Chariots of Fire
-
Posts
2,782 -
Joined
-
Last visited
Content Type
Profiles
Forums
Events
Gallery
Everything posted by Chariots of Fire
-

Airbrushing Duplicolor?
Chariots of Fire replied to Duncan4114's topic in Model Building Questions and Answers
I'm with Tony on this one. I've used Duplicolor rattle can paints for a long time and swear by them. So why decant them? They are very fine pigmented and go on smoothly. They do need several coats to bring out the particular color but that is the beauty of them. Letting them dry well between first coats will allow for some light sanding and prep work. And in my opinion never need to be clear coated to look natural. The only problem? Less color selection and lack of availability of that nice gray sandable primer. -
I just bought a new package of BMF and tried it. The material appears to be as good as the older foil was for adherence and for stretch. That is the good thing about it; that it is malleable enough to stretch around some corners. The adherence problems appear to have been solved. I will say that for some things BMF will not work but a Molotow chrome pen will. And I like both as a means of replicating chrome.
-
Blending the roof line of the ambulance with the cab is going to be a chore. Be sure and check out several pics of the WC-54 and you will see that the roof rolls inward above of and toward the cab doors. Making the box is easy enough. If you are a mind to, get a copy of the Tankograd WC series for the WC-51 and 52. It will have photos of the ambulance version as well. The ambulance wheelbase is 194-1/2" if that helps. Looking forward to see your work!
-
No easy fix there. If warm water does not soften the glue so you can remove it, you might be stuck with what you have.
-
I'll post some pics in the WIP section when I get started.
-
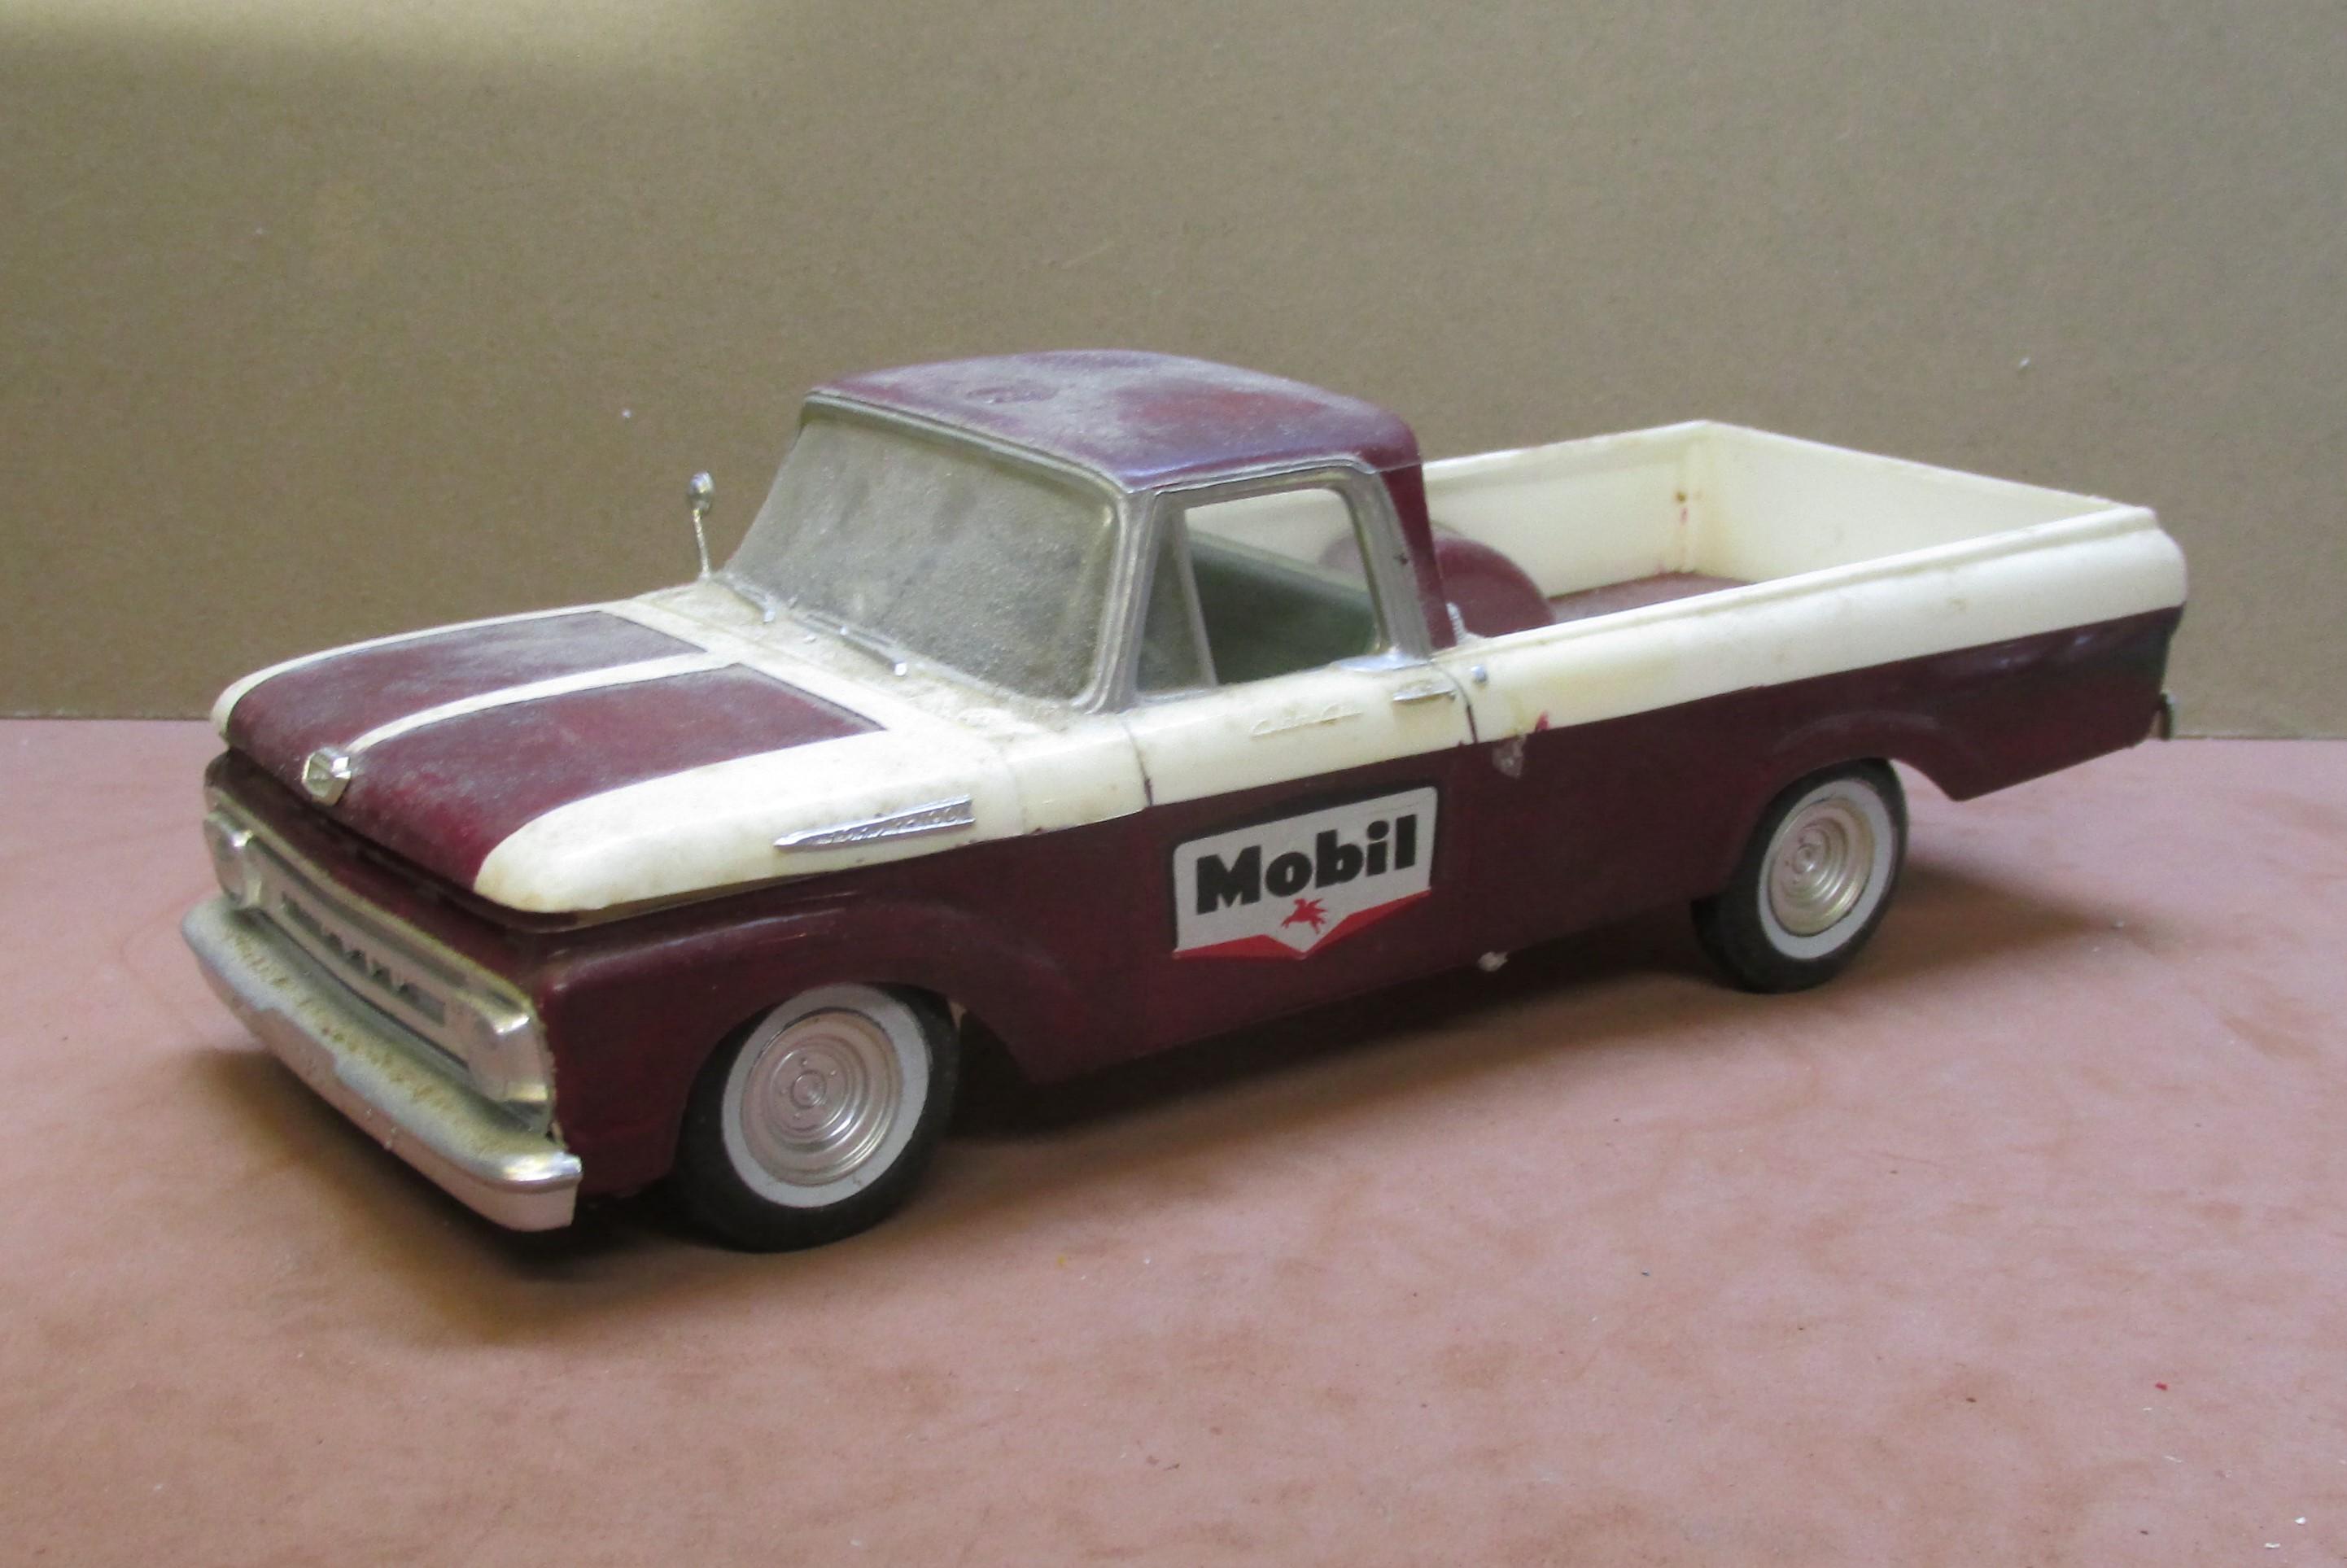
This project is now finished. I got the cab repainted so that the color matches the body. It didn't take as much work as anticipated but the door handles and such needed to be touched up. I got a new Molotow #1 pen to do the chrome. It came out nice! Door handles, gas cap, rear view mirror all have a great shine. Now it's on to the next save; this time a 1961 Ford pickup that came with the '60 Ford that was just finished. Same process all over again. Wash, pull apart, strip and repaint. Then re-assemble. Fun stuff.

-
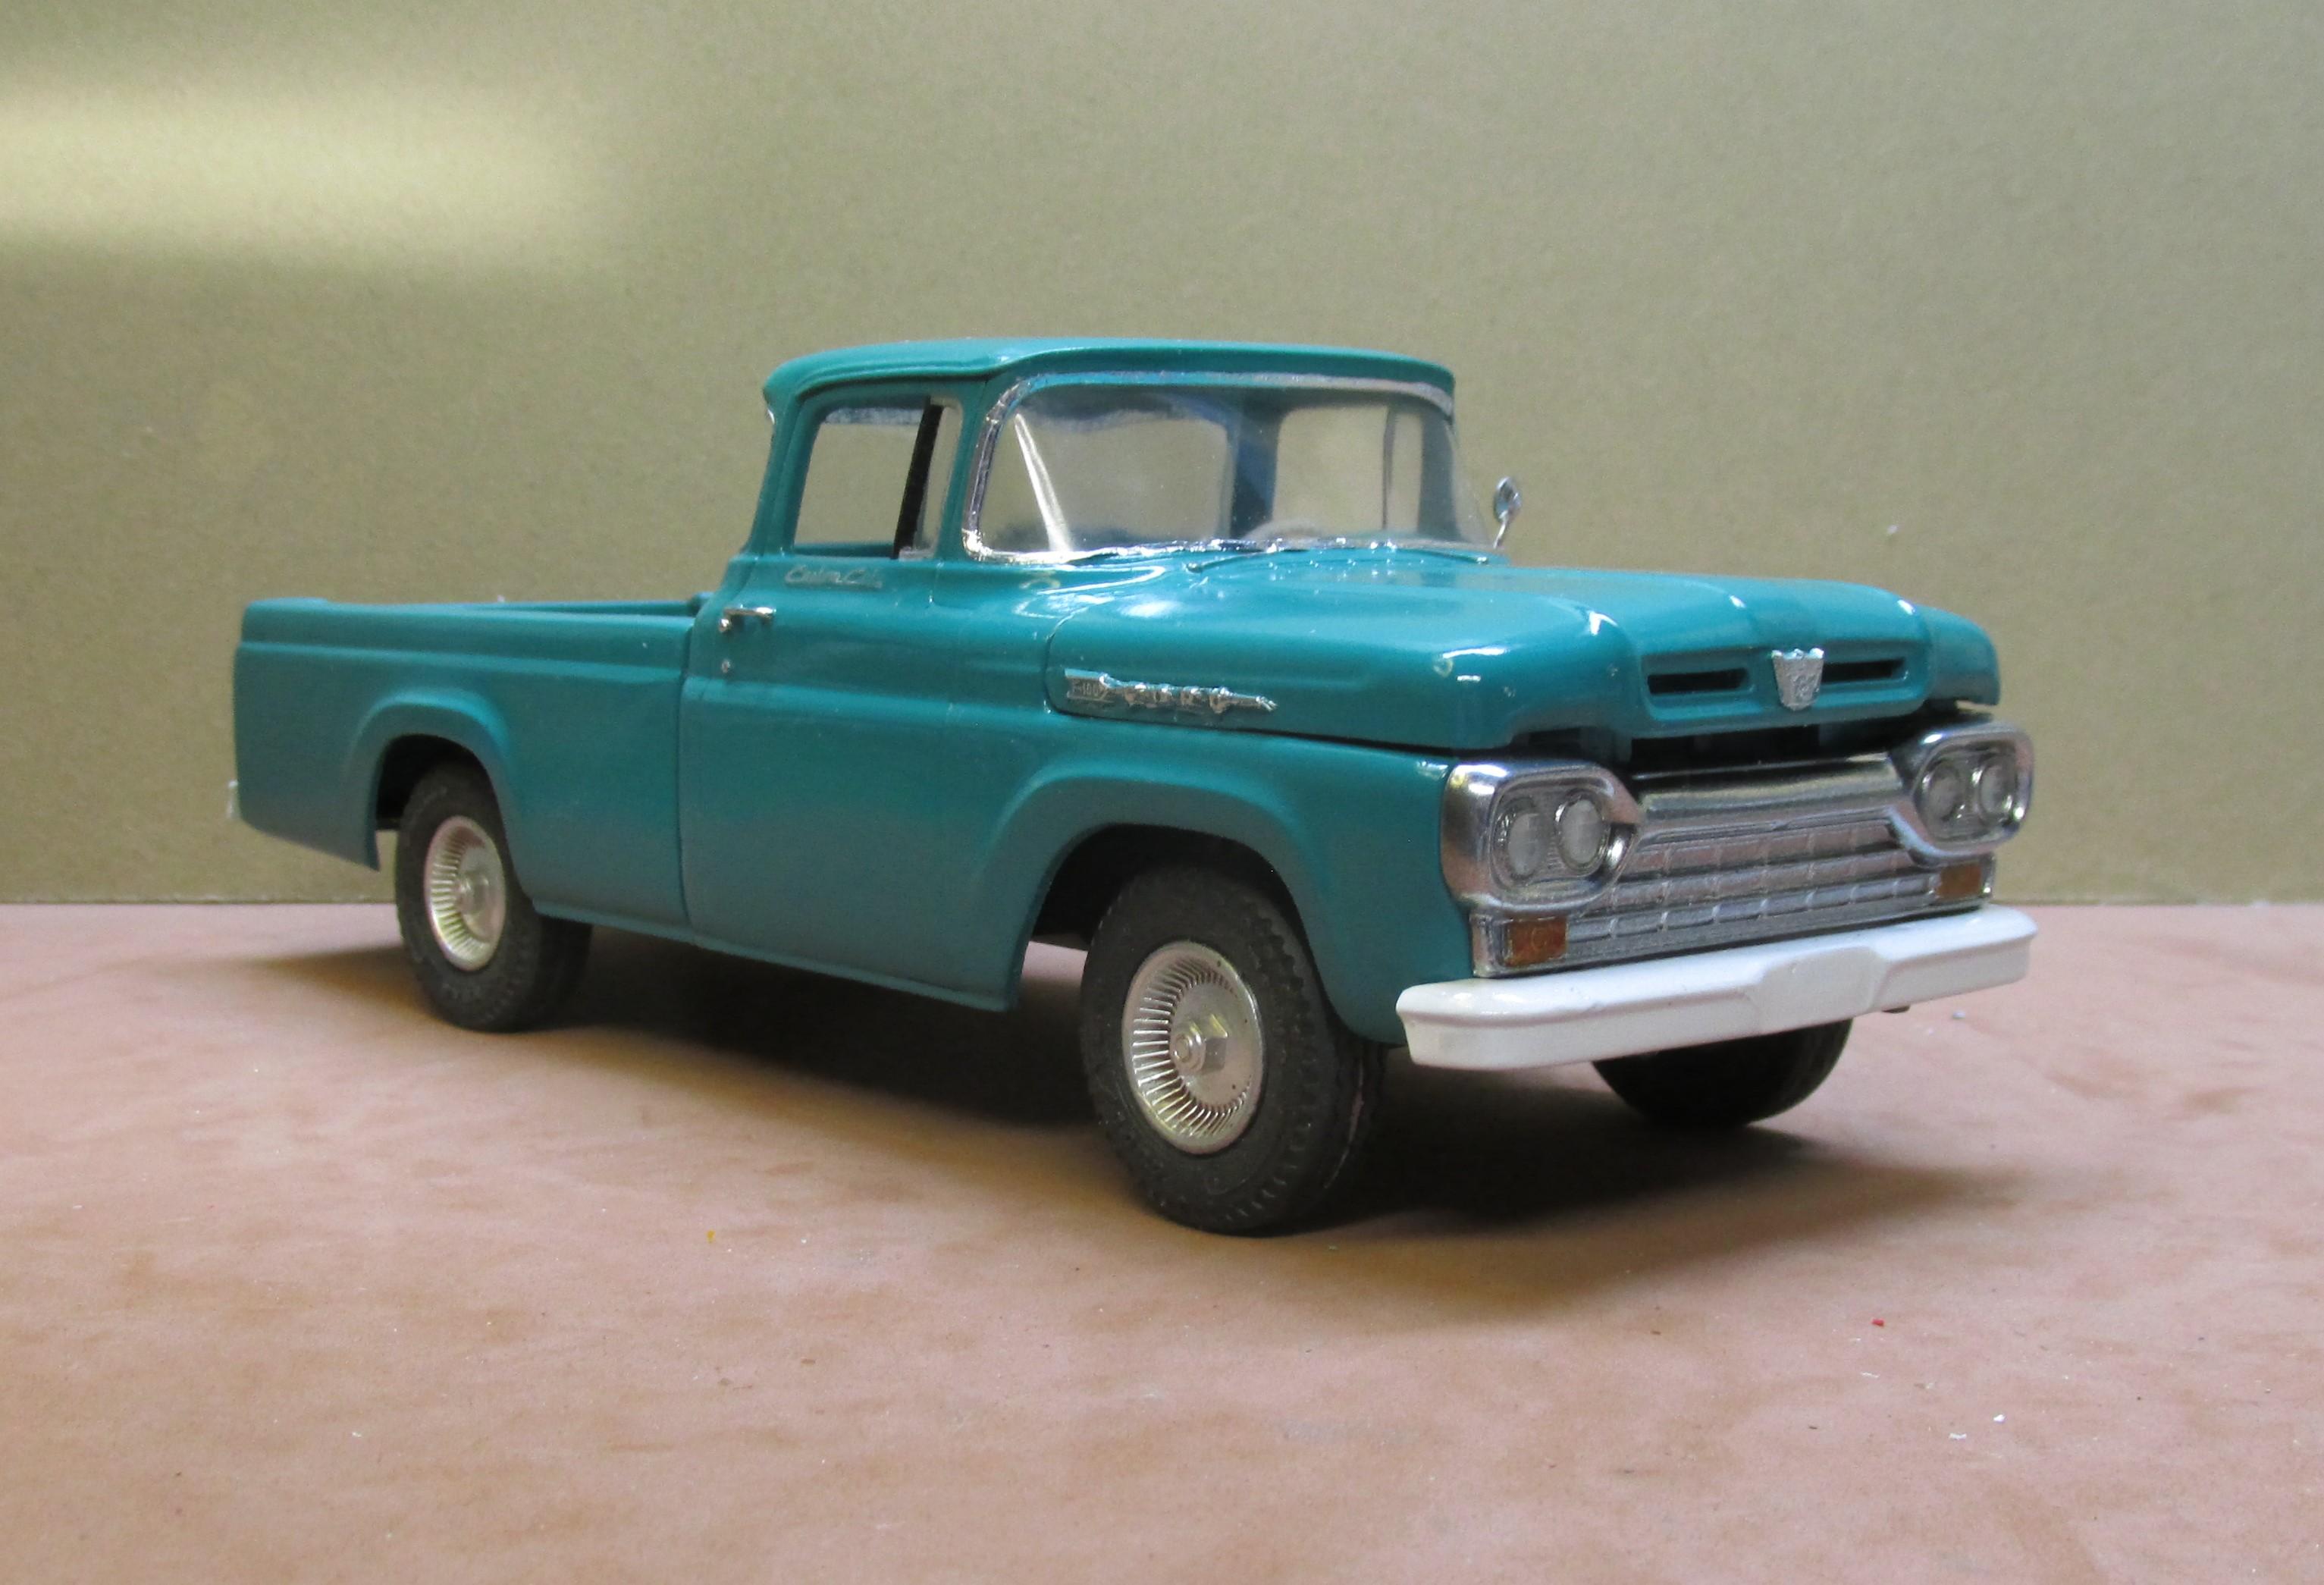
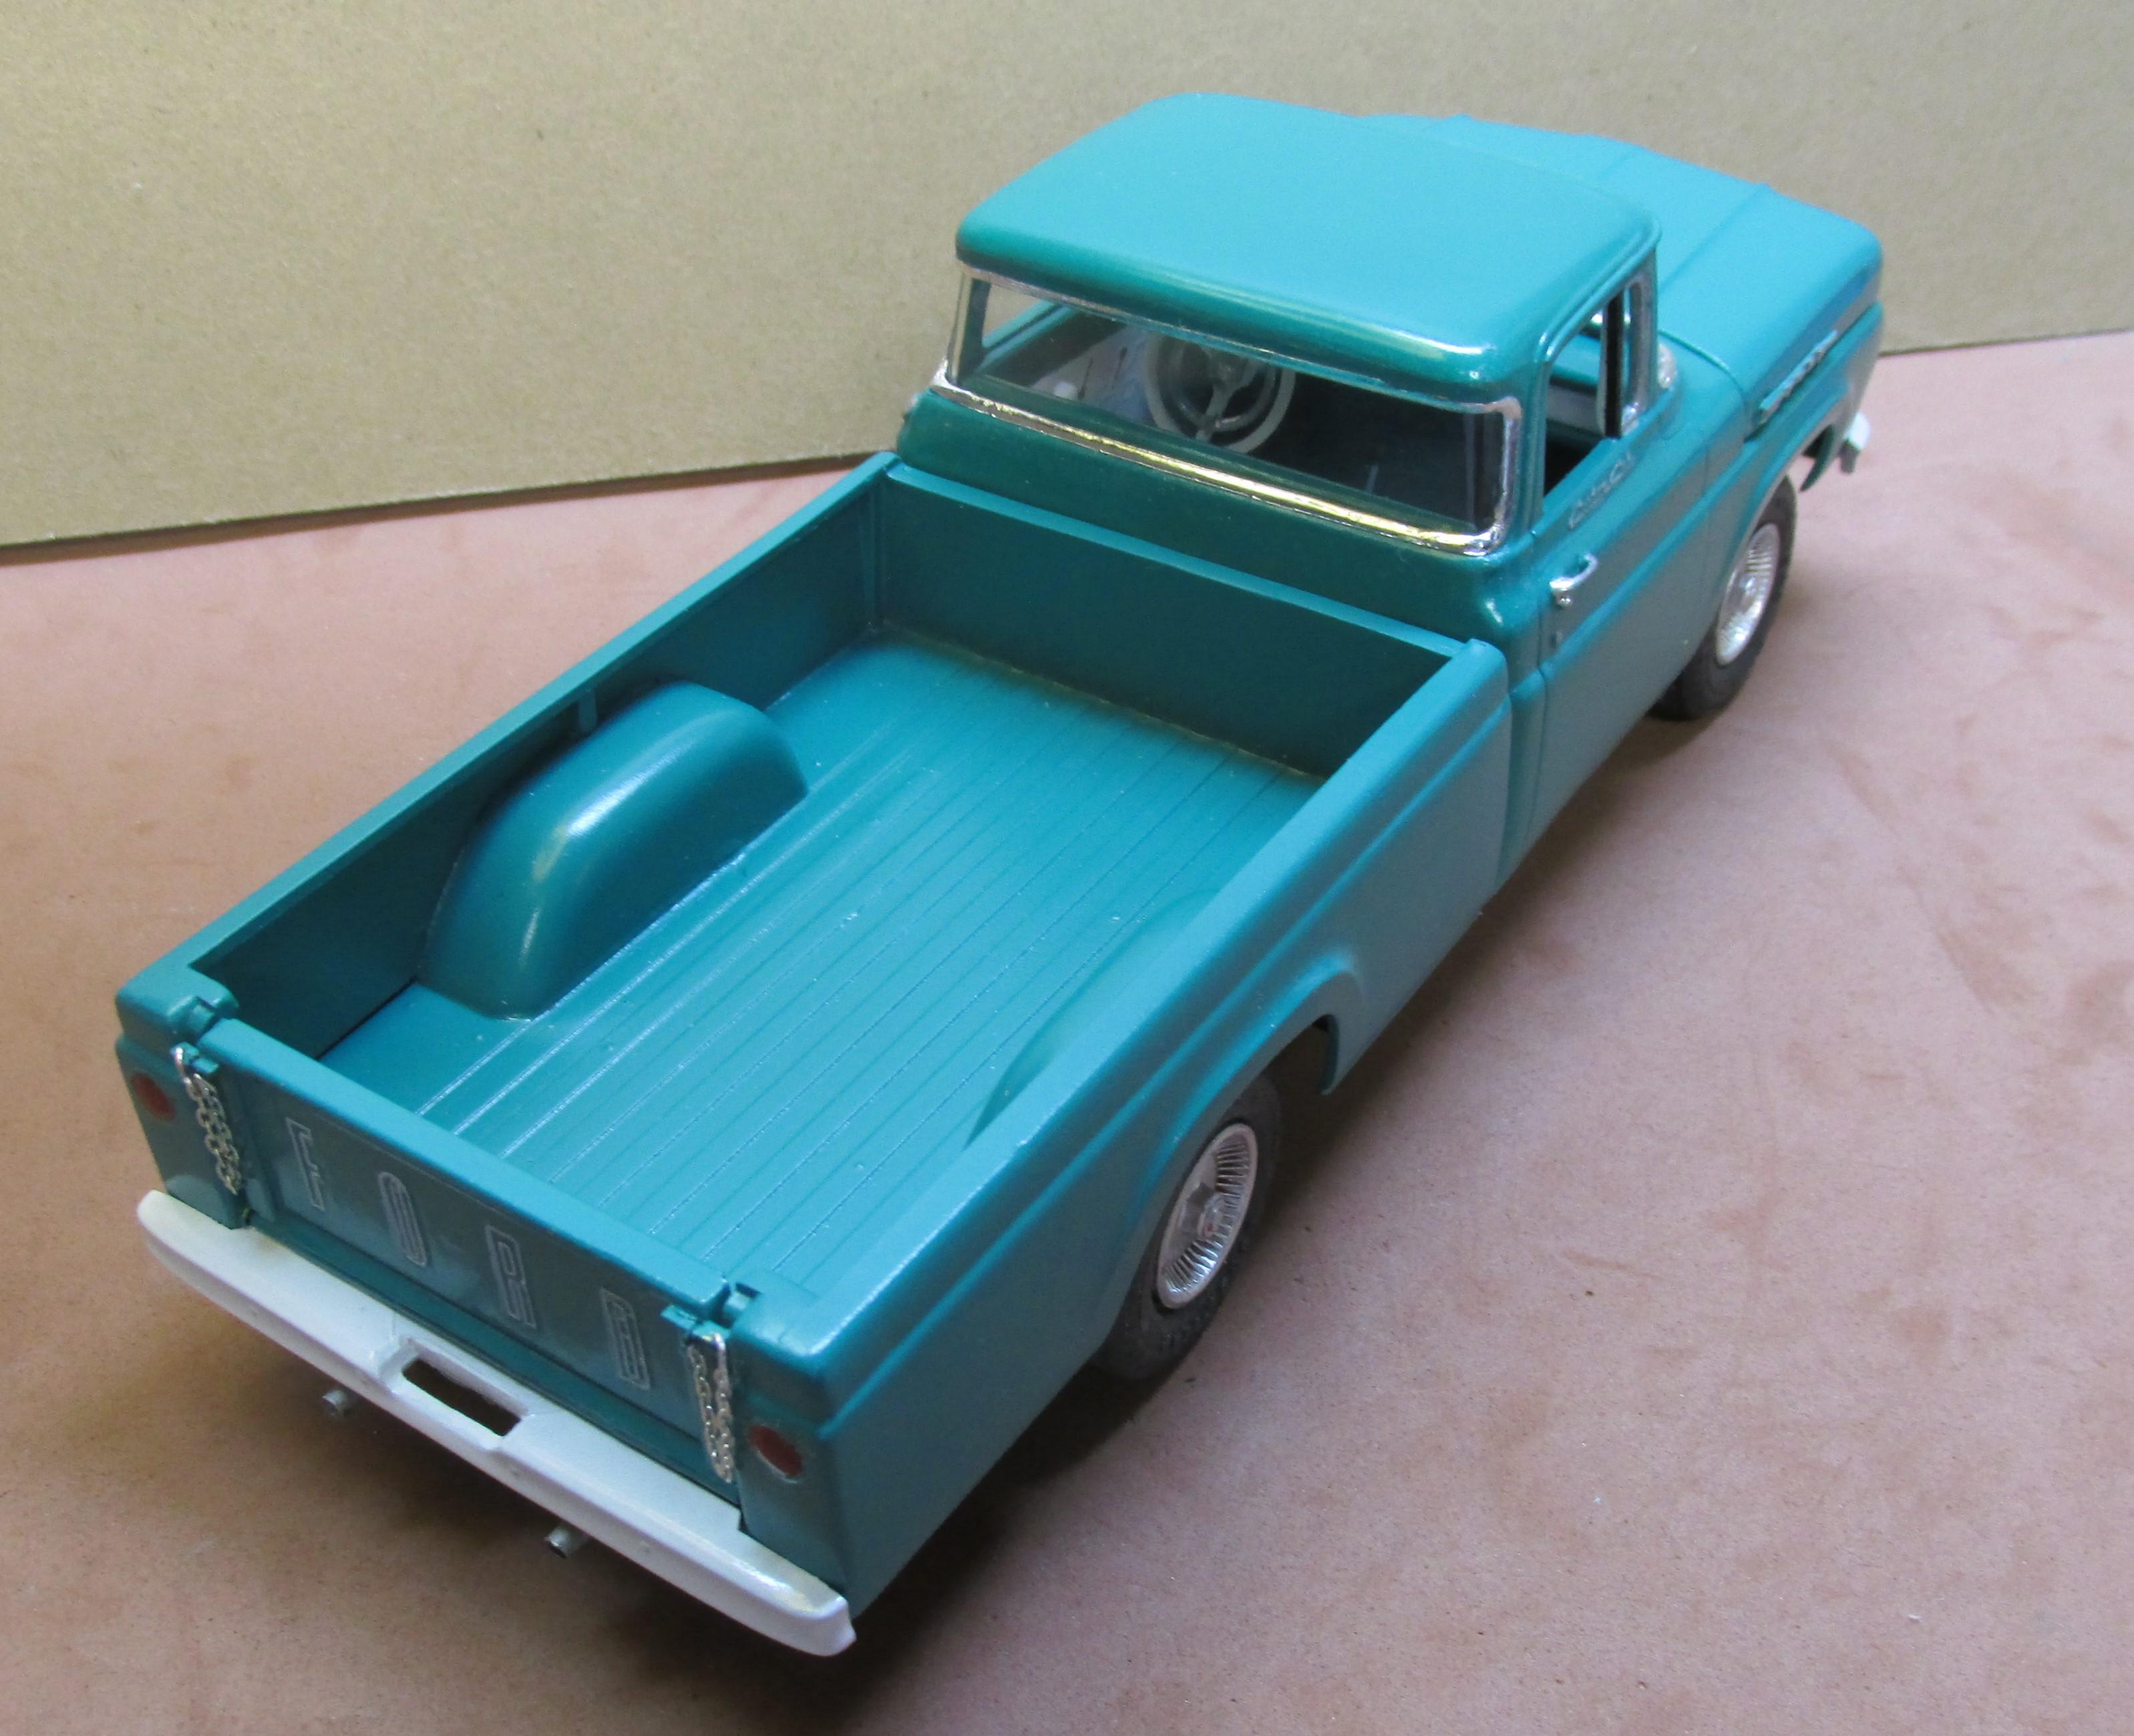
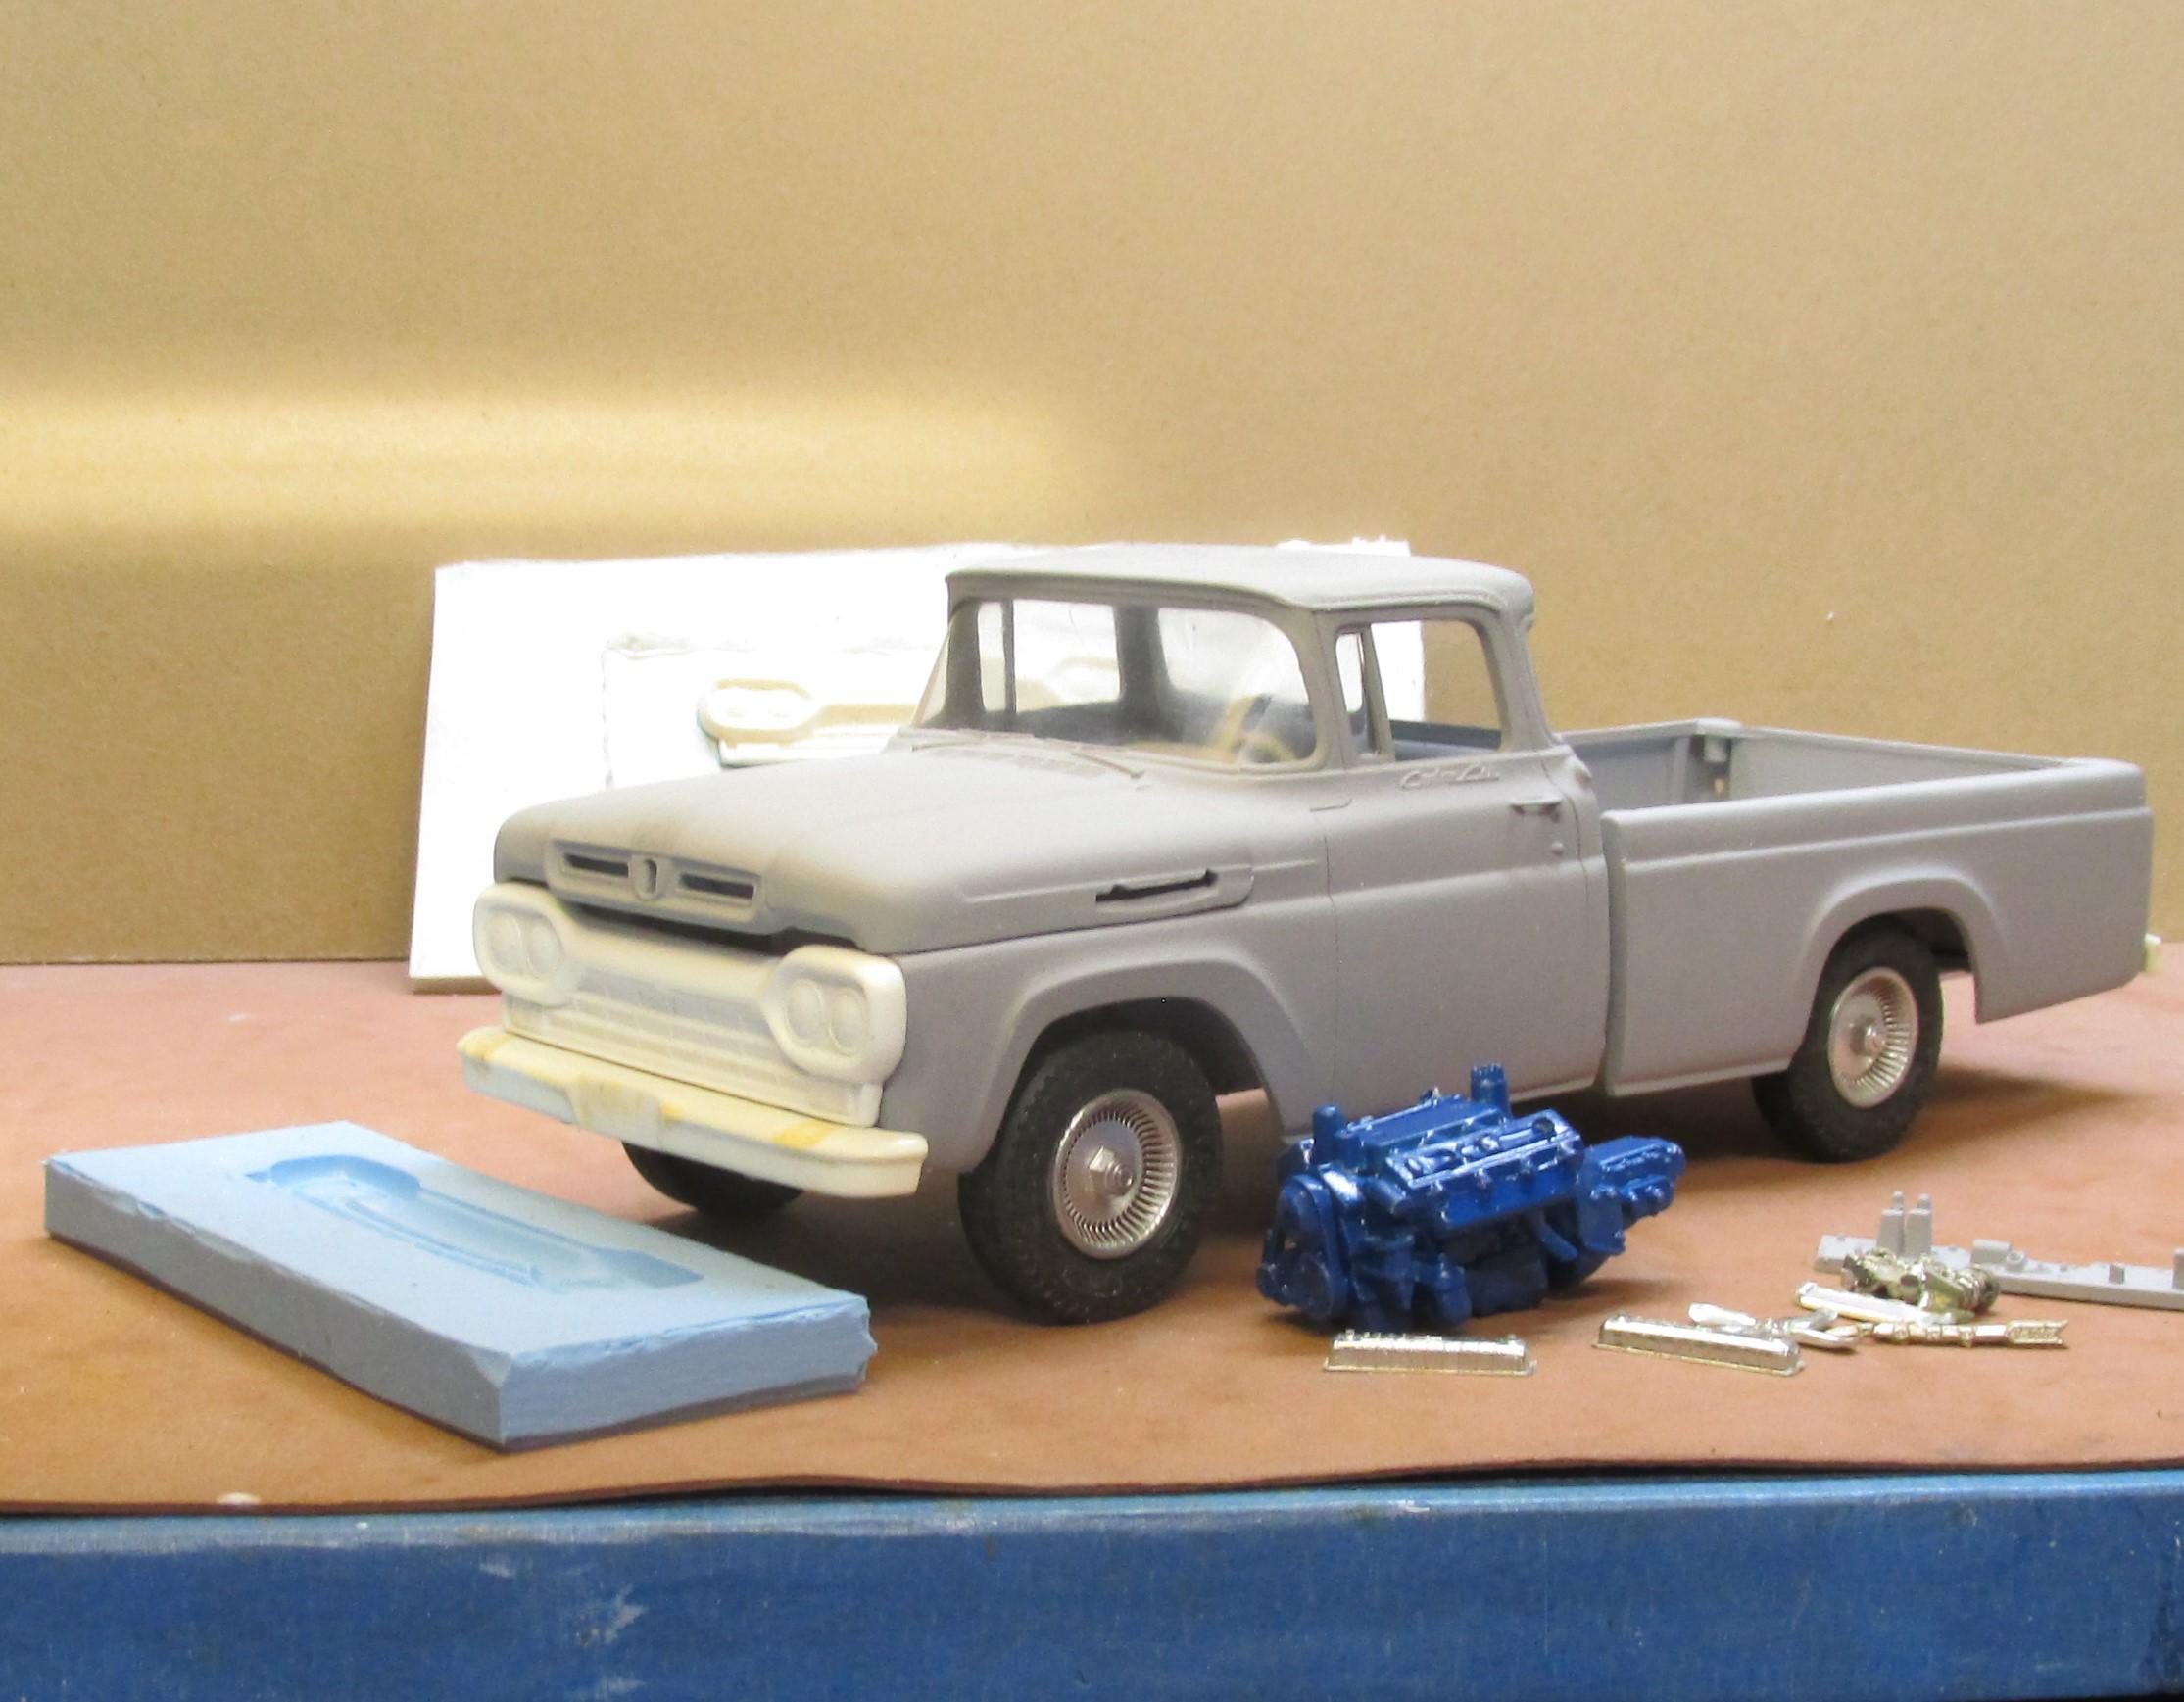
Well, after several attempts to find a paint color that I liked, I settled for the Tamiya 102. It's not exactly what I wanted but it is close enough. The biggest problem right now is that the cab is a shade darker than the body and I need to give the cab one more coat. The problem? Glass and interior tub are glued in!! So there will have to be some fancy masking to get things done. That's a resin cast grill in front of the cab. It was painted with gloss black and then Alclad. The headlights were opened up. Using the grill mold four clear headlight lenses were cast and then inserted in place. Tamiya clear amber was used for the turn signals. Unfortunately, the chrome FORD on the hood sides was not in good condition and there wasn't much I could do about it. Tires are 1/32 scale truck tires and the rims came from the parts box. The grill needs to sit a little higher. It is just in place temporarily in the photo. The tailgate was cut loose and hinged at the bottom. But when I put the bumper in place the license plate blocked the tailgate from opening up. The plate was cut away. The FORD letters were done with white decals. I found a tailgate image on line that I could use to make the letters to the right shape. The letters were copied and printed in white on the ALPS printer. Some small brass strip stock pieces were glued to the tailgate and the body. Wire and bright chain were added. I was able to make a casting of the interior of the FORD so that it looks like the stamped version of the real tailgate. It's a bit on the thick side but not bad when all is said and done. Now to get the cab corrected!!
-
WOW! What a beautiful build! The tractor and trailer look made for each other. Modifying the hood and fenders to make the wider stance of a heavier truck was really worth the effort. Colors are smashing!!
-
Well done, my Friend!! That's a pretty combination of orange and white. I like it! GLFD should be along shortly.
-
AMT Ford C900
Chariots of Fire replied to OldTrucker's topic in Model Trucks: Big Rigs and Heavy Equipment
Well done! Rear view mirrors can be a real pain, especially when the parts are so out of scale. I found a way to make the brackets using long straight pins and some solder that seems to work pretty well. They can be mounted by drilling small holes the size of the pins in the door. -
That's interesting (the UPS part) because you need the images to begin with and if they are not nice and clear, the ALPS will pick up whatever the image is, flaws and all. The cartridges are available but are sometimes hard to come by, especially the white one for undercoating. And that is essential because if you print decals on clear film without it the image will not be opaque. I have not found a driver for much beyond Windows XP and that is one reason why I hold onto the one old computer I have. The design program as well as the ALPS works well on it.
-
I have a Krylon color that is "close" but I'm taking one more stab at Tamiya next time I'm at the LHS. The cab is stripped again and back in primer for the time being.
-
That'll work too!?
-
have you got a second 1/32 scale truck kit where you can rob some extra tires? If so, cut one of the tires leaving just the flat surface of the outside. Sand it smooth and glue it to the inside of the front tires. Sand the edge down so that it is clean. Do the same to the other front open tire. You won't see the open back anymore.
-
It's off in left field compared to the color chip. White base would not have done the trick. I'm going to check out Krylon Caribbean blue as an alternative. Those chips look closer.
-
Well, I got a can of TS-102 and am disappointed in the color. I would call it a medium green and not anywhere near as light in color as the color chip suggests. The green Ford used was more of a turquoise color. Got to strip the cab and start over.
-
What they all said!!!??
-
Ya never know, Ricky!!
-
Could be. They are just sitting there for the time being. They'll be lined up in the final assembly. Thanks!!
-
A short wheelbase version would be great, Tom! The body on this one is now separate and is in need of shimming to get it up to the correct height. Almost ready for paint but I'm considering opening up the tailgate. So perhaps some additional cutting is in order! Happy 4th!!
-
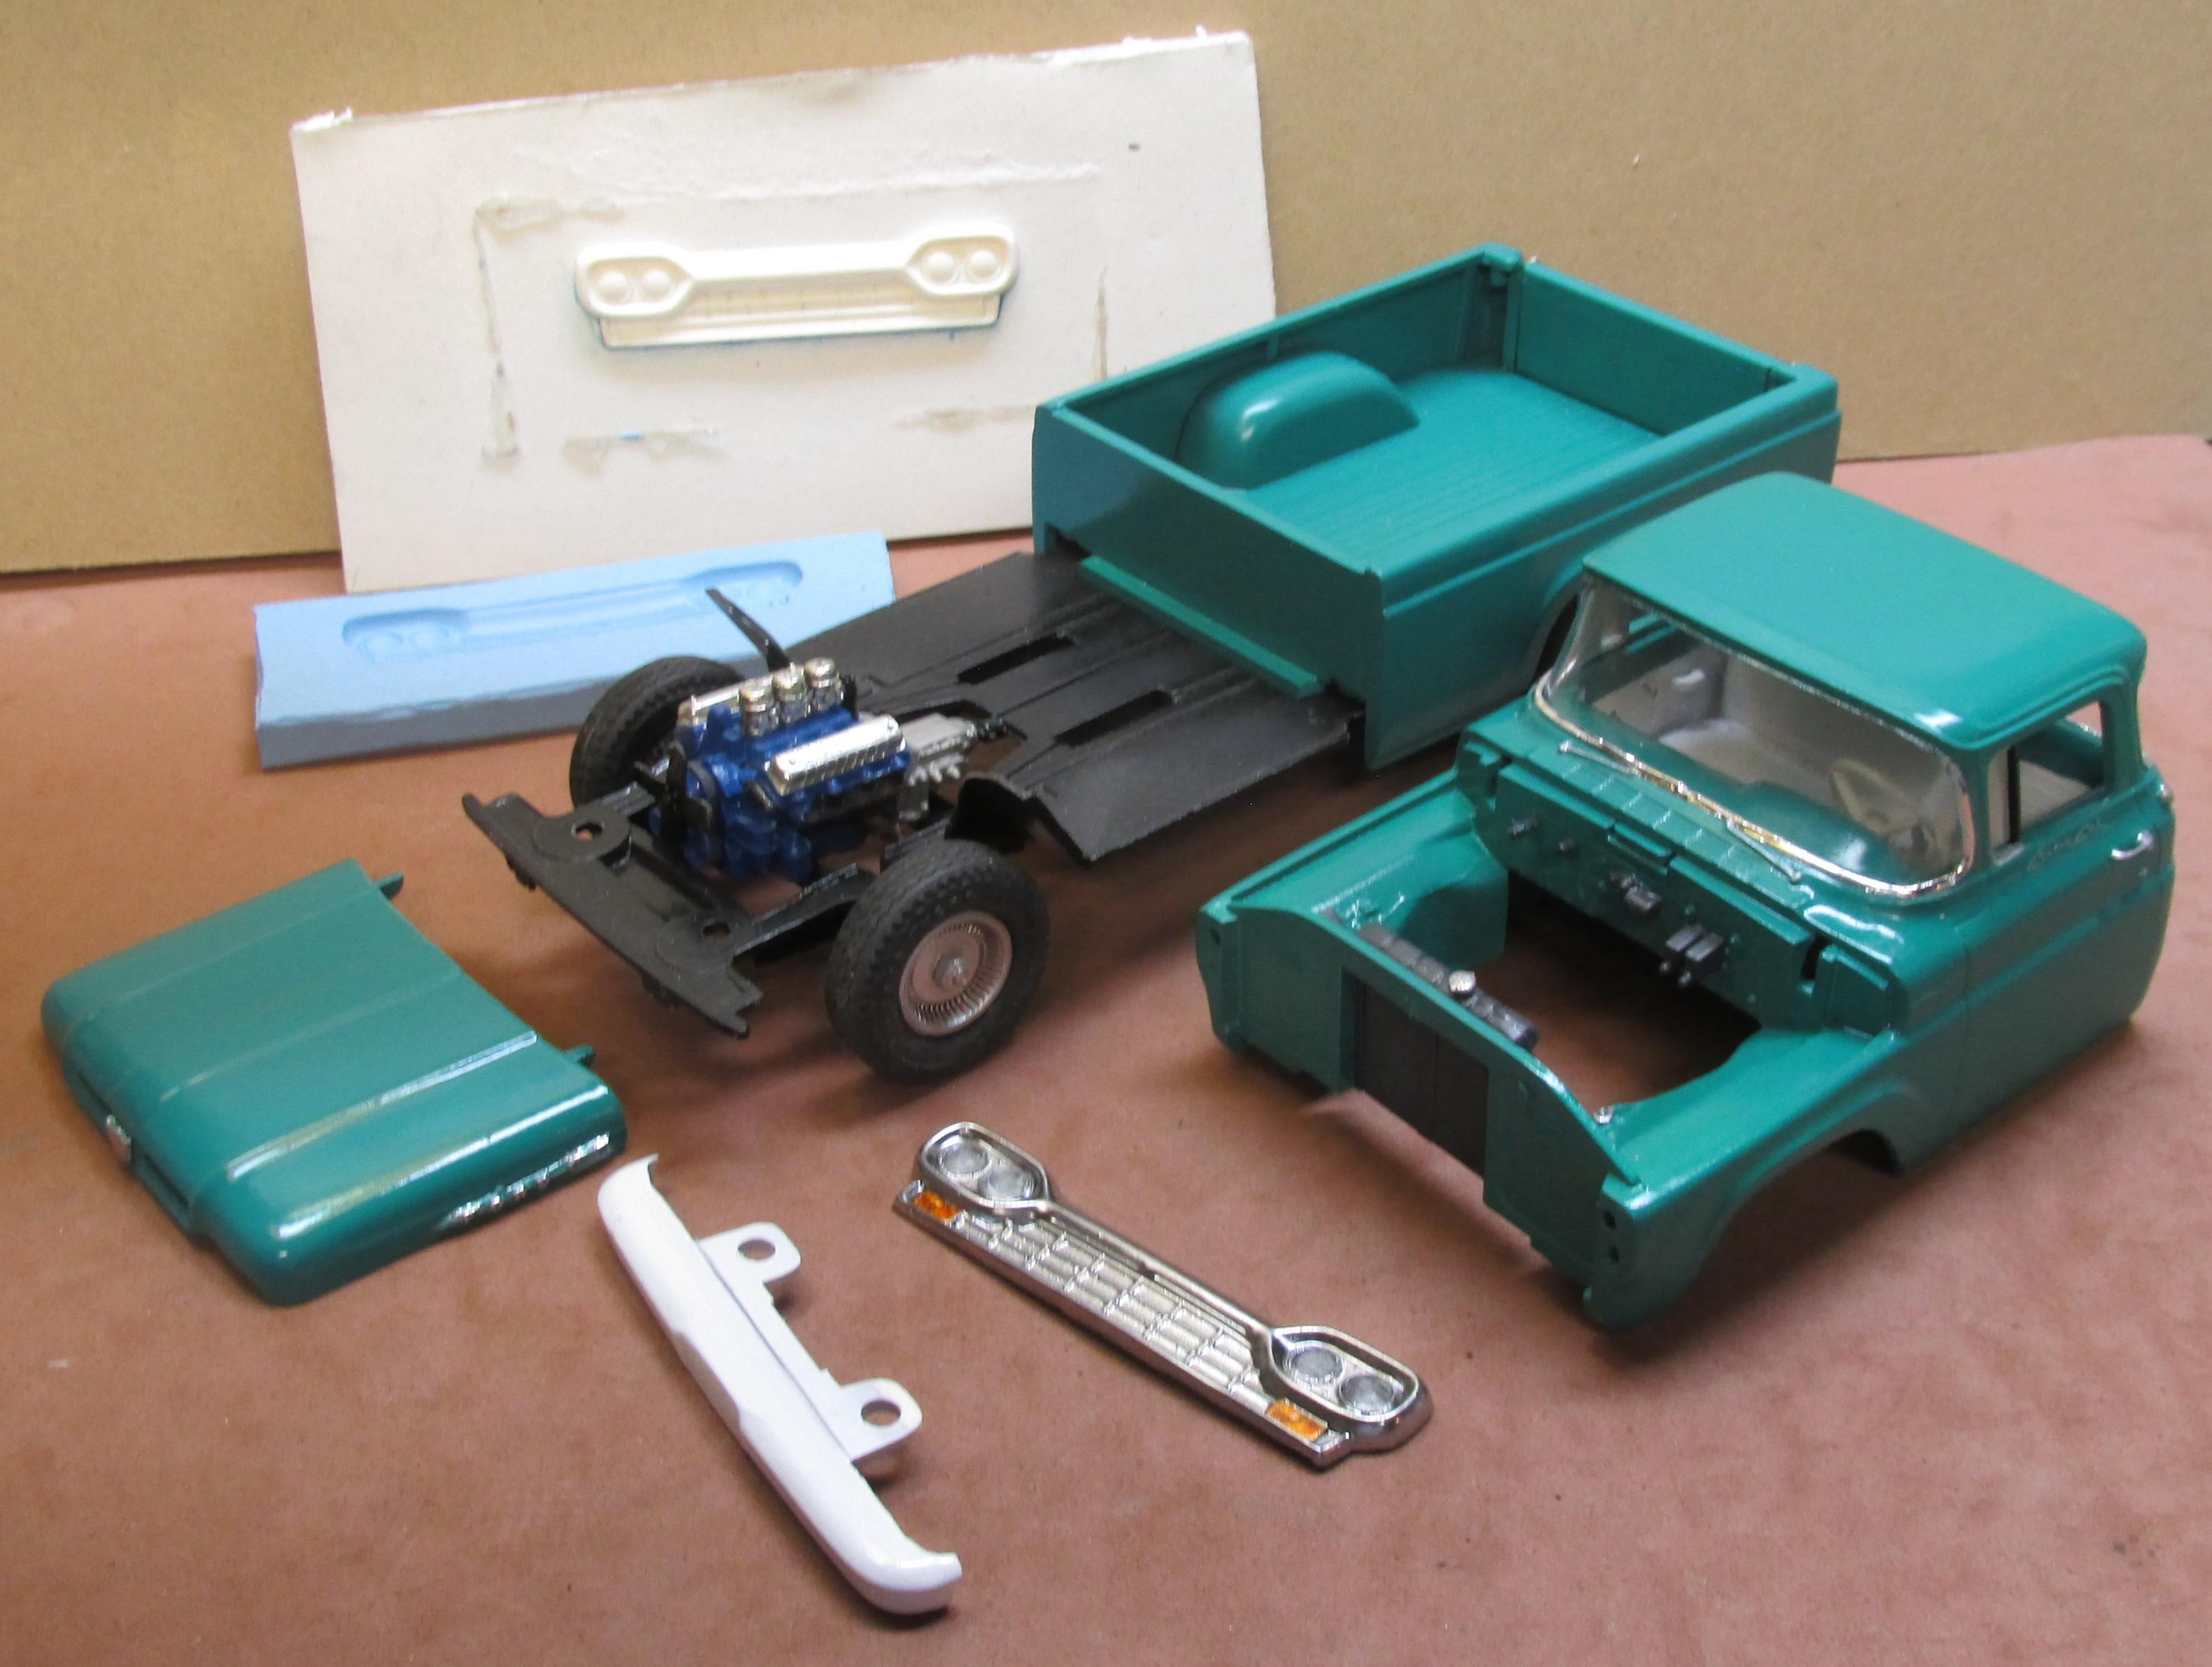
Got this much done on the re-build so far. Sink marks filled in, cab and body cleaned up, new resin cast grill to be opened up for clear light lenses and new tires and wheels.
-
Great work, Steve! The camper interior is really special. All the right period stuff! (The cab ain't bad either?)!
-
That might take a chain of events over the long haul, but I'll be pullin' for ya!?
-
TS-102 it is! Much abliged, Roger!
-
I'm trying to think of a come-back and I can't! ?