Chariots of Fire
-
Posts
2,783 -
Joined
-
Last visited
Content Type
Profiles
Forums
Events
Gallery
Everything posted by Chariots of Fire
-
 I've been using Squadron green putty for a long time. Liked it up until they stopped making it. Switched to Tamiya basic and I like it only that it takes longer to set up. What do you use and why do you like it?
 -
1941 Chevrolet tanker
Chariots of Fire replied to landman's topic in WIP: Model Trucks: Big Rigs and Heavy Equipment
Keep it here. Bigger than pickup size. The cabs were the same for both p/u and larger vehicles. Only thing that changed really were the fenders. Will be checking in to see how you make progress! -
Straight Axles
Chariots of Fire replied to Altered Ego's topic in Model Building Questions and Answers
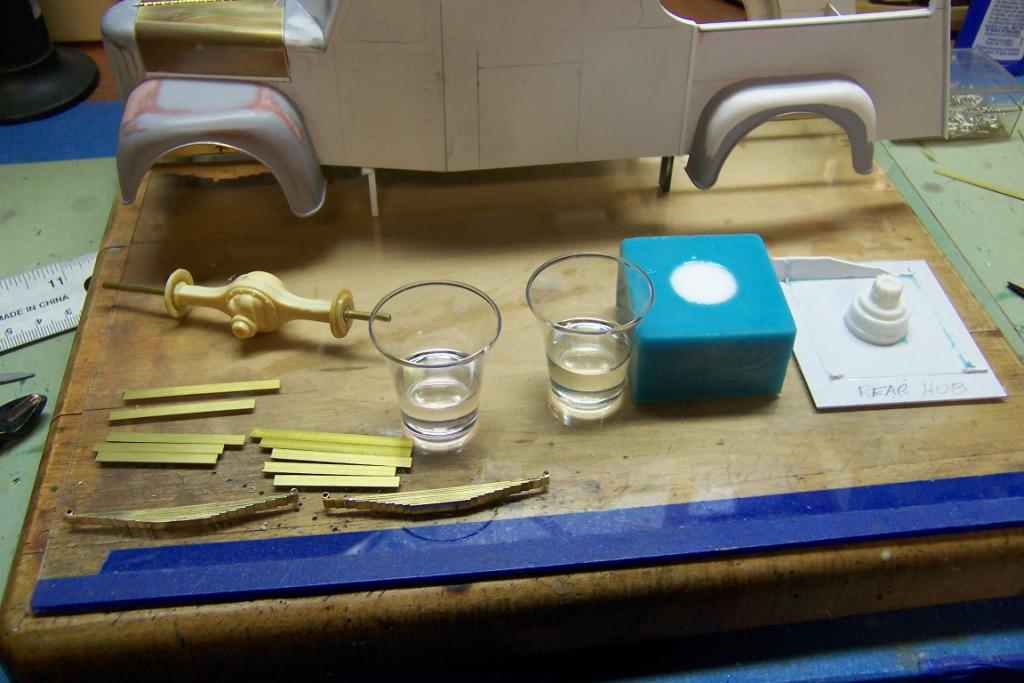
Using just resin to make an axle will end in failure because it tends to sag or warp with time and a bit of pressure. At least it needs some reinforcement such as a metal rod of brass or aluminum embedded in the resin to keep it straight. An axle can be made using an original as a master and making a two part mold for it. Casting resin can be poured with the reinforcement in place. Once set, the resin axle should be fine. I've done this a number of times using brass tubing as the reinforcement. The tubing allows you to insert a smaller piece inside as part of the wheel. This is a rear axle with brass tubing inserted. On the right is the wheel hub that will be drilled out for a bushing that will fit over the brass axle extension.
-
Wanna get really wild? Use a zip tie to replicate the ring gear on the turntable bearing.?
-
What did you learn to drive in?
Chariots of Fire replied to slusher's topic in General Automotive Talk (Trucks and Cars)
Carl: All it had was the cowl, radiator and a seat. The rest of the body was gone, no fenders. I took the hood off from time to time. It was what we called a "jalopy" to run around the back woods in. We made our own roads, had a lot of fun. It growled in second gear and would pop out of second all by itself. If you tried and hold it in second it would break your arm! -
1954 International Truck Resin
Chariots of Fire replied to 1964 Impala's topic in Truck Aftermarket / Resin / 3D Printed
Can you show us a photo of your mold? Also what kind of resin are you using? -
What did you learn to drive in?
Chariots of Fire replied to slusher's topic in General Automotive Talk (Trucks and Cars)
1928 Model A Ford when I was 14 years old. (1954)☺️ -
Anyone do brush rig kits/resin/am?
Chariots of Fire replied to Keavdog's topic in Truck Aftermarket / Resin / 3D Printed
My BAD, Scott! It's the Moebius Prostar that has the same cab. I tried giving you information without checking on what I had in the stash!? -
How to Apply Super Thin CA Glue?
Chariots of Fire replied to afx's topic in Model Building Questions and Answers
I have a couple of old dissecting needles on long wood handles. A drop of glue is all you get. When it begins to build up I just scrape the excess away. -
Hey, Greg: That grill in the diecast looks like it is easy enough to cast but if that fails, try using some plastic strip stock for the horizontal pieces, fill in with other pieces for the outside.
-
Anyone do brush rig kits/resin/am?
Chariots of Fire replied to Keavdog's topic in Truck Aftermarket / Resin / 3D Printed
The closest thing to that particular rig is the Trumpeter Lonestar but the hood is all wrong. Cab is the same but there would be significant amount of scratch building necessary to do one up. Great looking rig though and one that sort of whets my appetite! -
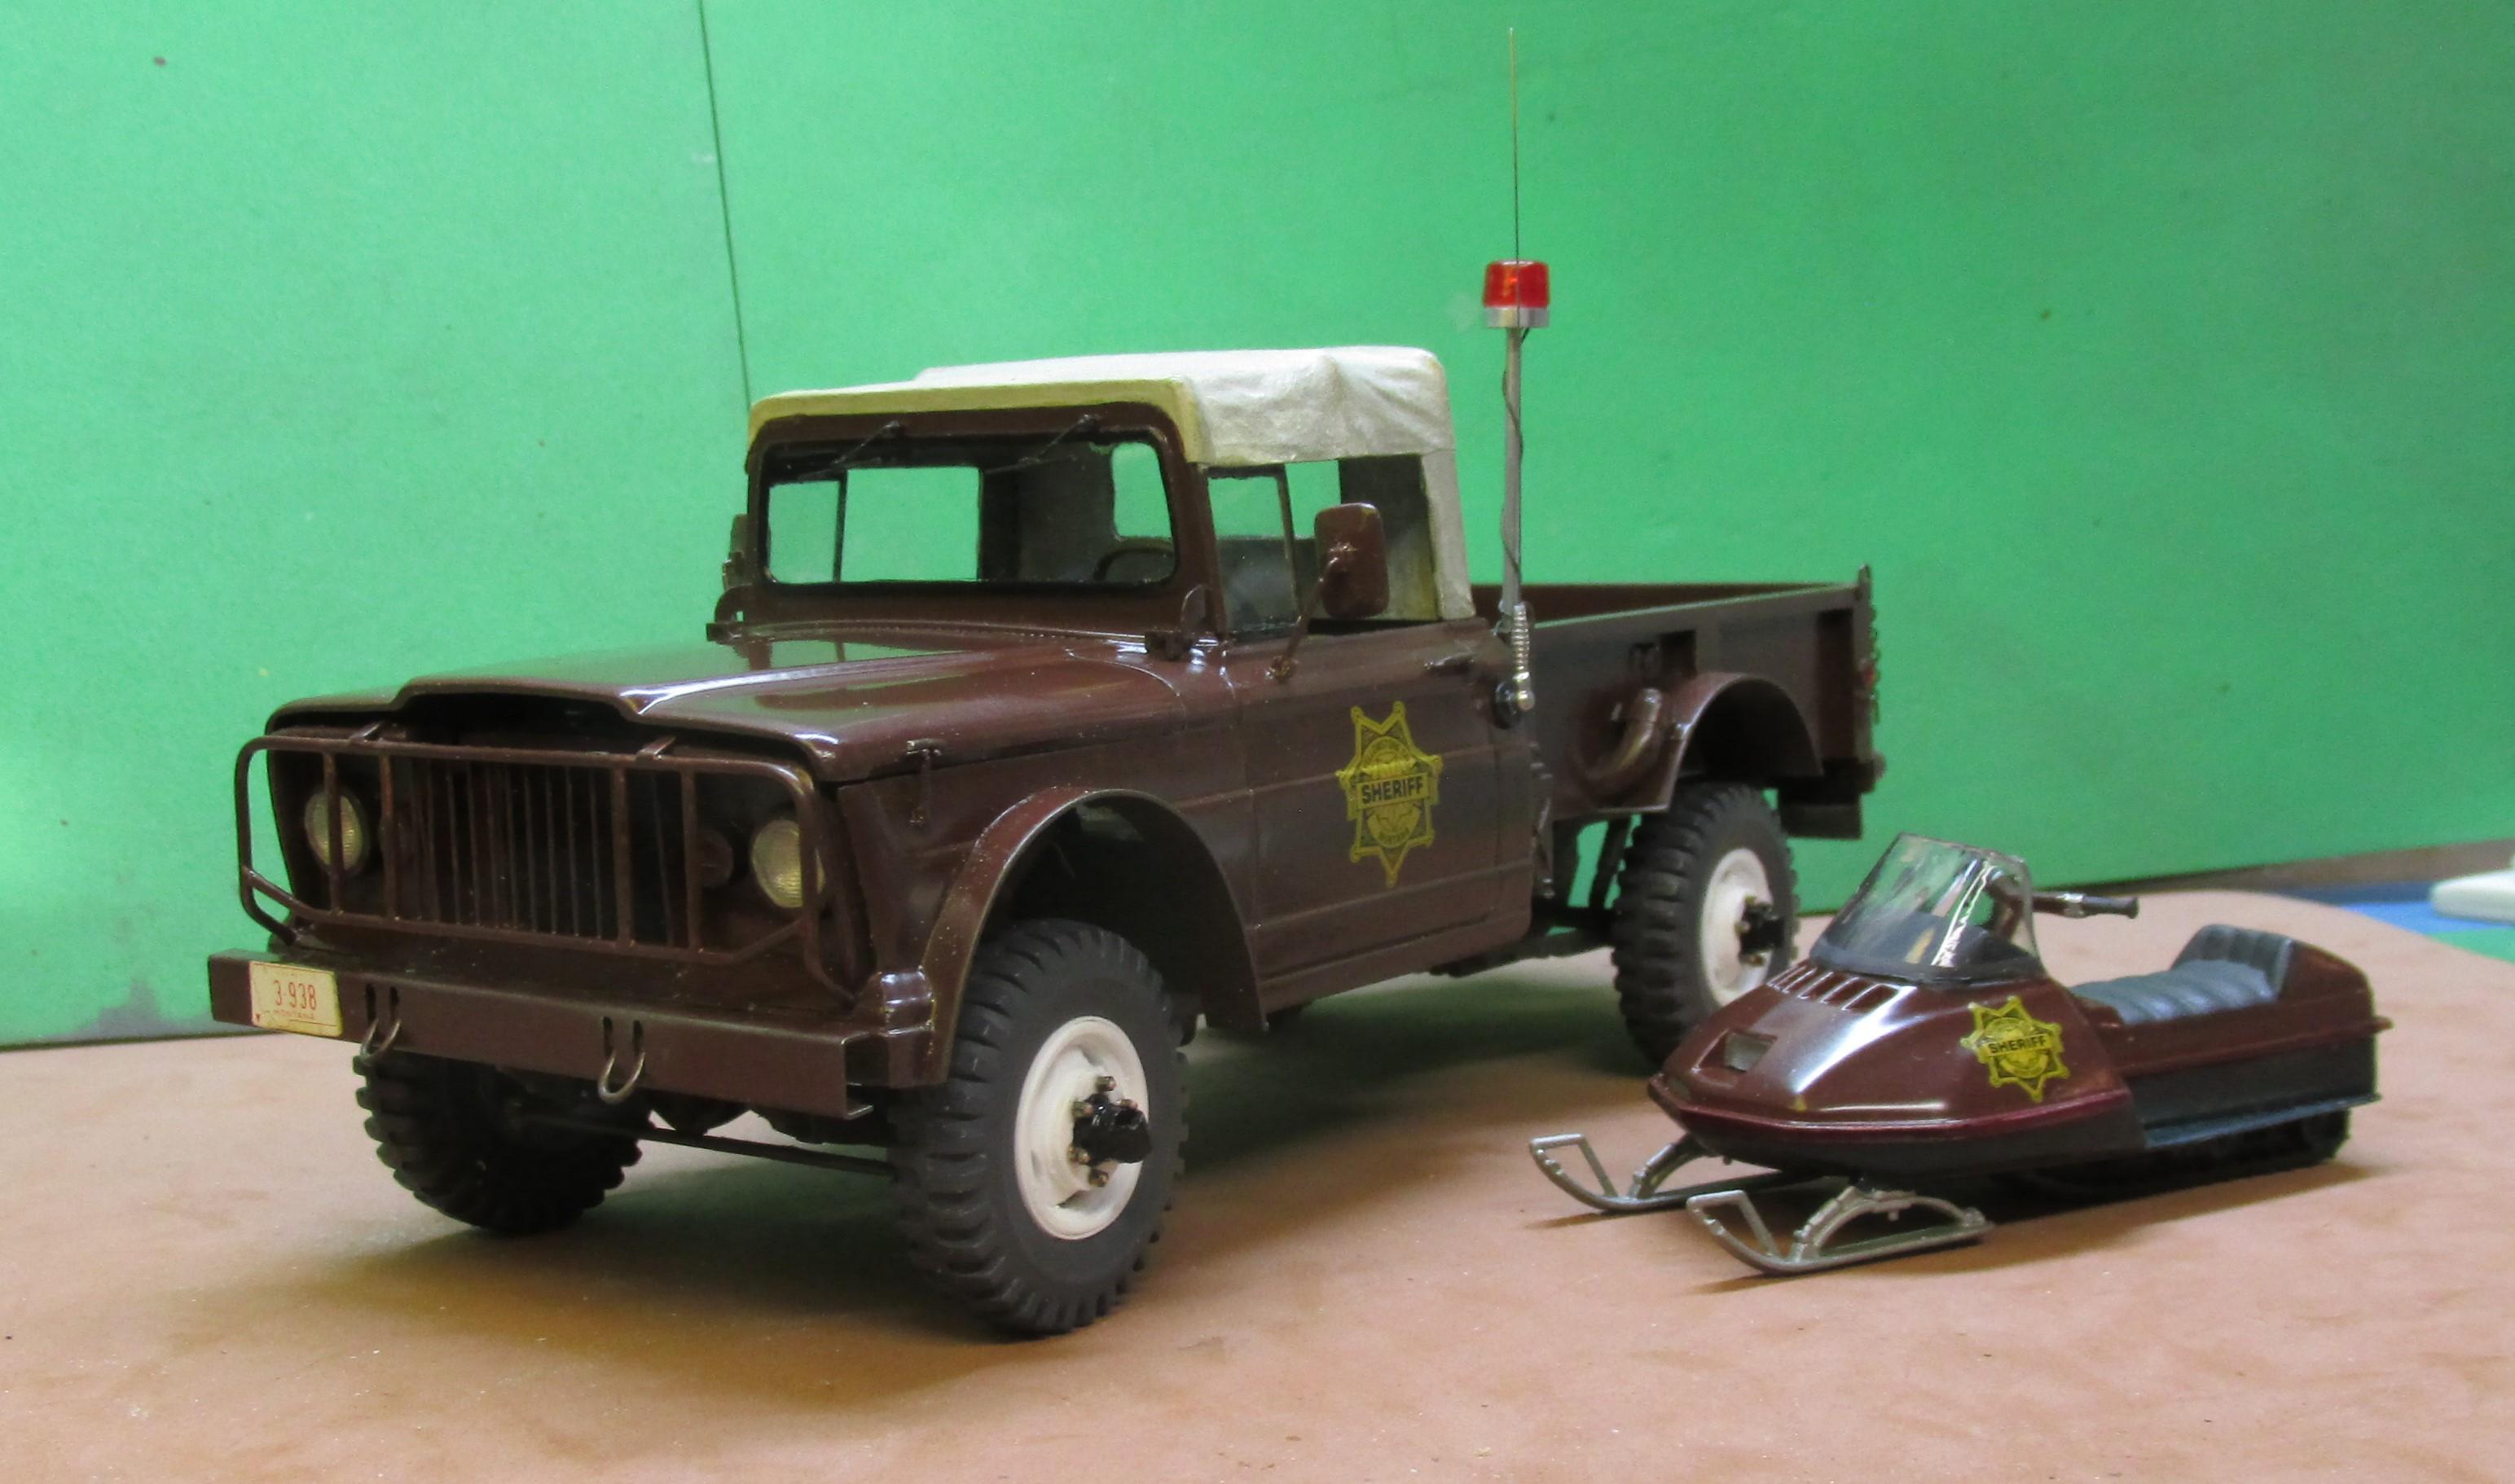
Finished up the project with radio and speaker in the cab and a whip antenna on the outside. It's now ready to go catch some bad guys.
-
Schneider CO-4070A
Chariots of Fire replied to k100's topic in WIP: Model Trucks: Big Rigs and Heavy Equipment
that's a good looking combination. The semi-gloss black against the gloss black sets it off great. Nice Work! -
M-715 Pickup
Chariots of Fire replied to Chariots of Fire's topic in WIP: Model Trucks: Pickups, Vans, SUVs, Light Commercial
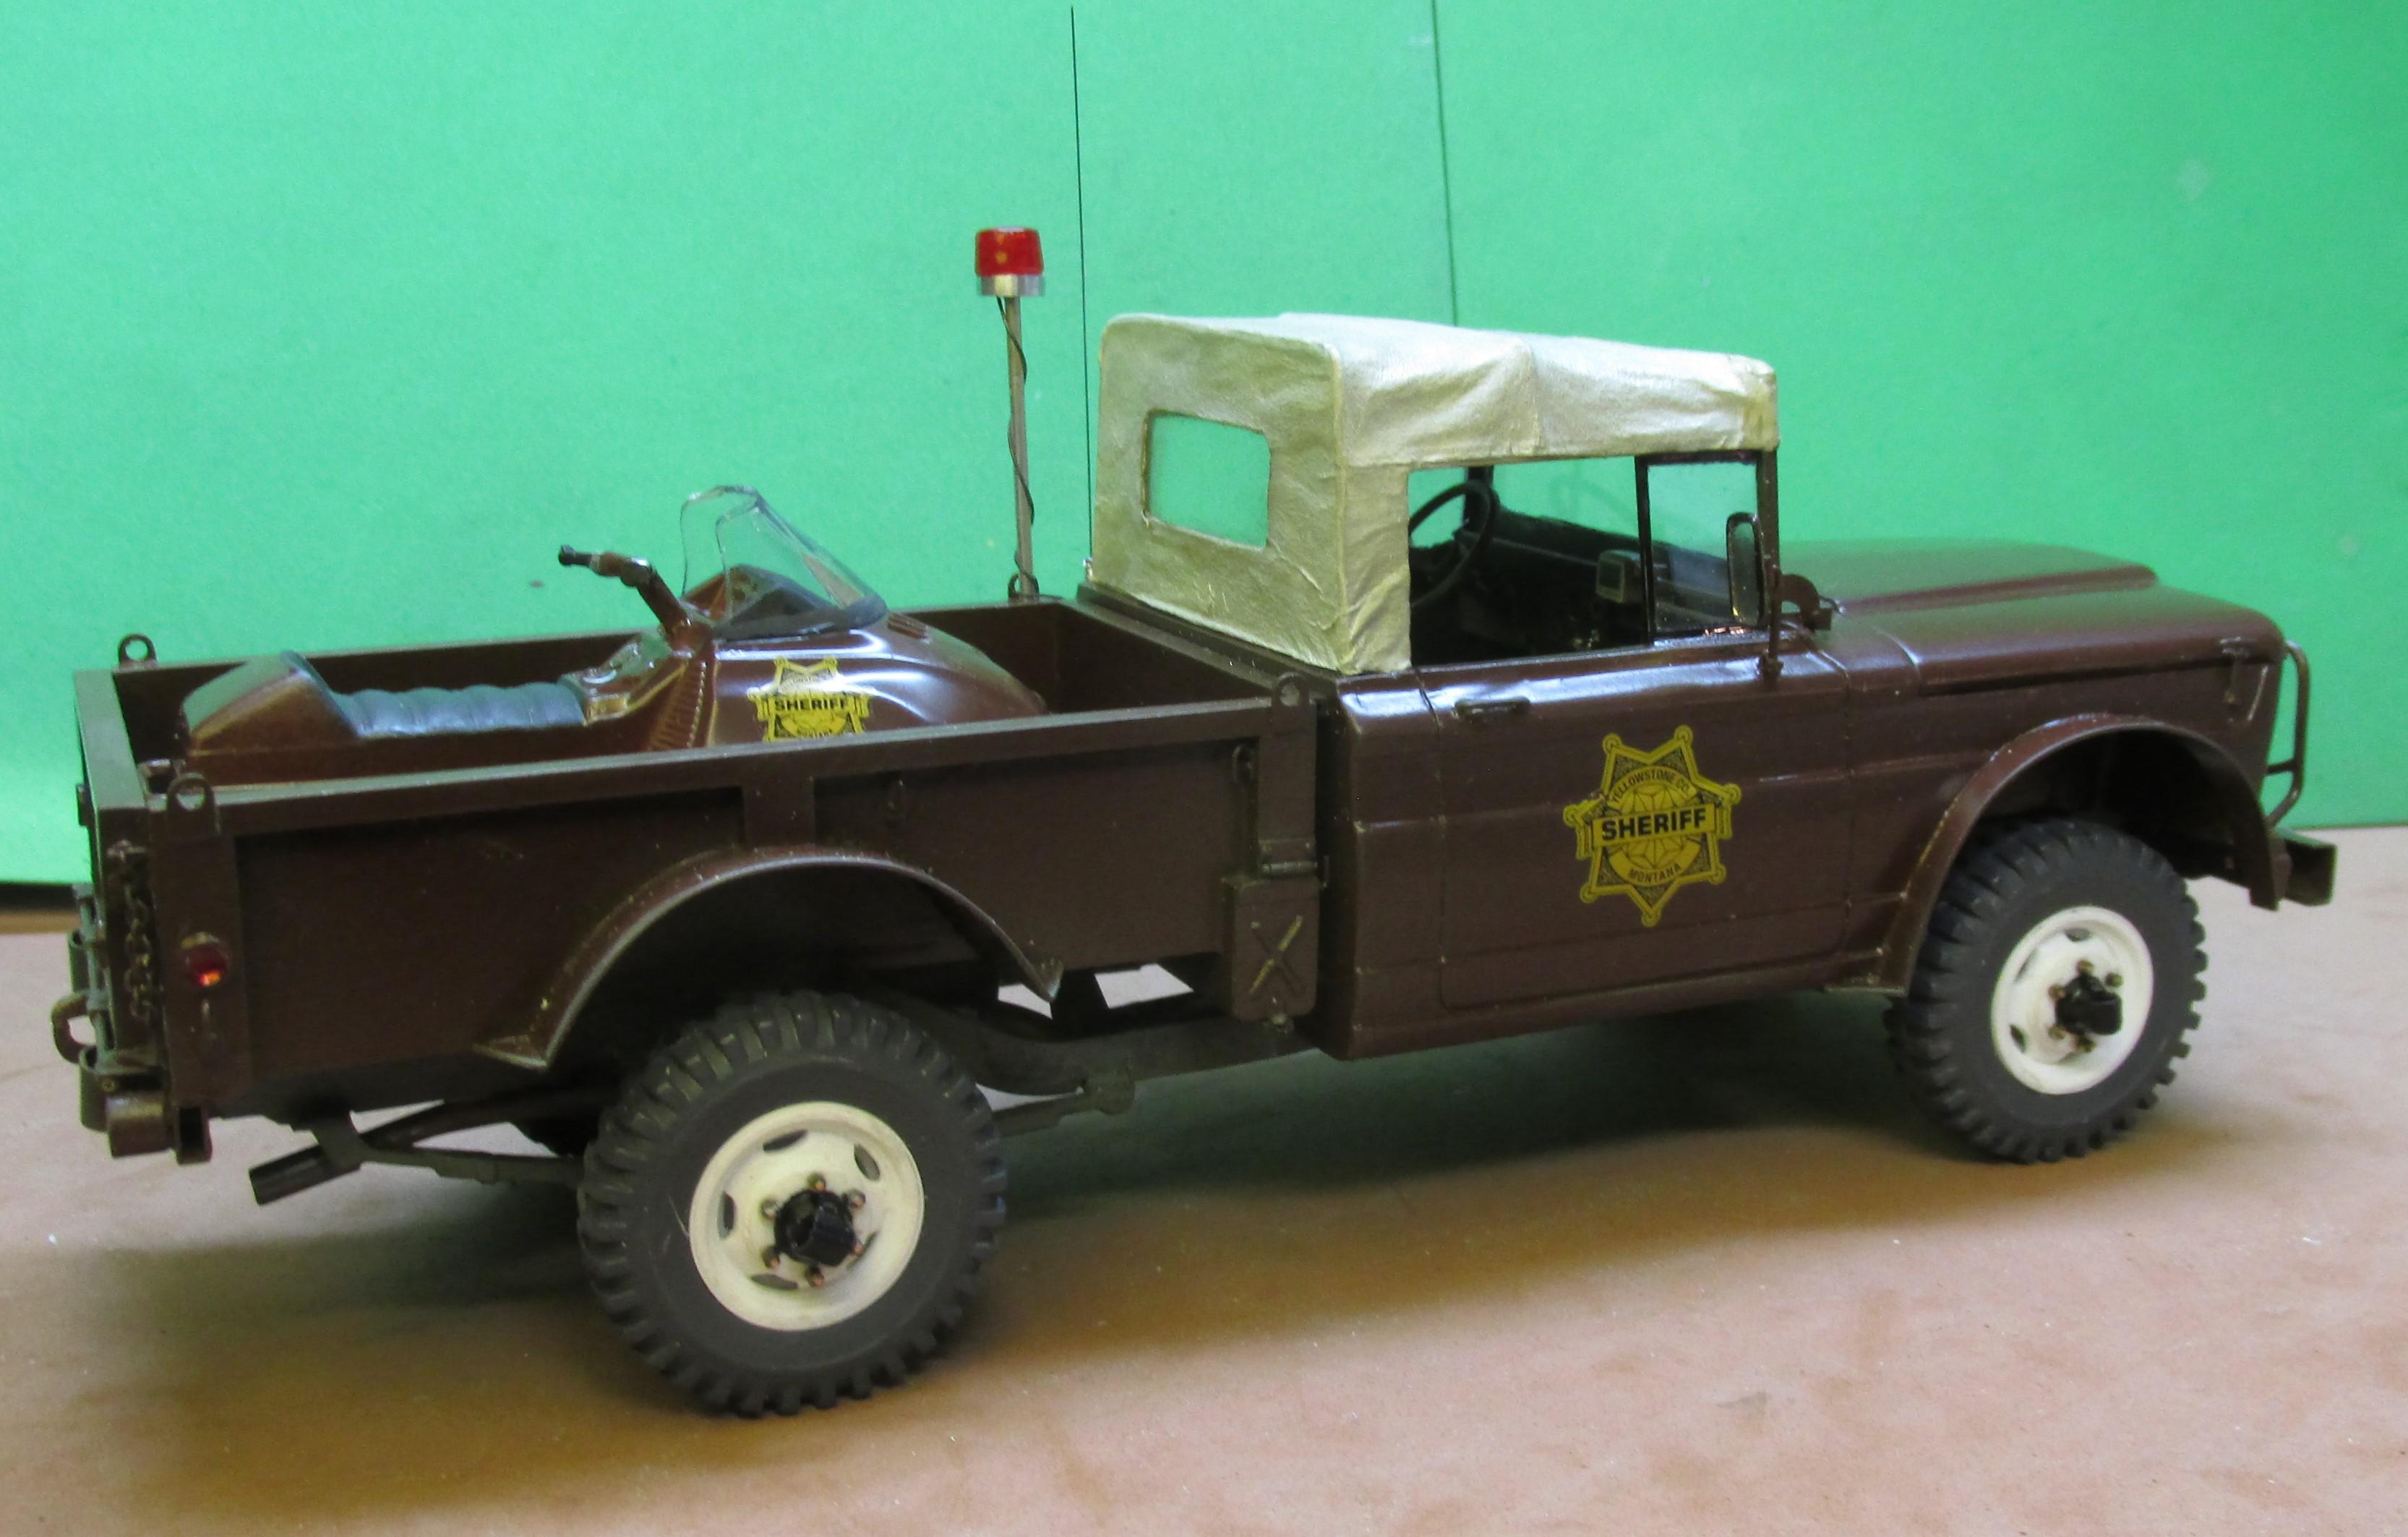
Got the radio antenna done and mounted. License plates for Montana are added. Seat belts inside and a little dust and weathering from going off road to catch some bad guys. Just about done and ready to go!
-
M-715 Pickup
Chariots of Fire replied to Chariots of Fire's topic in WIP: Model Trucks: Pickups, Vans, SUVs, Light Commercial
One red light on a pole and a radio in the cab is all I'm told was on the truck. I have a whip antenna to add yet. Maybe a short piece of wire from the bottom of the light to inside the pole.☺️ -
M-715 Pickup
Chariots of Fire replied to Chariots of Fire's topic in WIP: Model Trucks: Pickups, Vans, SUVs, Light Commercial
Got rear view mirrors on today along with the side windows. We are almost done with this project. Two or three details still to go and then we can call it good.
-
M-715 Pickup
Chariots of Fire replied to Chariots of Fire's topic in WIP: Model Trucks: Pickups, Vans, SUVs, Light Commercial
We're almost done. The interior is nearly complete and the top has been changed a bit to represent a dirty white top. Headlights and such are in place. Just a bit more tweeking here and there and it is a finish!
-
Trevor that is exactly what the backside of some of my panels look like as well but it does the trick on the front side!?
-
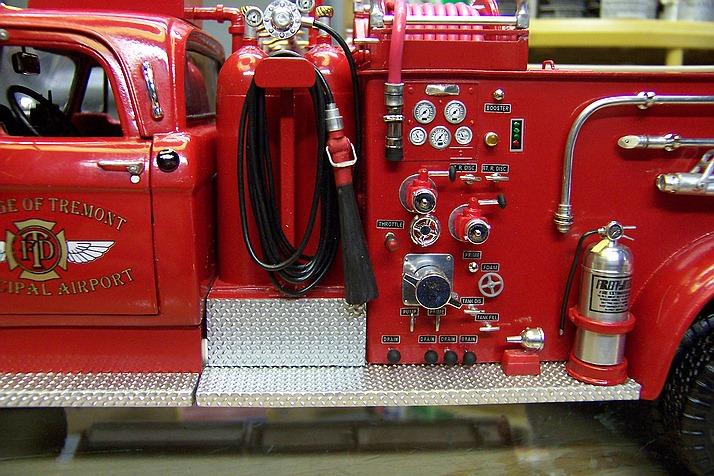
That is a great instructional. Thanks! It gives me something to work toward! I too have used aluminum tubing for gage bezels but I have not gone to the extend you have. When circumstances have allowed, I have drilled out holes the size of the bezel in the dash or gage panel. The back side is not important but the front is. So I carefully clean and polish the aluminum the same as you have. Then the bezels are inserted into the holes after painting is complete. The only down side is I have to make a backing that fits inside the bezels to put the gage faces against. Here is one example.
-
M-715 Pickup
Chariots of Fire replied to Chariots of Fire's topic in WIP: Model Trucks: Pickups, Vans, SUVs, Light Commercial
That's the way they were done and I did not have any to use from the kit. The kit grill for the Gladiator is altogether different and the headlights are square. -
M-715 Pickup
Chariots of Fire replied to Chariots of Fire's topic in WIP: Model Trucks: Pickups, Vans, SUVs, Light Commercial
It may become clearer after the build is complete!☺️ If not, I'll let you in on it. -
M-715 Pickup
Chariots of Fire replied to Chariots of Fire's topic in WIP: Model Trucks: Pickups, Vans, SUVs, Light Commercial
Worked some on the front of the cab today. Waiting for the big snow storm tomorrow. Made a mold for the headlight surrounds and got the front bumper done with tow eyes. Then the grill was done using brass wire.
-
Yeah, I like the plow too!
-
M-715 Pickup
Chariots of Fire replied to Chariots of Fire's topic in WIP: Model Trucks: Pickups, Vans, SUVs, Light Commercial
No brush unit, this. No visible fasteners either. A very basic build but for a specific purpose.