Chariots of Fire
-
Posts
2,782 -
Joined
-
Last visited
Content Type
Profiles
Forums
Events
Gallery
Everything posted by Chariots of Fire
-
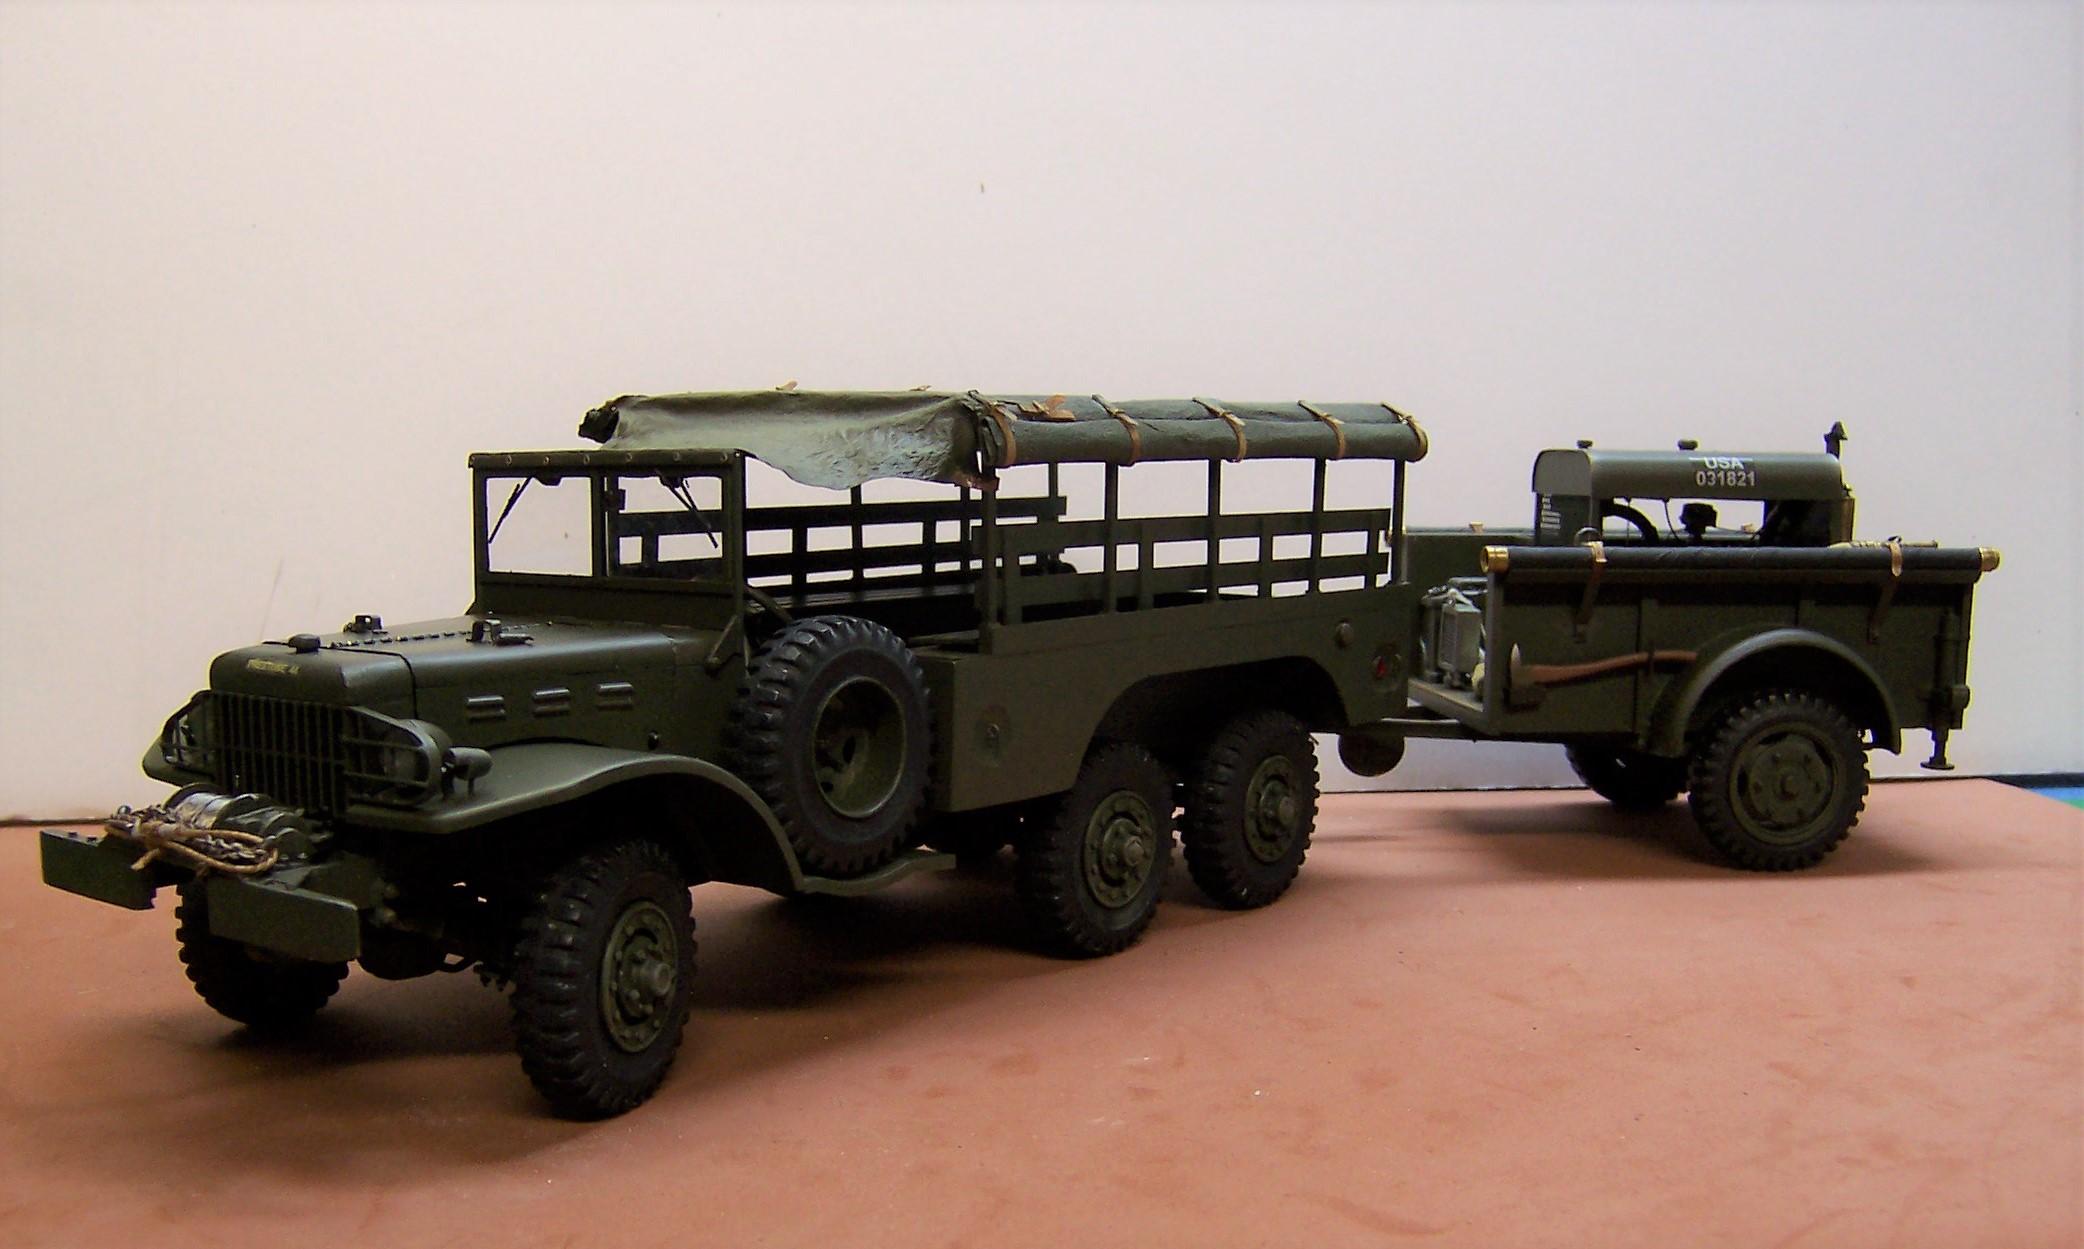
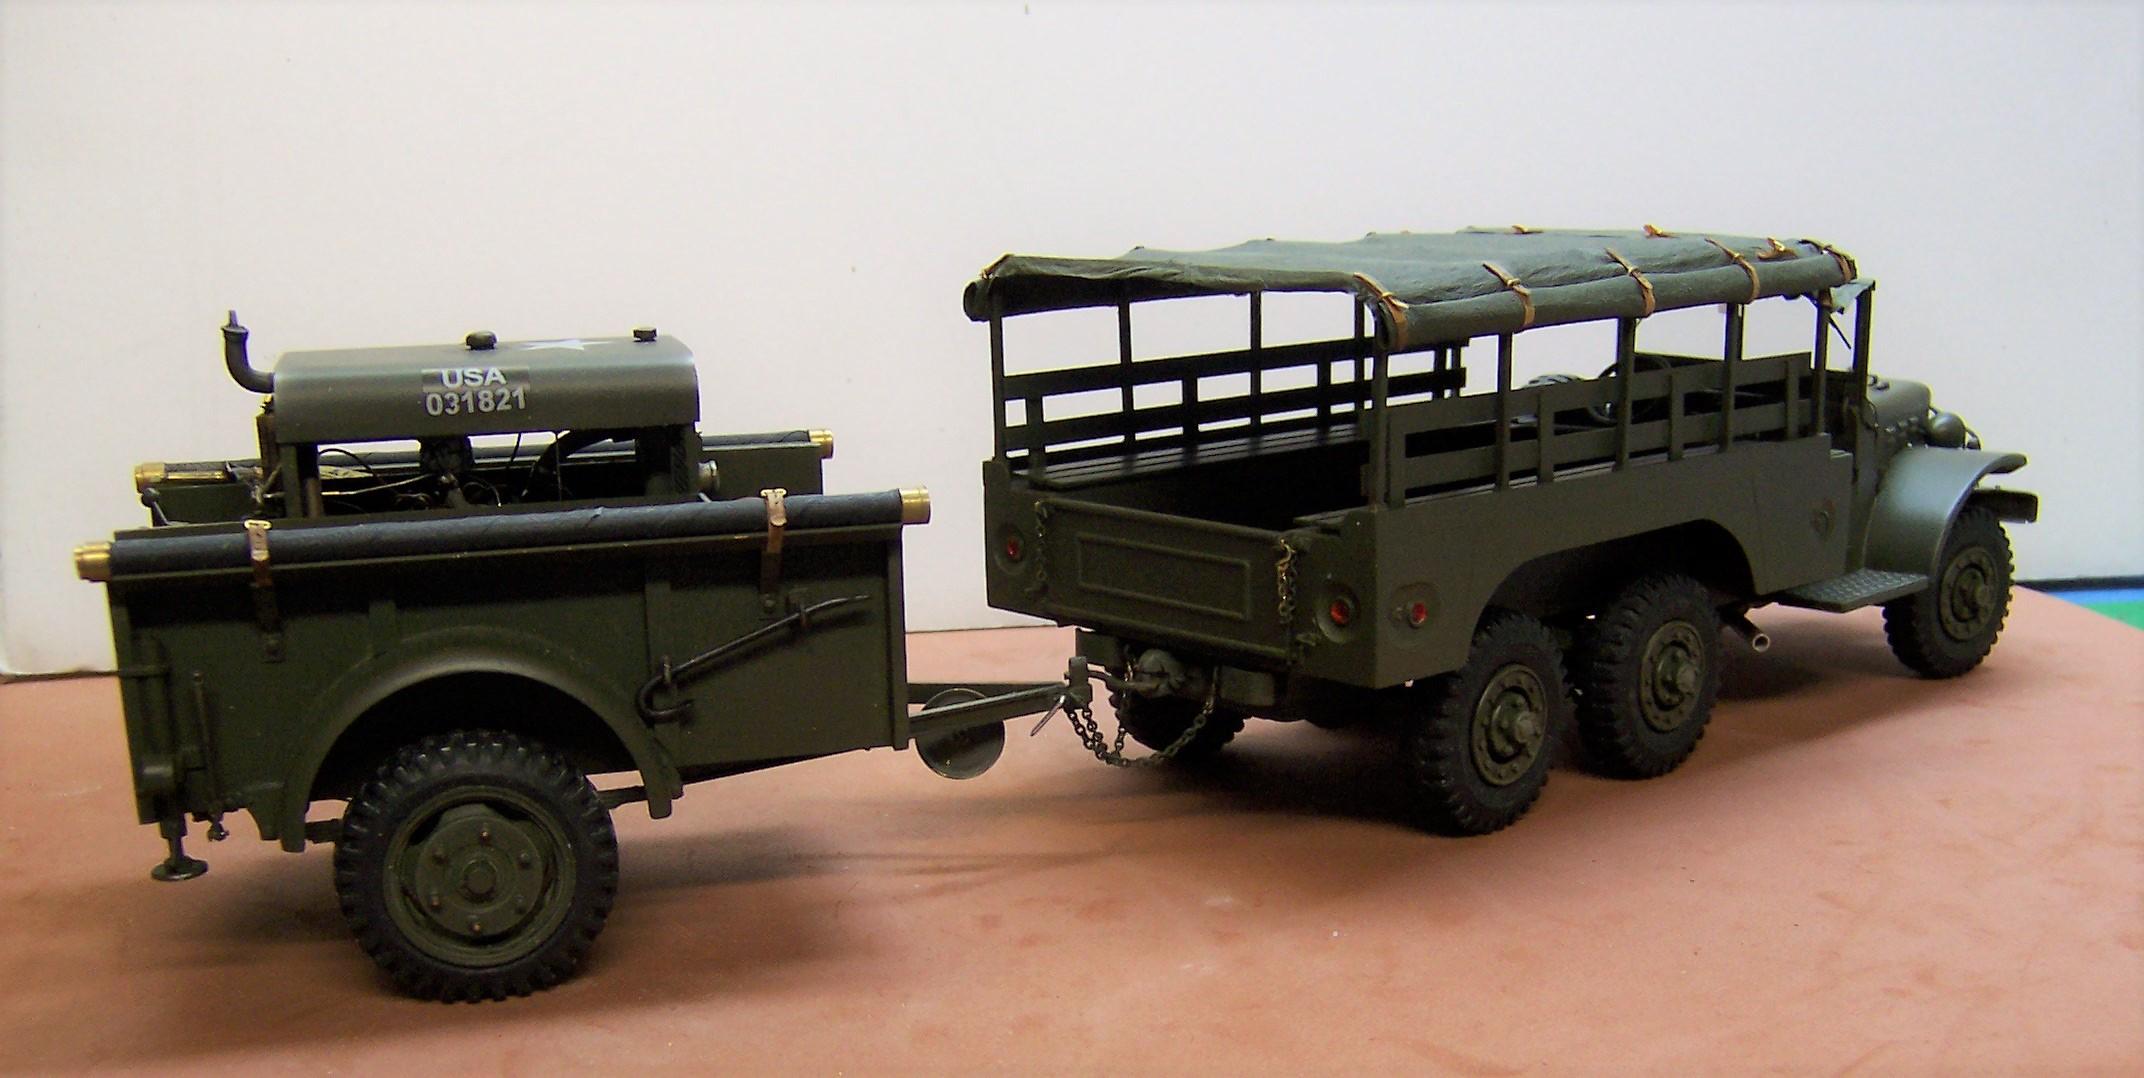
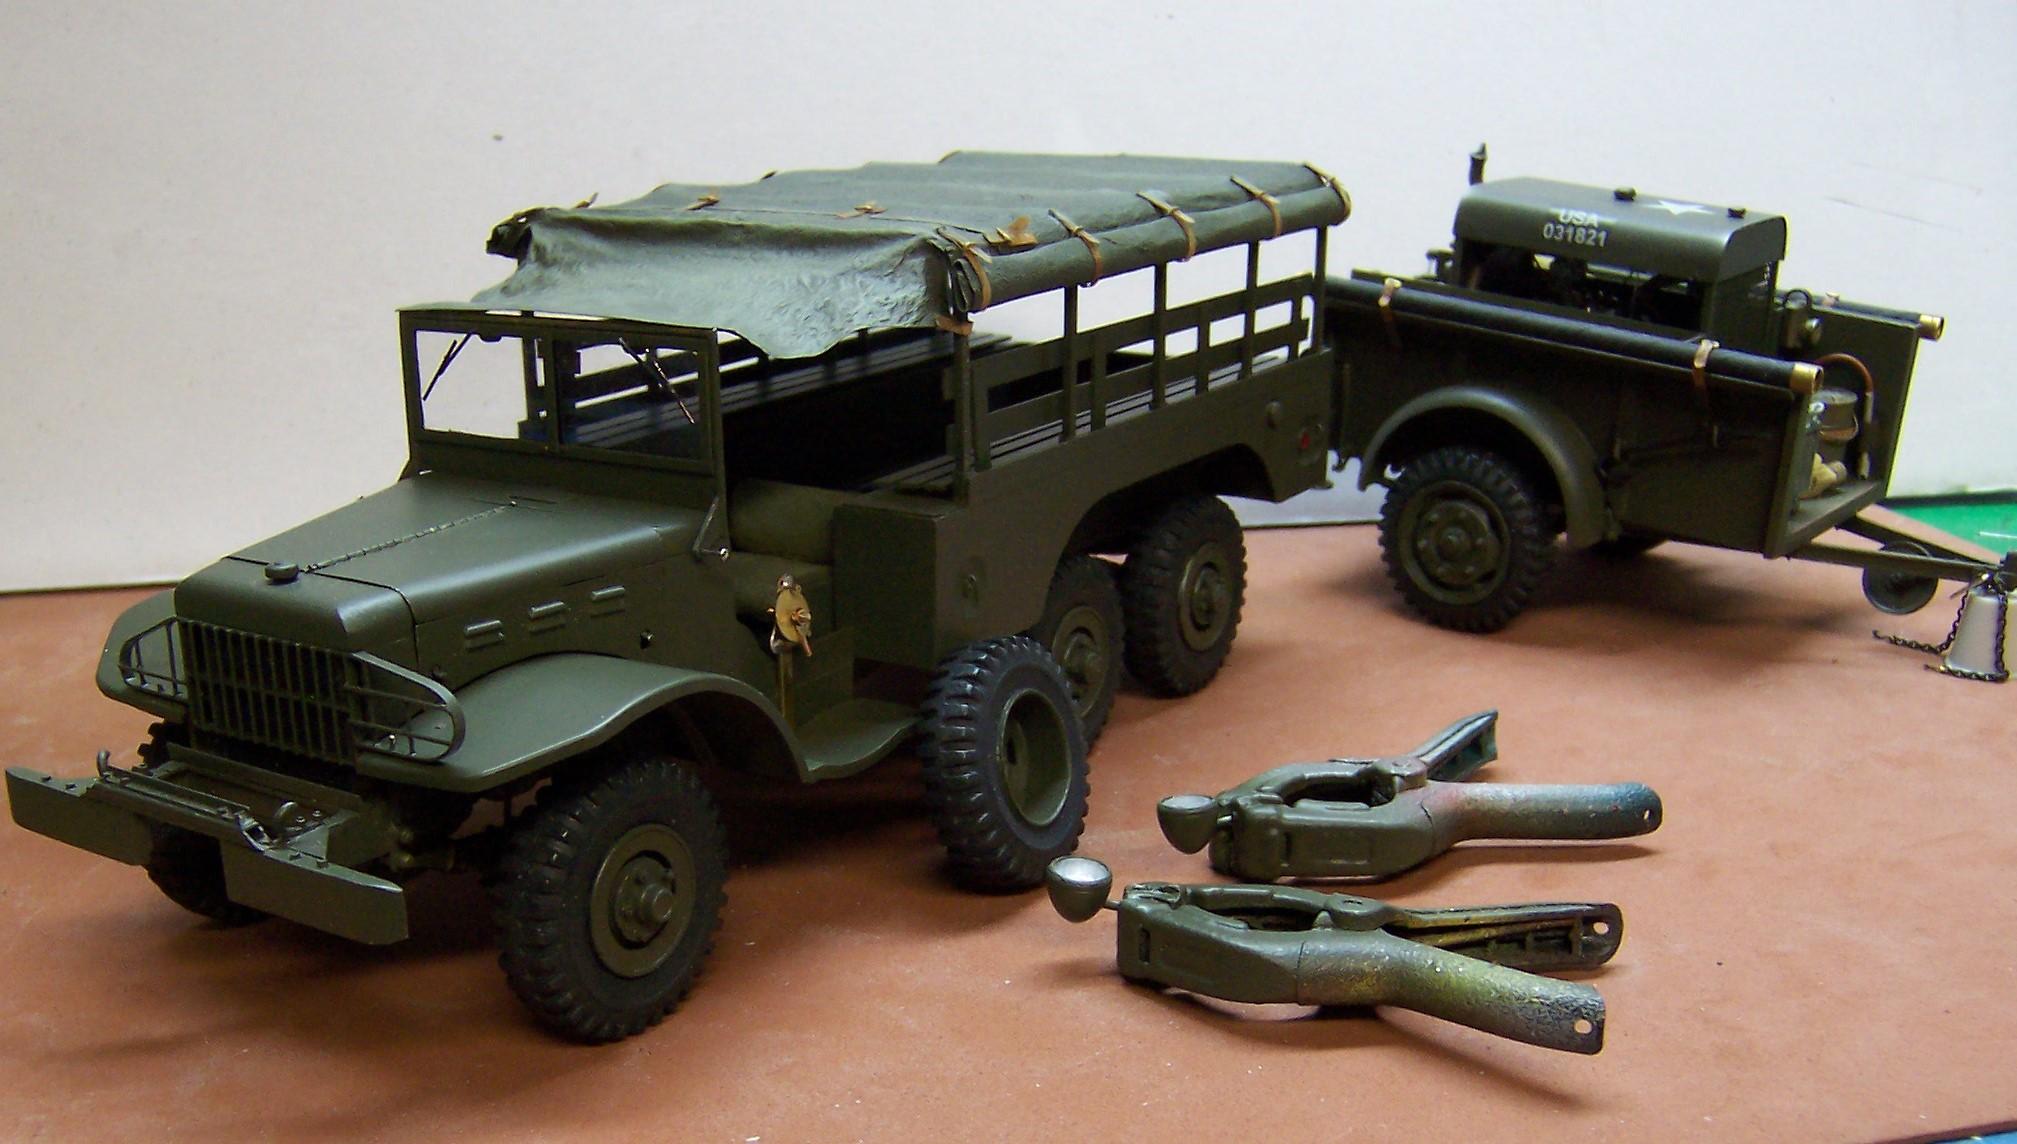
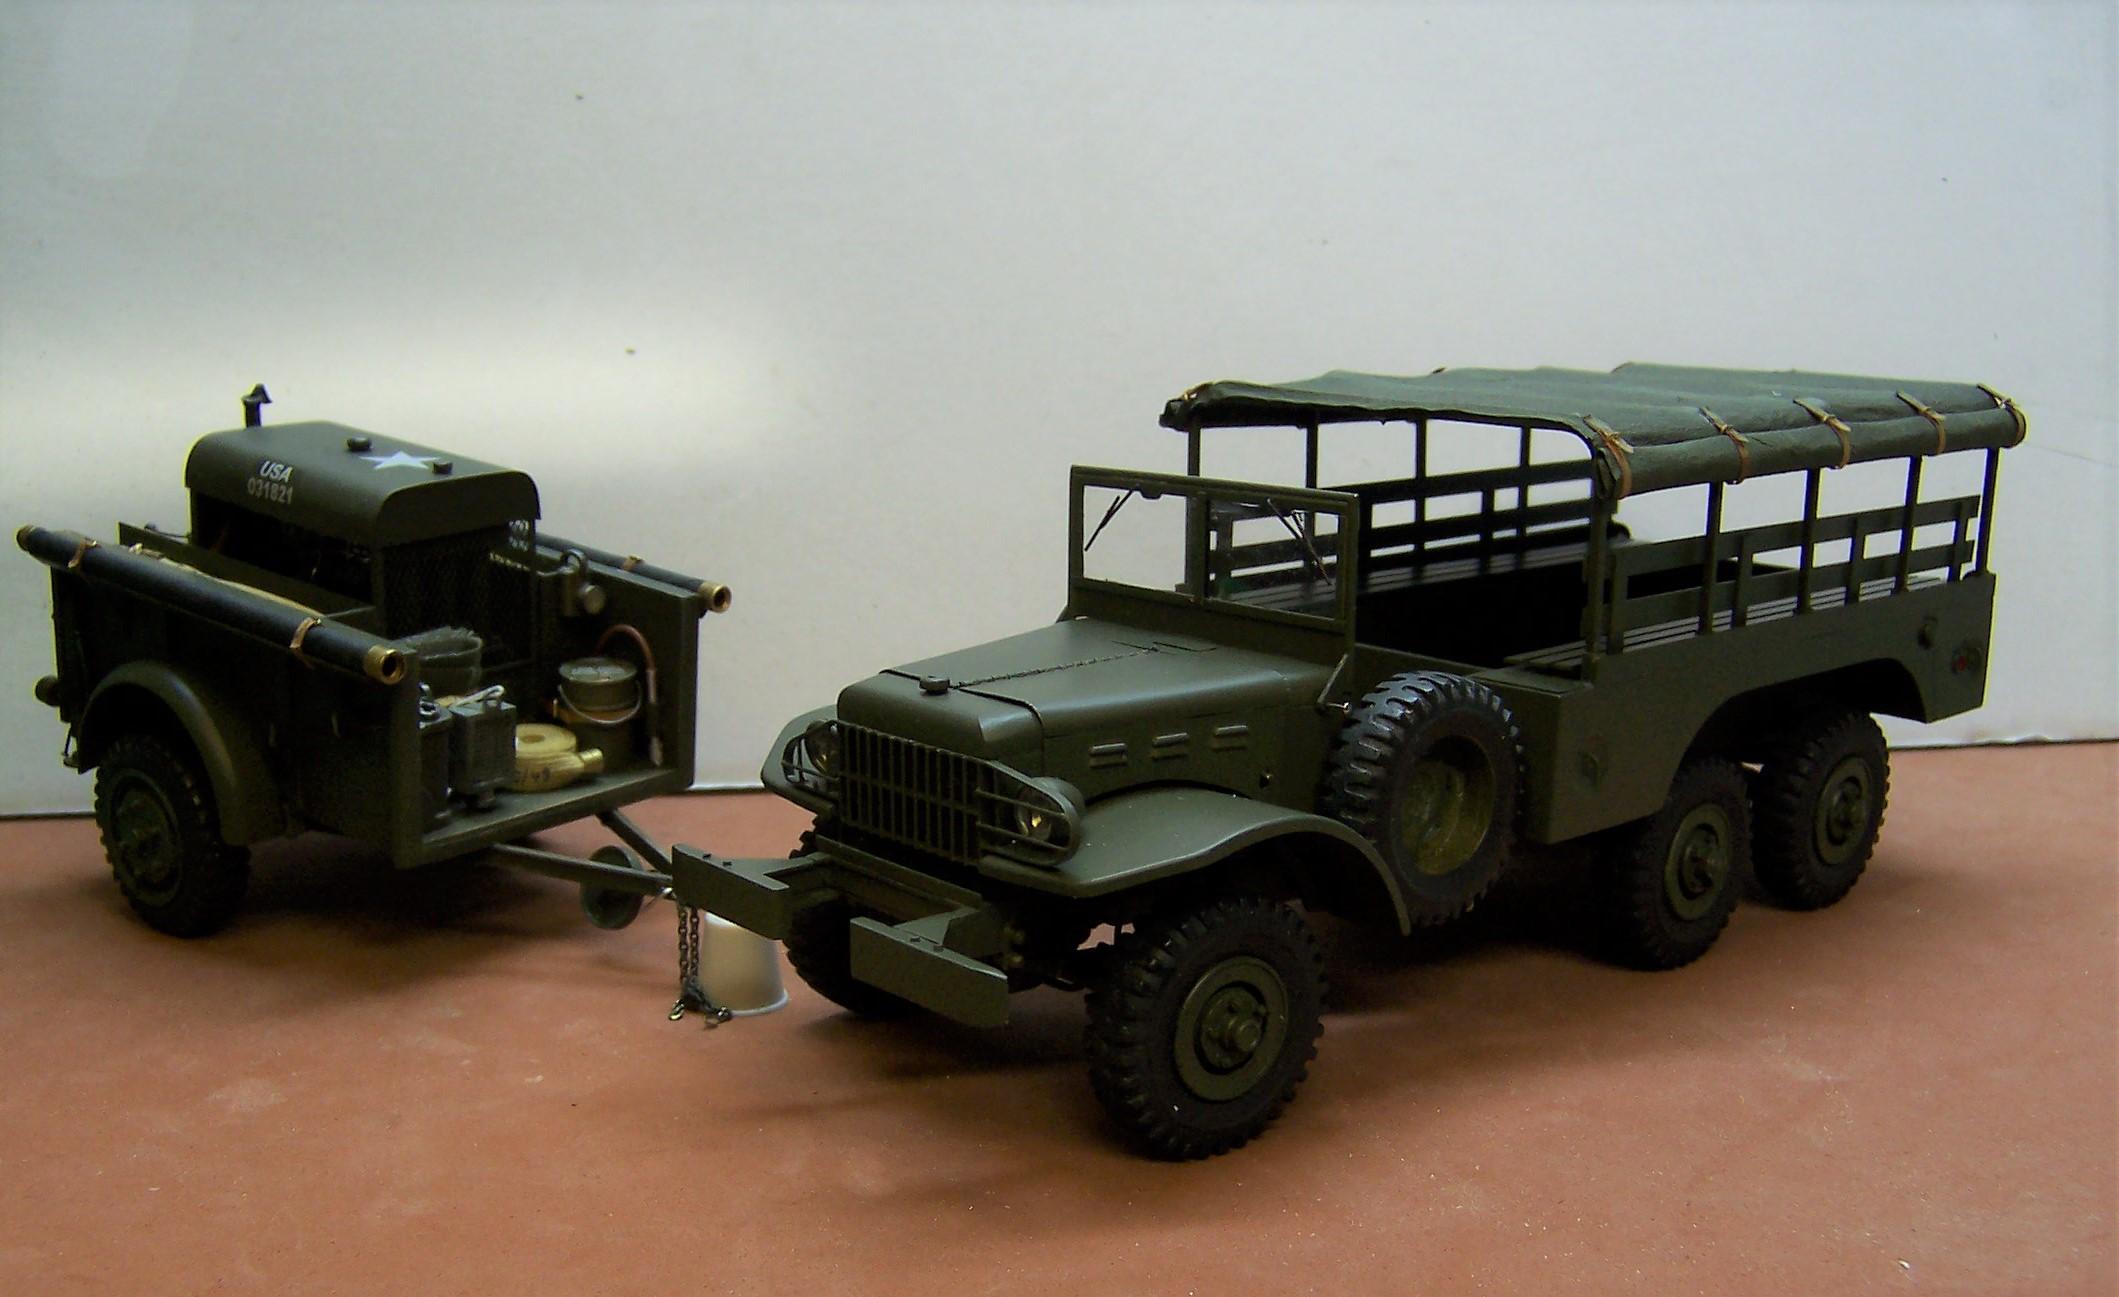
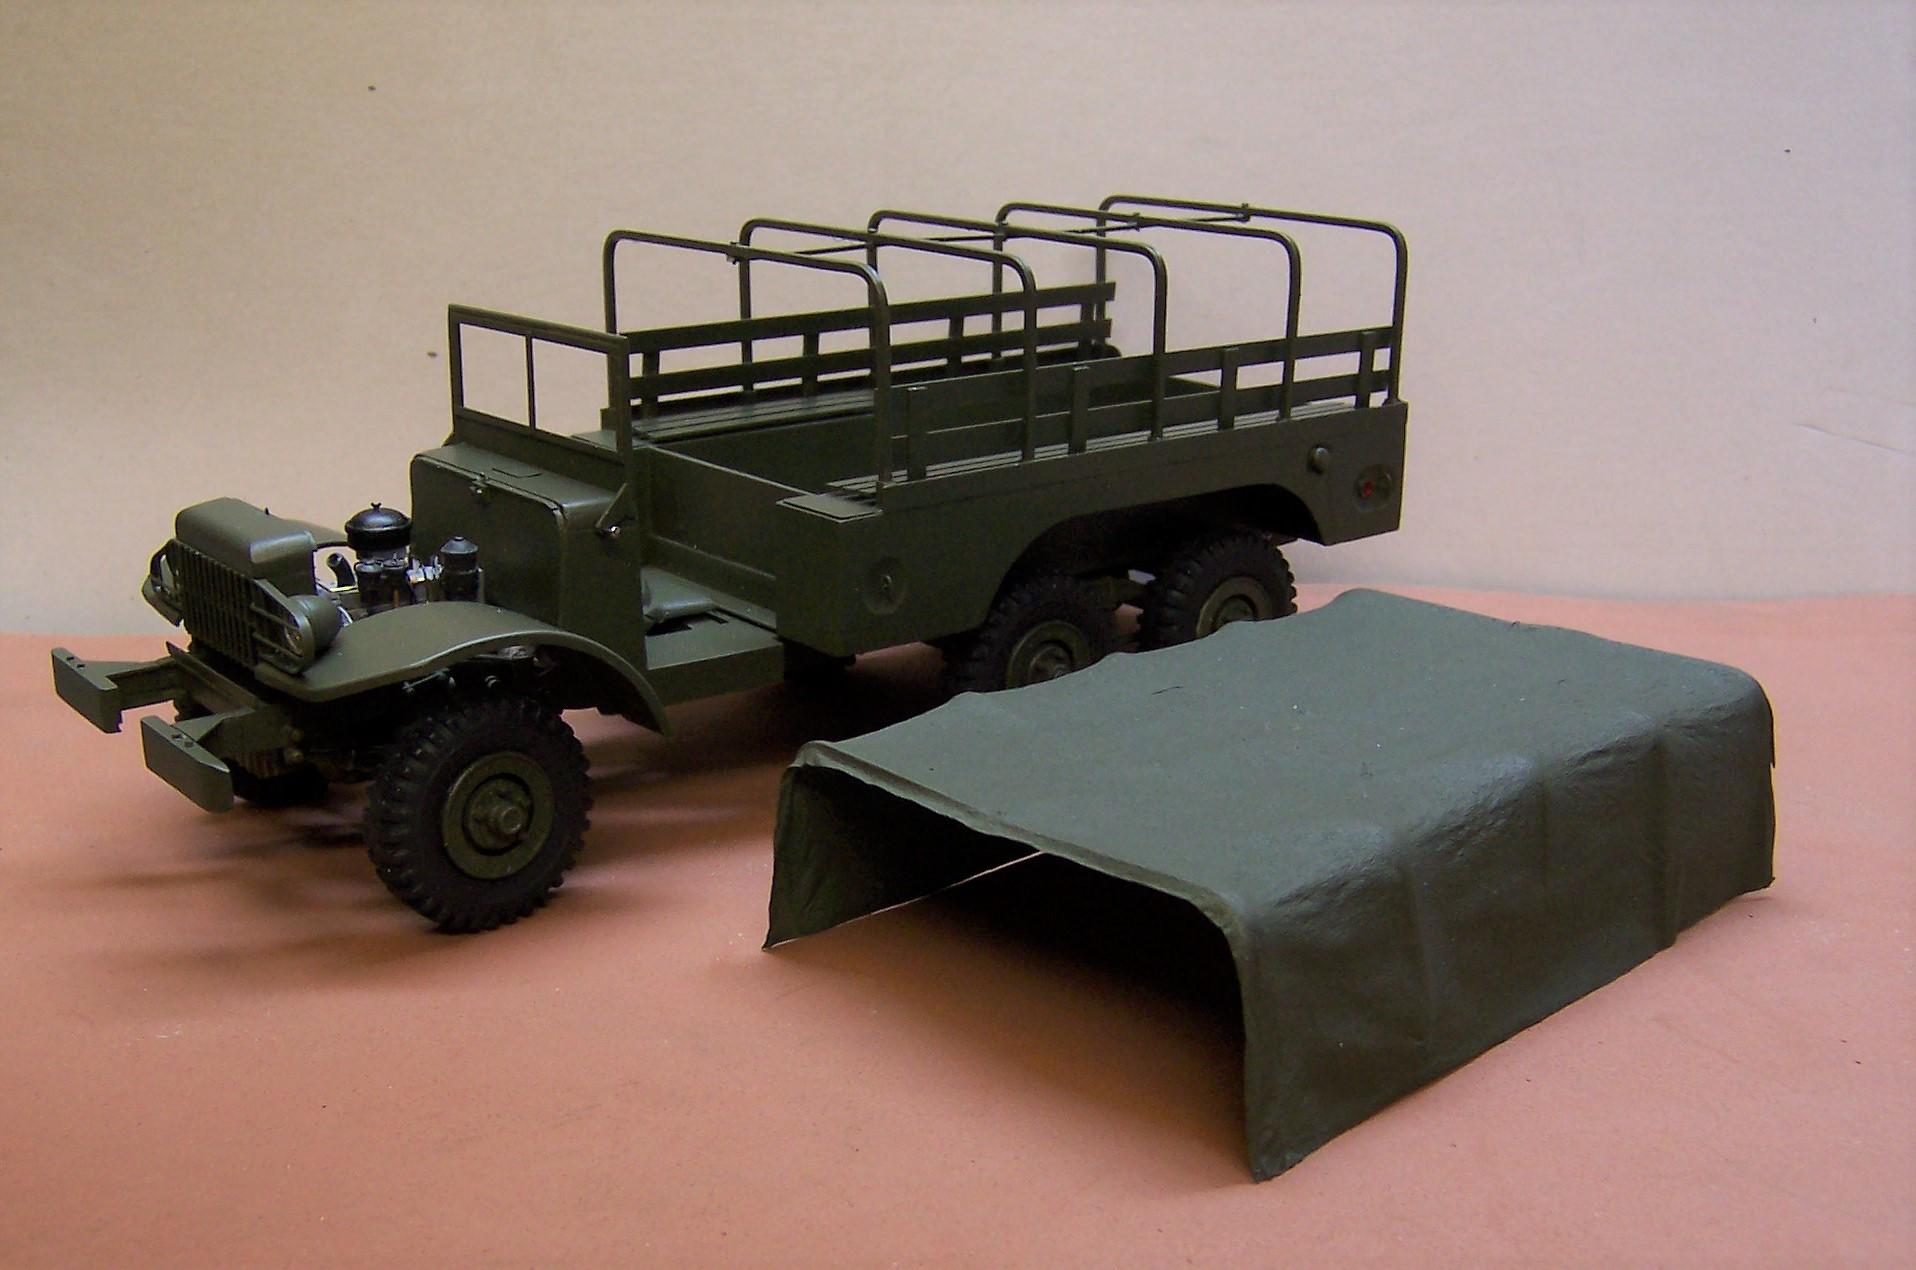
 Here's a photo of the WC with its tagalong pump trailer. This build is nearing completion. Decals still to do, rear view mirror and tail lights.
-
Machining Steering Columns
Chariots of Fire replied to bill-e-boy's topic in Tips, Tricks, and Tutorials
There's aluminum and then there's aluminum. Aluminum rod that rings when you tap it is good for turning. If the sound is dull then it is not. All aluminum stock is not the same. Wish I could remember the classification number for the best stuff but I cannot. -
Assembling Diamond Reo Mirrors
Chariots of Fire replied to OldTrucker's topic in Model Building Questions and Answers
I did a tutorial on making mirror brackets. Should be still up on this site. It is for smaller mirrors but the principle I used is certainly applicable to larger truck mirrors. If you don't find it let me know. -
53 or 56 ford f100 pickup
Chariots of Fire replied to MrMiles's topic in Model Building Questions and Answers
I think the '53 is a better build. The '56 not so good especially around the windshield and doors. -
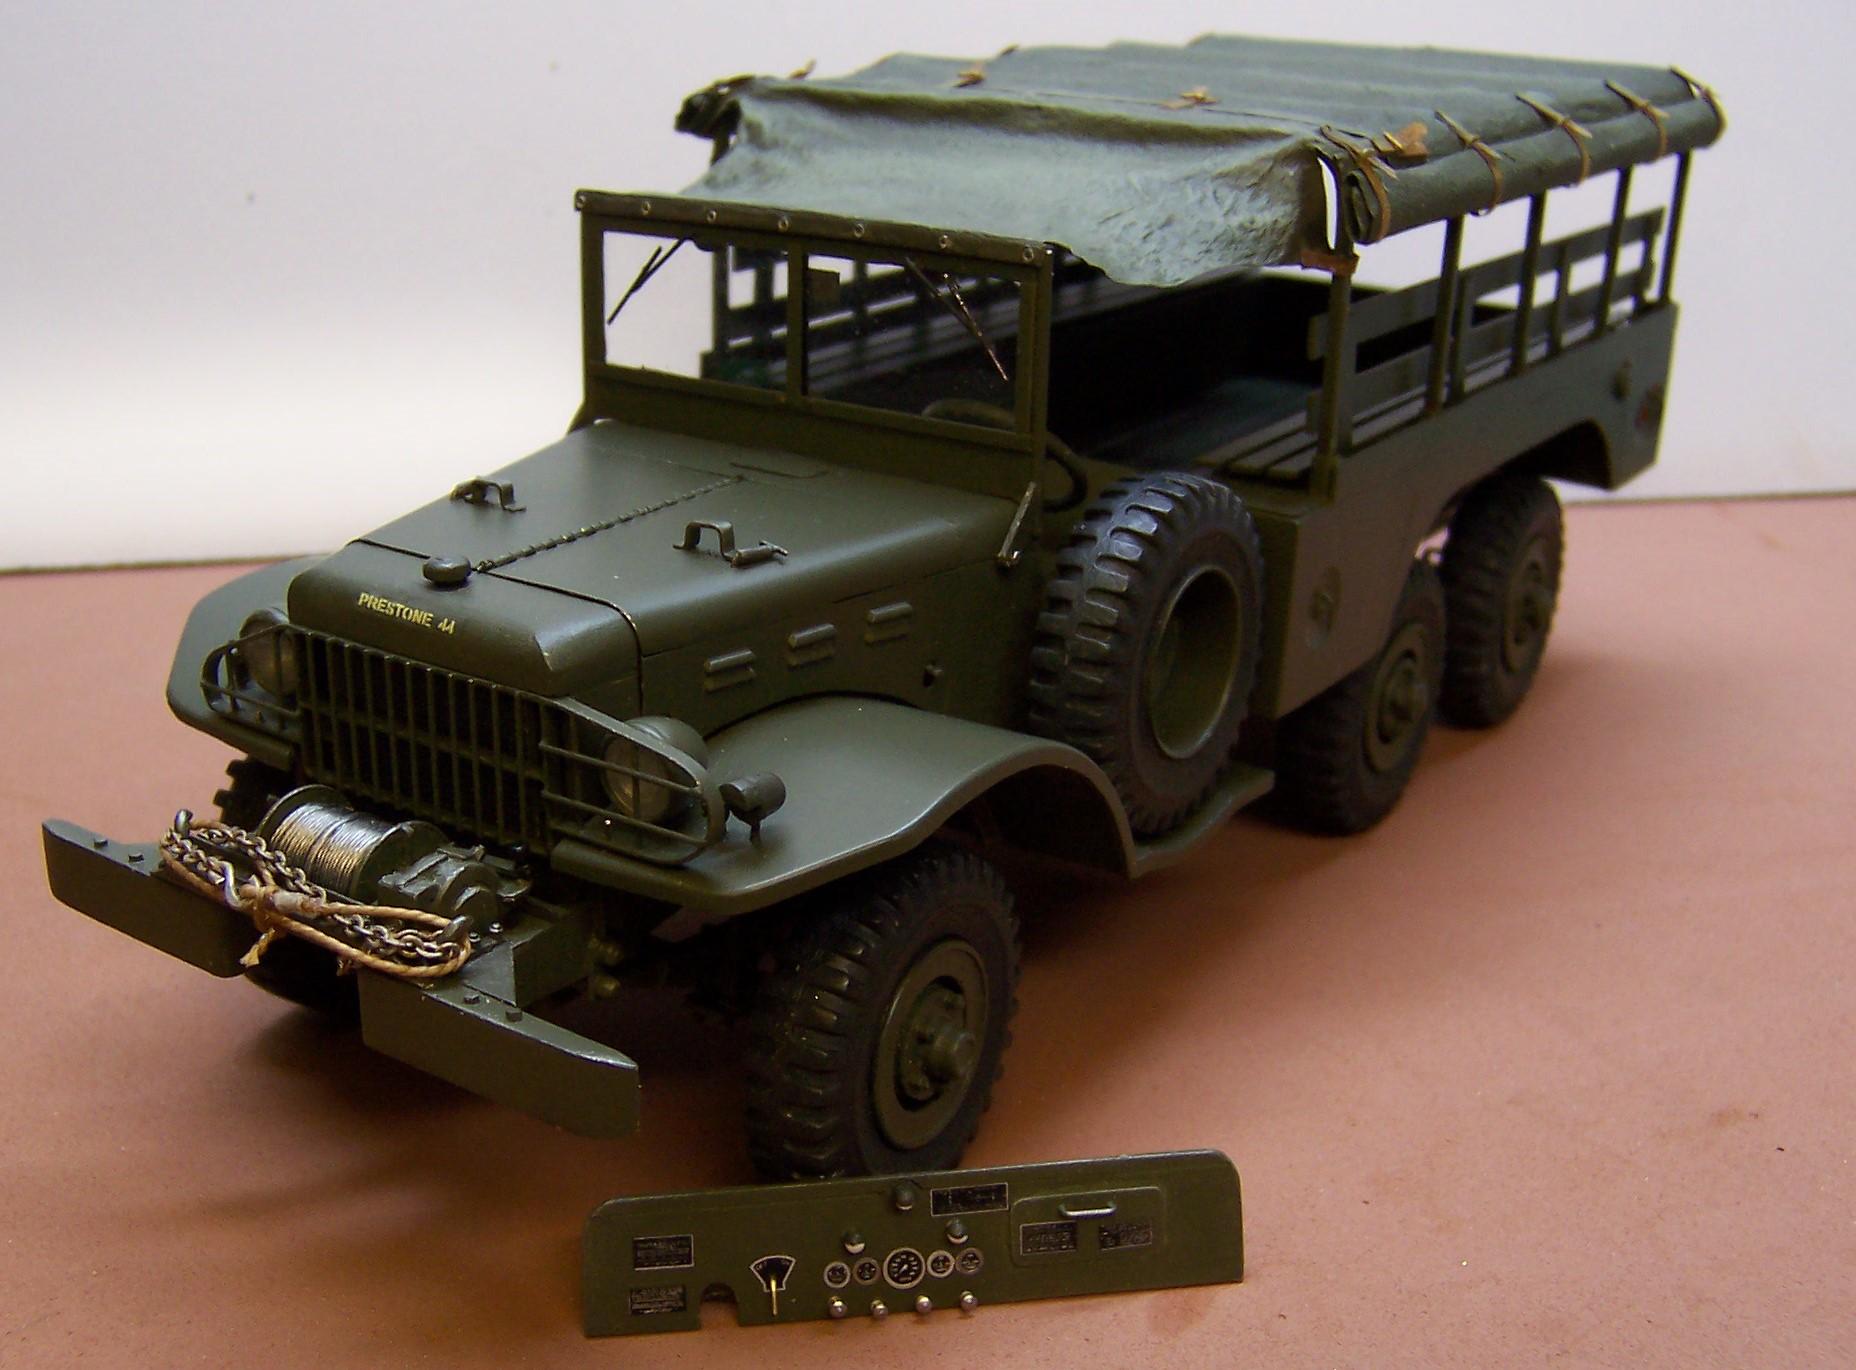
Winch is now complete and the dashboard is nearly ready for installation.
-
Got the start on the winch done today and then went on to finish it. Will post the pics of the finished winch soon. And I added a piece of small plastic angle stock to the edge of the tarp that goes to the windshield, then some small photoetch pieces to resemble the snaps that hold it in place. It's an improvement over what you see here which was not anywhere near done to attach it to the windshield frame.
-
Thanks, Greg. I'll take a second look!?
-
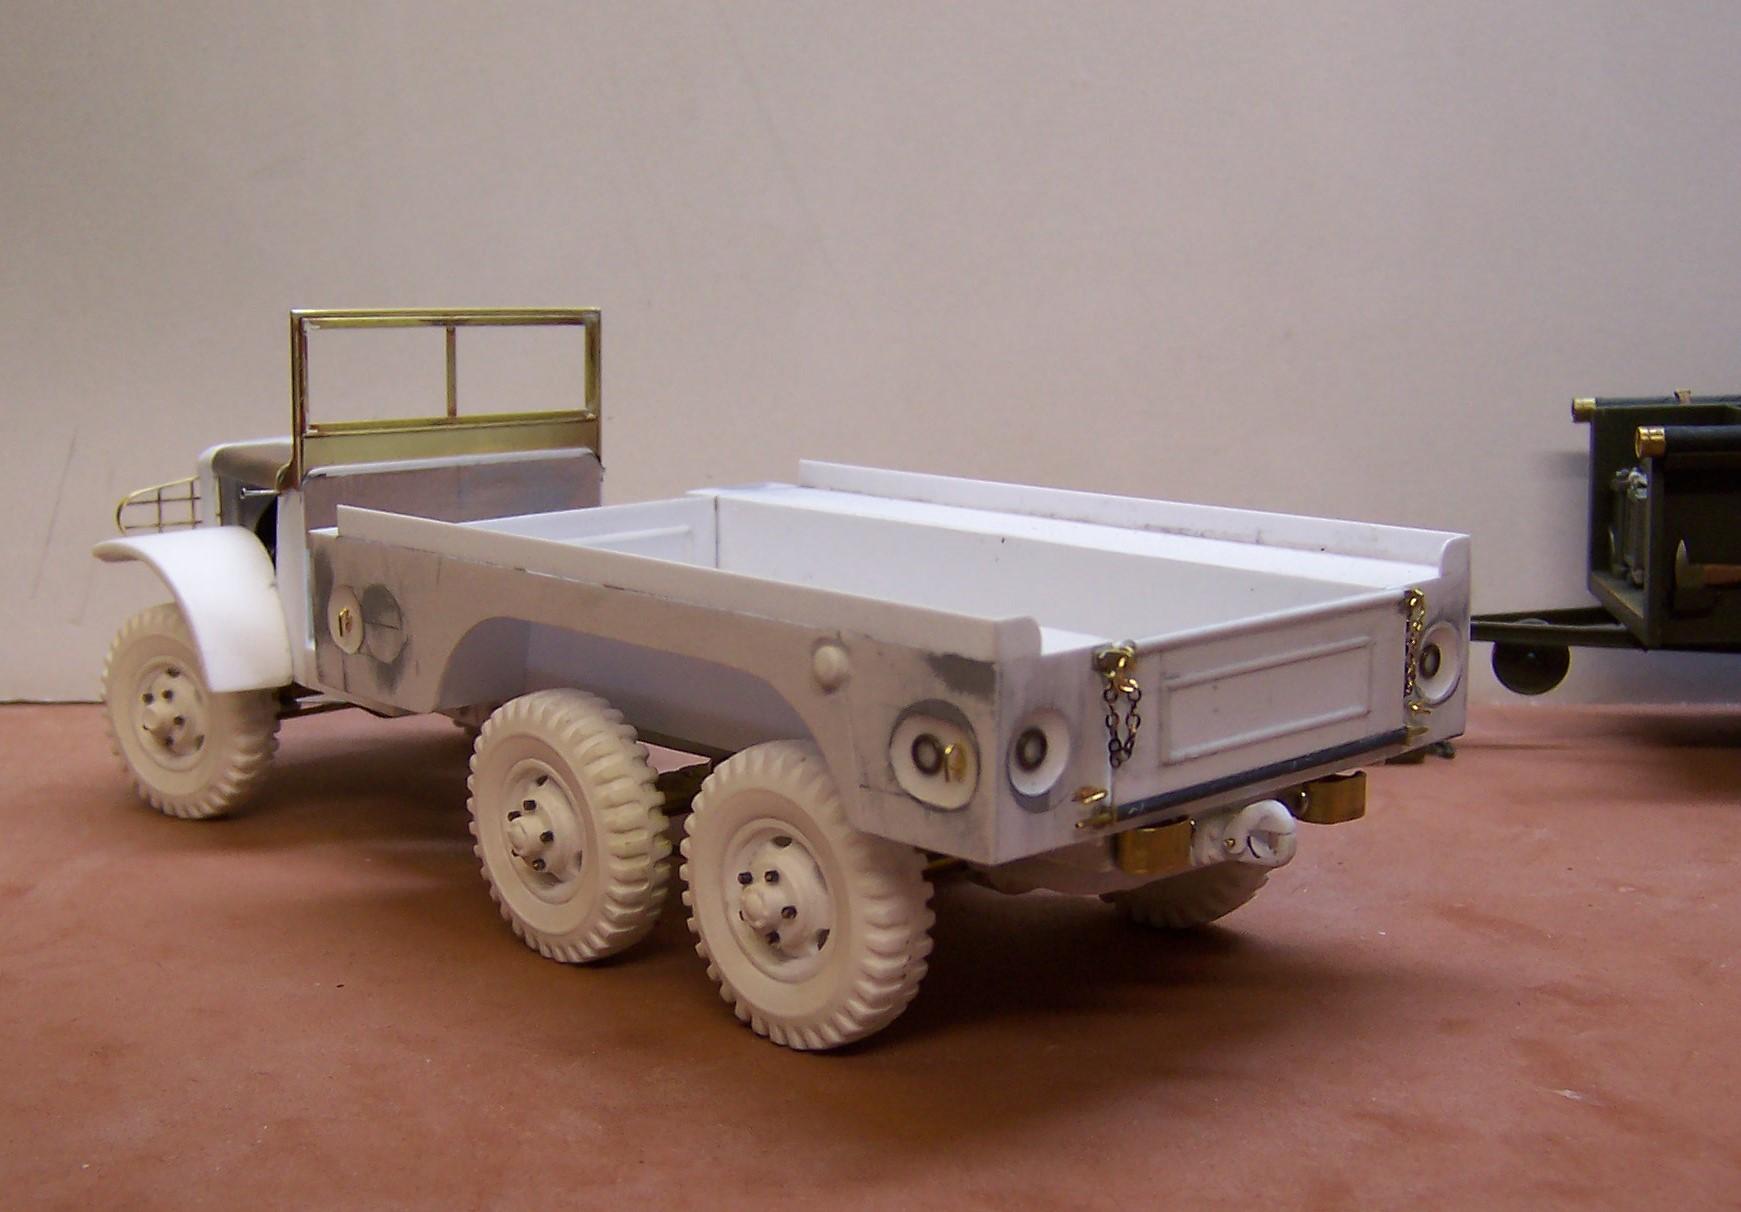
The spare tire mounts on the bracket and then the small disk and threaded nut are put in place to hold it. Same as the real one.
-
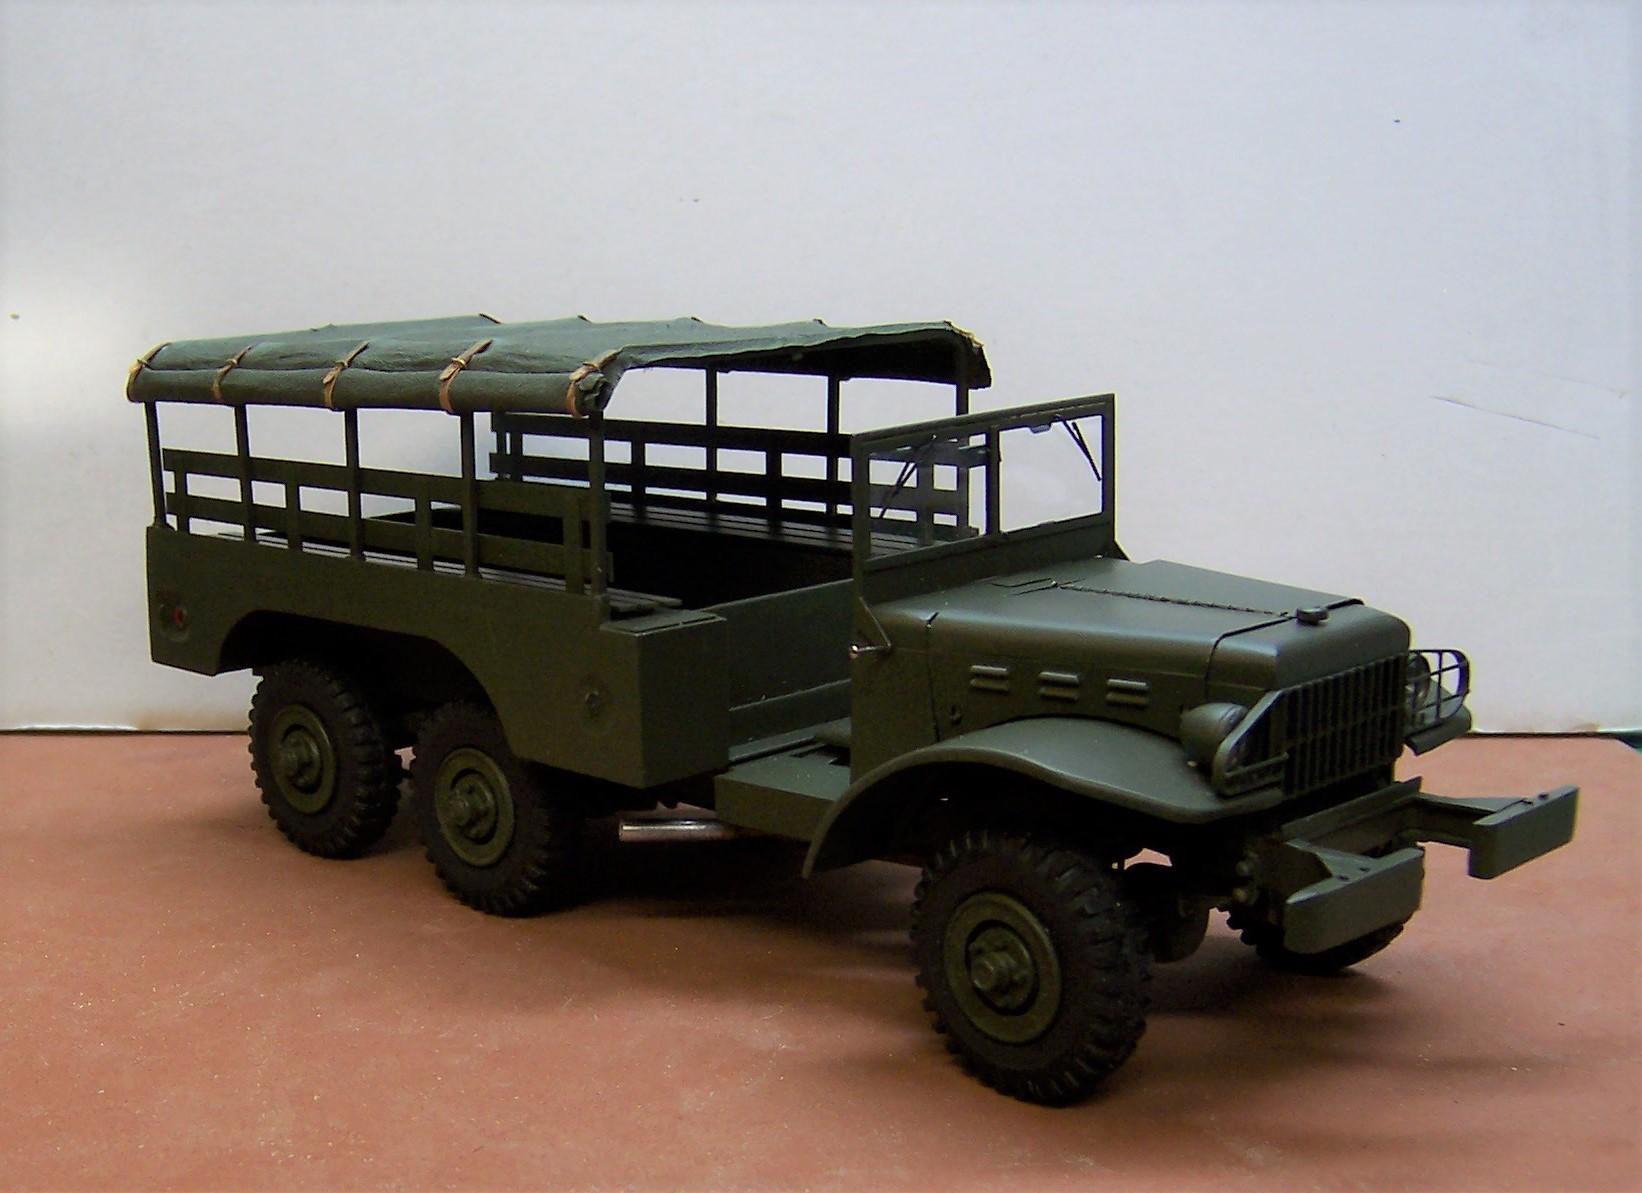
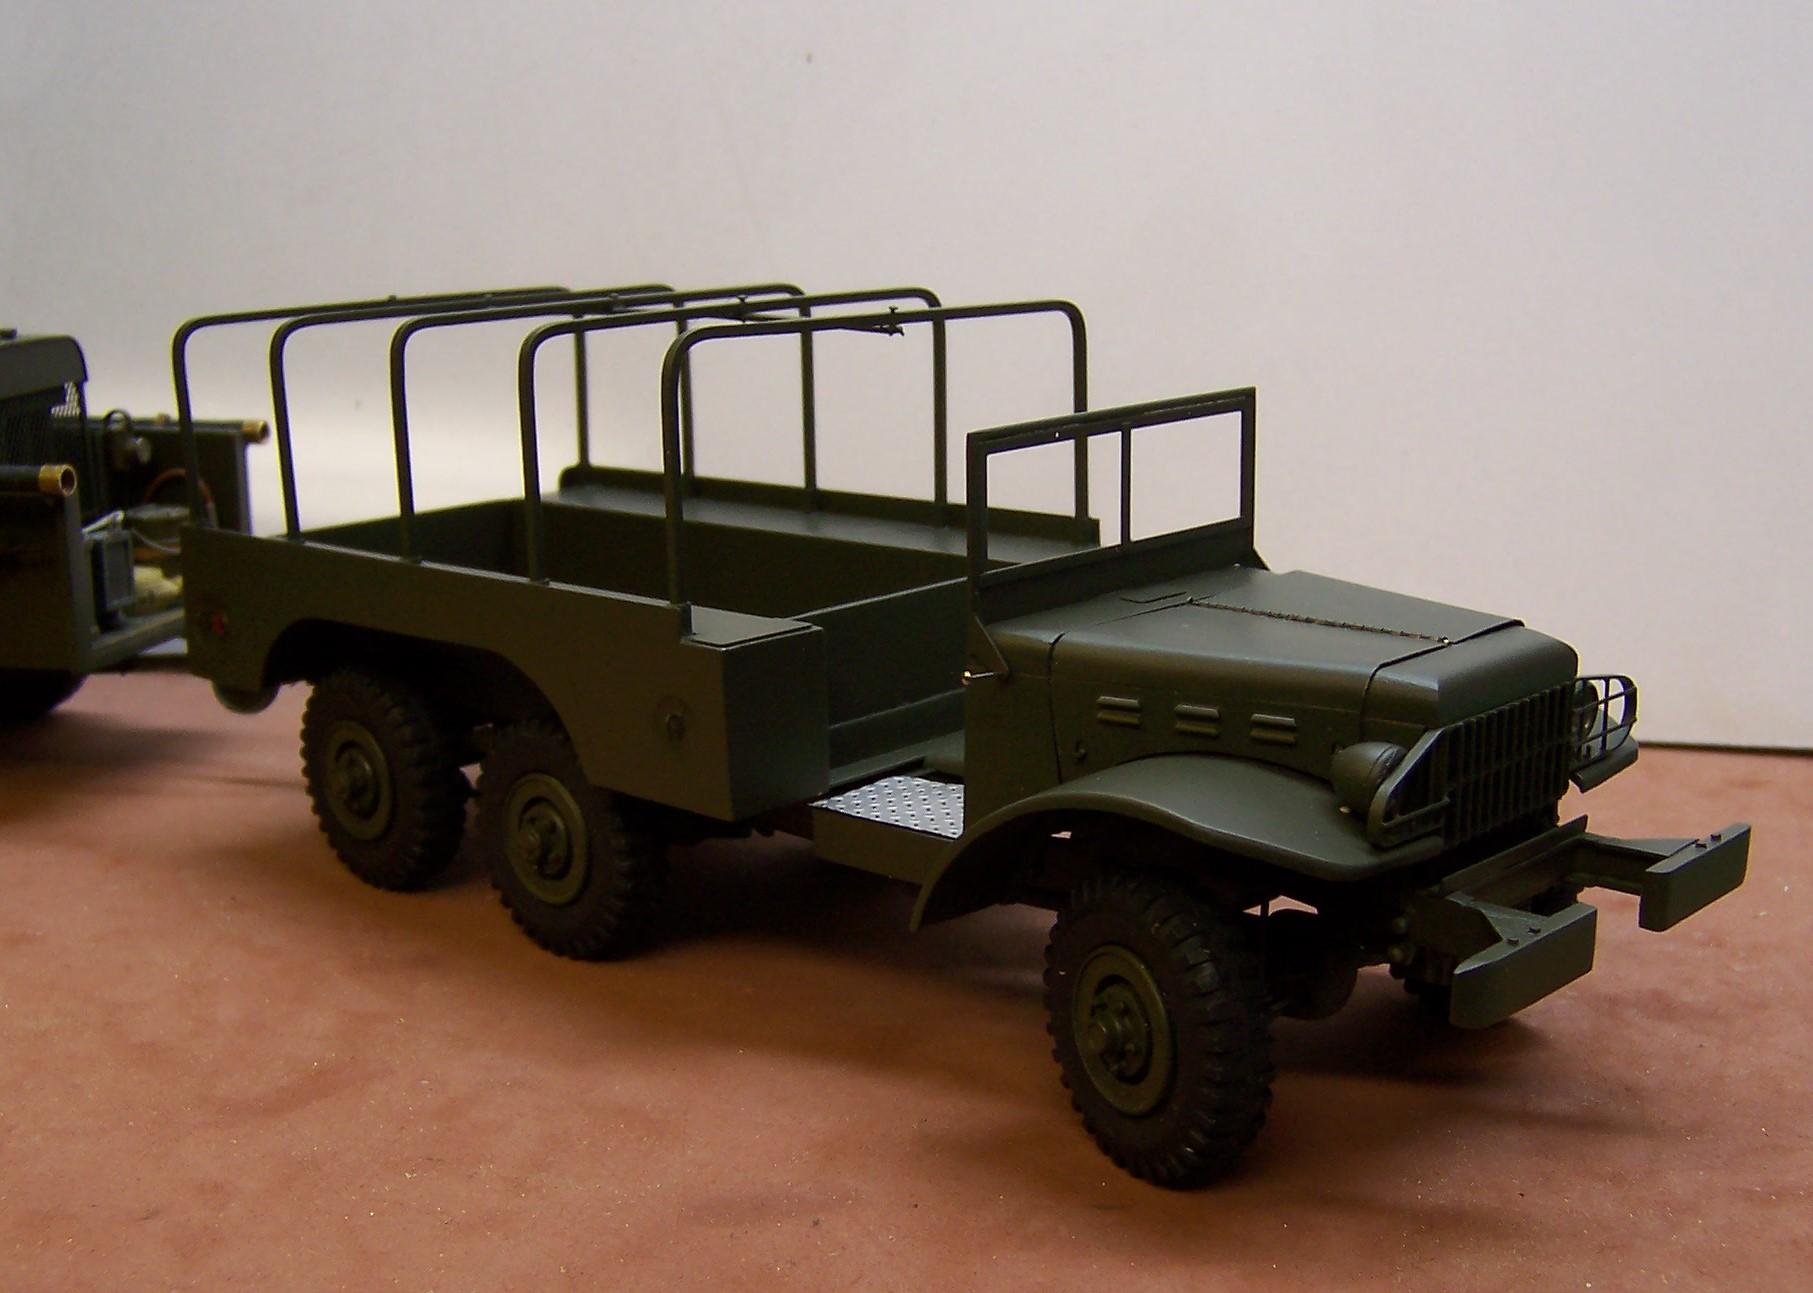
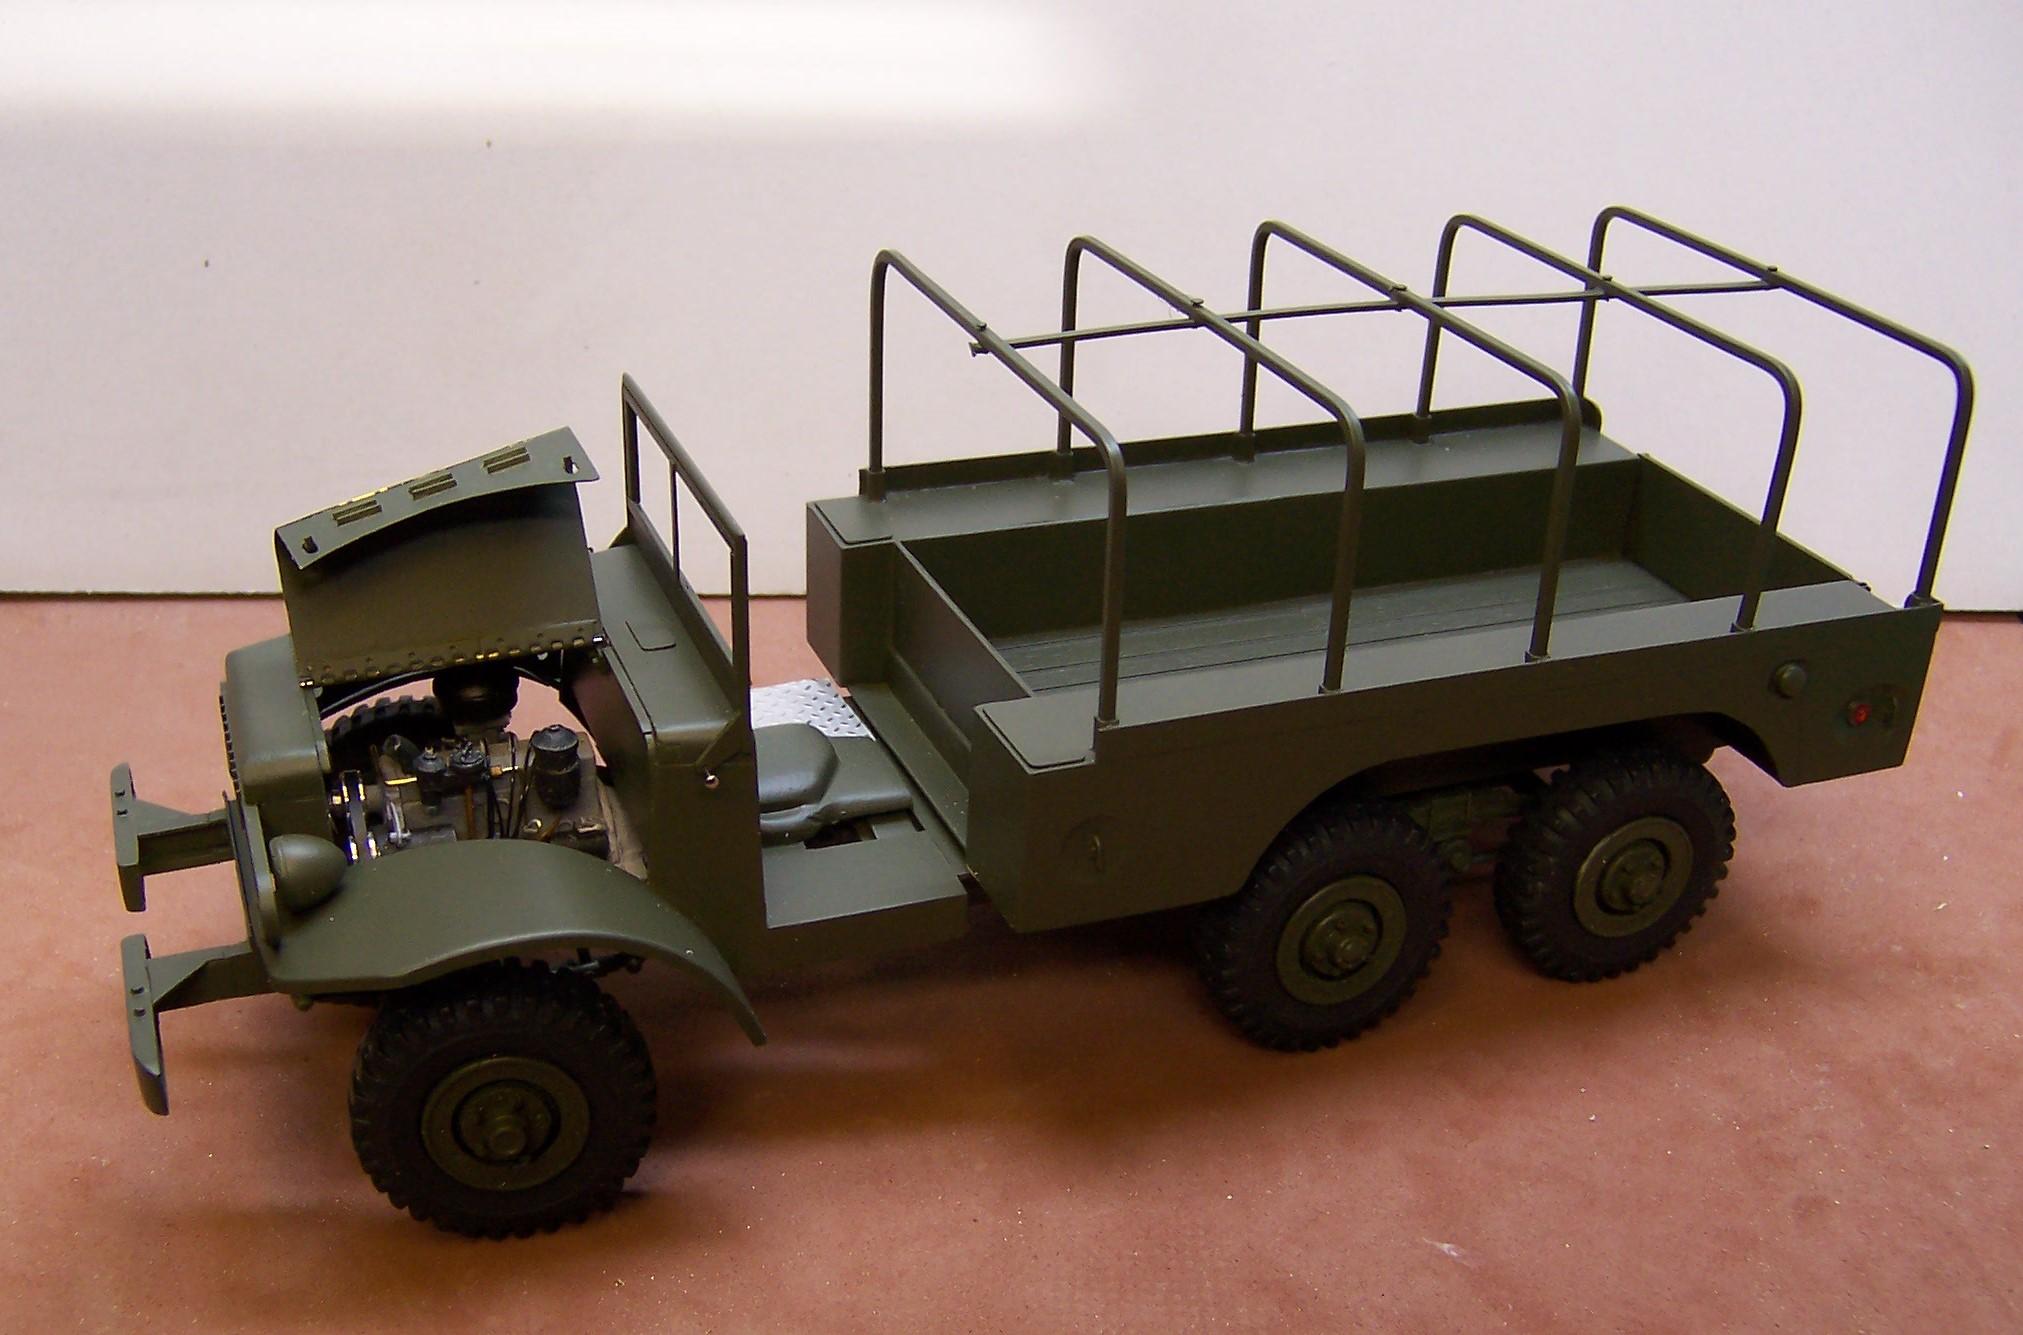
Got some more work done in the last couple of days. Tow hooks added to the front bumper, spare tire bracket made up and installed. Headlights glued into the buckets and a tarp was made between windshield and the body. I temporarily tacked the tarp at the ends so I can remove the windshield and cab for interior work. Did up the seats as well.
-
XM523E2 & XM524E2
Chariots of Fire replied to nathanyel's topic in WIP: Model Trucks: Big Rigs and Heavy Equipment
Someone may have asked already but where did the tires and wheels come from? -
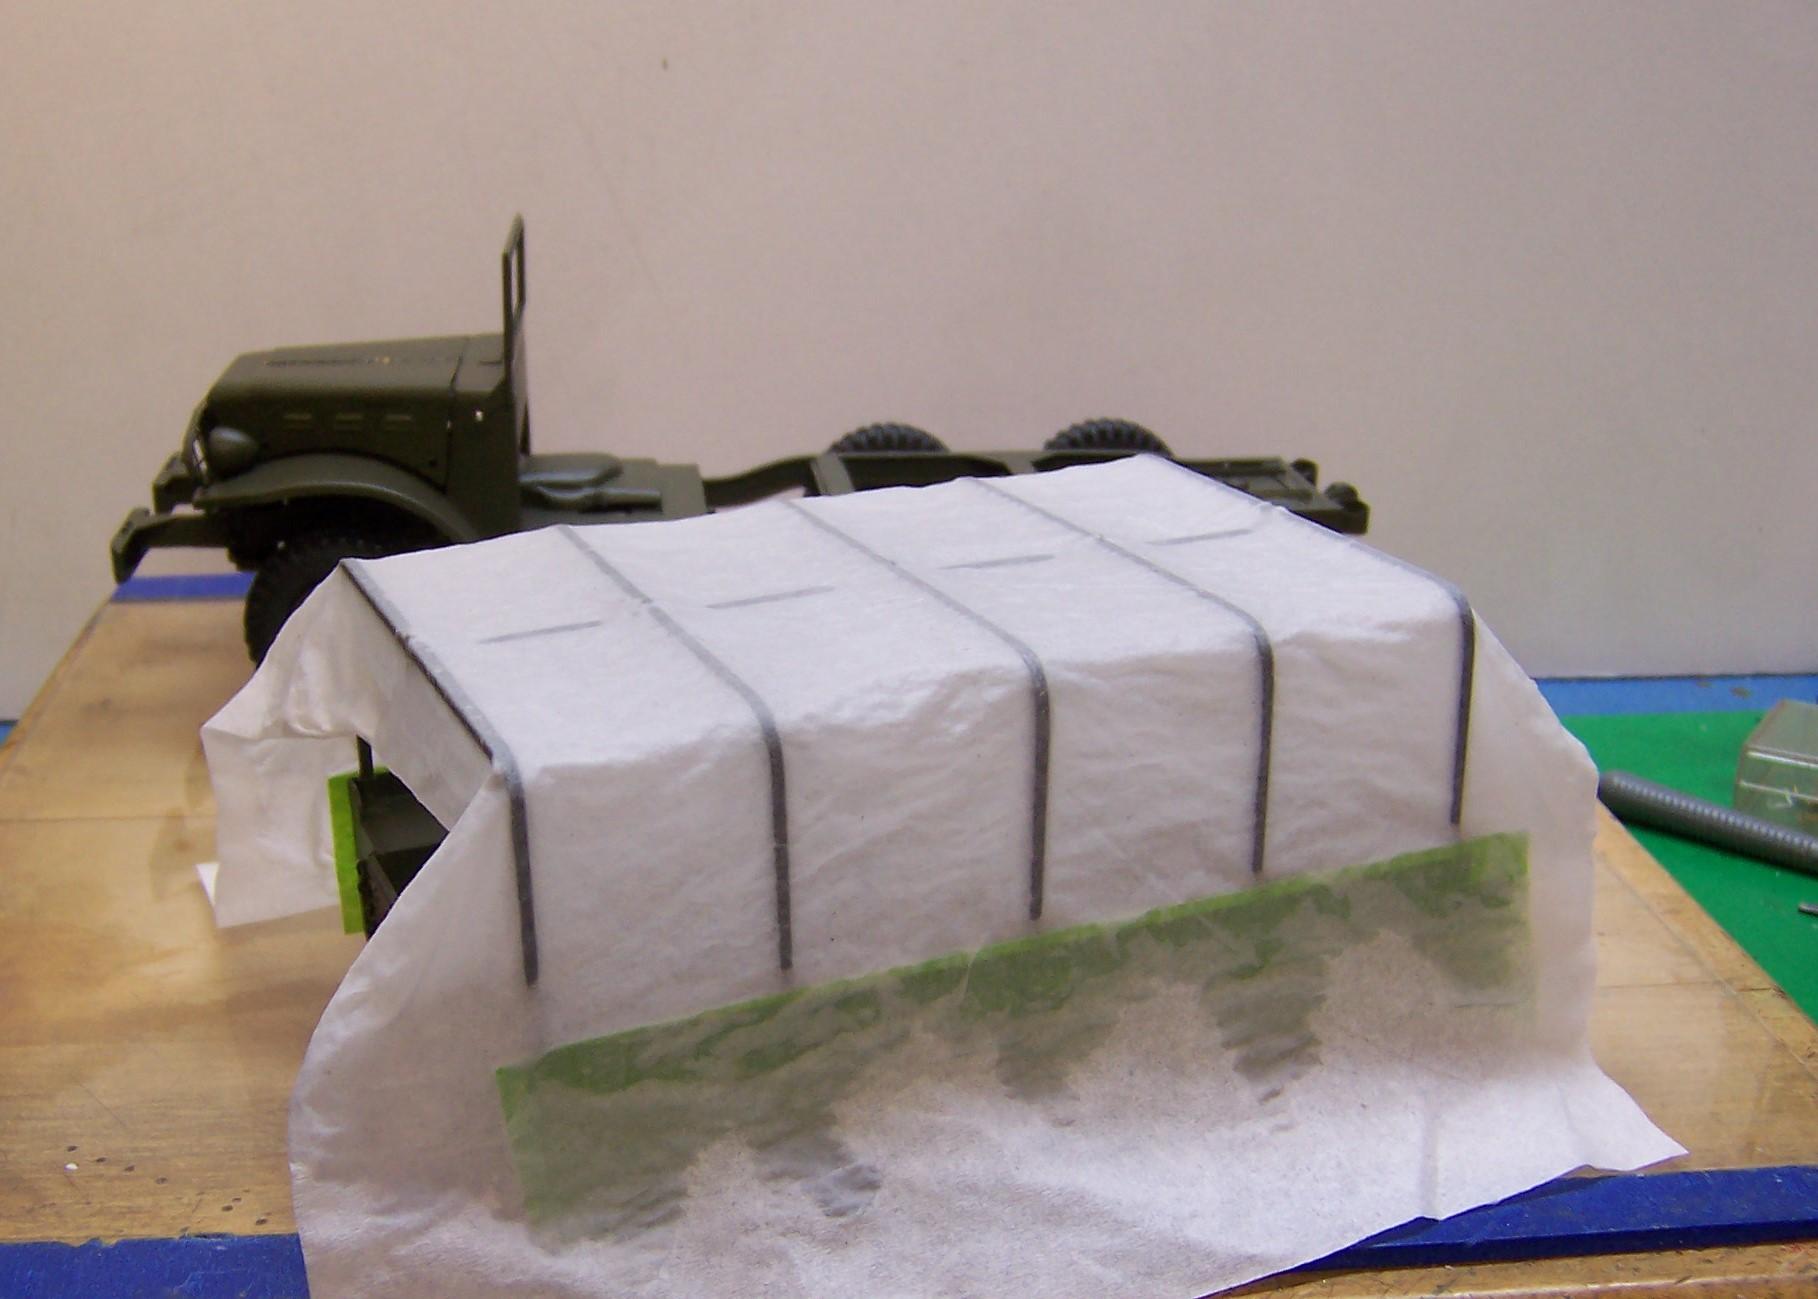
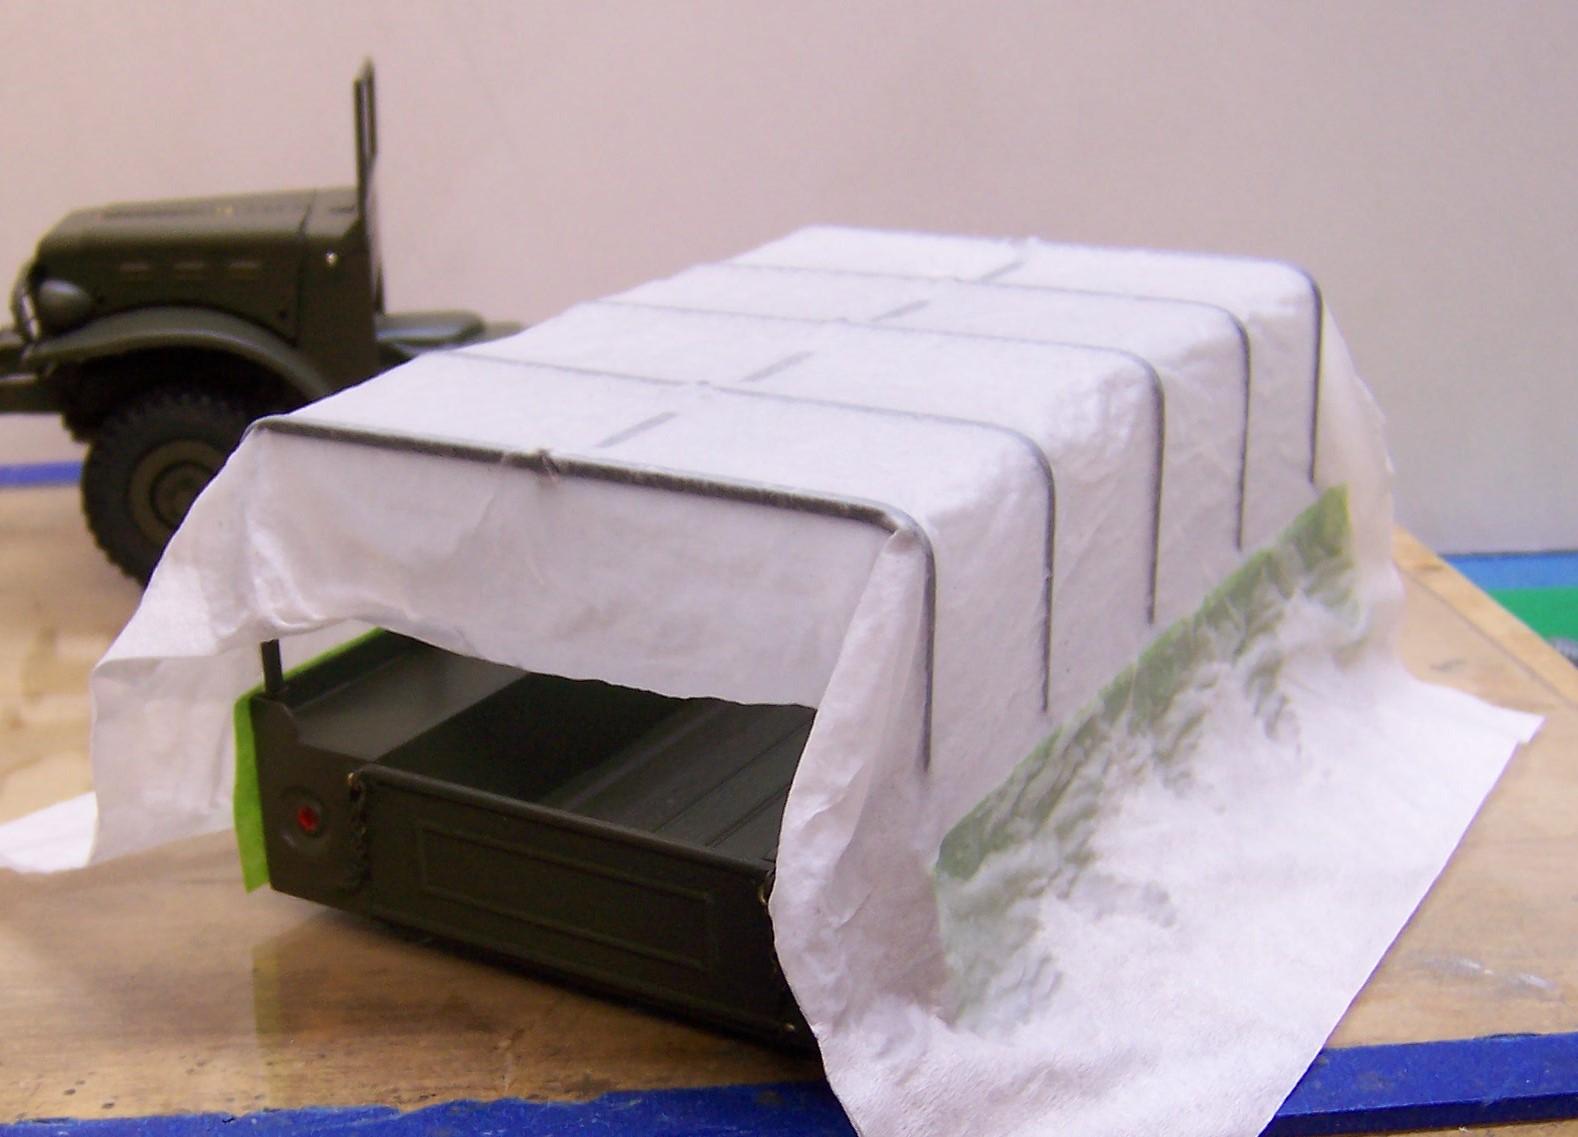
The buckles are just U-shaped pieces of wire. The ends of them tuck down into the roll so you can't see the ends. Then I took a fine black pen and painted some dots on the strips of paper to look like the punched-out holes in a belt. A separate piece of paper was laid on top of the original to represent the part that goes through the buckle. Then the U-shaped wire was added.
-
Amazing what you can get out of a brown paper bag!
-
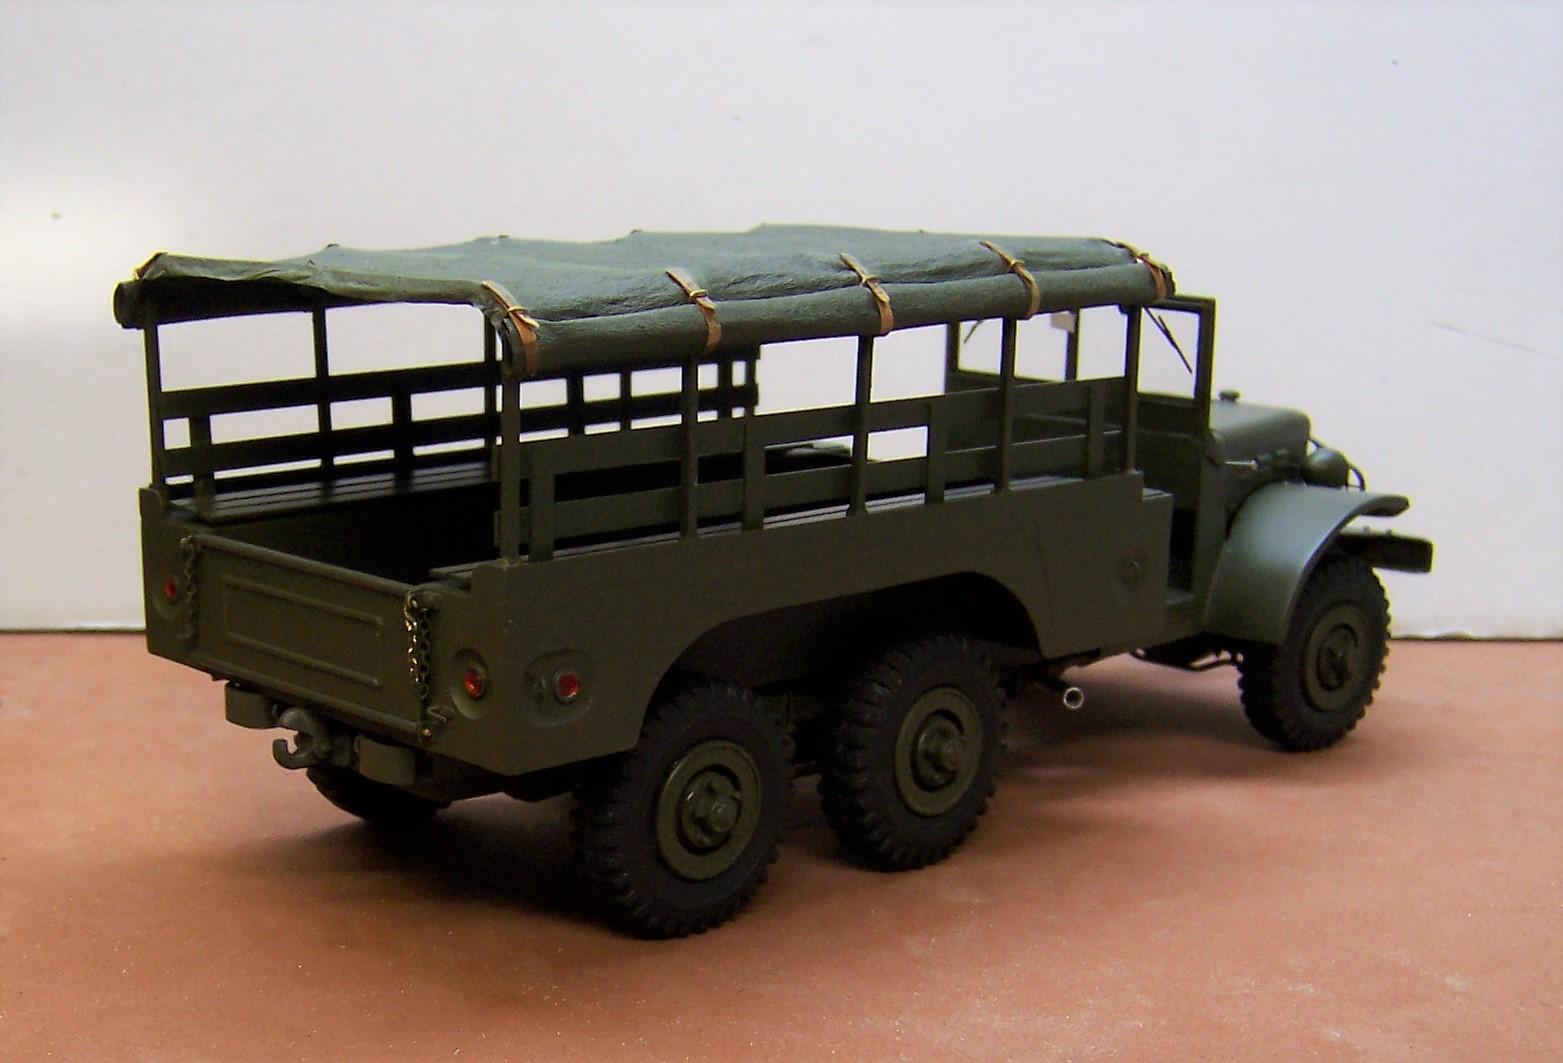
Here's what it looks like with the sides rolled up. Two more canvases to make!
-
HAH! This is going to be towing a fire pump trailer. Don't think bombs and fire scenes would go good together!?
-
The water/glue mix dried quite quickly so I gave the canvas a rough trim and painted the inside and outside with the same OD as the truck. I'll roll up the sides to show the seats better before it's done.
-
Started work on the canvas top today. I'm using 3 ply facial tissue with one of the ply's removed. It was then painted with a mixture of warm water and white glue. I'll let this set until it is dry and then give it one more coat. Then I can trim the tissue and paint it inside and outside.
-
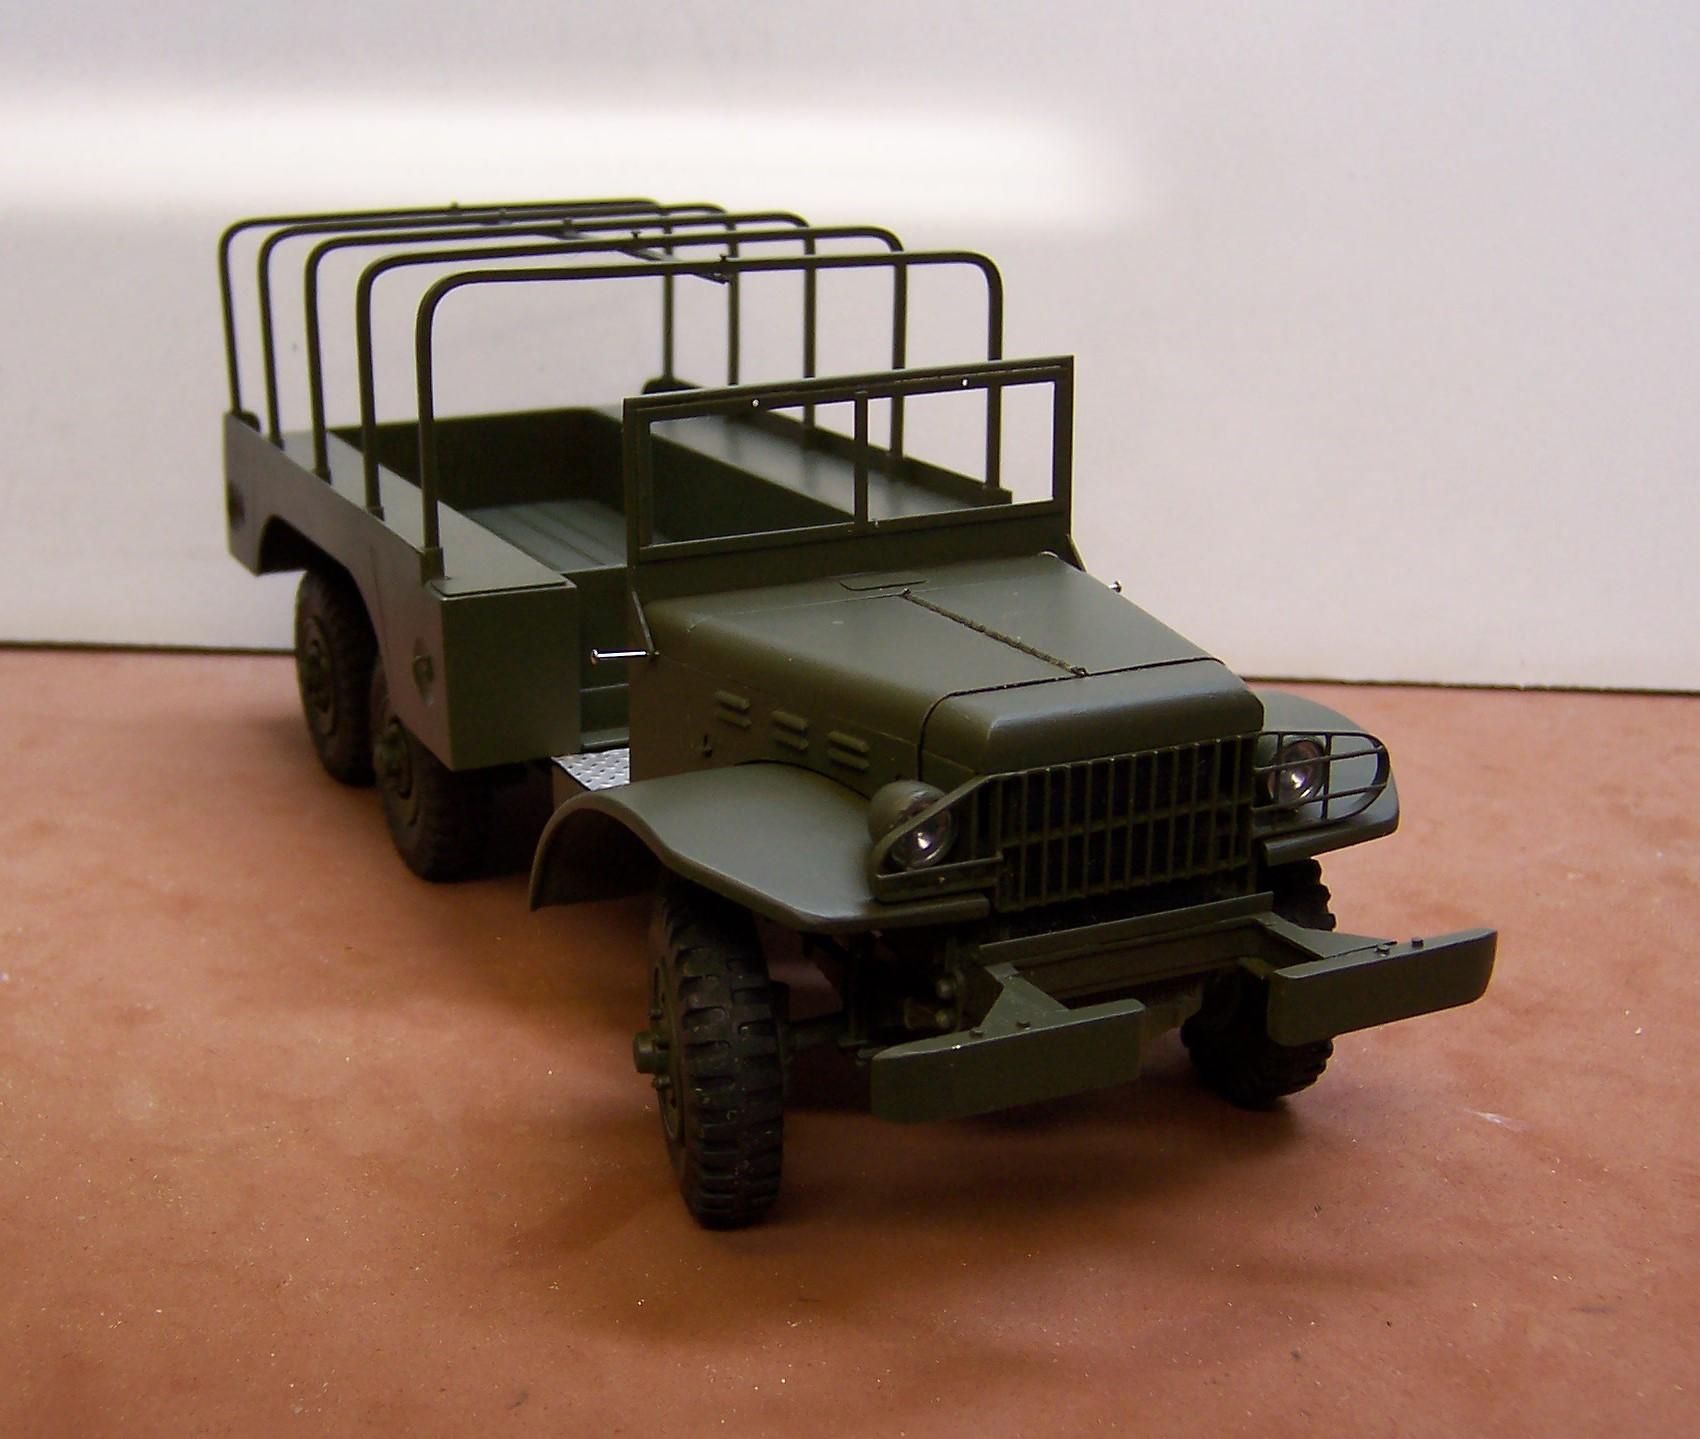
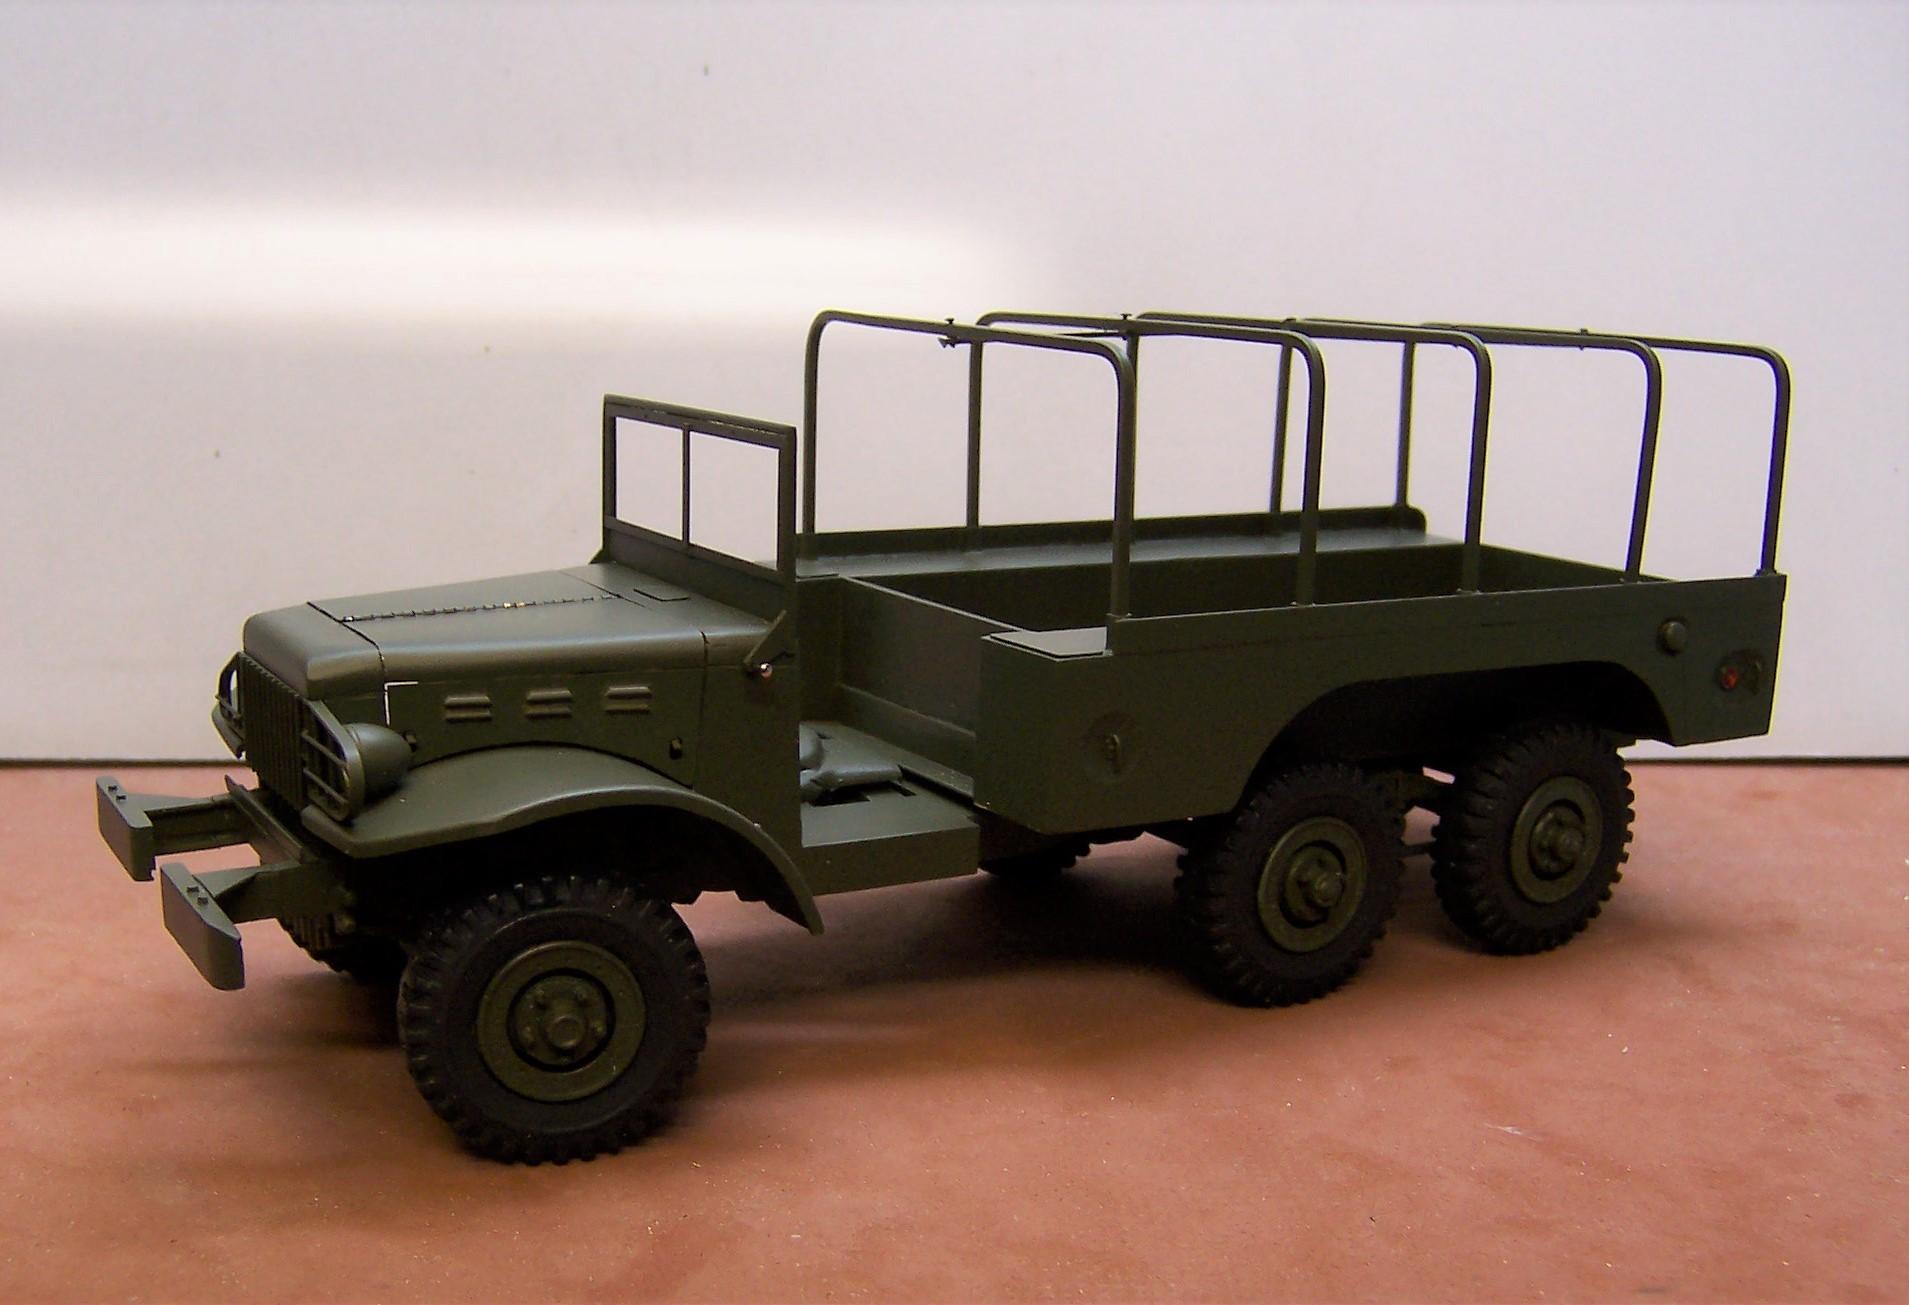
The rig is out of the paint shop for the most part. Still some things to get done but they are small. Plenty of detailing left to do.
-
AMT Diamond Rio
Chariots of Fire replied to OldTrucker's topic in WIP: Model Trucks: Big Rigs and Heavy Equipment
Gorgeous job on that hood! Looking forward to seeing the finished work! -
Use CA for just about everything. When I need some adjustment wiggle room I switch to epoxy or white glue. Most small parts I now pin on. No more depending on just the glue joint. Have not dropped the Xacto knife on me yet but I did forget to turn the dremel off with a cutting wheel in it when I dropped a part. Tore up my pants leg and it took 5 stitches to close up the cut (gouge) in my thigh. Very few kit builds now. Mostly scratch built or heavy conversions.
-
Looks like you are doing just fine! Welcome!
-
Back...with a new attitude
Chariots of Fire replied to customline's topic in Welcome! Introduce Yourself
Hope this forum reduces the stress and gives you some inspiration! Welcome back! -
At Walmart (at least one store)
Chariots of Fire replied to Classicgas's topic in General Automotive Talk (Trucks and Cars)
Notice where the price is for the Ford Snow Plow Kit? It's not 24.97. It's 29.95. Price tag is hidden on the bottom of the shelf. I bought one the other day. -
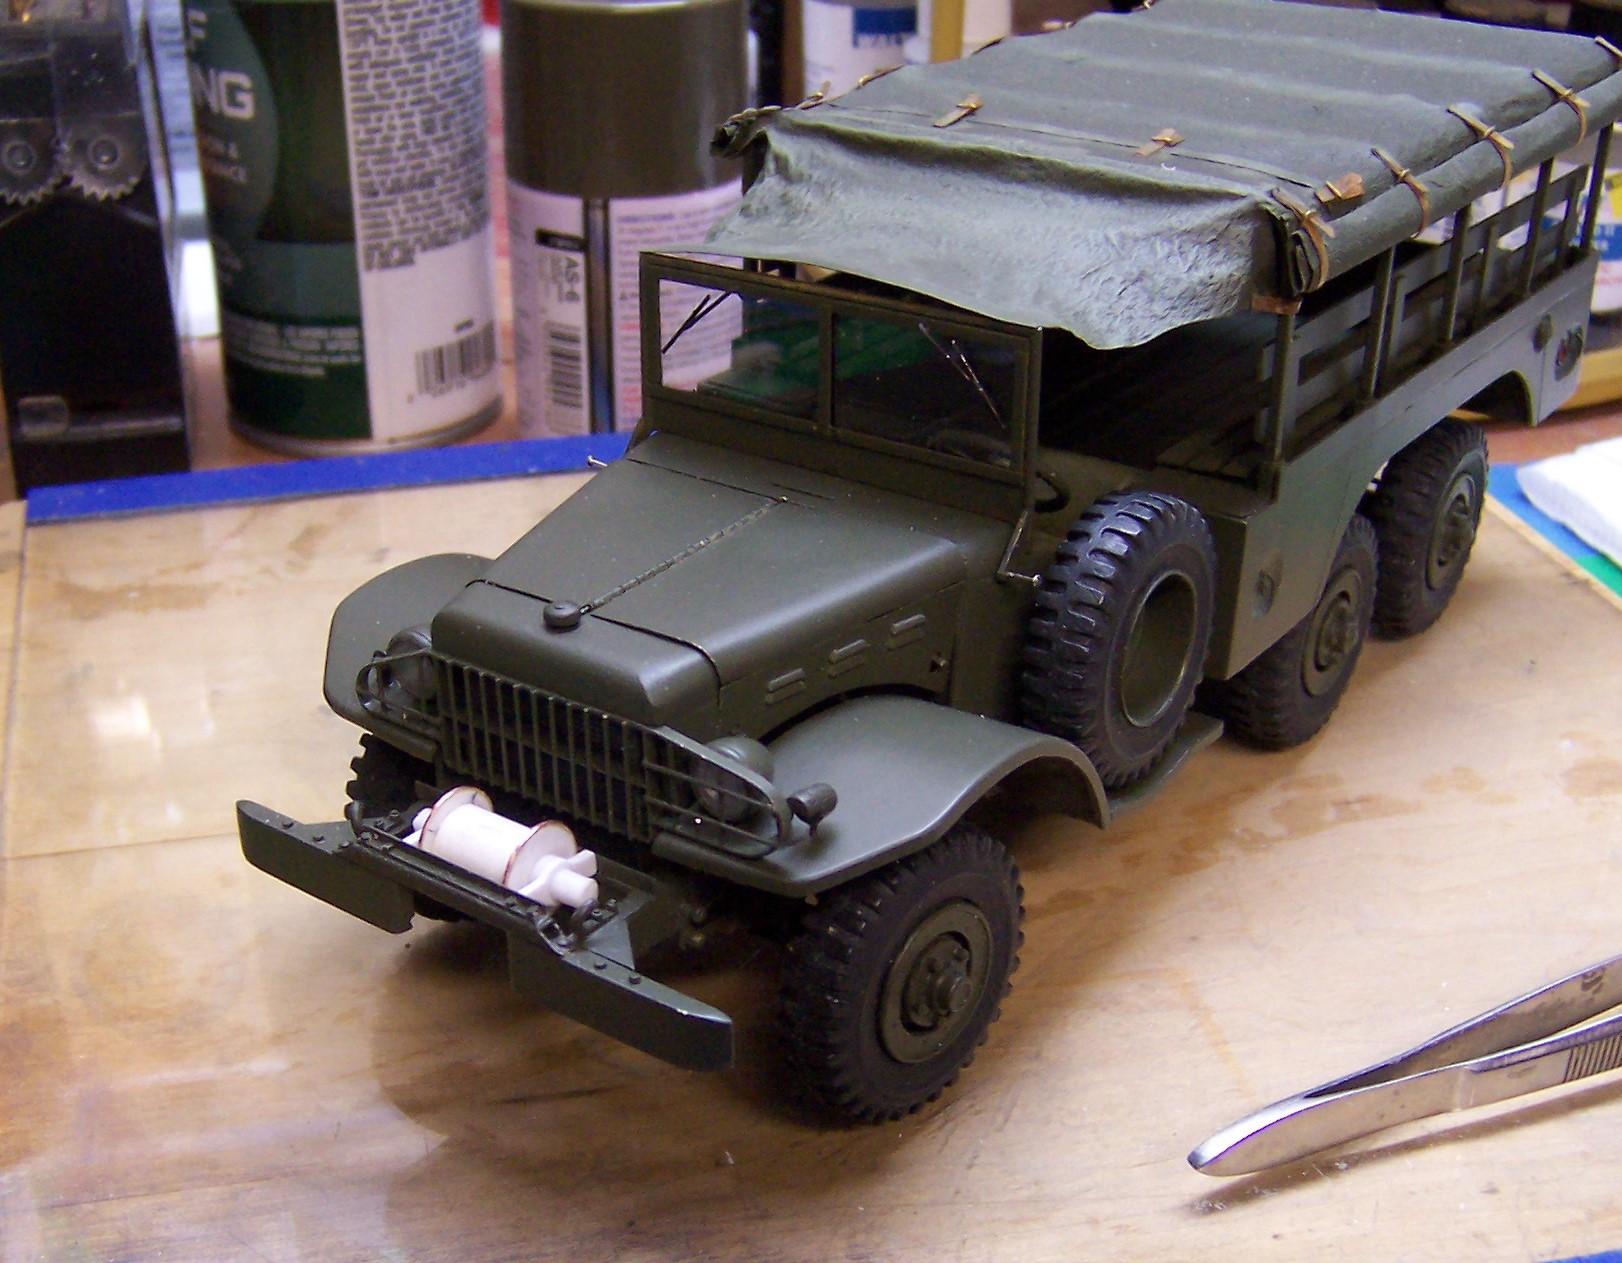
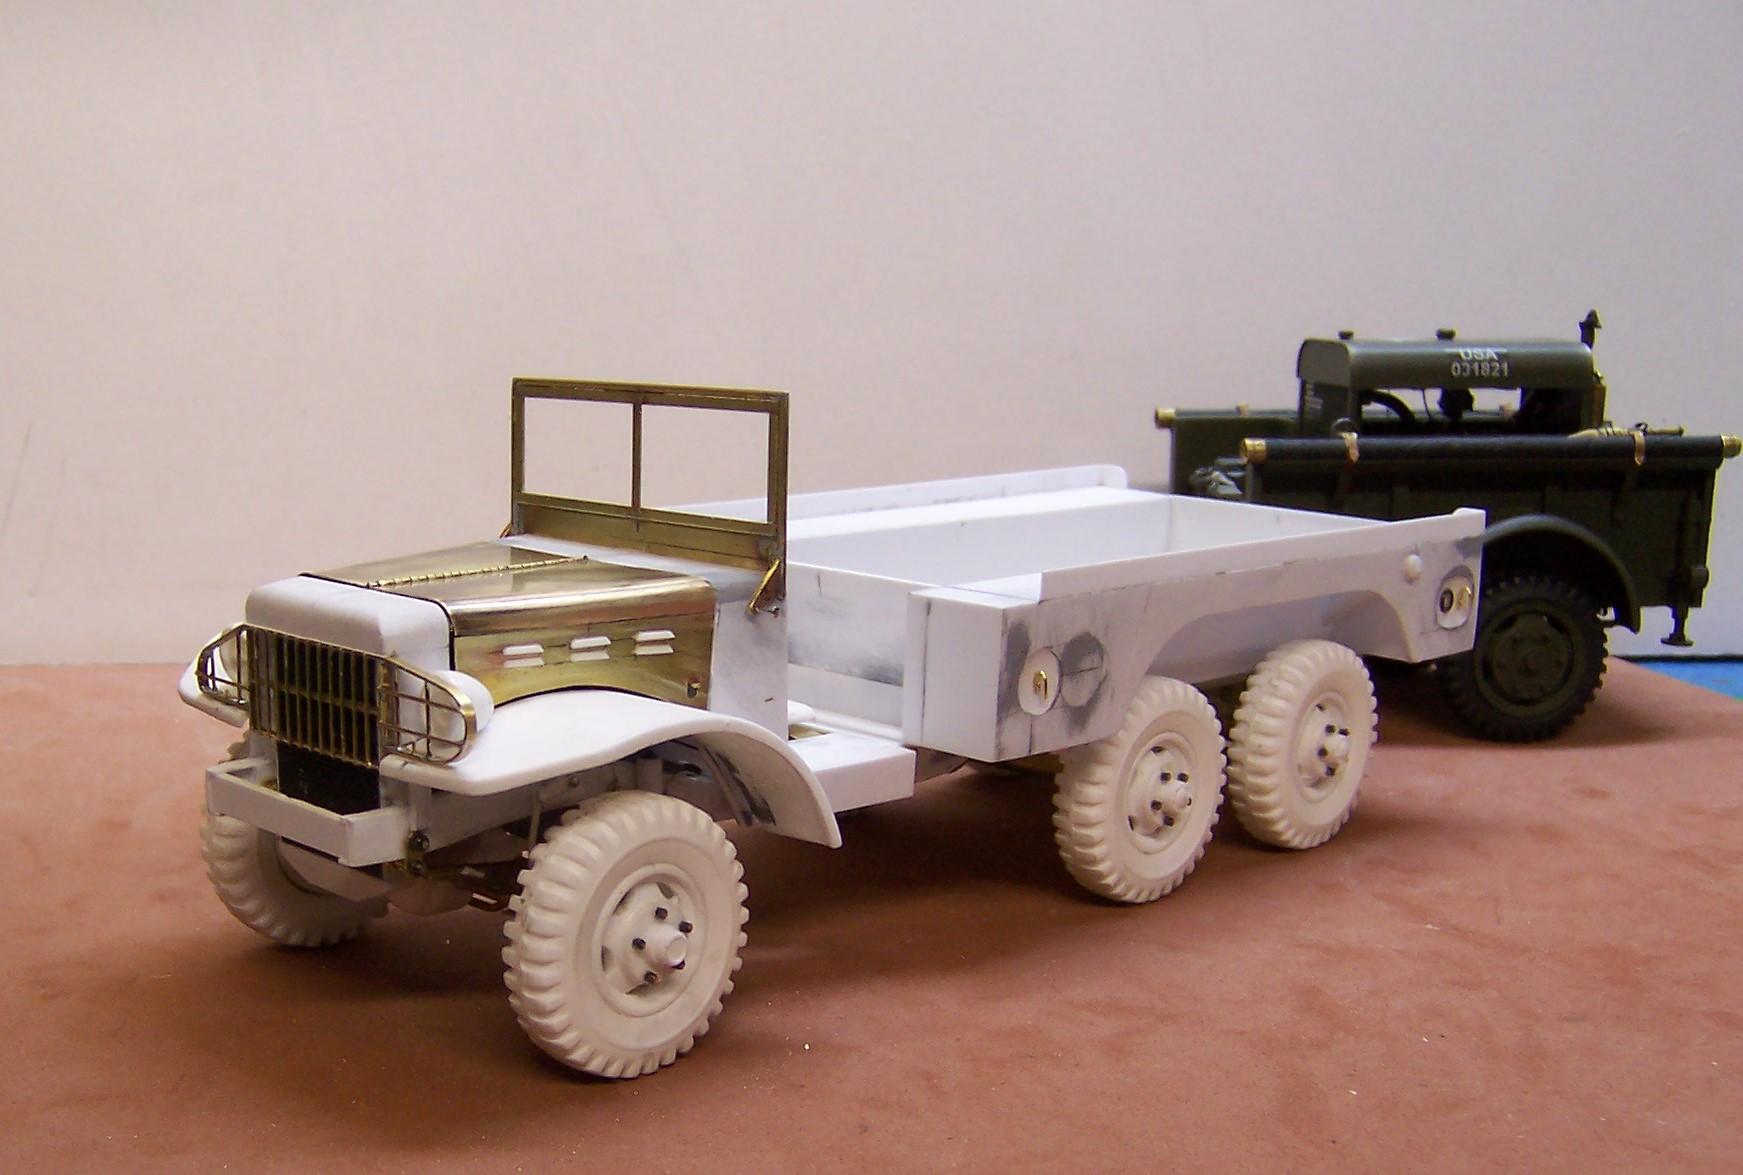
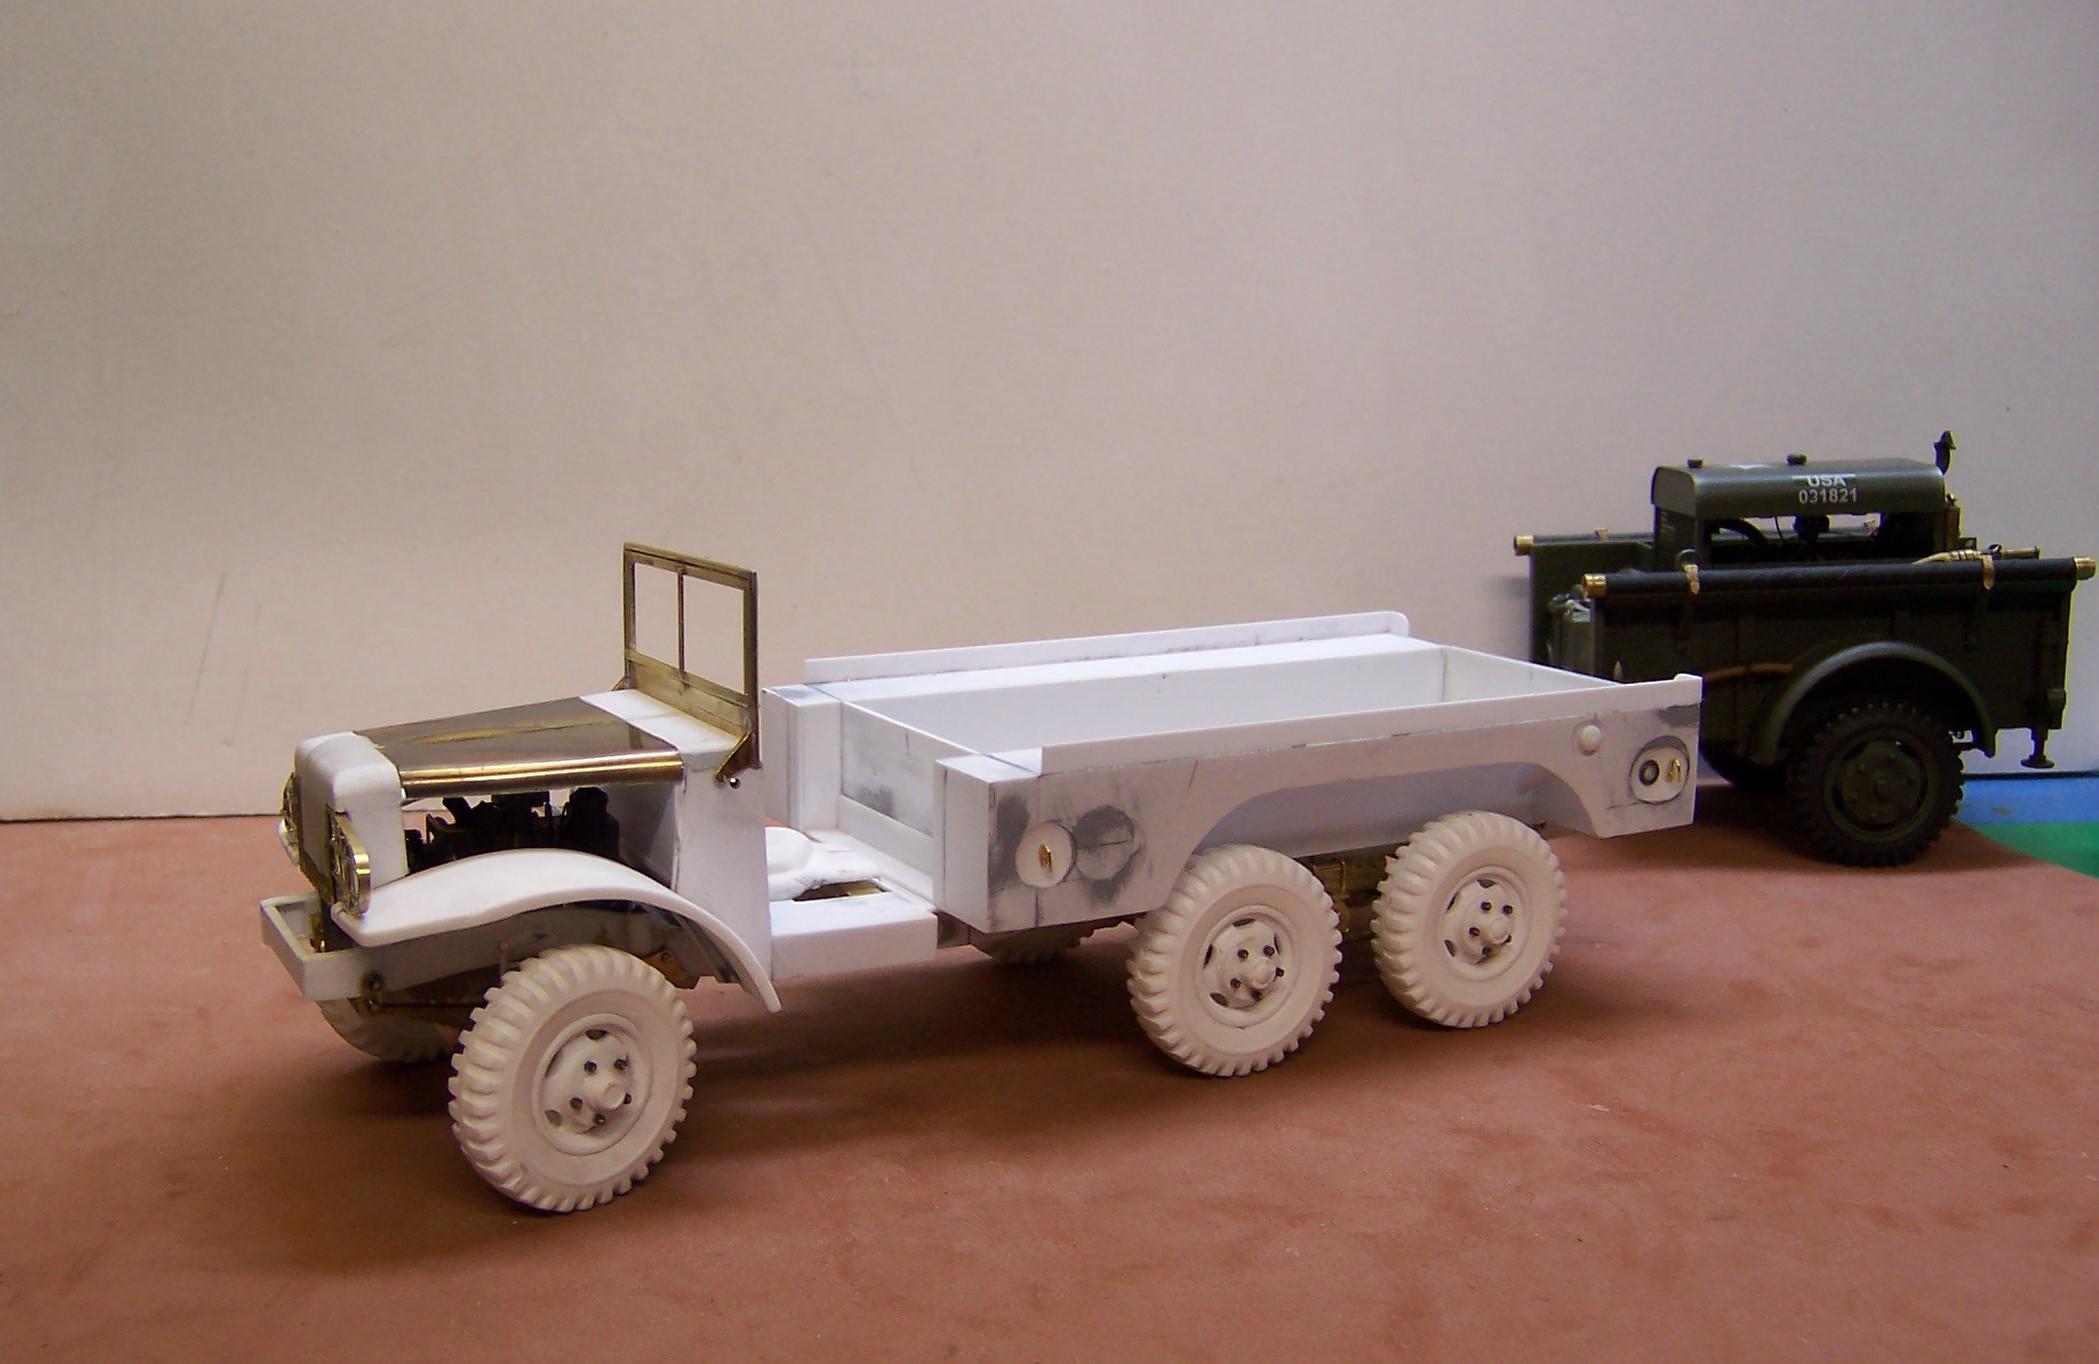
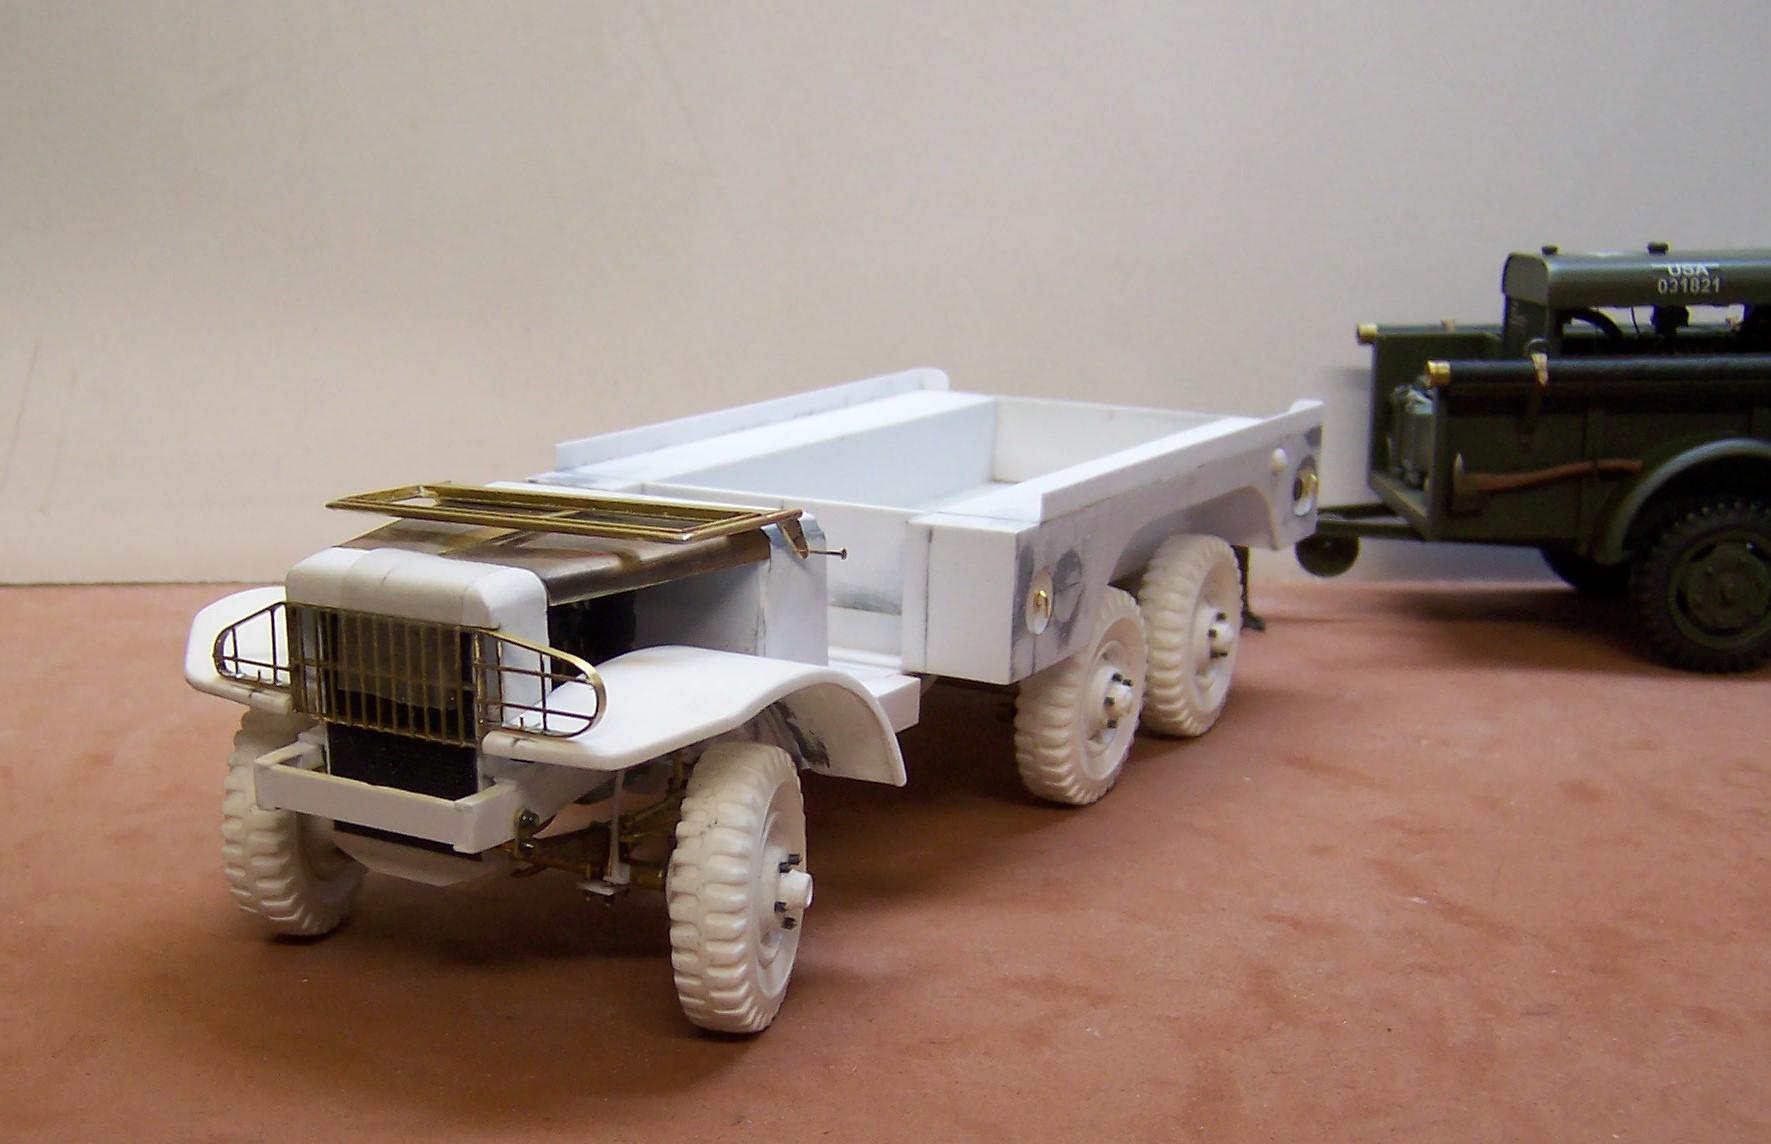
Here are a couple of pix showing the completed hood pieces. The "louvers" on the side are 0.030 quarter round Evergreen. The small latches in the corners are just pieces of 1/64x1/32 strip stock bent and then soldered in place on the back side. Had a chance to position the headlights. I think next up is to do the front bumper and winch.
-
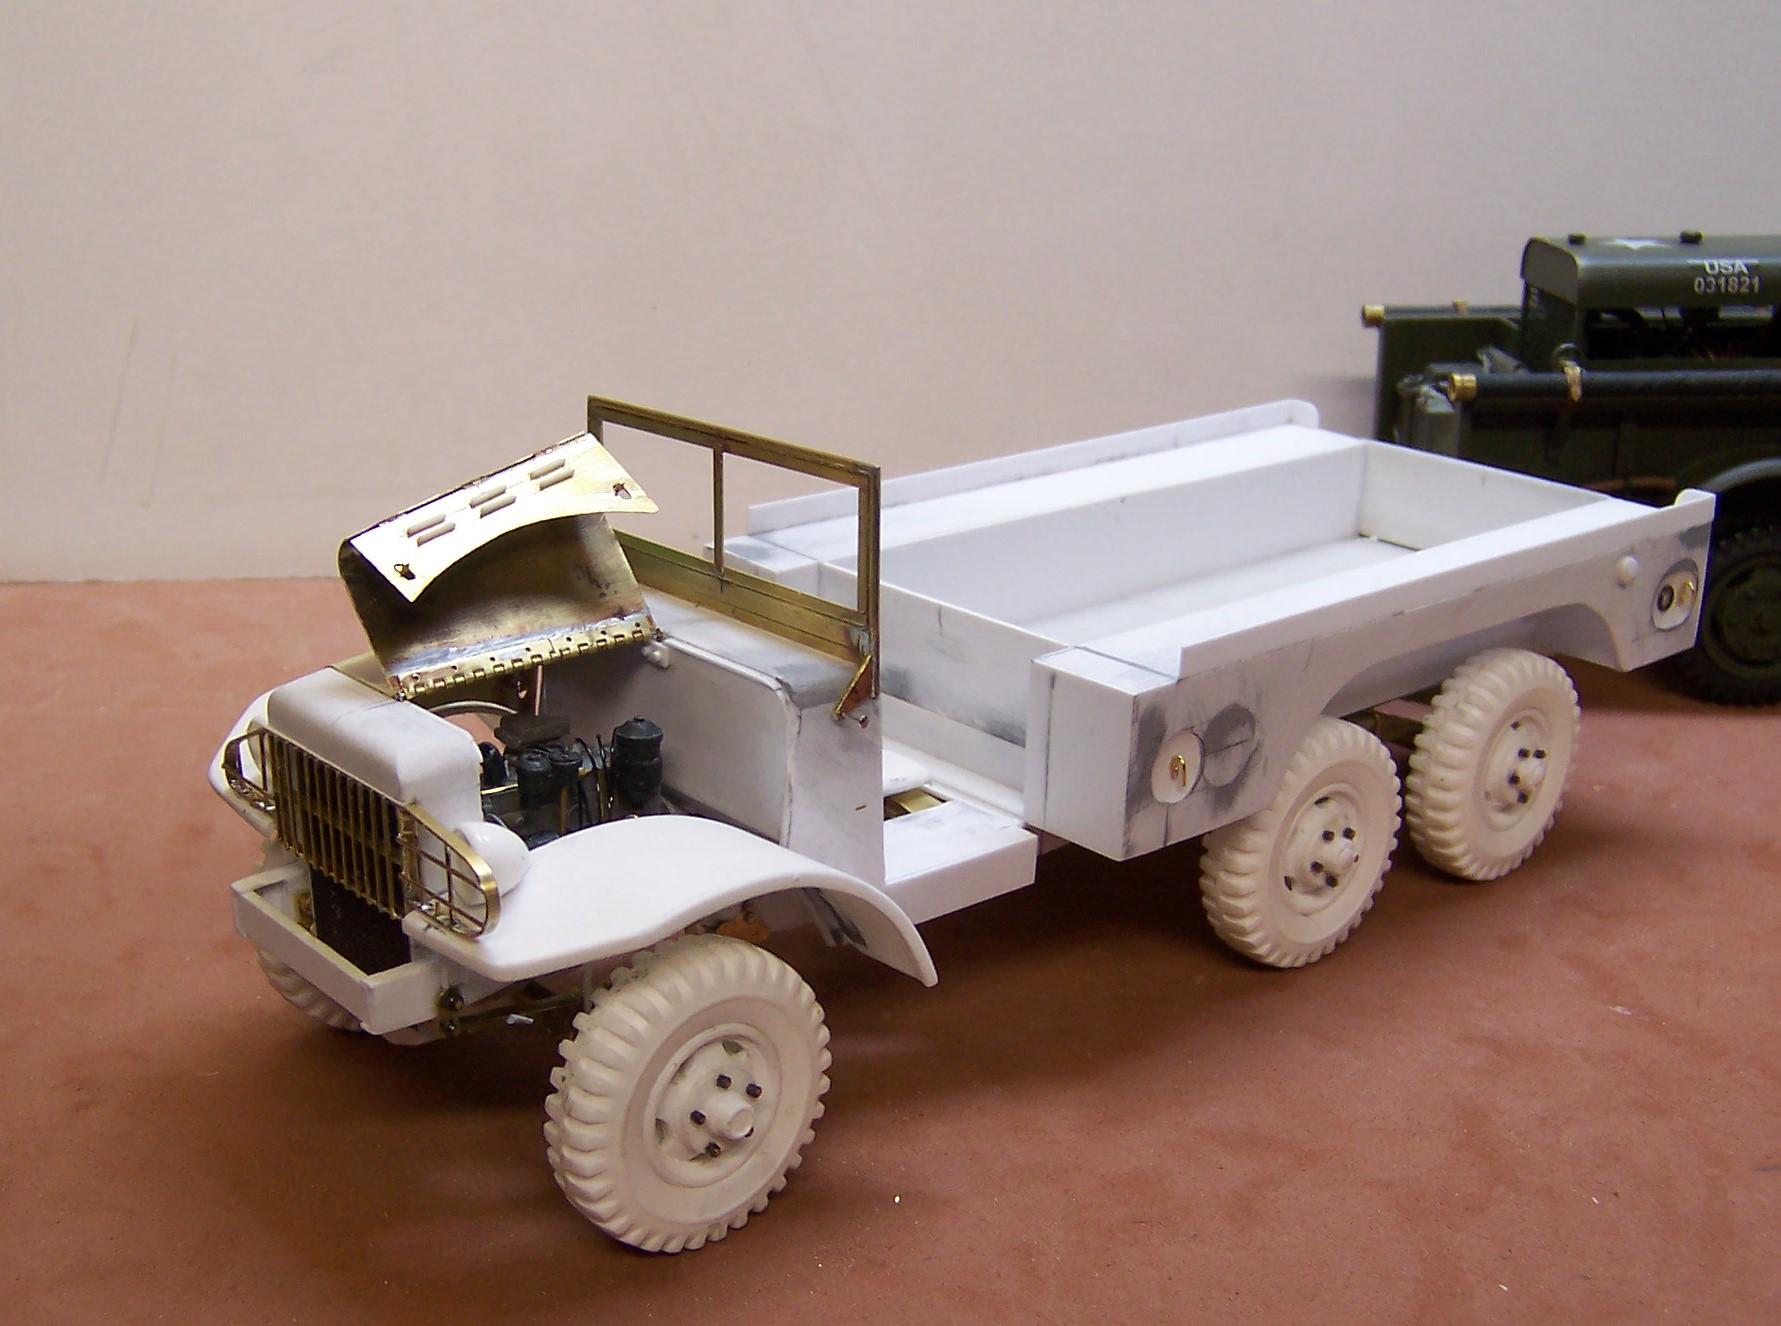
Glass will fit into the back side of the windshield frame. The 1/16 angle forms a perfect area for it to fit in. A way to go before paint though. I was able to scrounge just enough of two small piano hinge leftovers to make up one for the hood top. Got those soldered in place. Hood sides will be done with single small "H" hinges.
-
Update on progress. The indents in the body were re-cut and then backfilled and given a coat of resin. Tie downs were then added and the rear ones were prepped for reflectors. After repositioning the radiator and front fenders some the top pieces of the hood were shaped from thin brass sheet. The windshield is also brass tubing, 1/16 brass angle and some 4mm strip stock. When my shipment of small hinges comes in the hood side pieces will be made up and attached.