Chariots of Fire
-
Posts
2,782 -
Joined
-
Last visited
Content Type
Profiles
Forums
Events
Gallery
Everything posted by Chariots of Fire
-

GRUCCIE CHROME PEN
Chariots of Fire replied to ROY FERGUSON's topic in Model Building Questions and Answers
Wow! That photoshop is bad!!? -
What do the pros use to print decals?
Chariots of Fire replied to jchrisf's topic in Model Building Questions and Answers
Been using the ALPS for a long while now. The cartridges are getting more scarce all the time. I know of no other reasonably priced system that will print white or the metallics like gold and silver. I just ran out of the black cartridge and did not realize I had no more as a backup! Talk about panic! I did find a supplier and I have some new black cartridges coming in soon (I hope)! -
resin casting and molds
Chariots of Fire replied to Paul Payne's topic in Model Building Questions and Answers
Casting resin parts has become a big part of my scratch building. Not only do I get the part I need but several copies can be made if necessary. I like the RTV mold rubber sold by Micro-Mark. It's a bit expensive but when you consider how many molds can be made from one set of RTV it's not bad. It is mixed 50/50 until the blue Part A is thoroughly blended with the white Part B. The RTV has a long enough setup time to do the pours over the master and takes 3-4 hours to cure. The casting resin is clear for both Parts A and B and is either quick set or long set. The quick set cures to a dense white in about a half hour or less. It does not have much working time. It's important to get the 50/50 mixture of resin close to accurate. Otherwise the parts tend to remain soft and rubbery. One part molds are easy to do. Two part molds are a bit more complicated in order to locate the separation line properly or to avoid big undercuts. I'd be happy to show a couple of easy ones if there is interest. -
chain fittings
Chariots of Fire replied to Paul Payne's topic in Model Building Questions and Answers
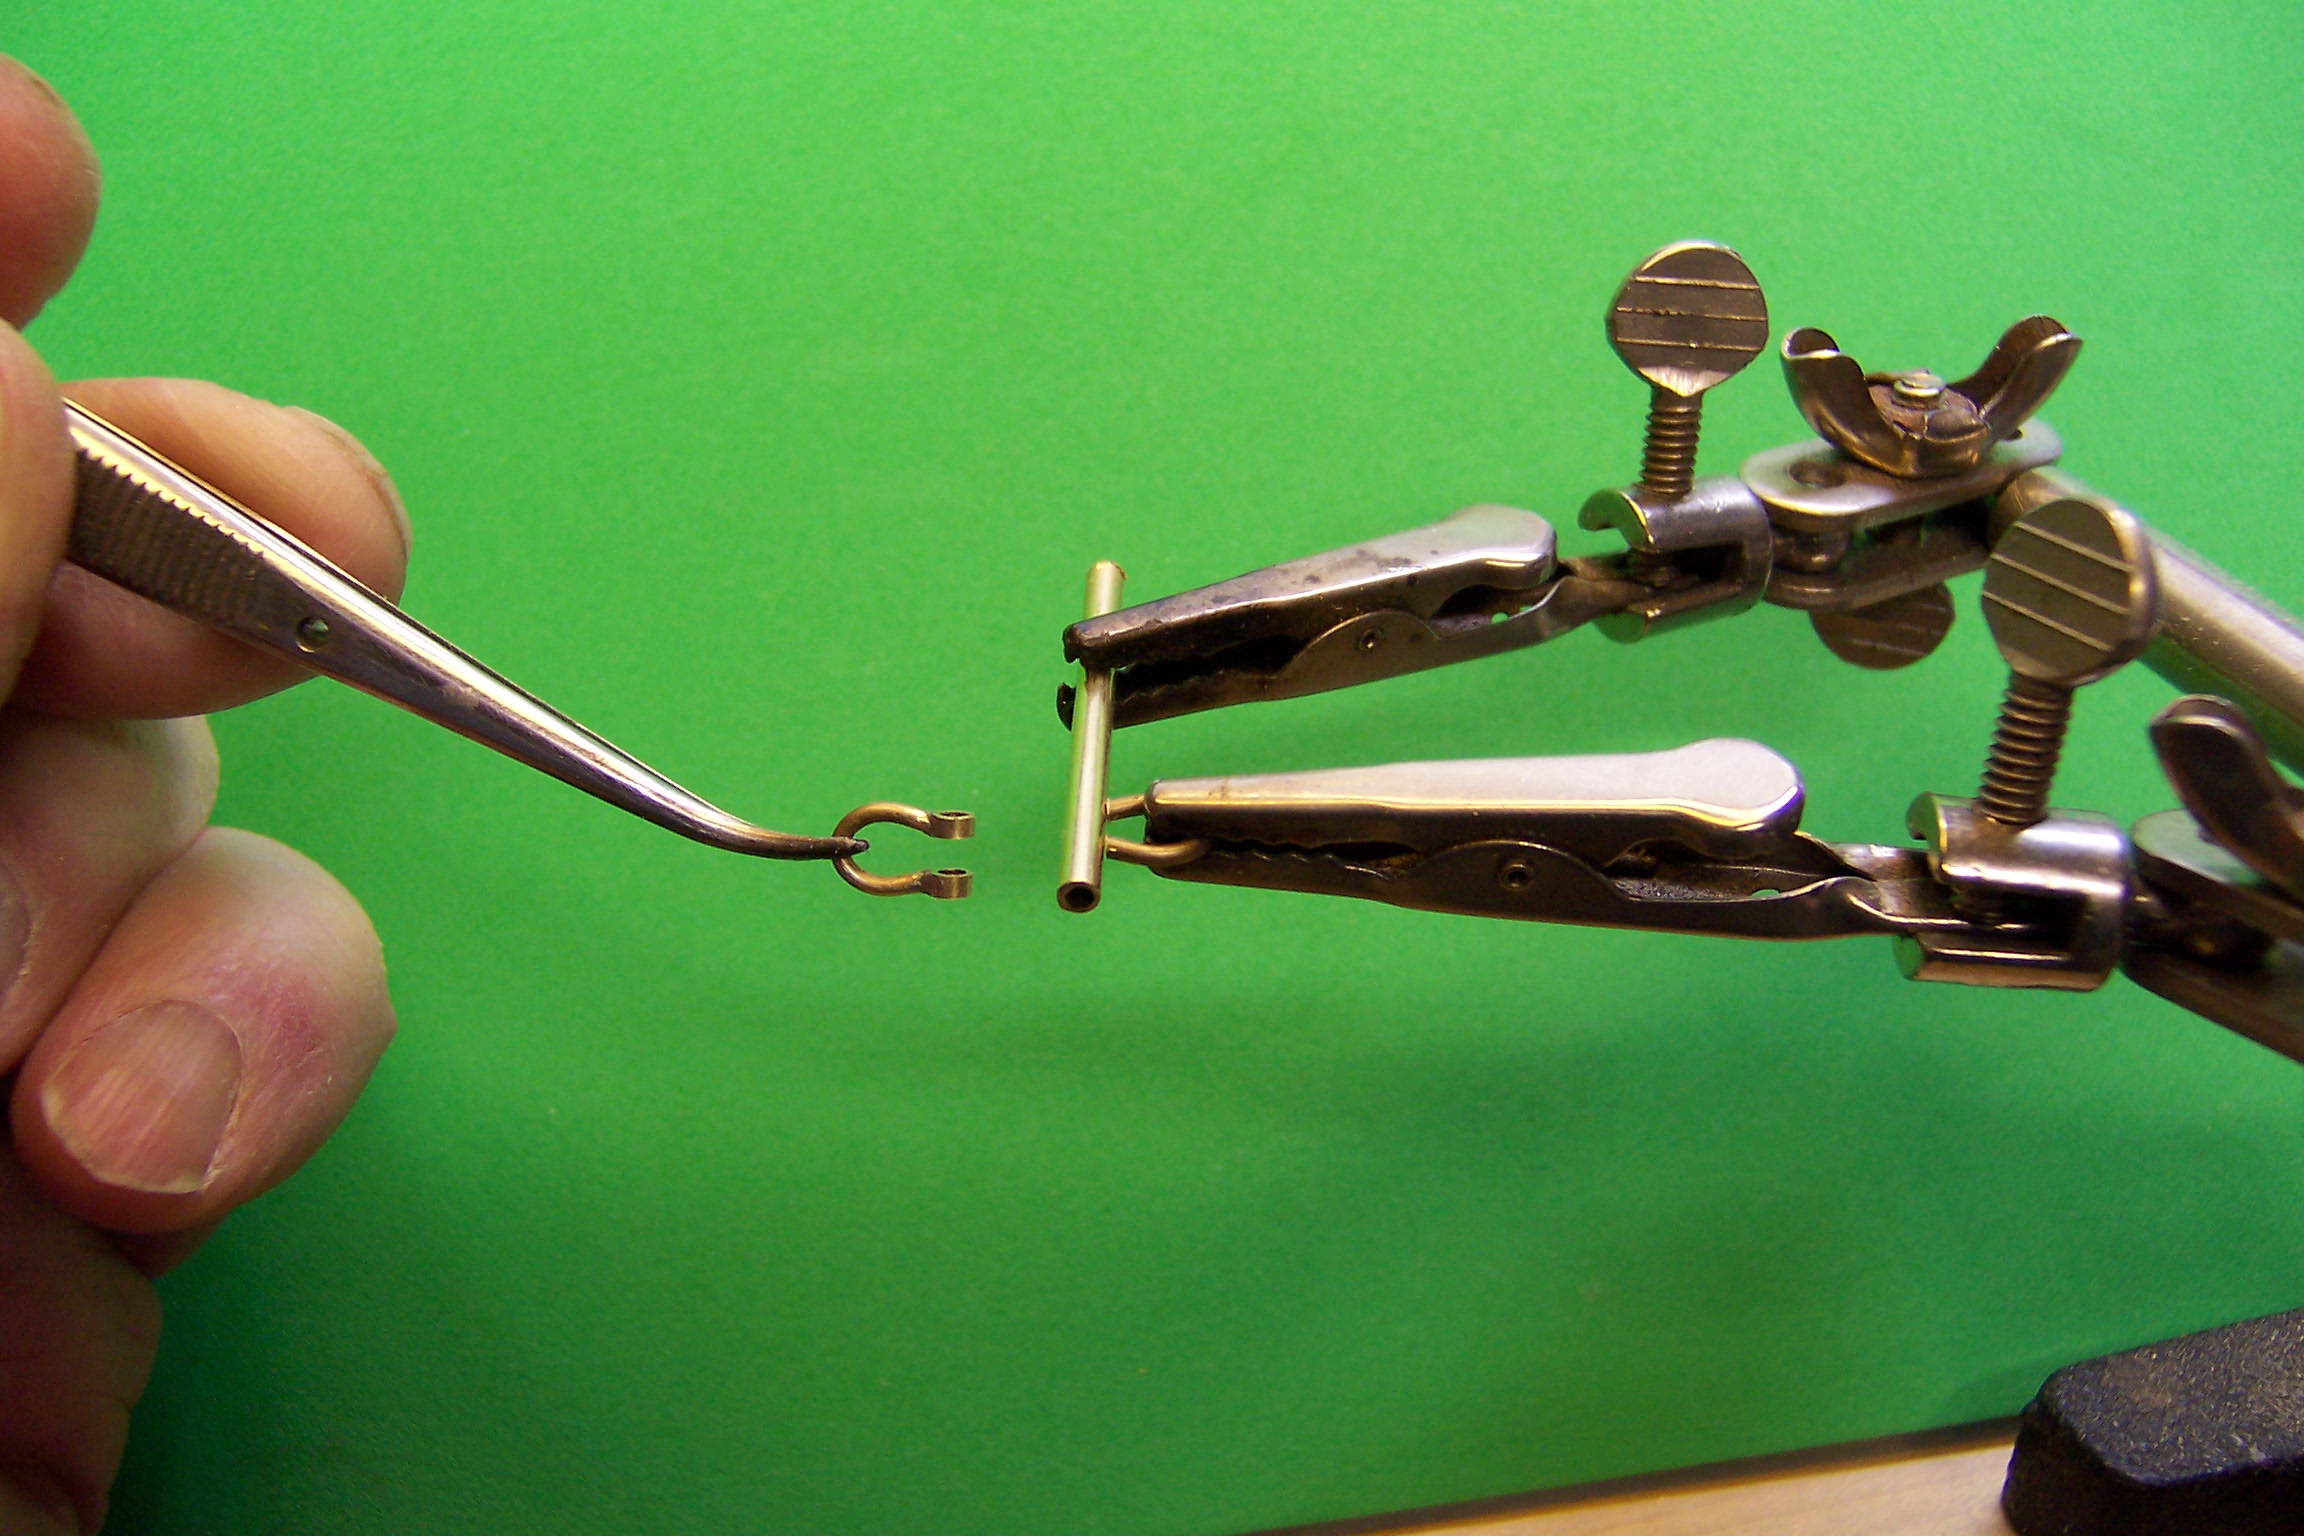
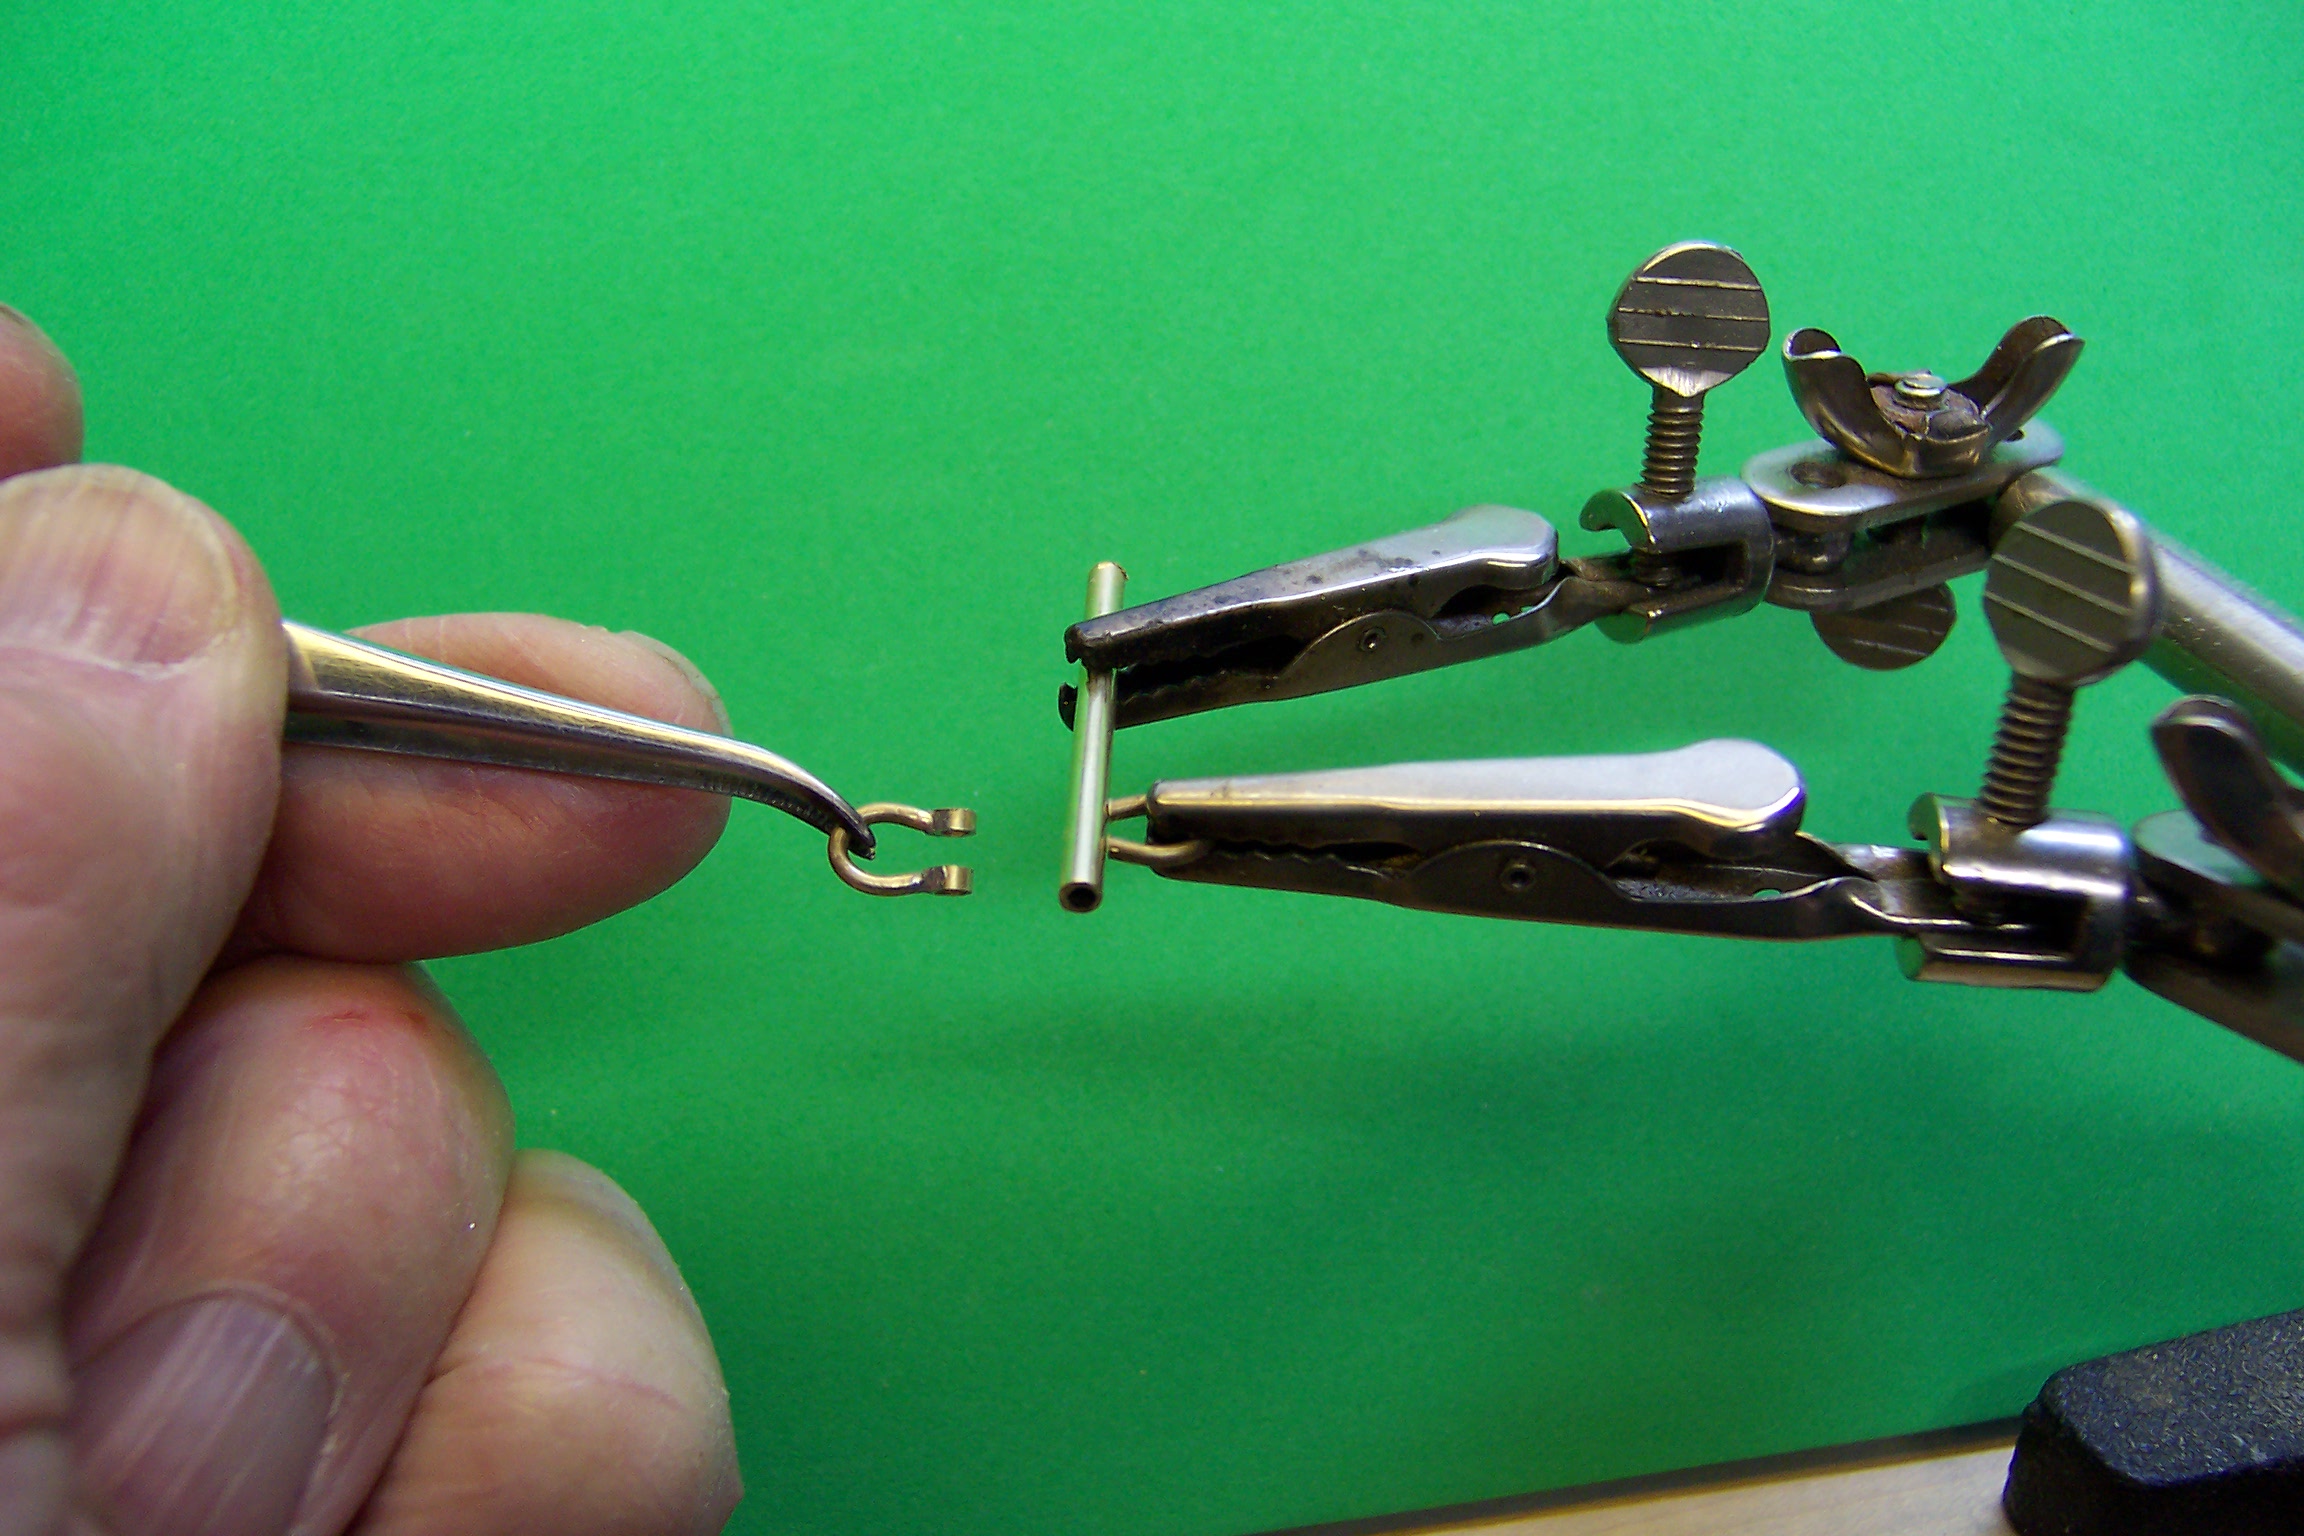
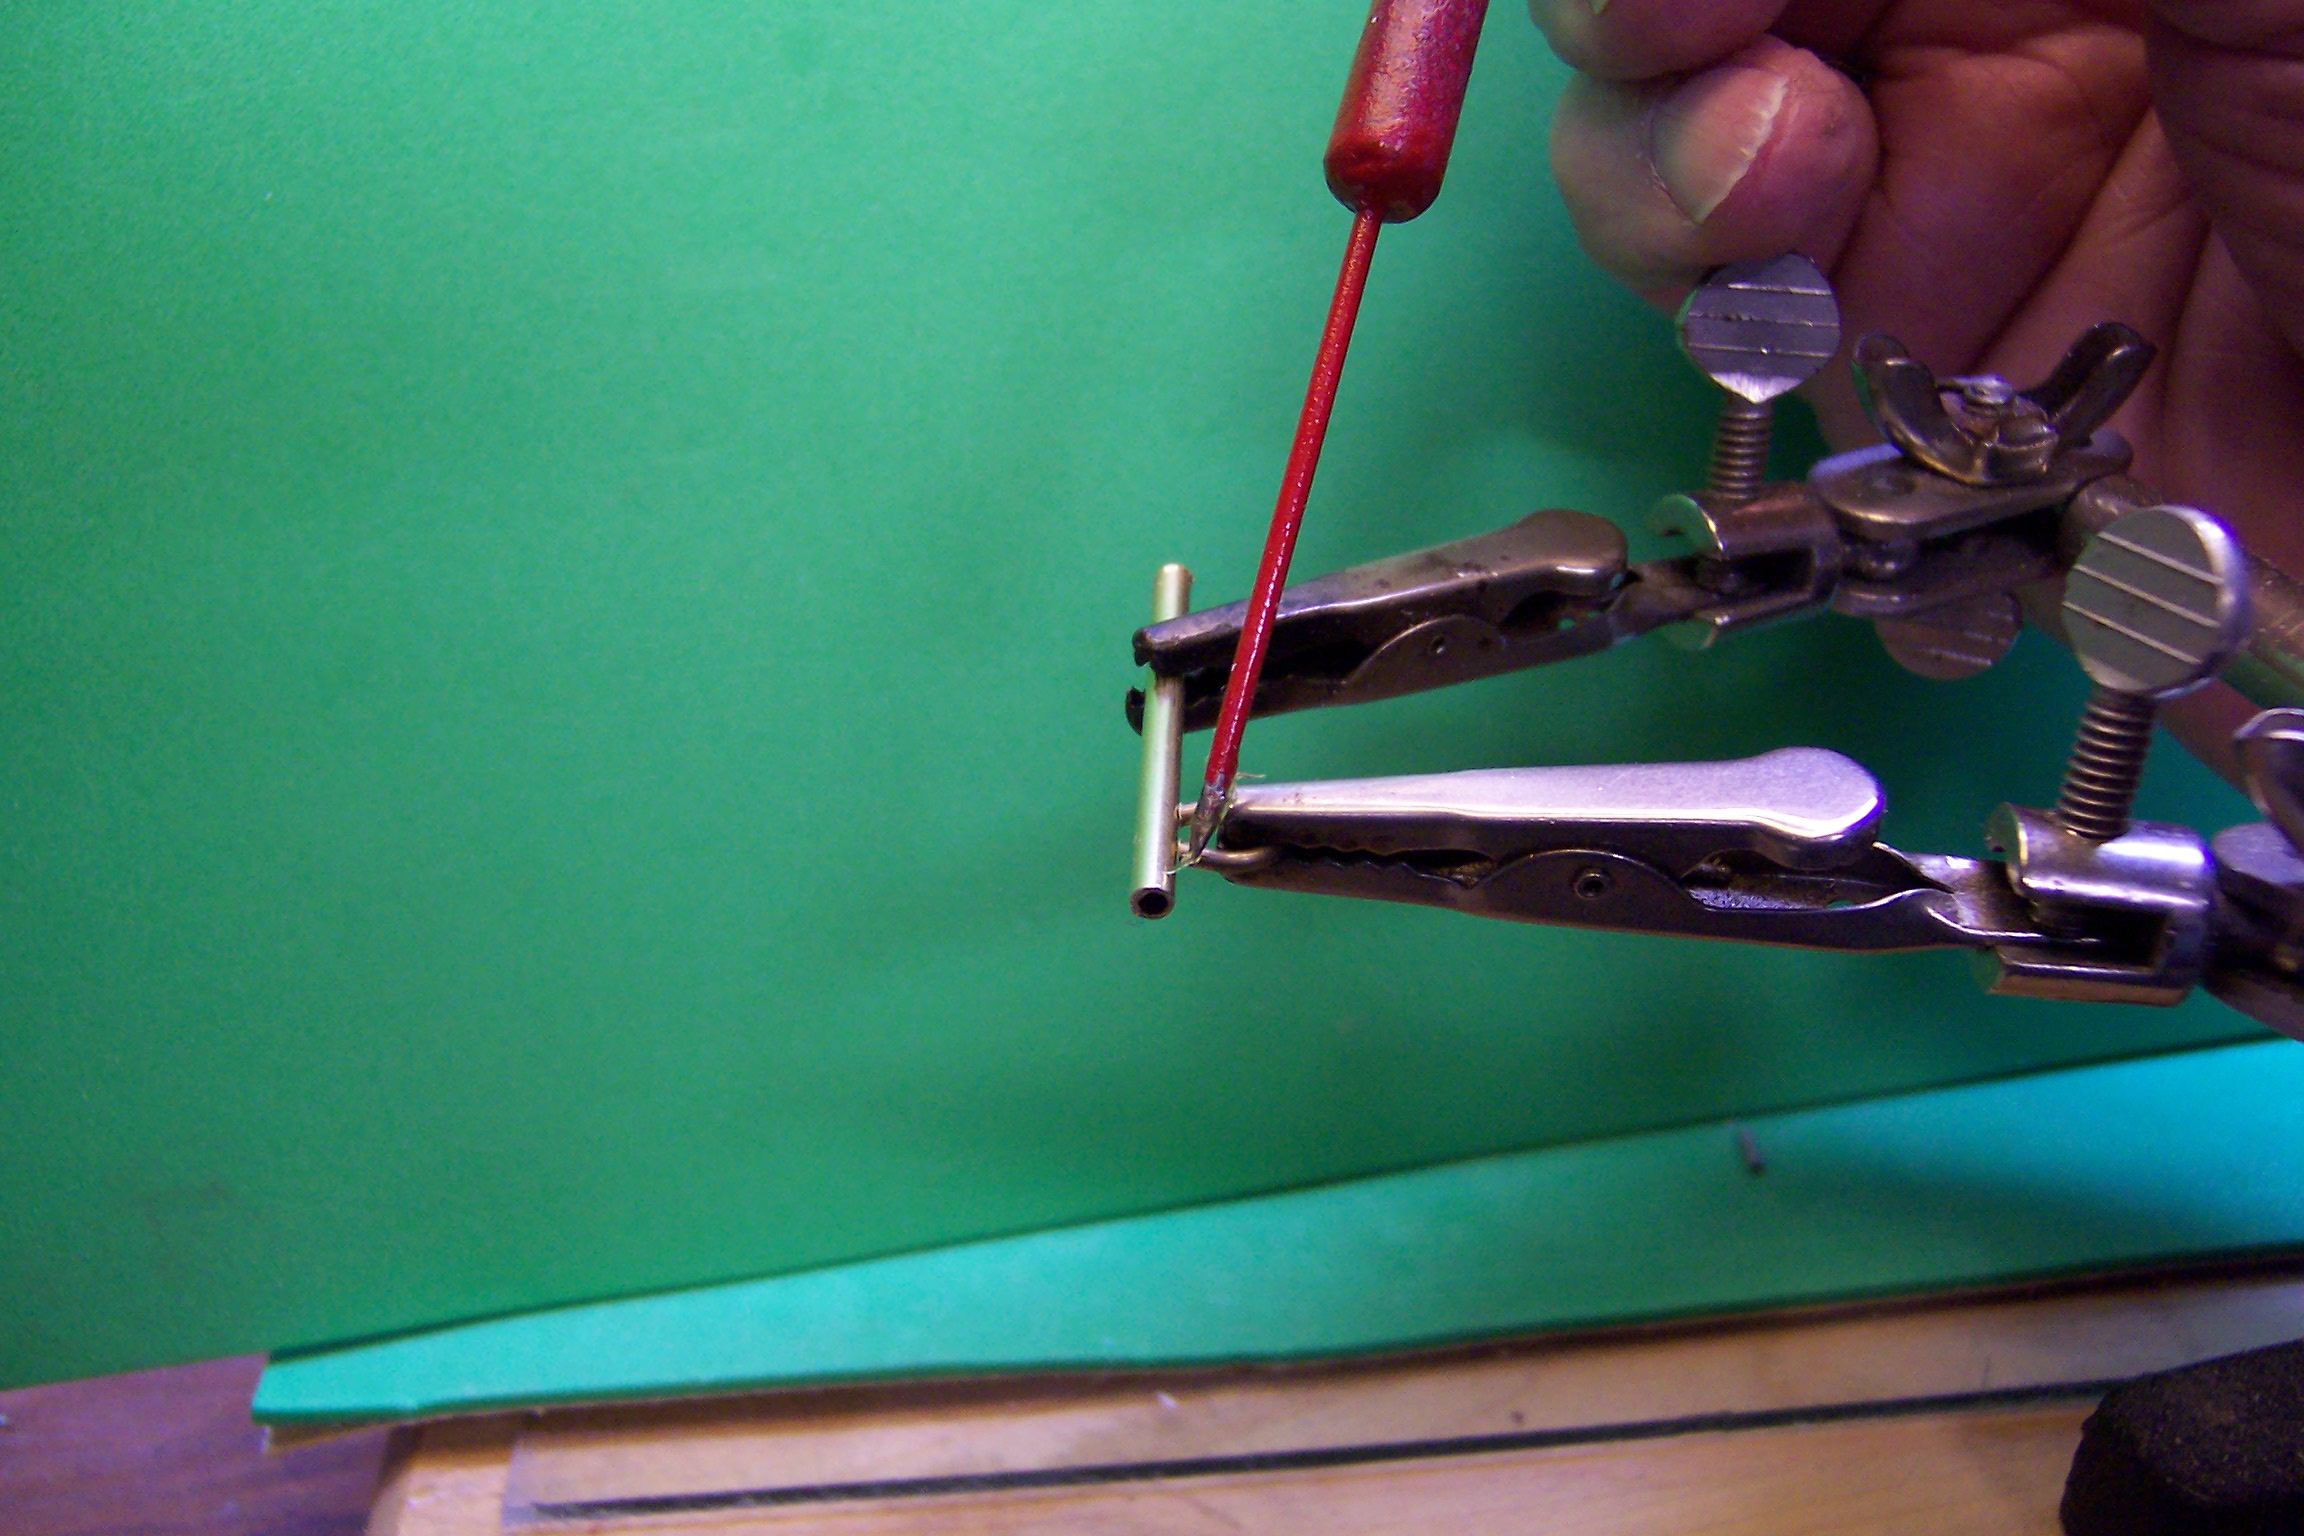
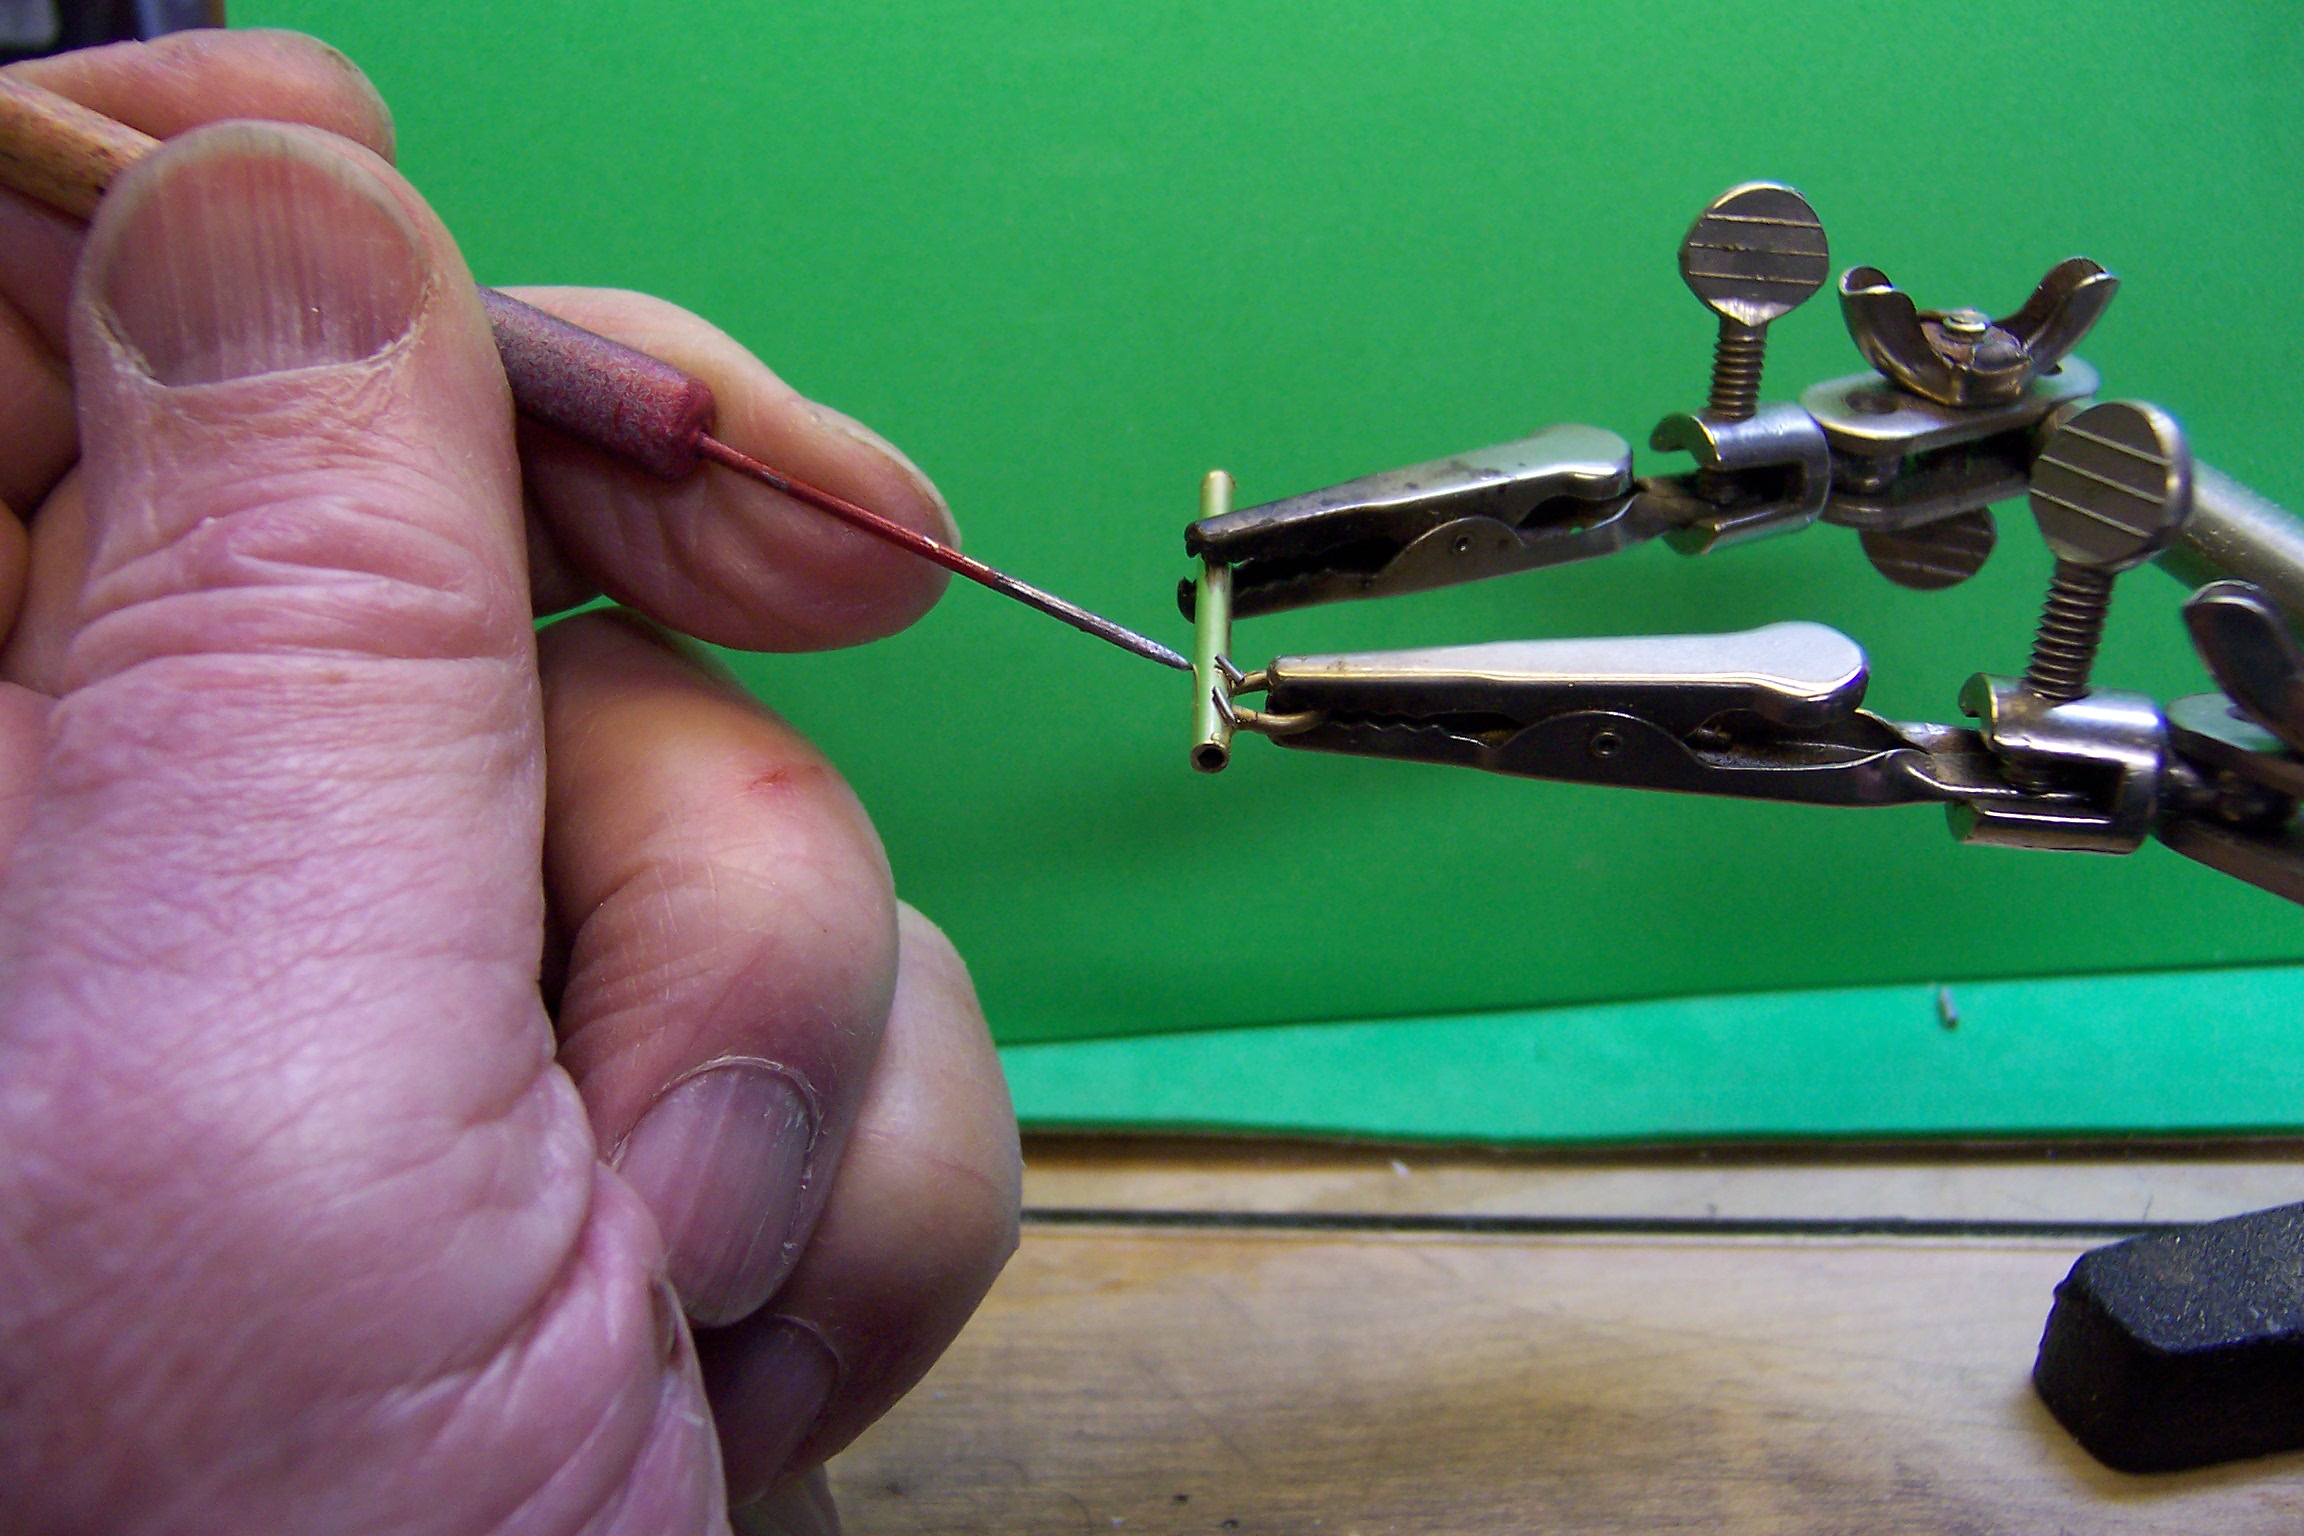
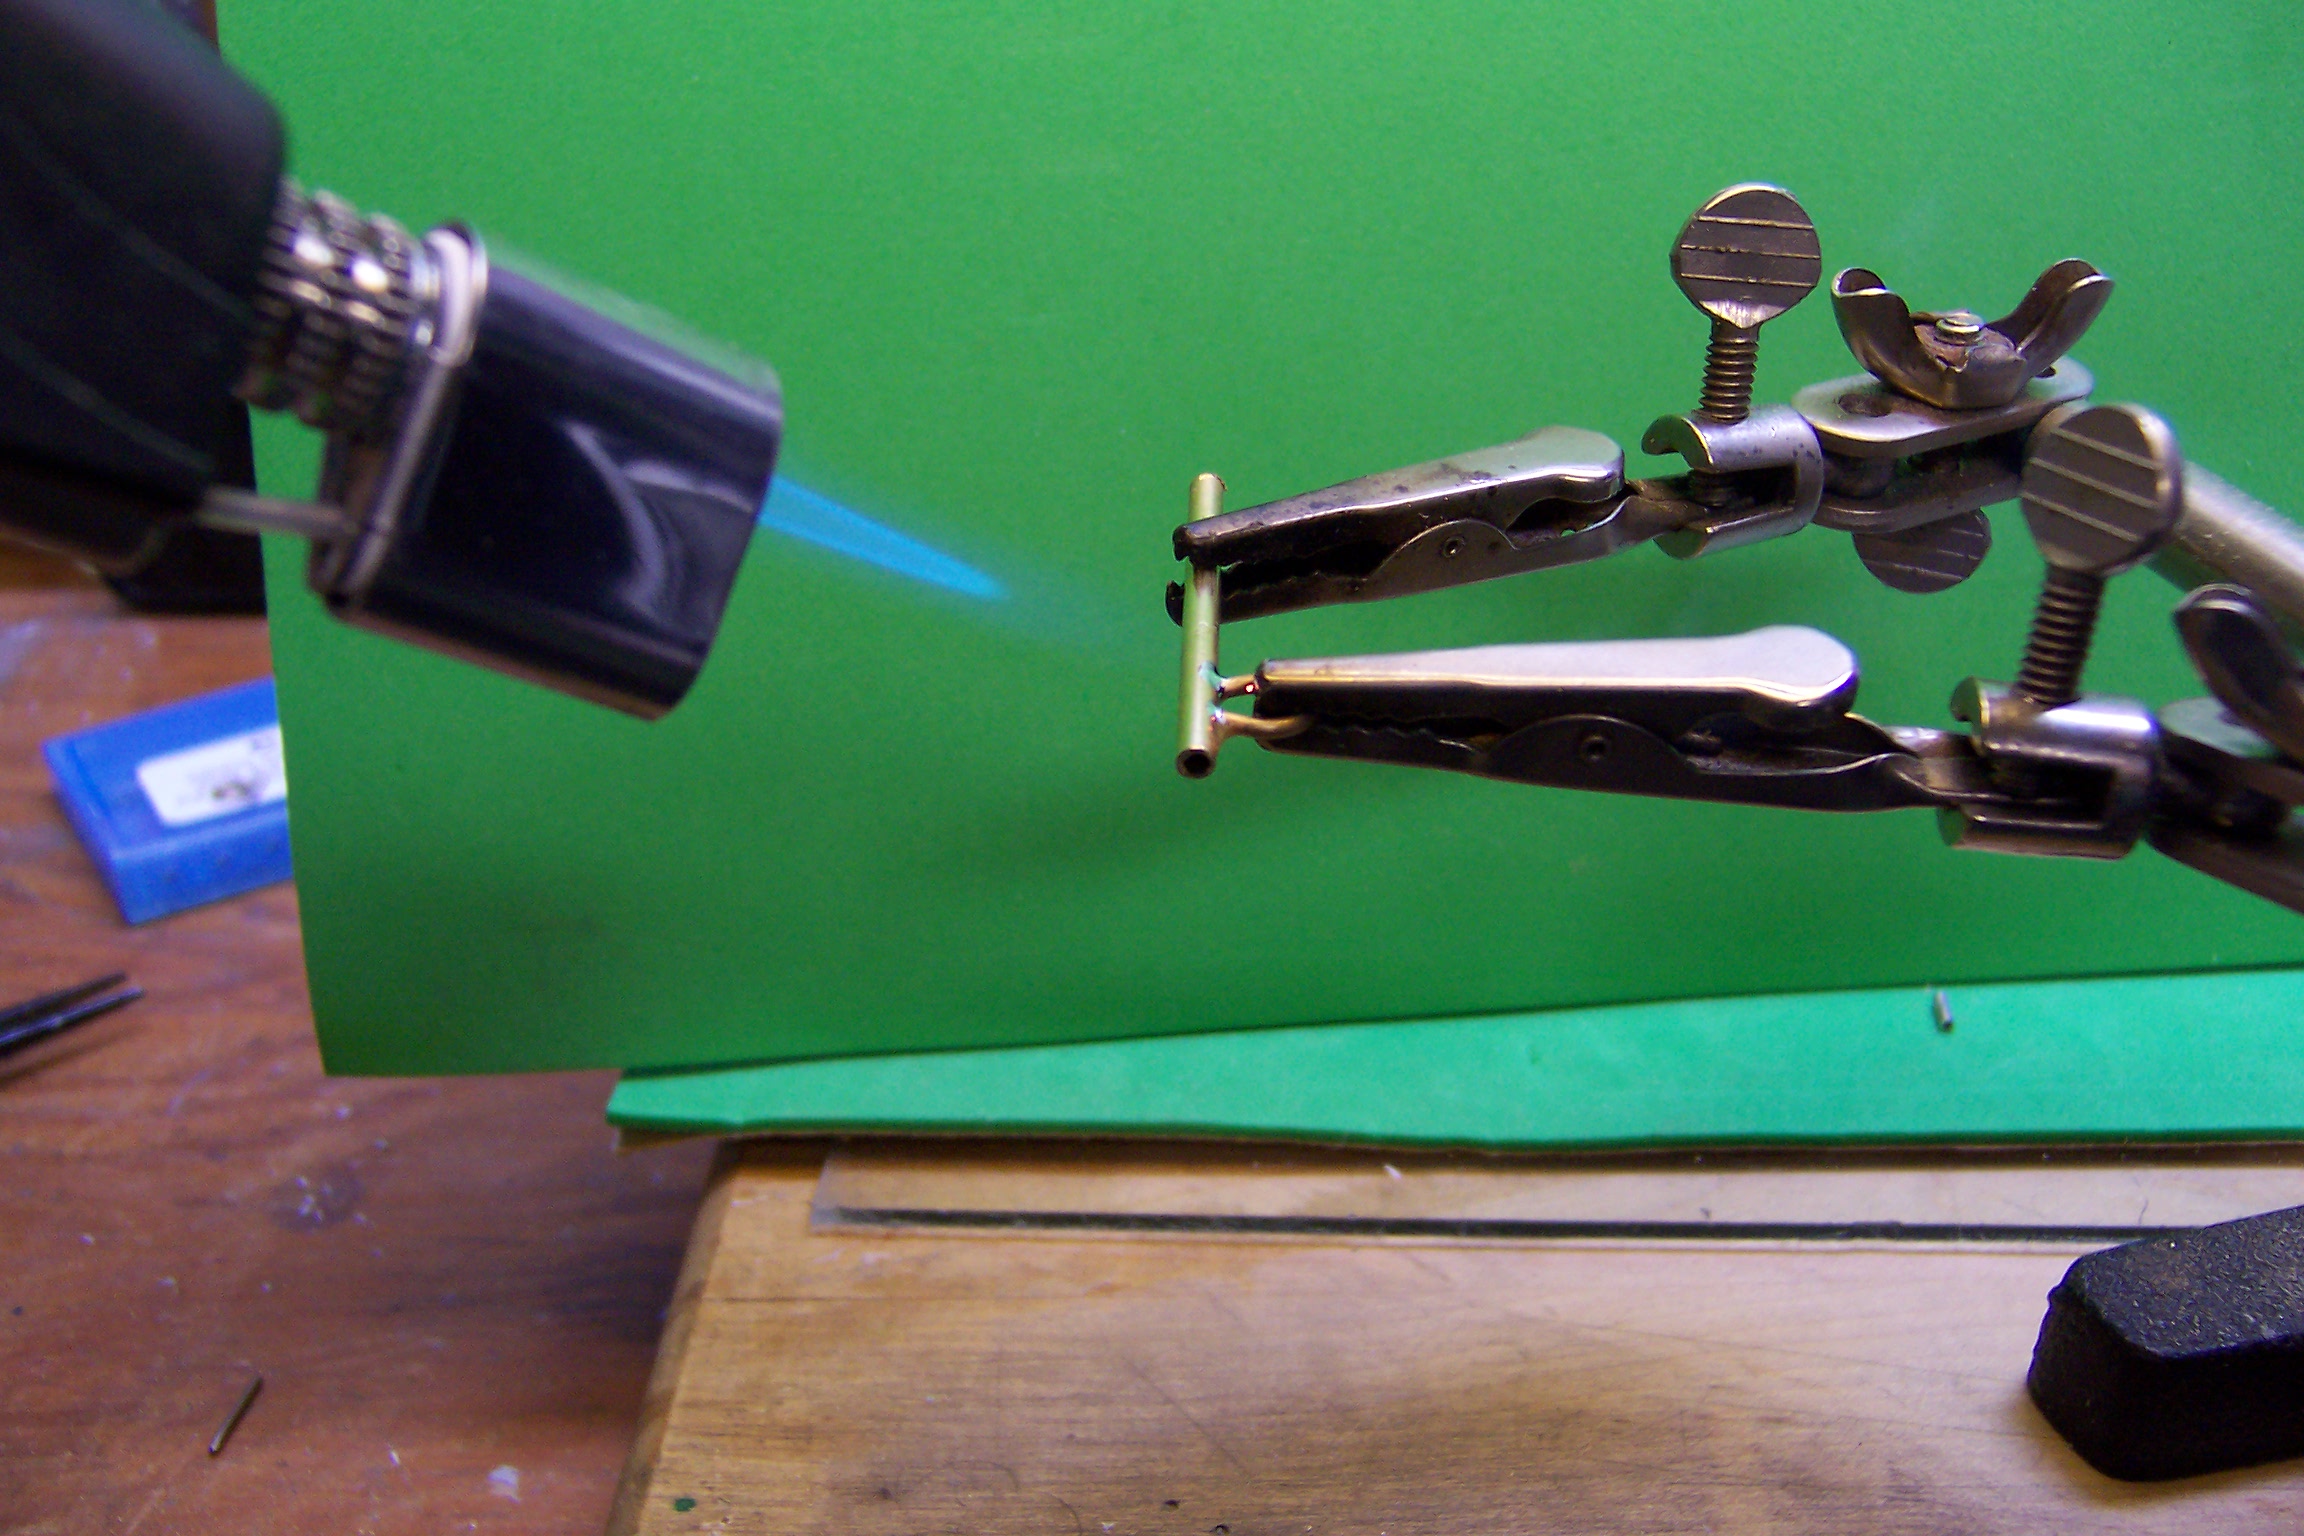
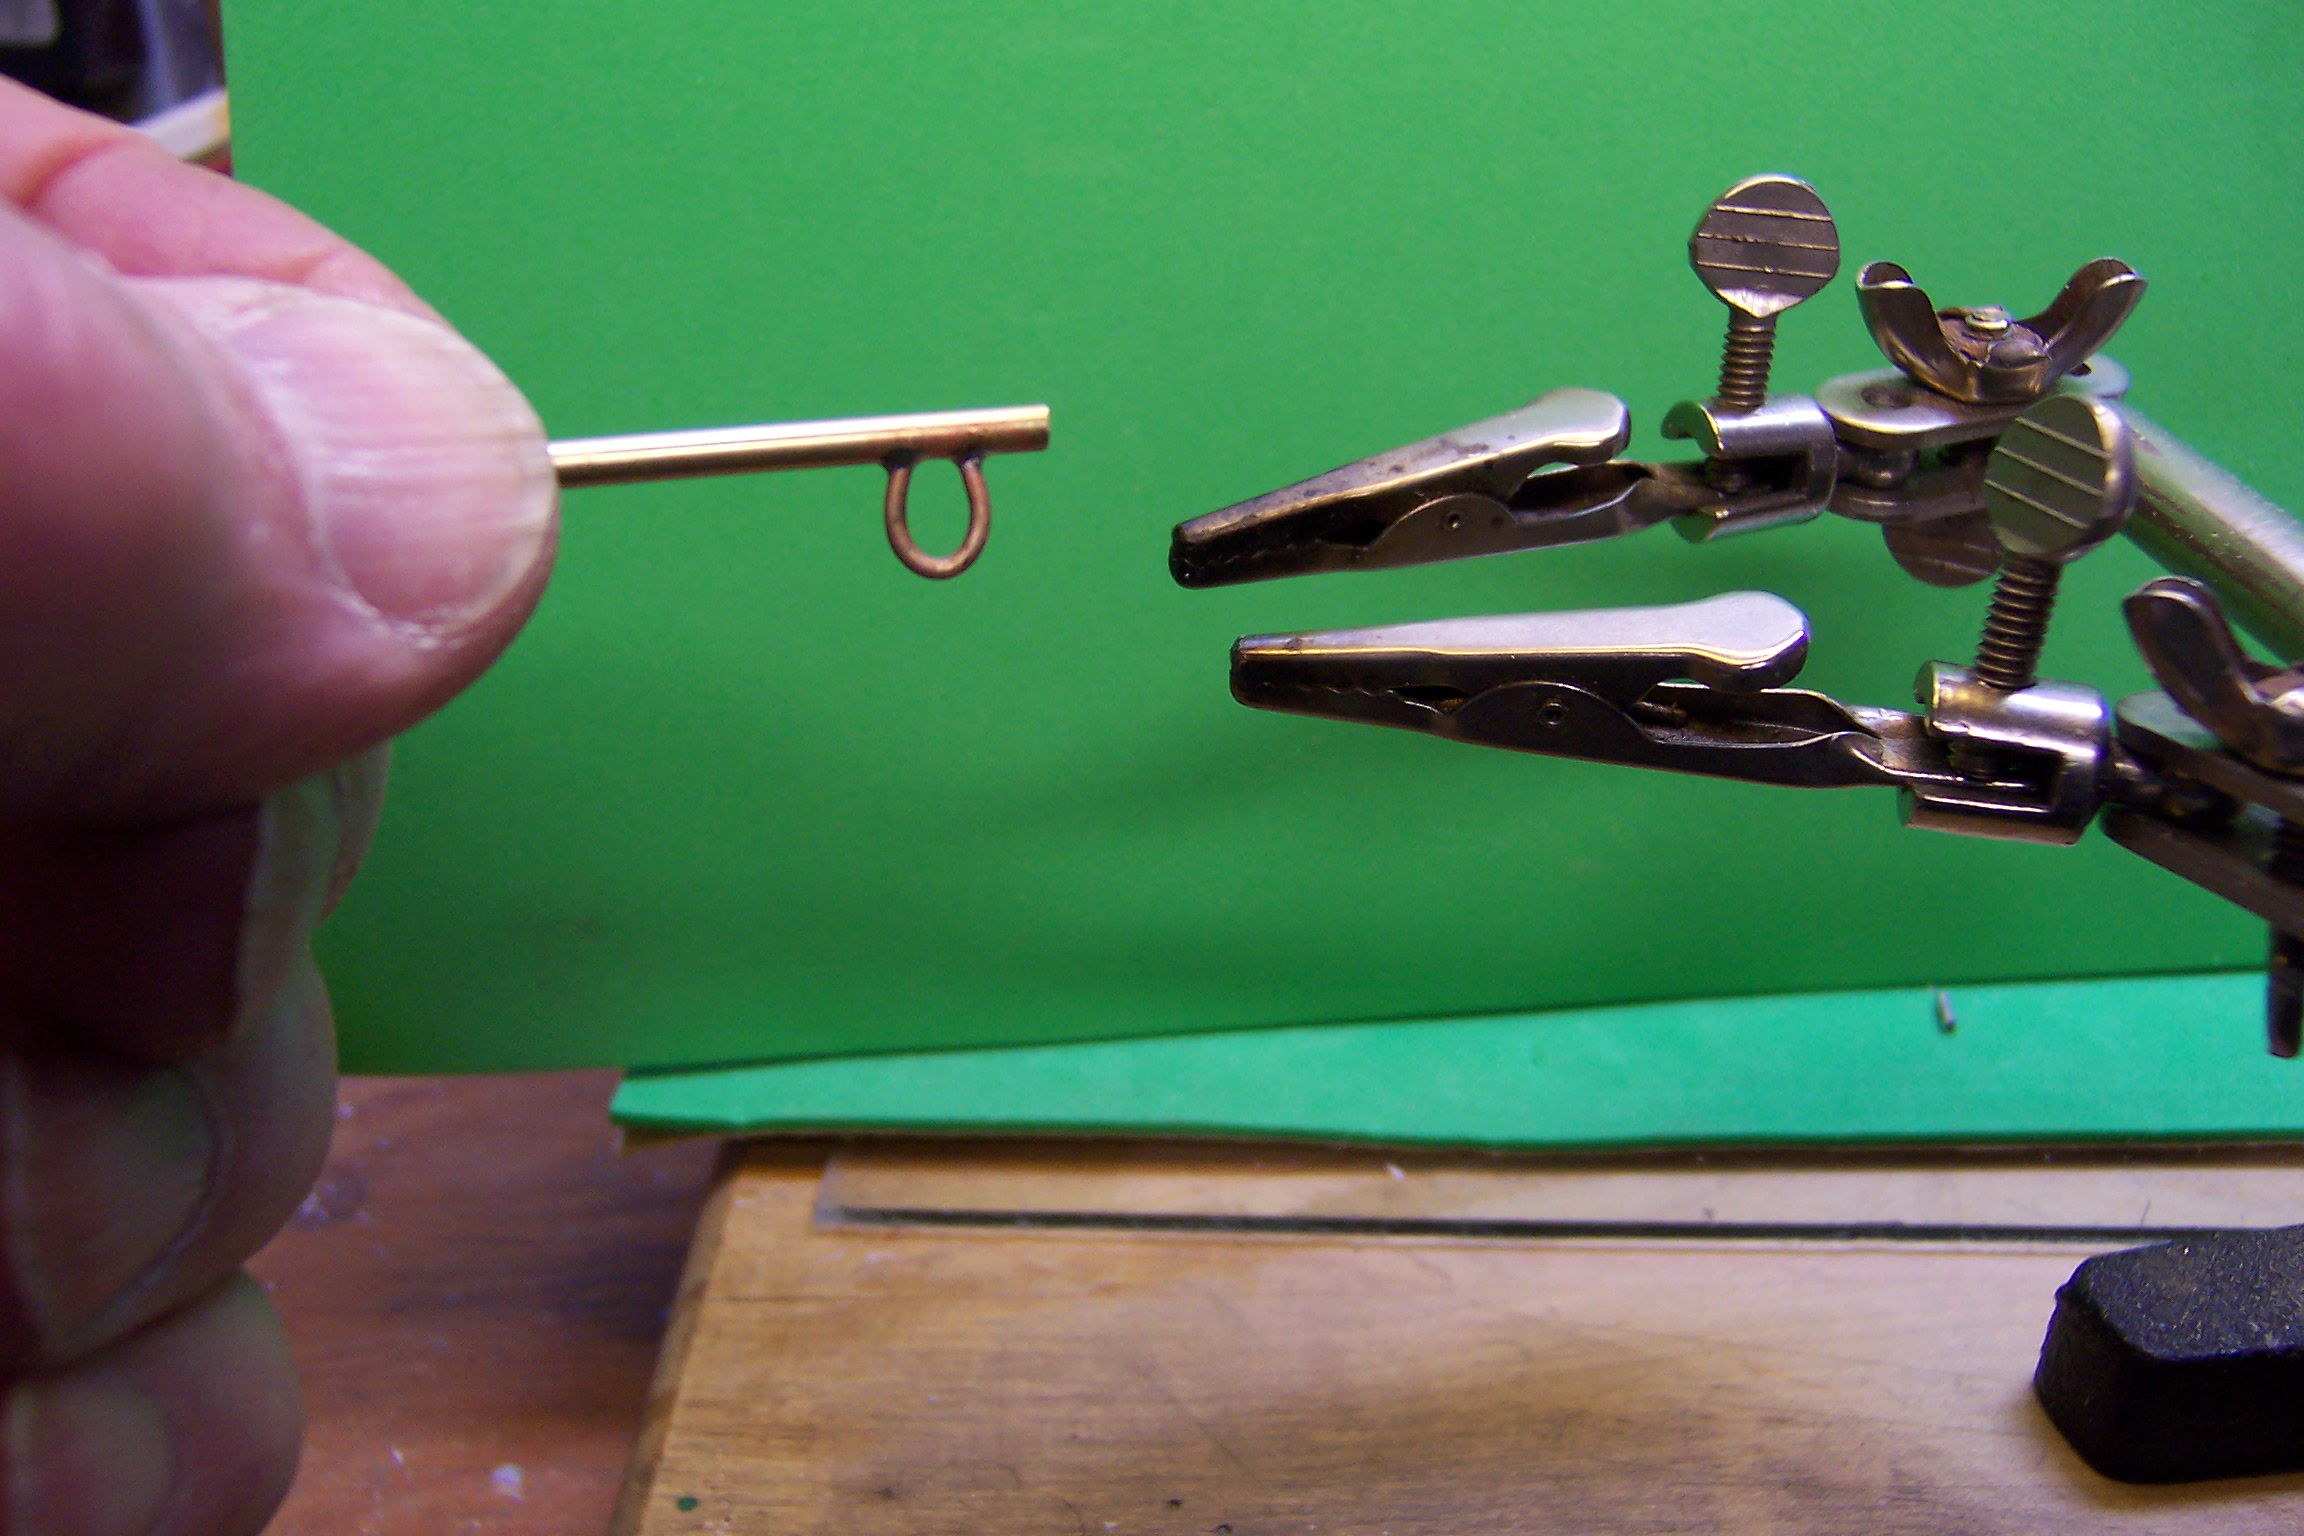
Those tow brackets on the bumper above remind me of a tutorial I did a few years ago using some brass tubing and brass wire. Here is the tutorial for anyone who is interested. I made these tow brackets for the Type O-5 crash truck in 1/25 scale. Start out with a piece of brass tubing that will form the eyes and a section of brass rod or wire for the loop. Using a set of alligator clips line up the tubing and rod after the loop is made and touch each piece with some flux and a tiny piece of solder wire. Let the torch heat the tubing so that the solder melts at the joint. A soldering iron would do the trick also but the butane torch is so much easier. With this piece of tubing and rod soldered together cut the brass tubing on each side of the joint leaving what will amount to a mounting eye. Cut the tubing with a Dremel and cutting disc going slowly so as not to melt the solder. Clean up each section and you get a nice tow loop line the one below. The ones in the photo were what I used on the O-5.
-
Real gold leaf needs a sizing agent painted on the surface before transferring the gold from the sheet. It is like a clear varnish that needs to set and get tacky for the gold leaf to stick. When you lay the gold on the sizing agent it needs to dry there well before brushing away the excess gold. Not an easy thing even in 1:16 scale.
-
Trailer for my tractor
Chariots of Fire replied to the goon's topic in Model Building Questions and Answers
How about a construction (lowbed) trailer? Would take some scratch building but it would look good with the tractor you have. -
Some had stars and some didn't. I think it was mostly the early models. Later ones had identification of all sizes and placement was not necessarily standard. They did put small stars on the sides of the body and one on the front bumper though. Henri was a big bust for us. It went on a westerly track that kept us clear of the wind. We got some rain and there was a bit of coastal flooding that was more than normal as the full moon cycle came along at the same time. Just lingering showers now.
-
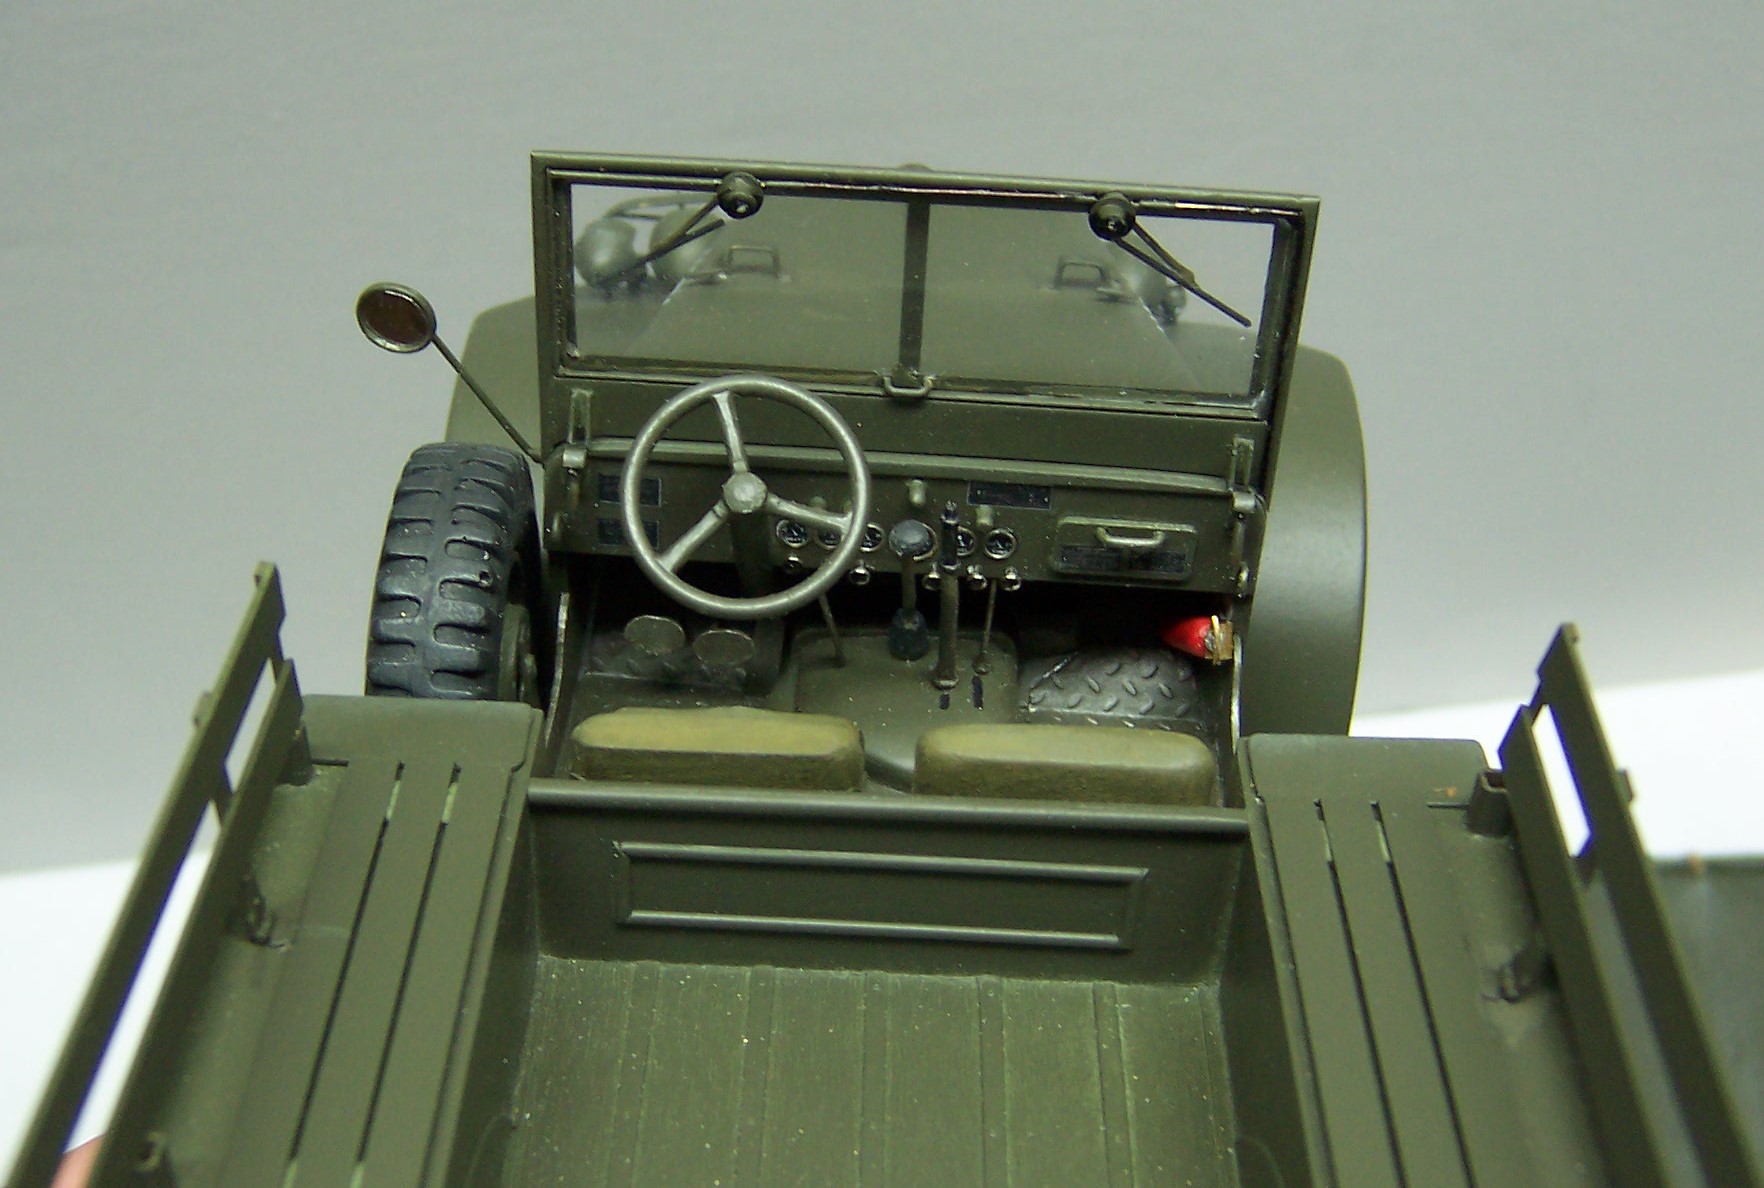
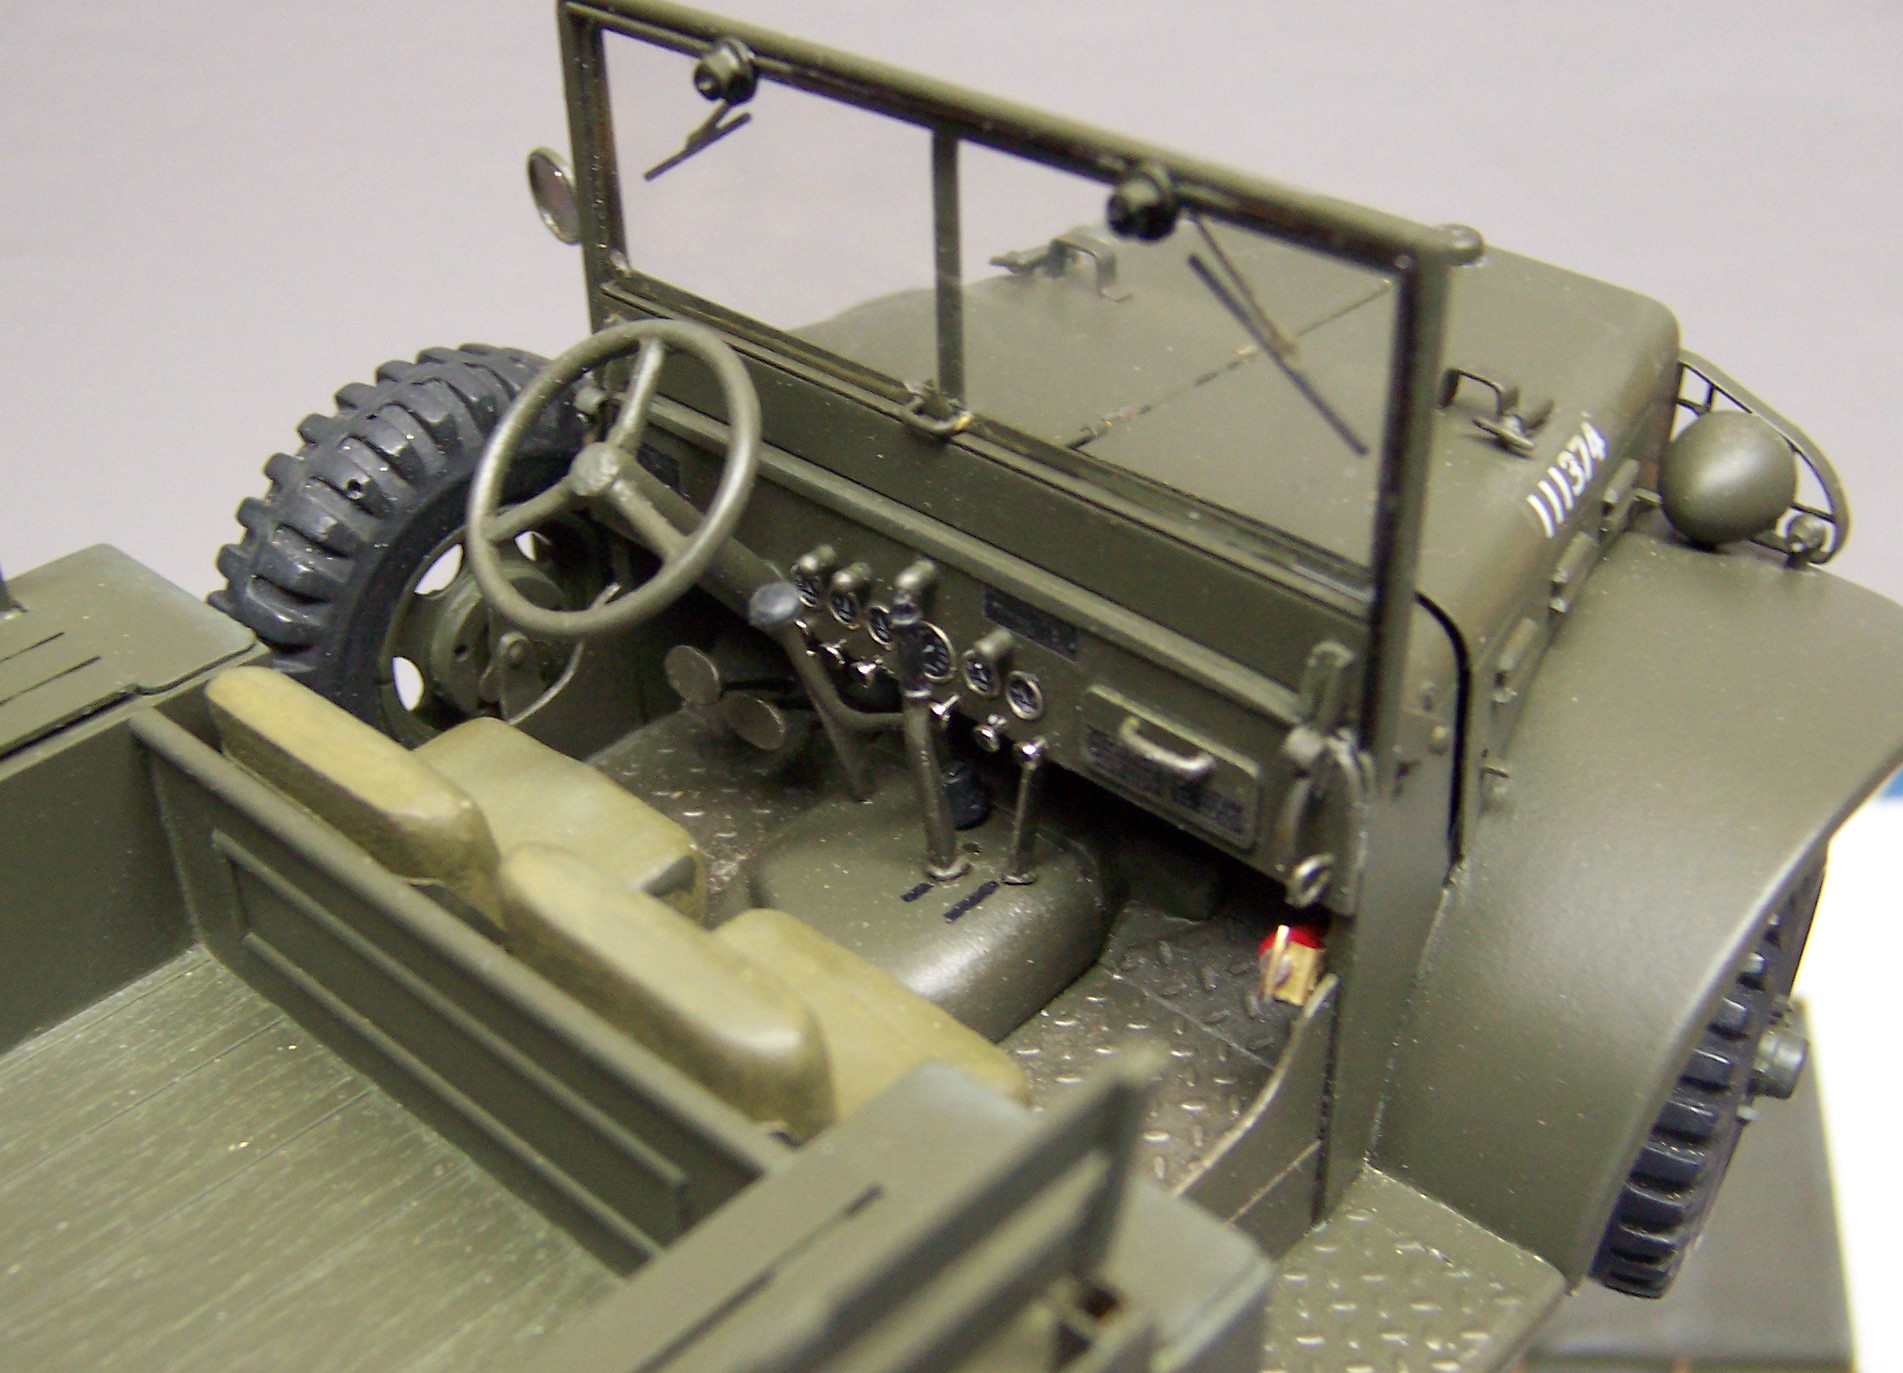
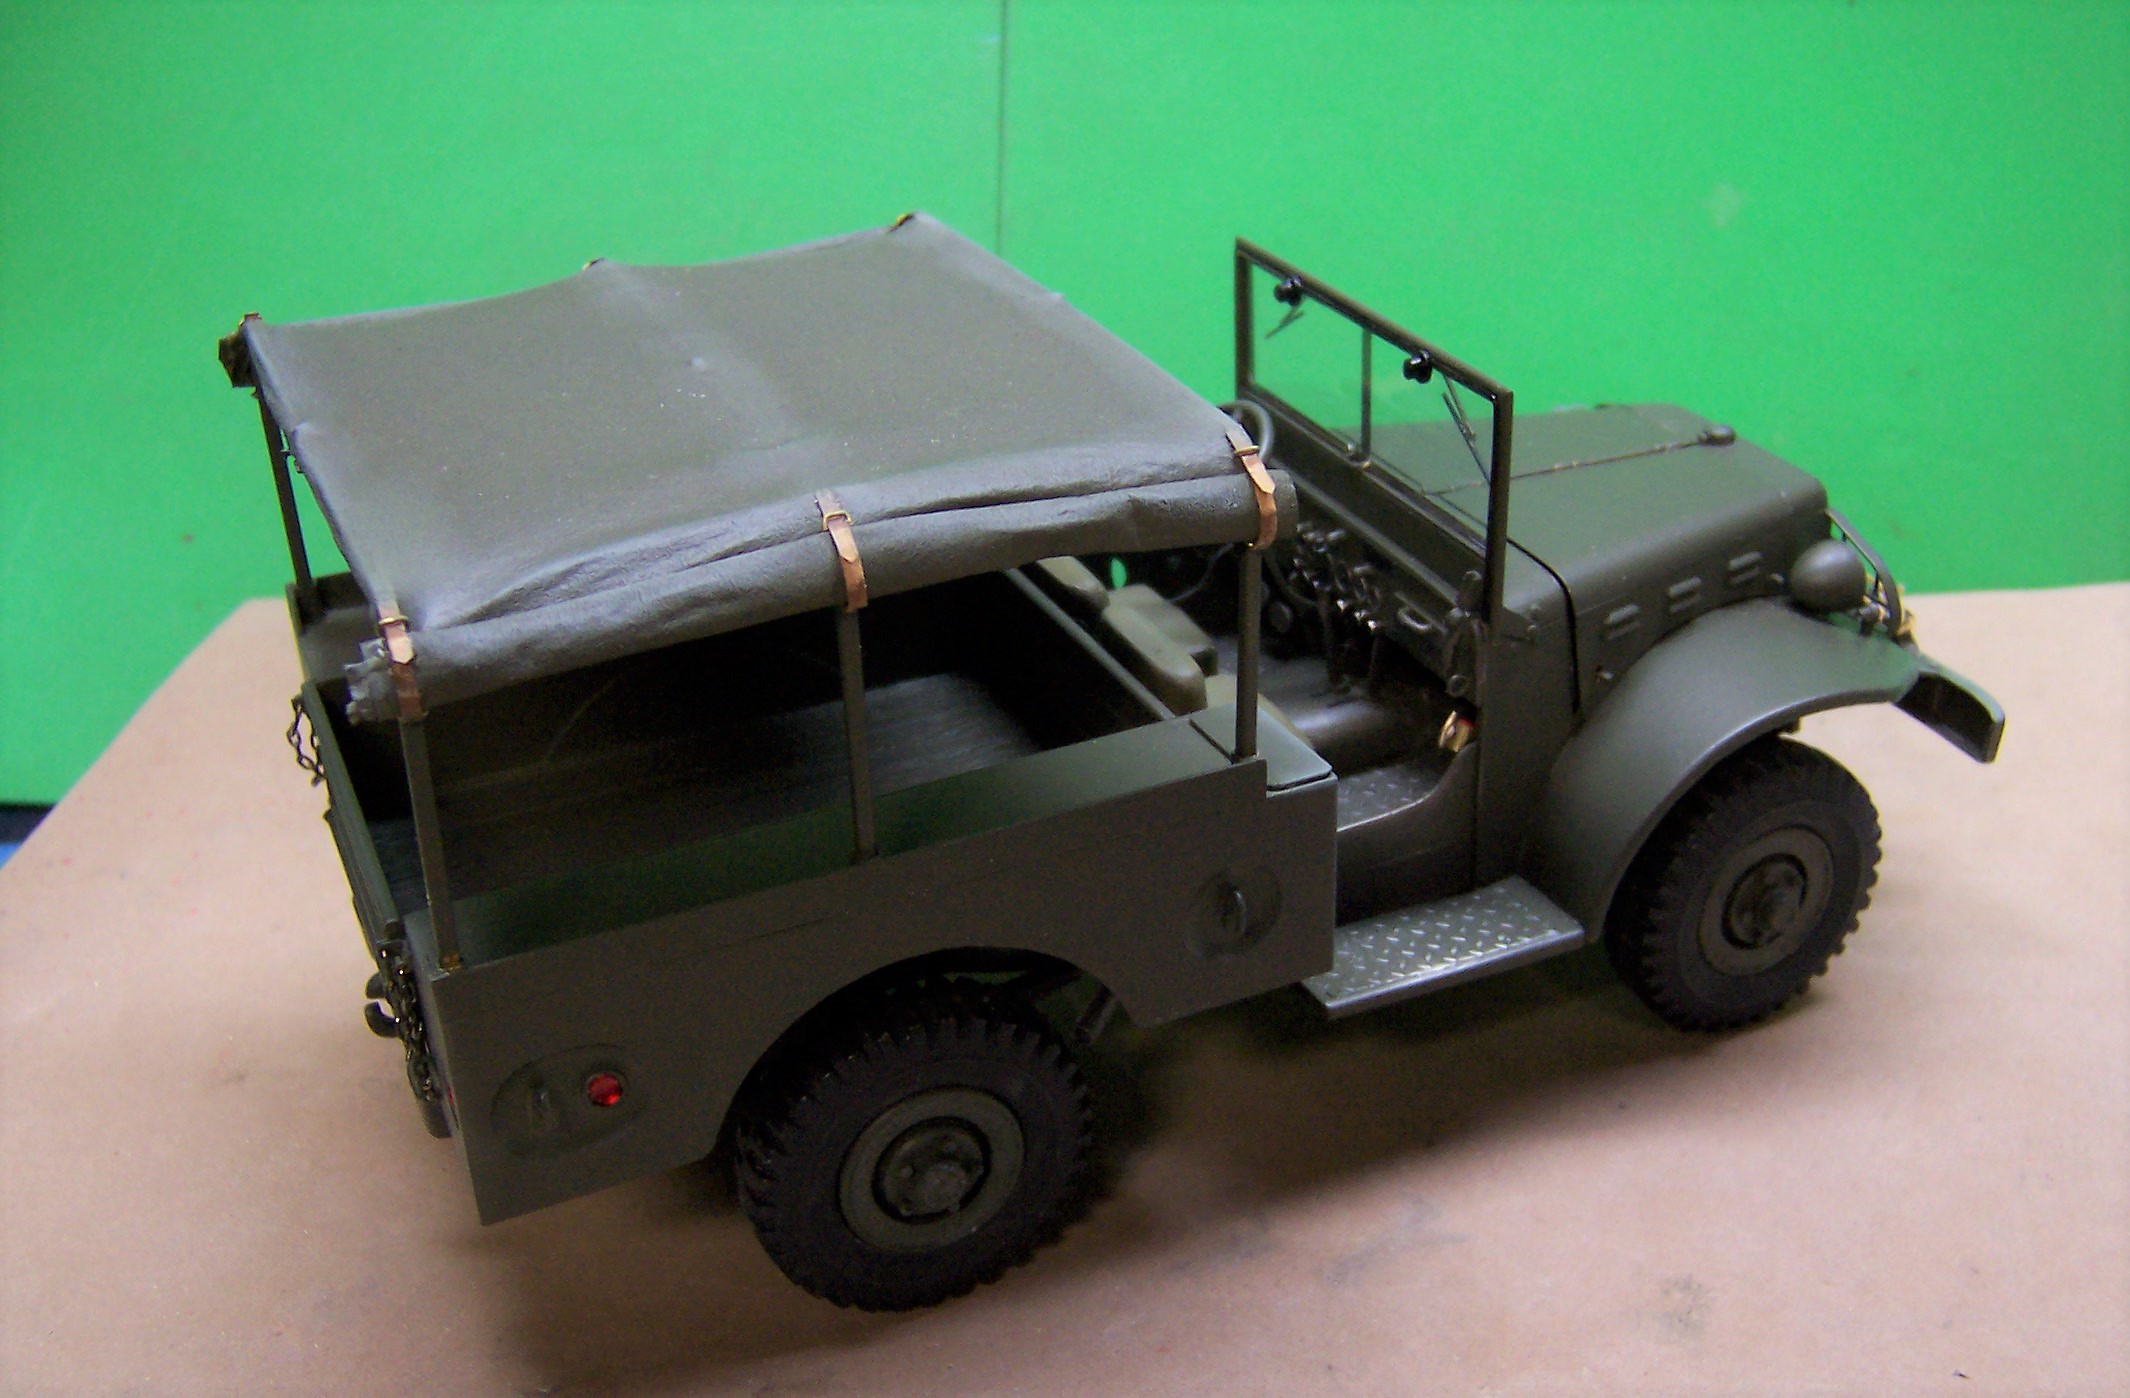
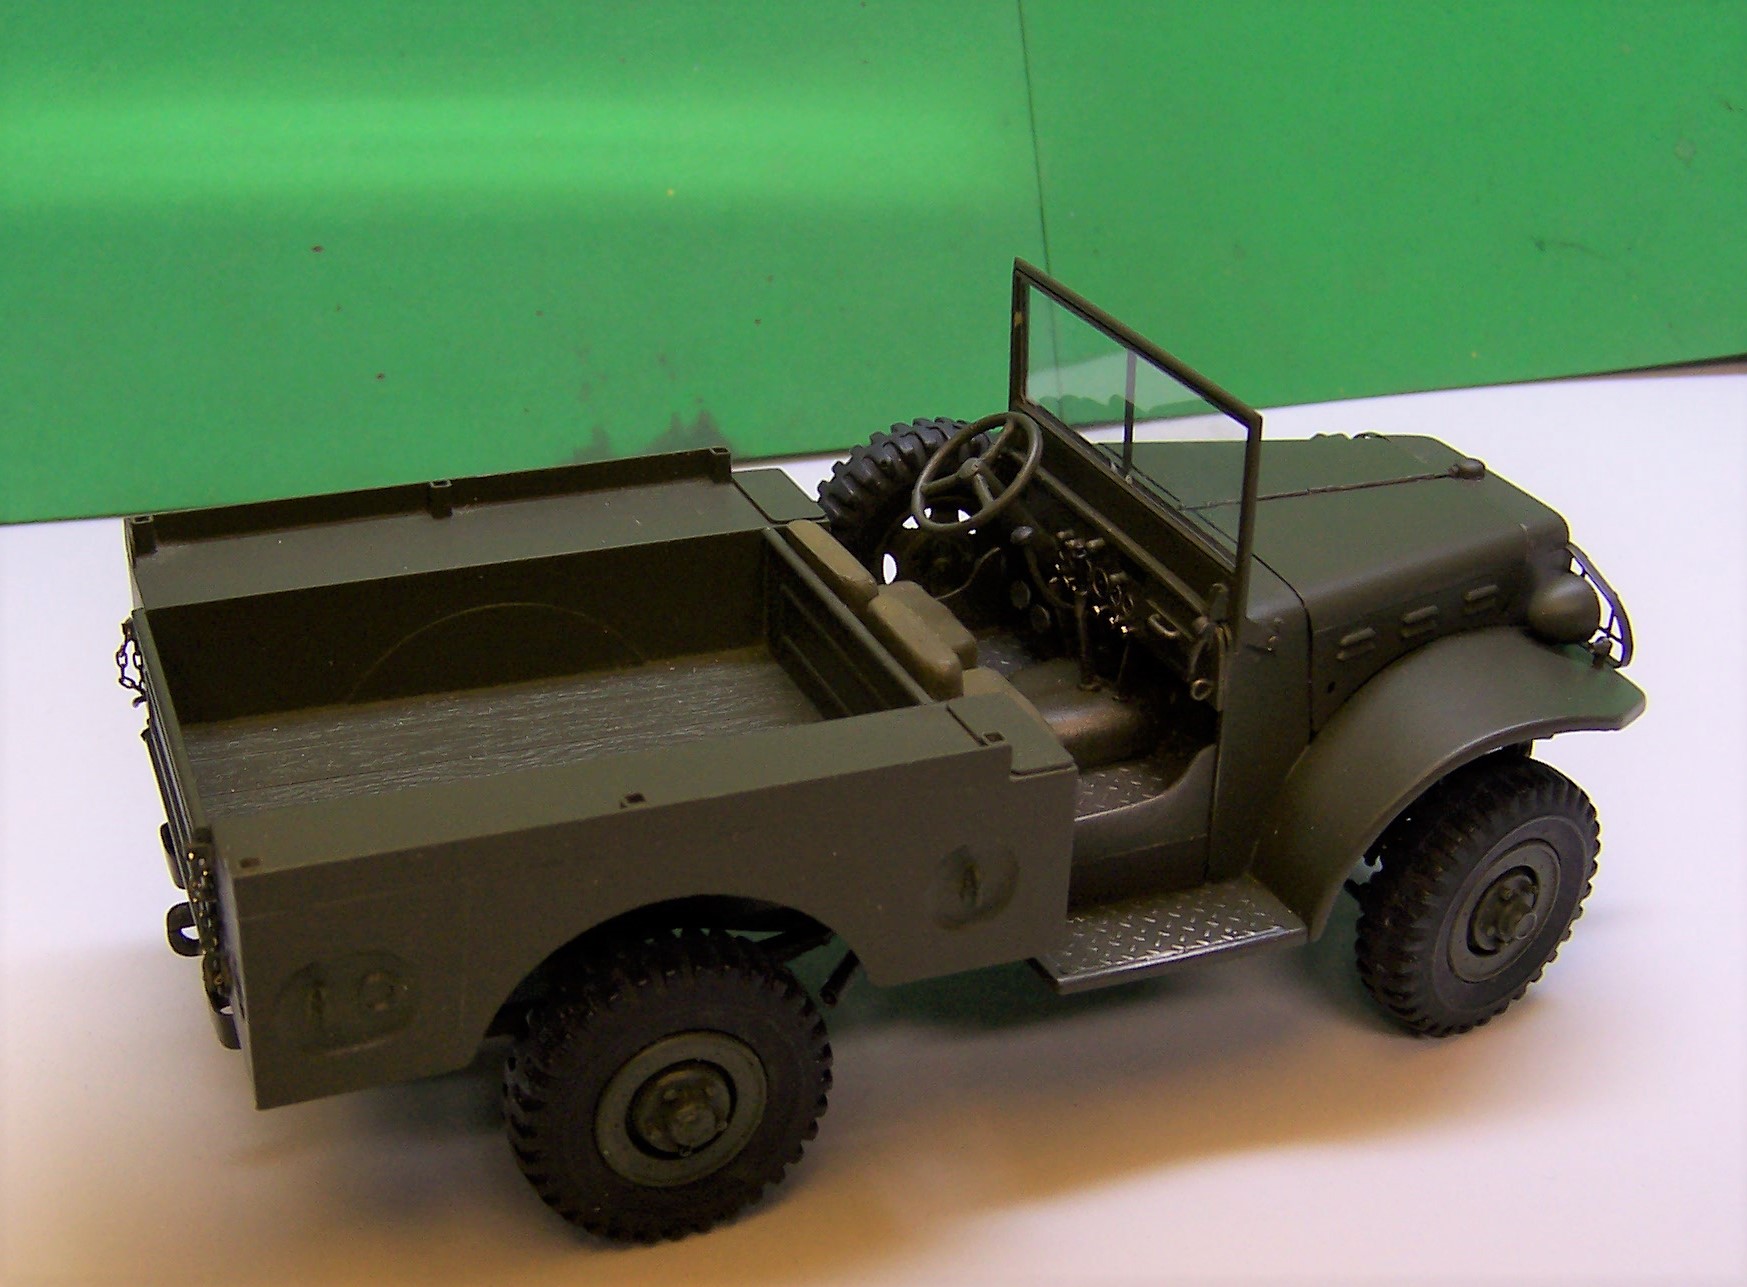
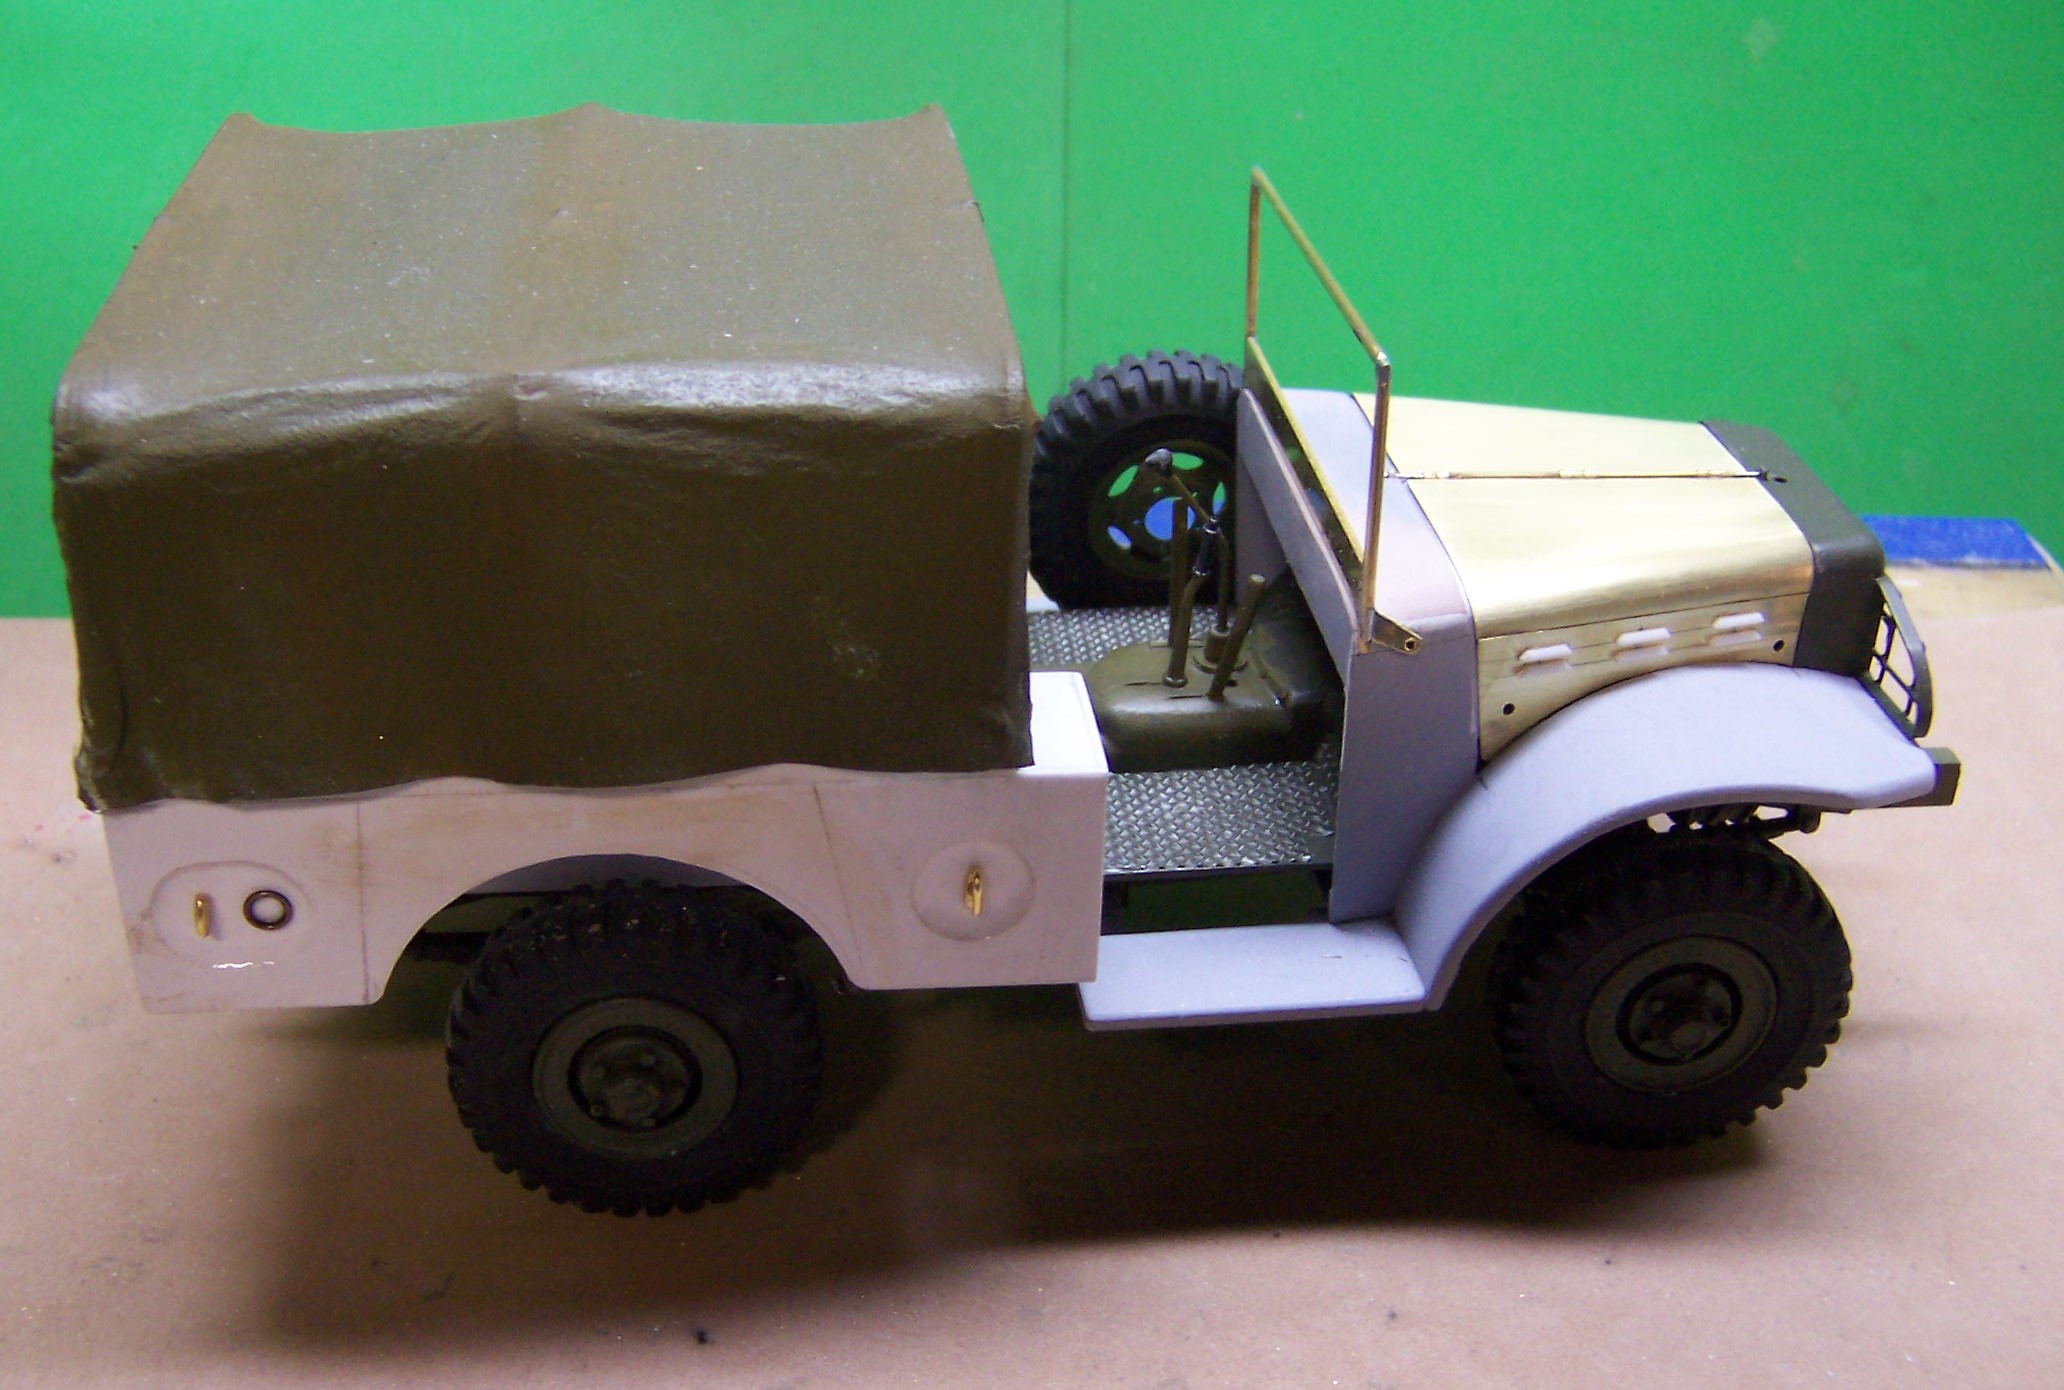
Paul: No, I was never a teacher but my work as a professional engineer and land surveyor required me to be able to put down in writing things that were clear and to the point. Hopefully I have done that here. In the meantime here are some updates of the dashboard area that you had inquired about. Wow! Closeups really exaggerate the flaws! I've got some touchup to do in a couple of places. The dash was made up separate from the rest of the interior from photos and drawings of the the truck taken from a technical manual. I drew the gage cluster out in CAD, sized them to 1/25 scale and printed them out on clear decal film. The bezels around the gages are photoetch items. The instruction plates were done the same way using the ALPS black and silver cartridges. The diamond plate floorboards are photoetch stainless steel that I got from a fellow modeler friend. All of the knobs and switches at the bottom are common pins dabbed with some black marker on each face. I can see I should have at least dusted off the interior before taking the photos.?
-
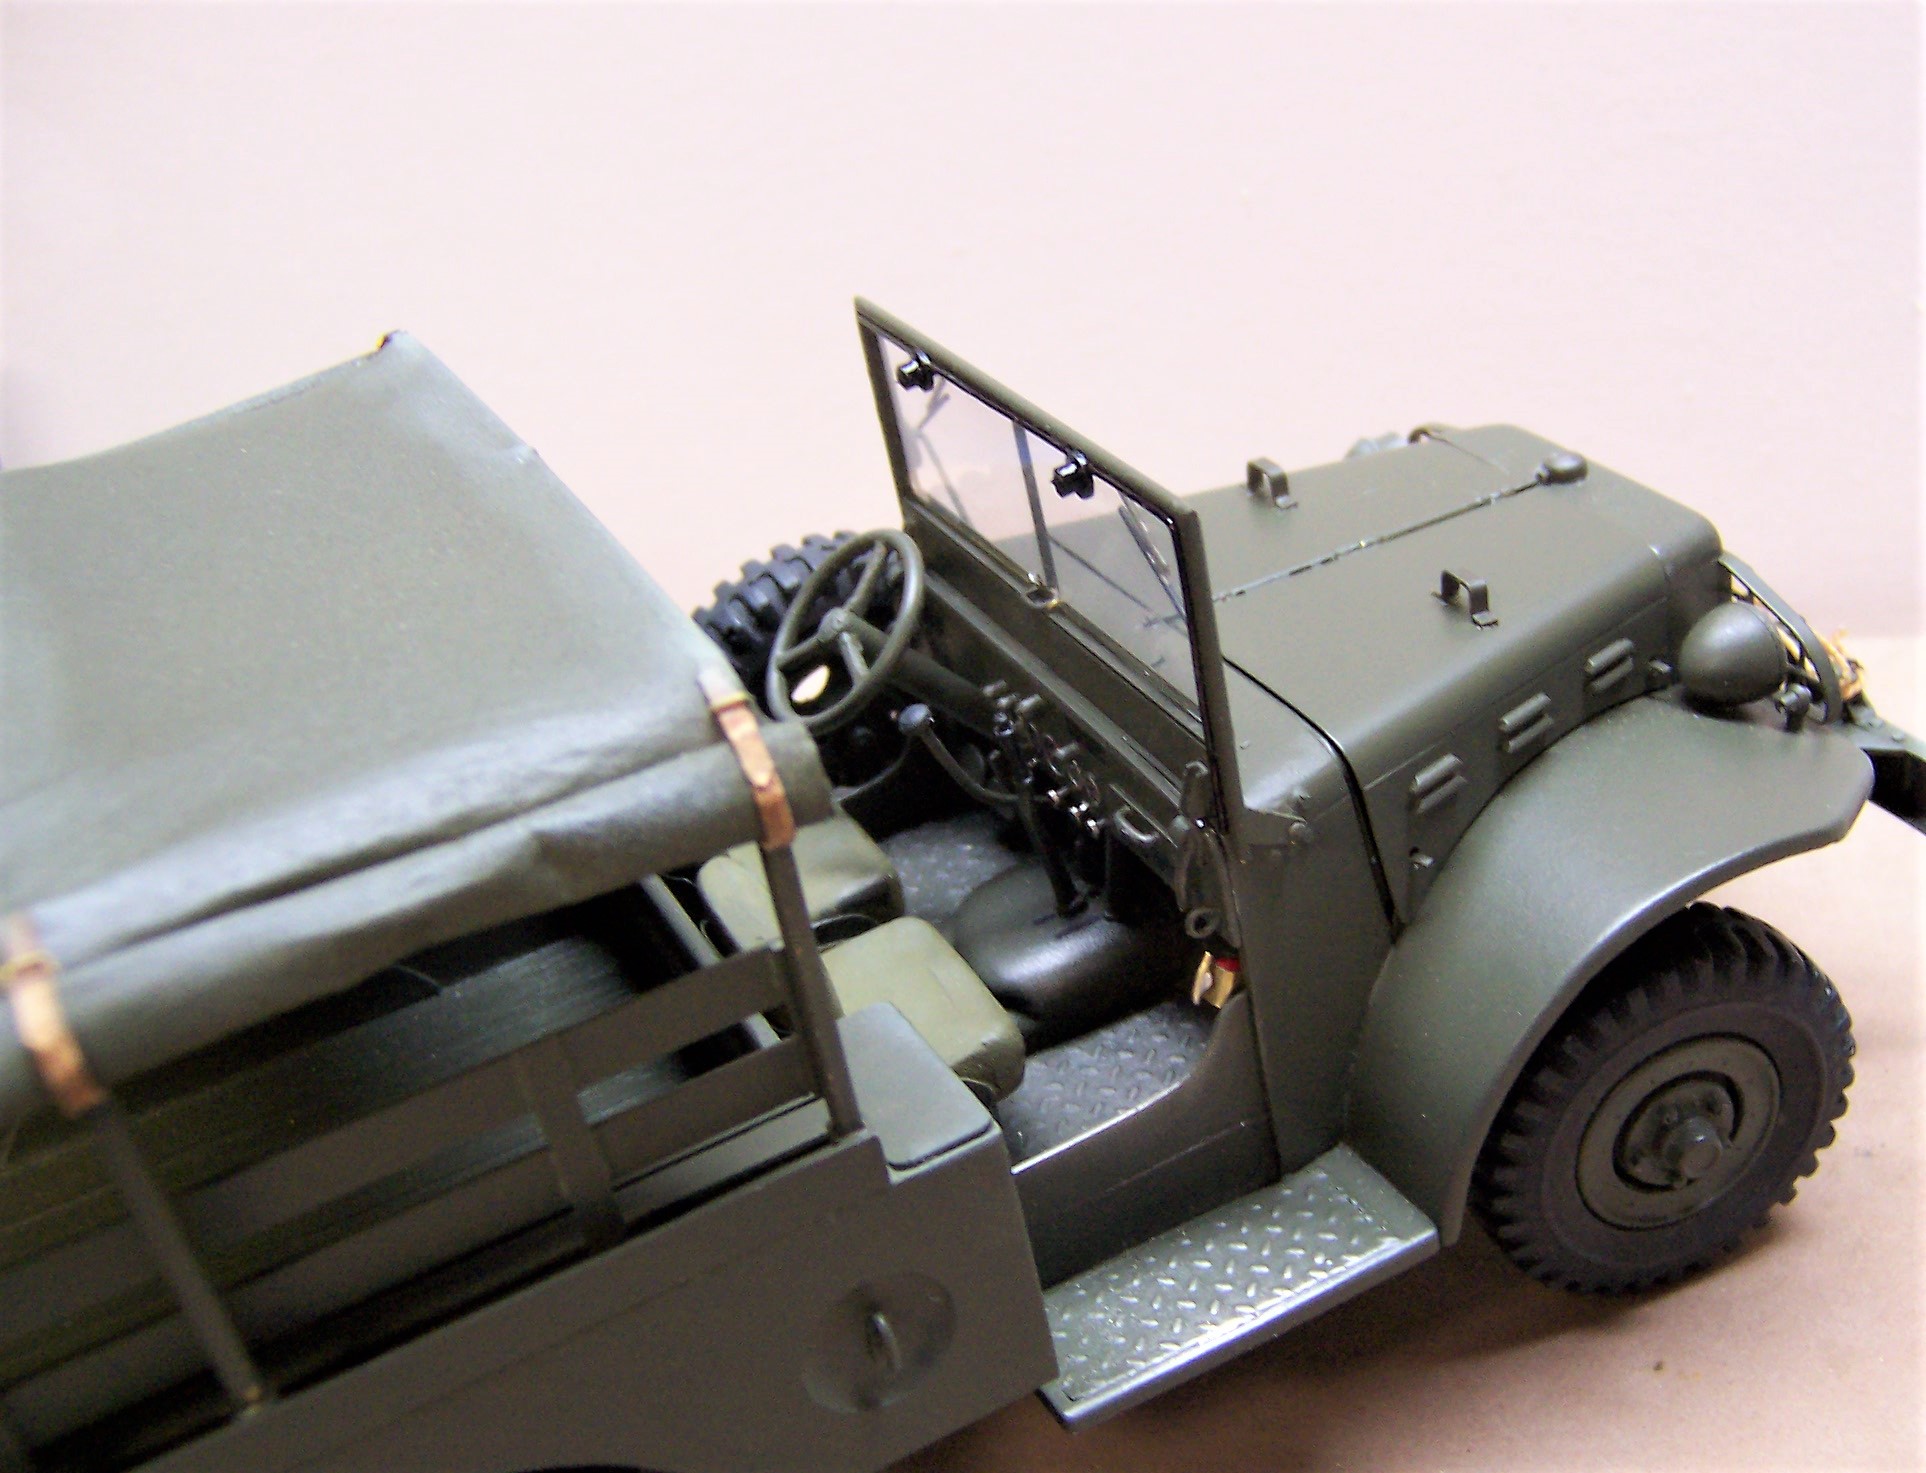
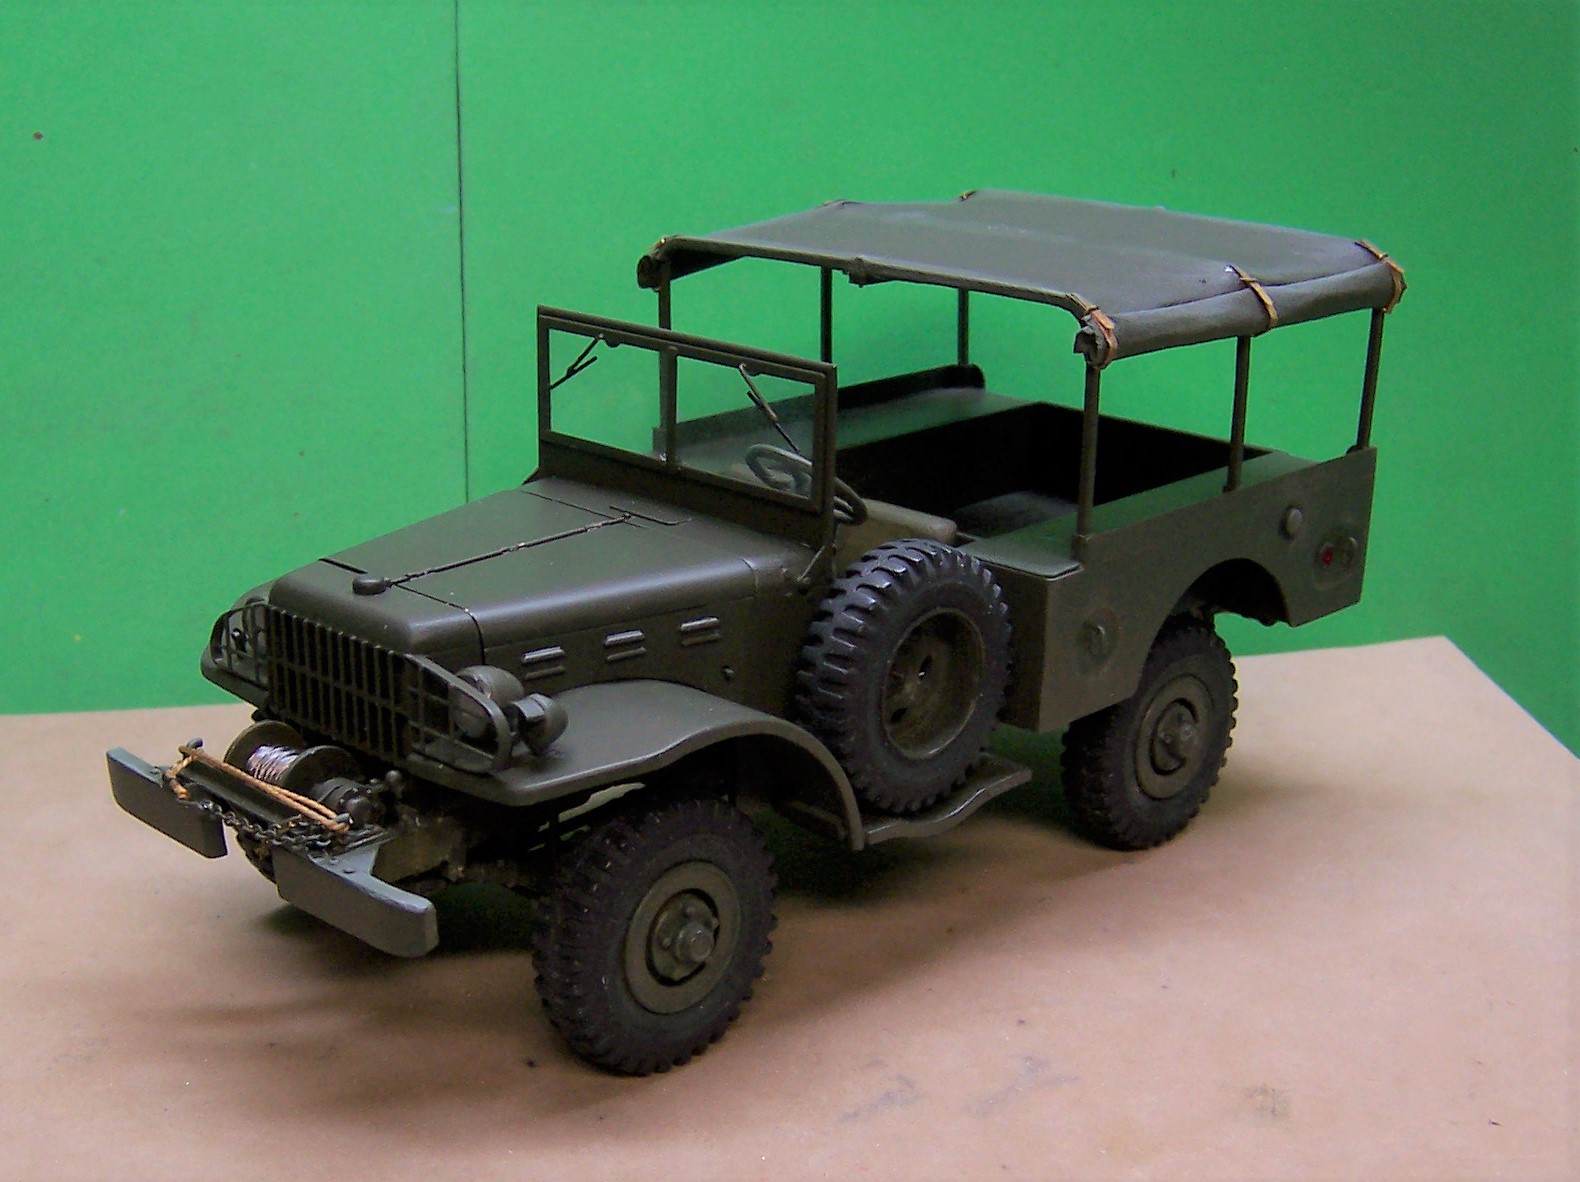
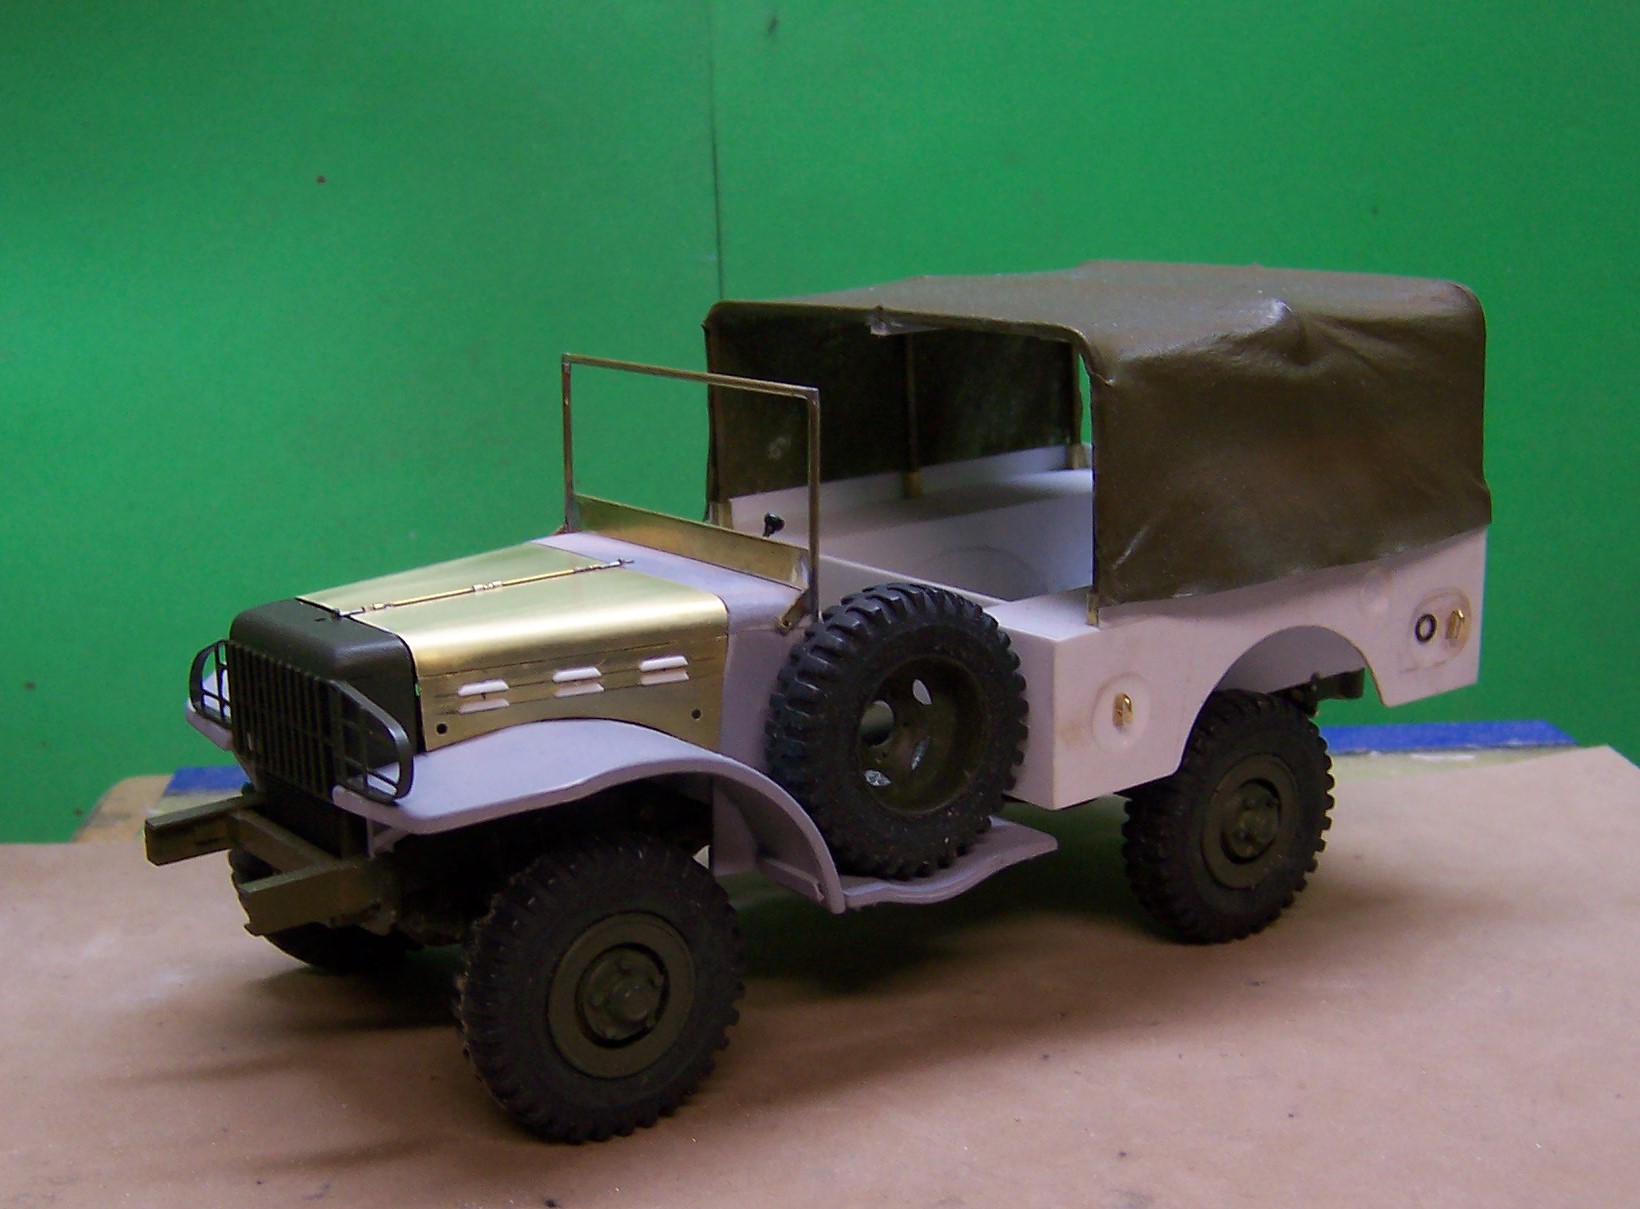
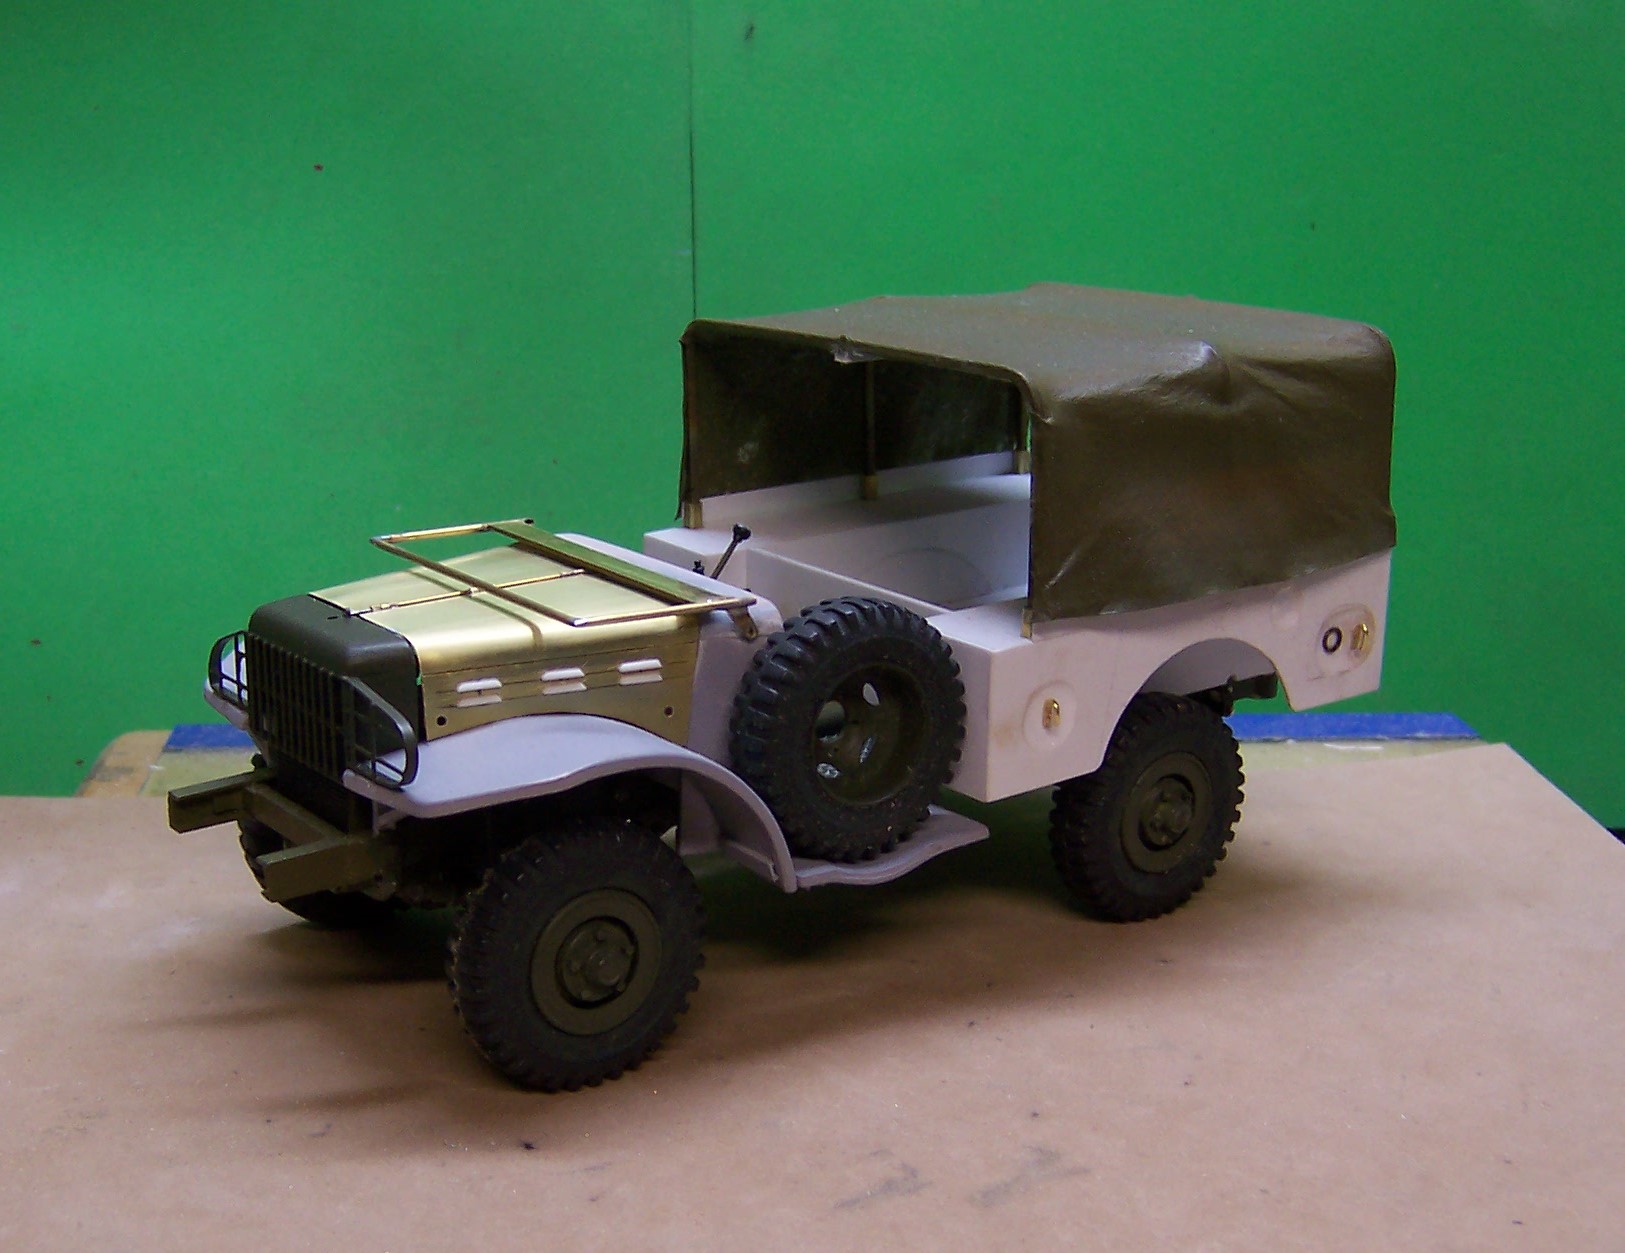
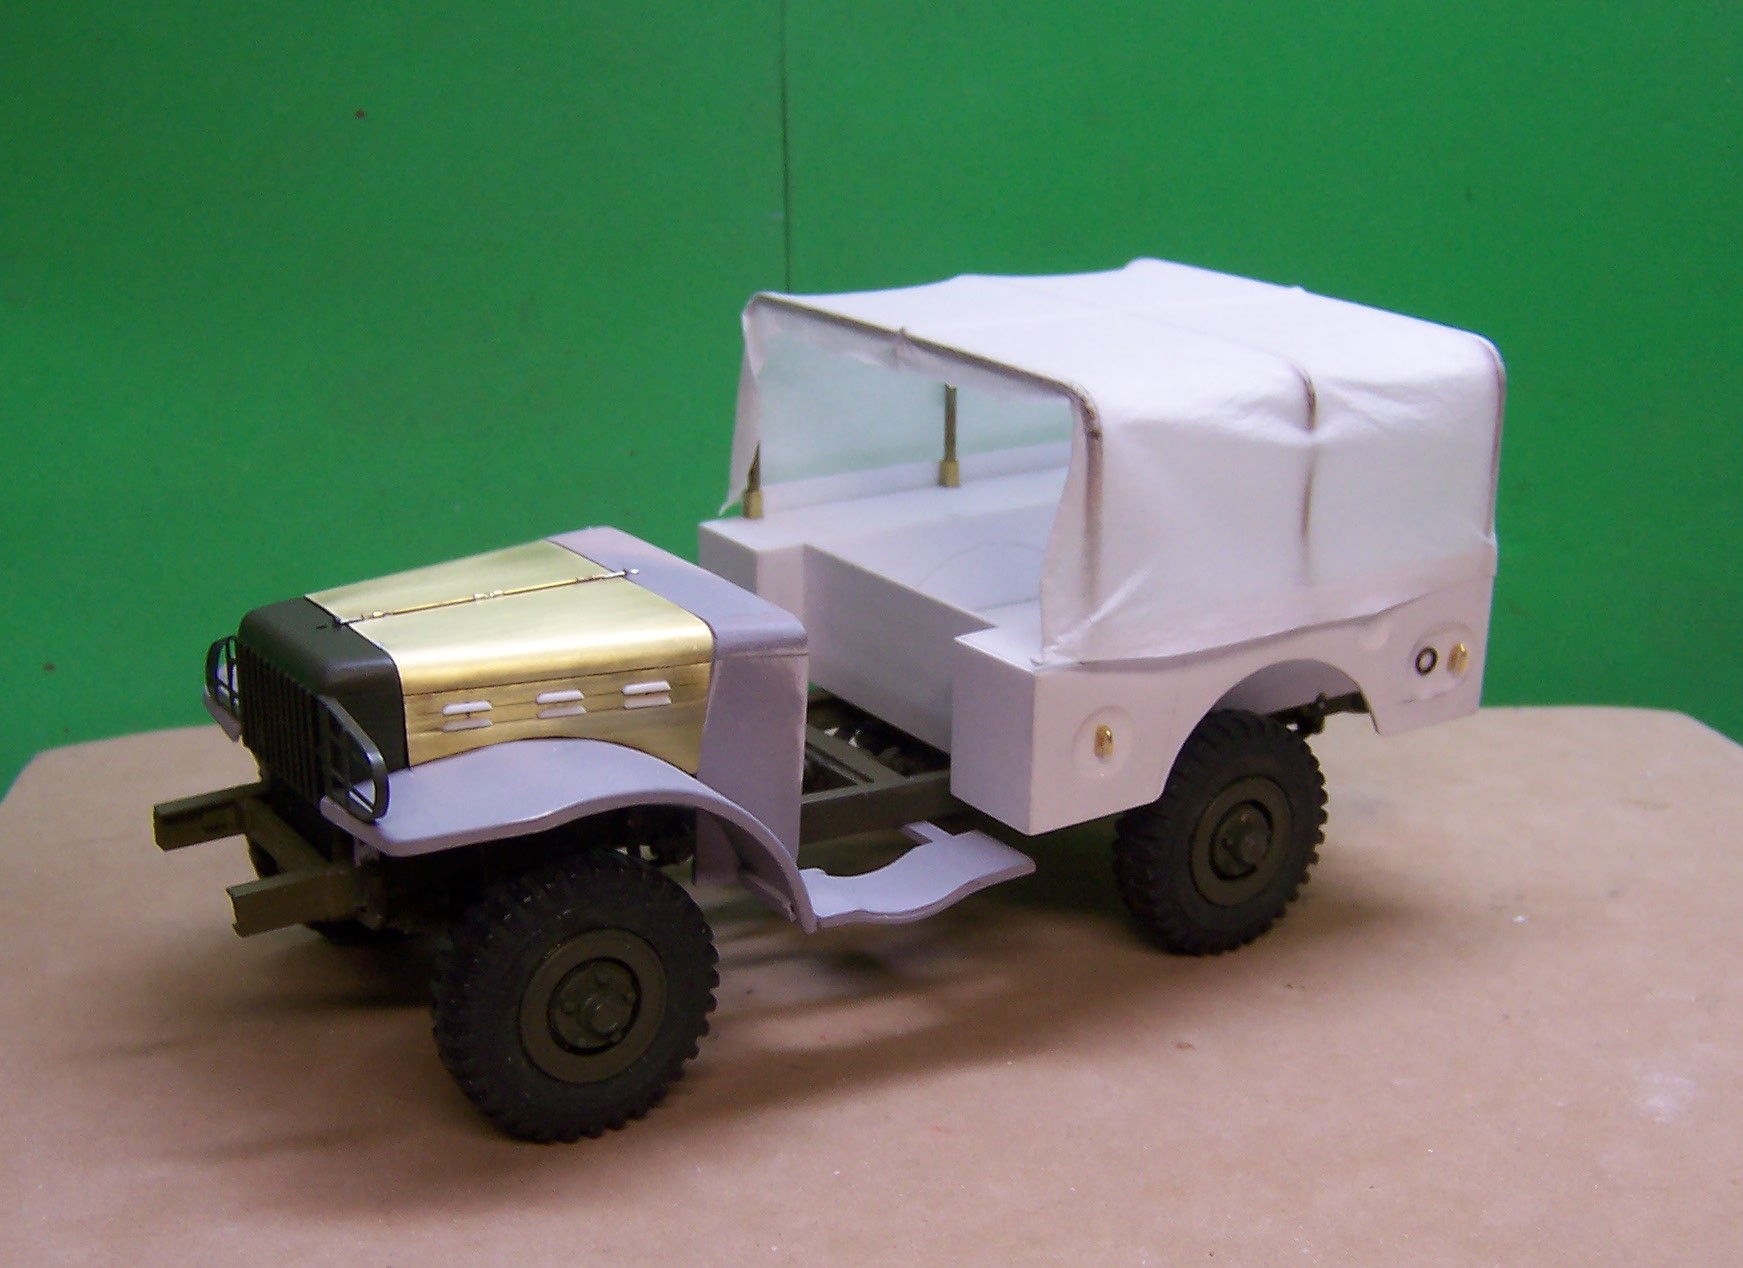
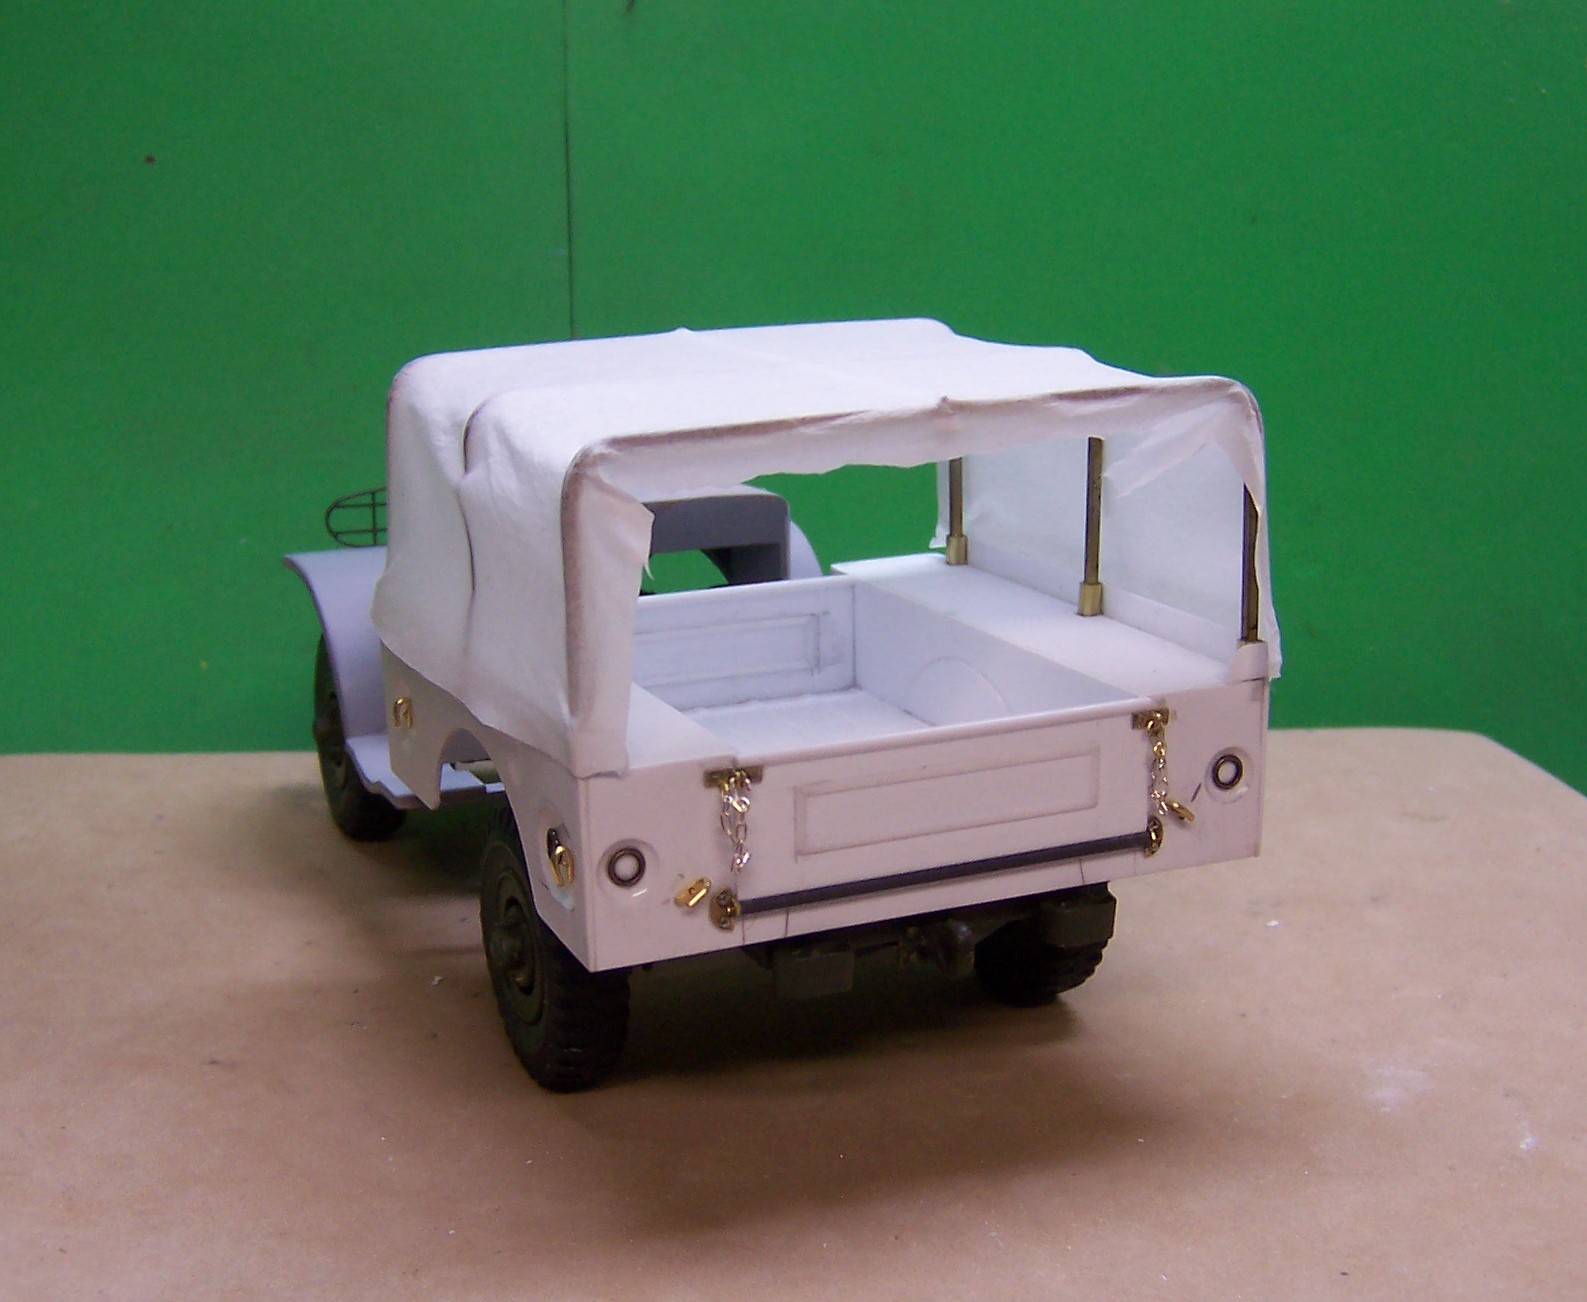
Hello, Juregen: The canvas roof, or tarp,is a single ply sheet of "kleenex" tissue that I draped dry over the brass frames. Then I painted the tissue with a mixture of water and white glue. The tissue needs to be plain with no imprints or designs otherwise they will show up in the final product. I let it dry over night. After it dried I gave it an outside only coat of Tamiya AS-6 which is the color of the model. I let that dry. I decided to roll up the sides rather than show them tied down. Once rolled up I glued the sides in place. Then I painted the whole thing again this time both inside and outside. This sealed the "tarp" to the frame. The straps are only strips of brown paper bag. I used a small piece of brass wire to represent the buckles. They are just glued down with CA which tends to seep into the paper. To hold the straps in place under the rolled up tarp I made a small brass "U" out of wire, folded the end of the paper strip around it and glued it over. Then I tucked the "U" under the rolled up tarp and glued it in place. The final touch was to use some weathering powders to highlight the edges of the top and where it is drawn tight against the frames. Military modelers use this technique all the time. So I decided to give it a try. Worked well.
-
This is about as good as I can get without removing the top. I can do that if I am careful but in the meantime here is what I can show. I need some better lighting as well.
-
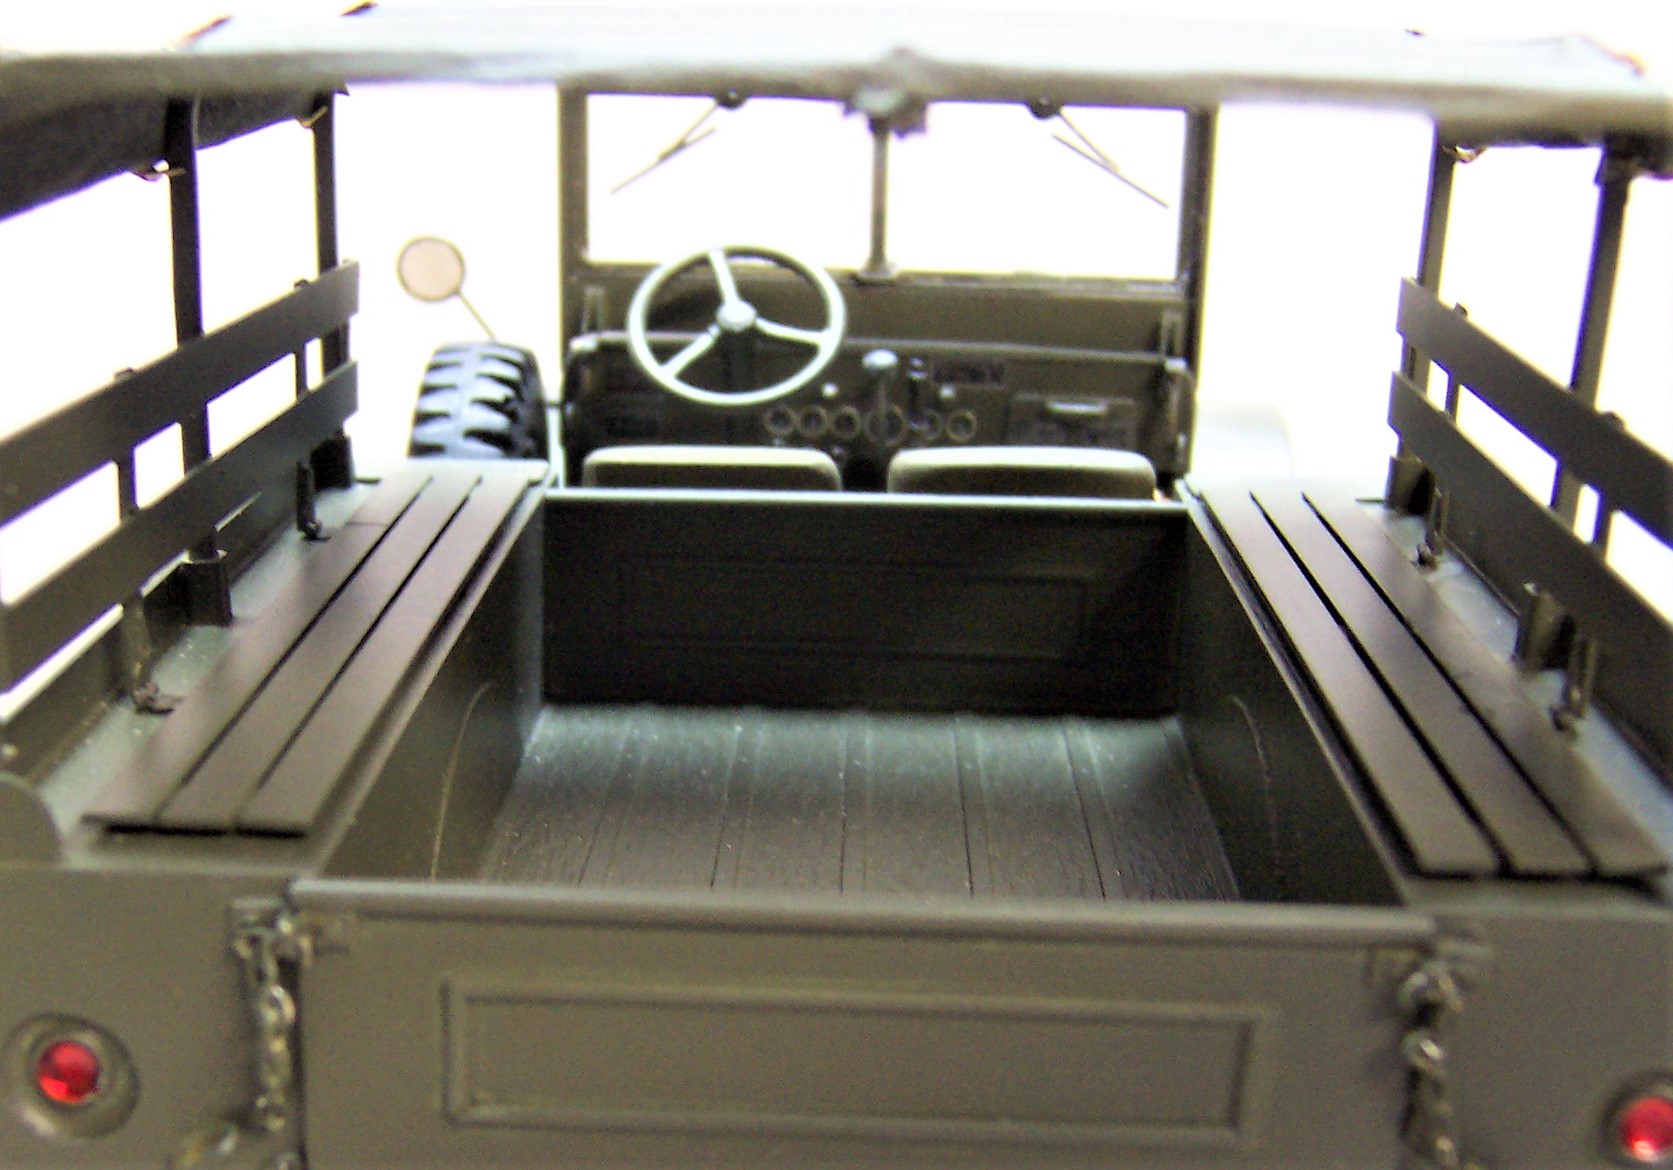
I love working with flat paints! They hide a lot of those flaws! Just finished the rear view mirror. Now it's on to the slat seats in the back. That's one reason I decided to roll up the tarp sides so you can see inside the body better.
-
Quite a bit done since the last posting. The project is nearly done. Need some markings on the hood, bumper and sides.
-
Those tires and wheels are the exact ones I used on the WC-52. I did modify them a bit for the locking rings that go on the outside. Lots of goodies on the Ertl piece!
-
Try the model ship builder's guild. Also Model Shipways can probably help you out.
-
chain fittings
Chariots of Fire replied to Paul Payne's topic in Model Building Questions and Answers
Craft wire is perfect for making that sort of thing. What espo said. Michaels craft store is also a good source. But you do have to fabricate your own. -
The original question was why was it so hard for young people to get into modelling. Ceaser_Salad: Has your question been answered???
-
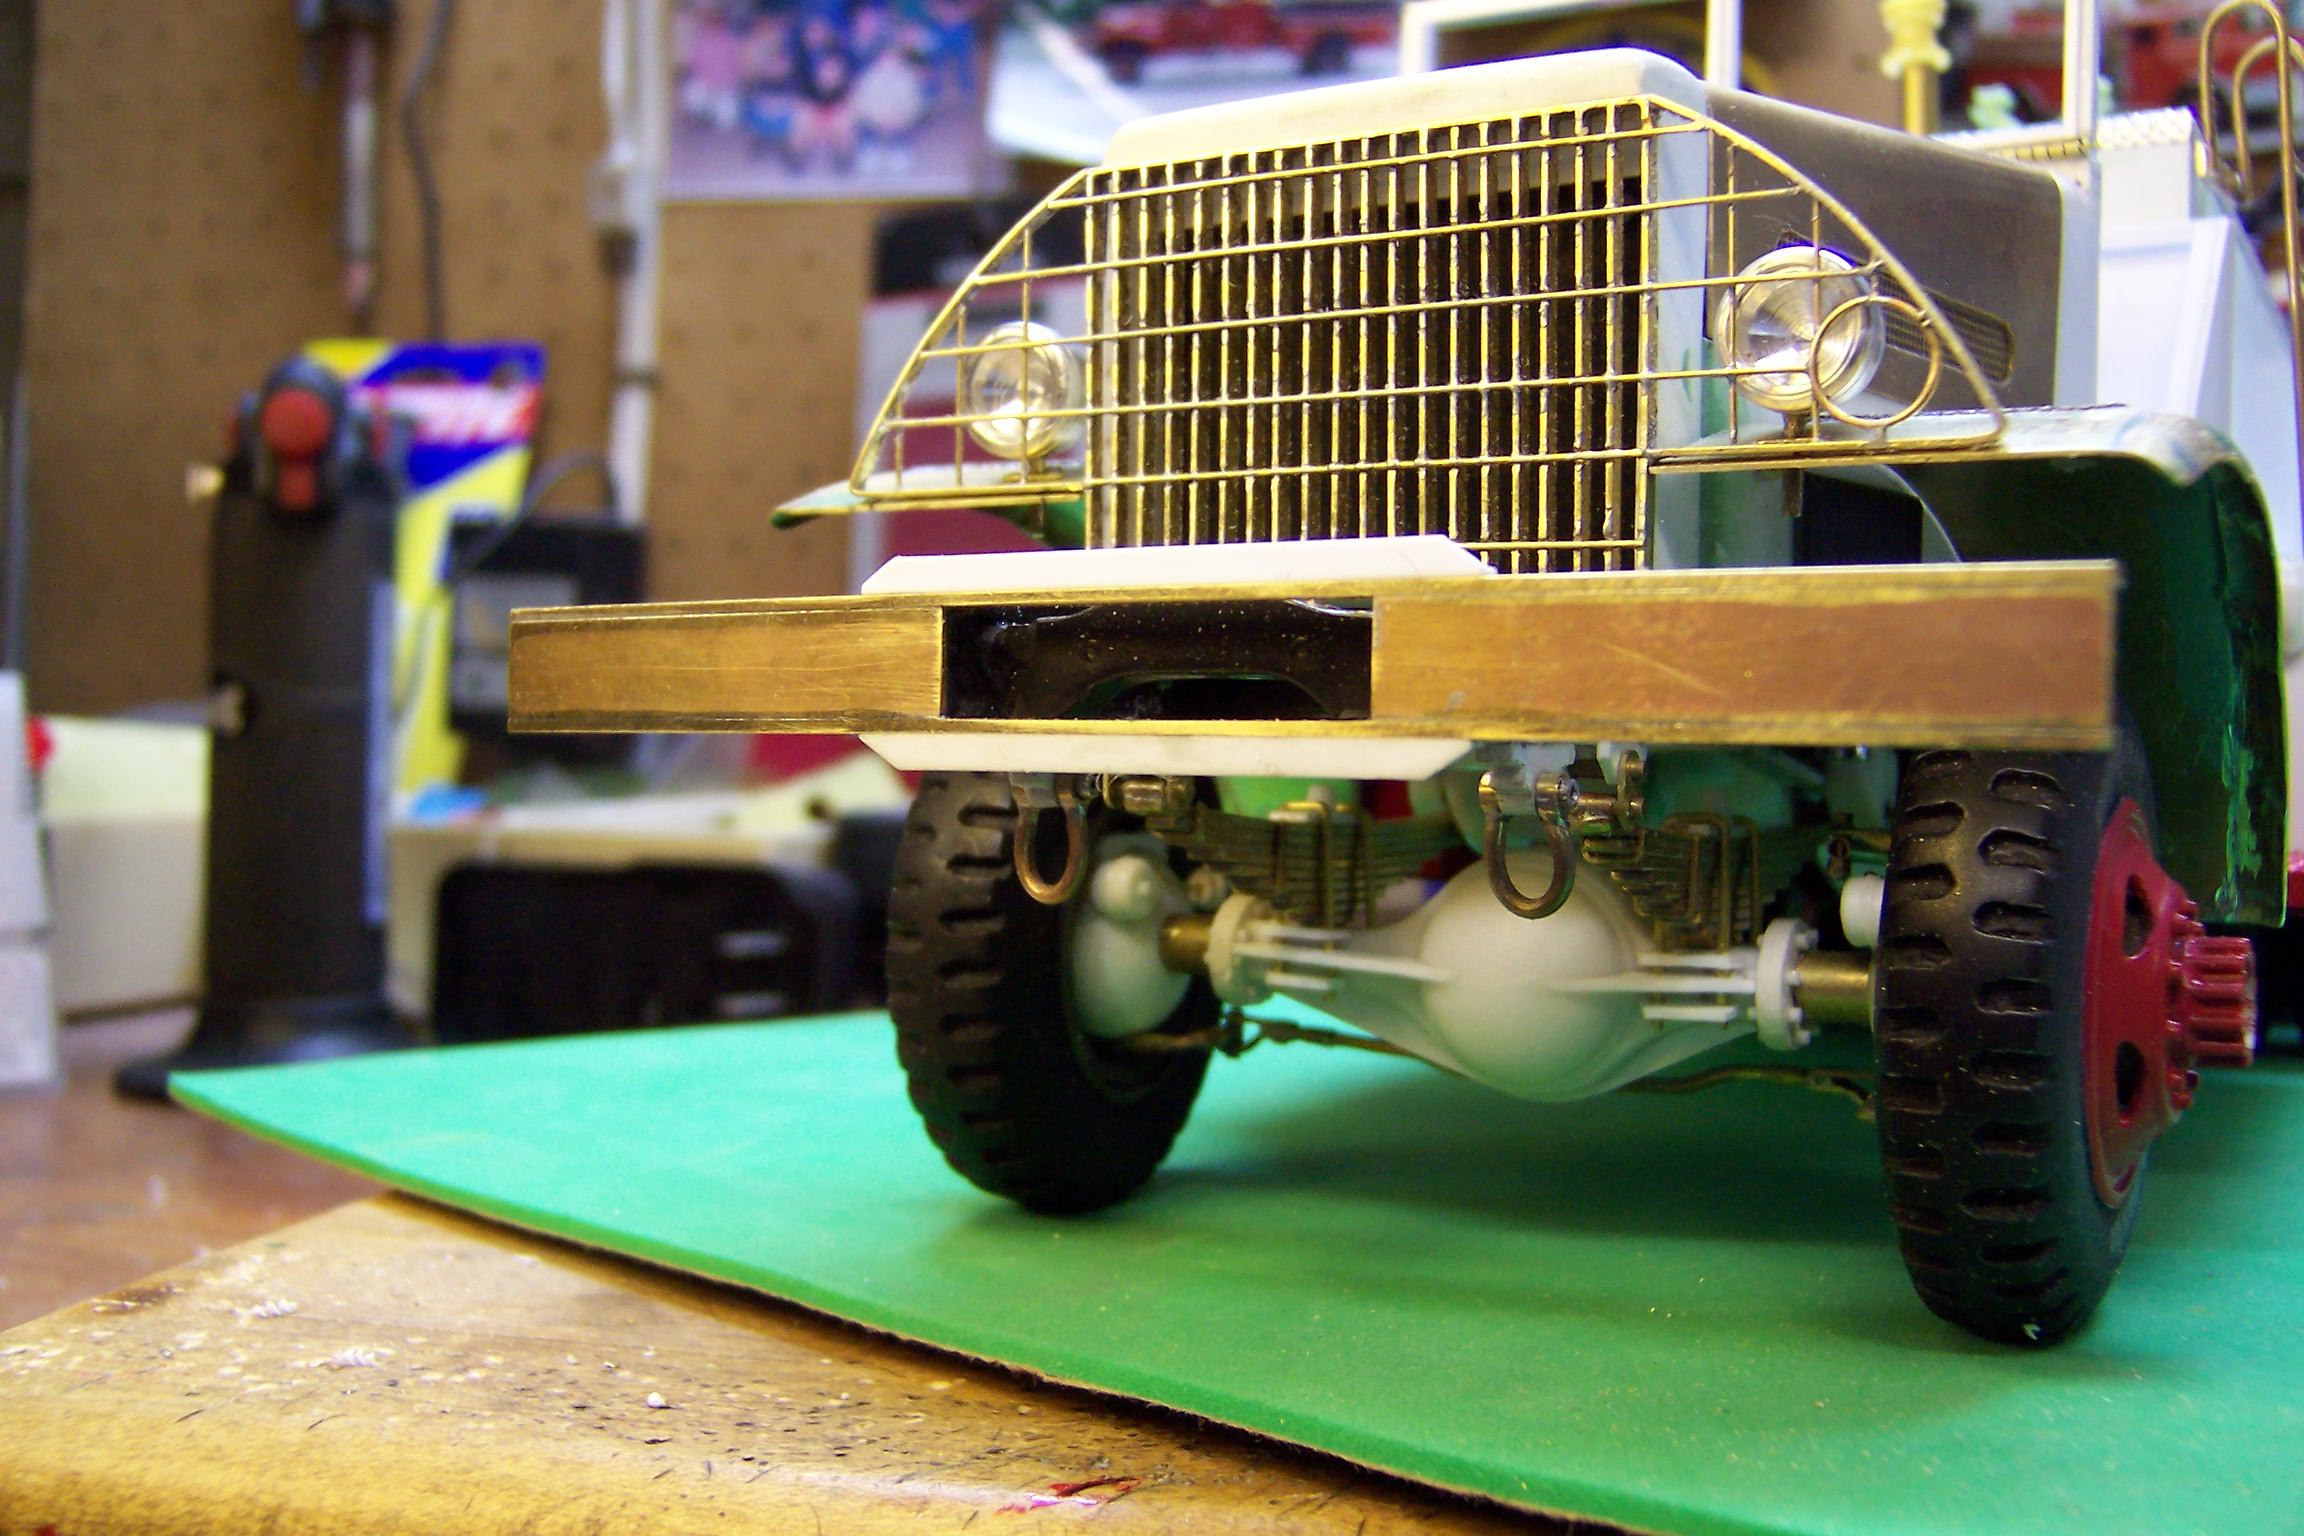
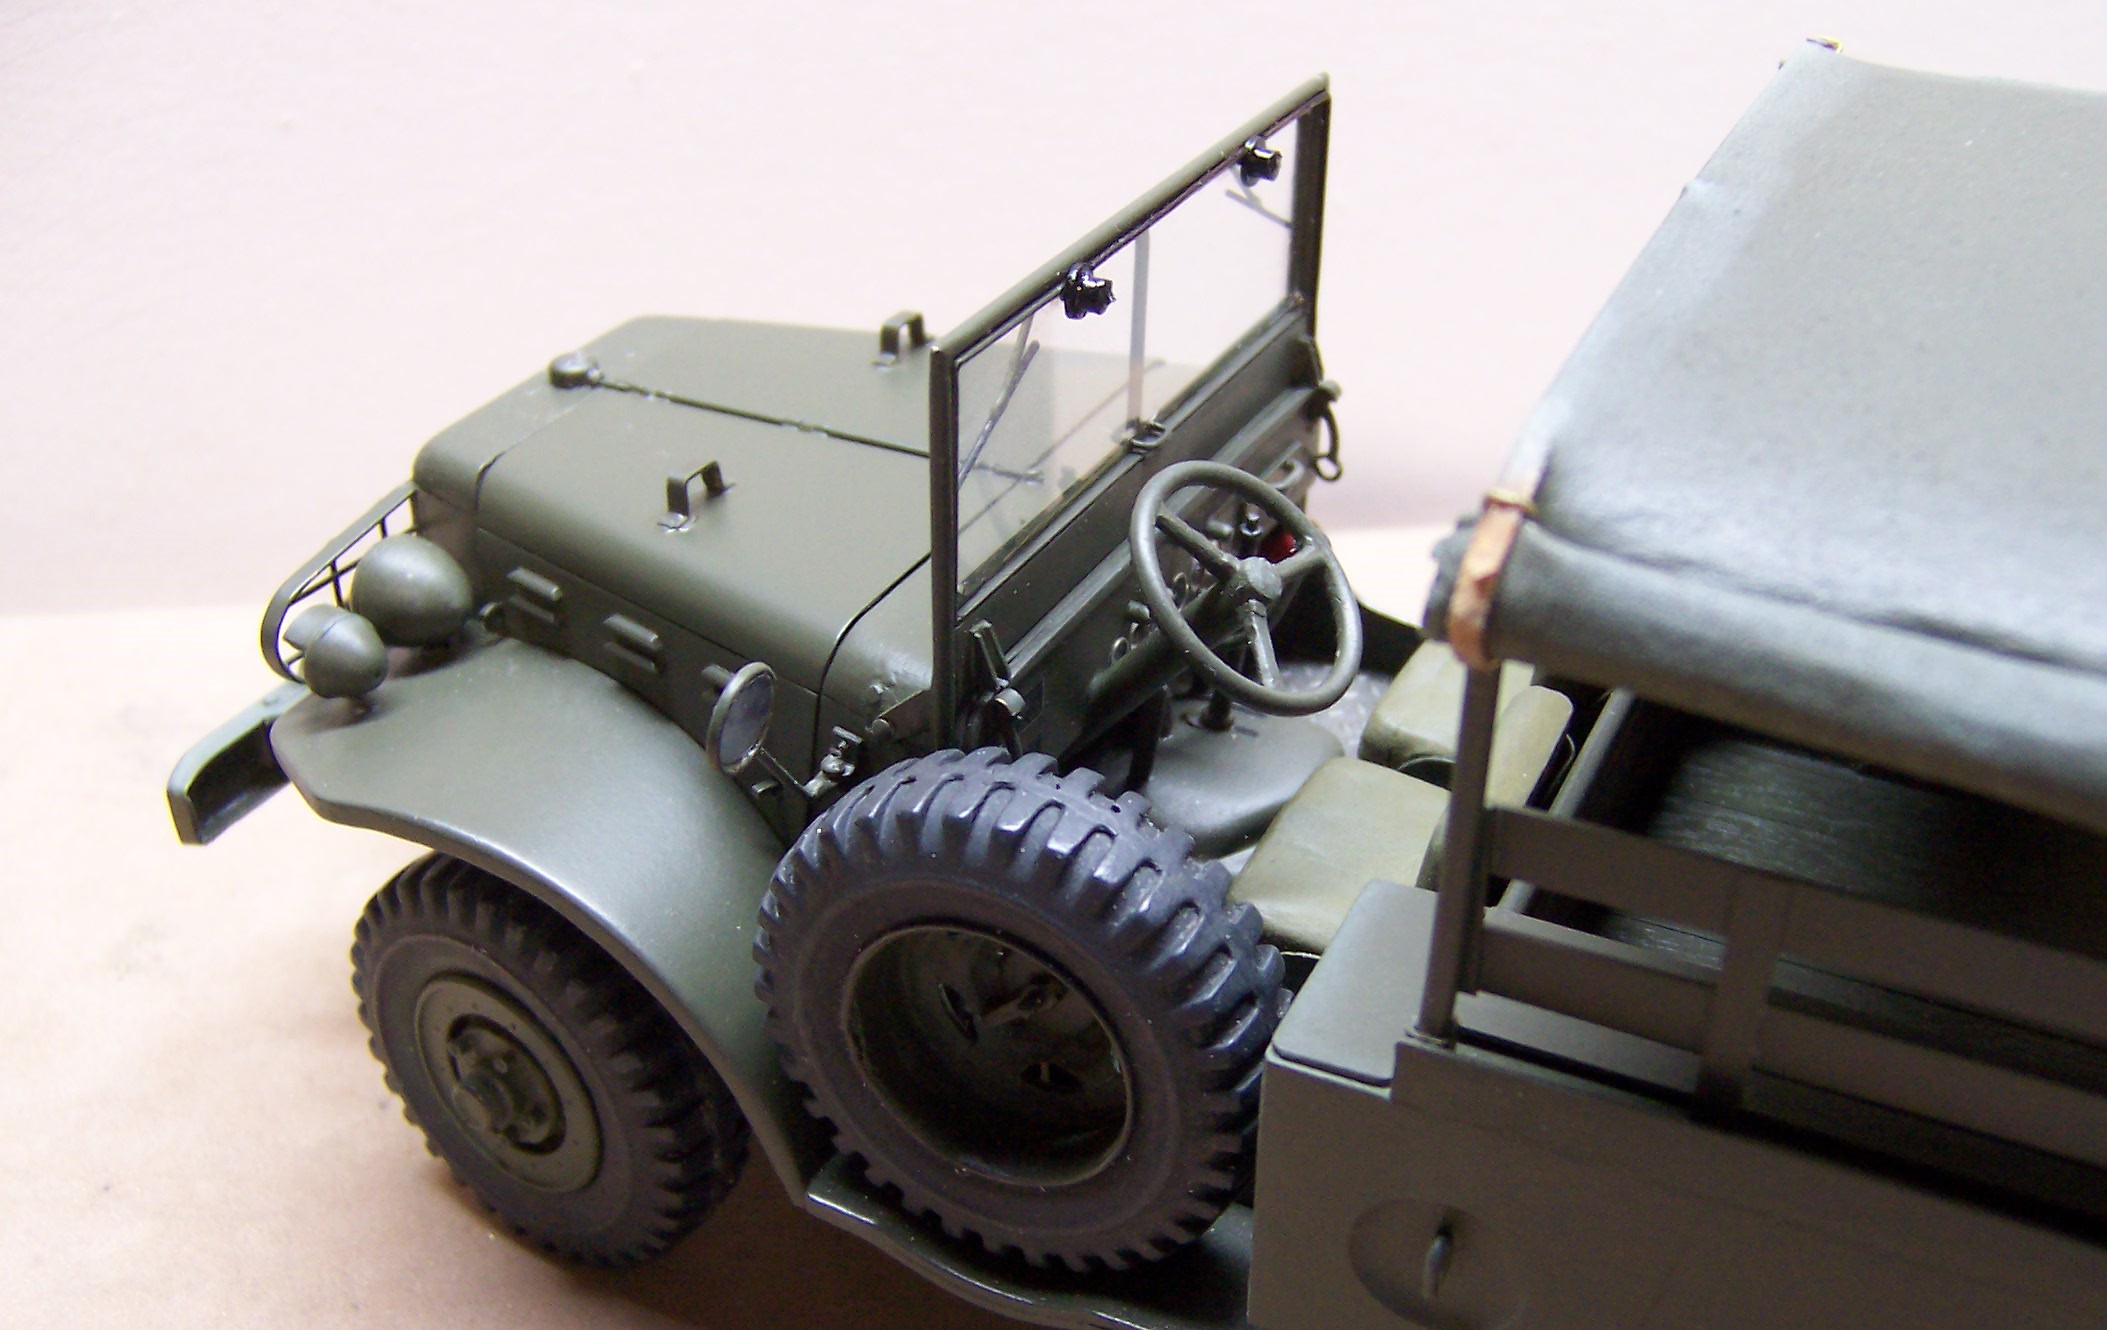
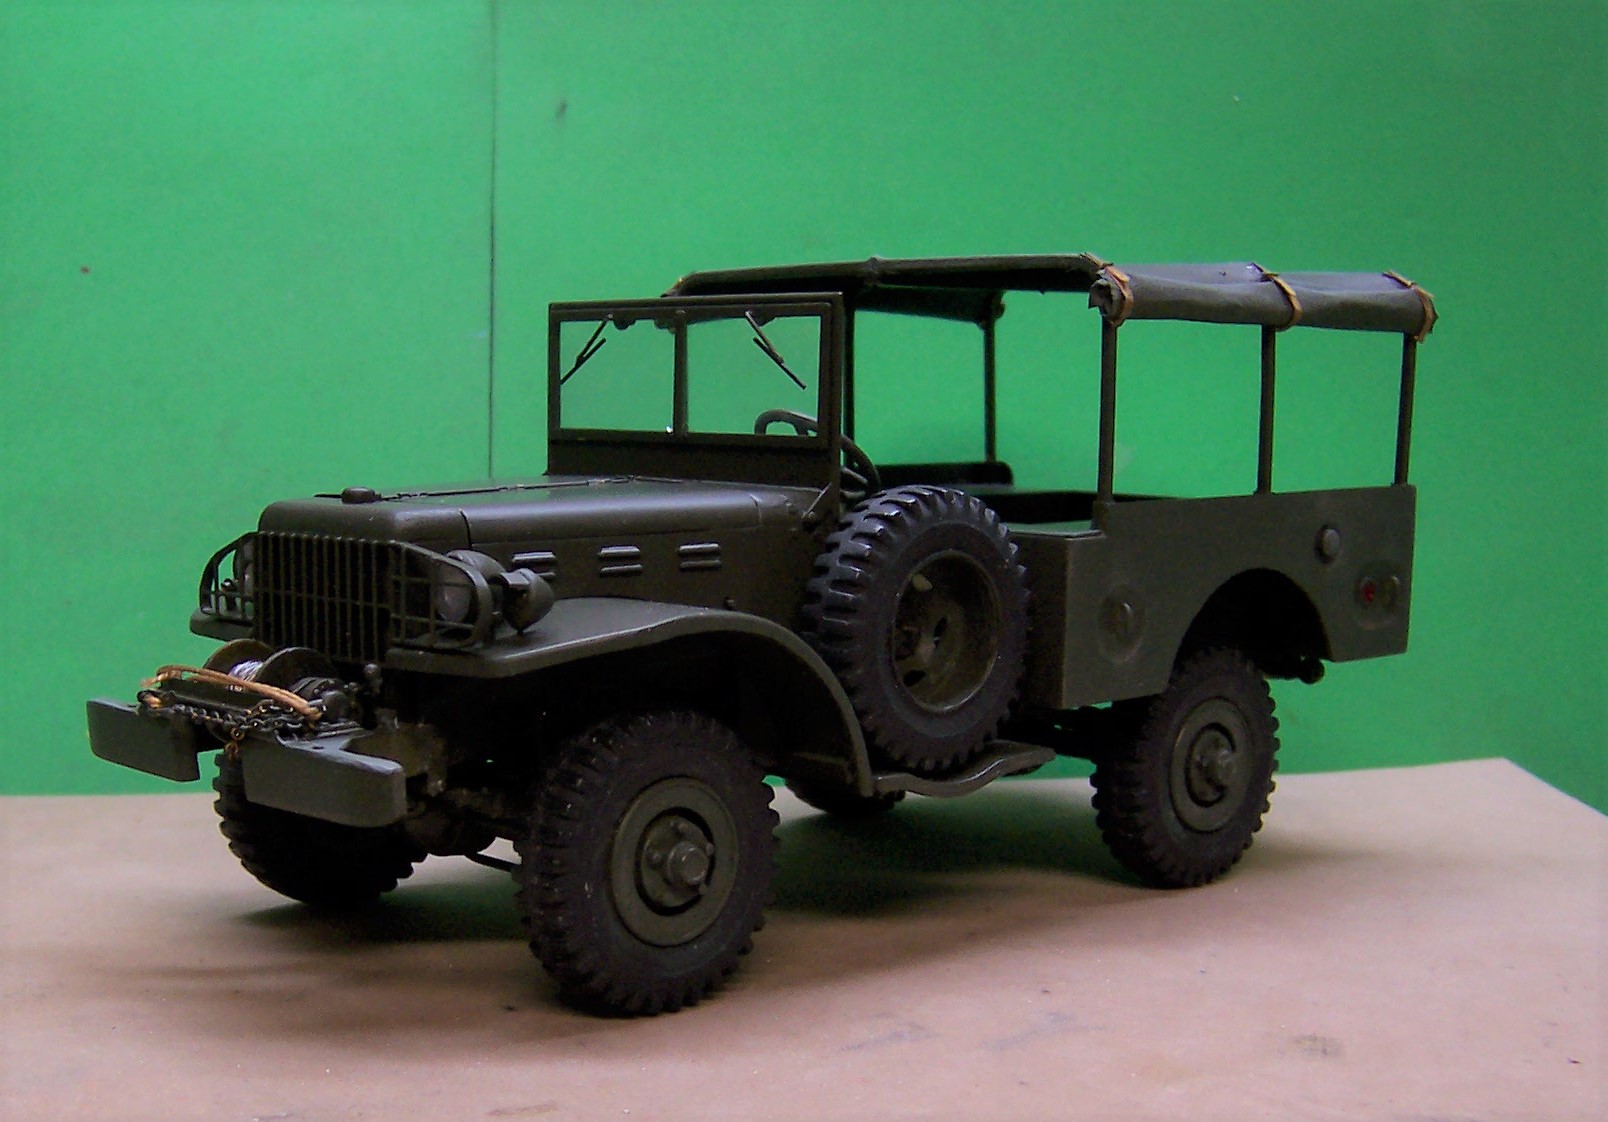
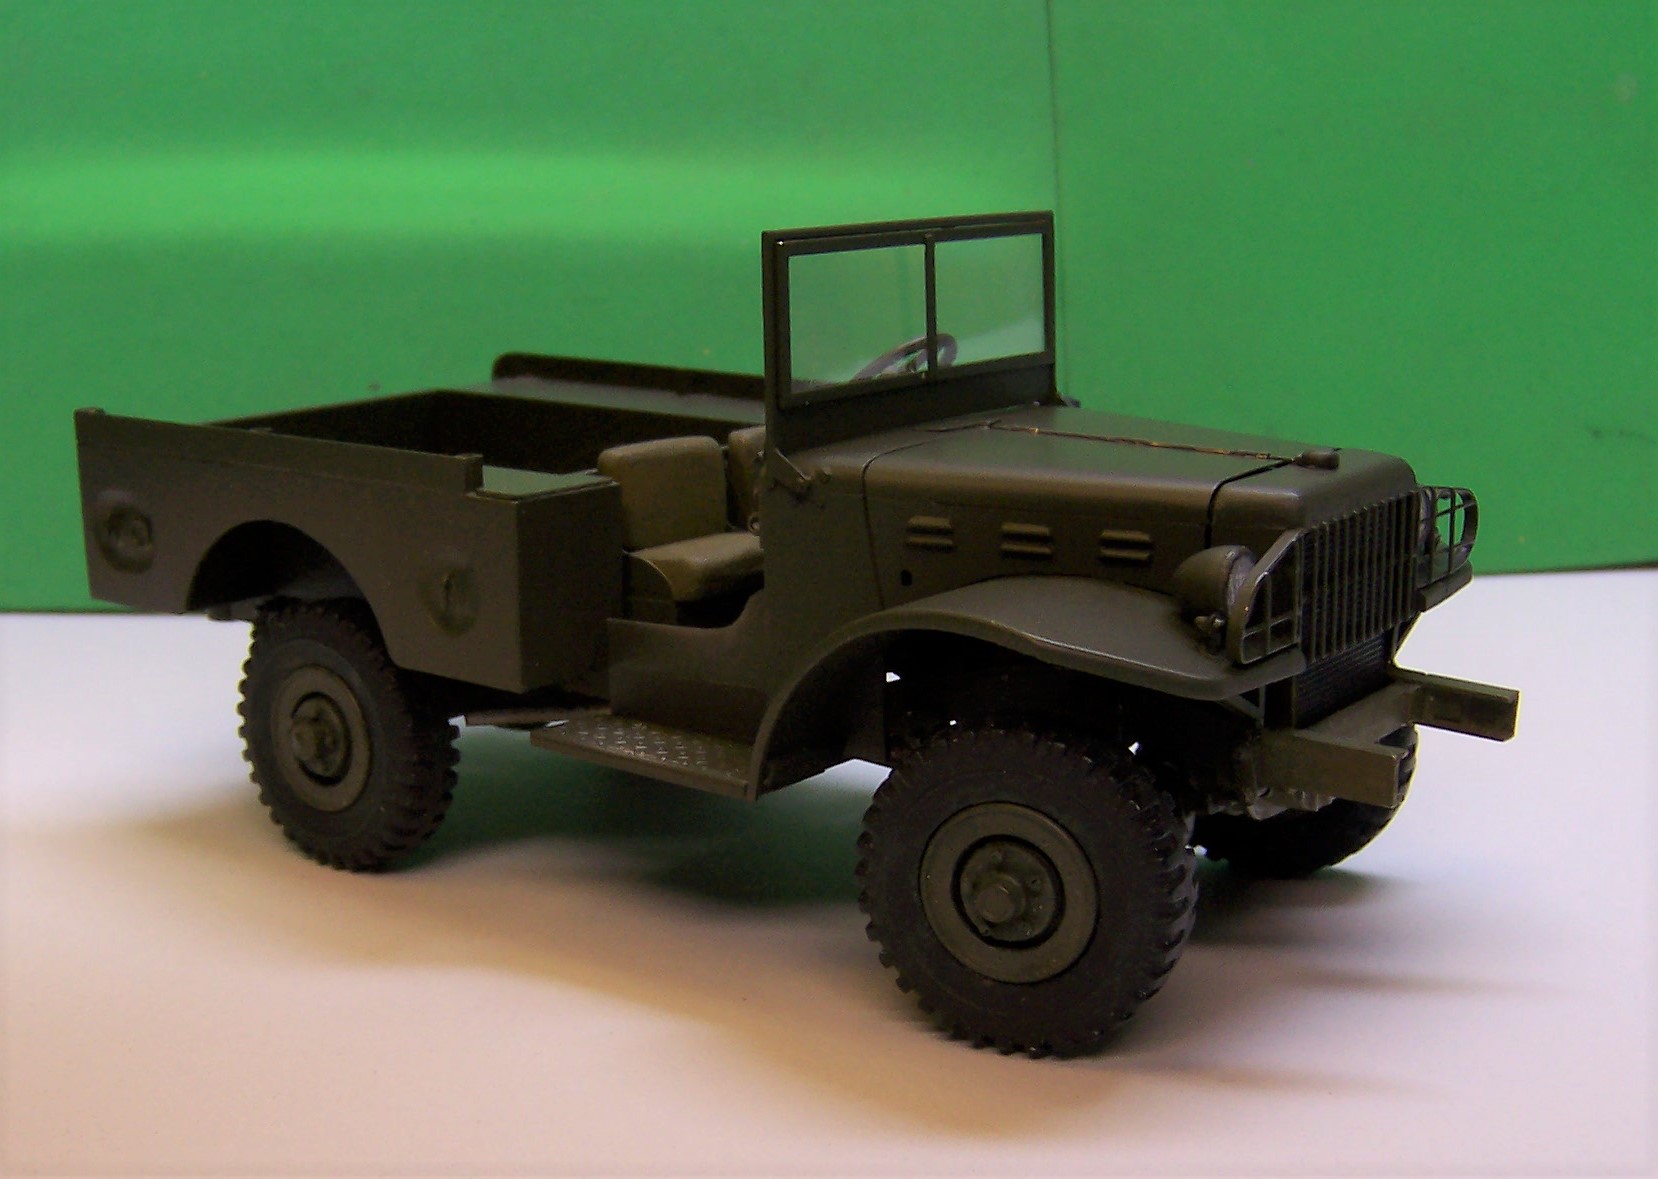
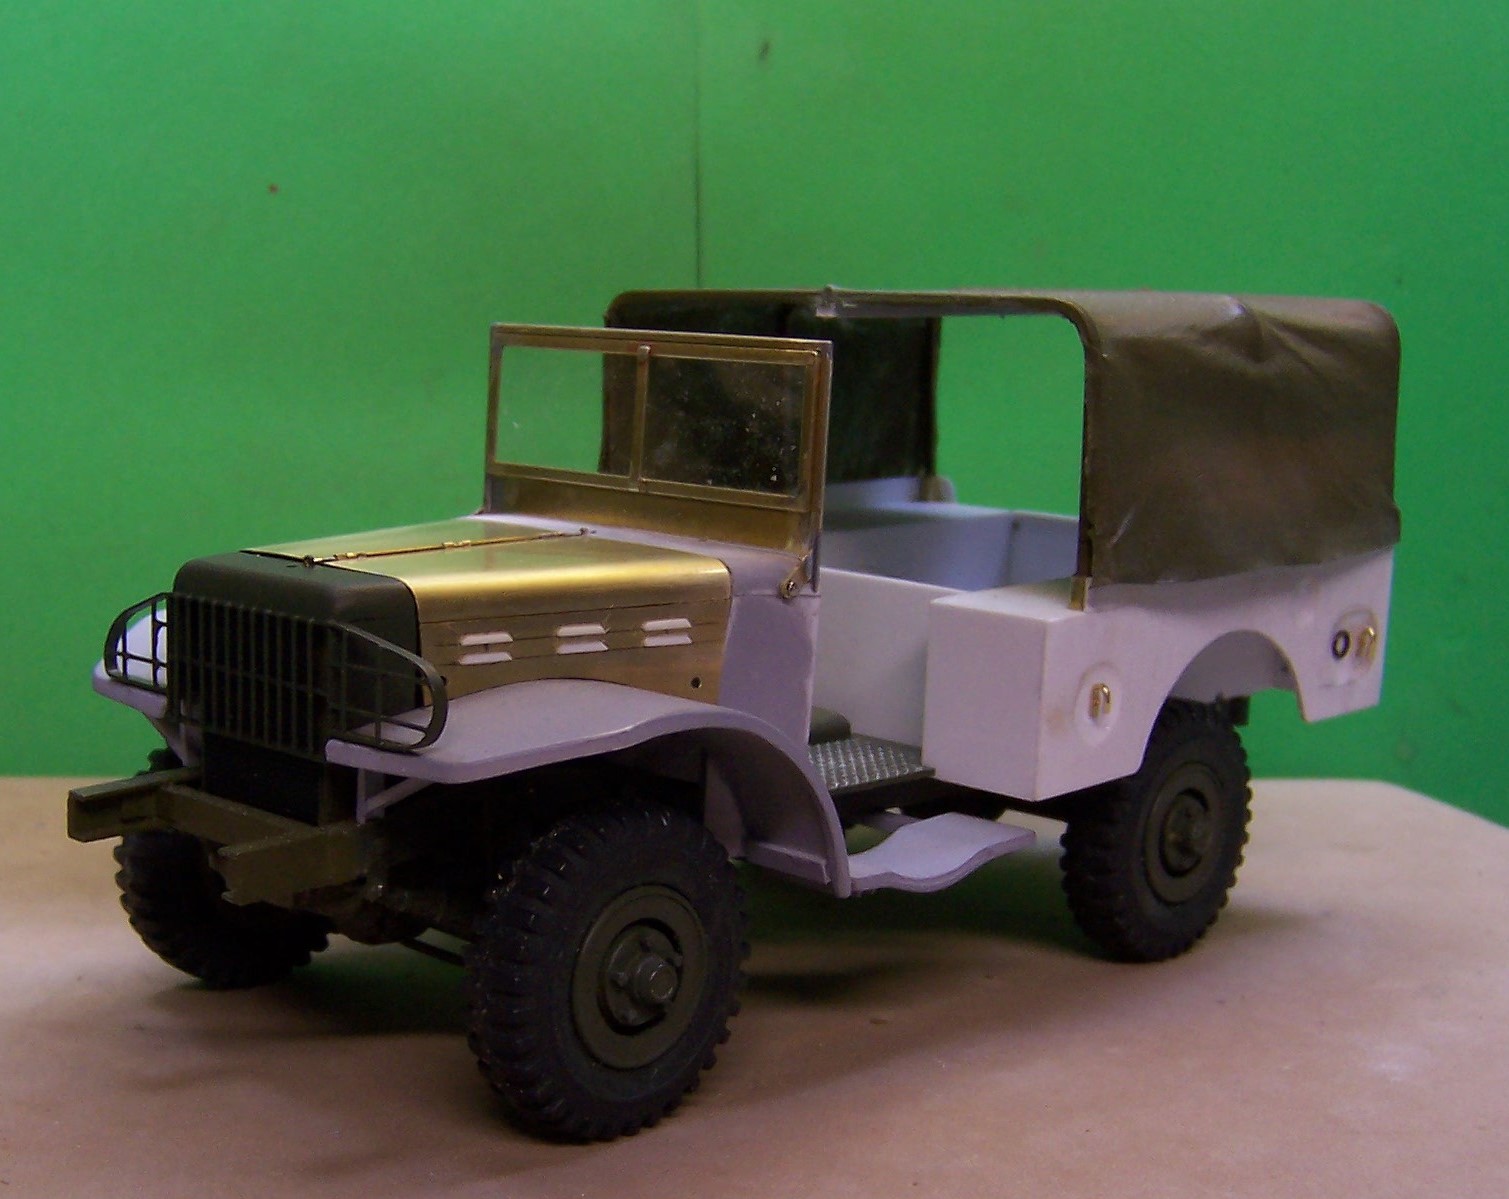
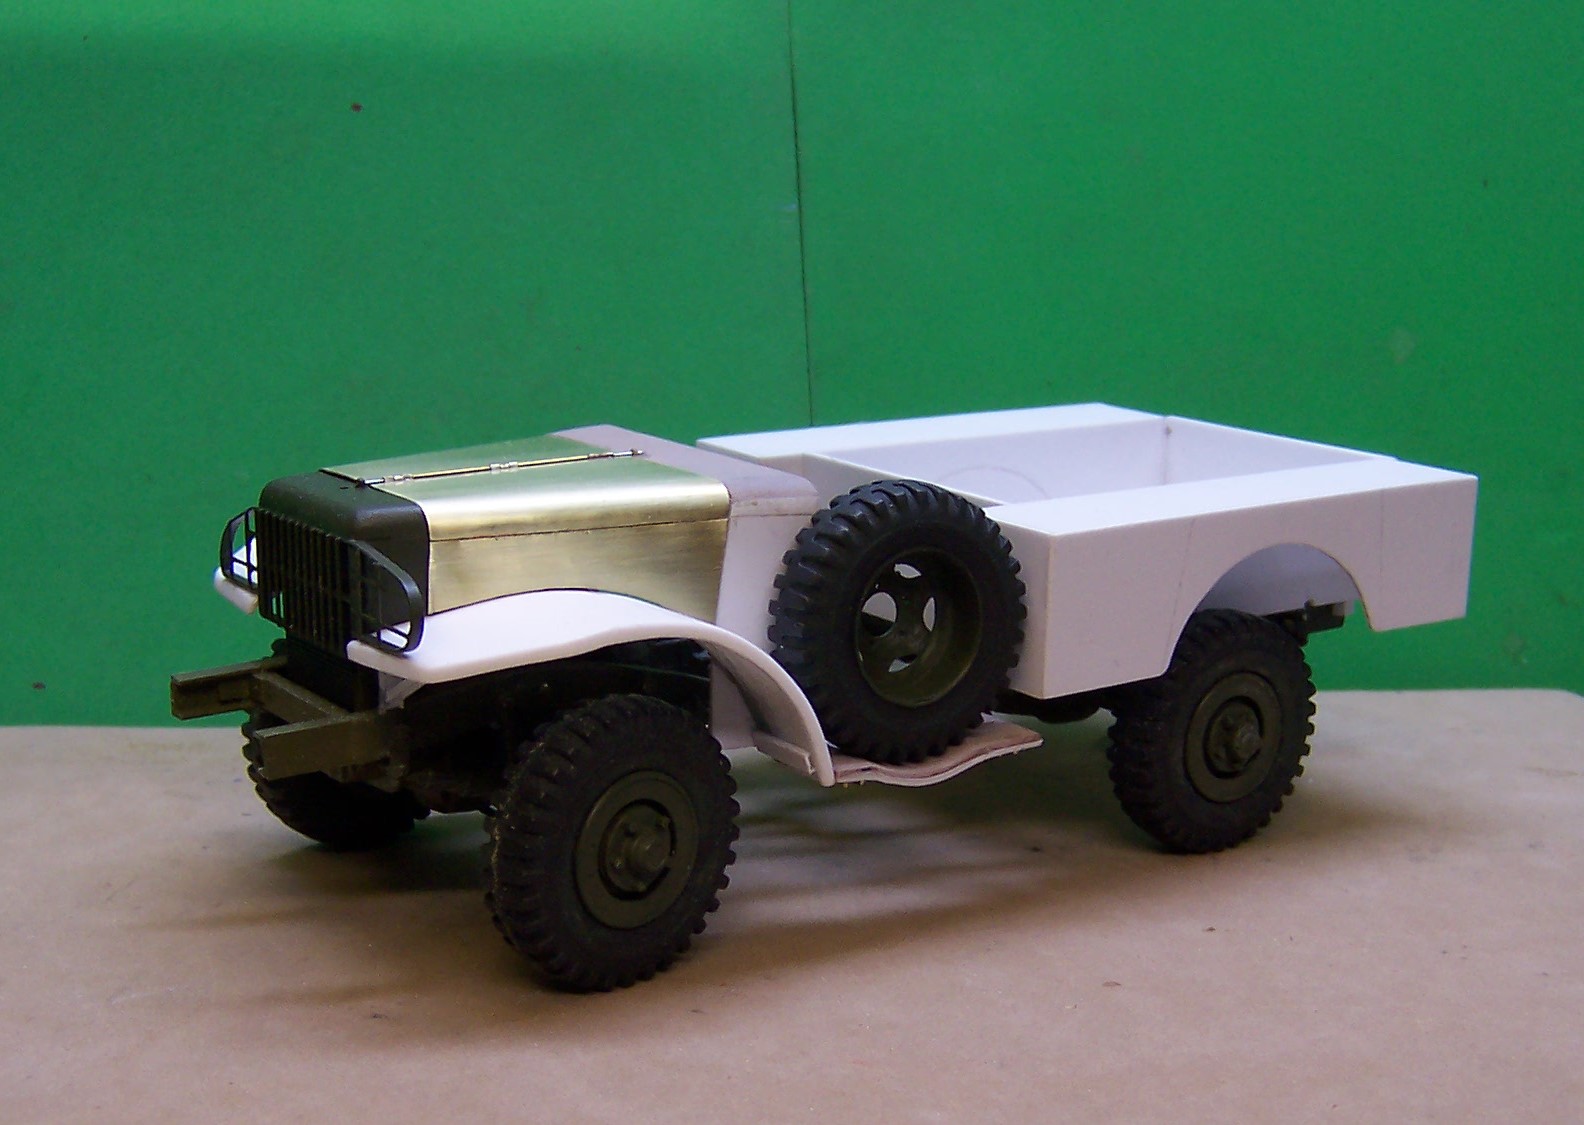
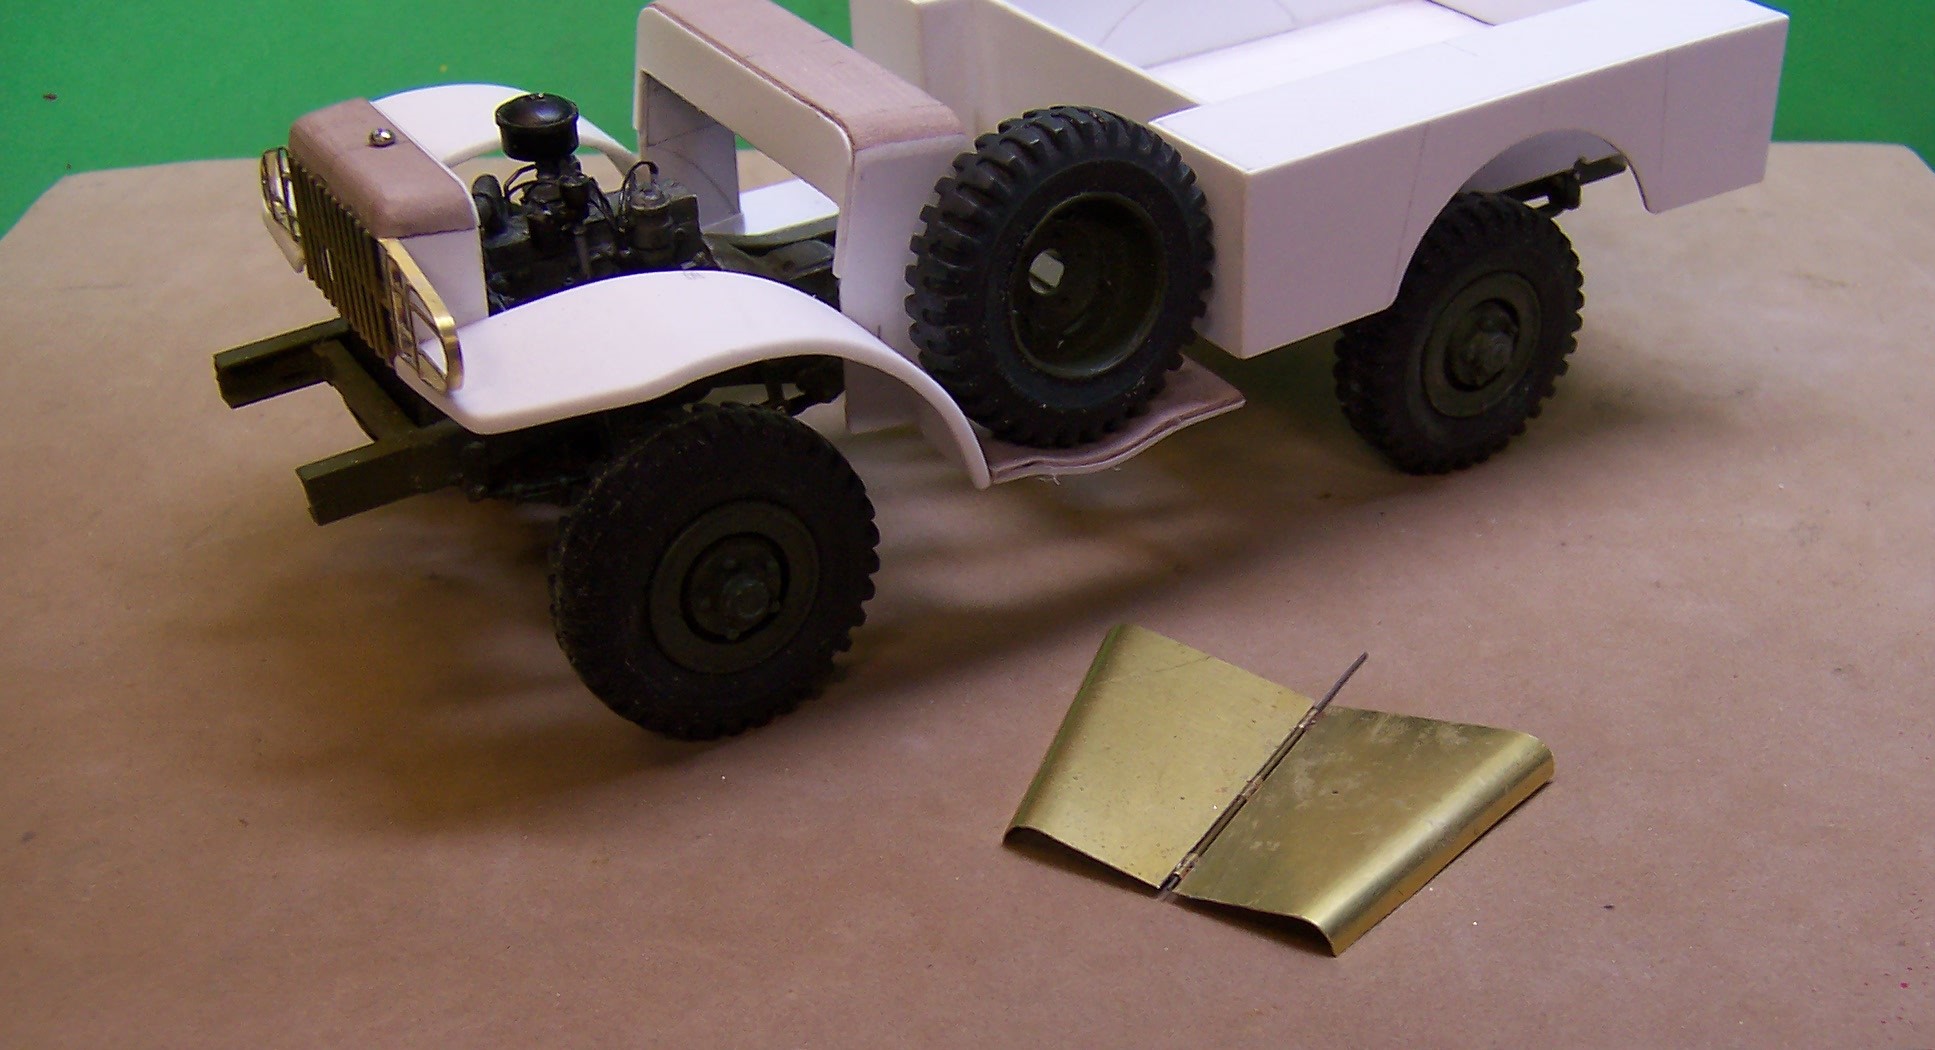
I've put the top aside for now. Got some 'wrinkles" to work out on its construction. But here is where the build is of today. Last thing done was to paint and assemble the headlight buckets, make up a blackout light and two small running lights for the front. Time to start on the winch and front bumper. Interior of the cab is done with all of the levers, controls etc. I've added just a bit of wear on top surfaces such as the running board and the plate on each side the the cab where shoes would normally wear the paint away. Still have some windshield wipers to make up and secure the clear sheet for the glass.
-
Why would any kid today want to do anything so mundane as building models anyway? Everything is done for them. Instant gratification has been the thing for years now. To build something and then show it along side something another person did? Why that might breed hurt feelings. Can't have them getting their sensitive little egos hurt ya know. The current generation has no clue what it means to entertain themselves away from the cell phone or video games. It's not a matter of patience. That comes with practice. What is missing is discipline whether it's in the home, in school or at play. I know, I'm ranting. And there are some young people today who have it figured out and will become great men and women in society. So it's not fair to put them all in the same category. Nevertheless they are in the minority compared to others who seem to have no clue which end is up. The question was asked and that is MHO!!?
-
I'm with Zippi. The paint is truly great just the way it is. Sometimes a clearcoat just is a step too far.
-
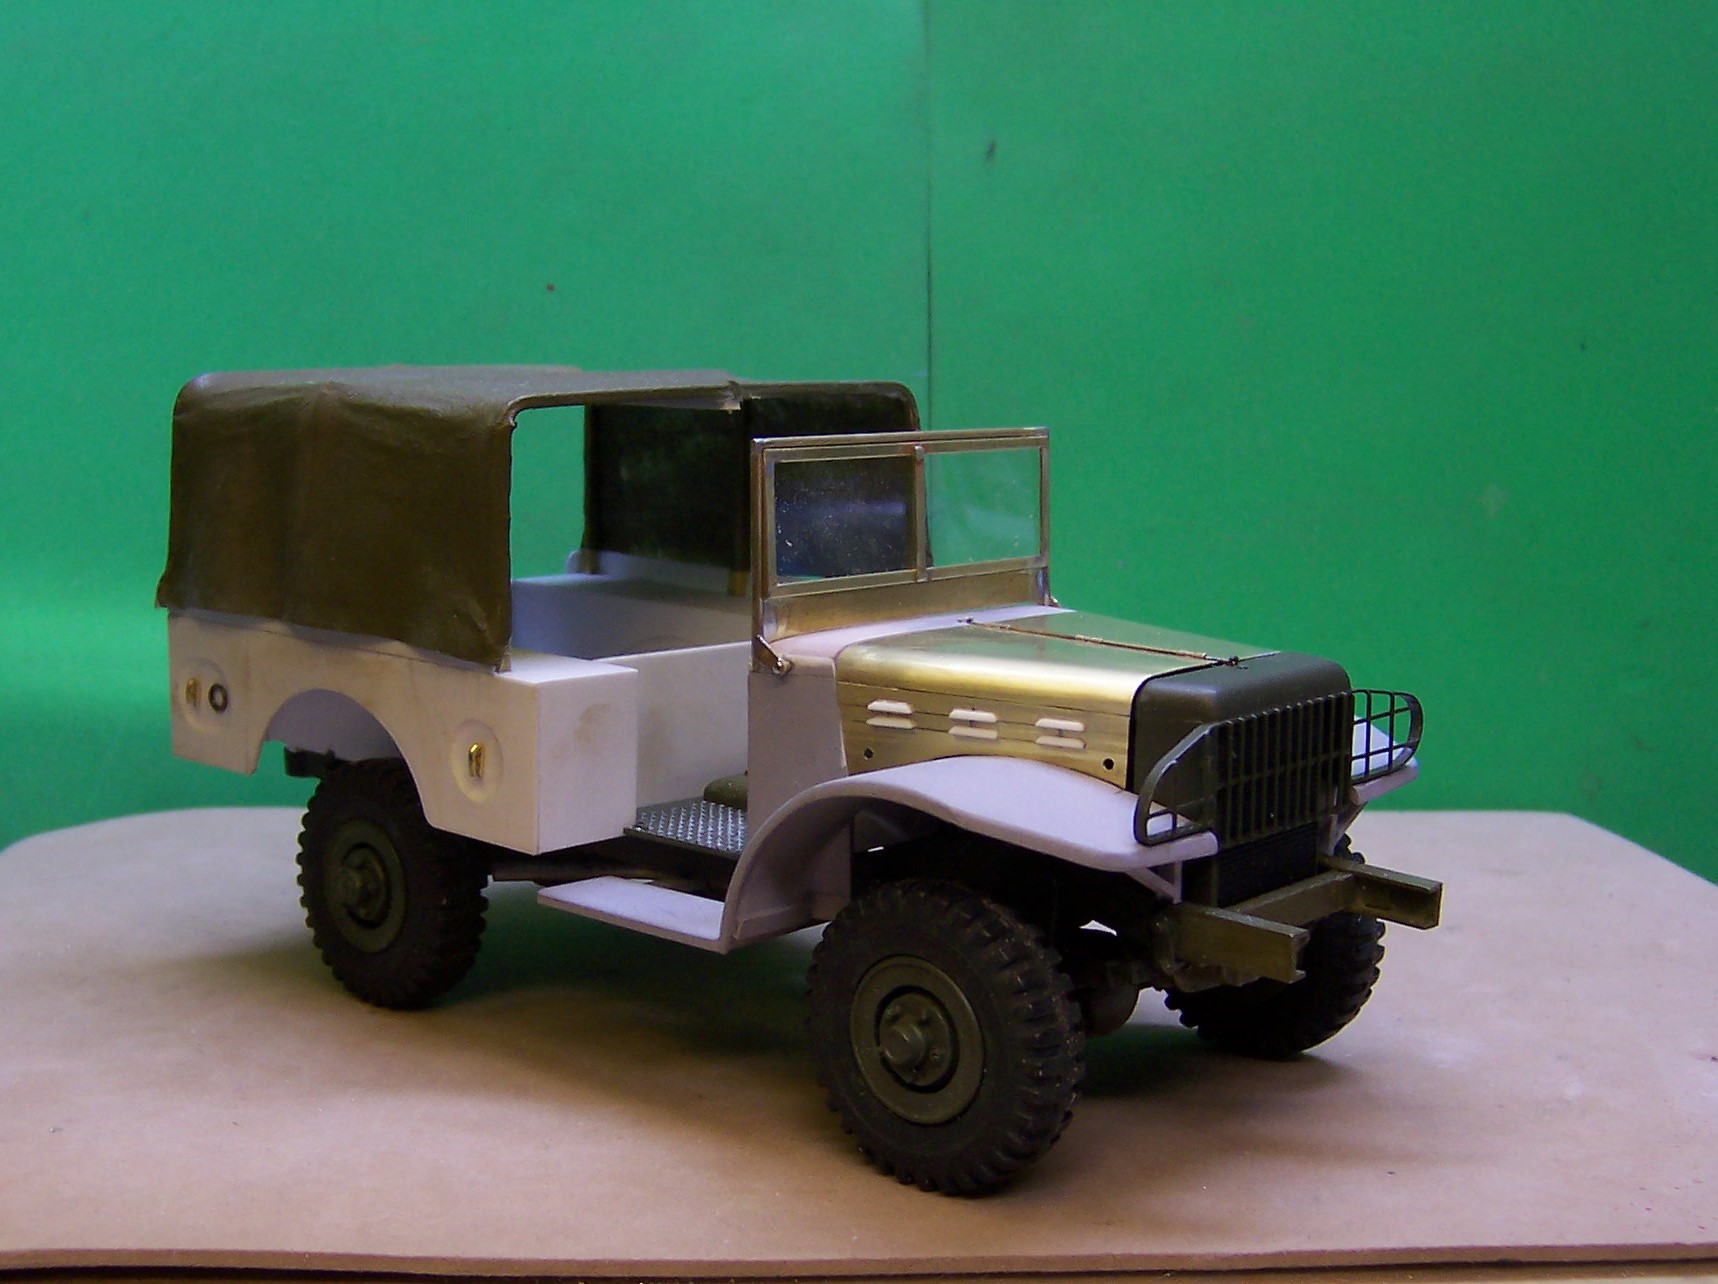
Did some painting on the canvas top. Ok, but I think I can do a bit better. A piece is still needed between the windshield and the body canvas and a piece needs to be made for the back. Floorboards are done and ready for installation. Today was windshield day. It's made of brass tubing, brass angle and strip stock. It folds down.
-
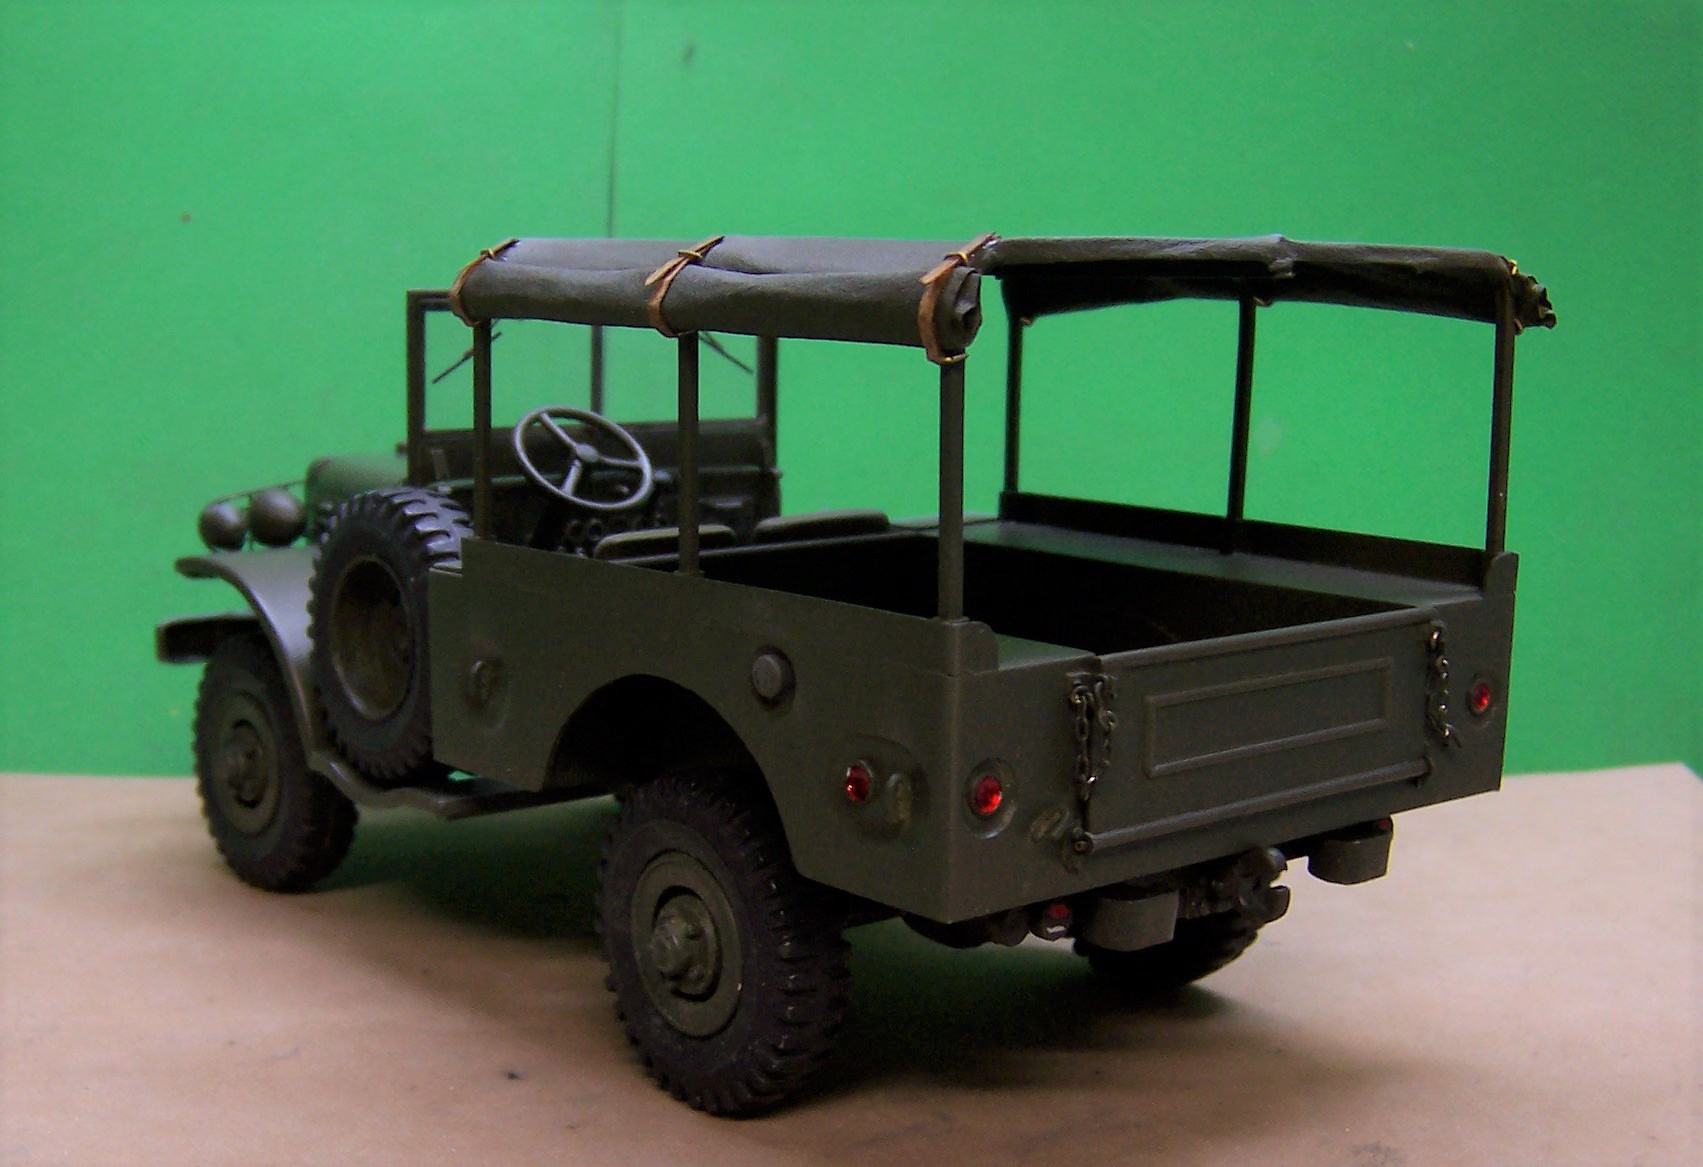
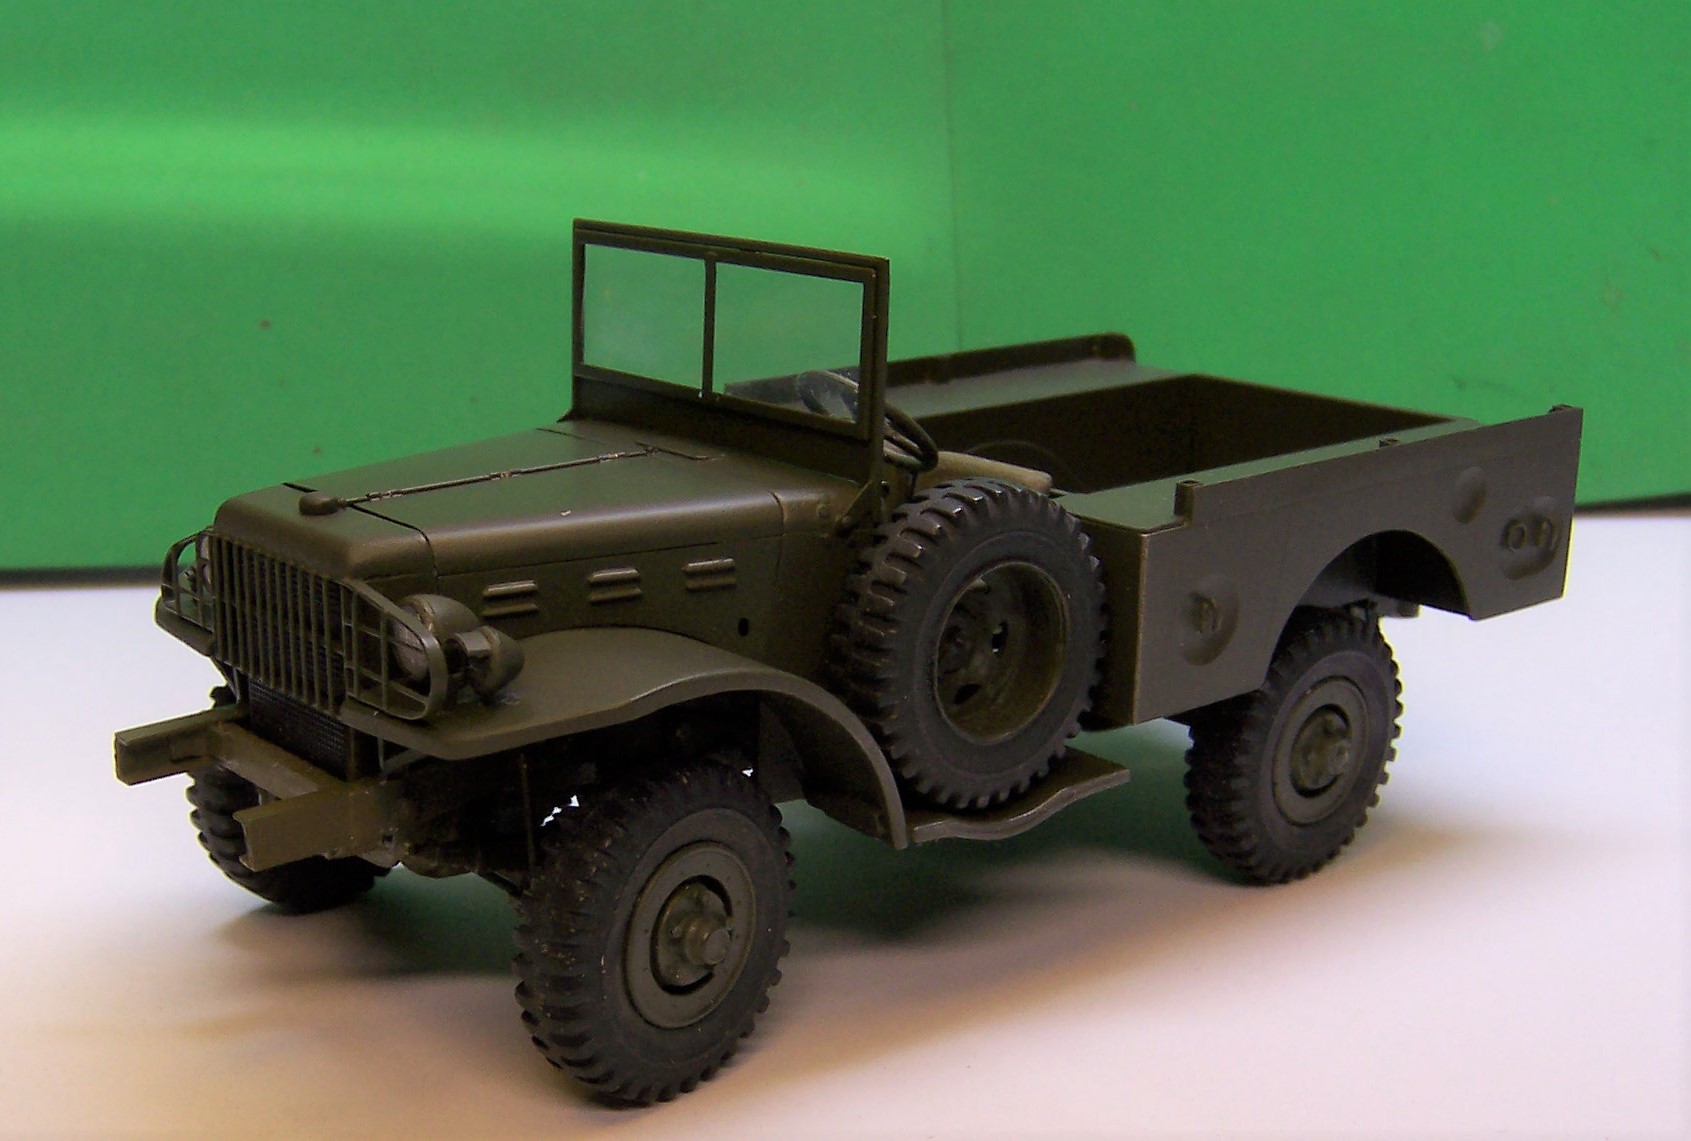
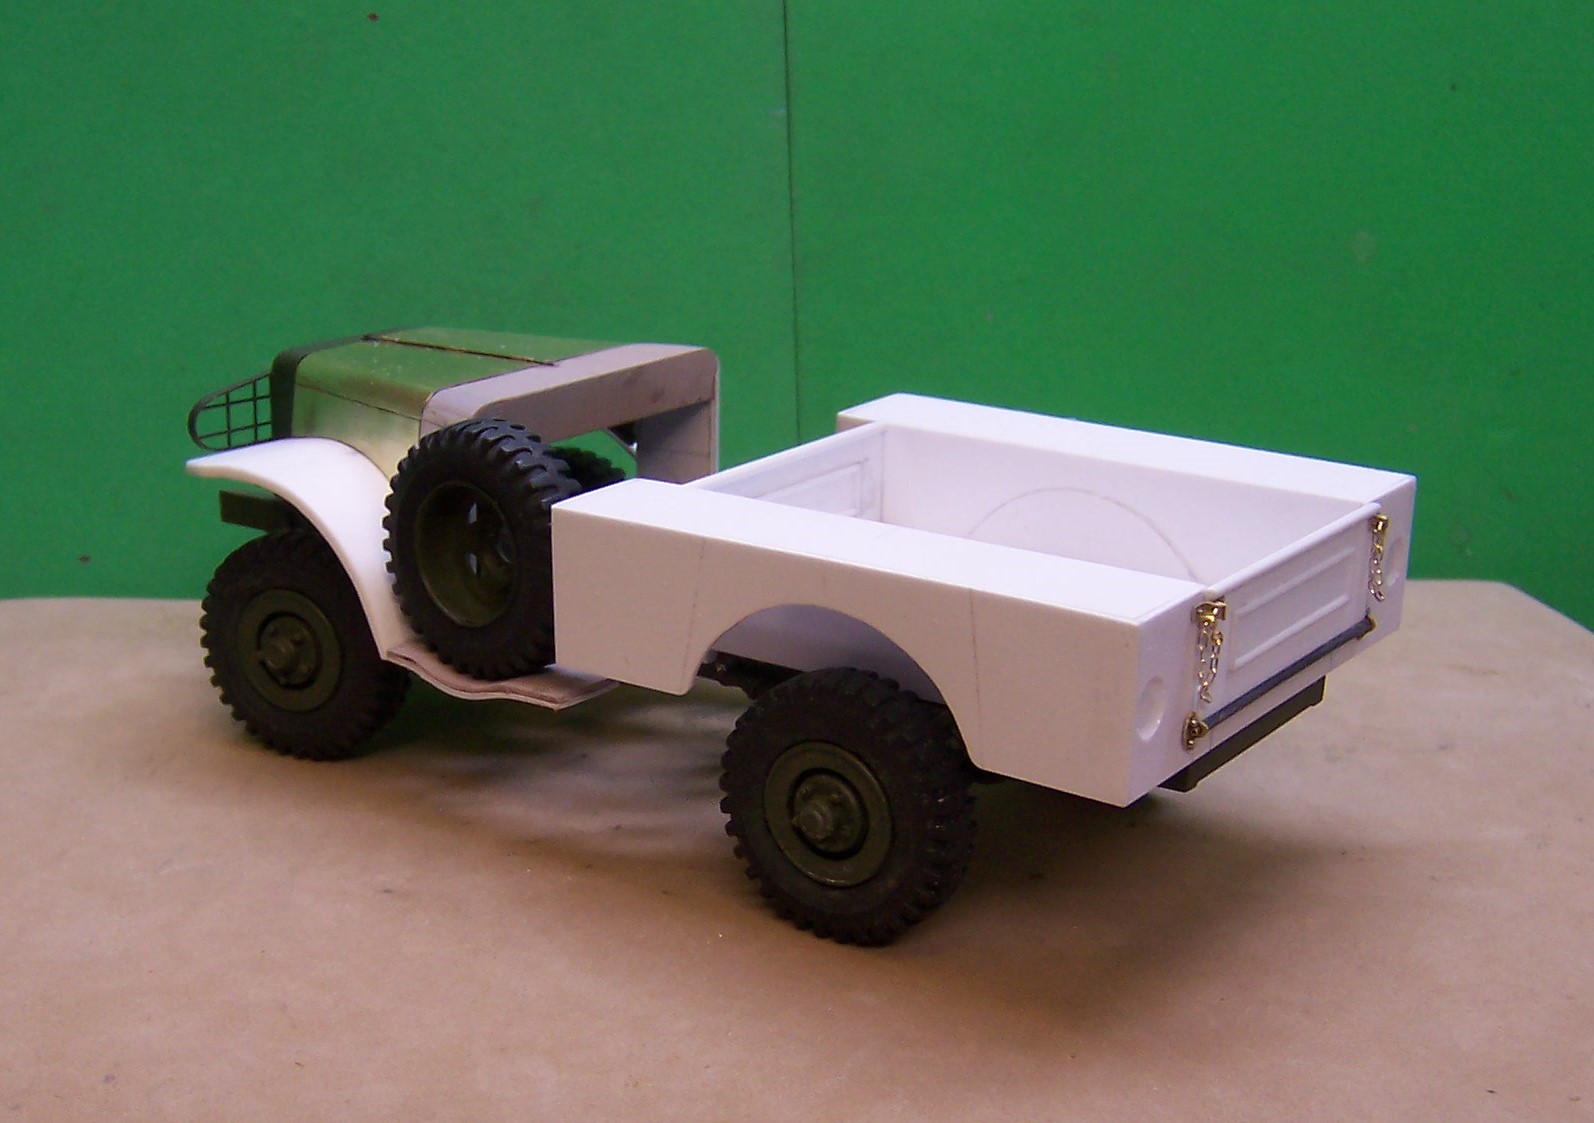
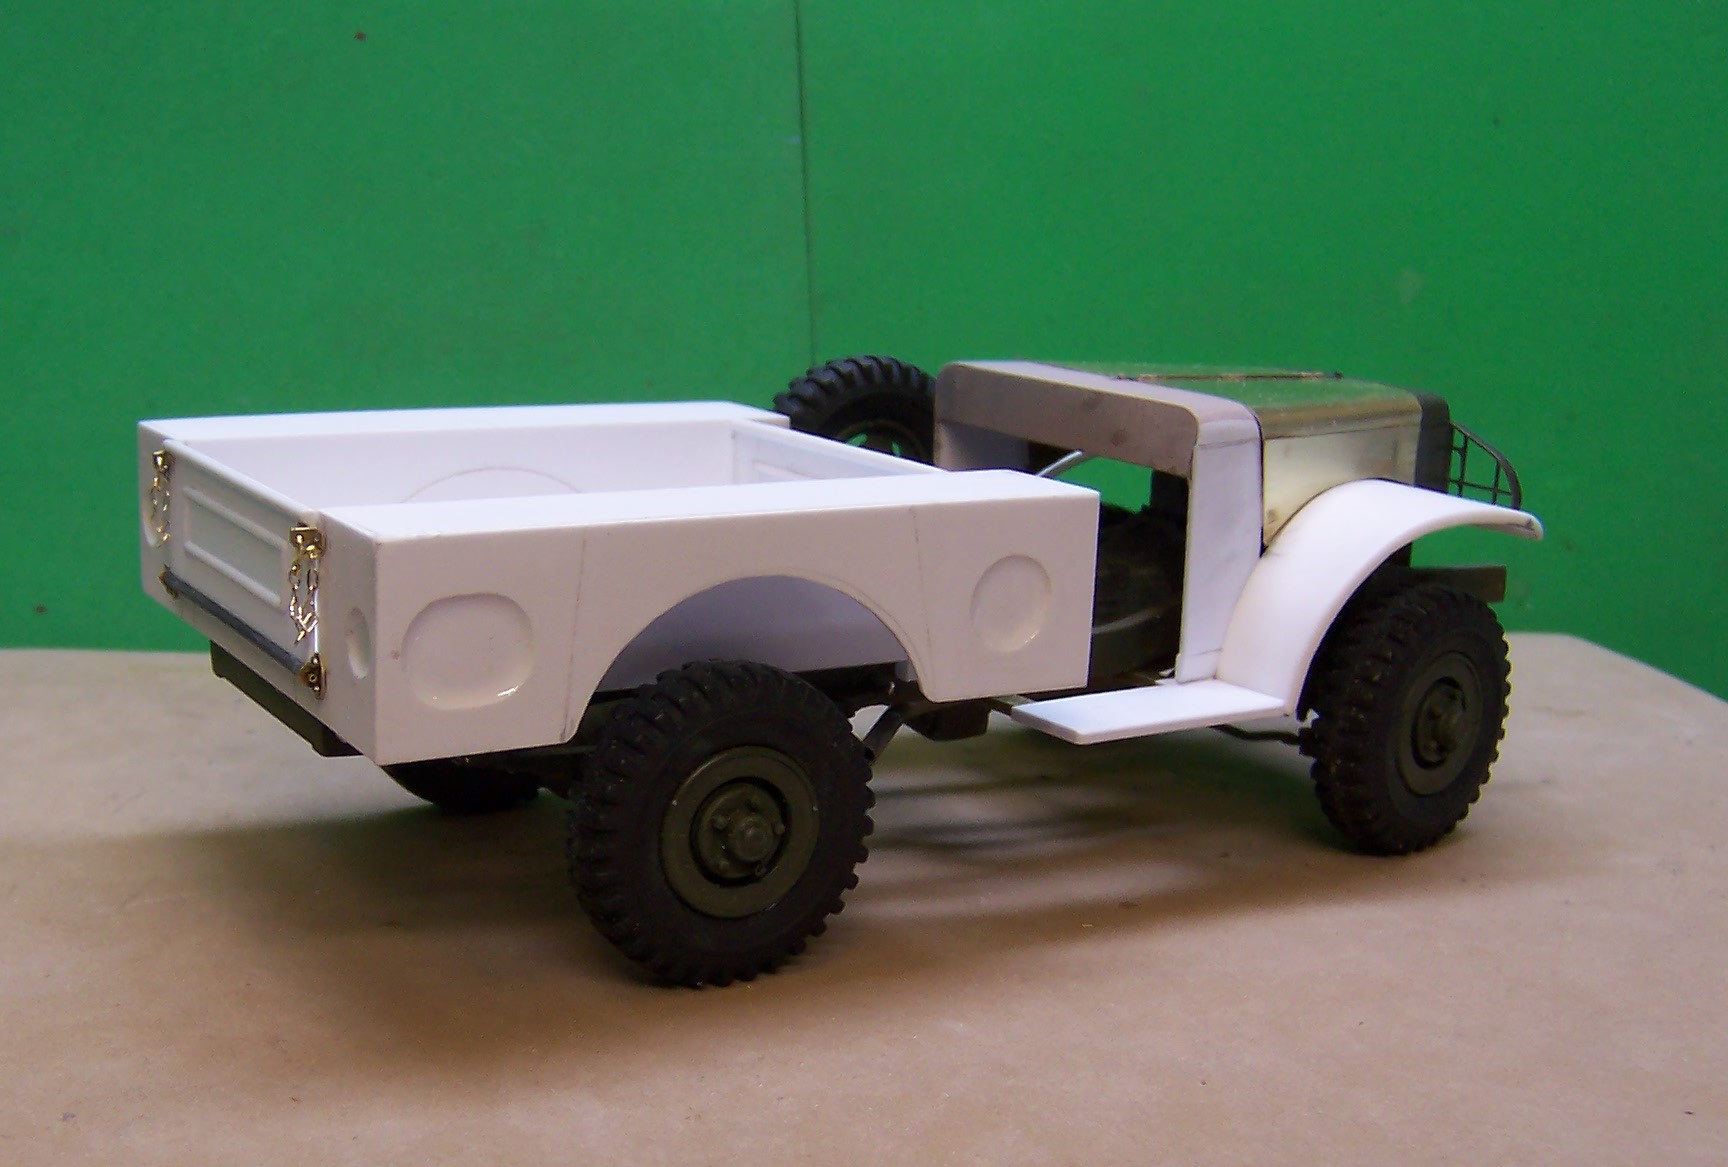
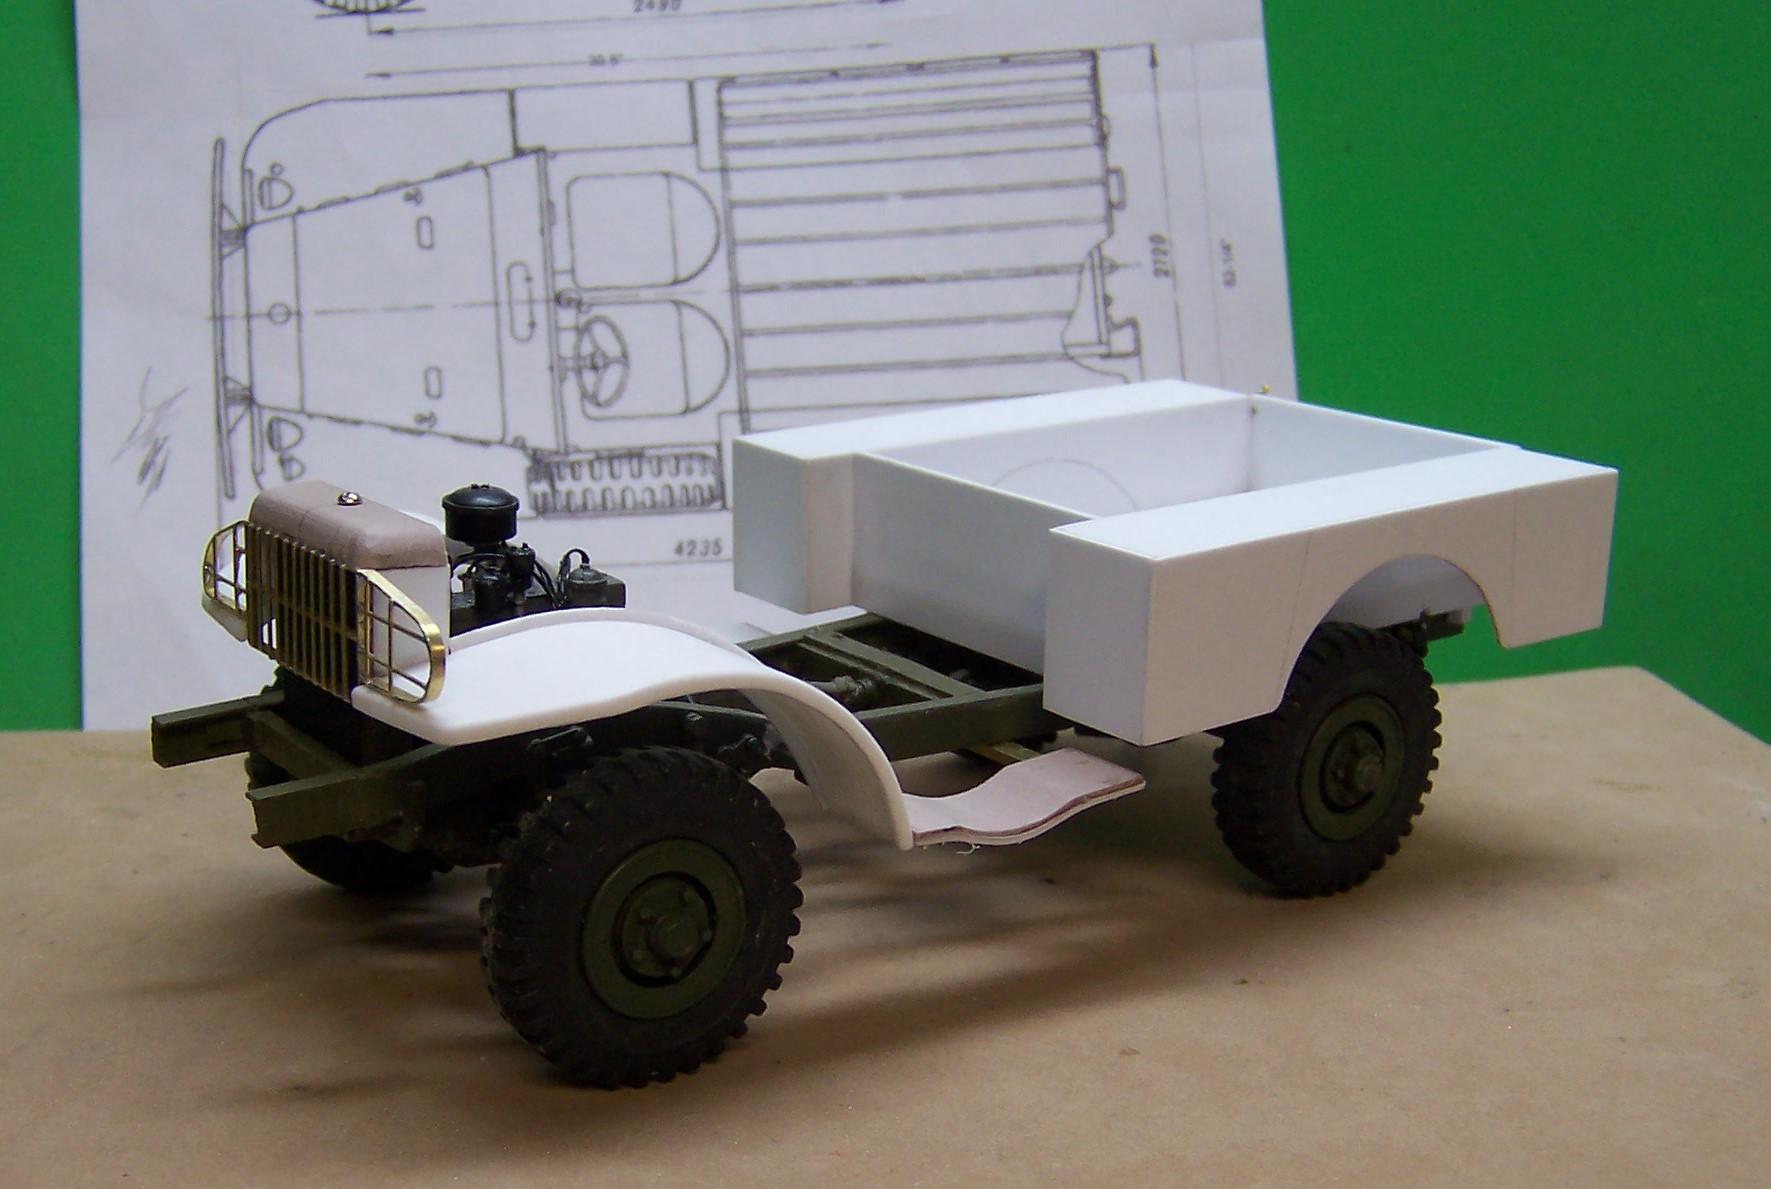
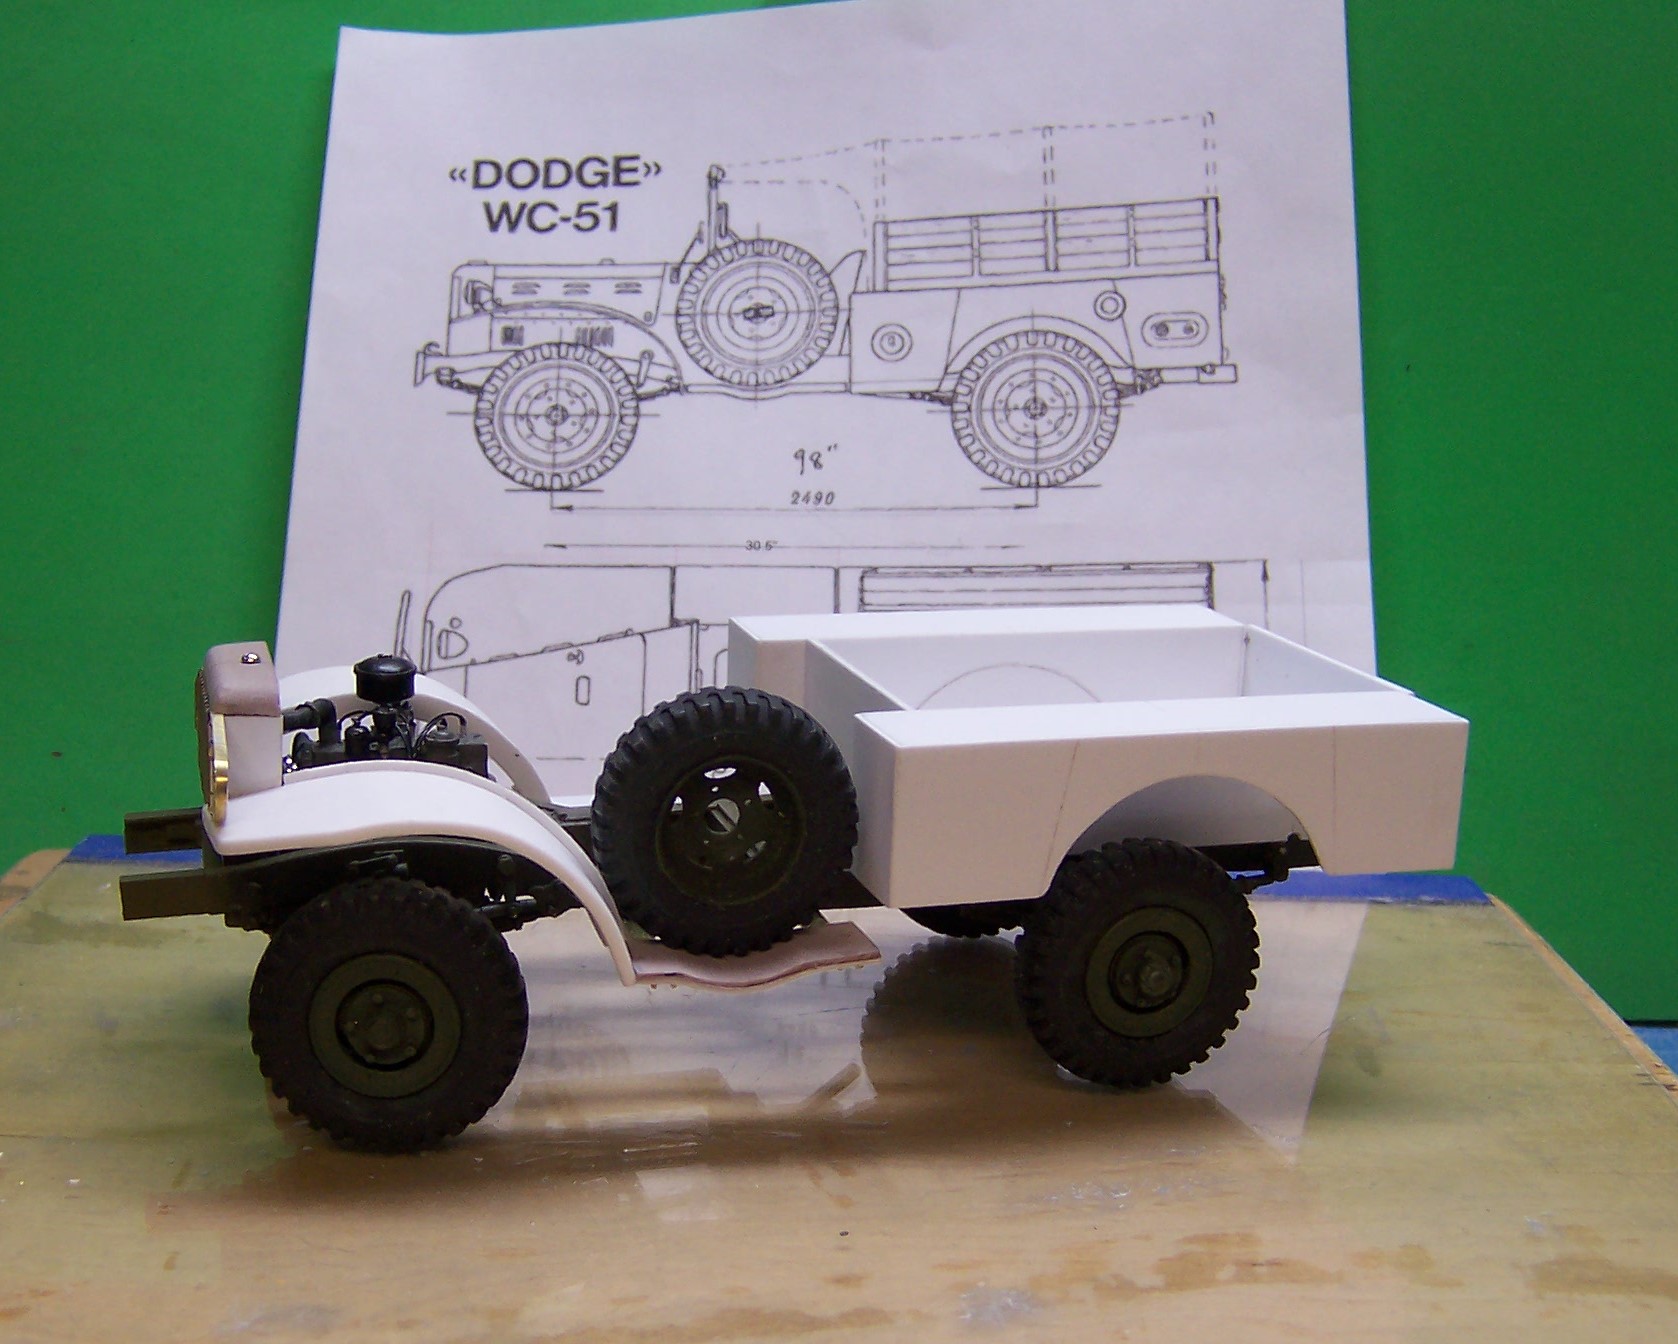
Going in a slightly different direction with the build. The WC has a canvas top so I began to experiment with some plain kleenex type tissue and a white glue/water mix on top of some brass ribs. Just a trial run really to see how it works out. There are other pieces that would have to be done including the piece that runs from the windshield to the top of the canvas top and a rear piece as well. The tiedowns on the body are what hold the canvas in place. Doing the ropes for that should be a lot of "fun". In the meantime a center section of the floorboard is in a cast for molding parts in resin. It will sit on top of the flat floorboard piece that is already made. Then comes the windshield. The small pieces of plastic on the sides of the hood are 0.030" quarter round to represent the vents. The round circles on the back of the body are the outside of reflectors. Once the body is painted the centers will be painted silver and toped with Tamiya clear red. The canvass tiedowns are brass wire, flattened on one end and then bent over.
-
Wow! What a transformation. Looking forward to see what you do with it!
-
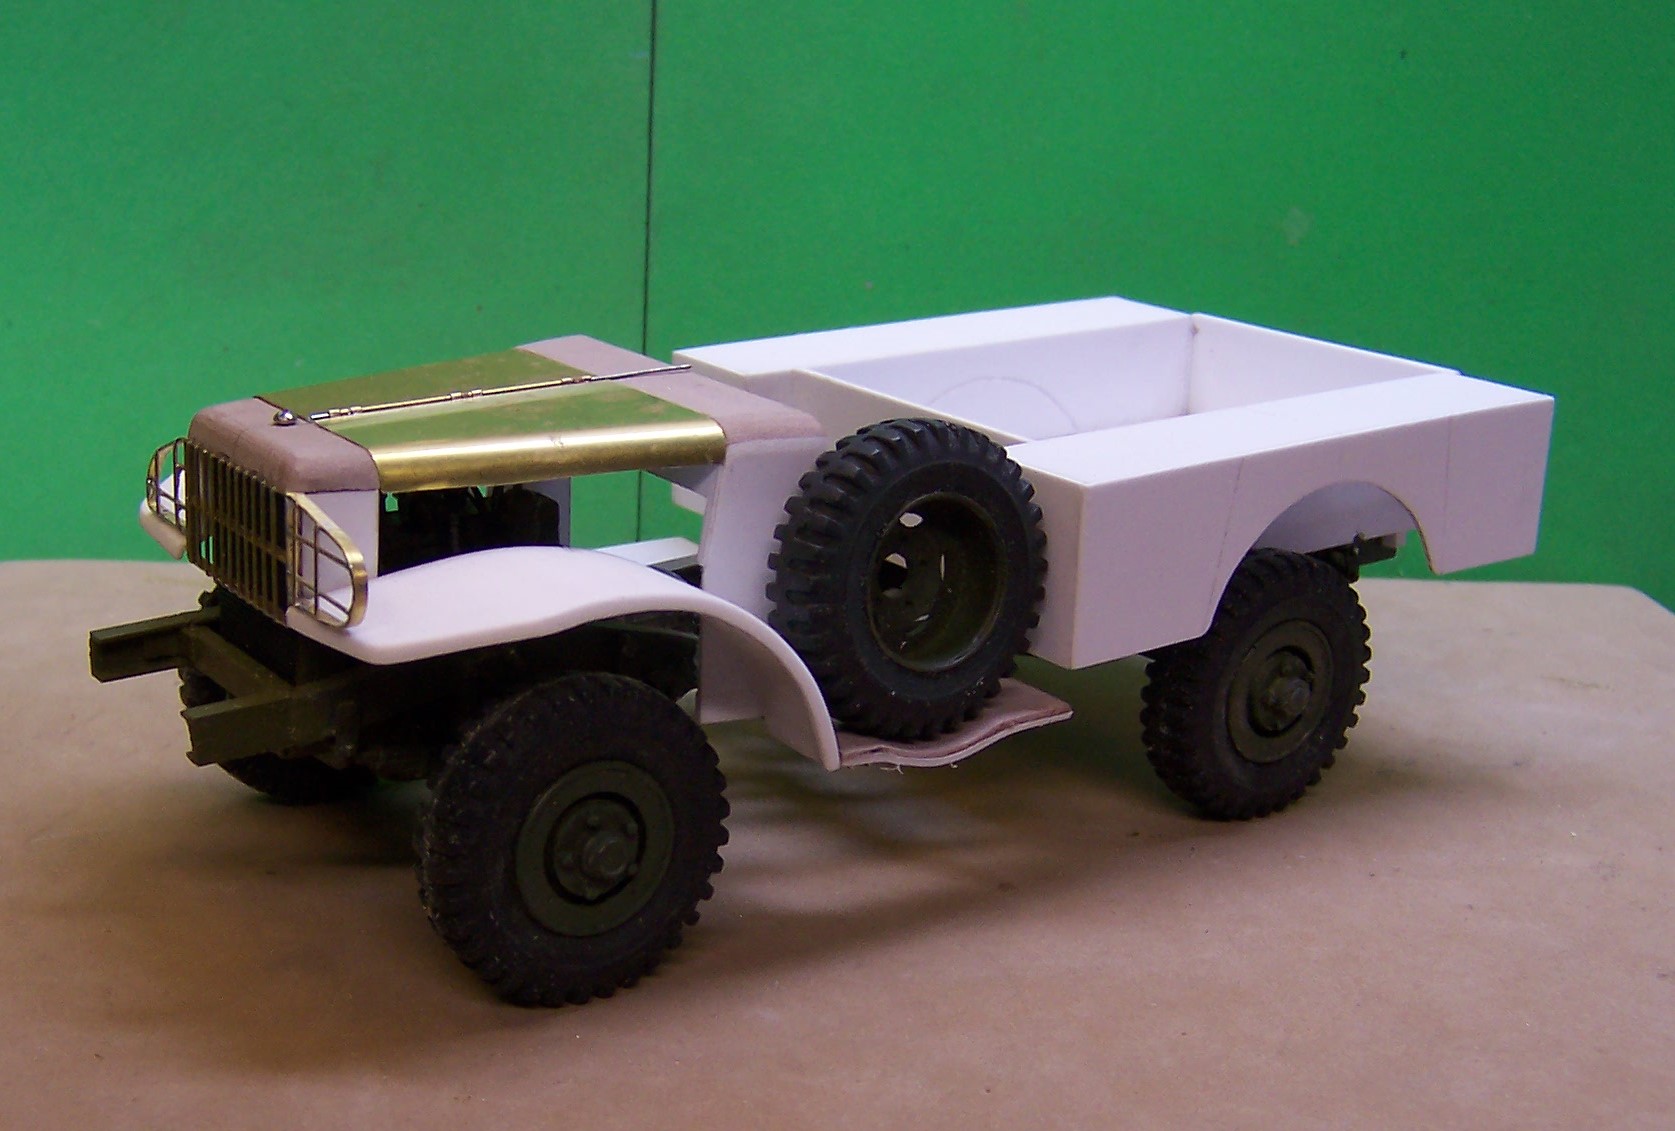
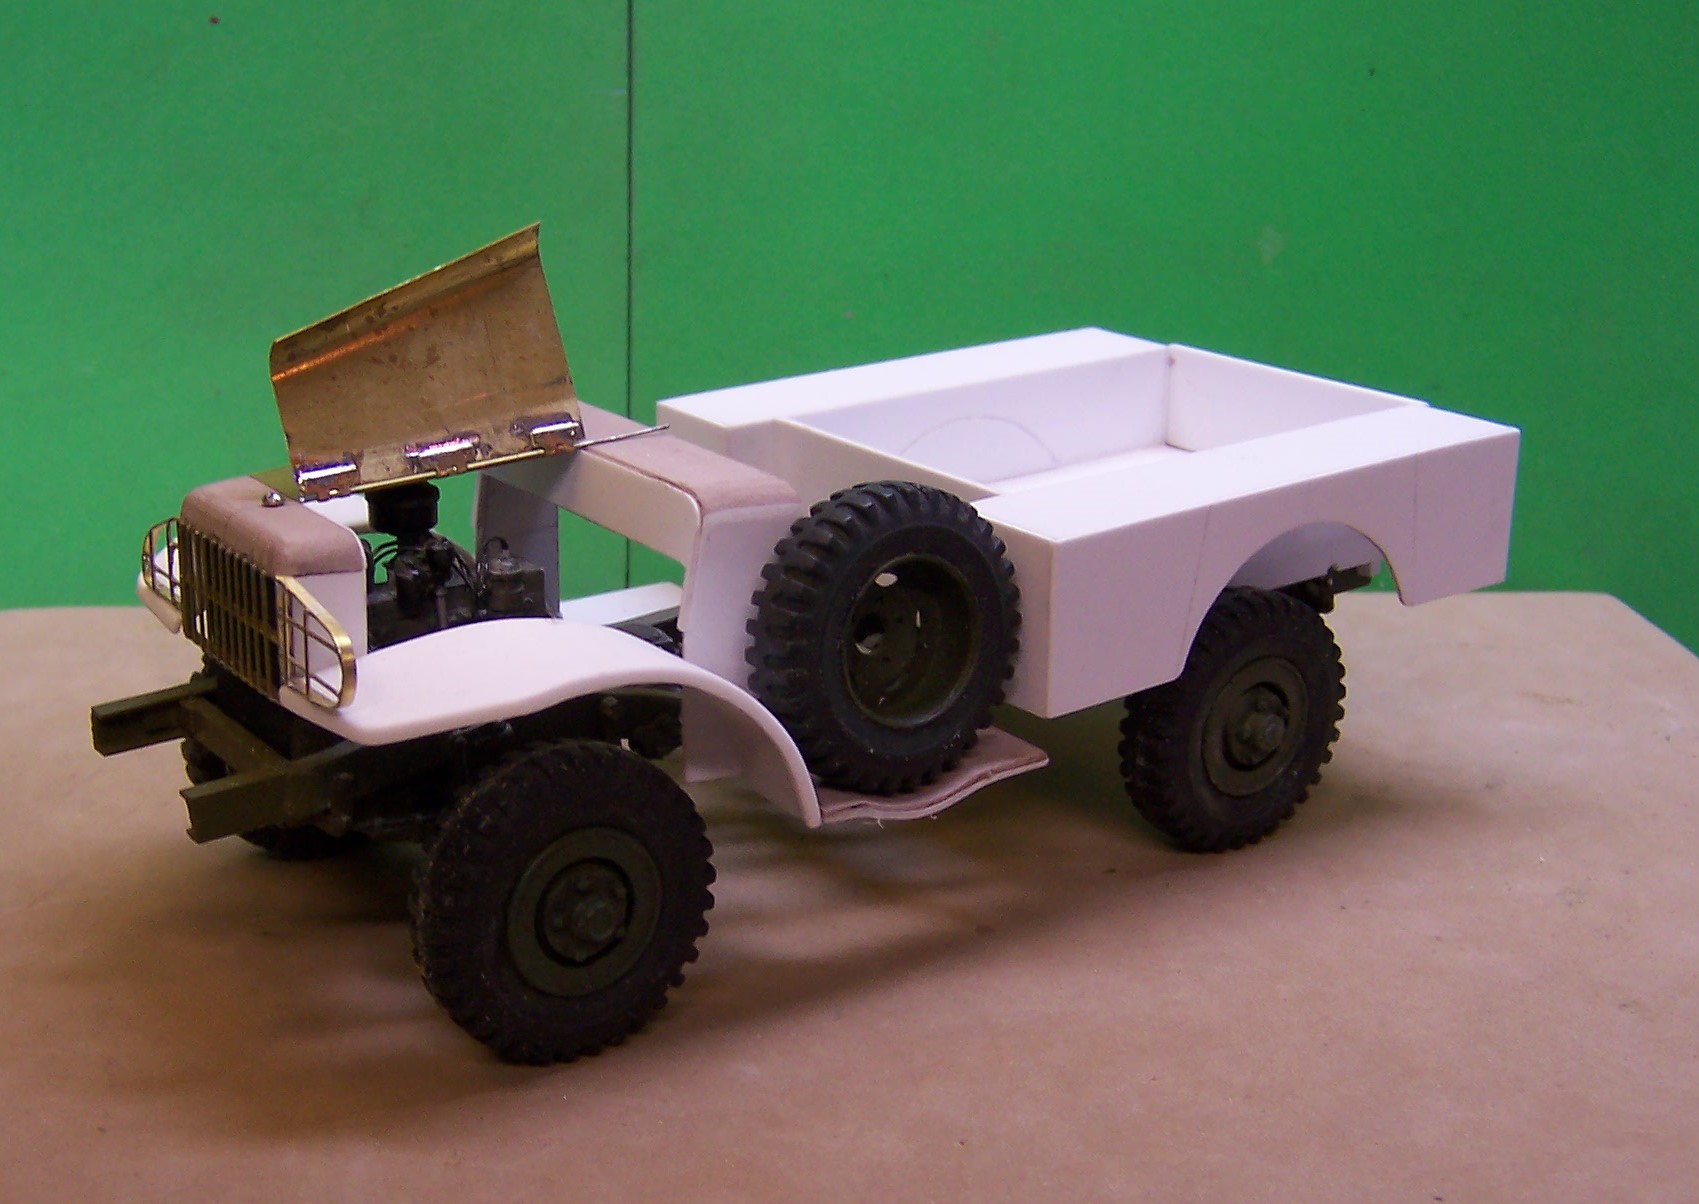
The basics of the hood are finished. Just a bit of touchup and the six louvers for the sides. Now it's on to a few details under the fenders and then the floorboards. The two cutouts in the body on the right side are done as well. The larger rear one will have a reflector and a tiedown hook. The front one just has the hook. Left side still to go along with the fuel filler.
-
Got some work done on the hood in the past couple of days. It's a real bummer to have finally run out of the small piano hinges that can be soldered on. So I opted for using some of the Micro-Mark H style hinges in three places and filled in the gaps with small pieces of brass tubing. One alternative would be simply to use all individual H hinges but I think this will be ok in the long run. Now it's on to the hood sides with a similar hinge issue. But with those the entire hinge is inside where it cannot be seen except when the hood is folded back.
-
Second fender is now on with the left side running board. This is where the spare tire will be mounted.