Chariots of Fire
-
Posts
2,783 -
Joined
-
Last visited
Content Type
Profiles
Forums
Events
Gallery
Everything posted by Chariots of Fire
-
 That is some fine work! It's clear that you are an experienced modeler with some exceptional skills! Will keep watching to see what you end up with.
 -
CCKW
Chariots of Fire replied to Chariots of Fire's topic in WIP: Model Trucks: Big Rigs and Heavy Equipment
Here's what it looks like painted up.
-
Hey, Brian. Give us your take on the overall quality of the cab casting. It looks clean from here but a bit on the heavy side.
-
CCKW
Chariots of Fire replied to Chariots of Fire's topic in WIP: Model Trucks: Big Rigs and Heavy Equipment
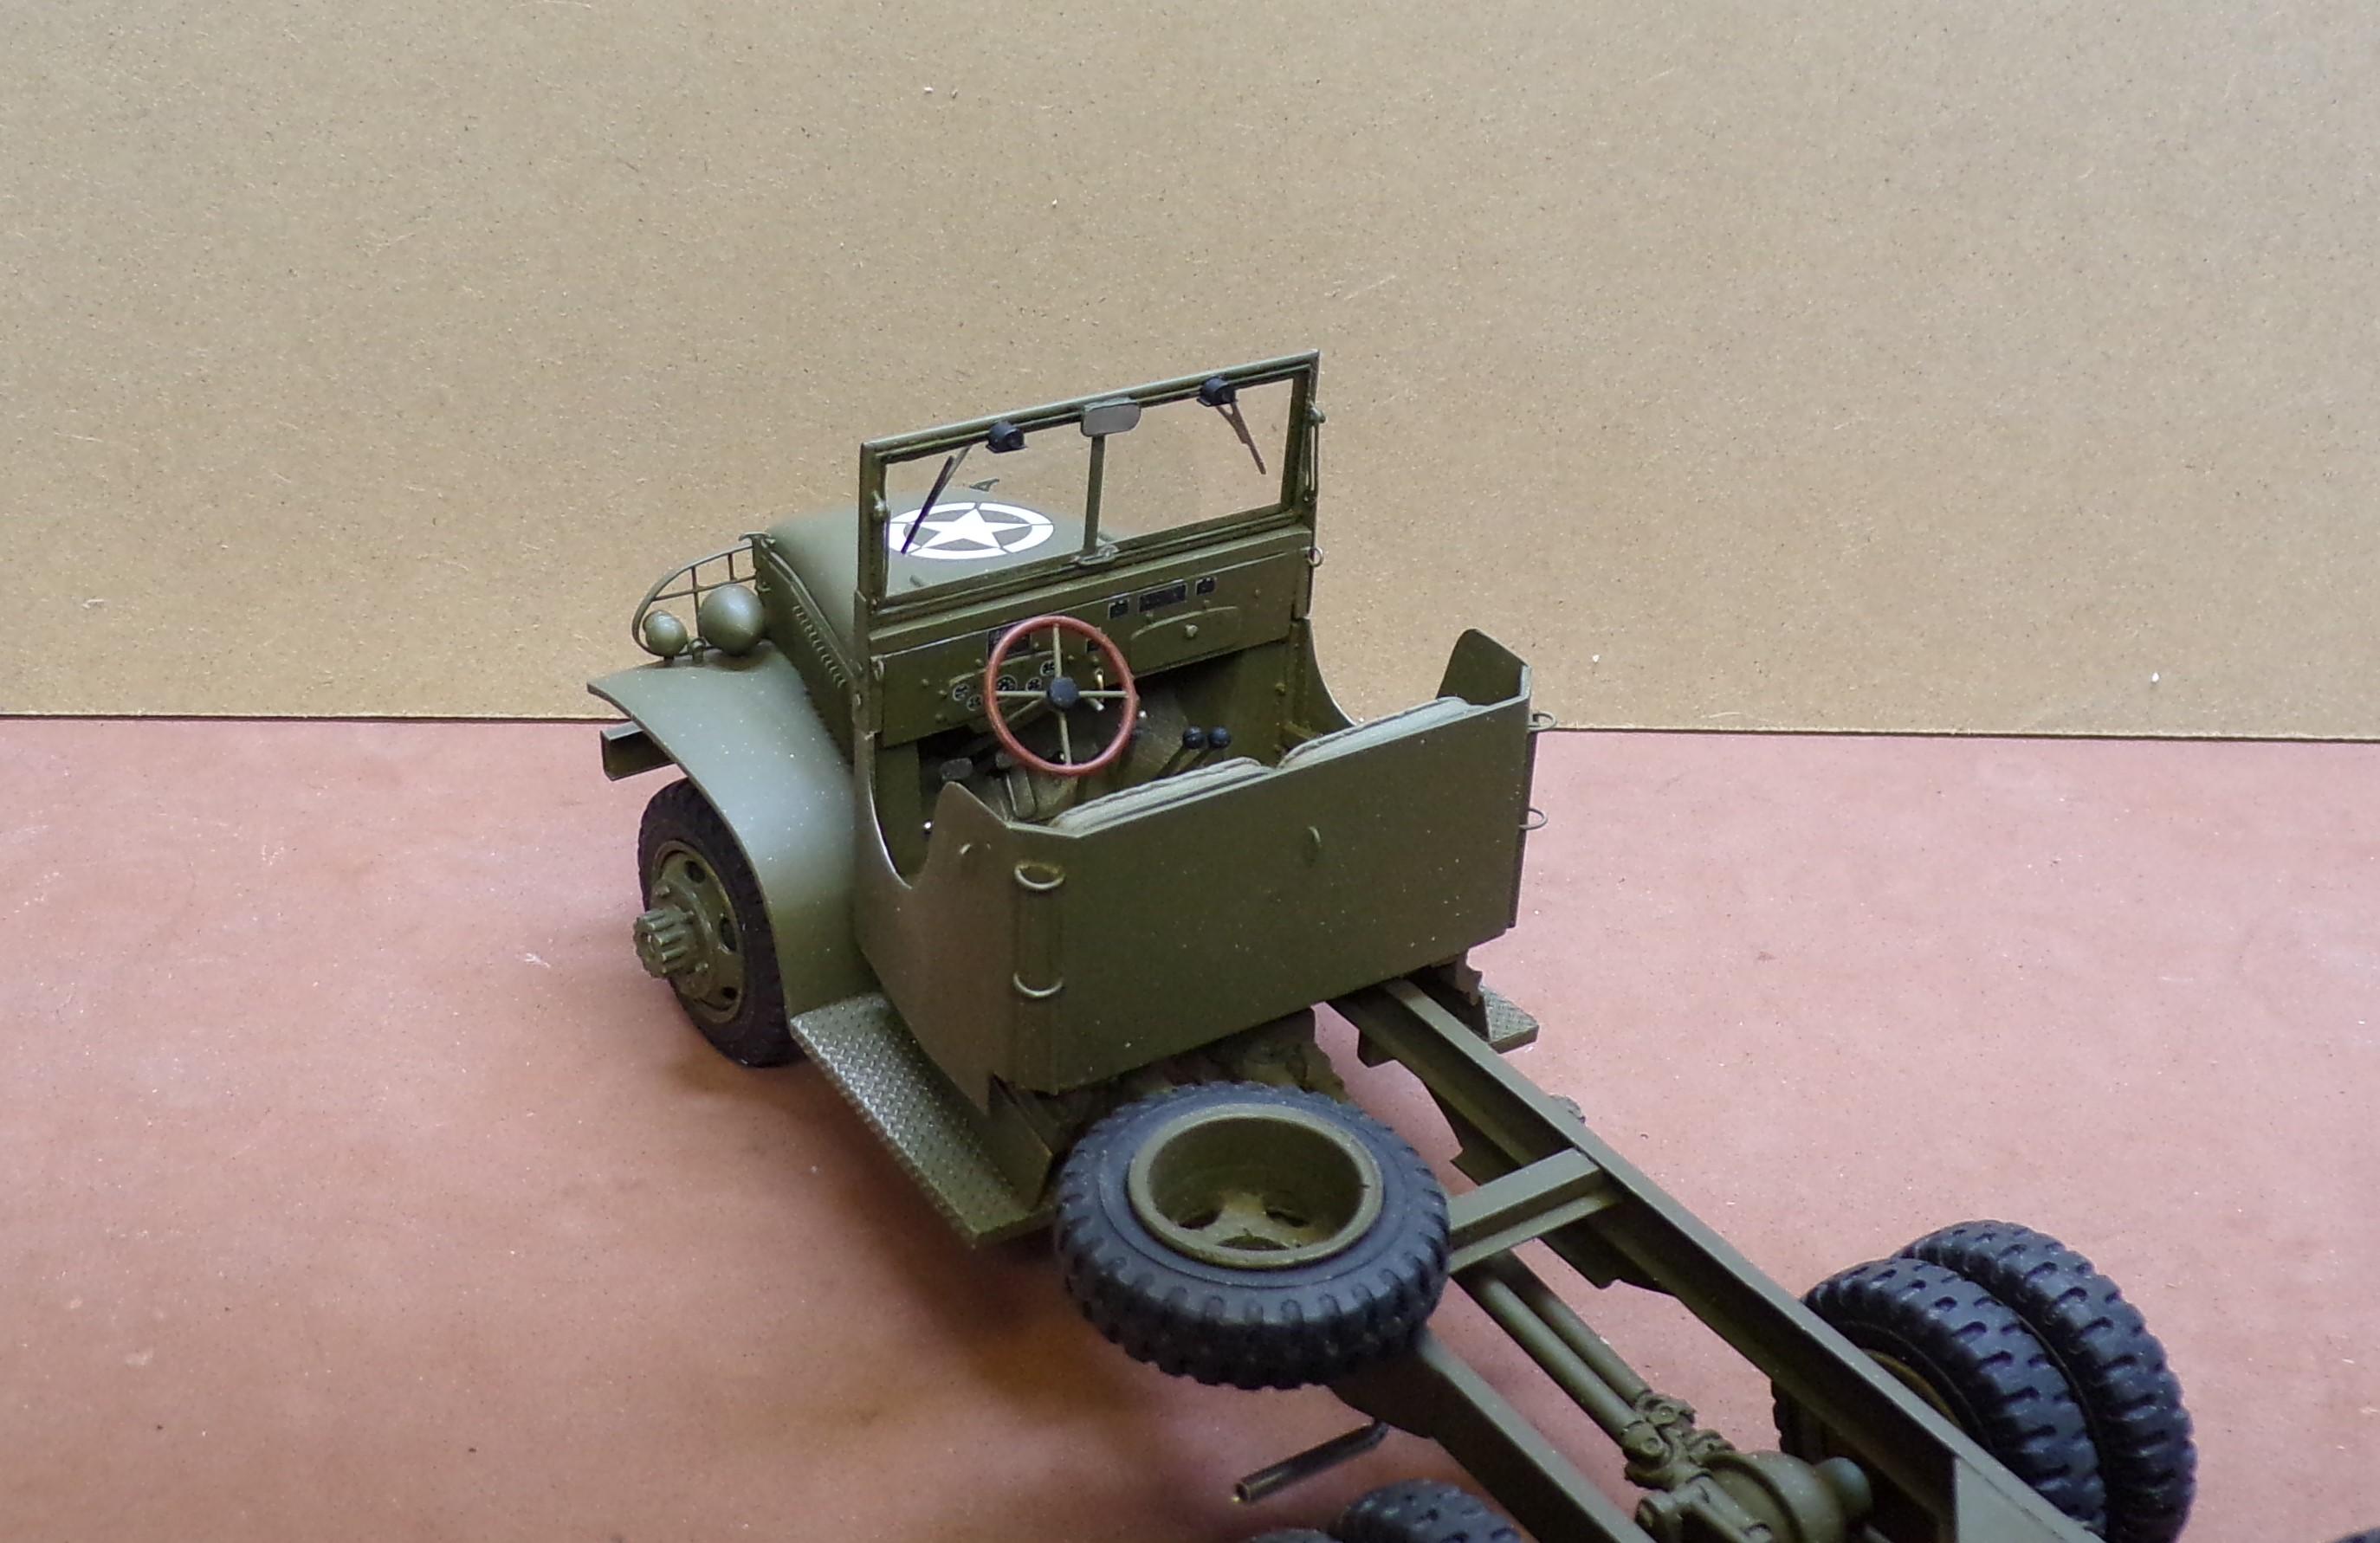
I'll check on the wheels for sure. The modified ones are now on the truck and secured in place. Work has been on the cab interior with the dashboard, controls and seats being finished up. Today I took a break from the truck build and made a Garand M1 for the cab. Still has to be painted and it needs a scabbard to put it in but it's ready. The brown paper strip beside it will be the sling strap after the painting is finished. The steering wheel is dark red but needs toning down. In late version deuces they used wood to save on regular steering wheel materials for other uses. The rifle is 43.5 mm long (the real one is 43.6") and is made of plastic strip stock, wire and brass stock.
-
I've had a few tires and wheels done in 3D just to get patterns done. Then the rest is casting multiples from there. 3D printing has its place just like everything else in the hobby. Being a scratch builder, I use just about anything that fits the need.
-
The trick will be securing it tight against the sides. Aluminum doesn't like some adhesives. Two part epoxy, maybe, but not CA.
-
CCKW
Chariots of Fire replied to Chariots of Fire's topic in WIP: Model Trucks: Big Rigs and Heavy Equipment
I just re-read what I wrote. Wow! Where's the automatic grammar correction when you need it!!!? -
Keep doing things one at a time and you won't be overwhelmed with the project. I once read that doing every little piece as if it were a model unto itself helps to keep things in perspective.
- 108 replies
-
- 1
-

-
- 1953
- studebaker
- (and 2 more)
-
CCKW
Chariots of Fire replied to Chariots of Fire's topic in WIP: Model Trucks: Big Rigs and Heavy Equipment
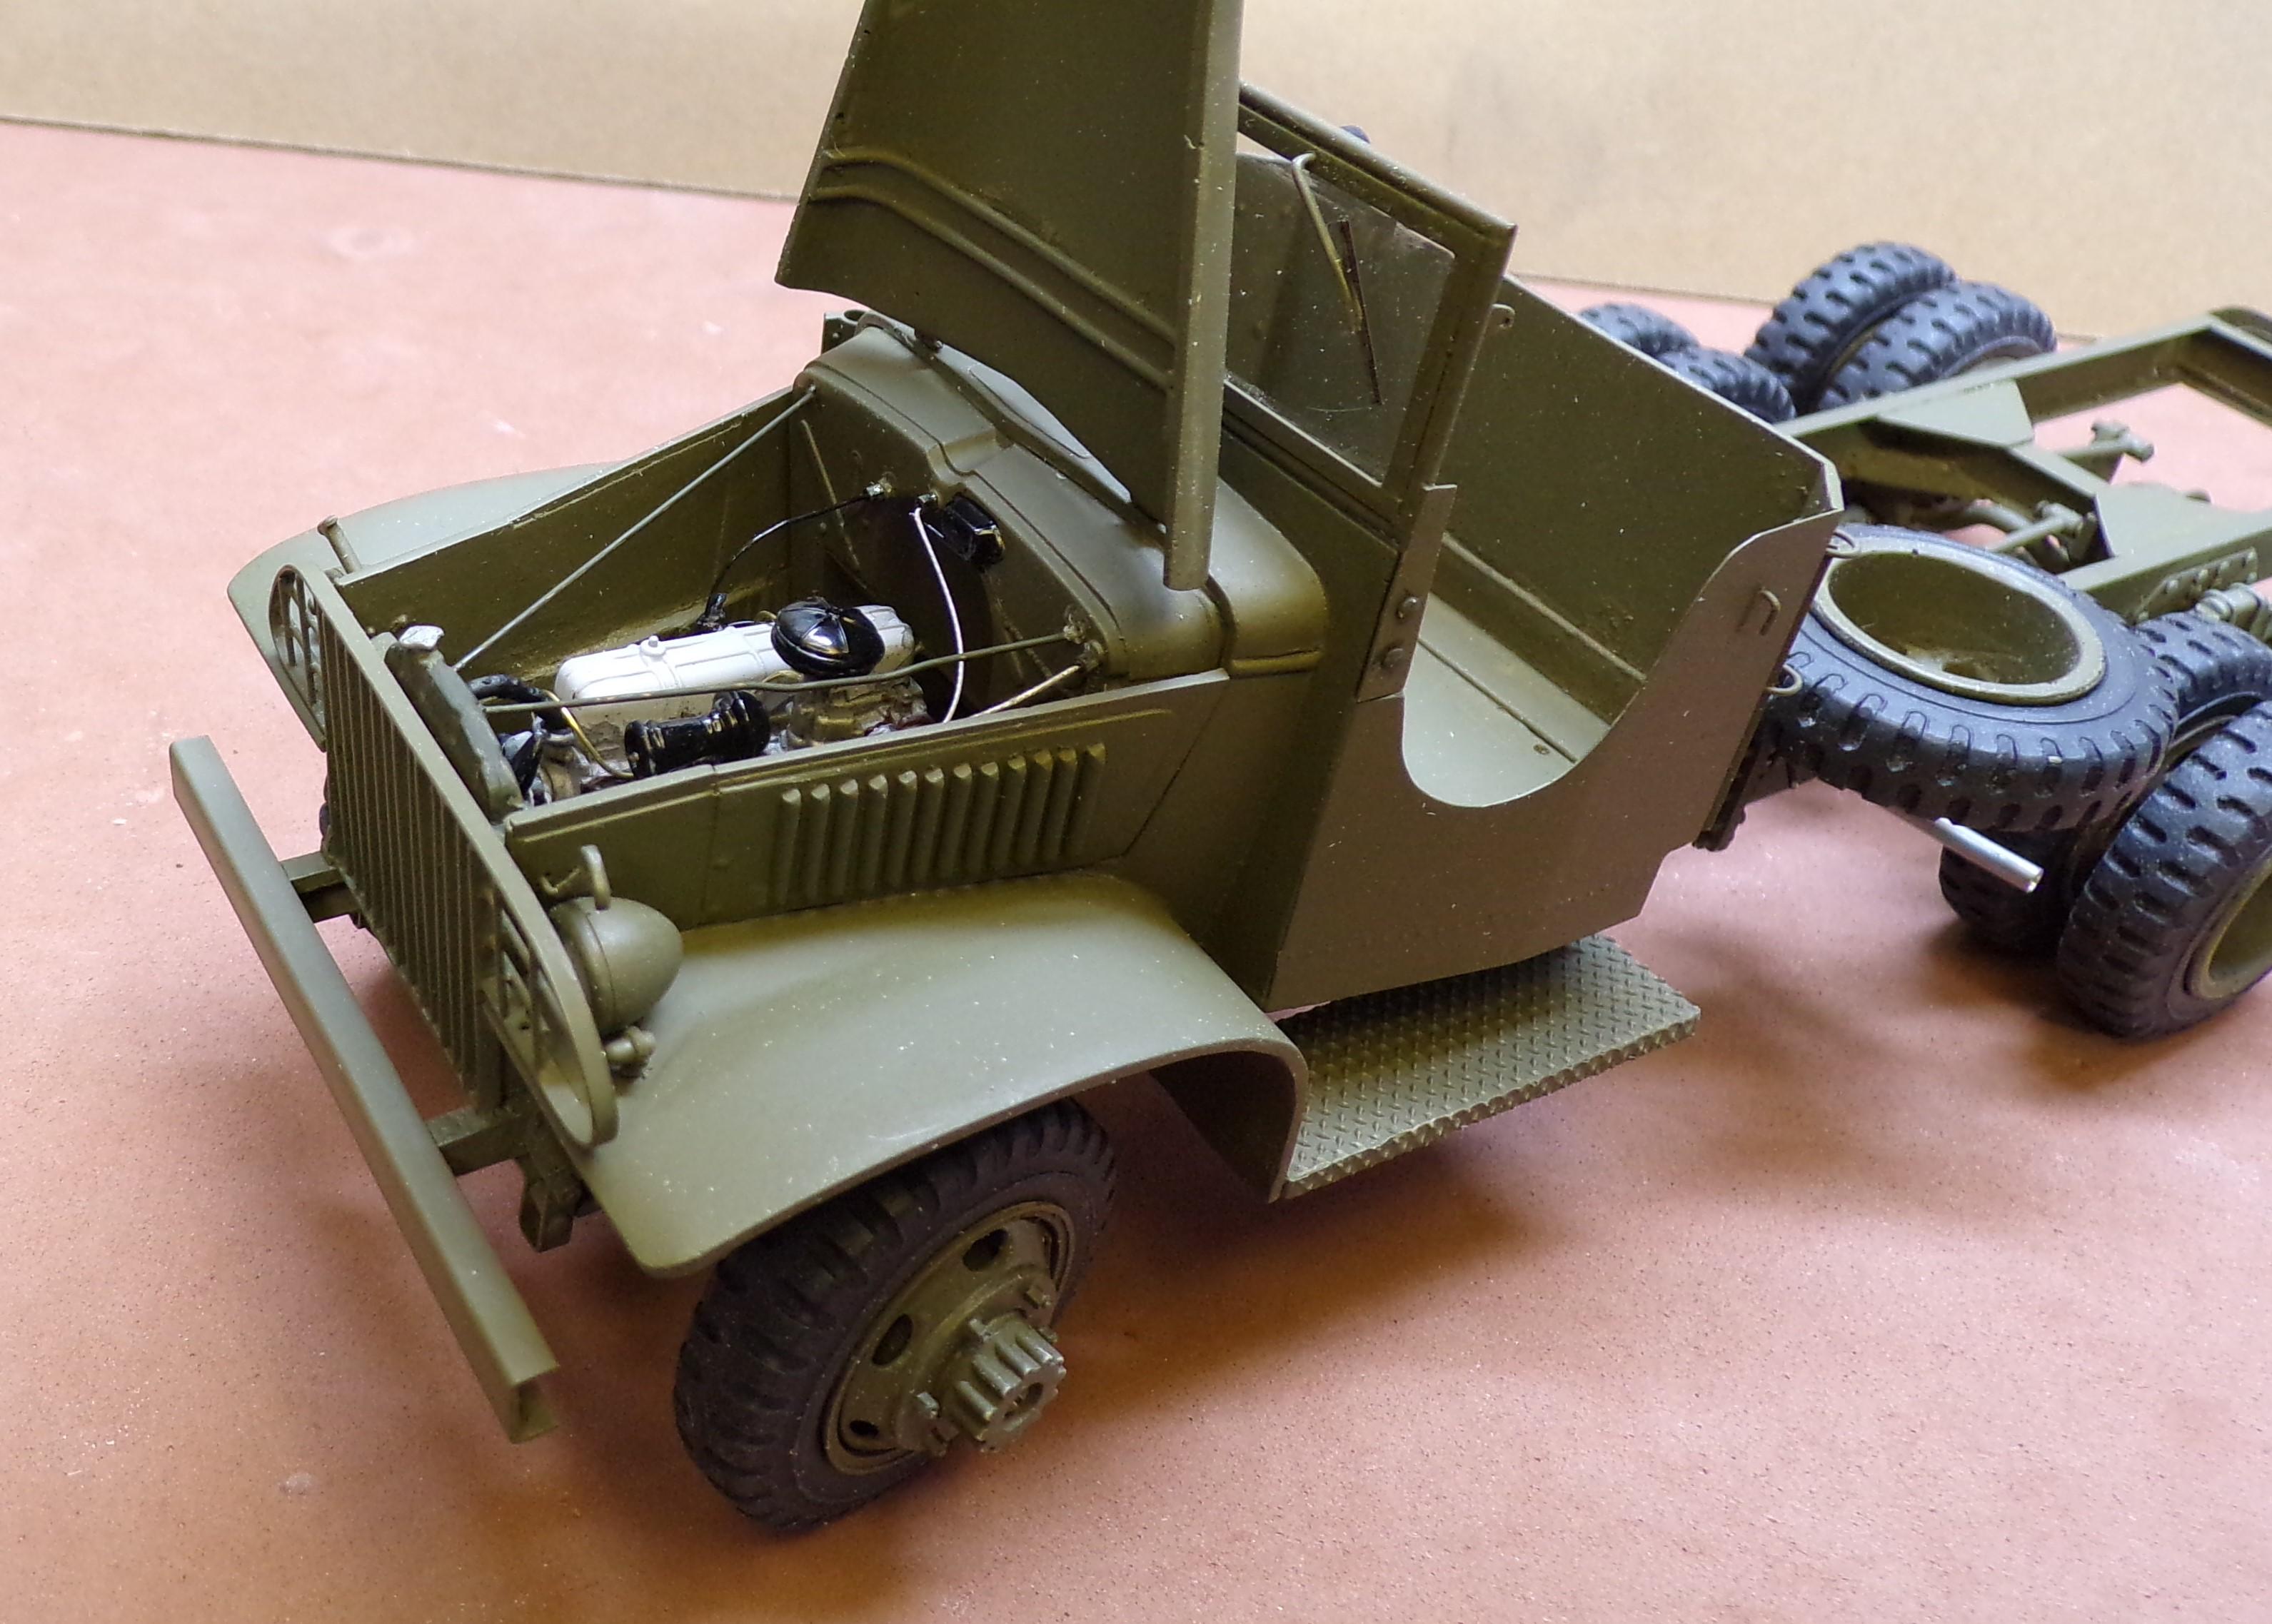
What a pain it has been to get the tires and wheels right on this build!? The original set, although ok, were way to wide, making the overall width of the model well over the 88" it should be. The wheels were also to wide, making the spacing between rear tires even worse. So I set out to cast new tires using the old mold. I poured the mold half full, set it set and then popped out half a tire. Did it a second time and then sanded bot halves down to remove some of the width. When it was done a new mold was made to cast 10 new tires. Whew!? To get a thinner rim I took an old rim, plugged the 5 holes, sanded them smooth and then opened up 6 new ones. That took a while and then a mold was made to cast 8 new rims for the rear. I kept the front ones as they were since tire spacing was not an issue. In the meantime the headlight bezels were finished and headlights were set. The windshield glass is also set. Gorilla glue was used sparingly on both the headlights and windshield to secure them. The glue takes a while to set but it stays clear. The engine bay was also completed but there are a couple of details that need to be added to finish it up. So this where we are now. On to the cab interior before tackling the body.
-
Coming together nicely! Lots of great detail and for a unique subject. Thanks for sharing!?
- 108 replies
-
- 1
-
-
- 1953
- studebaker
- (and 2 more)
-
What is the plan for rounding off the front and rear edges of the roof?
-
Buying a pin vise HELP
Chariots of Fire replied to WizPorsche944's topic in Model Building Questions and Answers
Cheap pin vices are junk. Get a good one with interchangeable collets. Should go to 1/8" diameter. The top should spin free so you can hold onto it. I have a variety of drill bits that are carbide with 1/8" shanks. They are brittle in the smallest sizes but are sharp as needles. -
CCKW
Chariots of Fire replied to Chariots of Fire's topic in WIP: Model Trucks: Big Rigs and Heavy Equipment
Those are brackets meant to mount the frame for the 50 cal machine gun should the truck have one. Not all did but the mounting brackets were there anyway. Same for the bracket just ahead of the windshield on the right side. -
CCKW
Chariots of Fire replied to Chariots of Fire's topic in WIP: Model Trucks: Big Rigs and Heavy Equipment
Got the frame painted today and made final adjustments on the hood sides, fenders and hood. The cab is almost ready for paint but it needs a couple more details added. Headlight buckets are resin castings made from a turned aluminum master.
-
CCKW
Chariots of Fire replied to Chariots of Fire's topic in WIP: Model Trucks: Big Rigs and Heavy Equipment
Note the dolly wheel behind the cab frame. That part of the truck could maneuver on its own into the aircraft since the front axle could drive. They only had to steer it on board with the dolly wheel. Interesting stuff. The rest of the truck was crated. -
CCKW
Chariots of Fire replied to Chariots of Fire's topic in WIP: Model Trucks: Big Rigs and Heavy Equipment
That frame isn't actually split. I just looks that way. The solid roofs went away as the war went on and only about 30% of the trucks were transported by air, I think for possible delivery to the pacific theaters of operation. But it is a unique feature that won't be on many models so I included it. Right now I'm trying to get the hood sides adjusted to where the cab can be painted. Lots of little fiddly things to do so that when I attach the fenders things will be right. -
CCKW
Chariots of Fire replied to Chariots of Fire's topic in WIP: Model Trucks: Big Rigs and Heavy Equipment
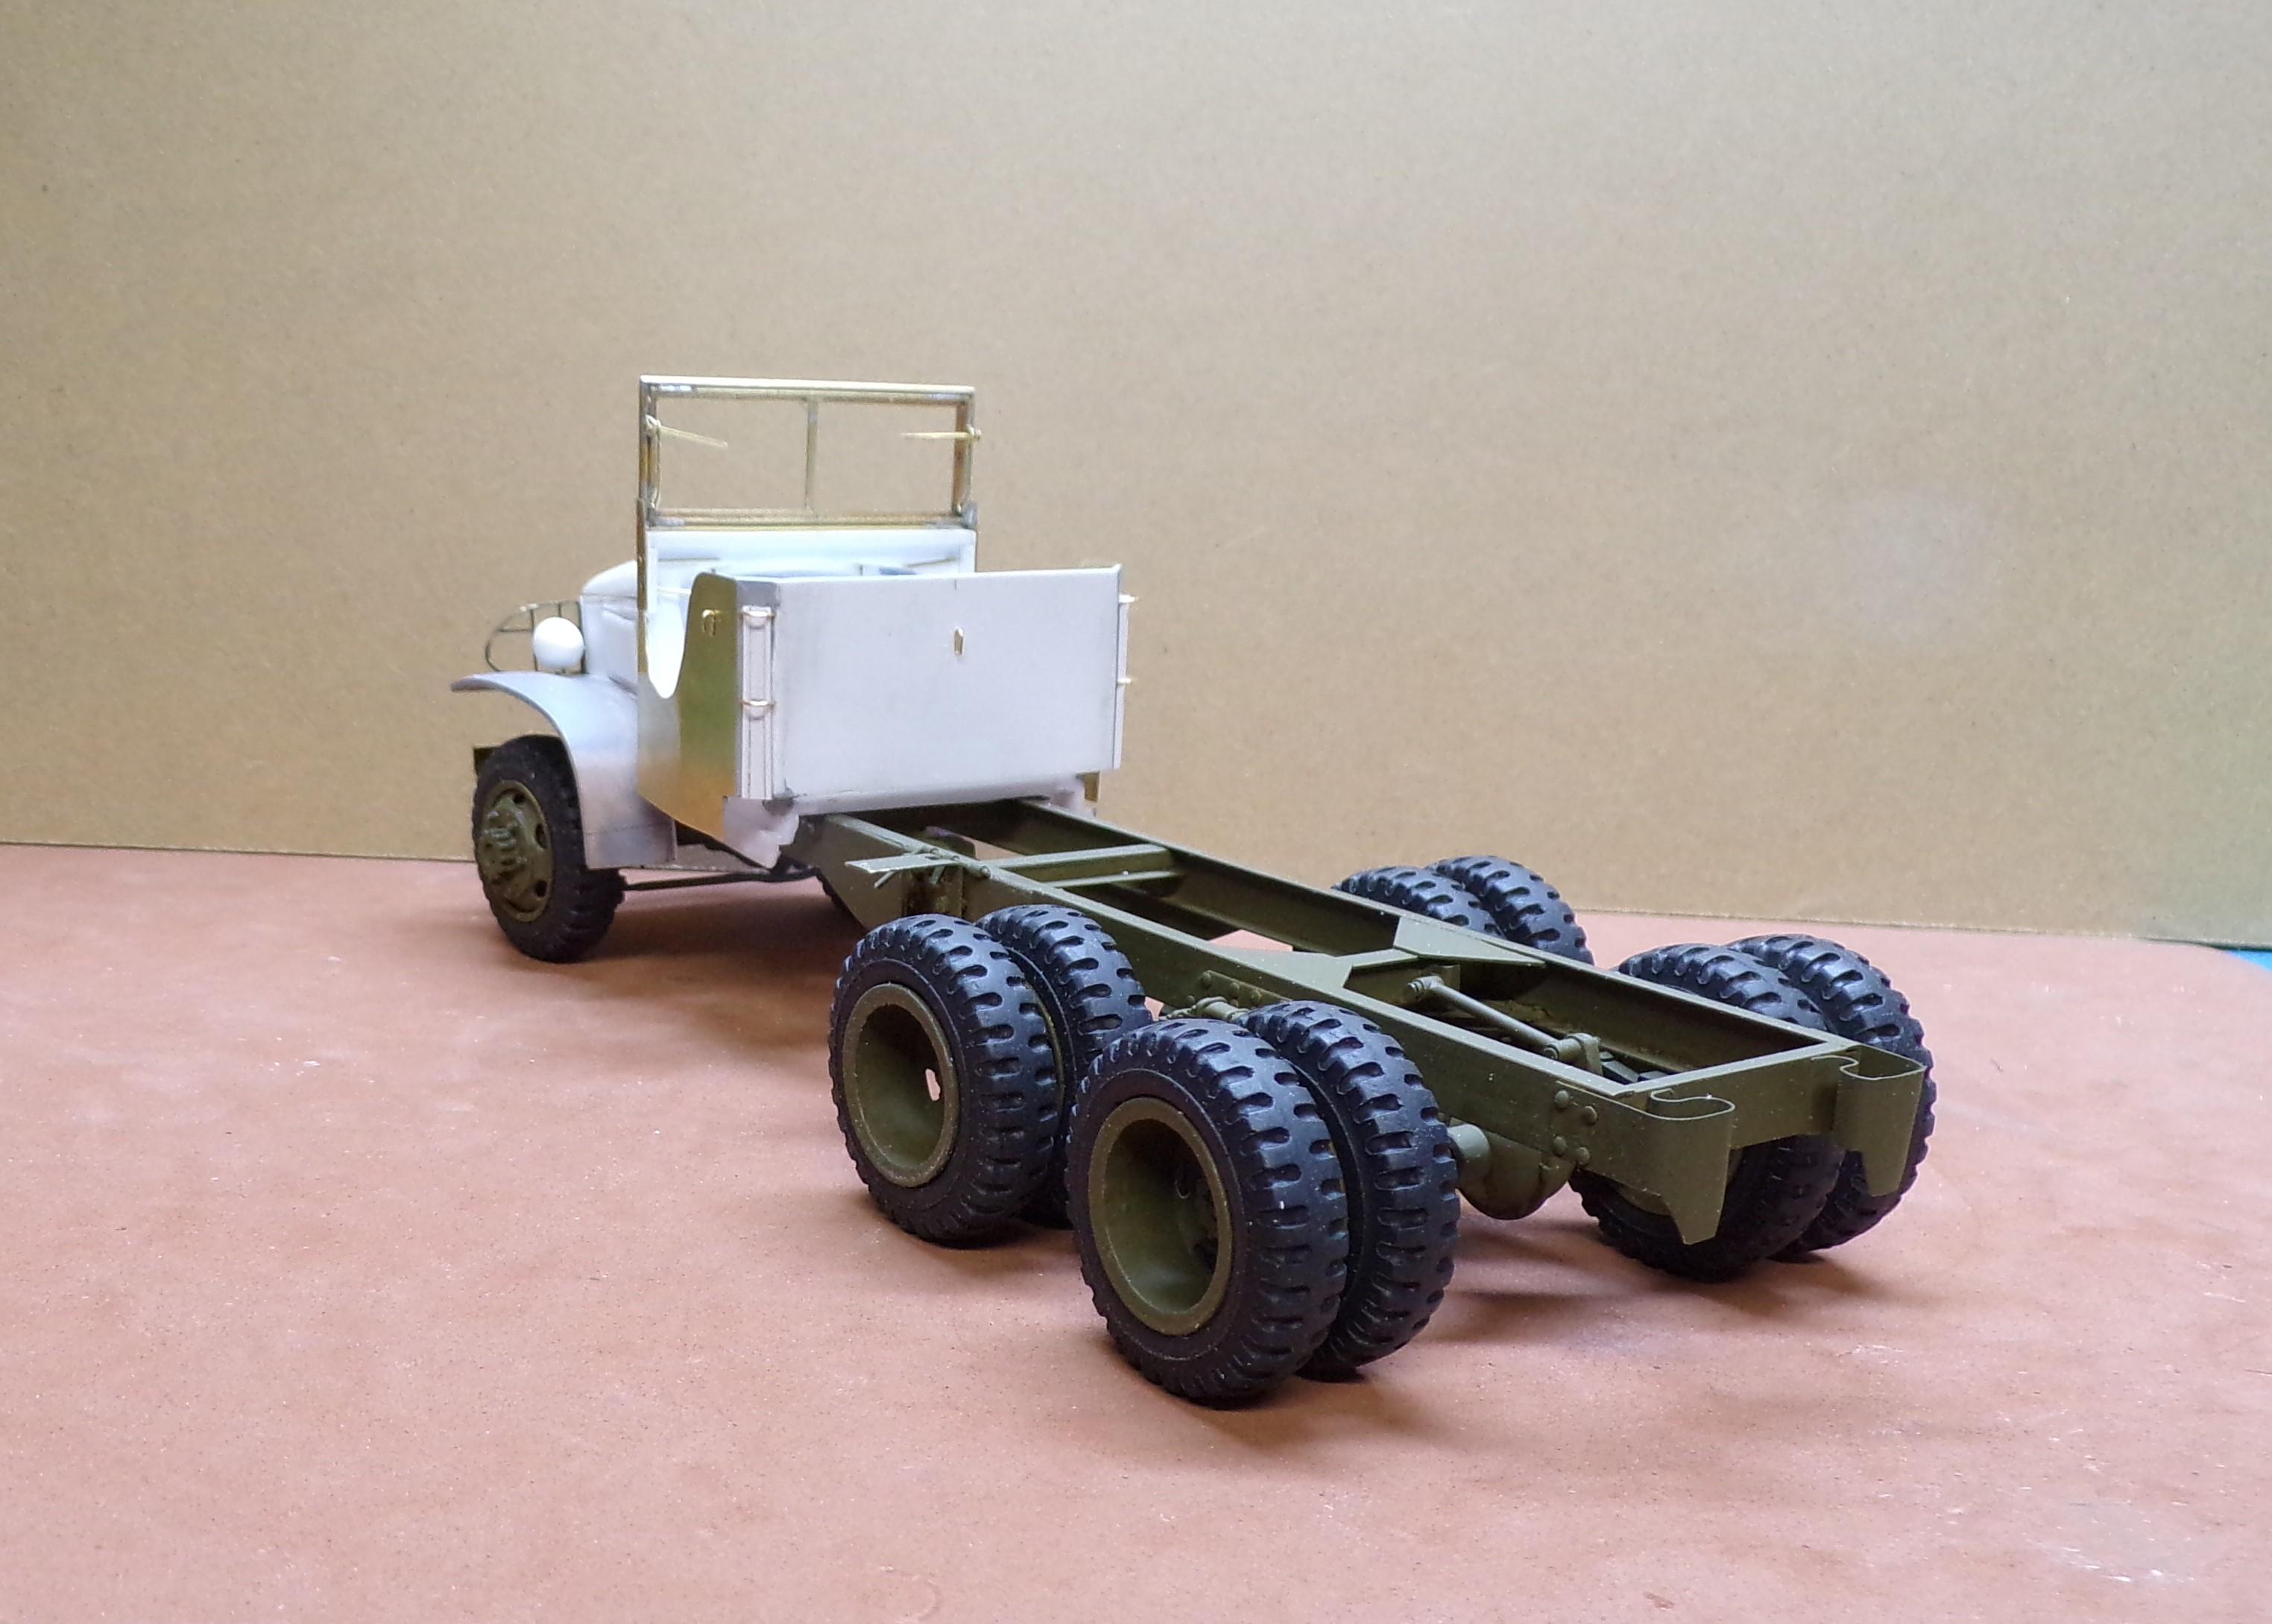
Been busy doing a lot of little things since the last post. Here is where we are as of today. Thres and wheels are painted. Although not in the photo, the trim rings are also in place to finish off the tires and wheels. Fenders are ready for placement but they need some fine tuning first. The cab is essentially done except for the interior. The windshield is done except for the glass and wiper motors. They won't go on until the painting is done. Hood sides are in position with tape for now. The Deuce has 12 grill slots and these only have 6 since they came from the 1-1/2 ton Chevy so the 6 were sanded off and a decal has been made to show the placement of the new pieces. They can be glued on right over the decal and then the hood sides can be painted locking them in place. The cab is secured to the frame with small pieces of angle stock and screws. The hood hinges are done and have temporary pins to help locate the hood for accurate placement of the hood sides. Lots of little stuff but fun detailing it all.
-
1944 Diamond T wrecker
Chariots of Fire replied to Chariots of Fire's topic in Model Trucks: Big Rigs and Heavy Equipment
The only kit based piece is the Jeep MB. The Diamond T is scratch built. The deuce and a half will also be scratch built although there are a couple of resin 1/25? scale kits out there. -
Looking real good, Jeff! Are you going to letter it?
-
Thanks, Jeff. Here's the finished build.
-
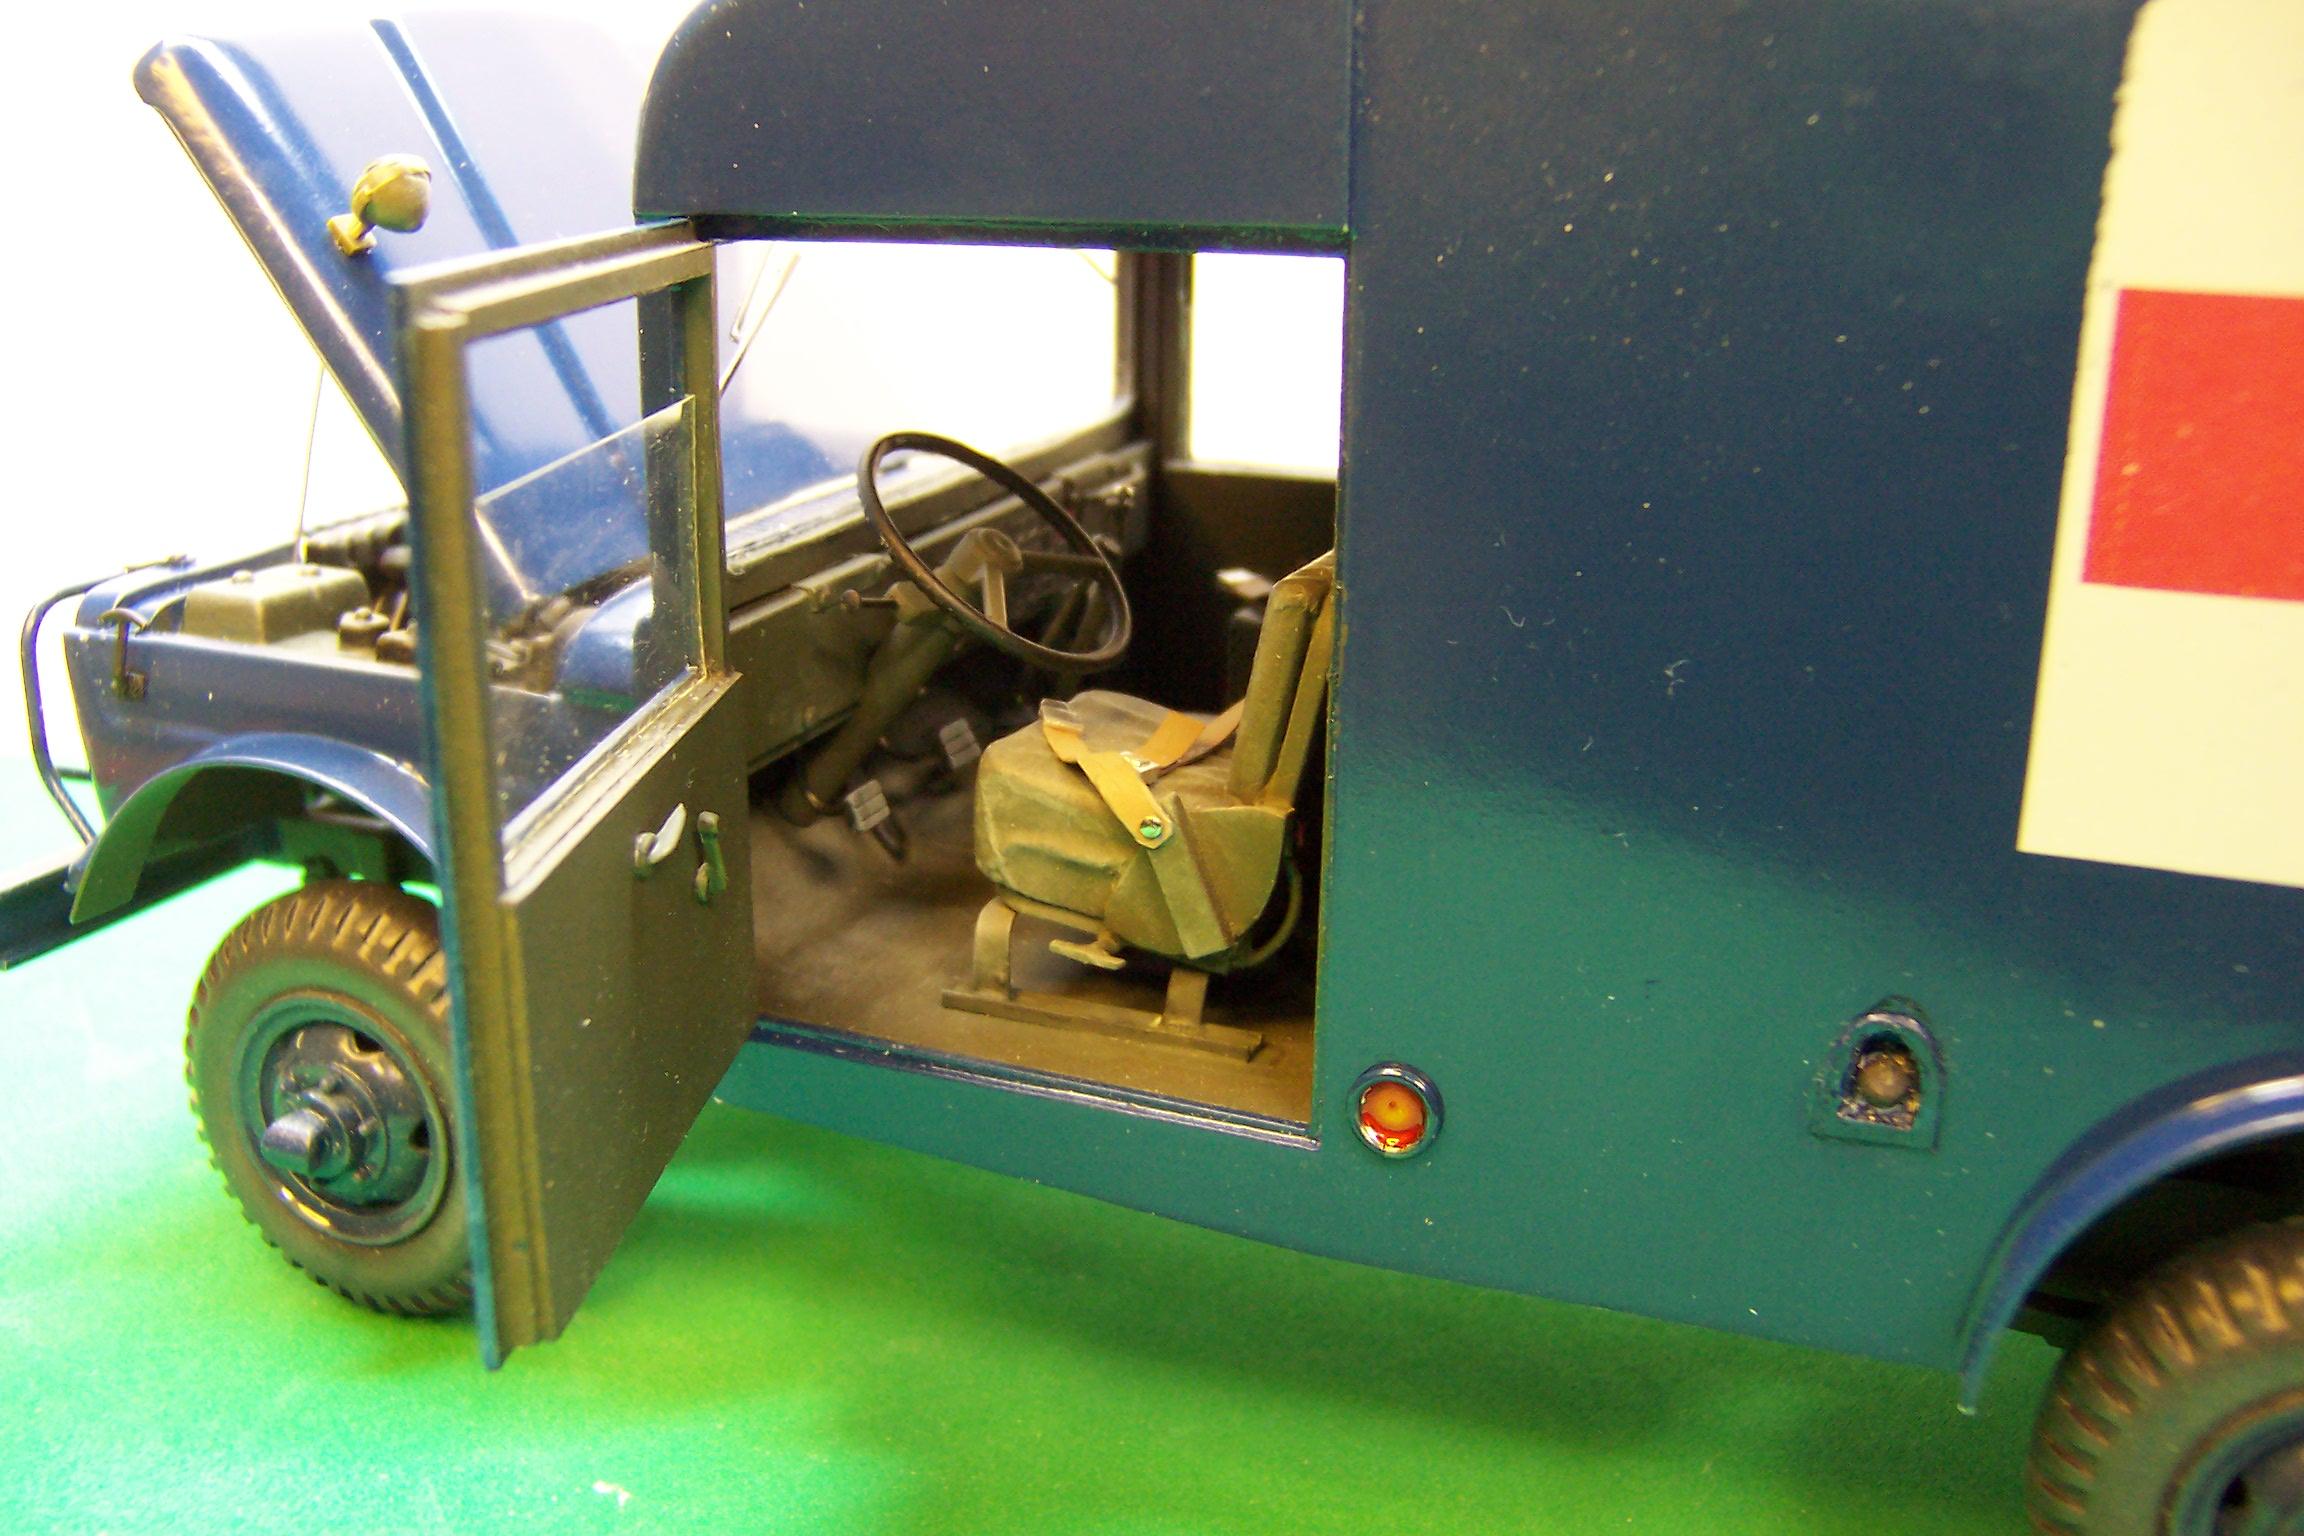
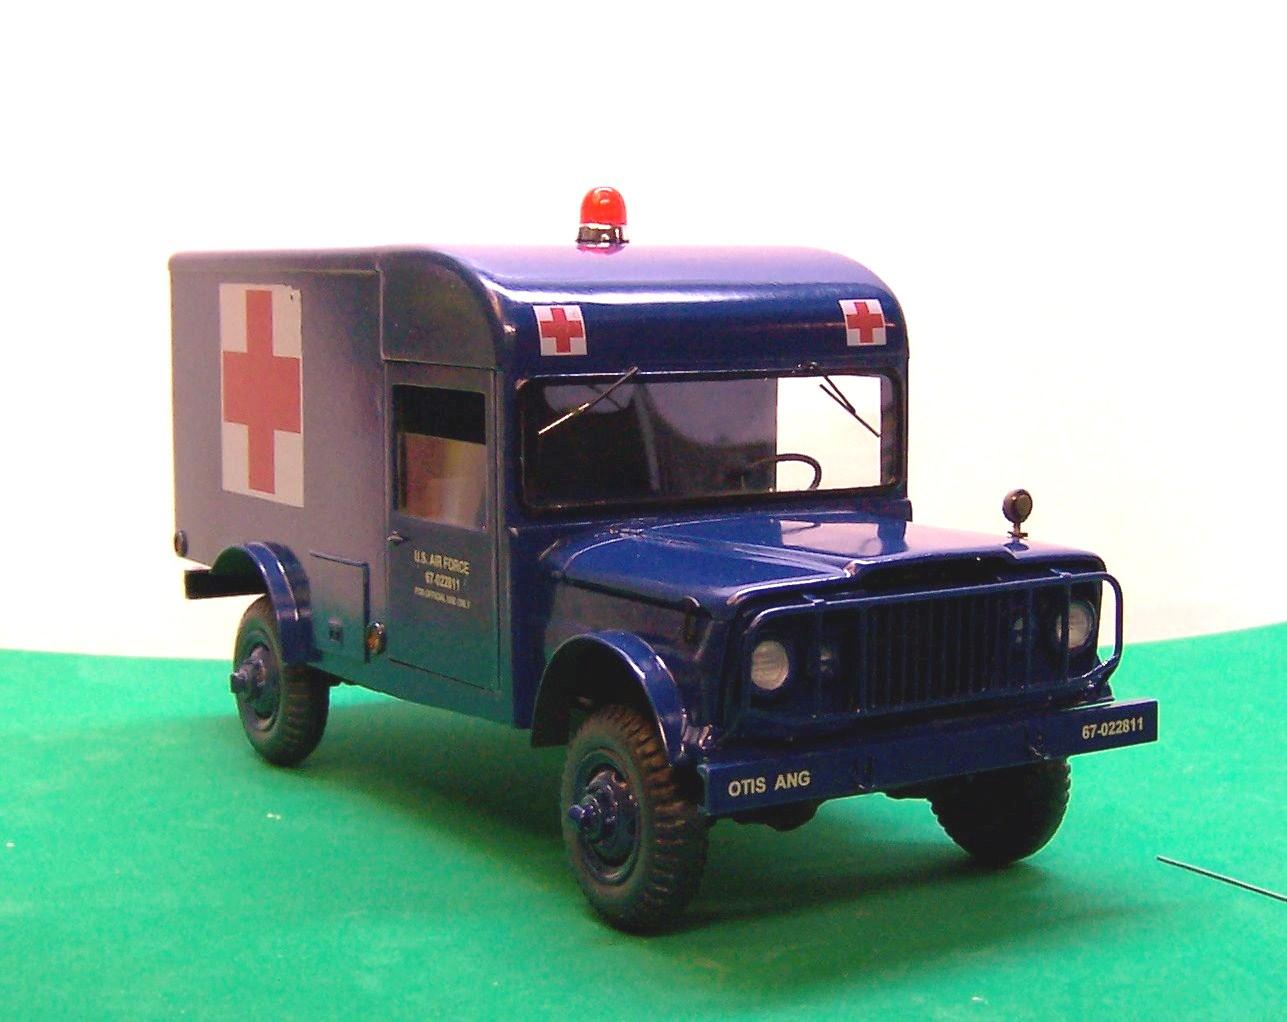
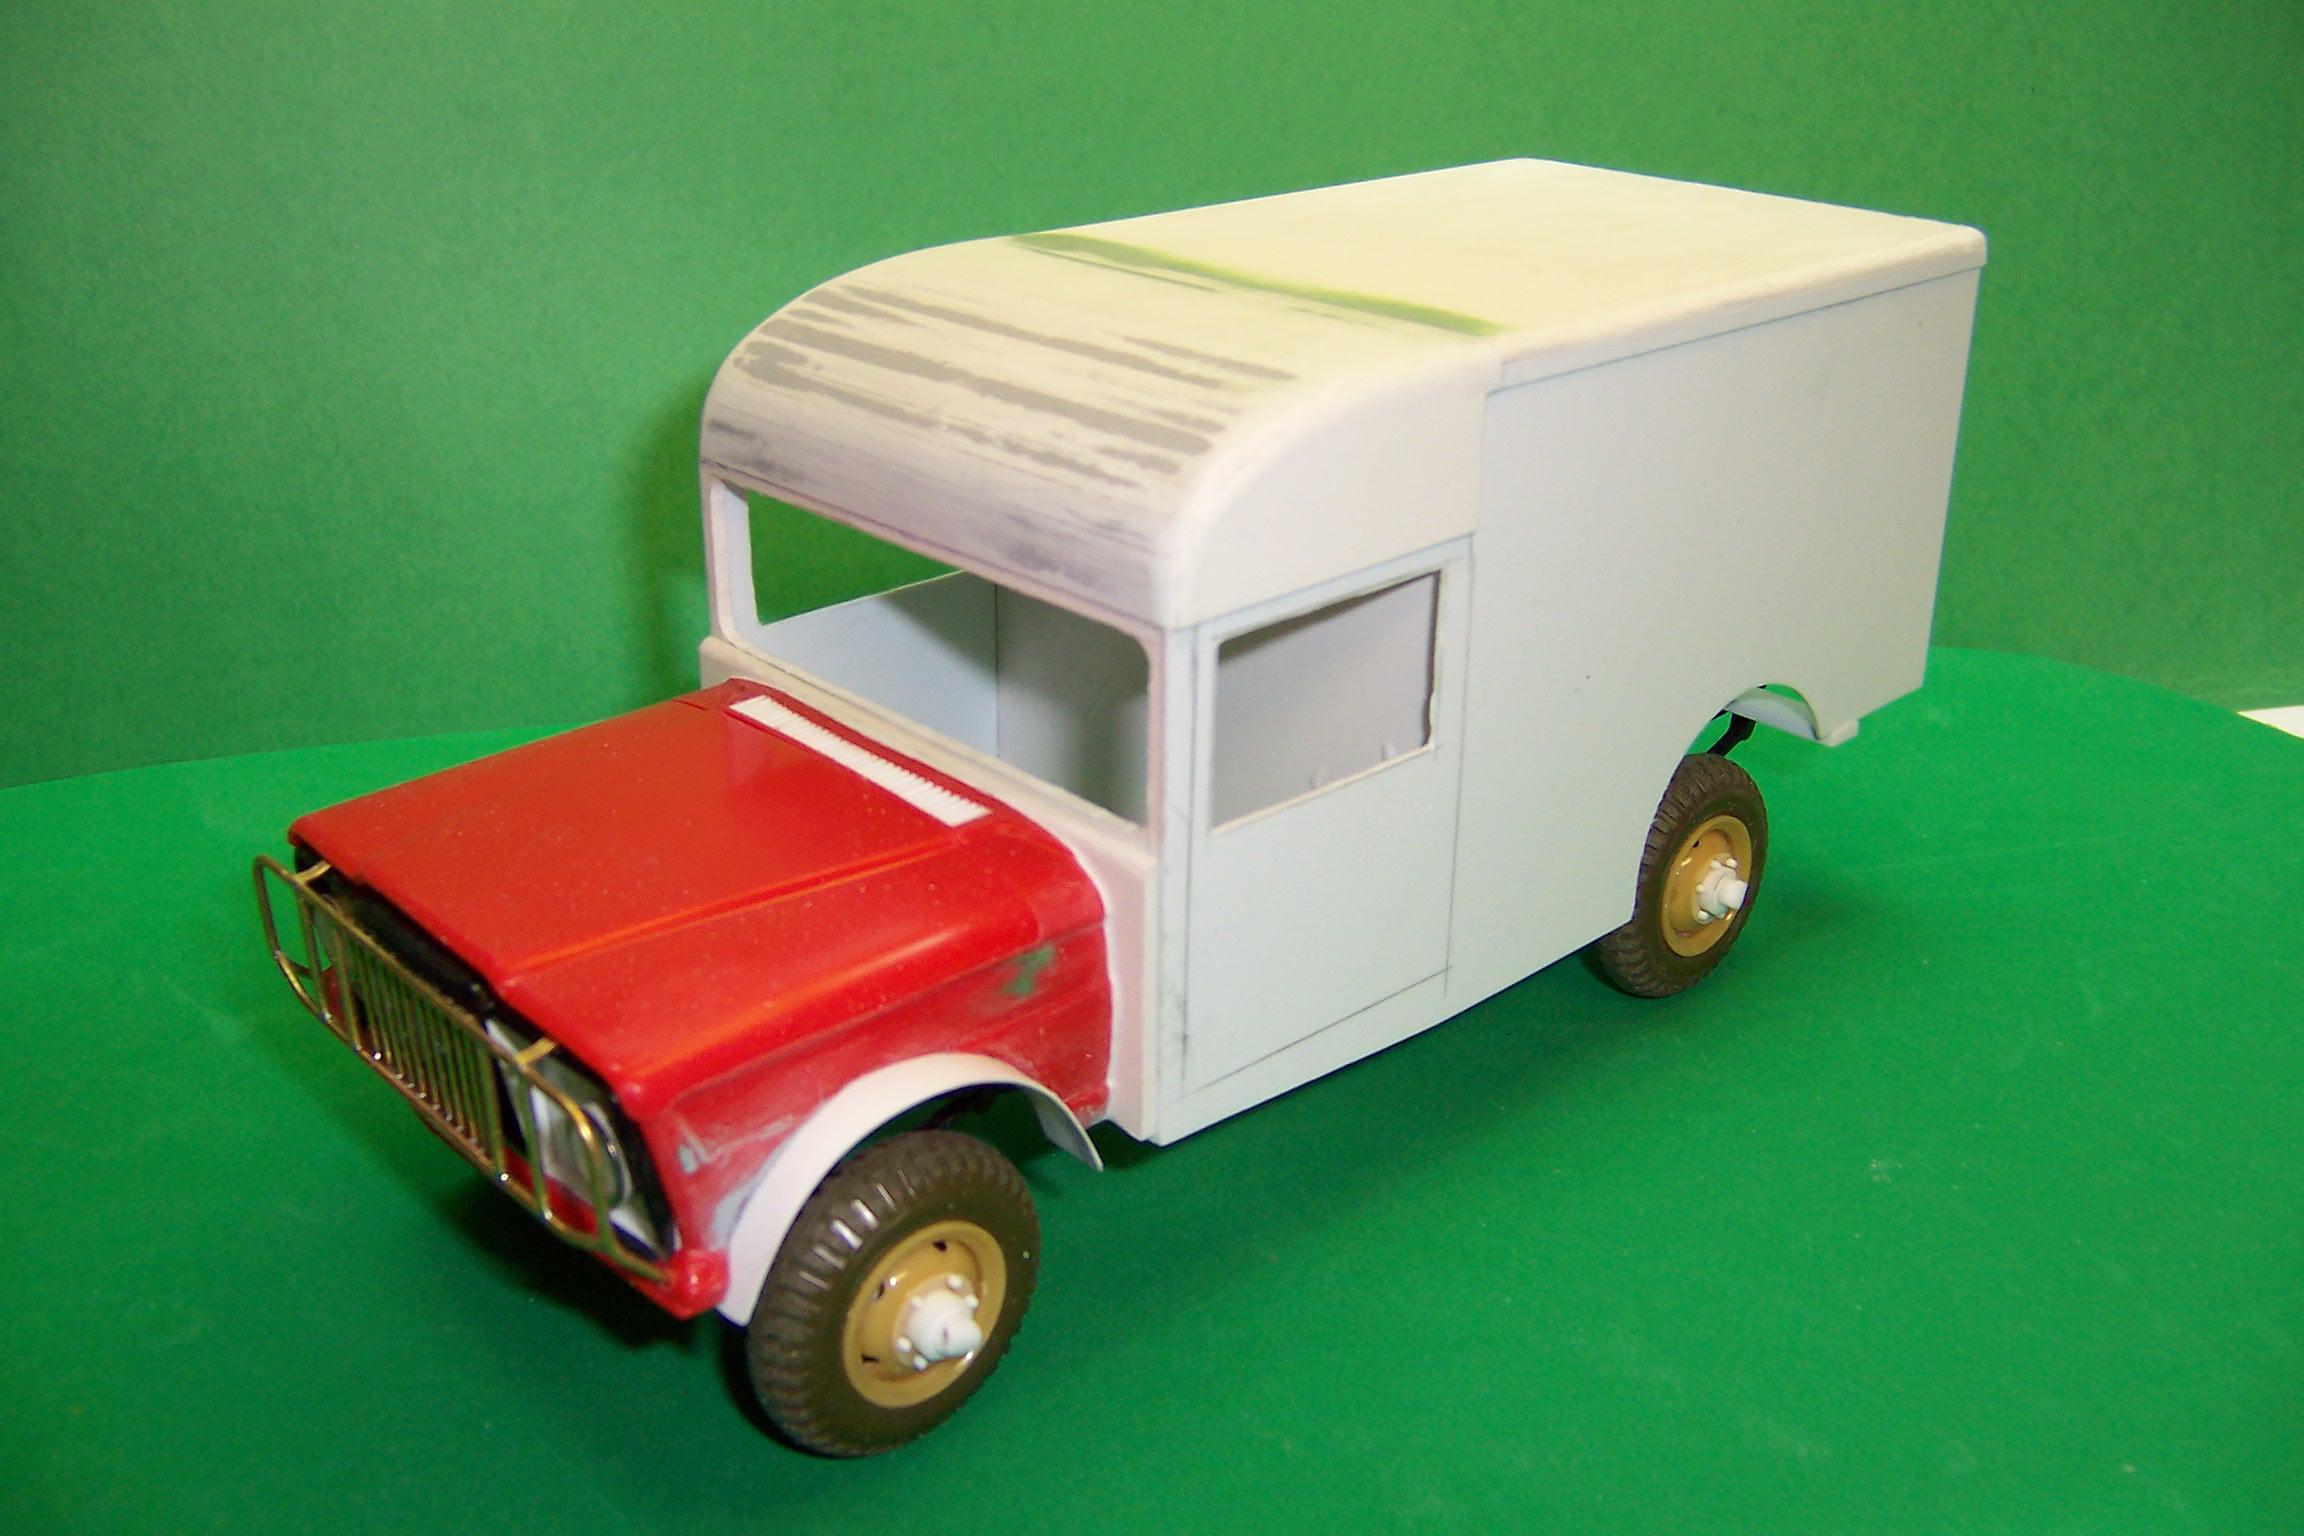
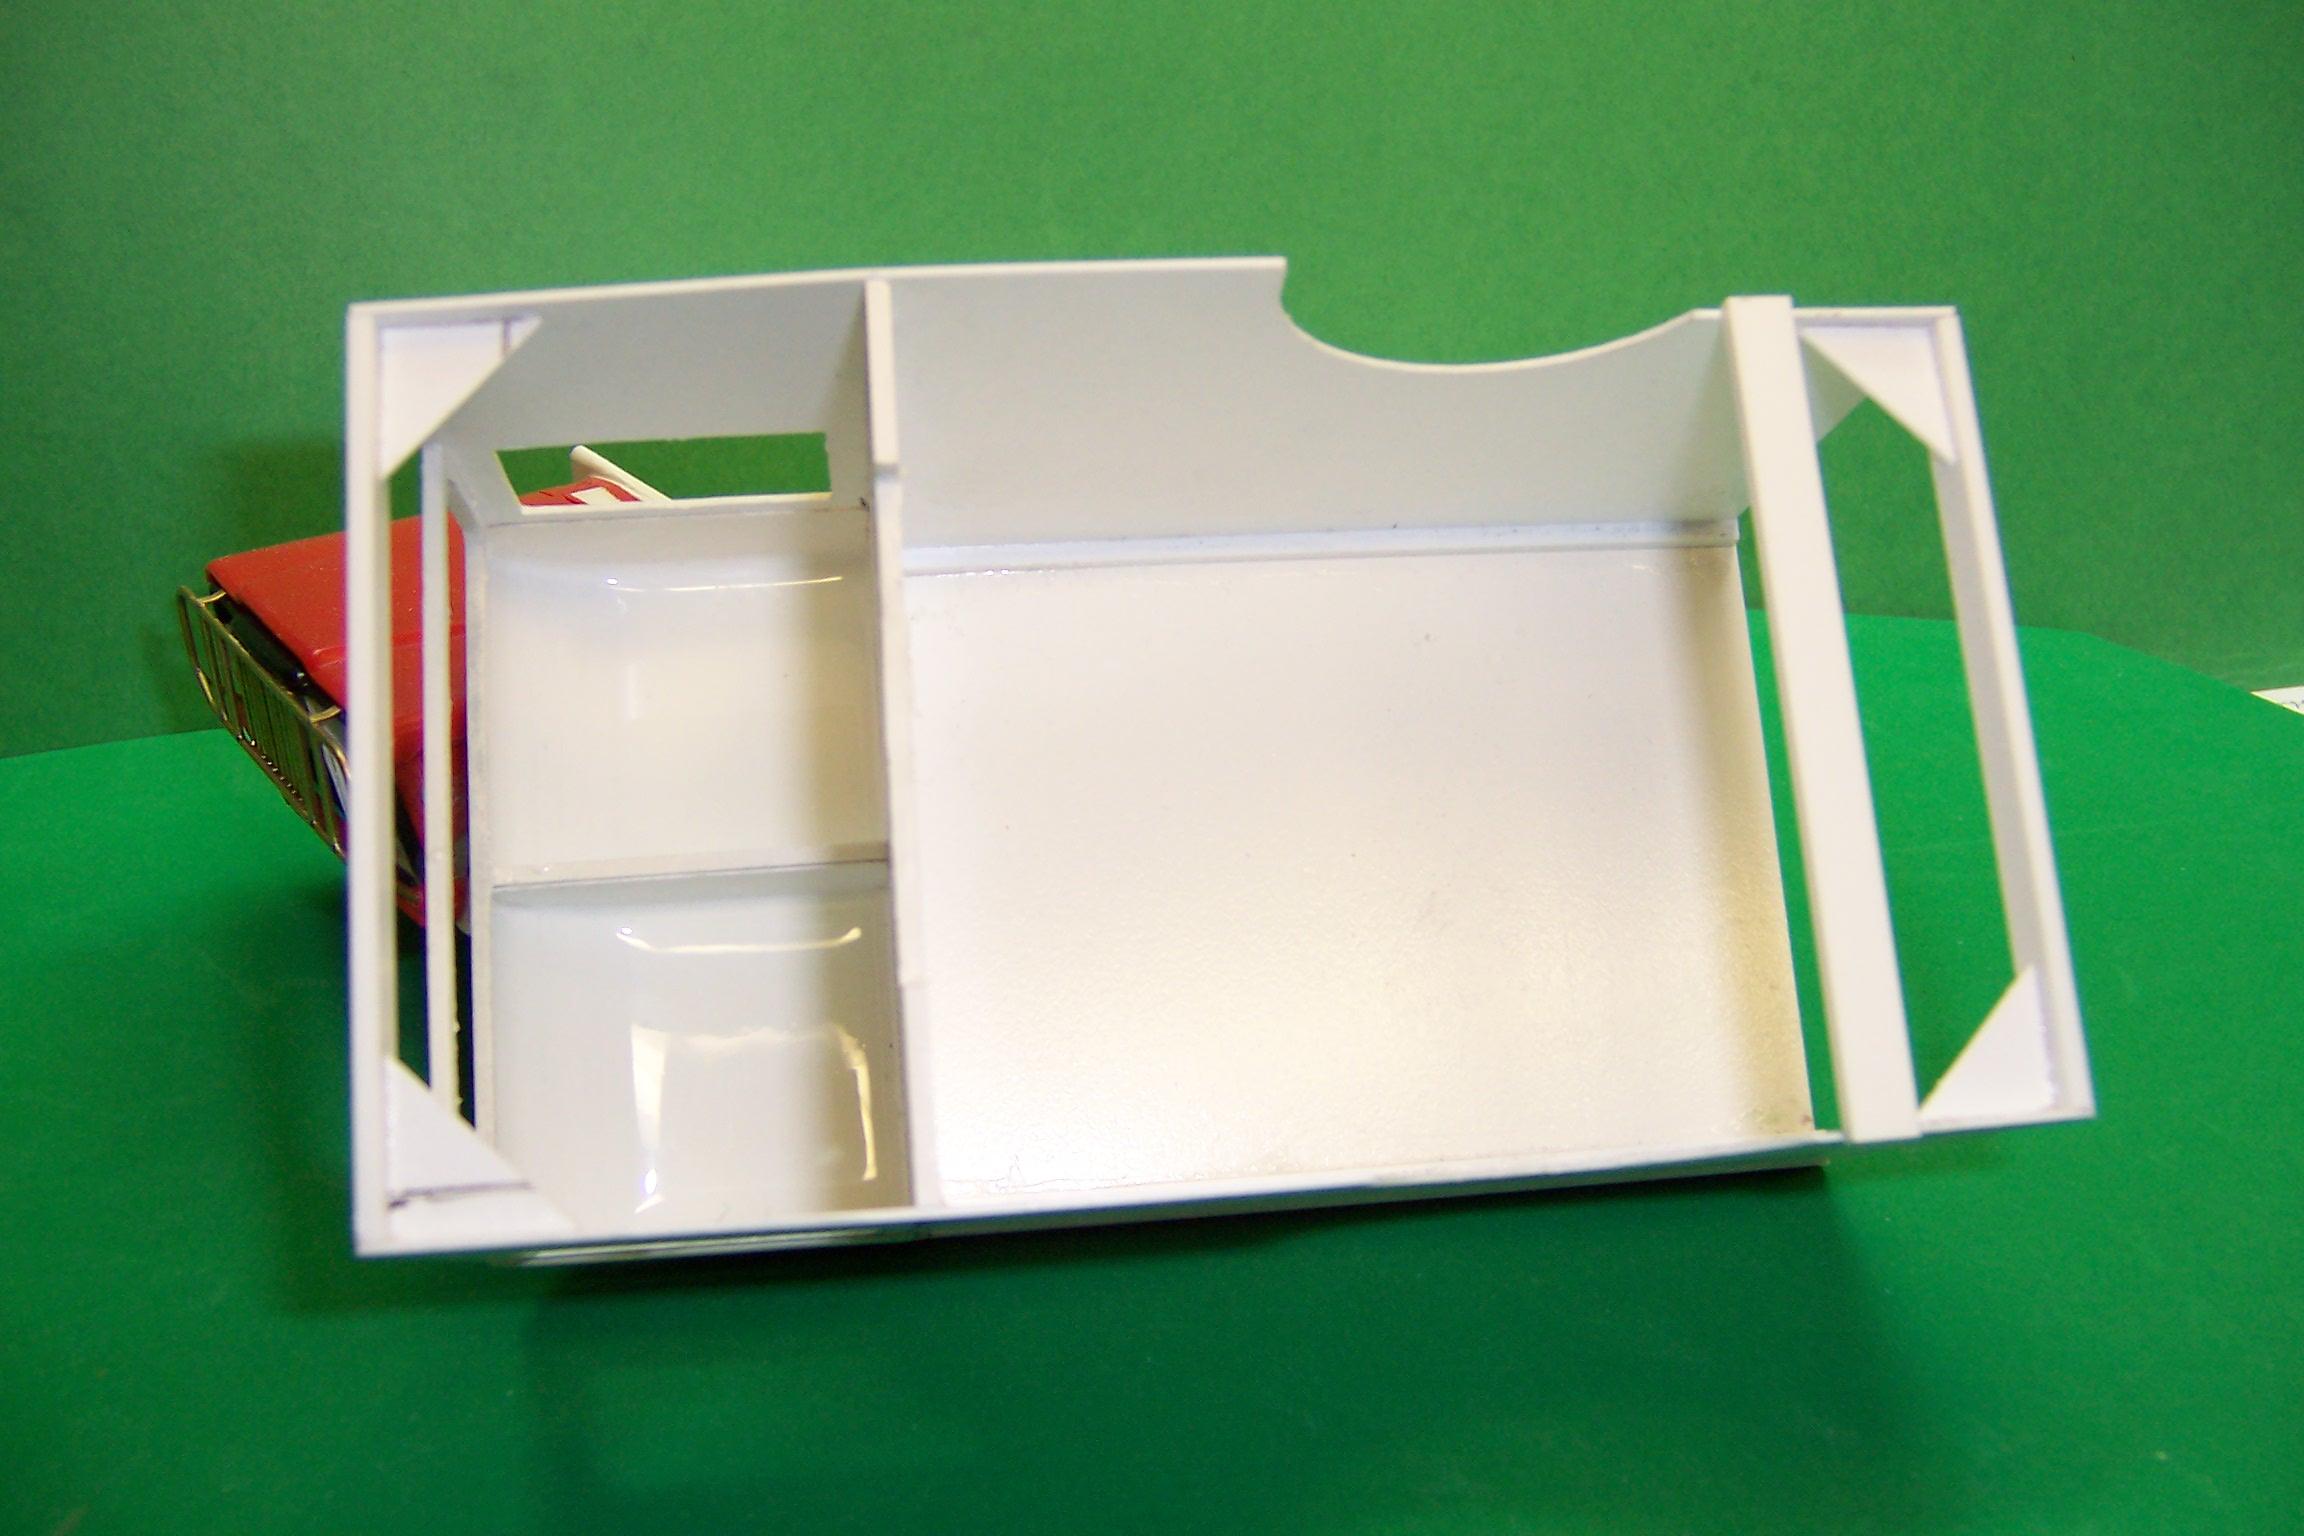
Just a suggestion for the roof. Unless you plan on removing the roof to see the interior I would suggest that you use plastic strips laid side by side from one end to the other. Why? Because plastic sheet will tend to dip in the middle and unless you can pre-form it over a buck to soften it there will be too much stress in the plastic. You might be able to use very light gage aluminum for the top but again bending it will be a chore. Using the strip method you can lay one strip down over the ribs, glue it and lay the next one to it and glue it as well. When it is all done, sand the edges until the joints disappear. There will be no dipping in the middle and the roof will be strong. You can do this while the inner ribs are temporarily in place and then lift the whole thing off for painting. If you want a smooth interior, when the roof is finished mix up some two part casting resin and pour it in and let it cover the whole inner surfaces in a light coat. When it hardens it will be smooth as silk. Here's my M-725 USAF ambulance that has this method of roof construction over the cab doors. In the first photo you can see the strips that are laid crossway and the filler that was used to smooth it out. The strips were 030" x .125" if memory serves me right. In the second photo the underneath has been coated with casting resin to smooth it out. The piece in the middle is just a support but it really was not needed. Hope this helps!
-
Excellent work! Love scratch building! Archer may have gone but Micro-Mark has sheets of rivets (#84985). I use the HO size. They come in a variety of patterns so there's plenty to choose from.
-
1944 GMC CCKW
Chariots of Fire replied to Warren D's topic in WIP: Model Trucks: Big Rigs and Heavy Equipment
I've got the tech manual as a PDF but it does not have a lot of build info like some others. Either of you want it I can forward it to you. -
CCKW
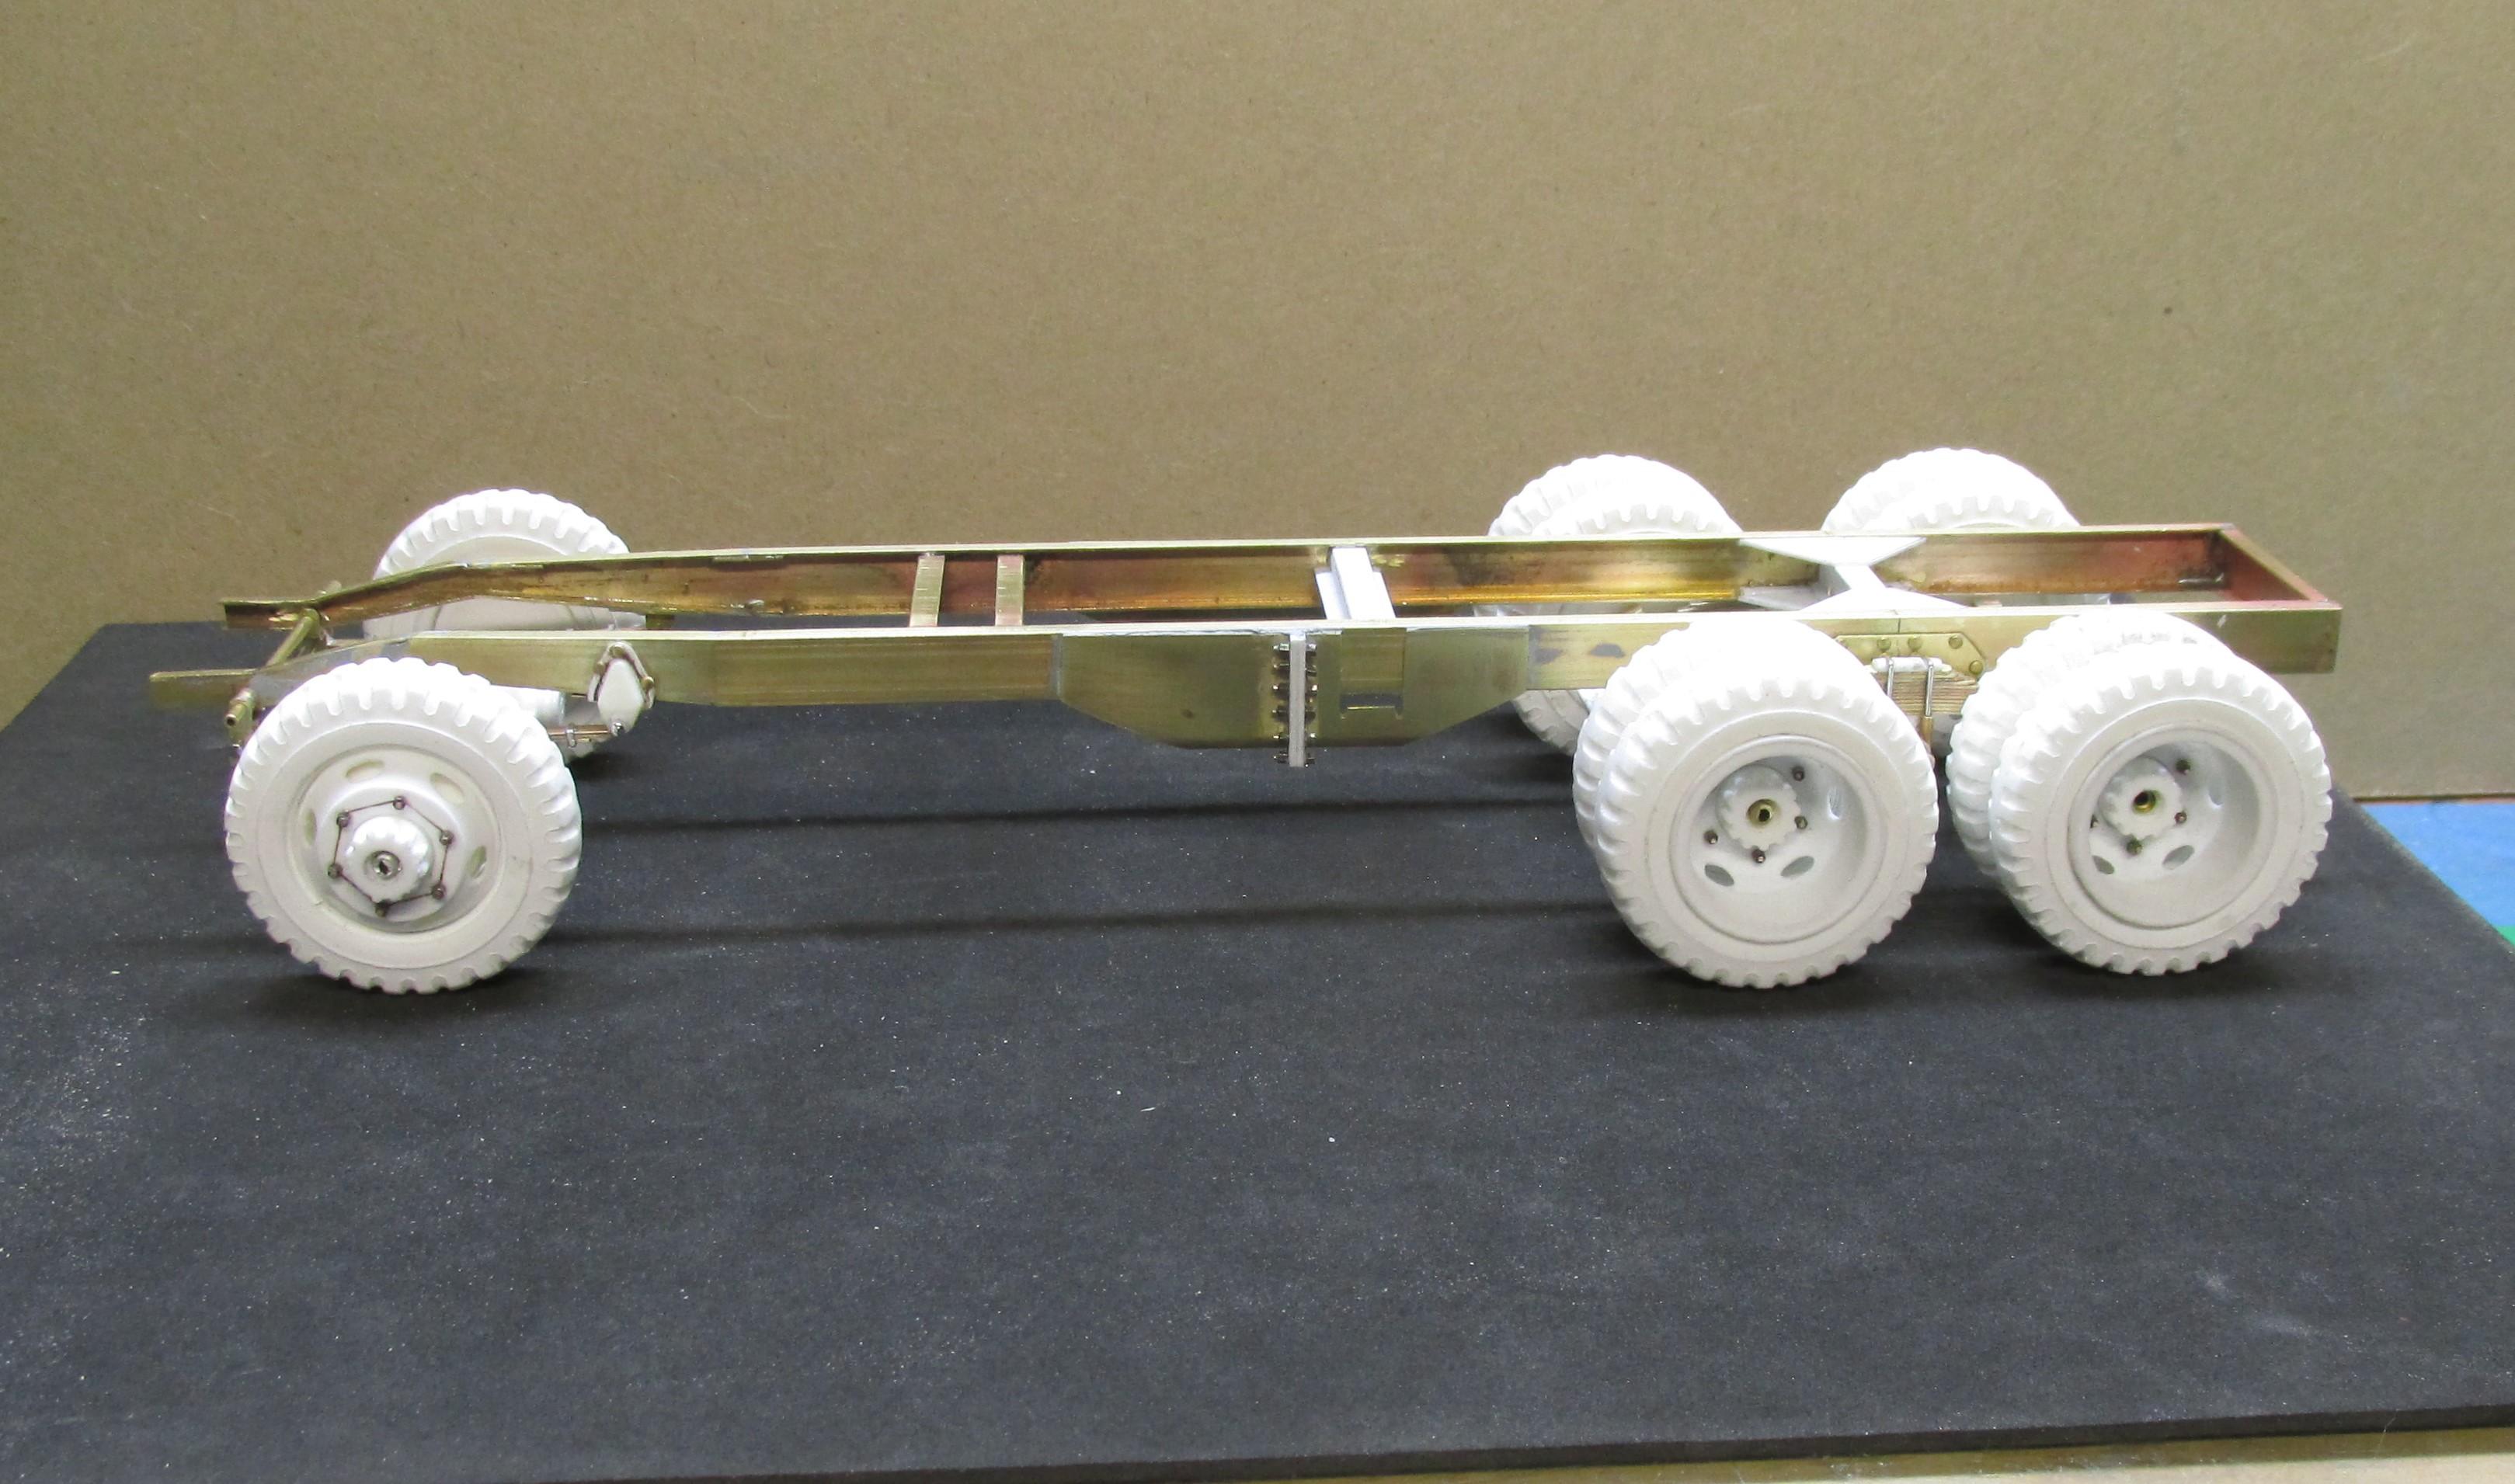
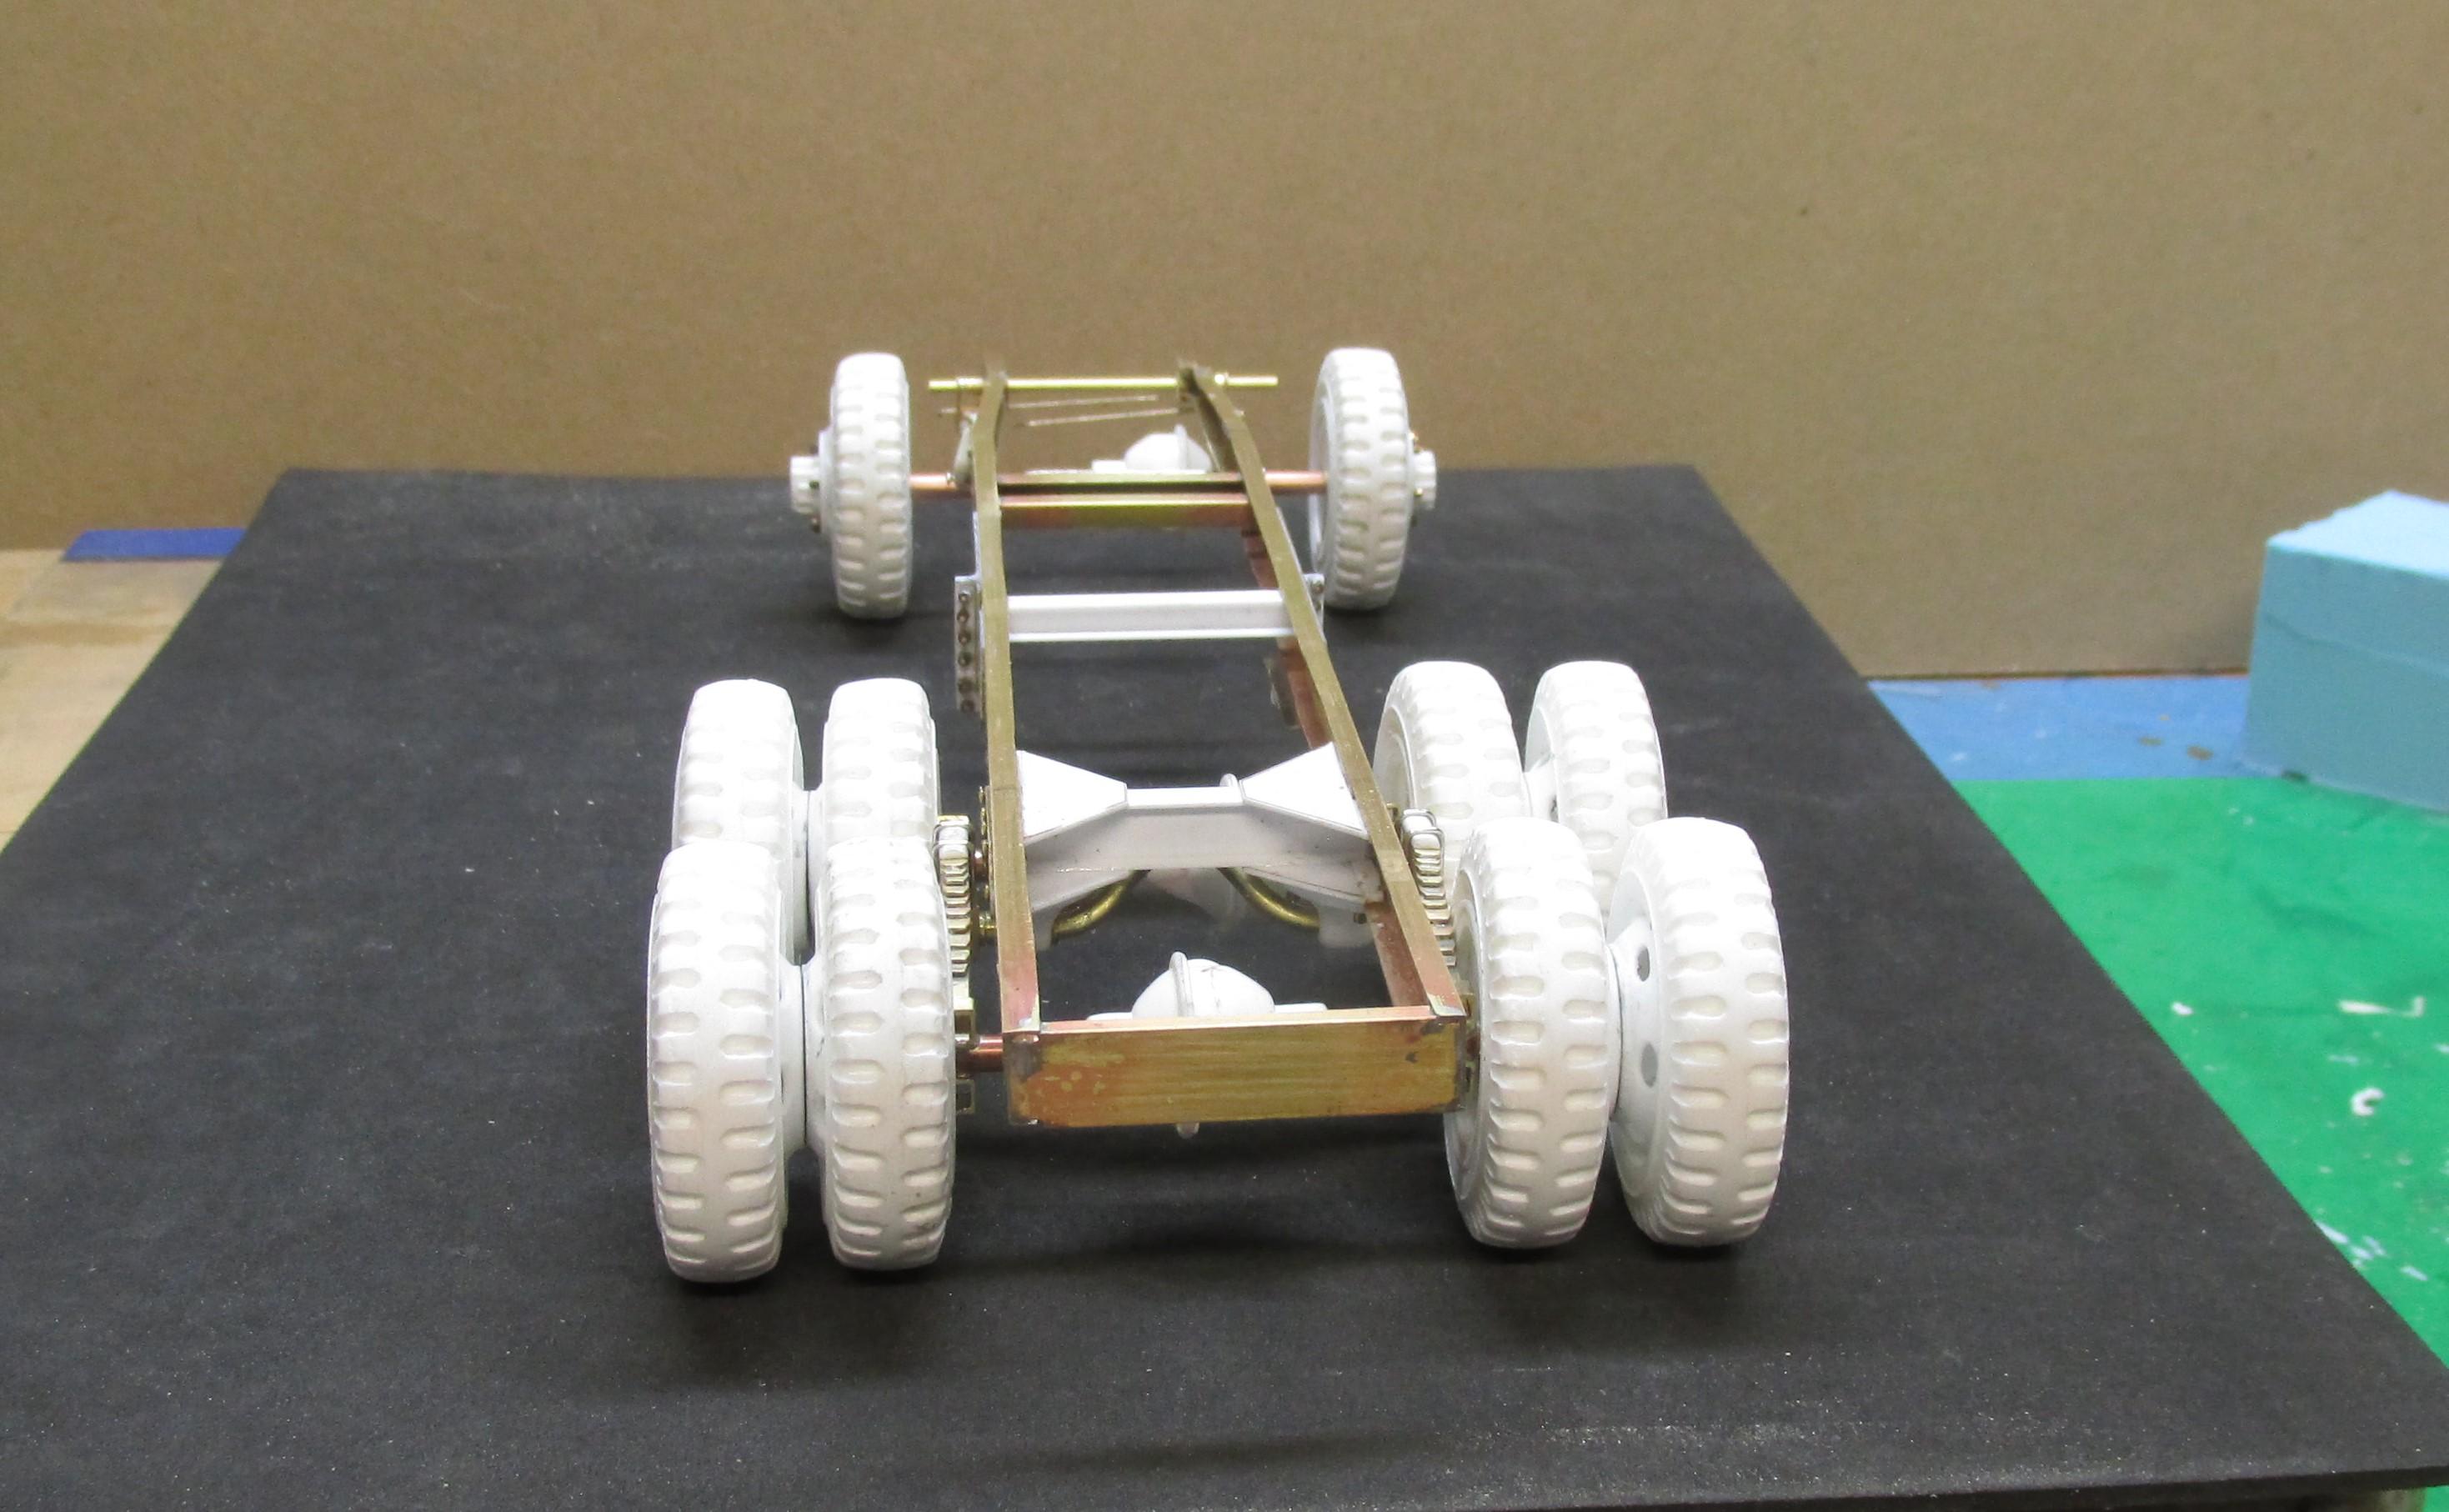
Chariots of Fire replied to Chariots of Fire's topic in WIP: Model Trucks: Big Rigs and Heavy Equipment
Got the frame up on wheels tonite, at least temporarily. Mostly to see if the frame would be level with the ground with what has been done to date. So far so good. Working on the torsion rods for the back now. Two done, more to go.