Chariots of Fire
-
Posts
2,788 -
Joined
-
Last visited
Content Type
Profiles
Forums
Events
Gallery
Everything posted by Chariots of Fire
-
 WOW! Such a neat and clean area! Wish mine looked like that!
 -
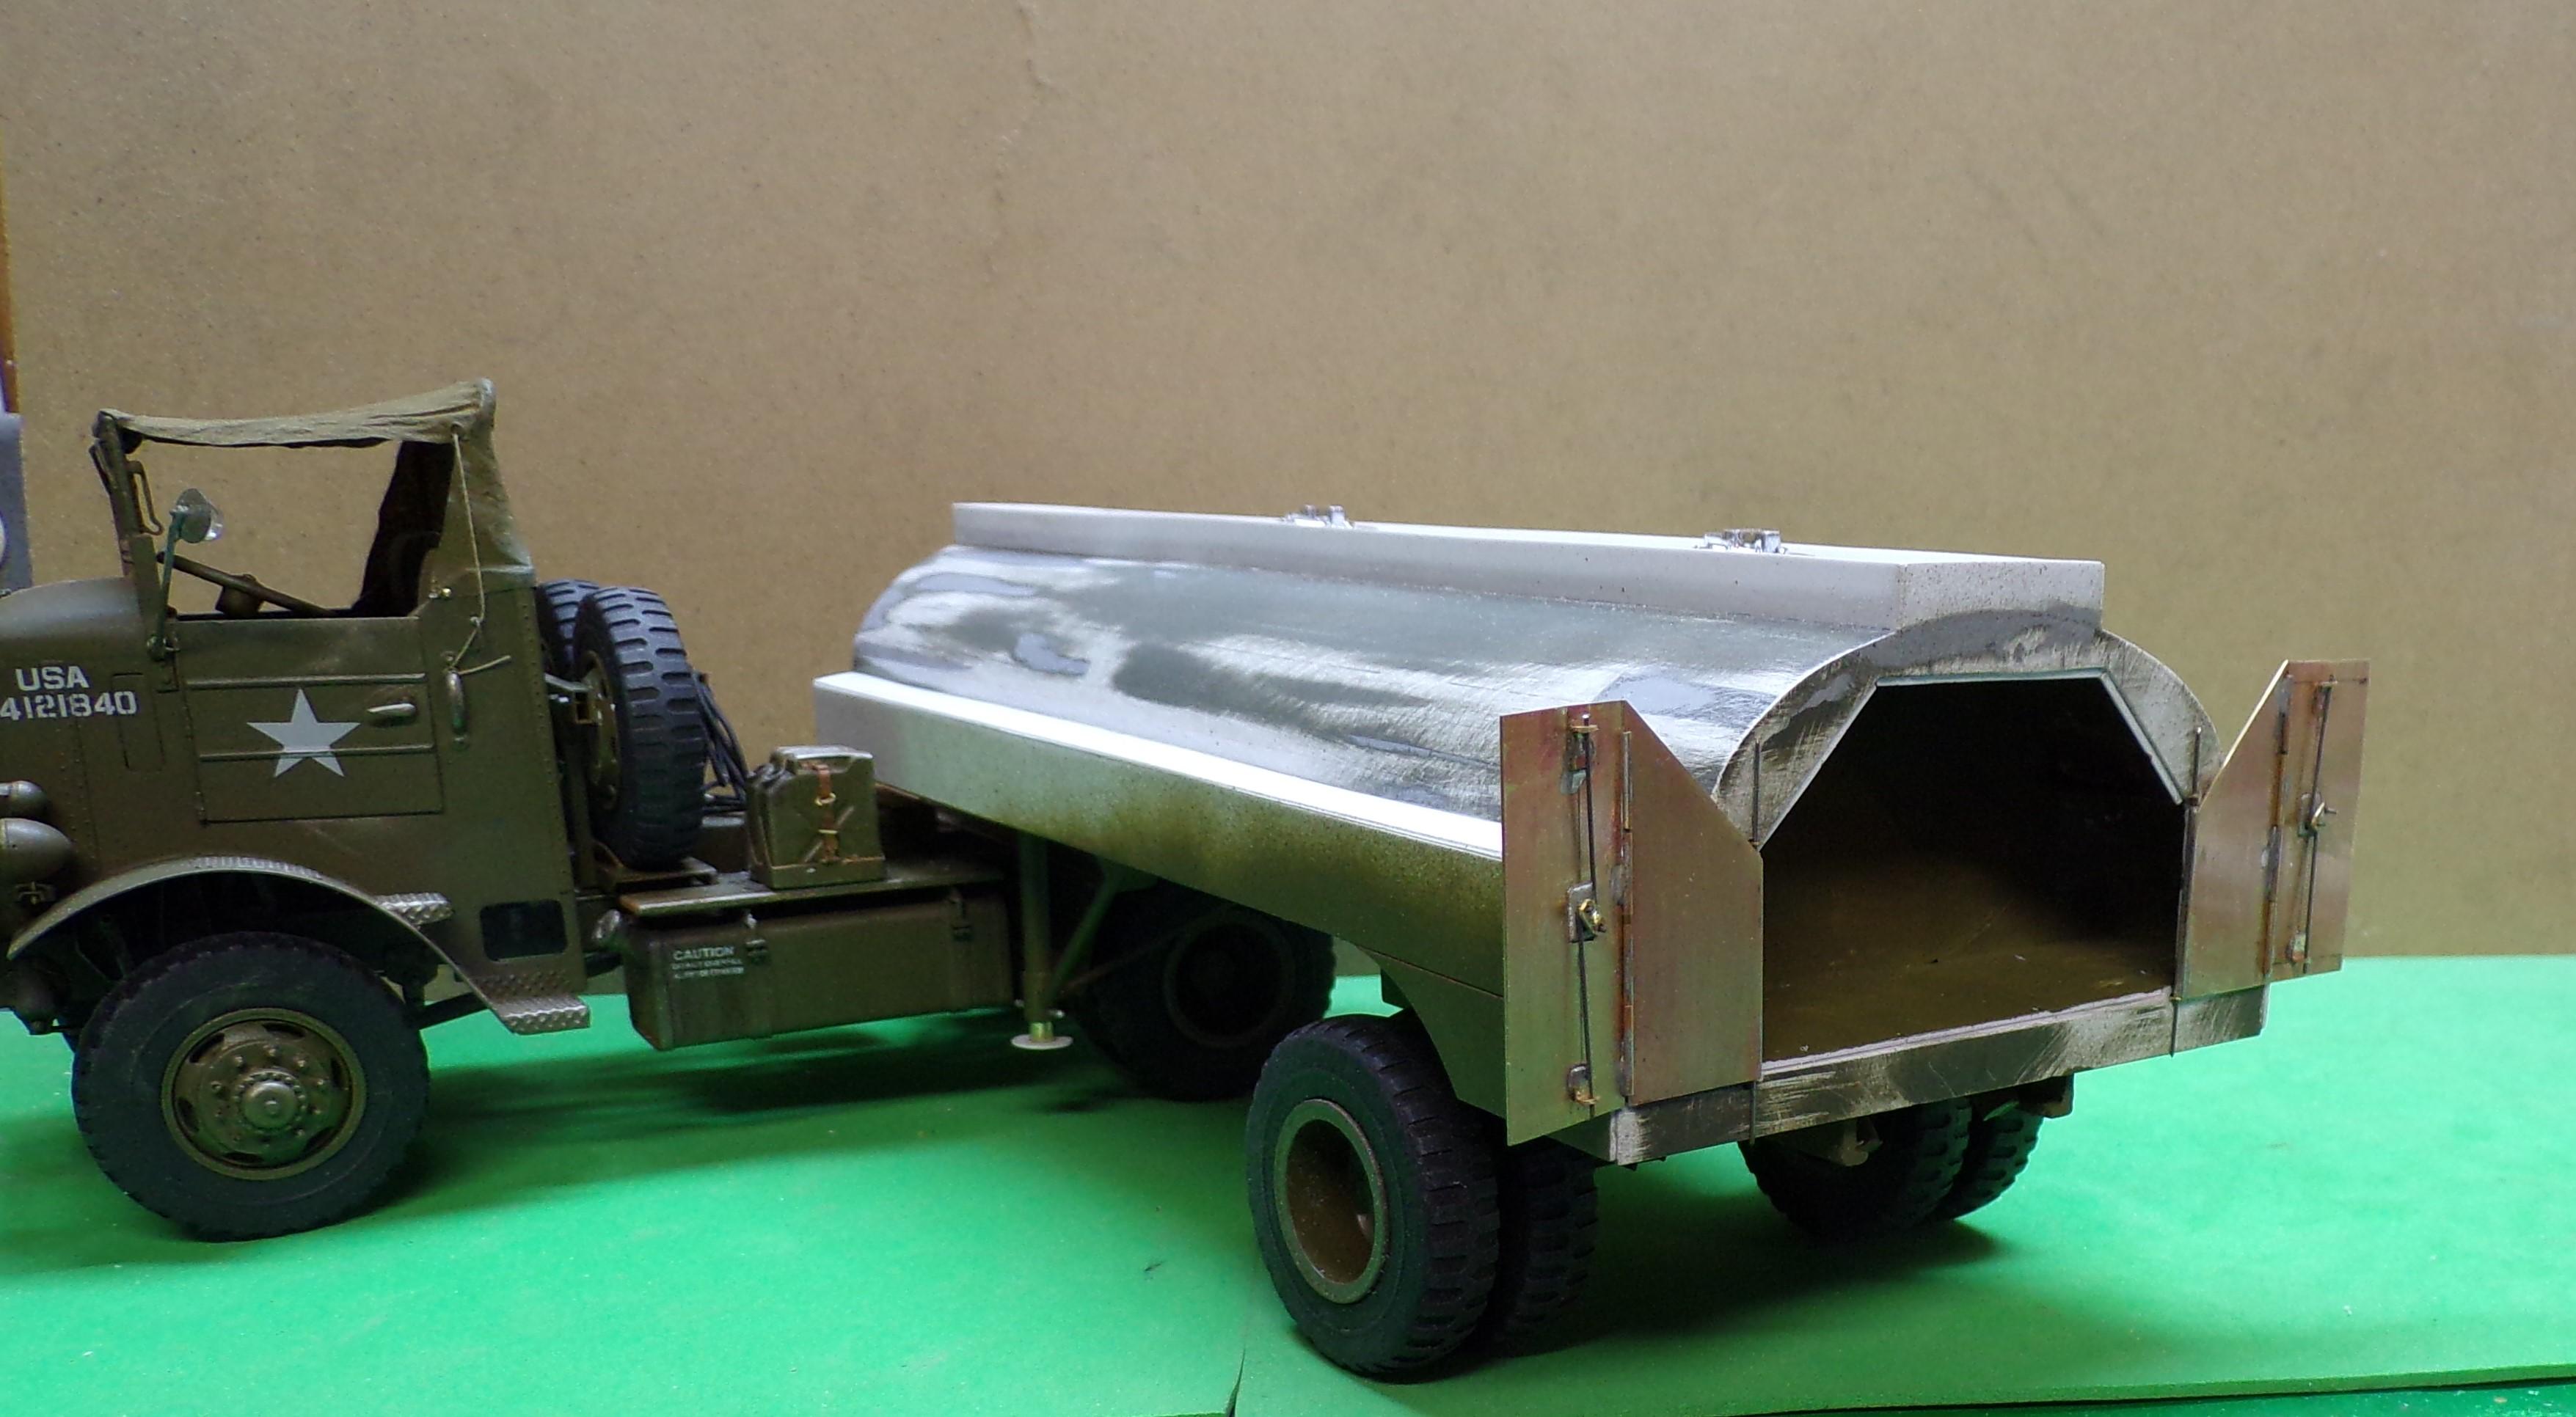
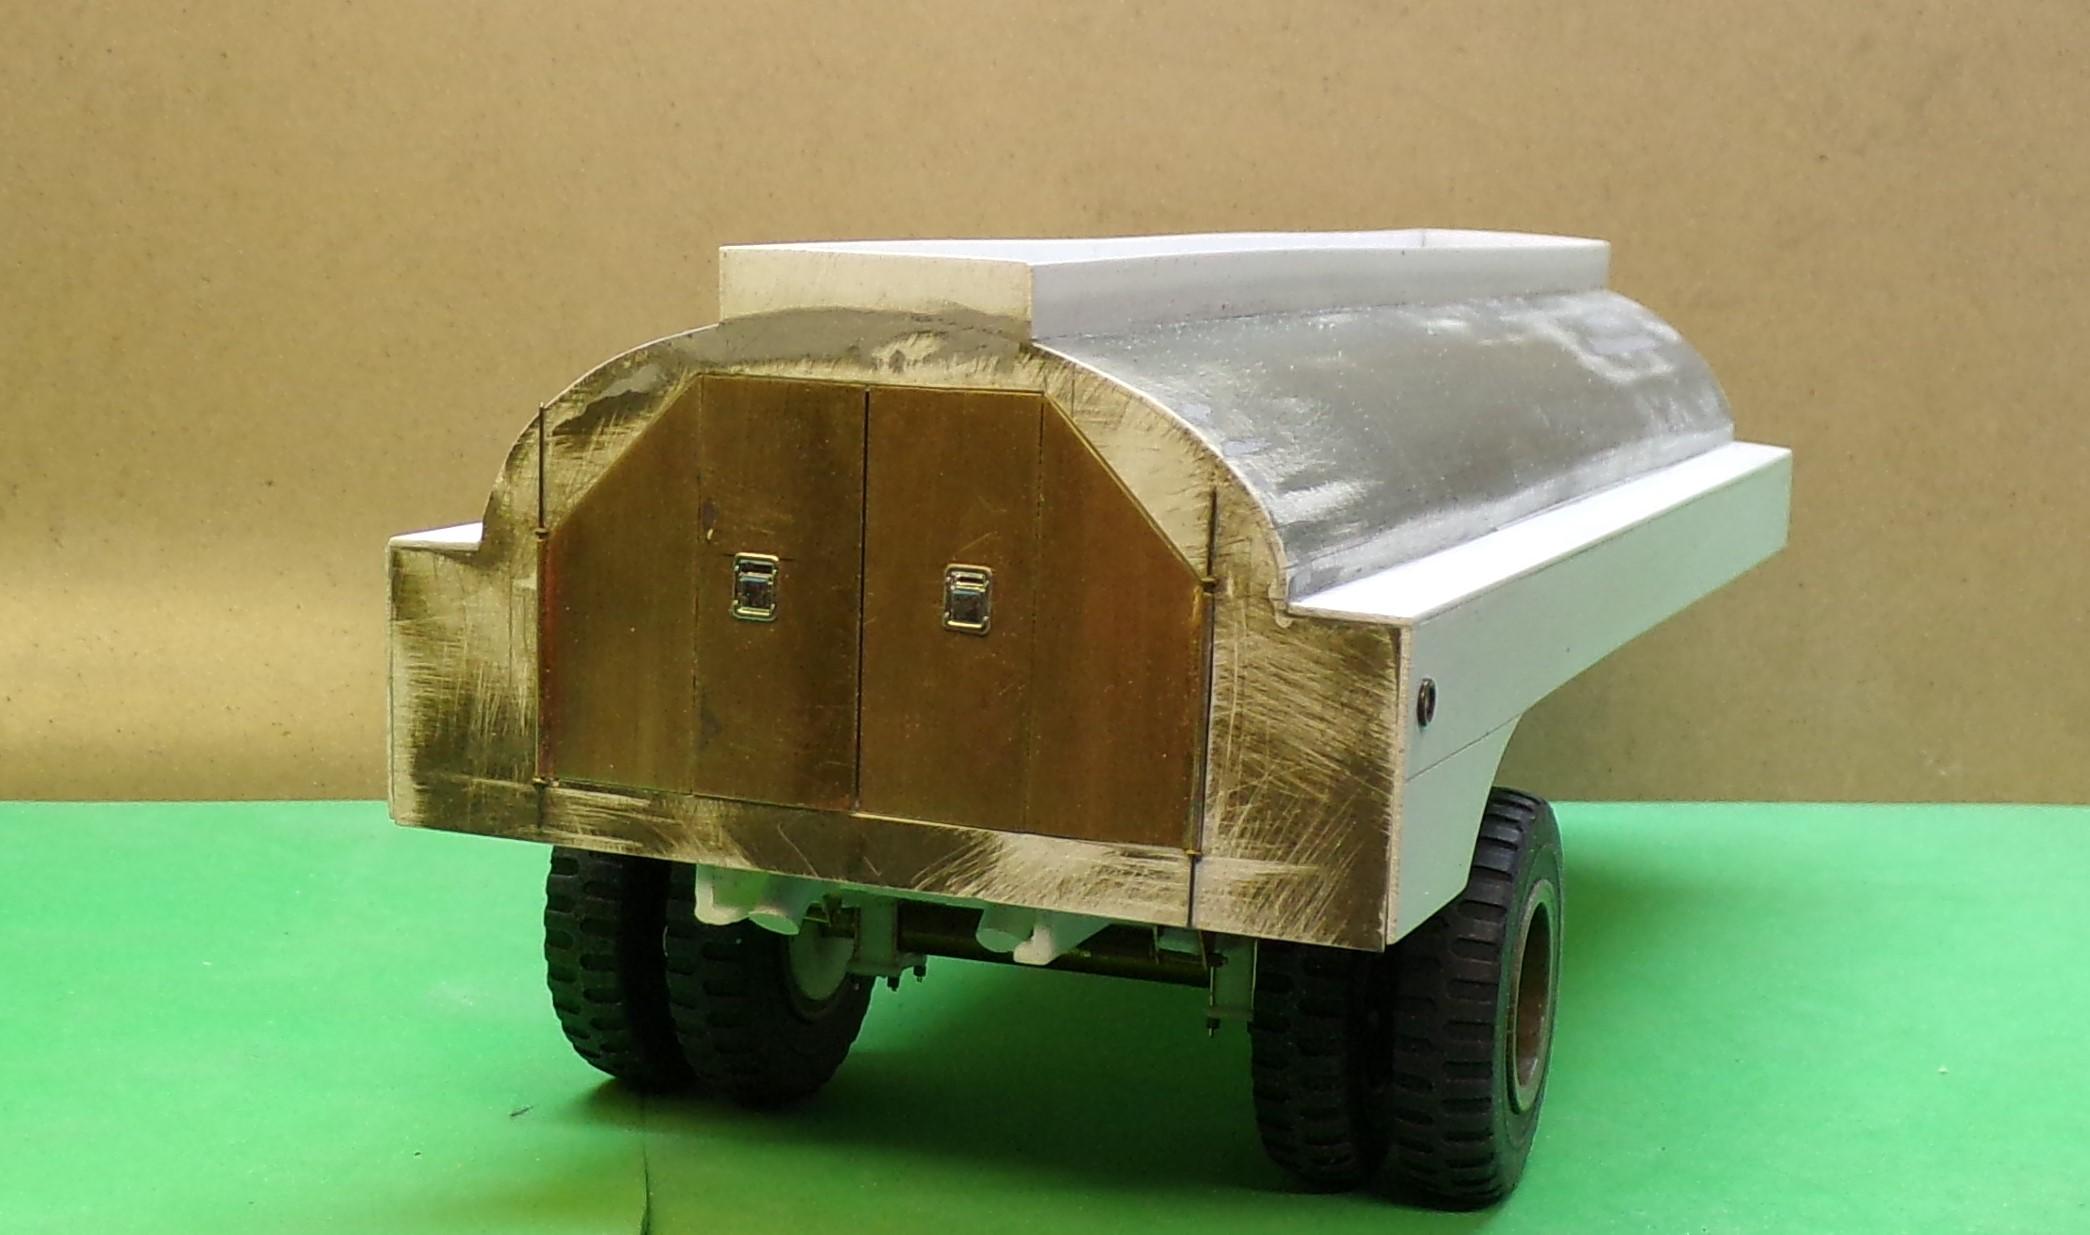
Couple more pix. Got the dome covers done and some louvers at the rear. About it for tonite. More a bit later.

-
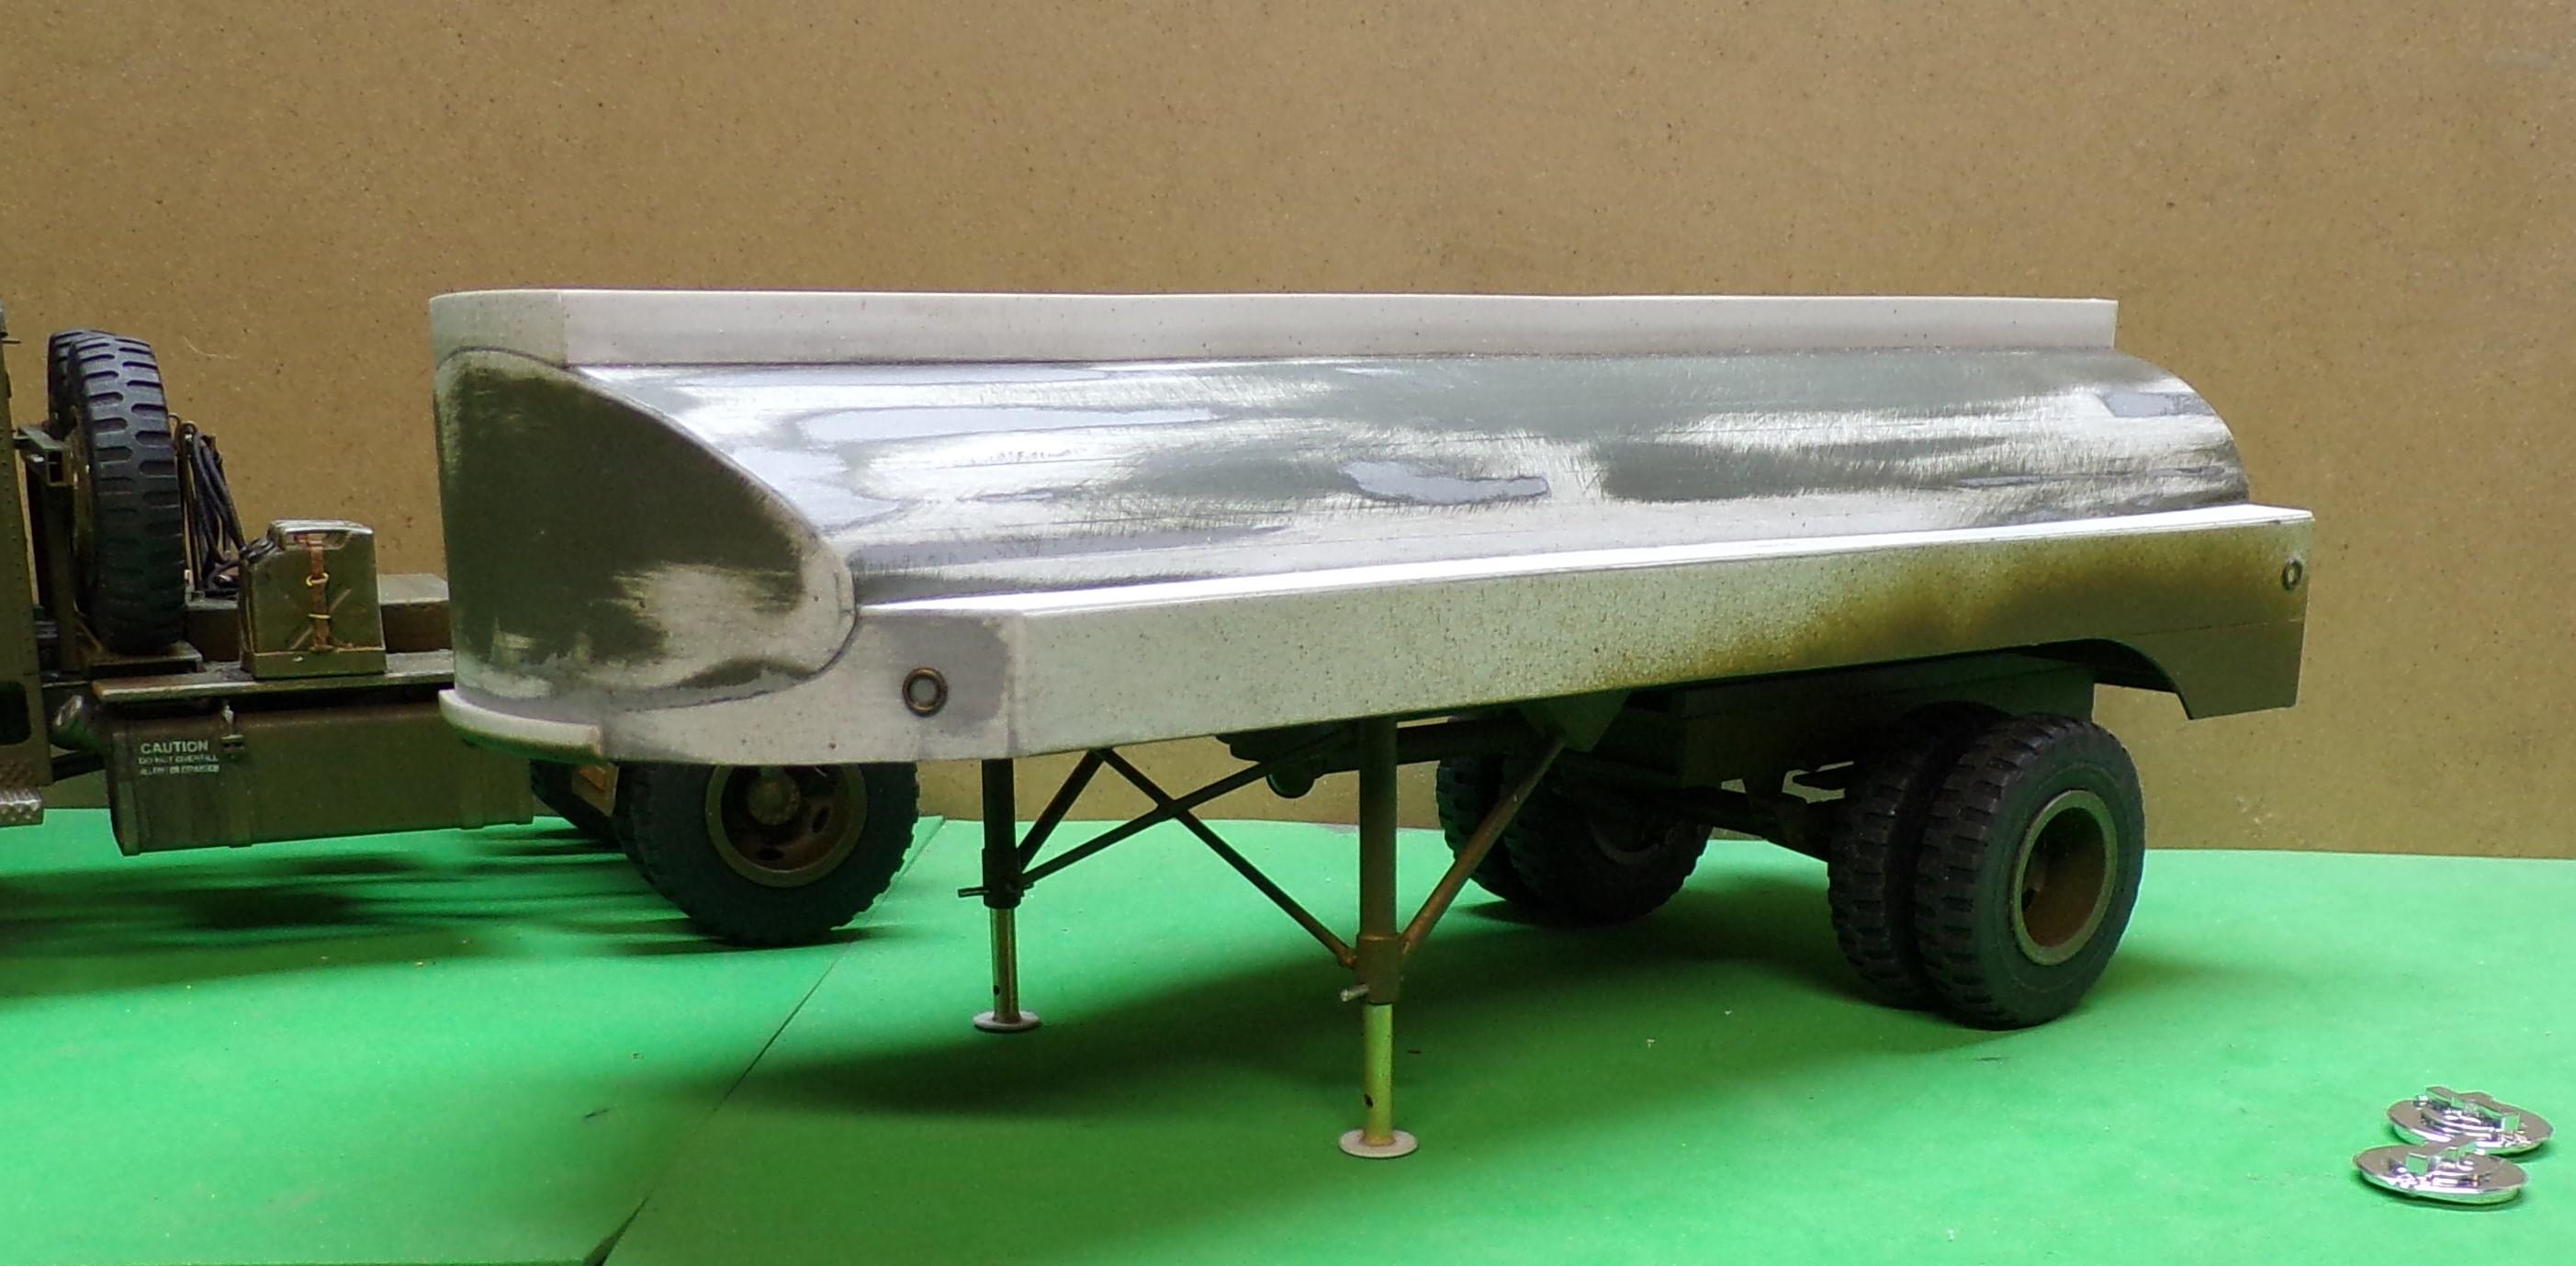
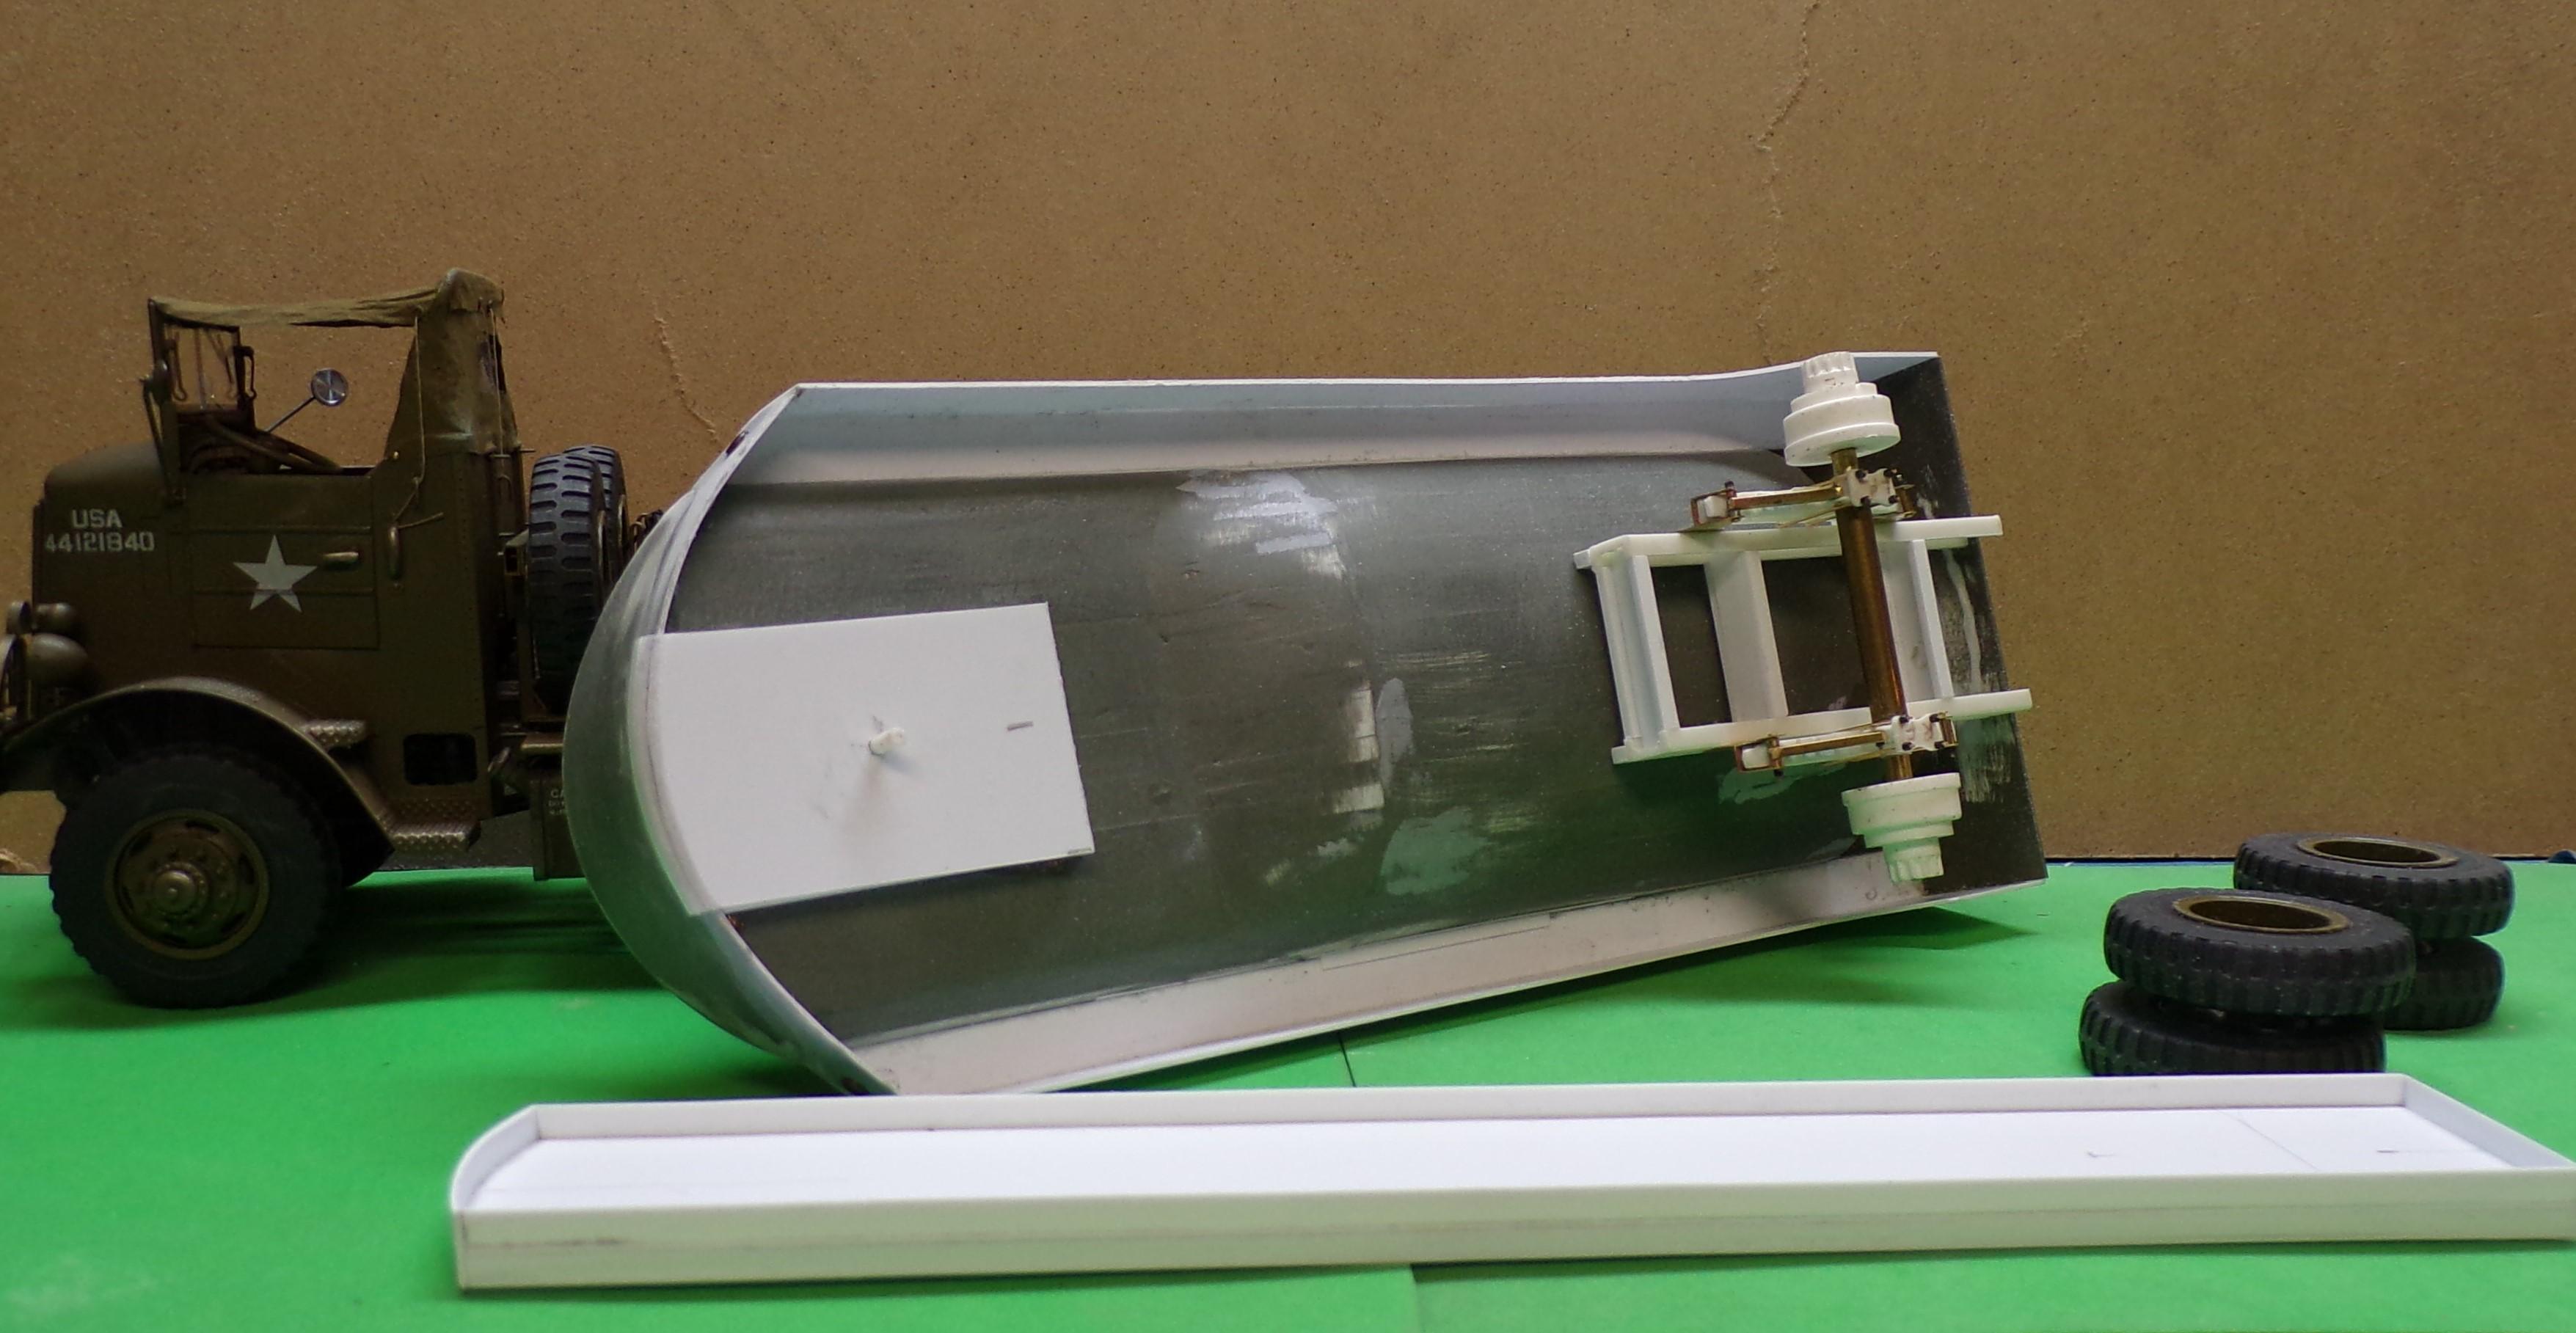
Got door latches done so that the rear doors stay closed. Also finished up the landing gear that allows the trailer to stand on its own. Steady progress with plenty of details yet to go.
-
The tech manual has been very helpful and there are photos on line that show lots of outside detail that can be put into the build.
-
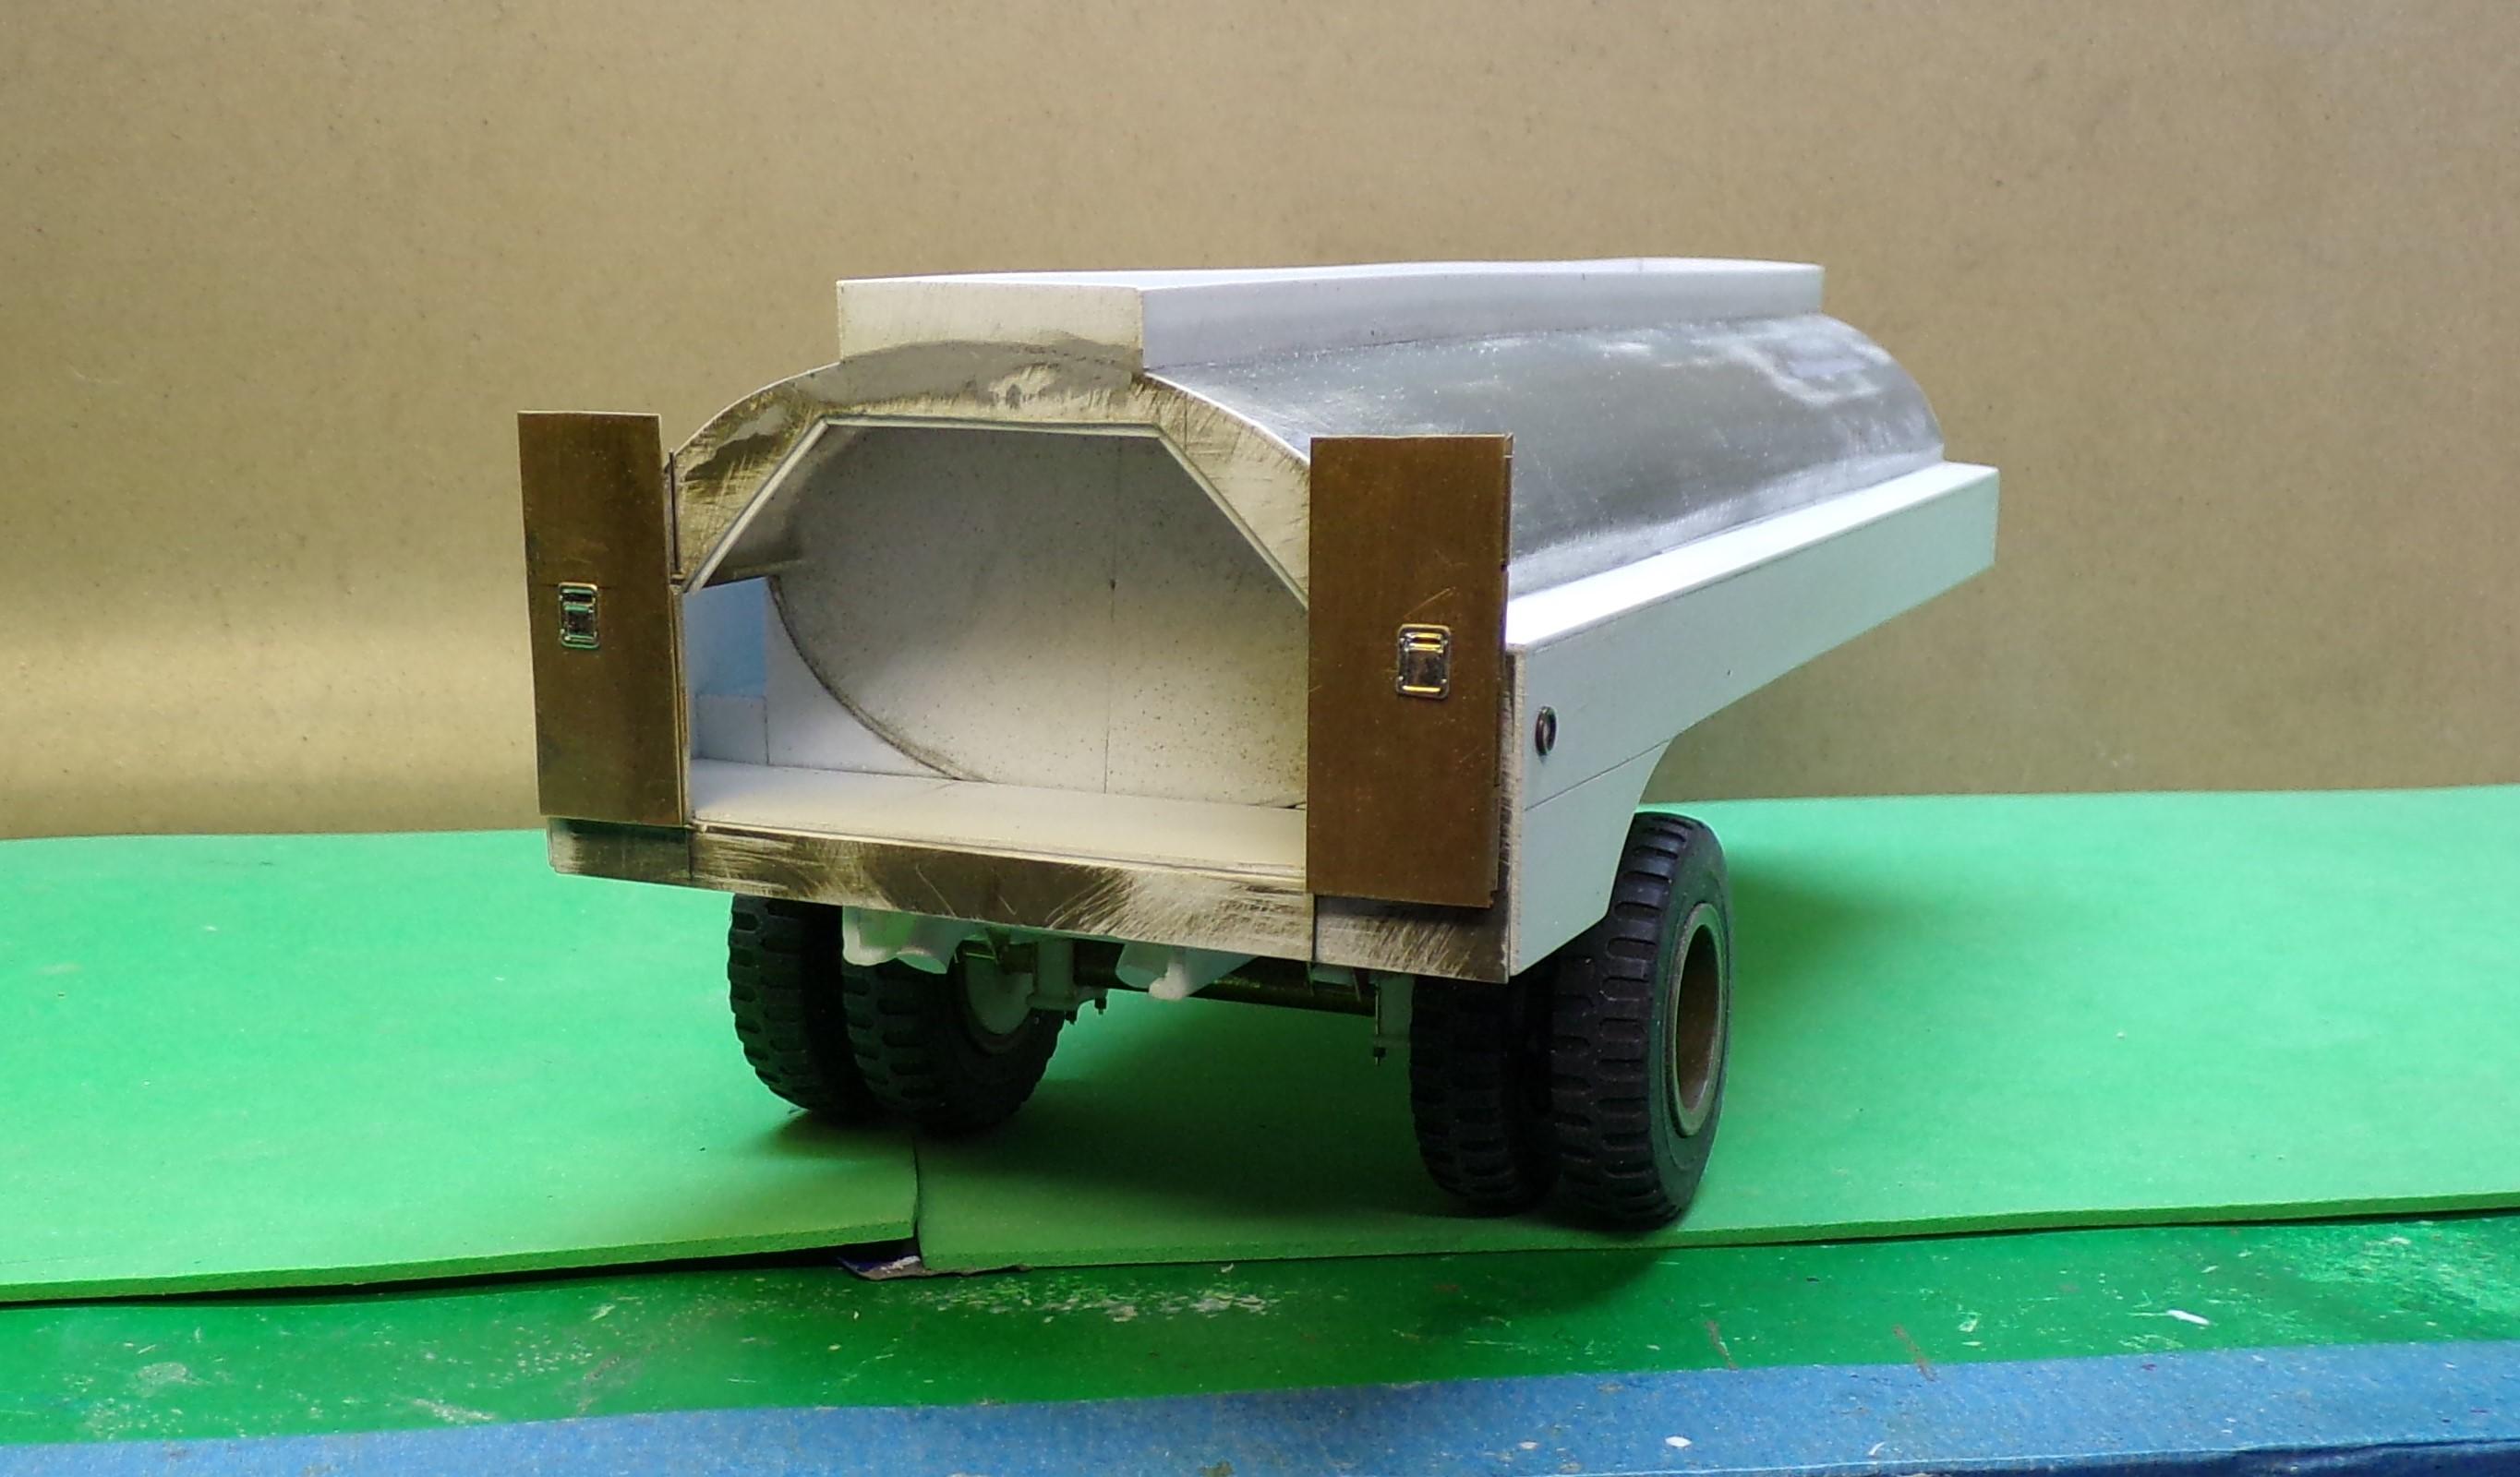
Here's an update on building progress. The main tank portion of the build is done and details are now the order of the day. Bottom plumbing is generally done with some fixtures needed at the end of the discharge pipes. Hinged brass doors were made for the rear compartment. Two more small doors need to be made for access to the storage area for the discharge hoses. The back is now enclosed and will have a small pump and a box of tools. Need to get the landing gear finished up as well. One thing at a time!!
-
Welcome! It's all about building!!
-
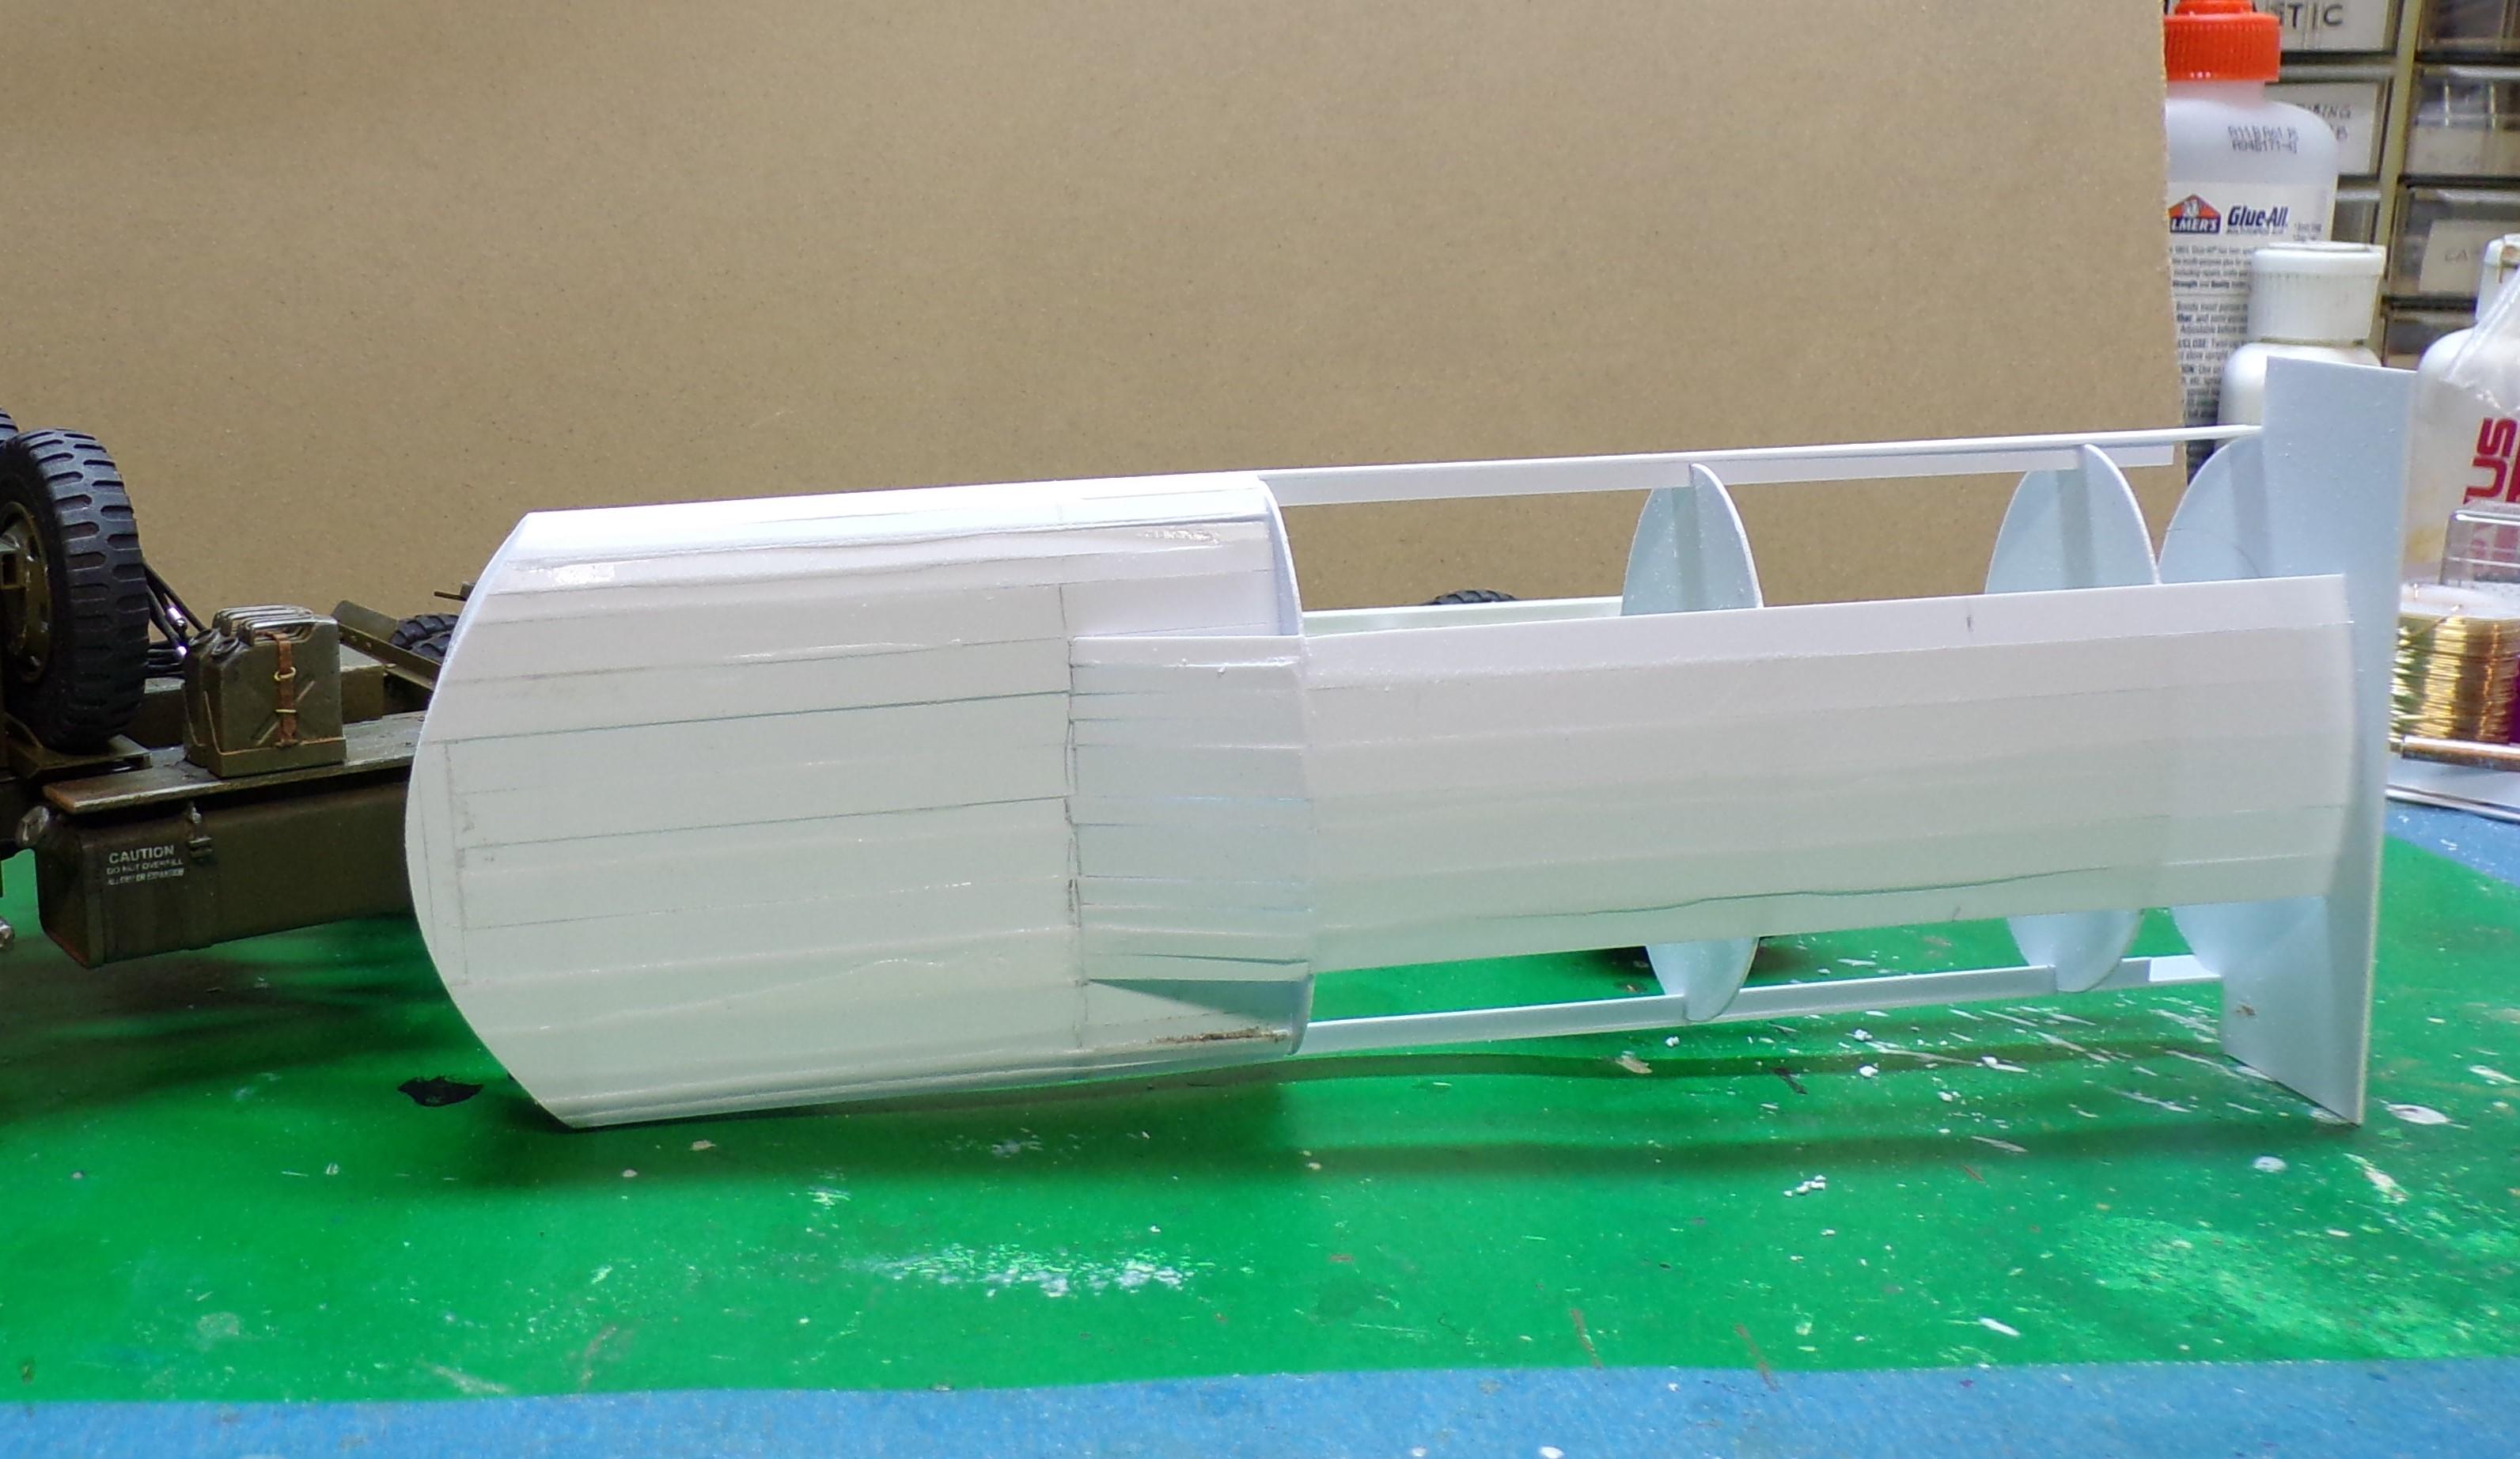
Hey, Steve! Getting the curves right is easier than it might look. I made templates on my graphics program and stuck them to some sheet plastic with contact cement (one surface only). Then I trimmed them out. Doing it that way made the bulkheads all the same. The double curved one the end was made last and the only thing I did was extend it some horizontally. I intentionally left the sides of the tank extra long and bent the bulkhead a bit and snapped it in place. Then it was glued in permanently. Trimming the sides to the shape of the end was easy after that. Take a look at the second photo down from the top and you will see what I just described.
-
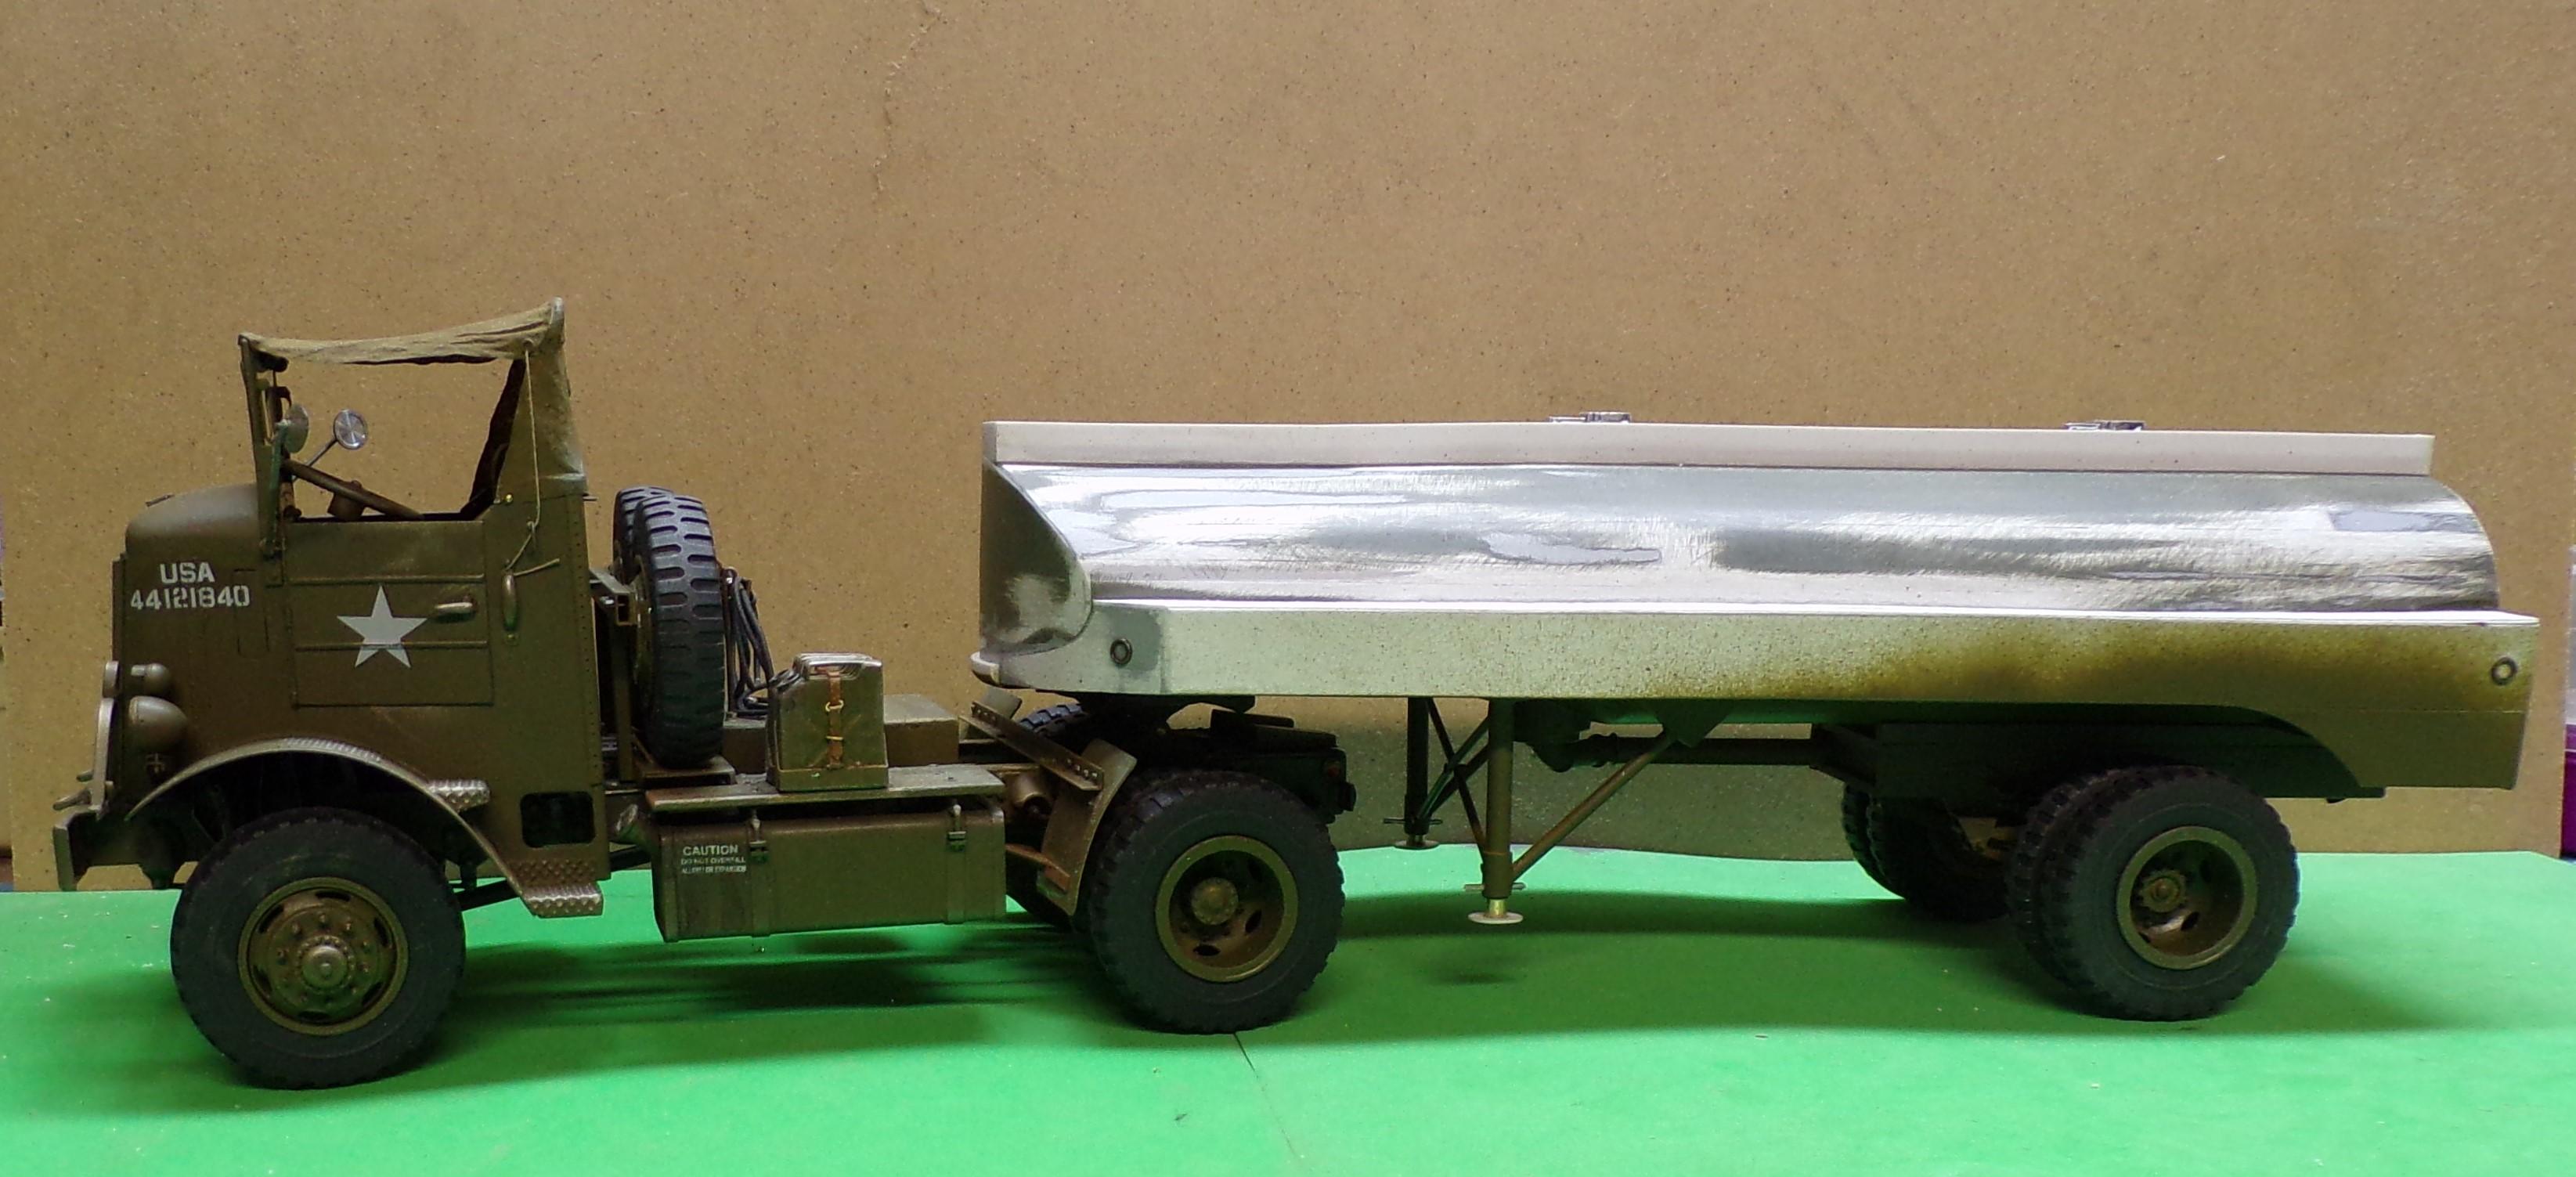
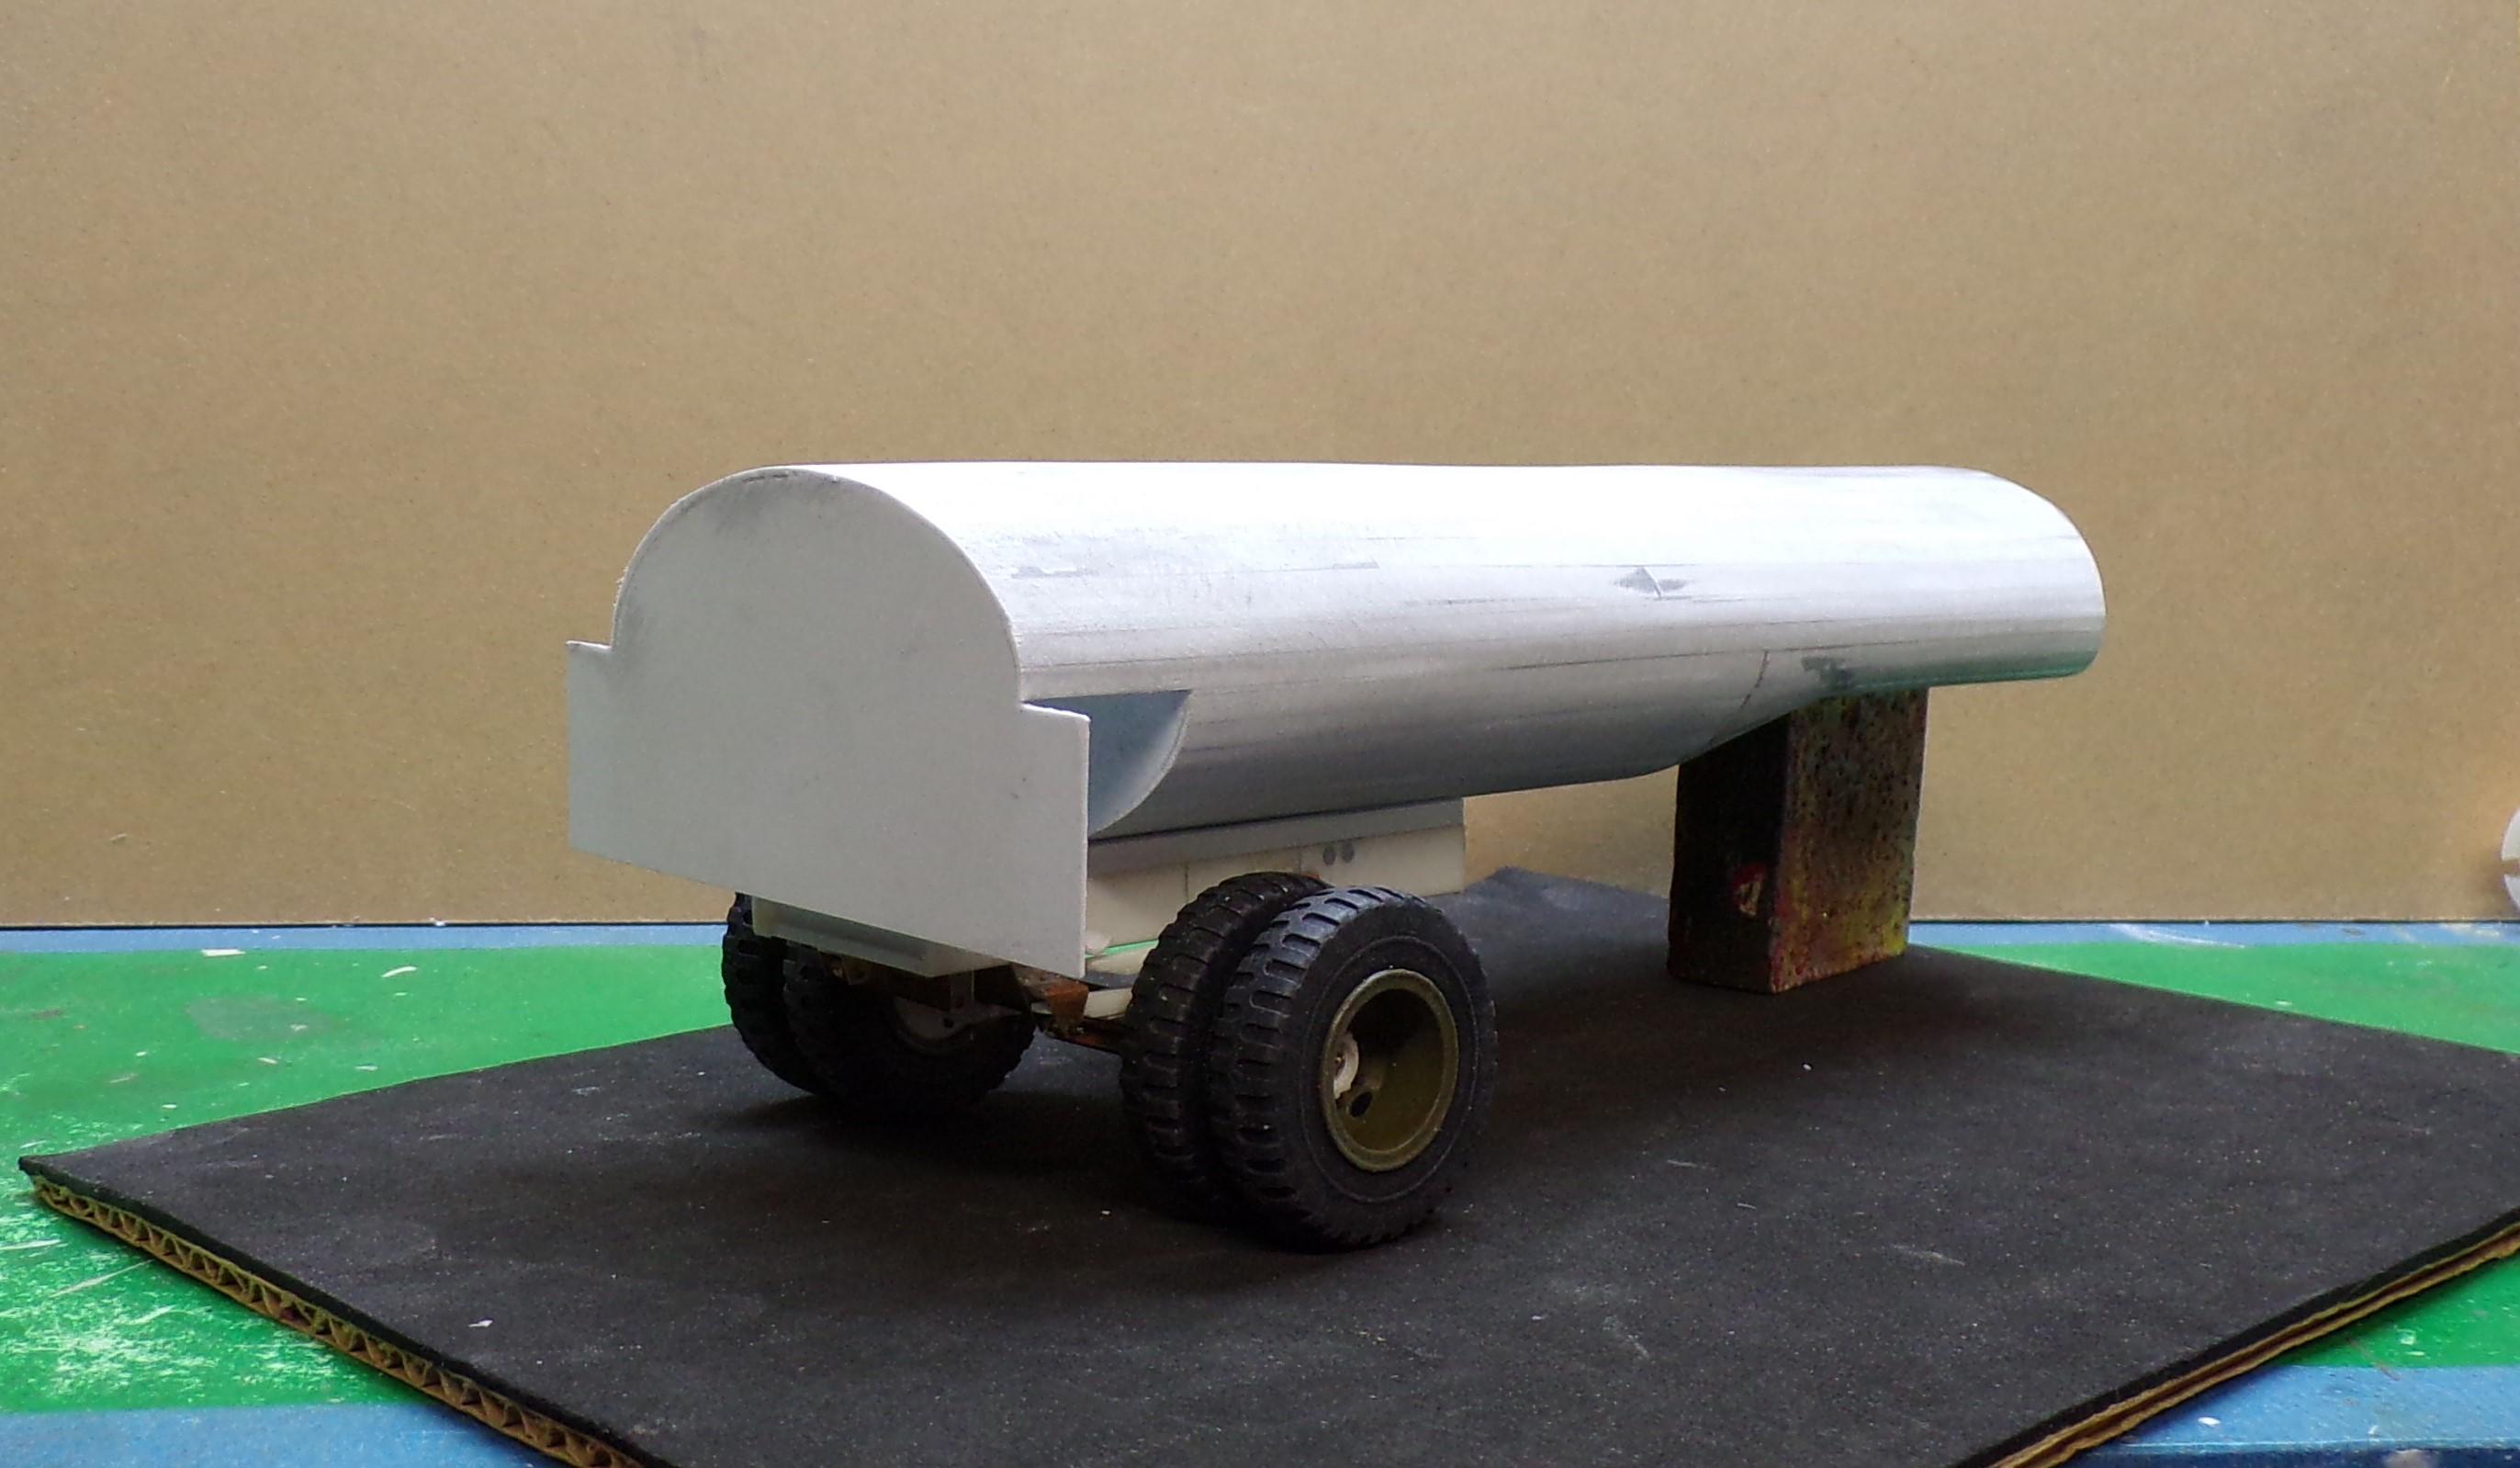
Its got skirts now! Got them done this afternoon. Still some cleaning up to do on the bottom tank surfaces. Still to decide if the top where the two filler manholes go should be narrowed up. It looks to wide and high right now. Rear bumper to be added along with the typical pintle hook and rings for chains. More detailing to take place on the tank itself and get the landing gear made up.
-
A bit more progress today getting the strip stock glued in and sanded. Still some filling in certain spots but overall it looks ok. Nice and strong with no warping or unsightly dips in the surface. It's coming along and won't be long before it can be hitched up to the tractor.
-
Got the trailer started using a boat building method. Made up some bulkheads (trailers had them to keep liquid from sloshing around) and then began adding strips of Evergreen to shape the sides. Rather than try and curve sheet stock which has a tendency to buckle in the middle, the strips stay straight and only need to be sanded down and filled to make the surface smooth. I filled in the bottom with some 2 part resin to strengthen it and make it easier to sand the outside. Still plenty of work to do but it's a start.
-
1/32 Mack R tractor
Chariots of Fire replied to ROY FERGUSON's topic in WIP: Model Trucks: Big Rigs and Heavy Equipment
What they said. That would be the normal location for them. -
Mack R688ST take 2
Chariots of Fire replied to Warren D's topic in Model Trucks: Big Rigs and Heavy Equipment
Oh, Man! Clean as a whistle!! ?? -
Using aluminum foil for treadplate
Chariots of Fire replied to Chariots of Fire's topic in Tips, Tricks, and Tutorials
Fantastic! Thanks for sharing. -
Emeryville / Fruehauf tanker
Chariots of Fire replied to ghoodii's topic in Model Trucks: Big Rigs and Heavy Equipment
Well done, George! Like it a lot! -
Autocar U-7144 is done
Chariots of Fire replied to Chariots of Fire's topic in Model Trucks: Big Rigs and Heavy Equipment
Glad you like it David. Thanks for the kind comments, all. -
Excellent work! Nice and clean, crisp details. Lookin' good!
-
Autocar U-7144 is done
Chariots of Fire replied to Chariots of Fire's topic in Model Trucks: Big Rigs and Heavy Equipment
HOw did you pick that out!?? Had to shave some of it away though.☺️ -
Using aluminum foil for treadplate
Chariots of Fire replied to Chariots of Fire's topic in Tips, Tricks, and Tutorials
Nice job on the Magirus aerial!! Got a photo of the front view?? -
Autocar U-7144 is done
Chariots of Fire posted a topic in Model Trucks: Big Rigs and Heavy Equipment
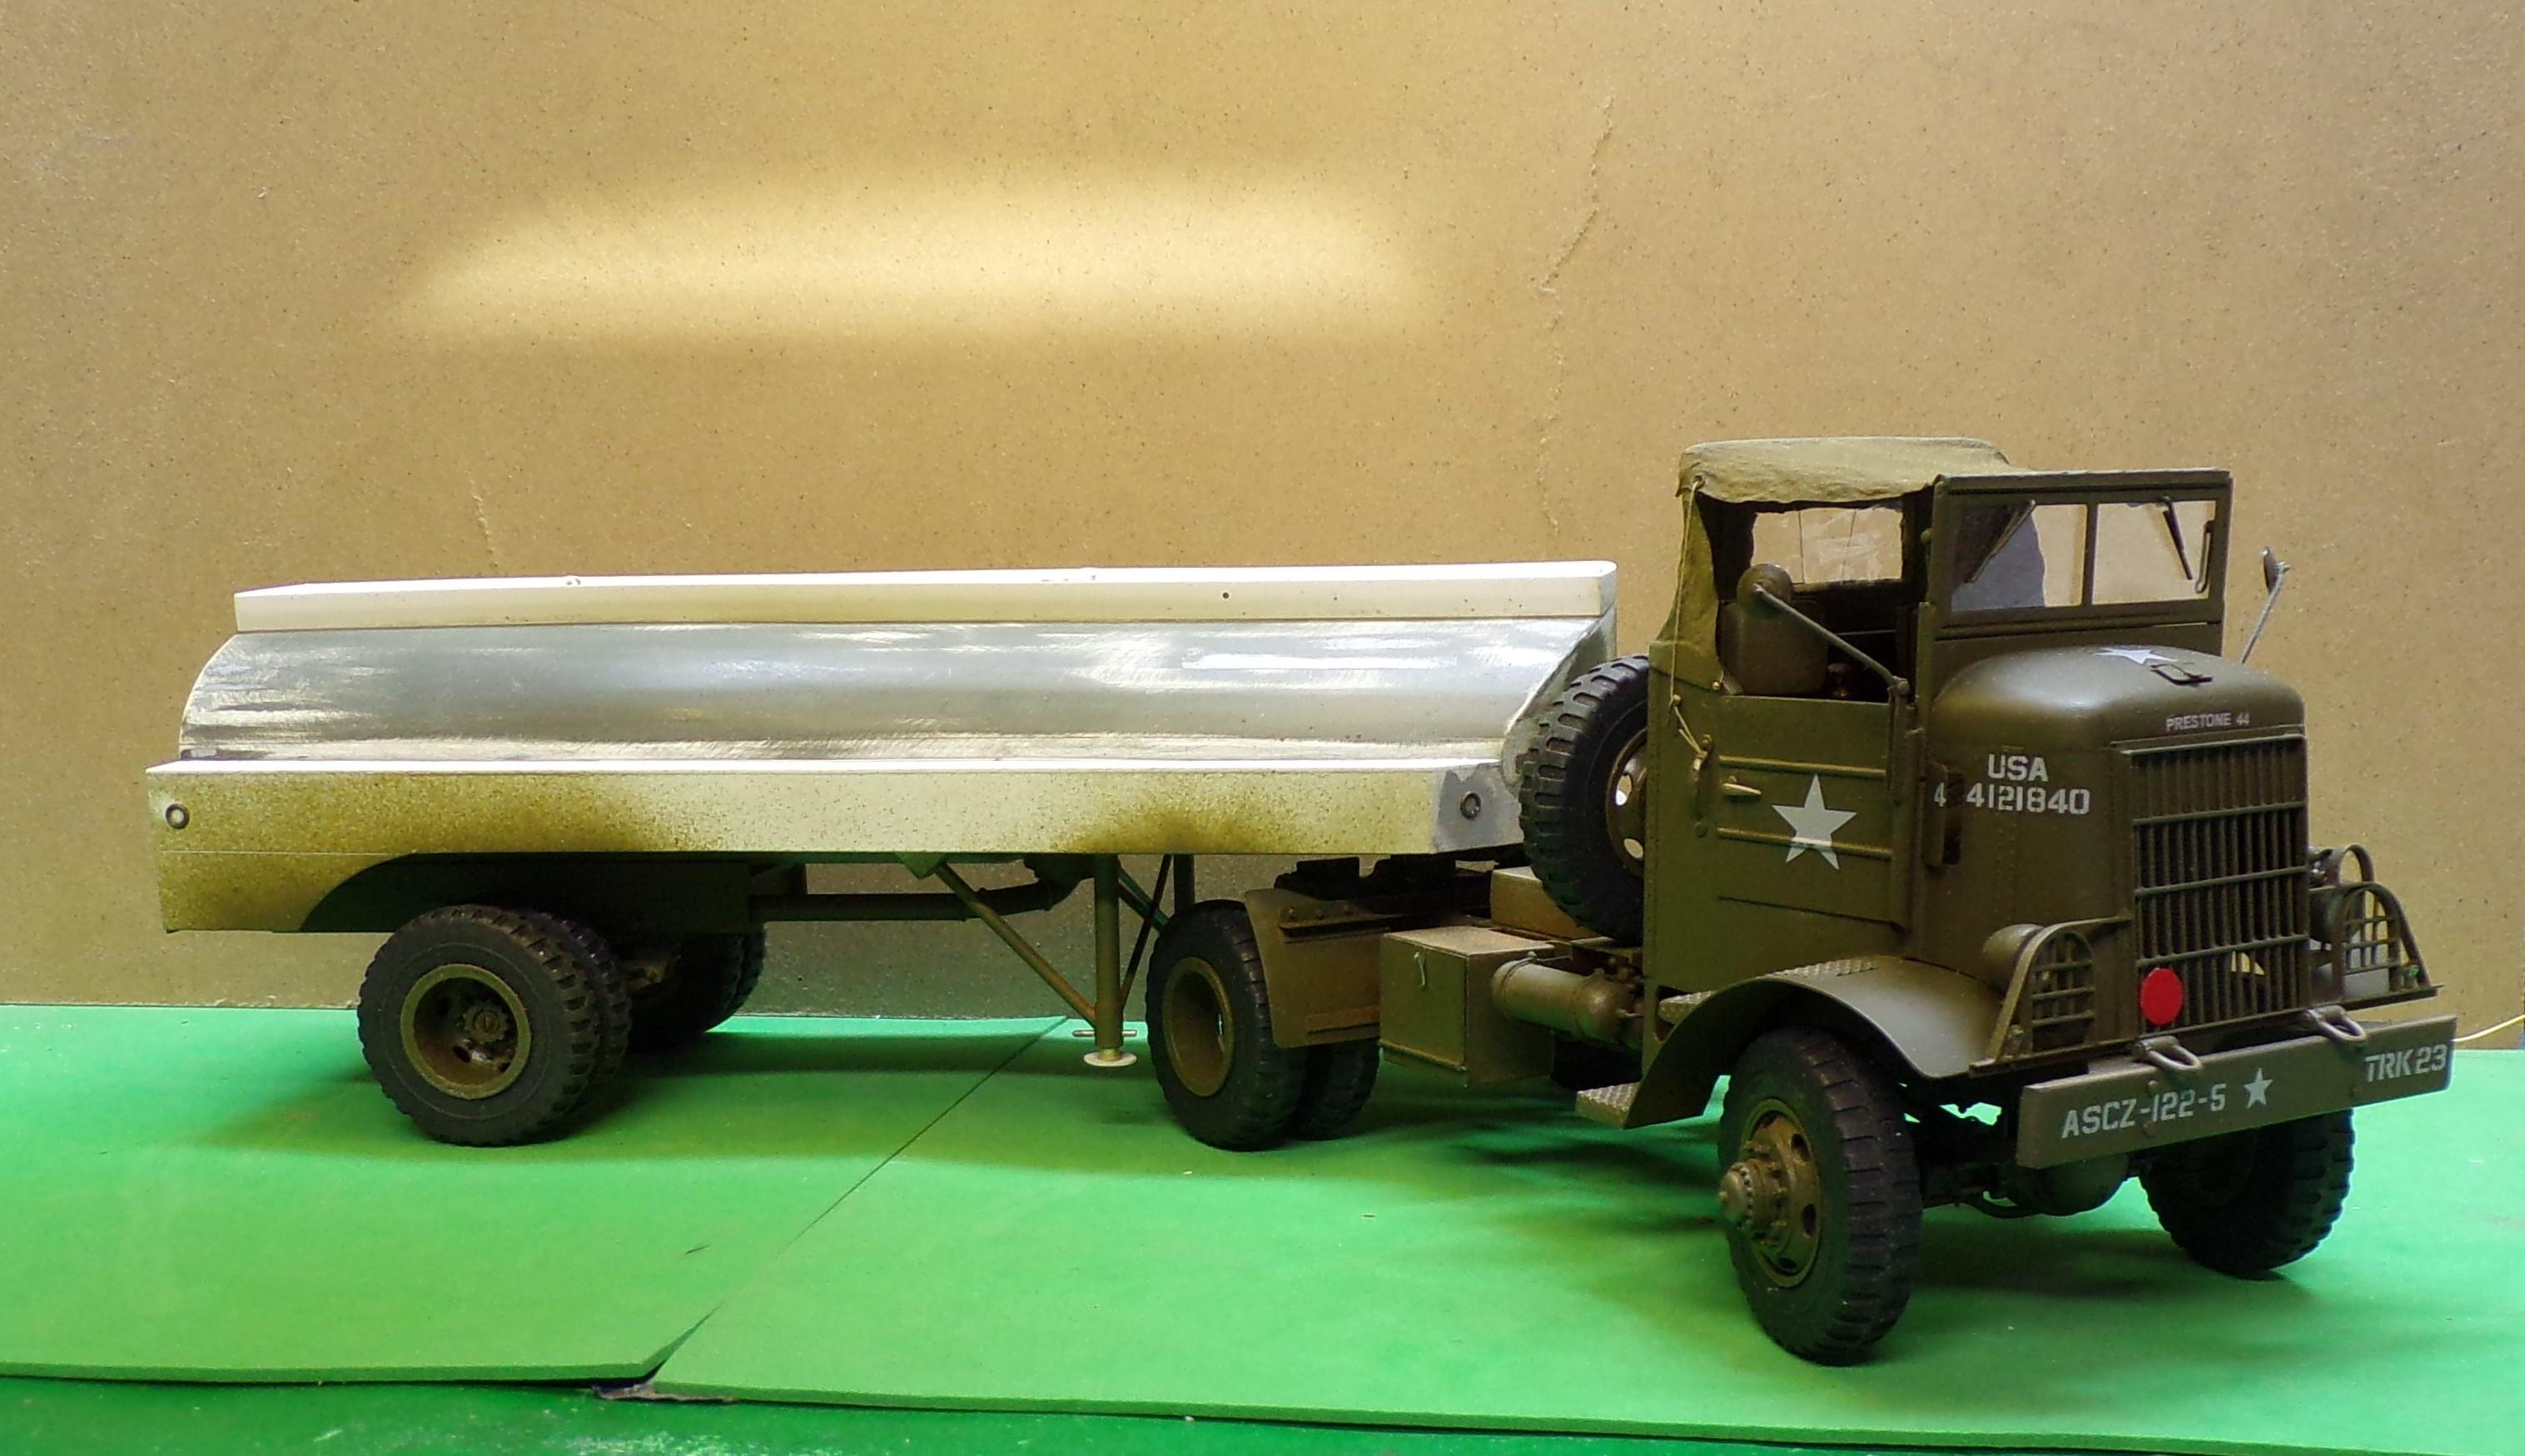
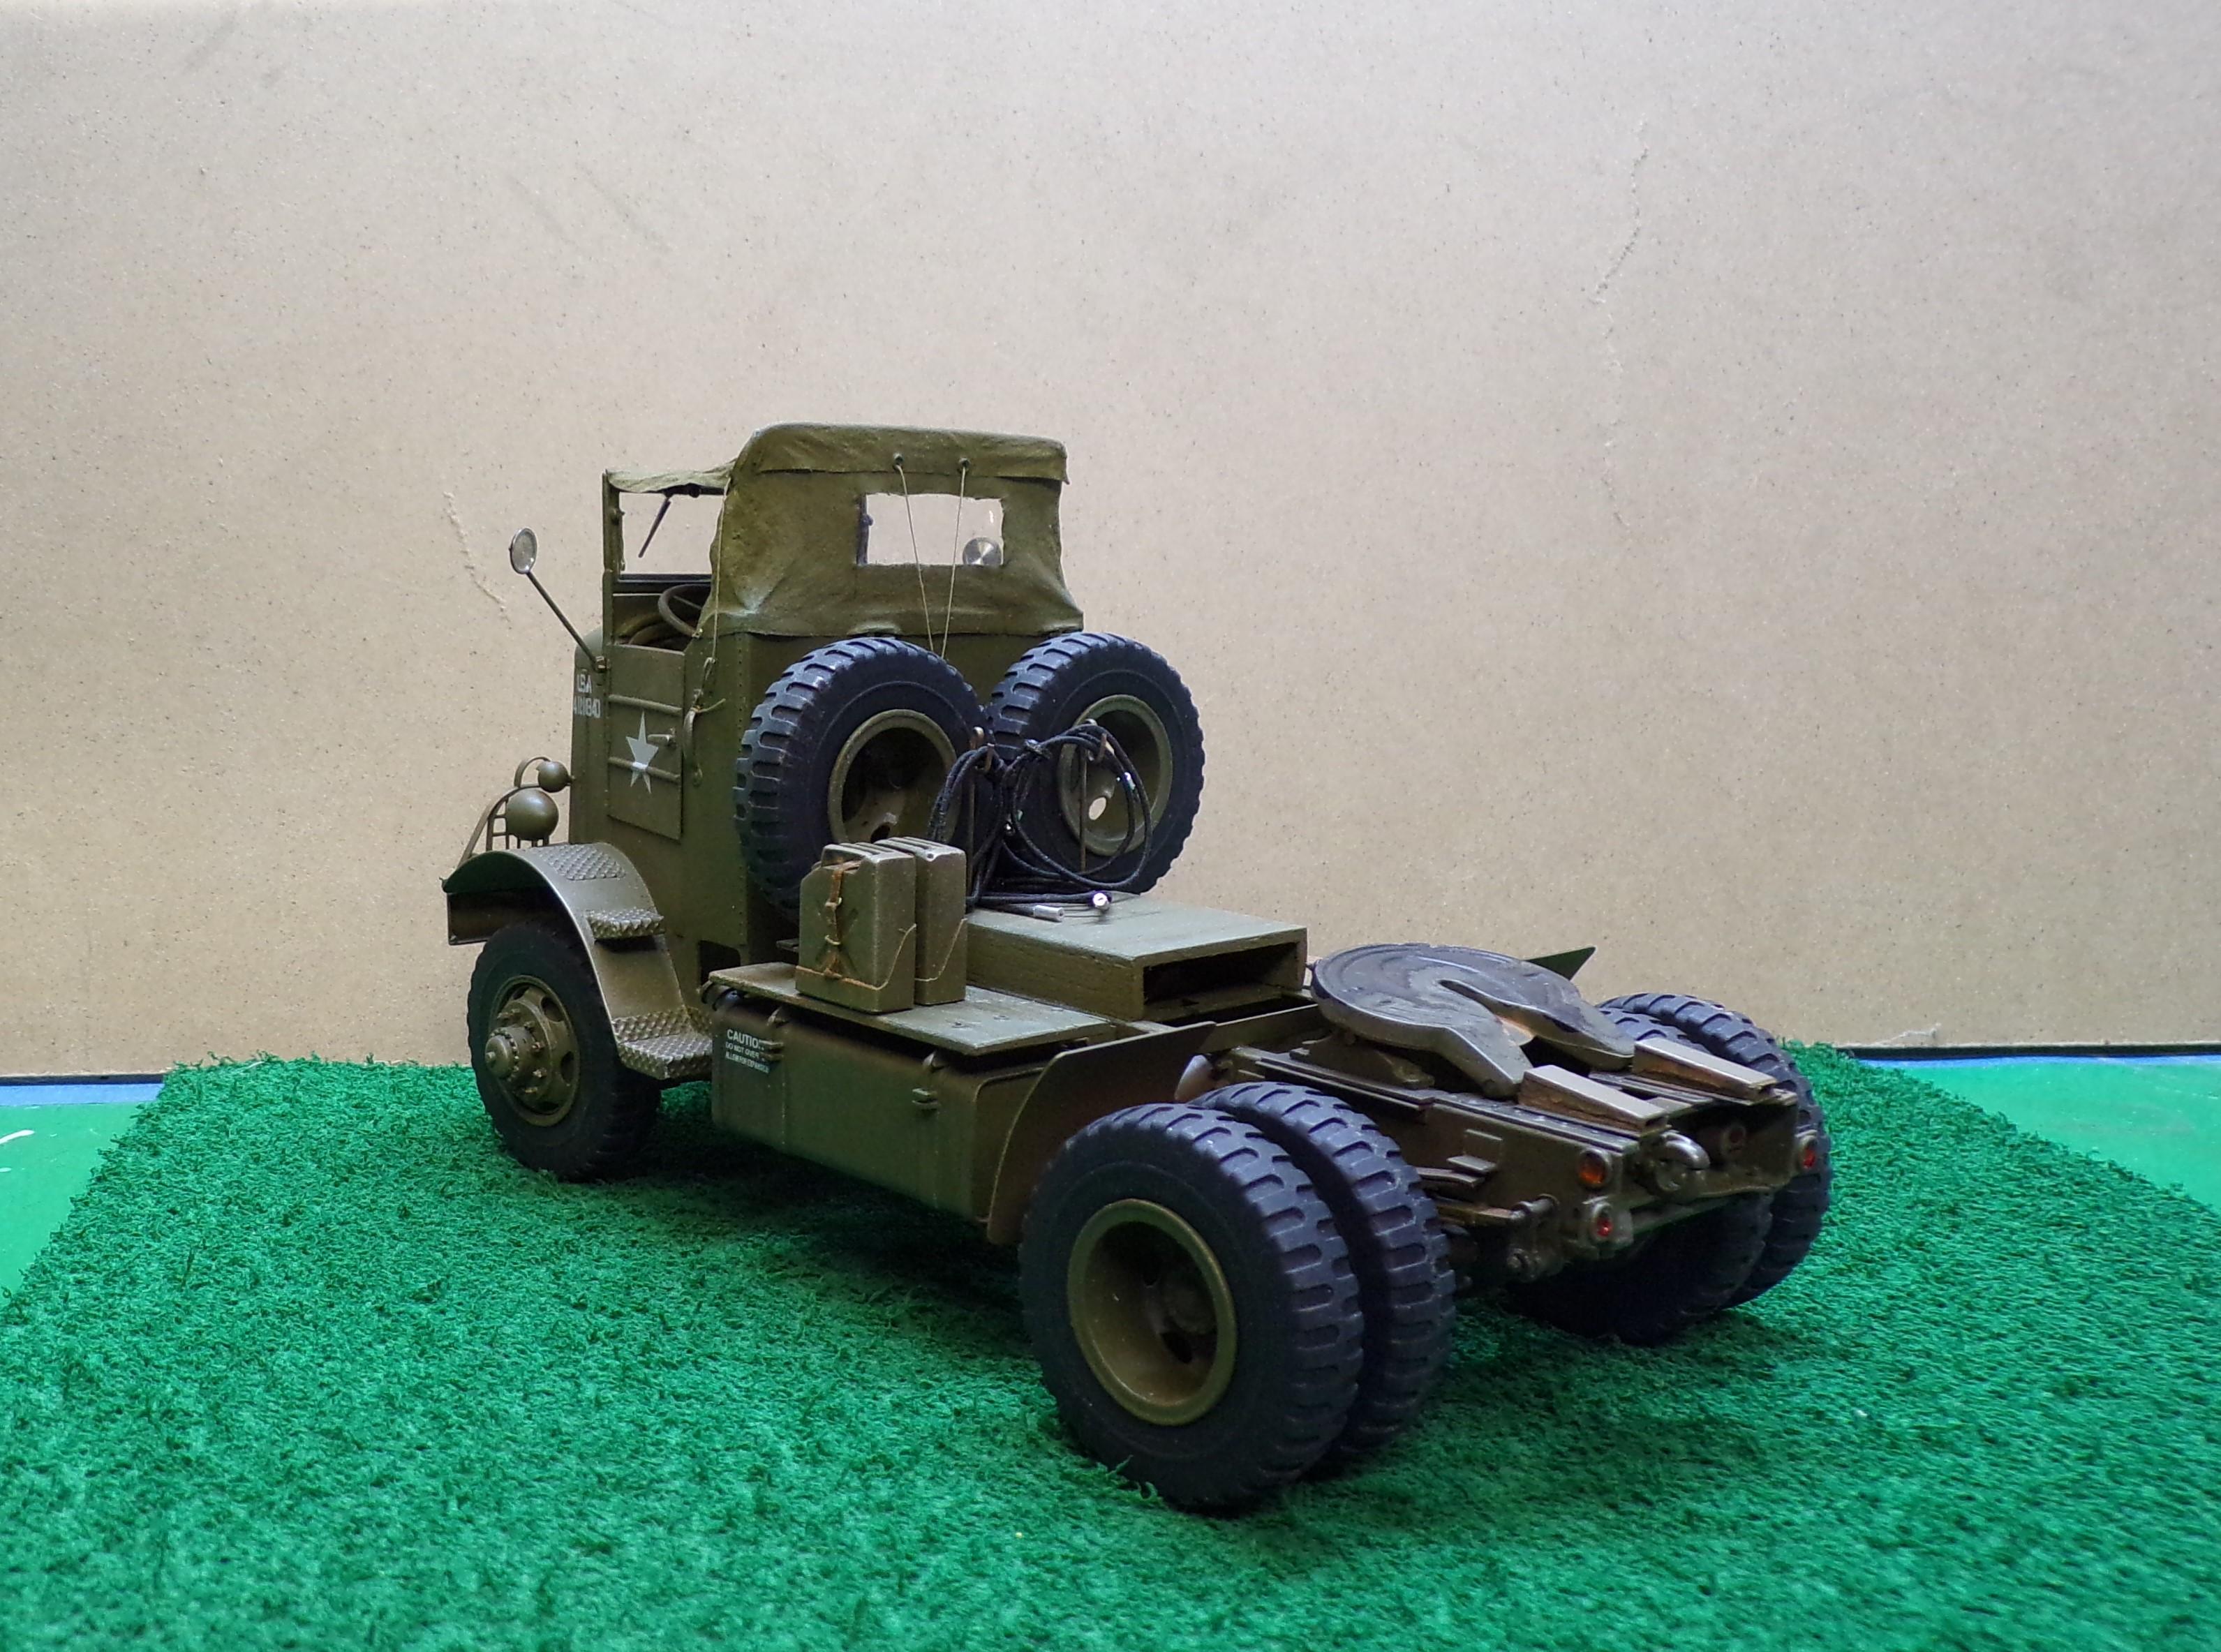
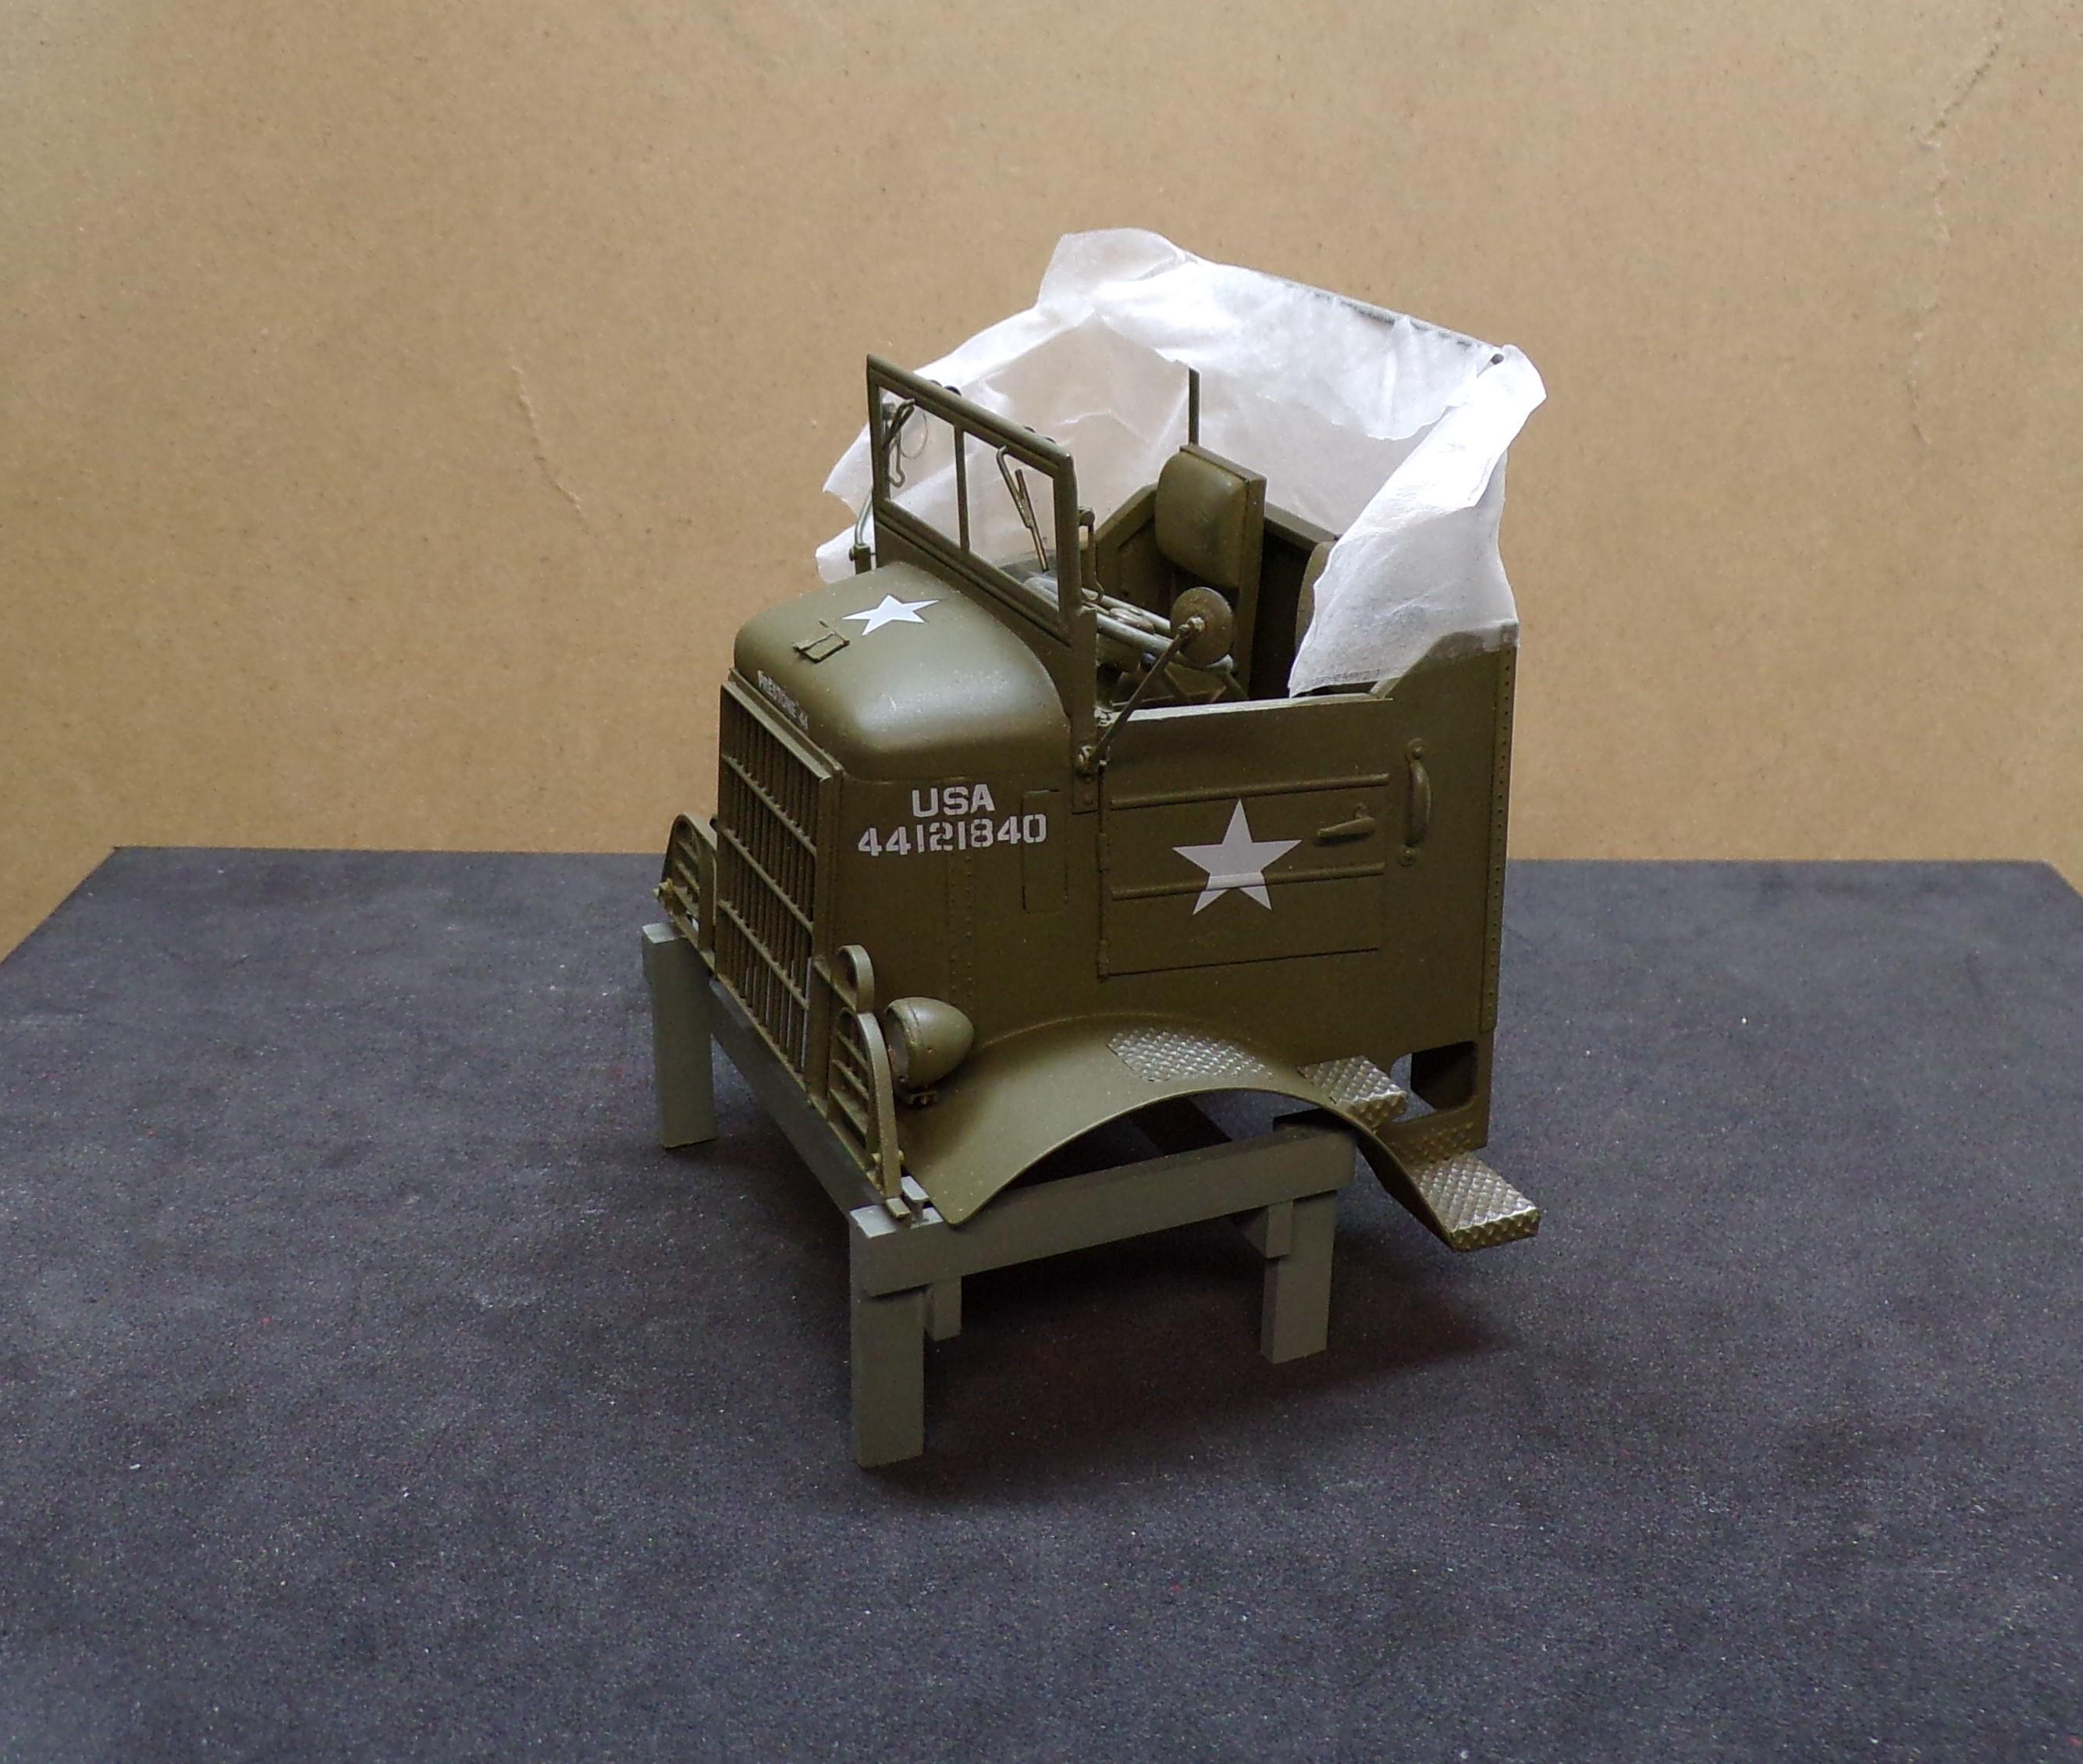
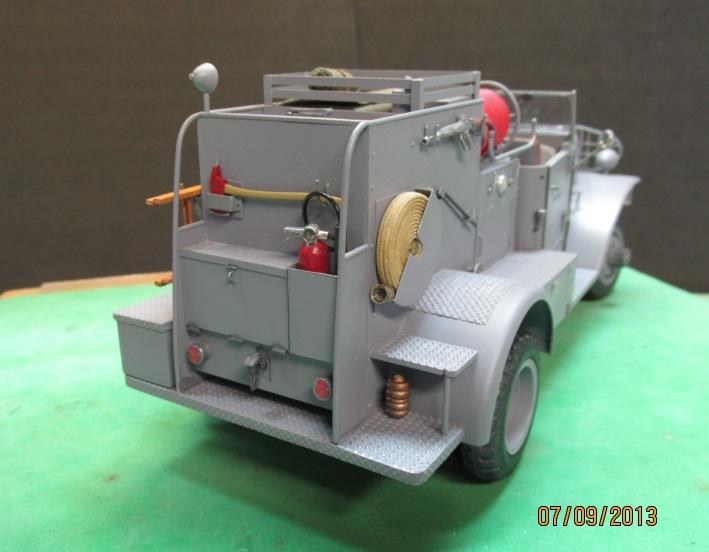
Finishing touches were added to the build today. A fine amount of weathering was done here and there. Fire extinguisher added to the interior of the cab and two GI gas cans were mounted above the fuel tank. Electric and air brake lines are coiled up waiting for the next build which hopefully will be a Heil F2 2000 gallon tank trailer.
-
1944 Autocar U-7144T
Chariots of Fire replied to Chariots of Fire's topic in WIP: Model Trucks: Big Rigs and Heavy Equipment
Hey, Bob. I turned the mirrors from aluminum rod. Just drilled a small hole in the back for a pin and added the arm. The other end of the arm fits inside a small section of square channel and with a pin through both. -
1944 Autocar U-7144T
Chariots of Fire replied to Chariots of Fire's topic in WIP: Model Trucks: Big Rigs and Heavy Equipment
Beginning to close in on the finish line. Still plenty to go but many of the details have been added to both the cab and chassis. The wood decking over the gas tank and frame have been added along with door handles inside and out, rear view mirrors and the cab interior is done. The spare tires are mounted on separate brackets that are attached to the frame. Early versions of the U-7144 had steel deck plates but as the war wore on, wood was substituted for the steel. It did the job for uses that did not get a lot of wear. I used some basswood strips to form the decks and retained some of the openness of the grain for contrast. And work has begun on the soft top using two ply tissue with white glue/water mix to shrink and stiffen it. Decals have been added and I ended up changing the windshield wipers. The first ones didn't look that good and fortunately they were easy to remove.
-
Using aluminum foil for treadplate
Chariots of Fire replied to Chariots of Fire's topic in Tips, Tricks, and Tutorials
Only one way to find out, Peter! Give it a try and let us know how it does! Most pieces are relatively small and don't take long to do. The only downside is that after a while the erasers get hard and have to be replaced with another pencil!? -
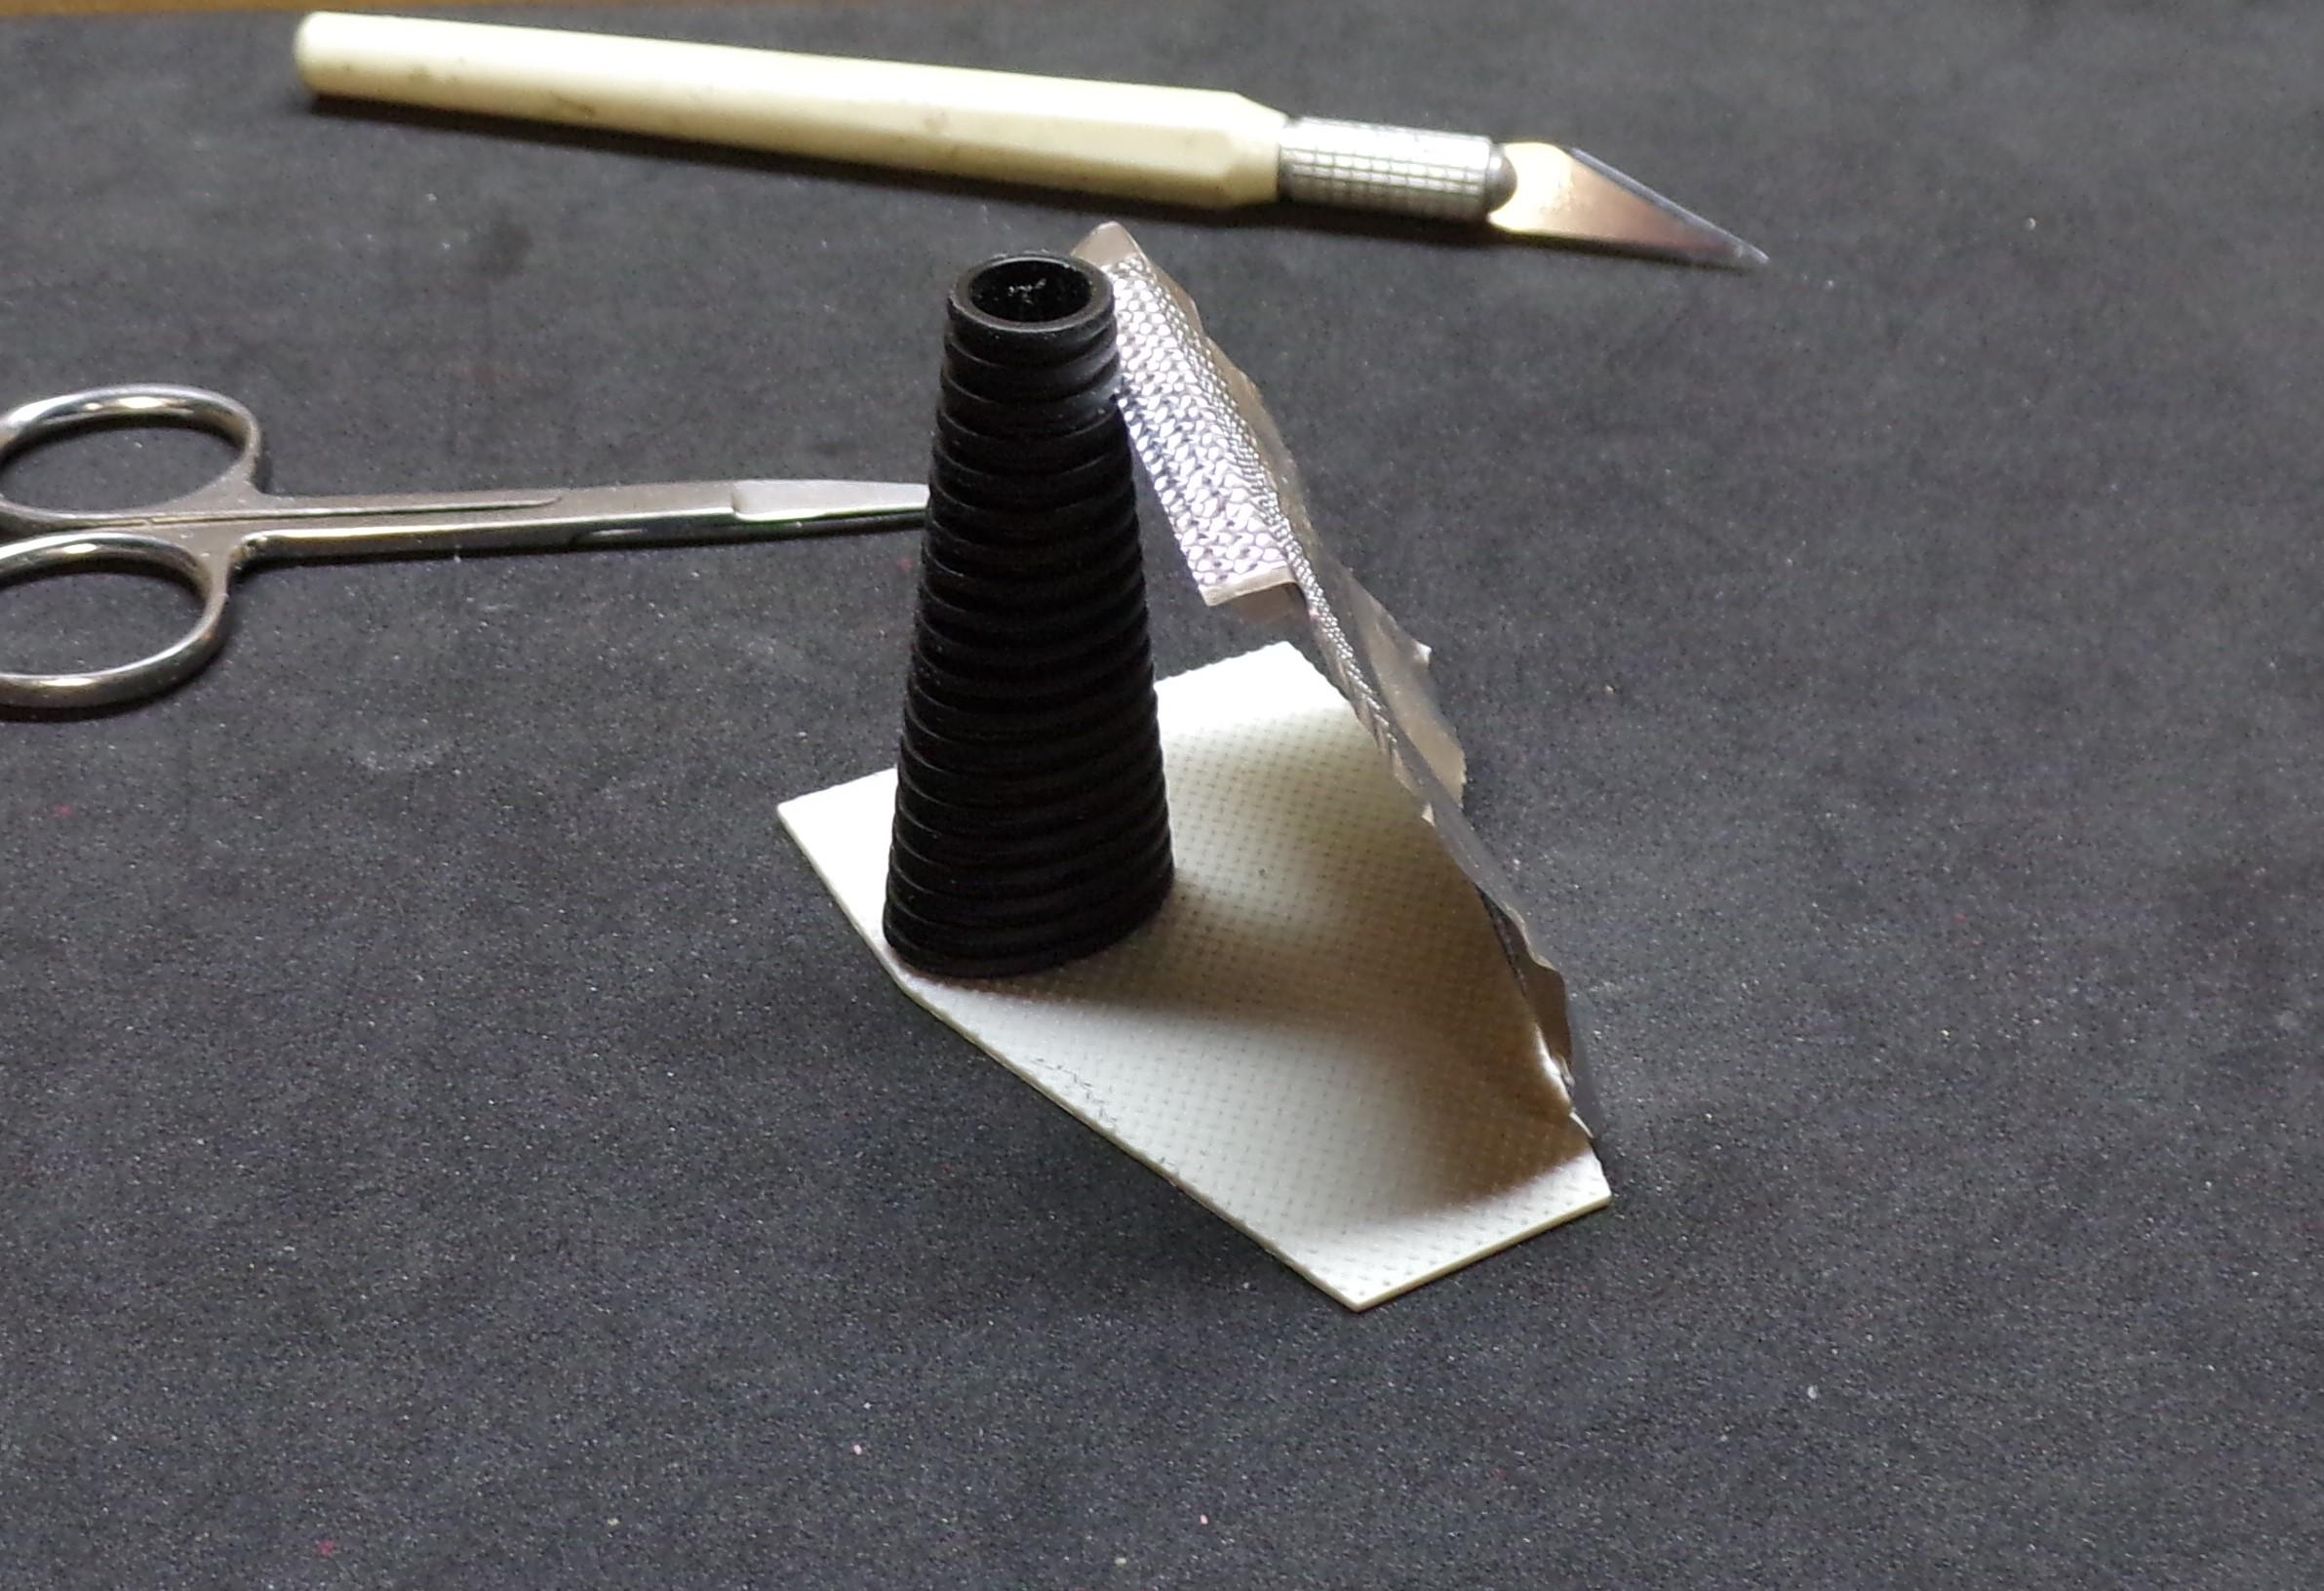
Here's a tutorlal on making the foil treadplate. I was asked about it in the build of the Autocar U-7144. You will need the following materials and tools to get it done. A scrap piece of plastic treadplate and a piece of aluminum foil and the part you want to apply the foil to. Also a pencil with a soft eraser, CA or other adhesive that will stick to the foil, a new Xacto blade and a pair of small scissors. In the photo above is a small piece of plastic sheet with some strip stock applied to the edges where the foil will be placed. There is also a scrap piece of Don Mills Models plastic treadplate that is approximately 0.050" thick. The foil is placed over the plastic treadplate for embossing. Align one edge of the foil with the treadplate pattern and lightly press it down to hold it in position. Using the eraser on the end of the pencil, press it onto the foil rolling the eraser as you press down. Follow this process along until you have made an impression that is larger than what you need. Be sure to firmly hold the foil in place or the impressions will become distorted. Go over the impressions with the eraser to be sure that all areas are well embossed. Gently lift the foil away and coat the underside liberally with CA or epoxy. Be careful not to bend or distort the foil and place the part to be covered on the foil making sure that it is aligned with the treadplate image. Let the adhesive fill in all of the indentations in the foil. It will help in retaining the treadplate of the foil when it sets. After the adhesive has set so that the top surface of the foil is secure, gently fold the foil over the edge of the plastic on the long side. Be sure that there is adhesive under the foil and let it fully cure. After it is cured cut the foil adjacent to the corner and fold the foil over on the adjoining side. Do the same thing with the CA here and let it cure well. Check the corner to be sure that it is well covered with the foil. Don't worry about the excess foil until all of the adhesive has cured to the touch. The last step is to take the Xacto blade and plunge it into the excess foil from the front somewhere other than at the end. Let the blade to the slicing of the excess foil against the plastic. Slice away the excess foil in each direction, being careful at the corner. Check to be sure that the foil has not lifted away from the plastic. The results will look something like the foil used in the following projects that have been done. The first is a USN FFN-3 International airport crash truck. The rear step and running board was done using this technique for the edges. Actual treadplate was used in this case for the top surface but the procedure for the edges as described above. Embossed foil was also used for the plate on top of the rear fenders. In the next photo of the CCKW regular treadplate was again used for the top surface of the running board but foil was used for the edge. Sometimes the edge can be a little rough. If needed it can be filed smooth with a fine file, but care needs to be taken not to ruin the raised portion of the pattern. The last example shows the technique used in several places on this Emergency One pumper. It was also used on the top of the cab. Since the foil is very thin it is very useful in this type of application. Try inserting a piece of plastic treadplate in its place. Probably impossible, the surface will not be curved, and the edges will be crudely defined.
-
1944 Autocar U-7144T
Chariots of Fire replied to Chariots of Fire's topic in WIP: Model Trucks: Big Rigs and Heavy Equipment
I've reposted the tutorial in the tutorial section of the forum. -
If you are not concerned about it being permanent, use some contact cement. Spread on the cardboard, spread on the wood board and when both are dry to the touch put them together. They will never be parted again!?