Chariots of Fire
-
Posts
2,802 -
Joined
-
Last visited
Content Type
Profiles
Forums
Events
Gallery
Everything posted by Chariots of Fire
-

Fire investigation unit
Chariots of Fire replied to Firebuilder's topic in WIP: Model Trucks: Big Rigs and Heavy Equipment
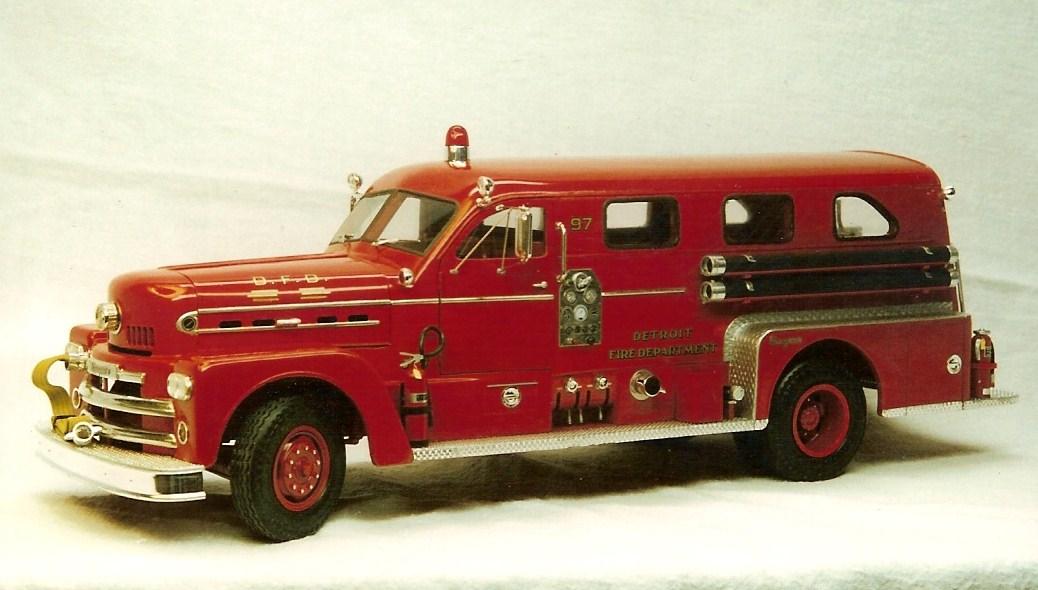
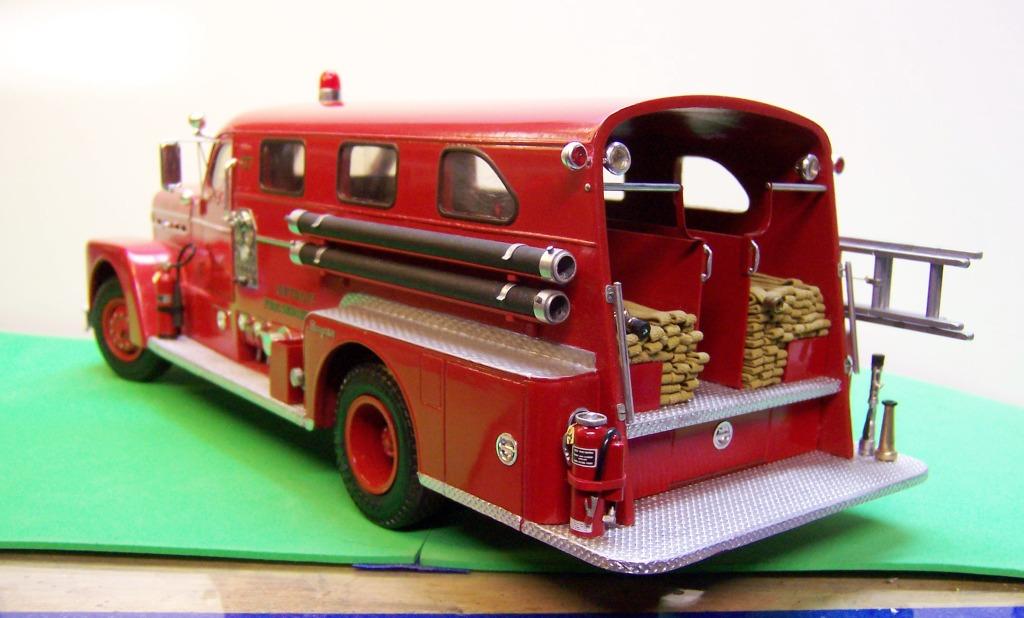
Here you are, Danno. I built two of the River Edge pieces. One is in their Company 2 station. The first one I still have and was shown in Scale Auto Magazine years ago. A River Edge SAE reader saw it and inquired as to who built it. SAE contacted me via snail mail and the rest is history. When I delivered the built to River Edge I got a personal ride around the village in the real Seagrave. A real treat! The second one is a typical Detroit sedan style rig, I took a lot of information from Matt Lee's book on Seagrave. This is the River Edge piece I still have. It was built from photos I took at Croton-On-Hudson fire muster years ago. The rig that is in River Edge is in the foreground. The Company Chief insisted it needed a flag and although it is difficult to see It is there near the right end of the windshield. The Detroit Seagrave. Doors and hood open. An original Eisbrenner casting.
-
M-20 Prime Mover
Chariots of Fire replied to Chariots of Fire's topic in WIP: Model Trucks: Big Rigs and Heavy Equipment
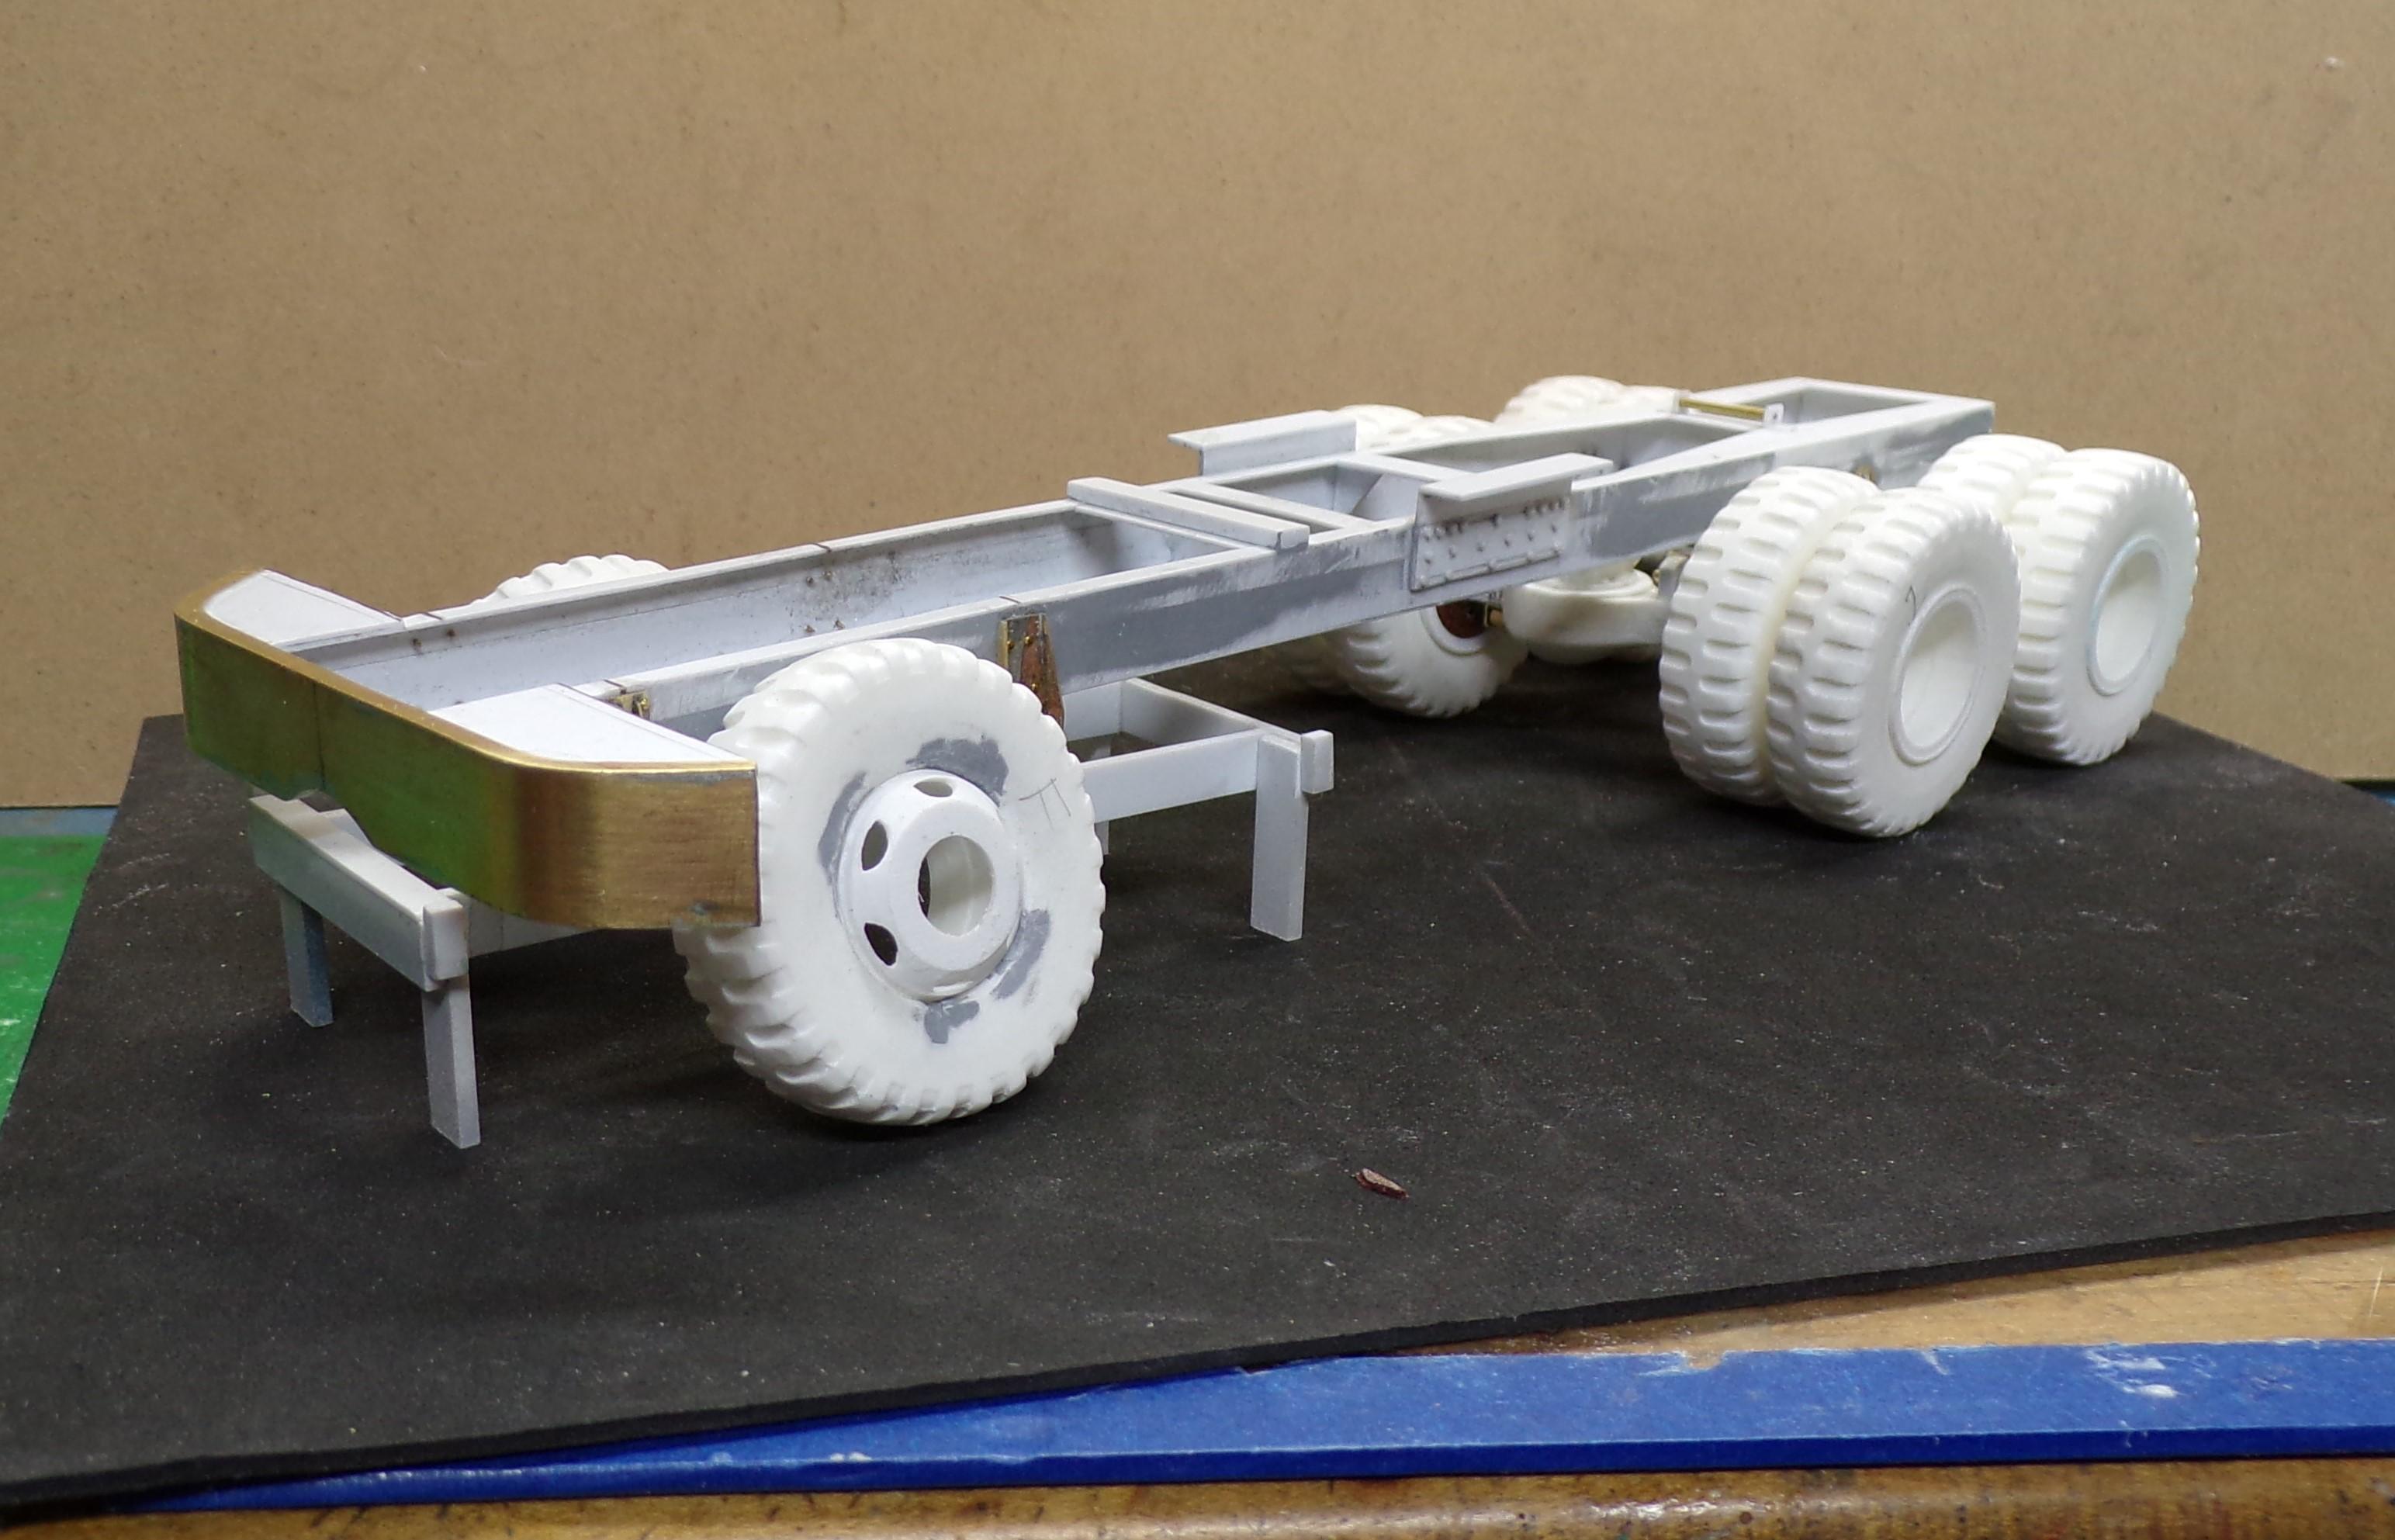
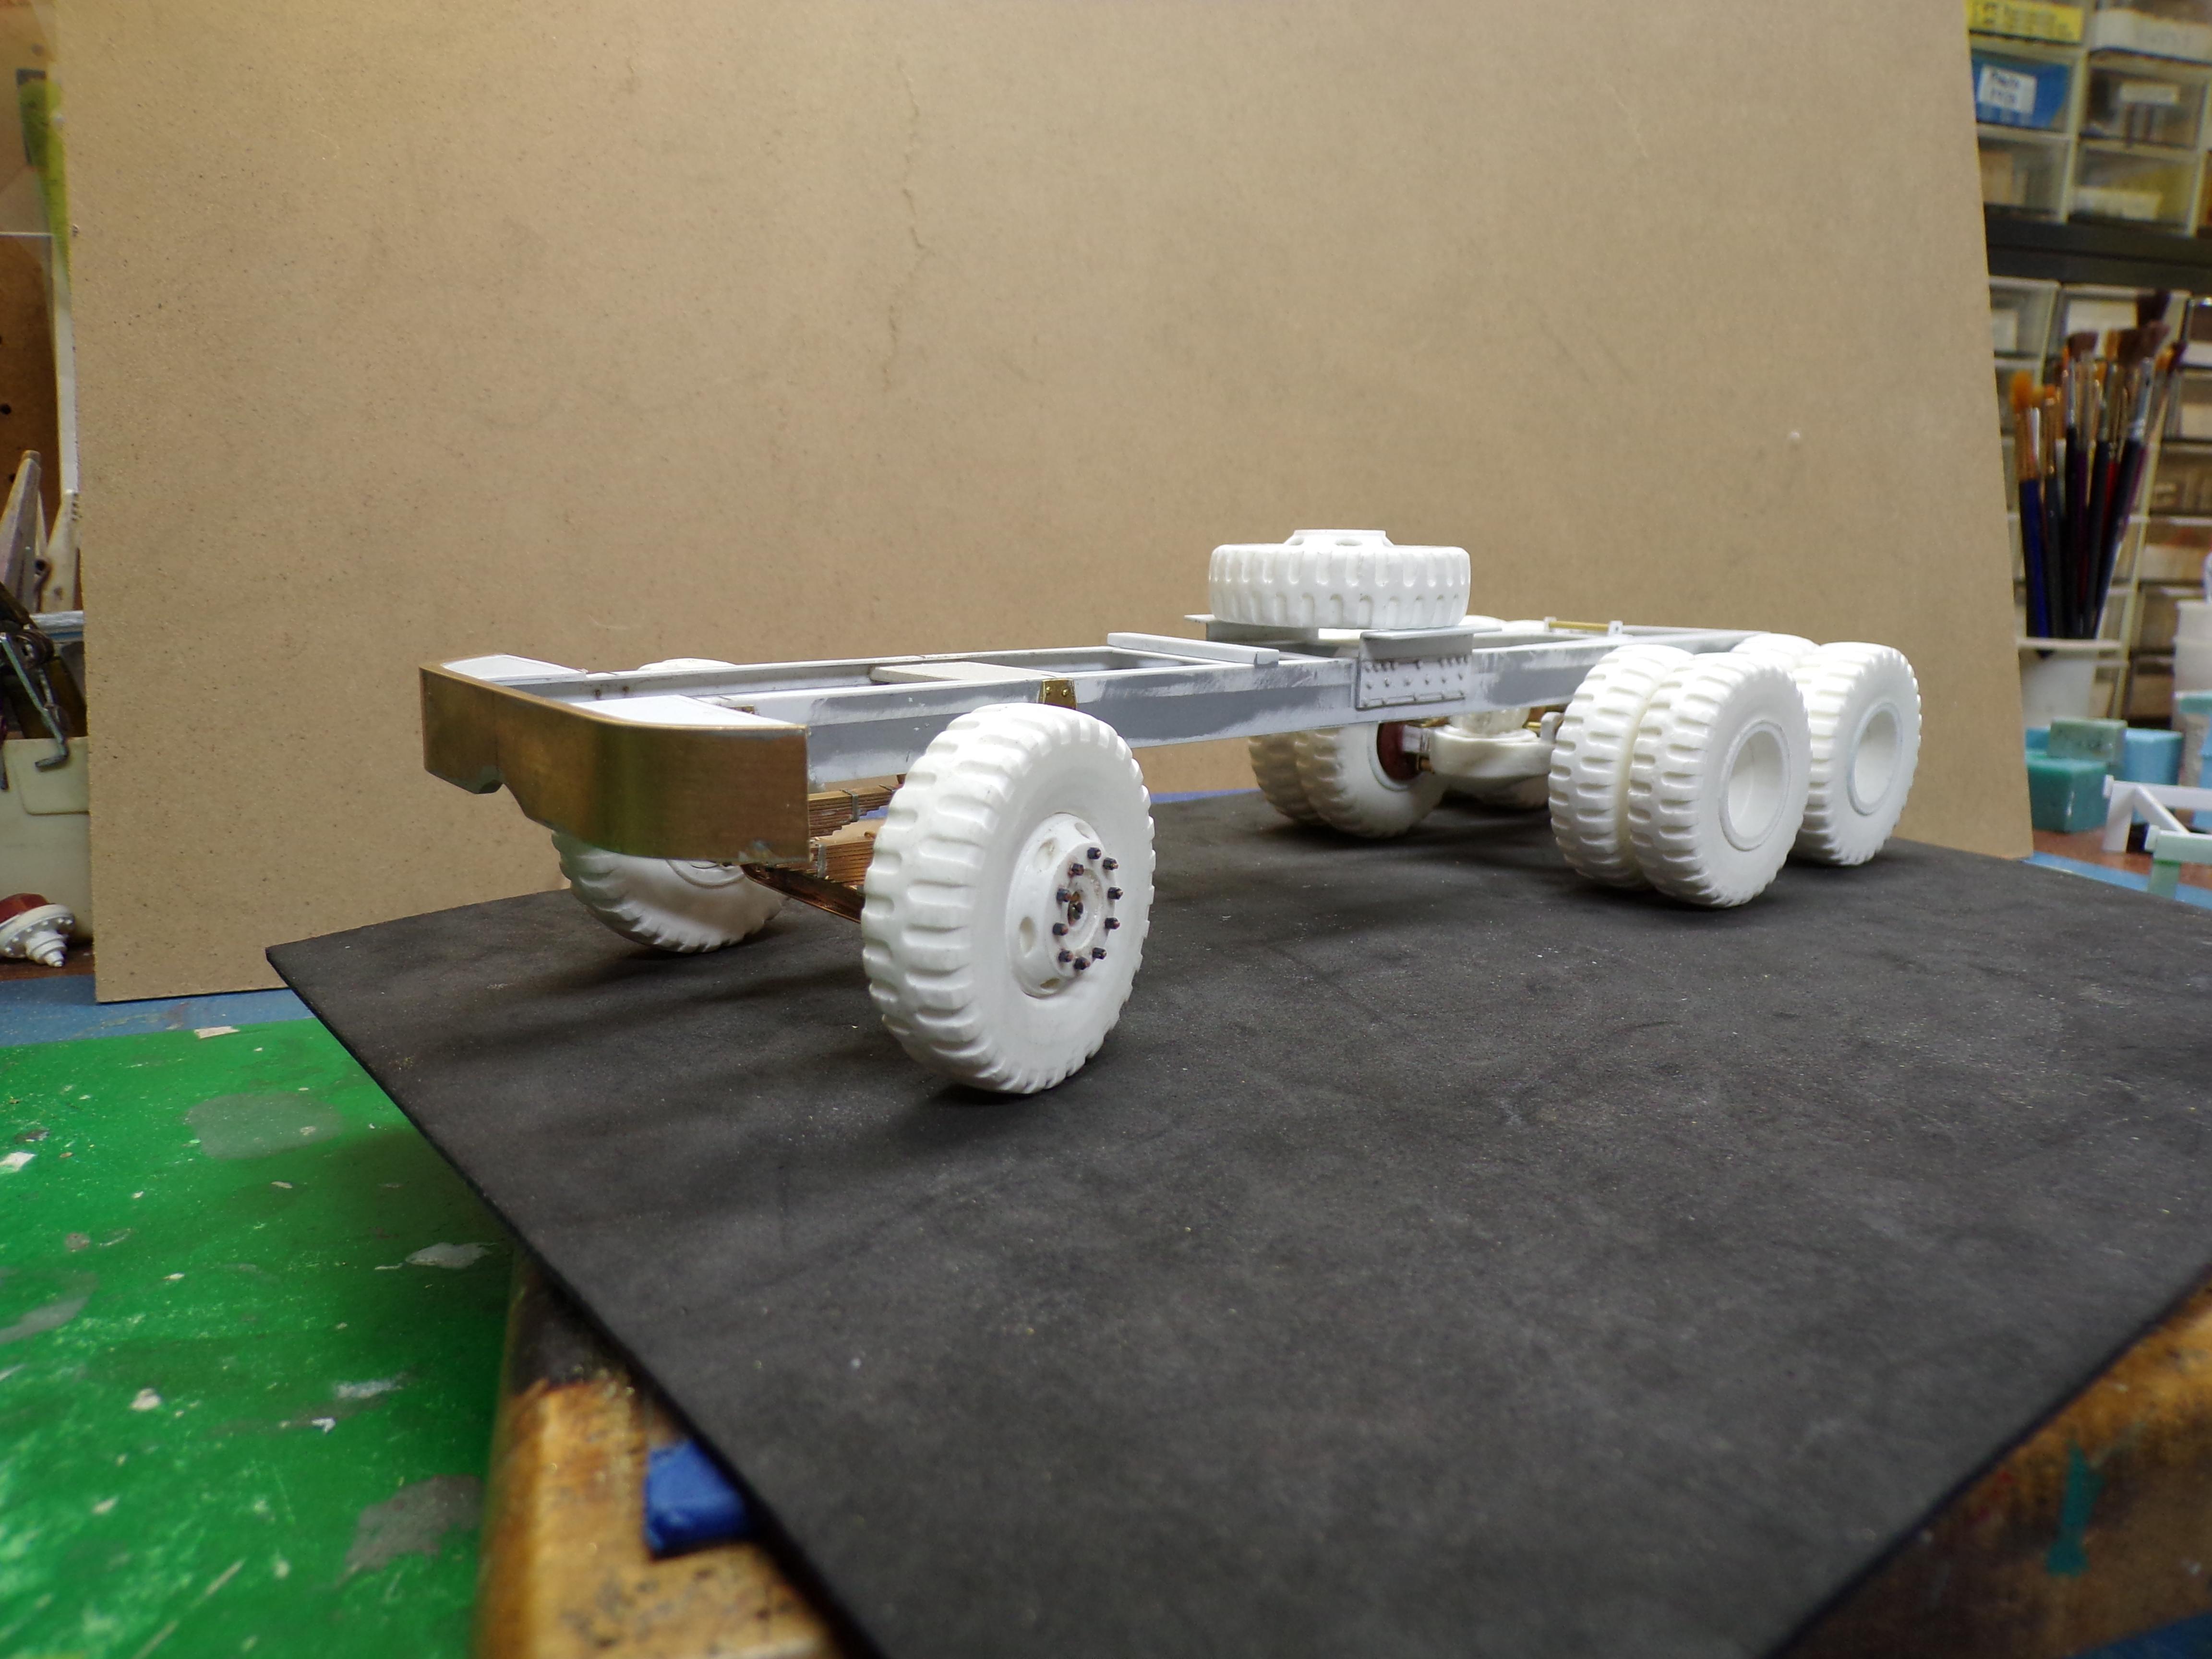
Got it standing up on all 10's now (temporarily at least). Working on the steering arm for the front end as we "speak".
-
Fire investigation unit
Chariots of Fire replied to Firebuilder's topic in WIP: Model Trucks: Big Rigs and Heavy Equipment
Whose Seagrave casting is that in the background? I built two from the original Eisbrenner castings and still have one of the real early ones that had no window trim. Looks like brown bakelite. -
M-20 Prime Mover
Chariots of Fire replied to Chariots of Fire's topic in WIP: Model Trucks: Big Rigs and Heavy Equipment
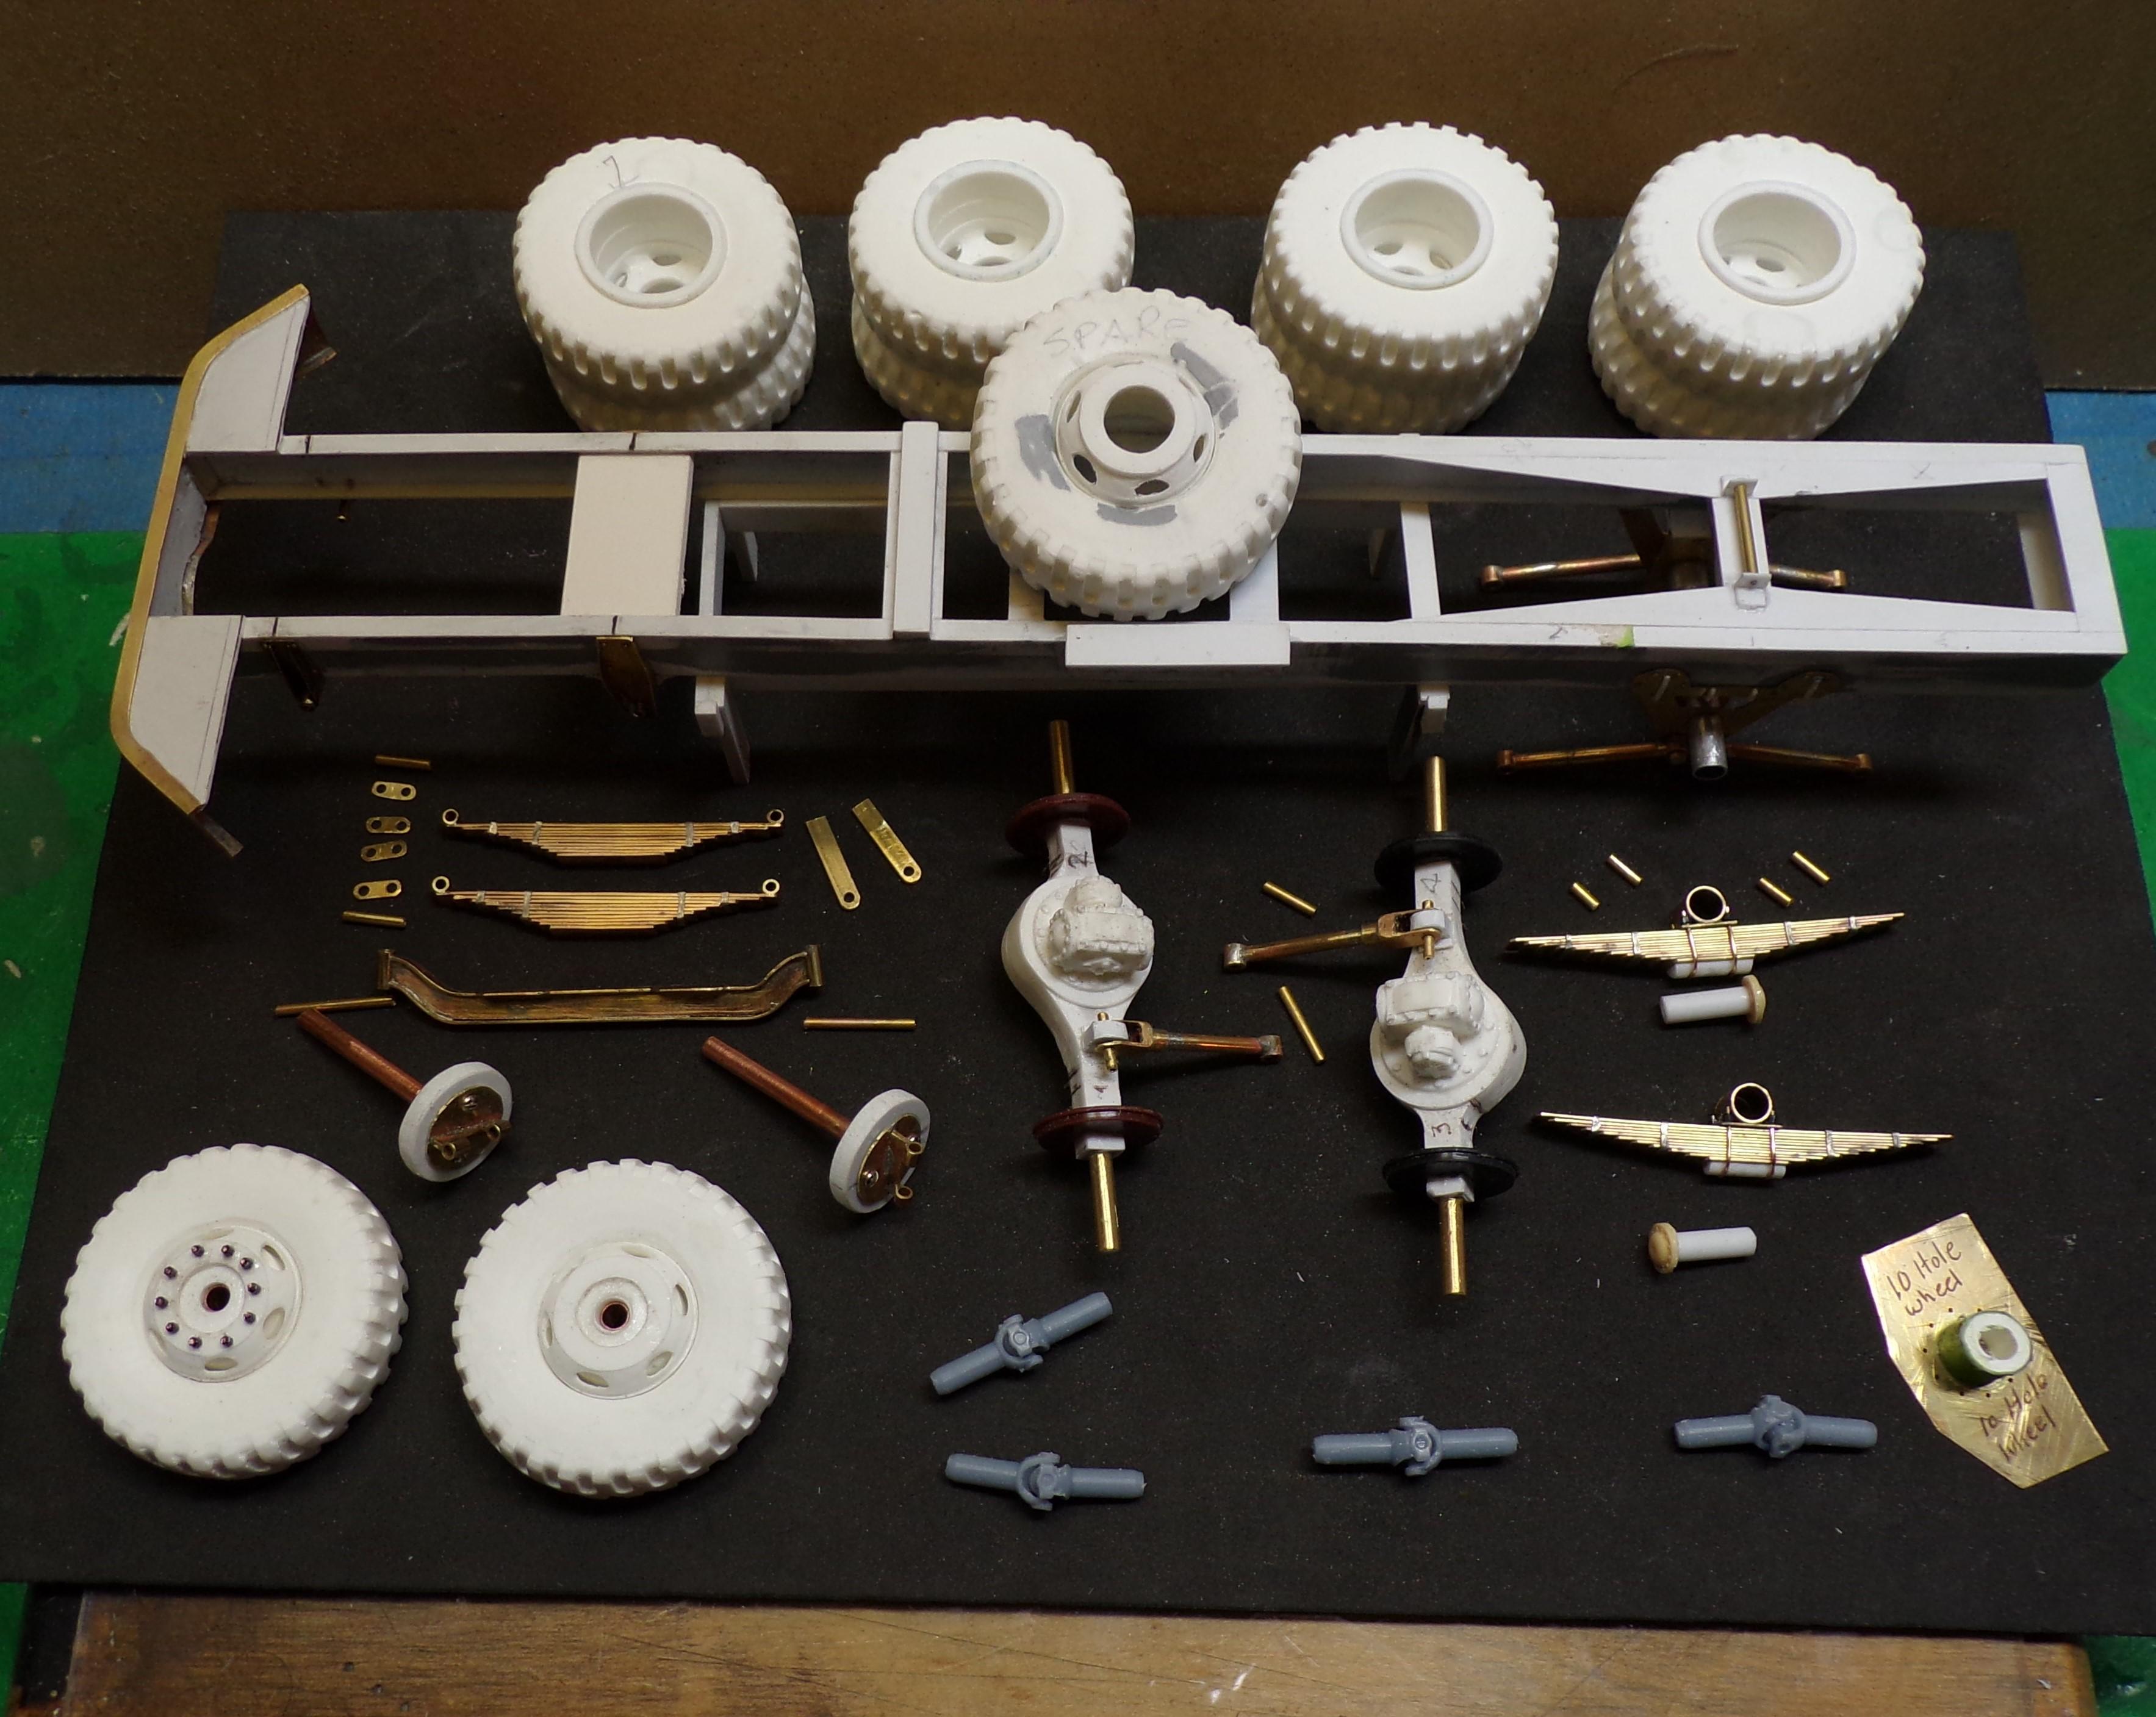
Hey, Bob. The hex nuts are on the ends of the shackle bolts but are hard to see. I use them for all sorts of stuff. I had a master done in 3D by Down Range Productions. Then I made a mold and cast what you see. All I did was send a photo of the tire with some basic dimensions and they did the rest. 12:00 x 20's are good size and much larger than anything else I had. -
M-20 Prime Mover
Chariots of Fire replied to Chariots of Fire's topic in WIP: Model Trucks: Big Rigs and Heavy Equipment
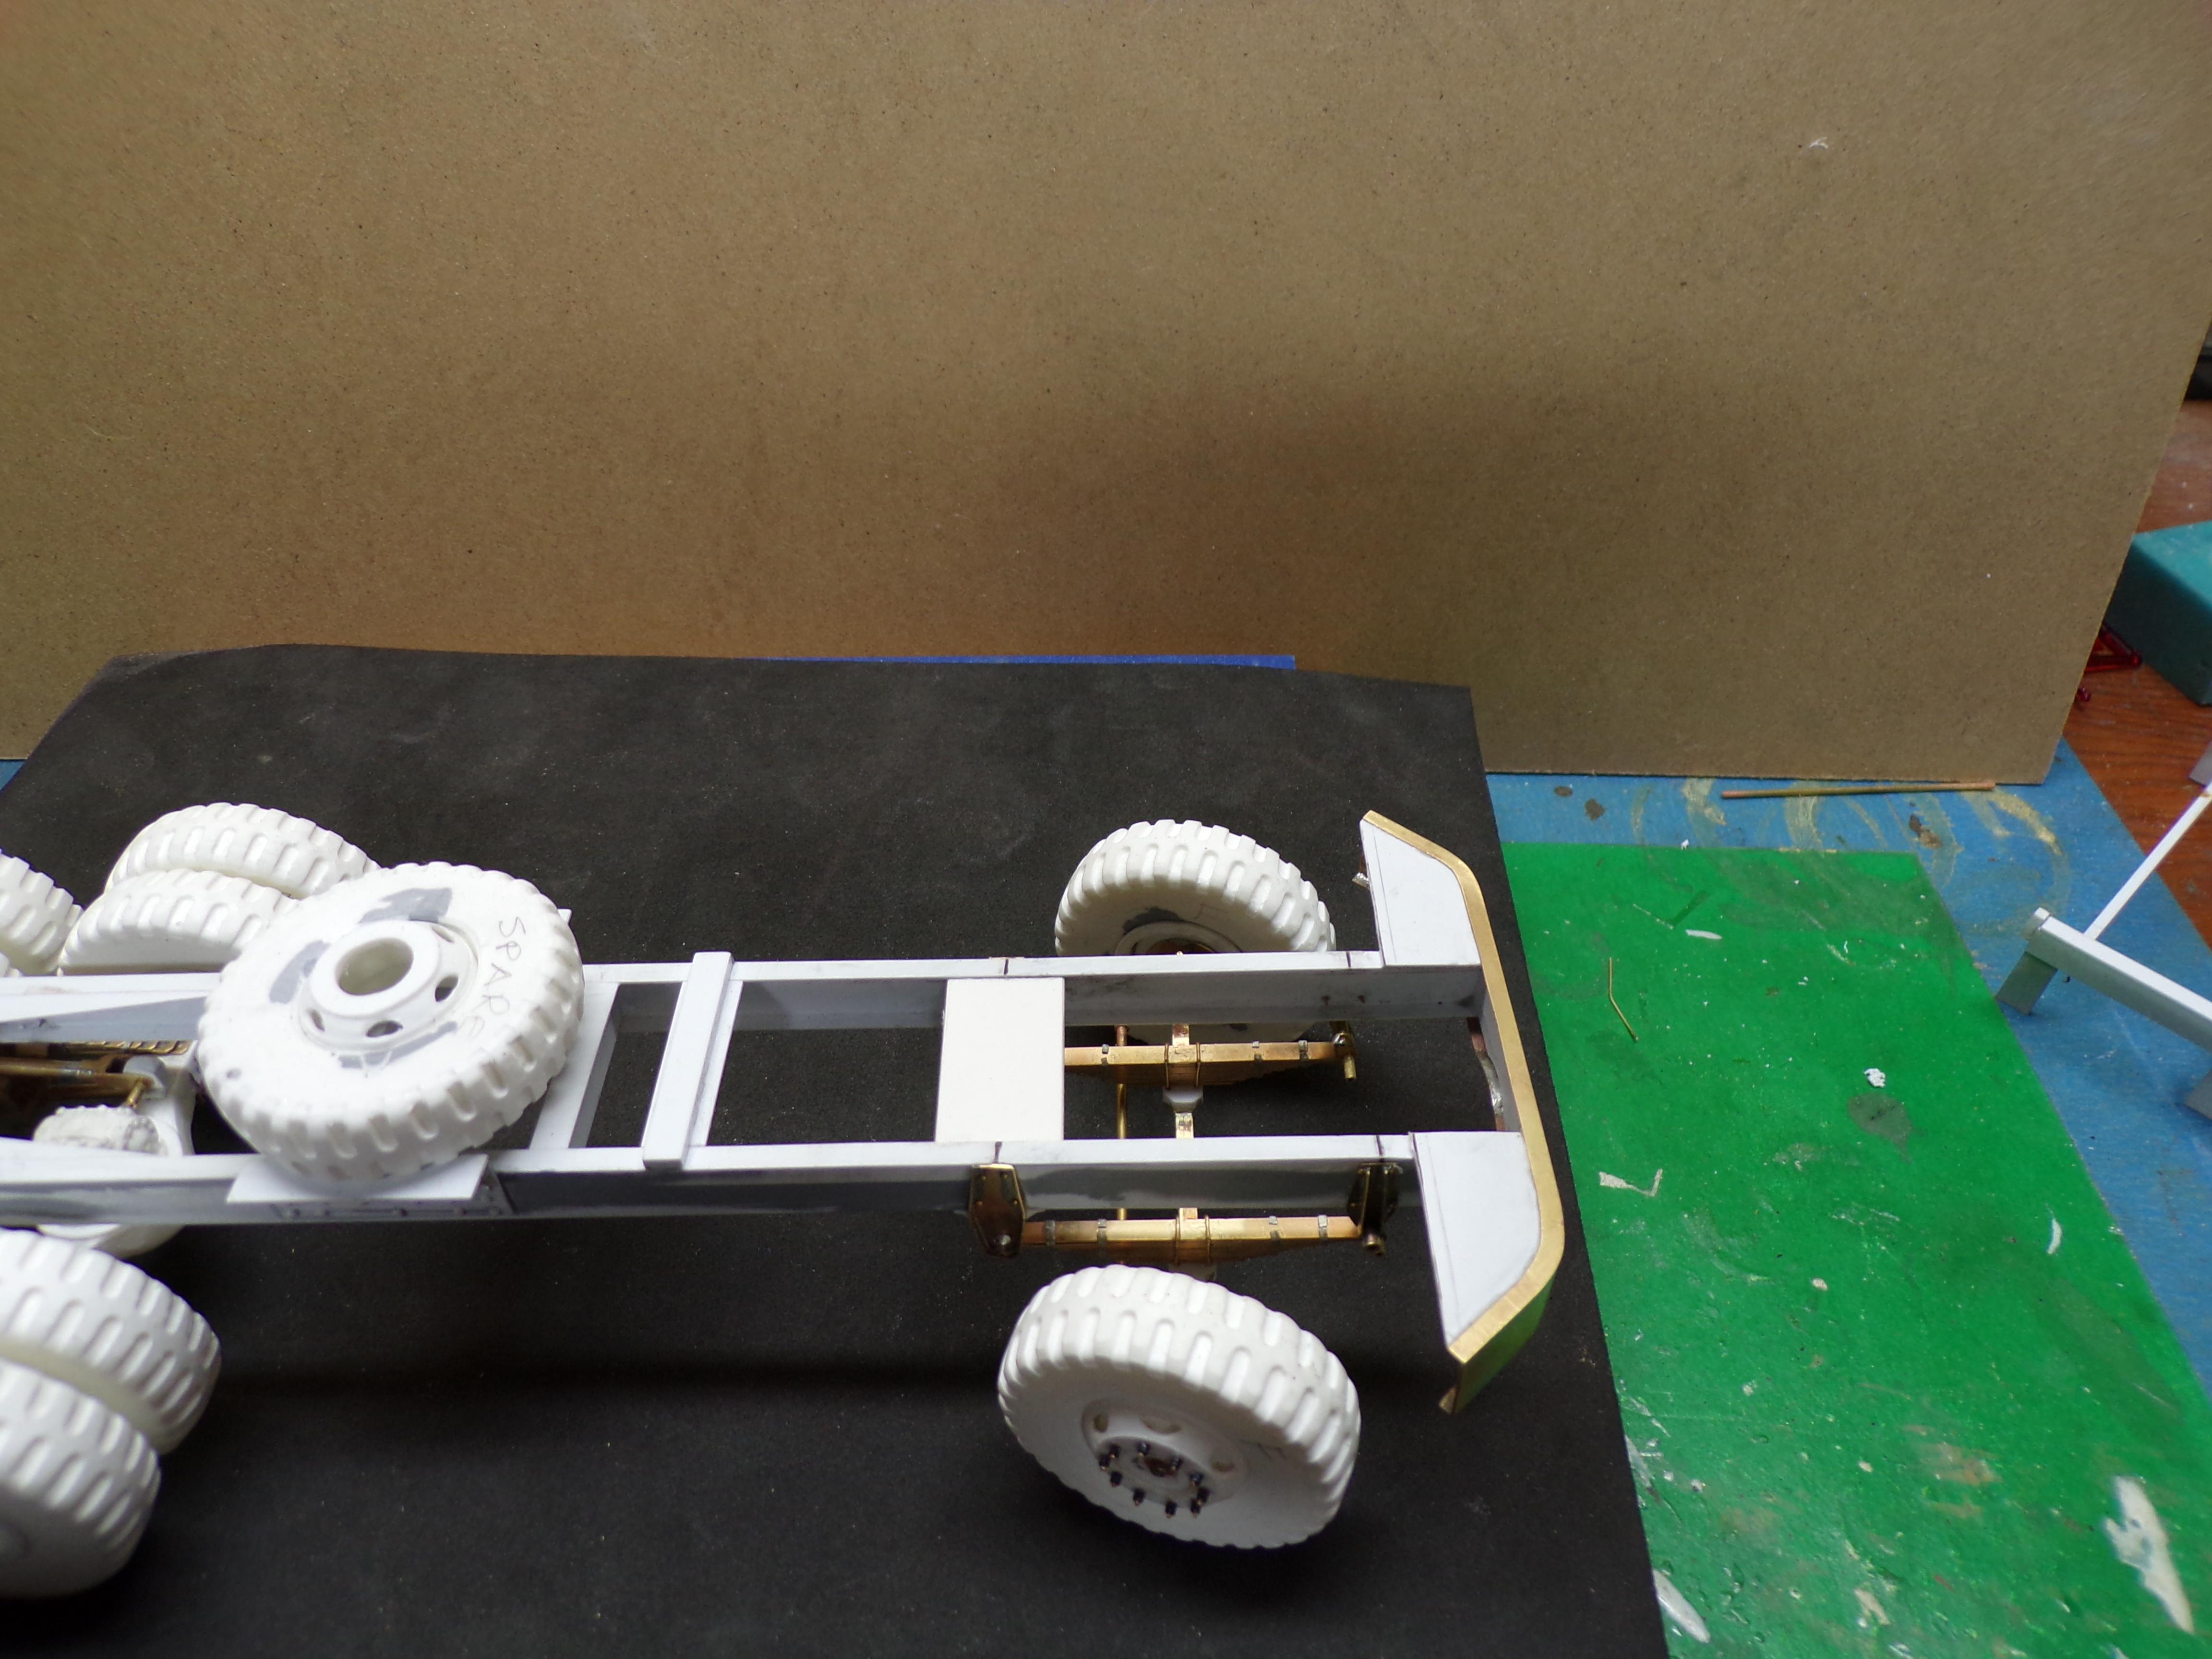
Here's the latest work on the M-20. Front springs are done along with shackle components. I found some soft 1/8" brass craft wire that comes in a coil but which is easy to straighten. Pieces were cut to length and soldered at the ends beginning with the short ones first. The front axle is soldered brass stock as well. Spindles a finished and the wheels are all set for tie rod connections and the steering arm. The gadget in the right front is a template for making holes in the wheels for the lug nuts. It fits the center of the wheel and it is easy to locate each hole for drilling and the spacing is even. Can't do it to the remaining front wheel. The hub is glued in so the locations for drilling have to be by eye. Oh, well. Live and learn!! The universal joints are 3D printed from Down Range Productions. They sort of snap together but need to be modified for the drive shafts.
-
Got a good start, there my friend!
-
Revell Mack CF
Chariots of Fire replied to Gmatta691's topic in WIP: Model Trucks: Big Rigs and Heavy Equipment
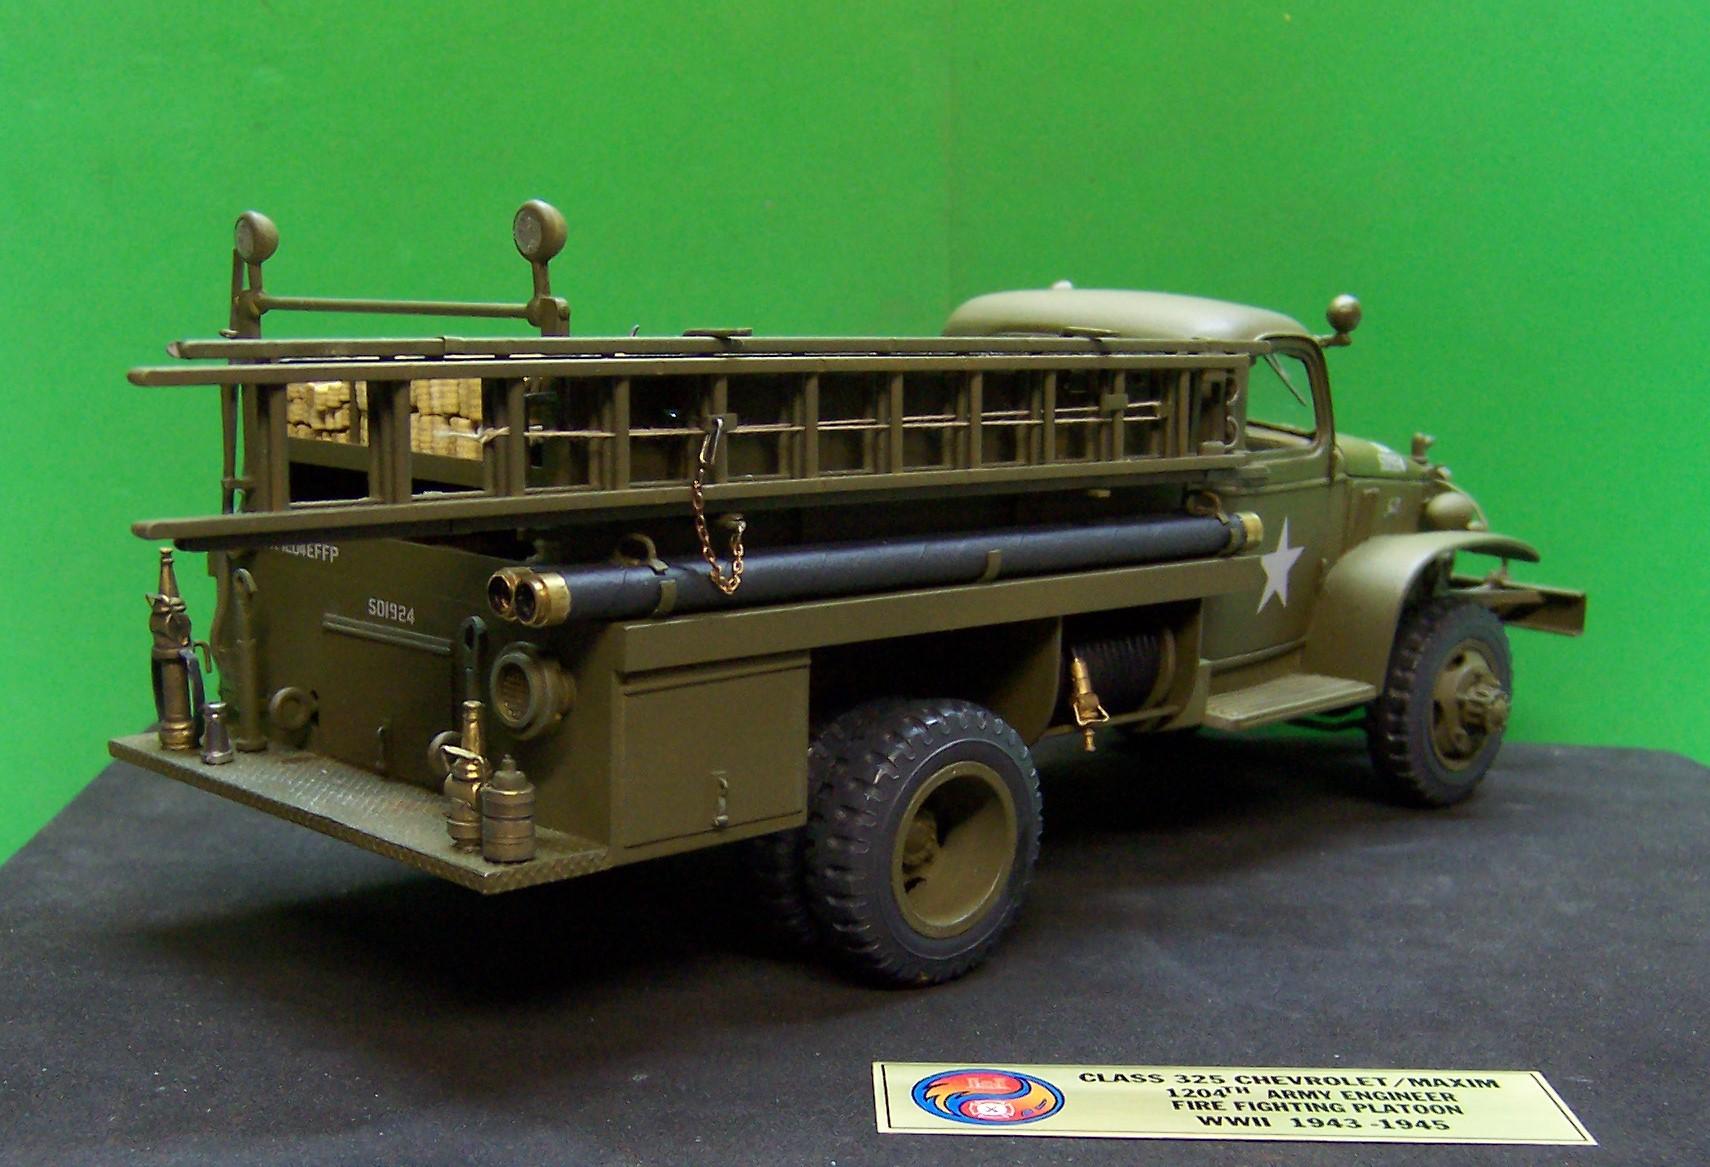
Depends on what type of nozzles you are talking about. If it is for either the booster line or the handline in the bed try DonMillsModels@aol.com He has them in white metal. If you want a larger nozzle for a 2-1/2" working line then you could make one out of sections of brass tubing. I'll show you the white metal ones and one I made from brass. The nozzles on this brush truck are the white metal ones that have been painted up and given a wash. The nozzles on the tailboard of this Class 325 military fire truck were made of brass tubing as was the nozzle on the booster reel in front of the rear tire.
-
M-20 Prime Mover
Chariots of Fire replied to Chariots of Fire's topic in WIP: Model Trucks: Big Rigs and Heavy Equipment
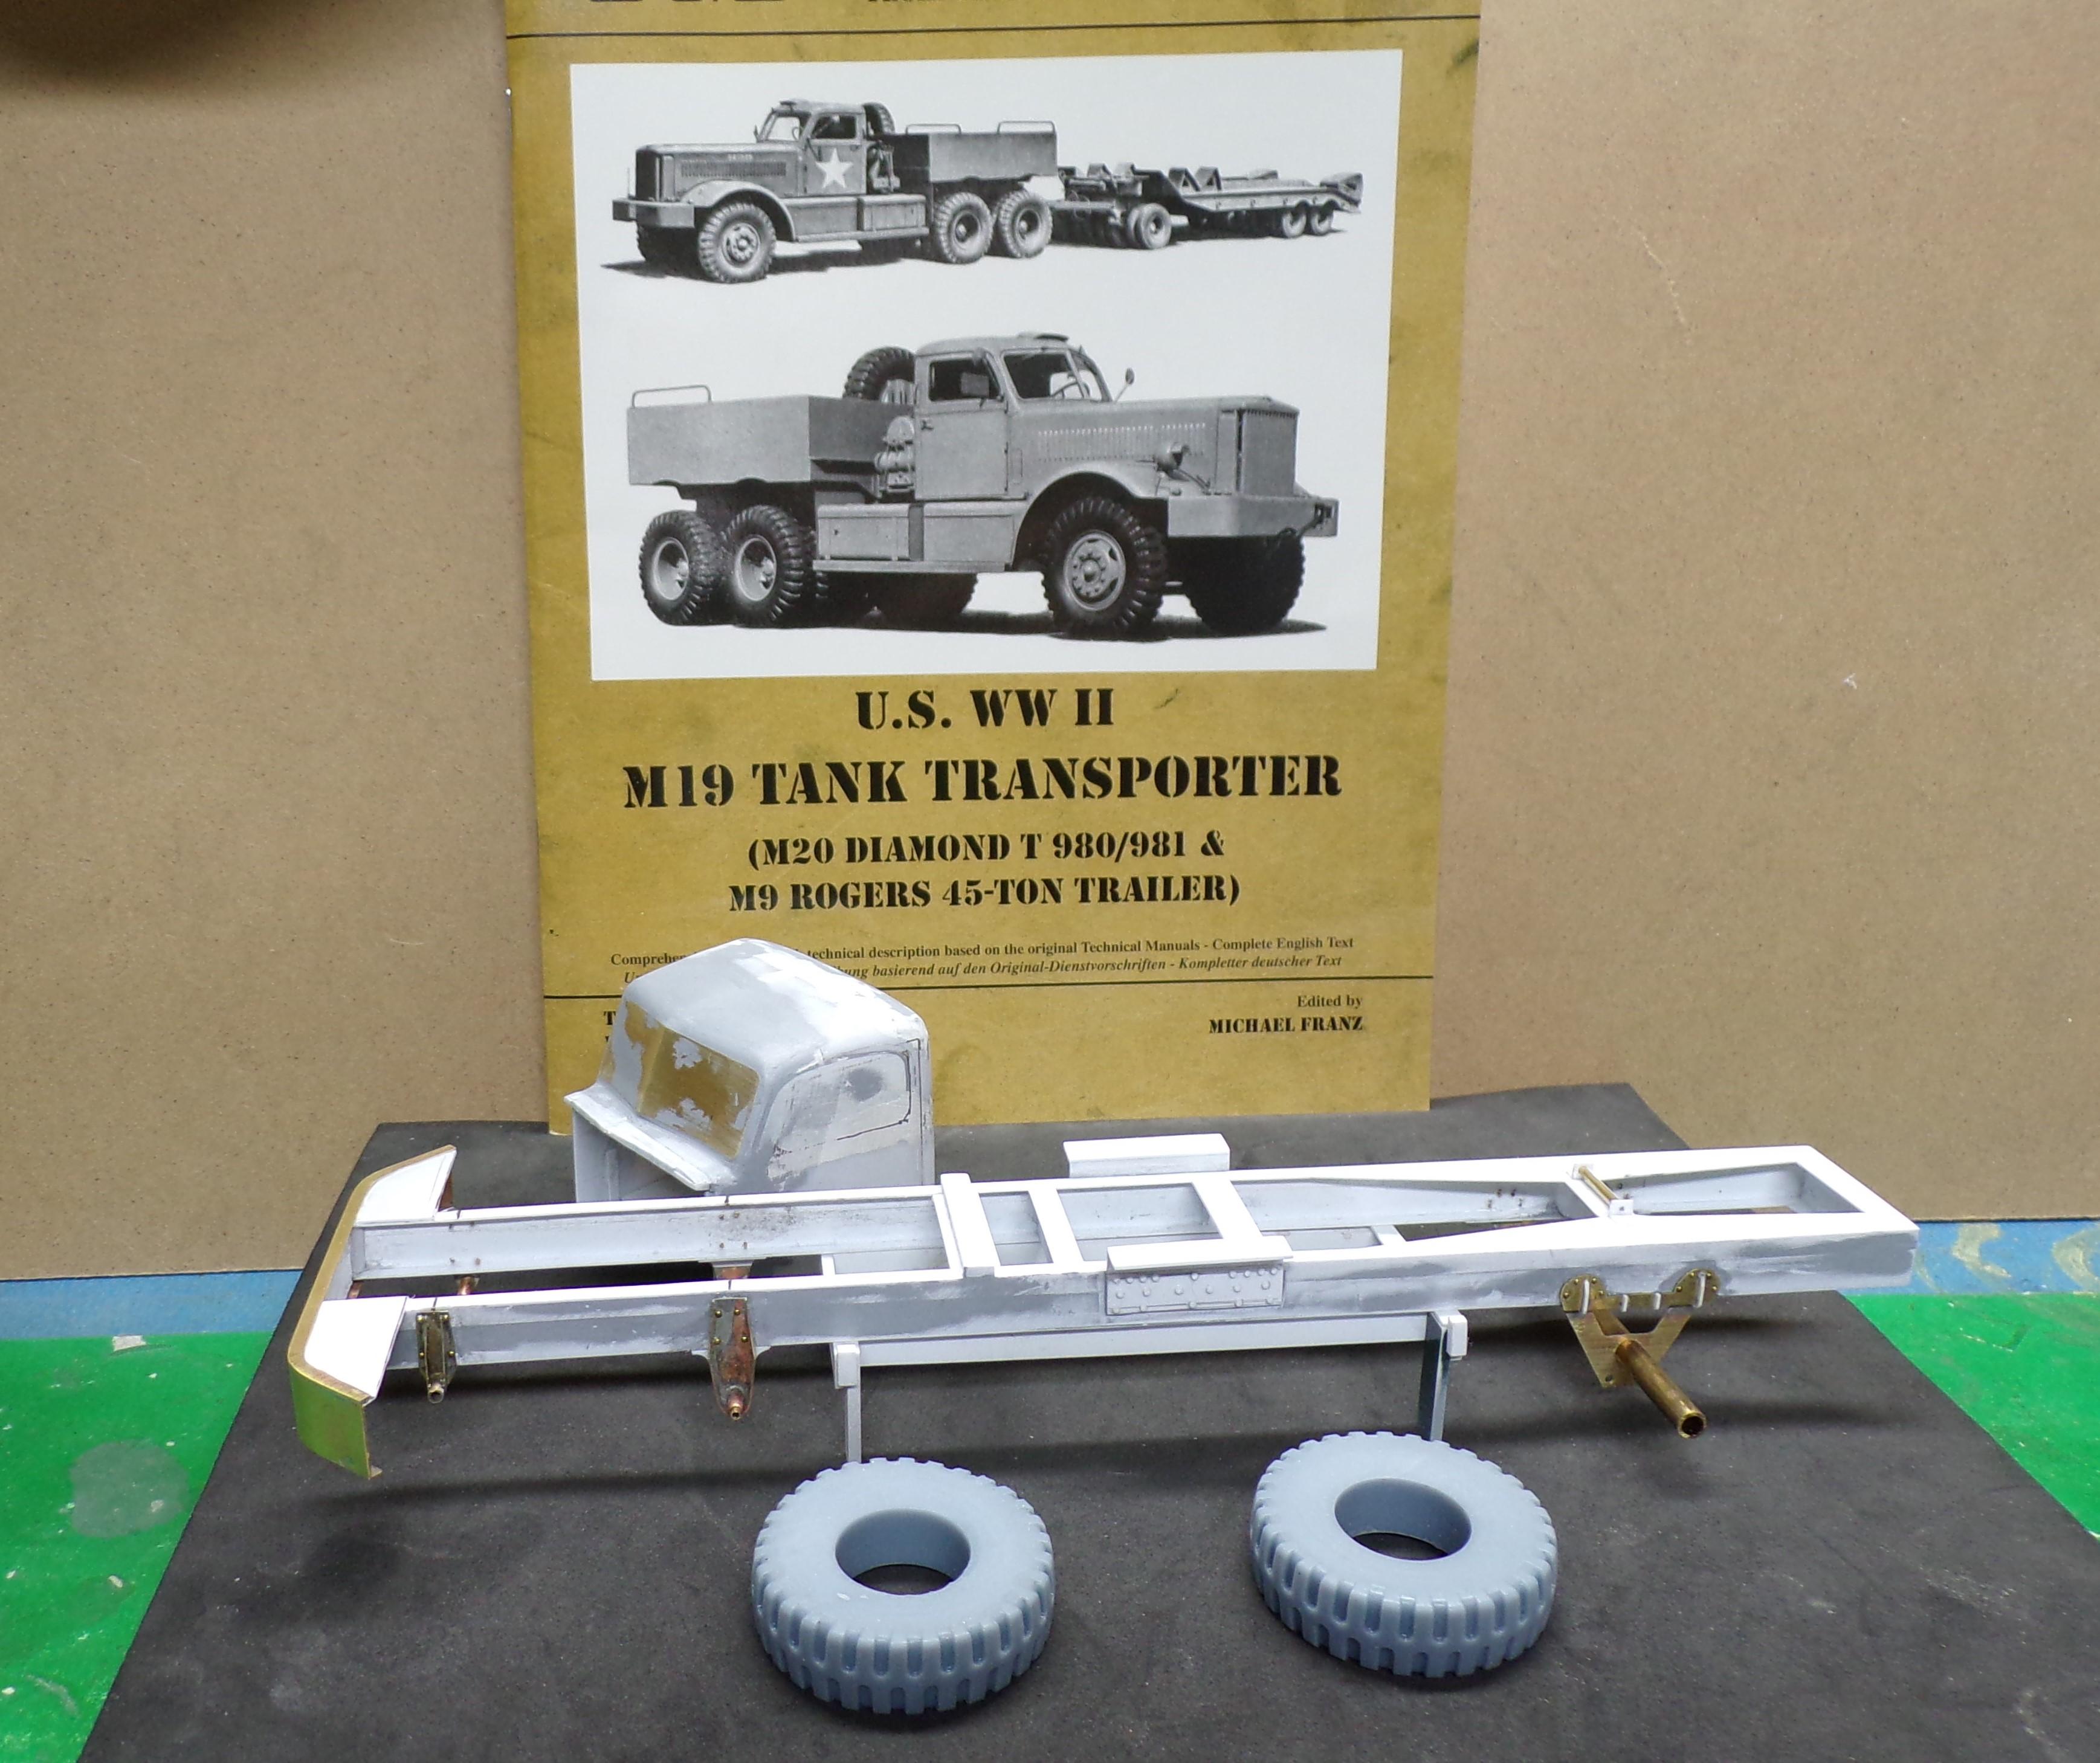
Yes it is. I have a 1/35 scale kit of the same rig but 1/25 is the scale I prefer. -
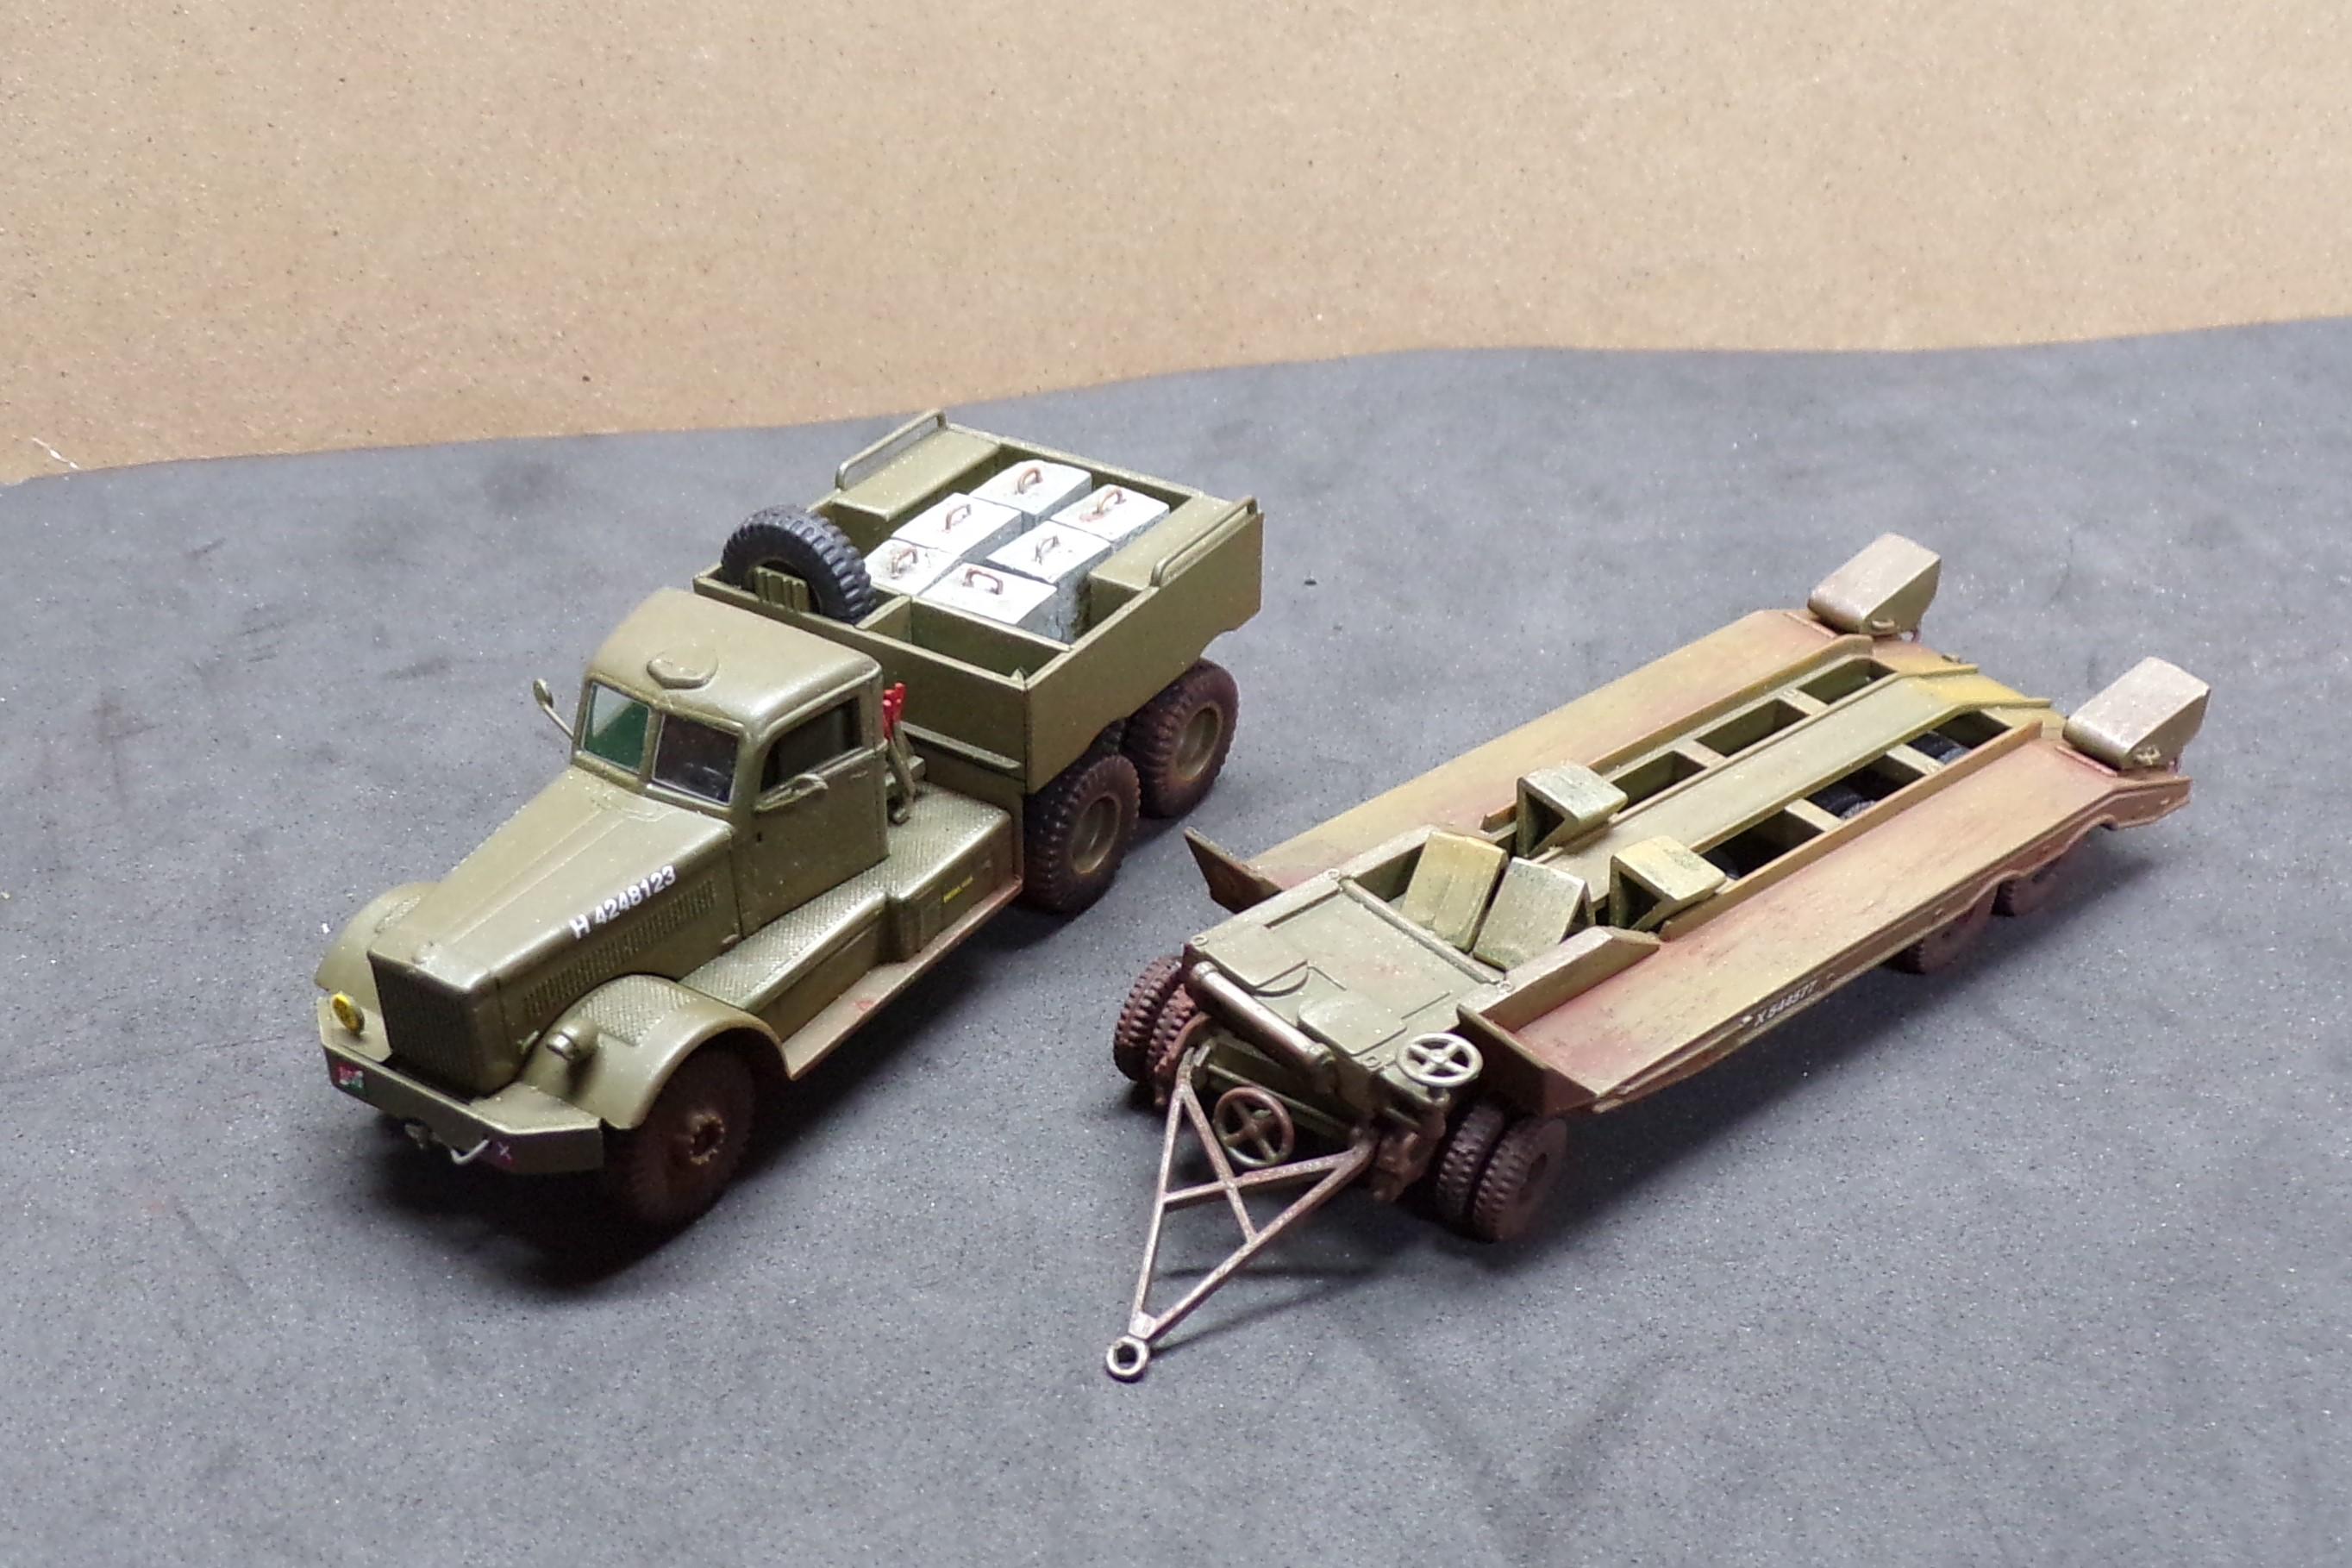
Been working on this project for a while now. Slow in coming as there is a lot of underside detail to do. Lots of castings, brass soldering, etc. But it is fun to do. Will be posting in progress pix from now on. The M-20 is a Diamond T 10 ton tractor used to pull a 45 ton Rogers trailer. They hauled tanks and also heavy supplies to the American army as it progressed inland from the beaches of Normandy. Trailer will be done after the tractor is finished.
-
Revell Mack CF
Chariots of Fire replied to Gmatta691's topic in WIP: Model Trucks: Big Rigs and Heavy Equipment
A bit hard to see but I think you may be putting the paint on too heavy. Best to do thin coats and let it dry between coats so that if there any imperfections you can sand them out. Each time is a learning experience. -
Revell Mack CF
Chariots of Fire replied to Gmatta691's topic in WIP: Model Trucks: Big Rigs and Heavy Equipment
What kind of paint are you using? -
Revell Mack CF
Chariots of Fire replied to Gmatta691's topic in WIP: Model Trucks: Big Rigs and Heavy Equipment
Looking good. If you have the guides for the other side of the hose reel, put them at the other side of the body, not at the hose reel. -
HI, Ed. Not for a while, I'm afraid. It has been put away until the spirit says go. A lot to it and there has to be a plan.
-
Mack monogram fire truck
Chariots of Fire replied to Aerodyne03's topic in WIP: Model Trucks: Big Rigs and Heavy Equipment
You've got the right idea. Be as neat as you can be with the red and amber. I know it's hard to do but it will make all of the difference in the world. Some file work on the body where you did the cut and then some plastic sheet stock and you should be good. Again, be as precise as you can when putting the sheet in place as the inside corners are going to be hard to clean up otherwise. Cut a little big and then sand a little at a time to get a close fit. -
Mack monogram fire truck
Chariots of Fire replied to Aerodyne03's topic in WIP: Model Trucks: Big Rigs and Heavy Equipment
Use your Dremel with a sanding disk after you cut most of the beacon base away. Don't worry if you sand away a little more than you need to flatten the roof. Use some Evergreen plastic rod or something similar to fill in the hole. After the glue has set trim off the extra rod flush with the cab and fill in the abrasions with some putty like Tamiya gray. Sand that smooth using sanding sticks and then fine sand paper or sanding sponges. That should do the trick. If you can get some Tamiya acrylic clear red and clear amber the lenses will look great as well. -
Mack monogram fire truck
Chariots of Fire replied to Aerodyne03's topic in WIP: Model Trucks: Big Rigs and Heavy Equipment
Hi, George: I used my dremel with a cutting disk to clean out the cross lay bins and cleaned up the cuts with files and Xacto knife. After that I put in pieces of plastic sheet stock for the bottom of each. If you have some scribed sheet that would be good as back then deck boards were used that were made of wood and painted. That gave the hose a chance air out and not get mildewed. I did the same for the booster reel but took both half pieces of the reel and glued them together to make one. A small piece of electrical wire the same basic diameter as the "hose" on the reel was added and draped over the rollers. For lenses I have made molds of them and then cast them in clear 2 part resin. Which lights in particular are you concerned with? Charlie -
Mack monogram fire truck
Chariots of Fire replied to Aerodyne03's topic in WIP: Model Trucks: Big Rigs and Heavy Equipment
Sorry that I don't have any in-progress pix of the Mack. The headlights are clear lenses that just pop in place. I used Tamiya clear red and clear amber to paint the red warning lights and the amber turn signals. It really pops over the chrome base. The body and chassis are very durable and easy to work with. They did some nice work on the kit. Why they molded in the cross lays above the pump panel is beyond me. The other thing that they could have improved on was the tires. But then it would not have been a snap kit. To fix that I cut the sidewalls off some spare tires of the same type of kit, sanded them flush, and glued them to the open face of the tires that I was using. This fills in the back of the tires and adds to the overall appearance. Don't forget to add a vertical windshield divider to the windshield area. Windshields on those Macks were not one-piece. Plastic strip stock works well. Hope this helps. -
Outstanding job of putting this all together. Weathering is great and the details are the way they should be. Thanks for posting!?
-
Best clear material for large flat windows?
Chariots of Fire replied to crowe-t's topic in Tips, Tricks, and Tutorials
PETG material is the best in my opinion. 0.020" thickness. It has protective backing on both faces that need to be removed first. For flat surfaces it is stiff enough not to bend and can be cut with shears. Agree with sanding round corners rather than trying to cut them. The material is very clear and transparent. I use it for vacu-forming but for what you are going to use it for I would say it is perfect. -
A little big project
Chariots of Fire replied to Chariots of Fire's topic in WIP: Model Trucks: Big Rigs and Heavy Equipment
It's hard to read but that very sign is on the right rear of the truck body!? -
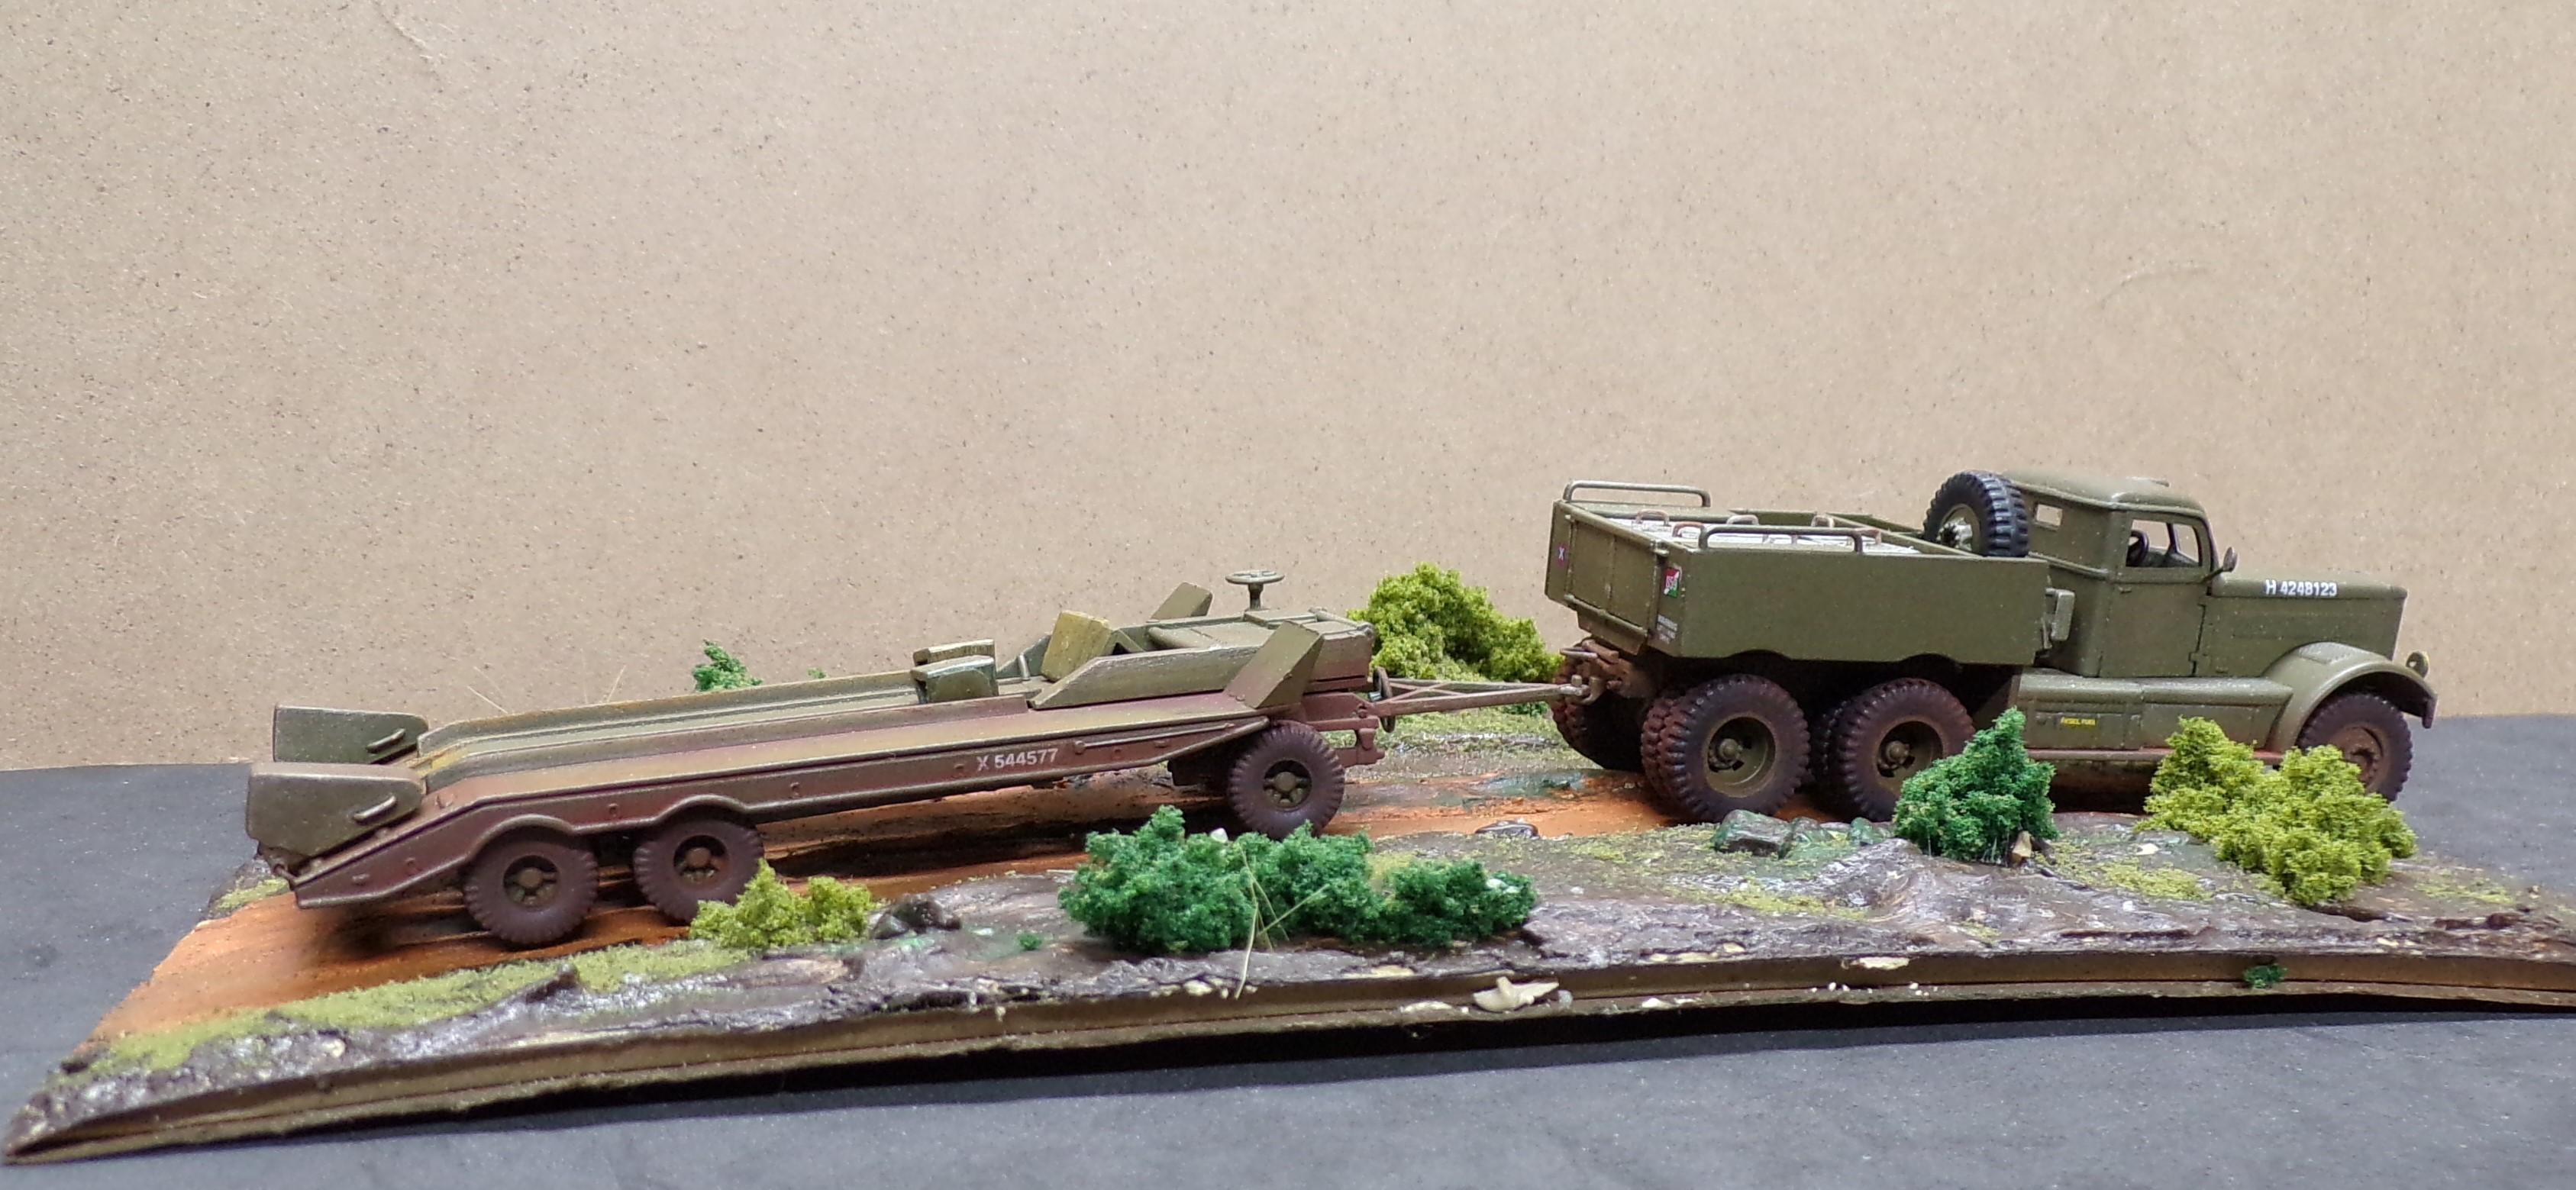
Diamond T made some 12 ton 4x6 trucks during WWII that were initially built for the British to use in hauling around tanks to strategic points in case of a German invasion. They towed a variety of trailers designed for real heavy loads. This 1/76 scale build from Revell was a lot of fun to do. I added a few details like windshield glass, winch cables, concrete ballast to the truck body and movable ramps for the trailer. The markings are British and the truck is a model 981 instead of a 980 because there is a front winch cable as well as a rear one on the truck. It's also known as an M-20 Prime Mover. Paint is Testors OD and the weathering was done with Doc O'Brien powders and Tamiya weathering pads. The base is a bit curved because I put wet Durham putty on a practice piece of cardboard. Tried flattening it with some weights but to no effect. Permanent base will be better built on something that won't warp!
-
Did that cut and paste splice of the frame straighten it out any? Nice work that you're doing. Lots of little detail things beginning to show.
-
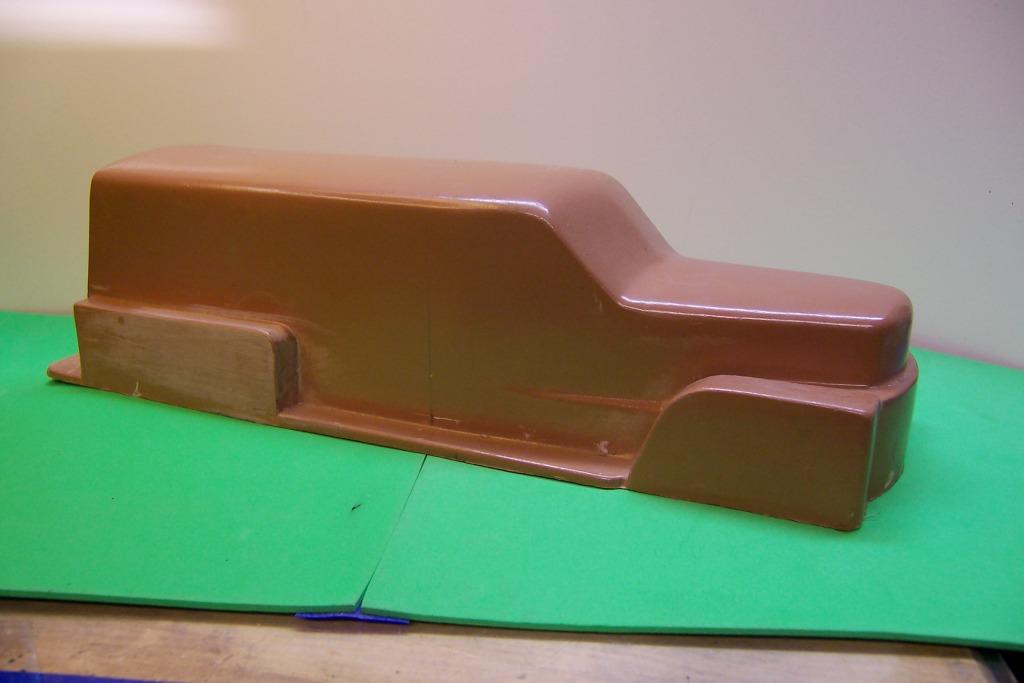
If you are talking about the cab corners, it is PVC water pipe. I sliced it lengthwise to get a section for each corner. The radius is based on the radius measured on the drawings of the truck and reduced down to 1/25 scale for size.
-
I'll check that out Bob. At first glance they seem just a little big but maybe not. We'll se. Thanks!
-
Not a bit of it, Bob. The tower has a 5 section ladder with the basket on the end. Mid mount to boot. Body is basically one of a kind so all will be scratch built as well.


.JPG.5cdf5af7a385e5ed9ccb12024c4f6e1c.JPG)