Chariots of Fire
-
Posts
2,782 -
Joined
-
Last visited
Content Type
Profiles
Forums
Events
Gallery
Everything posted by Chariots of Fire
-

Reo Gold Comet
Chariots of Fire replied to Chariots of Fire's topic in WIP: Model Trucks: Big Rigs and Heavy Equipment
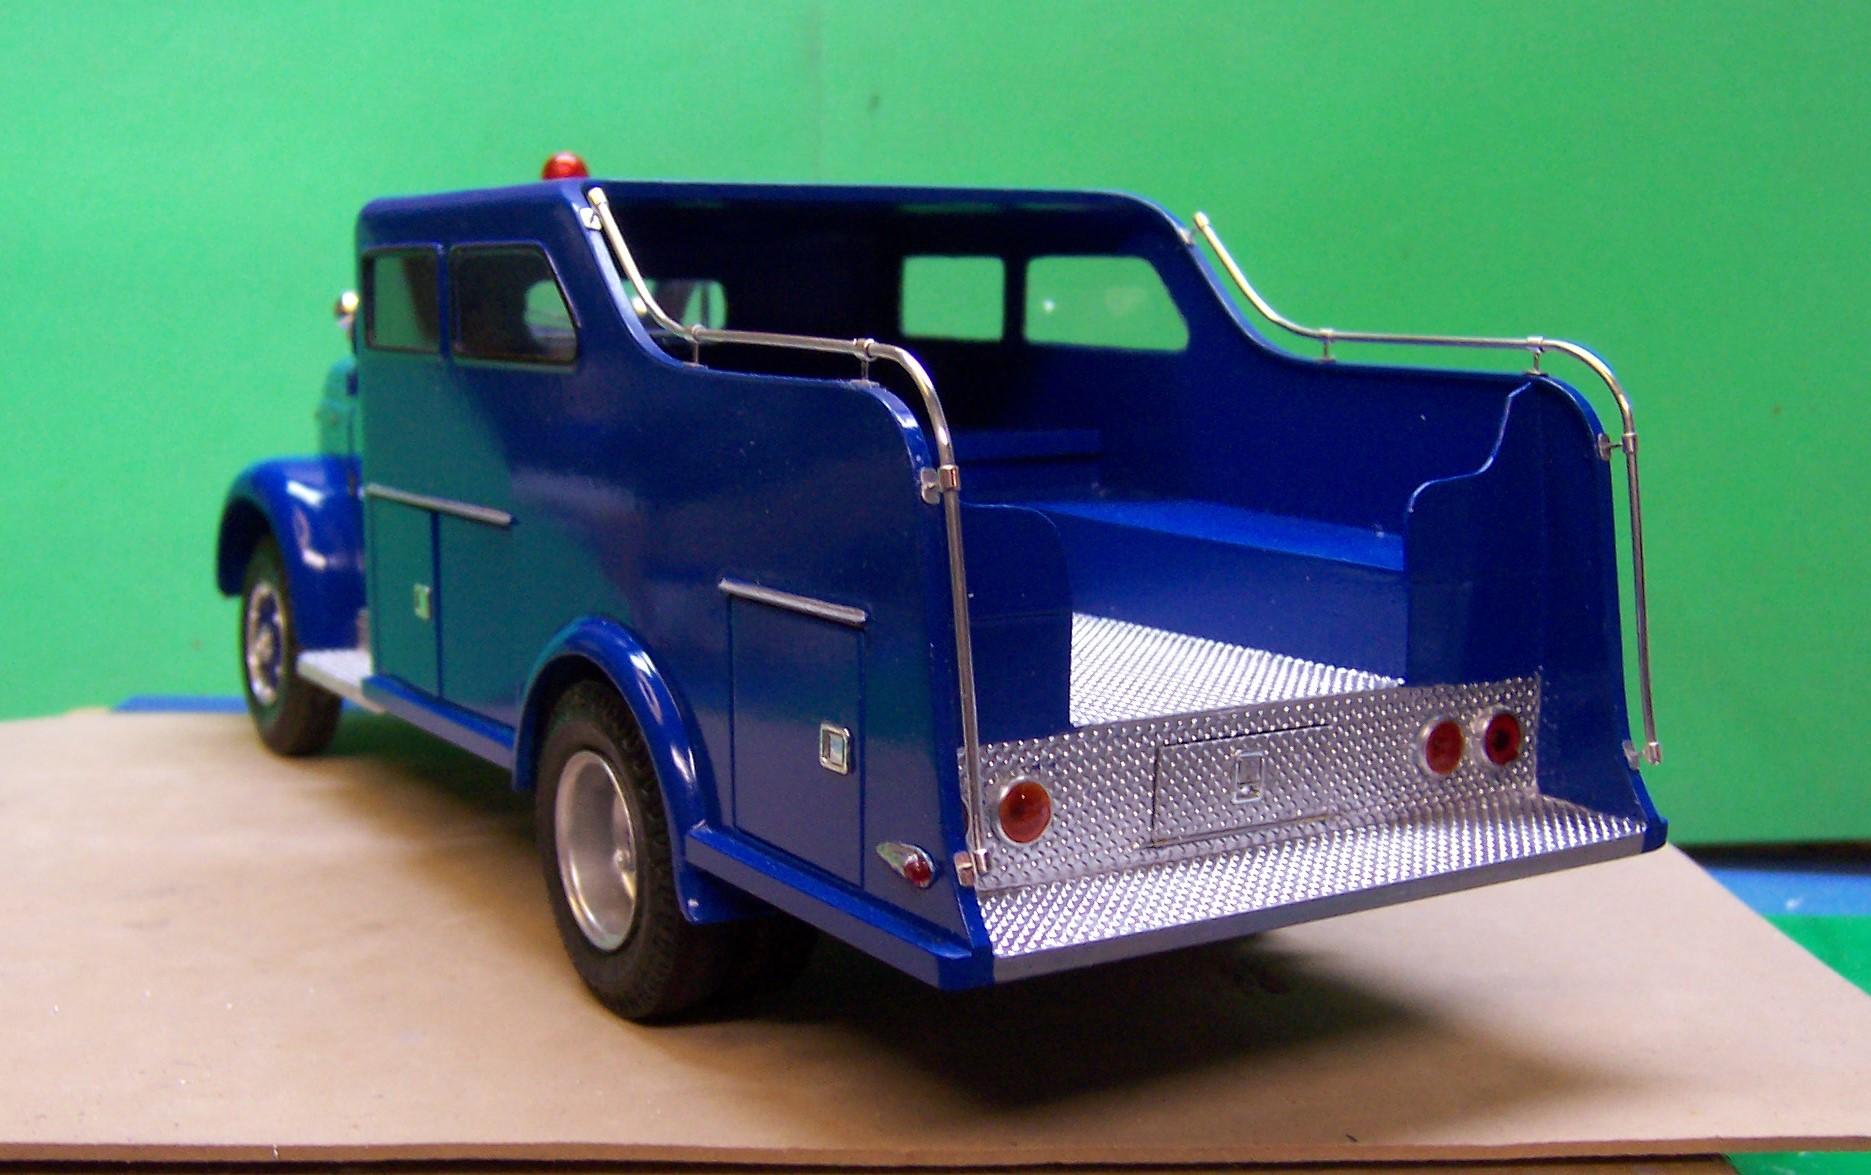
Latest pix. Finished rear view mirrors and fender directional lights.
-
NO need to save the dust, Roy. Just wipe away most of the CA leaving the rest in the void. Let the sanding stick or file make the residue and in doing so it will fill and harden the void. The mixture sands away fine and it does not shrink.
-
I agree with what Alan said about filling gaps first. I use CA a lot and when the gaps are small I just sand them and let the CA capture the sanding dust. It is a good filler. Then I can use the Tamiya putty sparingly. It does tend to shrink and it takes a bit of patience to work with it. Let it harden really well and then sand the extra putty away. If you still have gaps try filling them at that point with glue and/or styrene and then reputty.
-
Reo Gold Comet
Chariots of Fire replied to Chariots of Fire's topic in WIP: Model Trucks: Big Rigs and Heavy Equipment
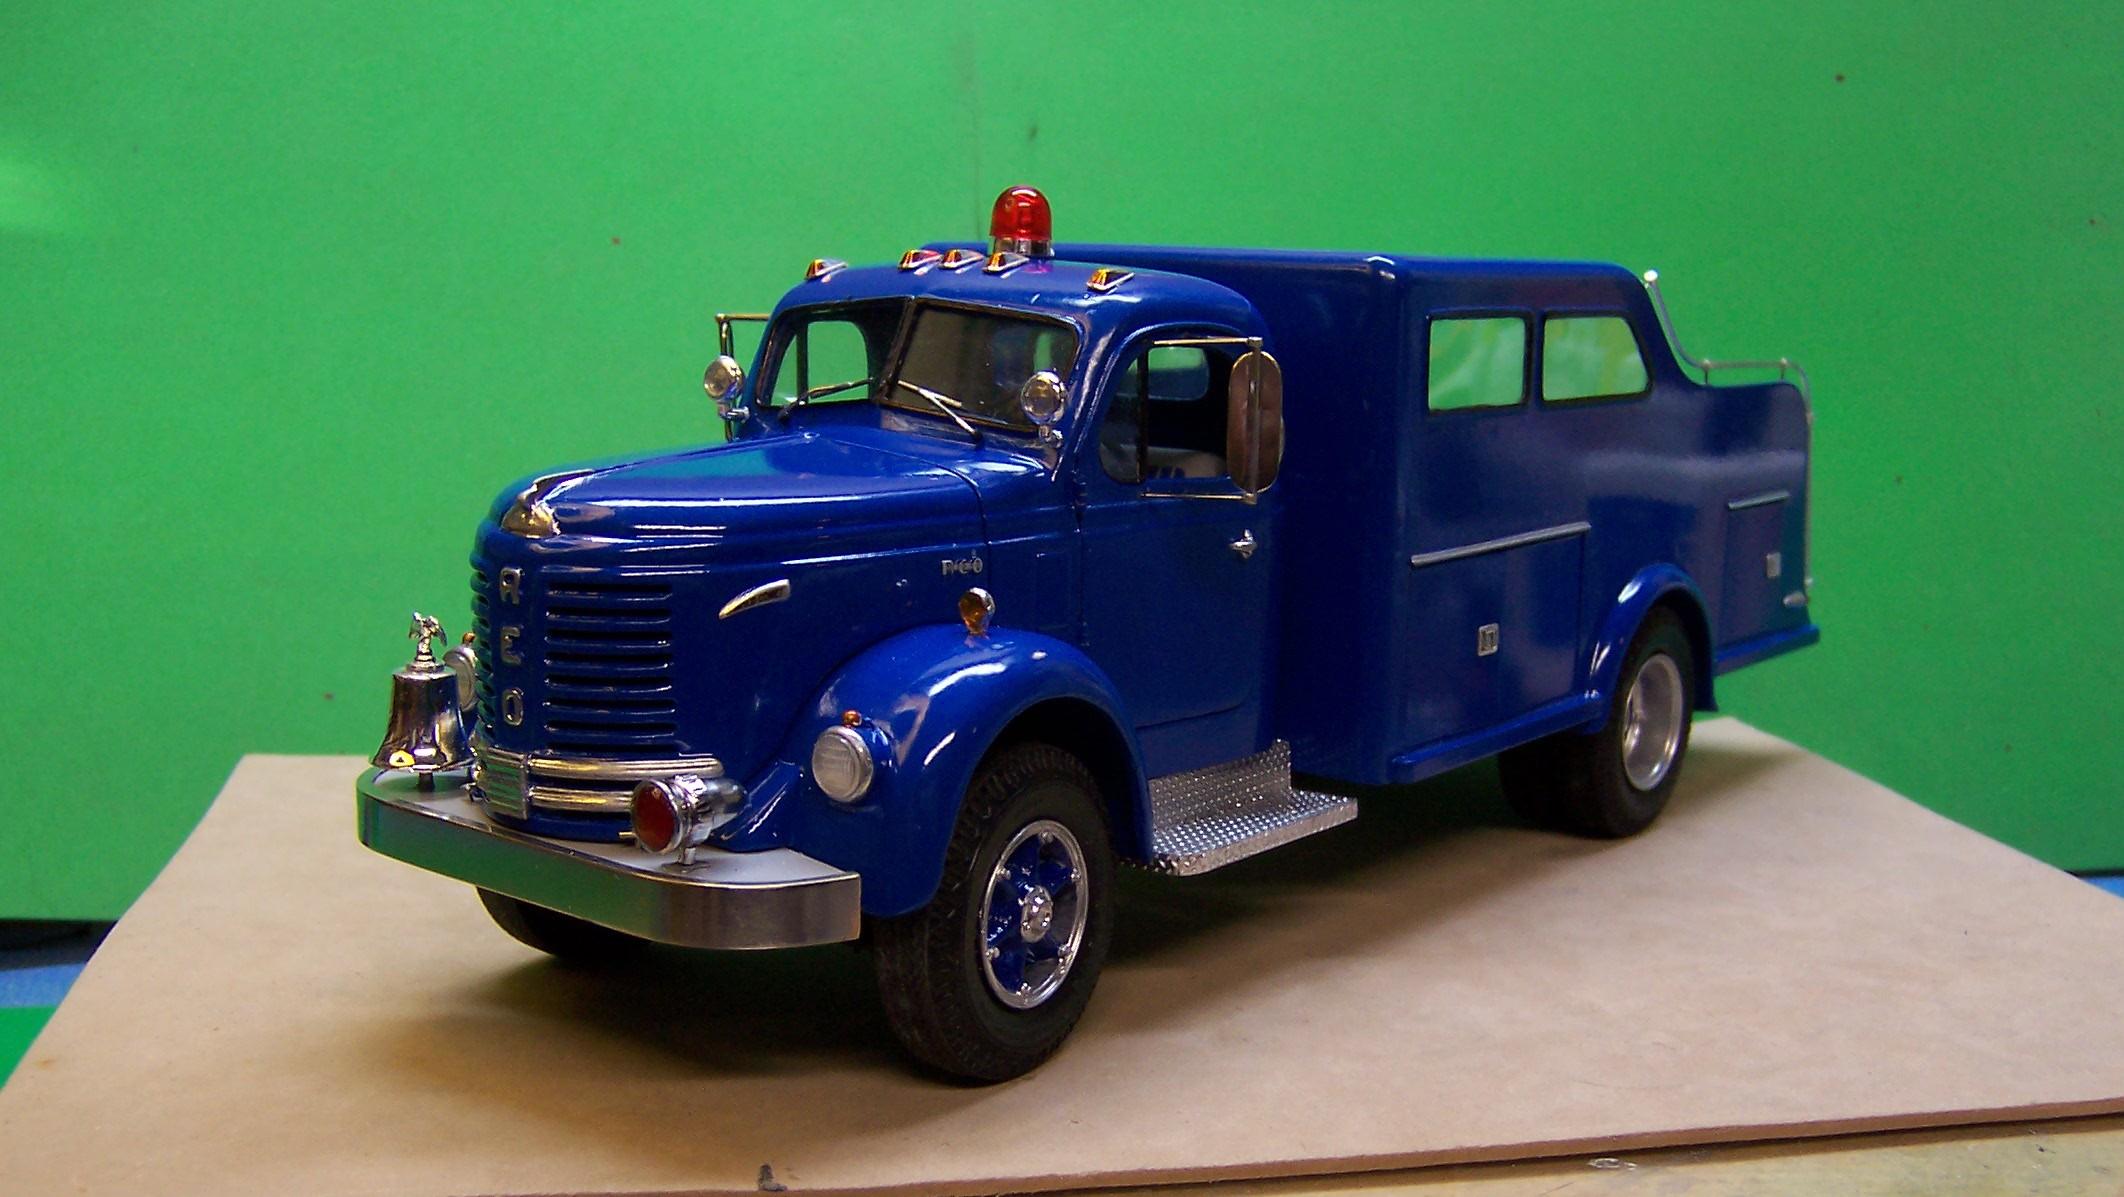
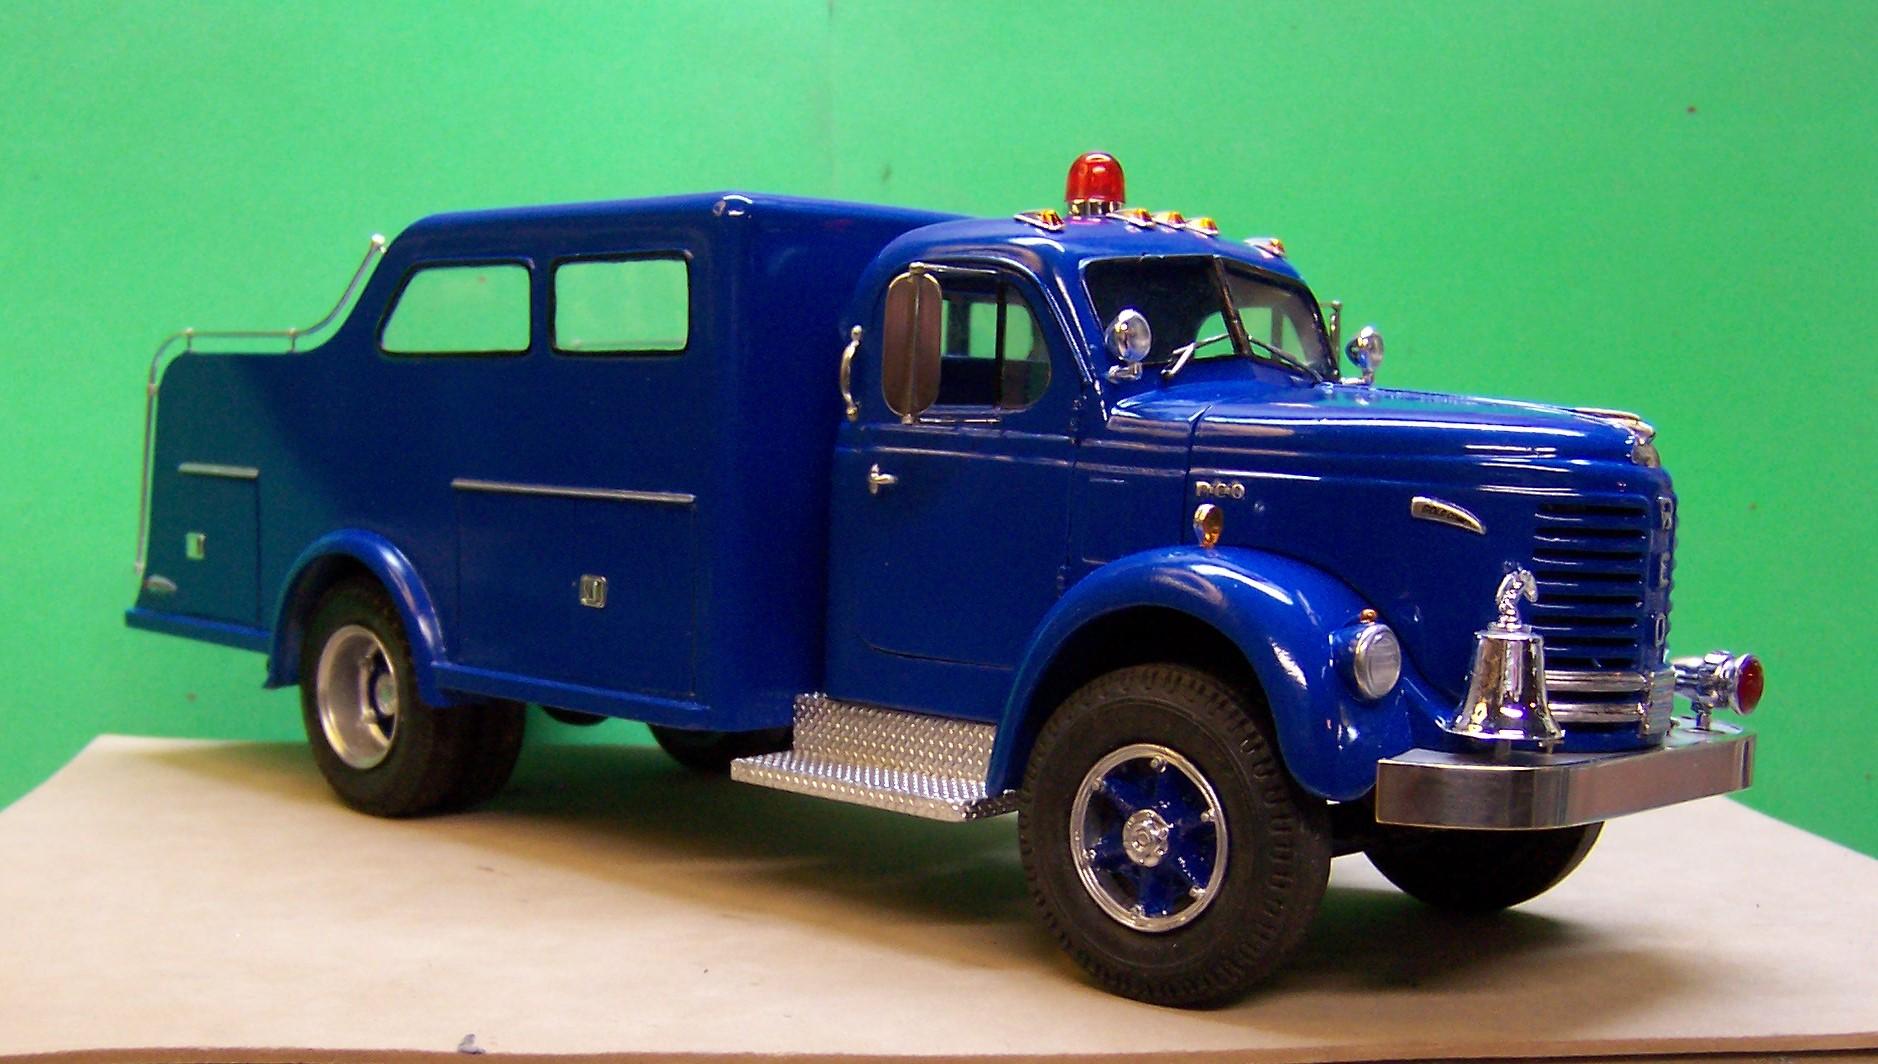
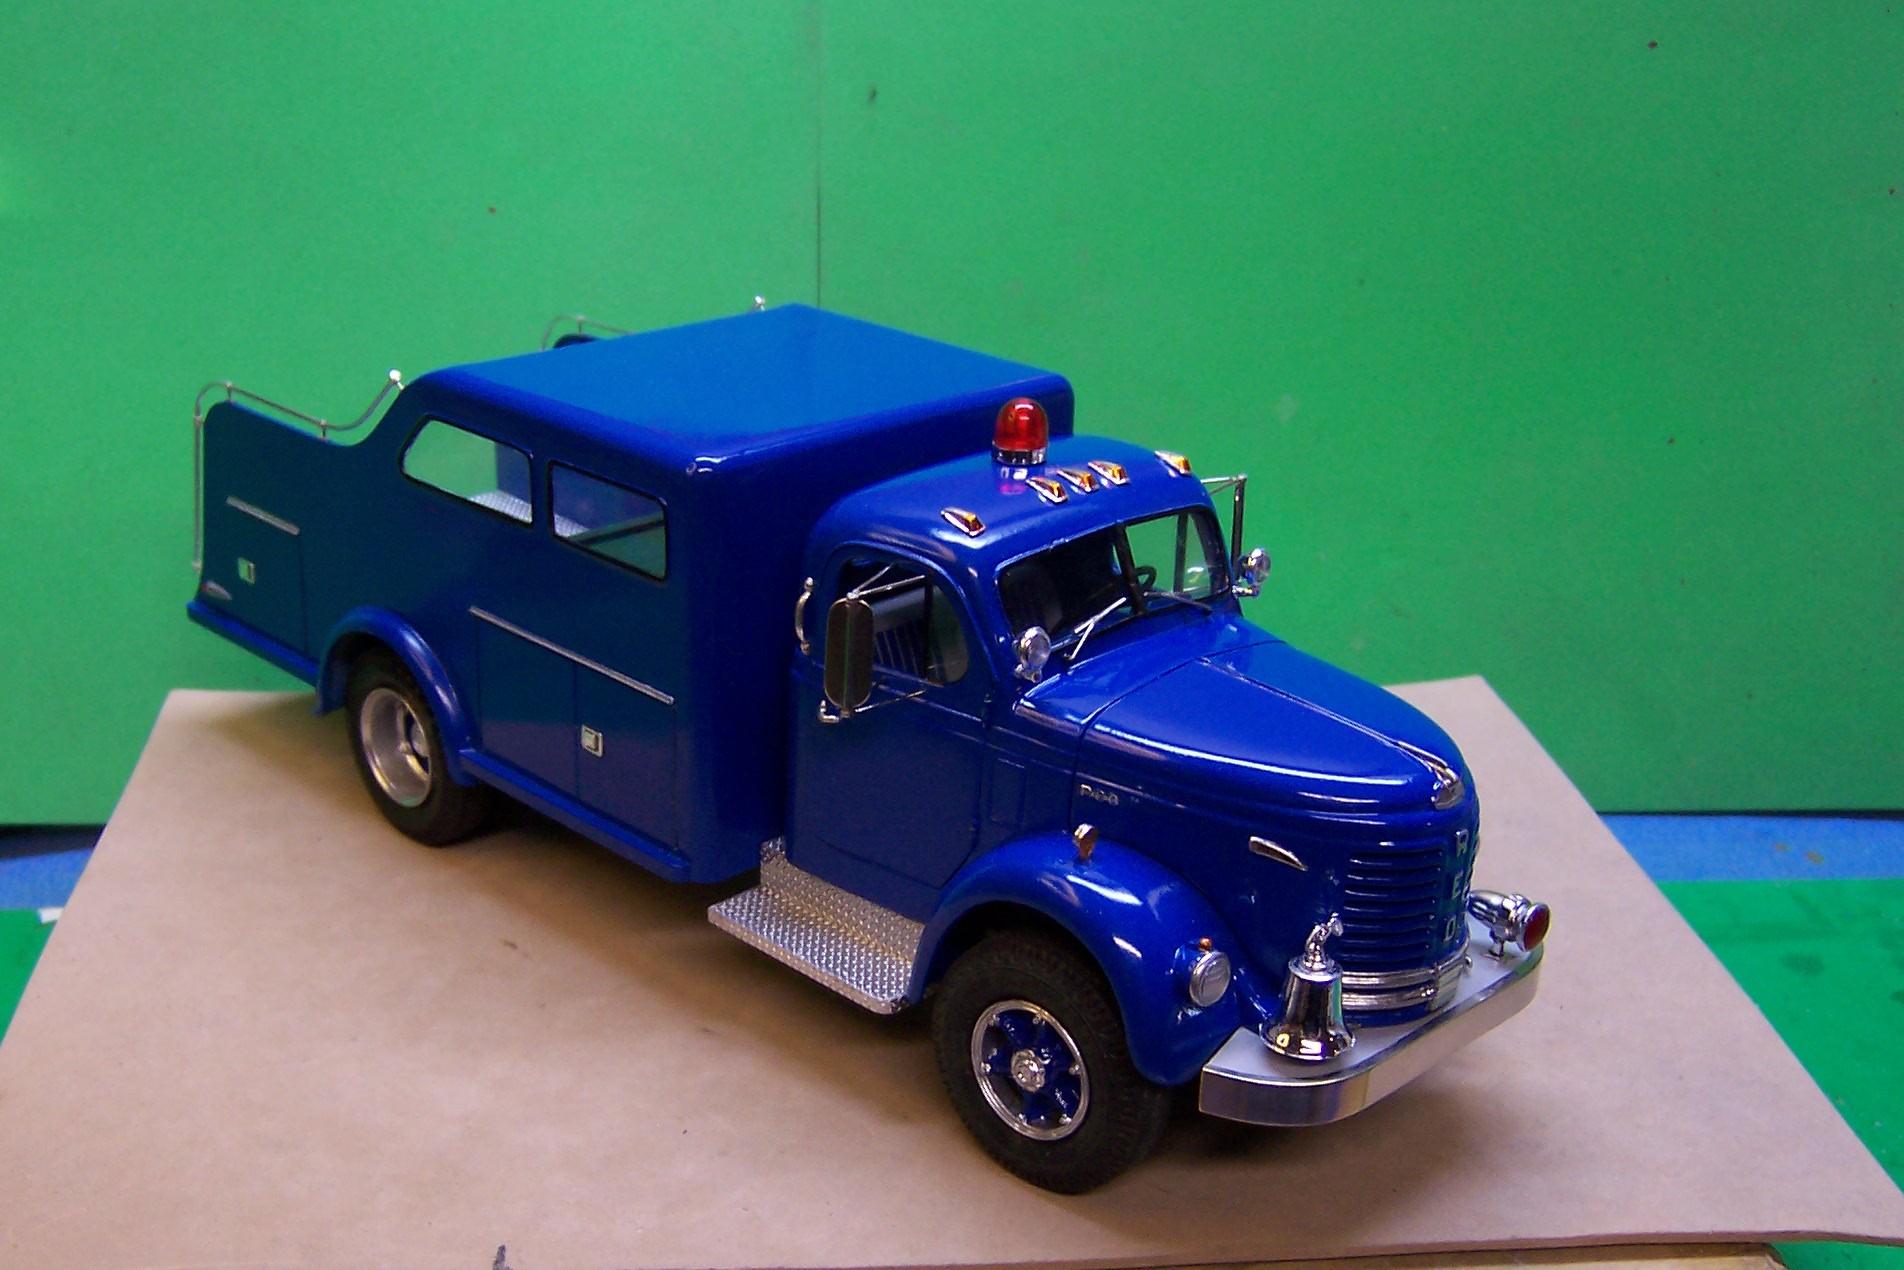
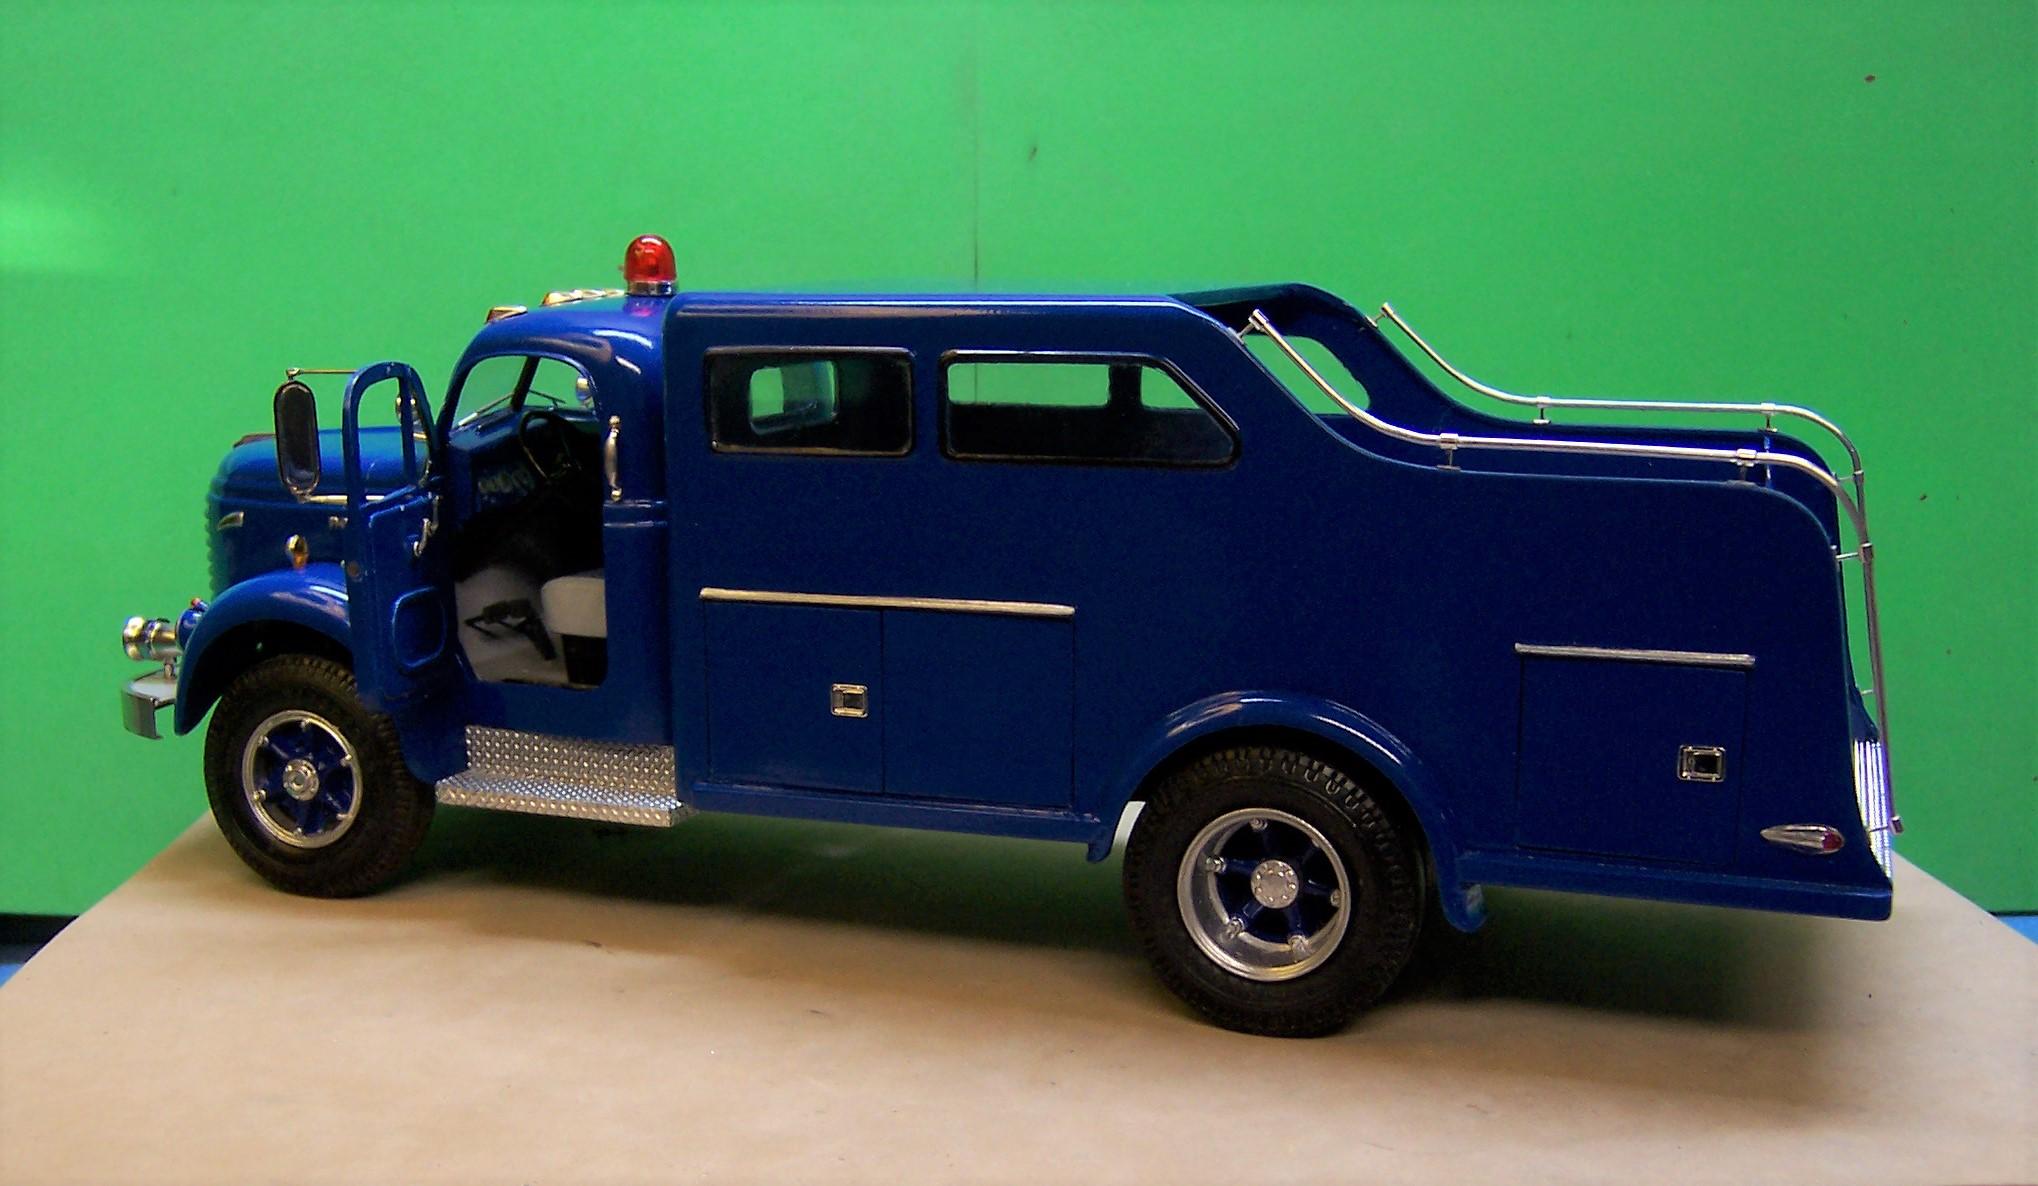
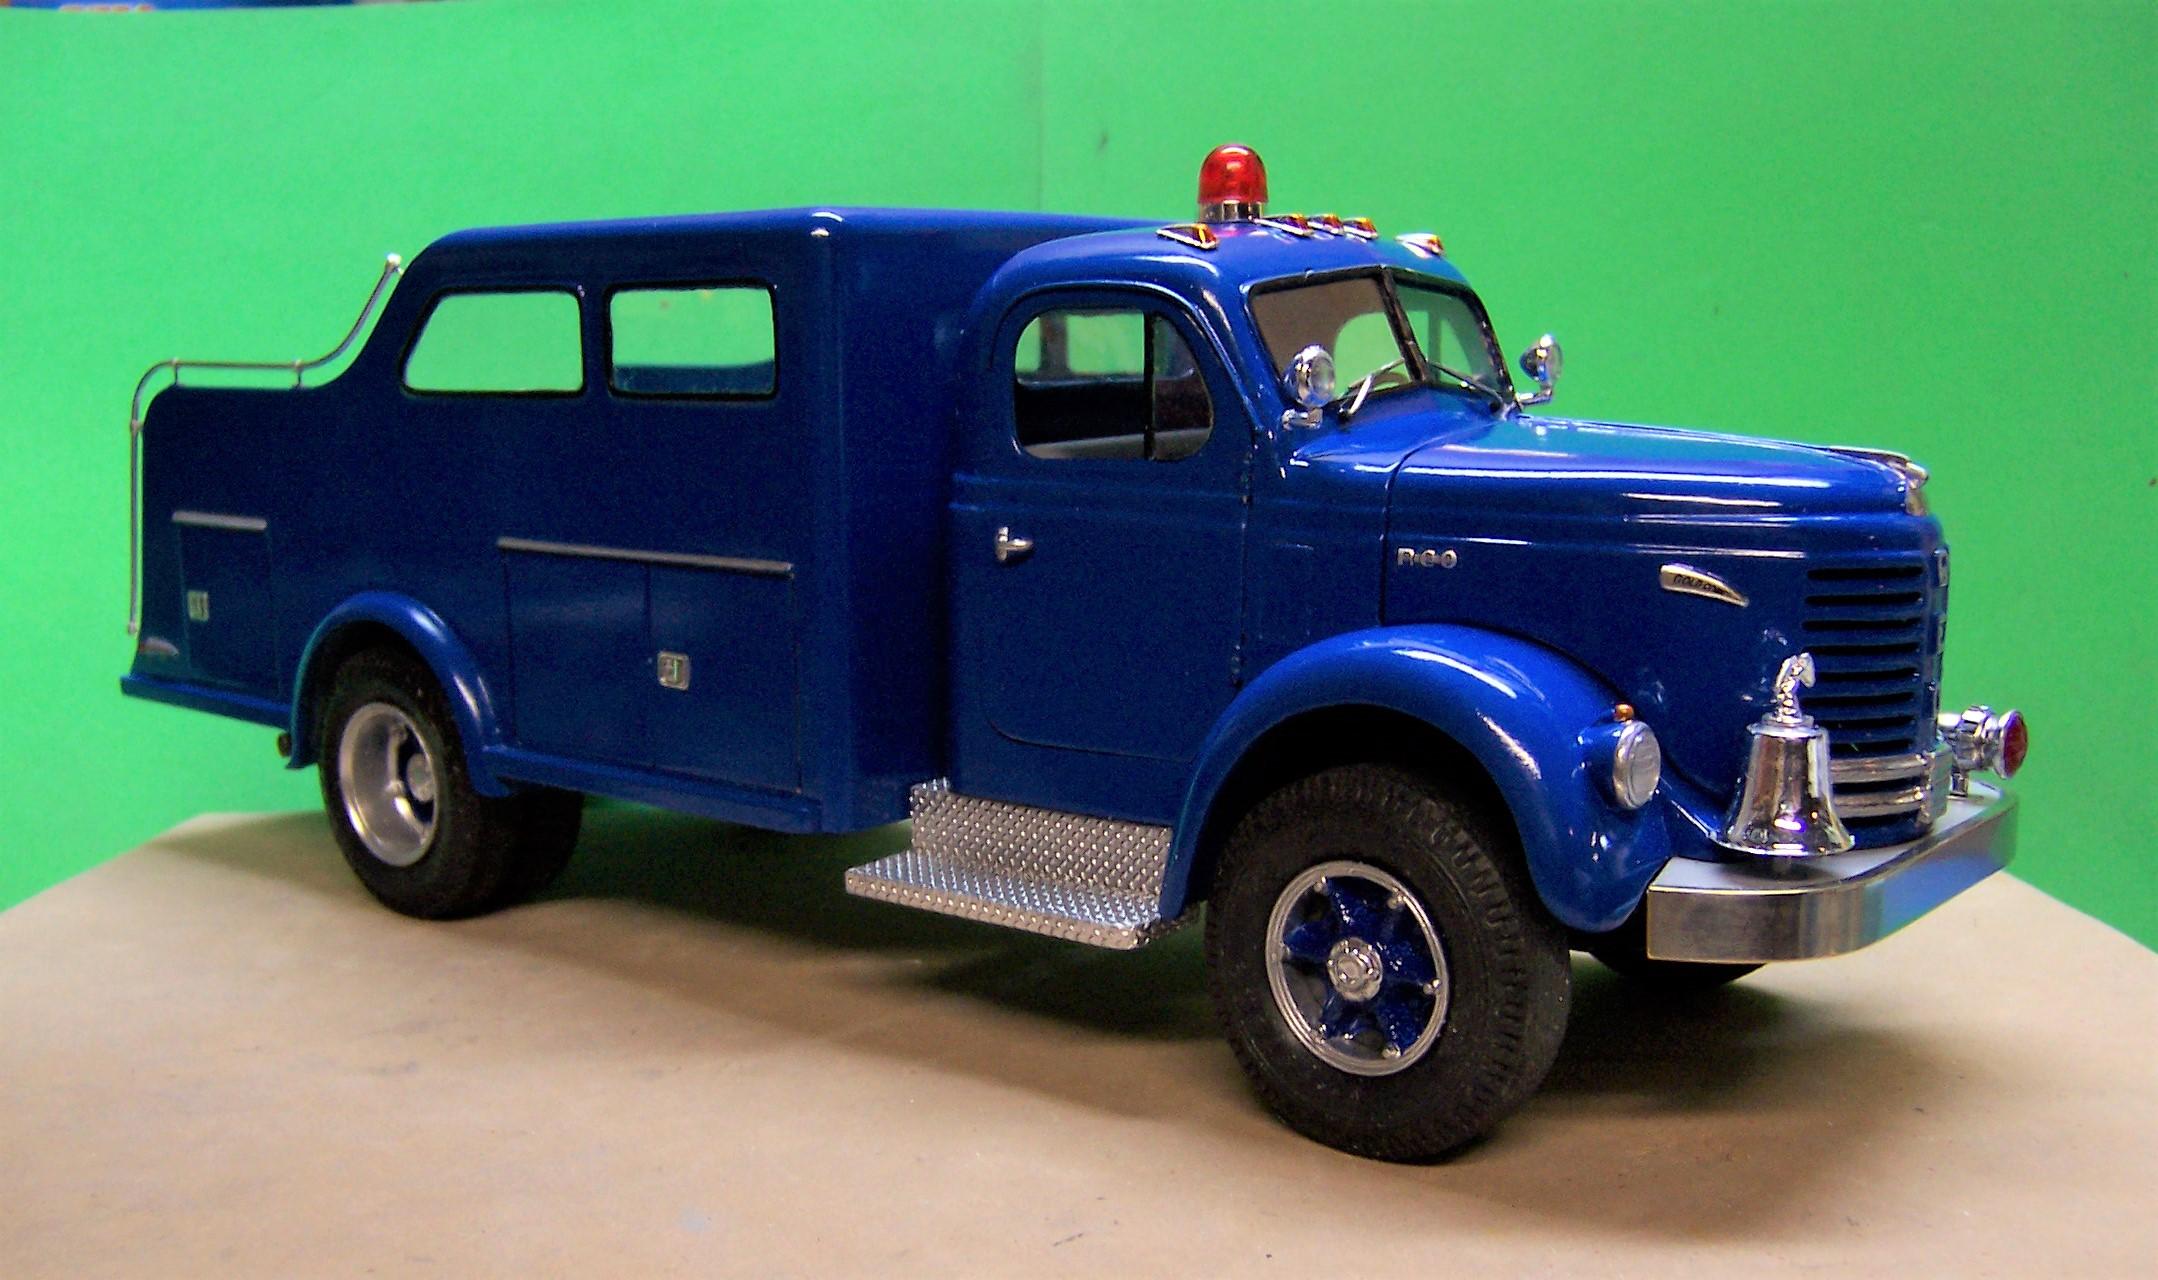
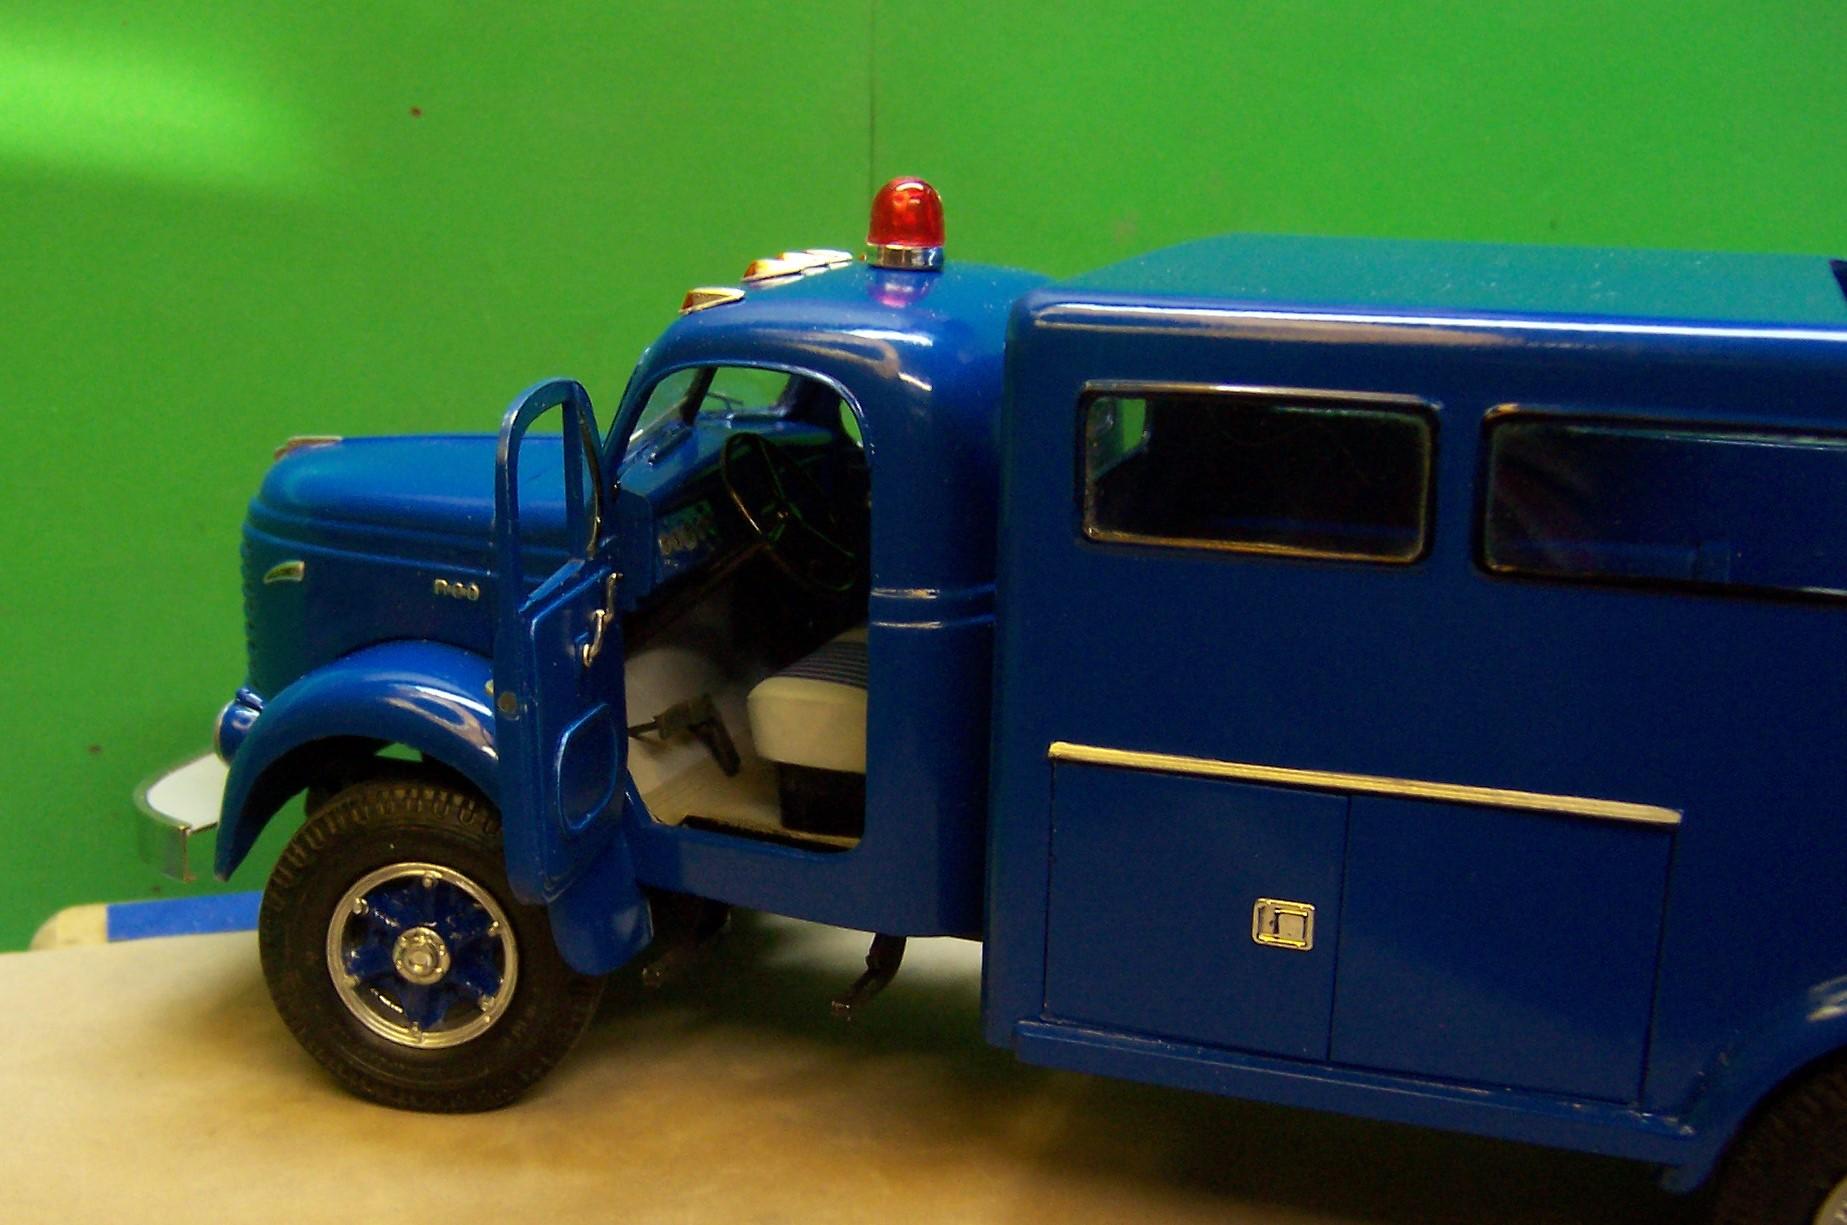
More work on the project. Bell and siren/light combo on the front bumper, steps, spotlights, rear tail and direction lights and body grab rails. The latter were a pain to bend. The aluminum rod tends to bend in one spot rather than take a nice radius. Perhaps because it is soft. Stanchions are crimp beads along with common pins and aluminum flashing for the mounting points.
-
Monogram 1926 Mack
Chariots of Fire replied to Straightliner59's topic in WIP: Model Trucks: Big Rigs and Heavy Equipment
I went to a show a few years back with my '37 Seagrave tractor drawn aerial. Before the show actually got underway I was putting things out on the table and two guys came up to me and said "boy those ladders look just like real wood". I said "Yes, I guess they do! That's because they are real wood"1 ?? -
Monogram 1926 Mack
Chariots of Fire replied to Straightliner59's topic in WIP: Model Trucks: Big Rigs and Heavy Equipment
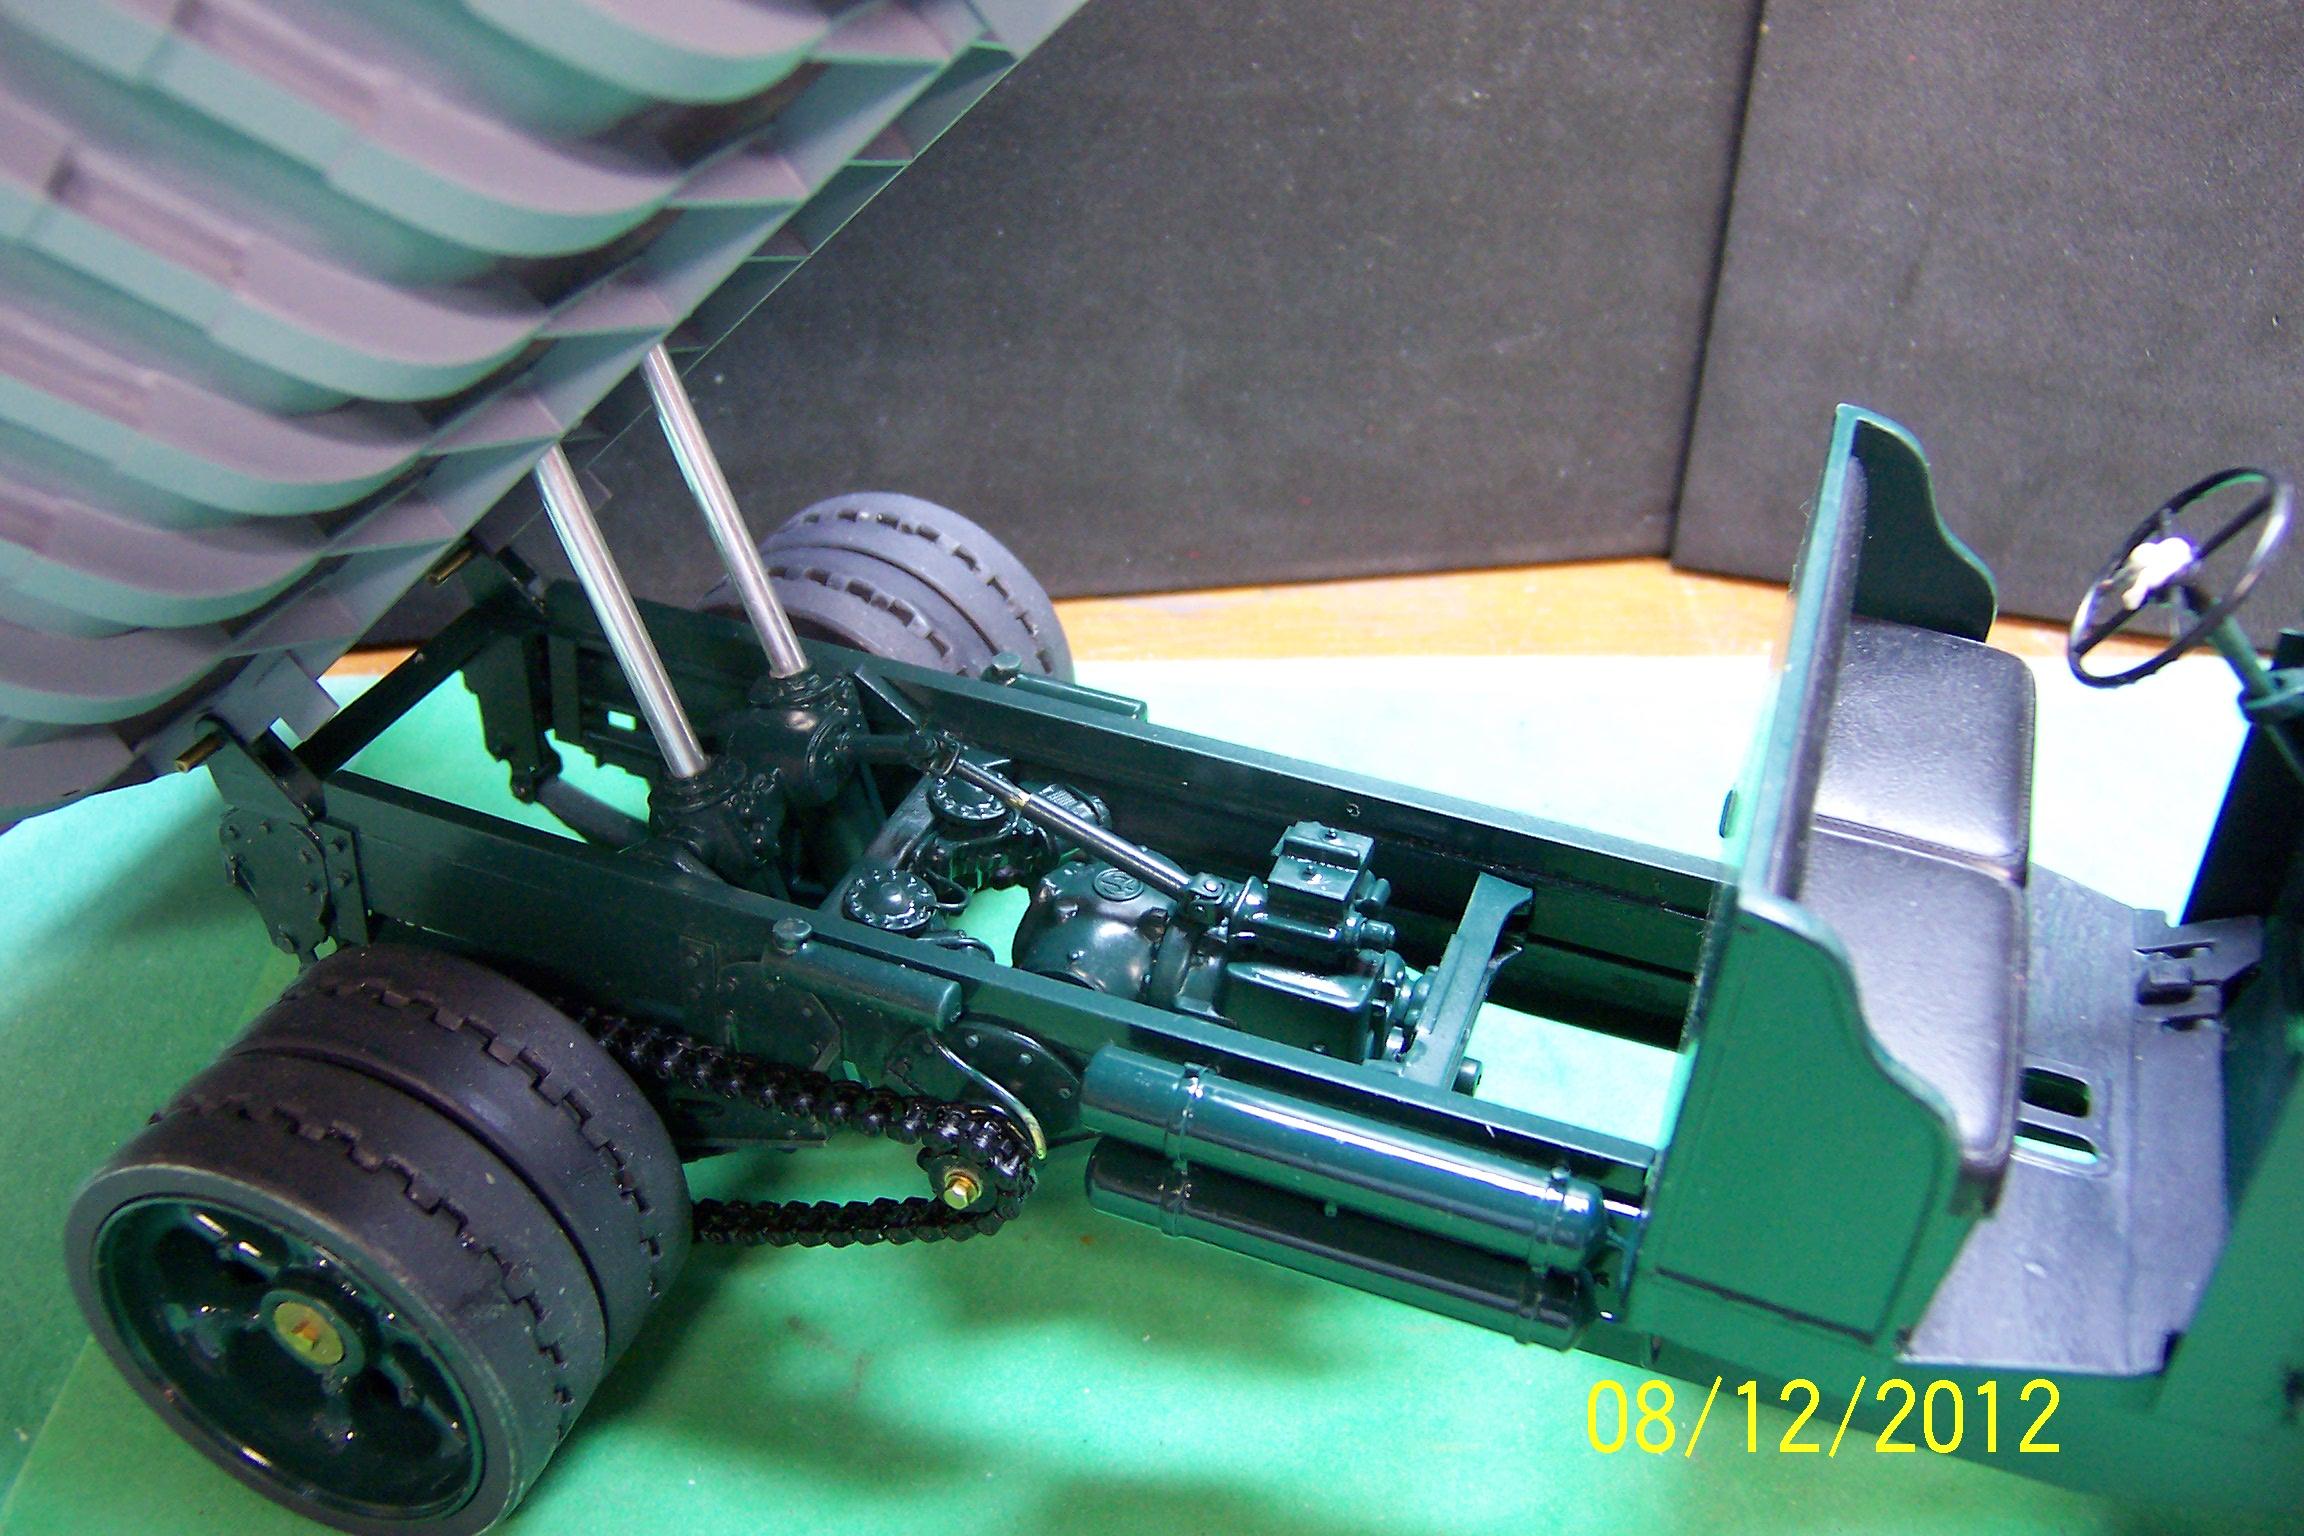
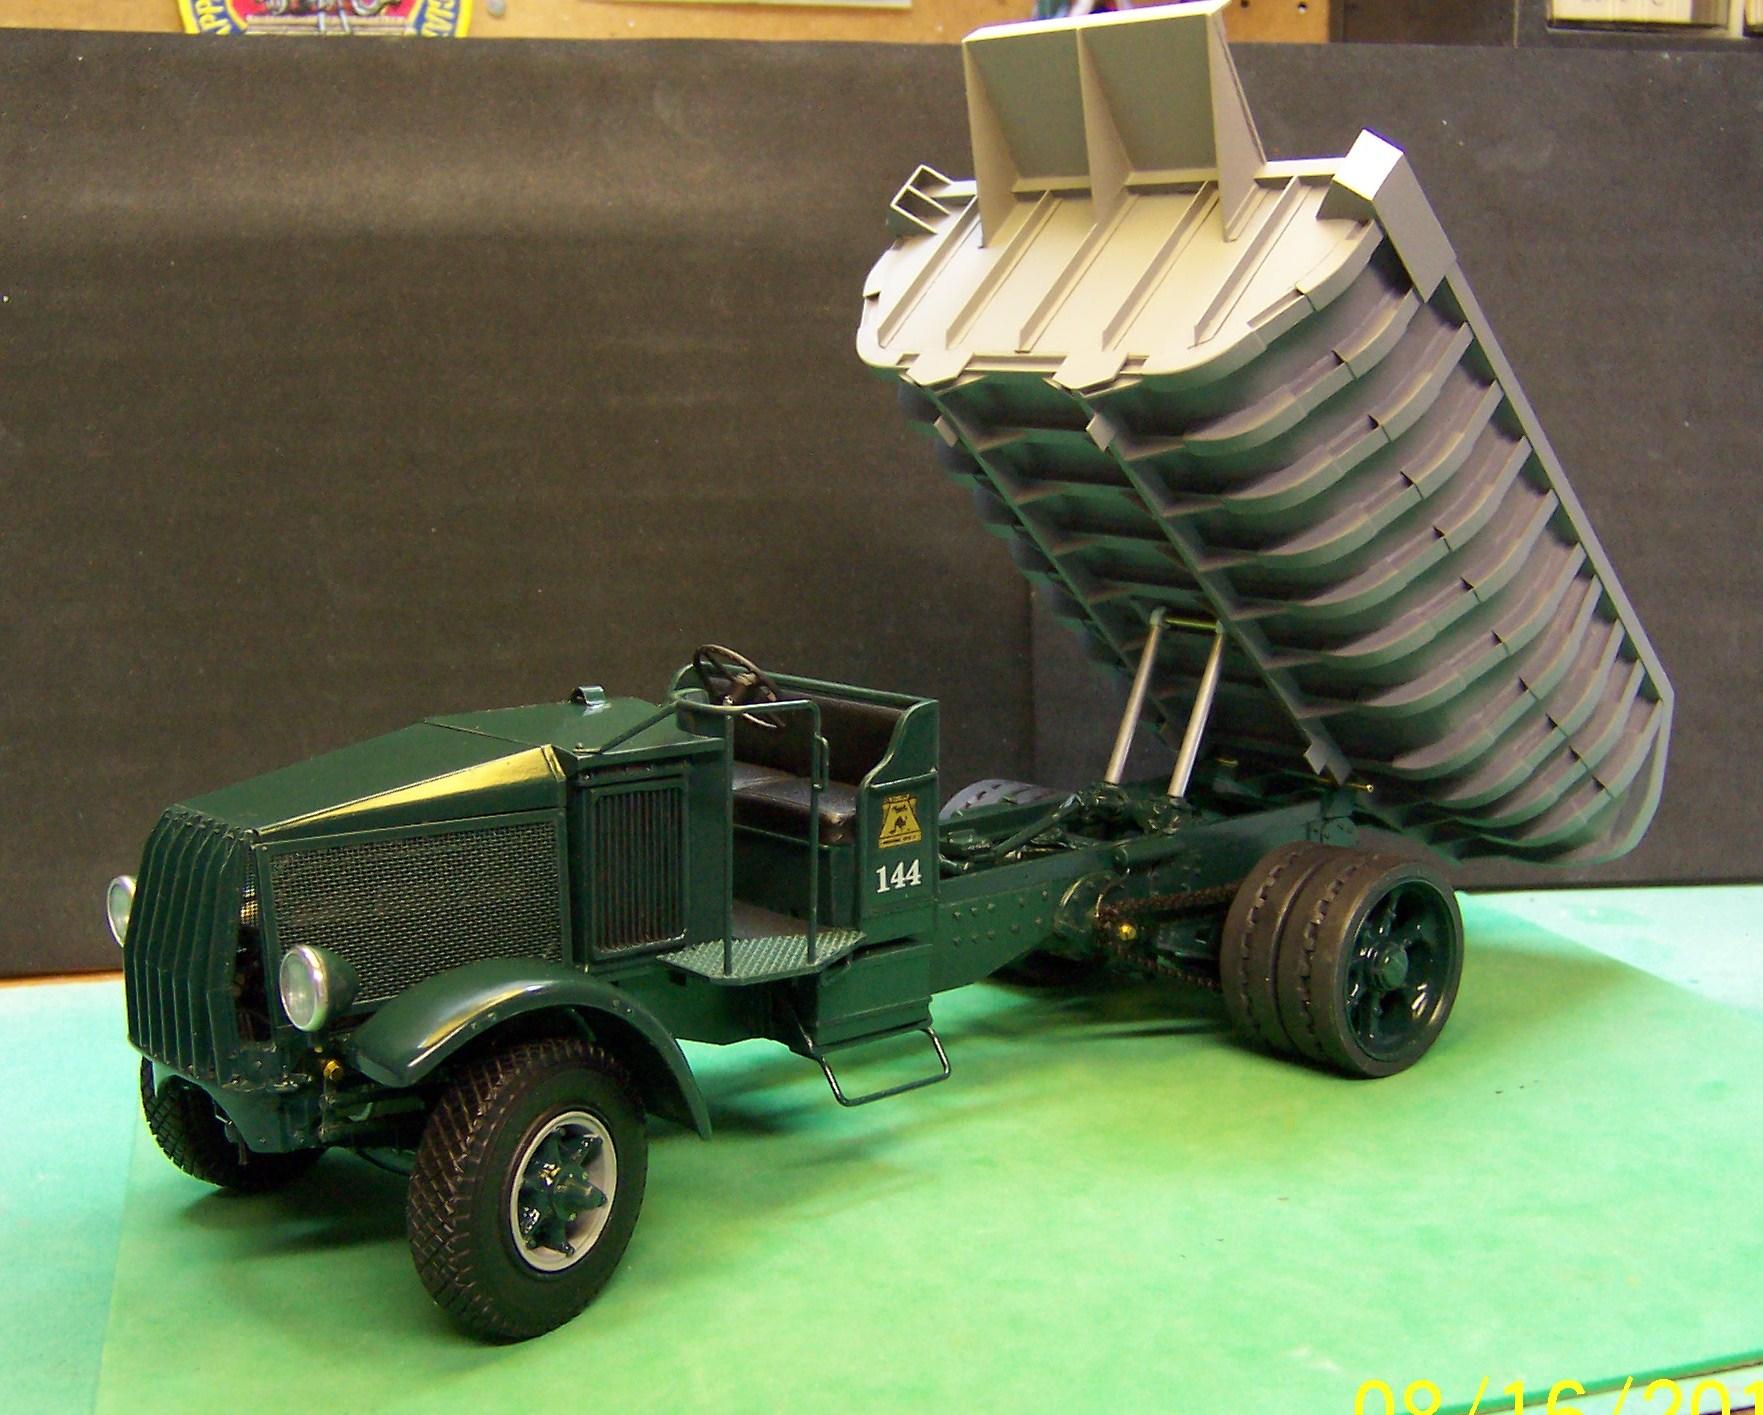
Now I see how you did your raising mechanism. Here's a look at how Mack did the similar thing for their AP's that were used in the construction of Boulder Dam. I don't know exactly what the lifting capacity of the system was but these were 12 cubic yard dump bodies. Rock fill weighs about 140 lb/cubic foot and there are 27 cubic feet to a cubic yard so when we tally it all up the weight of the payload alone is about 45,360 lb. or about 22.7 tons. And that does not include the body weight. Later versions had bodies made of aluminum which cut down the overall weight that has to be raised.
-
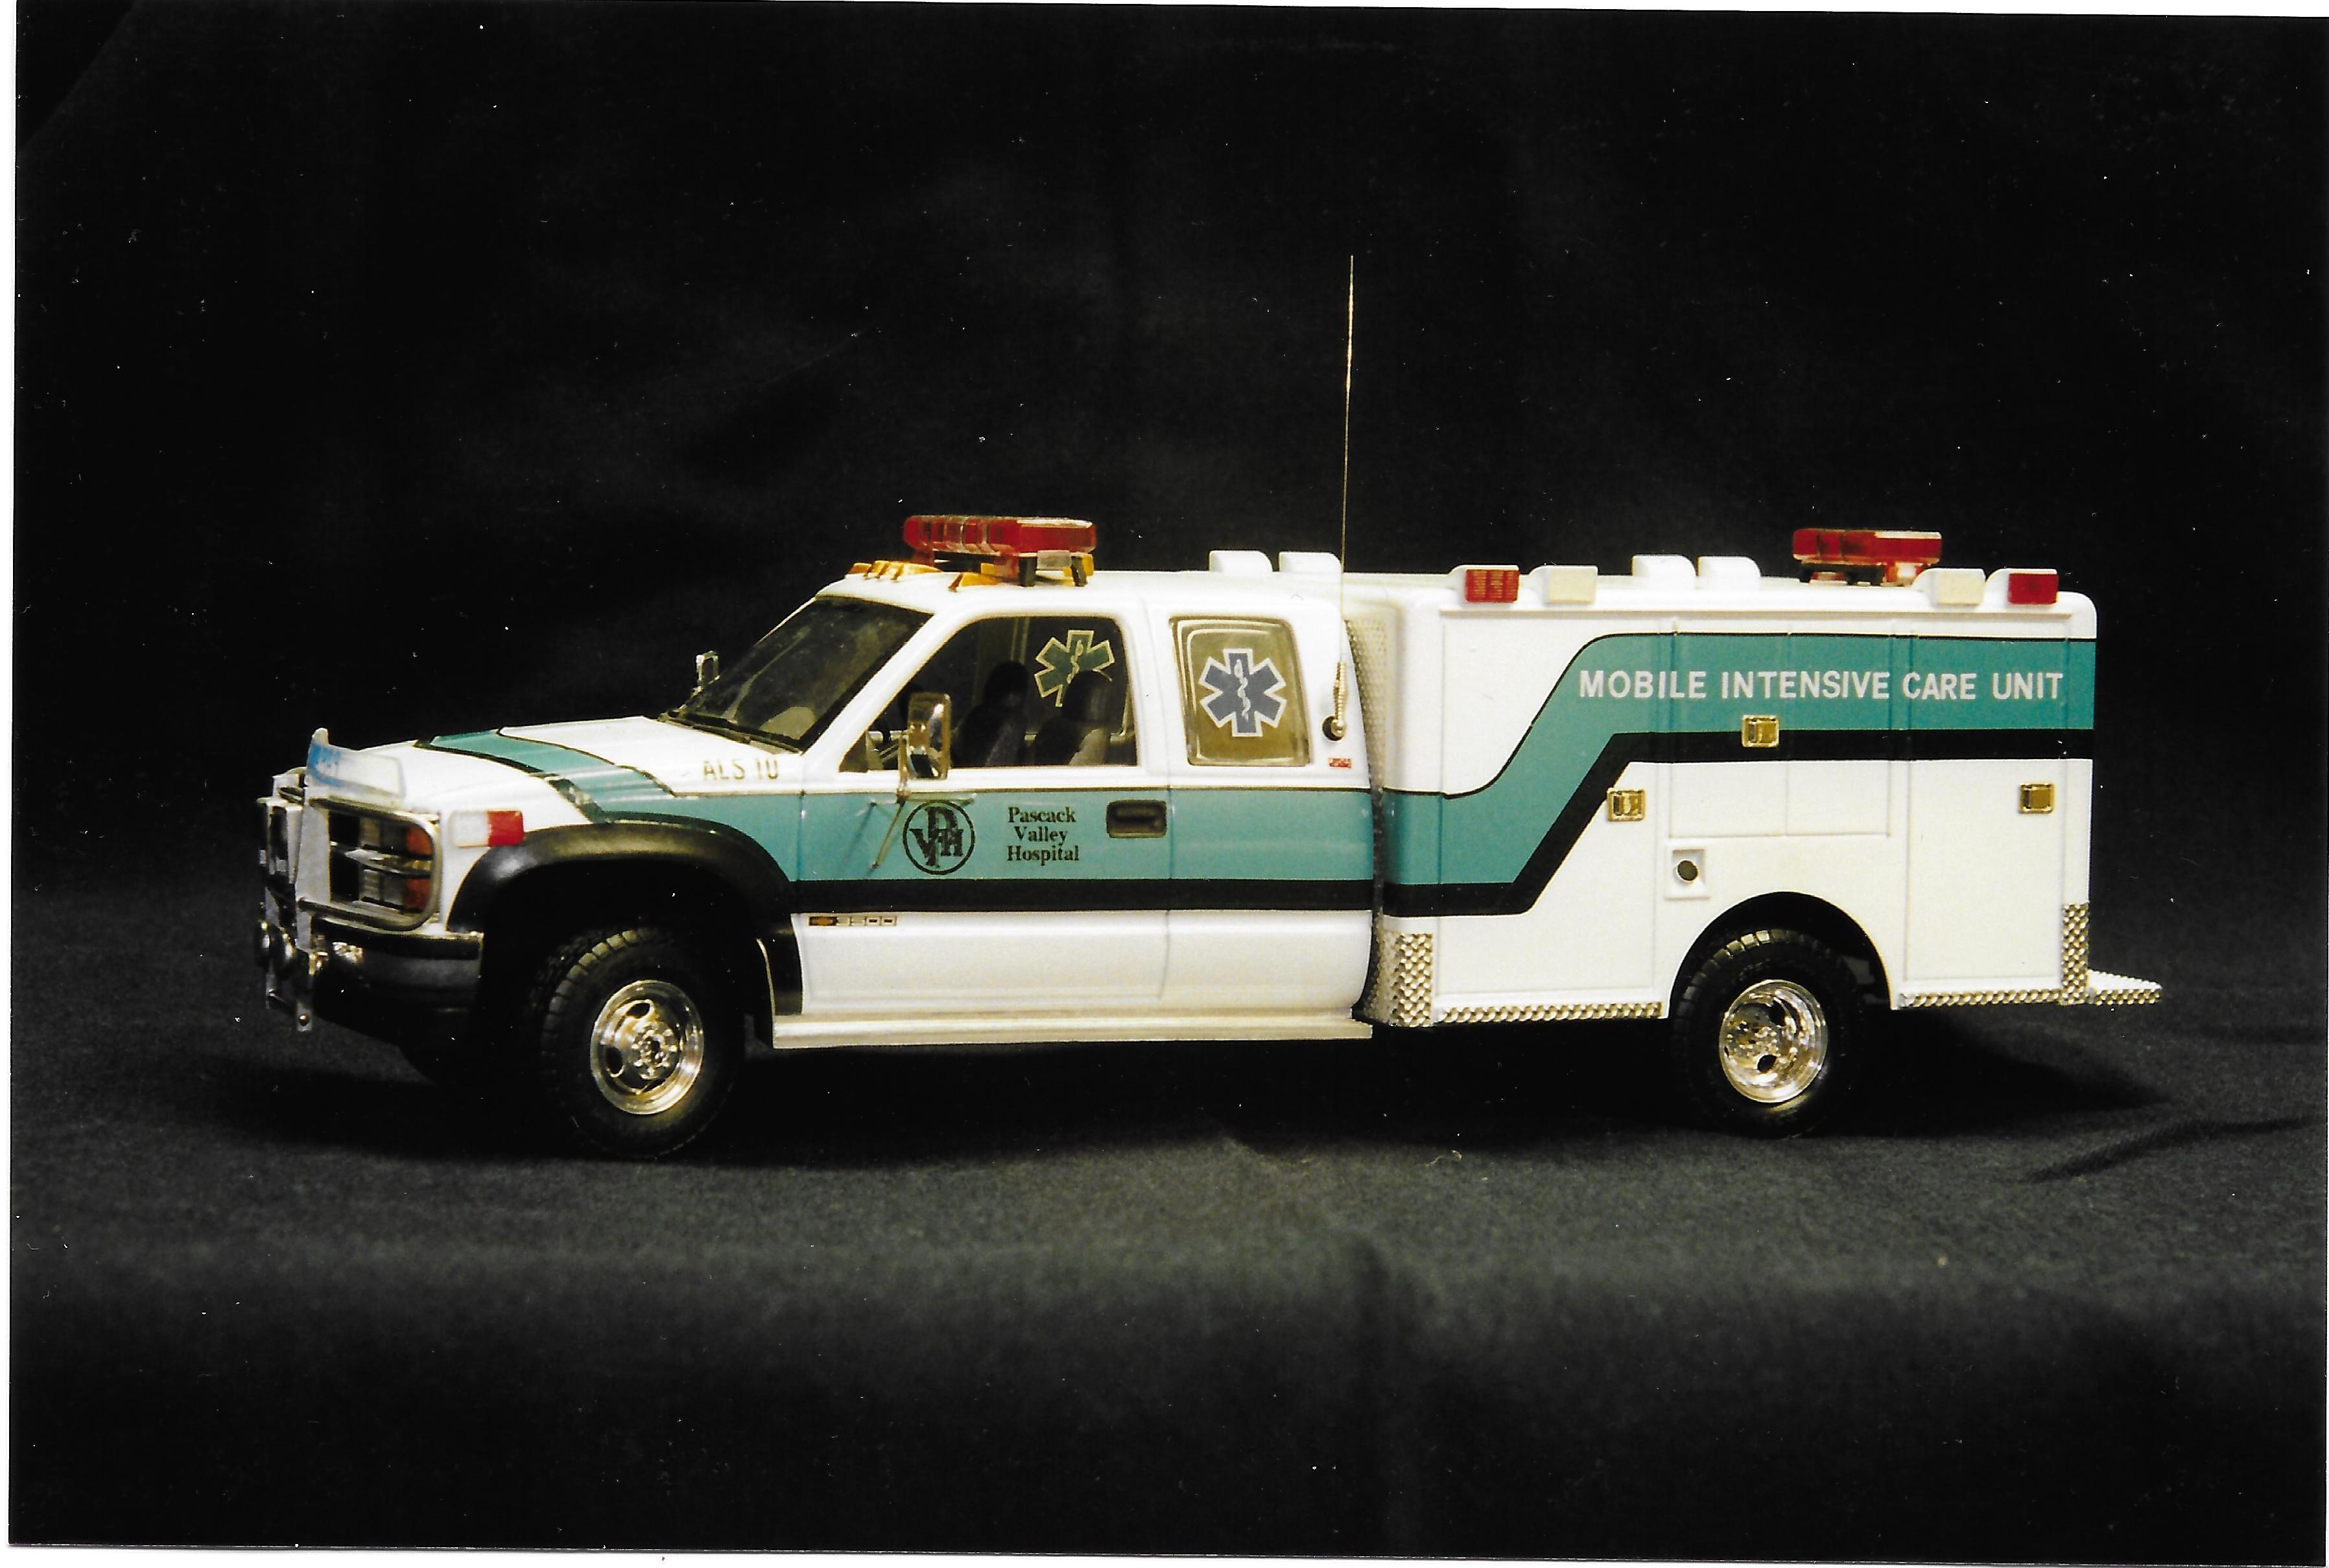
This one was done back in 1998. I had photos of the actual rig and went from there. Snap kit Chevy was a real good base to work from.
-
I like those wheels and tires as well! Just might have to pick up a set!
-
Reo Gold Comet
Chariots of Fire replied to Chariots of Fire's topic in WIP: Model Trucks: Big Rigs and Heavy Equipment
More small stuff being added each day. Today it was windshield wipers, front hood latches, interior door handles and window cranks, clearance lights and cab interior. The engine also needed to have the radiator hose connected now that the cab is permanently attached to the frame.
-
Looking for resin Dodge Truck cab.
Chariots of Fire replied to 1st 700 Quad's topic in Truck Aftermarket / Resin / 3D Printed
Nice rig from St. Clair Twp! -
Reo Gold Comet
Chariots of Fire replied to Chariots of Fire's topic in WIP: Model Trucks: Big Rigs and Heavy Equipment
Getting there, Dan. One little bit at a time!? -
Monogram 1926 Mack
Chariots of Fire replied to Straightliner59's topic in WIP: Model Trucks: Big Rigs and Heavy Equipment
A question Daniel. Does the hydraulic cylinder arrangement pivot on its axis? It needs to in order for the pistons to move along with the body when it is raised. The Mack AP that I did a few years back has the same equipment. Nice job! -
Reo Gold Comet
Chariots of Fire replied to Chariots of Fire's topic in WIP: Model Trucks: Big Rigs and Heavy Equipment
Just a little bit more done. Got some decal work done on the hood and it is now attached to the firewall. Dash is finished and awaiting installation. After that is done the steering wheel, shift lever, brake lever, pedals etc will be done. The seat still needs some work but it has been primed and is ready for final paint. Lots of small detail stuff from now on.
-
Mack Trident
Chariots of Fire replied to Hessel Hemstra's topic in WIP: Model Trucks: Big Rigs and Heavy Equipment
Nicely done and well executed! -
That's going to look like it should! Would you consider painting the pump panel flat black? If so, before the paint dries completely take a Qtip and go over the major components of the panel that are in relief. It will remove the black and leave the chrome. A VERY small dab of thinner would help. Here's an example of the results.
-
Reo Gold Comet
Chariots of Fire replied to Chariots of Fire's topic in WIP: Model Trucks: Big Rigs and Heavy Equipment
Here's what the magnets look like. Those are half inch long pins in the photo and a stack of the magnets to the right. I couldn't get the two individual ones closer without them snapping together! In the second photo you can see one of the magnets that have been embedded in the edge of the door.
-
Reo Gold Comet
Chariots of Fire replied to Chariots of Fire's topic in WIP: Model Trucks: Big Rigs and Heavy Equipment
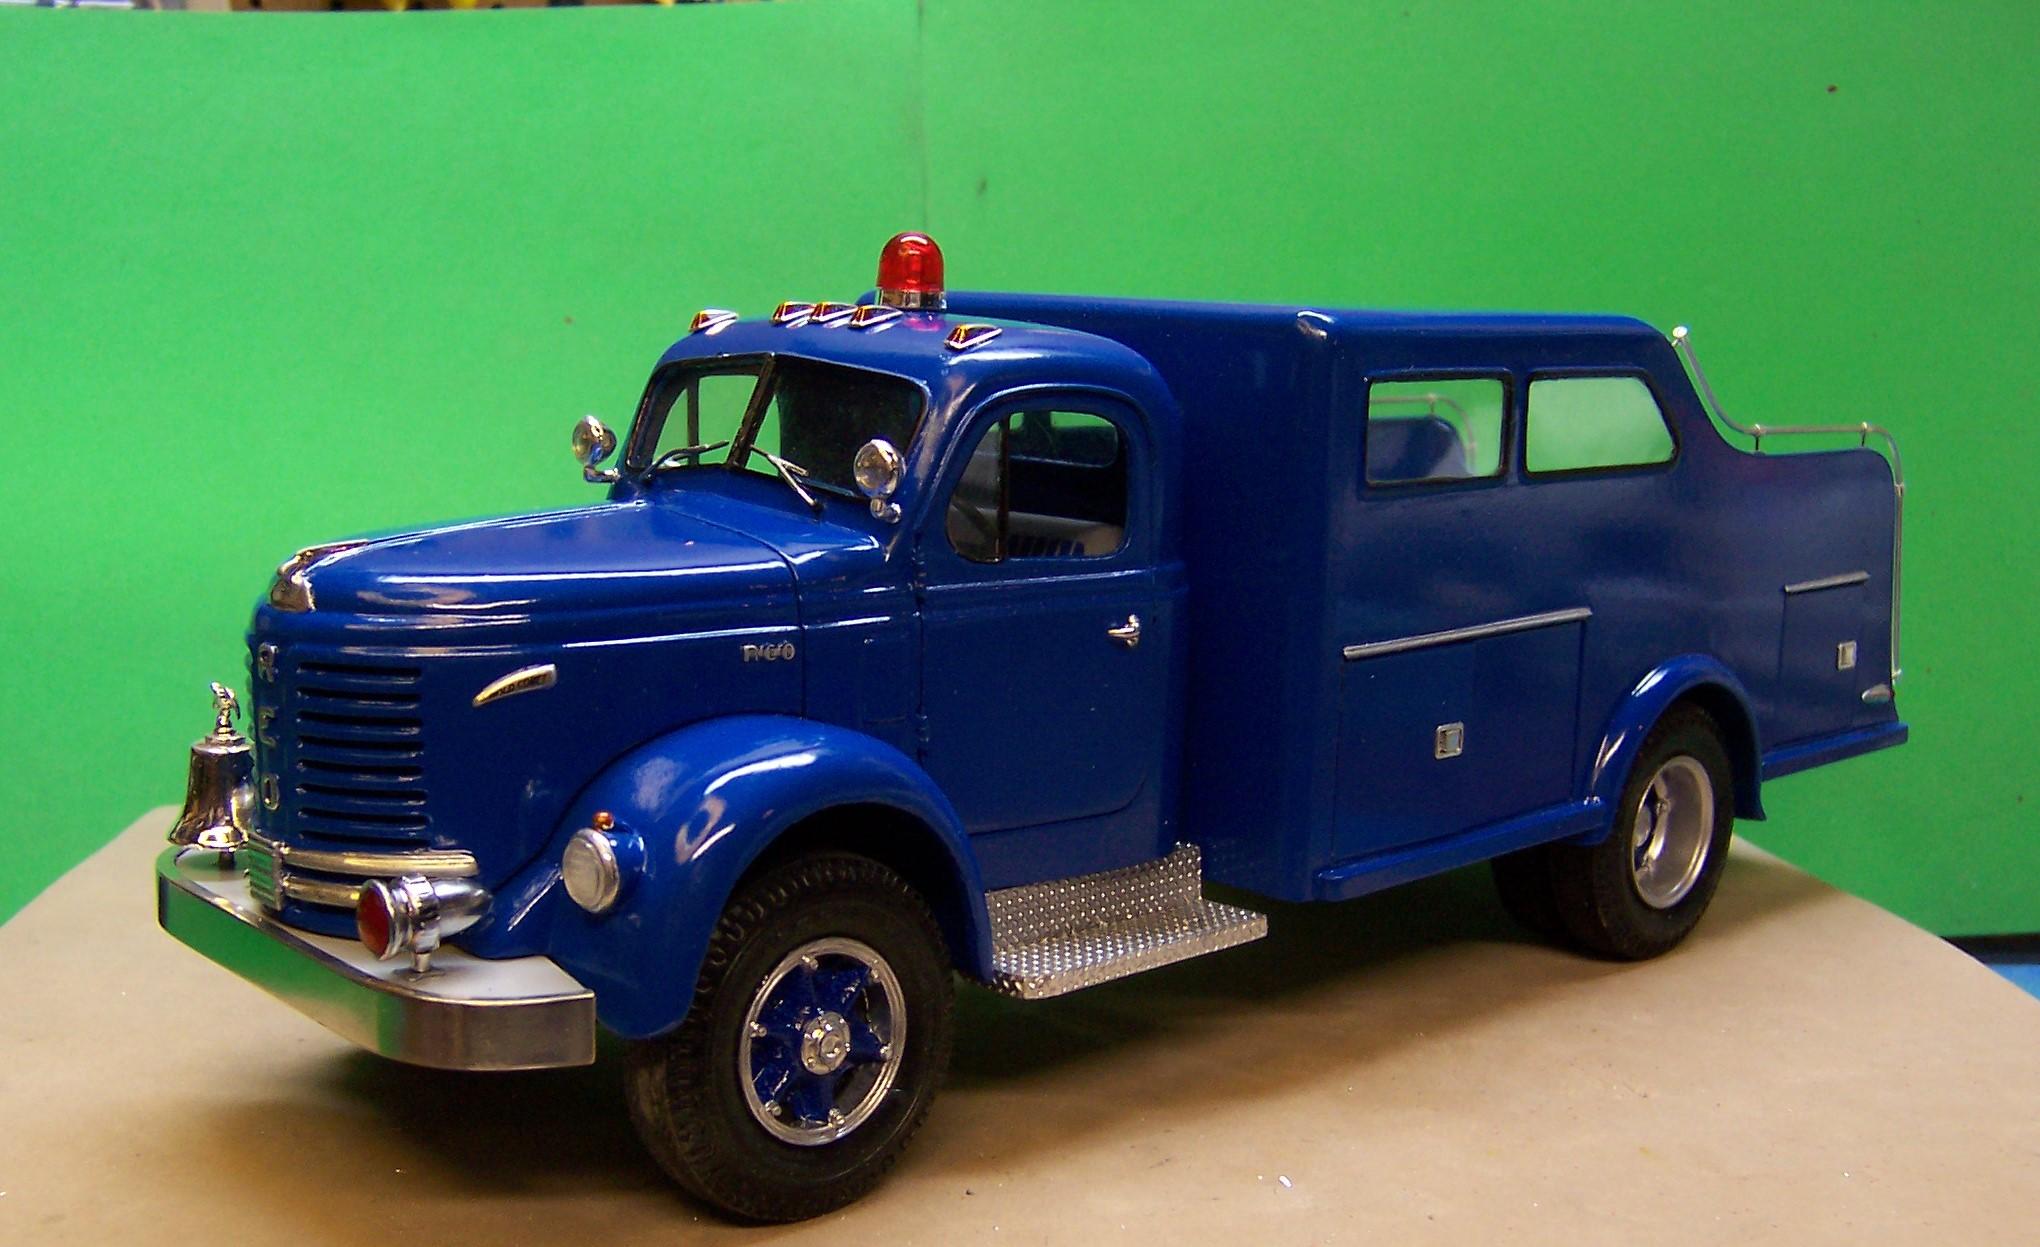
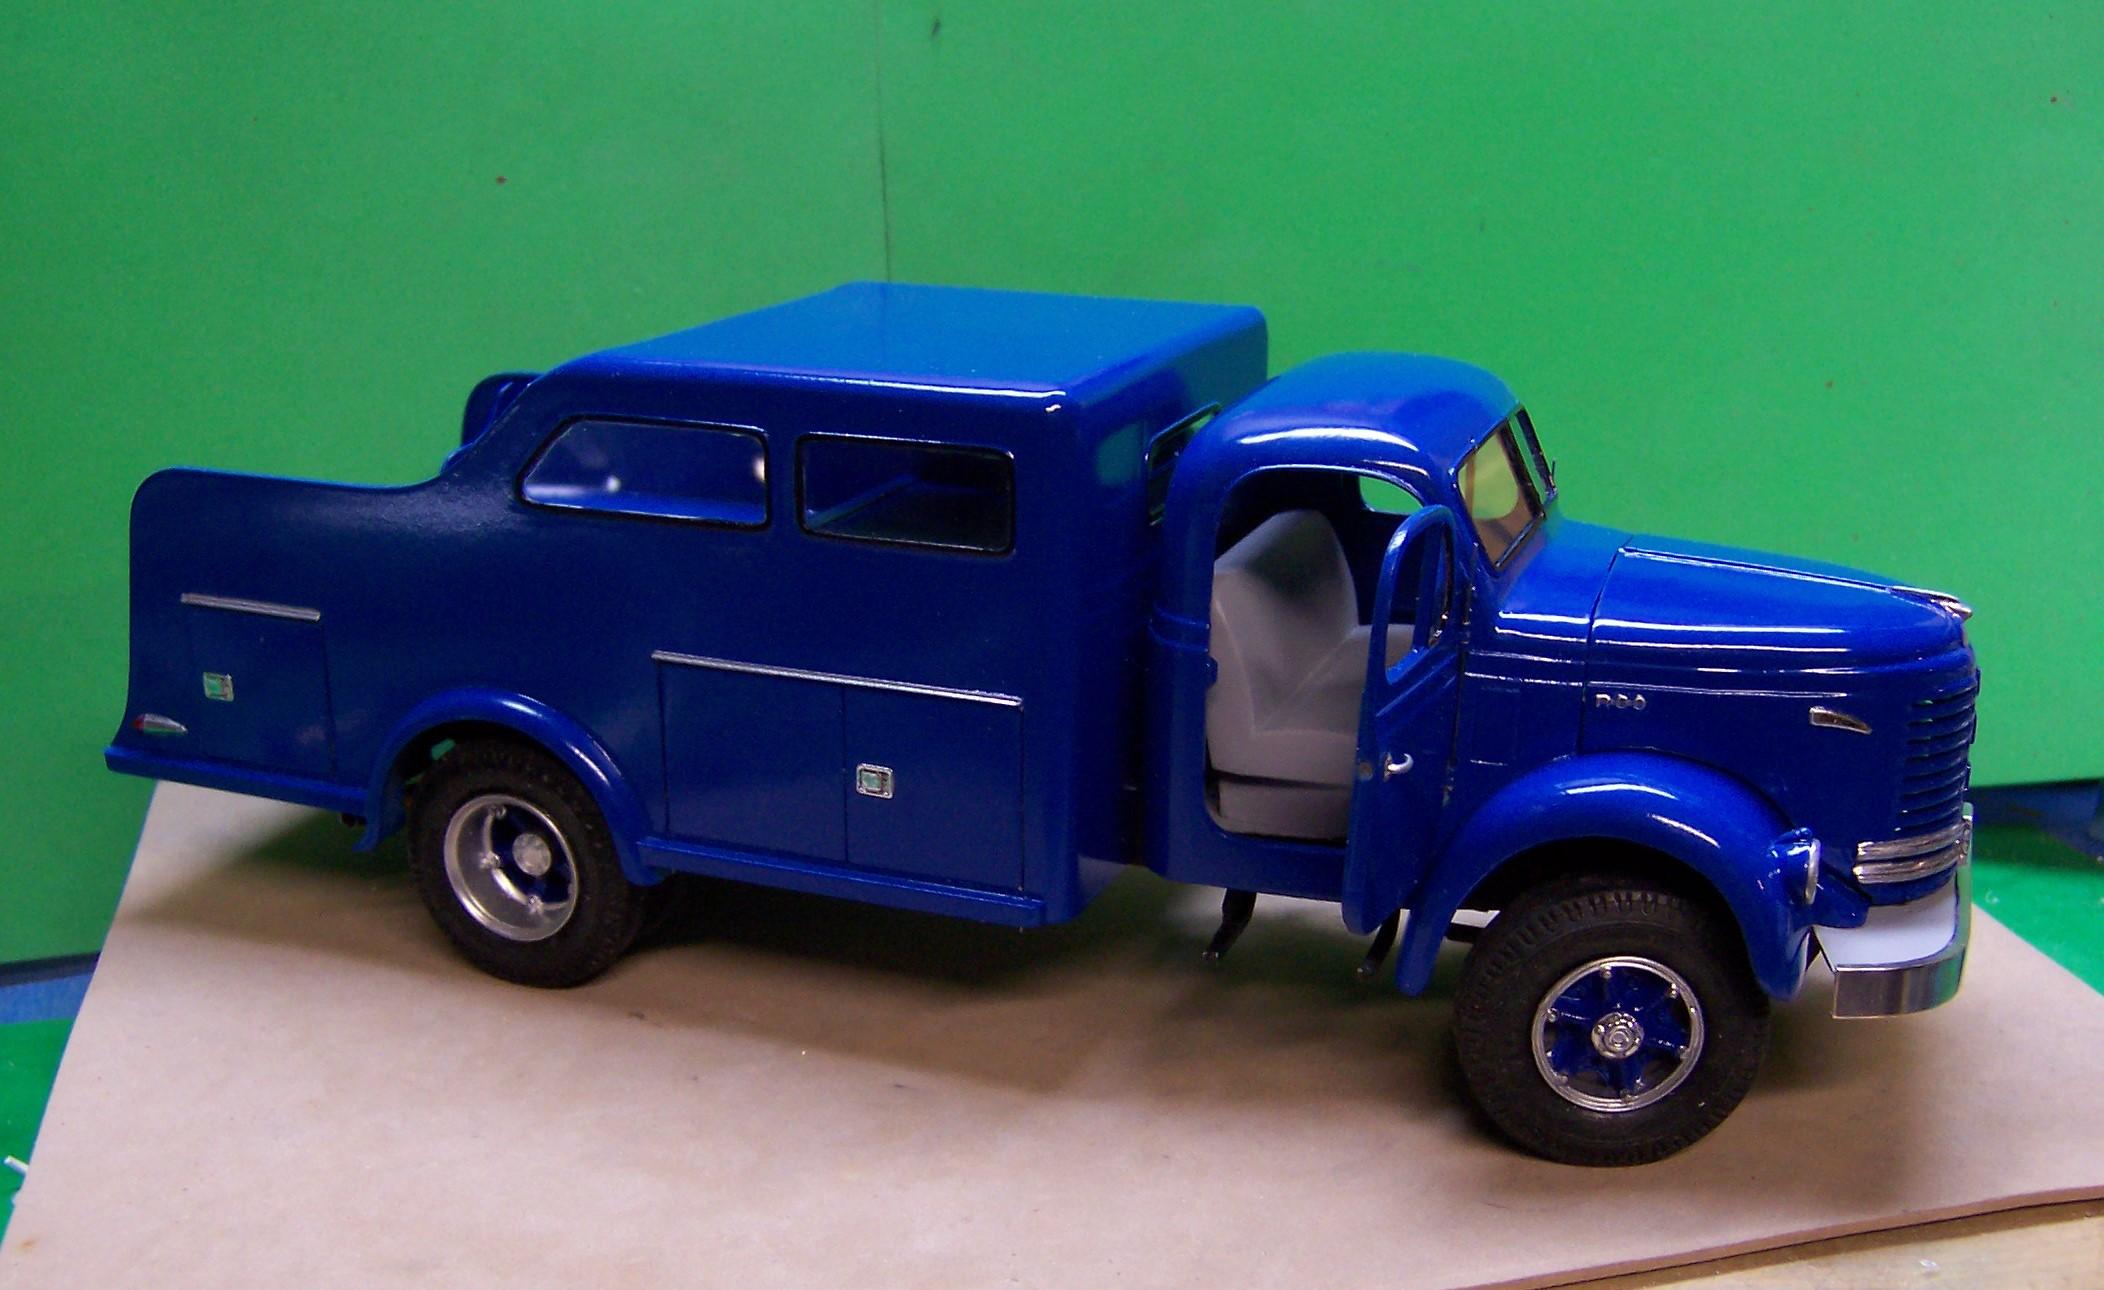
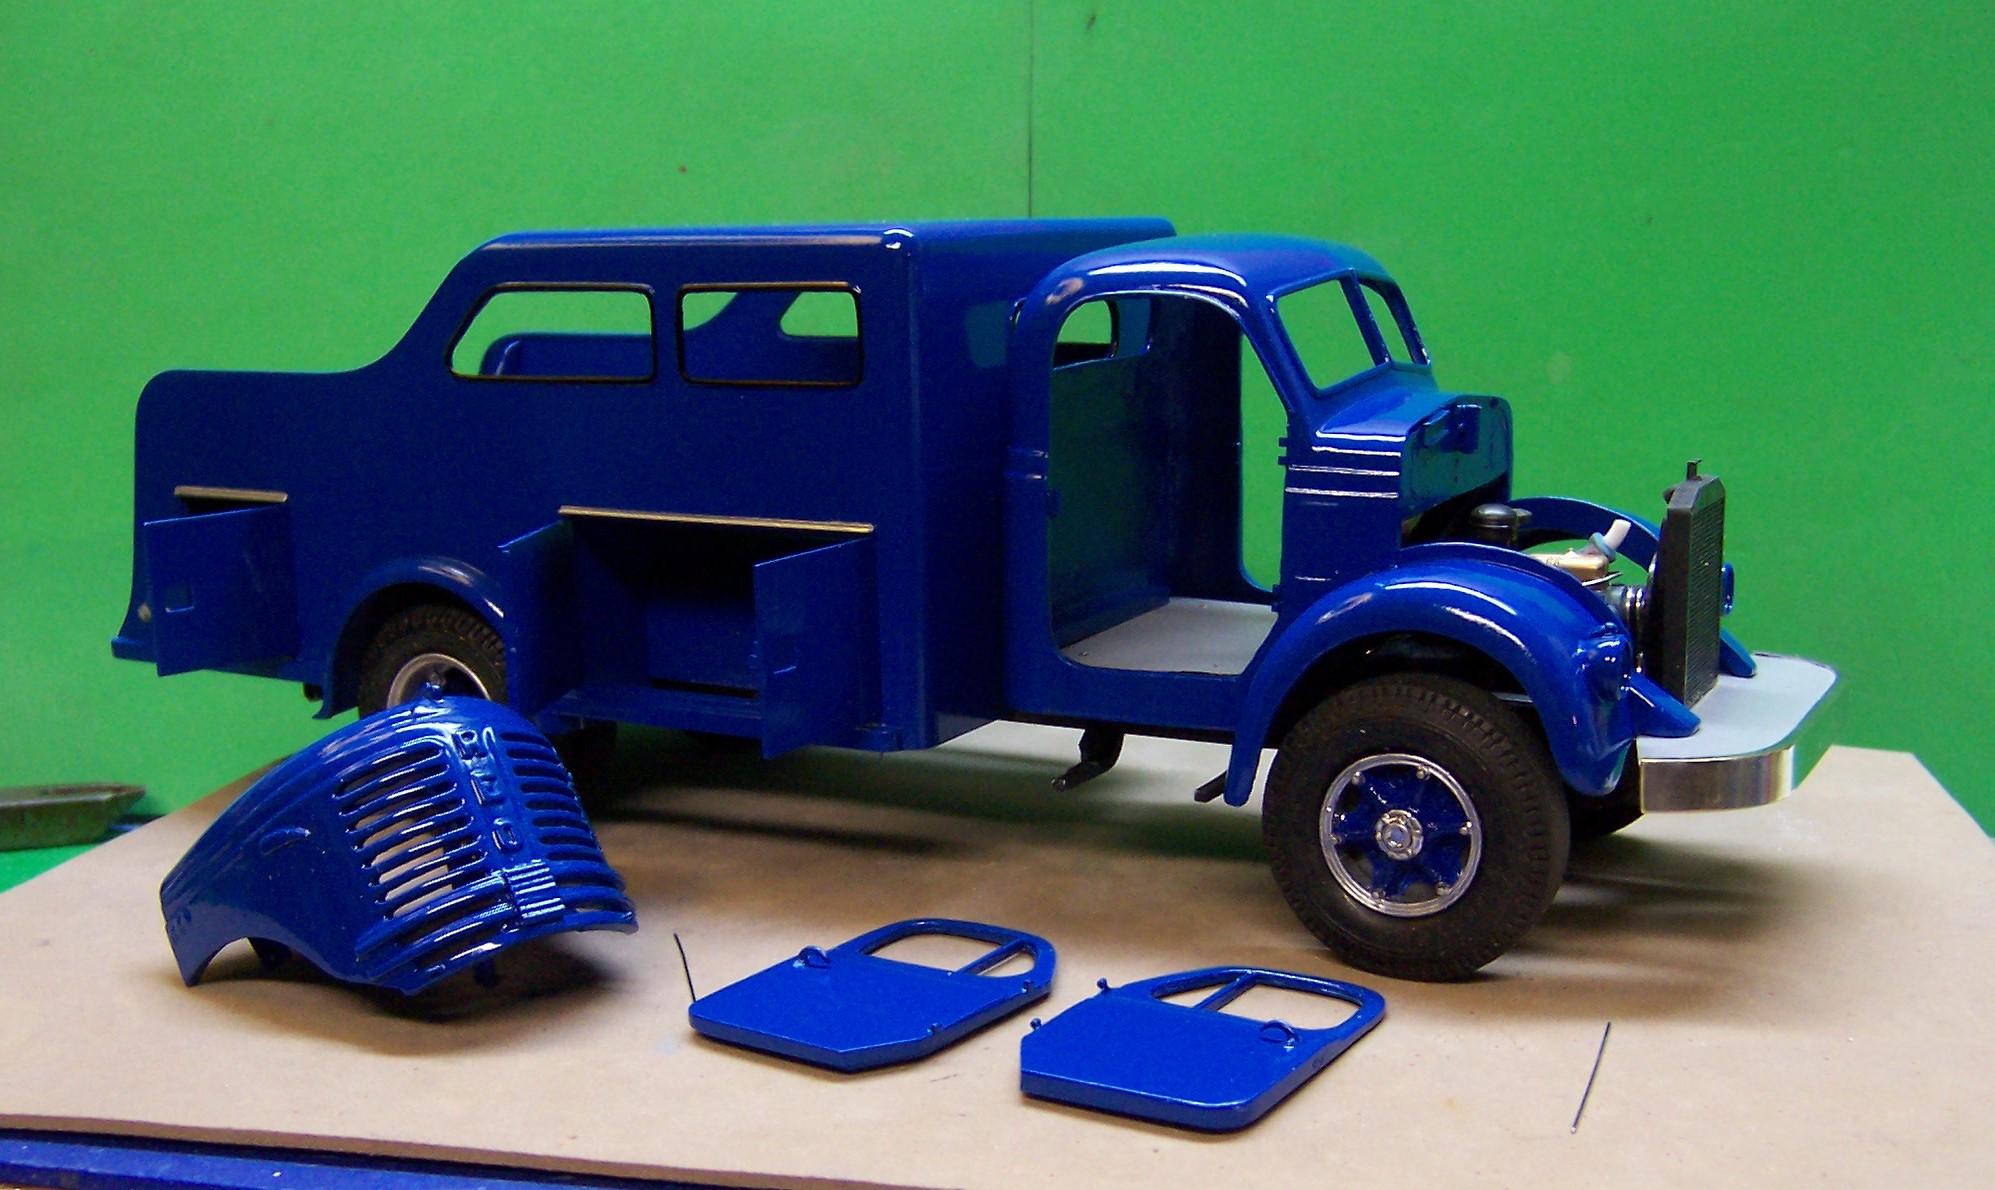
This has been paint week. I say week because it has taken me all week to get it somewhere near right! My work area is very dry and as a result static electricity really builds up. So after each sanding the parts had to be scrubbed with detergent and allowed to air dry. Then I could paint the pieces. One of the things that always crops up when doing models with opening doors is that paint builds up around the edges and makes it difficult to put the parts back together. I found a solution for the compartment doors that helped some. I sanded the paint off the brass tubing used as the hinge. Using a blue magic marker I "repainted" the tubing to color it with a thin film of color. This made it possible to open and close the doors without rubbing the paint off the hinge point. And I got a bit of chrome work done as well. I used a 2mm Molotow pen to do the headlight trim rings but not the REO letters or hood ornament. Instead I dropped a blob of the Molotow paint on a piece of paper and used a fine brush to apply it. The brush works really well. The two bars at the bottom of the hood were done with the pen.
-
Monogram 1926 Mack
Chariots of Fire replied to Straightliner59's topic in WIP: Model Trucks: Big Rigs and Heavy Equipment
Daniel: To be in the same category as Joe Cavorley is an honor. I've learned that working with kit pieces sometimes requires some shaving and sanding to get the fit right. The assumption that they should go together without any hitches just is not so. These kits have been around for a while as well and are based on molds that were probably made long before CNC machines and the intricate detailing of today. Trial and error fitting with small adjustments at a time are the way to cure the bad fit. JMHO!? -
Reo Gold Comet
Chariots of Fire replied to Chariots of Fire's topic in WIP: Model Trucks: Big Rigs and Heavy Equipment
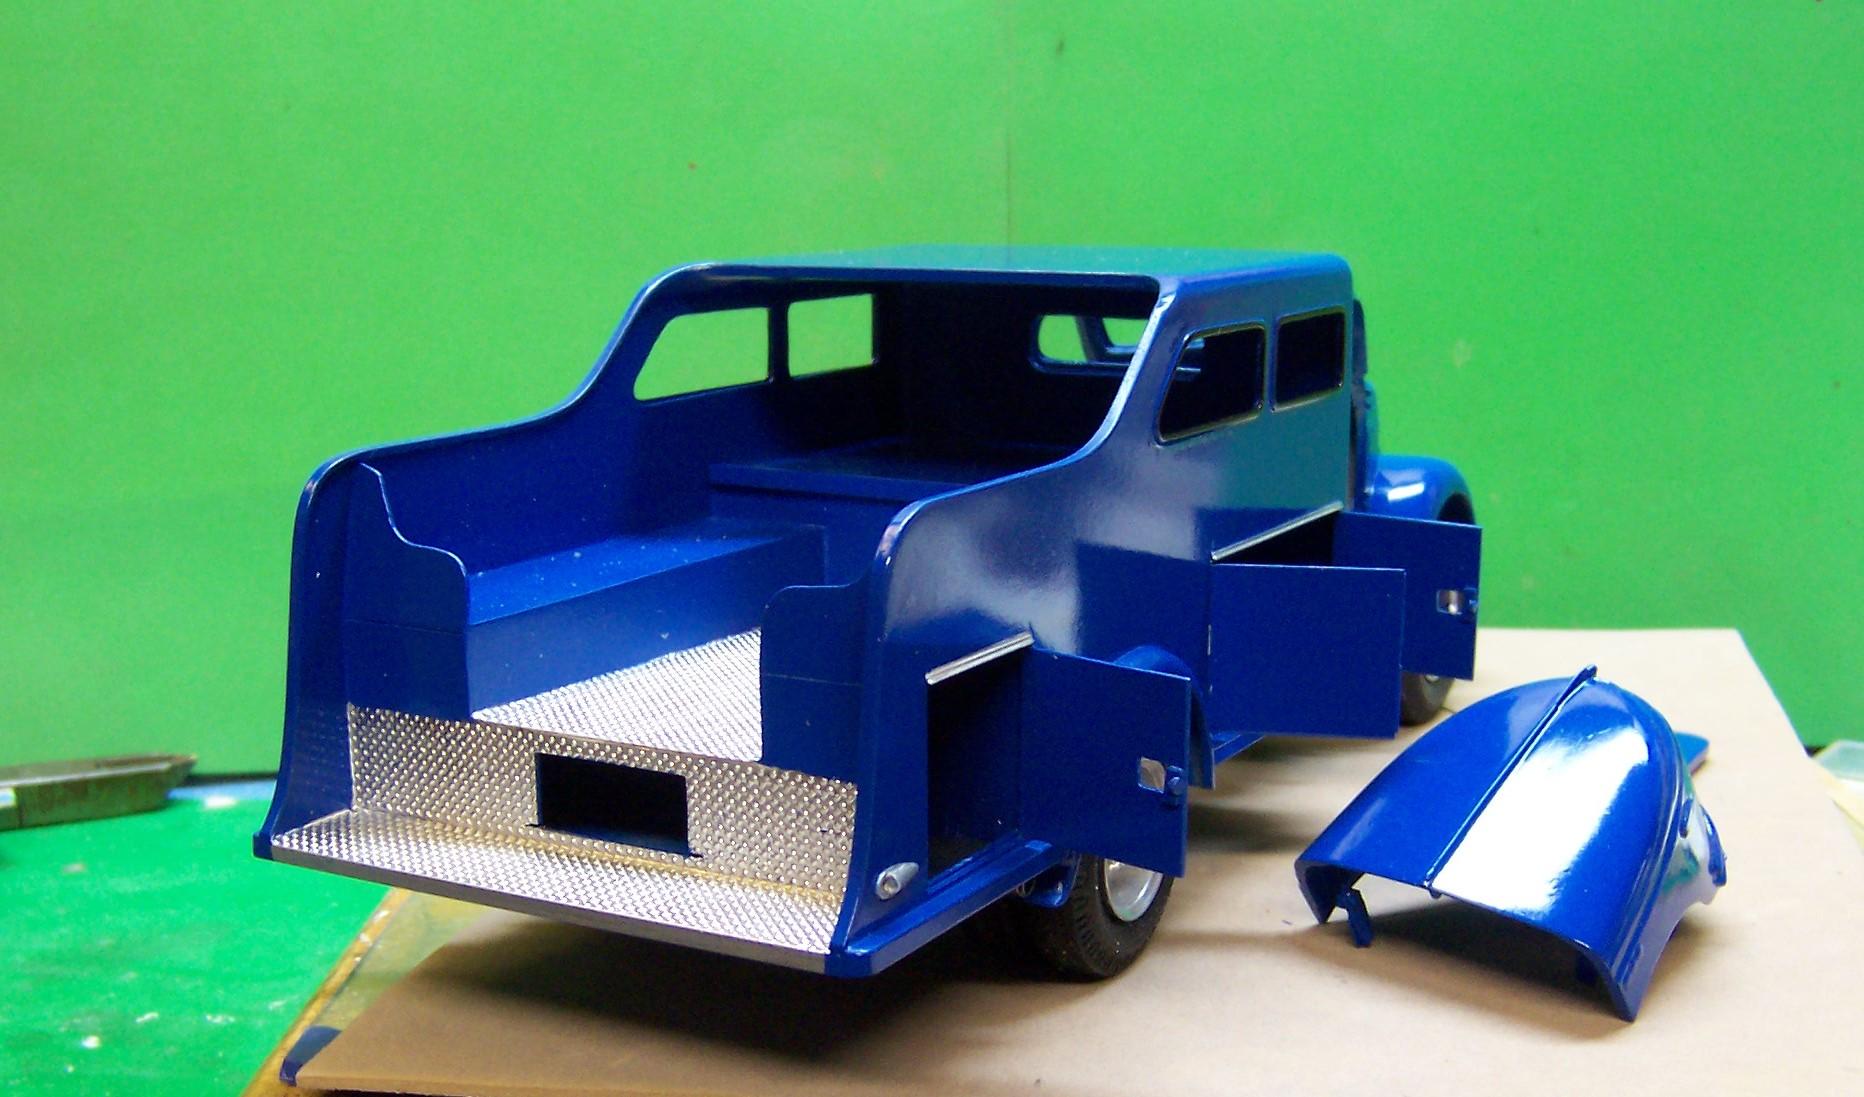
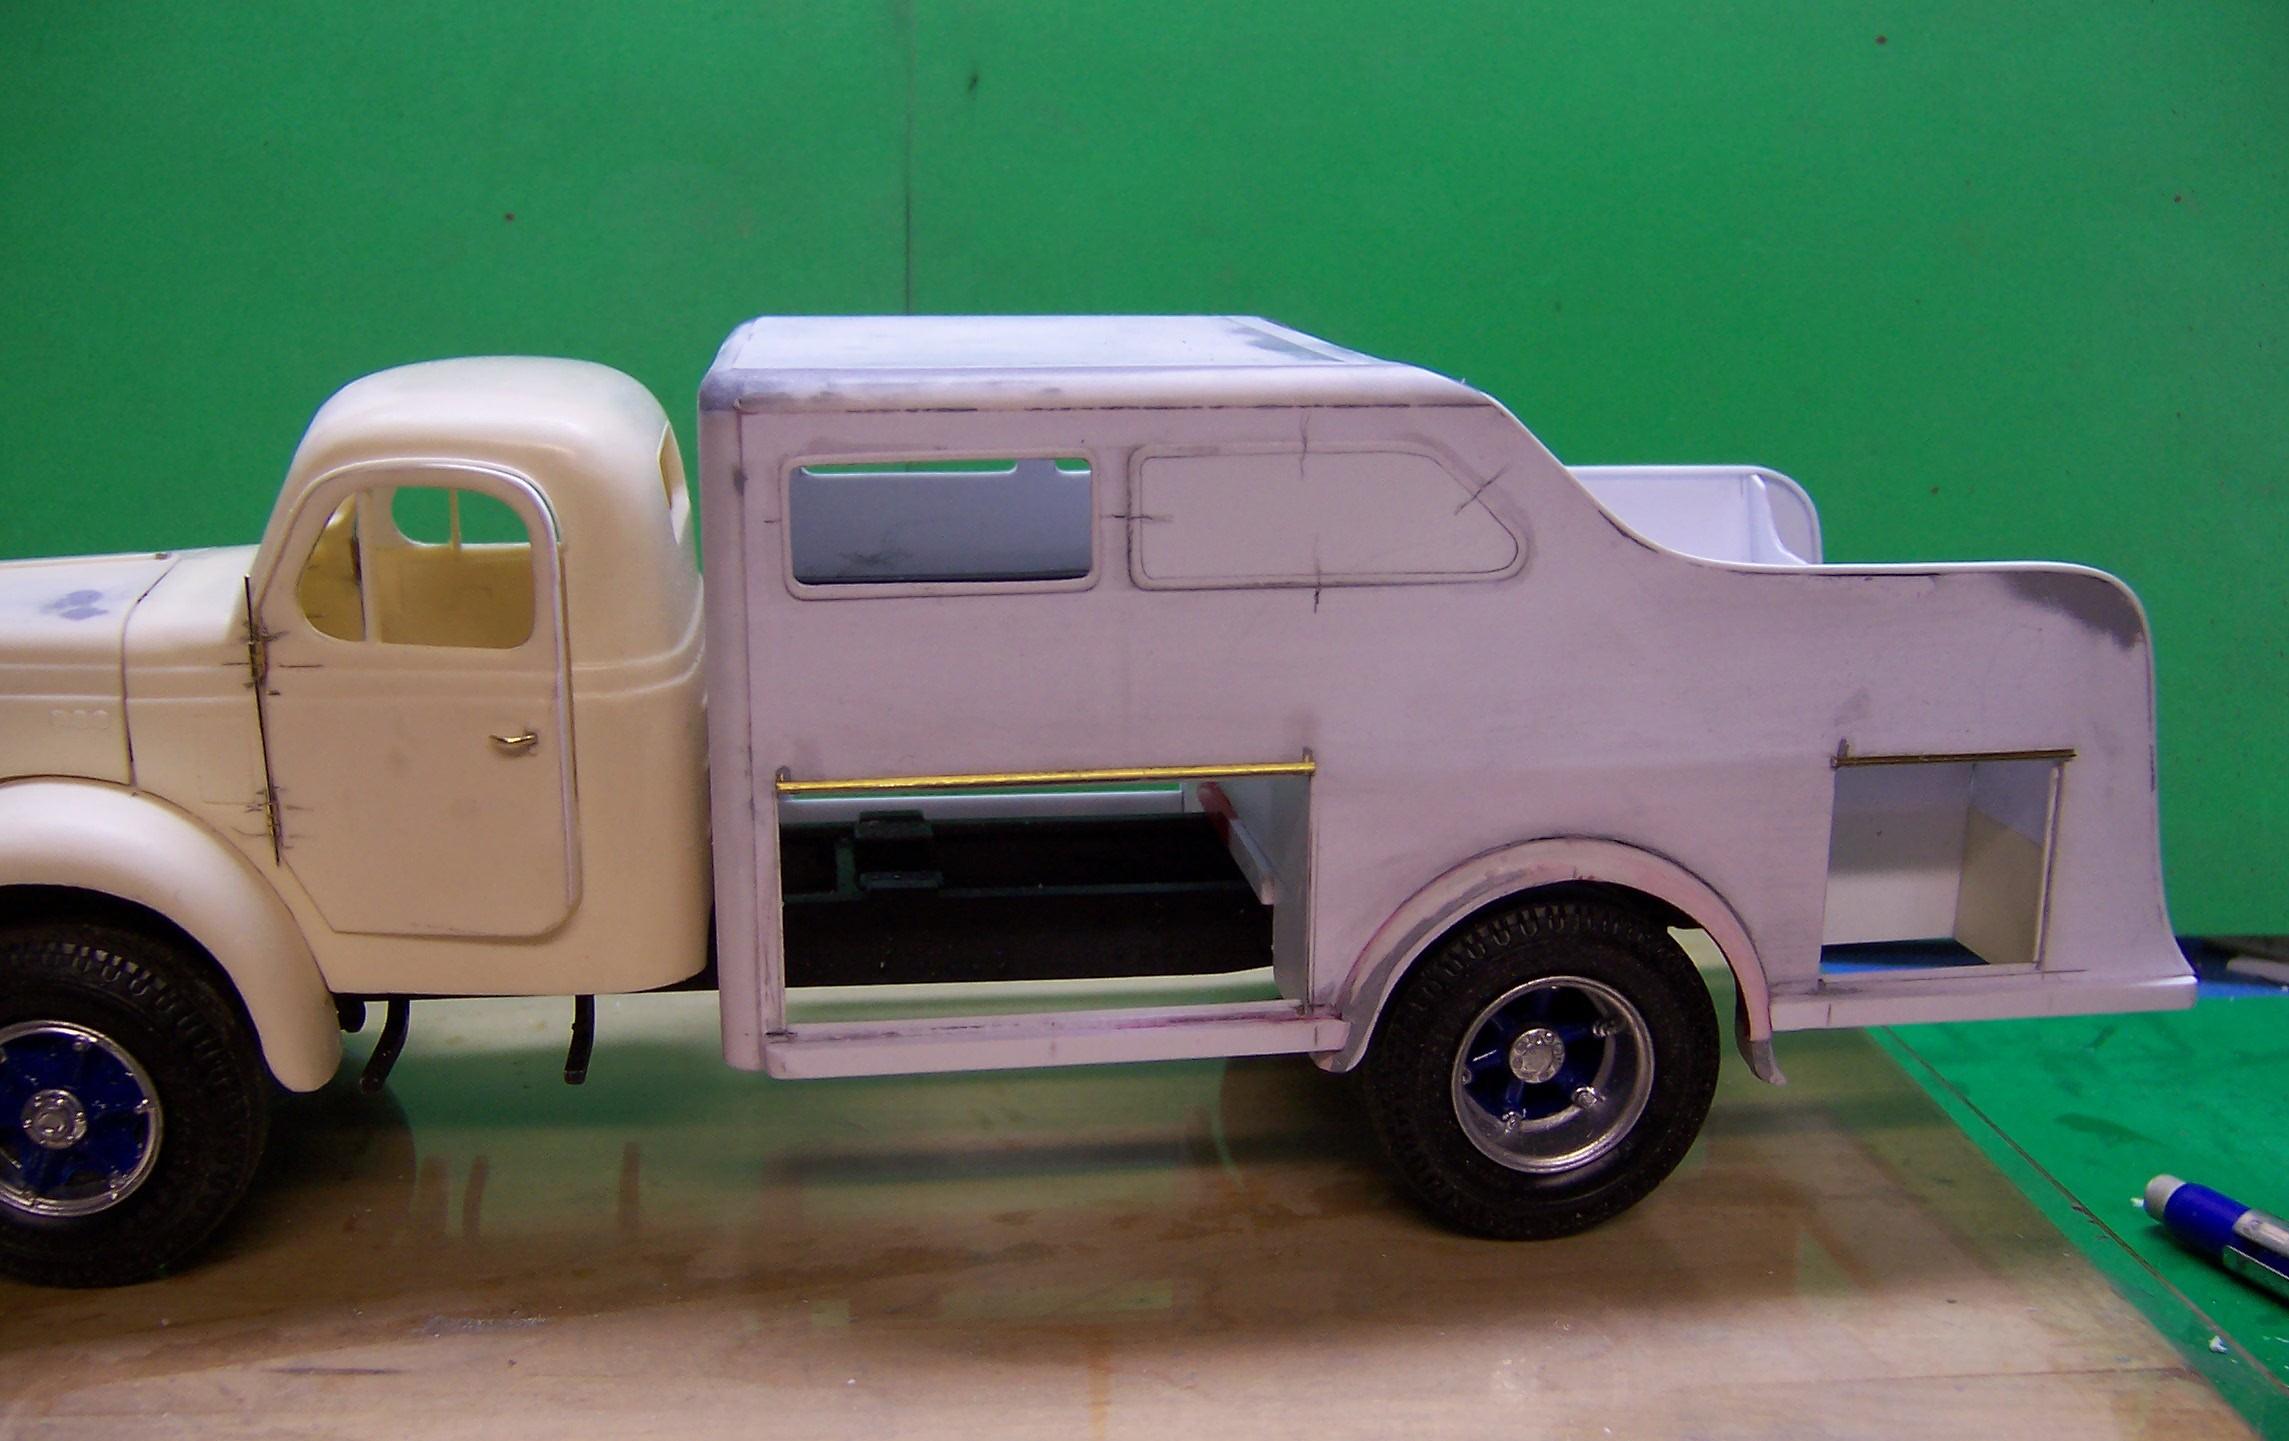
Hello, Juergen: Will try and explain. Once the window was opened up I placed a piece of 0.020 thick sheet stock on the inside and traced the opening. While it was on the inside I drew pencil marks on the stock and a similar mark on the outside on the body to give me positive location points. Then I drew concentric lines around the outside the thickness of what I wanted the gasket to be and trimmed it to shape. After shaping I rounded off the outside edges and sanded them smooth. Using the pencil locator lines, the gasket is placed on the body and glued all around the outside. See the photo below. When the glue was set I cut out the inside being careful to follow the interior lines and keeping them parallel to the outside. This process leaves a small ledge on the inside of the gasket for the clear window glass to rest against. I use 5 minute epoxy to set them in place but allowing the epoxy to set up until it is tacky before I do. Doing this eliminates the chance of the epoxy running onto the clear window glass. Hope this helps.
-
It's fun to see things like this come to fruition. It's amazing the variety of parts and details that can be done with a bit of effort. I'll give you an example of a side marker light I made for the Port Vue Reo. I have to take a couple of photos but it was pretty easy to make and now to cast.
-
Reo Gold Comet
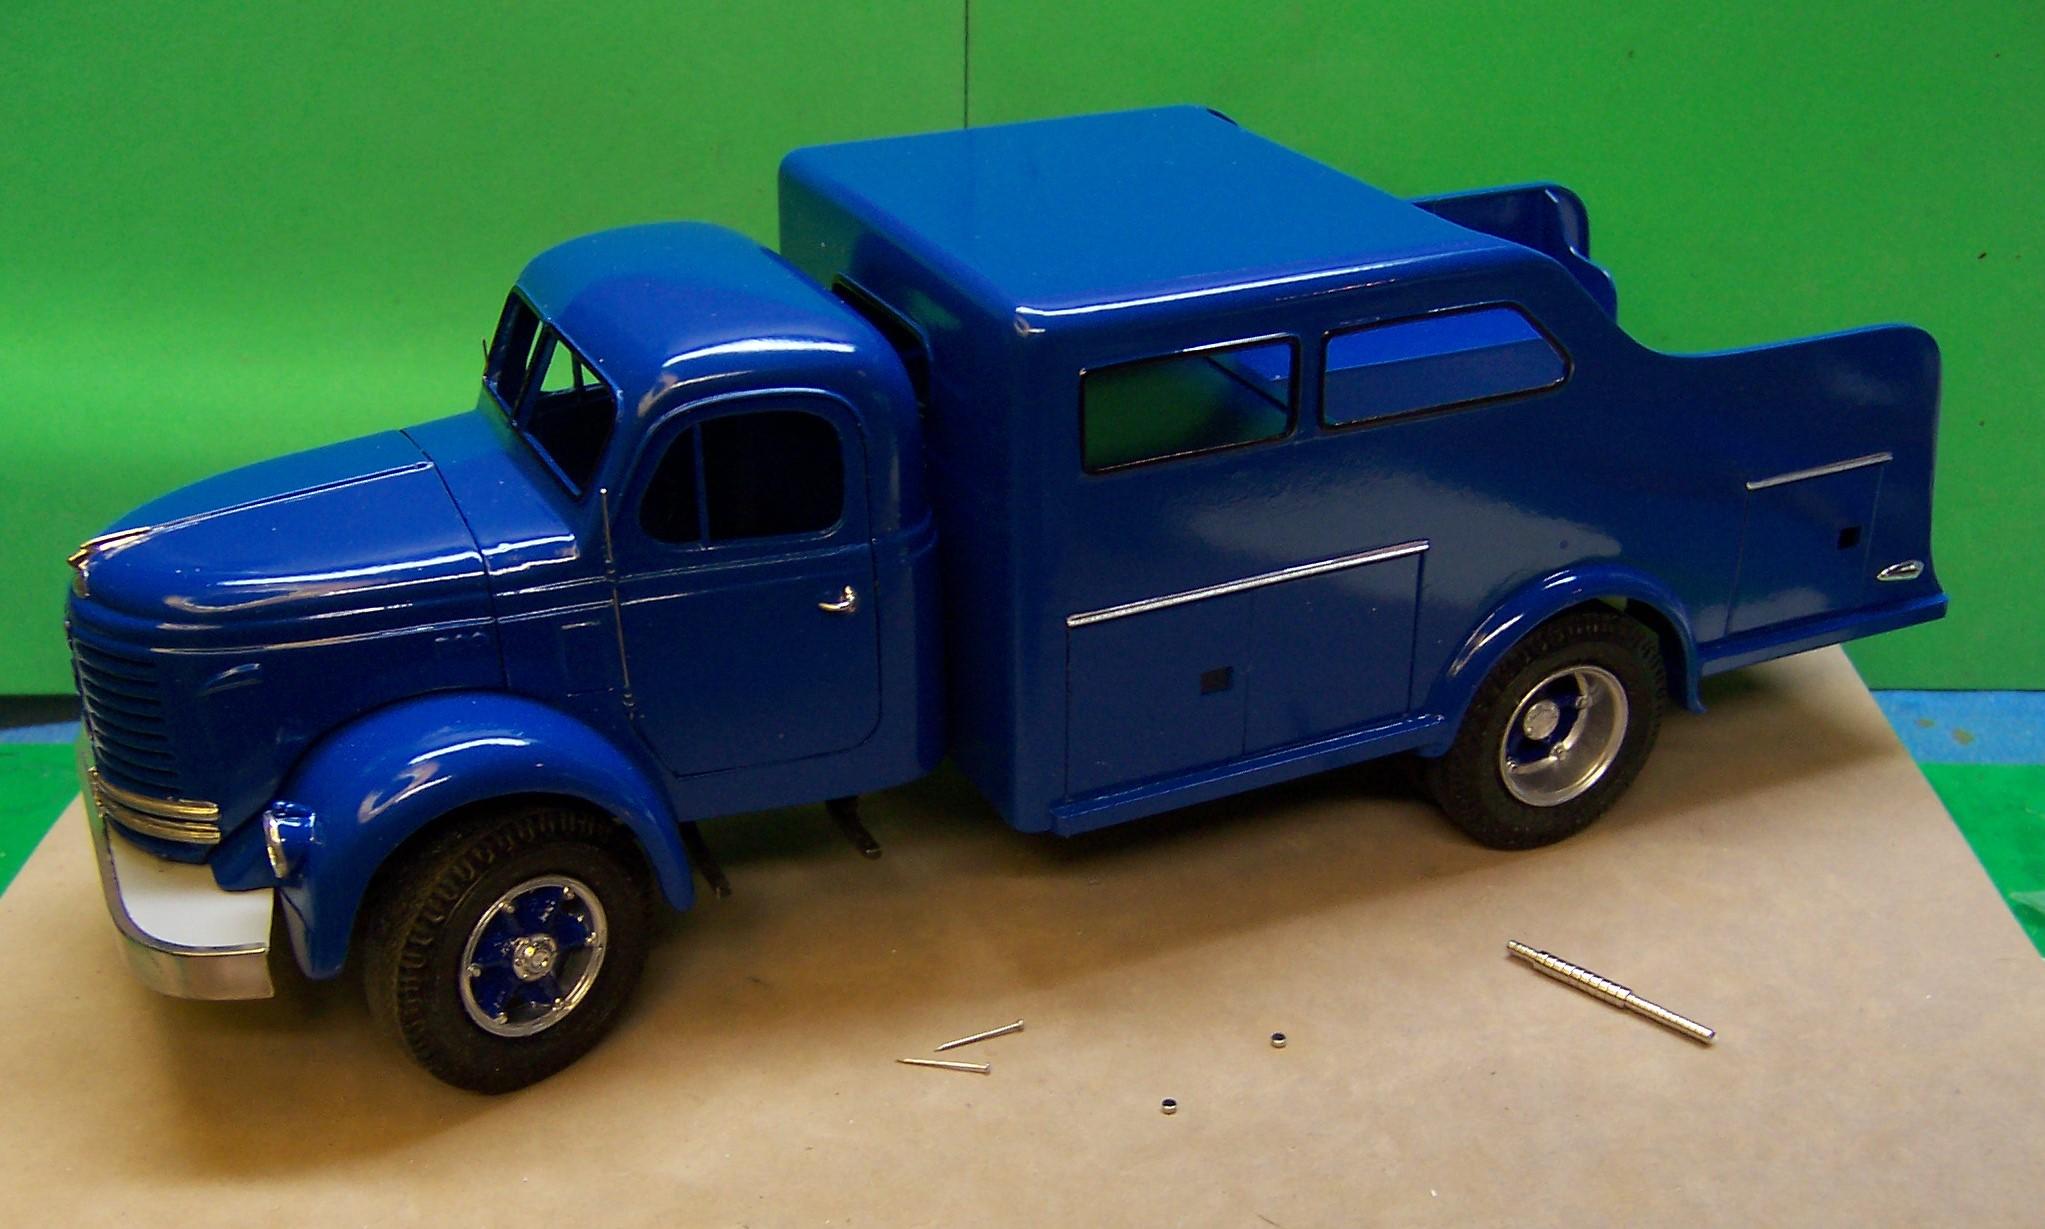
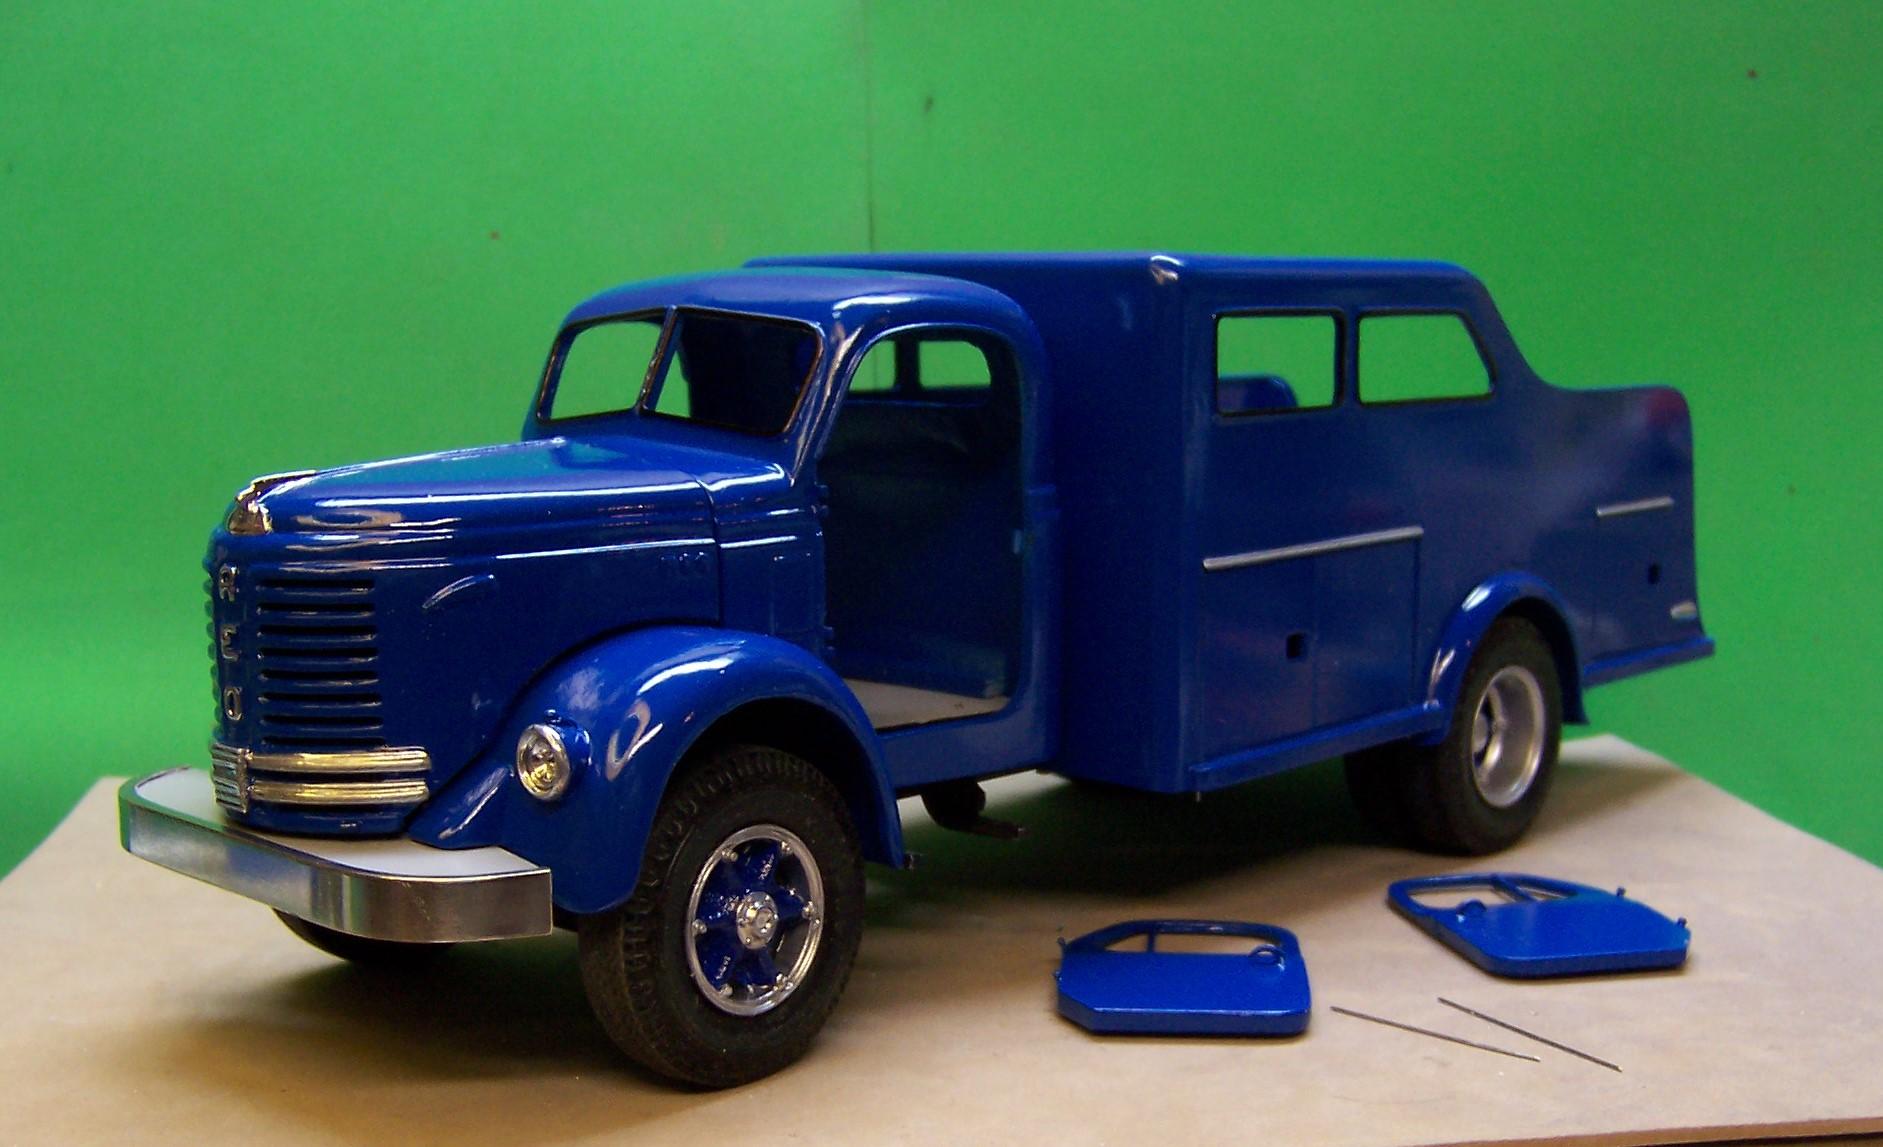
Chariots of Fire replied to Chariots of Fire's topic in WIP: Model Trucks: Big Rigs and Heavy Equipment
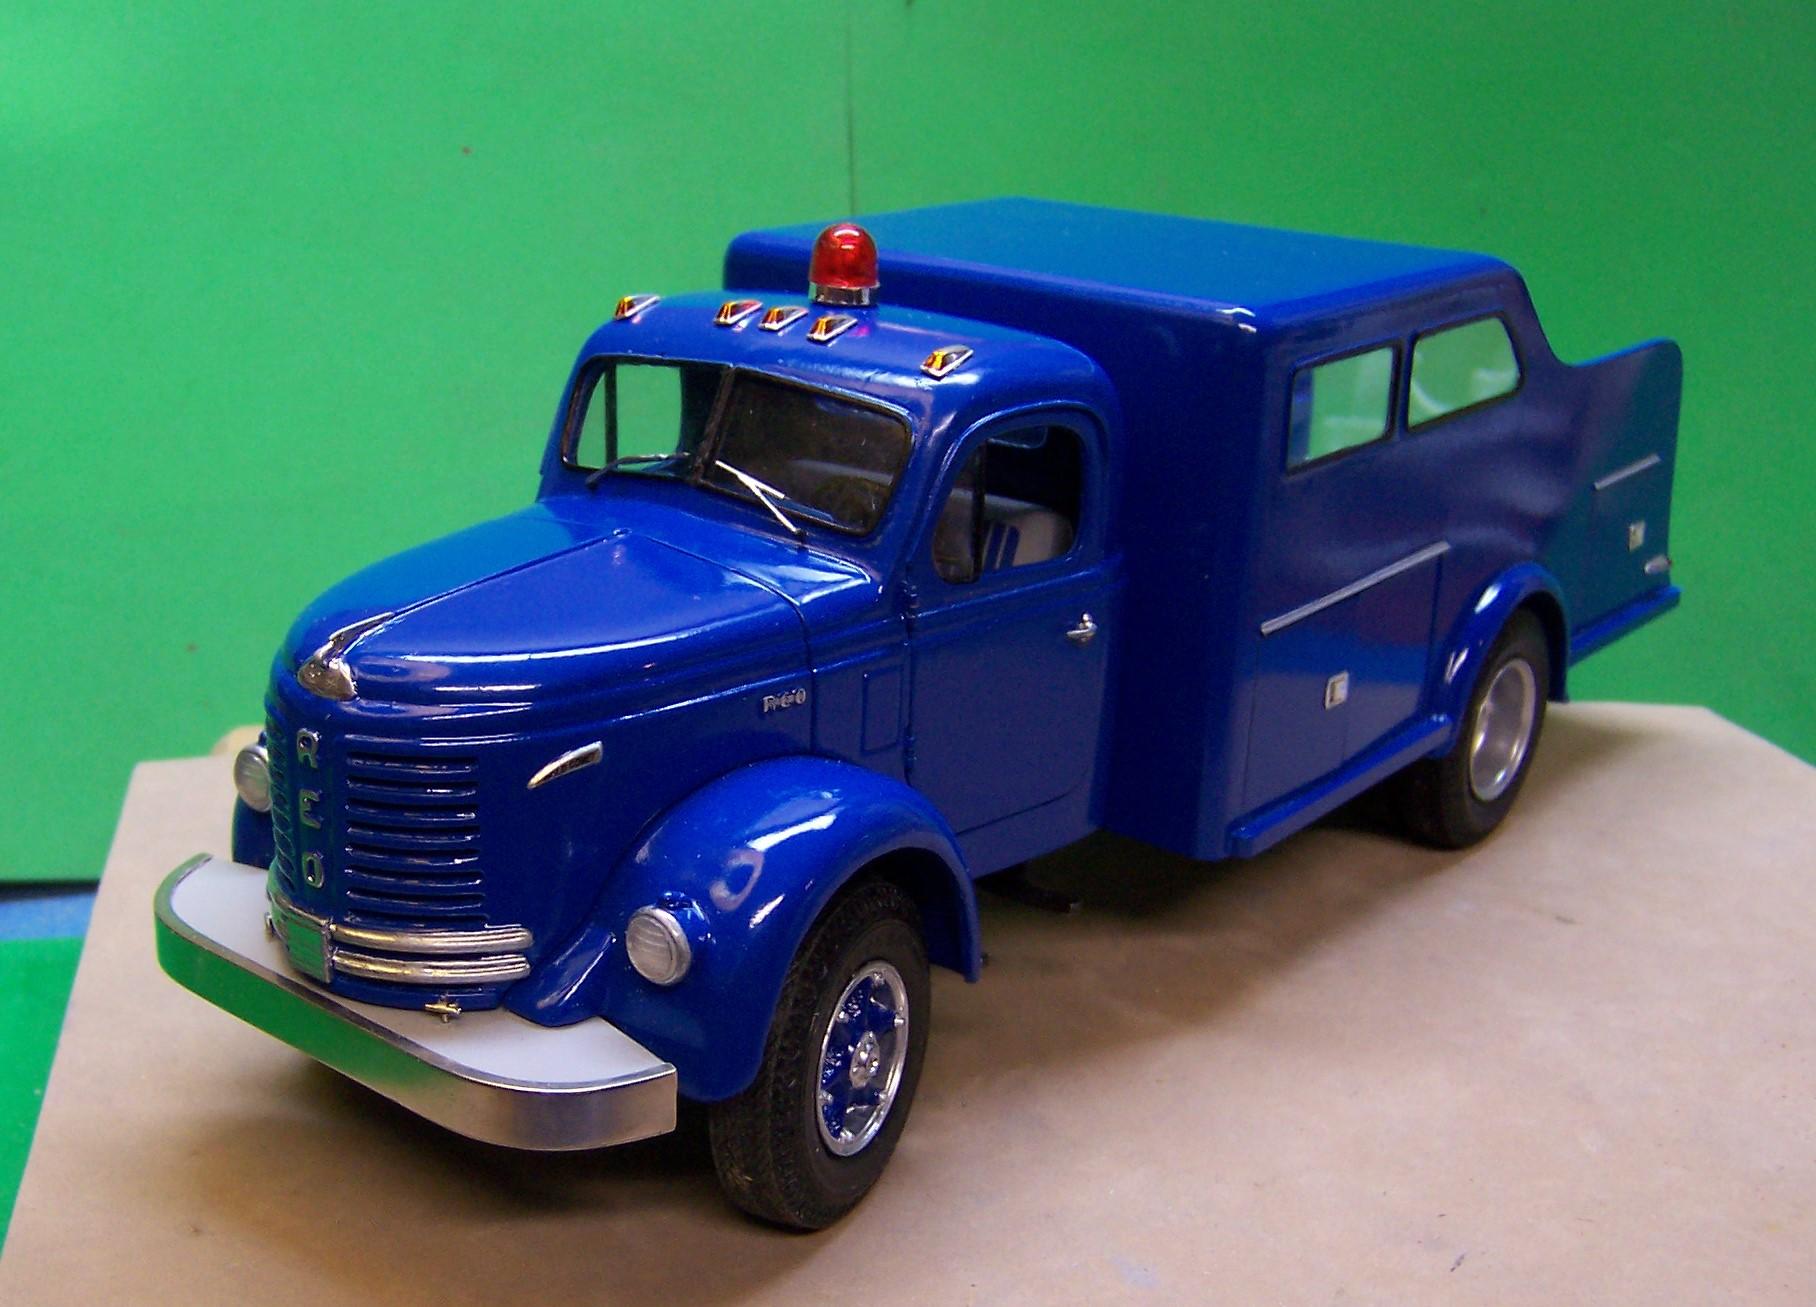
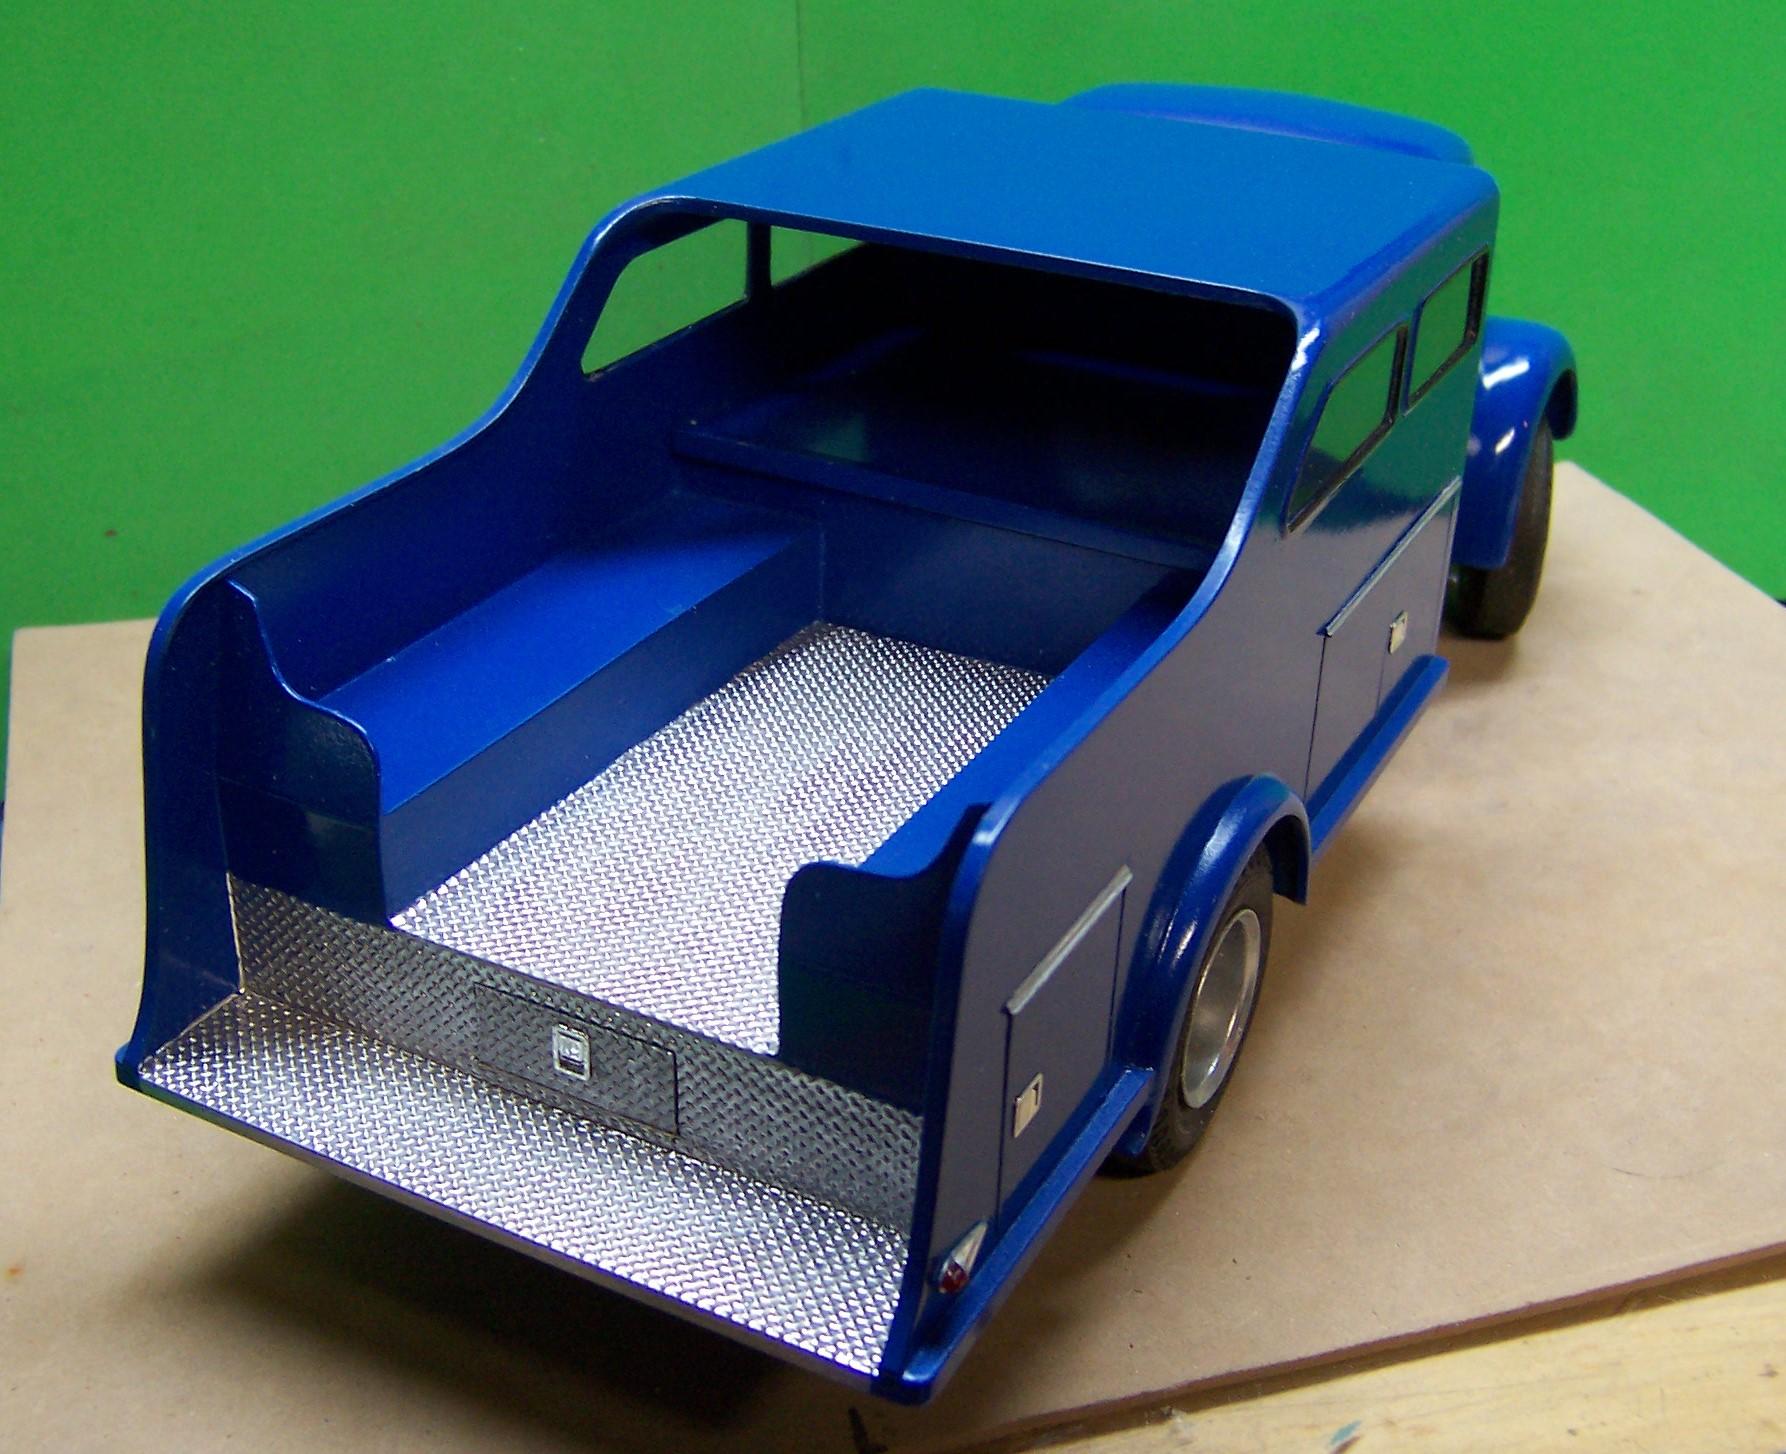
The body work is about done. Little places that needed touchup have been taken care of. First coat of primer is on the cab and hood. The blue panel at the right is what the truck color will be. I found a nice shade of blue at Auto Zone that is intended as engine paint but it is close to the actual color on the real truck. It goes on slick. Next up is to fit the small magnets in place on the compartment doors and give them a coat of primer.
-
Now that's scratch building!
-
Need adhesive suggestions...
Chariots of Fire replied to CTDude's topic in Tips, Tricks, and Tutorials
I agree. Wrap some thin sheet stock around the rim and build it up so that the tires fit. -
Reo Gold Comet
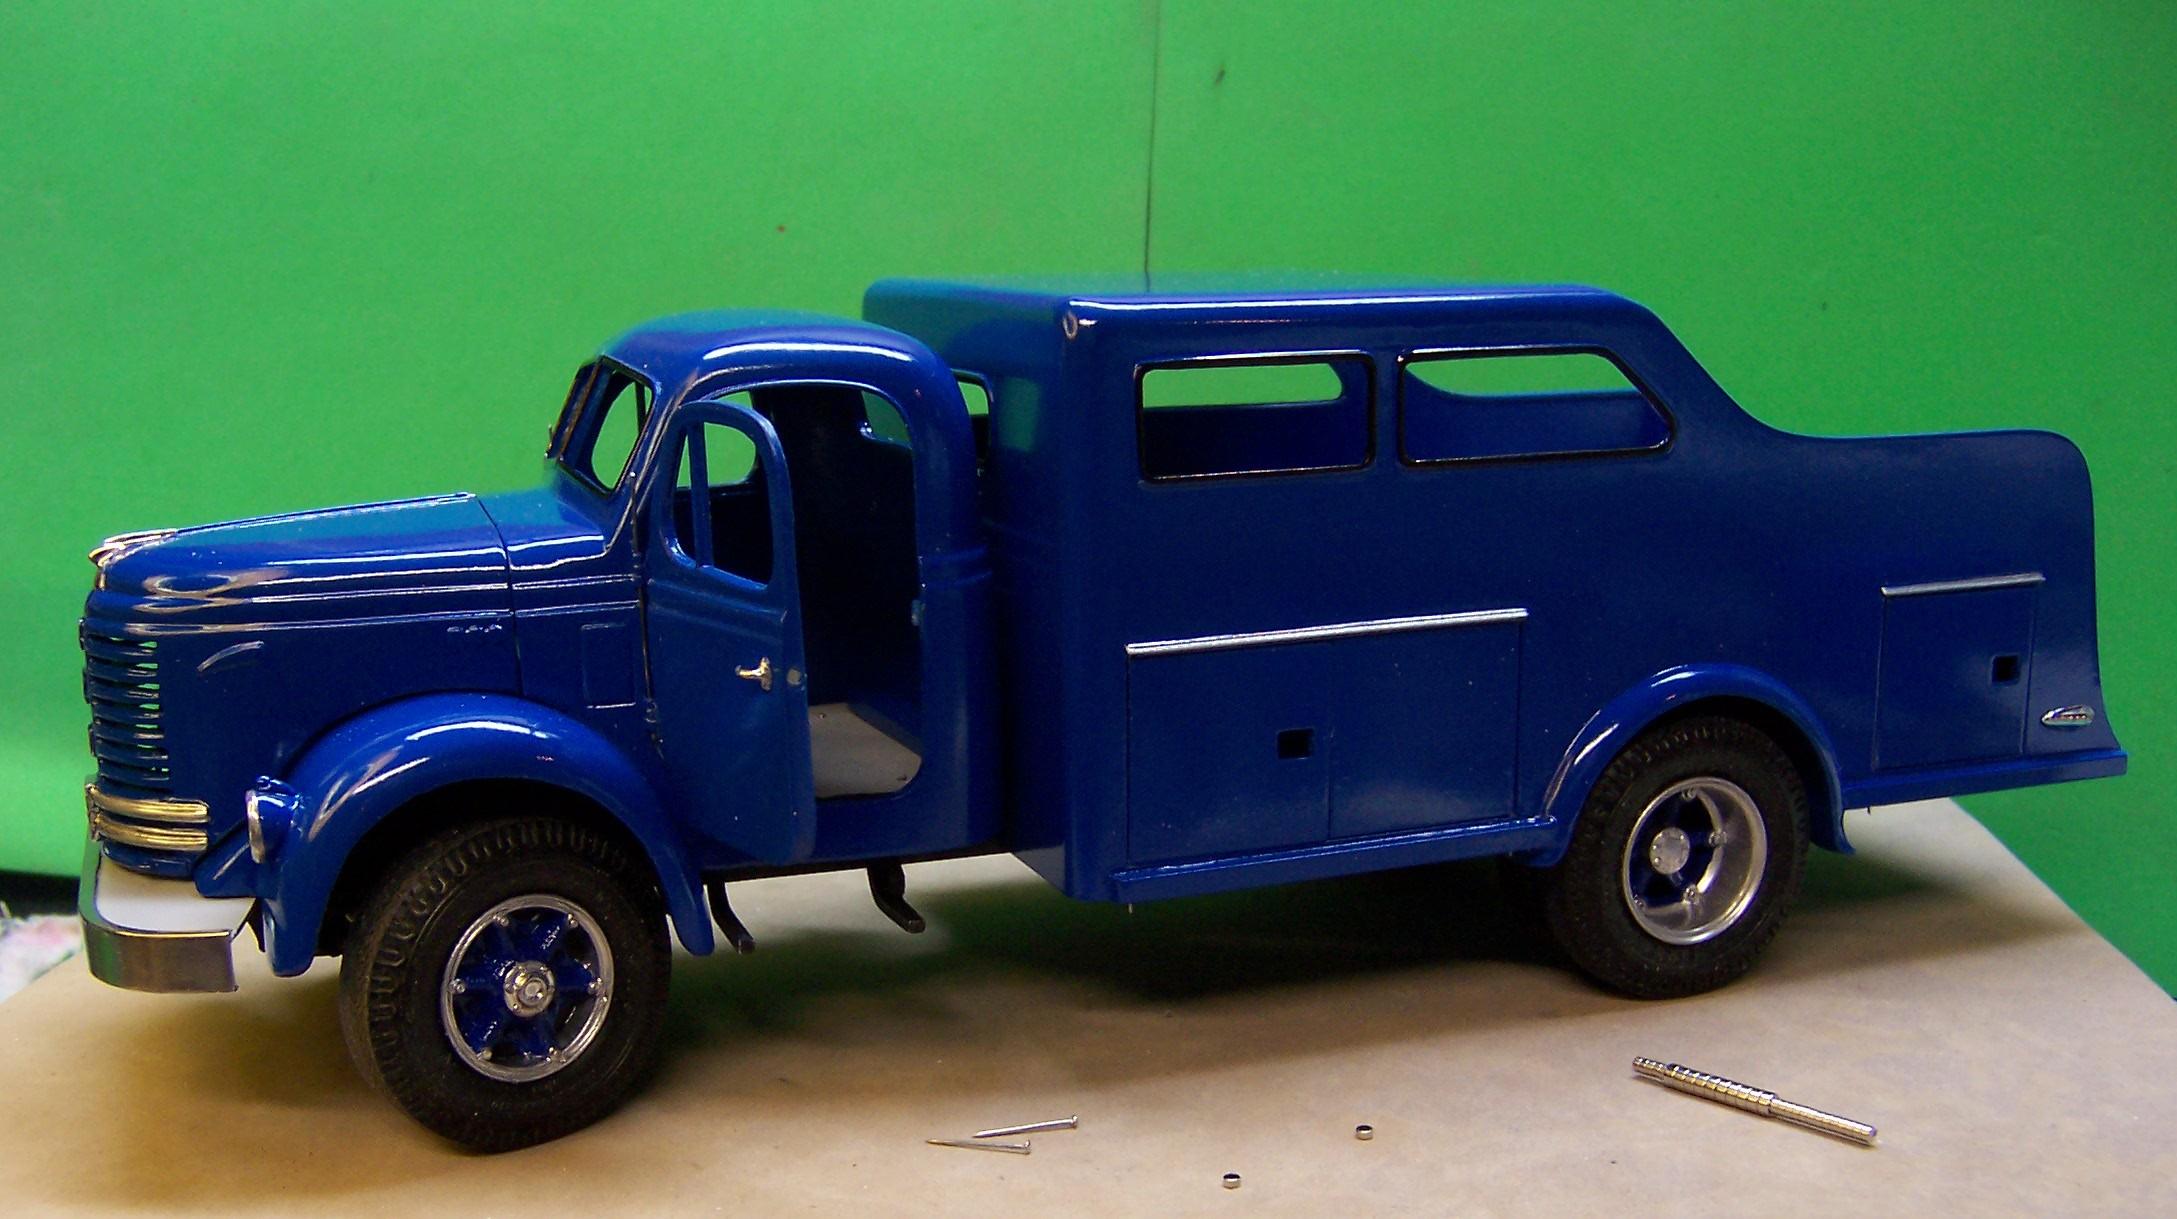
Chariots of Fire replied to Chariots of Fire's topic in WIP: Model Trucks: Big Rigs and Heavy Equipment
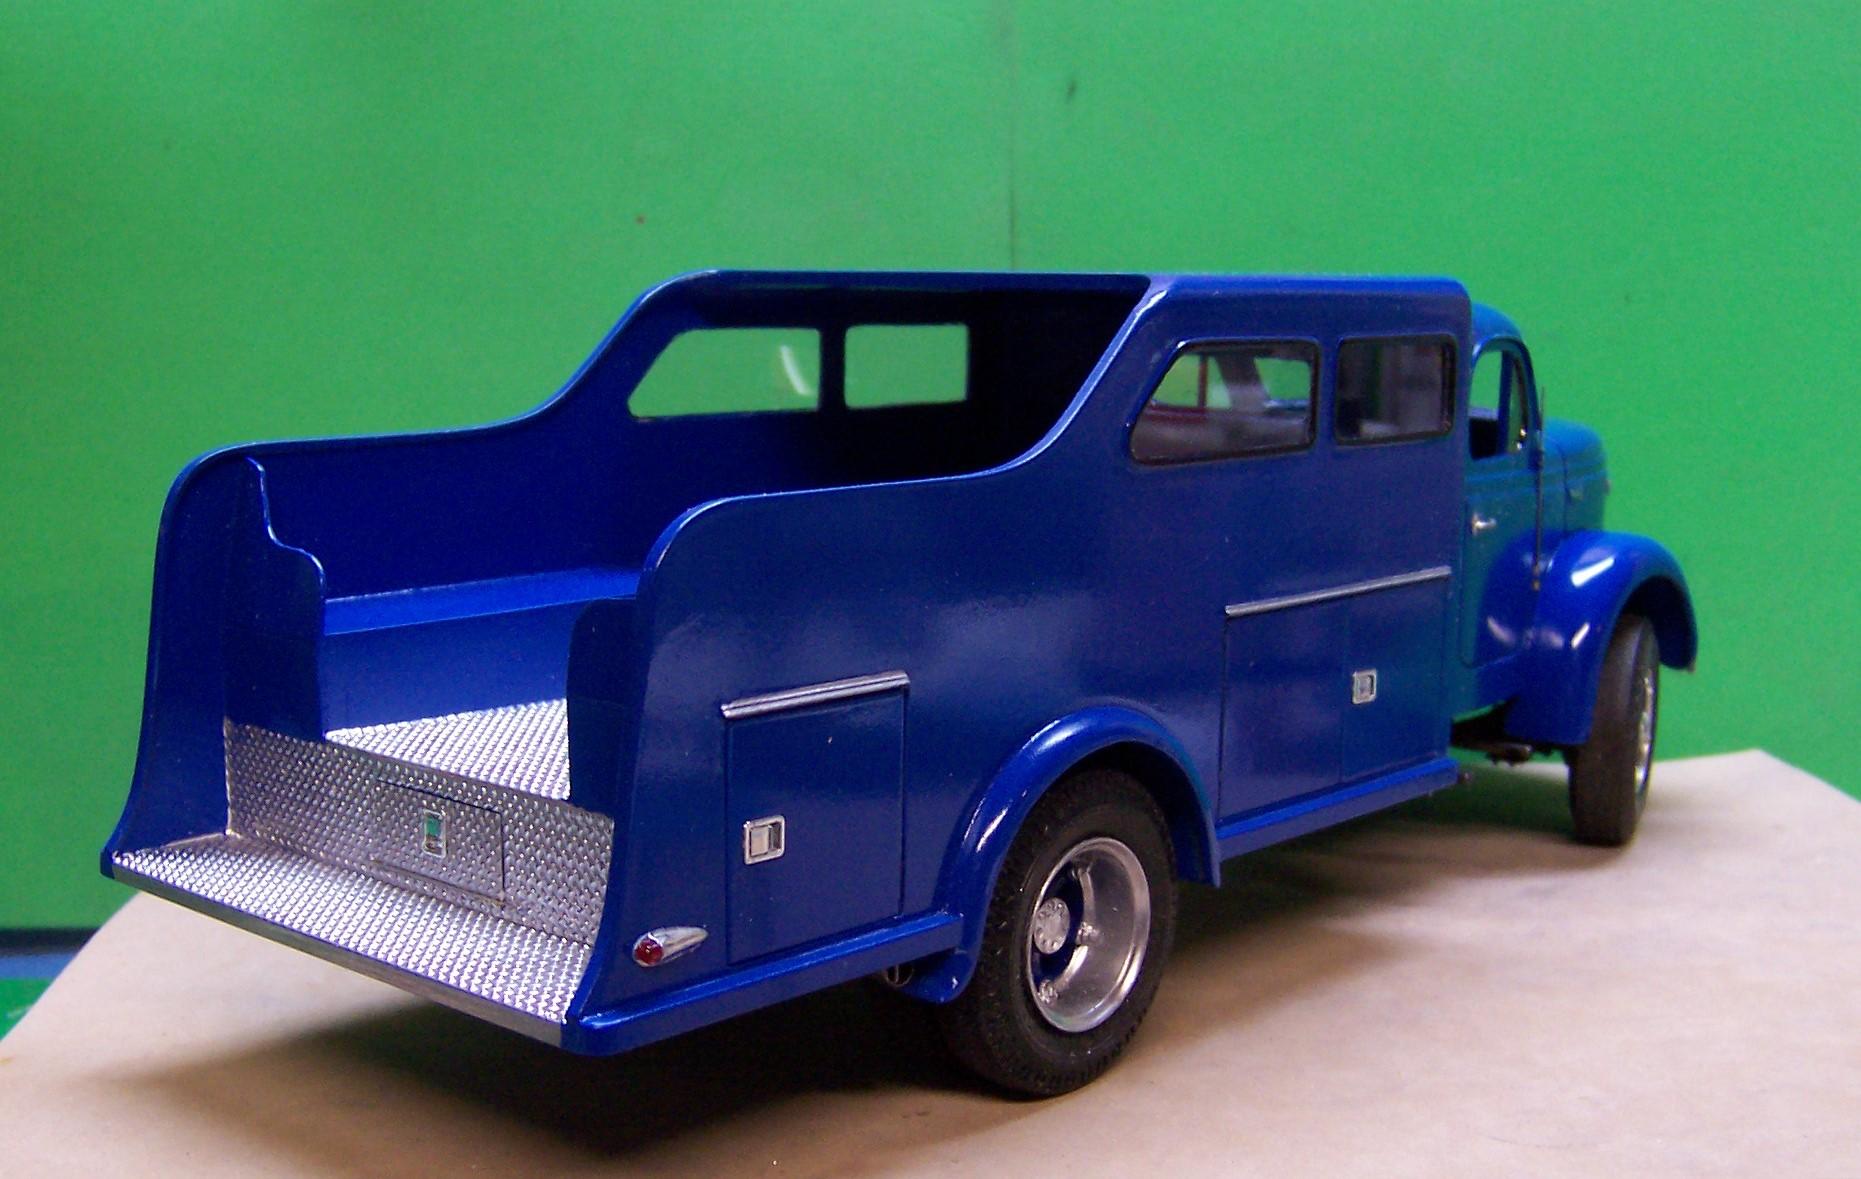
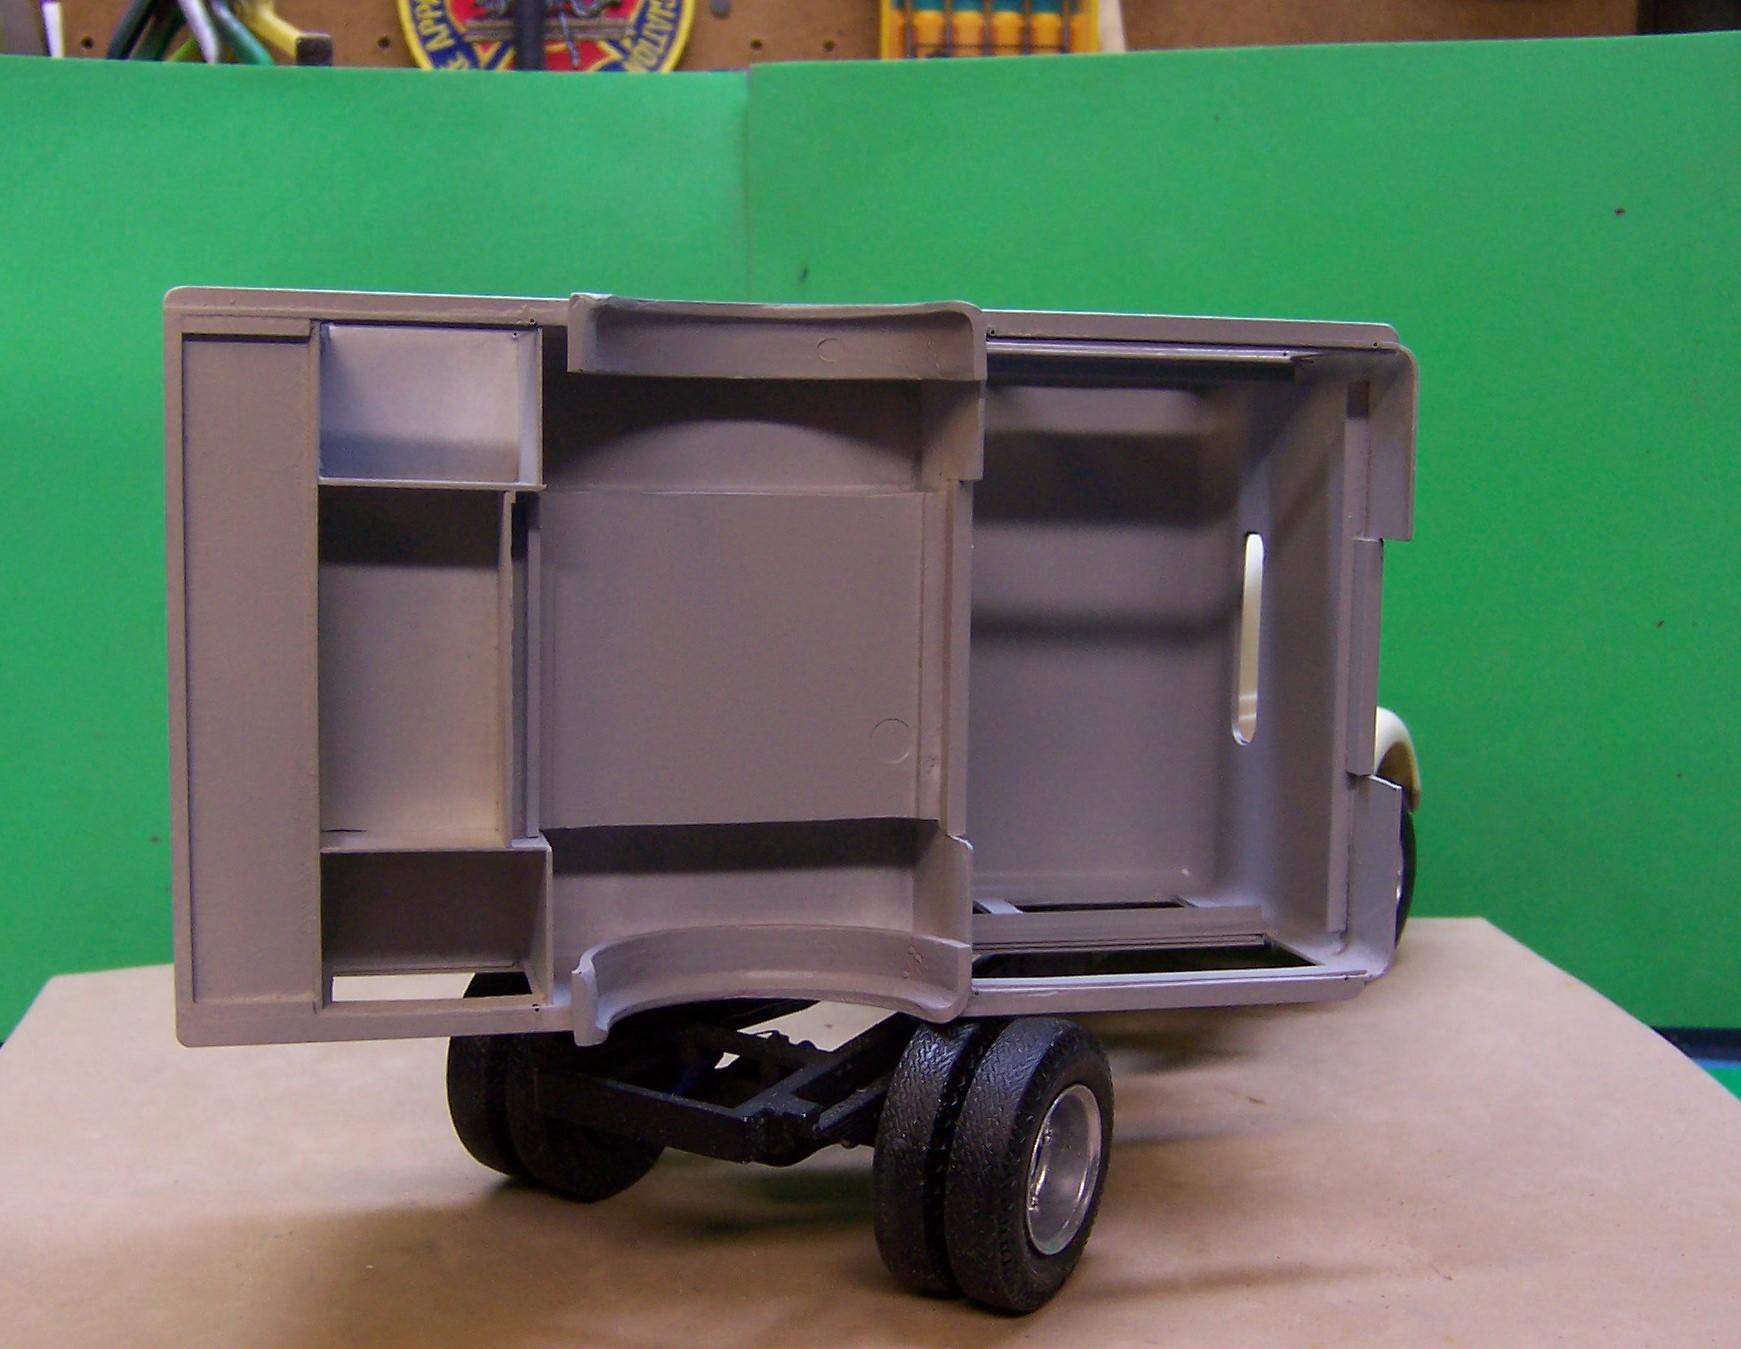
I tried very hard to make sure the joints are well filled in but they just don't show up sometimes. I did something else with this build as well. Inside the body at the corners I poured in some two part resin and let it set. It made all of the inside corners nice and smooth and sealed up a lot of places besides. In the photo below on the right inside those upper corners are nicely rounded with resin.
-
How do you get your chassis straight ?
Chariots of Fire replied to fredo84's topic in Tips, Tricks, and Tutorials
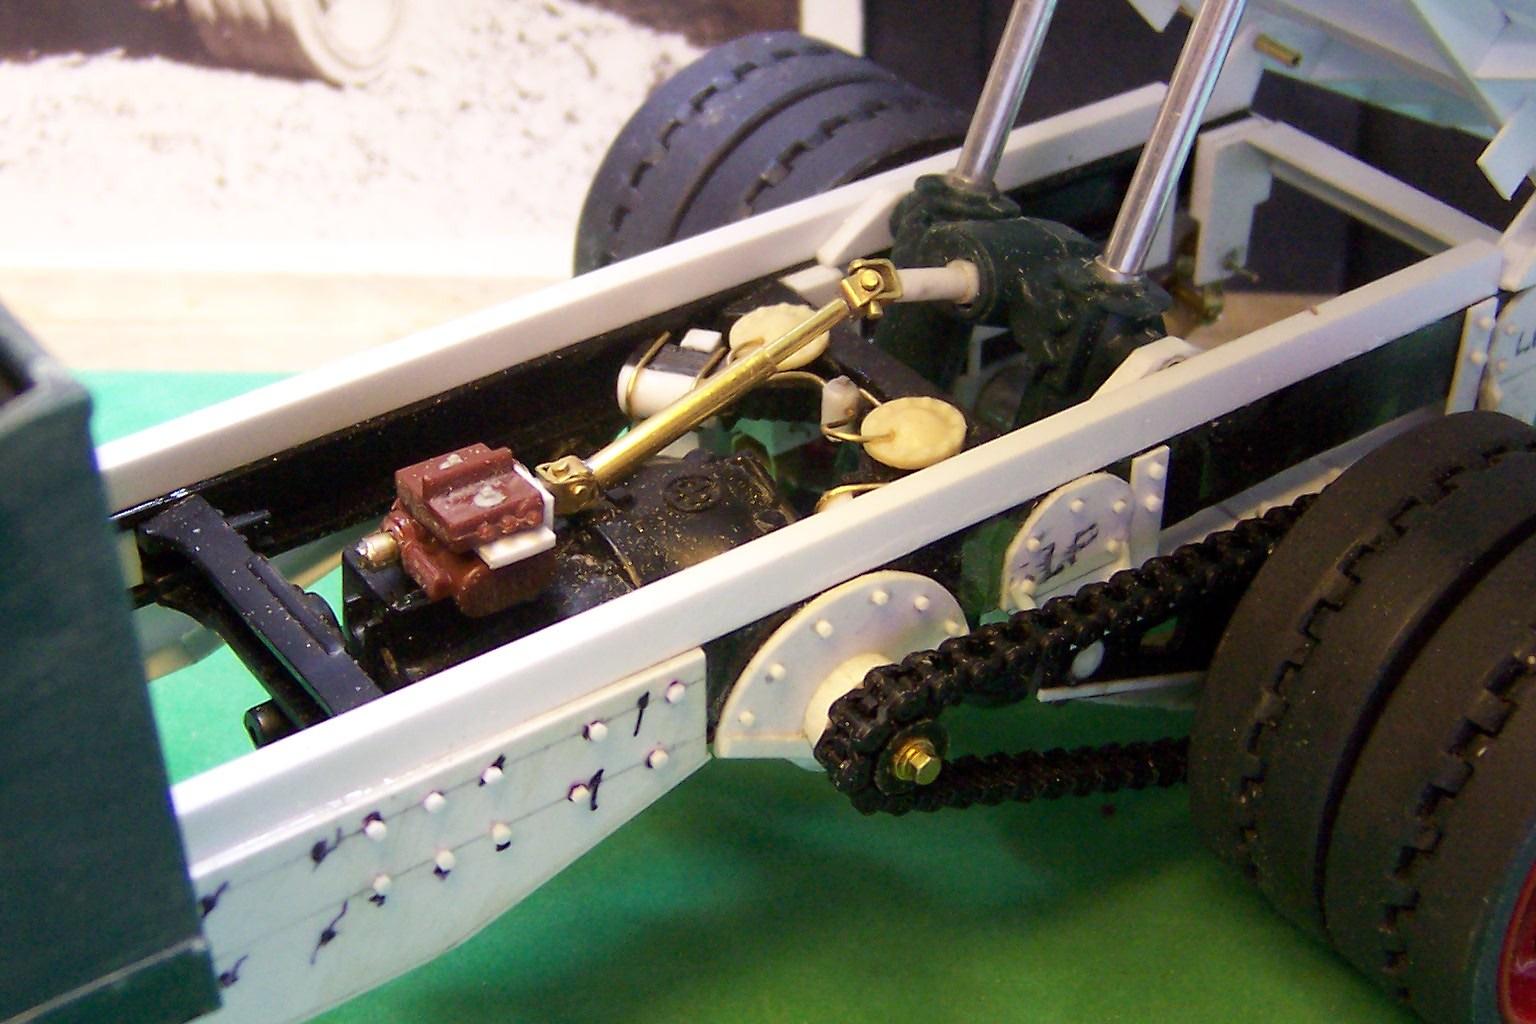
I scratch build the chassis. No problems!?