jaymcminn
-
Posts
1,743 -
Joined
-
Last visited
Content Type
Profiles
Forums
Events
Gallery
Everything posted by jaymcminn
-

Alfa Romeo 8C 2300- 1/12 Italeri Kit!
jaymcminn replied to jaymcminn's topic in Other Racing: Road Racing, Salt Flat Racers
Thanks Matt. I can't wait to see how yours turns out... you do some amazing work! -
Italeri Alfa 8c- WIP
jaymcminn replied to jaymcminn's topic in WIP: Other Racing: Road Racing, Land Speed Racers
Thanks Wayne! -
Parts Mounting Tips (for painting)
jaymcminn replied to JollySipper's topic in Tips, Tricks, and Tutorials
The corrugated cardboard idea is genius... a cheap cat scratcher would work great for this. I've been using florist foam for mounting toothpicks and craft sticks but it produces dust. Going to give this a shot! -
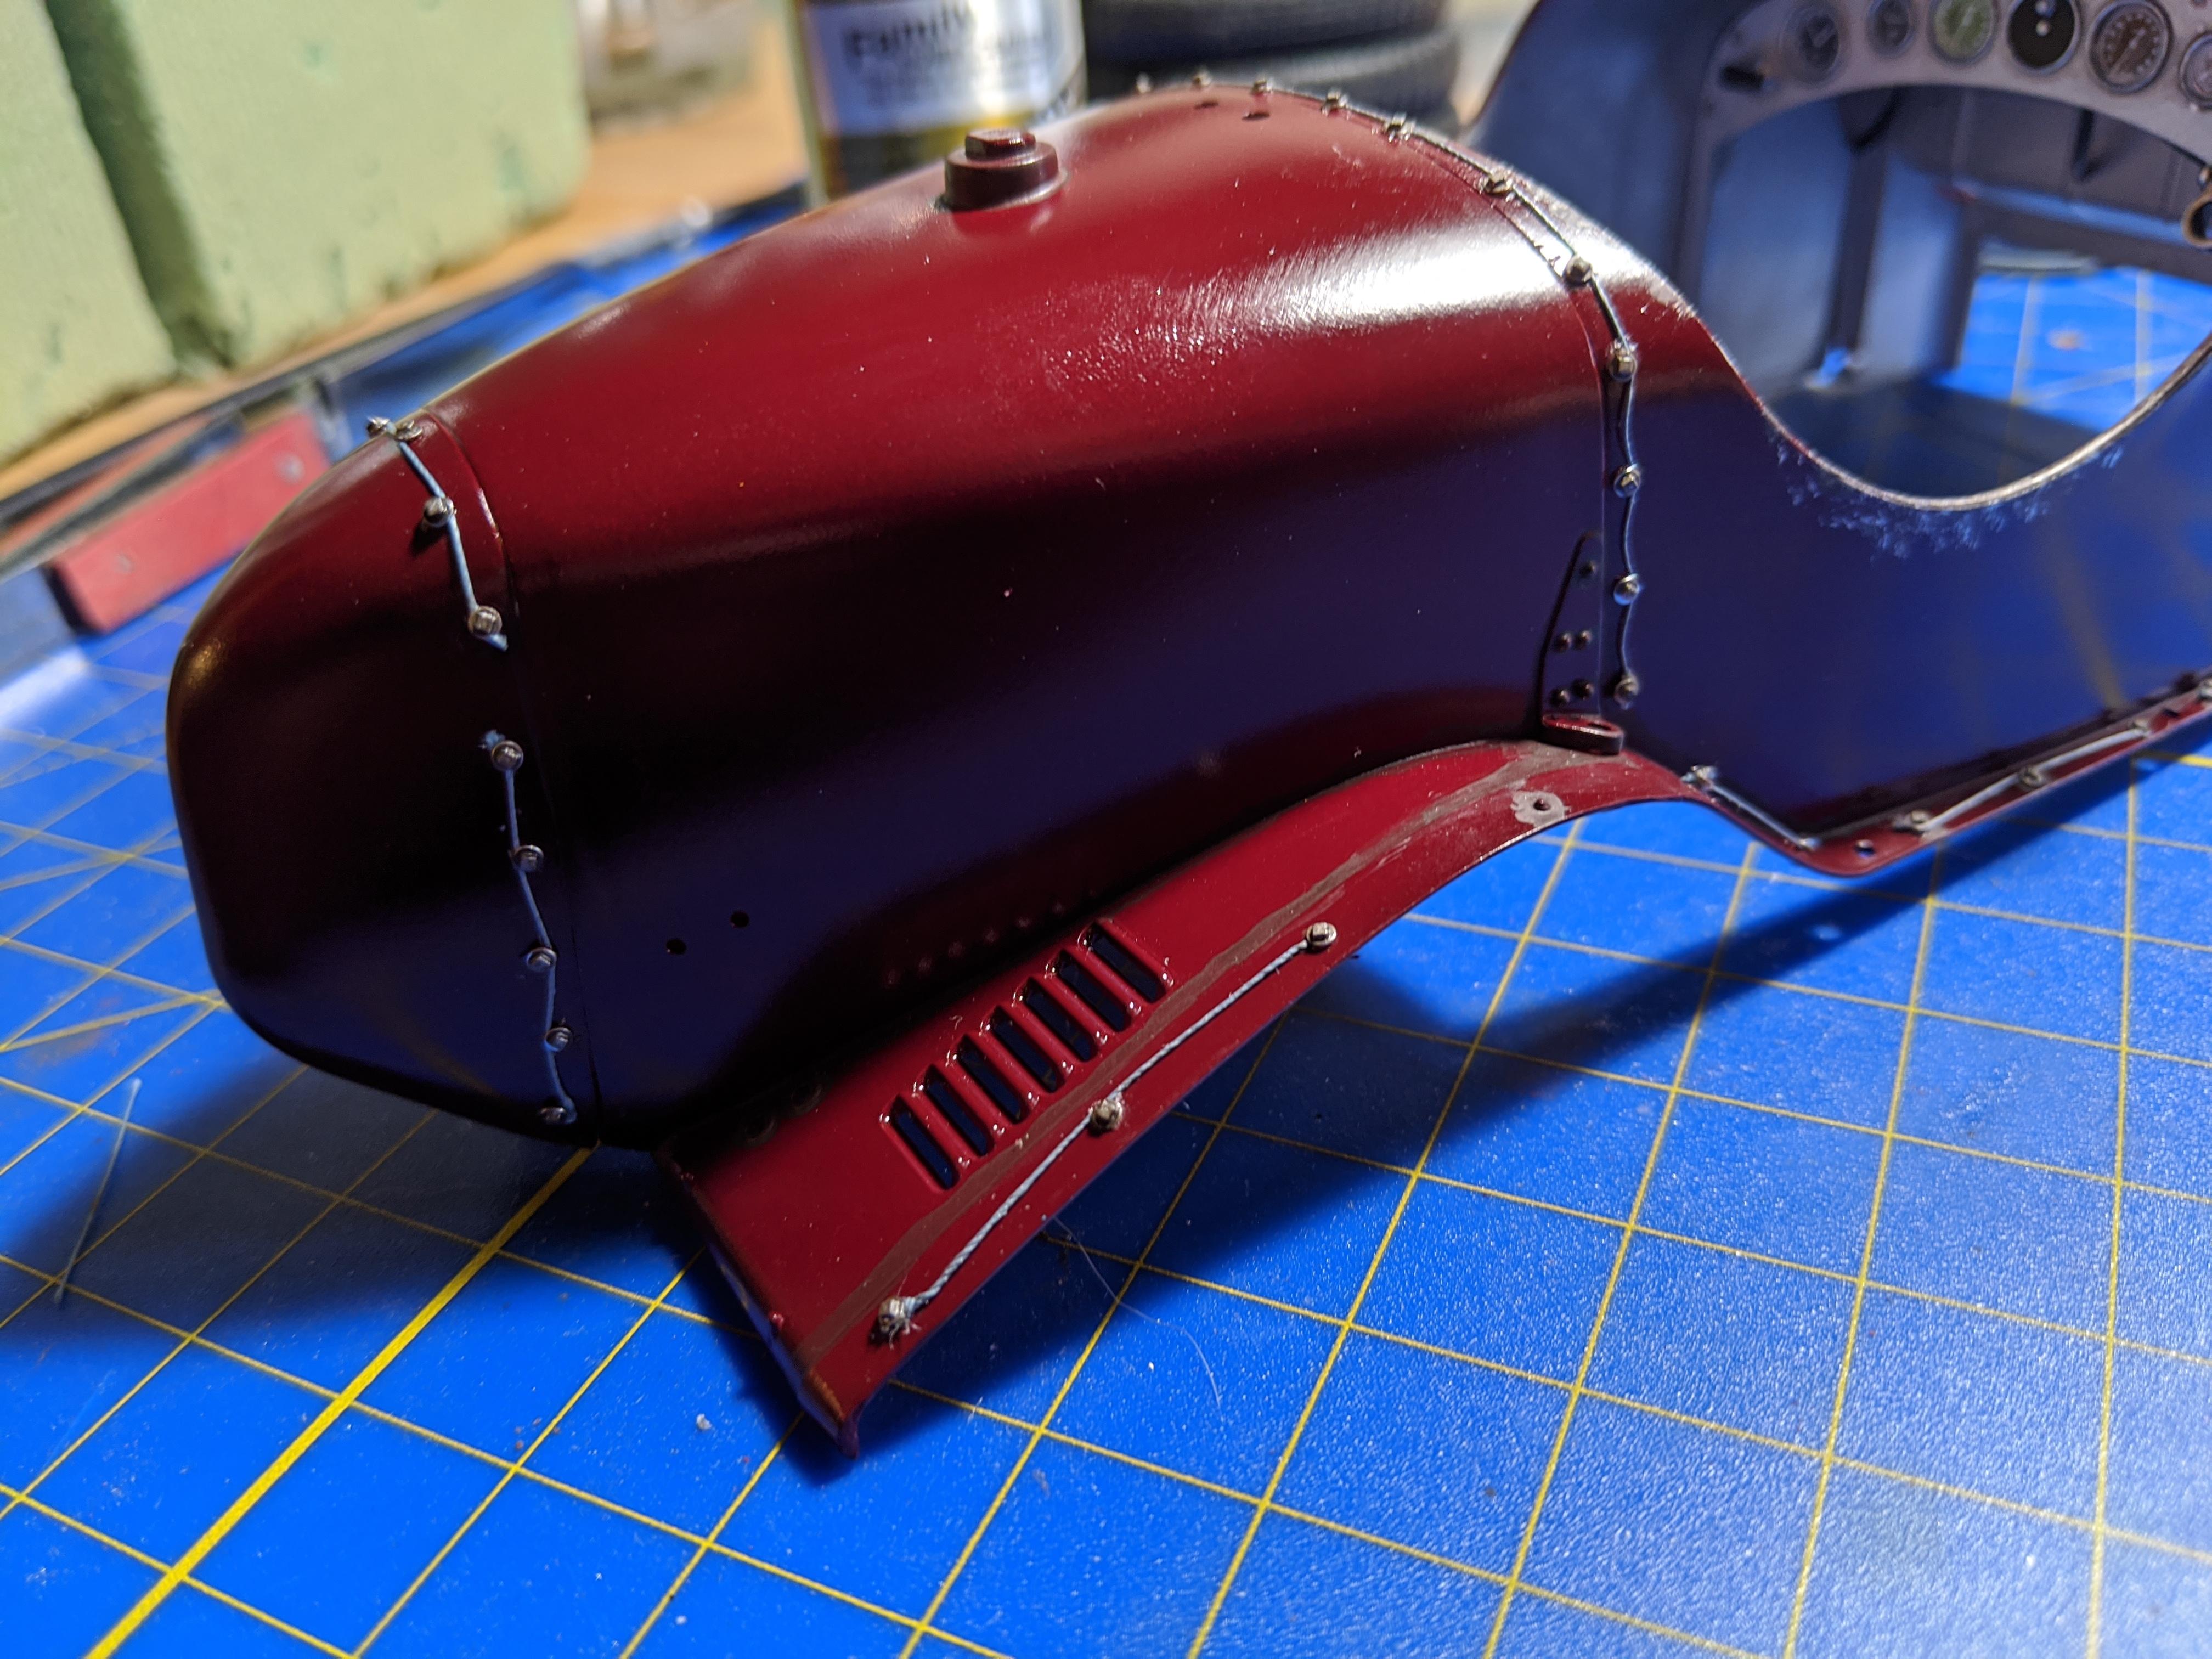
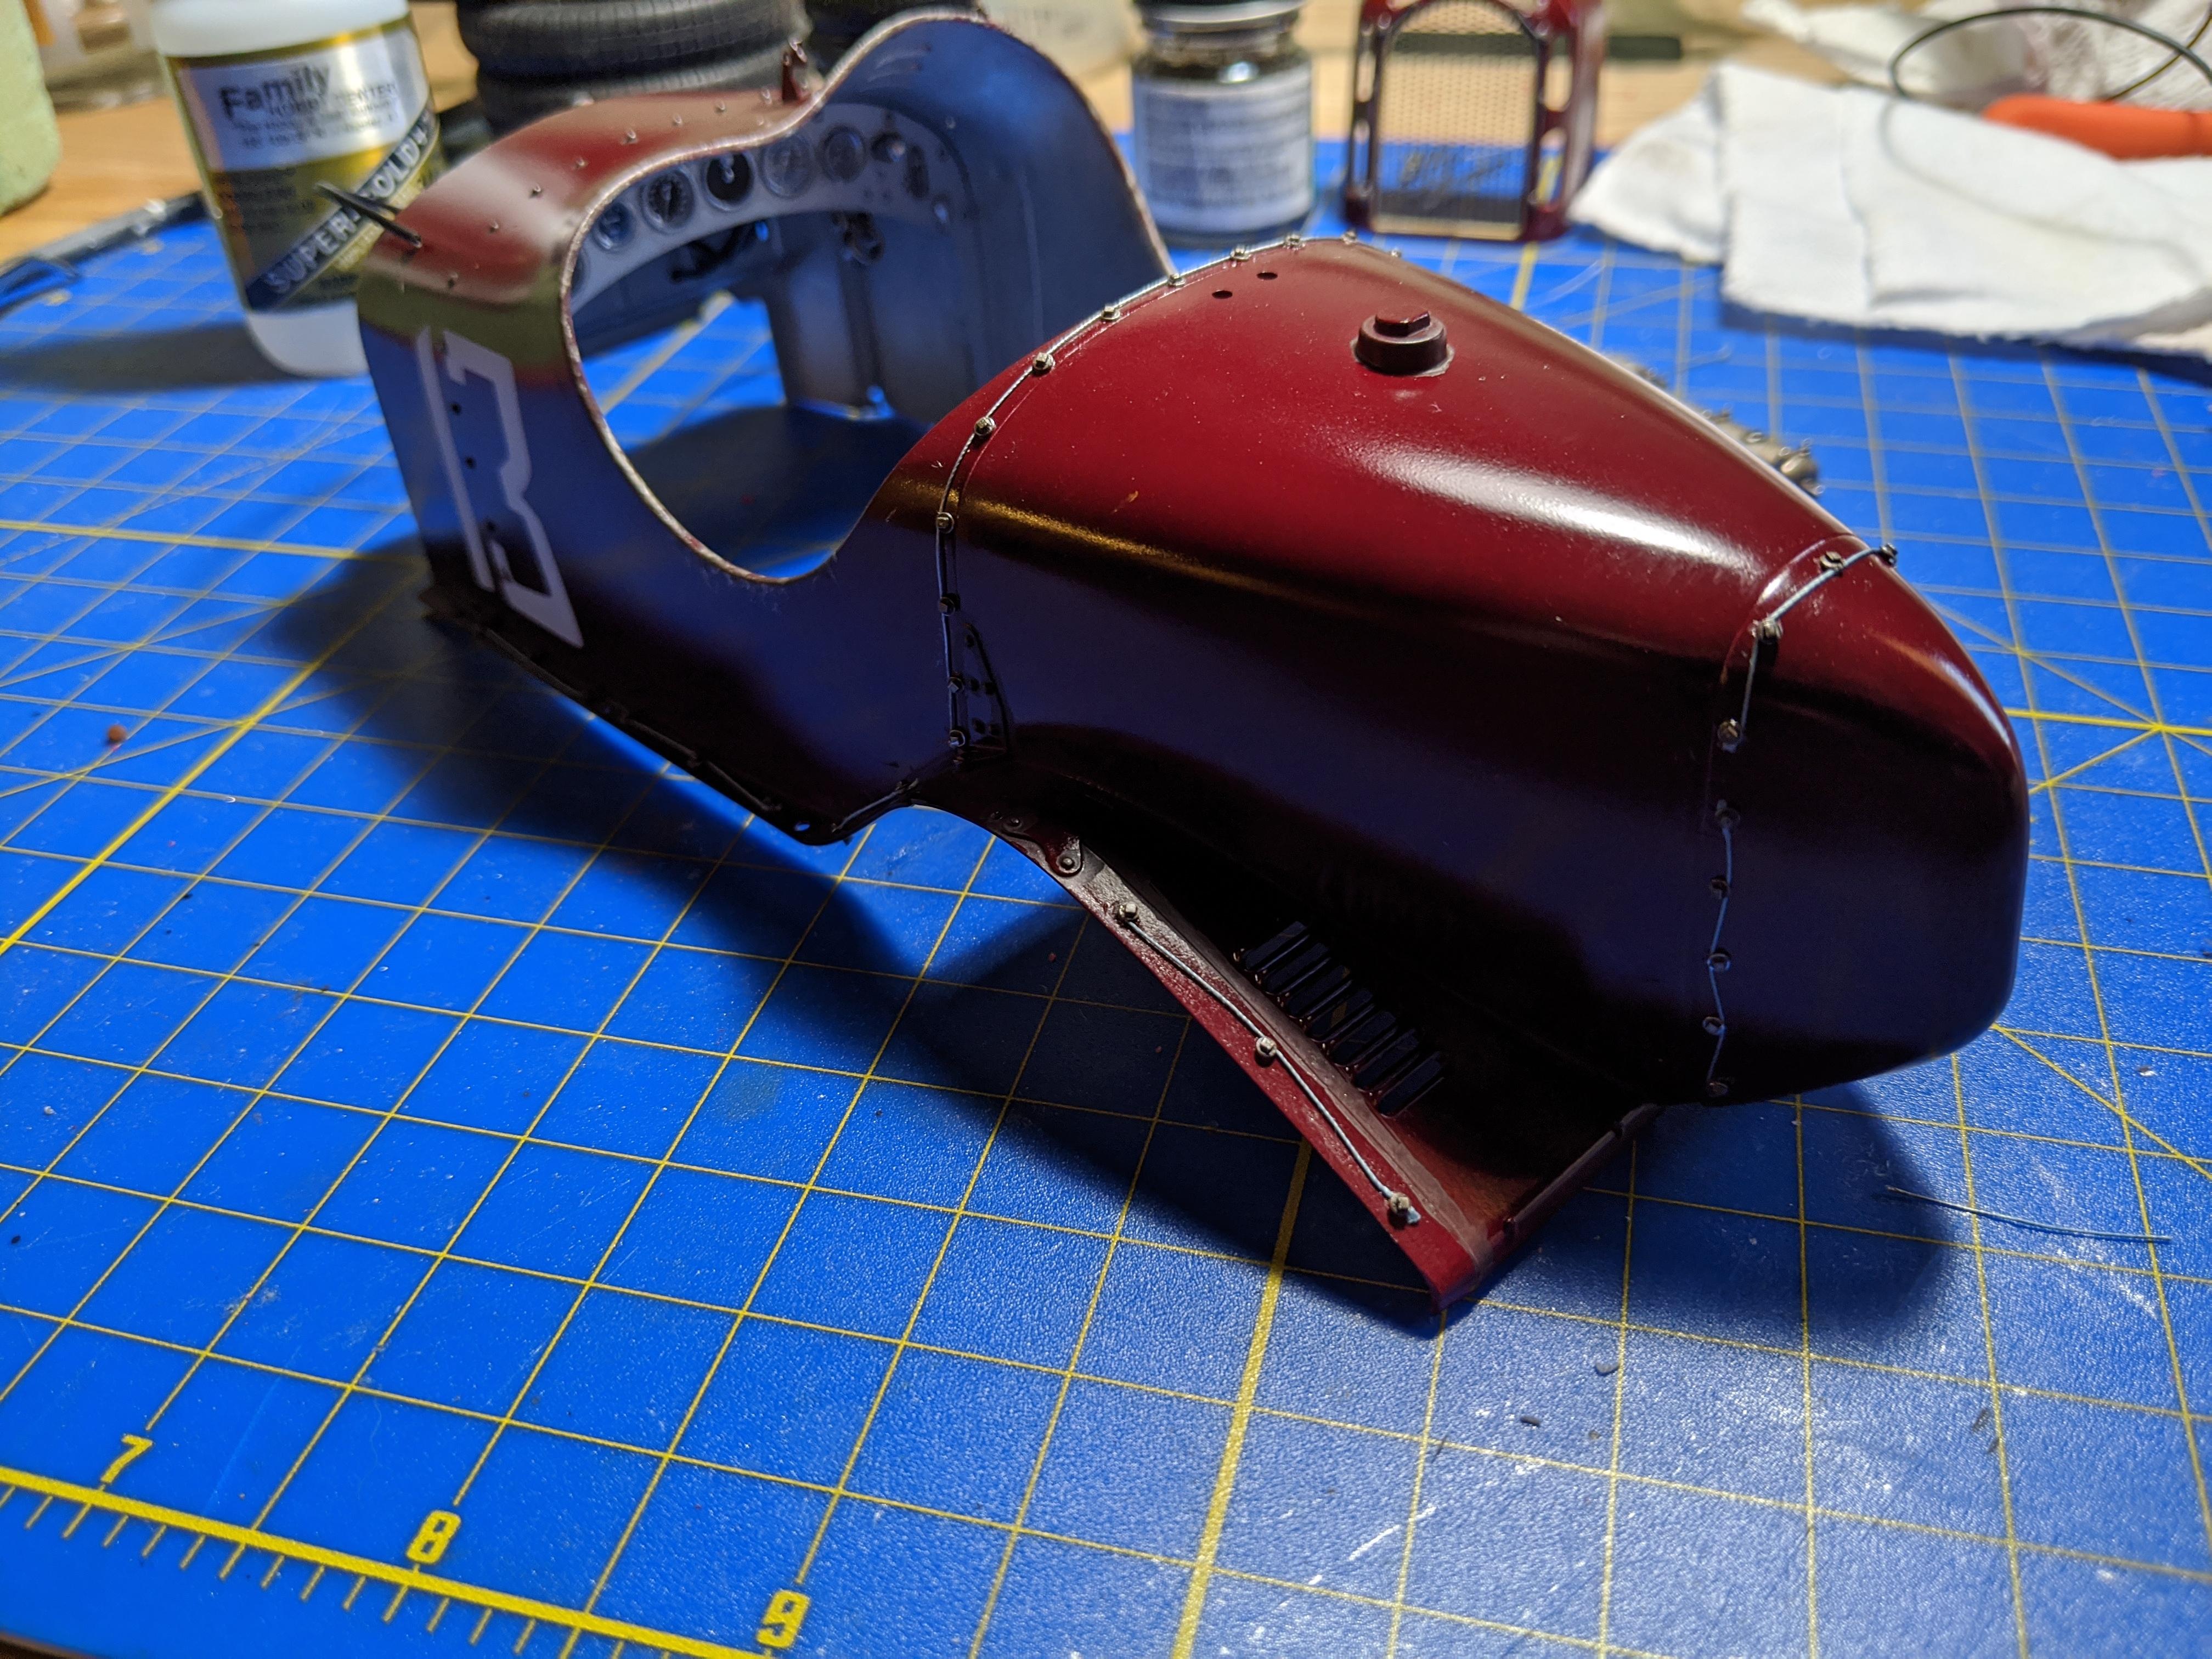
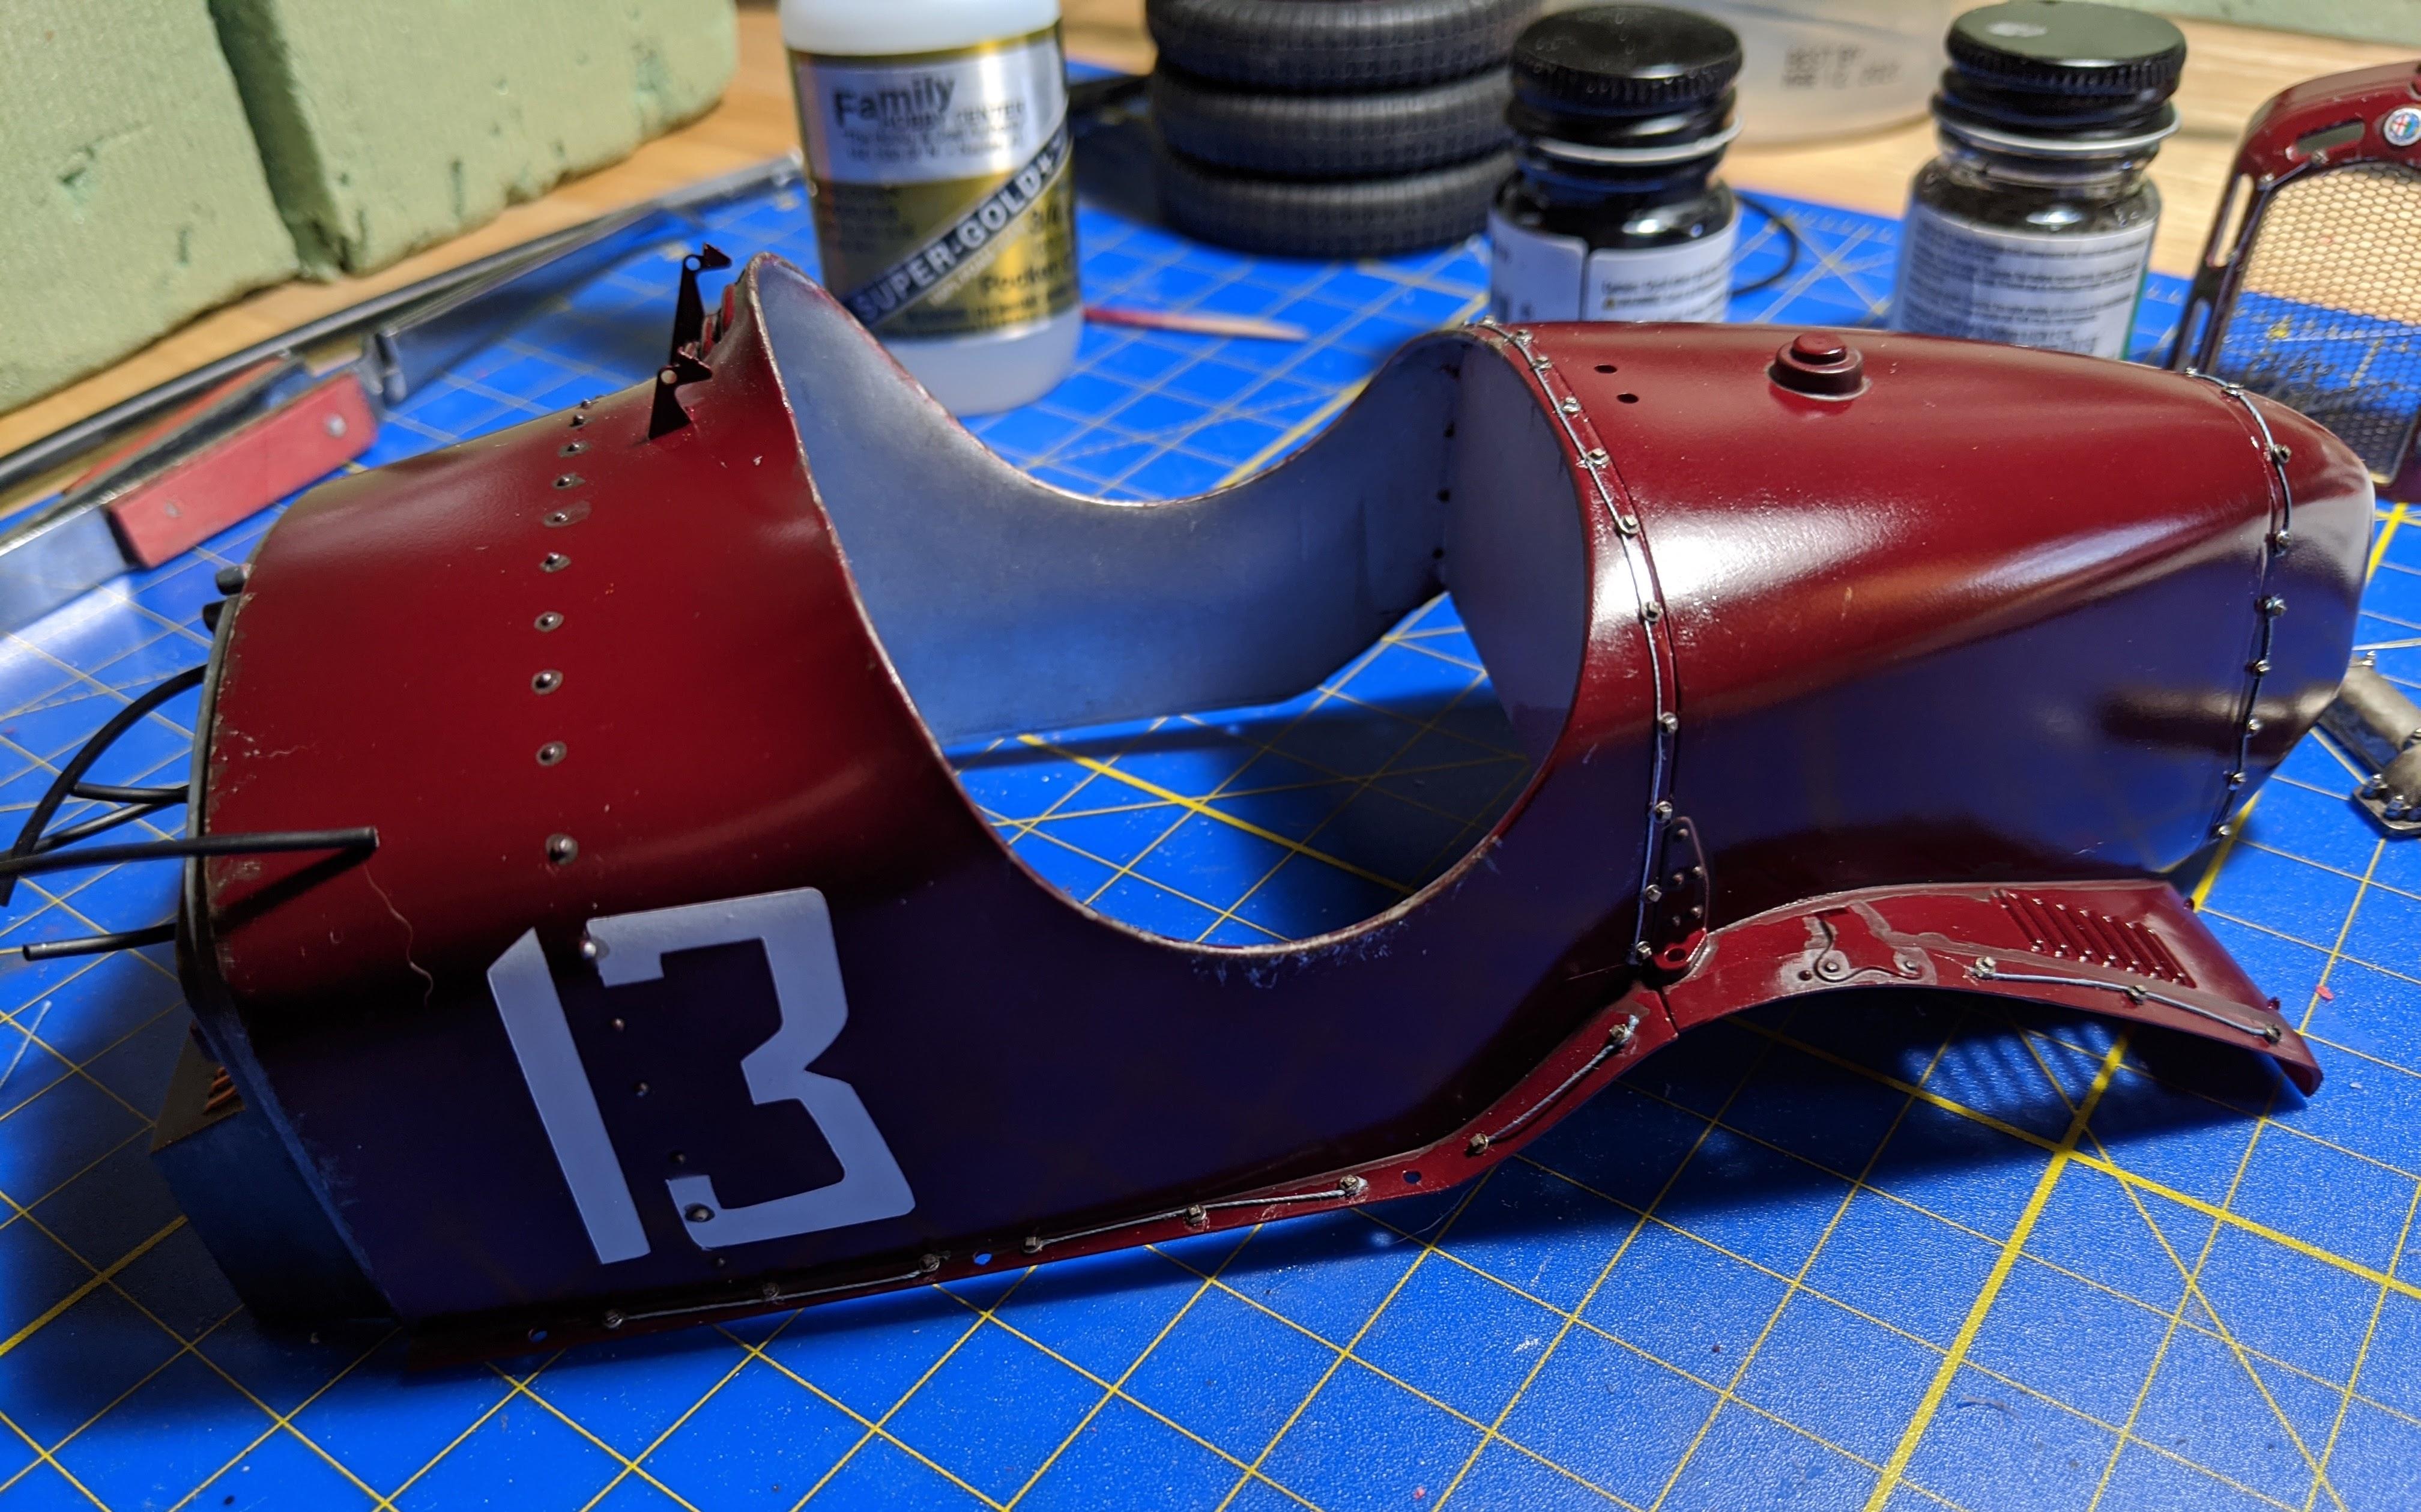
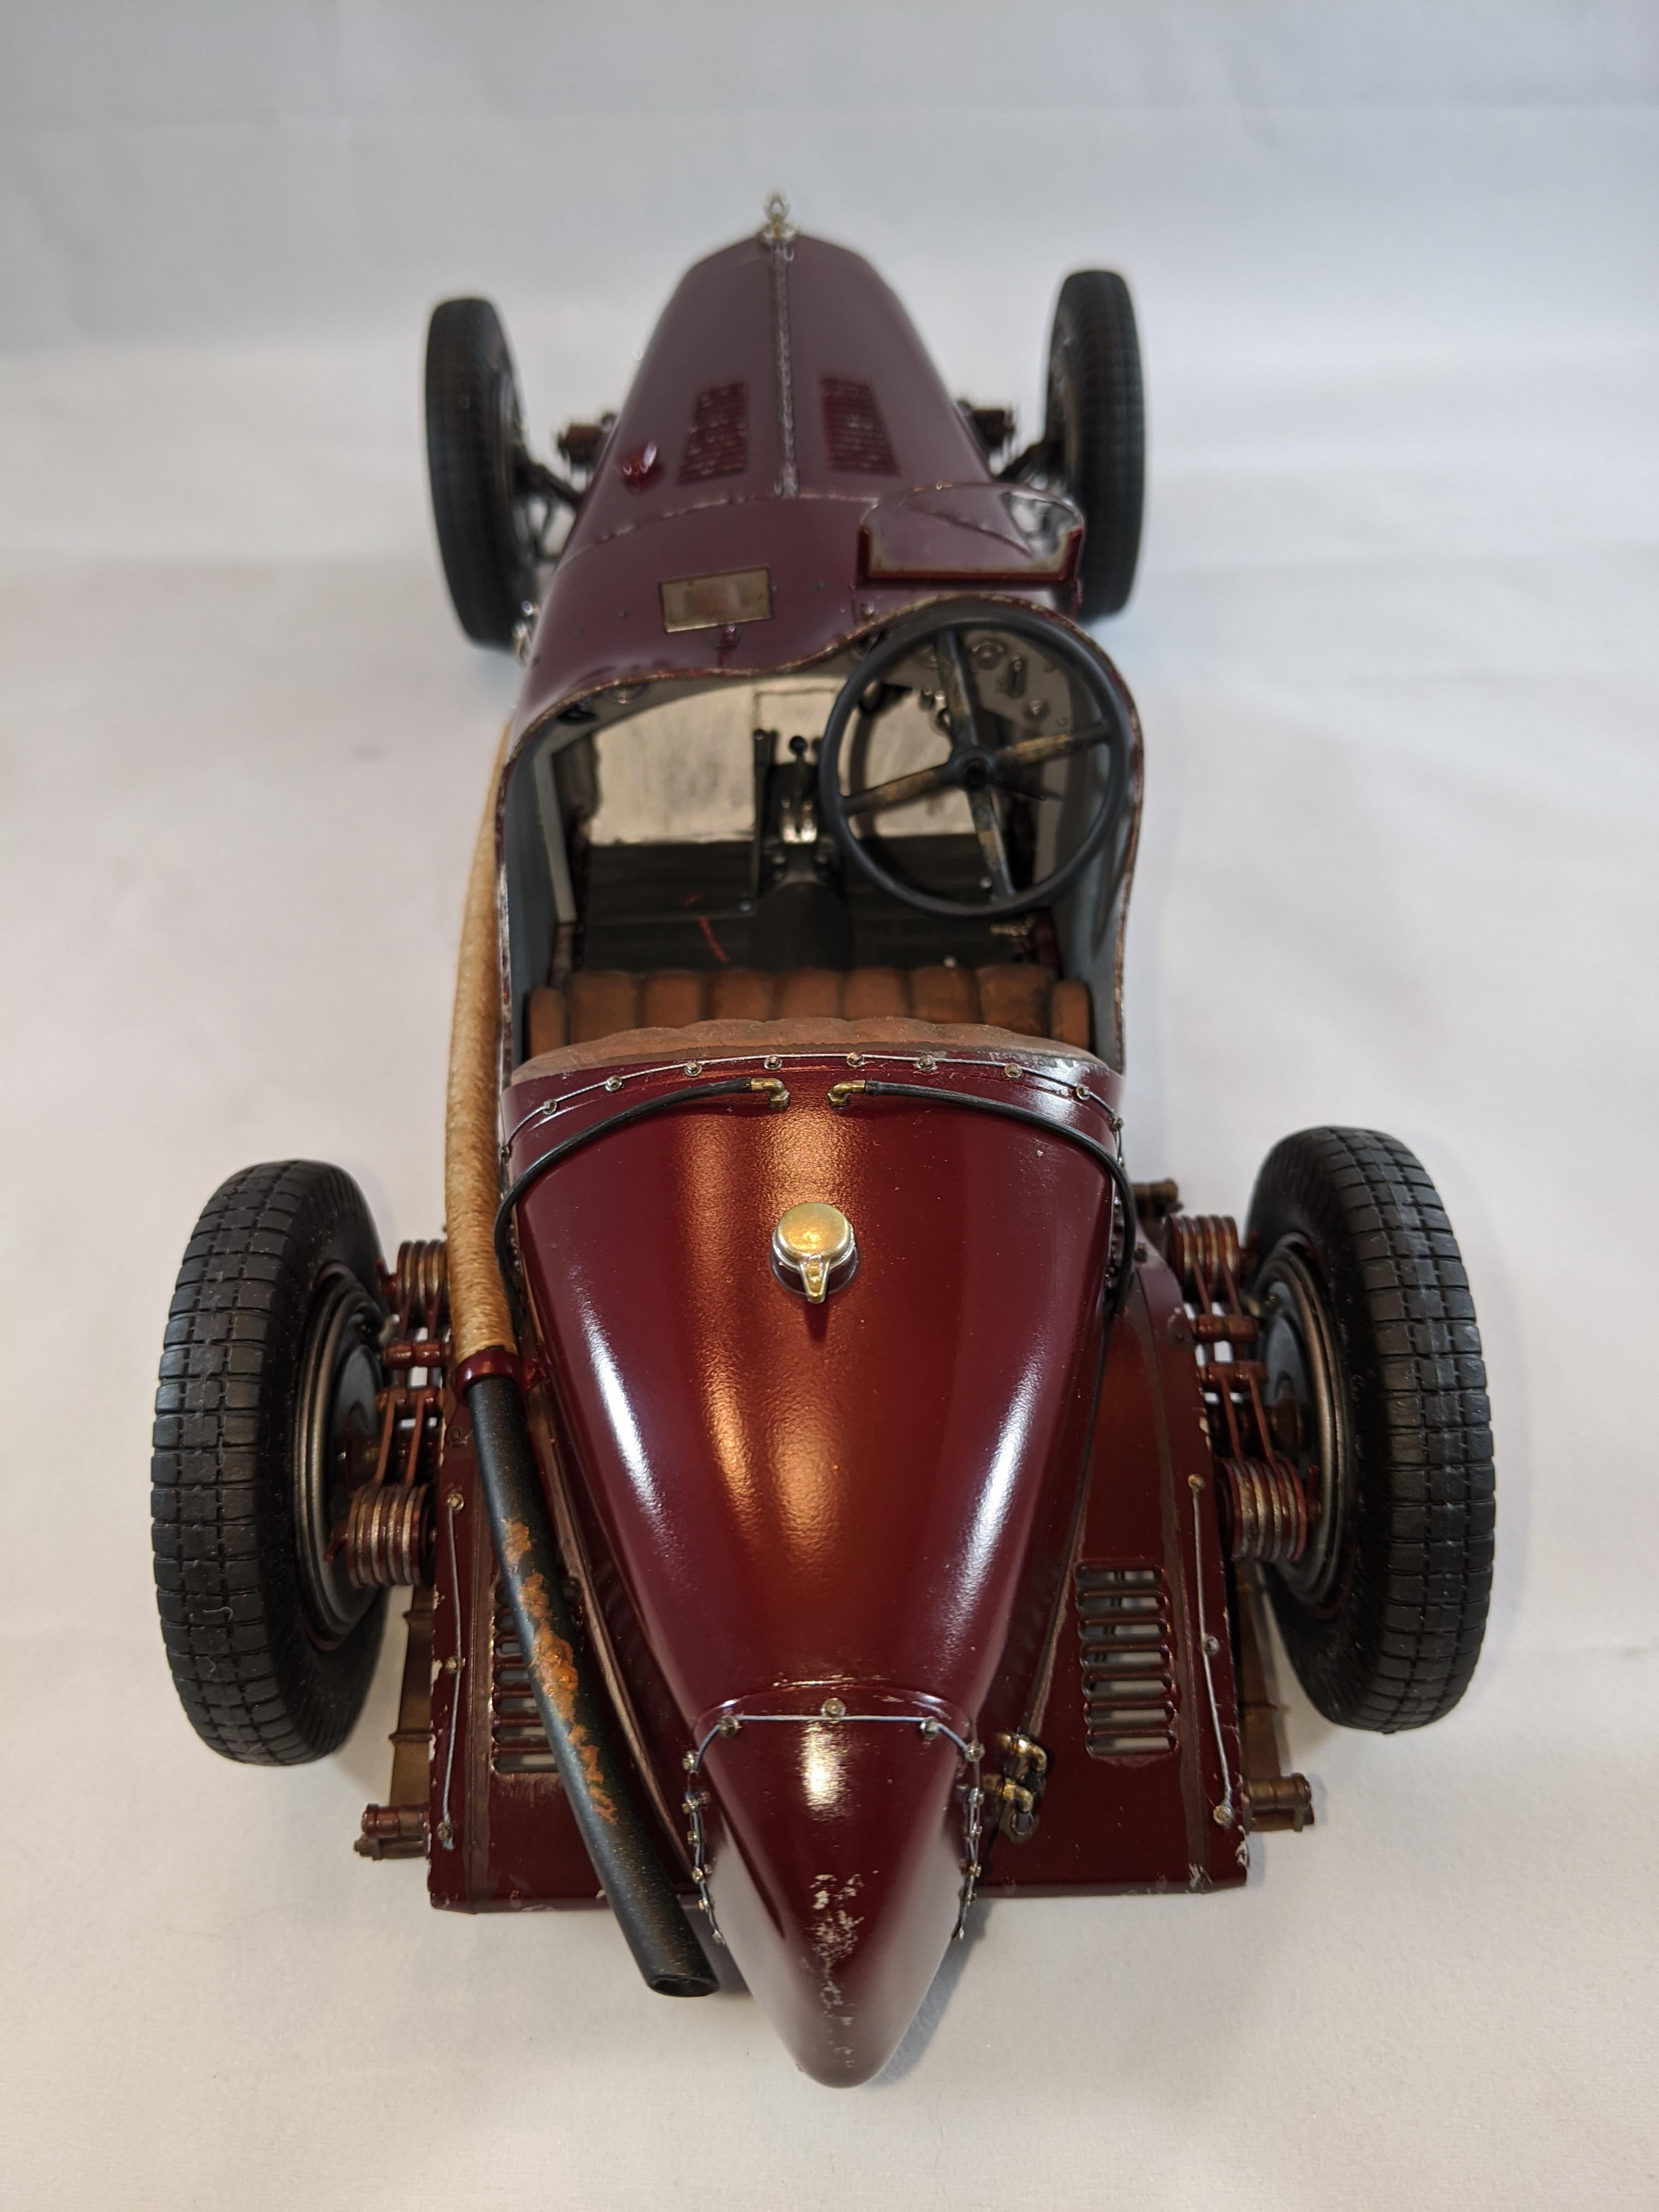
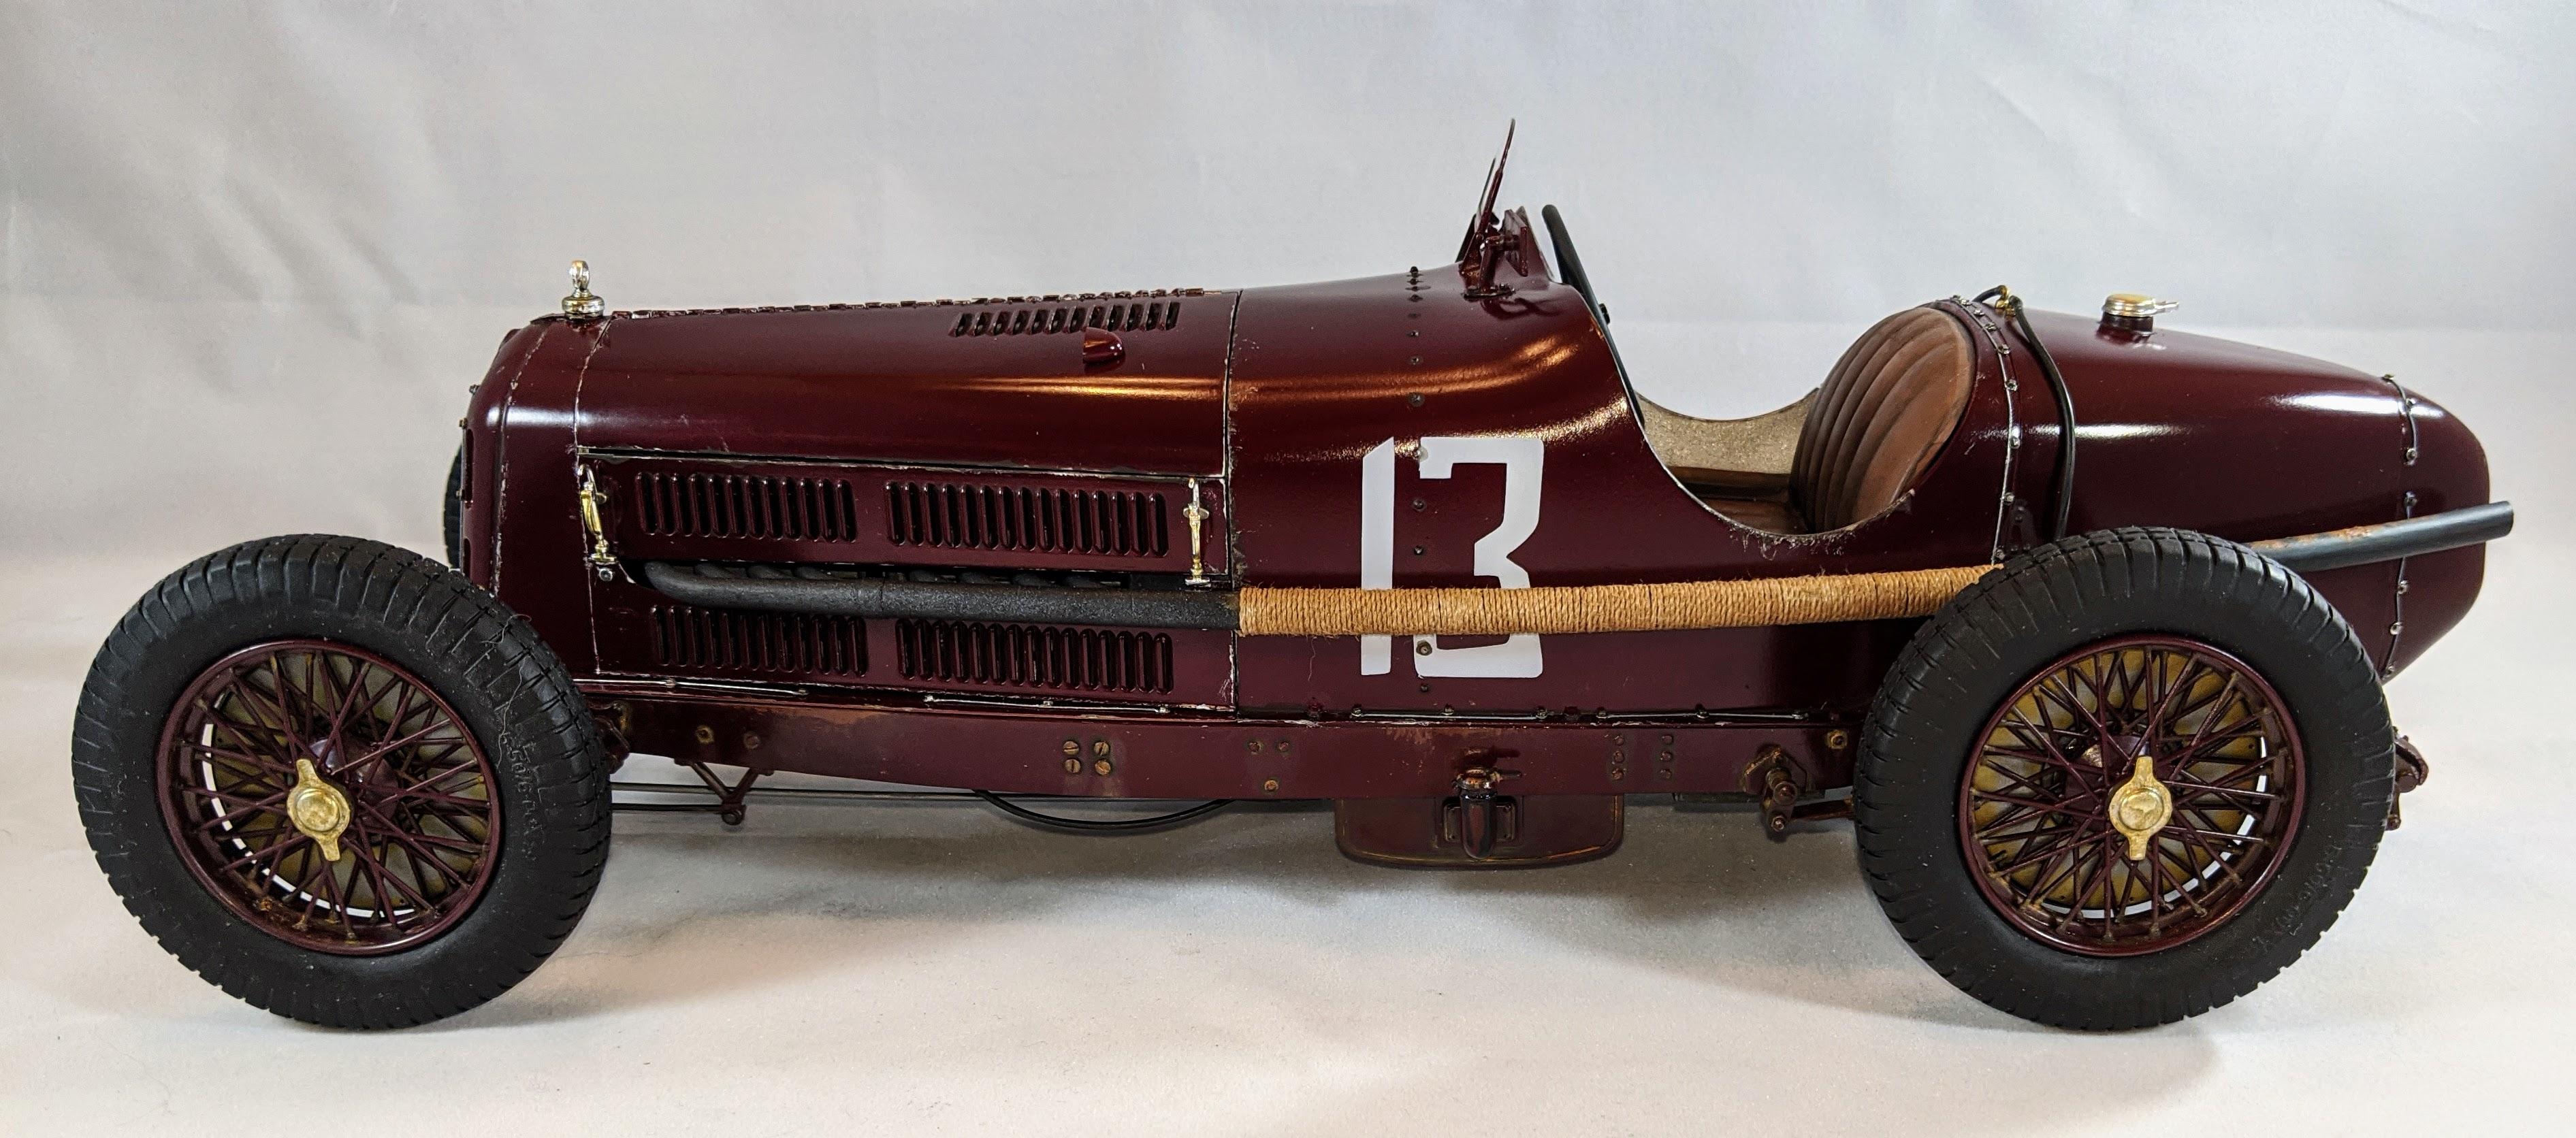
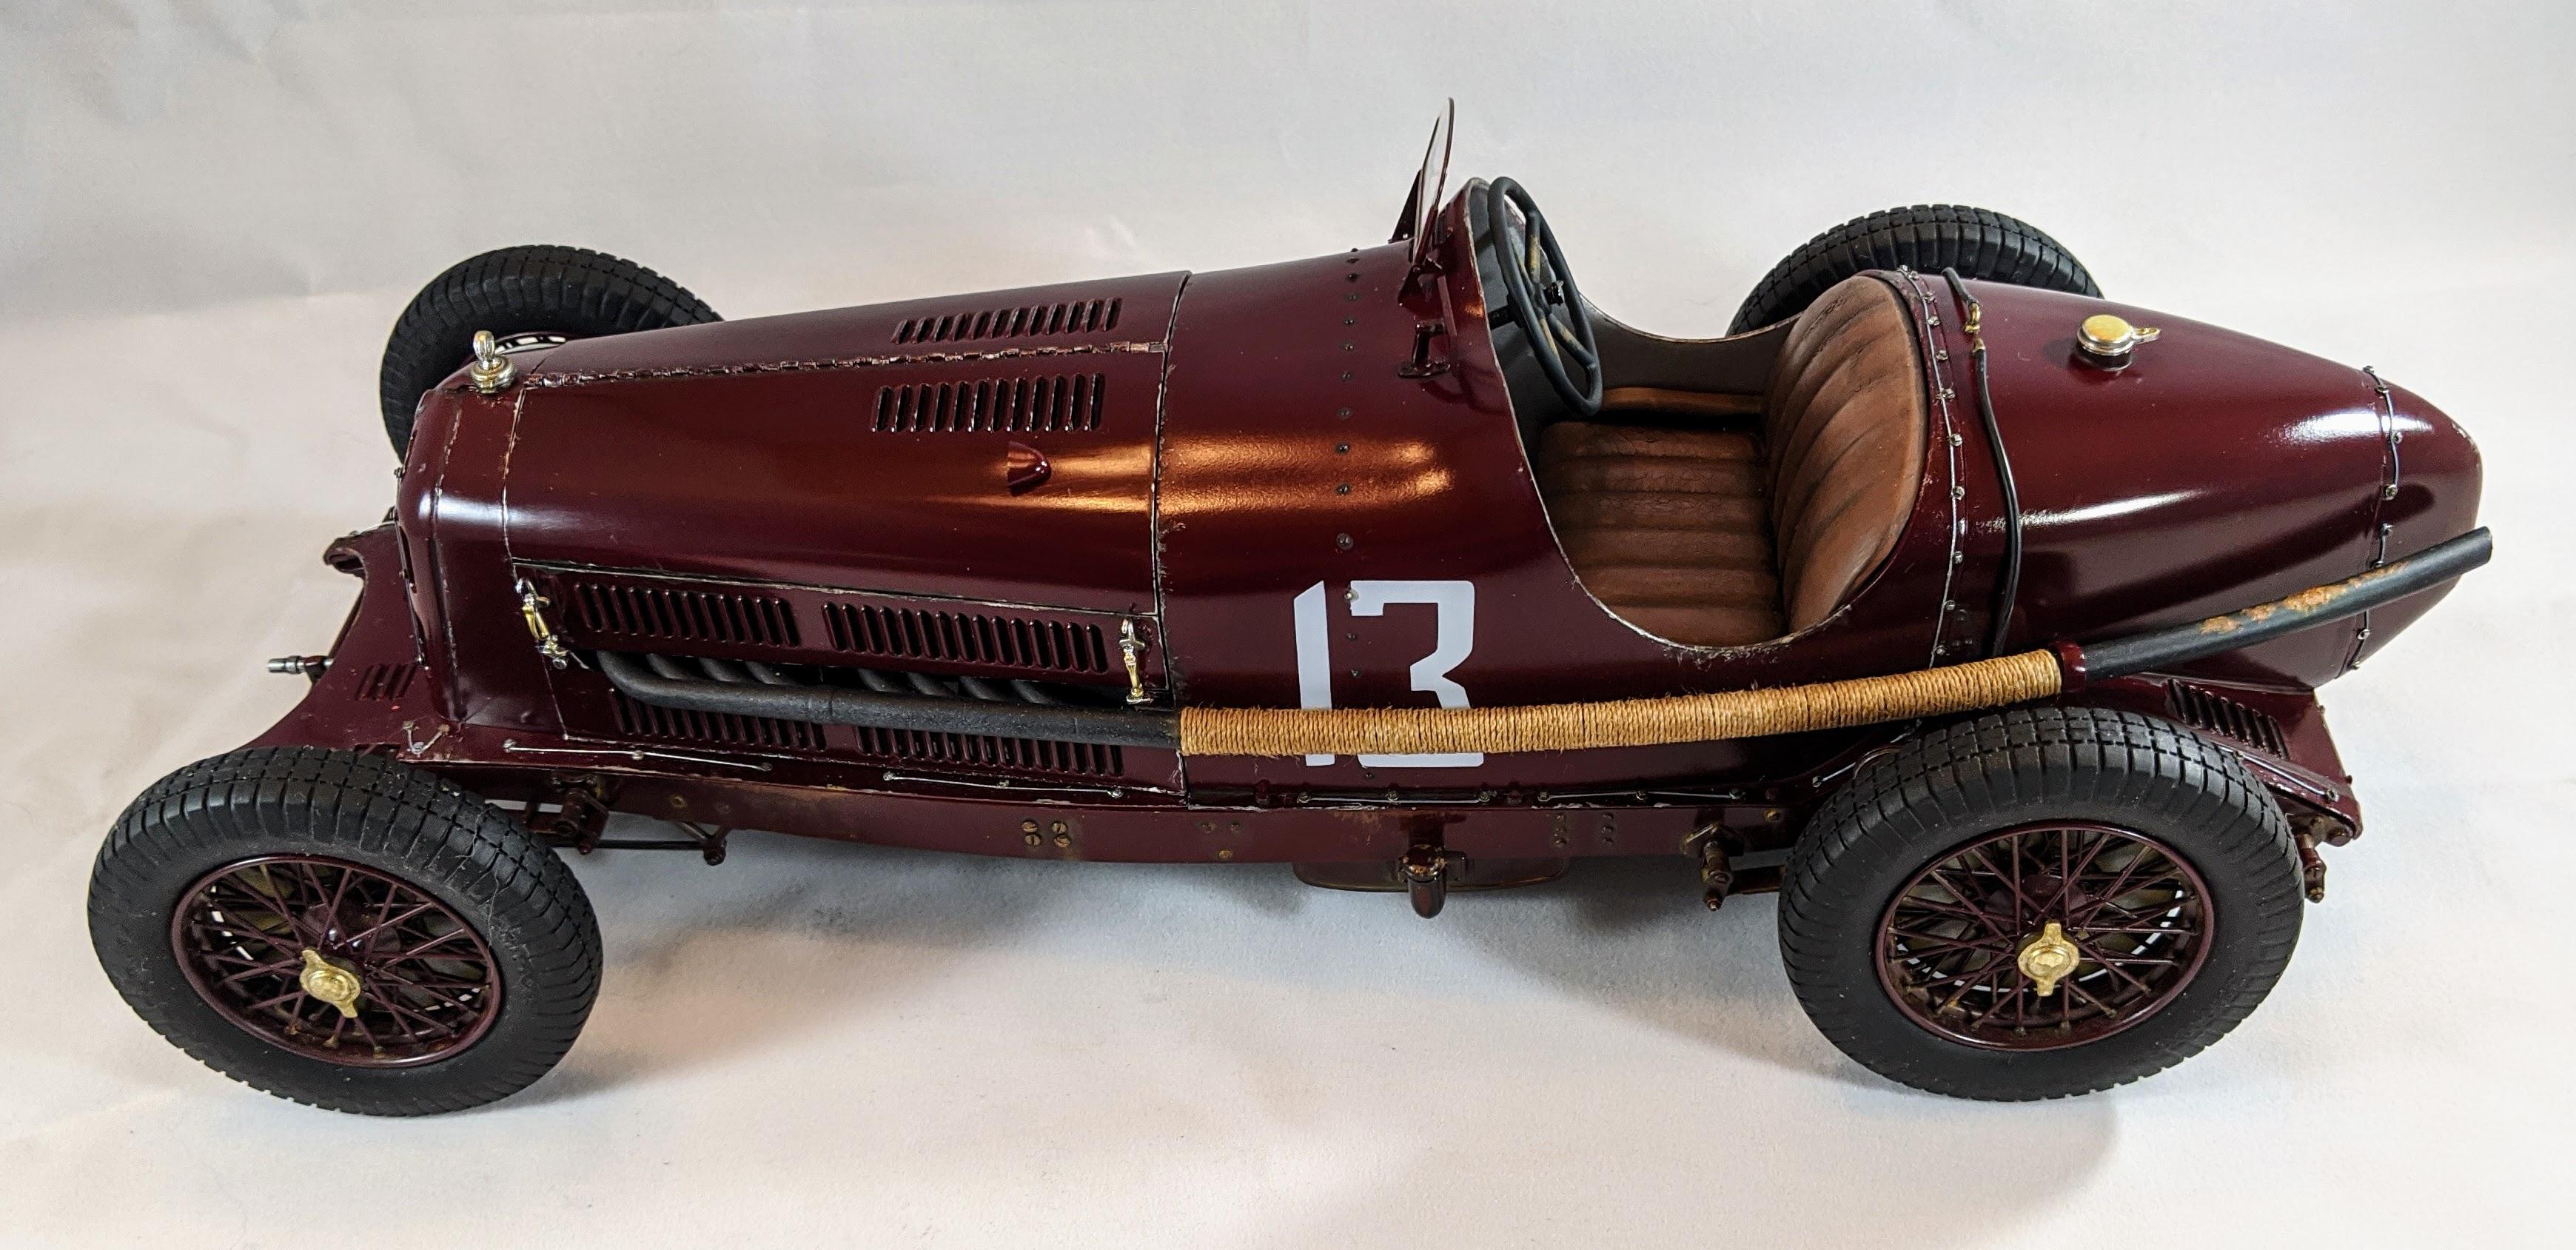
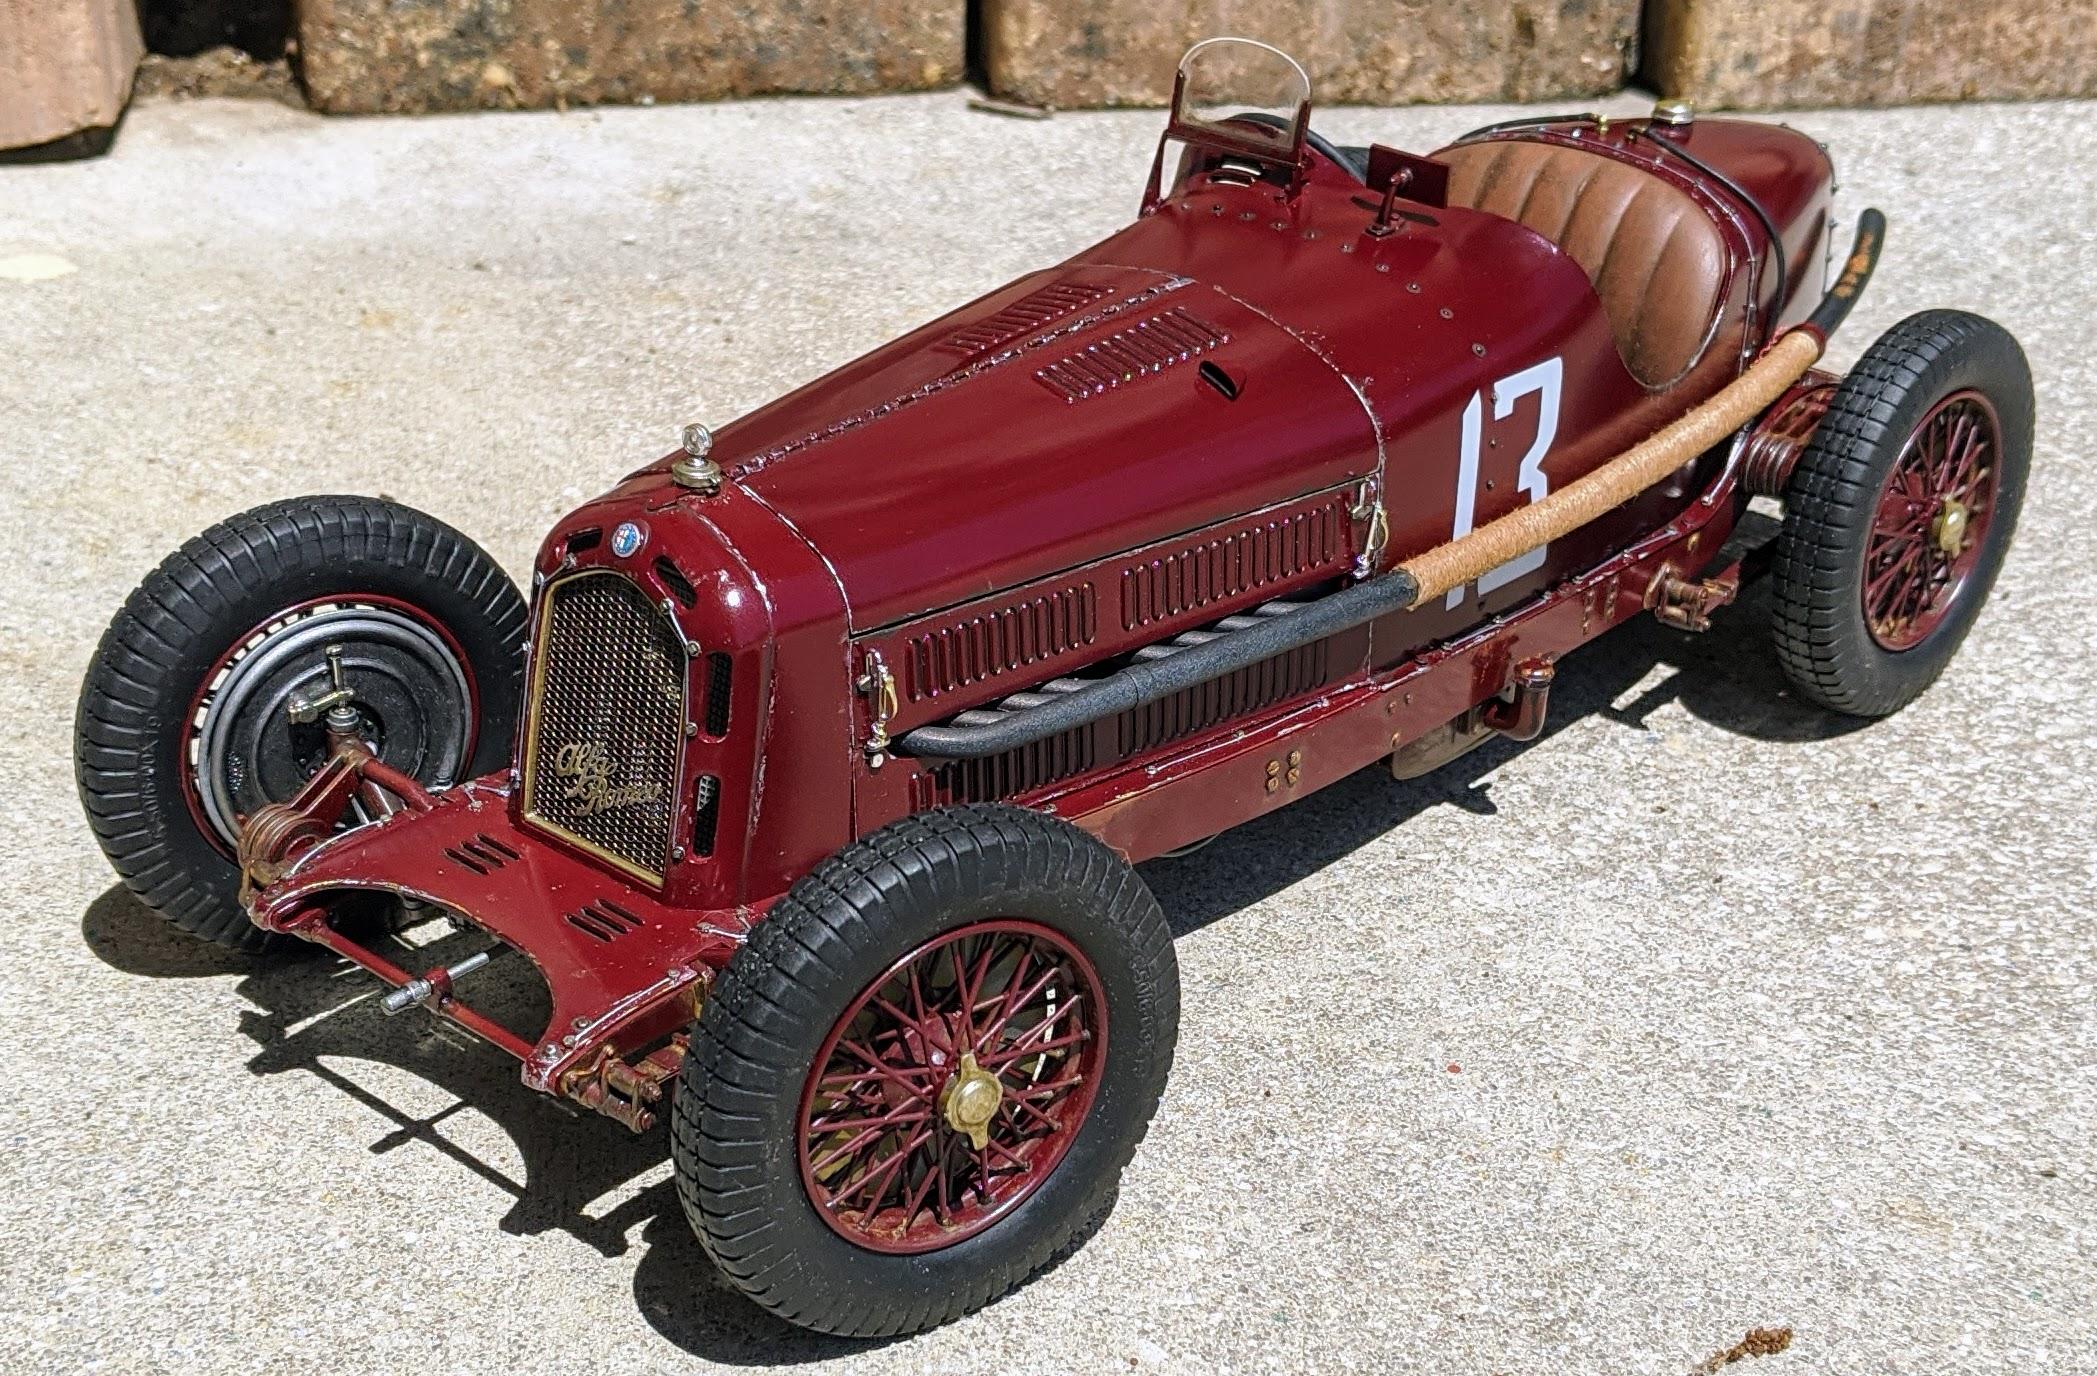
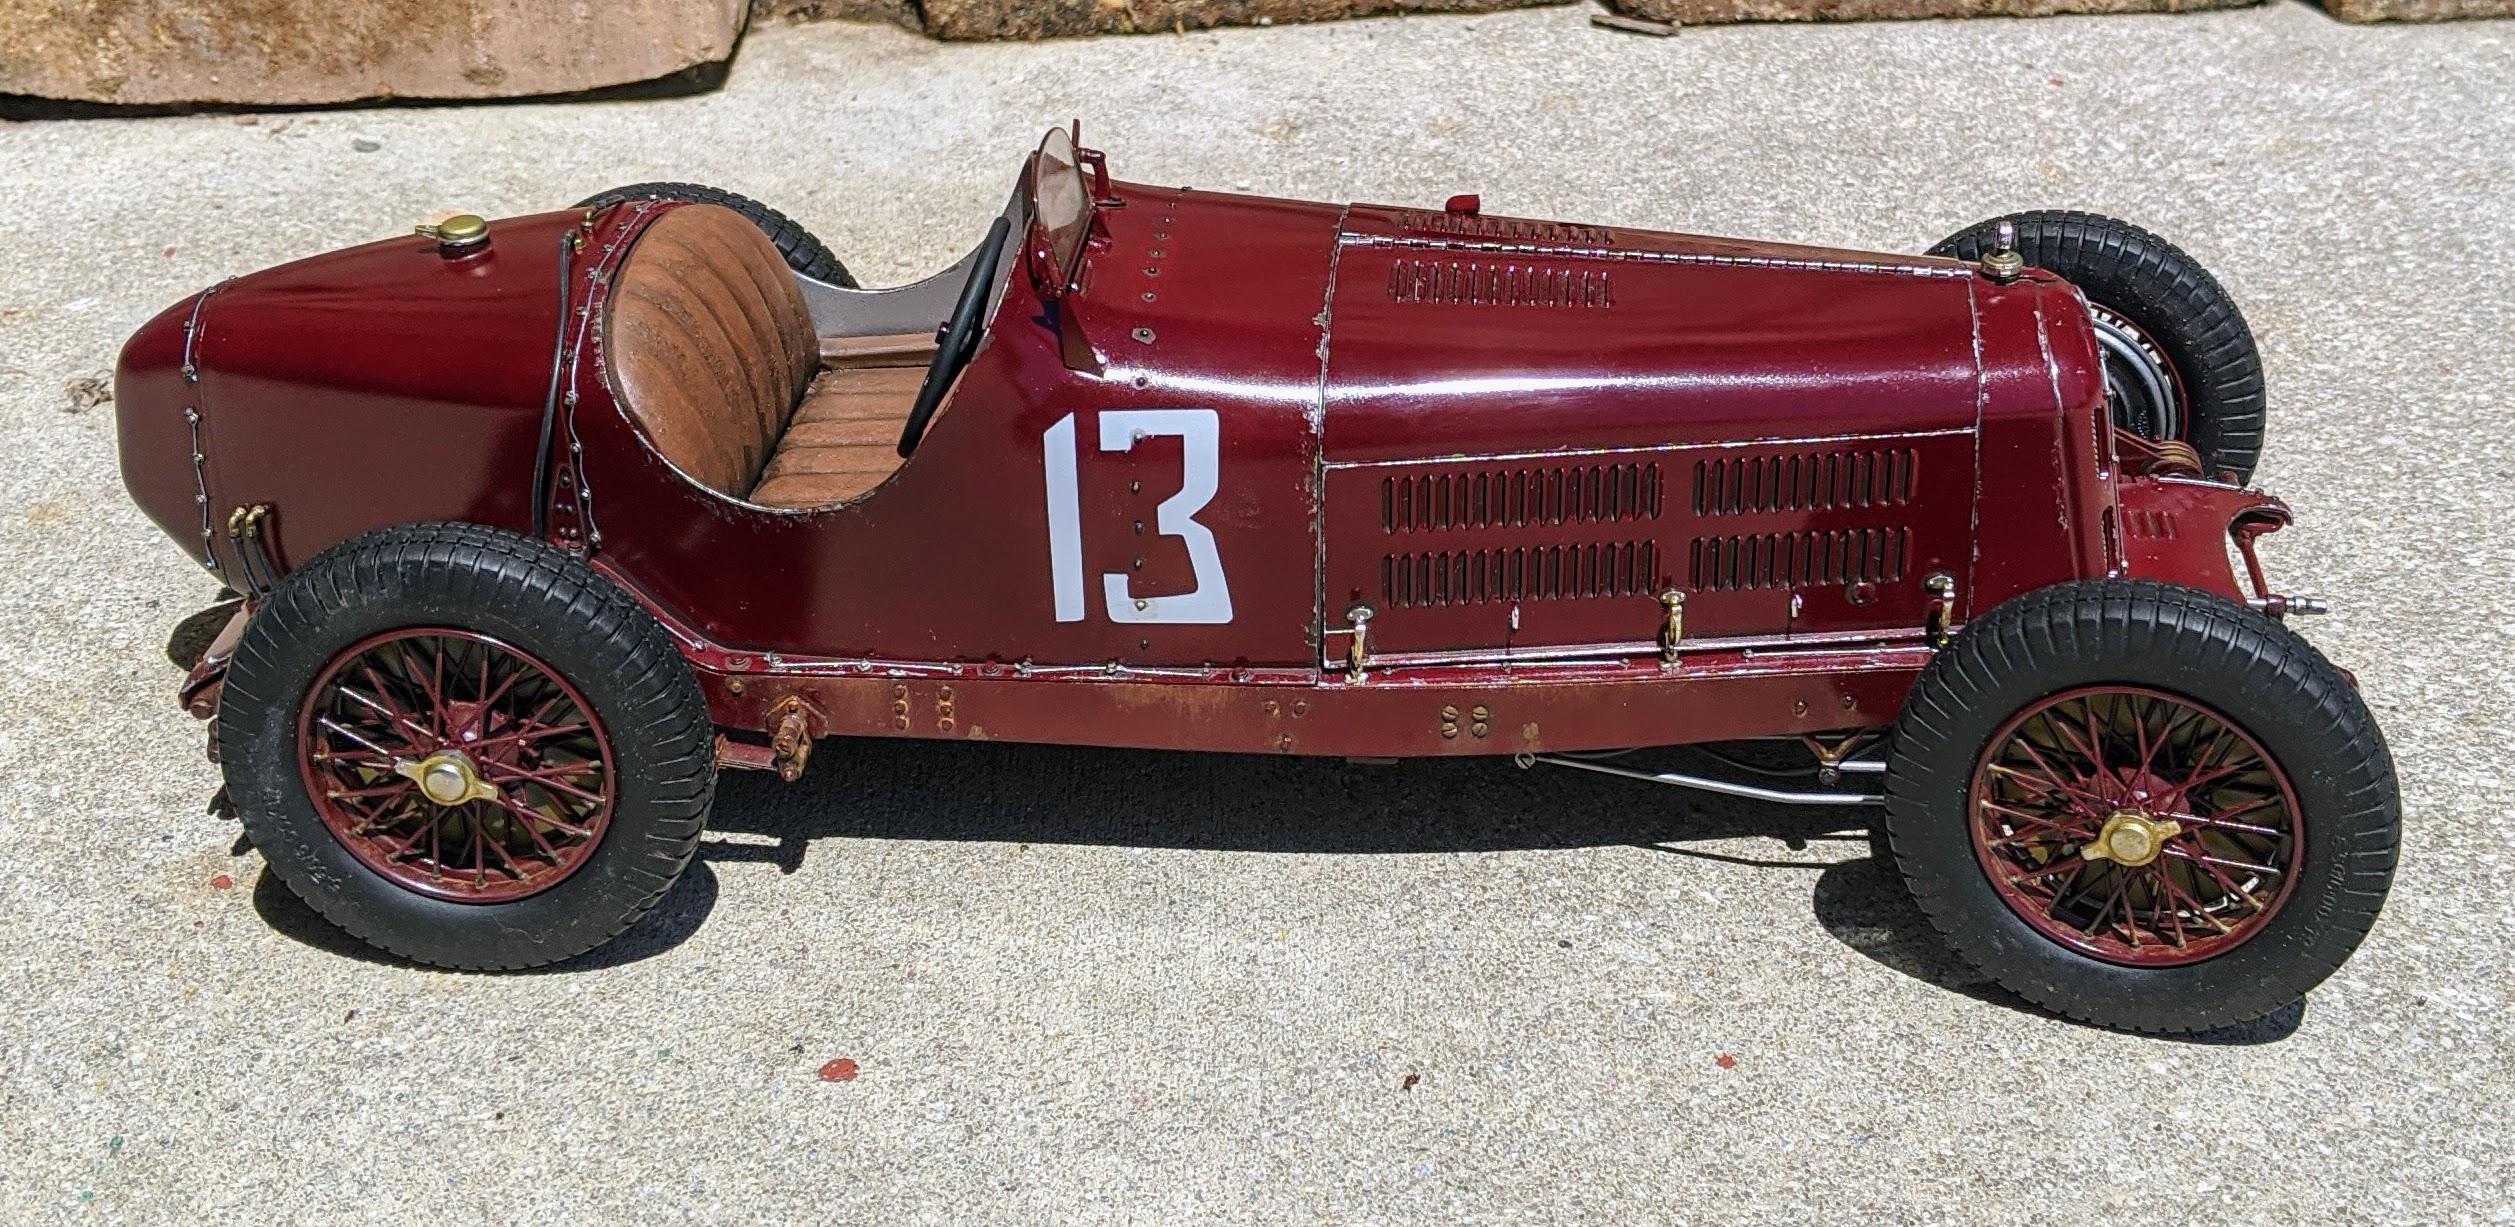
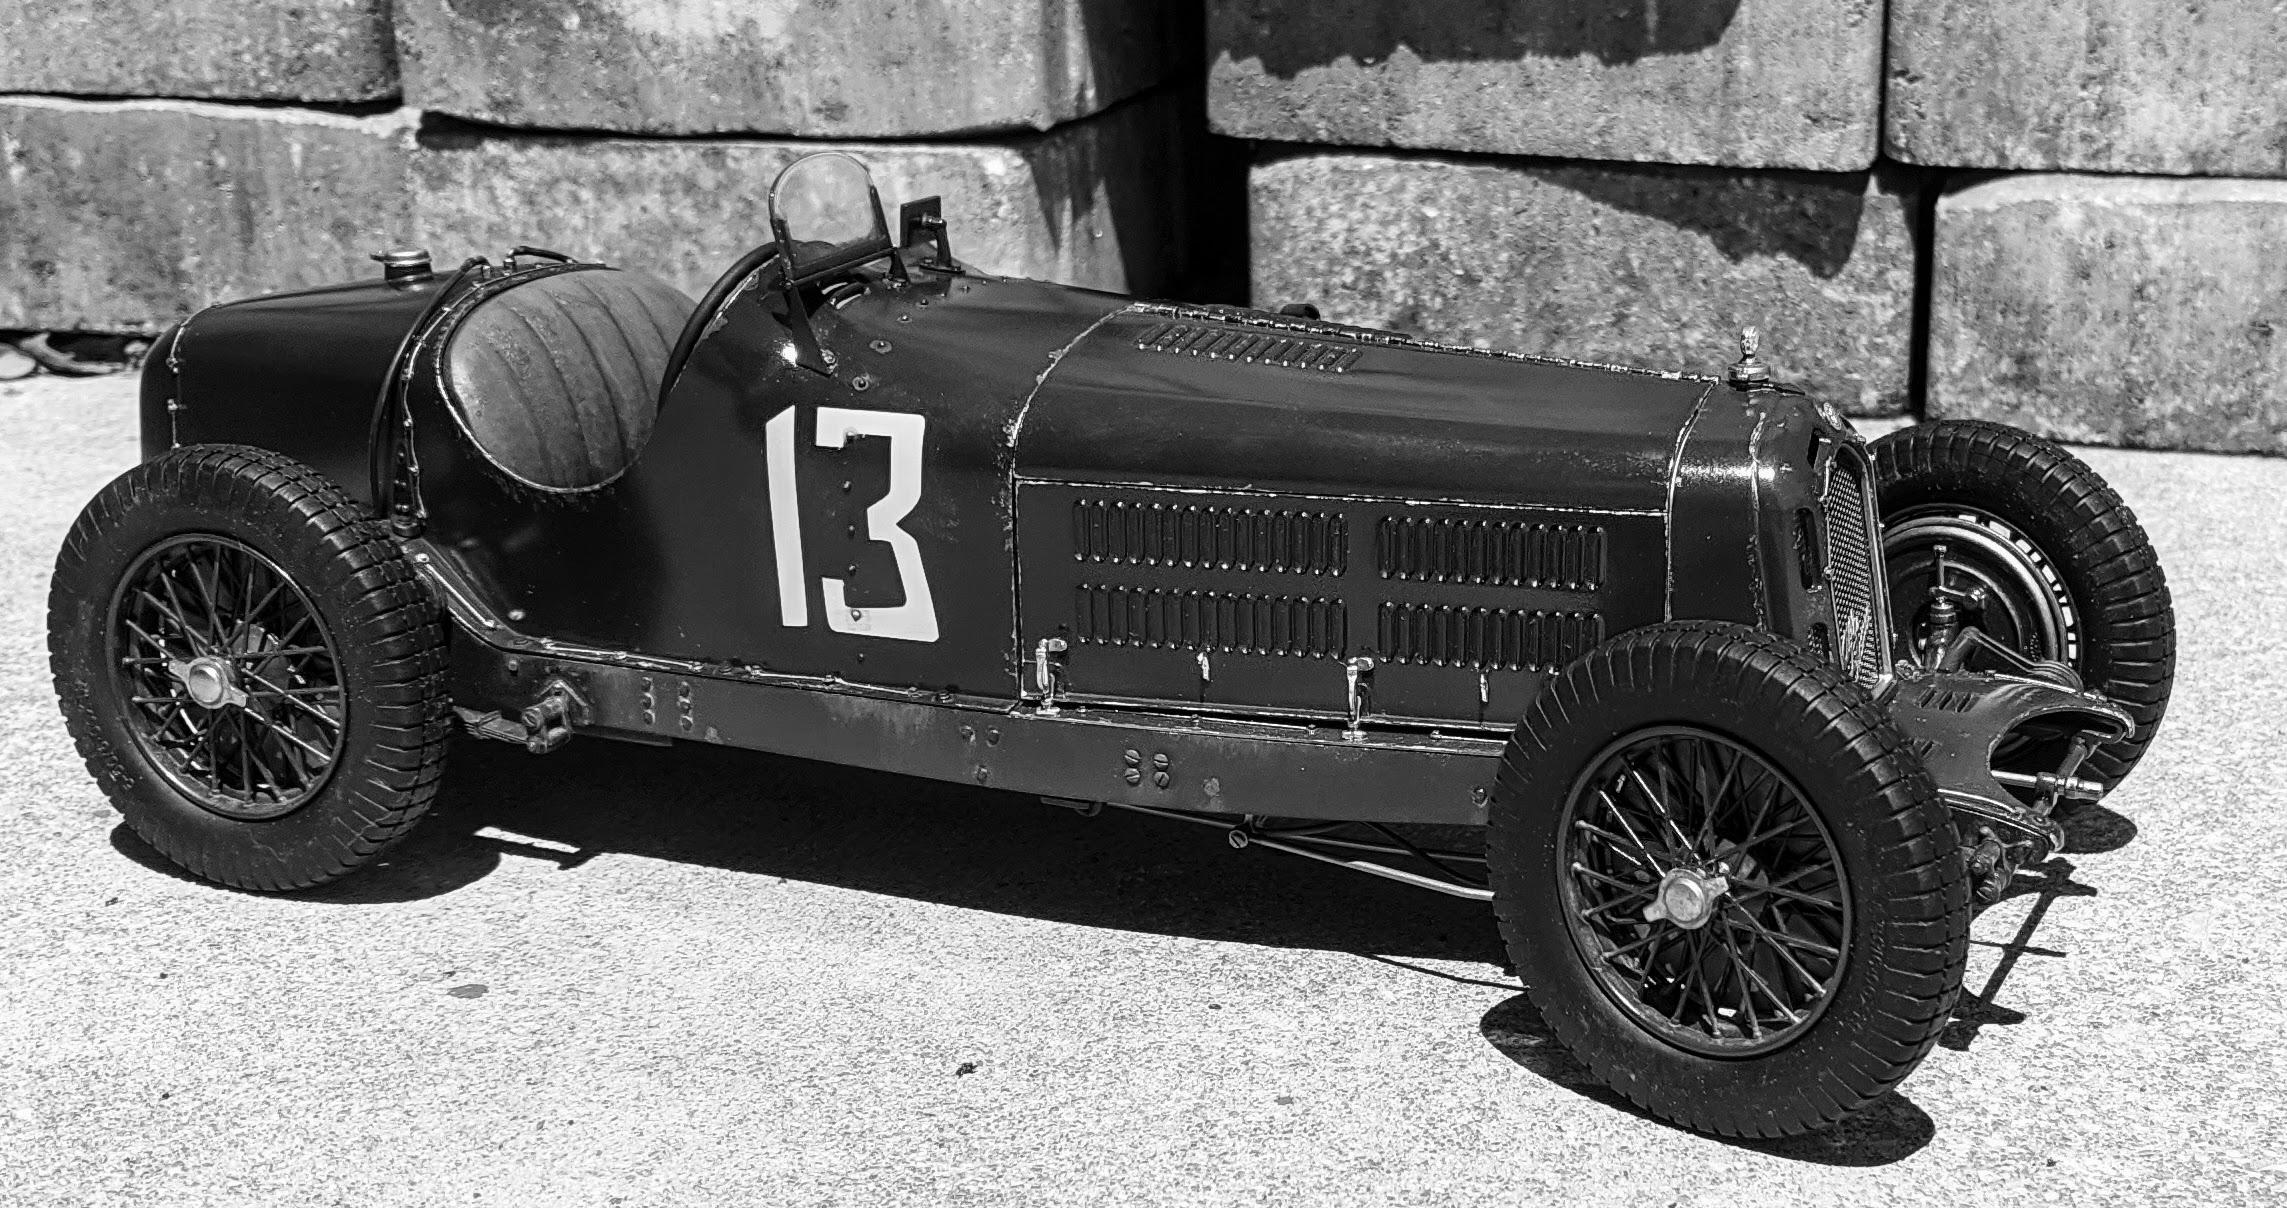
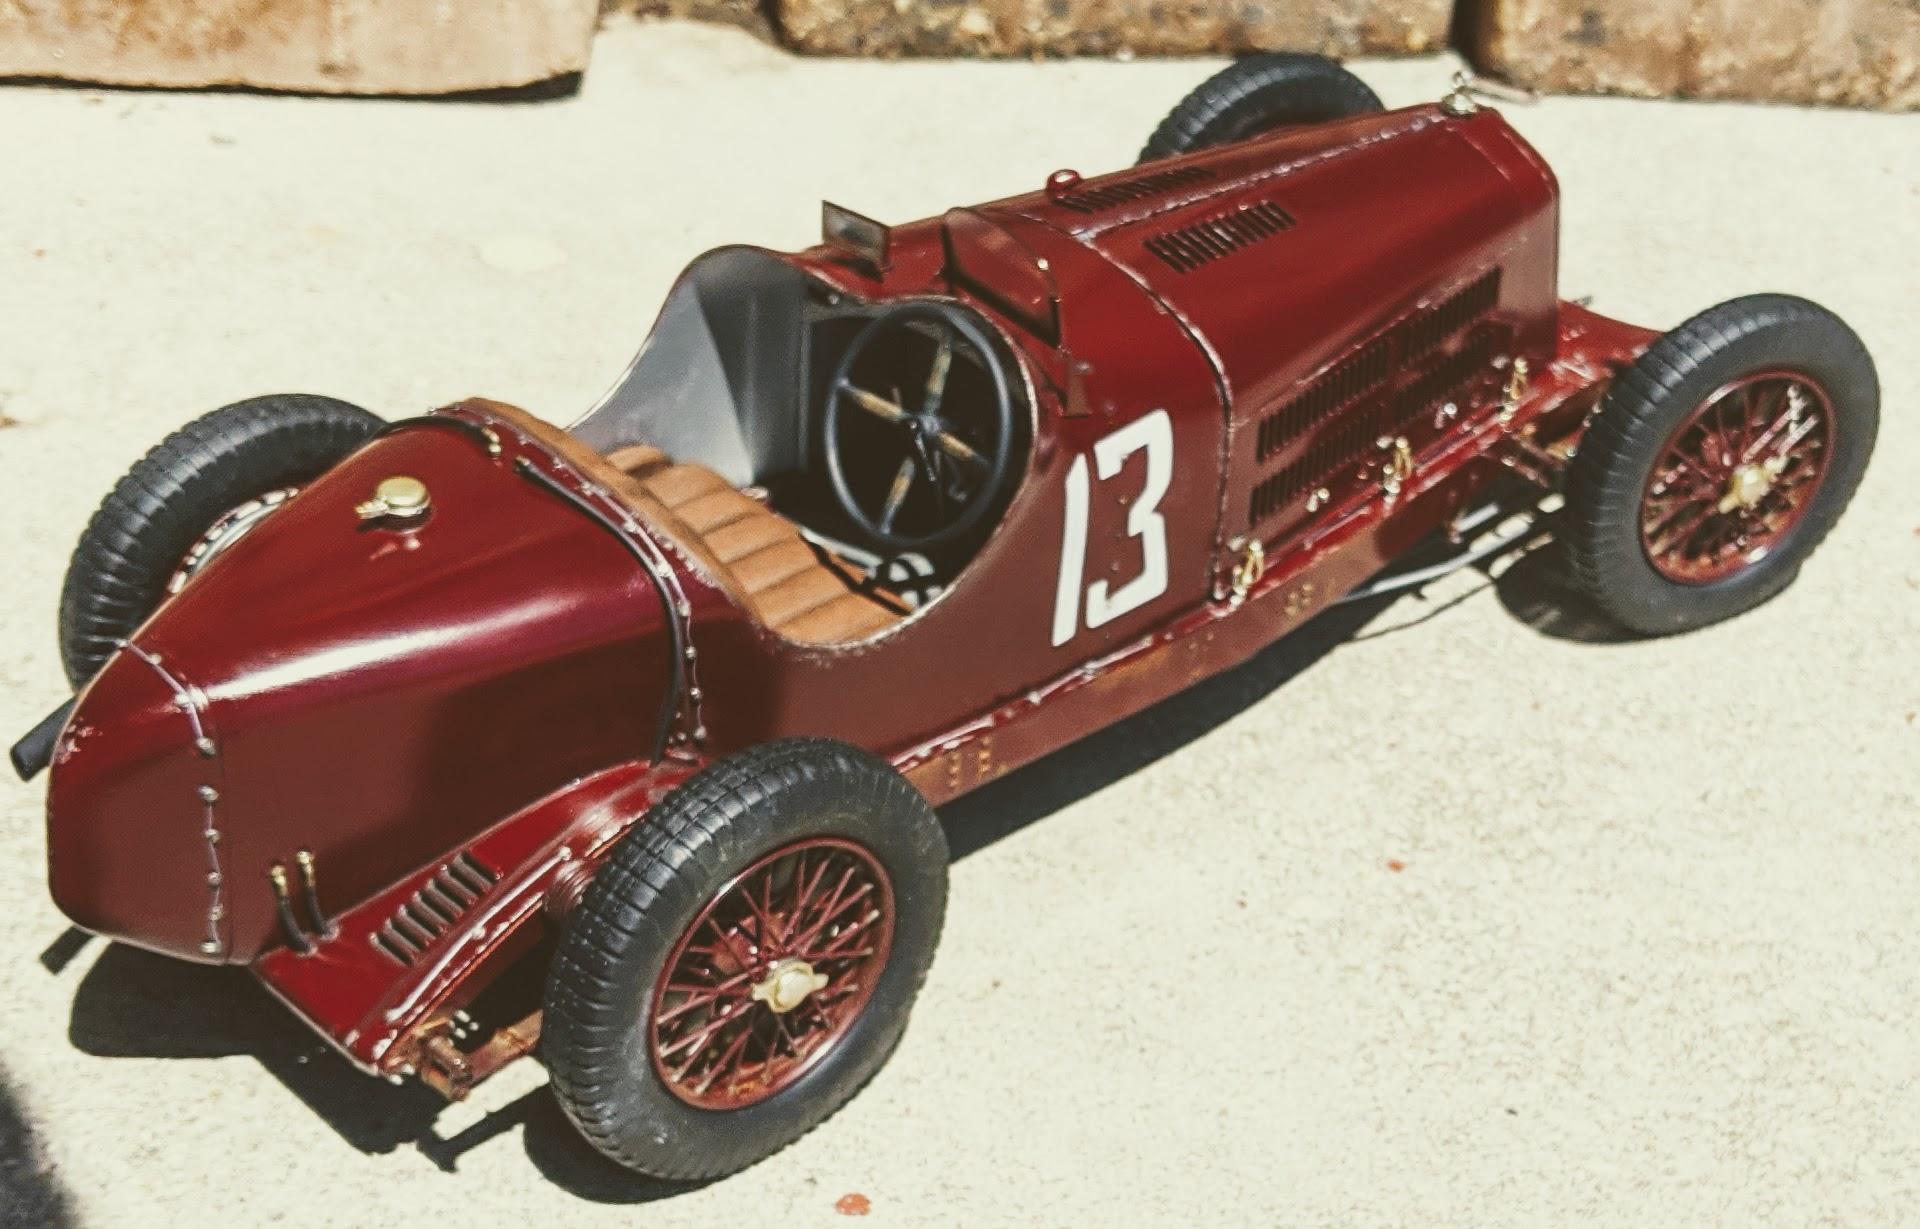
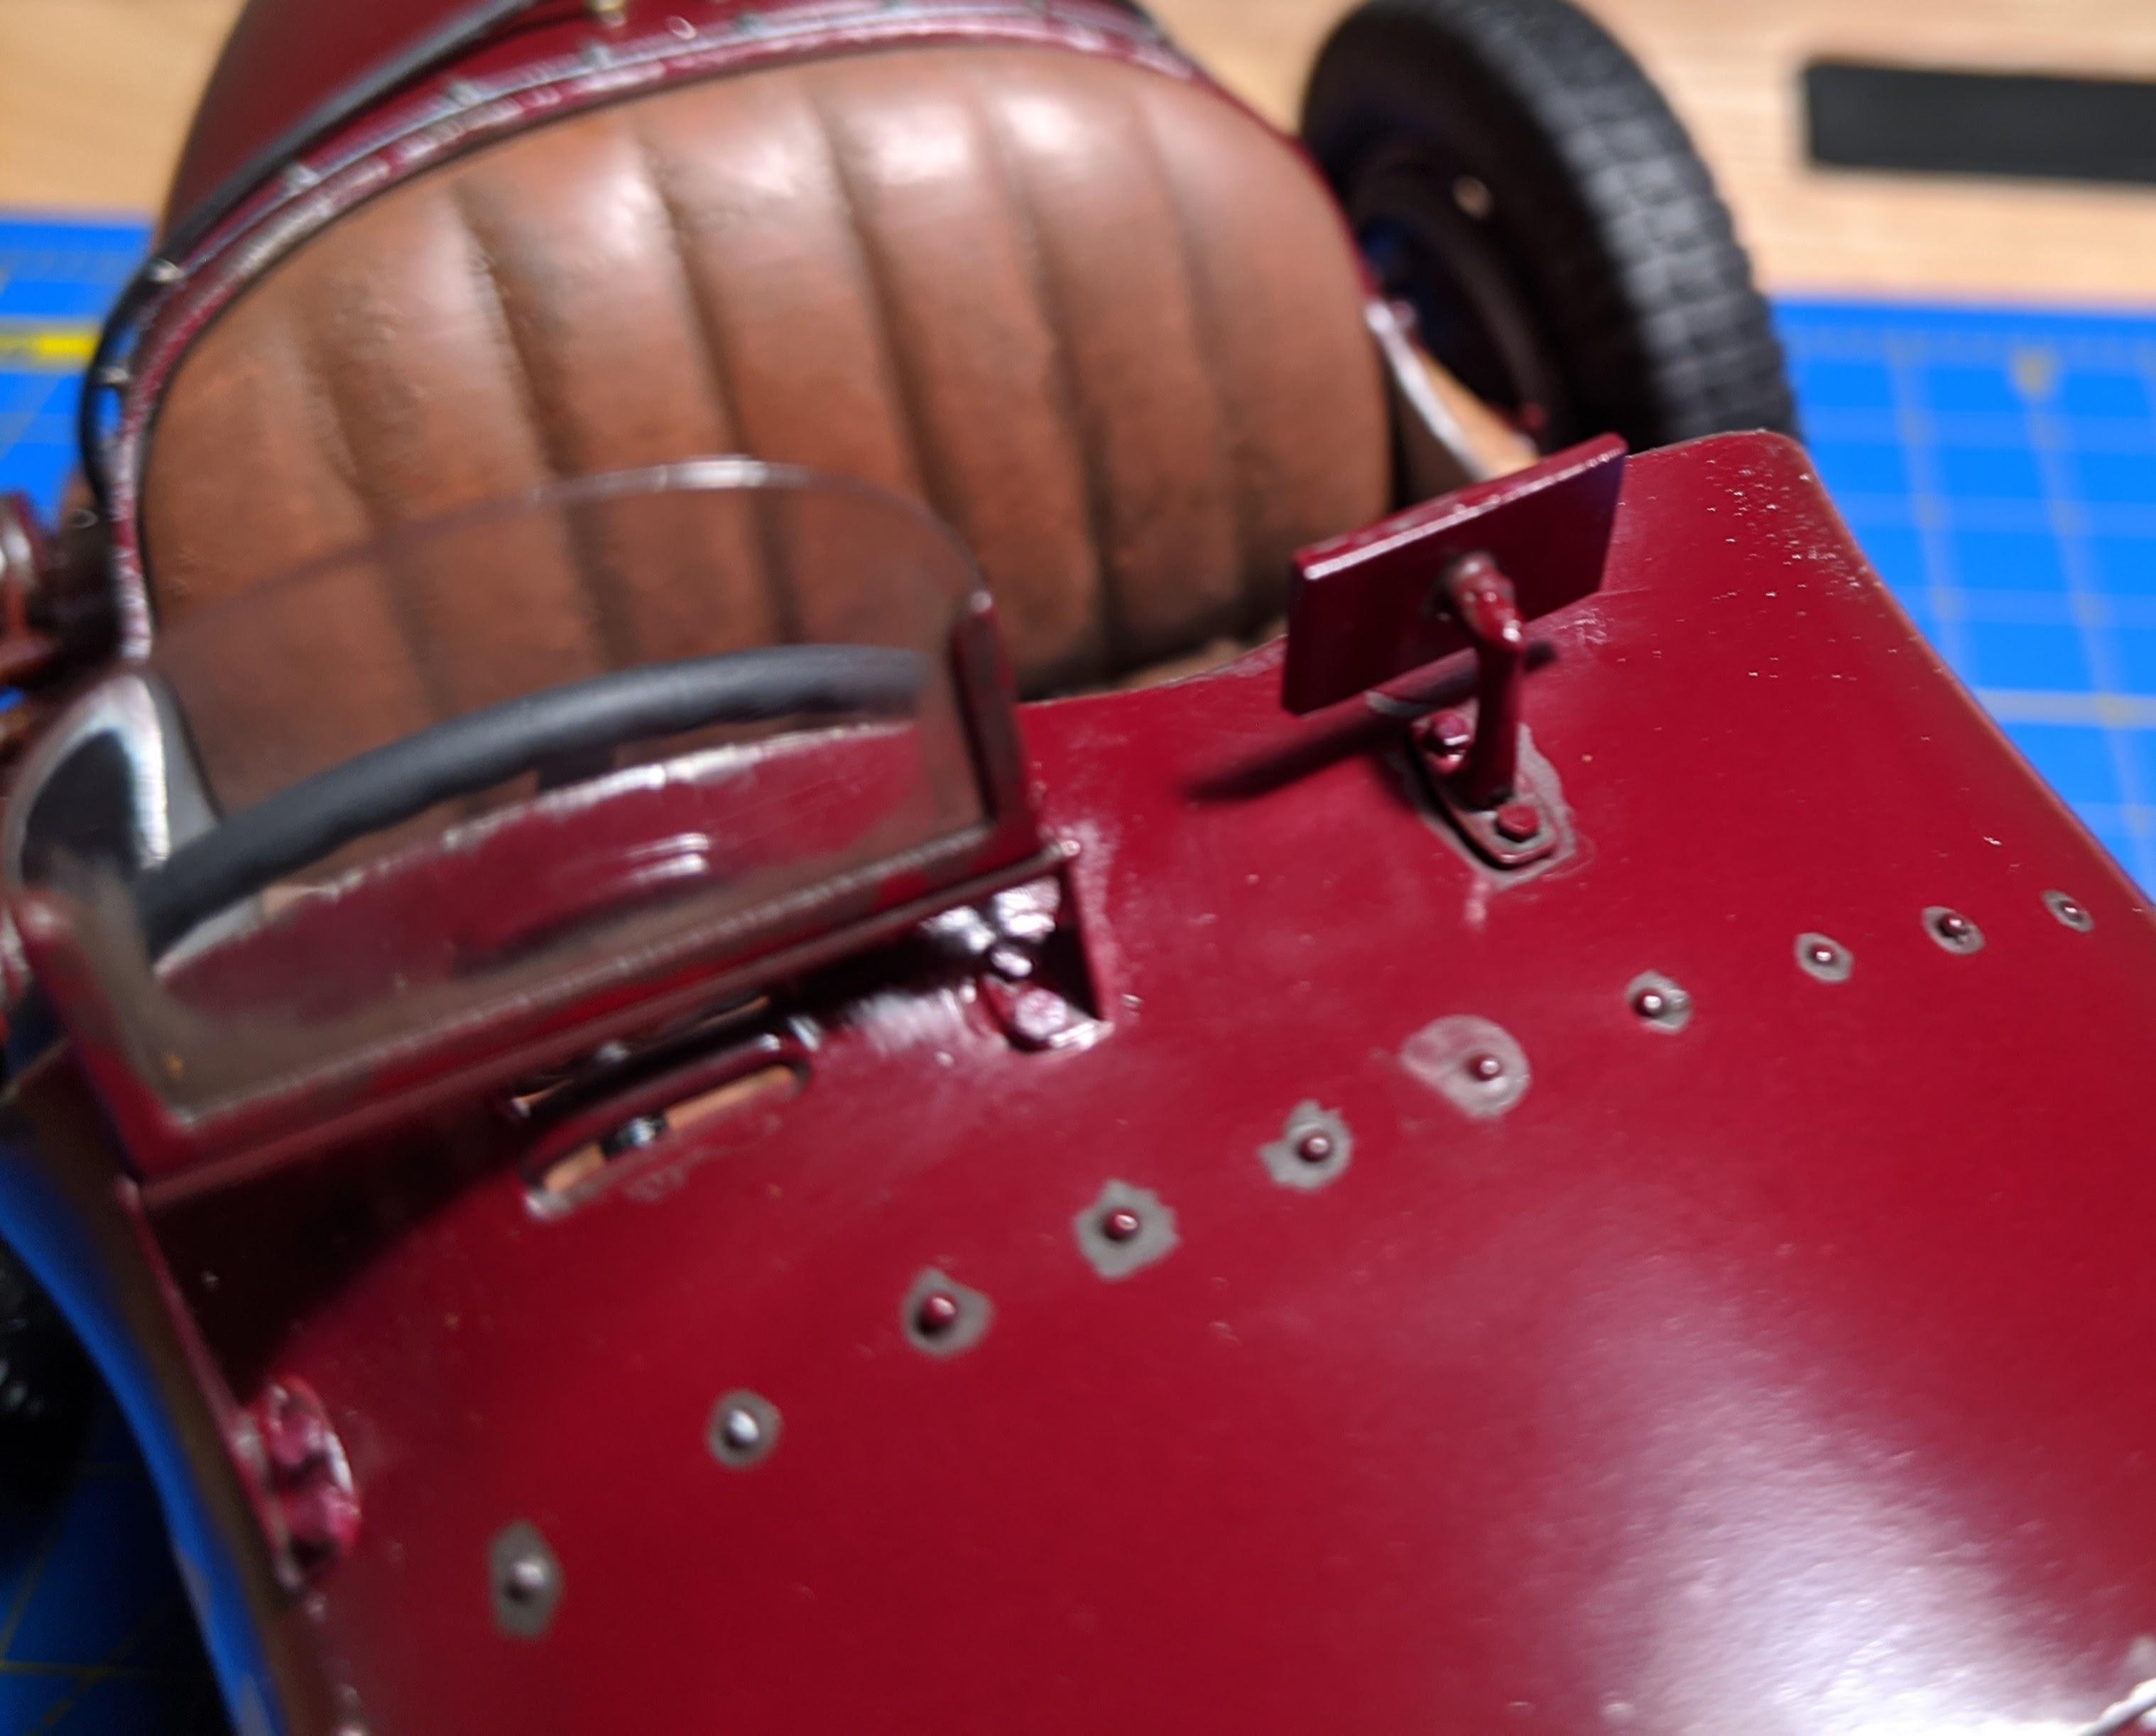
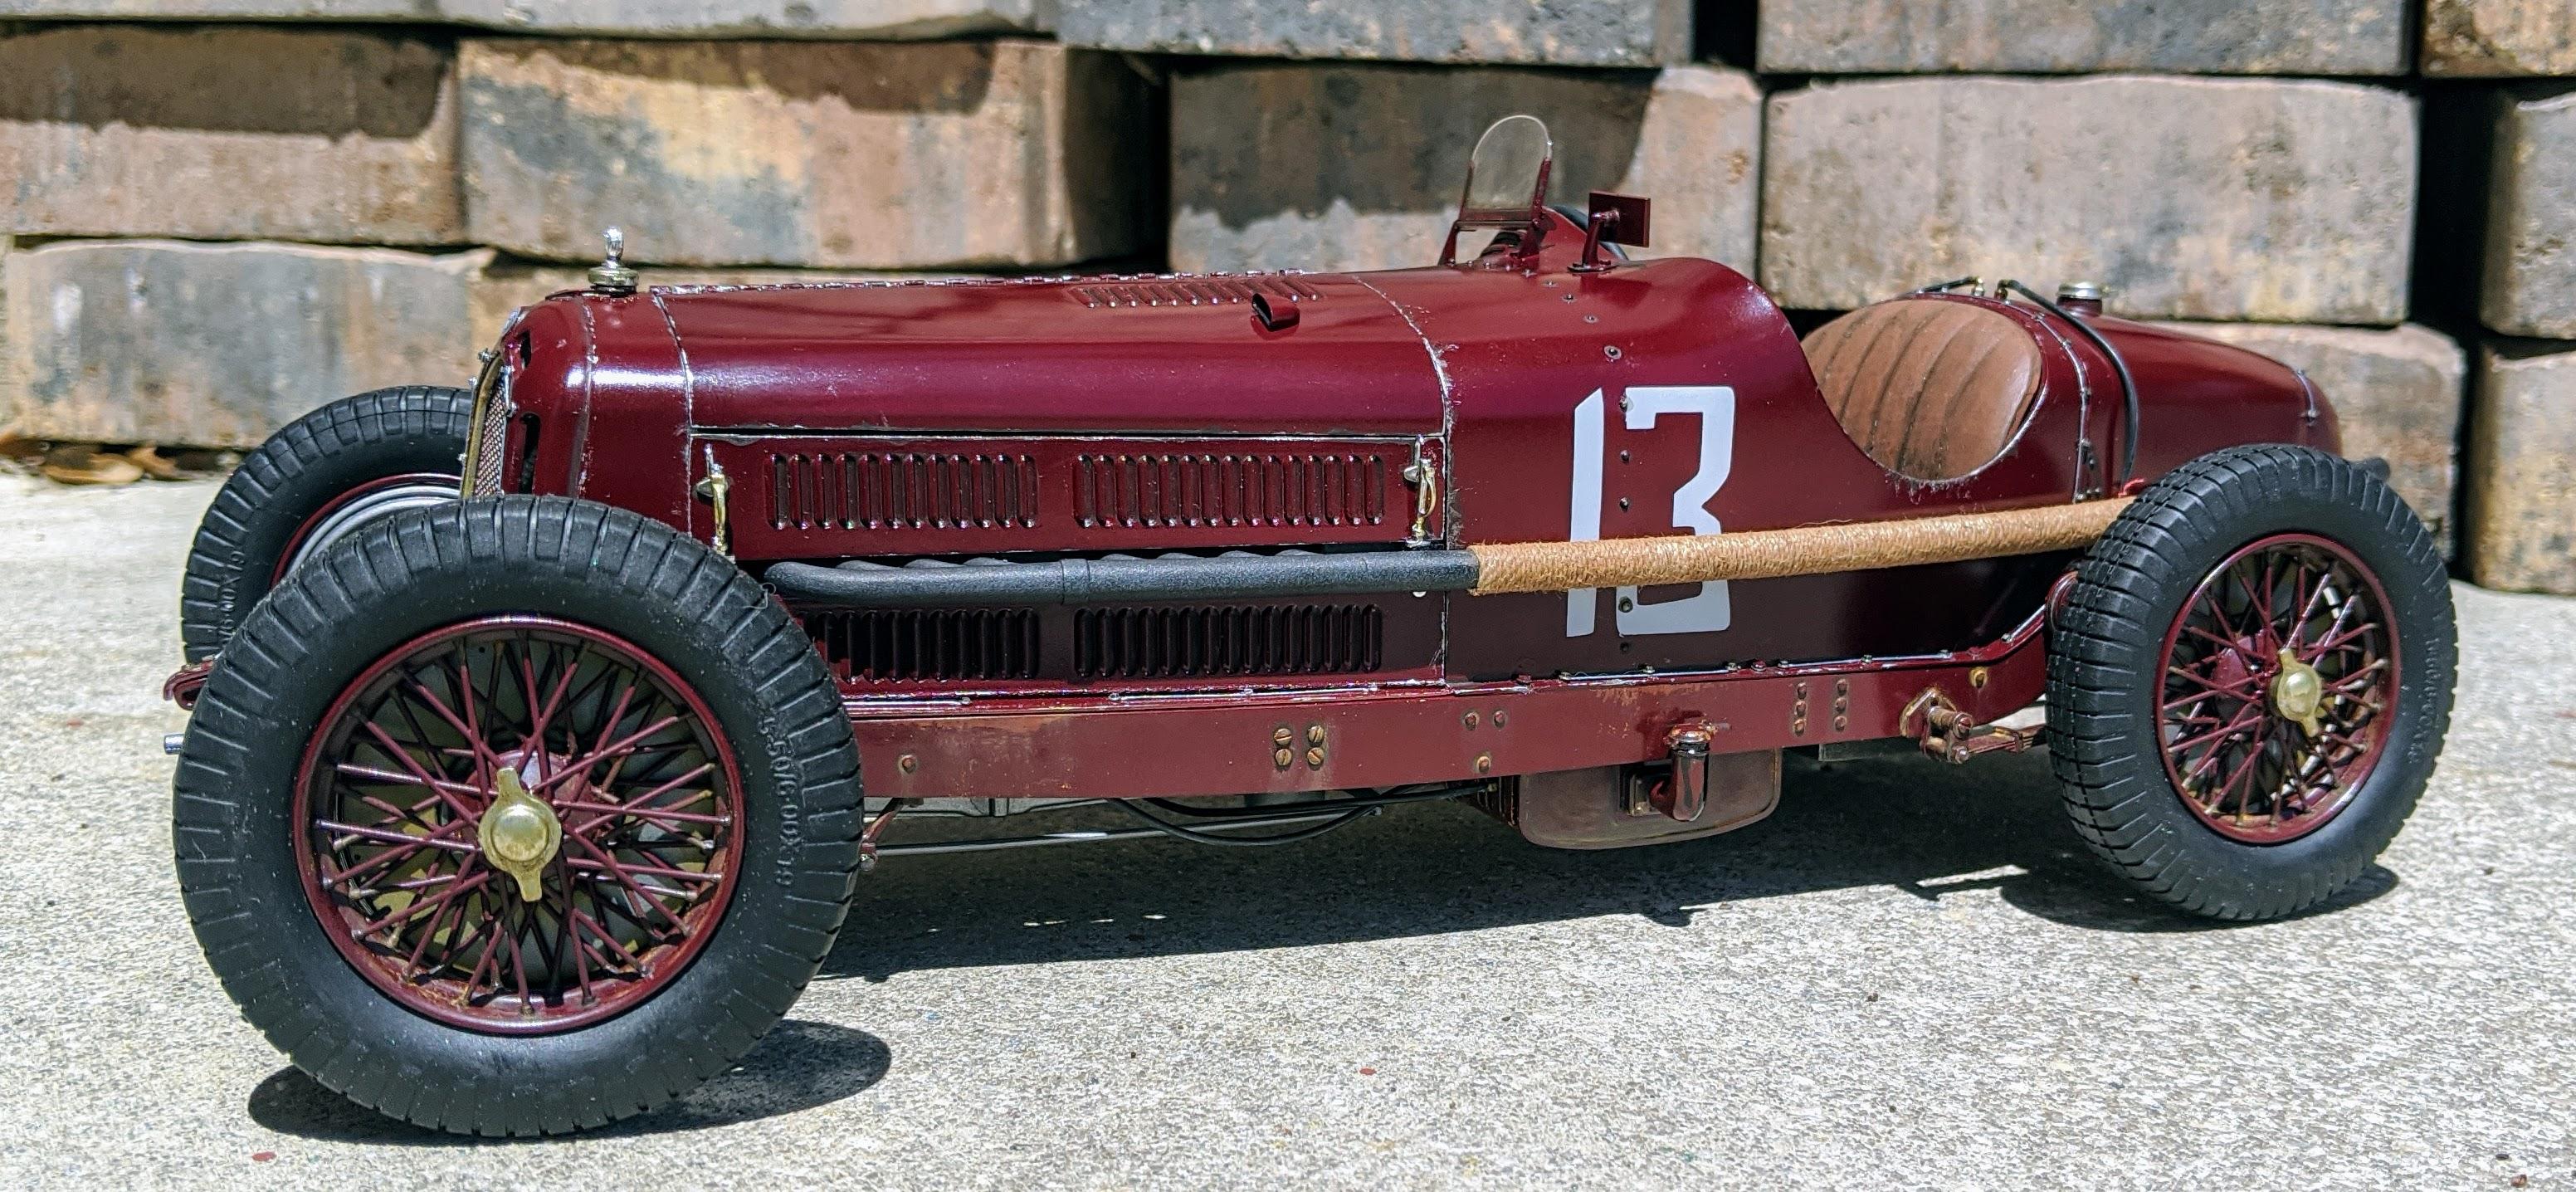
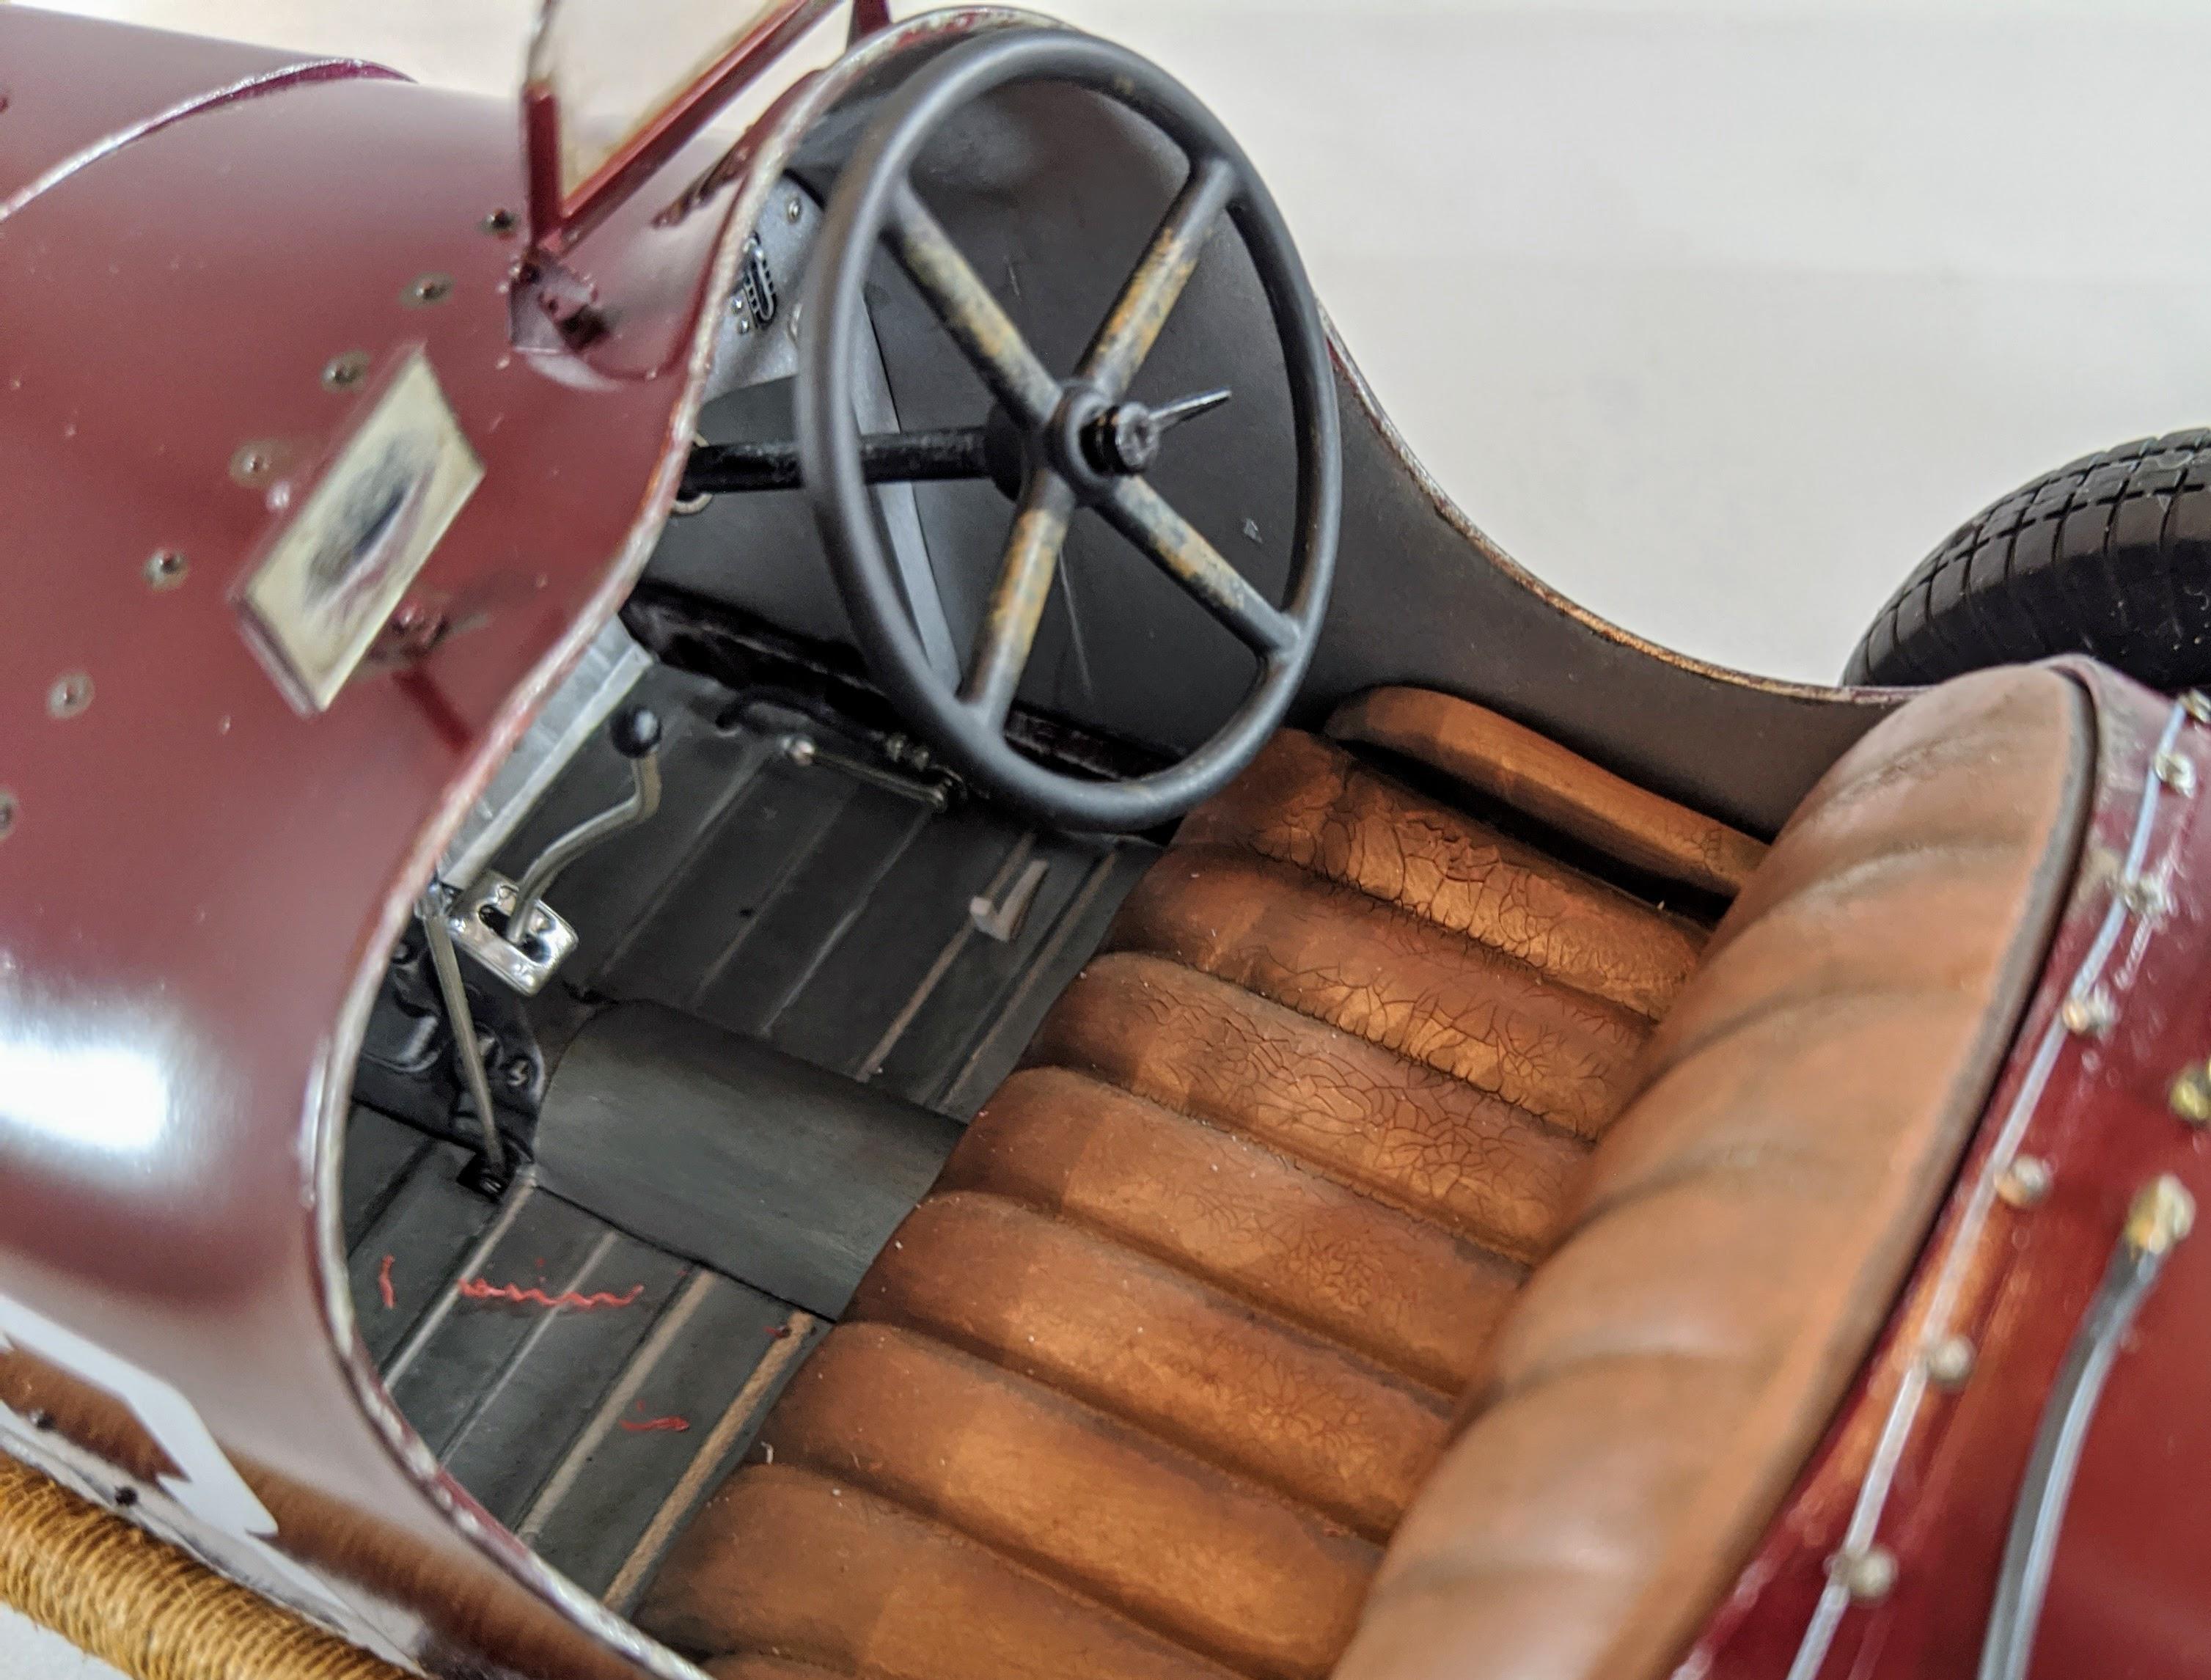
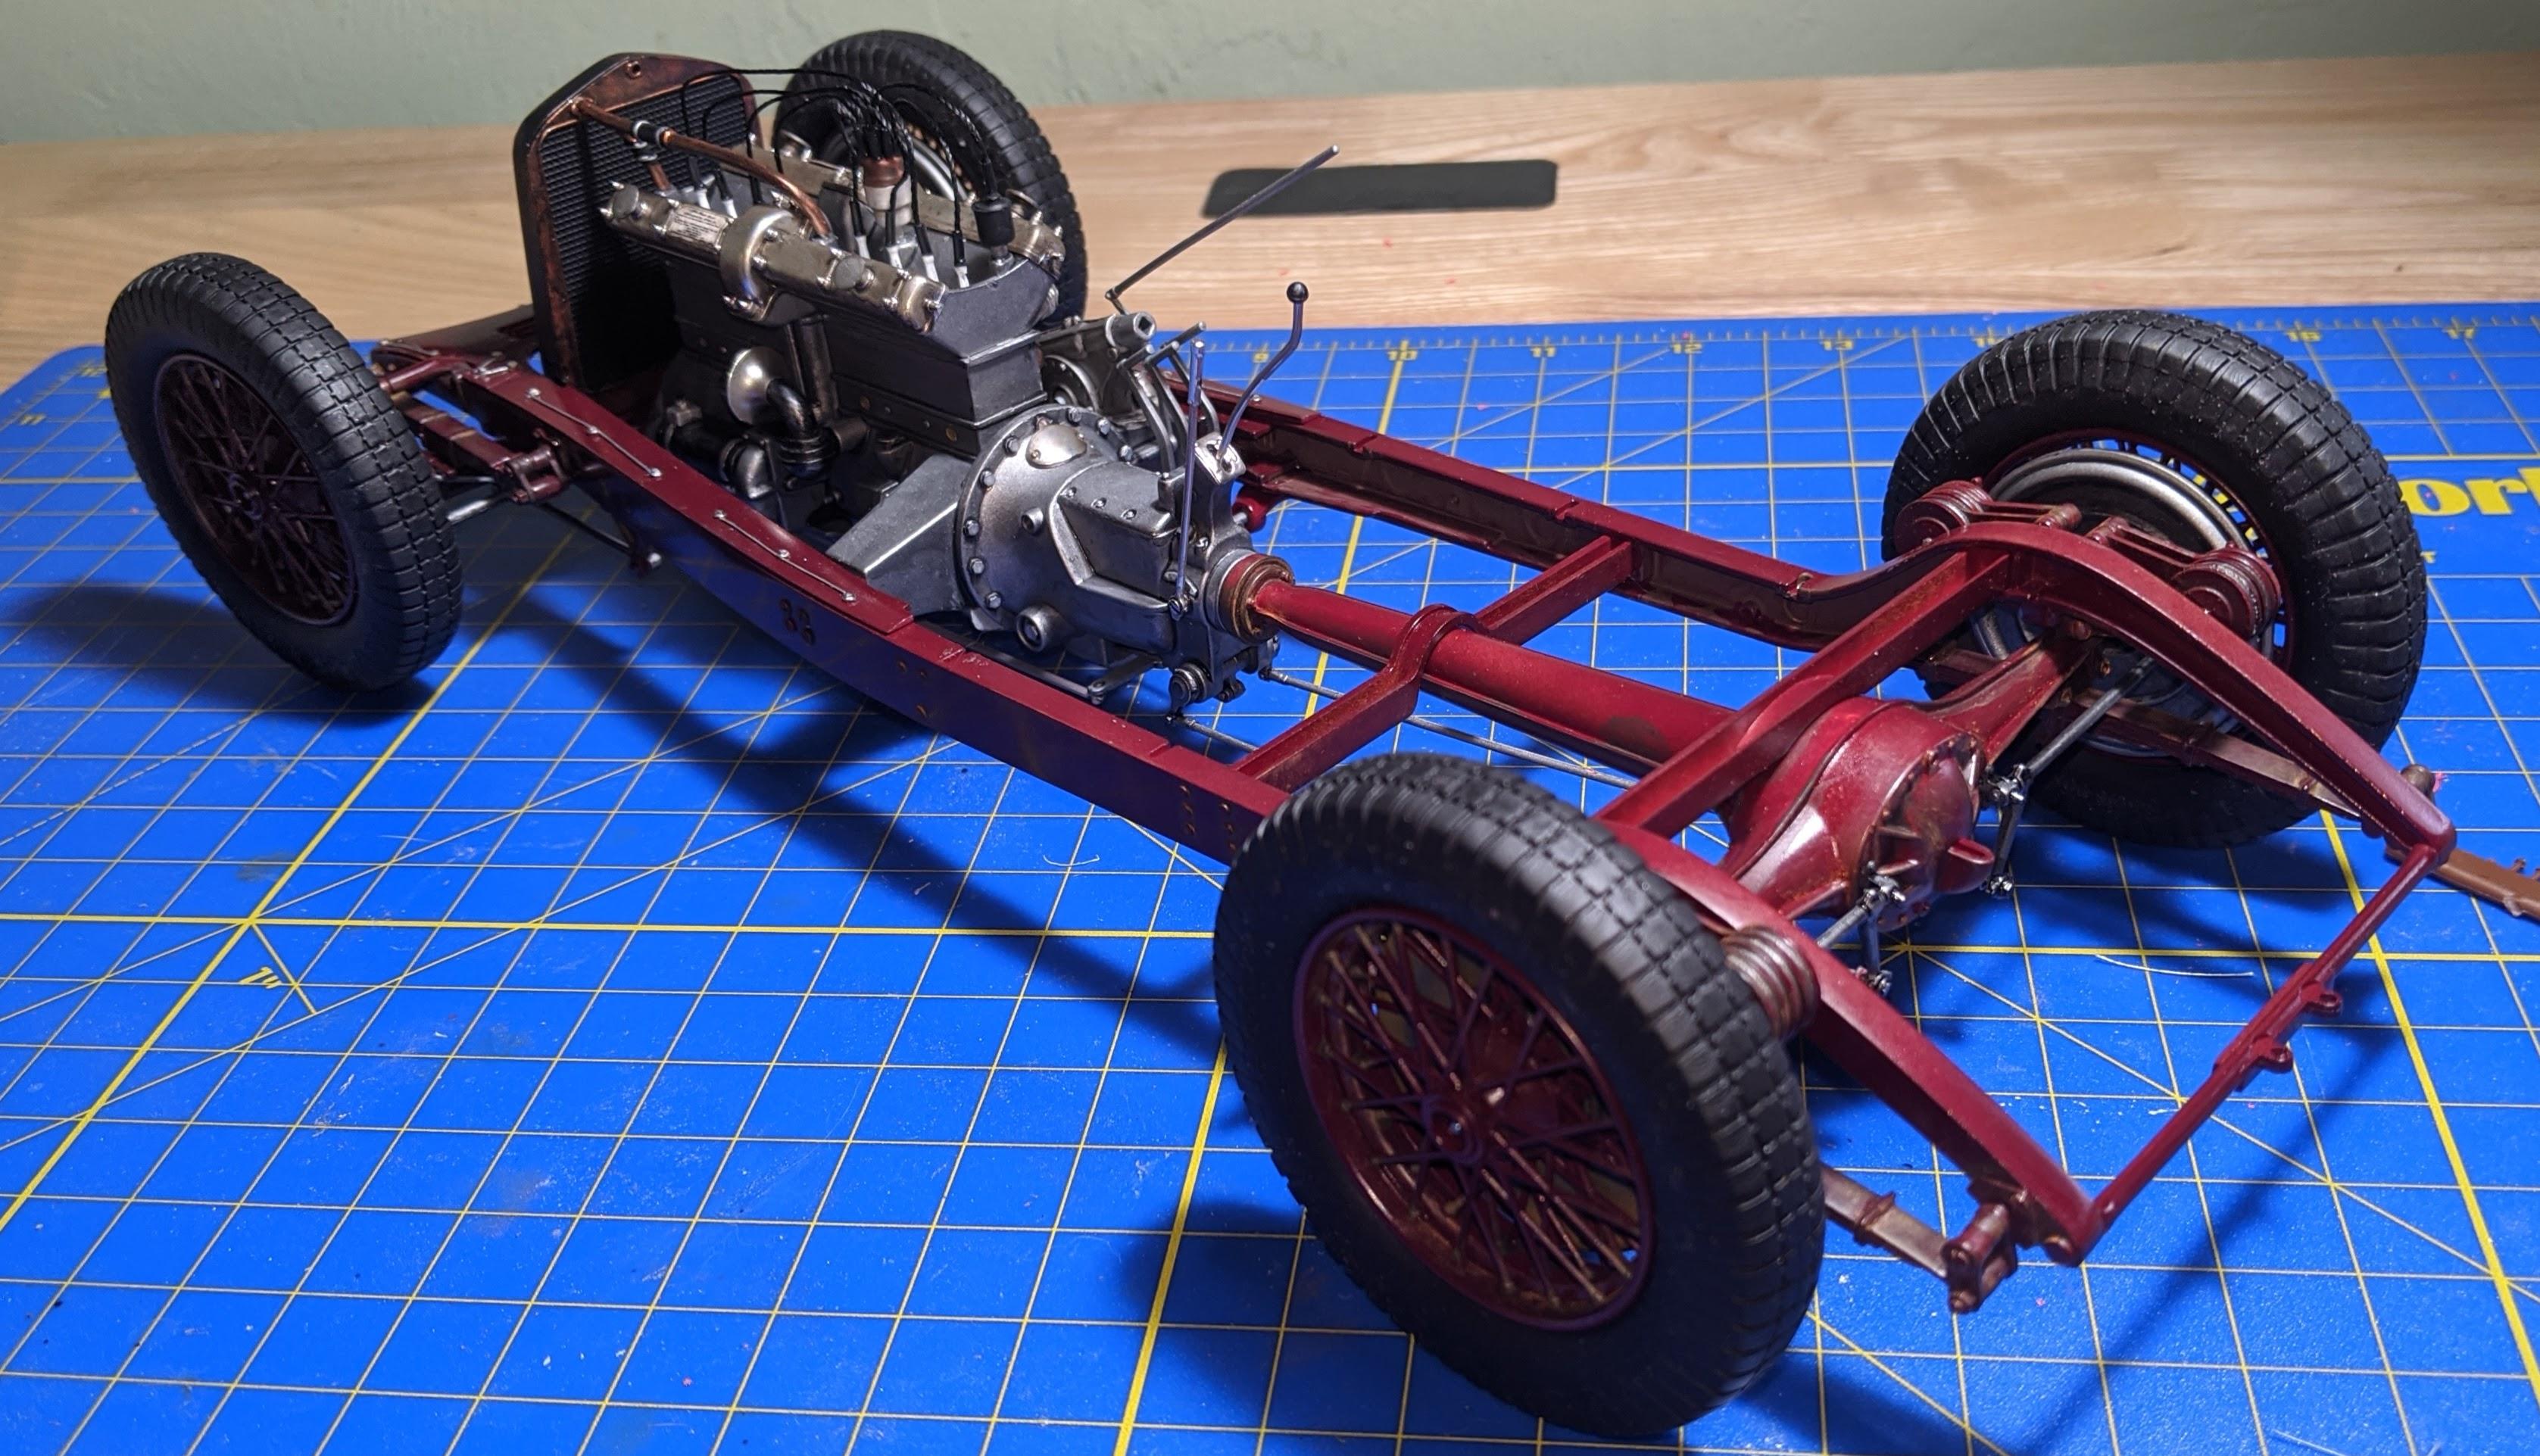
This was my big coronavirus furlough project- Italeri's new release 1/12 Alfa 8C kit. The kit is extremely well-detailed right out of the box., but I added floorboards made from thin aluminum sheet, some underhood details such as braided ignition wires, and lots of styrene rivets and bolts from Tichy Train Group. I also added safety wire using more Tichy bolts and silver-painted thread. The rear-view mirror was scratchbuilt. My concept for this build was to depict a weathered car a few years into its career, so I pulled out every trick in the book to represent a well-maintained but battle-scarred classic racer. Paint is Tamiya maroon over red oxide primer. To keep the shine down and give the finish a faded translucent look I applied mist coats without the final wet coats. Weathering was done with Testors acrylic and enamel washes and drybrushing with Tamiya flat aluminum and metallic grey. Final weathering was done with Tamiya's excellent Weathering Master powders. I used a crackle medium to represent the cracked leather on the seat. There is a WIP thread under the Road Racing WIP forum. This kit went together extremely well... my only fitment issues were due to some of the modifications that I did and were easily fixed. A lot of this kit goes together with screws and bolts. I did decide to skip the screws that attach the body to the chassis after a near-disaster with the first screw. On to the pics, and any questions or comments are welcome!

-
Italeri Alfa 8c- WIP
jaymcminn replied to jaymcminn's topic in WIP: Other Racing: Road Racing, Land Speed Racers
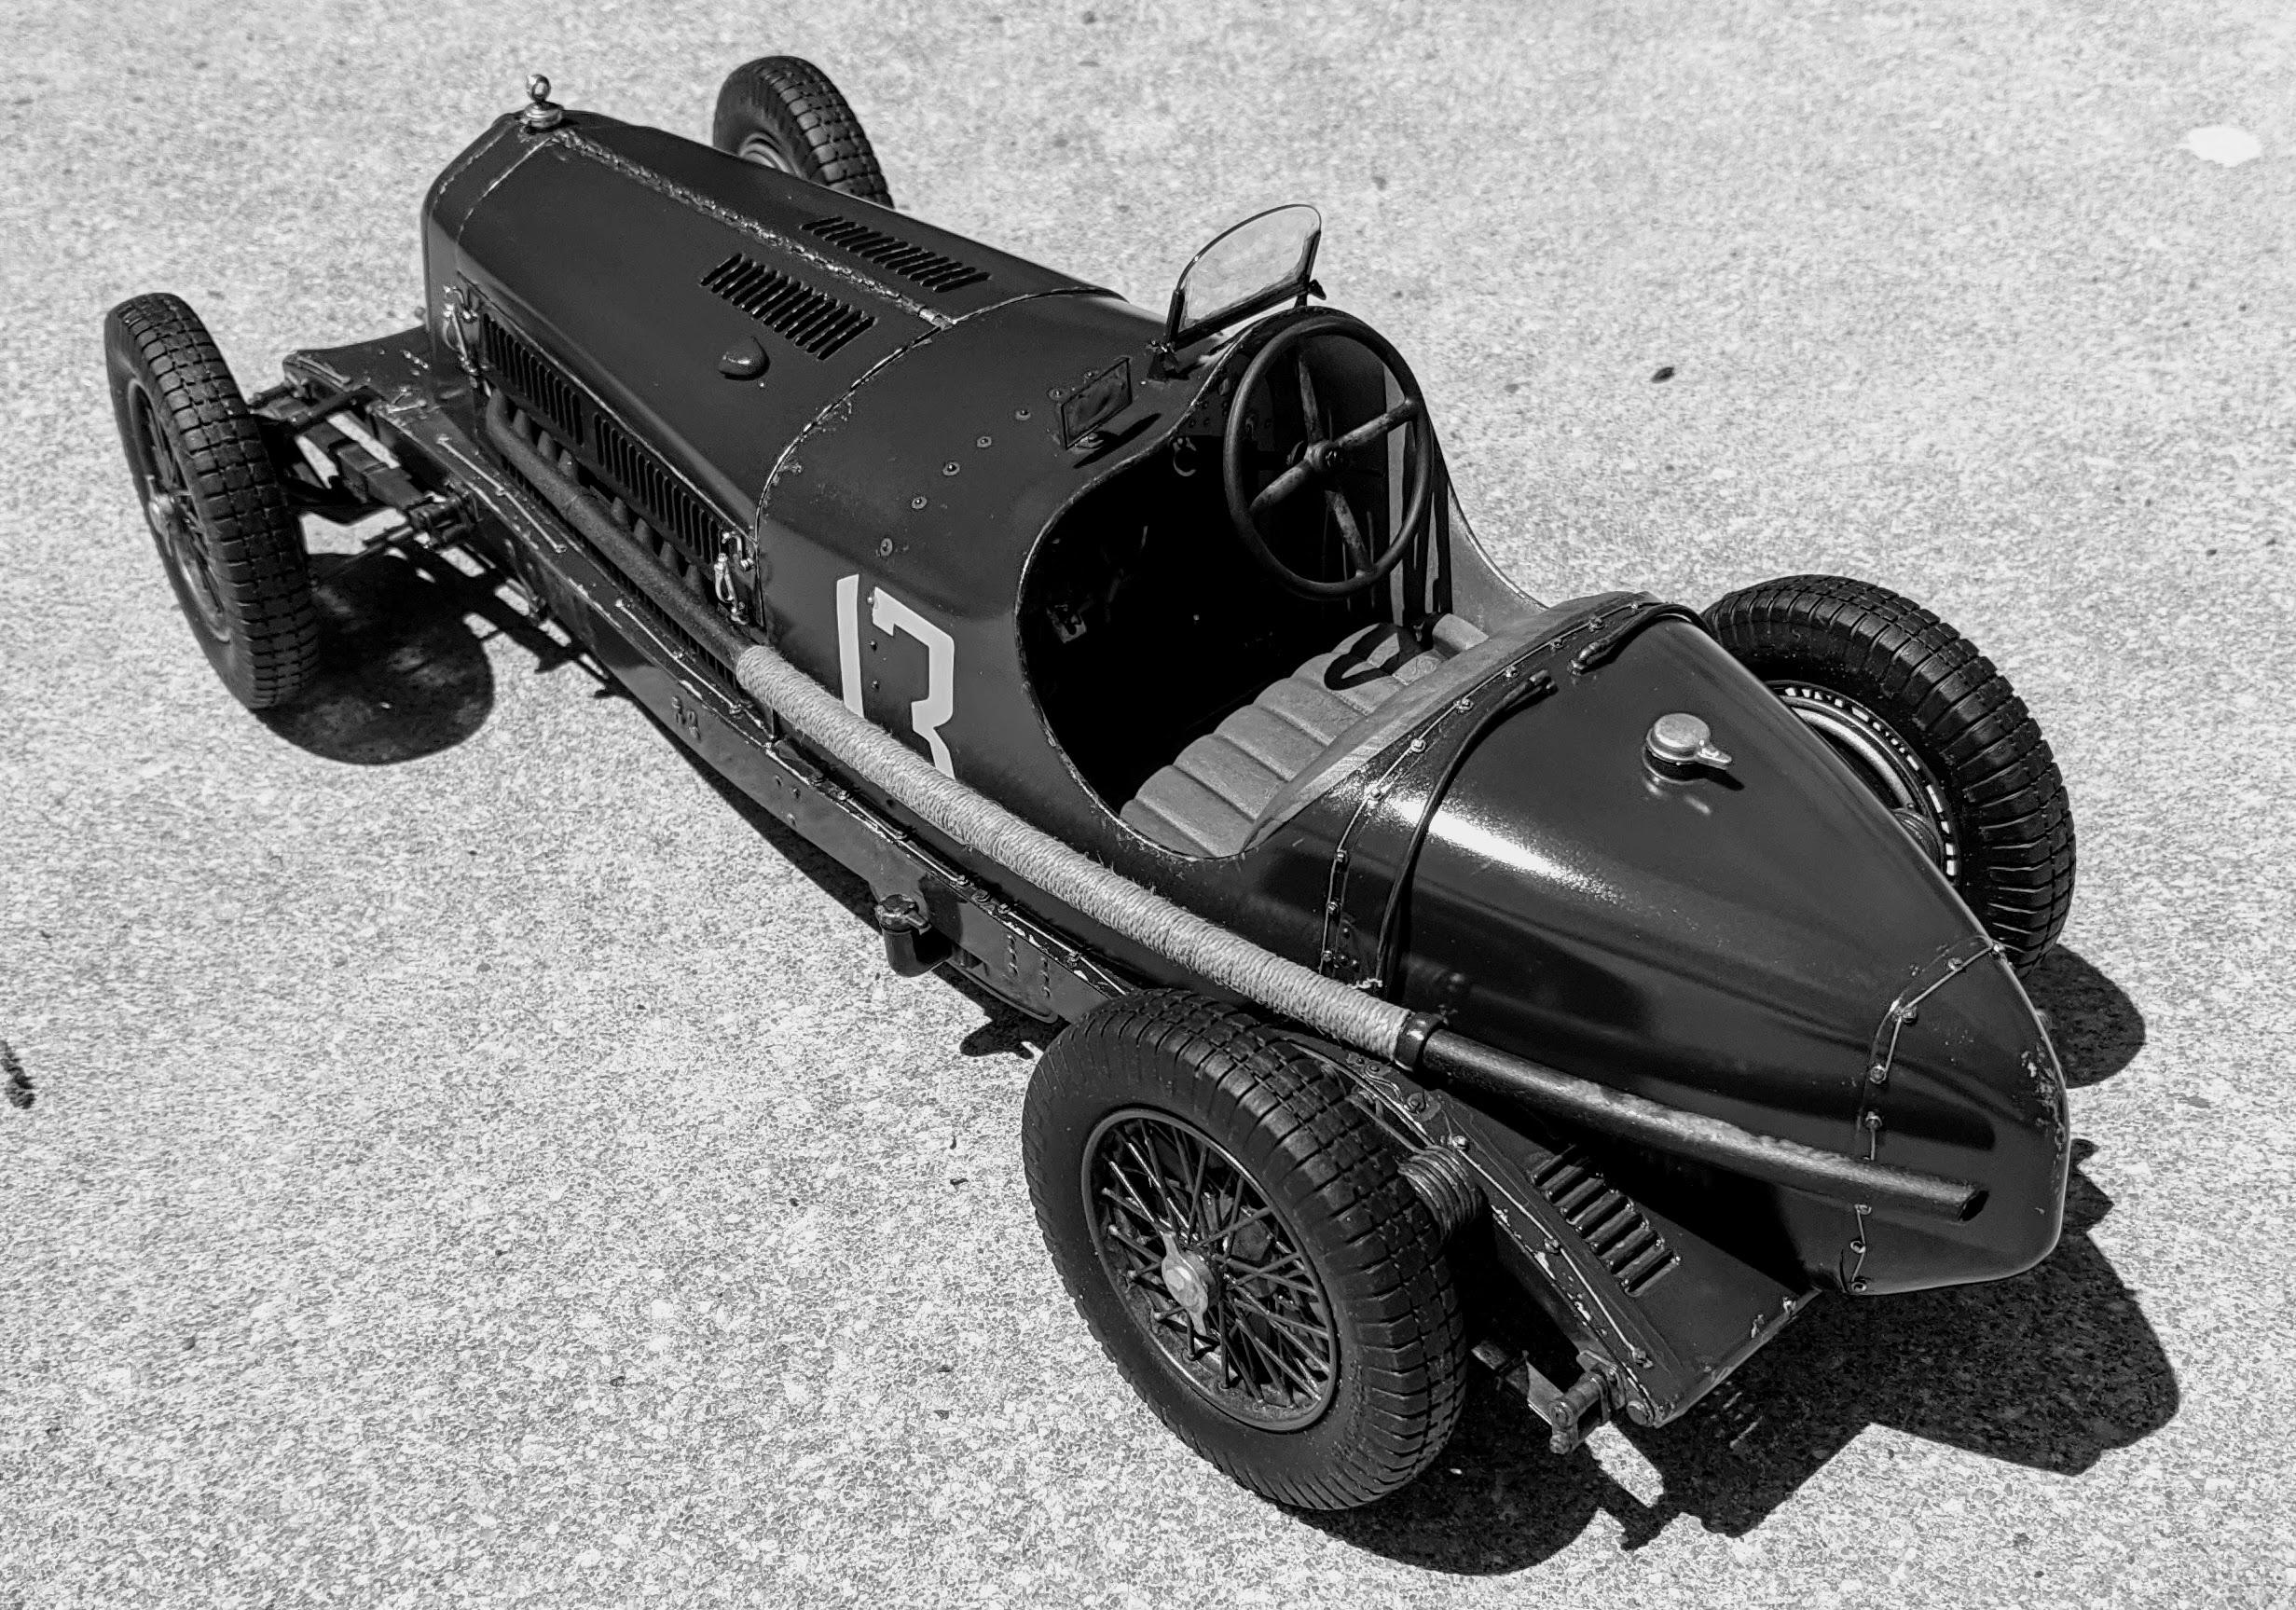
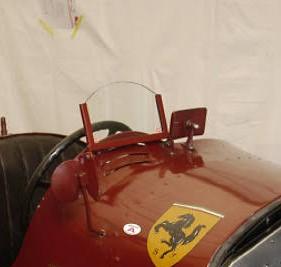
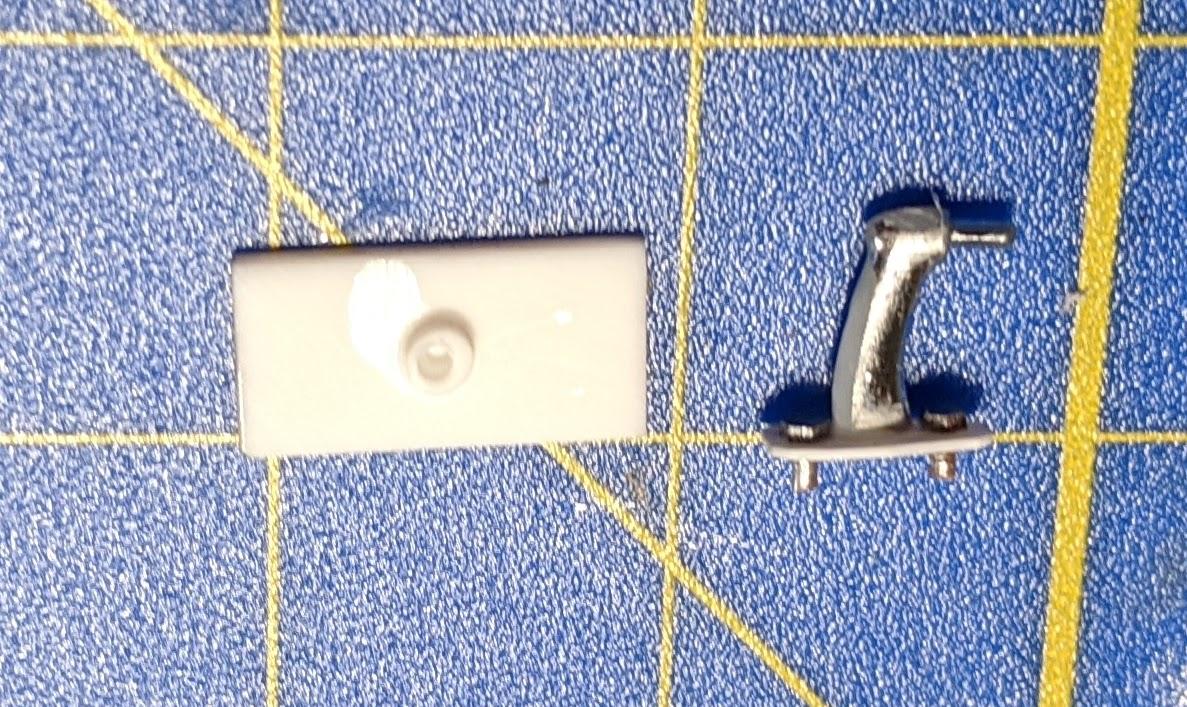
Under glass... When I had everything pretty much done I was going through my reference photos and saw a rear-view mirror on one of the Scuderia Ferrari cars I really liked. I scratchbuilt one out of a 1/24 license plate frame from the parts box as well as a mirror bracket from (I think) a 1/12 '67 Corvette, some styrene and Tichy Train bolts. The original. And the final result... And a couple of pics of this monster finished! Just noticed that I never cleaned the plastic out of the interior from the holes I drilled in the cowl for the mirror... it's done now. More pics in Under Glass soon!
-
Tamiya 1/24 Alfa Romeo GTV (1996) Twin Spark 16V
jaymcminn replied to Italianhorses's topic in WIP: Model Cars
Great color combination, Alex. That interior is incredible! -
Italeri Alfa 8c- WIP
jaymcminn replied to jaymcminn's topic in WIP: Other Racing: Road Racing, Land Speed Racers
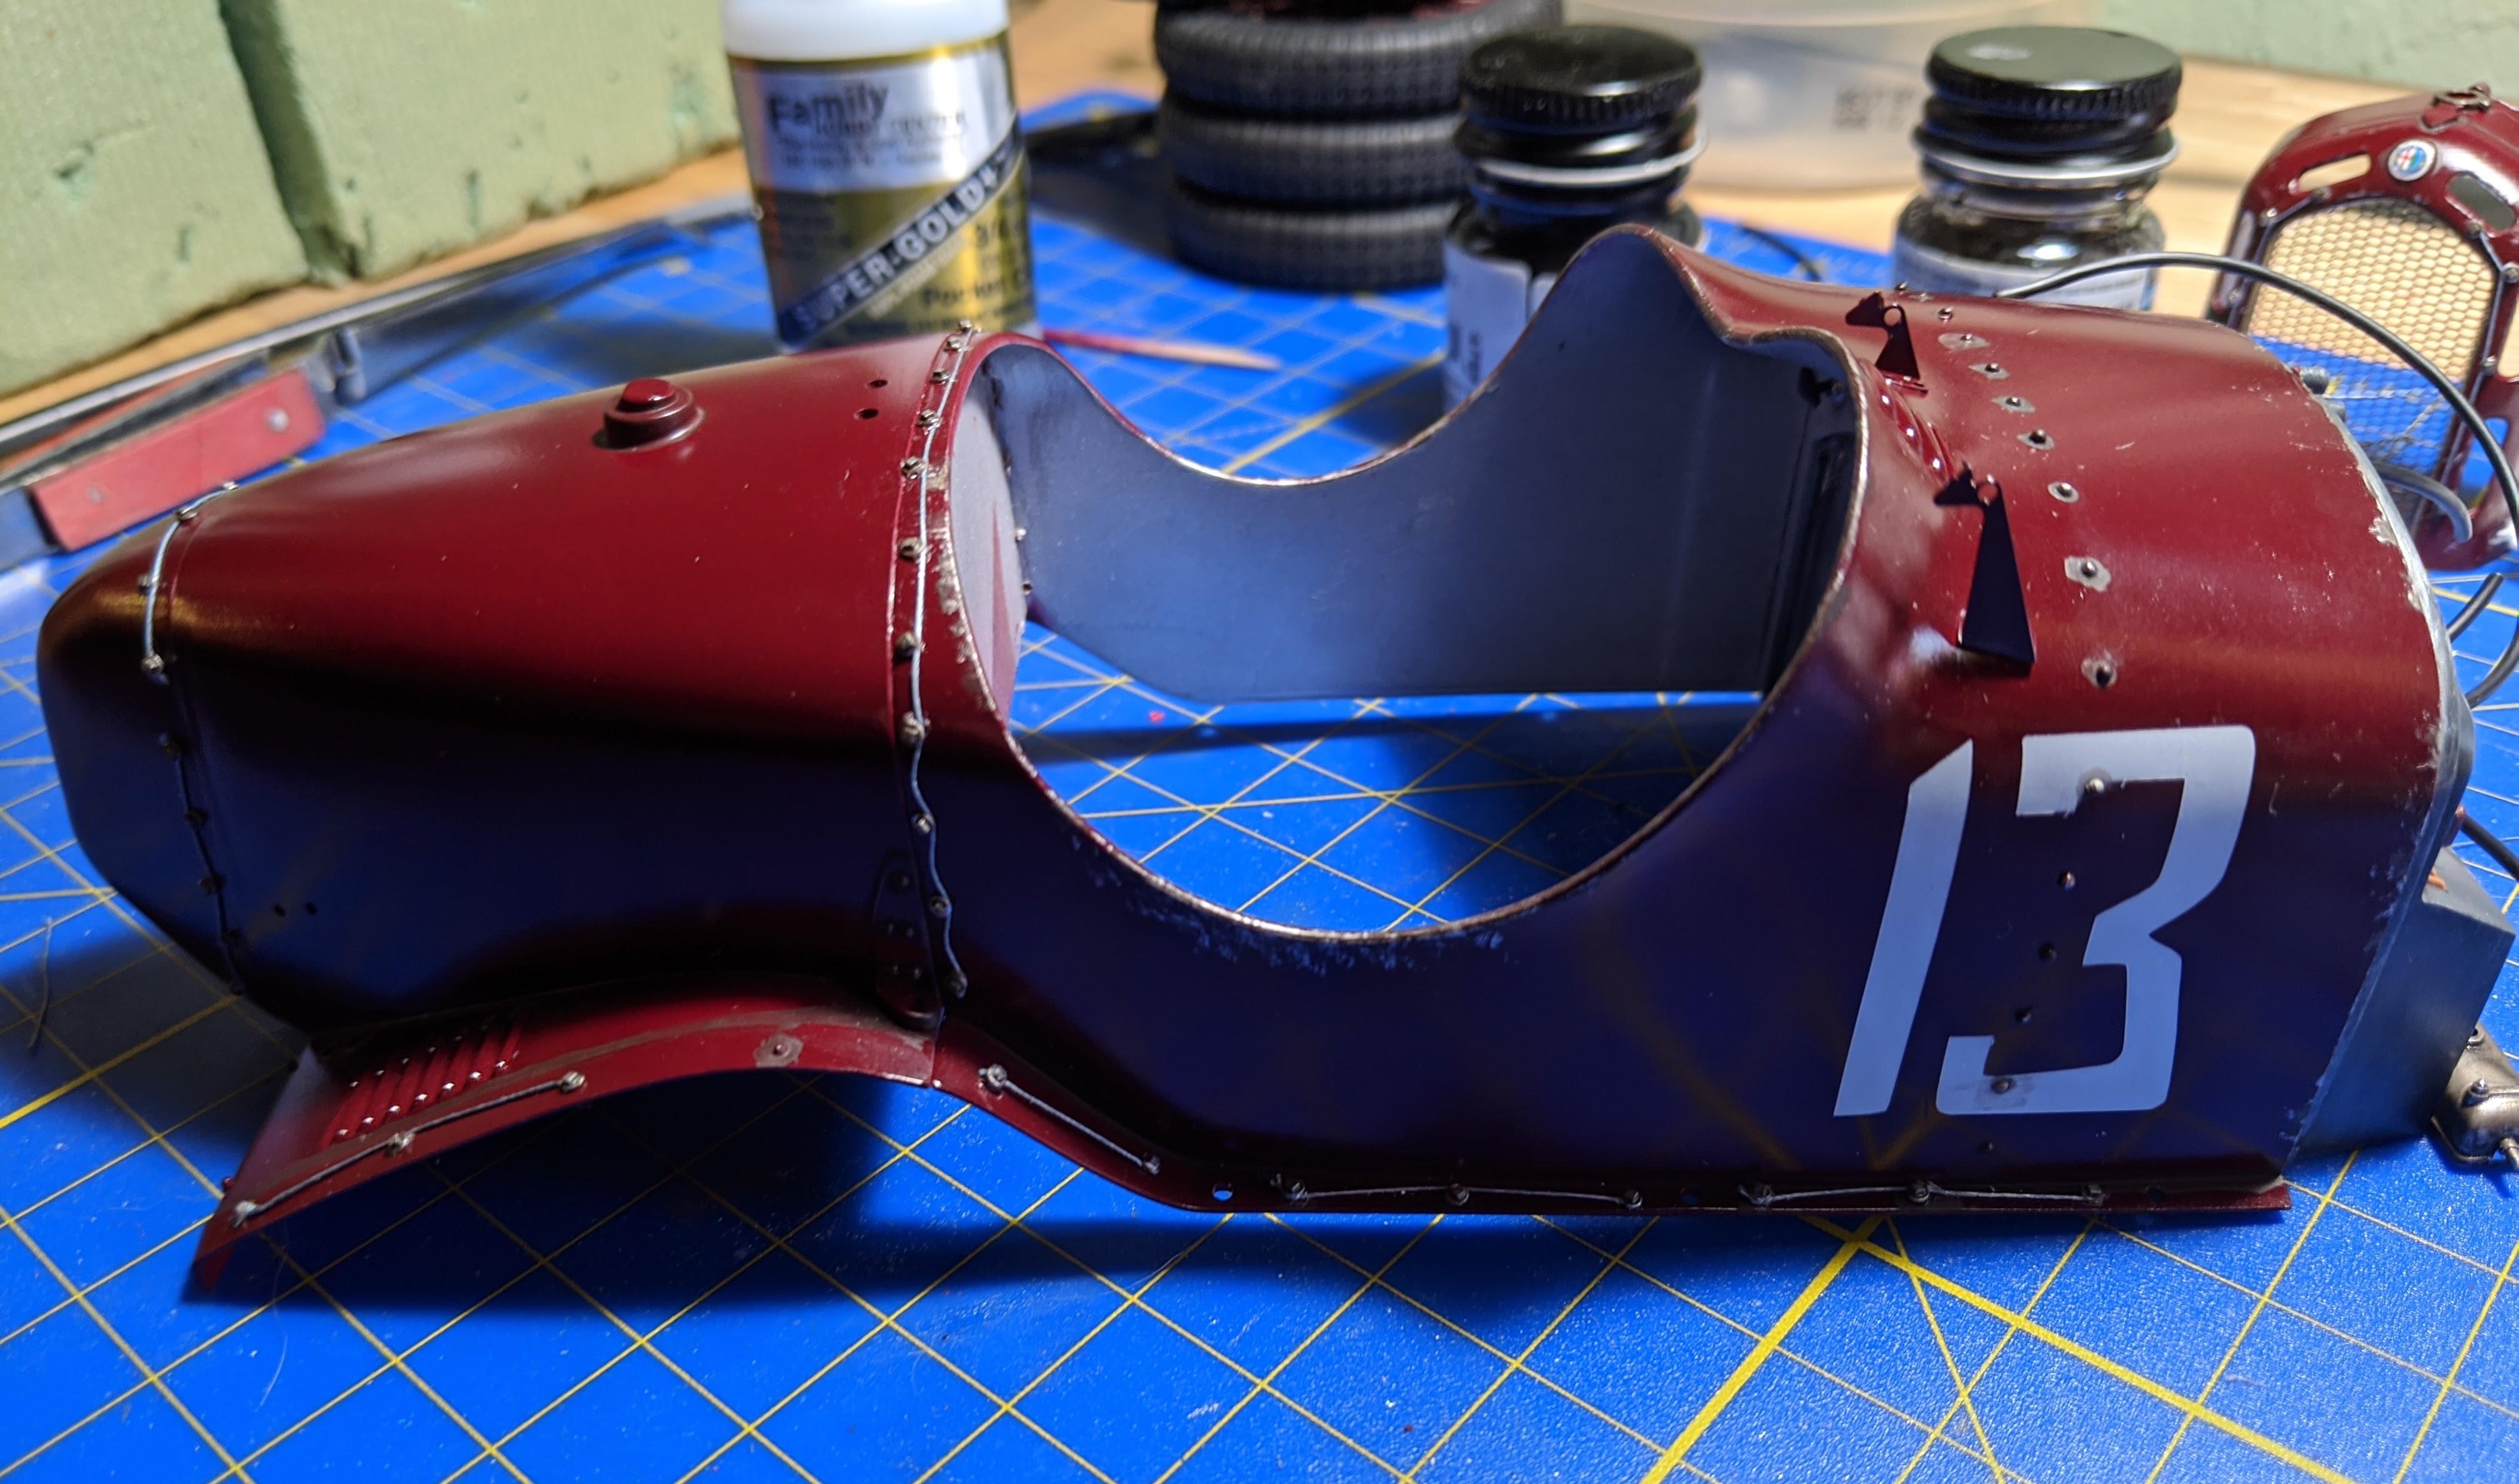
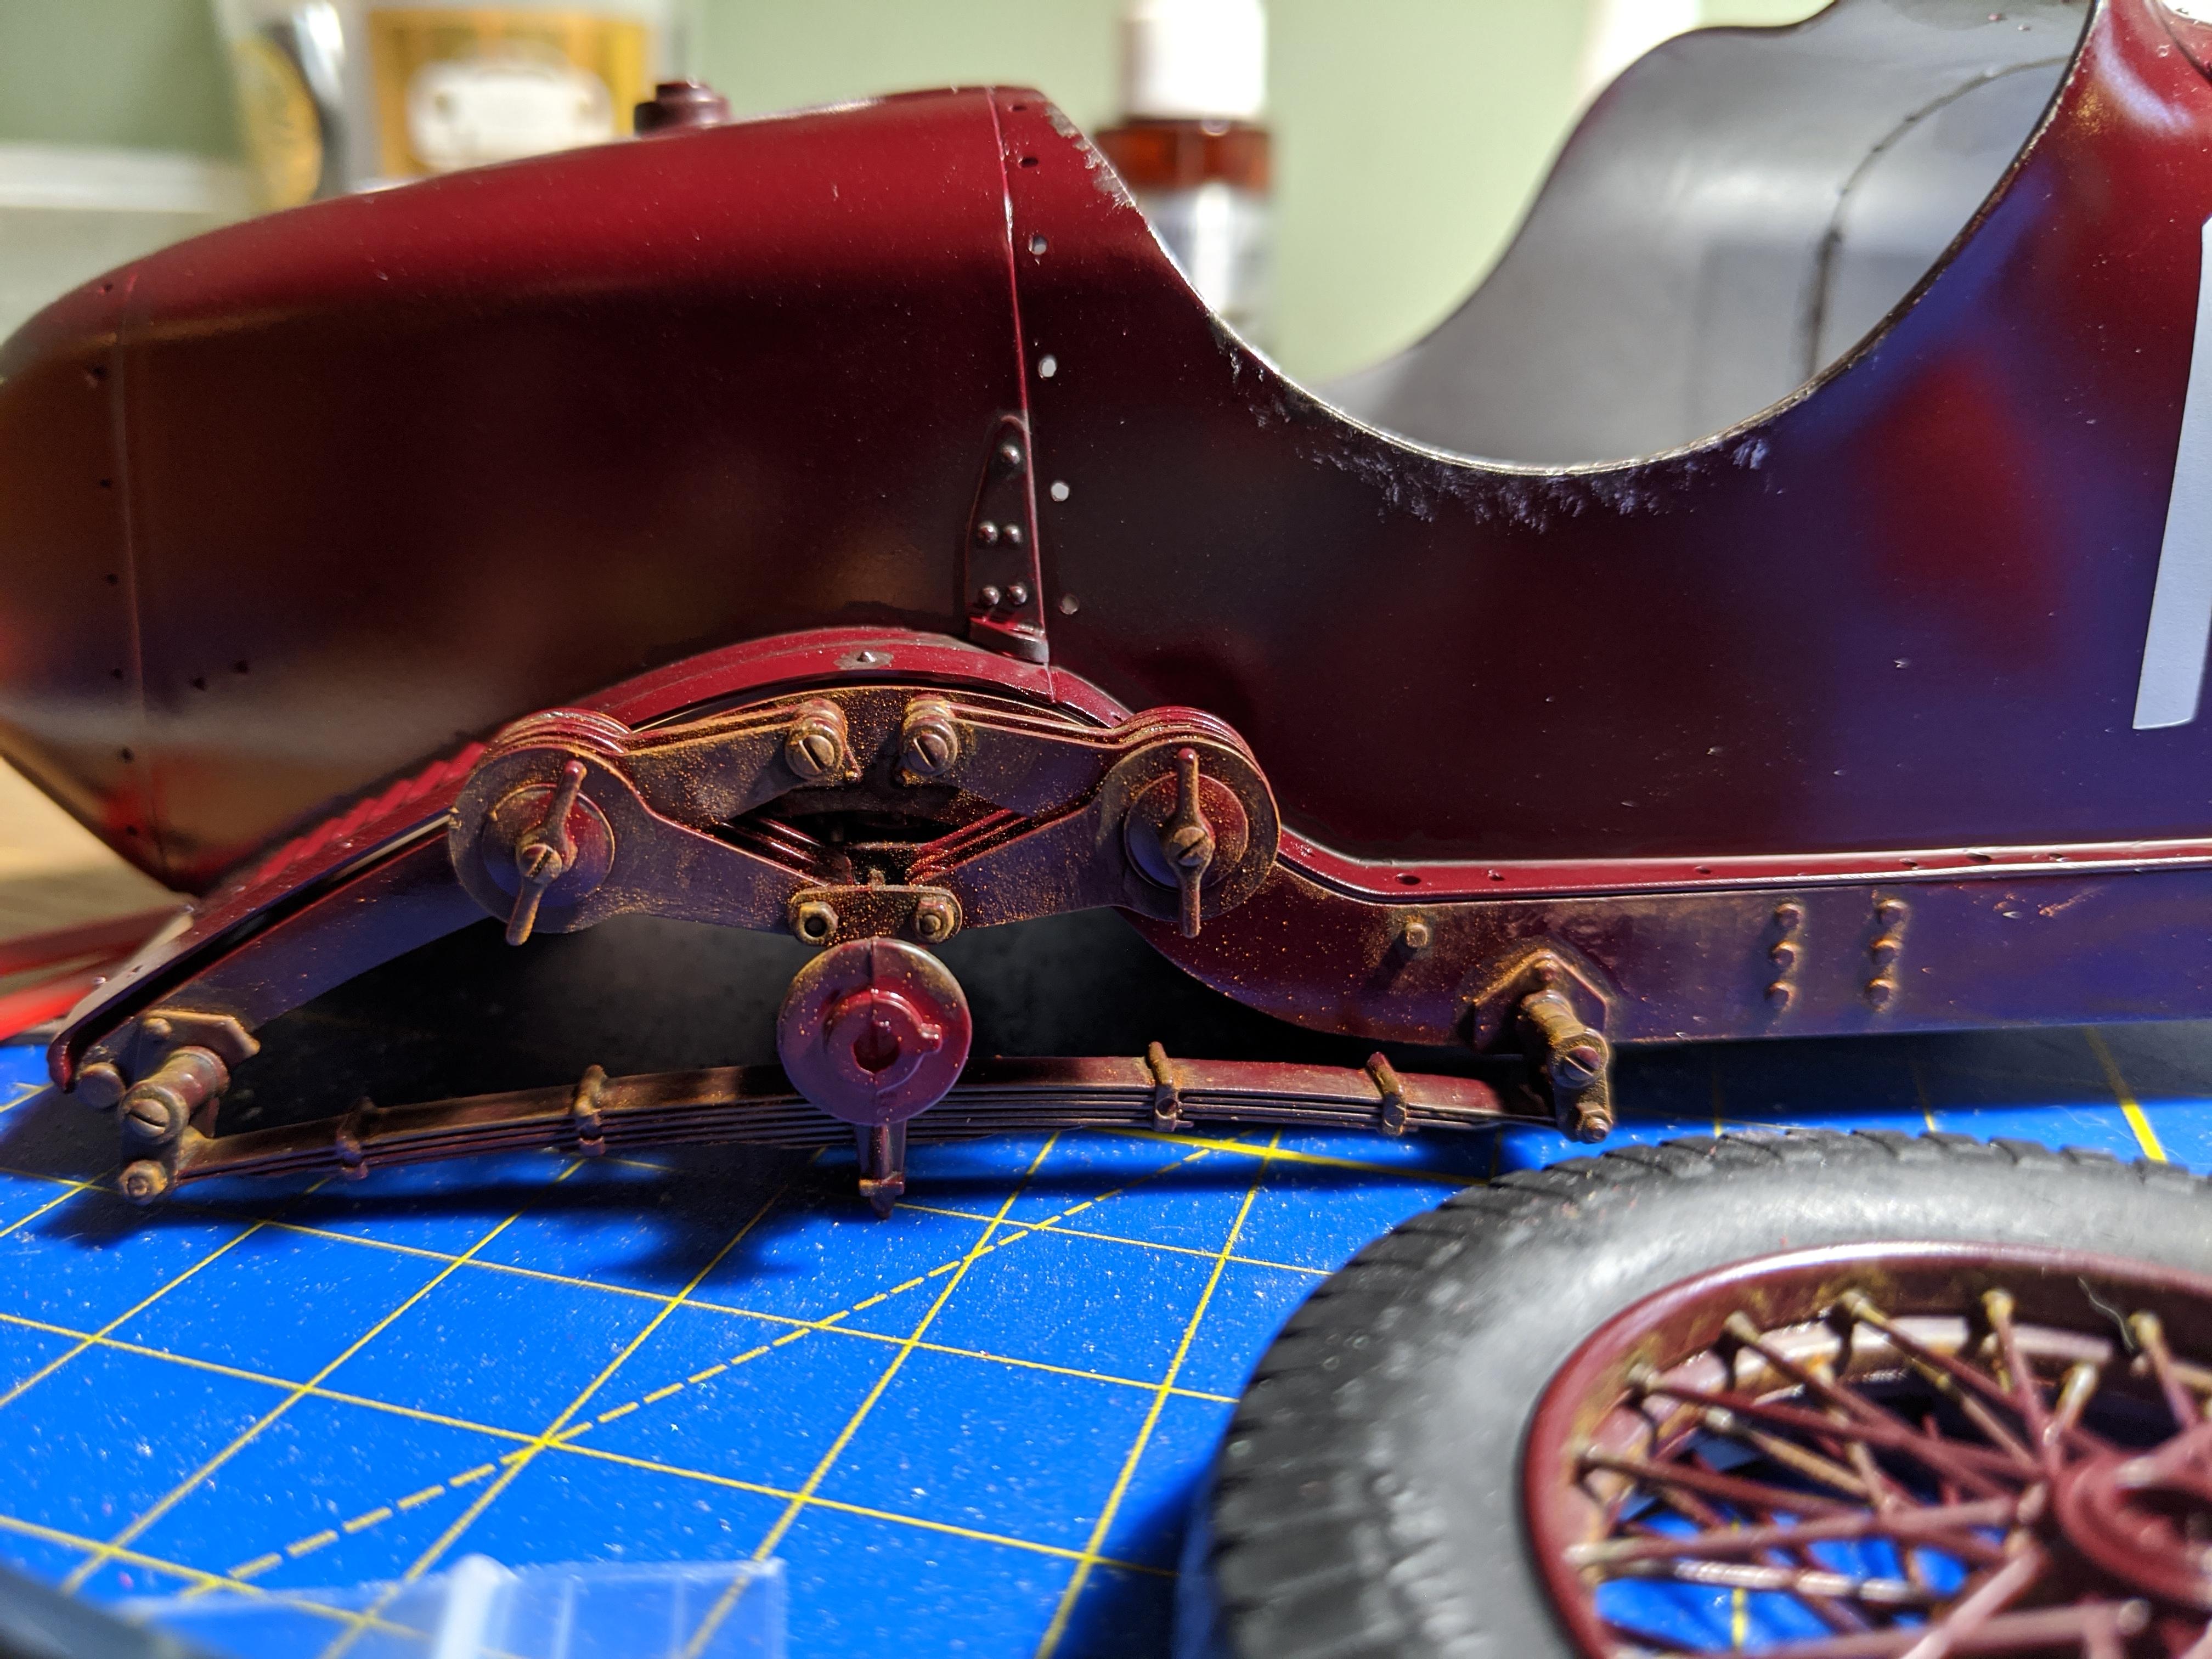
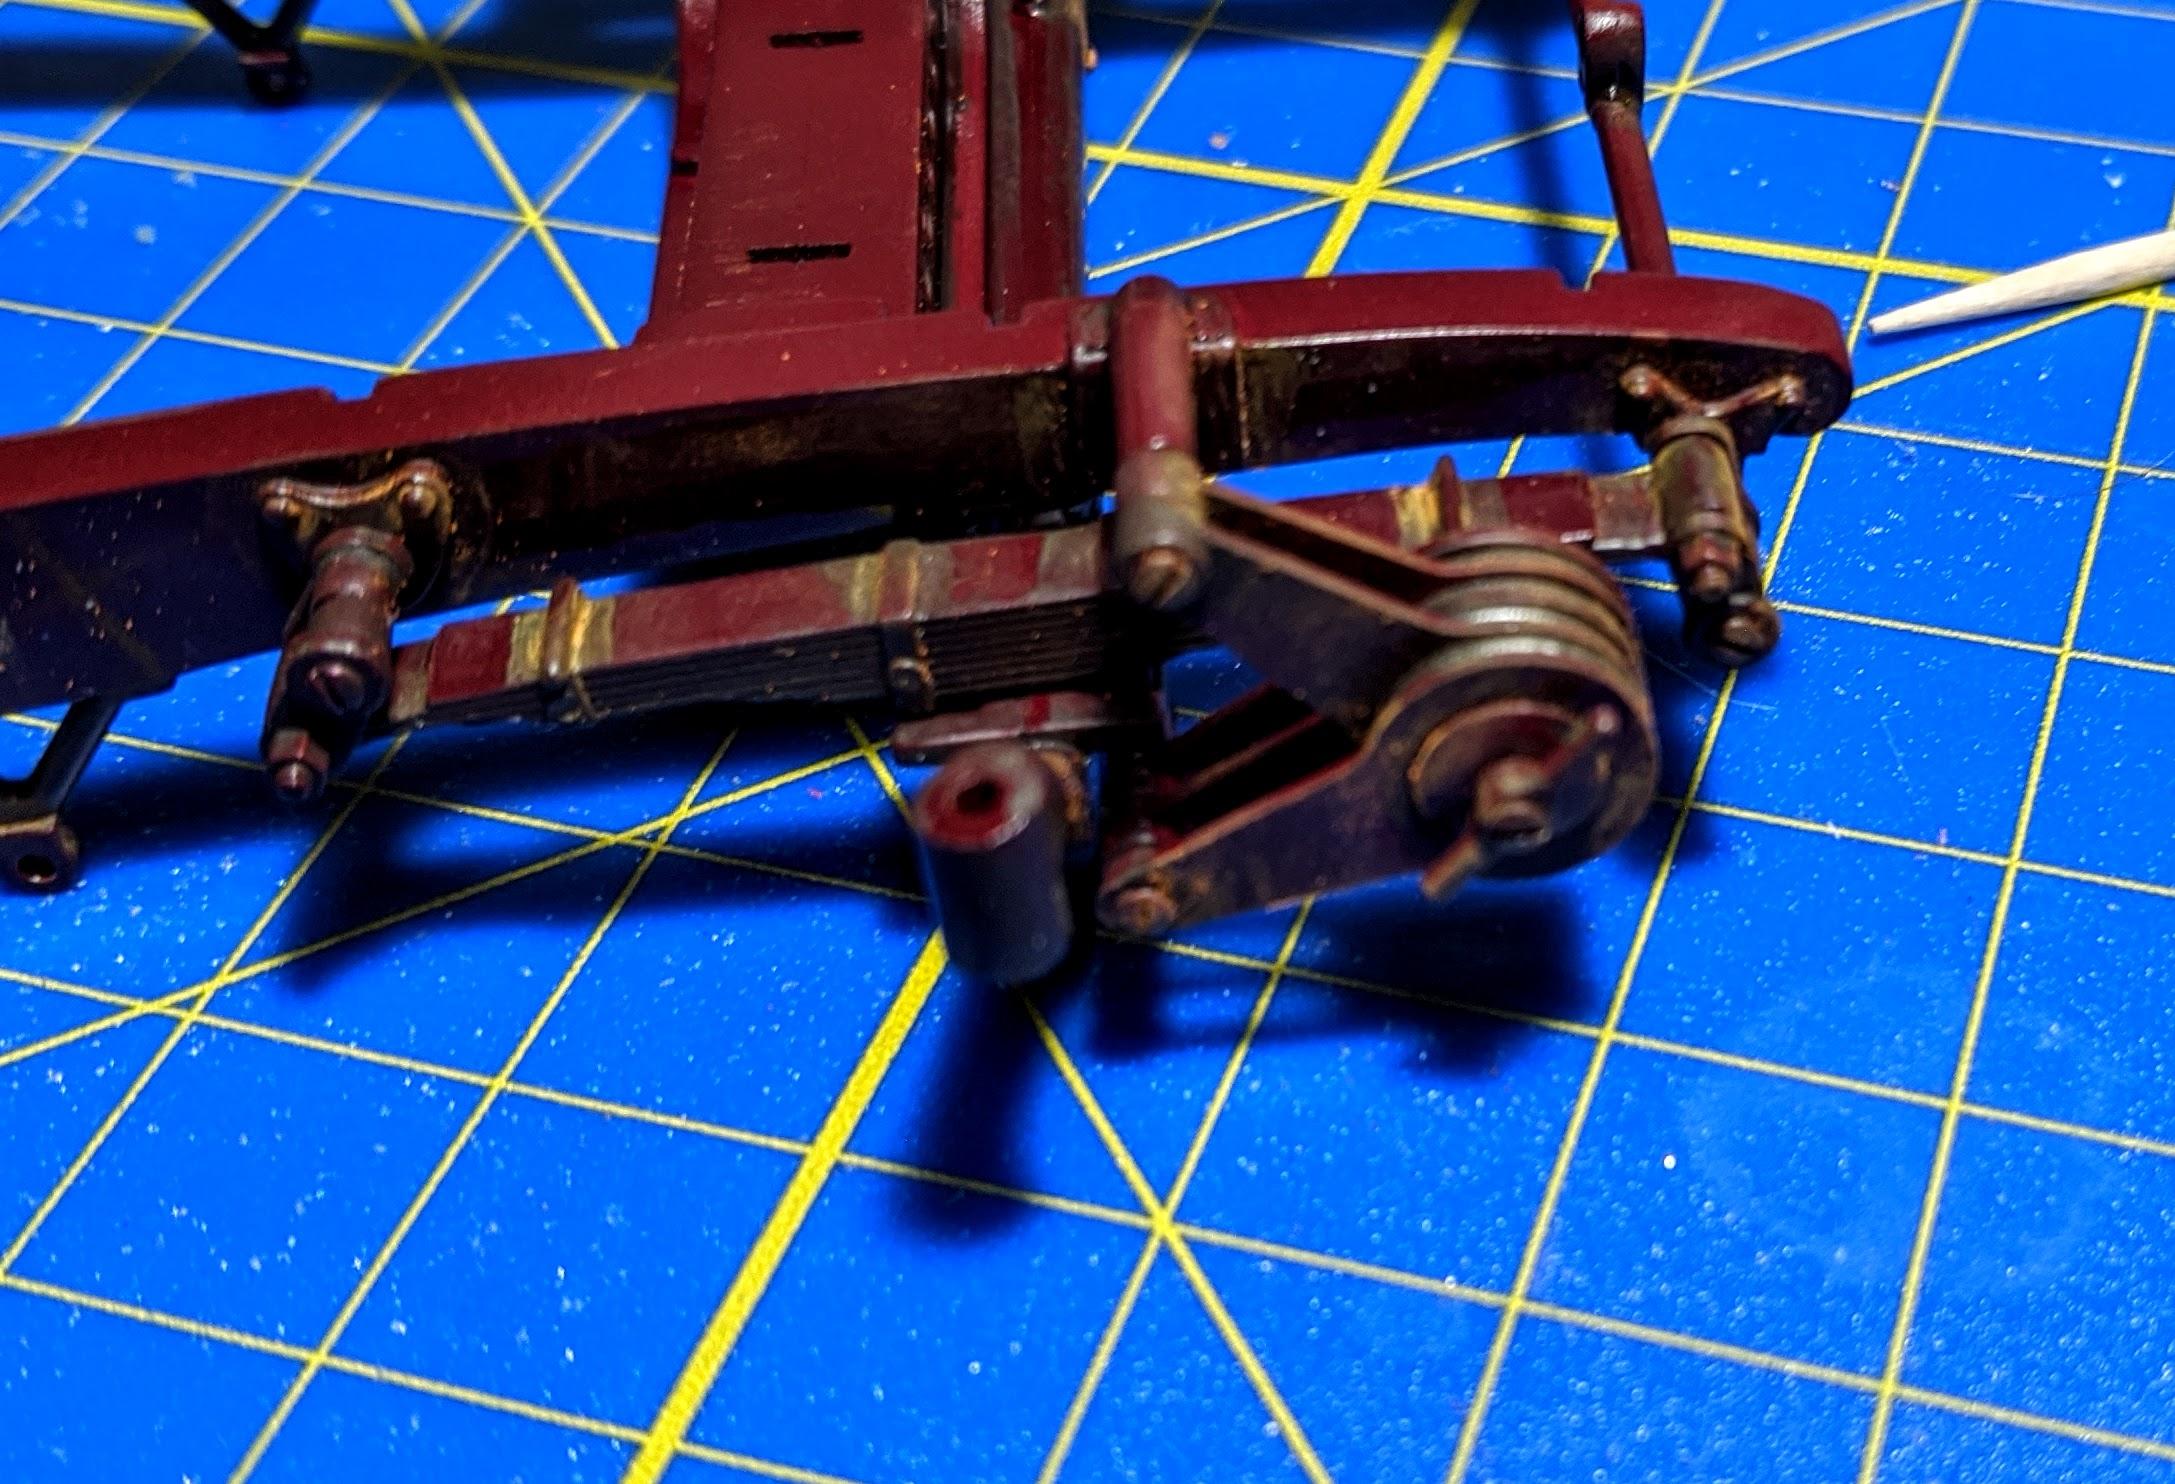
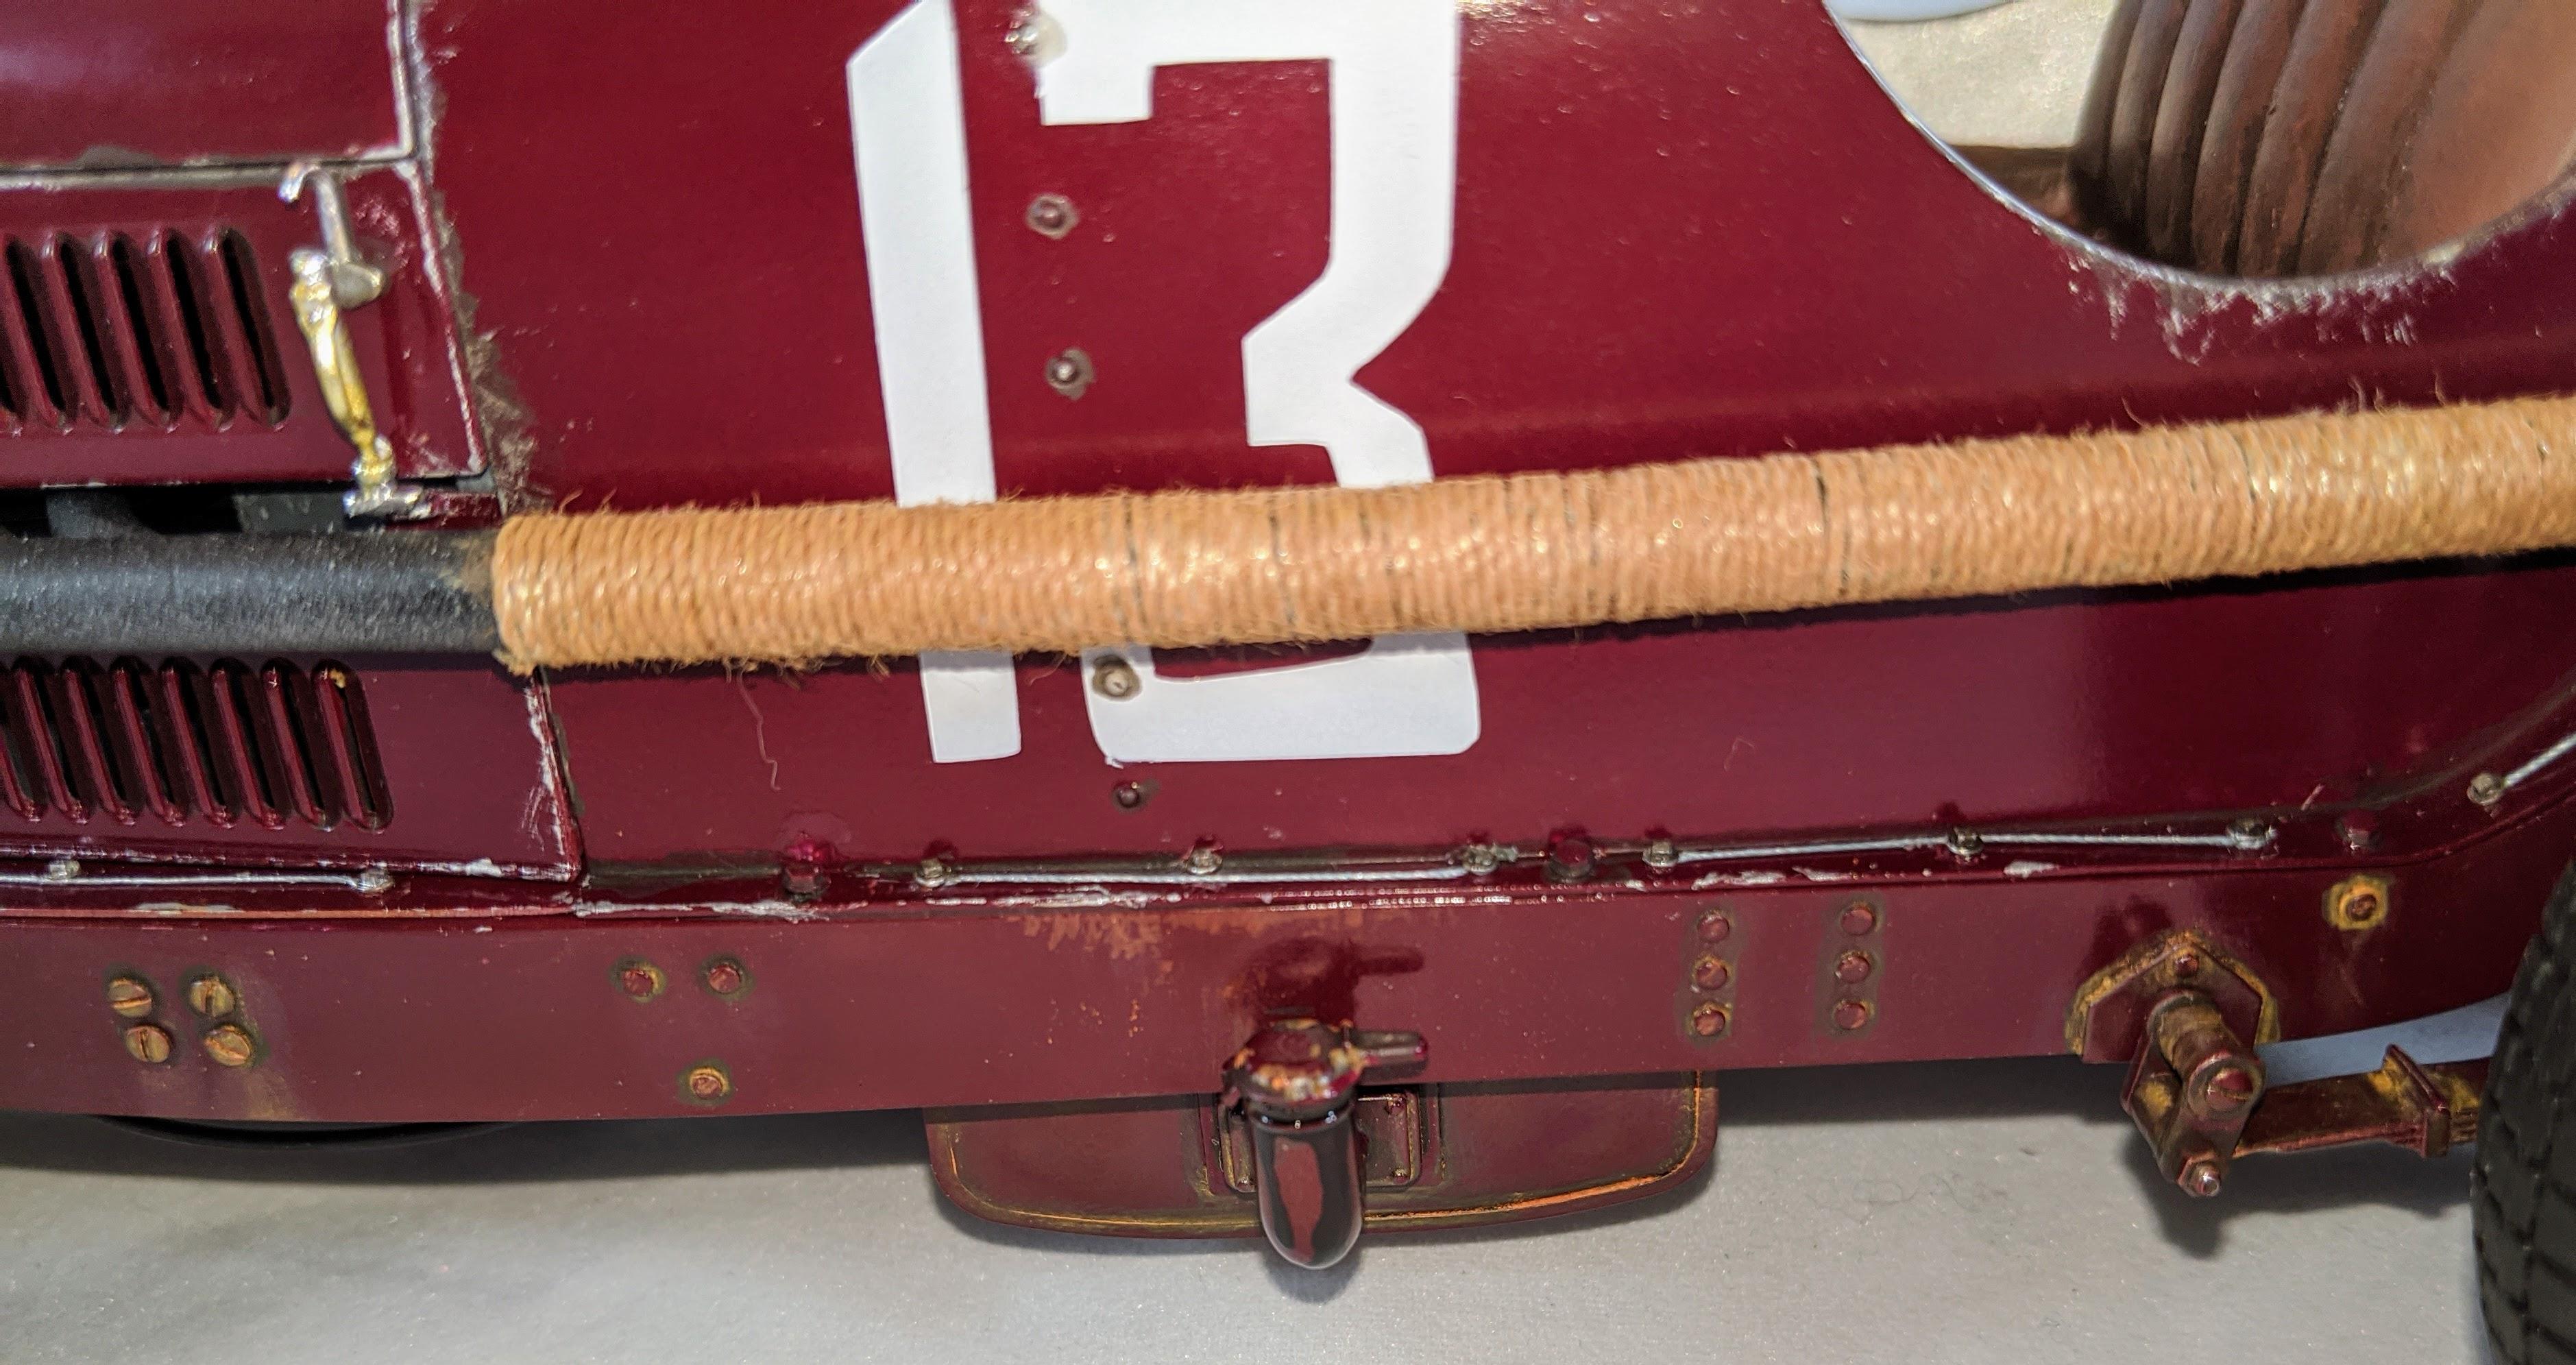
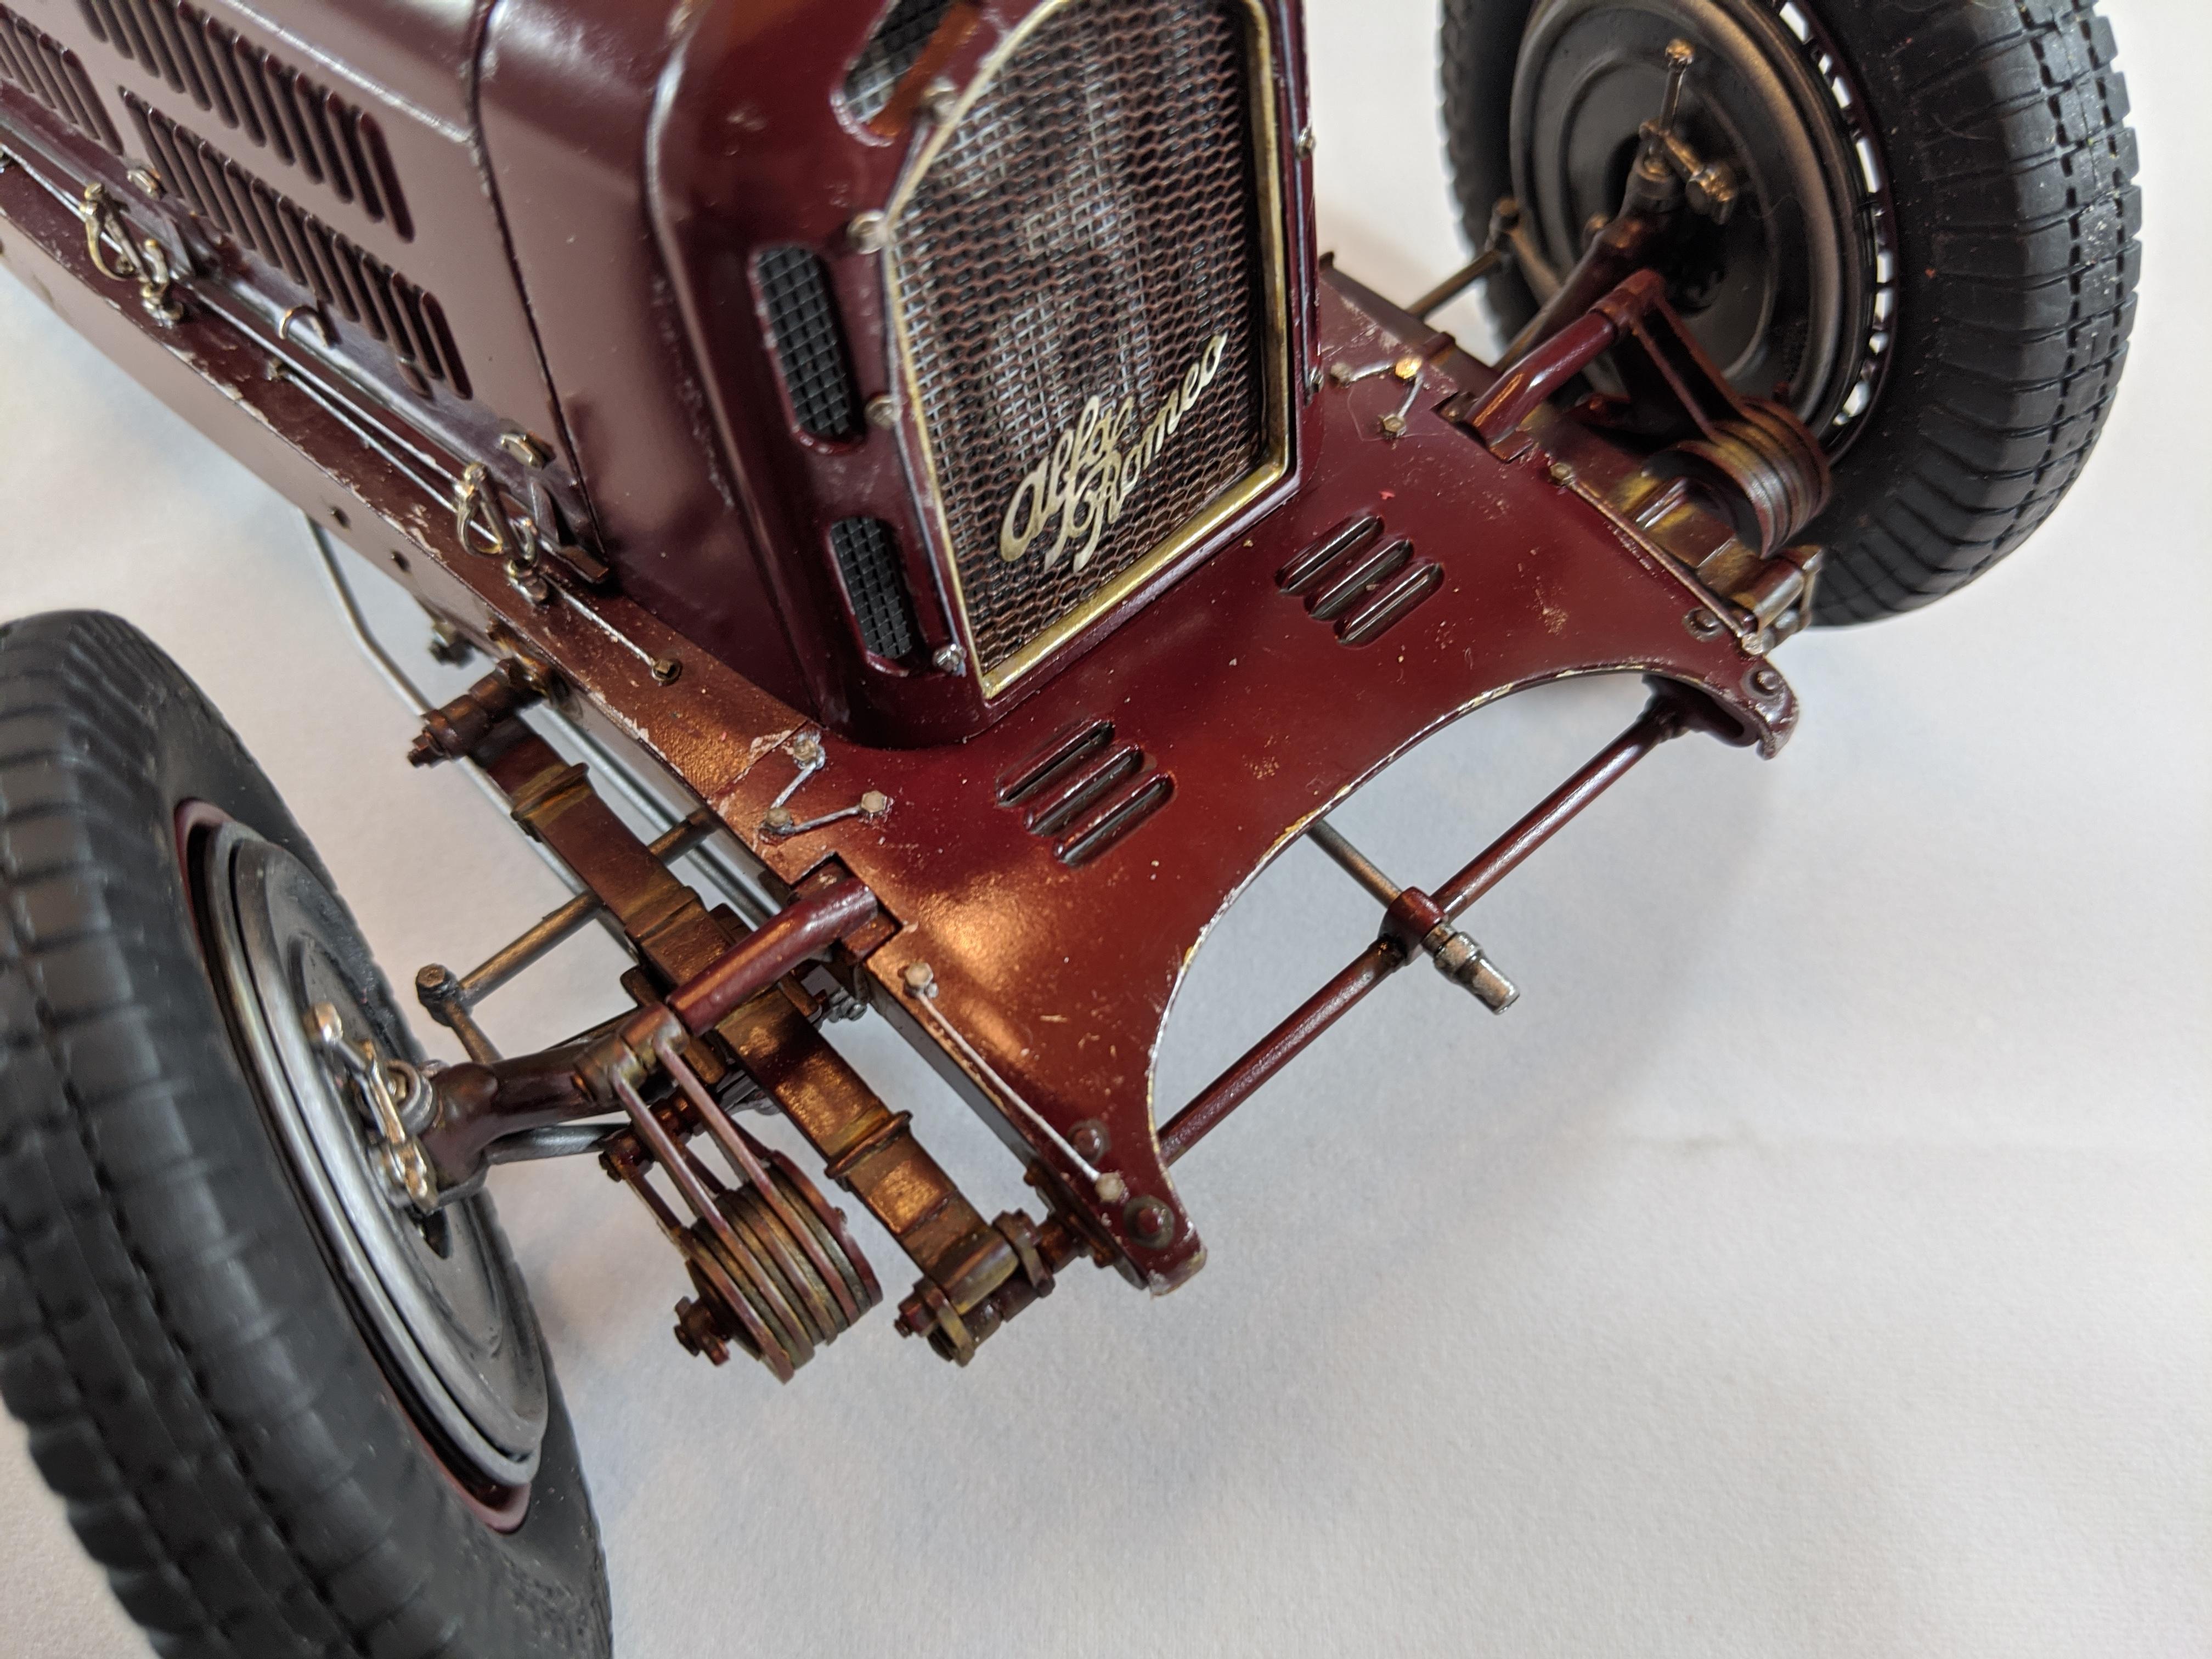
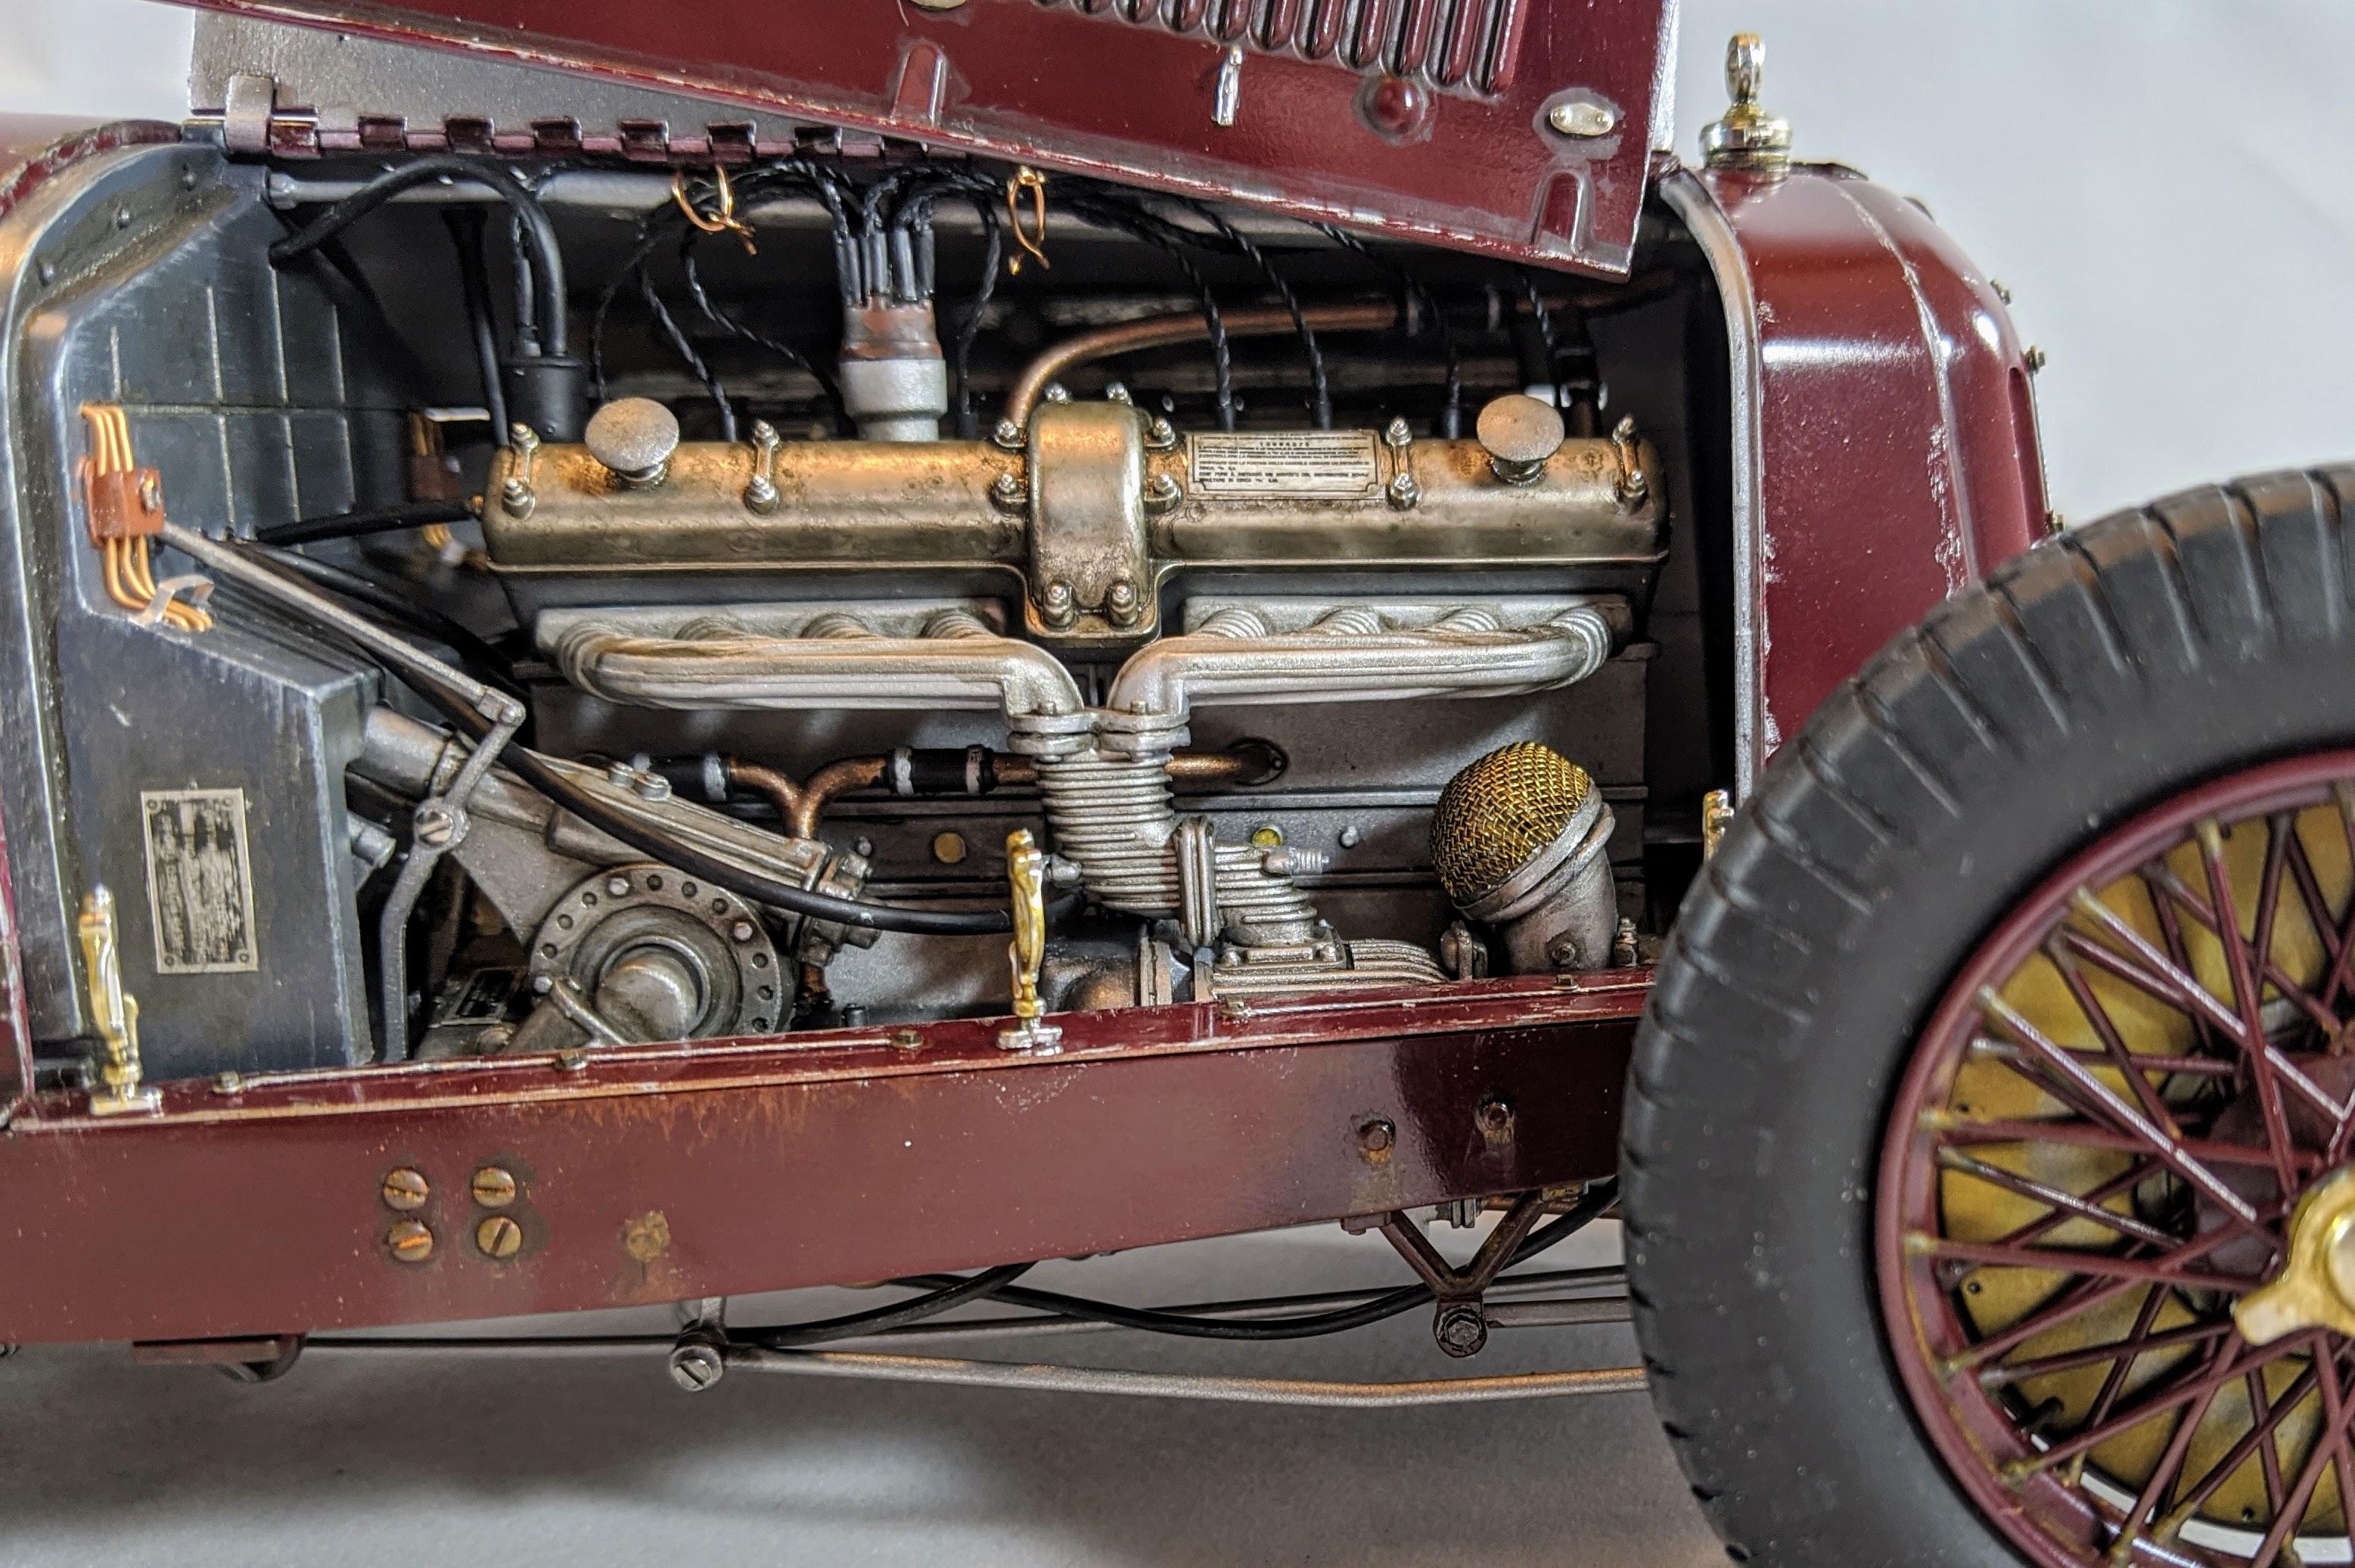
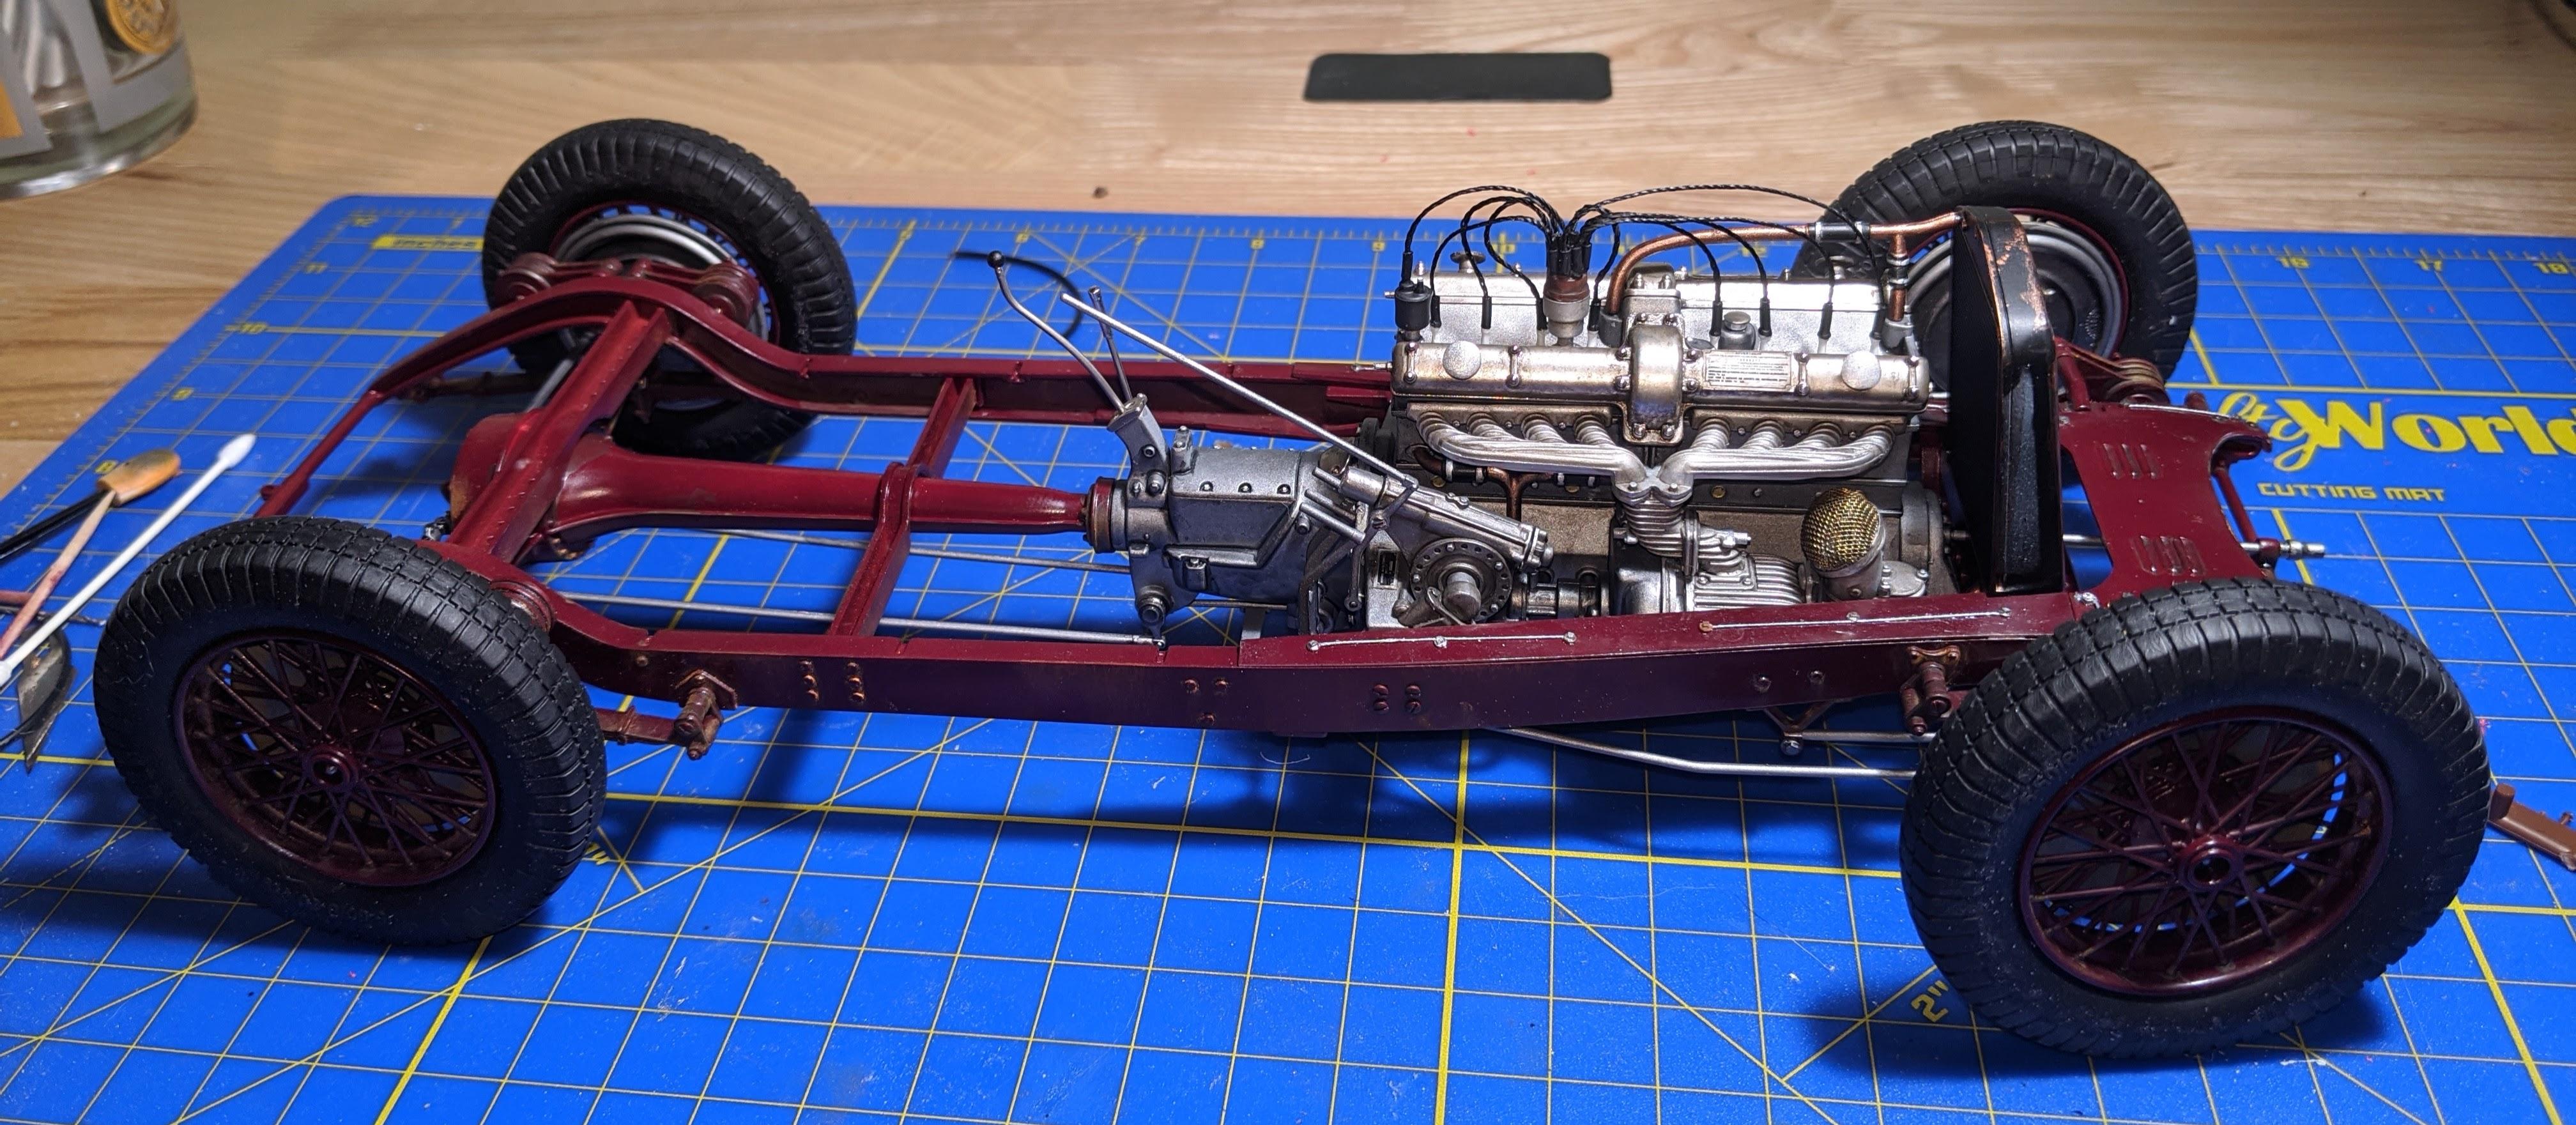
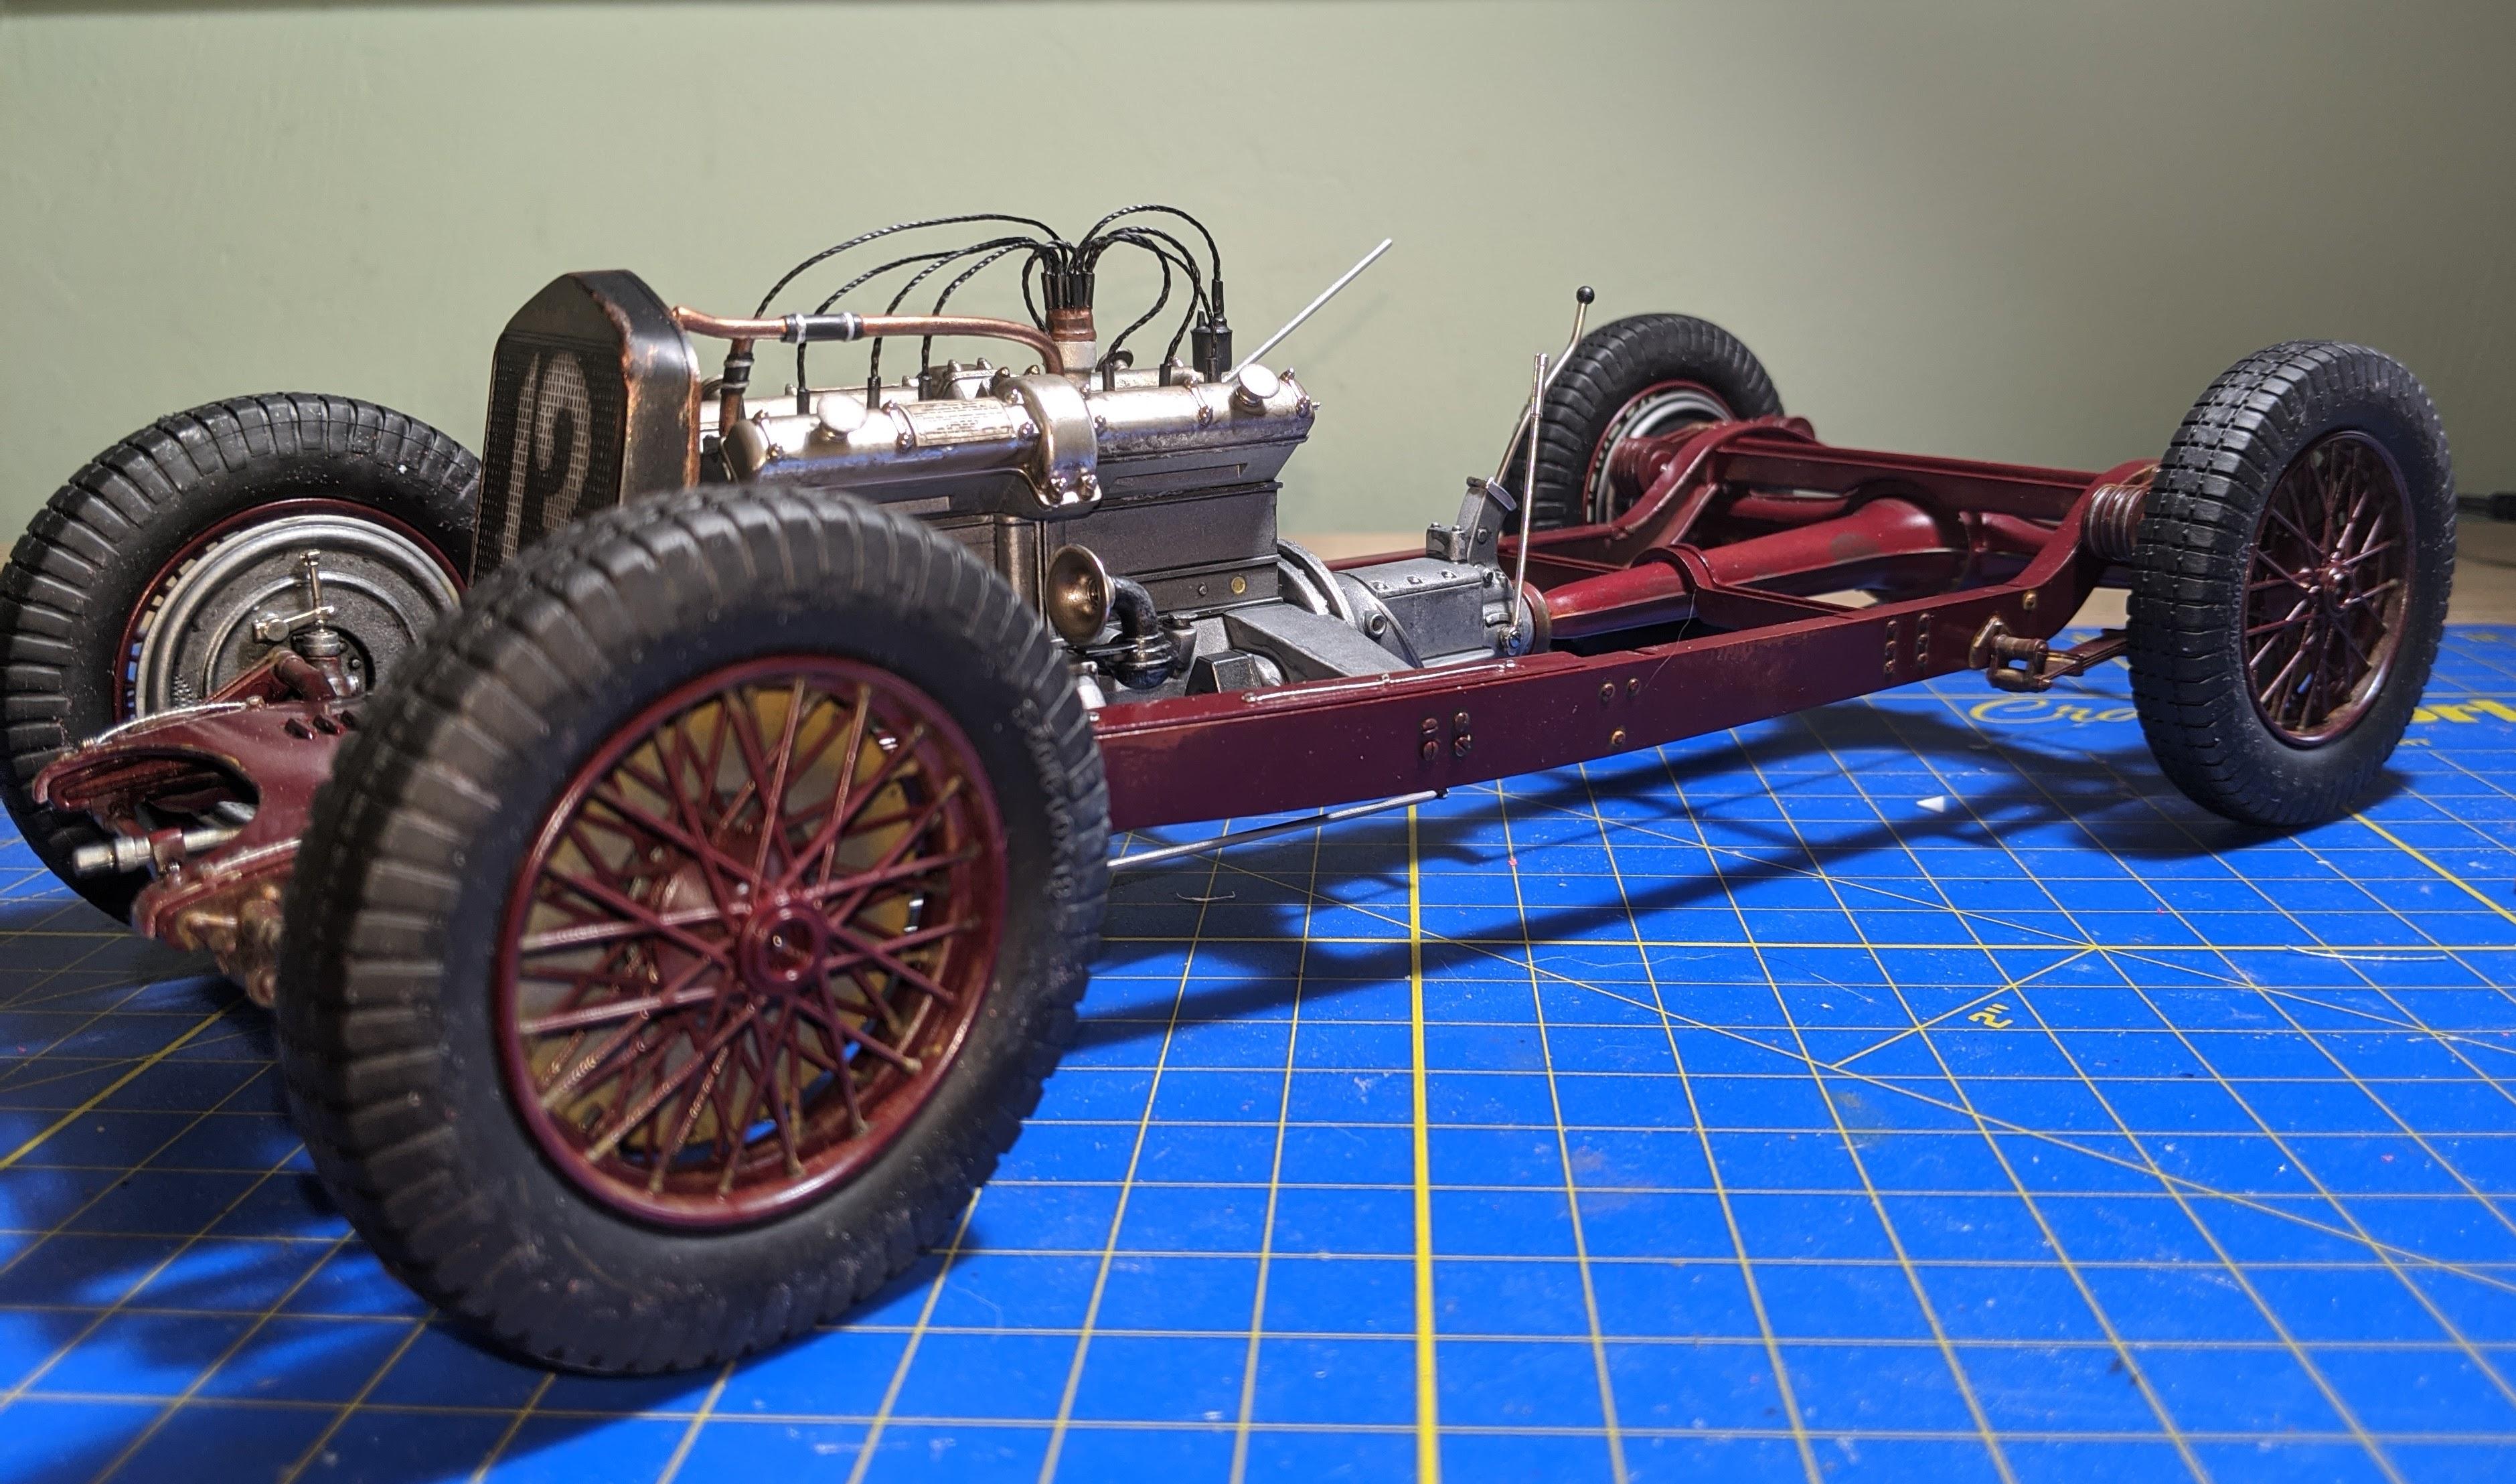
The motor meets the chassis... I decided to go with Tamiya Metallic Grey for the backing plates and brake and steering system instead of body color. Washes on these parts were done in Testors black enamel stain for its oily look. The stencil on the radiator is from the same set as the side stencils... 13 is definitely the best number for a racer. Since I took these pics over the weekend, I have basically buttoned this build up... finished pics, including one final detail I decided to add in literally when the thing was done, should be up tomorrow. As always, questions and comments are welcome!
-
Protar Ferrari 126C2
jaymcminn replied to zoomiev's topic in WIP: Other Racing: Road Racing, Land Speed Racers
Excellent work, especially given the Protar origin. Beautiful! -
Italeri Alfa 8c- WIP
jaymcminn replied to jaymcminn's topic in WIP: Other Racing: Road Racing, Land Speed Racers
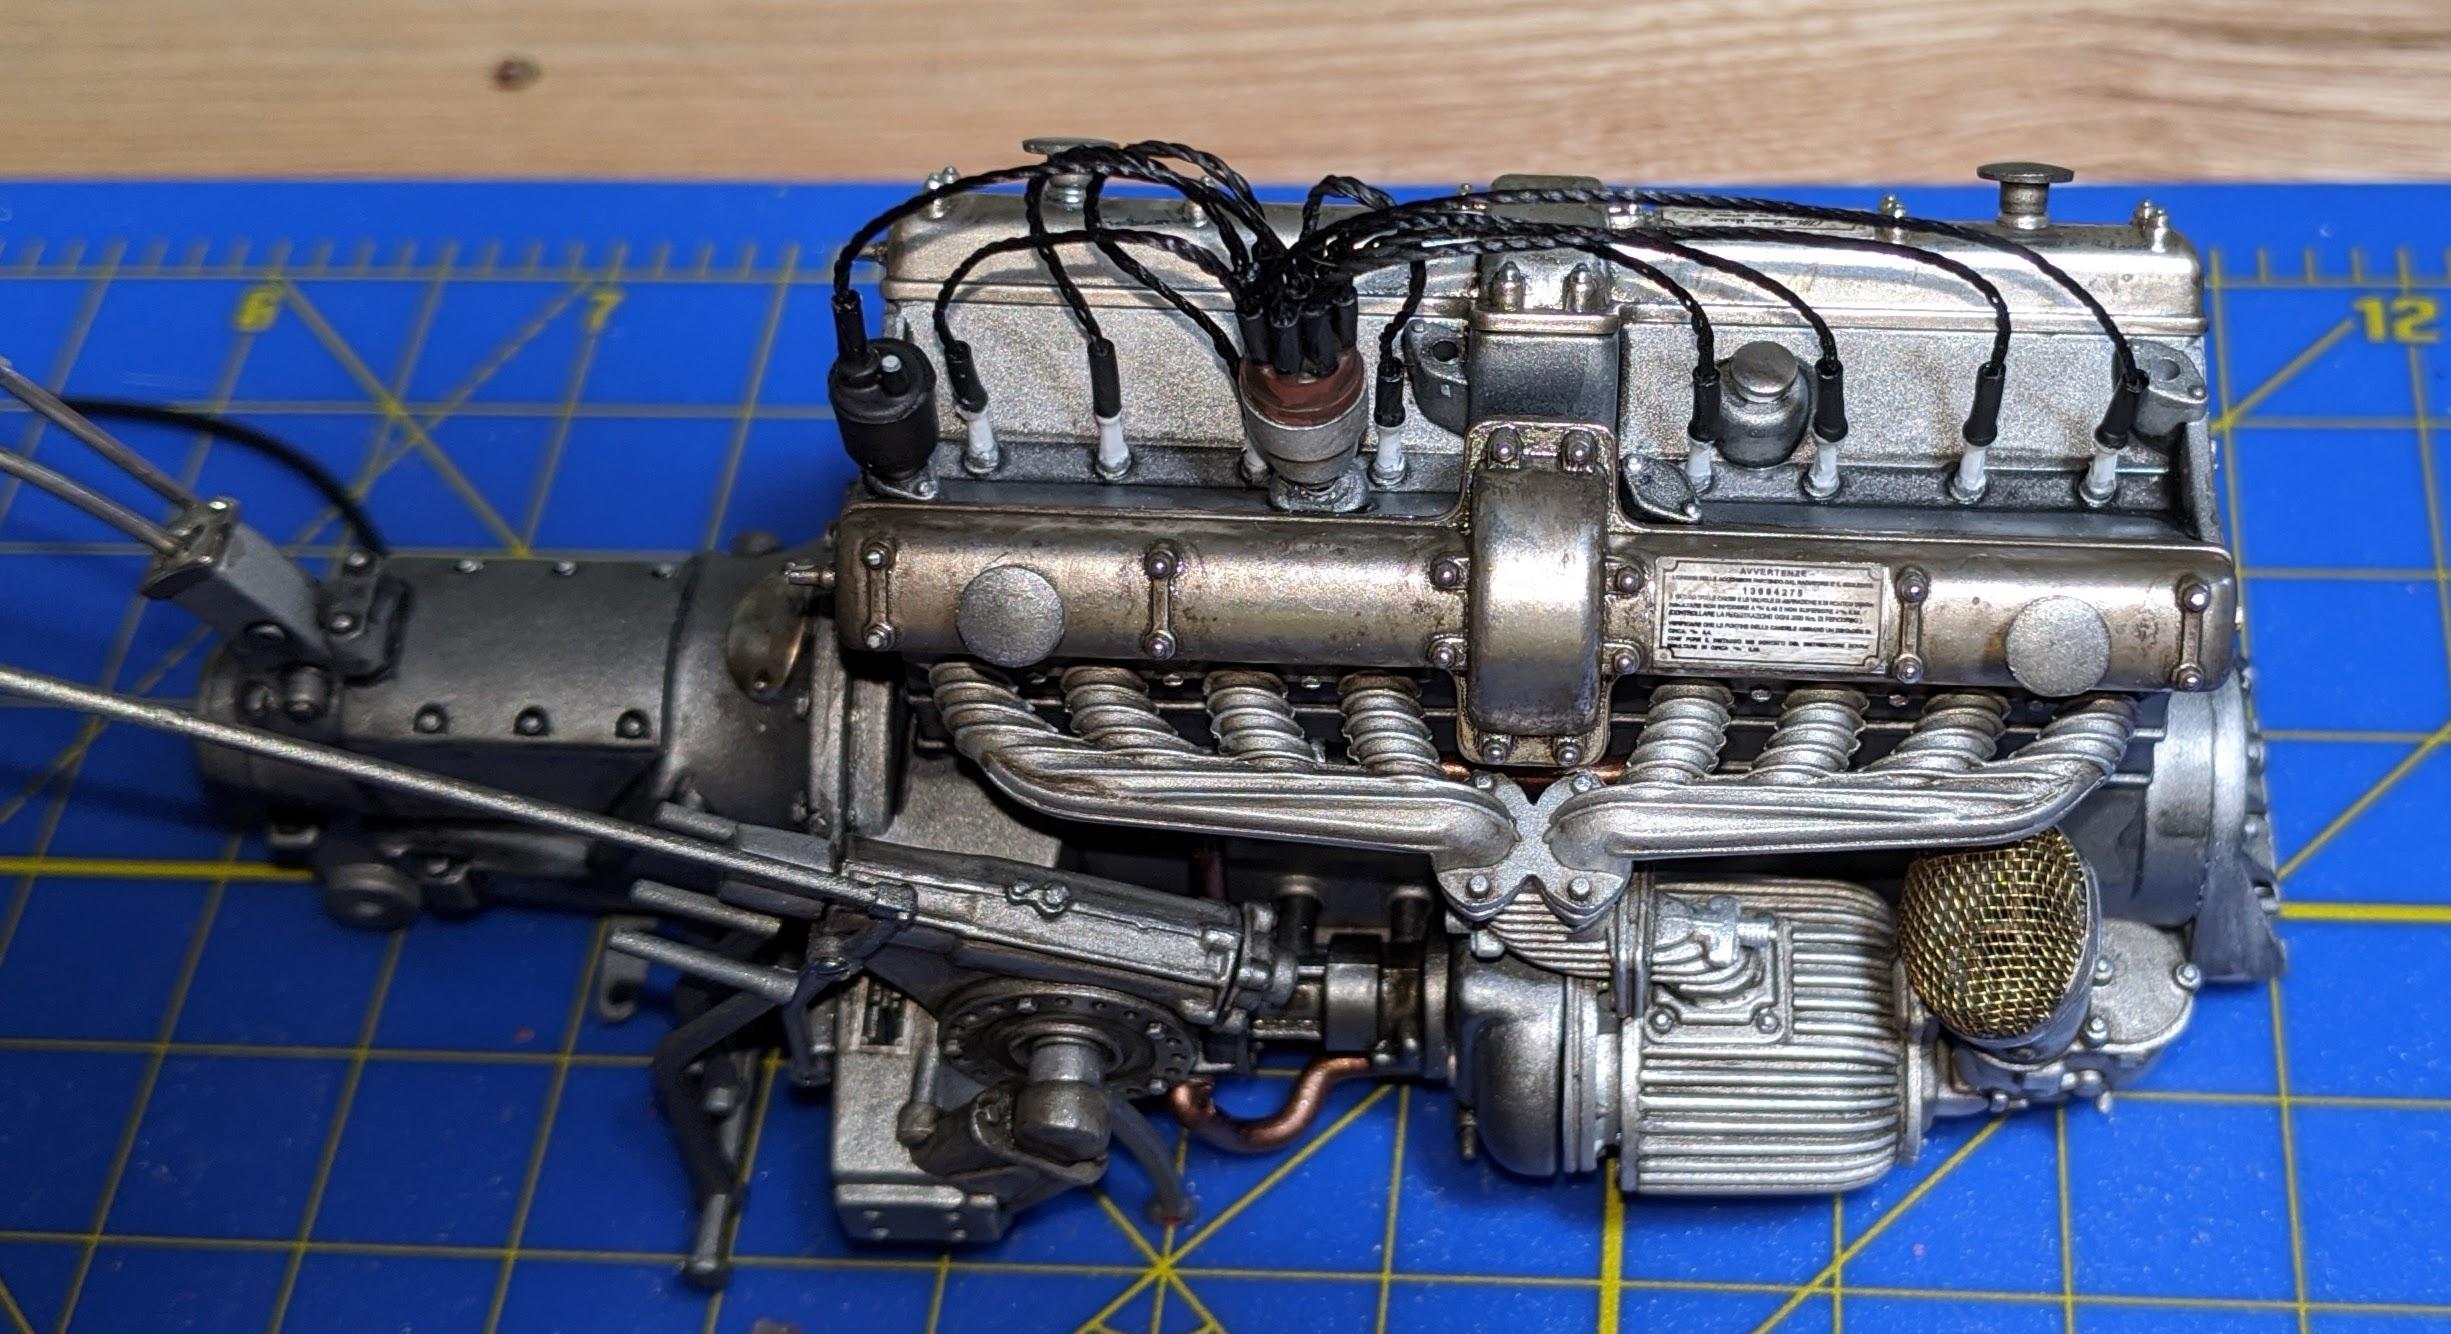
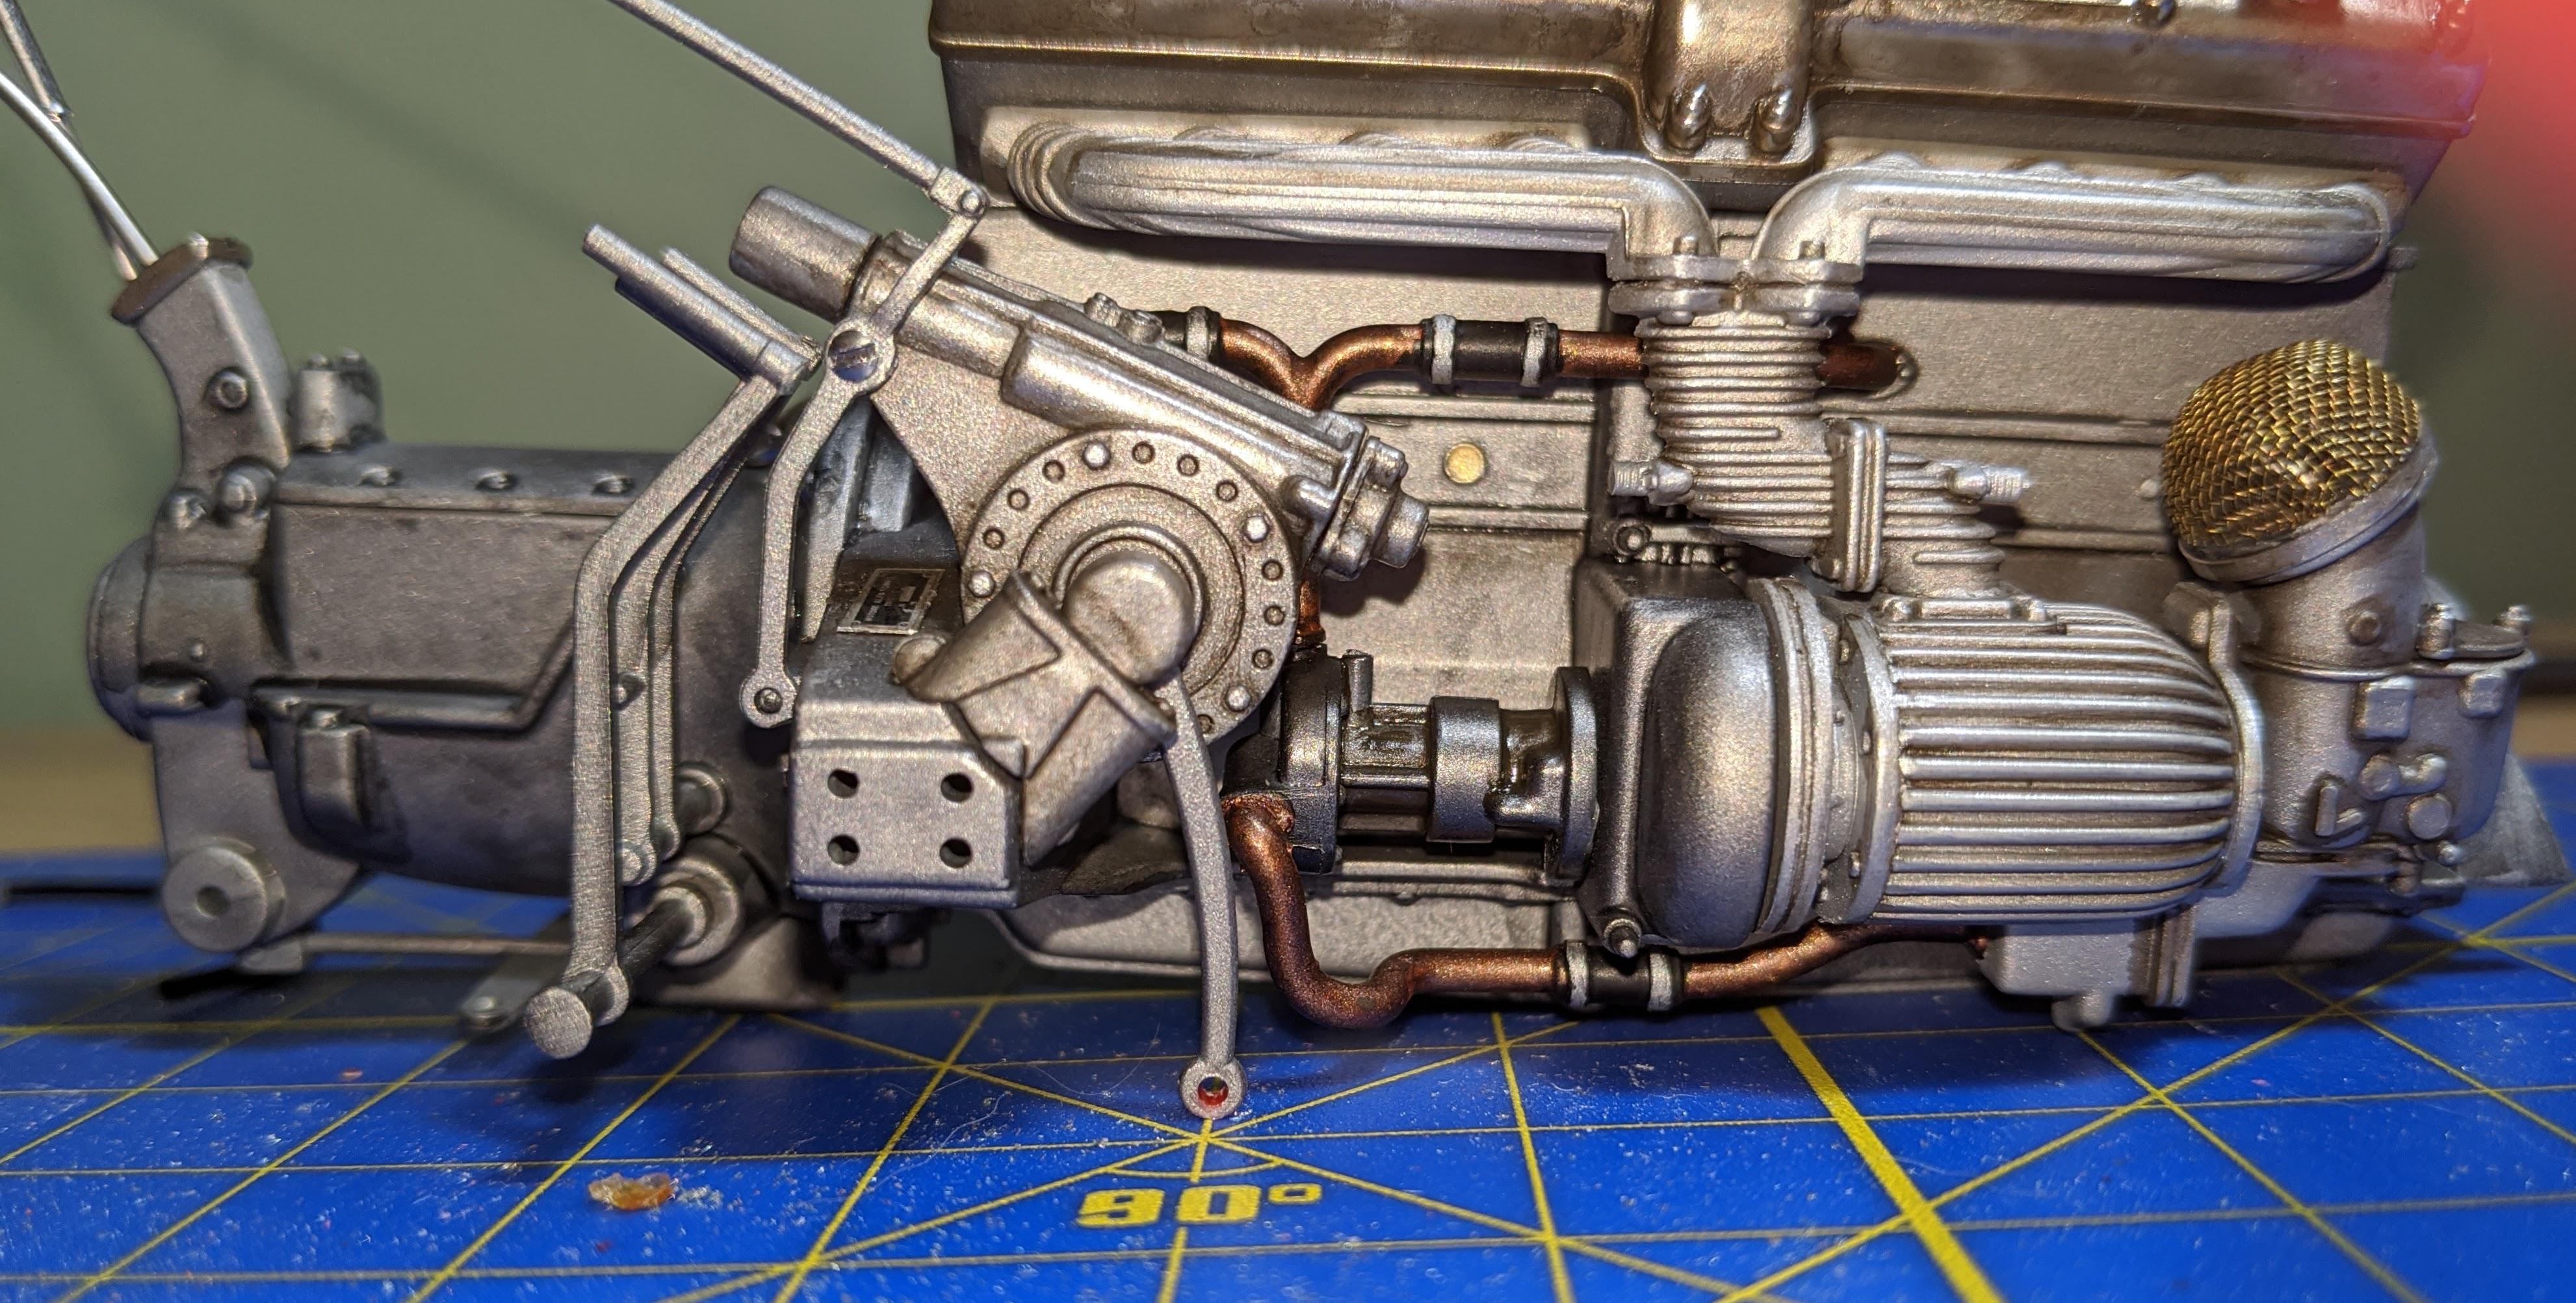
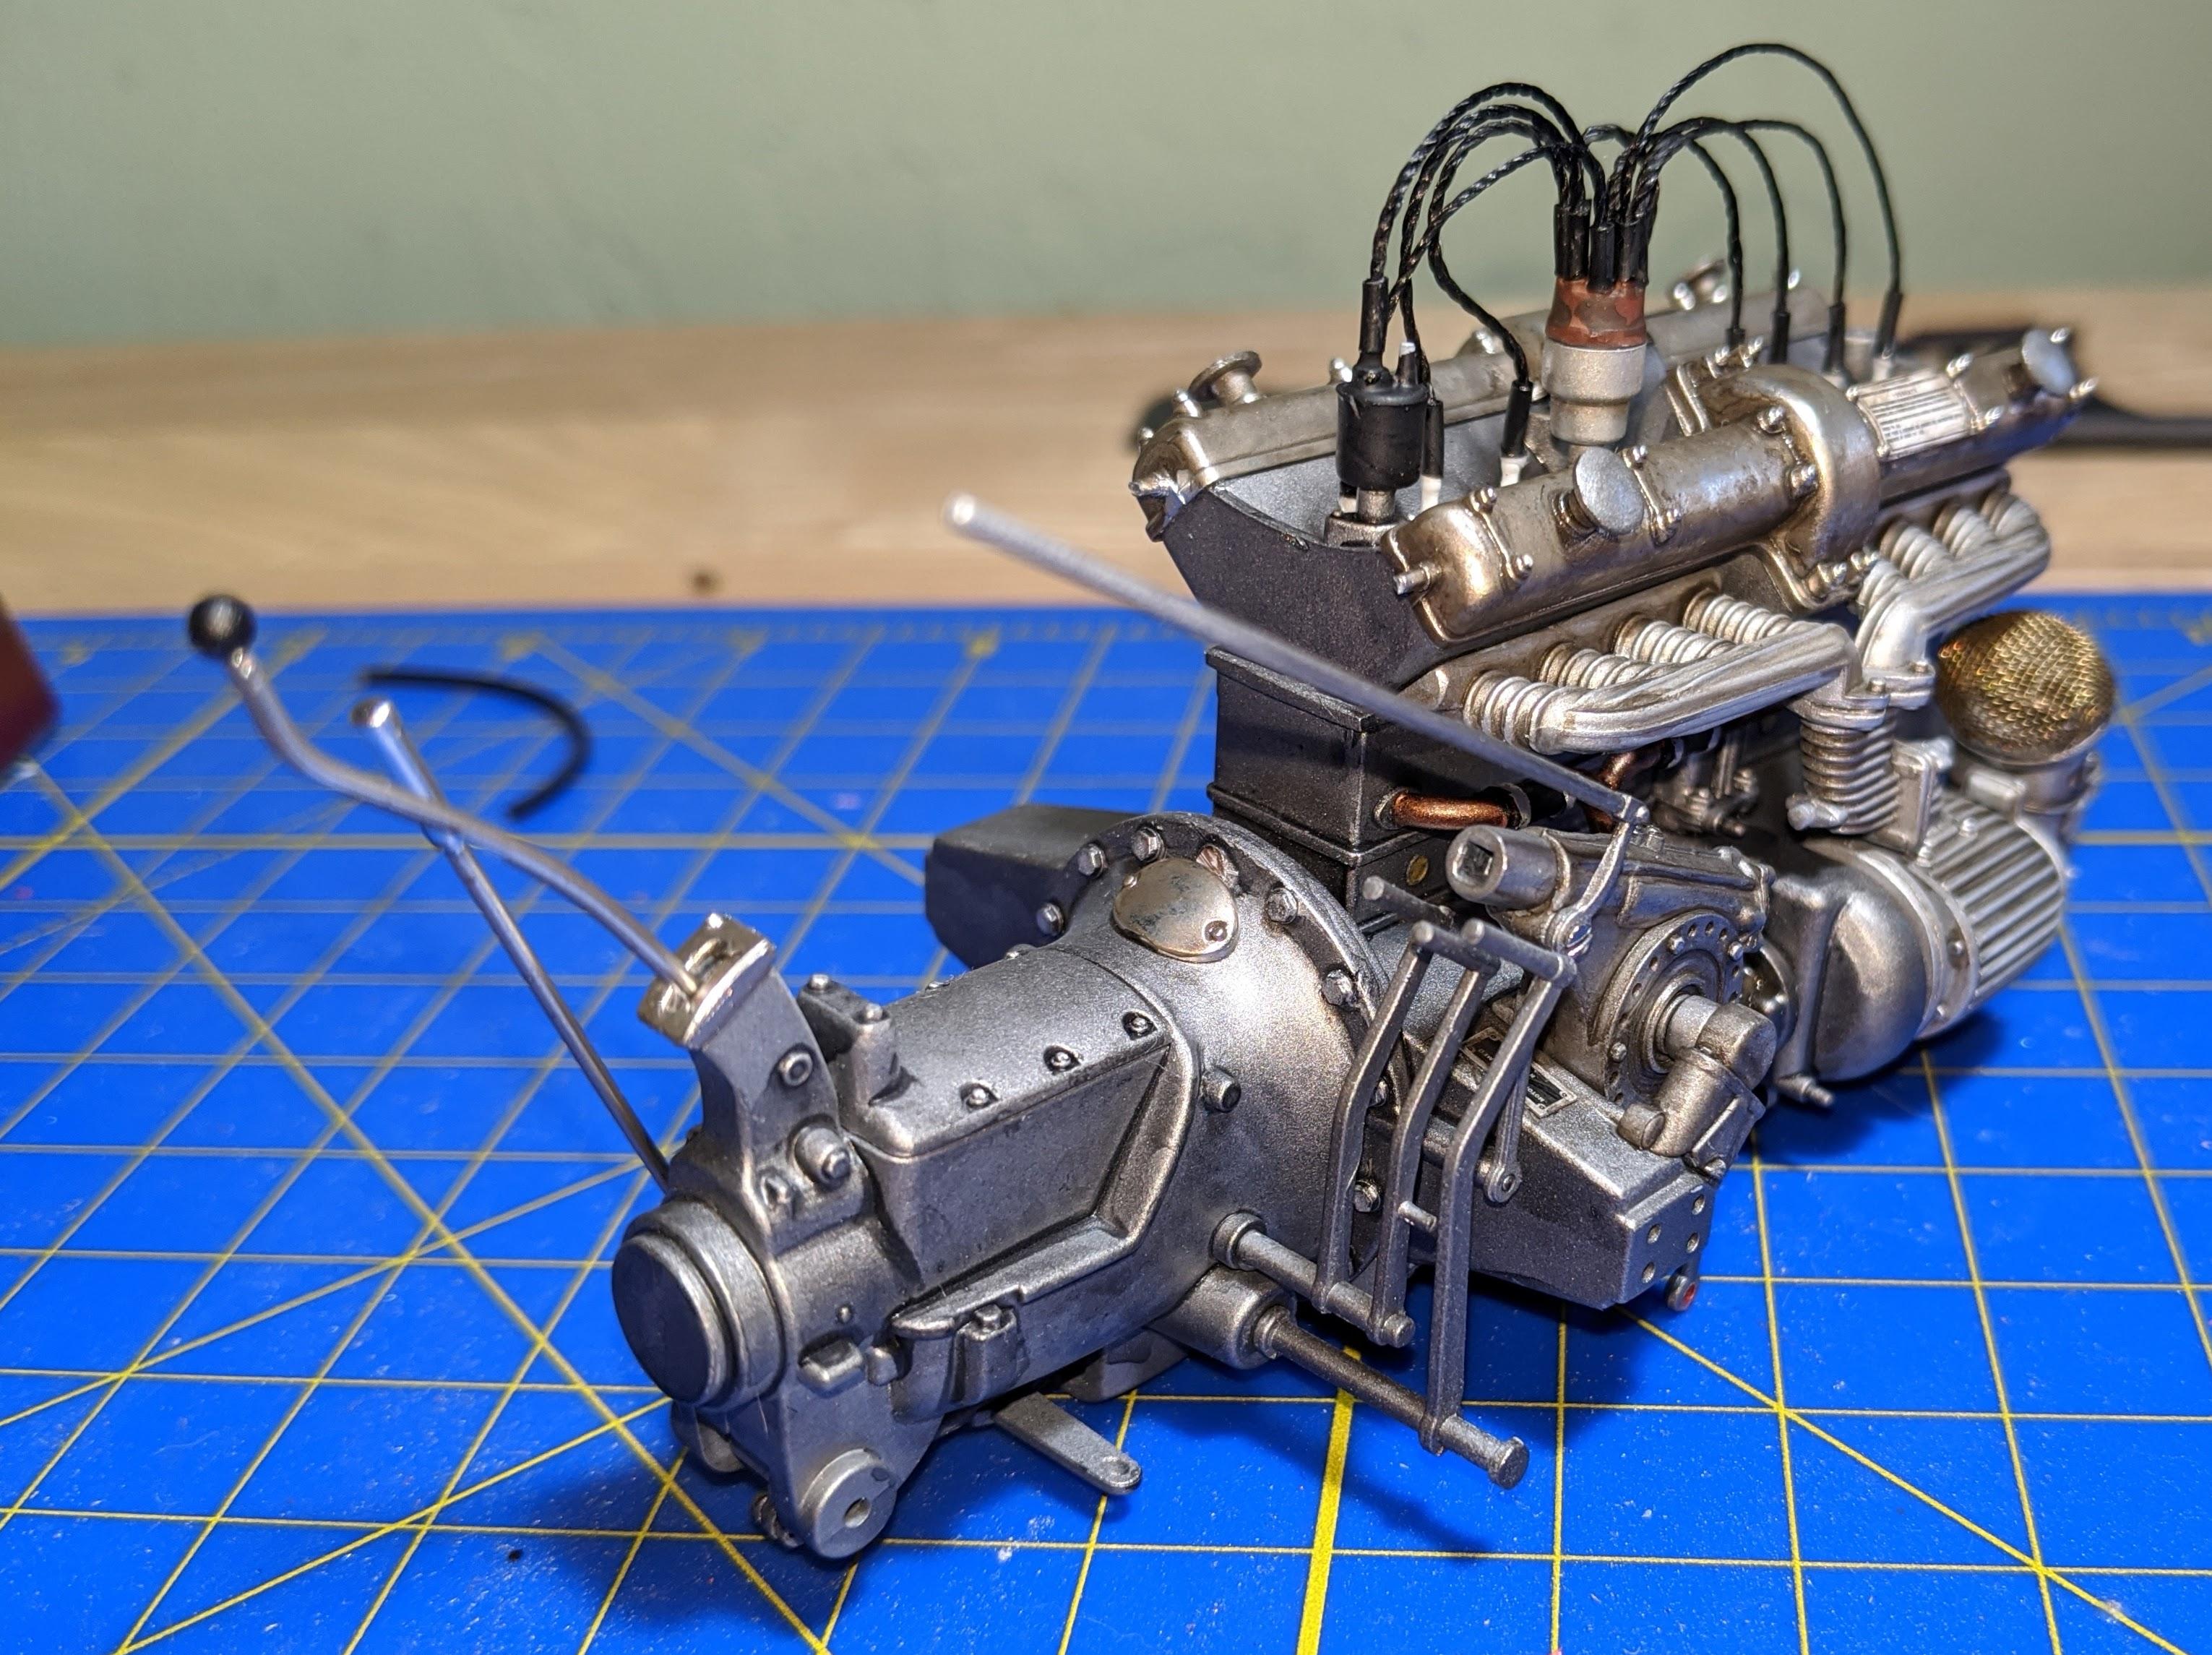
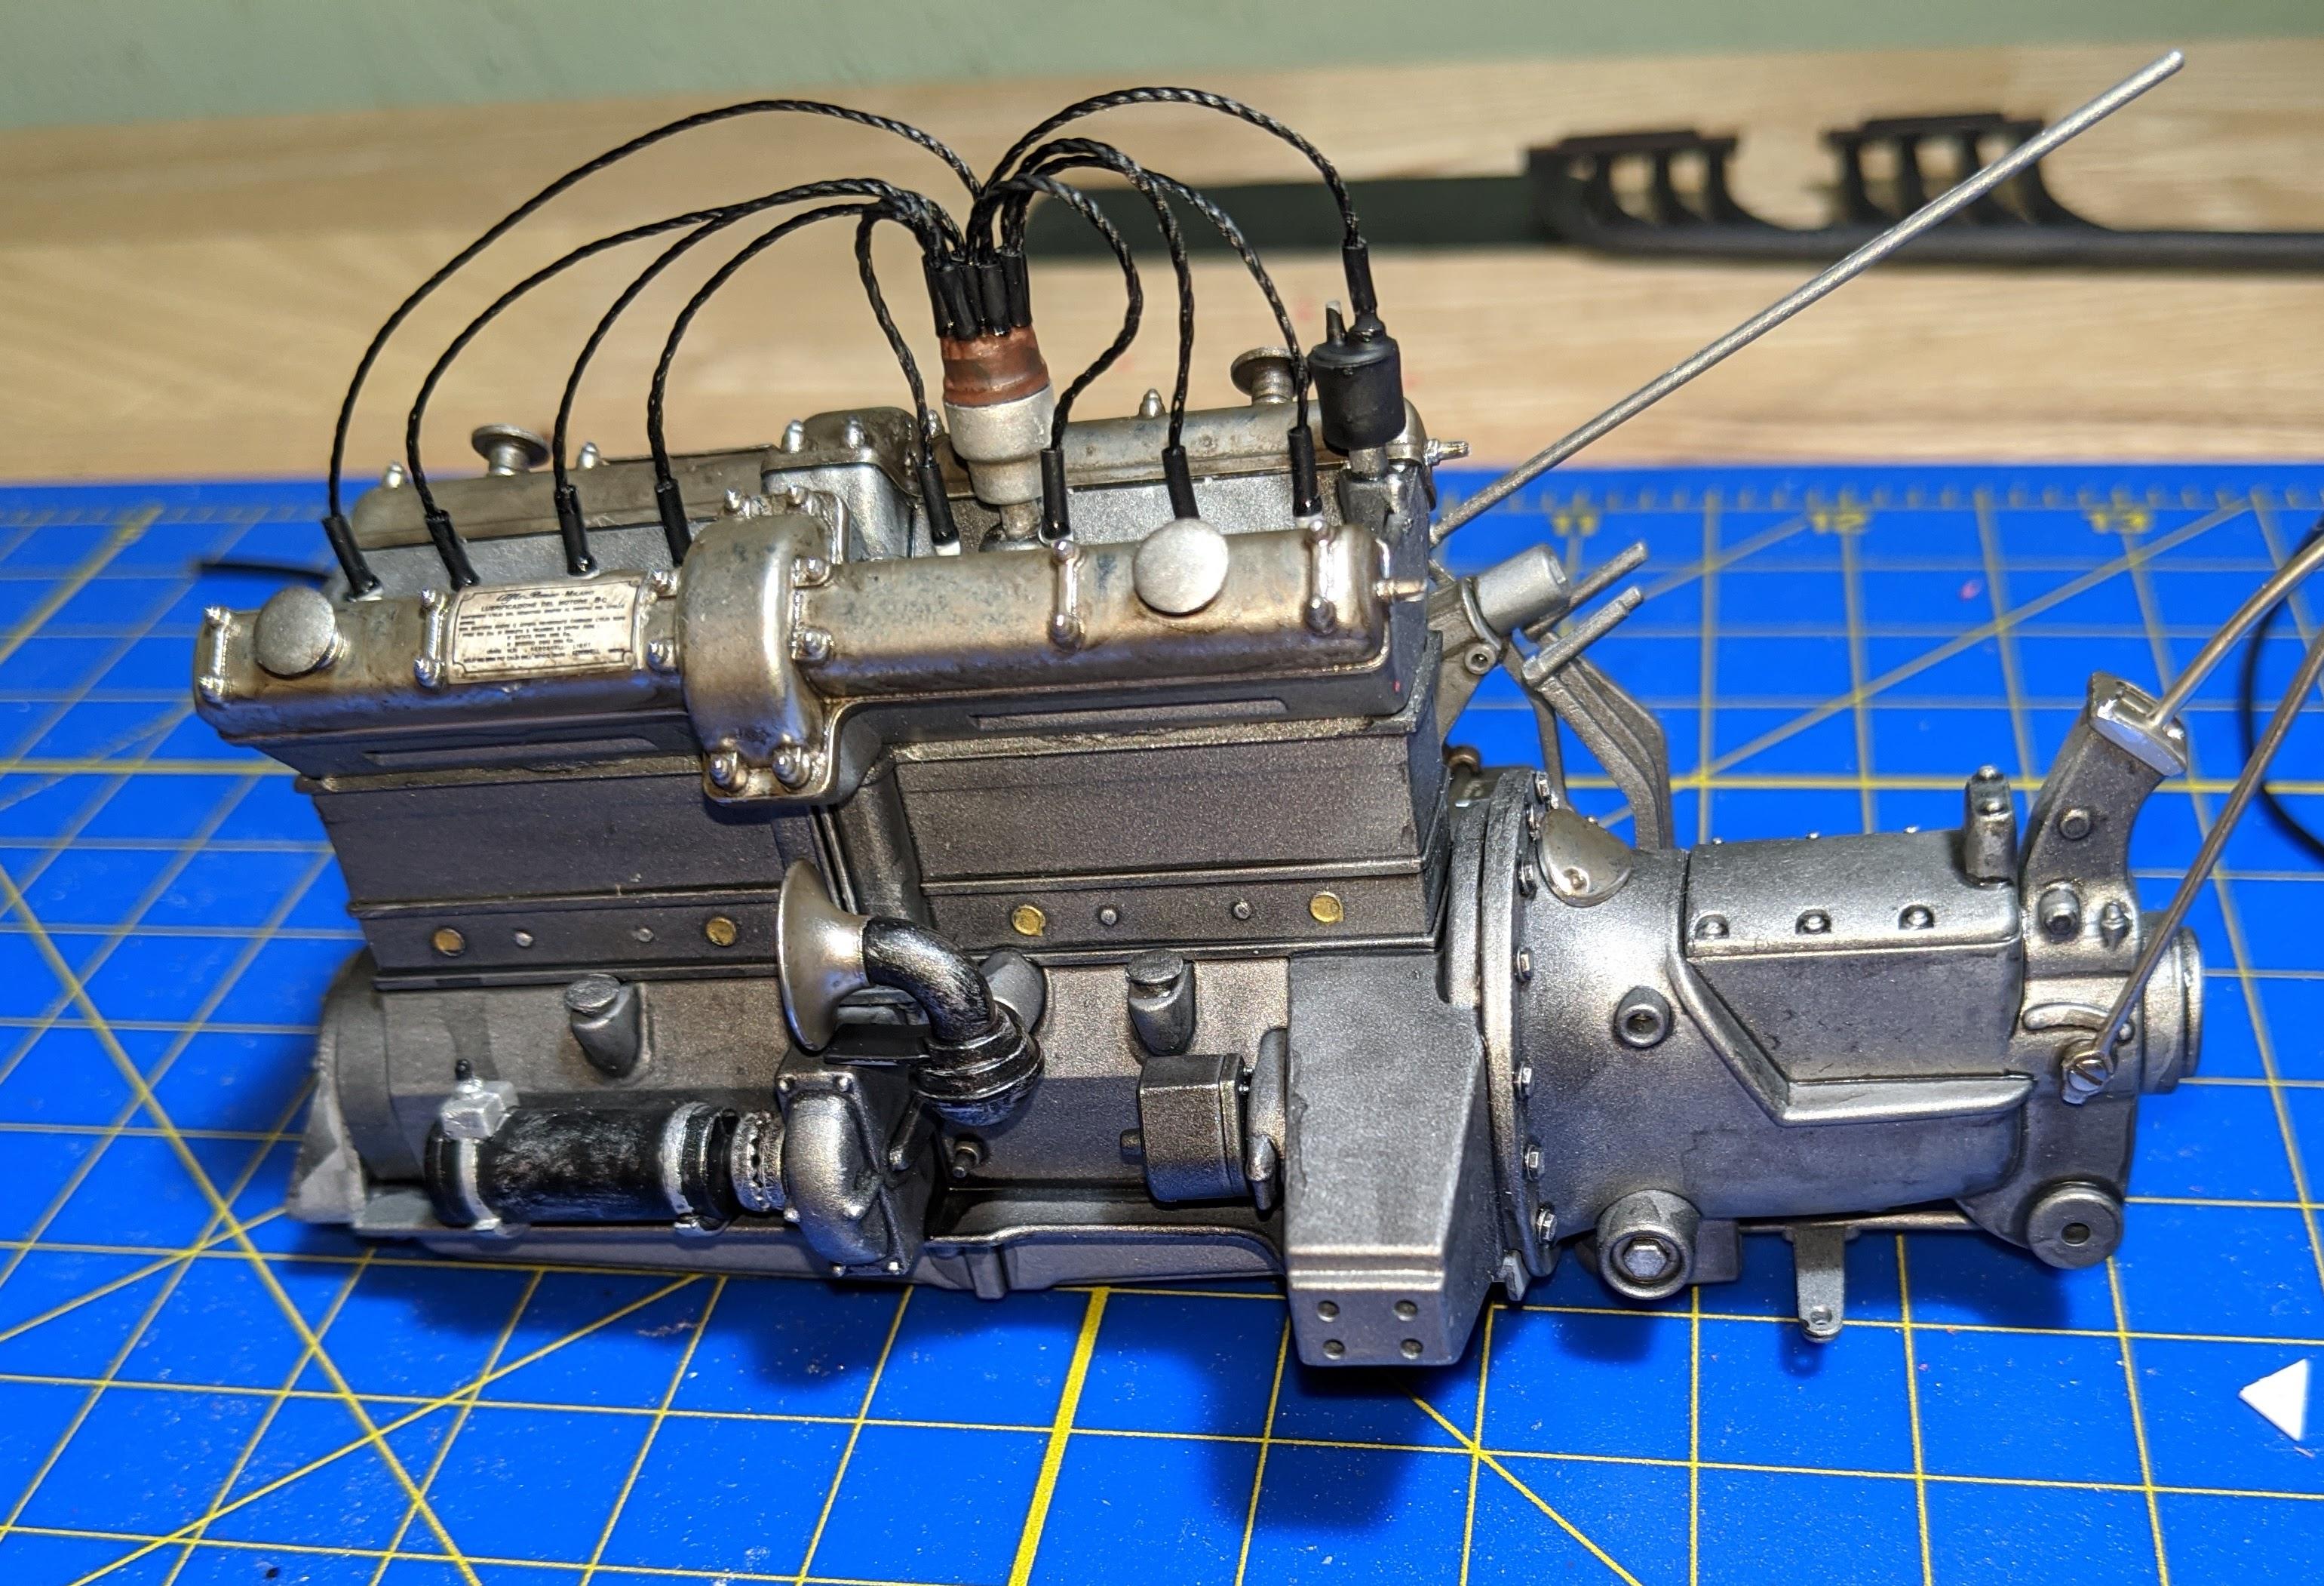
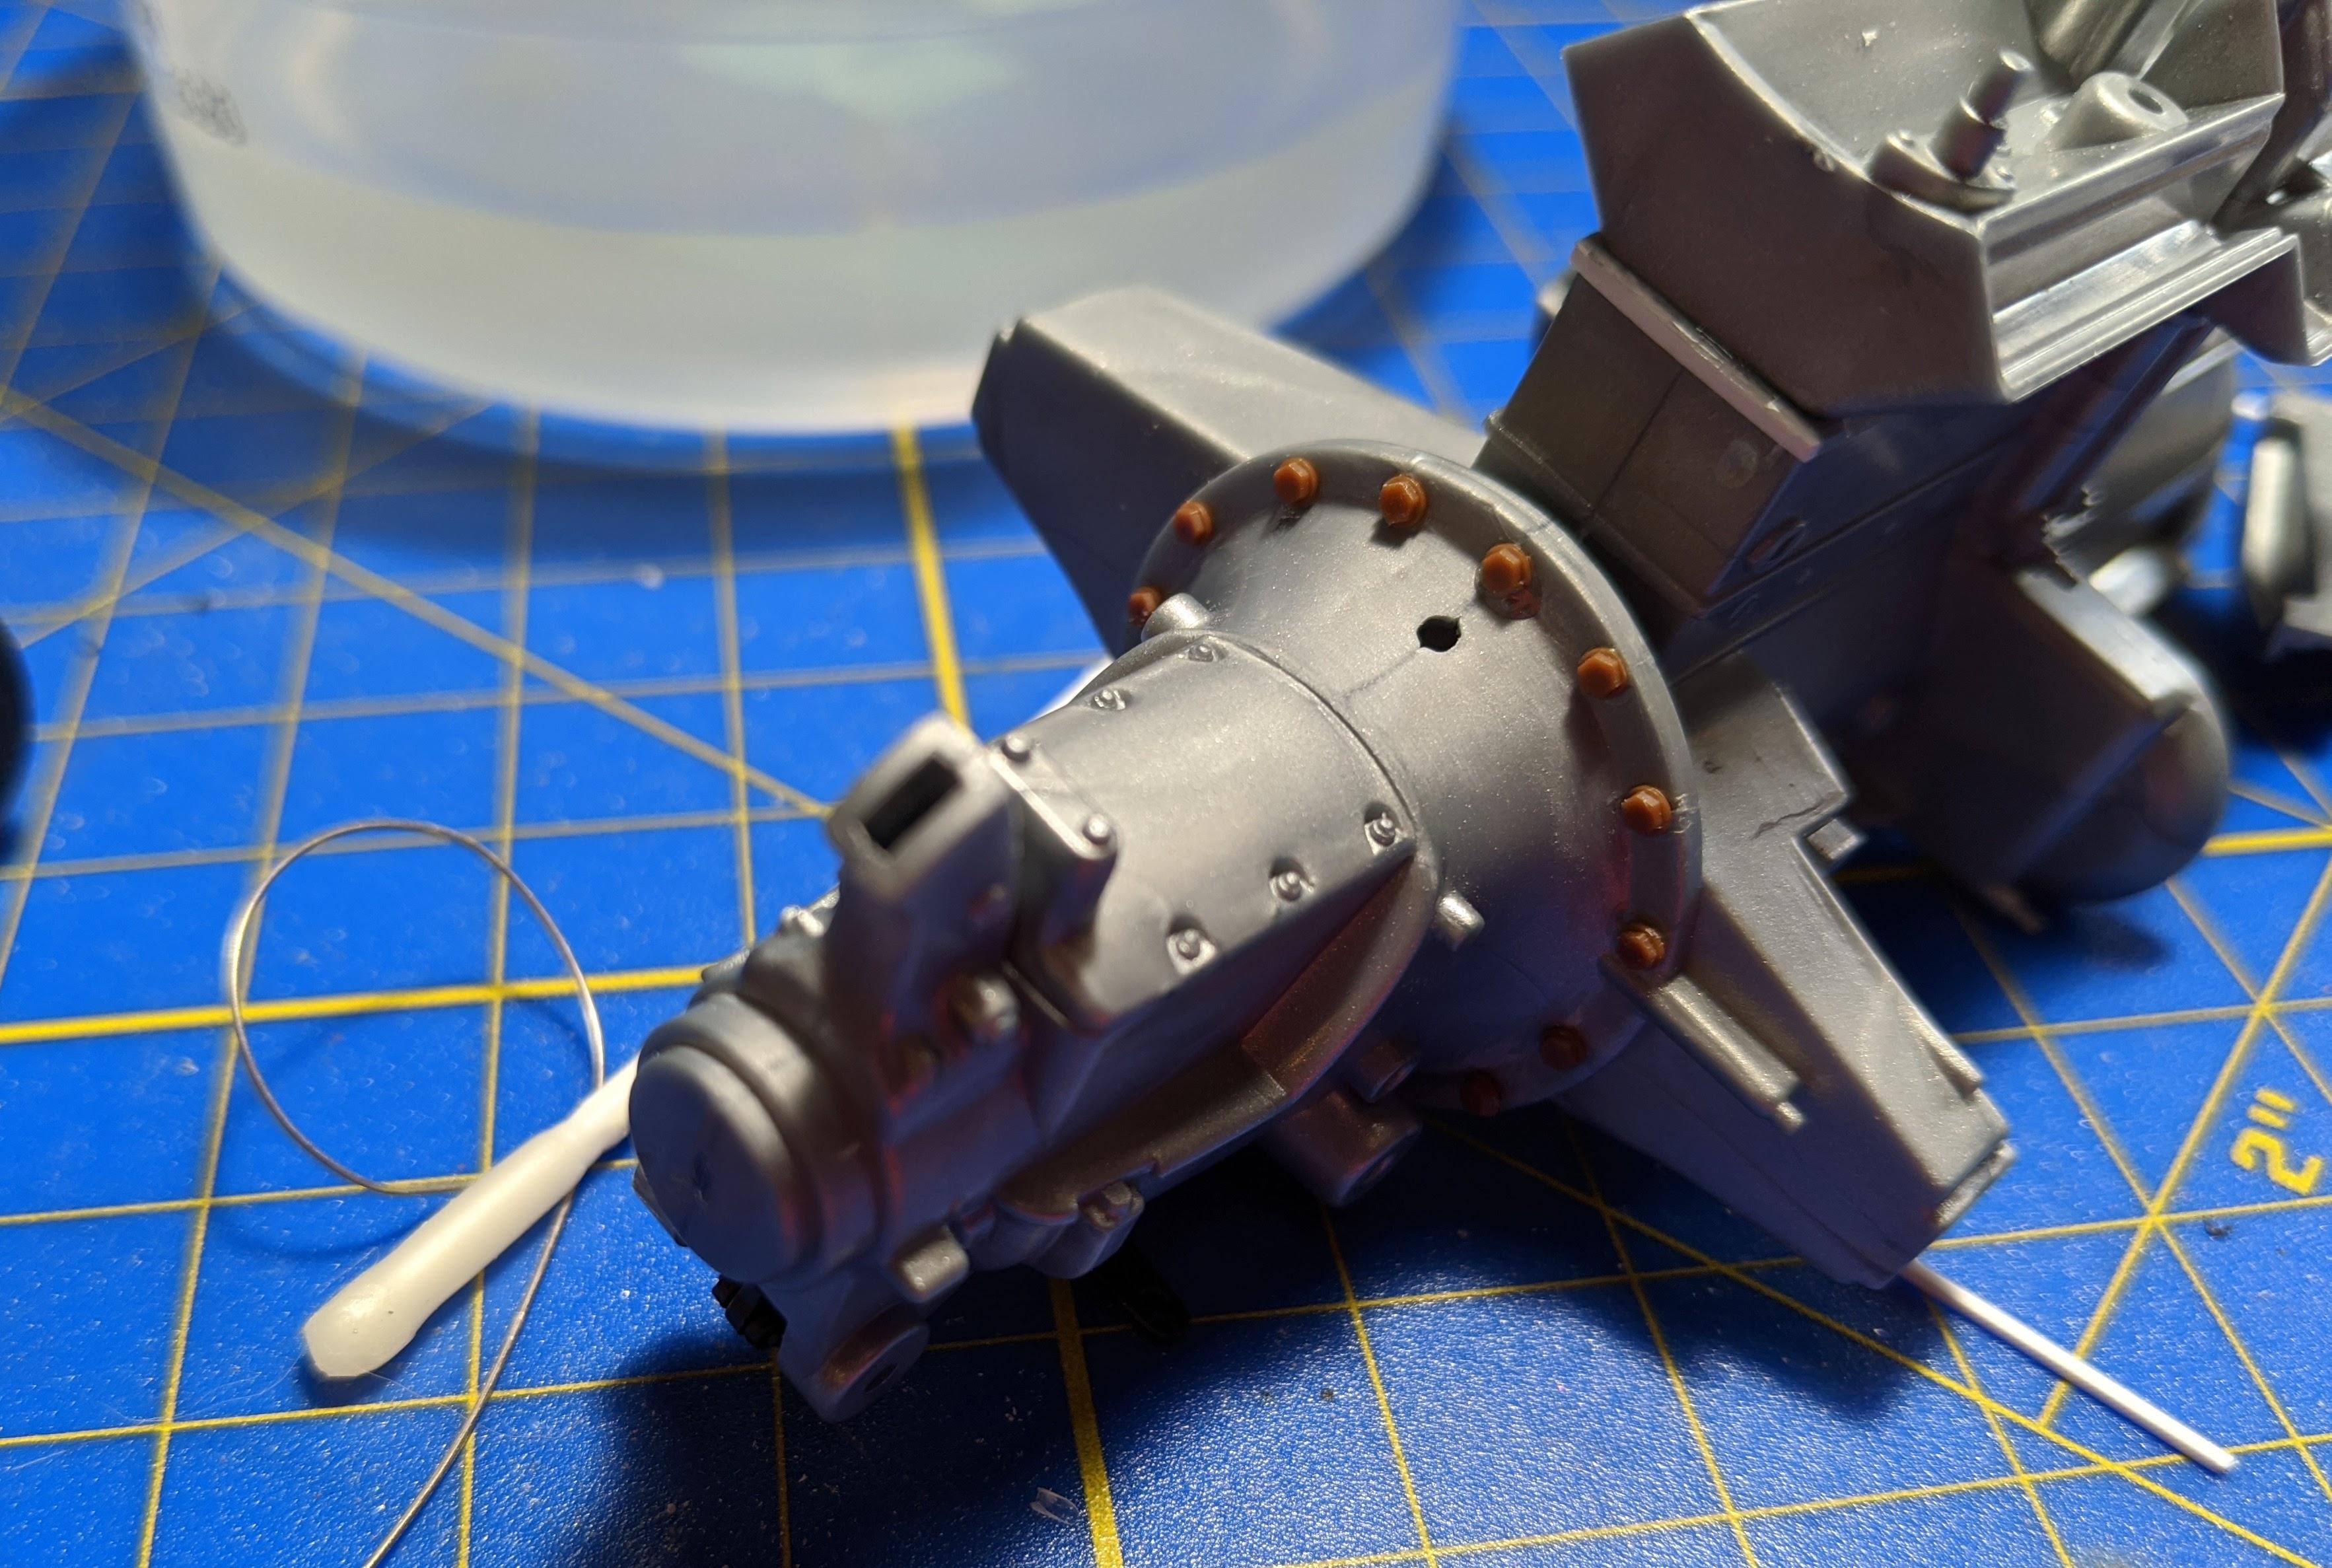
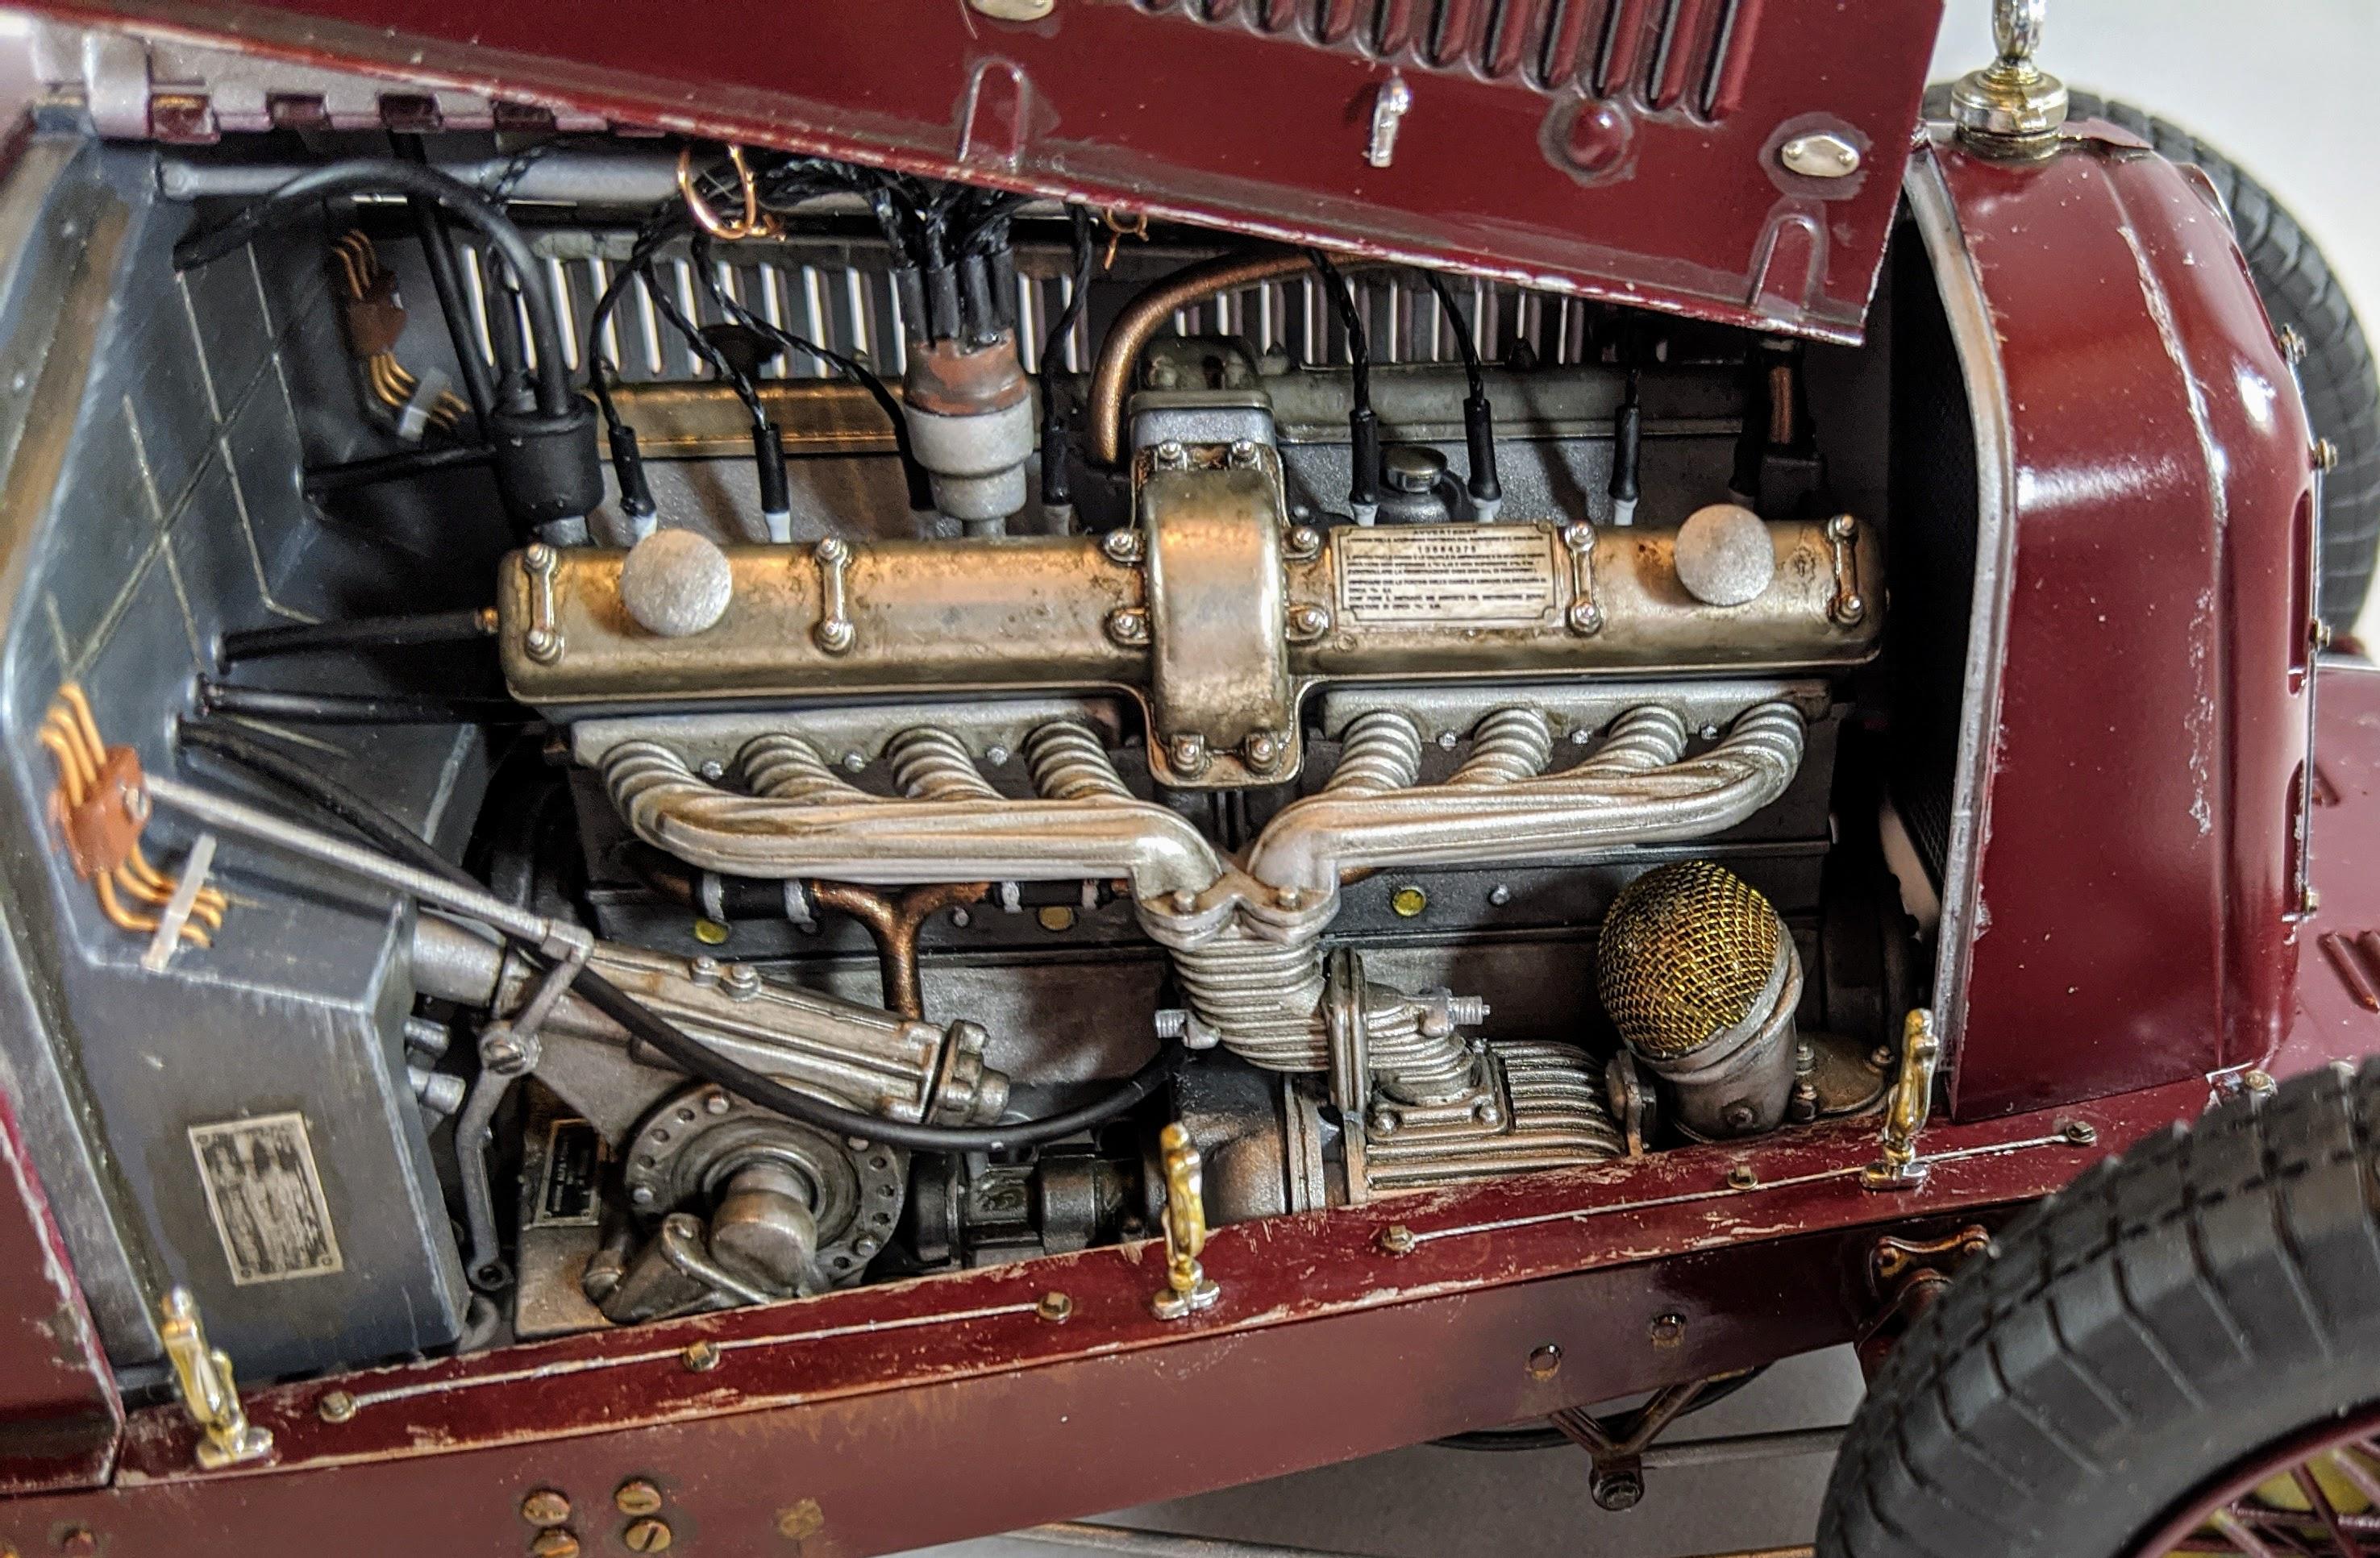
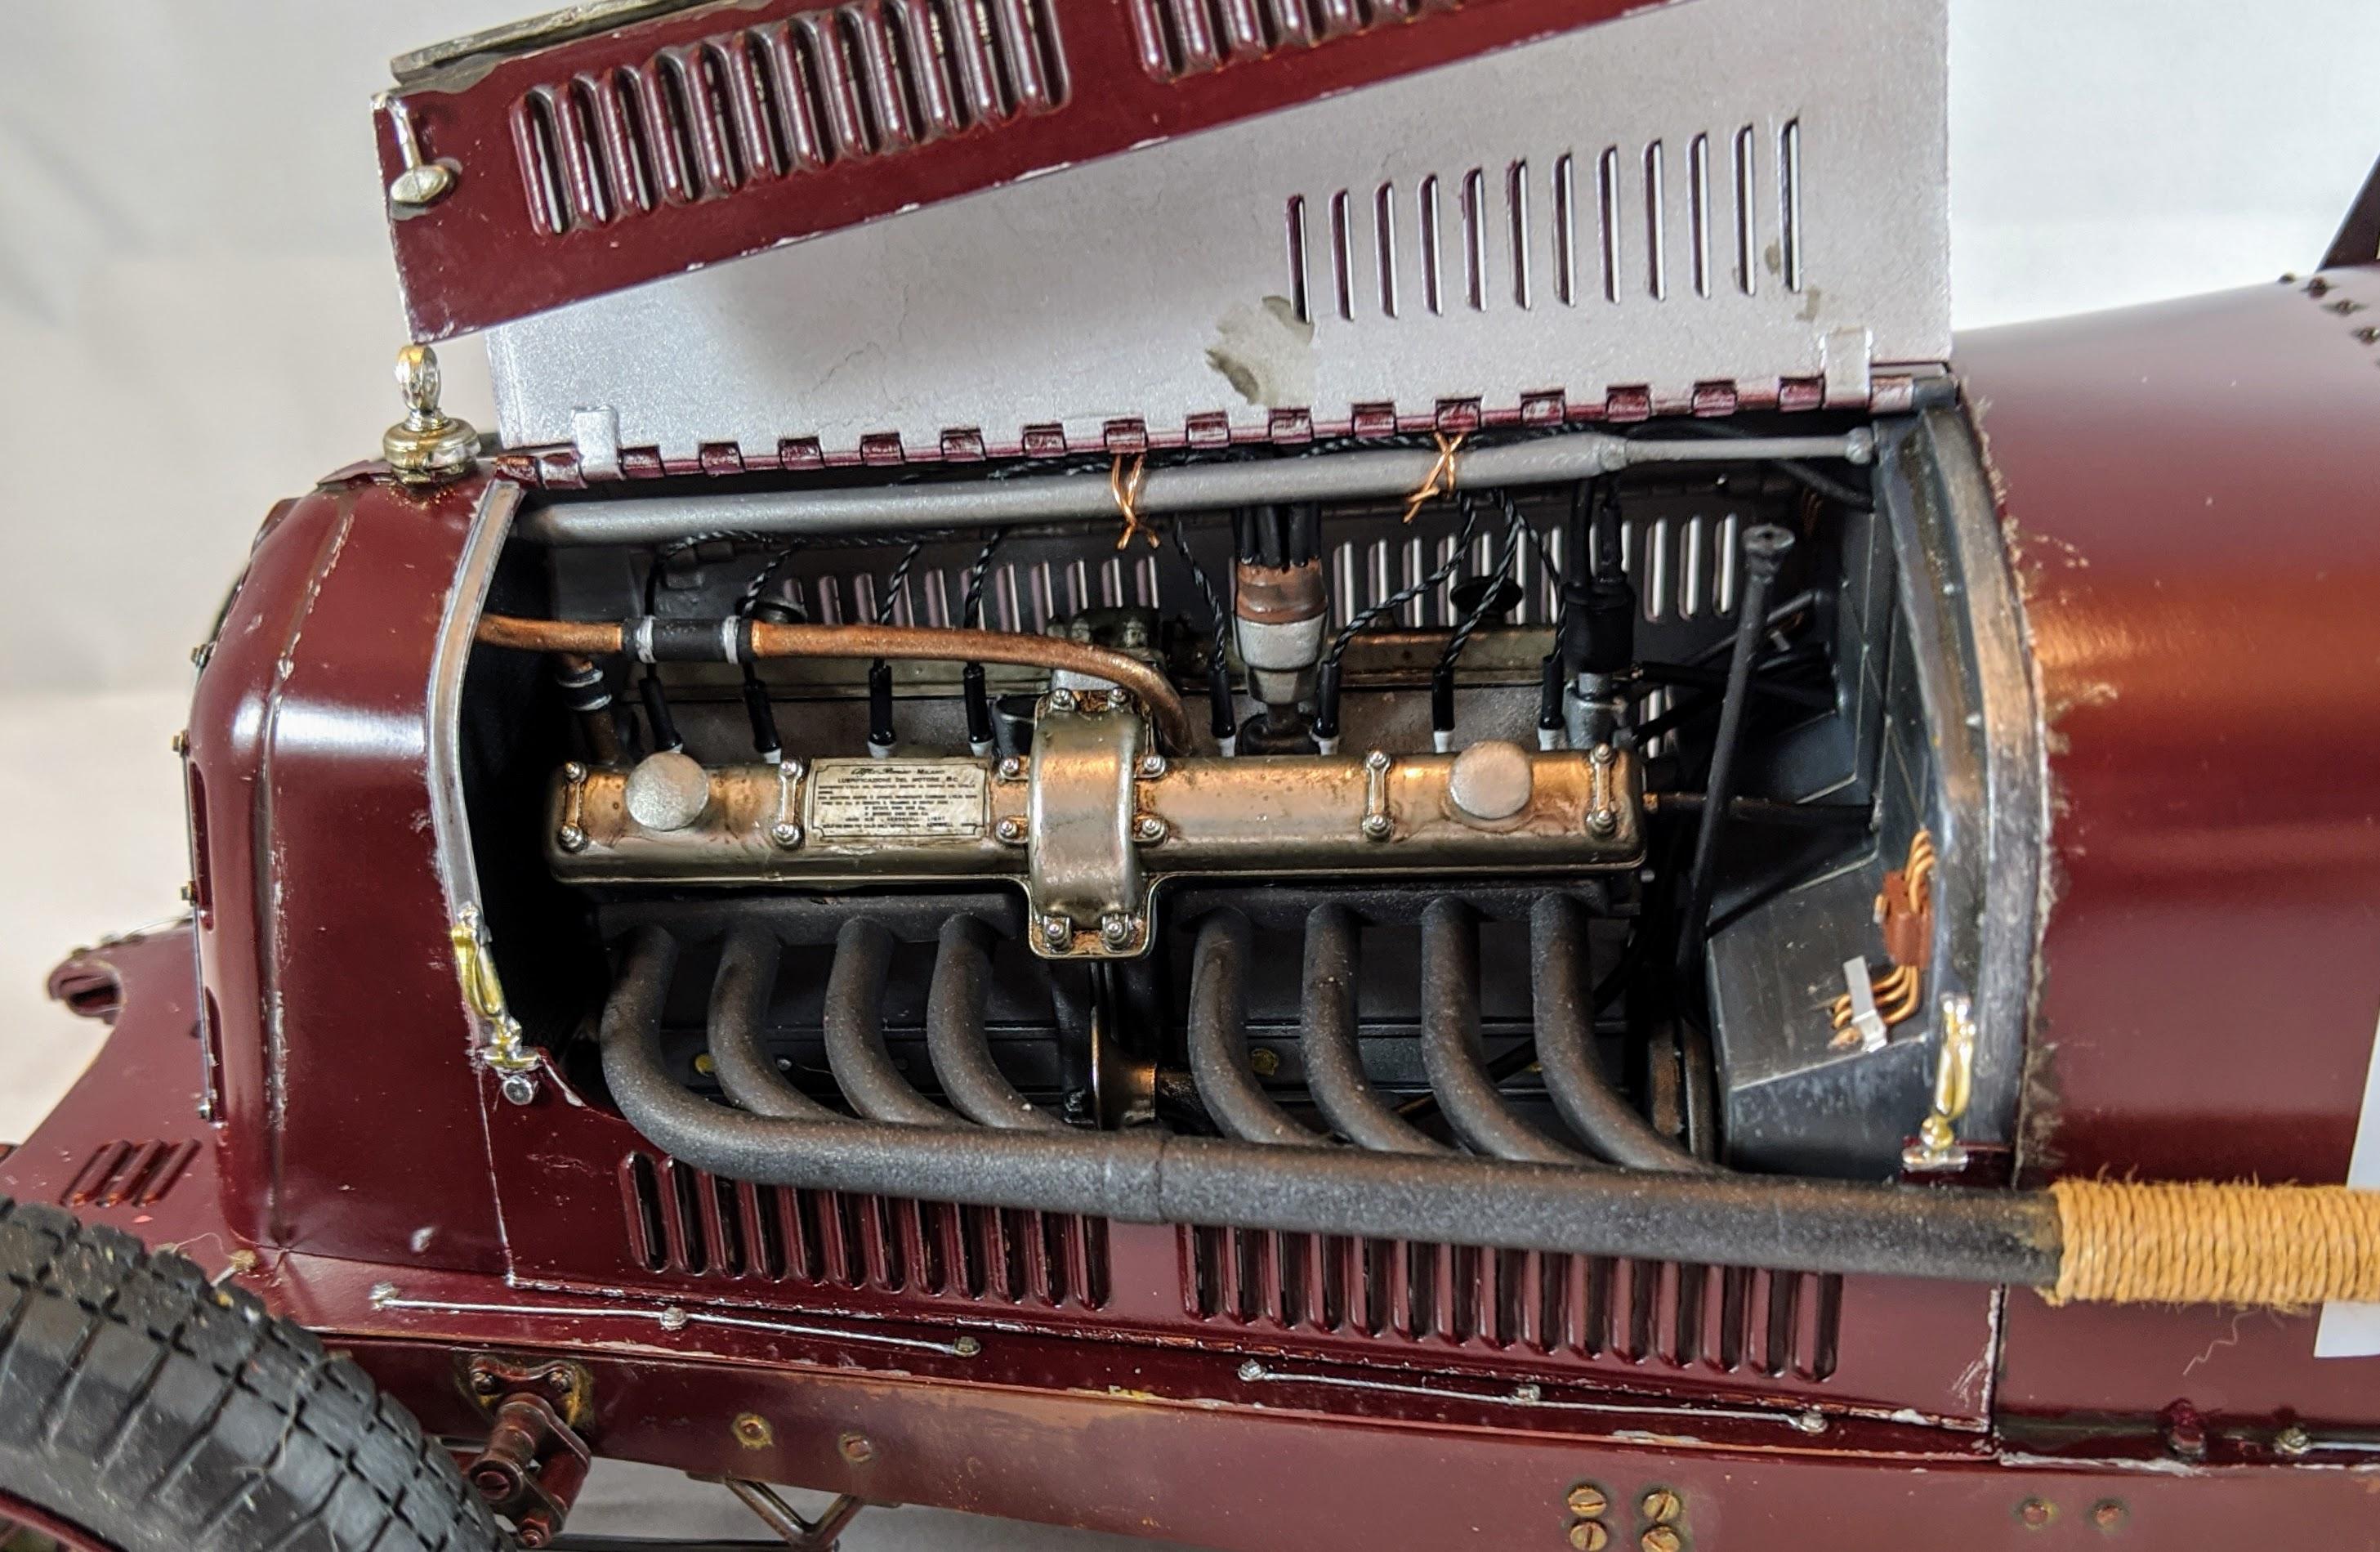
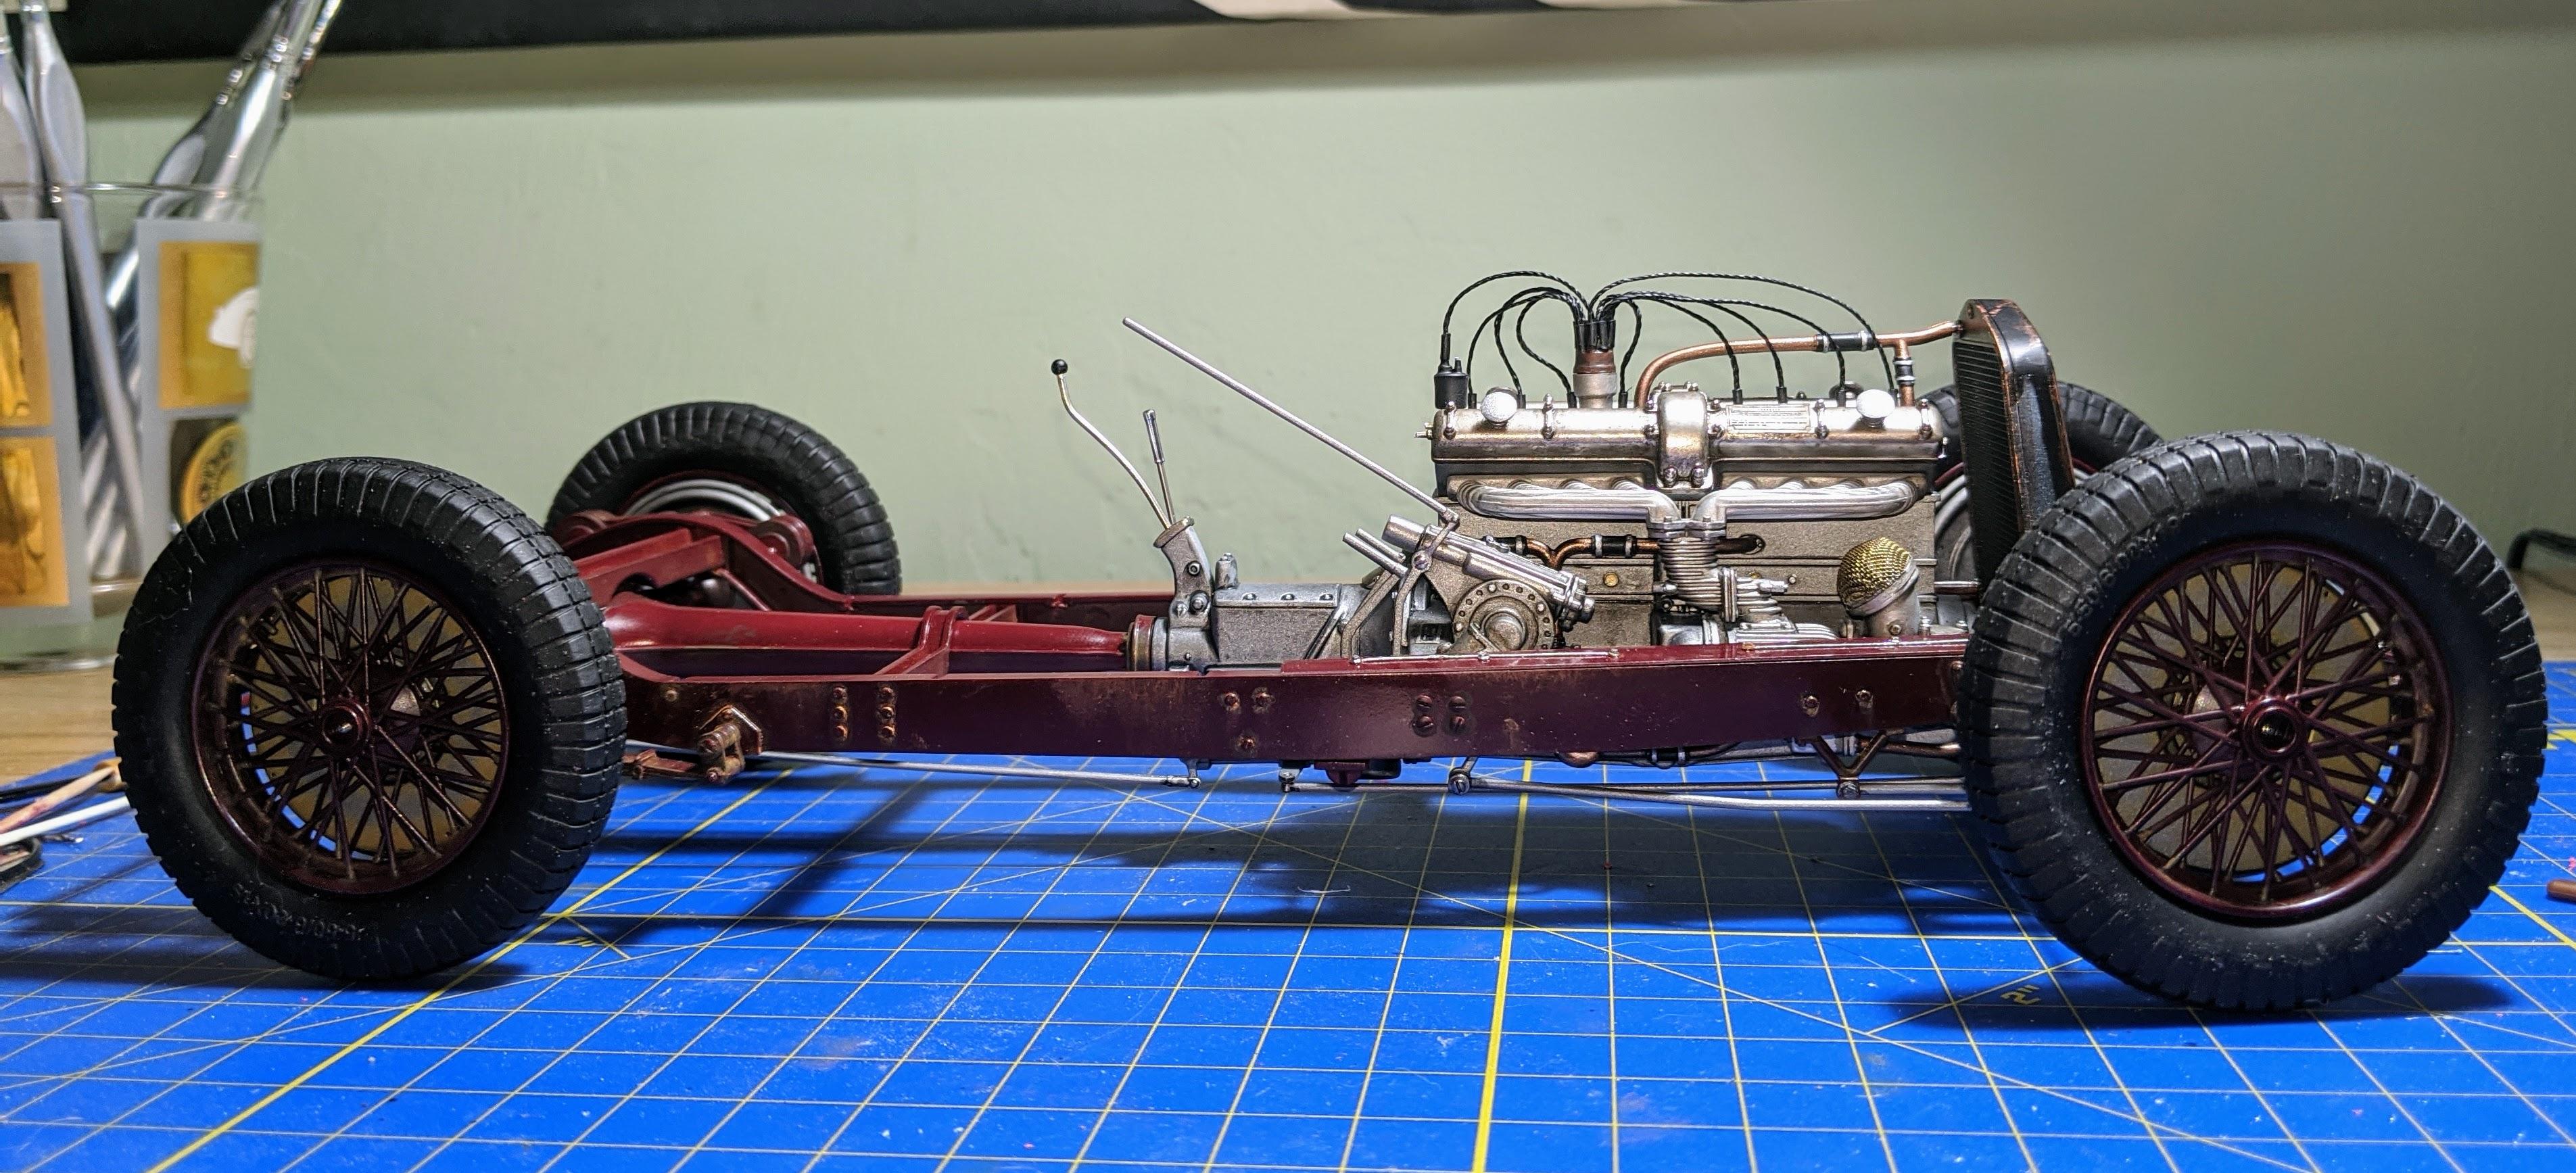
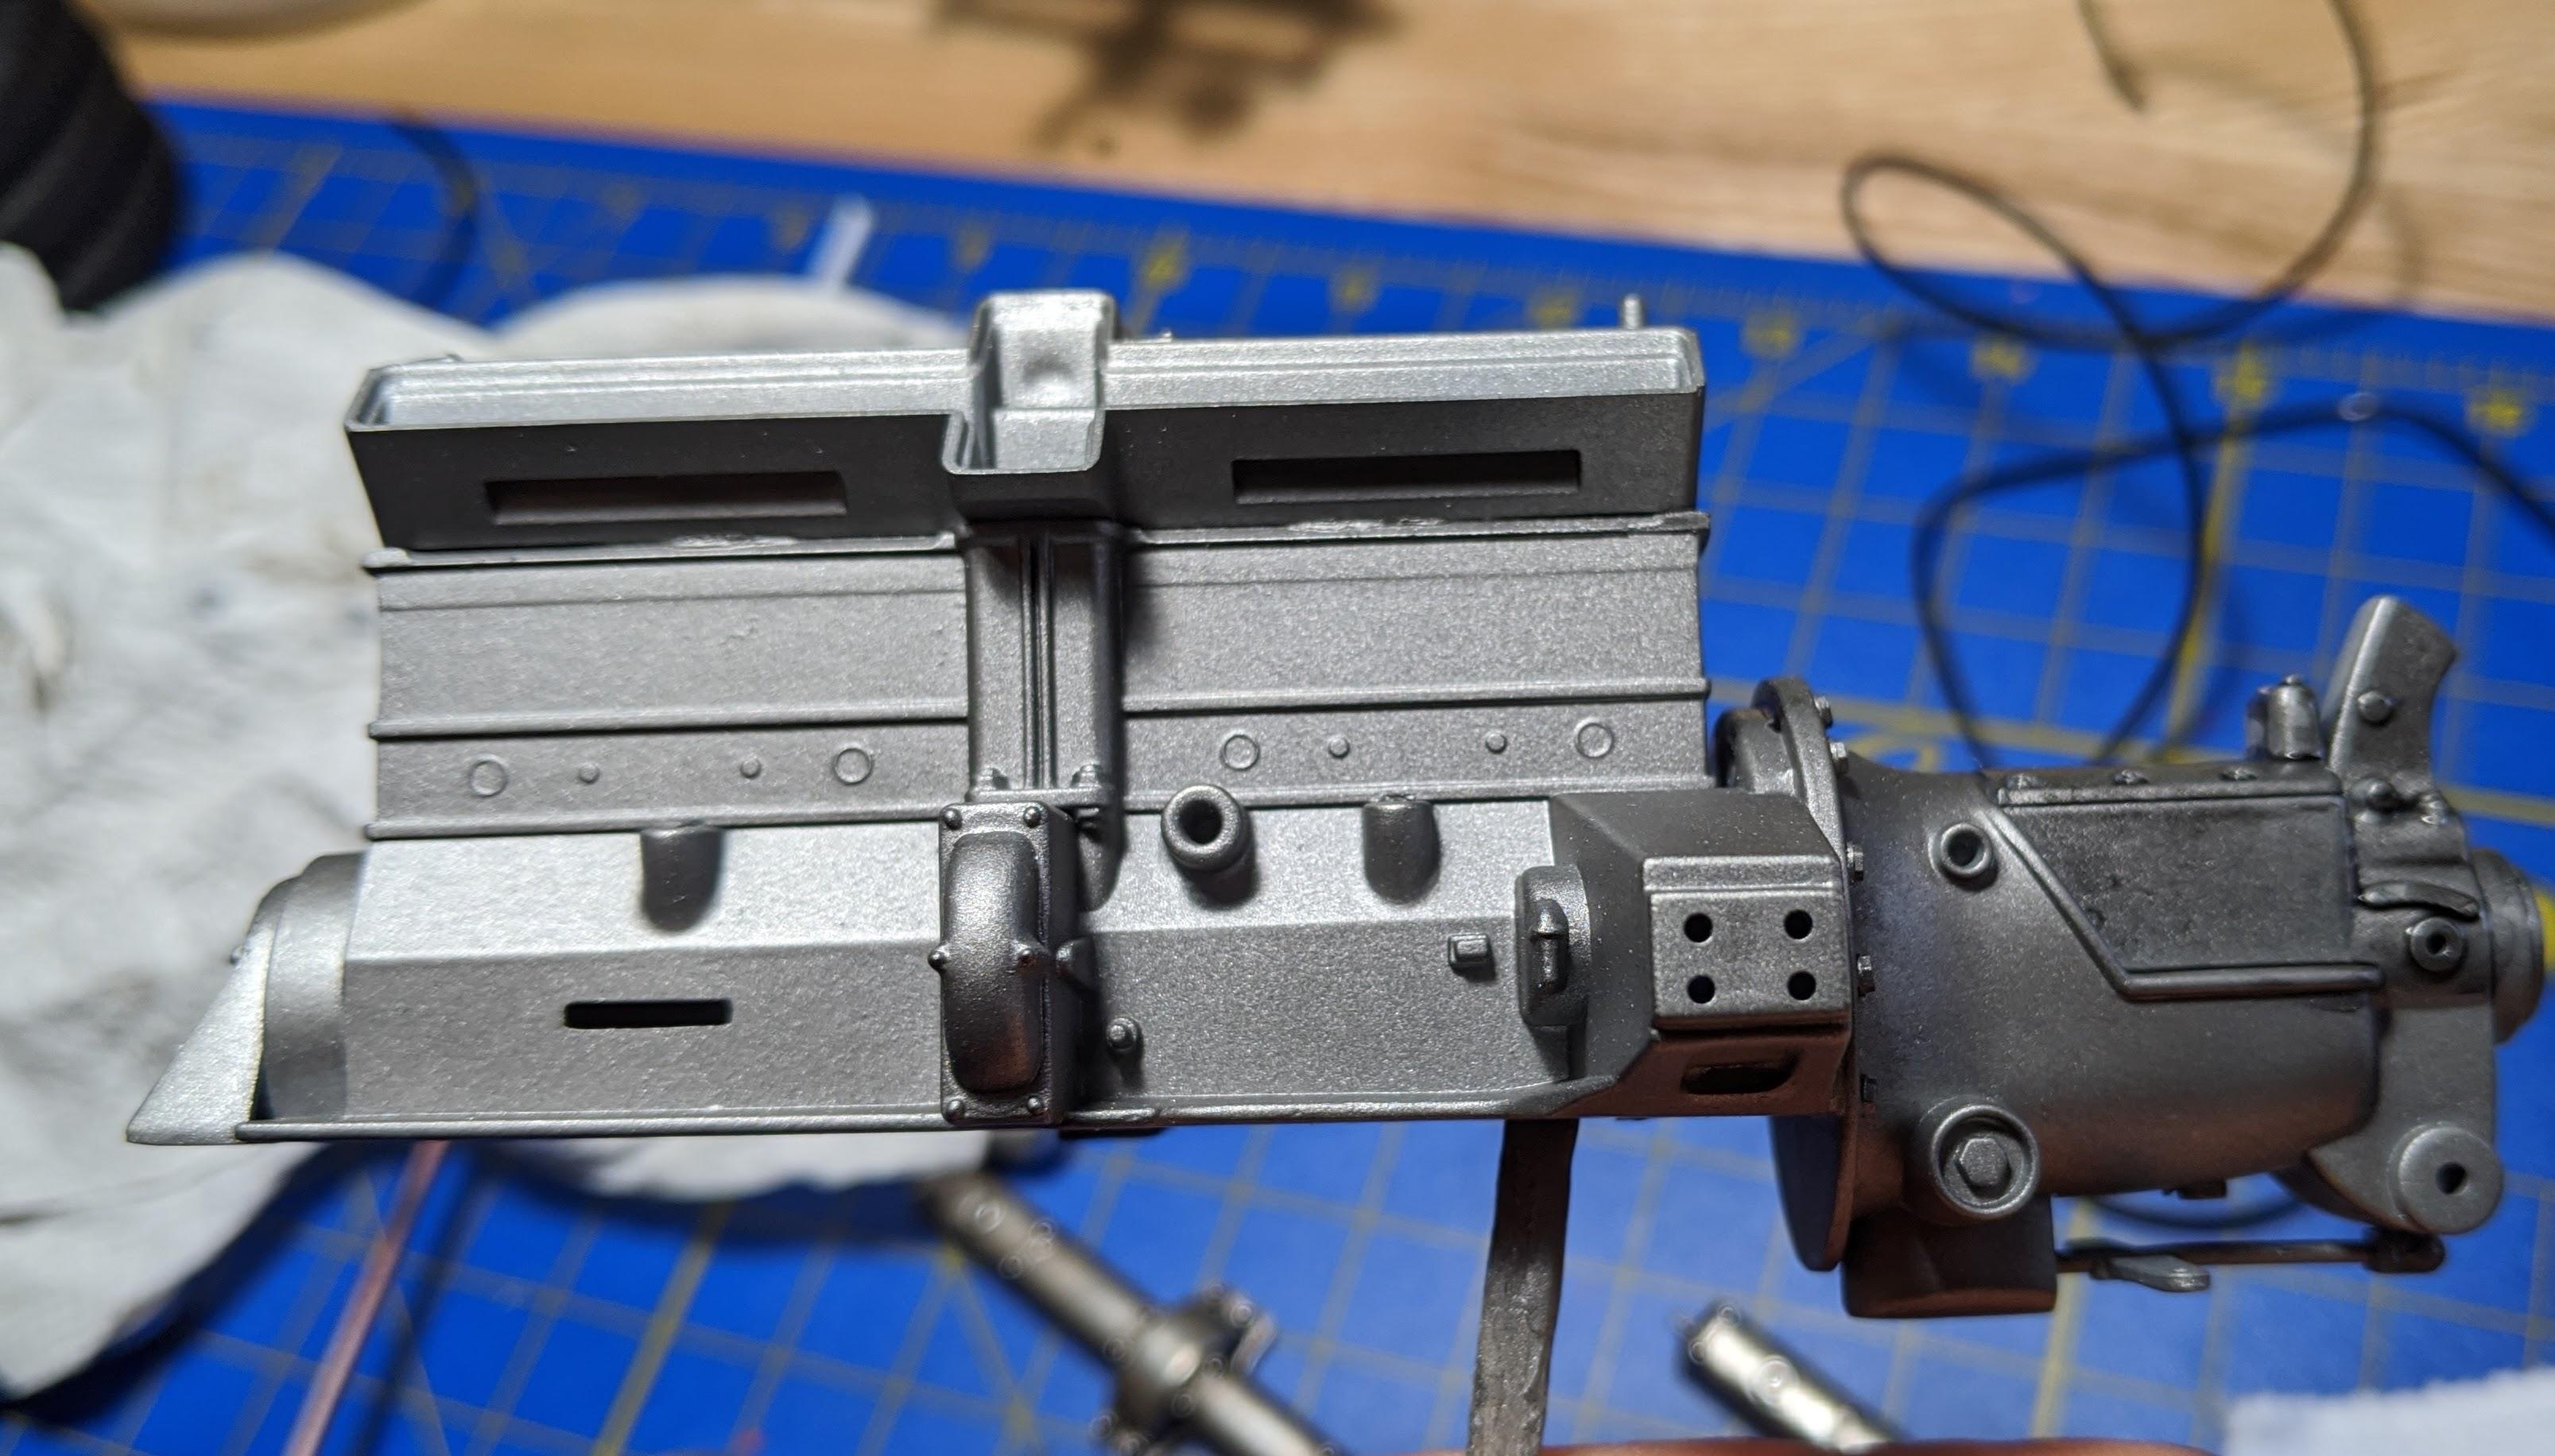
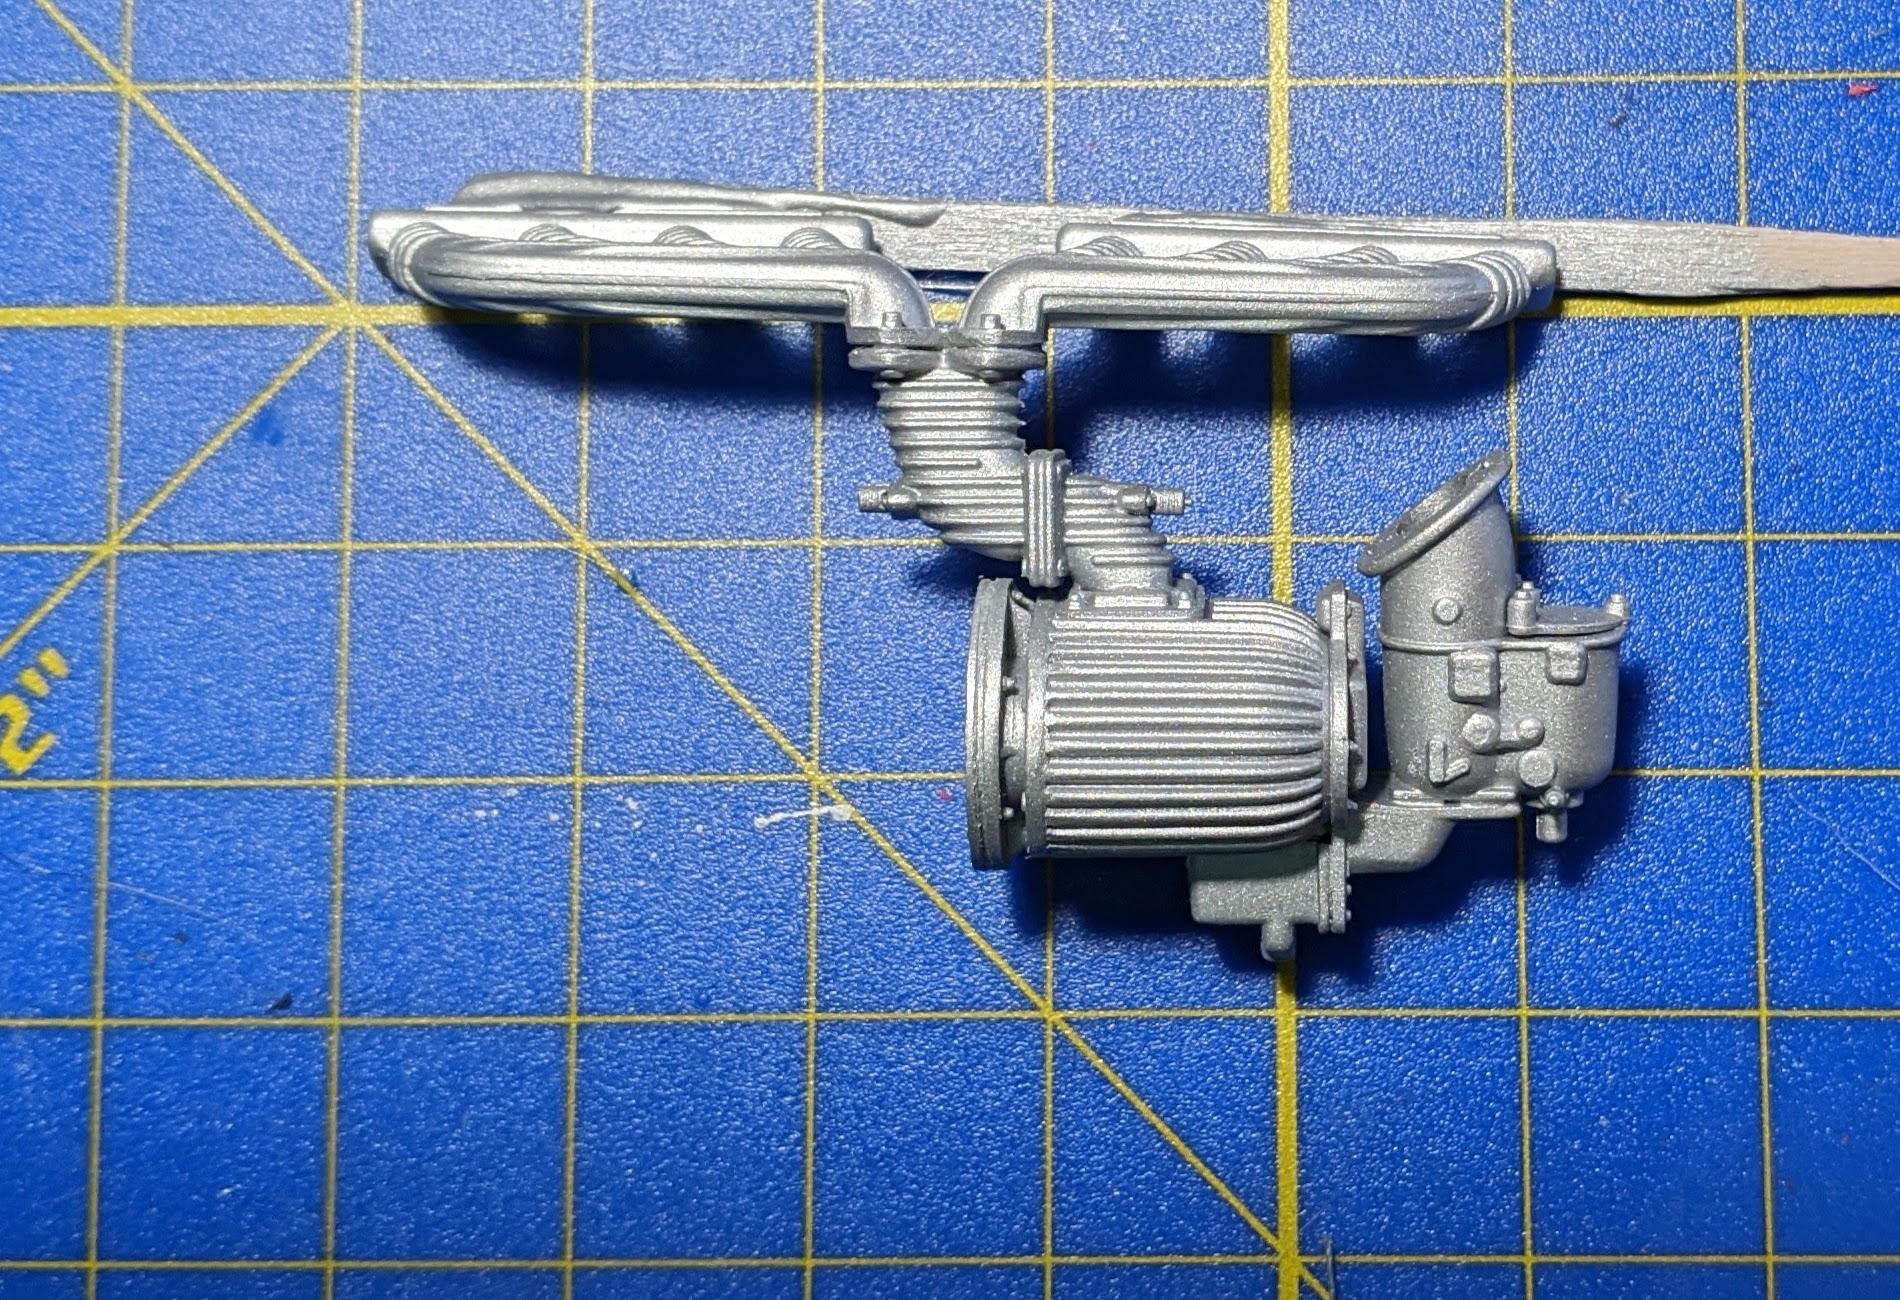
On to the motor... lots of finishes here. Engine/Transmission were airbrushed in Tamiya Metallic Grey, the intake manifold/supercharger were assembled as a unit and painted in Flat Aluminum. I used Testors black enamel stain for the weathering on the engine/transmission... it has an oily black look as opposed to the flat dark grey of the acrylic wash I usually use. I did use the acrylic wash on the intake manifold, steering box, etc. I also used the acrylic wash on the plated cam covers... I applied it thick and then used a makeup applicator to blot it off, leaving a nice discolored effect that matches up well with pics I've seen of these motors online. I picked out the bolts in Tamiya chrome silver. Ignition wires were done with braided cord. For the various data plates attached to the engine I decided not to apply the decals directly to the cam covers and engine mount, choosing rather to mount them to the same thin aluminum sheet I used for the interior floor before mounting them to the engine. This adds just a little dimension and detail. The air cleaner (brass bit at the front of the motor) can be built two ways- either a kit plastic part or a photoetched part with nylon screen. Neither of these is ideal, so I used the kit photoetched part under some fine brass screen that I formed over the plastic part to get the correct shape. One thing I have realized... when you take on a weathered build like this you have to commit to weathering pretty much every single part of the model. The old adage "treat every single assembly as a model in itself" really applies here. It's a challenge and it's a fun one. On to pics! Finally a quick stance check now that the backing plates are on the chassis. Four wheels touching... bingo!
-
Tamiya 1/24 Alfa Romeo GTV (1996) Twin Spark 16V
jaymcminn replied to Italianhorses's topic in WIP: Model Cars
Beautiful paint work. I need to try Zero paints at some point... -
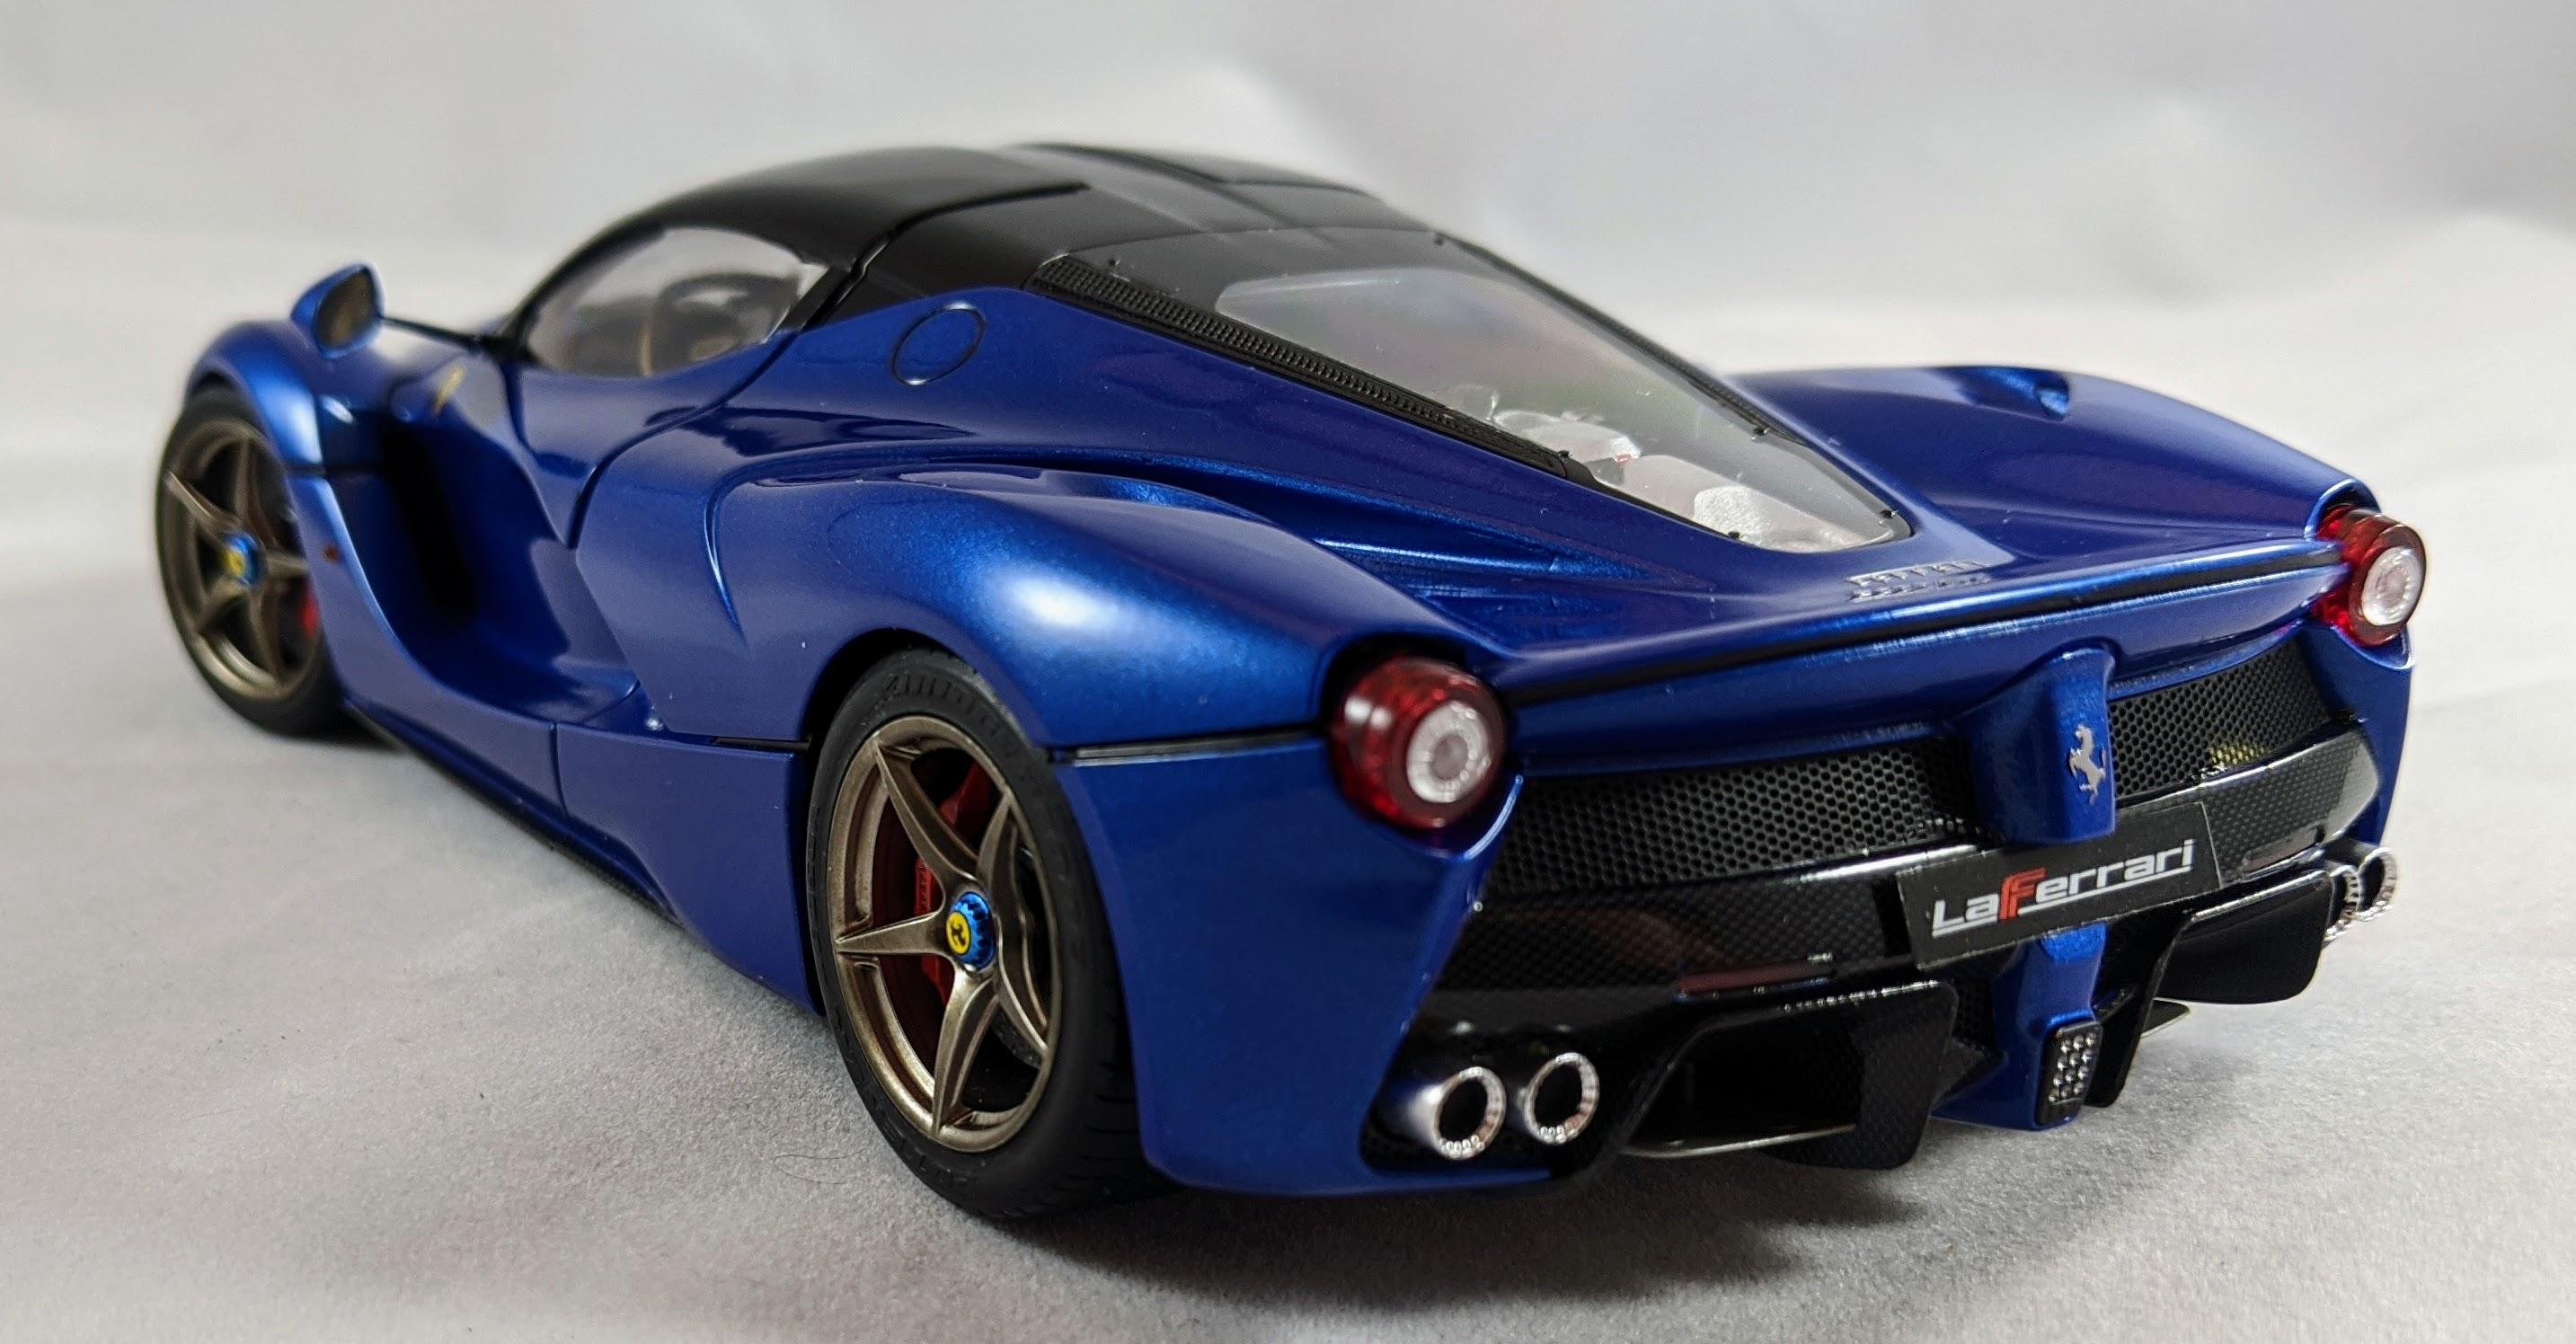
Very cool. With the new proportions it"s begging for a rear/mid engine layout!
-
Great work so far, I don't think I've ever seen the 1/16 F40 built up. The detail you've added in is excellent, and I think blue is an excellent choice for the F40. I could see this looking really good in Tamiya Mica Blue!
-
Italeri Alfa 8c- WIP
jaymcminn replied to jaymcminn's topic in WIP: Other Racing: Road Racing, Land Speed Racers
Thanks guys, it's this stuff: https://www.amazon.com/gp/product/B005FY5HCW/ref=ppx_yo_dt_b_asin_title_o01_s00?ie=UTF8&psc=1 It's always cool when you can repurpose something that isn't specific to our hobby with good results! -
Italeri Alfa 8c- WIP
jaymcminn replied to jaymcminn's topic in WIP: Other Racing: Road Racing, Land Speed Racers
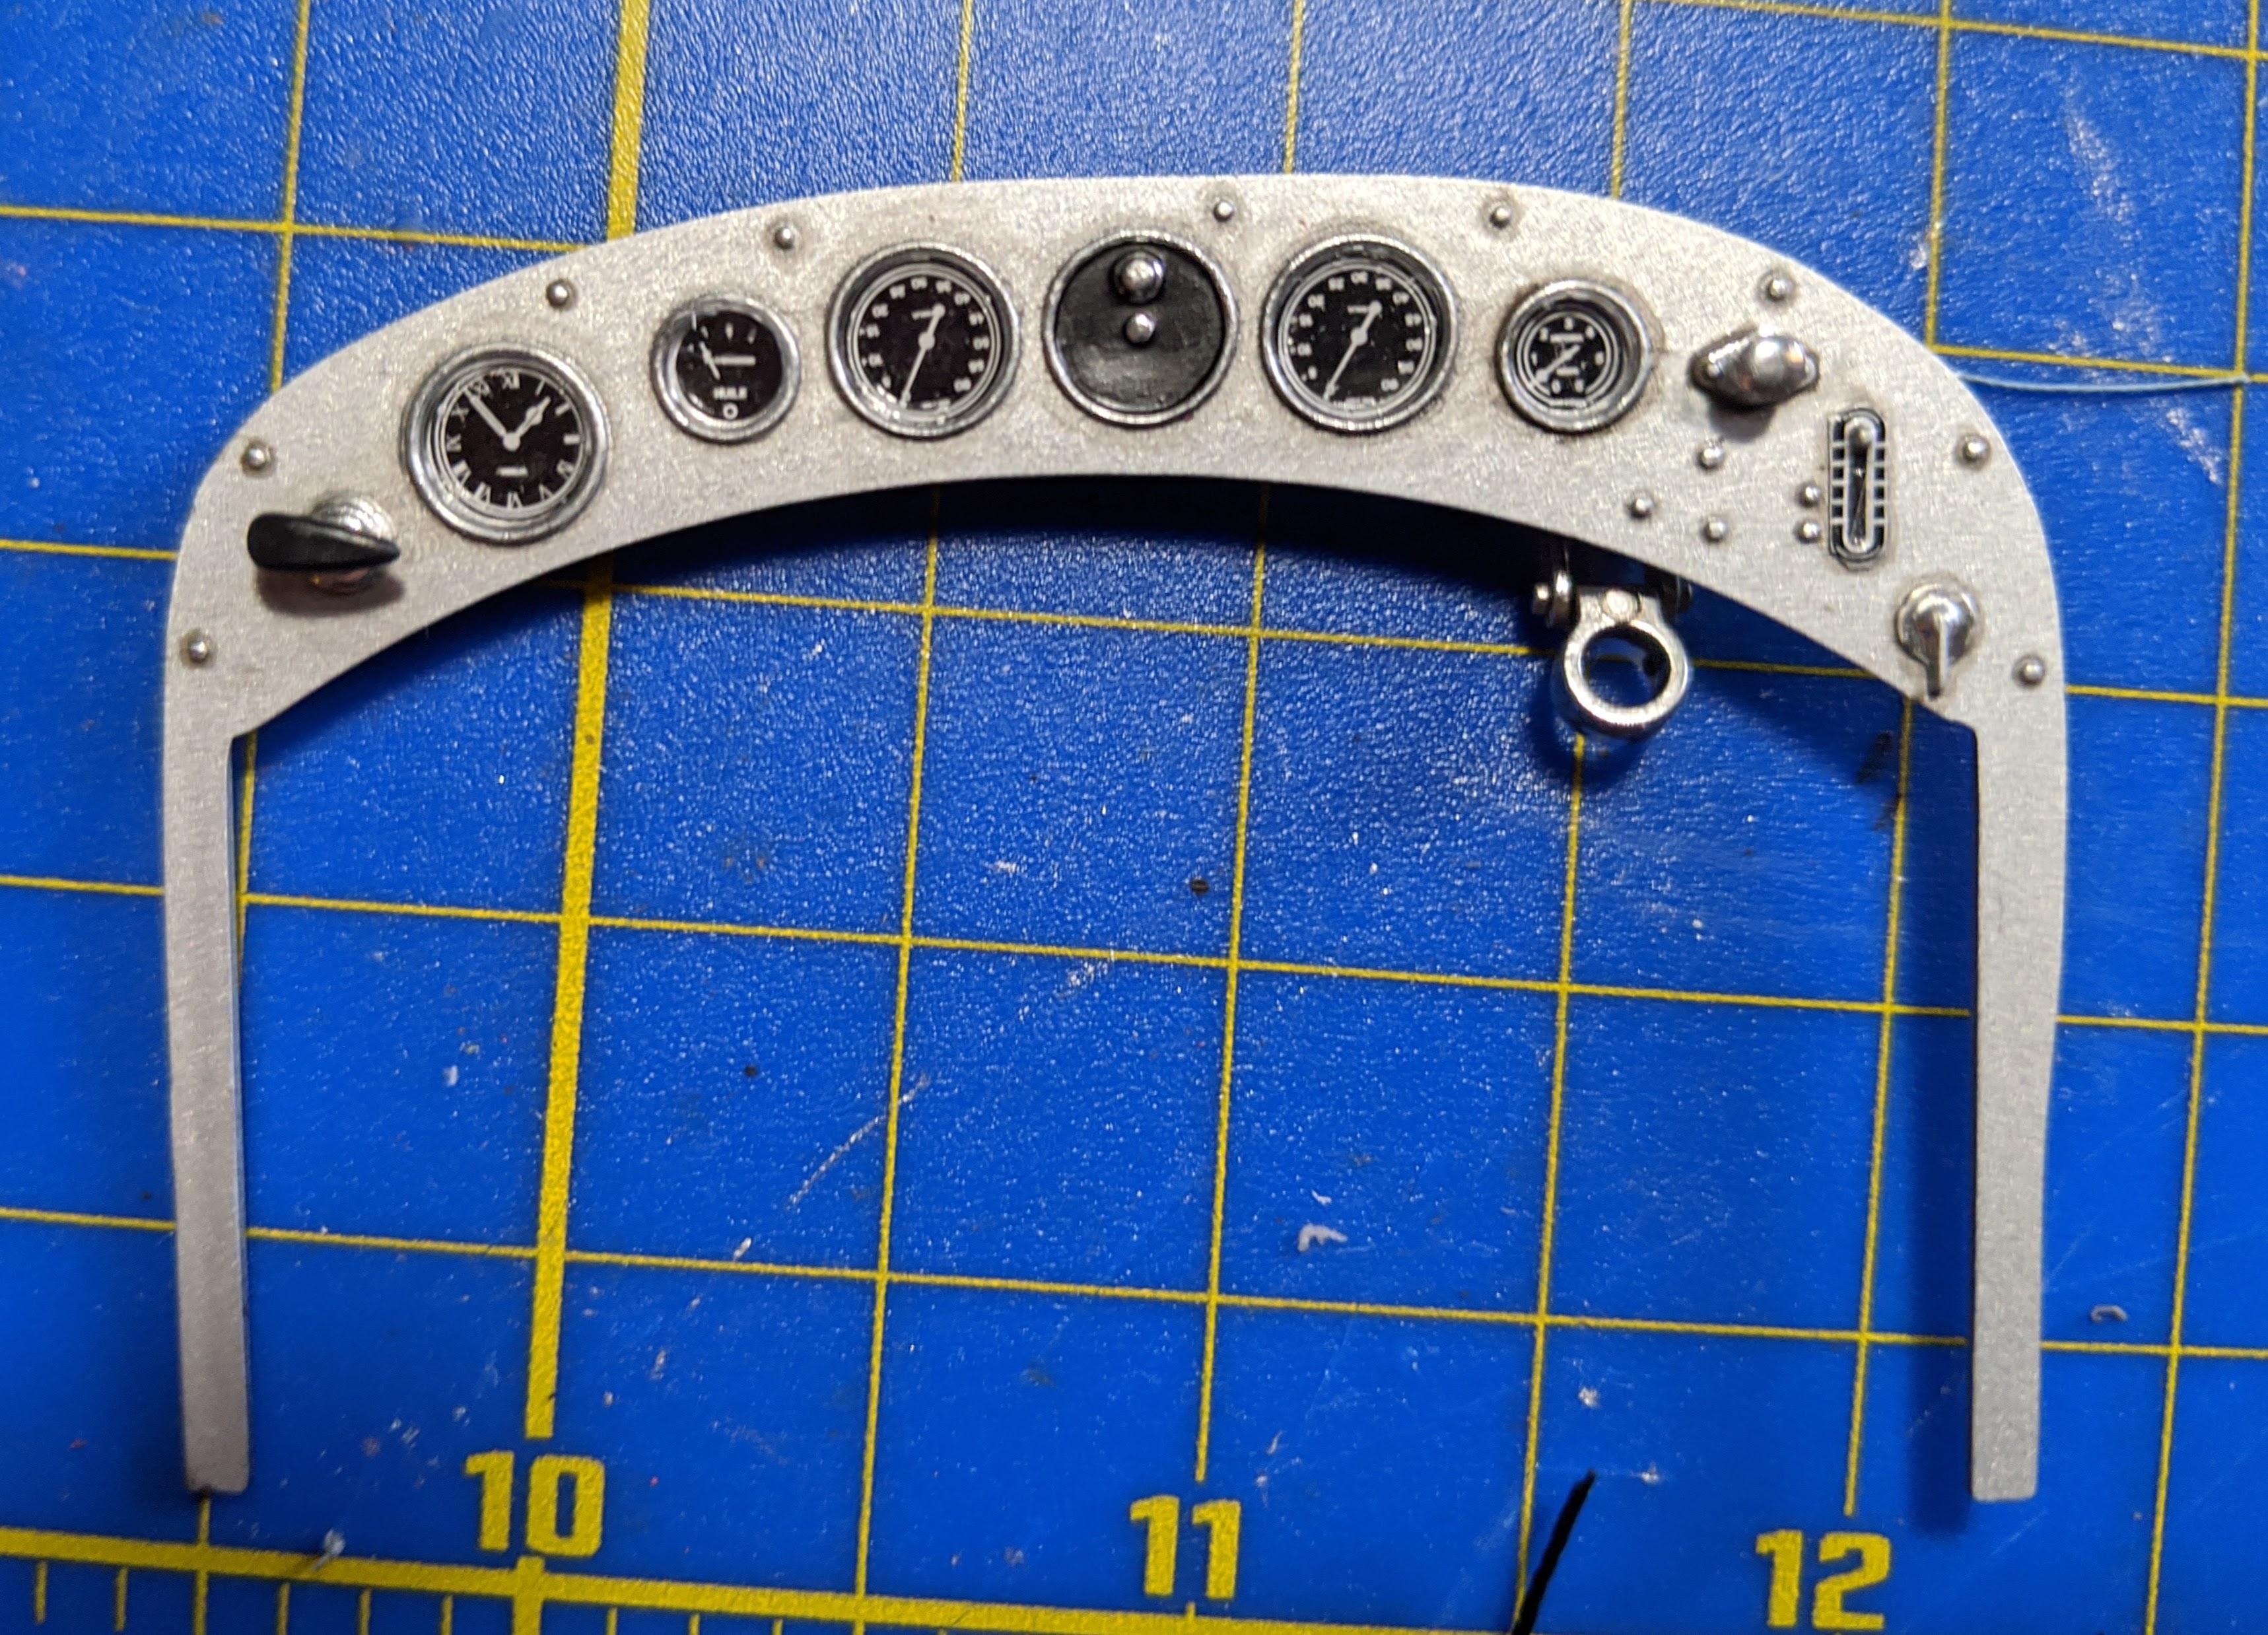
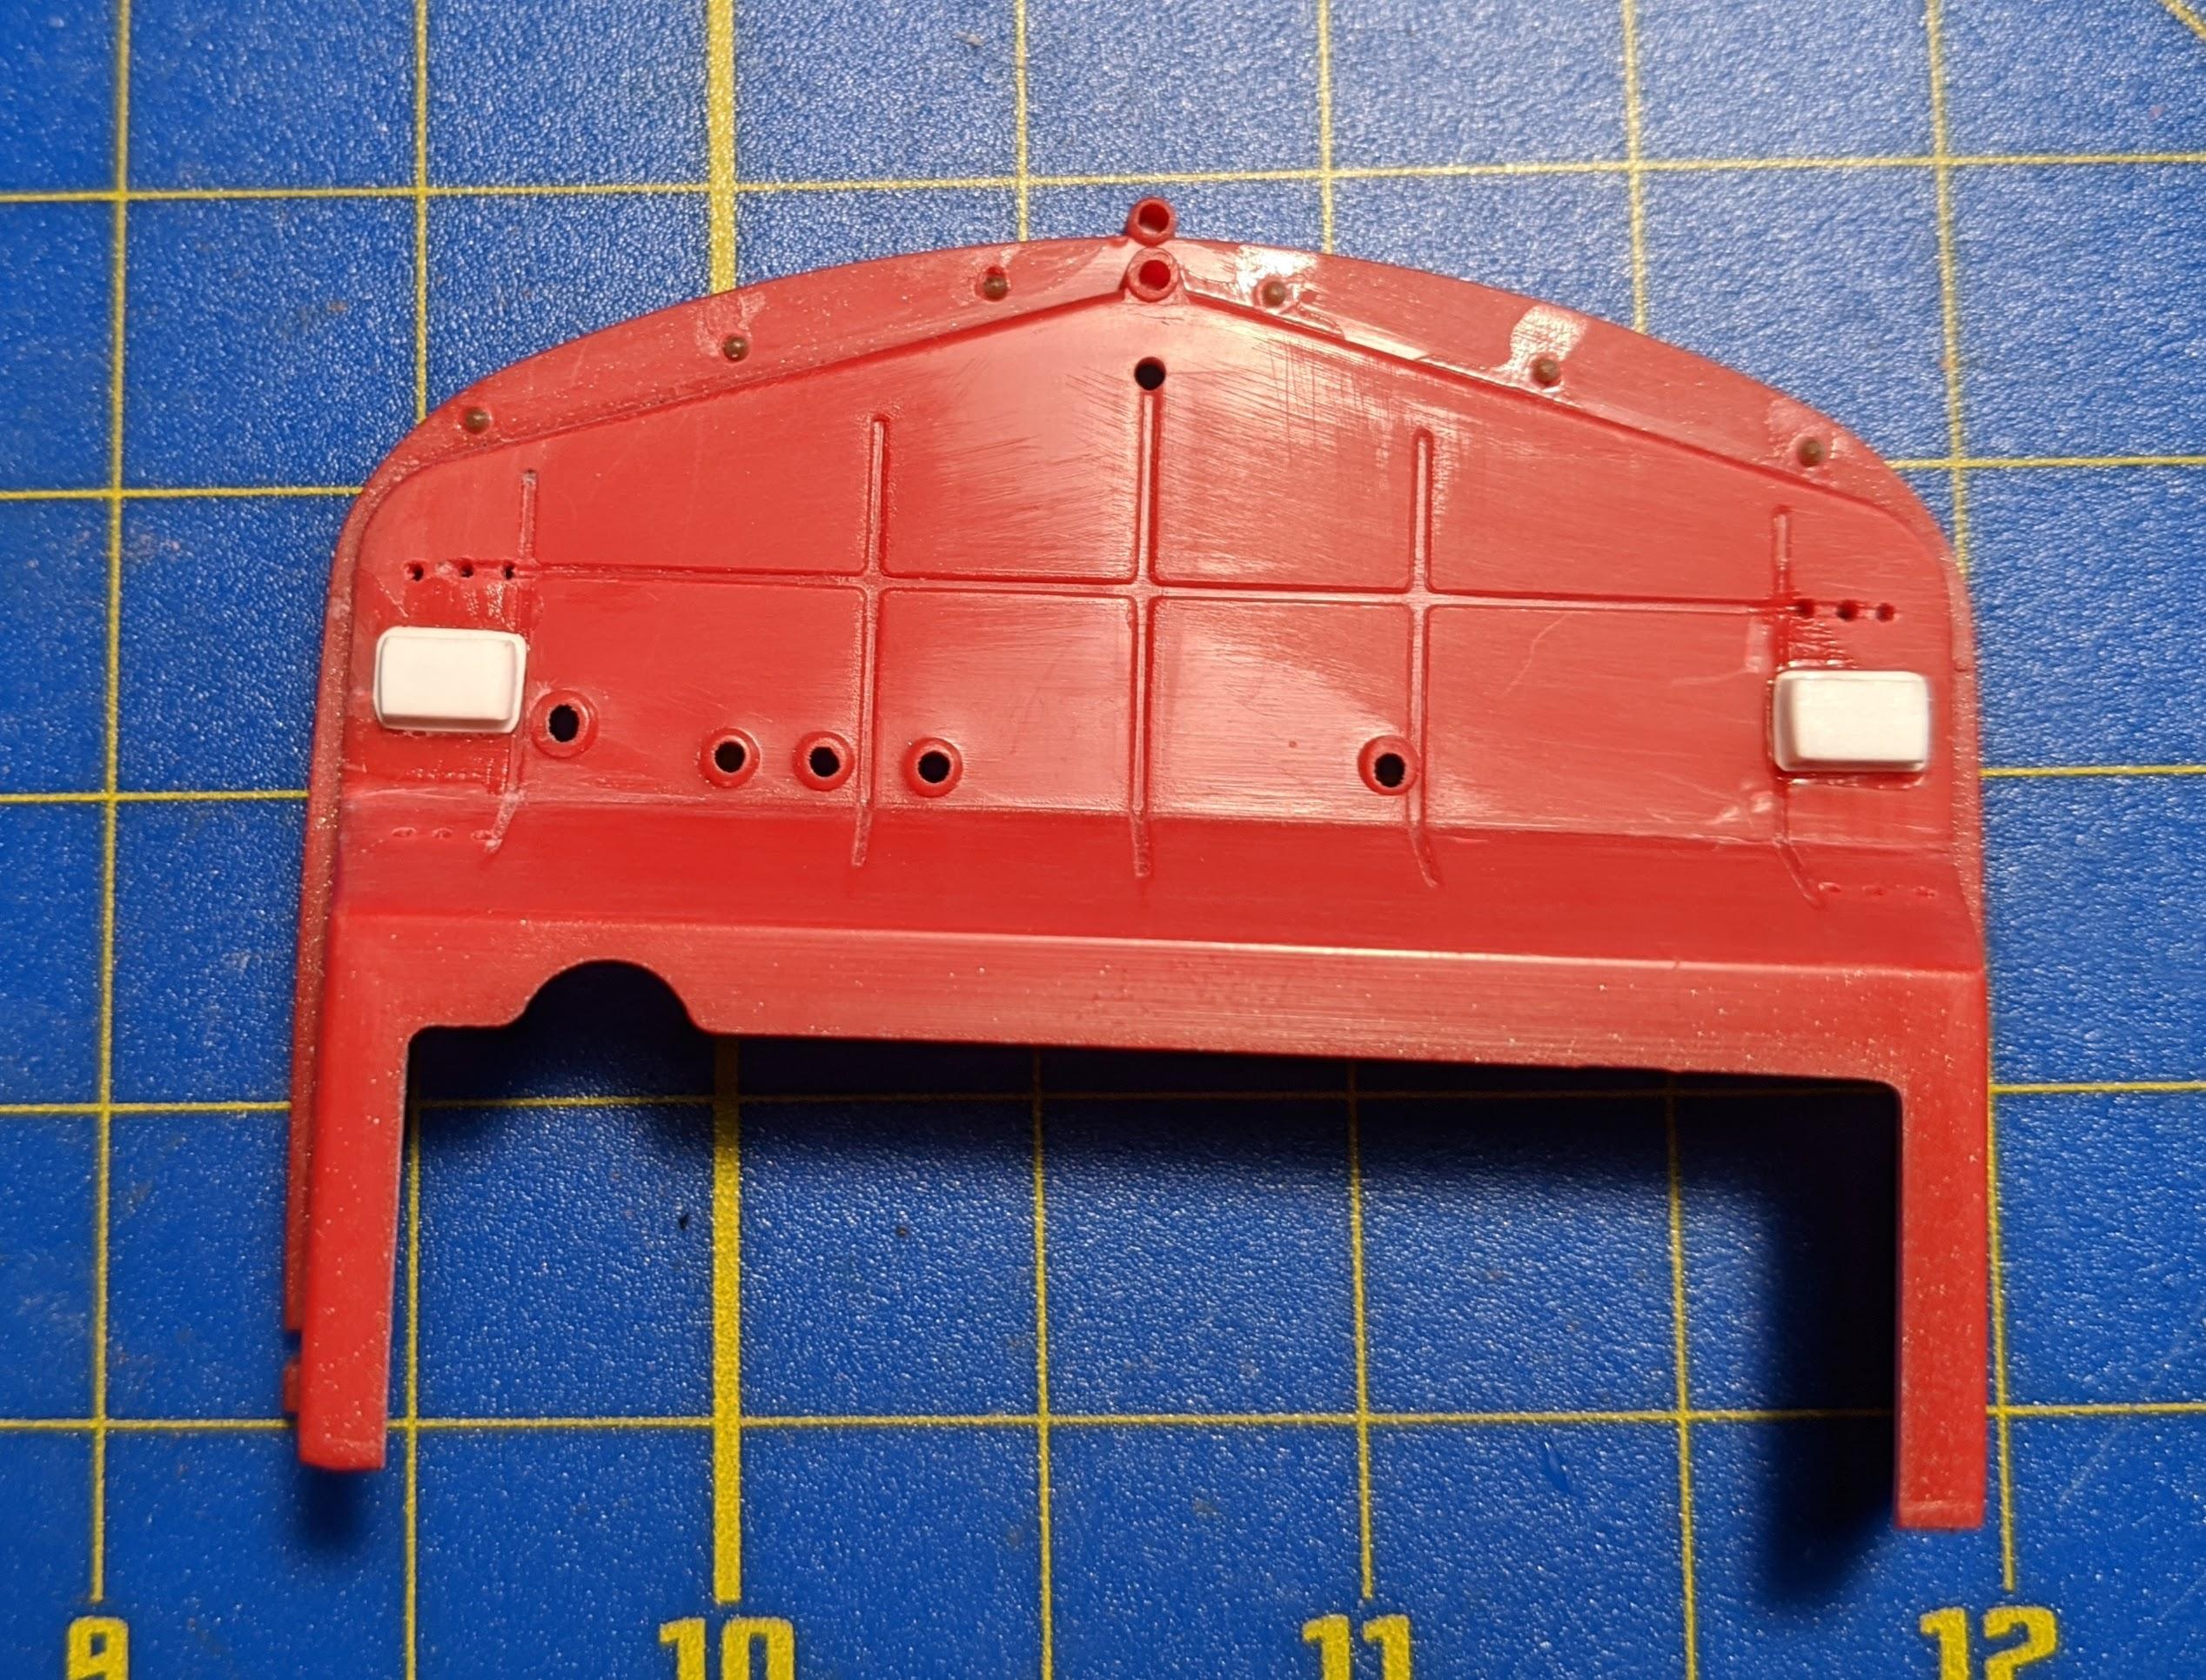
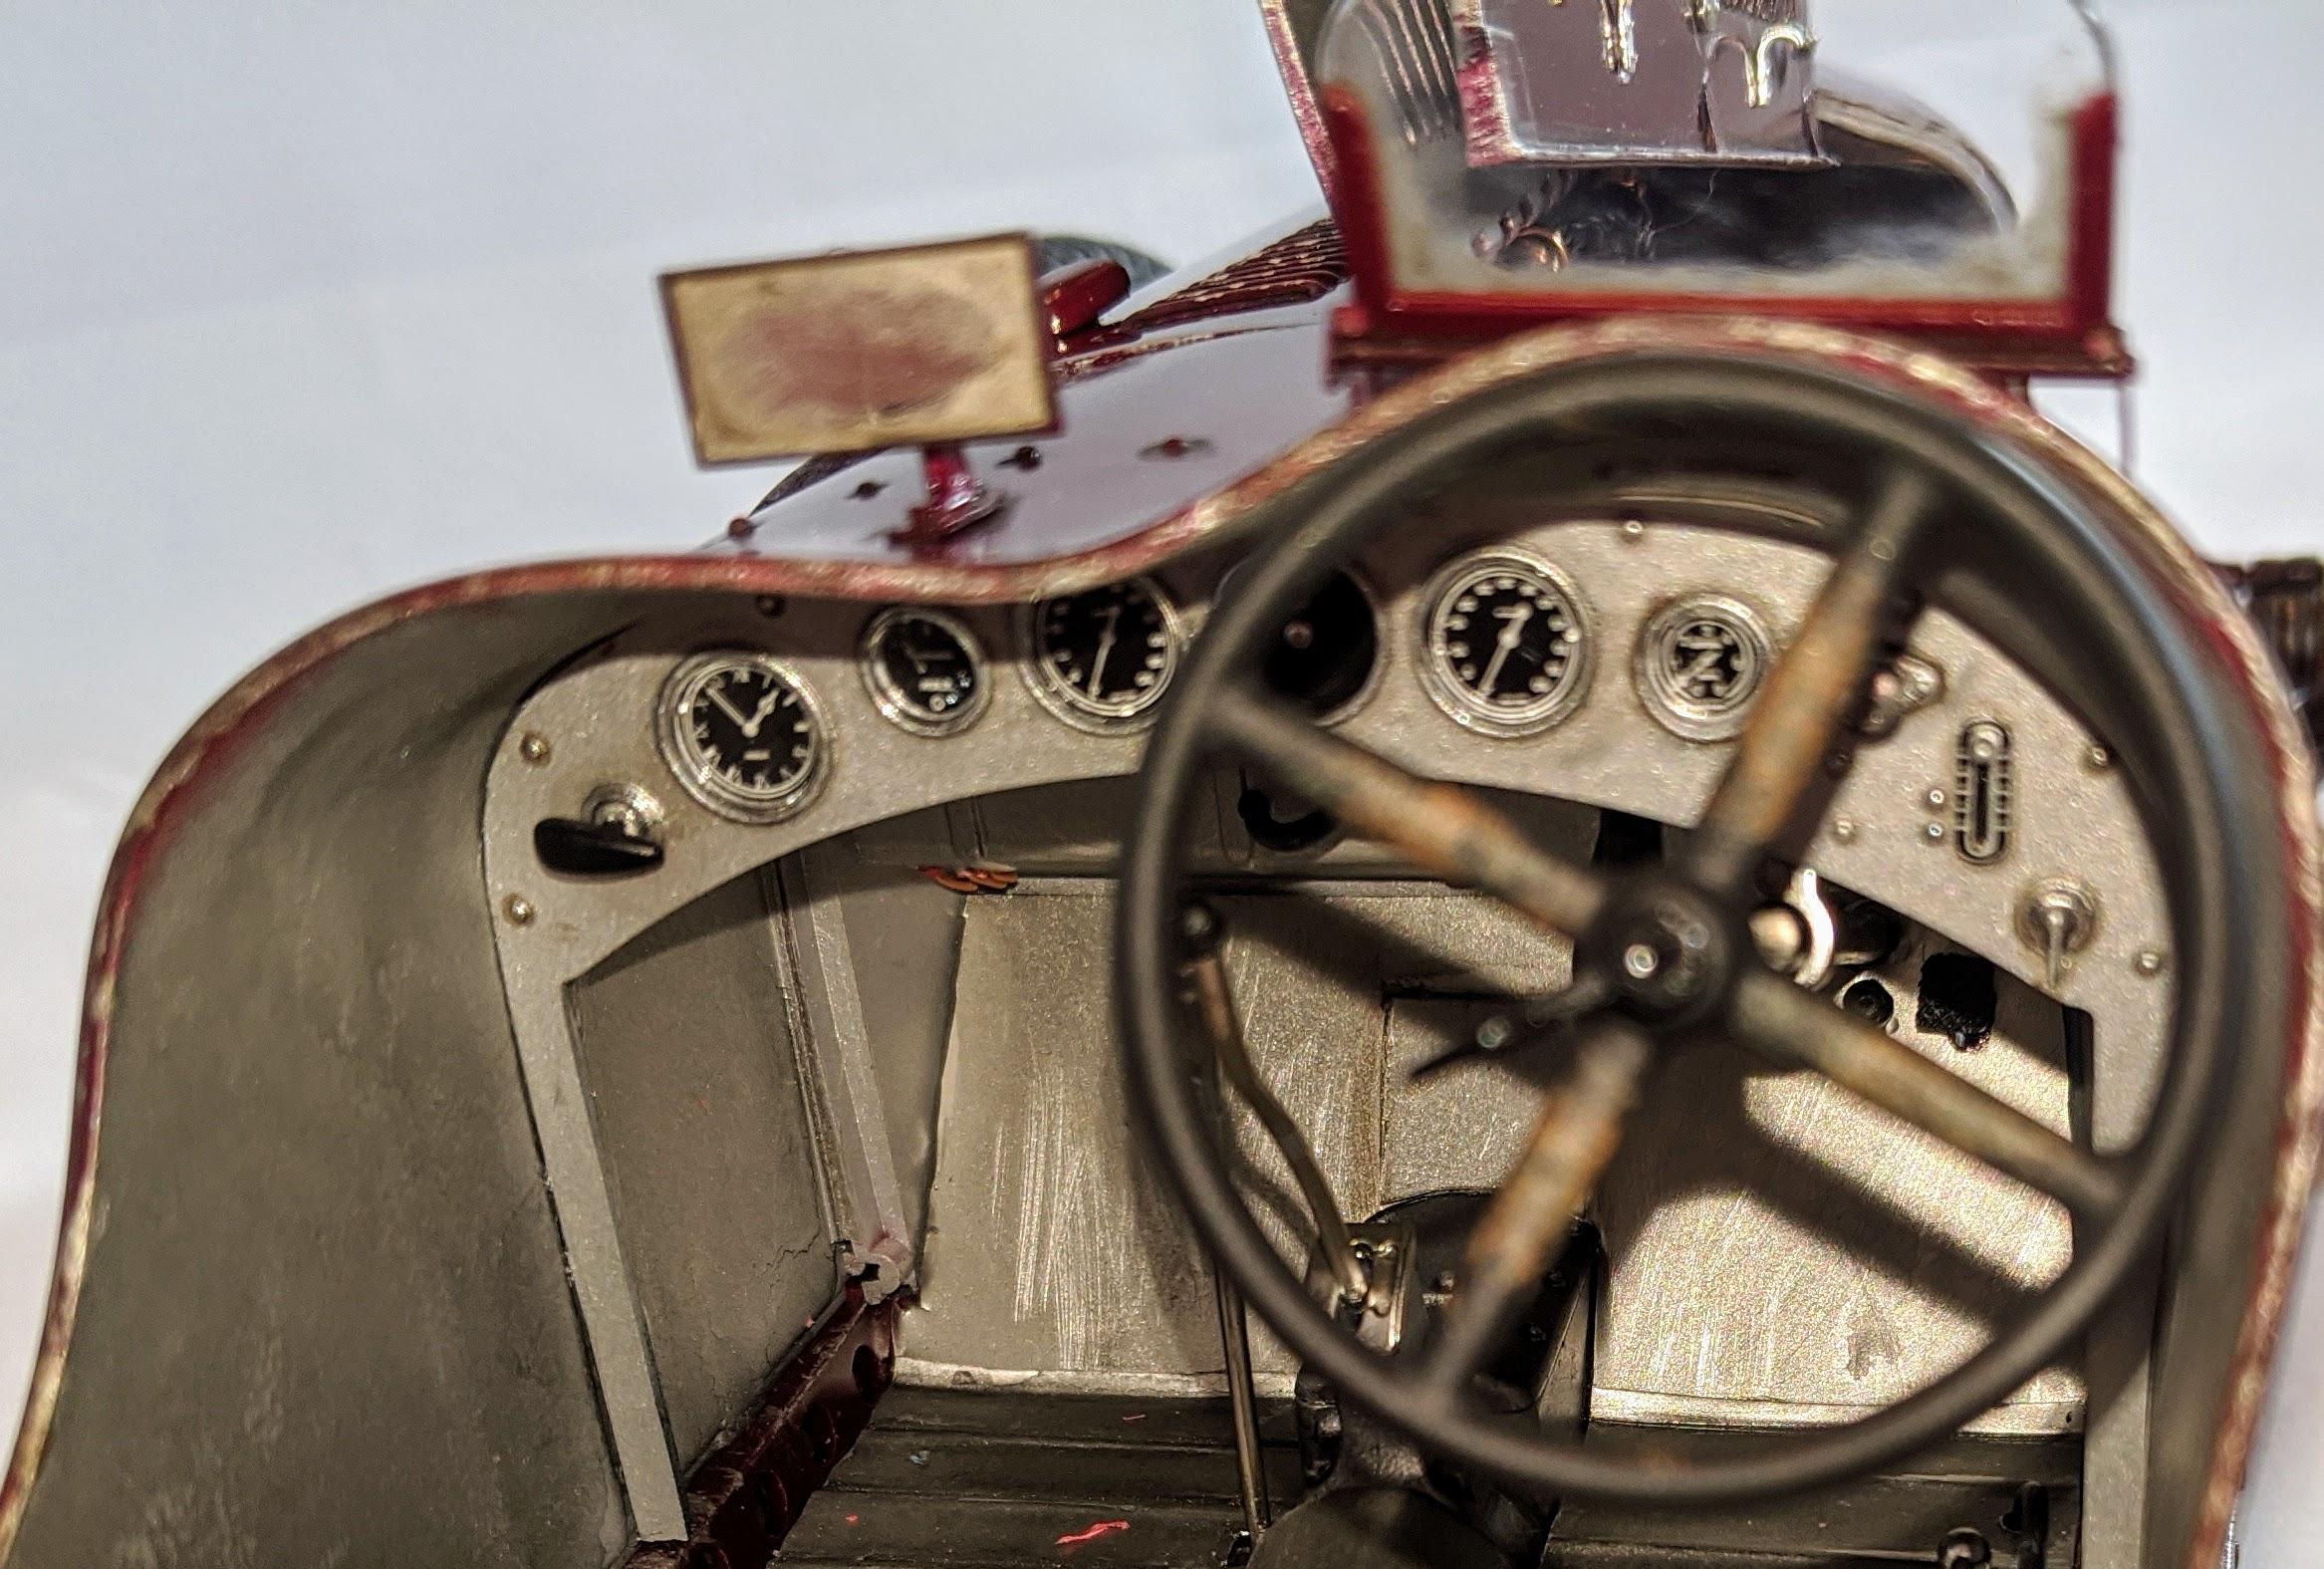
Latest update... I finished the instrument panel and the firewall. Instrument panel detail is very nice, with excellent decals under clear lenses. I used Molotow Chrome to highlight the instrument bezels. The firewall was painted in Tamiya Gunship Grey . Depressions were washed with a black wash and highlights were drybrushed and then everything was blended with gunmetal Tamiya weathering powder. Next came the safety wire on the removable body panels... I used square-head bolts from Tichy Train Group and silver cotton quilting thread to closely approximate the look of the fasteners and safety wire seen on the 1/1 cars. If it was perfectly accurate the wire would pass through the bolt heads instead of under them, but I wasn't able to figure out a way to make that work without driving myself completely nuts. I could never have drilled all of these holes without the Tamiya Handy Drill I purchased for this project... it's the perfect tool to drill several dozen little holes in plastic without causing any damage to either the kit or yourself. I can't recommend it enough. I installed the firewall and instrument panel, which involves adding the tubes that run from the instruments and ignition to the engine. The tubing supplied with the kit was hopeless, but I had some better-quality stuff in the parts box. Body shell is done except for a few details that'll go on later... on to the motor next!
-
Your work on this kit is fantastic. I built mine in yellow with a French blue stripe a few years back. This kit was probably the most enjoyable experience building a model I've ever had... It goes together so well and looks amazing when done right, as you have with yours. Awesome!
-
1949 Ferrari MM Le Mans Winner
jaymcminn replied to Gramps46's topic in WIP: Other Racing: Road Racing, Land Speed Racers
What a beautiful build of one of the most iconic Ferraris. Thanks for sharing it! -
Italeri Alfa 8c- WIP
jaymcminn replied to jaymcminn's topic in WIP: Other Racing: Road Racing, Land Speed Racers
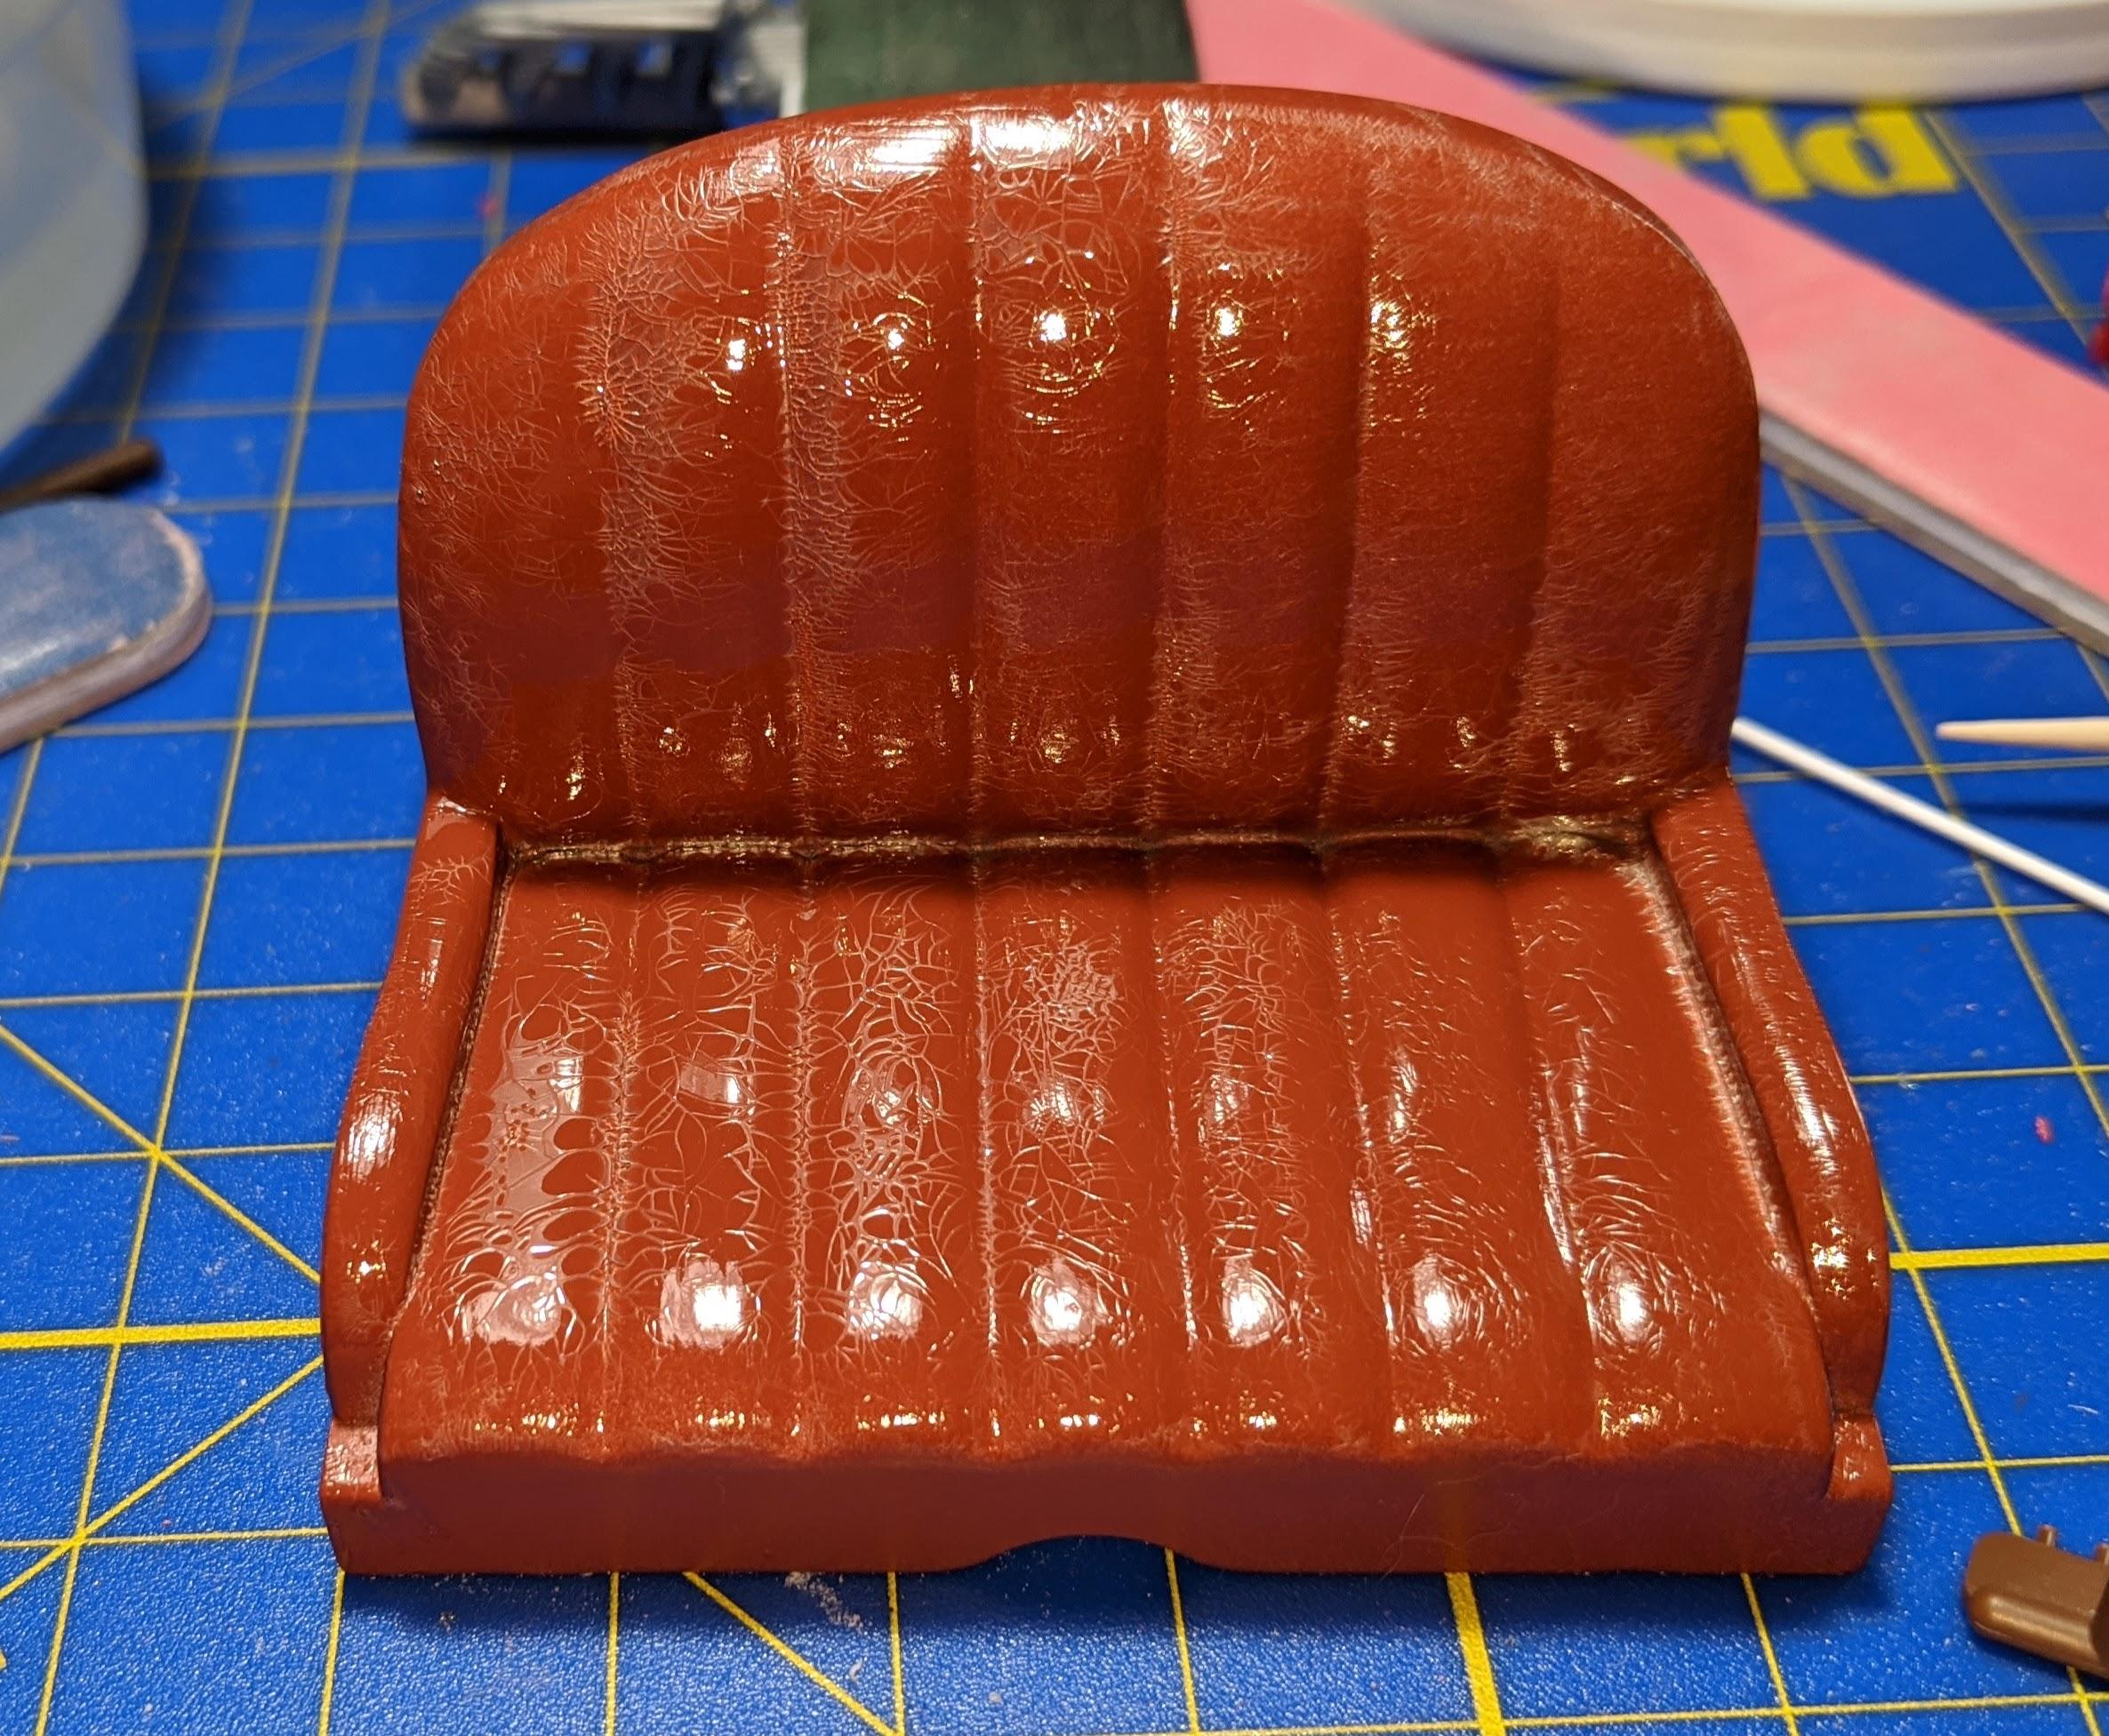
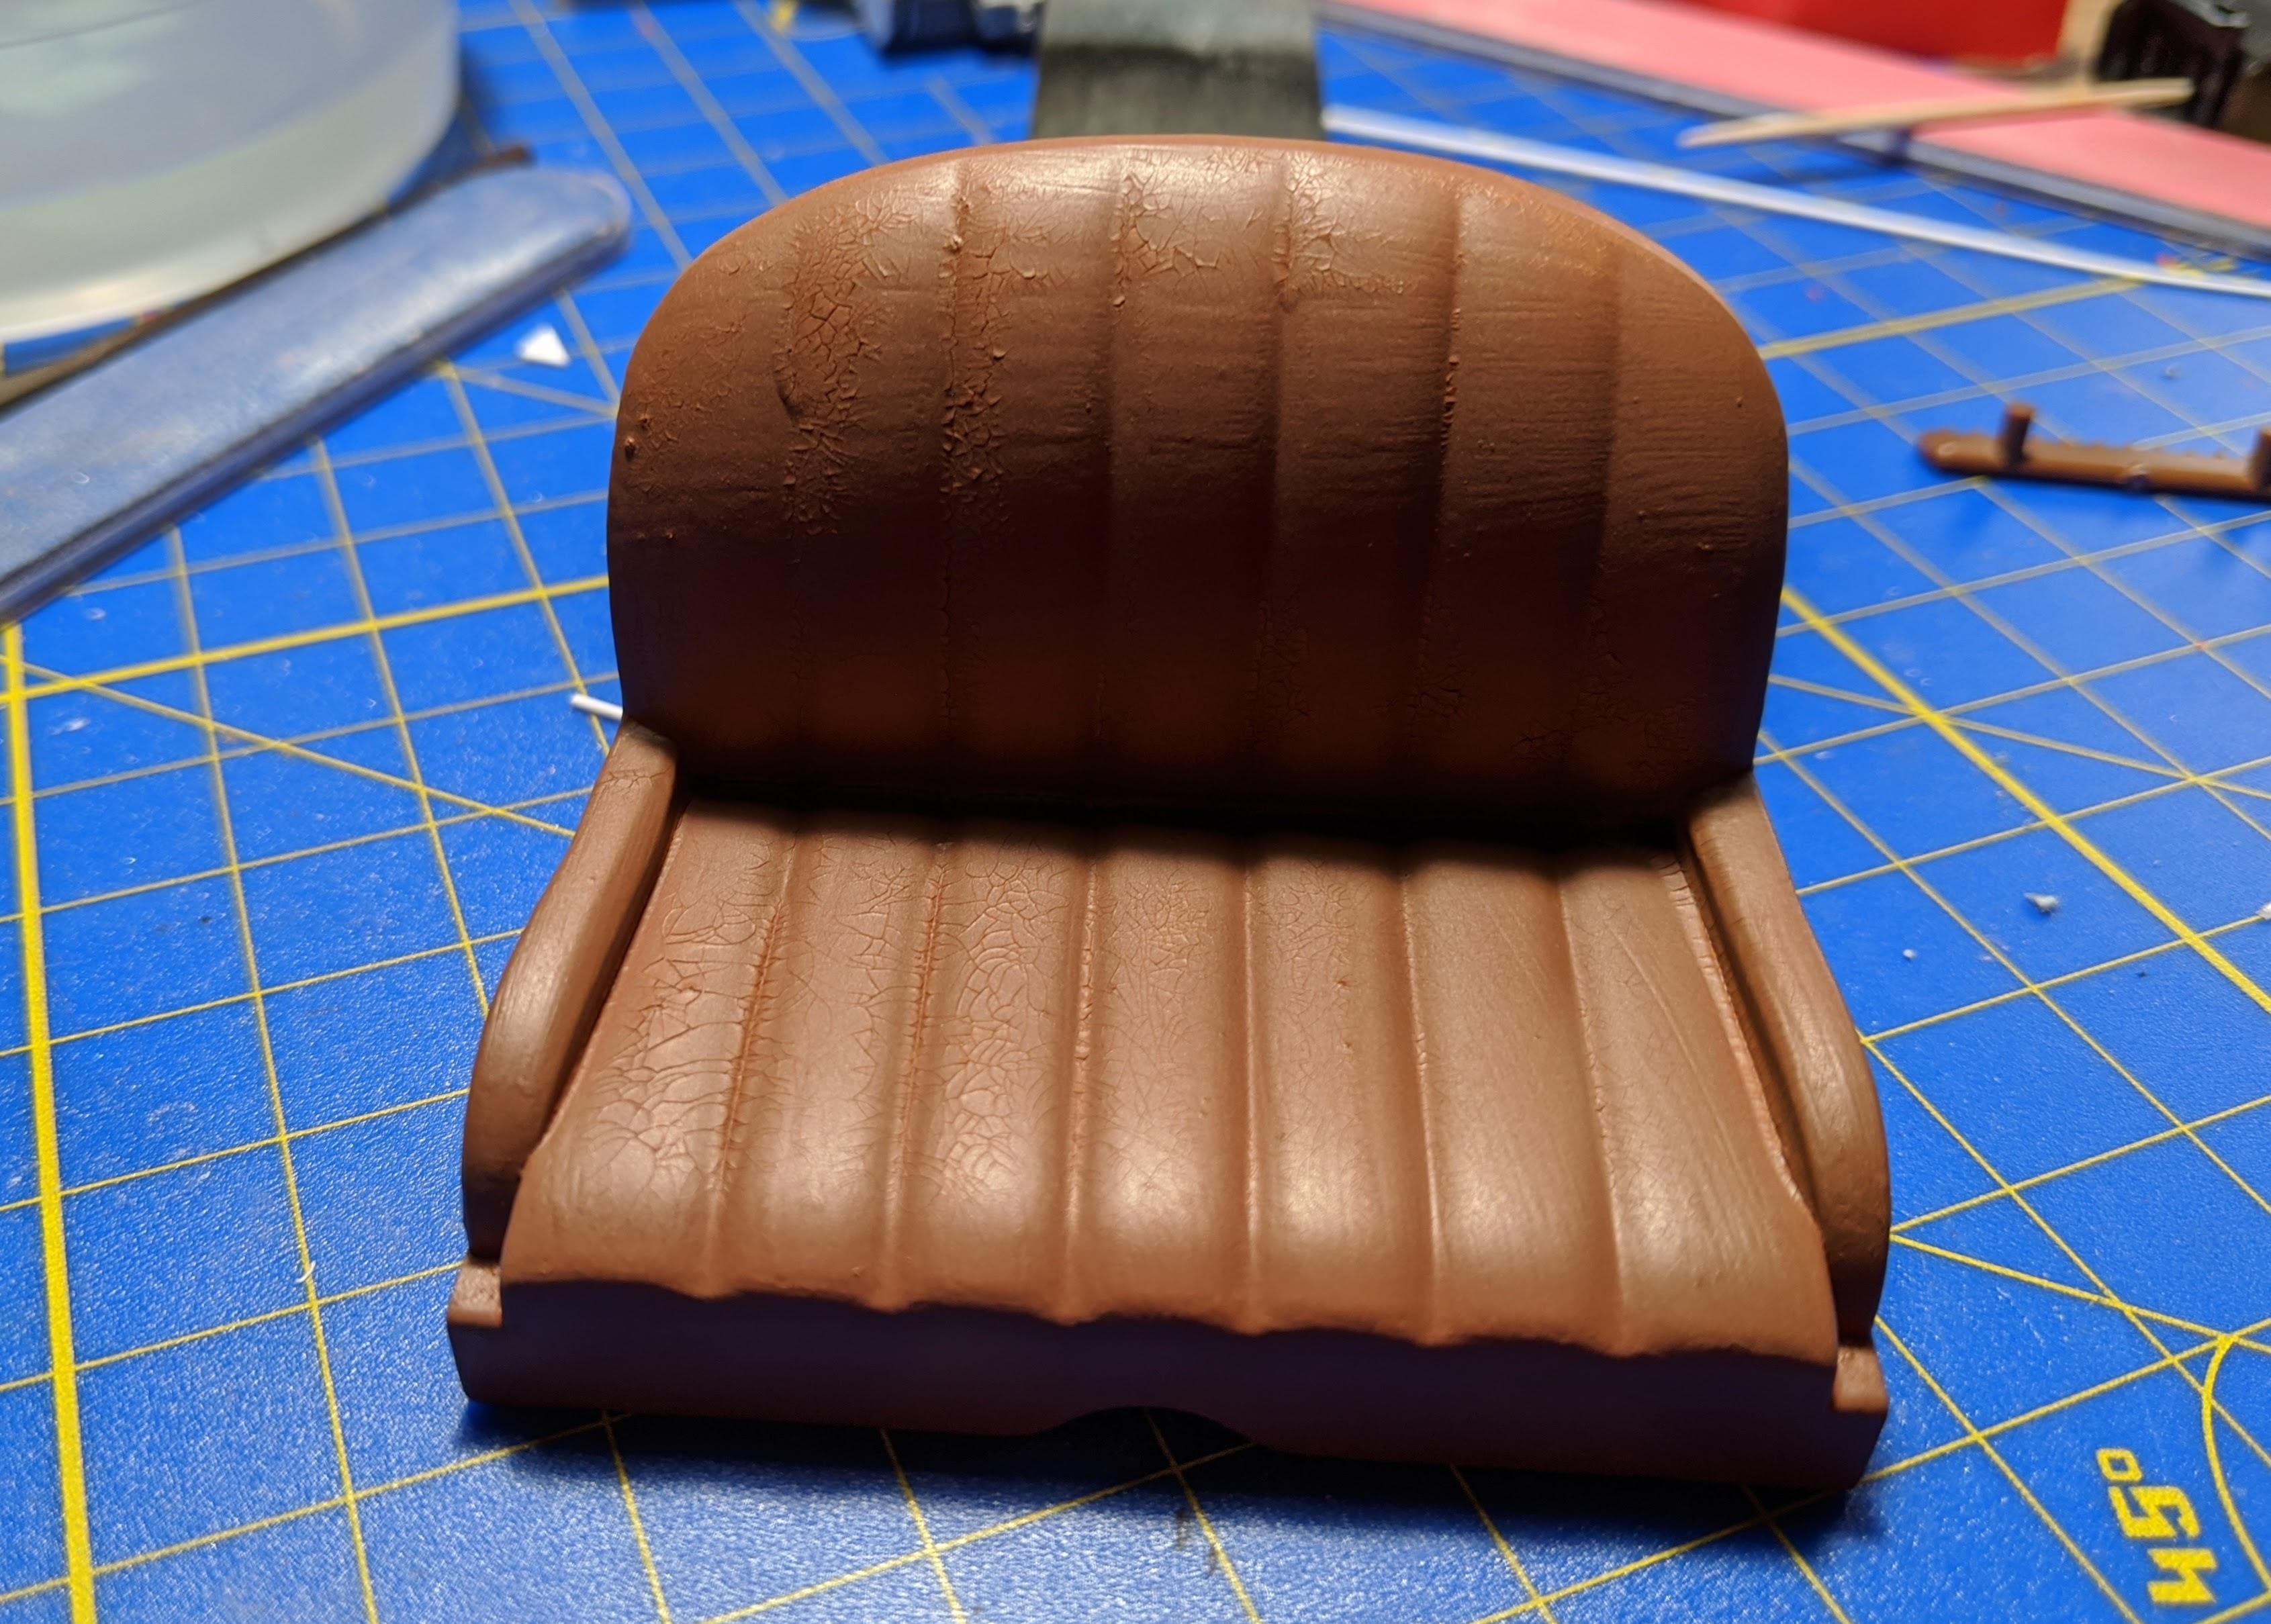
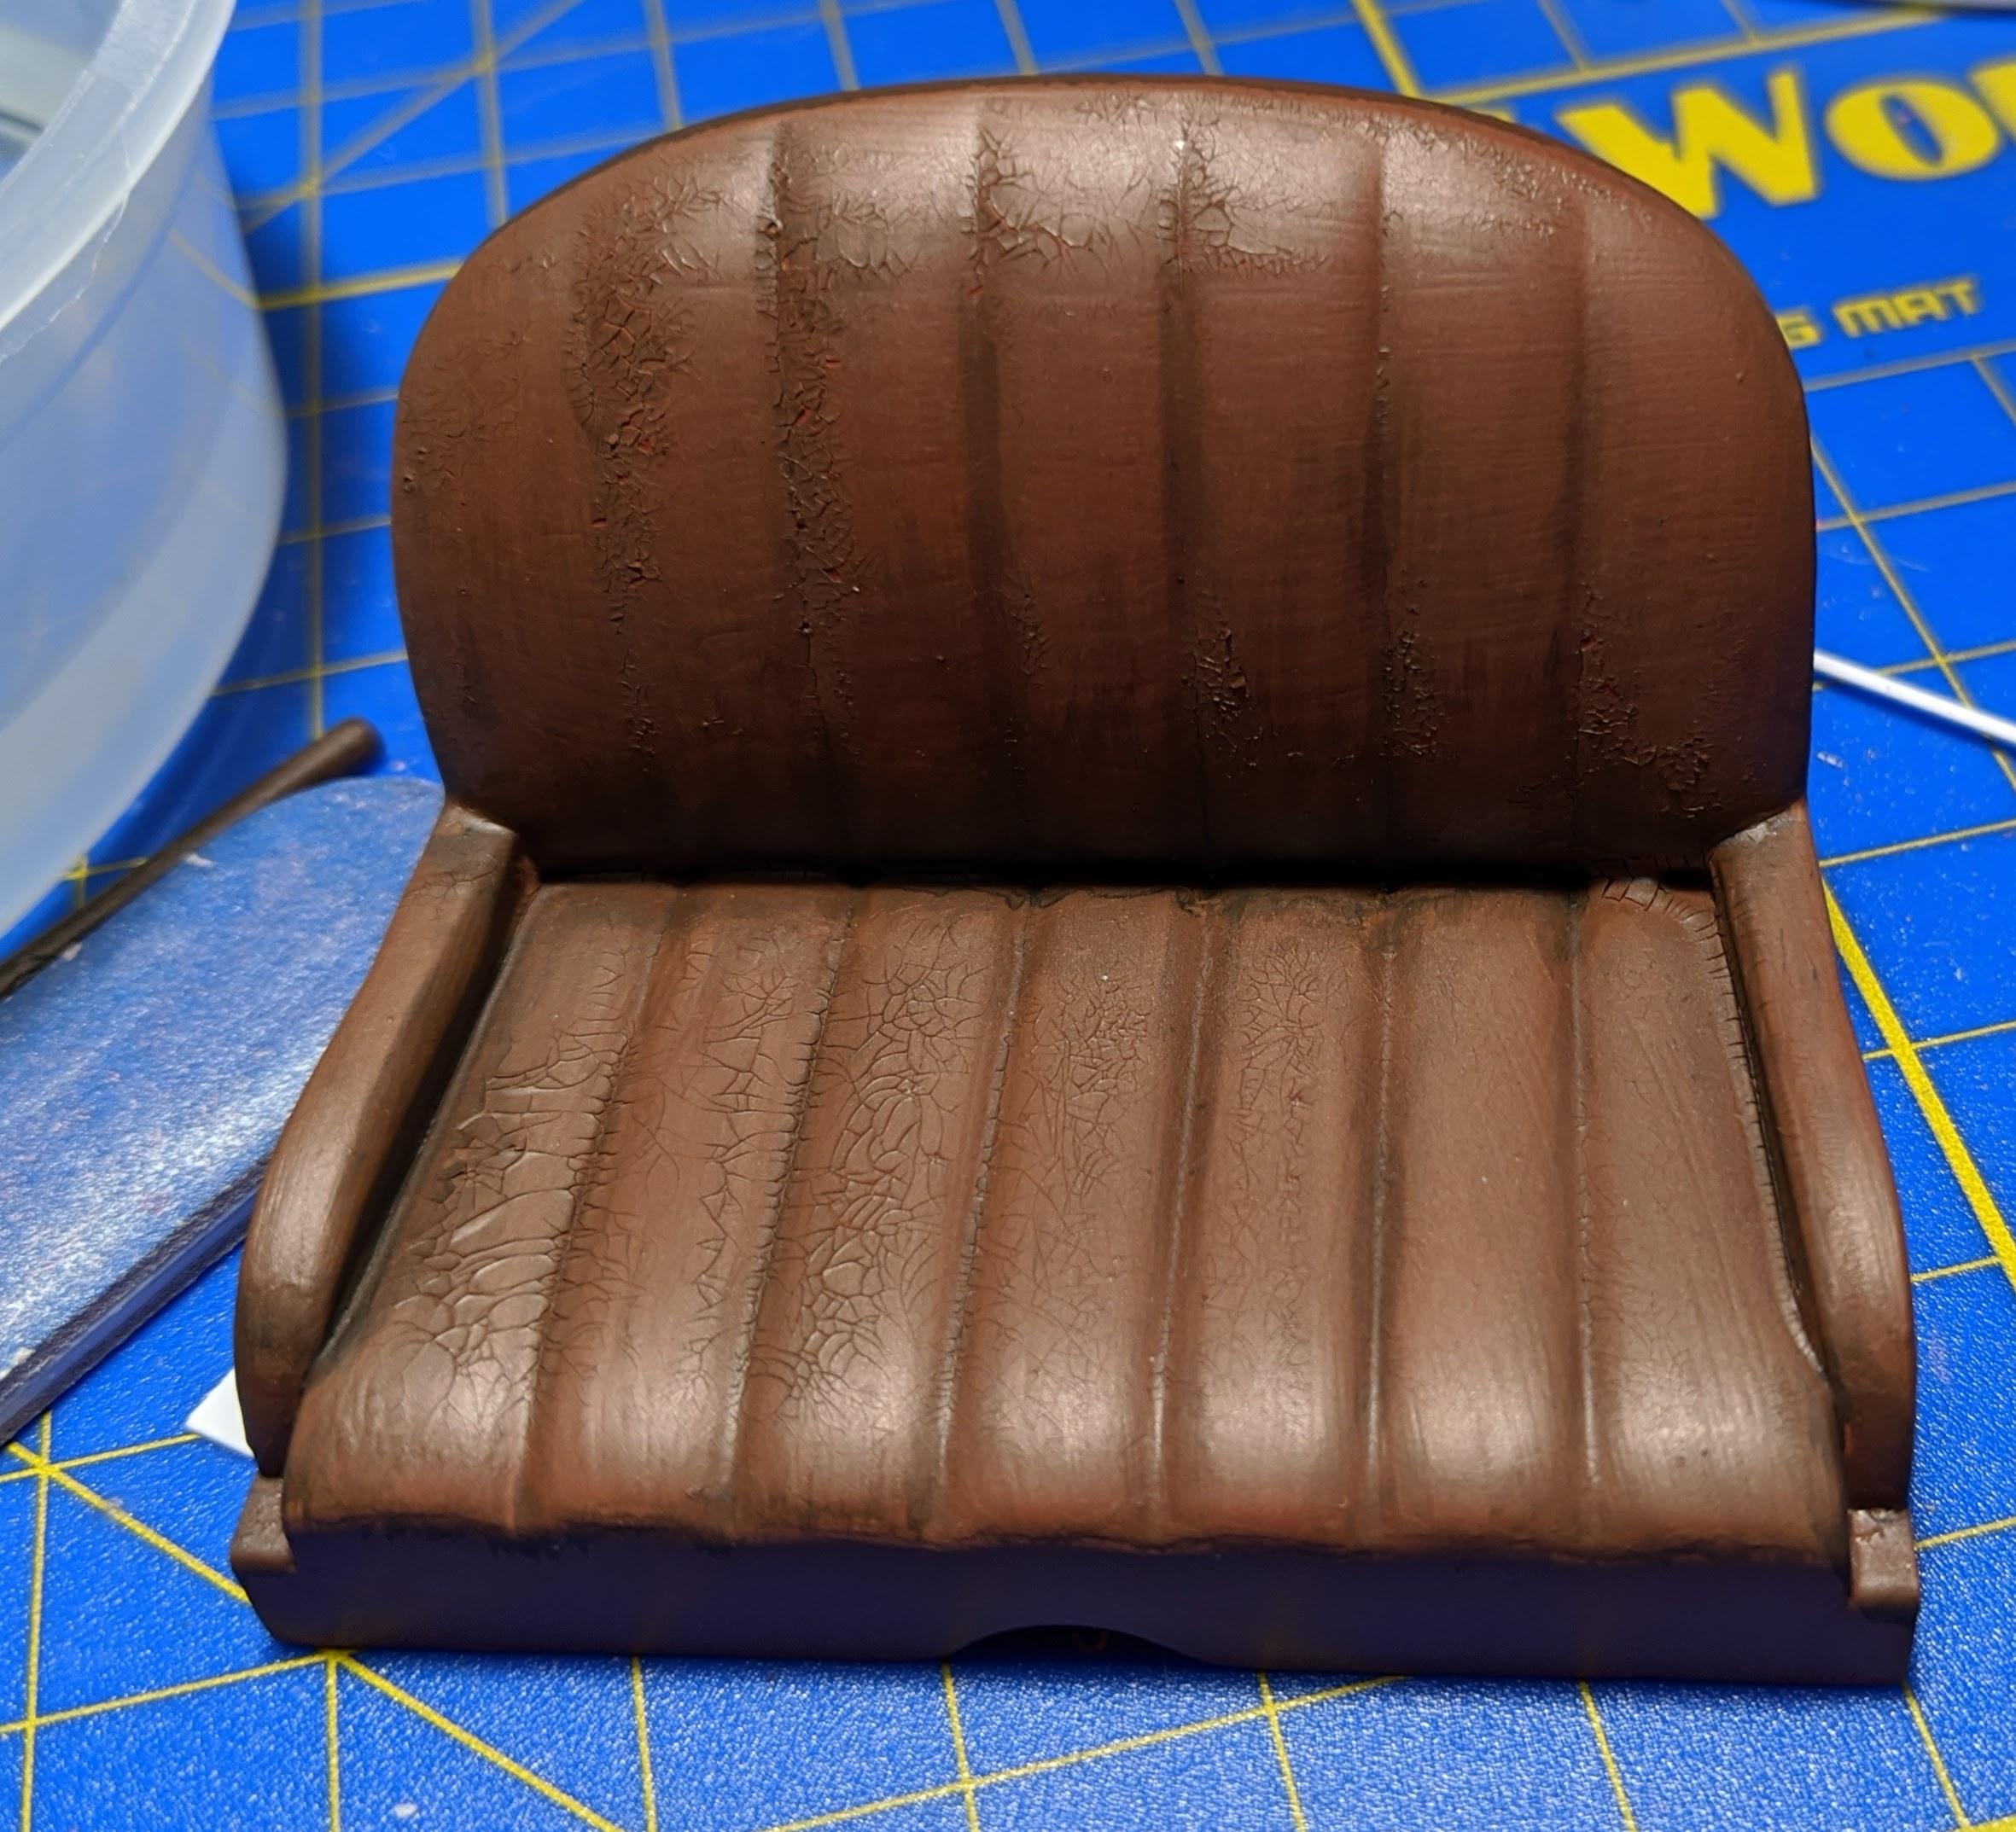
The crackle finish is cool but a little unpredictable. Thin coats give you finer cracks, which would work best in 1/24, but if you go too thin the cracks won't happen at all. And of course it's tough to see them at all until the final paint coat and weathering so you aren't sure what you've got until the final step. In addition the finish is extremely fragile, which works out well if you've got the right base color under the crackle medium because anything that flakes off will show more of your base leather color. I'm looking forward to playing with this stuff on future builds, because I can see lots of uses for it... checked and peeling lacquer or clear coat, rusting steel, etc. -
Italeri Alfa 8c- WIP
jaymcminn replied to jaymcminn's topic in WIP: Other Racing: Road Racing, Land Speed Racers
Thanks guys! I've done a rat rod or two in the past, but this is the first time I've tried for that balance of weathered and maintained that you see on old race cars. I've started the process of adding the fasteners and safety wire to the body... pics to come soon. It's pretty tedious work, but the fiddly bits are kind of my favorite part of a build like this. -
I like Plastruct Bondene for the bond strength and how quickly it sets, but I use the Model Master stuff in the applicator bottle if I need a couple of seconds before the cement evaporates to join my parts together.
-
Tamiya 1/24 Alfa Romeo GTV (1996) Twin Spark 16V
jaymcminn replied to Italianhorses's topic in WIP: Model Cars
Can't wait to see your touch on this one Alex. I'd love to find one of these kits for a reasonable price someday. -
The scale tells the story here. I'm guessing AMT reboxed one of the motorized Japanese kits or possibly even an Airfix kit. I'd go with the whole gutted interior theme and do a LeMons racer or something. Have some fun with it.
-
Italeri Alfa 8c- WIP
jaymcminn replied to jaymcminn's topic in WIP: Other Racing: Road Racing, Land Speed Racers
New update... first some better shots of the completed front and rear suspensions. I will say that this thing is going together wonderfully... the detail is a little on the primitive side, but it looks the business with a little work. Next I decided to tackle the seat... this is probably the biggest downfall of this kit. It's featureless and lacks any sort of texture. I was limited in terms of how much I wanted to mess with this piece because I'm guessing Italeri's parts replacement program isn't exactly robust, so I didn't want to do anything too drastic. I found a crackle medium on Amazon, applied it over primer and let it sit overnight... Followed by an airbrushed coat of Model Master Acryl Leather... And the final product after a dark gray/brown wash. The result is a nicely cracked leather, but not overdone. I applied a thicker coat of the meduim on the driver's side, which produces more and bigger cracks where you would expect them. Next I sanded the fuse box bases and wires off of the firewall and added scratchbuilt fuse boxes as well as drilled holes for the wiring... much better than the molded in detail. Finally I've started on the engine... more Tichy Train bolts for the transmission bell housing. To be fair, they'll be pretty hard to see once everything's together, but I'll know they're there. That's all for now, more to follow soon!
-
I love the color combo. I have the 1/24 in the stash. Got a laugh out of the license plate too. Great work!
-
Italeri Alfa 8c- WIP
jaymcminn replied to jaymcminn's topic in WIP: Other Racing: Road Racing, Land Speed Racers
Thanks Scott! I'm thinking about picking up the Mefistofele at some point. I know the Mefistofele and the Fiat 806 are ex-Protar kits and this is a new tool (although I'm wondering if it might have been a Protar kit under development when Protar shut down, it just doesn't feel like a state-of-the-art new kit) but the Mefistofele seems like a pretty fun challenge. I will say that the Alfa is going together brilliantly, but Italeri is pretty stingy with the screws, nuts and bolts. Don 't lose any, because you don't get extras! -
So what if I WANT a cracked finish?
jaymcminn replied to jaymcminn's topic in Model Building Questions and Answers
That does look awesome. I'm actually going to try a crackle medium by Ranger. The results I've seen look good and if I don't like the results it won't attack the kit plastic. I'll post up some trial pics in the next few days.


.jpg.e4c303137788a359a6c77c72836158cf.jpg)