jaymcminn
-
Posts
1,756 -
Joined
-
Last visited
Content Type
Profiles
Forums
Events
Gallery
Everything posted by jaymcminn
-
In May 2020 I finally bought the 1:1 "project car" I always wanted- a 1995 Miata with good paint and bones but some mechanical and cosmetic needs. A year and change of reupholstering, tracking down oil leaks and rough idle issues and it needs nothing (for the time being, anyway, except for a new top. And maybe that Xida coilover suspension. Mmm, coilovers. Wait, what was I saying? Anyway... ) so I was able to return to spending time at the bench. Taking some time away from the hobby often leads to coming back stronger and with renewed focus and new ideas. Building is something that should be done out of desire and not a sense of obligation so don't worry about being in a slump. You'll get back to the bench eventually.
-
Went to HL for the first time in a while. Got the Revell Land Rover Series 3 for about twenty bucks (40% off model kits). I was surprised to see them carrying Mr. Surfacer and Mr. Clear Flat spray cans... I actually went there because they always used to have Tamiya white primer in stock, but it looks like they're transitioning a lot of their non-Testors supplies to Gunze/Mr. Hobby. The shelves were pretty full, but it's almost all Round 2.
-
Was the device in question a 100 gallon fuel tank?
-

1957 Chevrolet 150 Black Widow
jaymcminn replied to Jim B's topic in Model Building Questions and Answers
You can get elastic thread in various thicknesses at craft and fabric stores. Bungee cord ends and bumper mounts can be made from wire. I'm gonna give this a shot for the bungee cords that hold down the spare tire on my Ferrari 330 p4 project. -
What paint are you planning on using? I've done primer and top coat with Tamiya primer and paint all in one session, although it's usually a second primer coat after "block sanding" a first coat. I've never had any issues, and I let 15-30 minutes pass between primer and paint.
-
1/12th Italeri Alfa Romeo 179 /179C
jaymcminn replied to AaronM's topic in WIP: Other Racing: Road Racing, Land Speed Racers
Good call on replacing those ignition wires. The smaller ones look a lot better. Your additional wiring and plumbing is really bringing this old kit to life! -
Very well-chosen upgrades on this build. The interior especially looks fantastic. I have a spare set of Tamiya MkII wheels and tires and a set of Dunlop wheels set aside for my roadster and coupe builds when I get around to them. Beautiful work!
-
(HRM) Shelby Cobra Daytona Coupe
jaymcminn replied to Venom's topic in WIP: Other Racing: Road Racing, Land Speed Racers
I've been working on HRM's engine/transaxle kit for the Fujimi Ferrari 330 p4. It's given me an appreciation for what you've done with this awesome kit. Great work! -
The way I do things evolves continuously as I learn new tricks and techniques and my repertoire of skills and collection of tools and supplies continues to grow. The desire to build something I'm proud of is the same at 51 as it was at 11.
-
Got 'er done. I'll have to throw up some pics of the final details (mostly the scratchbuilt details where the bonnet meets the wood pieces on the chassis) and a few beauty shots. I got stuck in on an old stalled build I'm trying to finish up before a contest next month (Fujimi Ferrari 330P4 with the HRM resin engine kit) which has distracted me from wrapping up this WIP. You're doing some excellent work on yours, keep at it and go at your own pace!
-
I don't look at myself as a "craftsman" so much as an eternal apprentice. Every build I complete adds something to my skill set. I'd get bored pretty quick if I were just churning out the same thing at the same level ad infinitum. My recent 1/12 Italeri 1923 Fiat Mefistofele project was my first time tackling major wood elements in a model and my first time using real leather, if only for the bonnet straps. I plan on going a few steps further in adding leather upholstery to an upcoming build of the Airfix 1/12 Bentley 4.5 litre. My current 1/24 Ferrari 330 p4 is going to be my first attempt at using the Archer resin rivet decals as well as the first time I've used a resin engine kit (The HRM unit, it's pretty nice). This is a fantastic time to be a modeller...forums like this one as well as online tutorials and aftermarket suppliers mean that if you want to push your skills to the next level you have the support and tools to do that. The internet has also done a lot to facilitate researching rare subjects... my Mefistofele project would be much harder to build with reasonable accuracy if the only way I could get good detail pictures was to jet over to Turin to view the original in the Fiat Museum. The model car hobby is a big tent, and many of us would do well to remember that. I've seen my share of builds where I'd do something a completely different way, and the temptation to provide unsolicited advice is strong. I then remember that not everybody is looking to get the same thing out of the hobby as I am, and a lot of builders just want to get something on the shelf and move on to the next kit. There's nothing wrong with building a nice collection of "shelf models" and the guy who builds 30 models a year is doing more to financially support the hobby than I am with my 2-3 builds during the same period.
-
1/12 Ford GT40 (remodelled)
jaymcminn replied to kpnuts's topic in WIP: Other Racing: Road Racing, Land Speed Racers
Pretty sure that's the Trumpeter 1/12 scale. The tires are a dead giveaway. Looks like a proper barn find as is! -
Thanks Noel. I'm actually showing this at a regional show here in Florida in November. I'm betting it's the only one on the table! I hope that the Alfa 8c has been a big seller for Italeri... tooling up the version with fenders and headlights is a good sign. I would love to see a T35 produced by them. MFH produces some amazing kits but their 1:12 scale kits are more than I'm willing to invest in a single project. Vintage racers have enormous appeal. They are works of mechanical art. They are objects of great beauty. They also speak to the romance and danger of the early days of motoring... Mefistofele set a land speed record of 146 mph in 1923. On a dirt public road. In a car with no front brakes or seat belts!
-
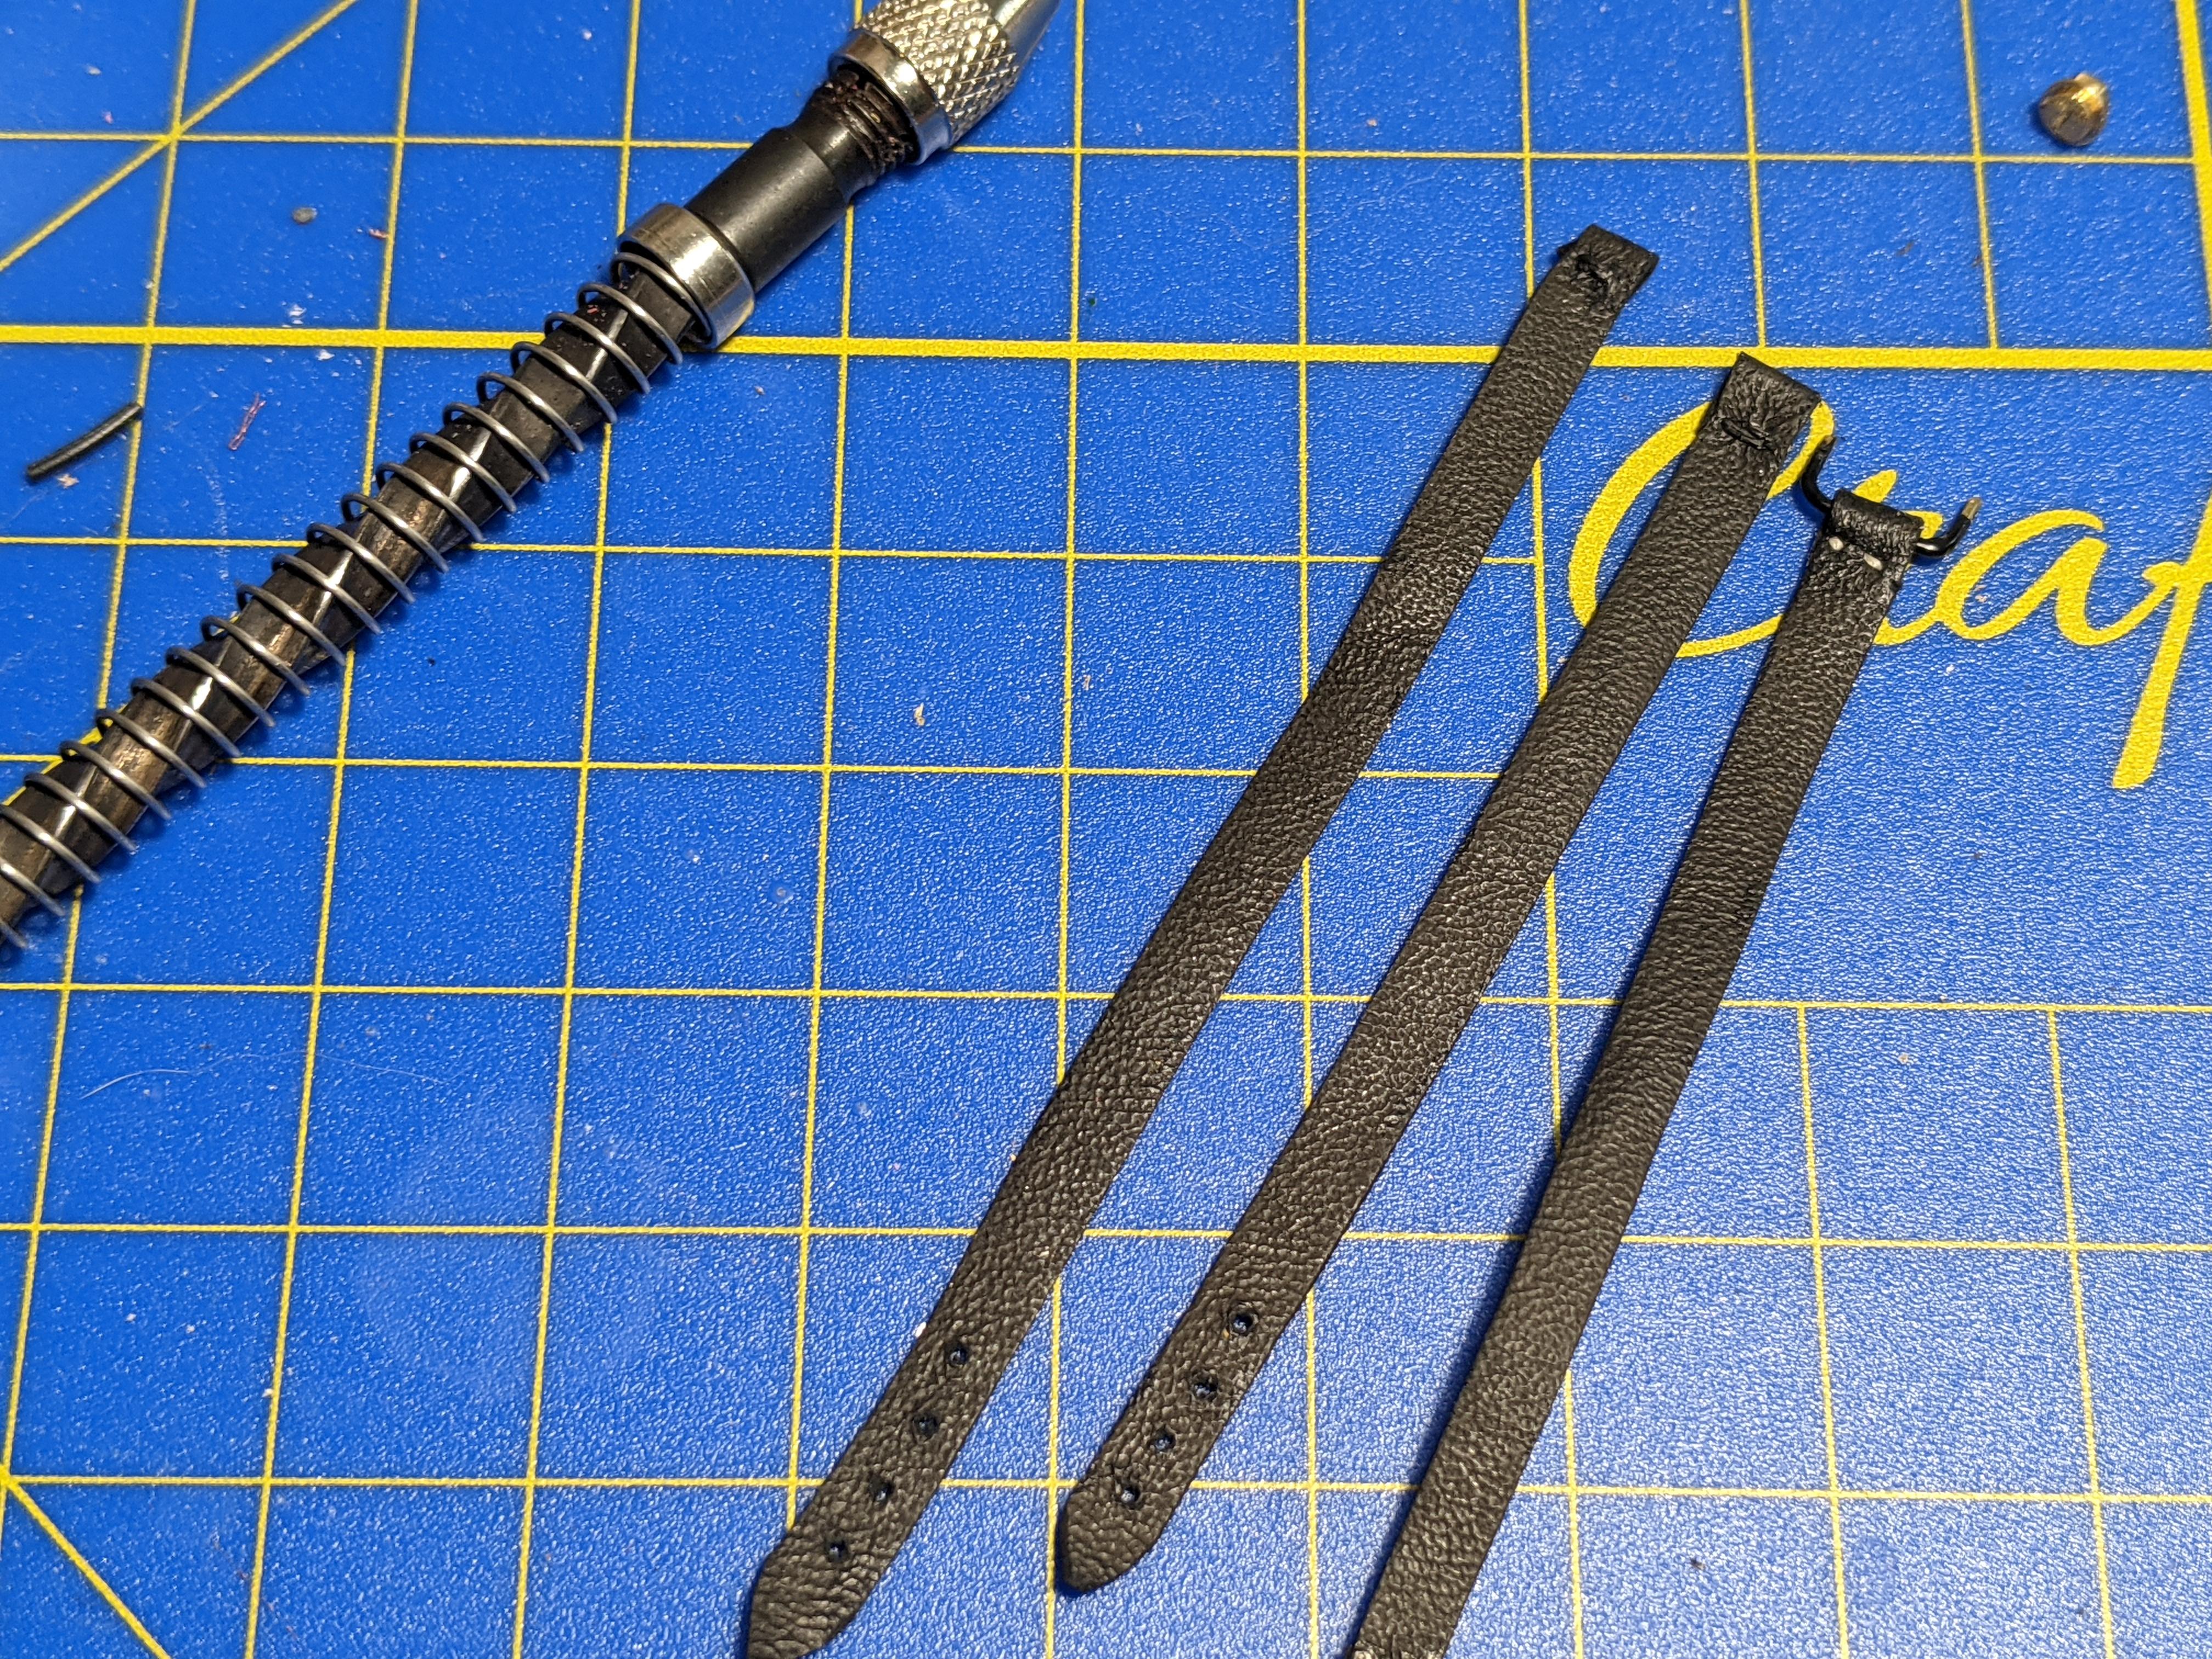
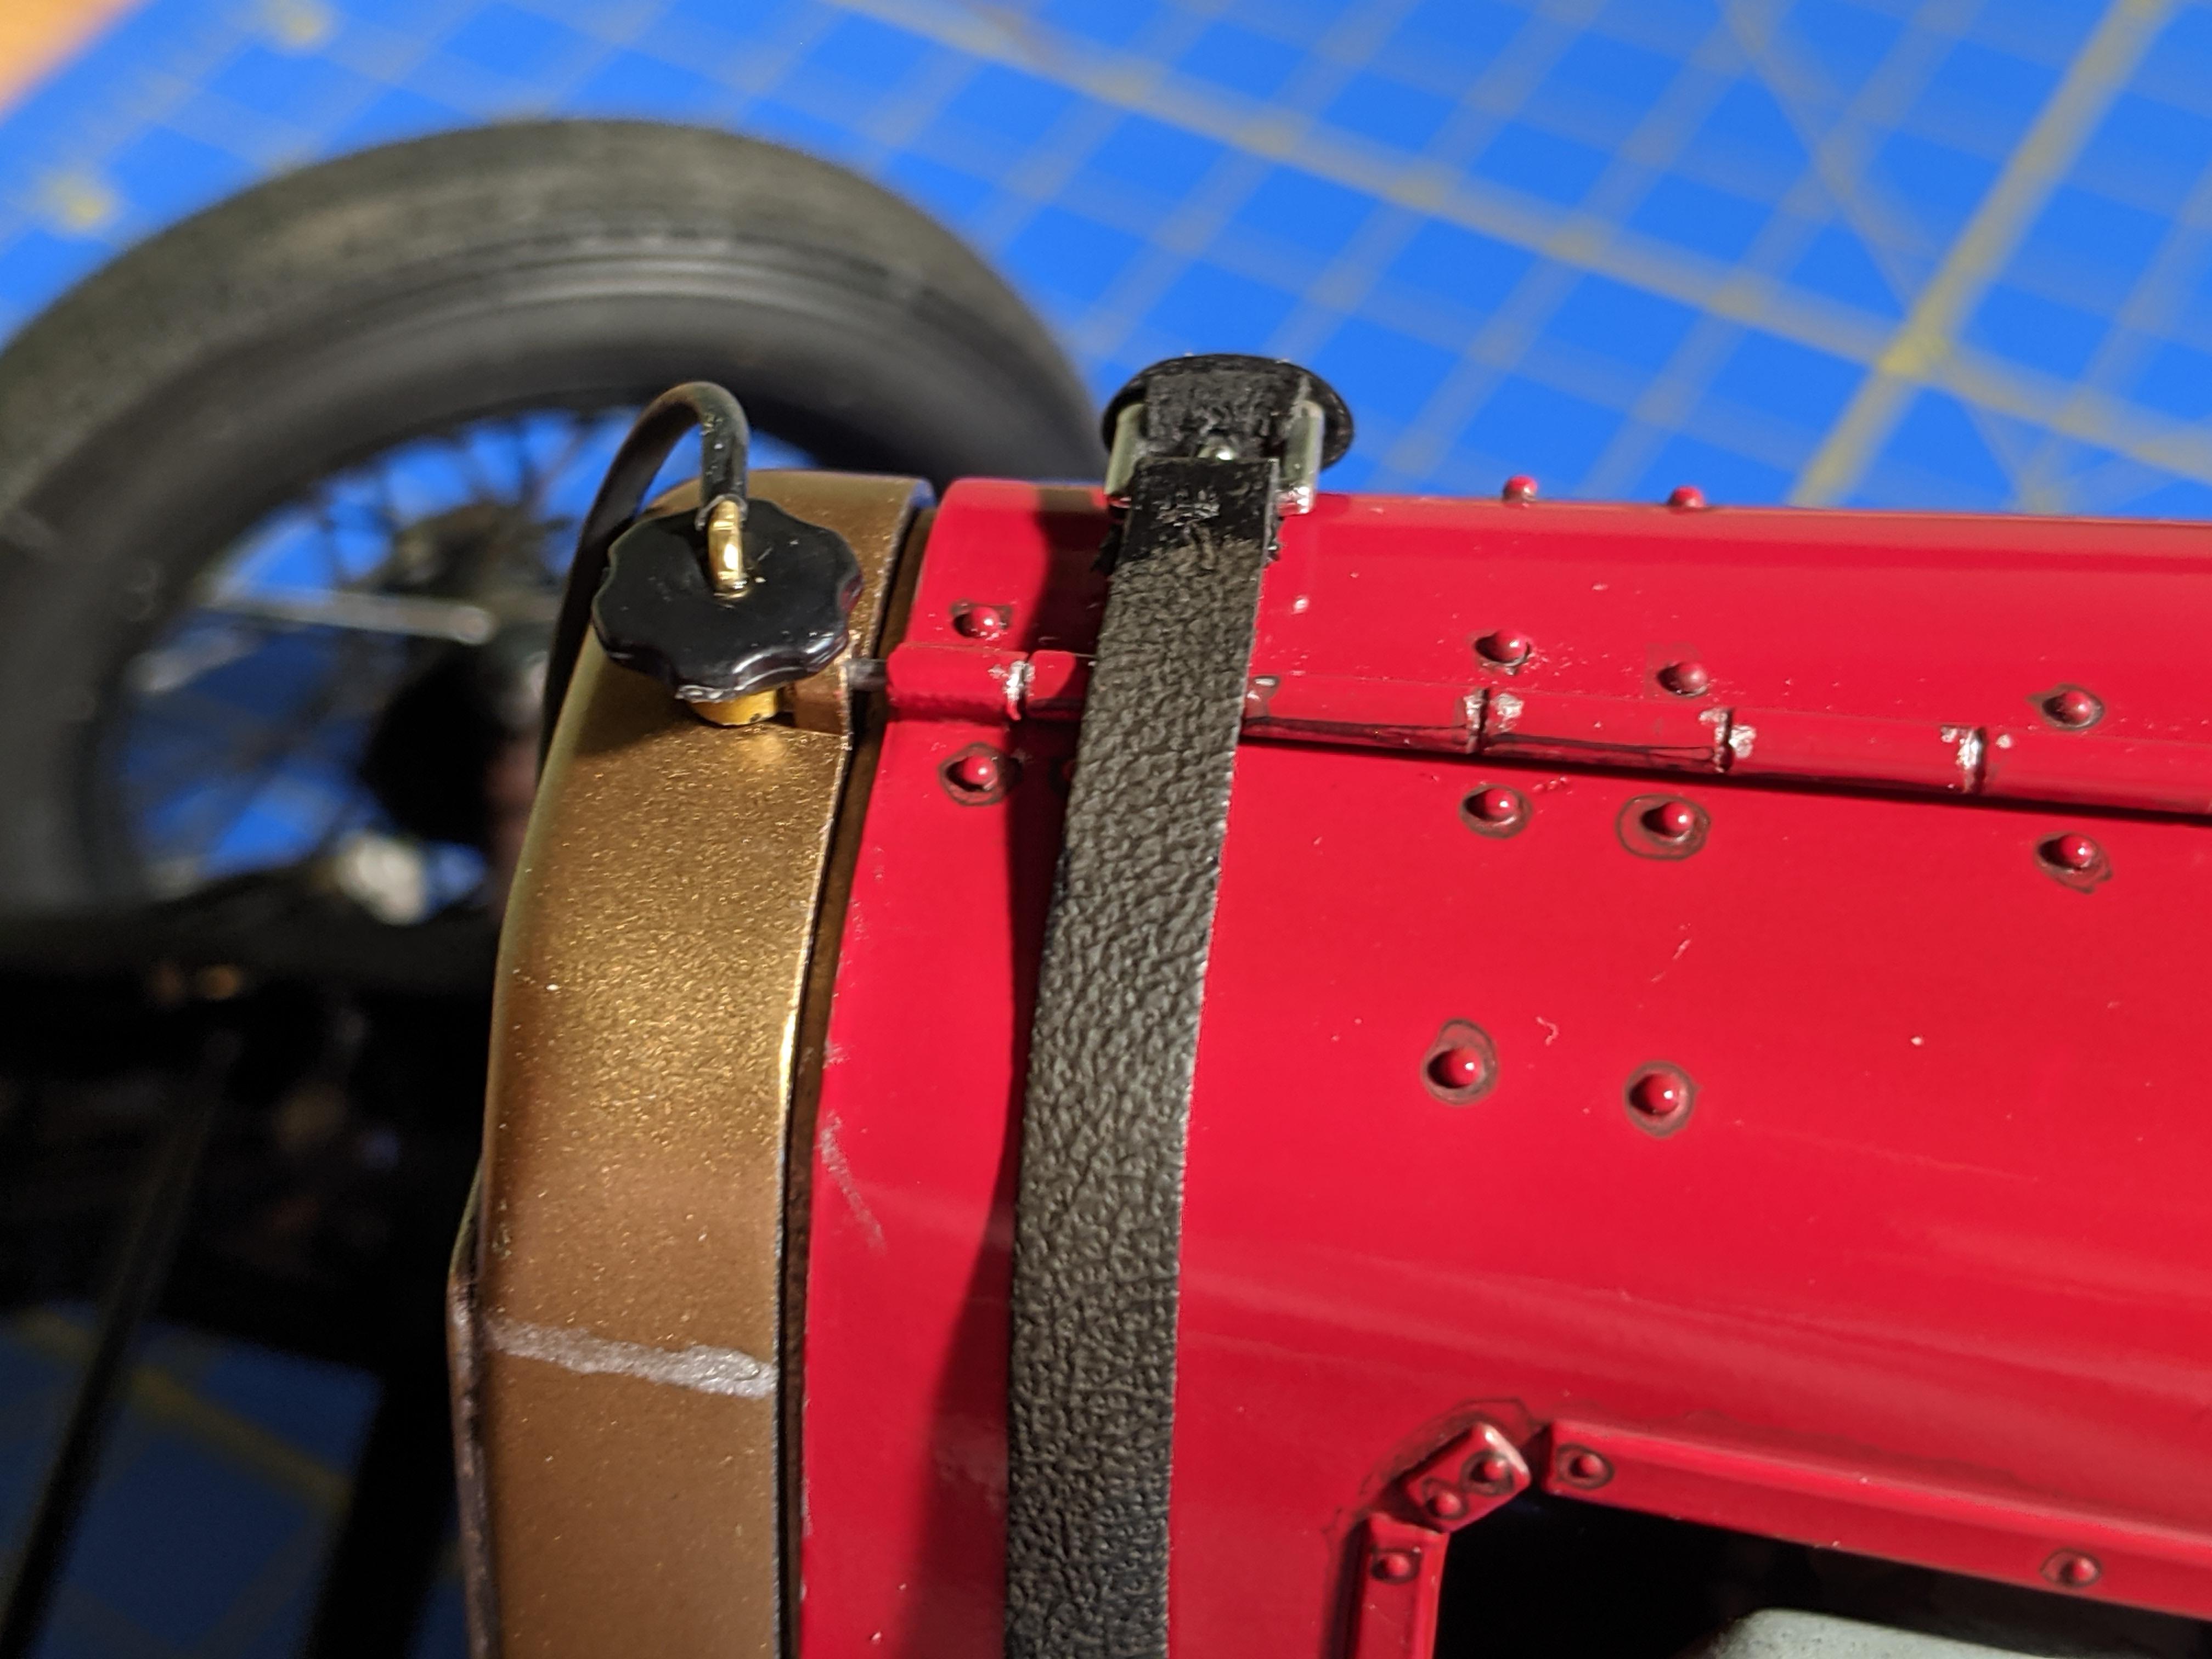
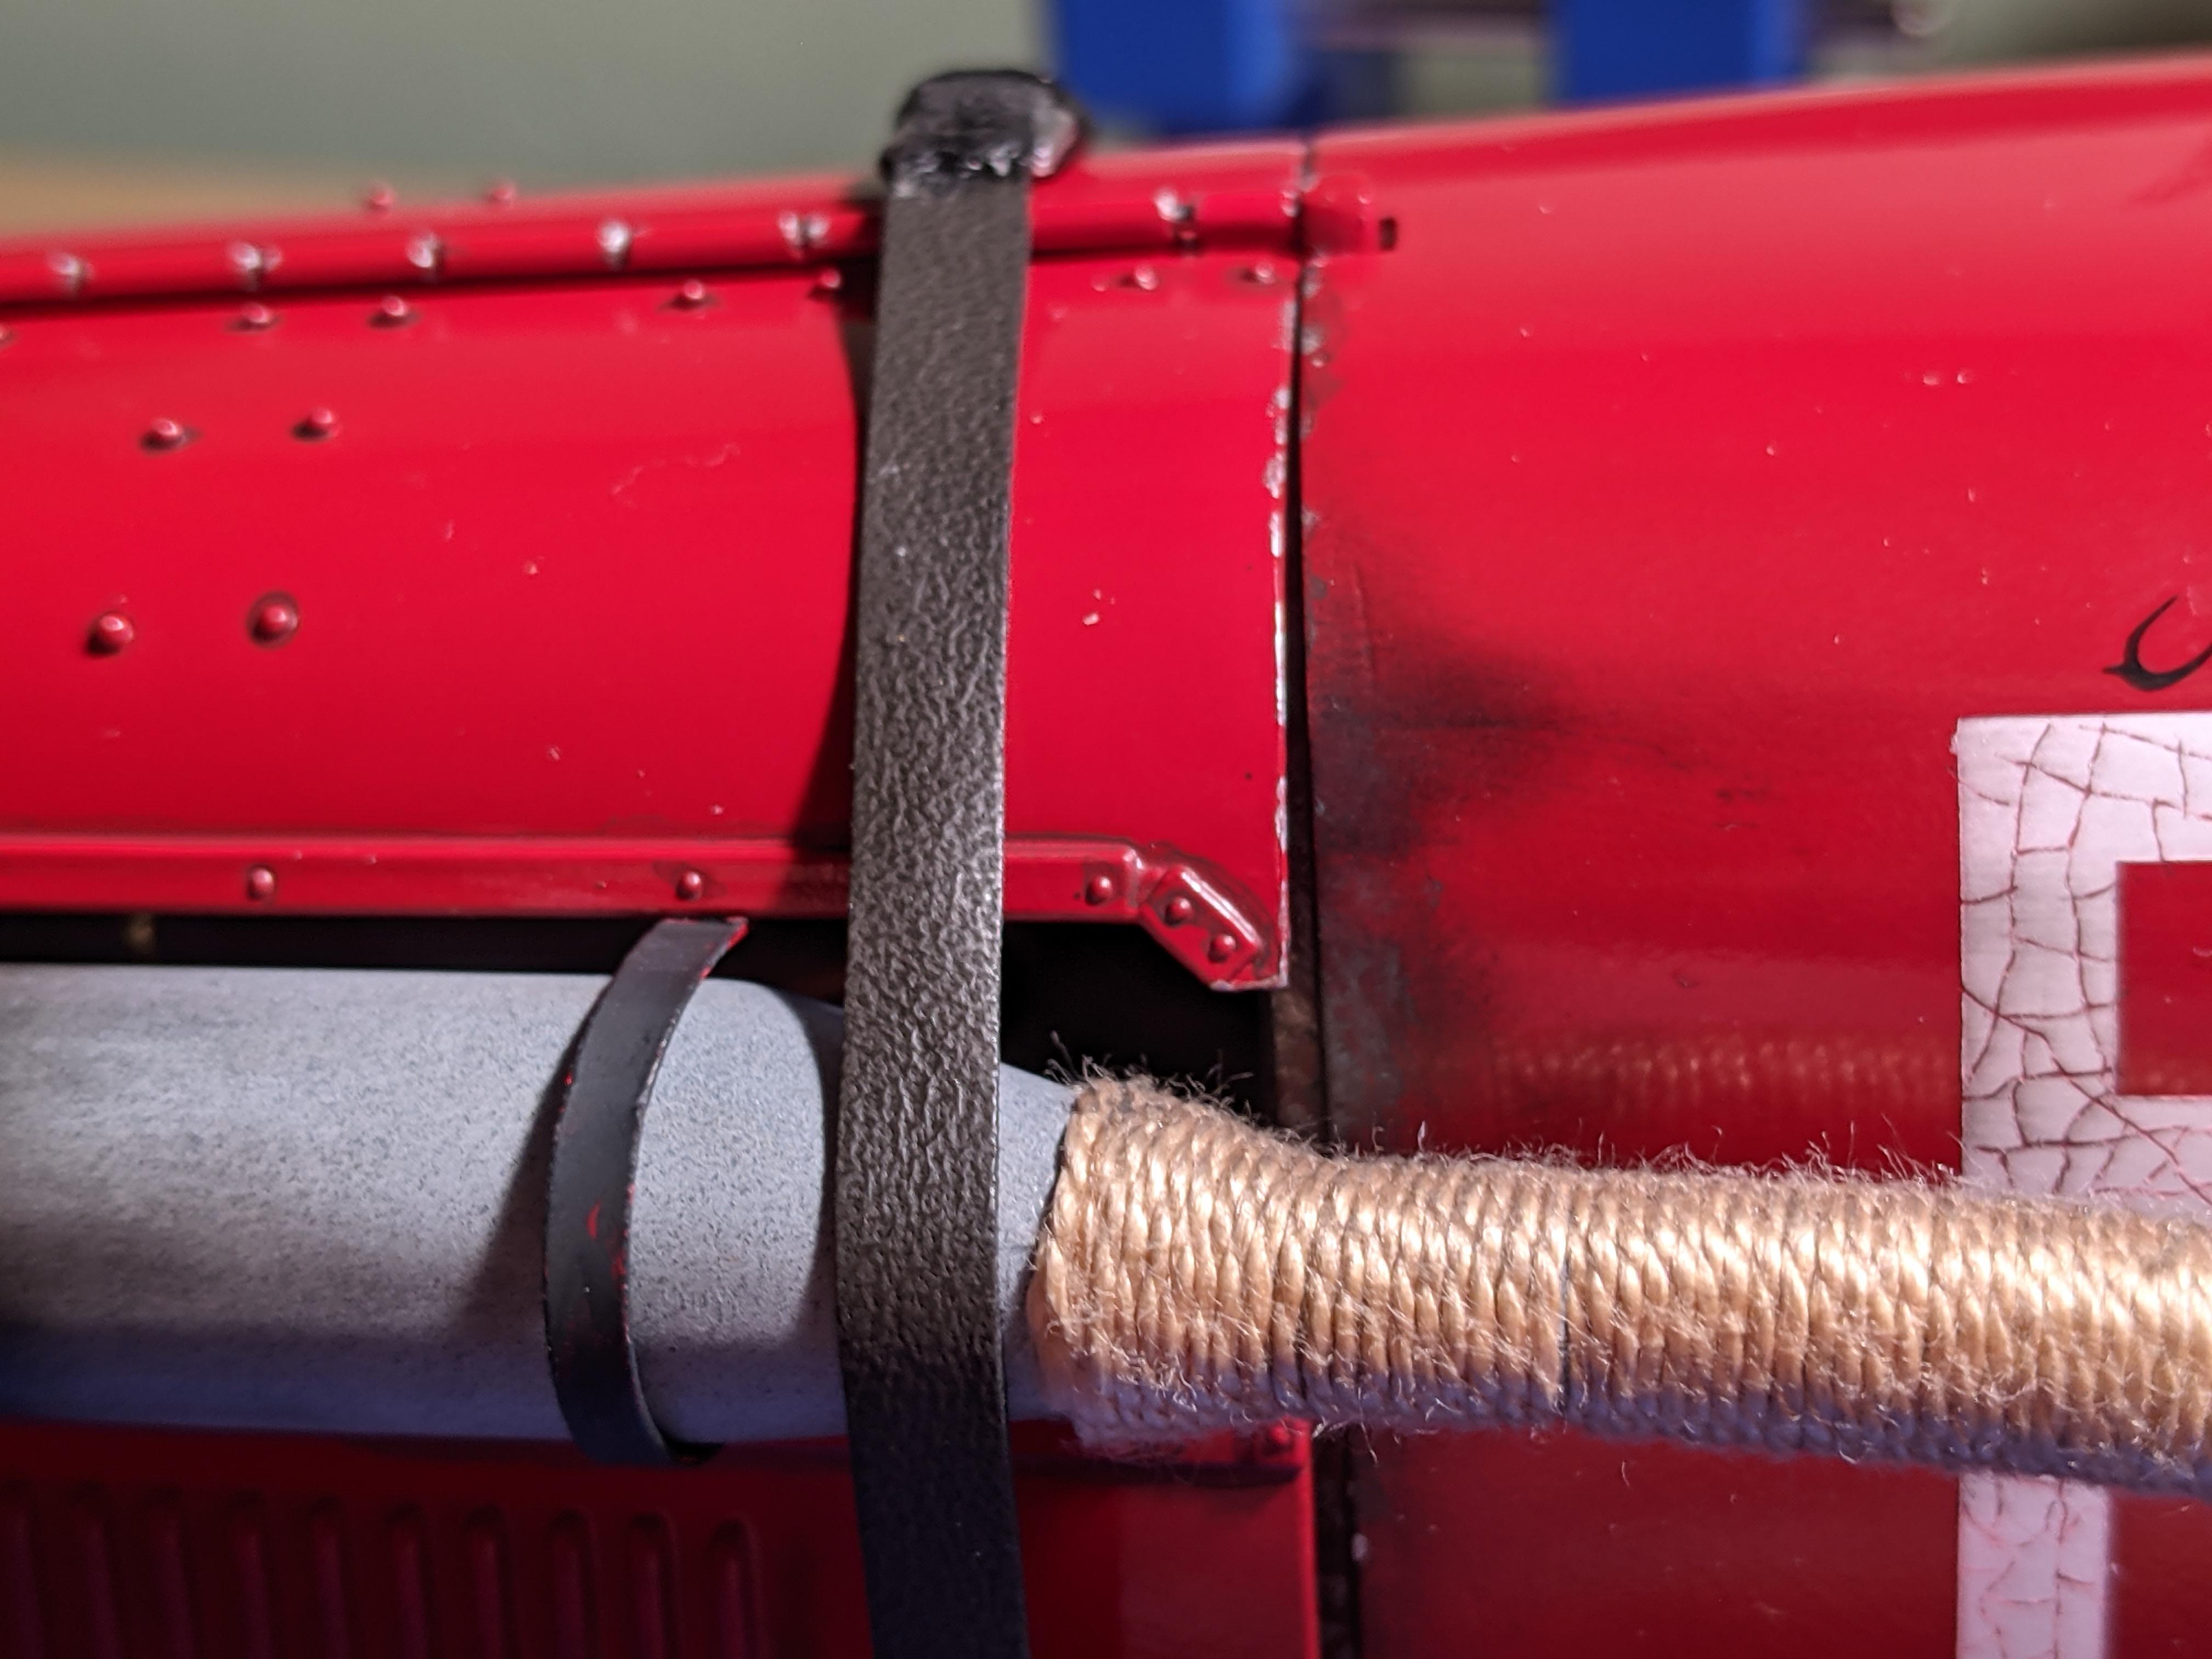
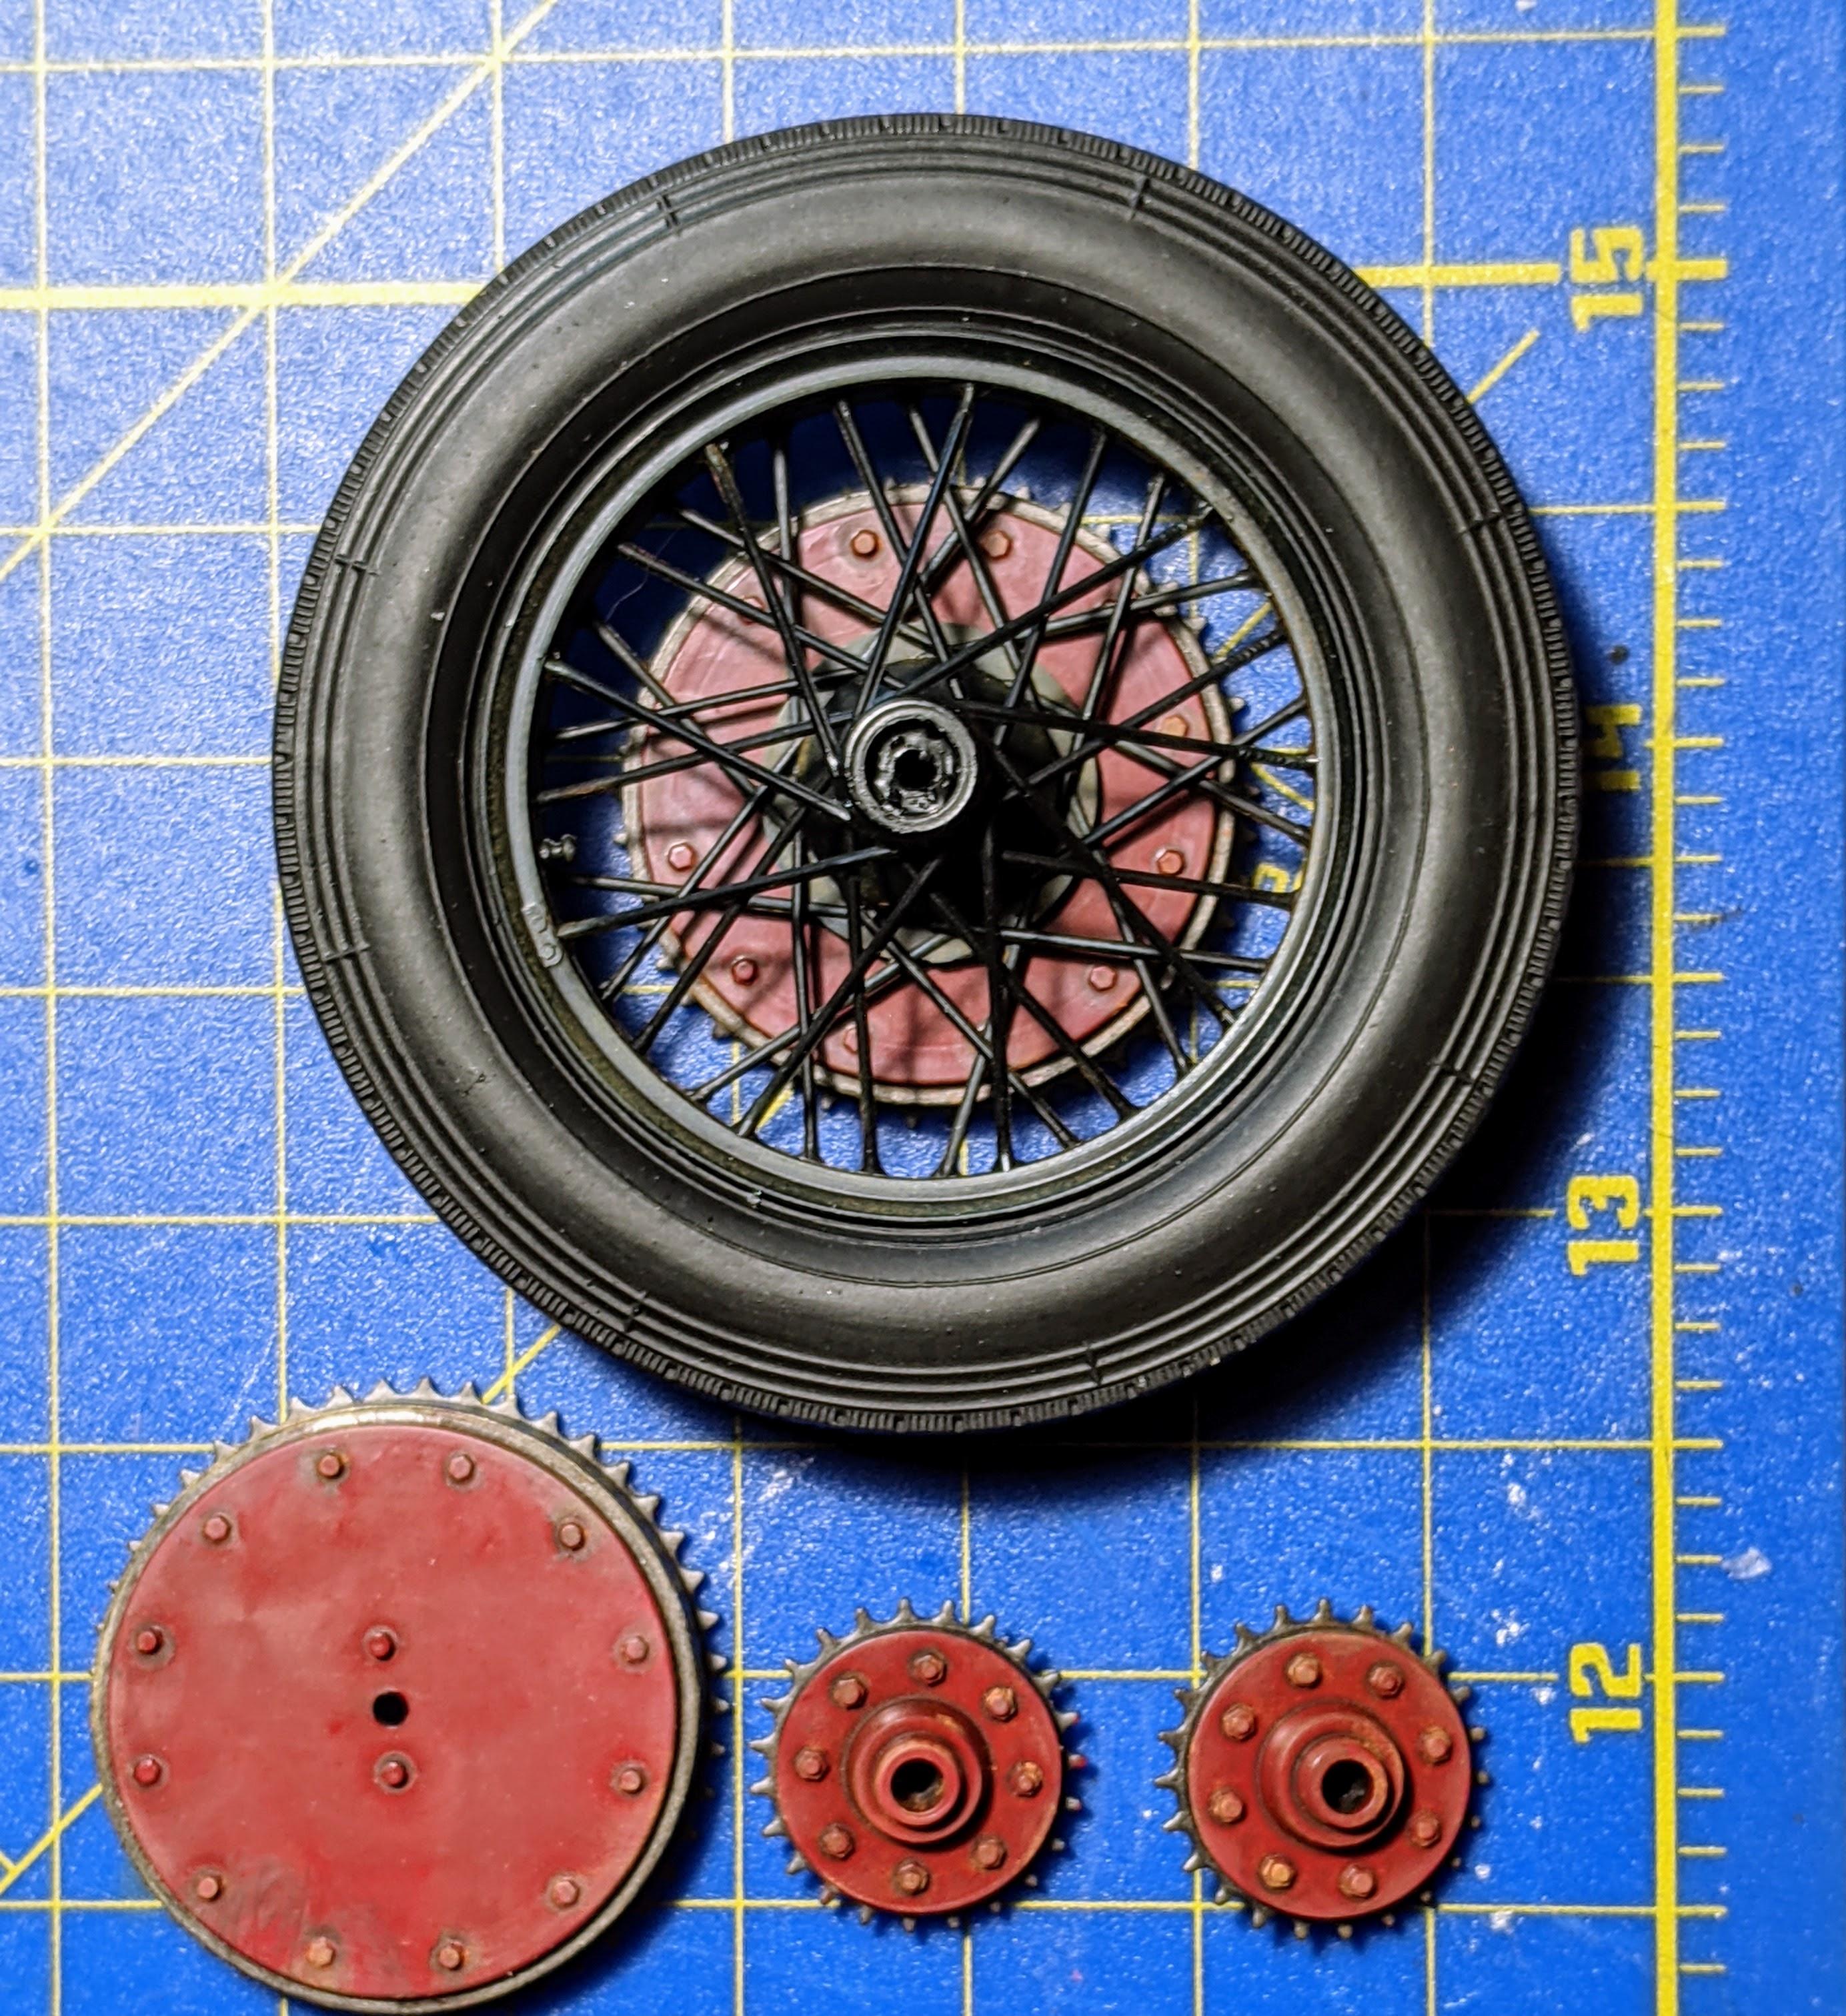
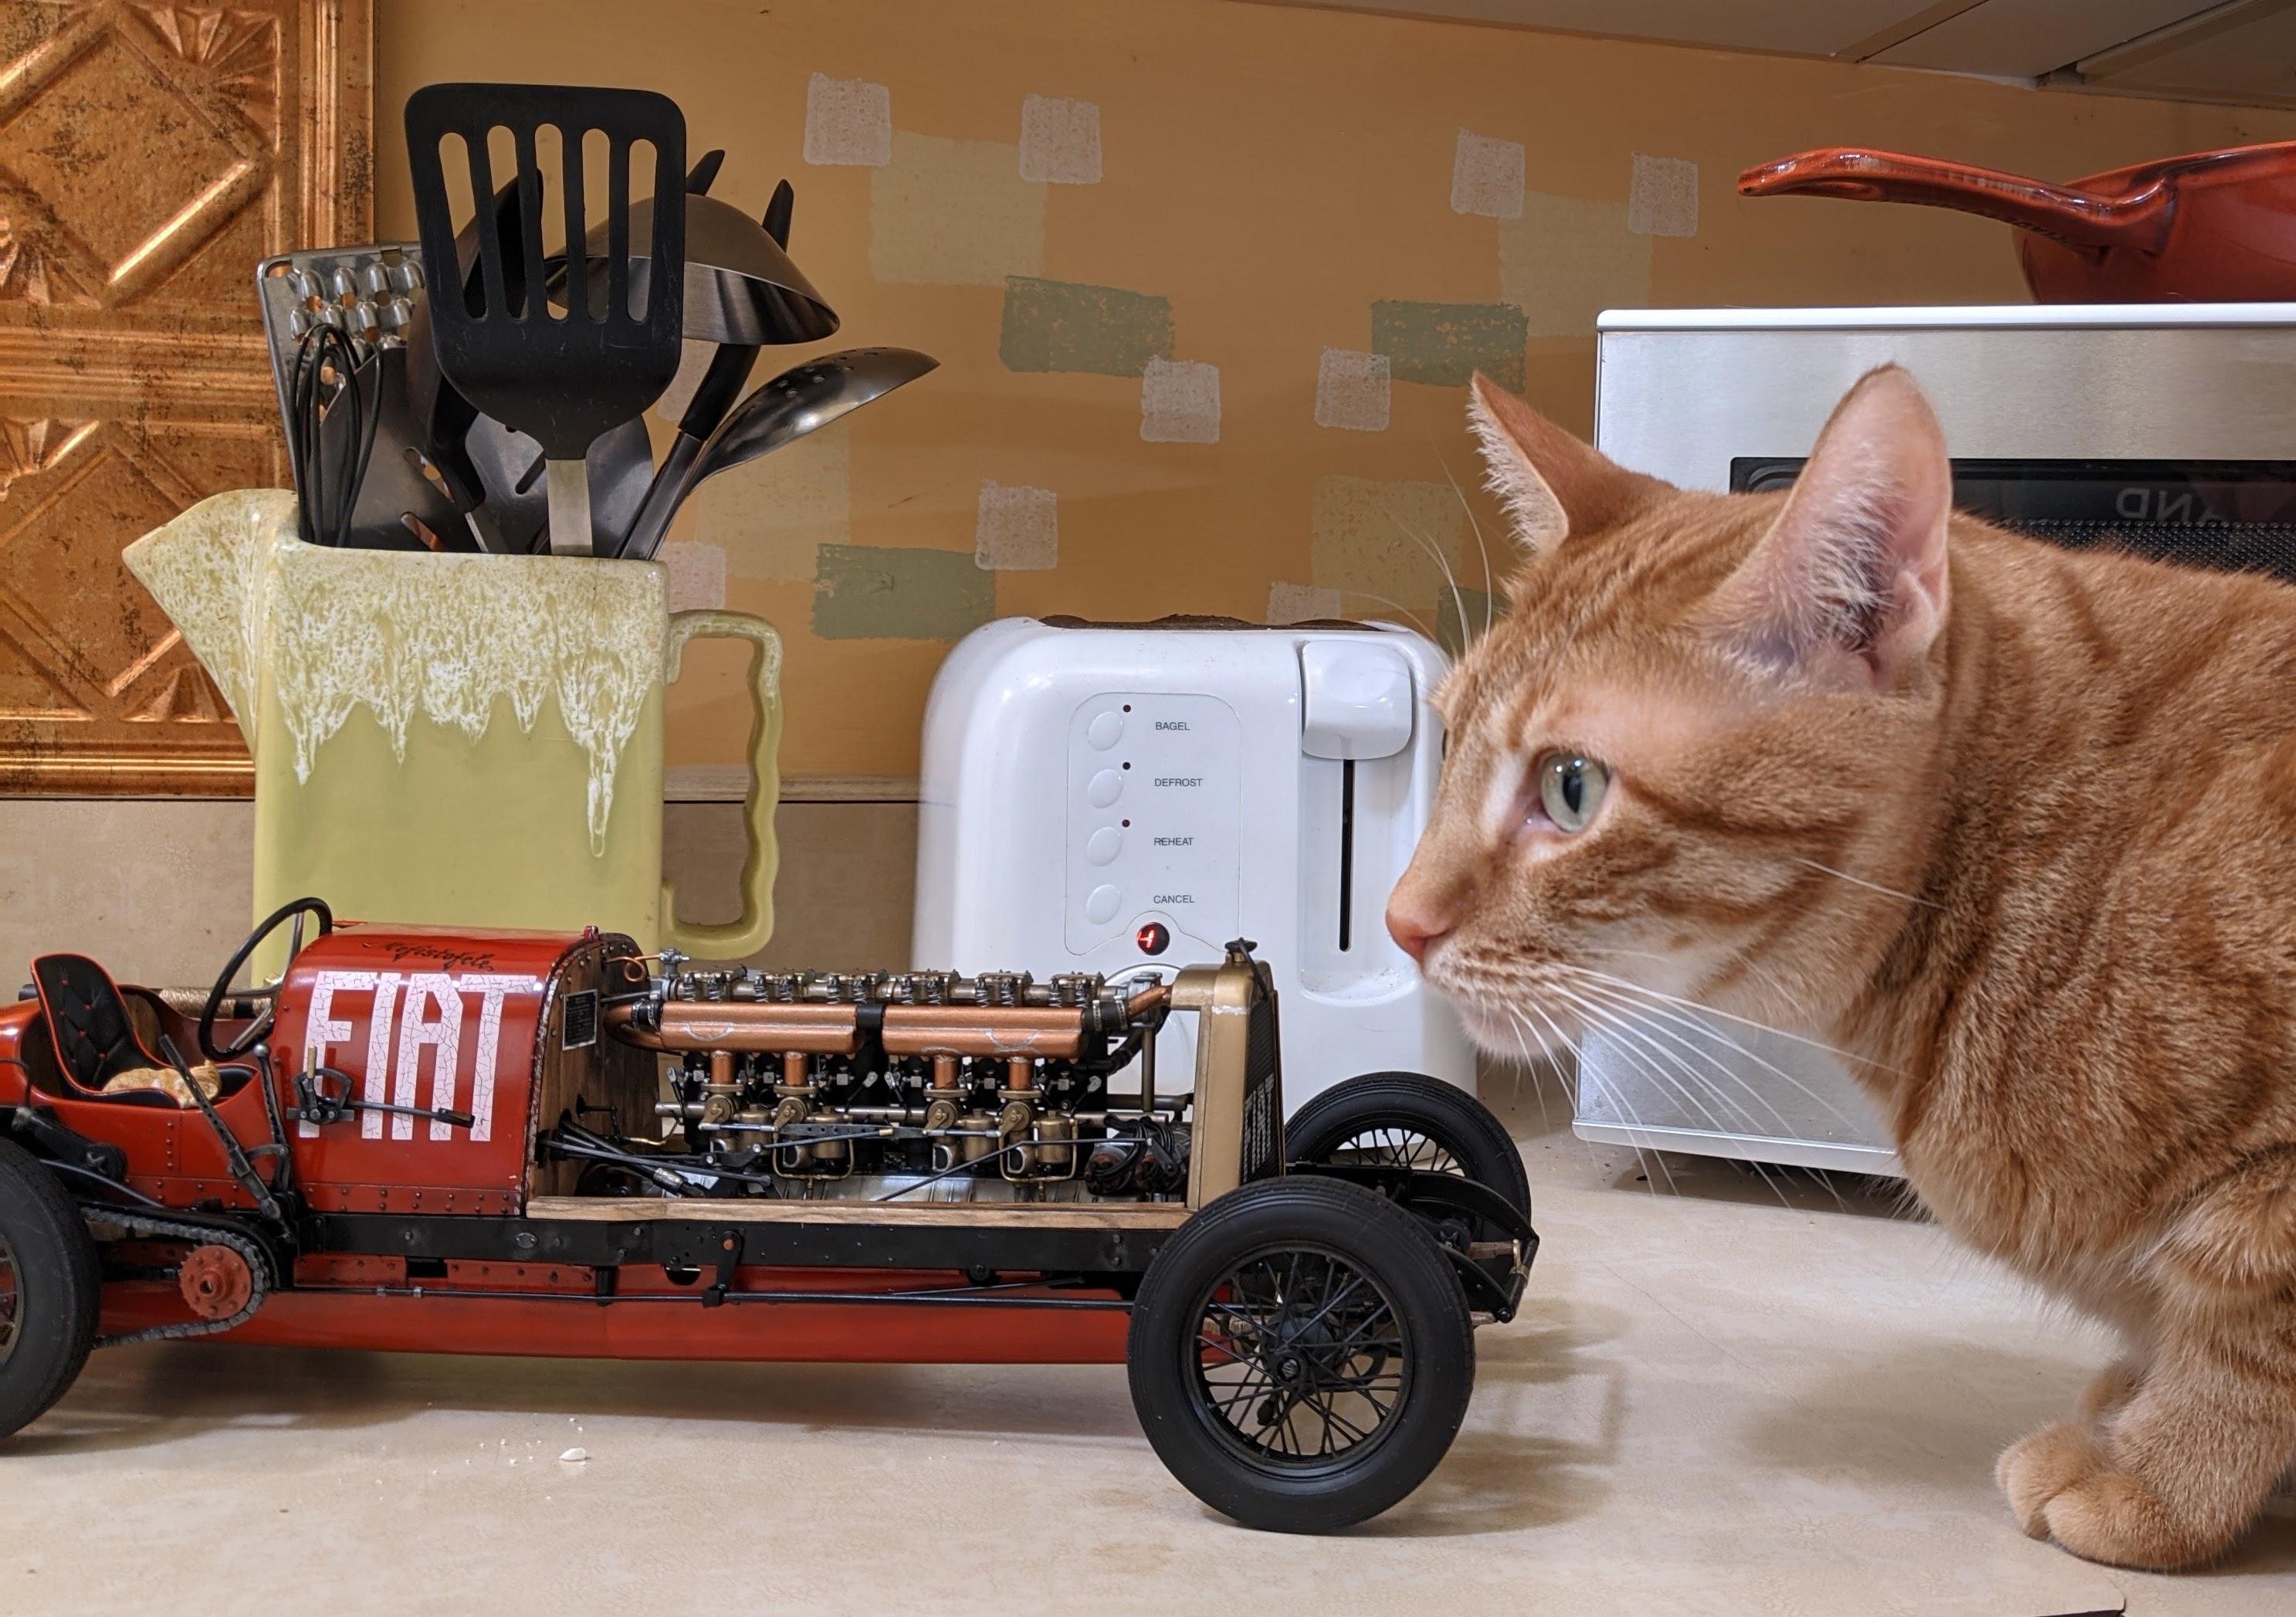
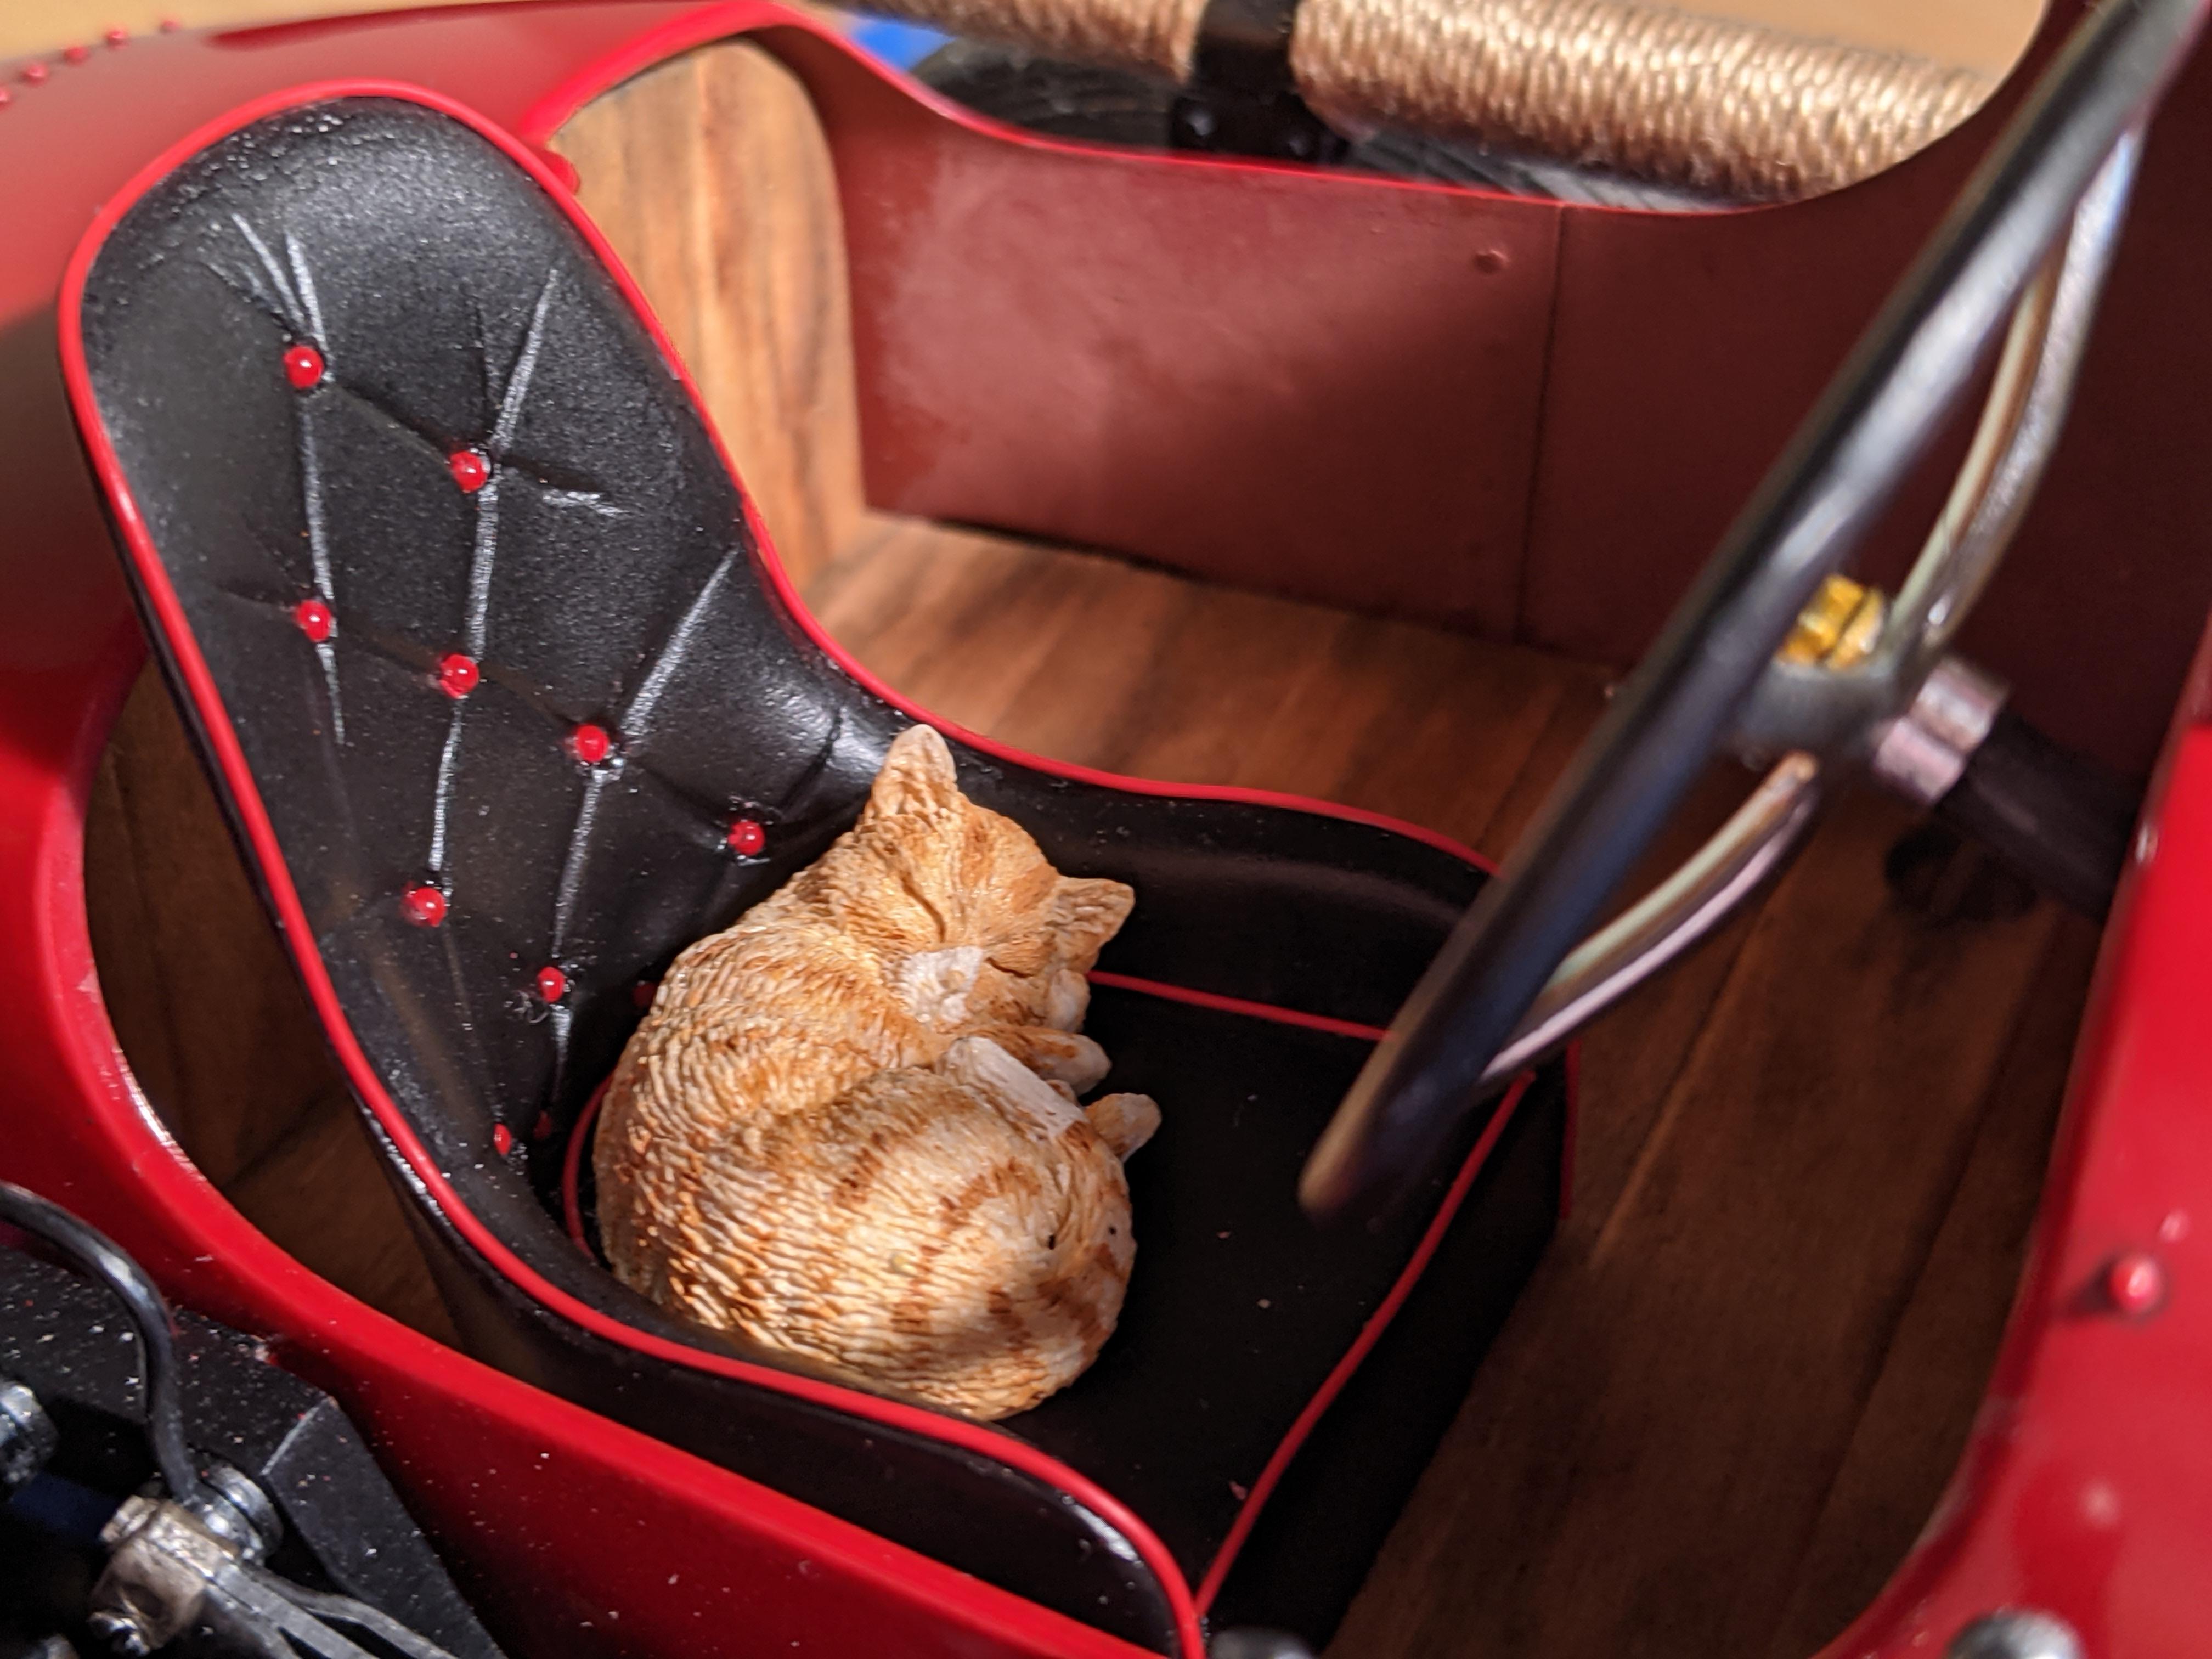
Getting closer... I didn't get pics of installing the tubing on the engine or the install. To be honest, installing the tubing around the engine, and then the throttle/ignition linkages after the engine was installed, were fairly frustrating jobs that I wasn't really wanting to interrupt to bust out my phone. I will say that Italeri has you install the wood parts on the frame rails before installing the linkages, which makes it much more difficult to get down in there and install the tricky linkages. Top tip... install the linkages first and then the wood parts. The engine looks the part, and some washes and weathering pastels go a long way. I wrapped the exhaust pipe in cotton cord rather than the garden twine Italeri provides. Next came getting this beast up on its wheels. The first thing I did on this kit was the drive chains for the rear wheels. The chains build up from four layers of parts mounted on frames. the frames align together and then the layers are heat-welded together. The chains are cut loose from the frames producing realistic, flexible chains. This was tedious work but wasn't especially difficult. Before the install I brush-painted the chains with gunmetal Metalizer. I used Shin-Etsu silicon grease on the large bolts that mount the wheels and sprockets to help them go in a little easier. The exposed screw head on the front sprocket was unacceptable. I found some #72 bolts, nuts and washers from an old project and fabbed up a more realistic solution... Up on its wheels and being checked out by my harshest critic... After installing the hood sides, I went ahead and tried my hand at a little leatherwork on the hood straps. I used extremely thin lambskin which I washed in dark grey to weather it up. Rather than the fragile kit mounts I bent brass rod to shape. THe straps were secured around the mounts with CA glue and a stitch to be on the safe side. They turned out really well and work great! Finally (for this post) my "driver" figure. A 1:12 version of my buddy Bandit, curled up exactly where he'd be on the real thing. Final update coming soon!

-
I would never believe that that is the Hubley Deusy. I tried one of those when I was a kid and it... did not go well. This is amazing.
-
I use automotive papers (2000 then 2500) and follow up with Meguiar's Ultimate Compound and Polish. I like them a little more than the old 105 and 205. As a bonus, they work great on my 1:1's.
-
Excellent paint and clean building technique. Makes me want to start the one in my stash!
-
Ferrari 312F1-67 MFH 1/12
jaymcminn replied to primabaleron's topic in Other Racing: Road Racing, Salt Flat Racers
Like almost everybody else, I thought the first few shots were reference pics before we got shots of the model. Beautiful work! -
What did you see on the road today?
jaymcminn replied to Harry P.'s topic in General Automotive Talk (Trucks and Cars)
Within the span of 5 minutes today I saw a beautiful primrose yellow Triumph TR4, a Ferrari FF, a McLaren 650s, and a Rolls Phantom Coupe. Naples is usually a pretty good carspotting town, but that was pretty wild. -
I'm actually a little ahead of these pics at this point. I wound up using brass rod for the piping instead of the copper stuff Italeri includes. I used the plastic t-junctions and the clear tube from the kit for the joins, but painted the clear tubing with acrylic brass after everything was together. The flexibility of the tubing at the joins was pretty helpful at times but I was sorely tempted to go with 1/16 tube for the joins. The kit instructions are truly woeful when it comes to this step, as you can imagine. I wound up just using photo references as much as possible. I did do all of the piping before installing the engine, I think it would have been much more difficult doing it once the engine was mounted.
-
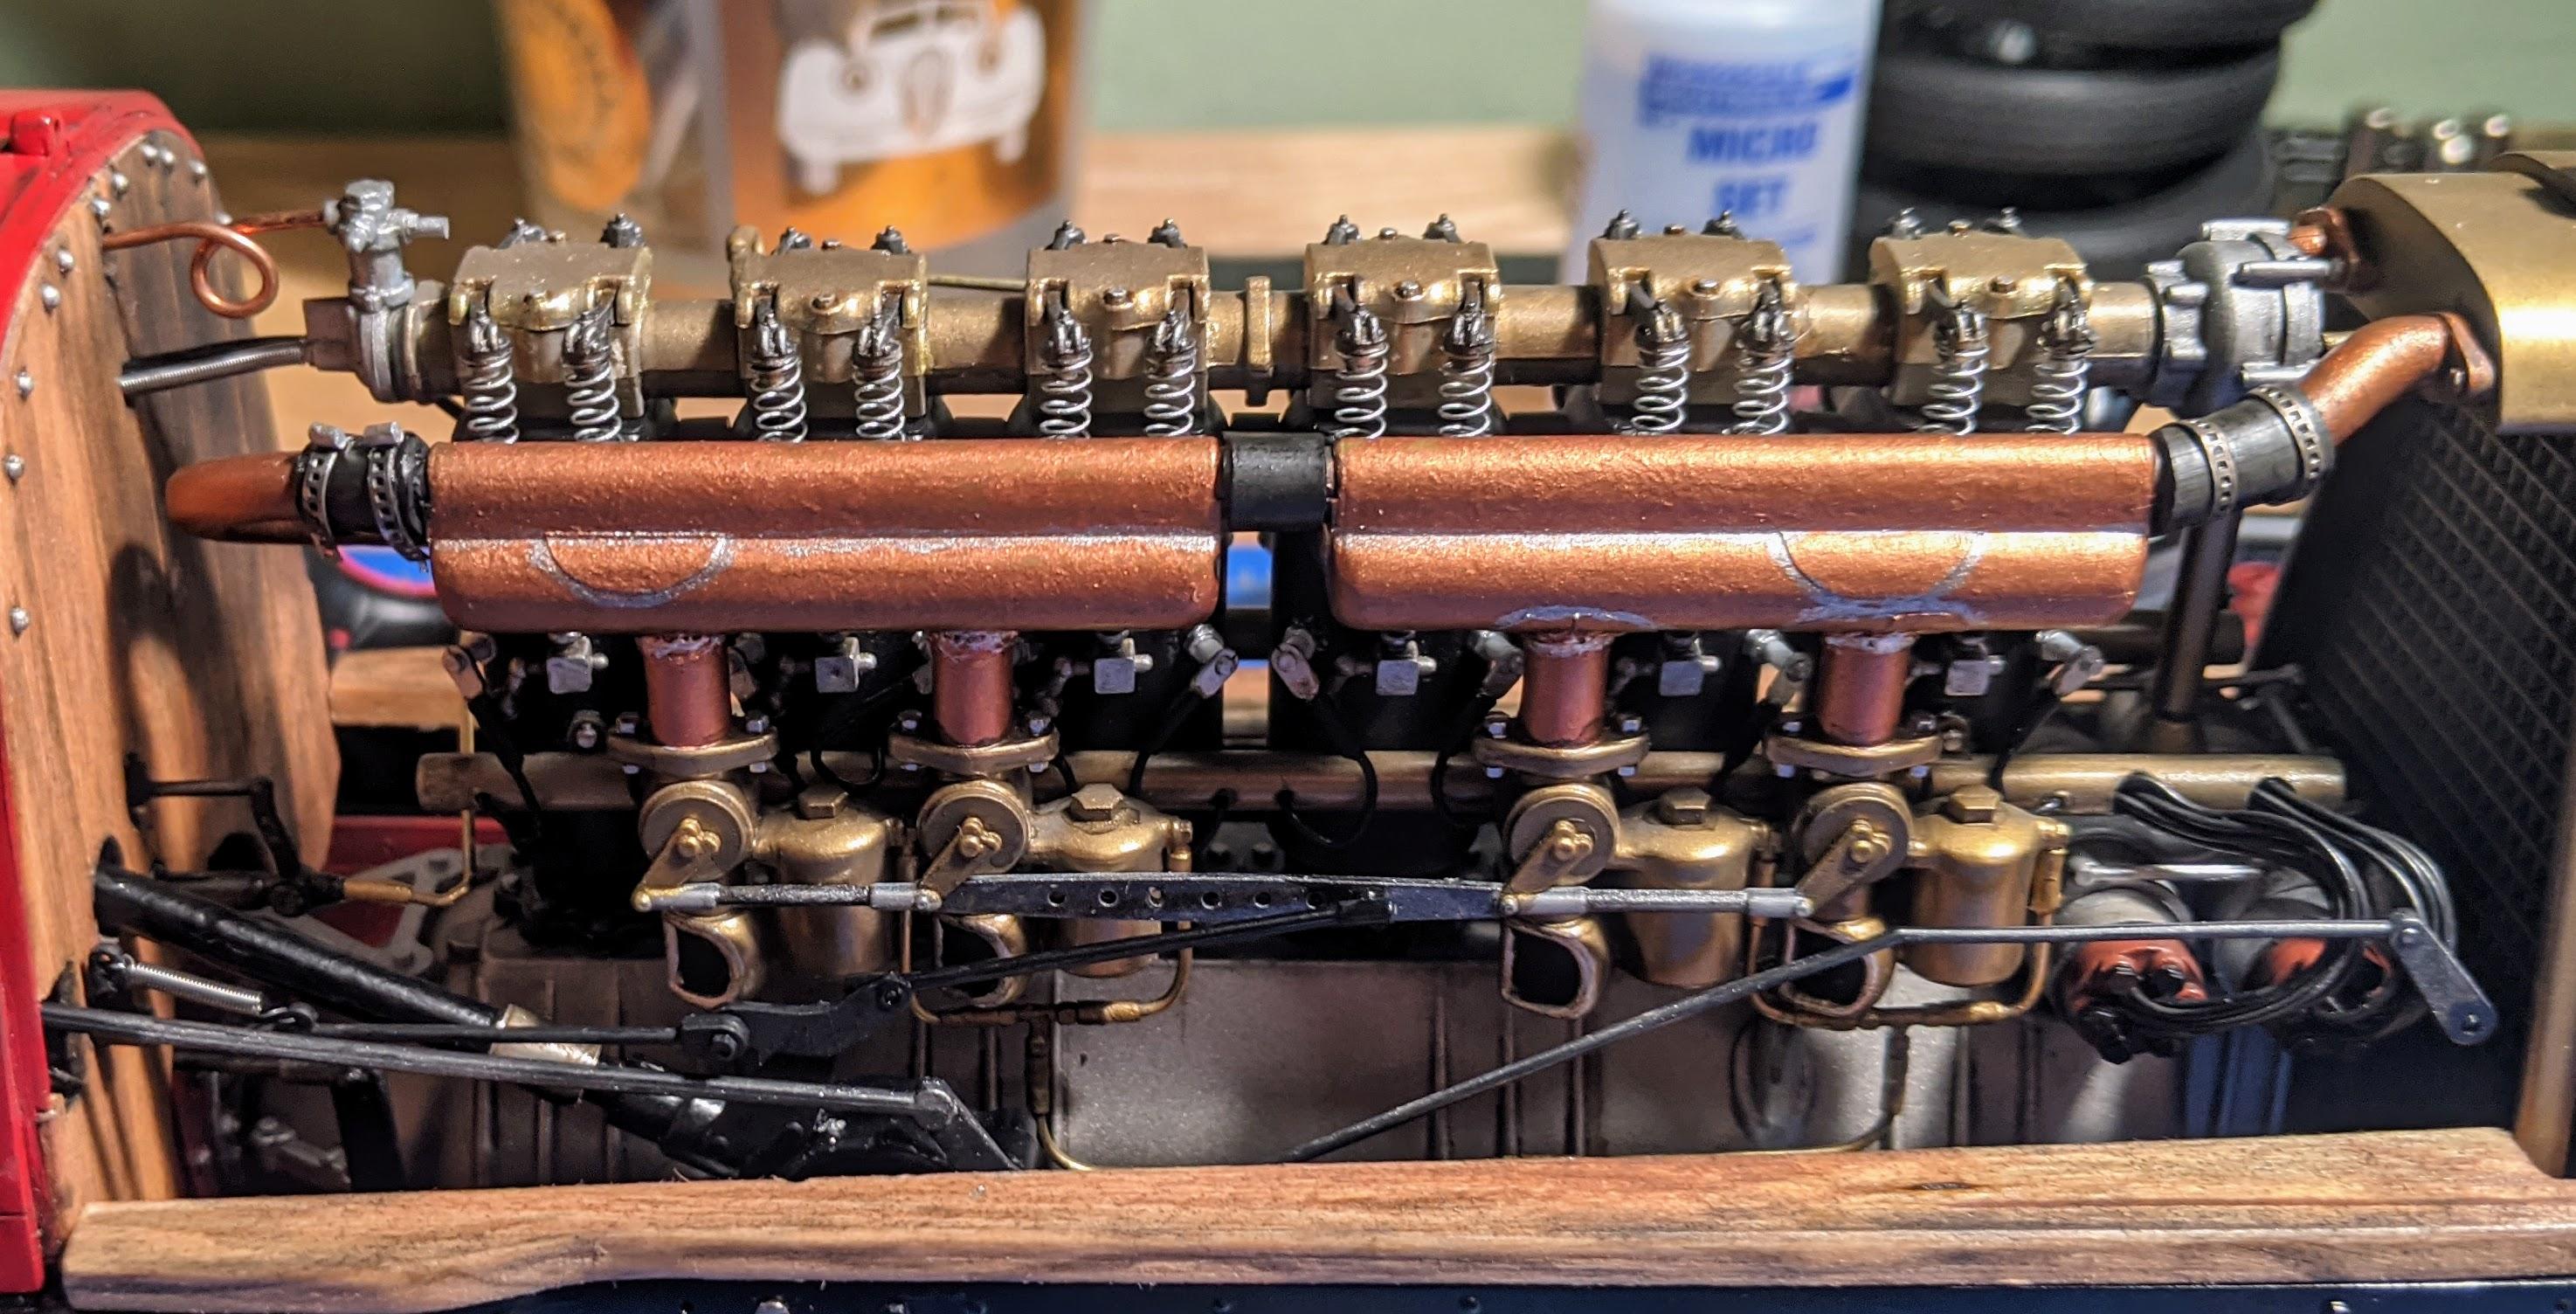
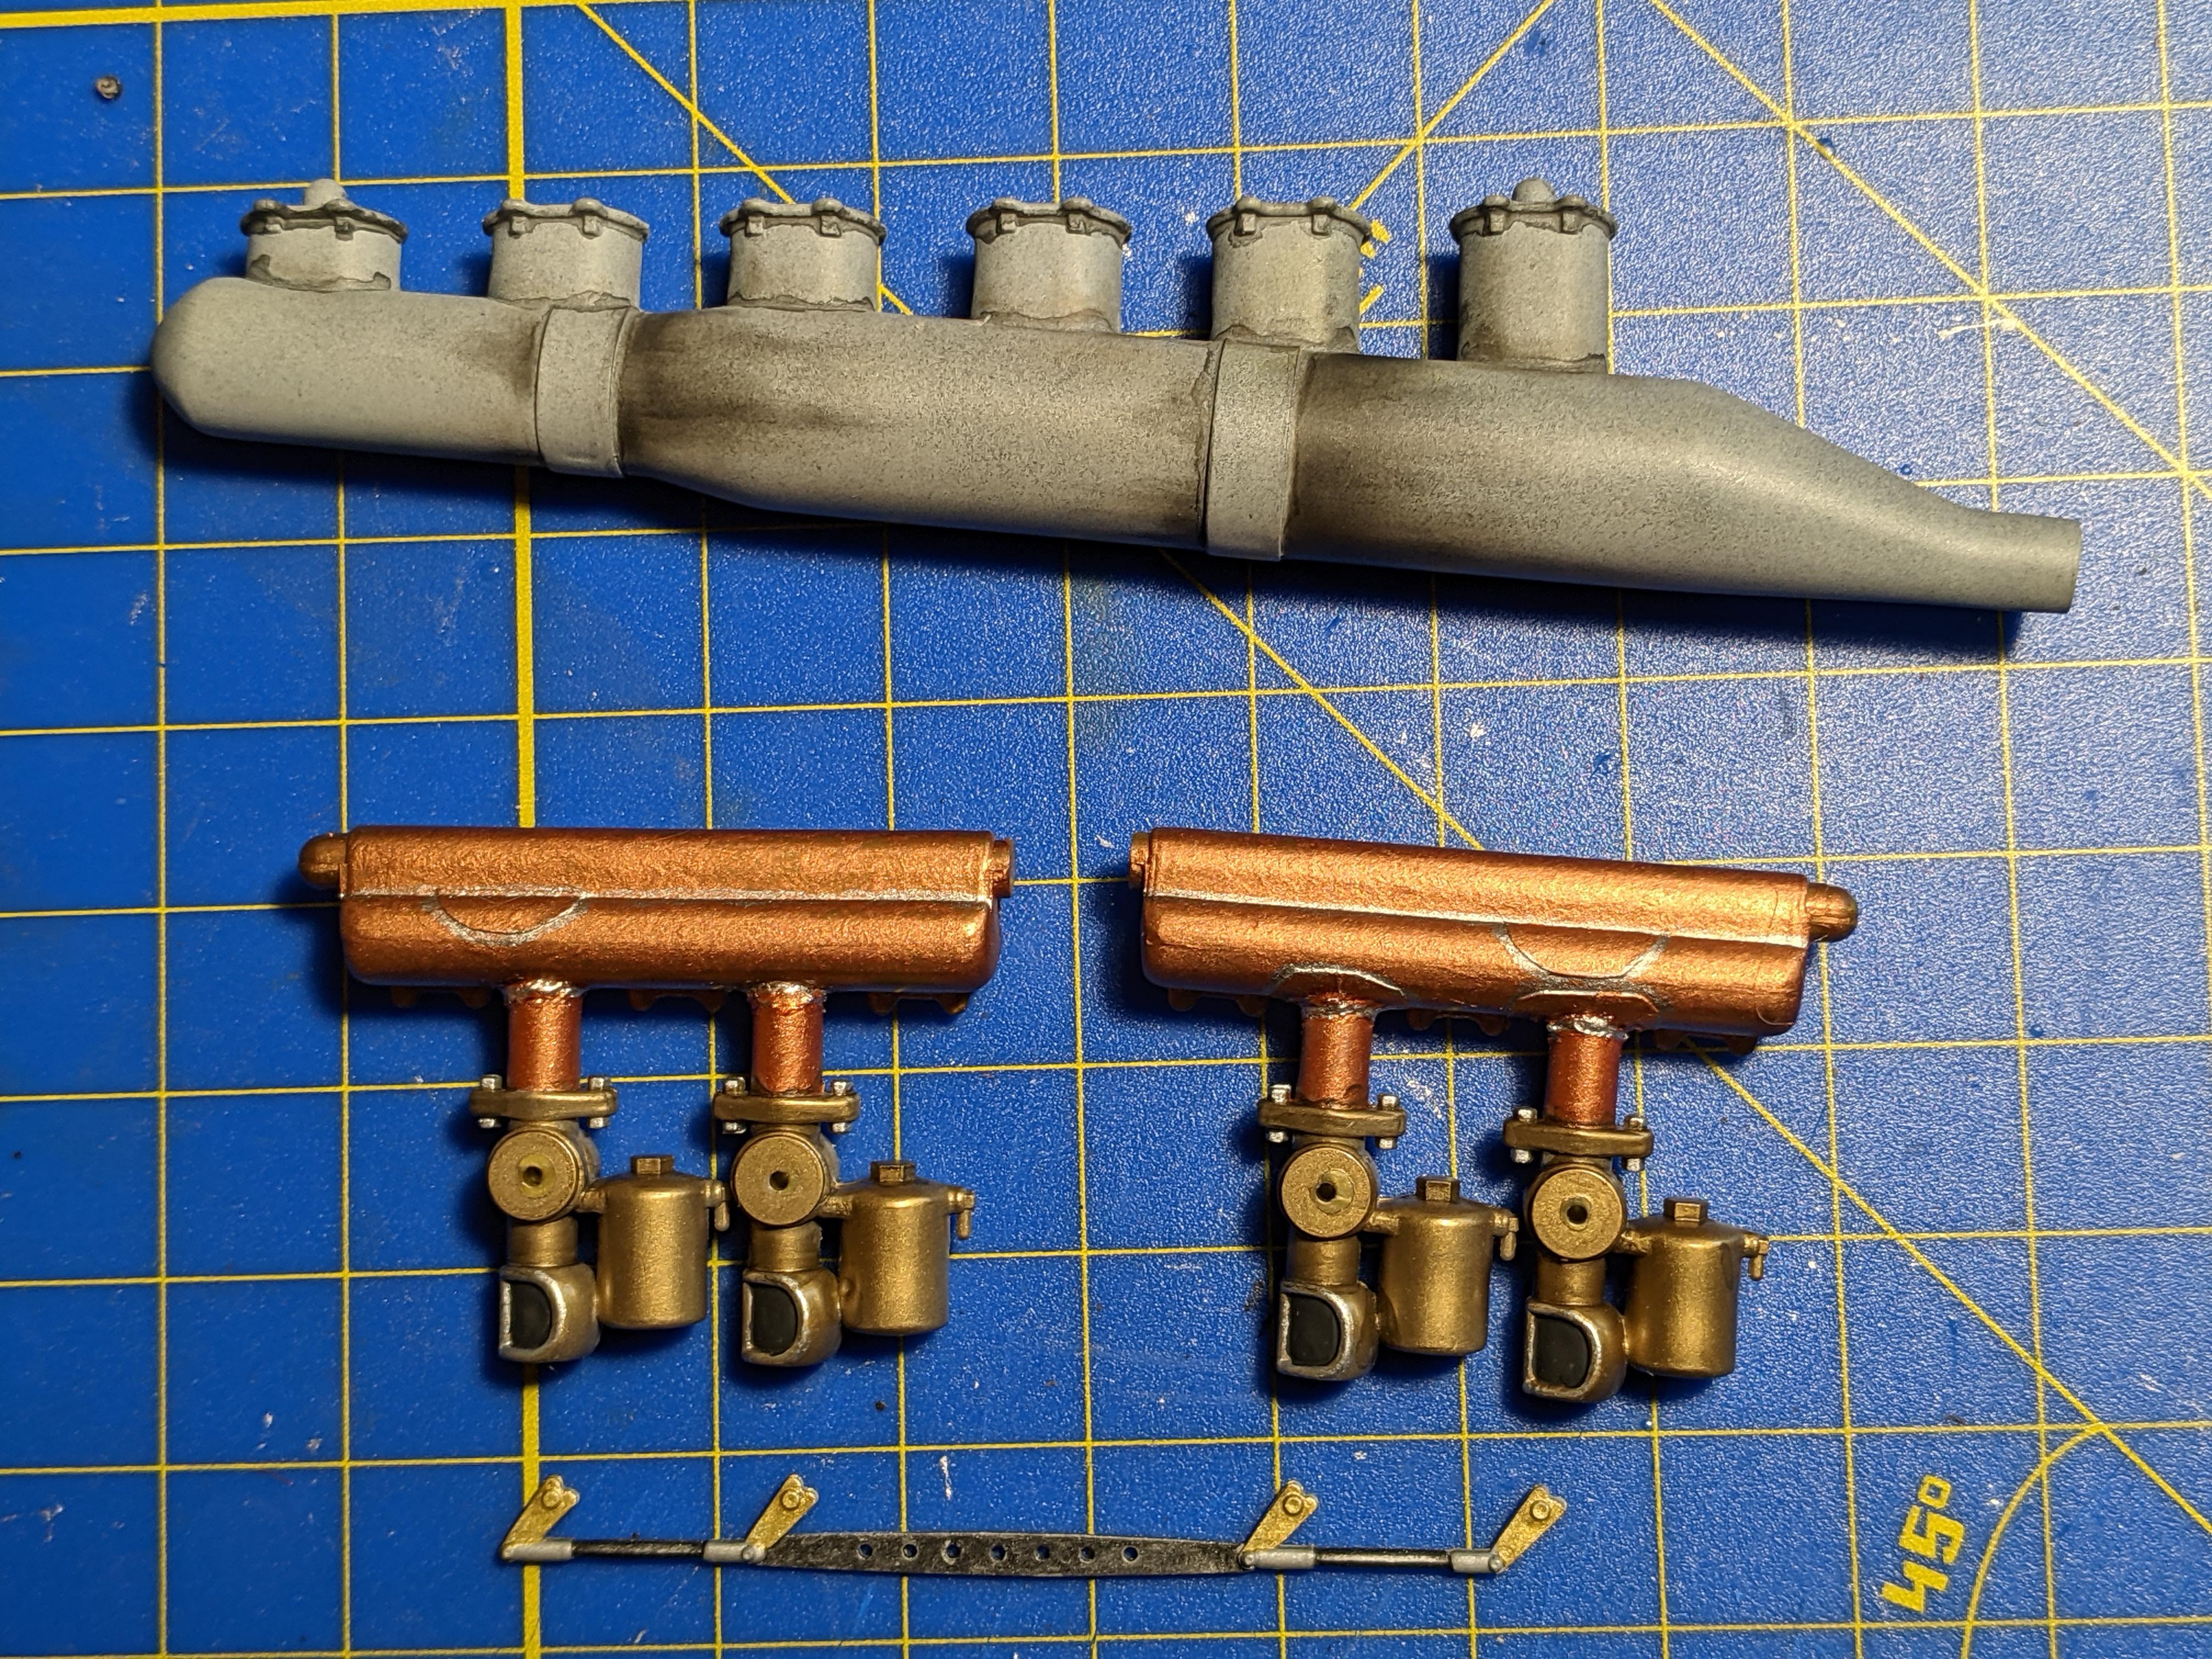
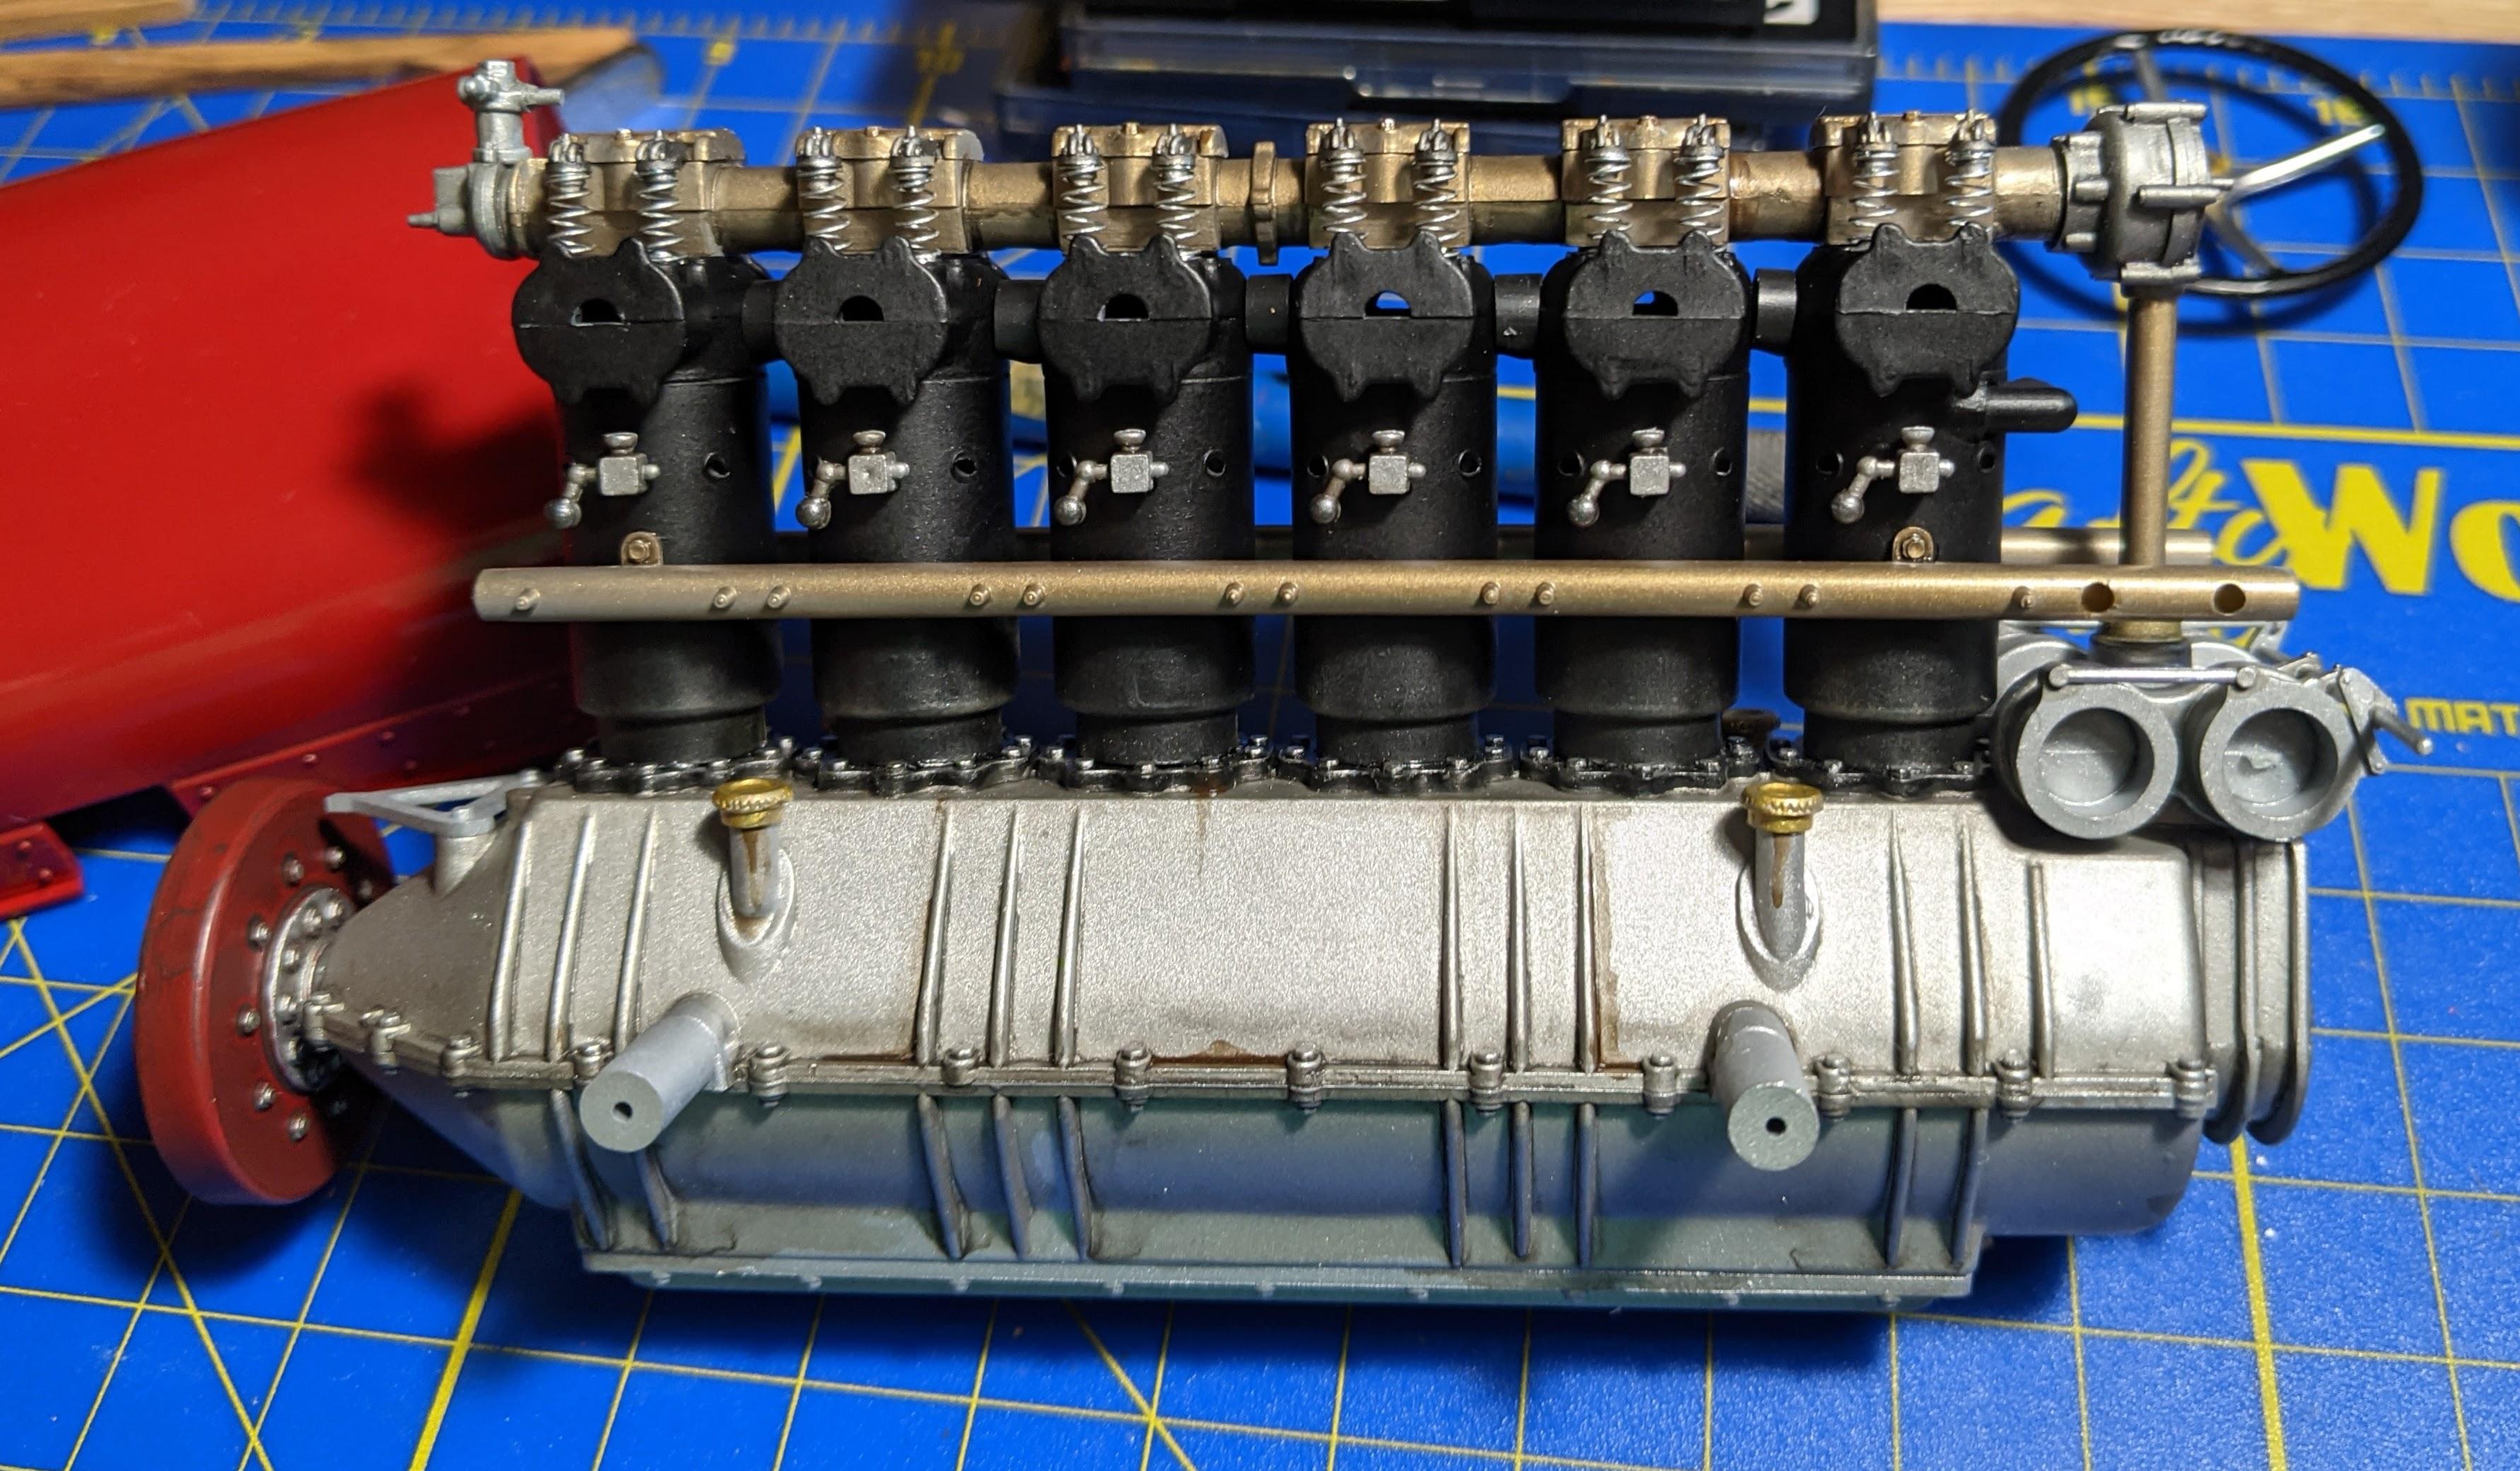
Next was the intake and exhaust... the 1:1's copper intake manifolds are pretty distinctive, with patched areas and visible solder joins. To represent that, I applied patches of extremely thin sheet styrene and textured the surface with Tamiya copper before applying a top coat of AK copper. Solder joins were done in thinned Tamiya flat aluminum. The exhaust manifold has visible and distinctive soot staining, that was reproduced with Tamiya Weathering Master soot. The cooling pipes on the passenger side were done with kit tubing and PE clamps. I would actually not glue this assembly at this point, since it will probably need tweaking to clear the frame rail after install. More pics soon, and any questions/comments as always are welcome!
-
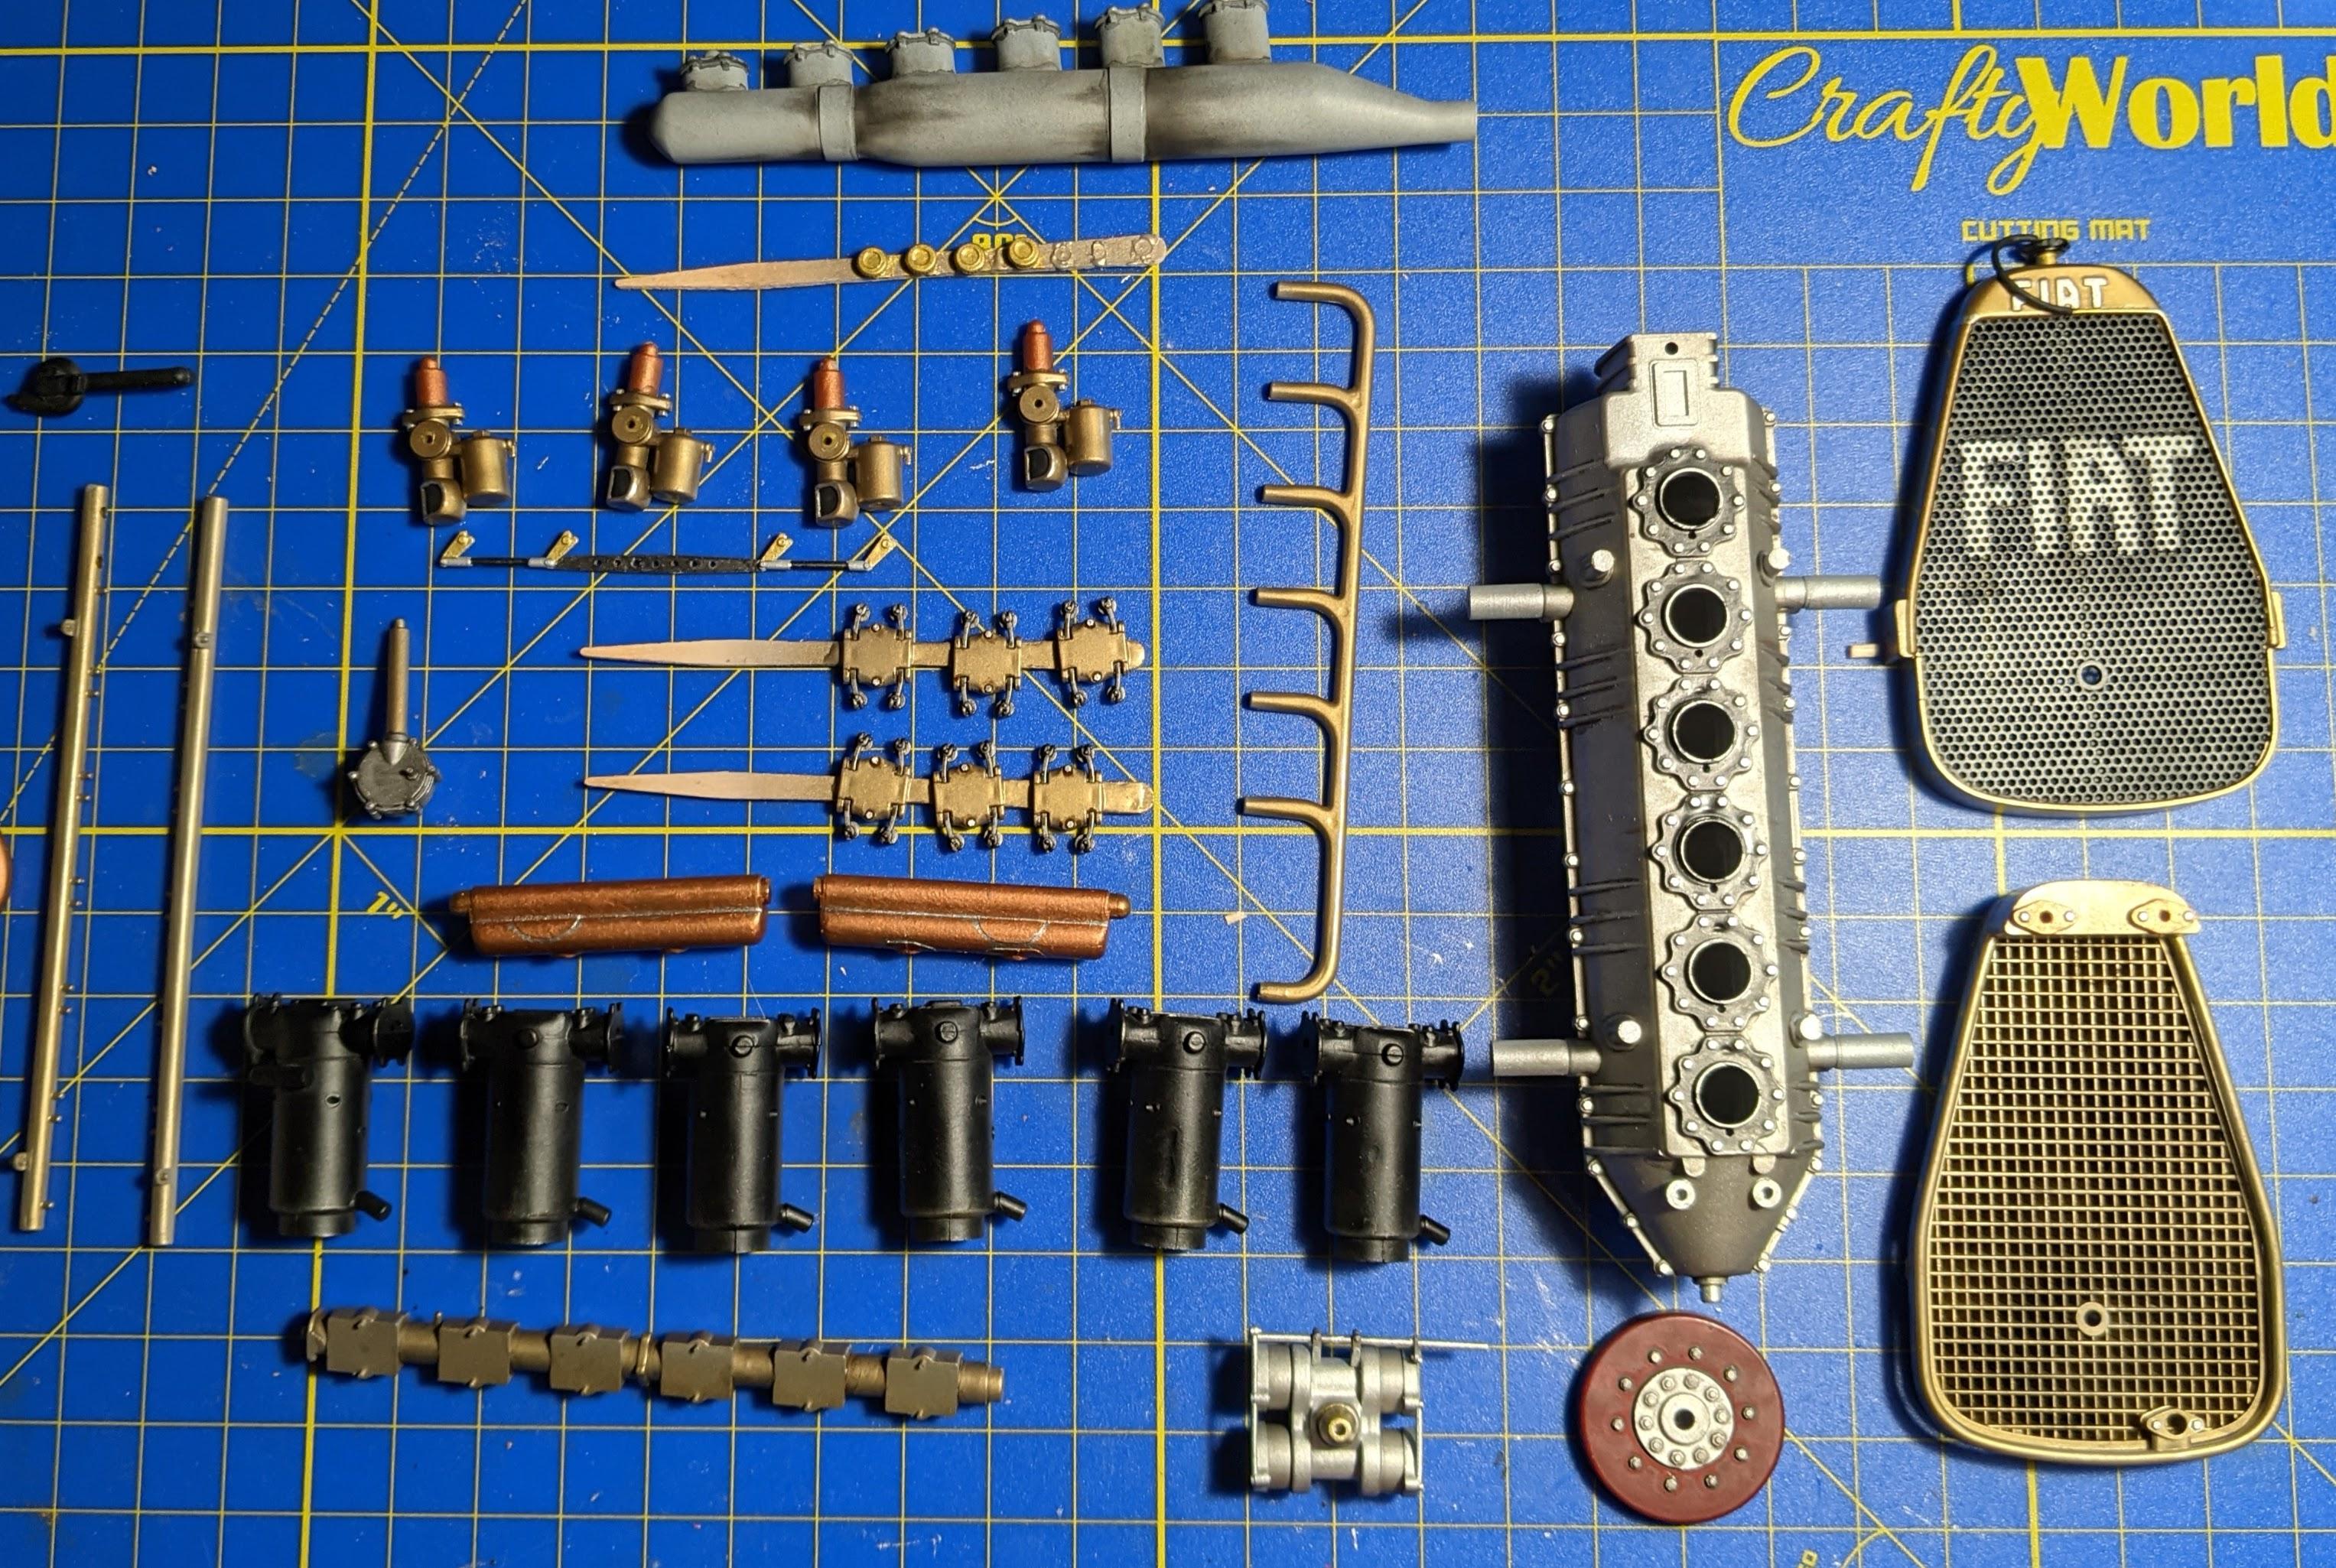
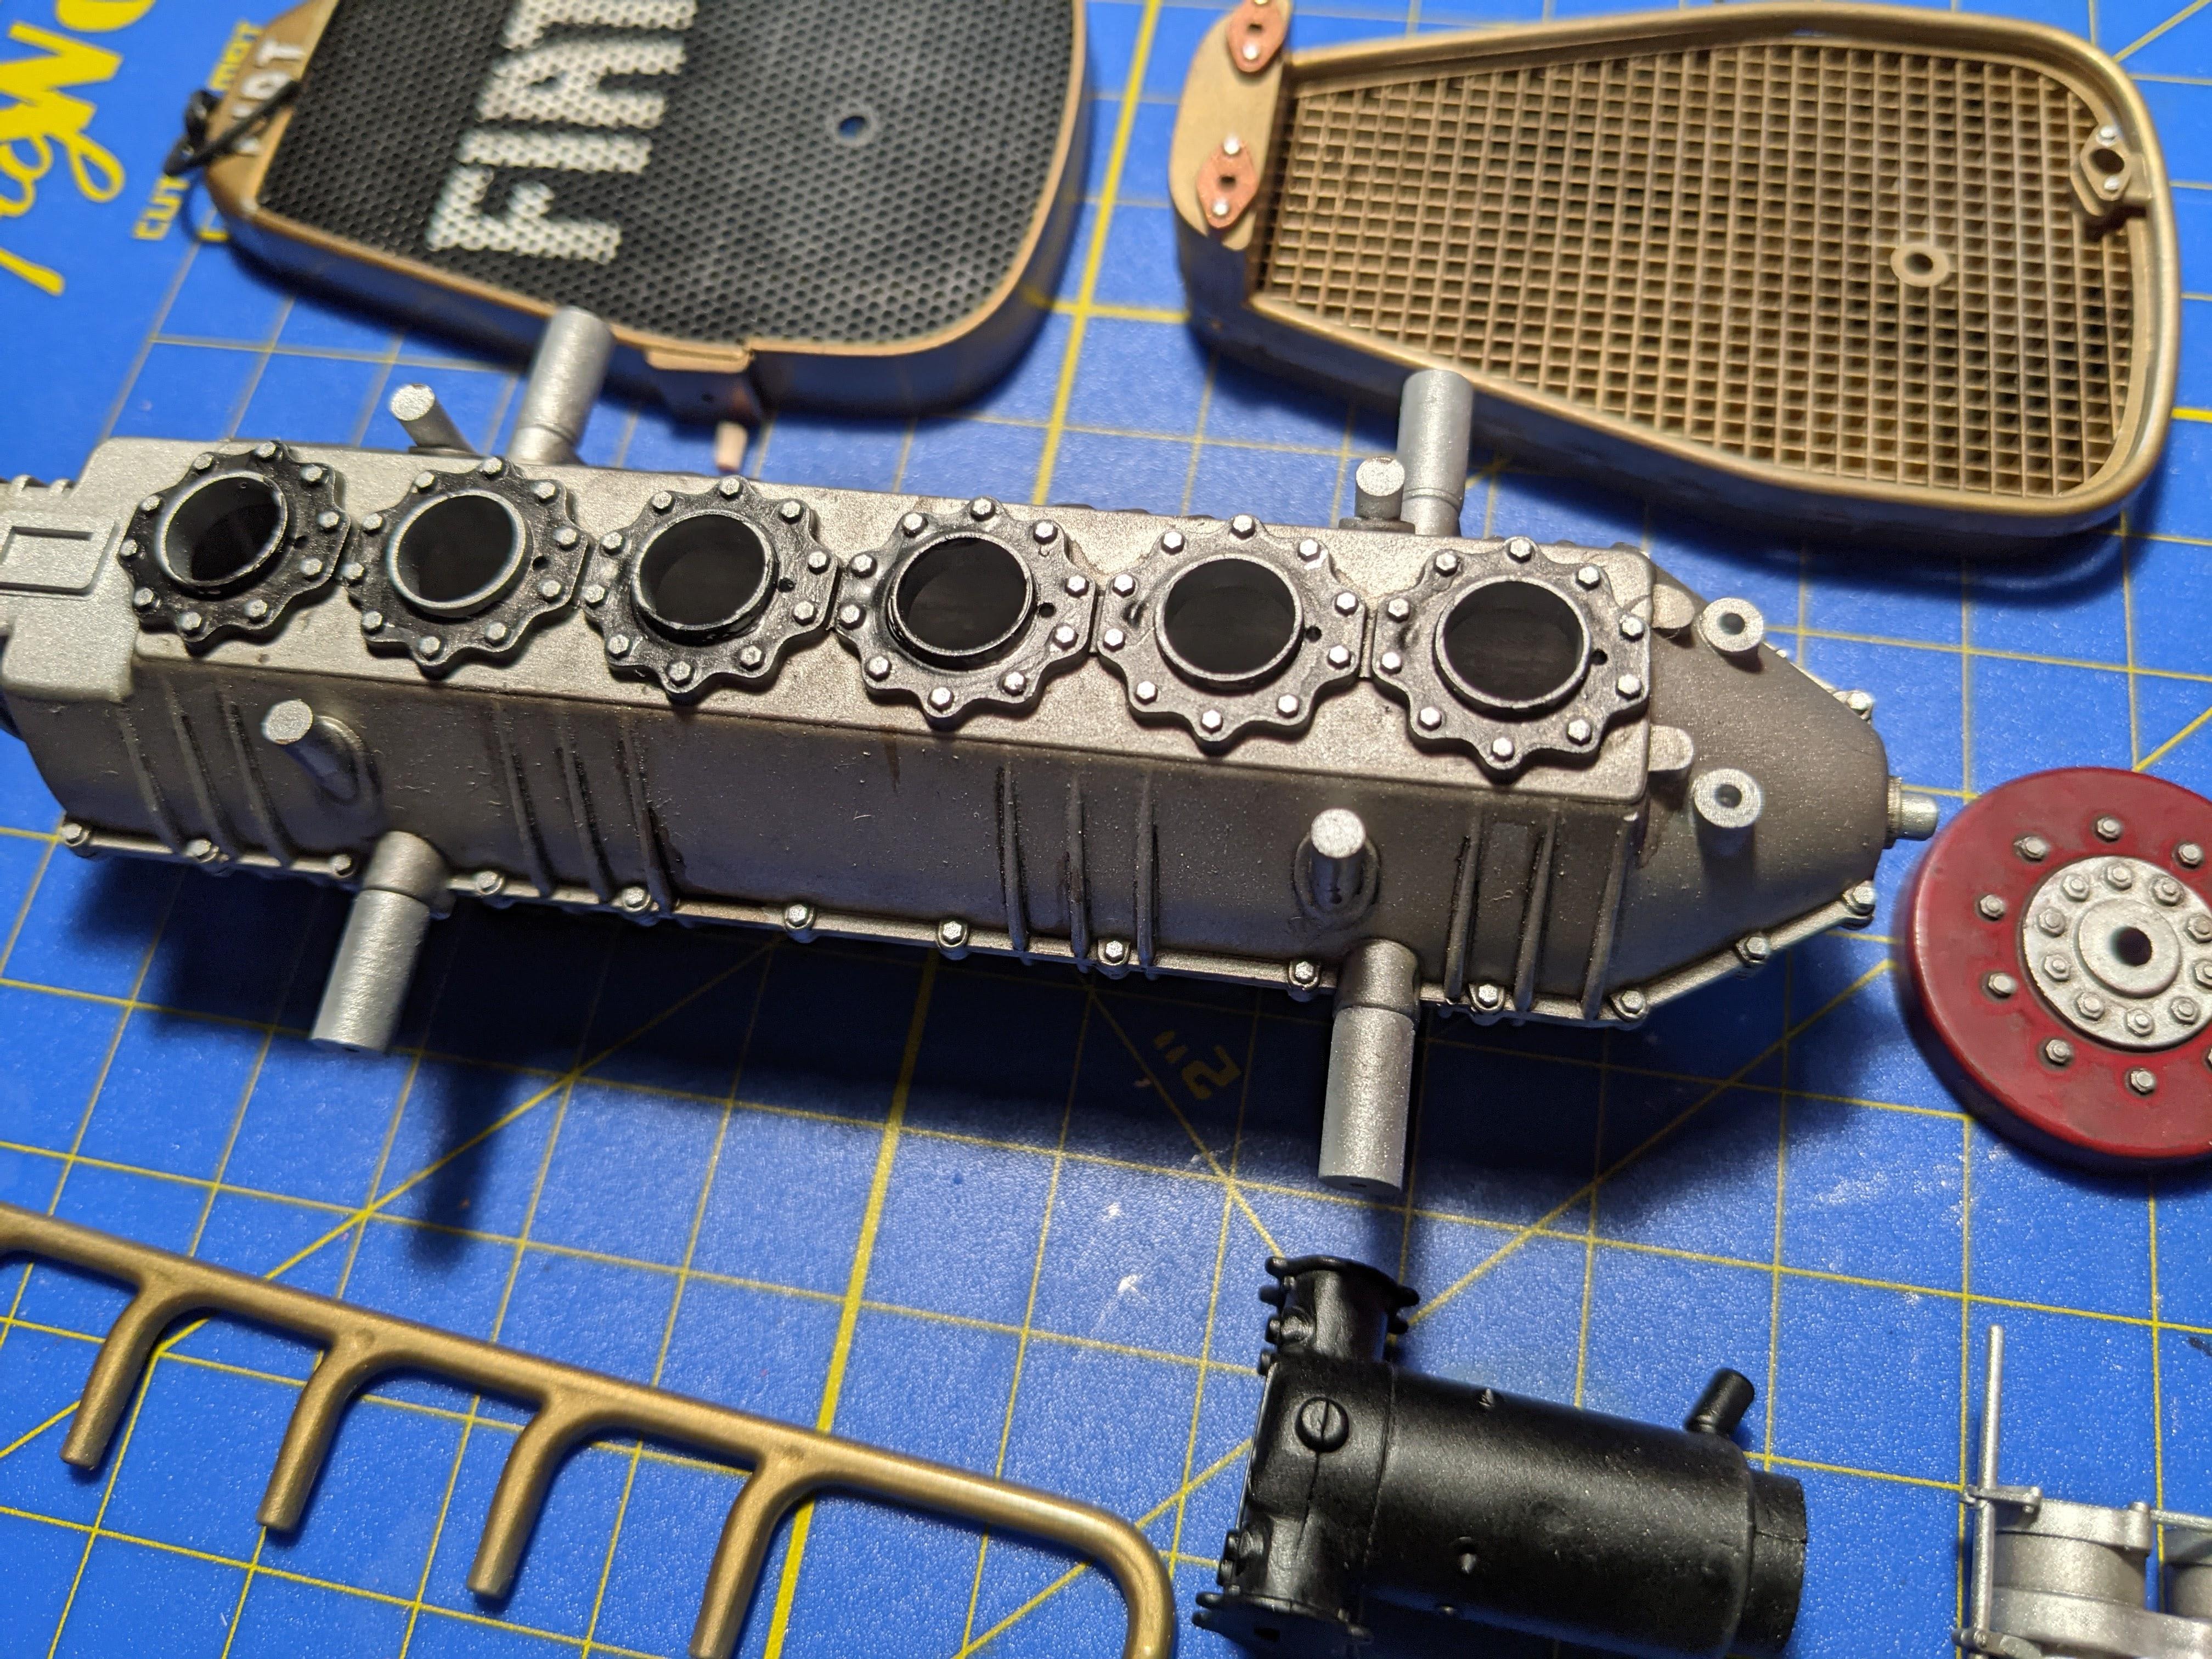
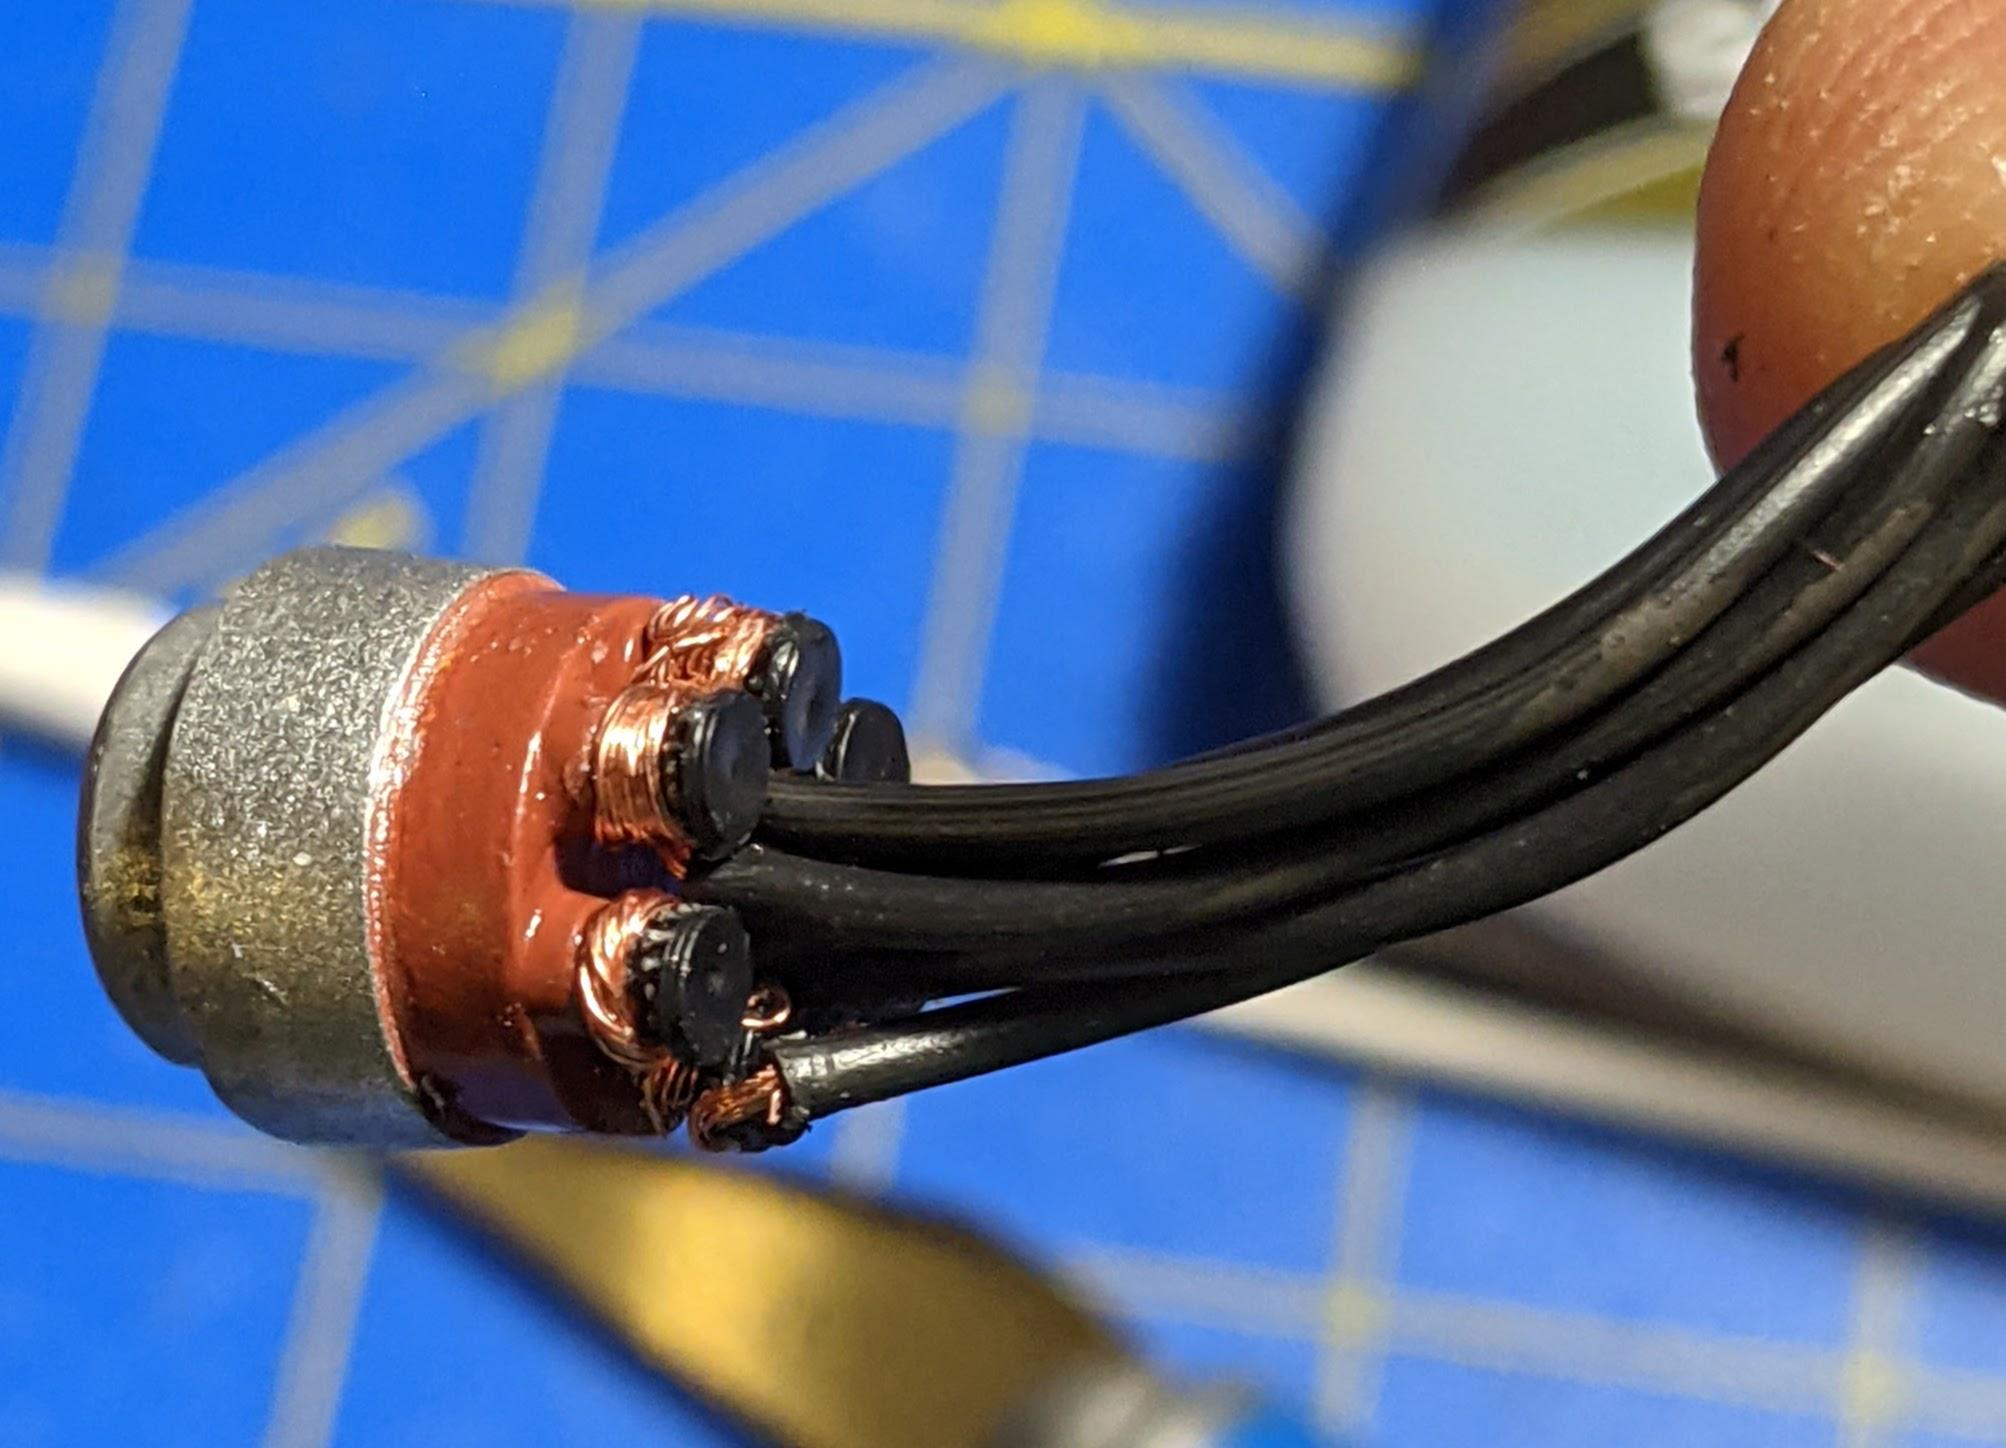
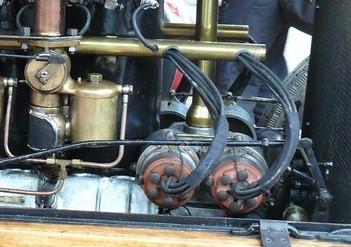
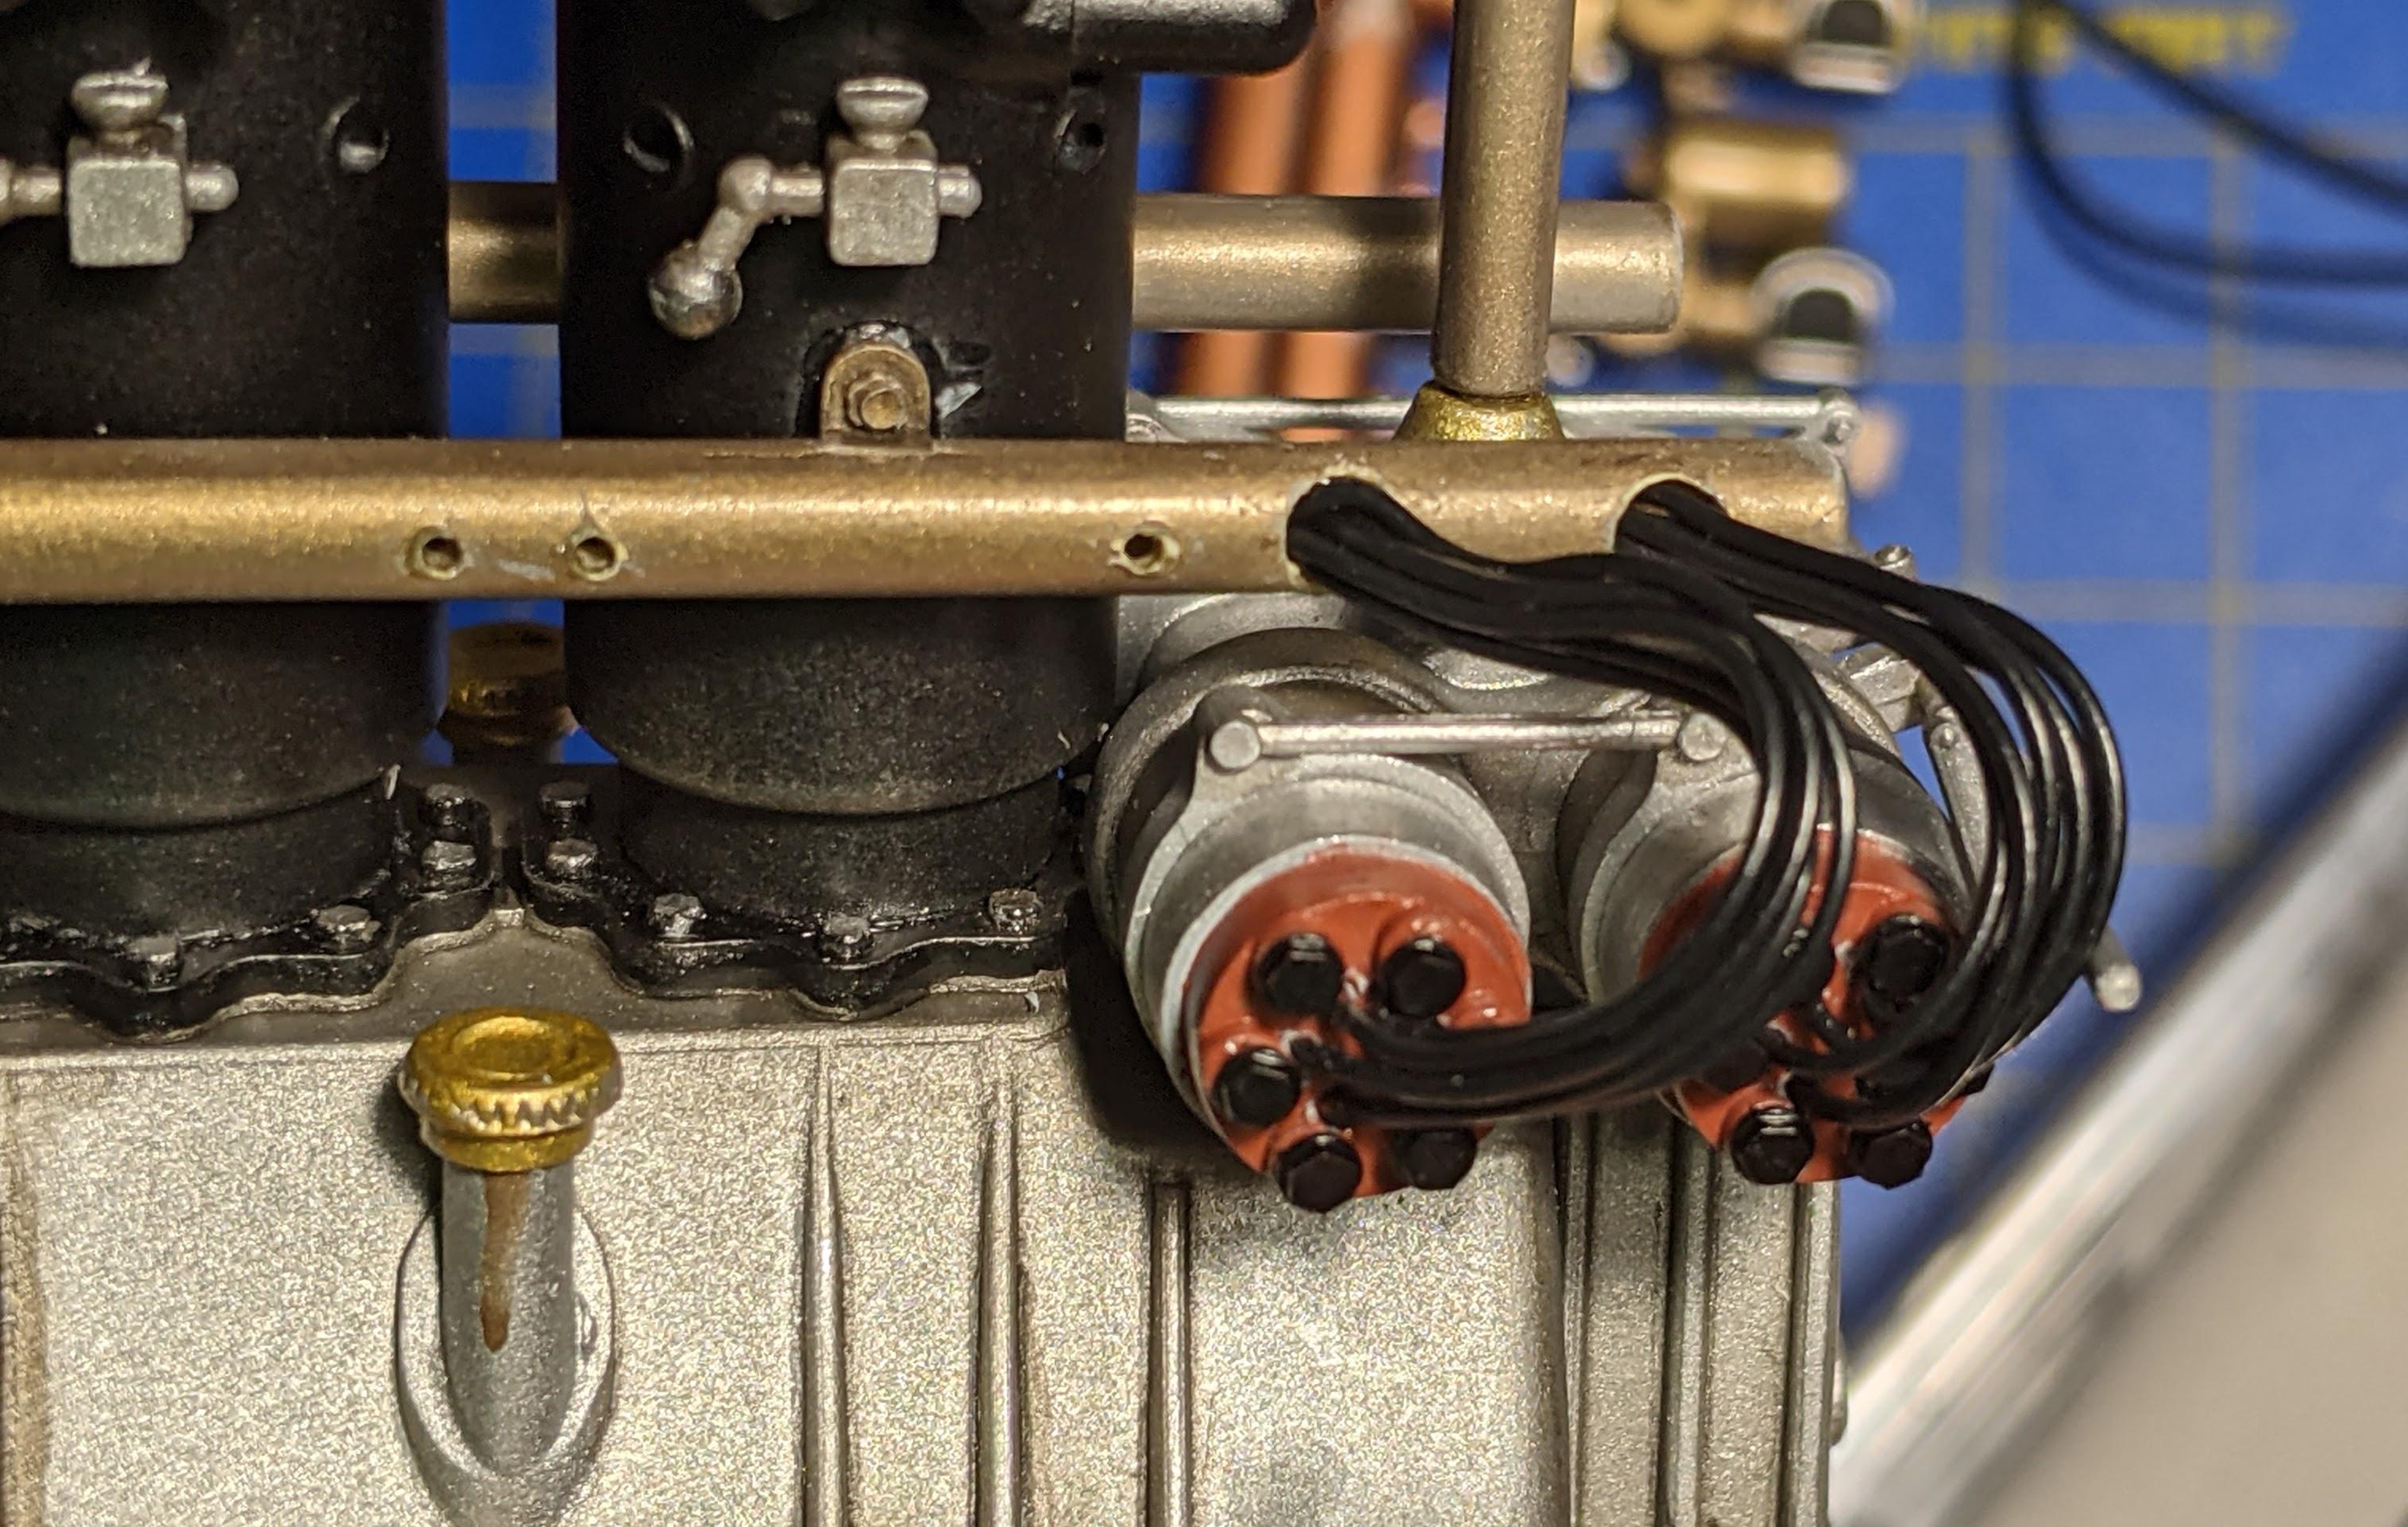
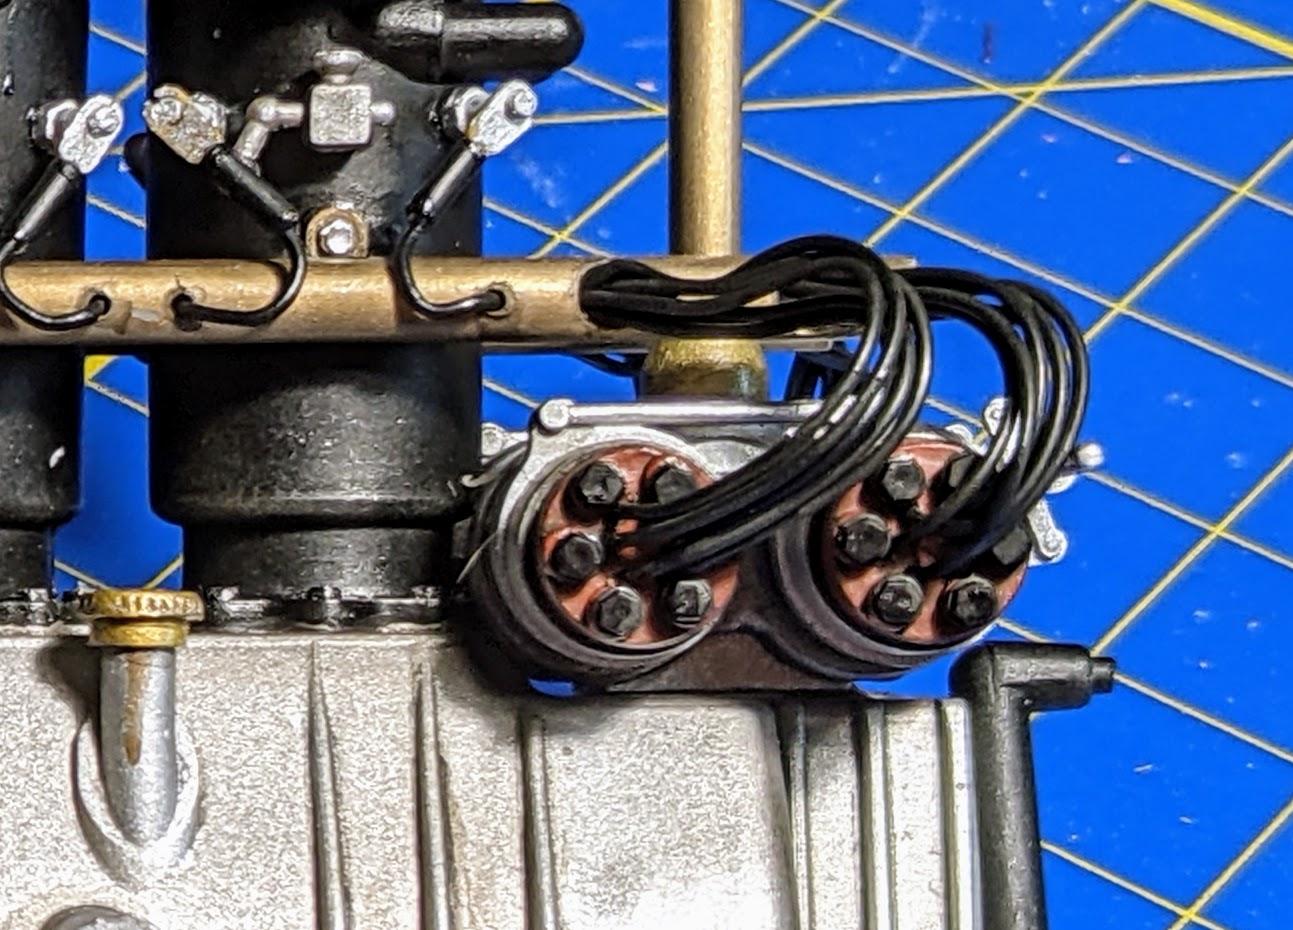
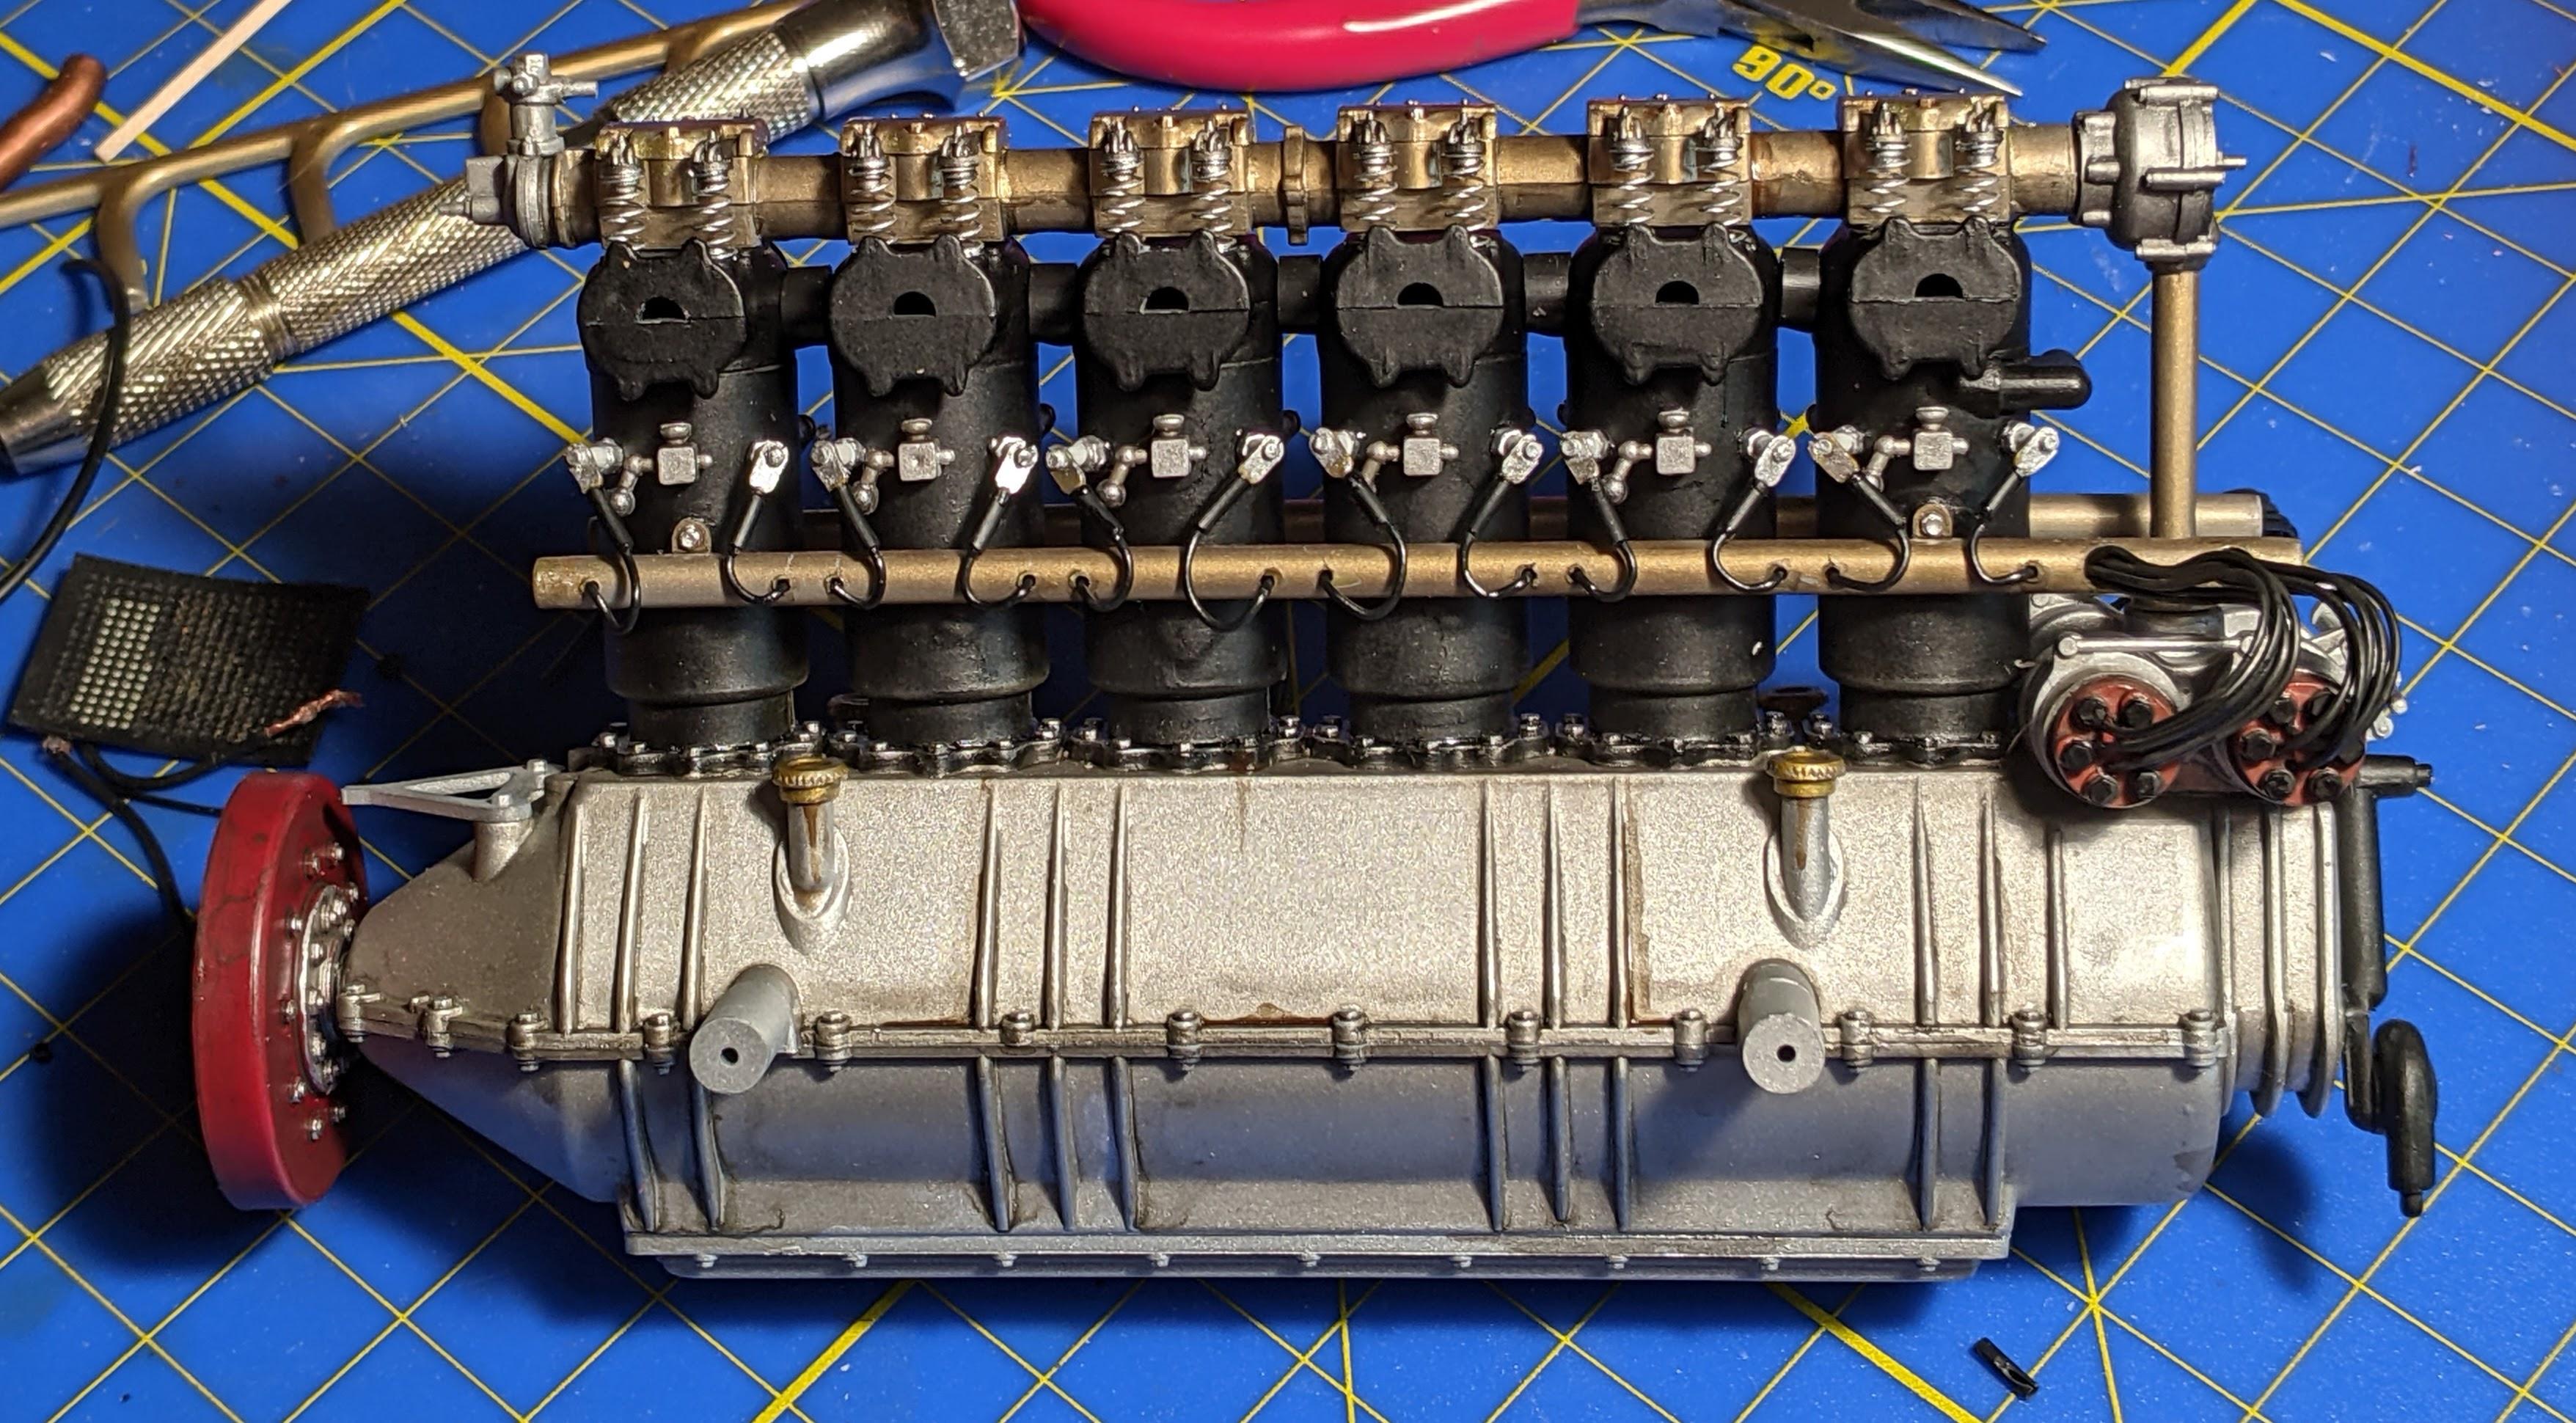
Thanks Tim! I've definitely kept it going... lots of building, some picture-taking, and now an update. The massive engine was a 316bhp, 21.7 litre Fiat aircraft engine purchased to replace the blown original by the builder, Ernest Eldridge. The detail on the kit's parts is extremely nice, but the execution is often a little lacking. Sink marks were filled and everything was airbrushed in Tamiya acrylics and AK Interactive Extreme Metal enamels. Next was the assembly of the cylinder barrels and the cam/rocker unit. Italeri provides springs, which I chose to use after applying primer and a coat of Tamiya chrome silver to add some thickness to the kit springs. At this point it looks good but there's much more to come! Italeri's ignition wiring is awful. The wires are insanely thick, and the attachment method involves stripping the ends off the wires, winding them around posts on the distributor cap, and then stripping the insulation off the other end and cramming the stripped ends into a too-small hole in the wire tubes on the sides of the motor. (yes, there are four distributors... 4 plugs for each of the 6 cylinders!) I built one up and decided it was awful and didn't look anything like the elegant original arrangement. Pic of the built-up distributor as Italeri would have you do it... ...And what the 1:1 distributors look like. I drilled holes just inside of the caps for thinner black wrapping wire and enlarged the holes in the wire tubes so the wiring would actually fit into the tubes. Much better! Next was the plugs and leads... with the thinner wrapping wire I was able to drill into the tubes so I could insert the ends of the leads into the tubes. Ignition system is a go!
-
It docks with a space station that looks suspiciously like a Smart Jet compressor.
-
So is Onyx asking you to rub his belly or daring you to rub his belly?
-
It does in my world.