jaymcminn
-
Posts
1,762 -
Joined
-
Last visited
Content Type
Profiles
Forums
Events
Gallery
Everything posted by jaymcminn
-
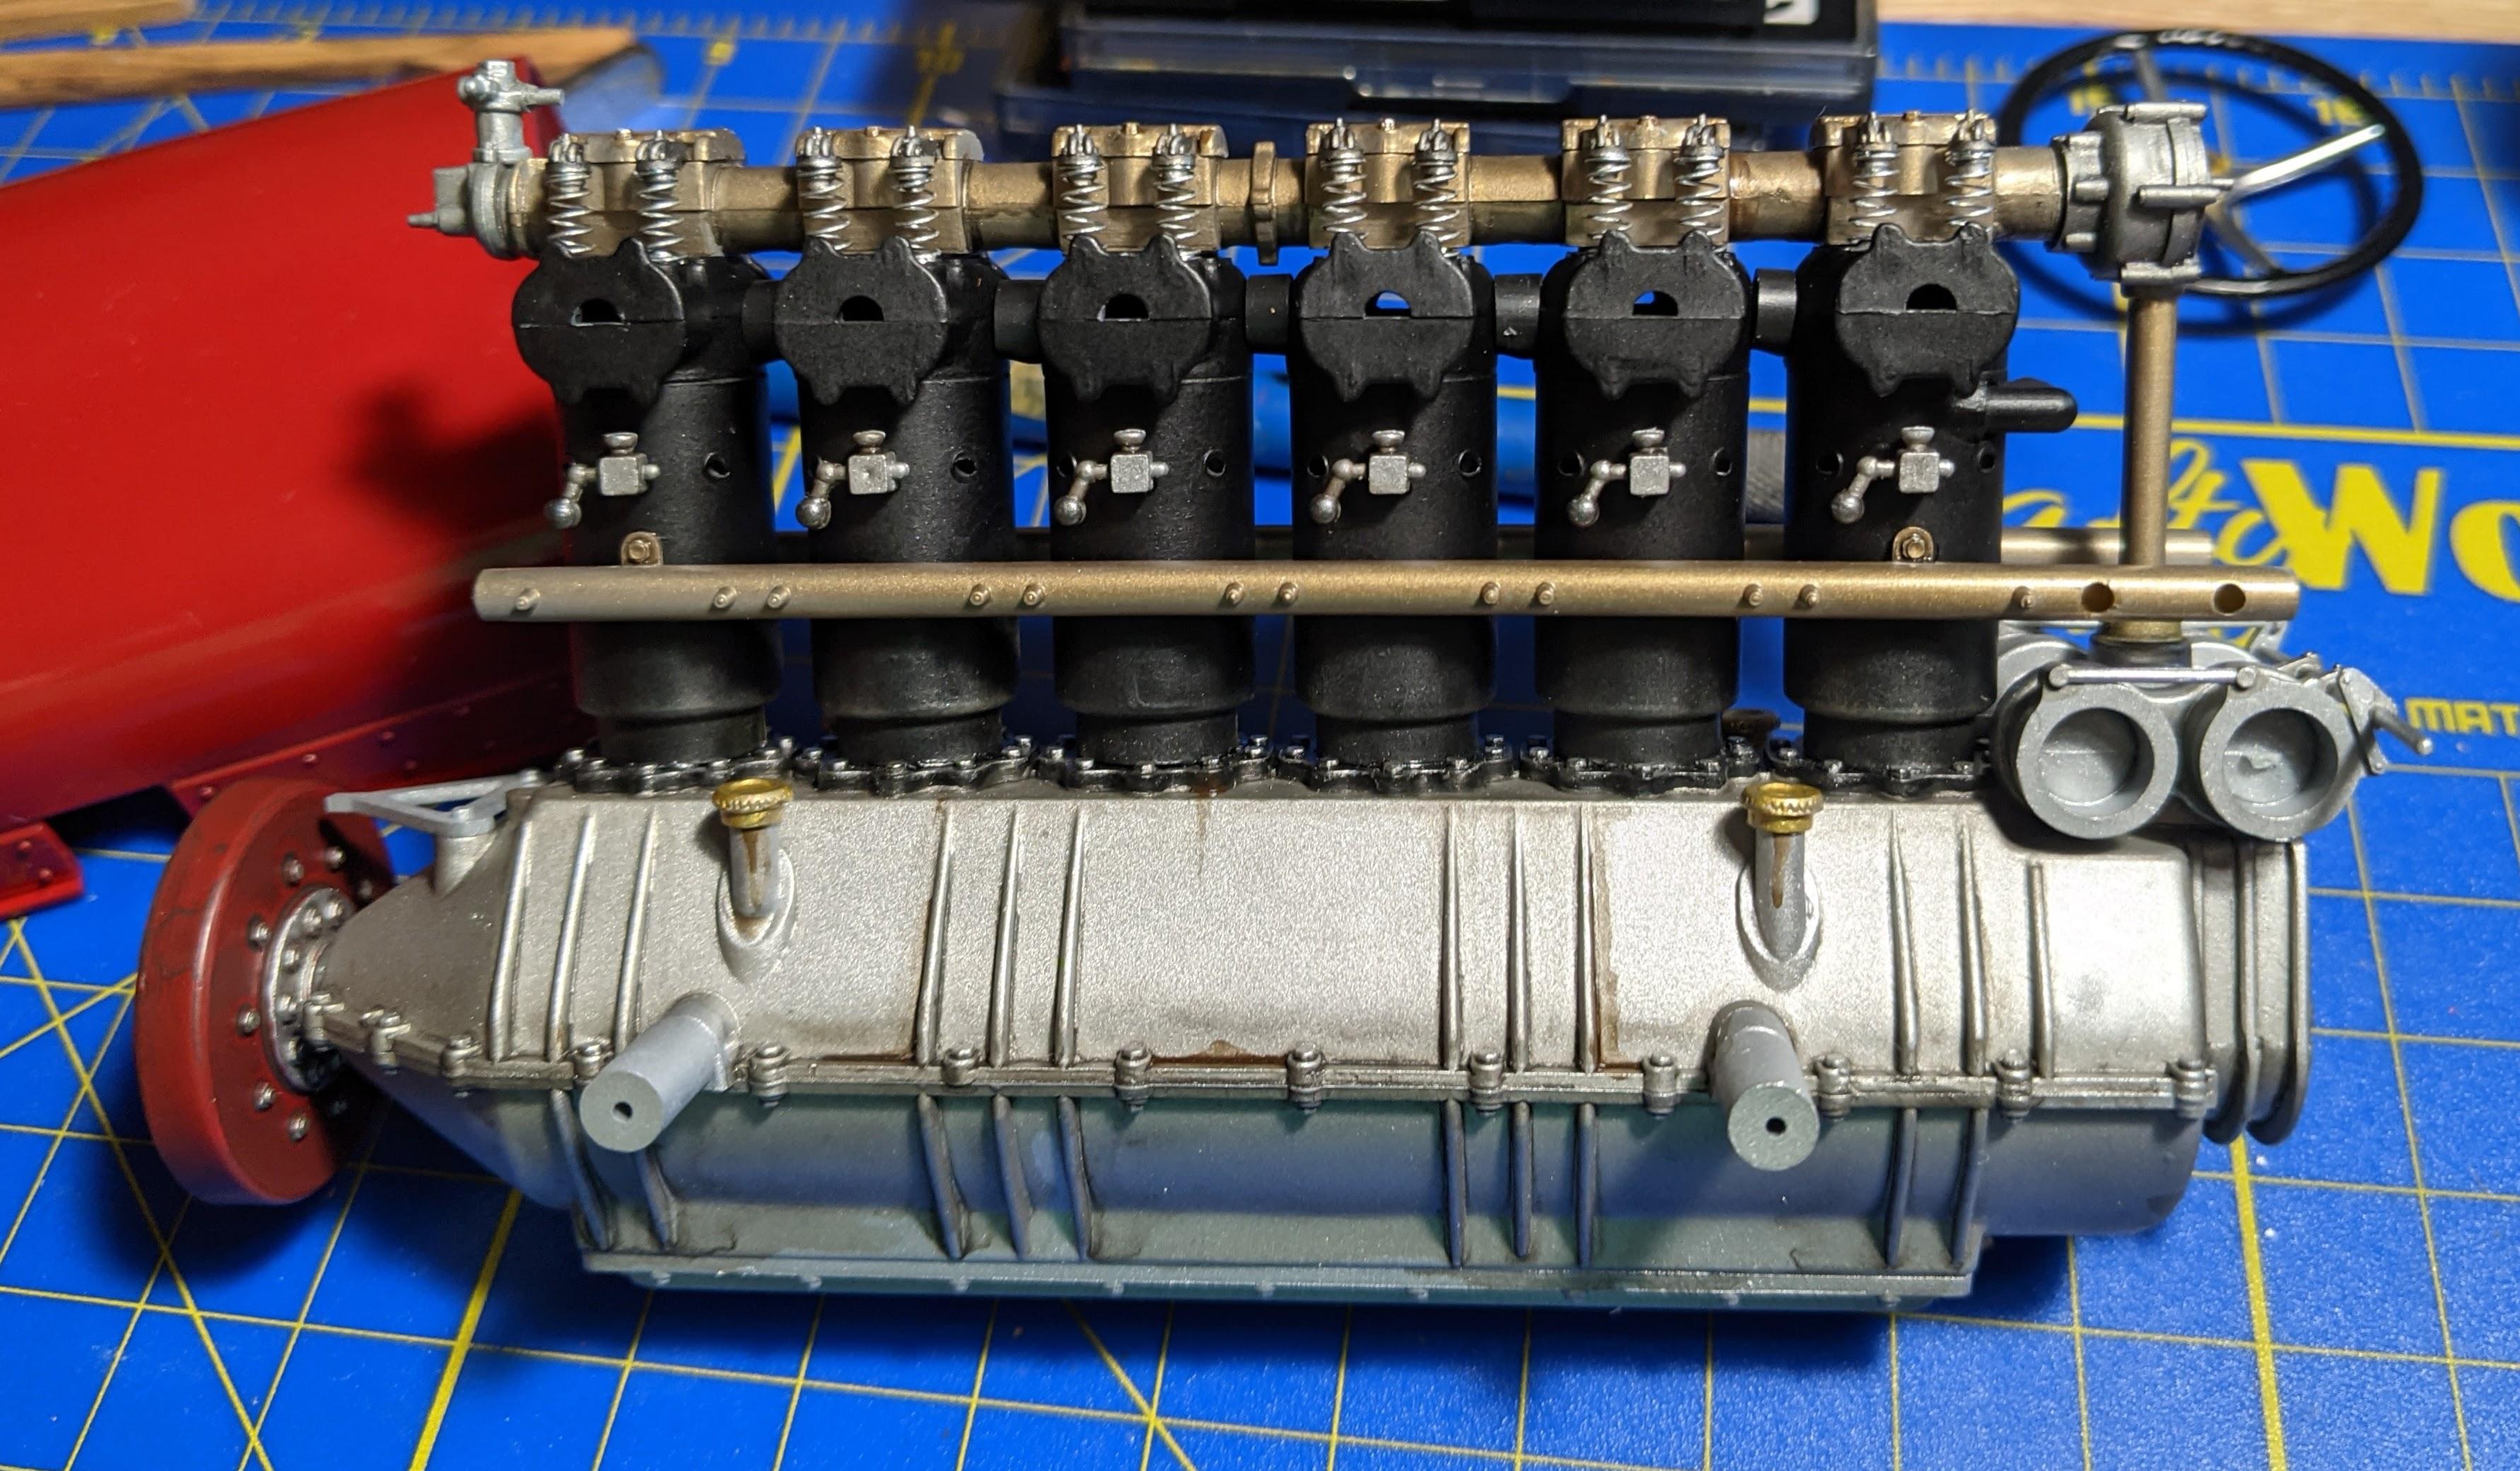
 I'm actually a little ahead of these pics at this point. I wound up using brass rod for the piping instead of the copper stuff Italeri includes. I used the plastic t-junctions and the clear tube from the kit for the joins, but painted the clear tubing with acrylic brass after everything was together. The flexibility of the tubing at the joins was pretty helpful at times but I was sorely tempted to go with 1/16 tube for the joins. The kit instructions are truly woeful when it comes to this step, as you can imagine. I wound up just using photo references as much as possible. I did do all of the piping before installing the engine, I think it would have been much more difficult doing it once the engine was mounted.
 -
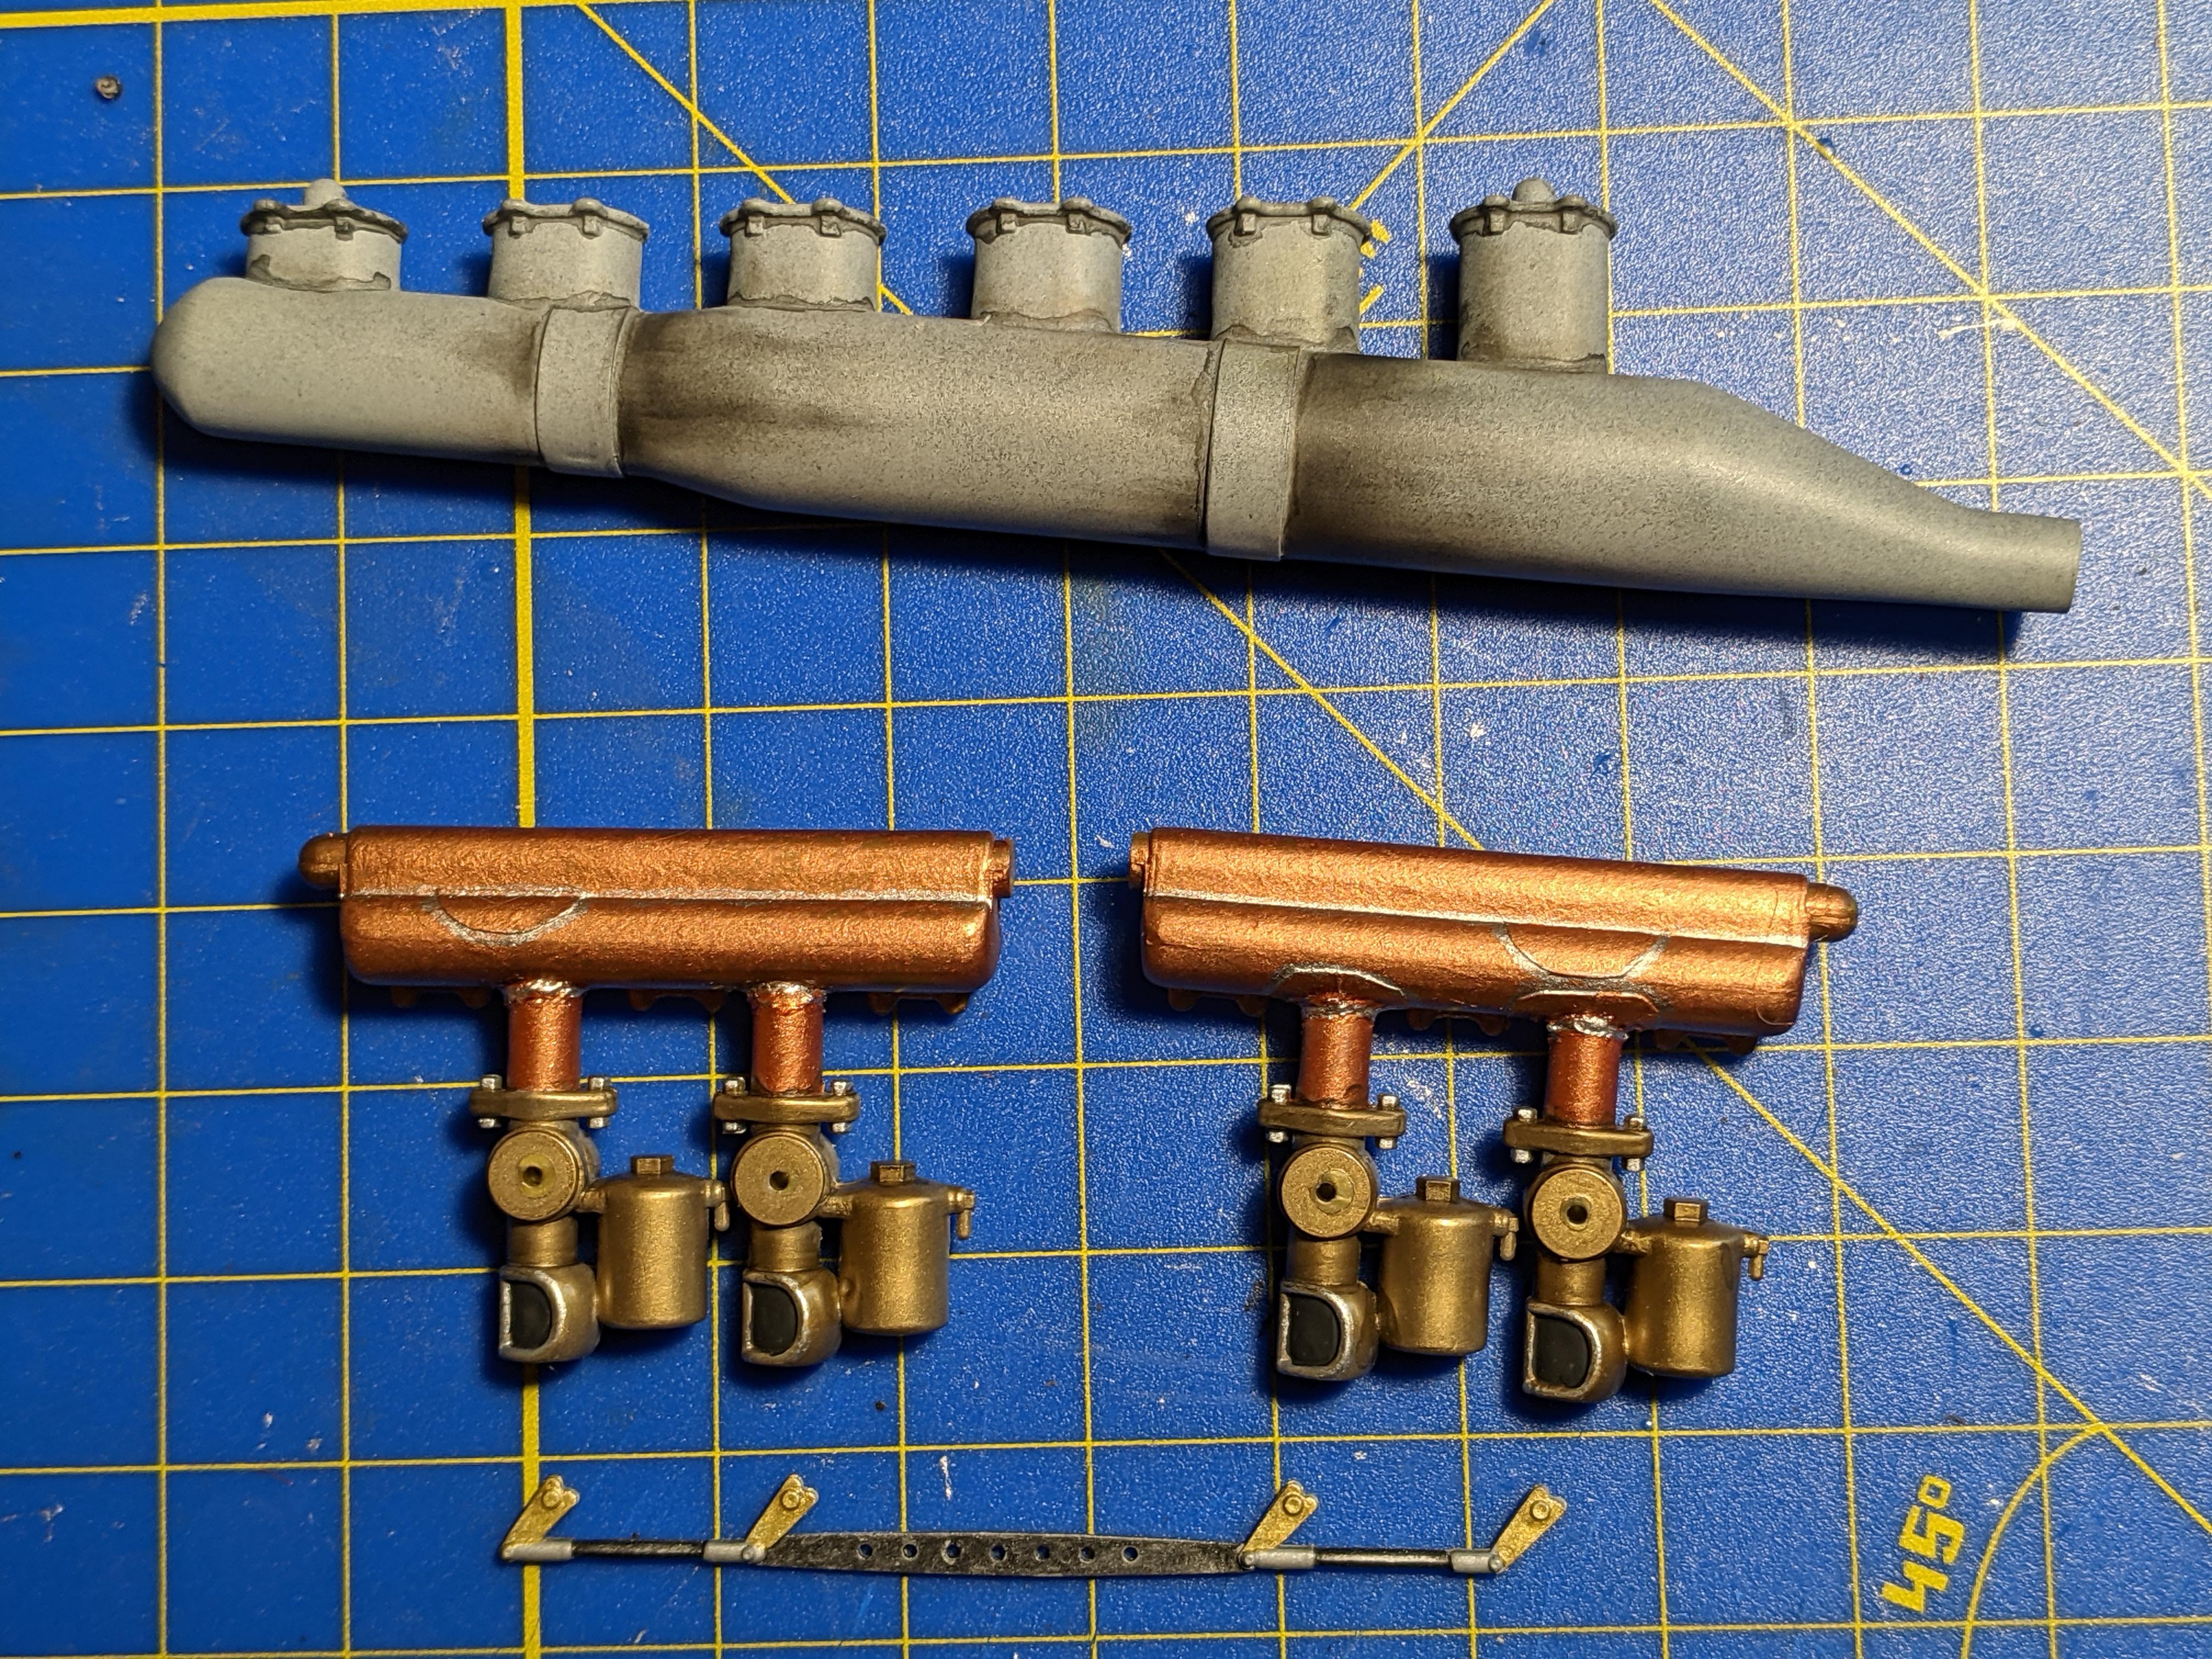
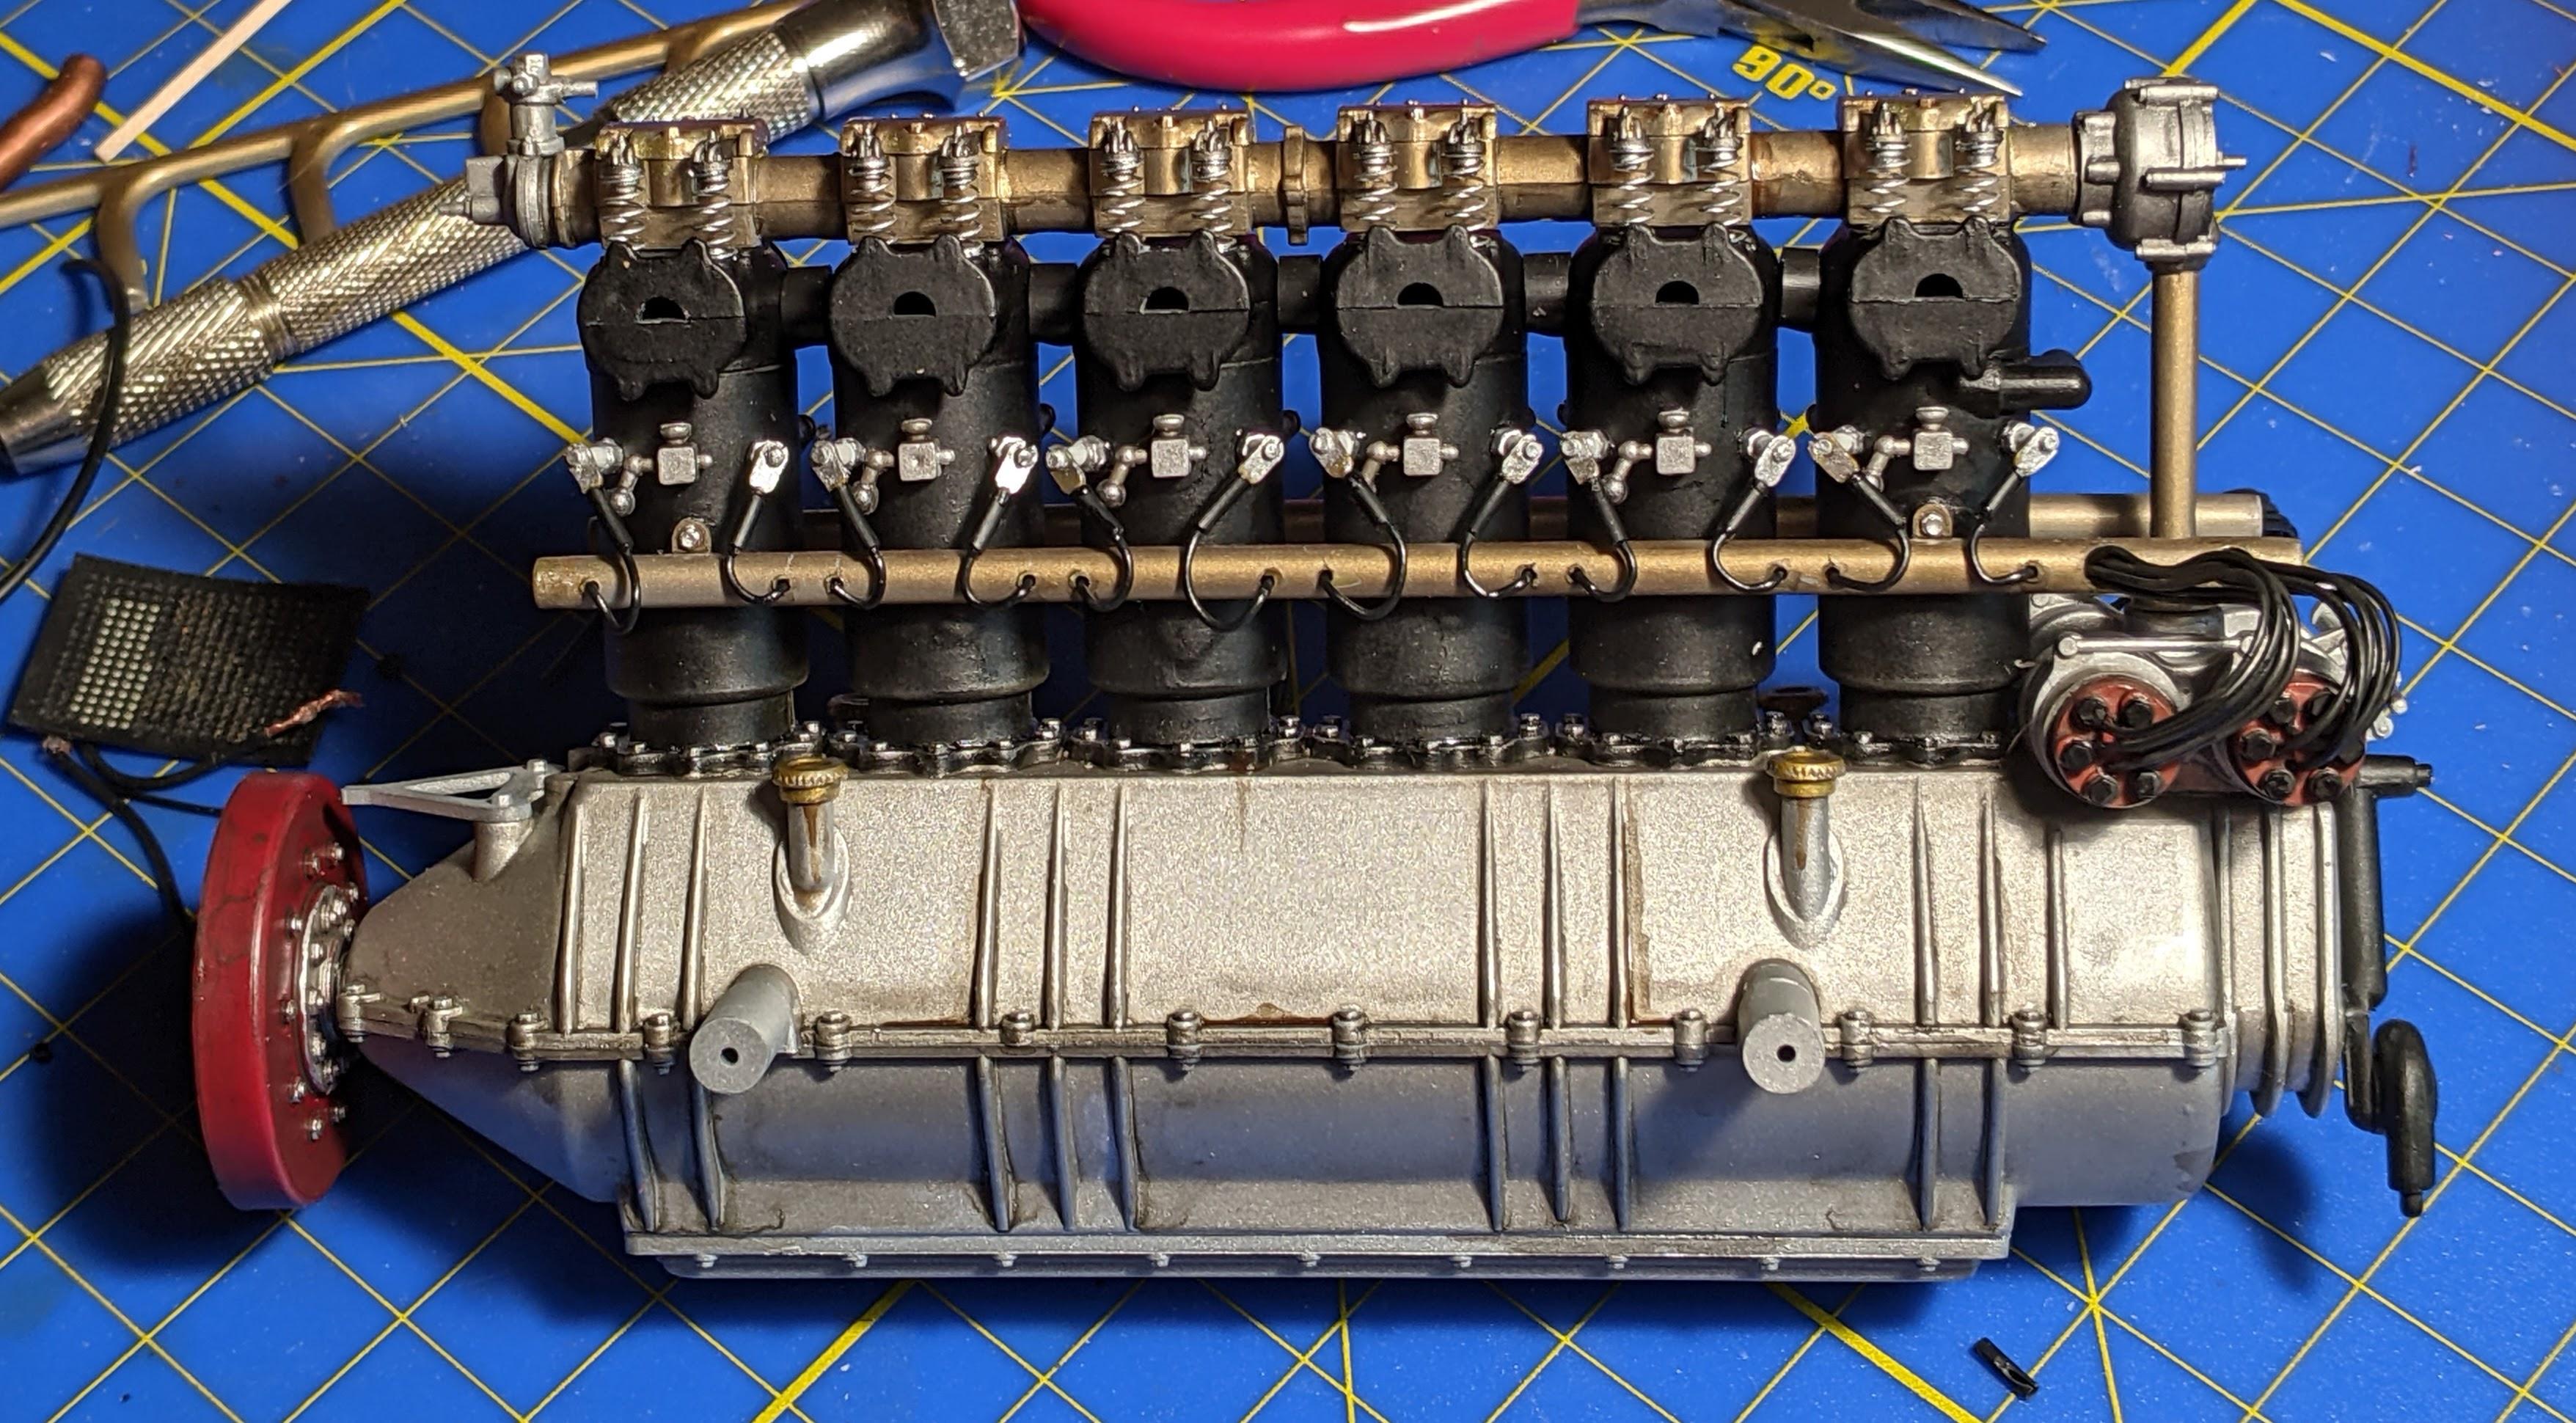
Next was the intake and exhaust... the 1:1's copper intake manifolds are pretty distinctive, with patched areas and visible solder joins. To represent that, I applied patches of extremely thin sheet styrene and textured the surface with Tamiya copper before applying a top coat of AK copper. Solder joins were done in thinned Tamiya flat aluminum. The exhaust manifold has visible and distinctive soot staining, that was reproduced with Tamiya Weathering Master soot. The cooling pipes on the passenger side were done with kit tubing and PE clamps. I would actually not glue this assembly at this point, since it will probably need tweaking to clear the frame rail after install. More pics soon, and any questions/comments as always are welcome!

-
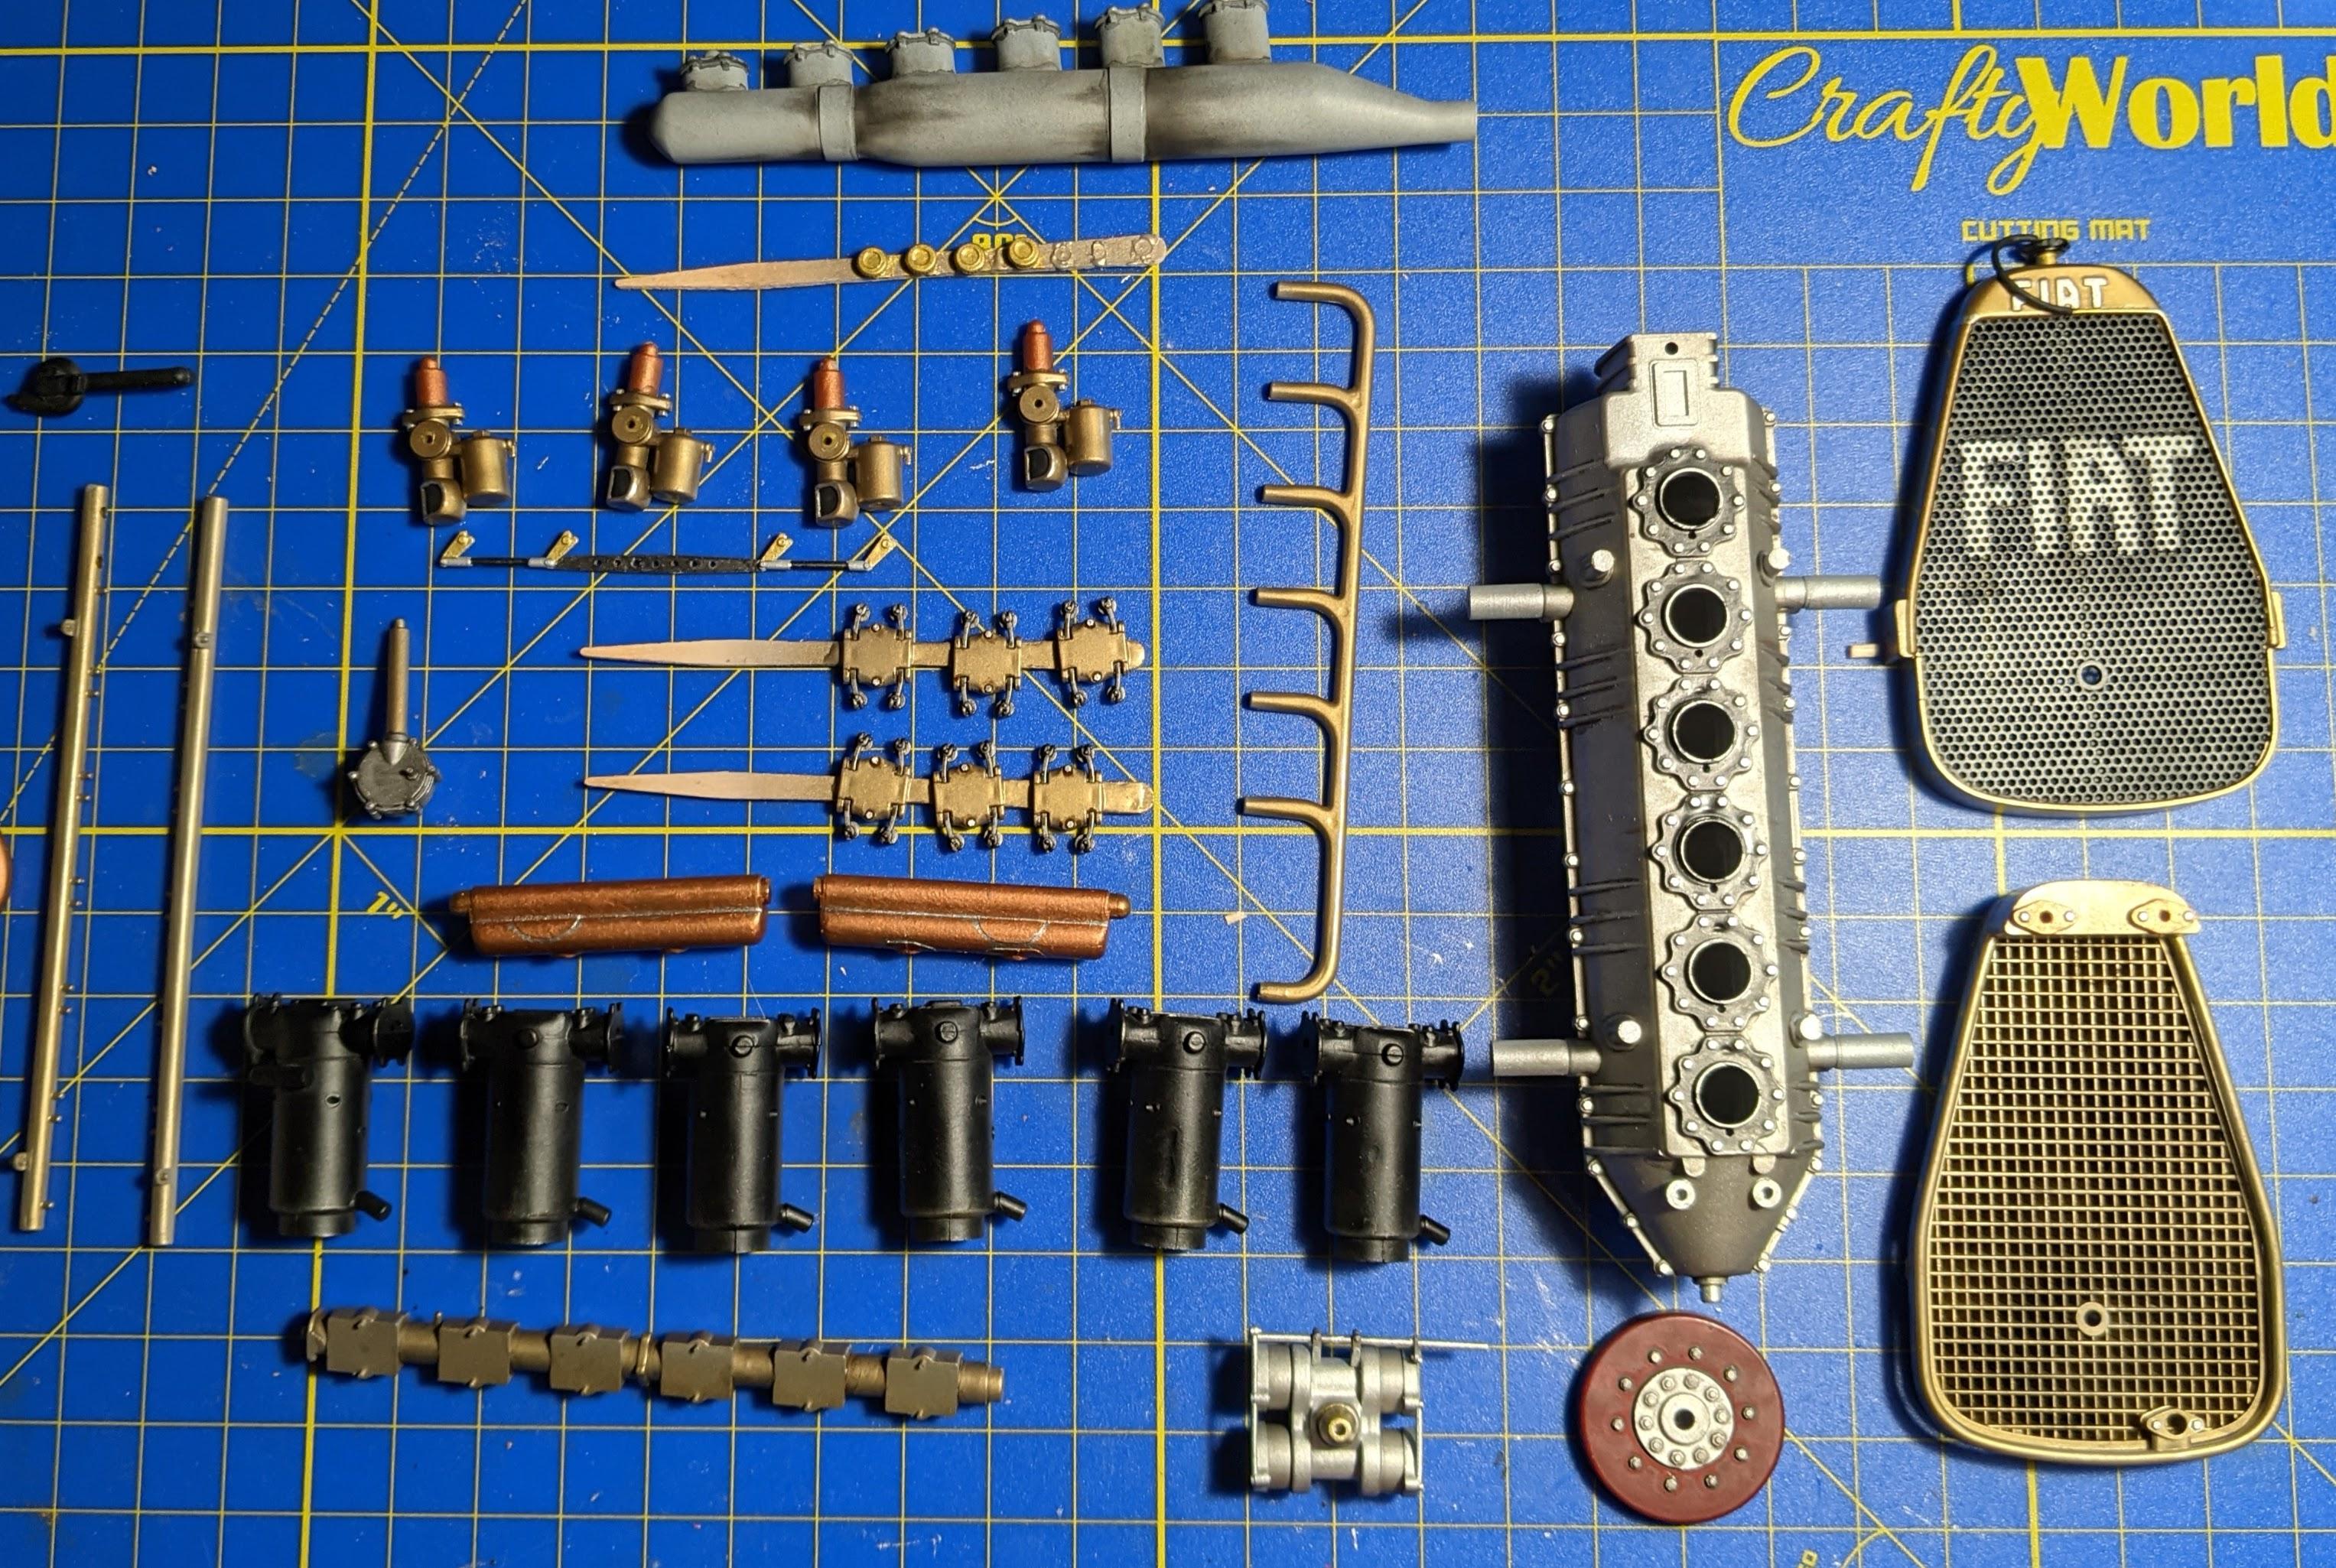
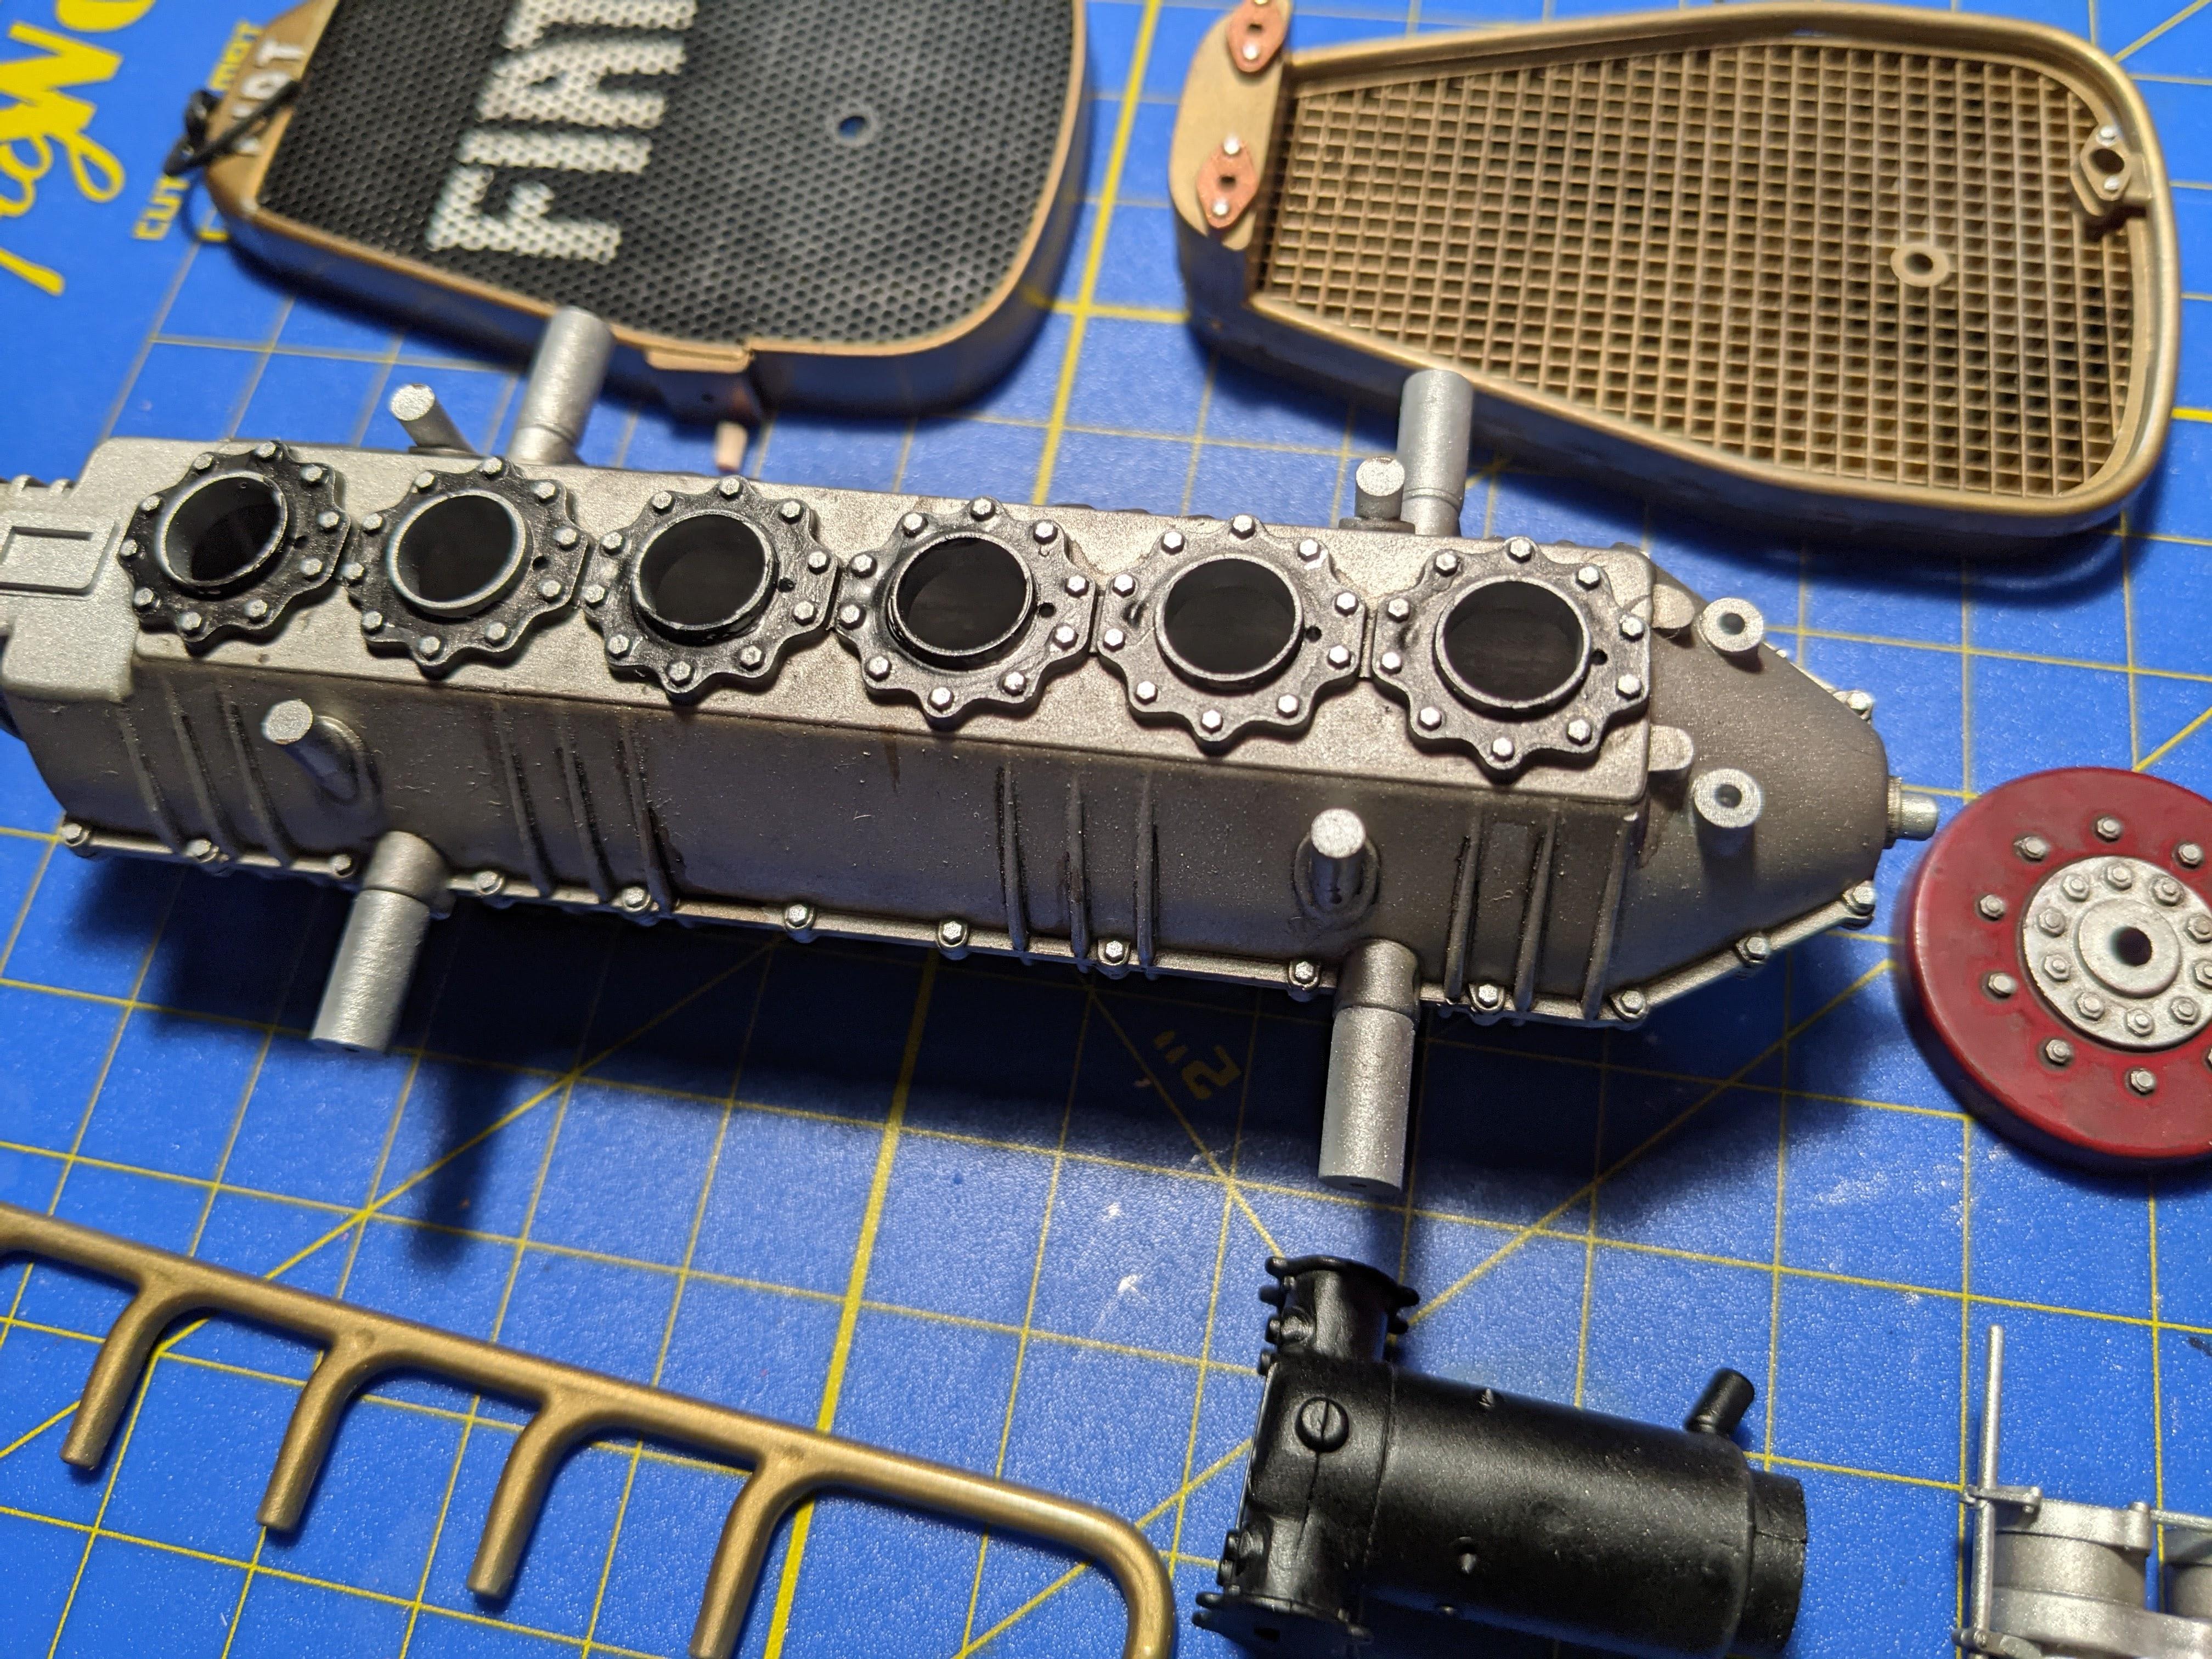
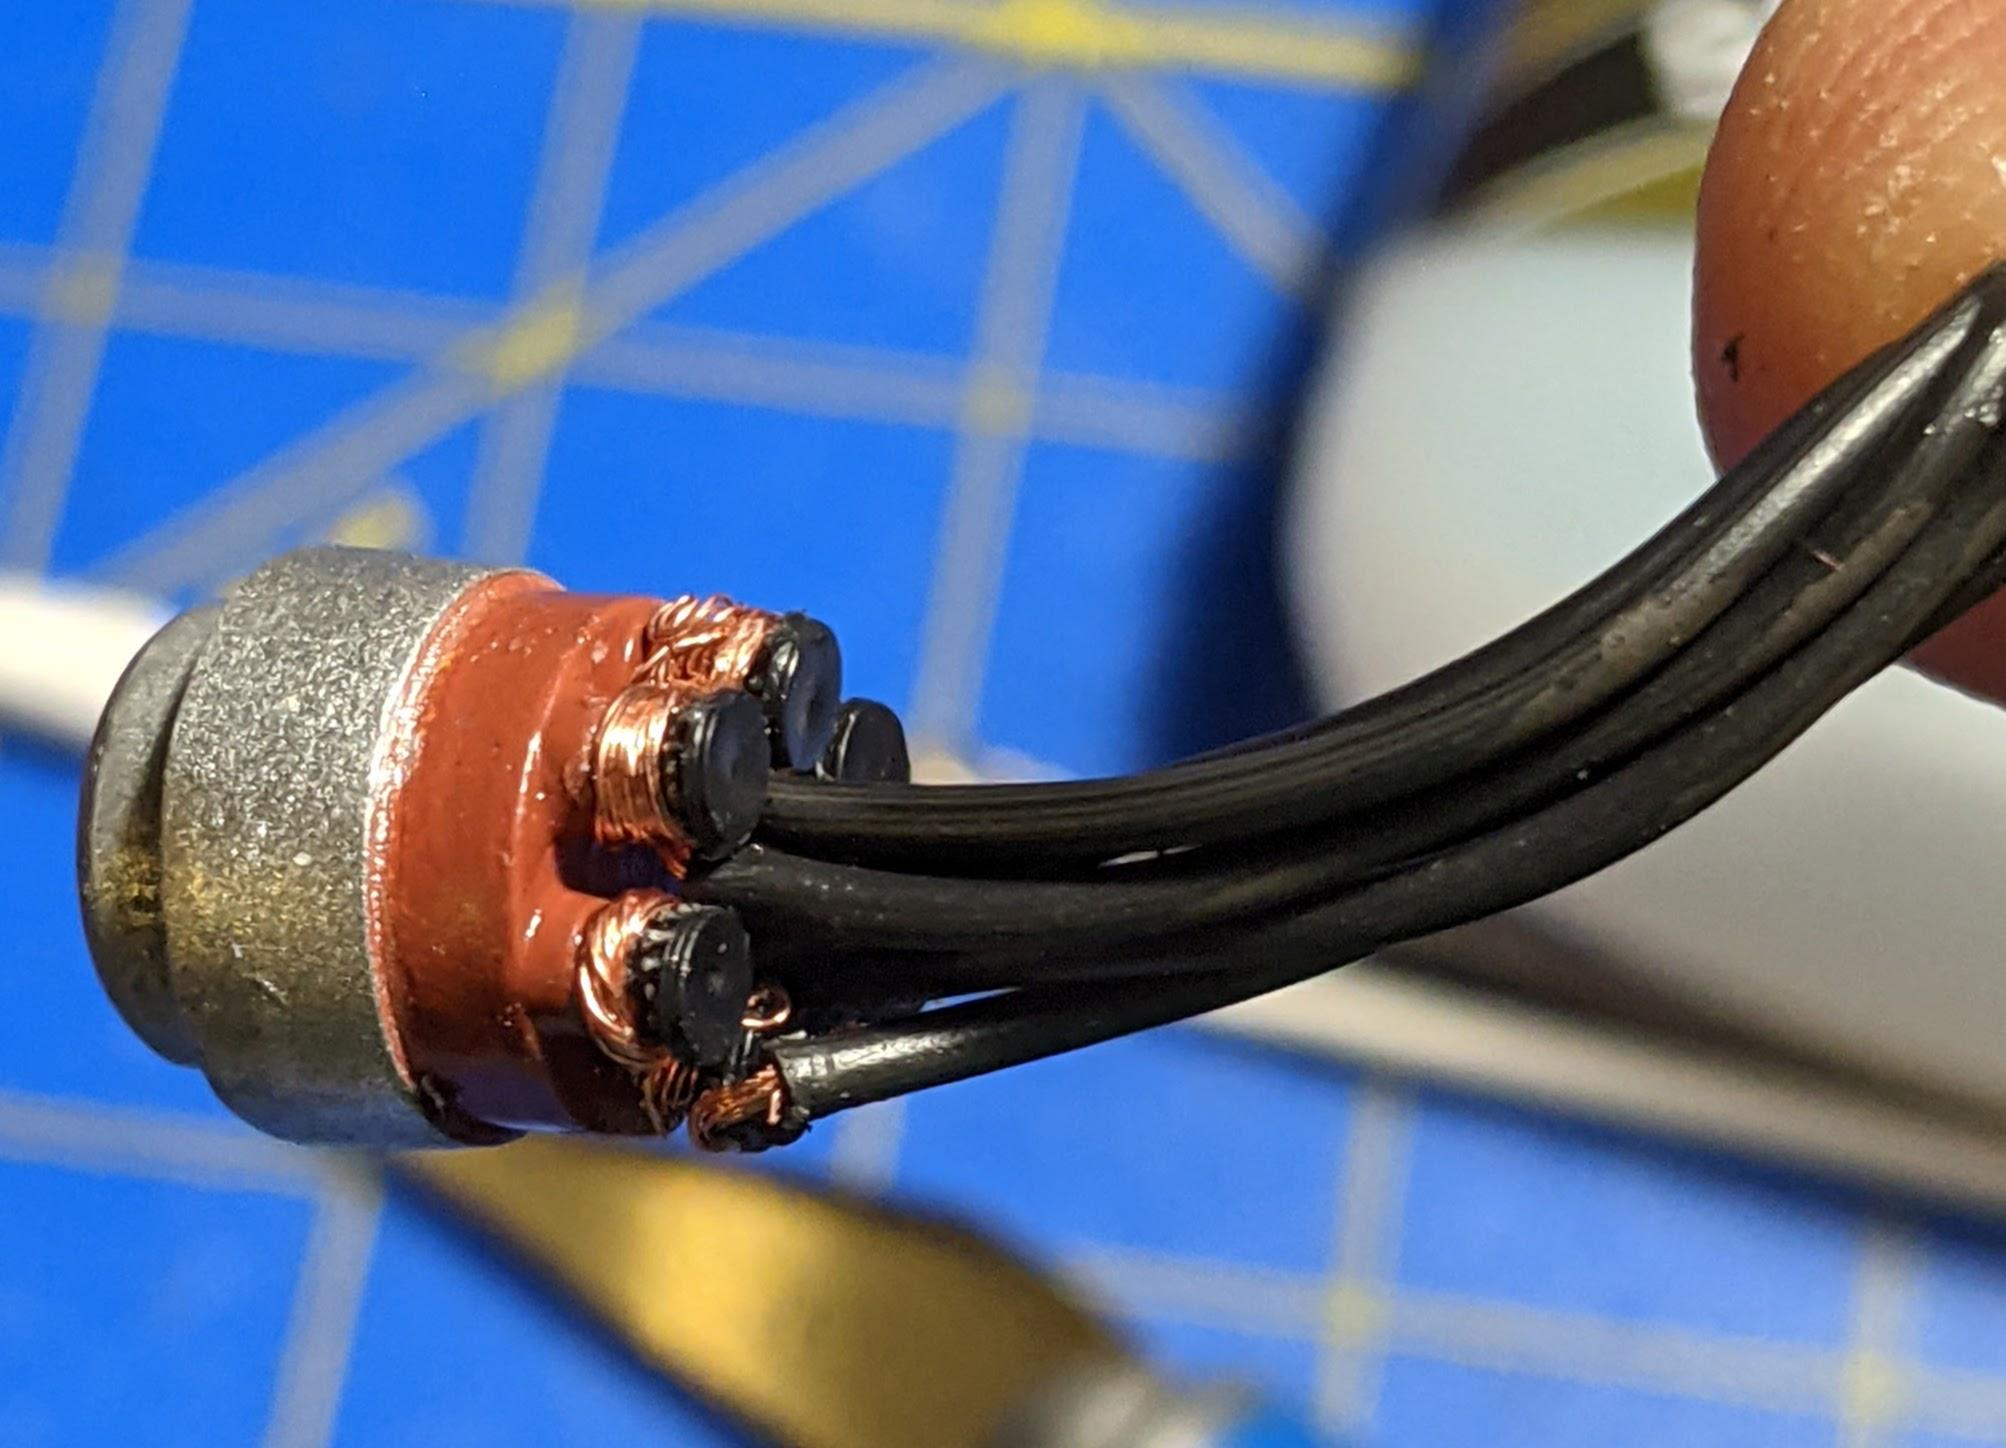
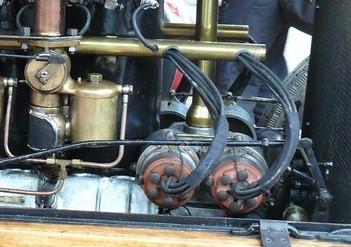
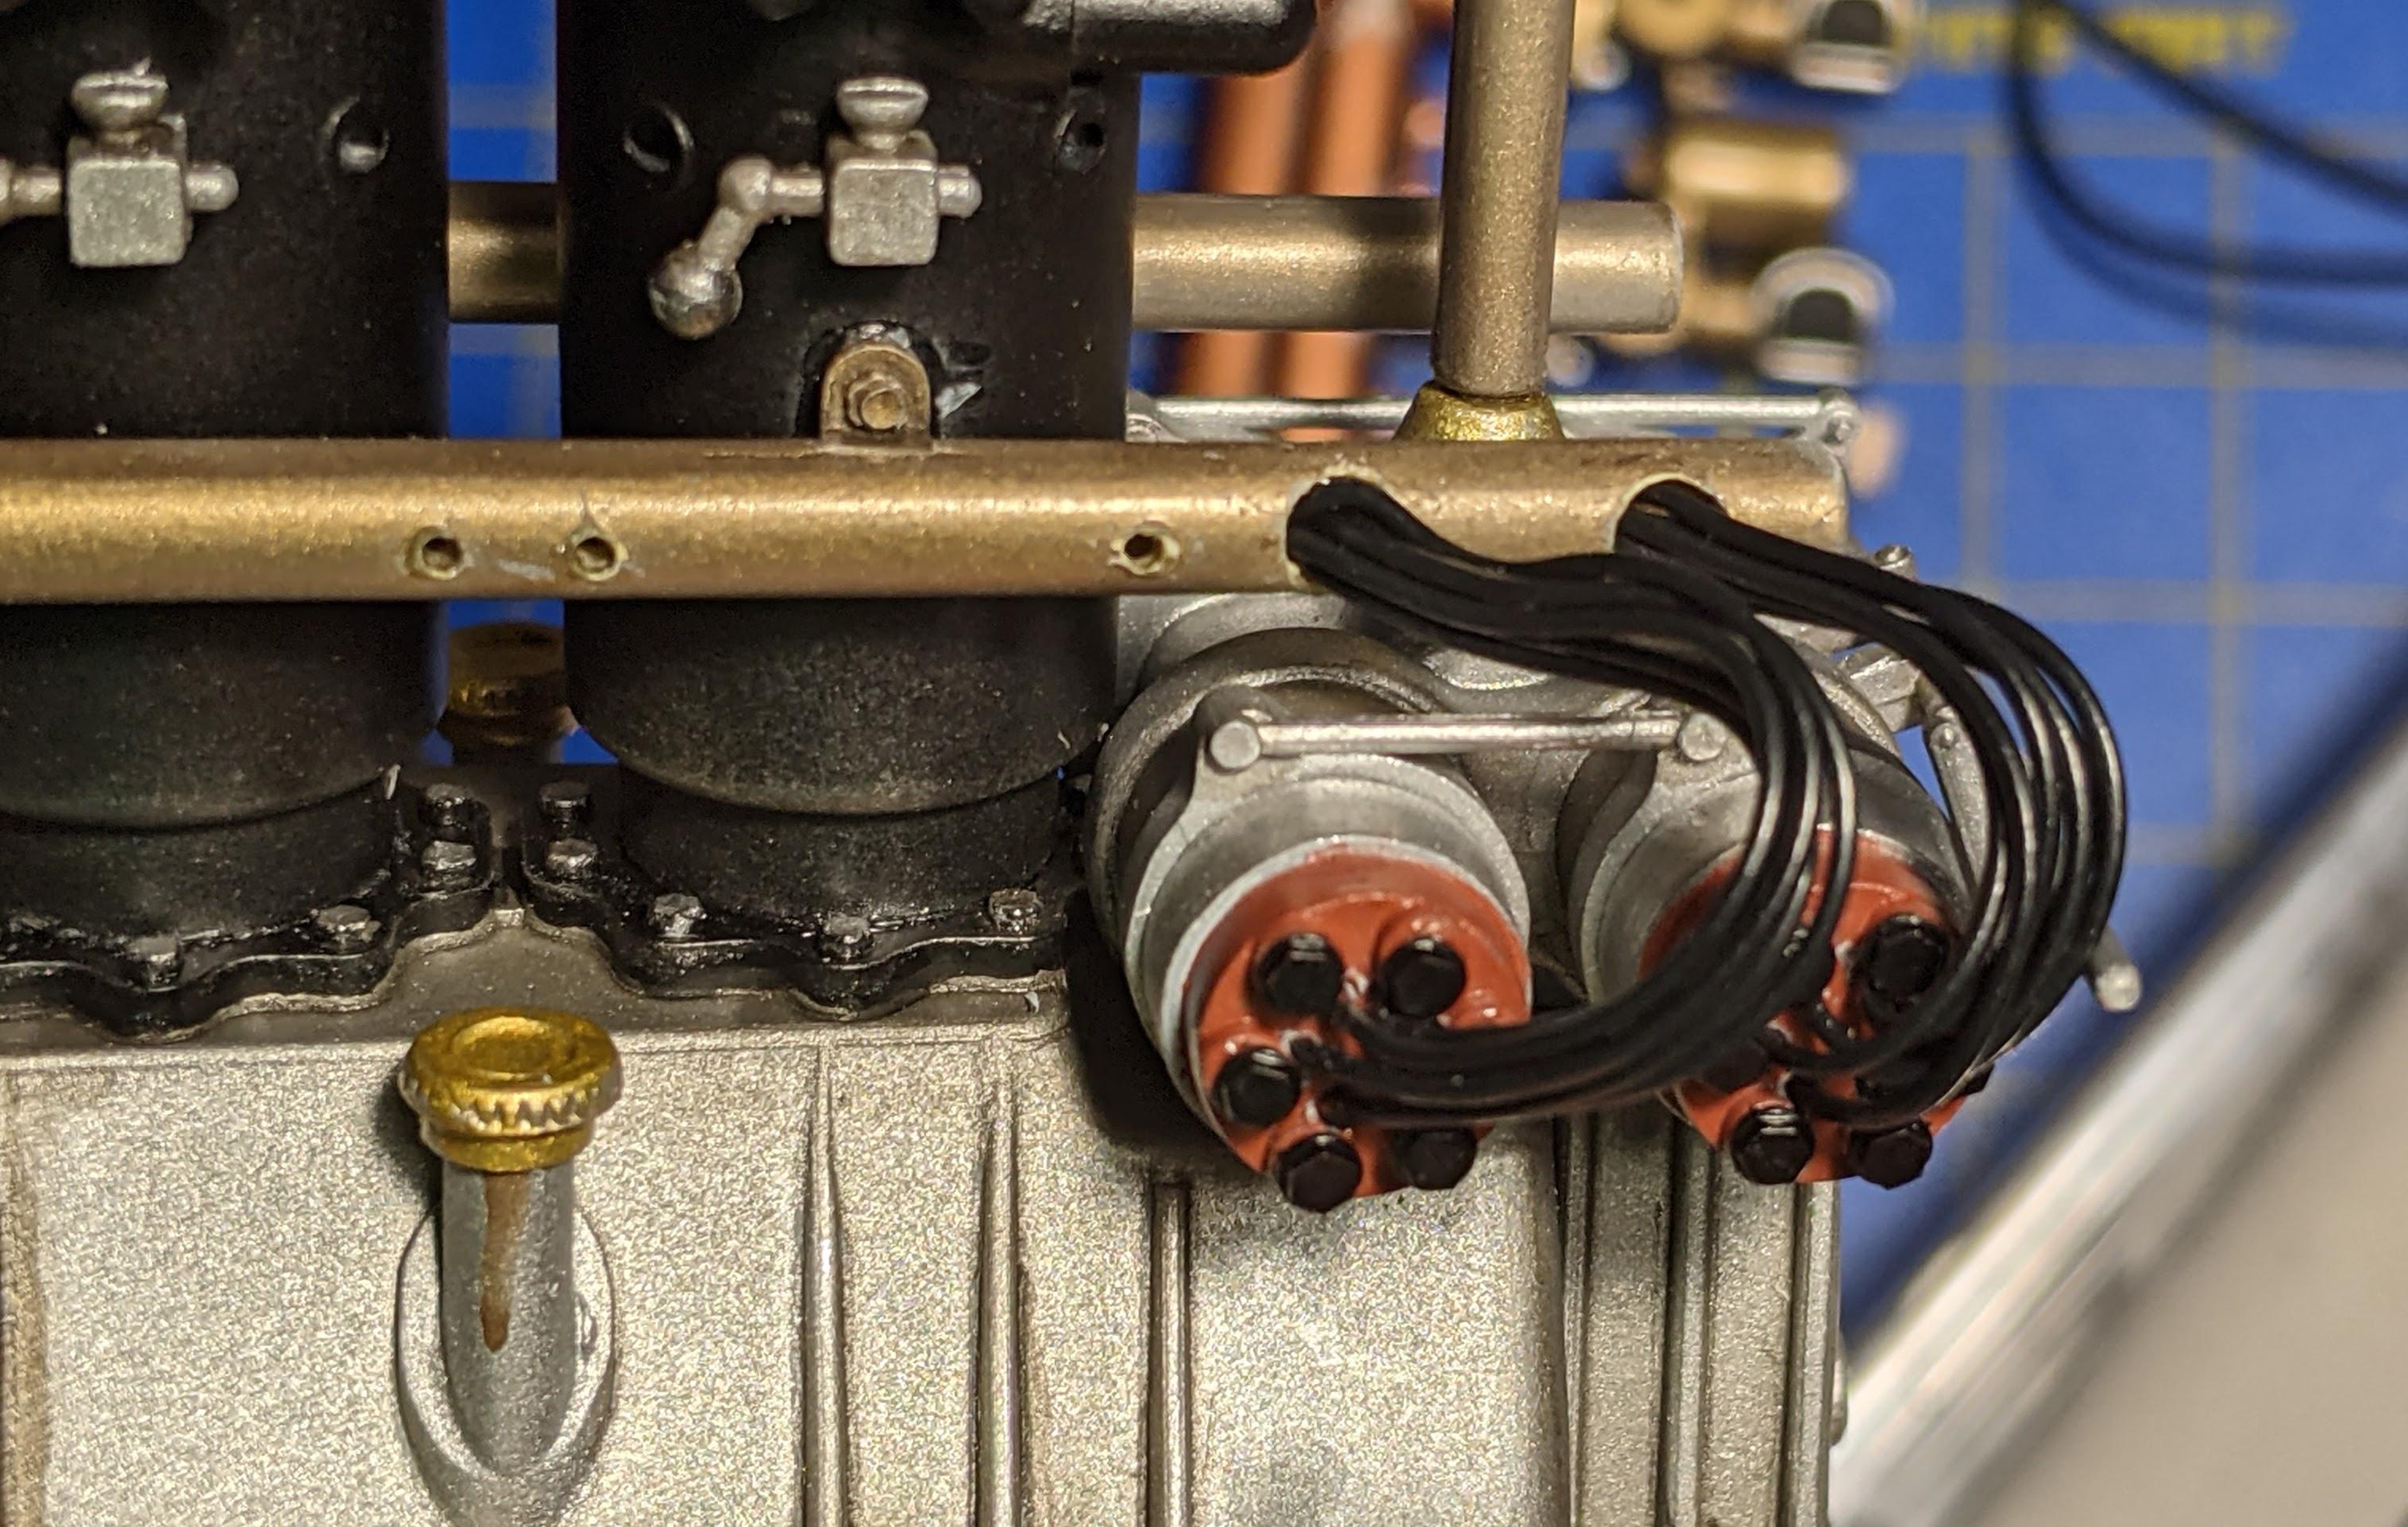
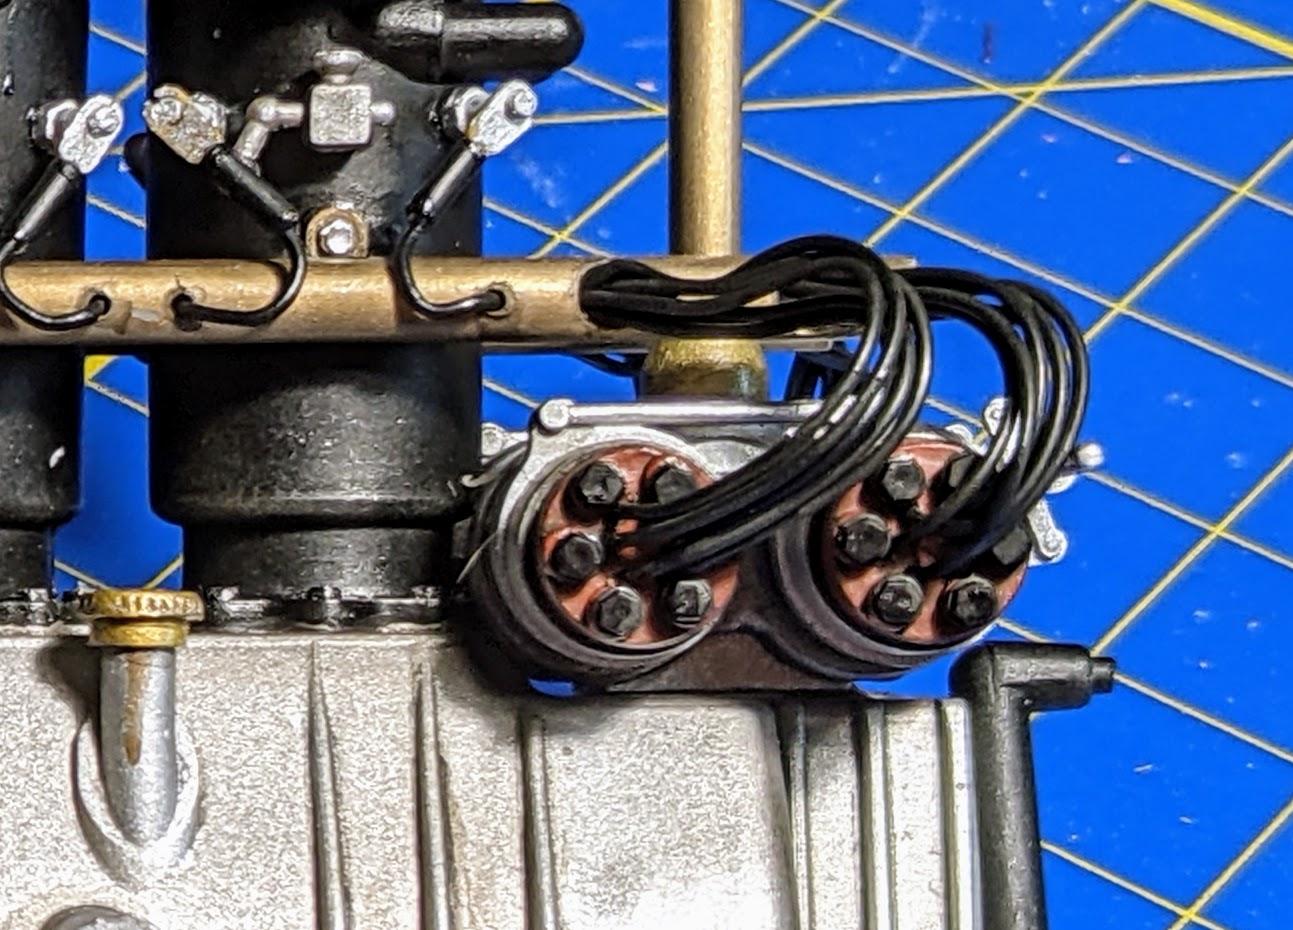
Thanks Tim! I've definitely kept it going... lots of building, some picture-taking, and now an update. The massive engine was a 316bhp, 21.7 litre Fiat aircraft engine purchased to replace the blown original by the builder, Ernest Eldridge. The detail on the kit's parts is extremely nice, but the execution is often a little lacking. Sink marks were filled and everything was airbrushed in Tamiya acrylics and AK Interactive Extreme Metal enamels. Next was the assembly of the cylinder barrels and the cam/rocker unit. Italeri provides springs, which I chose to use after applying primer and a coat of Tamiya chrome silver to add some thickness to the kit springs. At this point it looks good but there's much more to come! Italeri's ignition wiring is awful. The wires are insanely thick, and the attachment method involves stripping the ends off the wires, winding them around posts on the distributor cap, and then stripping the insulation off the other end and cramming the stripped ends into a too-small hole in the wire tubes on the sides of the motor. (yes, there are four distributors... 4 plugs for each of the 6 cylinders!) I built one up and decided it was awful and didn't look anything like the elegant original arrangement. Pic of the built-up distributor as Italeri would have you do it... ...And what the 1:1 distributors look like. I drilled holes just inside of the caps for thinner black wrapping wire and enlarged the holes in the wire tubes so the wiring would actually fit into the tubes. Much better! Next was the plugs and leads... with the thinner wrapping wire I was able to drill into the tubes so I could insert the ends of the leads into the tubes. Ignition system is a go!
-
It docks with a space station that looks suspiciously like a Smart Jet compressor.
-
So is Onyx asking you to rub his belly or daring you to rub his belly?
-
It does in my world.
-
Mclaren M8B...
jaymcminn replied to 4mula1fan's topic in WIP: Other Racing: Road Racing, Land Speed Racers
-
Mclaren M8B...
jaymcminn replied to 4mula1fan's topic in WIP: Other Racing: Road Racing, Land Speed Racers
I have one of these. Every few months I take it out of the closet, check out the parts, read the instructions and put it away again. I think AM made it this complicated so they could sell two kits to people who wanted to have one to display closed and one to display open. One day I will build mine... -
Fiat Mfistofele
jaymcminn replied to Kingslug's topic in WIP: Other Racing: Road Racing, Land Speed Racers
Sorry to hear about the setback man. On the plus side, the tubing won't have sink marks to fill! -
I found this out while test-fitting the motor and exhaust system. The steering box fouls the rear motor mount if you try to go in from above. Pics and an update soon, there's been a lot of progress!
-
I keep getting these too. I figured it's because I'm on the Watchuseek forum and always browsing Jomashop and EBay (I'm a watch collector, but not $1.8 million watches!). Anyway, the Chevy Silverado "Walter" ad is one of my favorites. https://youtu.be/iHTi7PBJLnk
-
Ford GT40, Meng, 1/12...
jaymcminn replied to Matt Bacon's topic in Other Racing: Road Racing, Salt Flat Racers
Beautiful, Matt! The grime is perfect! -
Fiat Mfistofele
jaymcminn replied to Kingslug's topic in WIP: Other Racing: Road Racing, Land Speed Racers
That looks fantastic! I might add some bolt detail to the tops of the lifters as well. It's pretty noticeable, and I have some PE bolt heads somewhere. I also owe you thanks... after looking at your finished chassis I realized I had the front shackles on the rear springs on my build flipped so the spring was under the shackle. It's the right way around now. I see you decided to keep going on the engine, I've gotten mine started and agree that the cylinder barrels aren't a lot of fun to install. I used Micro Kristal Klear so I was able to reposition them and make sure they were lined up correctly. Any idea how you're going to tackle the tricky finish and "patches" on the intake manifolds? -
that level of detail at 1:25 is insane. I'm really enjoying watching your work here.
-
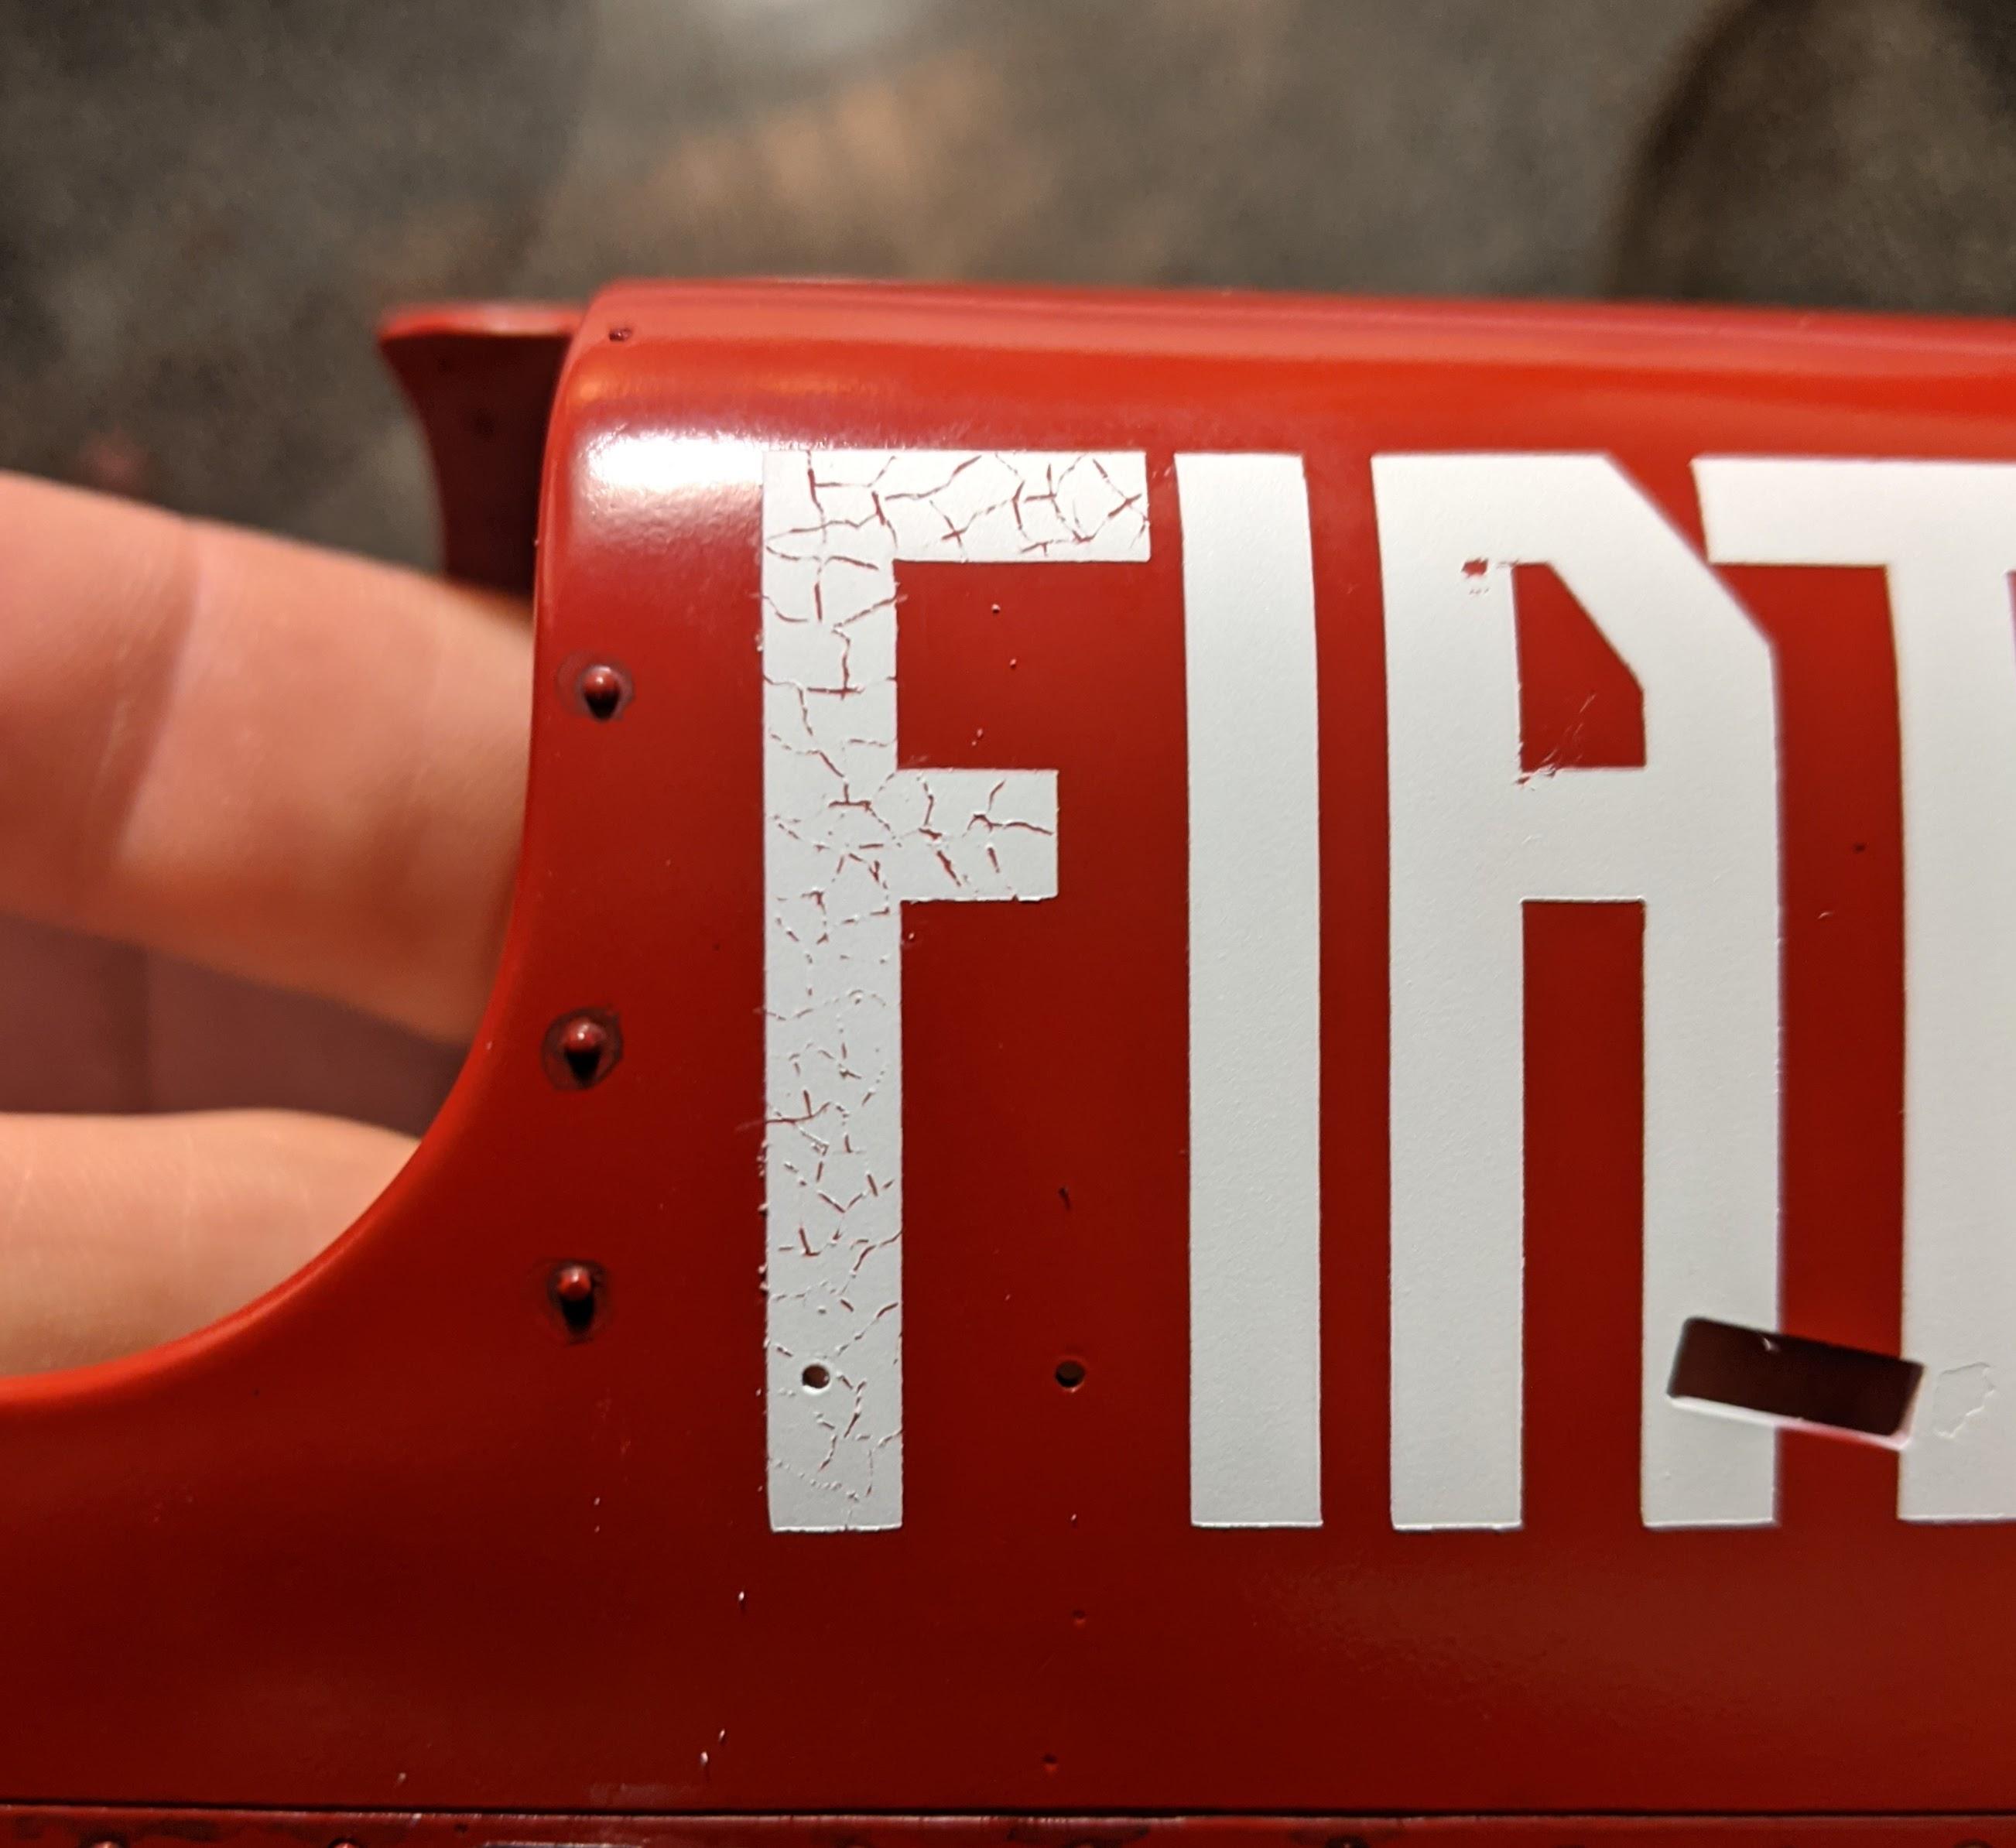
I don't think the actual screw attachment between the spring and axle mount is necessary for proper alignment. It seems to me that once everything is in place it should all align itself where it needs to be. I took a chance on the cracking of the letters and got lucky that it worked out exactly how I saw it in my head. Ordinarily I would try a test piece to make sure I wasn't going to do potential damage to a $200+ model I already have 100-ish hours sunk into, but I just kind of jumped in. I will say, if you try this at home, to use light pressure with the back of a used #11 blade. Also study pics of how paint cracks... there is almost a pattern to it that instinctively feels "right" when you see it. And don't do what I did, spray some test panels using your body color and the paint you're going to use for the lettering and practice on that first. What worked for me using Model Master Acryl flat white (I'll miss that stuff, best white paint in the world) might not work as well with something else. I've just gotten primer on all the engine bits and will probably sit down with the airbrush tomorrow before work and apply the aluminum, copper and brass finishes to the myriad of complex parts that make up the steampunk heart of this mighty beast. More updates soon!
-
Italeri Alfa 8c- WIP
jaymcminn replied to jaymcminn's topic in WIP: Other Racing: Road Racing, Land Speed Racers
Thanks, Randy. The crackle medium I used was Jim Holtz clear "rock candy" distress crackle paint. Basically my process is to apply a base color, then brush on a medium coat of the crackle medium. After that has dried, airbrush thin coats of your top color. Once that has dried, use a wash of a darkened version of your top color to highlight the cracks. The purpose of applying a base color under the crackle medium is that it's not the most stable stuff in the world so if it flakes off anywhere it'll look intentional. That being said, I built my 8c a year and a half ago and the finish on the seat looks exactly the same with no flaking at all. I did seal everything under a coat of satin acrylic, though. All paints were Tamiya acrylics, and I strongly suggest airbrushing your colors because the cracks are so fine that I think they'd get lost under brushed paint. I'd recommend trying the process out on a scrap piece first, but the nice thing about the crackle medium I used is that it's water-based and will come off pretty easily if you don't like the effect. Good luck, and make sure to post up your build. Are you doing the new release with the fenders? -
Gotta say, it's almost certainly not the tape. I've used Tamiya tape for decades. With acrylics, auto paints, Tamiya lacquers and Model Master lacquers both decanted and straight from the spray can. I've never had any issues like you're describing (in fact, I've never had MM spray lacquer soak through any tape whatsoever). Are you sure you didn't just get bleed under the tape from not having the tape burnished down enough? I suppose it's possible that by leaving the tape on for 24+ hours some of the color could have transferred through to your base color. I've never heard of it happening, but that doesn't mean it's outside the realm of possibility. That being said, it's a poor craftsman who blames his tools. When used properly, the paint and tape you purchased are perfectly fine. While Model Master spray cans aren't my favorite, I've gotten some decent paint jobs out of them. There's a reason why I have three widths of Tamiya tape on my workbench as well. But there's a learning curve to these things... my advice, as with many others who have posted on your thread, is to suck it up, take it as a learning experience, and move on. That's the best way forward as a modeler. Learn patience, learn to ask questions and learn to accept that the answers you receive may not be the ones you want to hear.
-
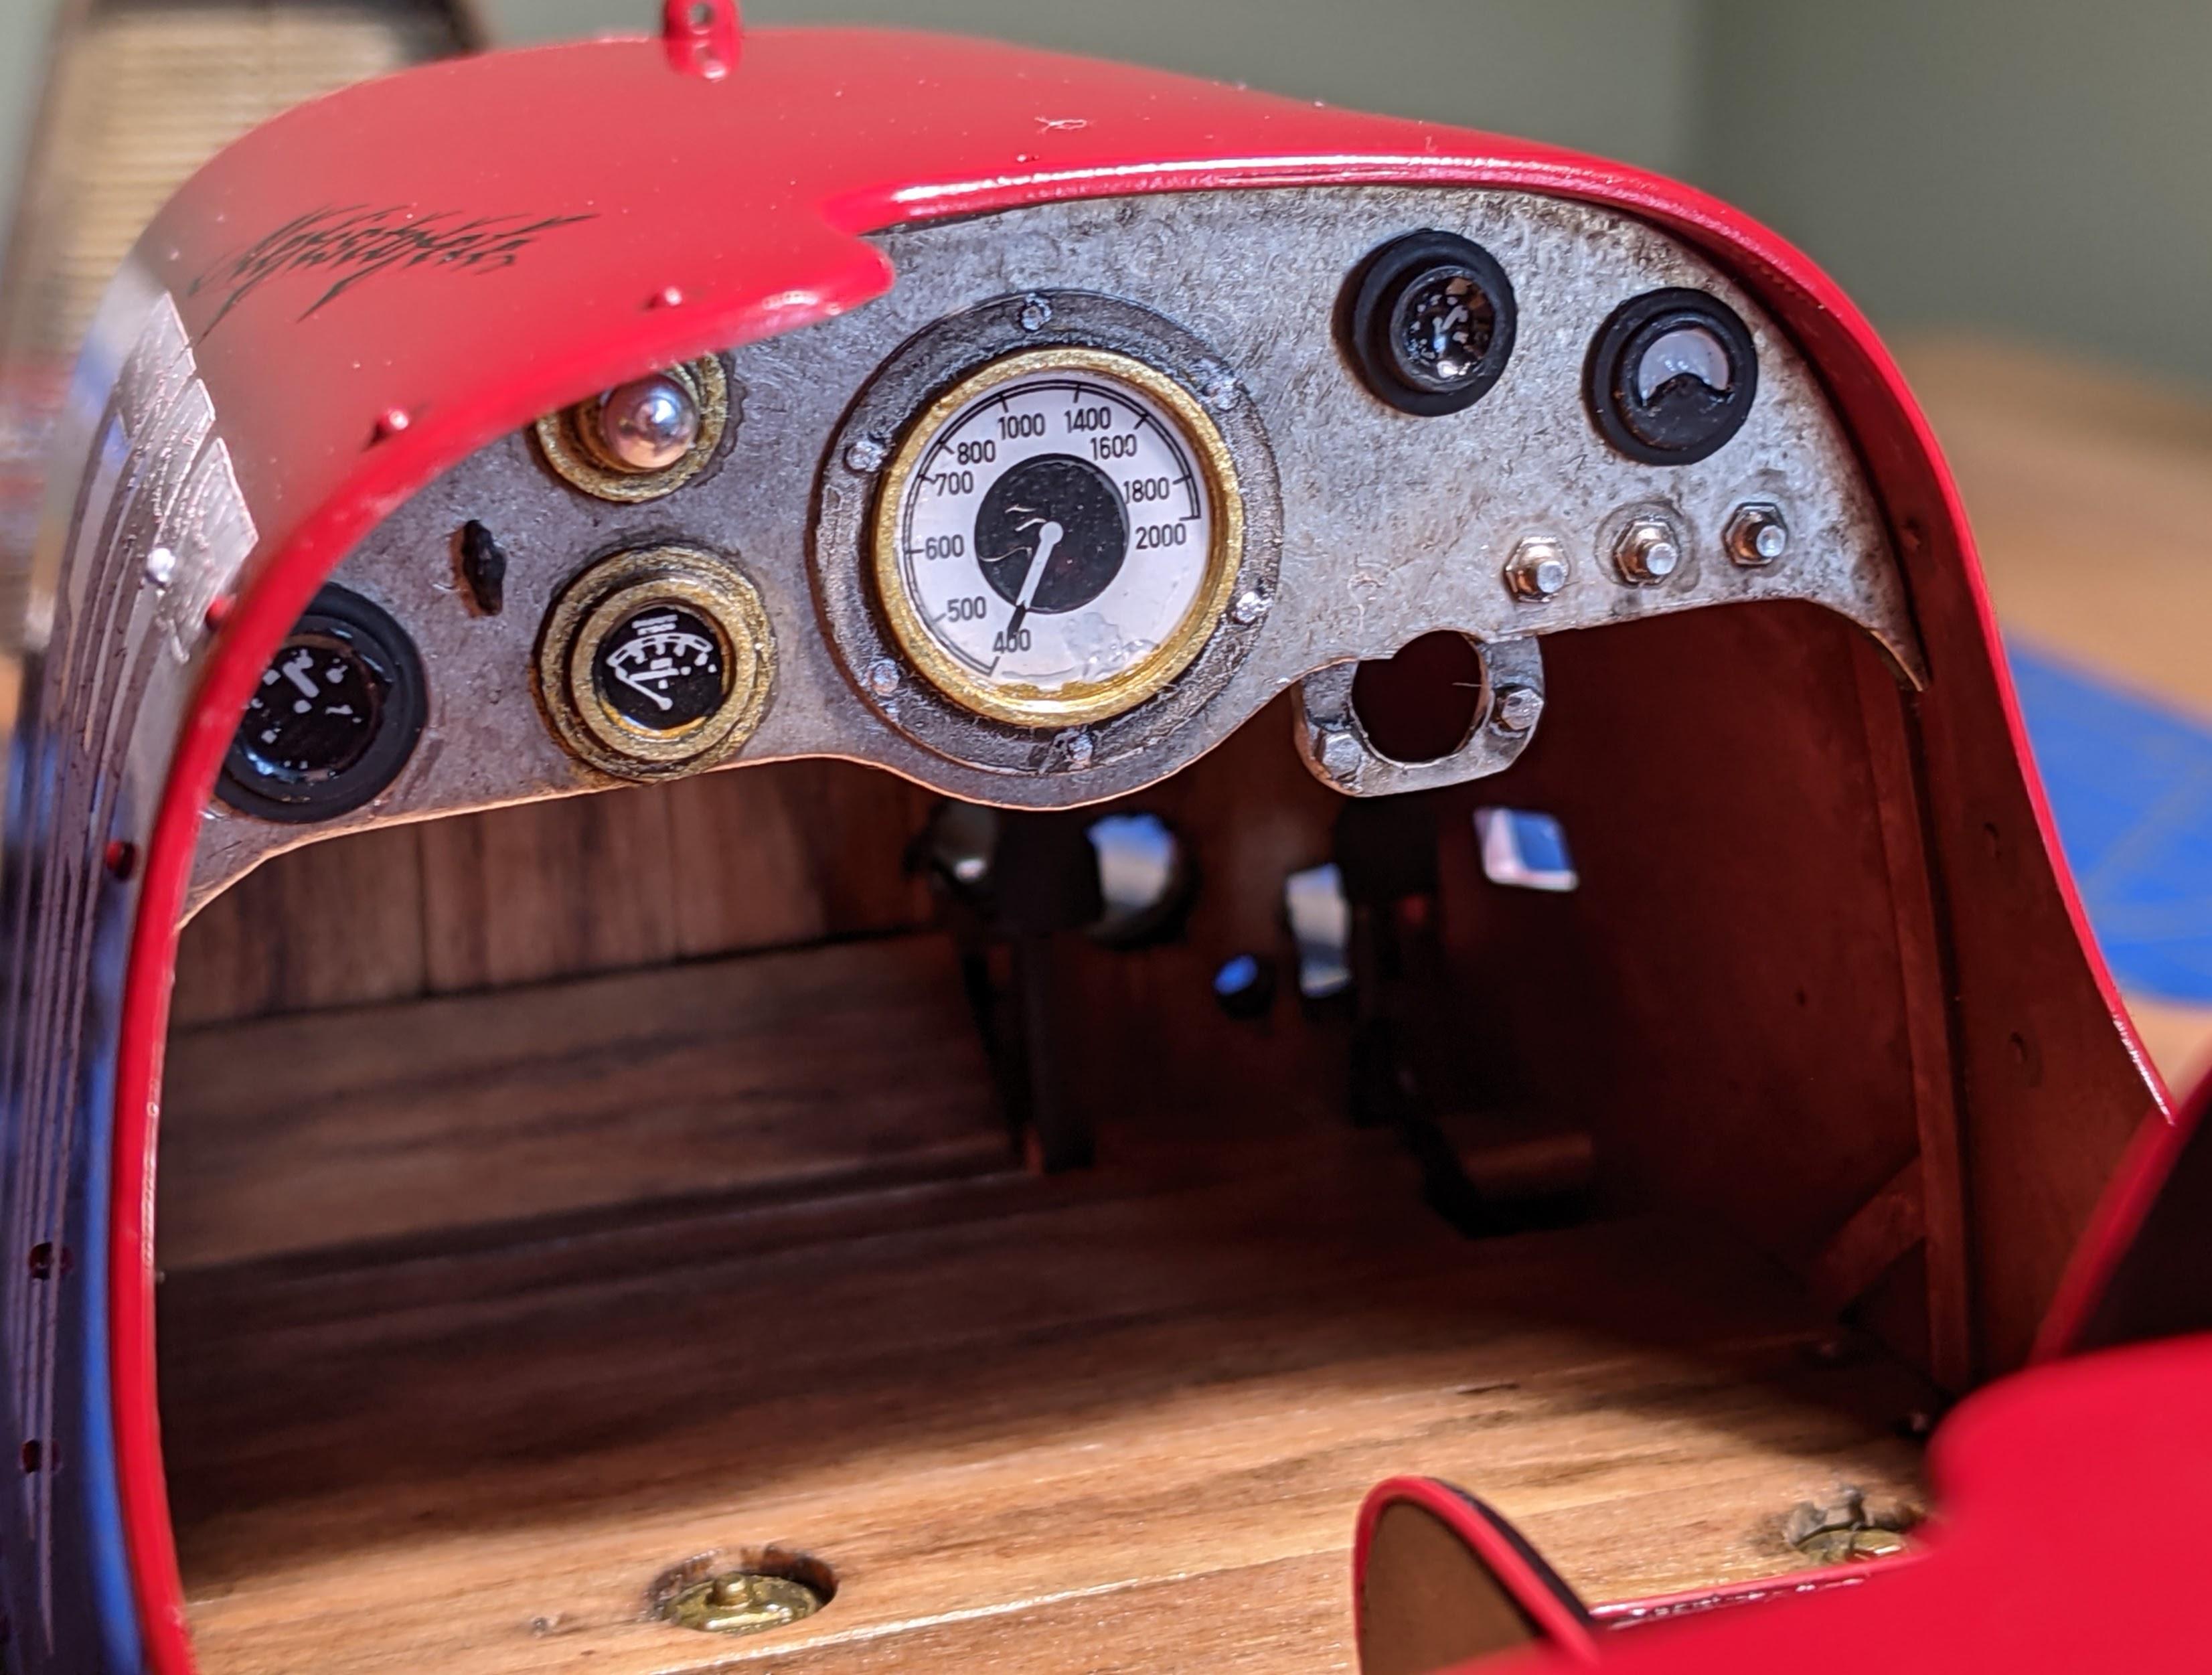
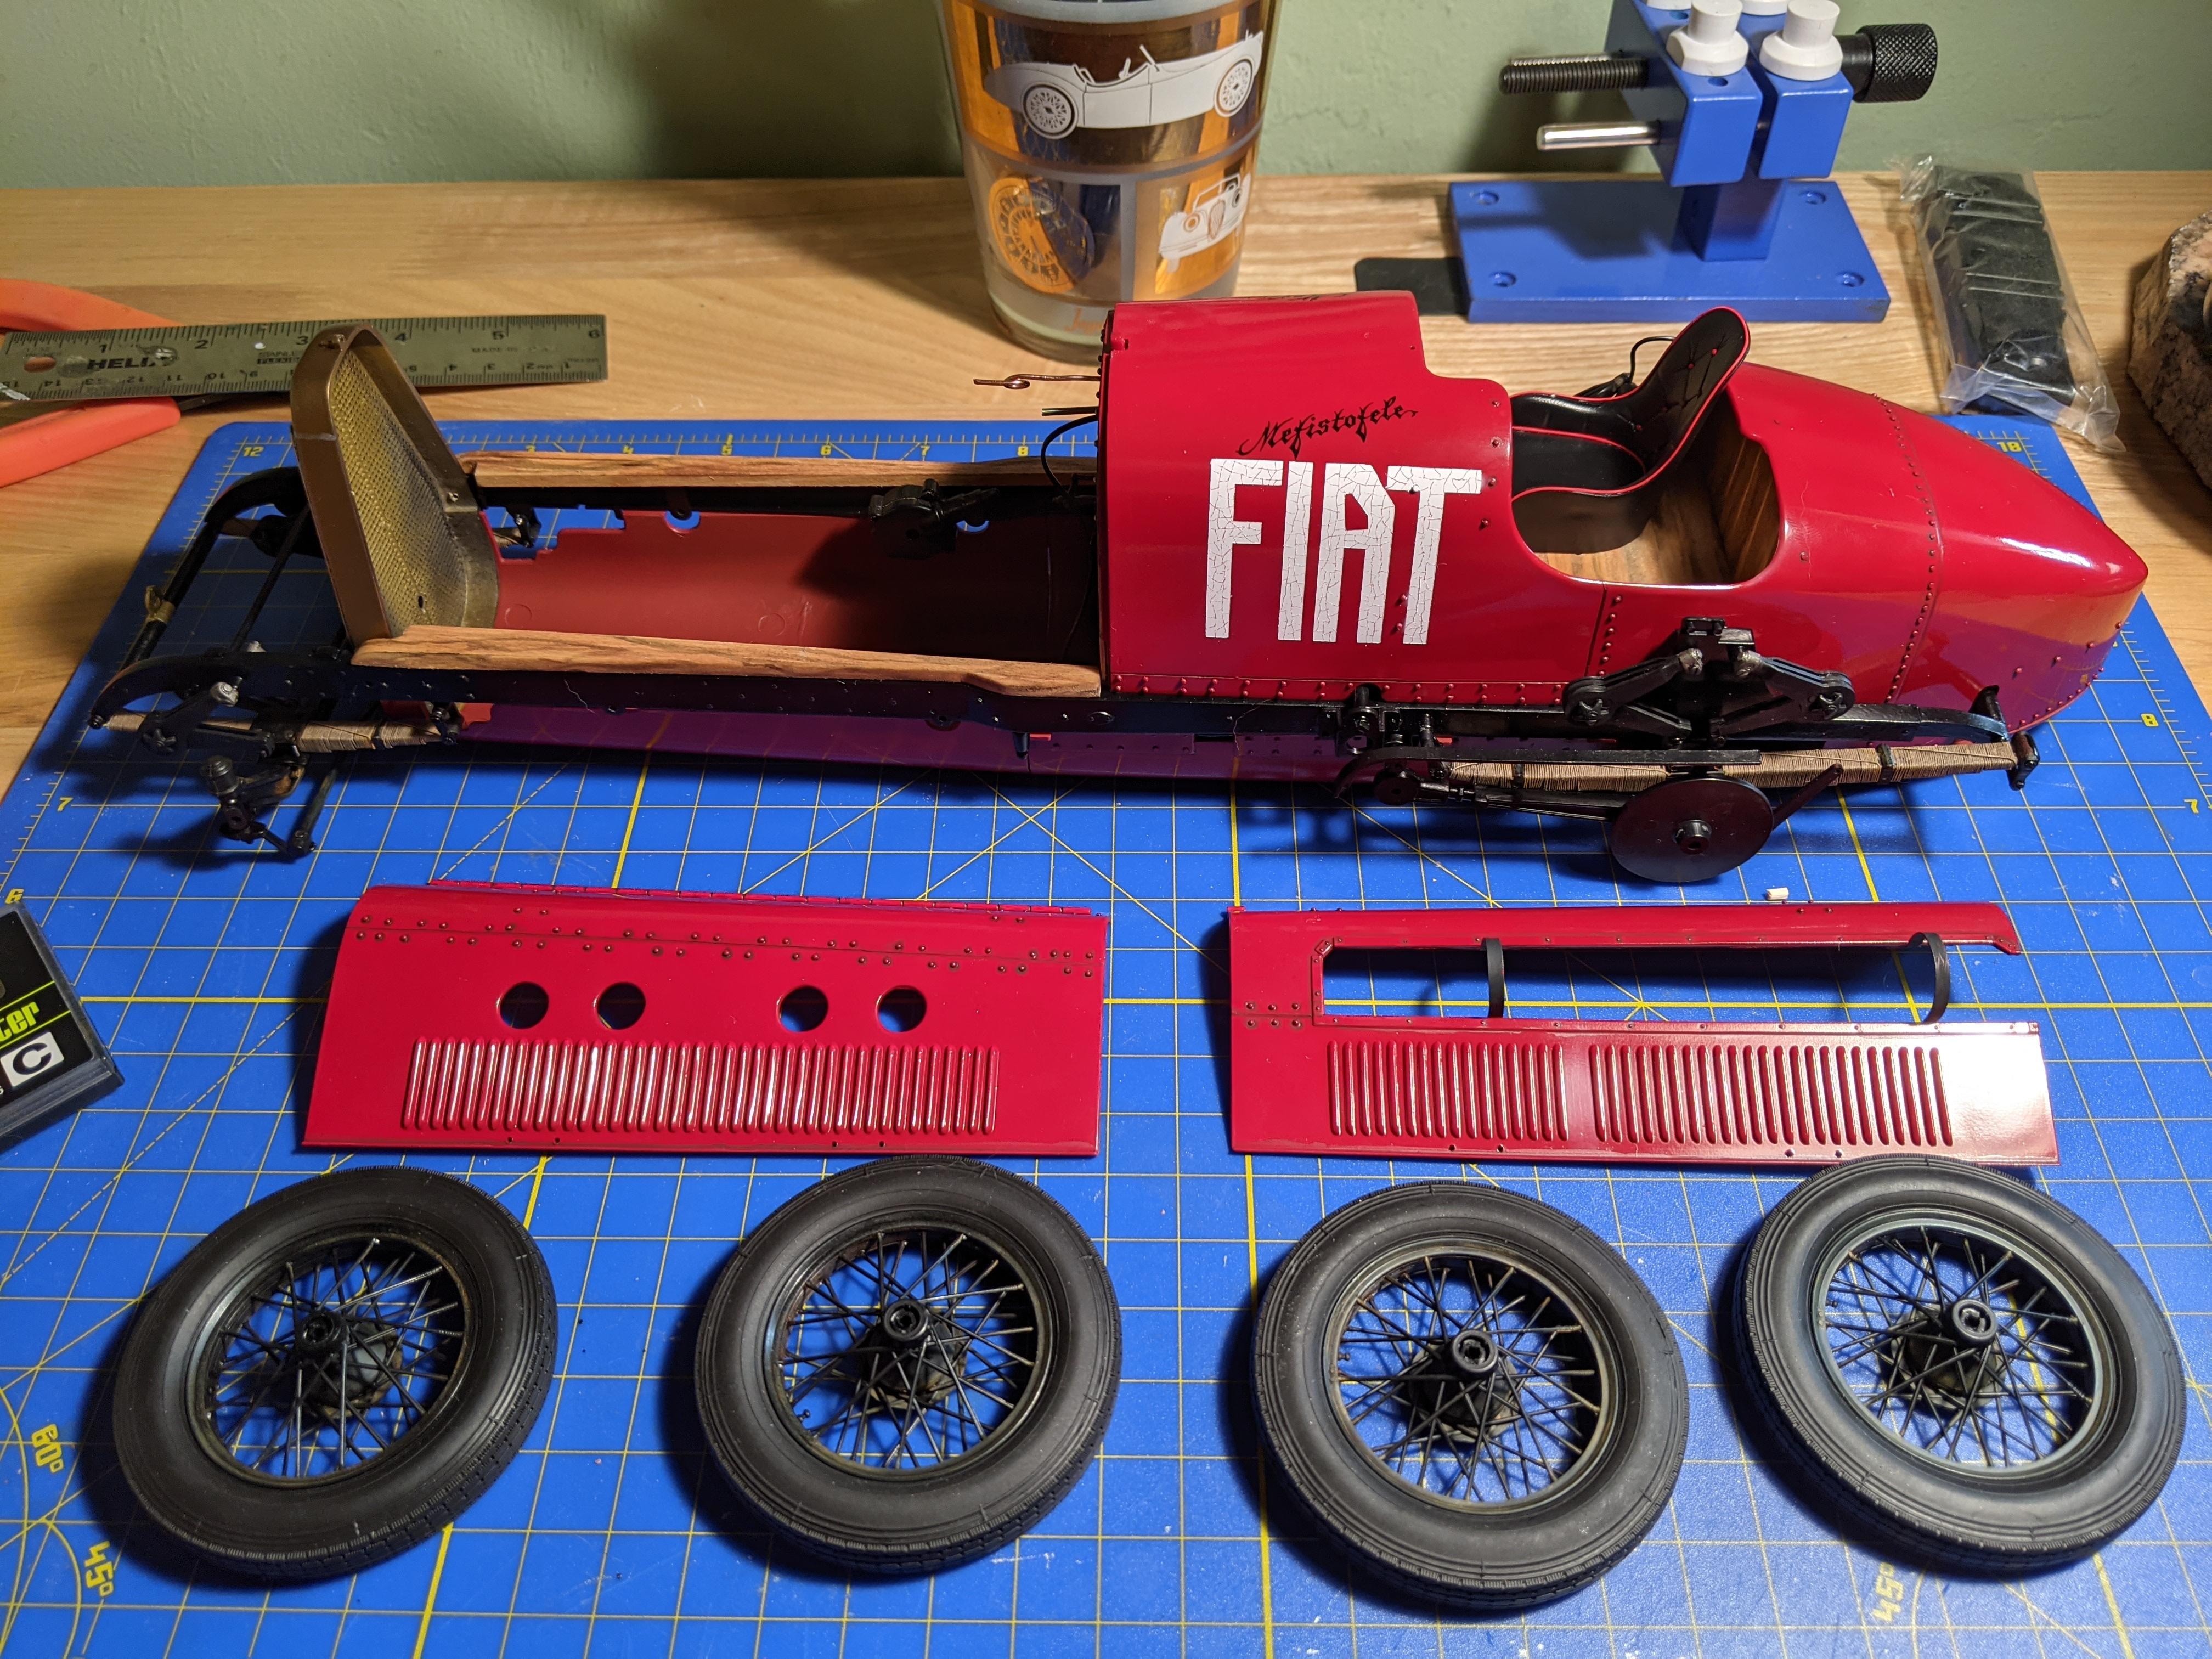
The instrument panel received a wash of thinned grey detail wash stippled on to give some of the turned texture of the 1:1. Paint is Tamiya Flat Aluminum, Gold Leaf, and Rubber Black. I installed the finished panel in the body, then installed the floor after which I was able to finally mount the body to the chassis. The last pic shows where I am right now... the wheels assemble from four layers of spokes, a hub piece (all of the hubs needed sink marks filled) and, sigh, 6 fiddly screws. The spokes are incredibly thin and were warped on all of my wheels, but when installed and aligned correctly the warp disappears. They're exceptionally nice plastic wire wheels, even better than the ones in the new-tool Alfa 8c. I painted them in Tamiya Semi-Gloss black and weathered them lightly with Tamiya weathering pastels. The belly pans and radiator grille are just there for looks right now. Unfortunately there's something BIG (21.7 litres, to be exact) missing... more to come! As always, questions or comments are welcome!
-
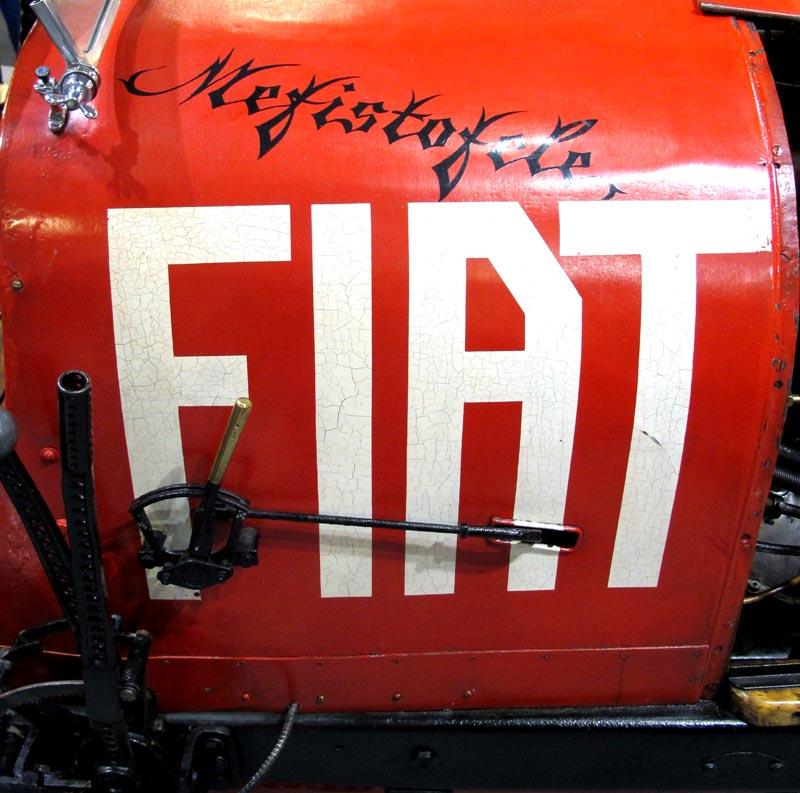
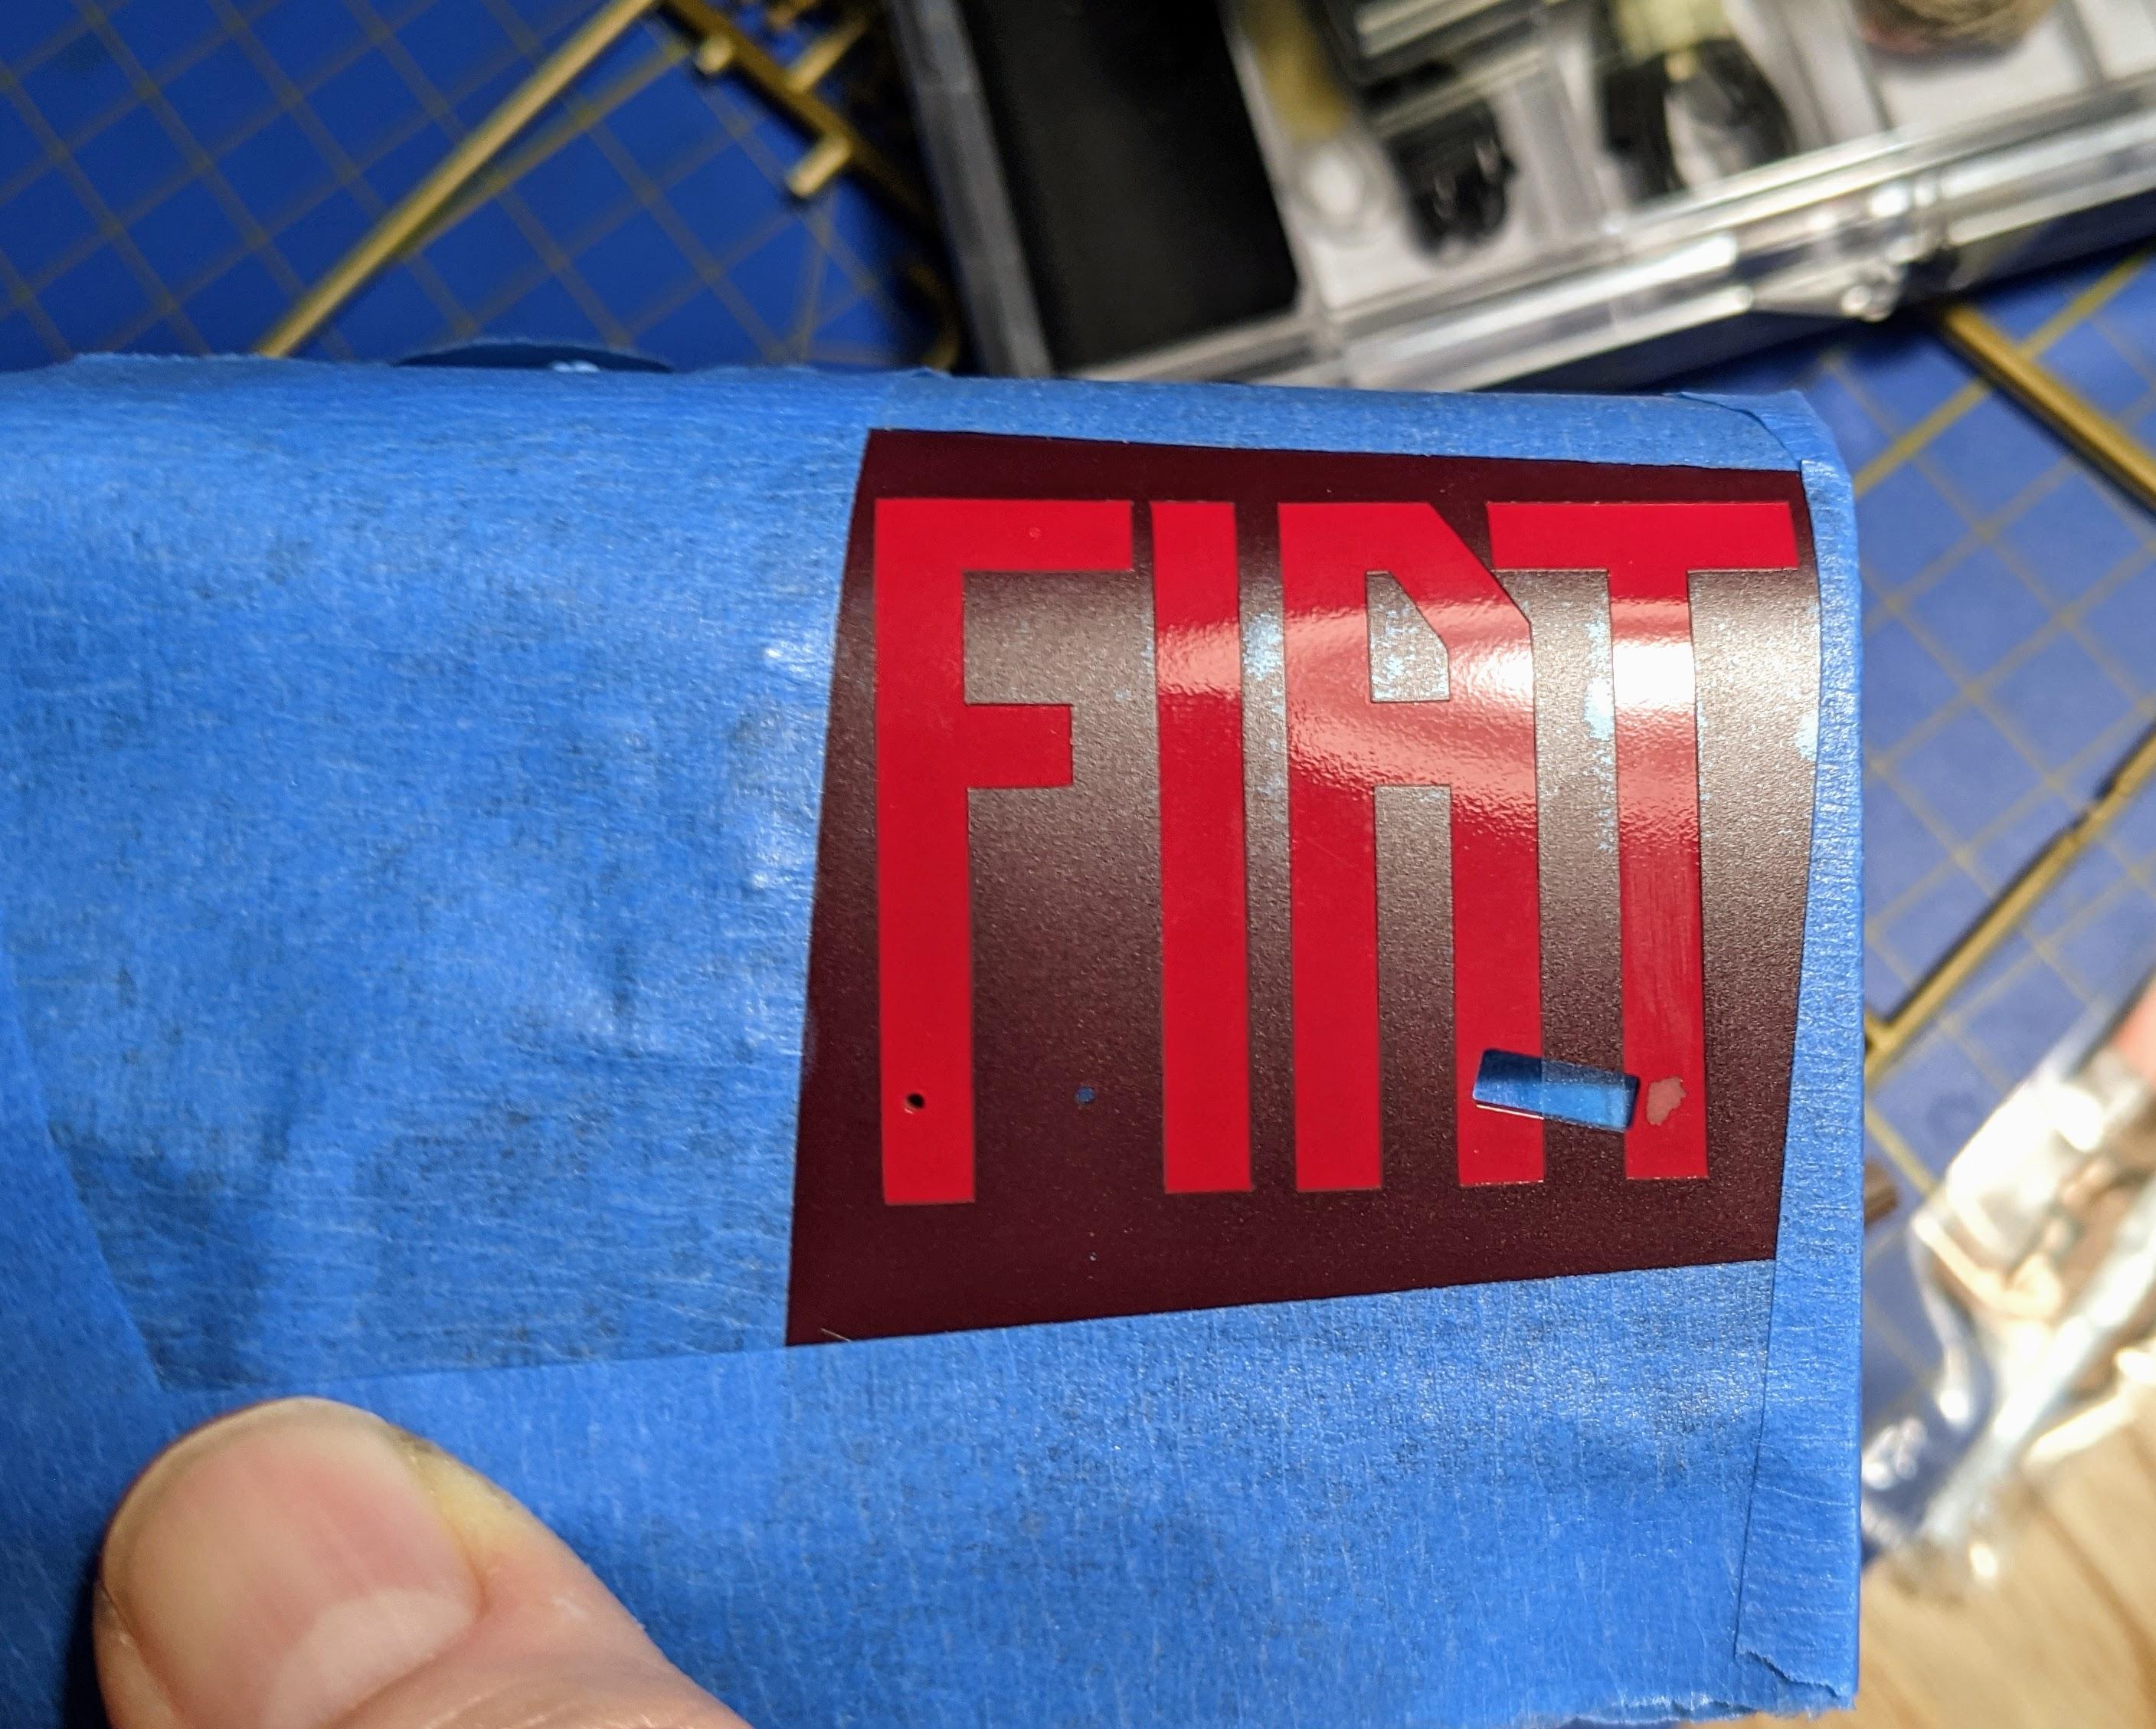
Update time... I got the pre-cut stencils from Orlee for the "FIAT" scripts. On the 1:1 the scripts are cracked with age. It's one of those textural details that I wanted to reproduce. I thought about using crackle medium under the white paint (unpredictable), drawing the cracks on with a technical pencil (smudgy) and finally decided to, umm, grab an X-Acto blade and start scratching up the fresh white paint I just laid down. Well, it could have been a disaster but it turned out to be exactly the effect I was going for...the cracks are in-scale and, just like the 1:1, you don't notice them until you get close. I installed the kit "Mefistofele" decals as well.
-
Fiat Mfistofele
jaymcminn replied to Kingslug's topic in WIP: Other Racing: Road Racing, Land Speed Racers
I'm in the process of cleaning up and mounting the motor parts for airbrushing right now. I'm debating how much of the motor to finish up before installing it in the chassis... probably going to install the ignition wiring but hold off on the tubing for the fuel system. -
Fiat Mfistofele
jaymcminn replied to Kingslug's topic in WIP: Other Racing: Road Racing, Land Speed Racers
Be careful with the handbrake and gear lever... I managed to break off my drilled gear lever already. I'm waiting to repair it until I'm basically done with the build. -
McBurnie Coachcraft 'Ferrari' Daytona Replica - 'Miami Vice Style'...
jaymcminn replied to crowe-t's topic in Model Cars
Great job in capturing the look of the McBurnie Spyder. Most people will never have any idea of how much work you put into making the Monogram MV Daytona look less like a real Ferrari. Beautiful finish on that black as well! -
The Isuzu 117 is a fairly esoteric subject outside of Japan, but it's a very pretty car that I'd like to have in my collection. The 1st-gen MR2 is a must-have for me.
-
1/12th Italeri Alfa Romeo 179 /179C
jaymcminn replied to AaronM's topic in WIP: Other Racing: Road Racing, Land Speed Racers
Excellent work so far. It's always exciting when you get to the primer stage...until you get stuck in the eternal prime/sand/prime/sand cycle. The tub and engine look great! -
Fiat Mfistofele
jaymcminn replied to Kingslug's topic in WIP: Other Racing: Road Racing, Land Speed Racers
I like the look of the bolts (instead of the screws). The chassis has the right crusty/lumpy look too. Keep the updates coming!