Anglia105E
-
Posts
3,487 -
Joined
-
Last visited
Content Type
Profiles
Forums
Events
Gallery
Everything posted by Anglia105E
-
Marvellous build Andy.... and what fantastic detailing! The battery caps and the hose clips, just perfect. The model can easily pass for the real car in photos. David
-
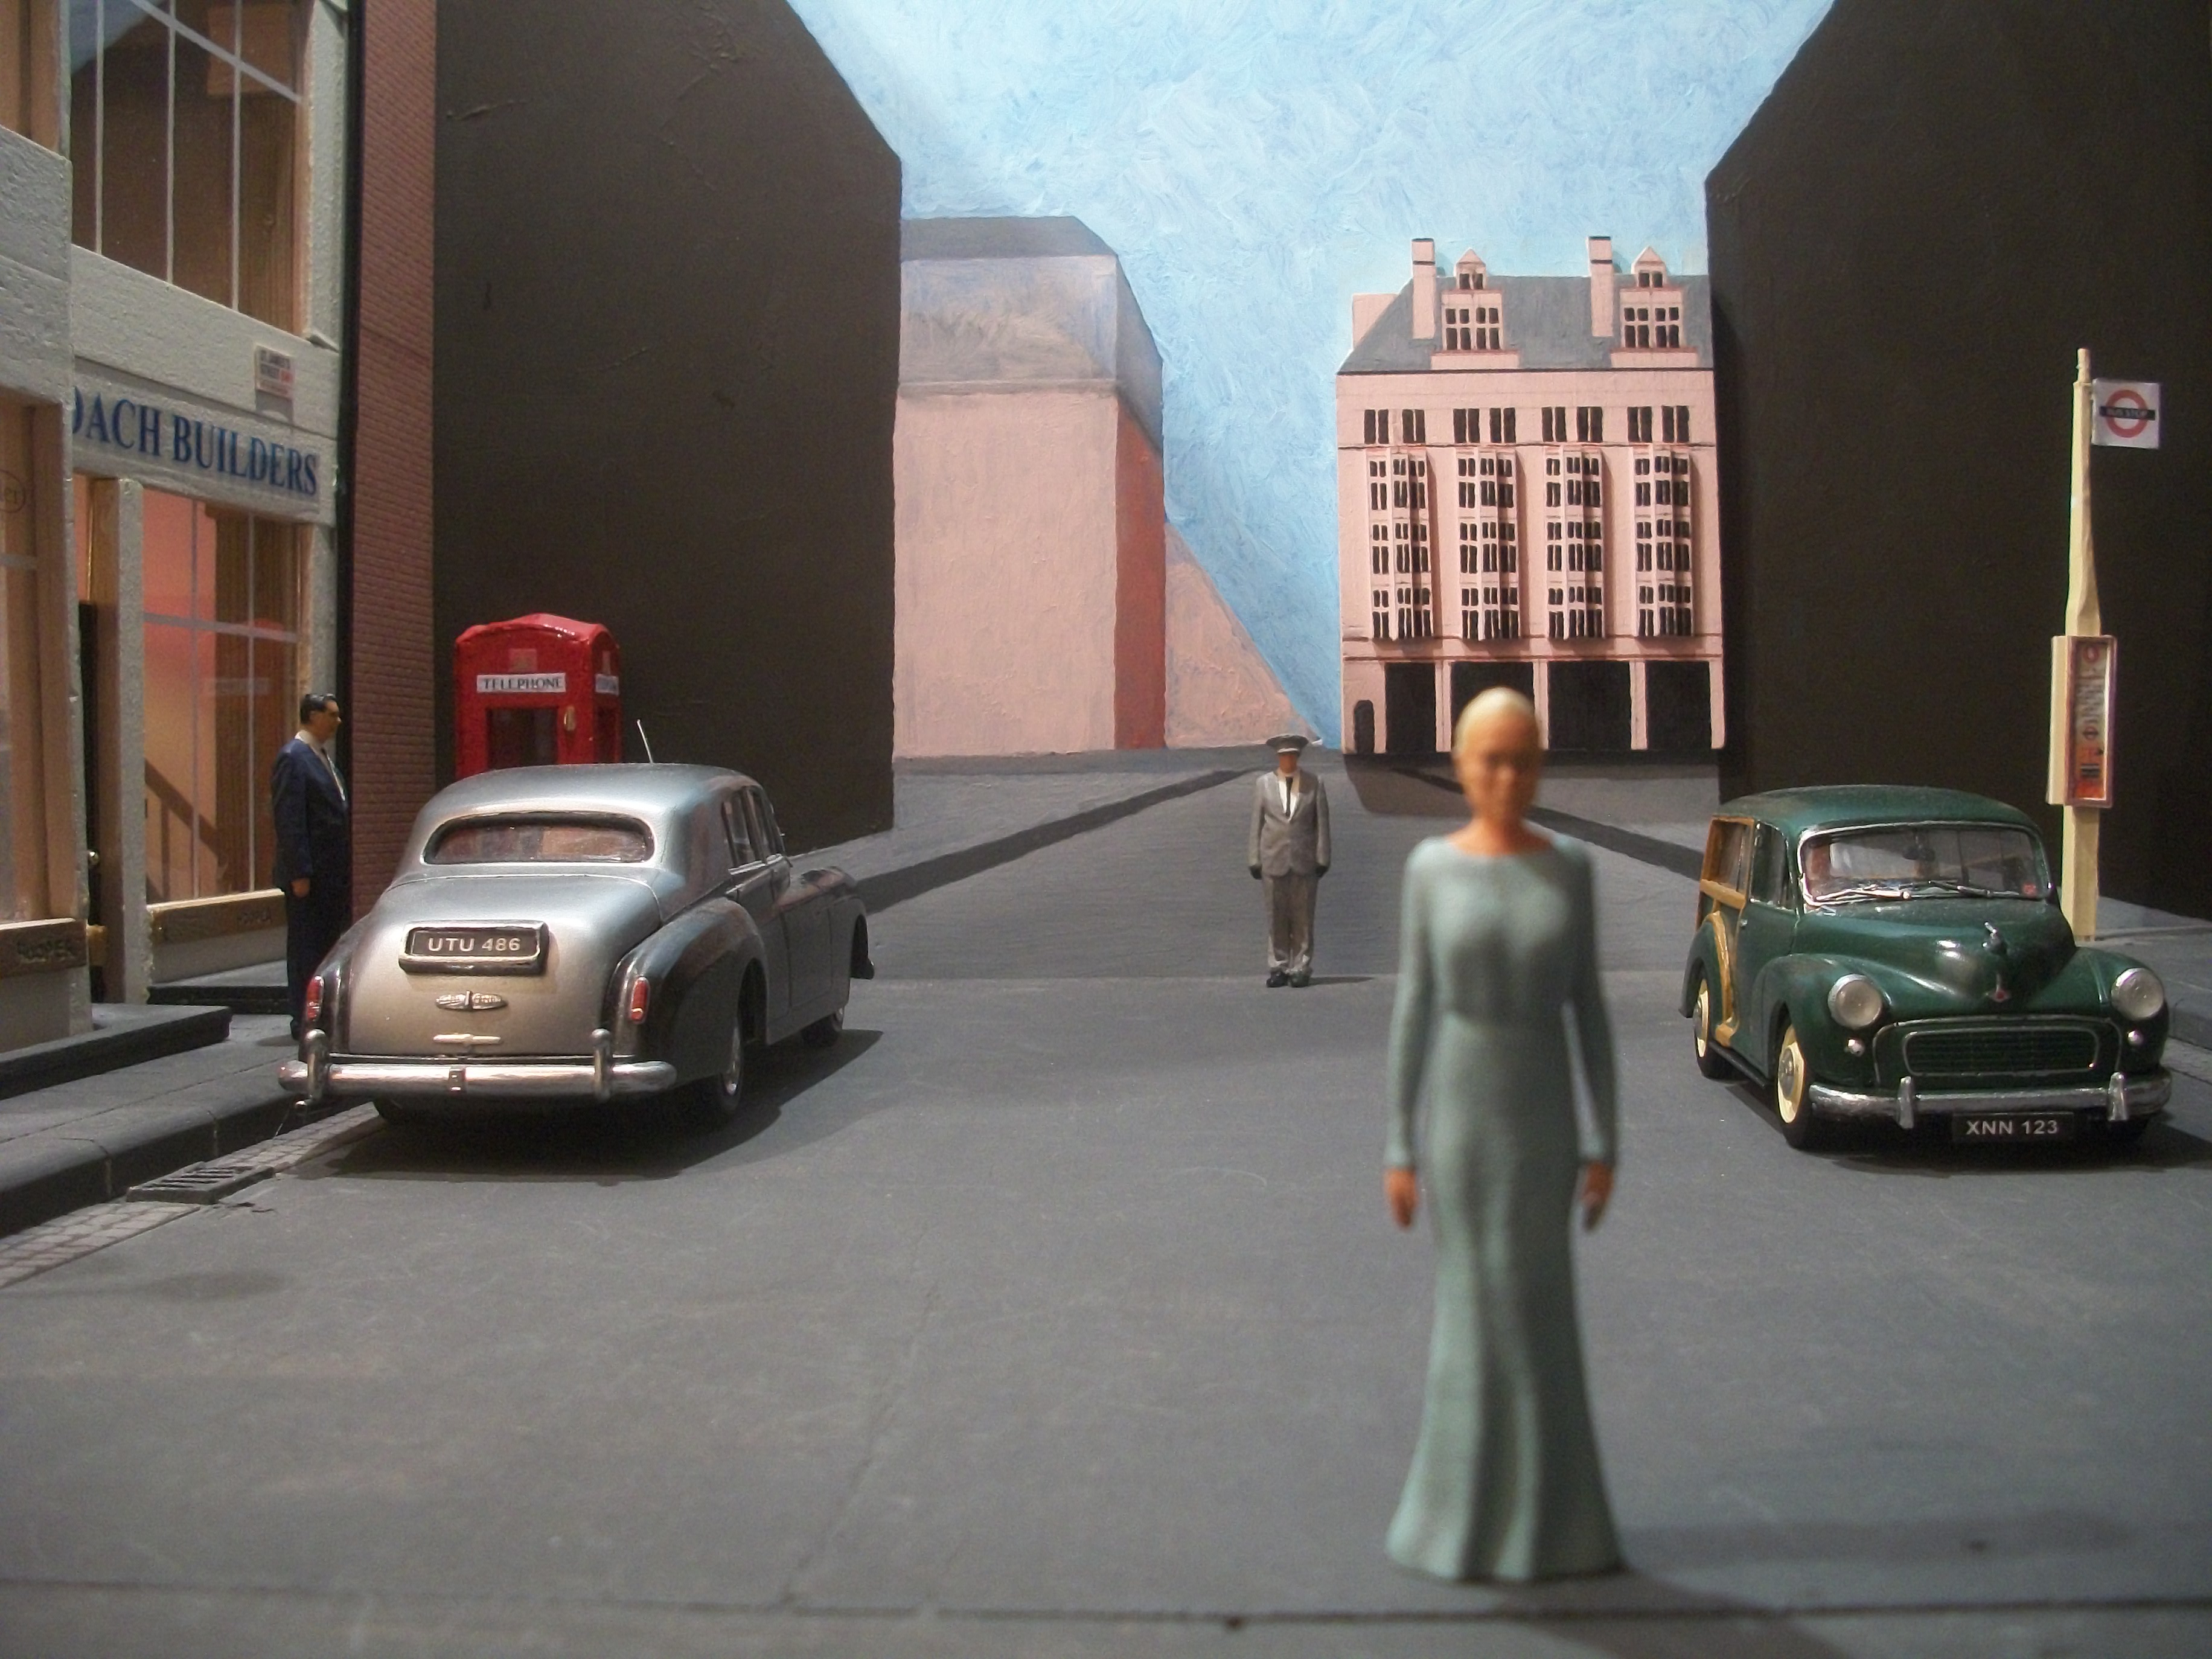
The kerb stones need final correction, but the surface of the road and the pavements is now the correct colour. Experimenting with different model cars and figures placed in certain positions. Lighting strength and angle is crucial to achieve the seamless transition from foreground to background. David

-
This really works from all angles Charles..... and actually it is the photography from so many different angles that shows how good your build is. The rust effect is perfect, the rear bumper hanging off, the oil leaks, the flat tyre and the two guys making a deal.... the whole thing is full of interest. Also, it shows that you don't necessarily need to build a huge diorama, when you can tell the story in such a small space. Each time I go back and take a second look there is something I didn't see before. I like your diorama a lot. David
-
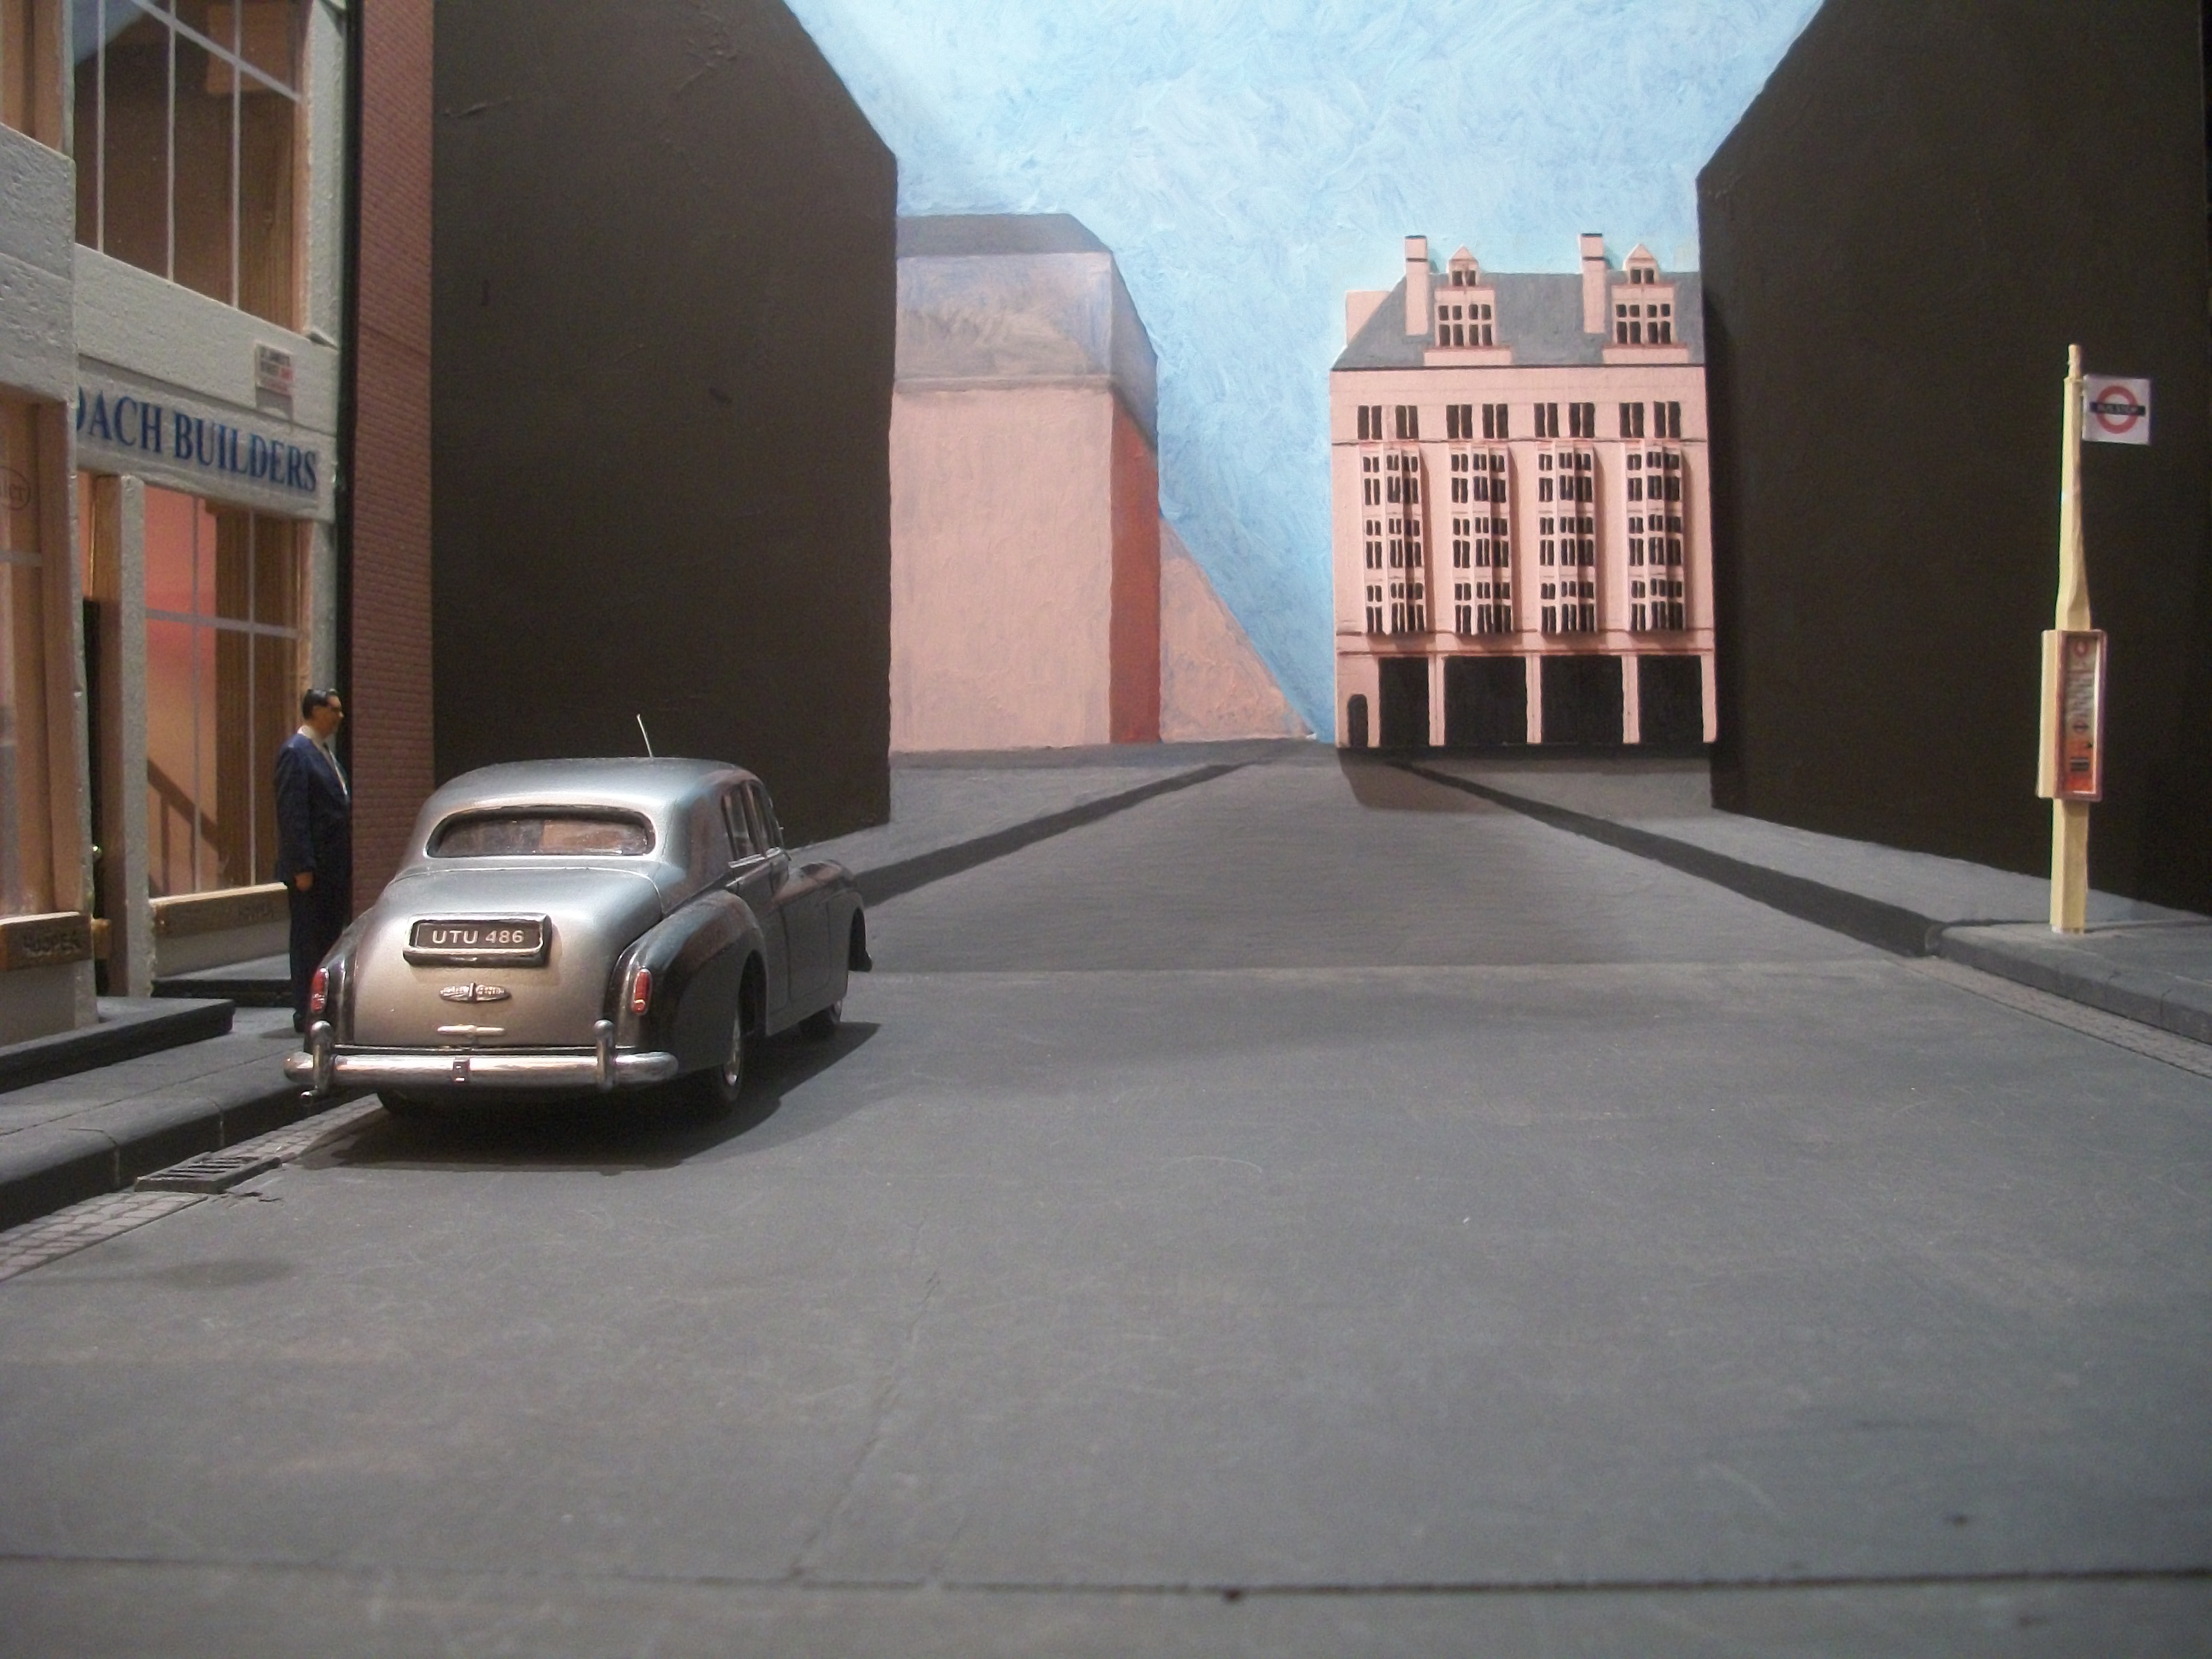
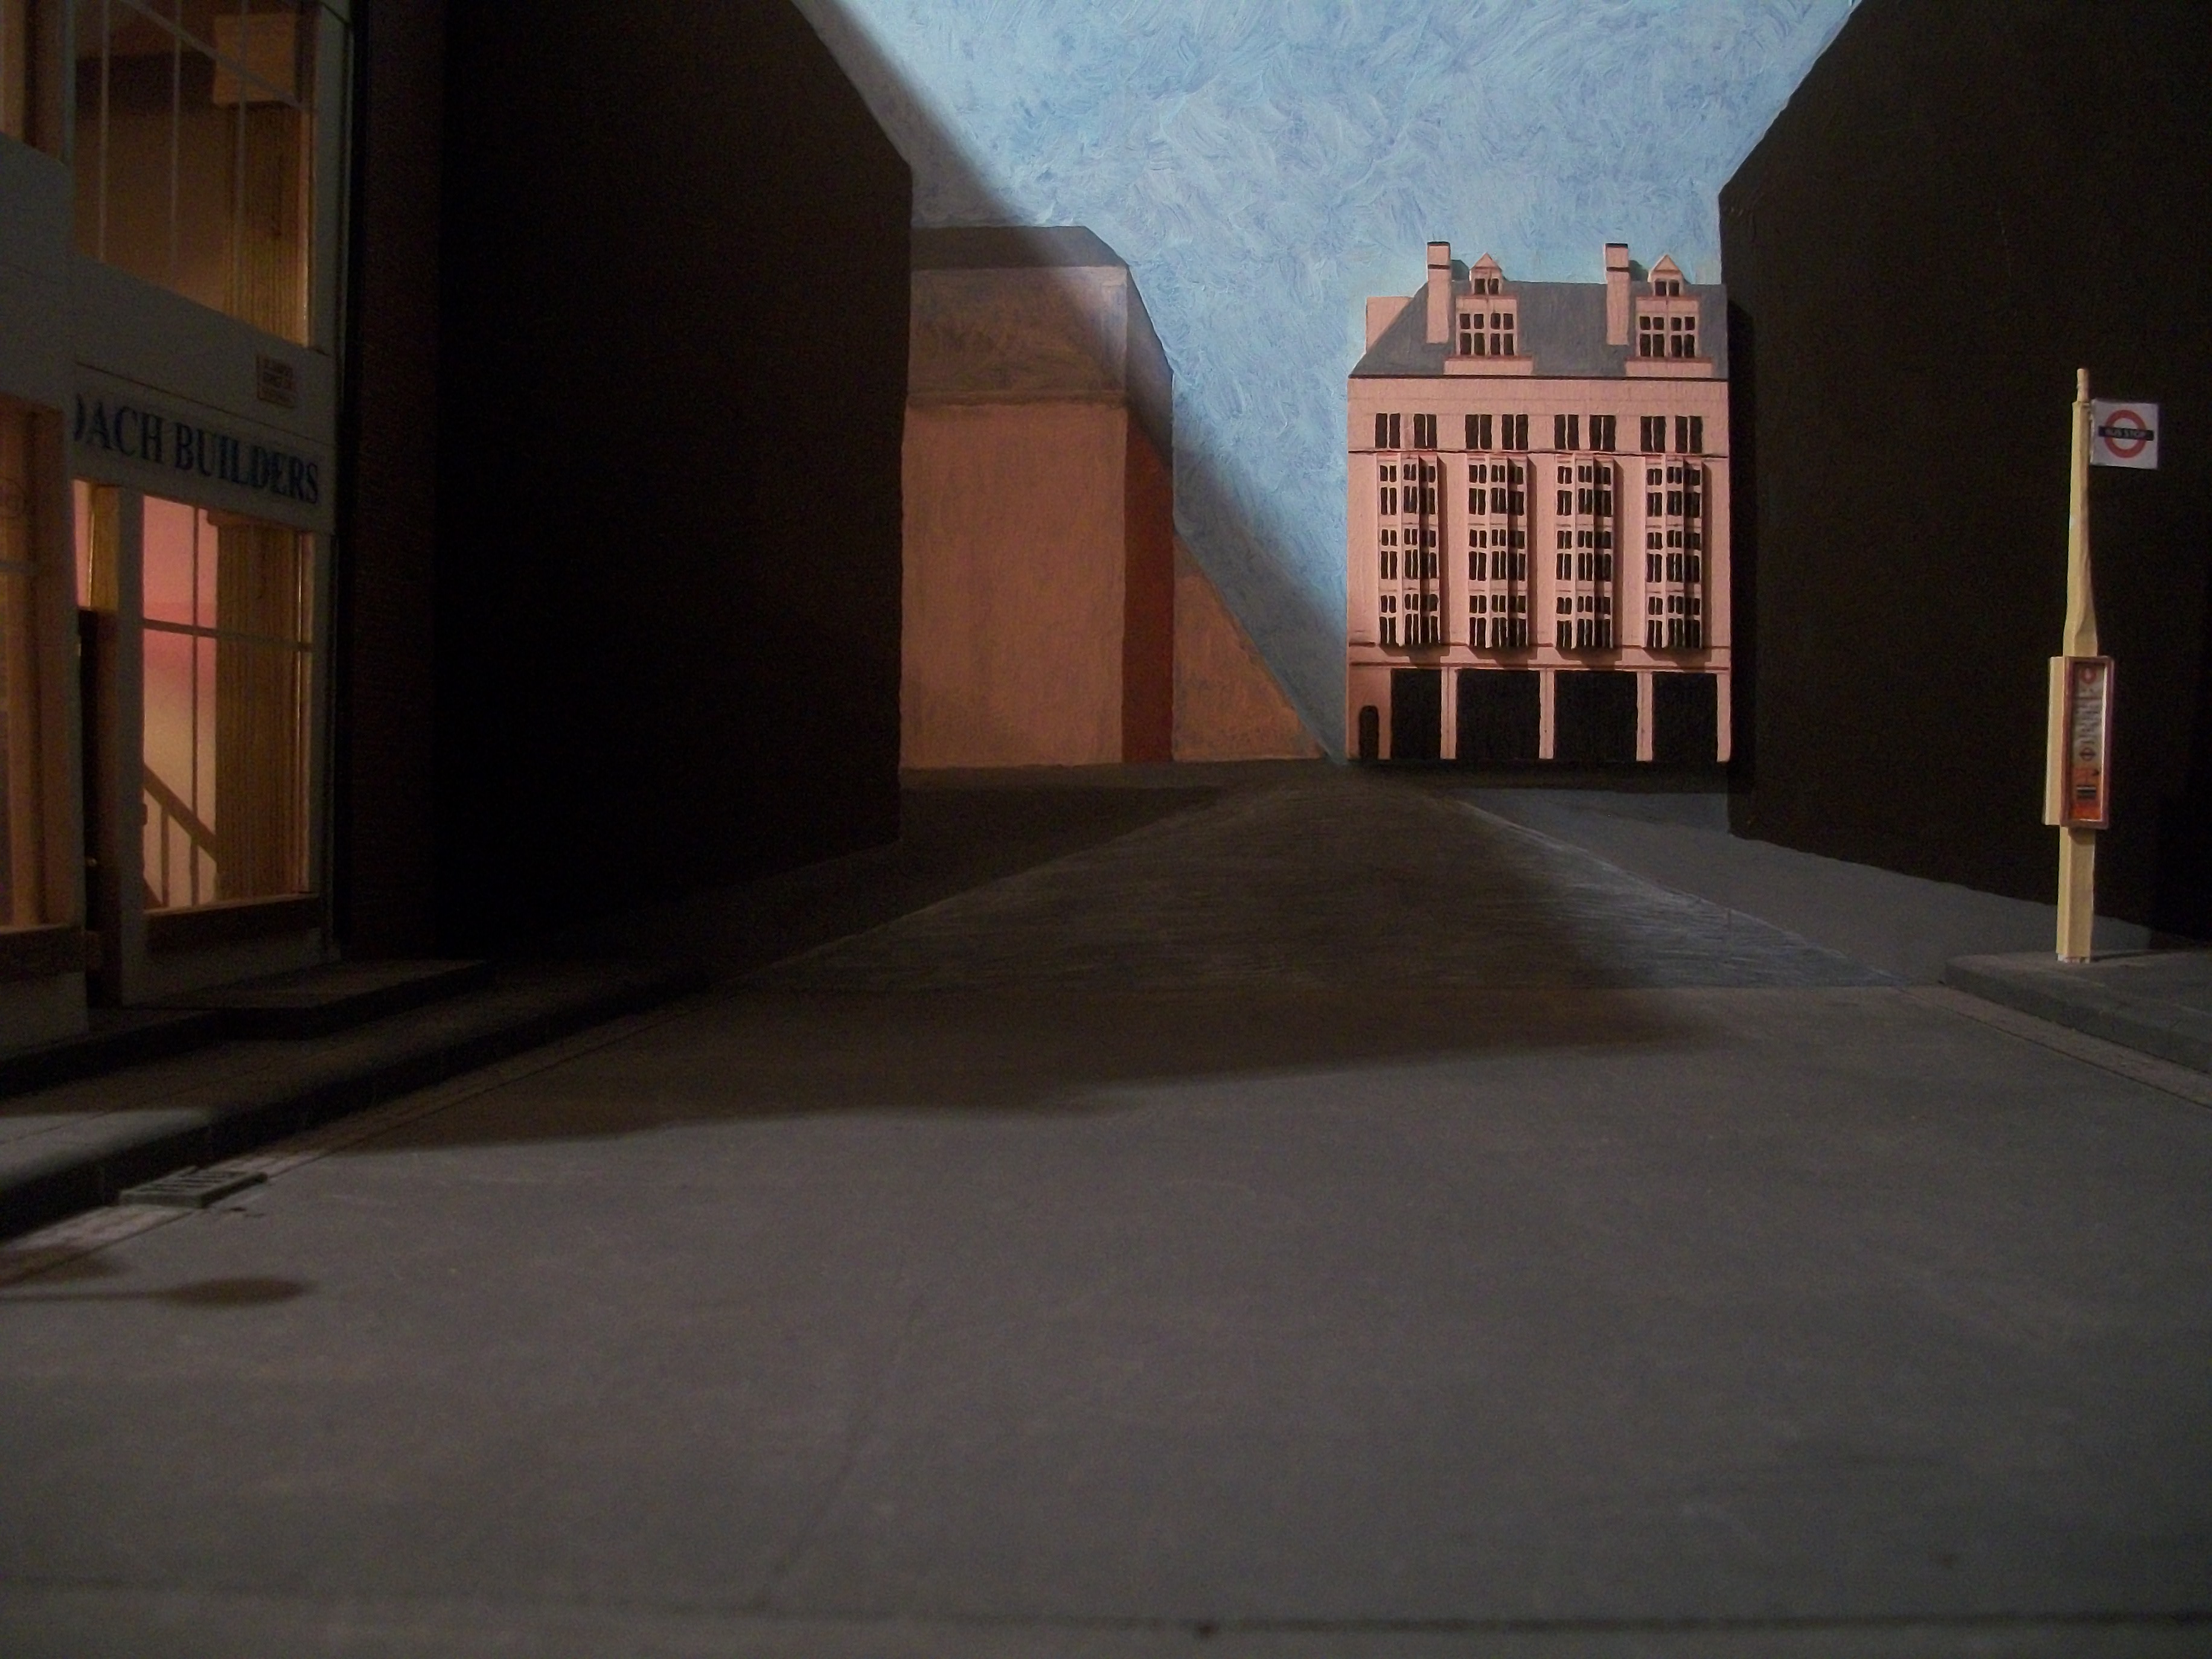
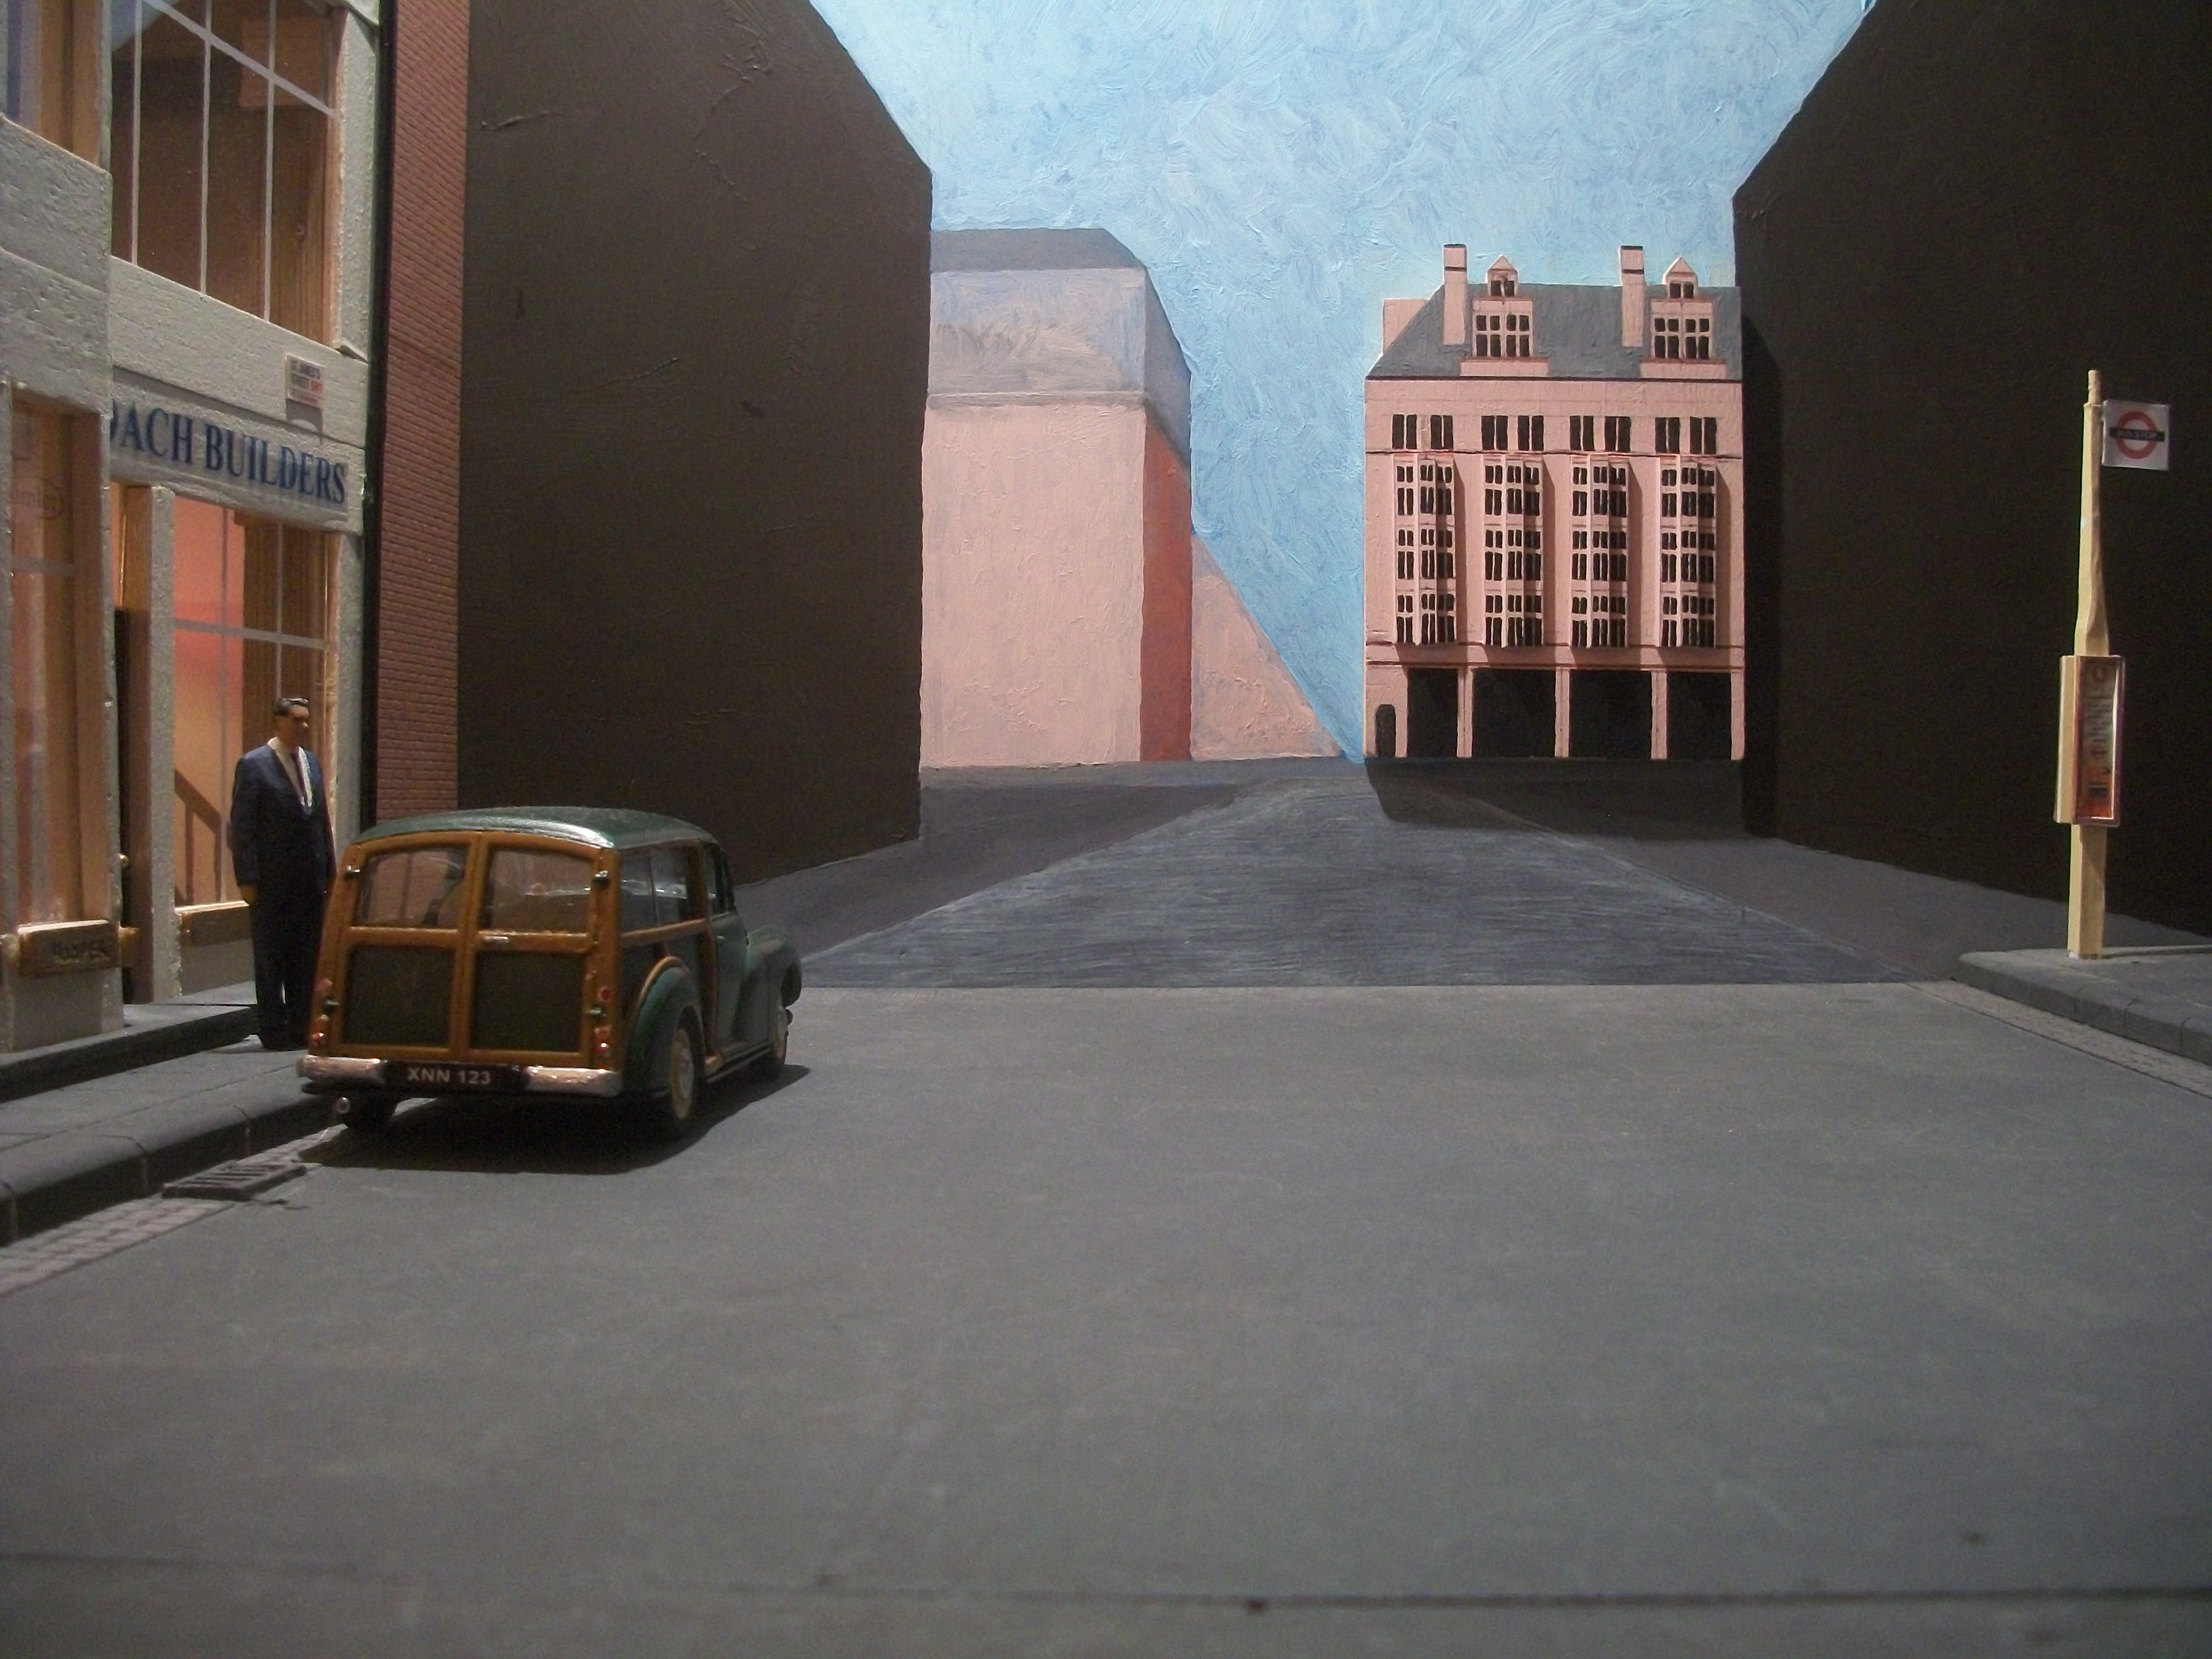
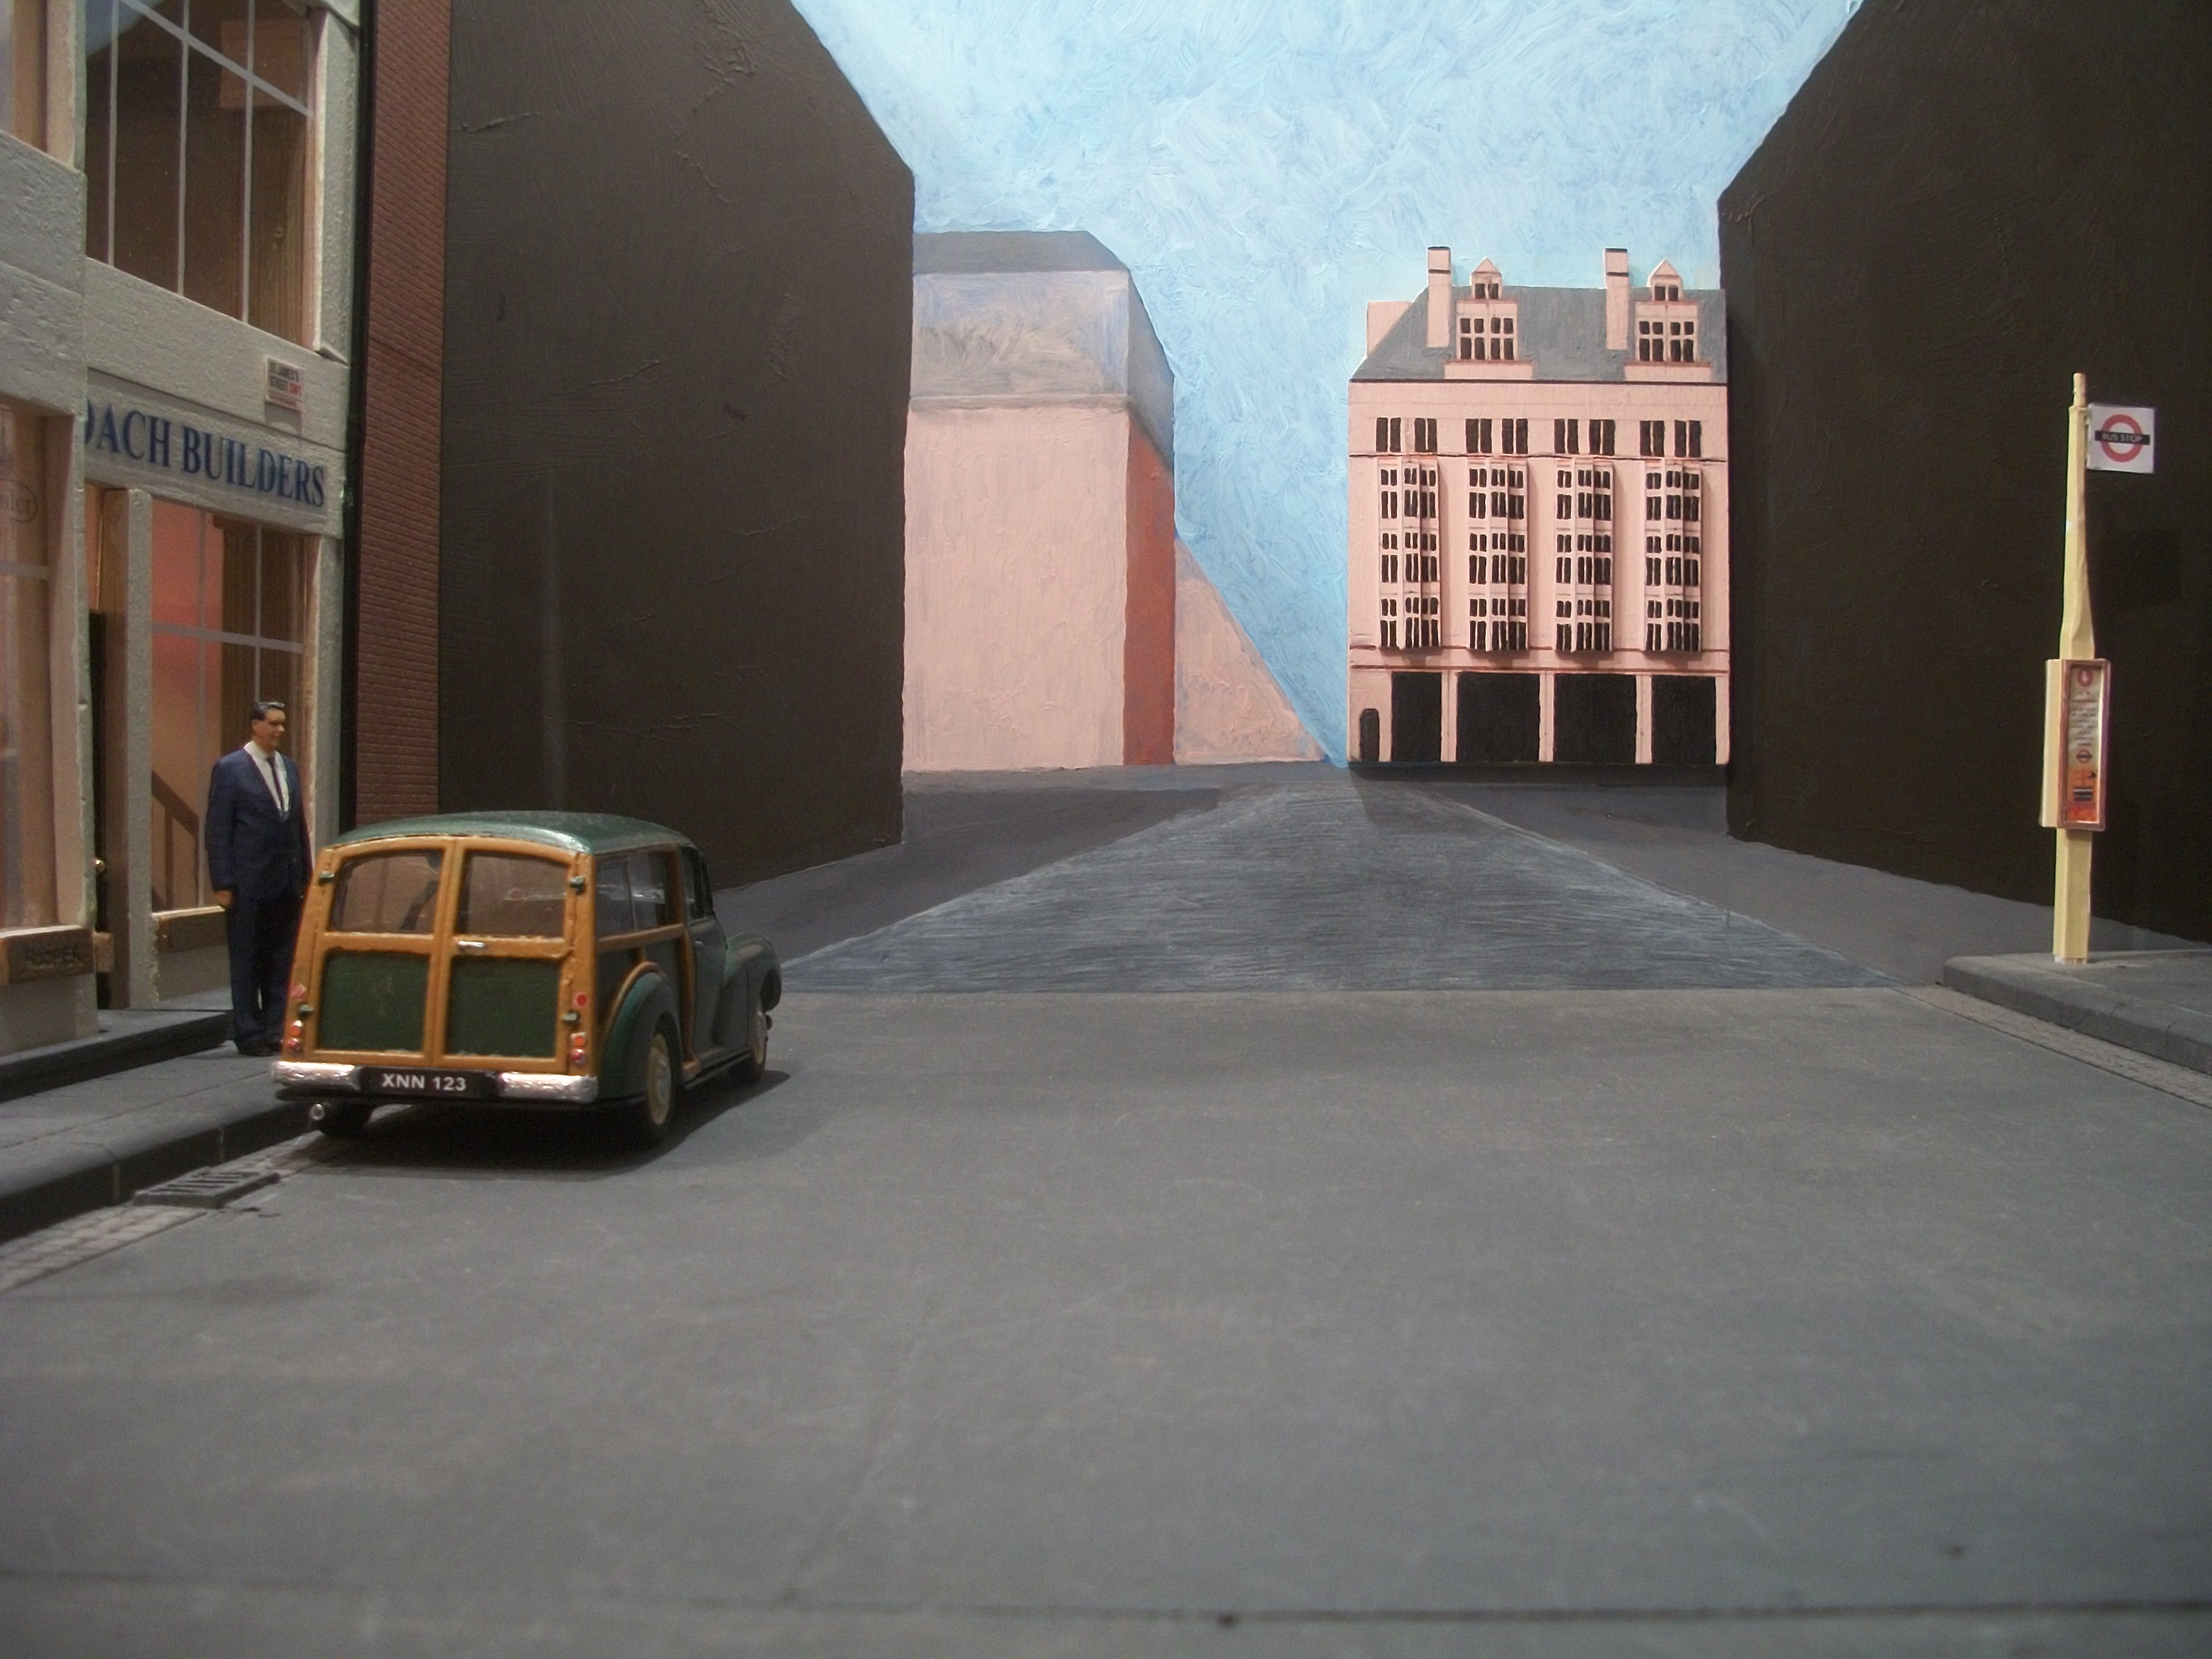
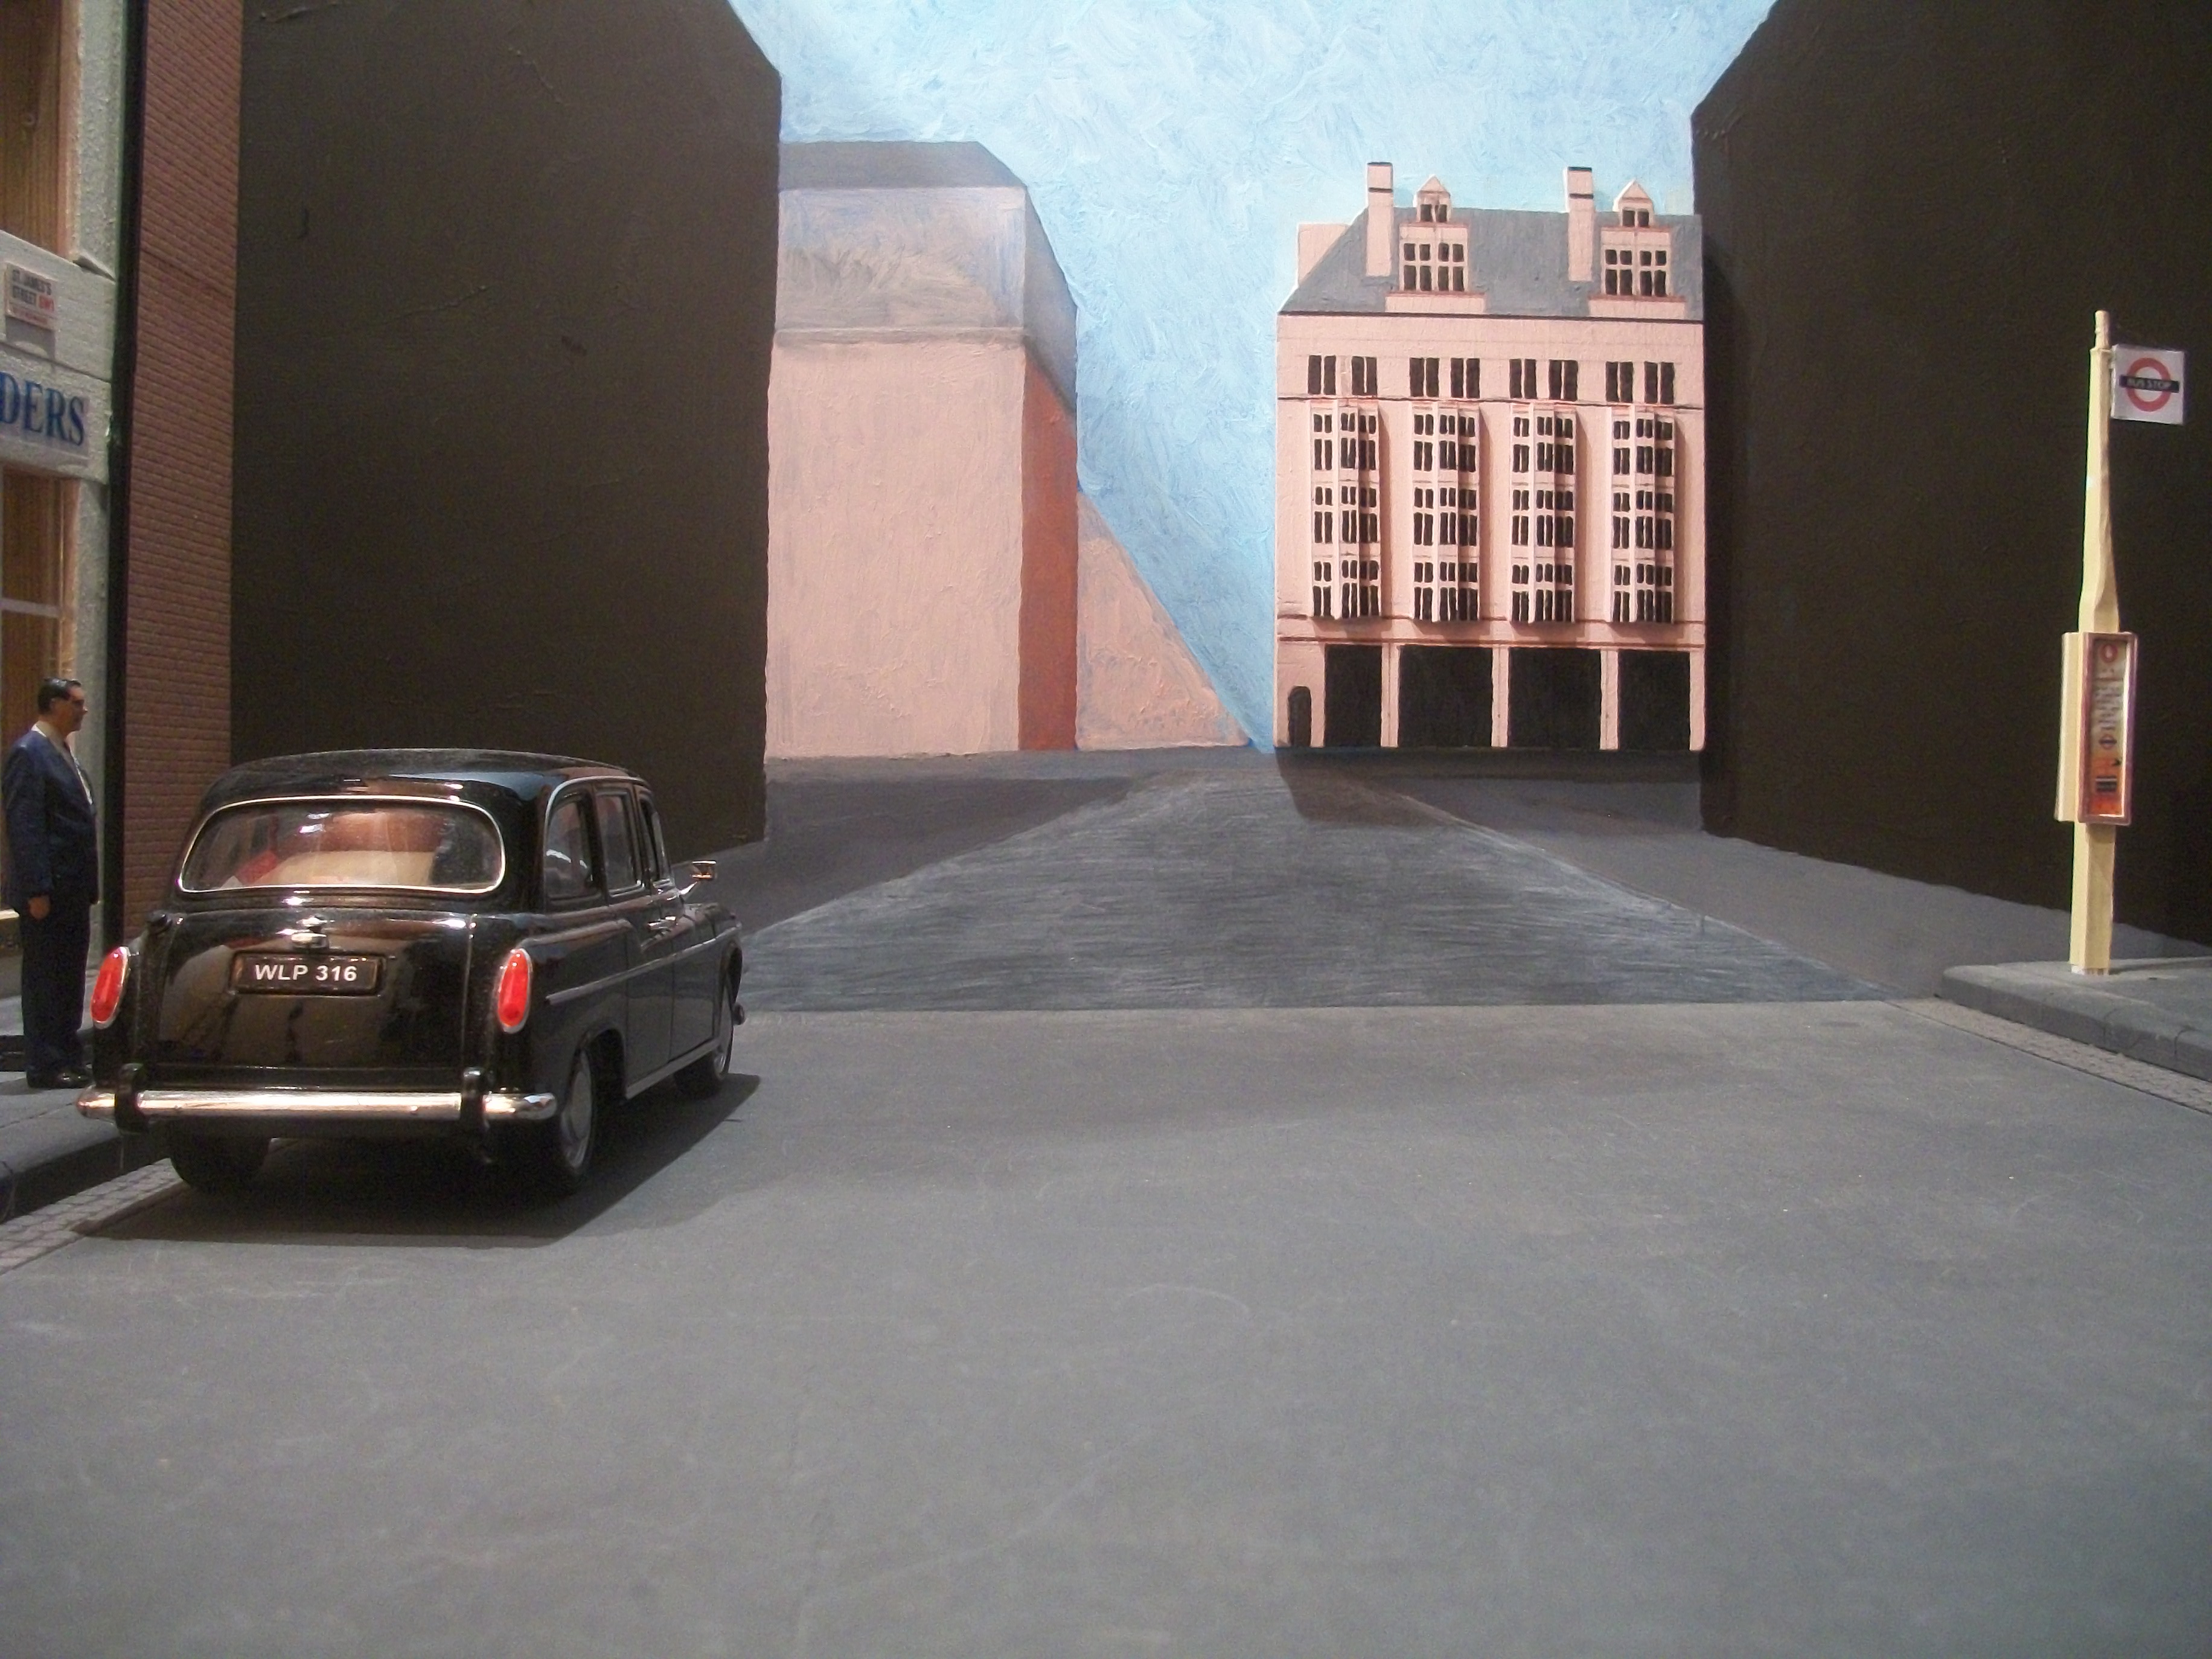
There is some more work to do on the background perspective painting for the diorama, but here are some photos of the background panel in place. I am quite pleased, and somewhat relieved, that the perspective does actually work! The pinkish coloured building that you see to the right of centre is made from balsa wood and this is the middle ground. Still need to match the colours of the road in the foreground (diorama) with the road colour in the background (painting). Tested this scenario using different lighting conditions, ranging from one 100W daylight bulb to two 100W bulbs then three 100W bulbs. Thanks for looking.... David
-
Hi Greg..... I found that coating any surface with Yacht Varnish allowed me to use Molotow Liquid Chrome Pen, and I would imagine that Bare Metal Foil would also like the Yacht Varnish..... worth a try because the surface comes out really shiny. David
-
Many thanks Anders..... and there will be more! David
-
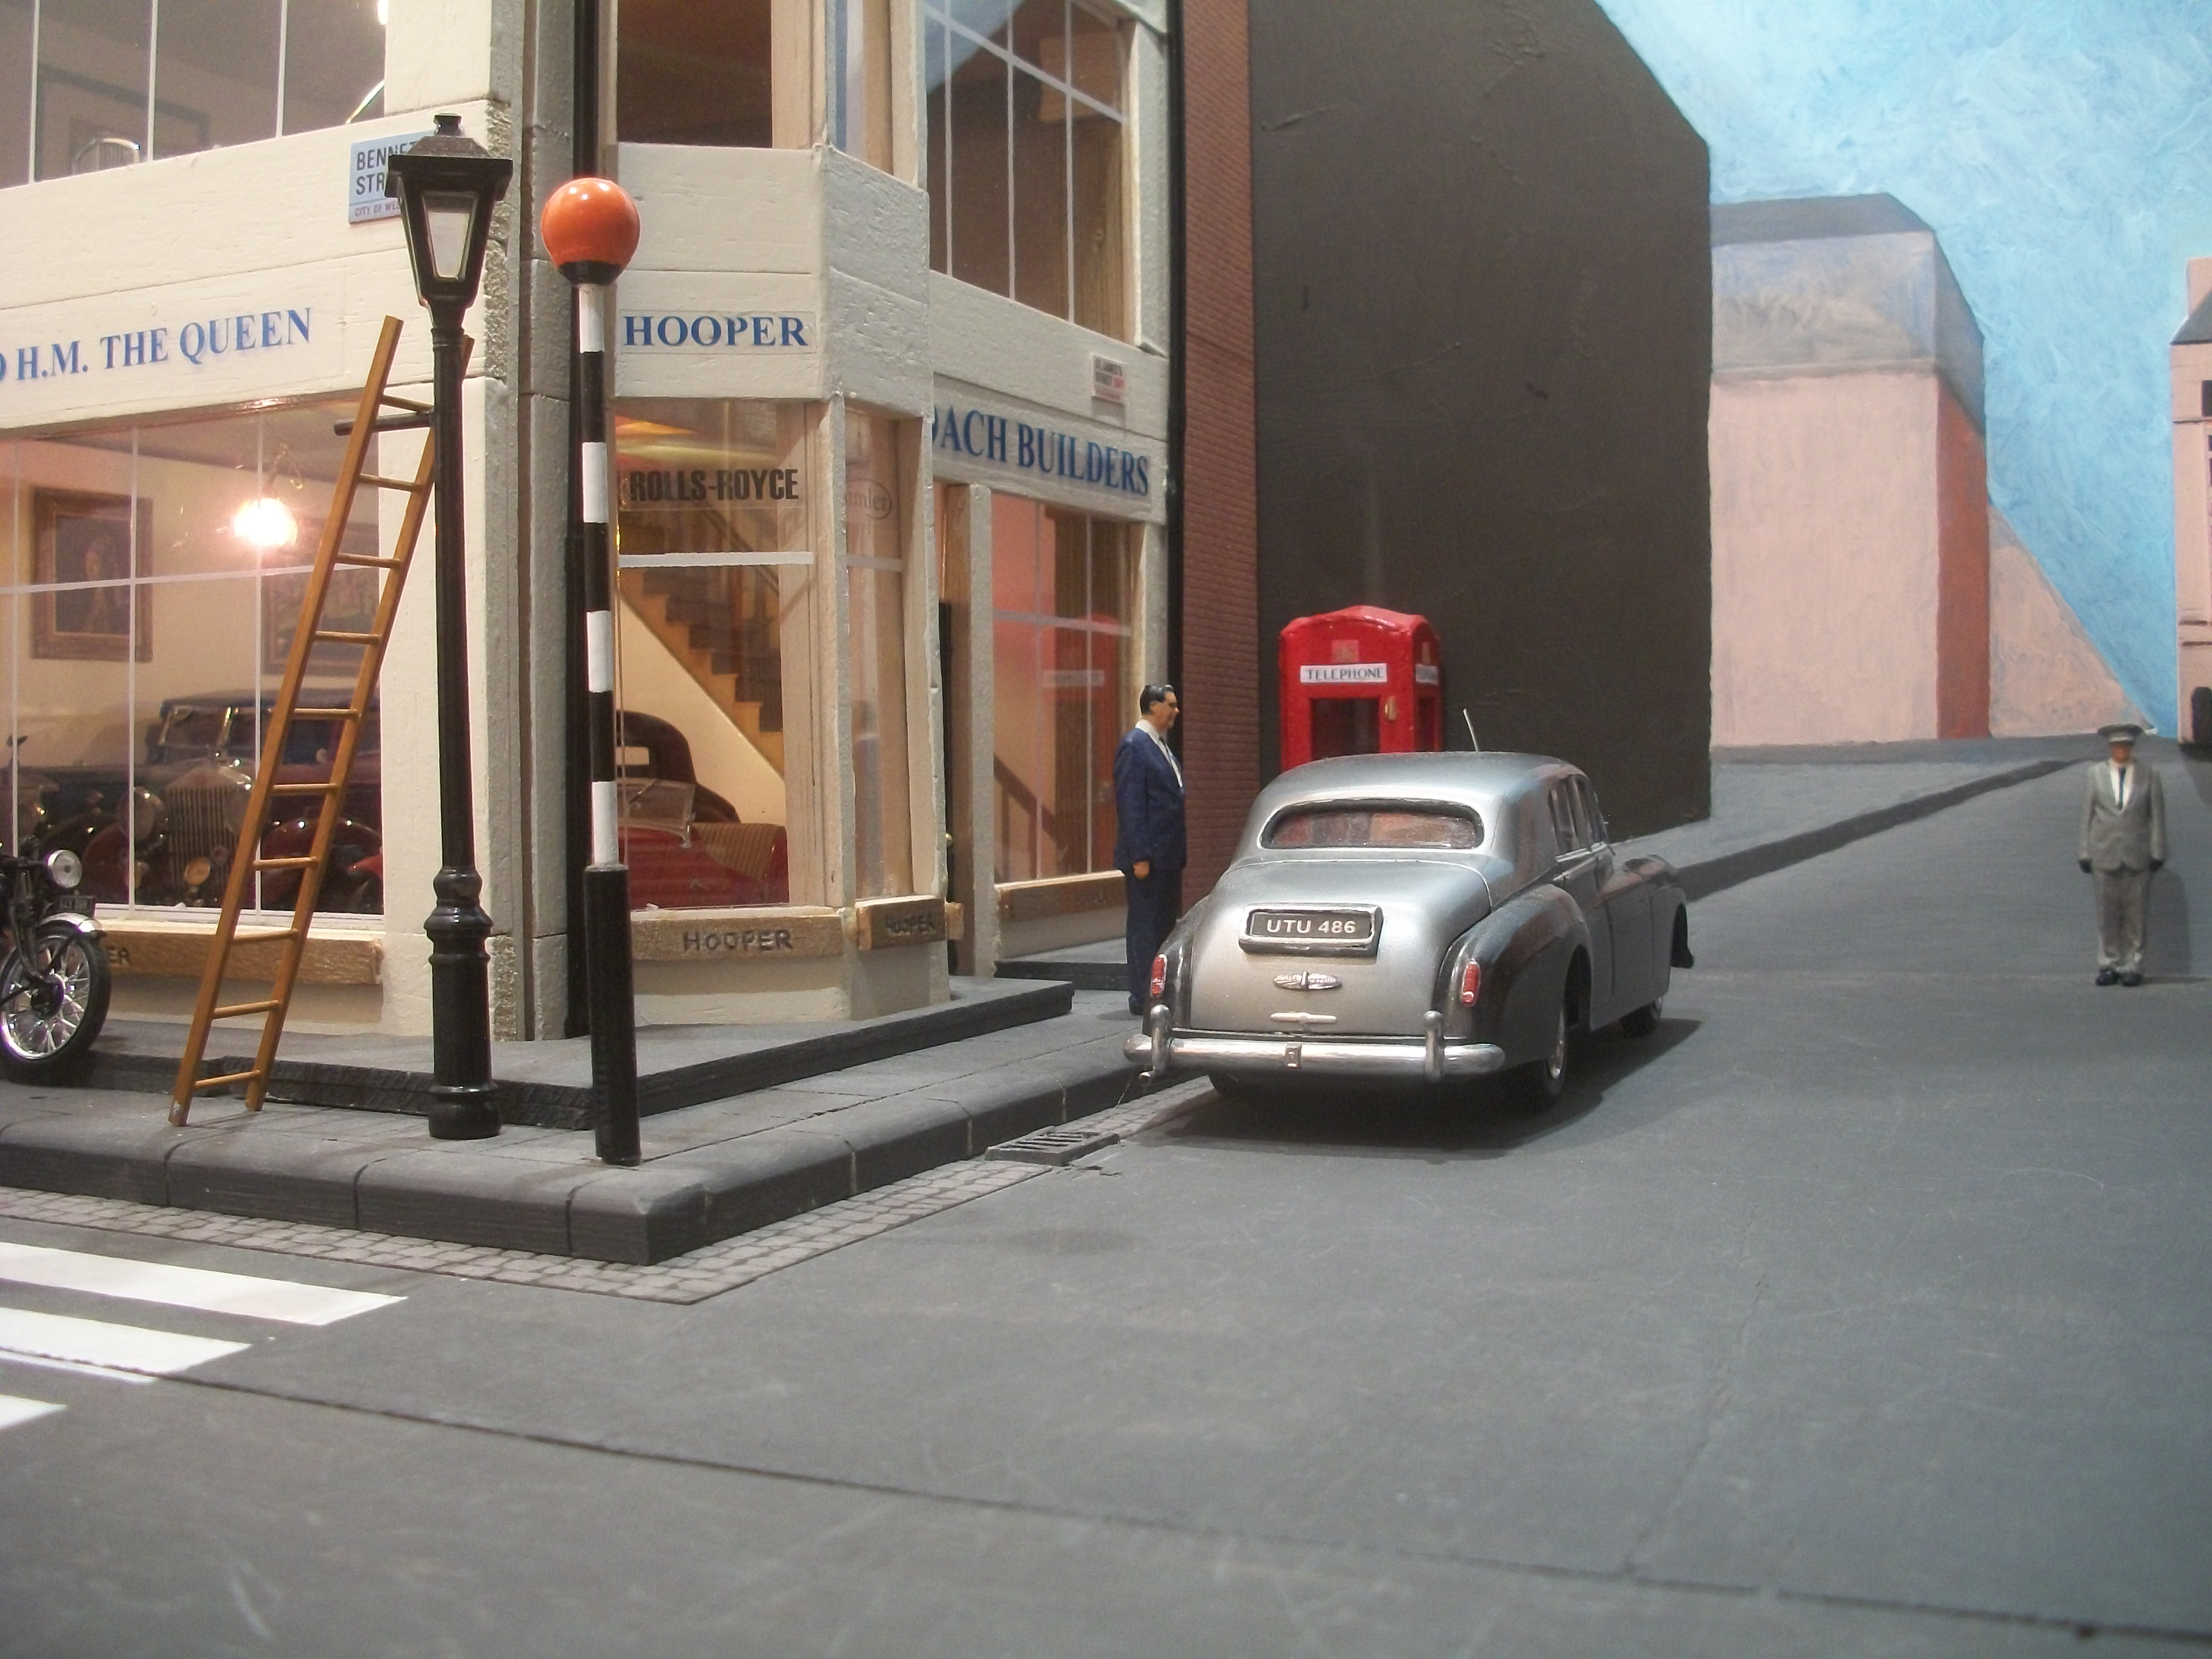
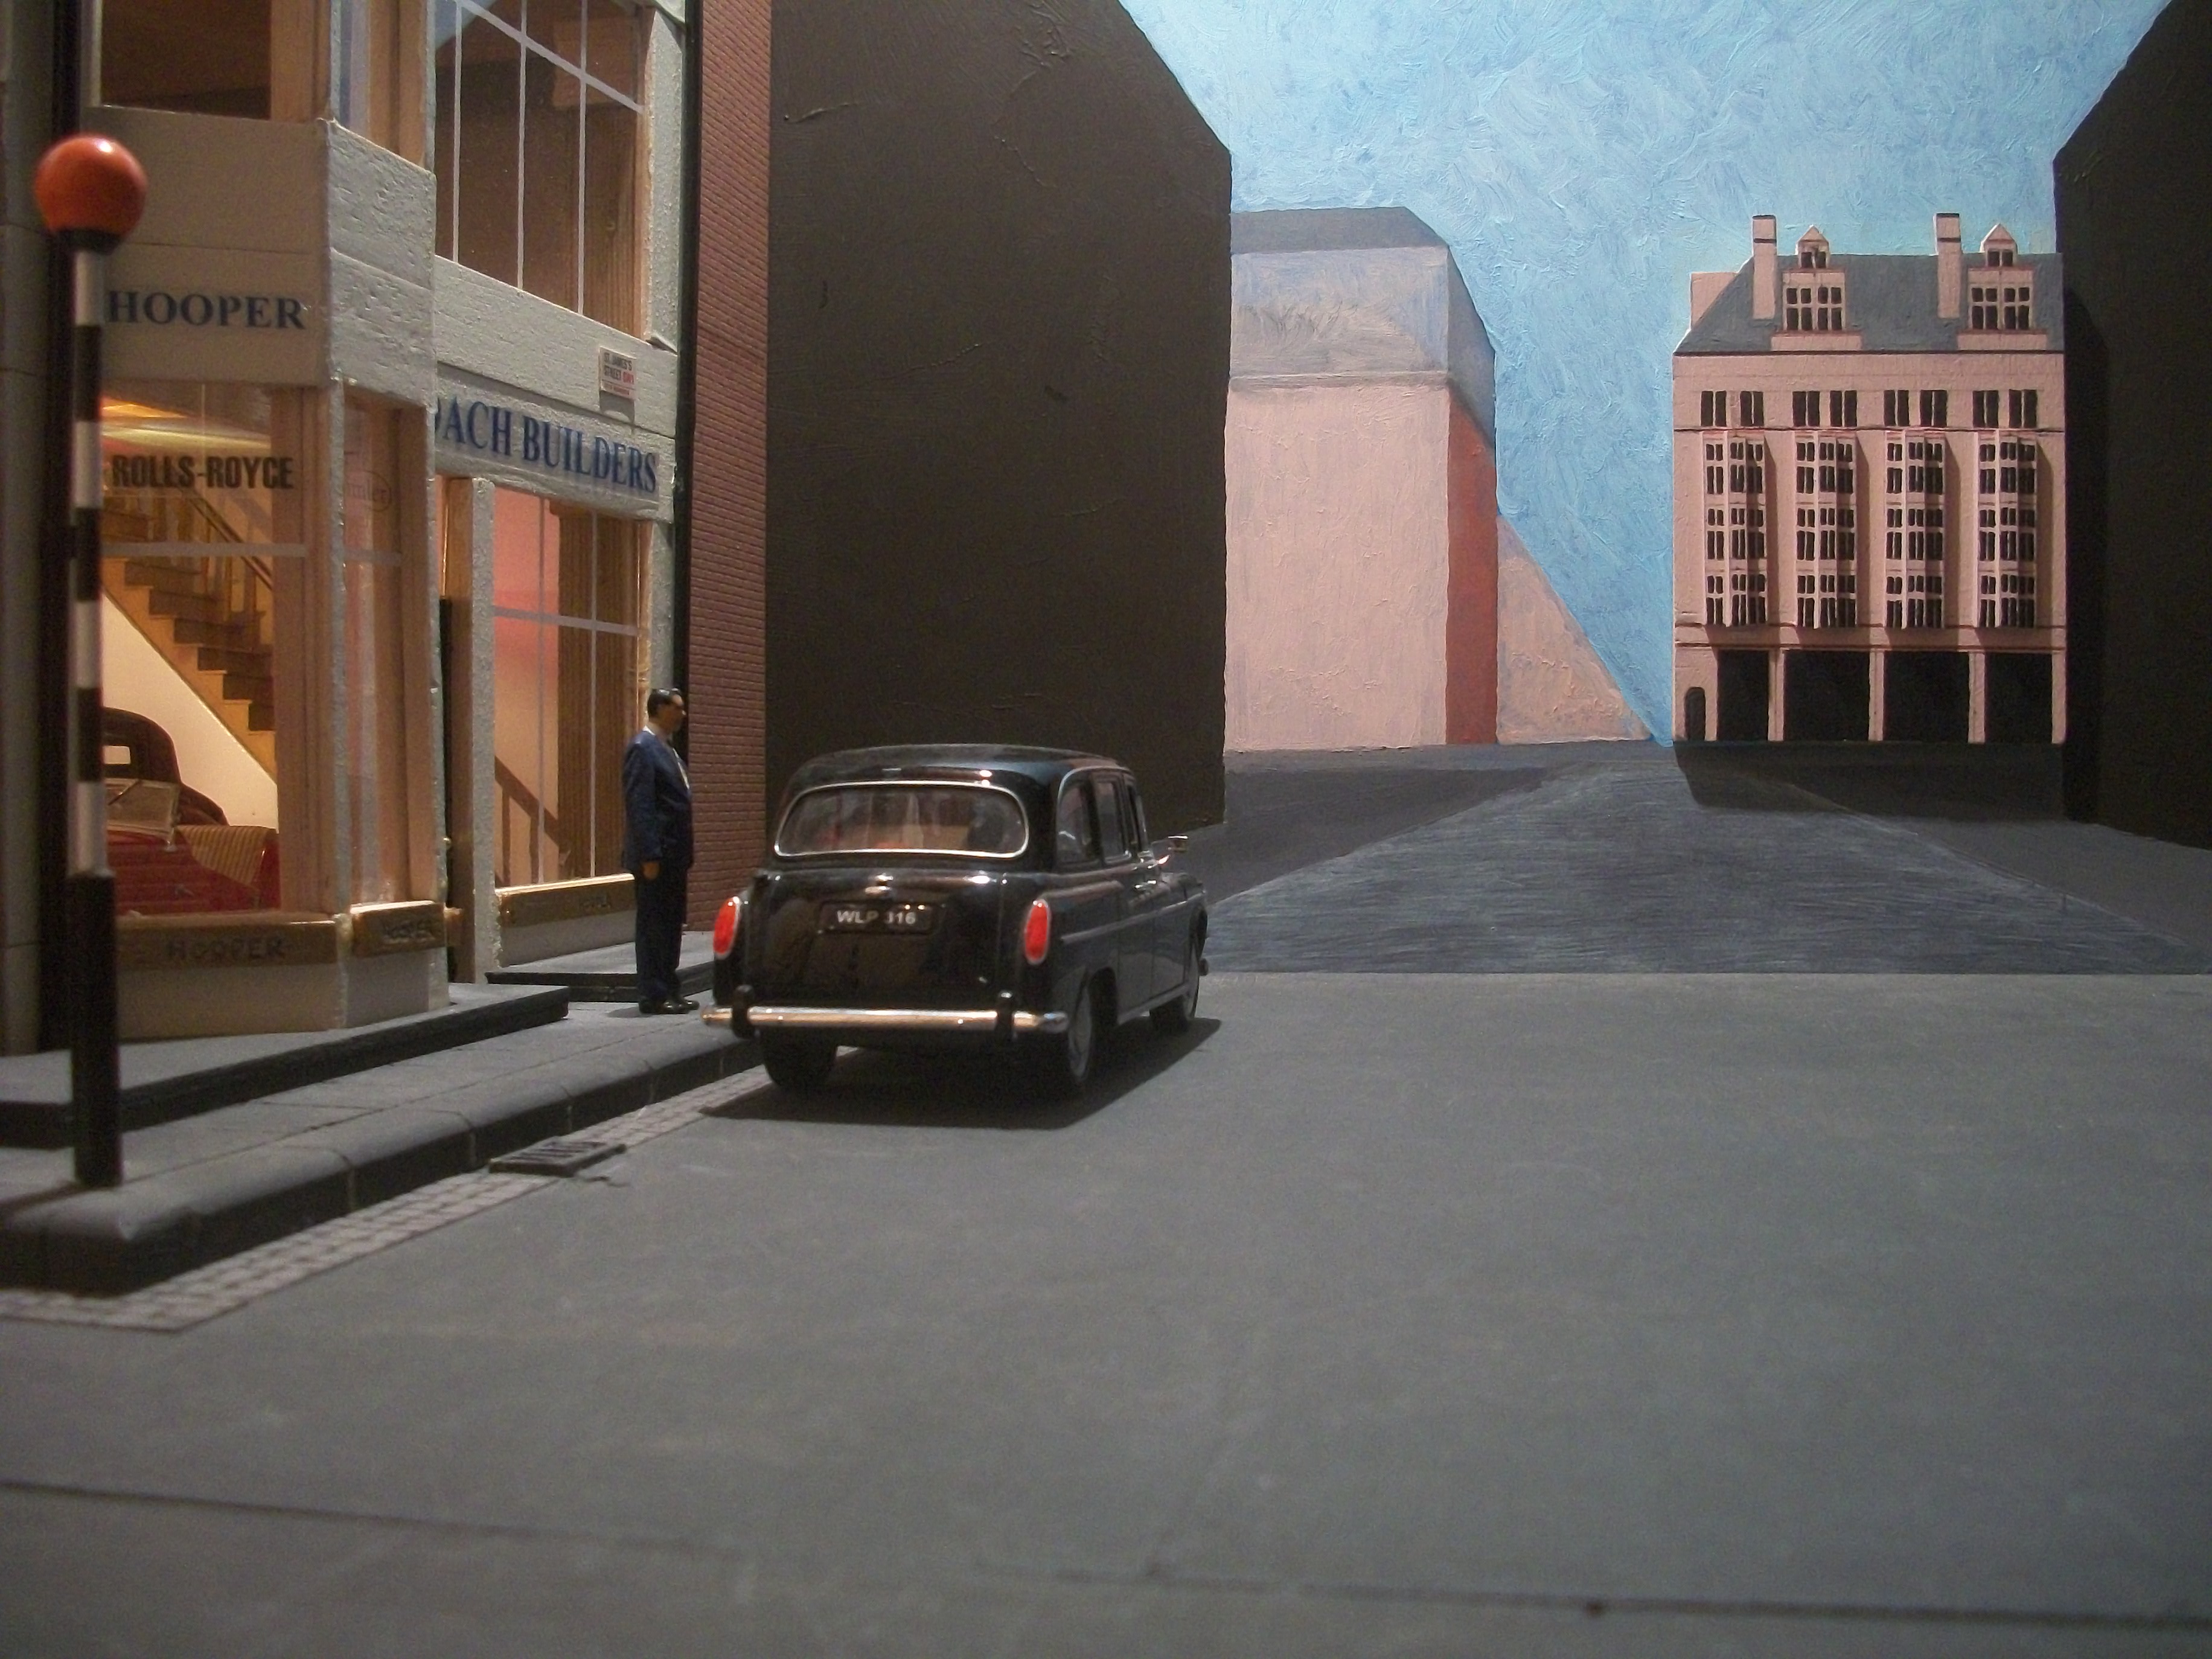
You are right about the modern street markings Eric, and I am pretty sure they would not have been there in the 1950's. Apart from the zebra crossing this scene wouldn't have had double yellow lines or even lane markings at that time. Very observant of you. The idea at the moment is to bring out the pink coloured building that you see over to the right hand side, by making it a balsa wood relief component of the painting. In this way it will not be a part of the painting in the background, nor will it be a part of the diorama foreground, but instead it will be the middle ground. Anything that appears in the middle ground will serve to blur the line between foreground and background. I haven't been able to source any photographs from 1958 that show this view looking up St James's Street towards Piccadilly, so I am using Google Maps street view as a reference tool. Although this is a marvellous tool, and it is very helpful, the problem is that the vehicles and markings are much too modern and also the camera angles from the roof mounted camera are rear facing and on the wrong side of the road. As you may have noticed, the large building on the left hand side, which is next door to the Hooper & Co building is covered completely in scaffolding and PVC sheets. This is a shame because that building is very old and could have provided period detail. David
-
Nice realistic effect with the floor mats Mike, and the body colour will look good when you get the clear on. I take your point about the pressed steel wheels and of course the wire spoked wheels look way better, so it is just the 1955 MK I car that needs the pressed steel wheels to be accurate. ' Accuracy ' is everything as you know! At least the Tamiya chrome wire spoked wheels will go on the Tamiya Morgan. Just got my 3.8 litre Jaguar engine assembled last night, which needs painting. Your build is going well and this Jaguar is such a beautiful design, almost as beautiful as the Rolls-Royce Silver Cloud ! David
-
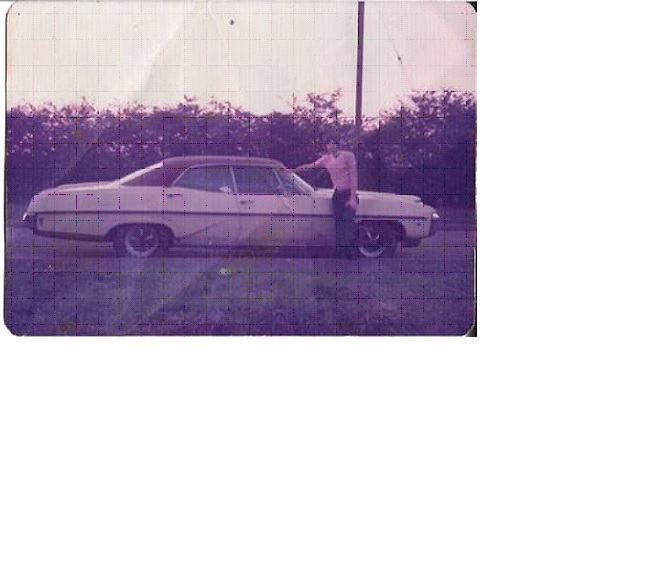
I really like your 1967 Pontiac Bonneville restoration build Steve, and it is so similar to a car that I used to own, which was a 1968 Pontiac Parisienne. My car was a Canadian right hand drive model with 5.3 litre V8, having pale yellow paintwork and brown vinyl roof, registration number FCK 33. Despite searching all over the Internet for the past year I have not been able to find a 4-door Parisienne kit, only the 2-door versions. Do you know of a 2-door Pontiac kit that would lend itself to a 4-door conversion that would not be too challenging? Photo of my car here.... David
-
Nice looking build there Andreas, and your daughter will love that ! Welcome to MCM forums David ( England )
-
Thanks Michael.... and I see exactly what you mean now. That particular issue with the Minicraft body shell is what made it very difficult for me to mask off and airbrush a two-tone colour paint scheme that looked right. I too have recently completed the build of a Tamiya Morgan 4/4, which has the exceptionally good chrome wire spoked wheels. Having purchased a second Morgan that has no wheels, I shall fit the wire spoked wheels from the Jaguar kit to the Morgan and fit pressed steel wheels to the Jaguar MK I. David
-
Apologies from me Michael, as I have posted a reply to Shay O'Dowd about the resin Ford Anglia body shell..... I didn't intend to hijack yout topic, sorry. Thanks for the info regarding the red carpet for the Tamiya Jaguar MK II and I am interested that you have a Minicraft Rolls-Royce kit. What sort of mold mis-alignment on the front fenders is giving you cause for concern? I do remember the Burke's Law TV show and the Rolls-Royce motor car. If it is any help to you I used crimson red felt for the carpets on one of the Silver Clouds and also real leather for the upholstery. David
-
Hello Shay.... I am pleased that you noticed the Ford Anglia 105E in the Jaguar photo, and it is a resin body shell but not Airtrax. When I decided that I would like to build an Anglia, because it was the first car I ever owned, I tried to find the Airtrax site but couldn't locate it. Previously I had seen that the Anglia body shell kit was a bit expensive but good quality. Anyway, this one that I have bought is from Modelkars in Yorkshire, England and a chap called Andy offers the Anglia on his website as well as on Ebay also. Here is a link to his Resin Bodies web page: http://modelkars.uk/index.php?main_page=index&cPath=42&zenid=ugb19i3mm2c33c3bj9rl7ramc2 You will see the Escort MK I chassis and the Escort interior which I believe will be suitable as a donor kit. I have just finished a build of a Morris Minor Traveller, using a resin body shell kit from Andy at Modelkars and a Tamiya Morris Mini Cooper as a donor kit for that one. Photo below. The Ford Anglia resin body is a better casting than the Morris, which was a bit rough but okay once tidied. David
-
Good luck with the '57 Chevy build Thomas, and the '40 Ford looks really good, Built by Tulio and paint job by yourself..... very nicely done and you have learned so much along the way. This is what scale model car building is all about. Your Grandfather would like this model of his pride and joy. Always interesting when there is a story to the build. David
-
Eric, I am fascinated by your two Duesenberg builds and your detailing work is something to be admired. You certainly know your Duesenbergs! Like you, I myself have reservations about giving a scale model car a paint finish of white. Your texture work on the grill of the white car does indeed greatly improve it's appearance, giving it a nice amount of depth. I have the greatest respect for your decision to attempt both builds at the same time. Several times I have set out to build two cars at once, but usually one takes priority and gets all my attention, with the other build going on hold. I intend to read through this topic of yours again in order to pick up on details I may have missed the first time. These are truly wonderful motor cars. David
-
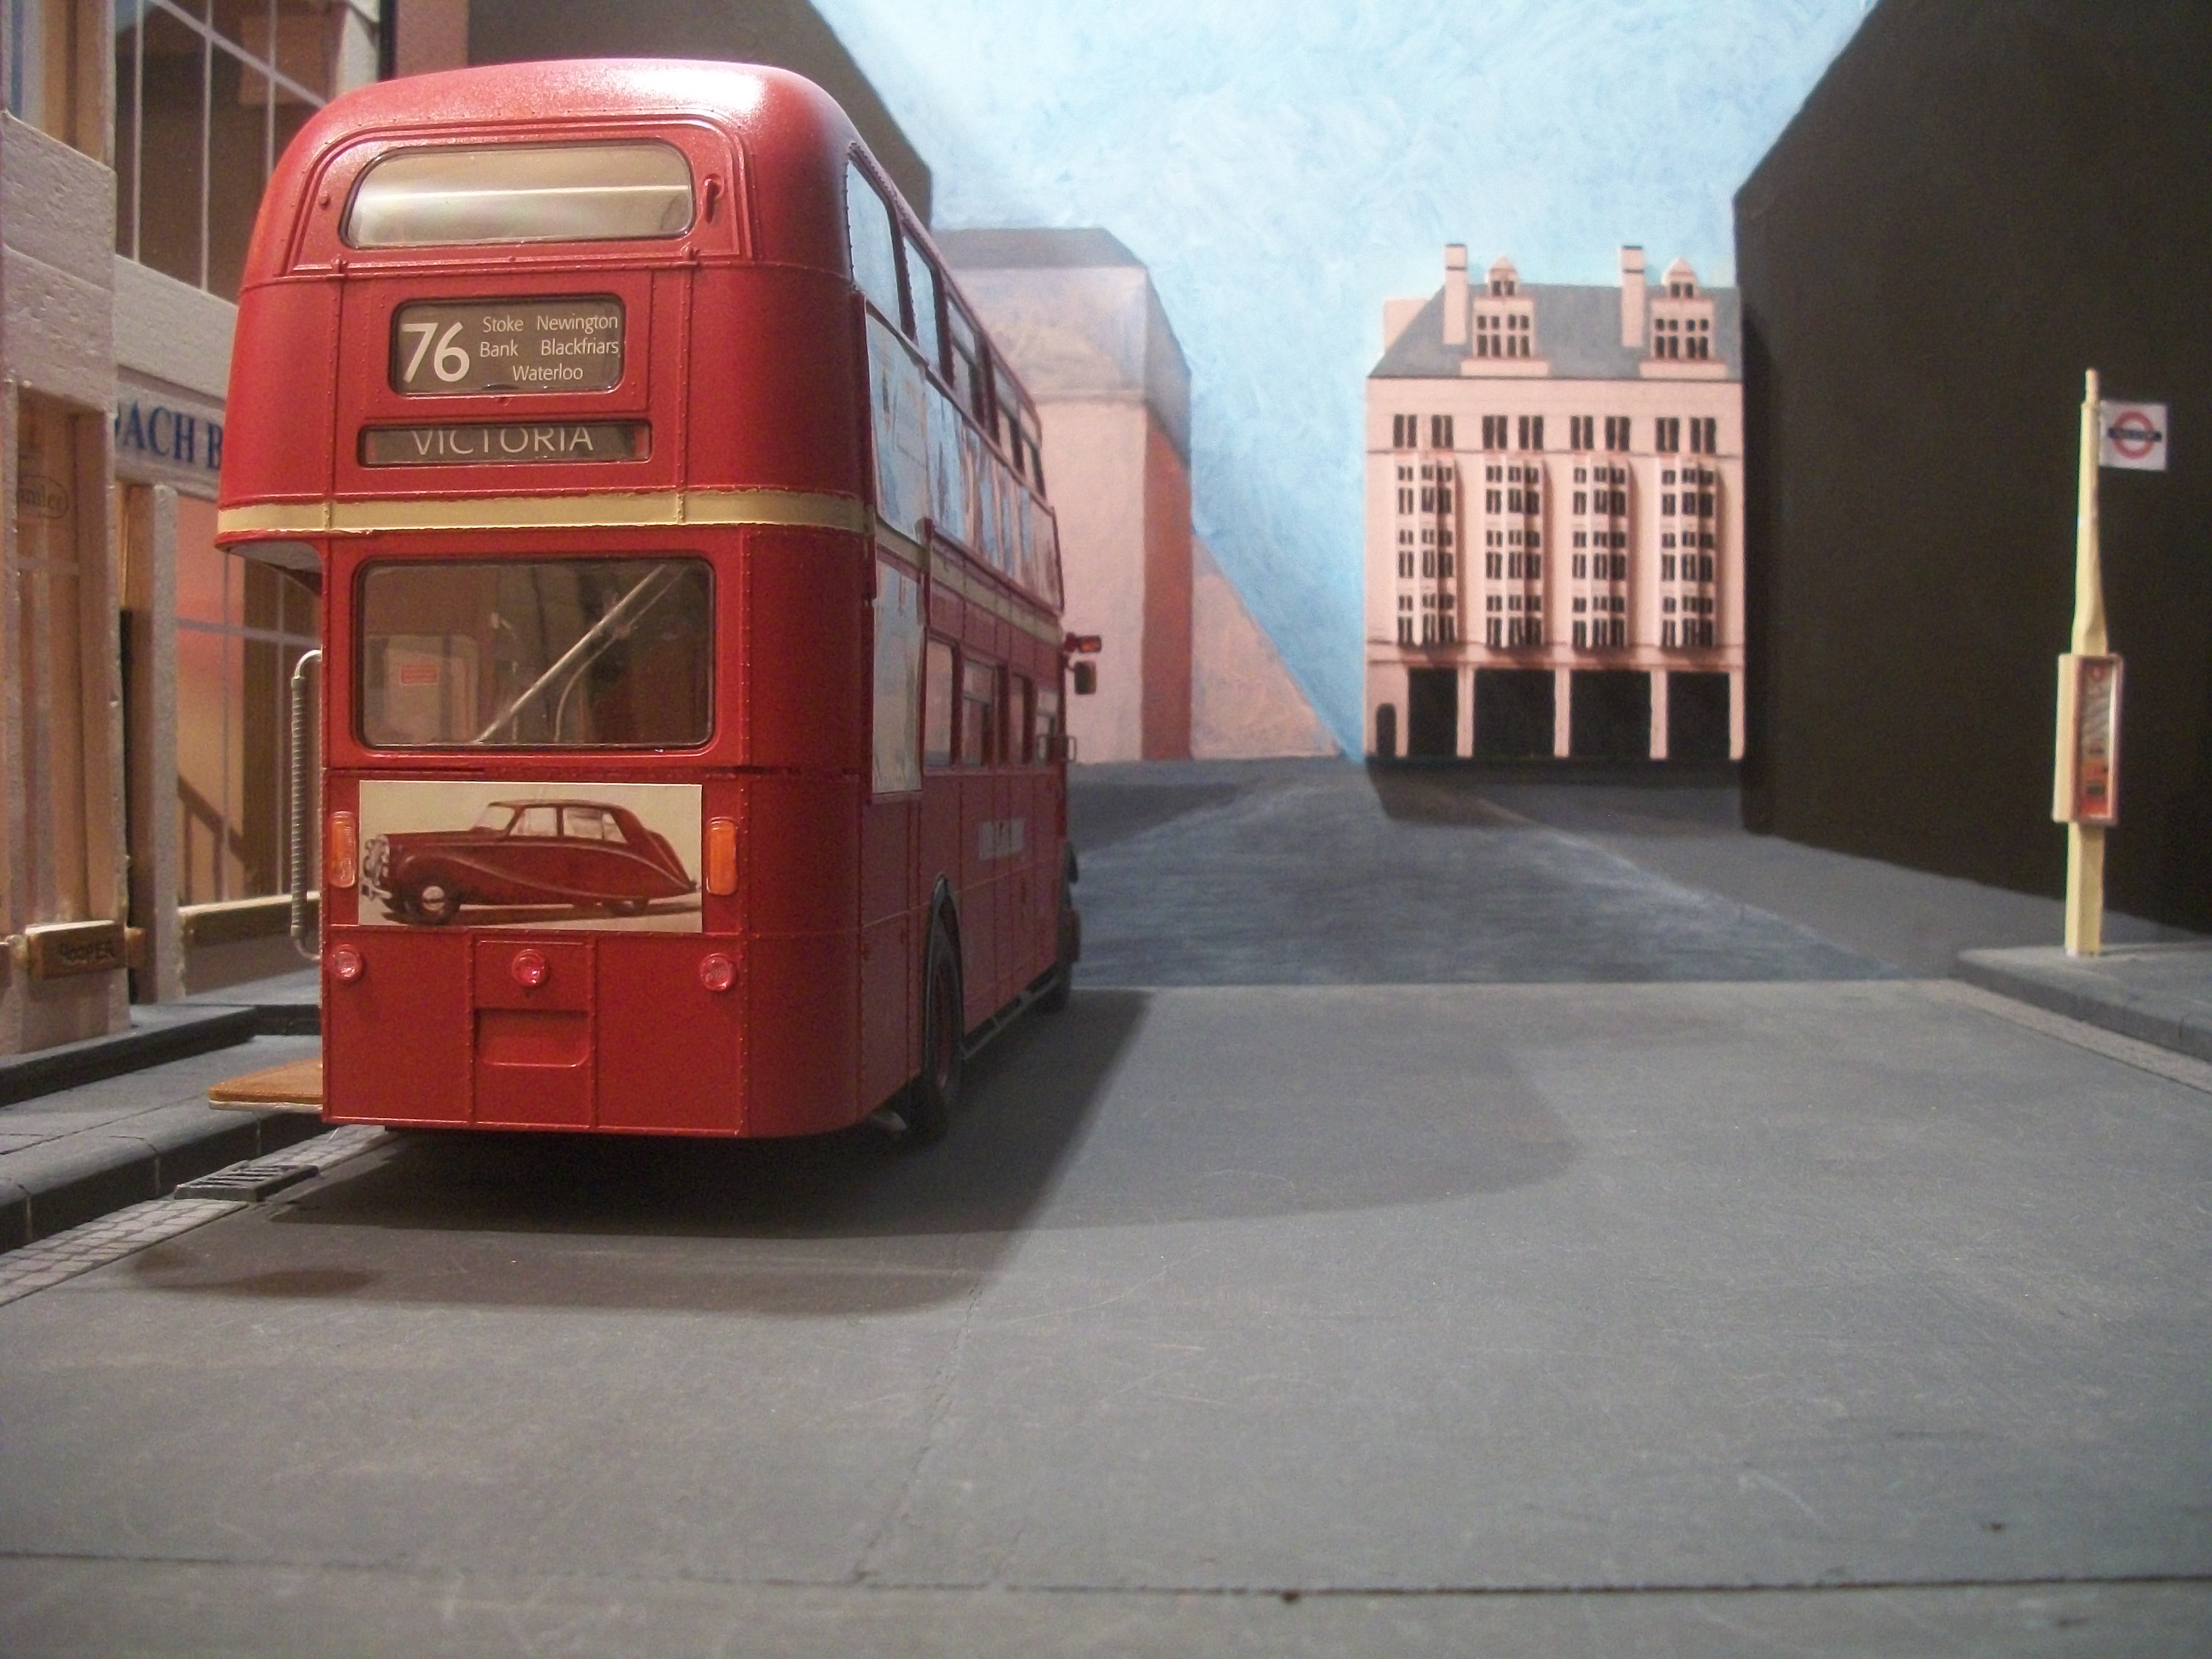
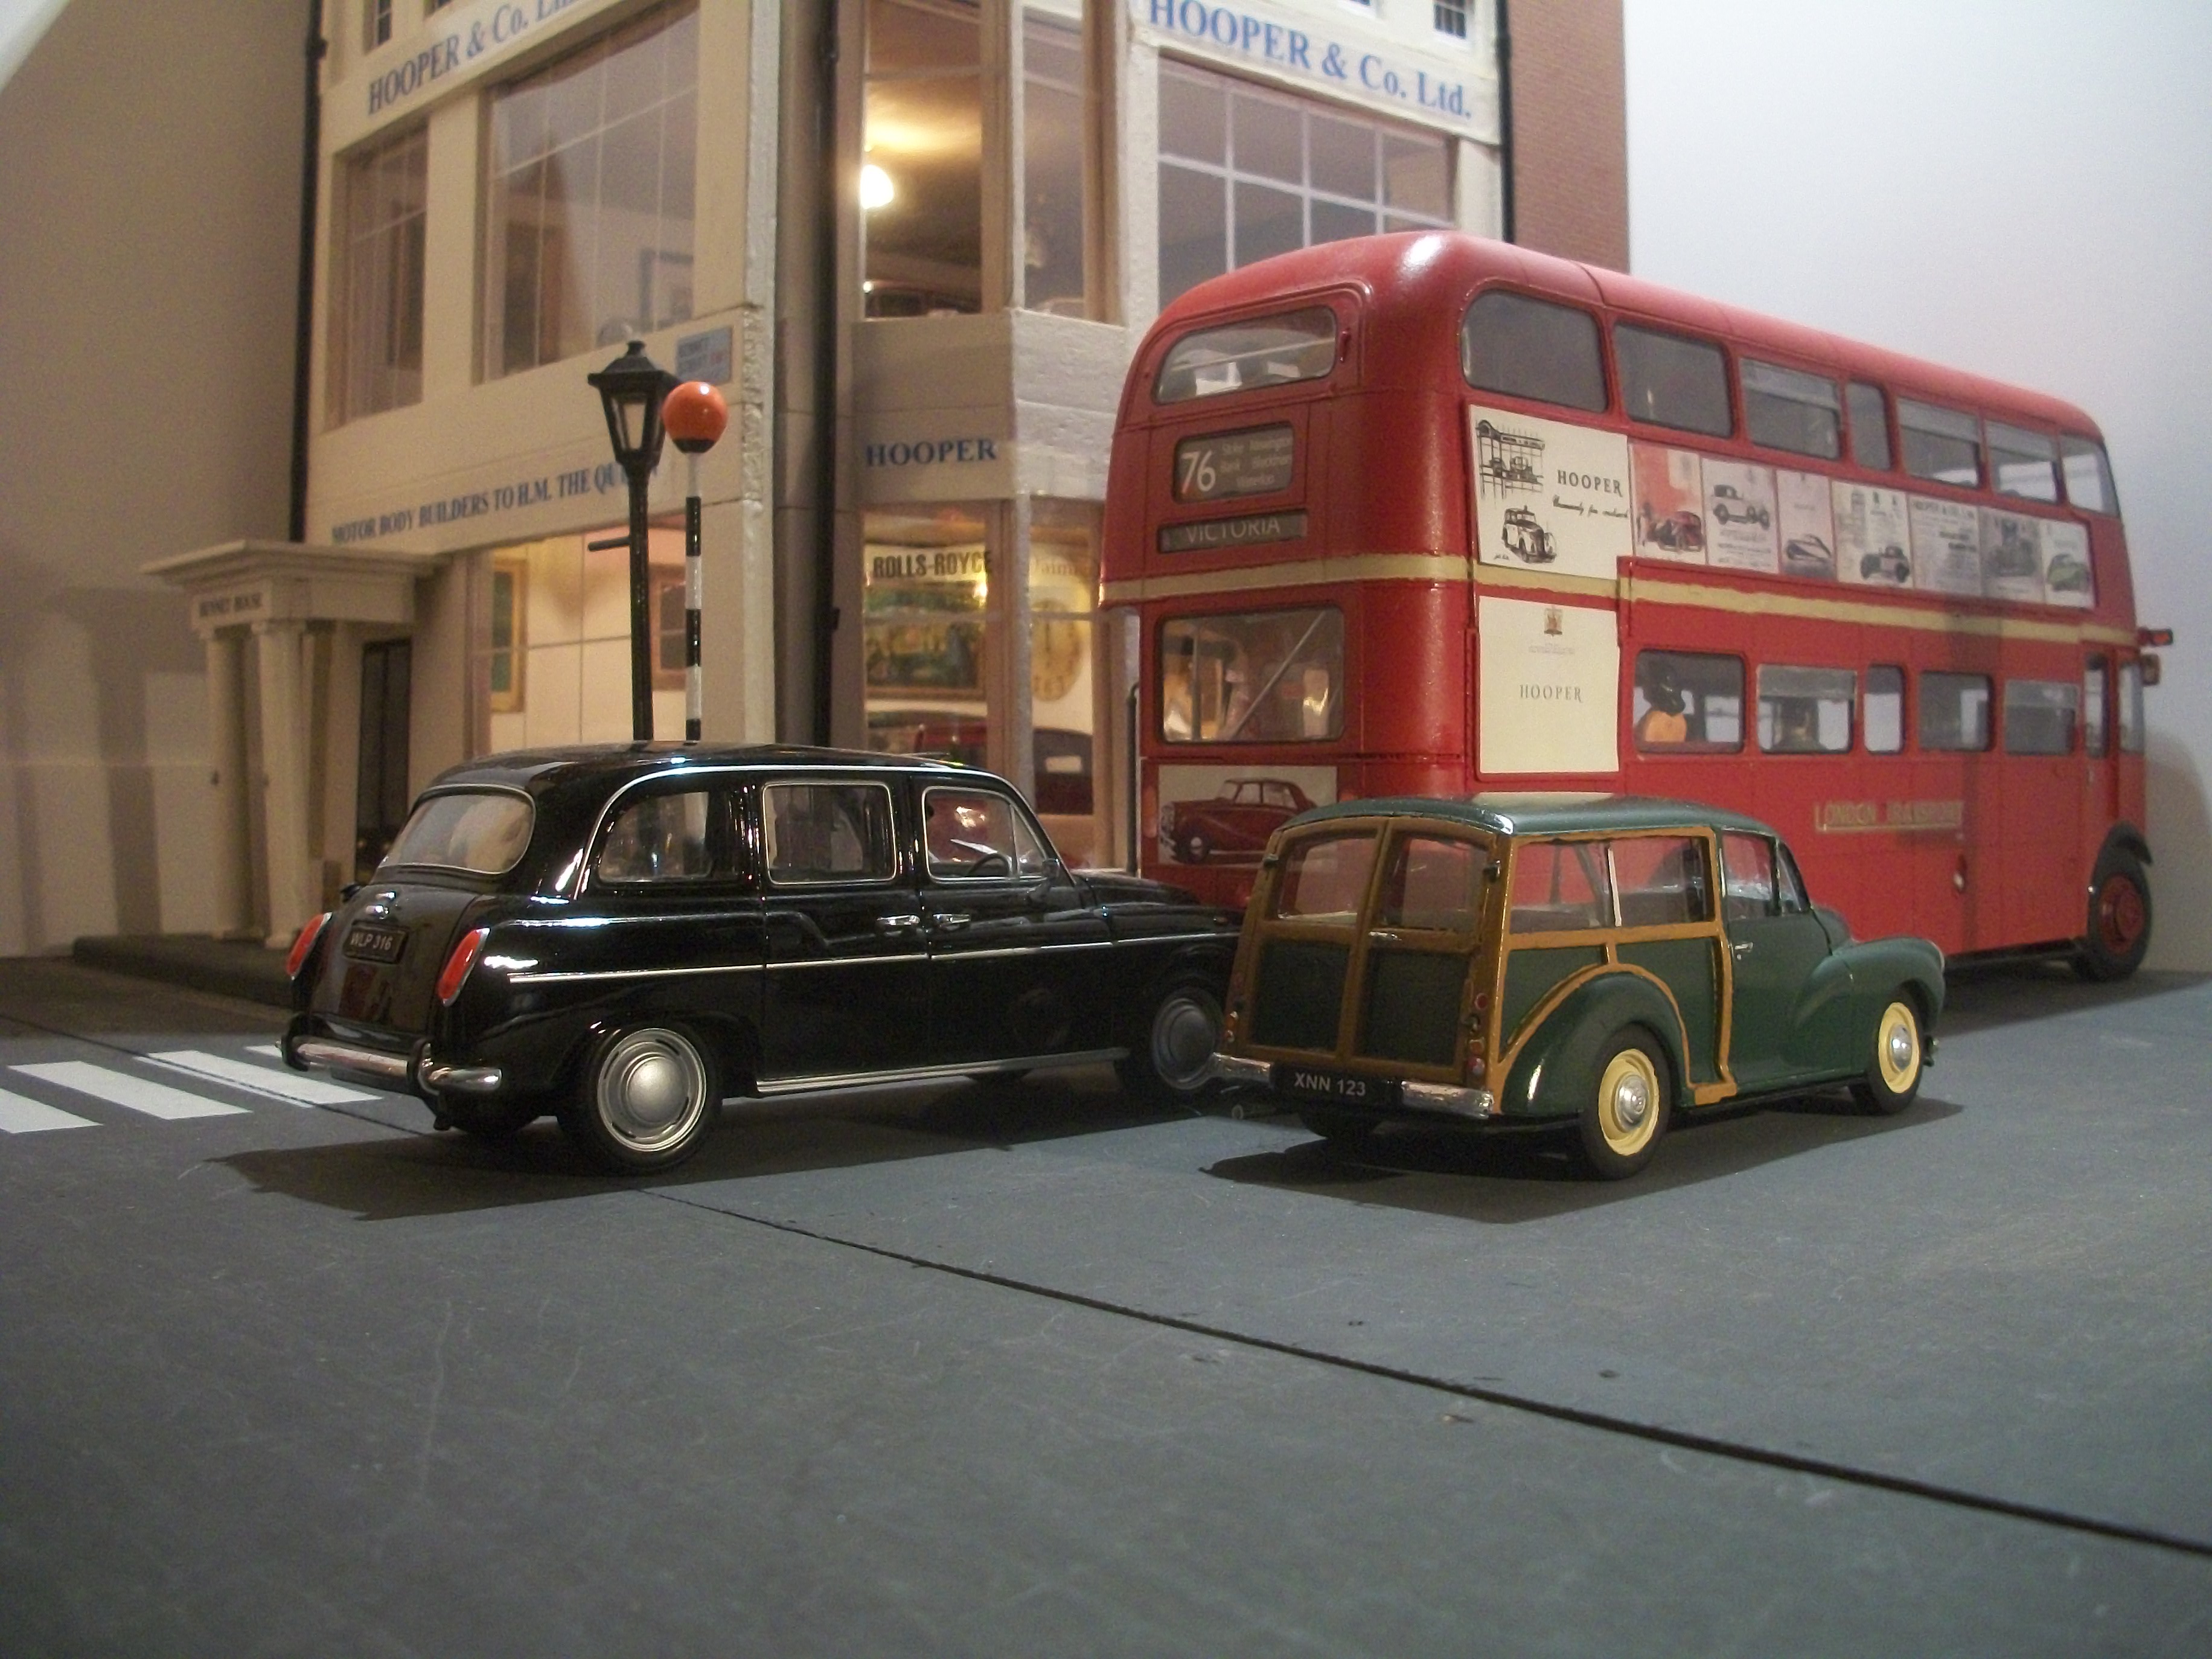
Well I don't know what to say Eric..... your compliments and words of encouragement are very much appreciated, I can tell you. I see this diorama project as something that will continue to evolve, rather than a project that has a beginning and an ending. There will always be something that I can add to the building, or the roads, or the models and really I haven't yet given due consideration to the figures. Clearly, a busy London scene like this would have many more people in view and obviously there would be more than one taxi ! At the moment, as well as building a Jaguar MK I car from 1955, I am about to produce an acrylic painting which is going to serve as the background to the far end of St James's Street, and the painting will be part of a foreground / middle ground / background arrangement. Hoping this will work, because if it does there will exist an illusion of perspective and distance, without the viewer being able to determine where the baseboard ends and the acrylic background painting begins. Consequently, any photographs taken of the diorama scene, looking towards the perspective painting should appear to be absolutely real. The photo below shows the scene as it was in September 2017, with the grey building on the left being the 1958 building from my diorama. David
-
Welcome to MCM forum Jeff.... and sounds like you are building some interesting model cars. David
-
Watson Fuels deliver in all weathers...... Yes, that is real snow in the photo and it is minus 4 degrees outside. The Bedford tanker gets through. Also, a few up to date photos of the resin bodied Morris Minor Traveller which is now a completed build. David
-

Best Way to Store Molotow Pens?
Anglia105E replied to Snake45's topic in General Automotive Talk (Trucks and Cars)
I store my Molotow Liquid Chrome Pens flat, so not tip up or tip down, and give one a good shaking before each use. They seem to be happy flat. David -
Thanks Michael.... and the work you have done on the engine is impressive. You mentioned floor mats, and I noticed there's a piece of red carpeting in the kit box, which doesn't appear to be large enough for the whole floor? I am really looking forward to starting the build on this one, having built four Rolls-Royce Silver Clouds by Revell and Minicraft, a Revell London Bus, a Tamiya Morgan and an Emhar Bedford tanker truck during the past six months. All these vehicles are for my 1950's diorama so my interest is in British cars between 1955 and 1959 mostly, with some of the models dated 1929 to 1948 also. David
-
Your 2CV build is very realistic and authentic Anders..... also, interesting to hear about the history of the car. Good photos, especially on the grass. David
-
Hello Michael... I shall be watching this build of yours with interest and the story element to it is also a nice feature. Currently I am building a 1:24 Tamiya Jaguar MK II, except I am converting it to a MK I as it would have looked in 1955. As you have discovered, this is one hell of a gorgeous kit by Tamiya, and those chrome wire spoked wheels are the best I've seen. There is no sign of mould lines or flash anywhere on my boxed kit. The paint colour for my Jaguar build is gold with a crimson leather interior. One photo here for you Michael....
-
Now you mention it Patrick.... my nearest motor racing circuit is Mallory Park, and I used to go there most Sundays for many years when I was in my twenties ( 64 now ). I have been meaning to find out if there are any Classic/Vintage racedays at Mallory Park, although las time I looked it was almost entirely motor cycle racing. As you know, it's the sound of the exhaust and the smell of the oil..... David
-
This diorama is interesting, from many aspects. The paint colour of this car shows up really well outdoors under natural daylight. I think the race driver figure adds a great deal to the realism of the scene, somehow the way his head is turned to one side and the lokk in the eyes even. It does indeed show motion and although simple, that diorama base holds the whole idea together. You must be rather pleased with how this has turned out. David
-
That's the way to do it Mark... the rubber pad for the scuttle looks just perfect, and so practical to use a piece of vinyl tubing. There are so many simple objects that quite often would be thrown in the bin, and then you realise it could serve as a part for a build like this. Nothing gets wasted. Sometimes a piece of styrene sprue that is sitting in a kit box after a previous build is completed can be made into a new part for some other model. Scratch building when it works is so rewarding. David