Anglia105E
-
Posts
3,486 -
Joined
-
Last visited
Content Type
Profiles
Forums
Events
Gallery
Everything posted by Anglia105E
-

Rolls-Royce No Chemicals, No Paint, No Harmful Glues
Anglia105E replied to Anglia105E's topic in WIP: Model Cars
As far as I am aware David, all of the Silver Cloud I, II and III motor cars had these vanity mirrors fitted. Some of my earlier builds did not have them , but I usually try to add them on every build that I do now . . . The mirrors are a difficult shape to make, and quite small, and actually they are not particularly visible from the outside of the model. Only when you take close up photos through the windows will you see the vanity mirrors. As regards the picnic tables, I like the idea of having one table in the closed position, and one table dropped down in the open position. Both tables closed is the easy option of course ! David -
Rolls-Royce No Chemicals, No Paint, No Harmful Glues
Anglia105E replied to Anglia105E's topic in WIP: Model Cars
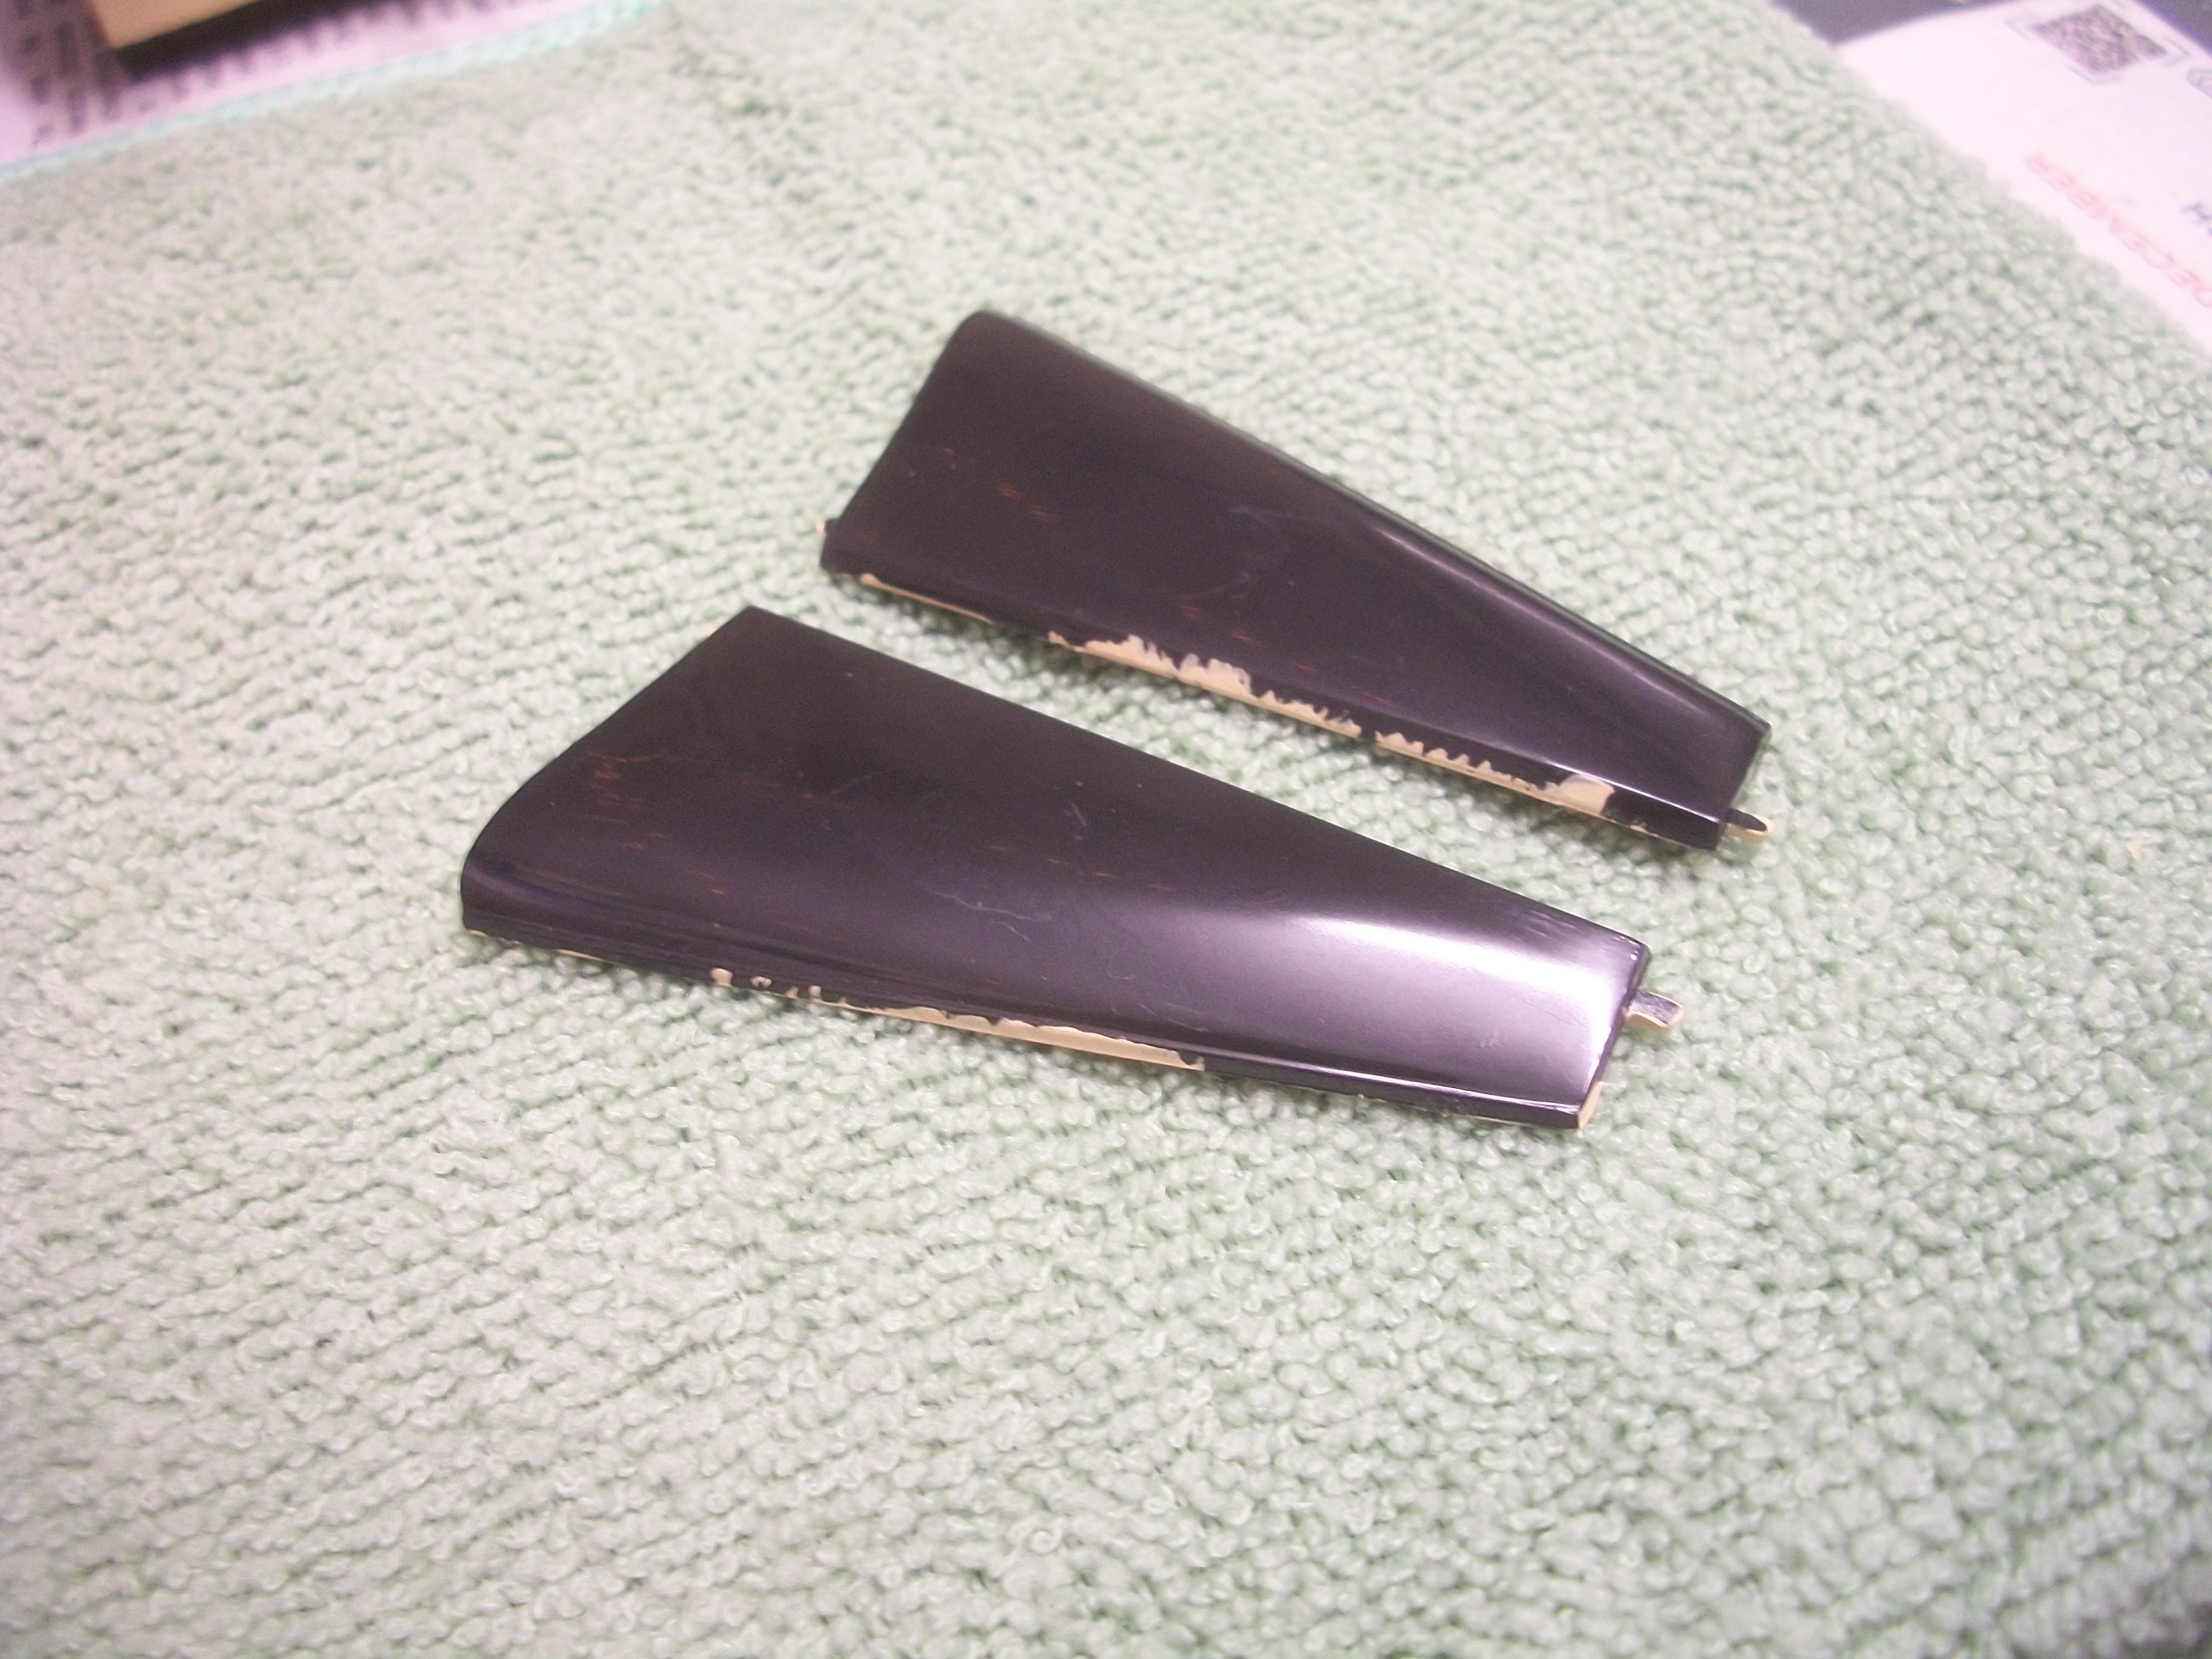
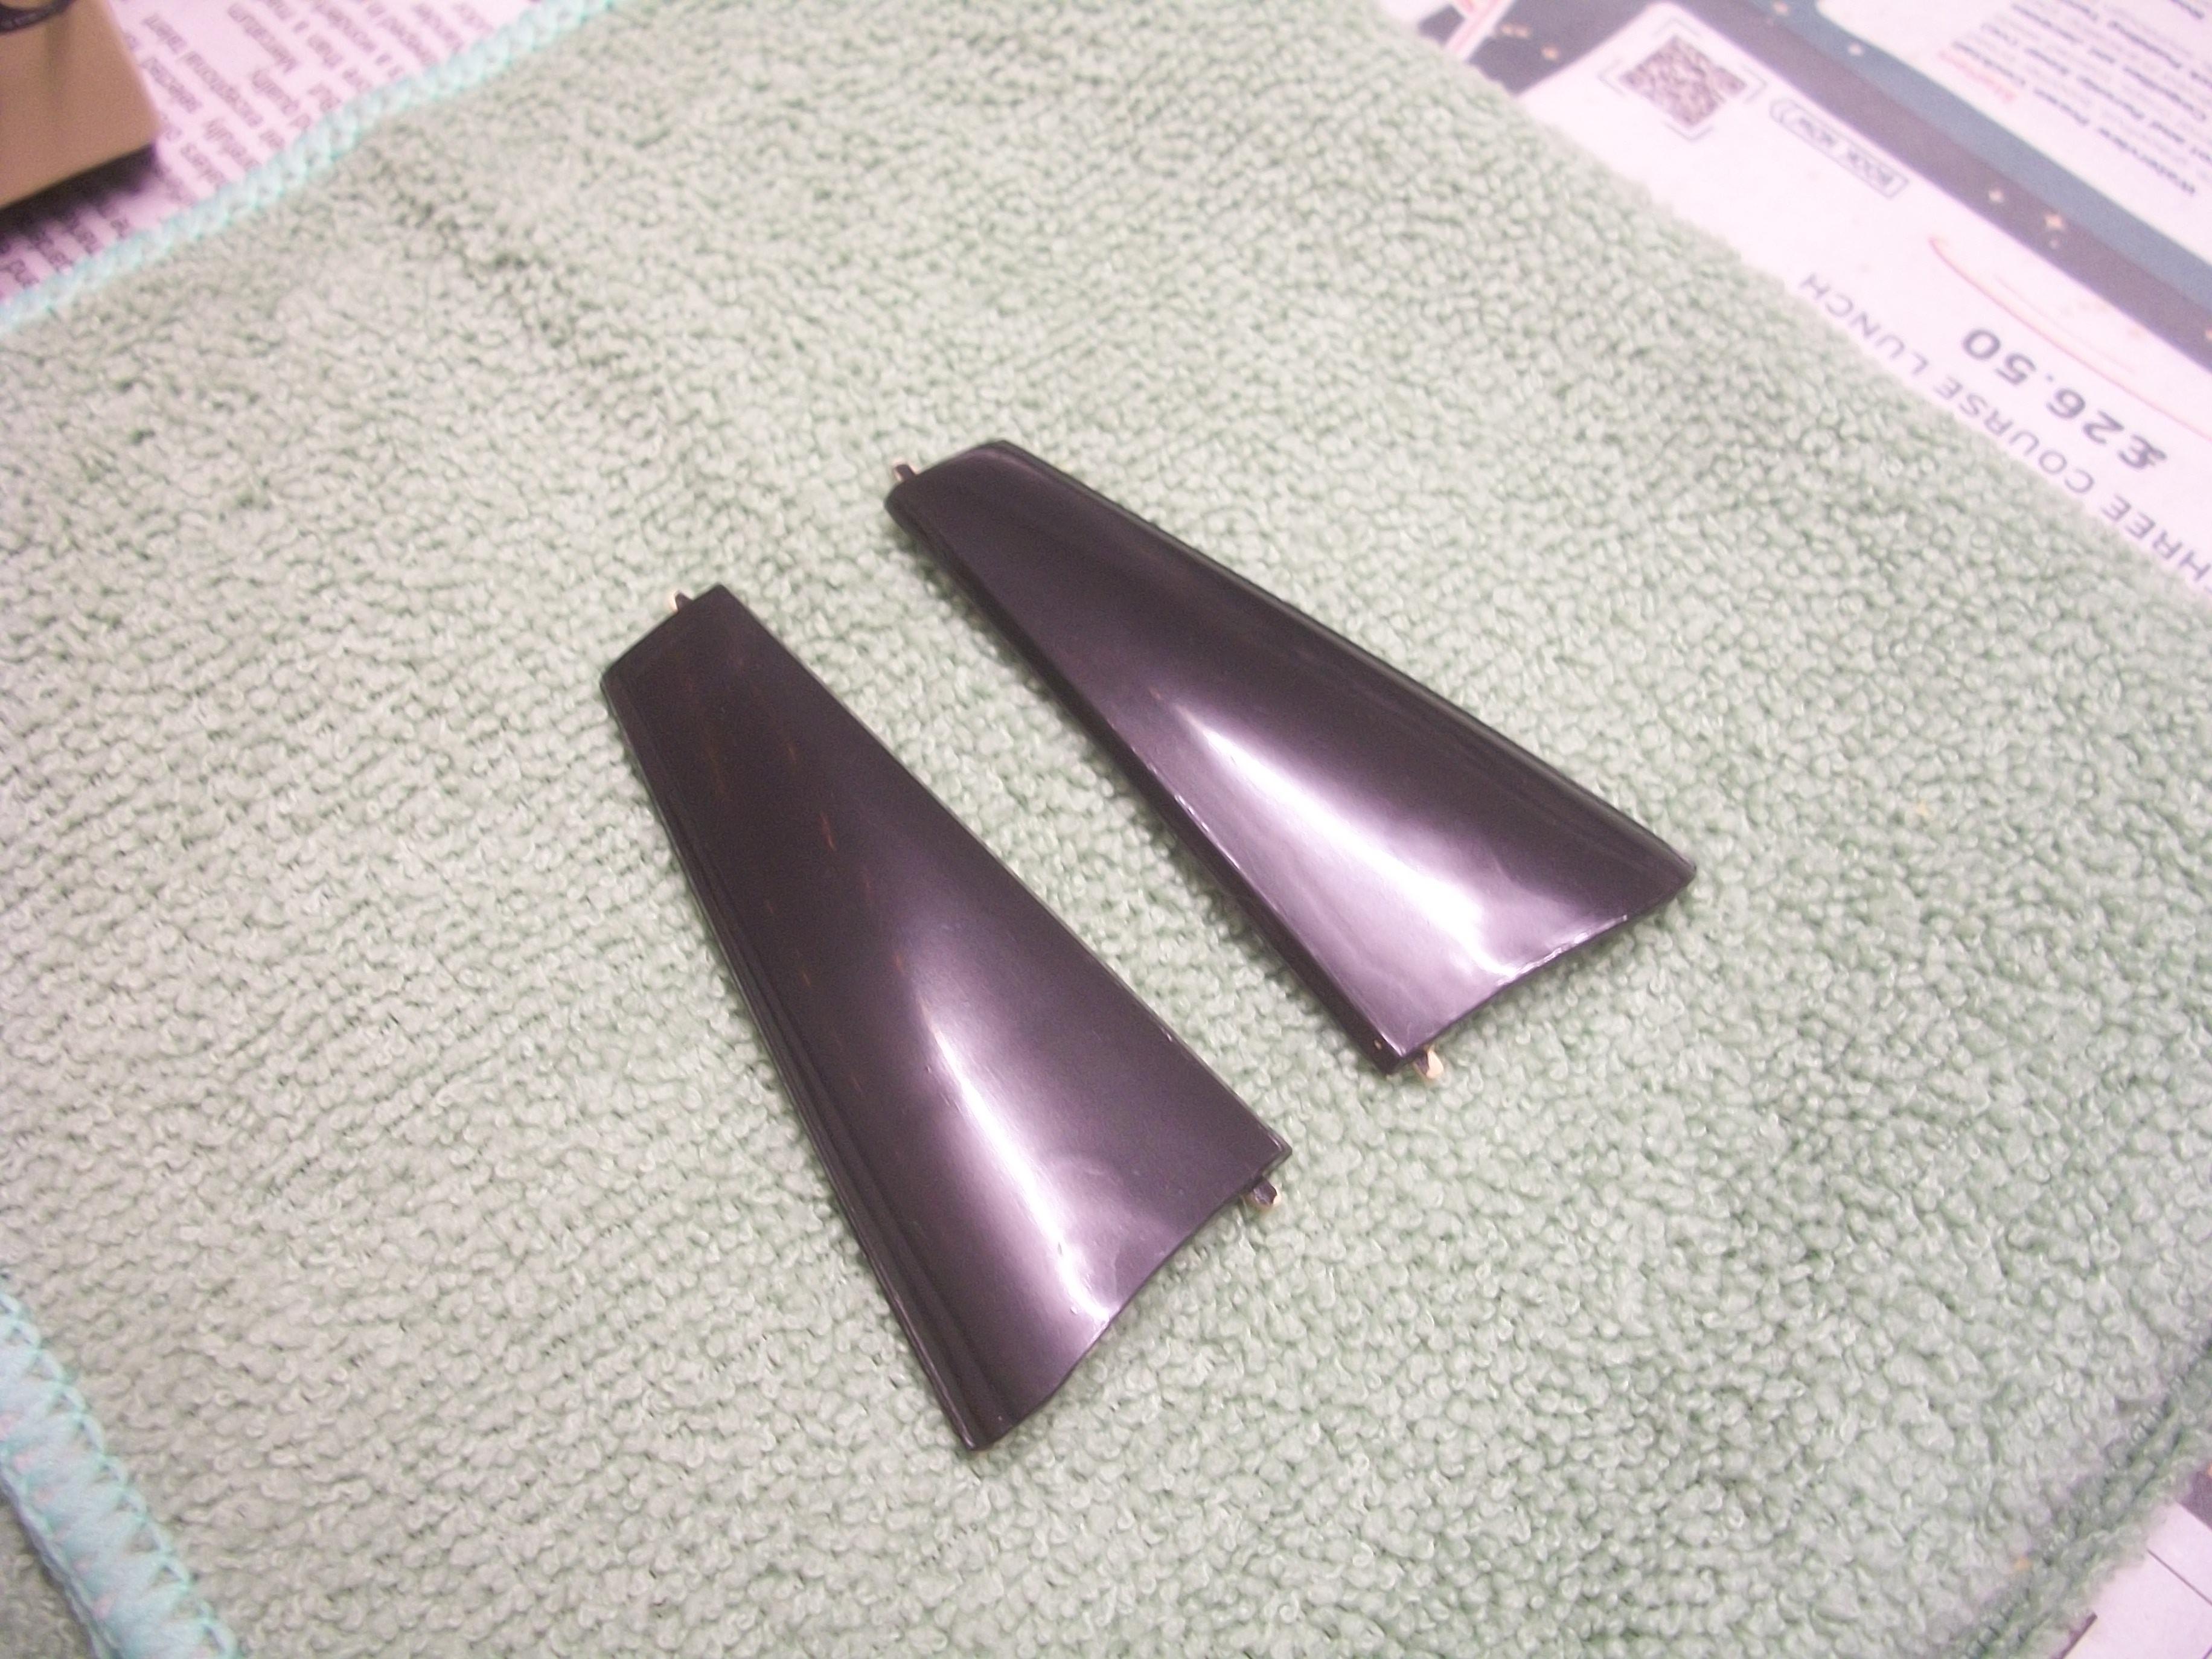
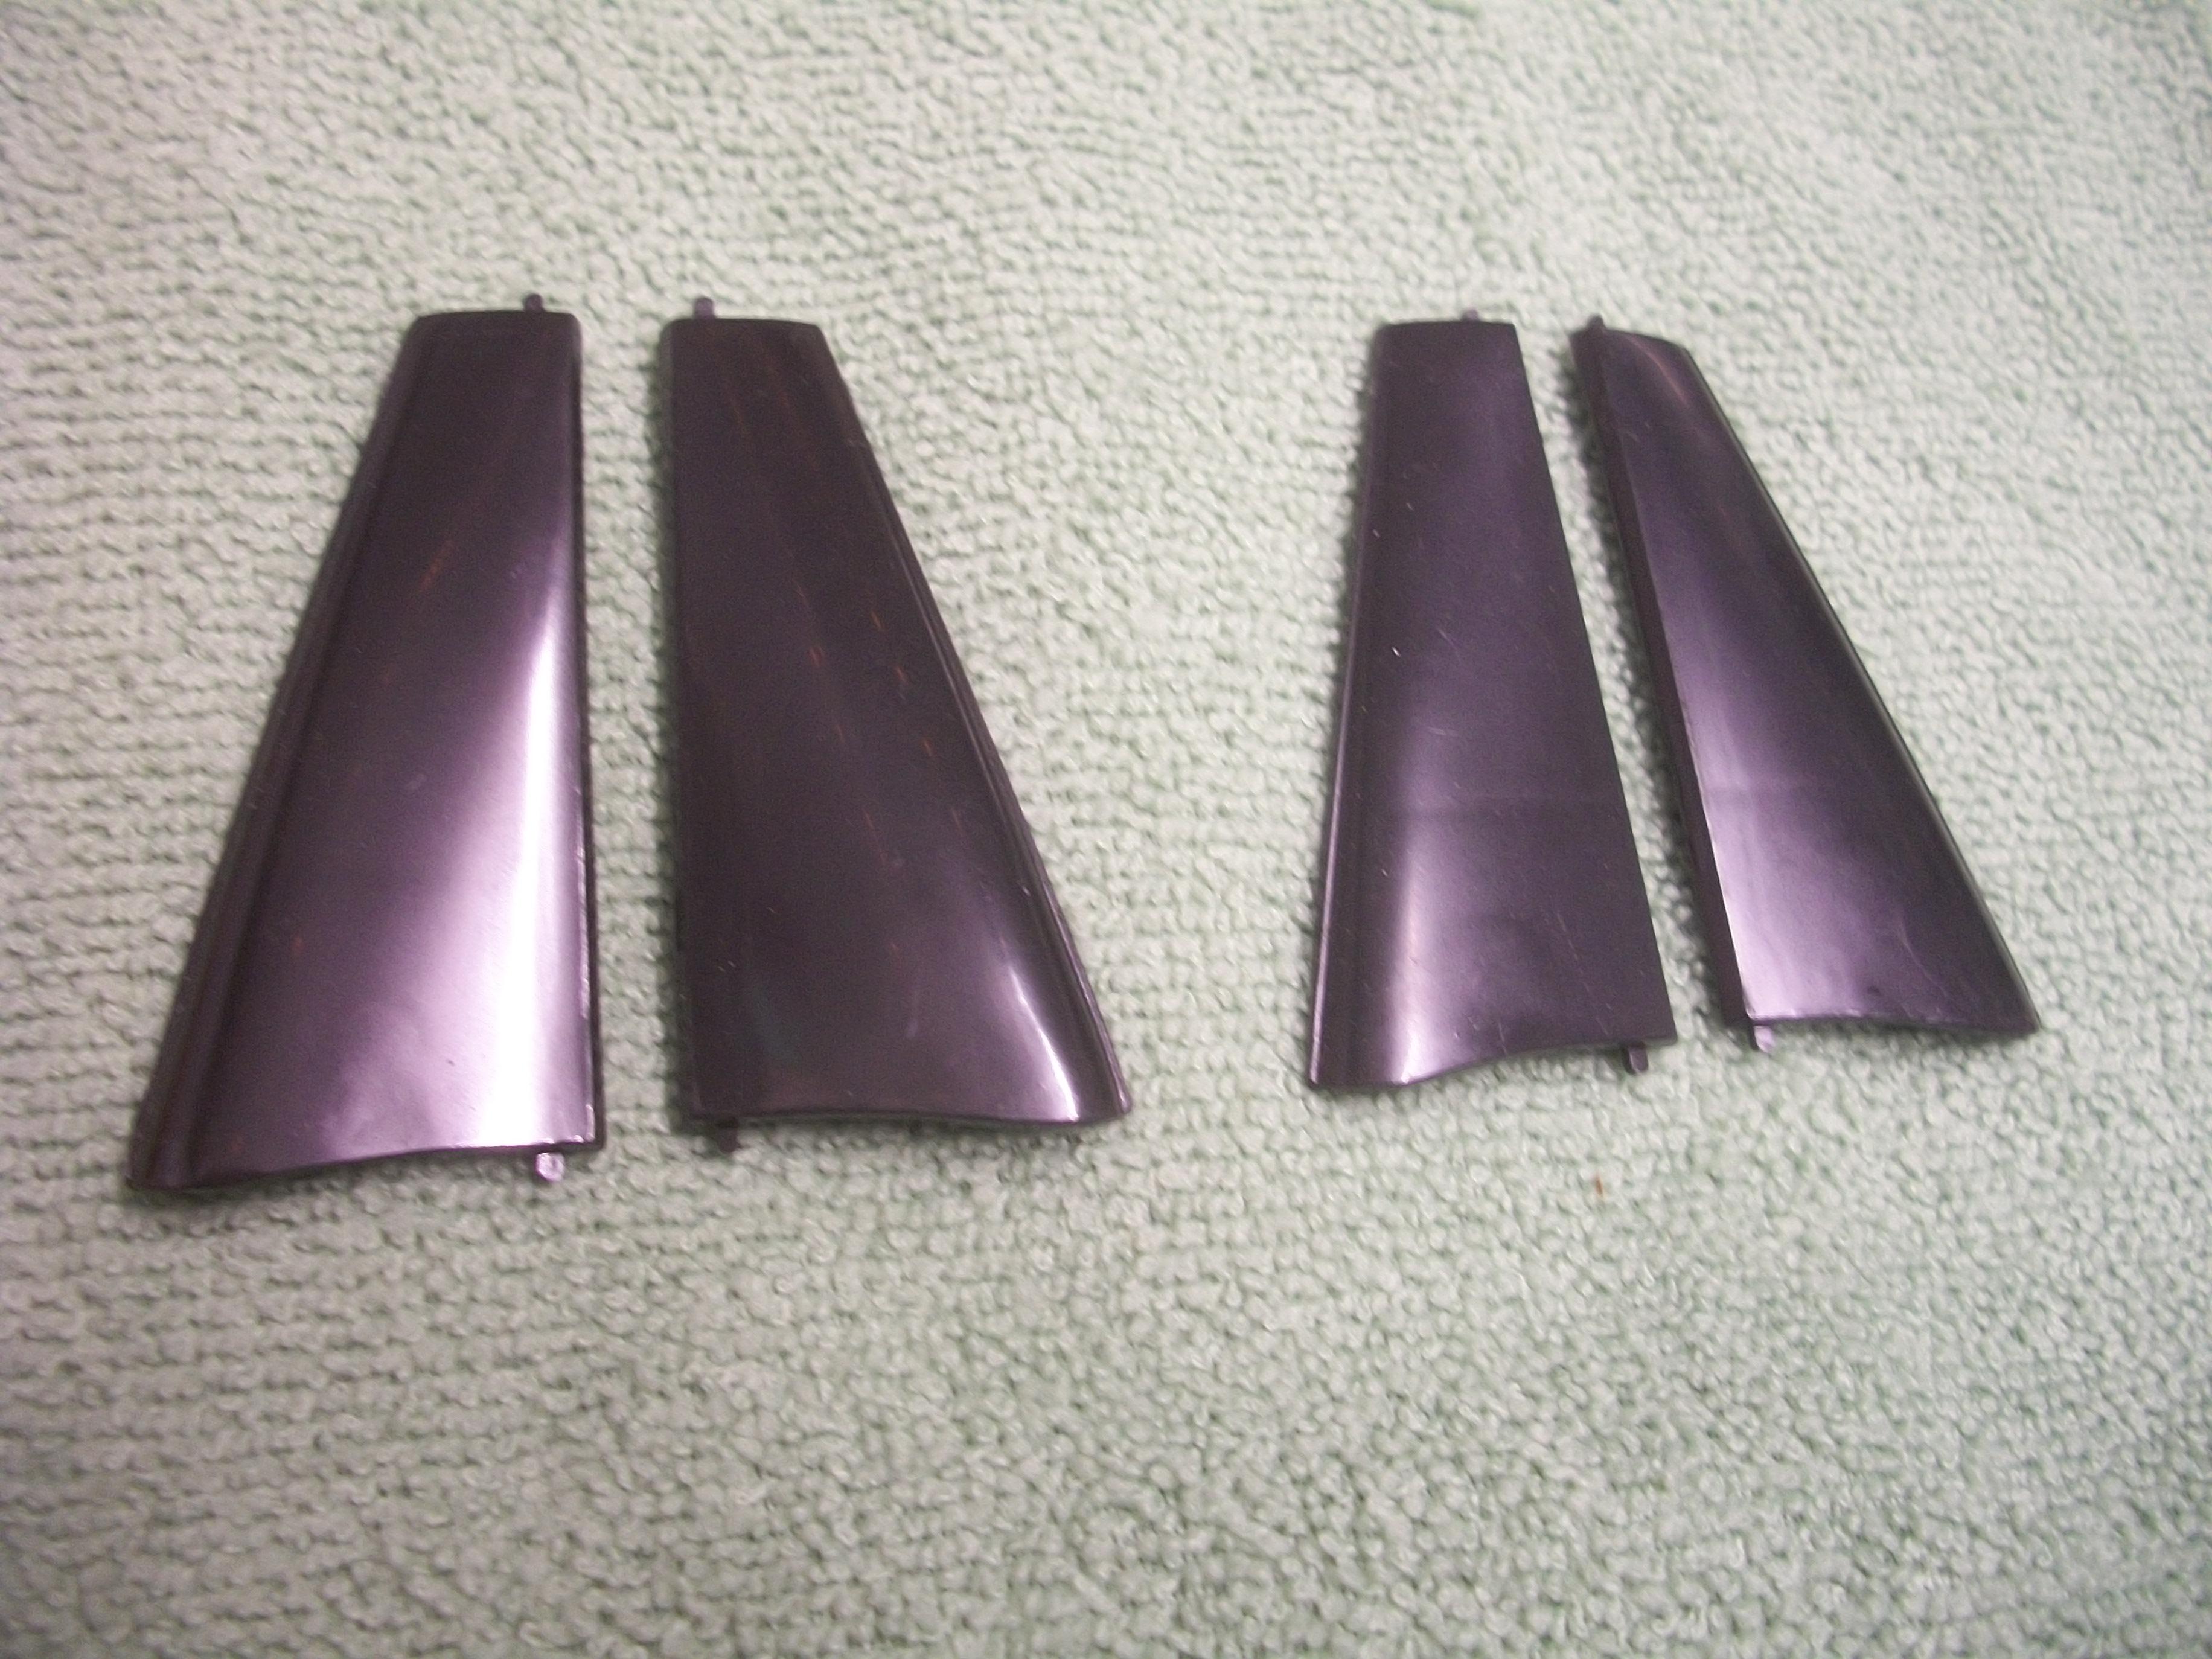
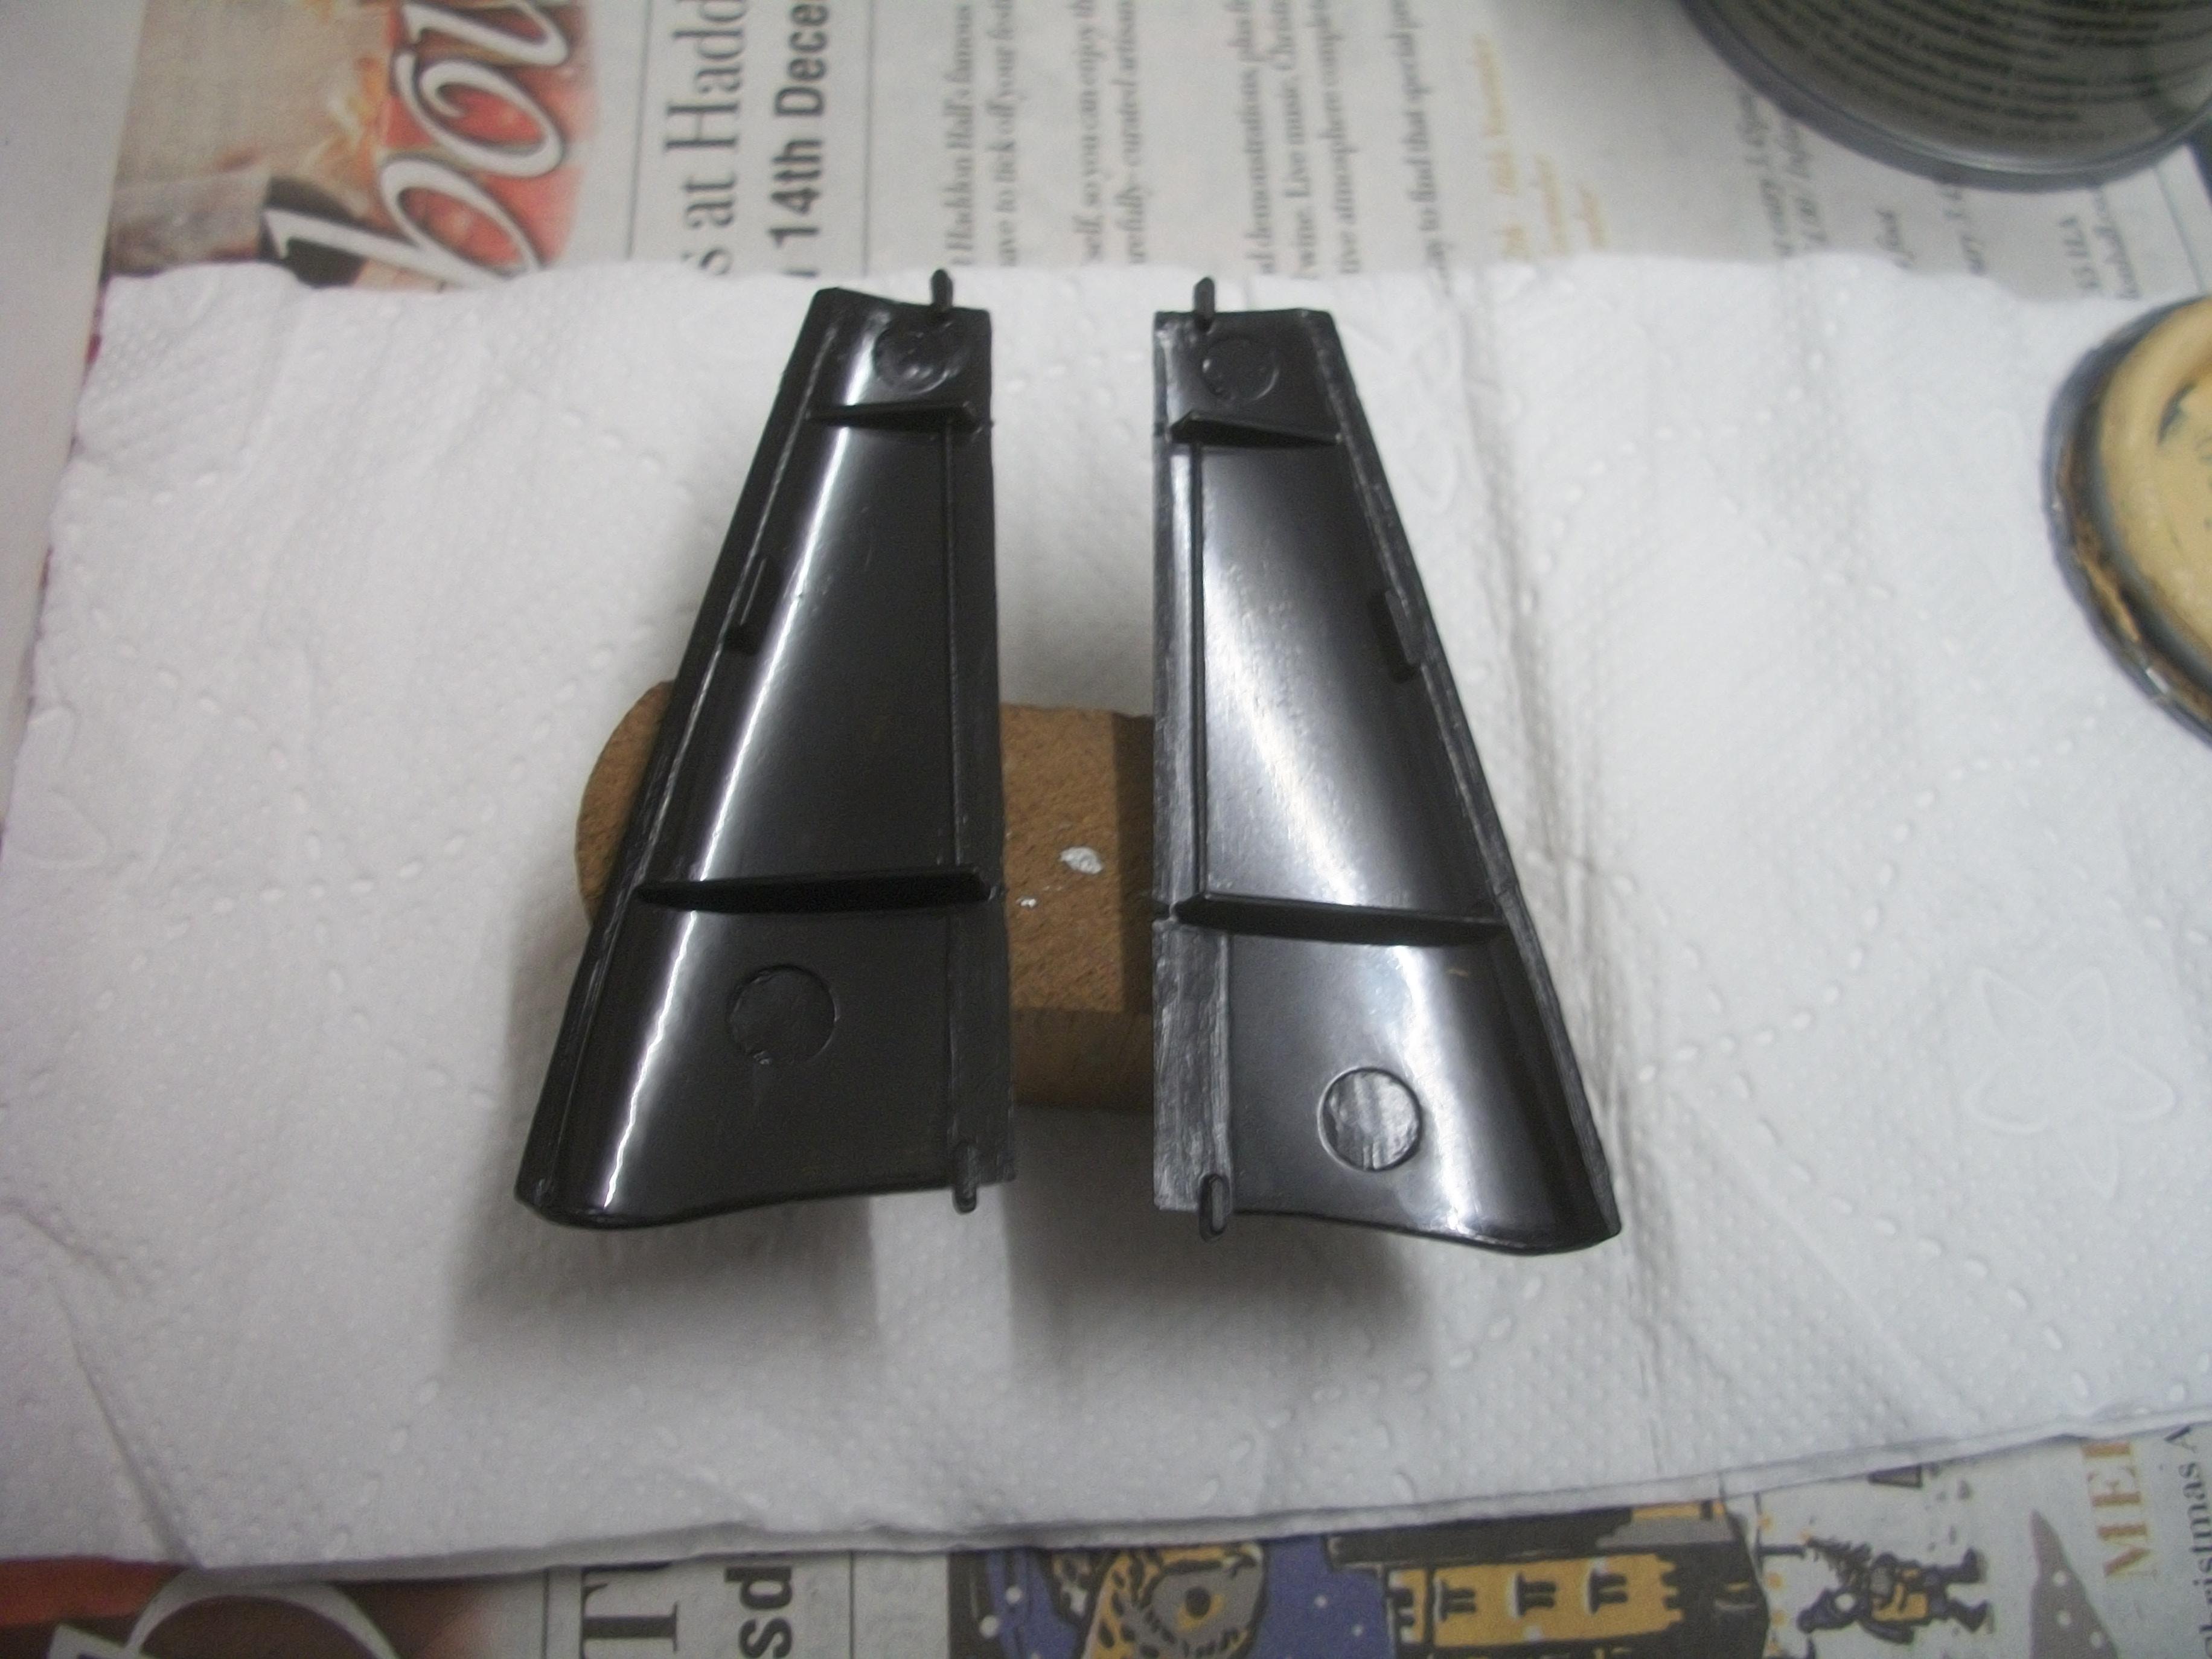
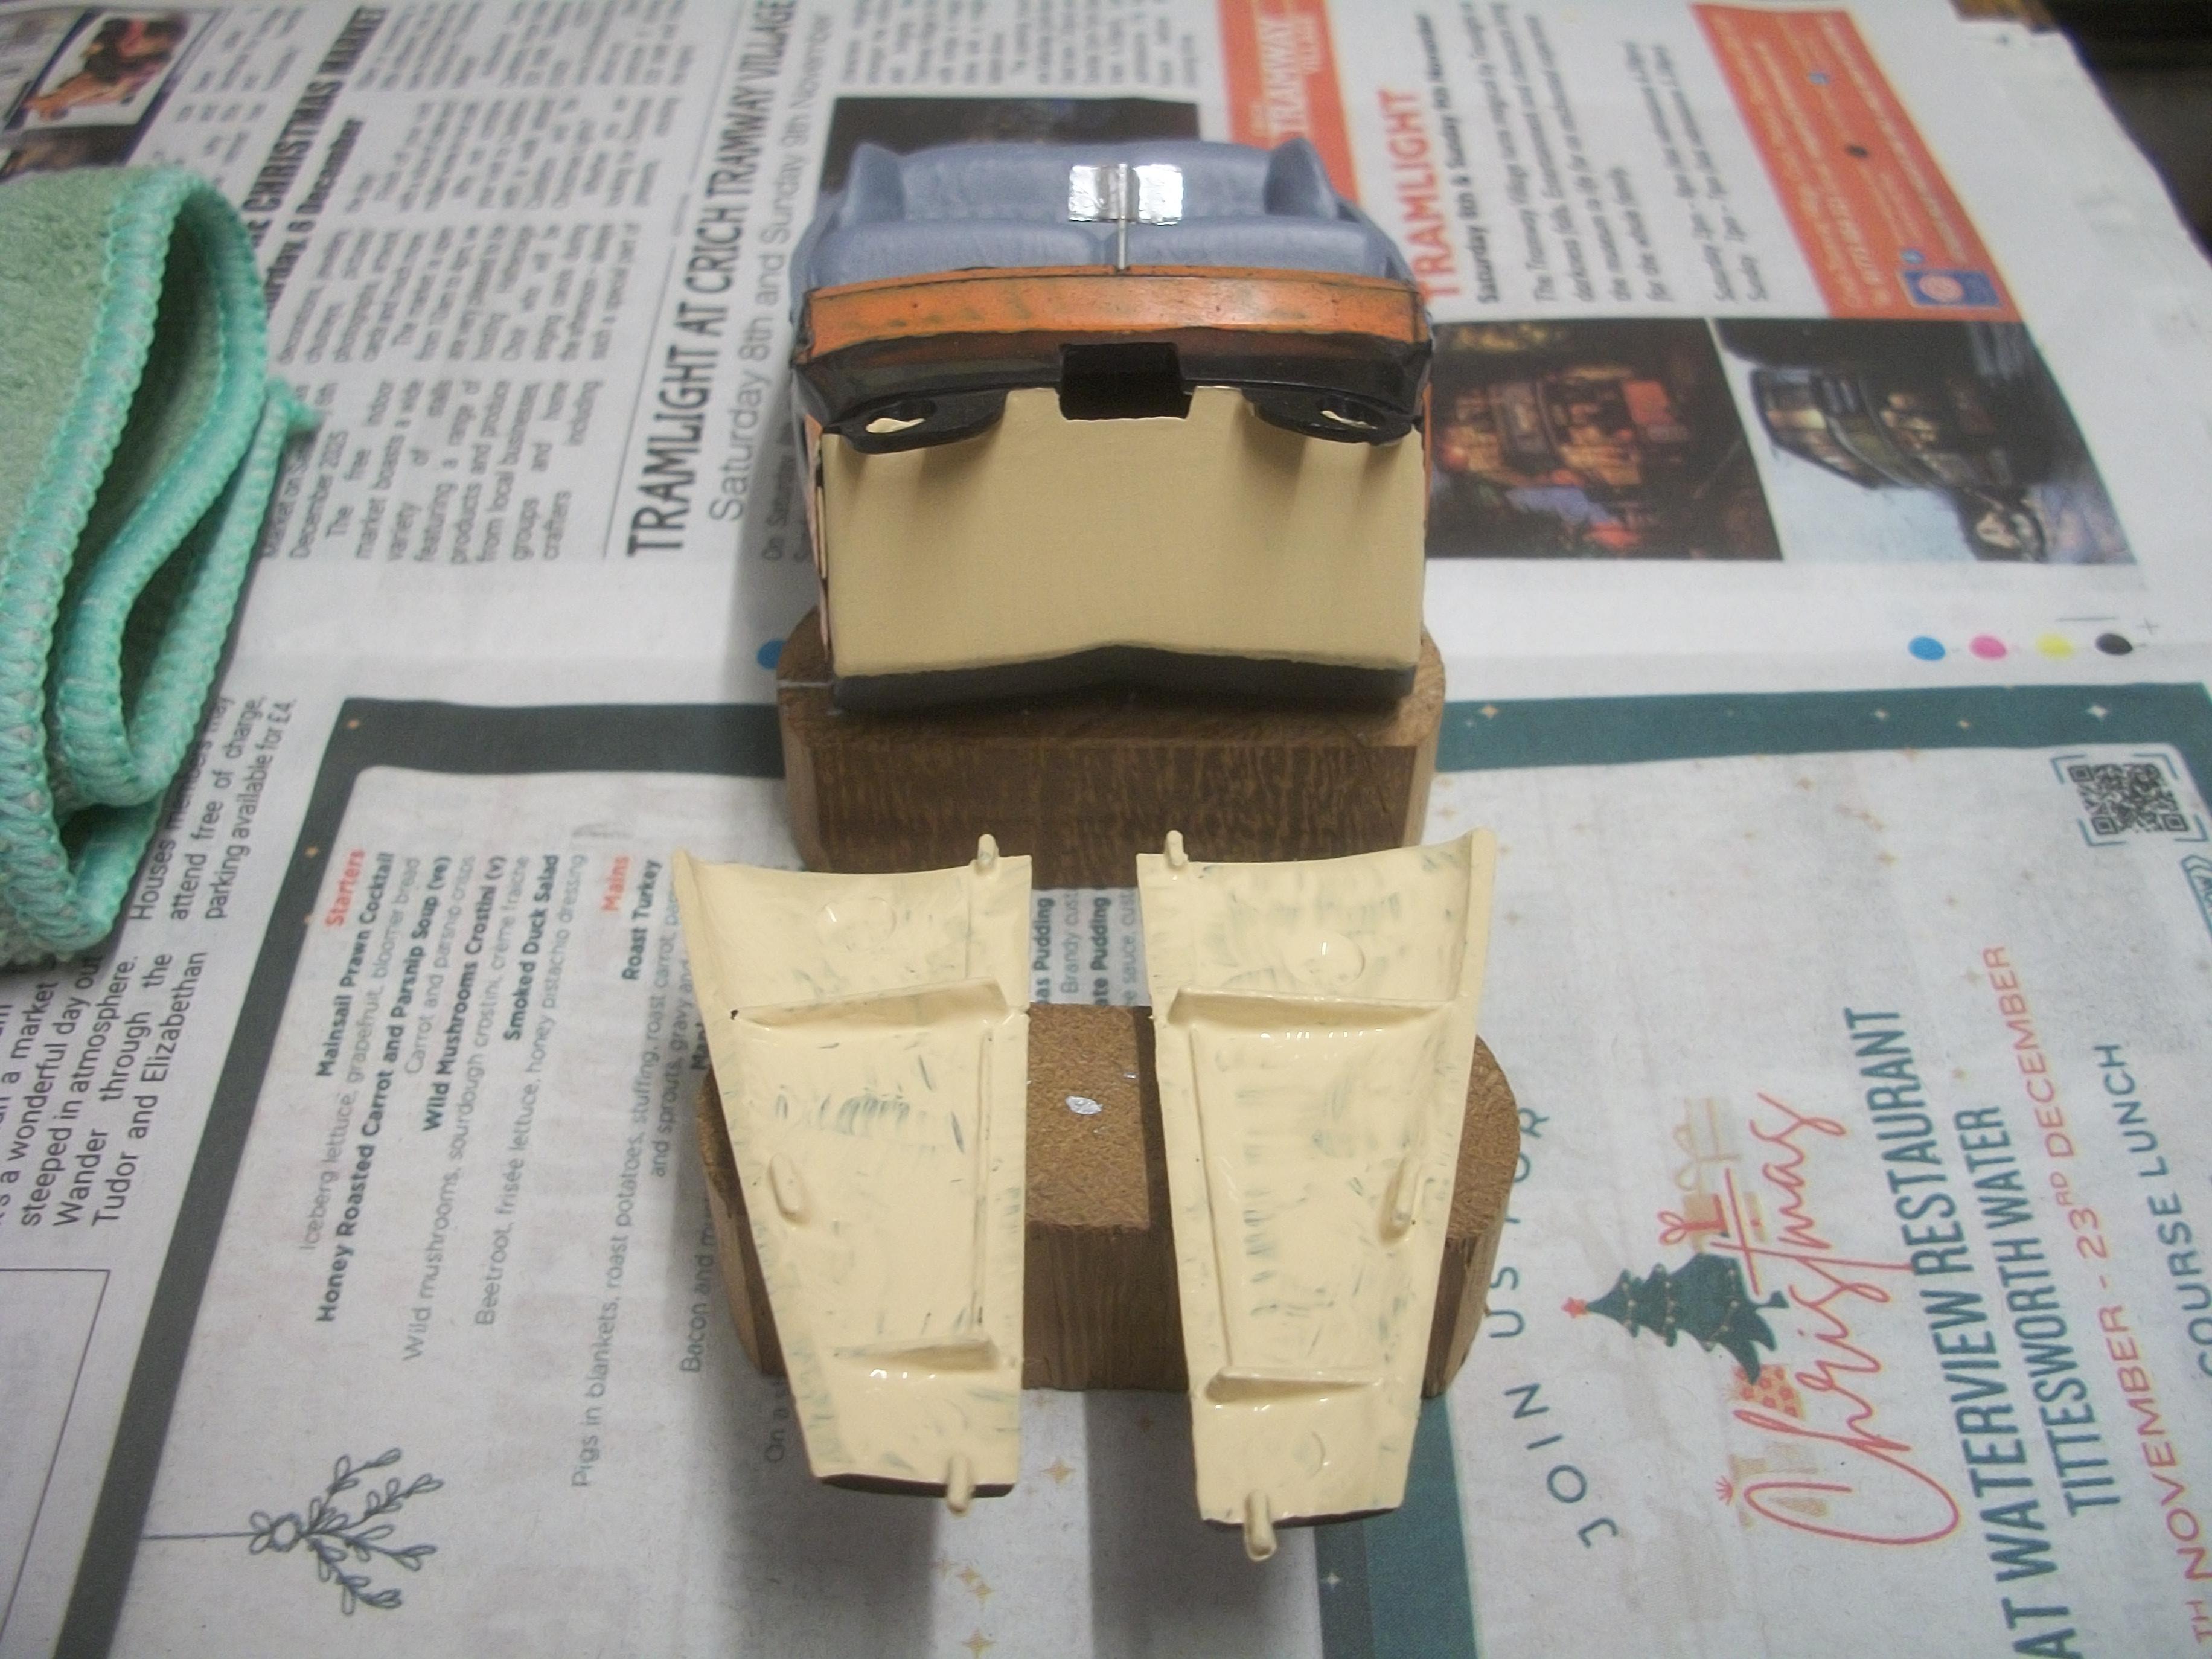
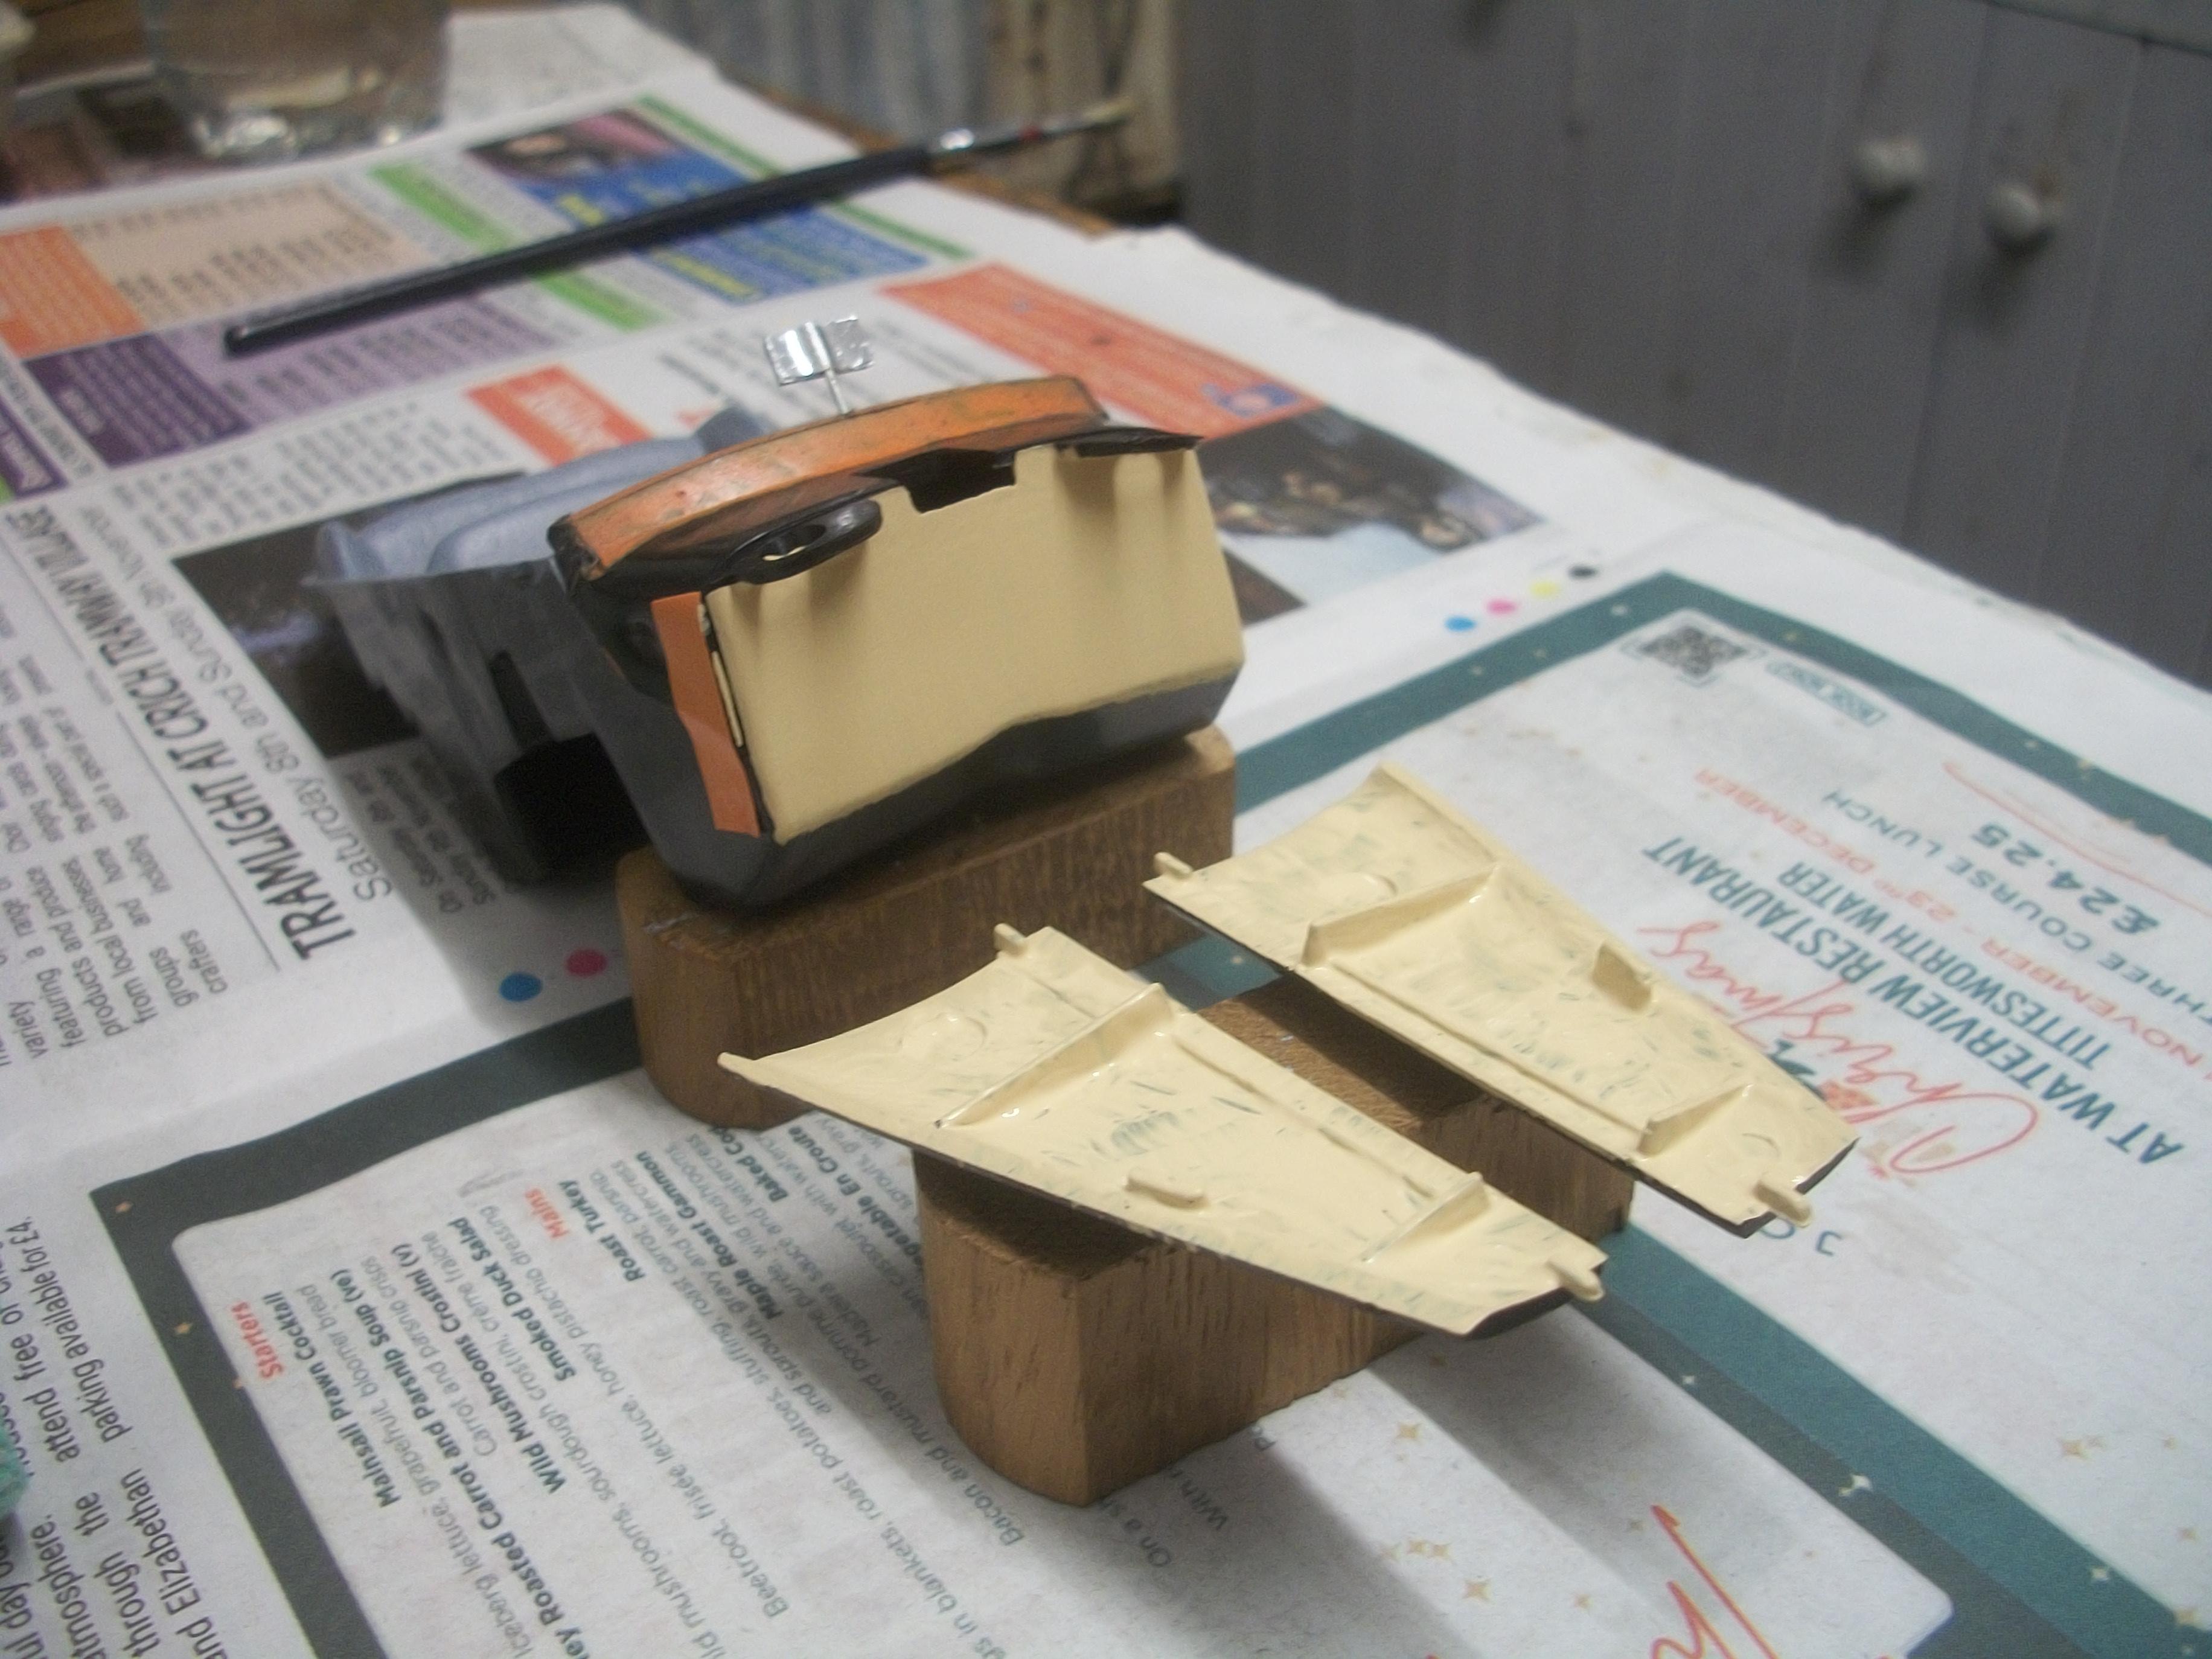
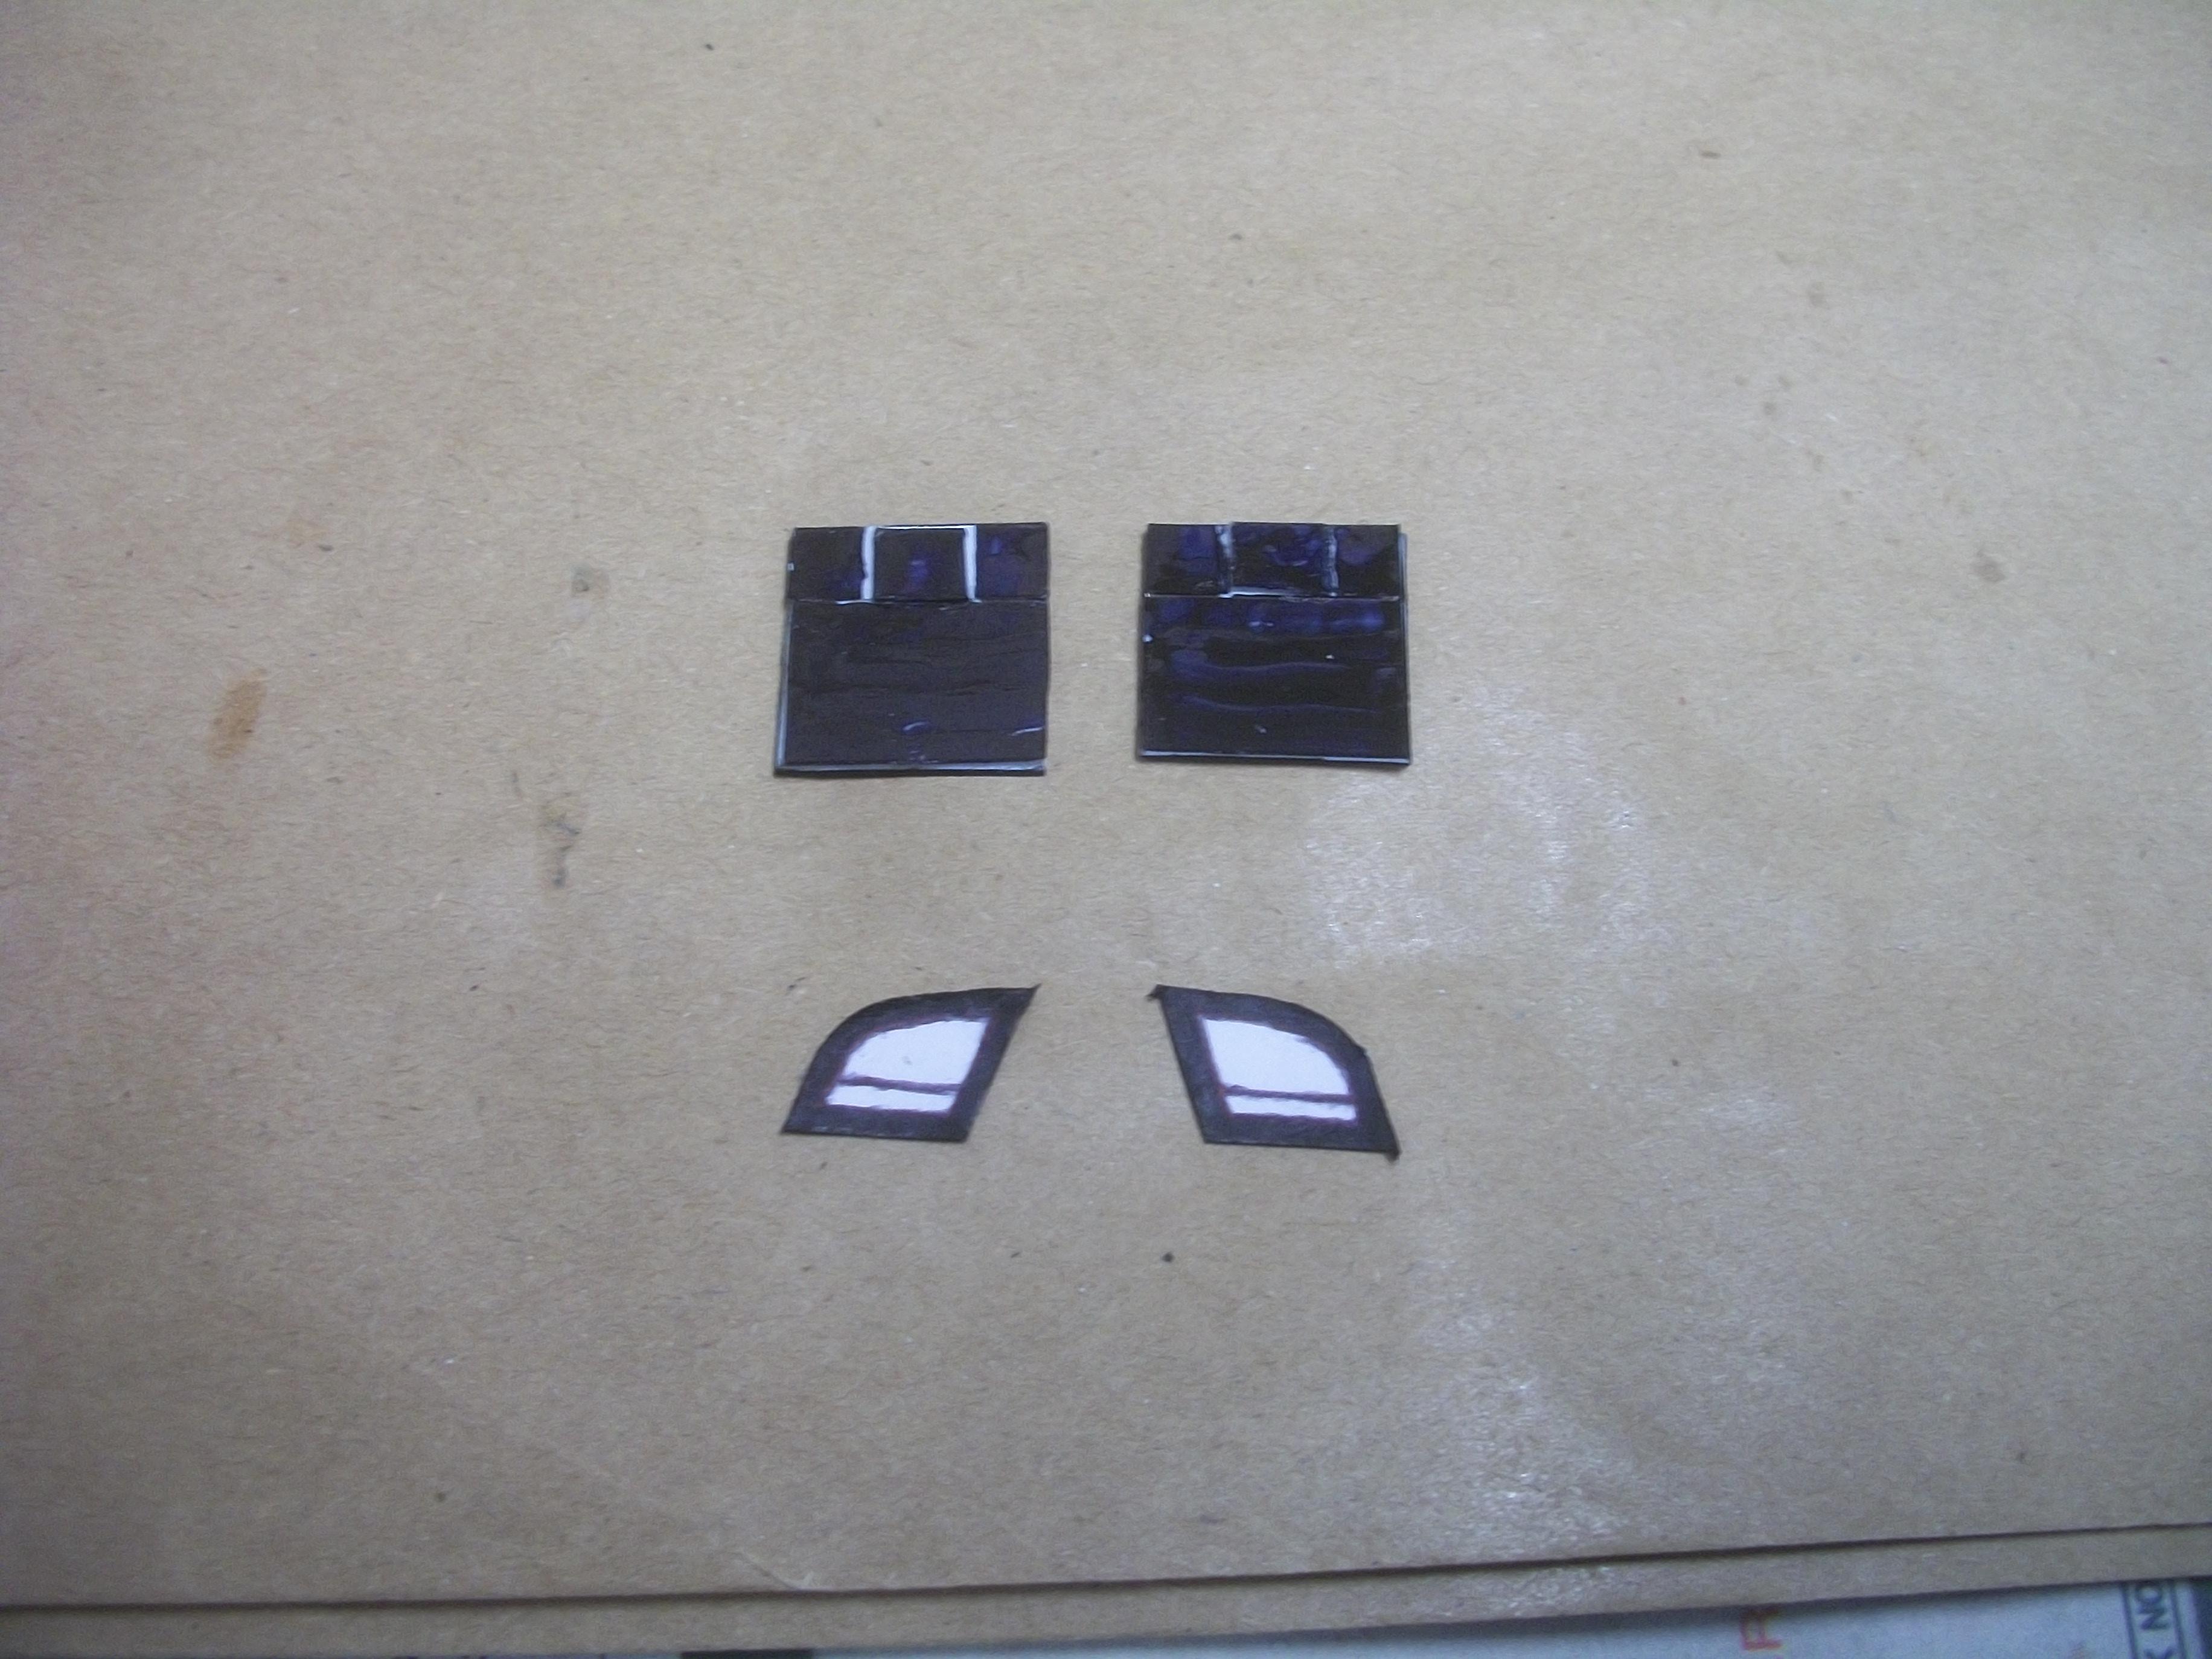
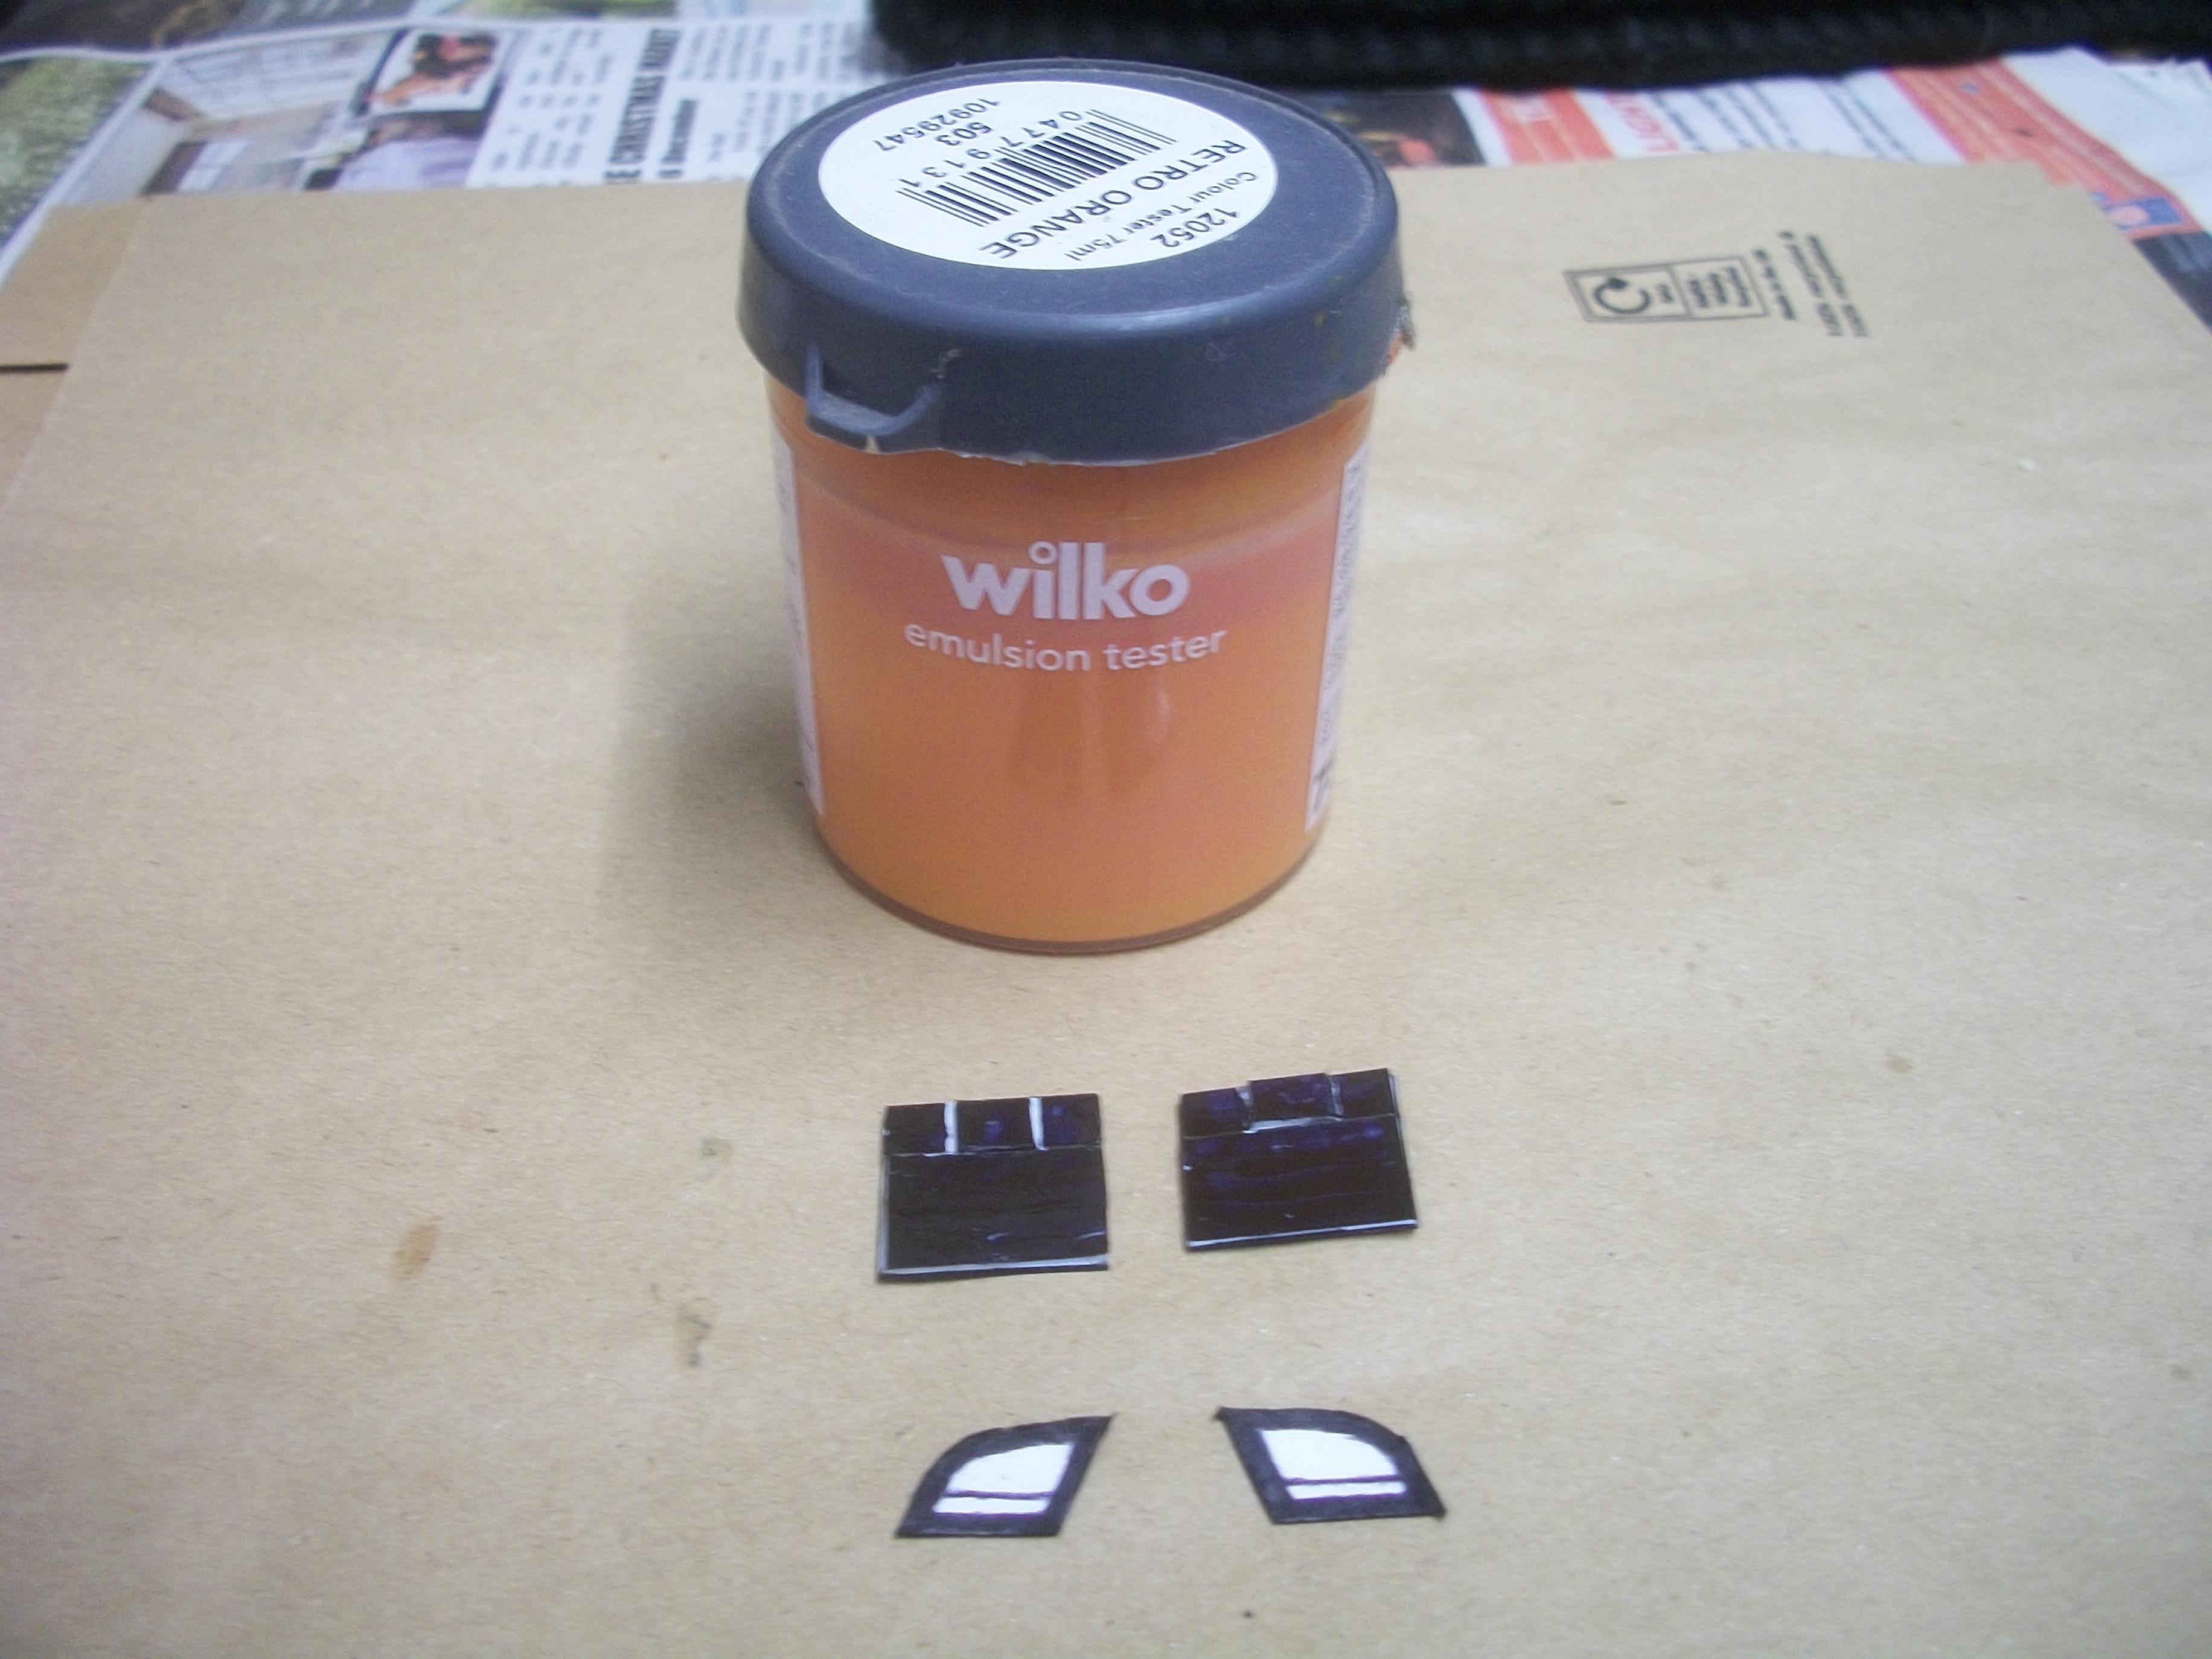
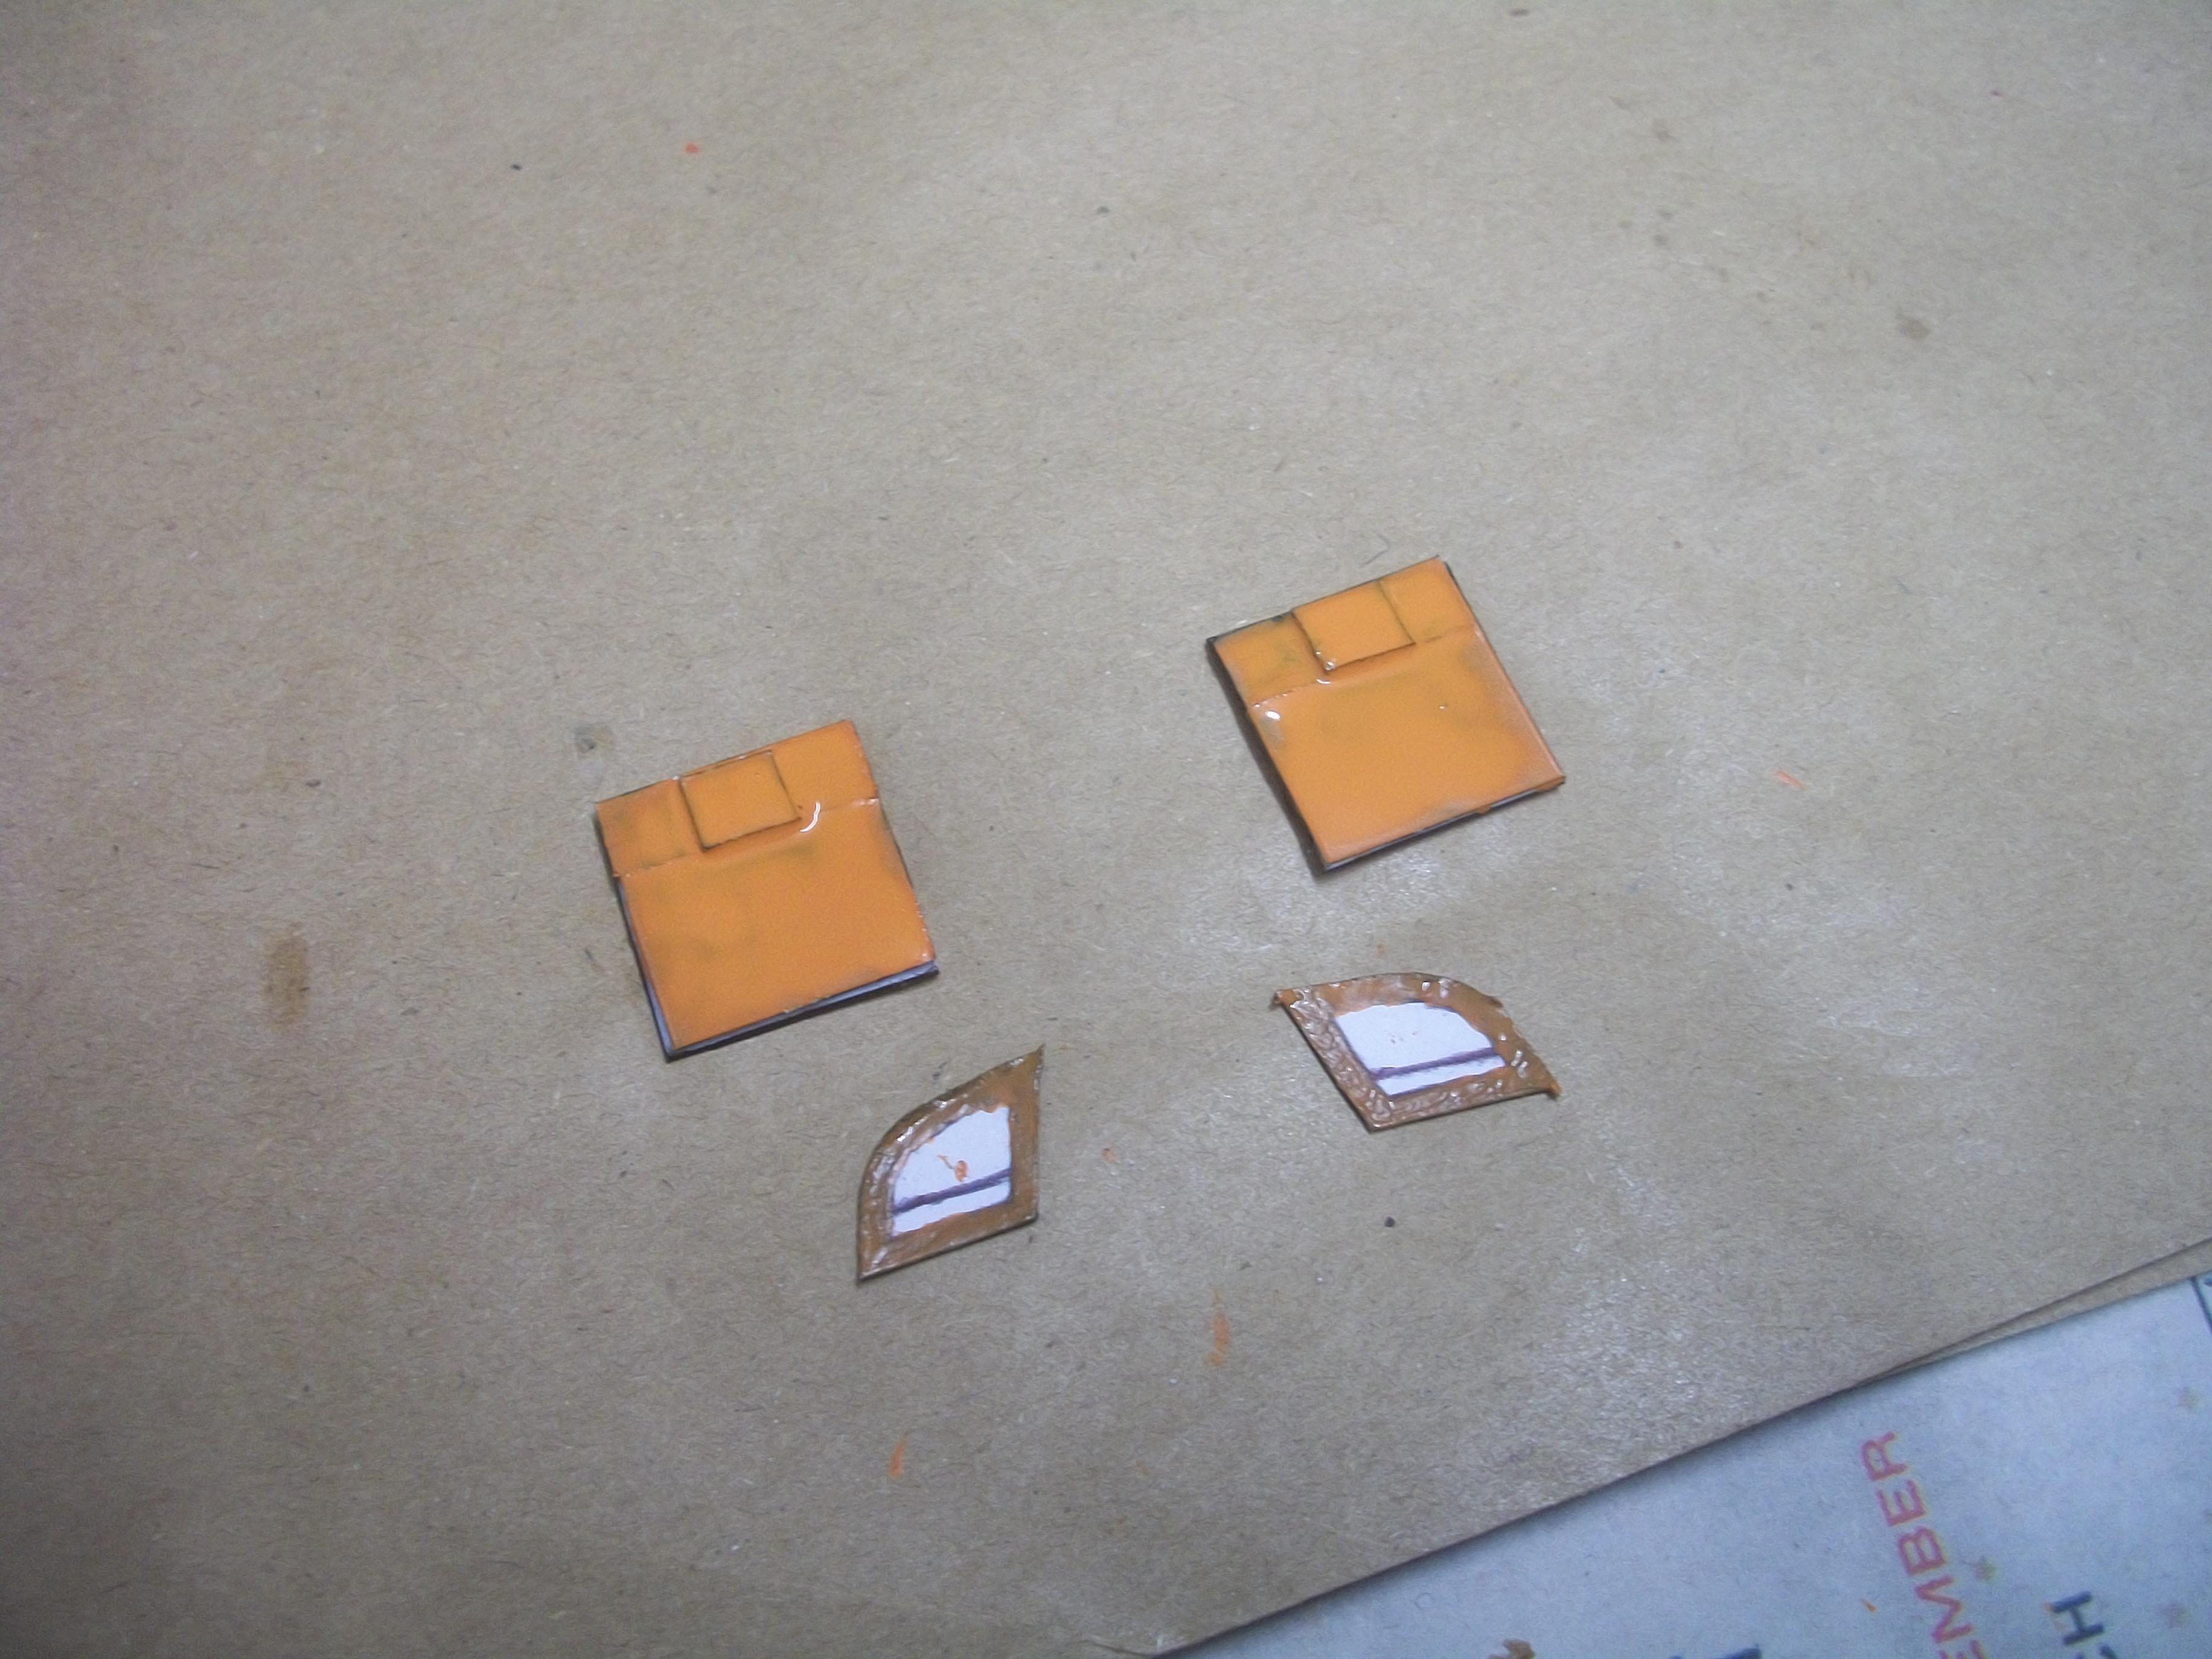
This evening I coated the two white styrene picnic tables, and also the two thin white card vanity mirror frames with permanent black marker. Then I used WILKO Retro Orange emulsion paint, applied over the black marker areas . . . This has to be allowed to dry for around 24 hours. Tomorrow, I shall use a brass bristle brush to scratch through the orange surface layer, to produce the burr walnut finish that I am seeking. This procedure was the result of my referring back to my previous notes, regarding the method used for the dashboard finish. David
-
Rolls-Royce No Chemicals, No Paint, No Harmful Glues
Anglia105E replied to Anglia105E's topic in WIP: Model Cars
Thanks for your suggestion John, and as I mentioned to Mark, these mirror parts are extremely small so I shall see if I can do it using Molotow Liquid Chrome refill to begin with. Rather than use a brush, which would force me to use a chemical cleaner for the brush afterwards, I use the tip of a CD marker pen. David -
Rolls-Royce No Chemicals, No Paint, No Harmful Glues
Anglia105E replied to Anglia105E's topic in WIP: Model Cars
I agree Mark . . . These are very small mirrors. and to begin with I shall see how Molotow Liquid Chrome refill works, when applied with the point of my CD marker. David -
Rolls-Royce No Chemicals, No Paint, No Harmful Glues
Anglia105E replied to Anglia105E's topic in WIP: Model Cars
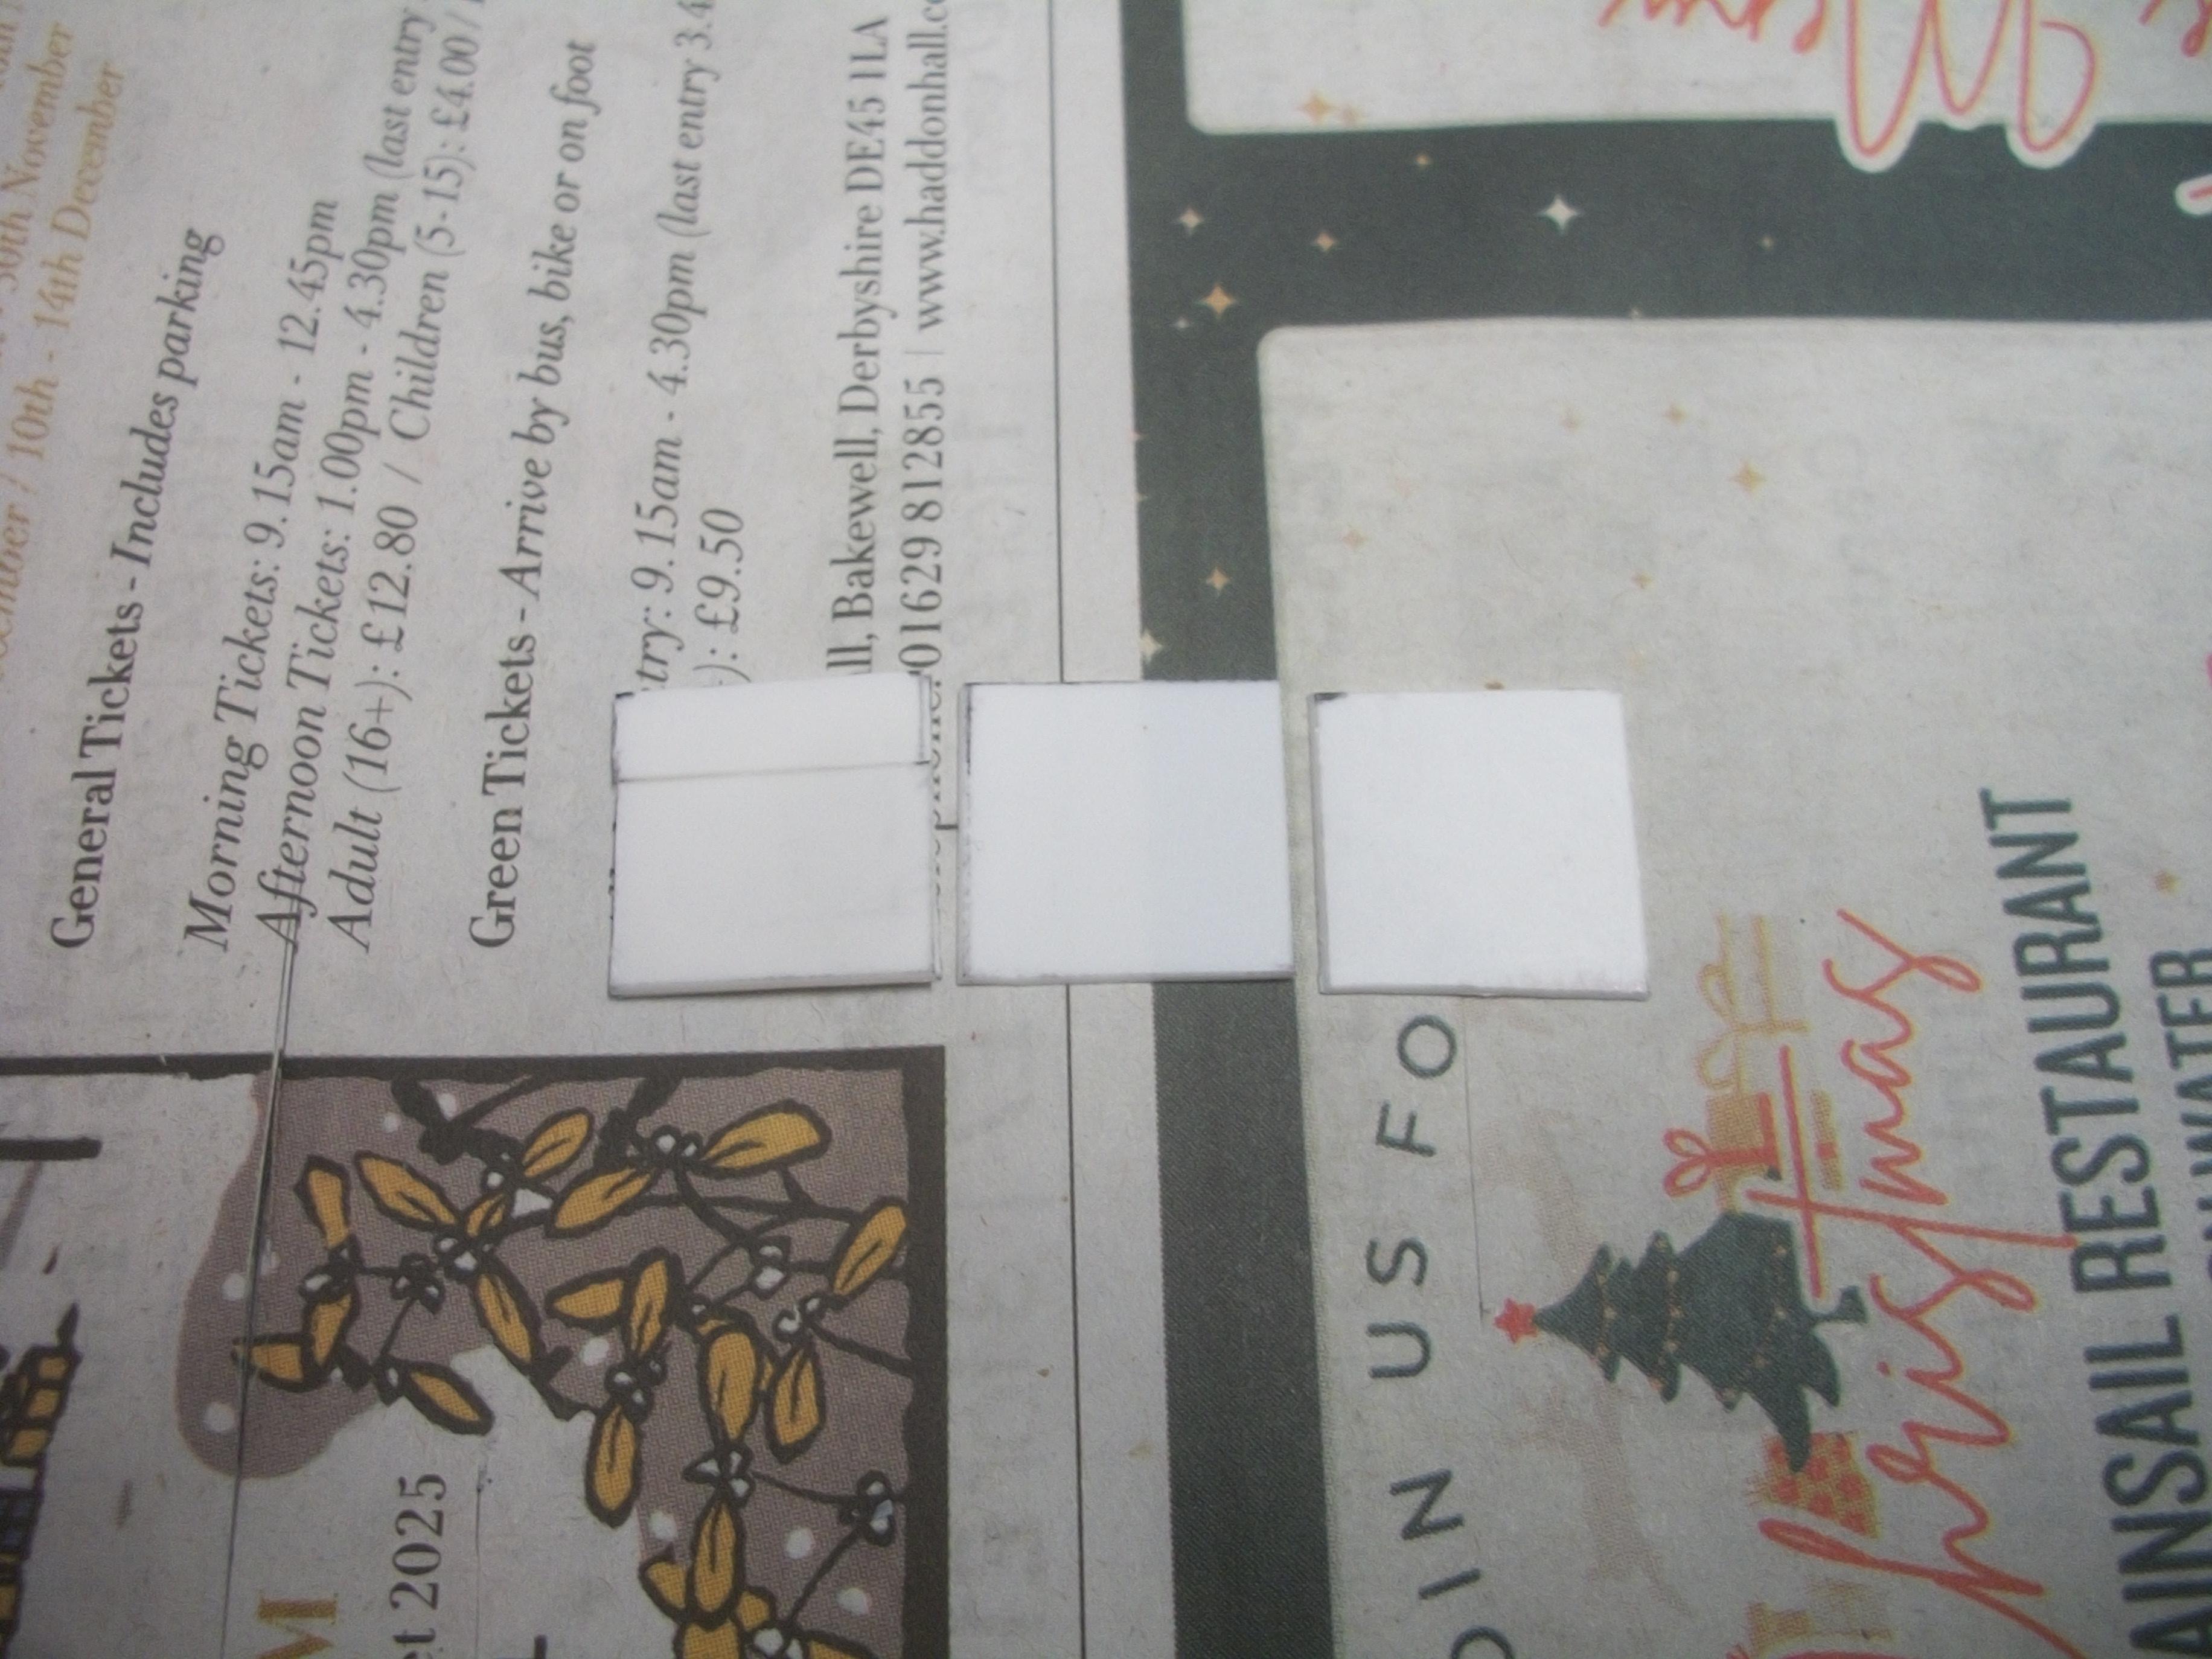
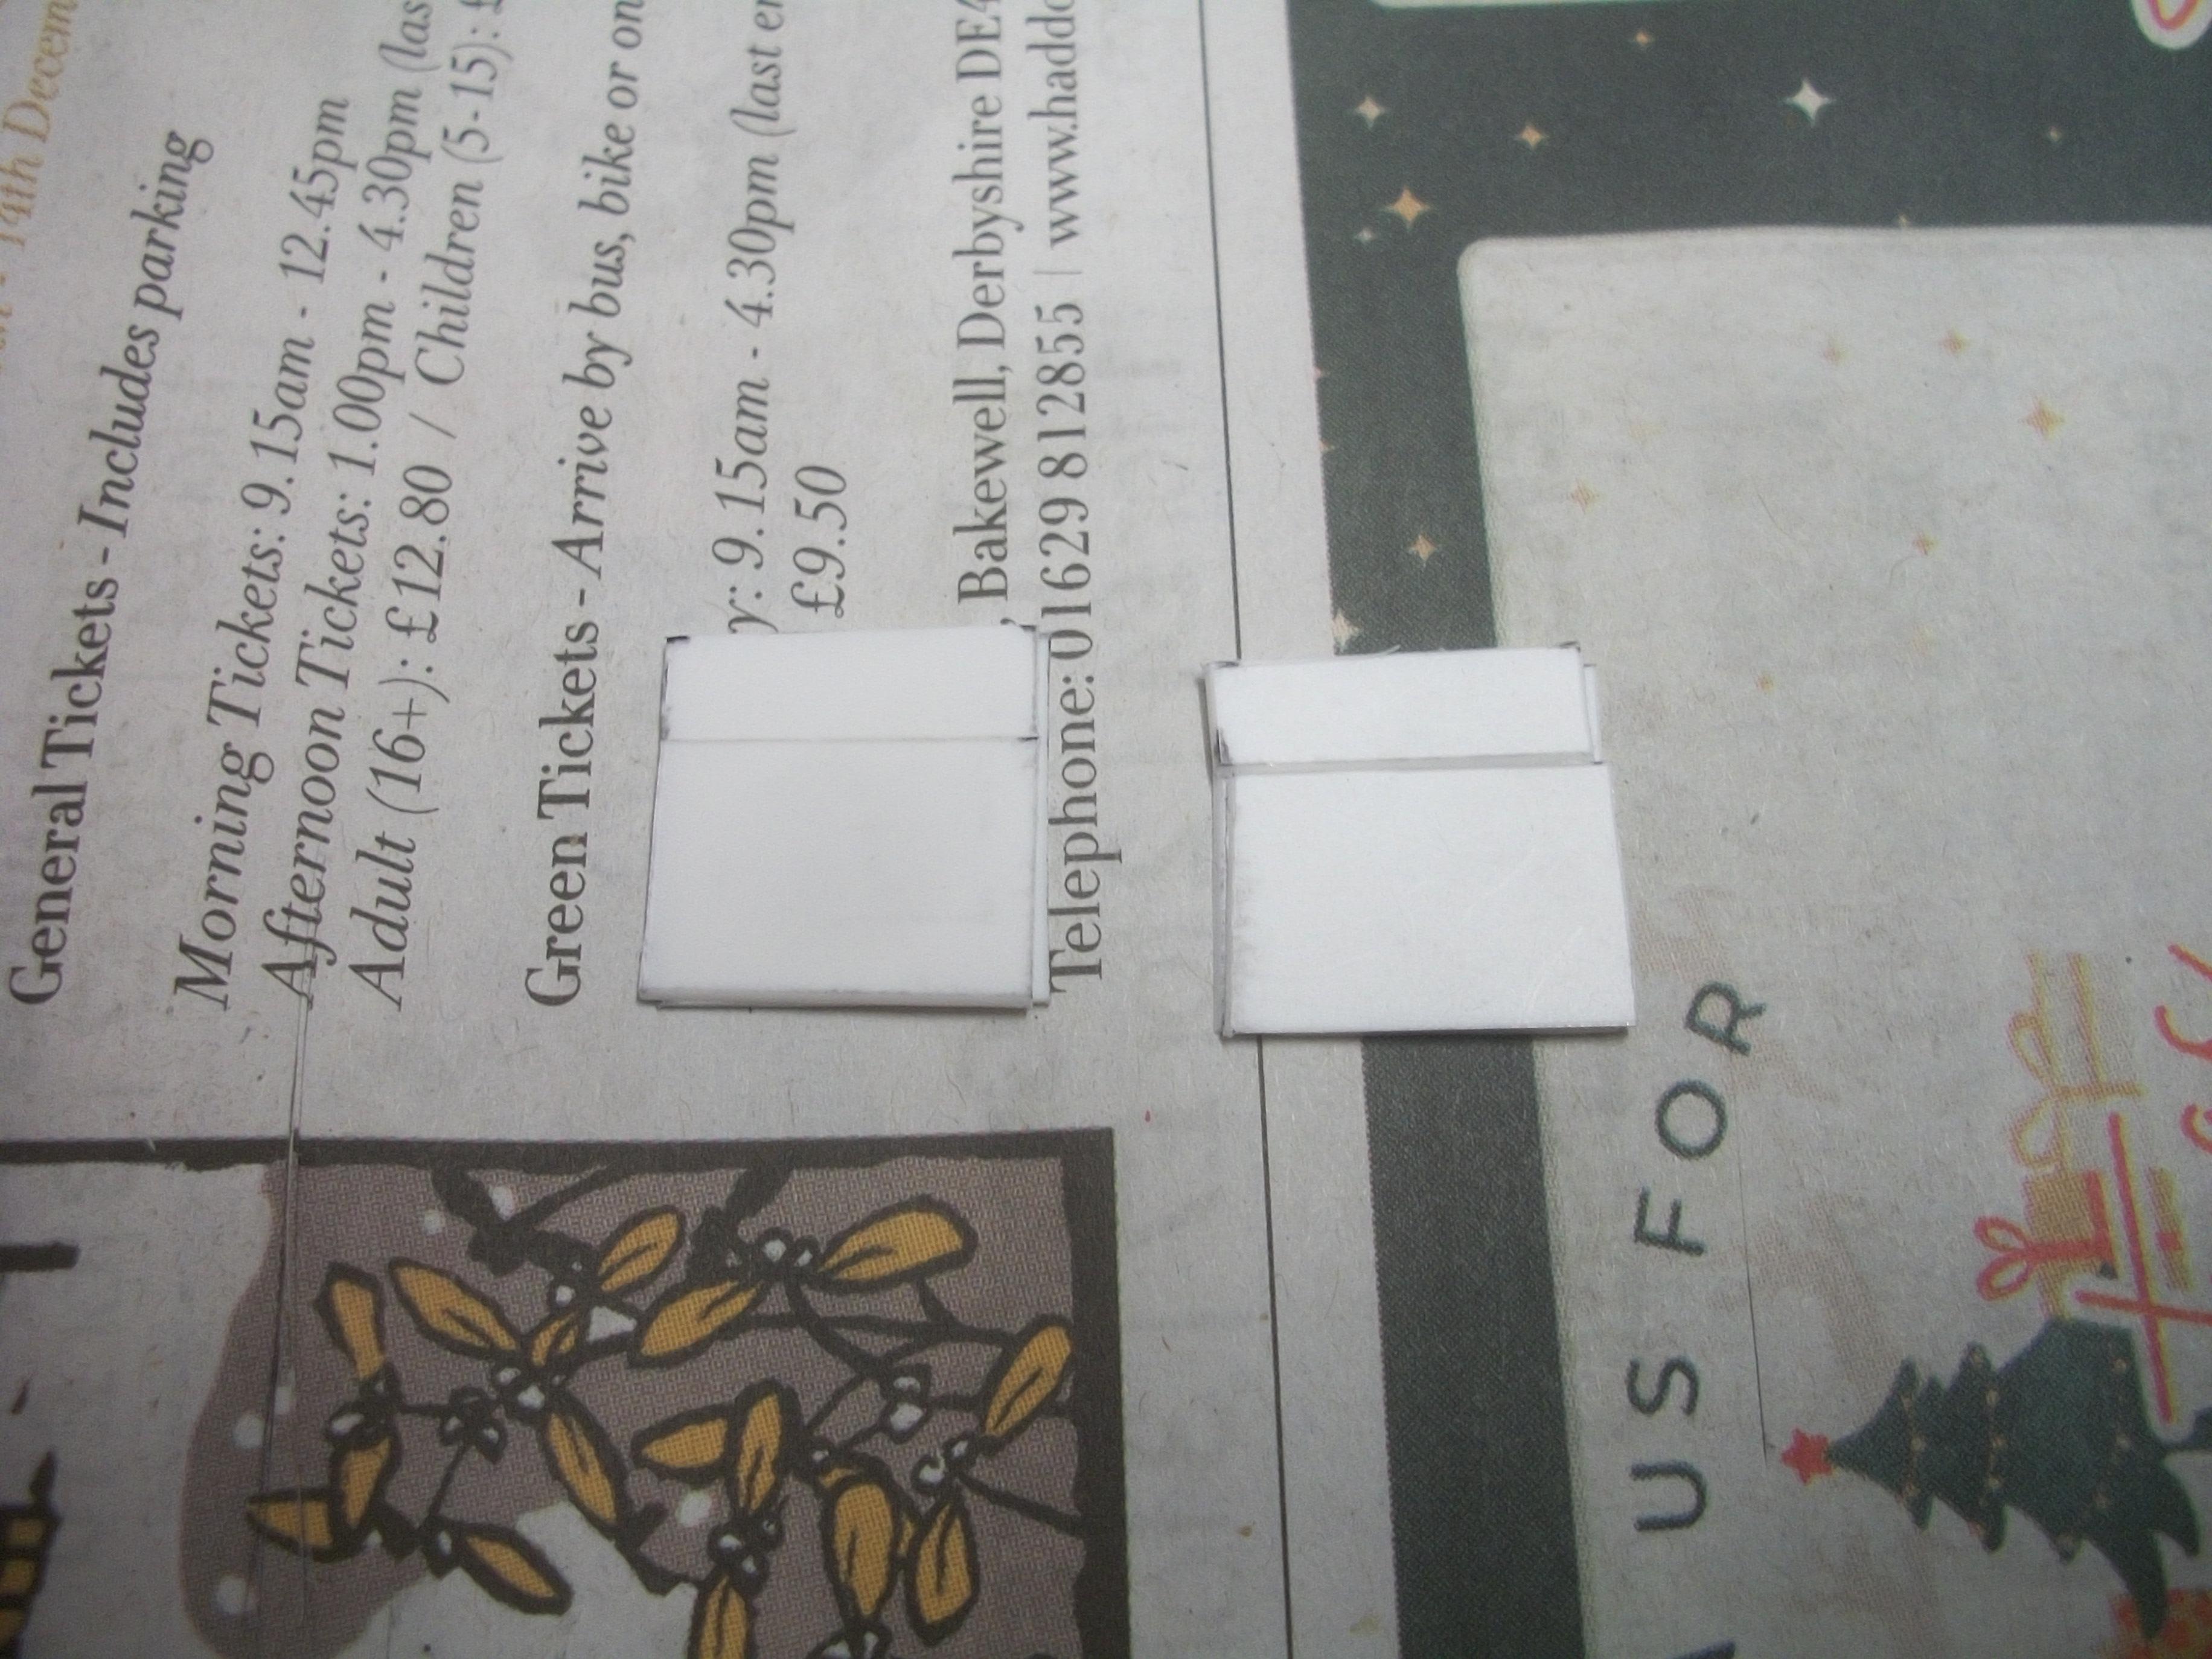
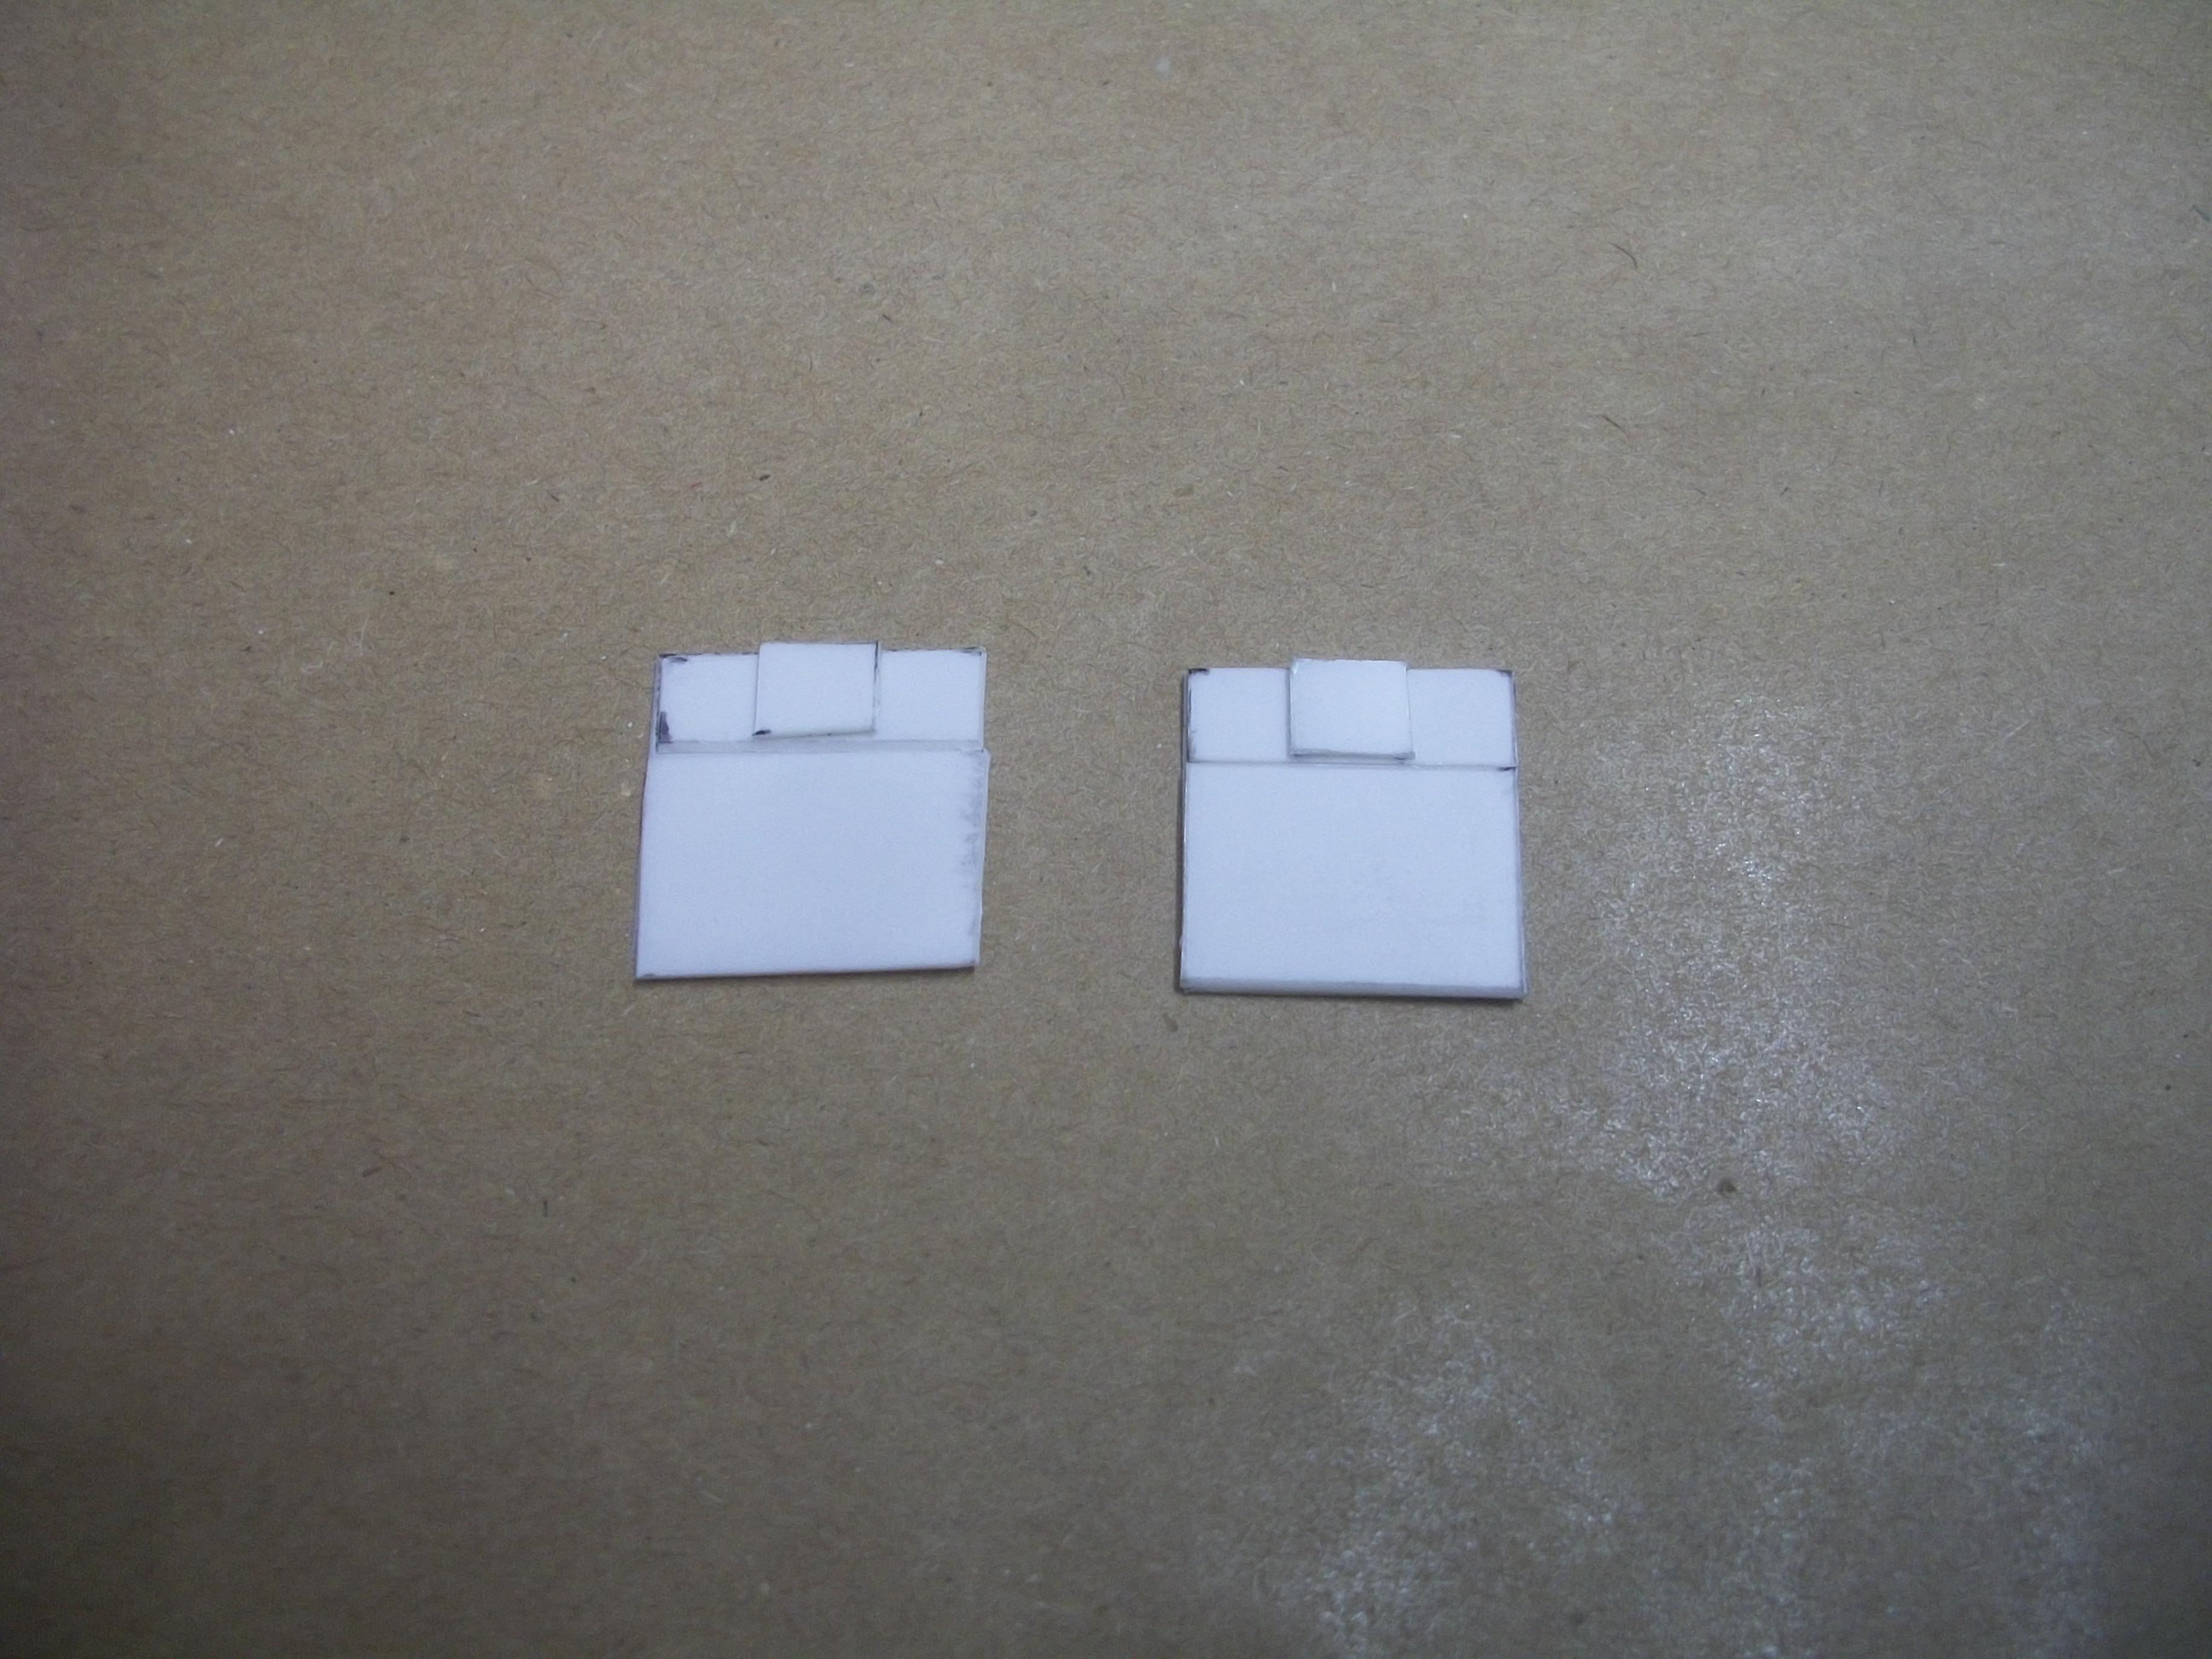
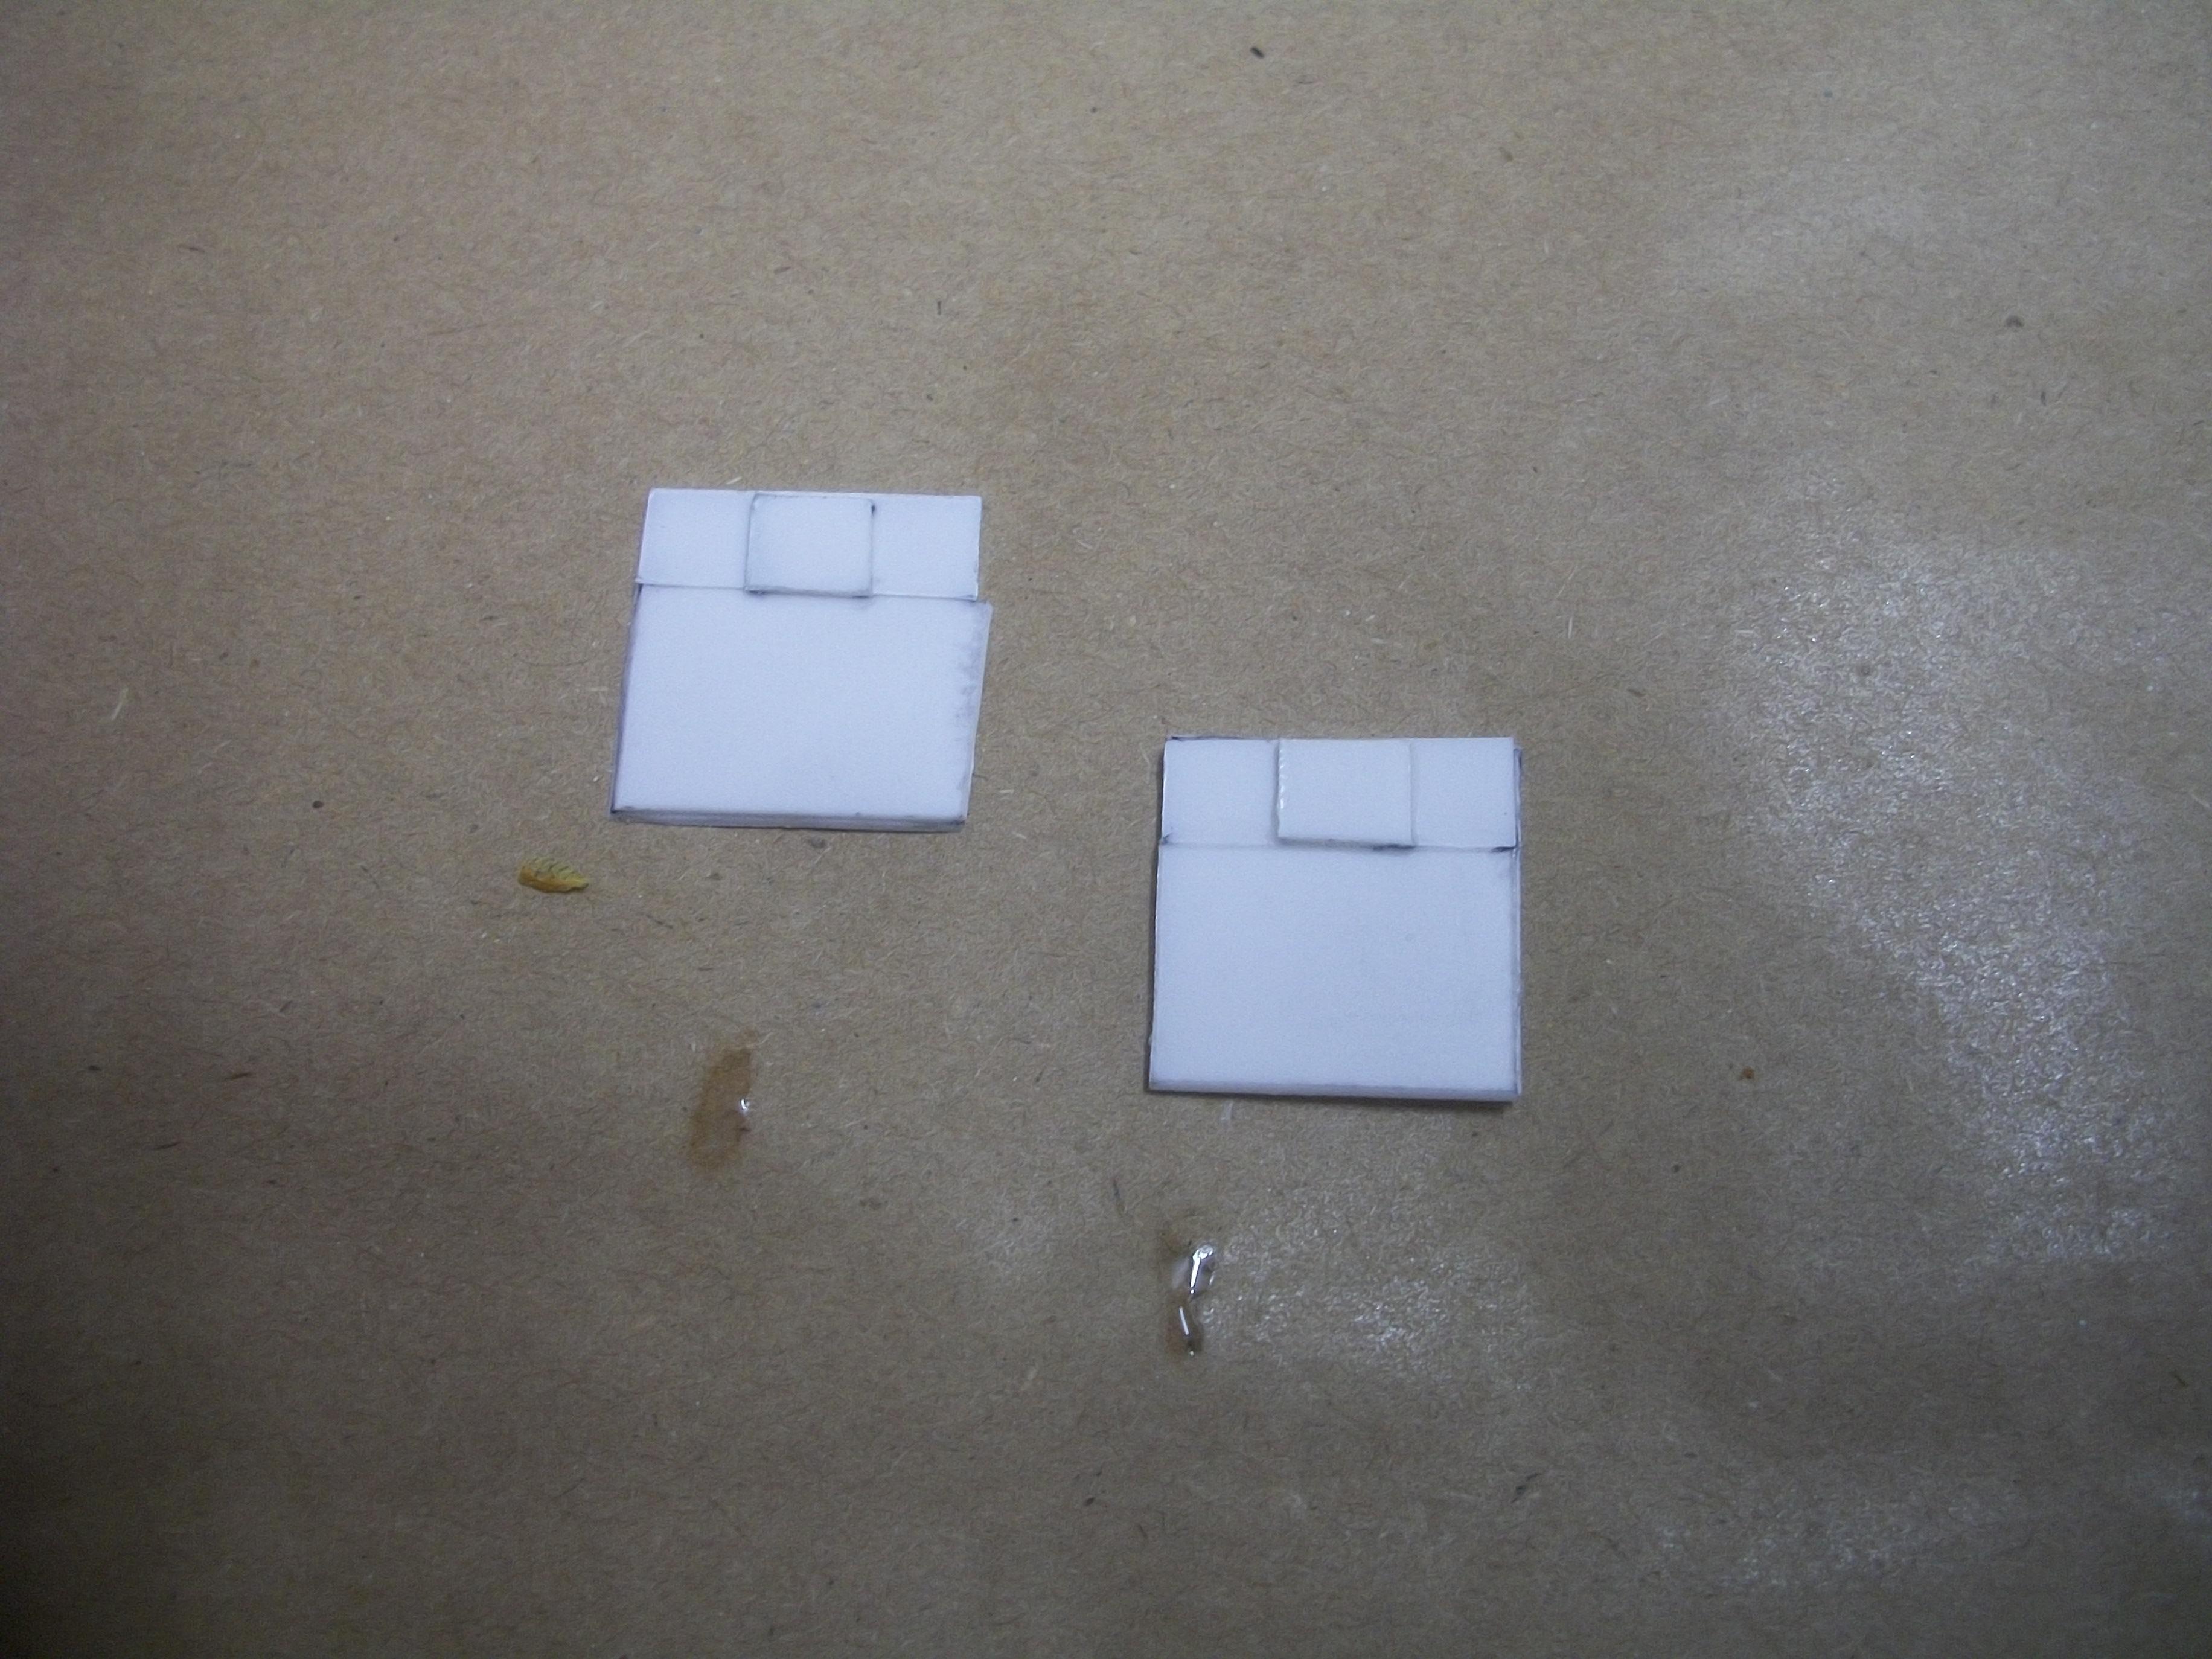
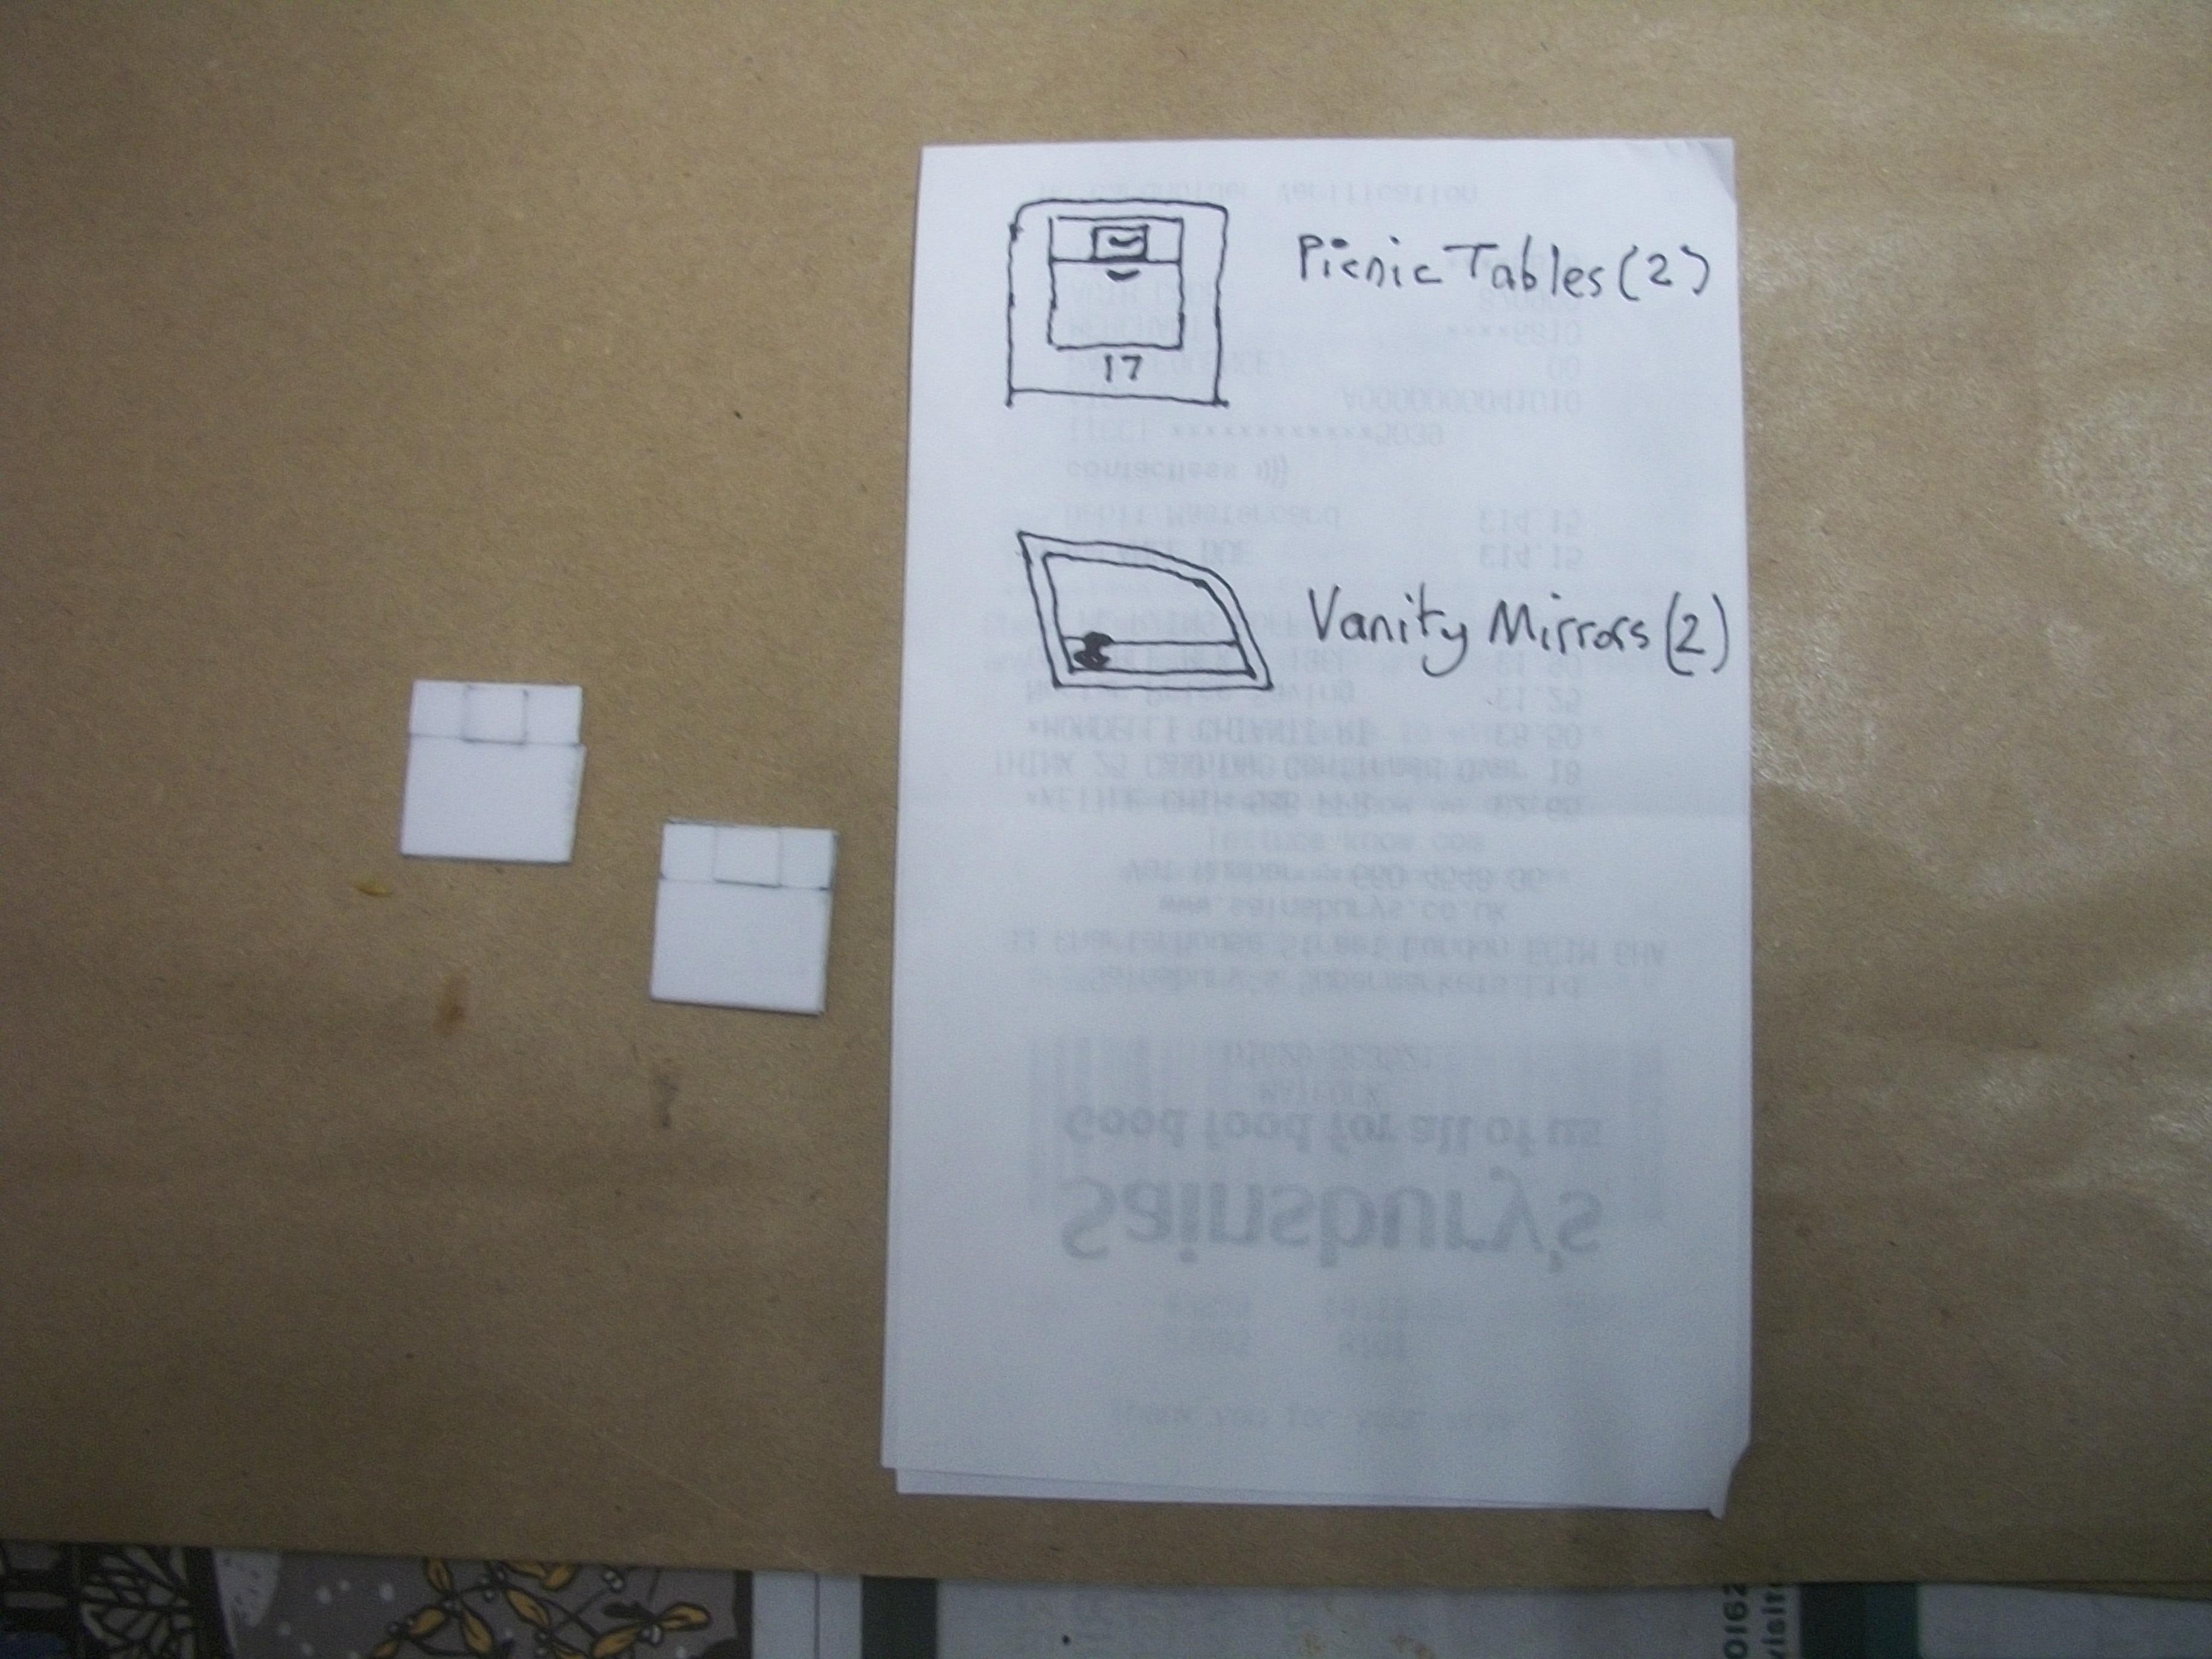
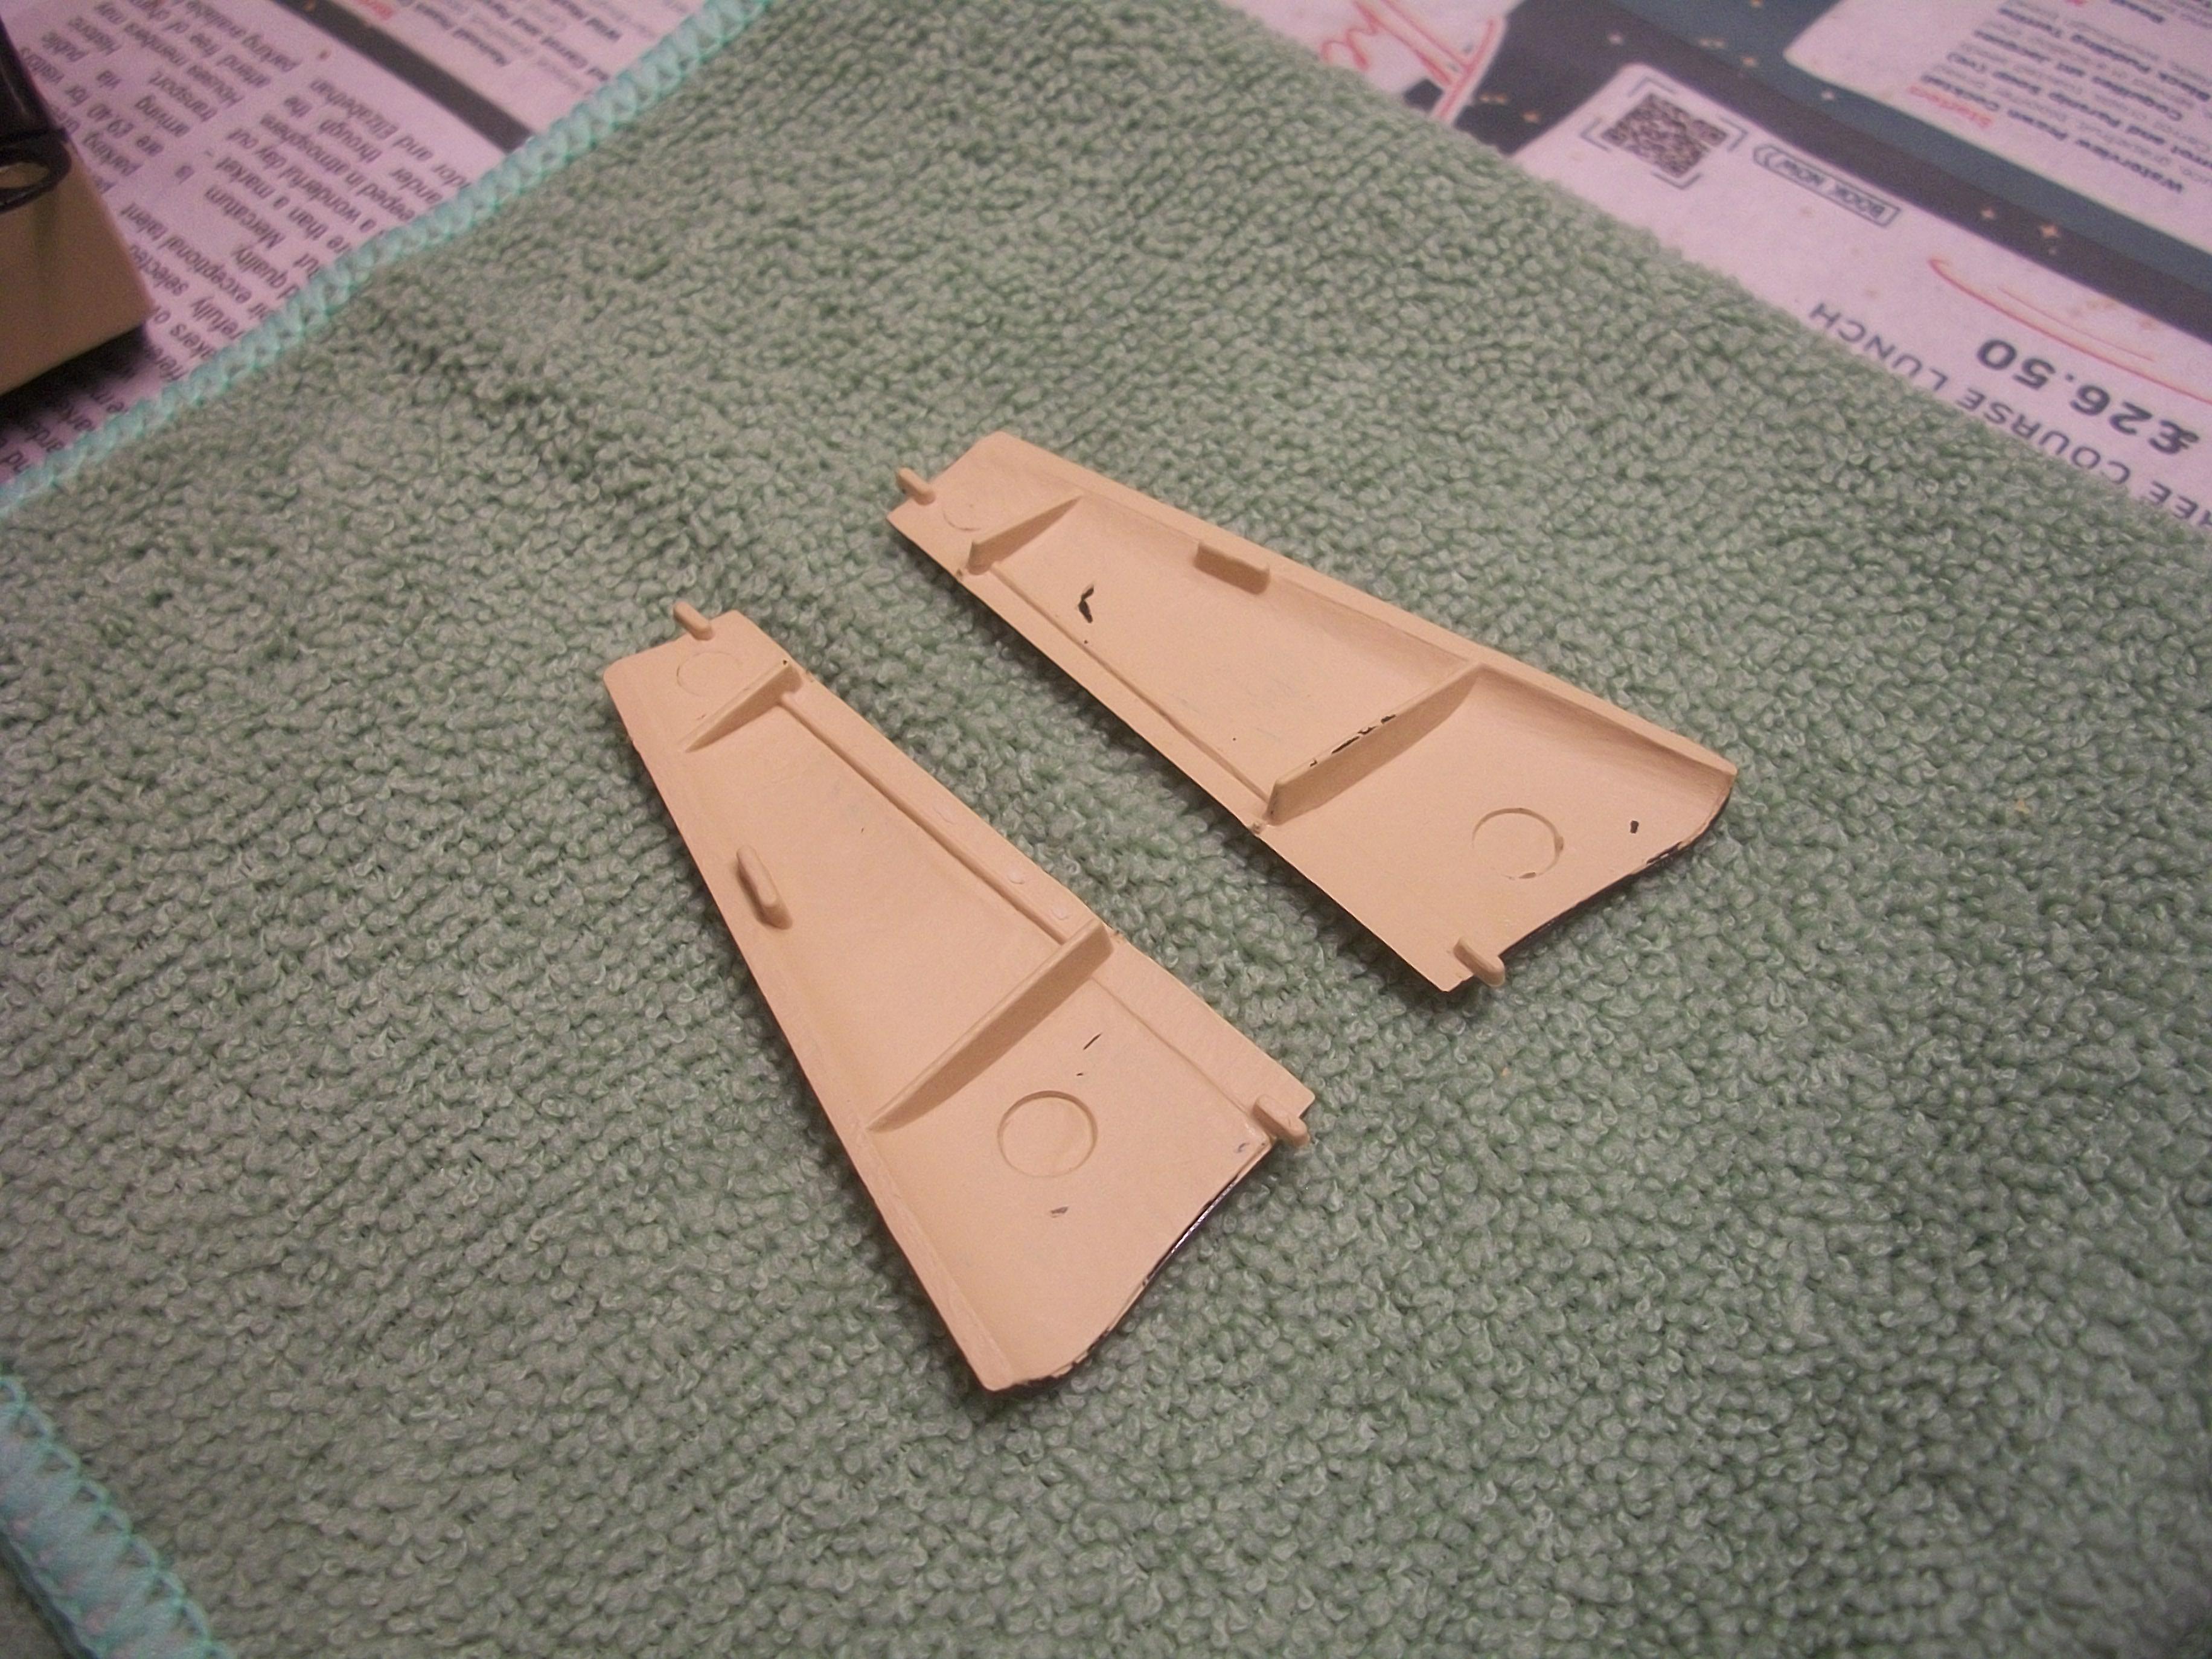
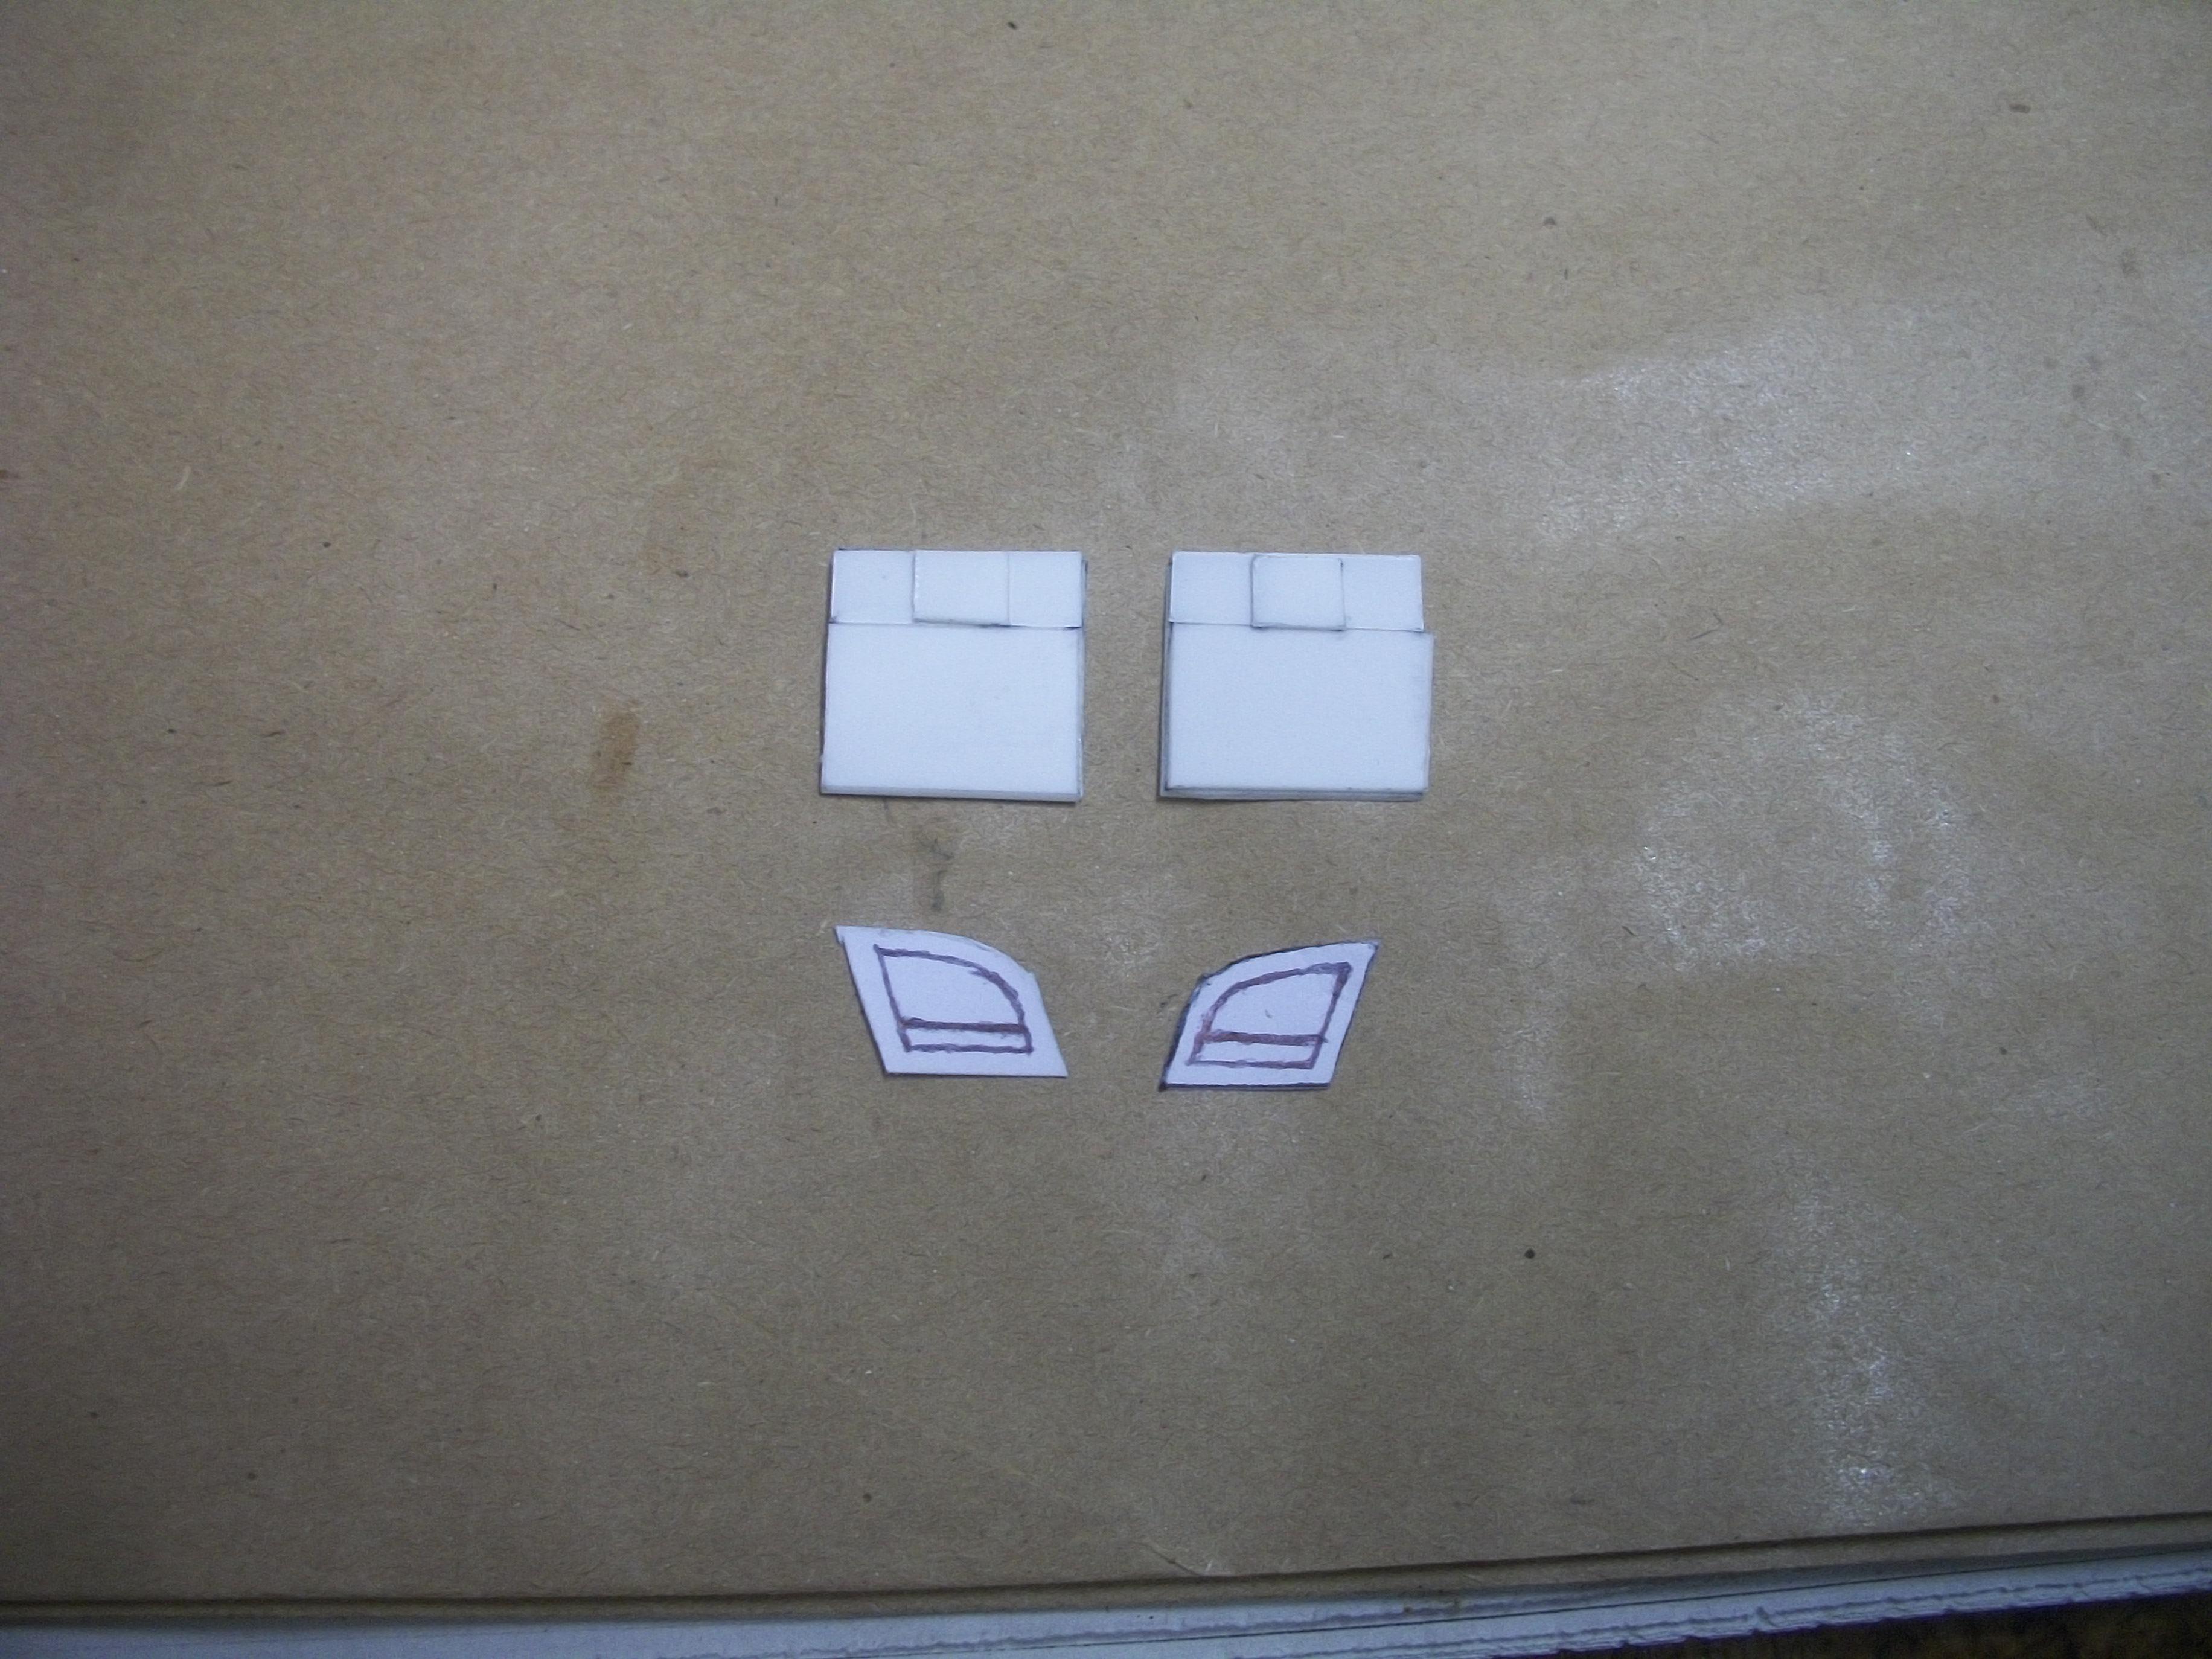
Some work done on the two vanity mirrors this evening, alongside the ongoing work for the picnic tables. Each of the mirrors will have a burr walnut frame, and they are simply pieces of thin white card . . . The driver's side vanity mirror has a cigar lighter, while the passenger side mirror does not have a cigar lighter. I shall be using a small amount of Molotow Liquid Chrome for the mirror glass area . . . David
-
Rolls-Royce No Chemicals, No Paint, No Harmful Glues
Anglia105E replied to Anglia105E's topic in WIP: Model Cars
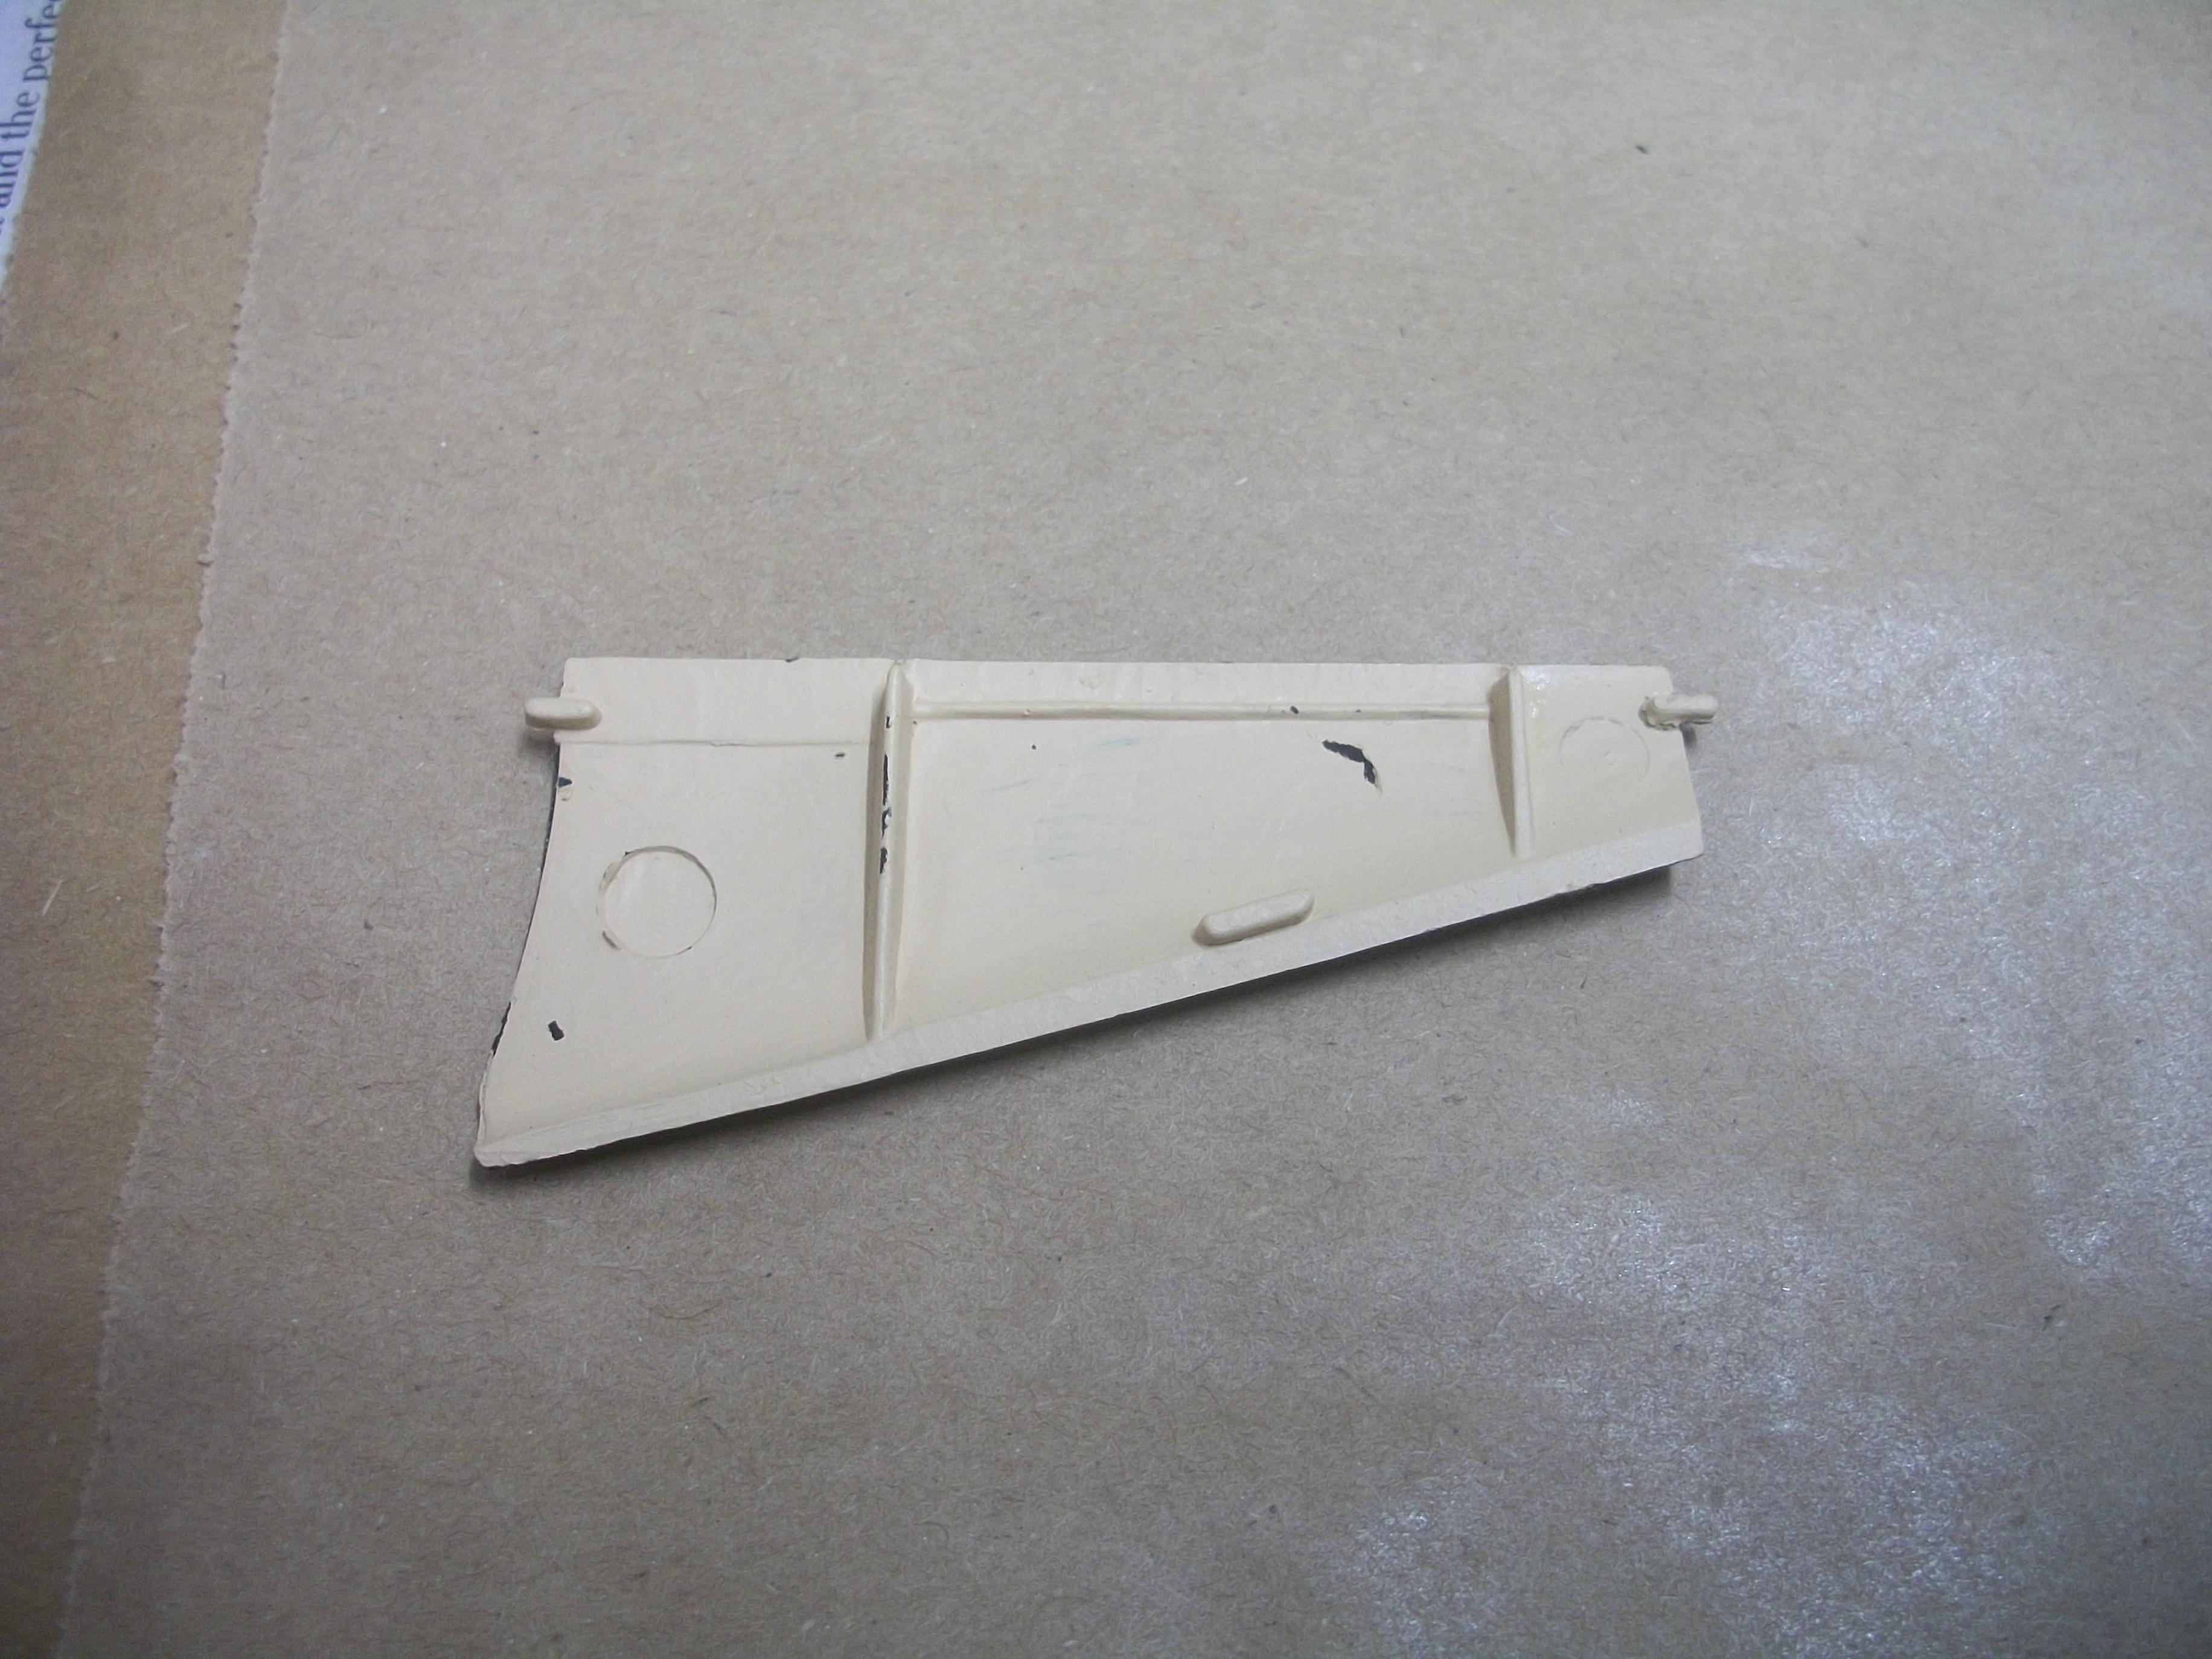
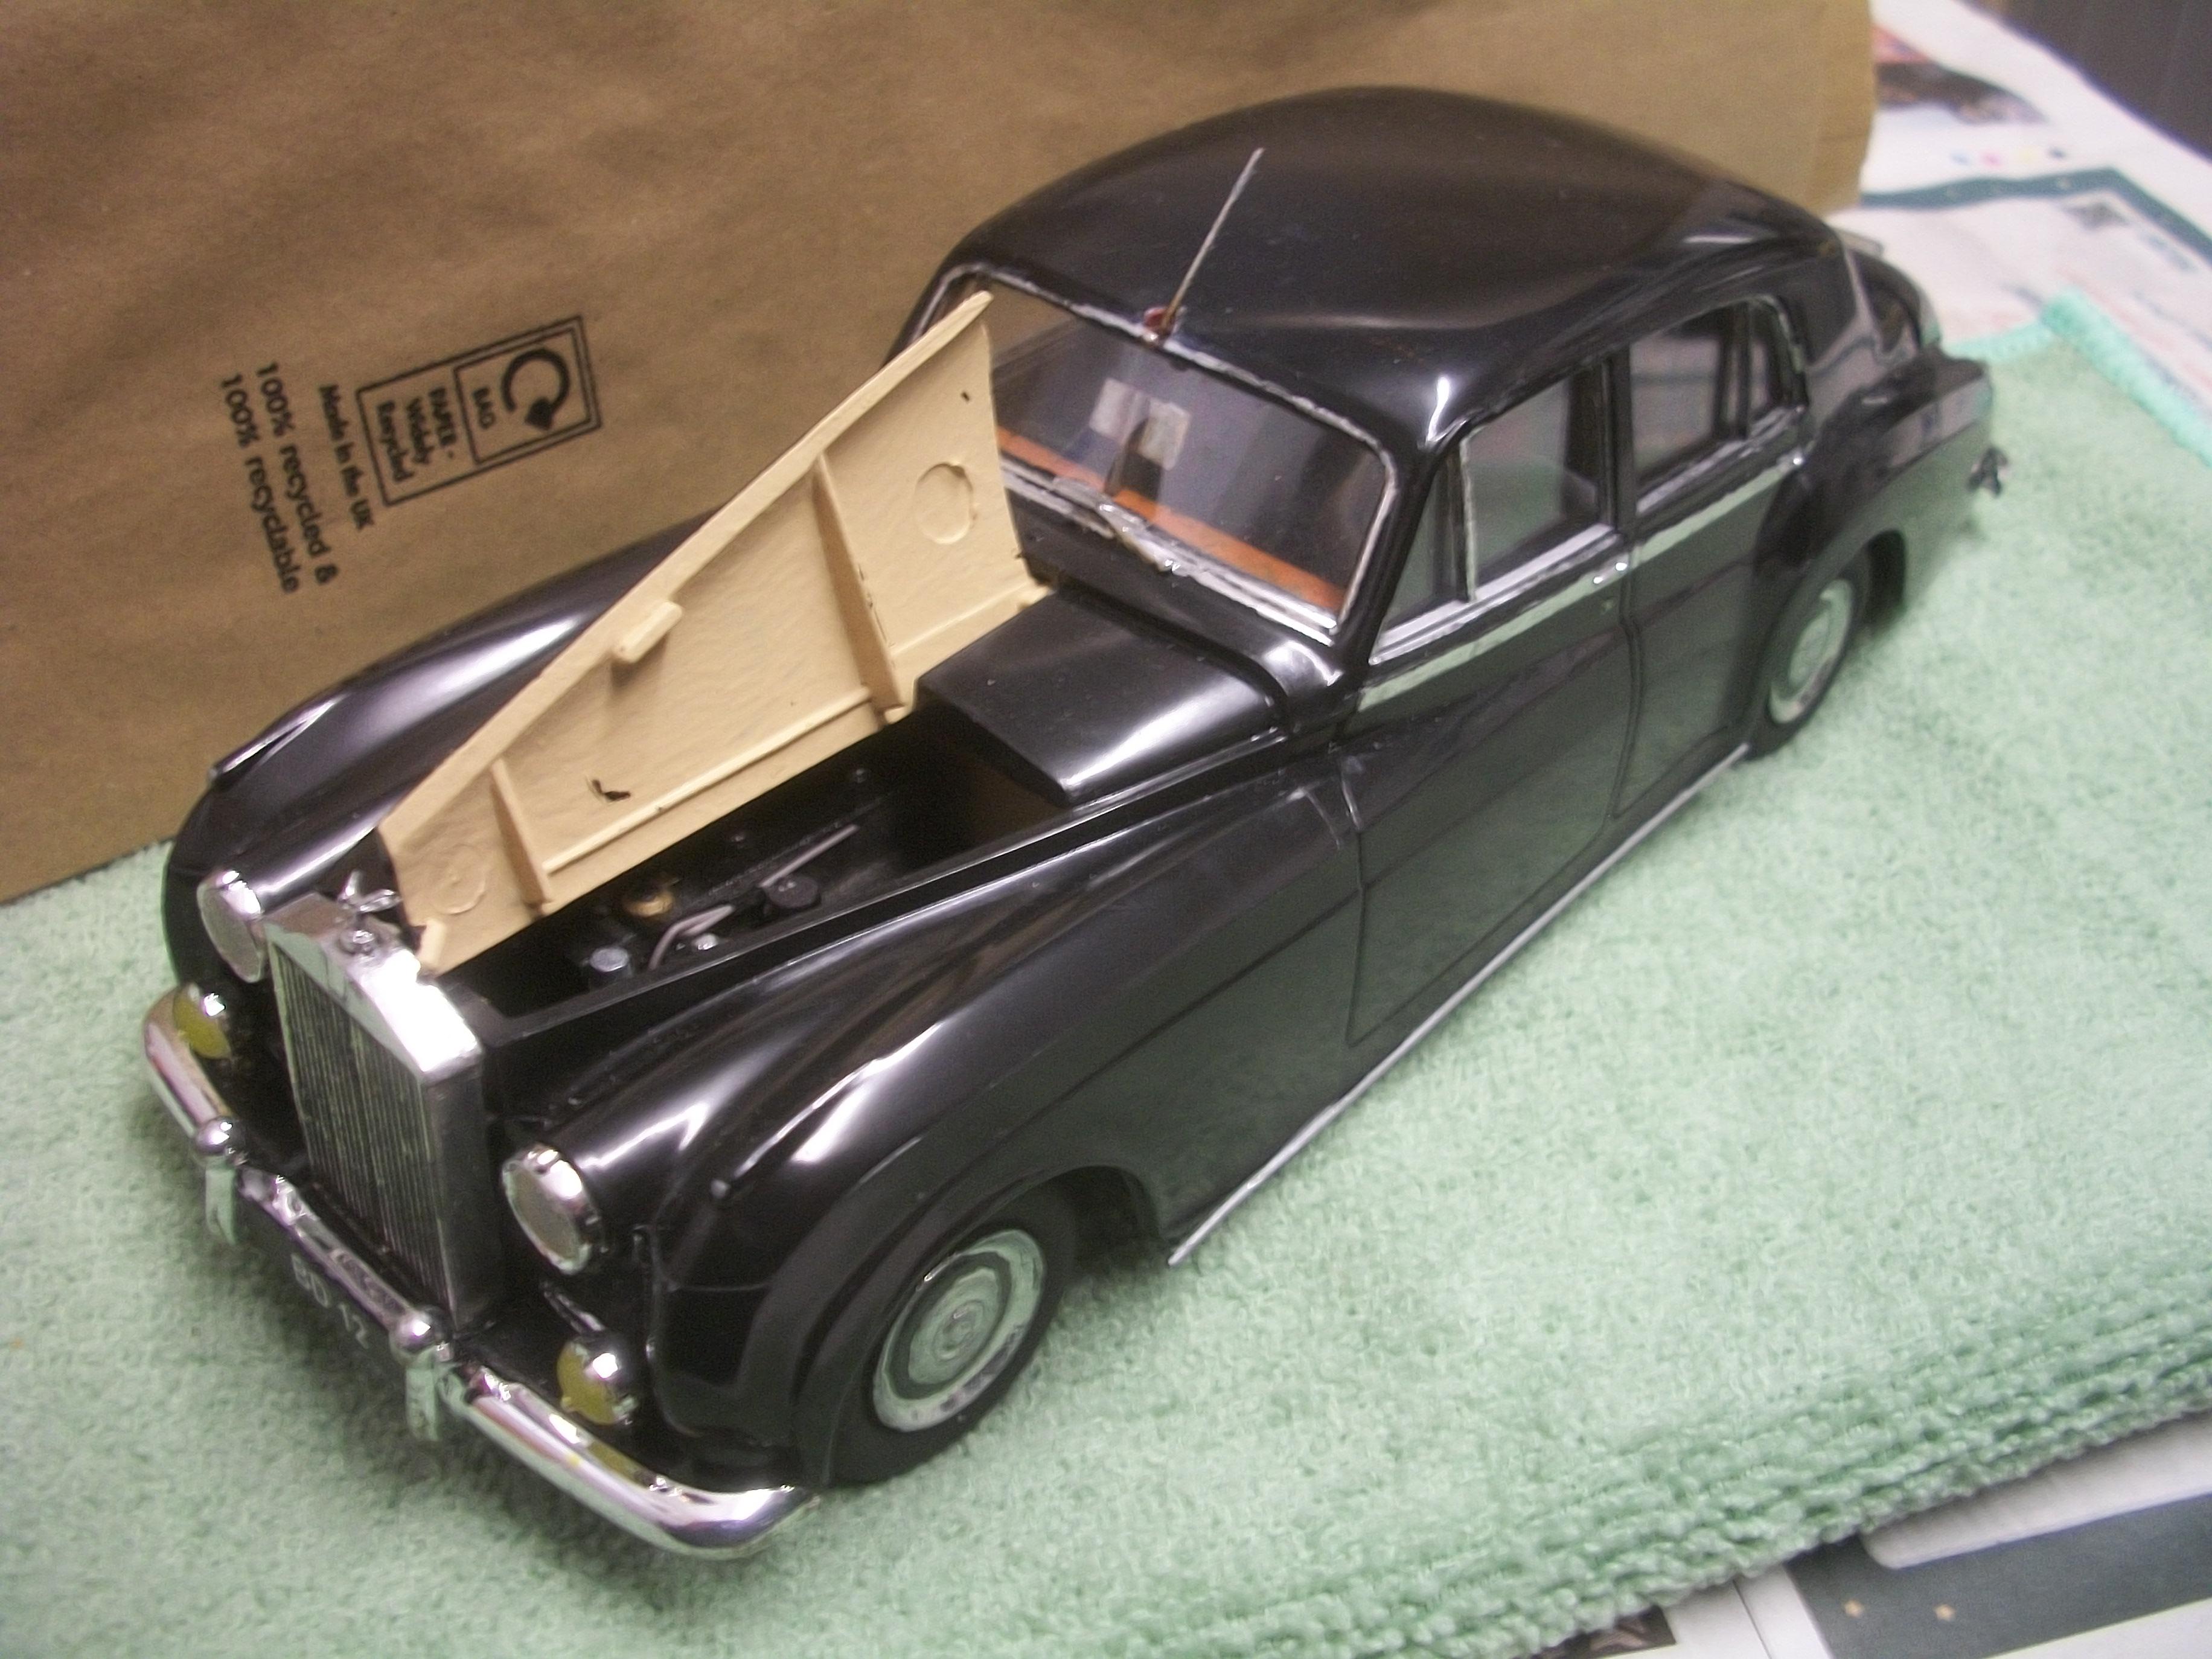
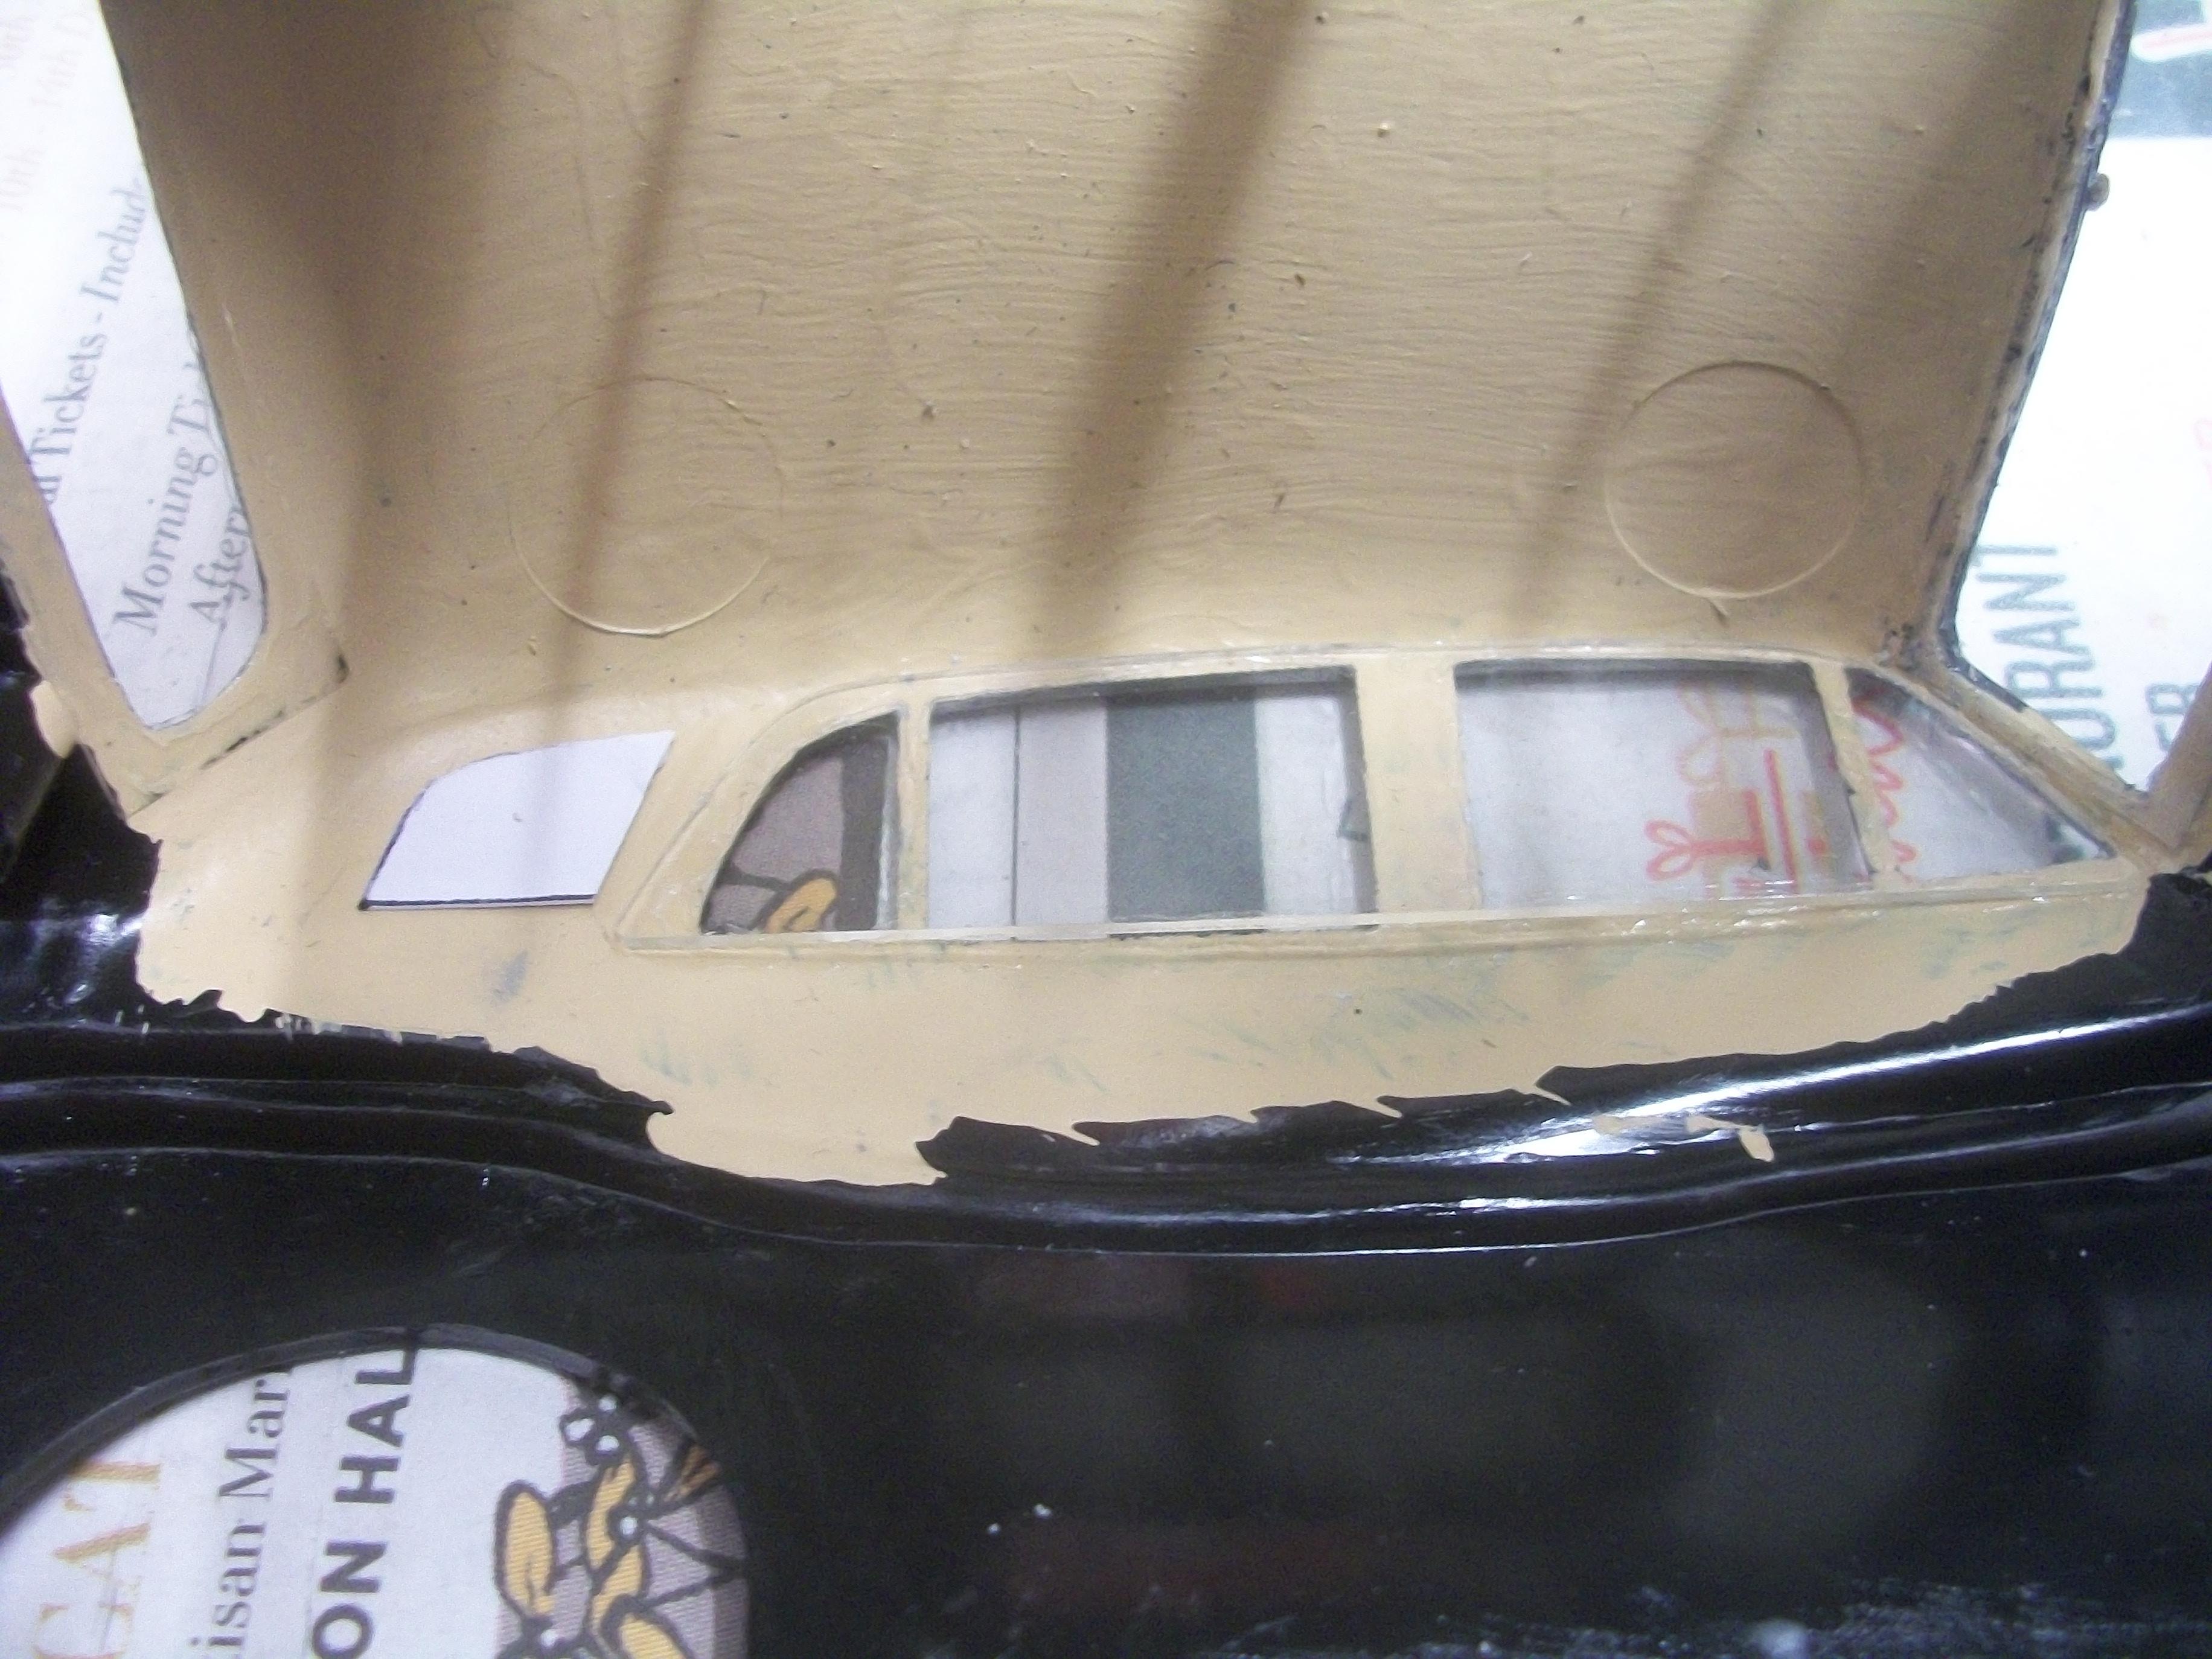
The passenger side bonnet panel front hinge pin has been super glued back in place, and hopefully this will hold when the bonnet panel is fitted later. To make the two fold up picnic tables that are mounted on the rear of the front seats I have cut out pieces of styrene sheet, which have been PVA glued together to form the tables . . . Once these have been allowed to set overnight, I can use Sharpies to create the burr walnut finish to match the burr walnut dashboard. There will be two chrome handles fixed to each of the picnic tables, which I shall make from paper clips cut to size and shape. Then both picnic tables can be glued to the backs of the front seats . . . David
-
Rolls-Royce No Chemicals, No Paint, No Harmful Glues
Anglia105E replied to Anglia105E's topic in WIP: Model Cars
Yes Mark, that must be what is happening . . . telepathy indeed. David -
Rolls-Royce No Chemicals, No Paint, No Harmful Glues
Anglia105E replied to Anglia105E's topic in WIP: Model Cars
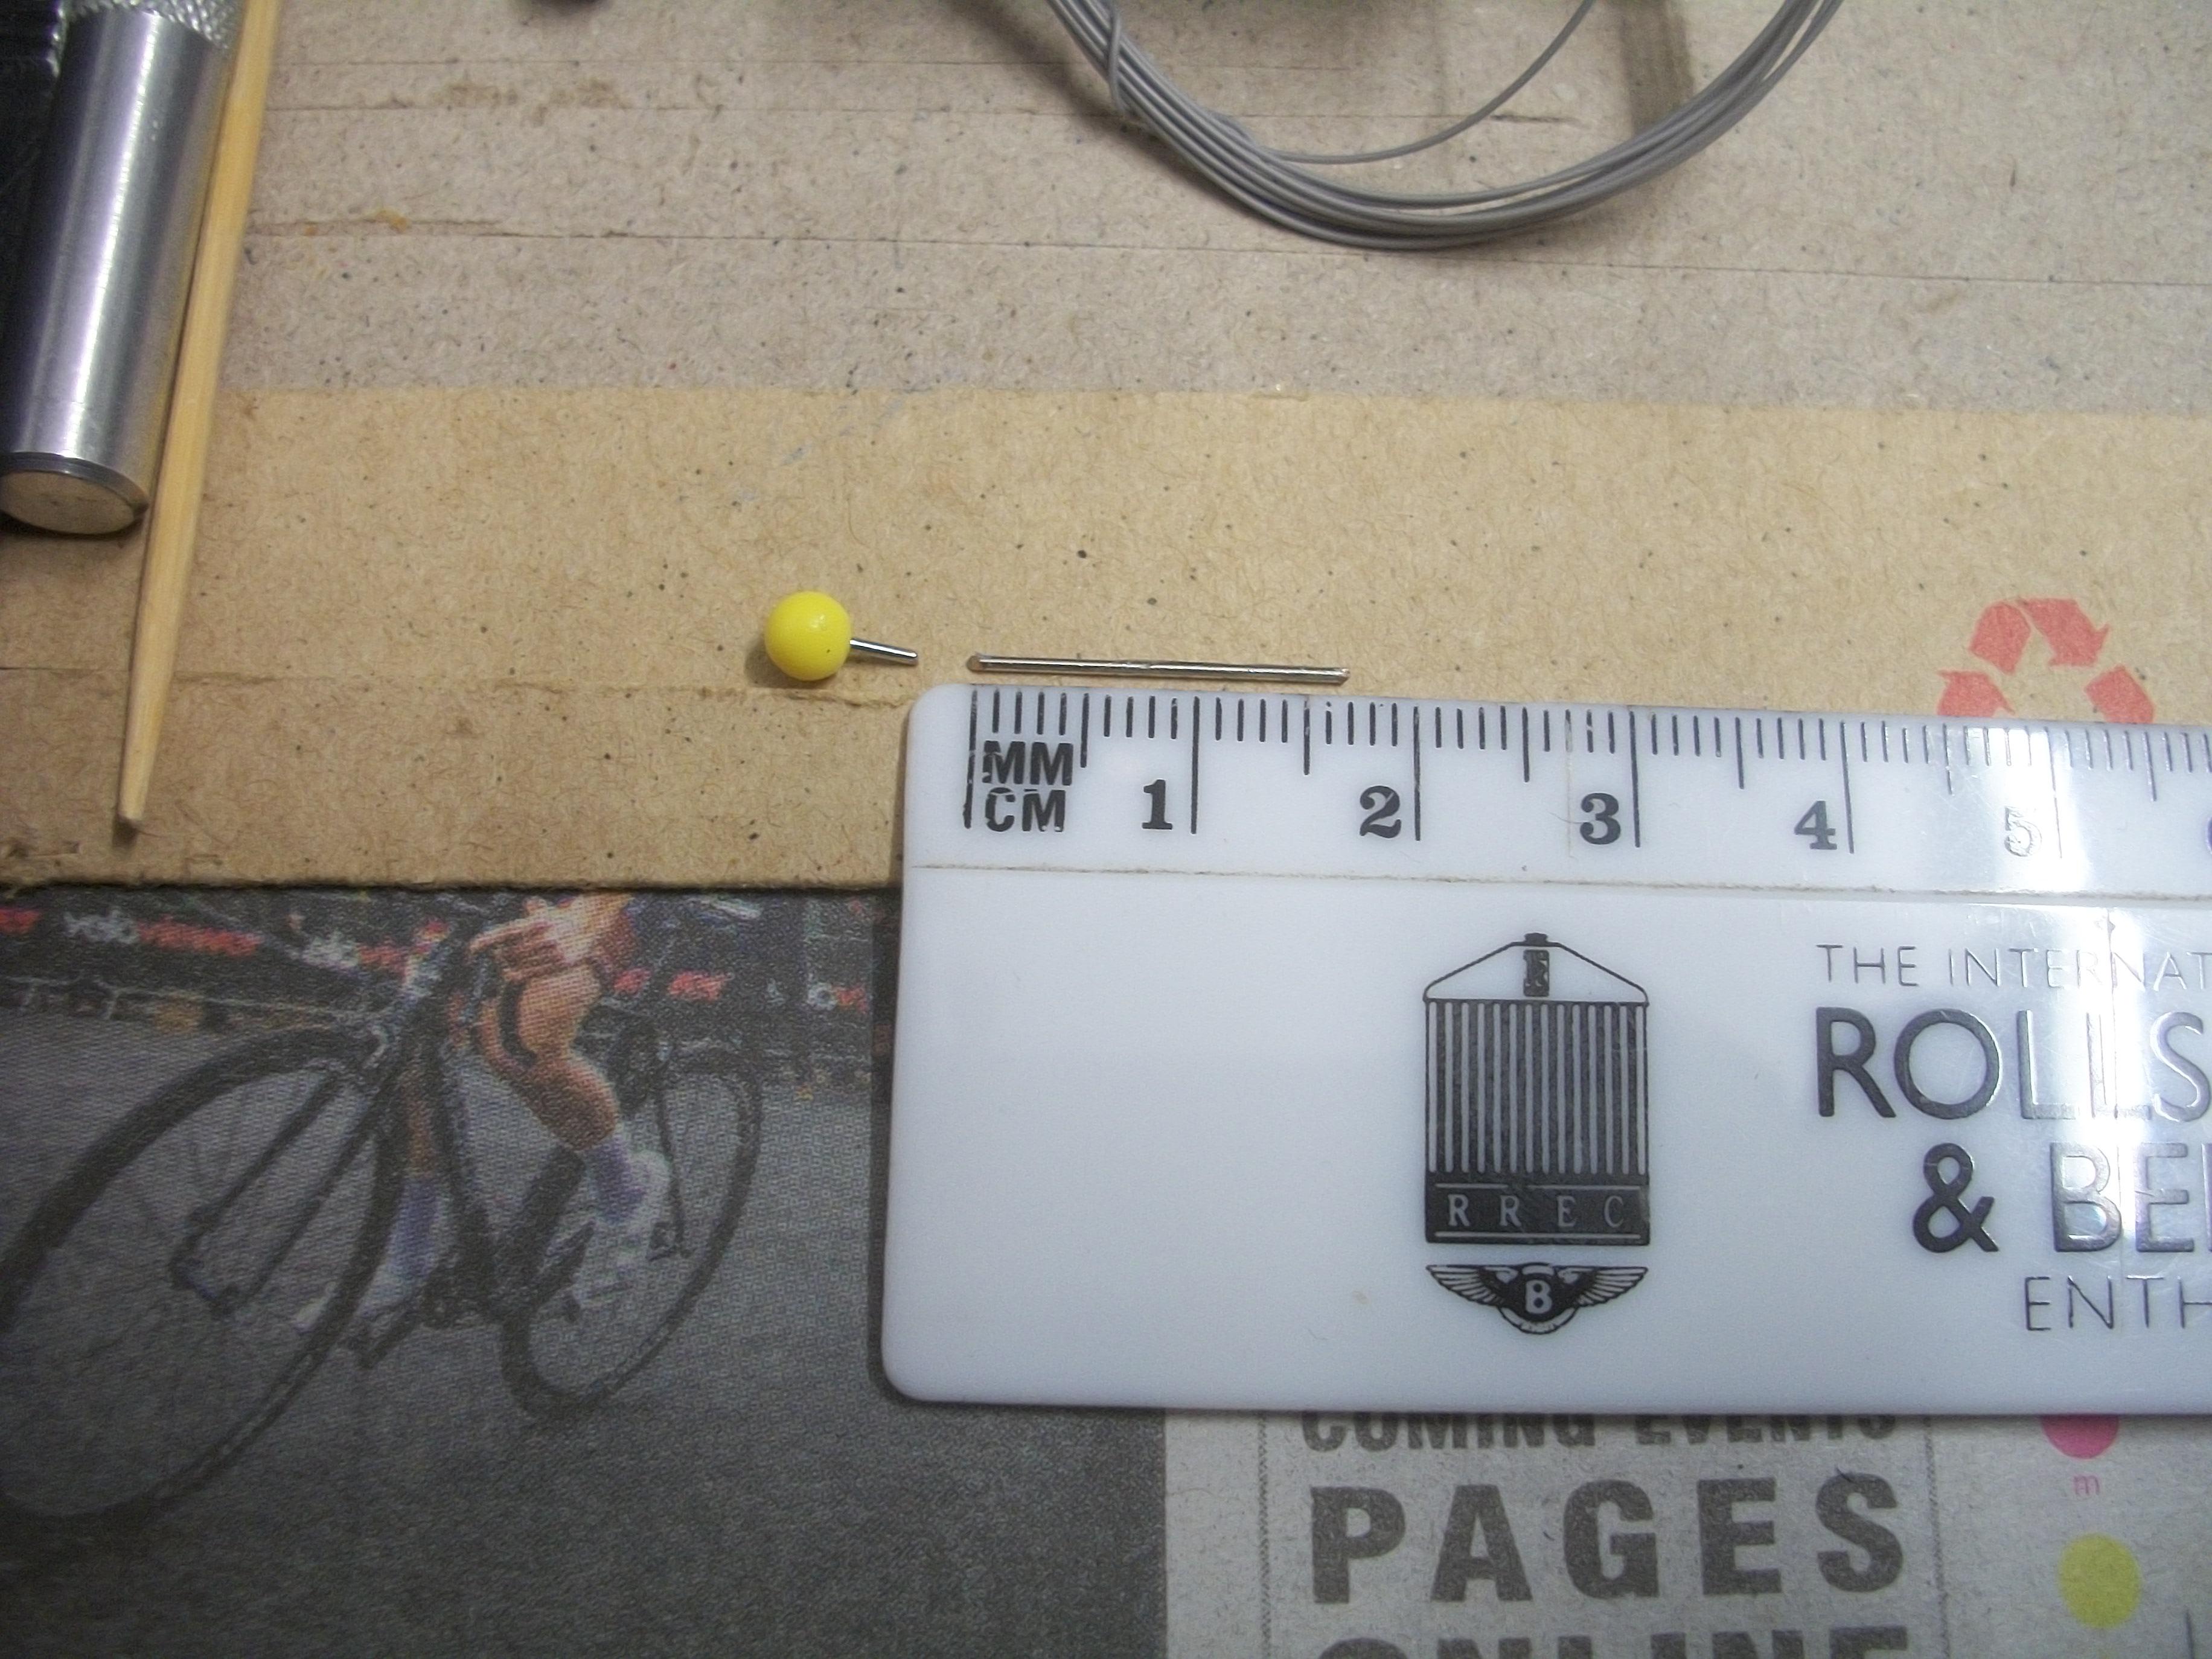
You and I are thinking alike Mark . . . Immediately after my previous reply to John, the thought crossed my mind to use a short metal pin, which can be the same type of pin as the roof antenna . . . Great minds think alike, they do say ! David -
Rolls-Royce No Chemicals, No Paint, No Harmful Glues
Anglia105E replied to Anglia105E's topic in WIP: Model Cars
Thank you John . . . I find it so important to connect with the model car that is on the workbench and to focus all of my thinking on the whole build, As you say, no distractions while keeping well organised . . . David -
Rolls-Royce No Chemicals, No Paint, No Harmful Glues
Anglia105E replied to Anglia105E's topic in WIP: Model Cars
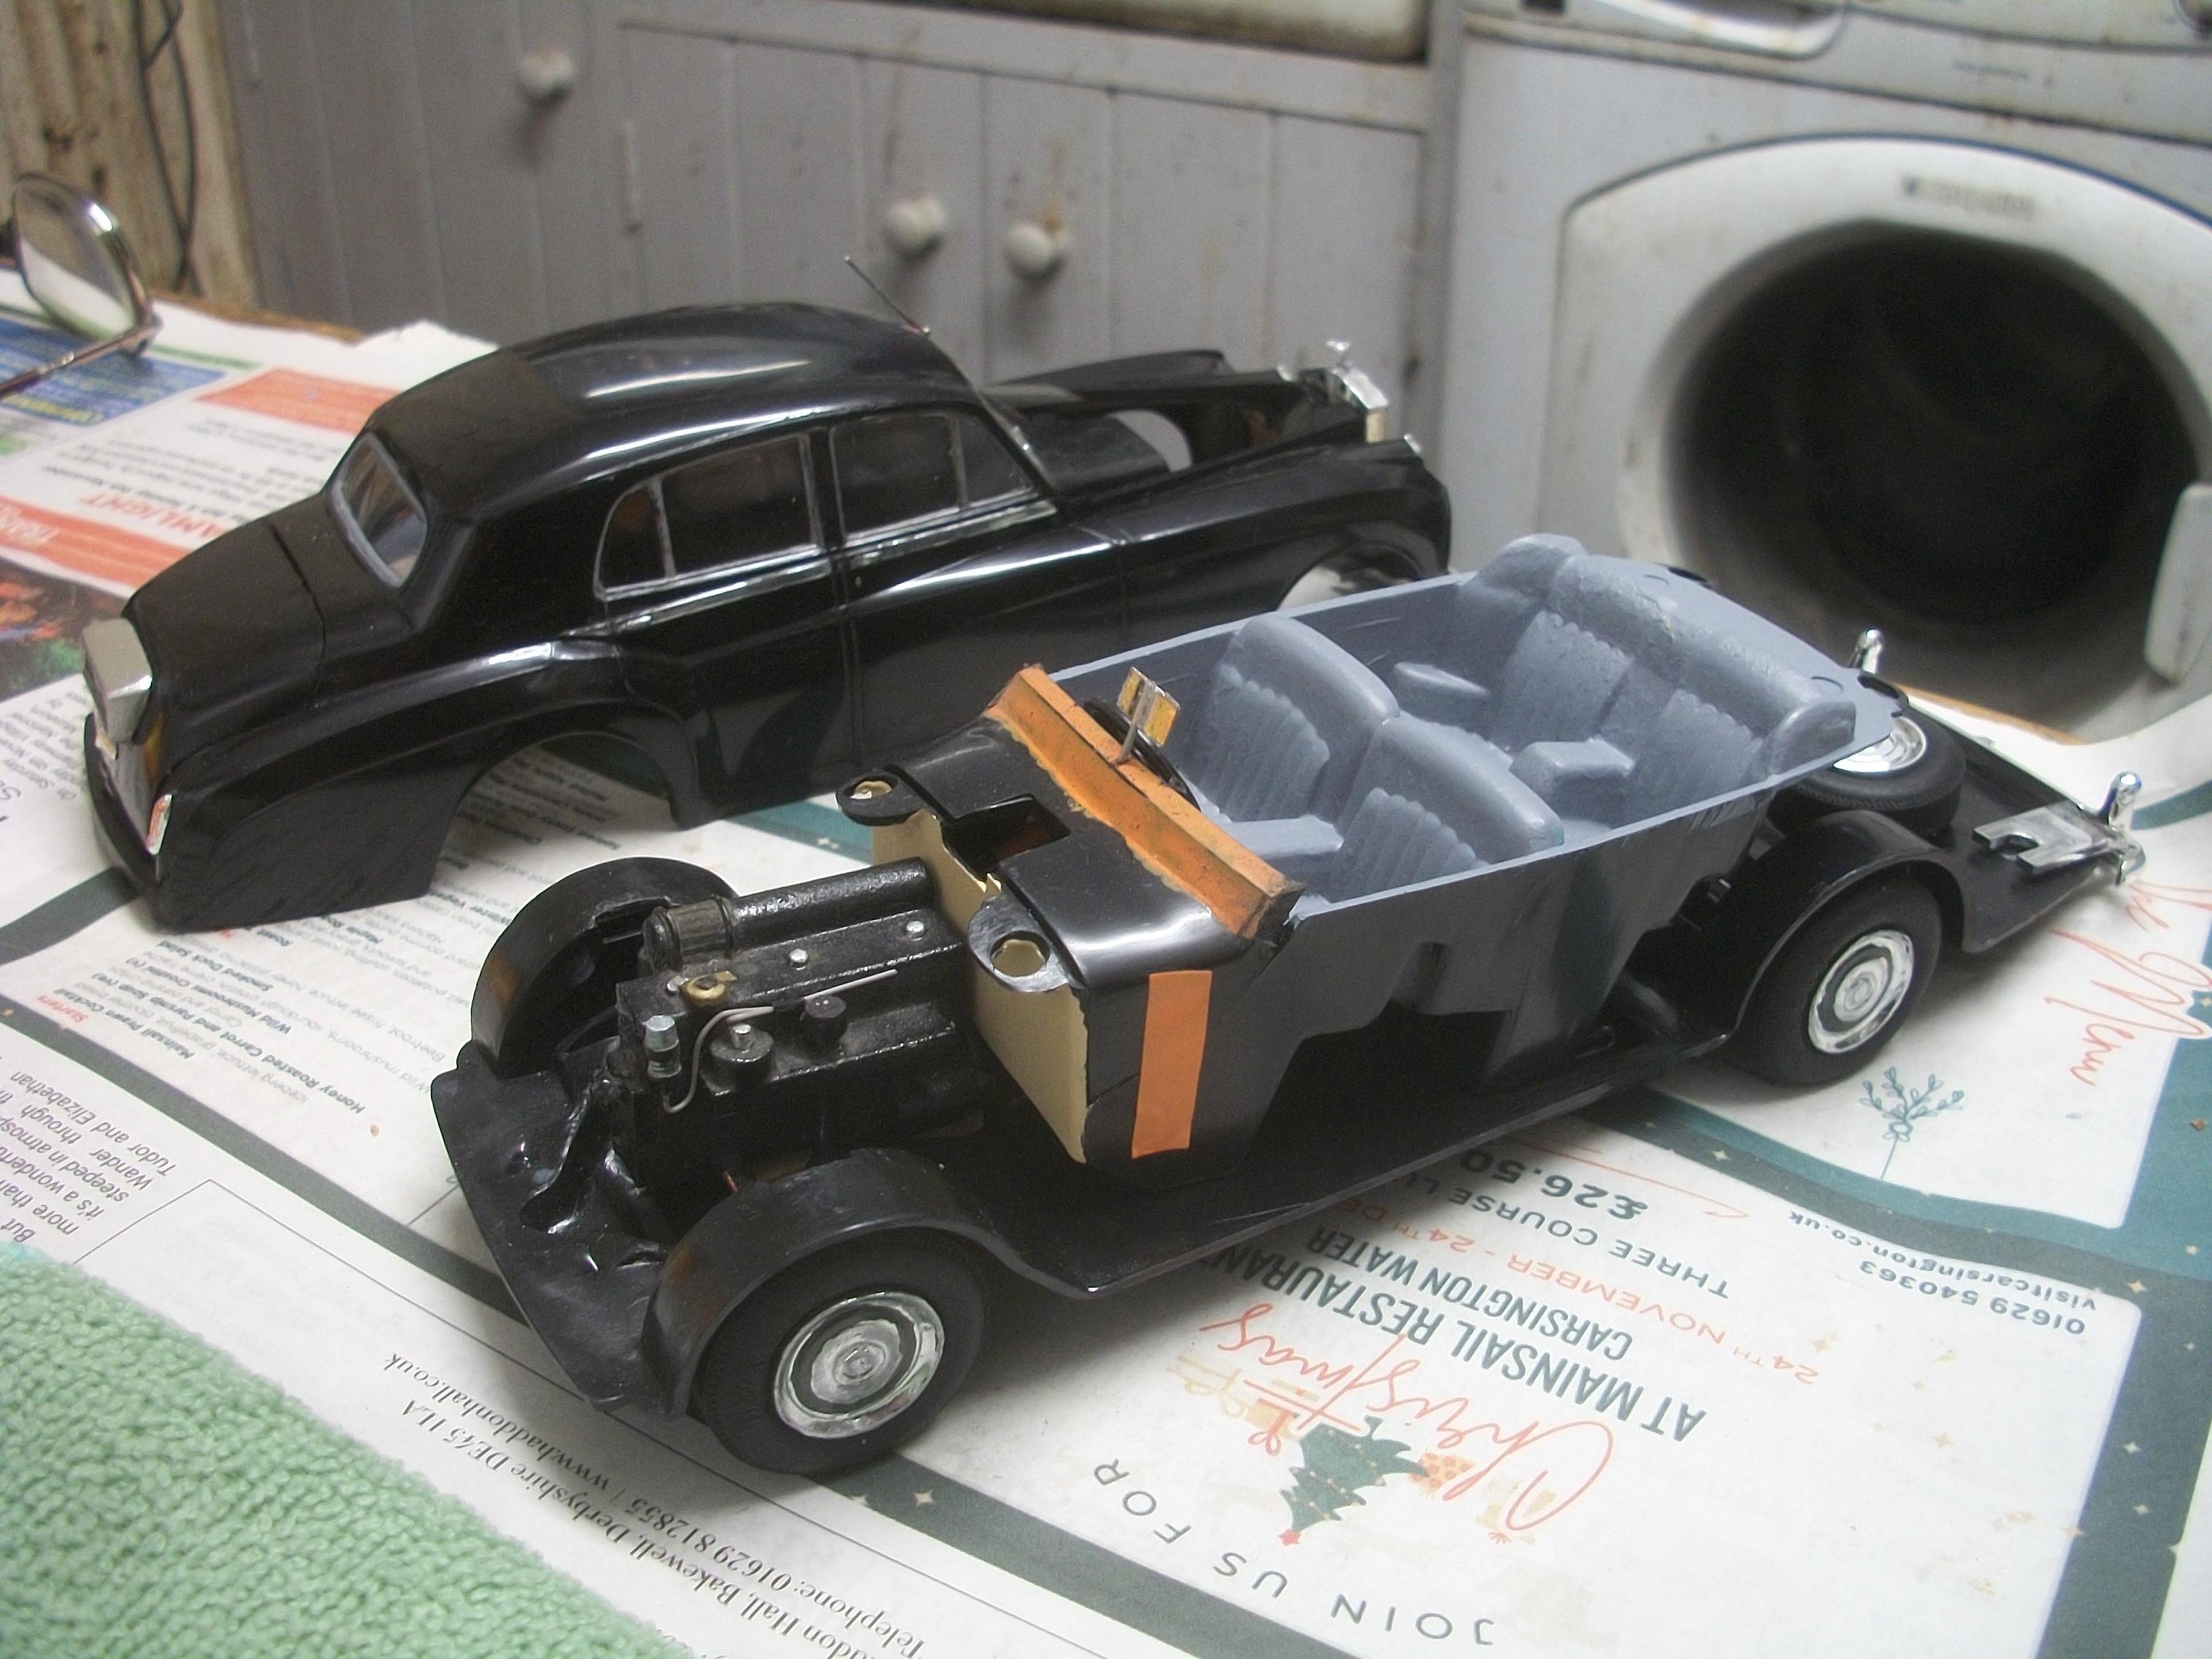
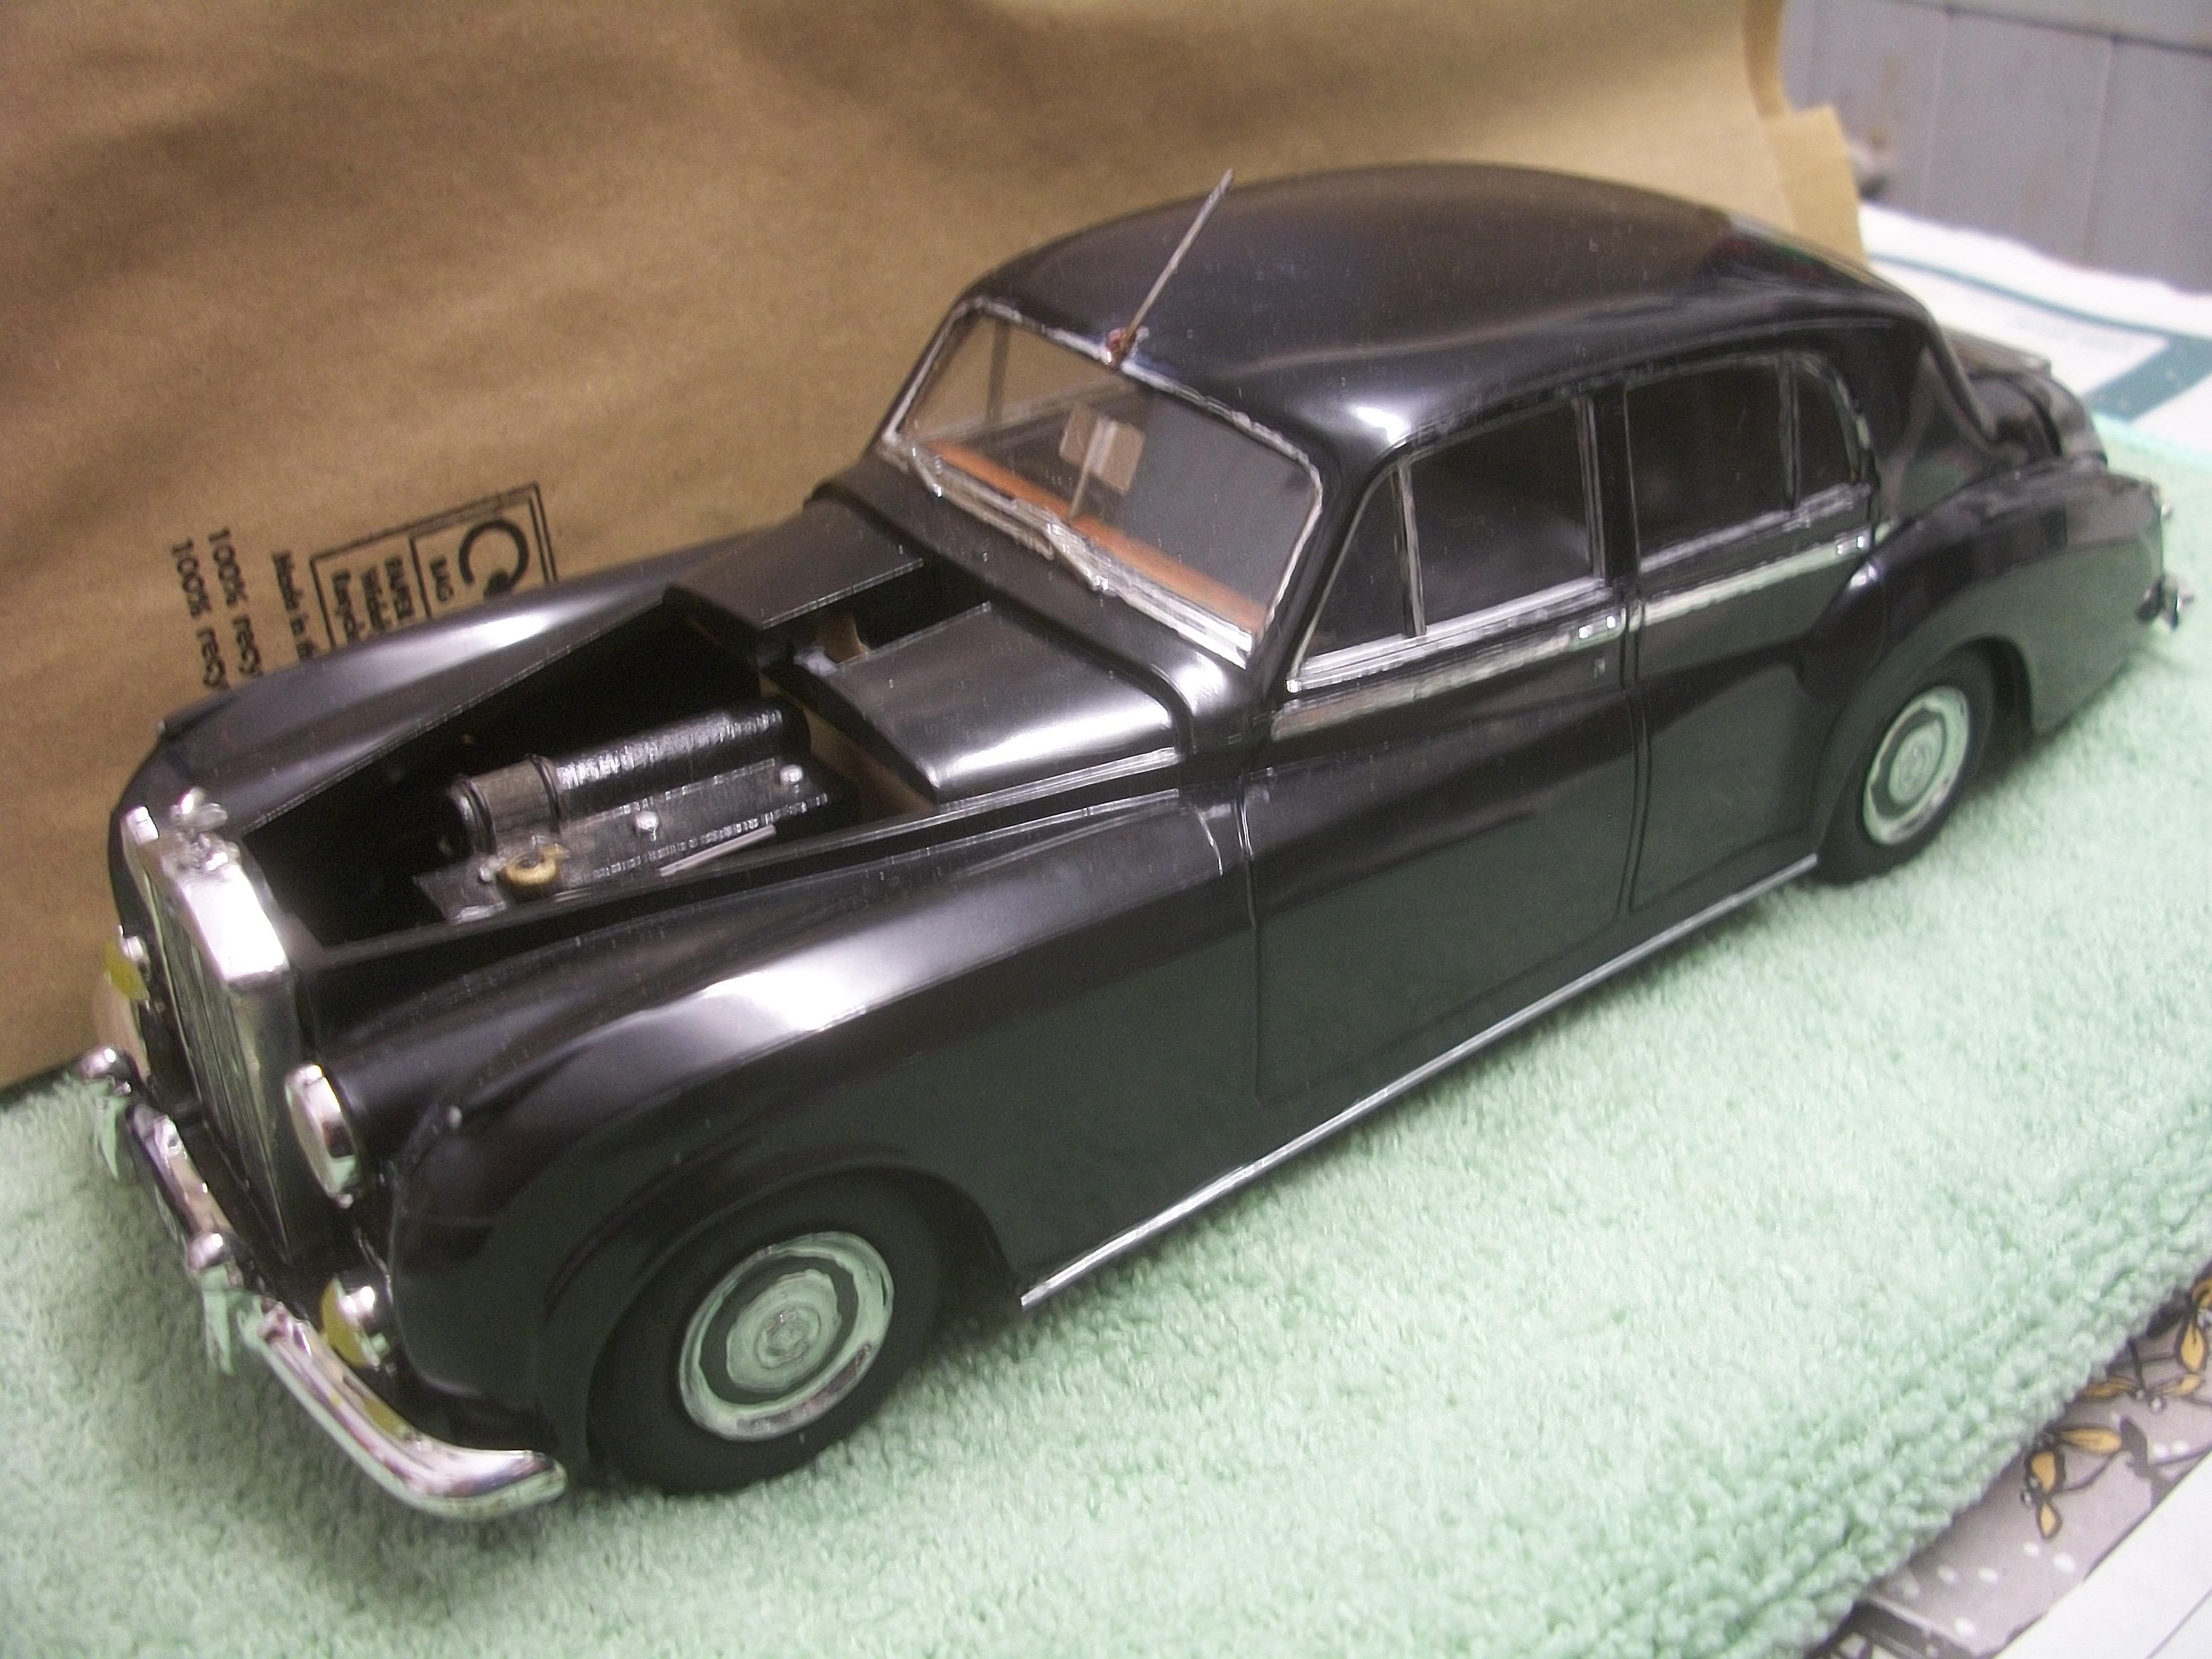
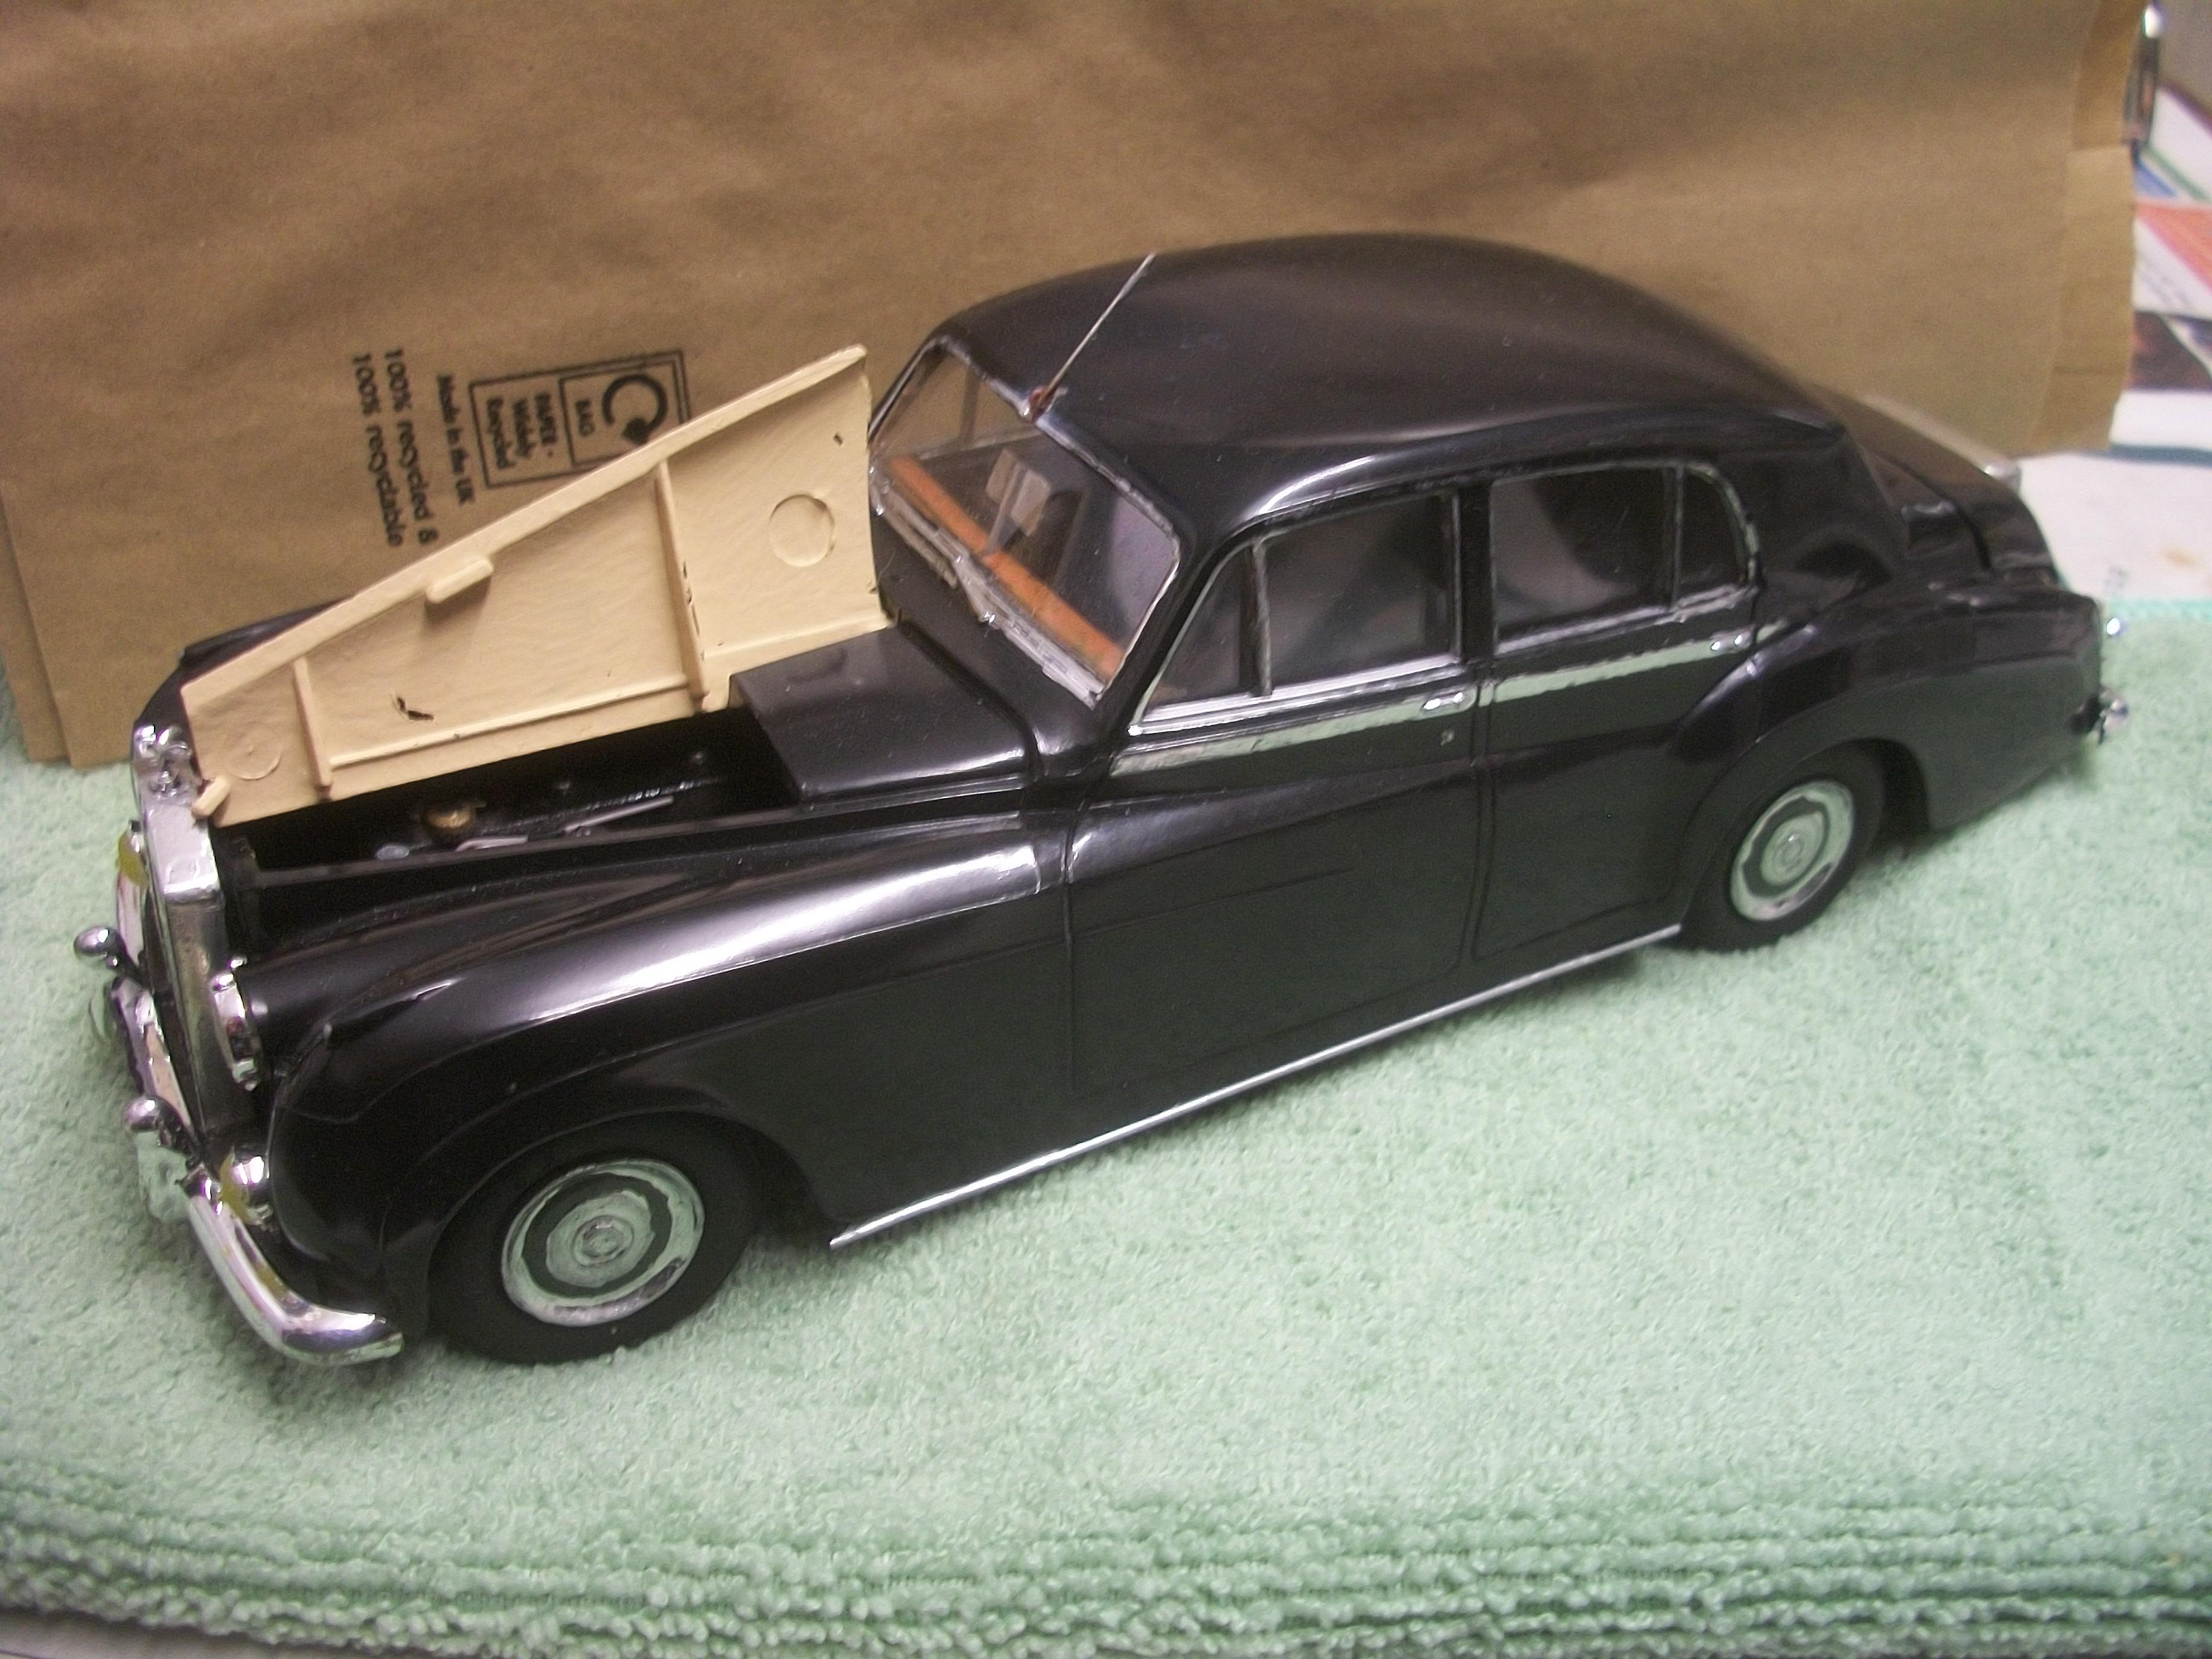
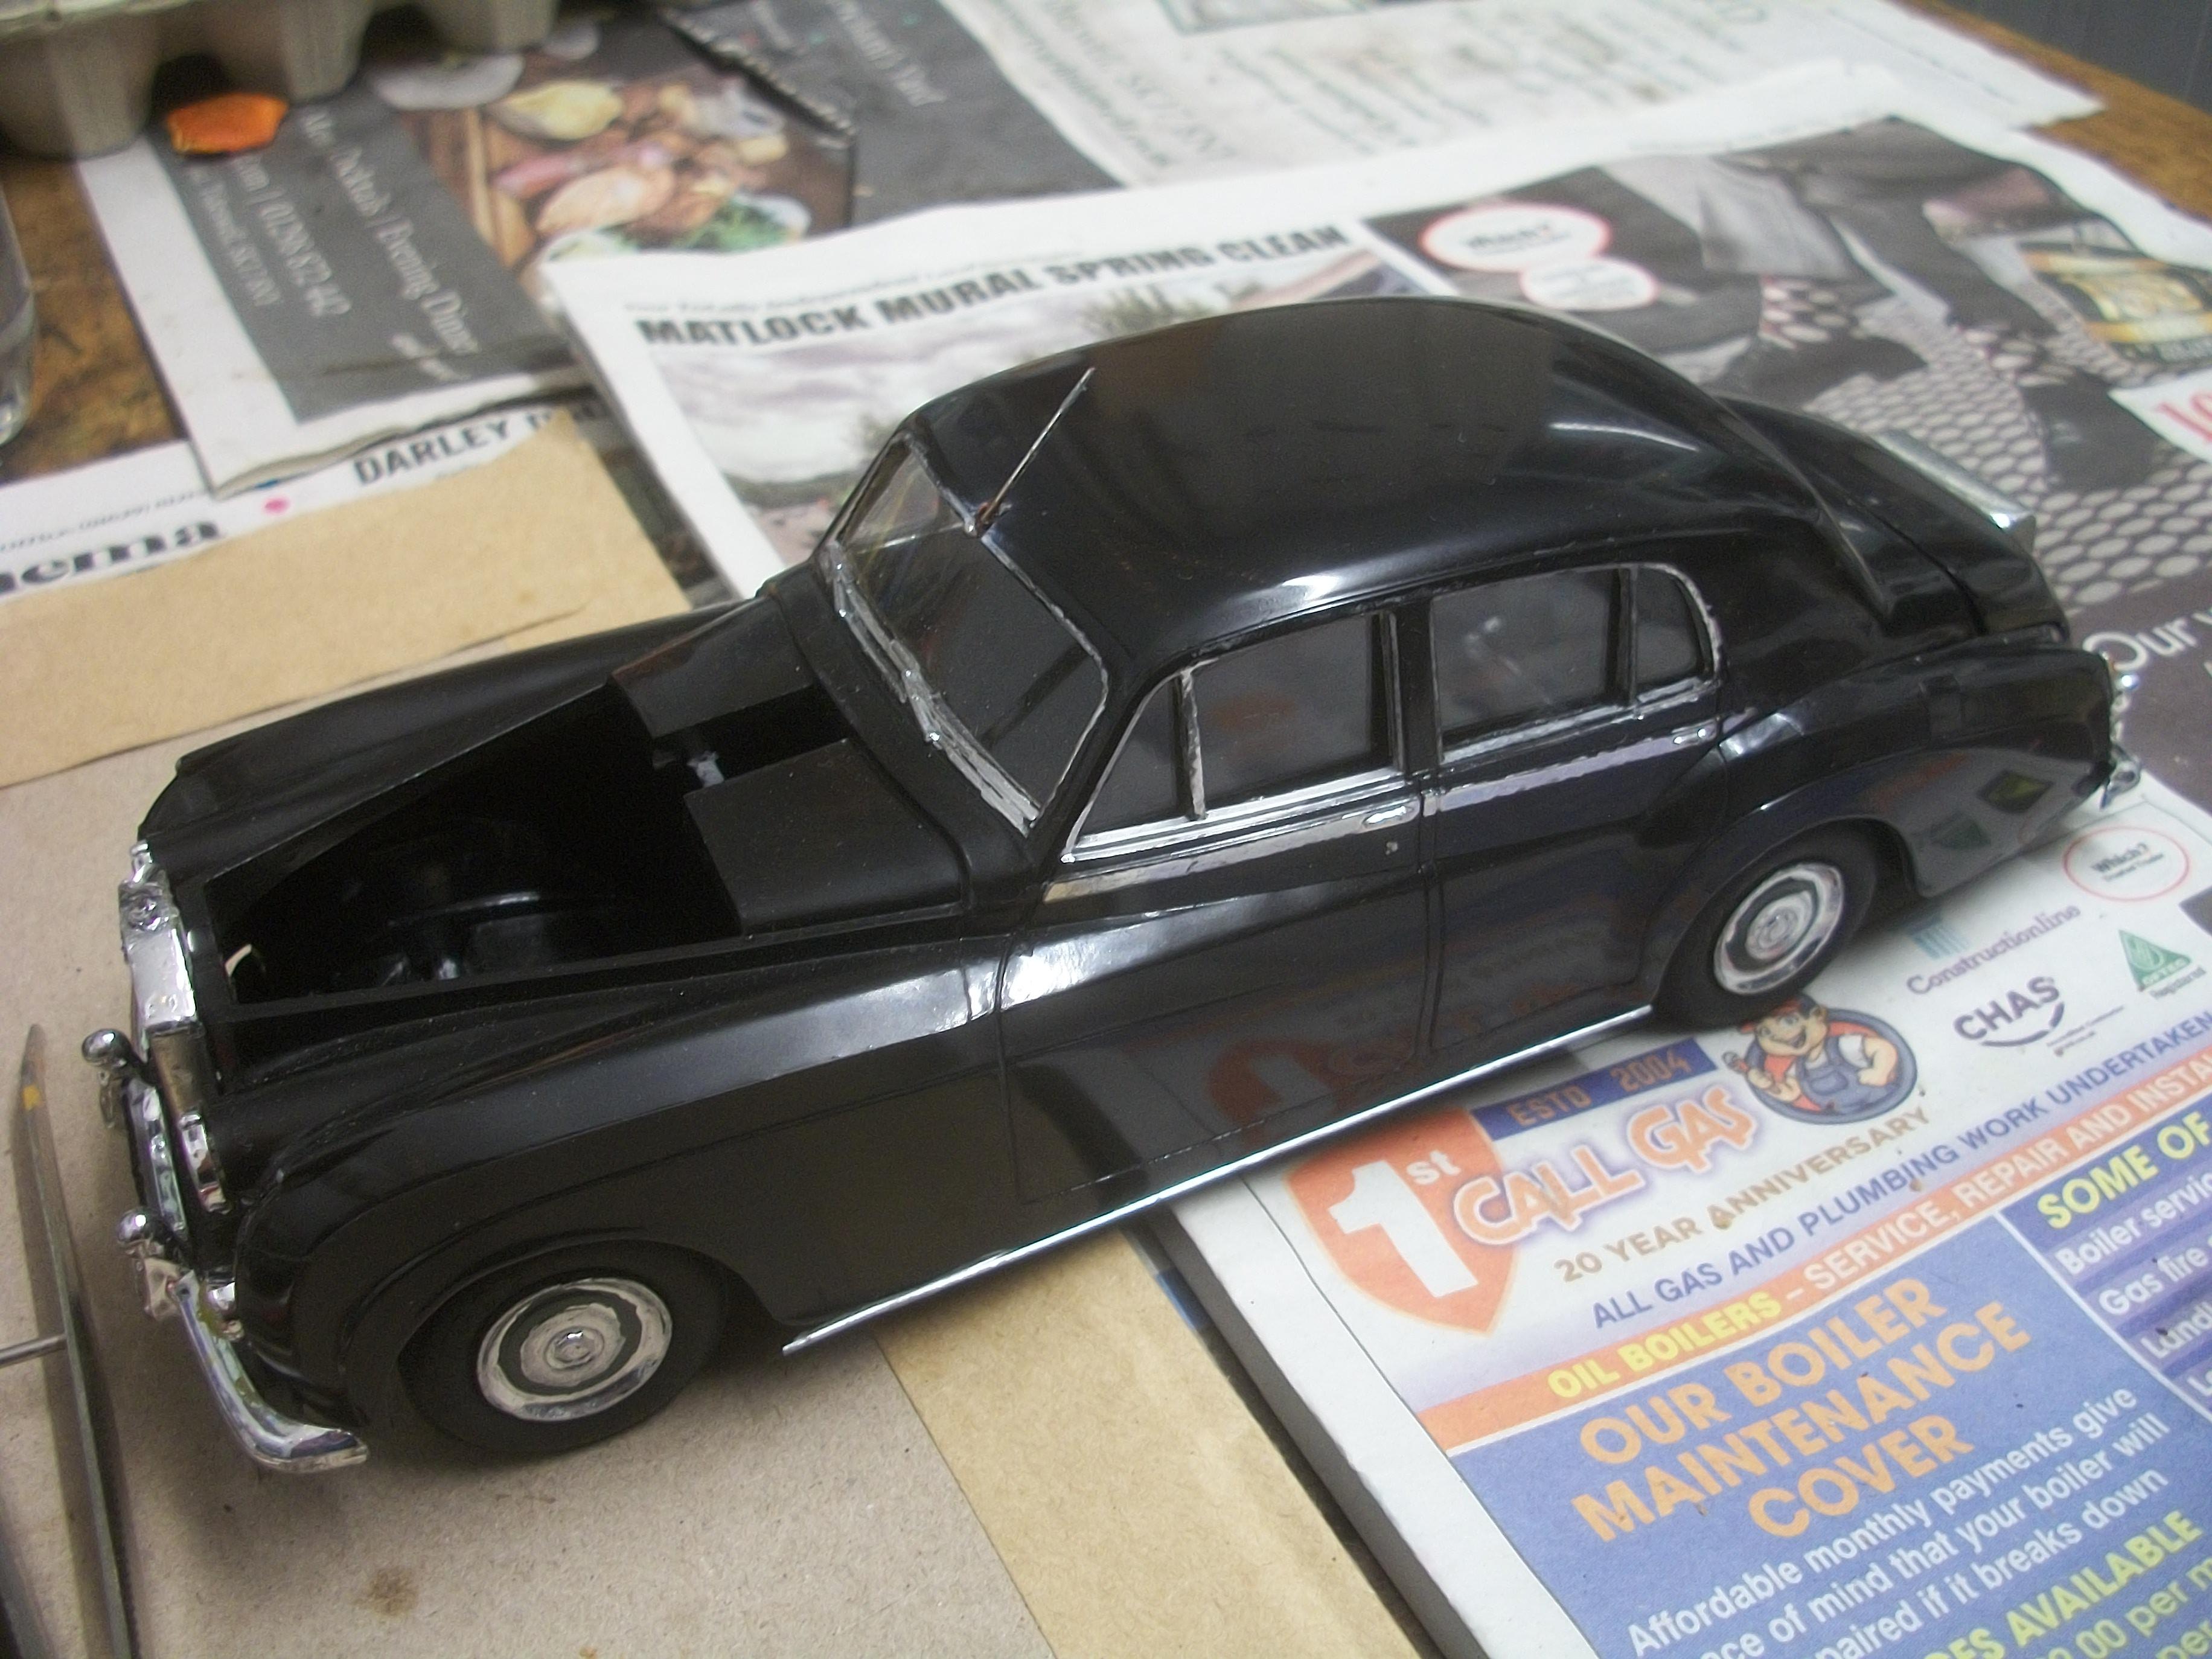
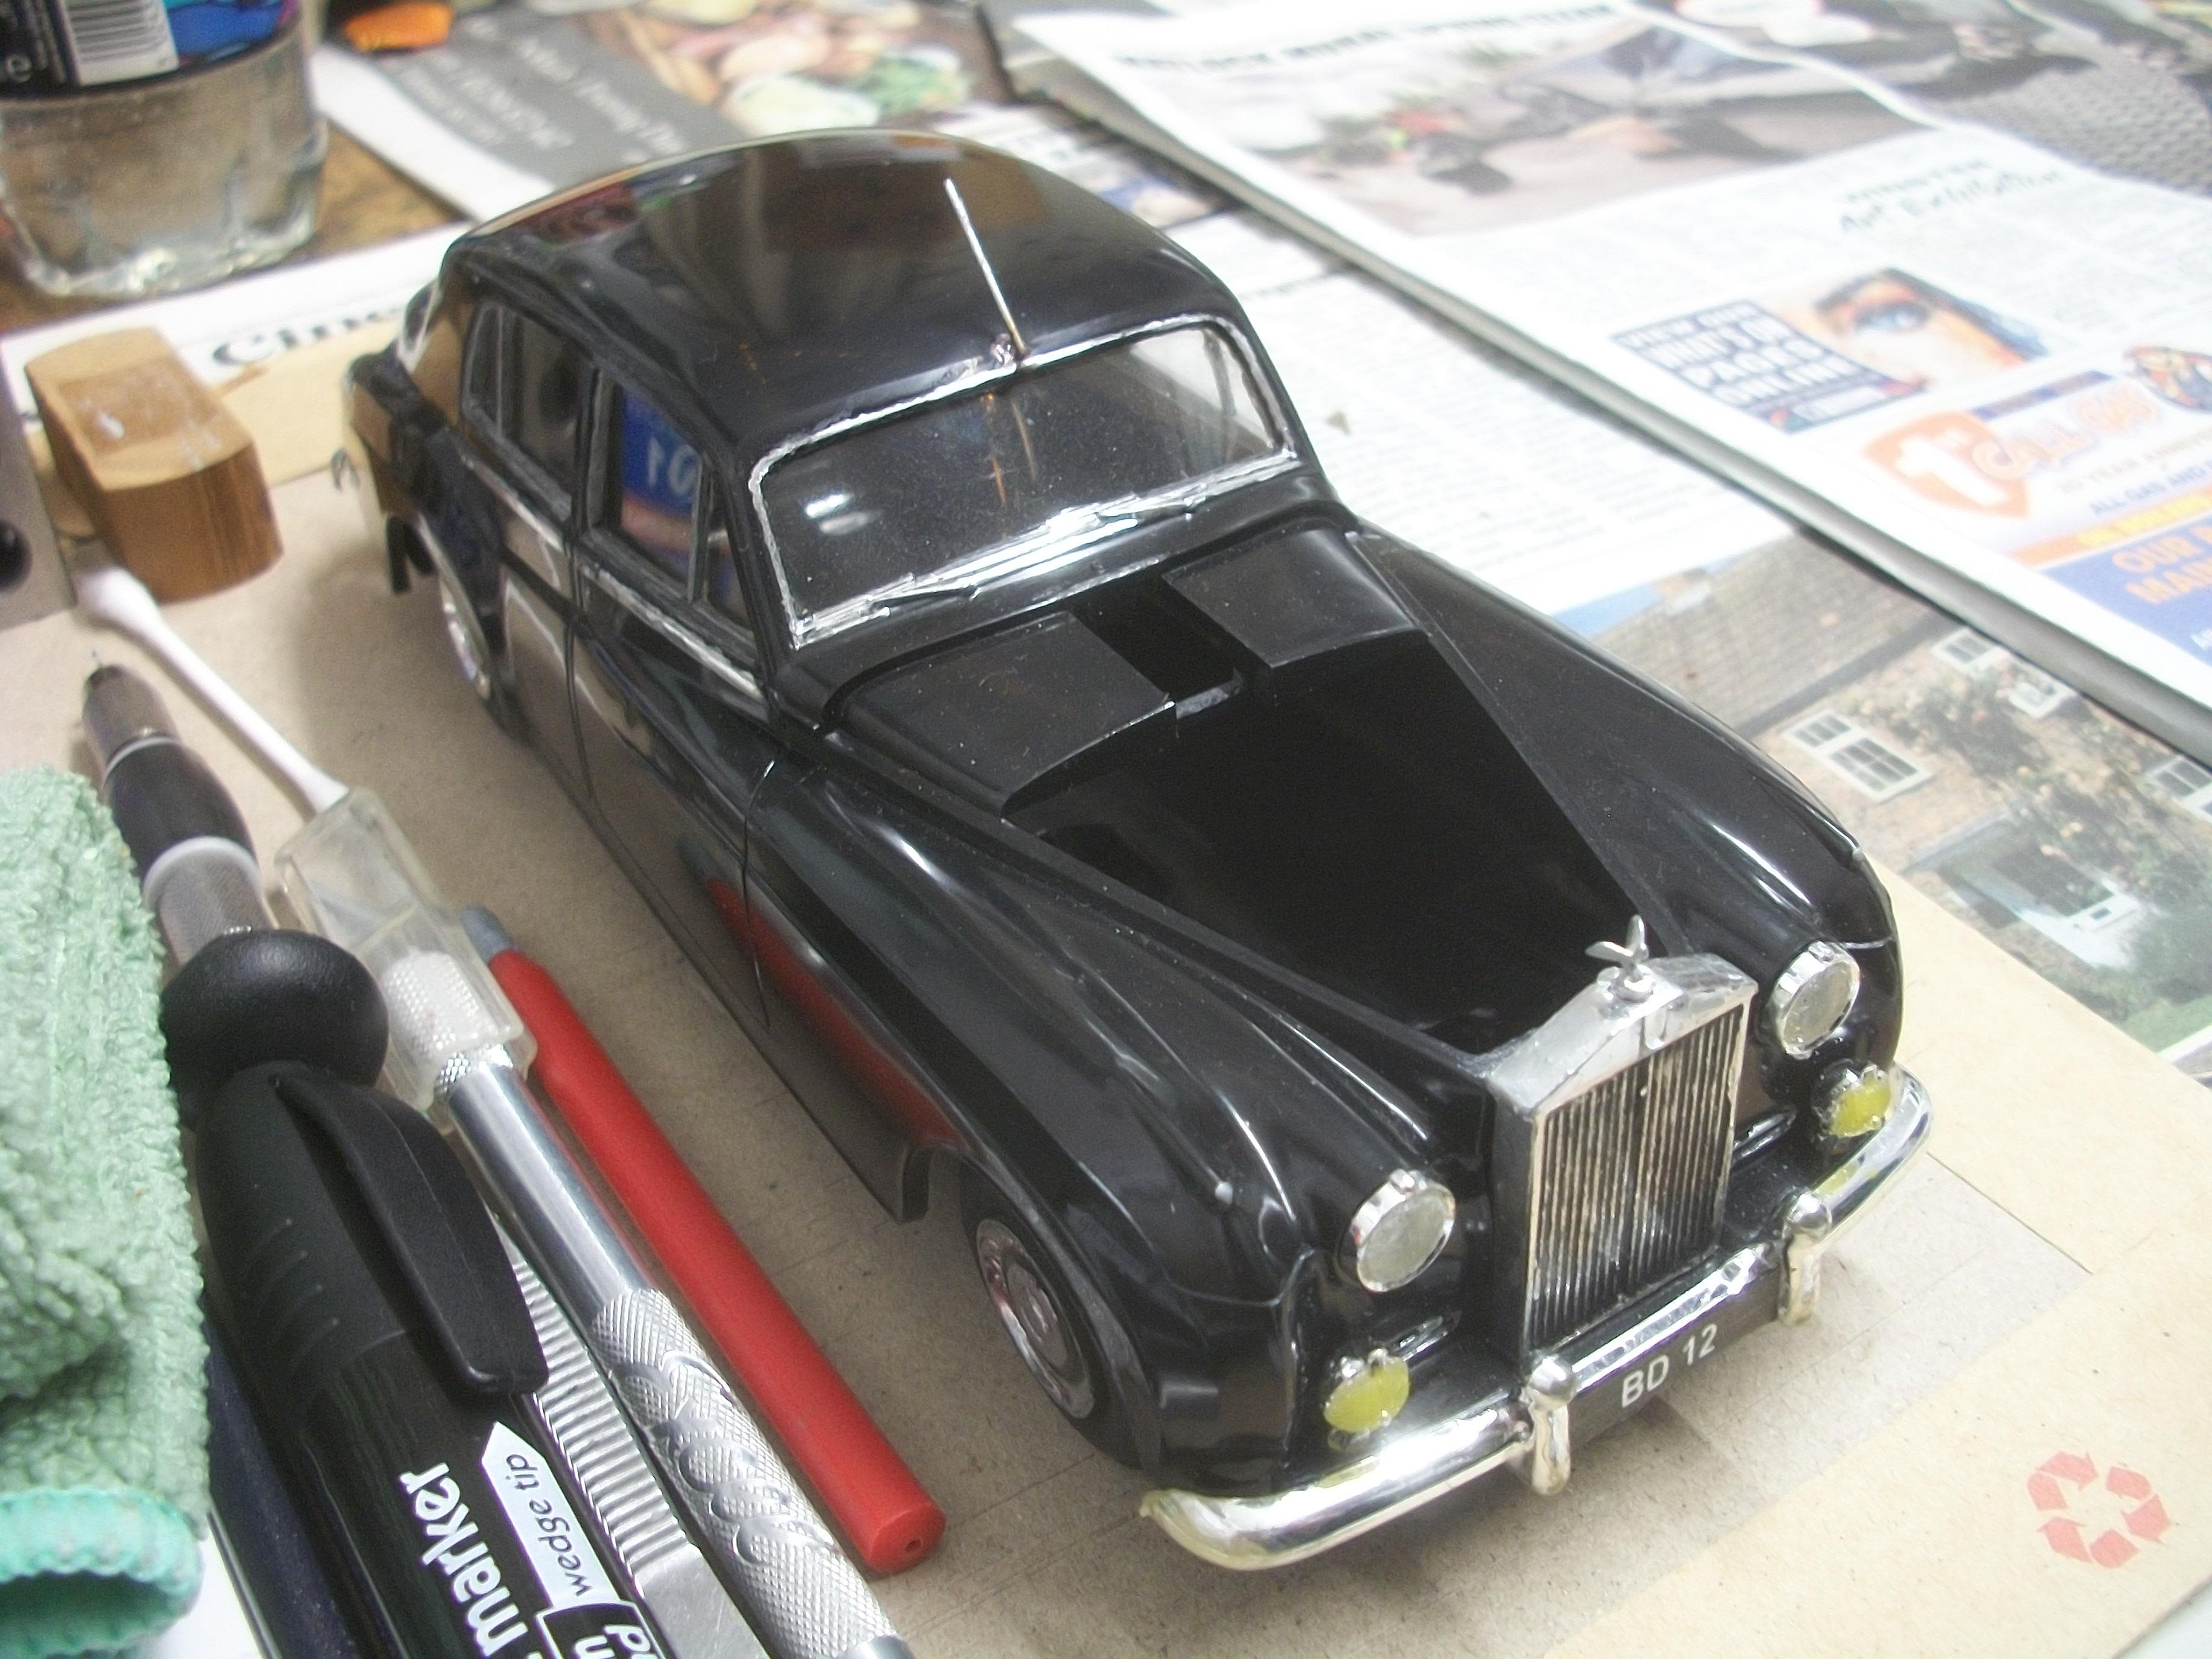
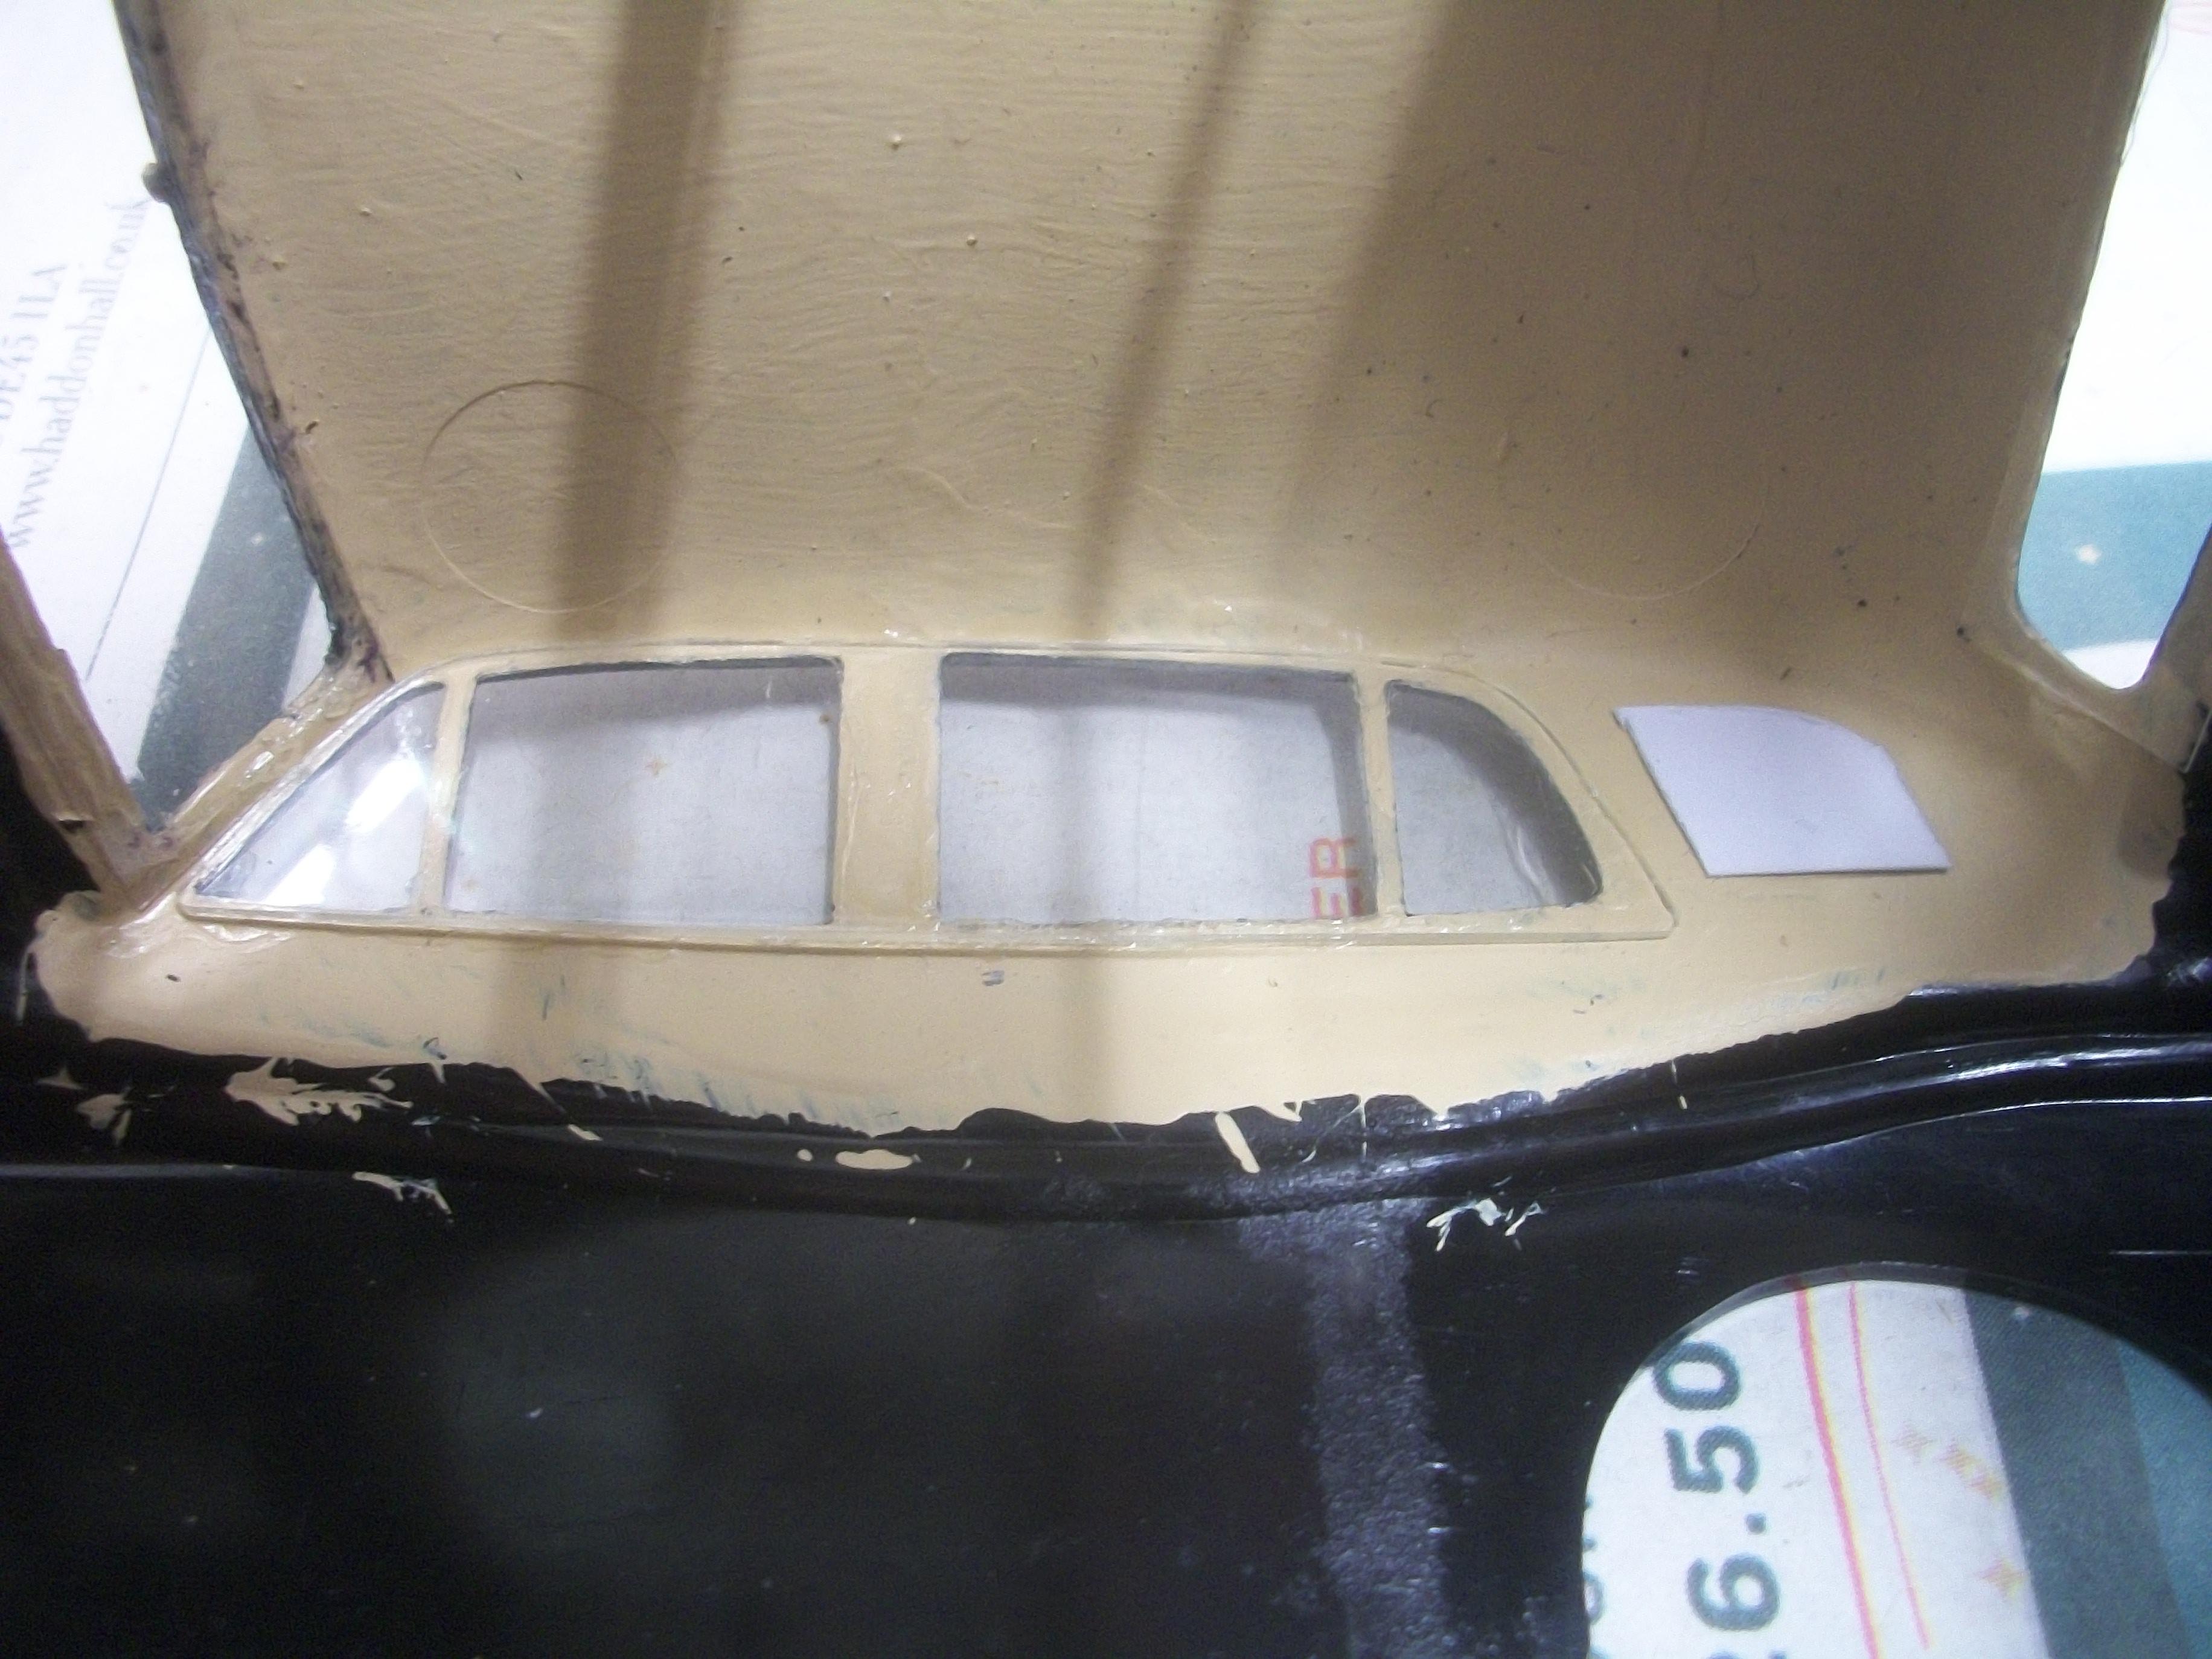
The undersides of both bonnet / hood panels were allowed to dry fully overnight so that I could remove the excess emulsion paint from the edges of these panels. By applying hand sanitiser to the edges of the panels with a cotton bud, and then rubbing with a cotton bud dipped in water, the paint came off cleanly. At this point I put together a mock up for the test fitting of various parts . . . The engine was mounted on a piece of double sided tape in the engine bay on the chassis, and the interior seating tub was clipped into the body, before lowering the body onto the chassis. By moving the radiator grille shell away from the bulkhead the two hinged bonnet panels could then be positioned correctly . . . Unfortunately, one of the bonnet panel pins broke off in the process, so this needs to be super glued back in place. I am only using tiny amounts of super glue here and there, always mindful of my topic heading ! David
-
Rolls-Royce No Chemicals, No Paint, No Harmful Glues
Anglia105E replied to Anglia105E's topic in WIP: Model Cars
Well Mark, I completely understand the approach to model building and I myself used to complete a build including full painting in around two months, and sometimes one month . . . These days, my builds typically take 6 or 7 months to one year. This is due to all sorts of reasons, but mostly it is to do with working intensively on one model car which might be in a larger scale of 1:16 or even 1:12 scale. This Rolls-Royce Silver Cloud is 1:24 scale, but I seem to be trying to add detail as though it is a larger scale build, and this is not always realistic . . . Yes, I used to be always looking ahead to the next build, while I was still in the early stages of the current build. My thought process now is to concentrate exclusively on the this one build, and I have no idea what the next build might be. Some model builders do have several builds as works in progress all at the same time, but I prefer to focus on just the one. As regards the patience Mark, my working life as a technical support engineer in personal computers forced me to tackle problems in a logical and methodical way, which requires an enormous amount of patience. This has turned out to be the perfect mental approach to assembling model cars and also dioramas . . . David -
Rolls-Royce No Chemicals, No Paint, No Harmful Glues
Anglia105E replied to Anglia105E's topic in WIP: Model Cars
Late this evening, I applied a second coat of emulsion to the engine bay rear bulkhead, and also applied a first coat emulsion to the undersides of the two bonnet panels. This is the Earth Balance colour, which is close to the beige colour that I was seeking. Both bonnet / hood panels will need a second coat of emulsion tomorrow. David
-
Rolls-Royce No Chemicals, No Paint, No Harmful Glues
Anglia105E replied to Anglia105E's topic in WIP: Model Cars
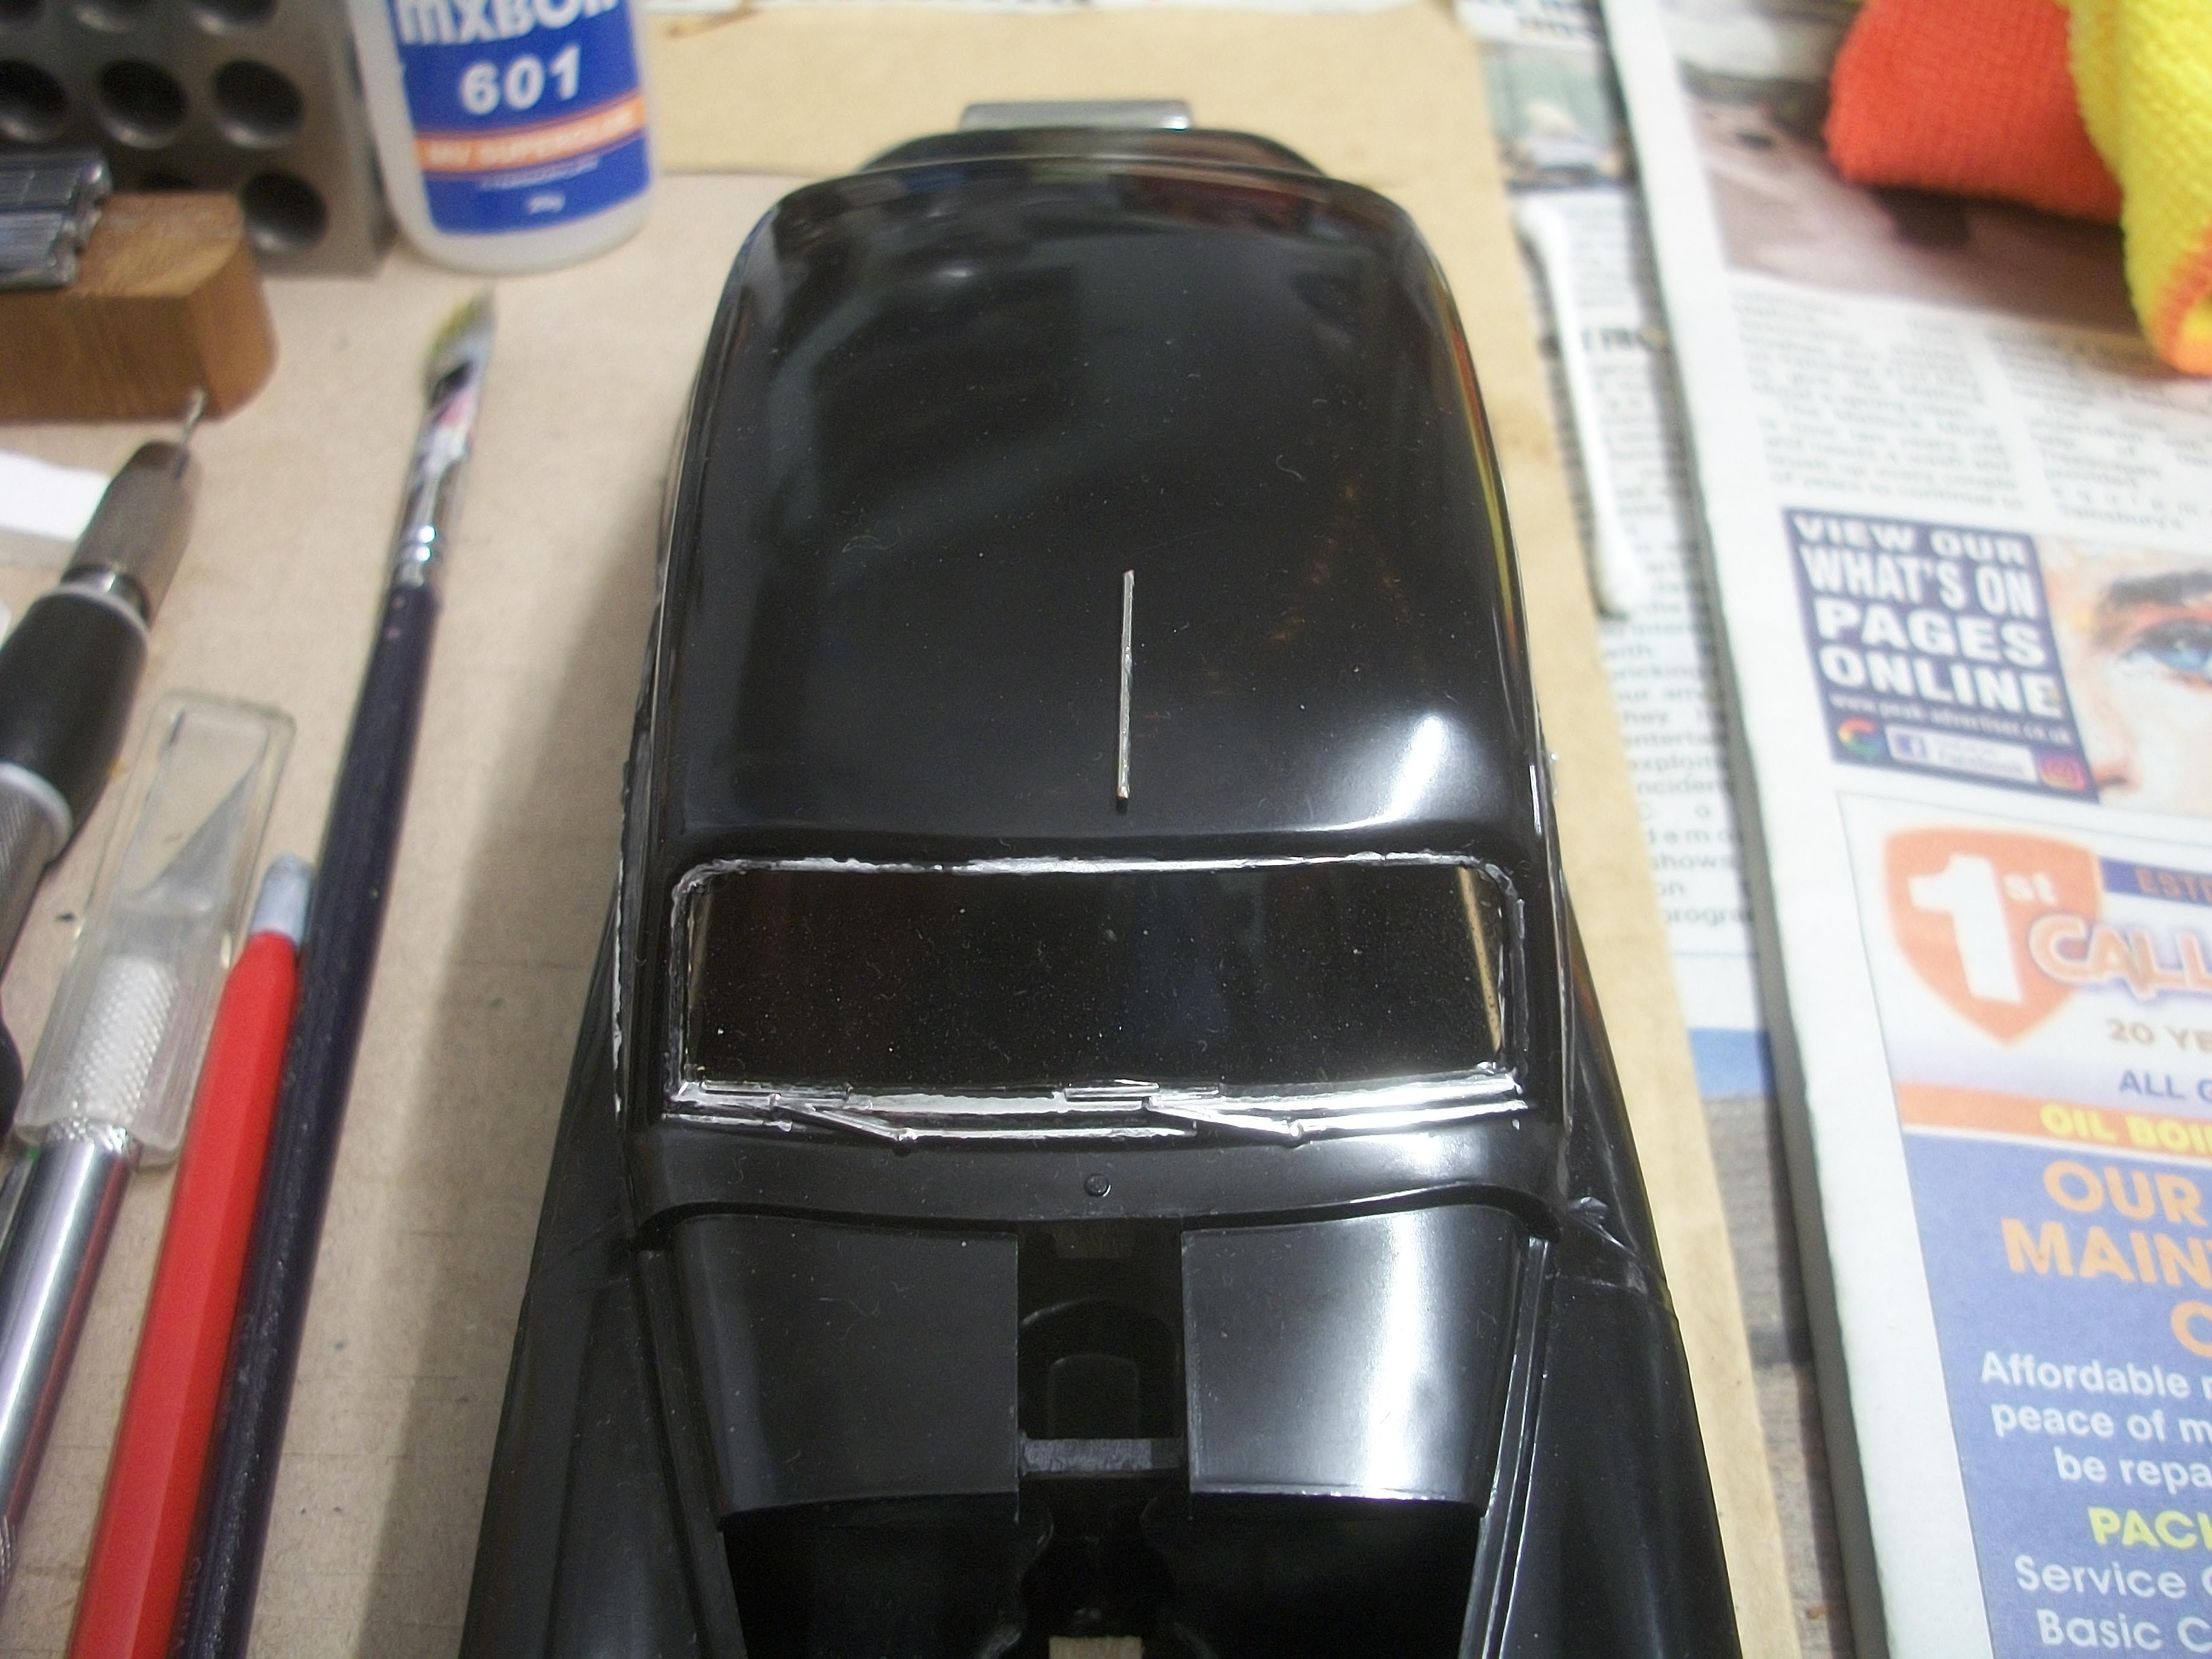
Funny thing is Mark, I thought about how I should have drilled a hole AFTER using the glue . . . I won't disturb the antenna now, but if it falls off the roof then I shall use the drill method as suggested ! Thanks for the comment regarding the roof finish, and I am rather pleased with the polishing. David -
Rolls-Royce No Chemicals, No Paint, No Harmful Glues
Anglia105E replied to Anglia105E's topic in WIP: Model Cars
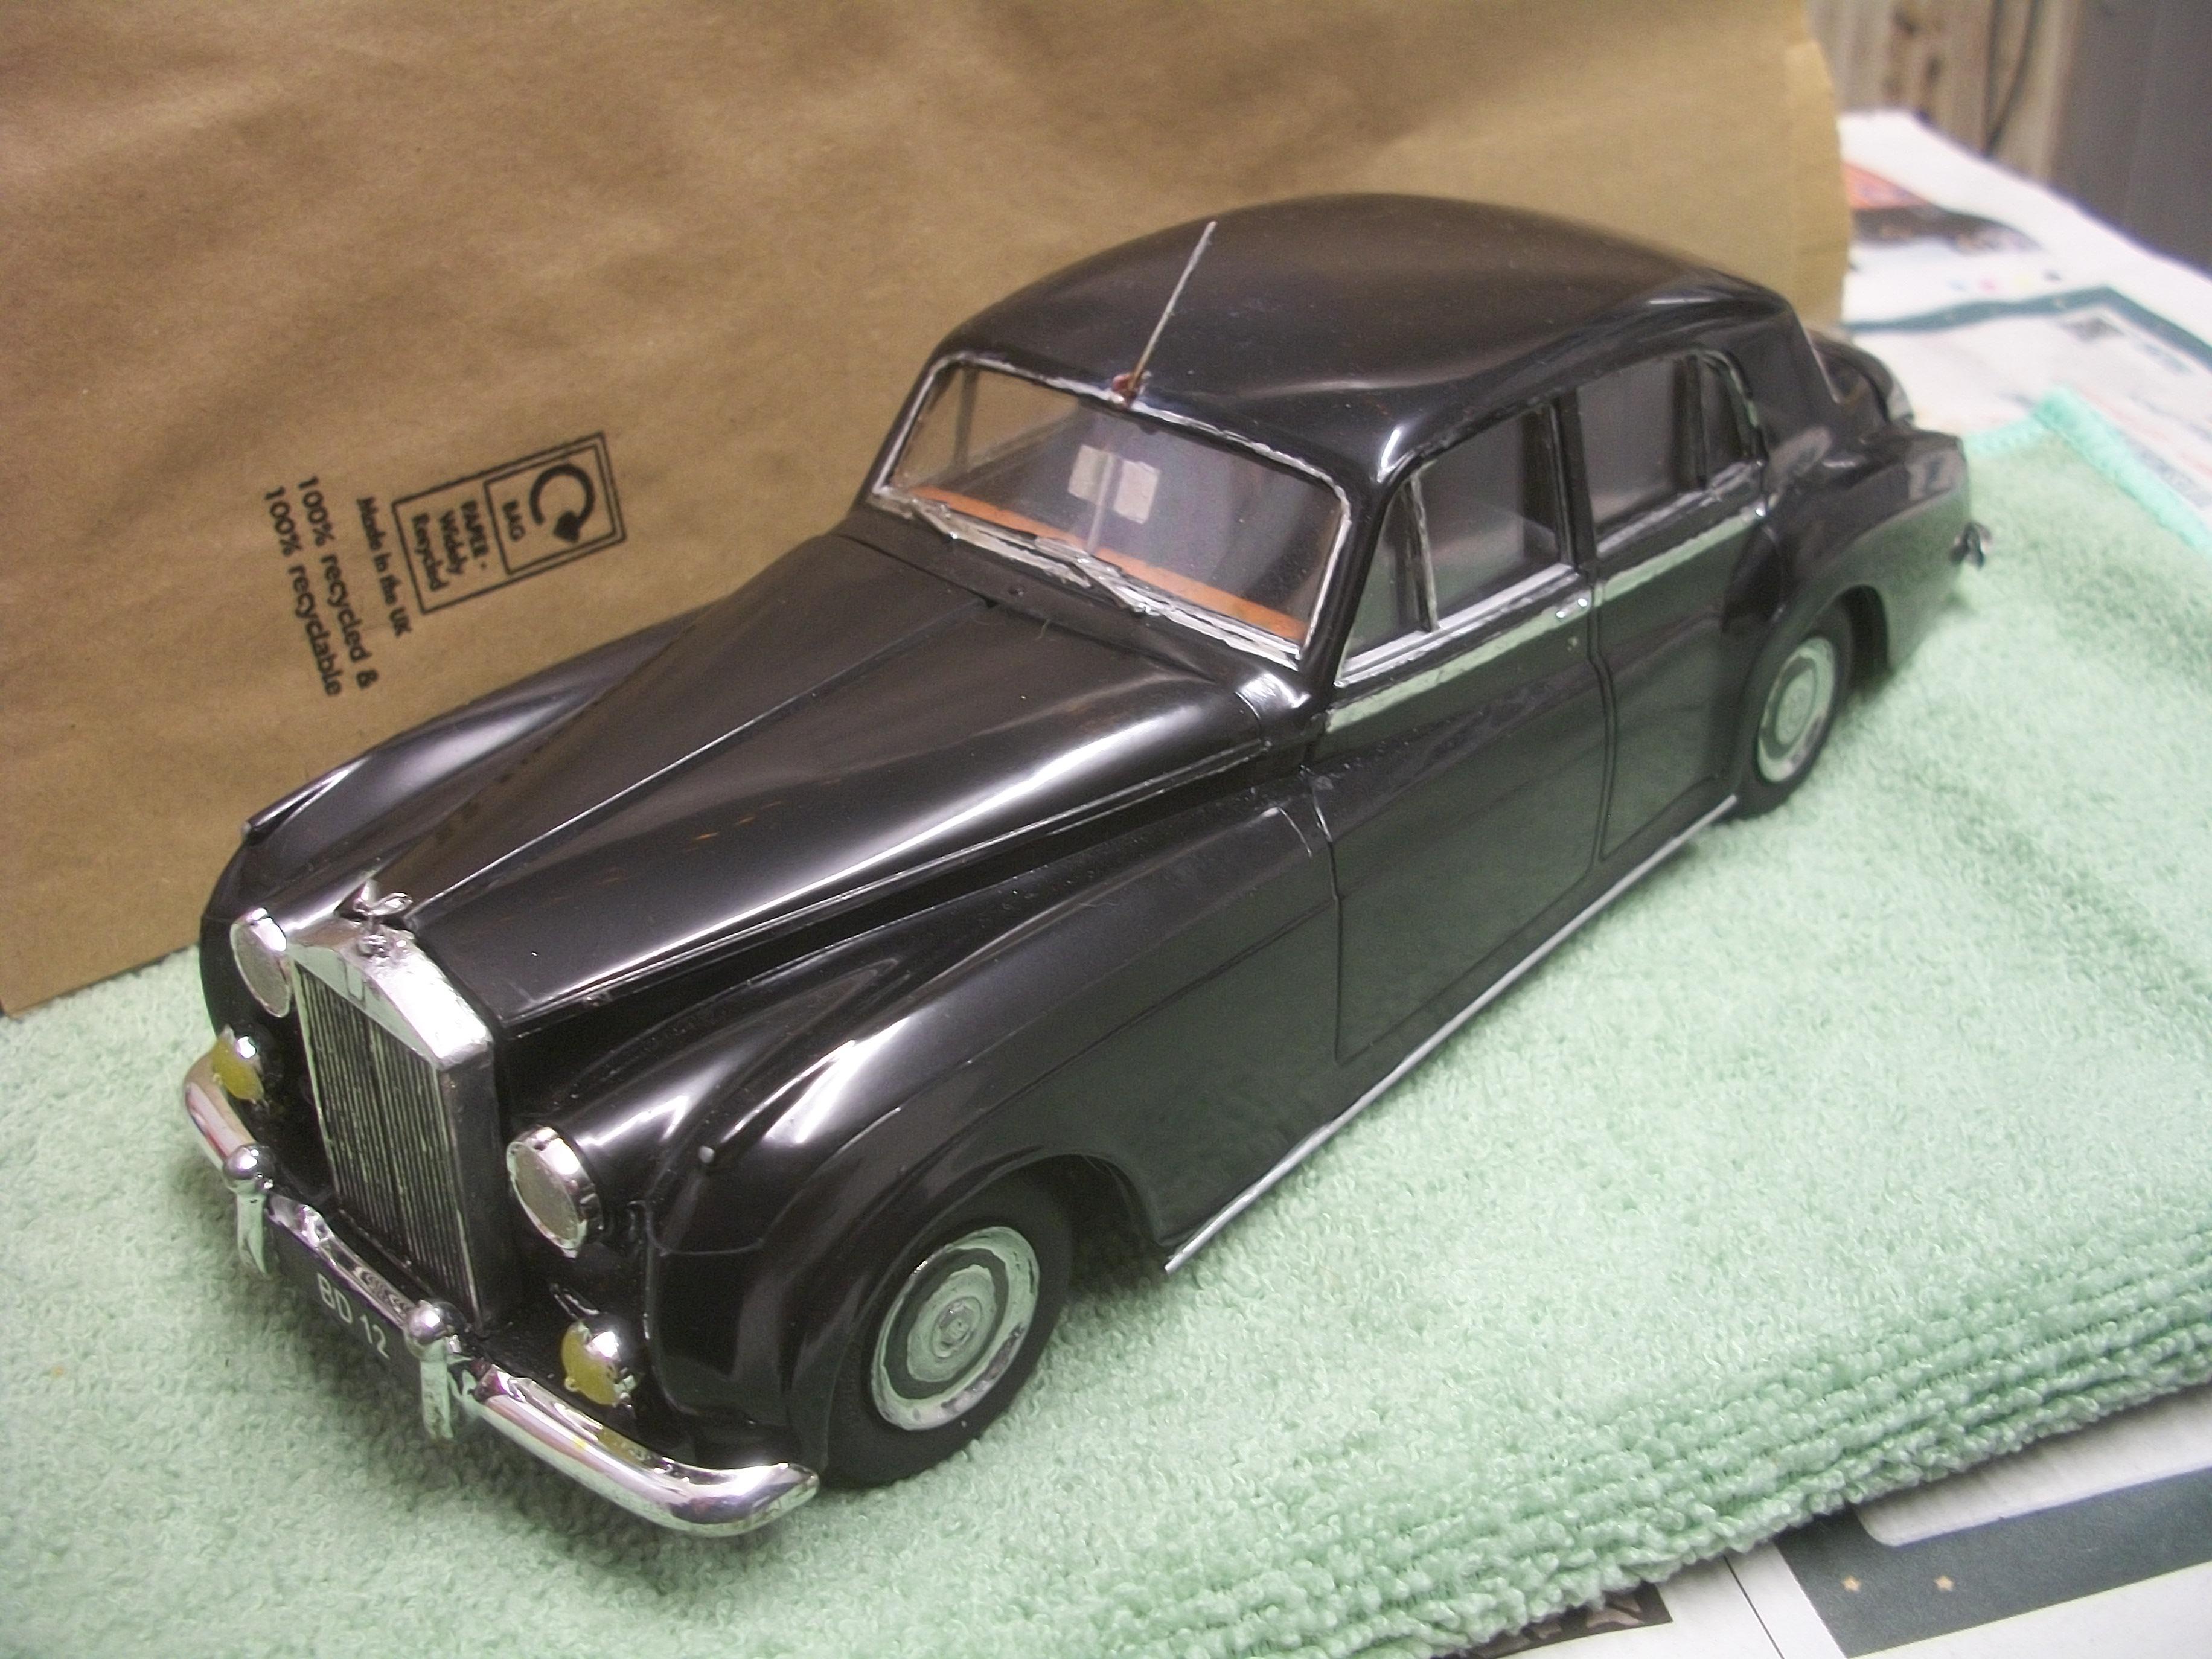
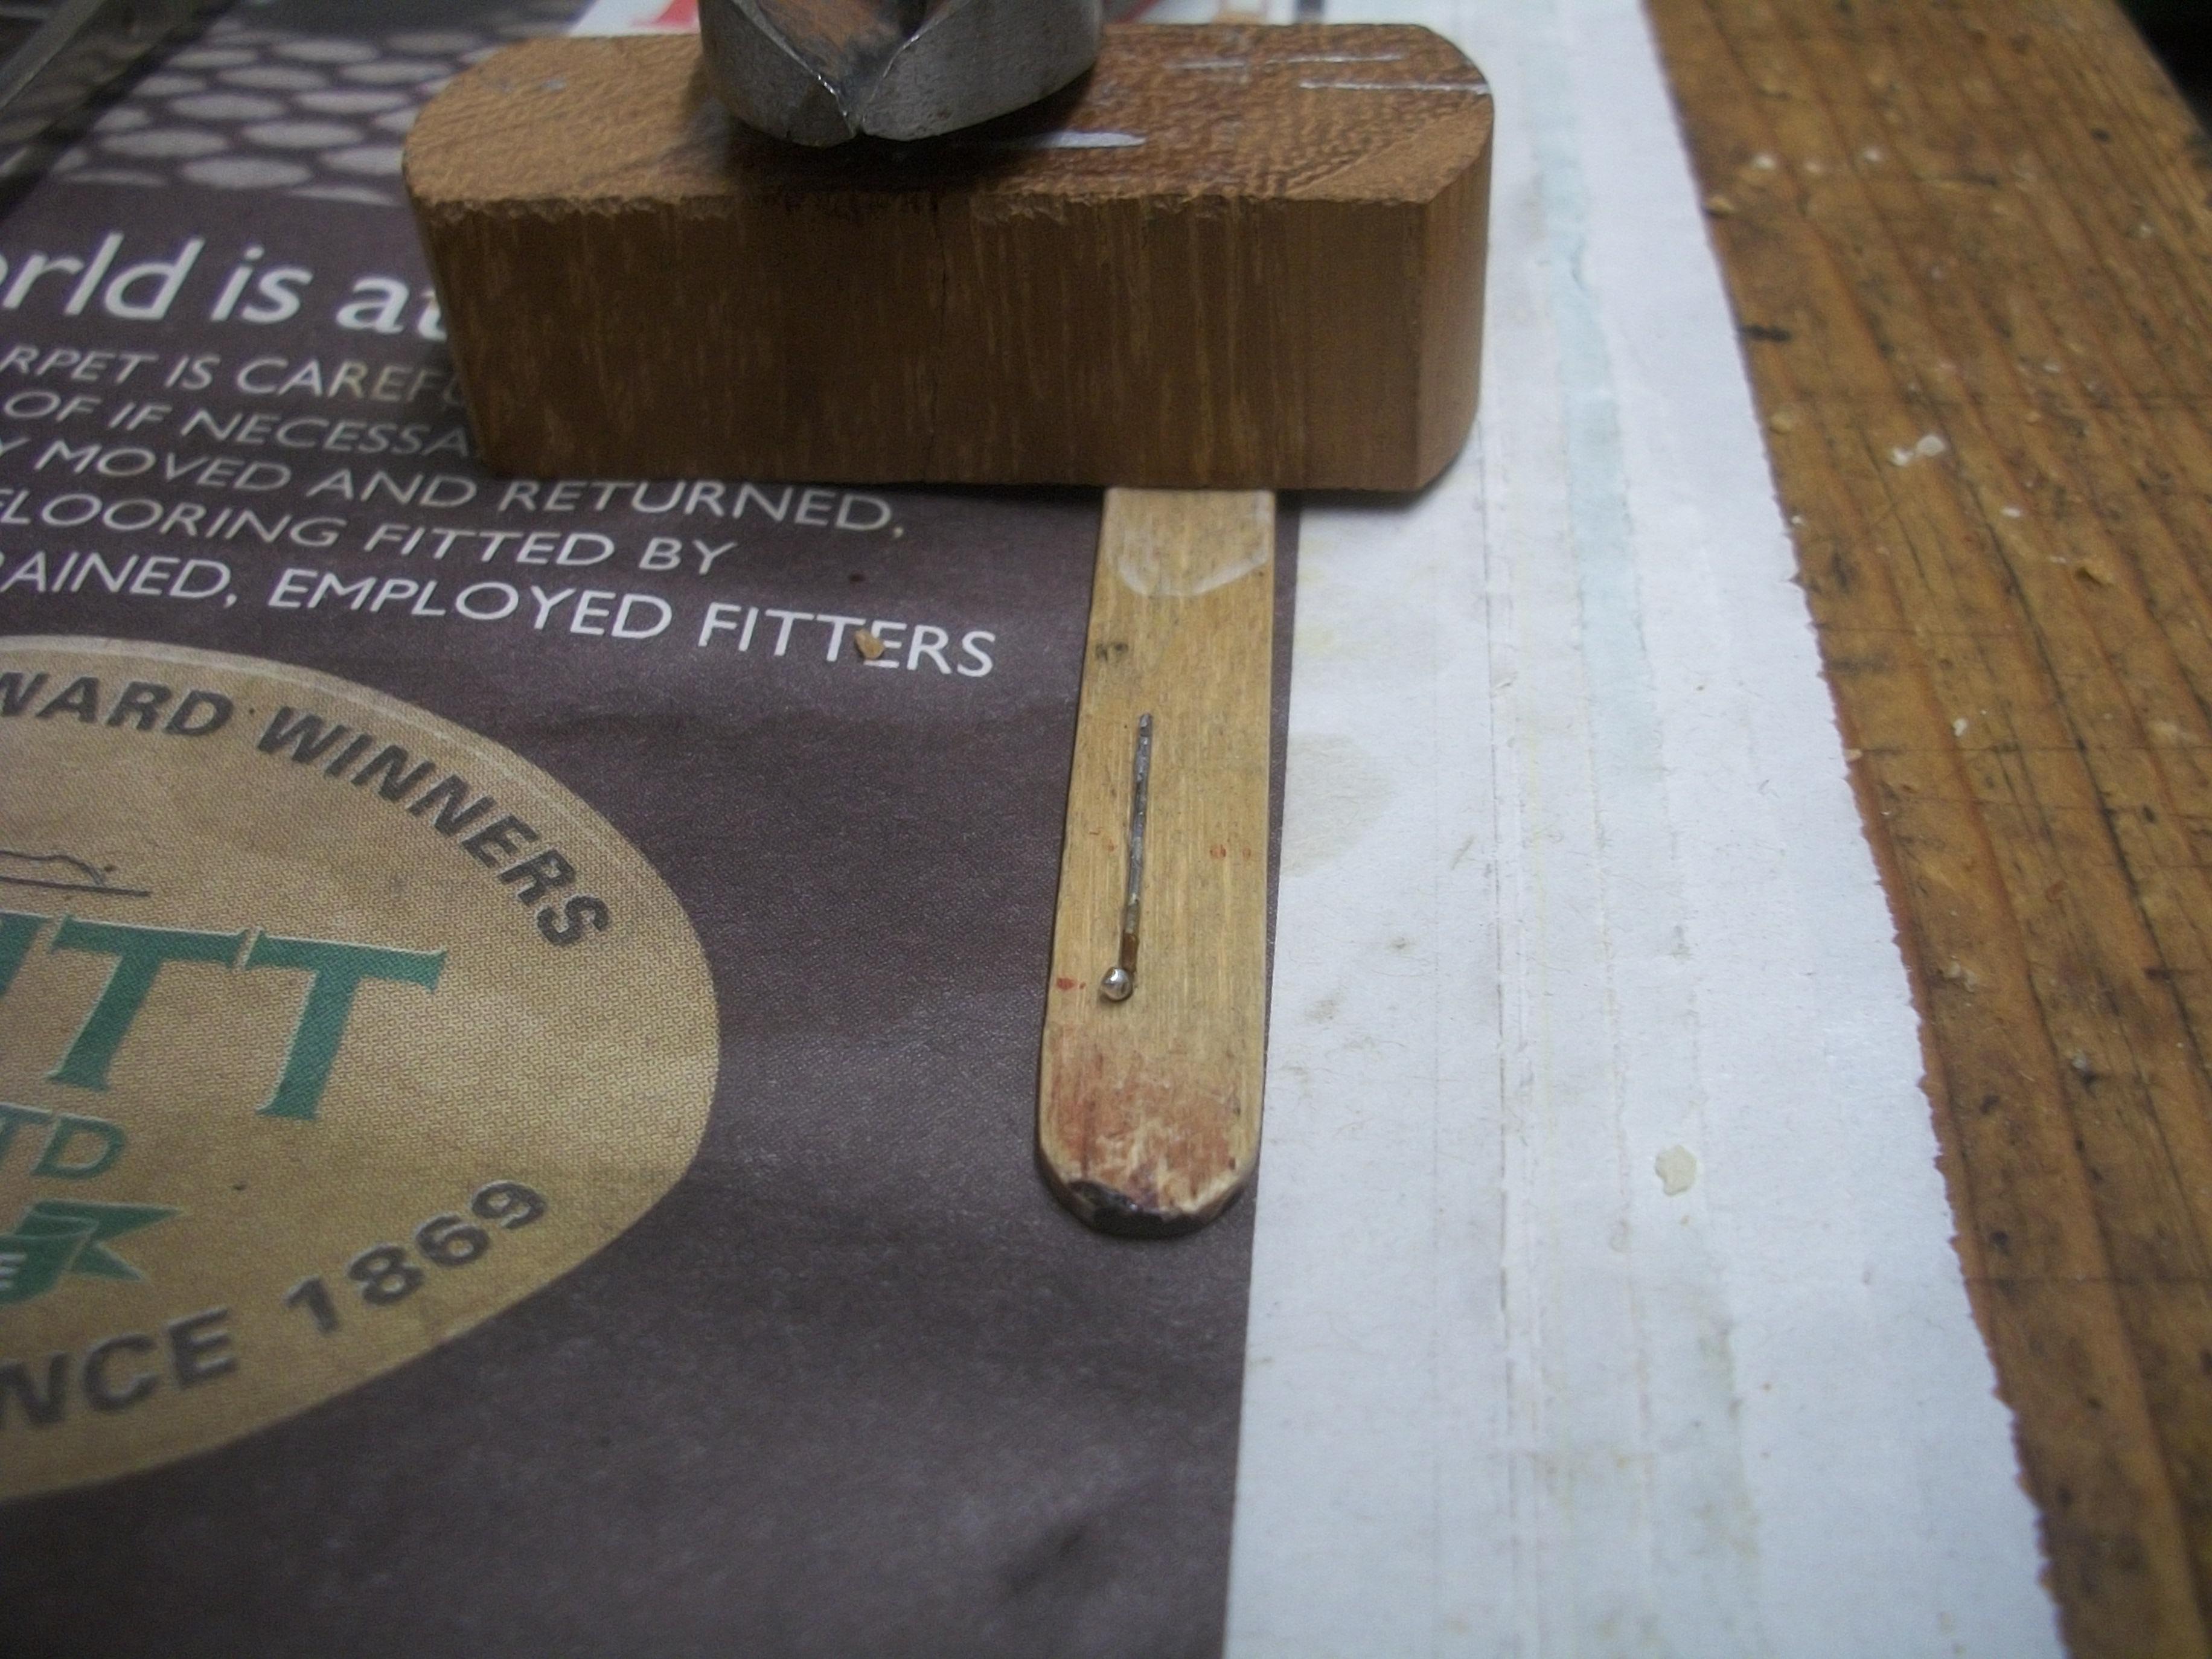
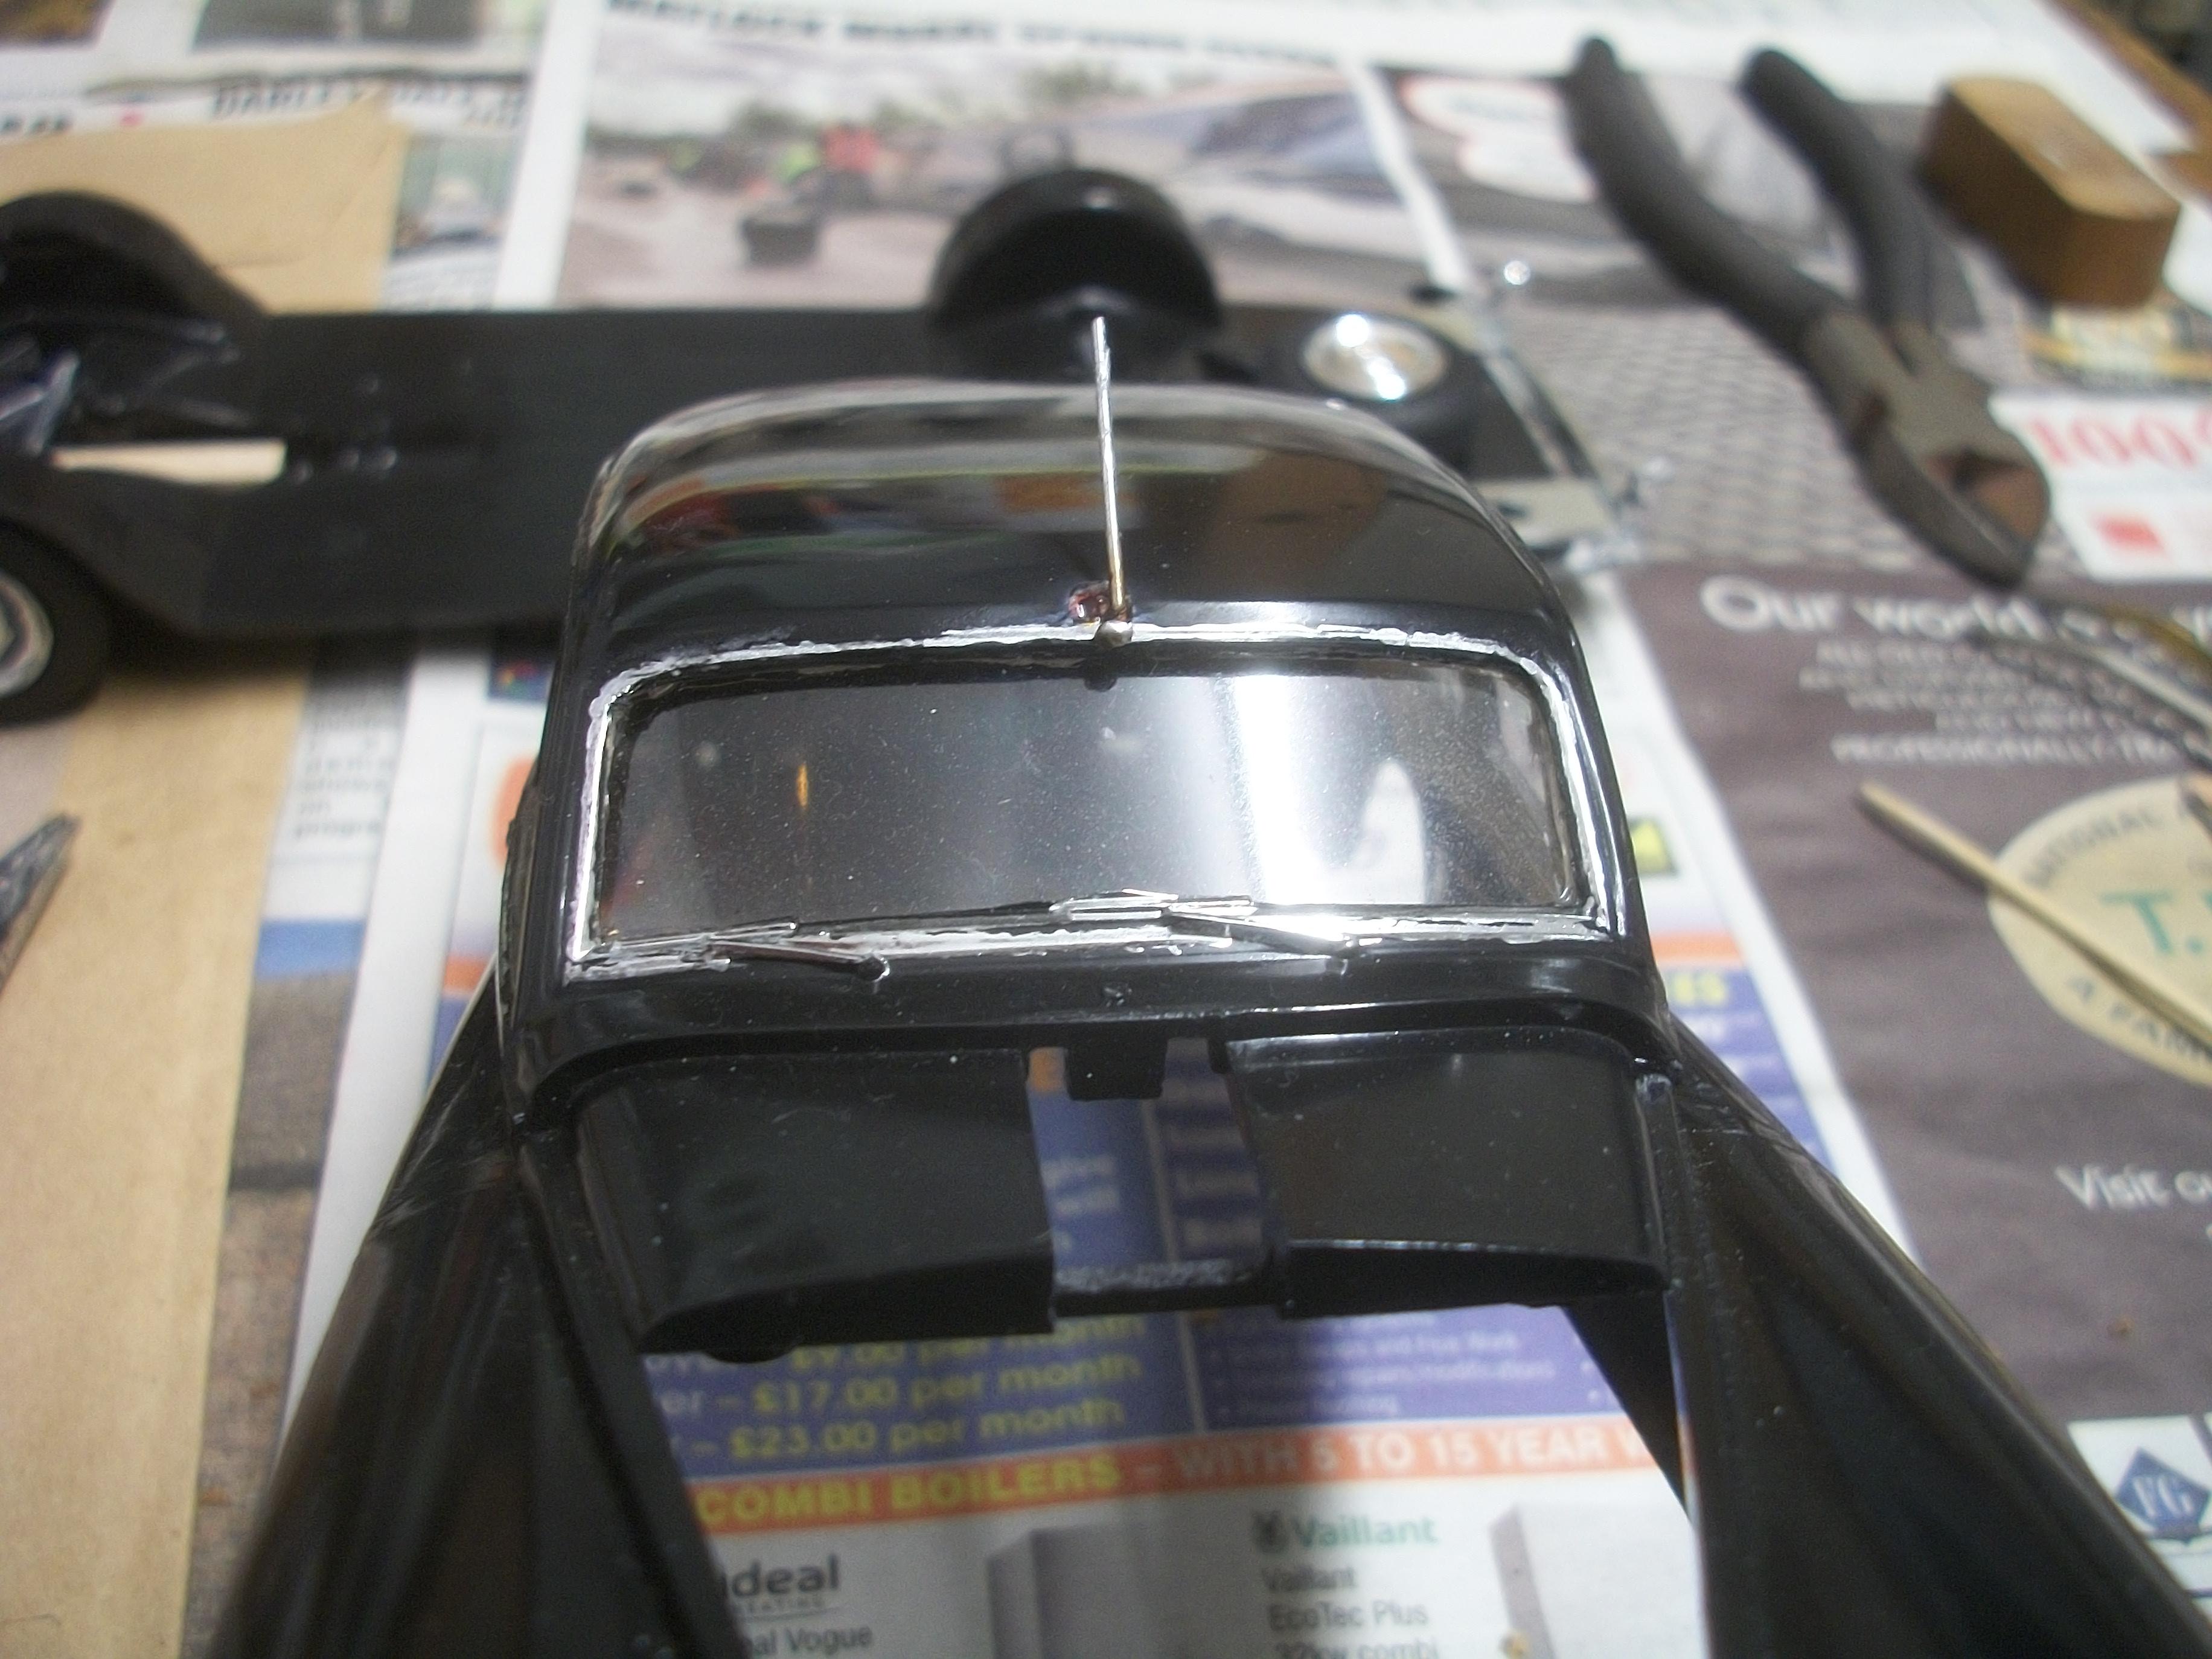
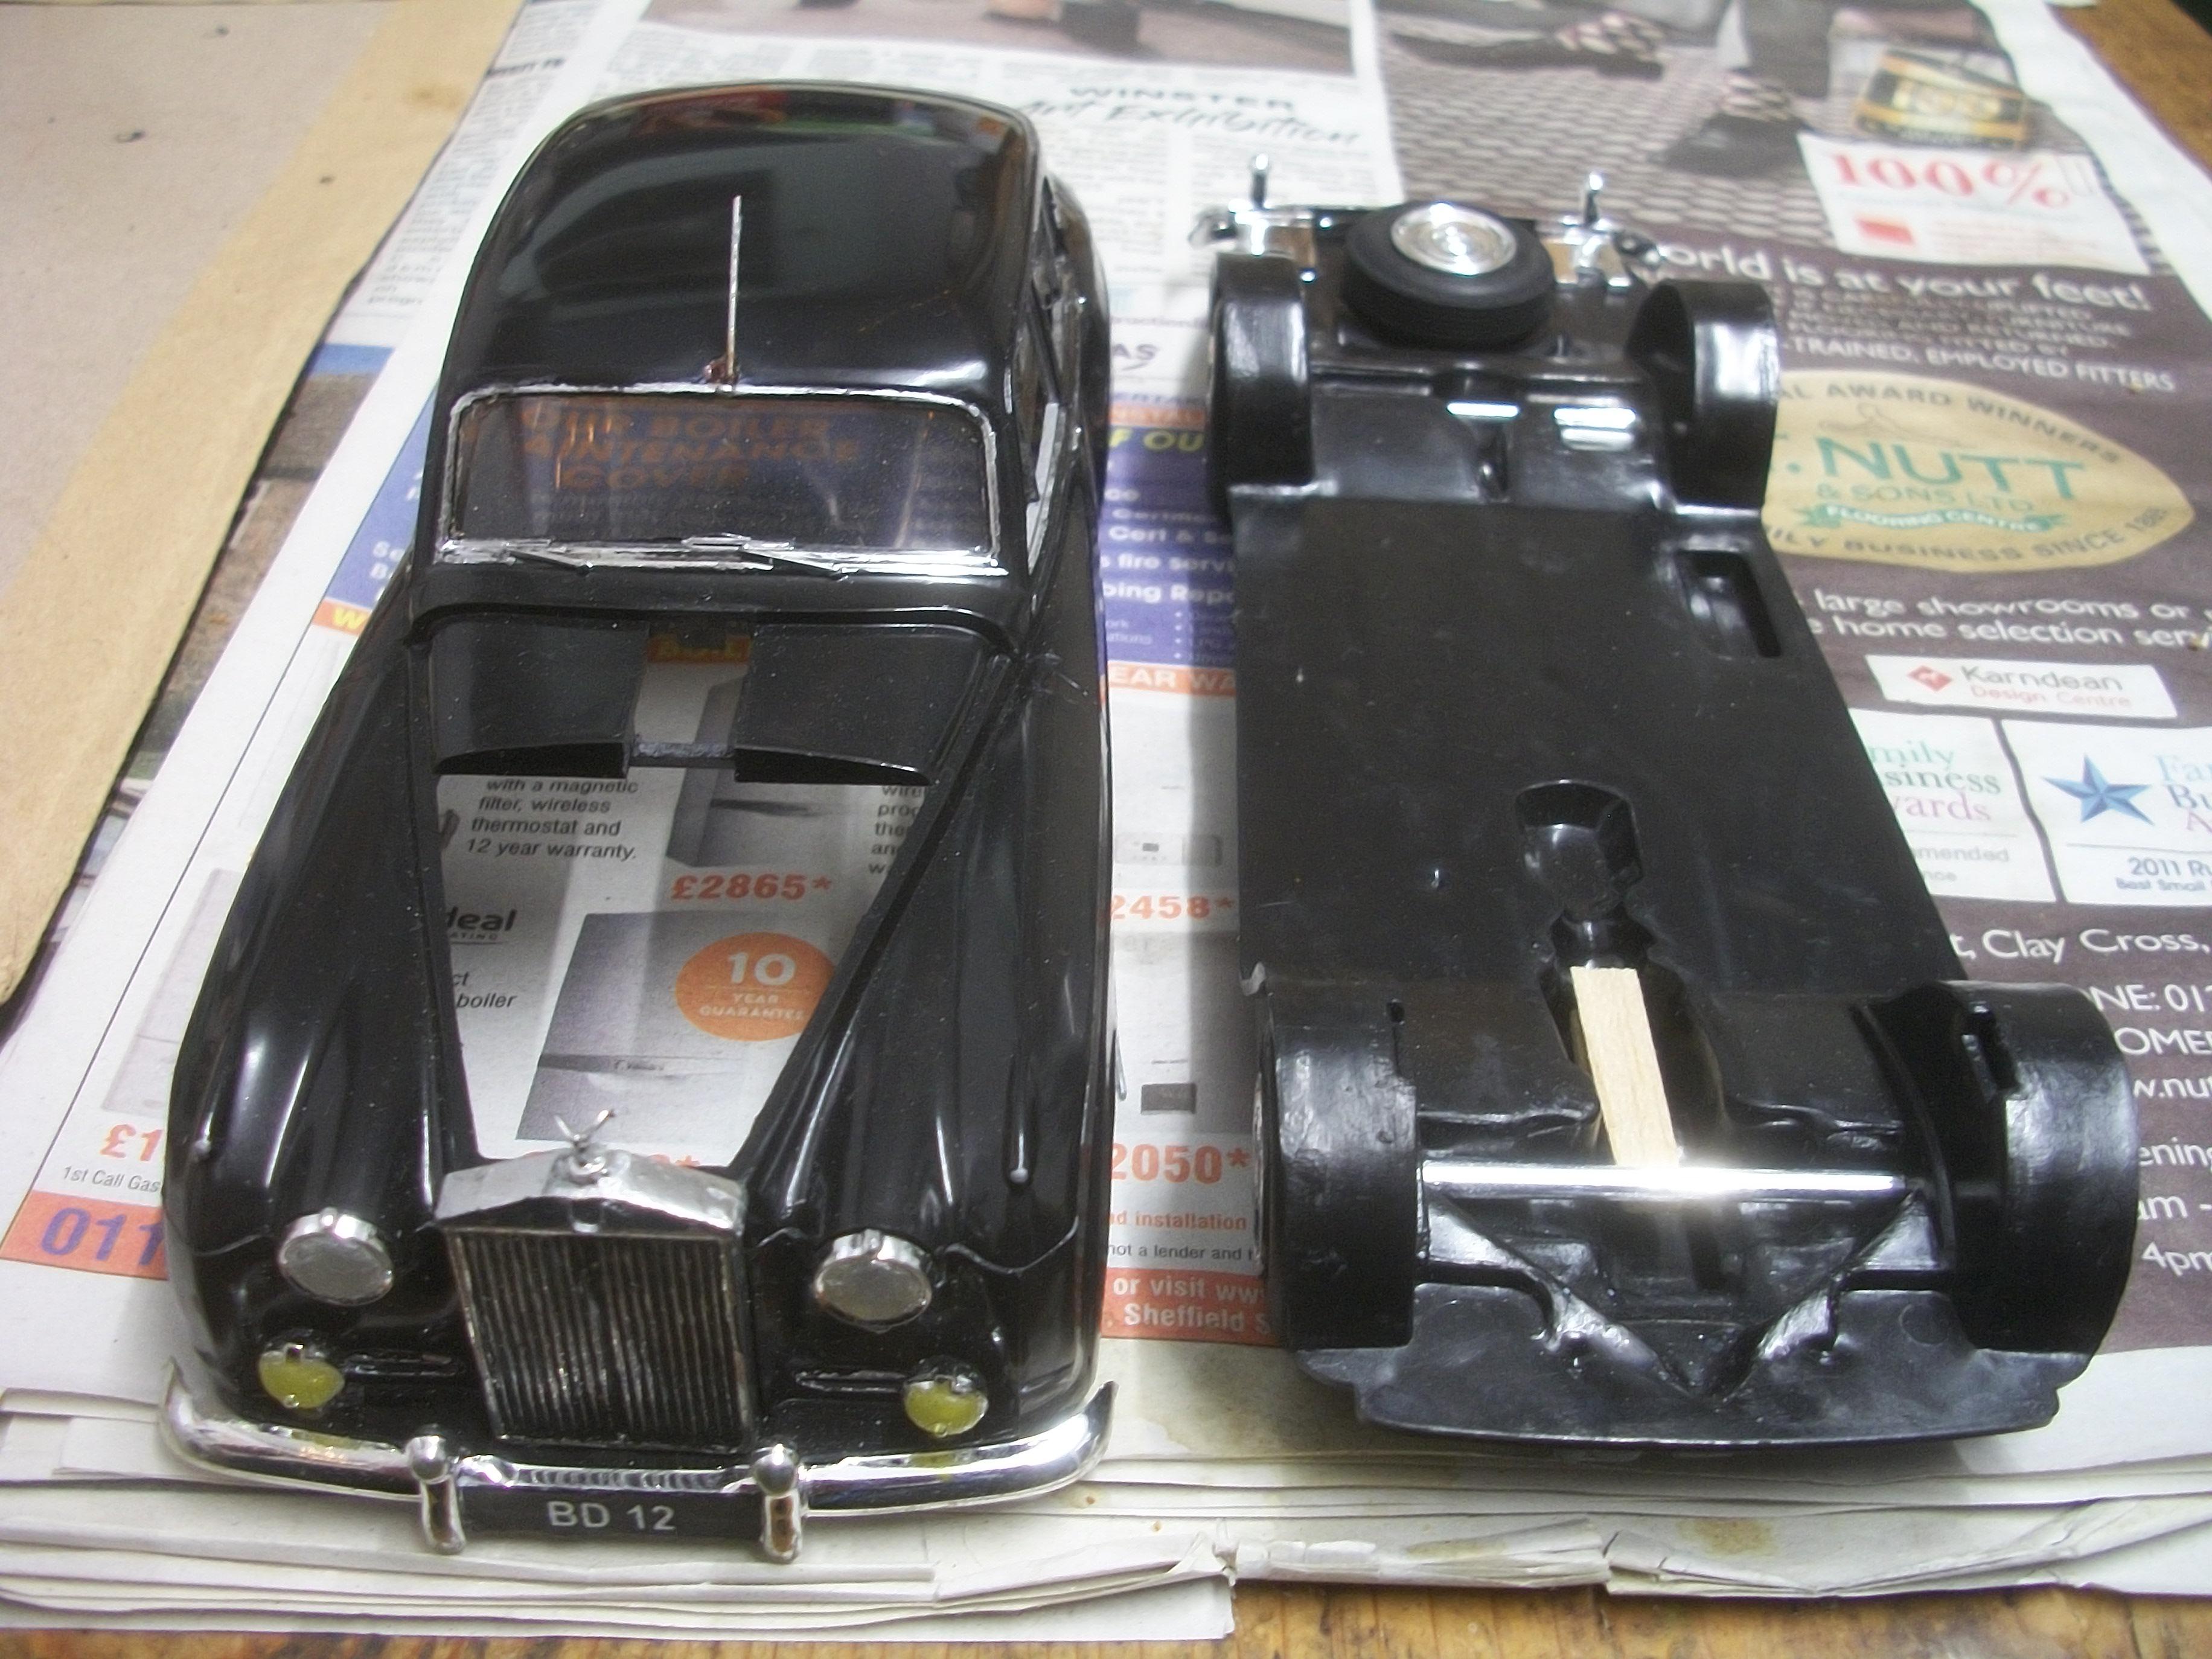
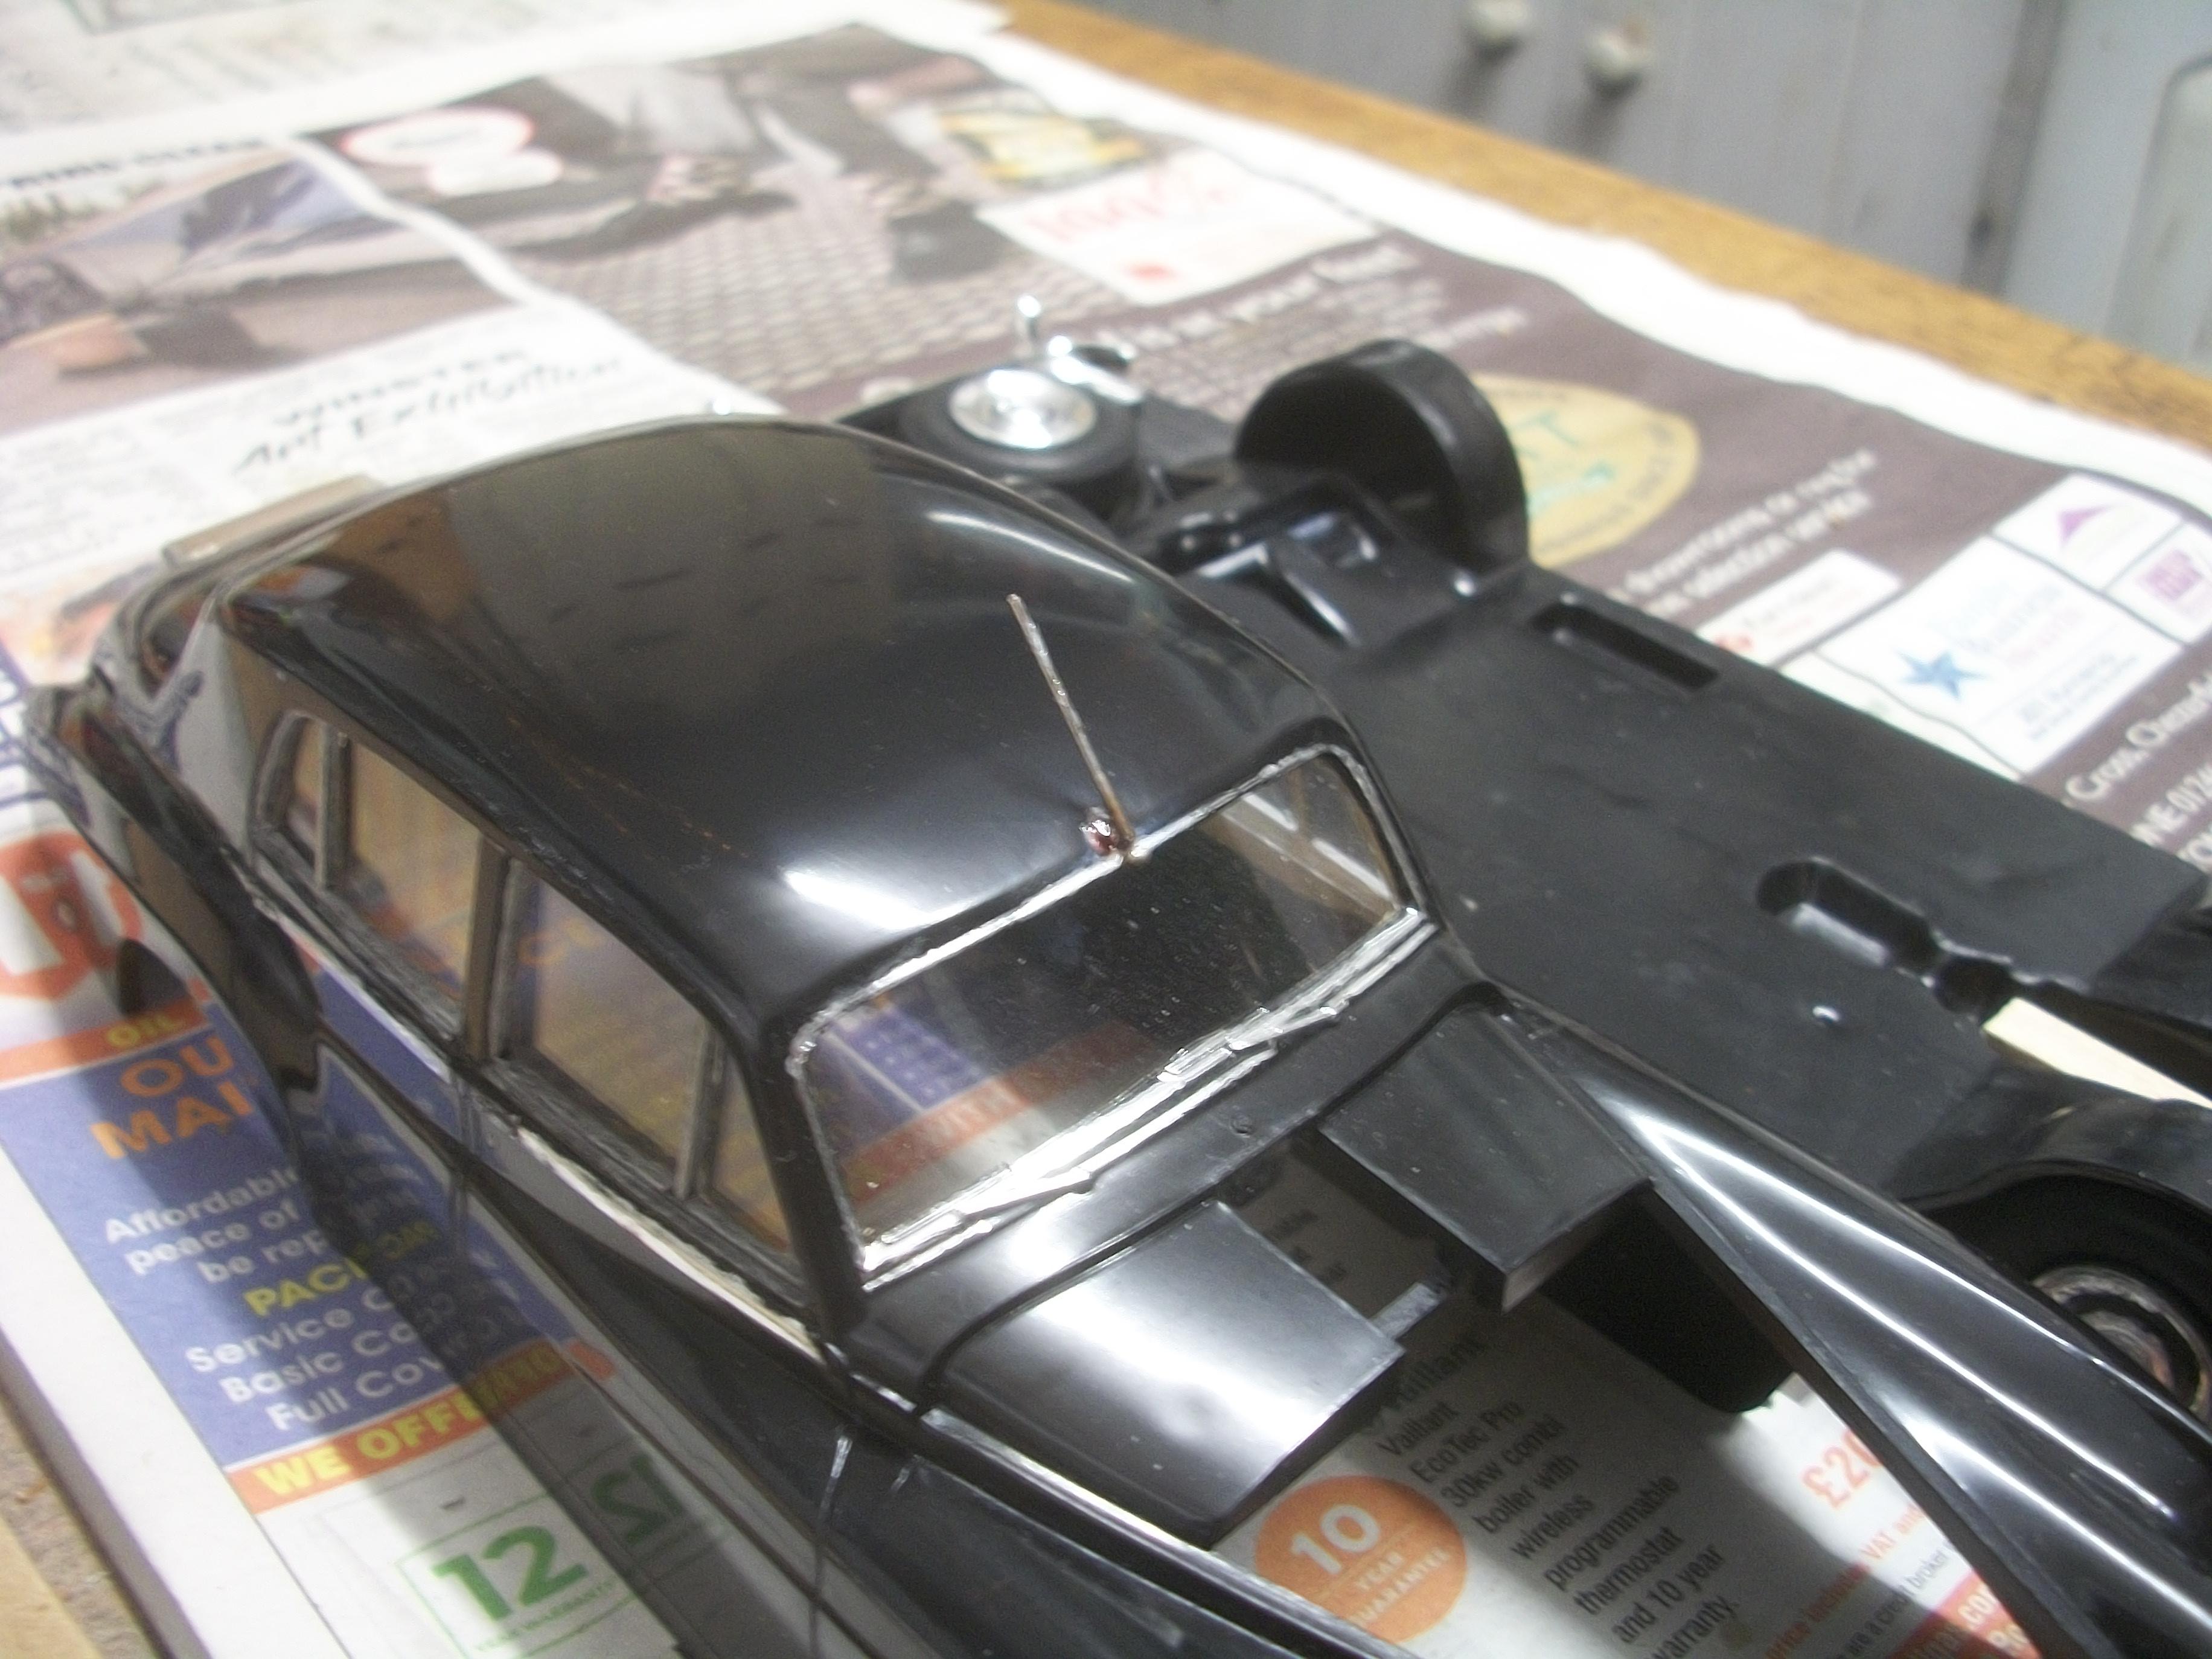
Well, partly due to my wife's trip to China, which involved an overnight stay in a hotel on the way to the airport and partly due to difficulties with the engine detailing, there has been a delay of around five days. During this time I didn't make any progress with the Silver Cloud . . . The engine detailing caused the build to stall, as I struggled to work it out in my head. I decided to step away from the engine detailing and instead it was the roof aerial that got some attention at last. First of all I polished the roof, because there is no way that I shall be attempting to polish the roof panel with the fragile roof aerial in place . . . Having cut a 17 mm length of steel pin for the roof aerial, my next task was to add a small lump of solder to one end of the pin. This was problematic, because there are two things that don't work for me in model building. one being super glue and the other being soldering. Eventually I did manage to attach a blob of solder to the end of the pin, which promptly fell off during the process of fitting the aerial to the roof. One tiny dot of super glue was placed onto the centre of the roof where it meets the windshield, and I carefully positioned the radio aerial at the desired angle, as well as keeping it at 90° vertically . . . Holding the pin there for what seemed like ages, the super glue just would not grip. After I could hold the piece no longer, the job was done. Both the roof aerial and the Spirit of Ecstasy mascot are the most fragile parts of this model car, without a doubt. They are extremely prone to breaking off later. David
-
Rolls Royce Silver Cloud II Drophead Coupe
Anglia105E replied to Perspect Scale Modelworks's topic in WIP: Model Cars
Many of the model builders on MCM Forums have not used the crude representation of a V8 engine that is included in this Silver Cloud kit, and they have usually sealed the bonnet panels in the closed position for that reason . . . I think you may have arrived at the best decision ! David -
Pleased to hear that your issue was resolved Bart . . . Nice to see helpful comments from Les Budge ( stitchdup ) and a link to my previous issue which was very similar to yours Bart . . . This is why we are happy to be members of MCM Forums, with lots of friendly people out there who are genuinely concerned about our problems and of course, our projects . . . David W.
-
Rolls-Royce No Chemicals, No Paint, No Harmful Glues
Anglia105E replied to Anglia105E's topic in WIP: Model Cars
Thanks Mark . . . Much of the engine detail will not be easily visible once the two hinged bonnet panels are in place. As long as there is a decent amount of detail then I shall be happy. David -
Rolls-Royce No Chemicals, No Paint, No Harmful Glues
Anglia105E replied to Anglia105E's topic in WIP: Model Cars
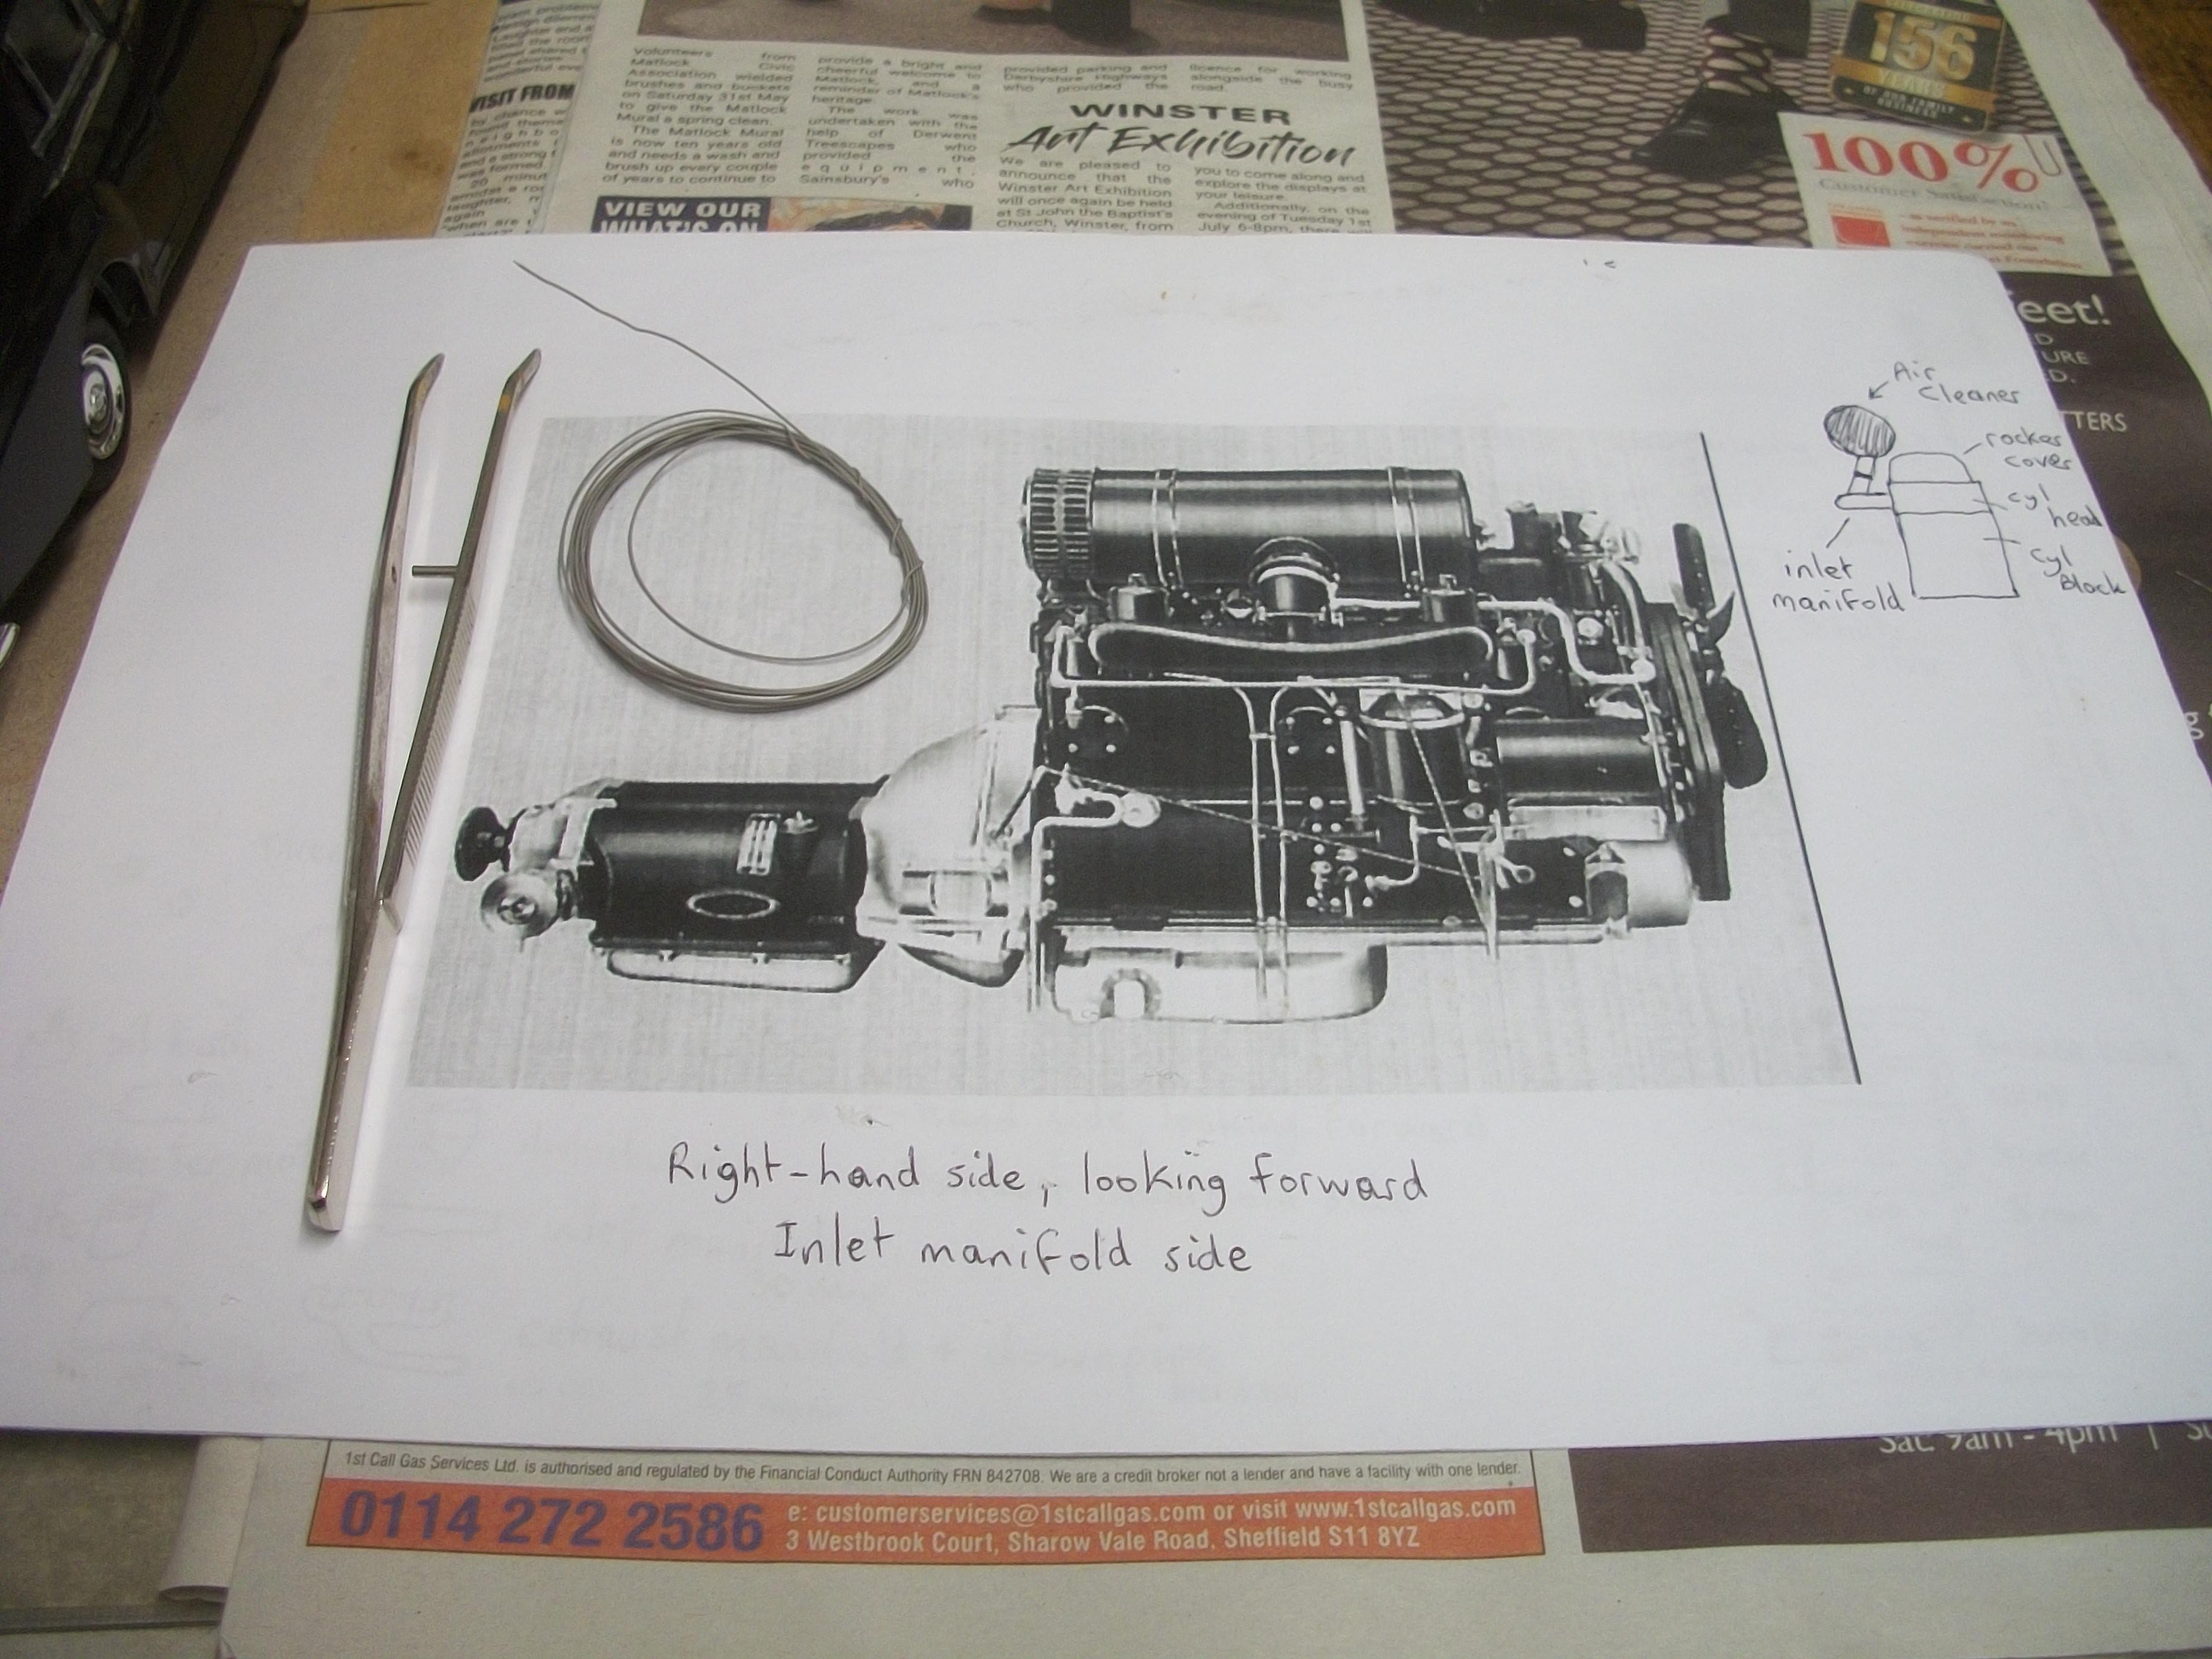
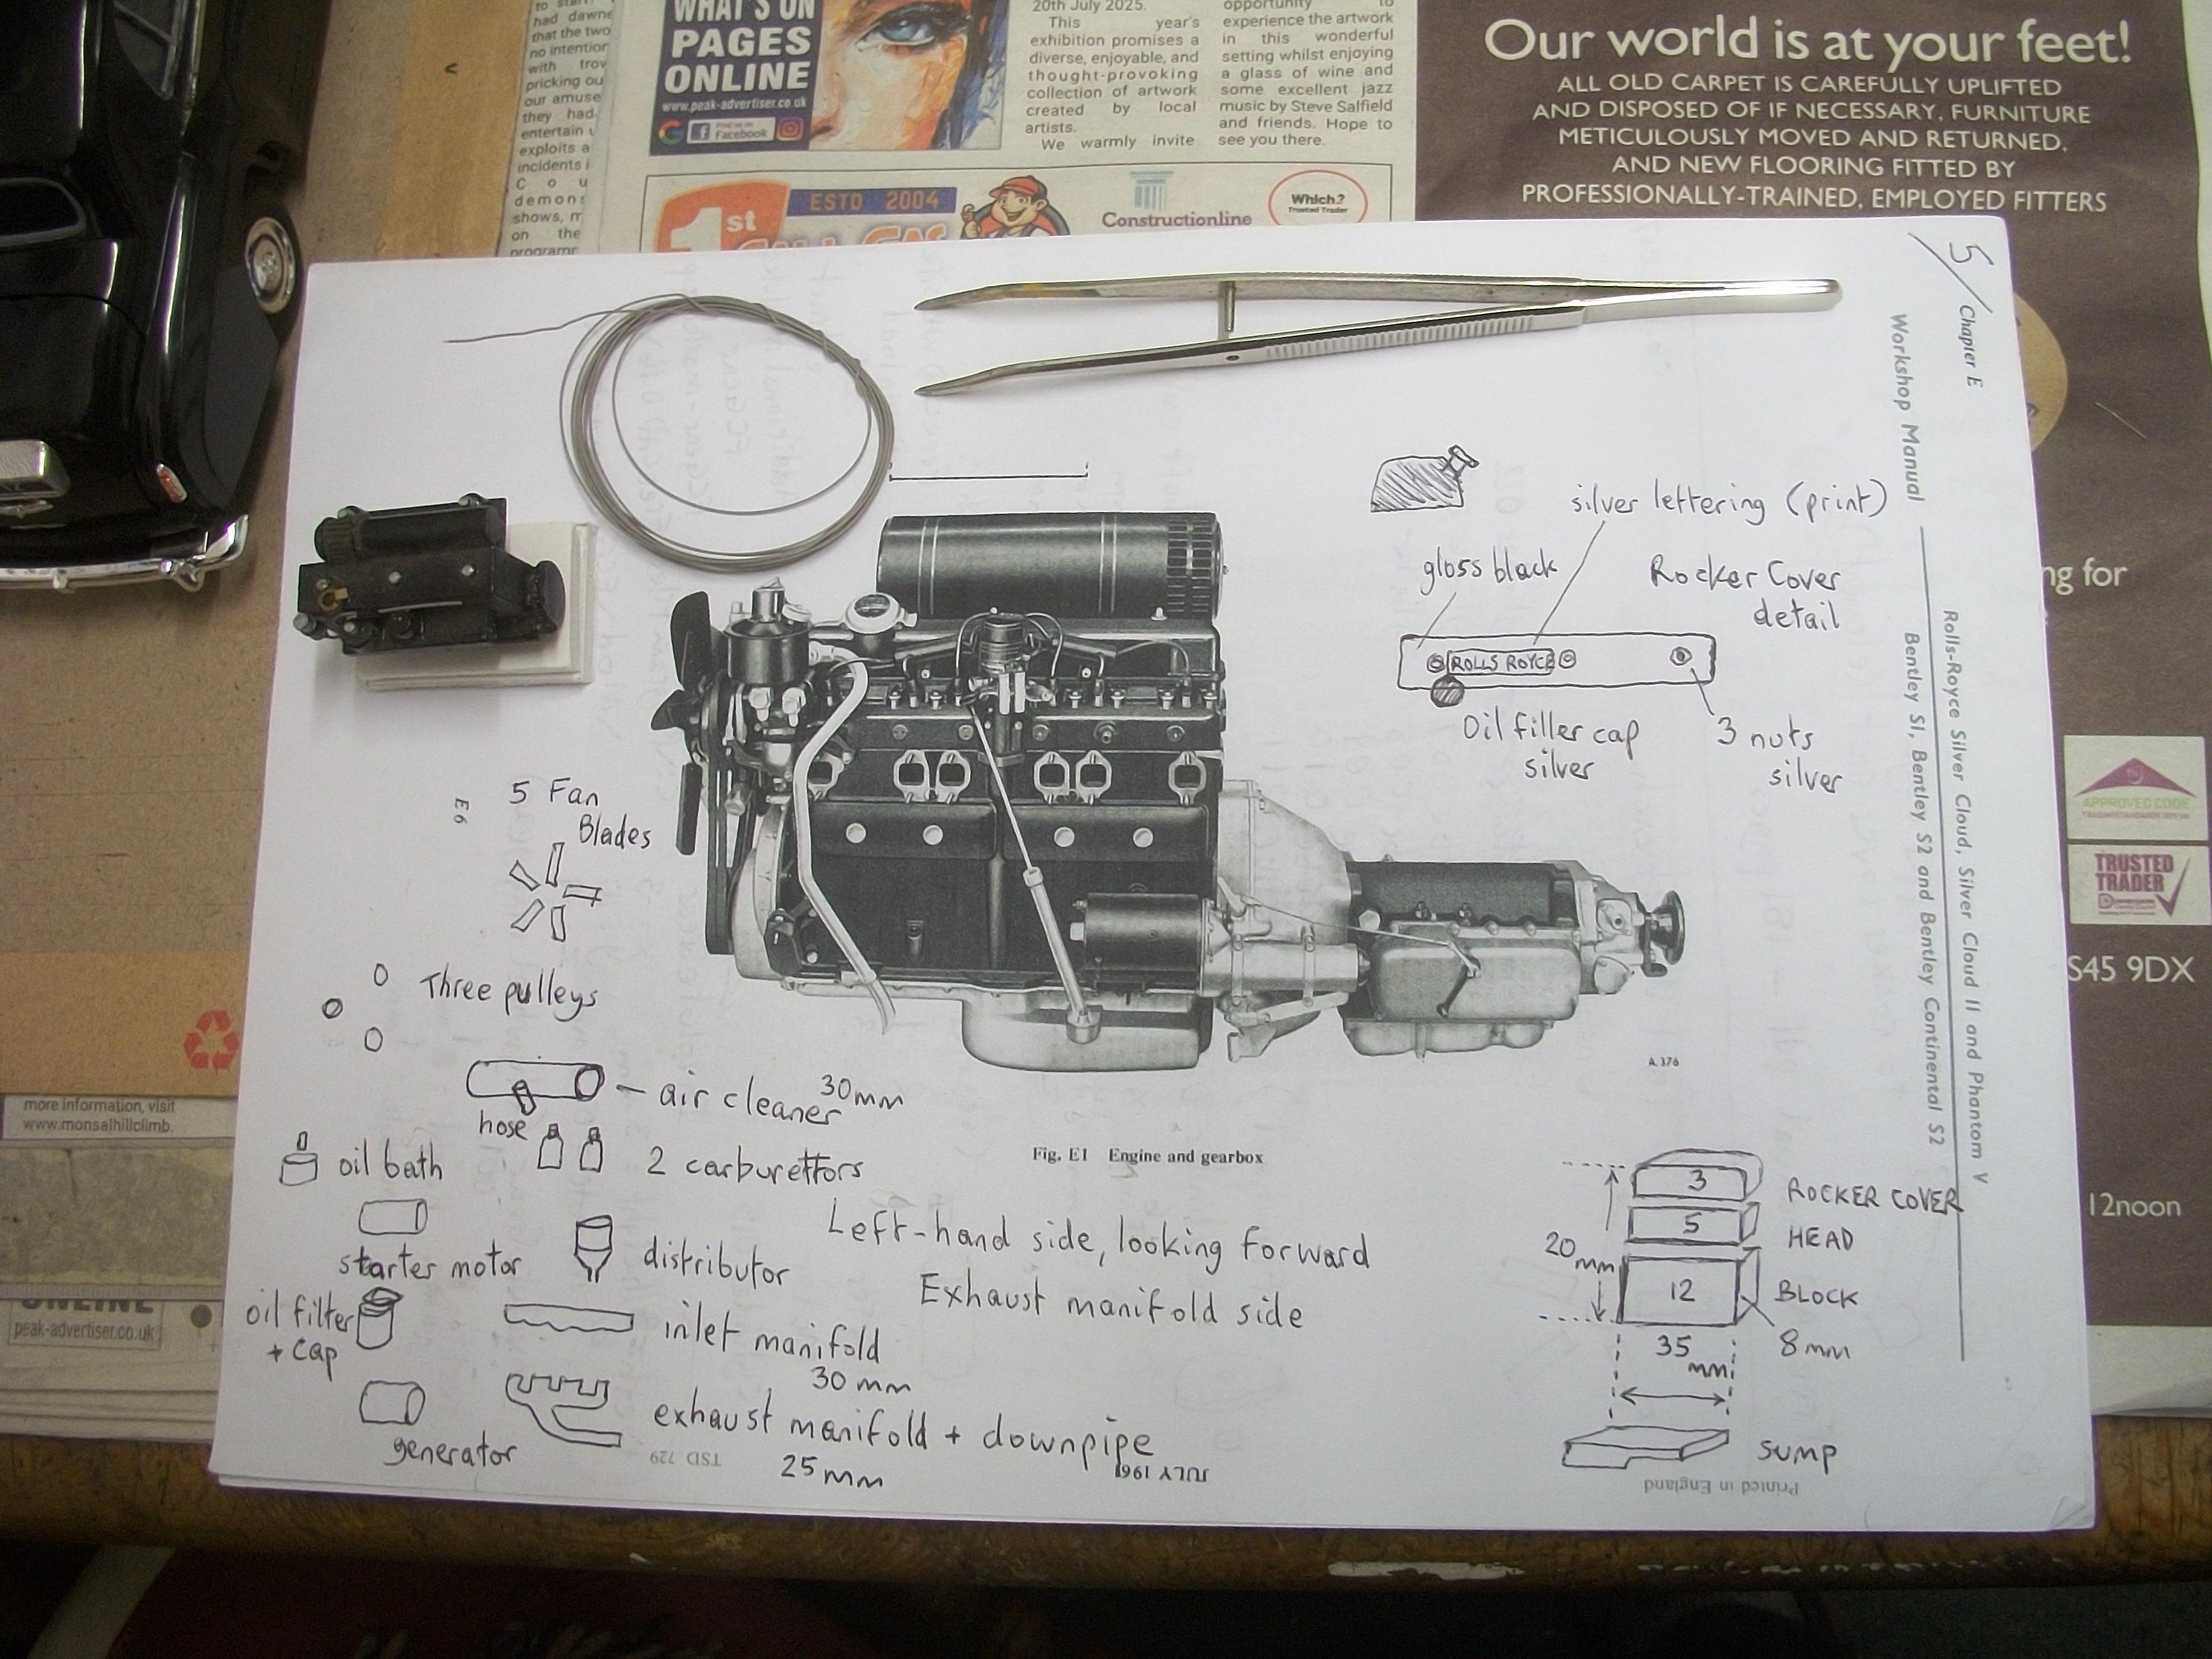
Time has come to study the images of the engine in paper format . . . Specifically, the left hand side of the engine looking forward. Either side of the distributor there can be seen three spark plug leads leading to the front half of the cylinder head, and three further plug leads leading to the rear half of the cylinder head. These plug leads are usually black on the real cars, but I decided they would be more visible if they were made from grey material. Four of the six leads are routed through two black bakelite tubes, so one each side of the distributor itself. The remaining two leads do not pass through the tubes. While I am not intending to add a huge amount of detail to this fine engine, I would like to add as many detailed features as realistically possible. The good news is that my old HP laptop has been given a new lease of life. Somehow, I have managed to get the machine up and running on Microsoft Windows 8 and it has no problem running Google Chrome as a browser . . . Posting here on MCM Forums with the laptop is much easier than using the iPad or the mobile phone device. David
-
Rolls-Royce No Chemicals, No Paint, No Harmful Glues
Anglia105E replied to Anglia105E's topic in WIP: Model Cars
I agree with you actually. I can easily apply some thinned black paint over the grey at some point. This will look much better. David -
Rolls-Royce No Chemicals, No Paint, No Harmful Glues
Anglia105E replied to Anglia105E's topic in WIP: Model Cars
Well Mark, when I say grey I meant to say dark grey, which I guess is close to black. As you can see from the photos, my grey emulsion paint is a bit too light in colour. Thanks for pointing this out and I do see why you were puzzled. David -
Rolls-Royce No Chemicals, No Paint, No Harmful Glues
Anglia105E replied to Anglia105E's topic in WIP: Model Cars
Don't worry, the rear window has a grey rubber seal surrounding it, and as I have probably mentioned before, this is usually given a coat of chrome by model builders who assume that it should be chromed. The rear window seal does not have a chrome molding, and the Franklin Mint diecast model has this correct. David -
Rolls-Royce No Chemicals, No Paint, No Harmful Glues
Anglia105E replied to Anglia105E's topic in WIP: Model Cars
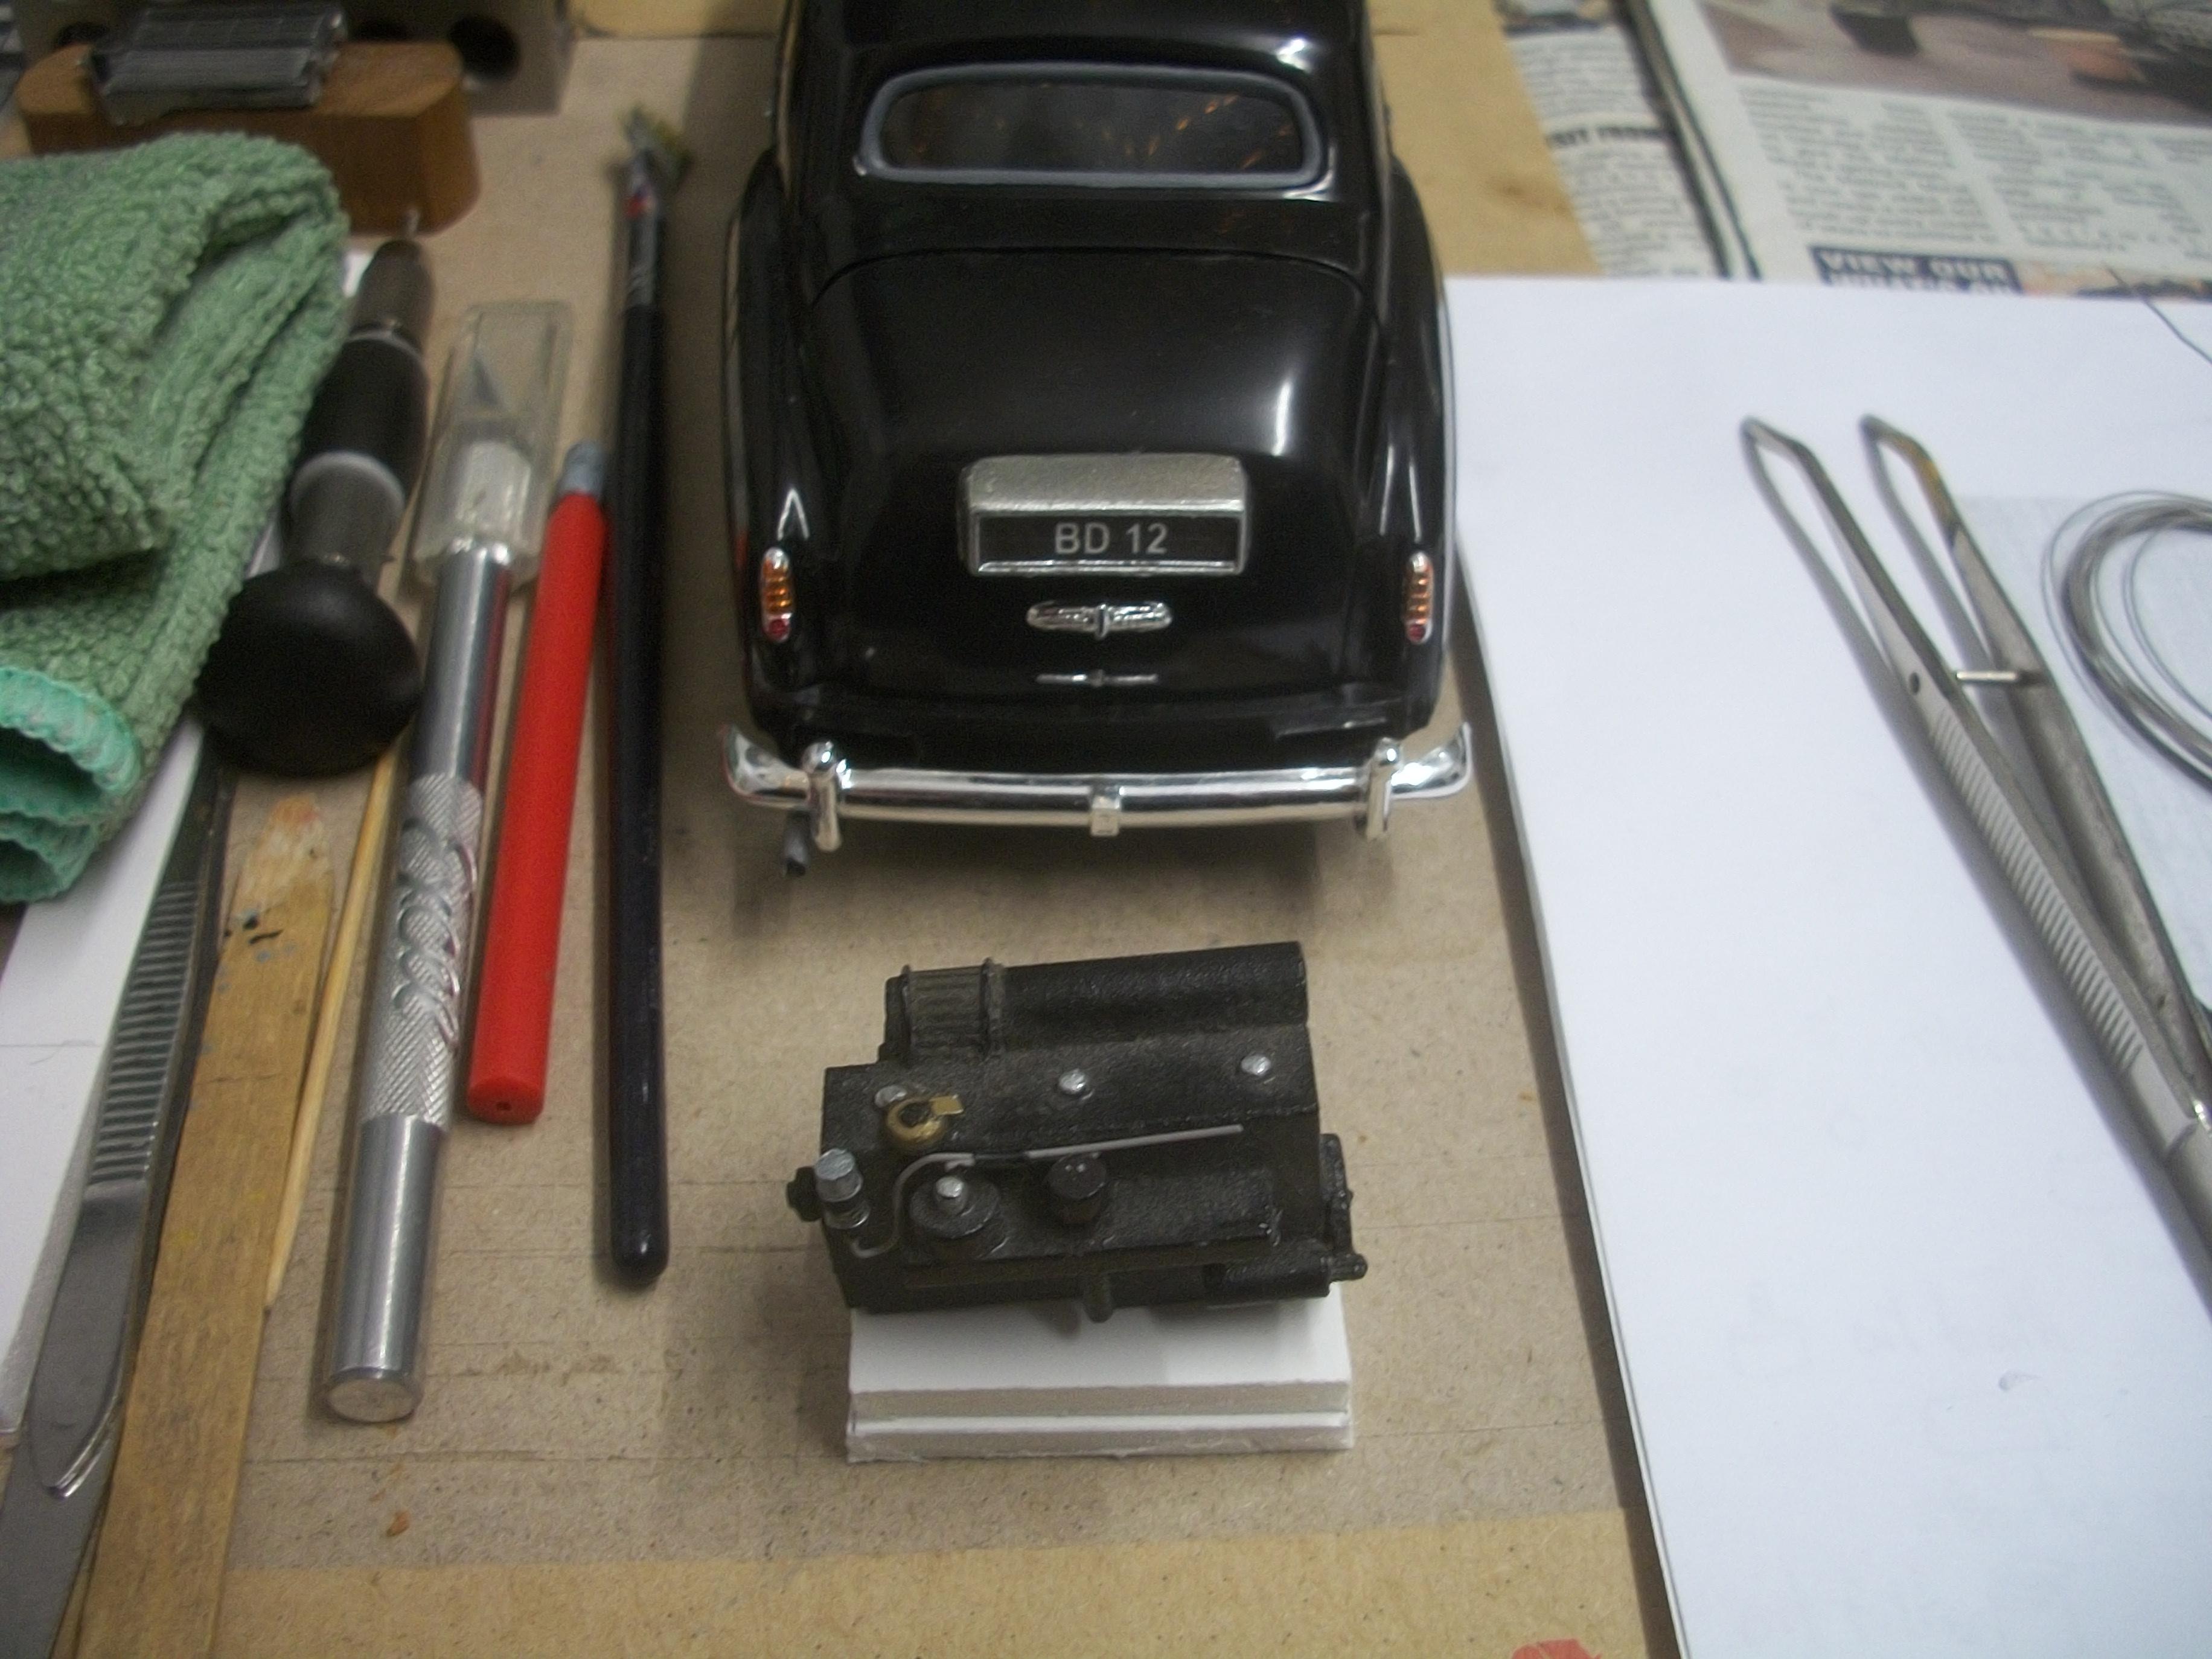
The engine bay bulkhead, or firewall, has been given a coat of pale yellow emulsion to represent the Rolls-Royce beige colour. Meanwhile at the rear of the car, several components have been PVA glued in place. These include the two rear light clusters, also the reverse lamp and the number plate plinth. For the rear bumper I used double sided tape to hold it in position. David
-
Rolls-Royce No Chemicals, No Paint, No Harmful Glues
Anglia105E replied to Anglia105E's topic in WIP: Model Cars
Here are three photos of the badge on the radiator shell. The radiator in front of the bumper is a Franklin Mint diecast part.
-
Rolls-Royce No Chemicals, No Paint, No Harmful Glues
Anglia105E replied to Anglia105E's topic in WIP: Model Cars
Having carefully removed the piece of orange tape, the tiny rectangle of liquid chrome does look quite good. The radiator shell is test fitted and presents well. I think it is unlikely that I shall be able to inscribe the RR logo on the chrome badge, because it would be extremely small. Photos to follow David. -
Rolls-Royce No Chemicals, No Paint, No Harmful Glues
Anglia105E replied to Anglia105E's topic in WIP: Model Cars
Thanks, and this type of work is more advanced than I would usually get into, but you never know it might just pay off. David


.jpg.8bee87d099bb29912b33c02364054ab7.jpg)