Anglia105E
-
Posts
3,486 -
Joined
-
Last visited
Content Type
Profiles
Forums
Events
Gallery
Everything posted by Anglia105E
-

Rolls-Royce No Chemicals, No Paint, No Harmful Glues
Anglia105E replied to Anglia105E's topic in WIP: Model Cars
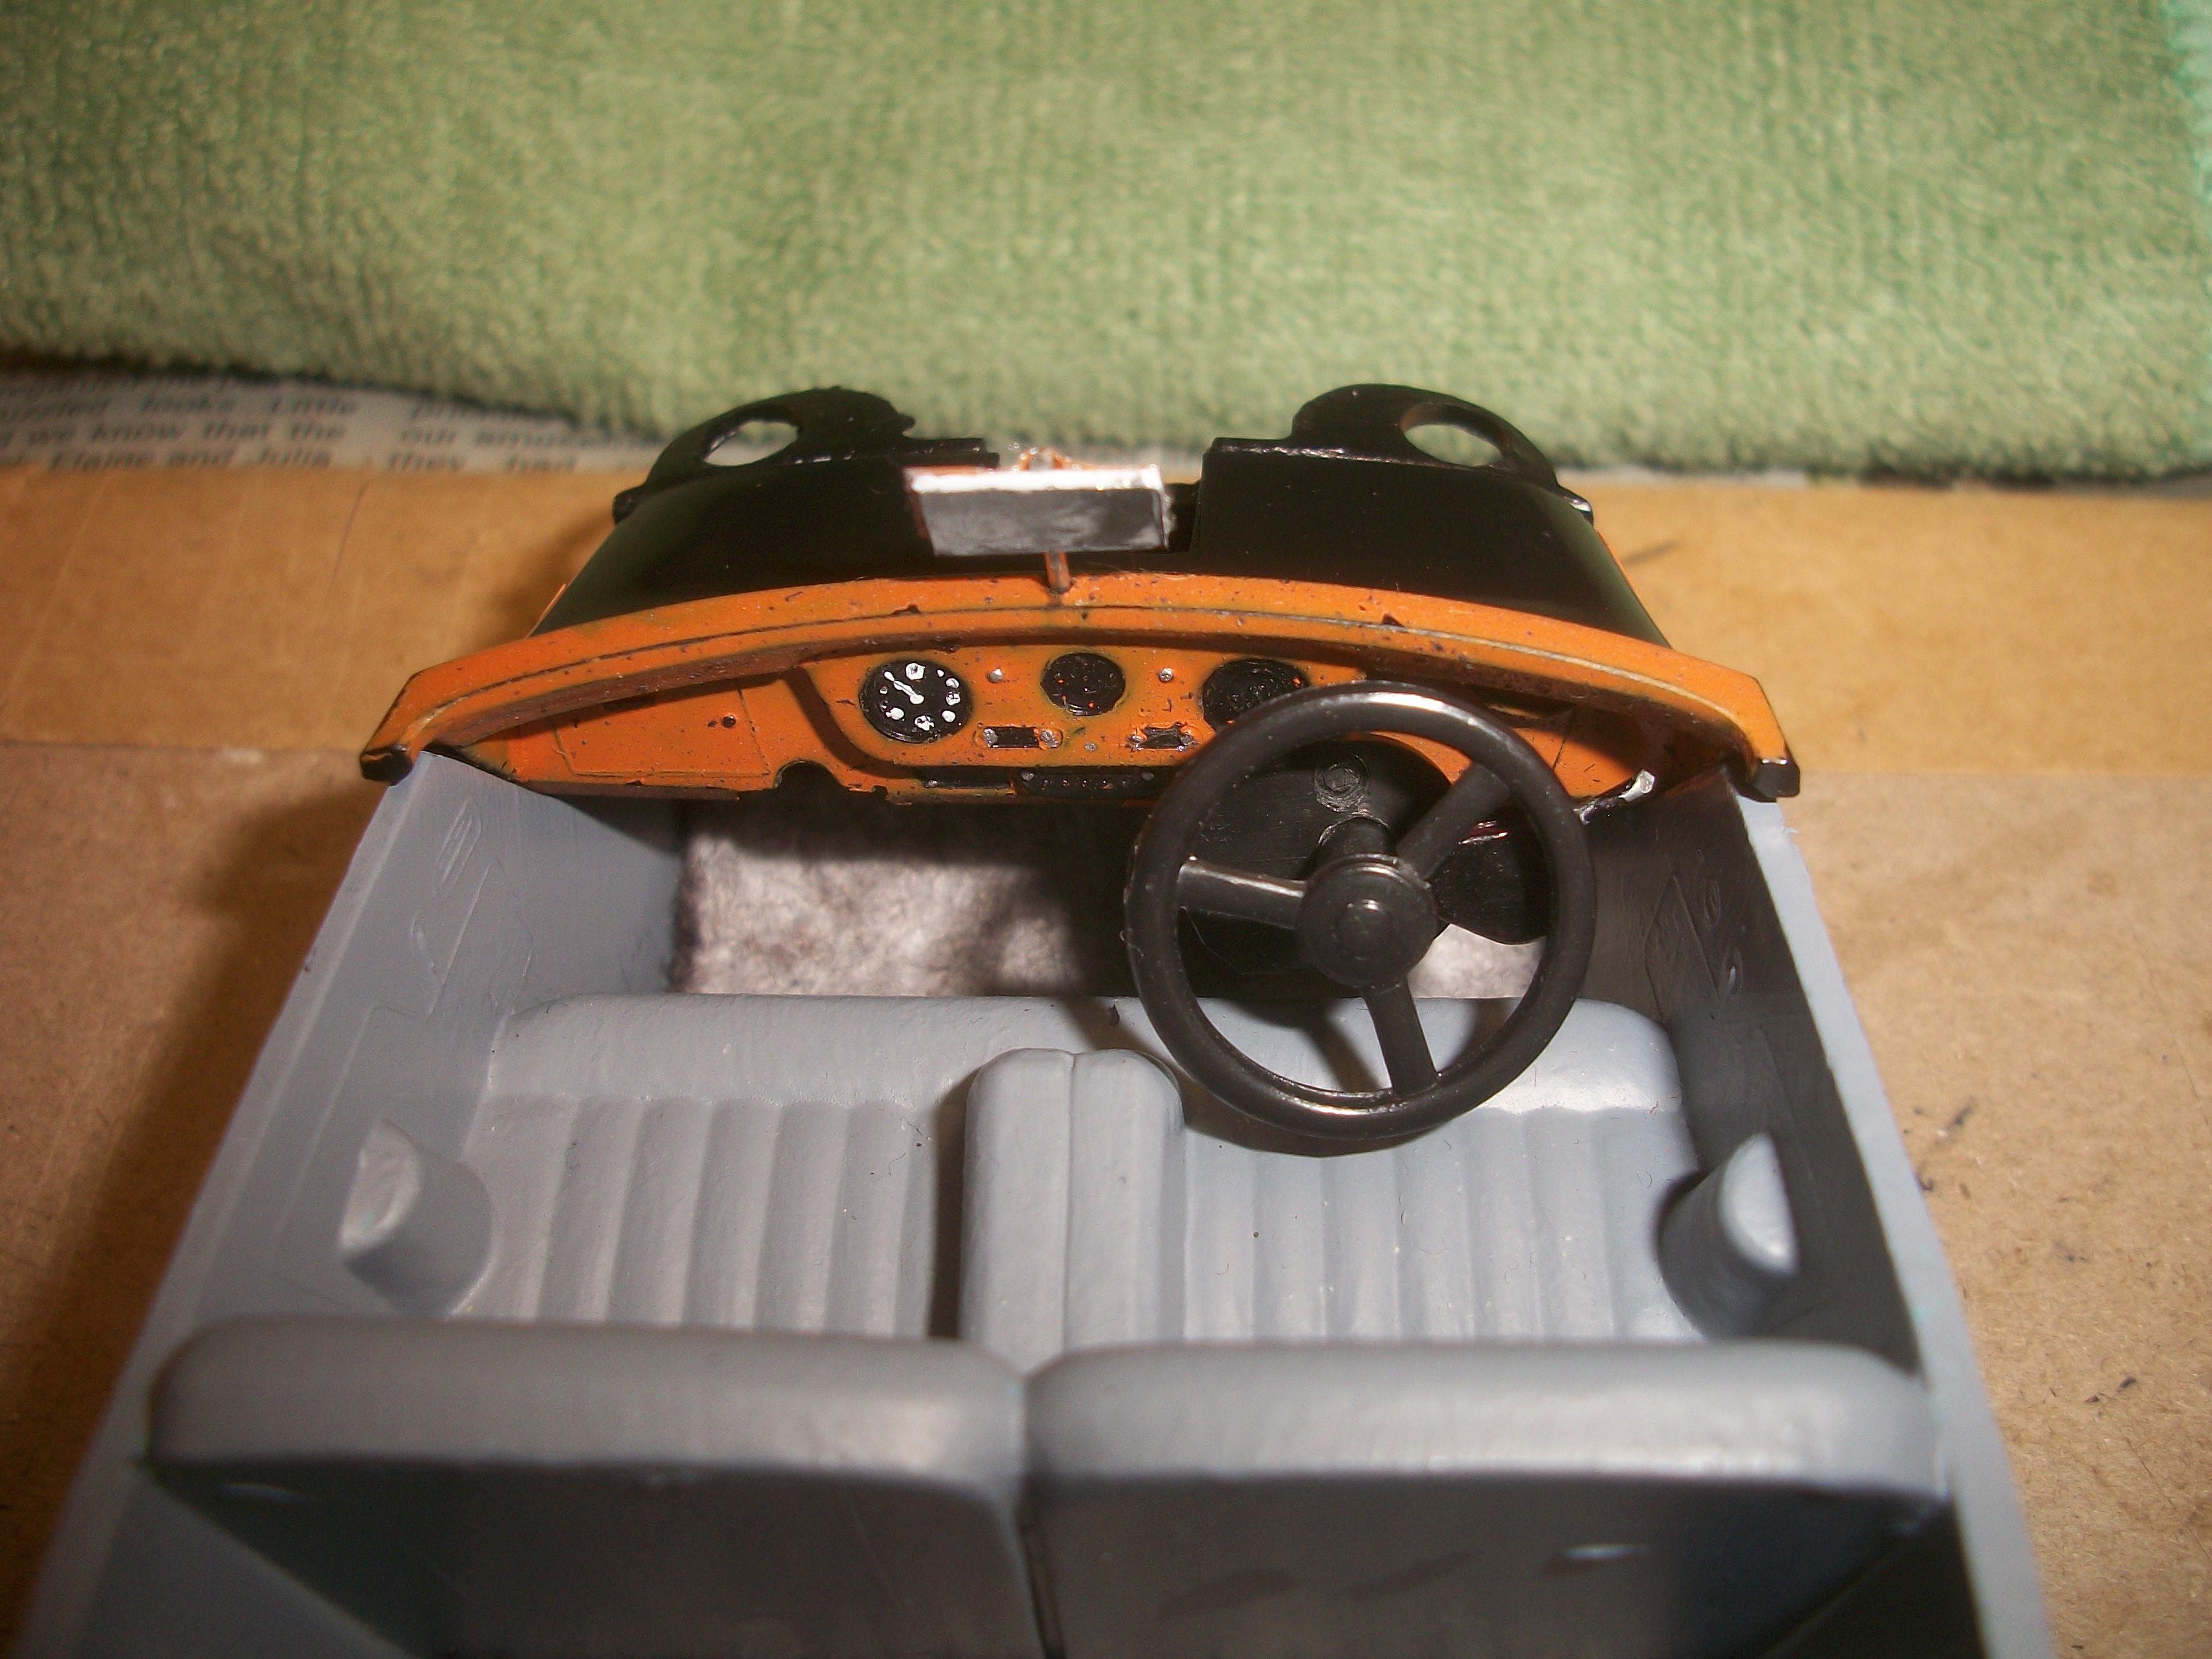
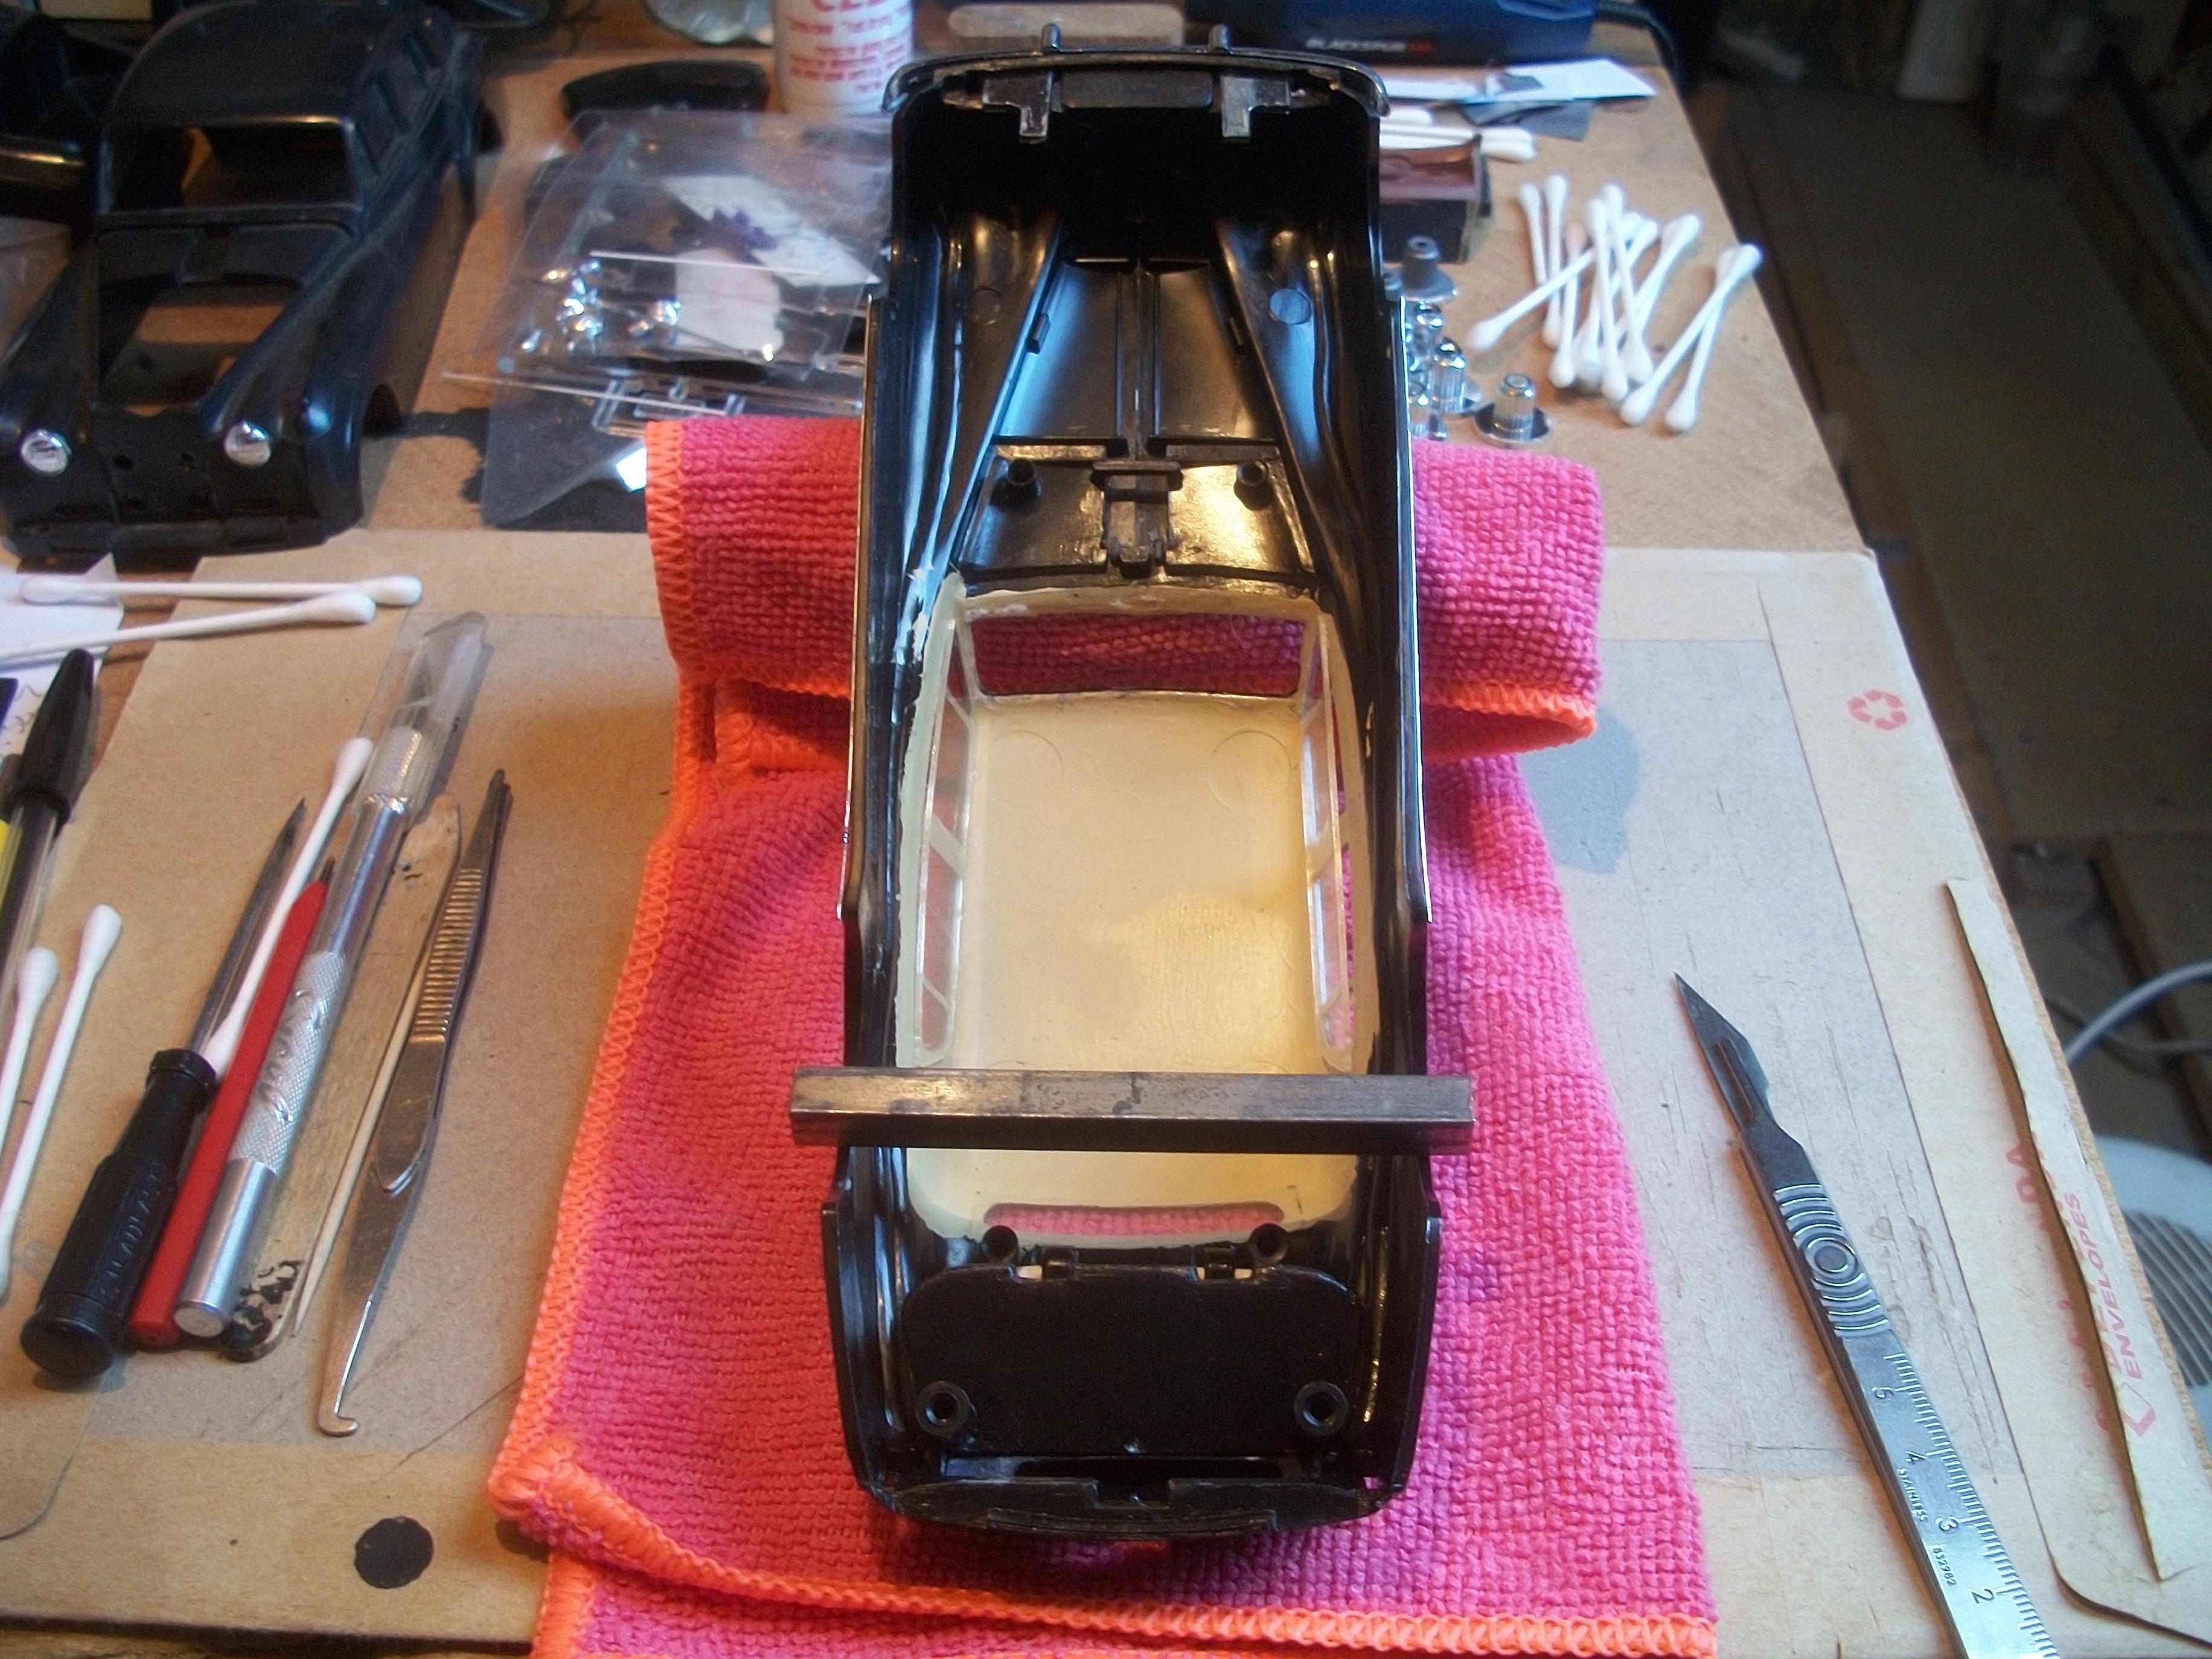
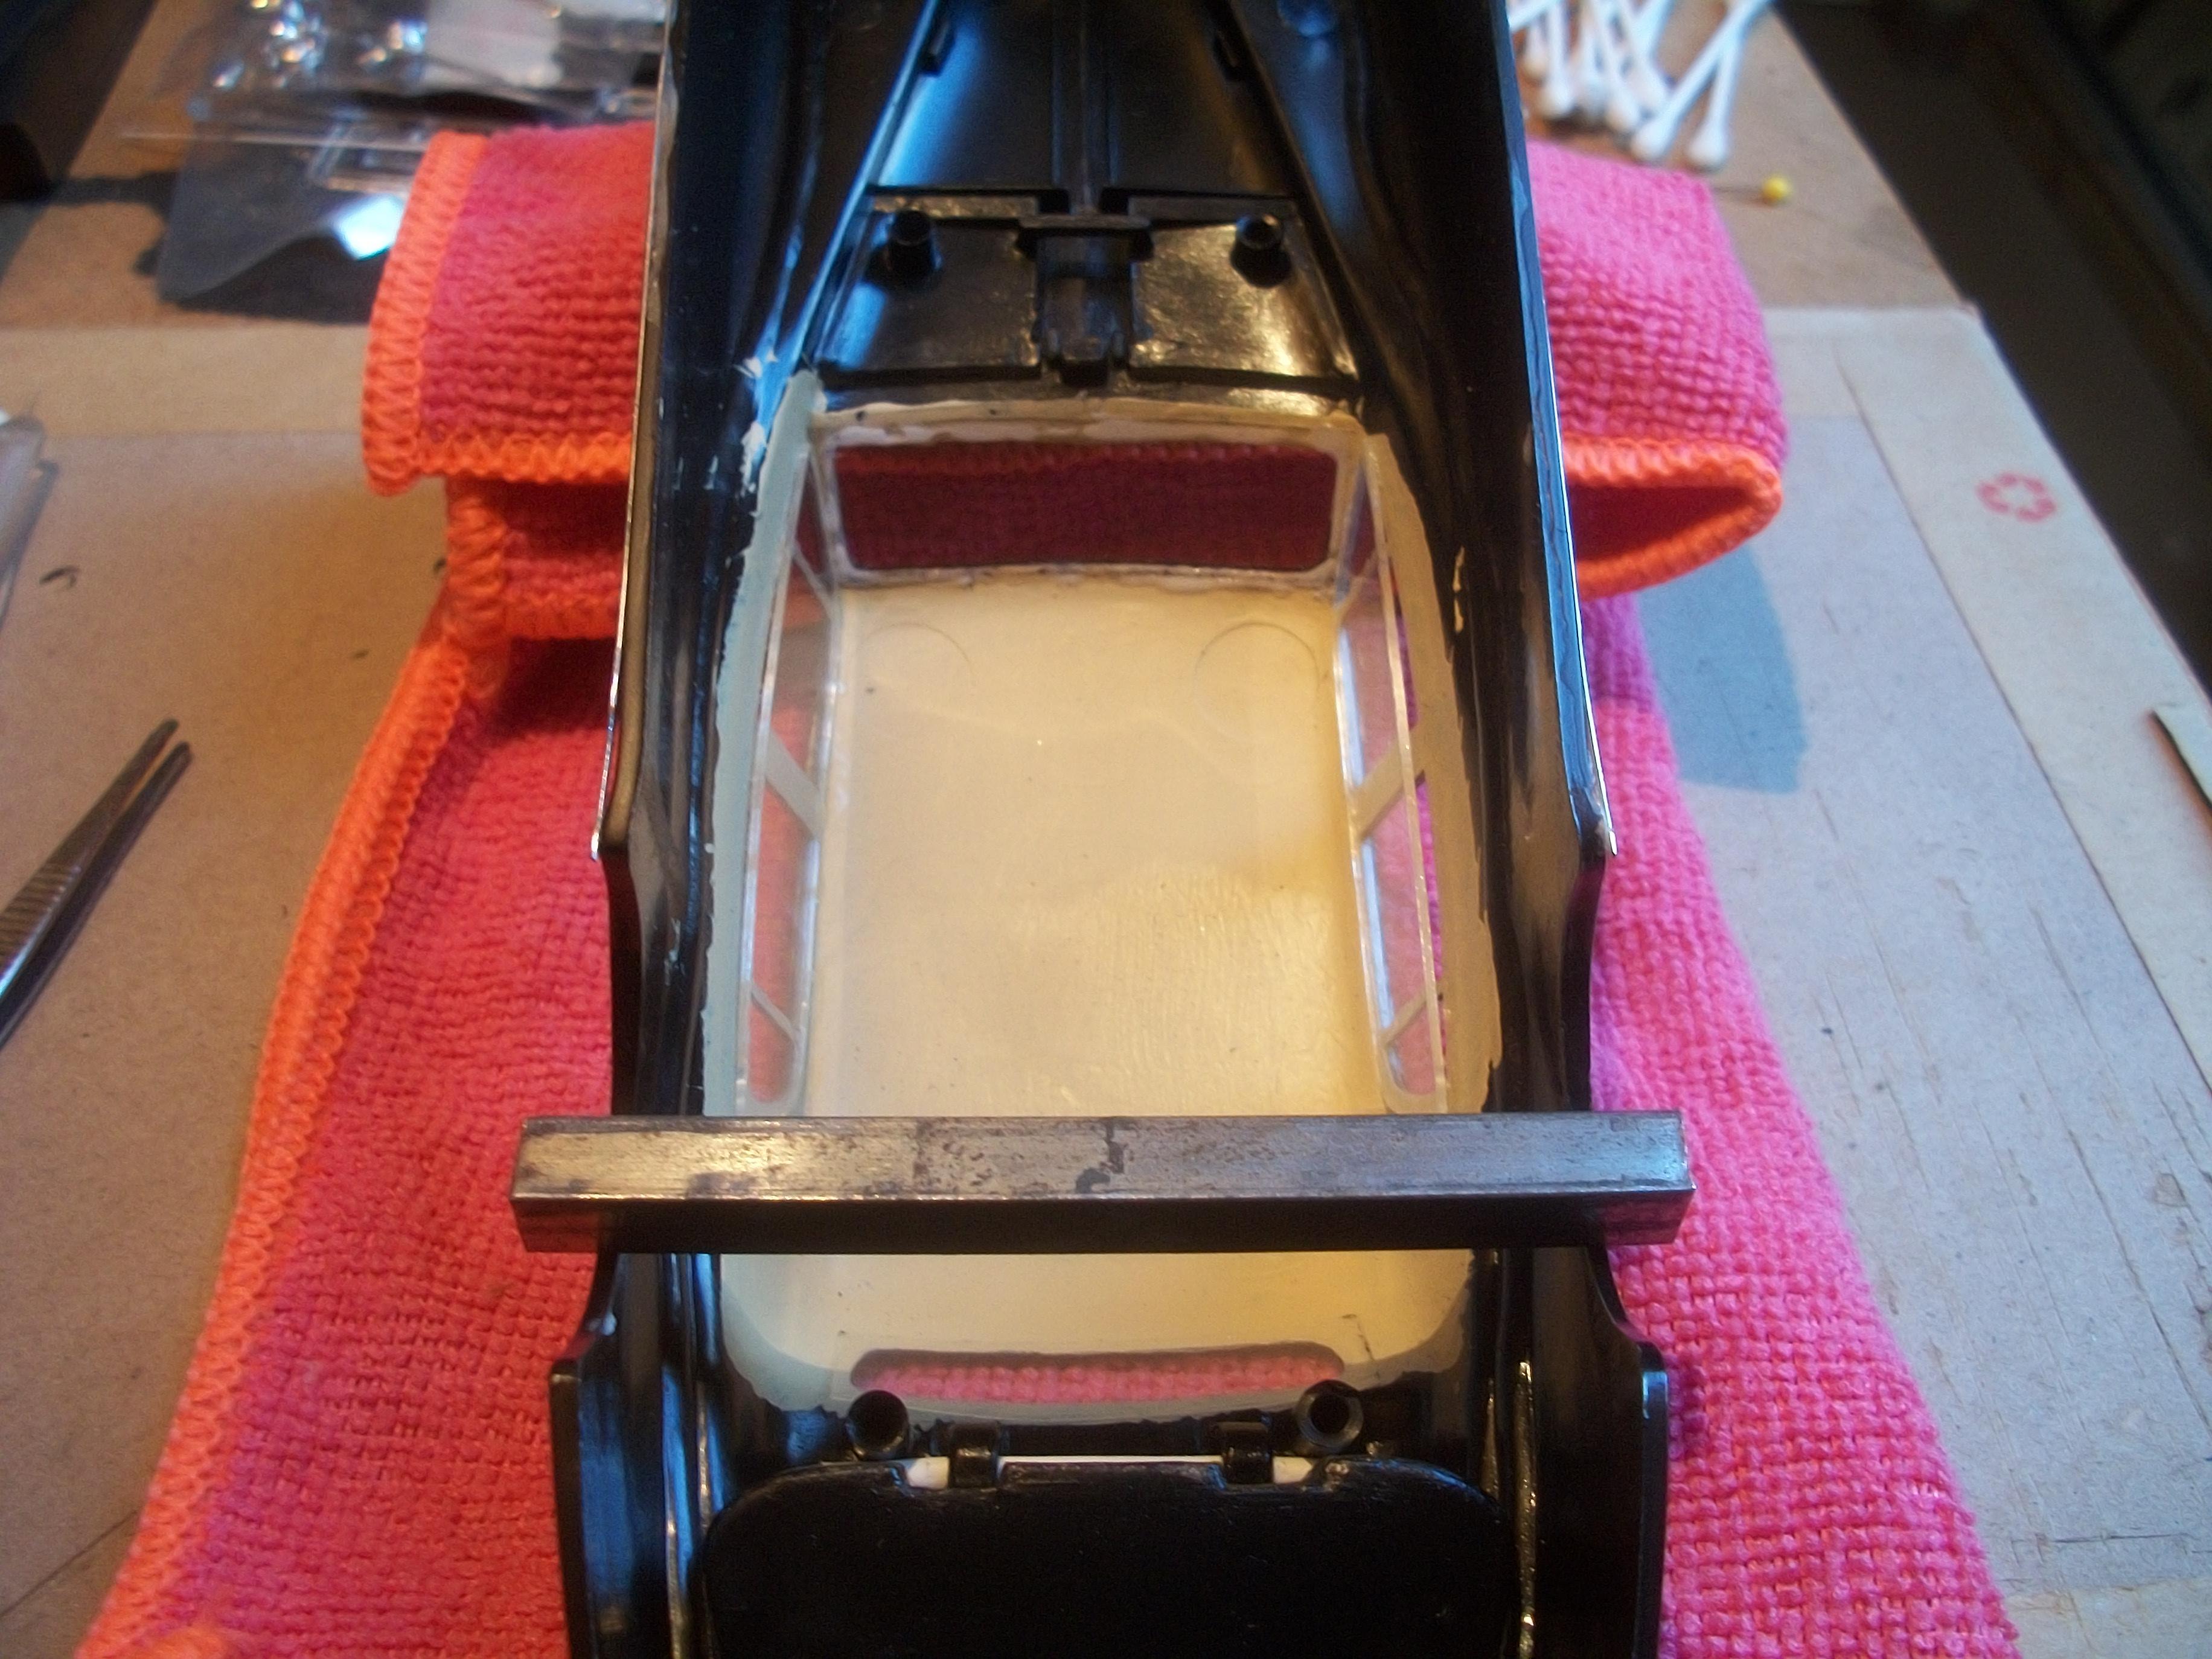
I agree that the detail is not great on the interior tub, but the fit is generally quite good. The dashboard does fit nicely into the front of the tub, and just needs some cutting away at the edges to clear the side windows glass . . . David -
Rolls-Royce No Chemicals, No Paint, No Harmful Glues
Anglia105E replied to Anglia105E's topic in WIP: Model Cars
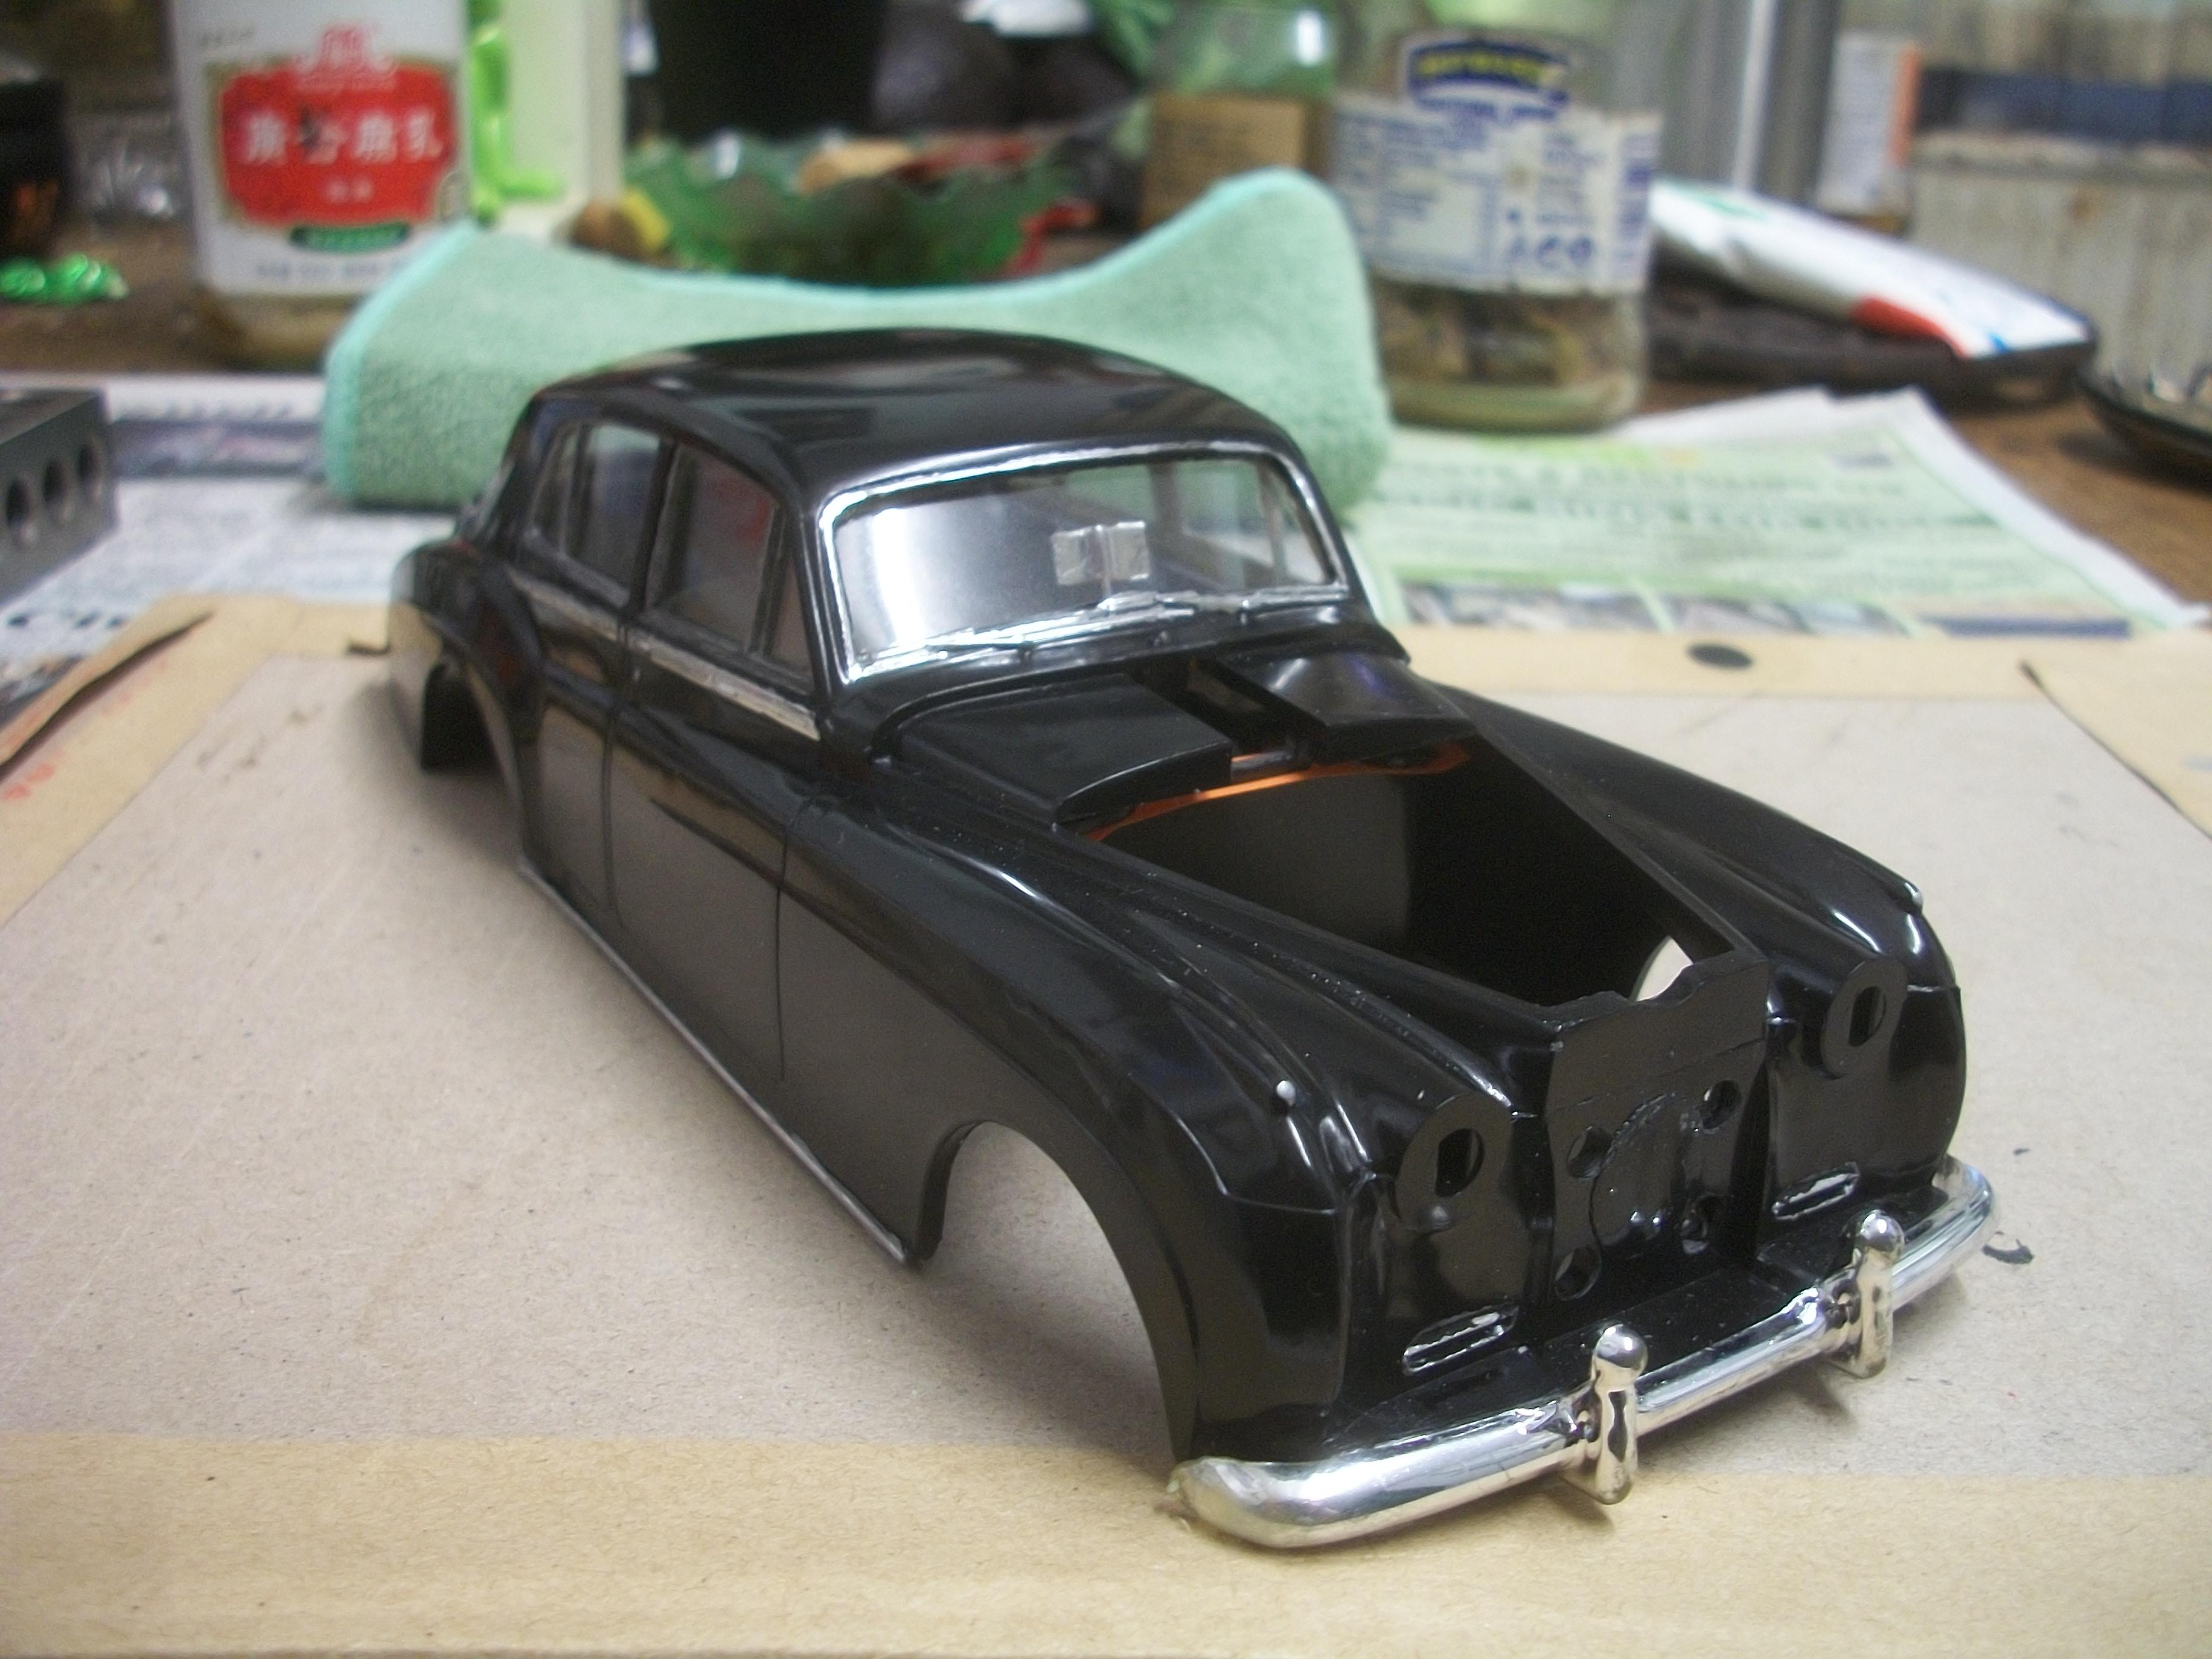
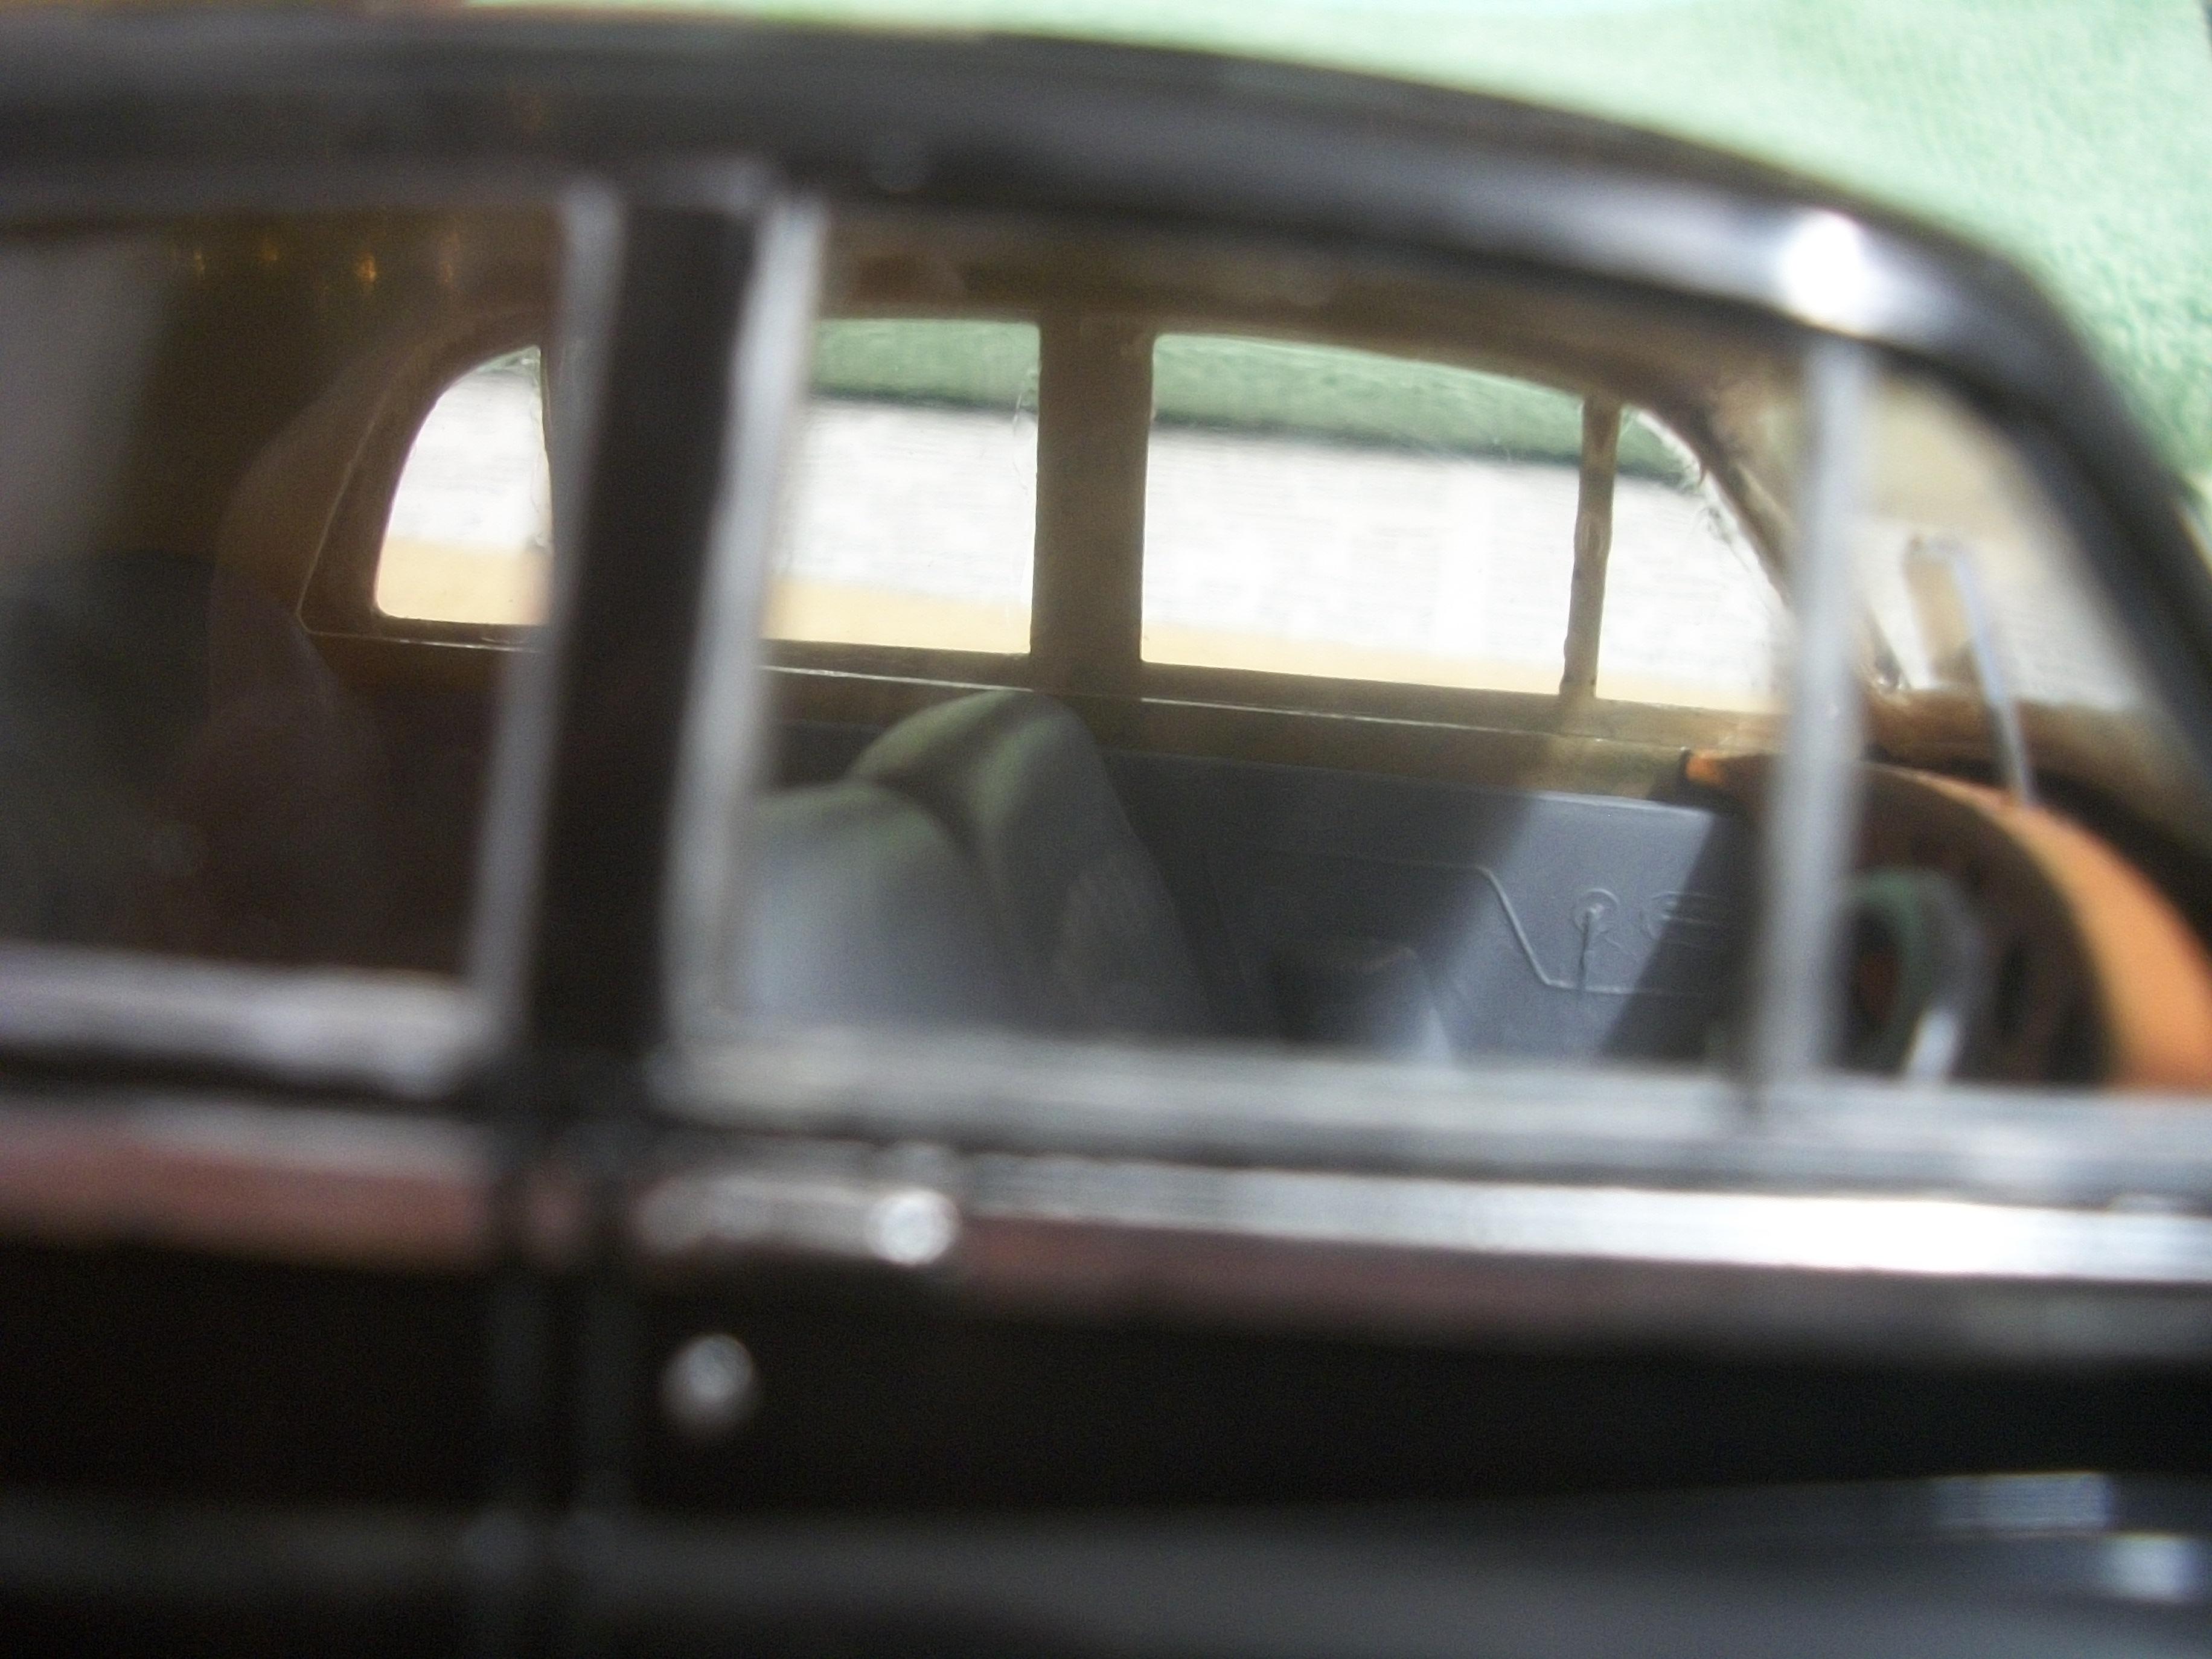
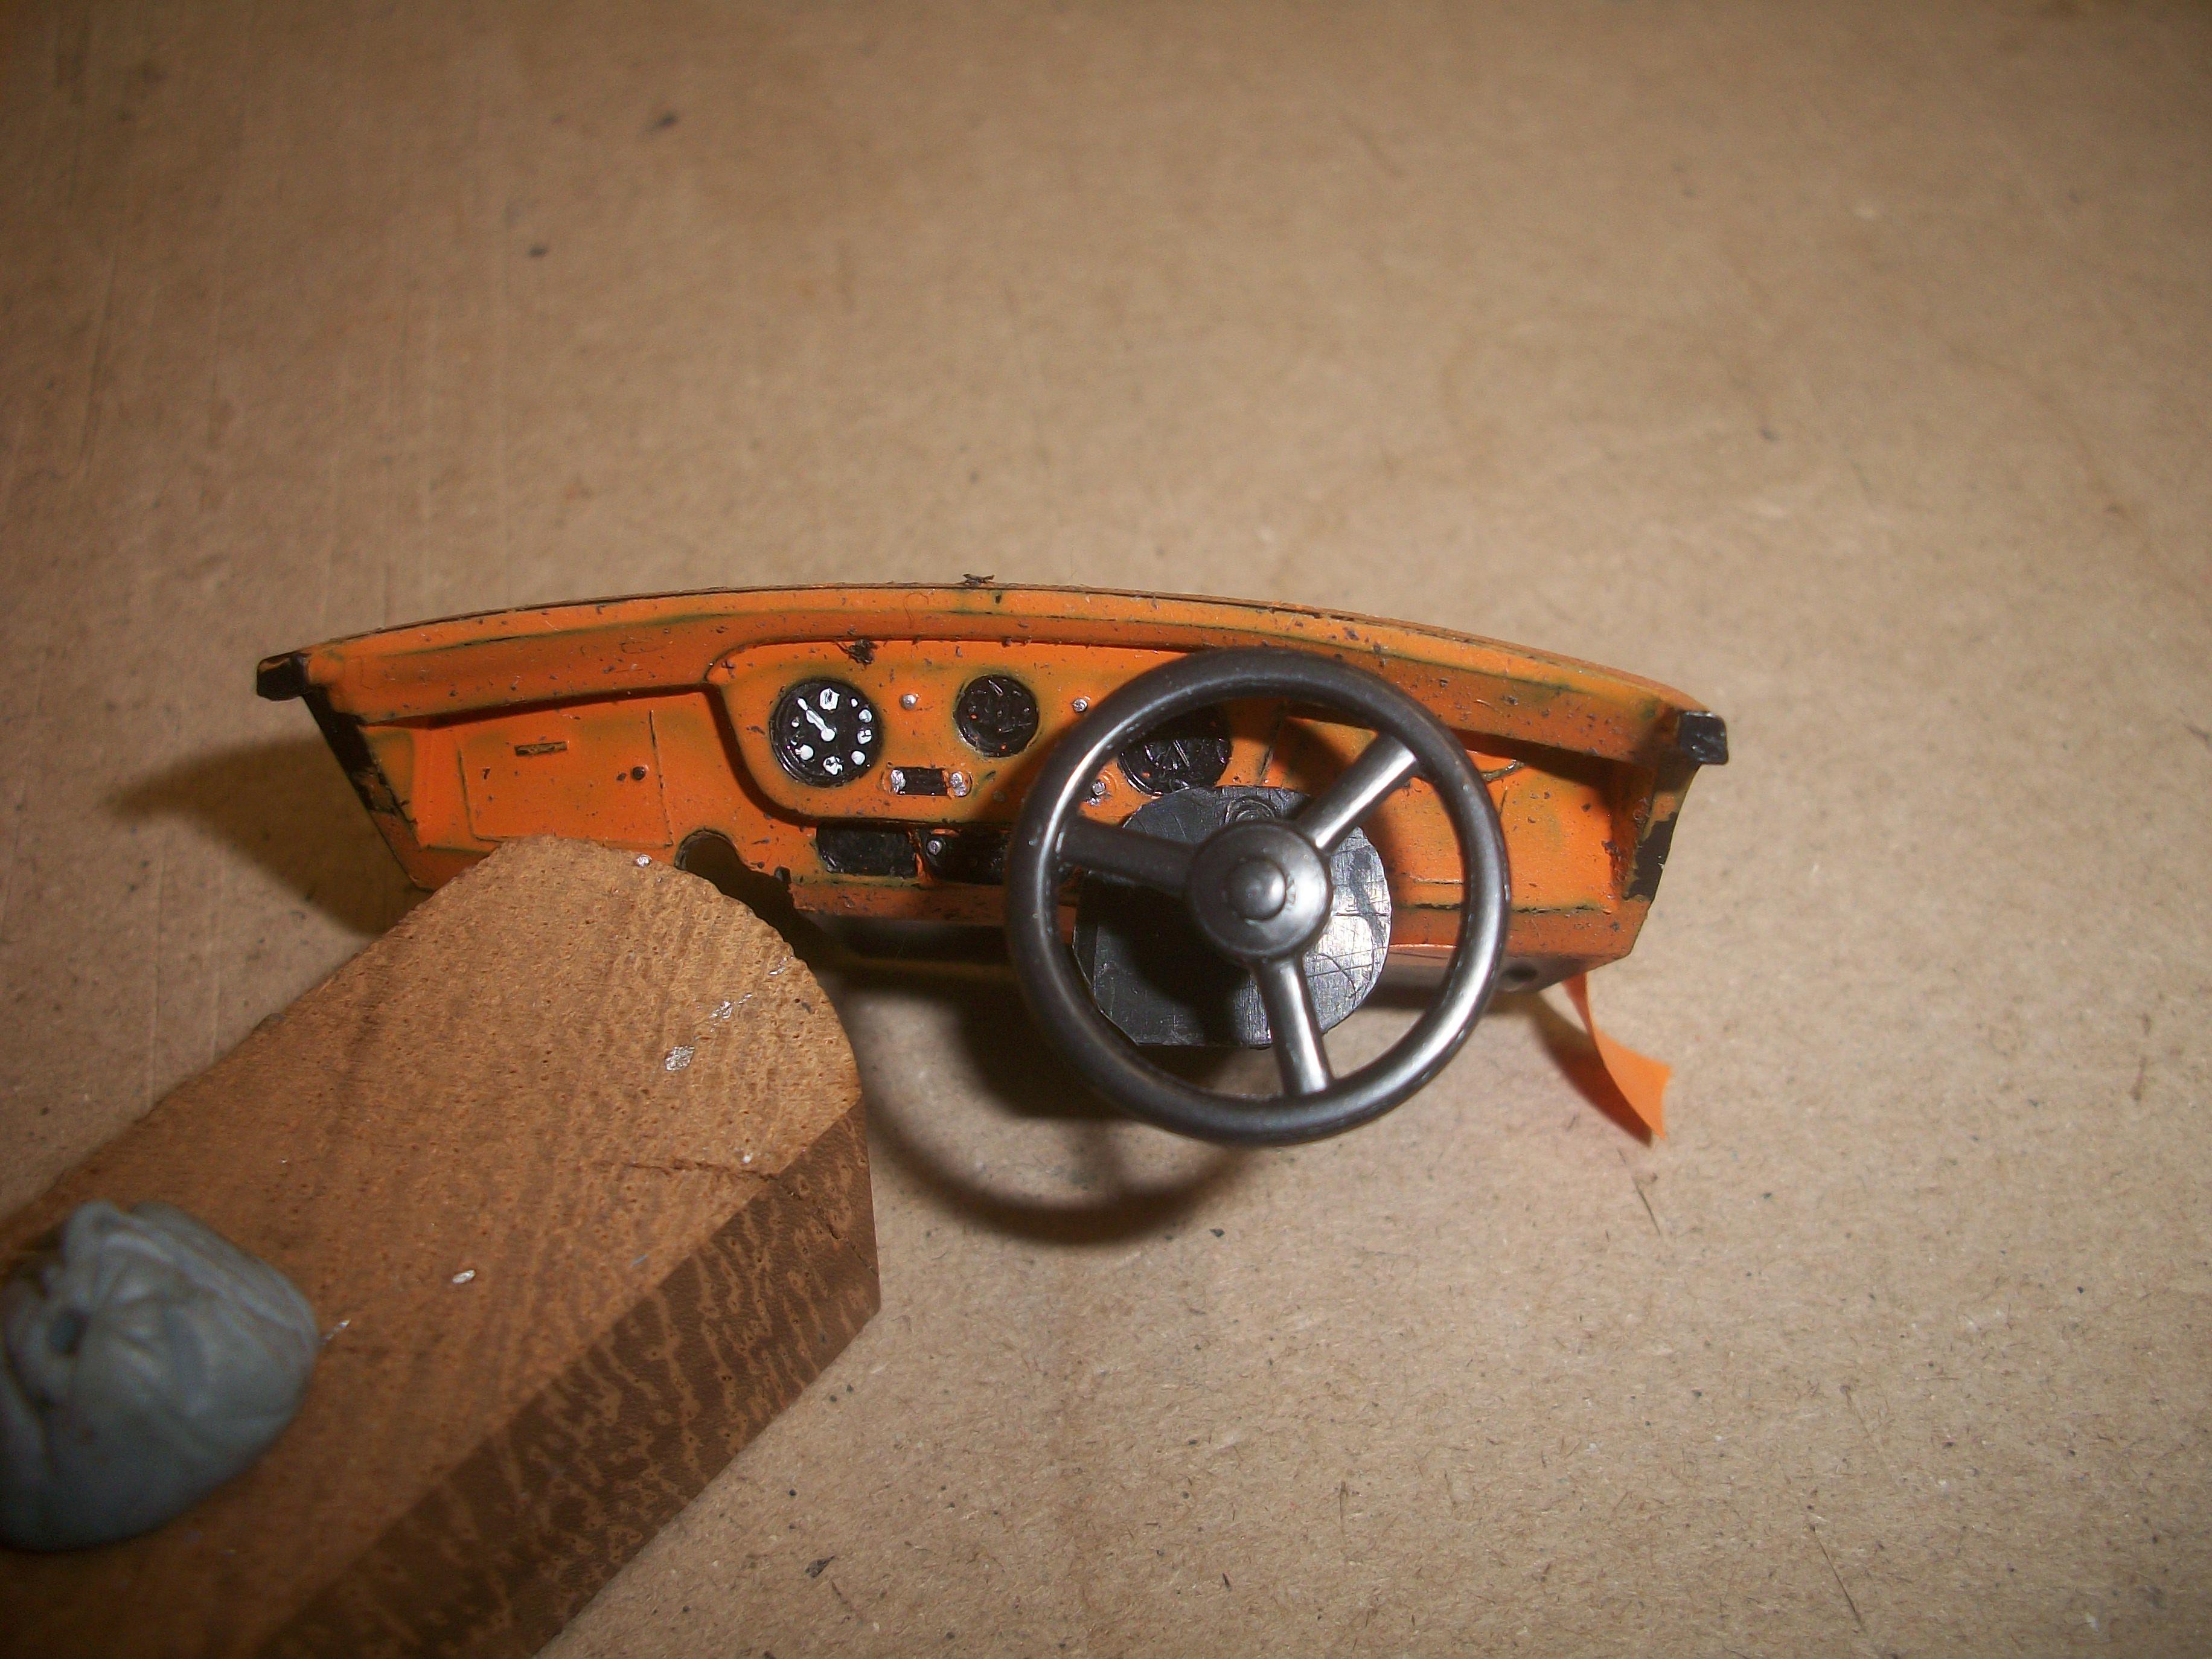
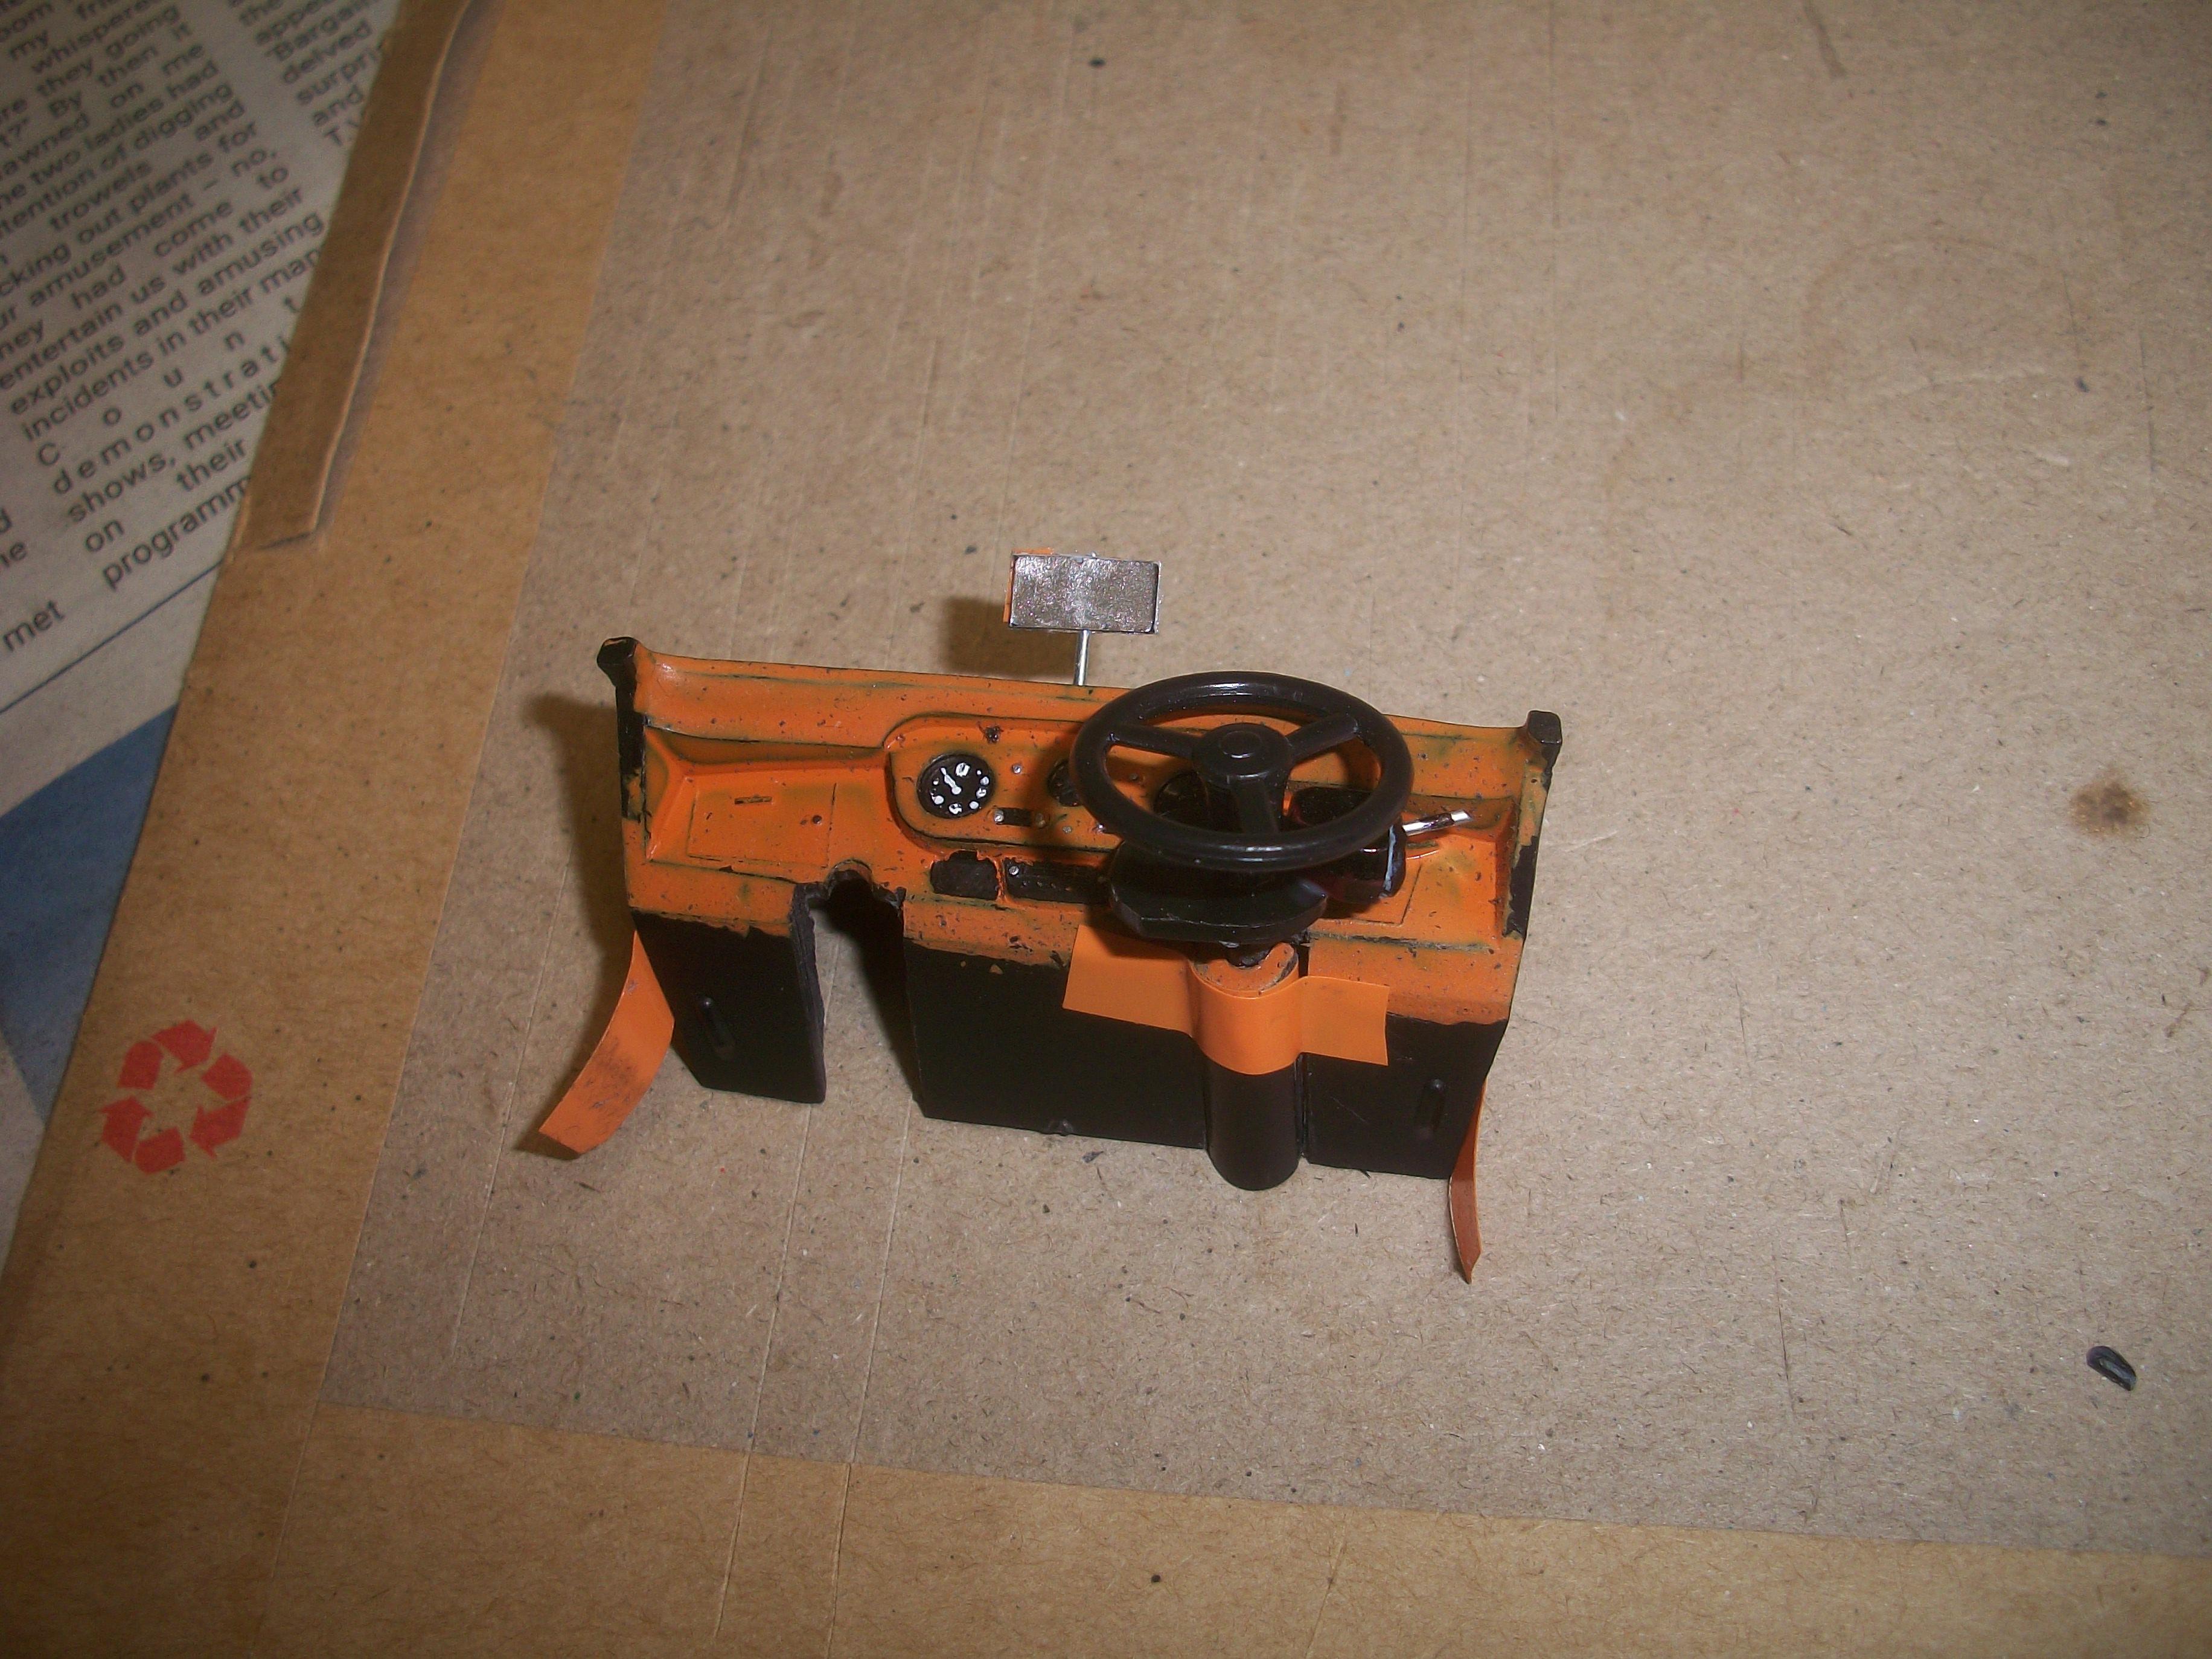
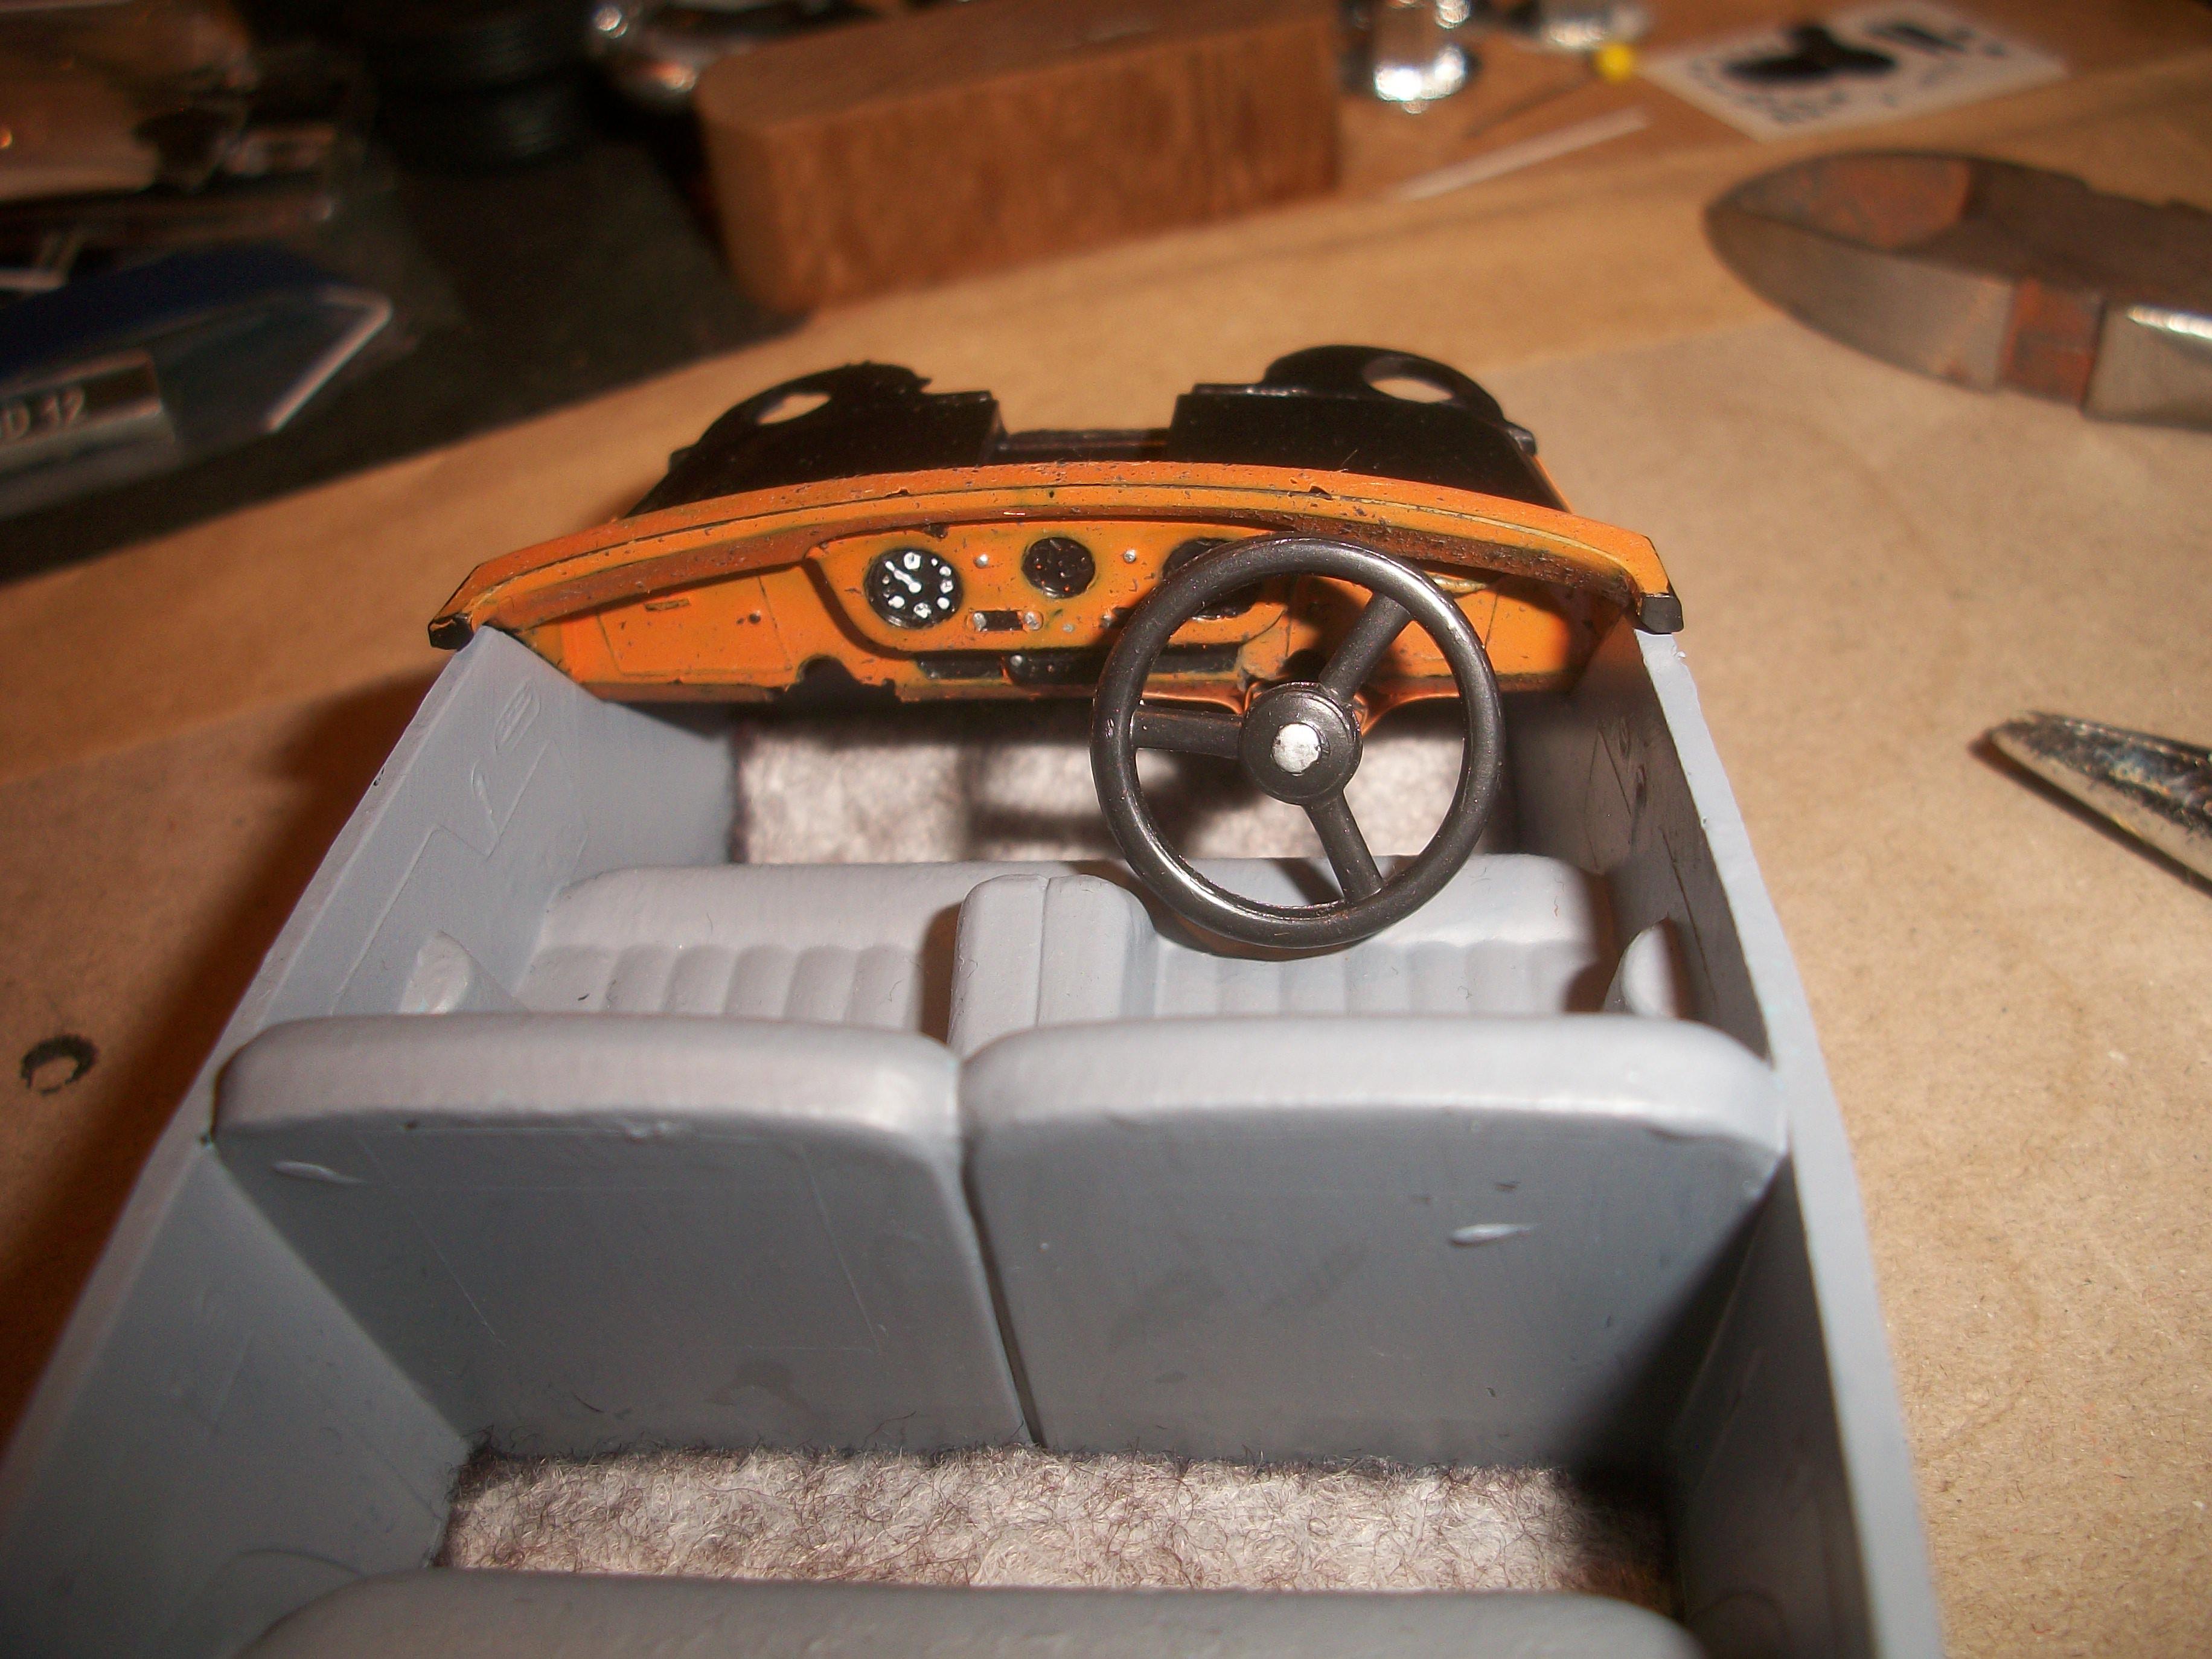
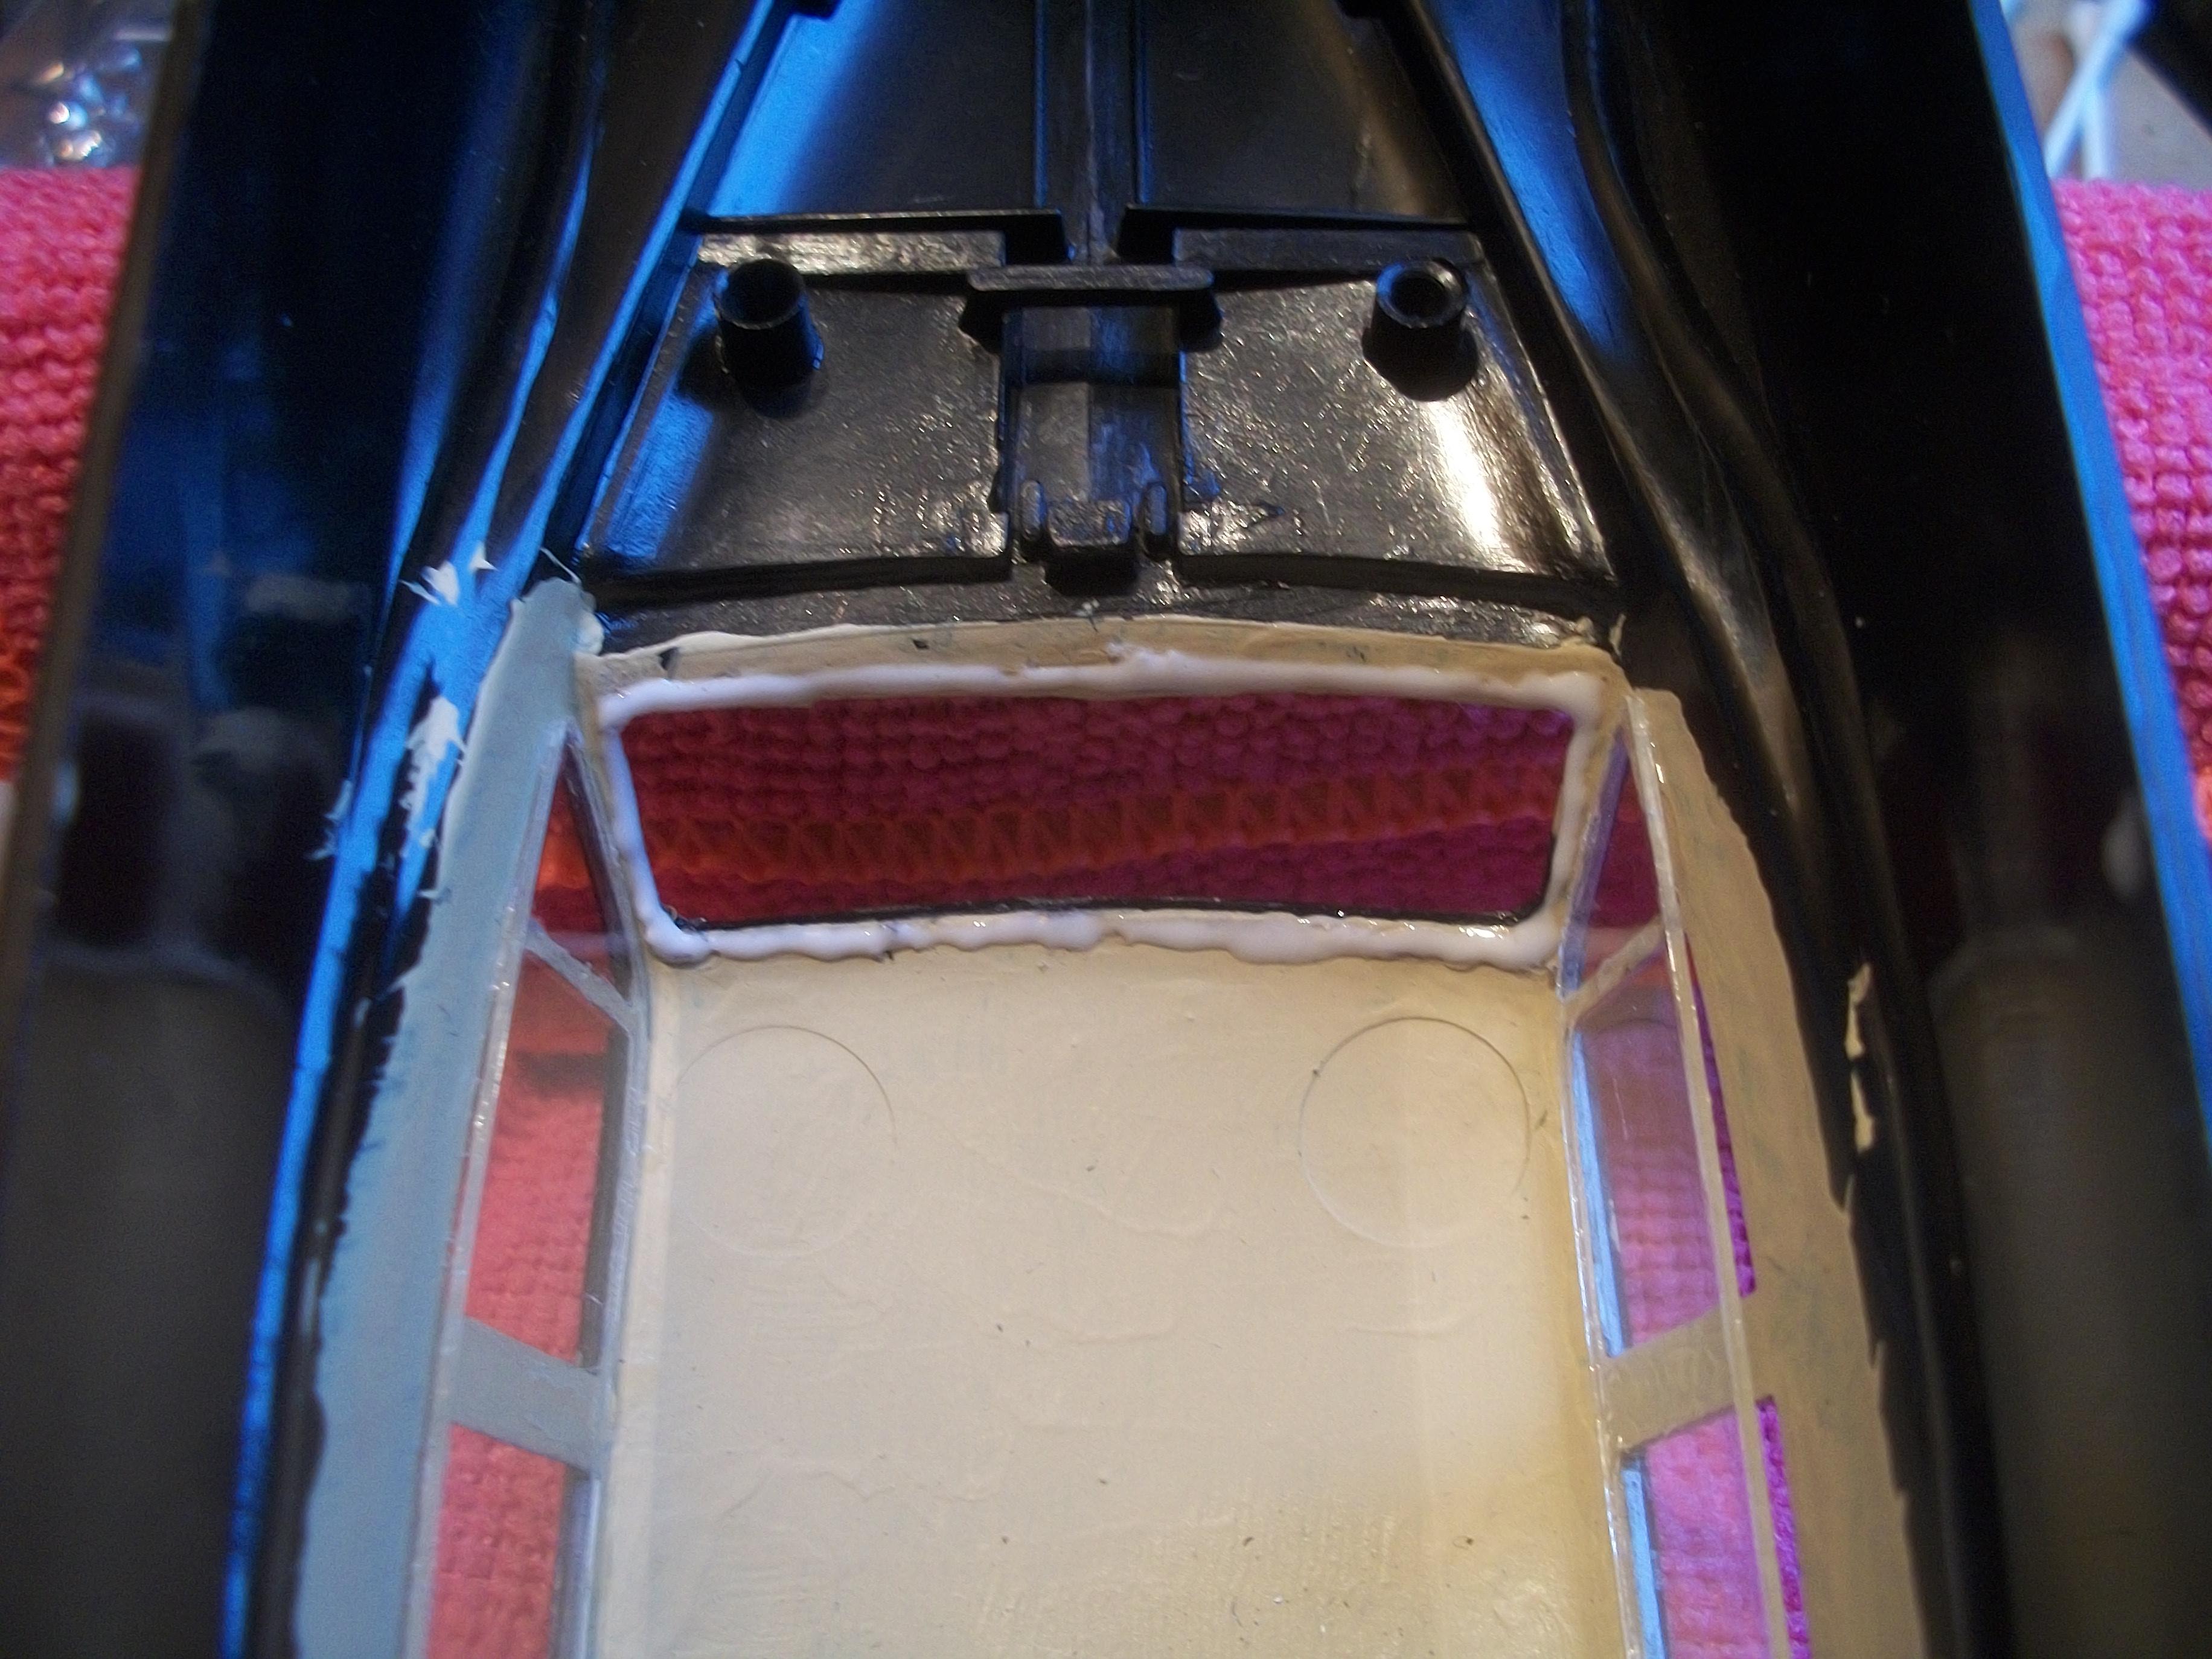
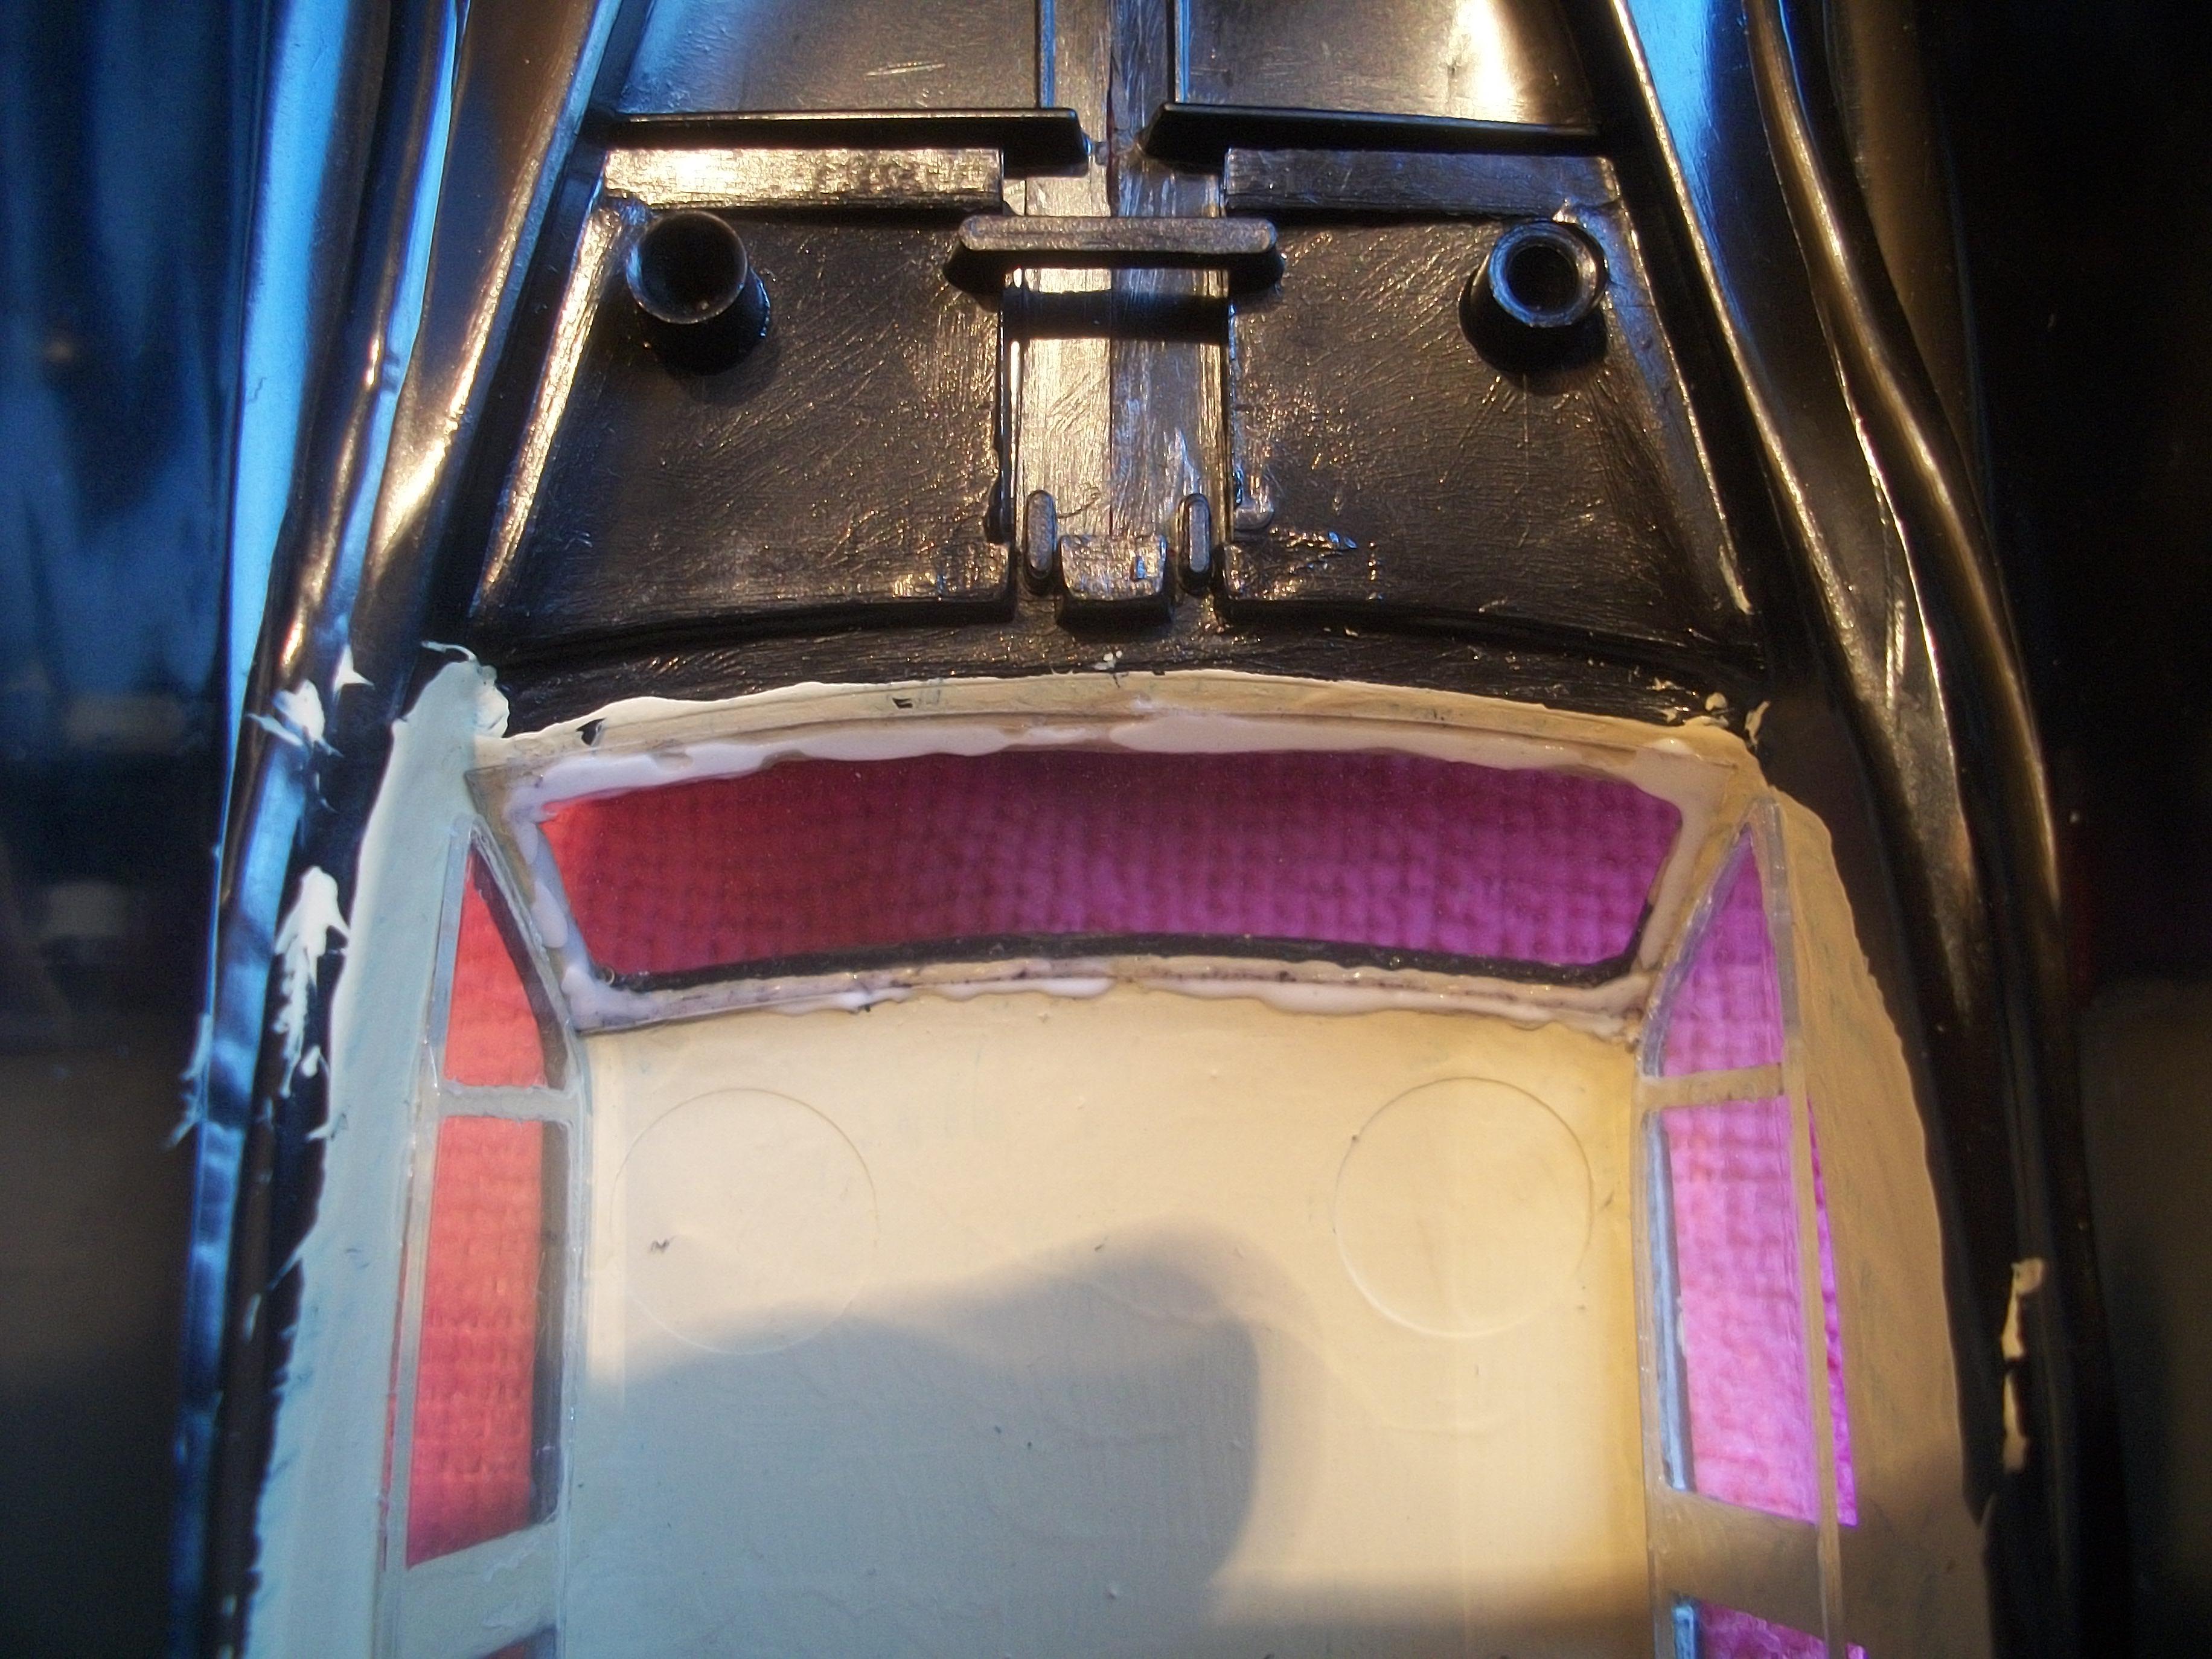
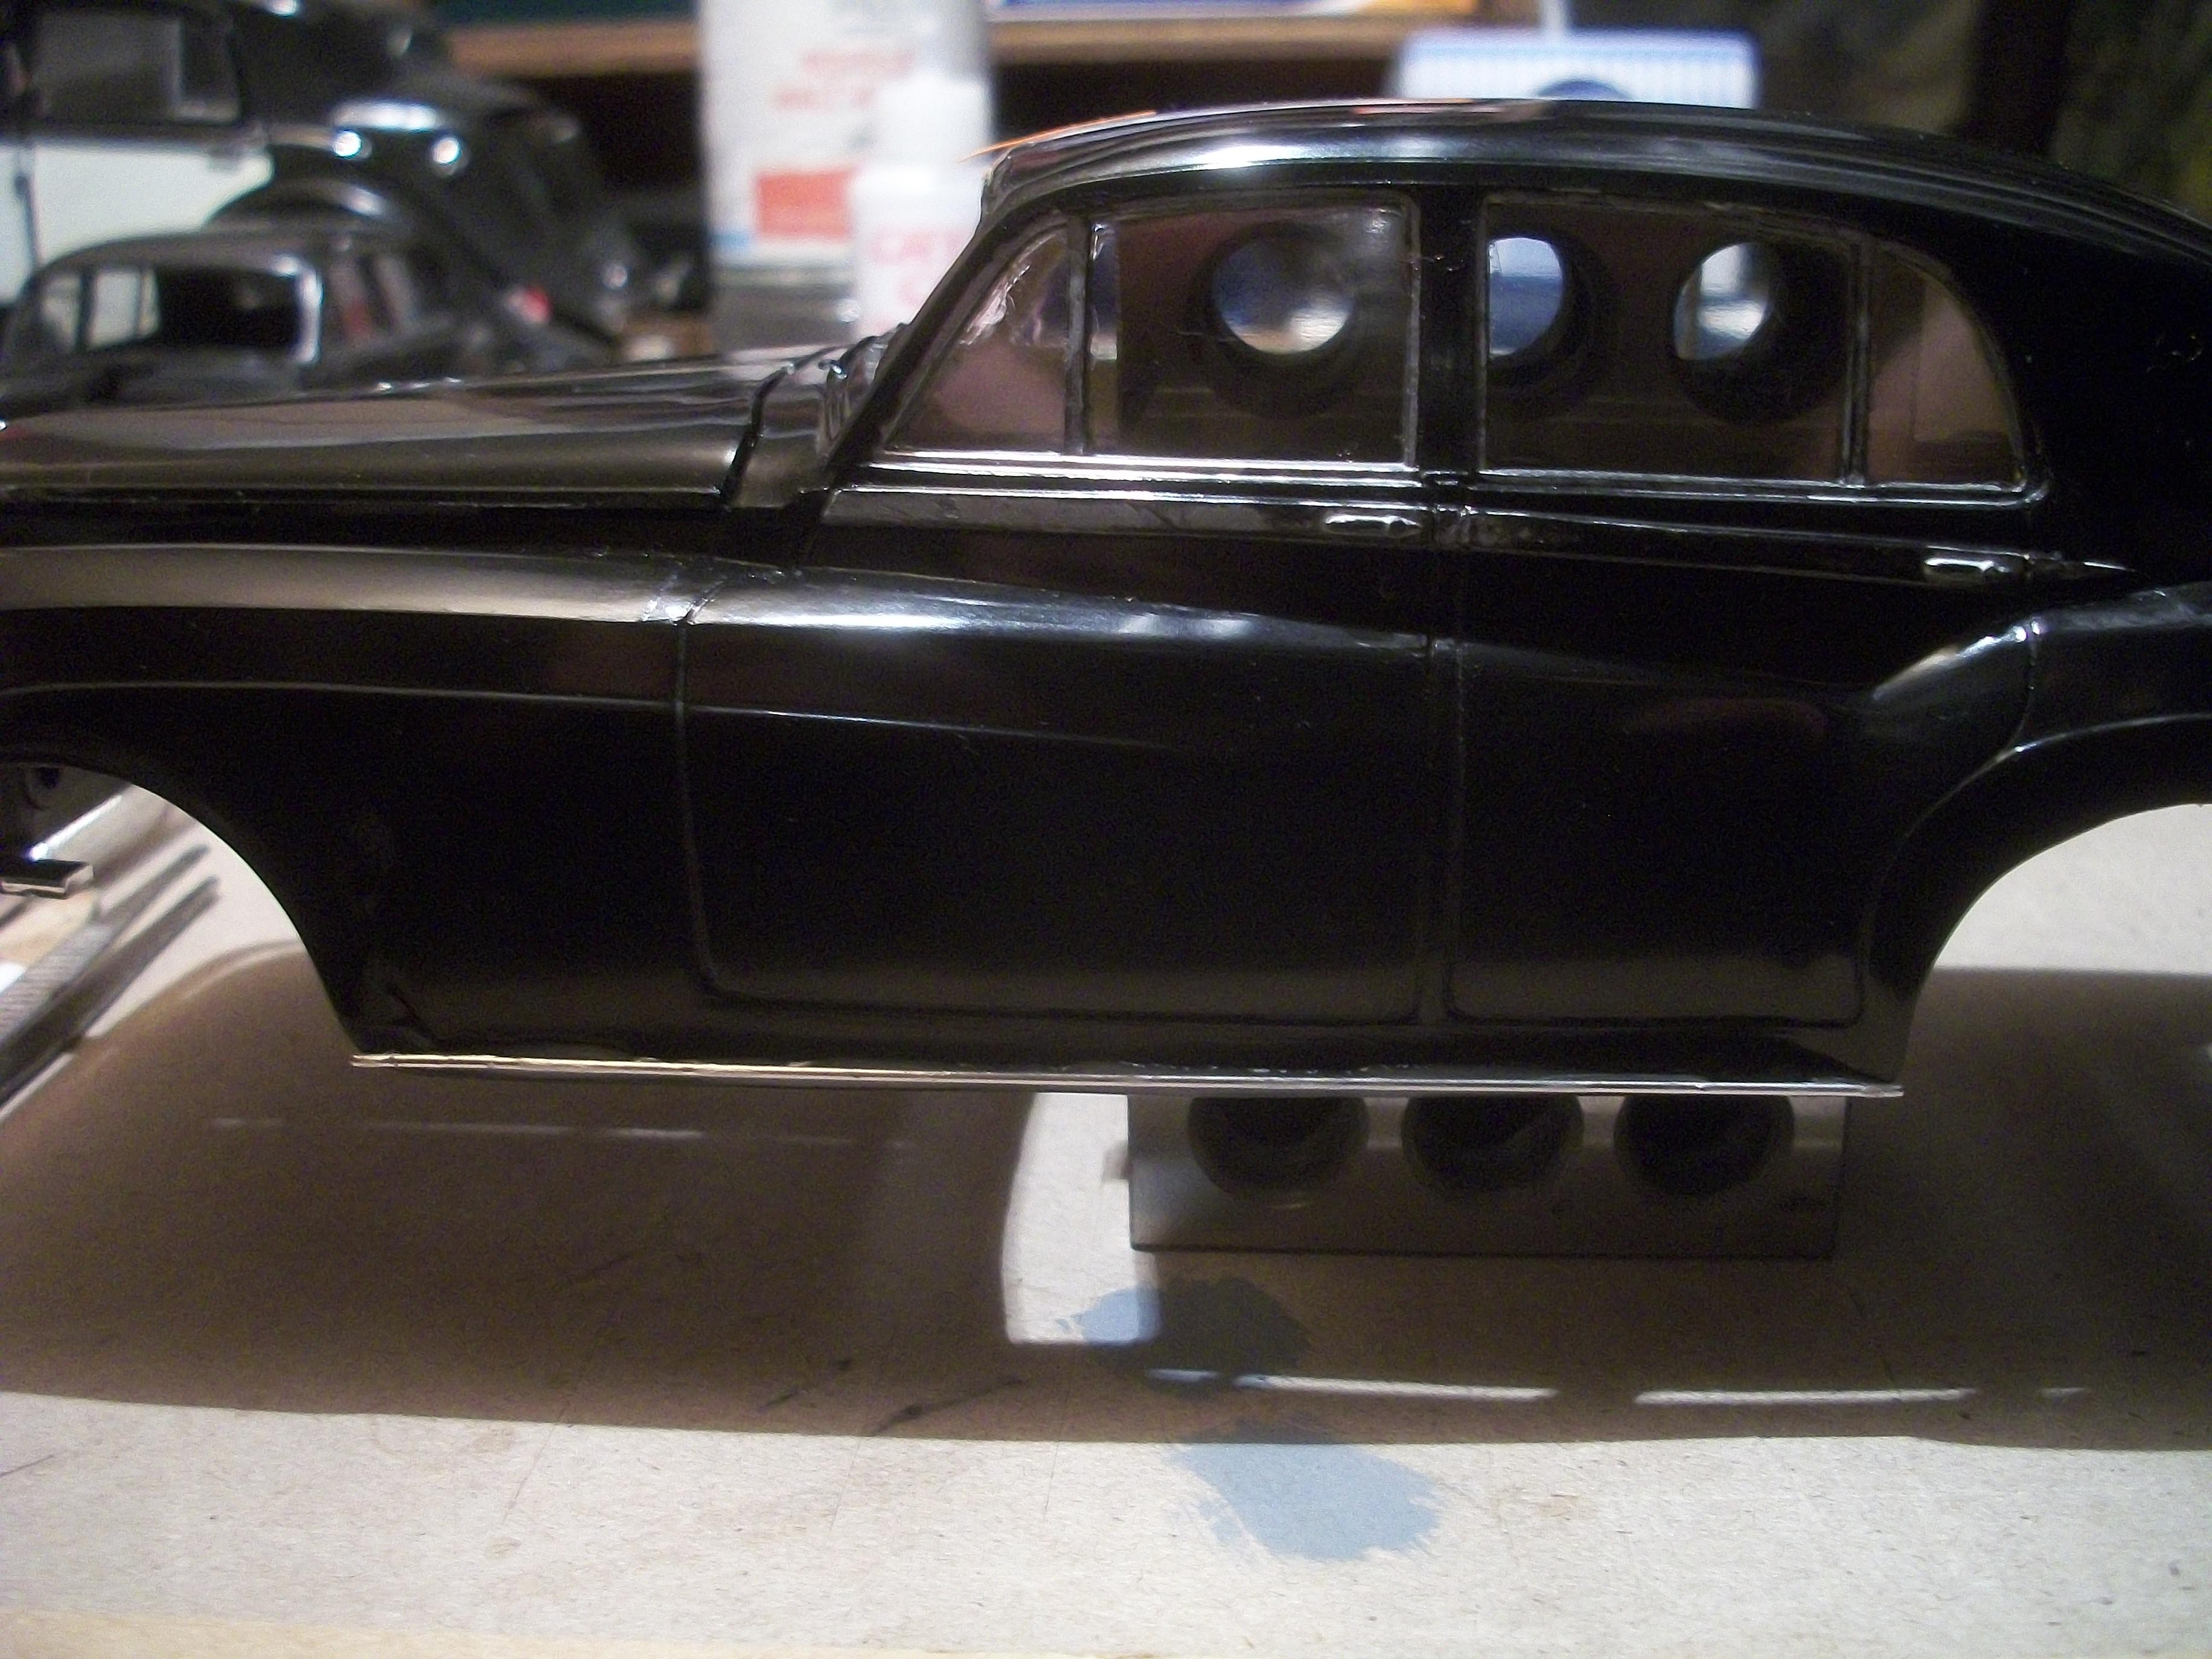
Okay, so the dashboard assembly looks pretty good when test fitted to the interior seating tub, and I noticed that the horn button in the centre of the steering wheel needs to be chromed . . . The interior mirror on top of the dashboard does not touch the windscreen, which is a good thing. There's not a great deal of the dashboard detail that can be seen through the driver's side door window, but I feel more satisfied knowing that the detail is there anyway. When lowering the body into place onto the chassis it became apparent that there is some sort of obstruction that prevents the body from sitting correctly. Placing the camera lens against the door glass and taking a close up photo showed the issue. The last photo in the following set shows how the ends of the dashboard are pressed up under the side glass part. This means it is not the interior tub that is causing the obstruction, but actually the dashboard ends. This brings back the memory of how I dealt with this problem with previous Silver Cloud builds. The end section of the dashboard has to be cut away on both sides for the body to sit correctly . . . David
-
Rolls-Royce No Chemicals, No Paint, No Harmful Glues
Anglia105E replied to Anglia105E's topic in WIP: Model Cars
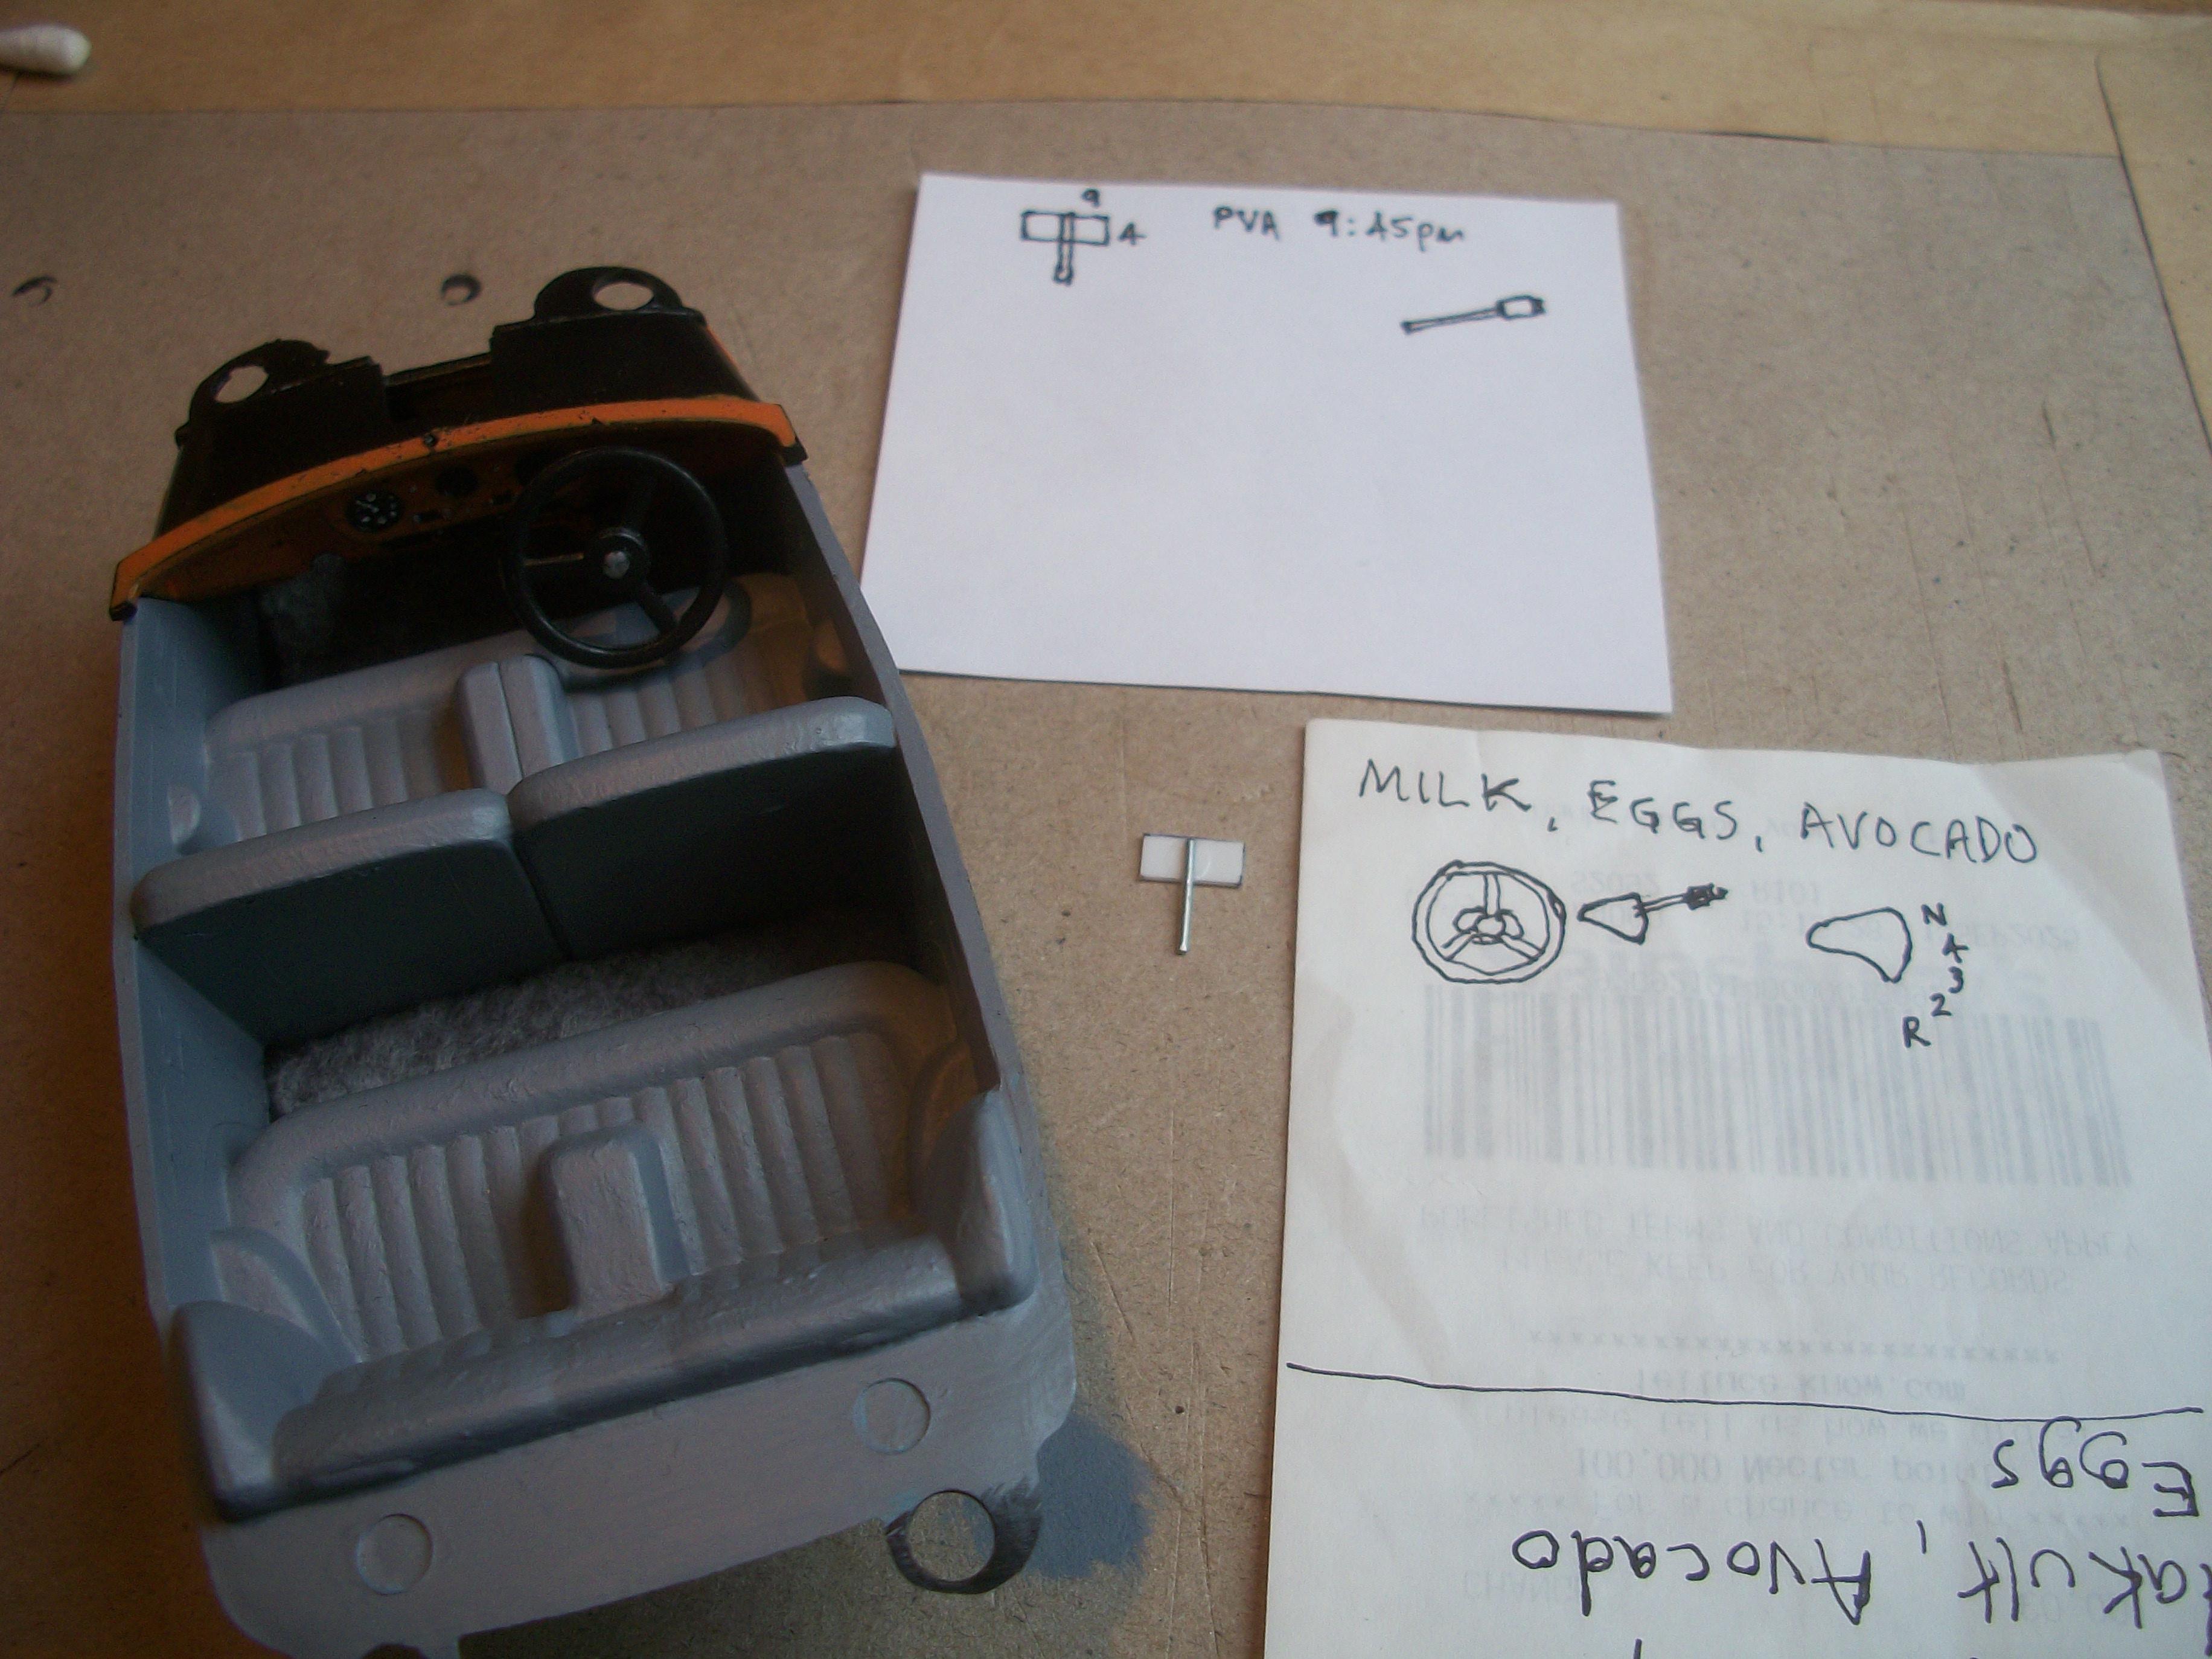
Oh I see, Jose . . . " Milk, Eggs, Avocado " . . . Yes, I made the sketch drawing on a shopping list note paper ! David -
Rolls-Royce No Chemicals, No Paint, No Harmful Glues
Anglia105E replied to Anglia105E's topic in WIP: Model Cars
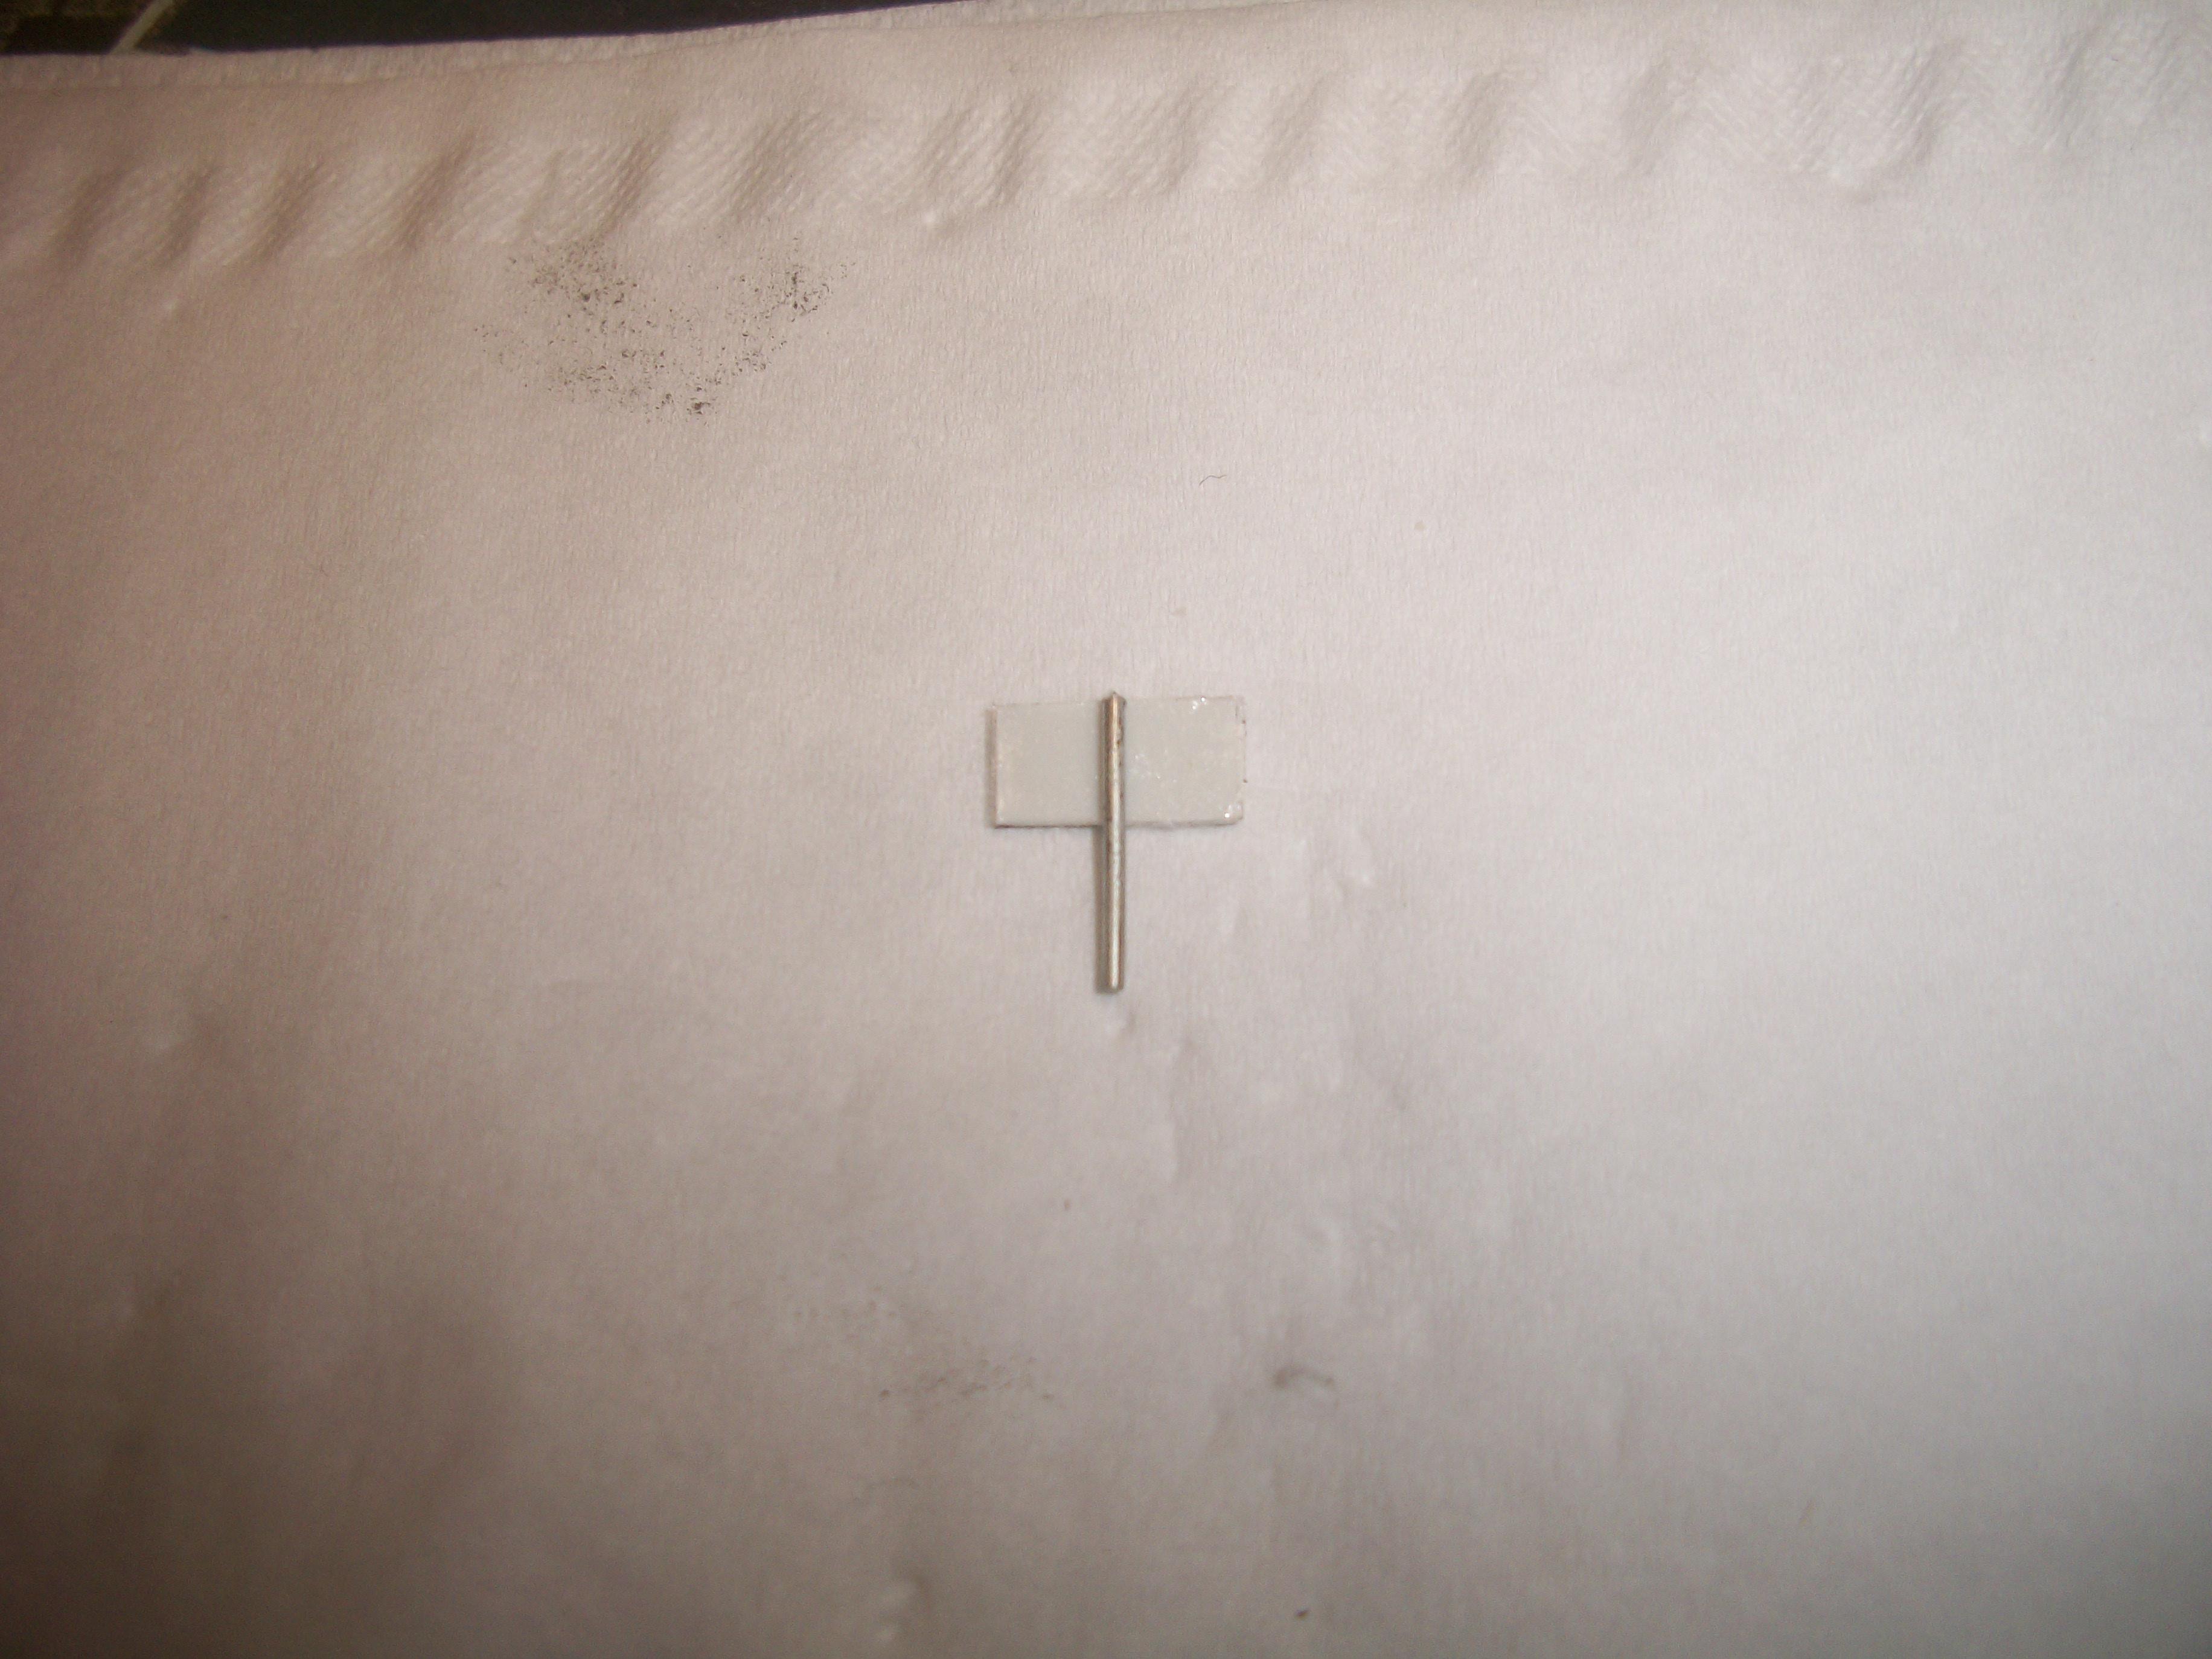
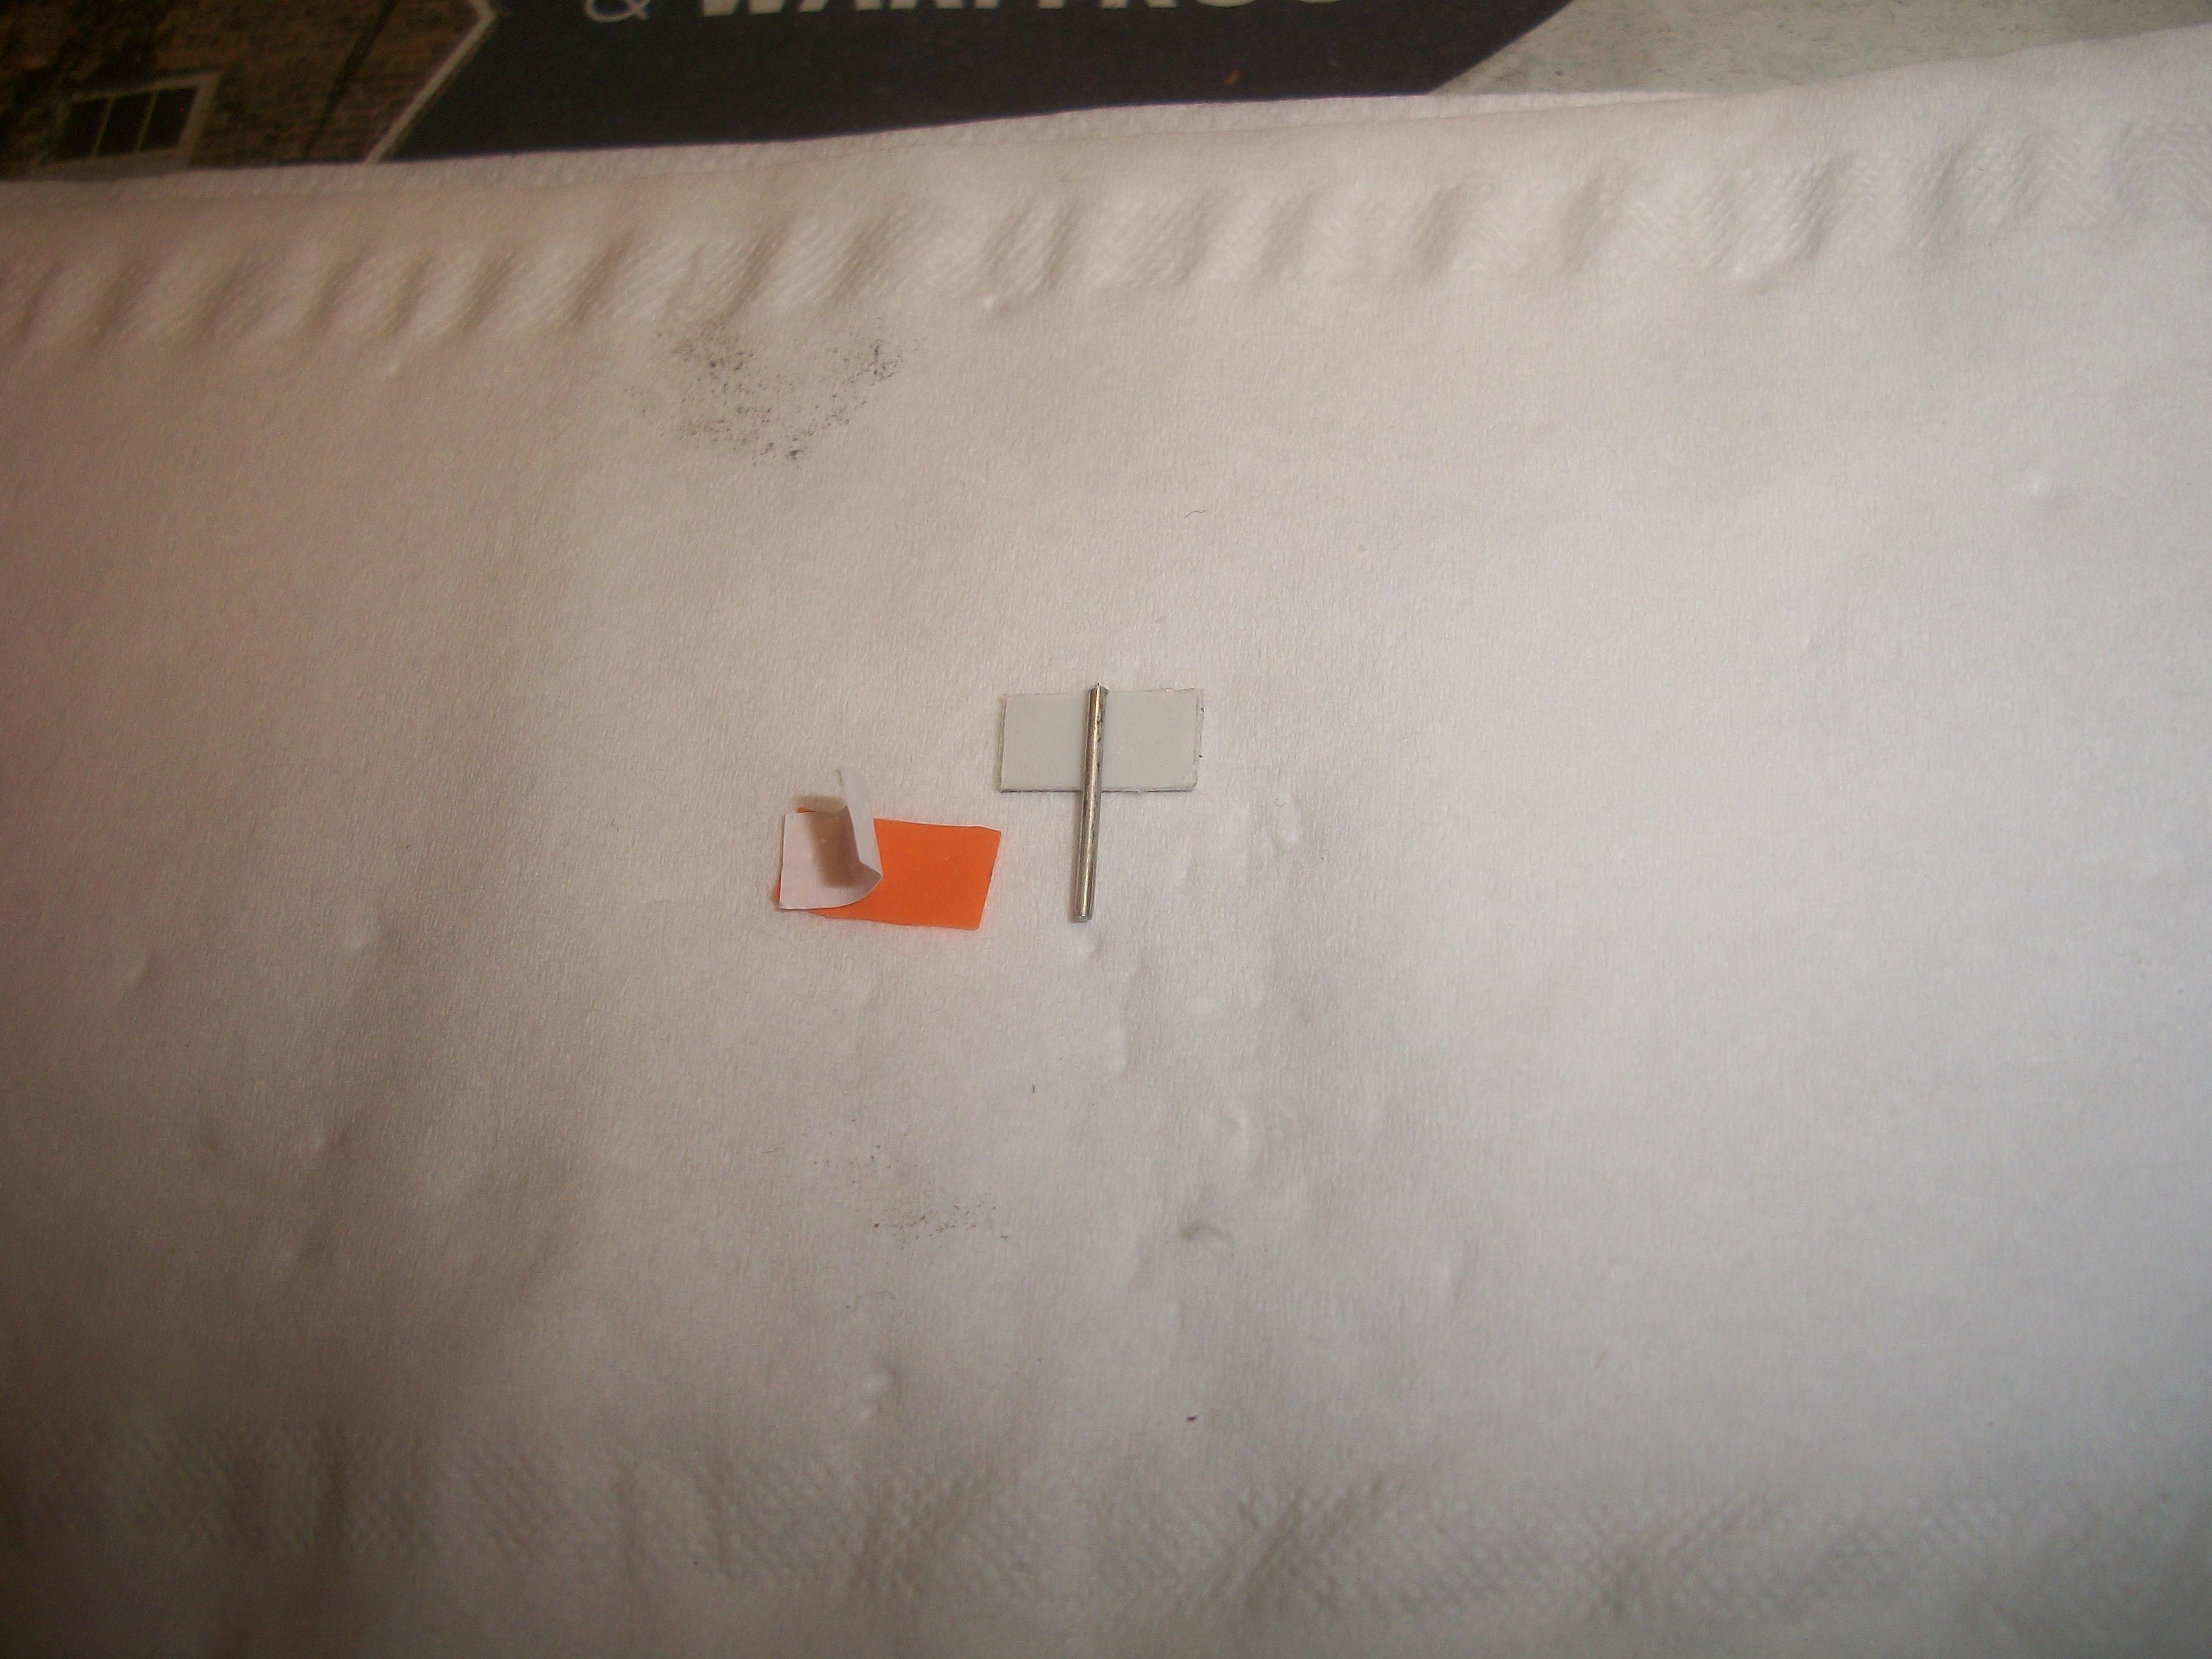
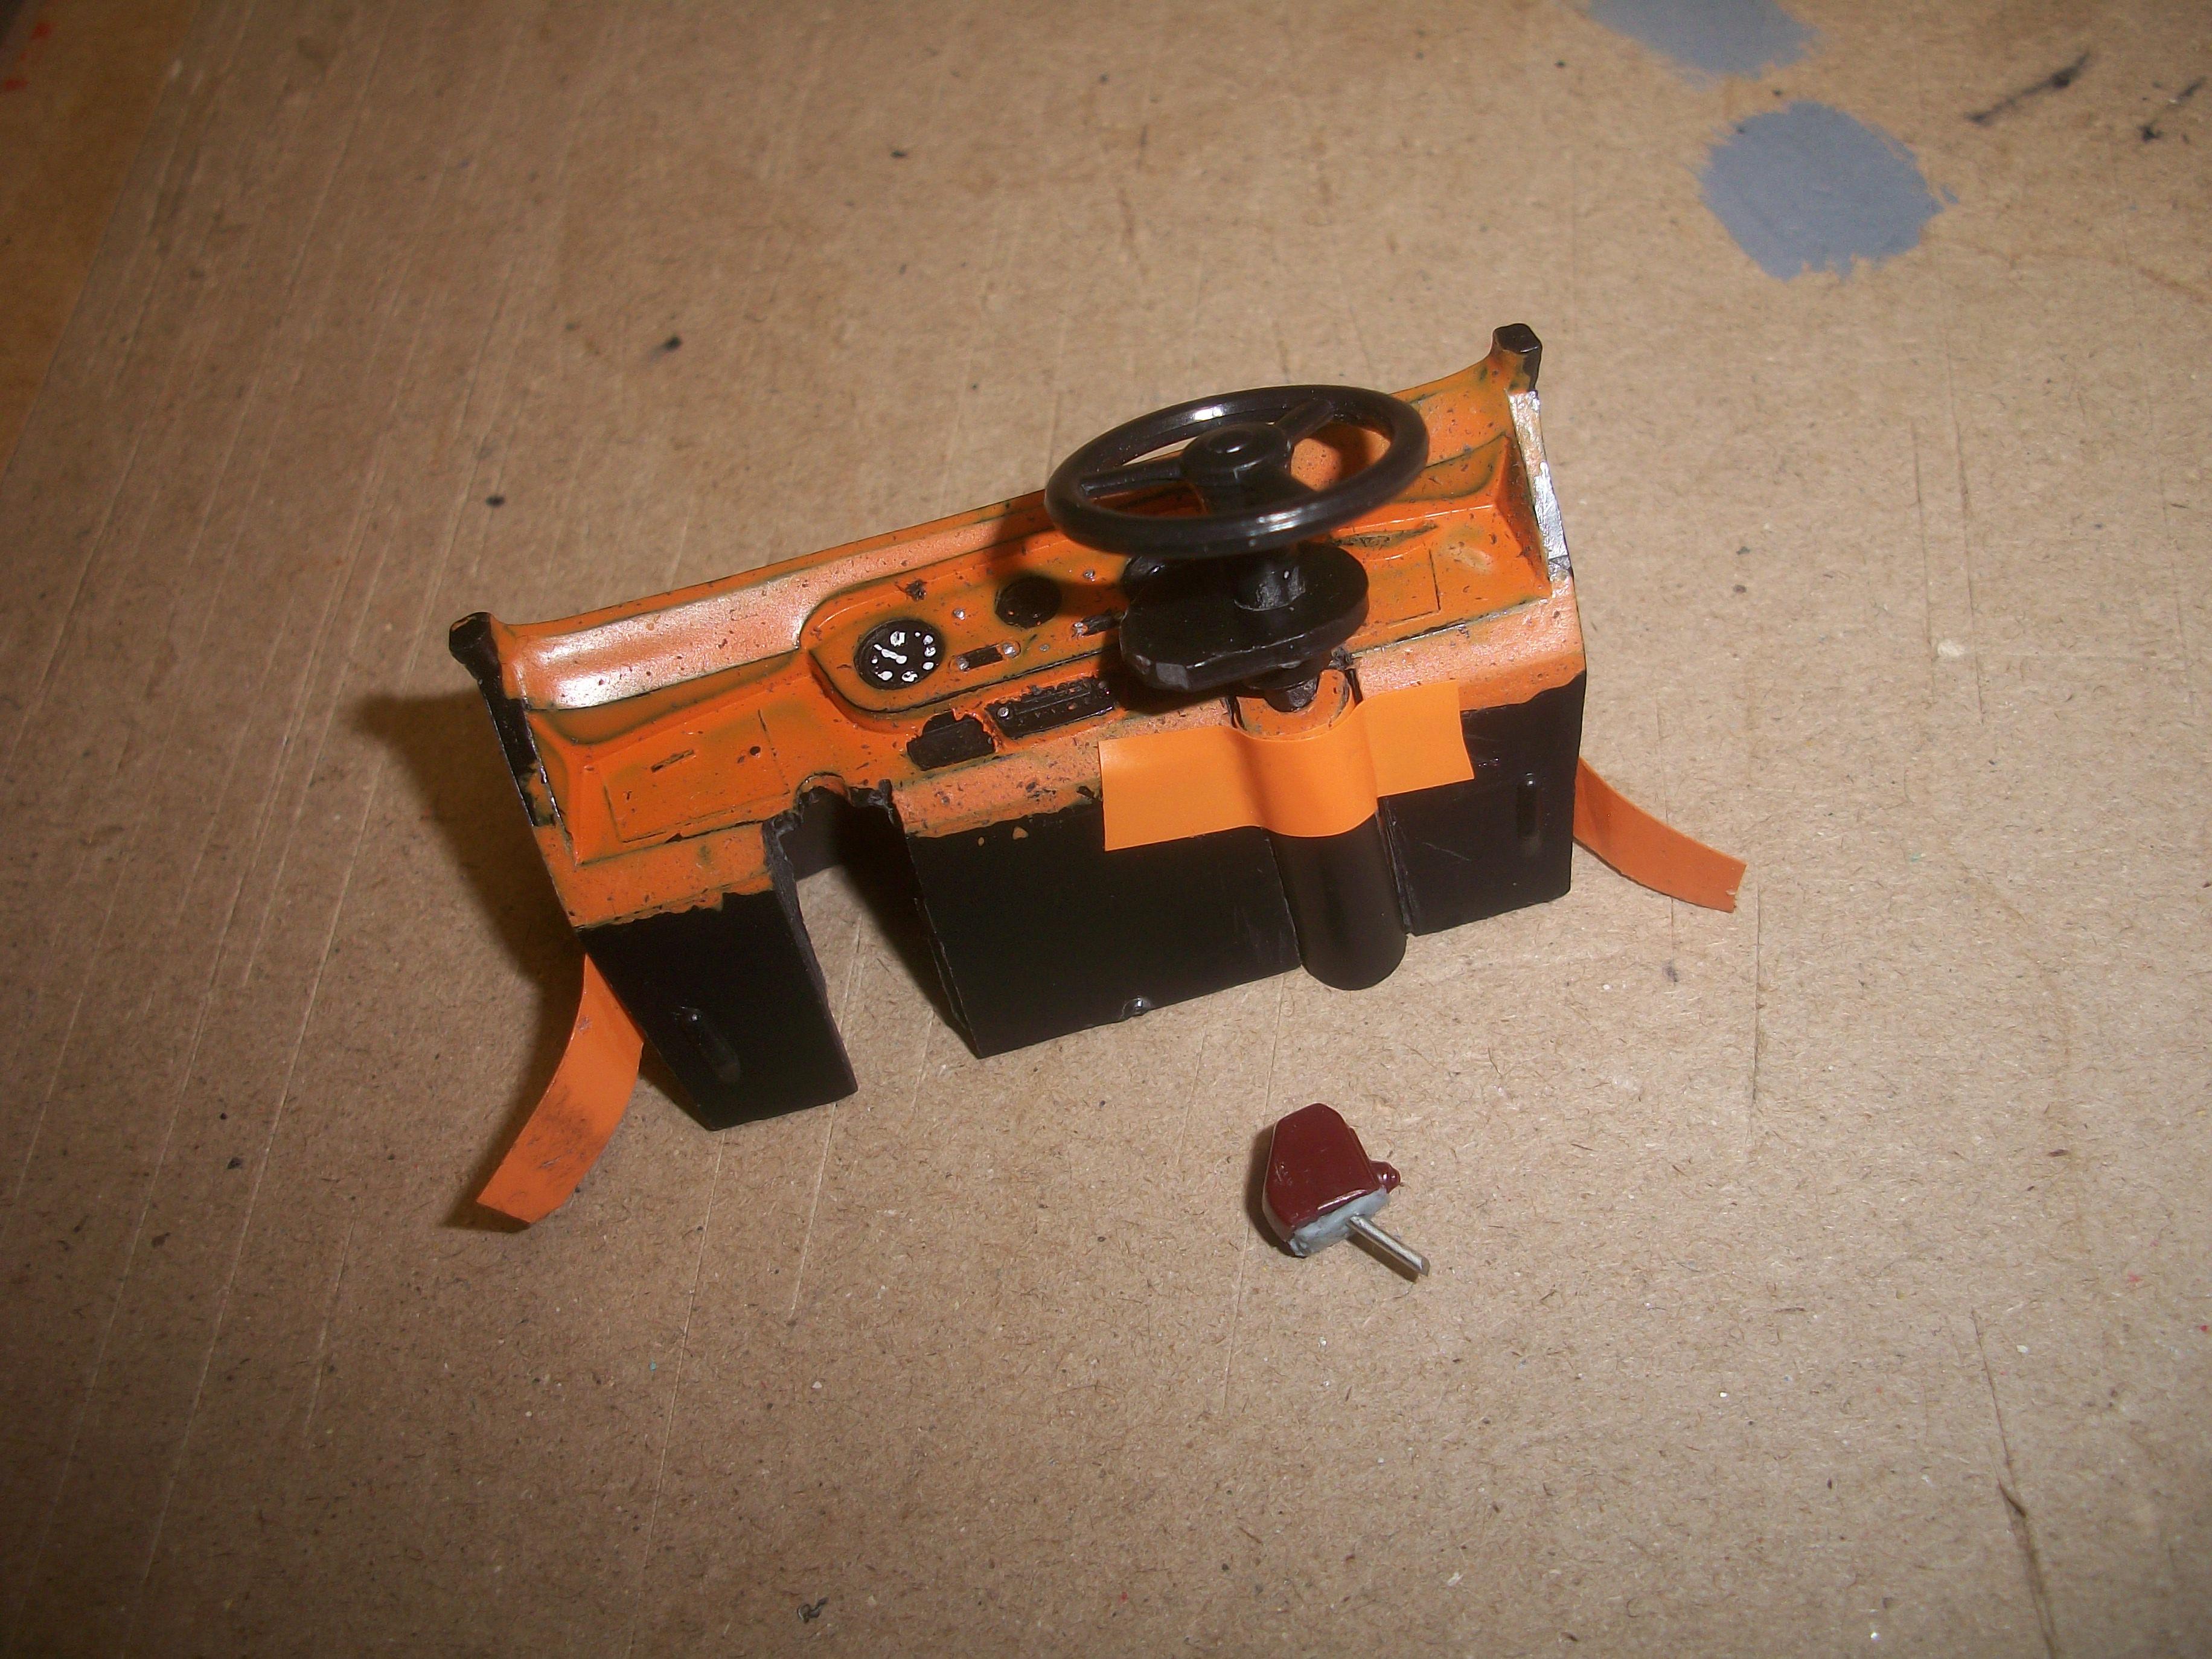
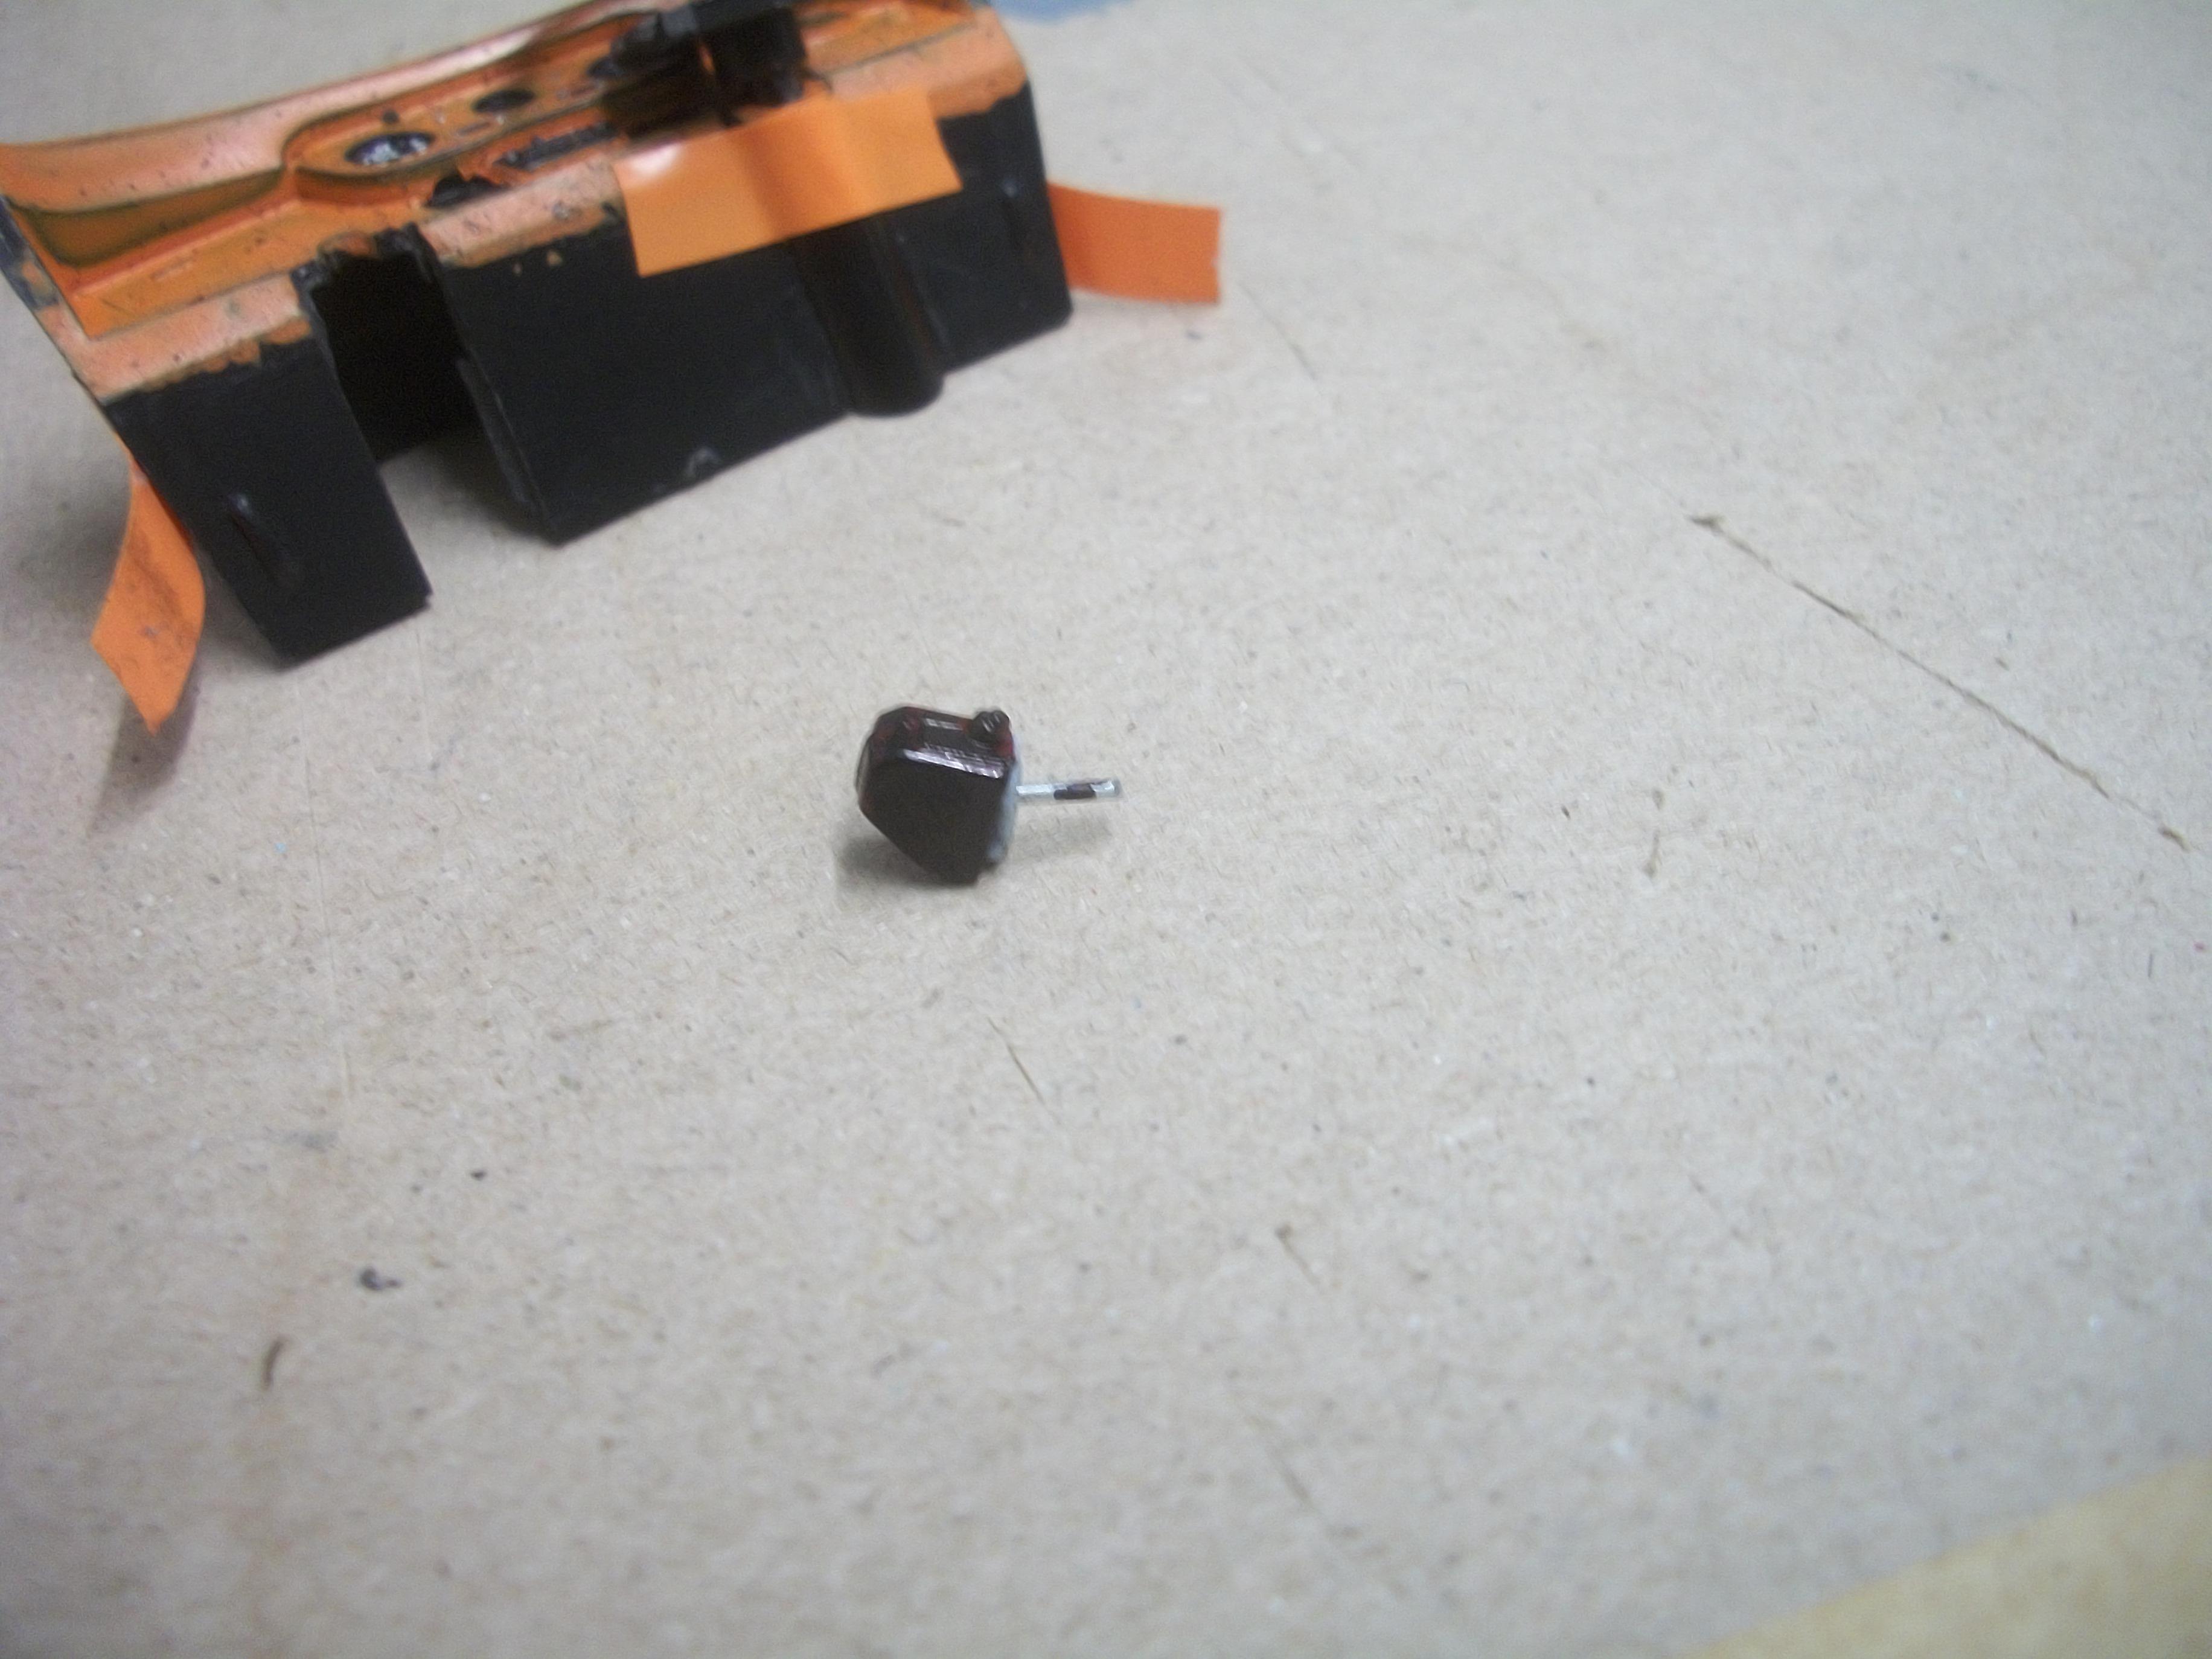
The interior dashboard mirror has turned out reasonably well, keeping in mind that I needed to avoid using super glue. I placed a small piece of double sided tape onto the back of the mirror and then positioned the metal stalk in the centre. A small piece of orange tape was then placed on top of the stalk and pressed down onto the double sided tape . . . Both sides of the styrene mirror have now been chromed, and the stalk fits into the hole on top of the dashboard. Moving on to the auto shifter that mounts onto the steering column, I found a part that is roughly the same shape. This is a piece that I cut off one end of a propshaft from a Monogram 1931 Rolls-Royce Phaeton . . . Then, a short length of metal paper clip was used for the auto shift lever. Some random spare part was placed in front of the dashboard with the steering column passing through a hole in the plastic part. I applied some black permanent marker to the red plastic part and PVA glued the assembly in place . . . David
-
Rolls-Royce No Chemicals, No Paint, No Harmful Glues
Anglia105E replied to Anglia105E's topic in WIP: Model Cars
41 years . . . That is a long stretch. I was self-employed as a technical support engineer from 2004 until I retired in 2018, and I shall be 72 years of age 4 days from now . . . David -
Rolls-Royce No Chemicals, No Paint, No Harmful Glues
Anglia105E replied to Anglia105E's topic in WIP: Model Cars
Interesting that you started out by working at a Chevrolet dealership, as my first job when I finished school was Motor Vehicle Partsman for a Ford dealership. This was in 1970, and to begin with I was working within the truck side of the business, before moving over to the car side at the workshop counter and also the retail front counter. Following a motor vehicle apprenticeship and a short time working as a motor mechanic for a small garage, I went on to work in the parts department for a large dealership that sold Jaguar, Rover, Triumph and Land Rover vehicles . . . I ended up in later years driving long distance trucks up to 7.5 ton gross, and then settled into computer mainframes leading to technical support for PC's as the mainframe computers ended. David -
Rolls-Royce No Chemicals, No Paint, No Harmful Glues
Anglia105E replied to Anglia105E's topic in WIP: Model Cars
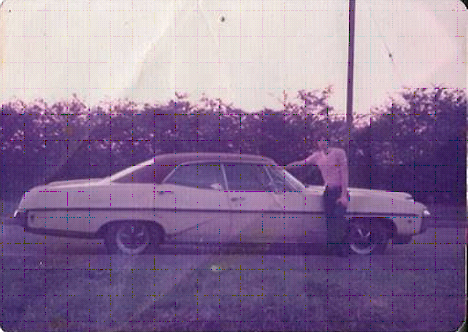
The Bonneville and the Parisienne were true classics I think . . . Very much an " aircraft carrier " . . . My Parisienne was registration number FCK 33 and finished in pale yellow, with a brown vinyl roof. 5.3 litre ( 323 cubic inches ) V8 engine. -
Rolls-Royce No Chemicals, No Paint, No Harmful Glues
Anglia105E replied to Anglia105E's topic in WIP: Model Cars
Oh yes, I really enjoyed driving that car . . . Just under 18 feet in length ( 215.6 inches ). Trouble was, I only got 12 miles per gallon of petrol. I think it might have been P R N D 2 1 . . . This was 49 years ago ! David -
Rolls-Royce No Chemicals, No Paint, No Harmful Glues
Anglia105E replied to Anglia105E's topic in WIP: Model Cars
Back in 1977, I had a 1968 Pontiac Parisienne but I can't remember the auto shifter positions. The car was RHD from Canada and was a 4-door version. David
-
Rolls-Royce No Chemicals, No Paint, No Harmful Glues
Anglia105E replied to Anglia105E's topic in WIP: Model Cars
Jose . . . I noticed there was only N ,4 , 3 , 2 and R positions on the auto selector, so I did some research and it turns out there was no true ' Park ' on the GM Hydramatic auto transmission. Apparently, when the engine was stopped, the gear selector is moved to the ' Reverse ' position which is effectively in ' Park '. From 1953 to 1978, British automaker Rolls-Royce manufactured its own versions of the General Motors Hydra-Matic transmission for use in Rolls-Royce and Bentley luxury cars . . . I don't know if the GM auto transmissions manufactured in the United States had a ' Park ' position, but the auto boxes produced by Rolls-Royce were heavily modified versions of the US ones, under license. My research information applies to the Silver Cloud I, II and III models specifically . . . David -
Rolls-Royce No Chemicals, No Paint, No Harmful Glues
Anglia105E replied to Anglia105E's topic in WIP: Model Cars
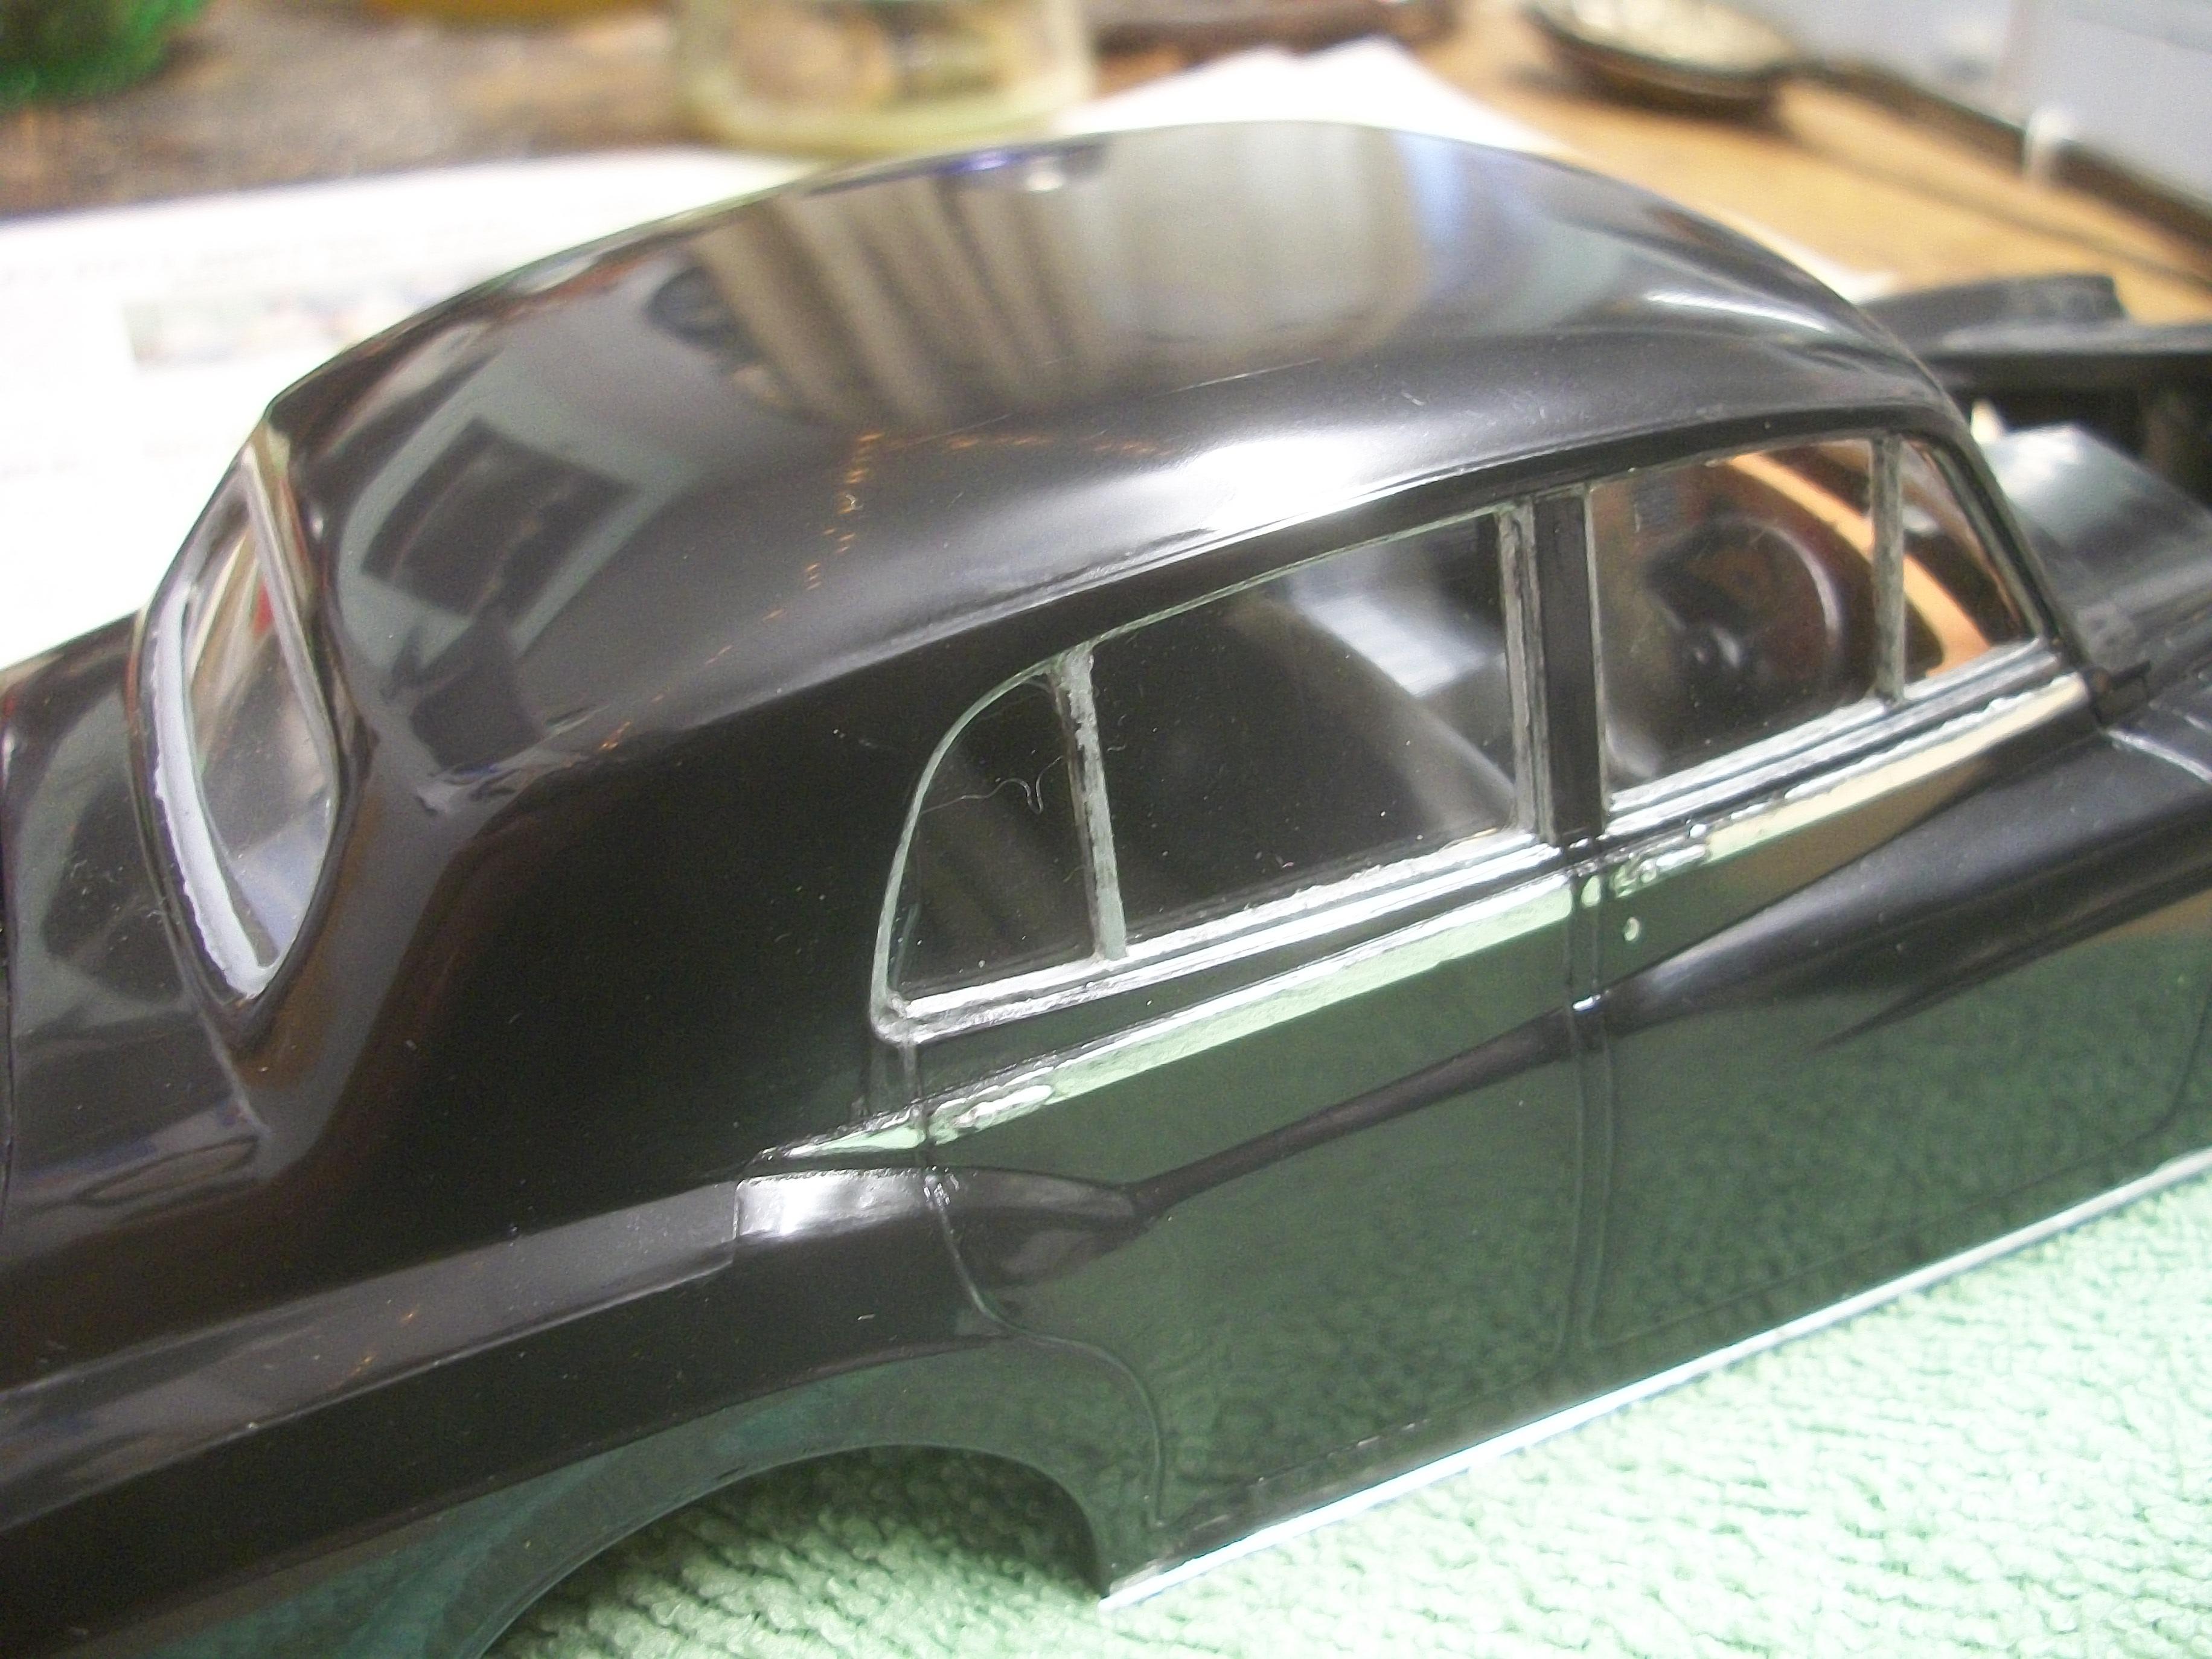
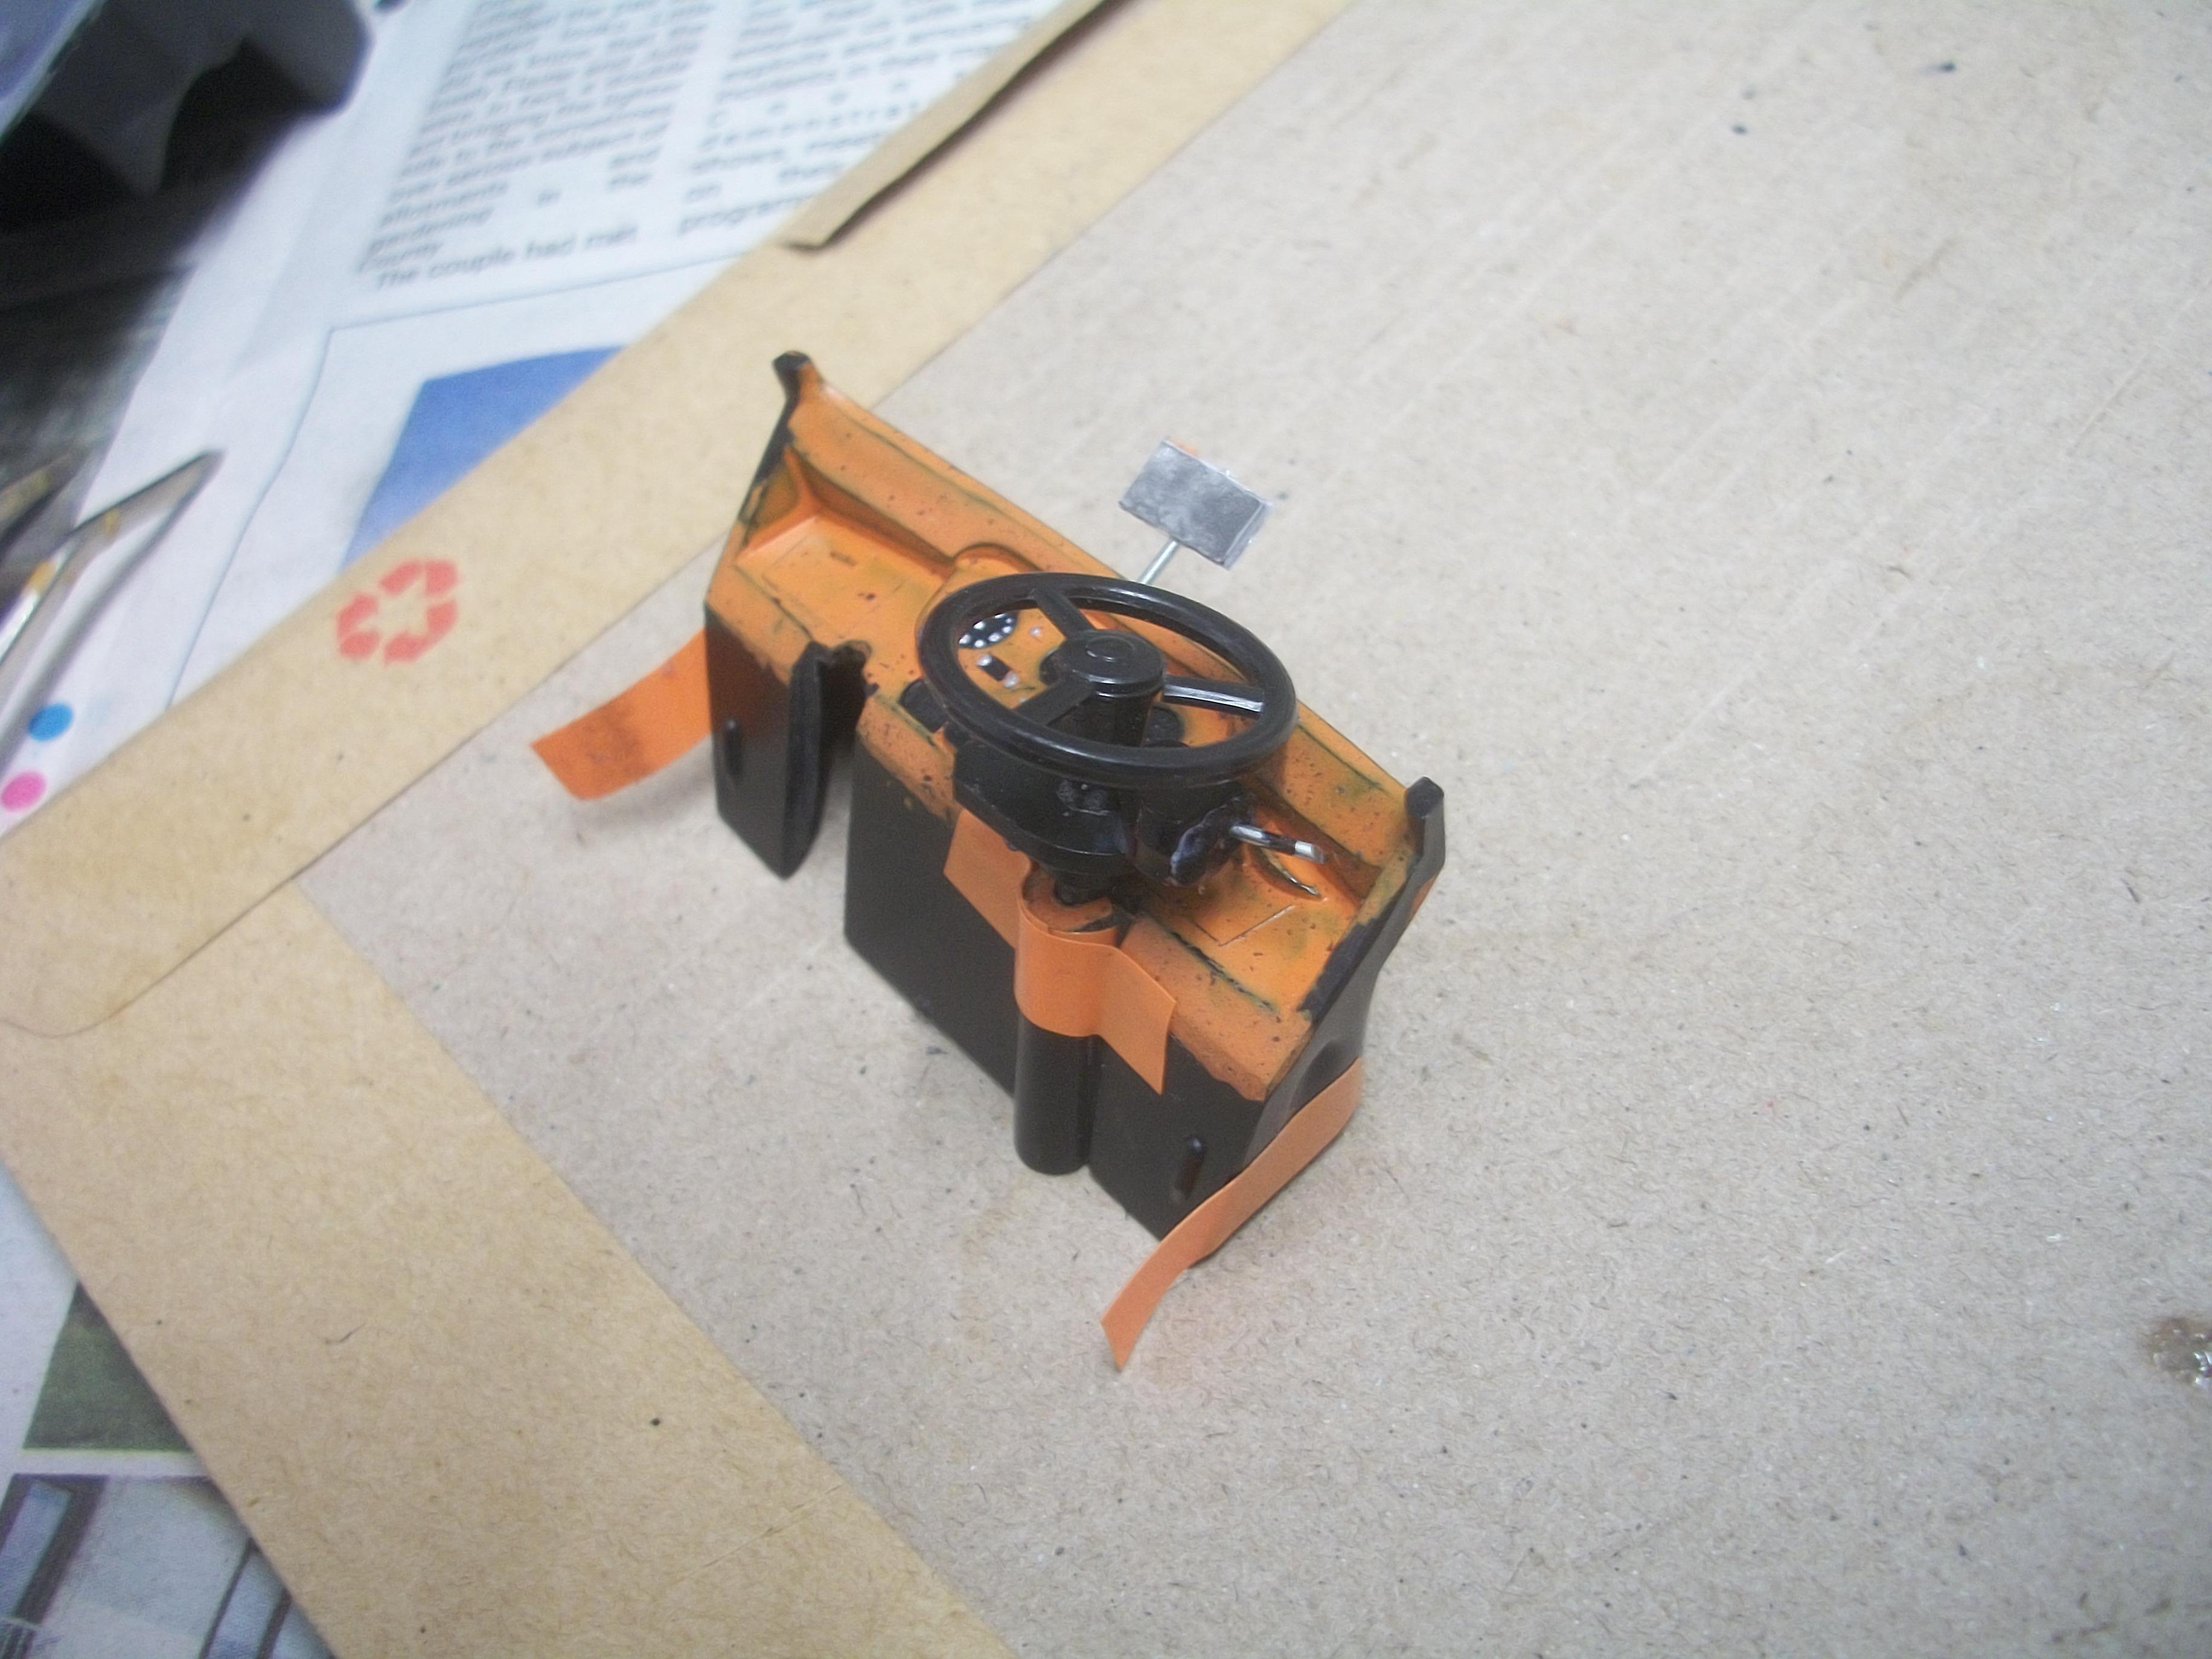
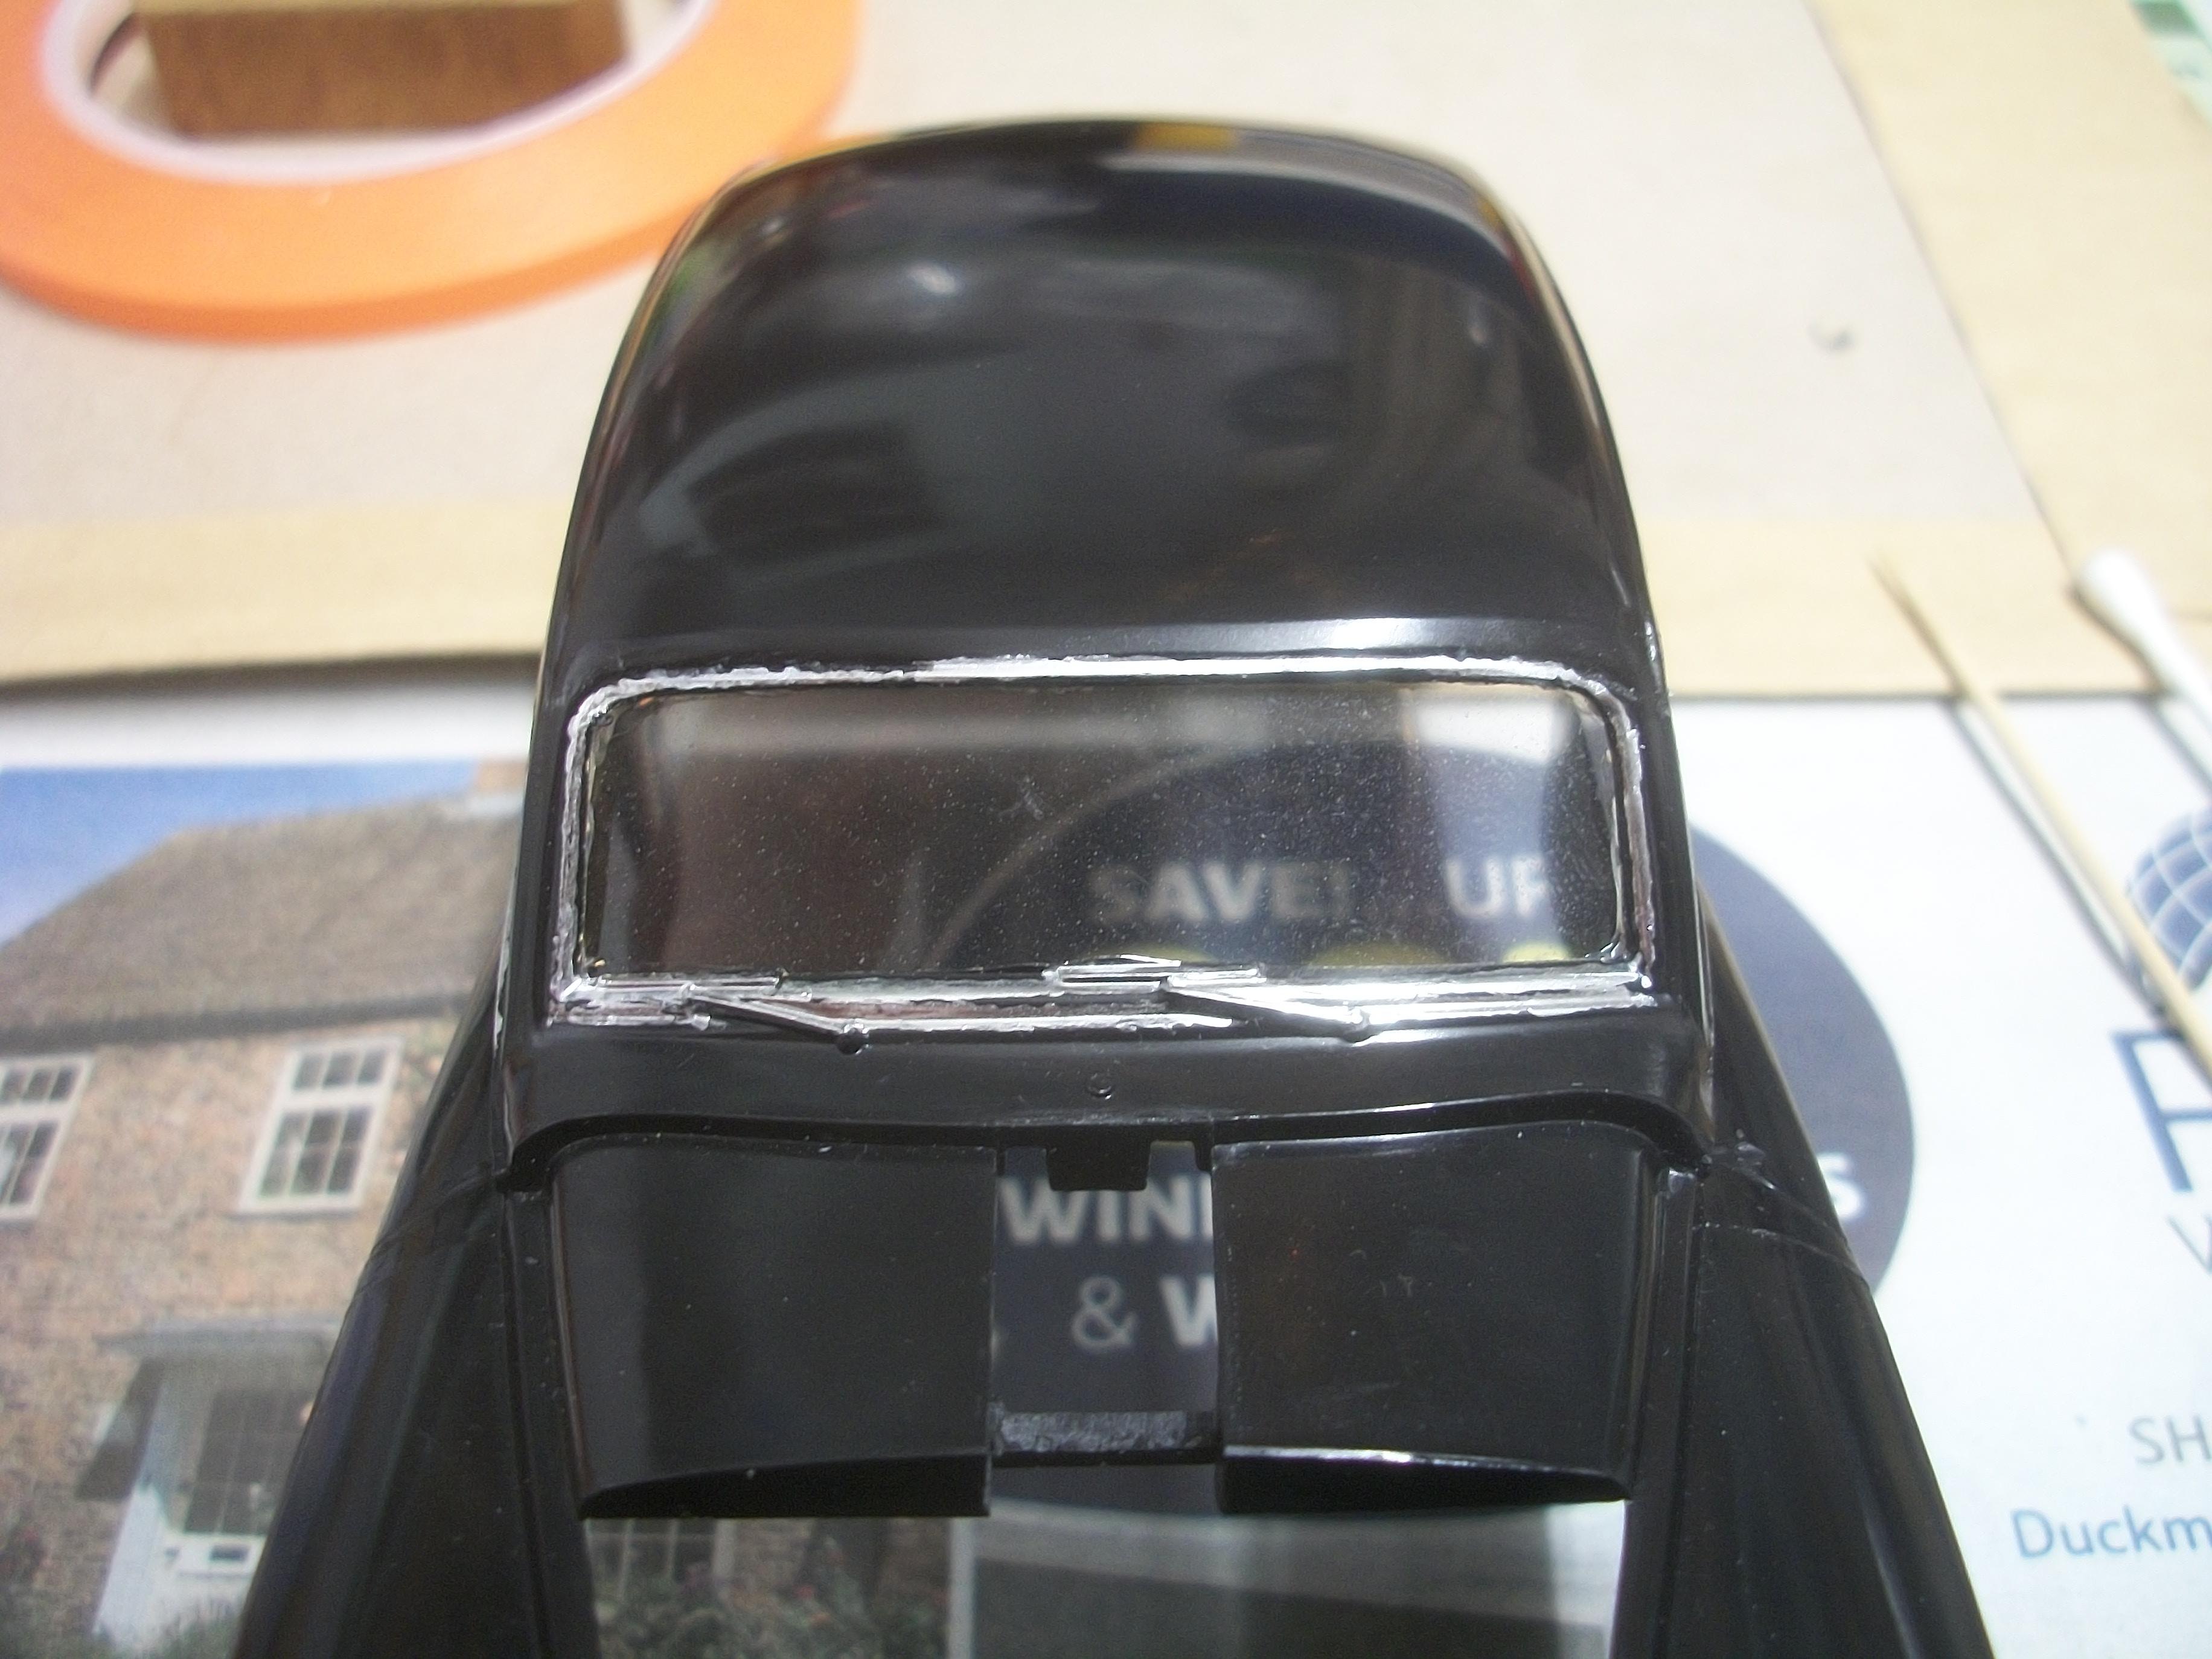
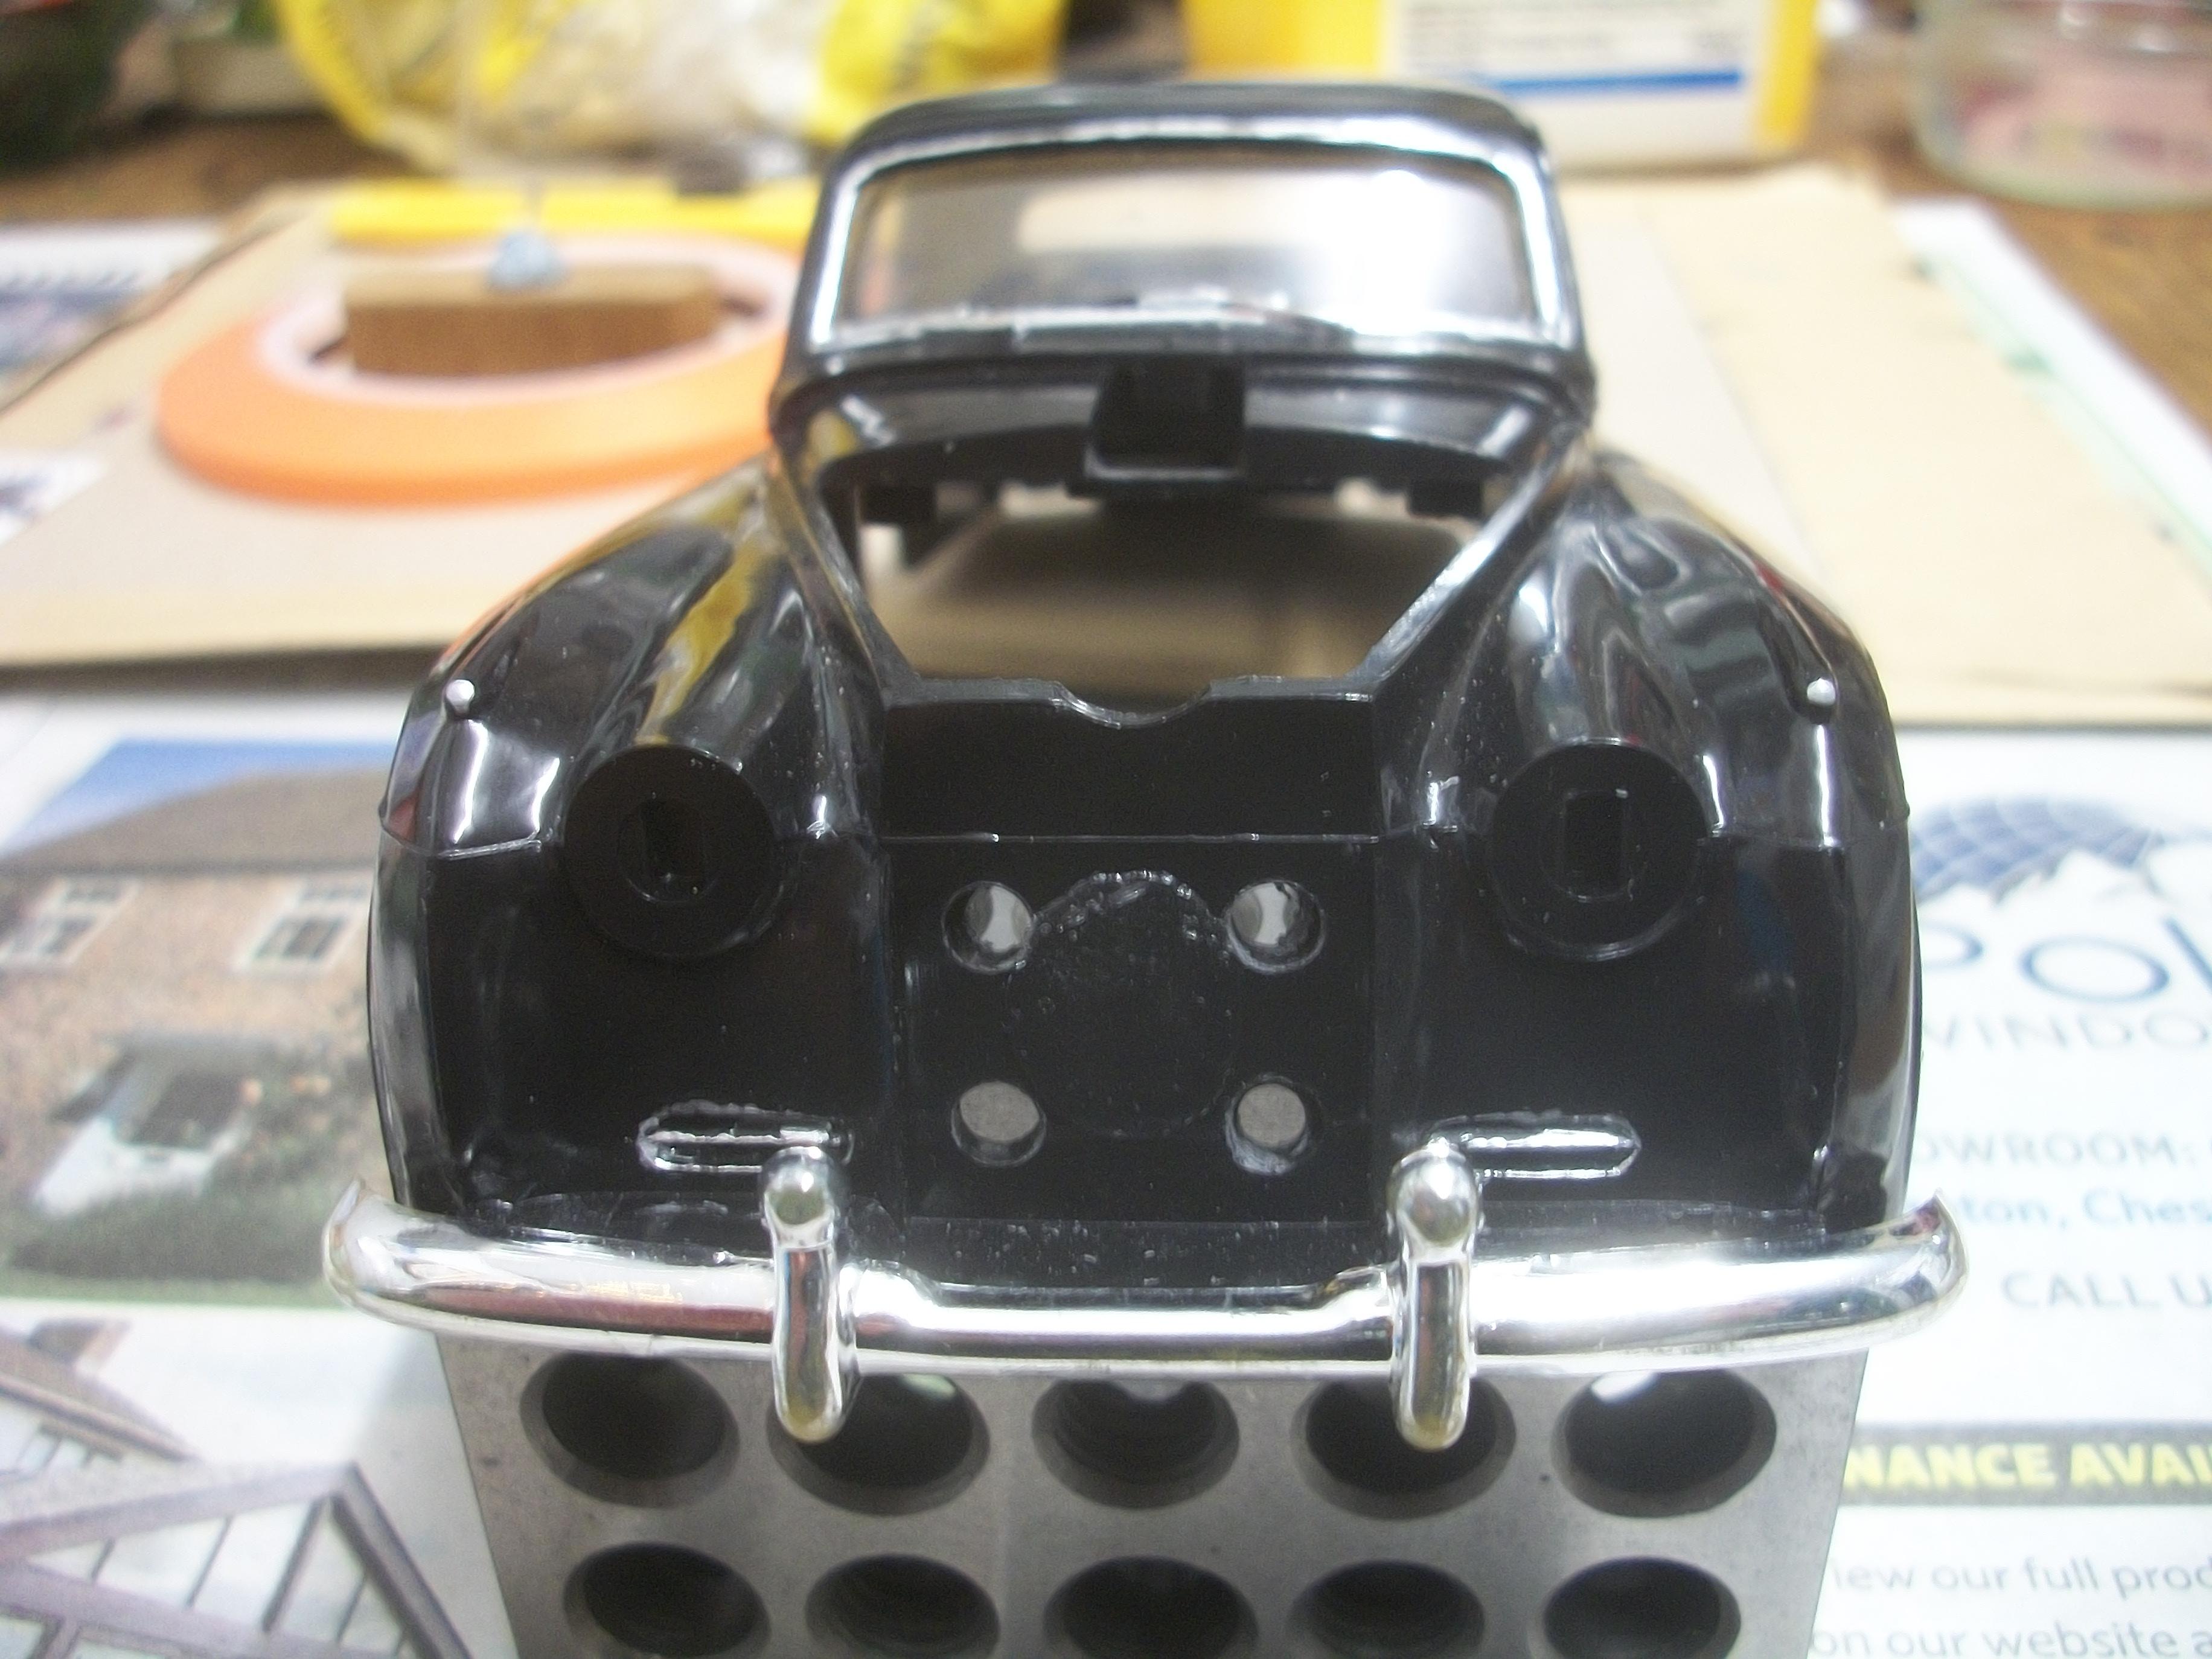
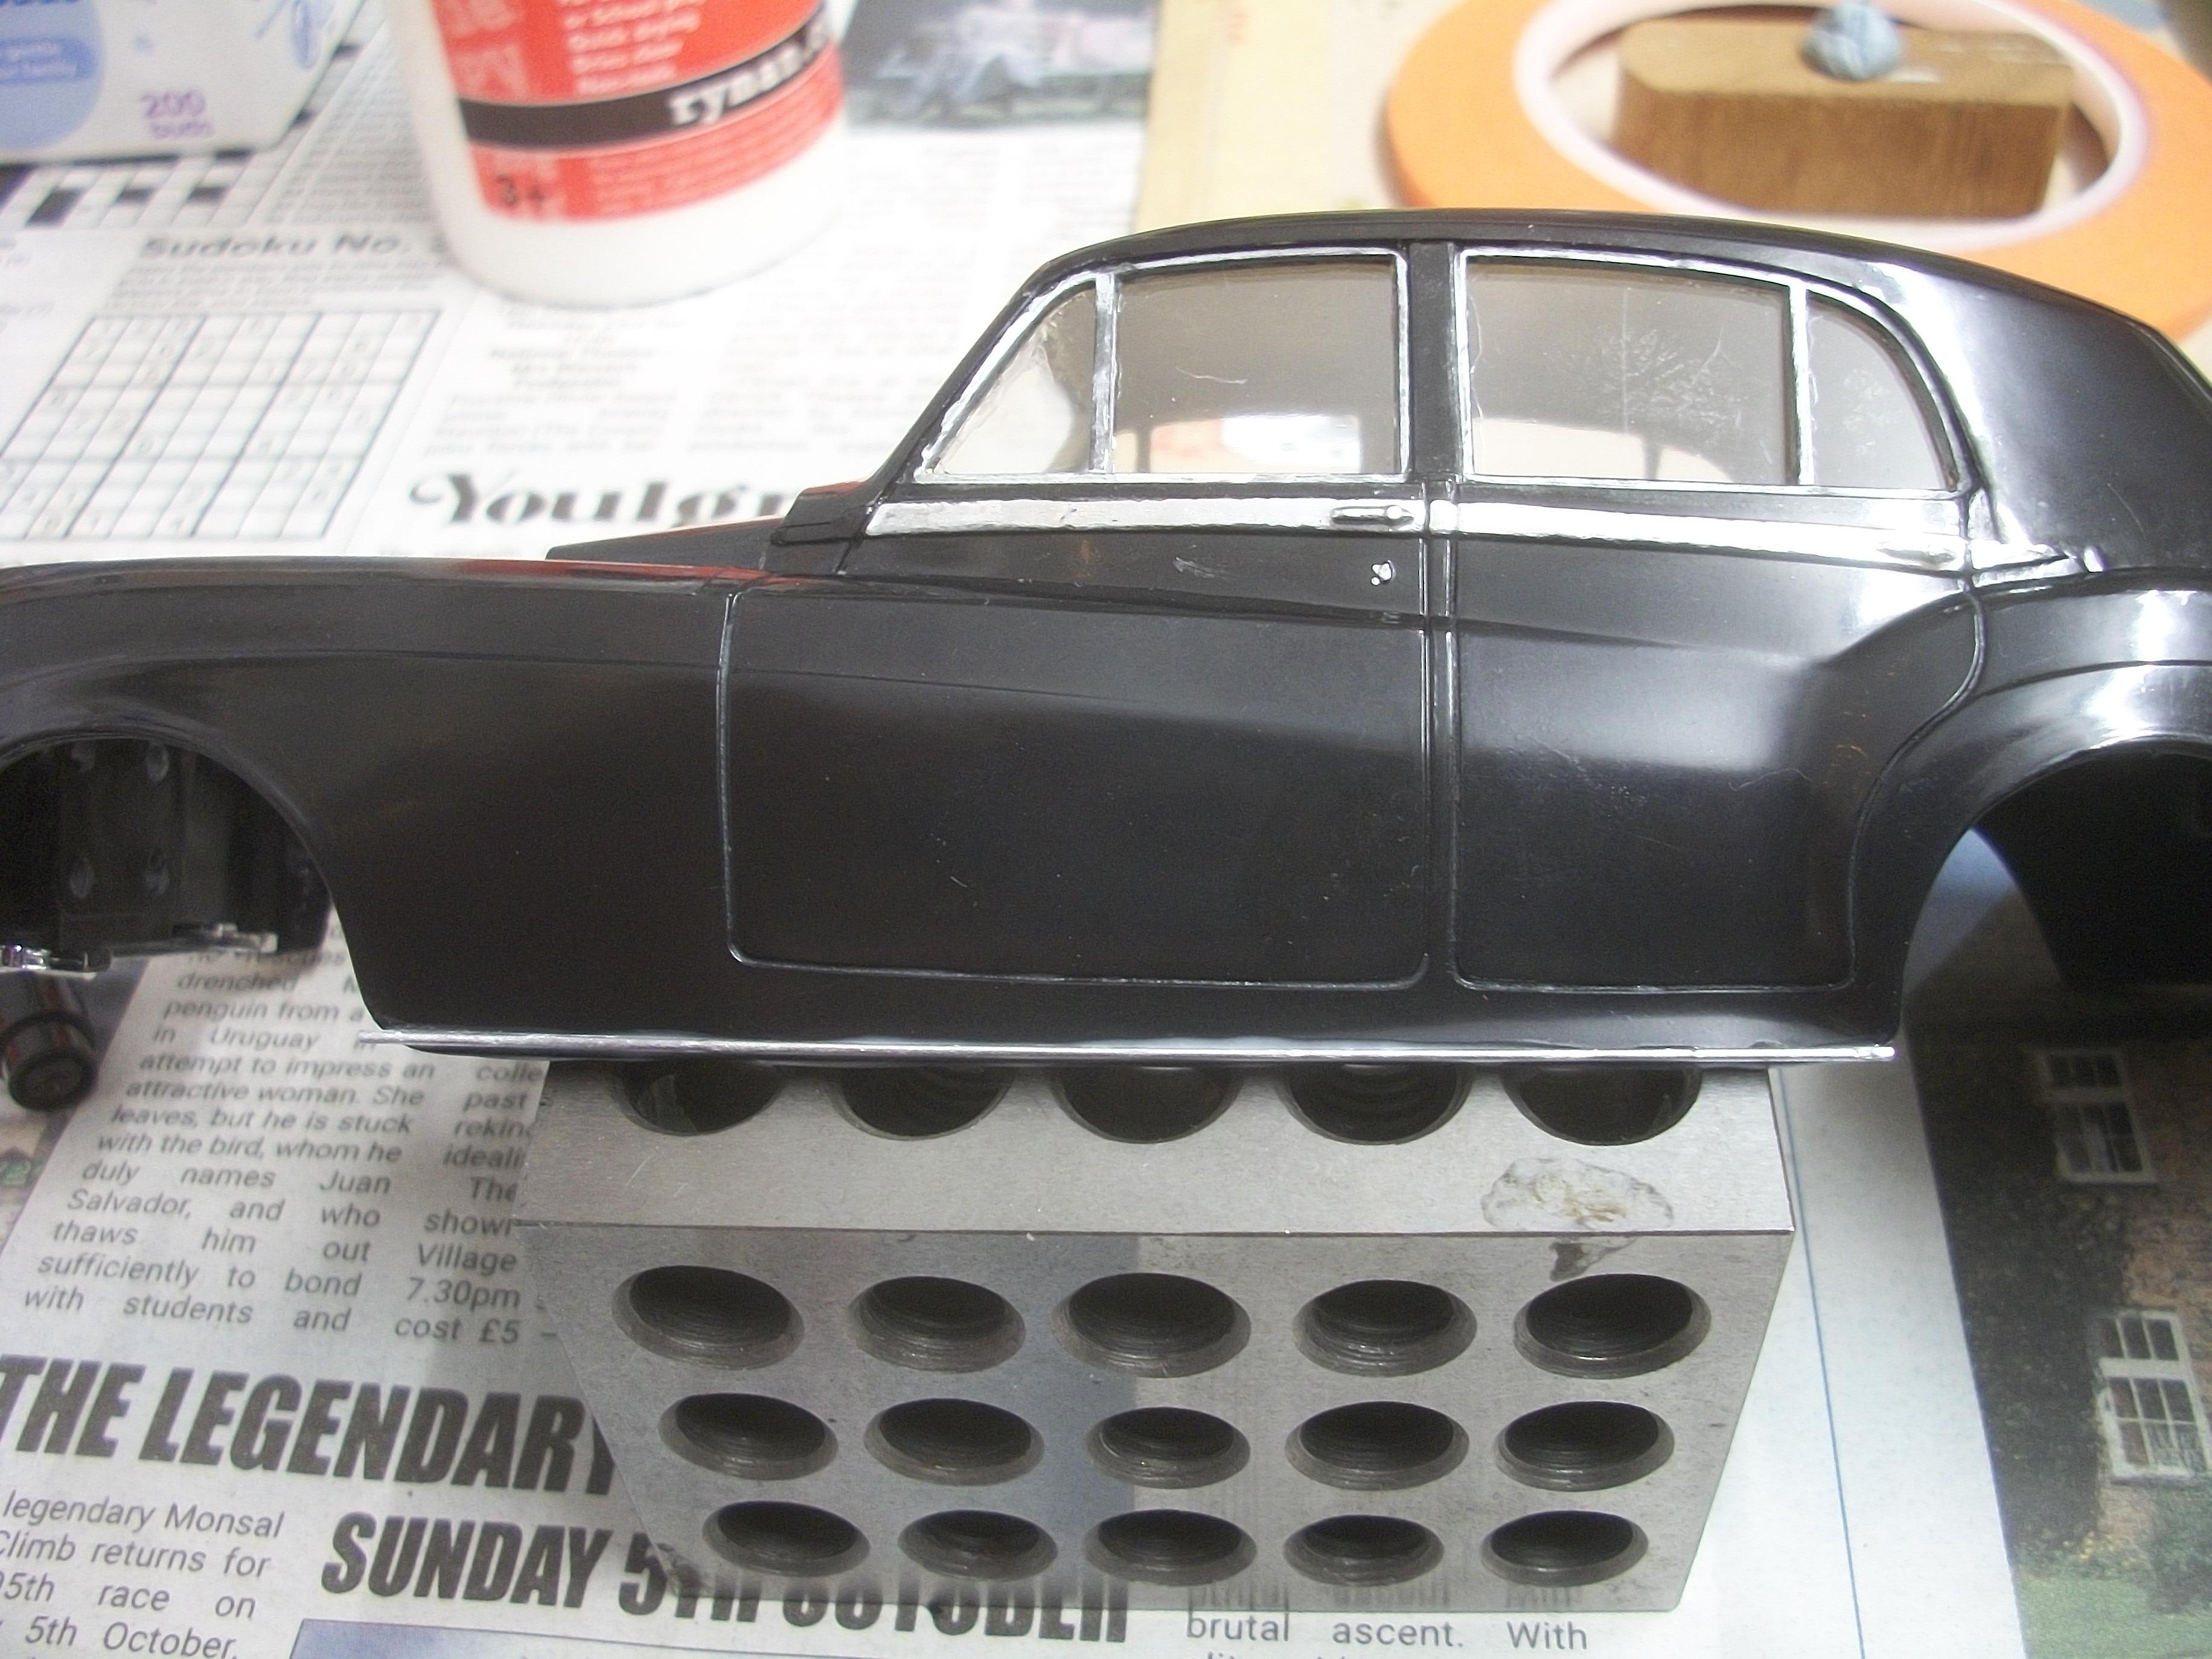
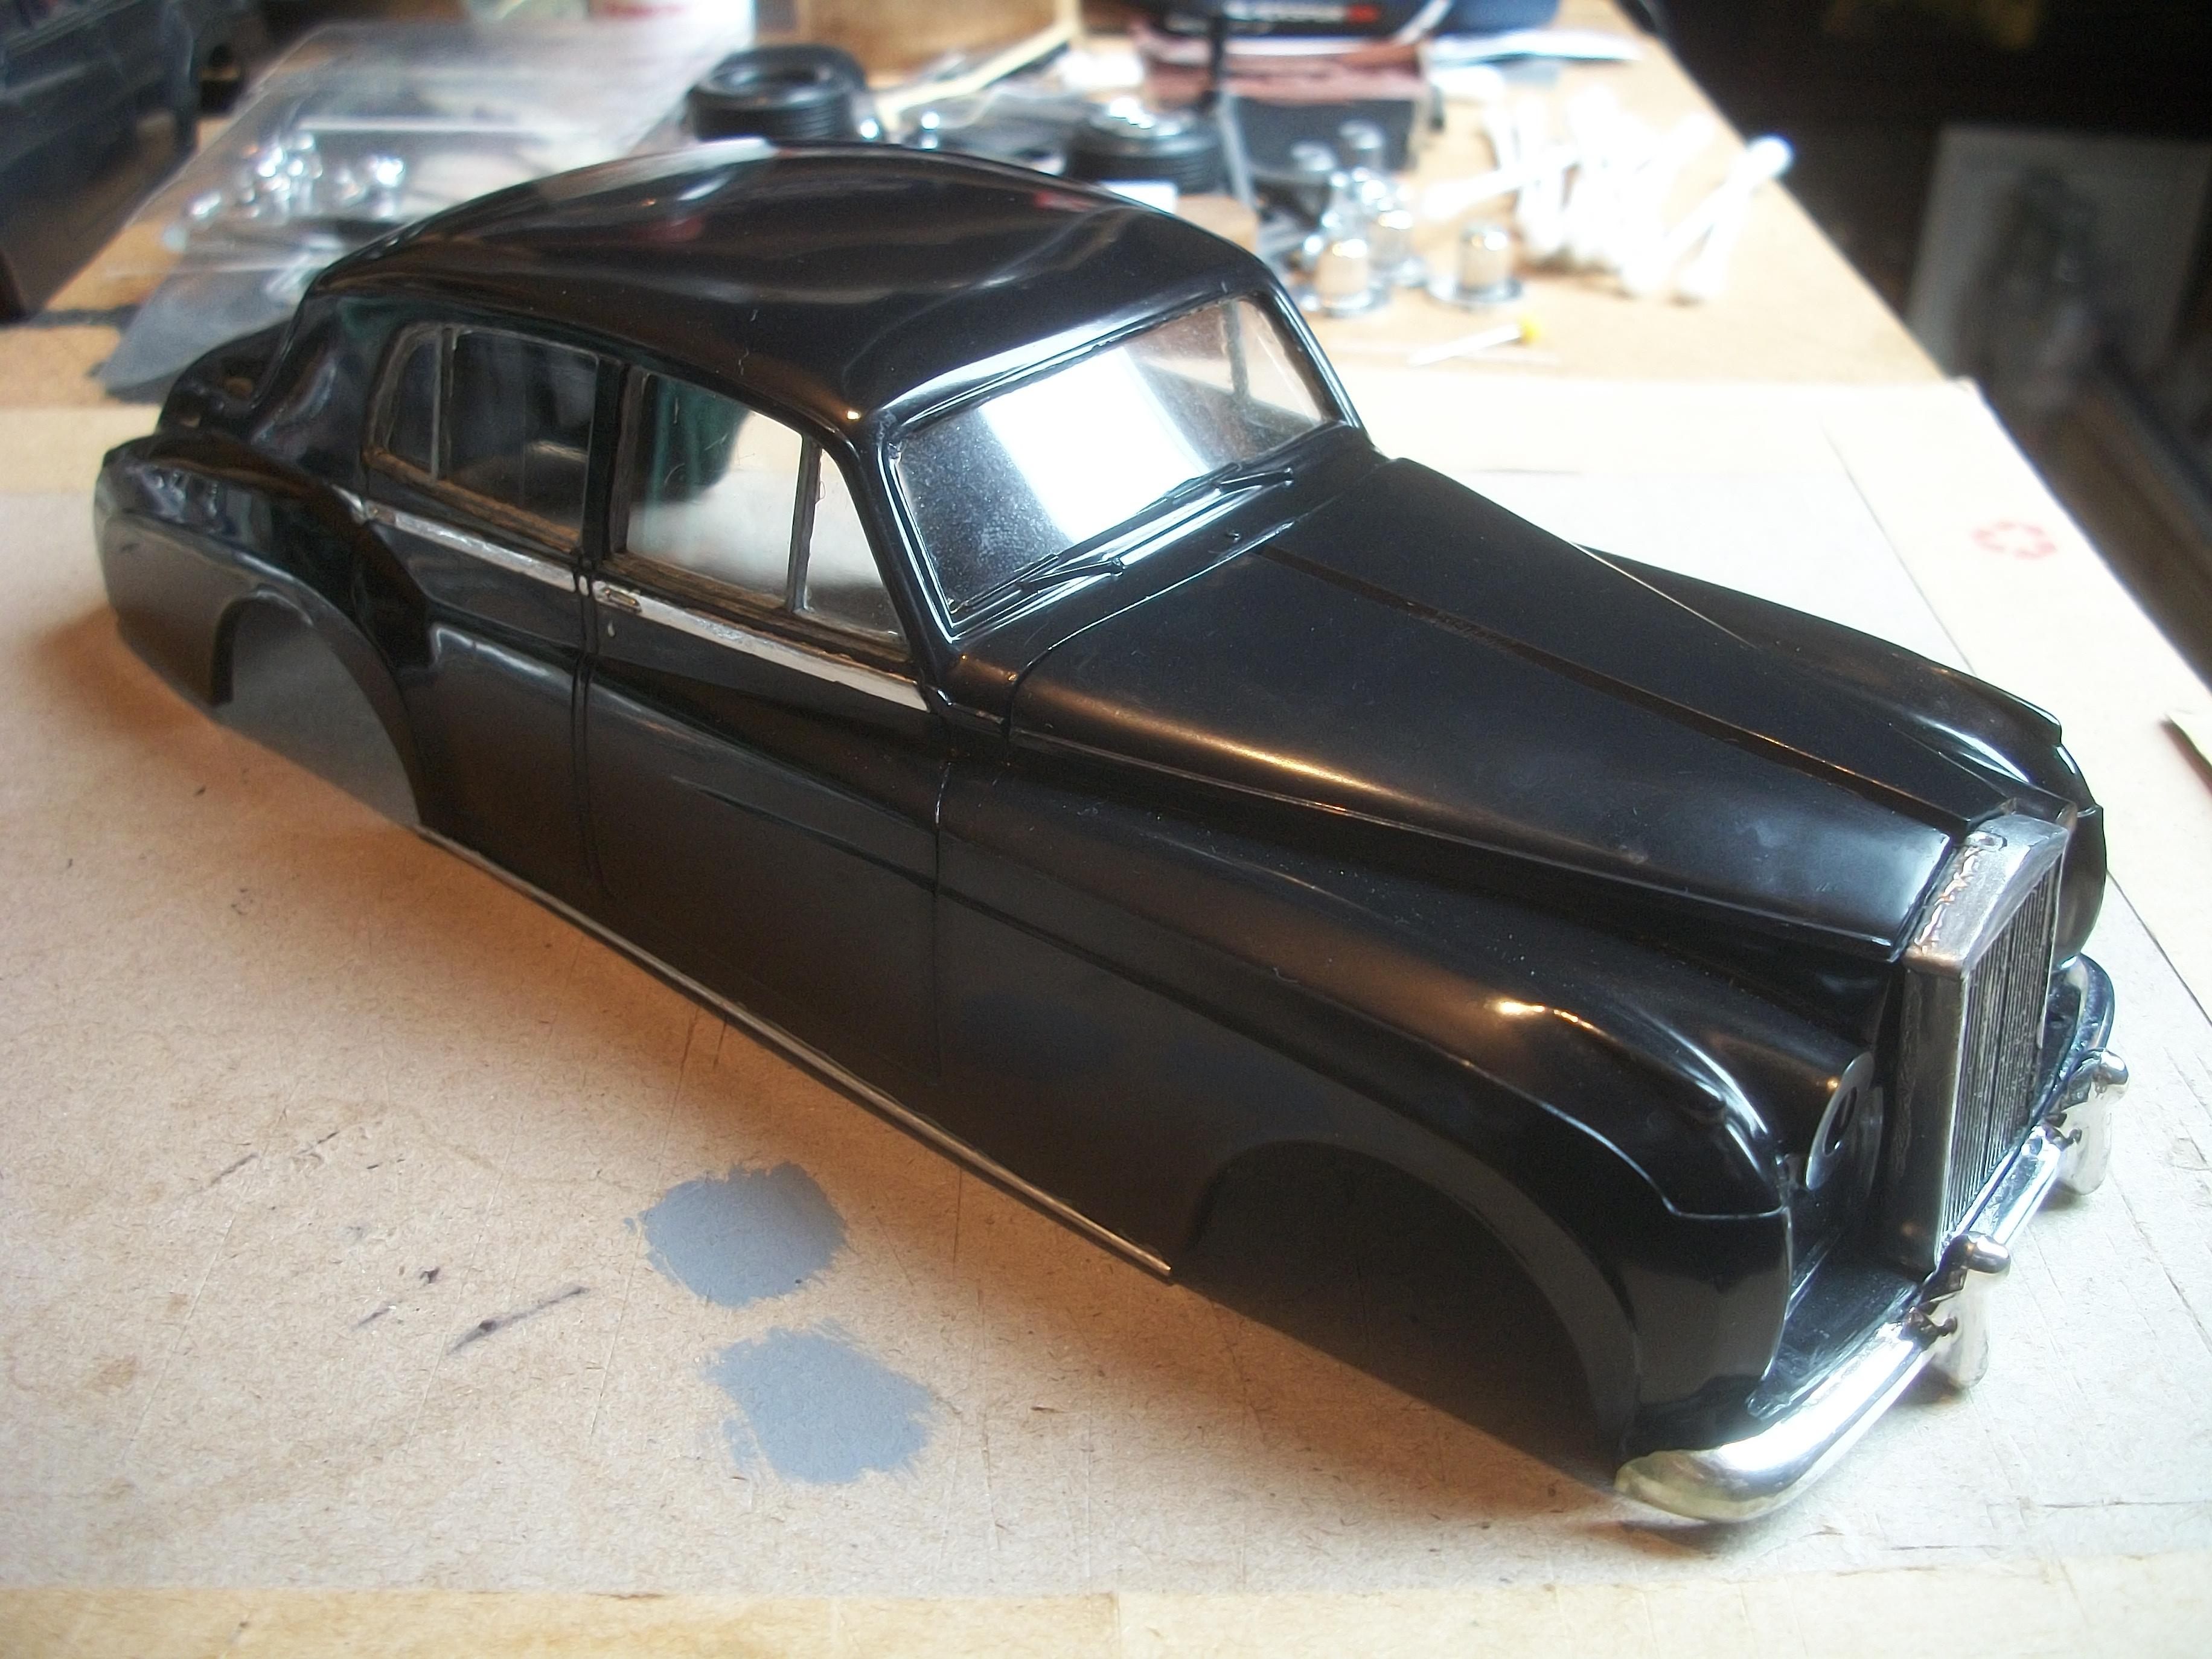
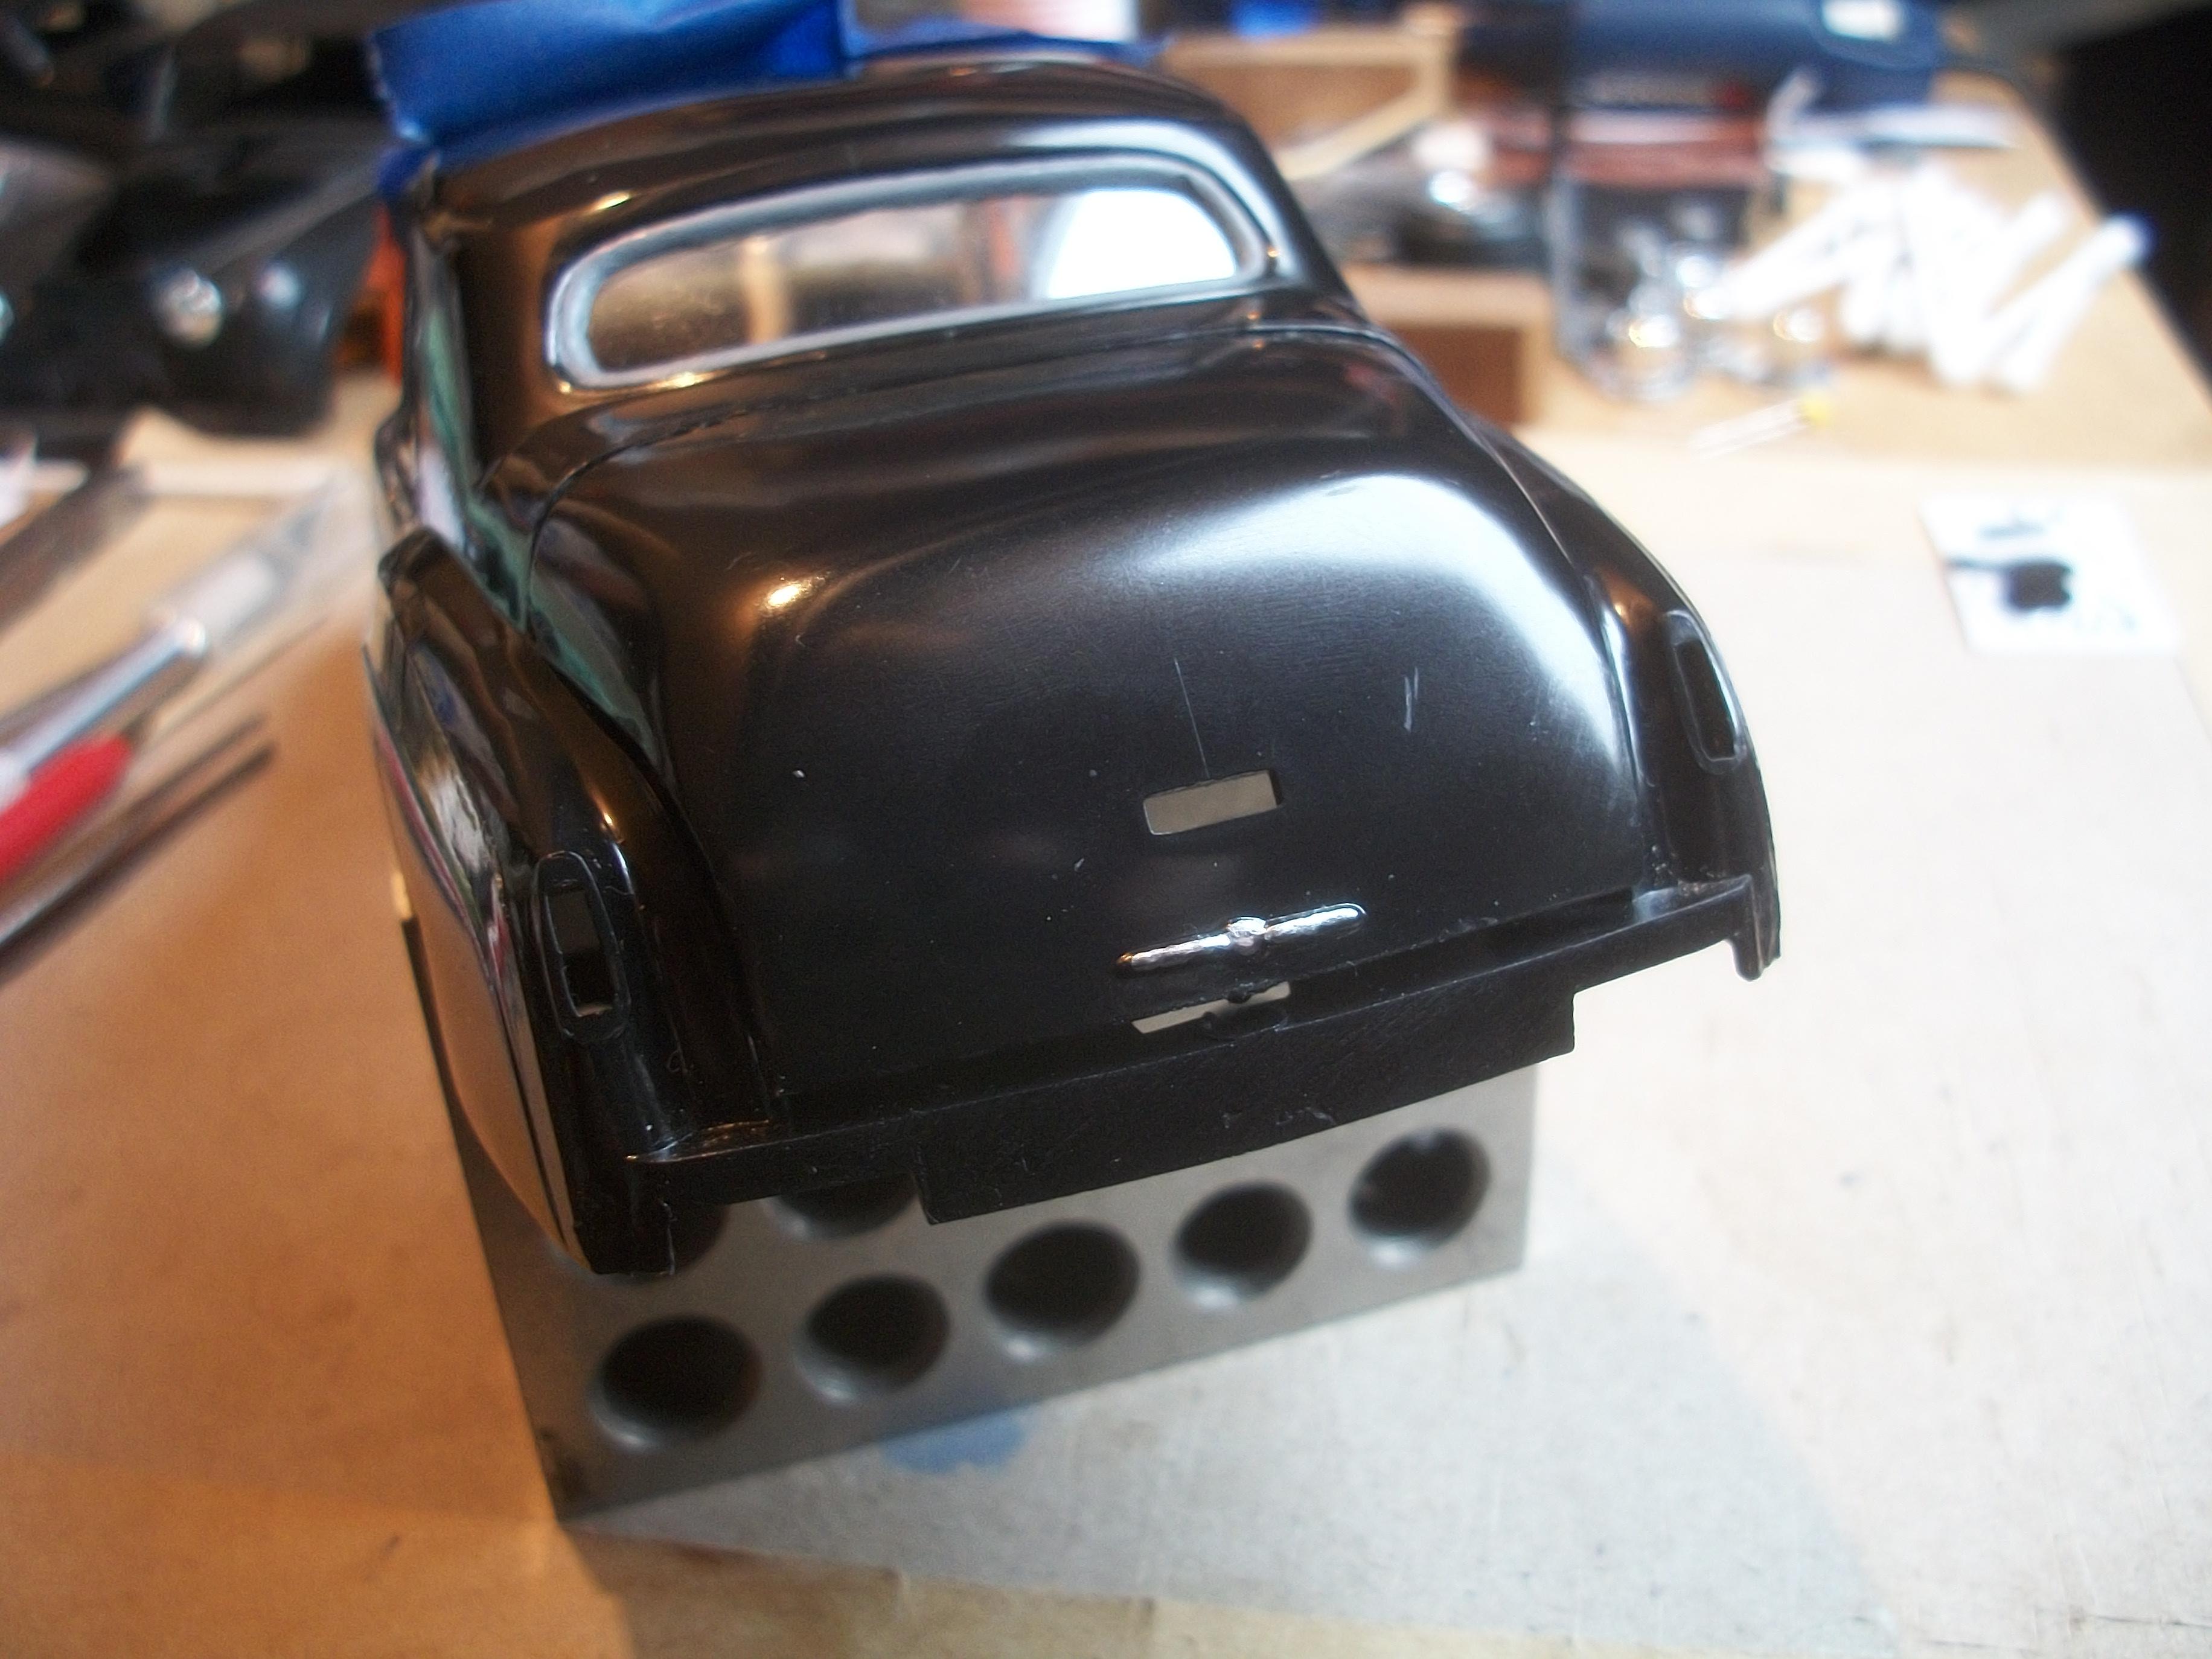
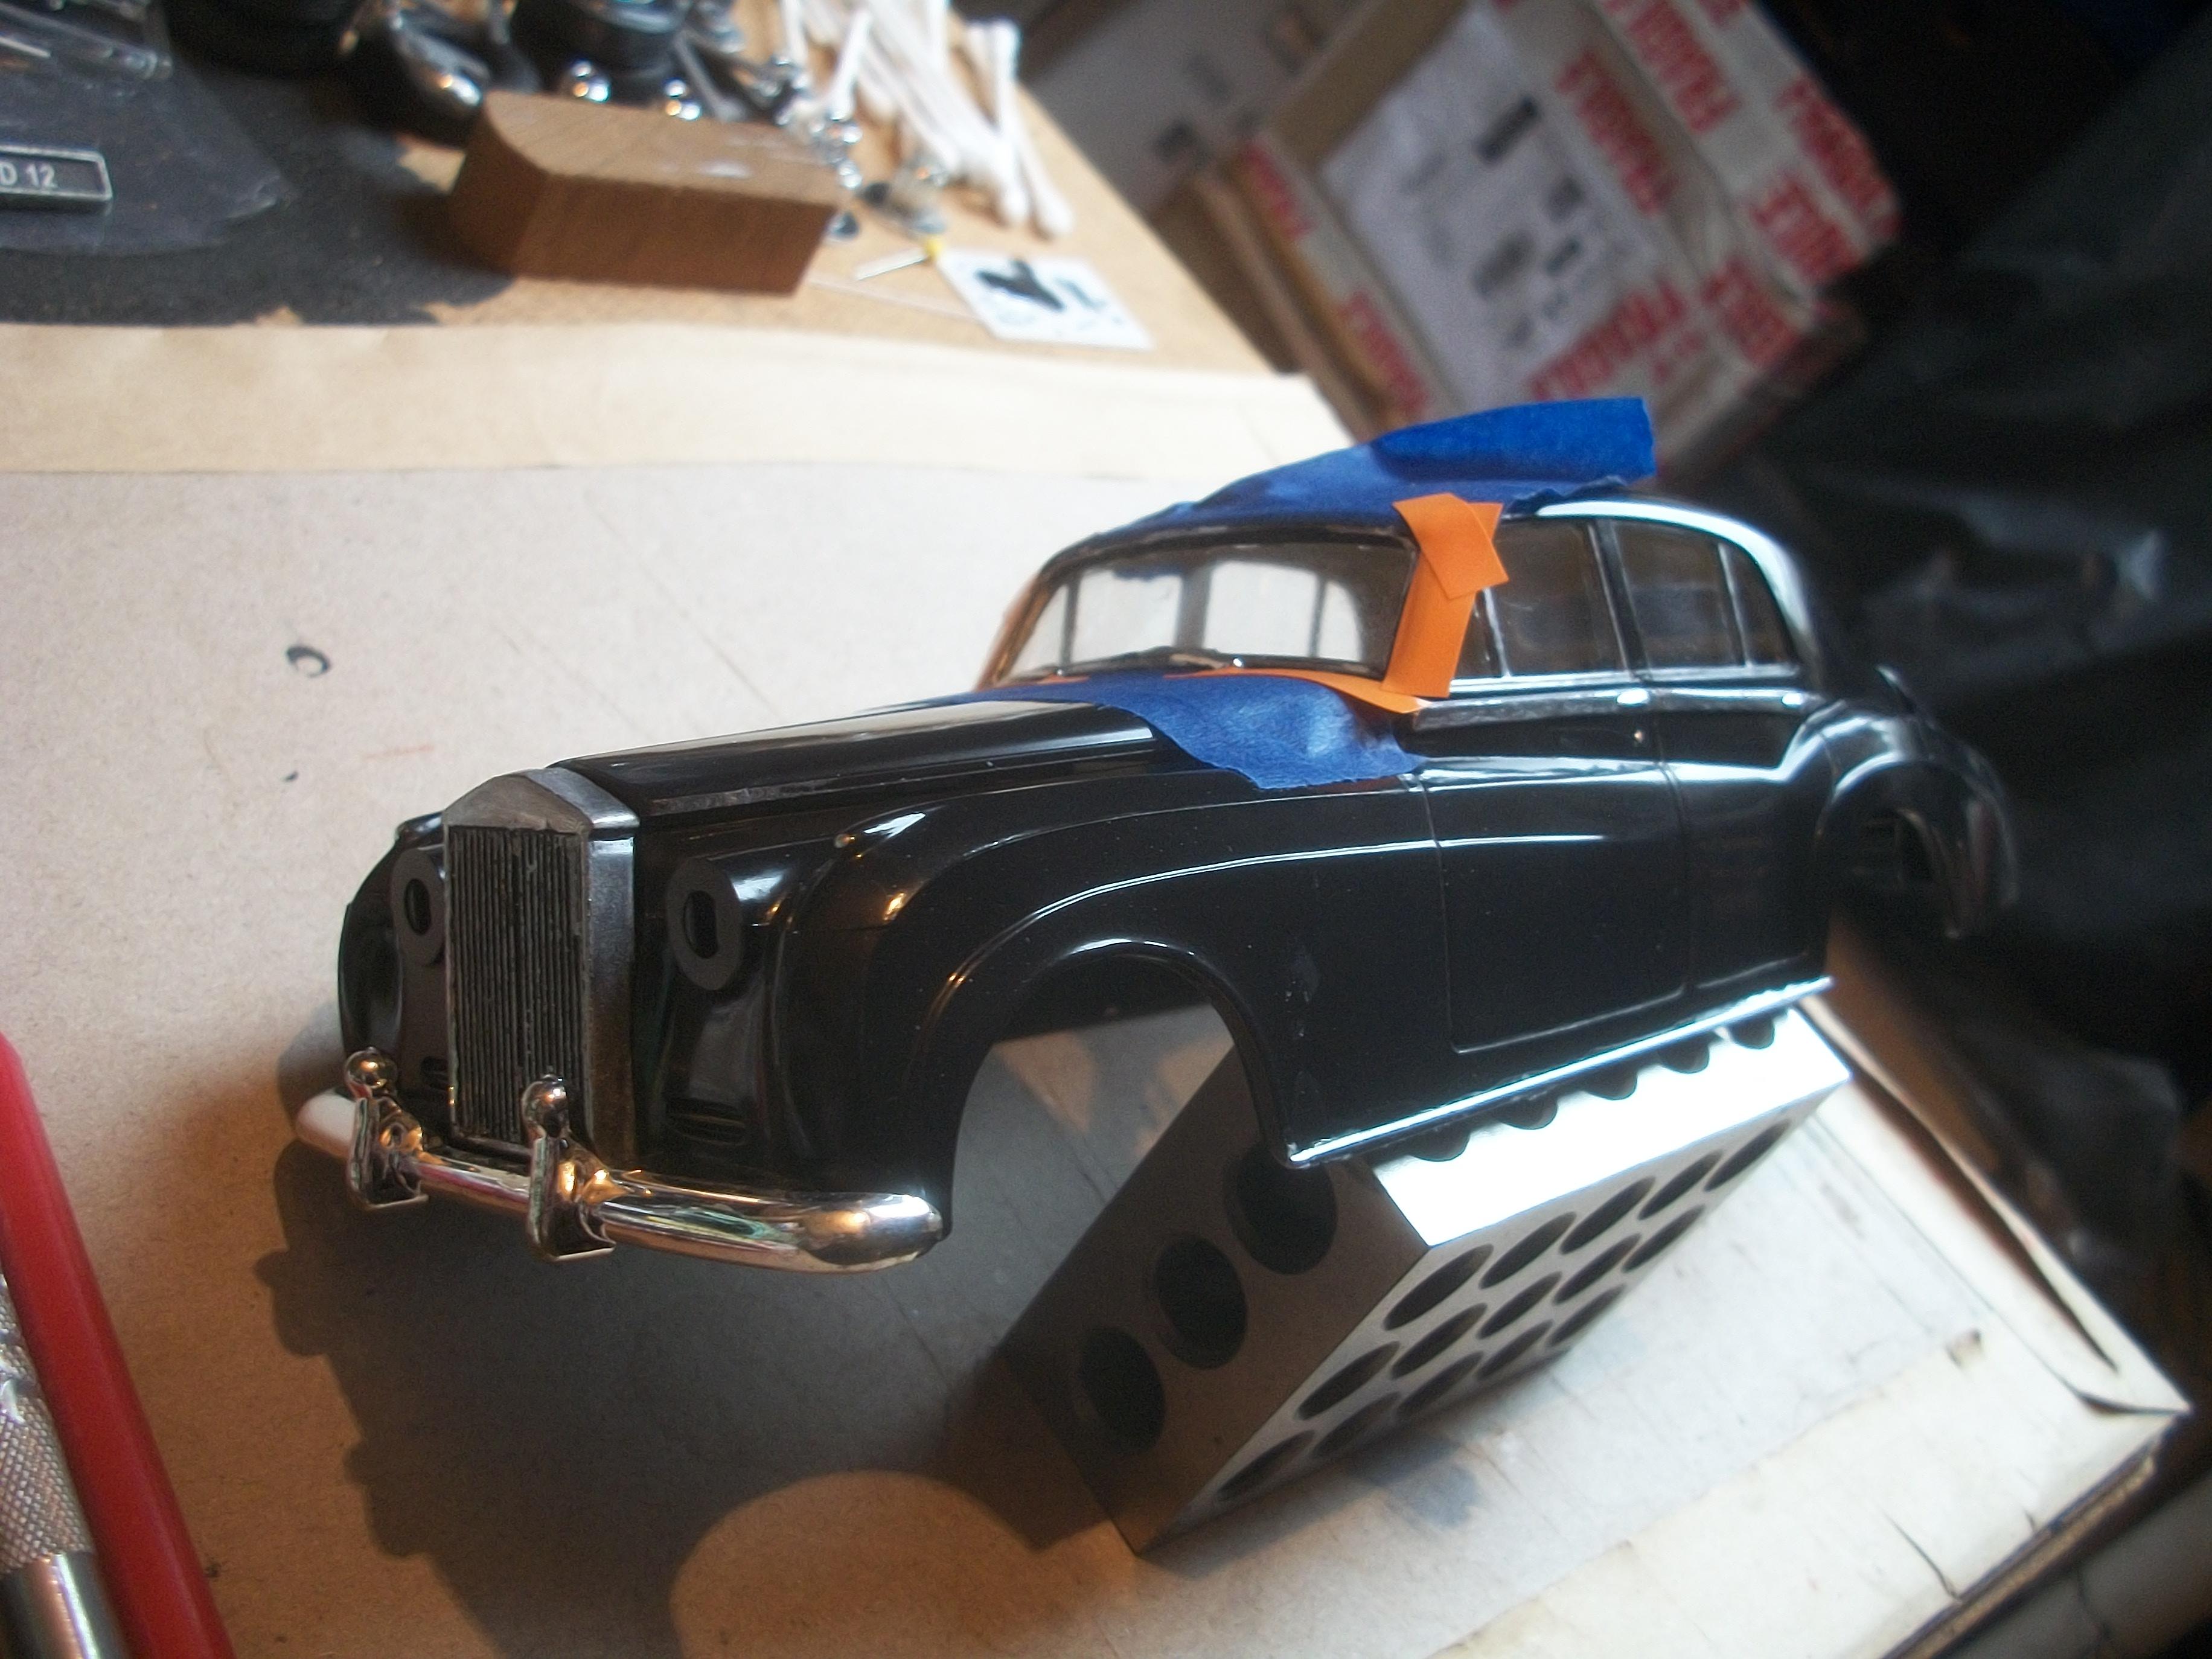
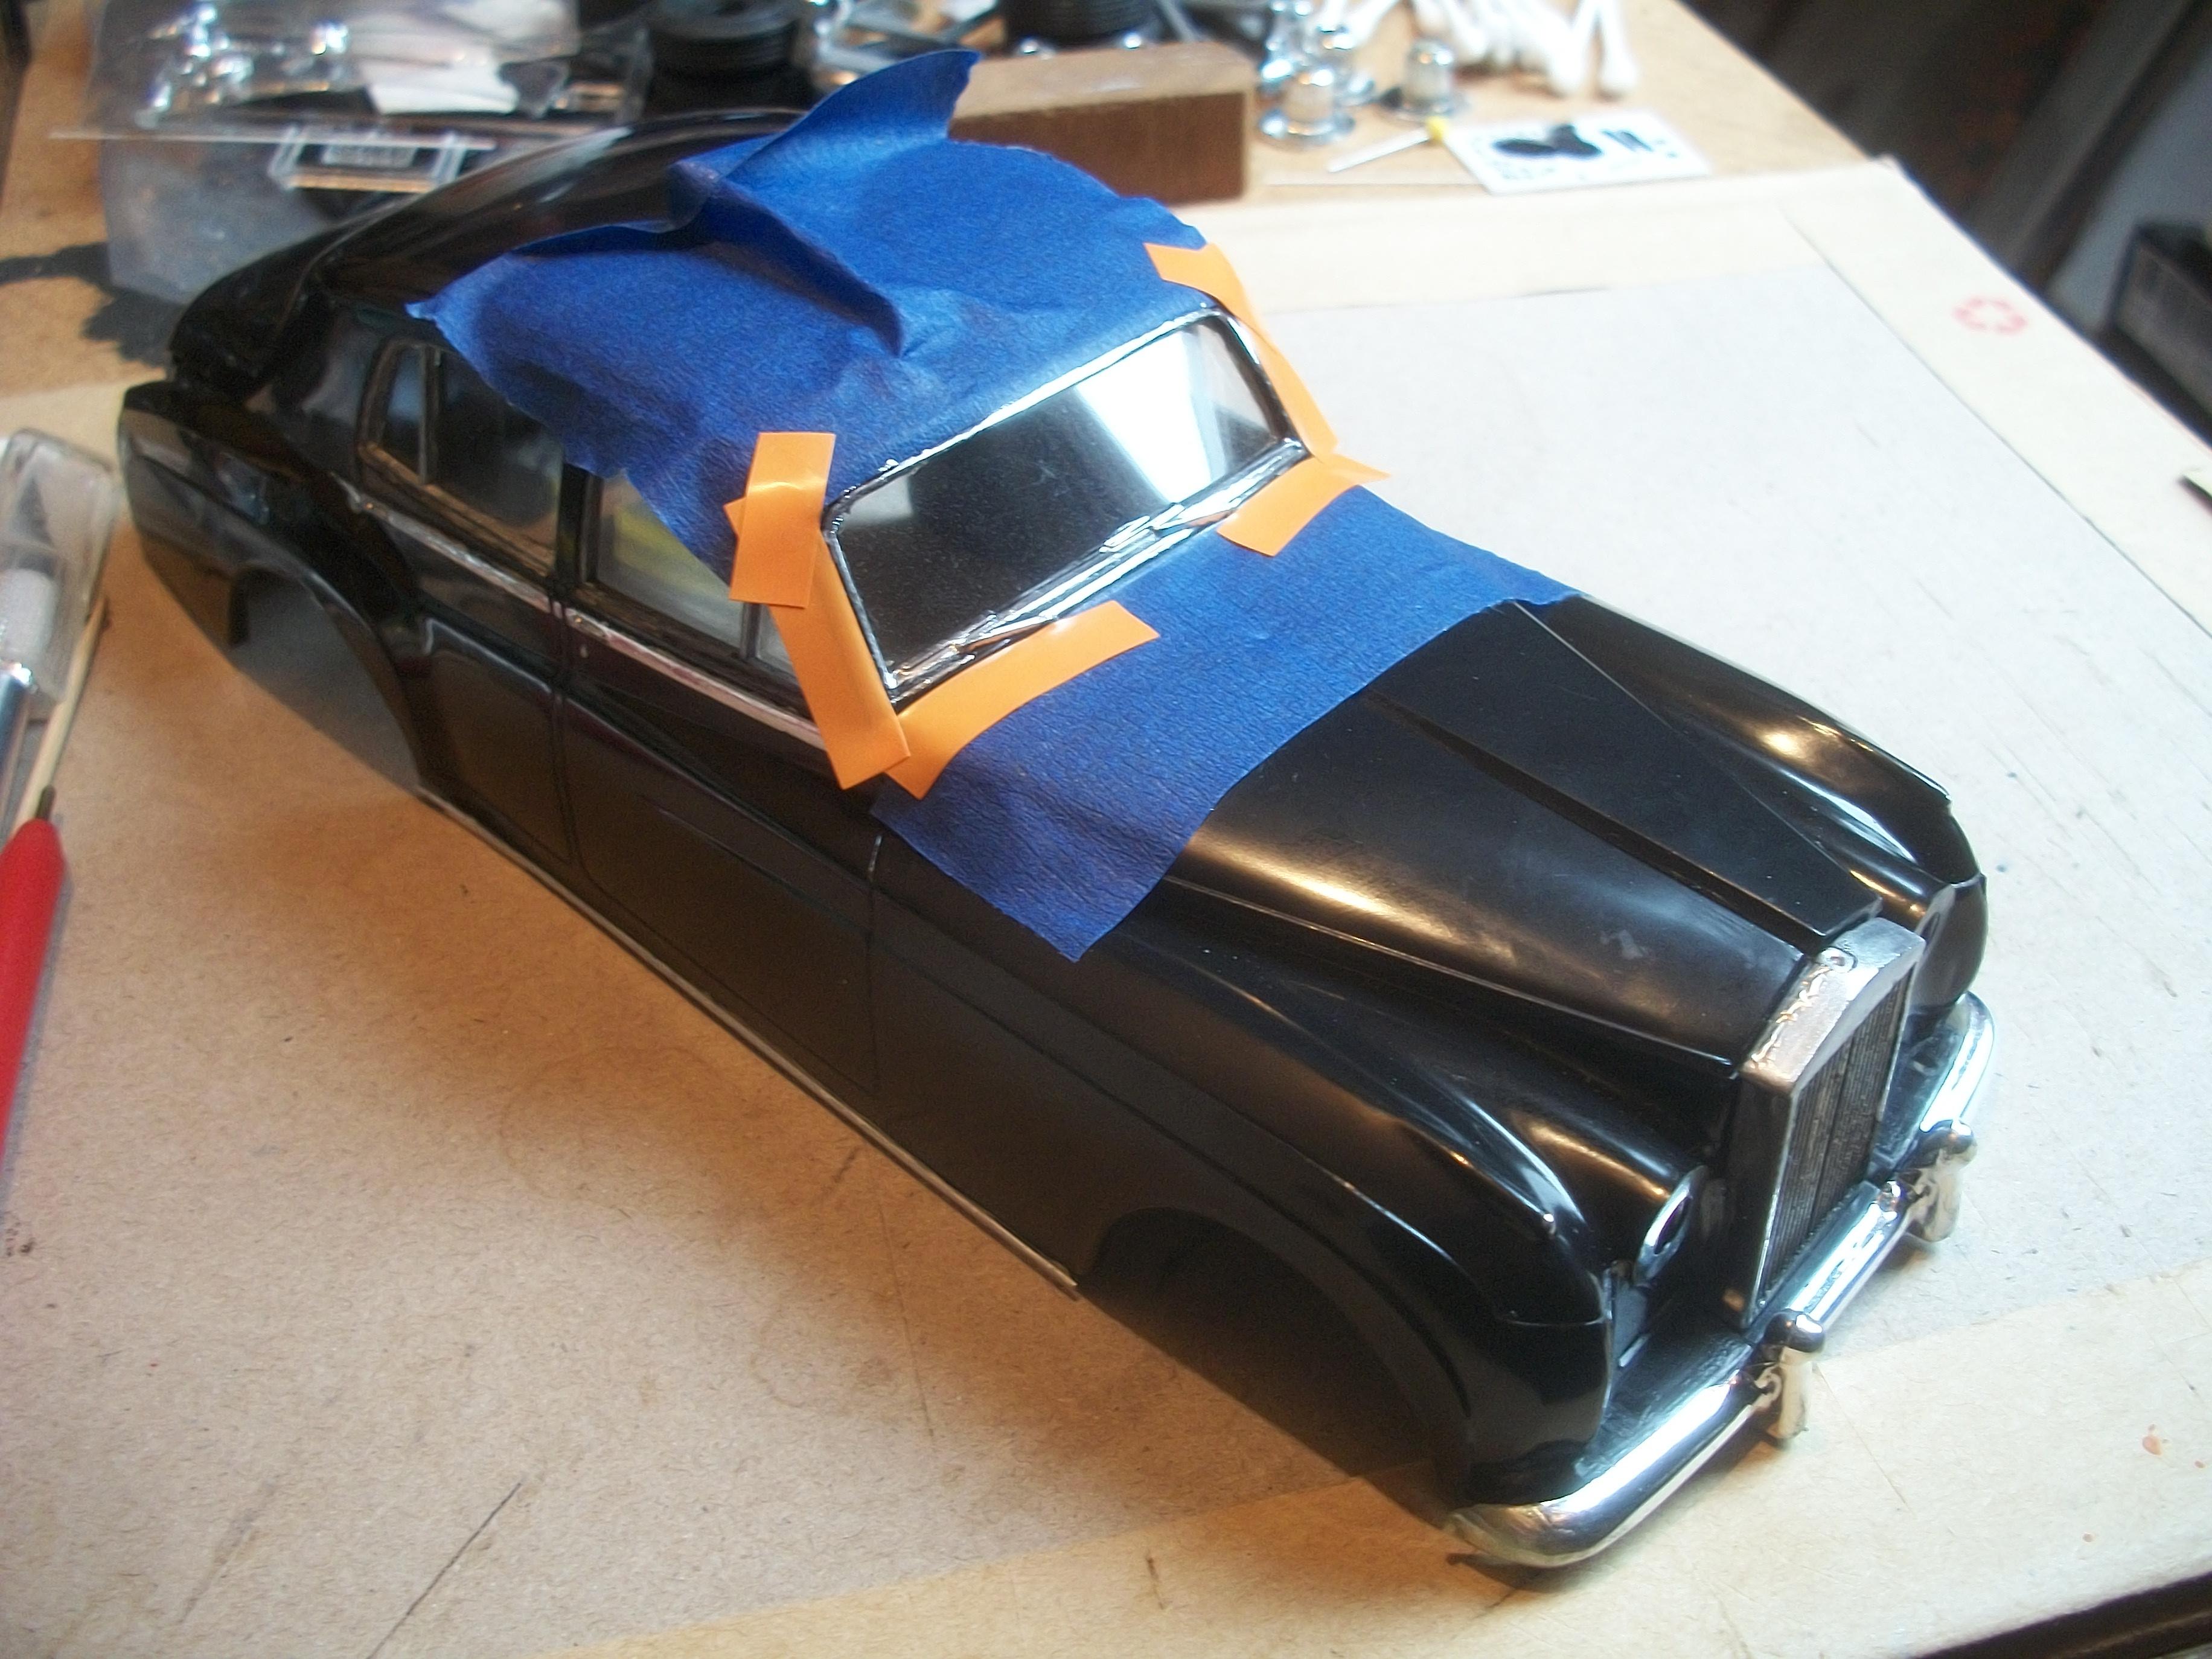
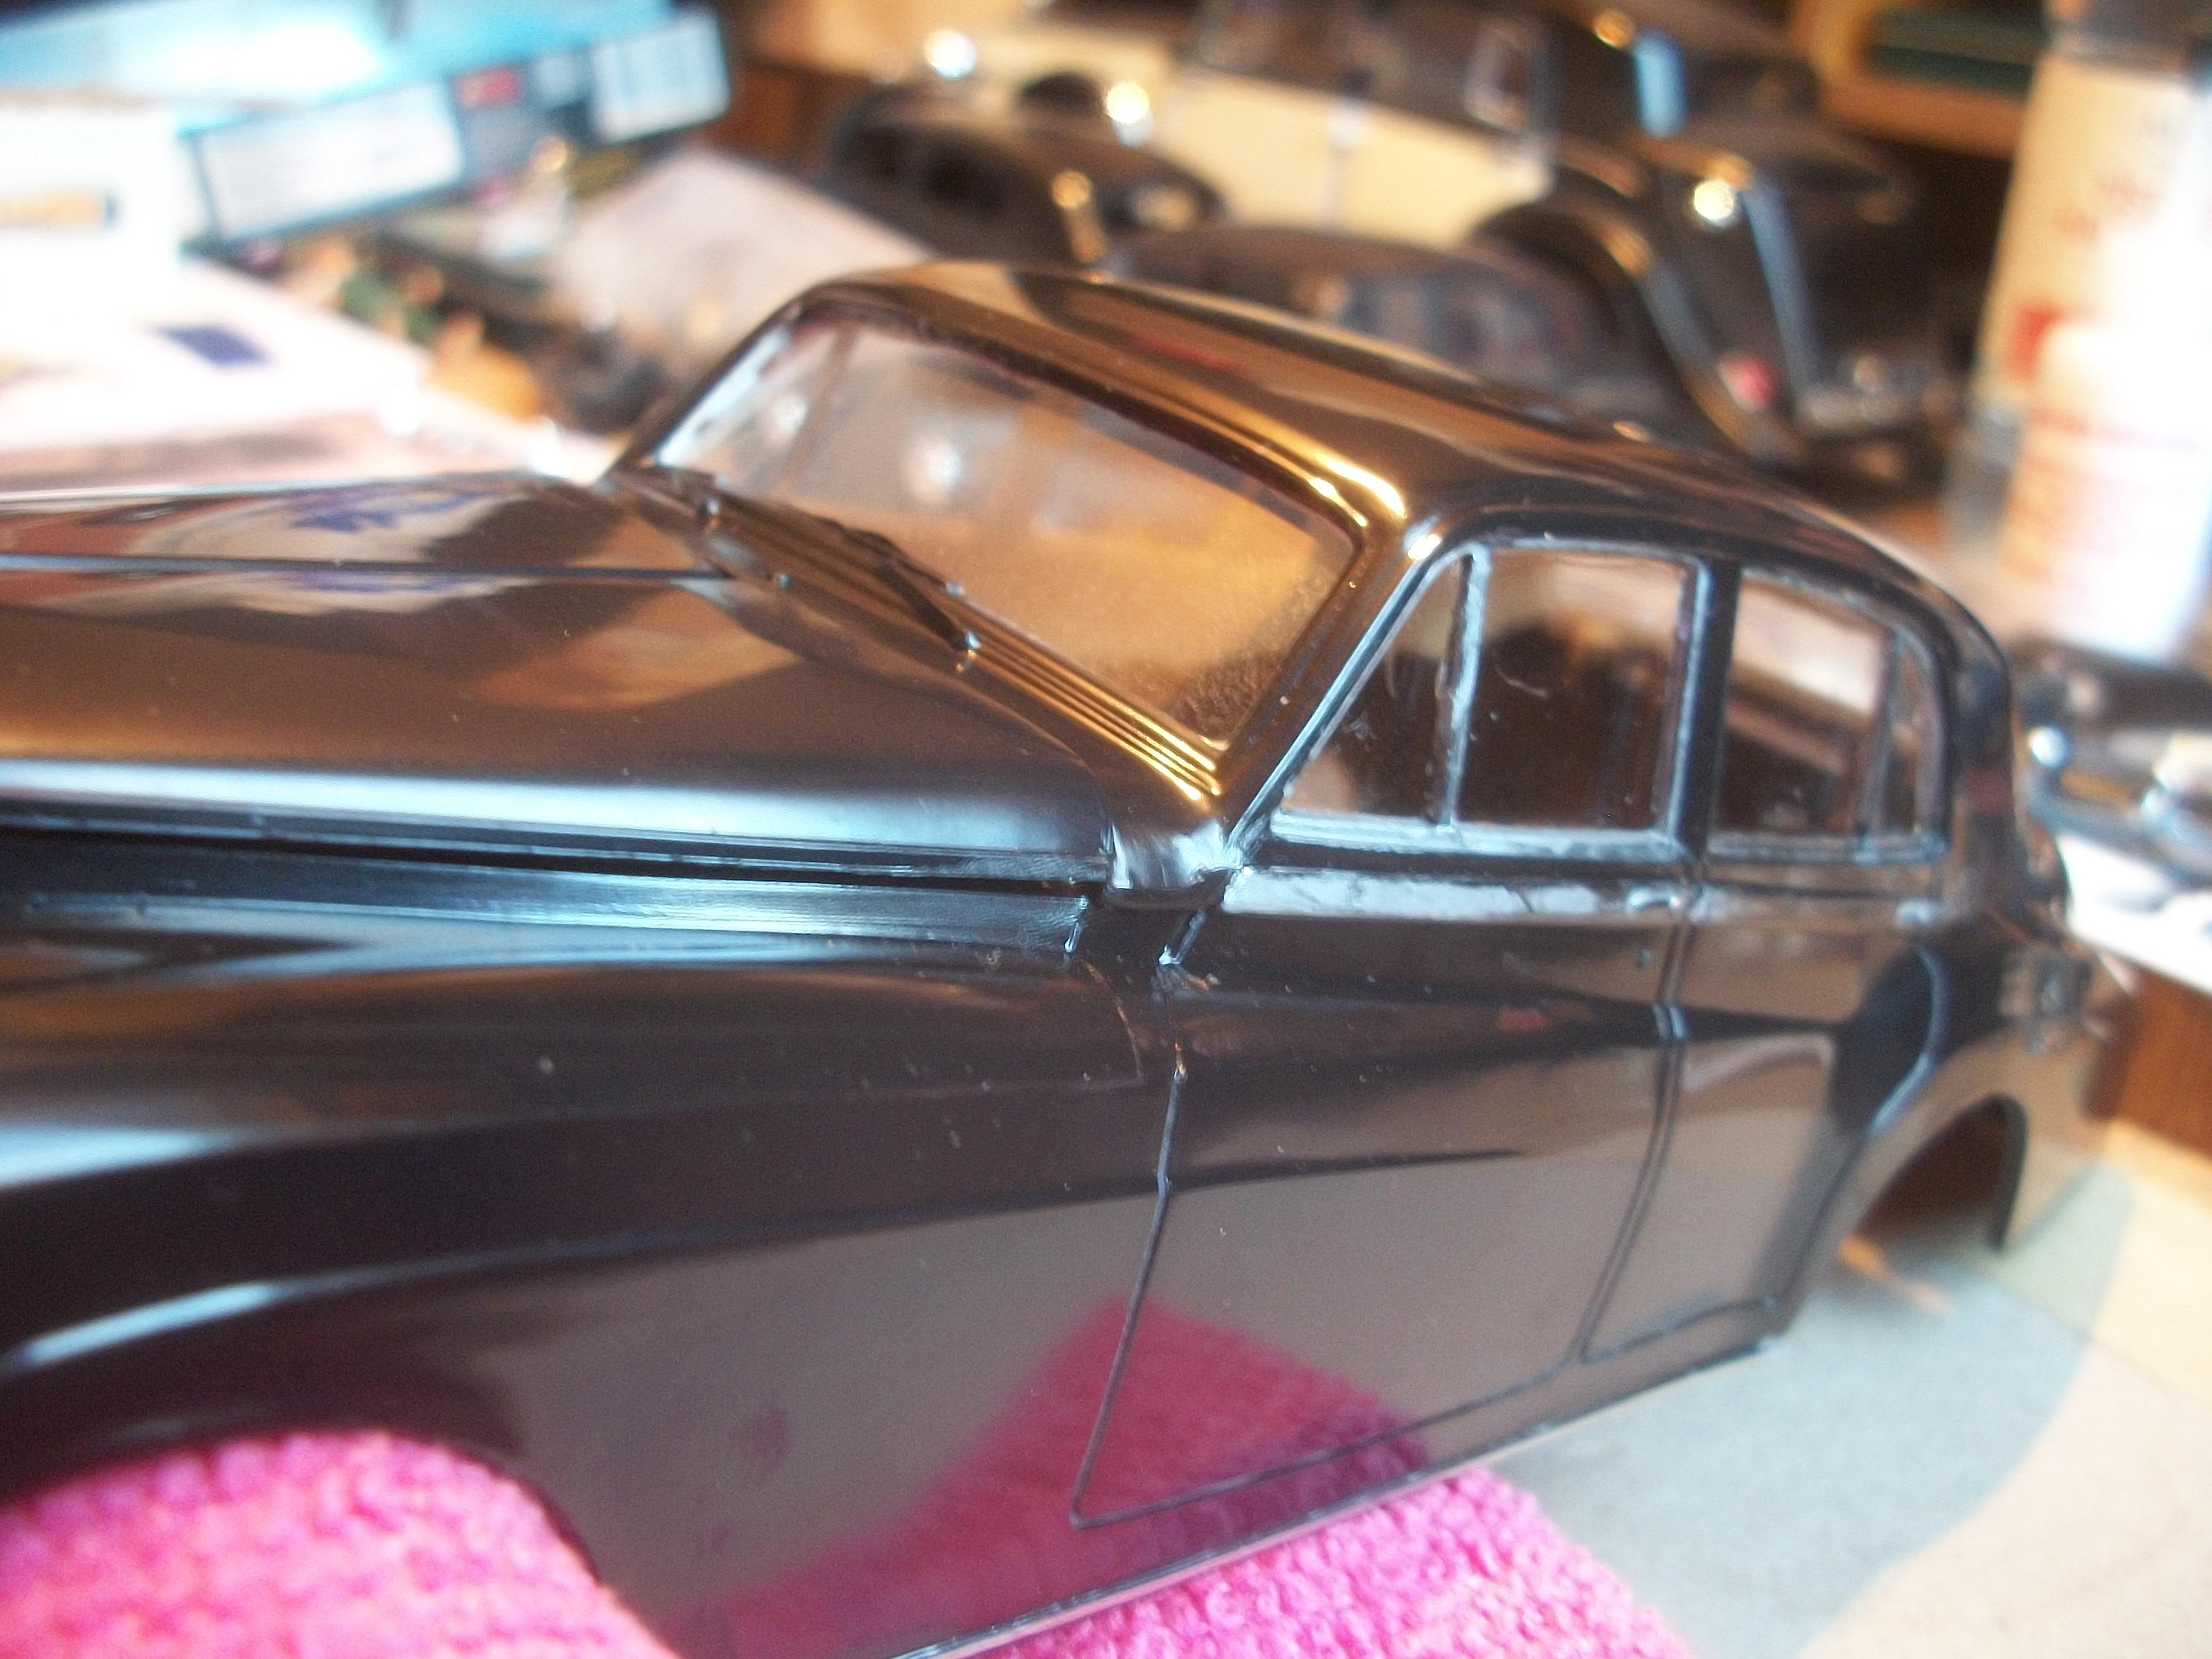
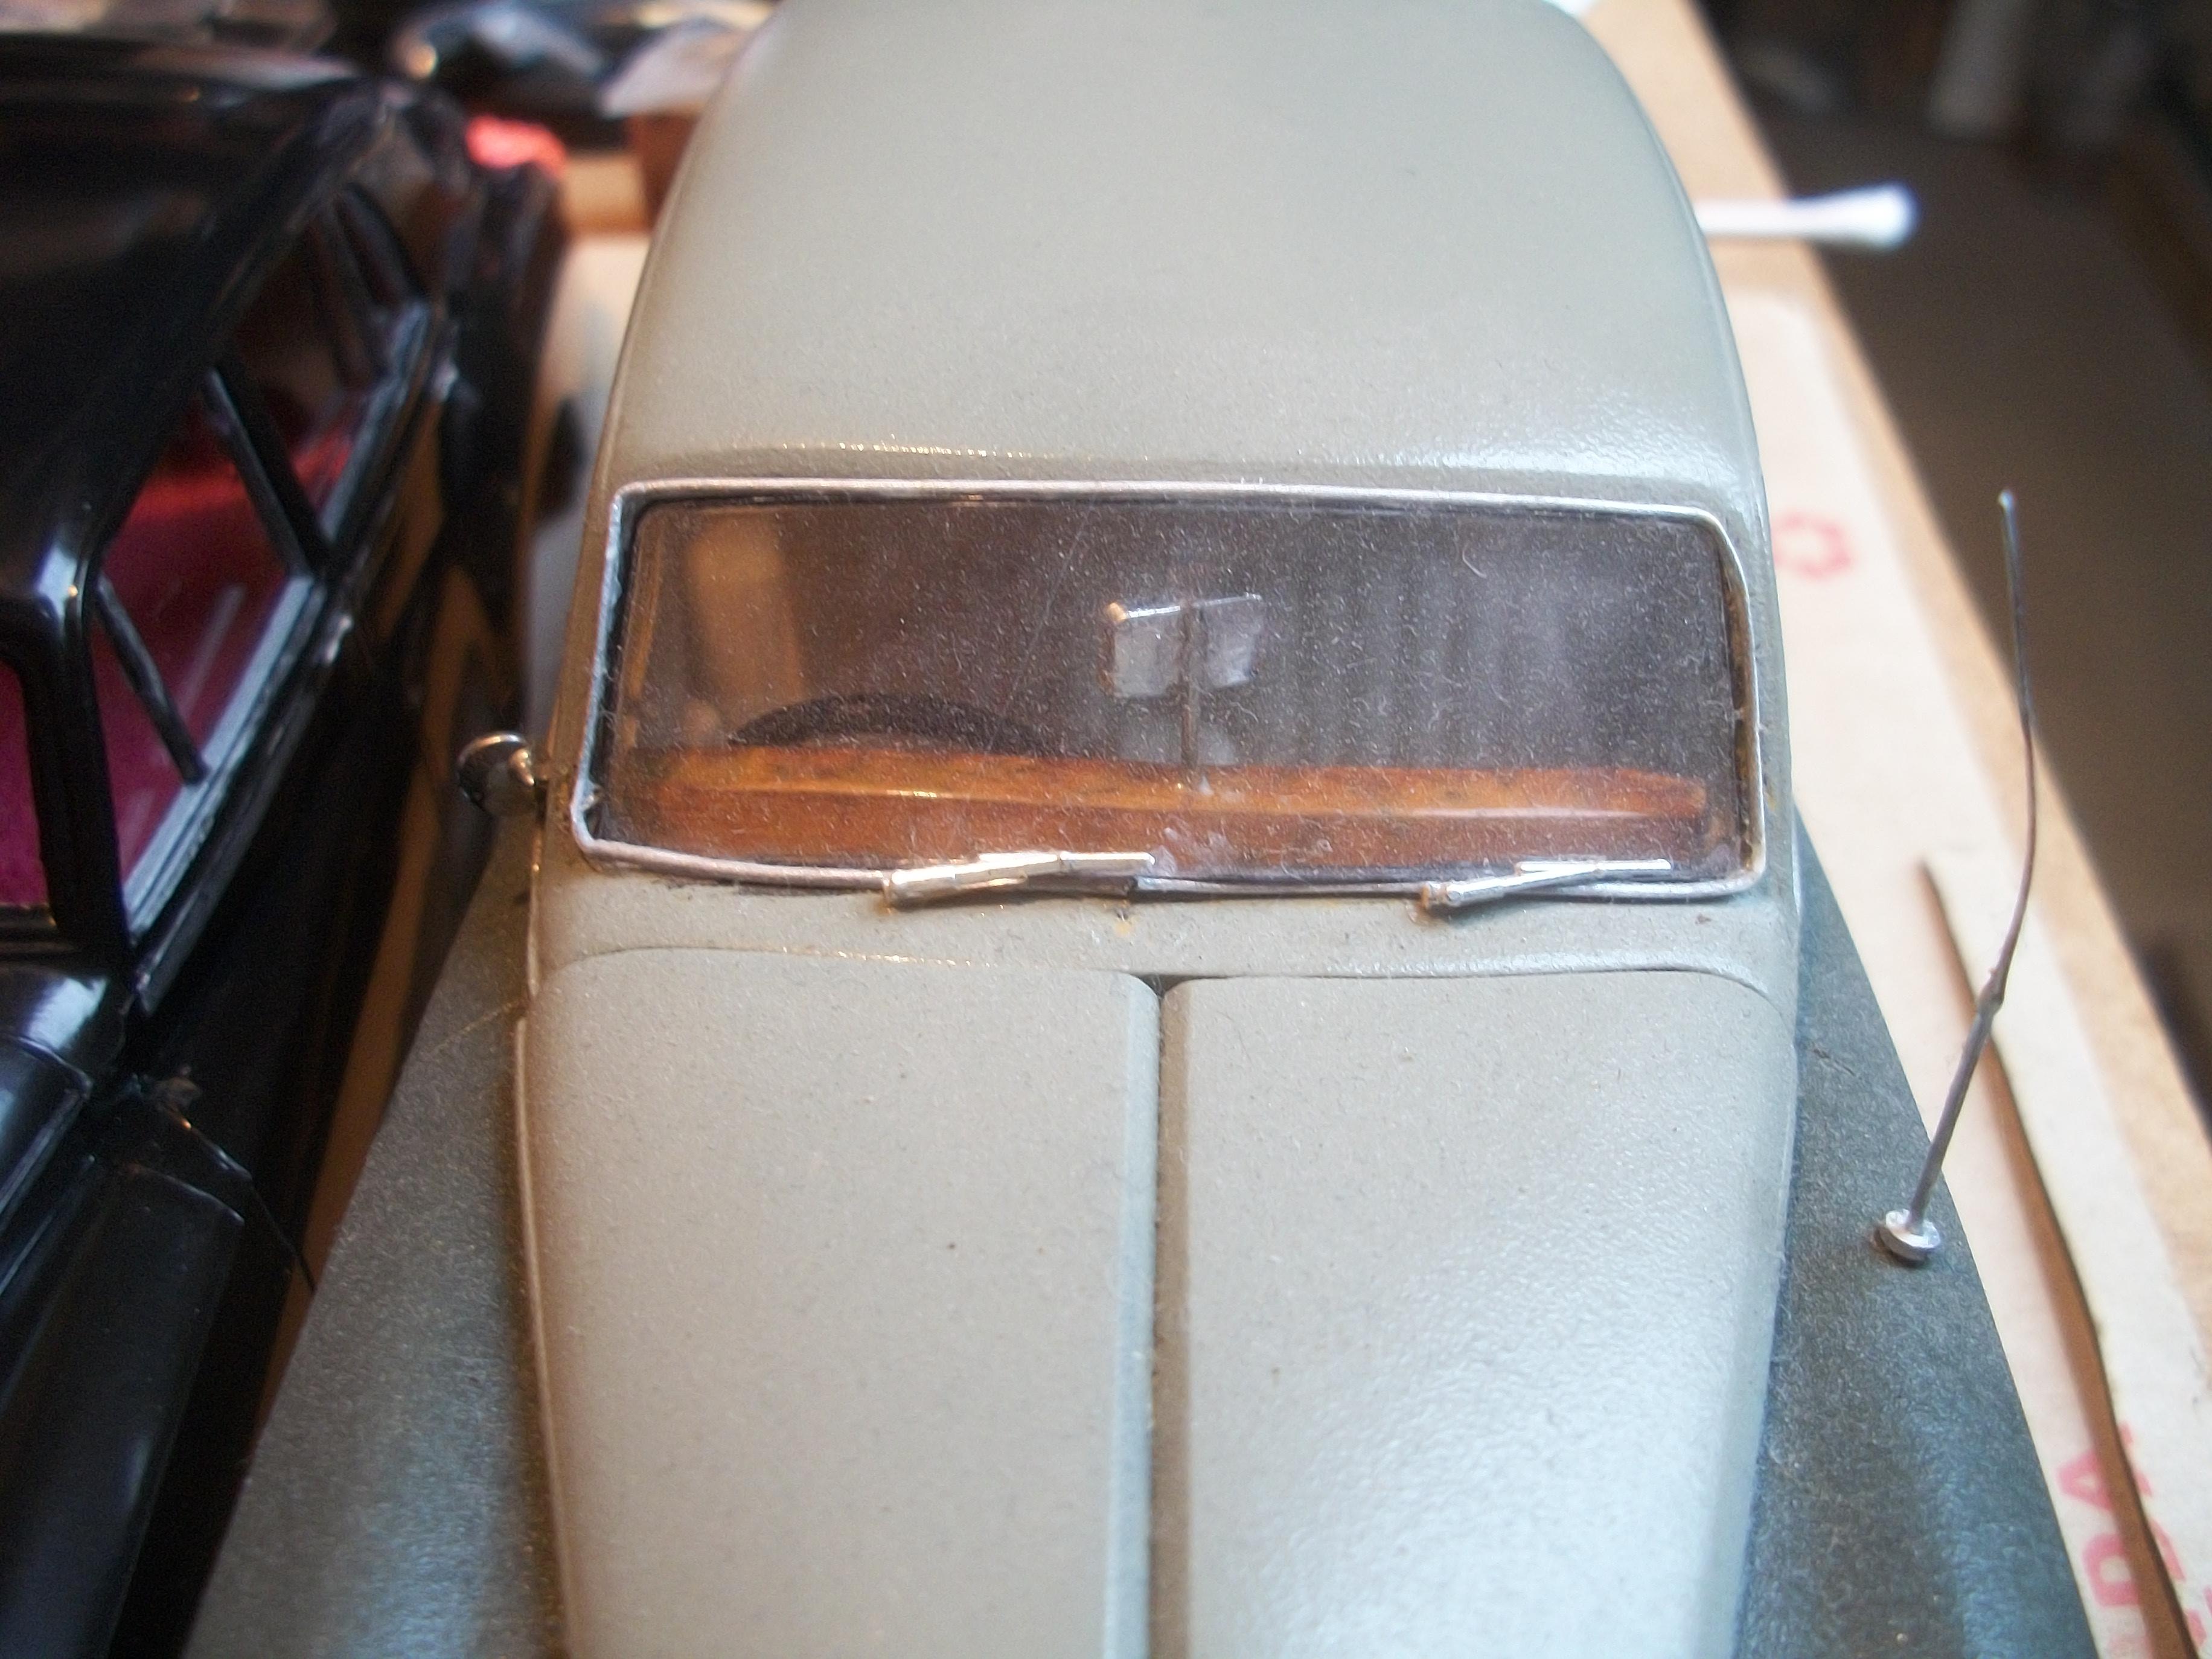
The interior dashboard mirror and stalk are being prepared to mount on top of the dashboard in the centre, where I have drilled a hole at an angle. This mirror needs to be chromed on both sides and it is made from a short length of metal paper clip which is glued to a small piece of sheet styrene . . . Having removed the masking tape from around the windshield, I can see that there is some bleeding of the chrome along the top edge. I am in the process of tidying up this excess chrome, and the two front air intakes have been chromed. These are being improved also, where the liquid chrome has run into the intakes. At the rear of the driver's side door strips there was a small amount of excess chrome that I have removed successfully . . . Some marks on the passenger side front wing were removed by further polishing, but in doing so, I caused the sill molding to fall off. This is now glued back in position . . . None of this is particularly interesting work, with most of it being cleaning up or correcting errors. Progress remains rather slow. To the right of the steering column and behind the steering wheel, there needs to be a stalk and triangular shaped box for the automatic gear selector. This will be quite a tricky part to make, but I am hoping to find the best way of doing this ( see last photo of the following series ). David
-
Rolls-Royce No Chemicals, No Paint, No Harmful Glues
Anglia105E replied to Anglia105E's topic in WIP: Model Cars
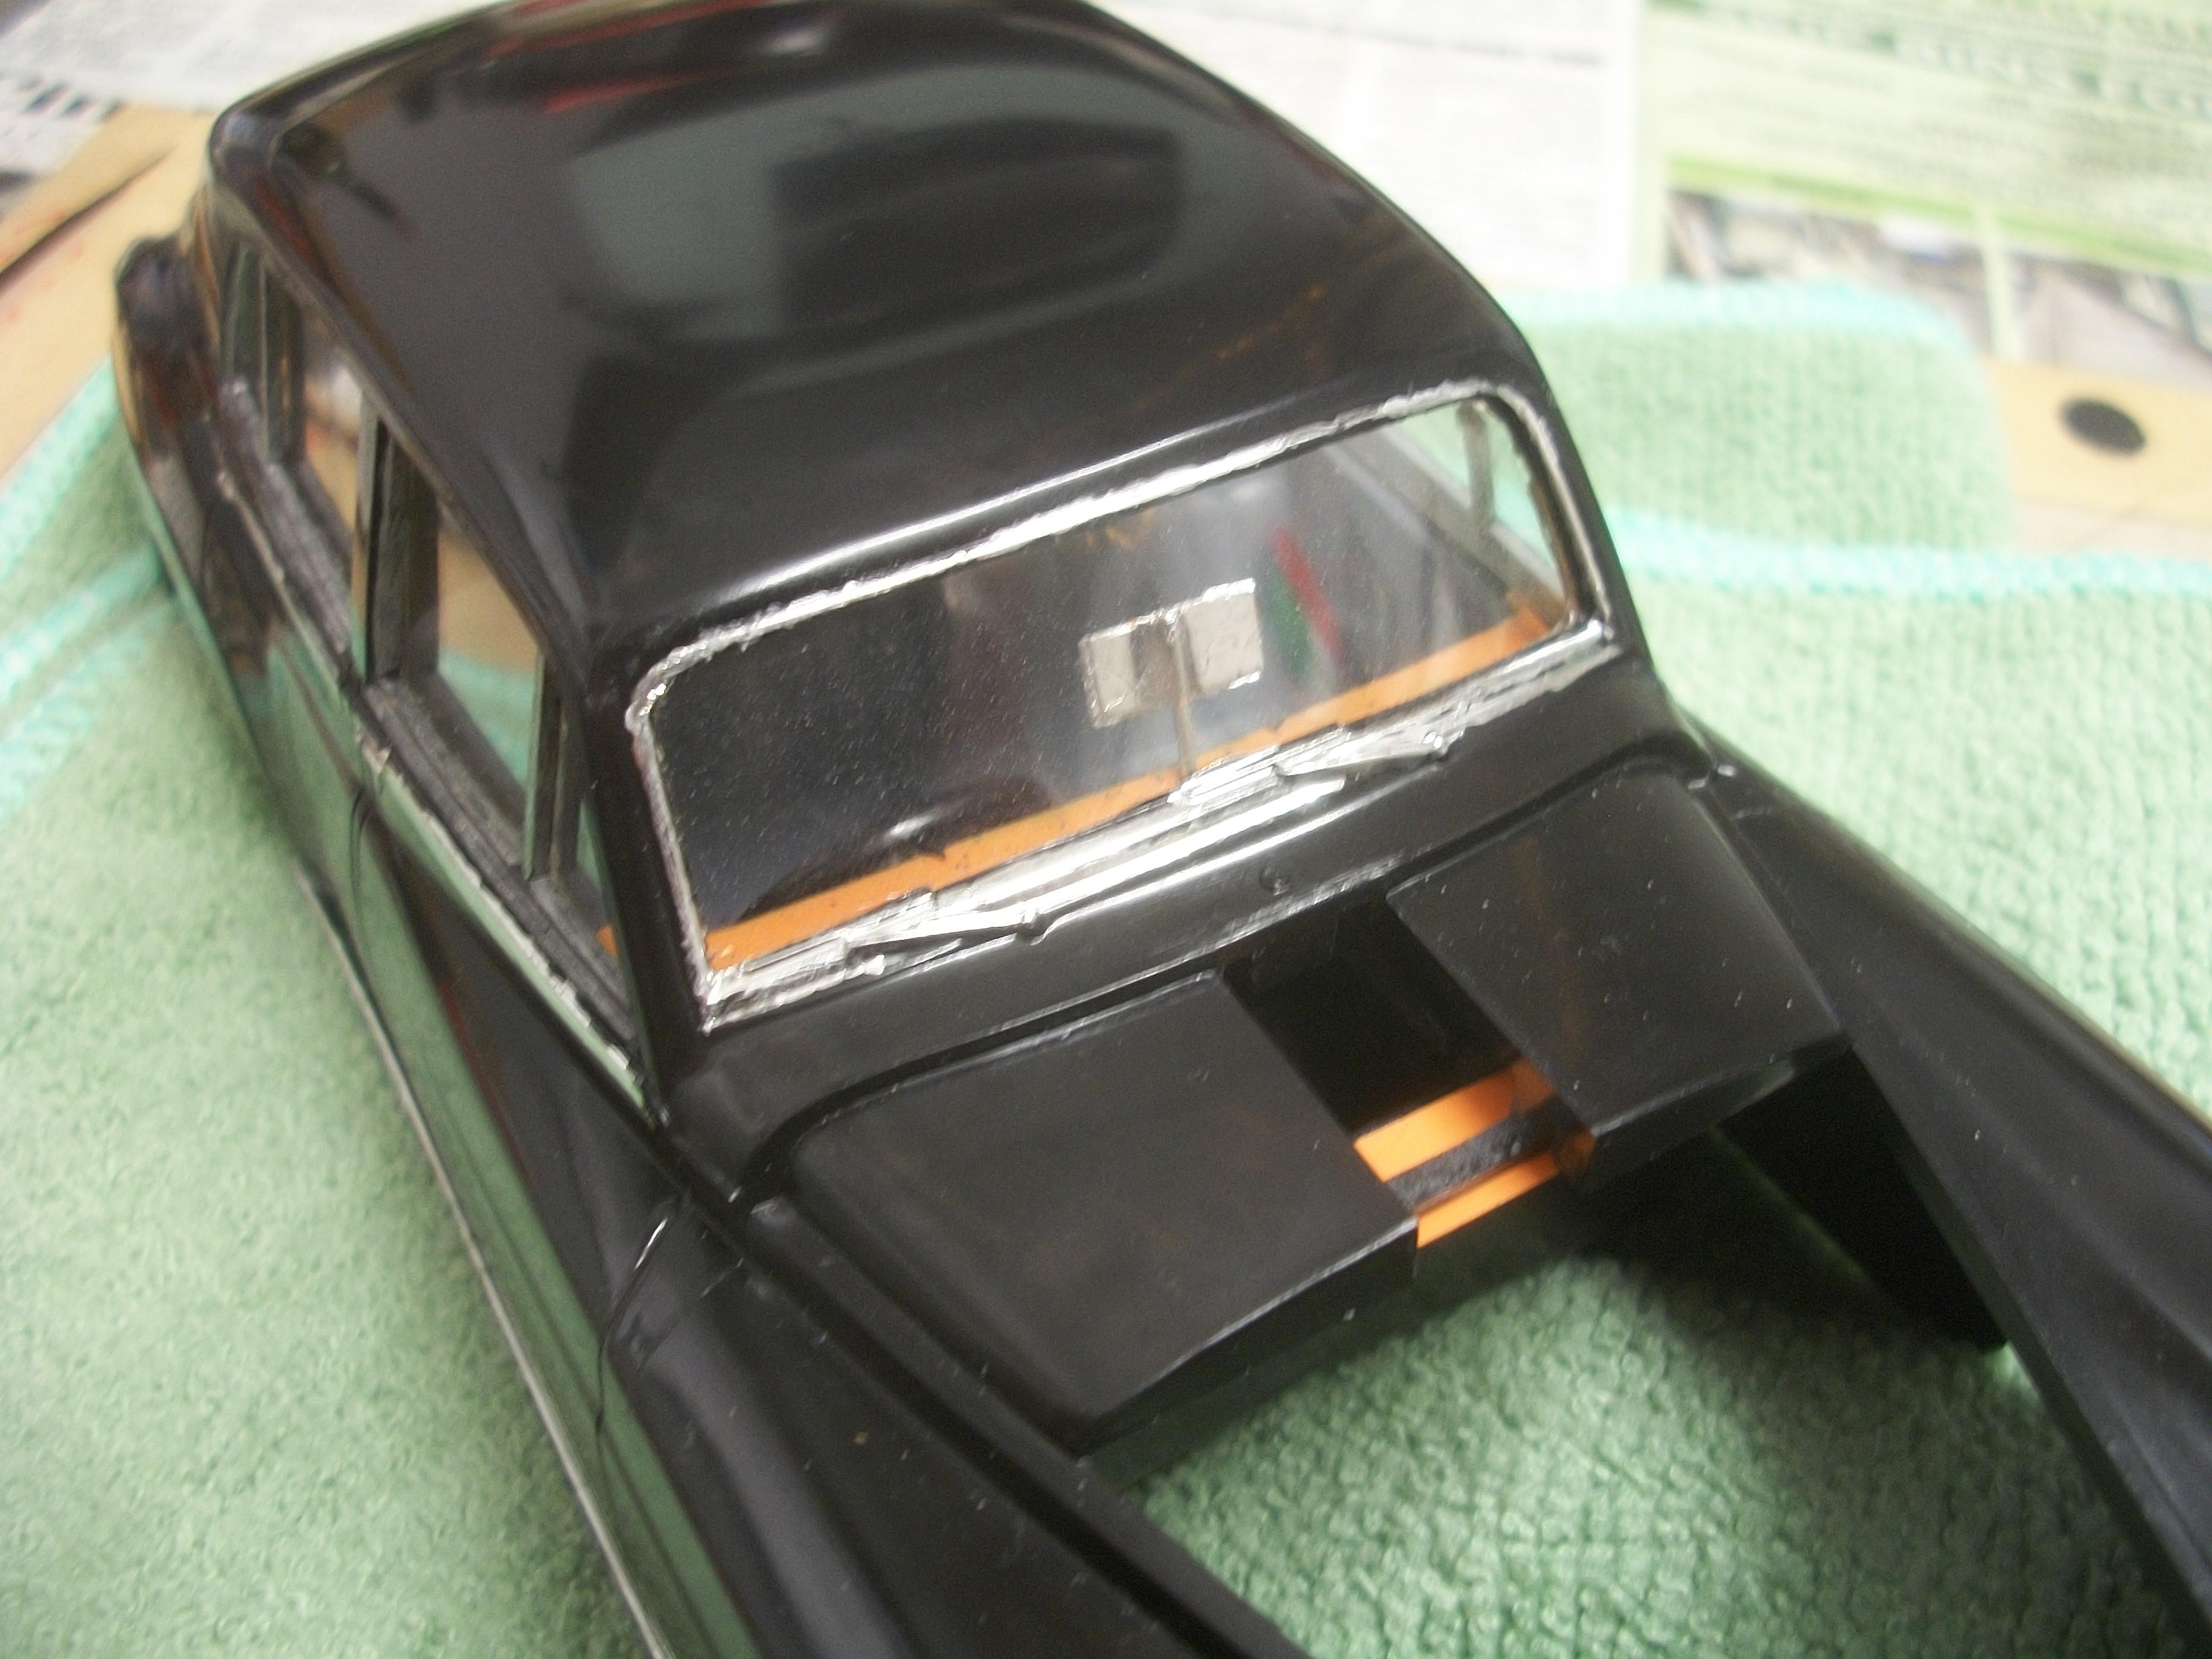
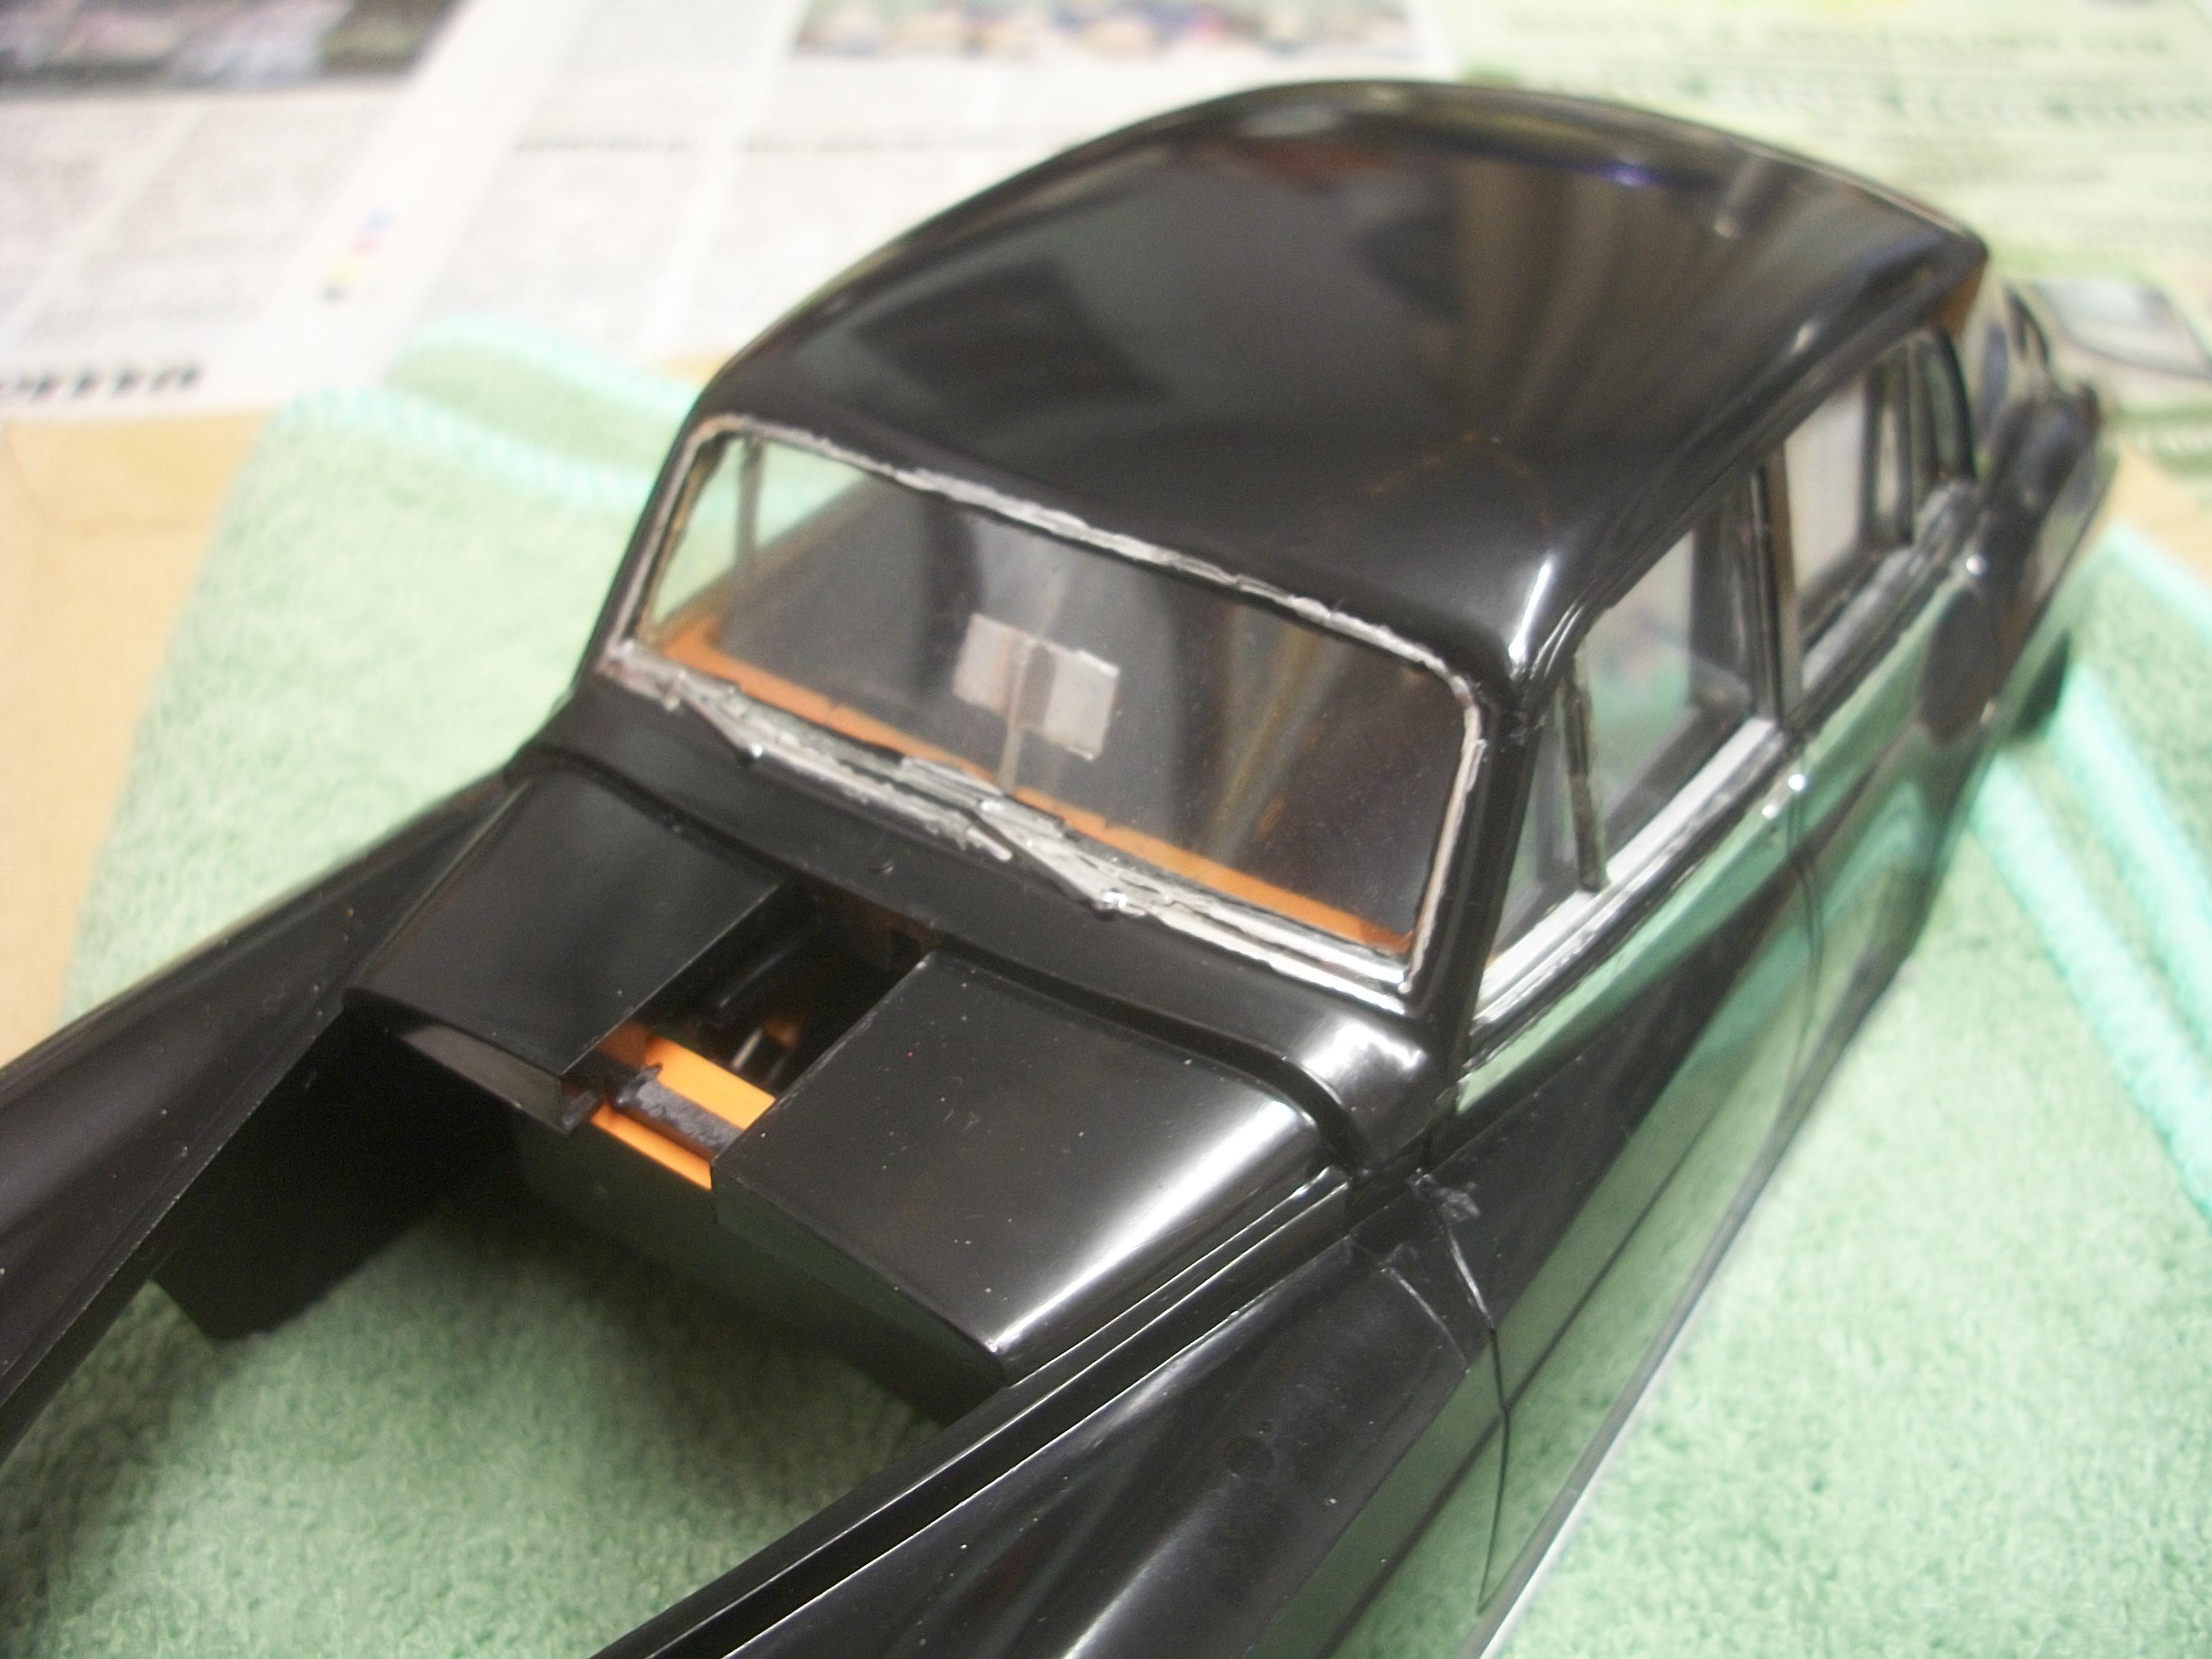
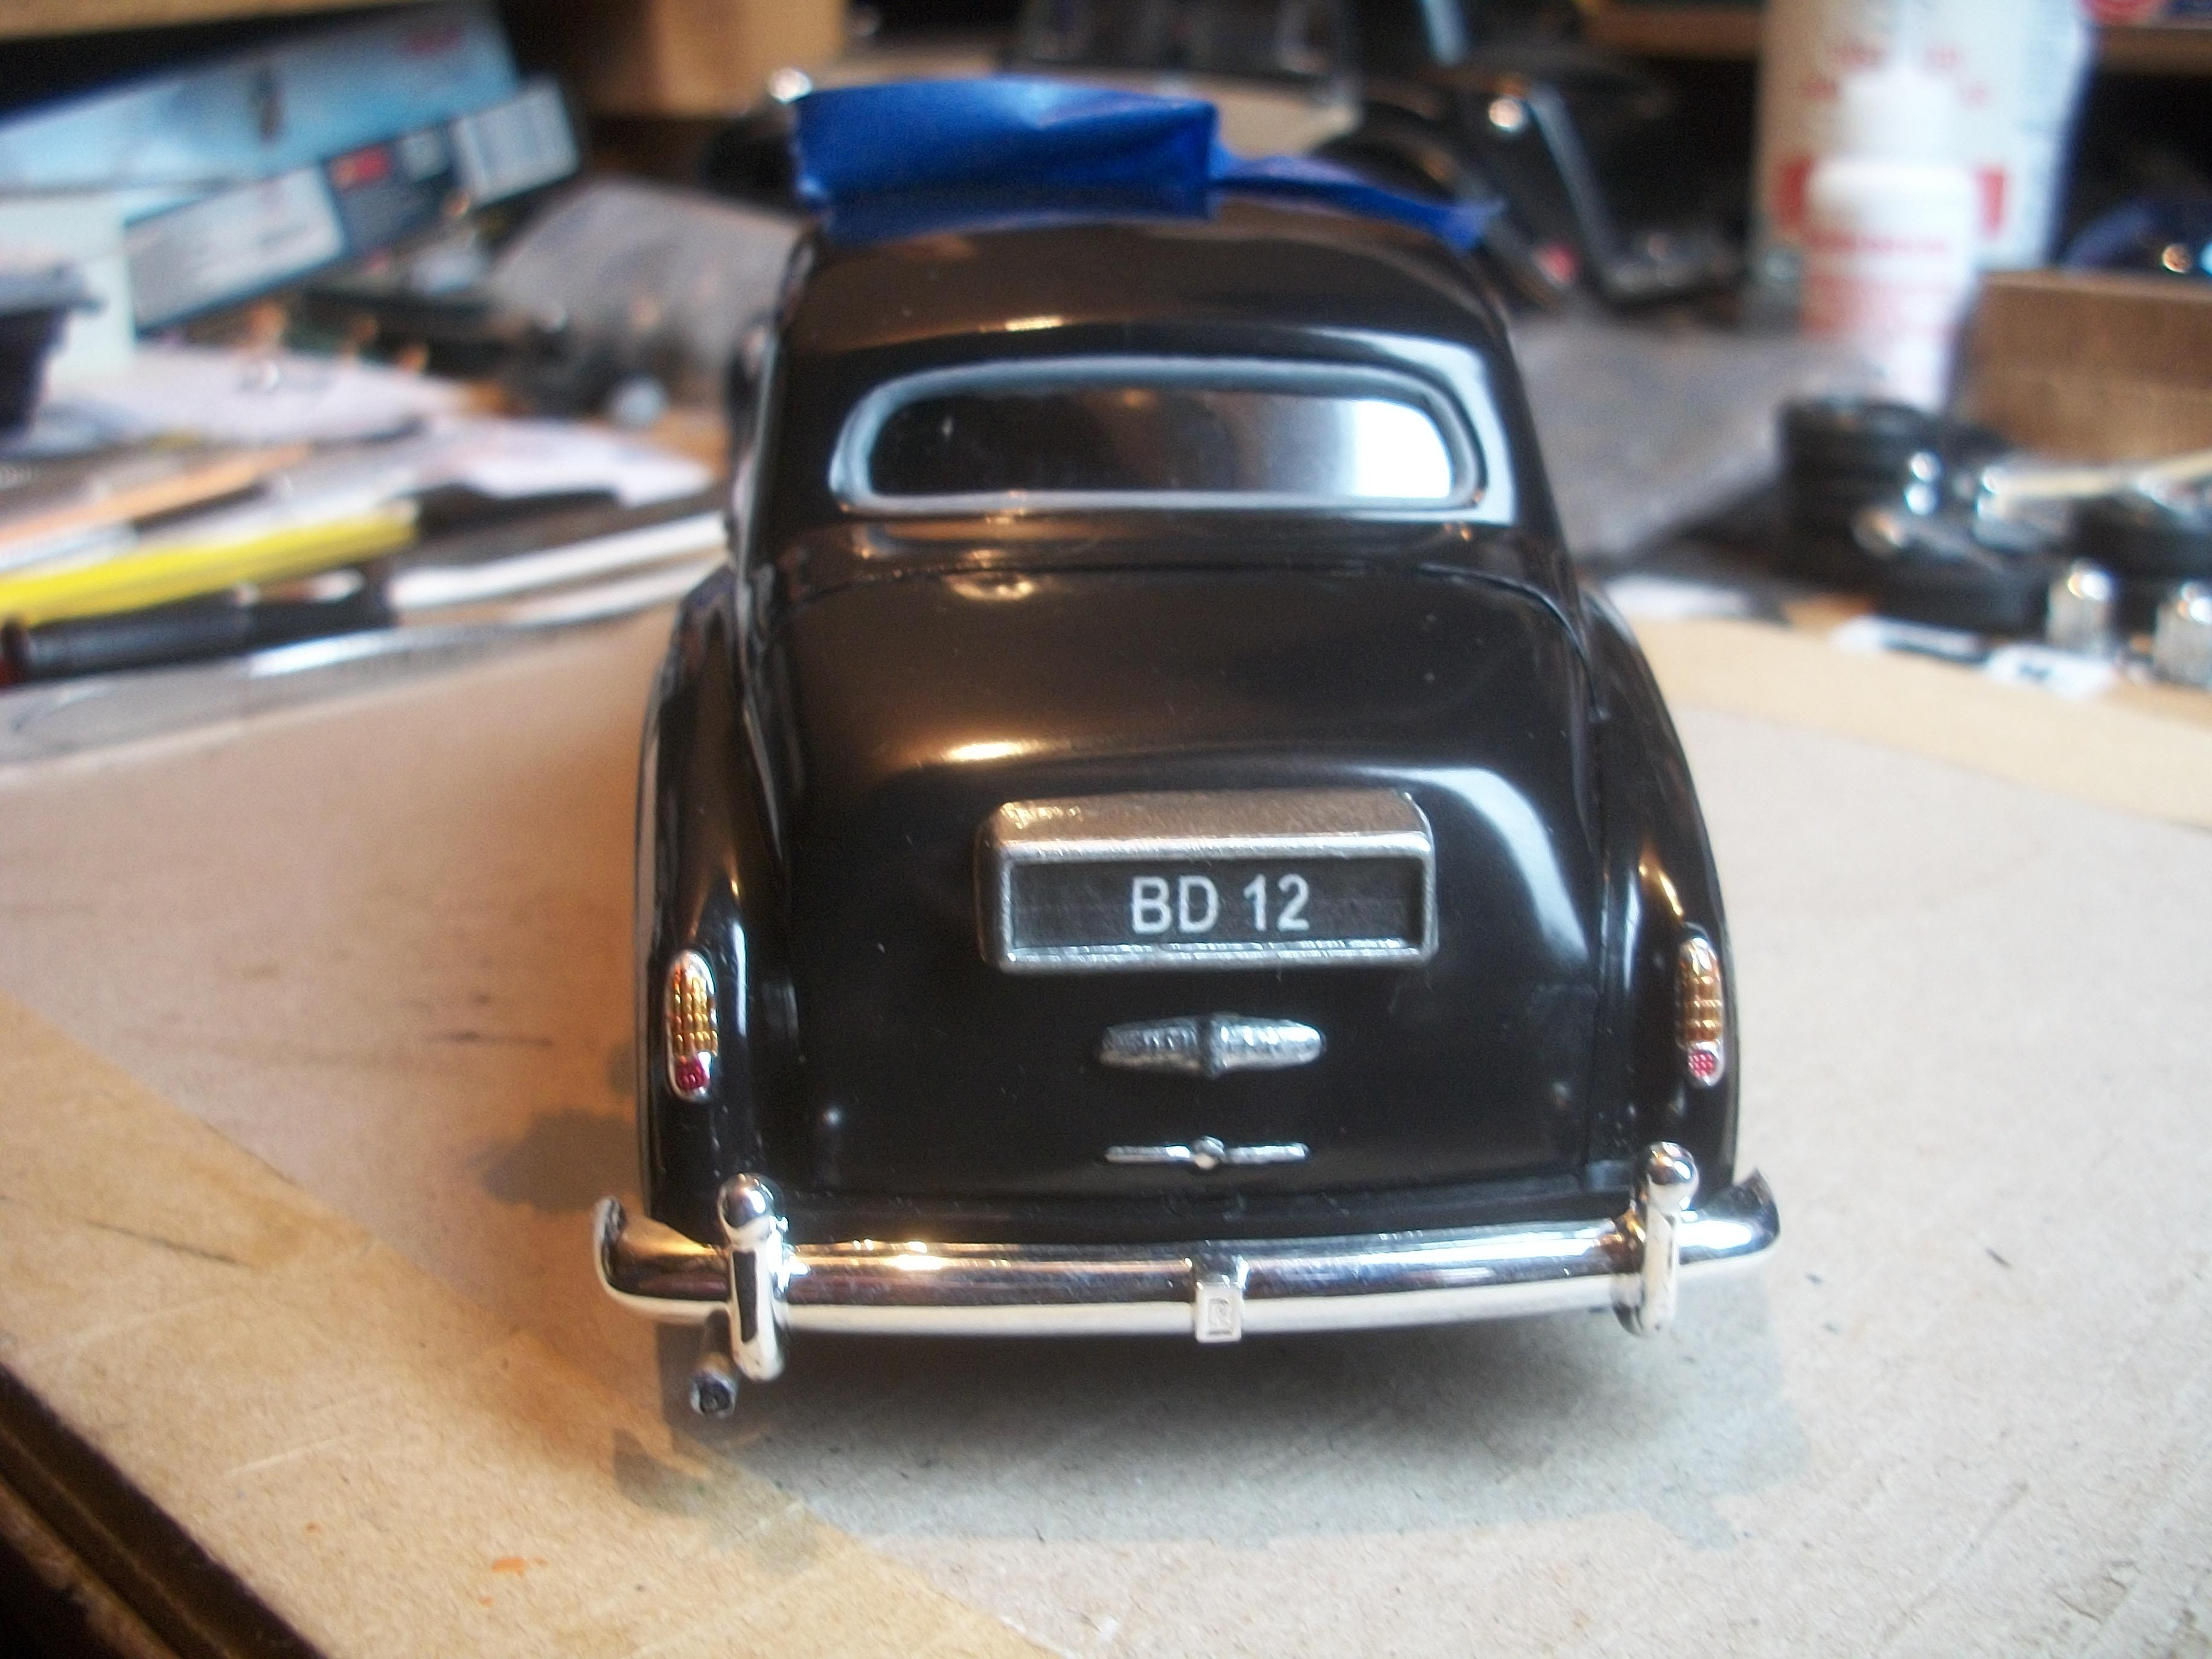
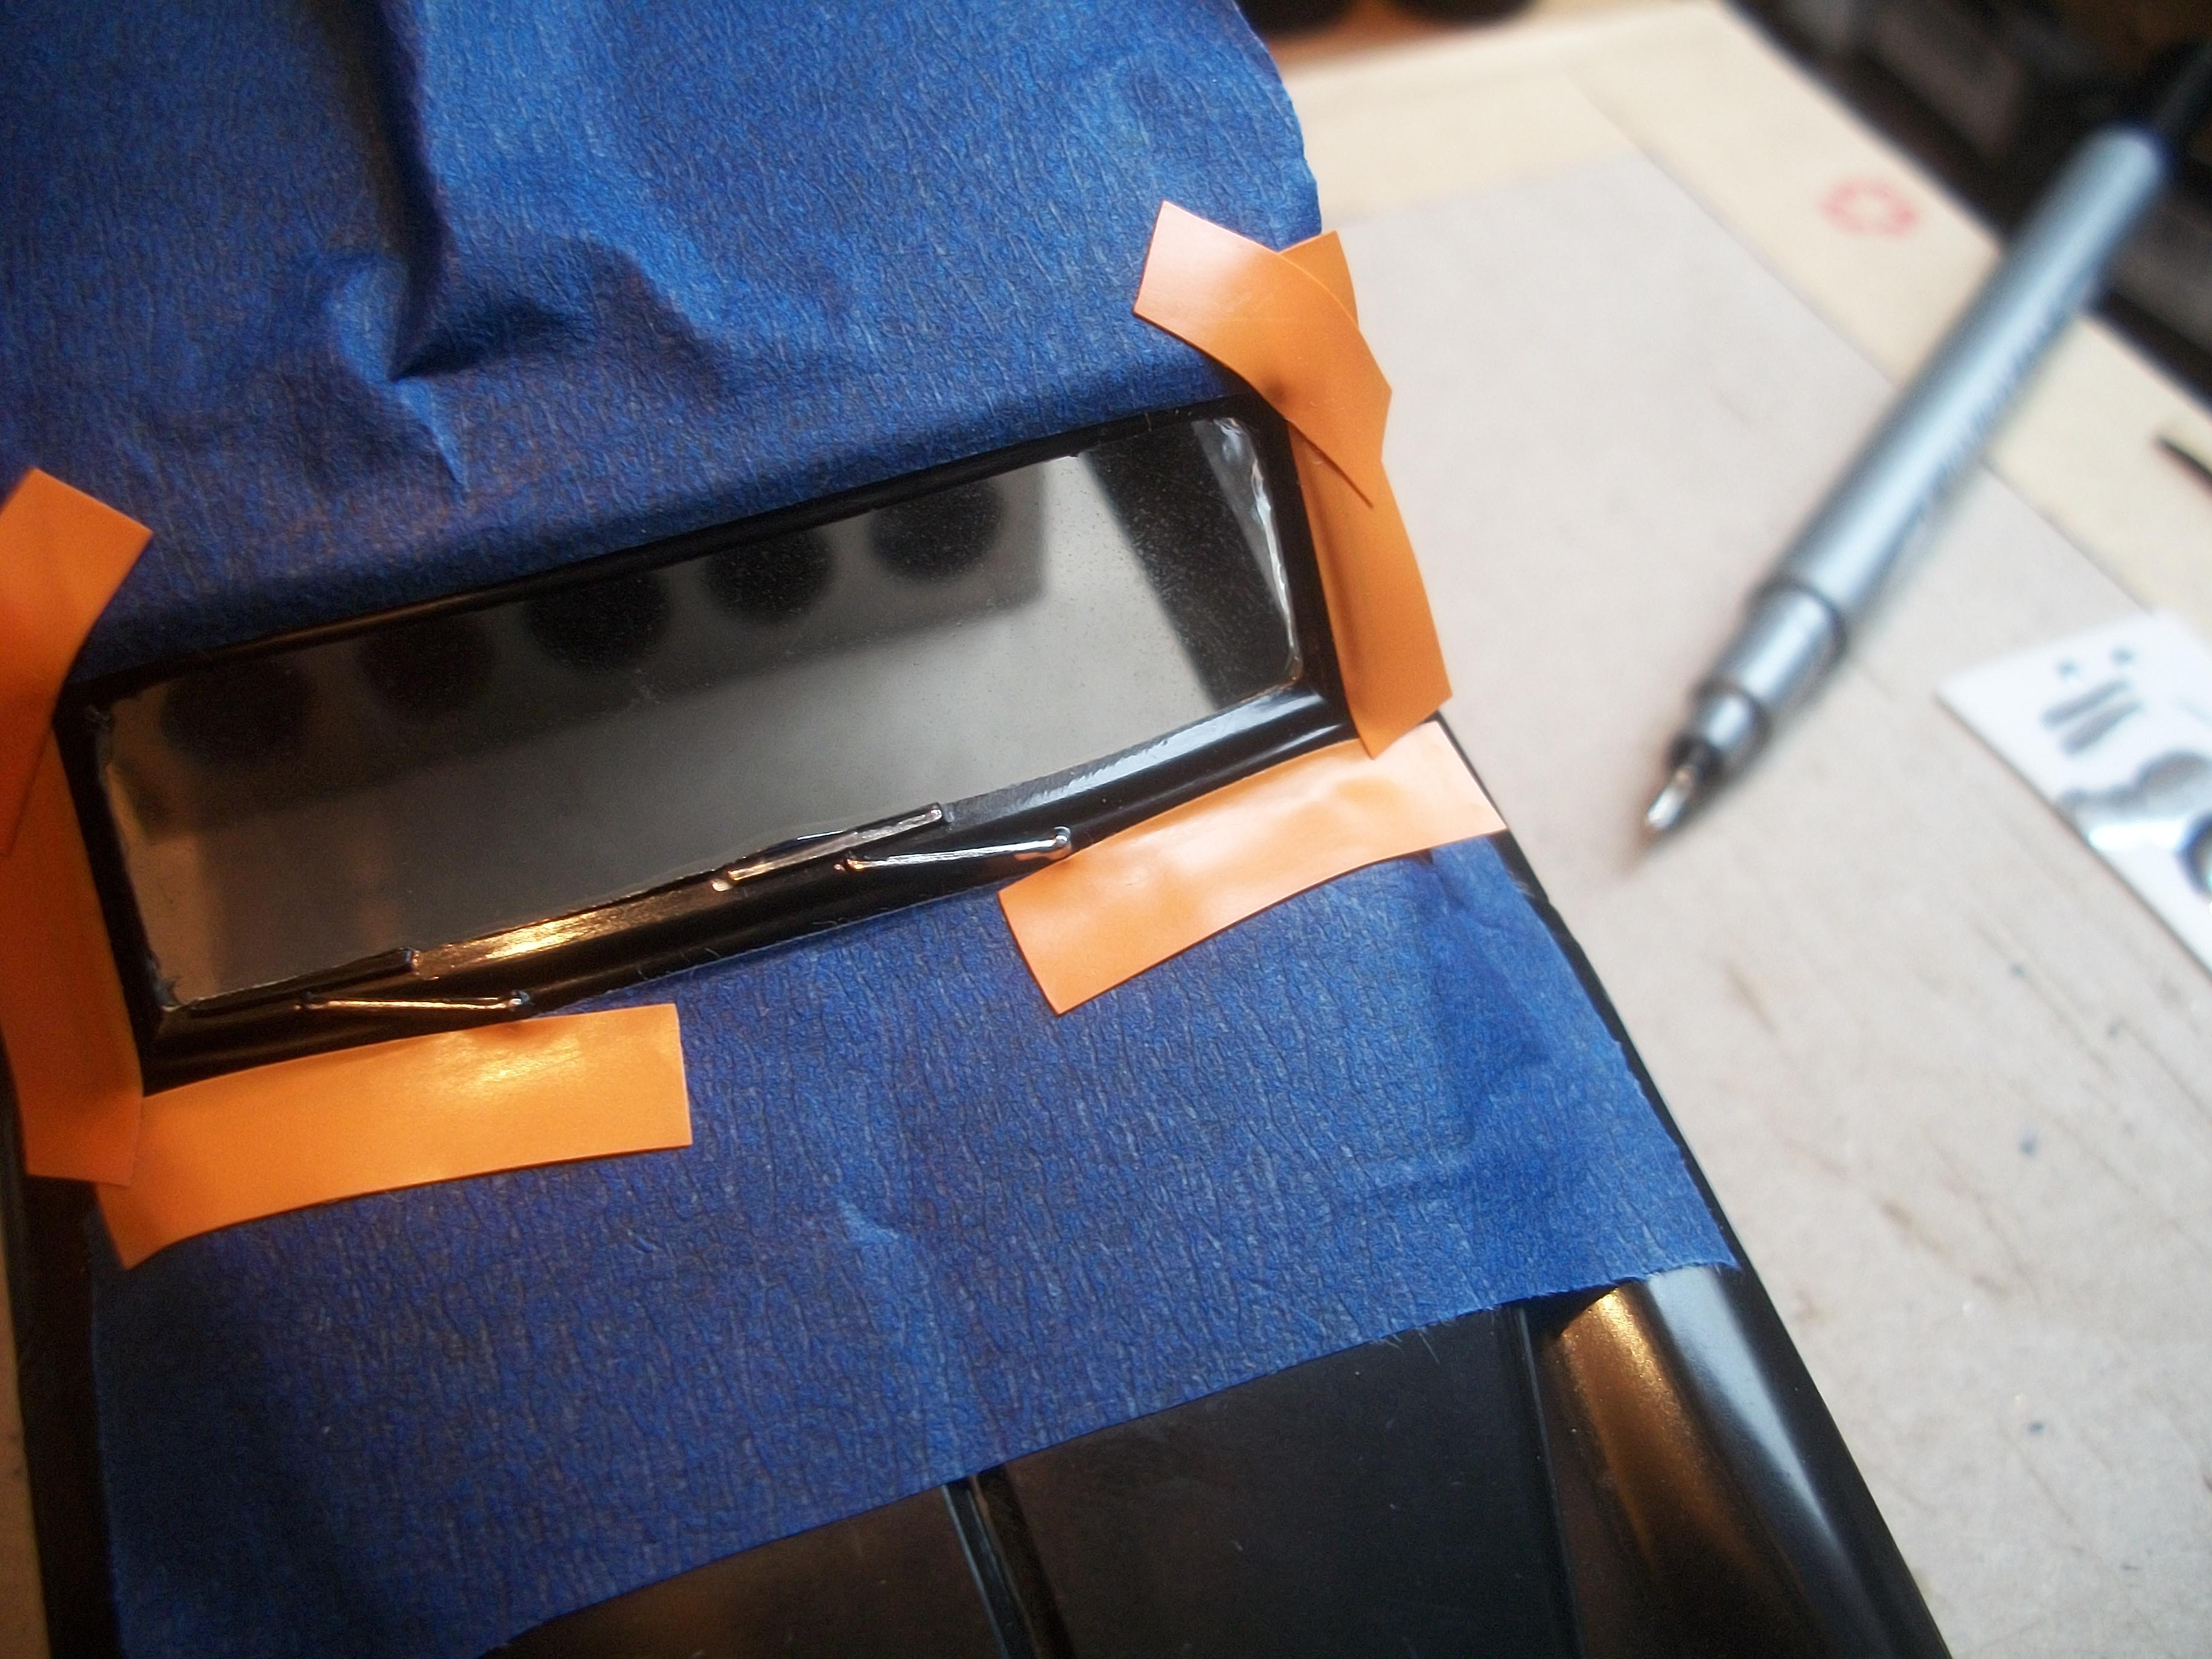
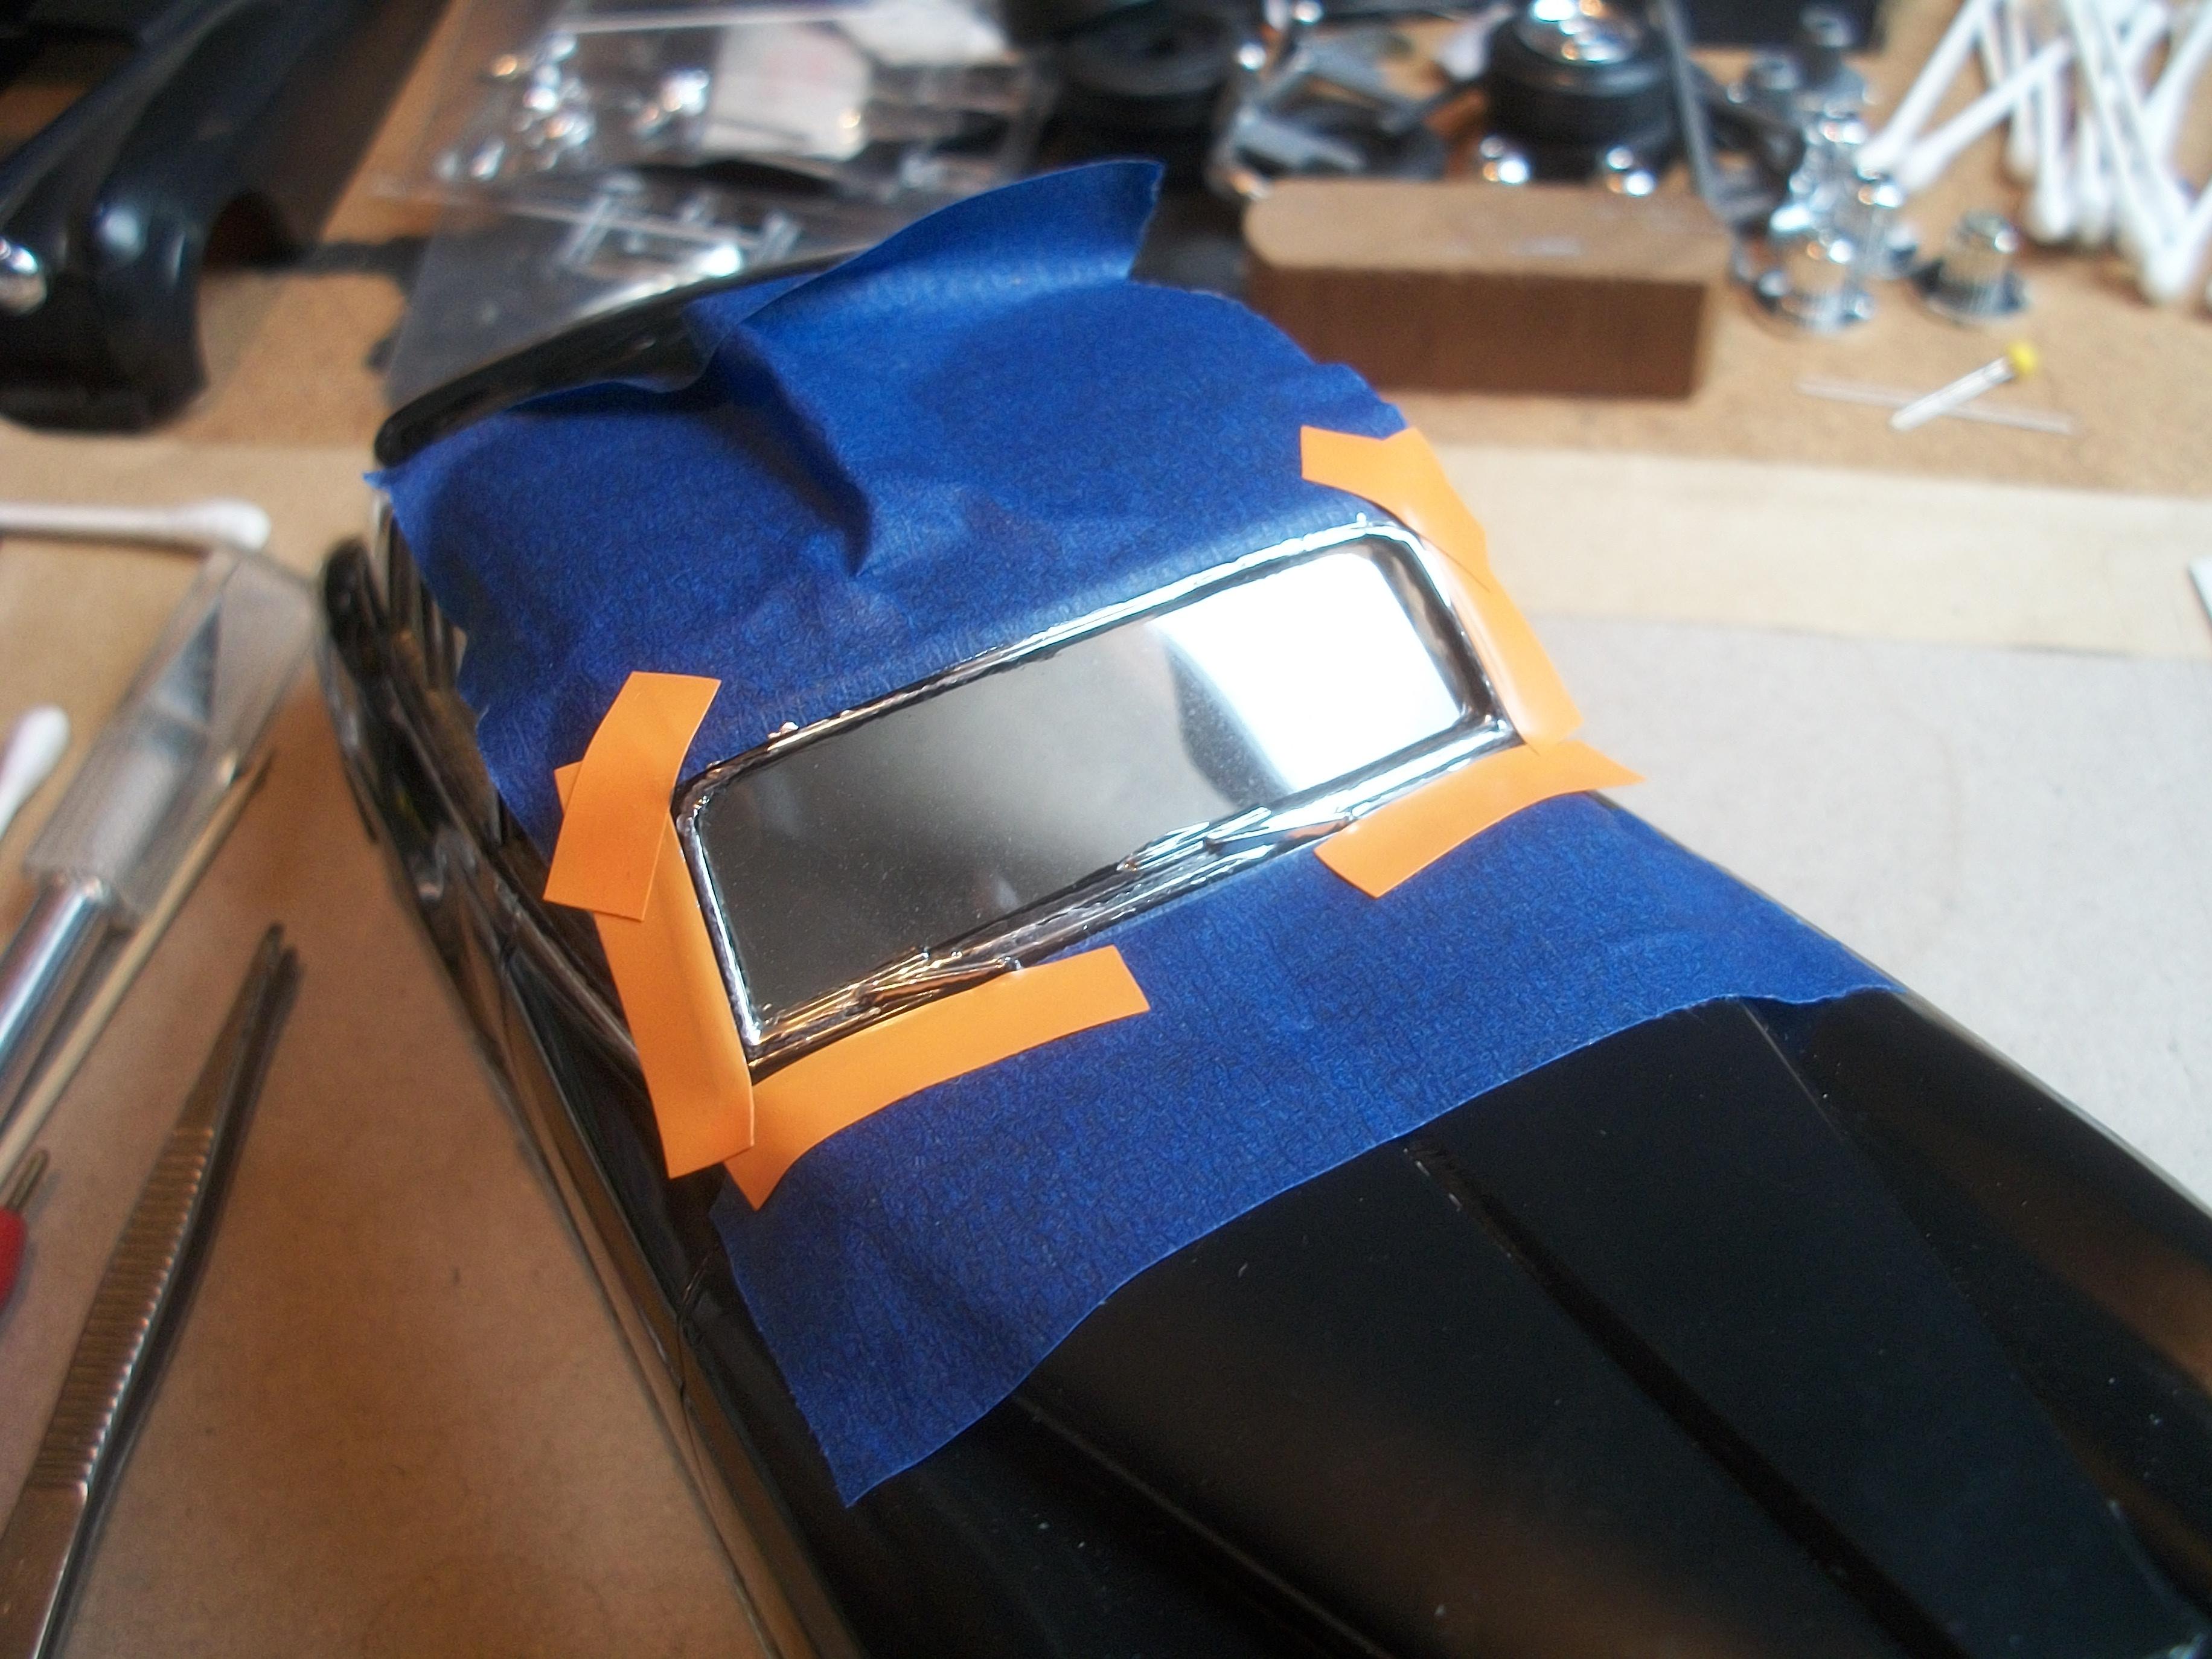
Thanks Mark, and as I half expected, there is some slight bleeding of the chrome along the top edge of the windshield. The masking tape has been removed at 24 hours, and I shall post some photos later today . . . The small amount of excess chrome should be cleaned up with a cocktail stick tip and polish (toothpaste). David -
Some nice work there on the roll cage, gauges and seat mods Mark . . . You sure are putting in plenty of scratch building and improvisation as you go along with this build. The car and the story that goes with it does make an interesting project . . . David W.
-
Rolls-Royce No Chemicals, No Paint, No Harmful Glues
Anglia105E replied to Anglia105E's topic in WIP: Model Cars
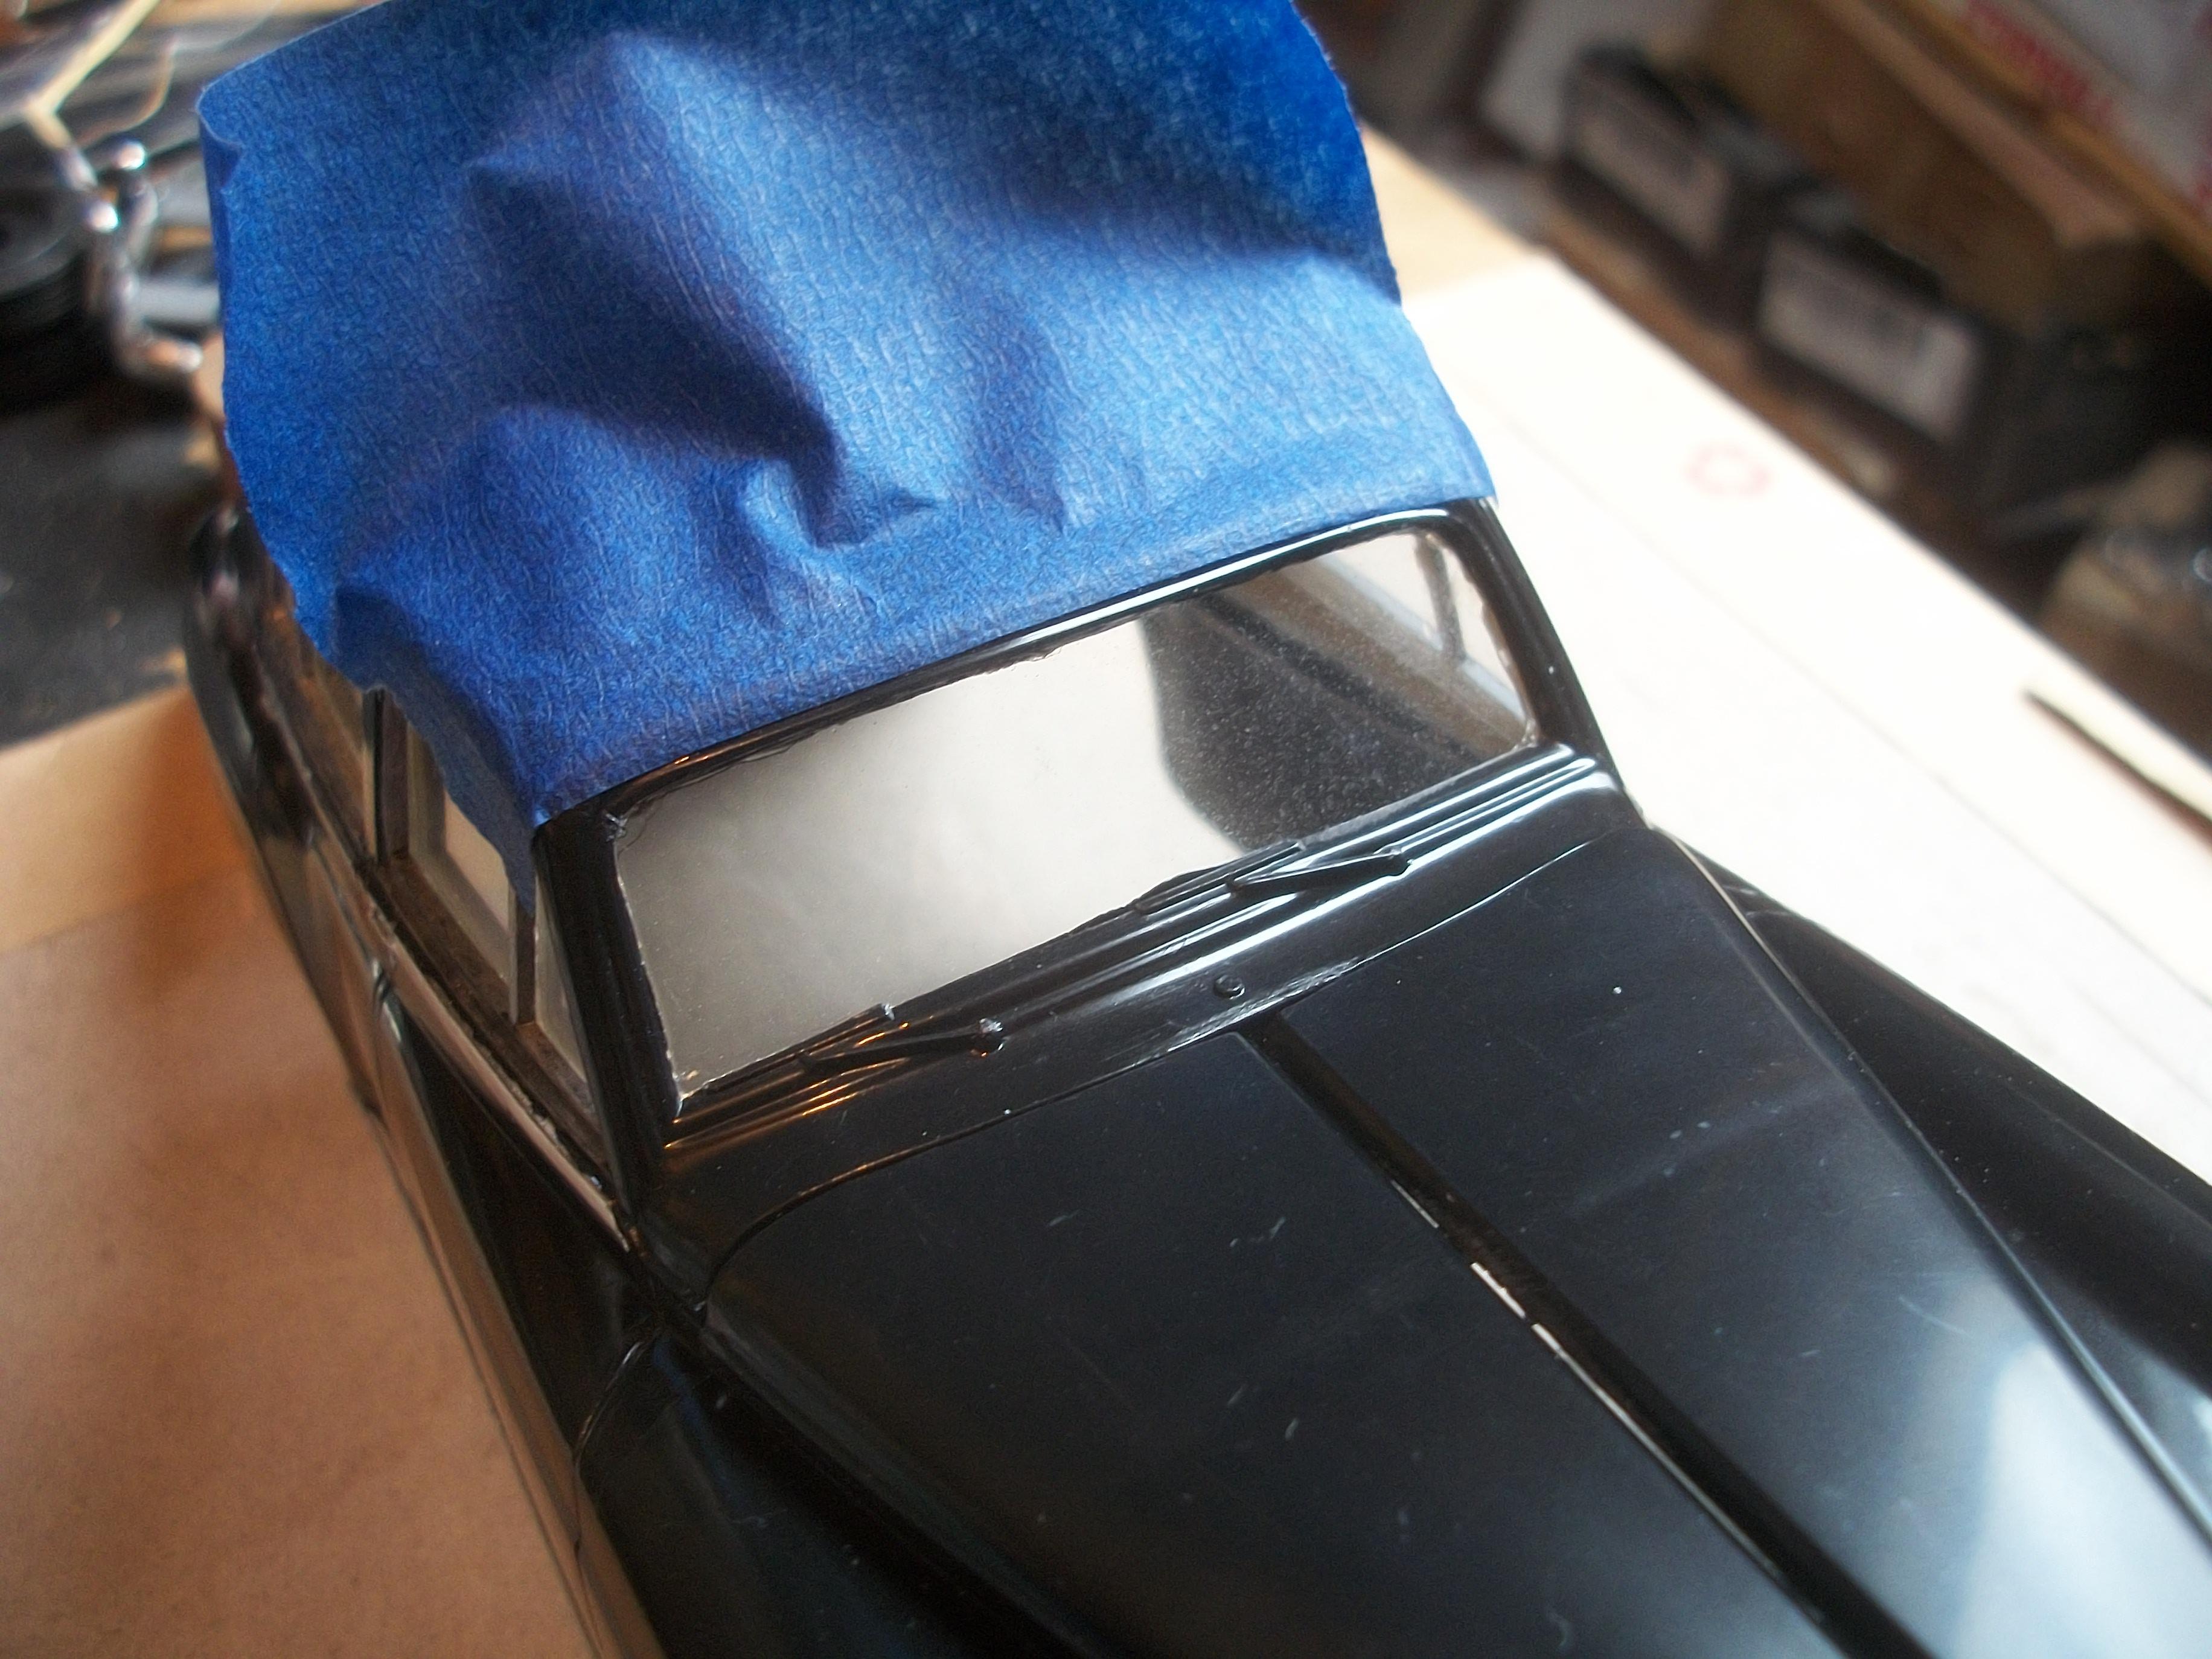
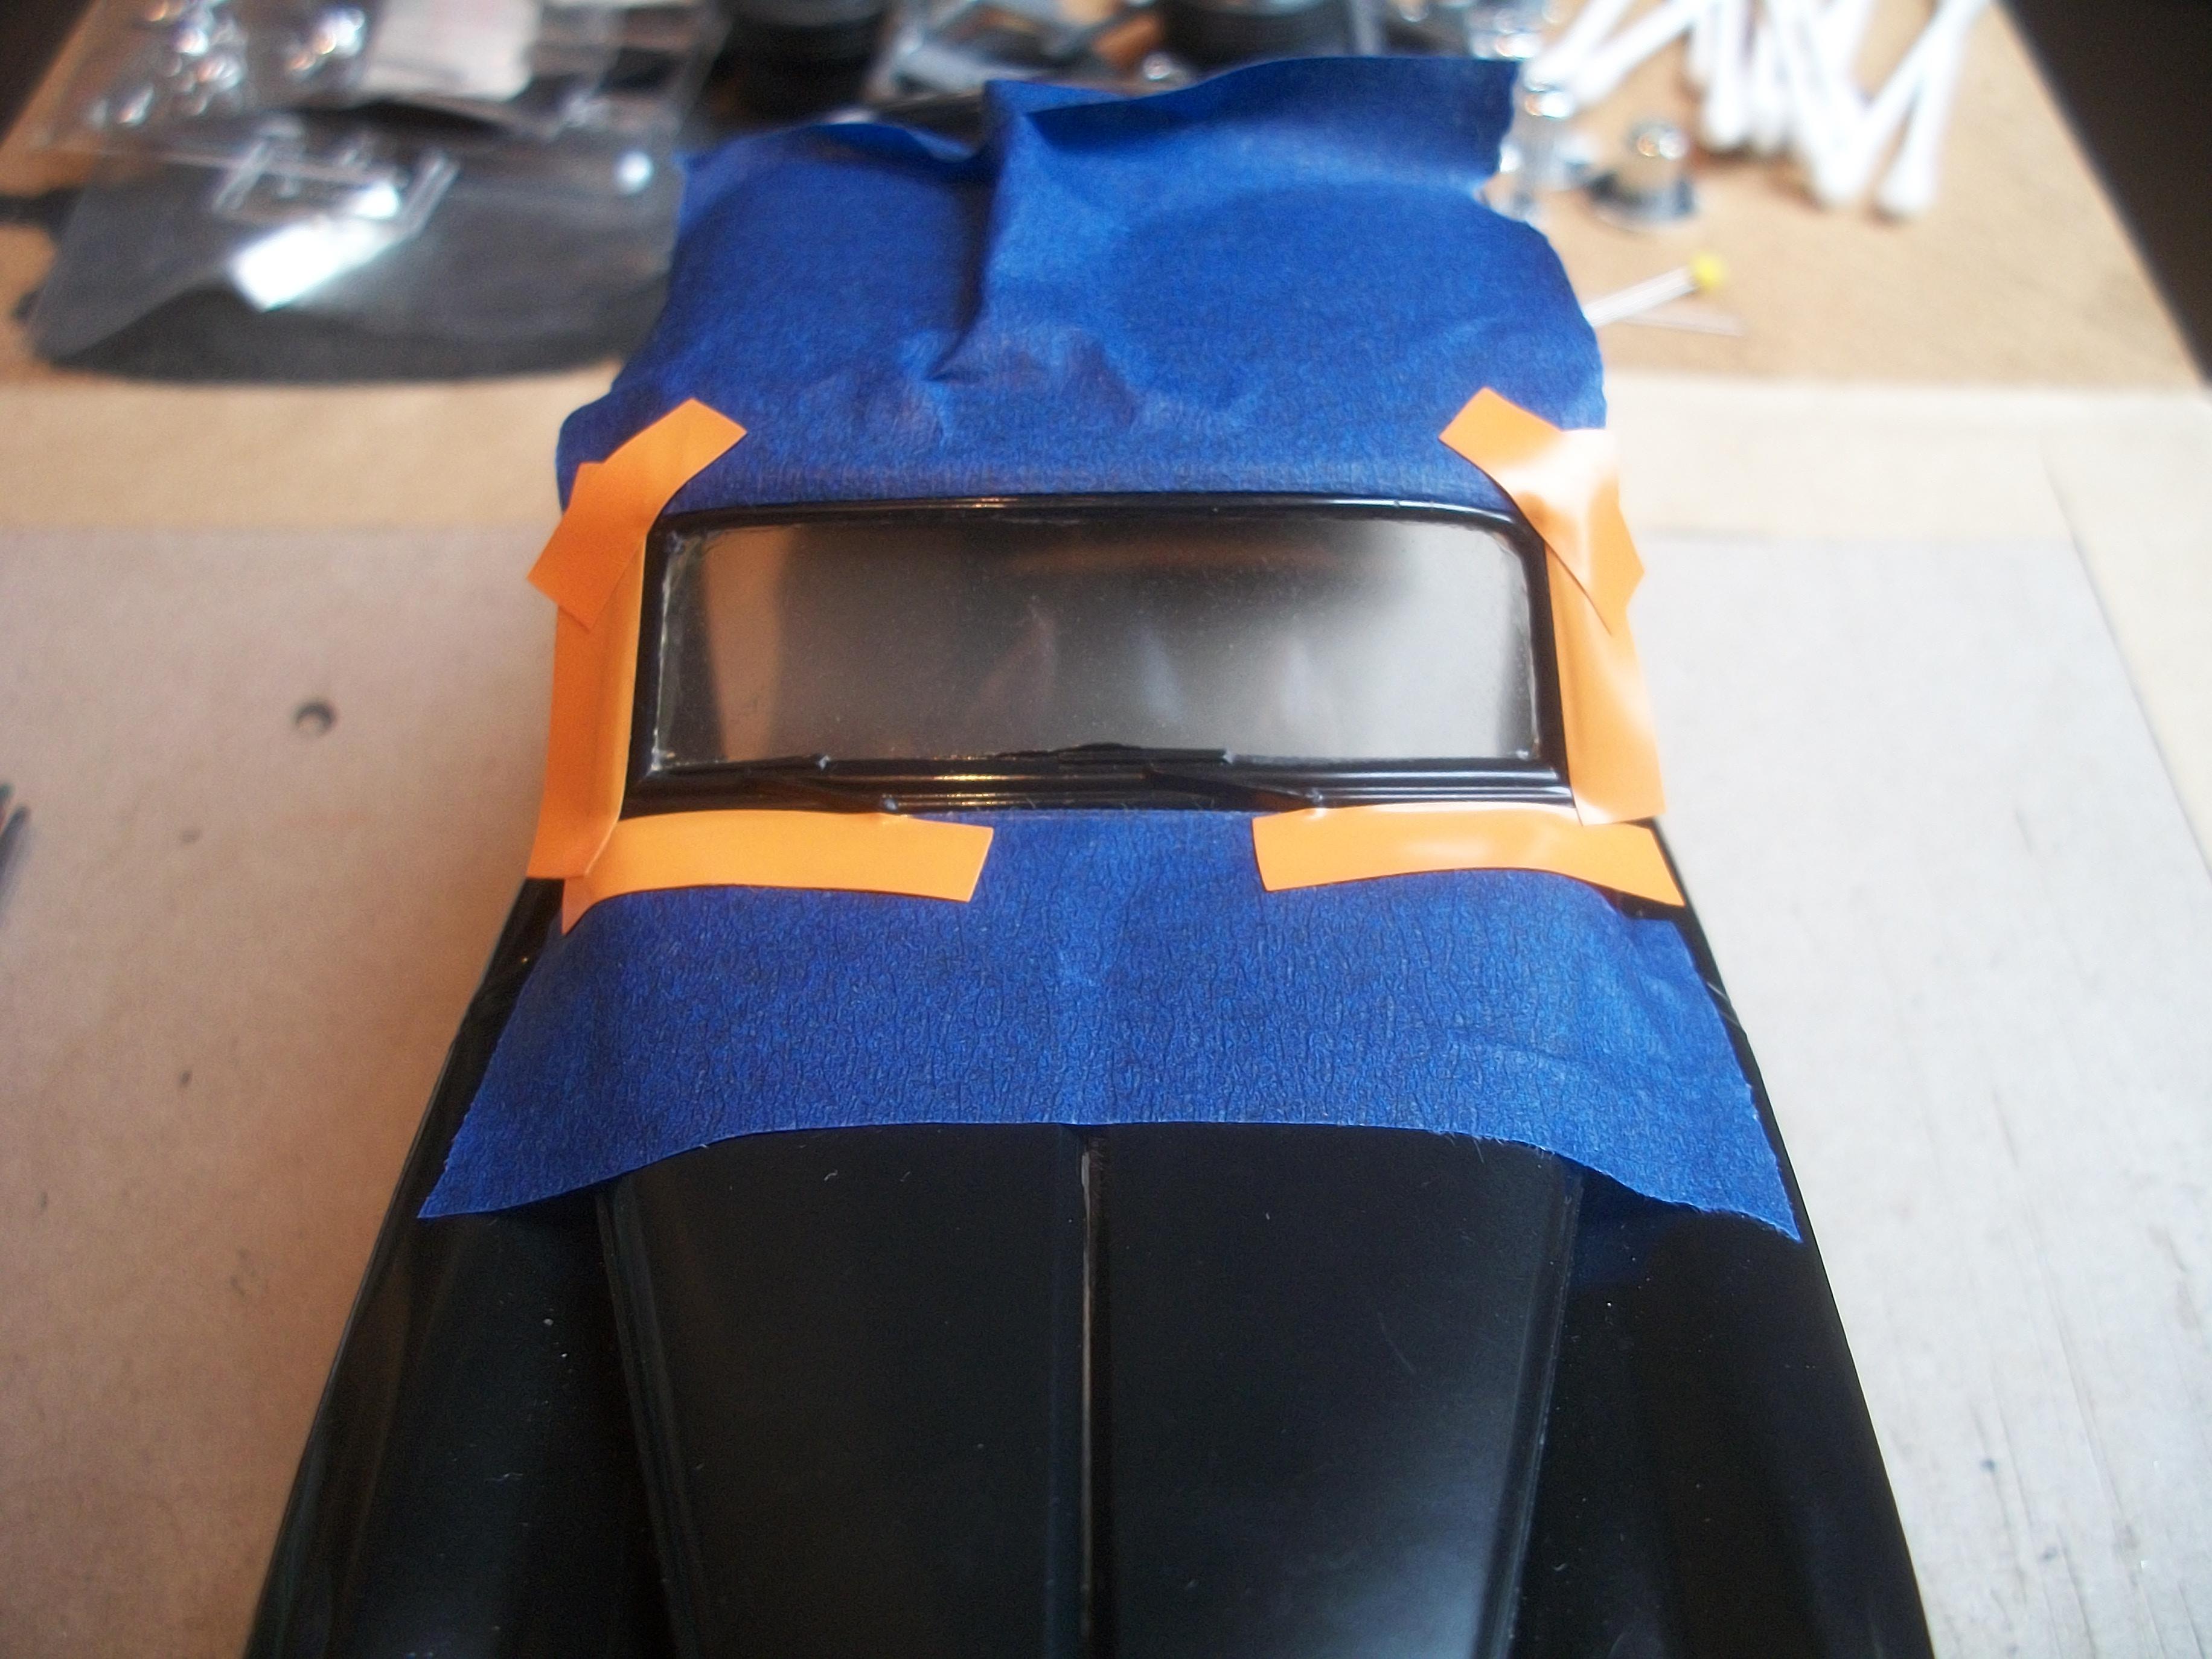
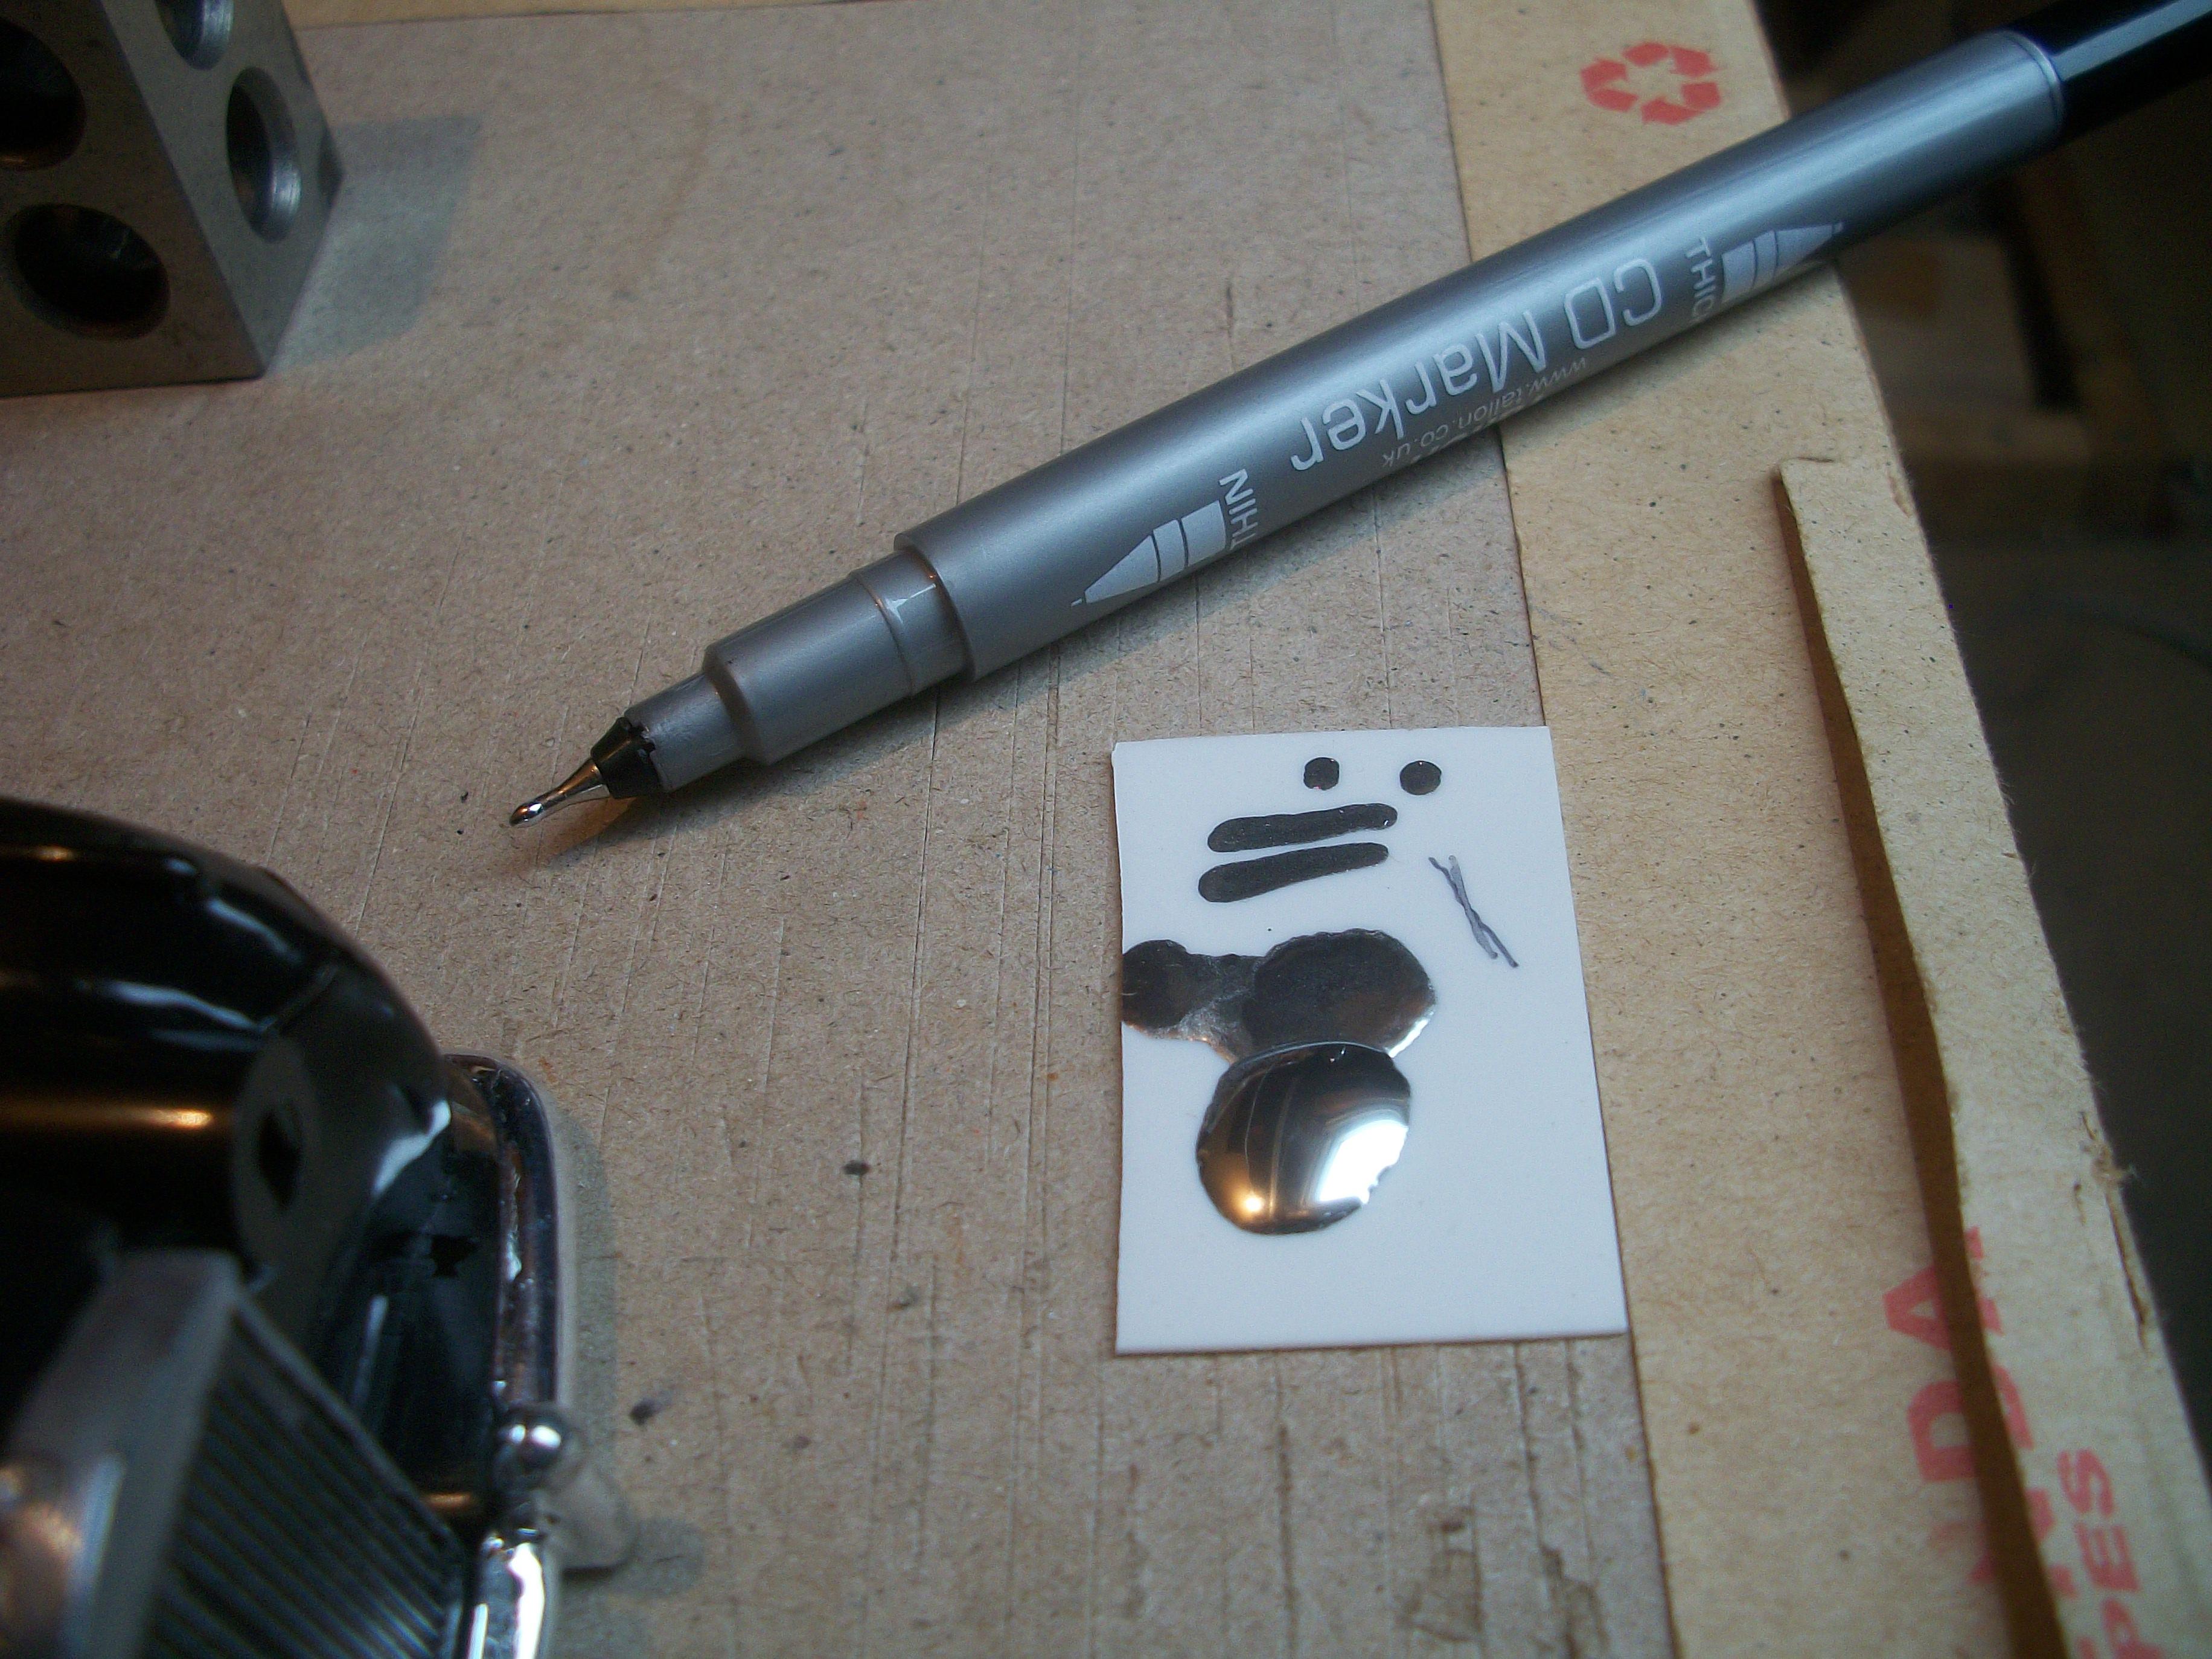
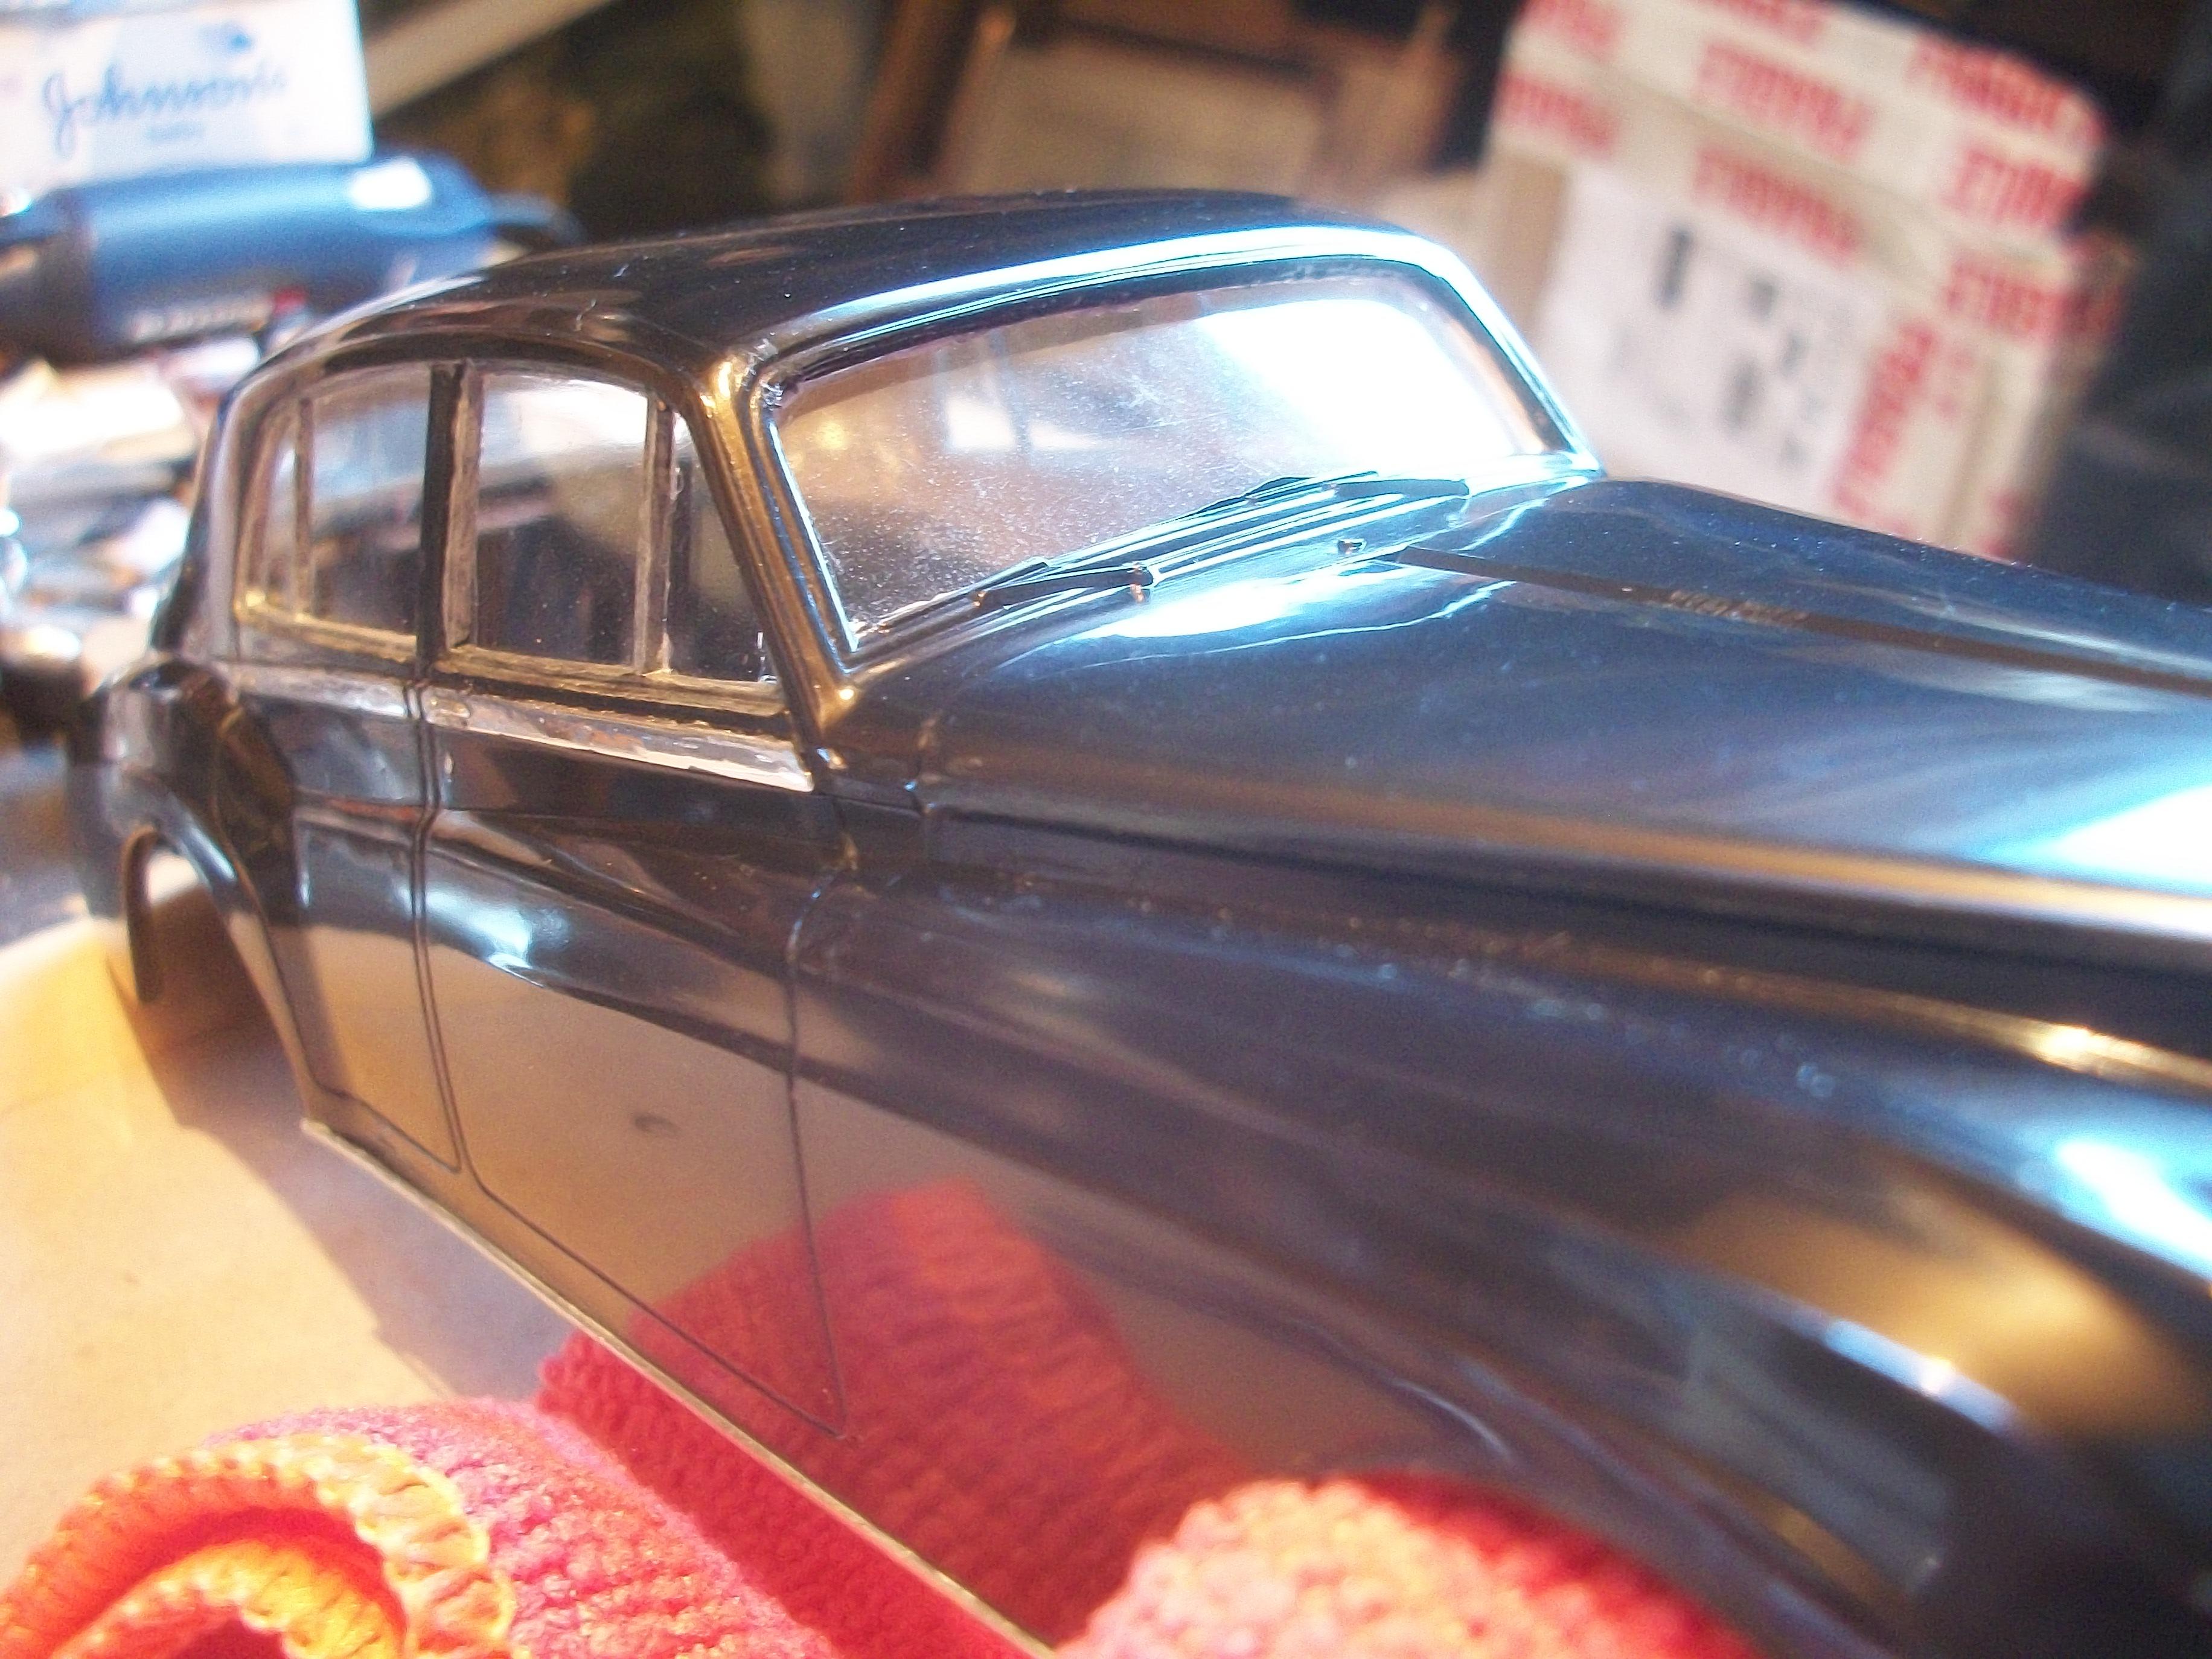
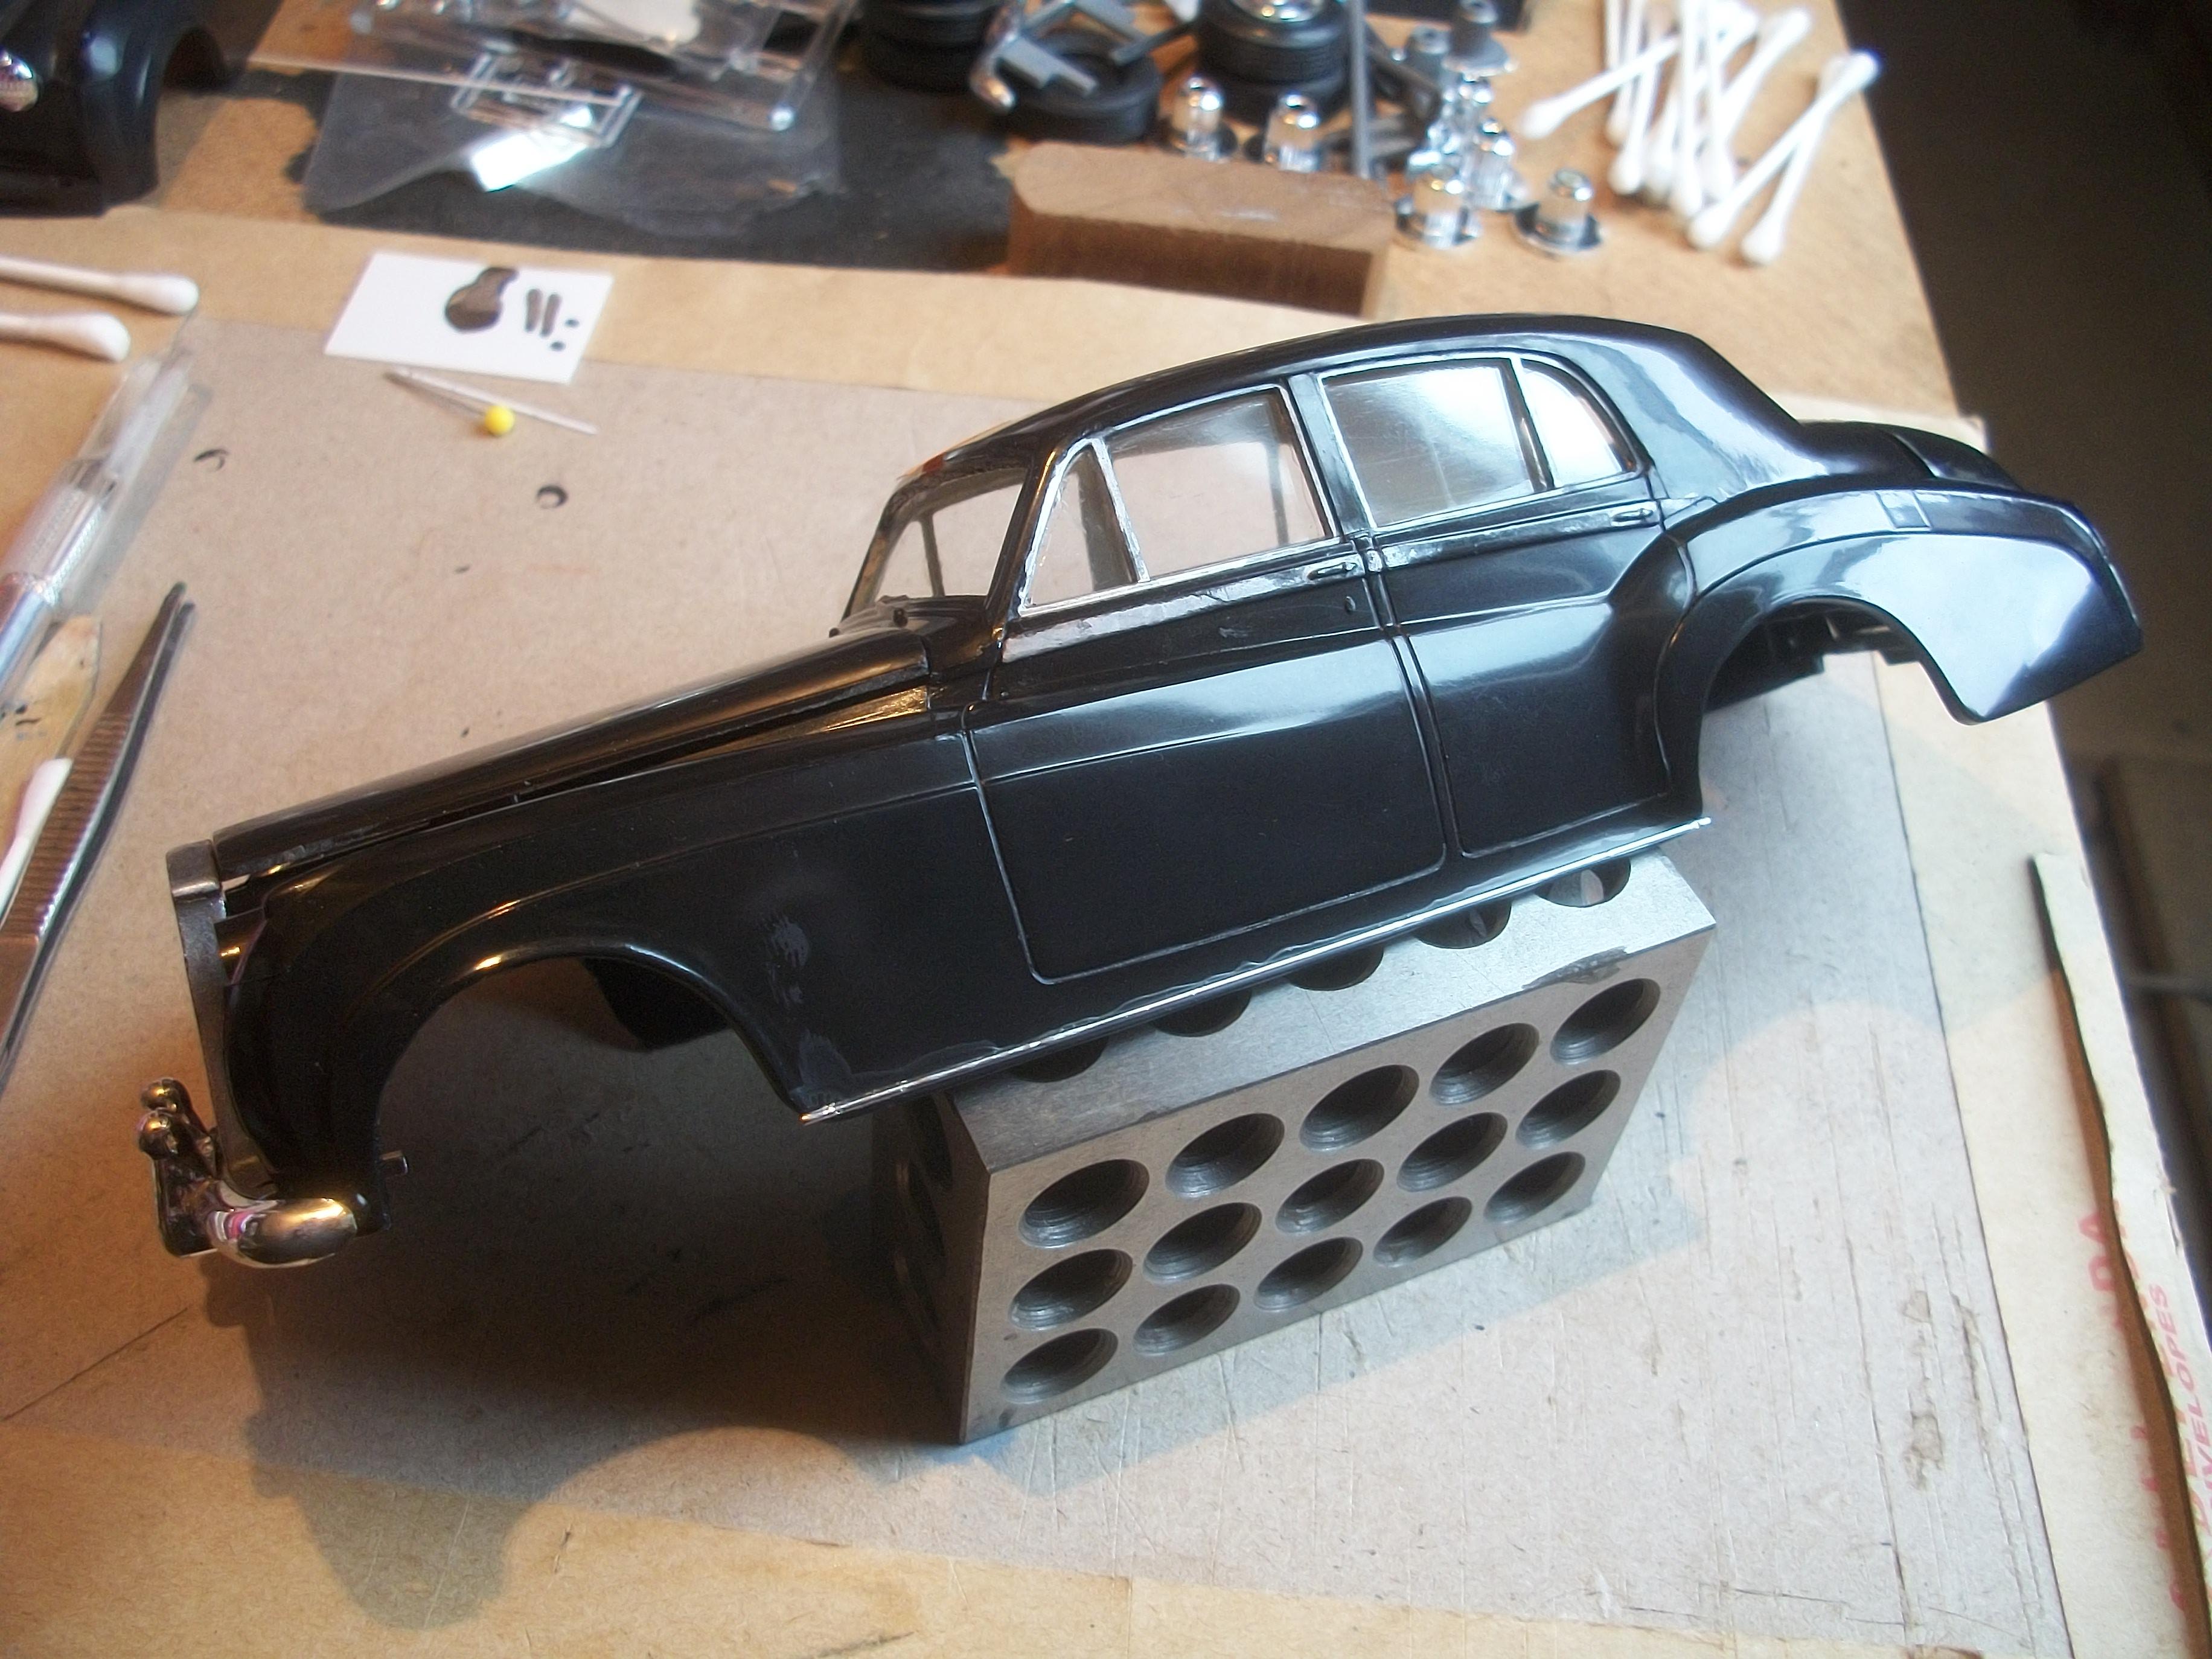
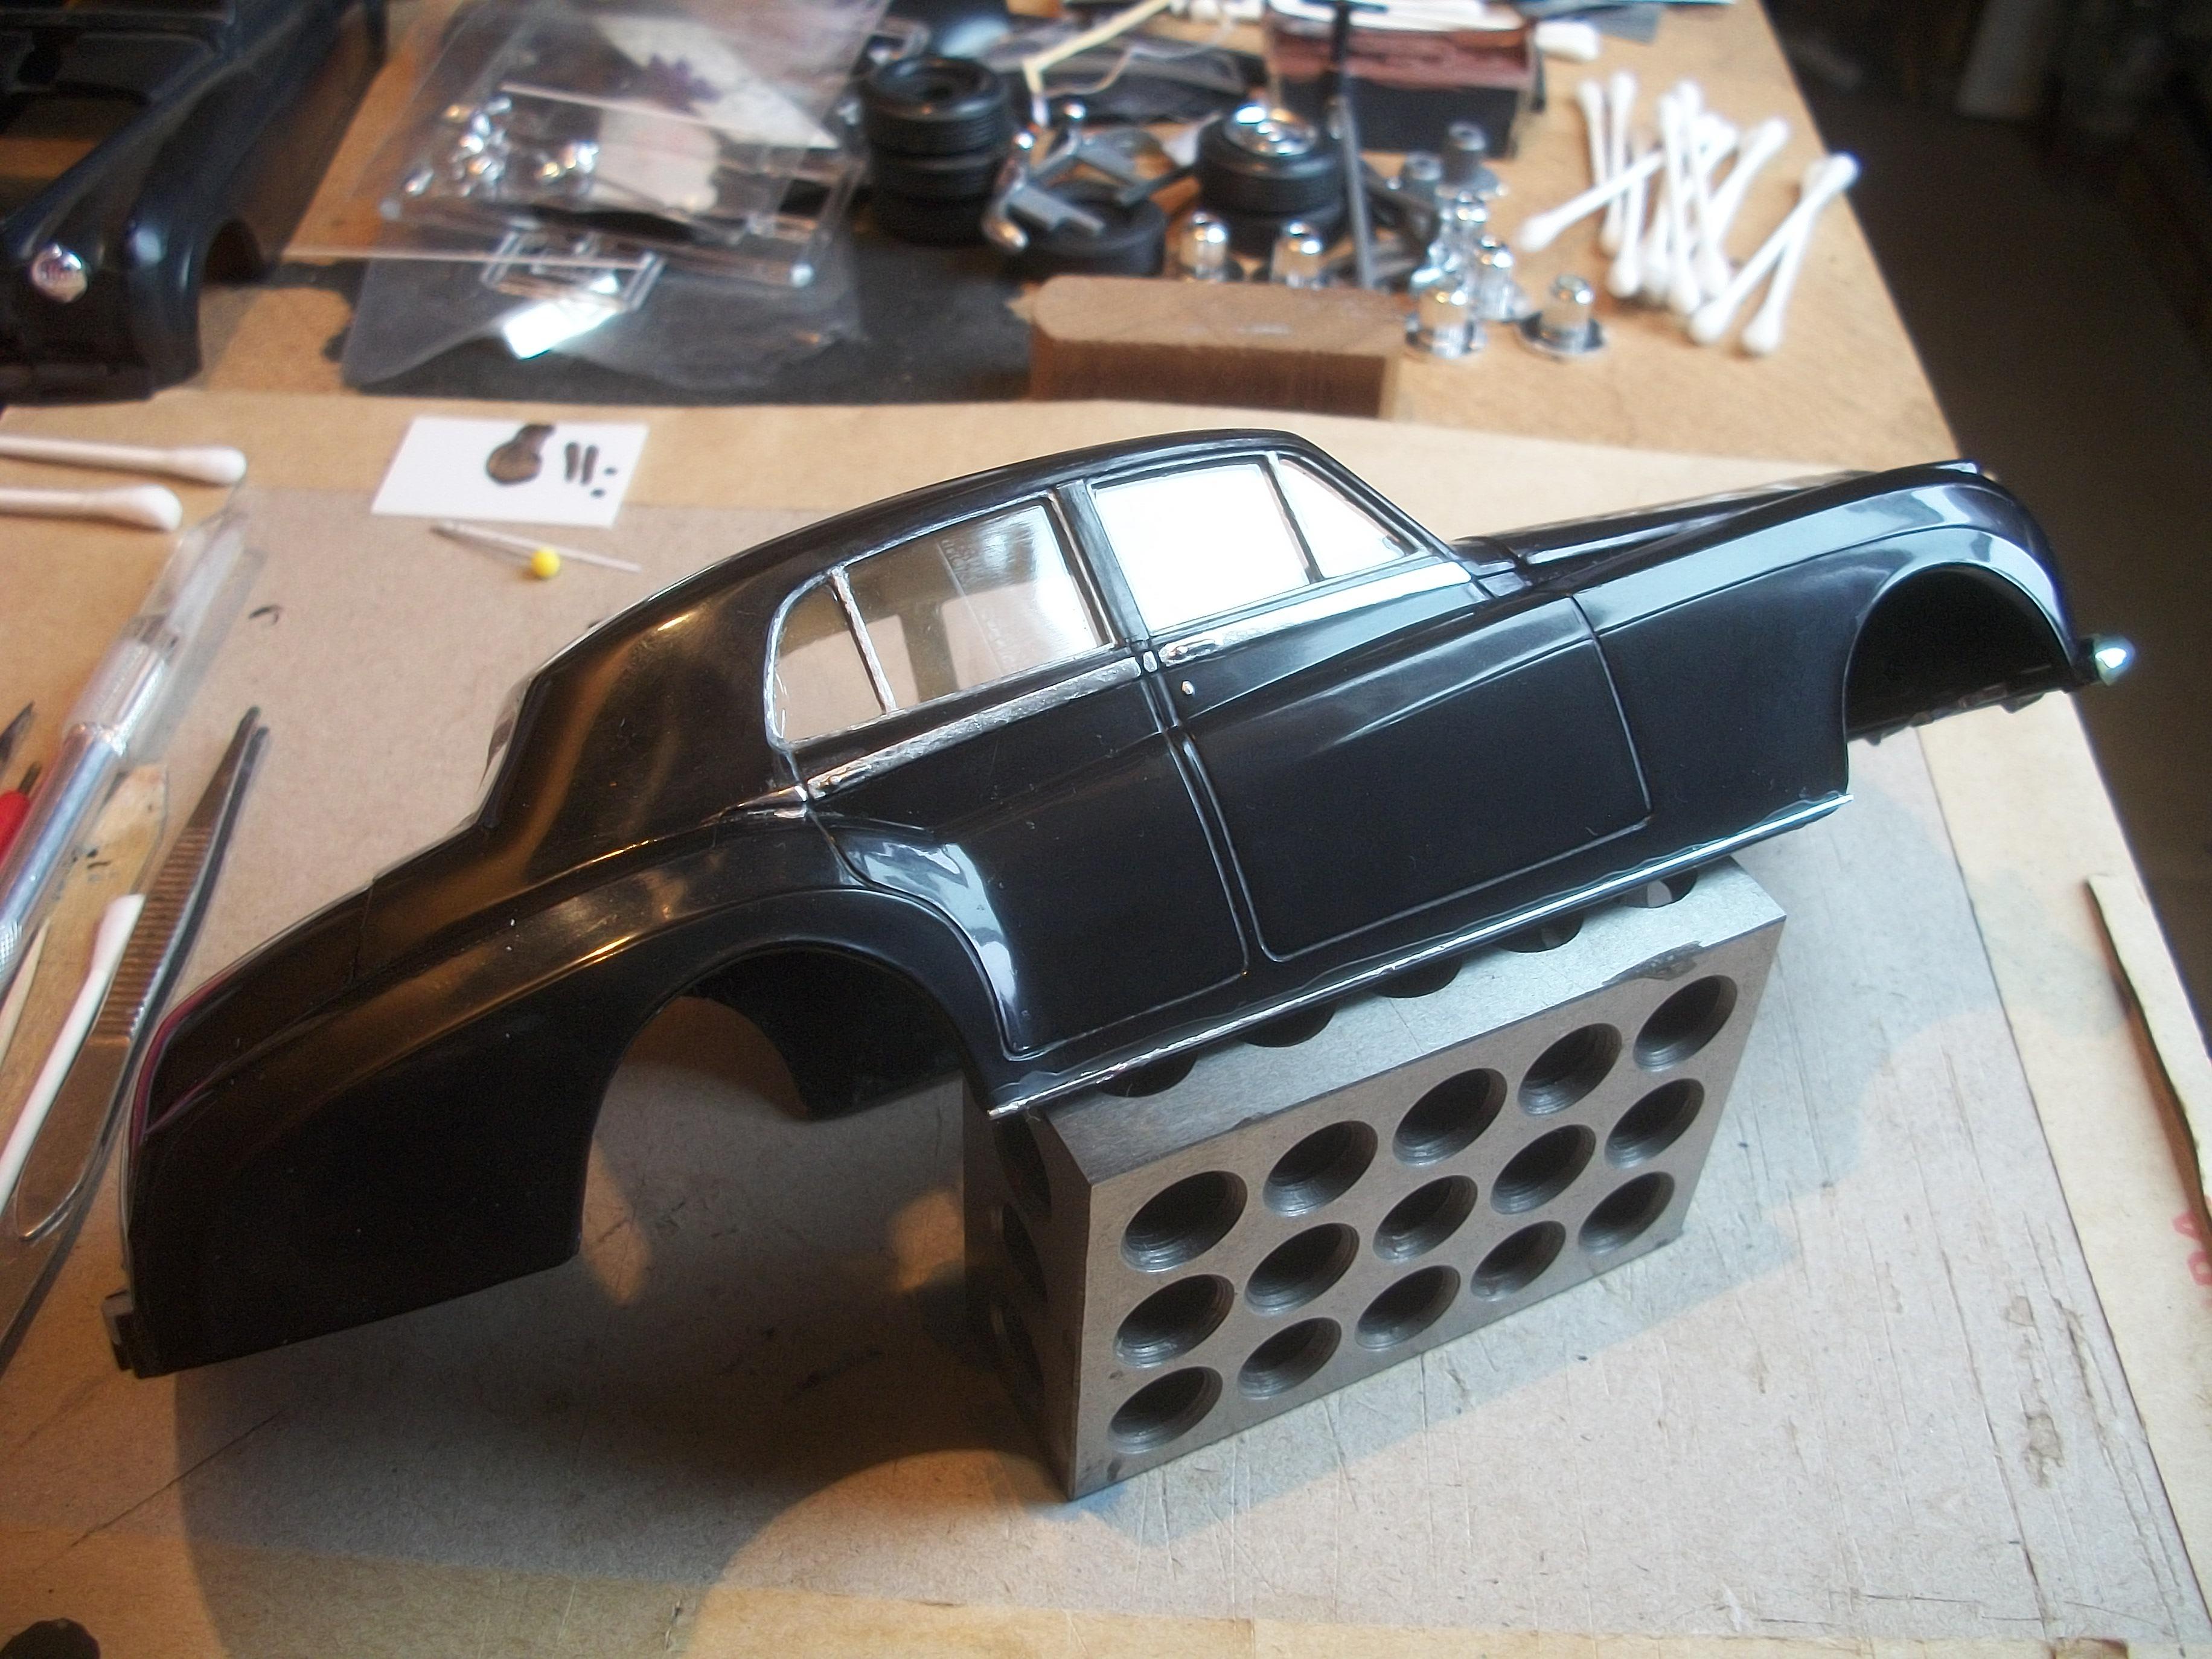
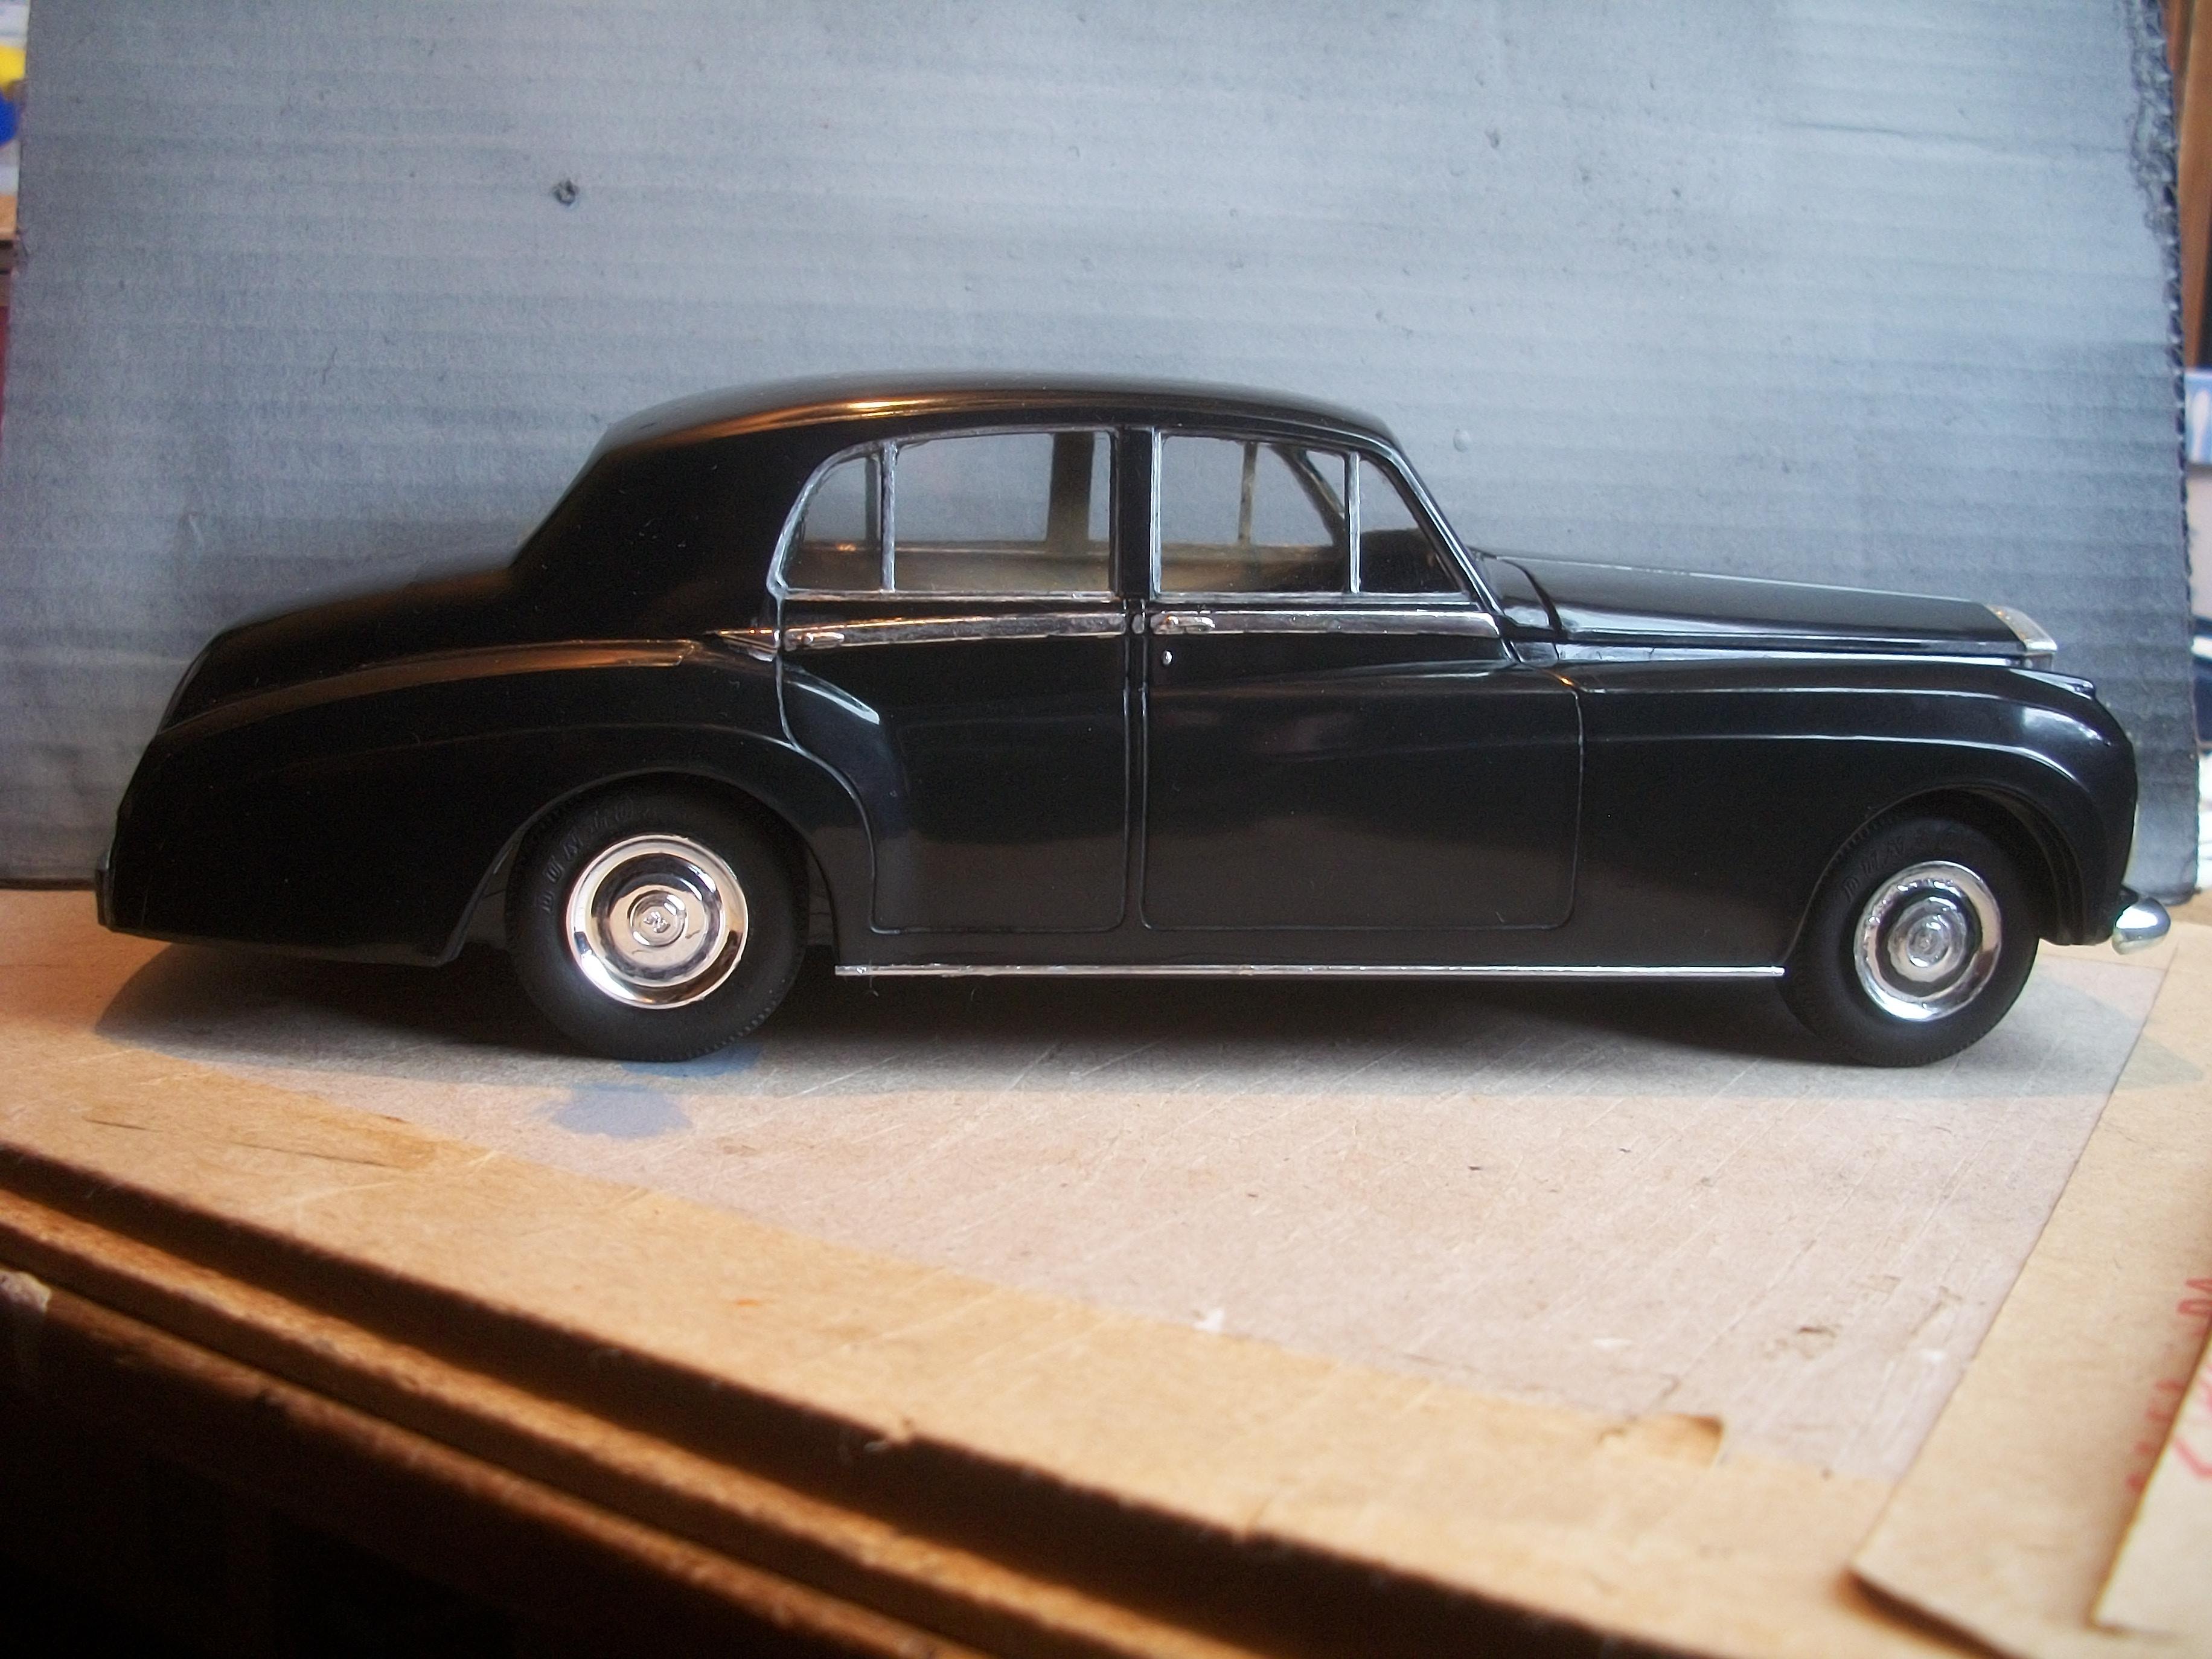
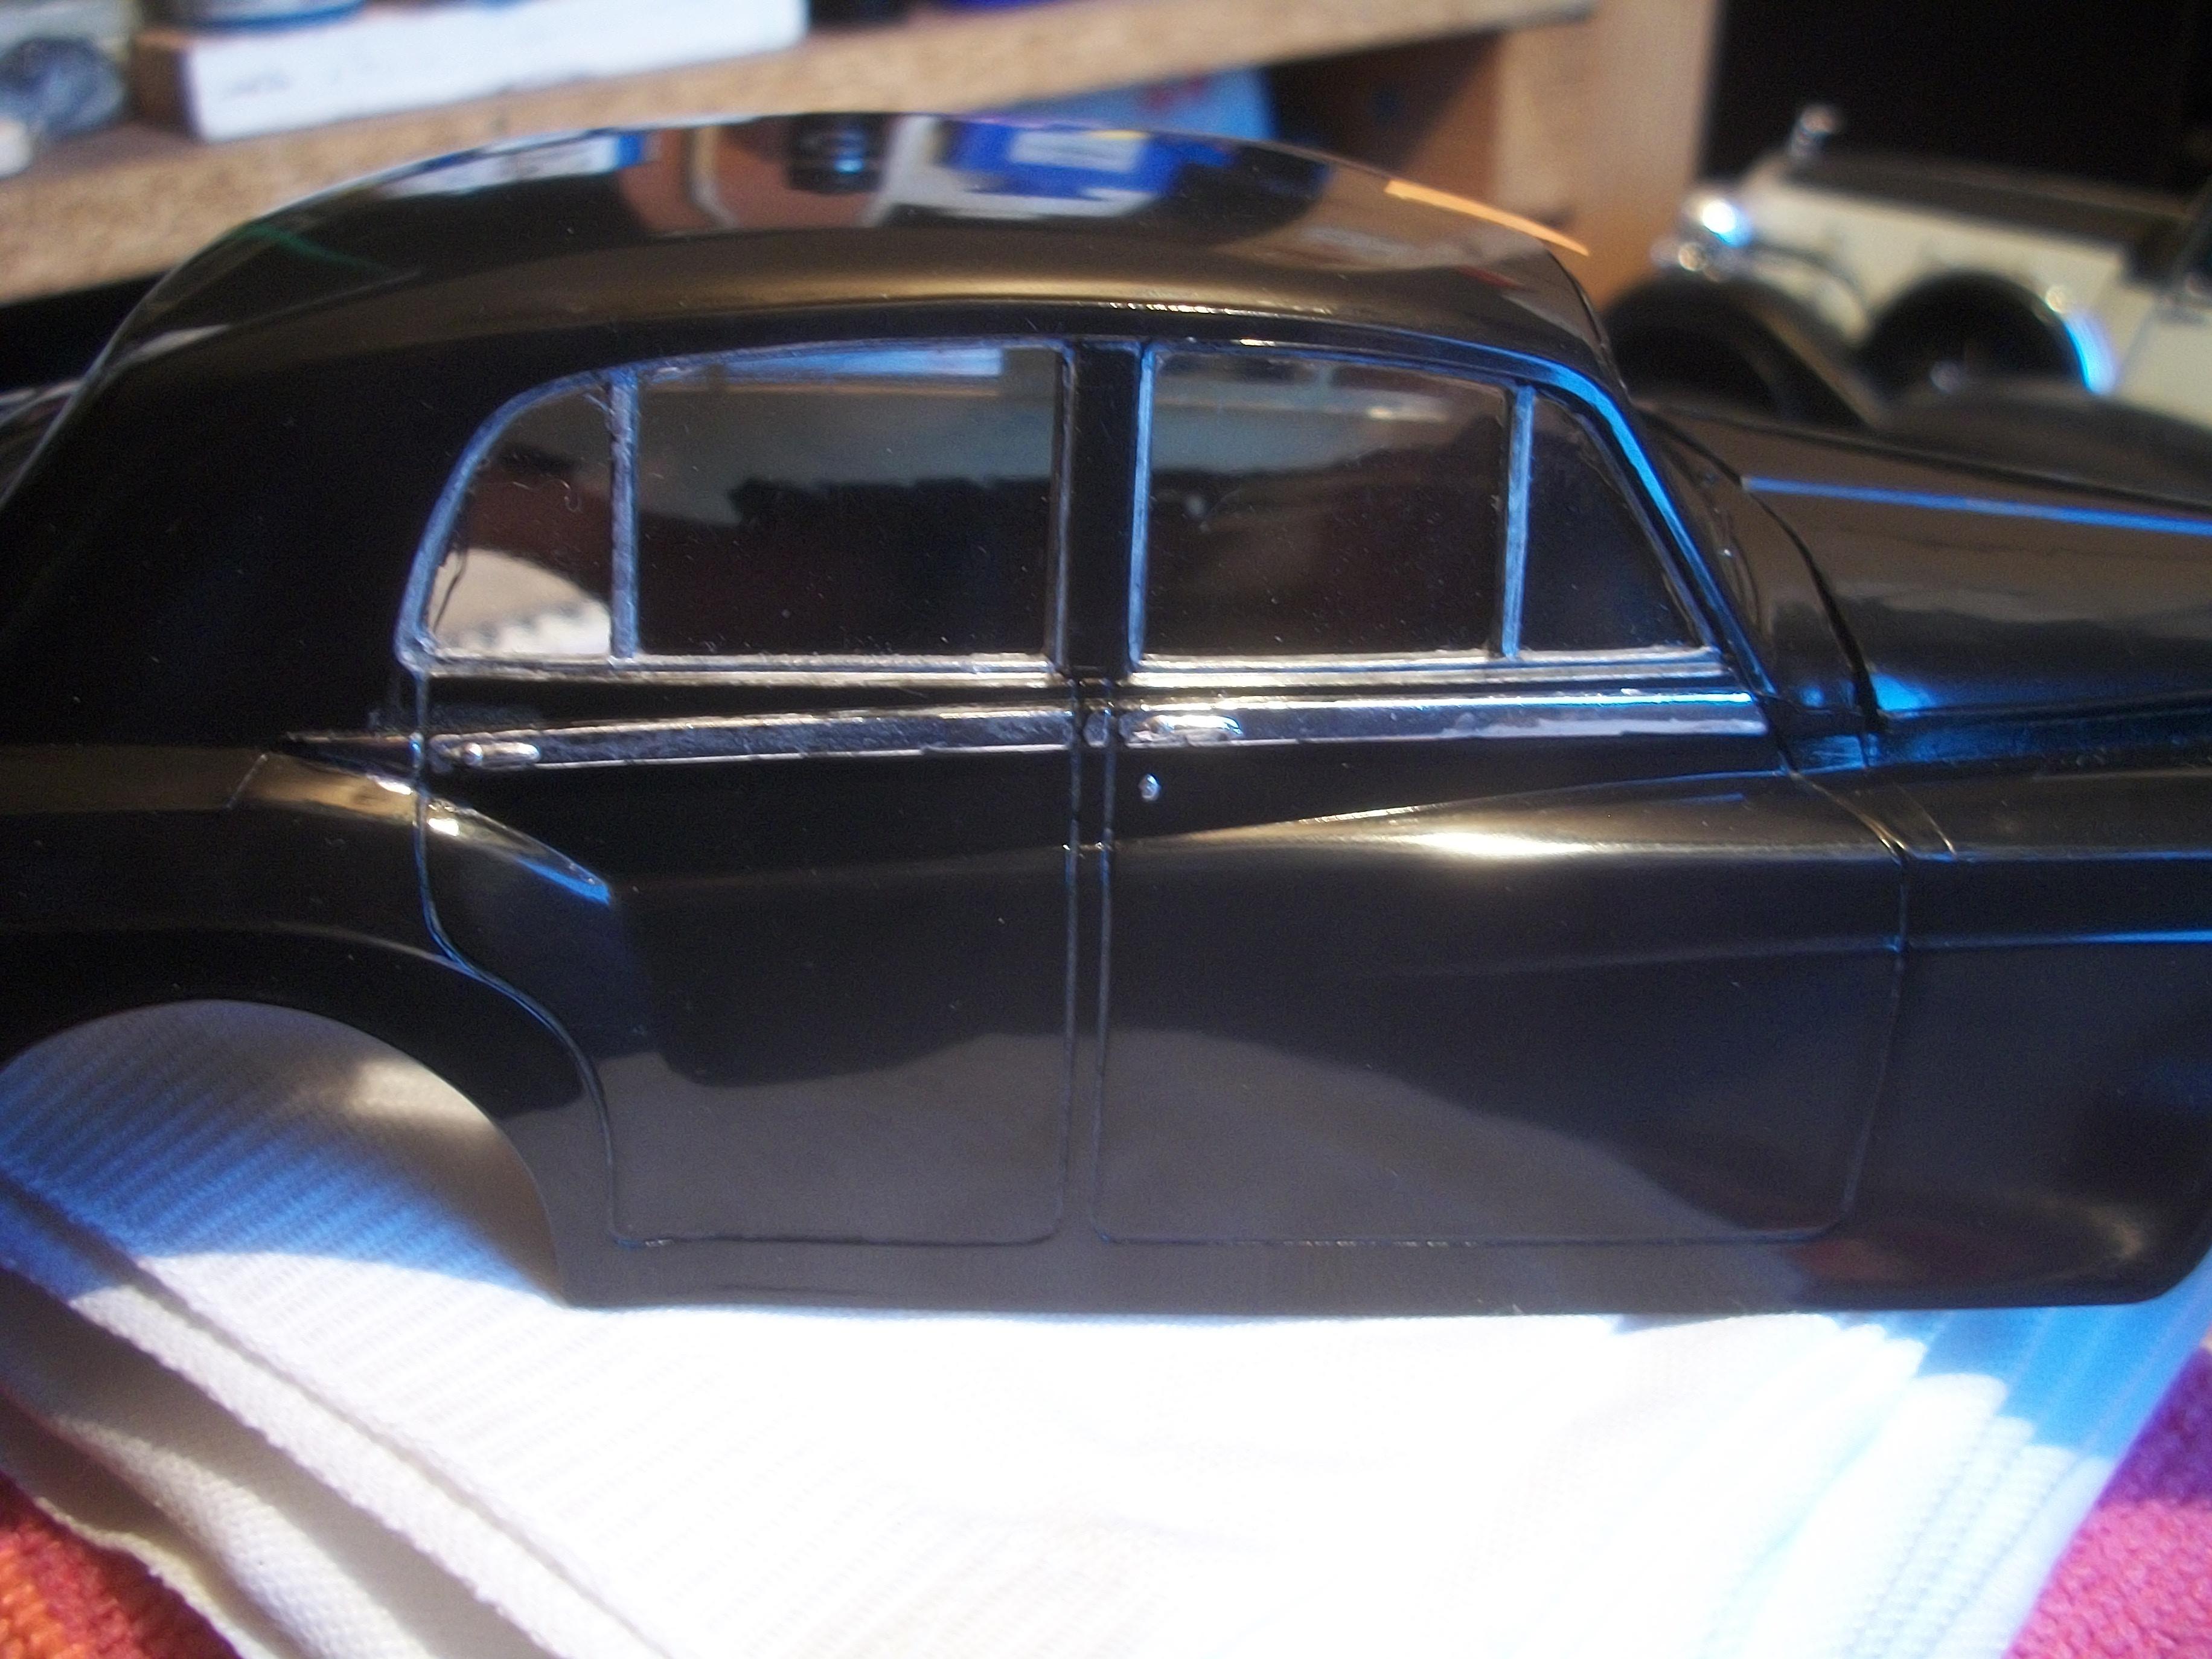
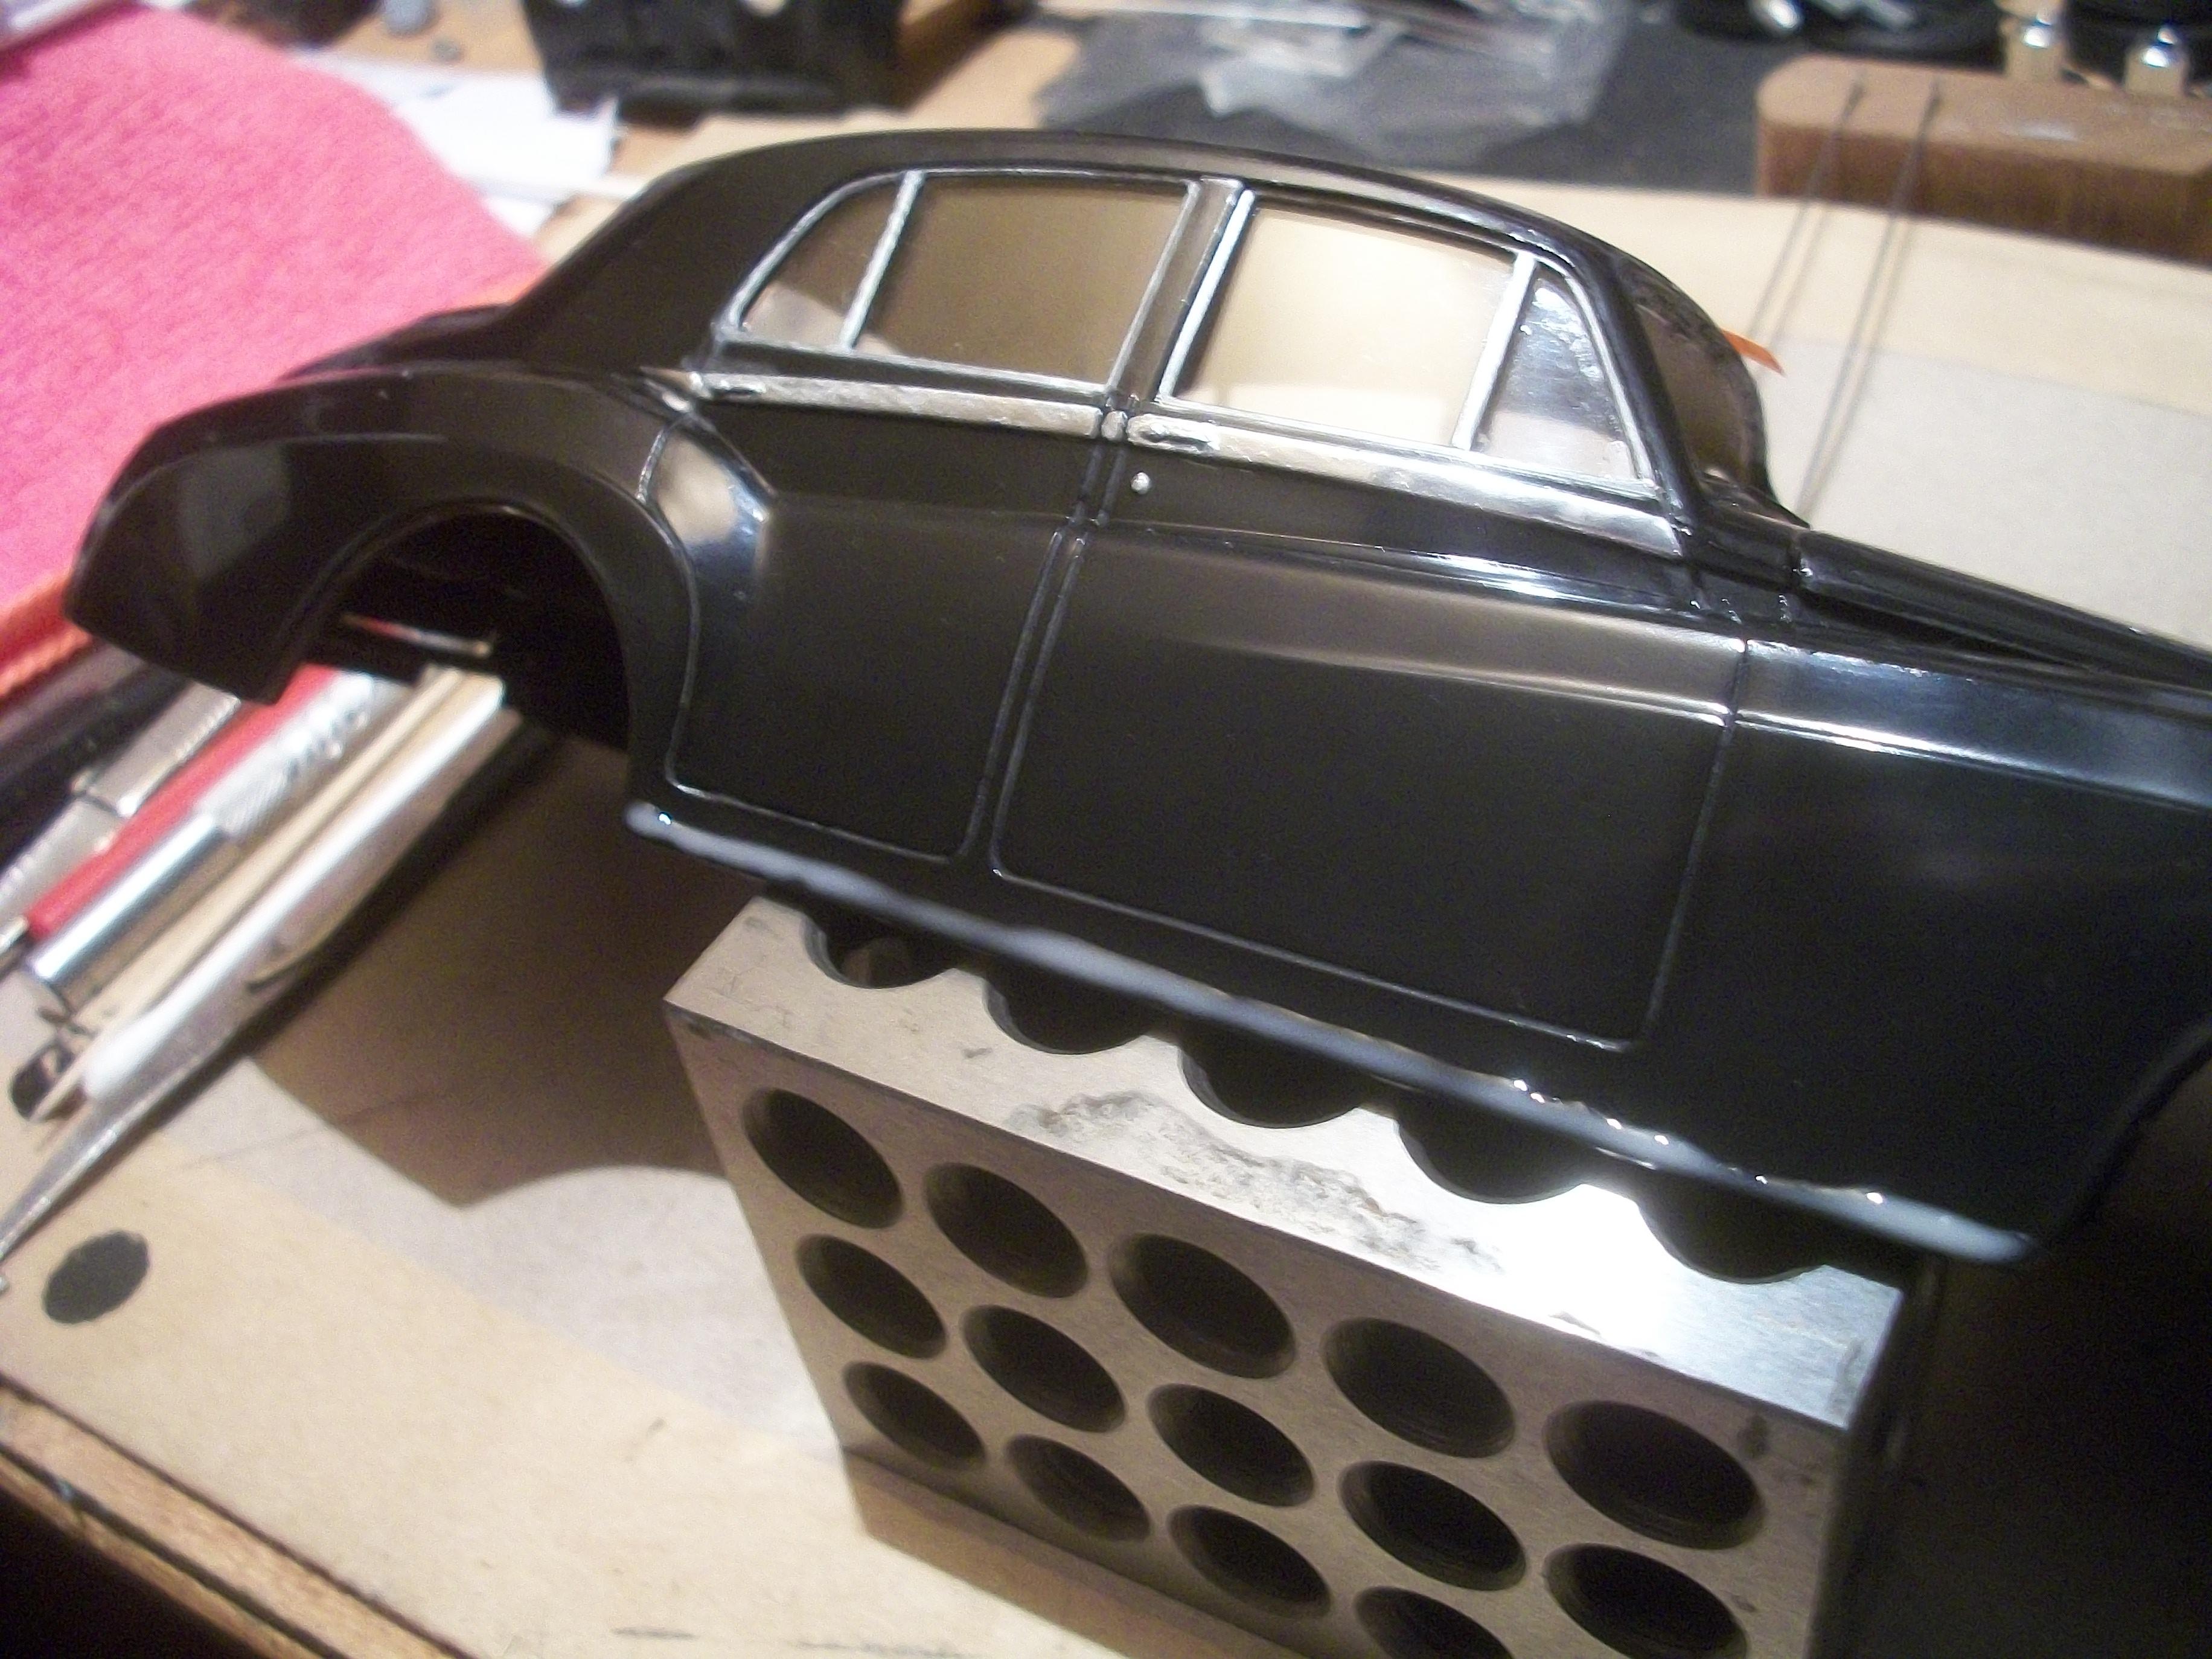
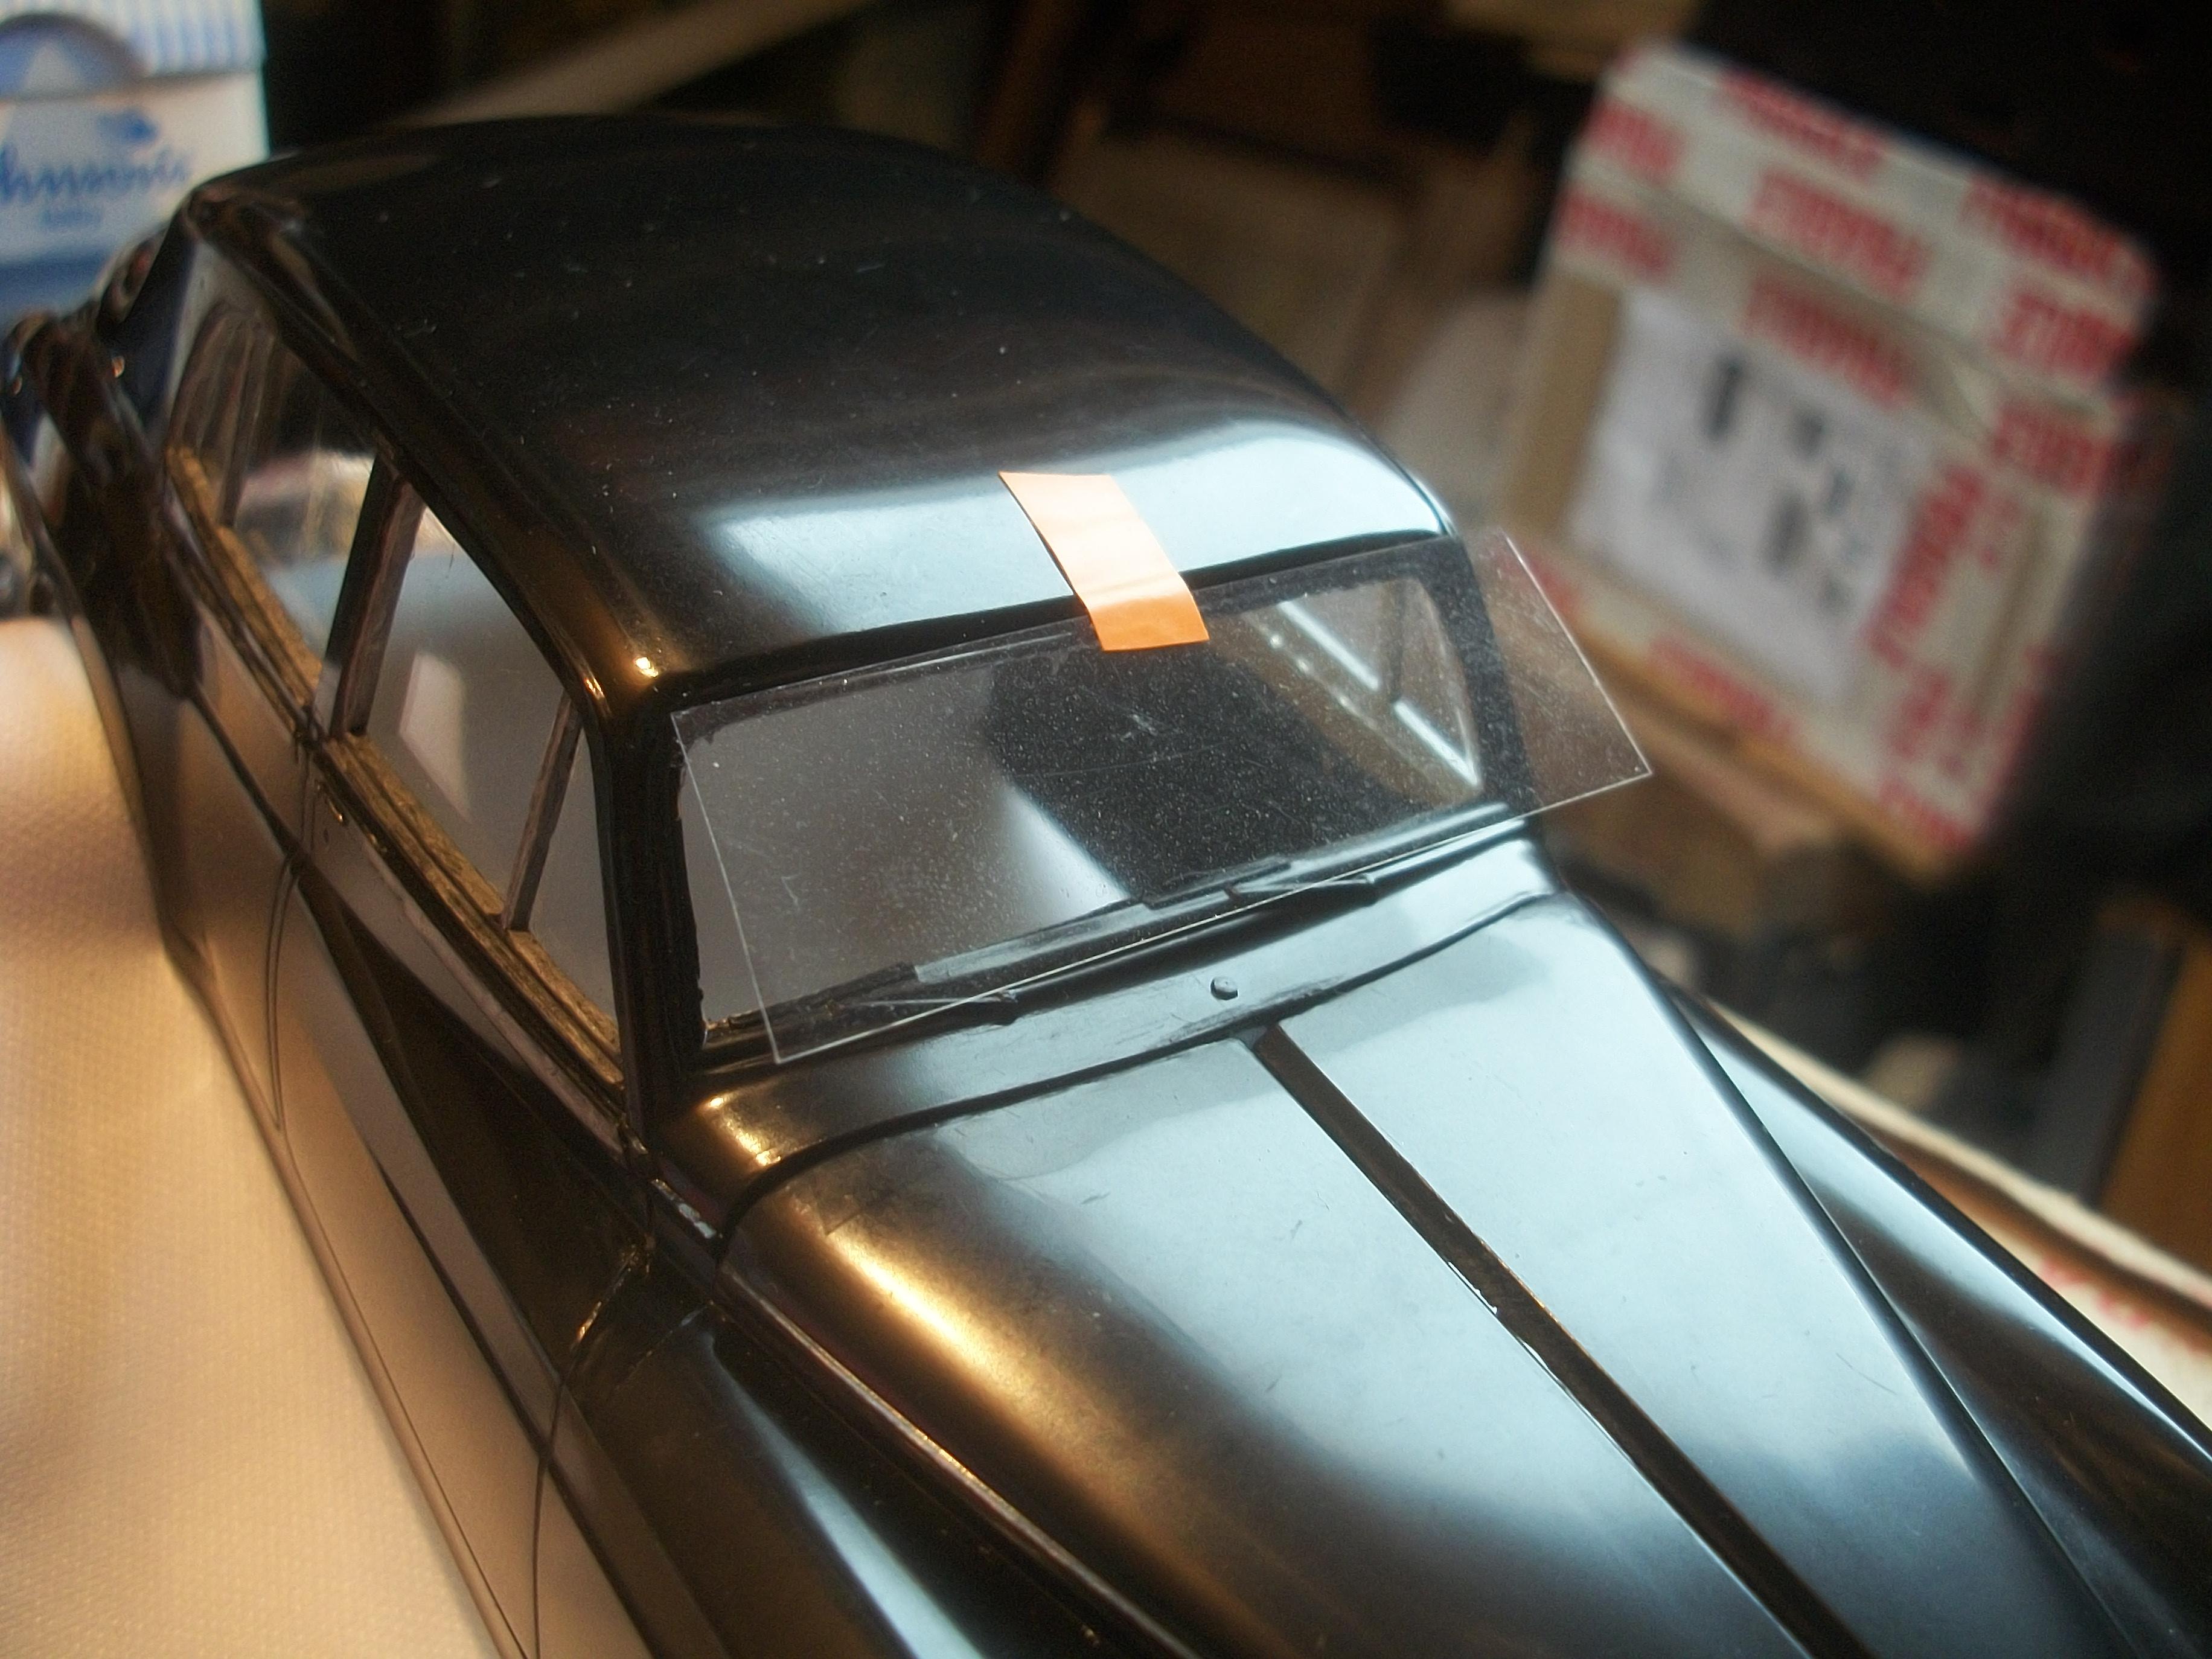
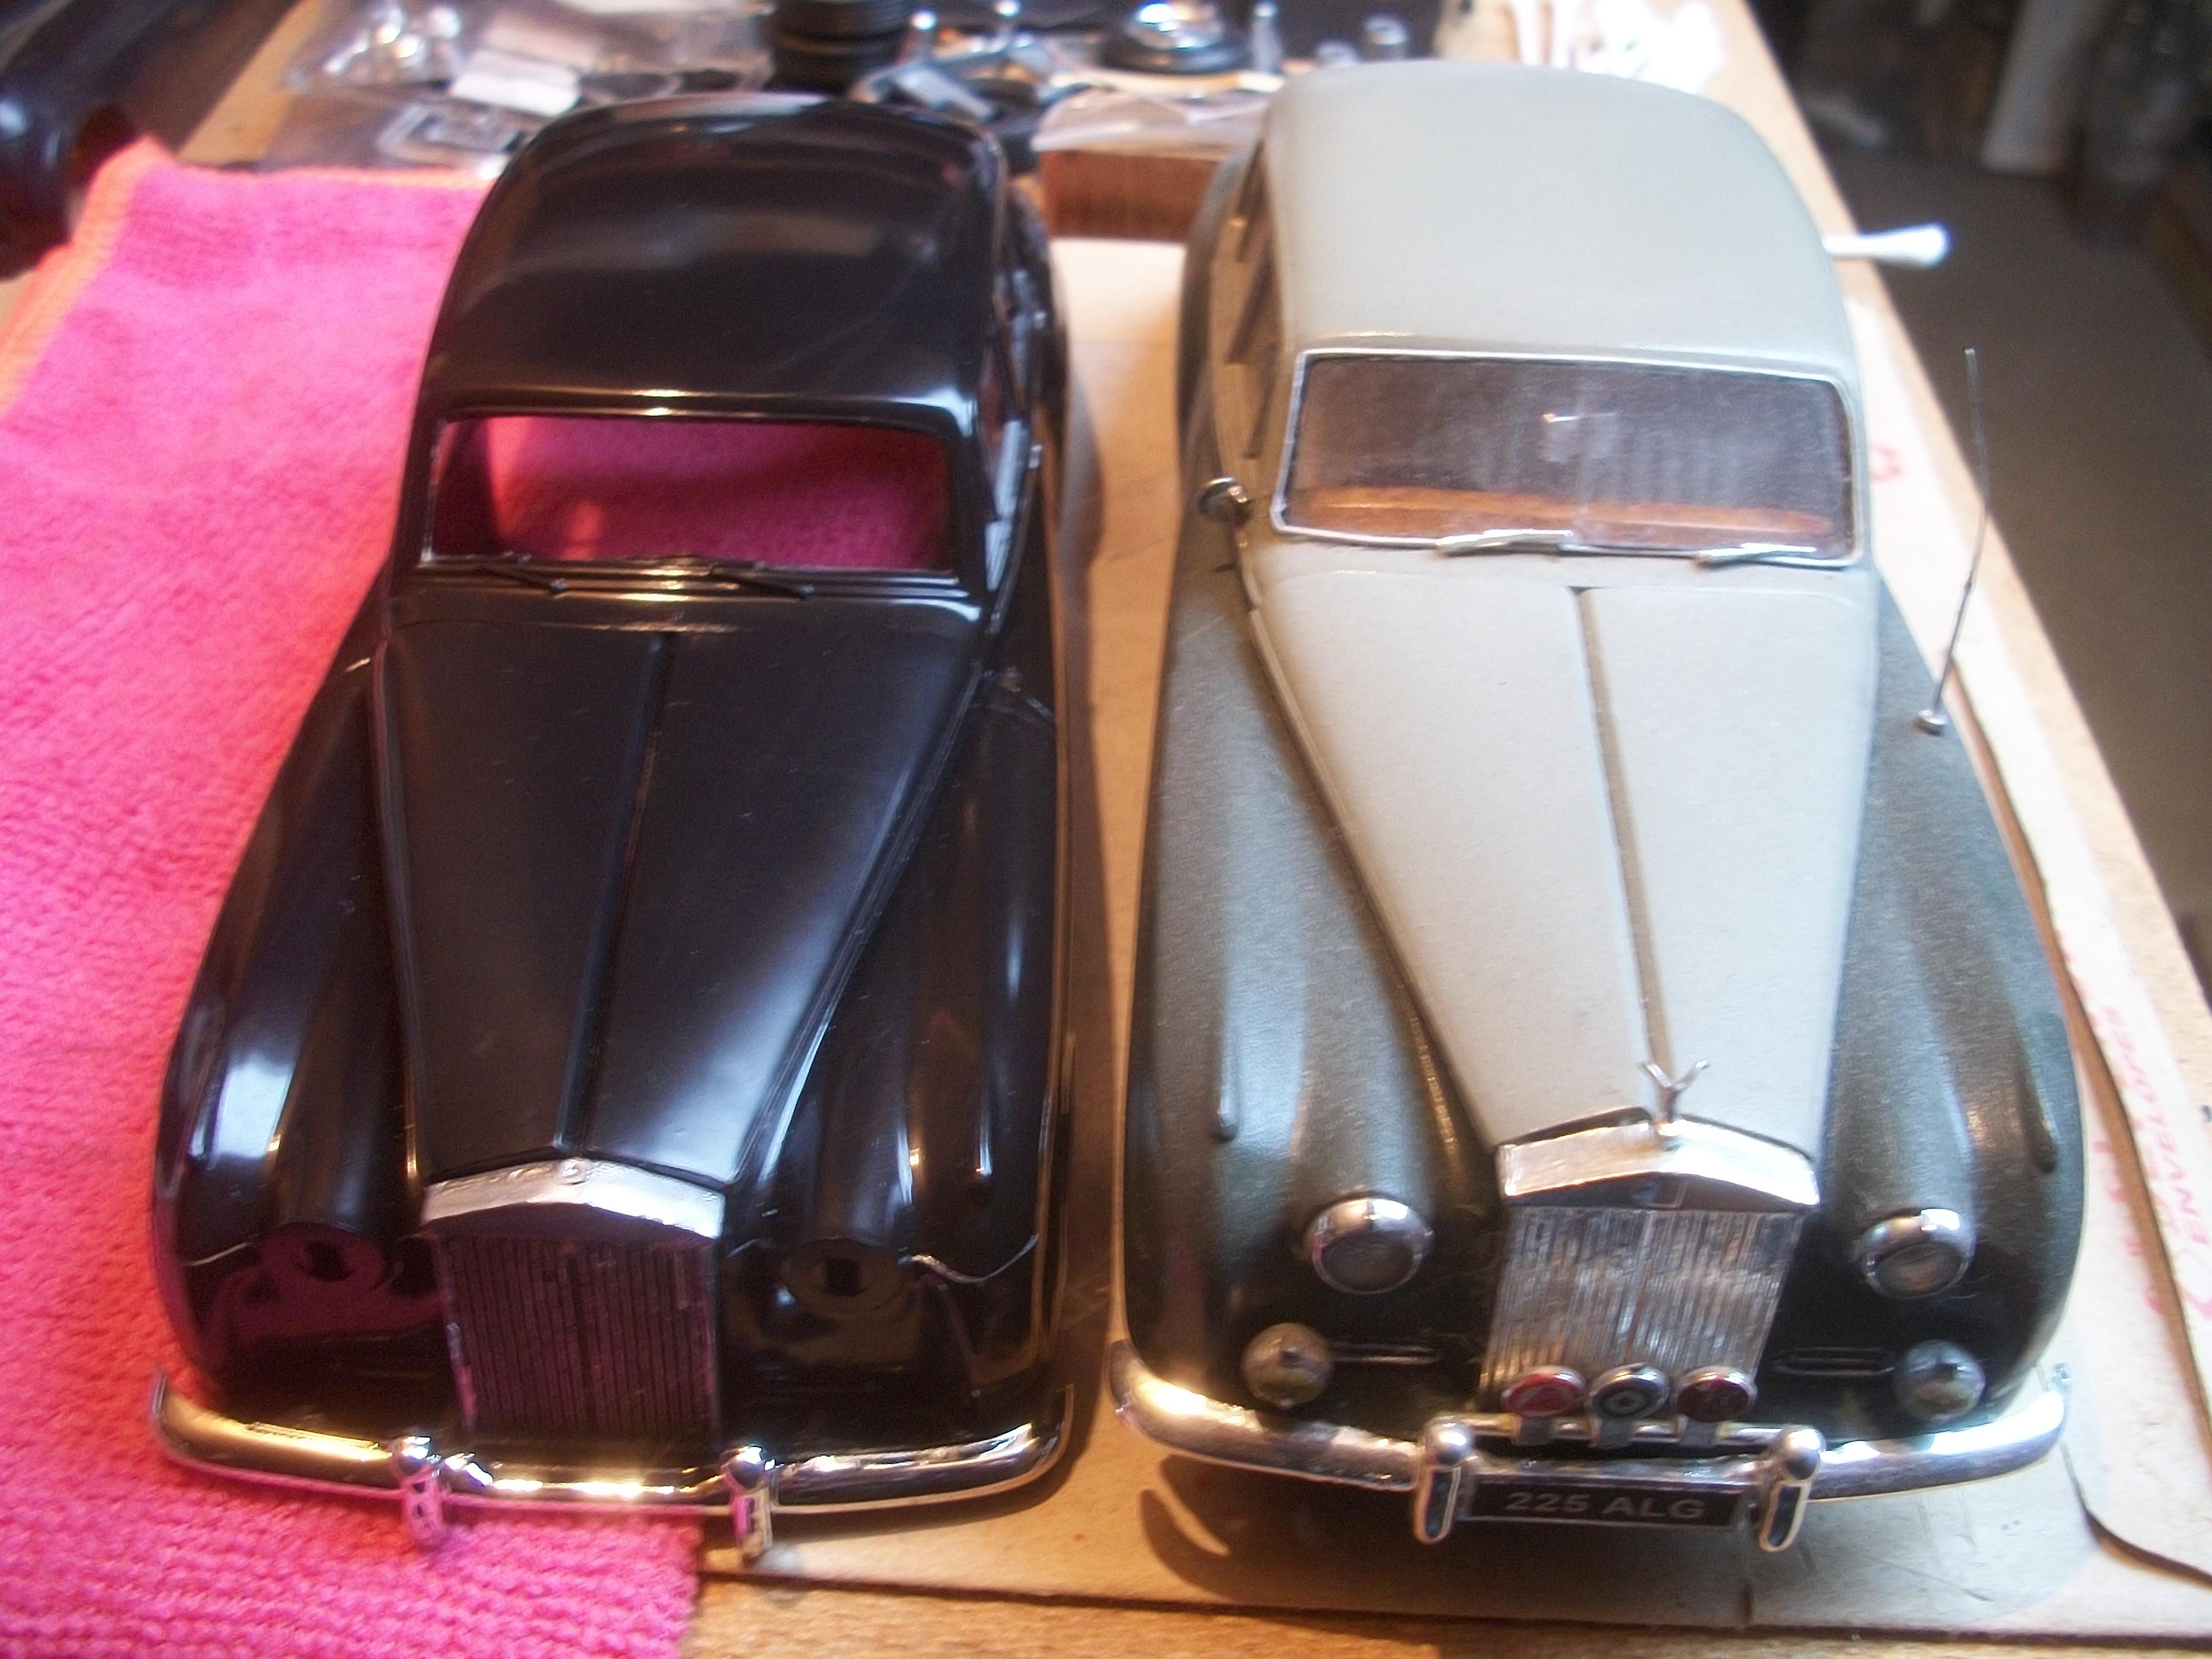
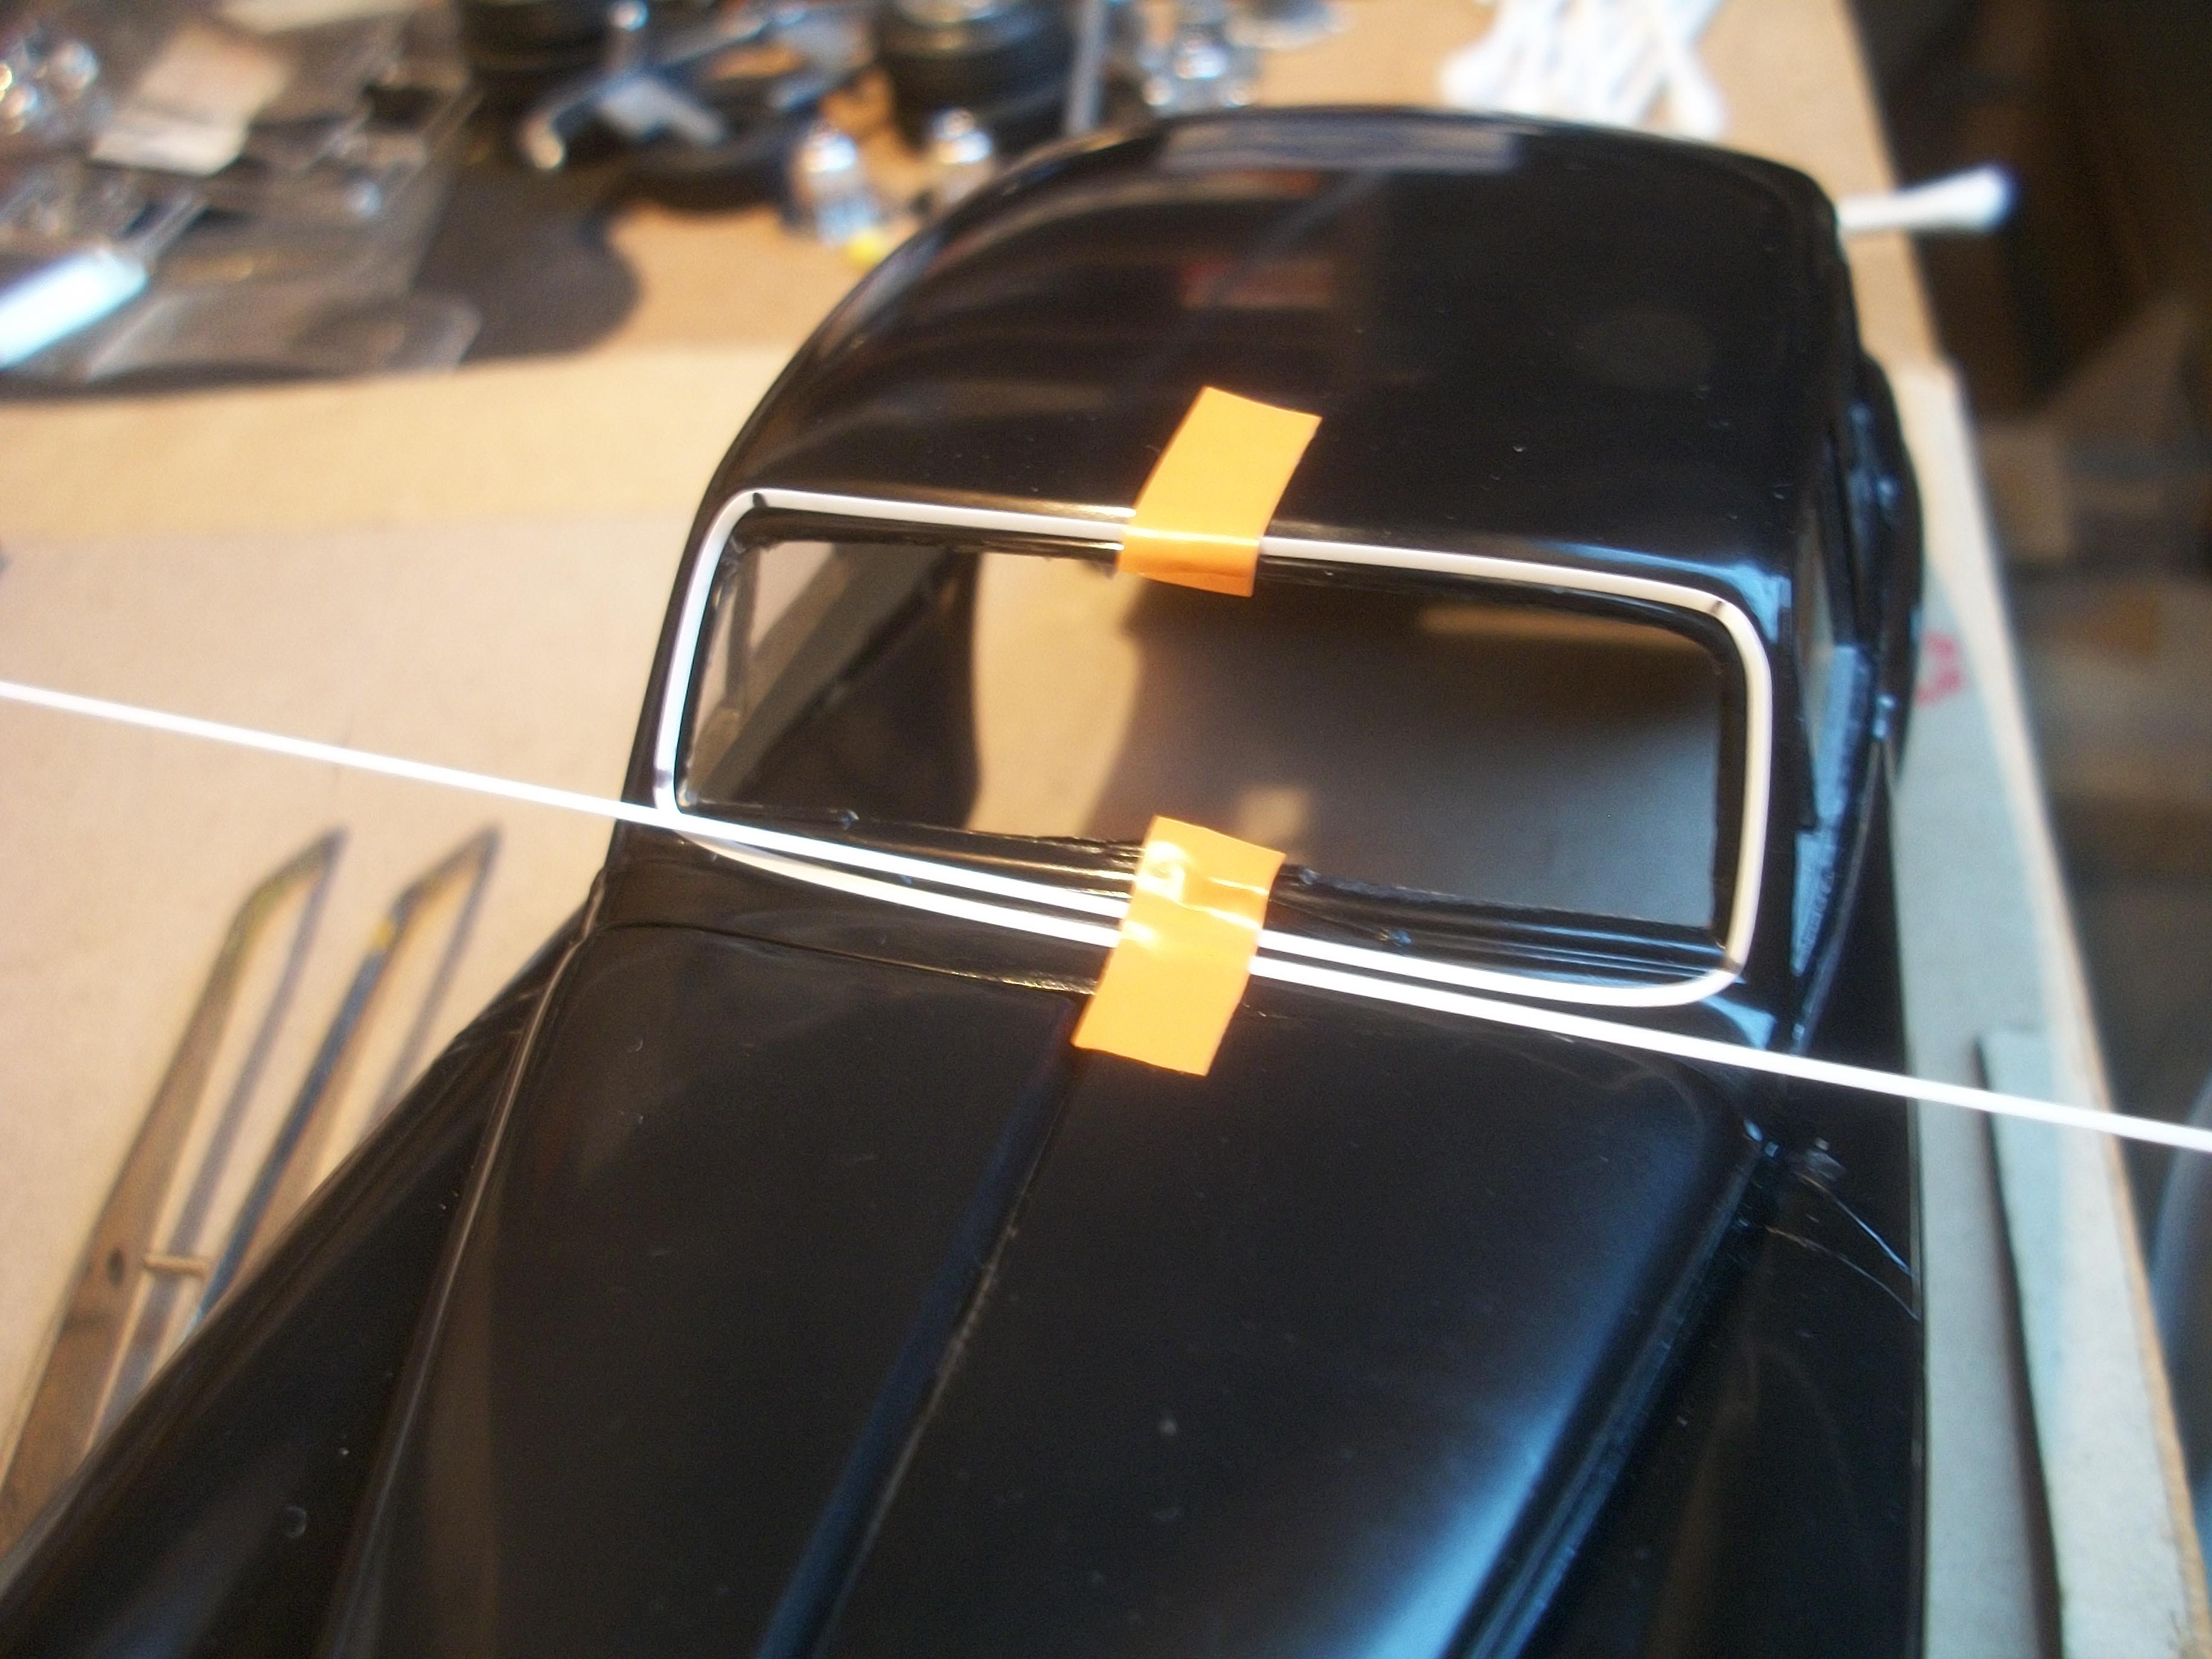
Now that the clear screen has set overnight, I prepared to apply the Liquid Chrome . . . Rather than attempt to use the silver Sharpie which has a 1 mm tip that is too large for this job, I chose to use a CD marker that has a thin tip. By dipping the tip into a pool of Liquid Chrome I was able to apply the chrome precisely. I used some blue masking tape and the orange fine line tape to protect the area of the bodywork around the windshield molding and wipers. First of all the molding around the windshield was chromed, followed by the wiper arms and blades. I managed to avoid getting any chrome on the clear screen, and the thought then crossed my mind that the obvious thing to have done would have been to apply the chrome BEFORE the screen was glued in place. Hindsight is a wonderful thing of course . . . Once the wipers were done, and not wanting to waste the pool of liquid chrome, I applied some chrome to the boot lid handle, and also the door strips on the passenger side of the body. This will be allowed to dry for 24 hours before I examine the overall result . . . David
-
Rolls-Royce No Chemicals, No Paint, No Harmful Glues
Anglia105E replied to Anglia105E's topic in WIP: Model Cars
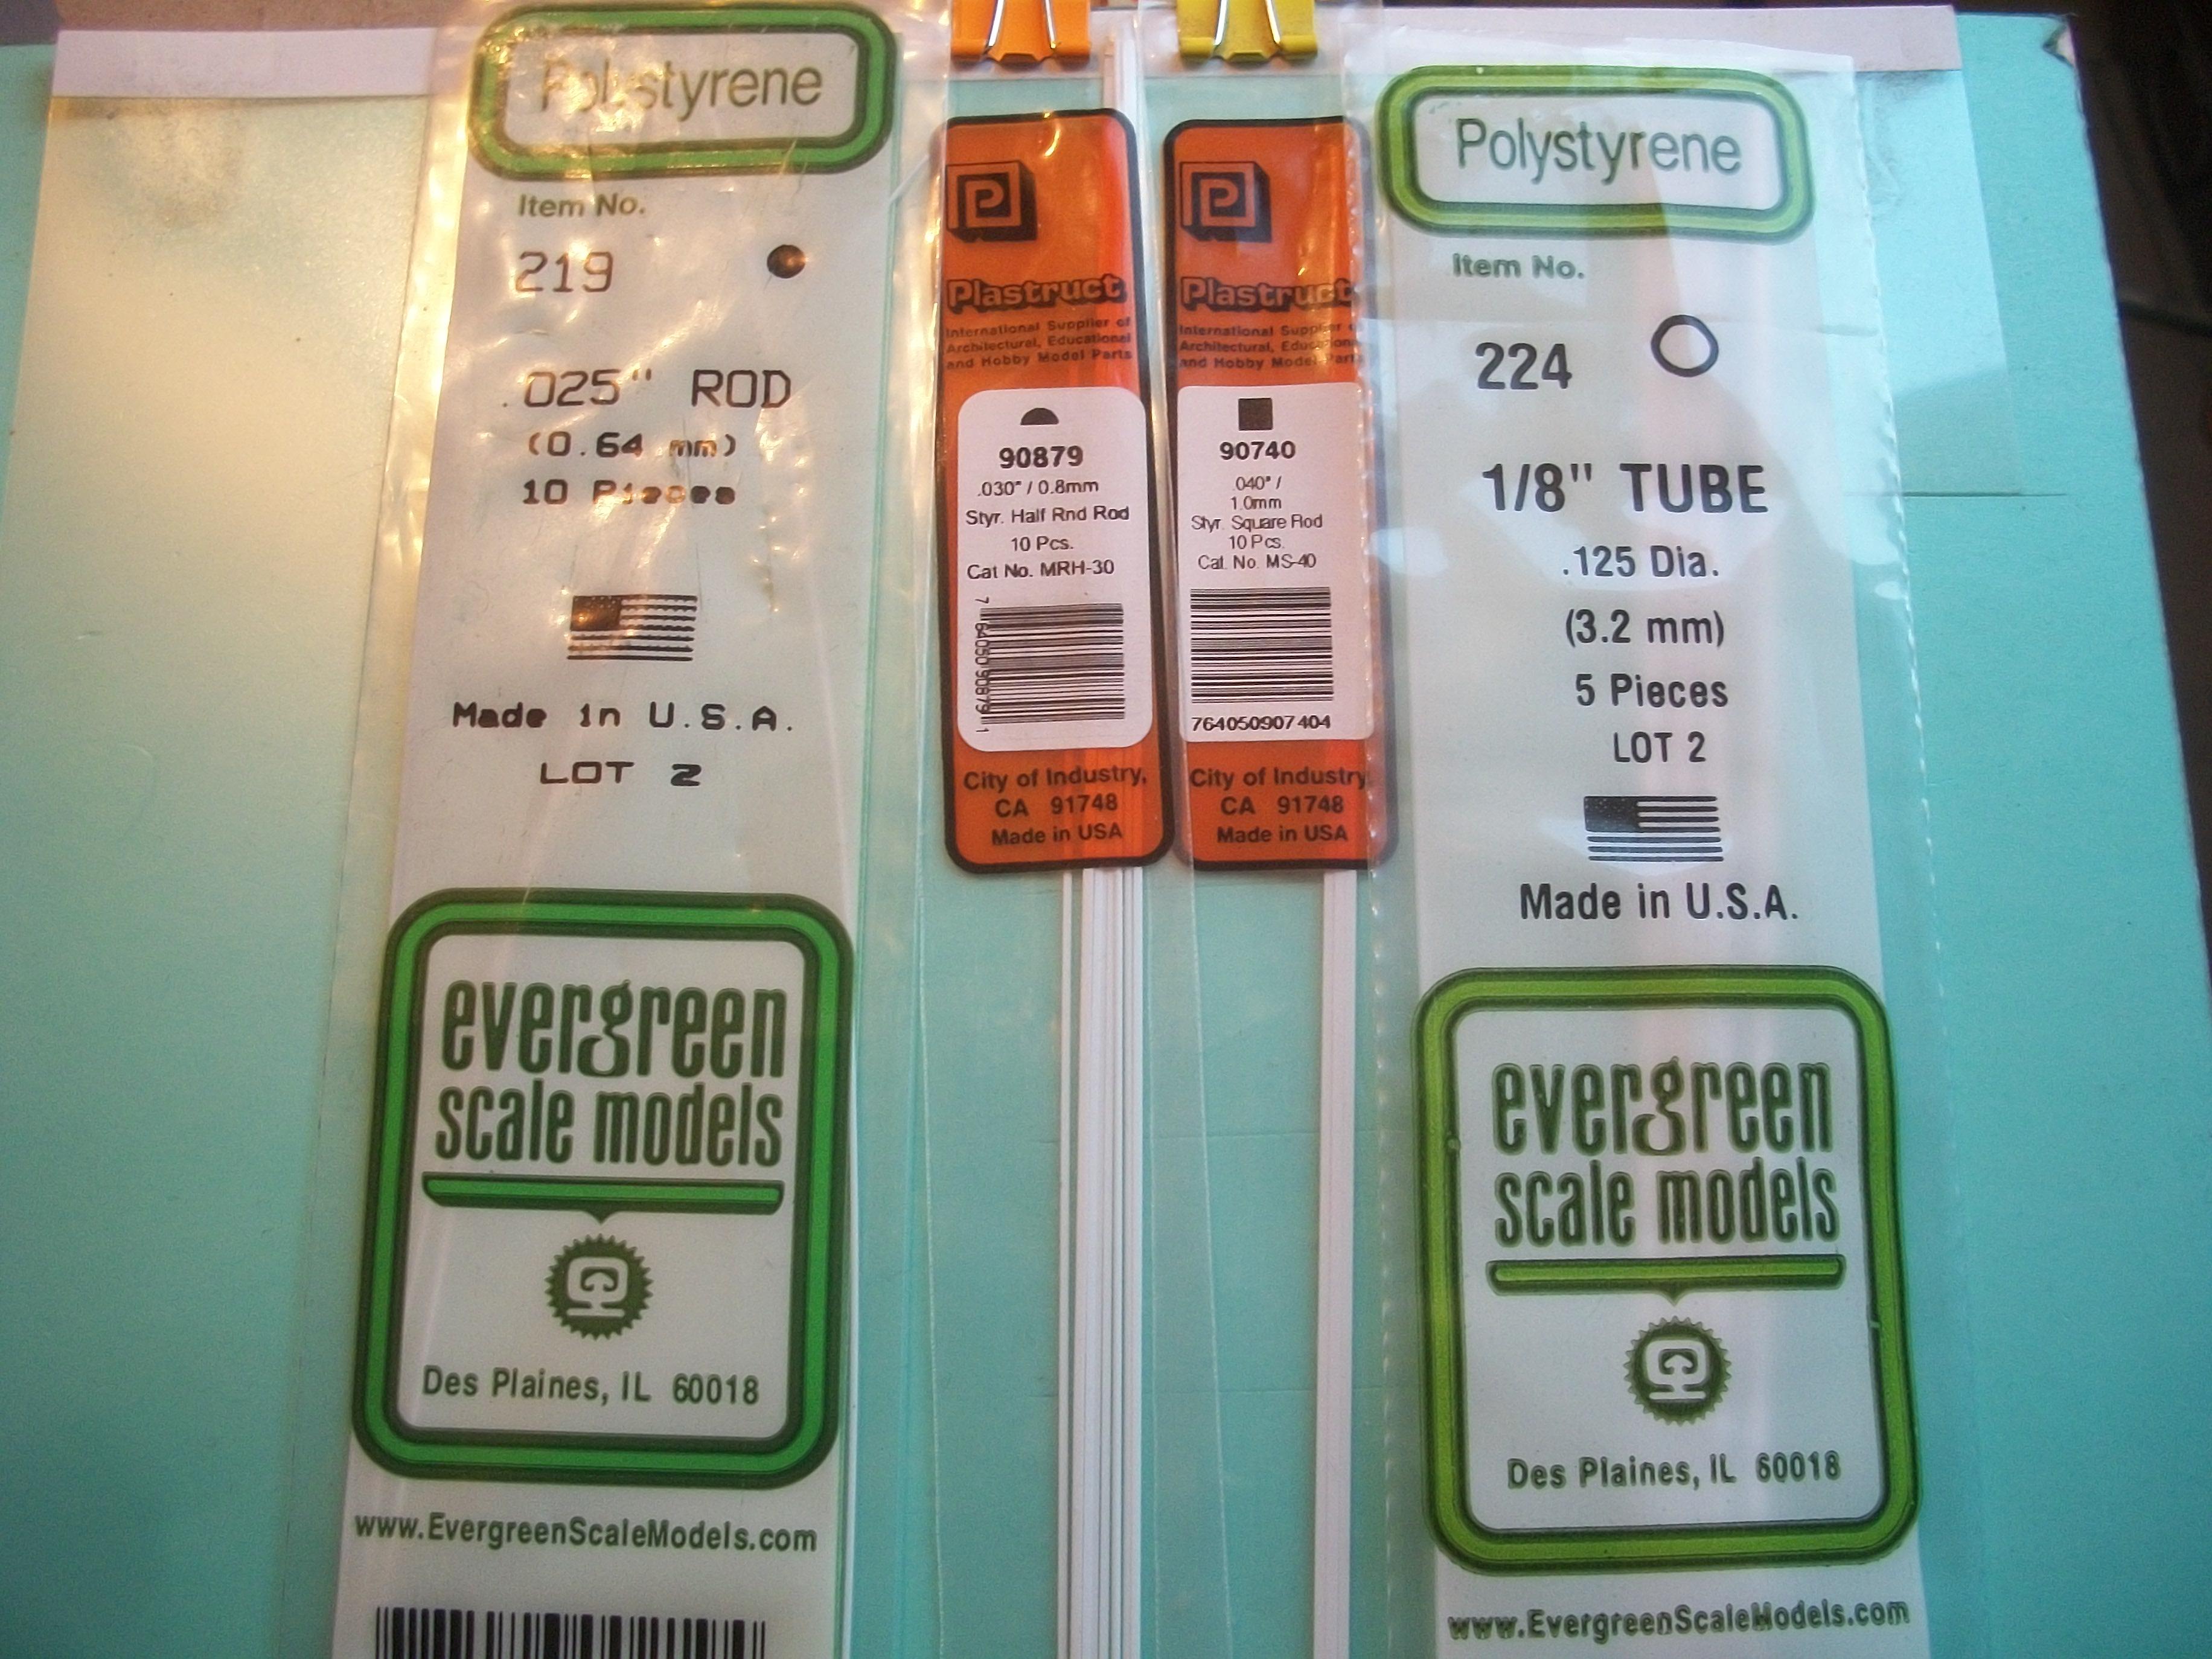
Having decided upon a method of putting together the windshield for this car, I am not yet certain this will be successful . . . The plan is to fit the clear screen to the inside of the body opening, and then to mask off the area surrounding the opening on the outside, which will allow me to apply liquid chrome using the silver Sharpie tip. The chrome will be applied to the windshield molding that is already molded into the body, so to begin with I am not attempting to add the half round styrene molding . . . Once this has been done I shall be able to see if the screen looks right, and if I am not completely happy with the result, then I can modify the approach as required. So far, the clear screen has been glued in place using Crystal Clear glue and this can be allowed to set overnight. David
-
Rolls-Royce No Chemicals, No Paint, No Harmful Glues
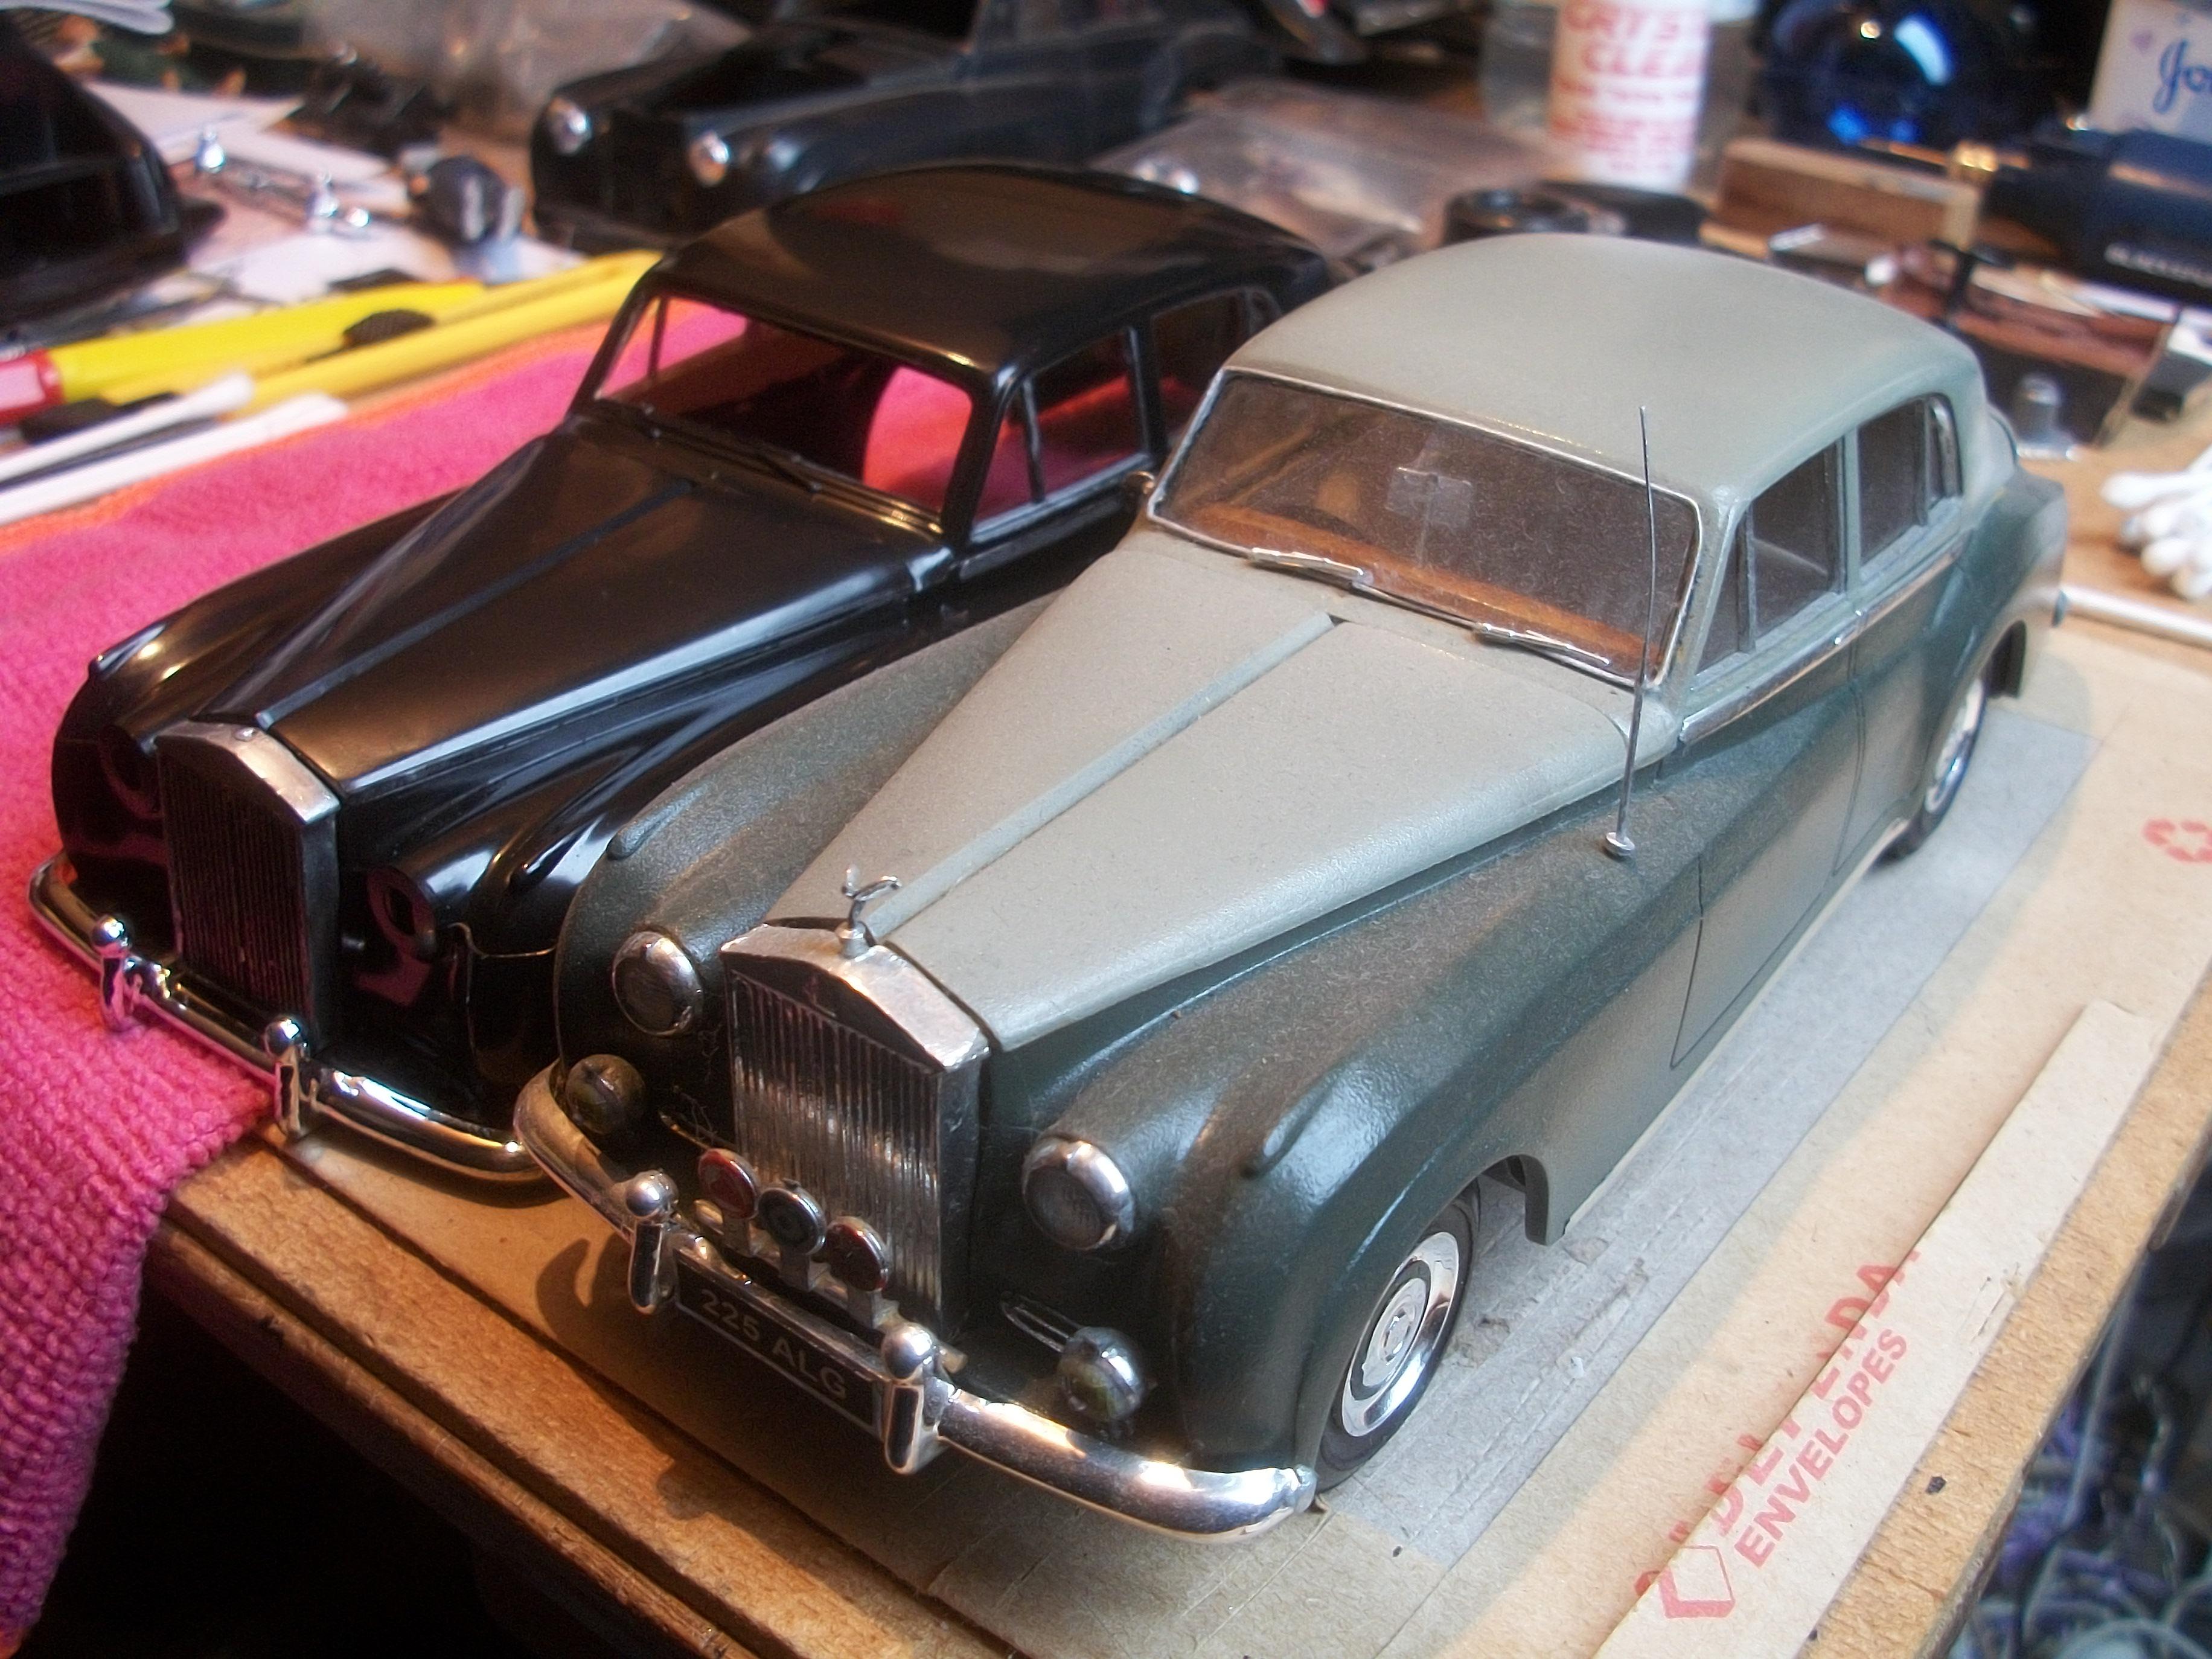
Anglia105E replied to Anglia105E's topic in WIP: Model Cars
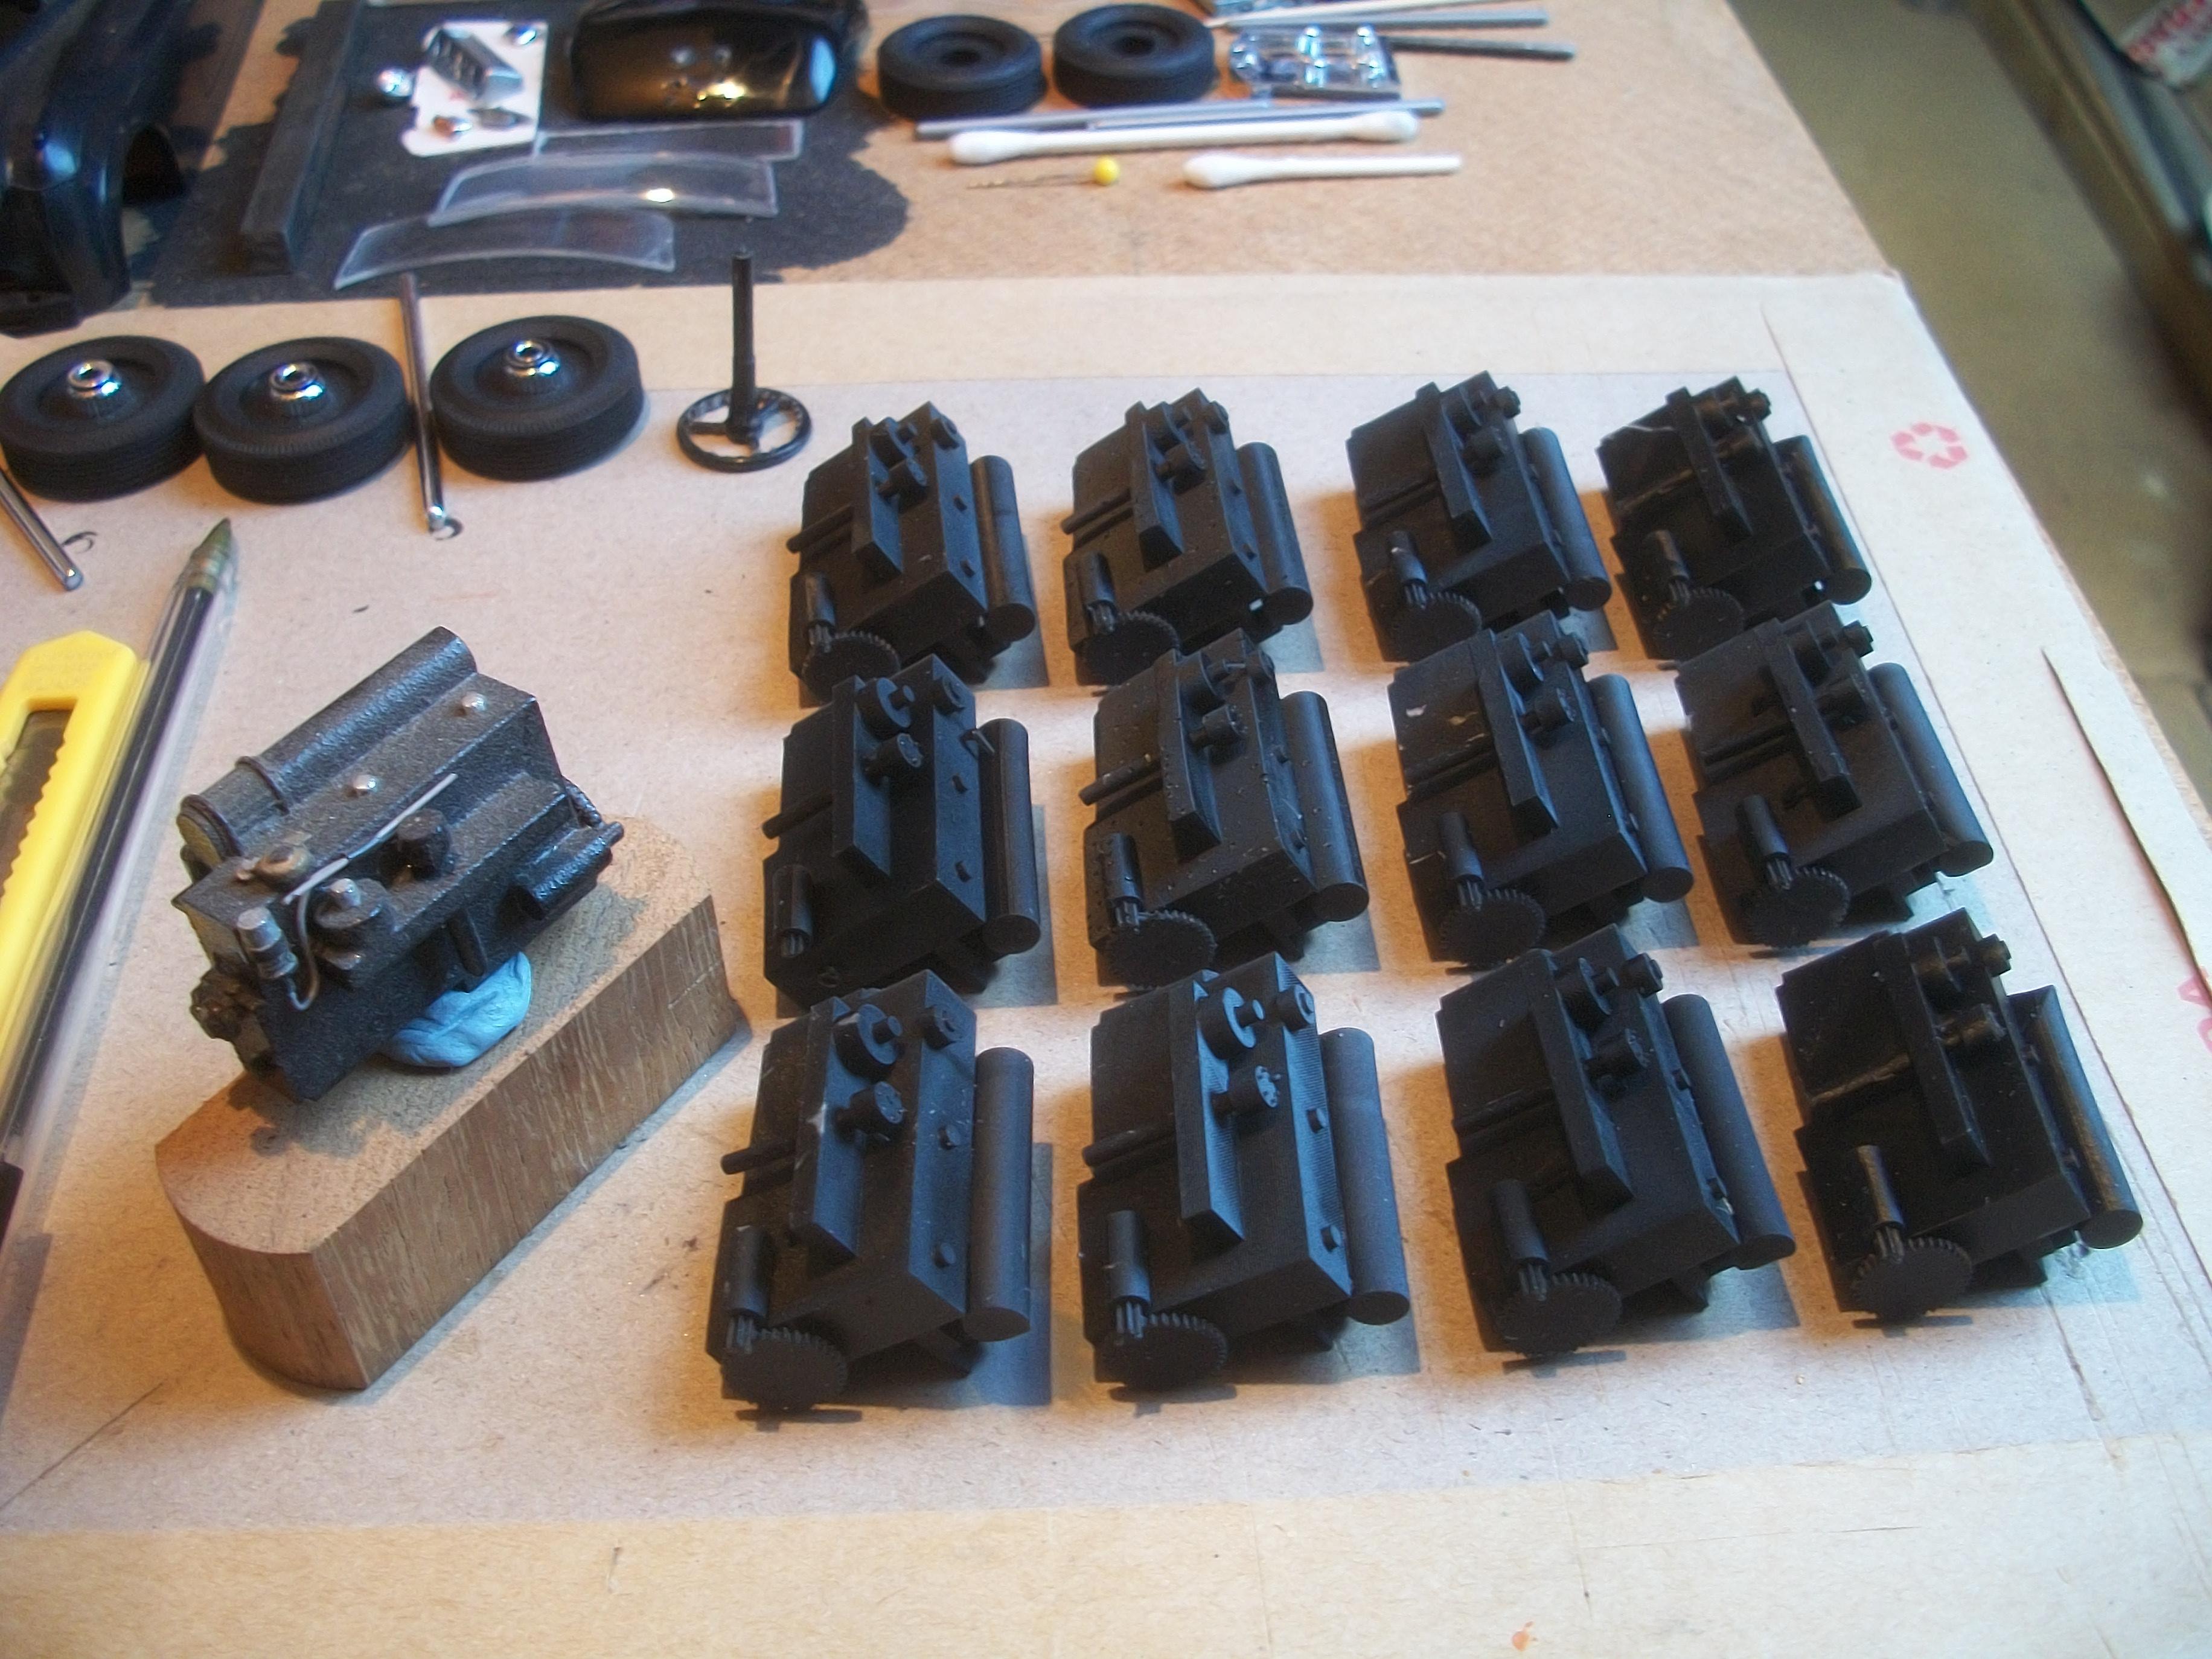
Even if I build two Silver Cloud models each year, there are enough engines here to keep me going for the next 6 years ! David -
Rolls-Royce No Chemicals, No Paint, No Harmful Glues
Anglia105E replied to Anglia105E's topic in WIP: Model Cars
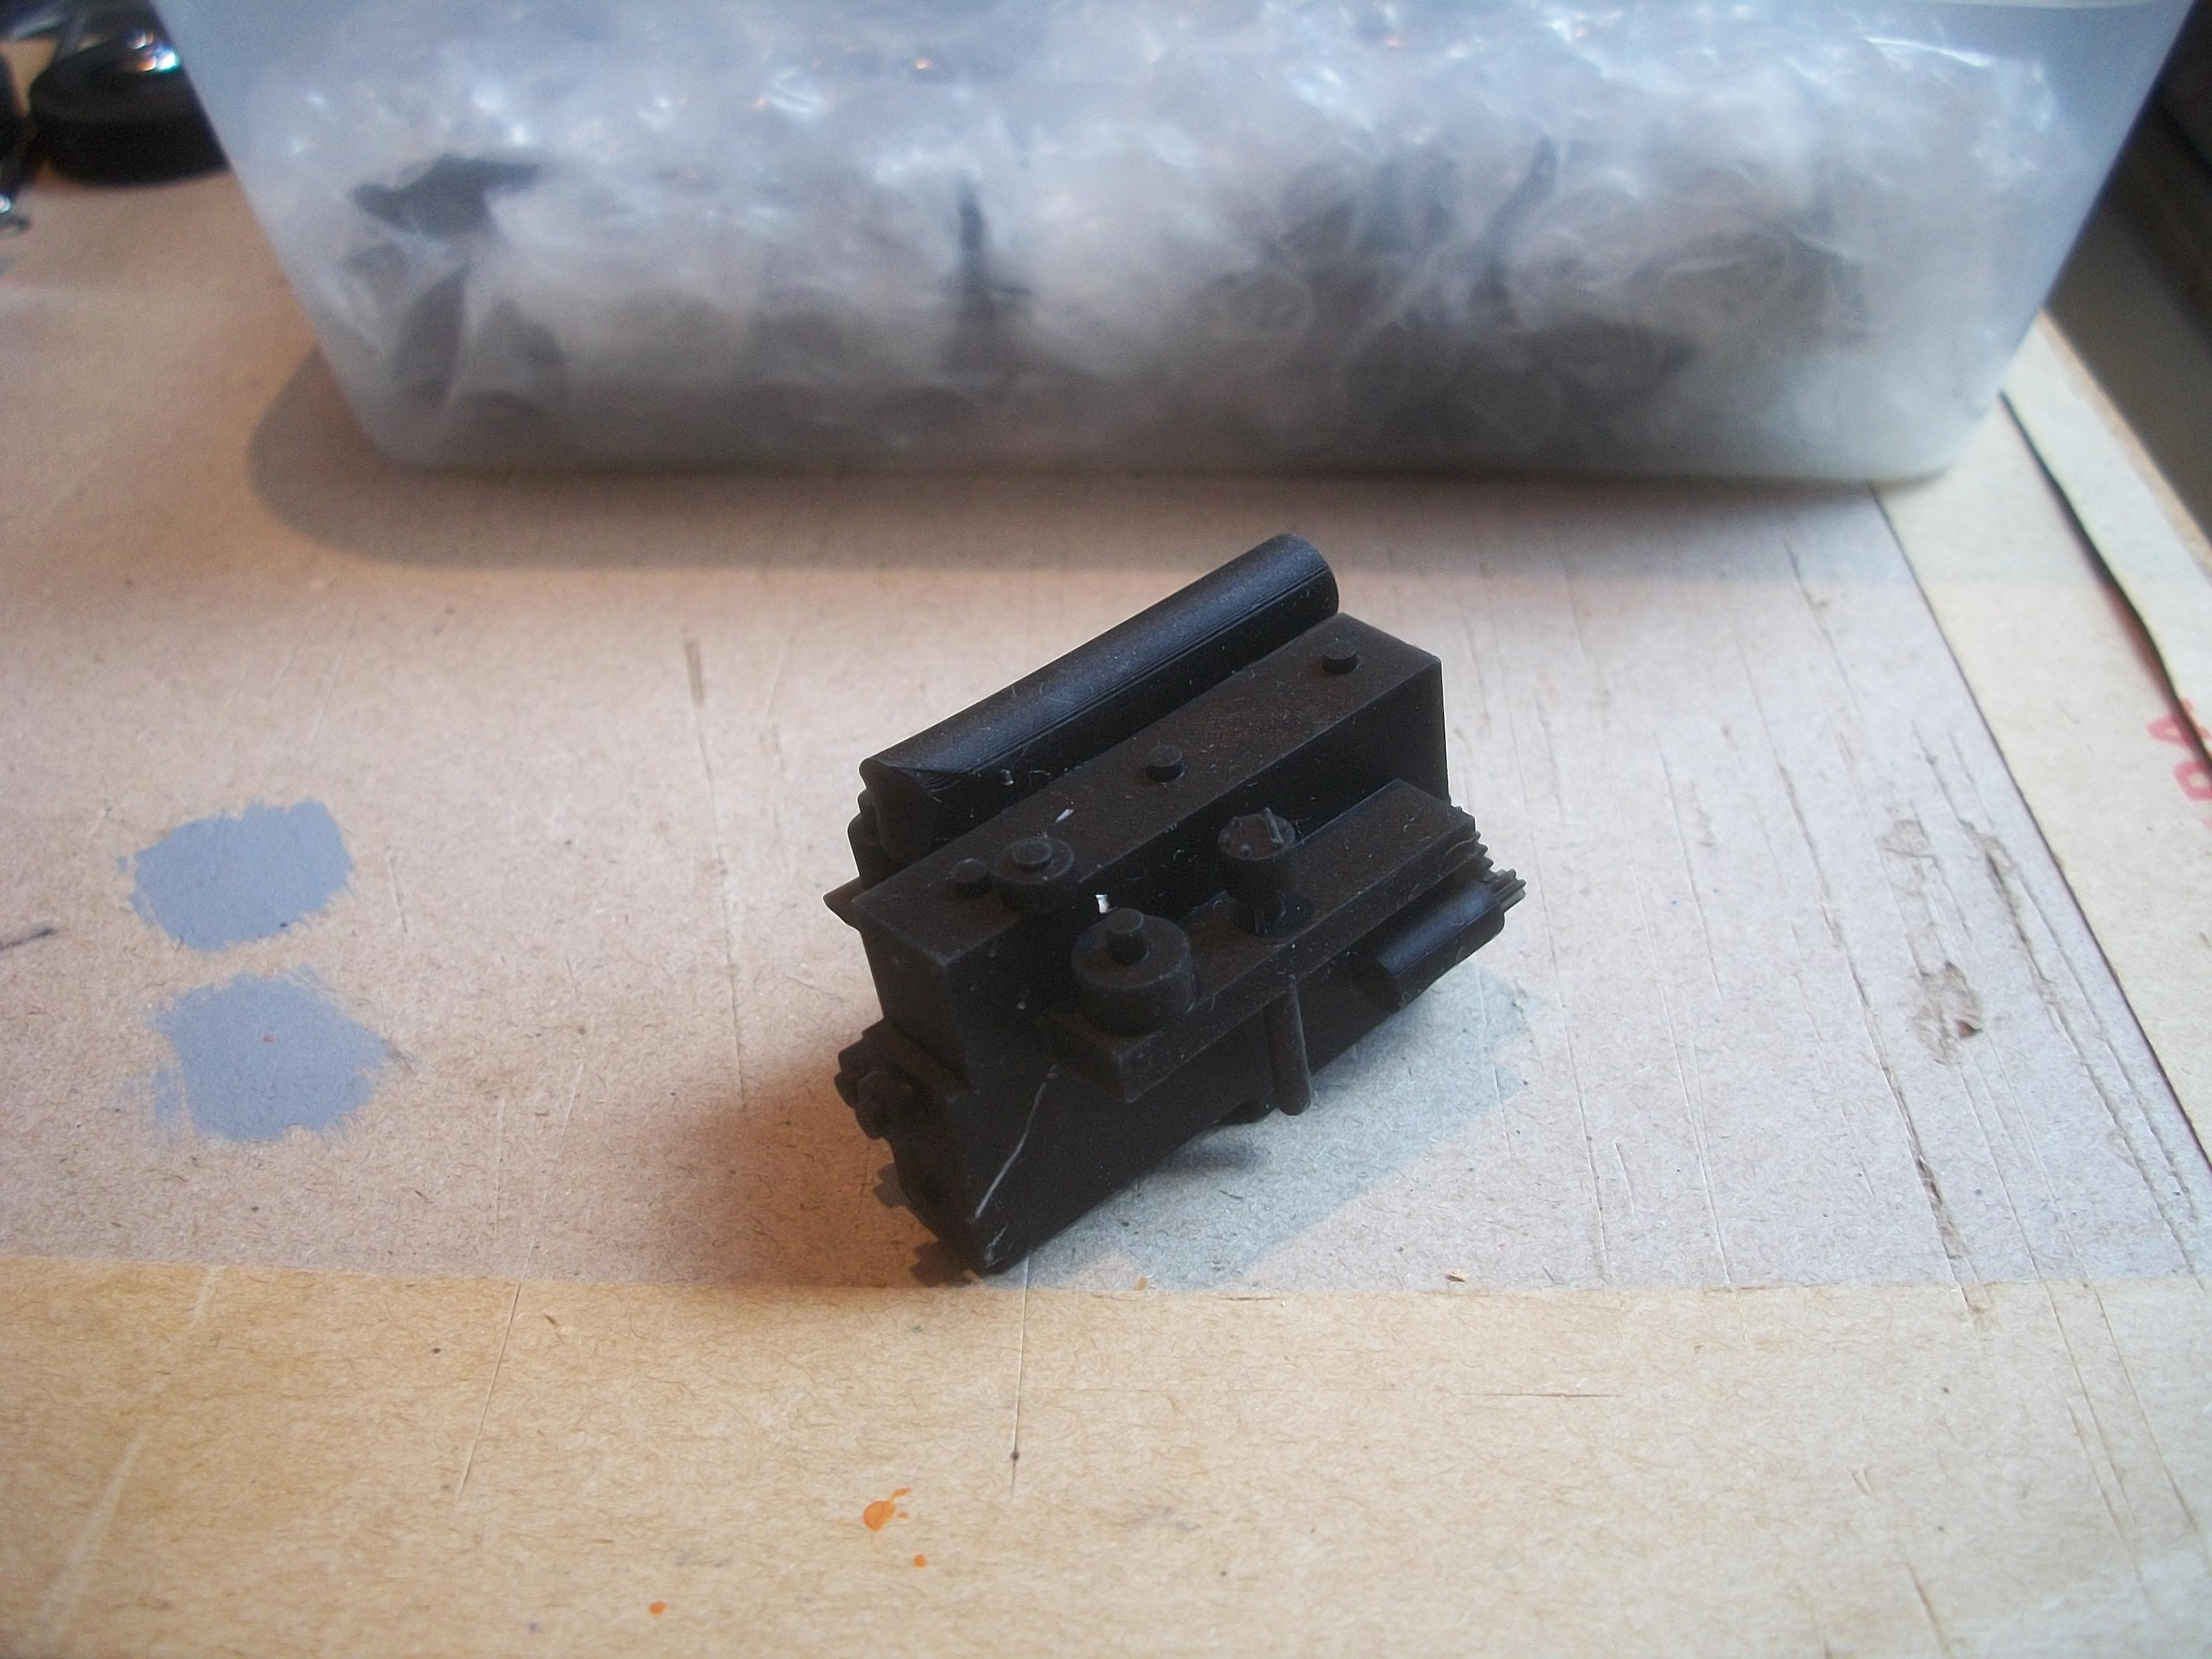
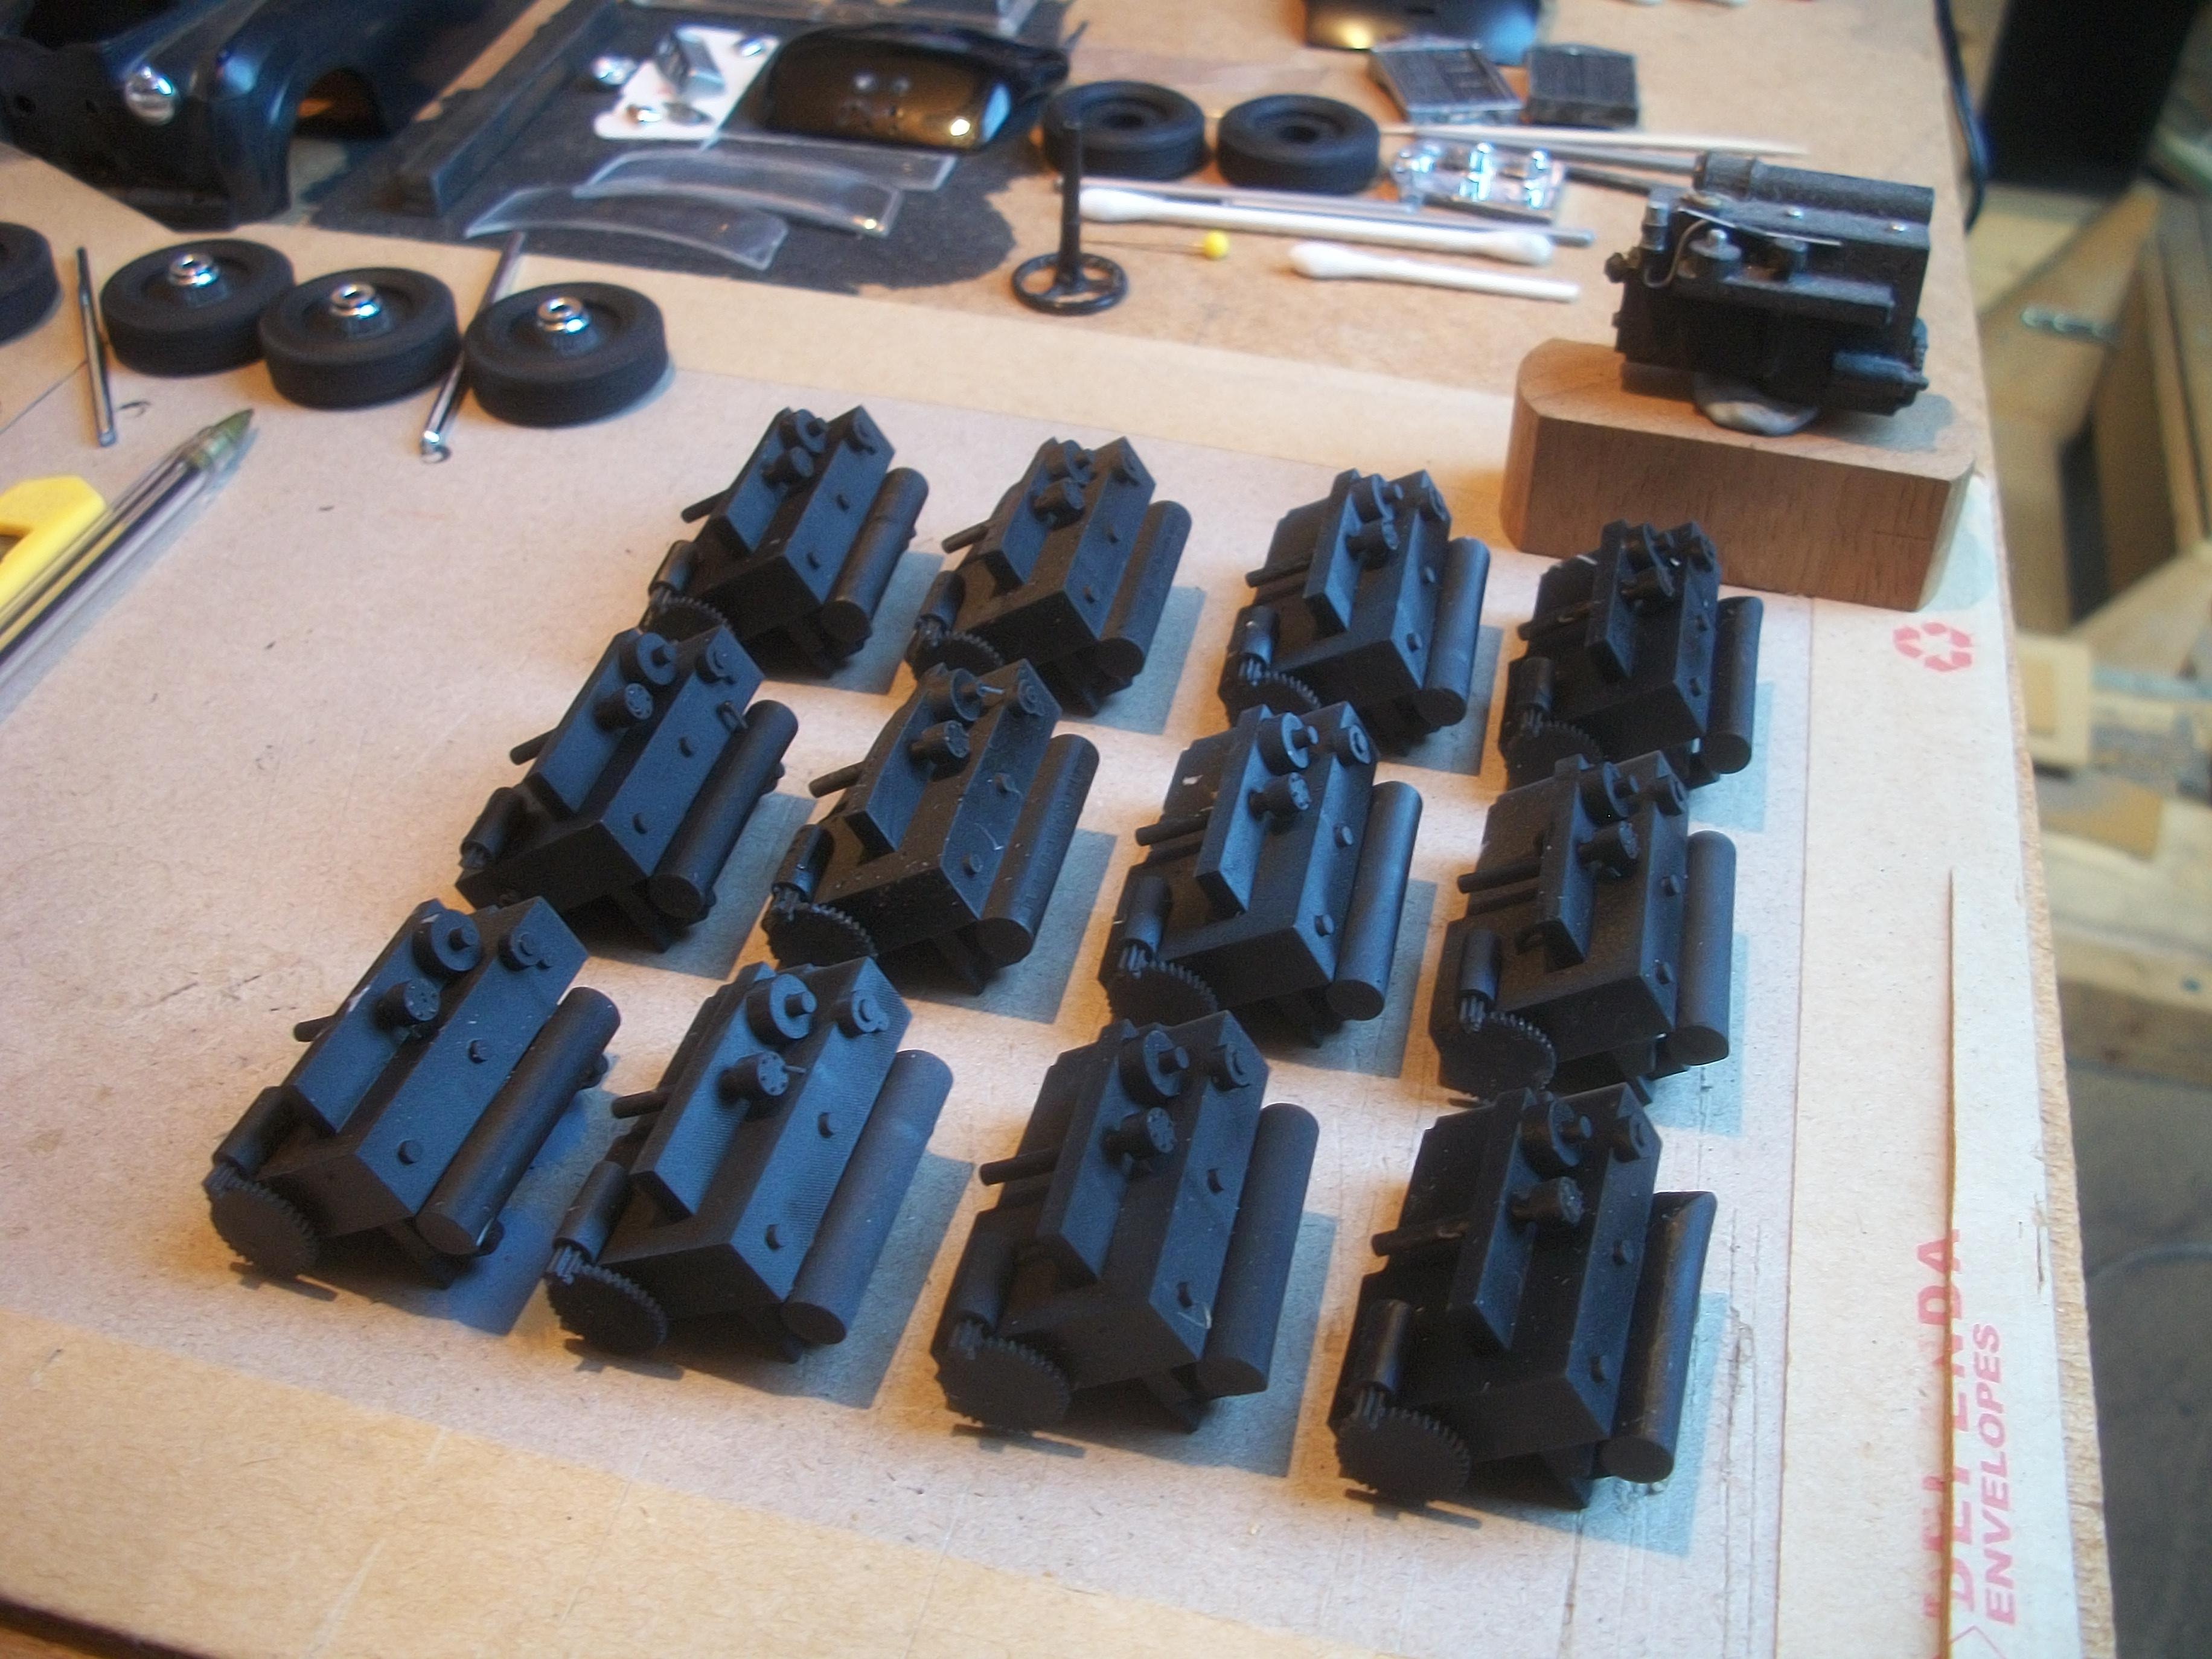
The Shapeways service used to be really good, and I had quite a few pieces shipped from the Netherlands and delivered by UPS at a very reasonable cost. Then they shut down their business, and after a couple of years reopened the business but in a totally different format. You cannot place an order for specific pieces any longer, which is a real shame . . . I did assemble my own 3D printer from parts supplied by an Ebay seller in China and somehow it actually worked well. Two years later the 3D printer exploded in my loft room and I haven't done any 3D printing since. The Rolls-Royce engine that I designed in FreeCAD at 1:24 scale was printed by Shapeways before they closed, but I only had two engines printed. Recently, a fellow member on MCM Forums has kindly printed some more engines for me in black resin which are really nice. The Shapeways printed engines are a white material that is not resin . . . I did manage to mold and cast one engine in resin, but I don't do molding and casting now because of the high risk chemicals. Three photos below of black resin 3D printed engines . . . David
-
Rolls-Royce No Chemicals, No Paint, No Harmful Glues
Anglia105E replied to Anglia105E's topic in WIP: Model Cars
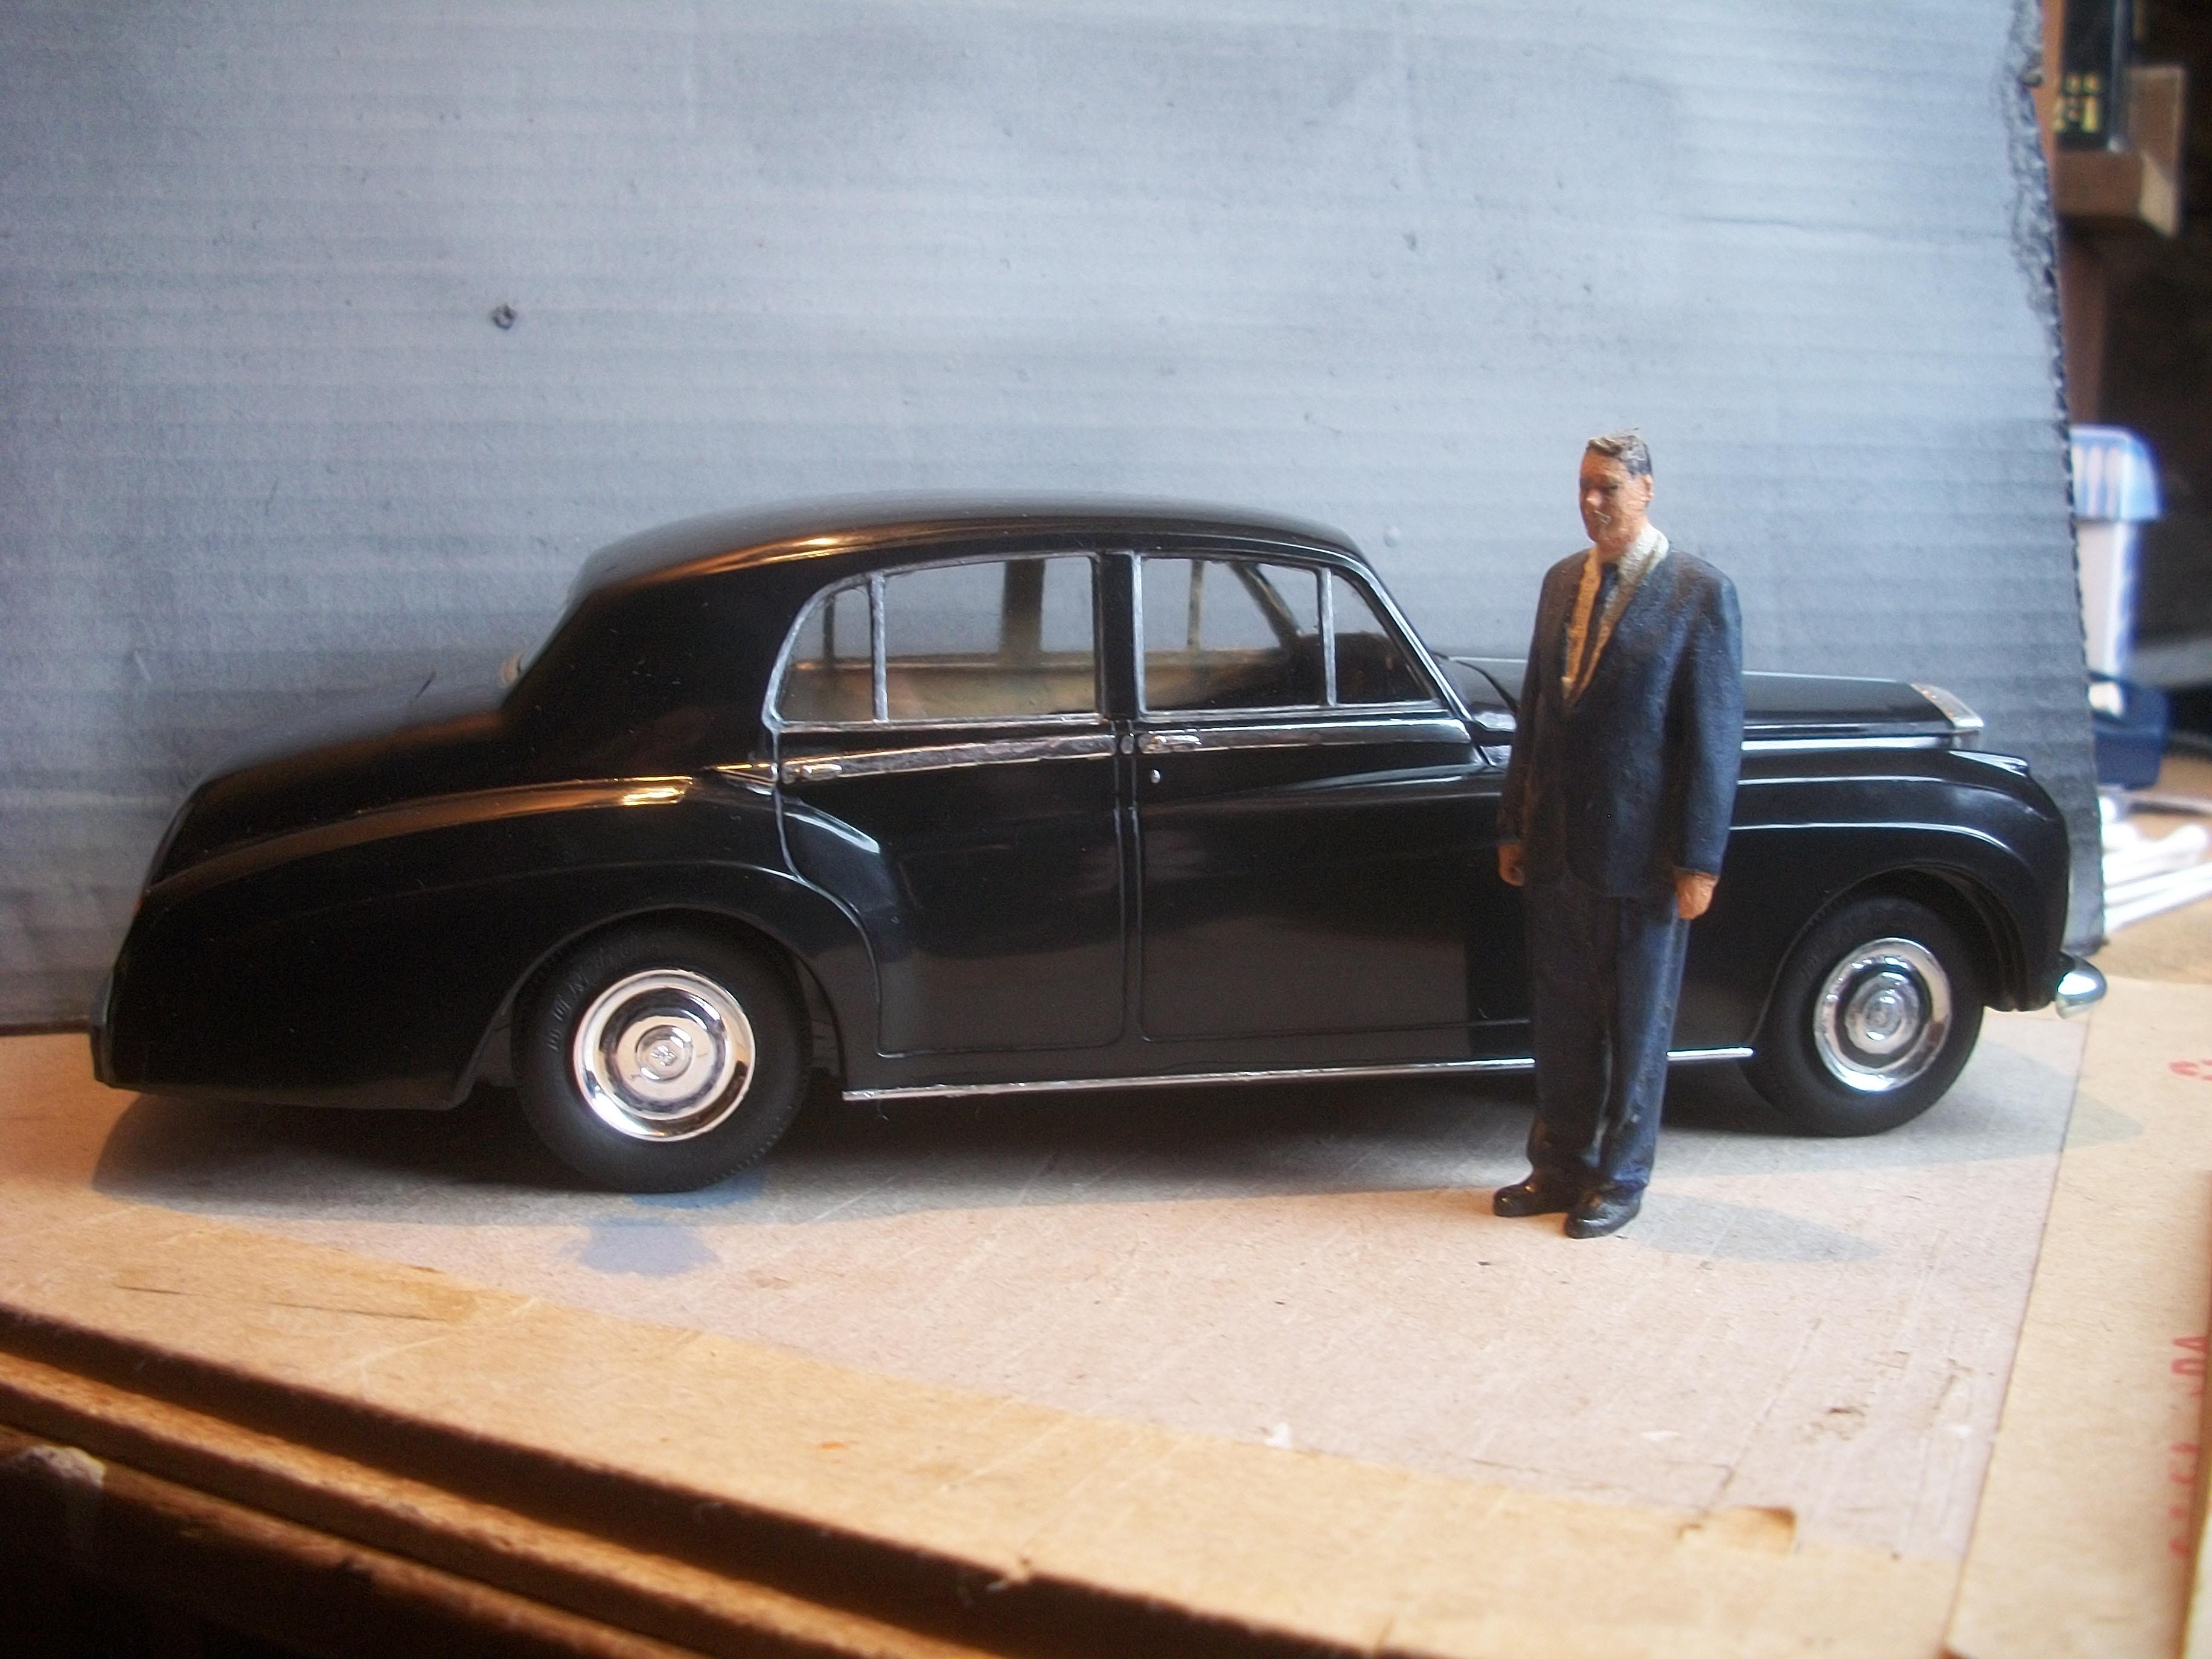
That is a 1:24 scale 3D printed figure that I had printed by Shapeways, and I modified the figure to look like Osmond Rivers, who was the Chief Designer and Managing Director of Hooper & Co. (Coachbuilders) Limited around 1958 - 1959 . . . David -
Rolls-Royce No Chemicals, No Paint, No Harmful Glues
Anglia105E replied to Anglia105E's topic in WIP: Model Cars
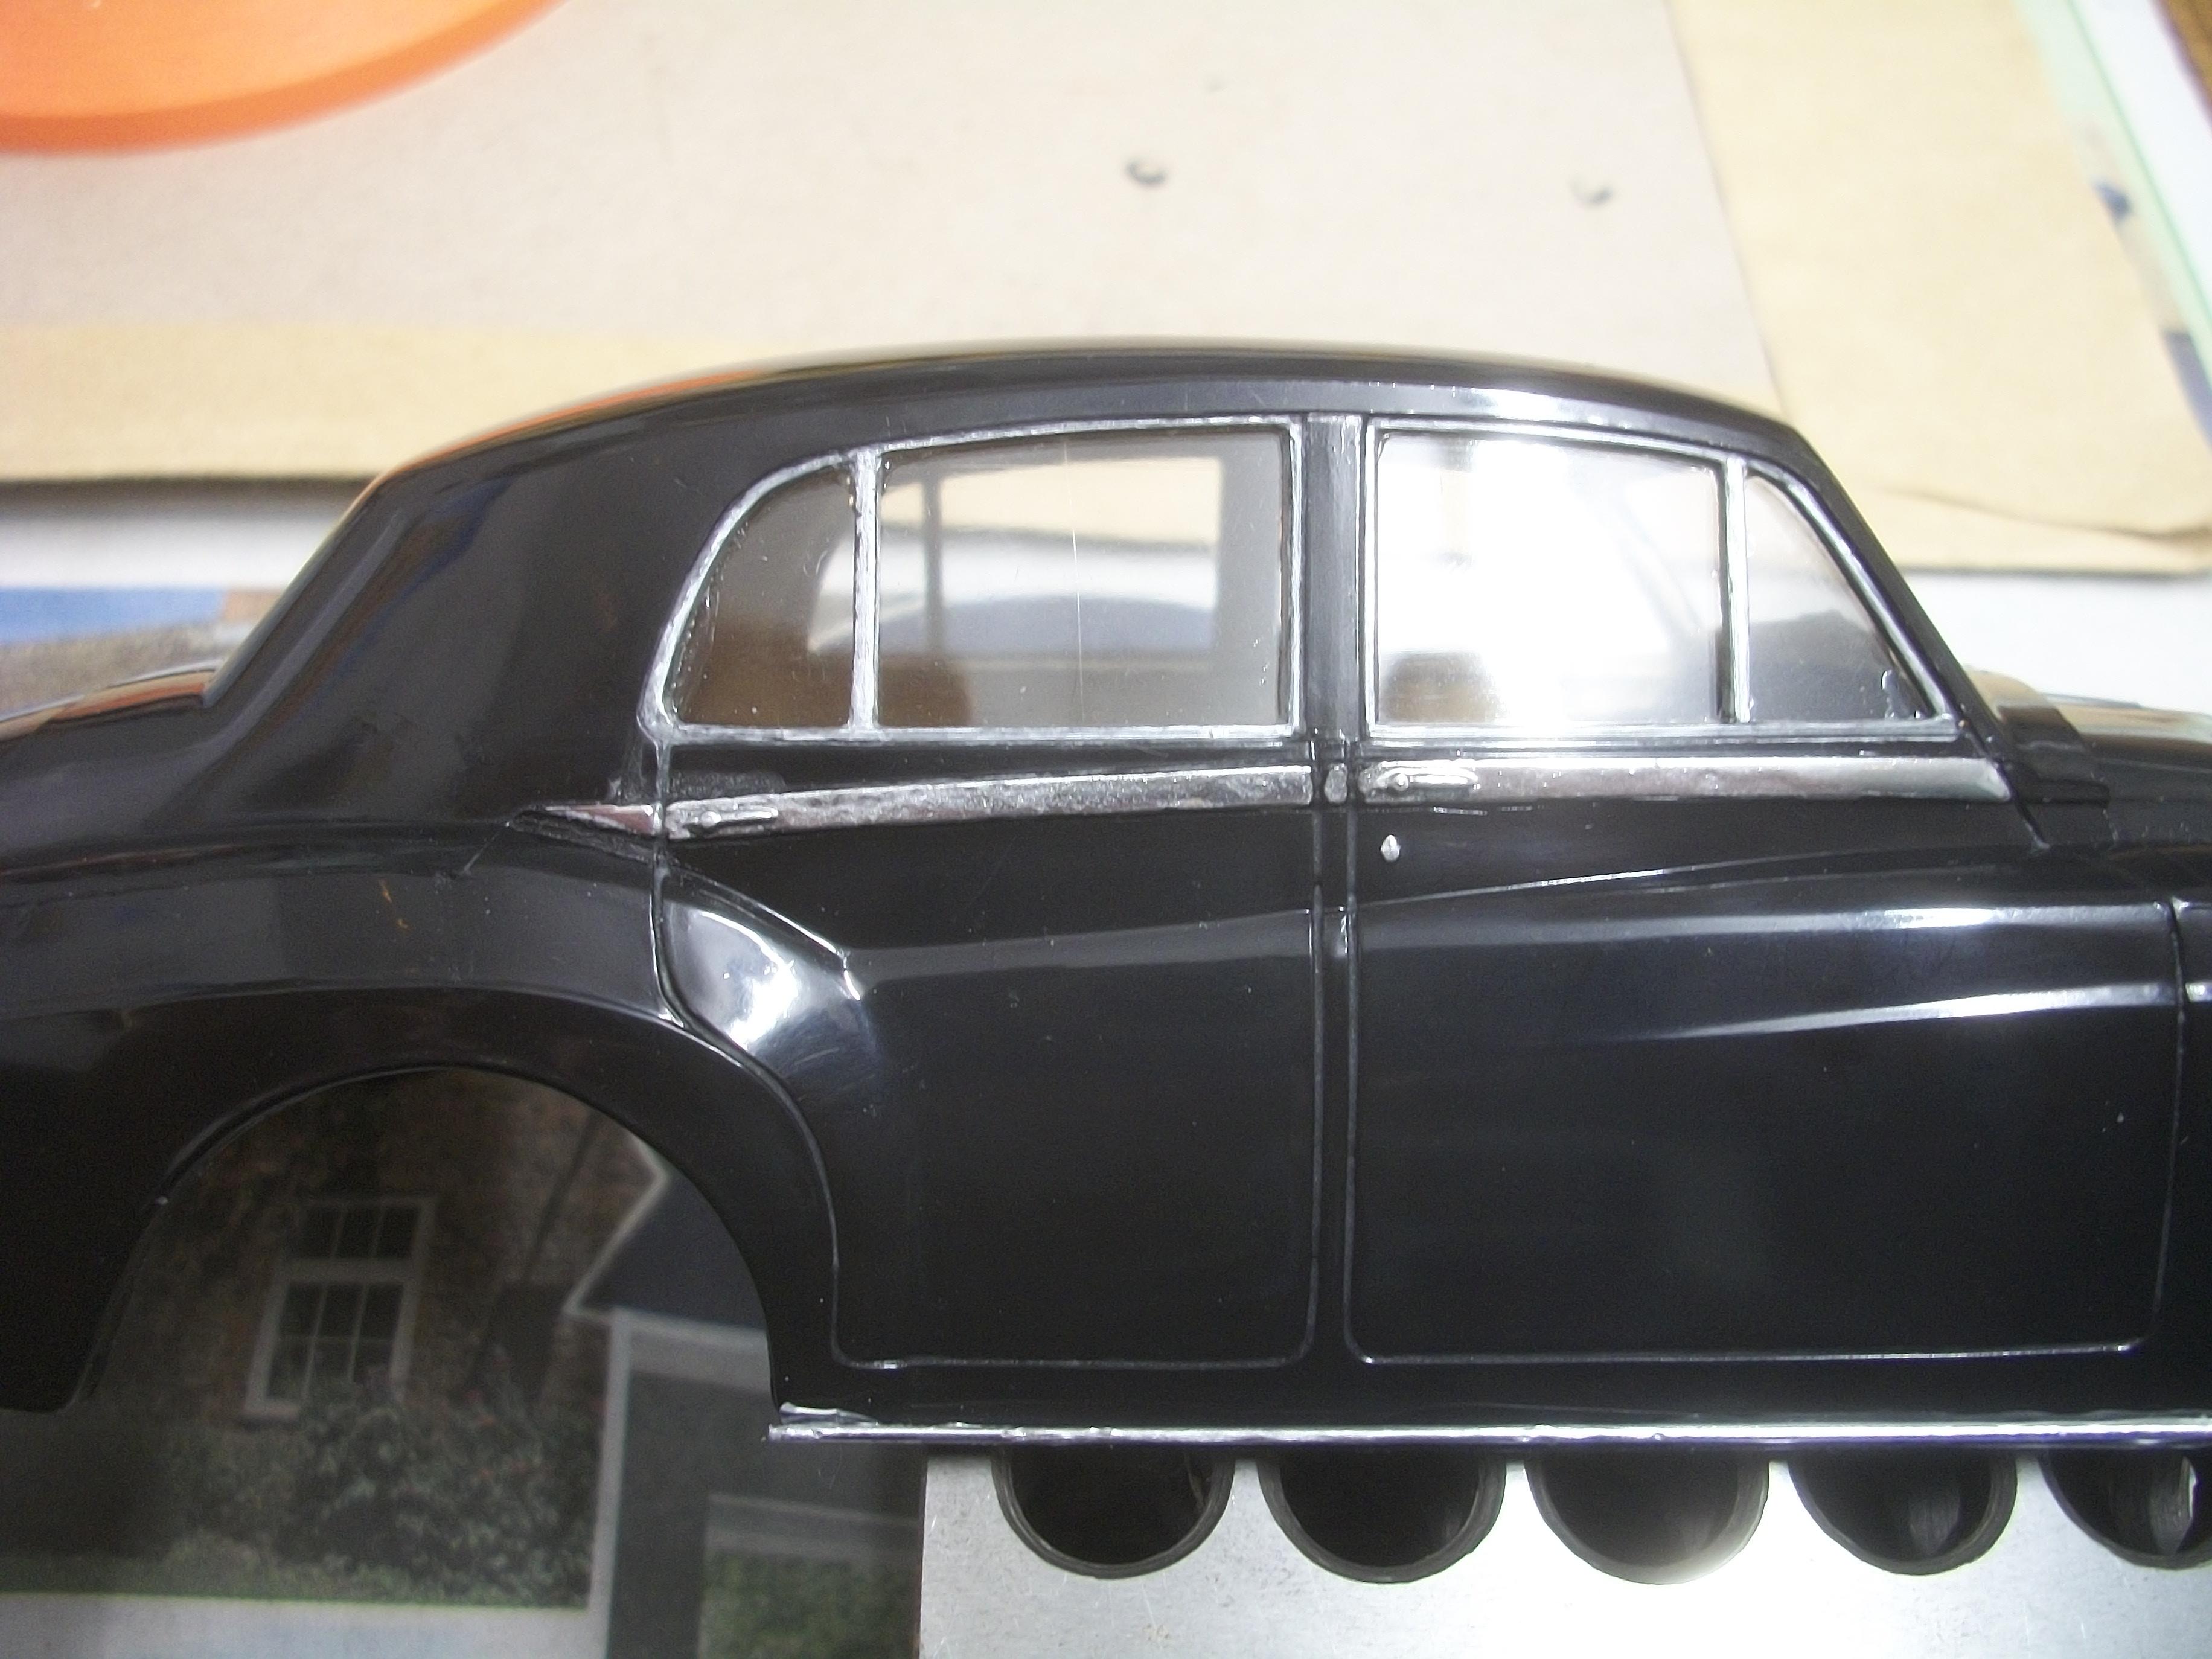
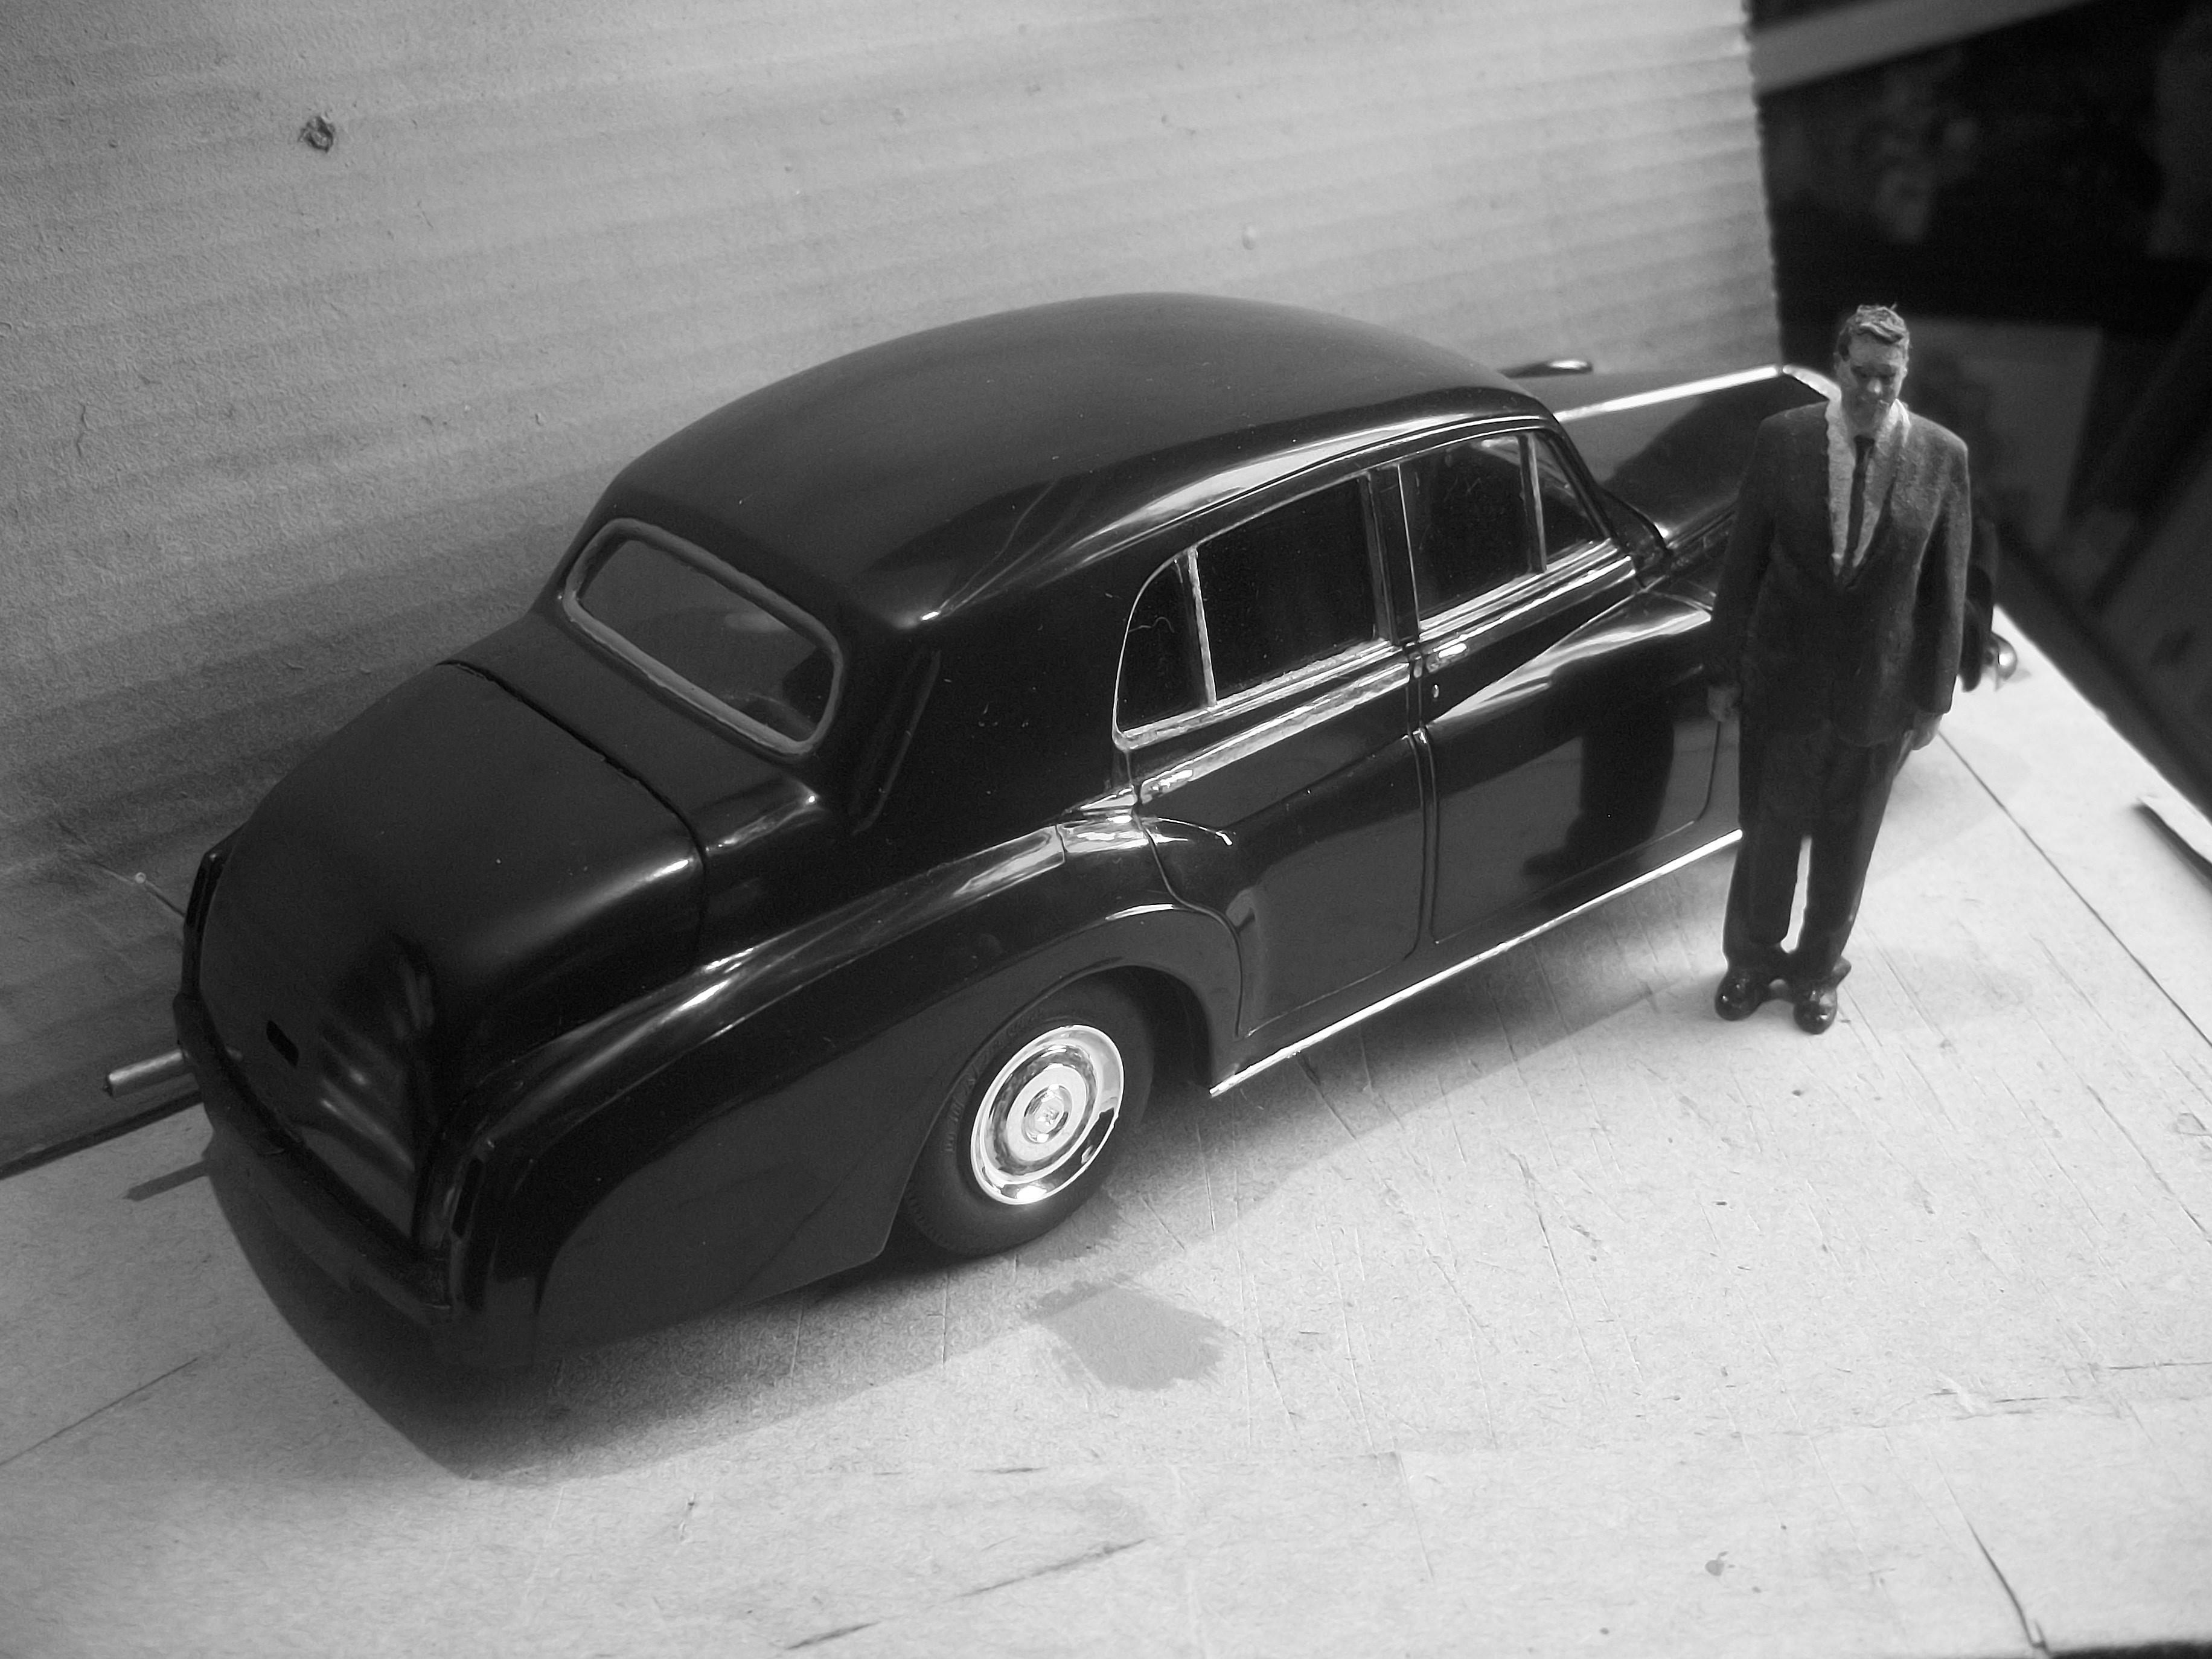
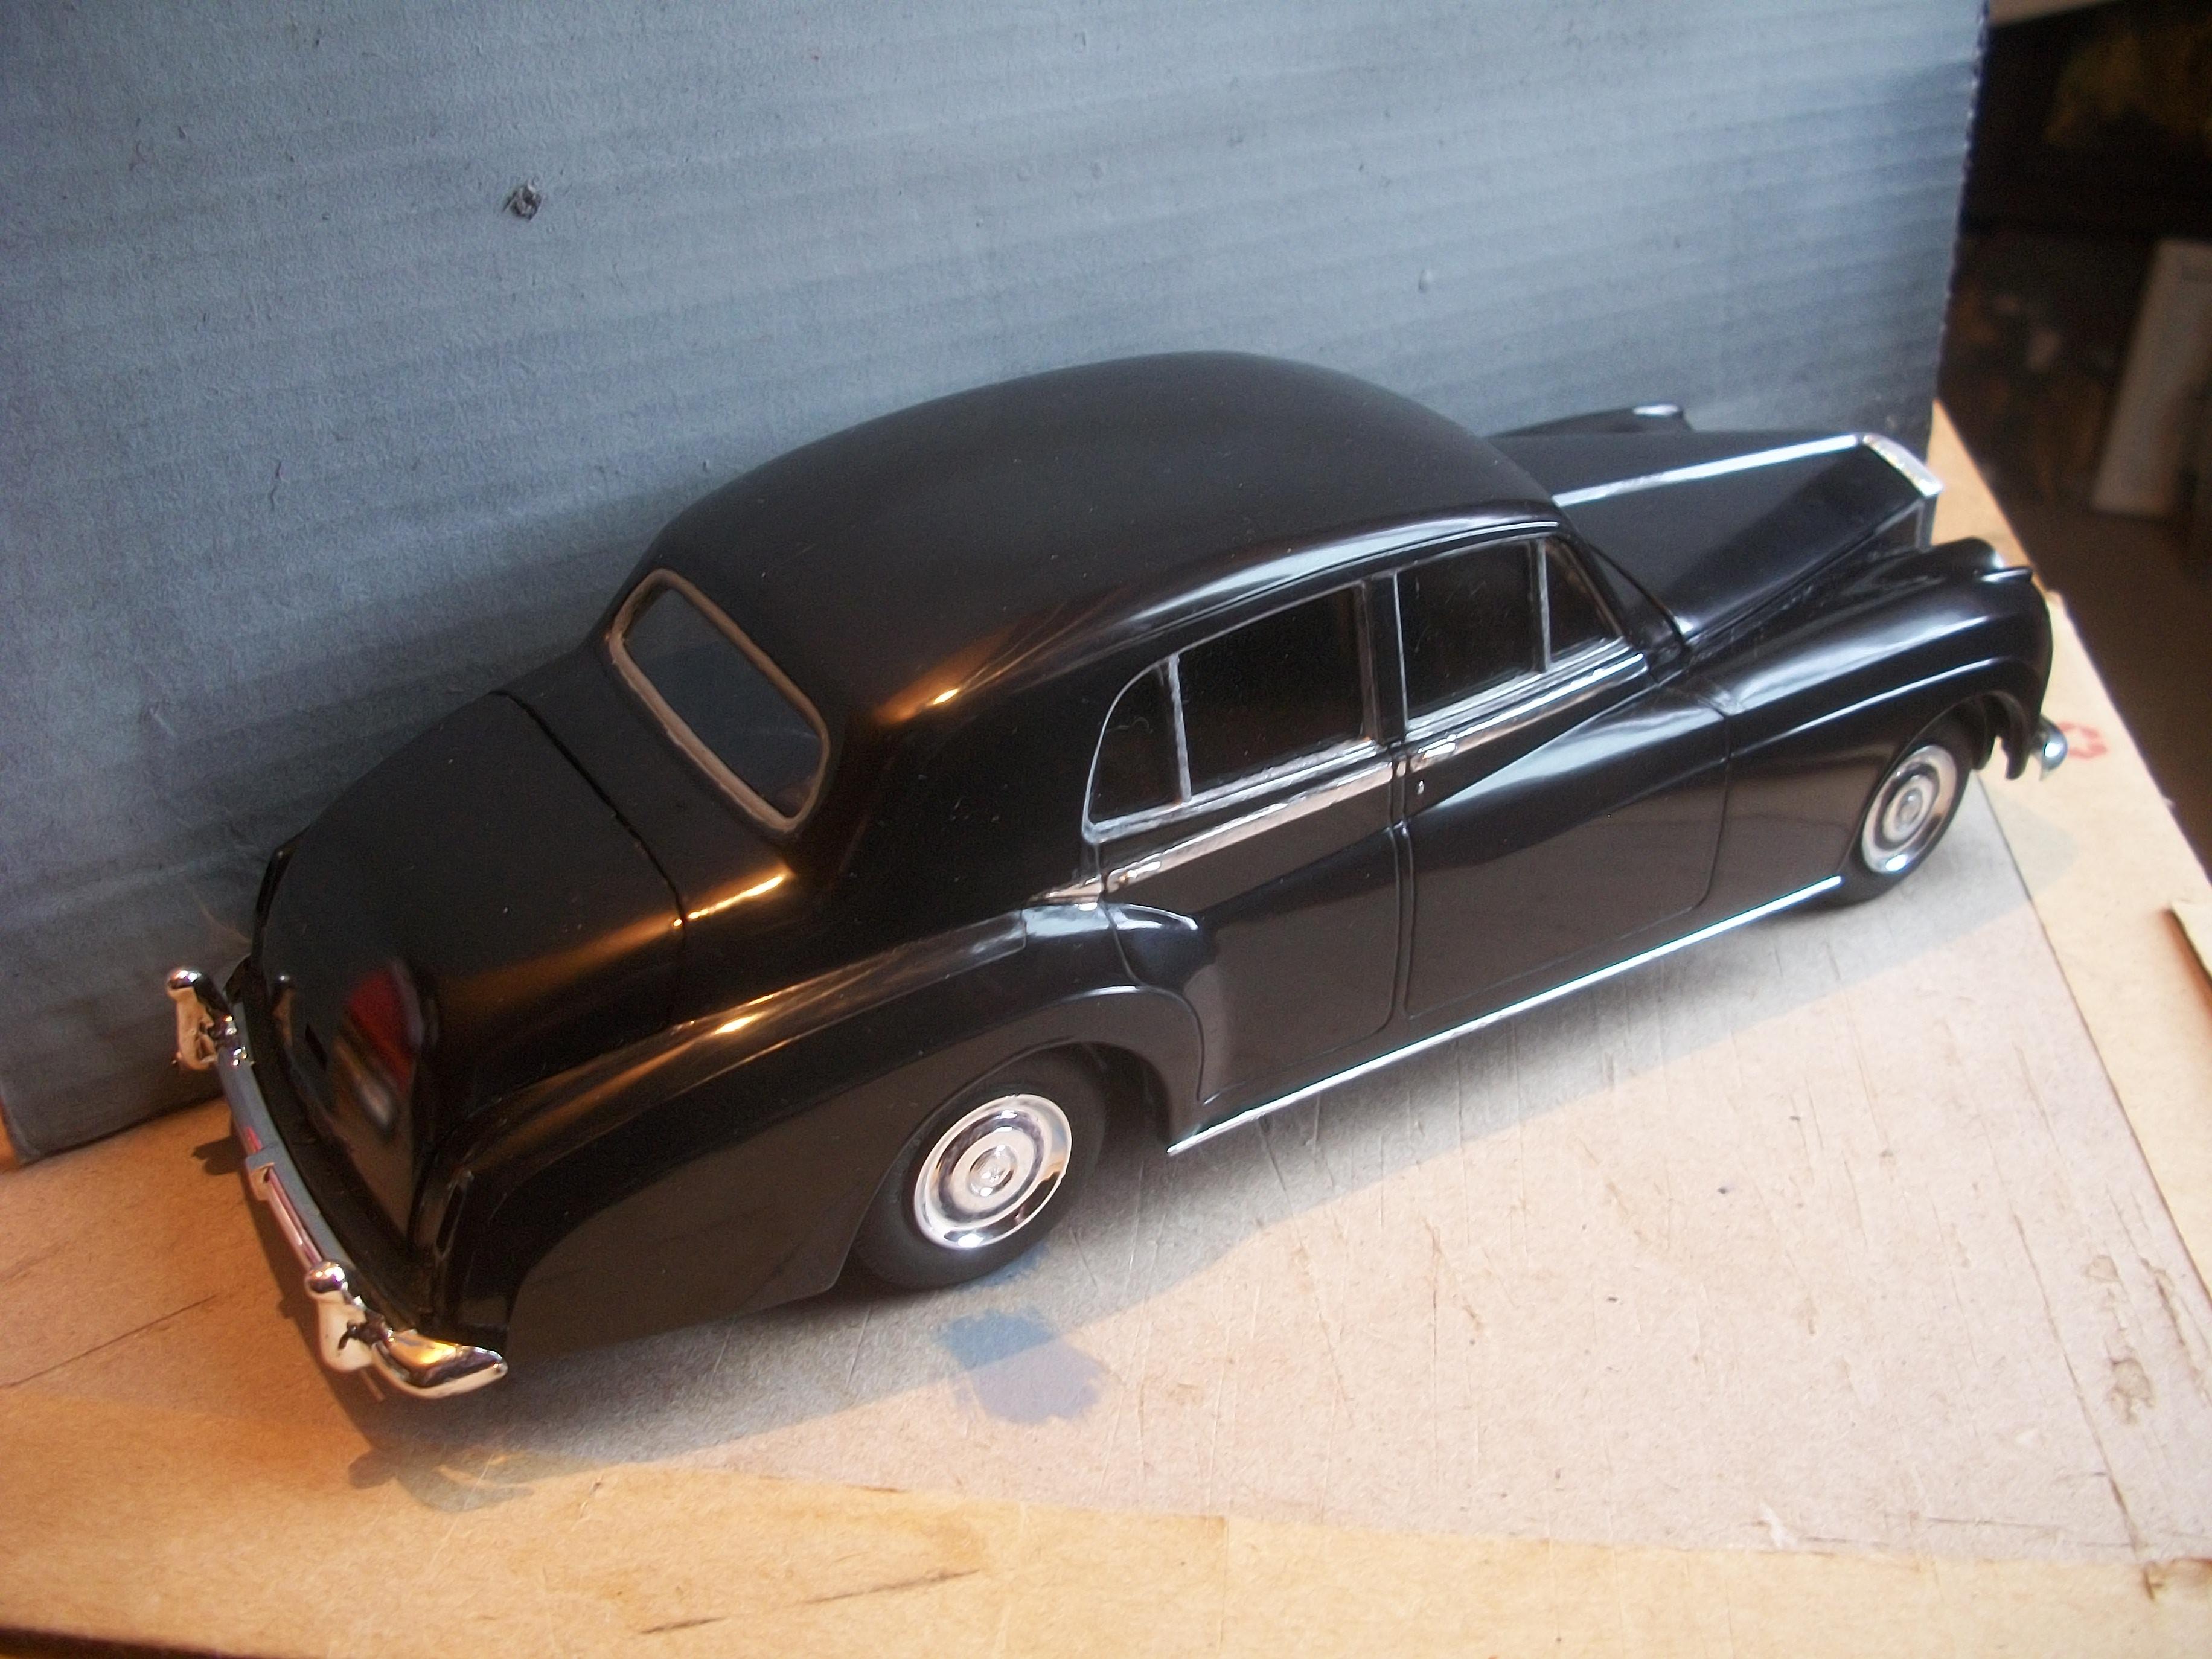
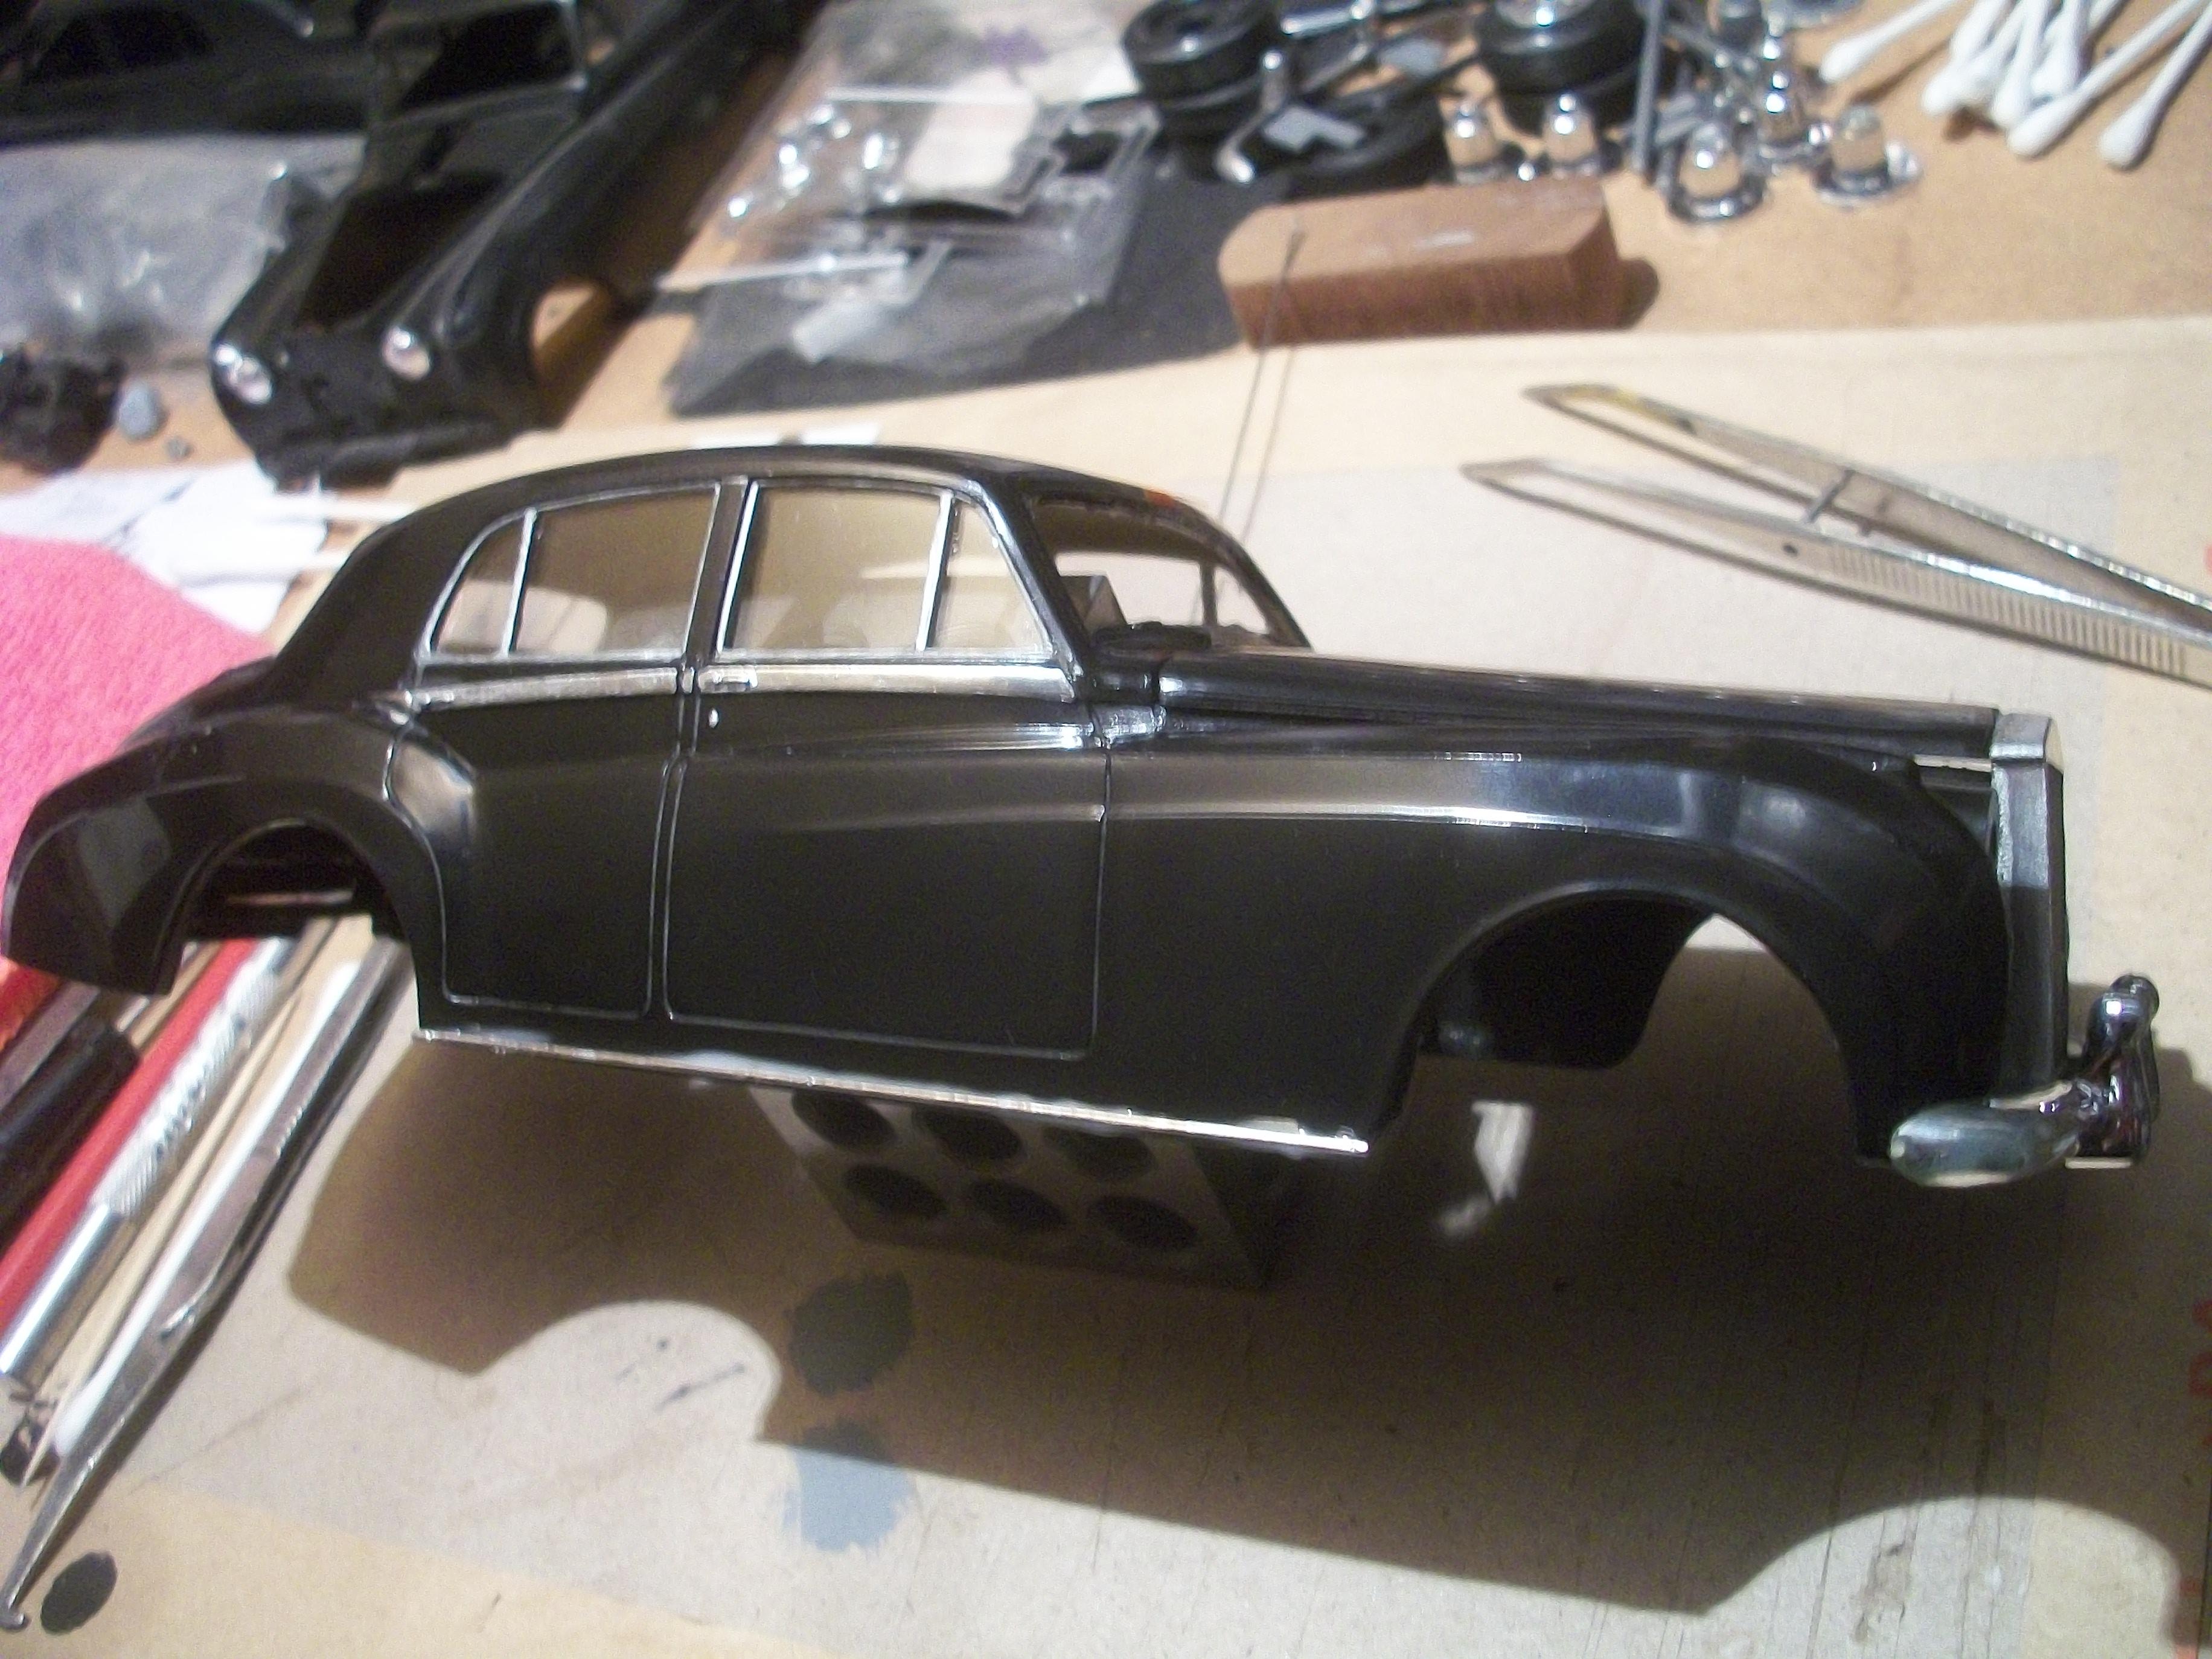
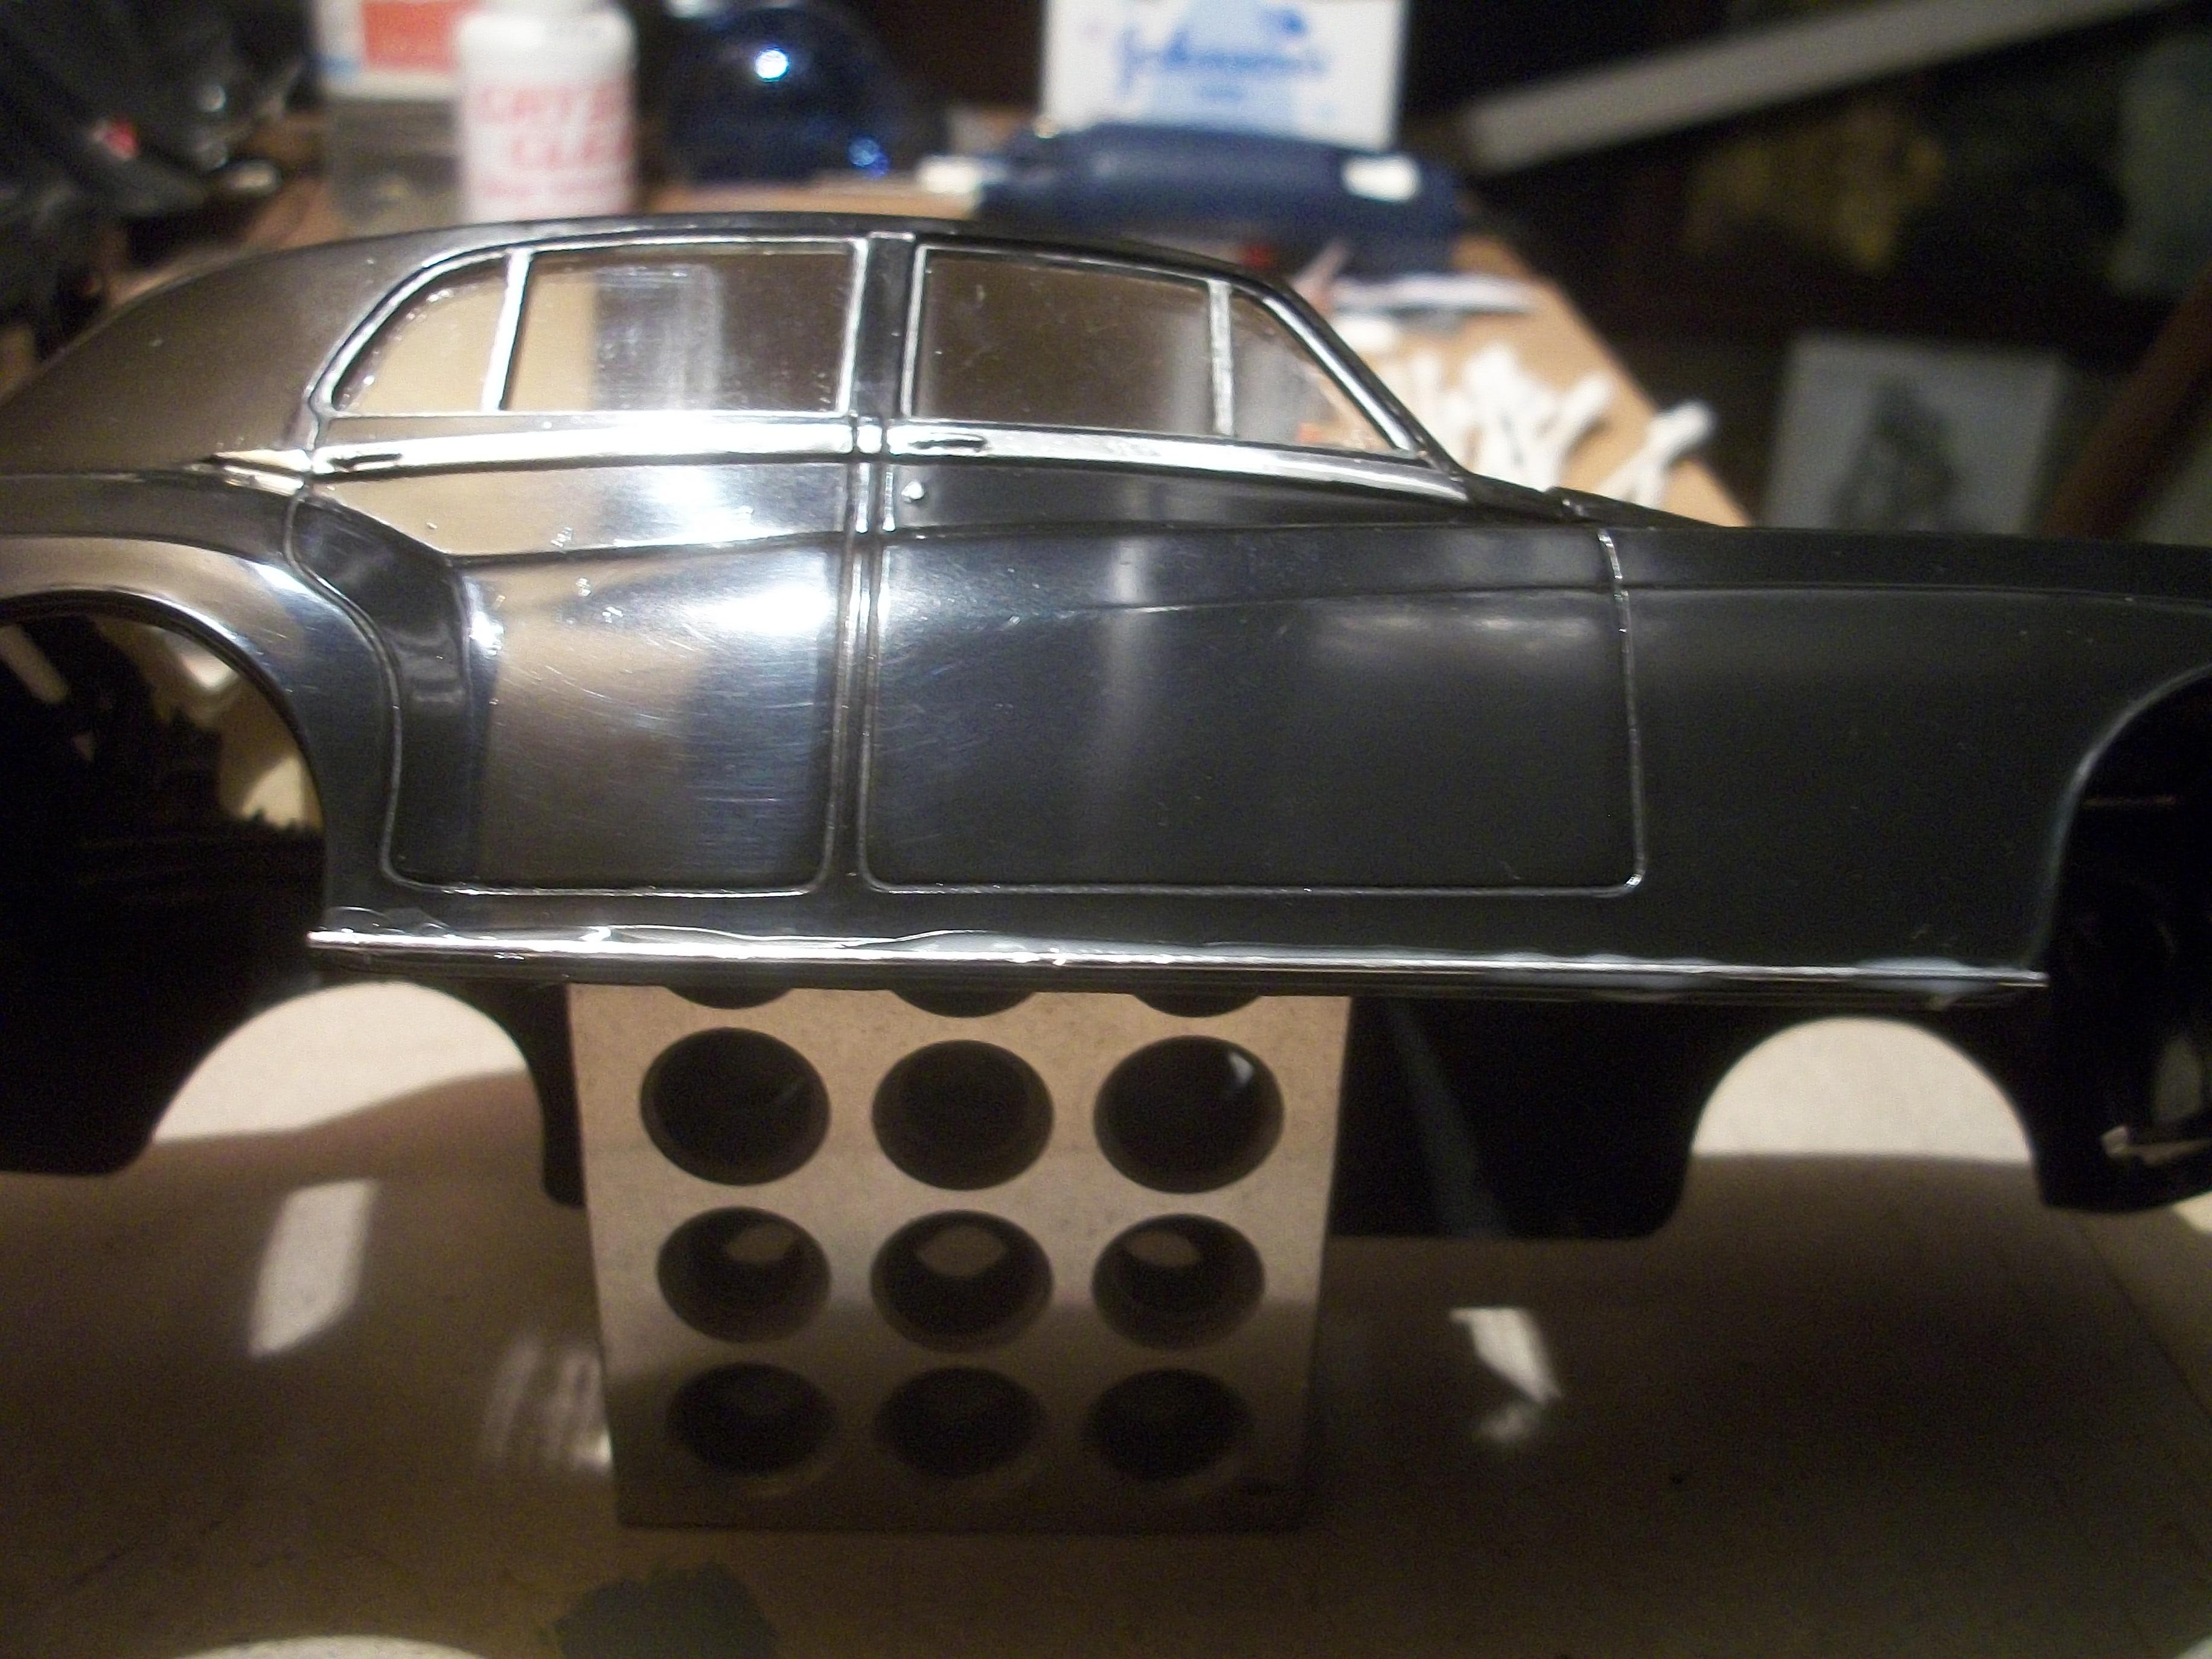
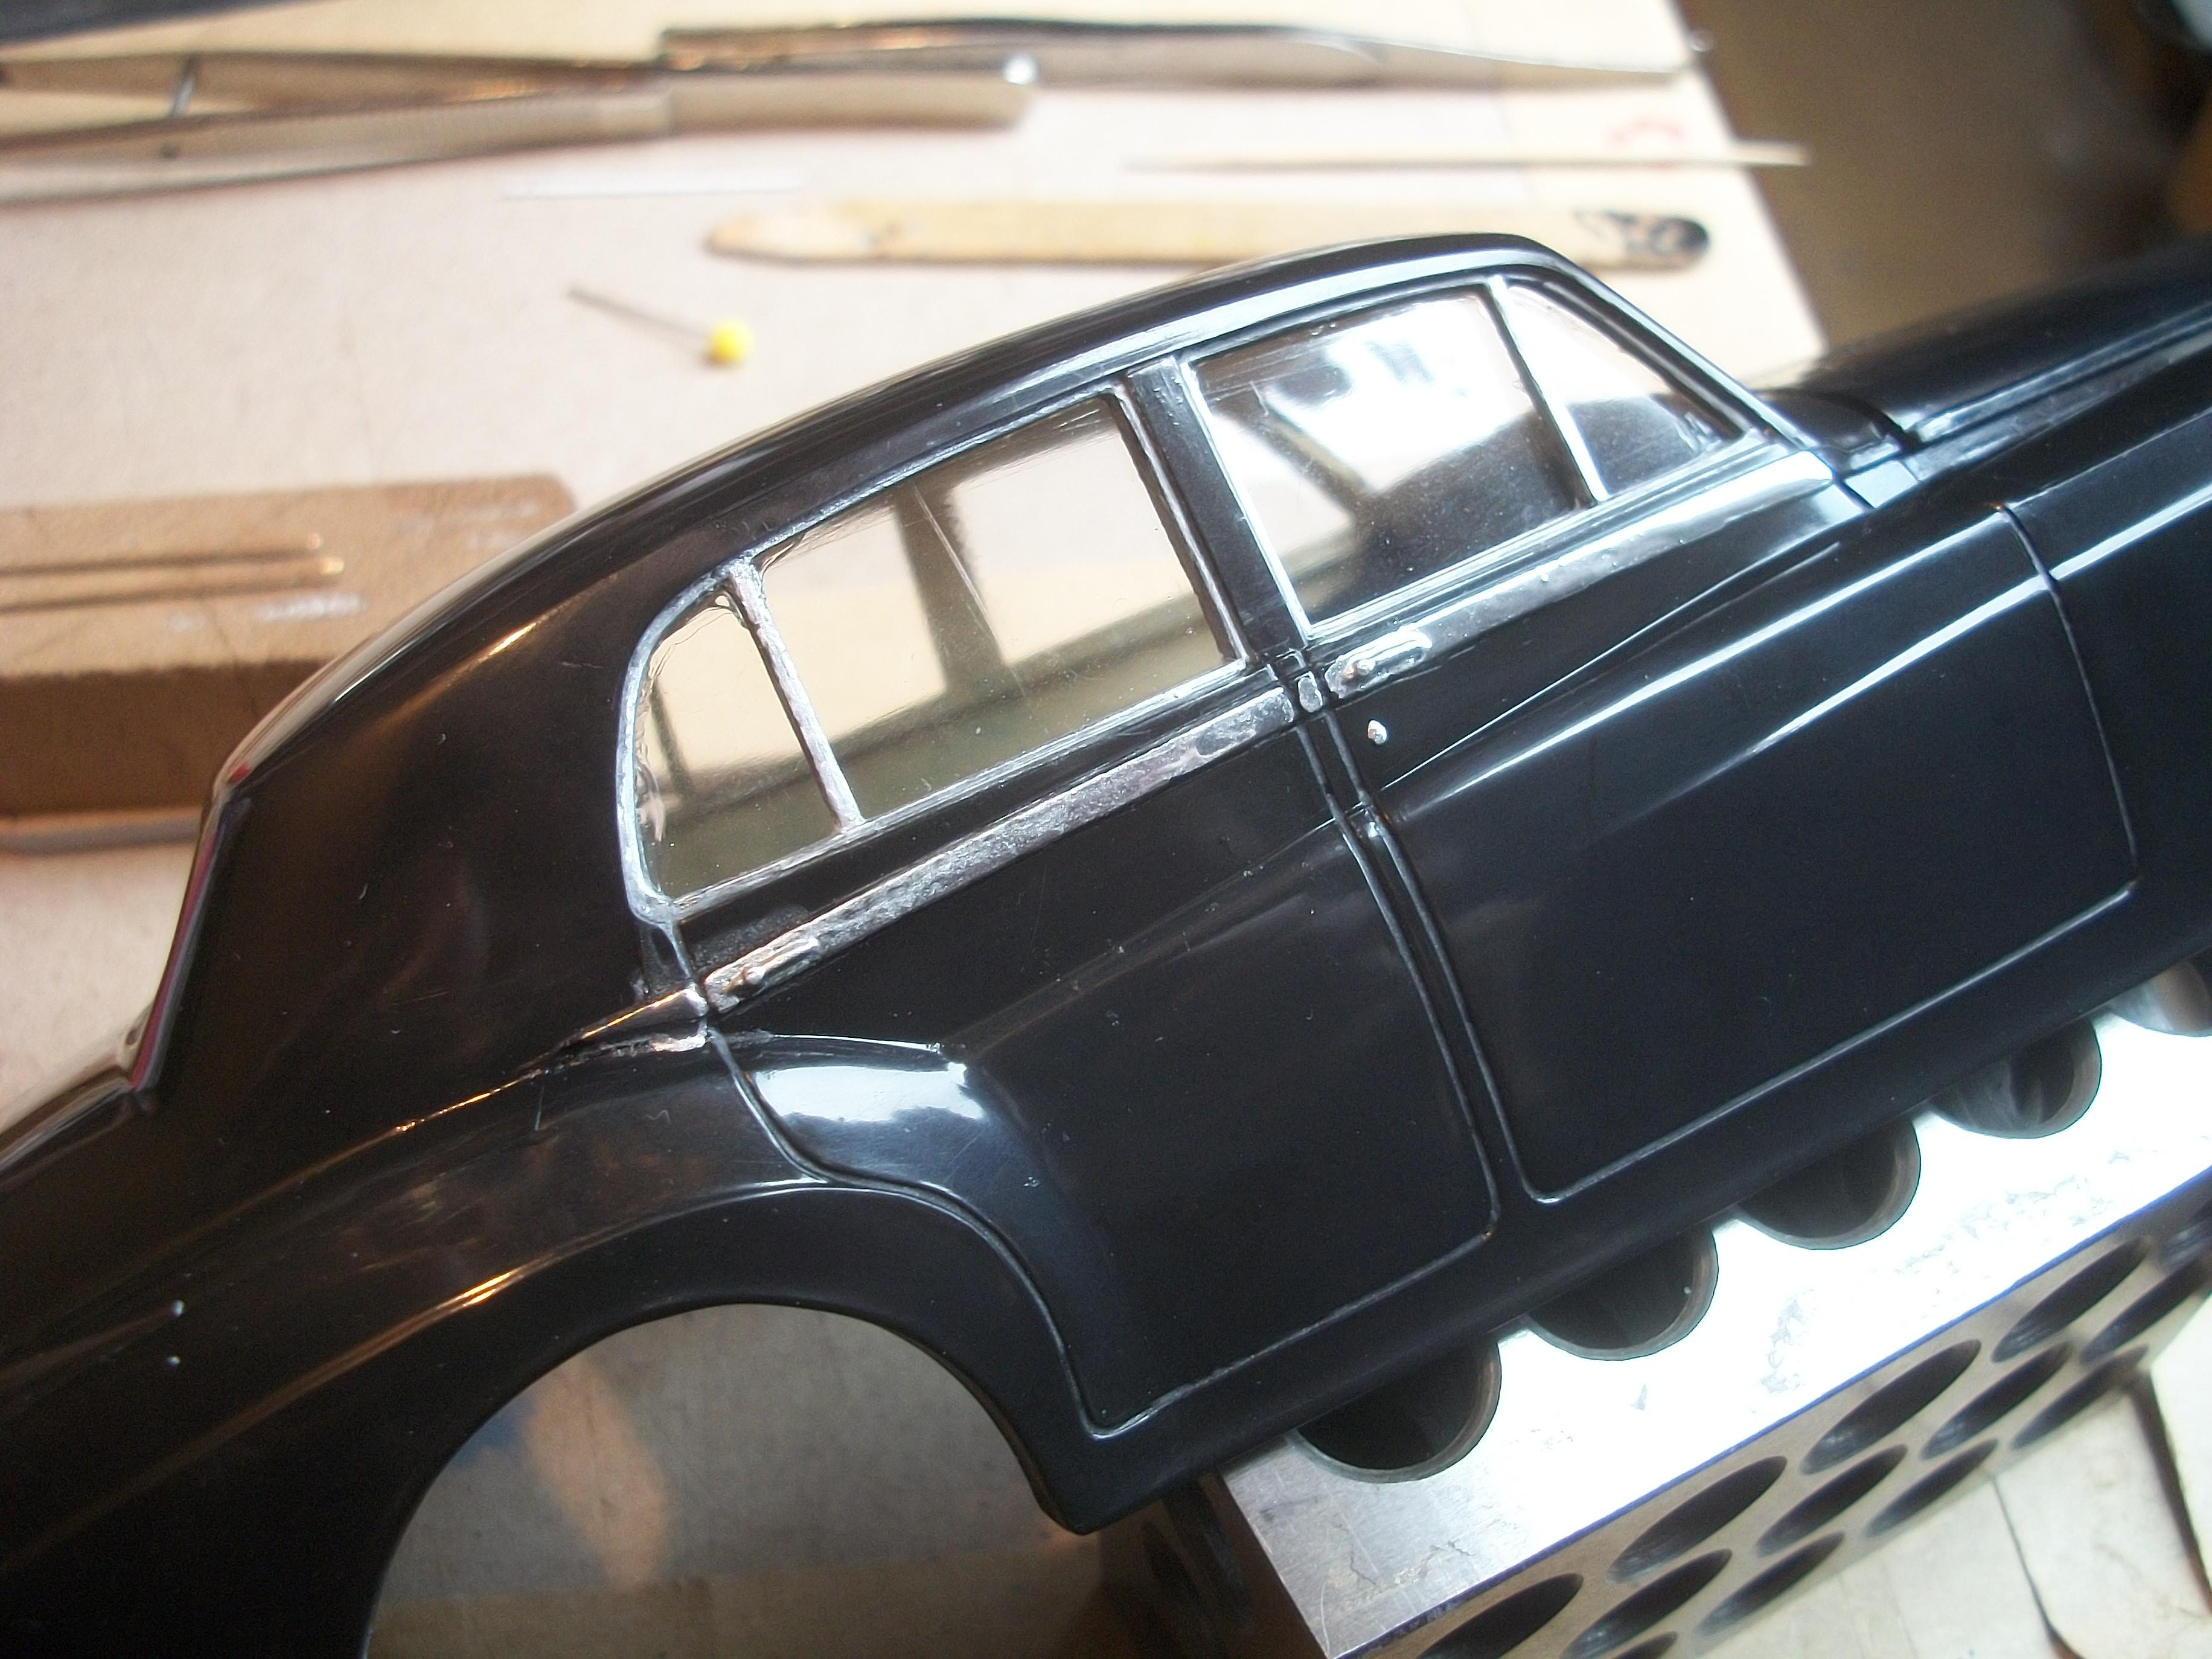
Thanks Mark . . . The sill moldings have turned out better than I had expected, and the PVA is not visible at the edges. Here are a few photos of the result. David
-
Rolls-Royce No Chemicals, No Paint, No Harmful Glues
Anglia105E replied to Anglia105E's topic in WIP: Model Cars
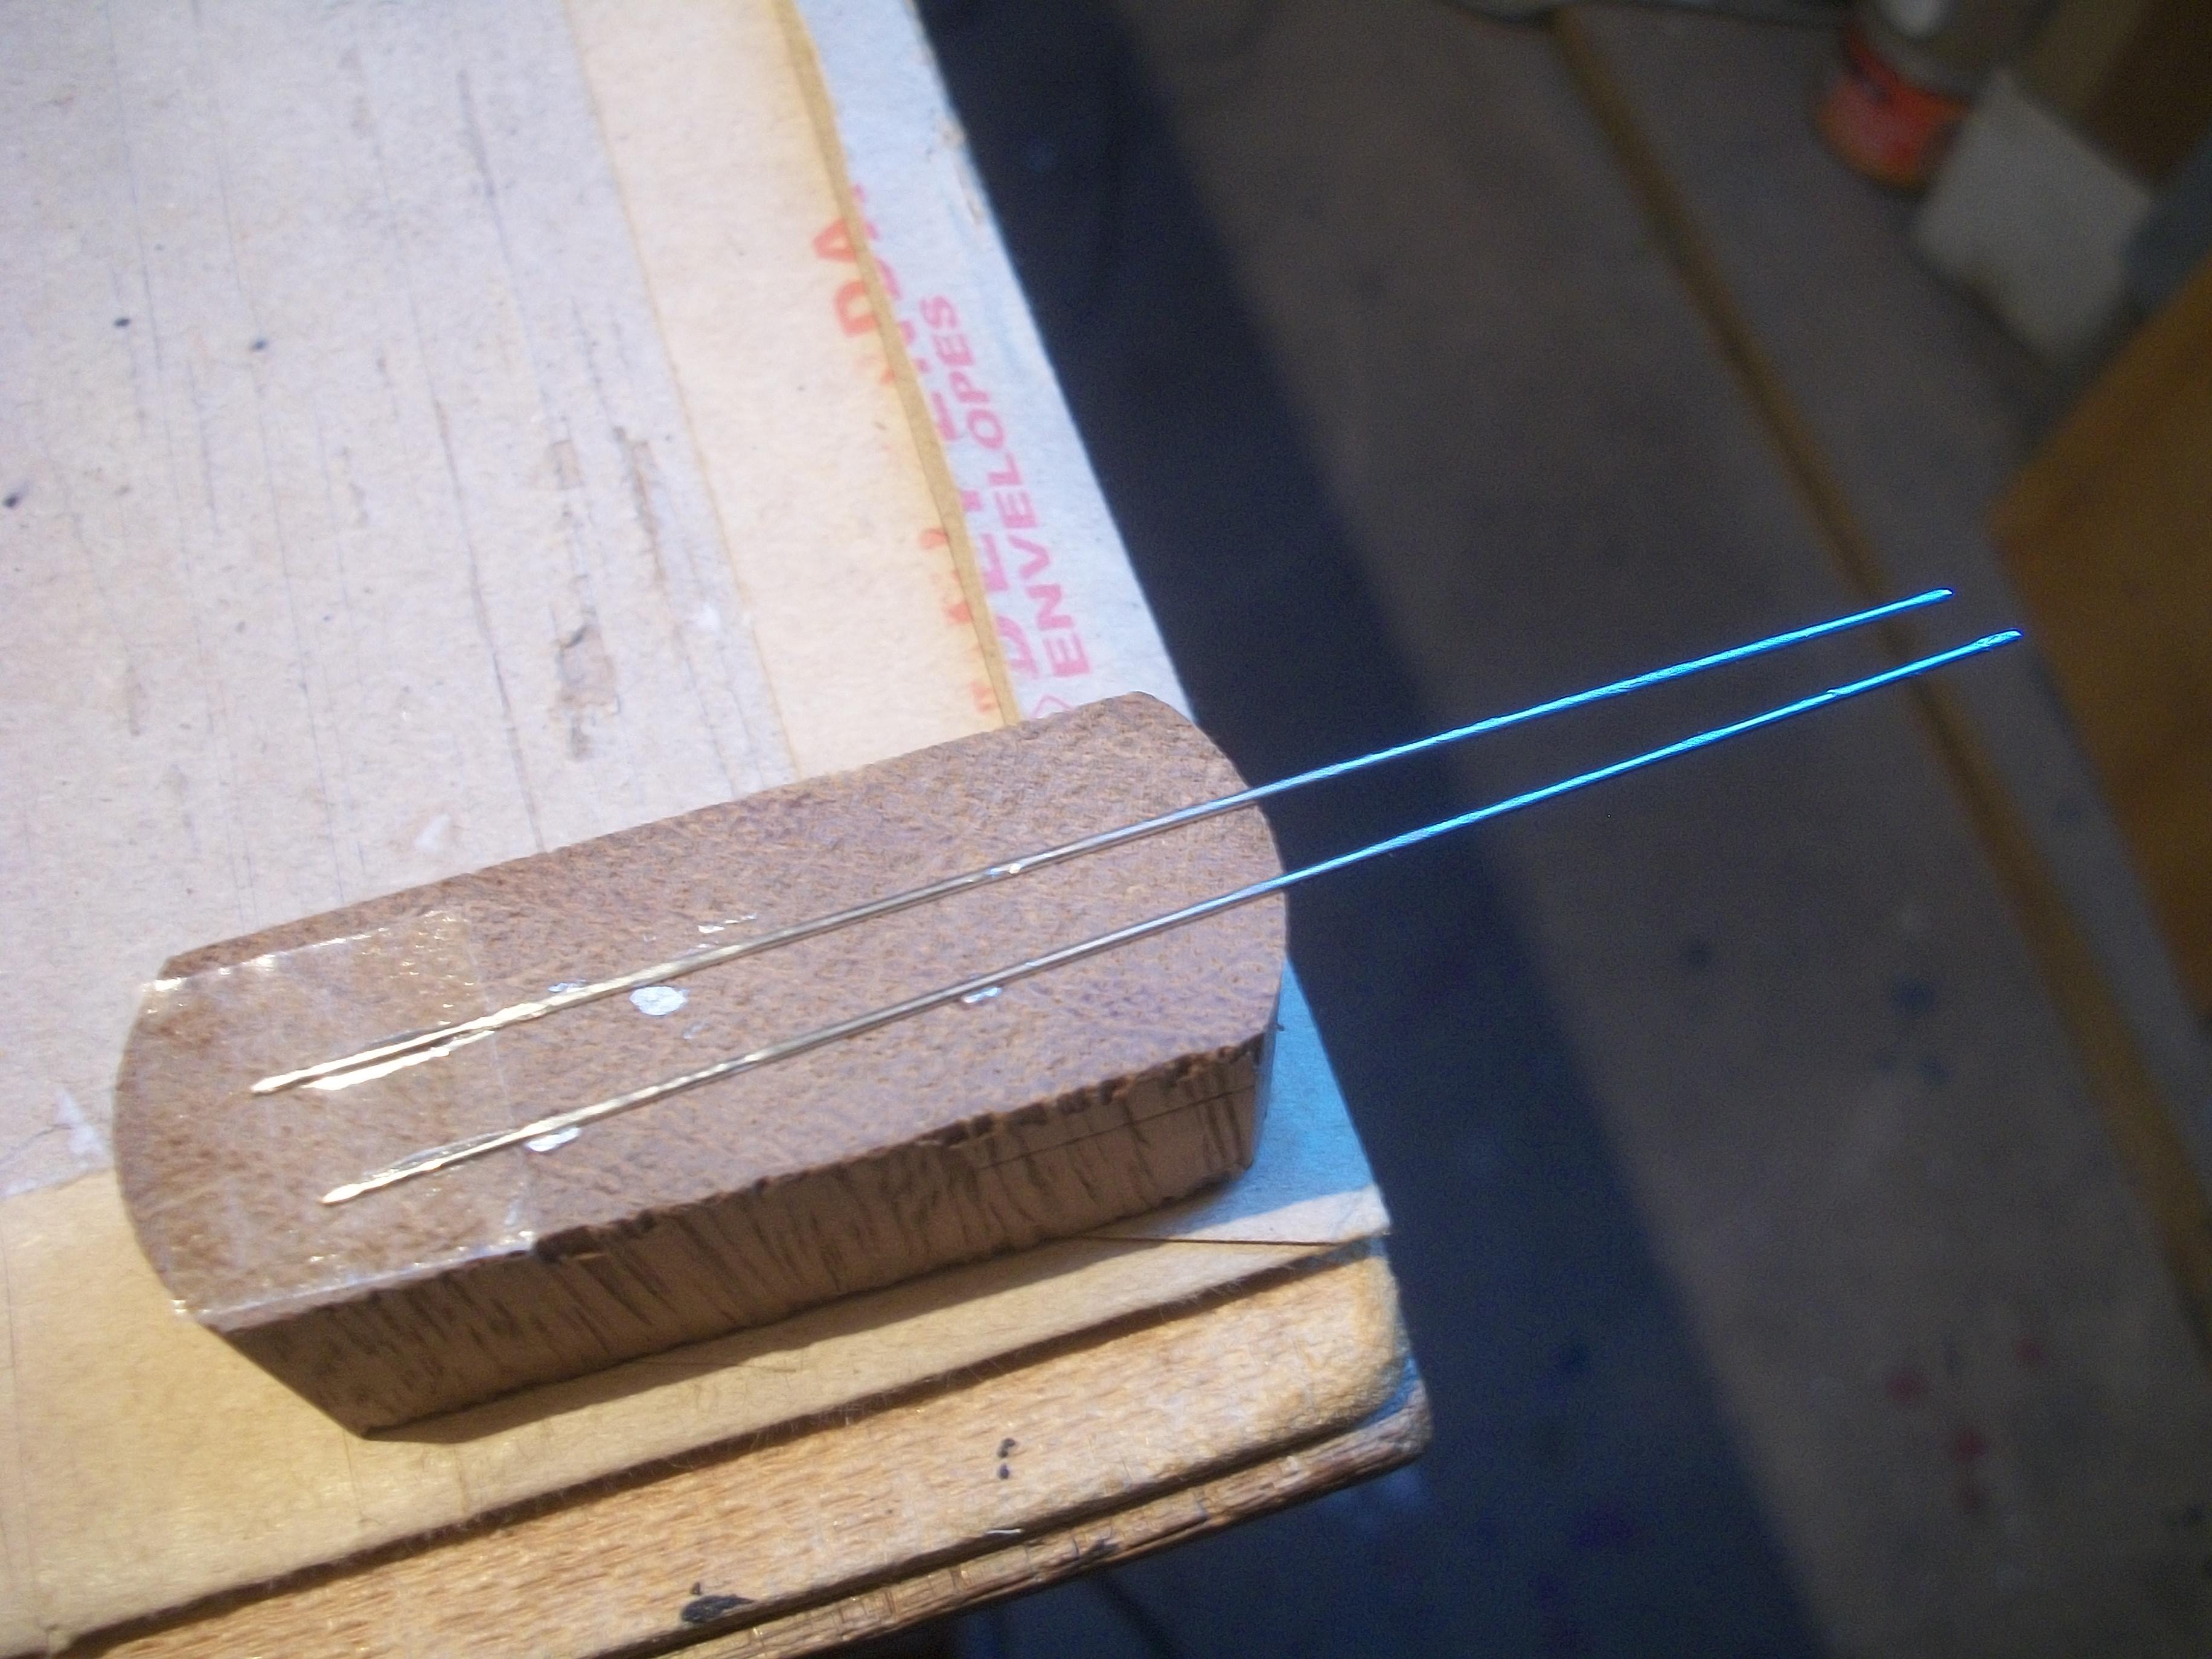
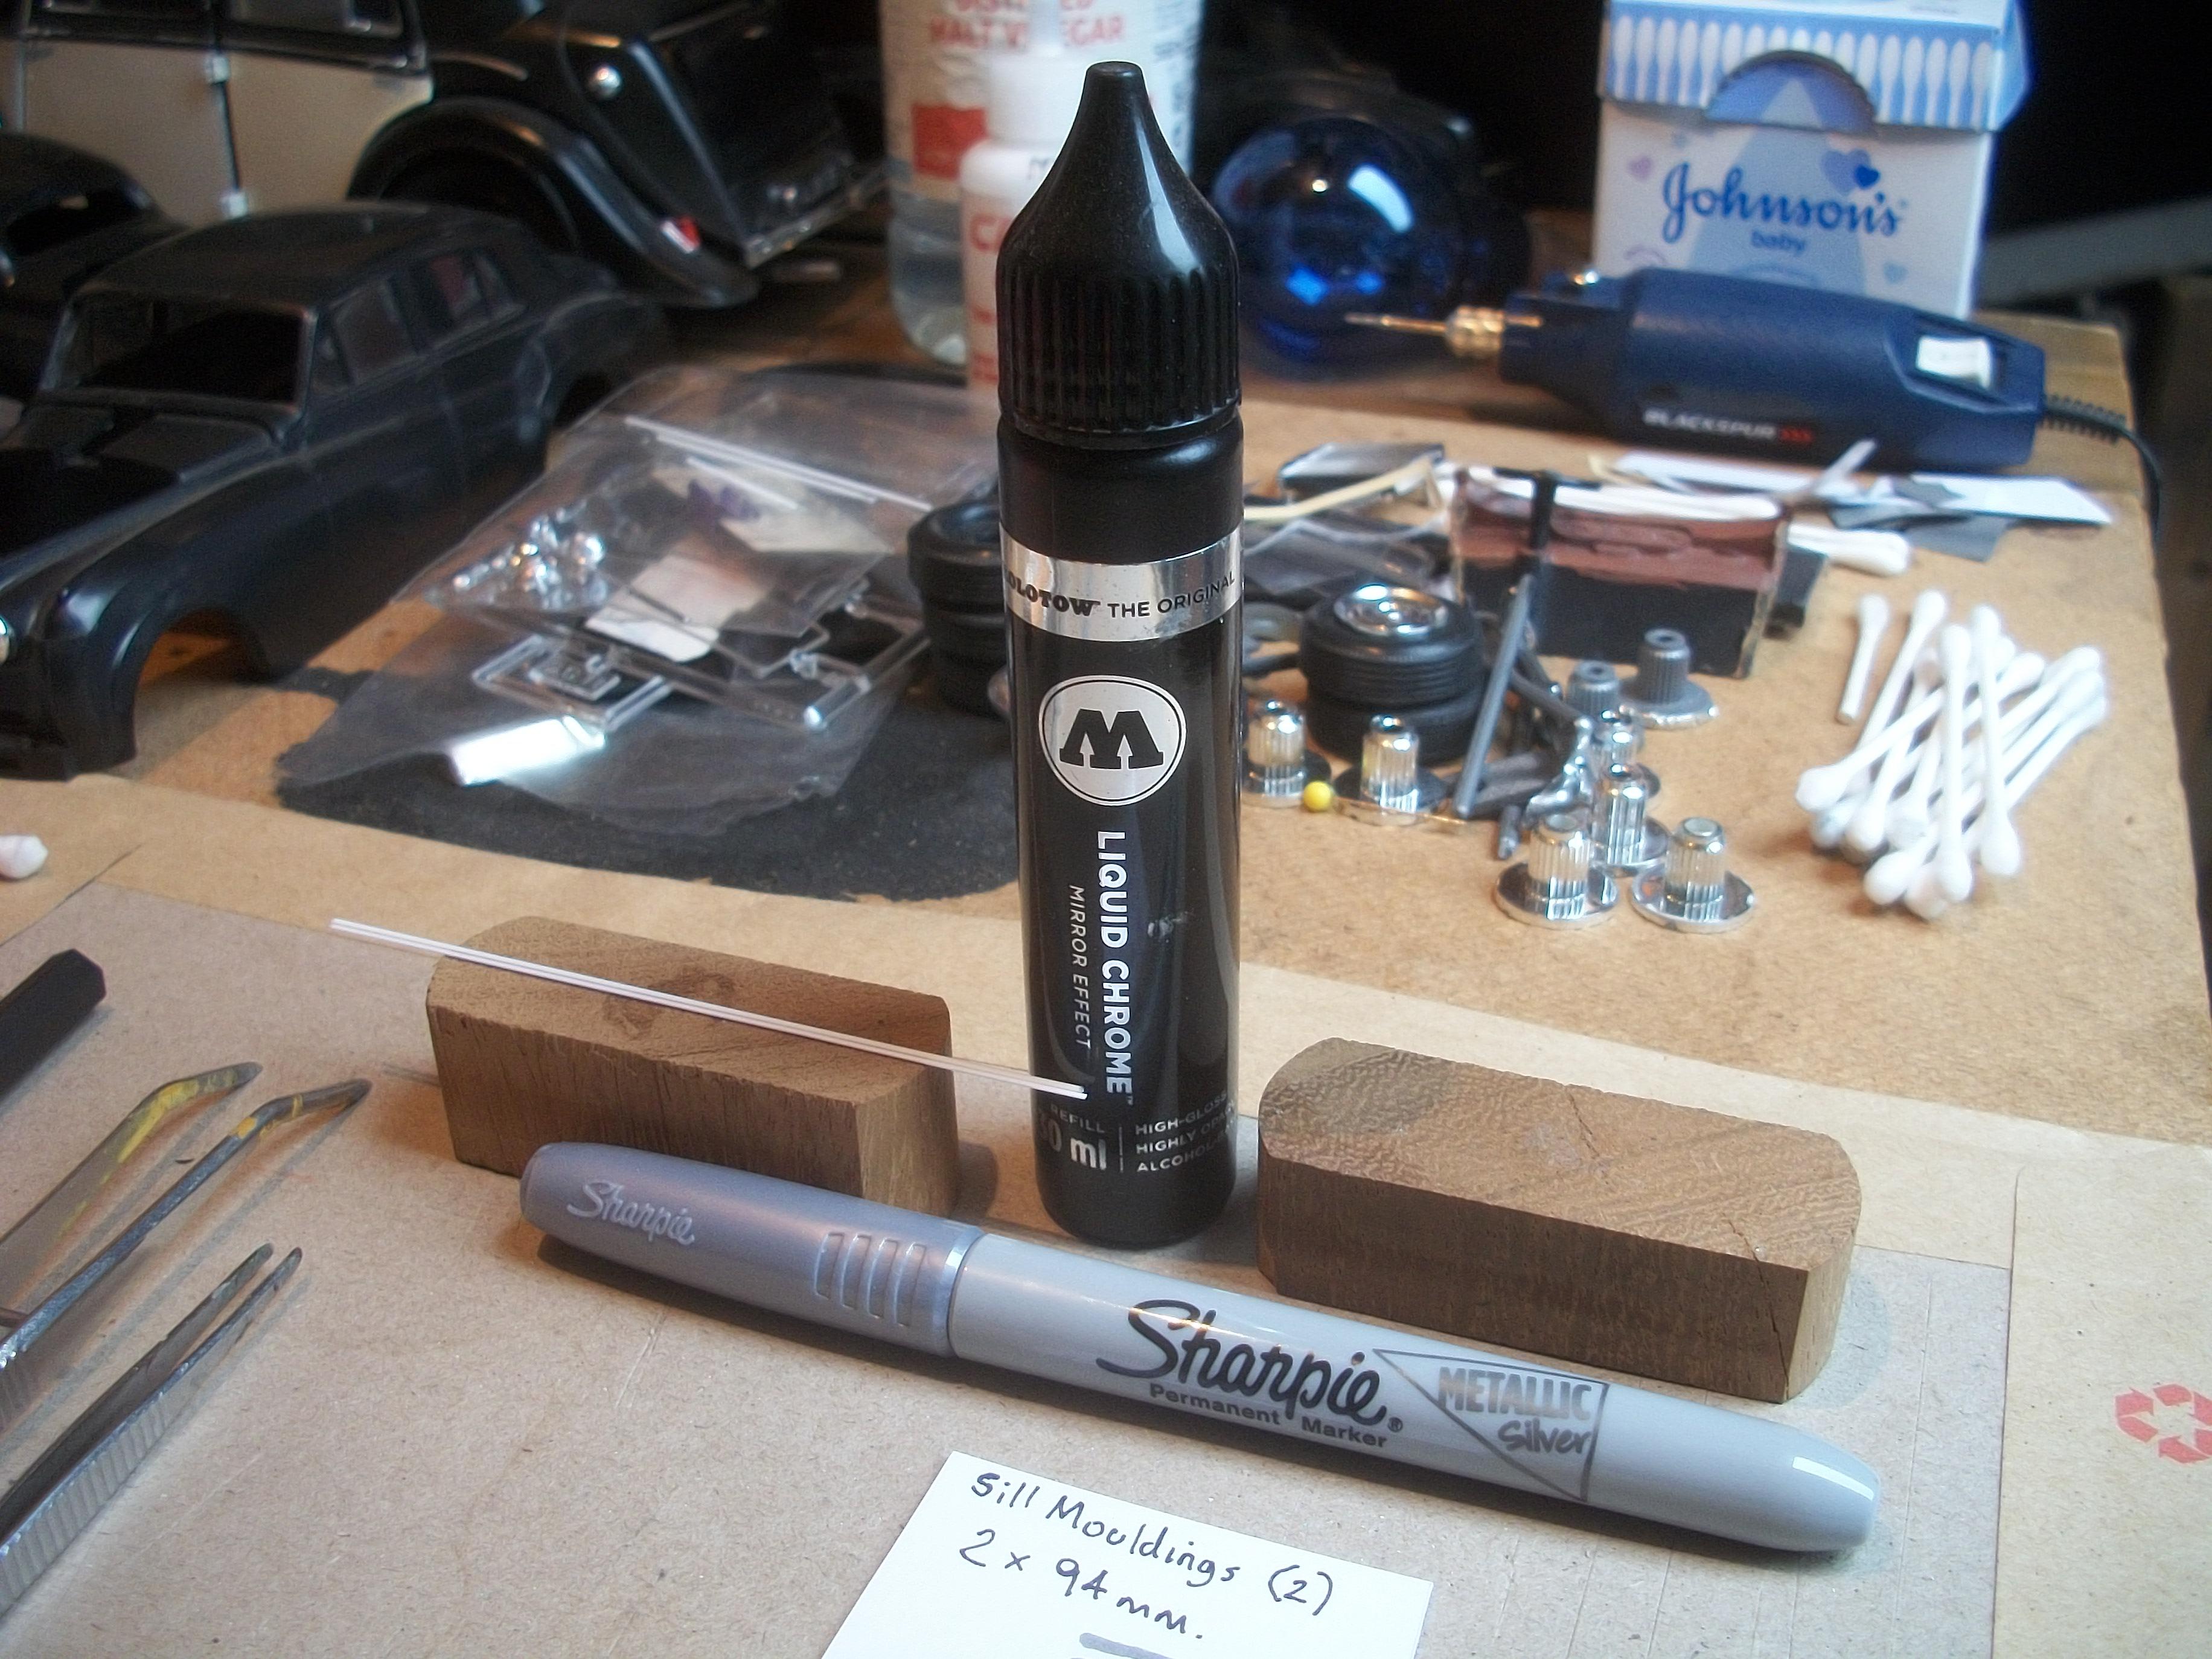
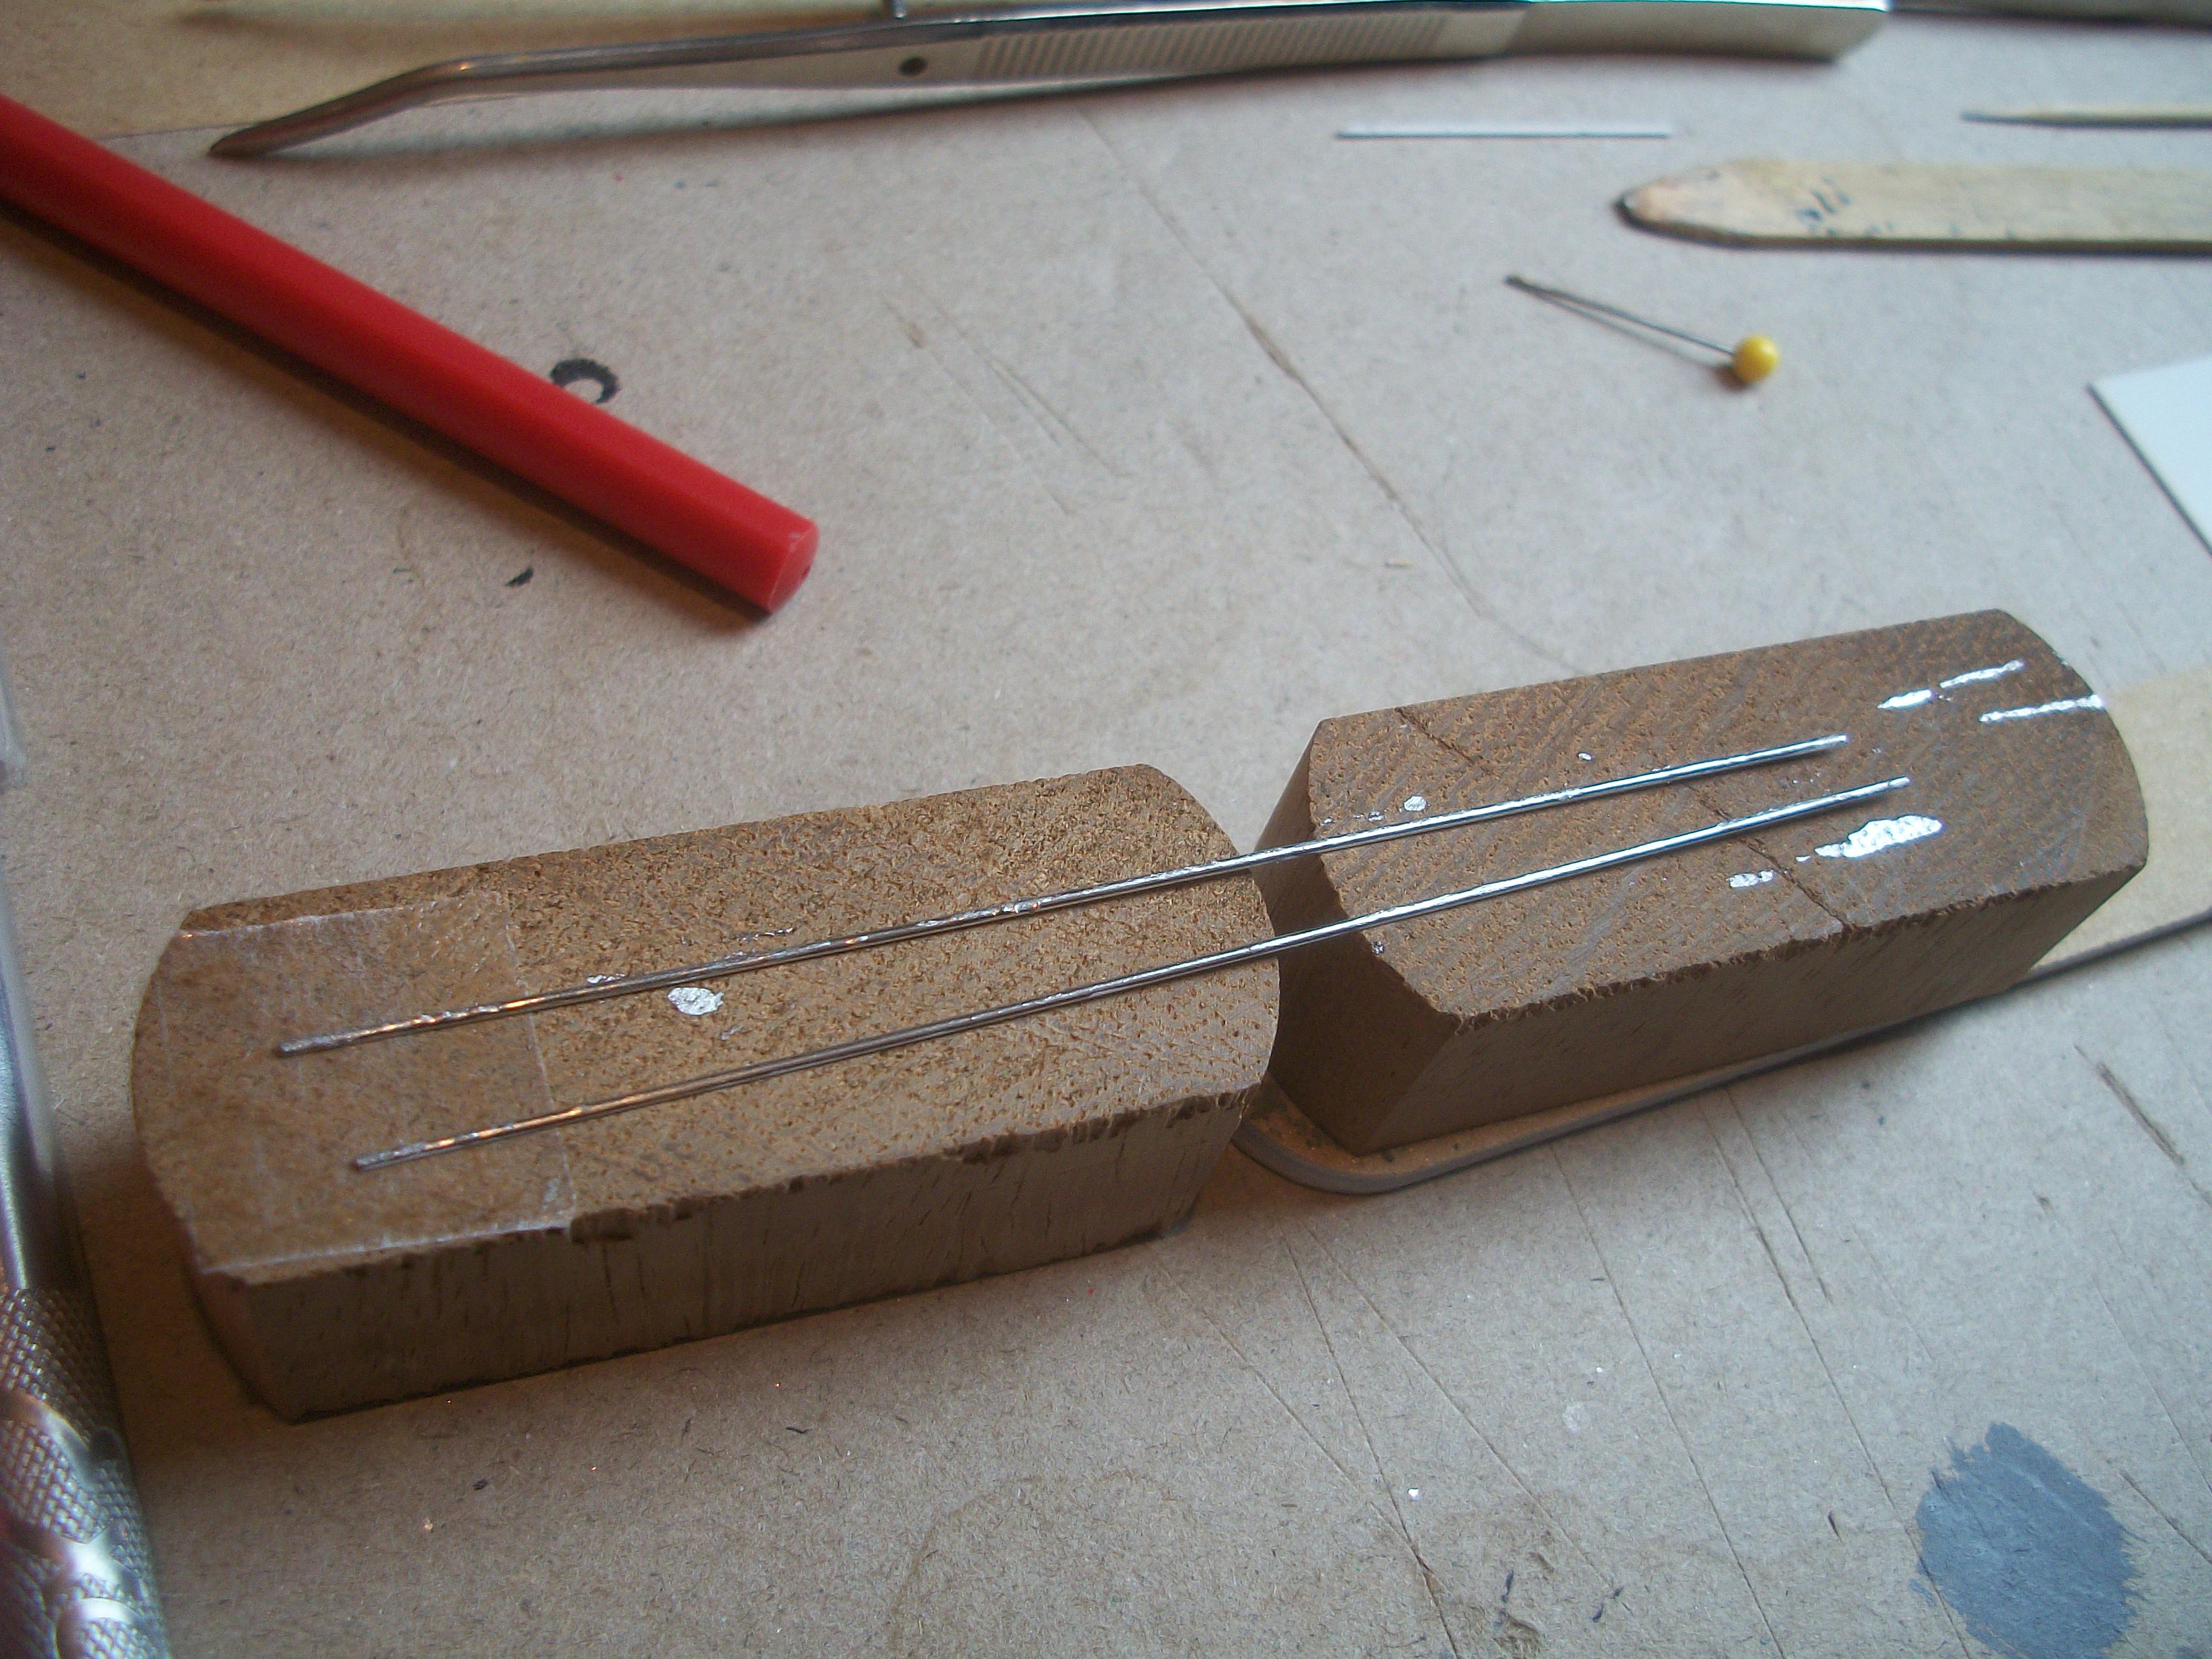
I forgot to mention in my previous posting, the reason that I felt justified in using the Molotow Liquid Chrome in this way, was that I don't need to use a chemical in order to wash the brush after use. The liquid chrome is applied using the tip of the silver Sharpie, which seems to work fine. When I examined the two sill moldings after 26 hours drying time, the resulting finish is actually quite good. This evening I have applied a thin strip of PVA glue along each of the sills below the doors, and then carefully positioned the chromed styrene sill moldings with tweezers. Leaving these to set overnight, I am fairly confident this should work . . . If this method of applying chrome to the Silver Cloud meets with my critical approval, then maybe most of the chrome on this model could be done this way. David
-
Rolls-Royce No Chemicals, No Paint, No Harmful Glues
Anglia105E replied to Anglia105E's topic in WIP: Model Cars
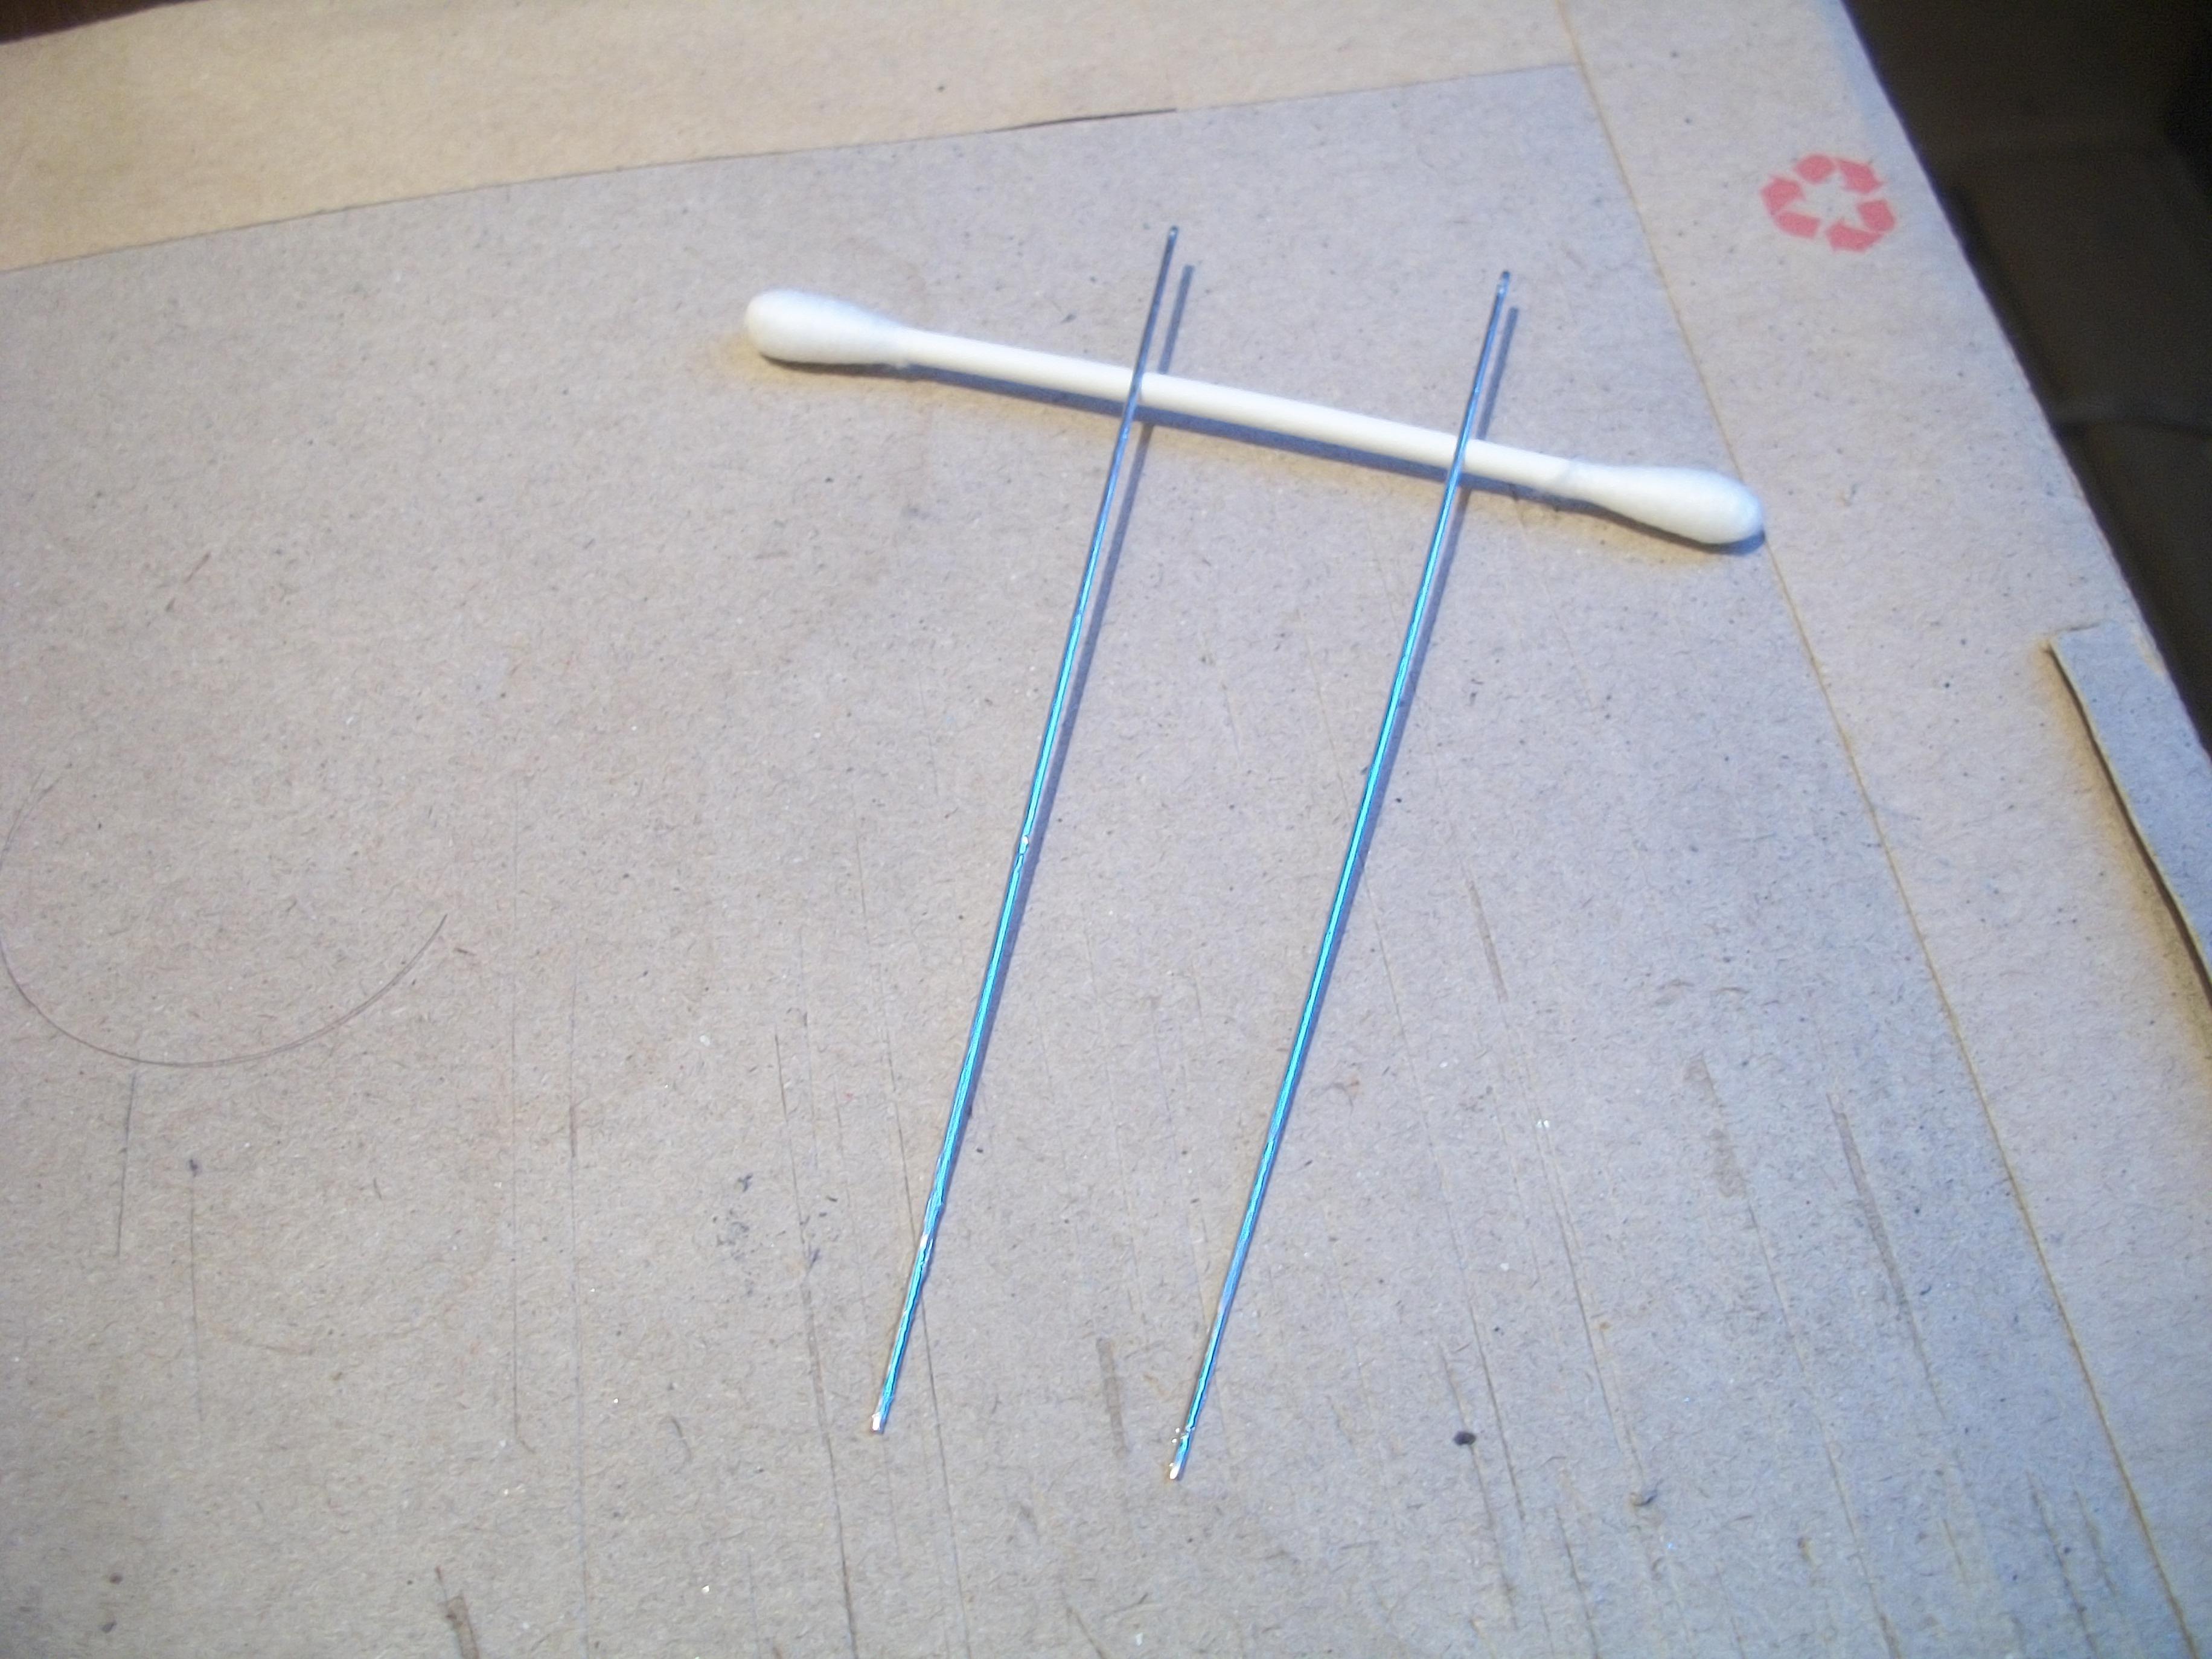
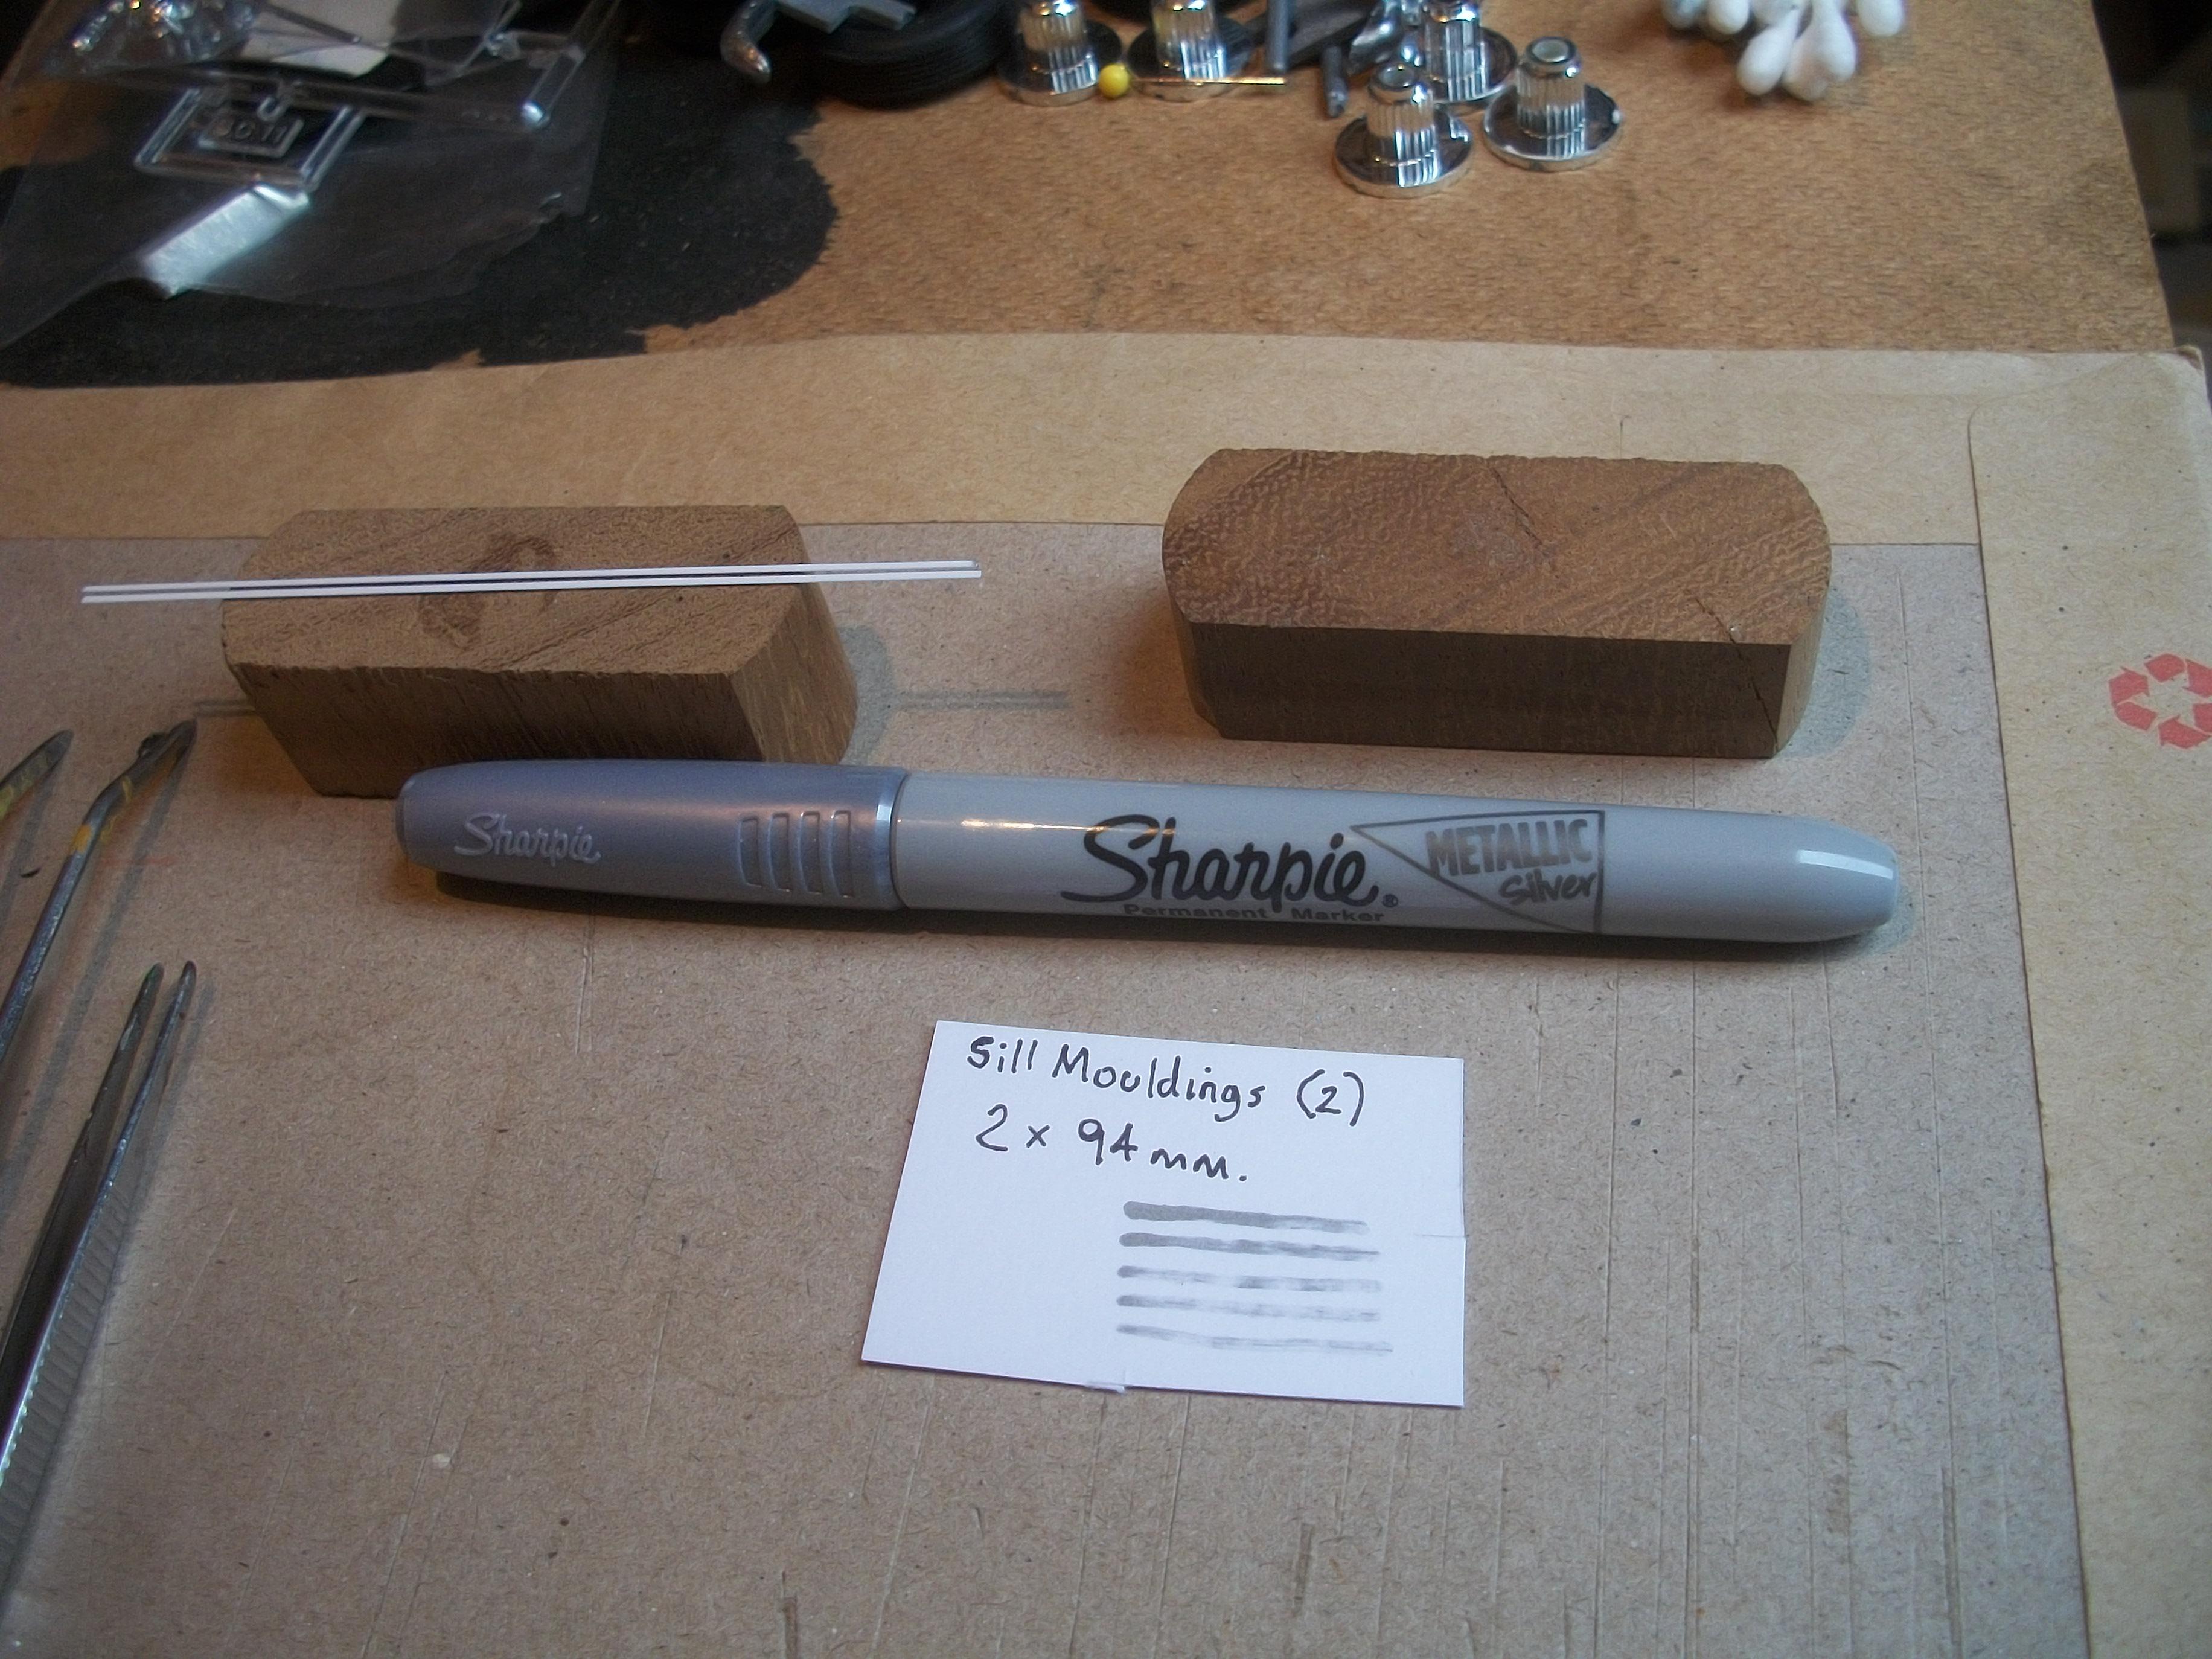
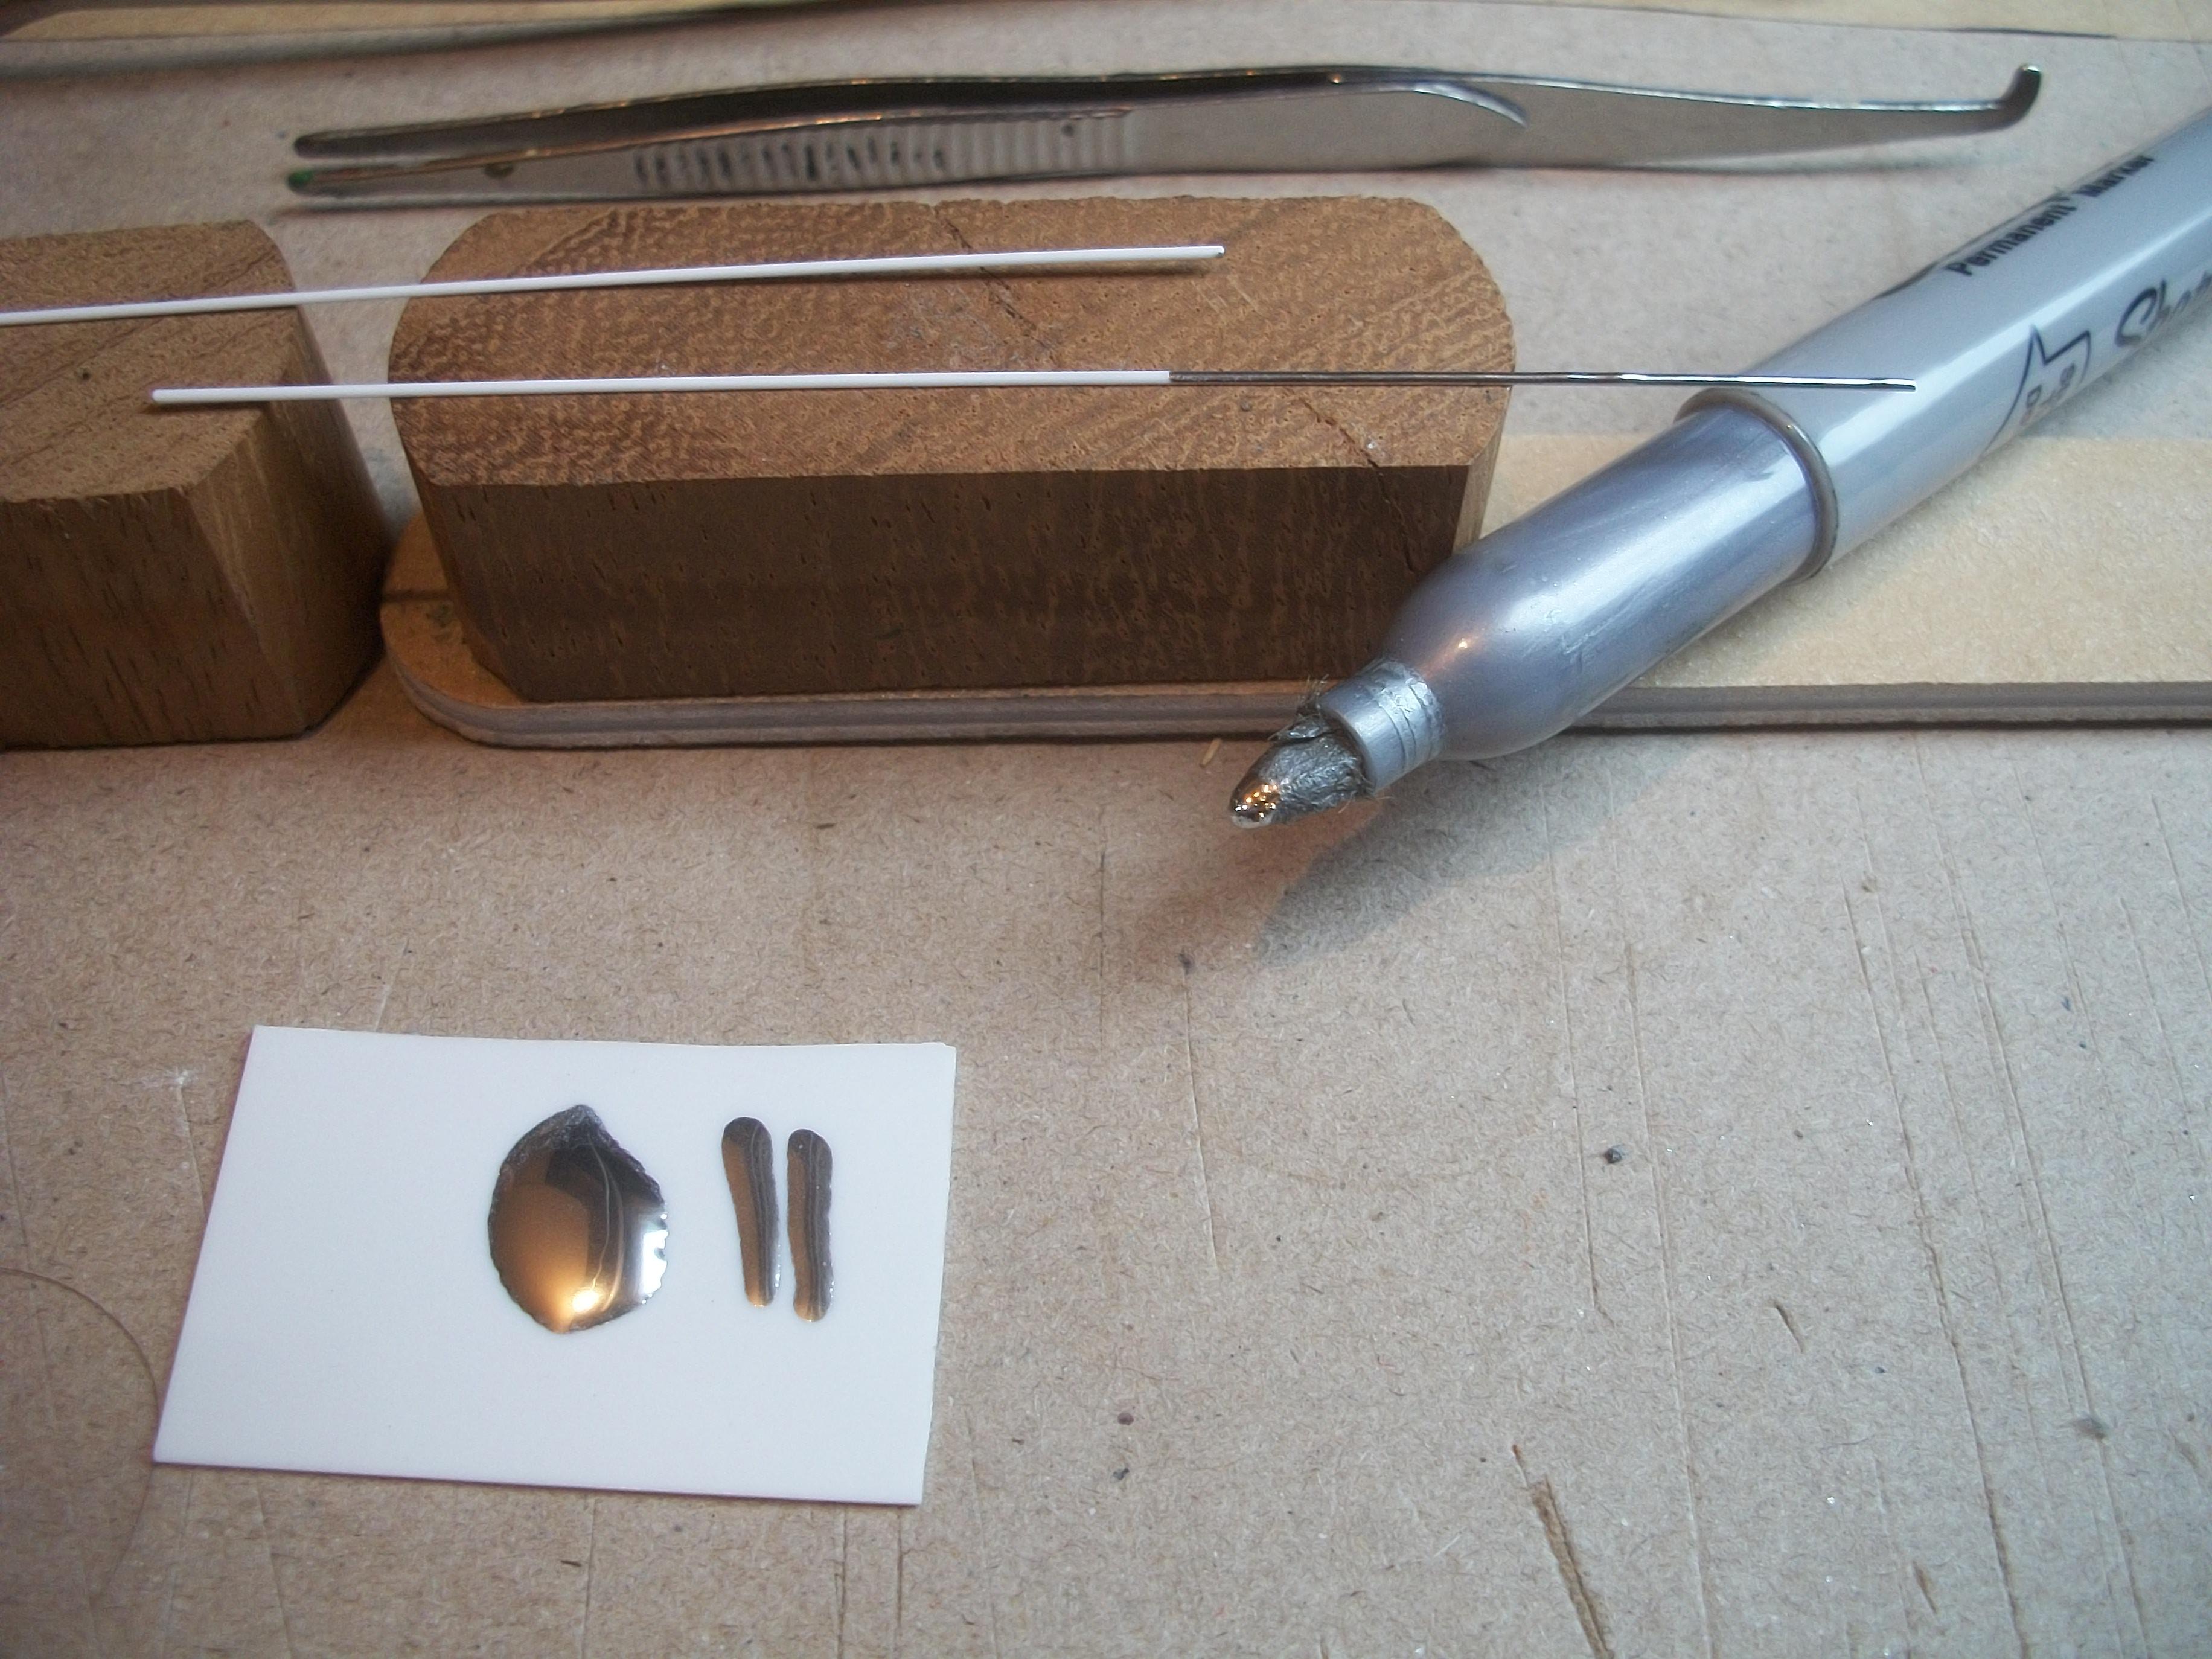
During the past two days I didn't get any work done on the Silver Cloud, so today I did find my way up to the loft to reassess the situation . . . The windshield and molding are on hold for now, and I am unsure as to where this part of the process goes next. Turning my attention to the sill moldings, and from out of nowhere, an idea came to me . . . This happens every so often, when a new and untested method suddenly comes to me out of the blue. Having checked the silver Sharpie and found that it is not working, I decided to give my Molotow Liquid Chrome refill a good shaking, as it has been standing vertically throughout the Summer . . . Then I dripped a small of the liquid chrome onto a piece of scrap styrene sheet. My idea was to dip the tip of the silver Sharpie into the pool of liquid chrome, and then apply this to the styrene strips. The two sill moldings were laid across a couple of wooden blocks and to begin with there was a bit of a struggle to hold the moldings steady while I carefully applied the liquid chrome. Once I had placed a small piece of double sided tape on one end of the blocks, I was able to gently run the tip of the Sharpie along the length of each sill molding . . . The result is not great, I must admit, but I shall leave the styrene moldings to dry for 24 hours and then see how they look. I used some of the remaining liquid chrome on the door strips of the body, just on the driver's side of the model . . . David
-
Superb engine detail there Pat for your current build, and that is a very nice red convertible that you owned. David W.
-
Rolls-Royce No Chemicals, No Paint, No Harmful Glues
Anglia105E replied to Anglia105E's topic in WIP: Model Cars
Greg . . . Your approach to this method does make sense to me, which is to cut out four pieces of half round instead of one, but I suppose what I am trying to do is to bend the four corners of this molding into curves. Also, I wanted to avoid the joins where the separate pieces meet. I agree with you that the process of bending the corners and getting the distance right is difficult, so if my first attempt does not come out well then I shall go for the four piece alternative, thanks. David -
Rolls-Royce No Chemicals, No Paint, No Harmful Glues
Anglia105E replied to Anglia105E's topic in WIP: Model Cars
Mark . . . Hoping to get the moldings cut to size for the sills, below the doors today. These will be the same half round styrene as the screen surround. For the door moldings / strips they will have silver Sharpie applied, as well as the styrene rod moldings . . . Progress does seem to be rather slow at the moment, but that is partly to do with all sorts of things going on around me. October looks like being a busy month for distracting commitments ! David -
Rolls-Royce No Chemicals, No Paint, No Harmful Glues
Anglia105E replied to Anglia105E's topic in WIP: Model Cars
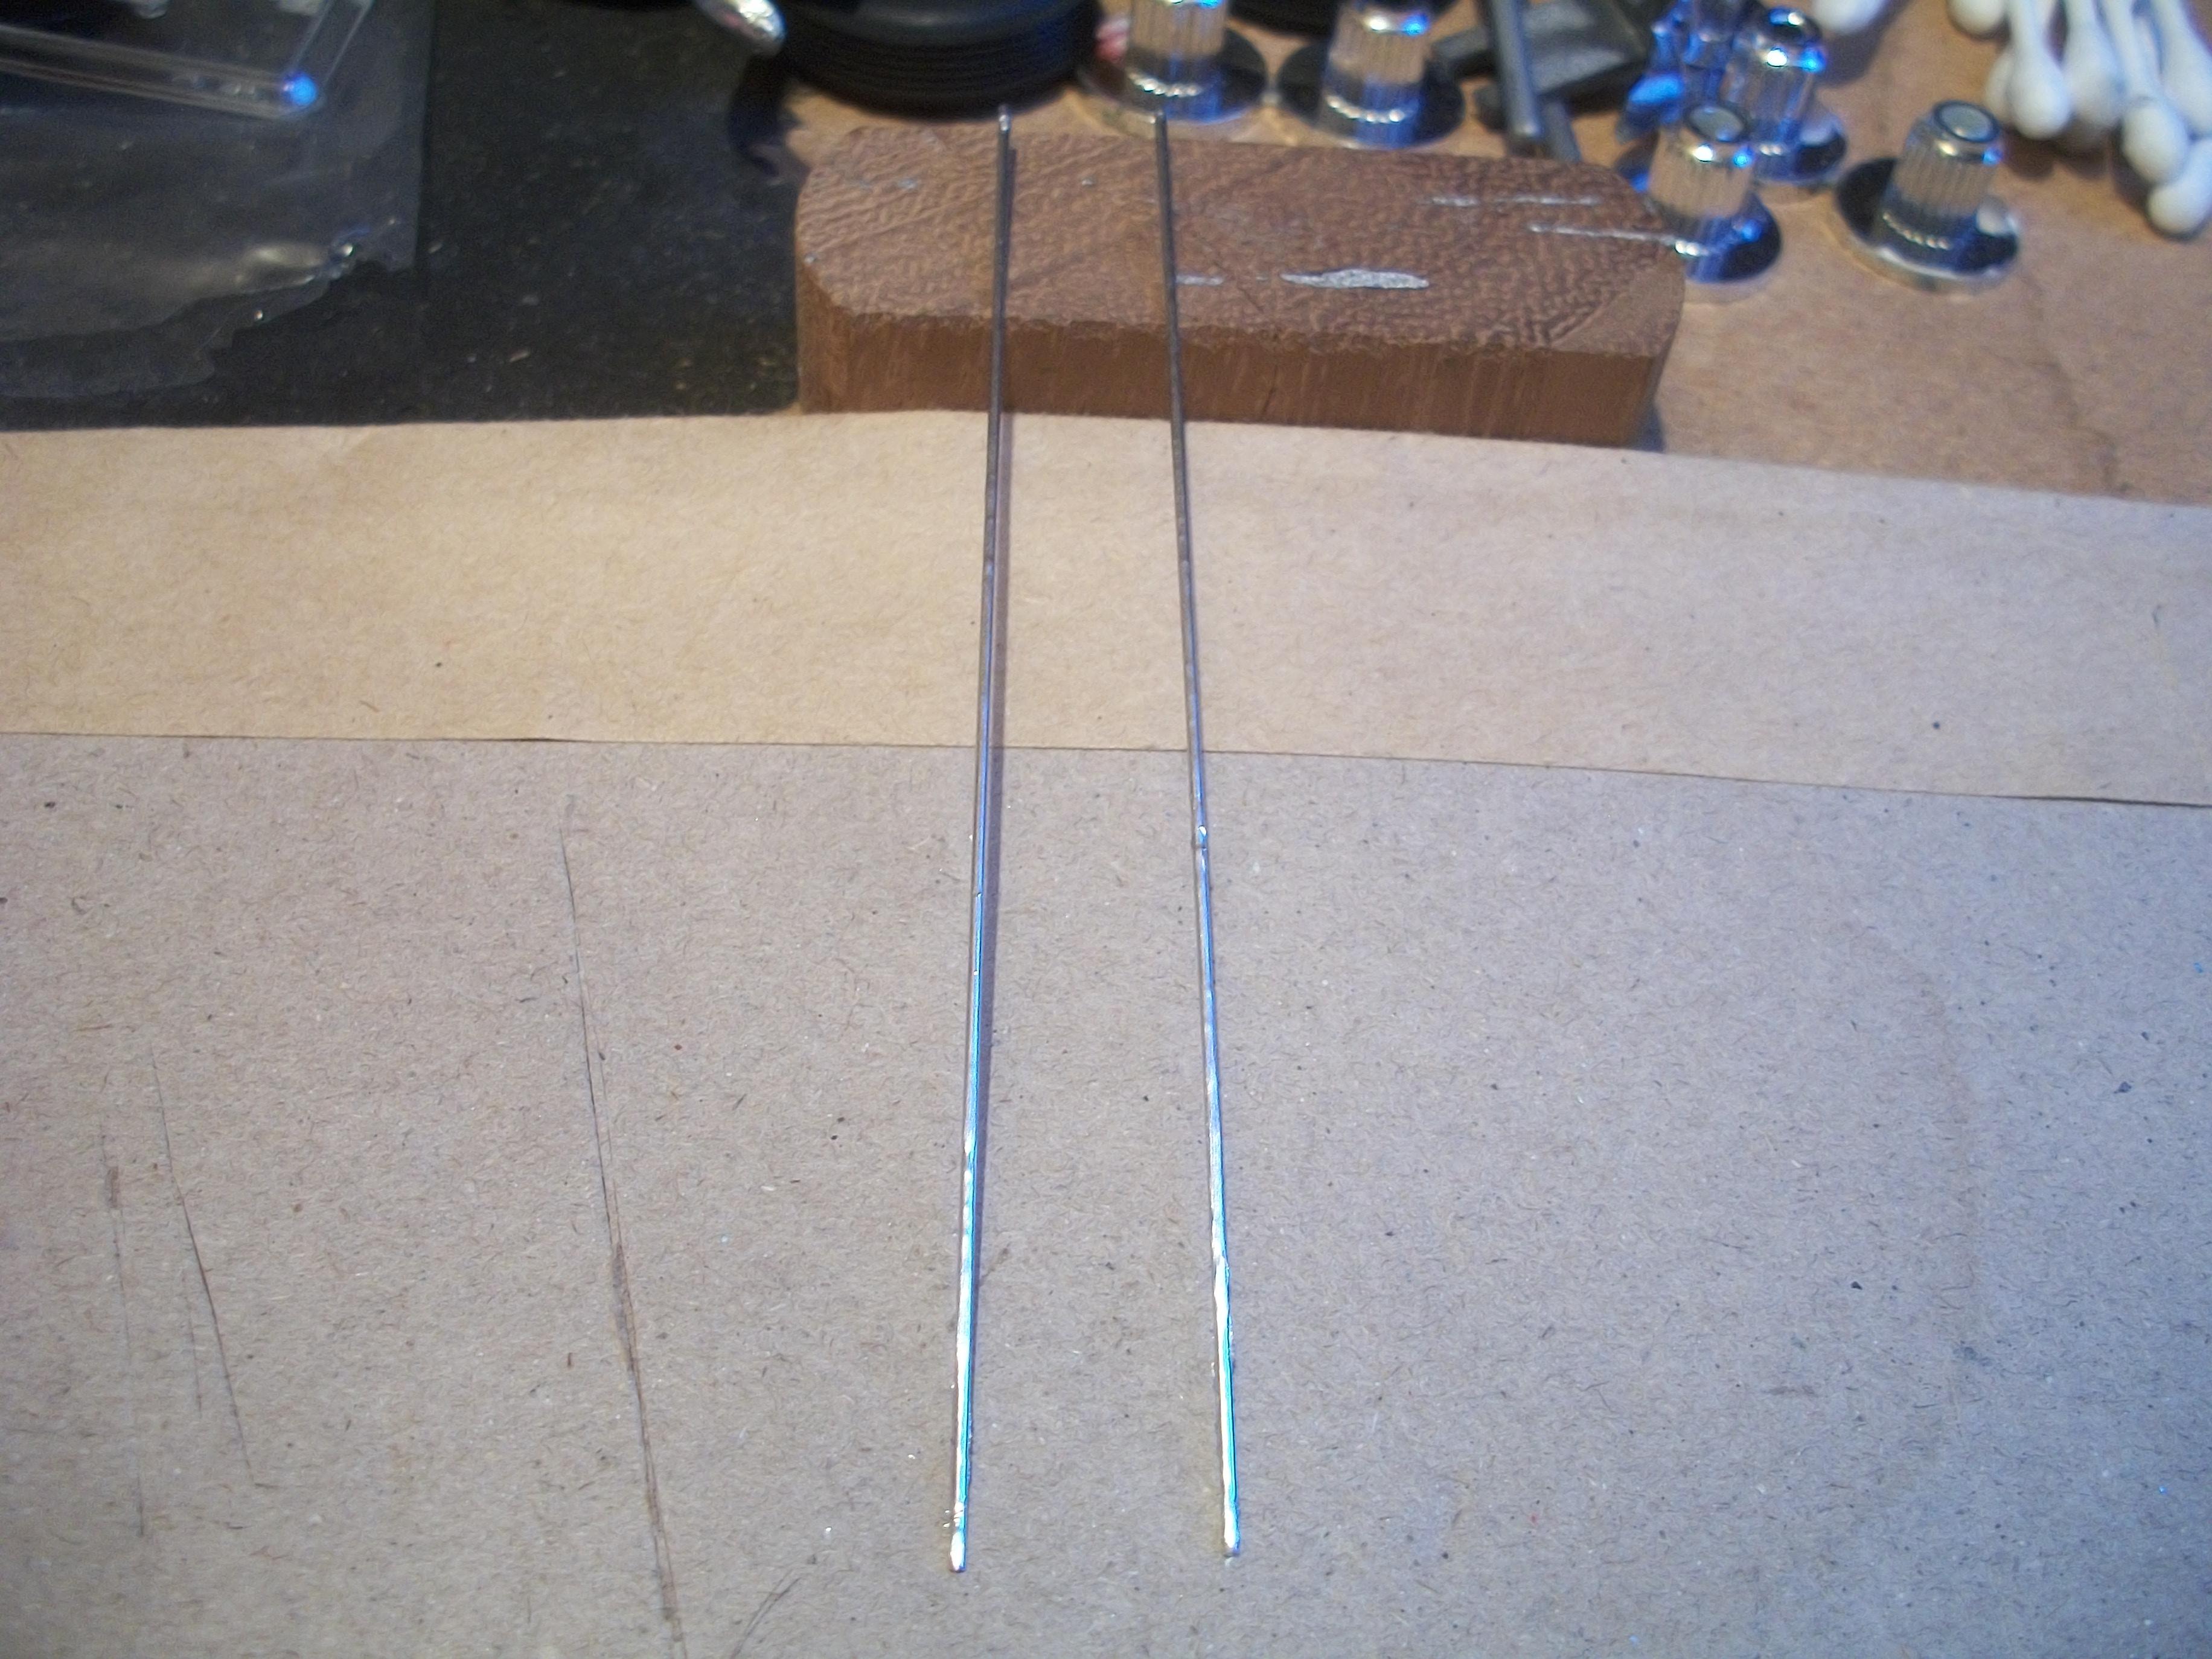
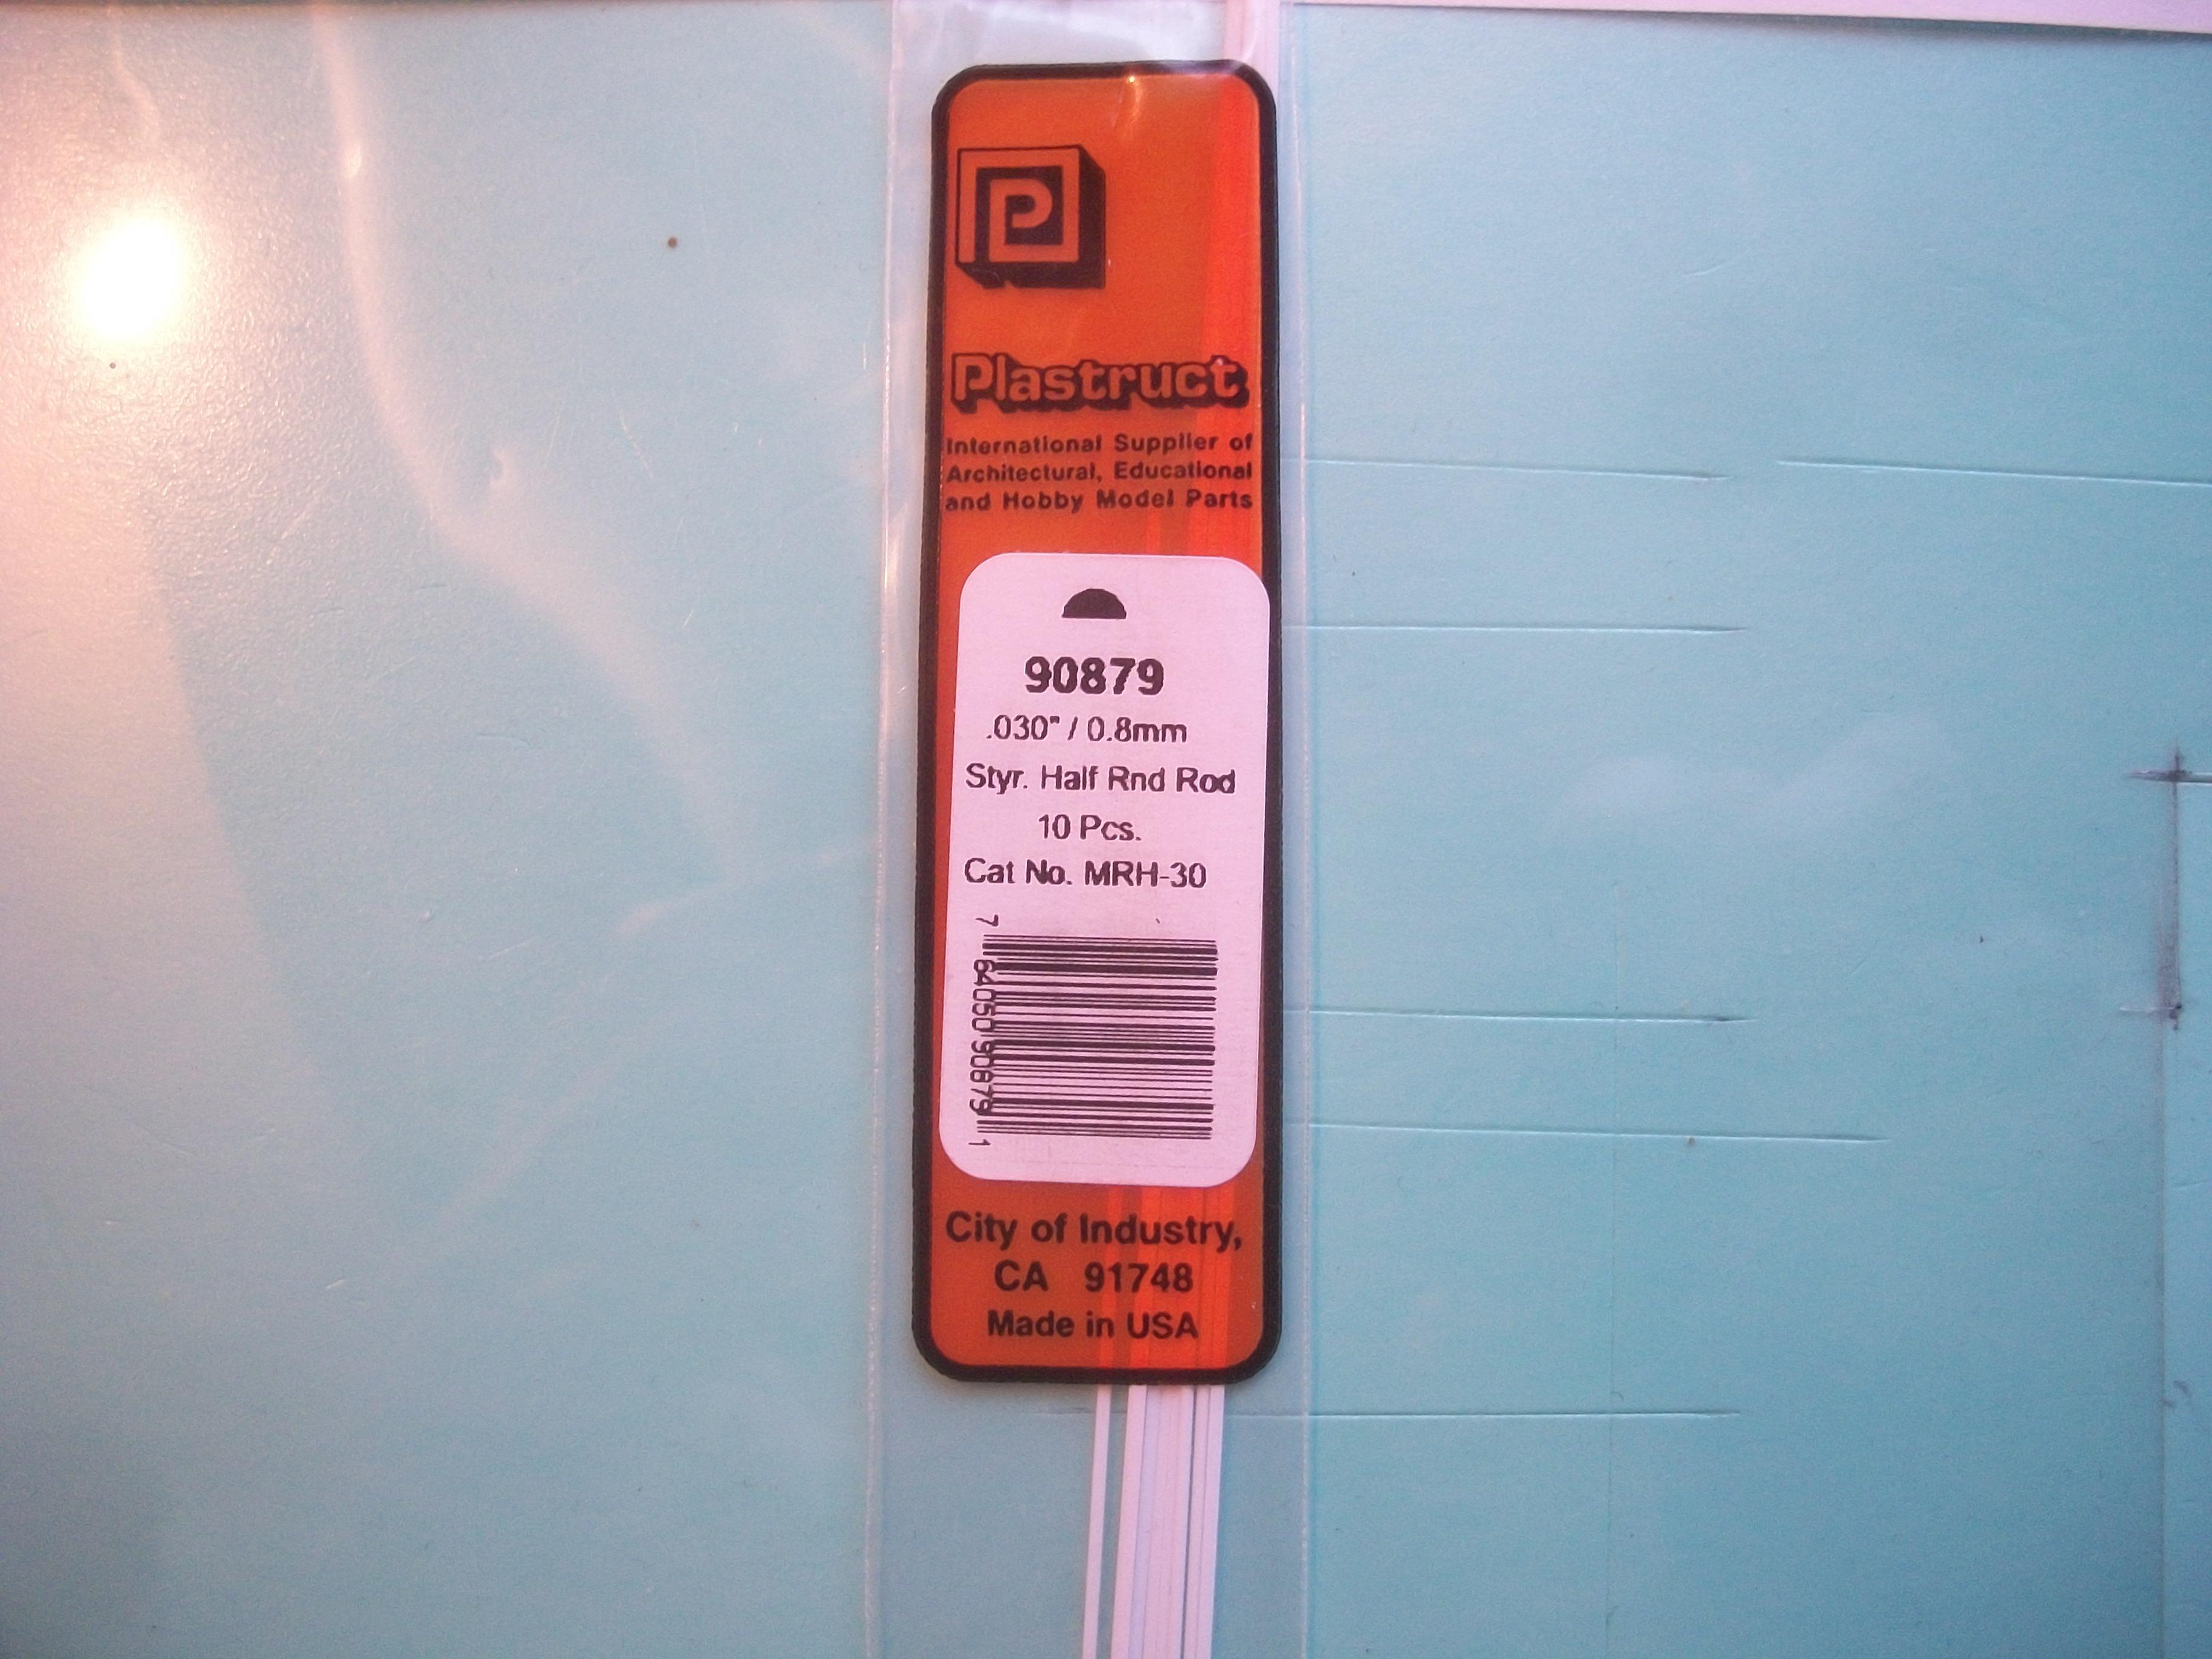
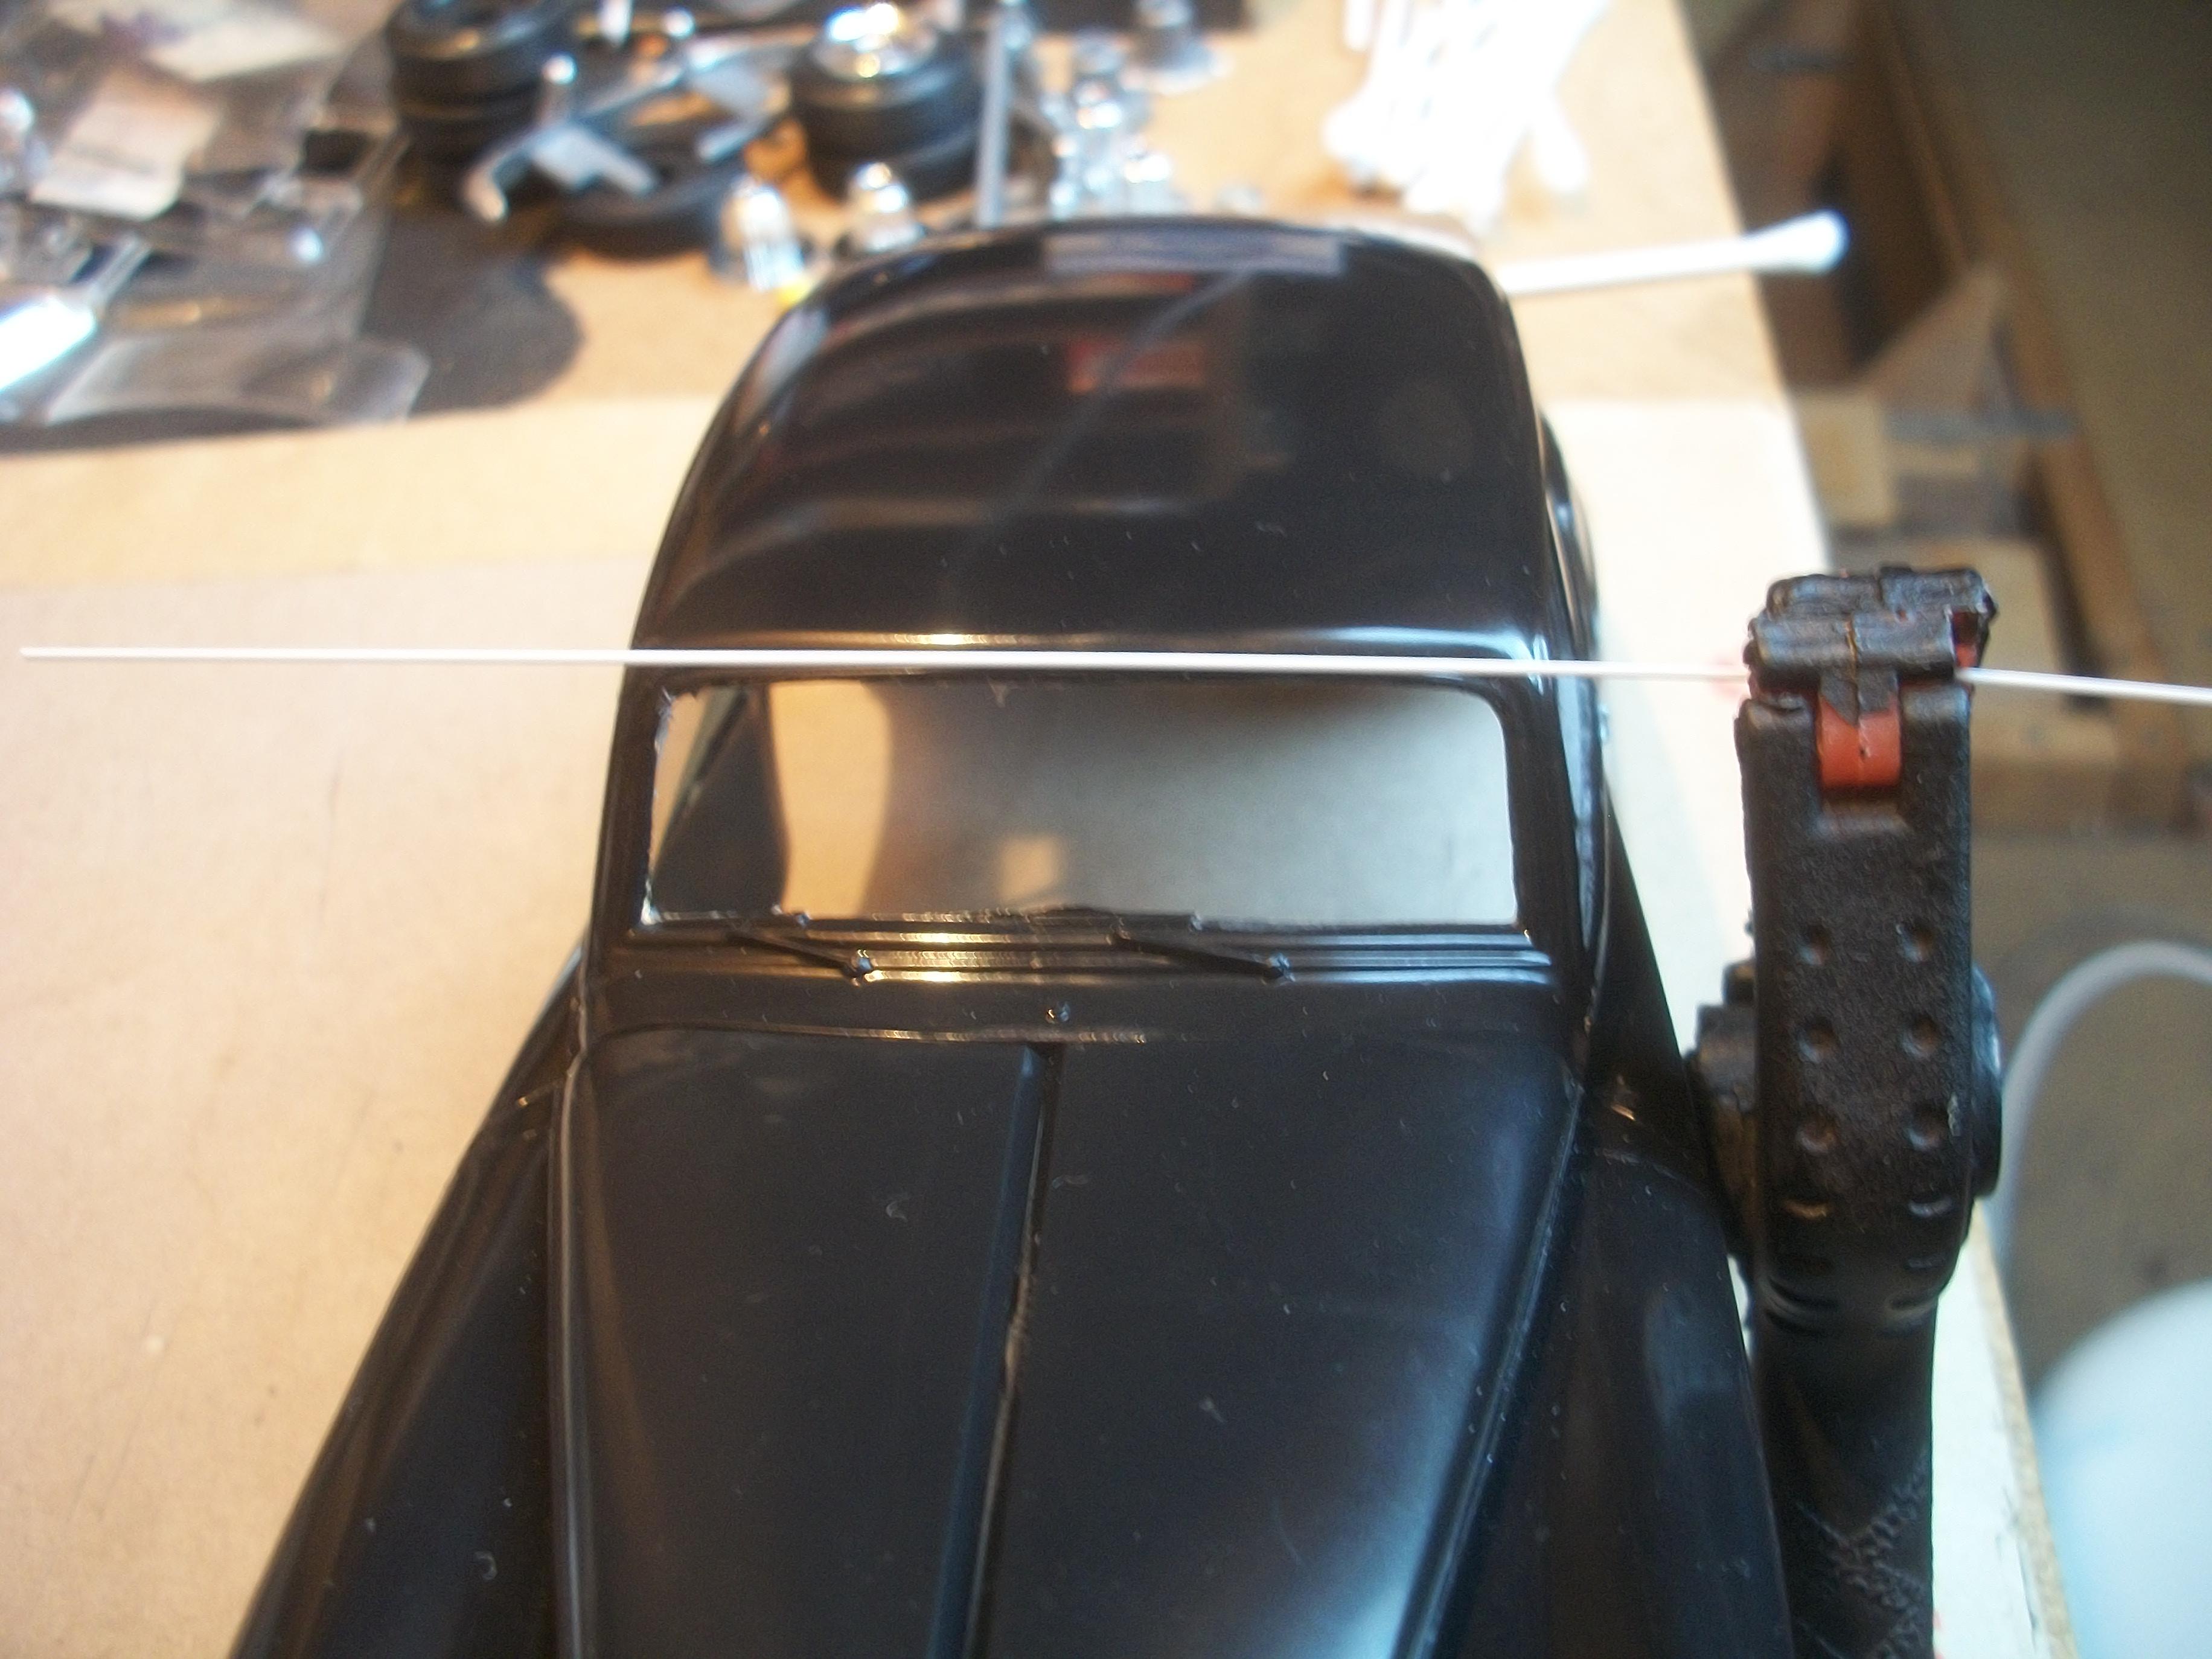
I brought to the table a previous Silver Cloud build, and this one has quite a good windshield in place. The method used to build this model was to cut a length of styrene rod to go around the opening for the screen on the outside. For this current build, I have selected a length of Plastruct .030" Half Round styrene which is 0.8 millimeter . . The idea is to glue the styrene moulding in position, with the clear screen already glued in place, probably using PVA glue. Previously I would have used Revell Contacta Professional cement, but this has a very strong smell, so I must avoid this product. It will be necessary to apply the silver Sharpie to the Plastruct moulding before carefully positioning the part with tweezers, so as not to handle the moulding. David