Anglia105E
-
Posts
3,486 -
Joined
-
Last visited
Content Type
Profiles
Forums
Events
Gallery
Everything posted by Anglia105E
-

Rolls-Royce No Chemicals, No Paint, No Harmful Glues
Anglia105E replied to Anglia105E's topic in WIP: Model Cars
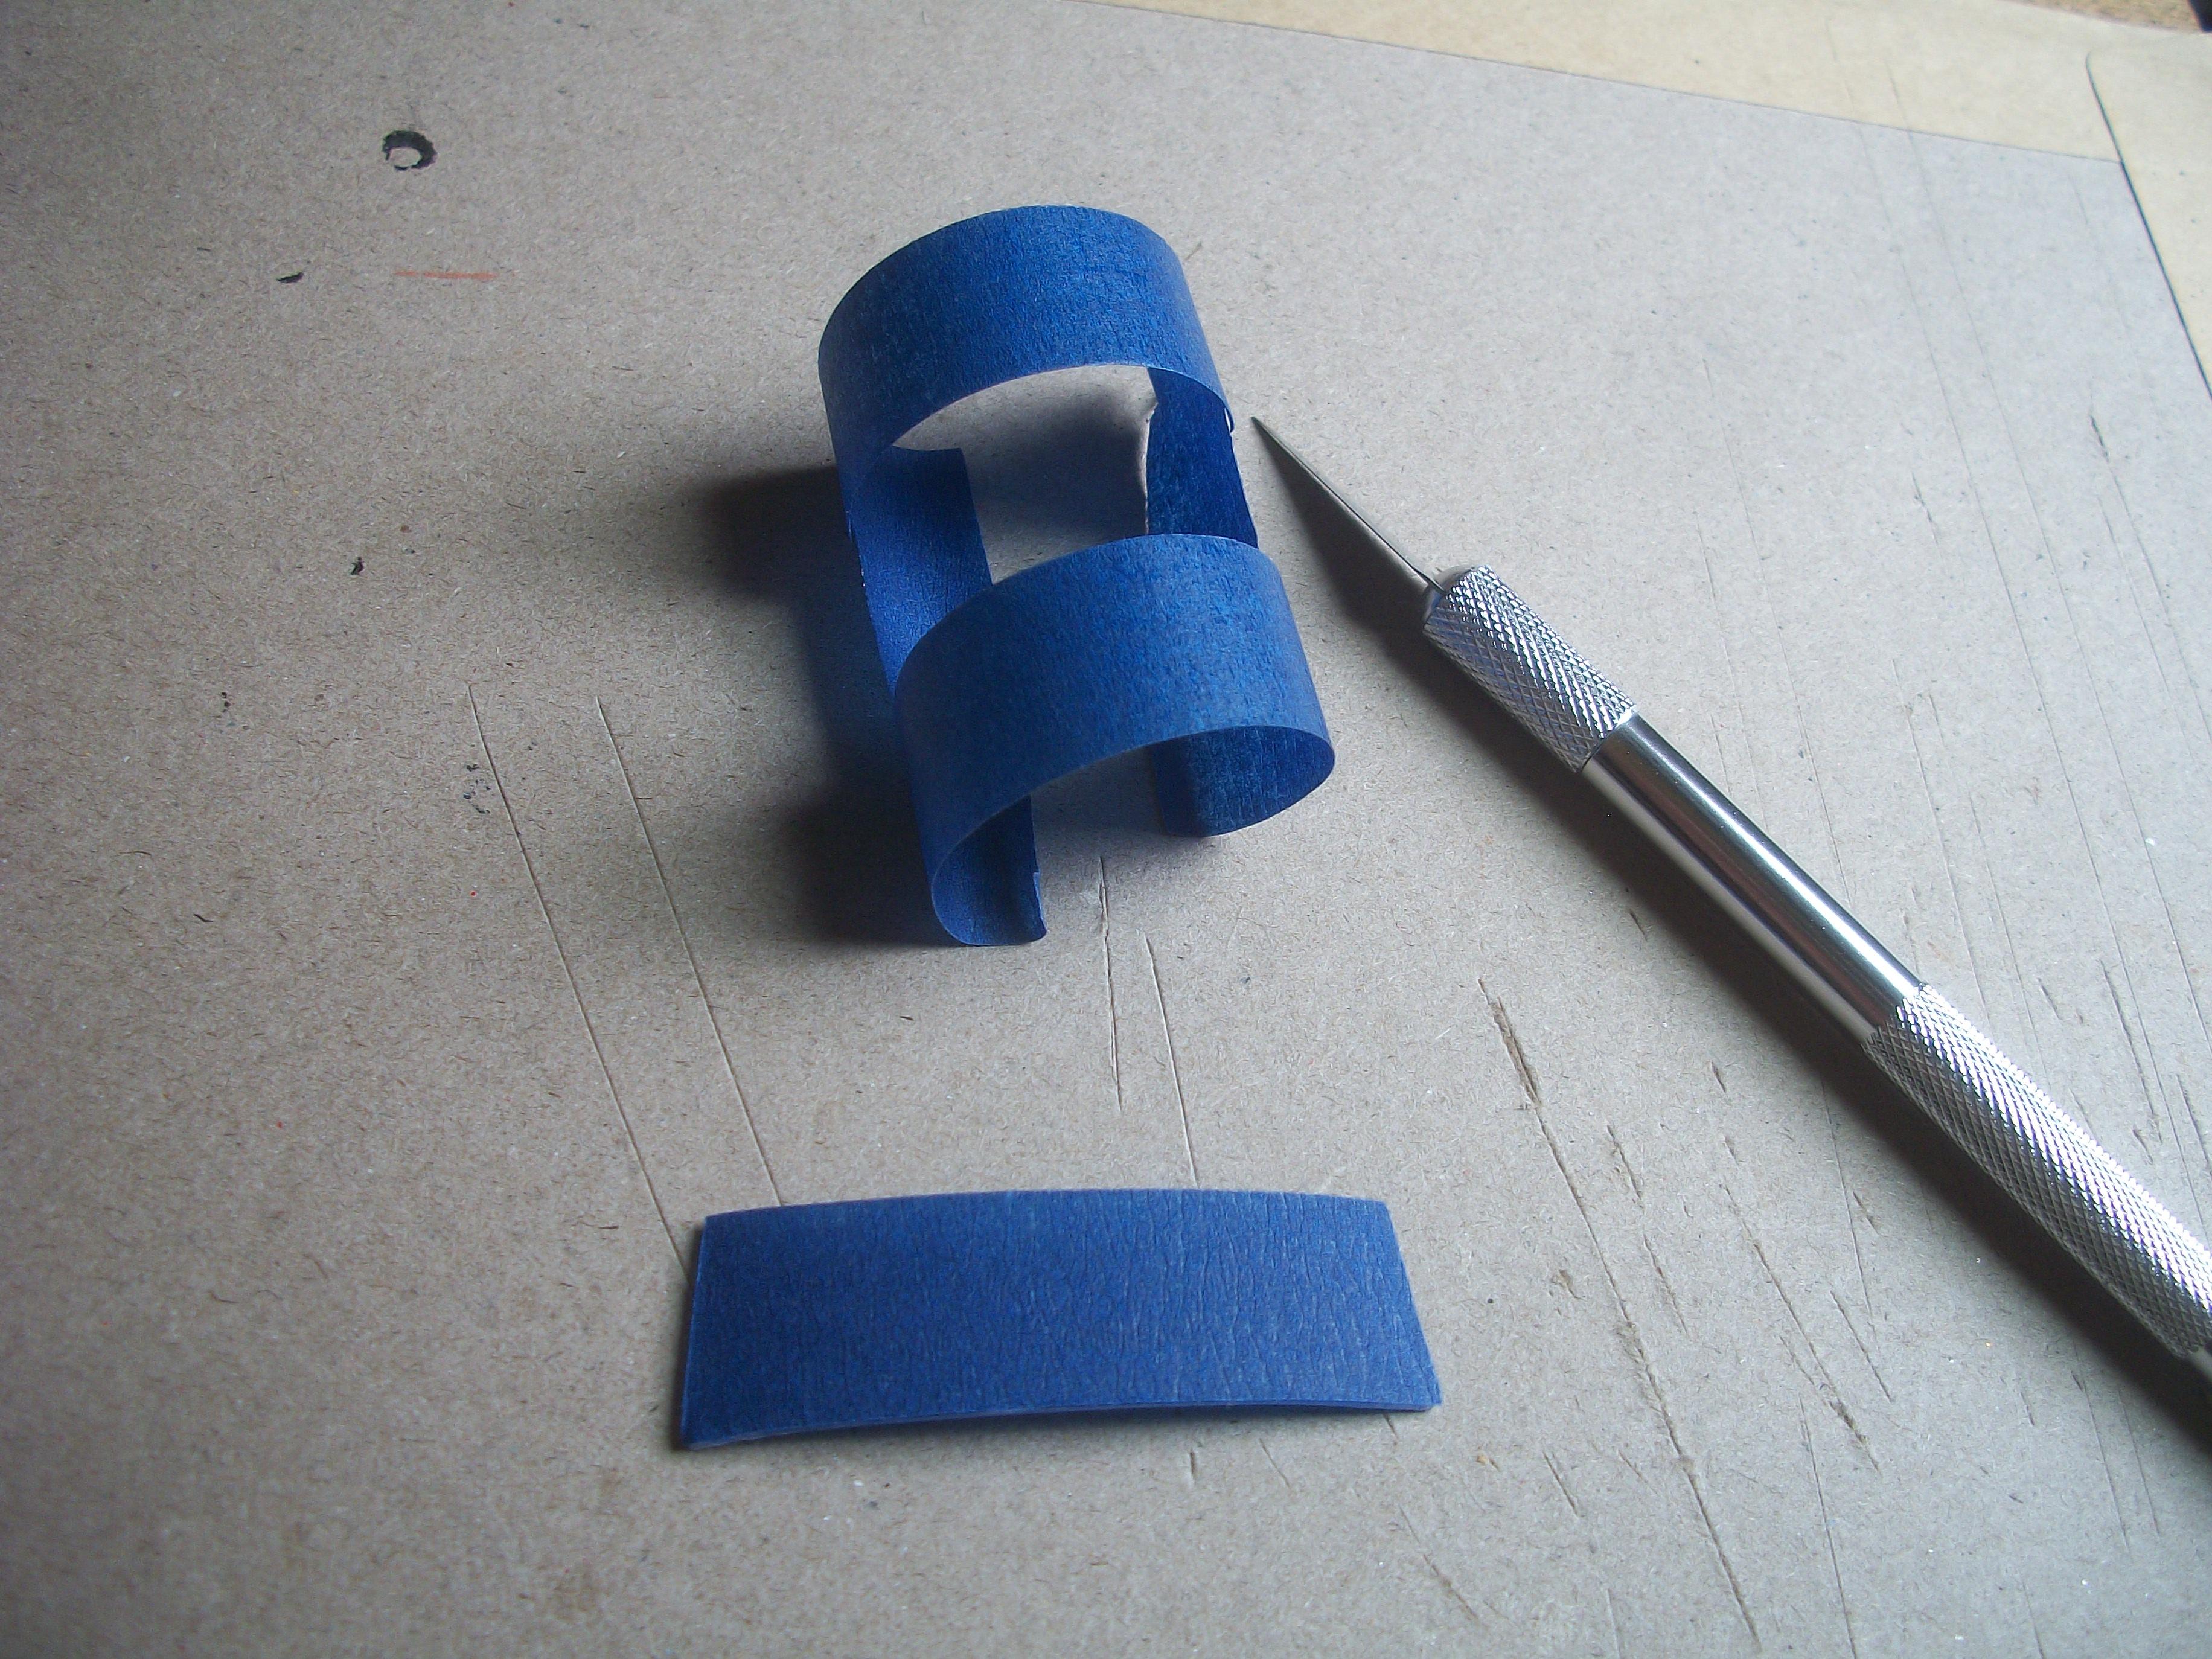
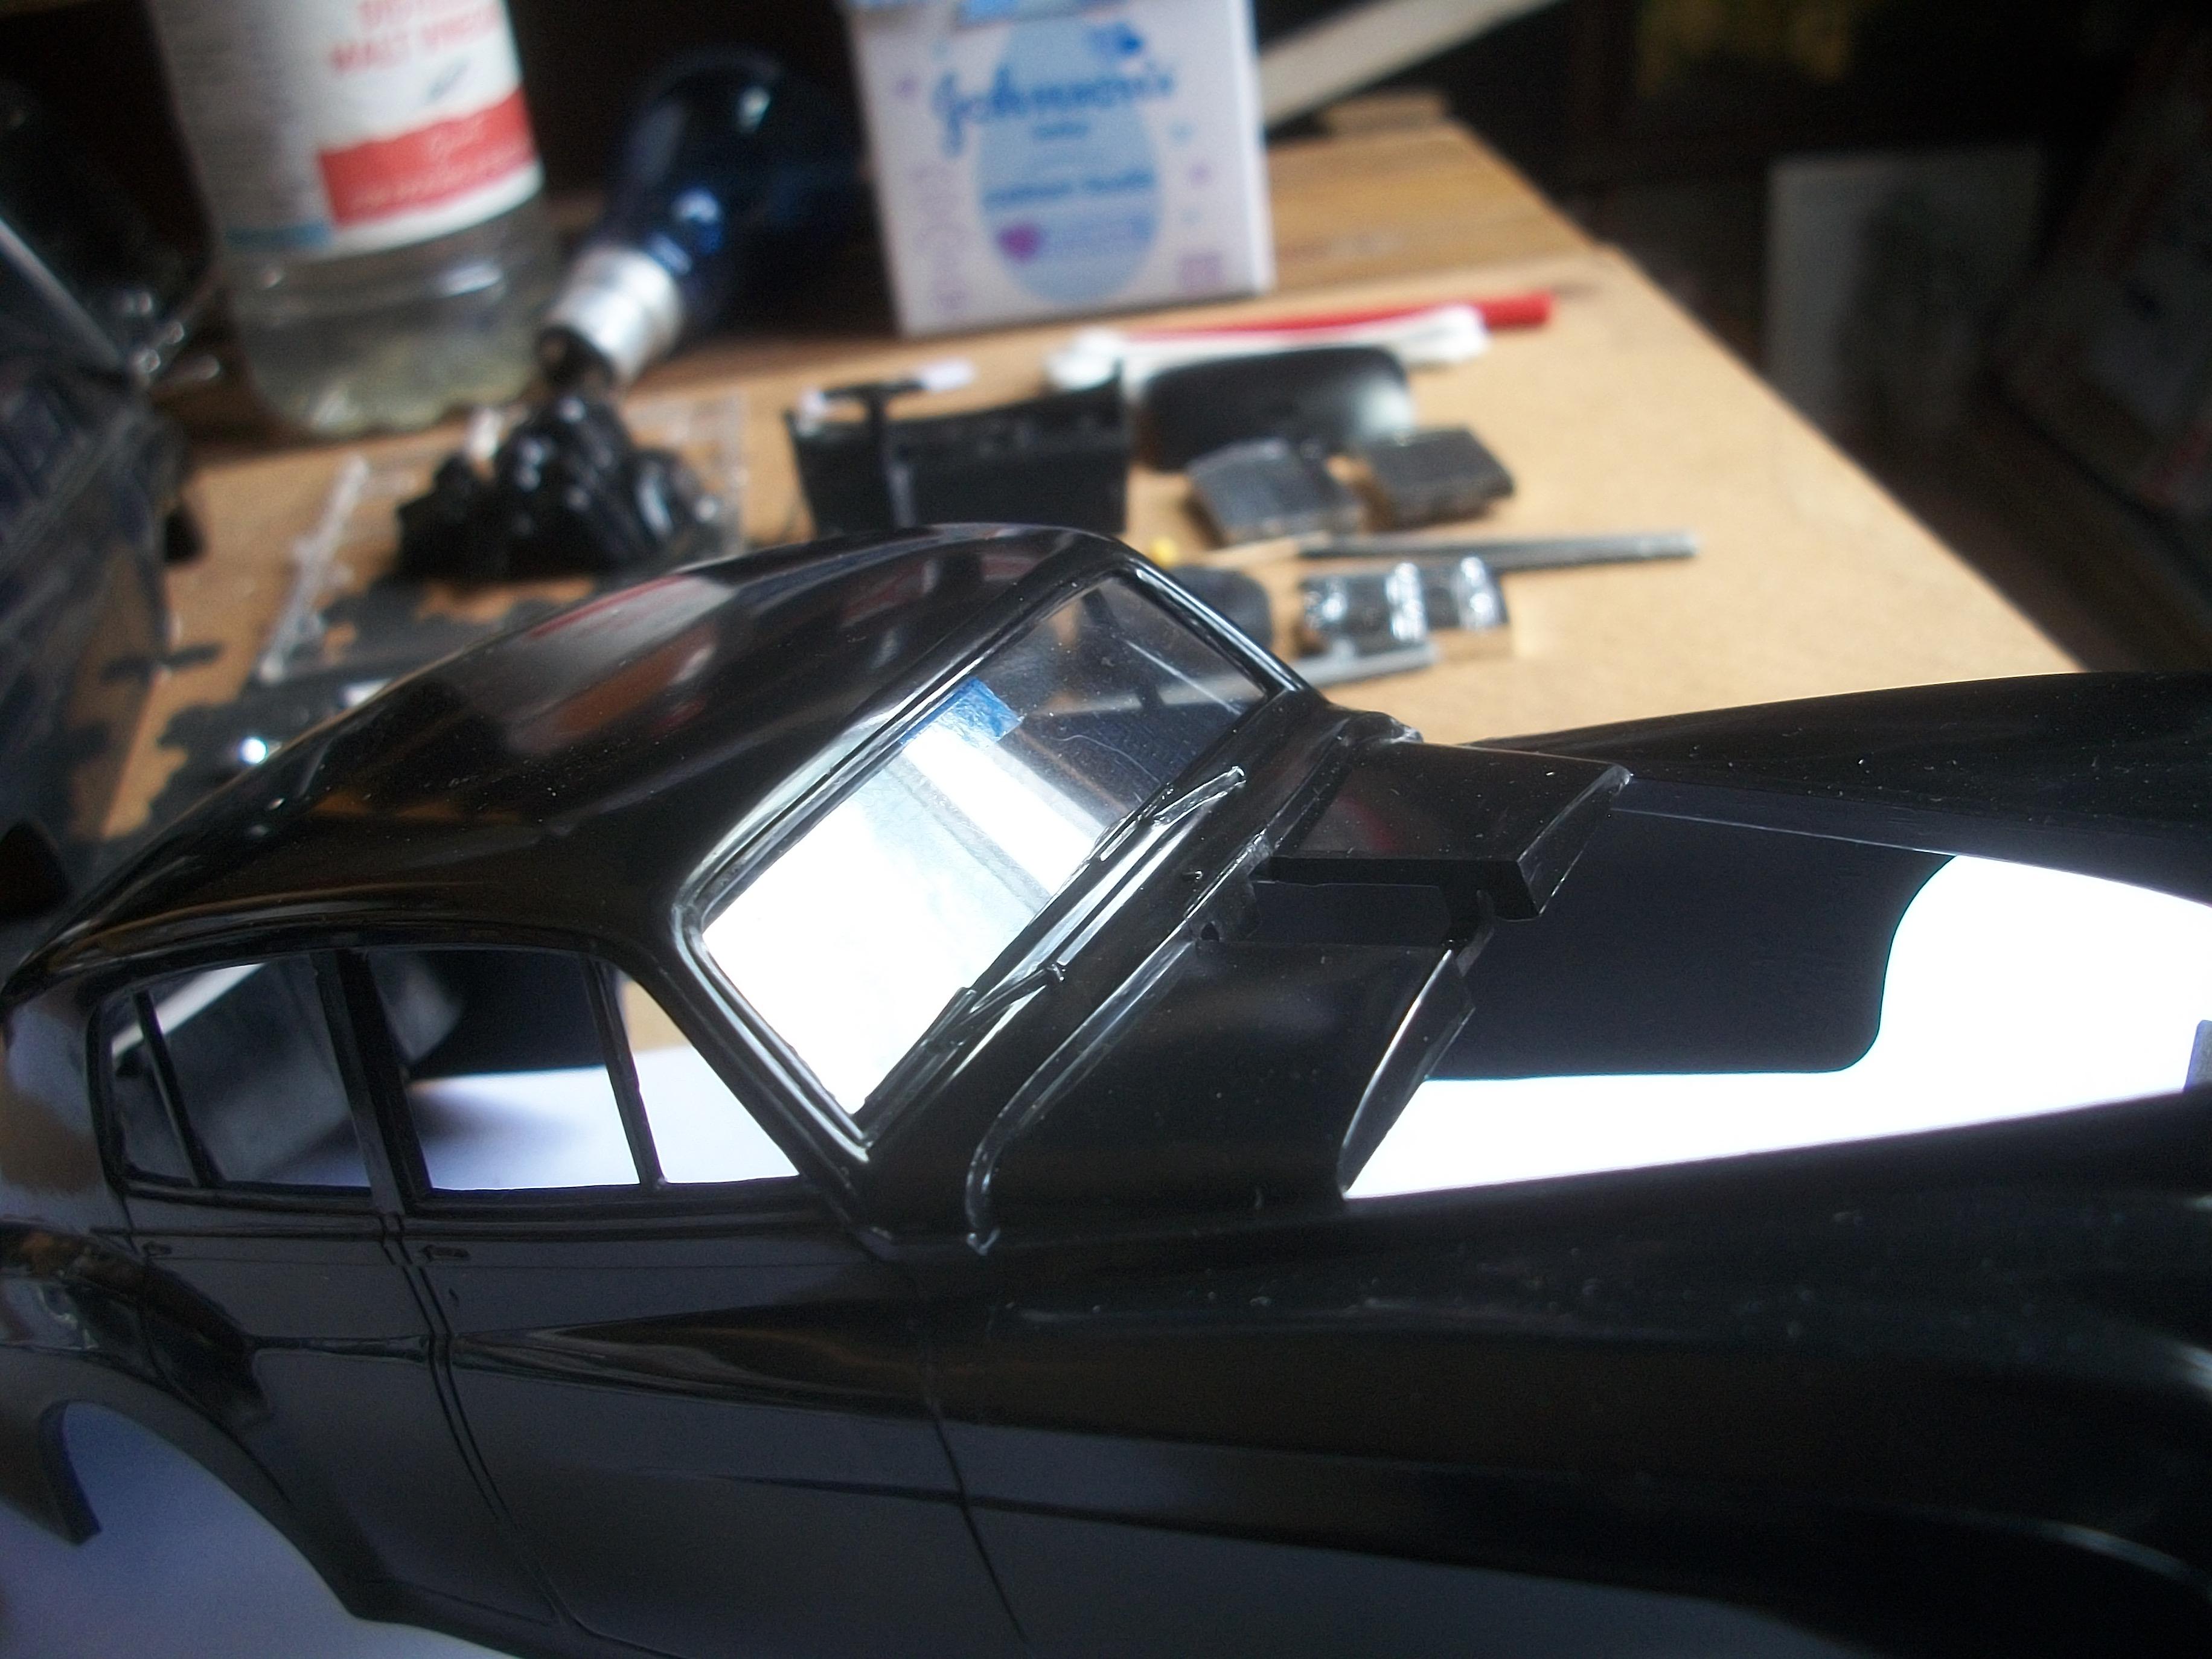
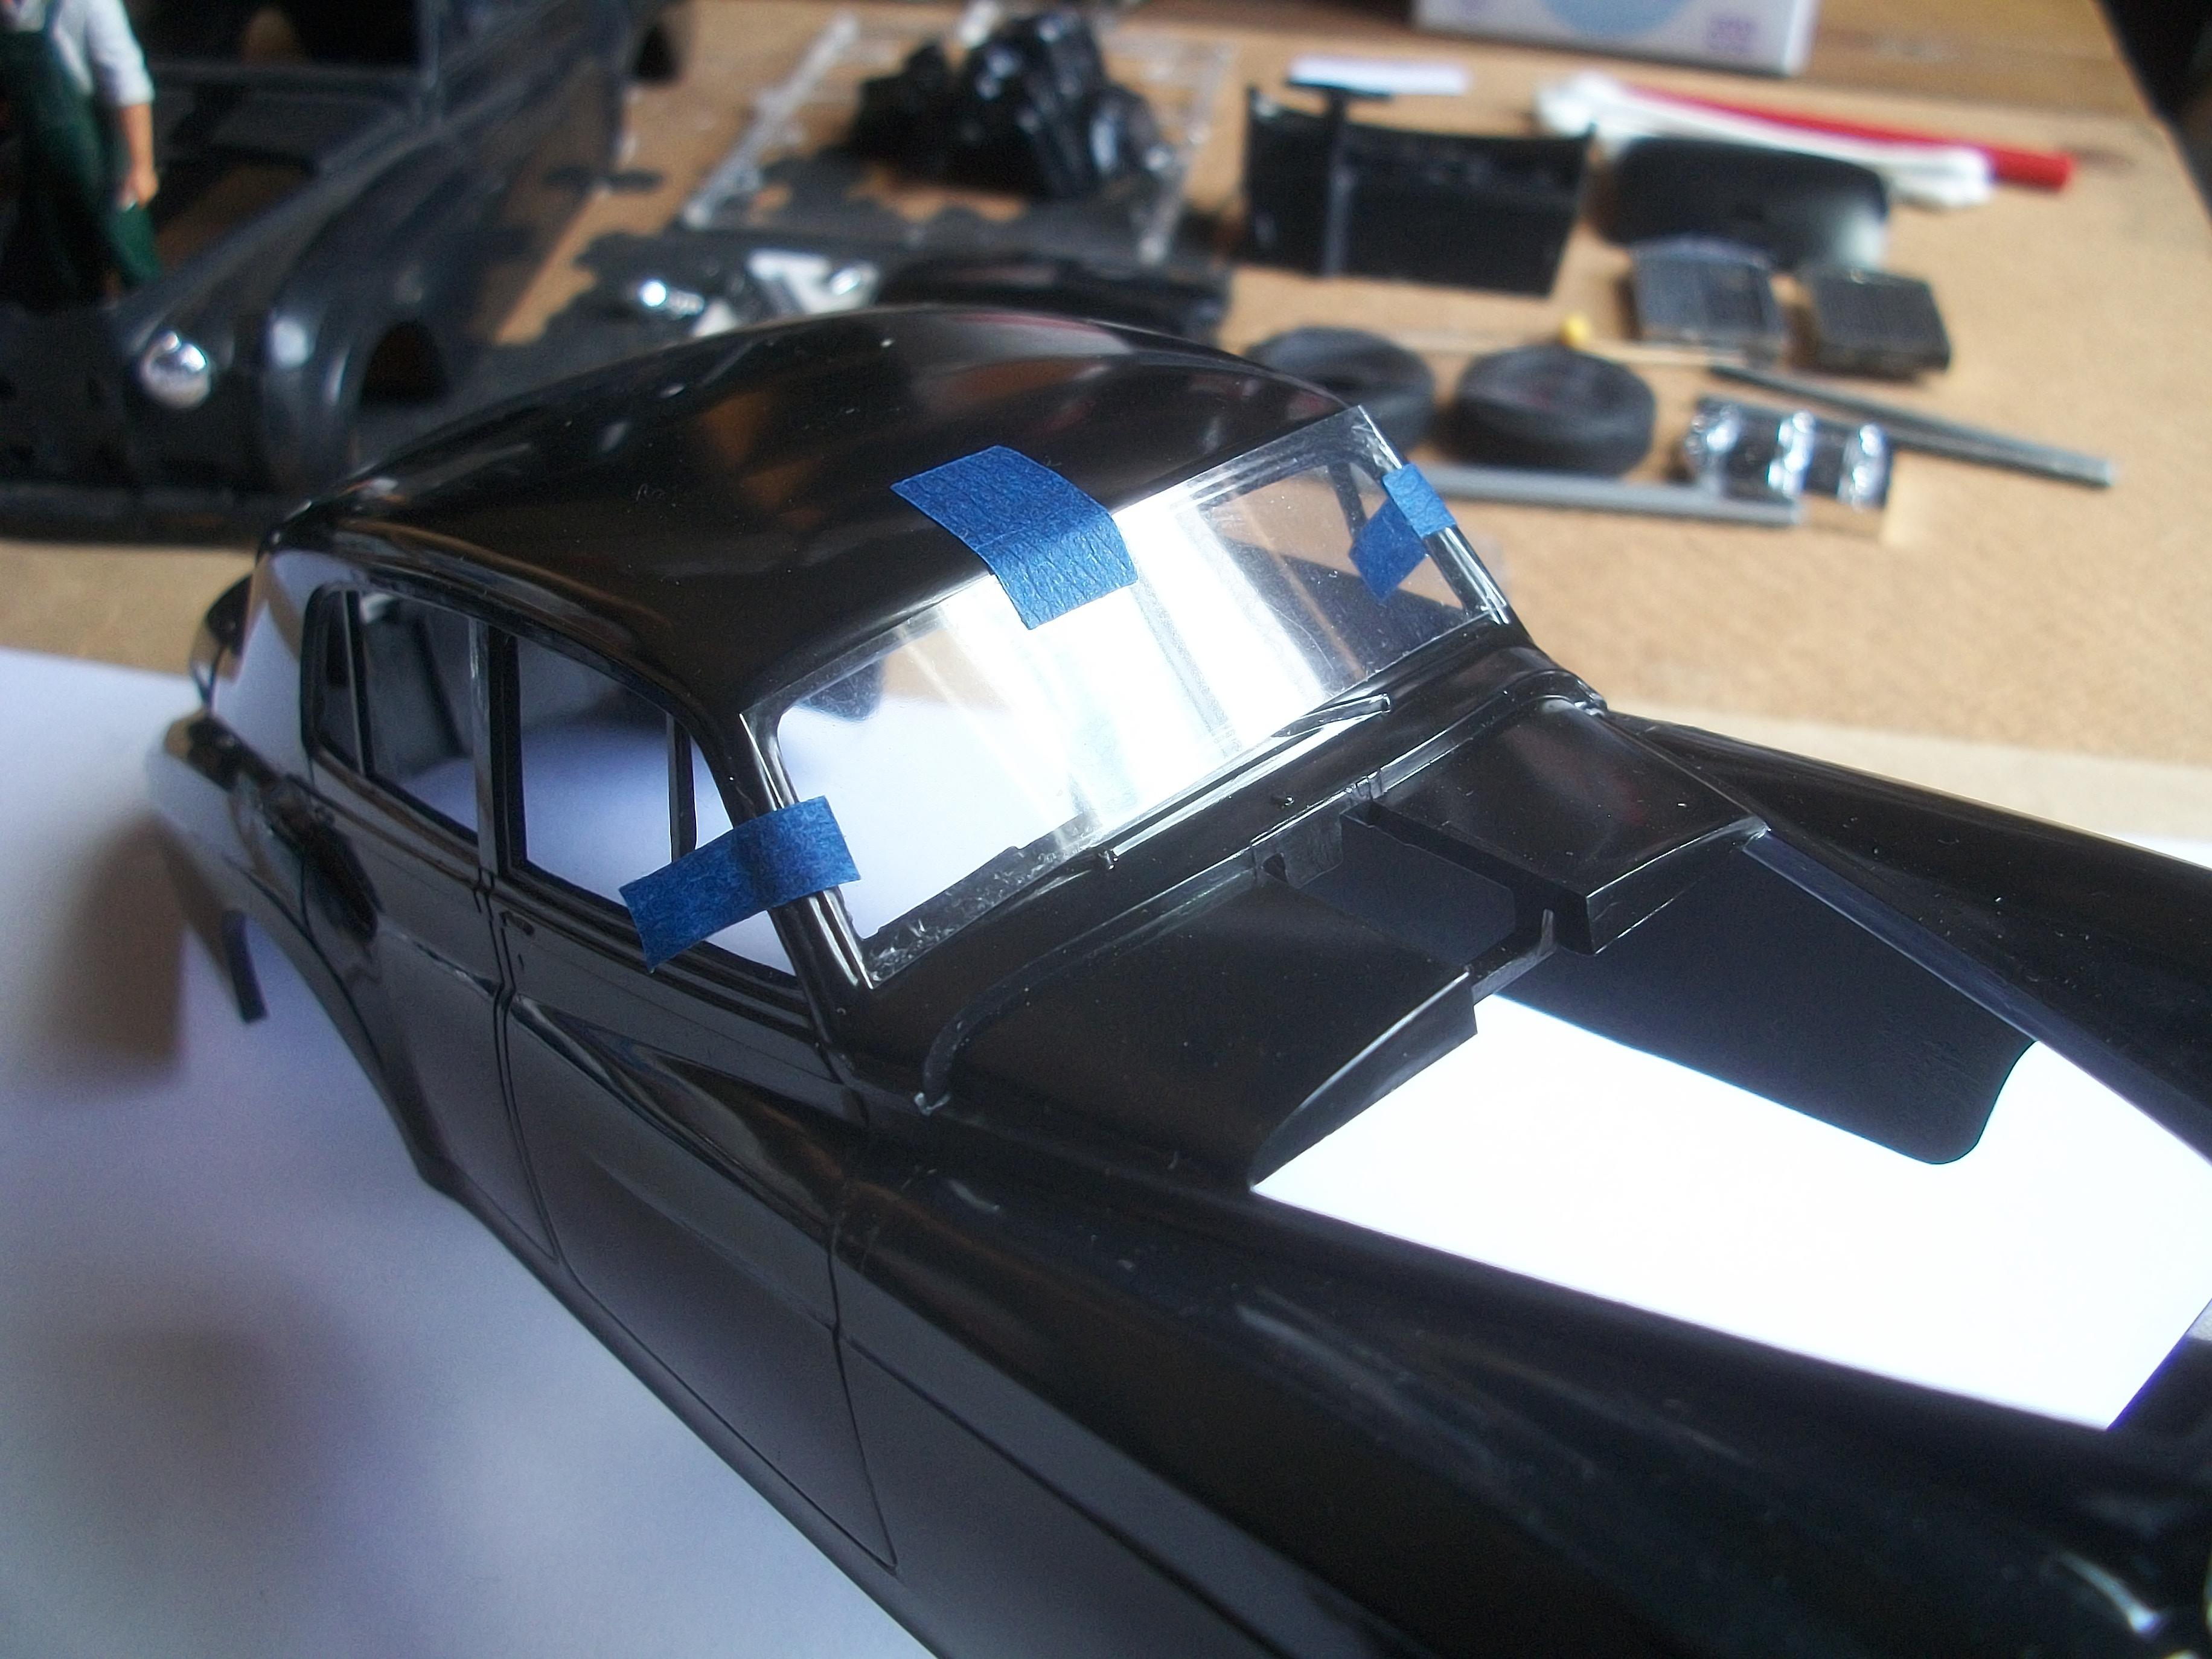
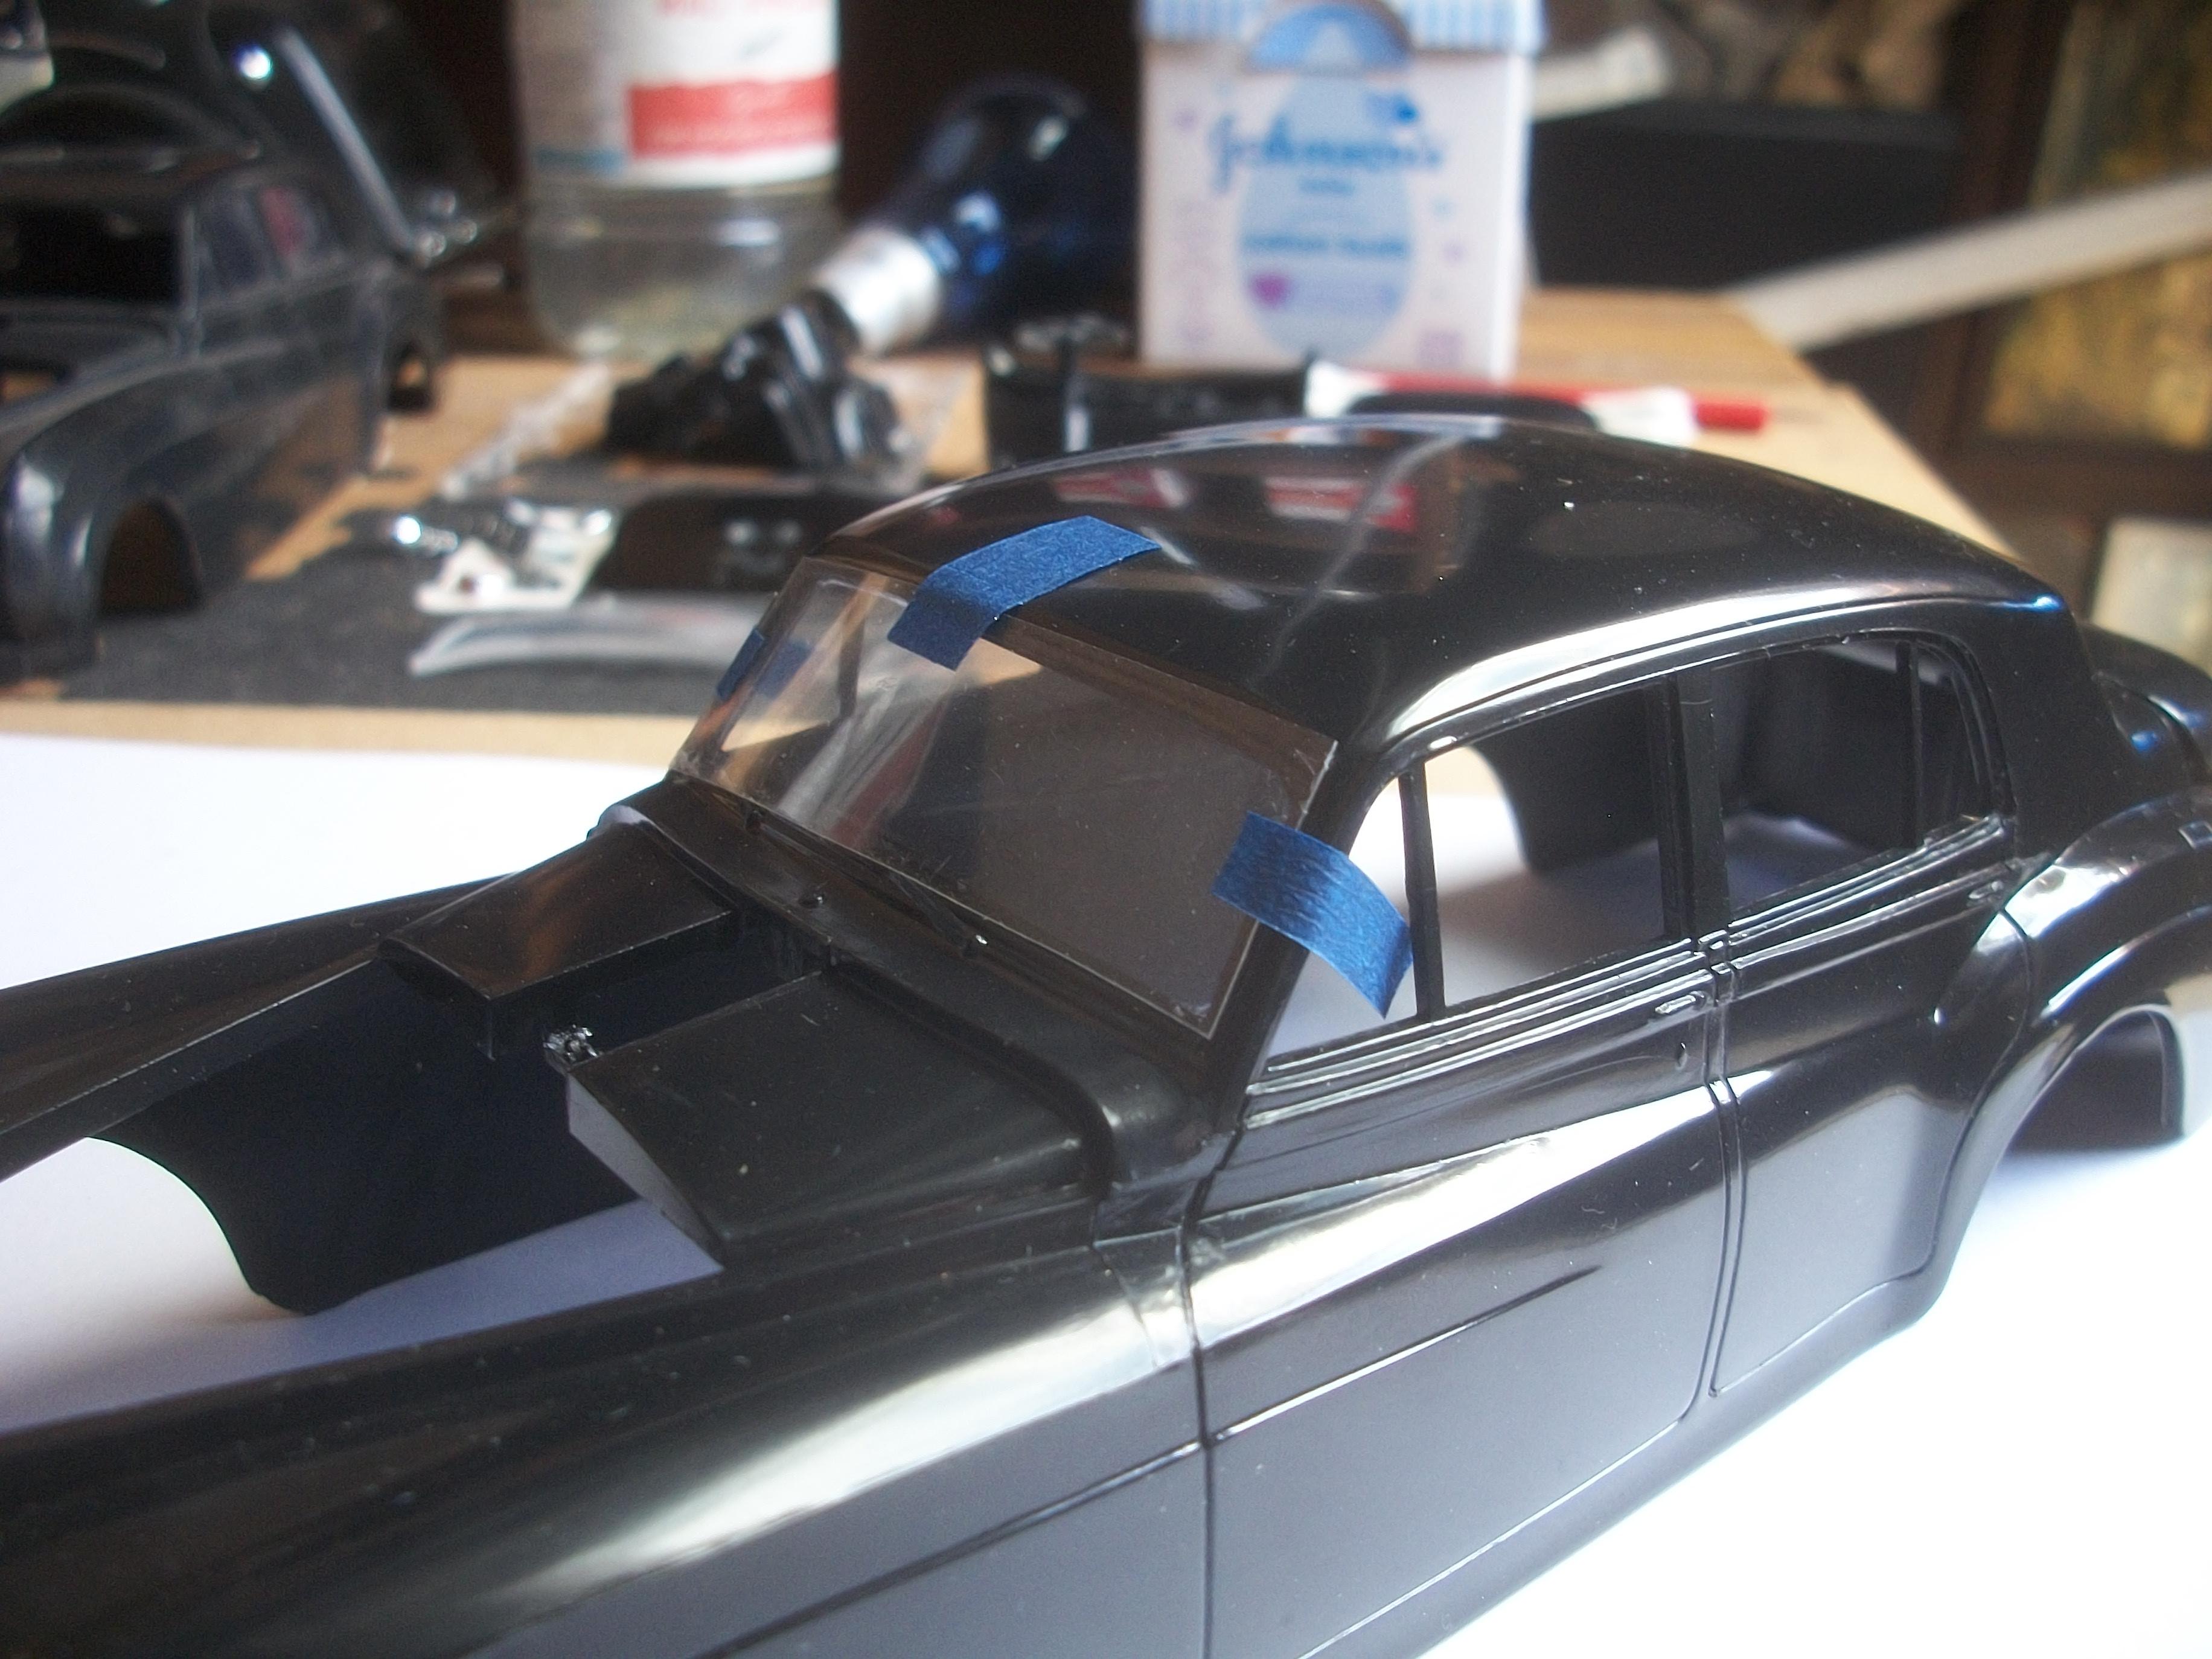
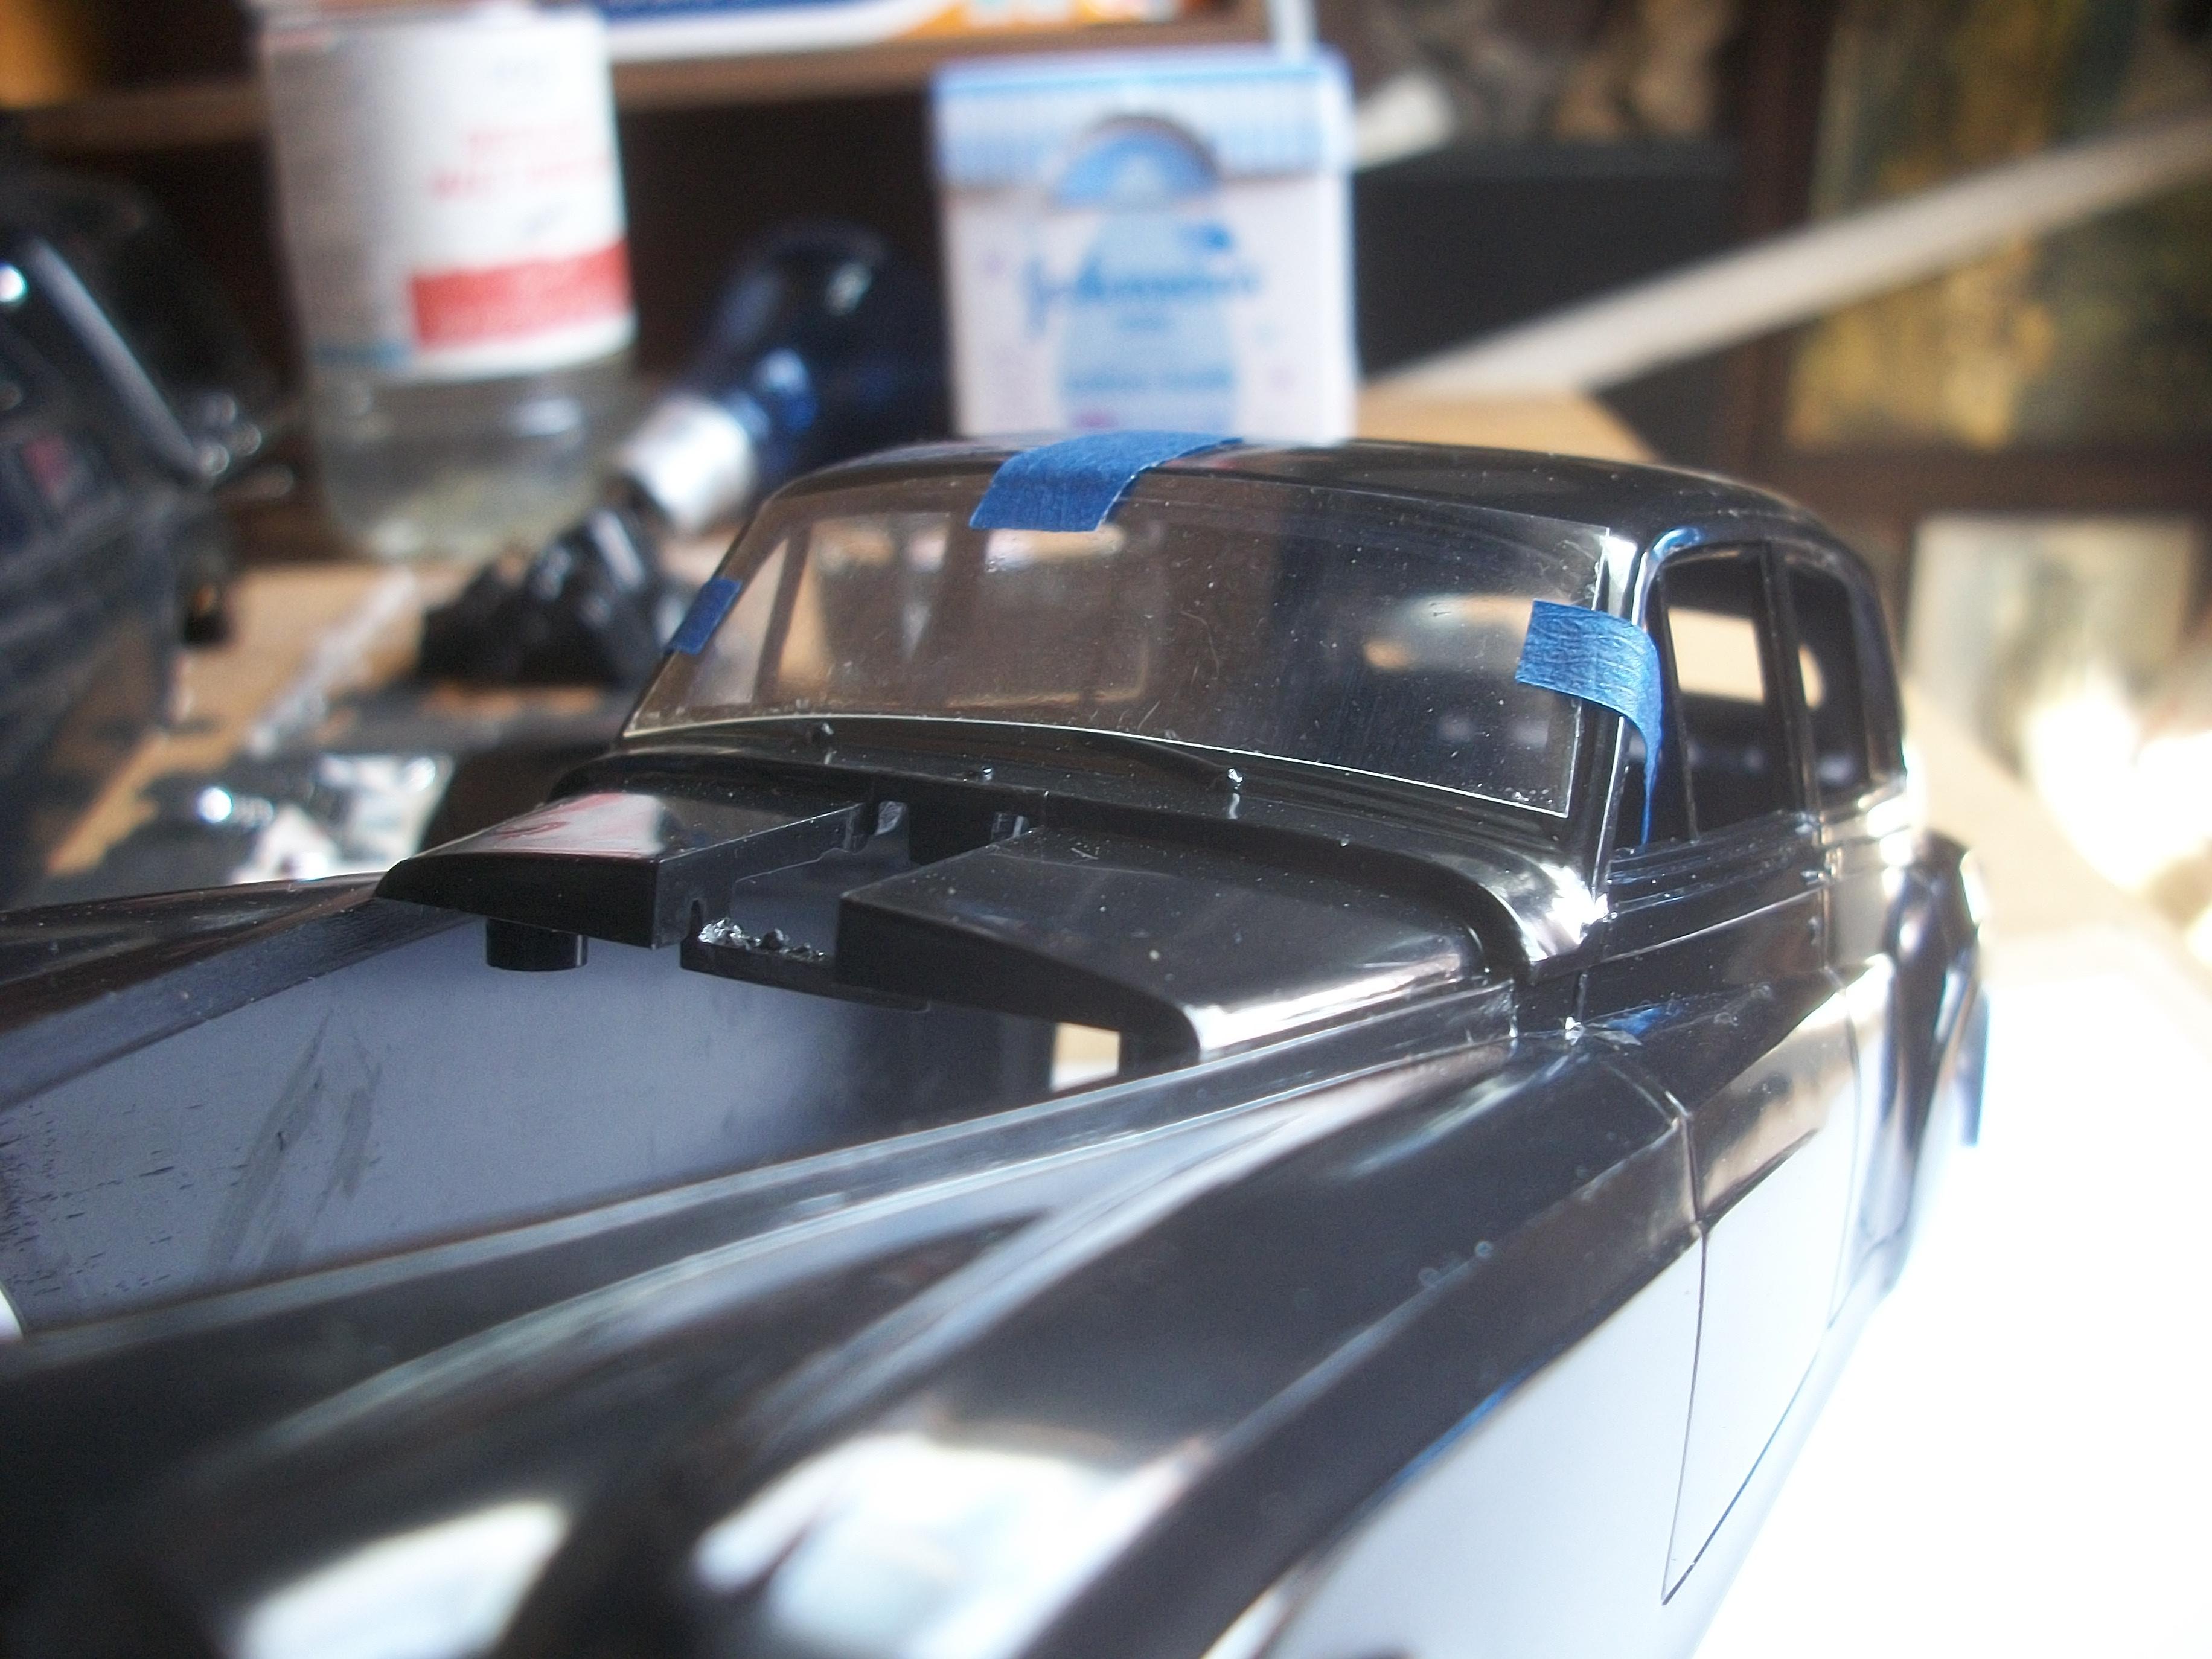
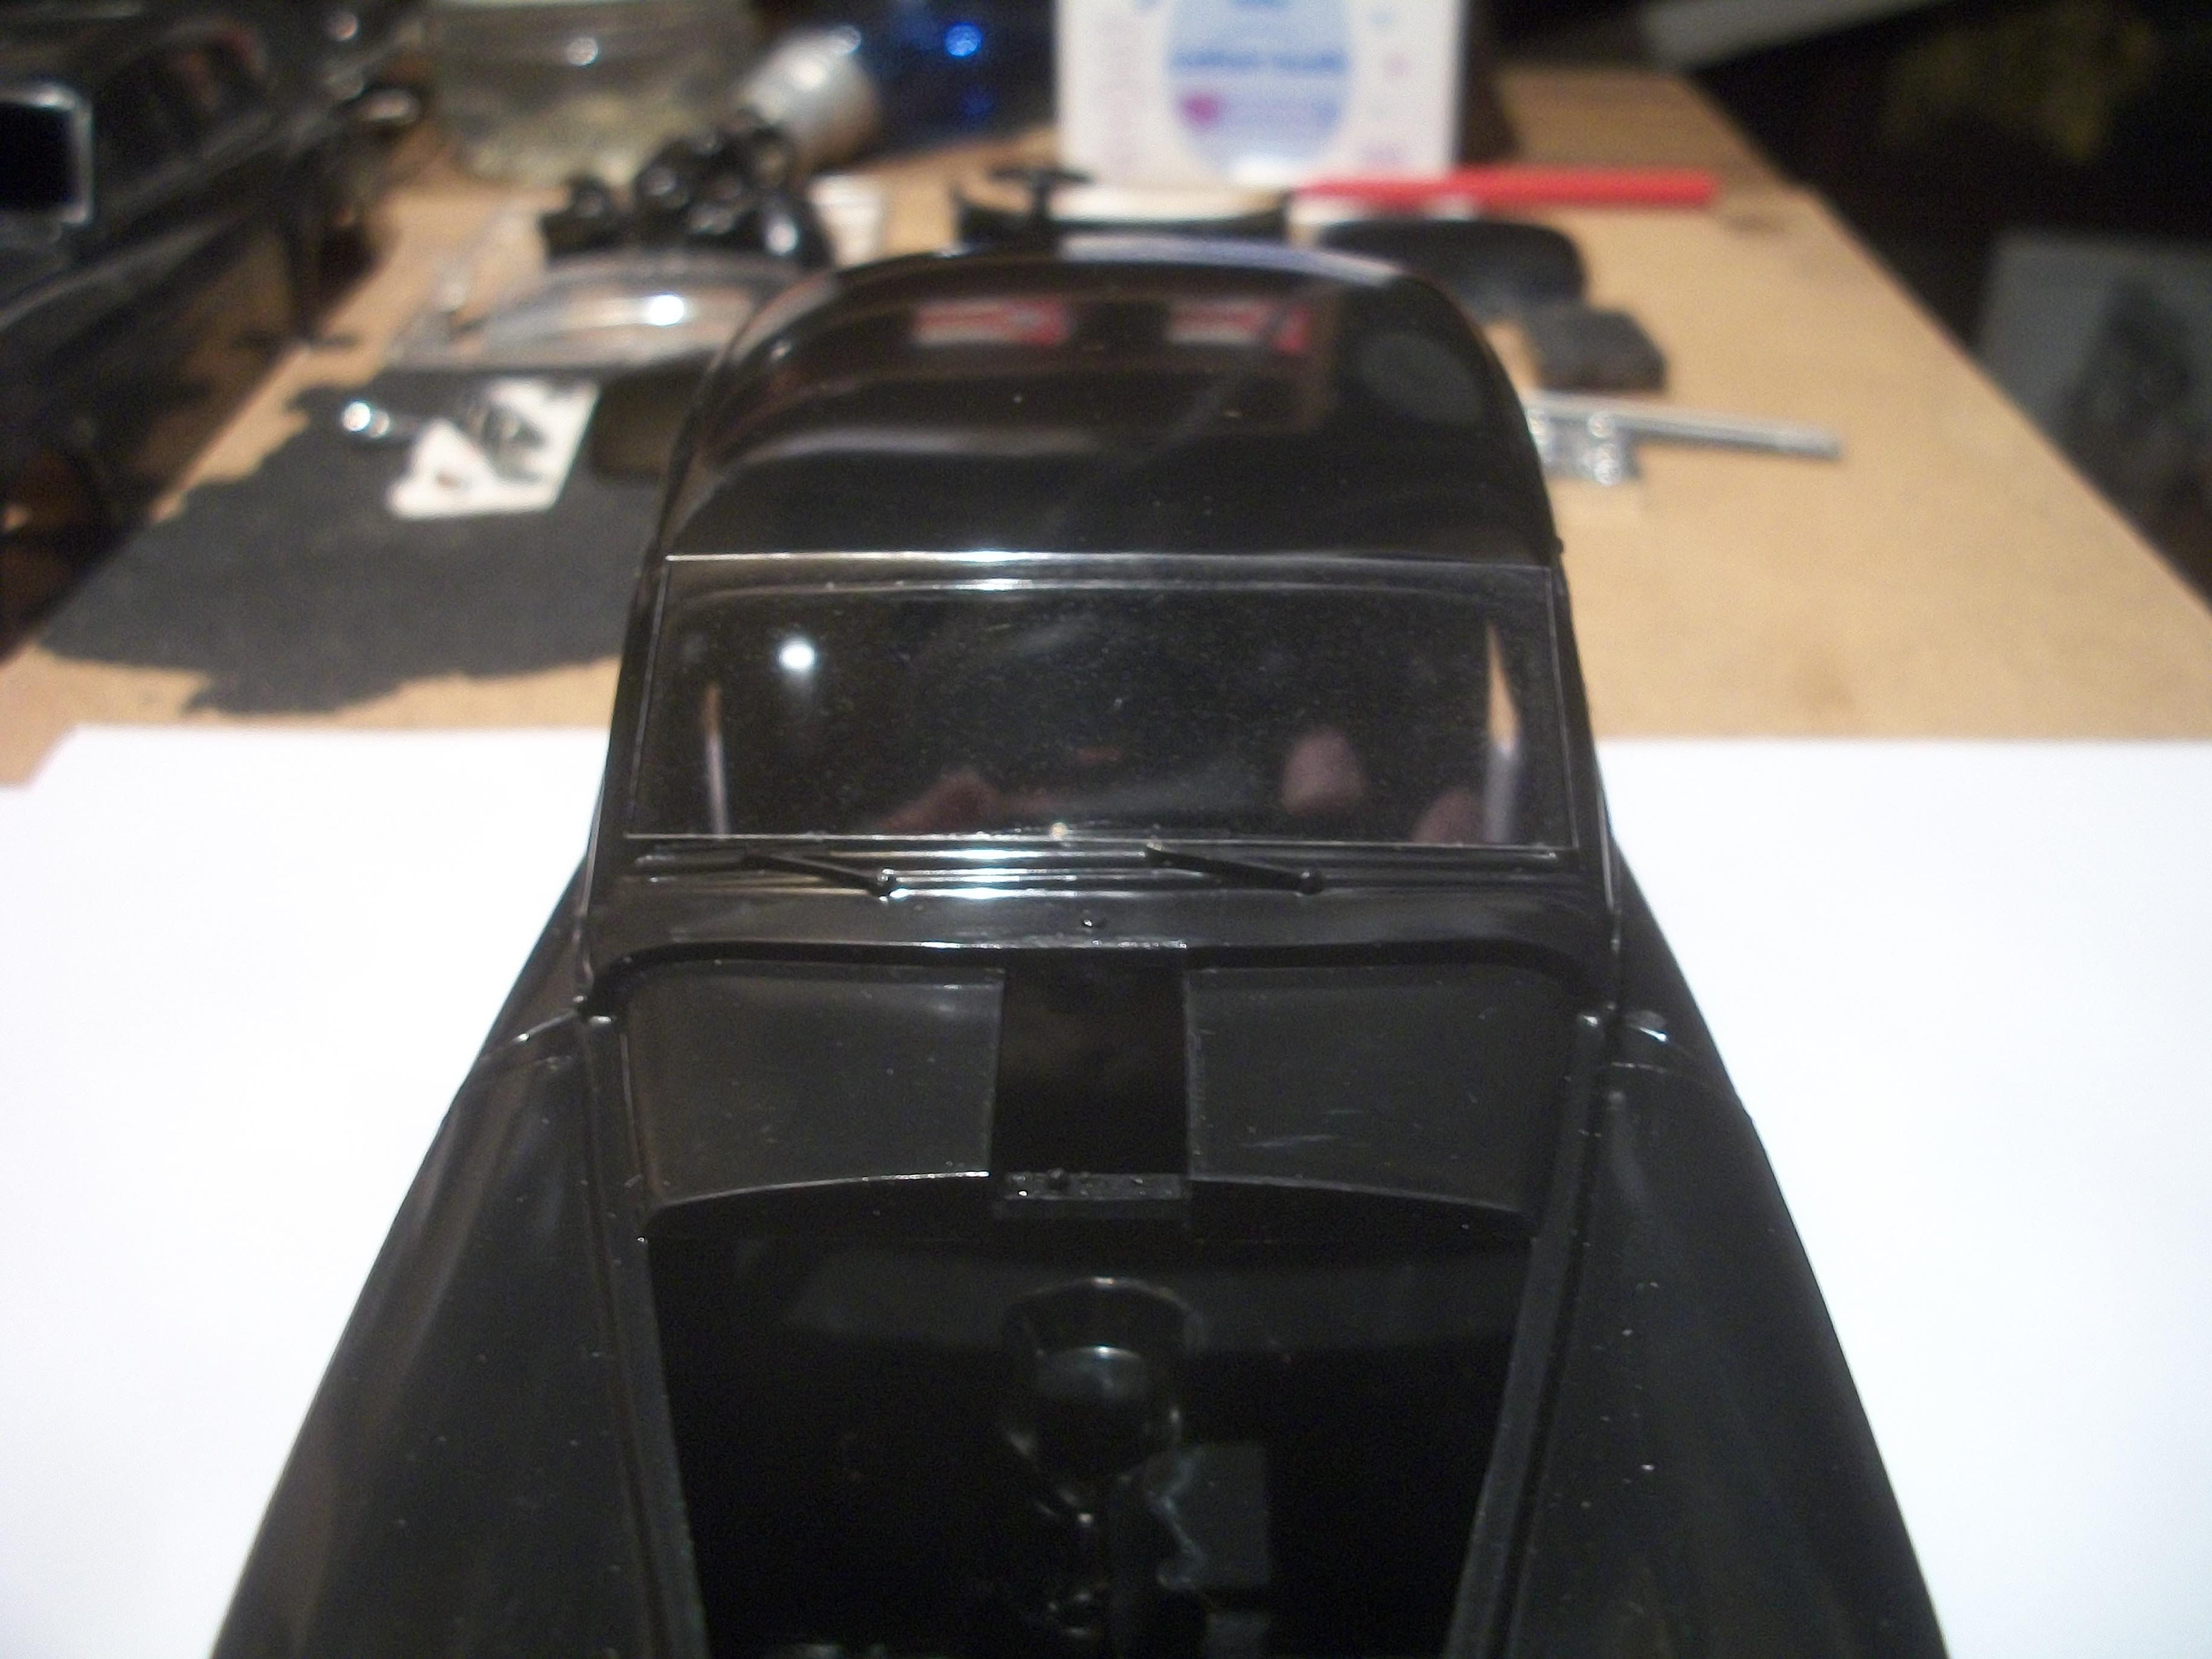
Using the kit supplied windshield part, I covered this with blue tape and cut around the perimeter of the screen. Removing the blue tape, allowed me to press the tape onto the surface of the clear plastic film . . . Once carefully cut out, following the outline of the tape, the screen was taped onto the inside of the body first of all. Then I mounted the screen onto the outside of the body, again using tape to hold it in place. I shall study the following photos more closely over the next day or so, and then decide which approach is more realistic, so inside or outside the windscreen frame . . . Then there is a third option available, which would be to mount the glass into the frame, as it would be on the actual 1:1 scale car. This method would require some reduction in the dimensions of the screen by a small amount, and also there would not be much material on which to apply PVA glue, in terms of the screen plastic material . . . The rear window was also cut and taped to the inside of the body at the rear of the car, but this was done from measurements and not using a tape template. I was outbid at the end of the Ebay auction for the Revell kit, during the very last minute, and by only one GBP . . . Starting price was only £15.00, and the final sale total was £27.02 . . . David
-
Rolls-Royce No Chemicals, No Paint, No Harmful Glues
Anglia105E replied to Anglia105E's topic in WIP: Model Cars
Thank you Michael . . . I shall continue to post more interesting updates during the next few days and weeks as this project develops . . . David -
Rolls-Royce No Chemicals, No Paint, No Harmful Glues
Anglia105E replied to Anglia105E's topic in WIP: Model Cars
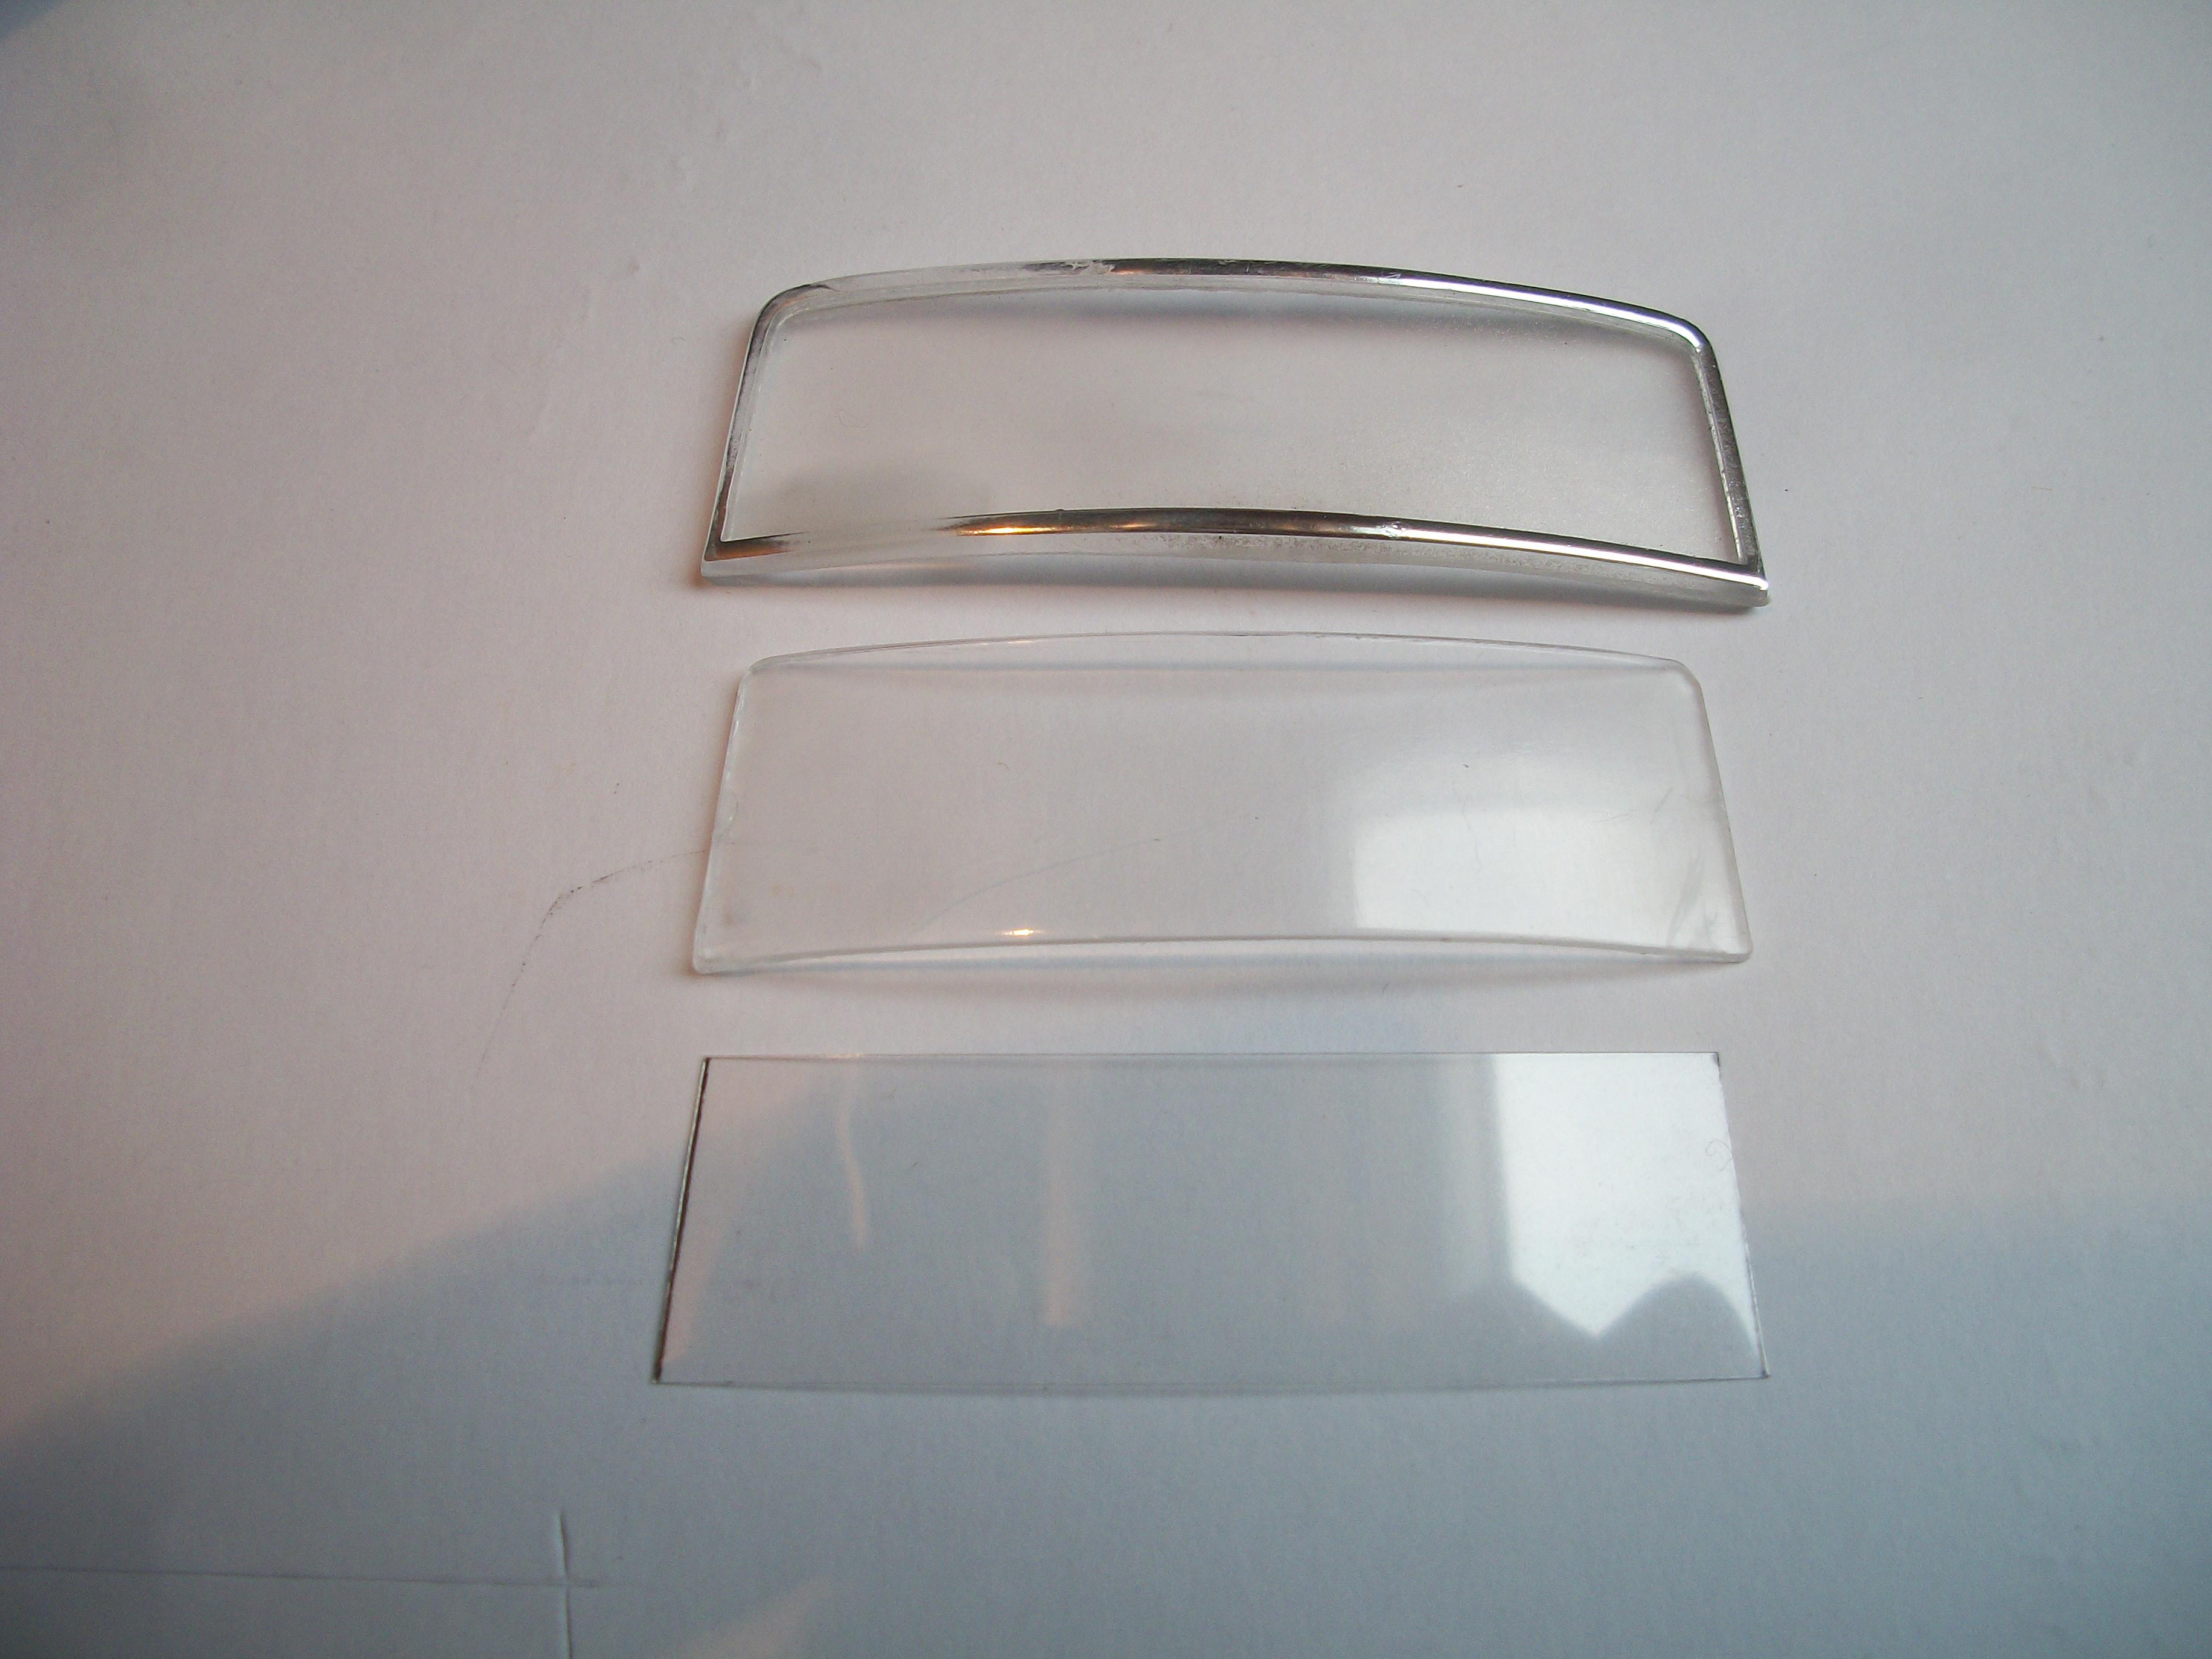
The following photo shows three windscreens / windshields . . . The screen at the top is the Franklin Mint diecast version, with it's chrome surround as part of the screen. The screen in the middle going downwards is the kit supplied screen part that is included in the Entex / Minicraft / Revell kits. The screen at the bottom of these three is my piece of cutout clear plastic film . . . As part of the process I shall use the masking tape method to determine the precise dimensions for a template . . . David
-
Rolls-Royce No Chemicals, No Paint, No Harmful Glues
Anglia105E replied to Anglia105E's topic in WIP: Model Cars
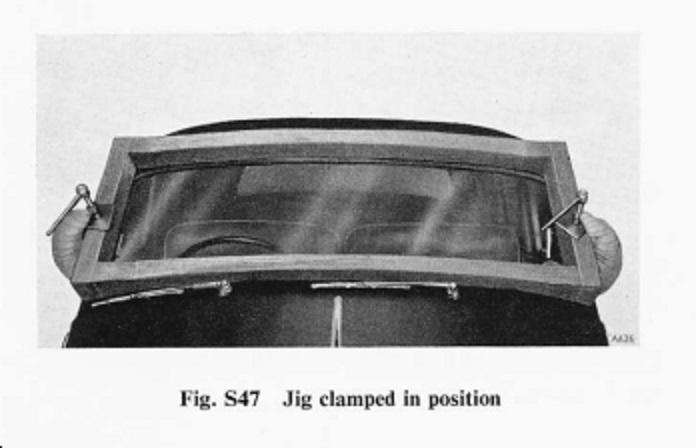
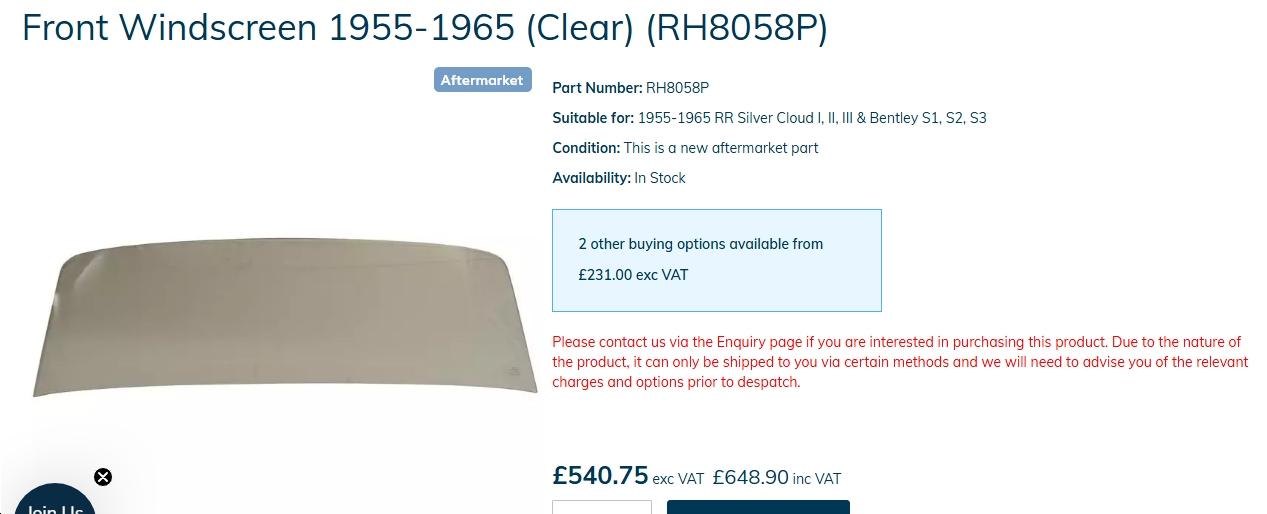
That is indeed excellent thinking on your part David . . . I was watching a YouTube video only yesterday, where the guy was showing how to use masking tape in exactly the same manner as you have just described. The curvature of the Silver Cloud screen is very subtle, but I agree that this third dimension is important. Here are two photos, one of the Jig that the Rolls-Royce factory used in order to fit Silver Cloud windscreens, and one showing the price of a real screen, which is very reasonable at £648.90 which is US $. 875.28 . . . David W.
-
Rolls-Royce No Chemicals, No Paint, No Harmful Glues
Anglia105E replied to Anglia105E's topic in WIP: Model Cars
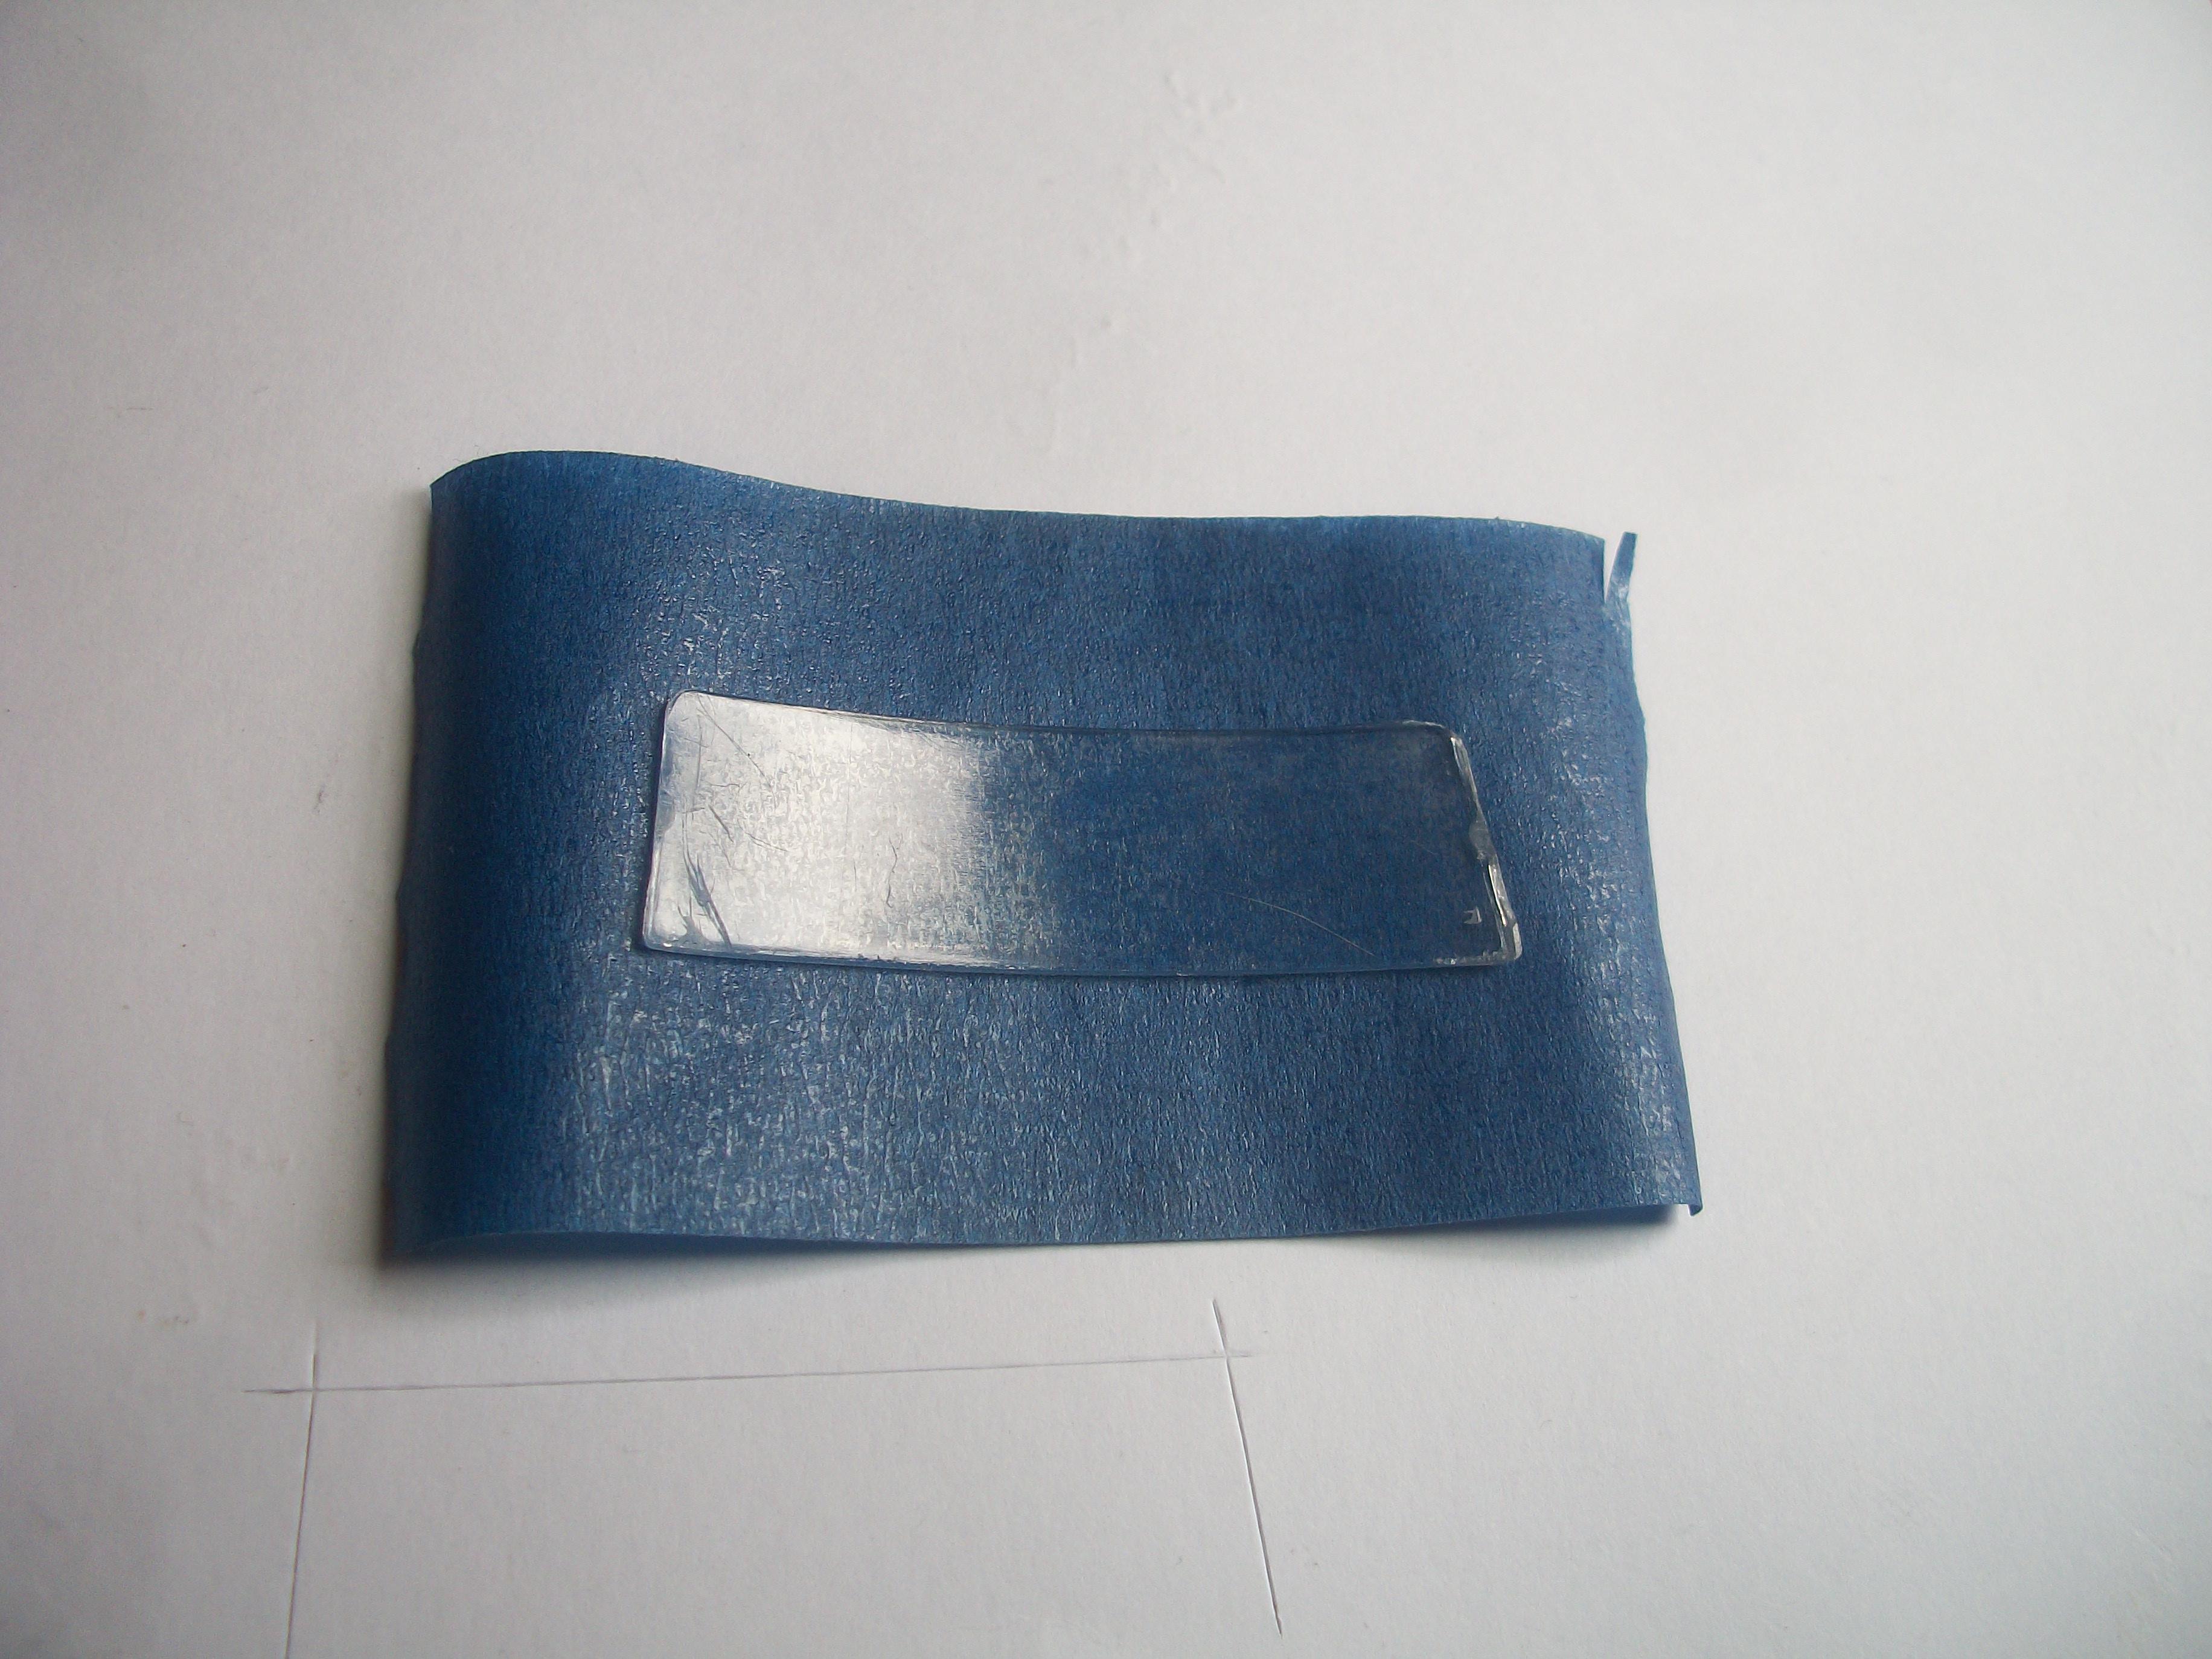
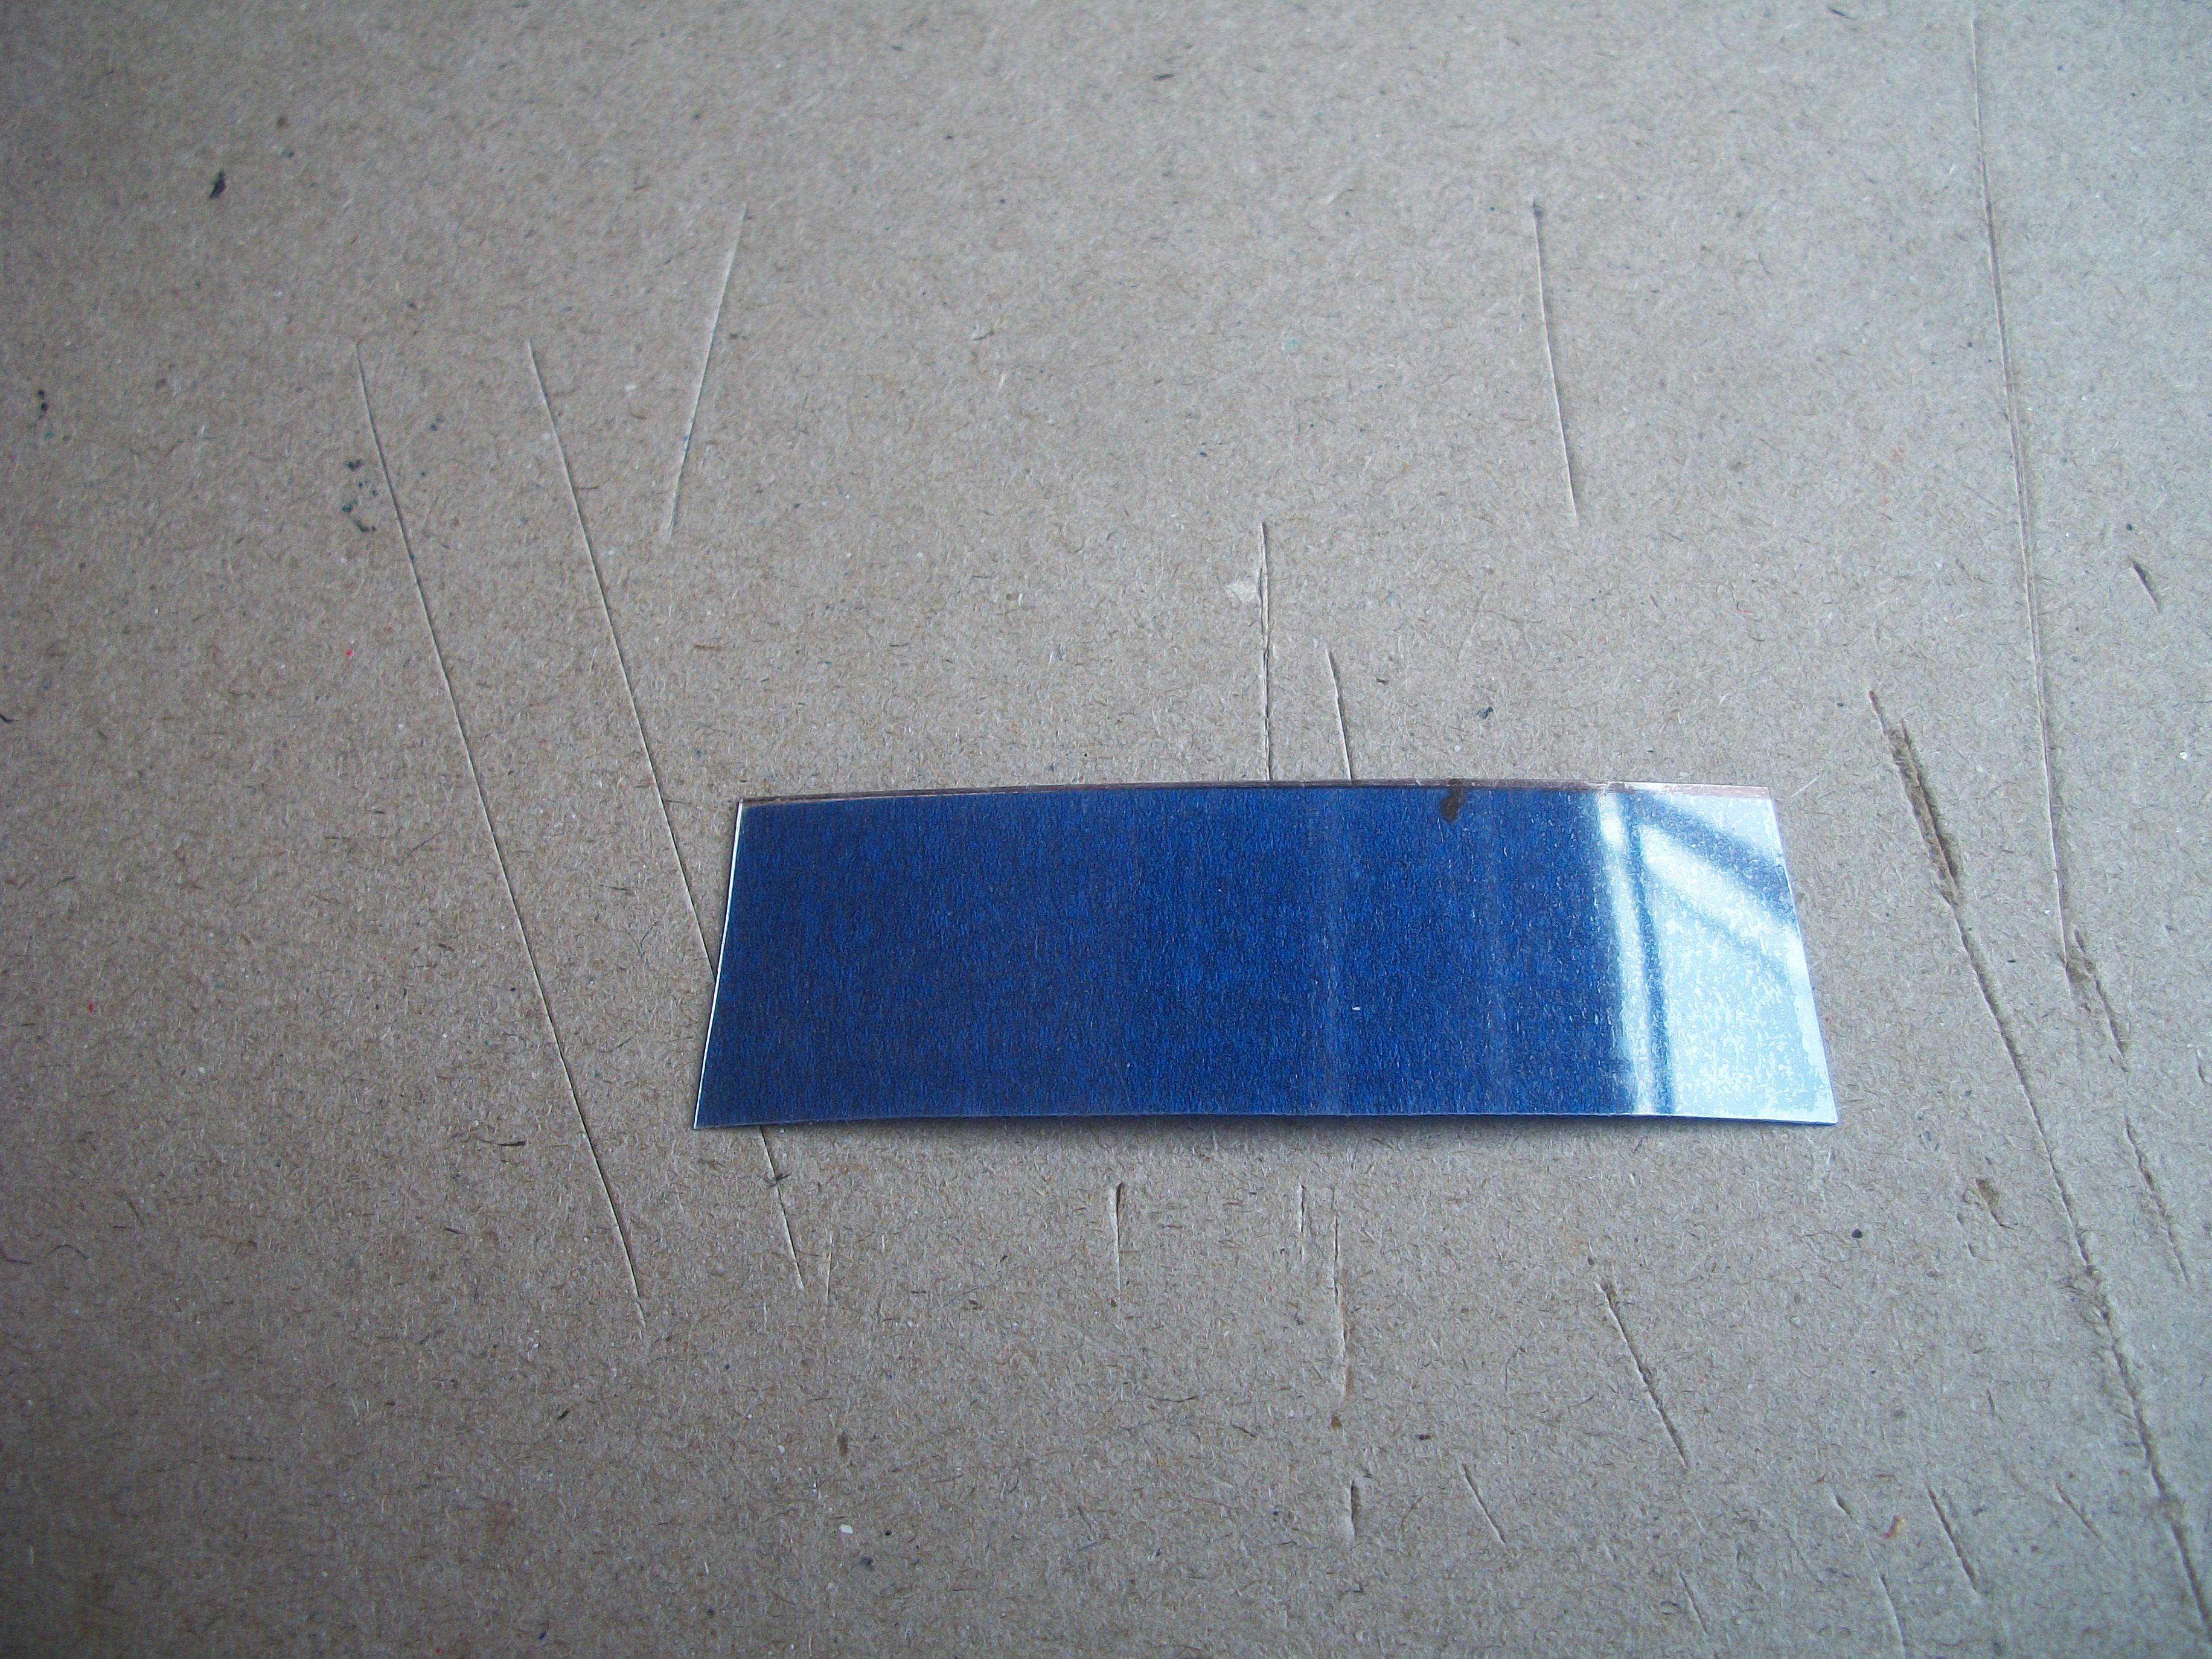
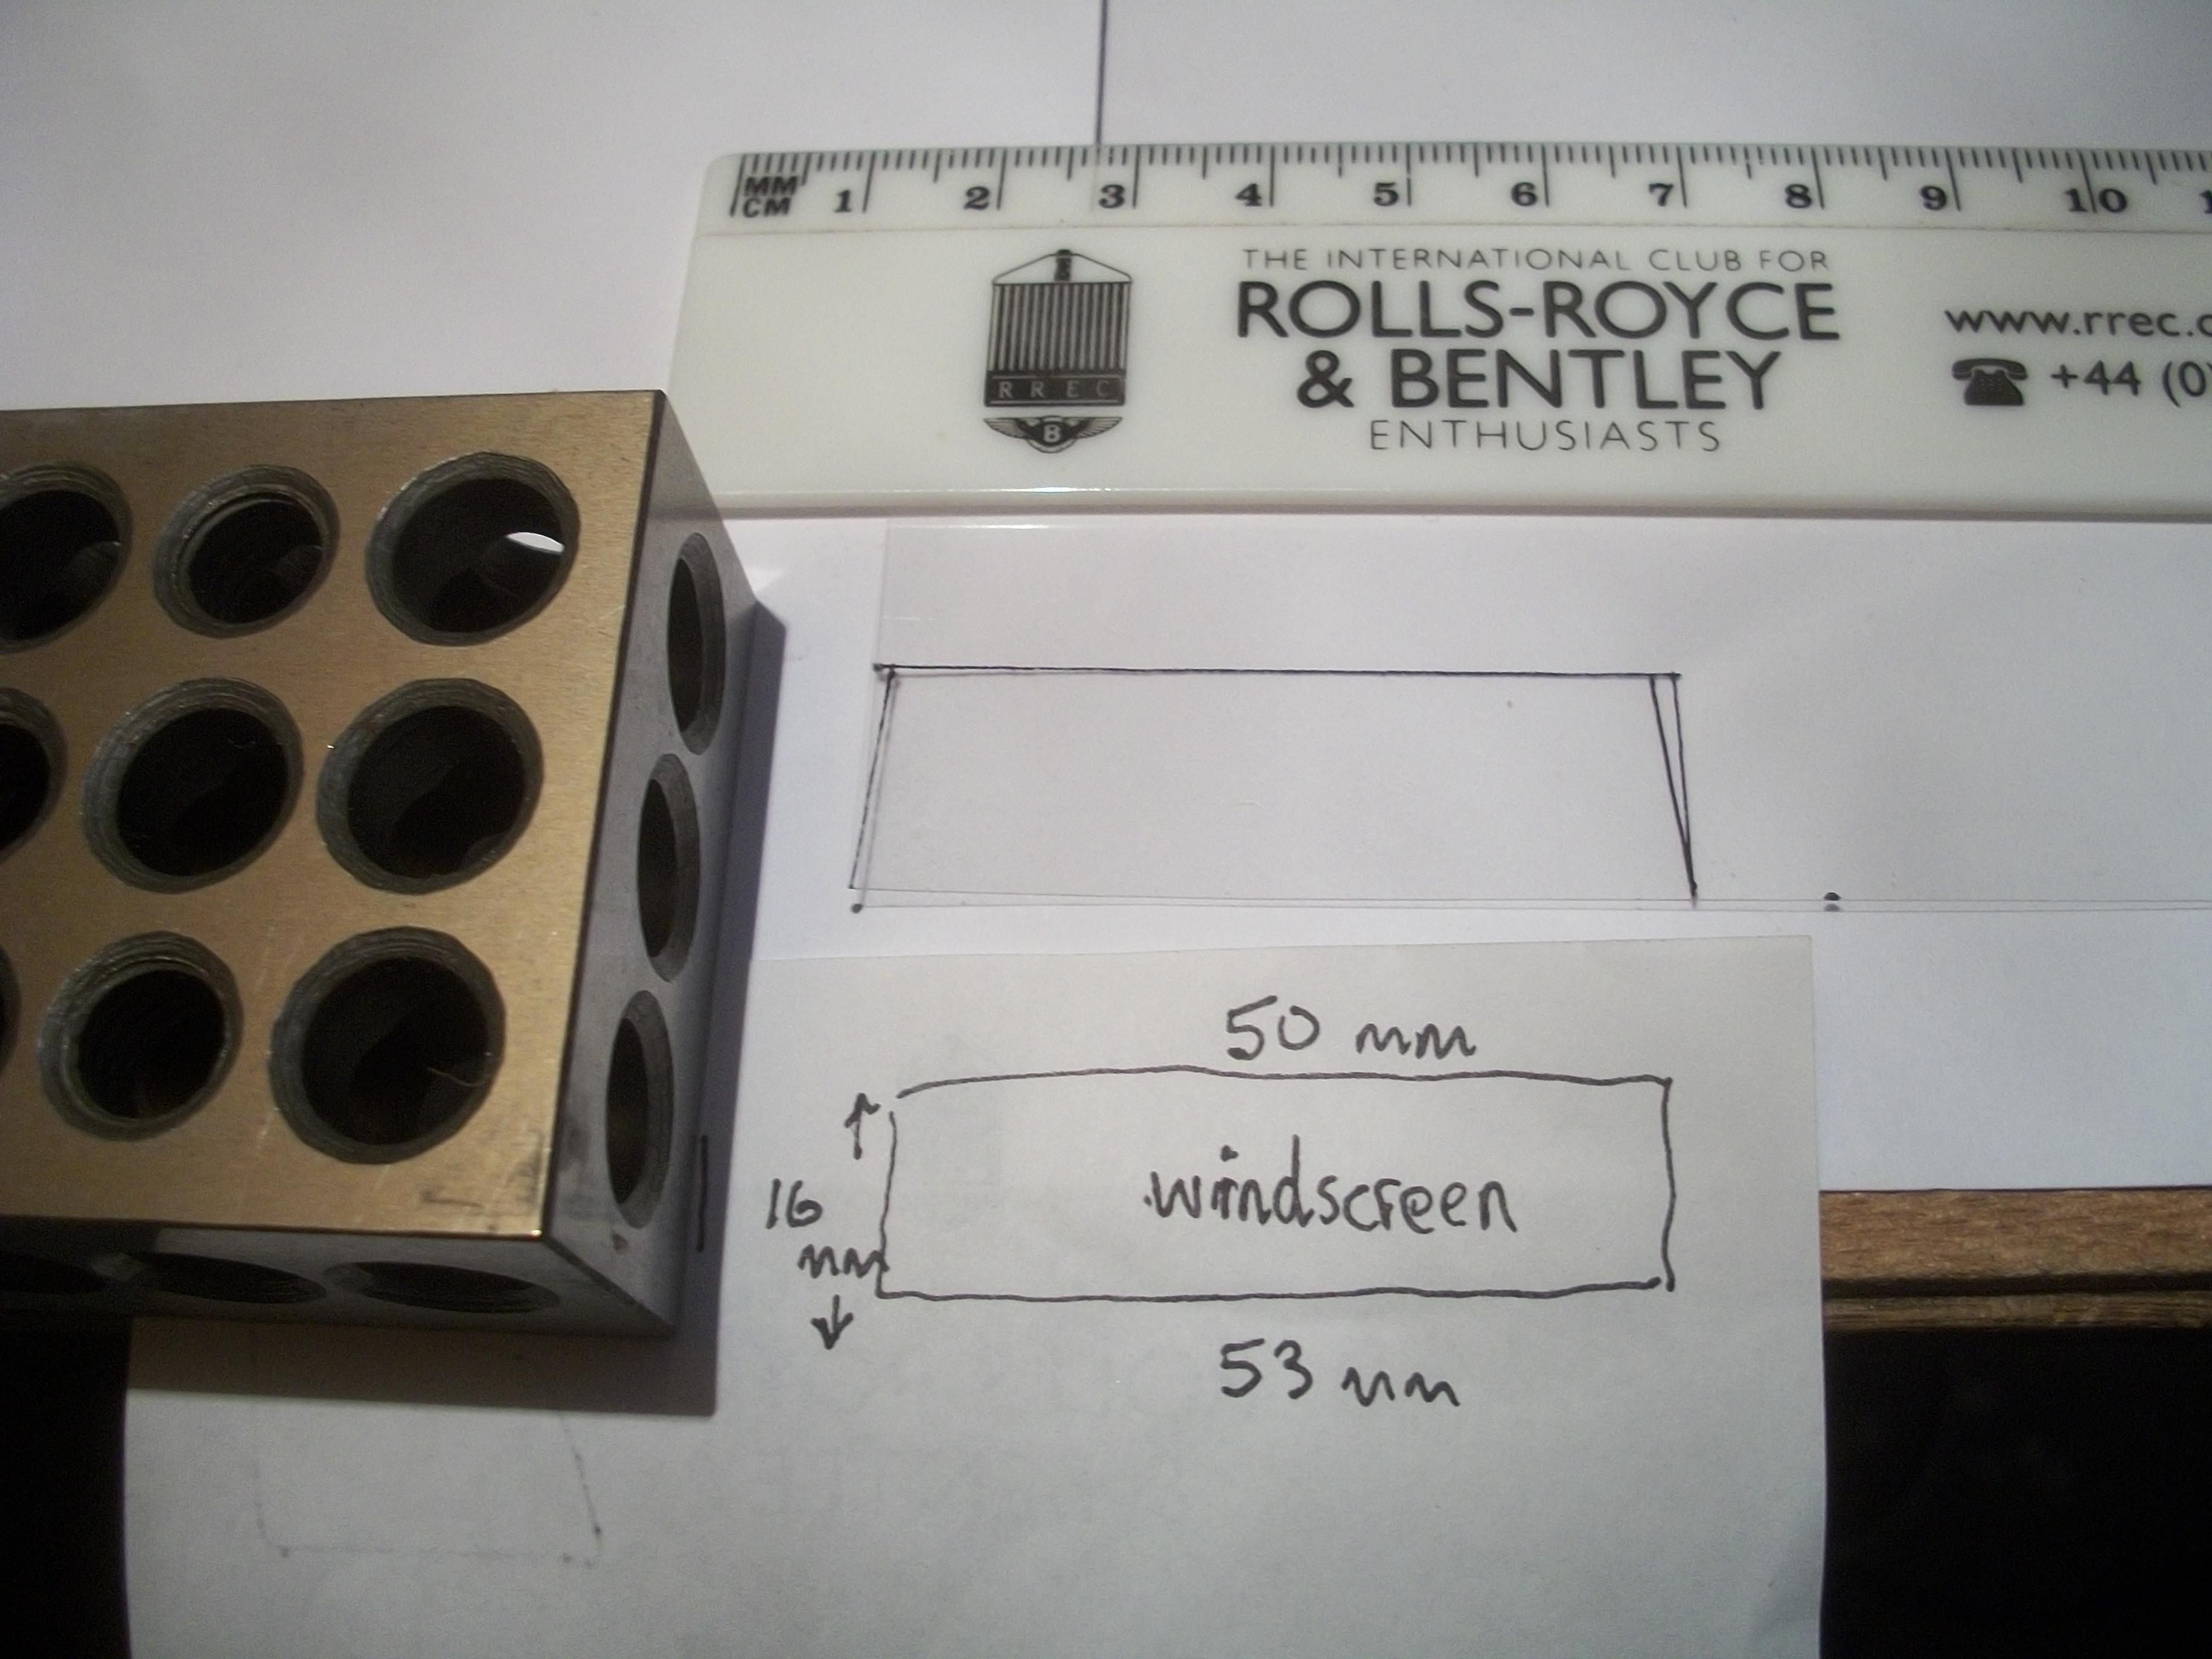
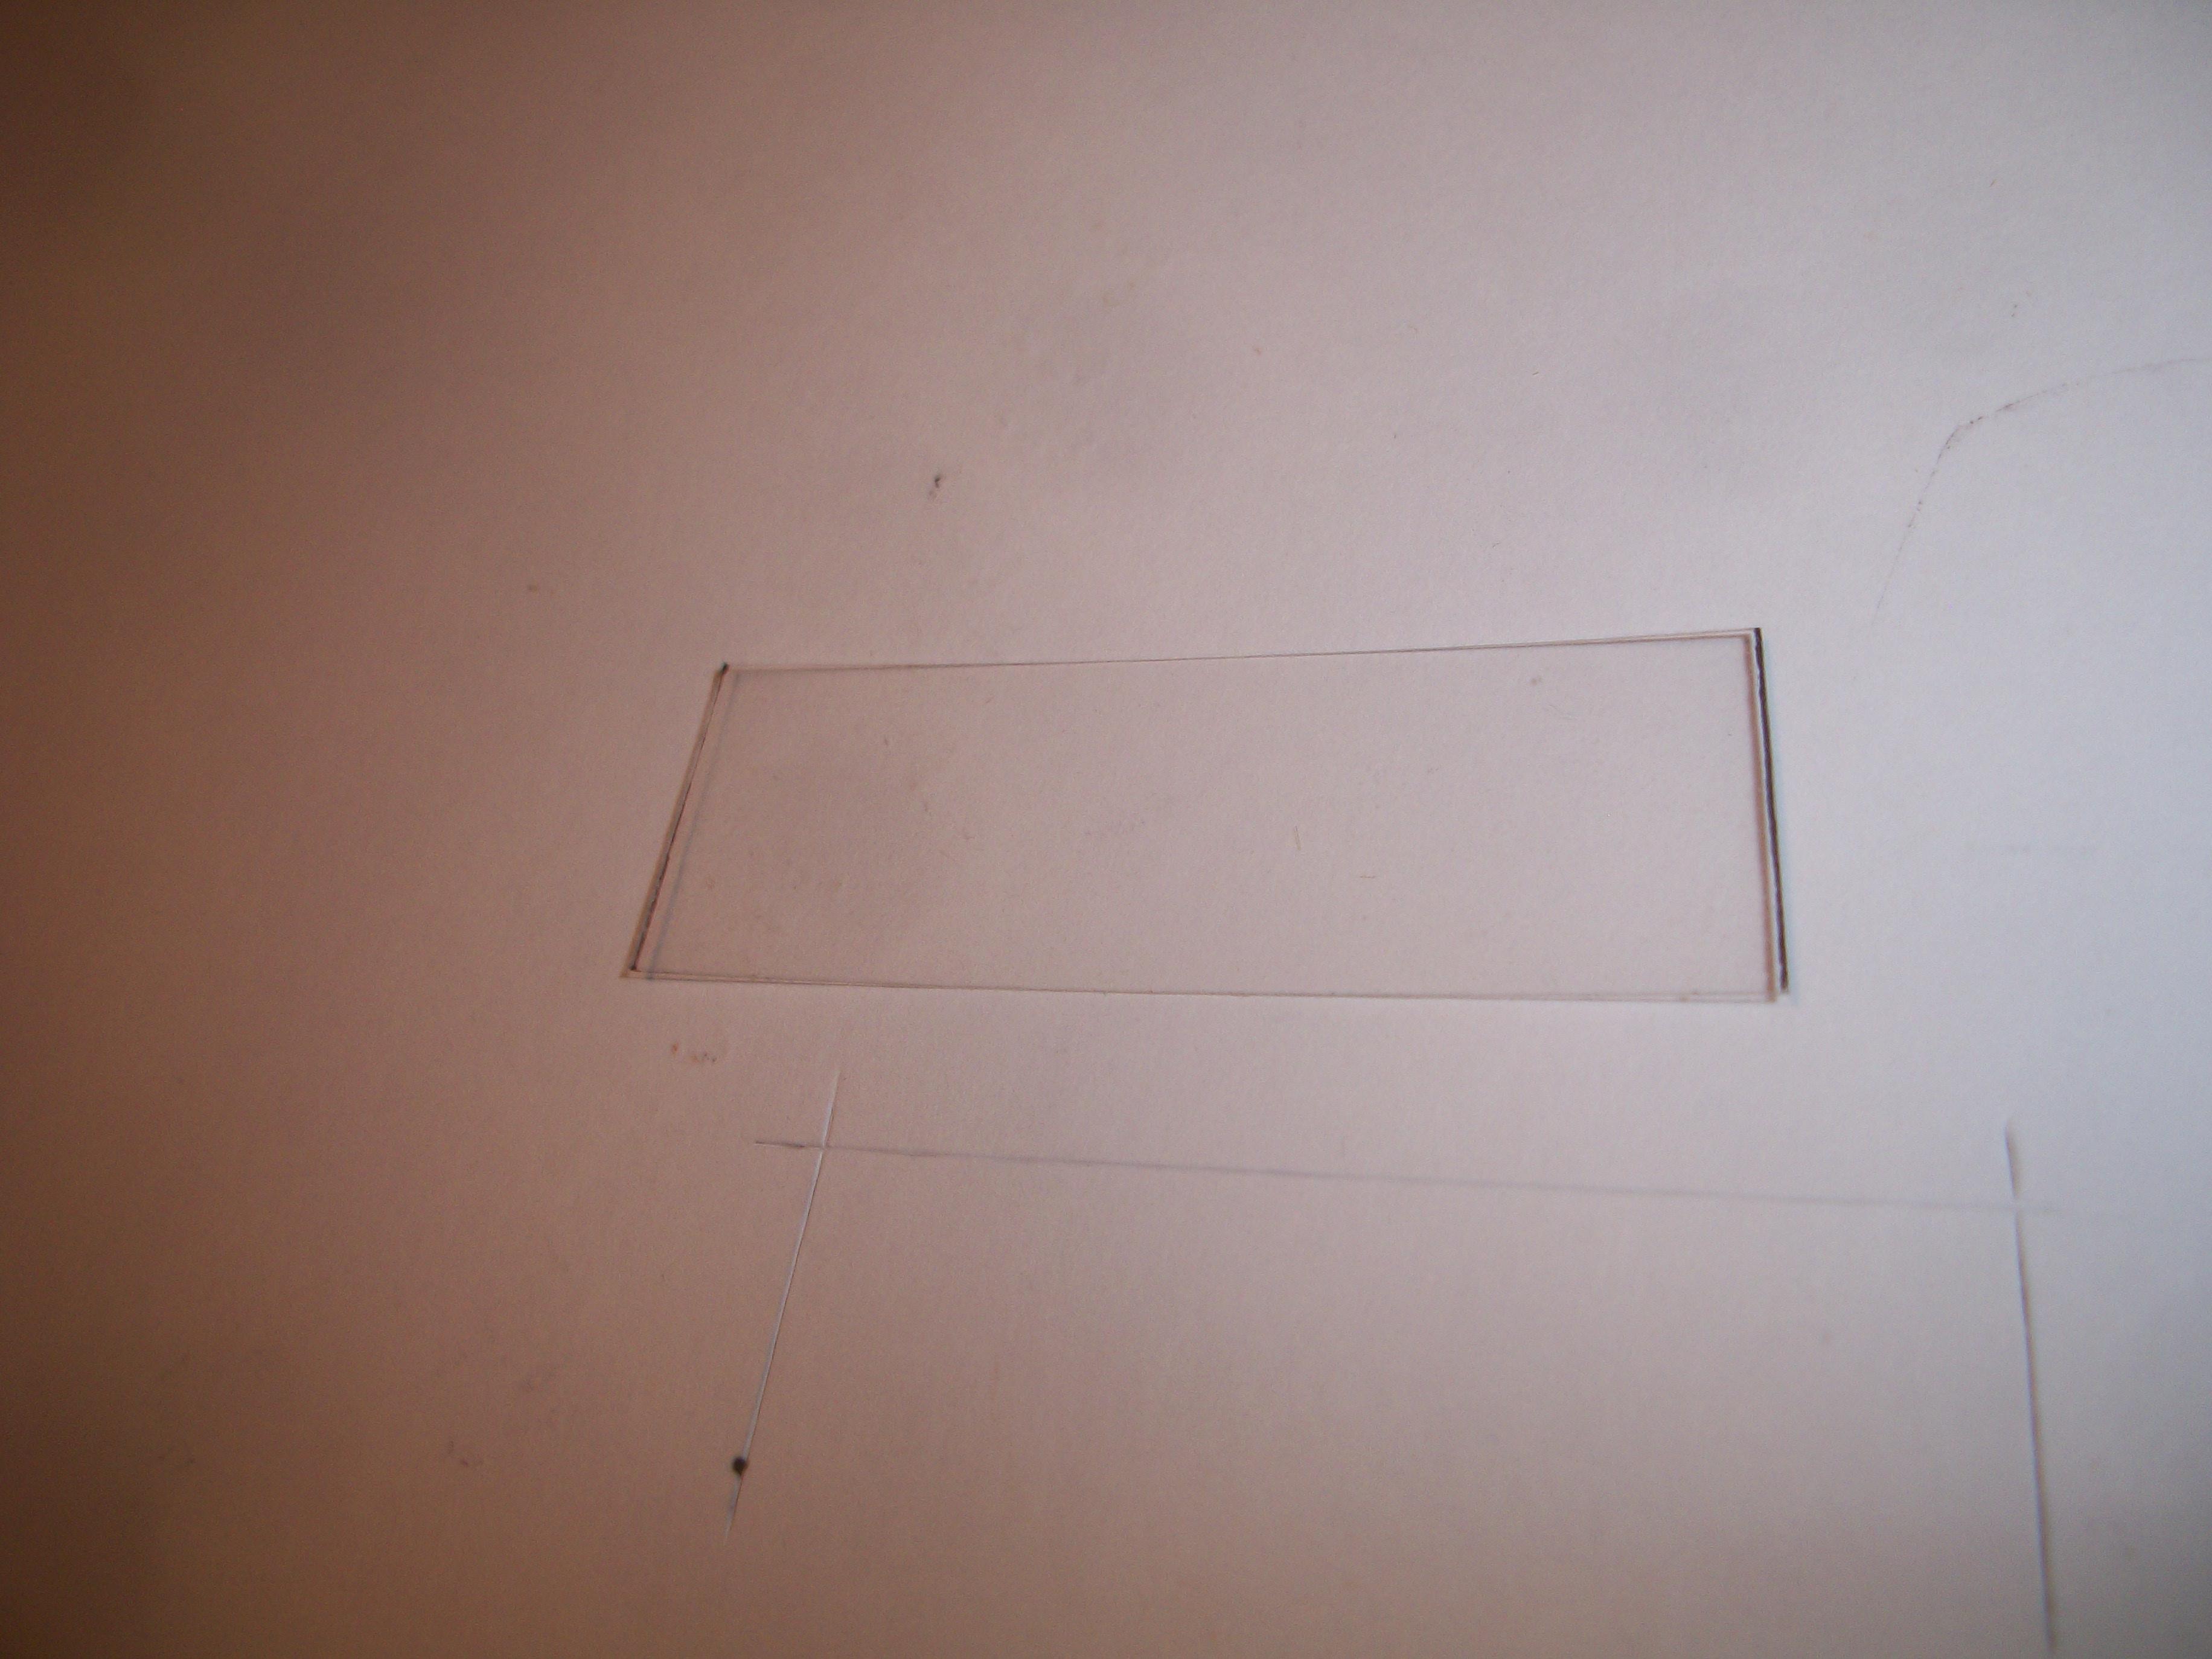
Turning my attention to the windscreen / windshield of this model, I measured precisely the dimensions of the part required. This came out at 50 mm for the top edge, 53 mm for the lower edge and 16 mm for each of the side edges . . . This positions the part on the outside of the windscreen frame, with around one millimetre of overlap. The part was cut out from a sheet of thin clear film and offered up as a test fit to the windscreen frame on the outside of the body . . . Now I need to think about how to mount this thin clear film screen onto the body . . . I am toying with the idea of reducing the dimensions of the screen part very slightly, and then attempting to mount the screen just inside the frame, from the outside, exactly how this would be done on the real car. There would of course be a rubber seal surrounding the glass on the real car . . . David
-
Having completed the Phantom III during 7 months of last year, and the Bungalow during 7 months of this year, I am now working on my second build for this year, so you are winning at four completed !!! Life is not a race . . . David W.
-
Nicely done Oldsmobile stock car David G., . . . Another one completed ! David W.
-
Rolls-Royce No Chemicals, No Paint, No Harmful Glues
Anglia105E replied to Anglia105E's topic in WIP: Model Cars
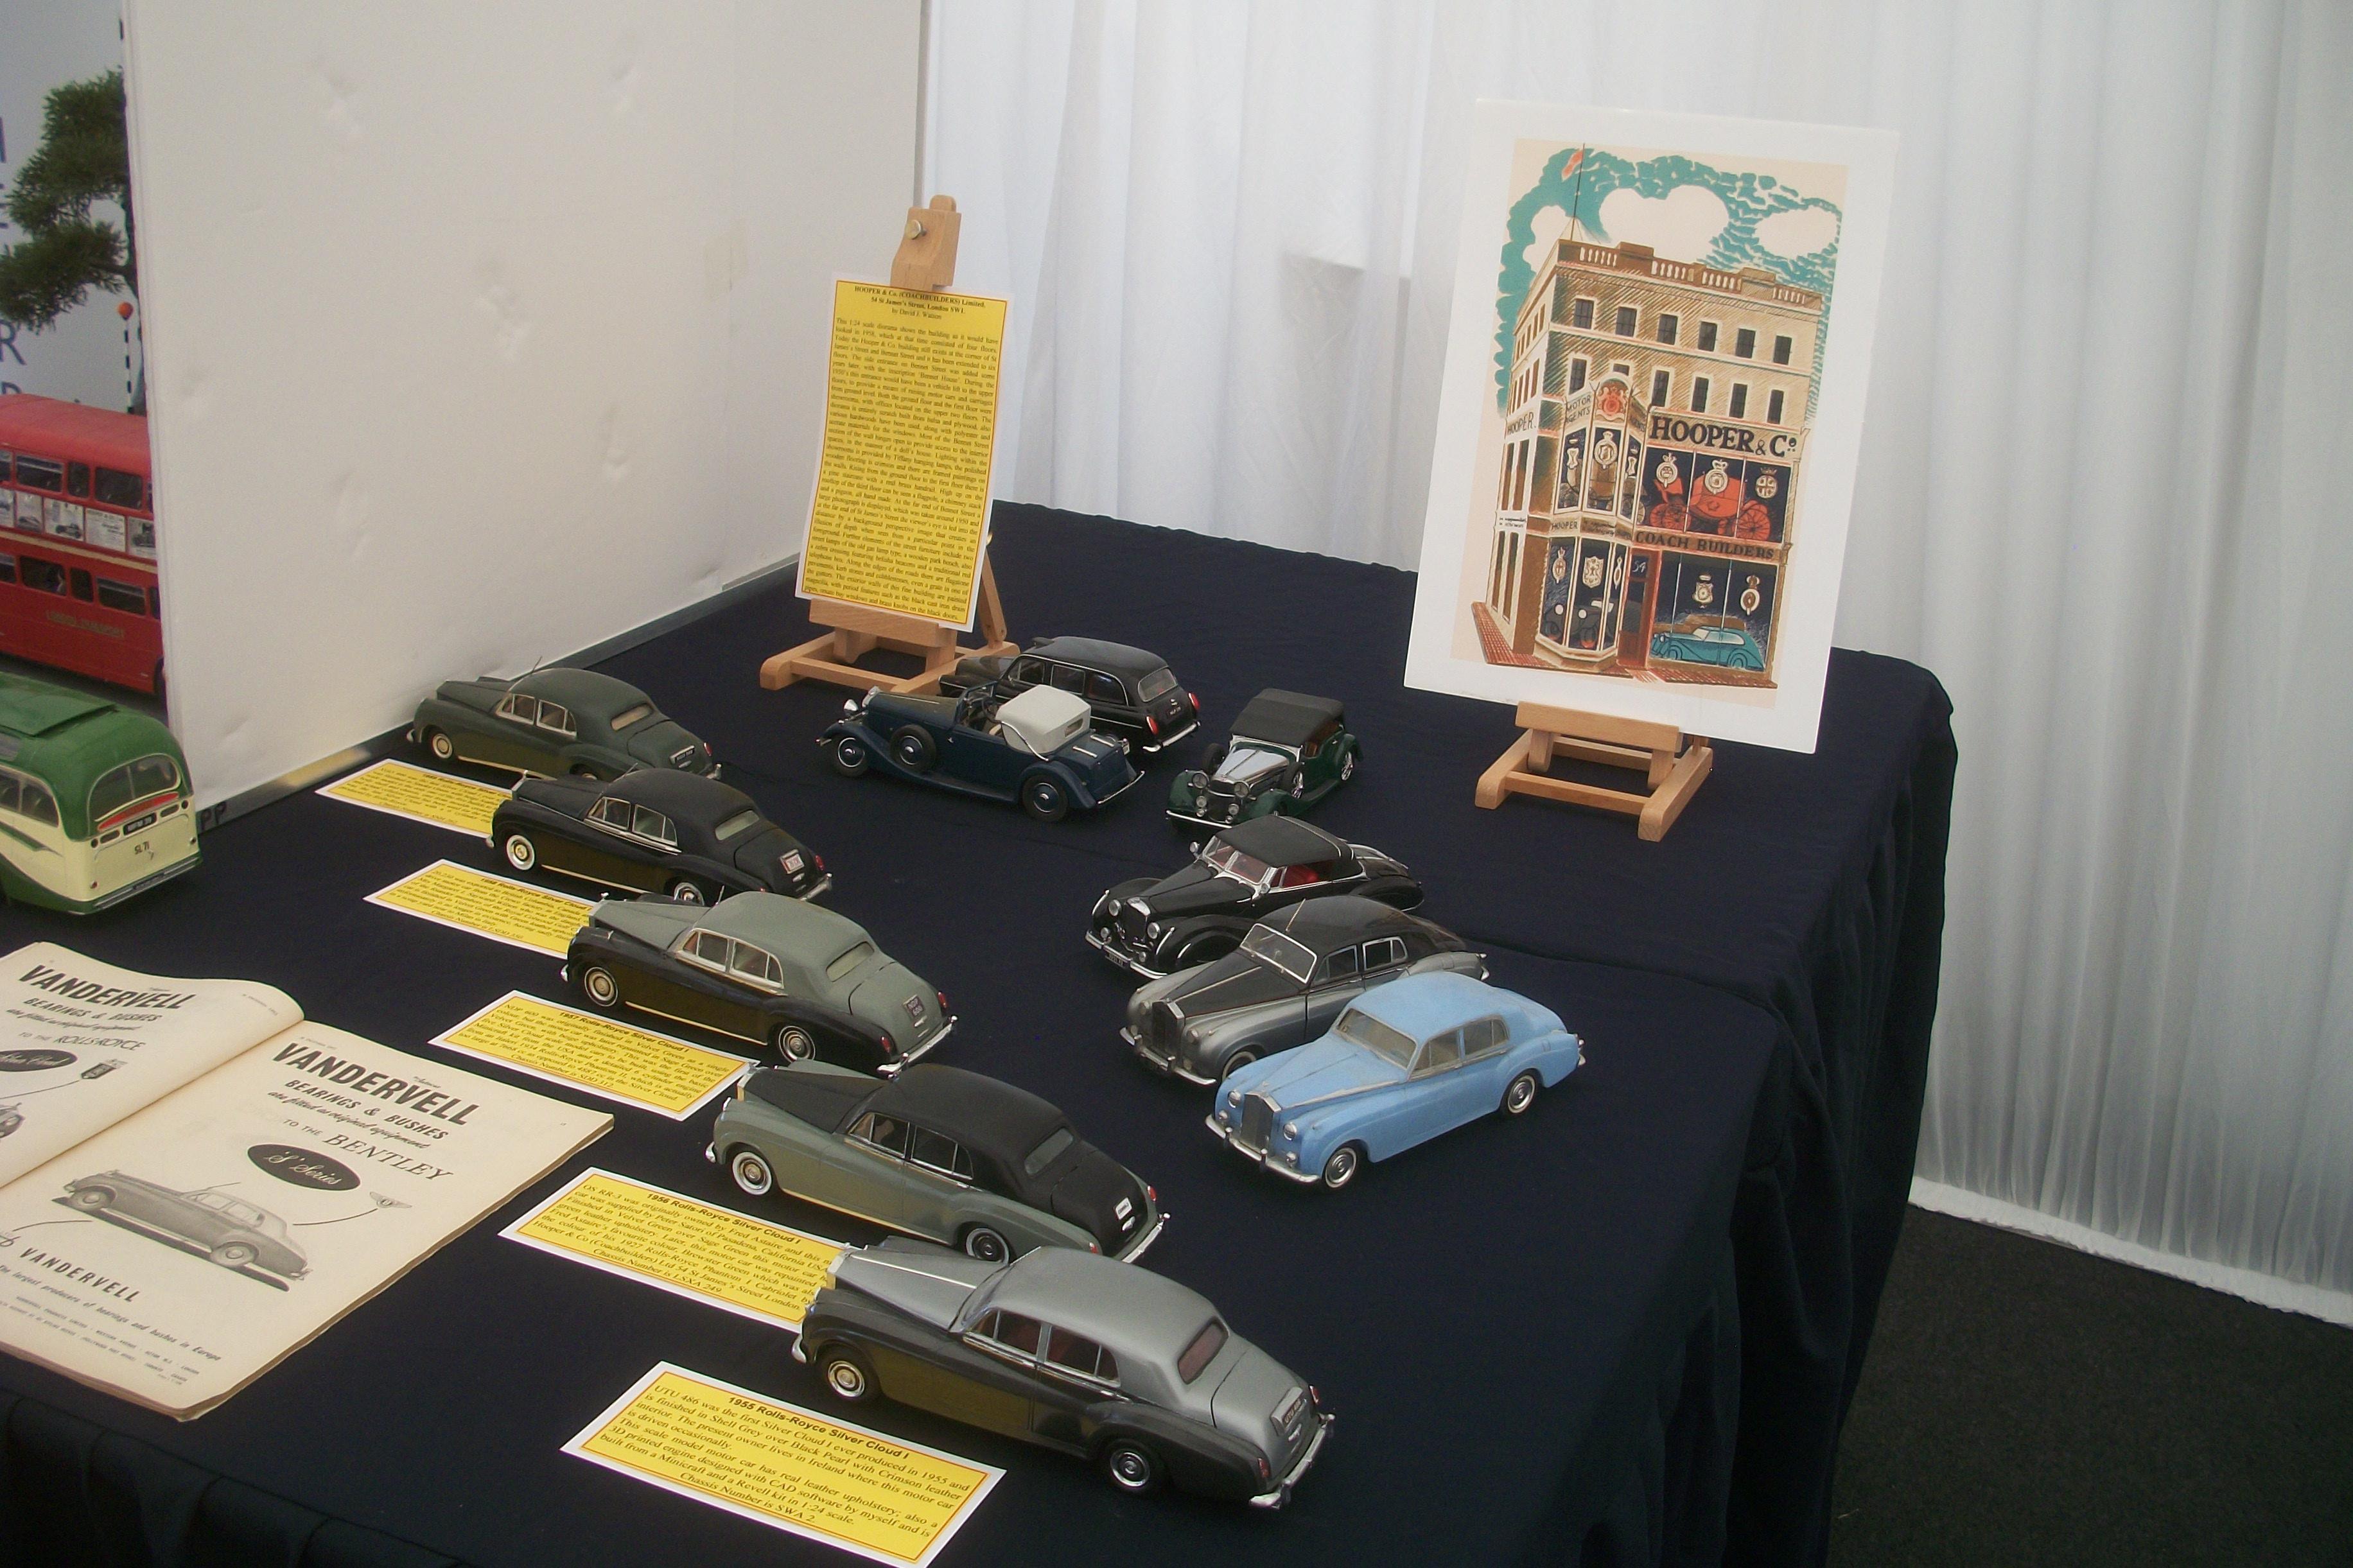
Thanks Jose . . . You did a great job with your incomplete glue bomb back then, and you didn't have much to start from . . . The display in the previous photo was my tables at the 2018 Rolls-Royce Enthusiasts Club Annual Rally, held at Burghley House in Stamford, England . . . David -
Rolls-Royce No Chemicals, No Paint, No Harmful Glues
Anglia105E replied to Anglia105E's topic in WIP: Model Cars
When you explain it like that Jose, I can understand why this is not a super detailed kit. The Hubley promo in blue plastic came first, around 1960, and was distributed to motor car dealers to begin with. Then came the Hubley version of the kit, some in blue plastic and later in grey plastic. Eventually, the kit was produced in black plastic by Revell and Minicraft . . . As a toy in the early'60's this was a very accurate representation of a Rolls-Royce motor car. You can see the Hubley promo on display, just right of centre in this photo, and it compares well to my built models from kits . . . David
-
Rolls-Royce No Chemicals, No Paint, No Harmful Glues
Anglia105E replied to Anglia105E's topic in WIP: Model Cars
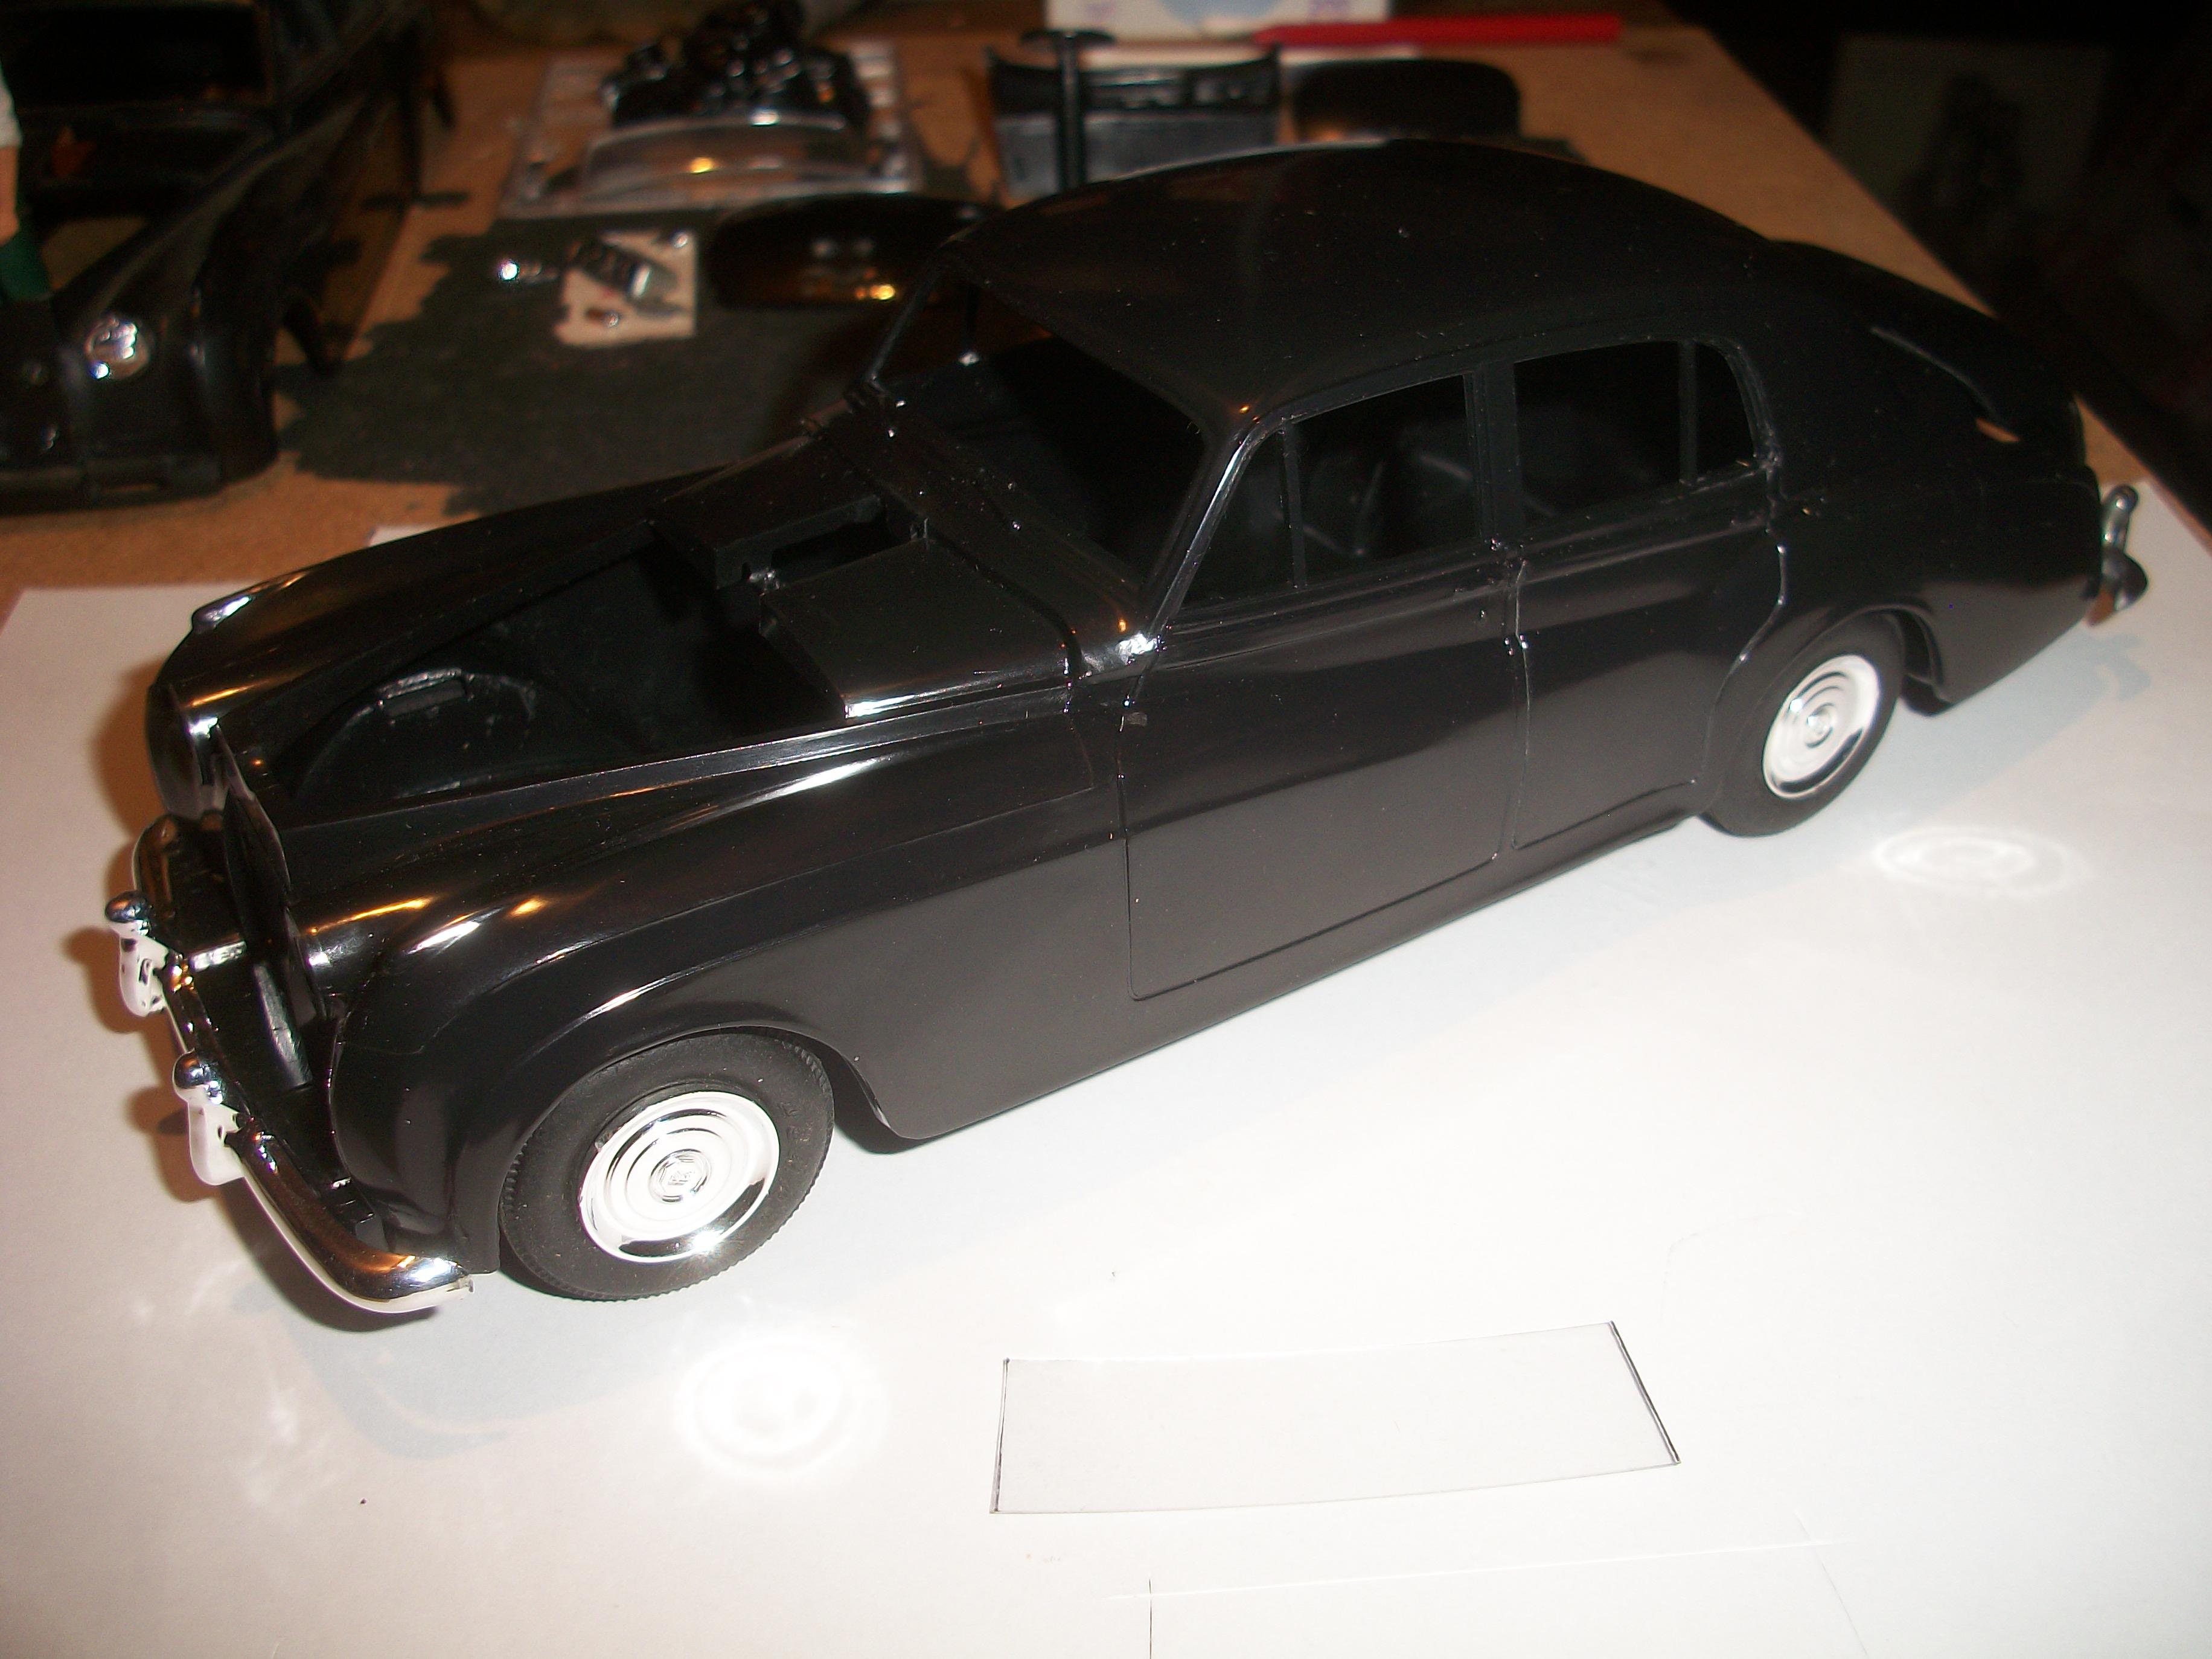
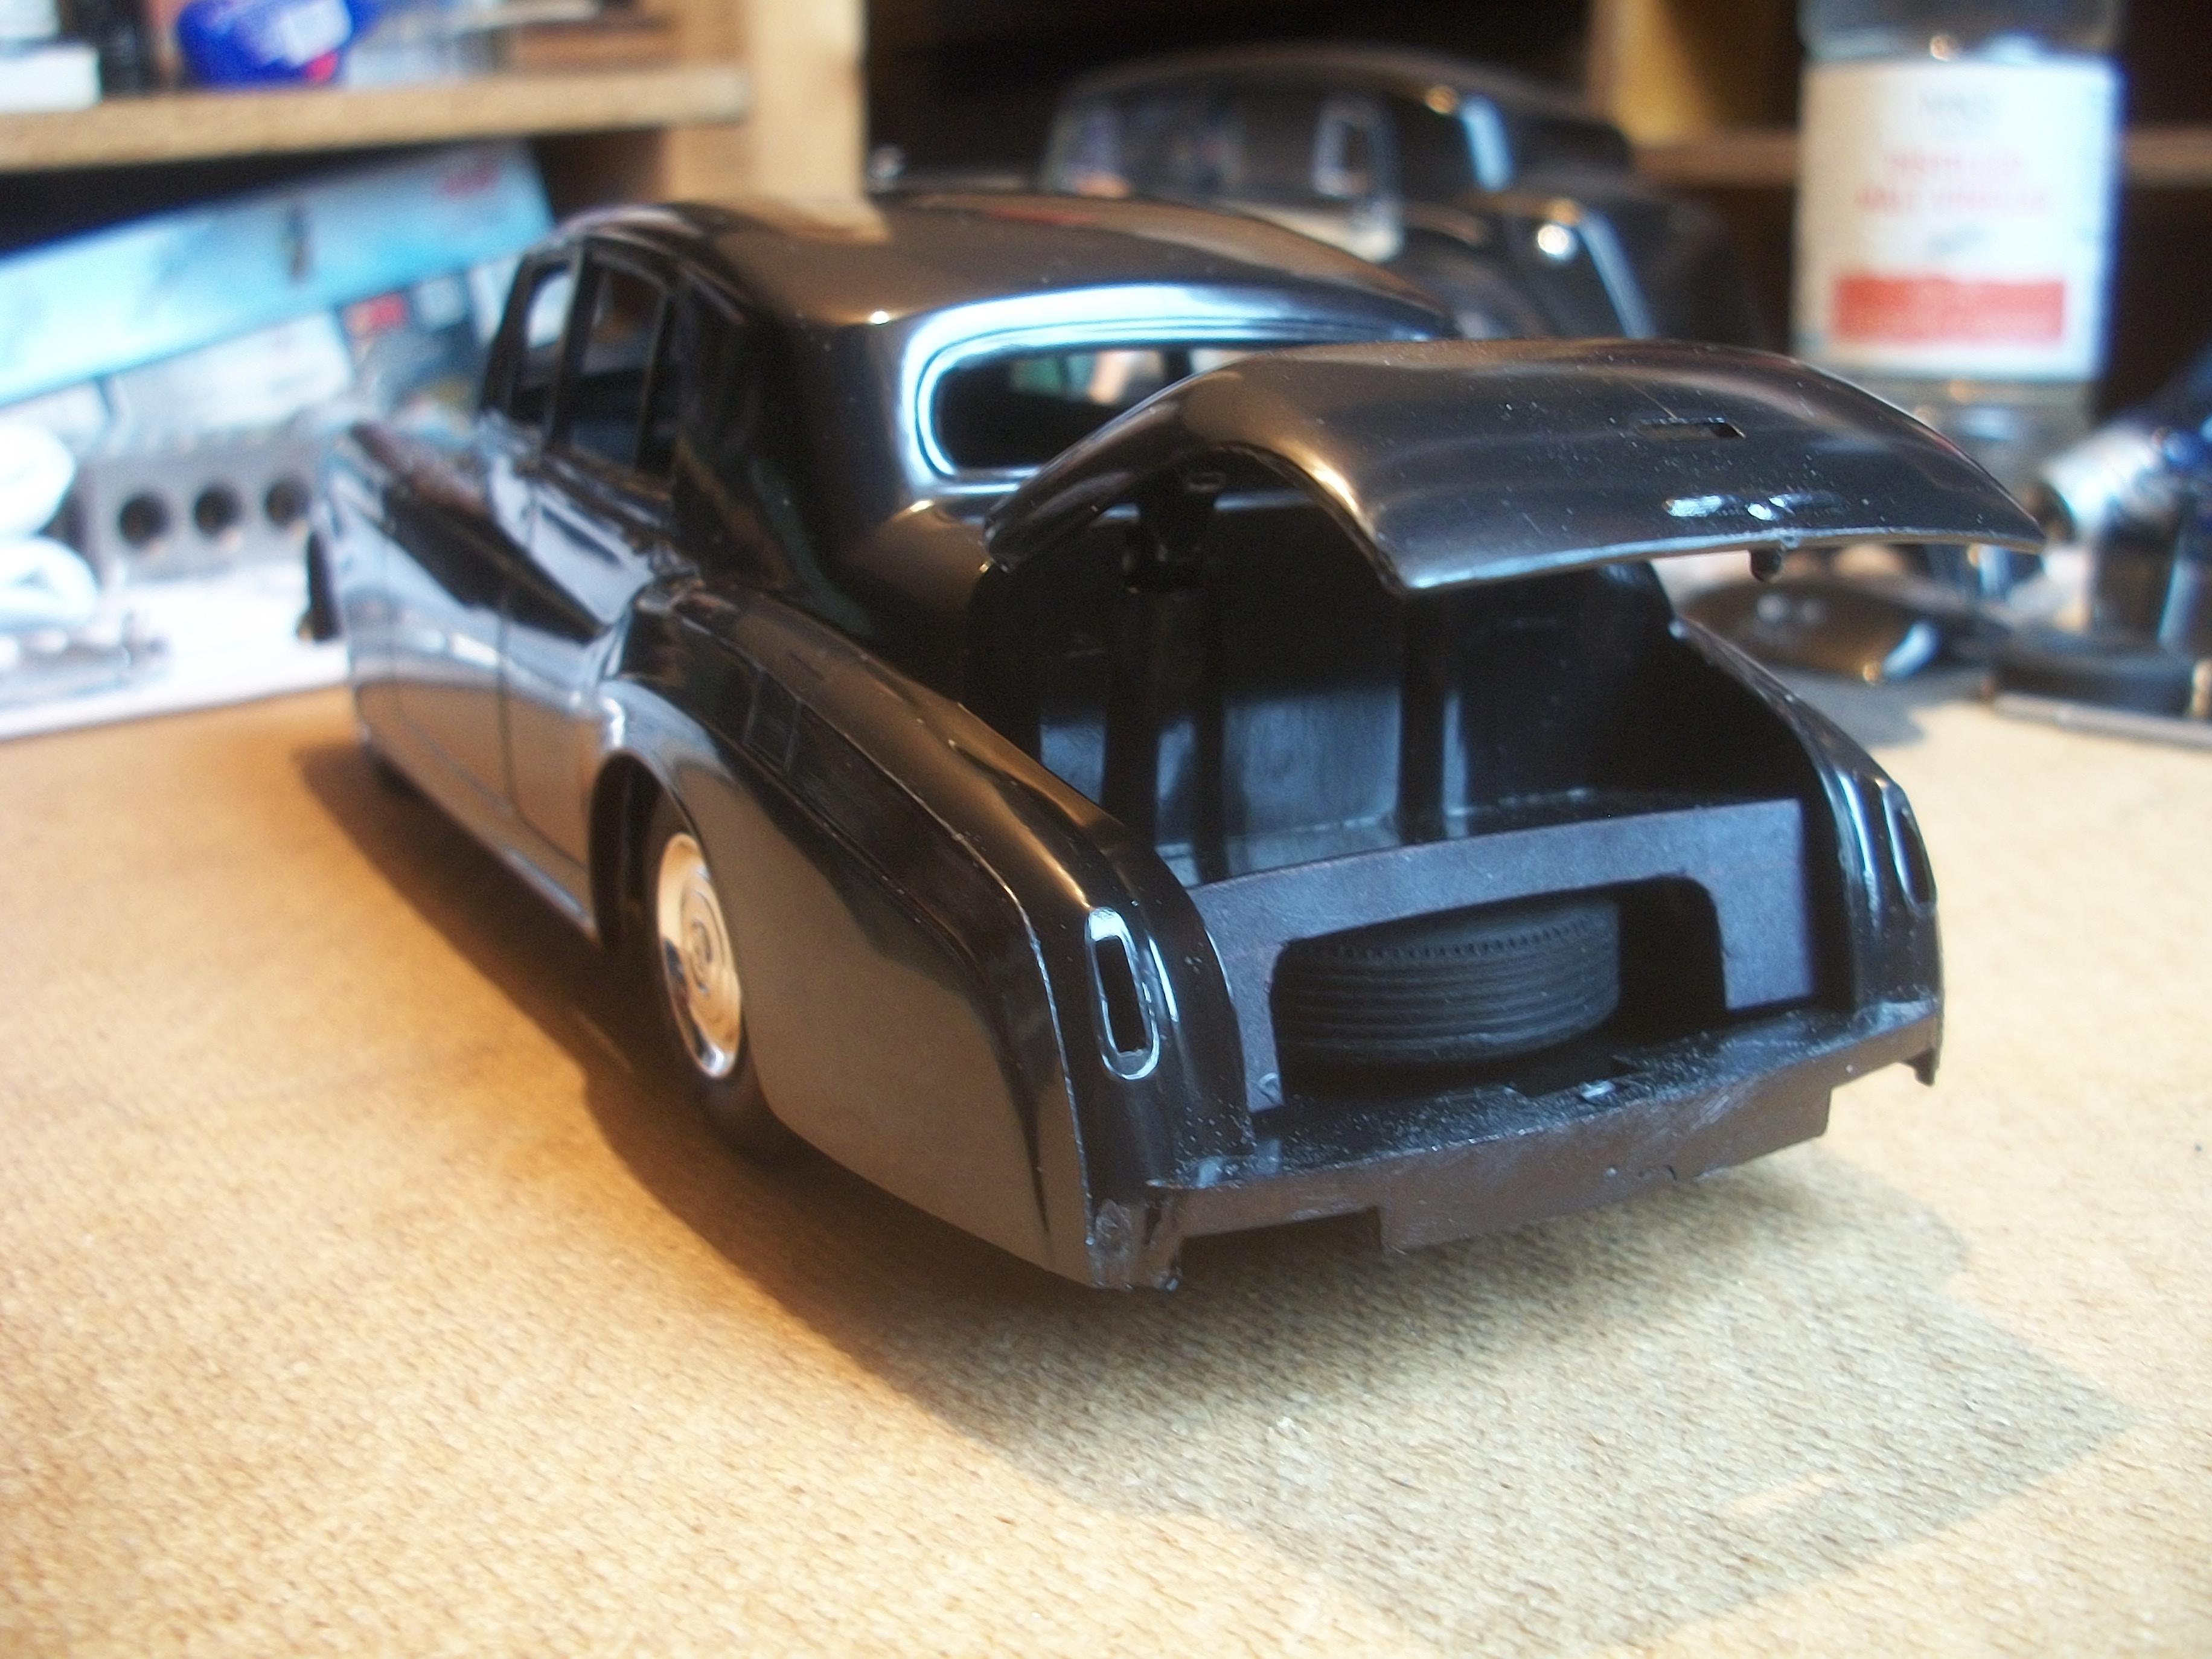
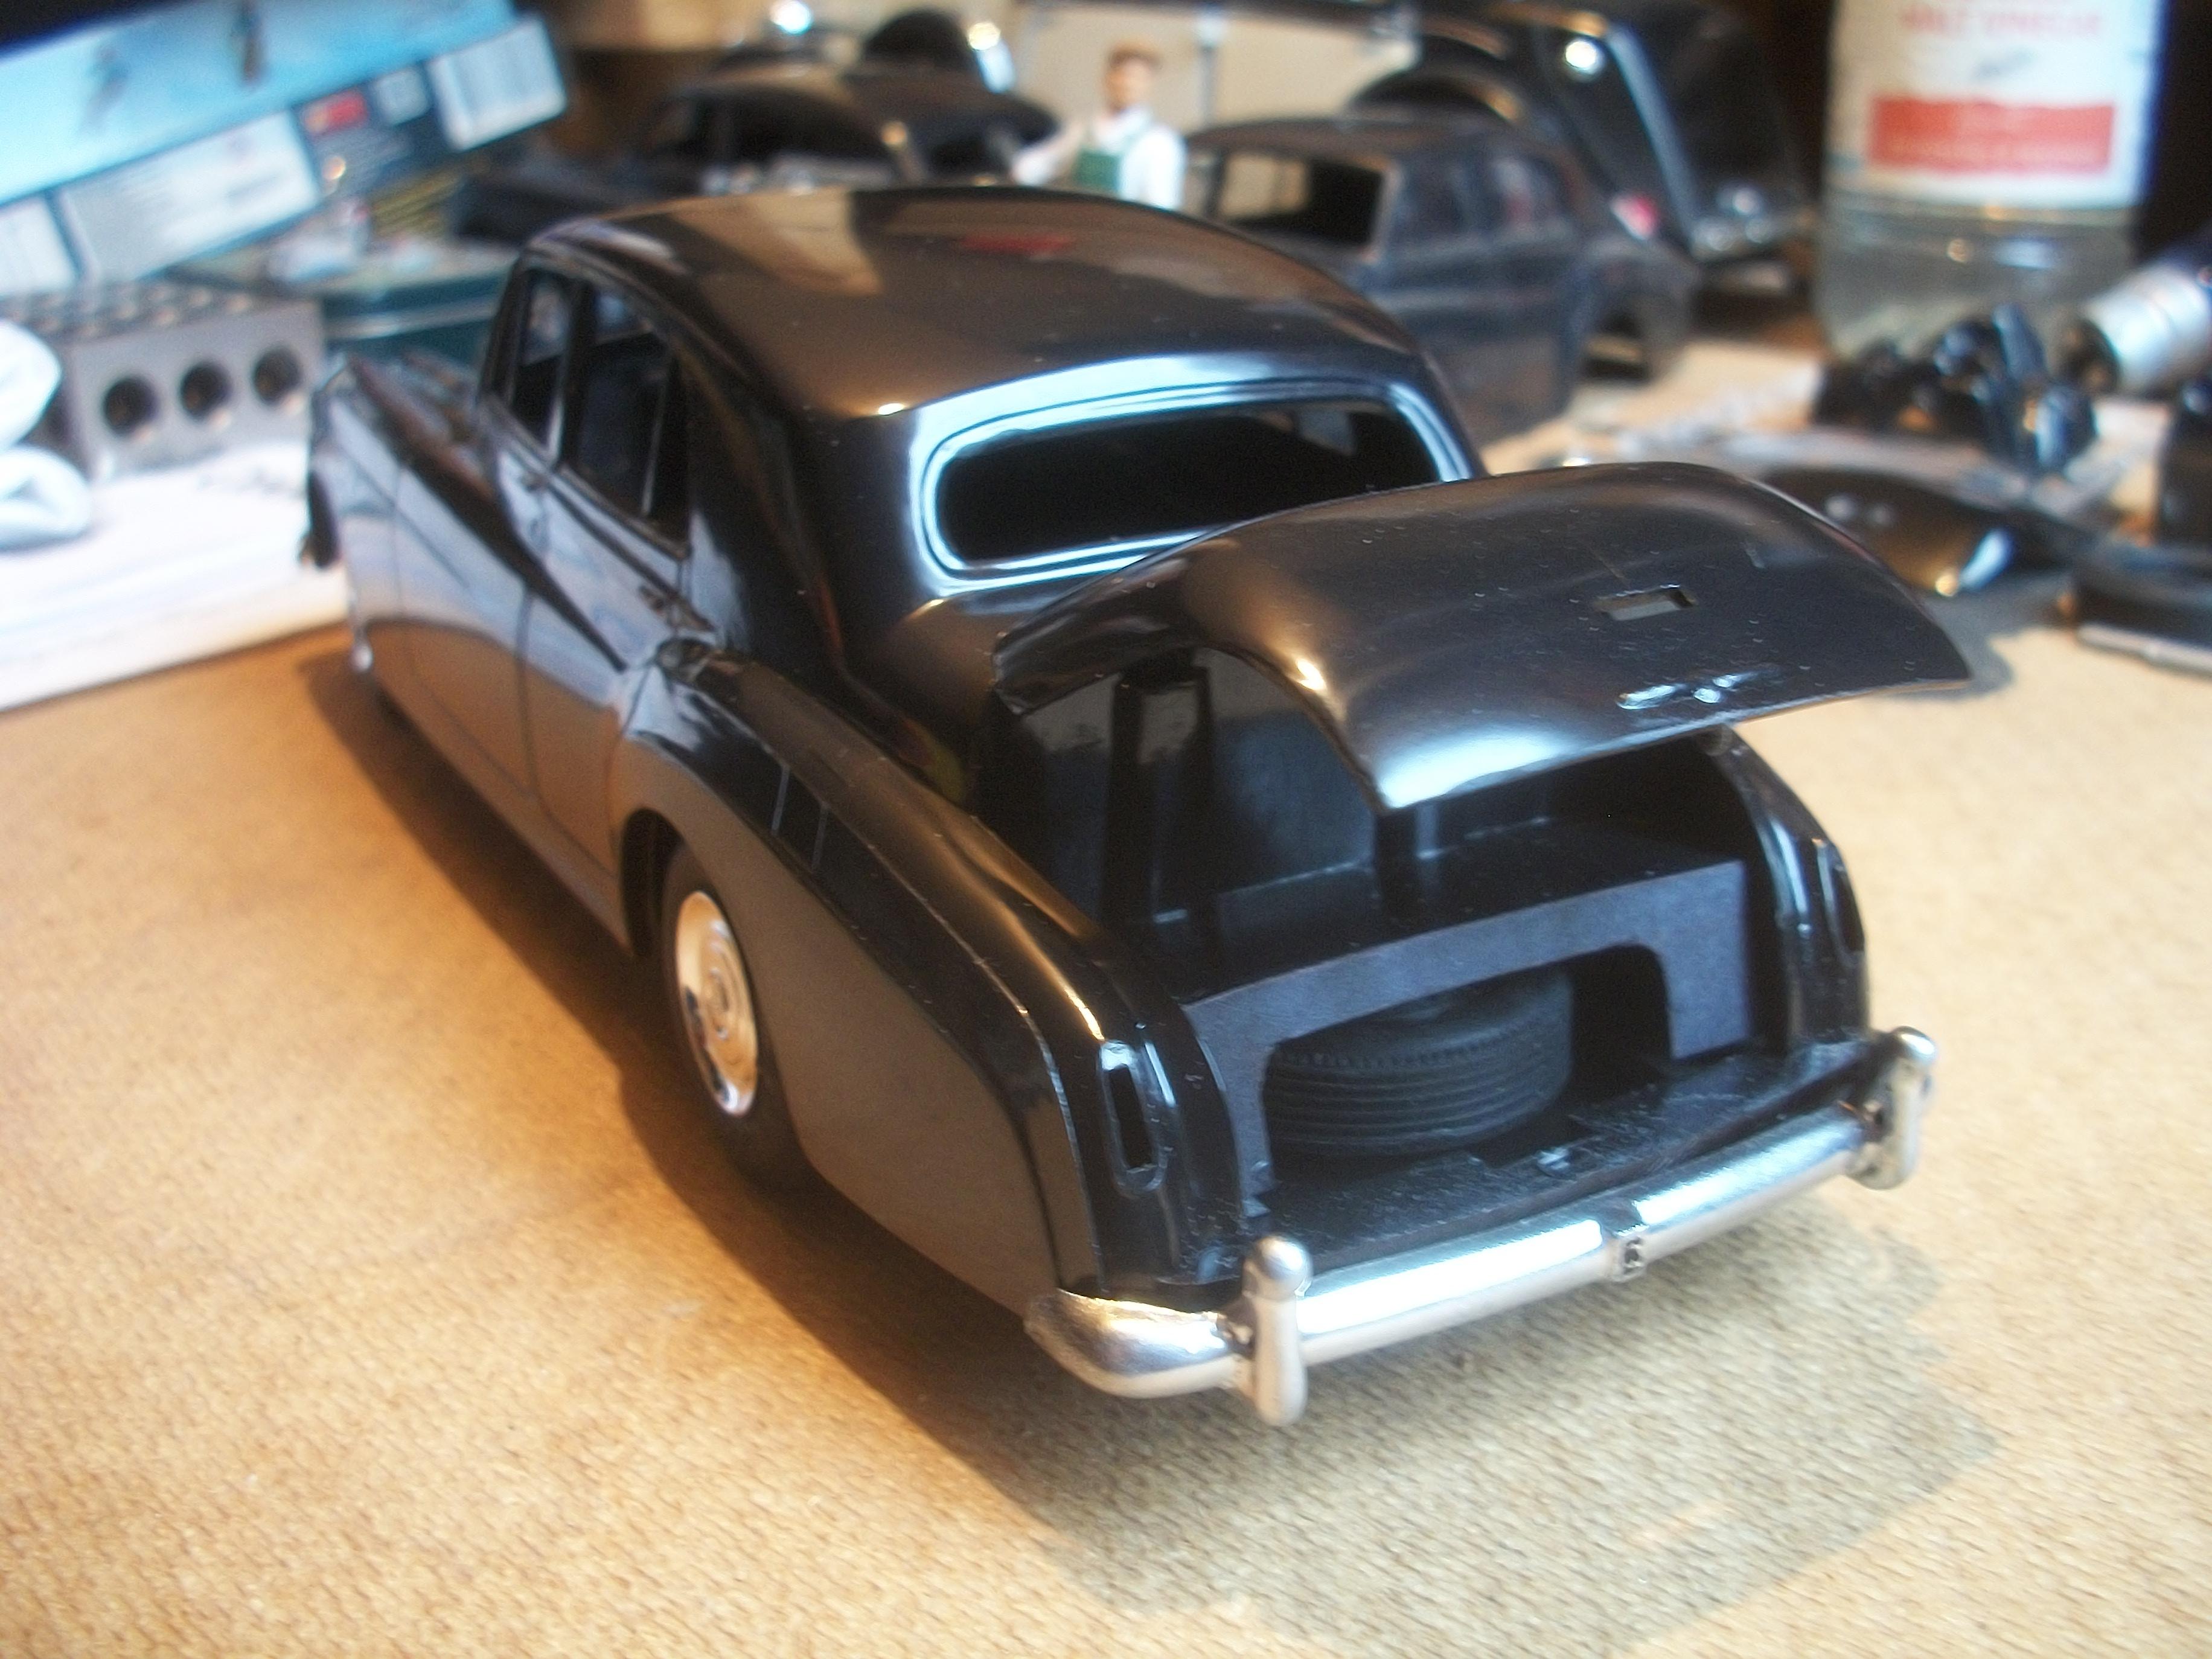
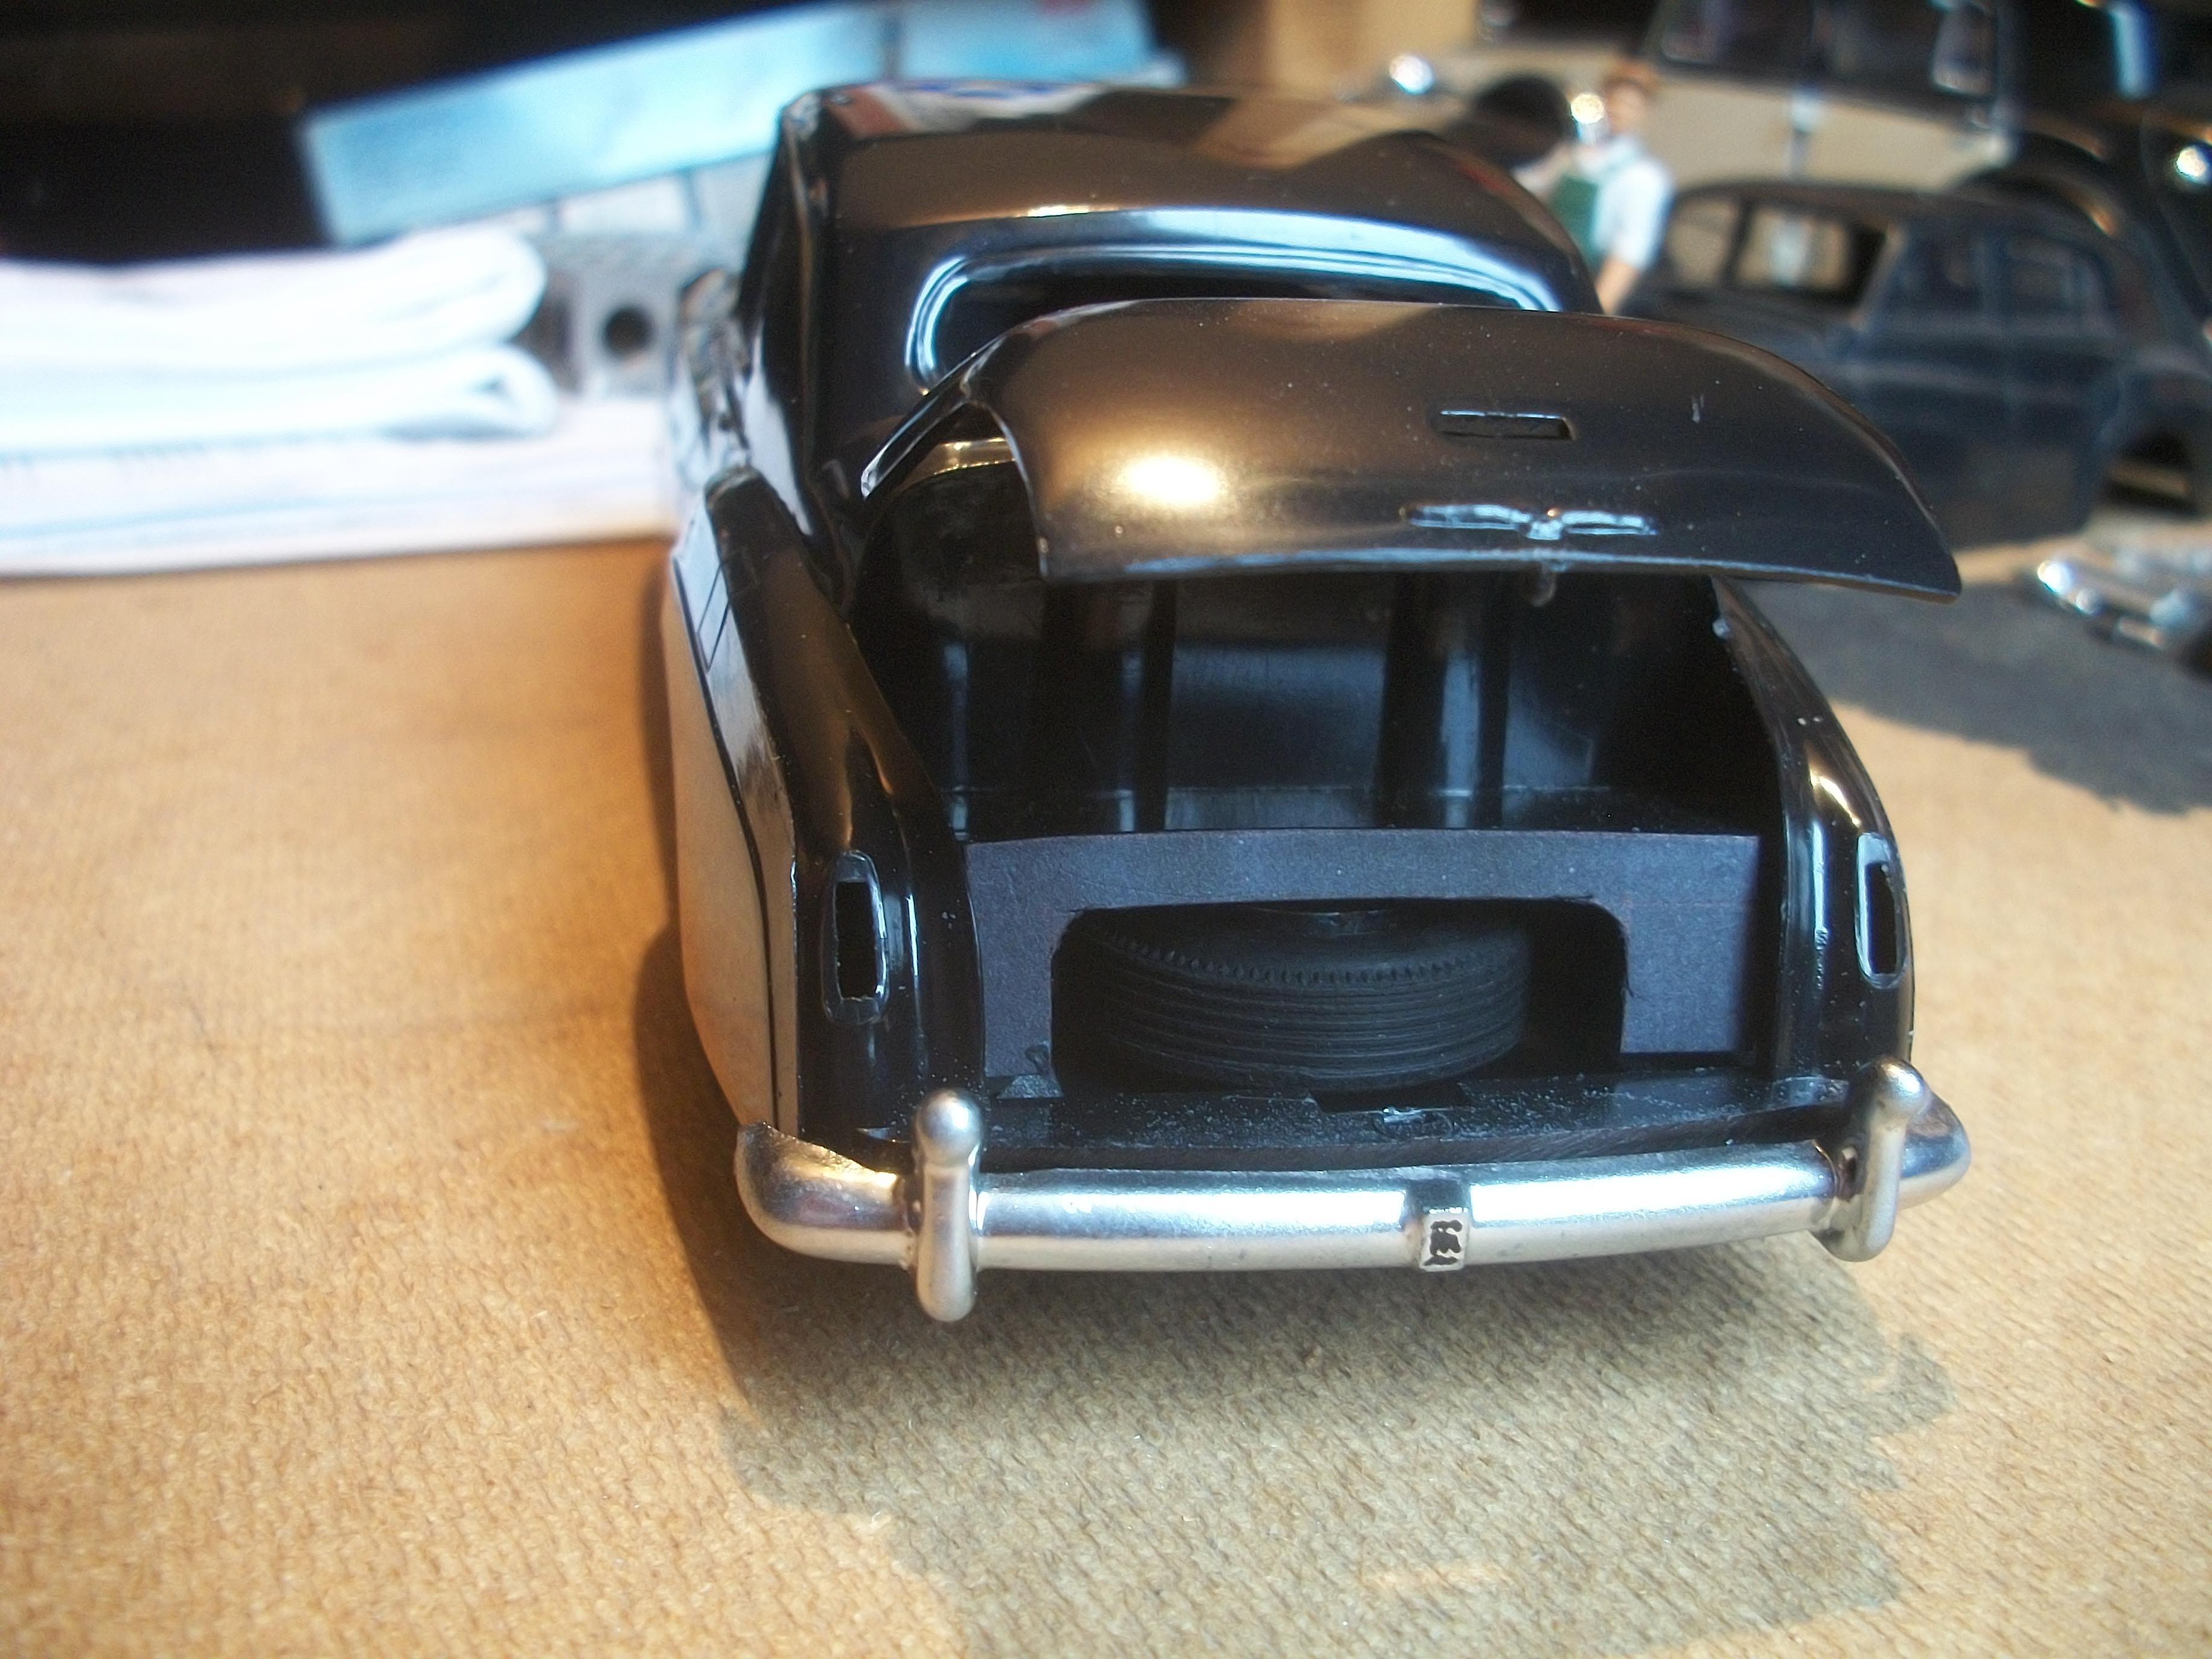
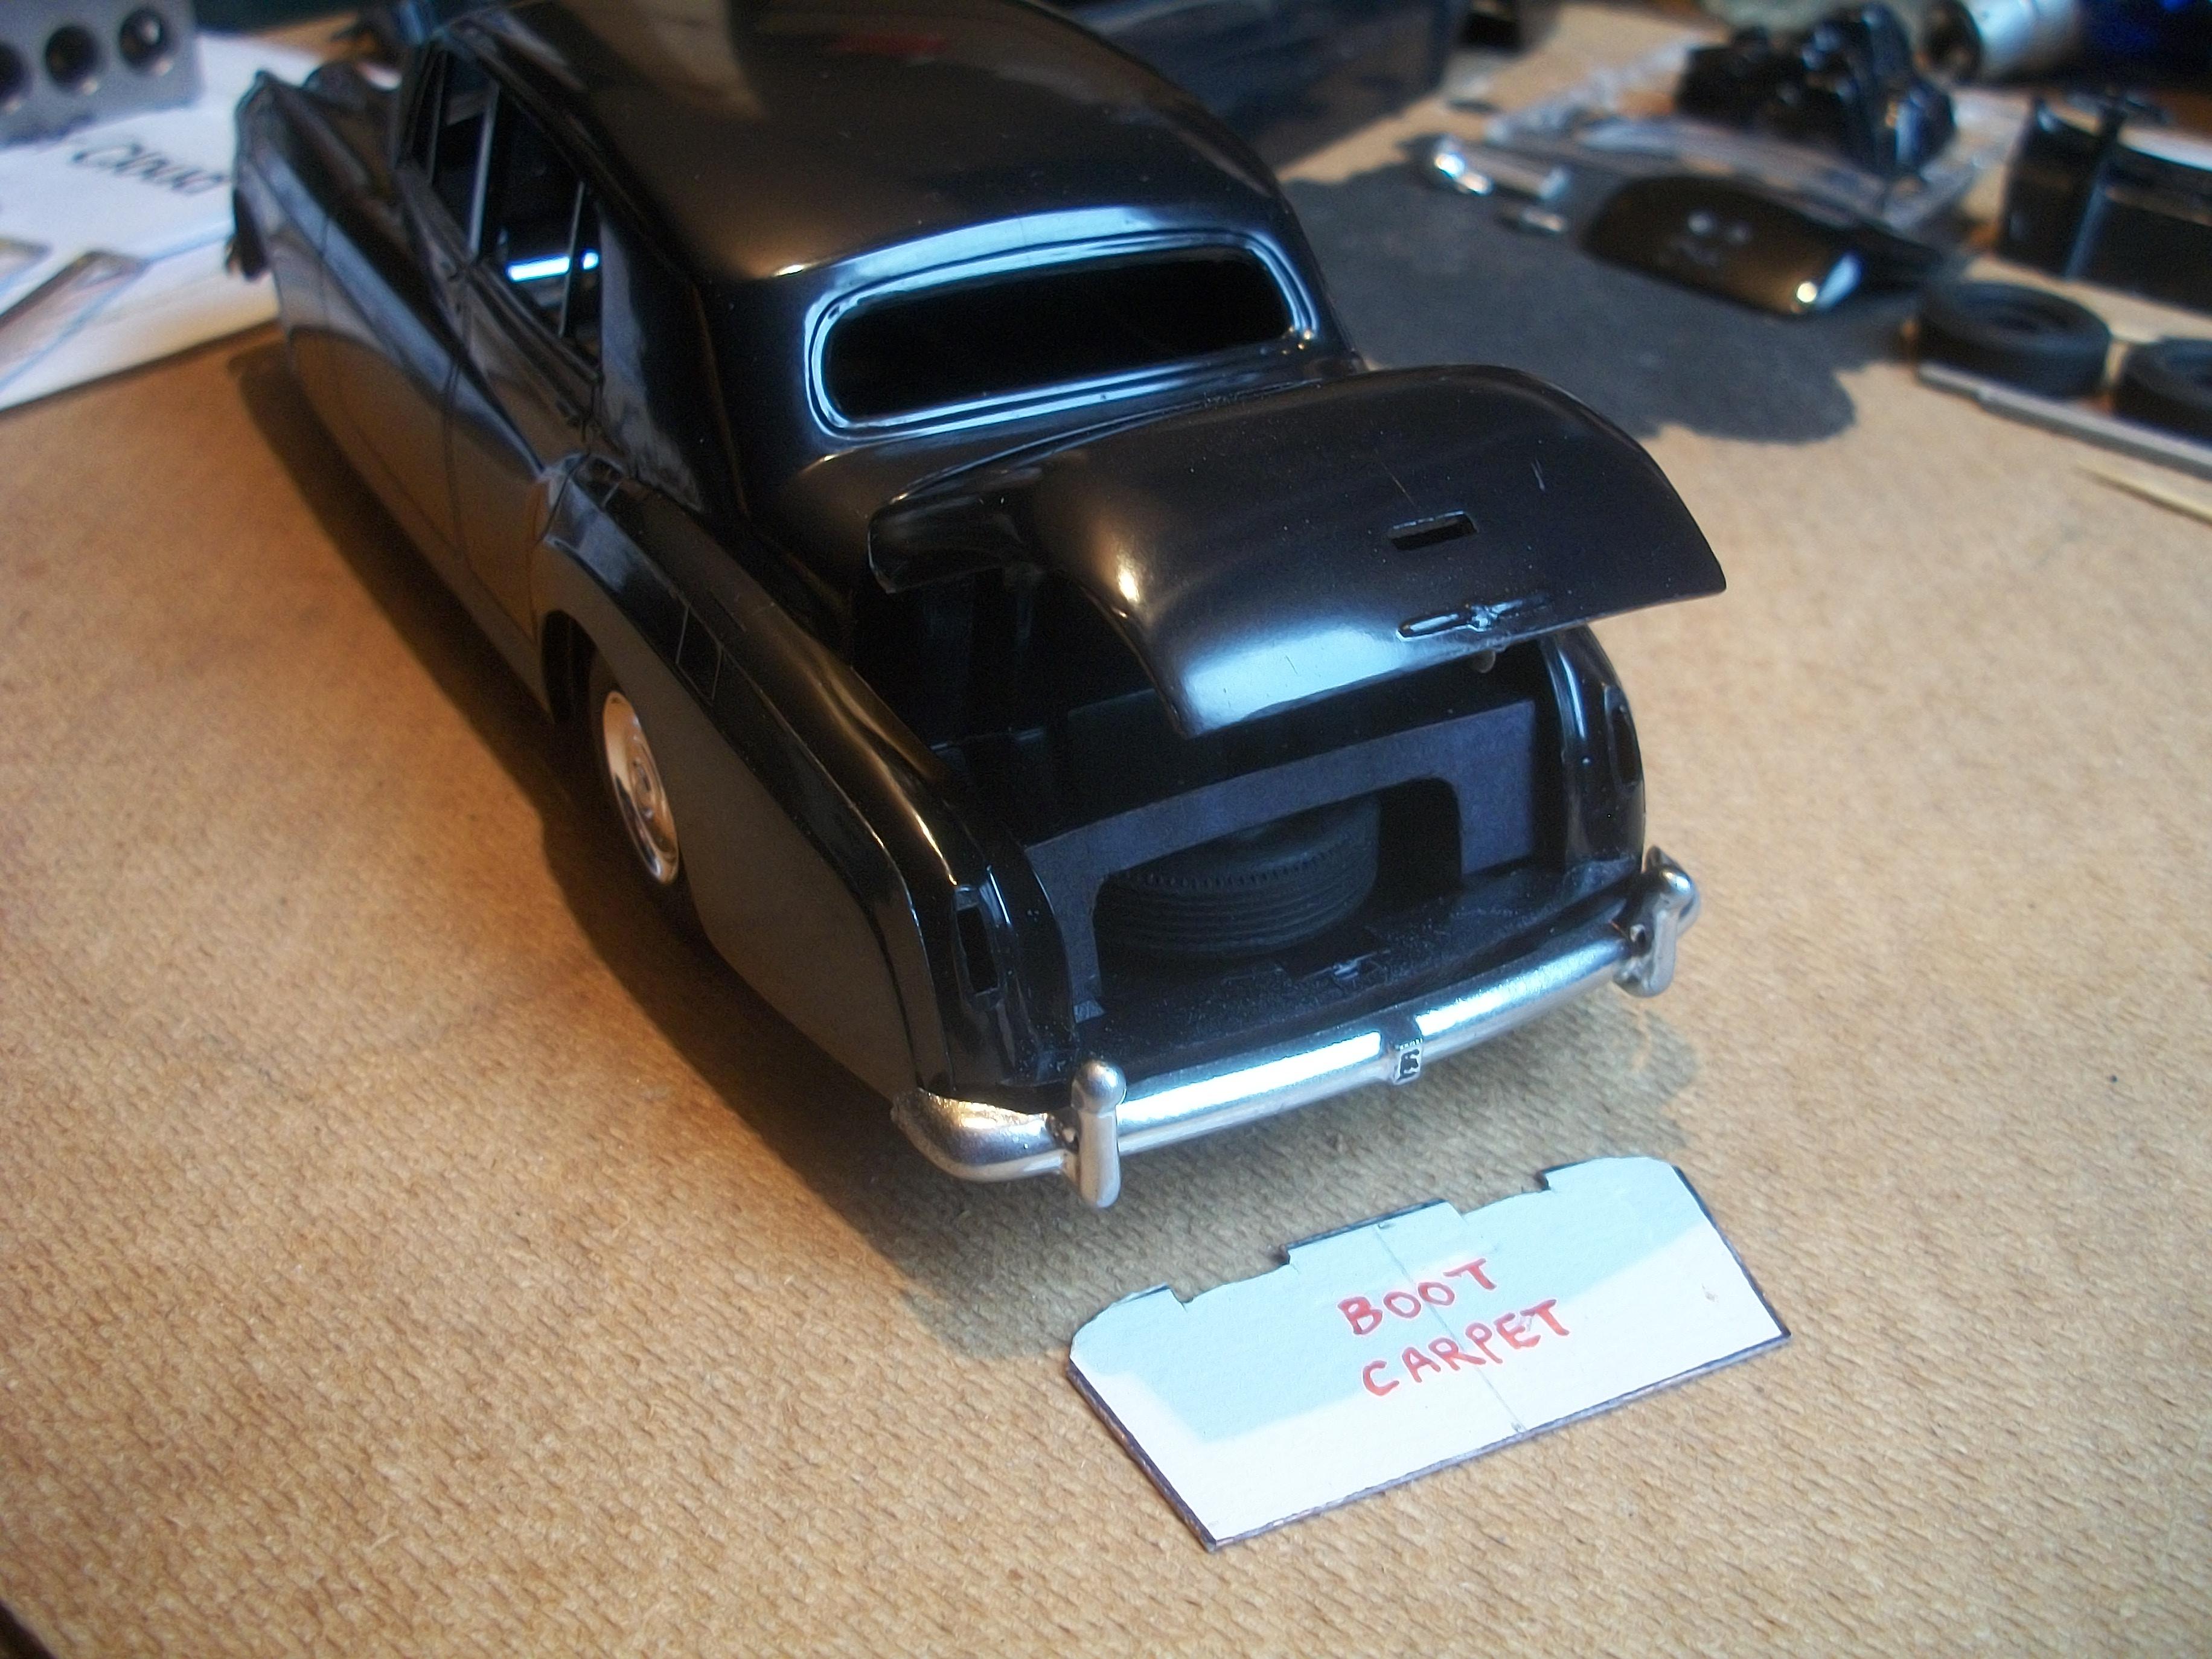
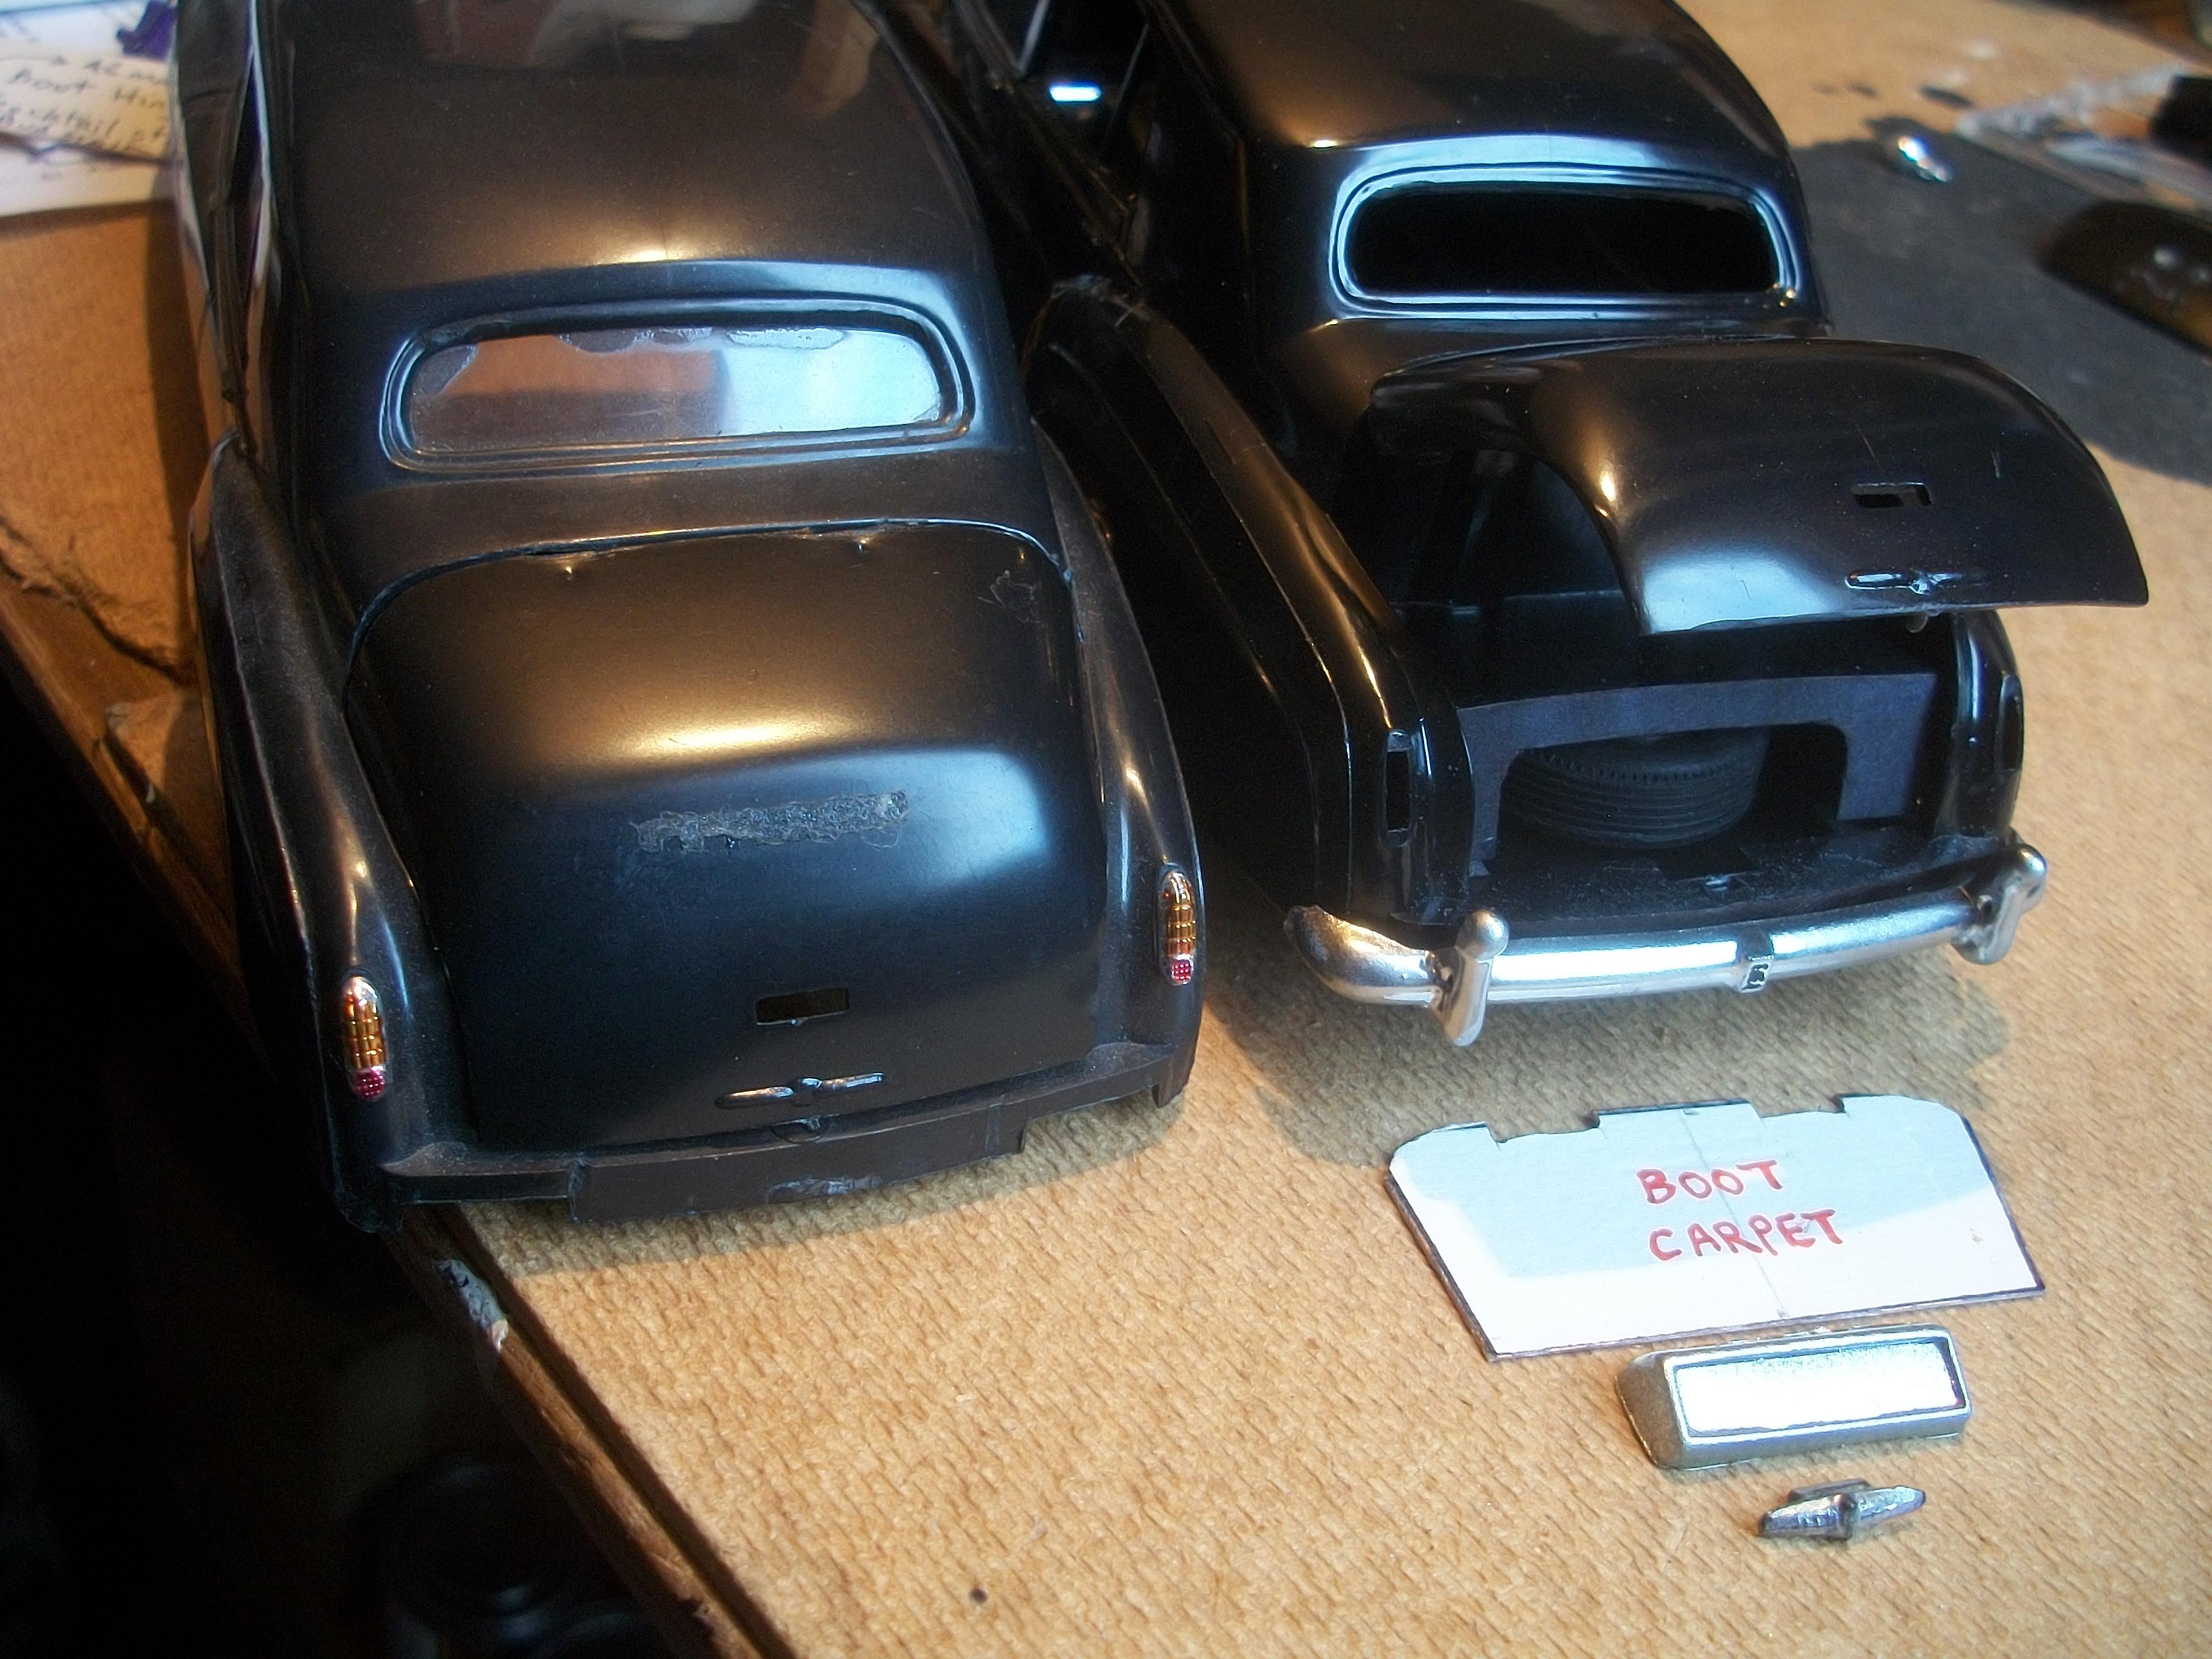
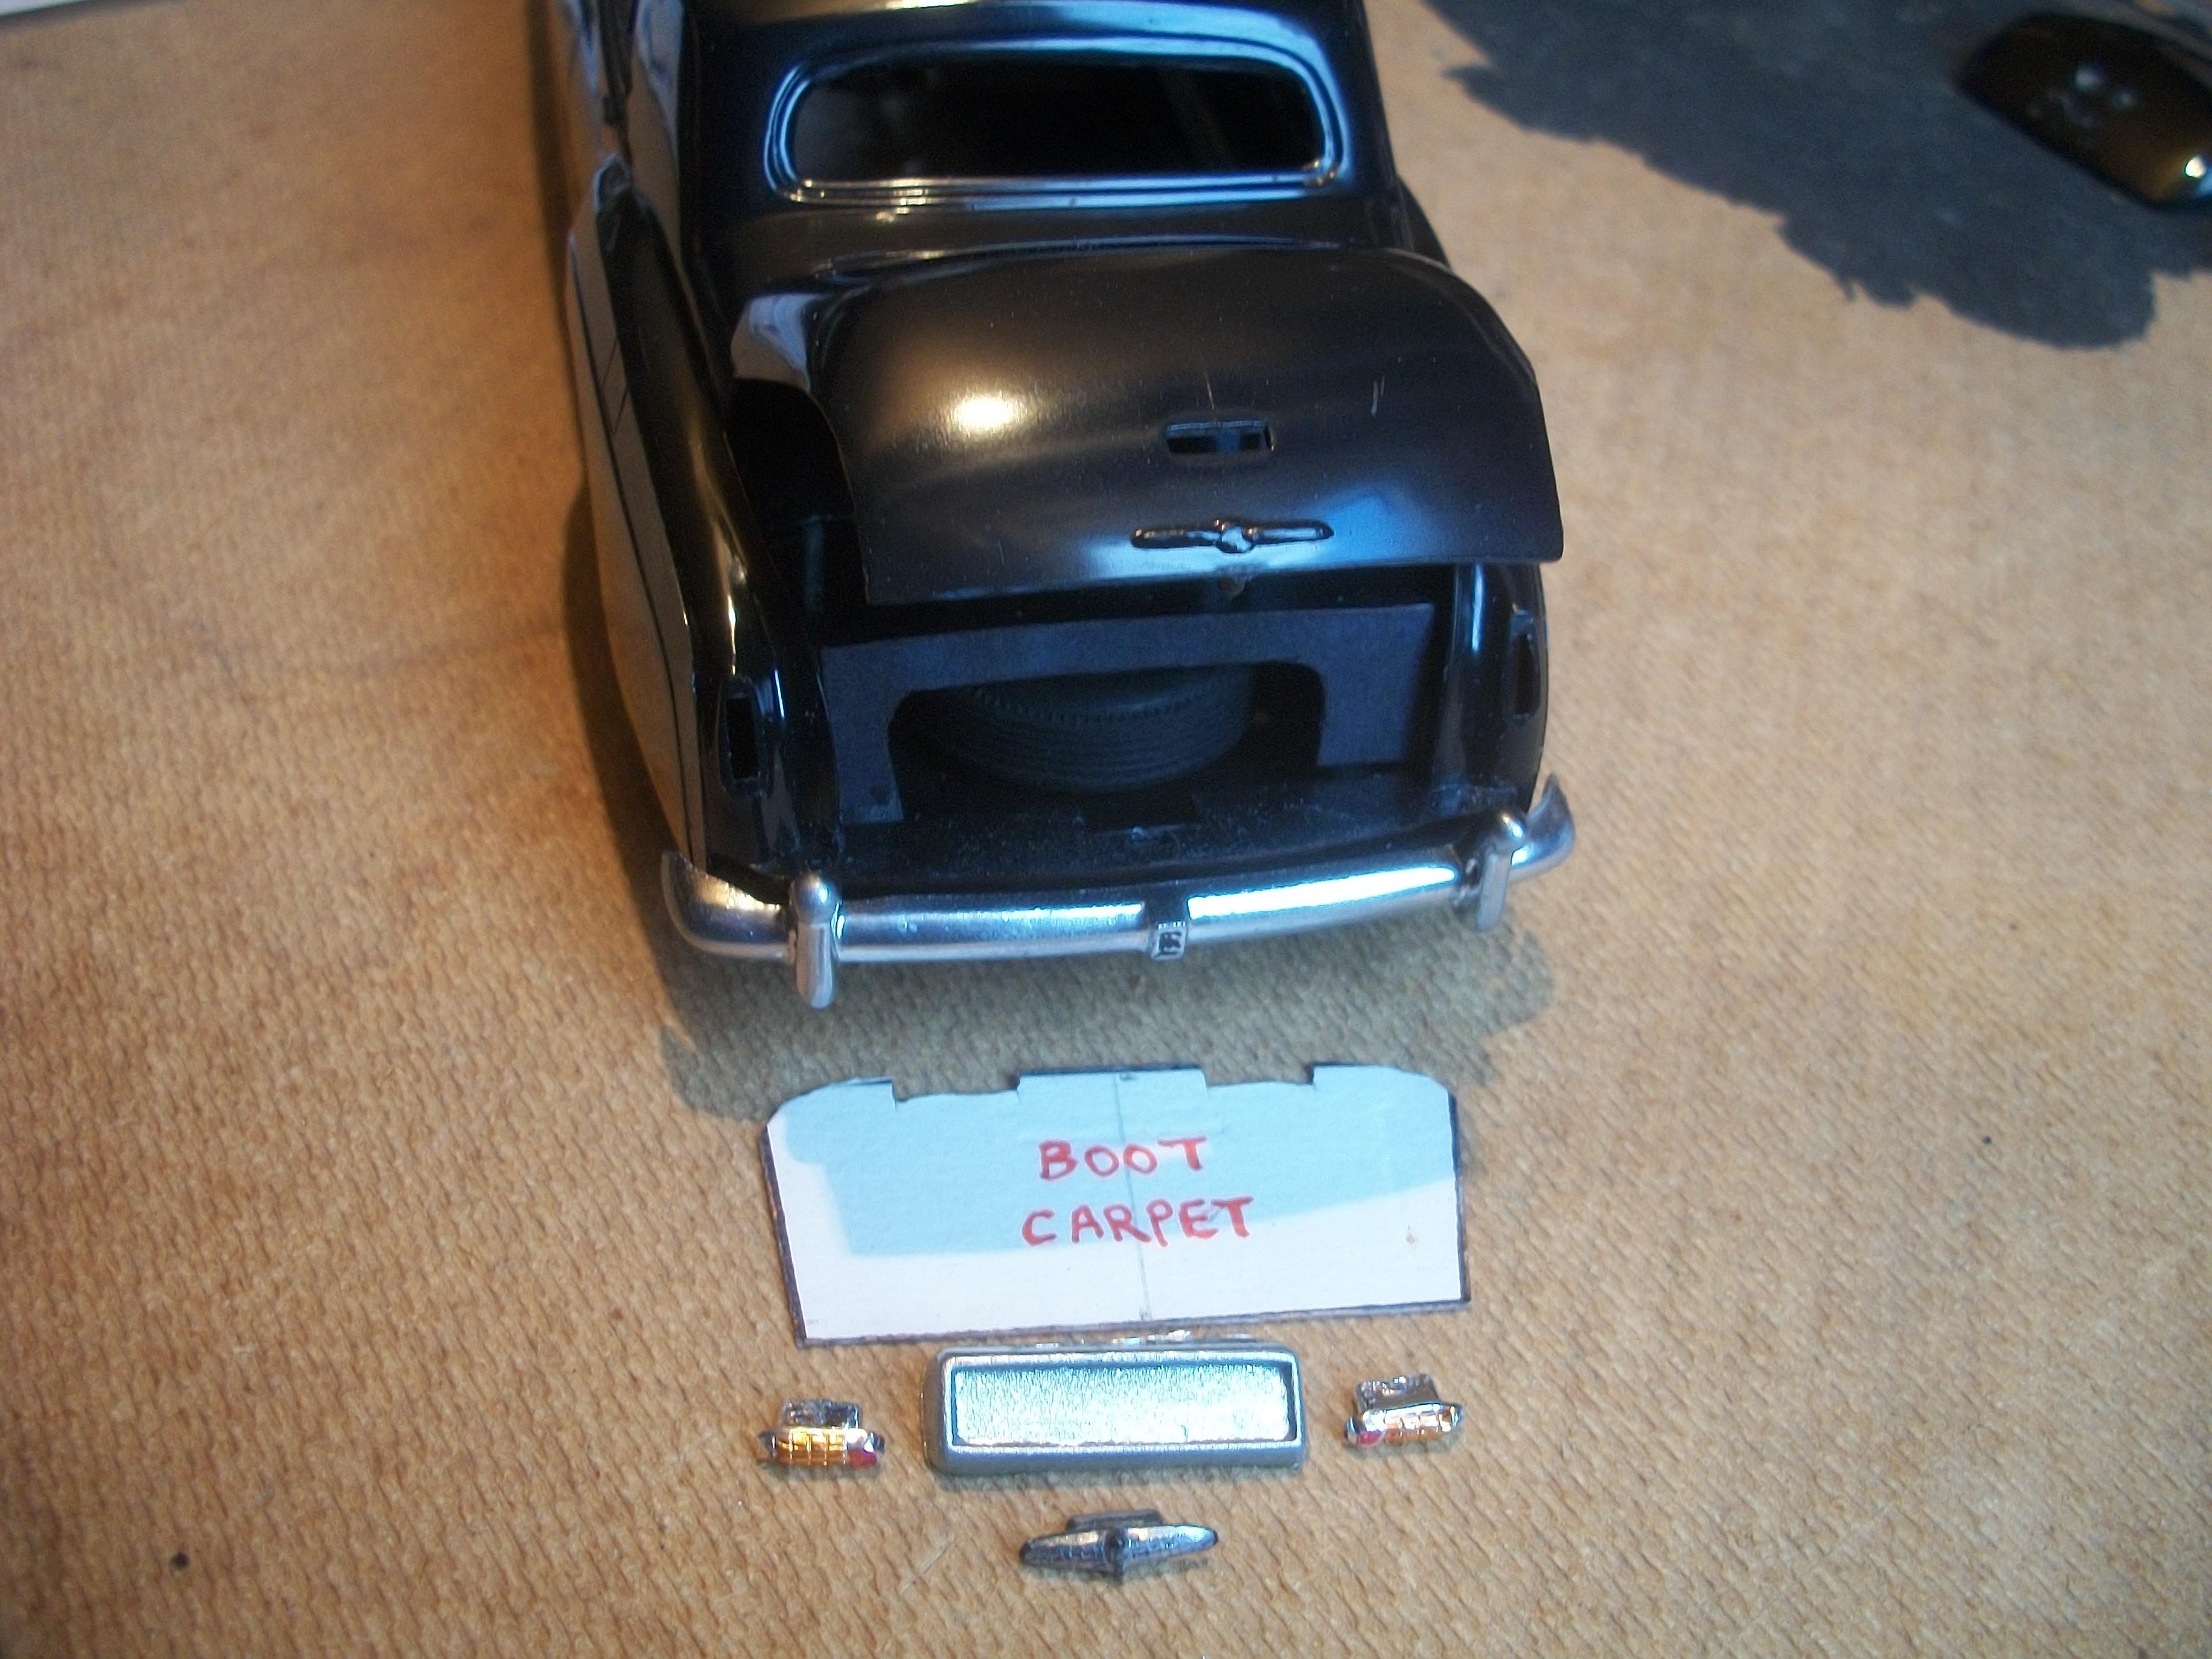
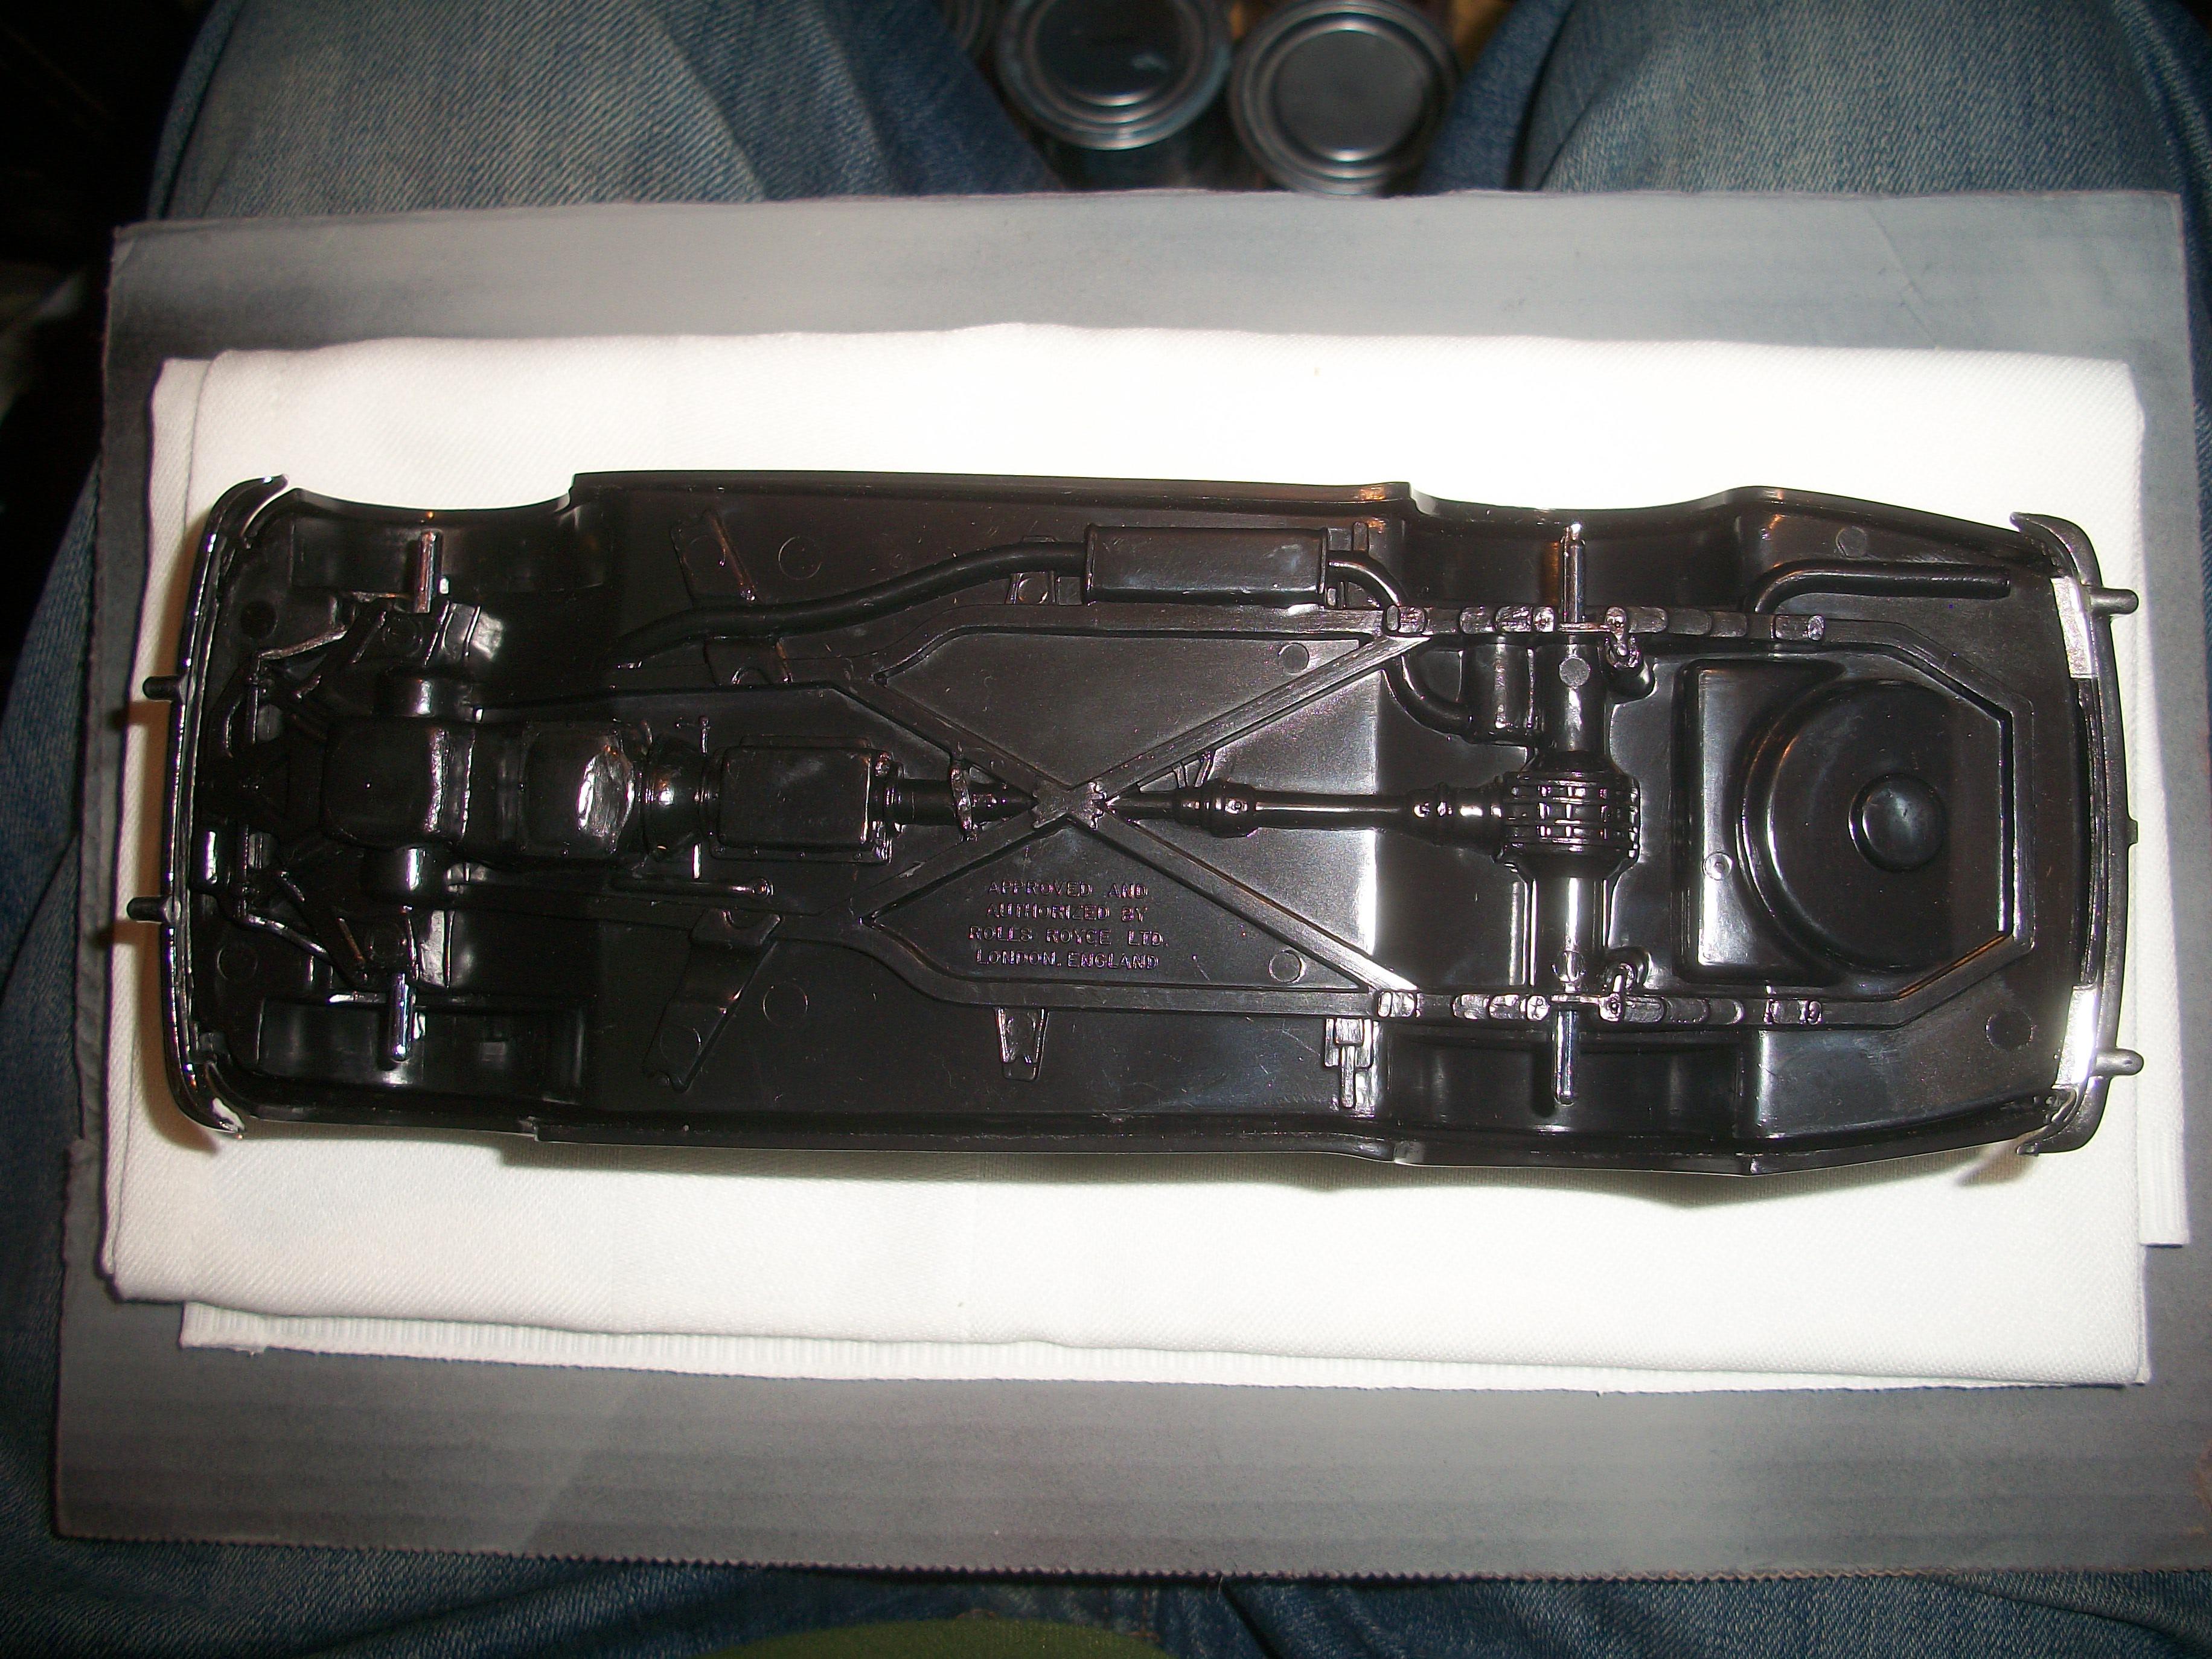
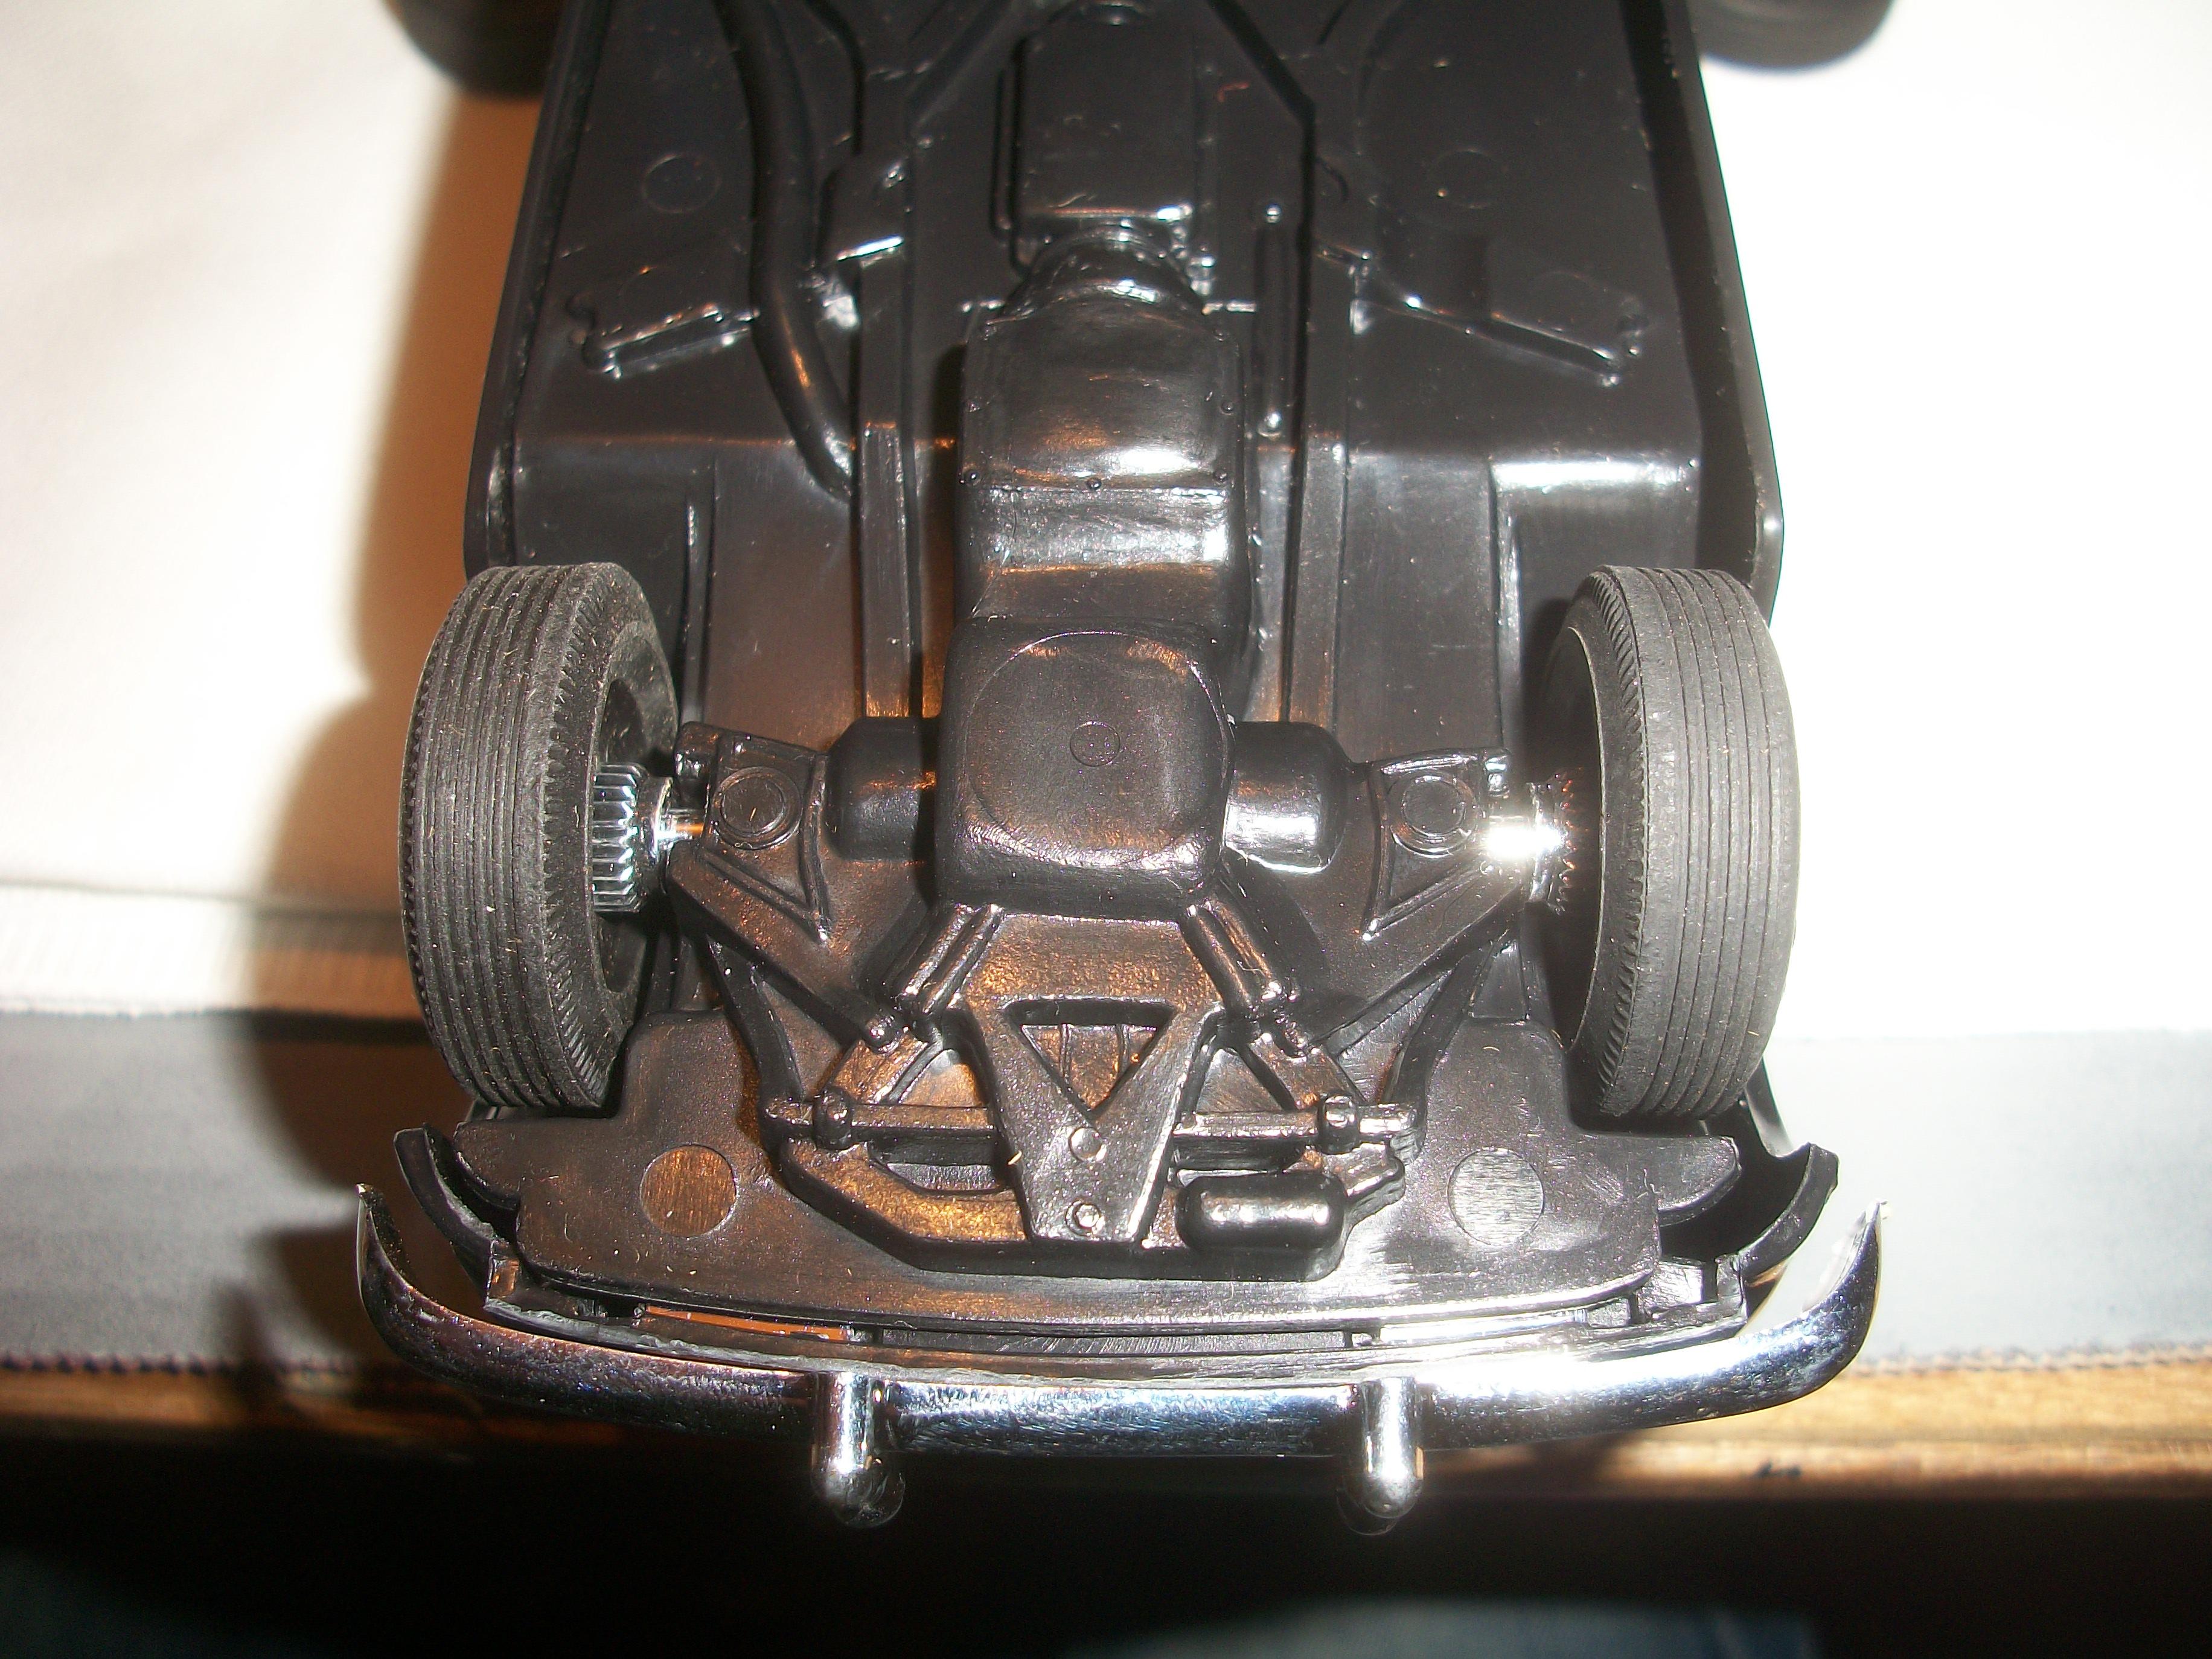
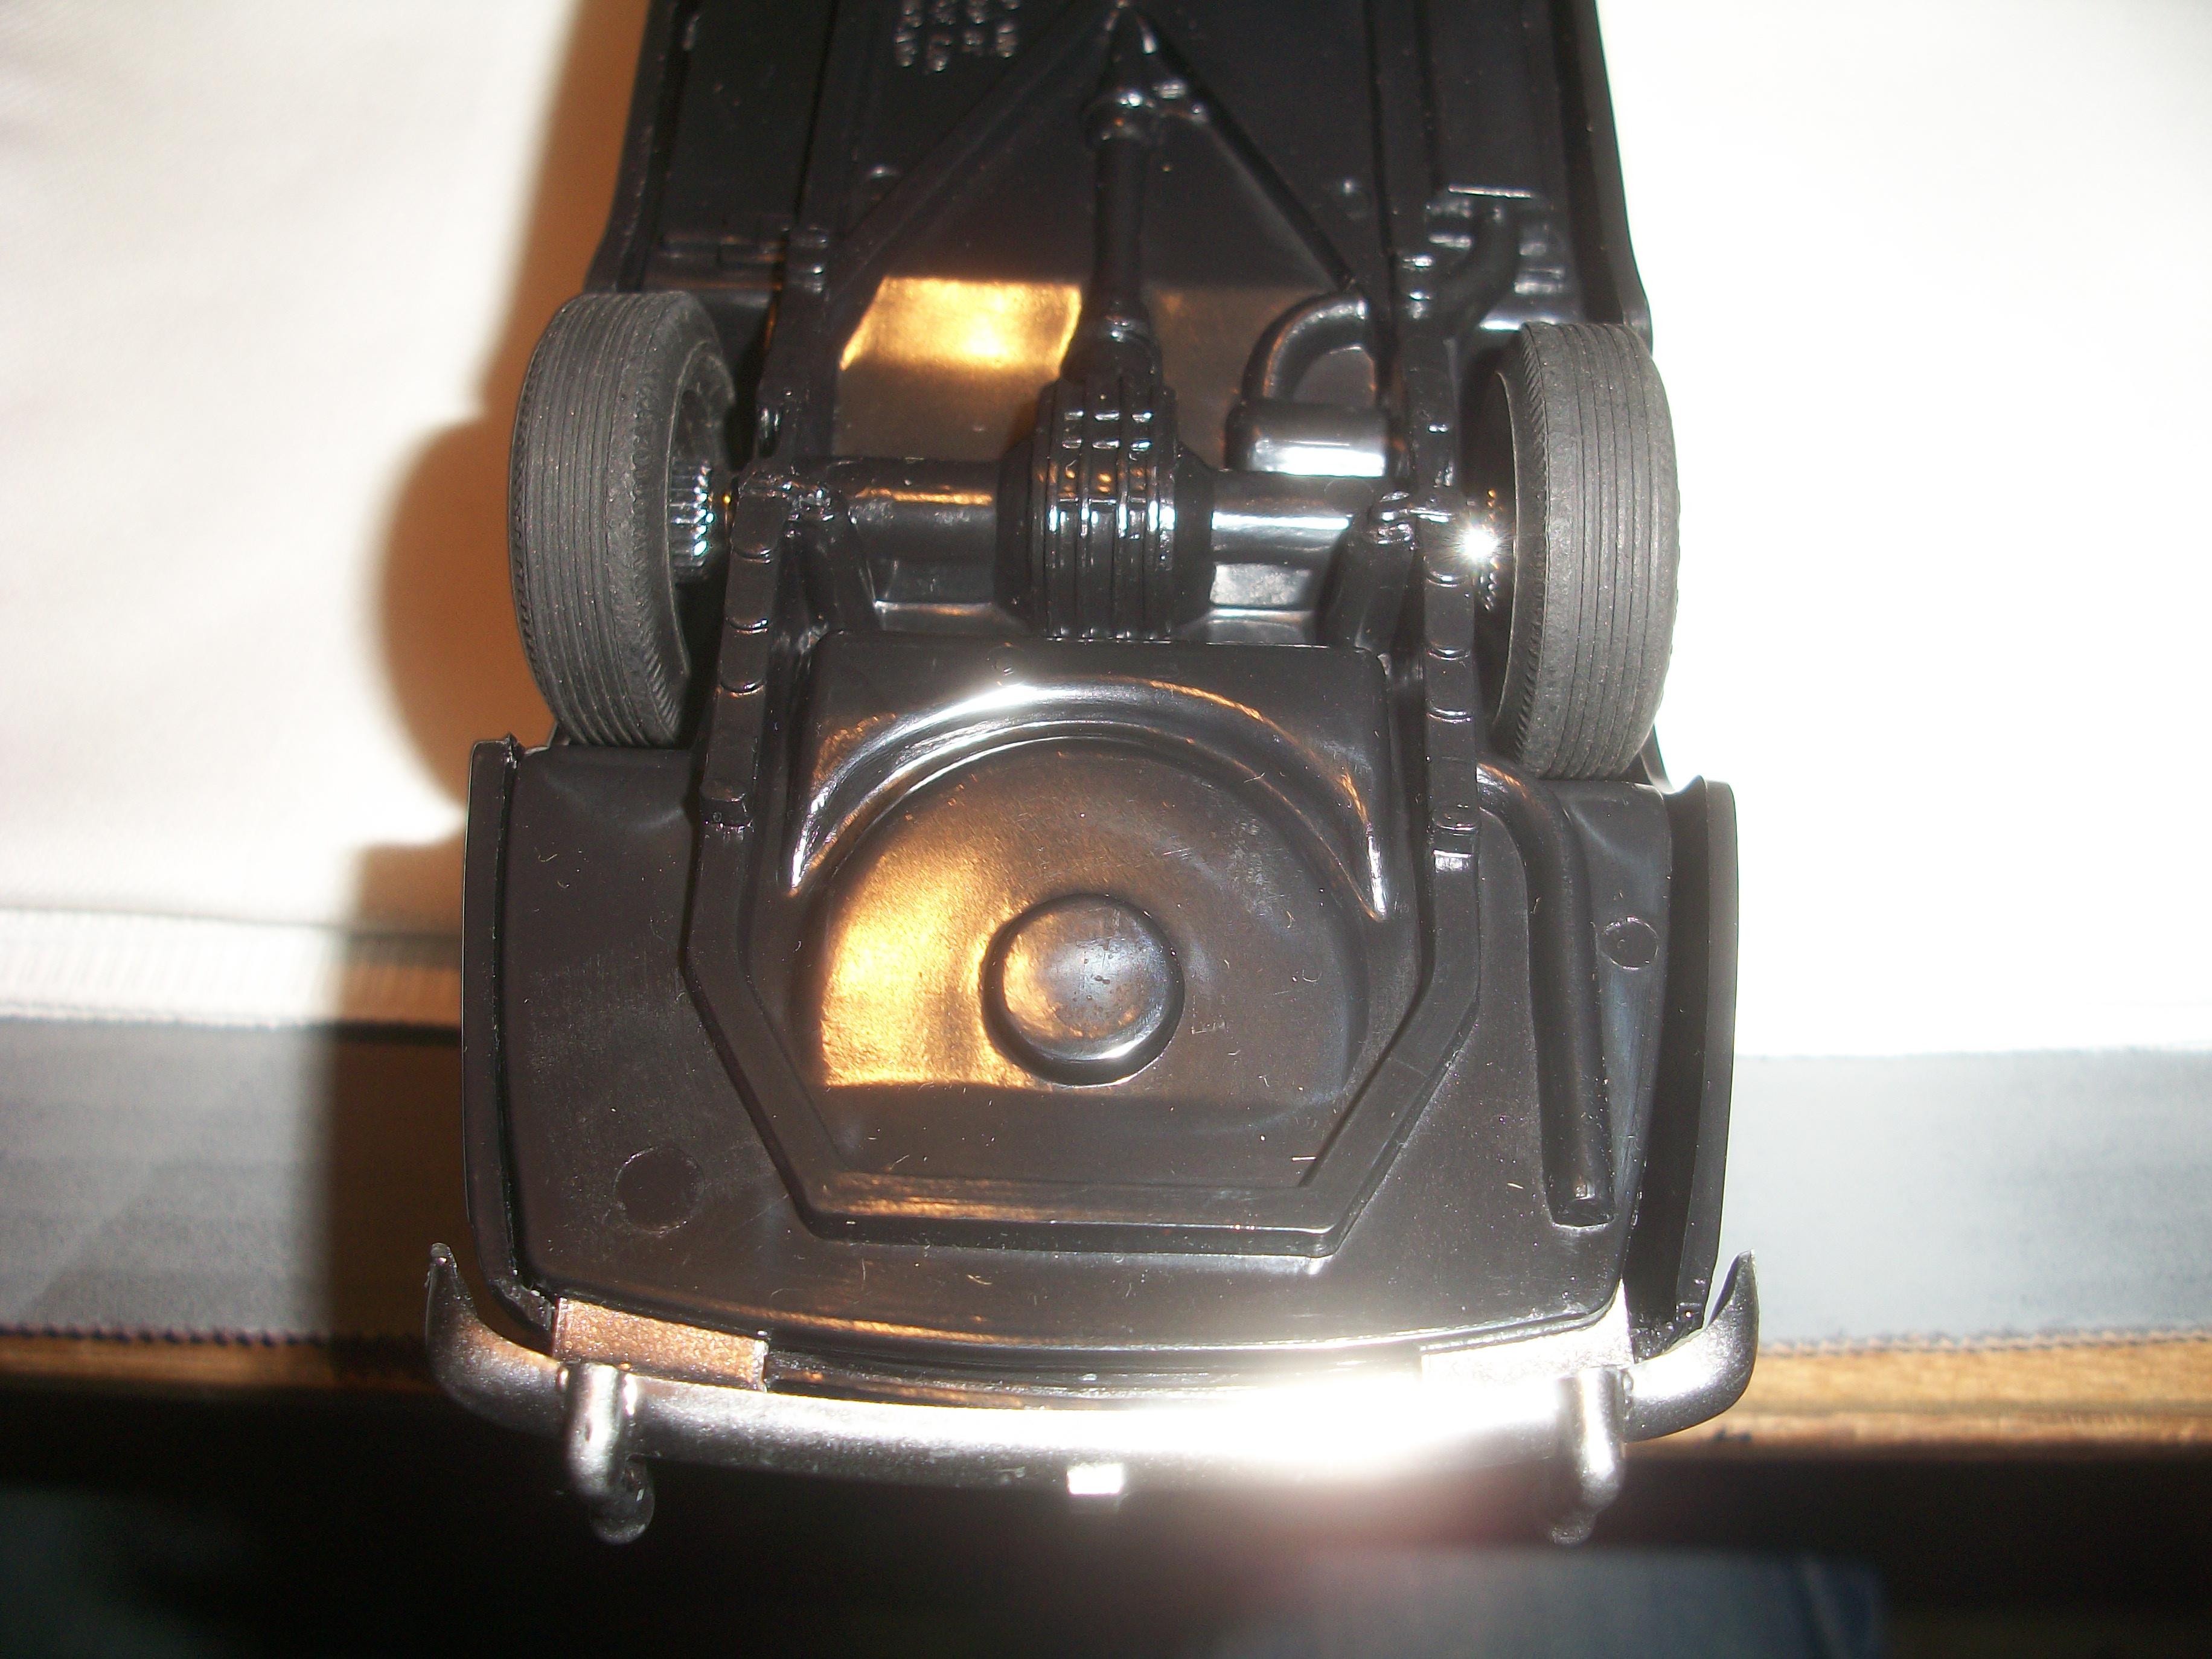
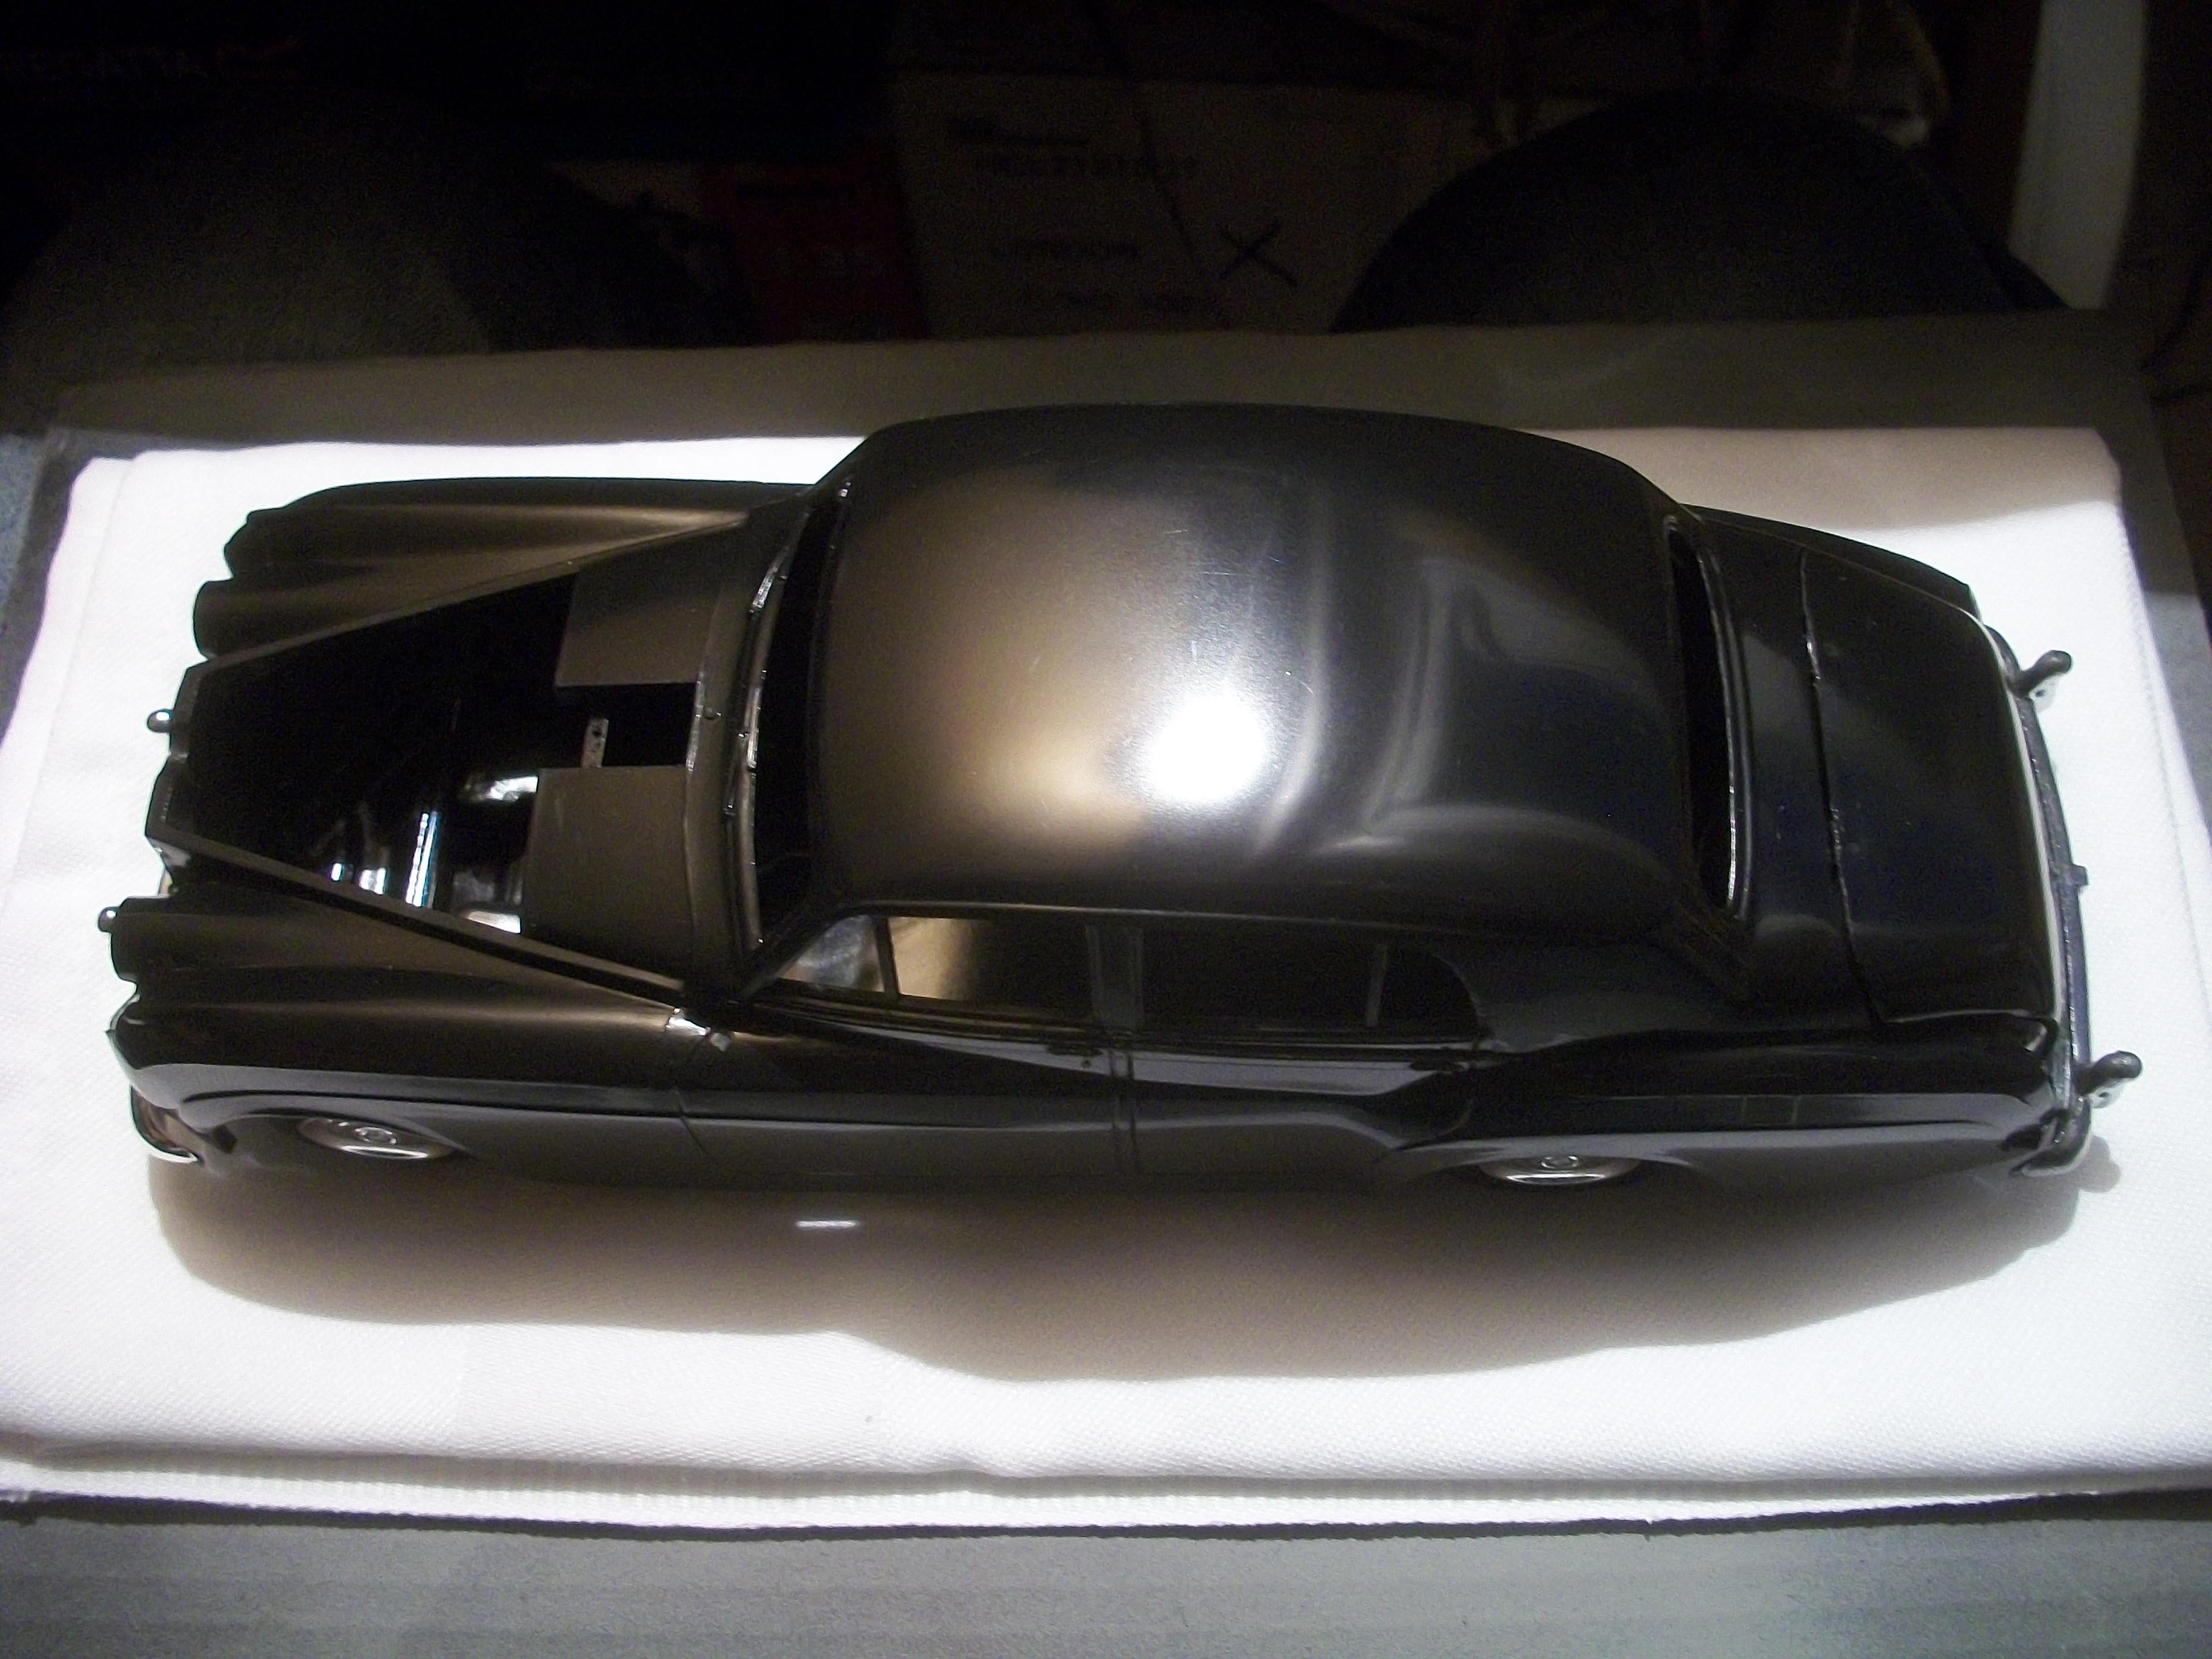
Today the body was lowered onto the chassis and I examined the area around the spare wheel and boot lid . . . The rear bumper has been inserted into the slots between body and chassis as a test fit only. I have a thin card template for the boot carpet, used to build previous Silver Cloud models, so this was placed inside the luggage compartment for a simple visual inspection. The boot carpet will be grey, and the interior upholstery will also be grey ( not blue as on the test model ). The parts to be assembled at the rear of the car include the reversing / number plate lamp, the number plate plinth and the two rear lamp clusters. These chrome rear lamps have been given a thin coating of amber and red, using a Sharpie. David
-
Rolls-Royce No Chemicals, No Paint, No Harmful Glues
Anglia105E replied to Anglia105E's topic in WIP: Model Cars
Thank you kindly Sir . . . I cannot quite understand why they didn't include perhaps 52 parts in the kit, rather than only 26 parts . . . I mean, this is a scale model of probably the finest motor car in the World, ever ? Even more surprising is that no other kit manufacturer produced a kit of this car. Hubley were the first company to make this available, and subsequently the tooling was passed down to Minicraft, Academy, Revell and Masterkit . . . I have found a Revell version of the Silver Cloud kit listed on Ebay, and the auction ends this coming Sunday afternoon. There are zero bidders, the starting price is only £16.13 ( US $. 21.64 ), postage is just over two GBP, and this kit is complete, with only two parts painted (rear seat ). I might bid on this one . . . David W. -
Rolls-Royce No Chemicals, No Paint, No Harmful Glues
Anglia105E replied to Anglia105E's topic in WIP: Model Cars
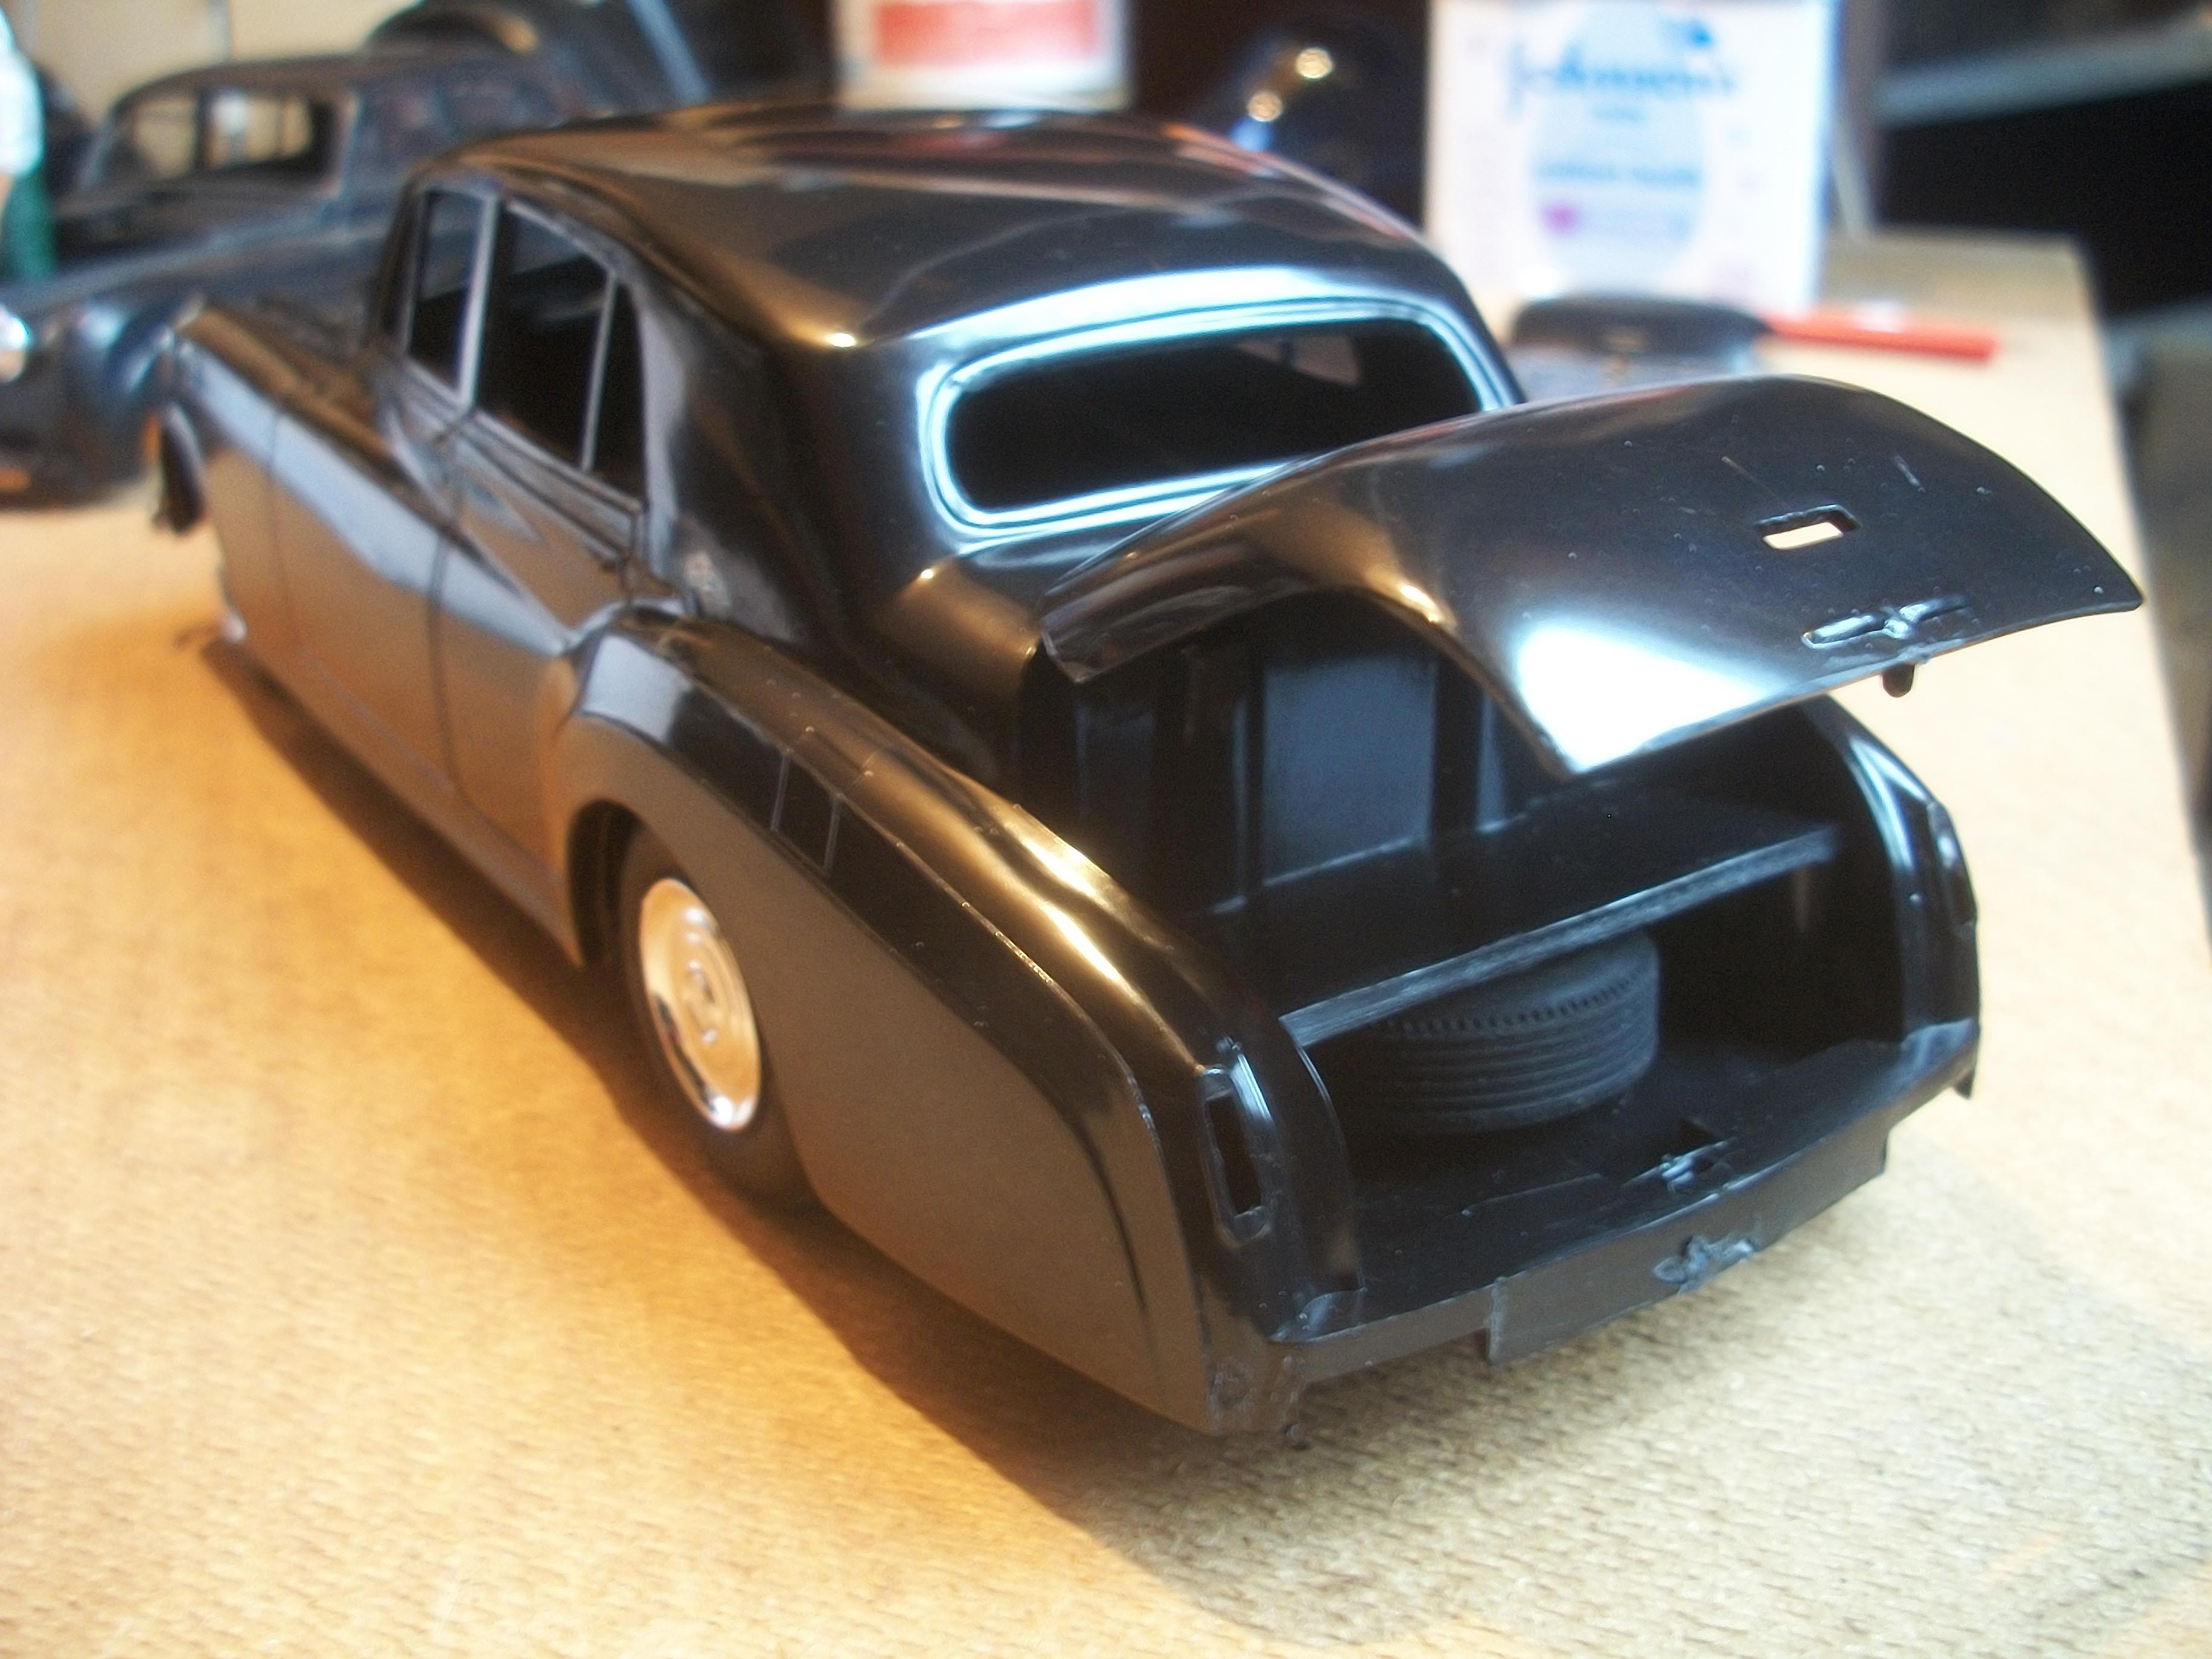
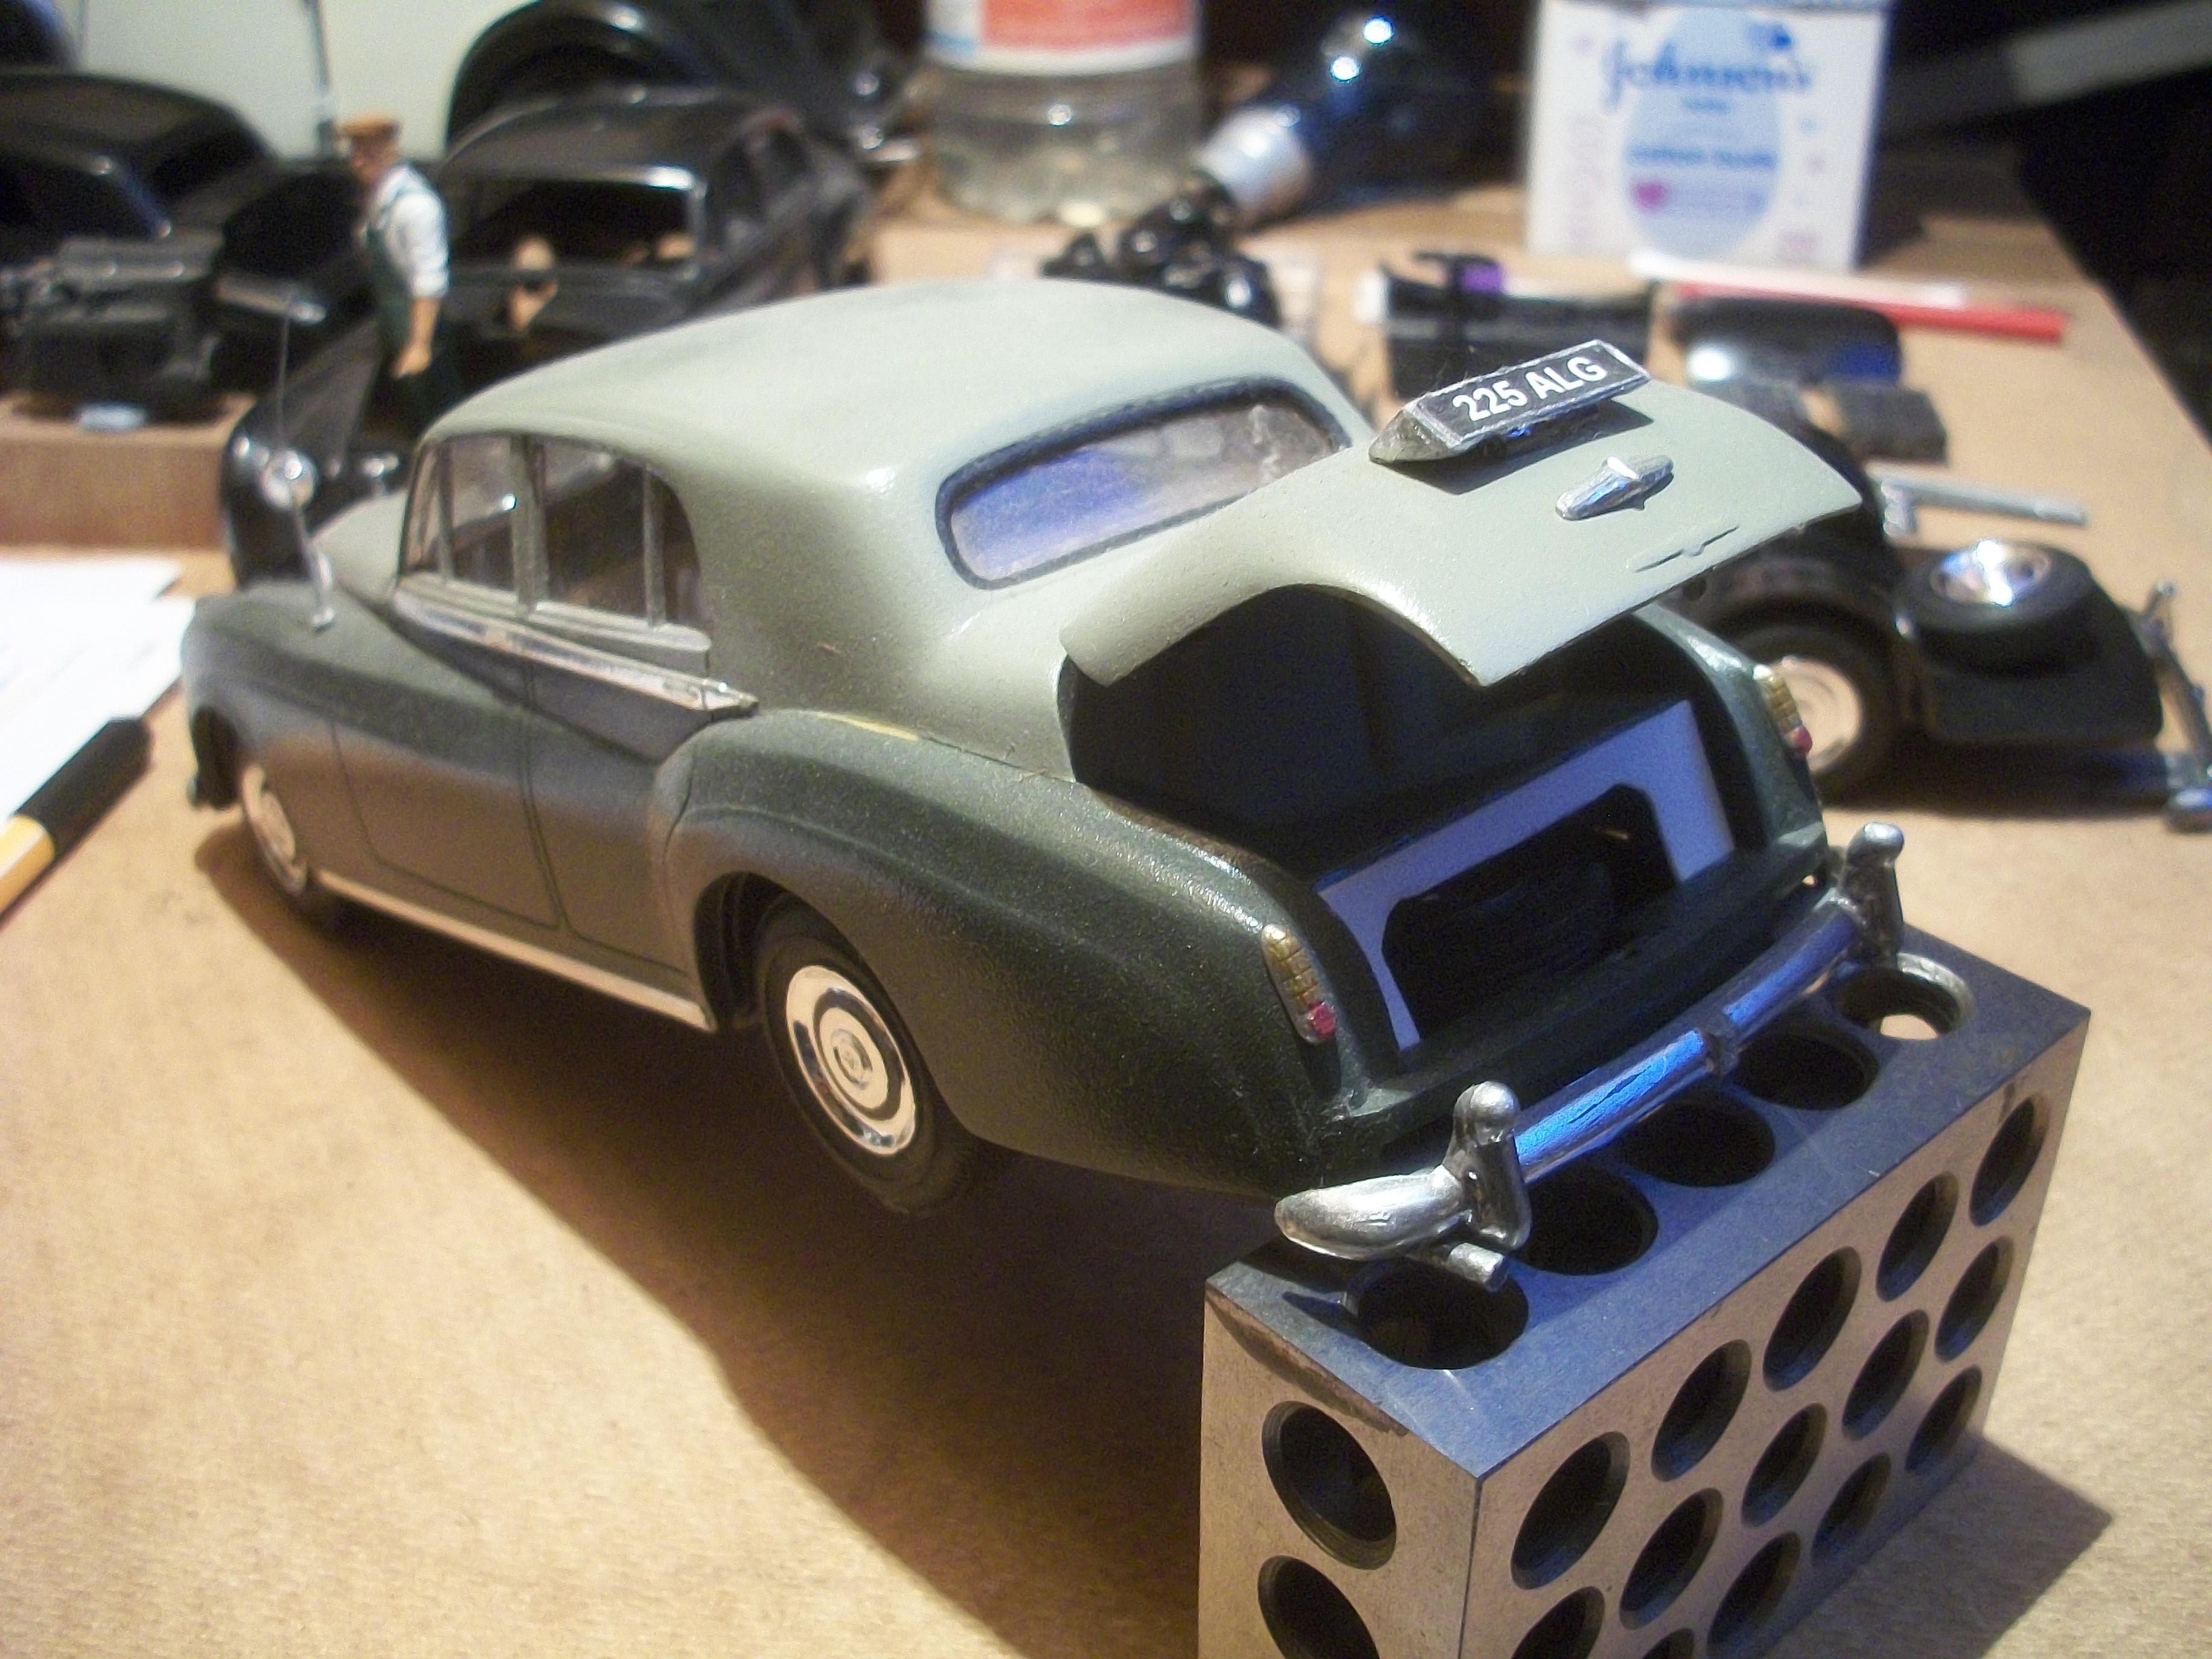
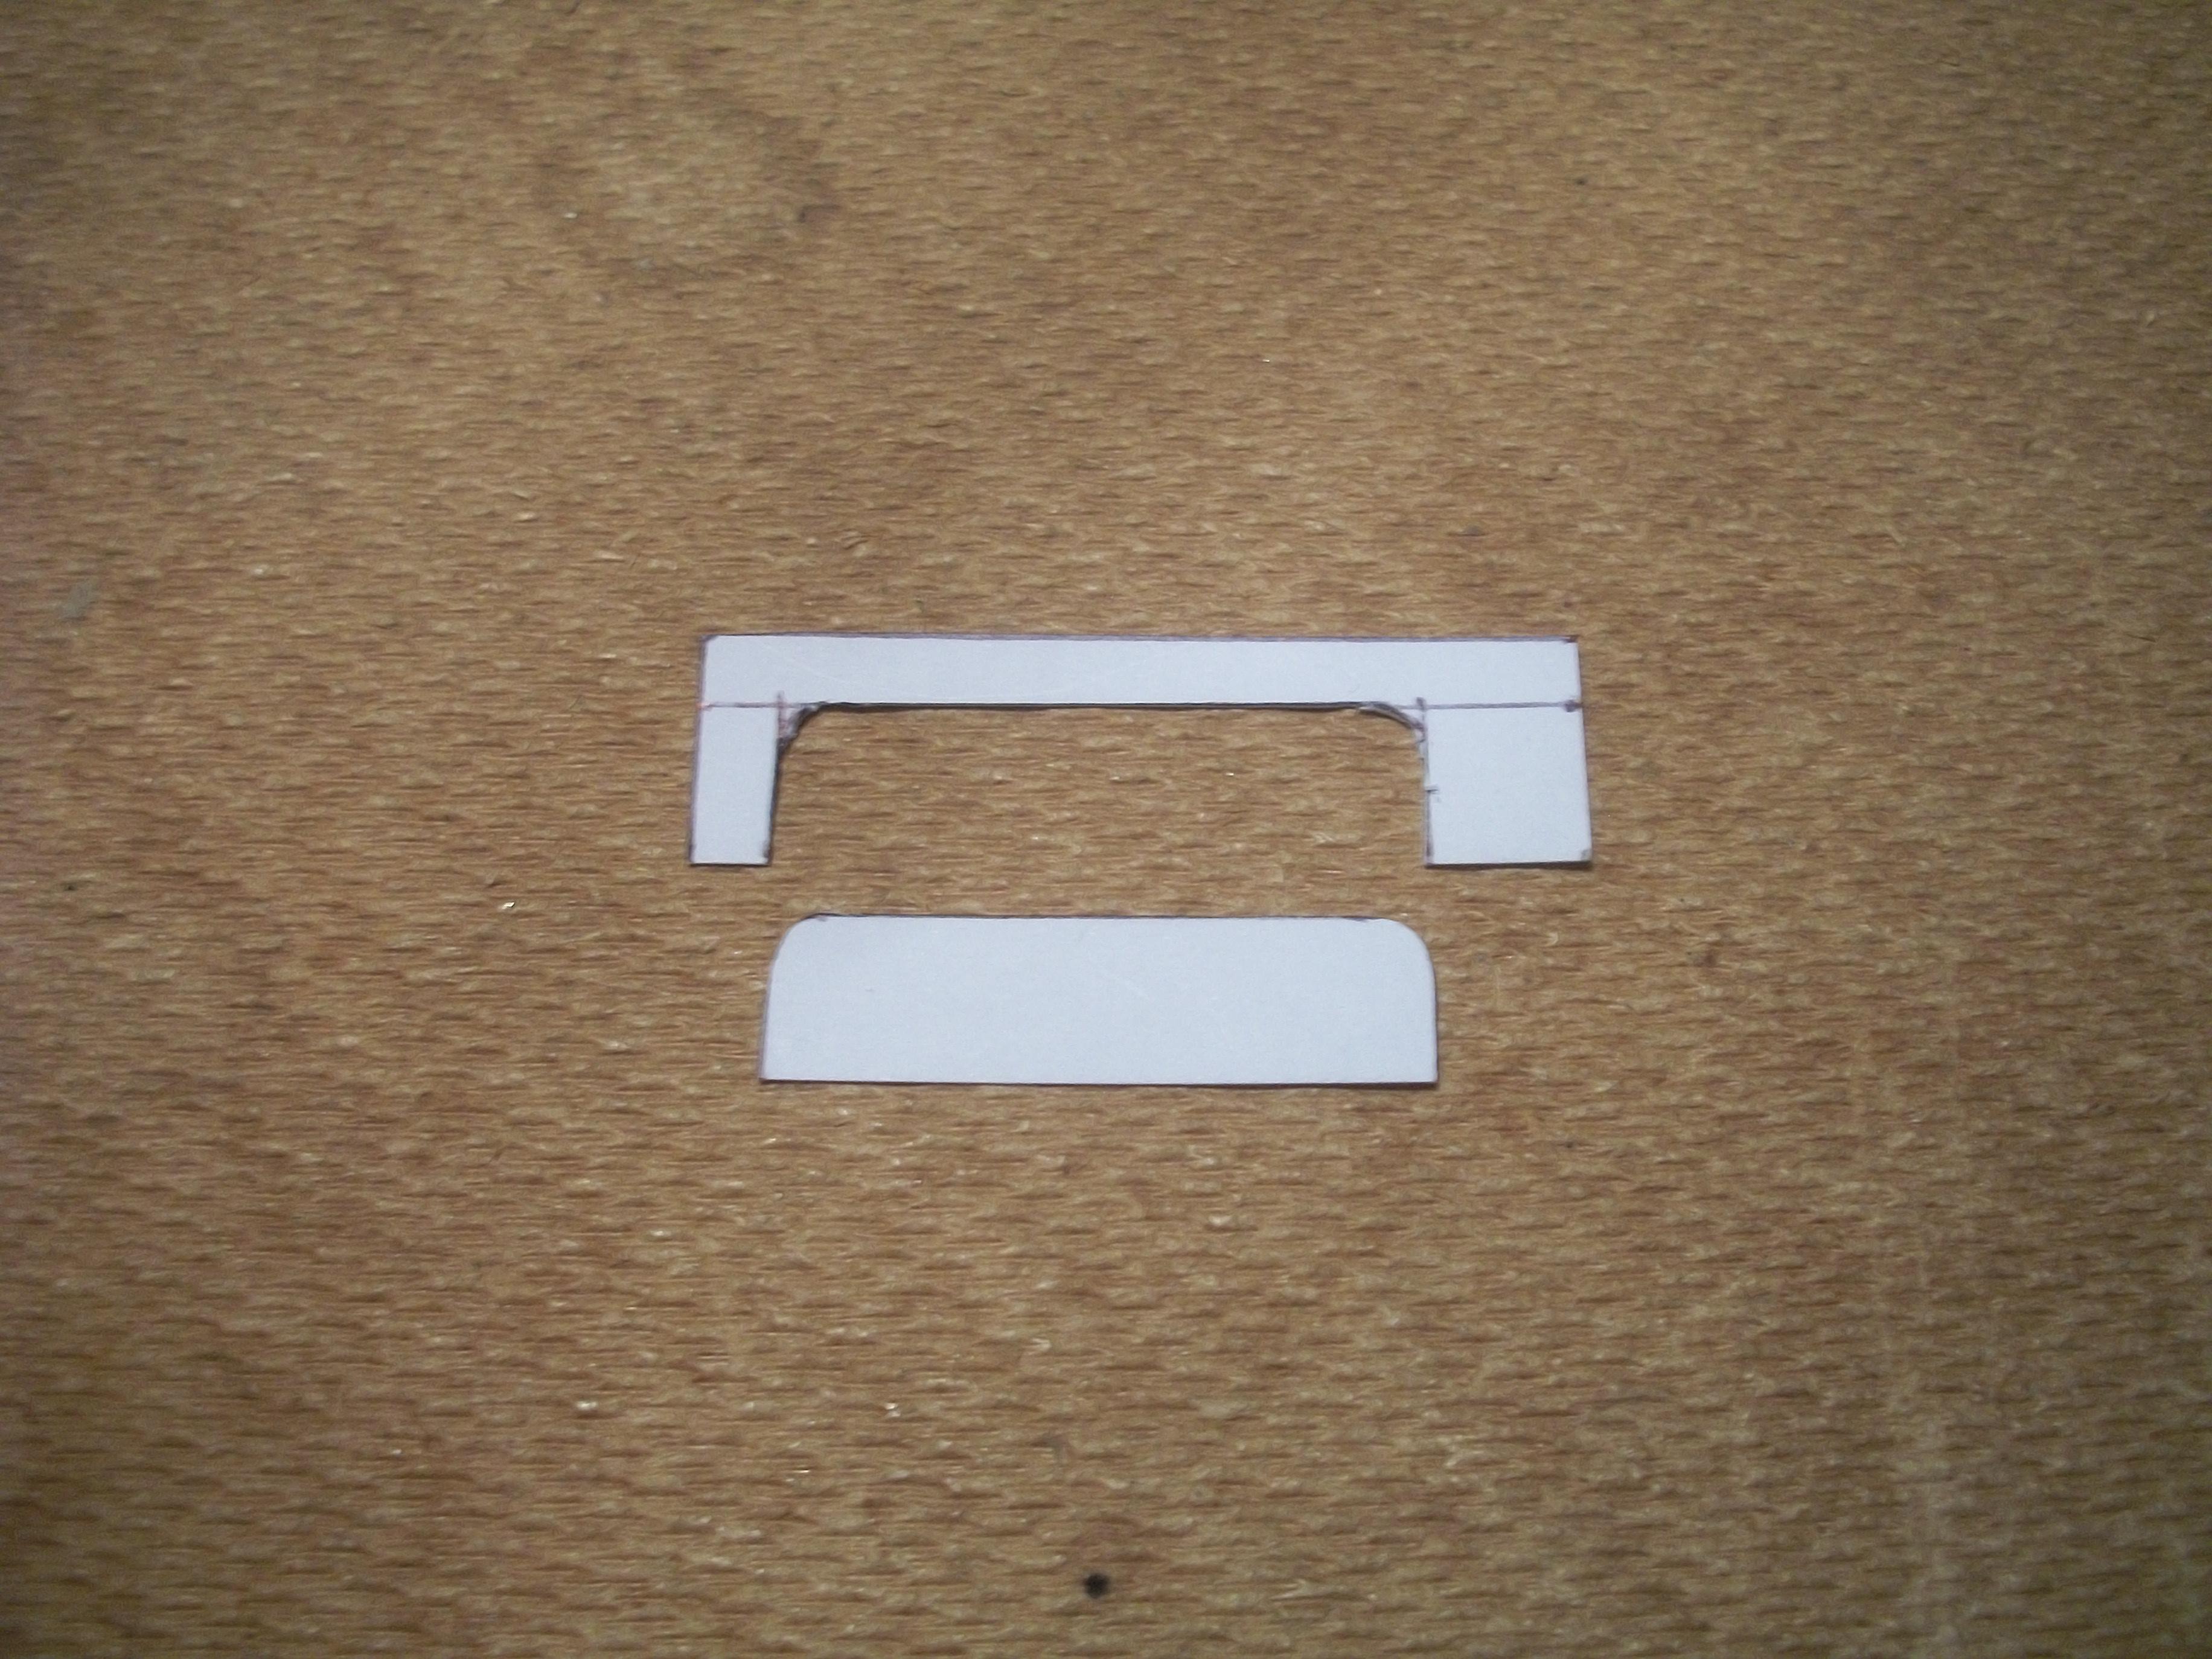
After checking that the boot / trunk lid can be raised to the fully open position, the spare wheel and tyre was mounted onto the chassis floor. The rear bumper fits between the body and the chassis at a later stage . . . Then I have measured, drawn and cut out the panel that fits immediately behind the spare wheel. One of the photos below shows this panel mounted in white on a previous build, which is 225 ALG. The panel has been given a coat of black permanent marker, to give it the black colour. The same permanent marker was applied to the lower edge of the rear body, after this was sanded down to remove a rough imperfection. The spare wheel panel was fabricated from thin white card . . . David
-
Rolls-Royce No Chemicals, No Paint, No Harmful Glues
Anglia105E replied to Anglia105E's topic in WIP: Model Cars
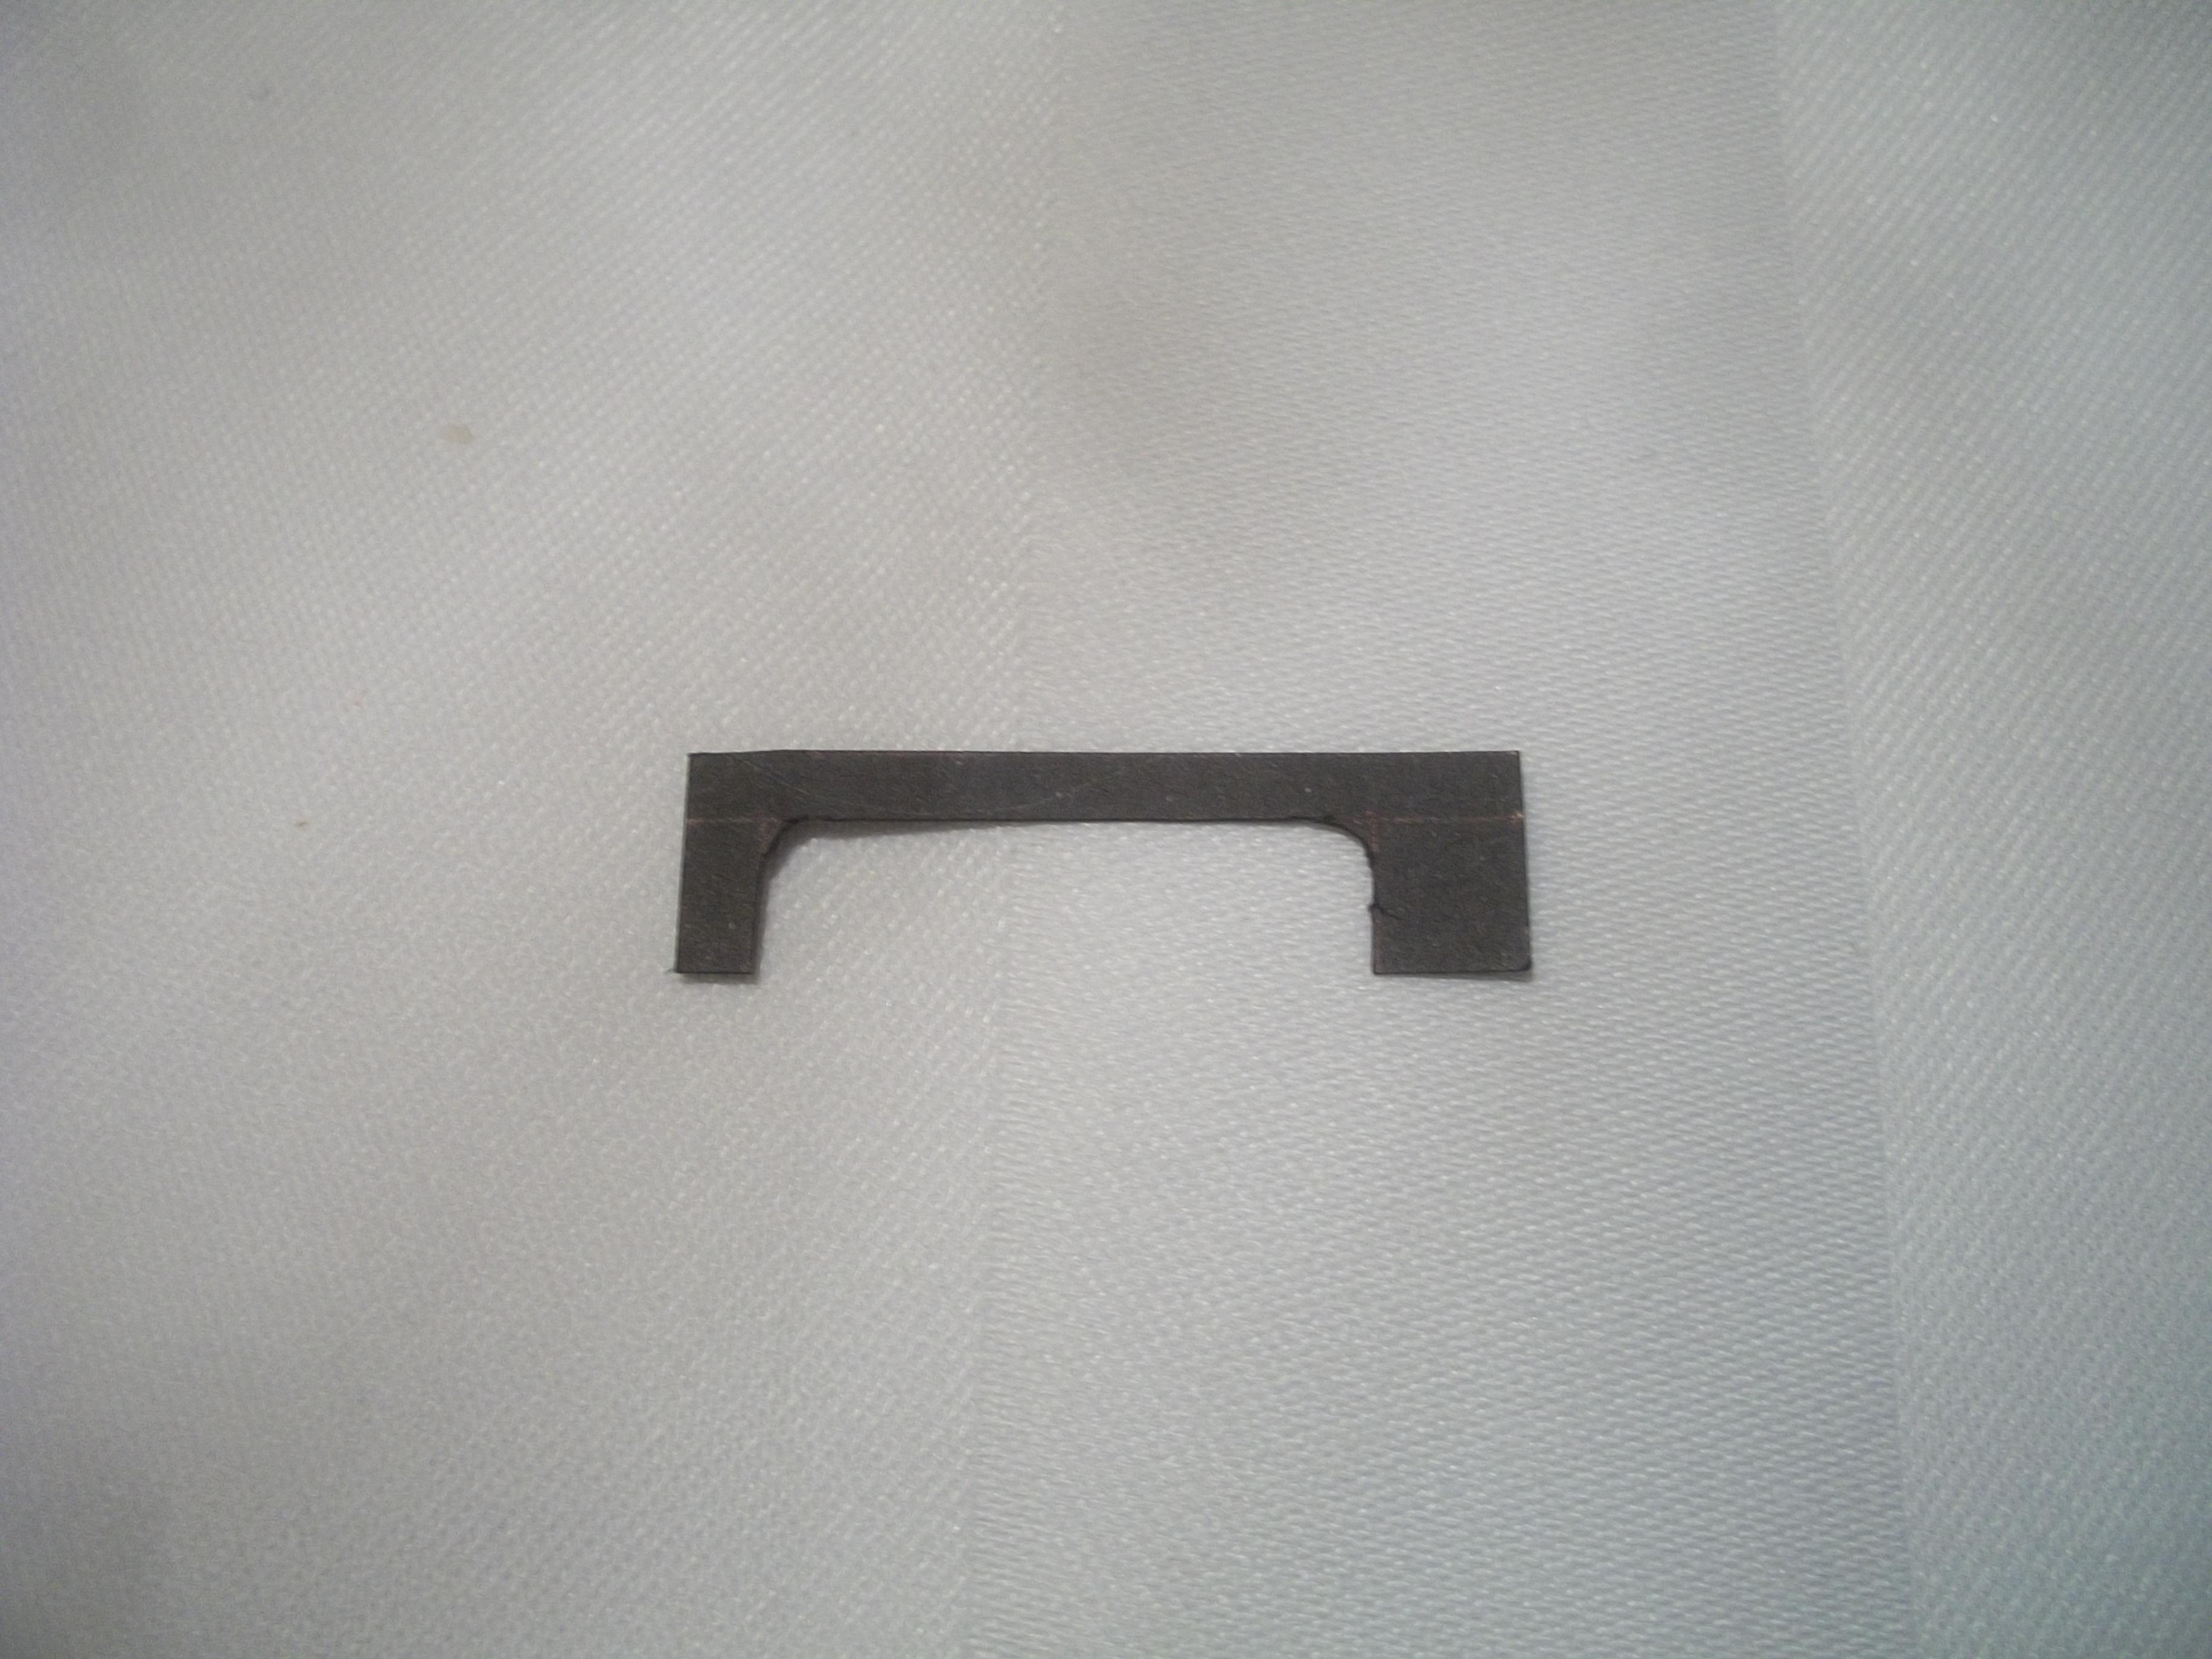
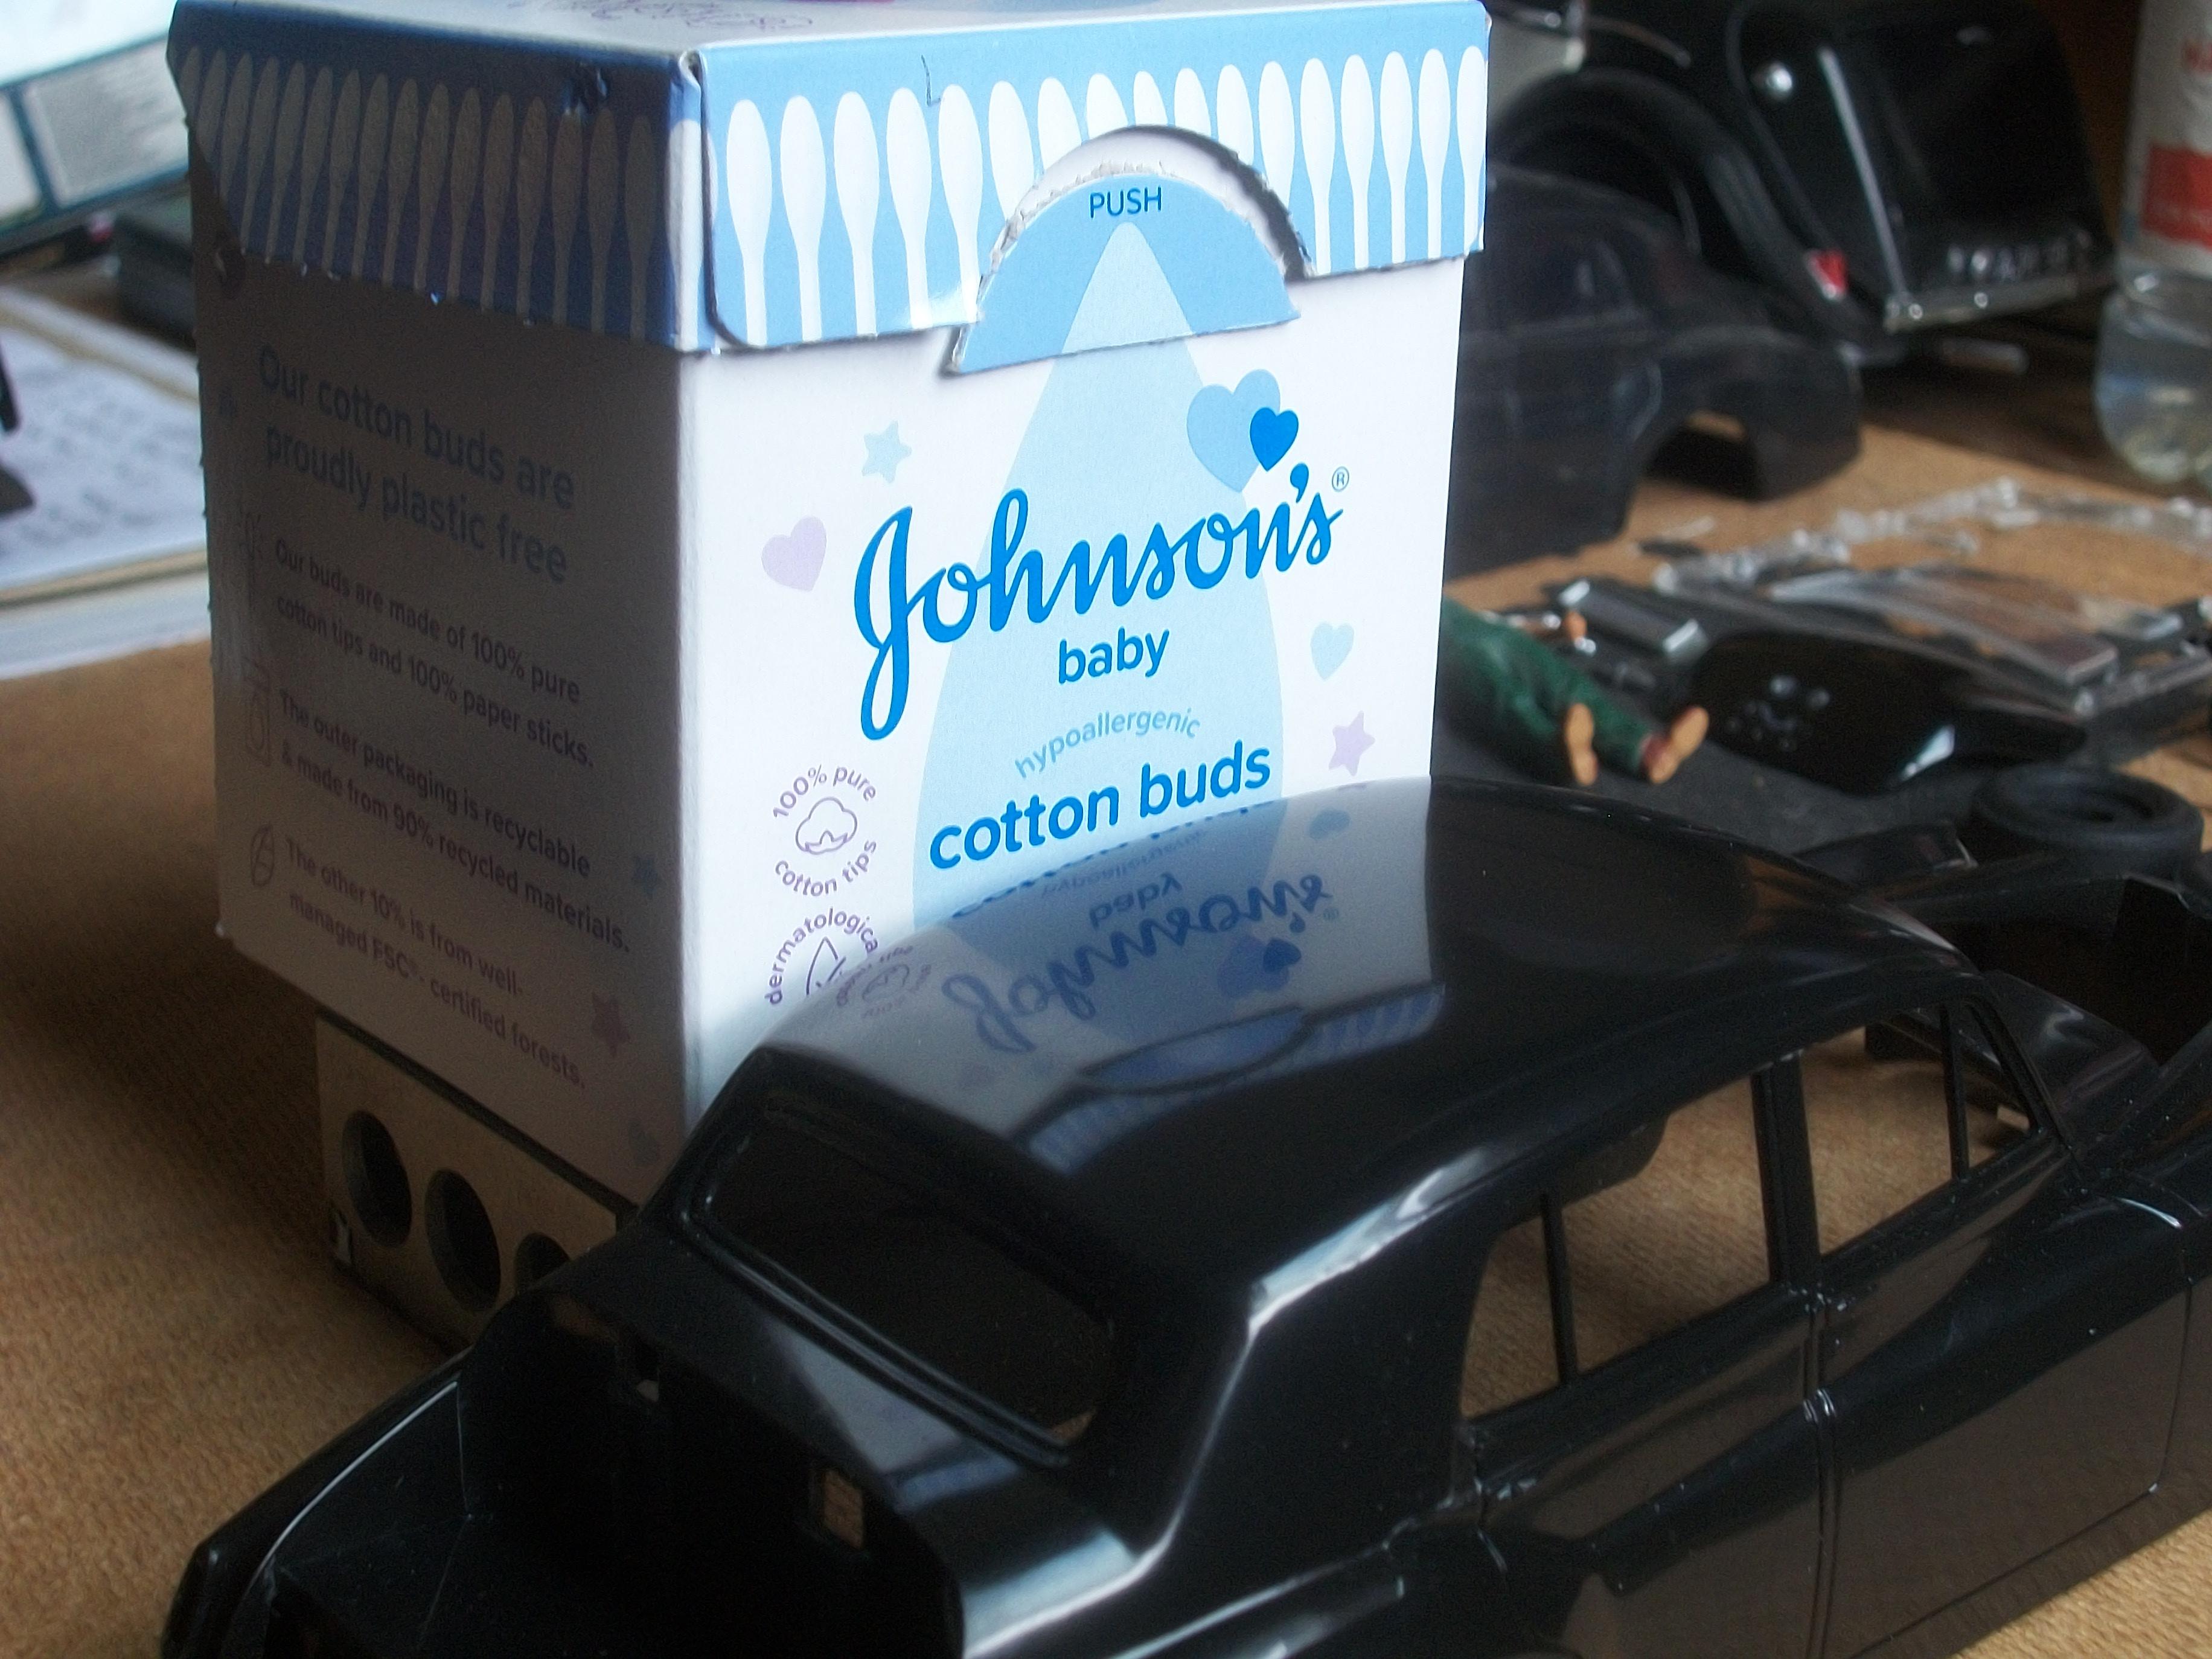
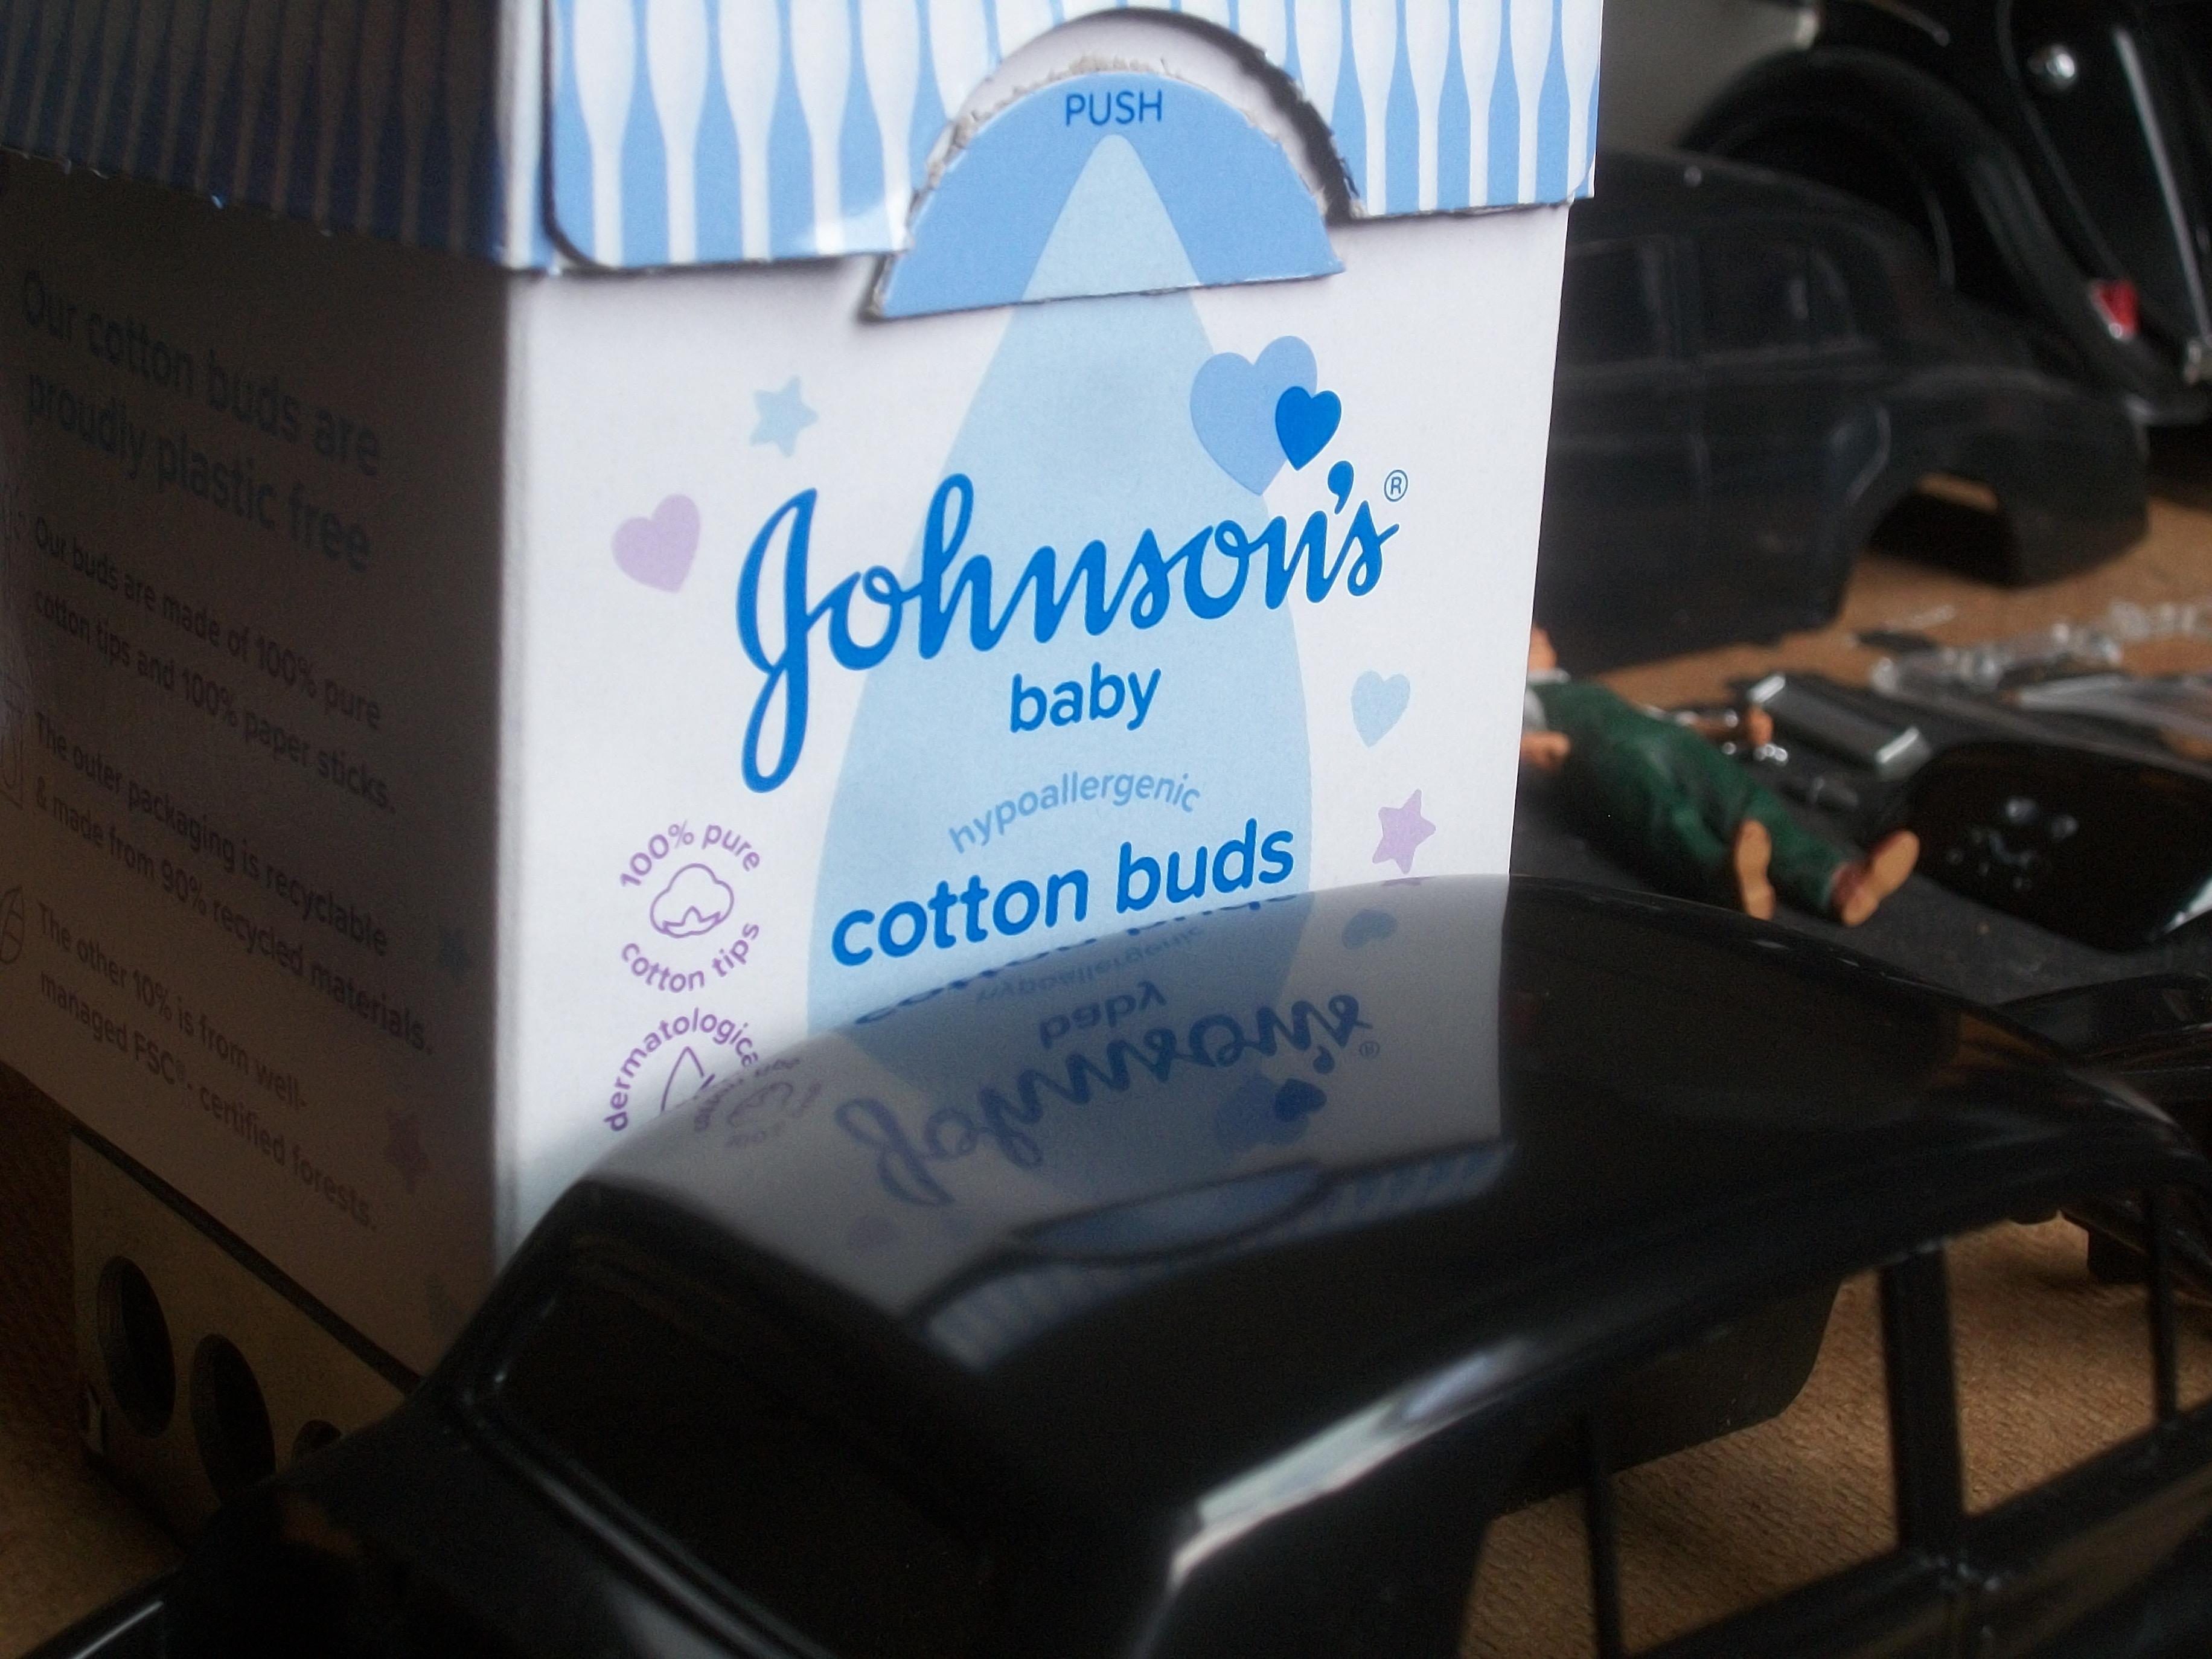
All of the previous eight Sliver Cloud builds have had the ' cocktail stick ' boot lid hinge pin modification fitted, so there is no part included in any of the kits to achieve this . . . My first use of a cotton bud stalk has provided a much better hinge pin action, as it is a tighter fit. Not yet sure what to do about those nasty boot lid dimples . . . Something like melted black plastic could have been an option in the past, but that process would give off unpleasant fumes, even in a very small quantity . . . David W.
-
I think the gold and the turquoise has worked quite well David . . . You are almost there, so the end is in sight . . . Soldier on . . . David W.
-
Rolls-Royce No Chemicals, No Paint, No Harmful Glues
Anglia105E replied to Anglia105E's topic in WIP: Model Cars
Thanks for the amusing recipe Steve . . . You have a way with words ! . . . Something did occur to me last night, the filler is white in colour, so even when it has dried and I sand the surface smooth, I cannot polish the black plastic of the trunk lid. One idea would be to mix Vallejo Gloss Black acrylic with the filler before applying the mix to the dimples, but not sure if that method would work . . . Every single one of these boot / trunk lid parts in these Silver Cloud kits has the two dimples in exactly the same place . . . David -
Rolls-Royce No Chemicals, No Paint, No Harmful Glues
Anglia105E replied to Anglia105E's topic in WIP: Model Cars
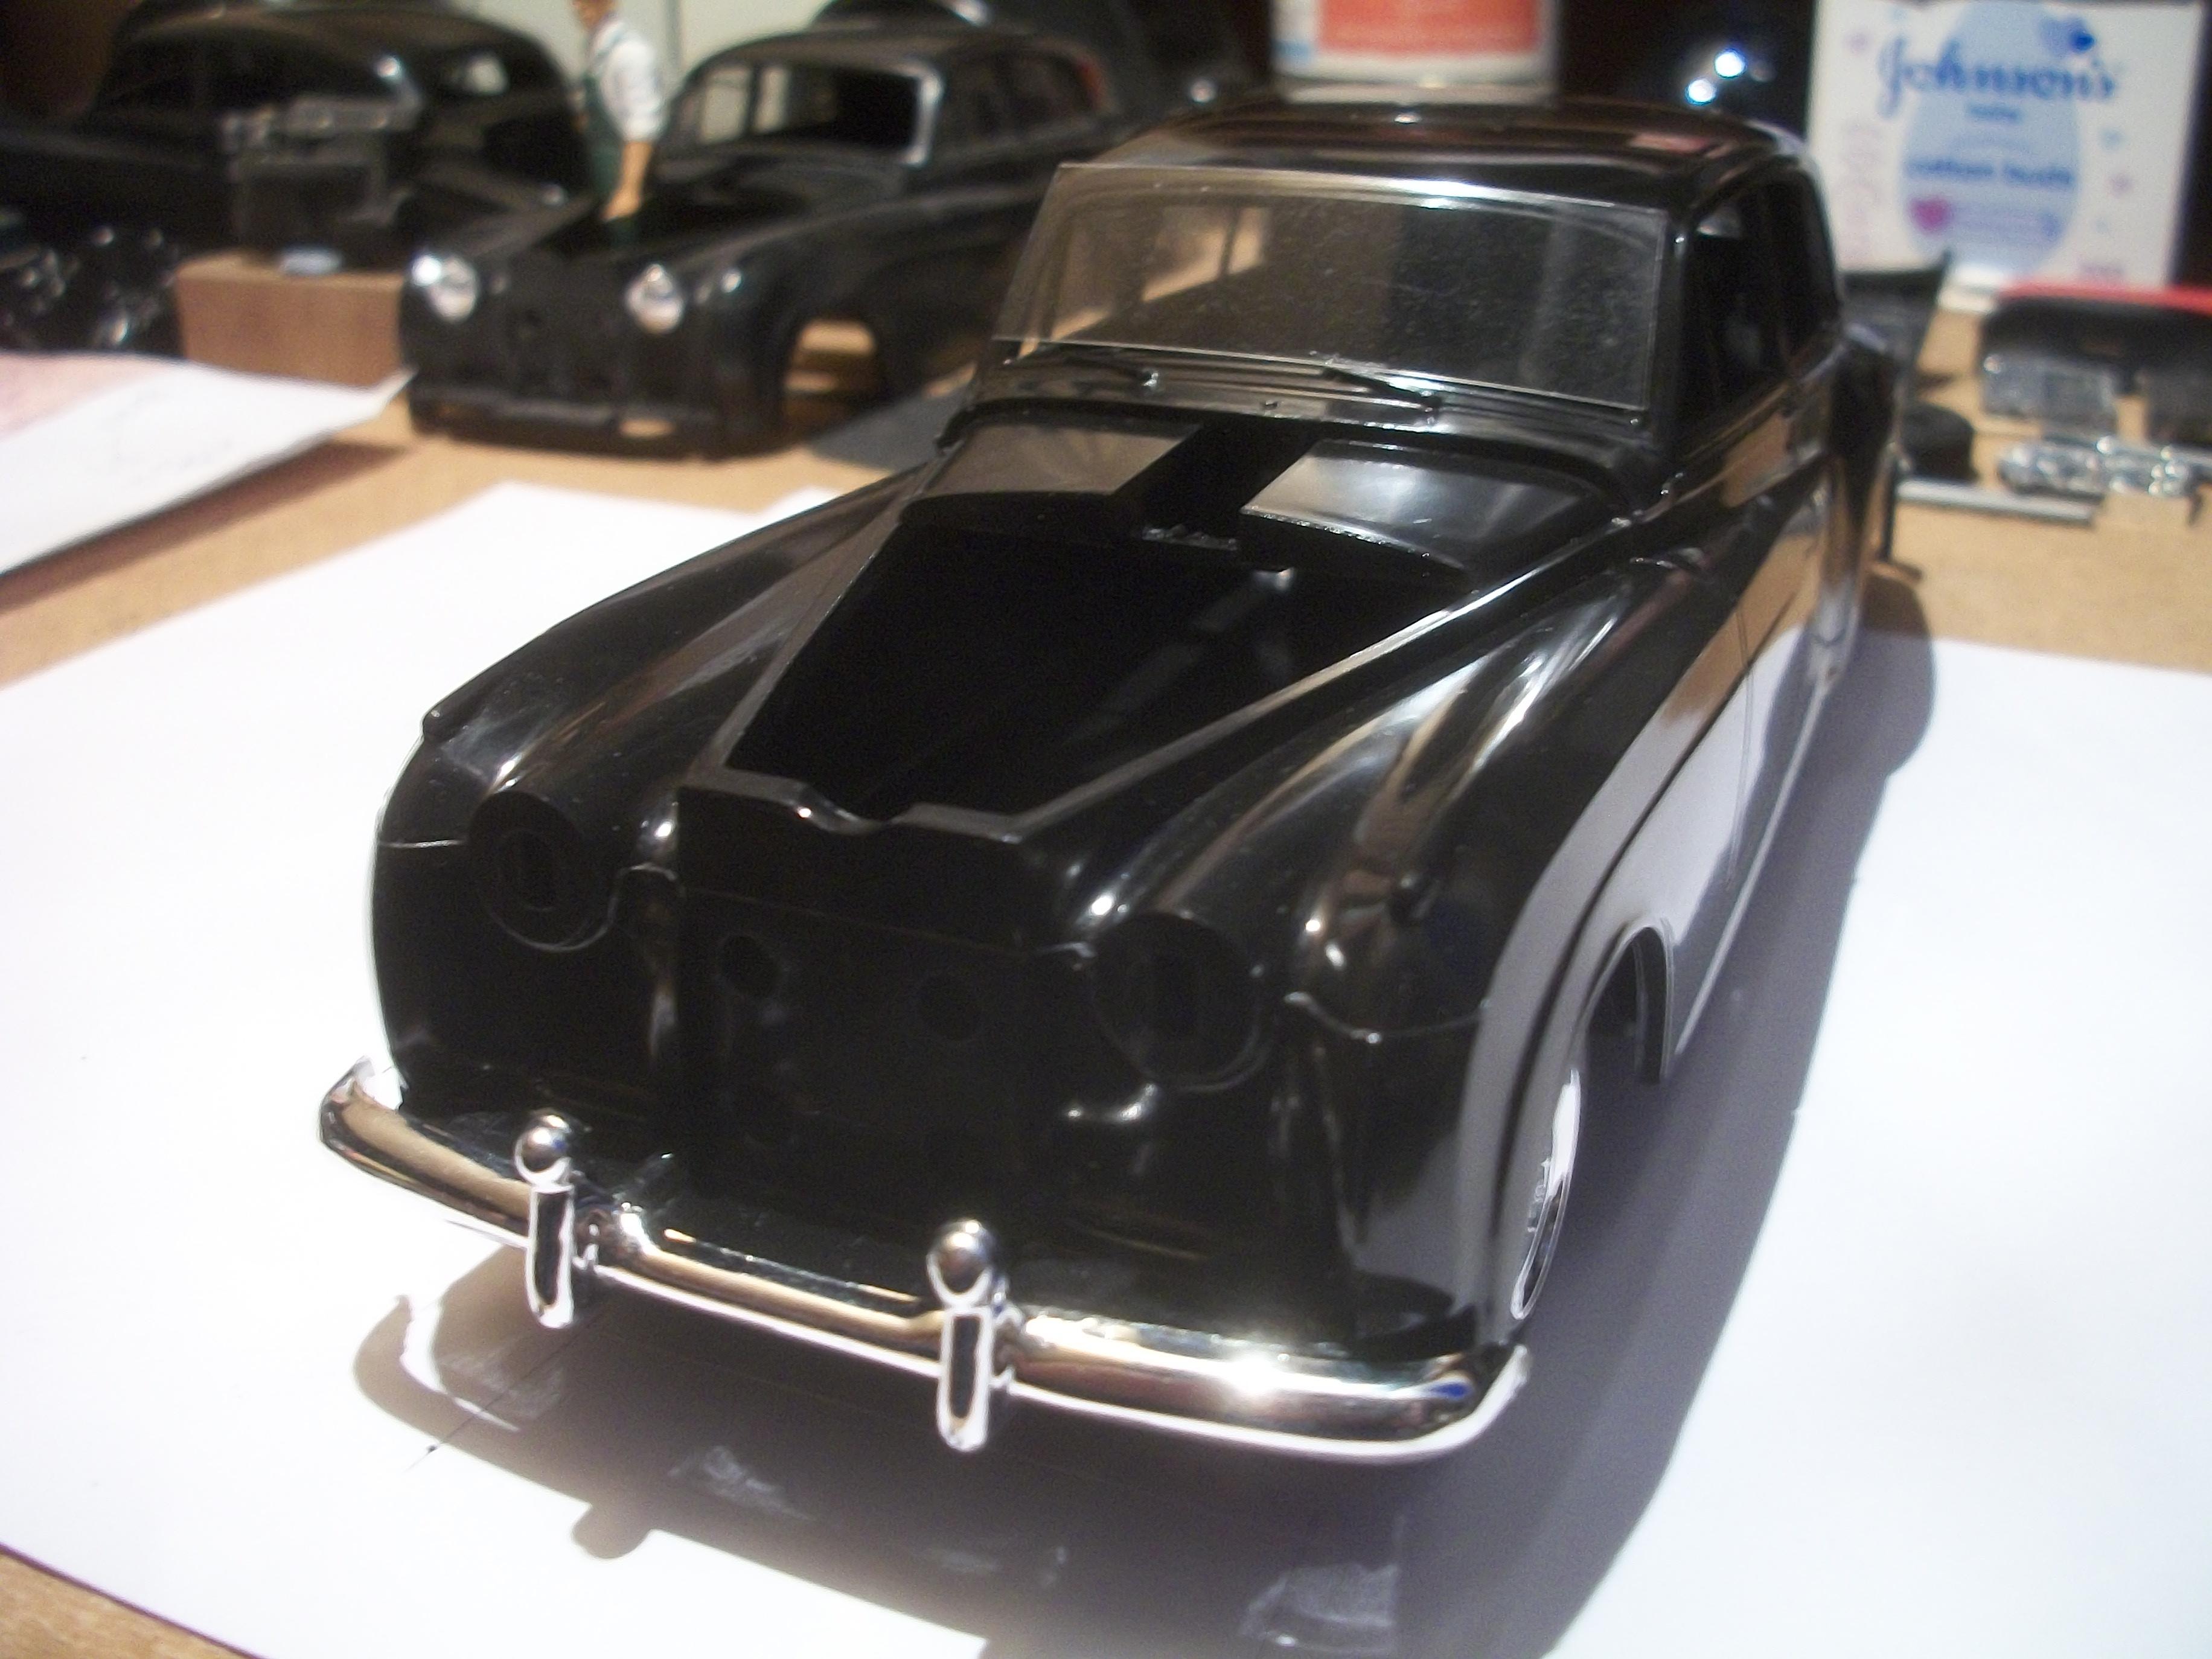
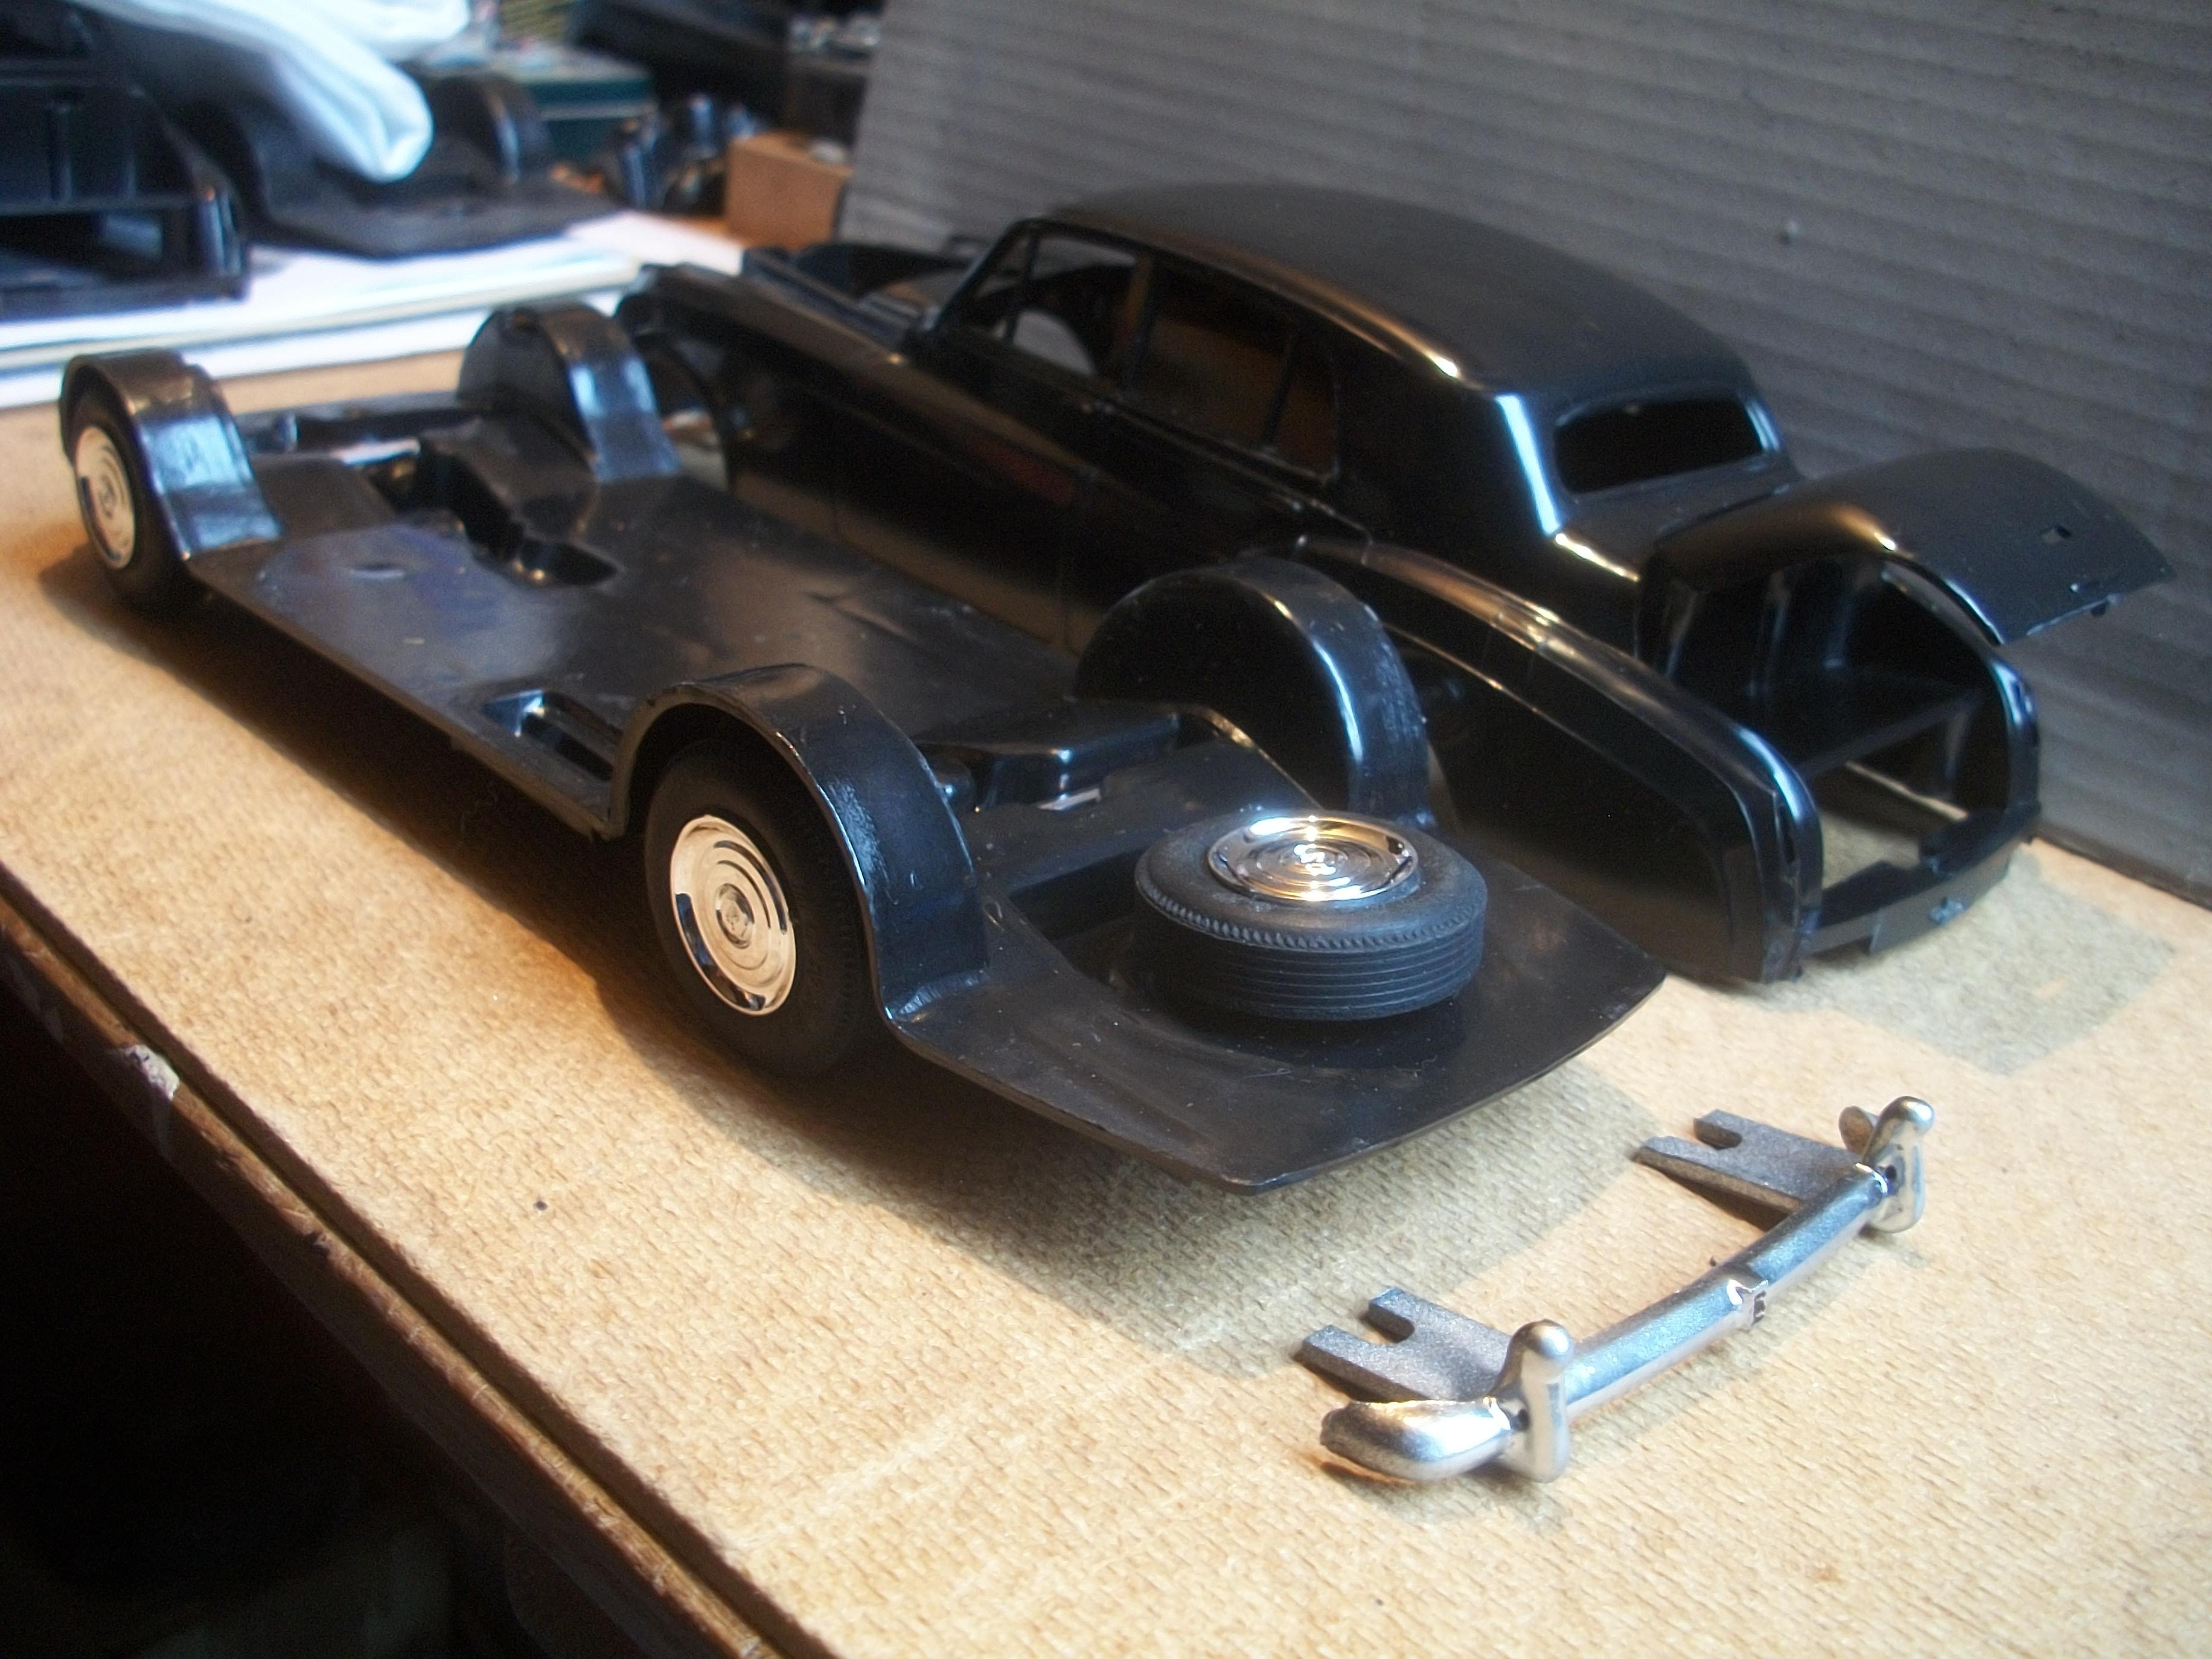
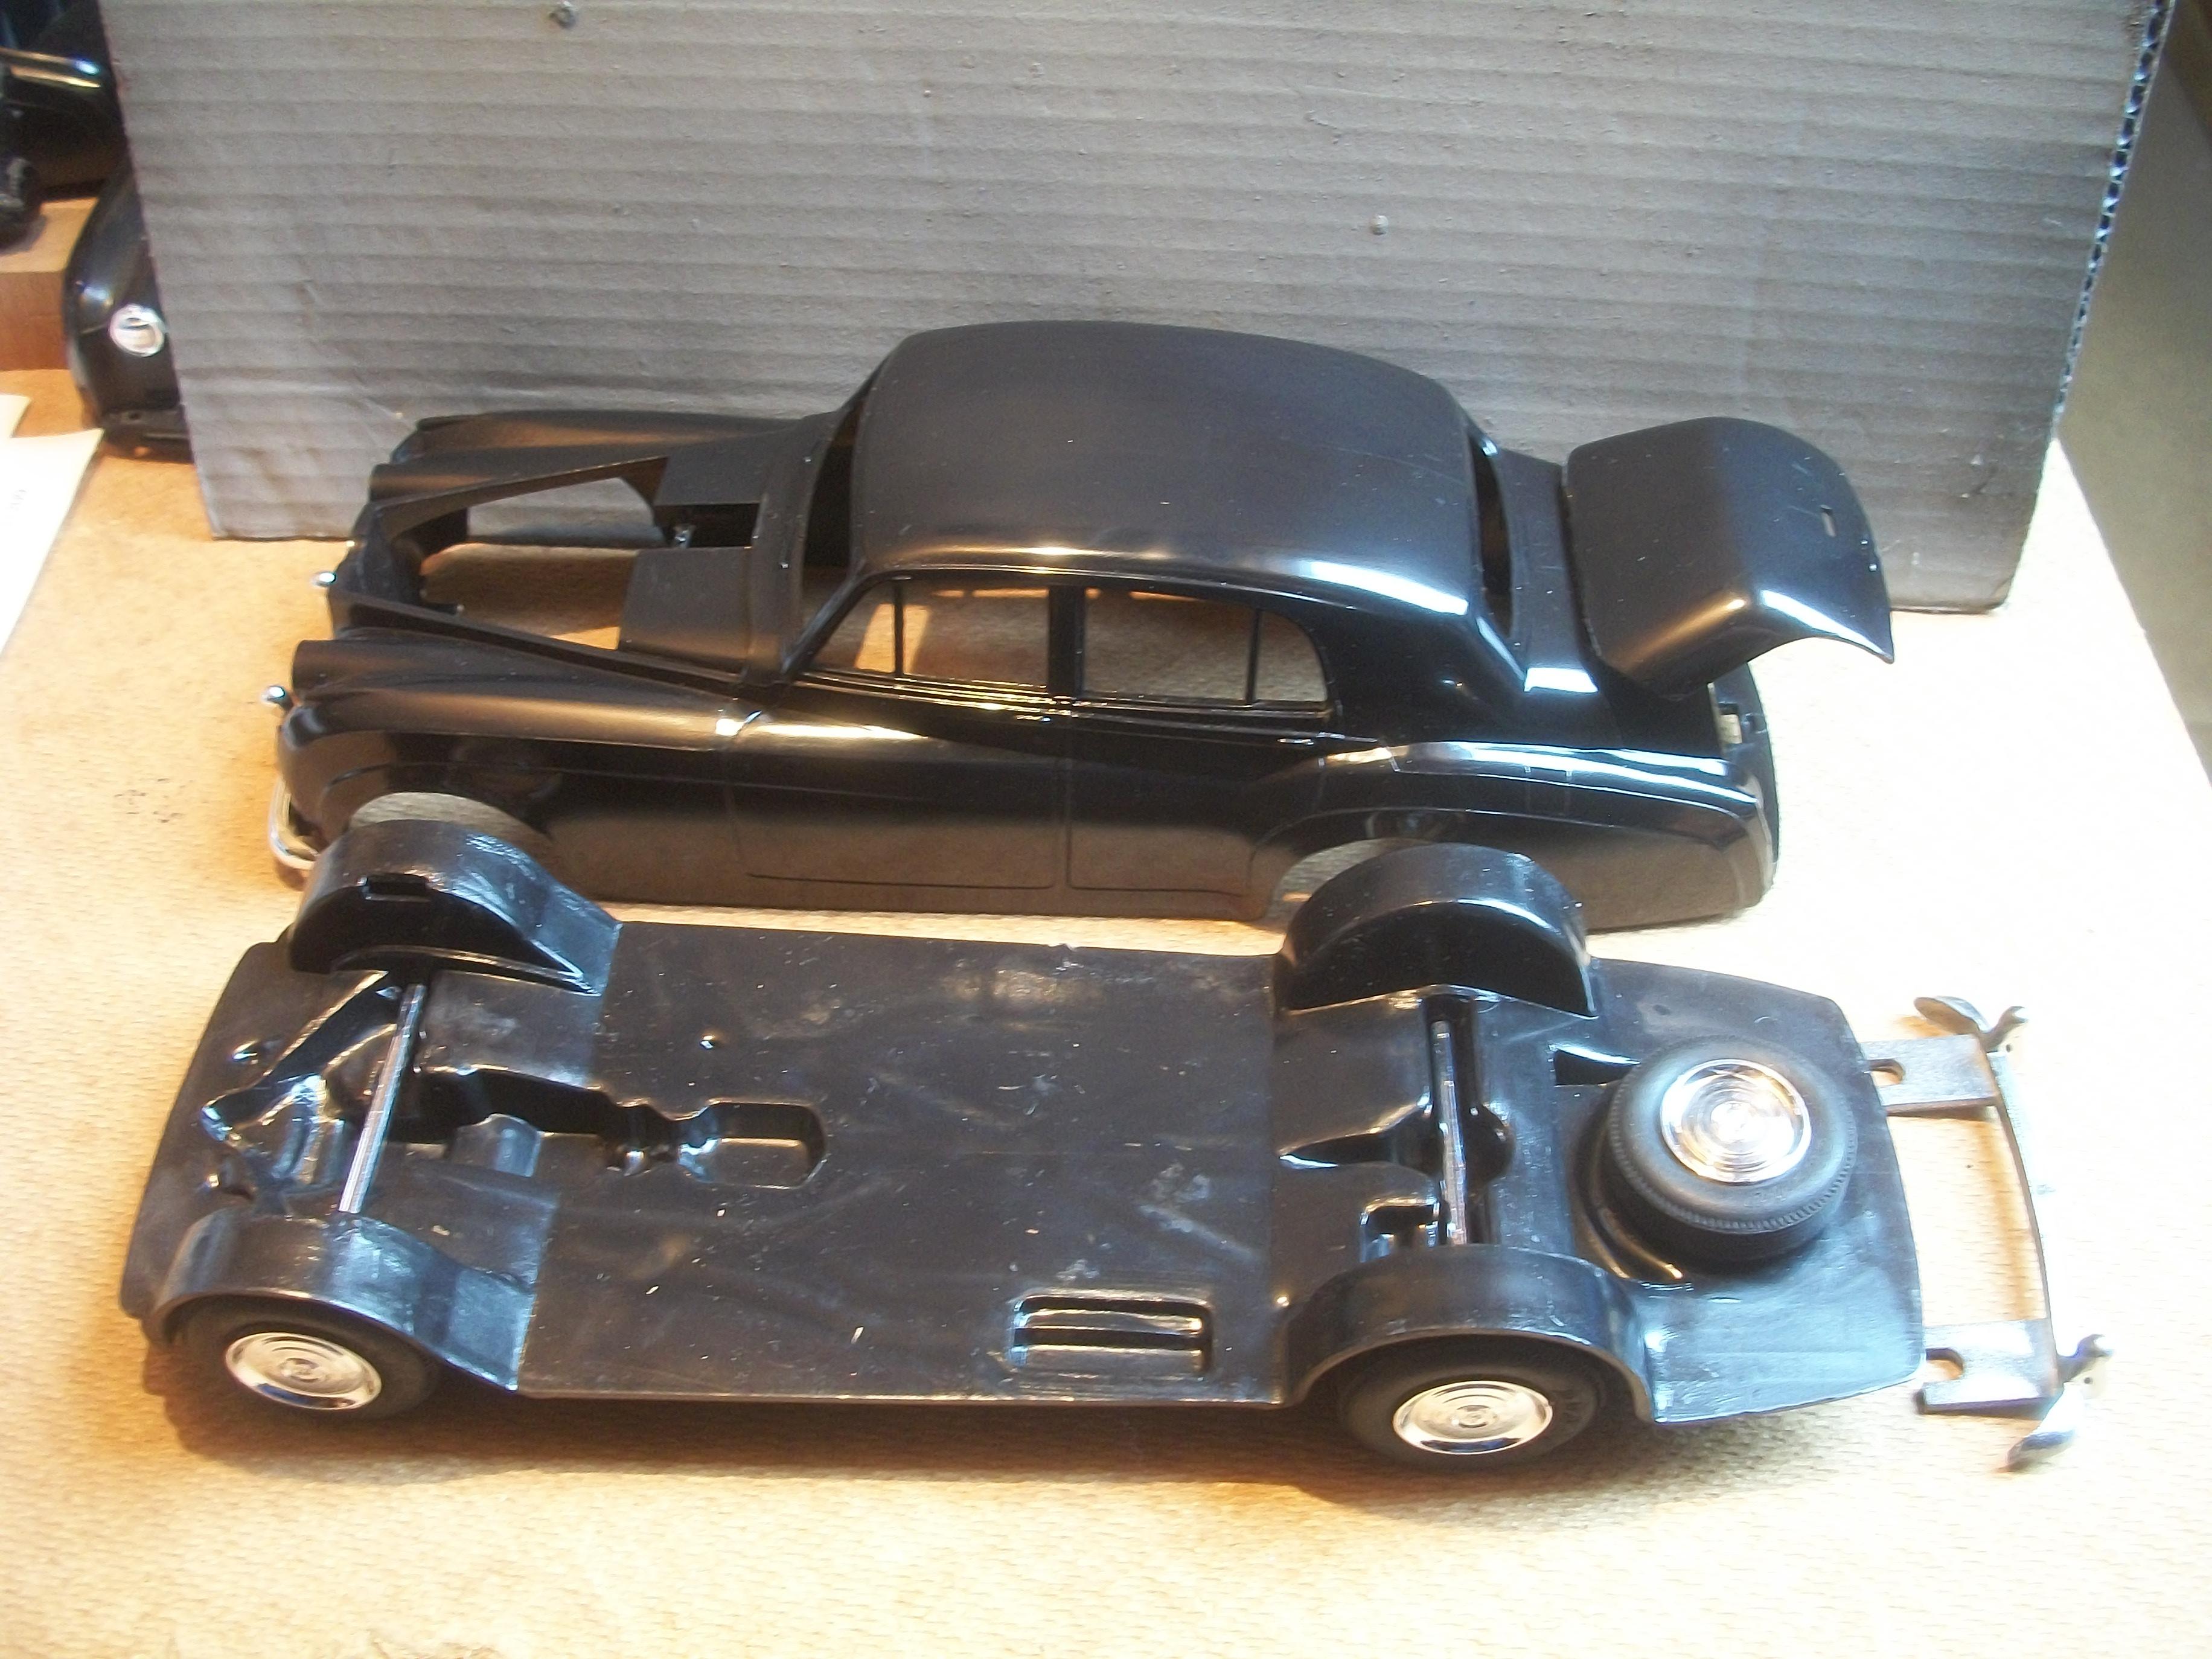
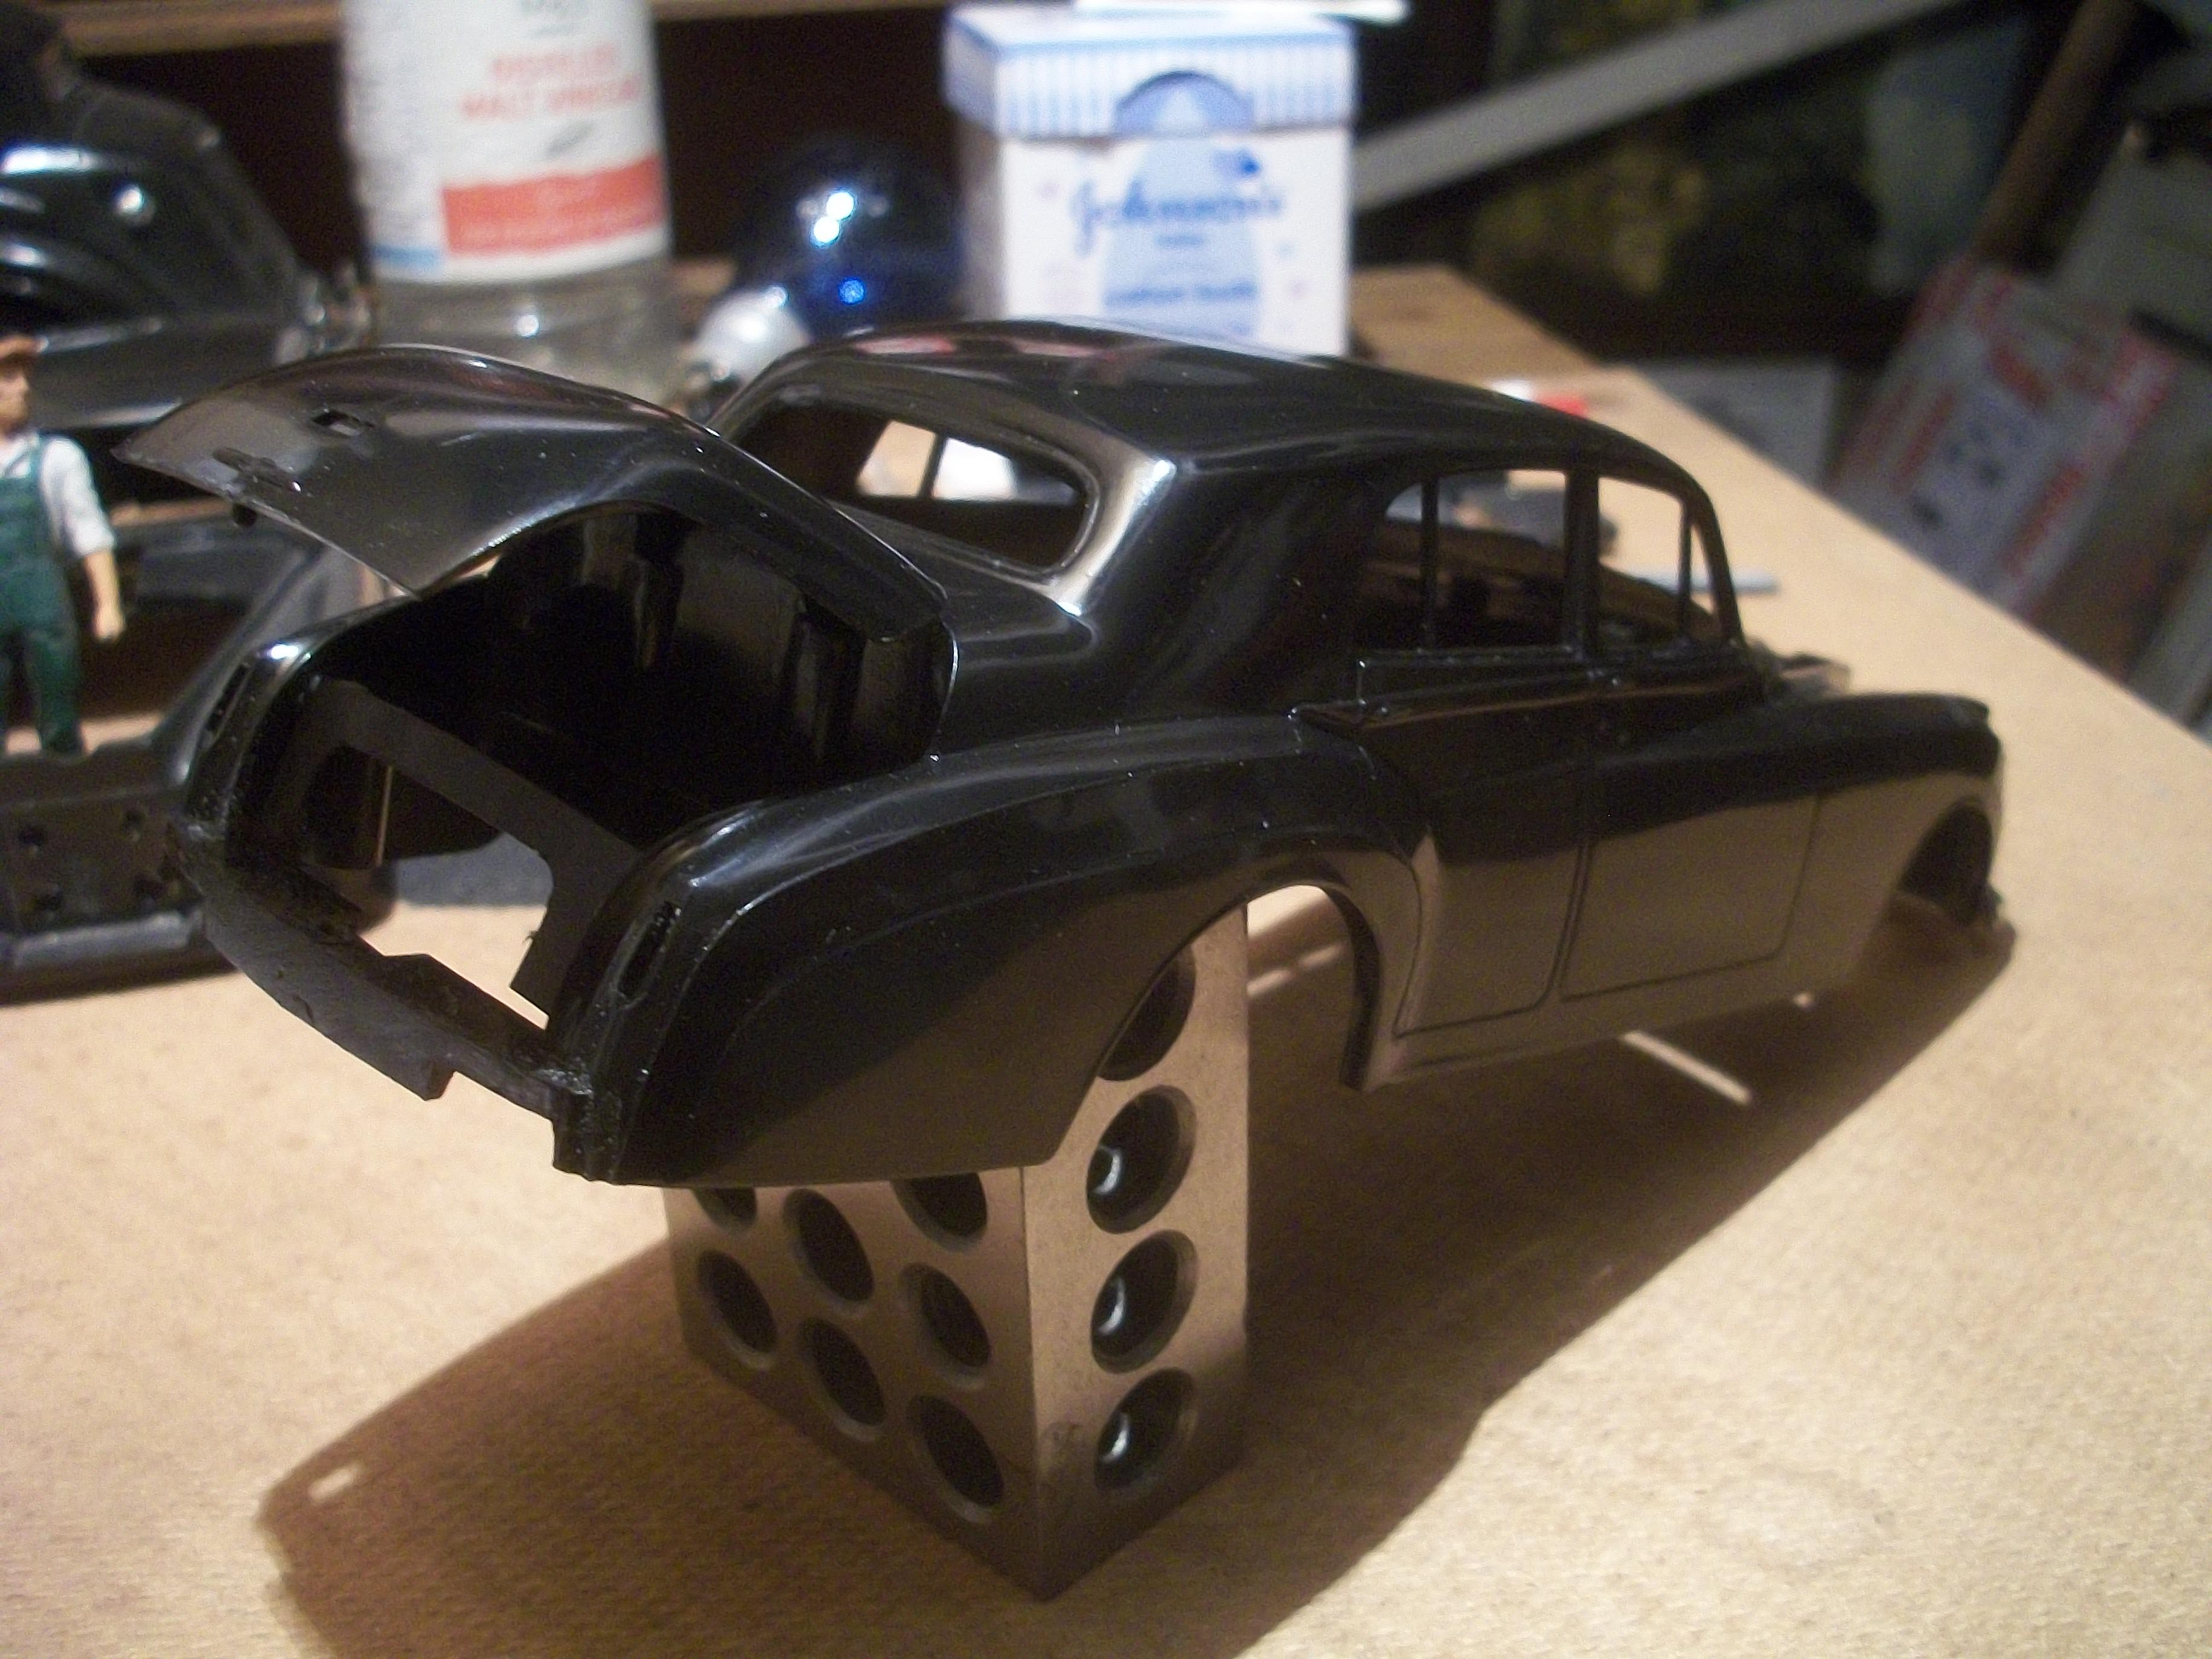
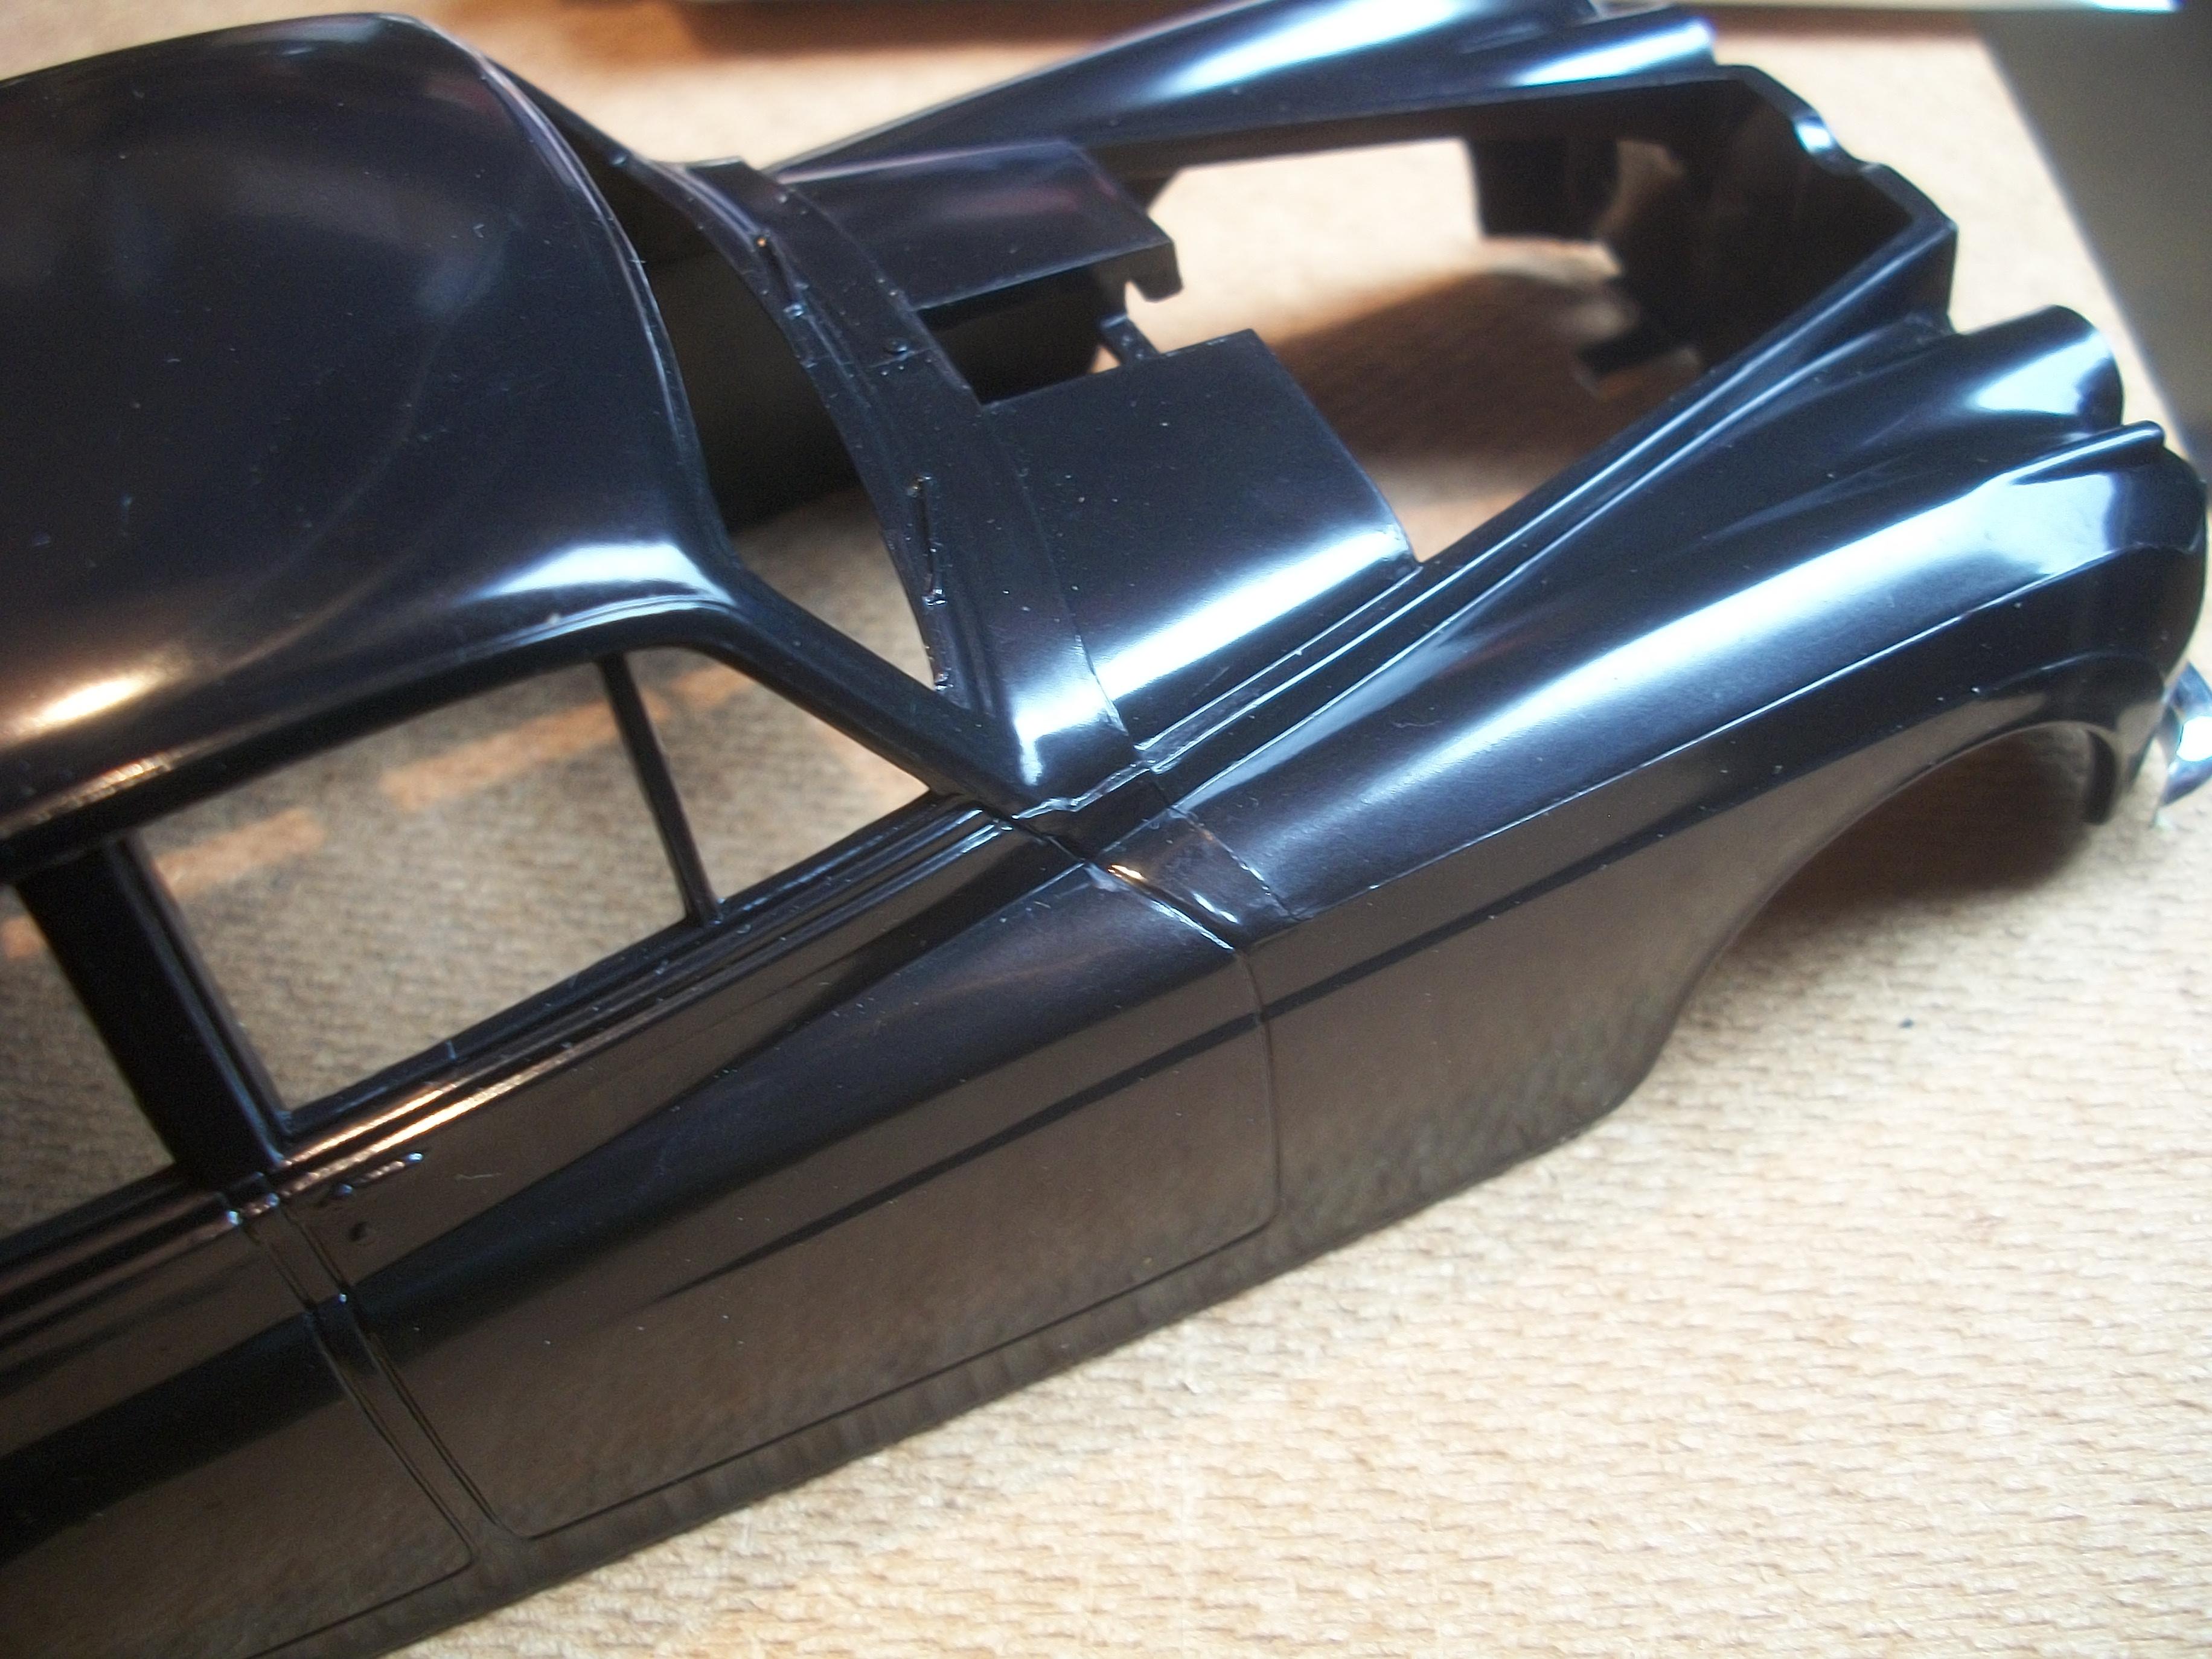
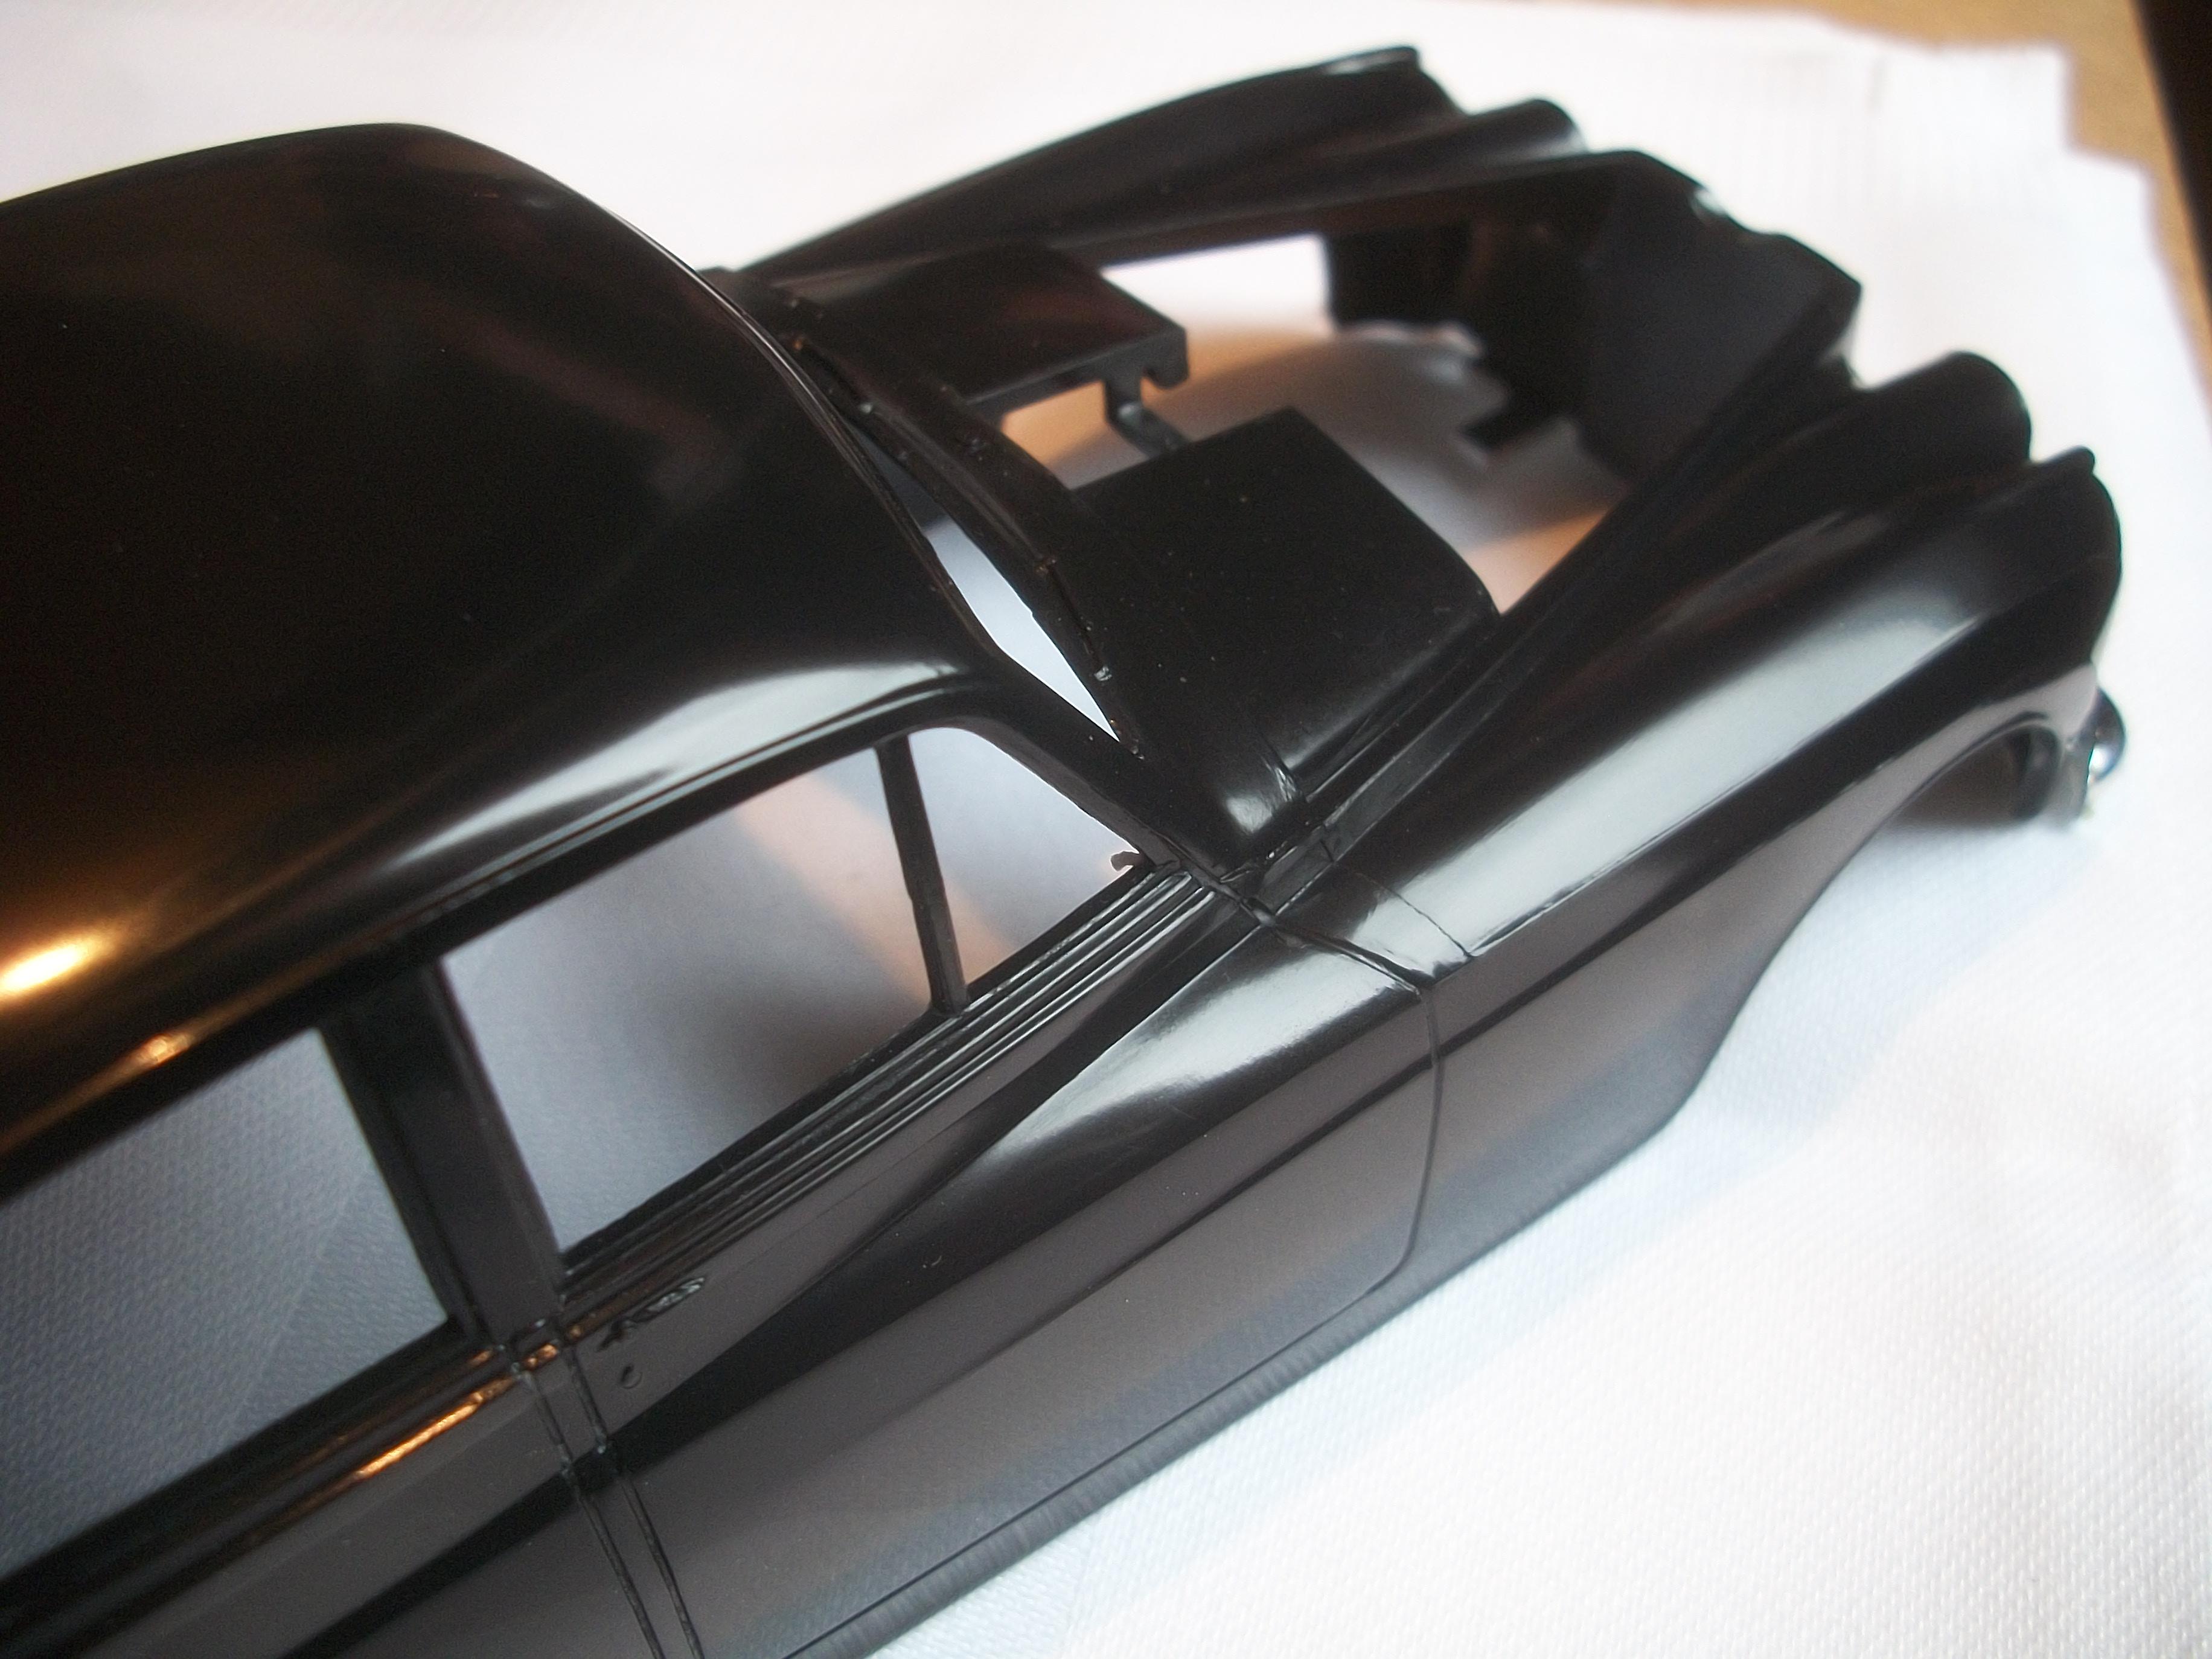
During this afternoon, I fitted the Entex boot lid to the Entex body shell, which seems to be a nice close fit. However, there are two dimples immediately above the two boot lid hinges that are underneath . . . Although I am reluctant to use Mr White Putty R filler, this may the only way to deal those unsightly dimples. For the first time I decided to use a short length of cotton bud stalk for the boot lid hinge mechanism, rather than the usual cocktail stick. All of my previous Silver Cloud builds have a short length of cocktail stick wedged between the struts inside the body shell. The two hooks of the boot lid hinges fit tightly over the makeshift hinge bar . . . The cotton bud stalk has a slightly larger diameter than the cocktail stick, and this actually works much better I have realised. No glue of any kind is required for the boot lid mounting. The Entex chassis, along with the chrome plastic axles, road wheels and tyres have been mated up with the body, and also the rear bumper. All of these parts are simply test fitted at this stage . . . The axles are very loose within their mounting holes, and the wheels are also loose on the axles, so this needs to be addressed later. I have emailed the RROC in North America, asking them for a chassis number for the OVD 777 car, if they have the car listed on their database. The RREC in England do not have any records for the car on their database. I have attached a selection of photos to the email message for the RROC, one of which shows both the UK registration number plate, as well as the Texas license plate also . . . David
-
Rolls-Royce No Chemicals, No Paint, No Harmful Glues
Anglia105E replied to Anglia105E's topic in WIP: Model Cars
That particular kit that you had to work with is probably one of the worst examples of this defect that I have seen . The area of the bodywork at the join between fender, door and windshield must have been difficult to cast from the tooling that was available to companies such as Minicraft, Revell, Academy, Entex, Masterkit and Hubley, as the moulds were well past their sell by date . . . Now that I am not able to use filler and sanding techniques, I feel so lucky to have picked up a kit that does not require this type of work in that area. David W. -
Rolls-Royce No Chemicals, No Paint, No Harmful Glues
Anglia105E replied to Anglia105E's topic in WIP: Model Cars
Many thanks for your comment Jose . . . The work proceeds at a steady pace ! David -
Rolls-Royce No Chemicals, No Paint, No Harmful Glues
Anglia105E replied to Anglia105E's topic in WIP: Model Cars
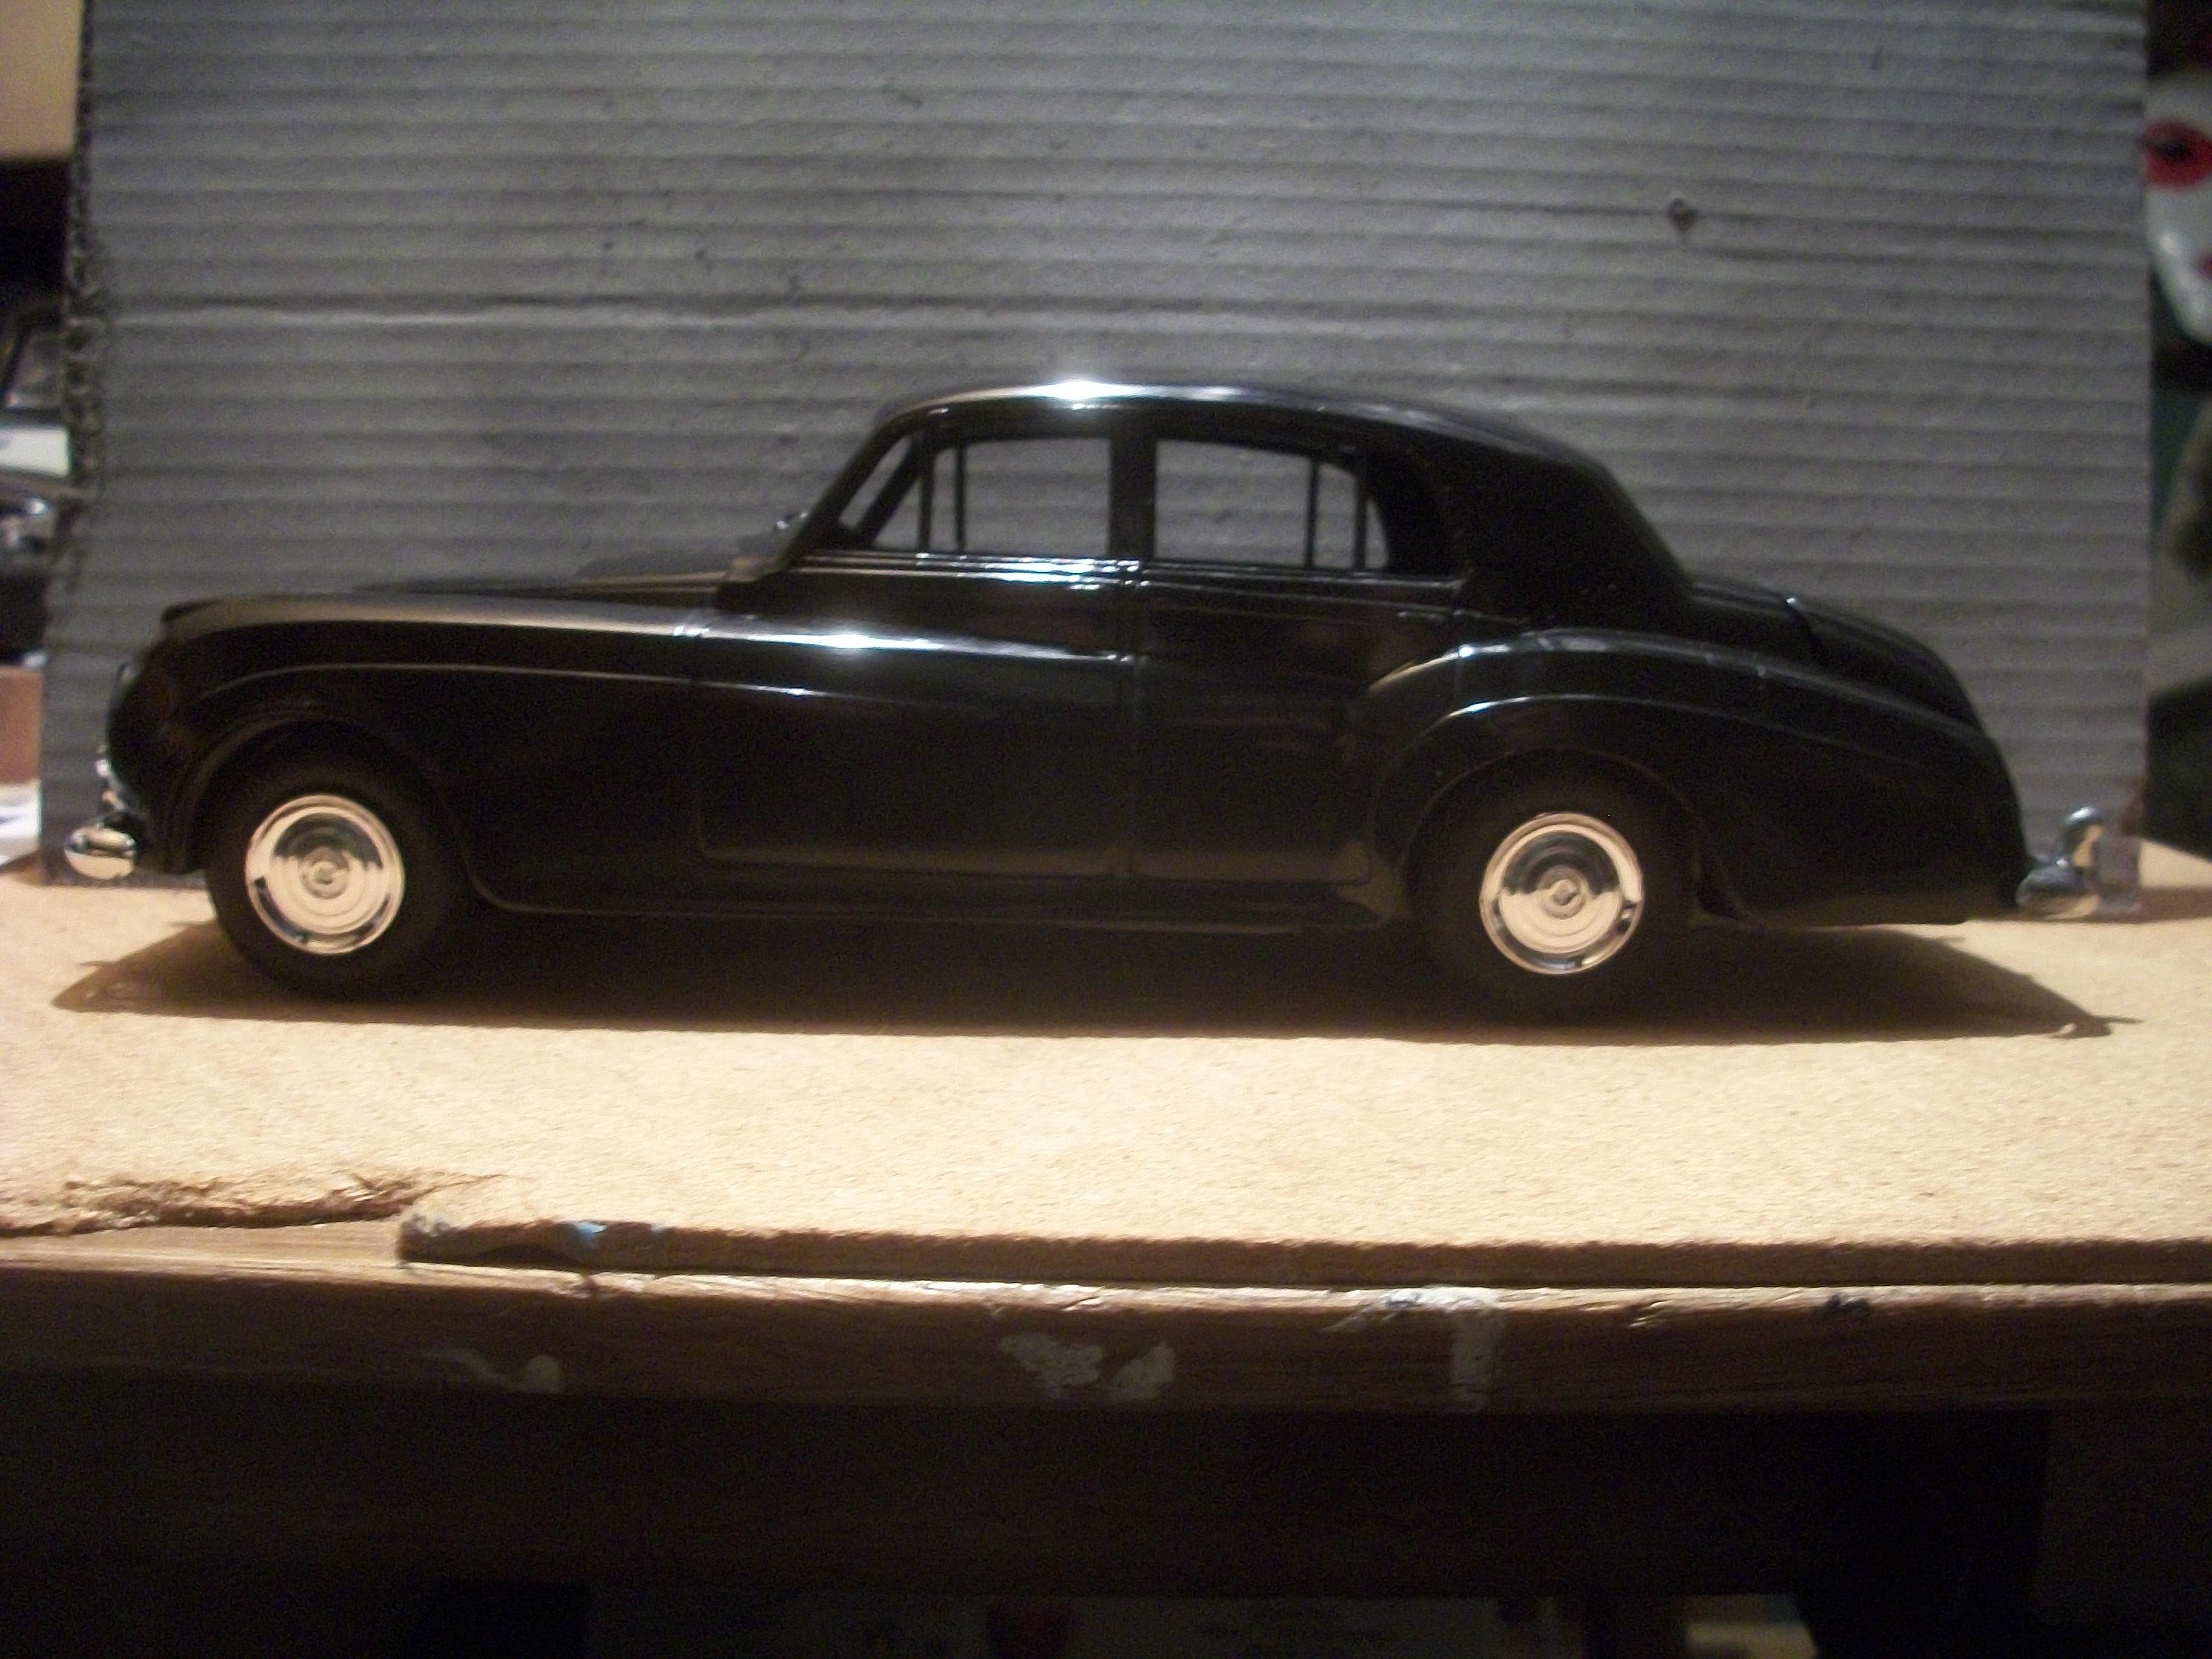
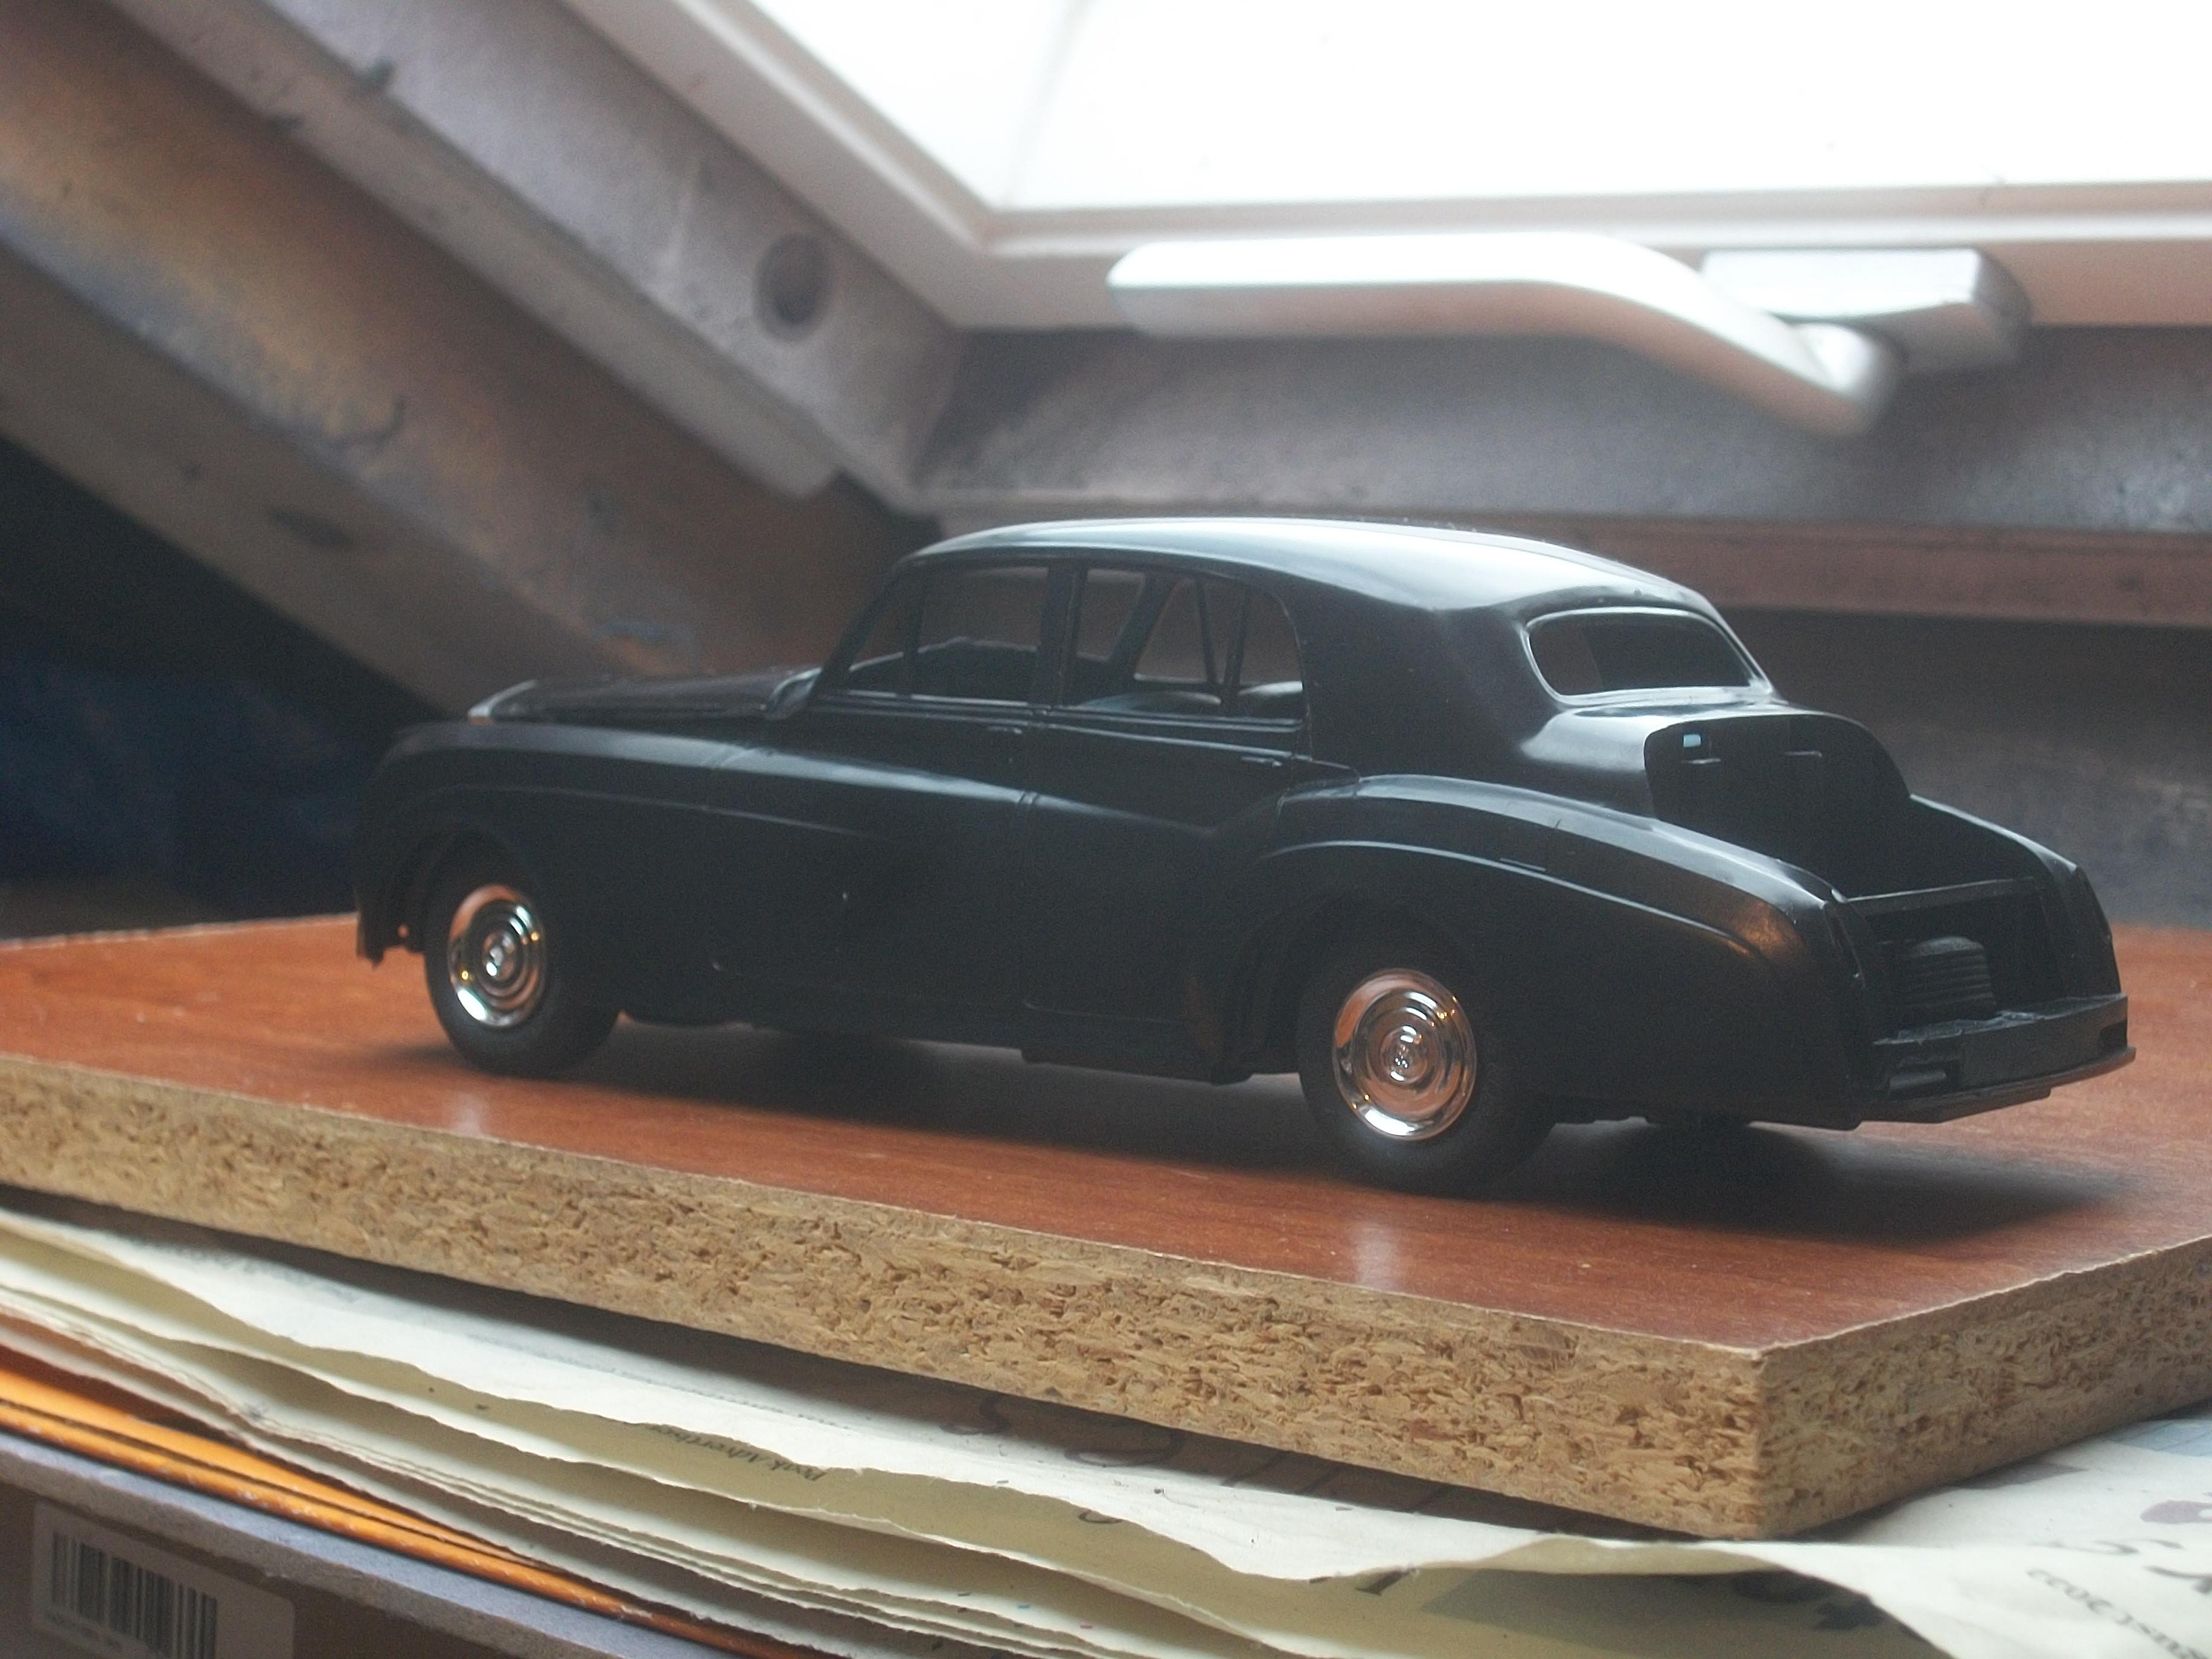
The first photo in the following series of photos shows a mockup of the car on wheels, but this is the test model, so not the actual build model. You can see how well the Silver Cloud presents itself in terms of proportions and stance . . . This afternoon I have polished the driver's side of the body, including front and rear wings and front and rear doors. The resulting shine continues to impress me, and by the time the window glass and BMF have been added later this model car should have a realistic appearance . . . Having contacted the RREC, Rolls-Royce Enthusiast's Club, as an ex-member they have informed me that the real car in New York, USA does not appear on their extensive database. They have no data for the UK registration plate OVD 777, but the lady at the RREC is going to forward my enquiry to the Silver Cloud registrar. Maybe I should contact the RROC, which is the Rolls-Royce Owner's Club of North America, located in Mechanics burg, PA, to see if they have any record of this Silver Cloud that is for sale in New York . . . David
-
Rolls-Royce No Chemicals, No Paint, No Harmful Glues
Anglia105E replied to Anglia105E's topic in WIP: Model Cars
Good idea to copy those photos for your own reference. When I was around the age of 17 - 20, I used to visit various different scrapyards with my Dad, usually on Sundays I seem to remember . . . We would rummage among the piled up scrap cars and unbolt any useful parts for my Ford Anglia 105E, and also my Dad's Ford Cortina MK 1 . . . Once you had gathered your parts together, you would take them to a sort of ramshackle broken down hut or shed, where a man would ask for a few pounds for the whole lot. Very cheap, and the parts would keep both of our cars running nicely . . . Those were the days eh David ? The correct sized mascots were resin cast for me by a model building friend who sadly passed away recently, and I only have two of them remaining. The Franklin Mint Rolls-Royce Silver Cloud I does have the correct sized radiator grille mascot in metal at 1:24 scale, but every single car that I purchased on Ebay had the mascot missing . . . I can only assume that the sellers would remove the part before offering the model car for sale. David W. -
Rolls-Royce No Chemicals, No Paint, No Harmful Glues
Anglia105E replied to Anglia105E's topic in WIP: Model Cars
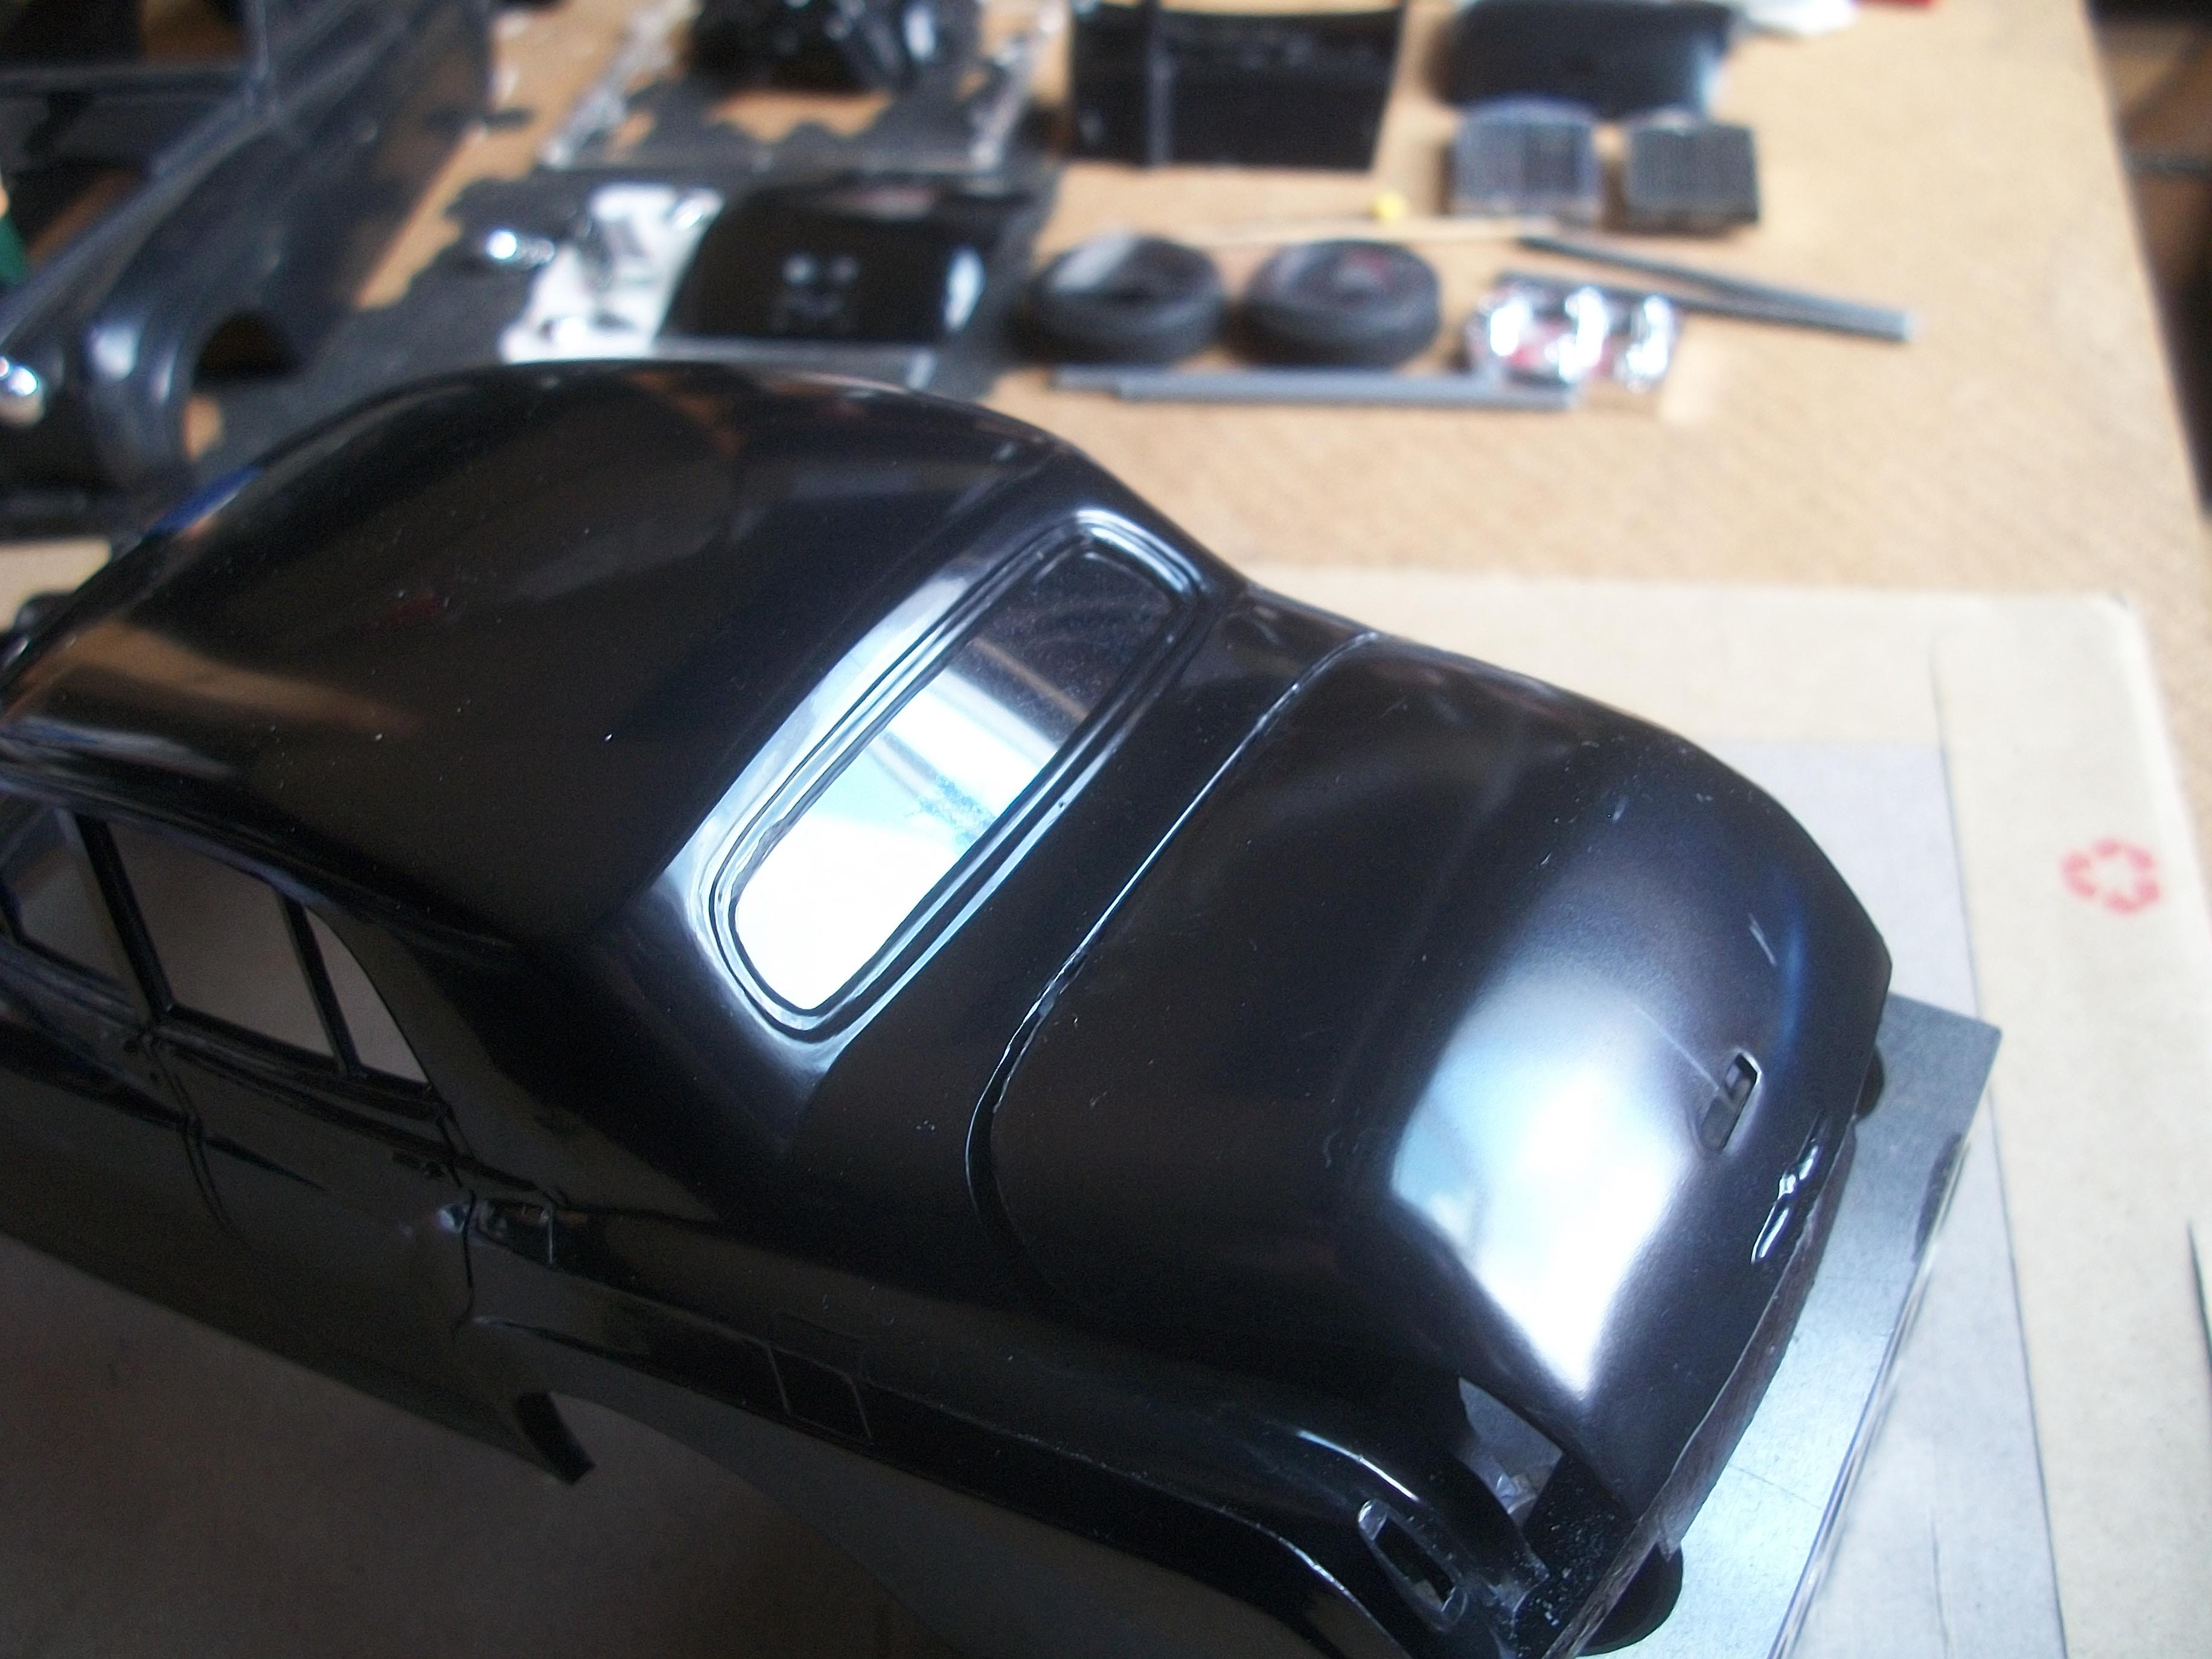
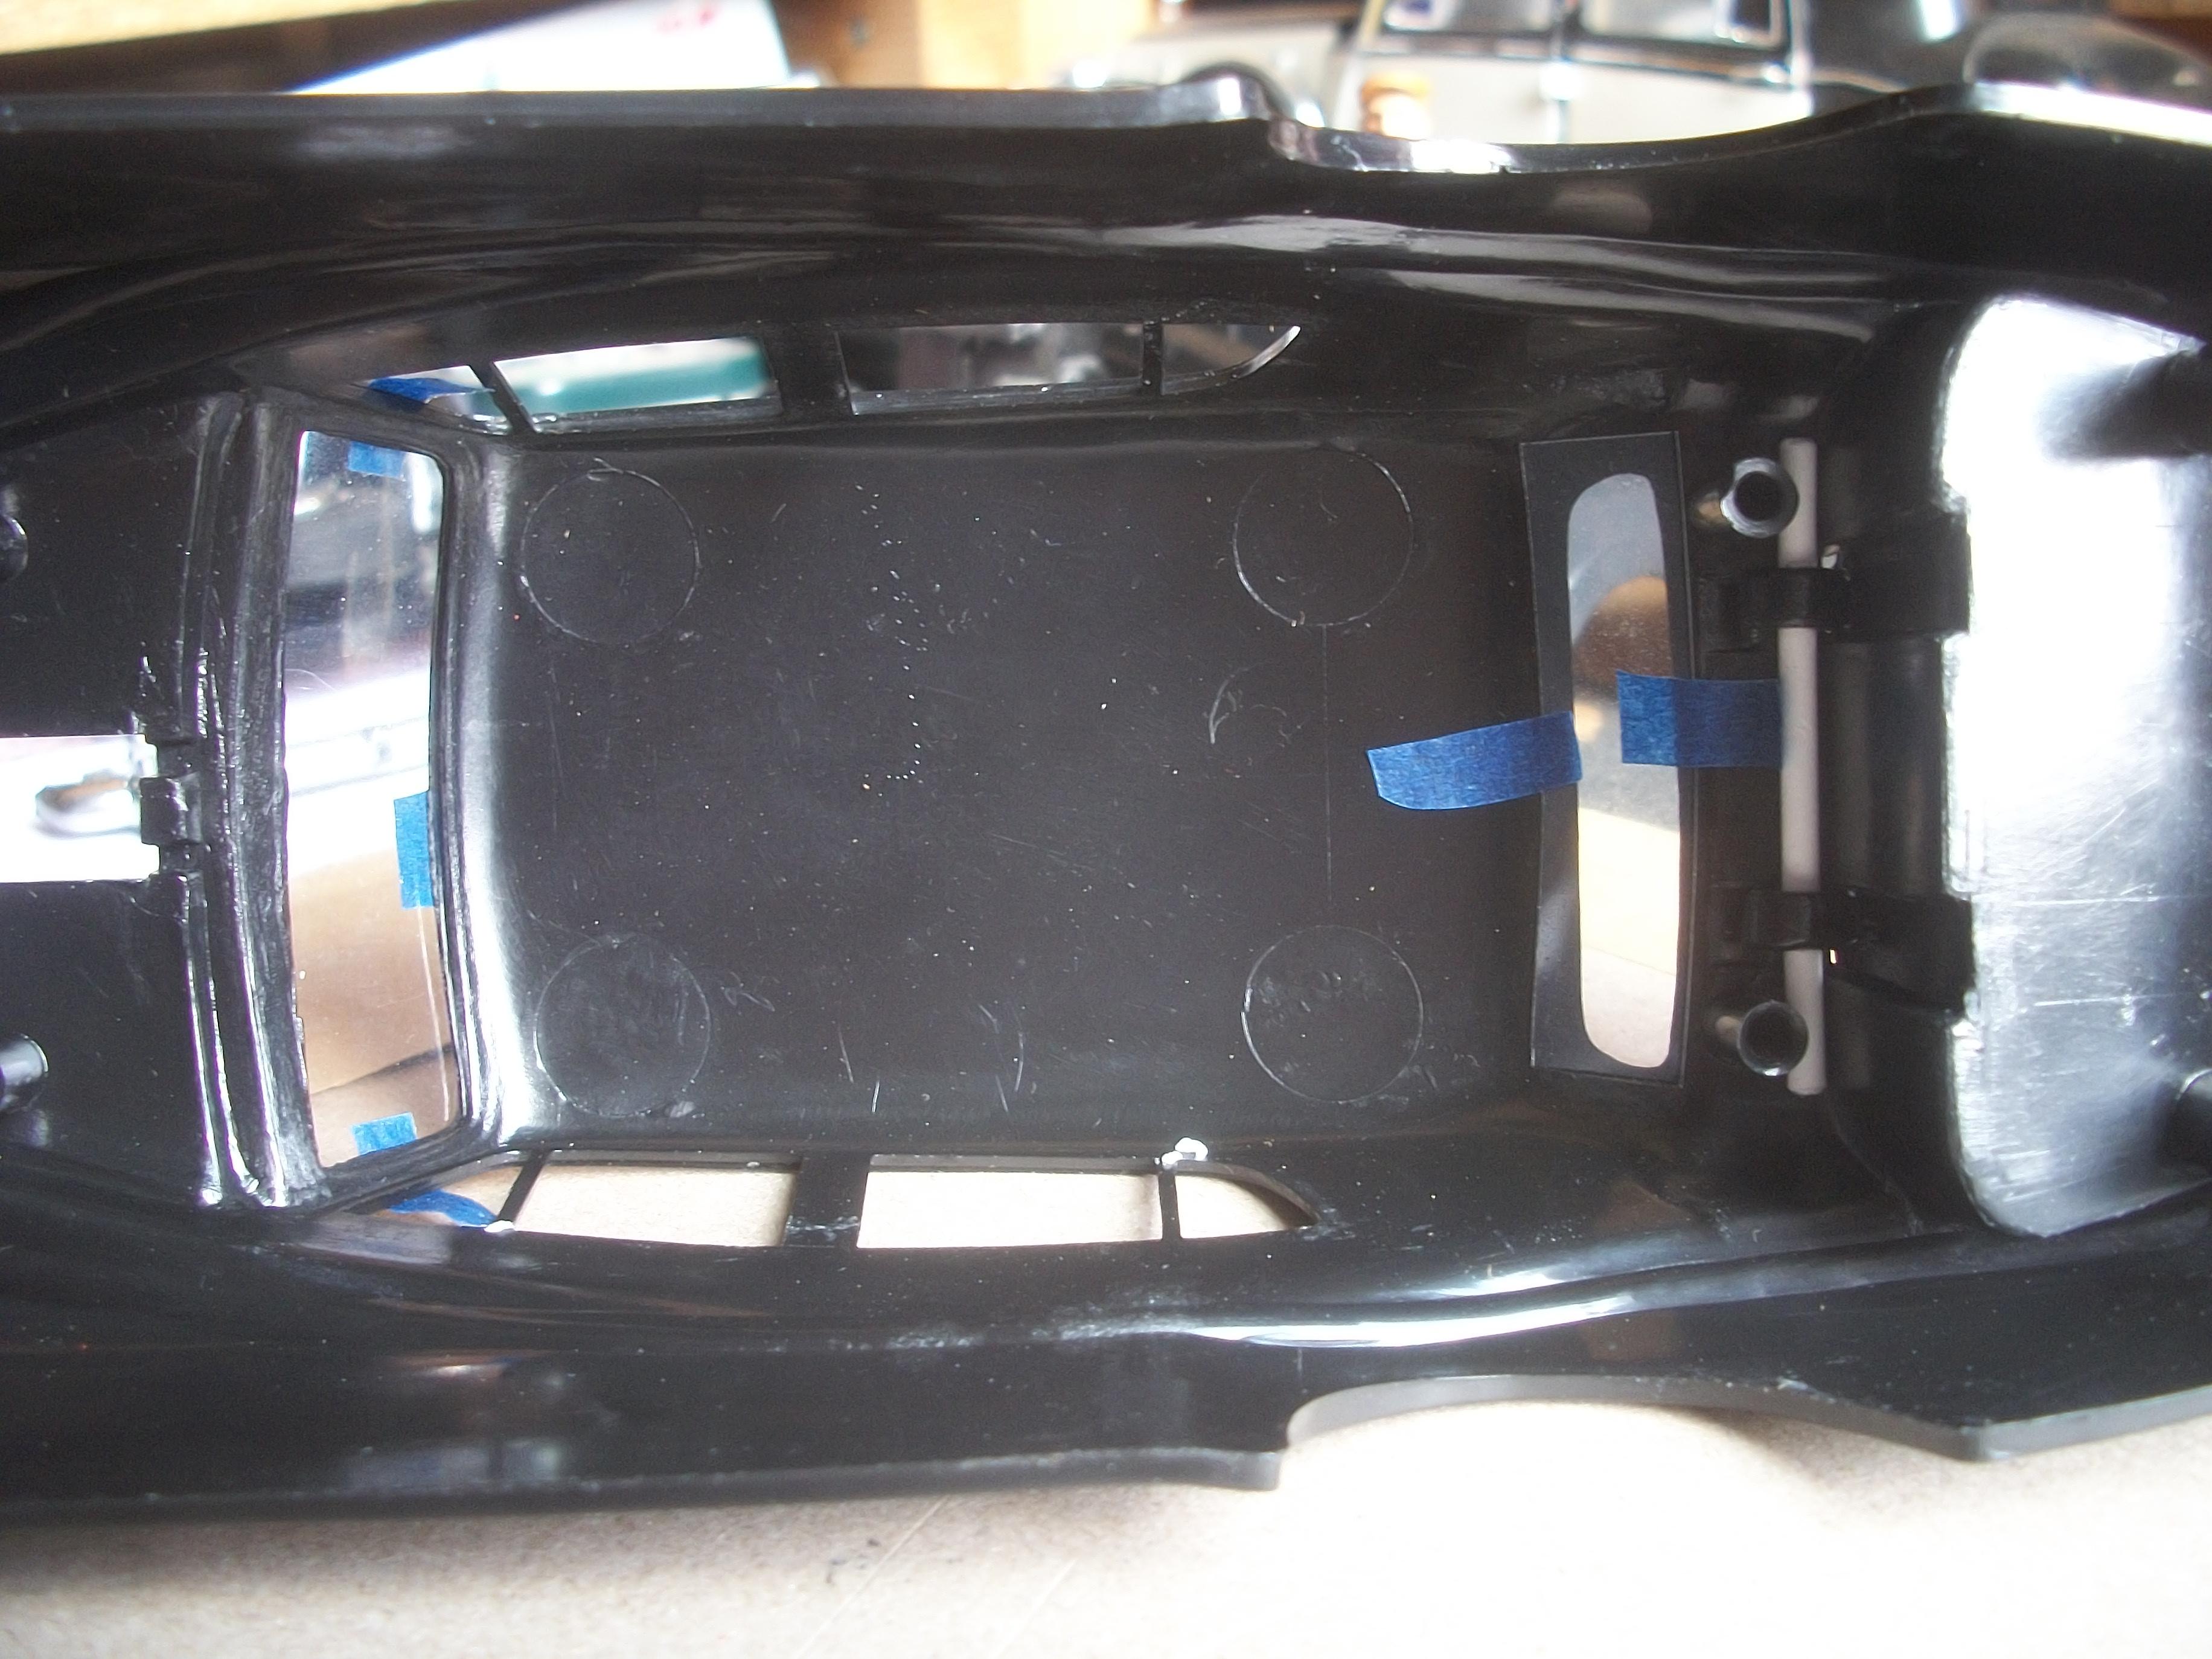
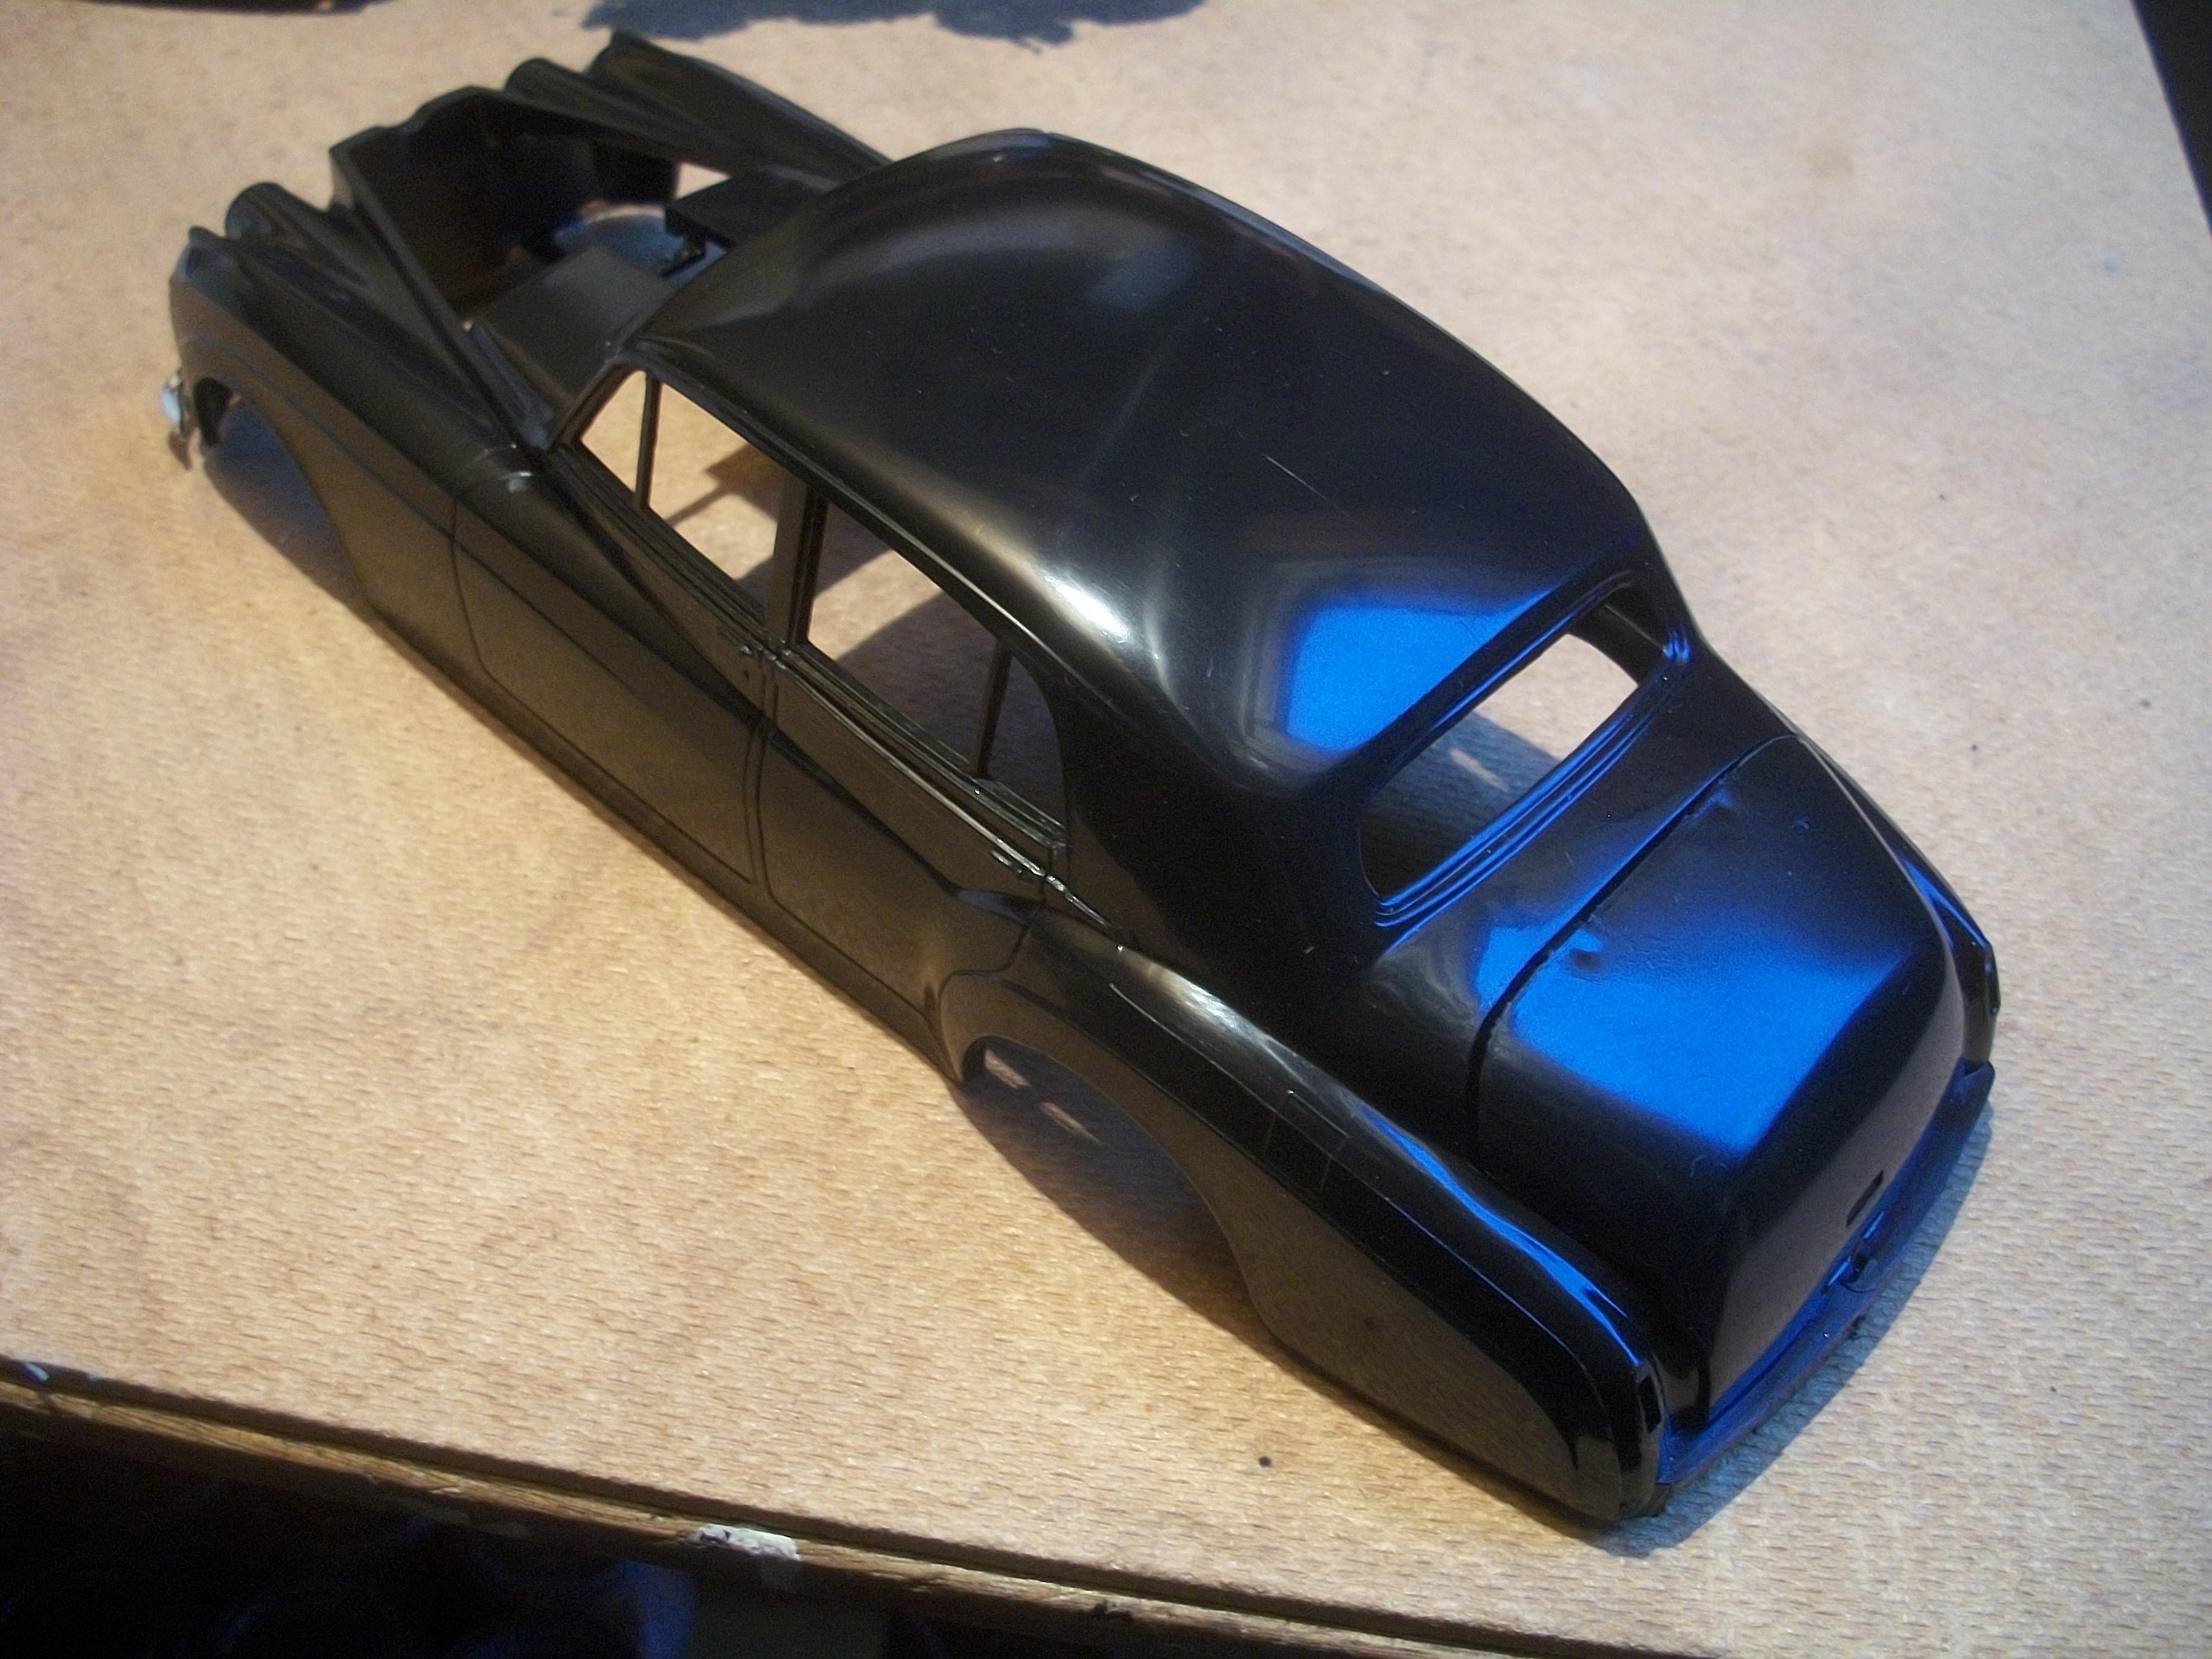
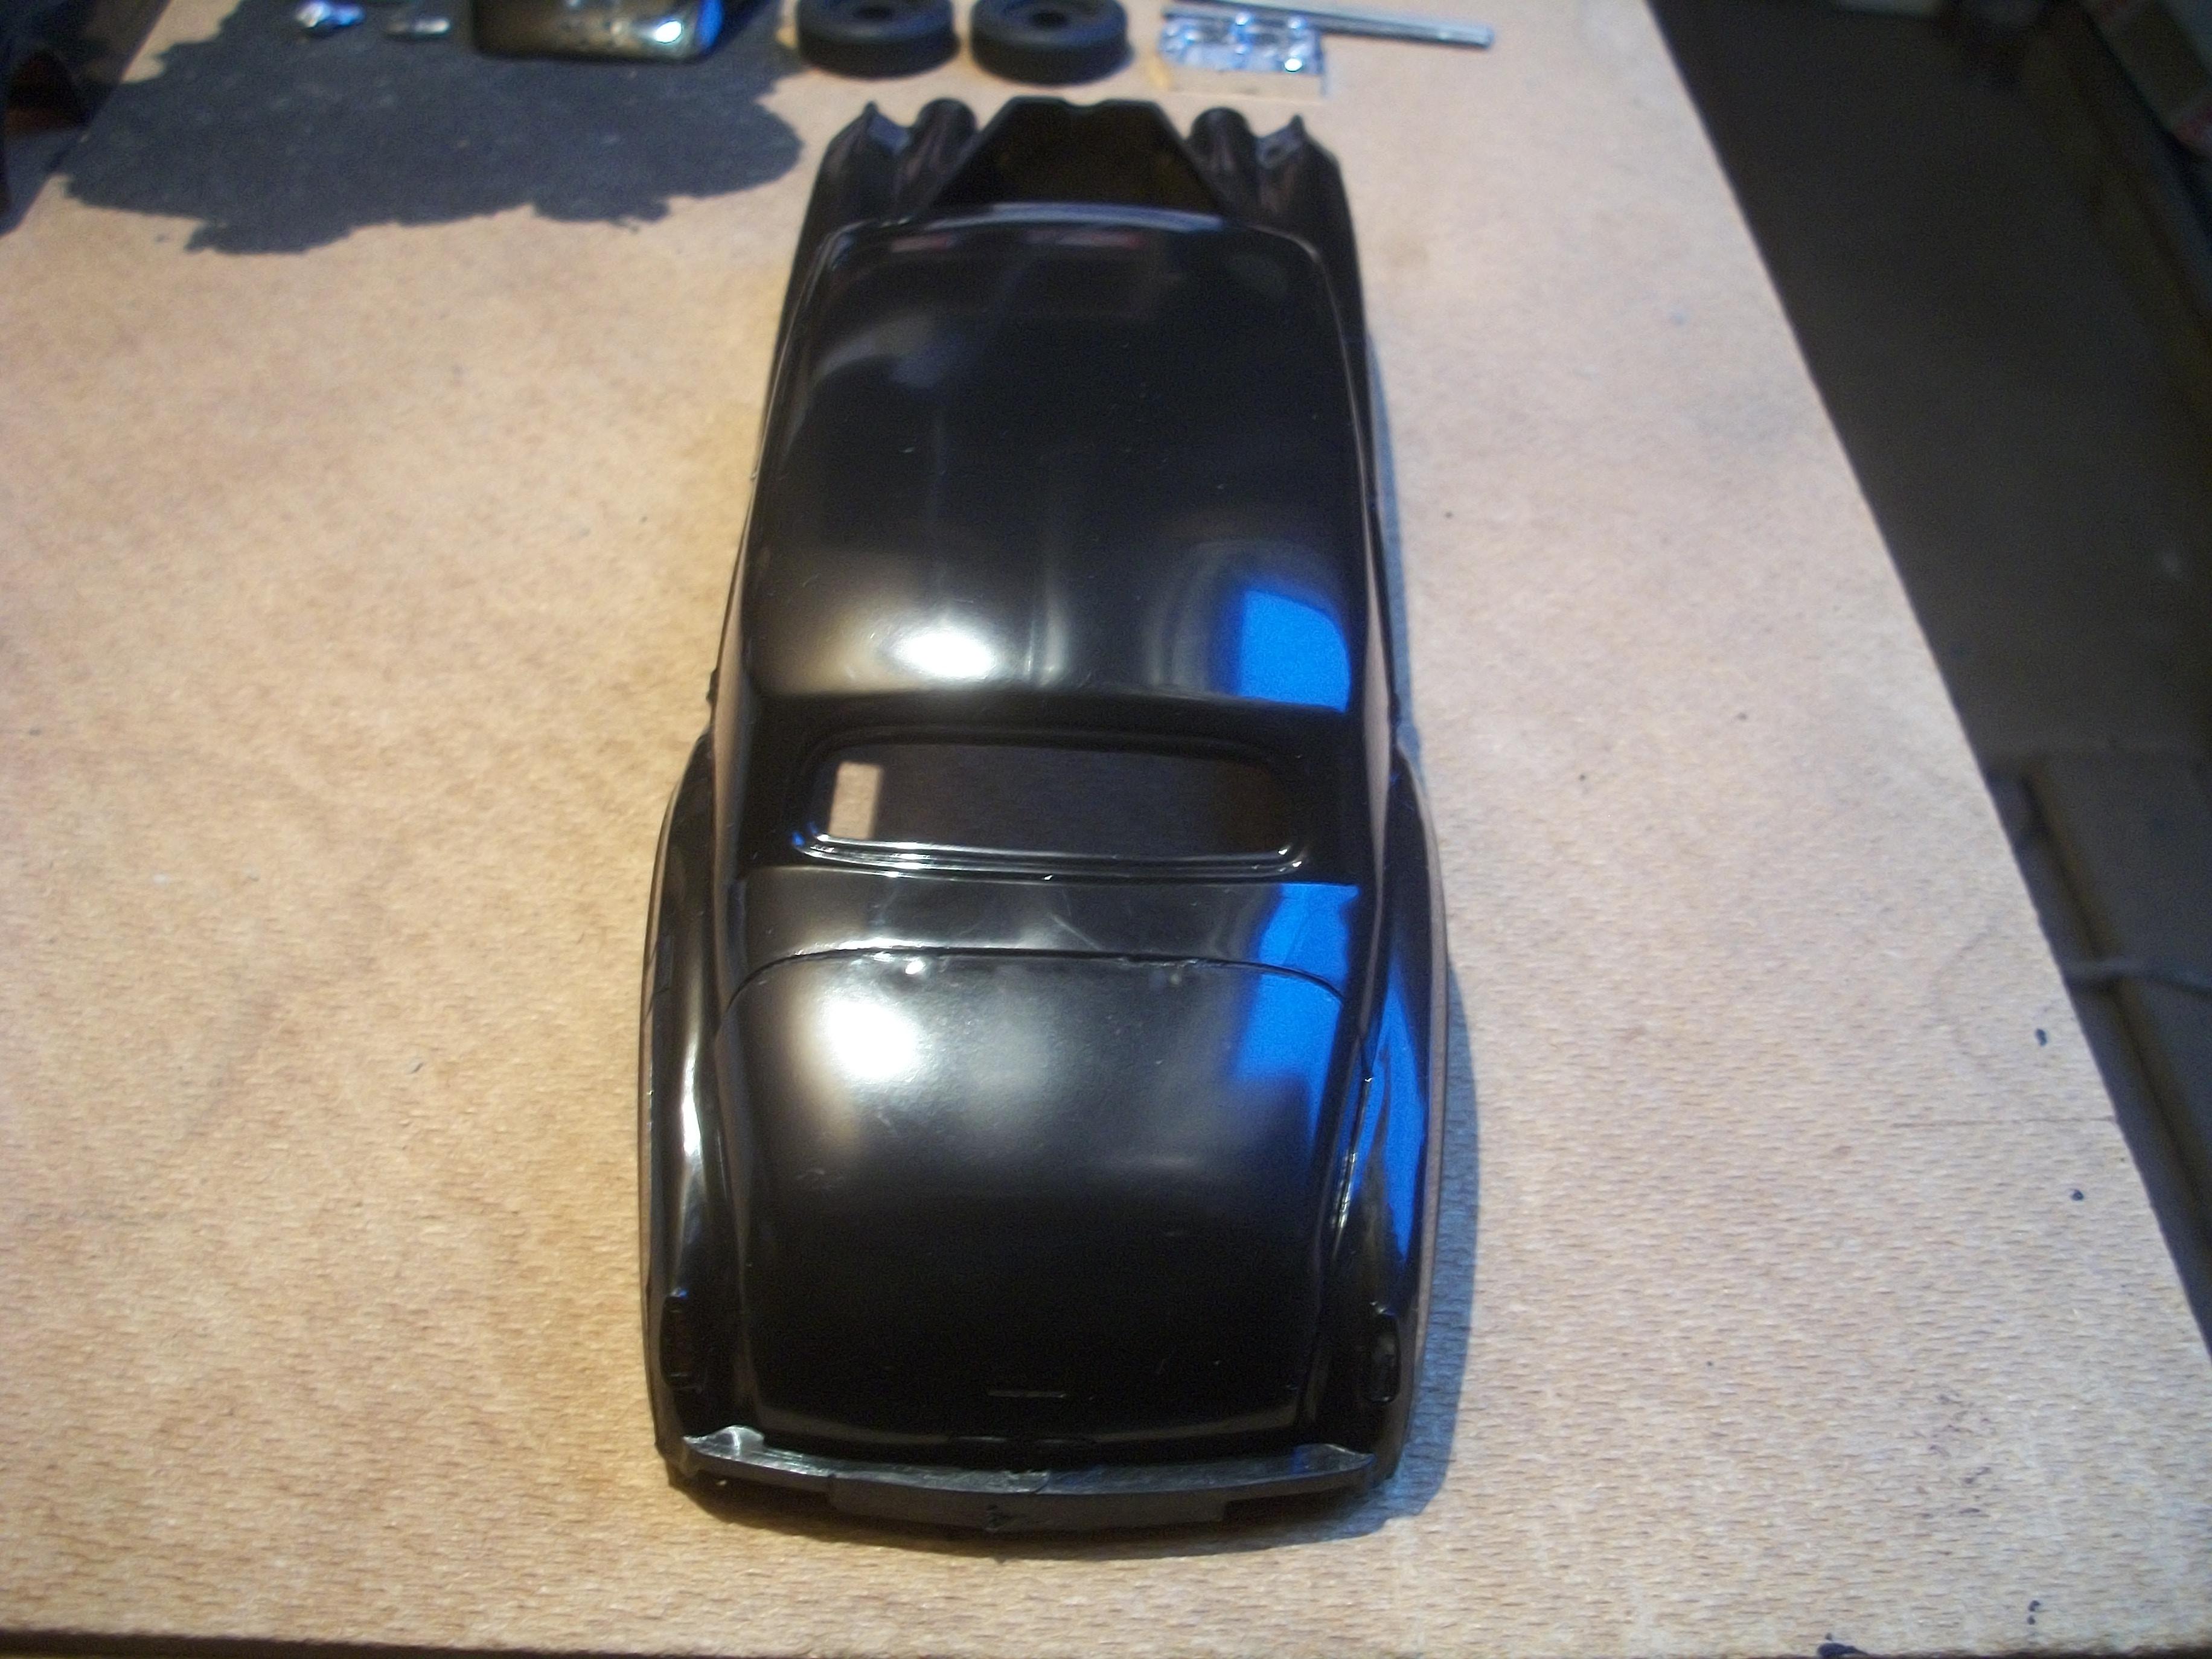
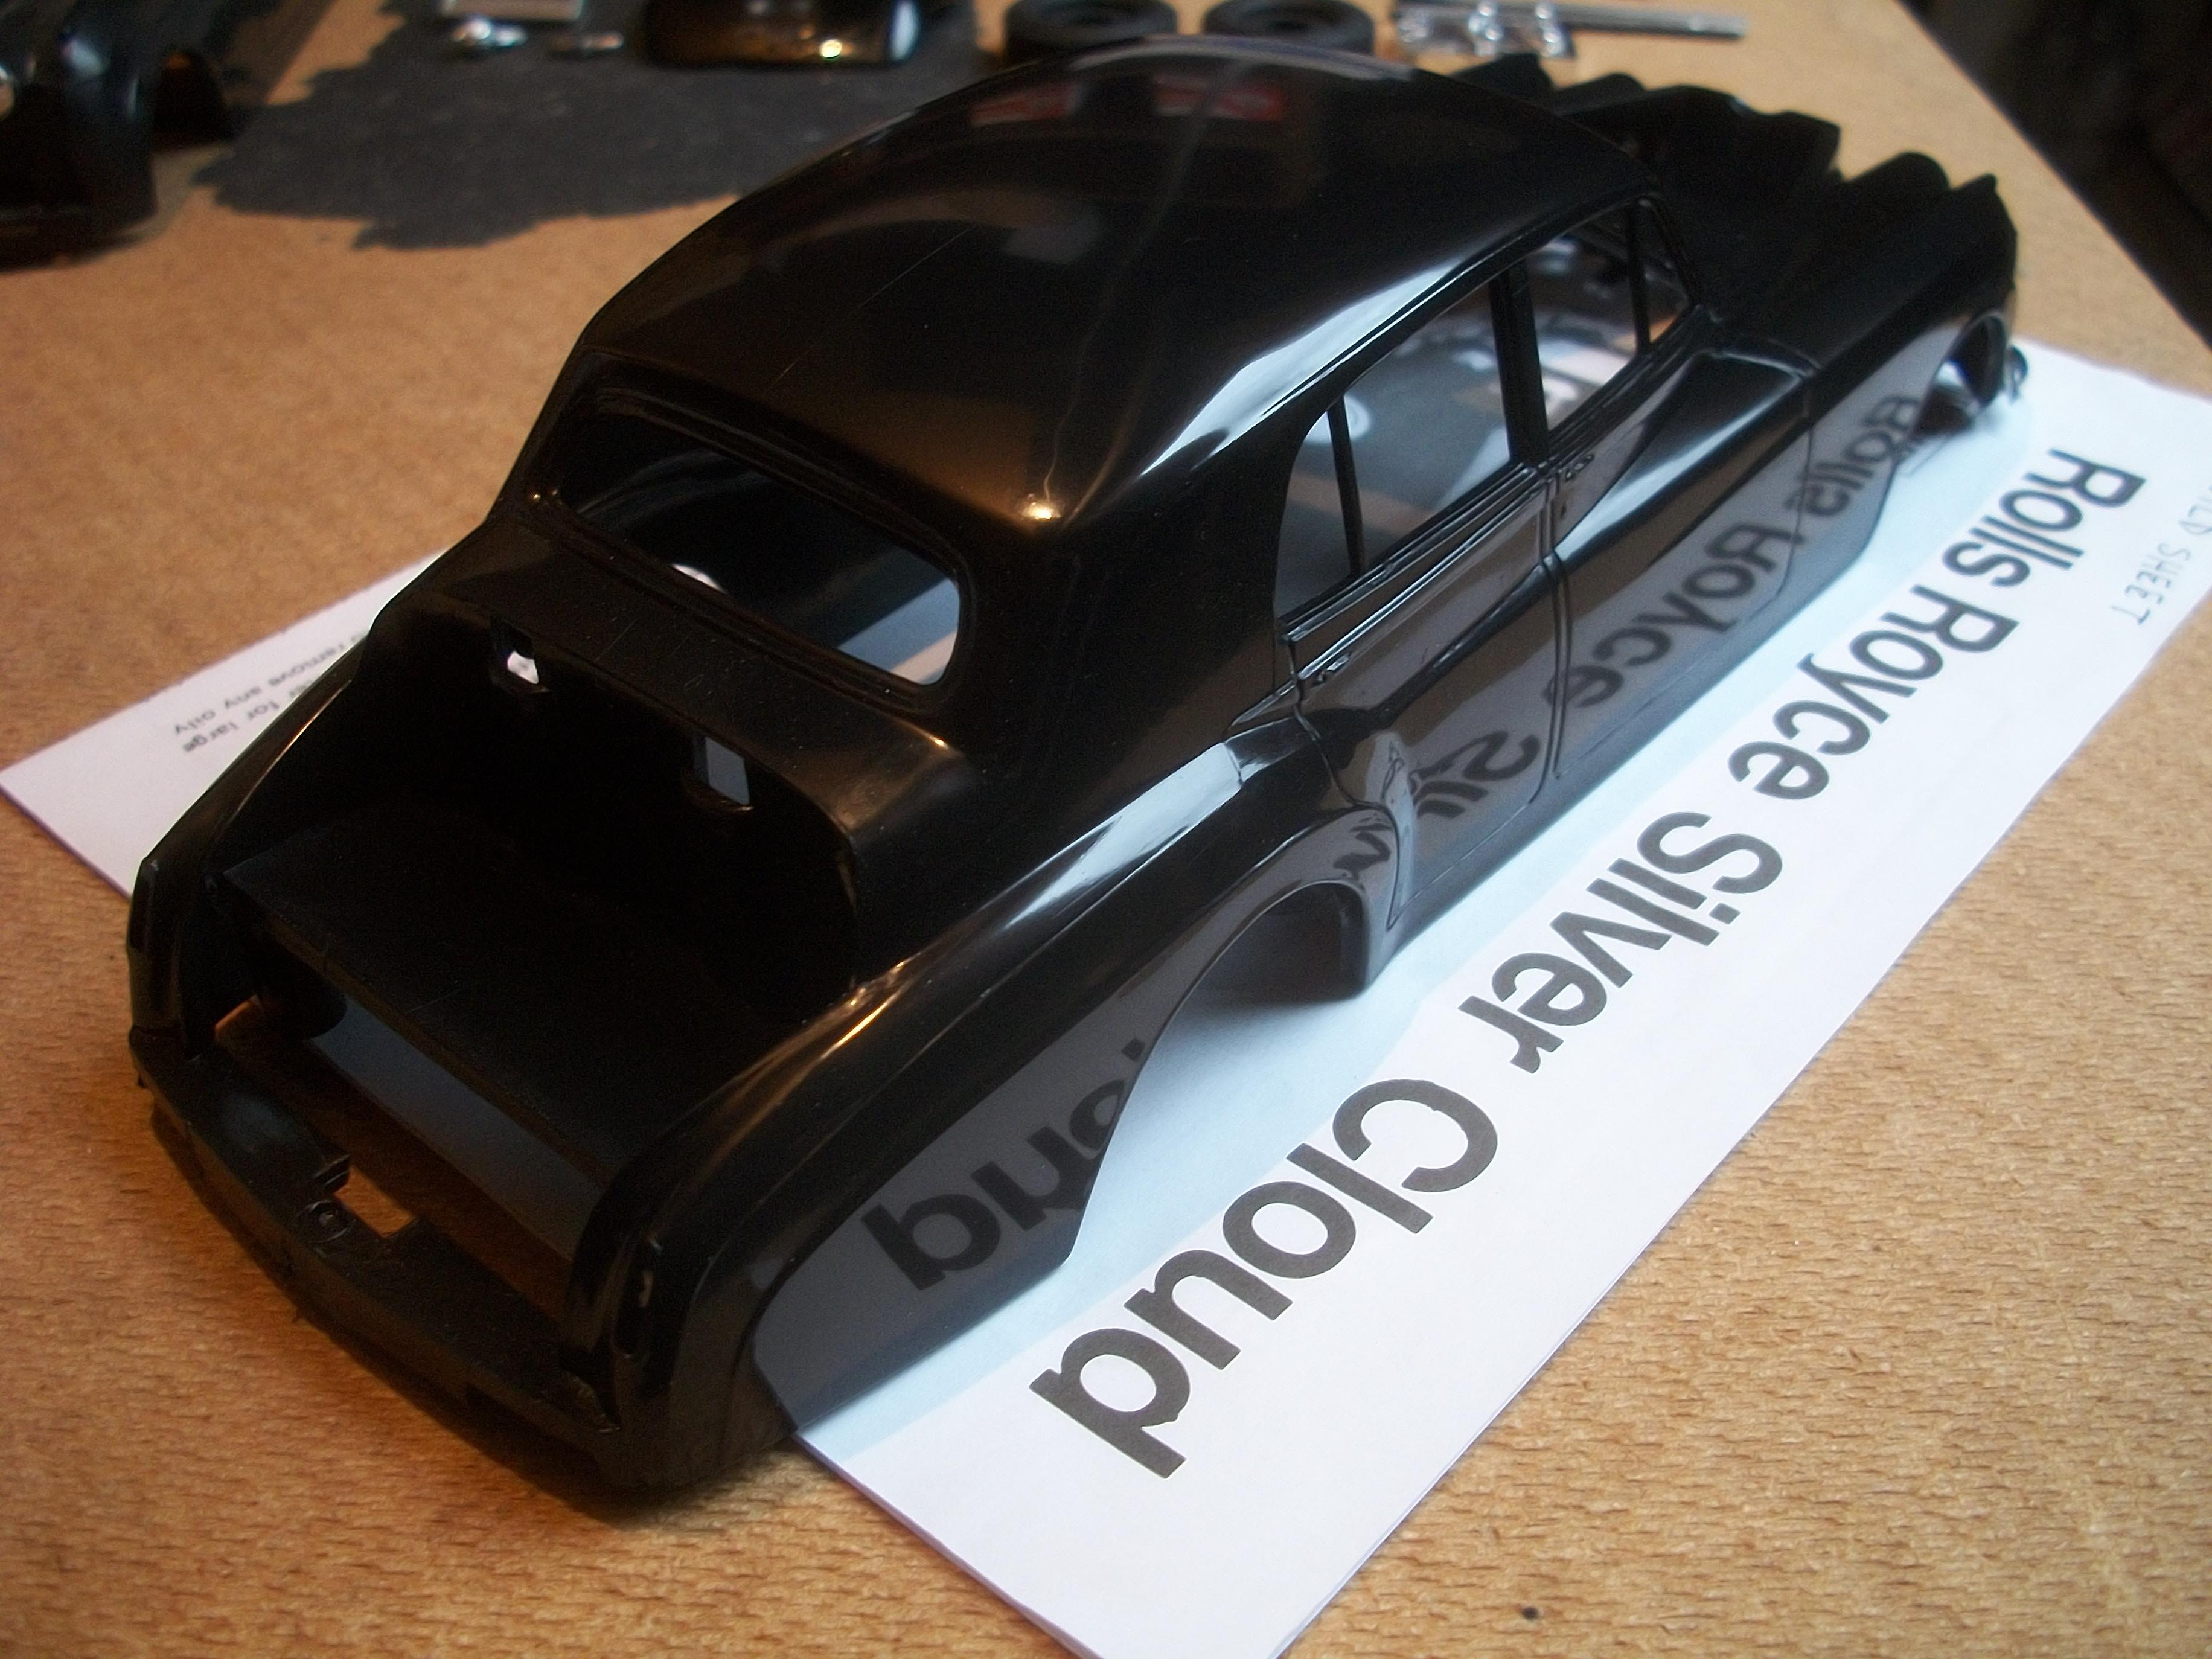
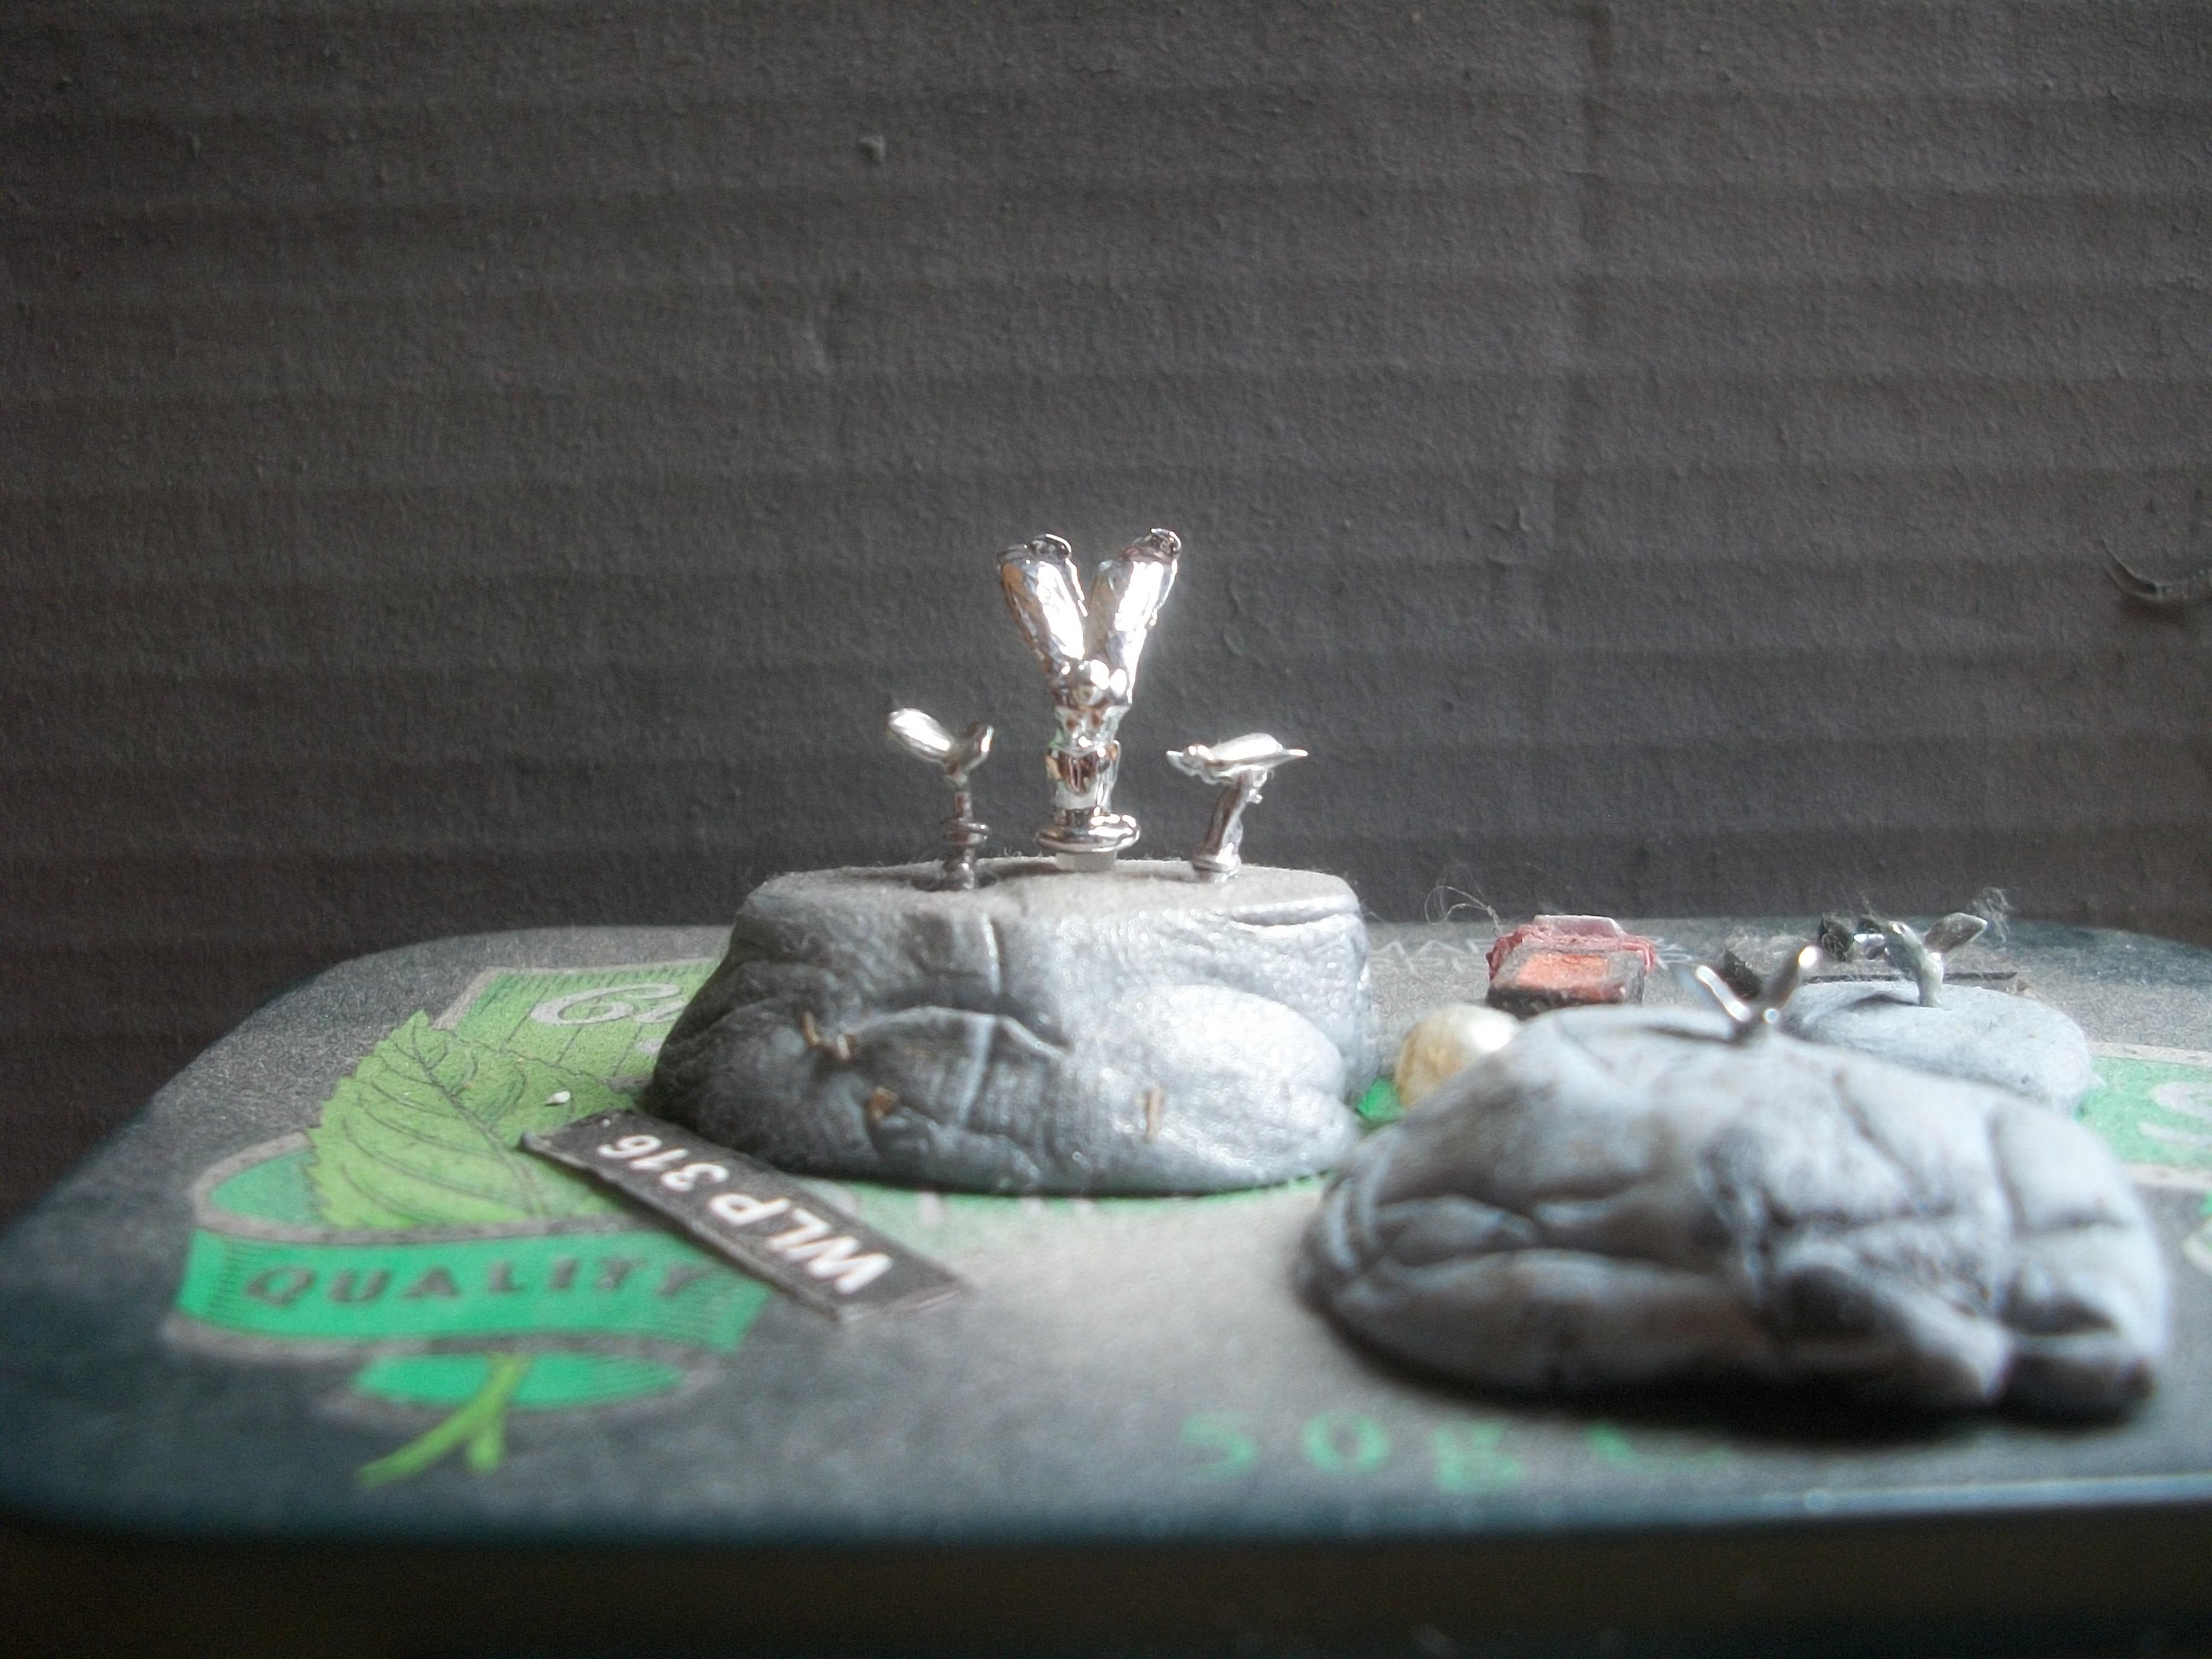
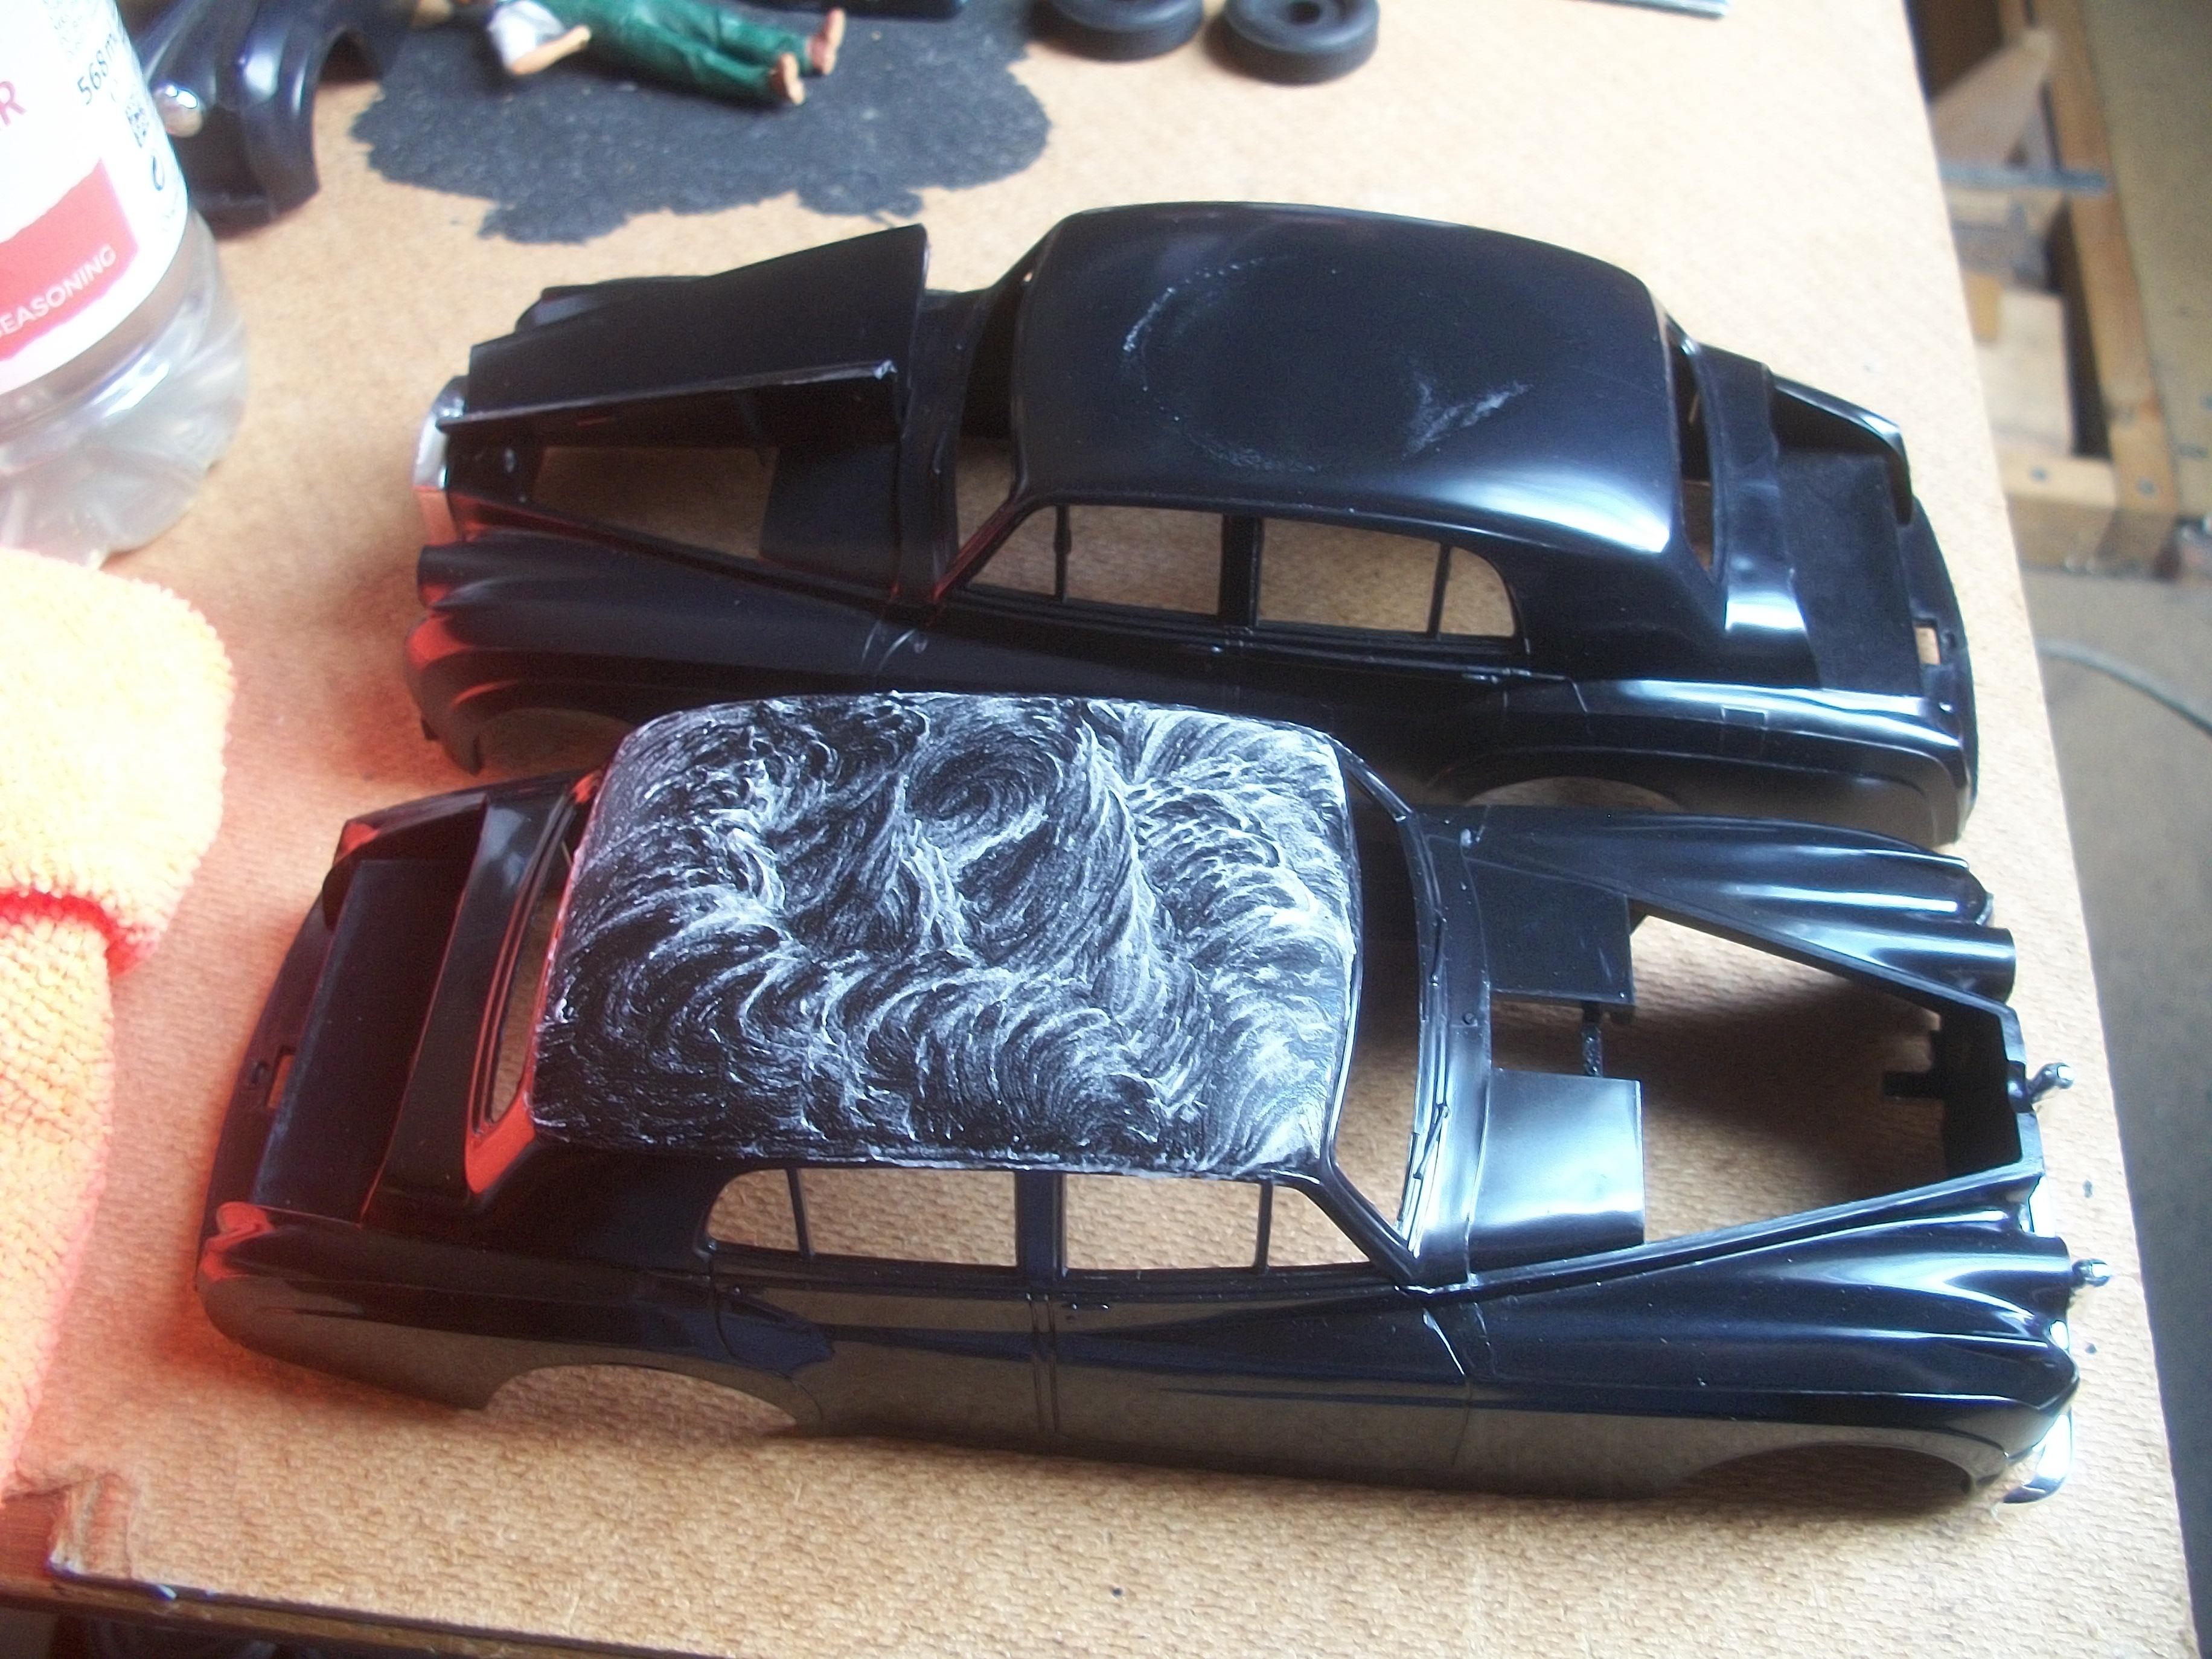
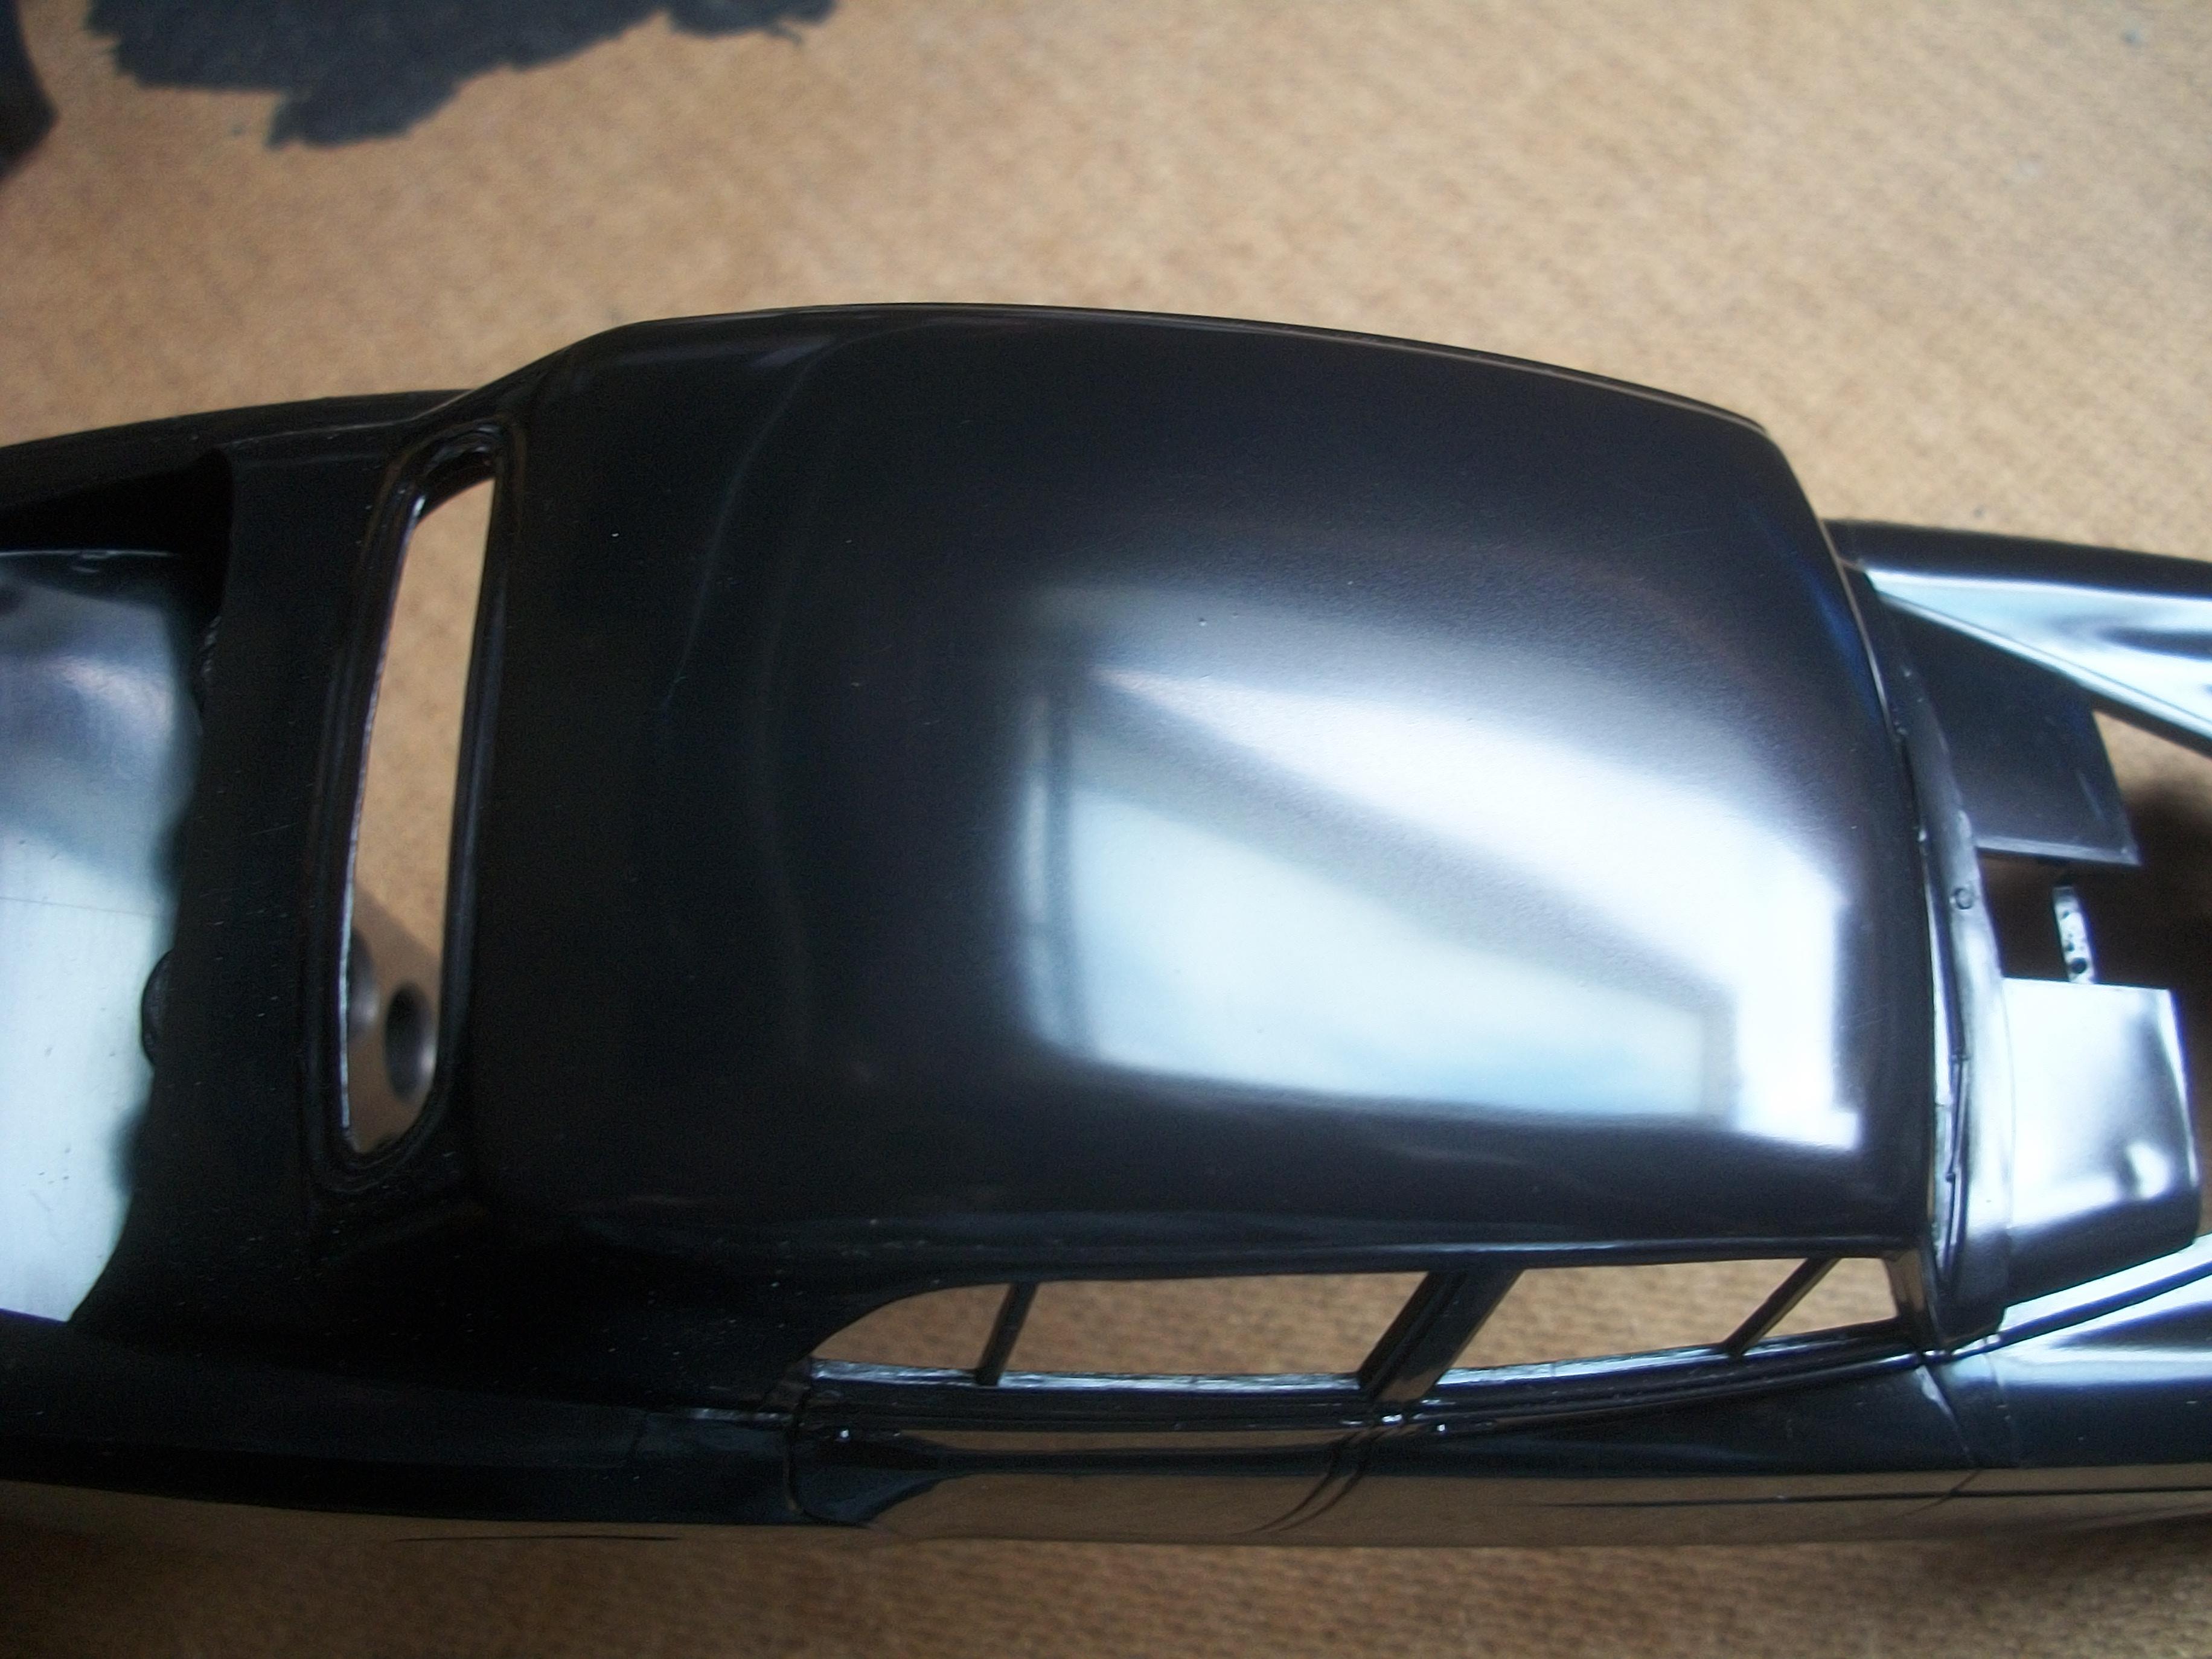
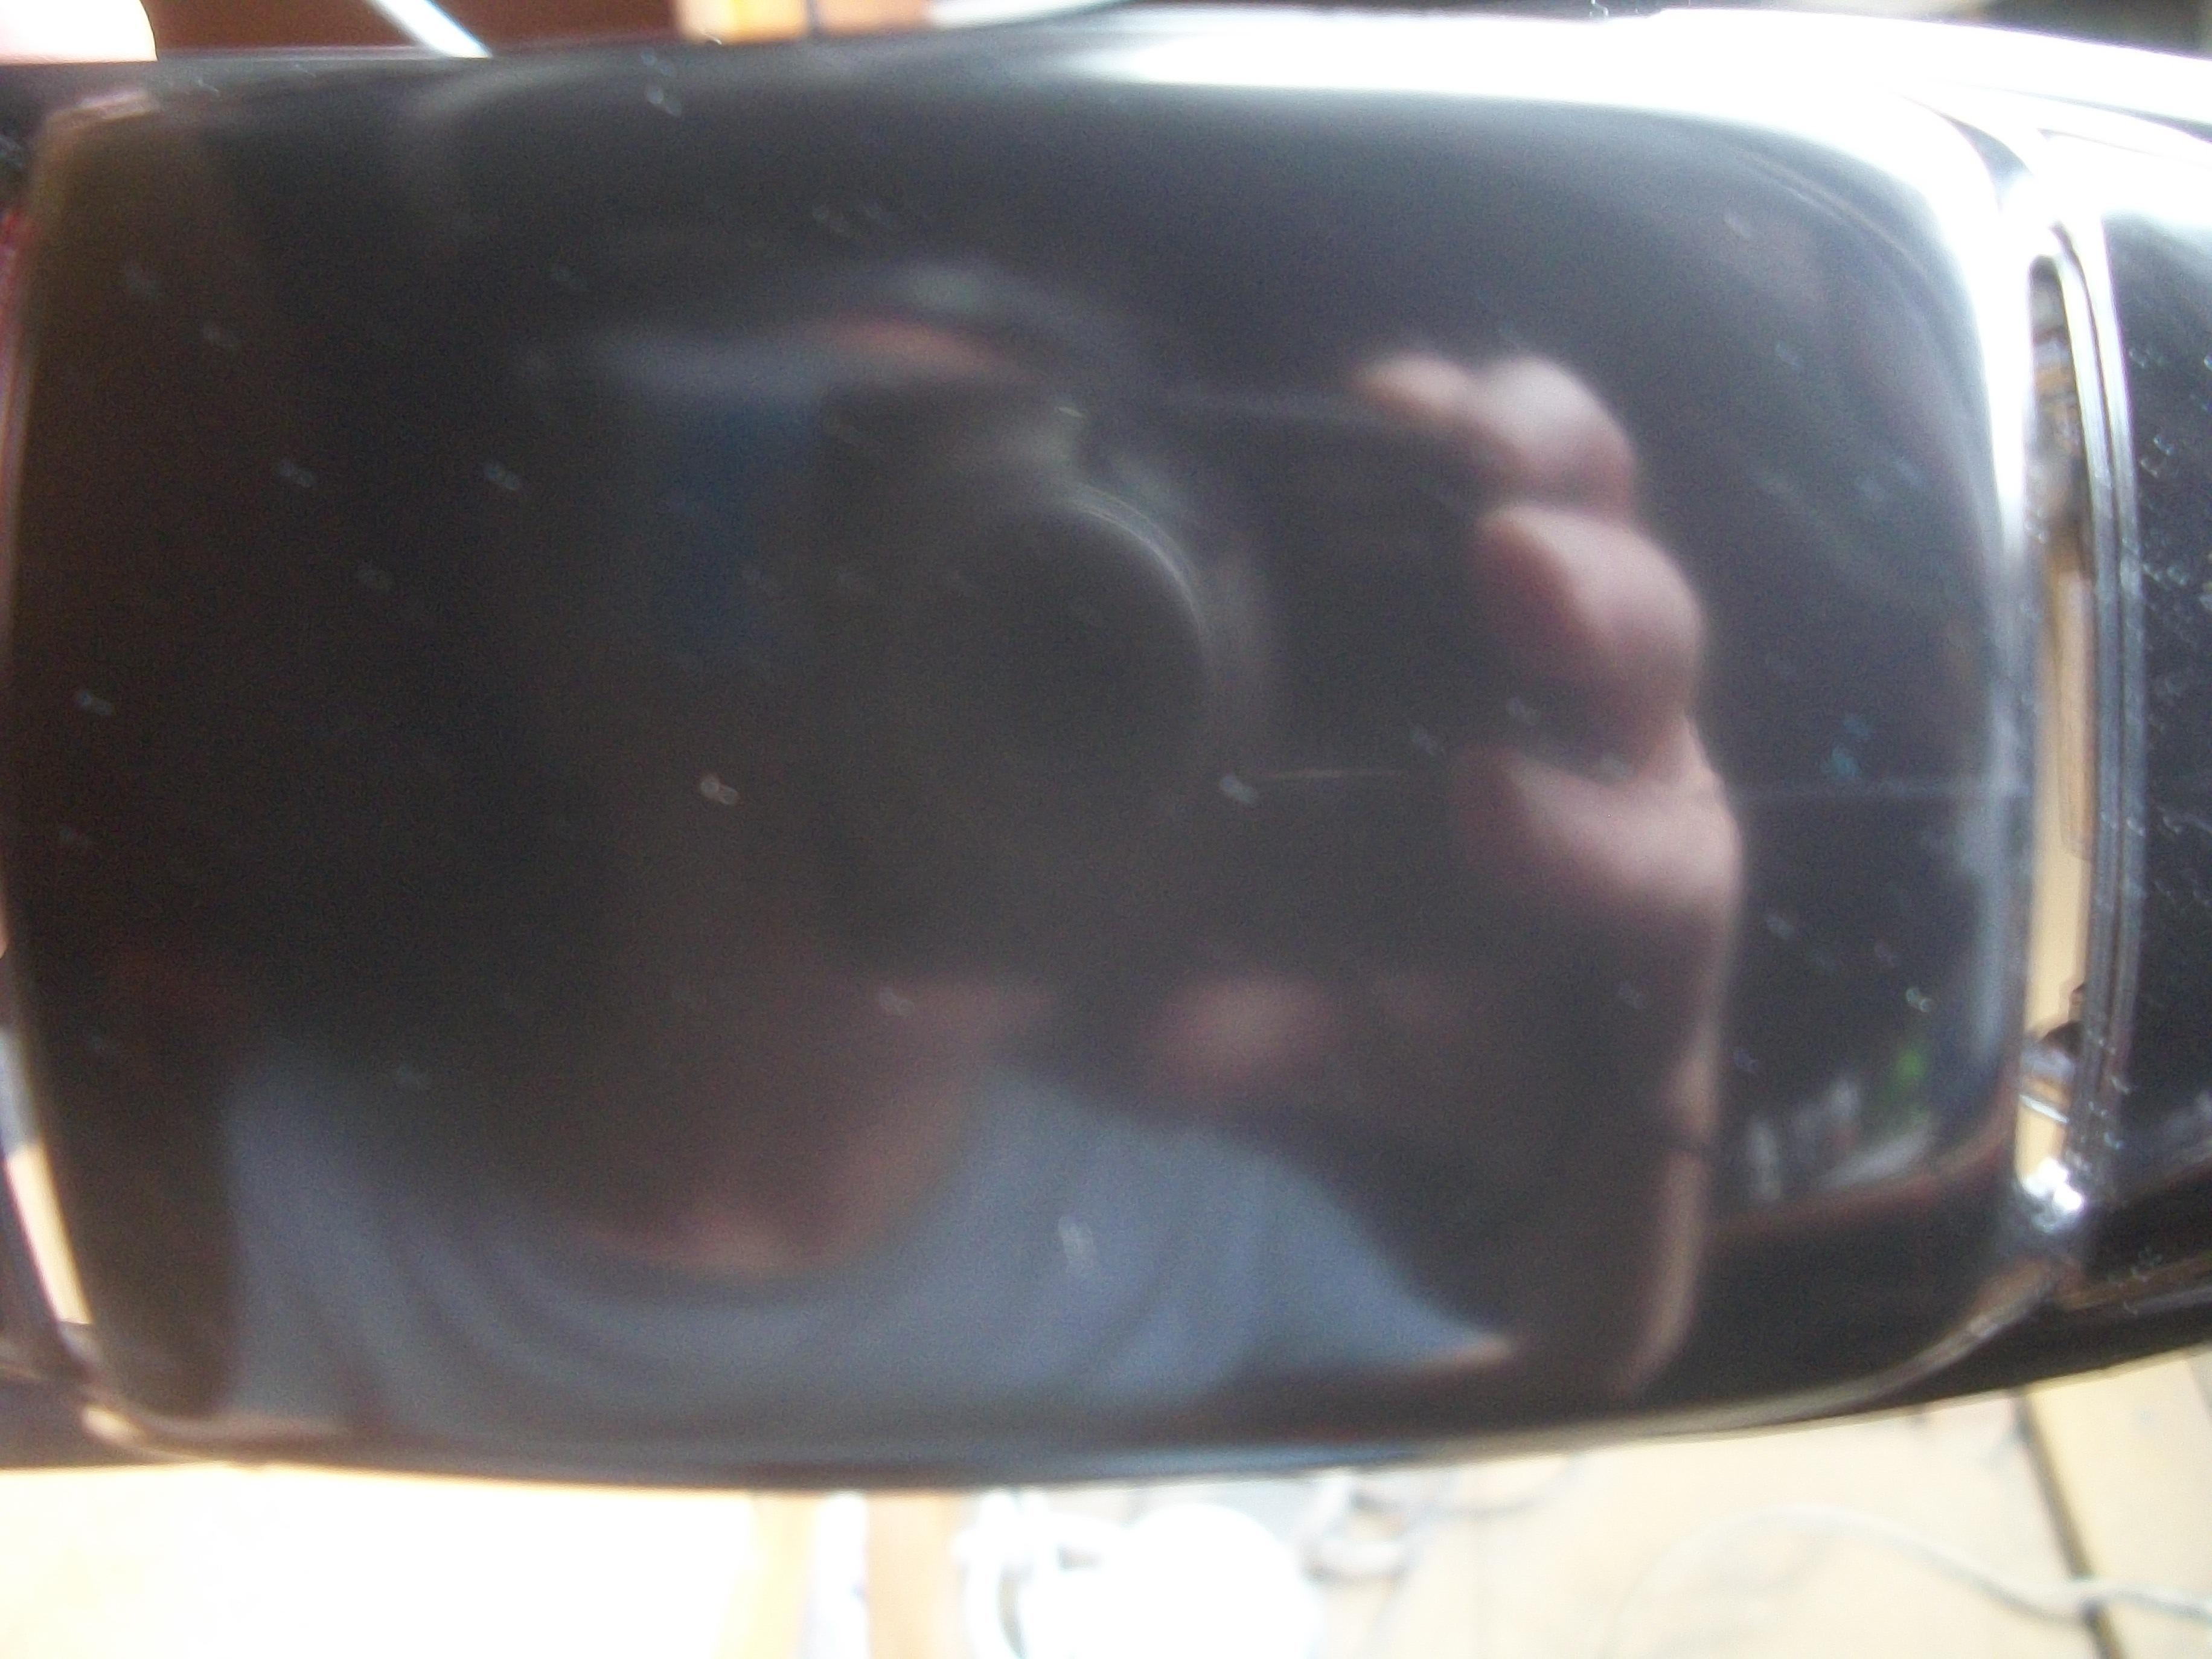
Today I set about polishing the roof panel area of the Entex body . . . Using the proven method ( Eco-Friendly ) baking soda toothpaste, distilled malt vinegar, and micro fibre cloth, the resulting mirror finish of the black plastic was most satisfying. One of the following photos shows a clear reflection of myself holding the camera as I photograph the roof of the model car . . . The oversized Spirit of Ecstasy radiator grill mascot was removed, and this had only been pushed in, so not glued. One photo below shows the difference in size between the Minicraft mascot in the centre of the three mascots, and the two correctly sized 1:24 scale mascots . . . I made a point of examining the area of the body where the wings meet the doors at the lower corner of the windshield, and I can confirm that there is no work required in these two areas. The casting is surprisingly good, compared to some examples that I have seen, both in my collection and in online images . . . David
-
Rolls-Royce No Chemicals, No Paint, No Harmful Glues
Anglia105E replied to Anglia105E's topic in WIP: Model Cars
Oh I see . . . We do have charity shops, which is where people bring stuff in for free that they no longer want and the charity shops sell the items quite cheaply. Similar idea to Goodwill maybe . . . David -
Rolls-Royce No Chemicals, No Paint, No Harmful Glues
Anglia105E replied to Anglia105E's topic in WIP: Model Cars
I hadn't heard of Goodwill here in UK, but then if they don't ship outside the US that is not al that surprising . . . thanks. David -
Rolls-Royce No Chemicals, No Paint, No Harmful Glues
Anglia105E replied to Anglia105E's topic in WIP: Model Cars
I do agree with your view Jose, and it is true that there are more dealers on Ebay now than private sellers . . . You can sometimes find genuine bargains, but it is becoming more difficult. David -
This will be a very interesting project Pico . . . The resin body kits from Air Trax in Finland are excellent, and worth the extra money to get them I think . . . David