Anglia105E
-
Posts
3,486 -
Joined
-
Last visited
Content Type
Profiles
Forums
Events
Gallery
Everything posted by Anglia105E
-
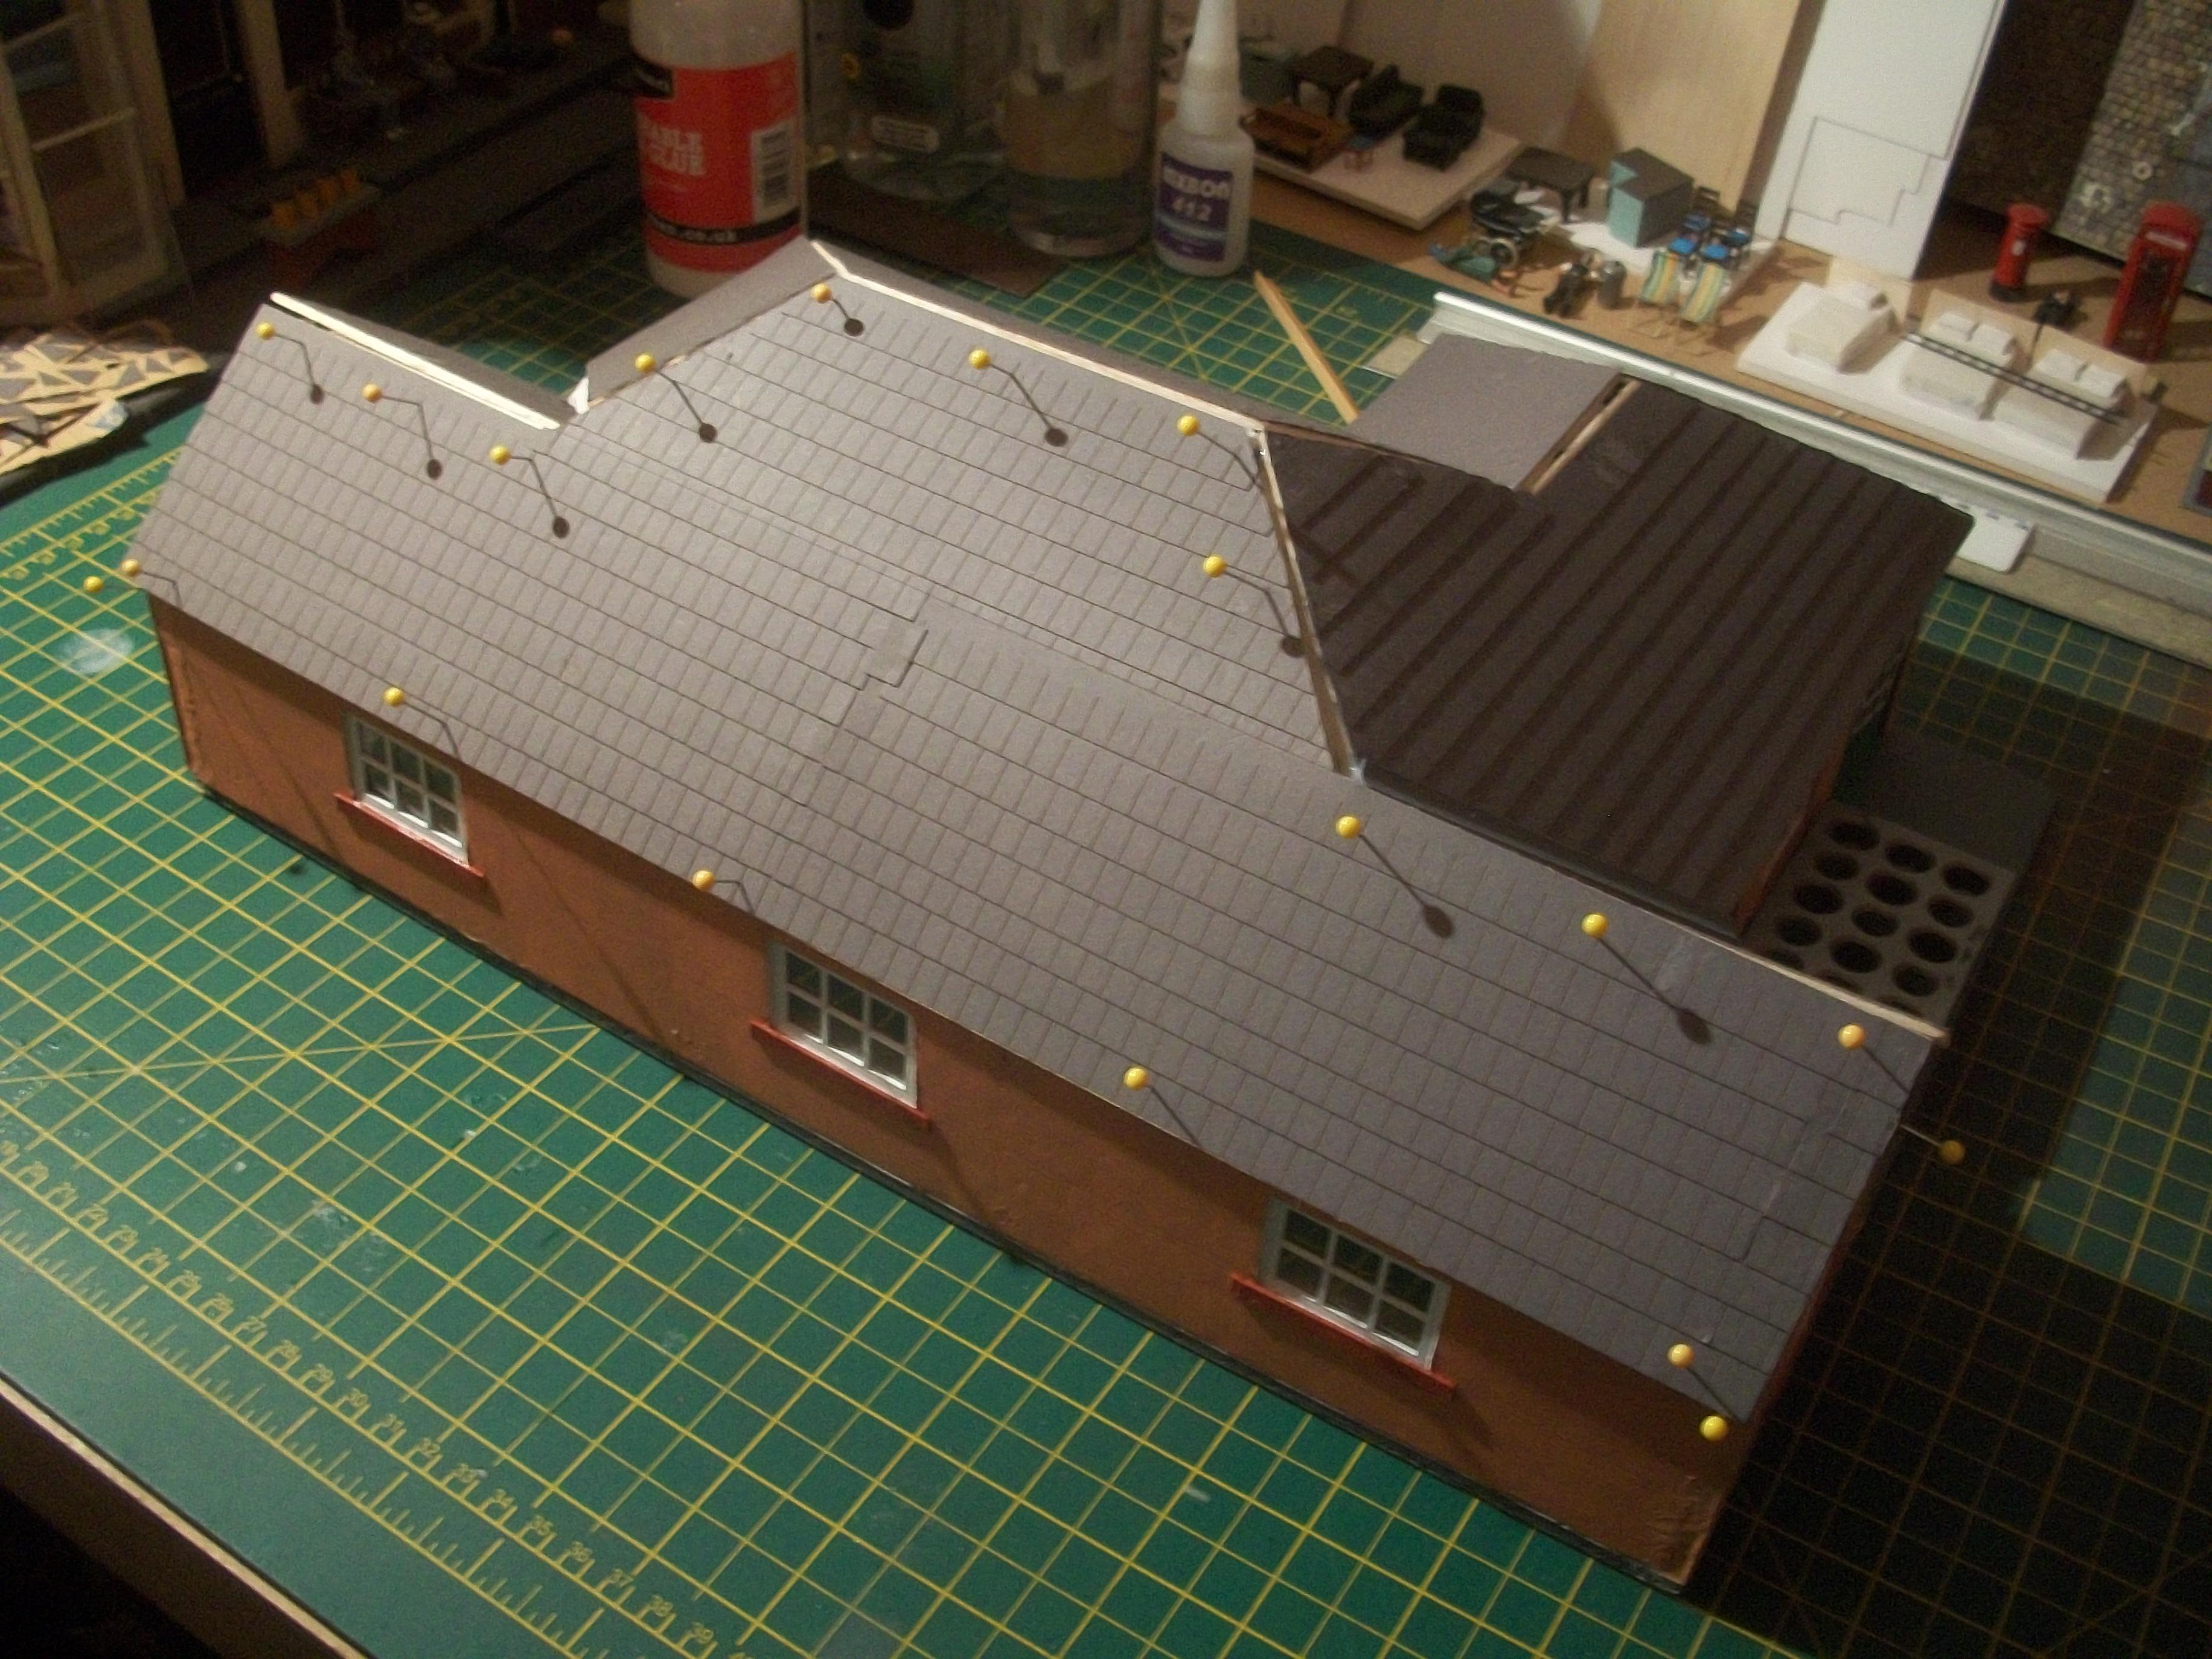
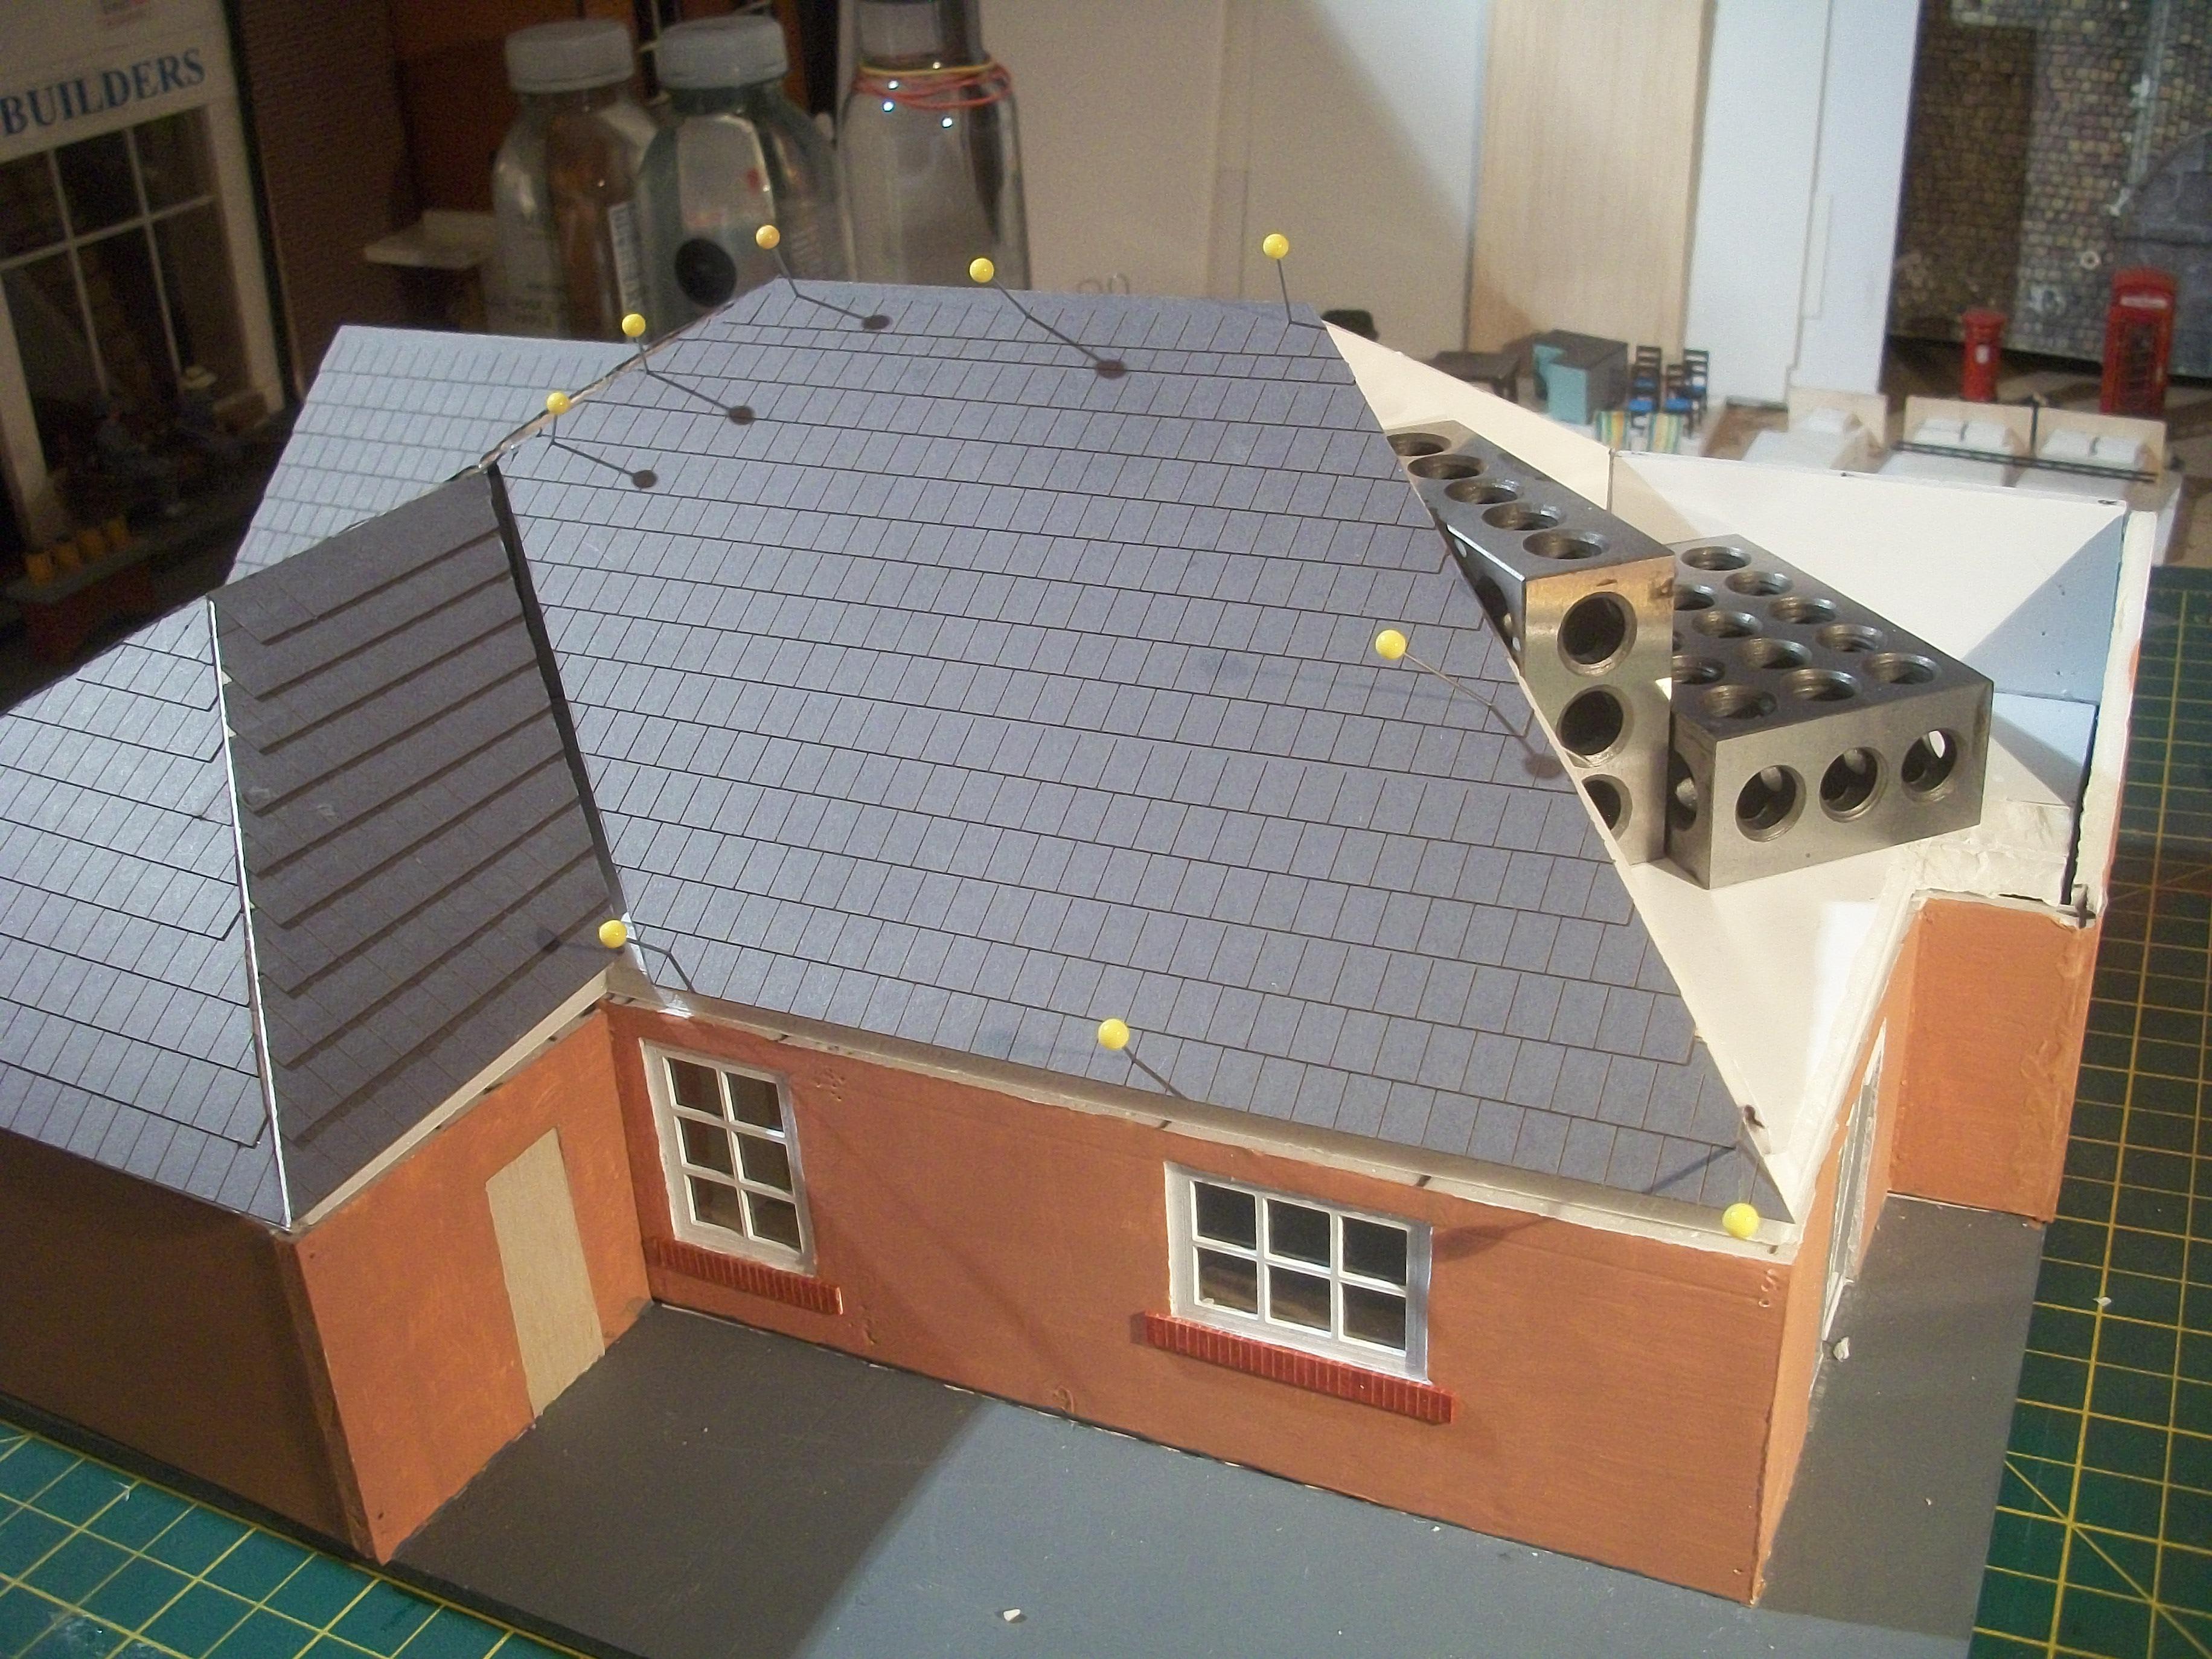
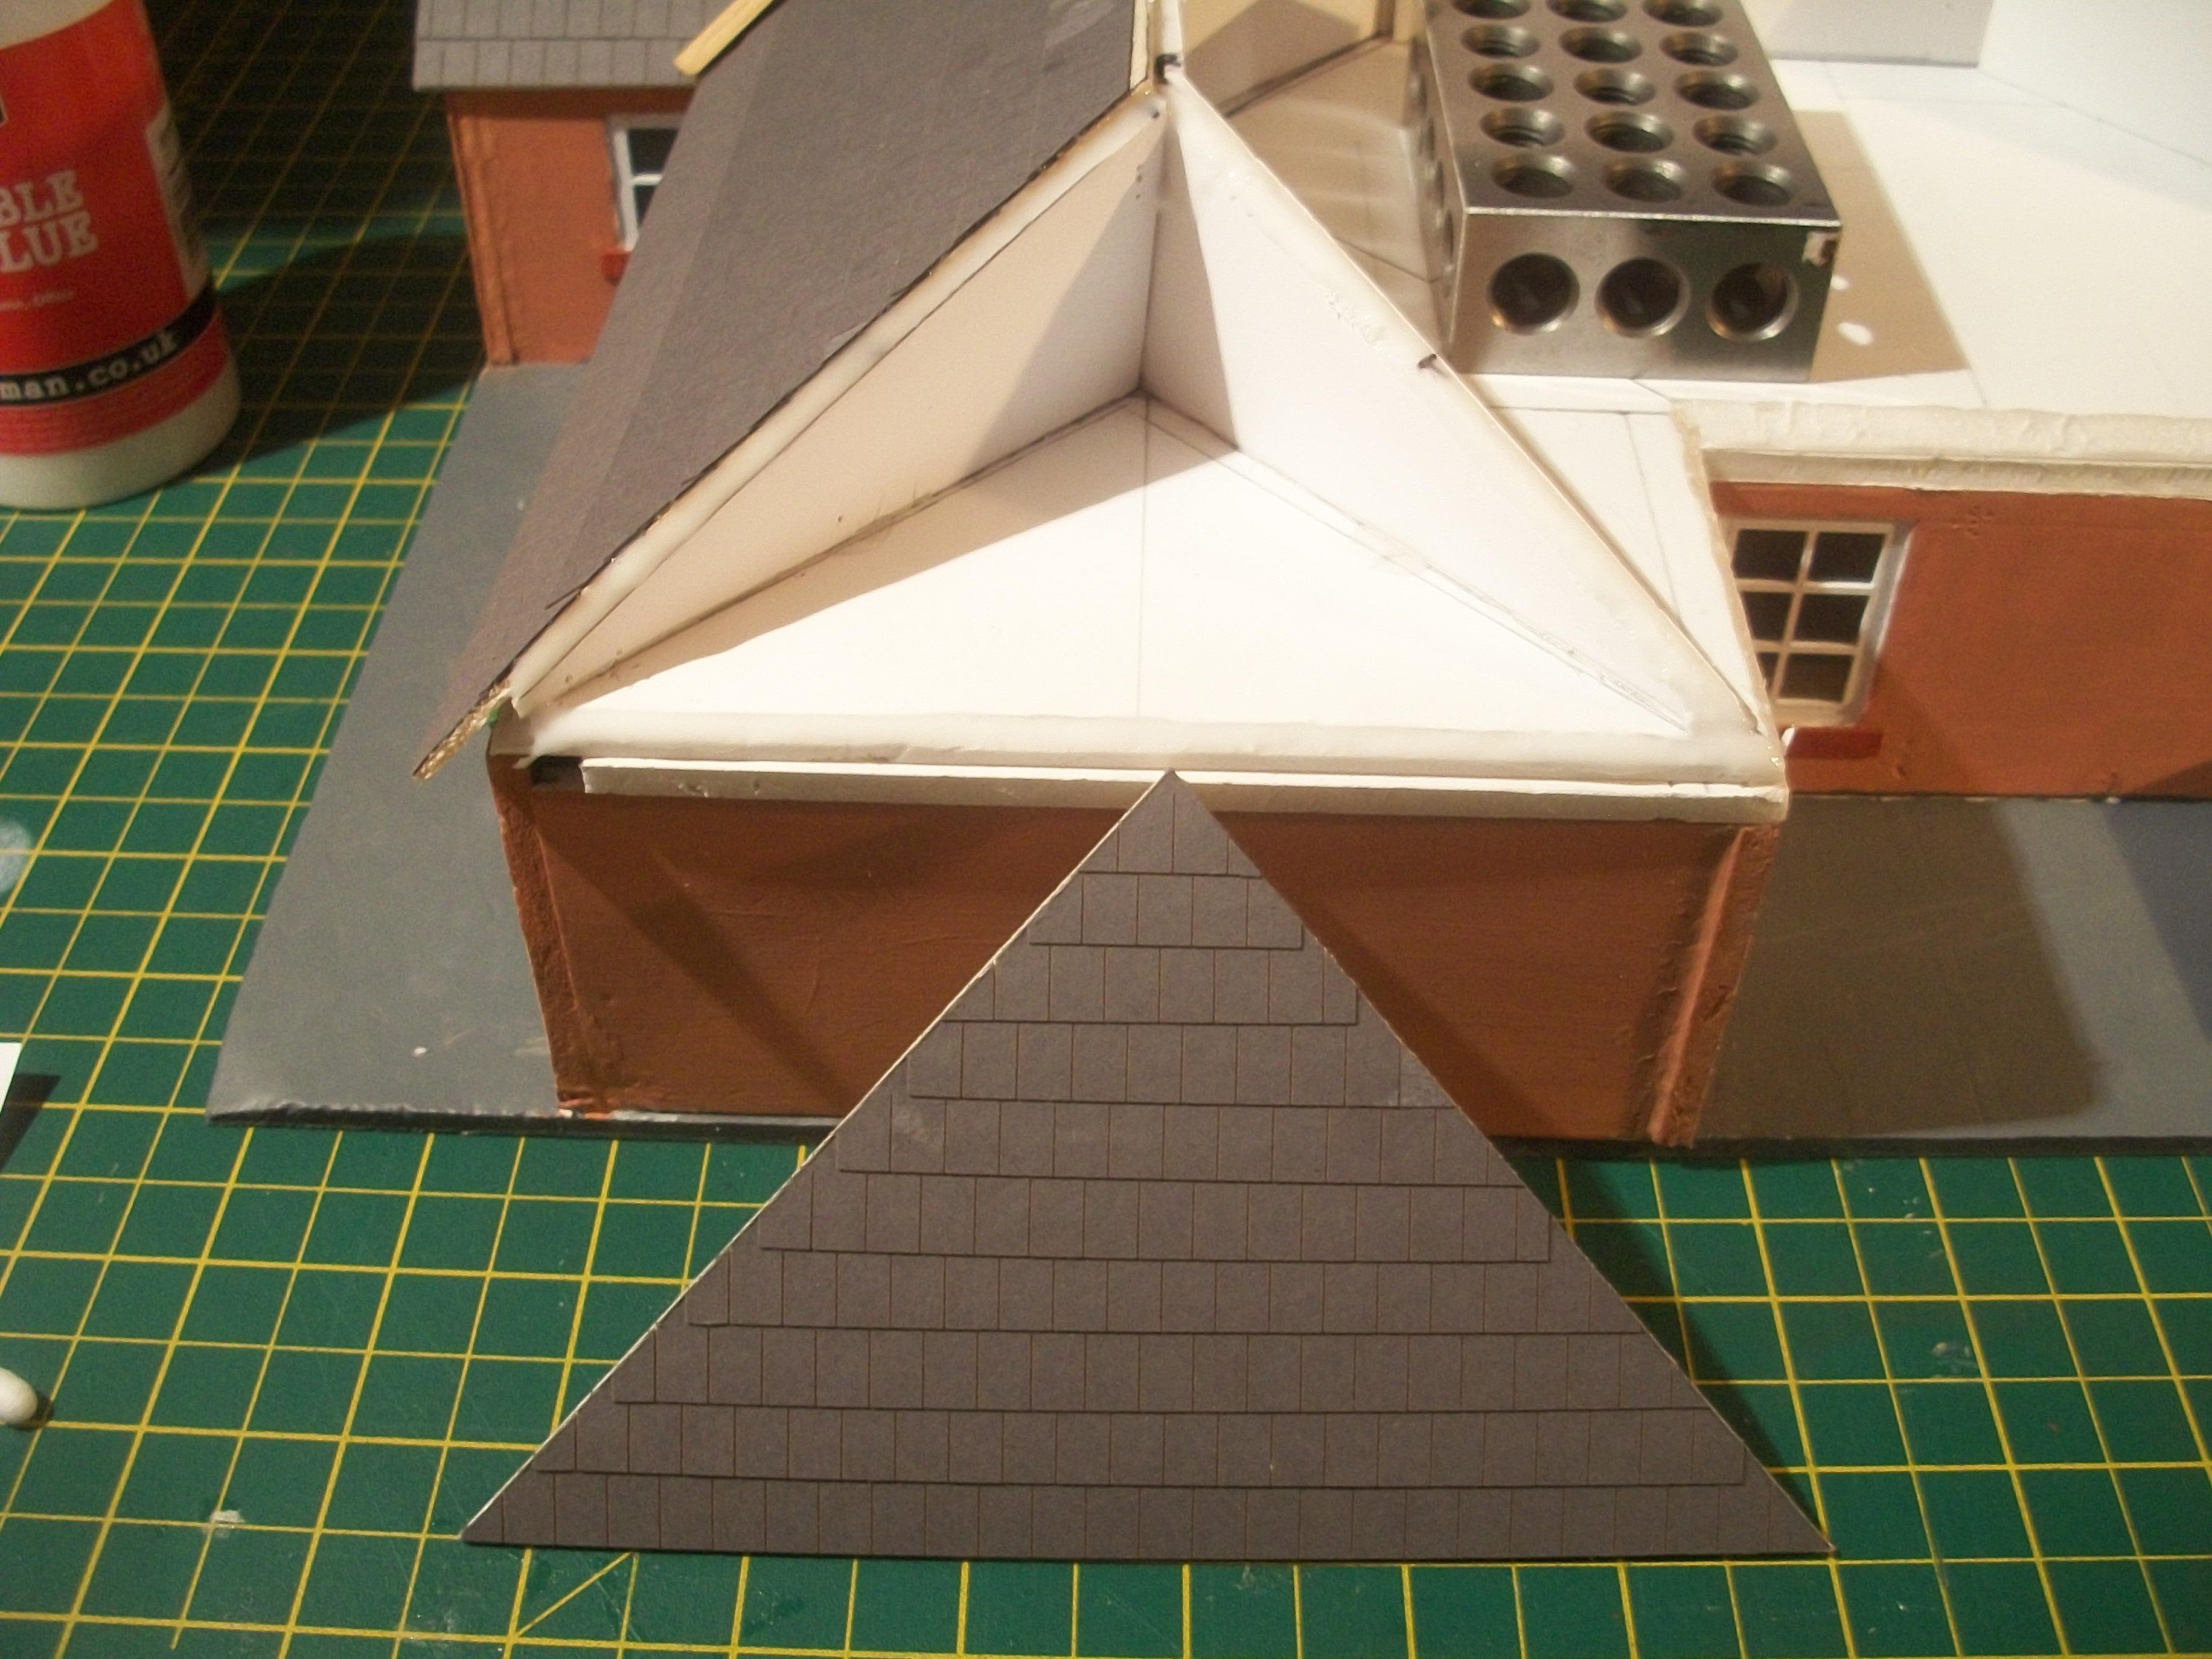
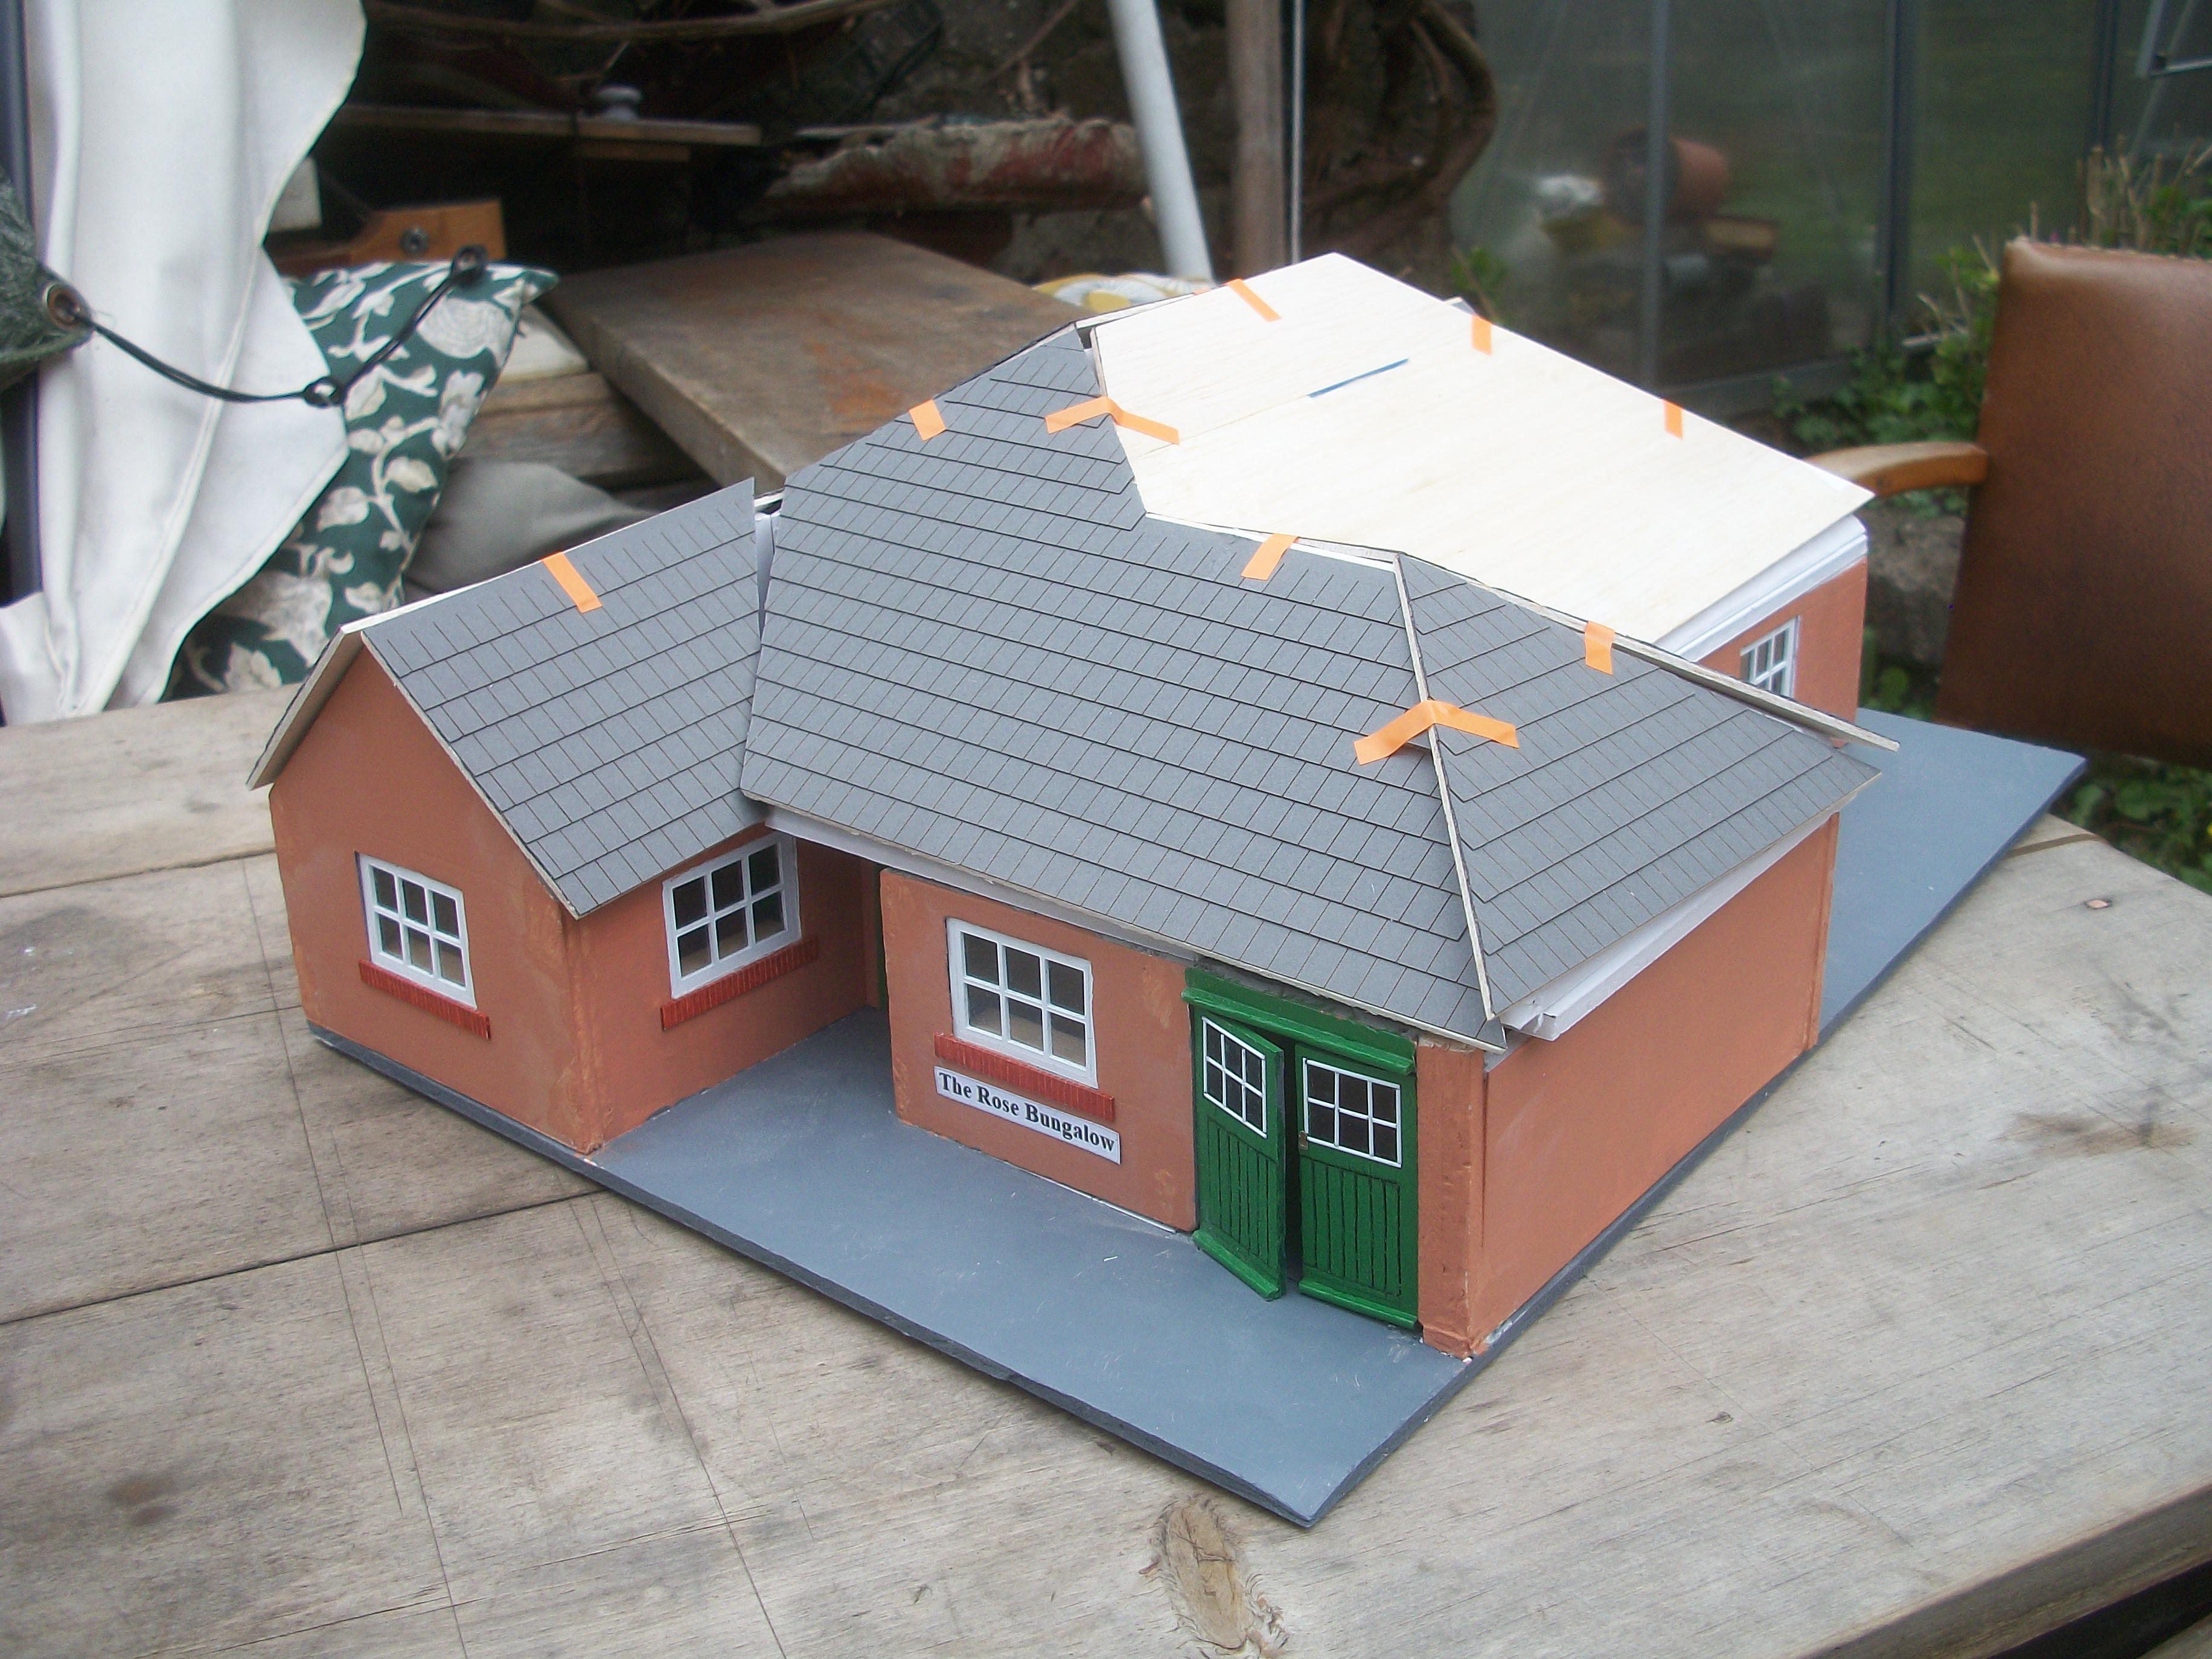
Yesterday I managed to PVA glue in place the sixth and seventh roof sections, which were both rather tricky, and particularly around the area where the gulley needs to fit. This area will need some further modification later . . . This evening was all about the eighth and final roof section, this being the largest of all the roof sections. First of all it was necessary to make two additional roof trusses from foam board, both of which were rectangular. One of these was for the front gable end, and the other was for the rear gable end. Once the extra trusses were in place, I set about applying a large amount of PVA glue to the relevant edges of the structure. Both extreme ends of the roof section were trimmed back slightly, to achieve a precise fit . . . The eight roof sections are all positioned reasonably well and can be allowed 24 hours setting time . . . There are two gullies to be fitted, and the packs of ridge tiles should be arriving in the post within the following two days. David

-
Yes Paul, the process of precisely positioning each piece of the puzzle is quite tricky at times . . . Somehow it is all coming together ! David
-
In order to mount the fifth roof section it was necessary to make an additional truss piece, because there was nothing to support the incline edge of the large roof panel . . . The existing roof truss was positioned just under and behind where it needed to be, so I had to provide a little more support. The truss was measured and cut out of foam board, and a couple of Bostik Glue Dots were used to attach this second truss to the side of the first one . . . The large roof section had to be cut away slightly at the far left edge, so as to fit properly where the gulley will be fitted shortly . . . PVA glue was applied to four of the five edges and the roof section was then pinned in place for 24 hour setting overnight. David
-
The foam board structure has a great deal of strength, and can easily bear the weight of the 1-2-3 blocks, and more. The builder appreciates your comment. Progress is indeed steady, and I should be able to get all of the roof sections in place by the time the ridge tiles are delivered. David W.
-
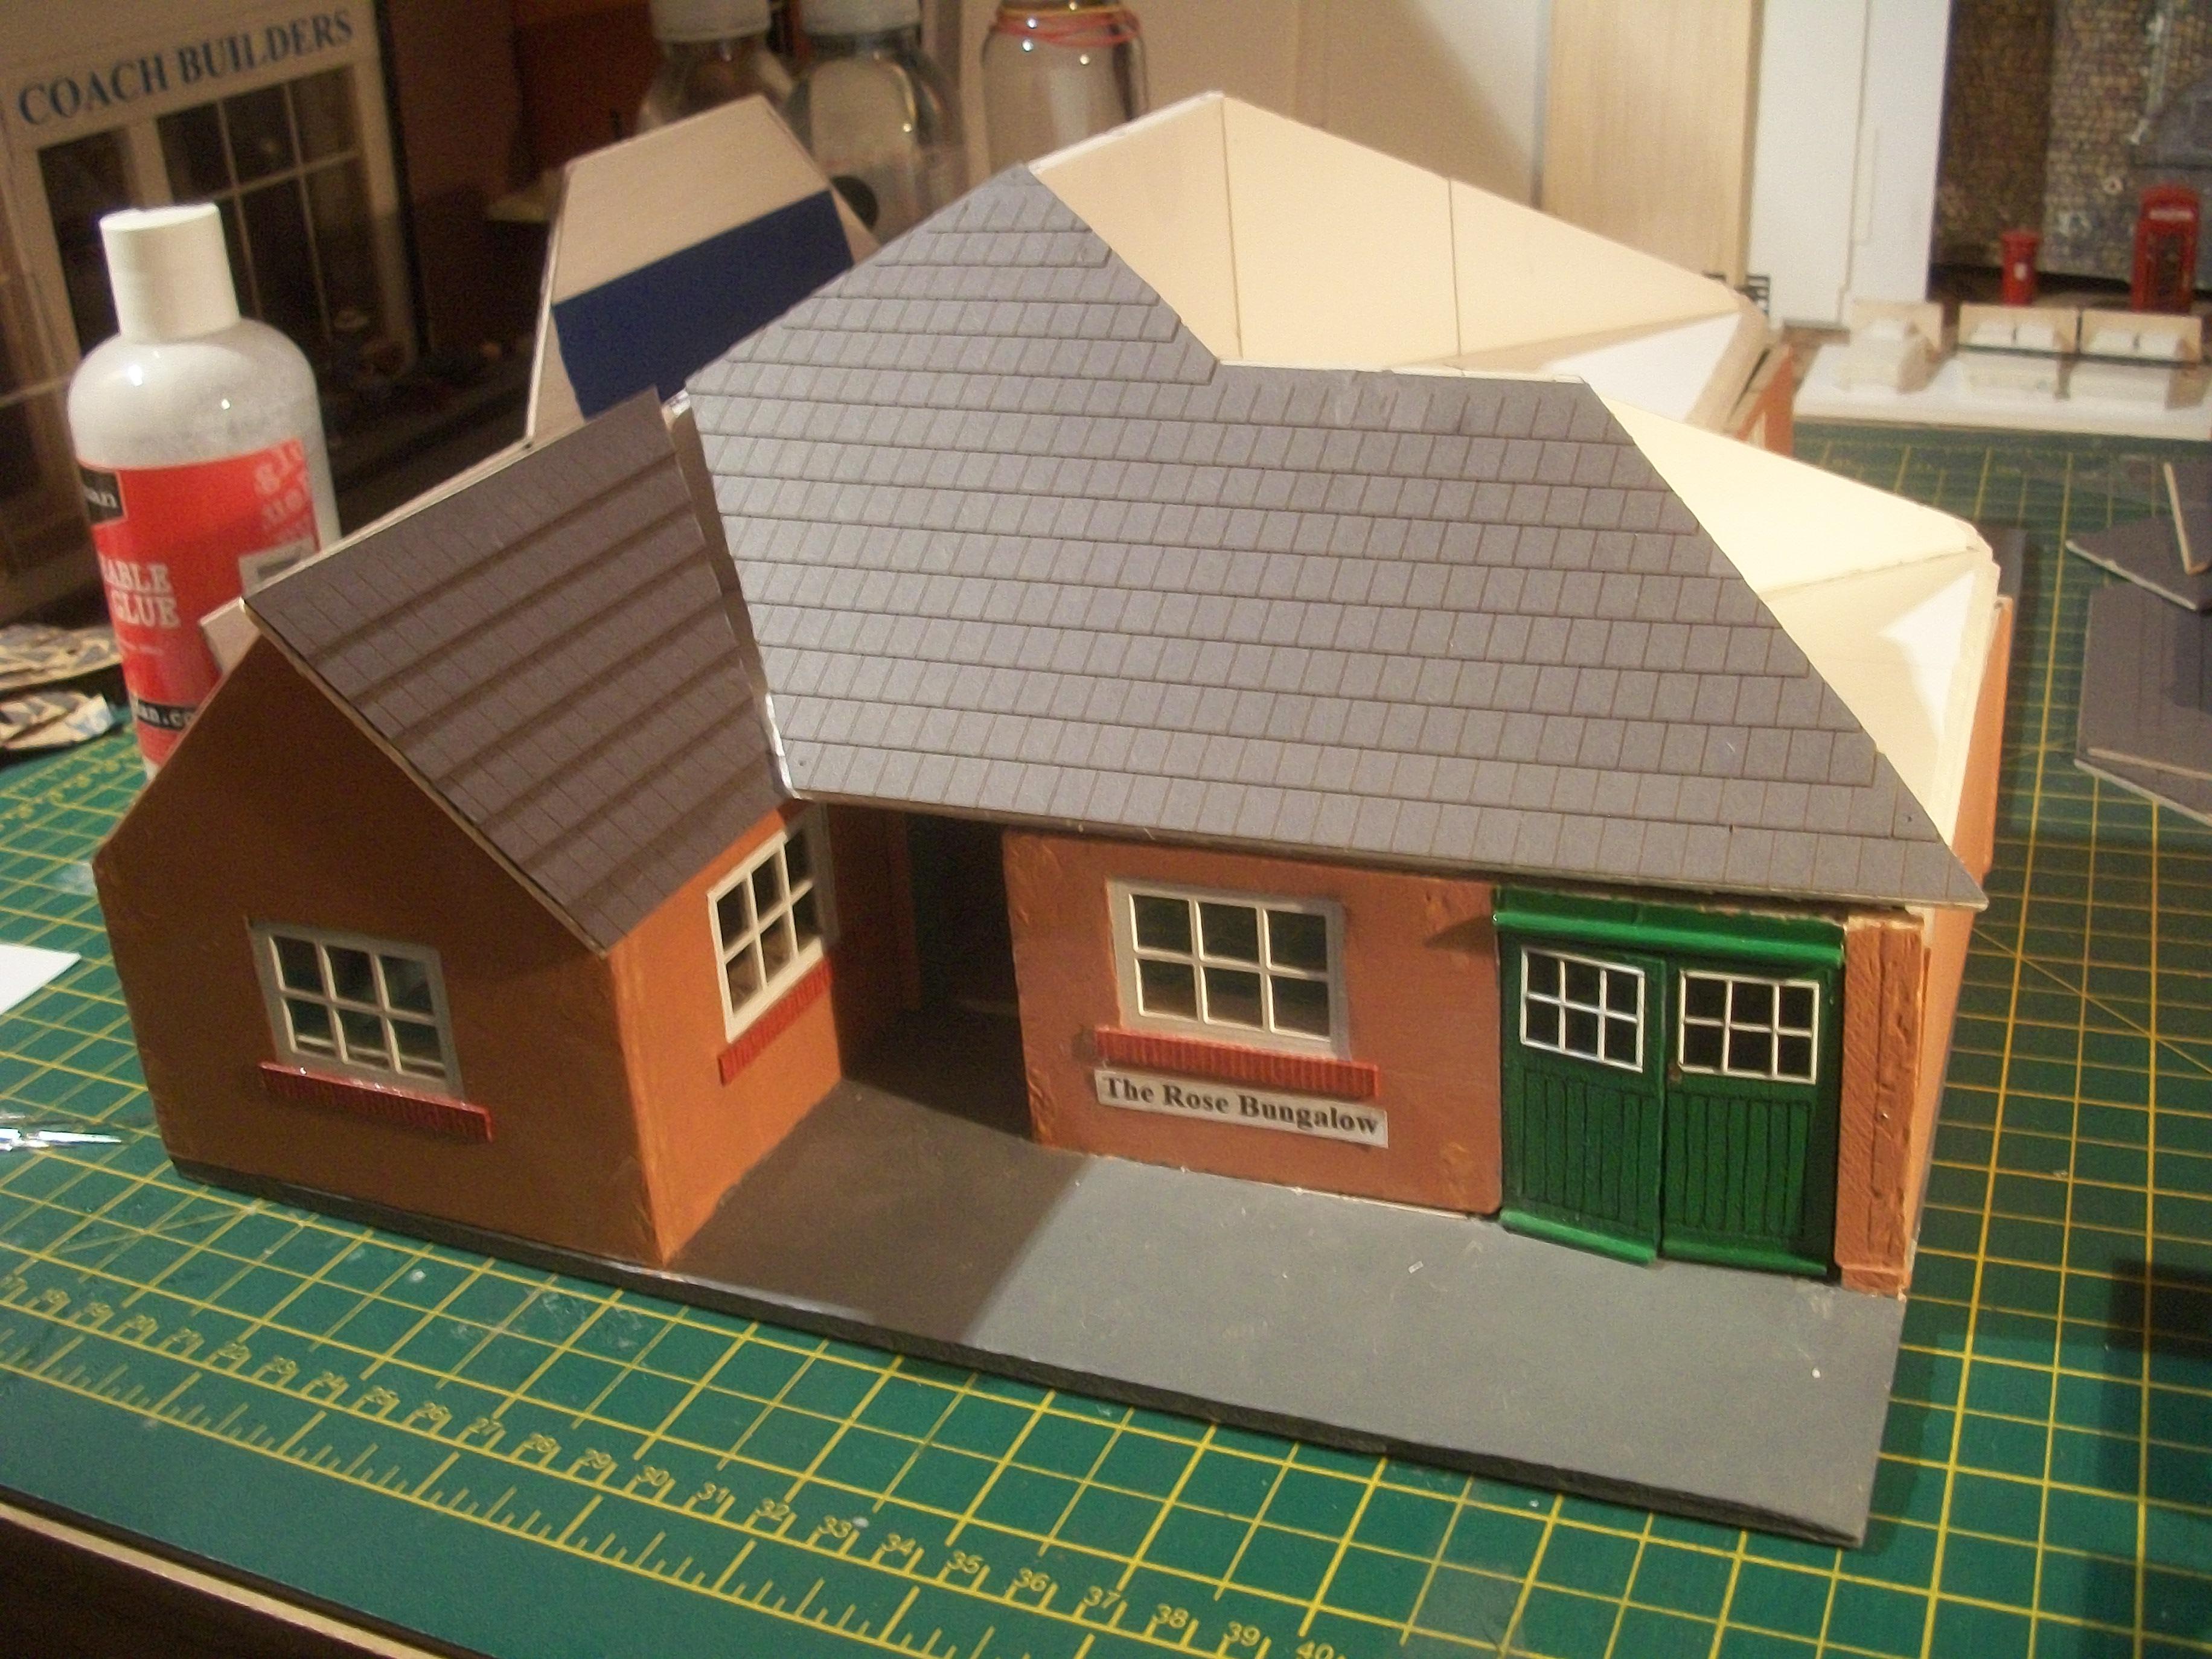
The gulley, previously glued in place, has now been given a coat of grey emulsion paint and the third roof section over the side of the garage has set nicely. Today I positioned the fourth roof section, which is over the rear of the garage, and PVA glued this in place . . .There are just four more roof sections to be fixed in place, with the largest section being the last to go on. As things turned out, I did have more than enough roof tiles ( shingles ) to cover all of the panels, so I don't need to order any further tiles. This evening I am placing an order for some ridge tiles, from the same company in York, and these should arrive in the post early next week sometime . . . David
-
Thanks for the link George . . . They seem to have a large range of figures in 1:24 scale, which is impressive! David
-
The second roof panel section has fitted nicely and firmly glued with PVA . . . Today I was able to position one of three gulleys, on the left hand side of the bungalow roof, as viewed from the front of the building. Then the third roof section was PVA glued in place, which is the triangular piece over the side of the garage . . . These will be allowed 24 hours setting time overnight, before painting the gulley with grey emulsion. David
-
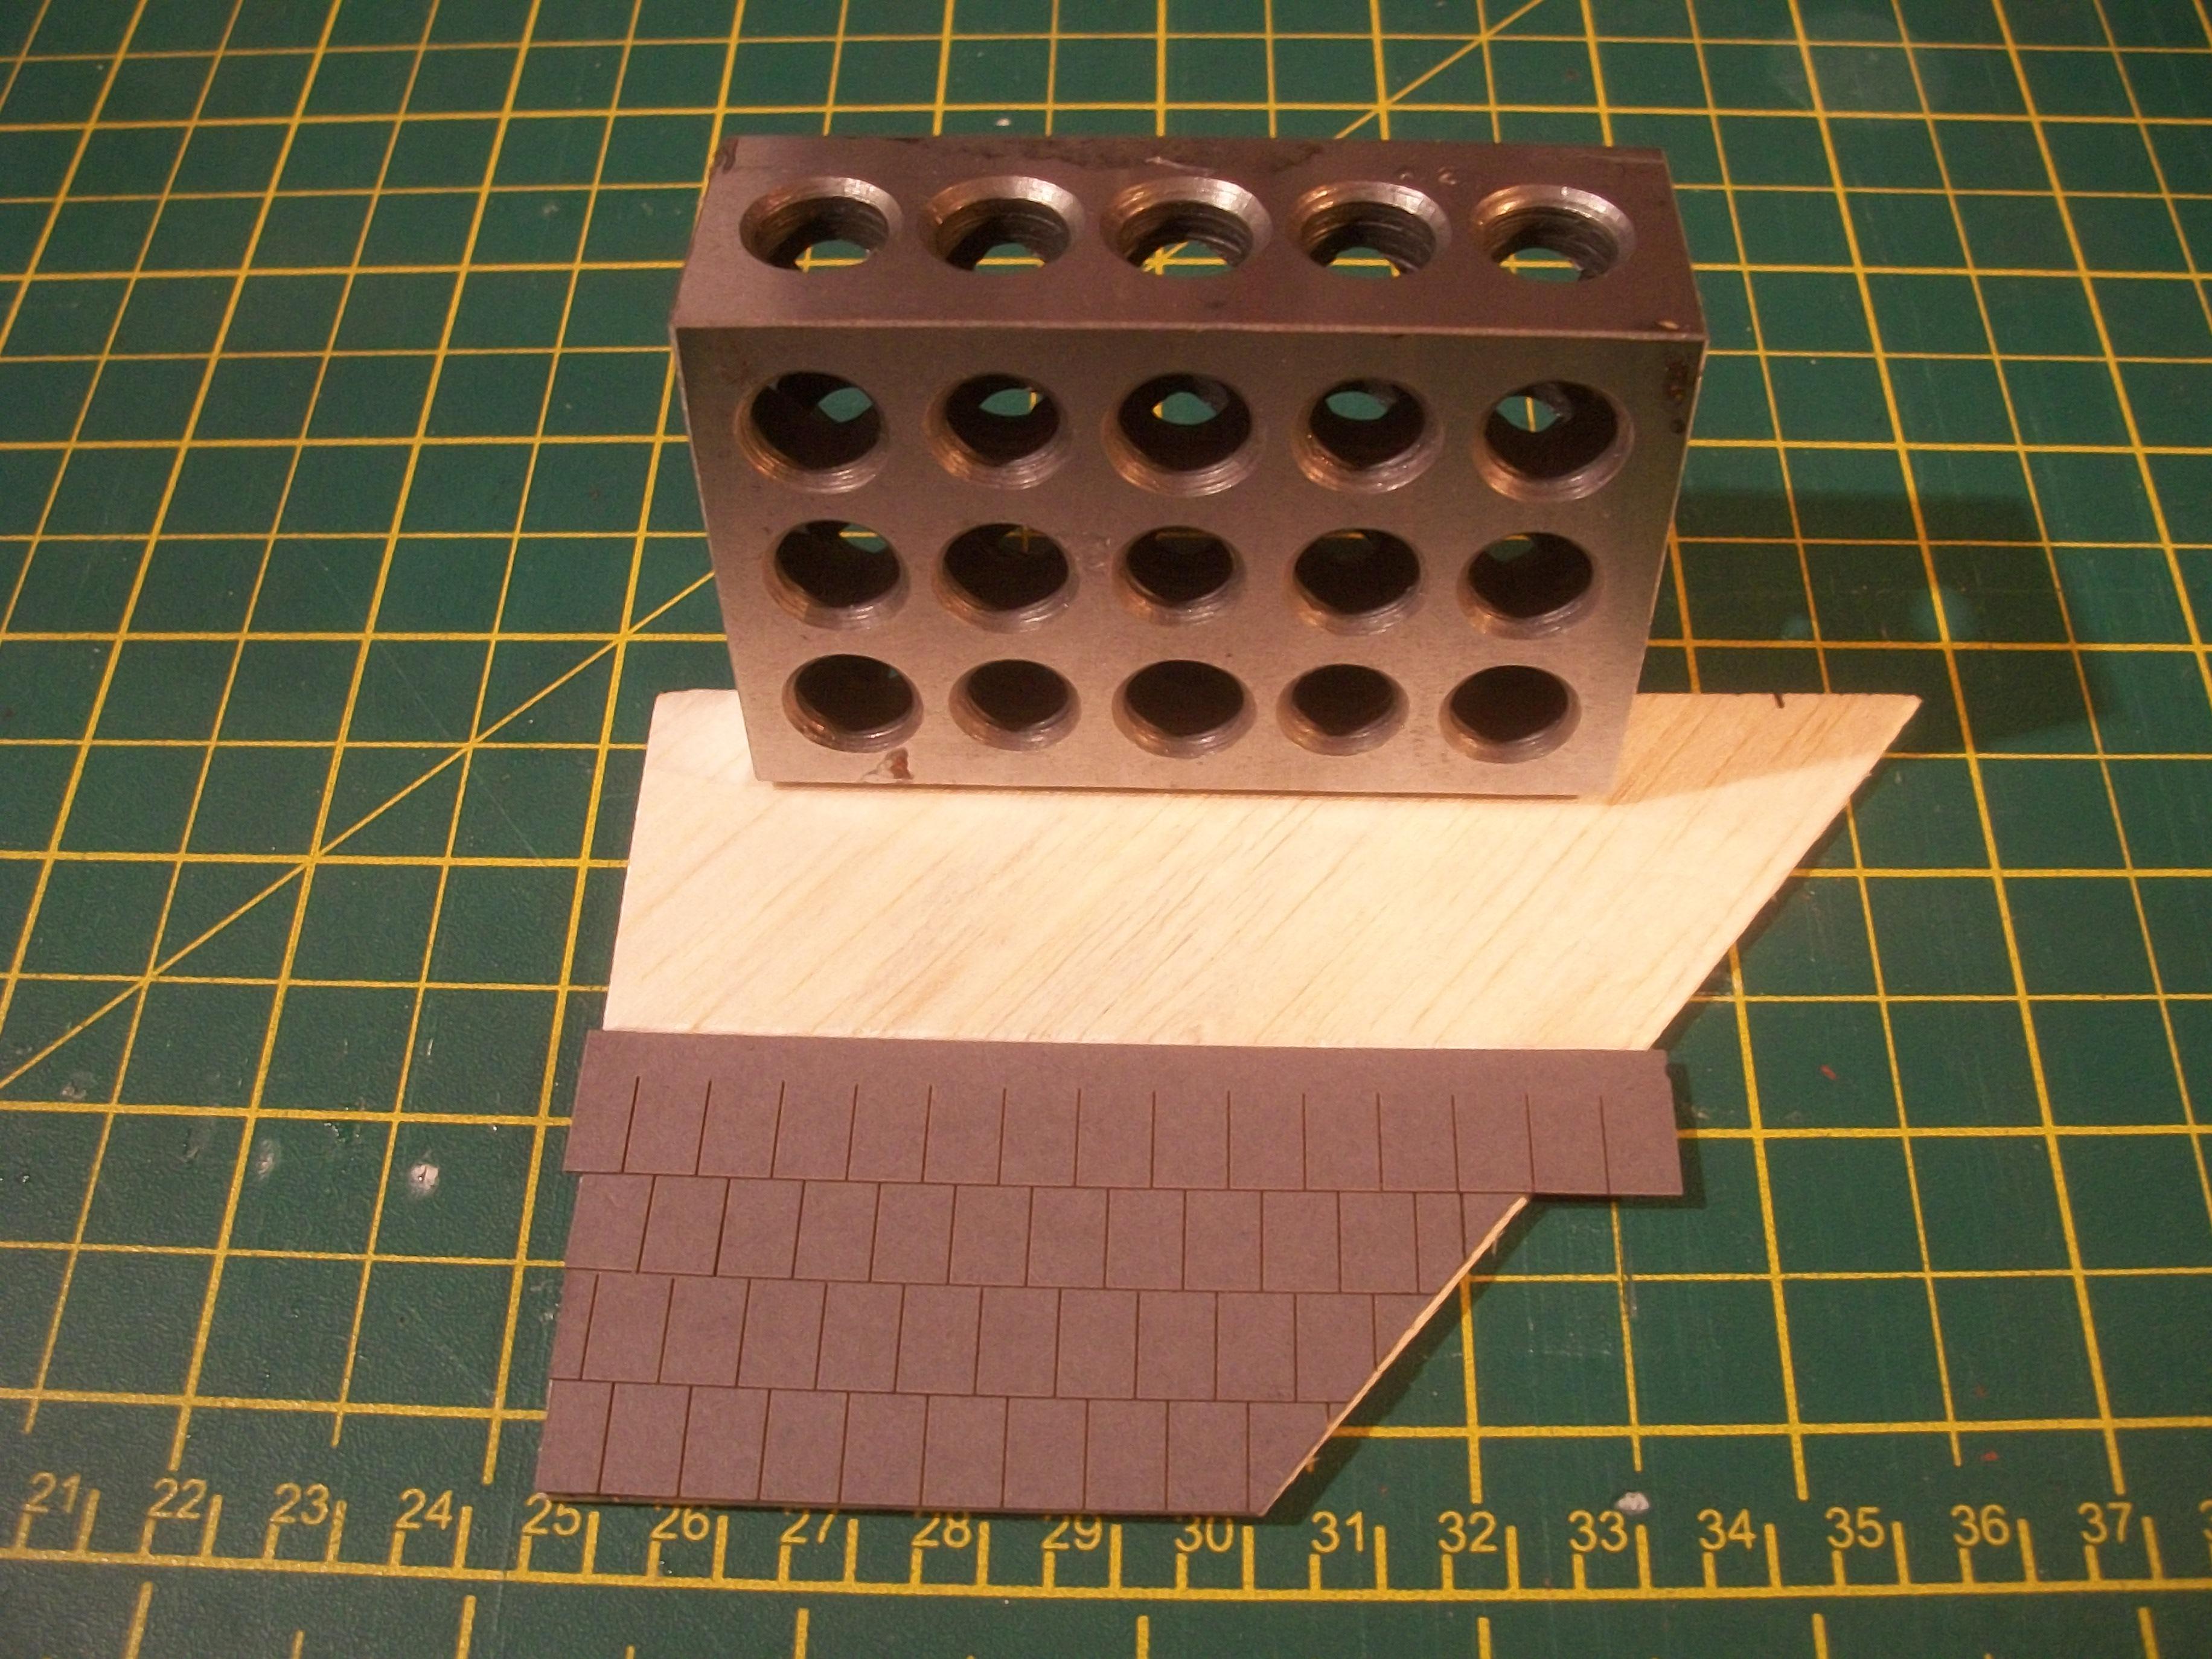
Thanks David G., the shingles ( roof tiles or slates as we say ) have turned out pretty good . . . Today I managed to get a third roof section glued in place, and also one of the three gulleys. The gulley is a 10 cm length of wood, and I have used PVA glue to hold the gulley and the roof sections in place. I then leave the PVA glue for 24 hours to set properly. See my next post for further photos of work in progress . . . David W.
-
You are off to a fine start Daniel, and it will be interesting to see where this one goes . . . David W.
-
Really nice diorama you have there George . . . You must be very pleased with your achievement. Which company supplies those figures? They look just right for your setting . . . David W.
-
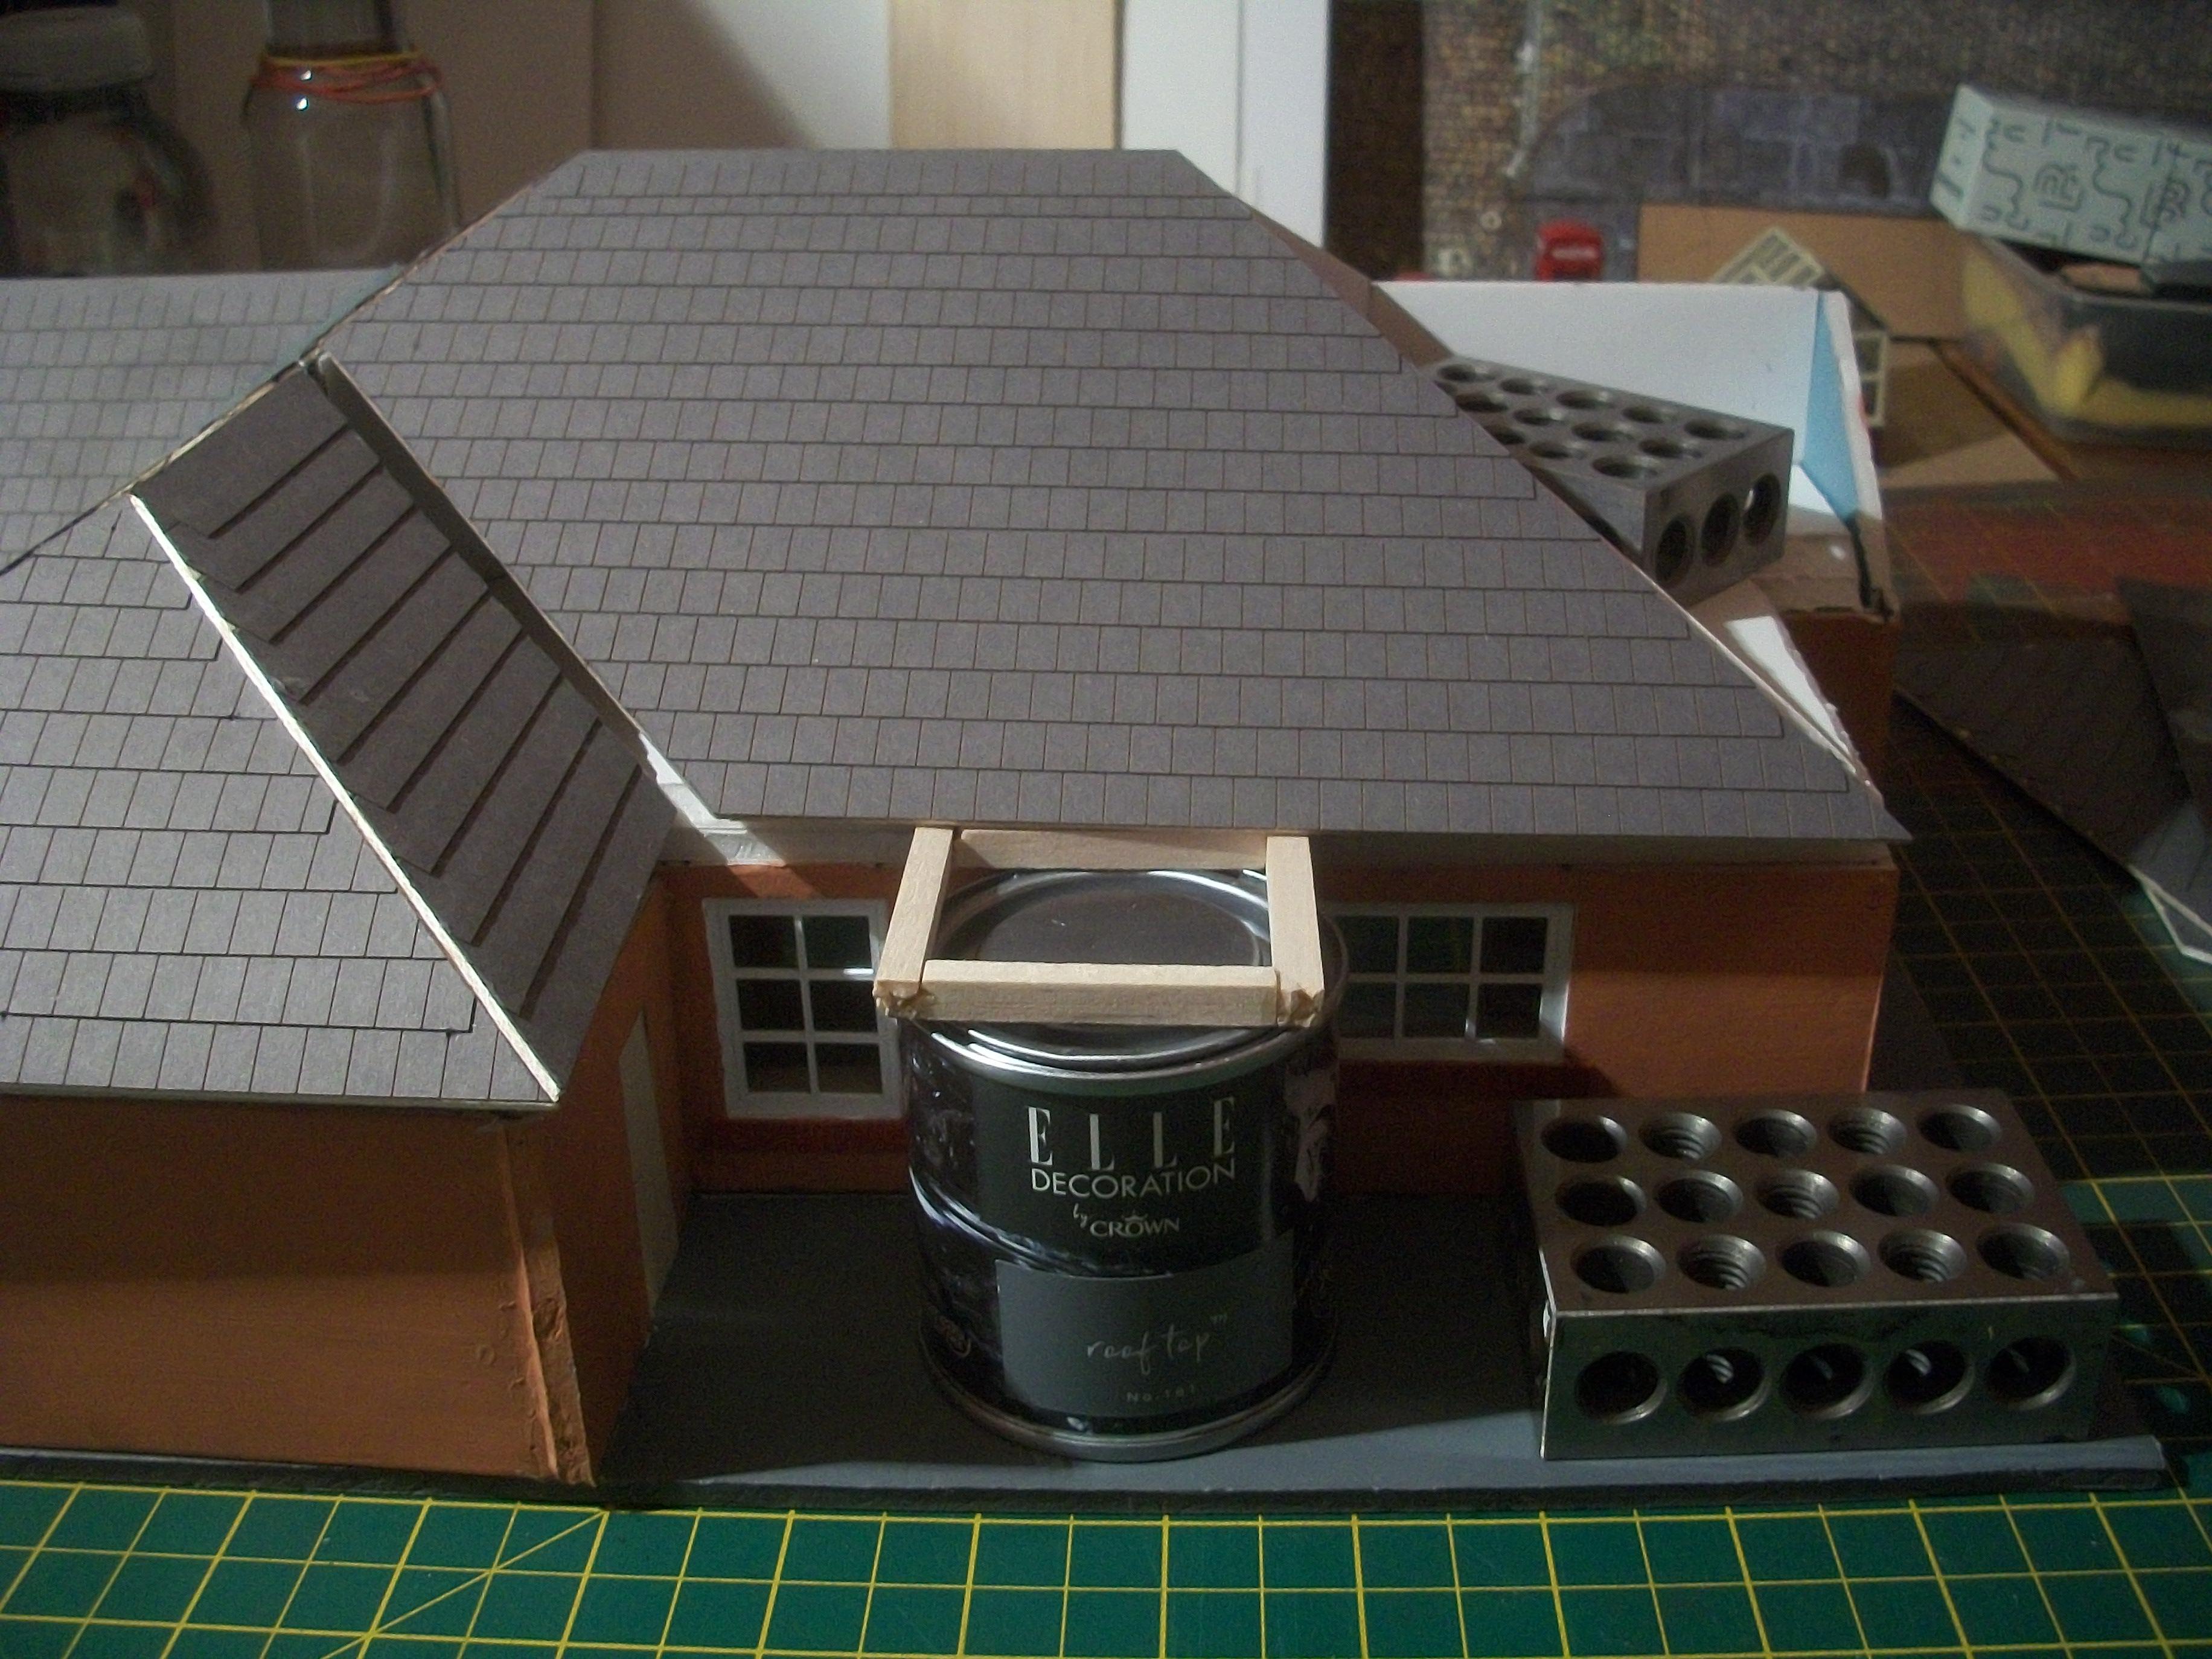
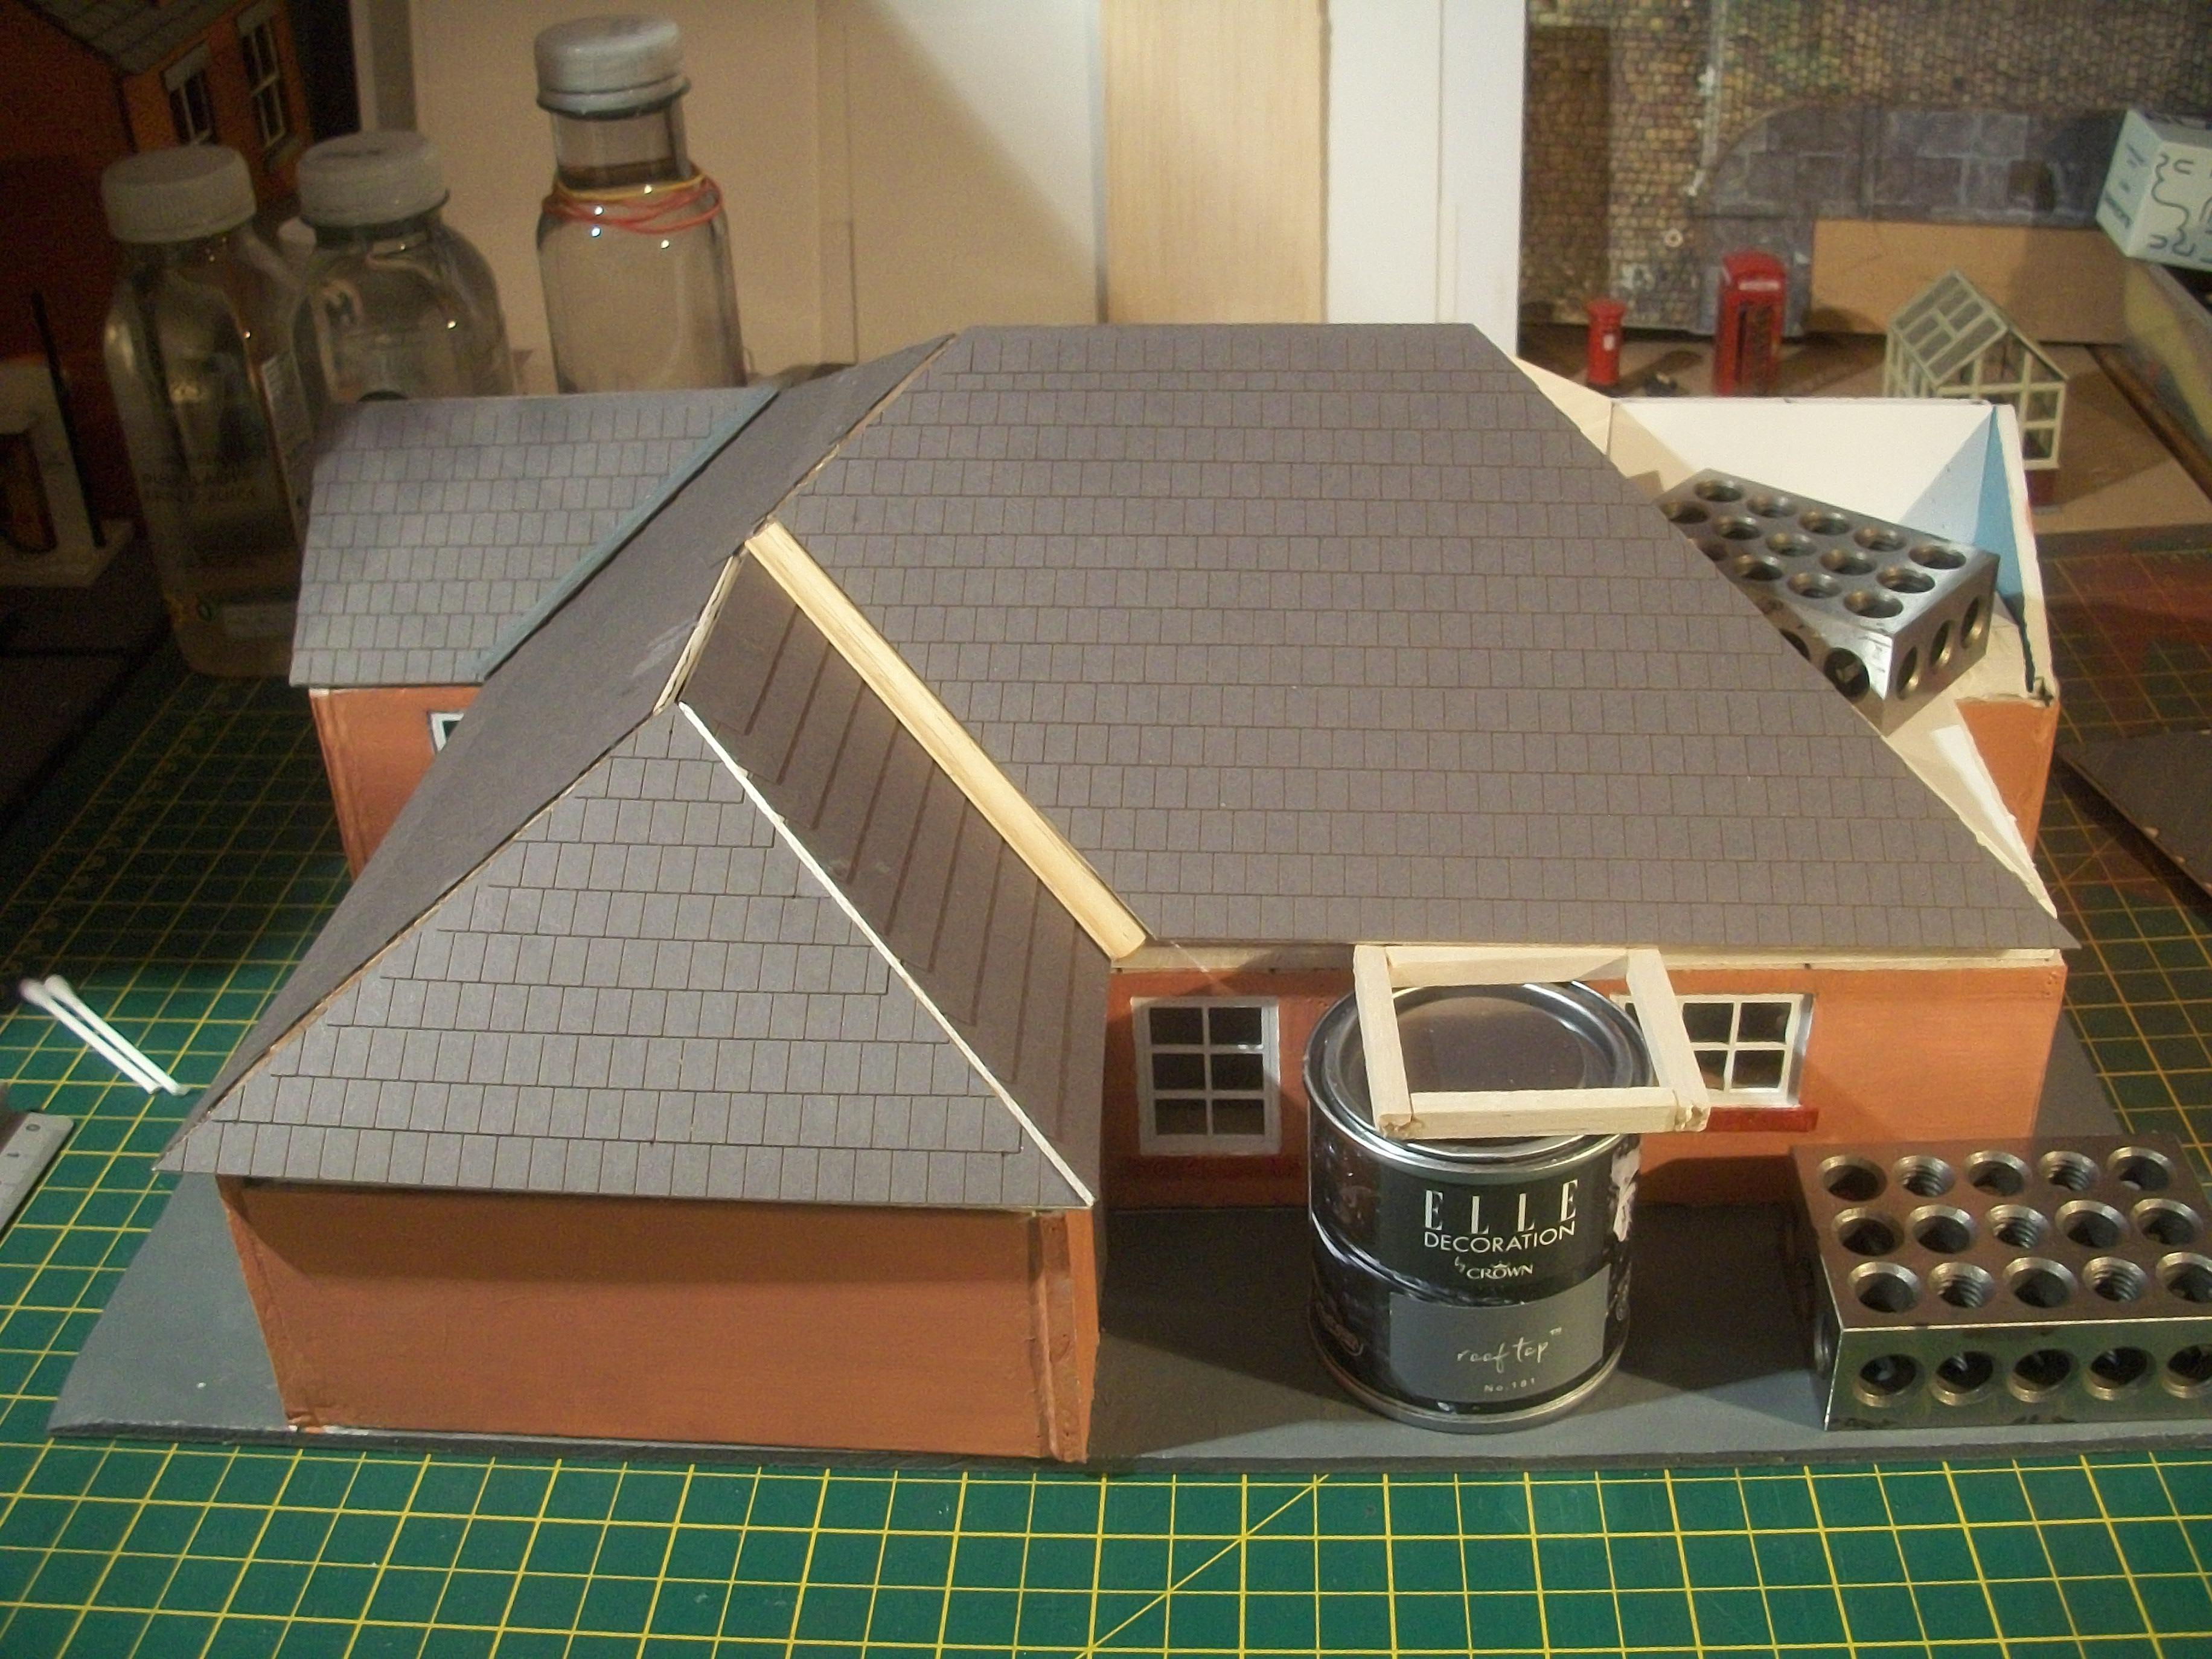
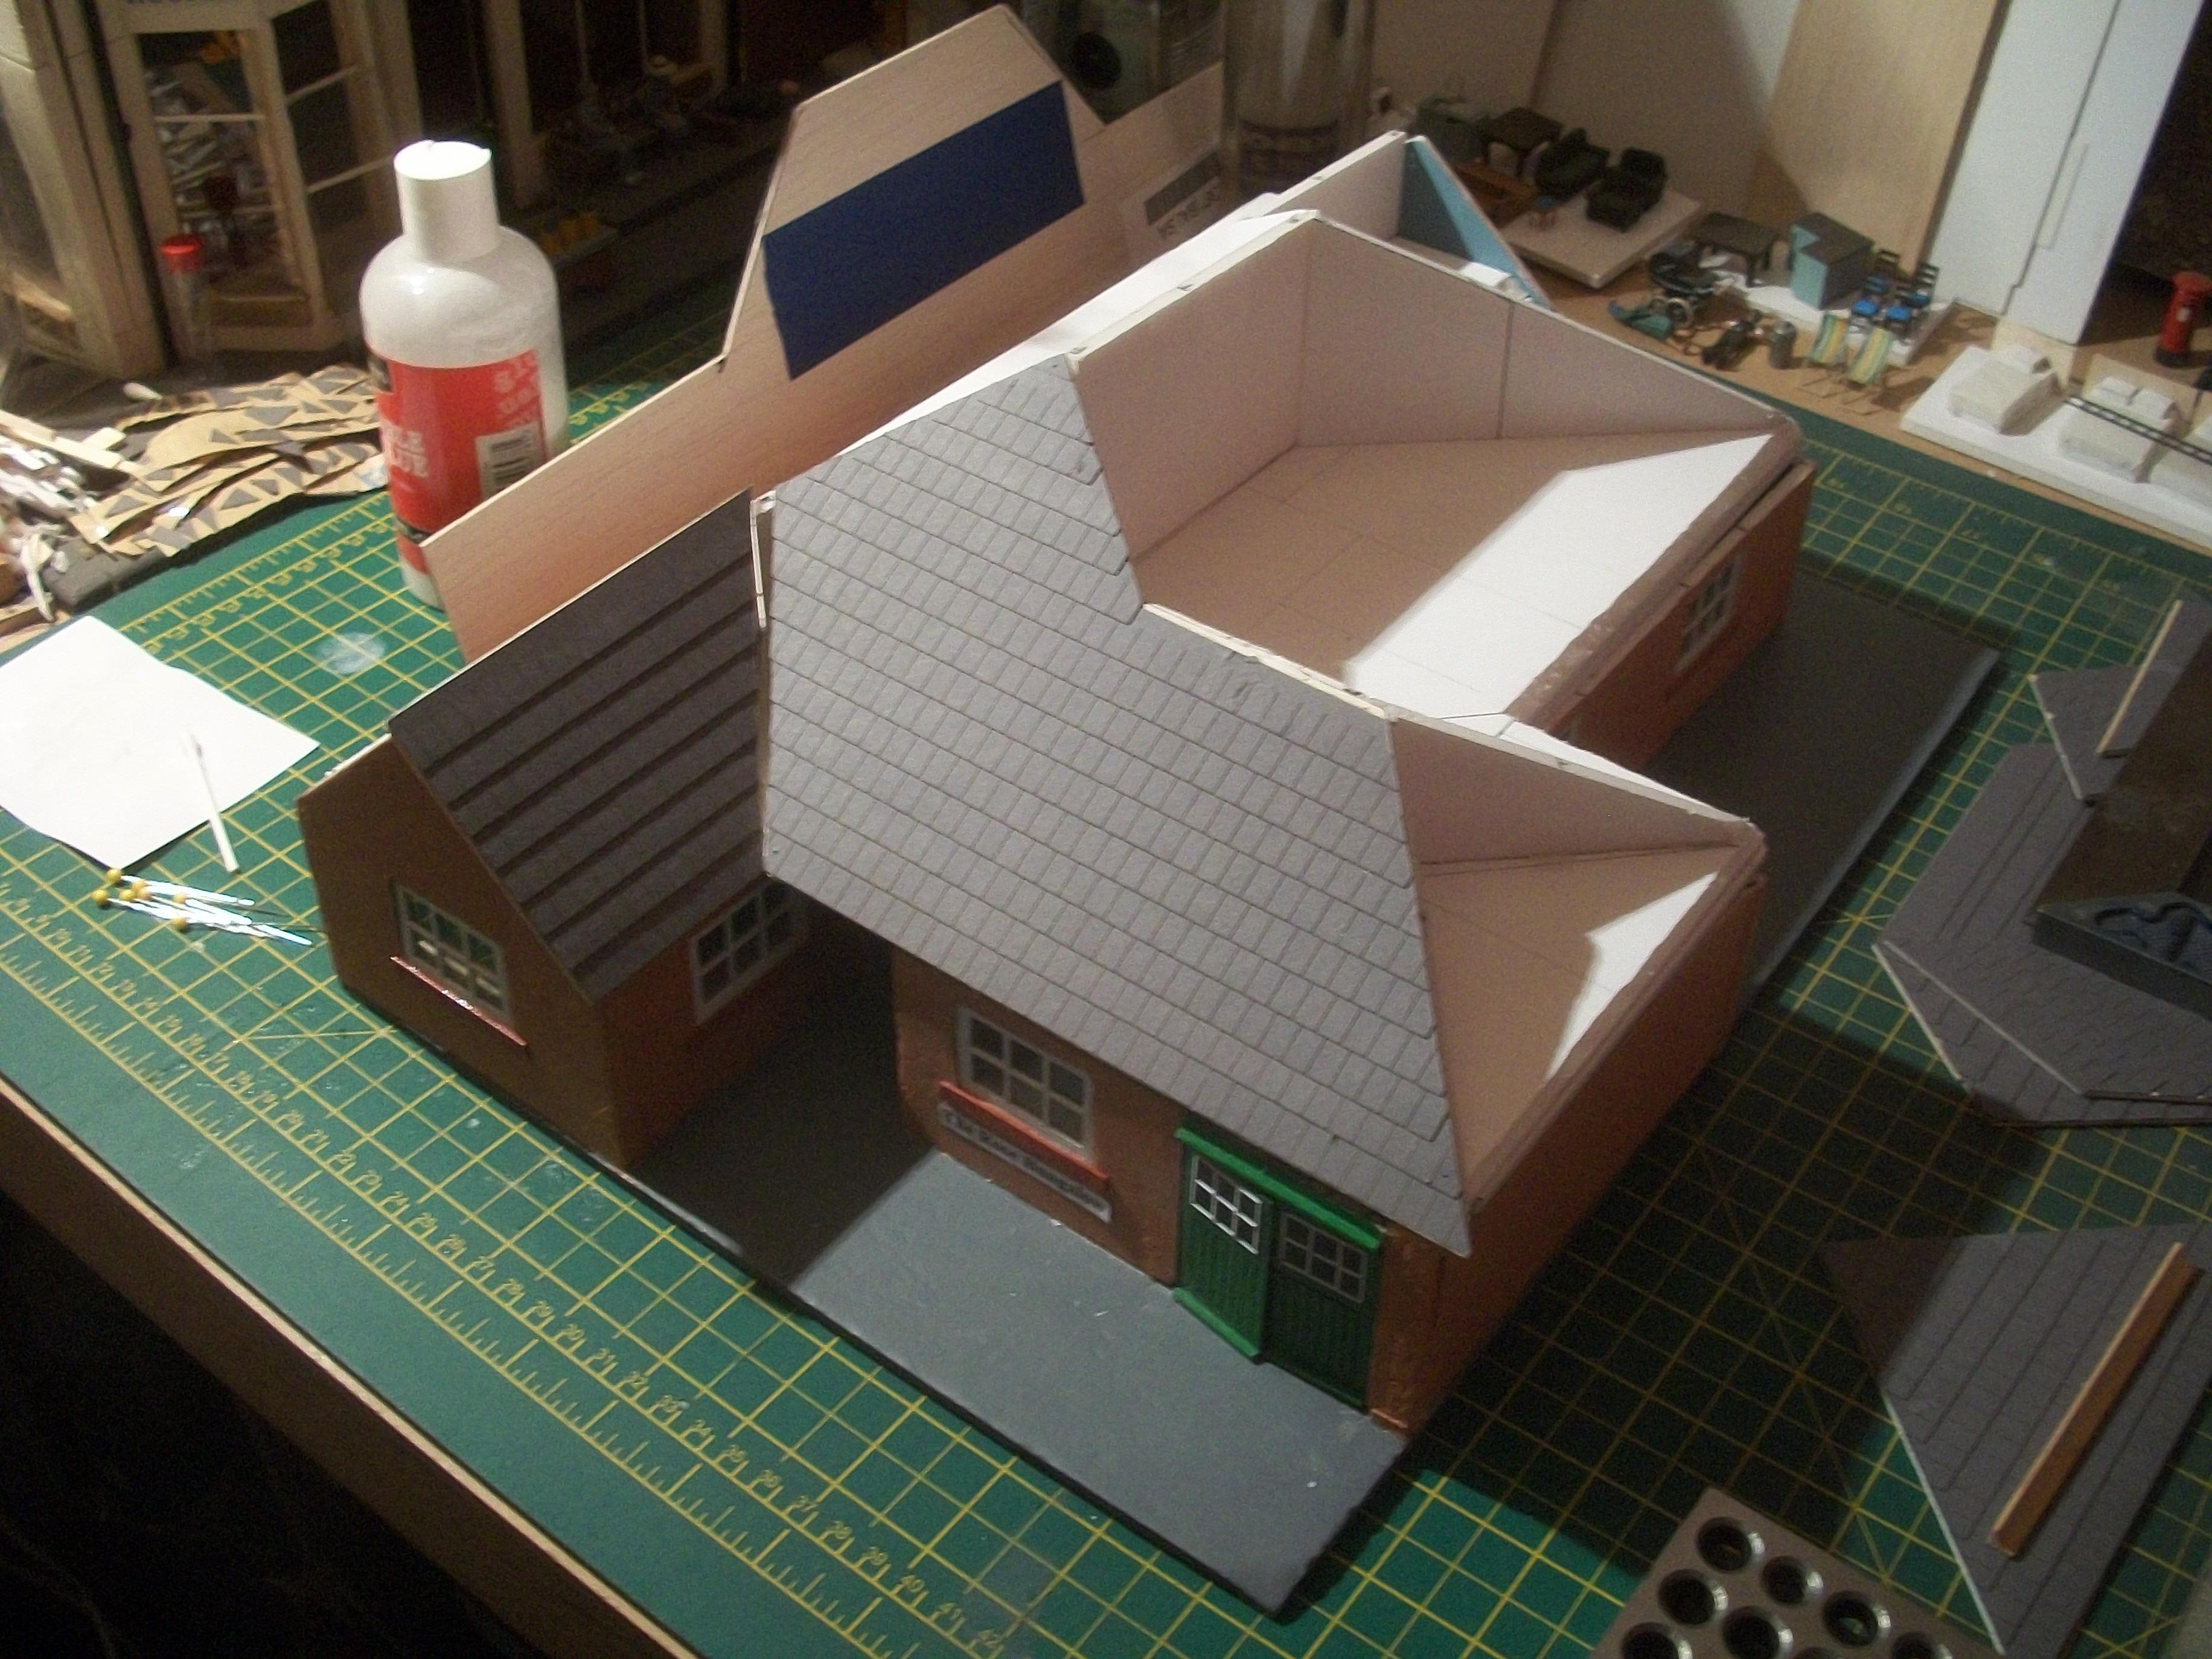
Having returned from my annual vacation, refreshed and ready to go, I did manage to achieve something within two days of arriving back home . . . The final roof section panel has now been fully tiled, and this was quite a large area to cover. During the next few days I shall be looking at the roof assembly as a whole, so thinking about how the roof sections mount onto the roof trusses and also how the roof assembly base panel is sitting on top of the ceiling panel below it . . . Here are a few photos taken last night . . . more to follow. David
-
Have a good vacation in the mountains David, and model building will resume around two weeks from now . . . David W.
-
Seven of the eight roof section panels have now been fully tiled, so there is only one remaining . . . I began to apply some strips of tiles today, and having done an accurate estimate, this large roof section will need 16 strips of tiles . . . There are still three sheets of tiles in the pack, which means that I have 33 strips available, This is more than enough to complete the roof . . . This following photo shows the bungalow model outdoors in natural daylight, taken on the patio table . . . Only one day before I leave for Cornwall, so not much model building will happen. David
-
That was something that always surprised me Paul, when I would allow the software to calculate the estimated print time and this would quite often come up with 10 hours, 12 hours, 20 hours plus . . . Leaving the printer running in my loft room, much of the time unattended, and even sometimes with nobody at home was a constant worry . . . The fire risk was probably the only downside of 3D printing I would say. As you say, the prices are coming down, as we all knew they would, so at some point I may take another look at getting a 3D printer. My best model to date is the O-gauge ( 1:48 ) Pannier Tank steam loco, which was a completely free download and I printed 26 parts for the assembly. Once printed, assembled and painted this produced a really nice model . . . ( see following photos ) David
-
Hello David G. . . . Always good to make someone happy ! Yes, I really miss that cheap 3D printer, which in spite of it's limited spec, did an excellent job. There was no fire at the time fortunately, which would have been bad for my loft room . . . The old gent who appears from time to time in my photos is Harold, and he is the best 1:43 scale figure that I have, in terms of detailed painting ( not painted by myself, I hasten to add ). The roof of the bungalow should be almost fully tiled during the next day or two, although I shall run out of tiles before completion. Once I return from my holiday trip I shall order some ridge tiles, and a further pack of the roof tiles . . . David W.
-
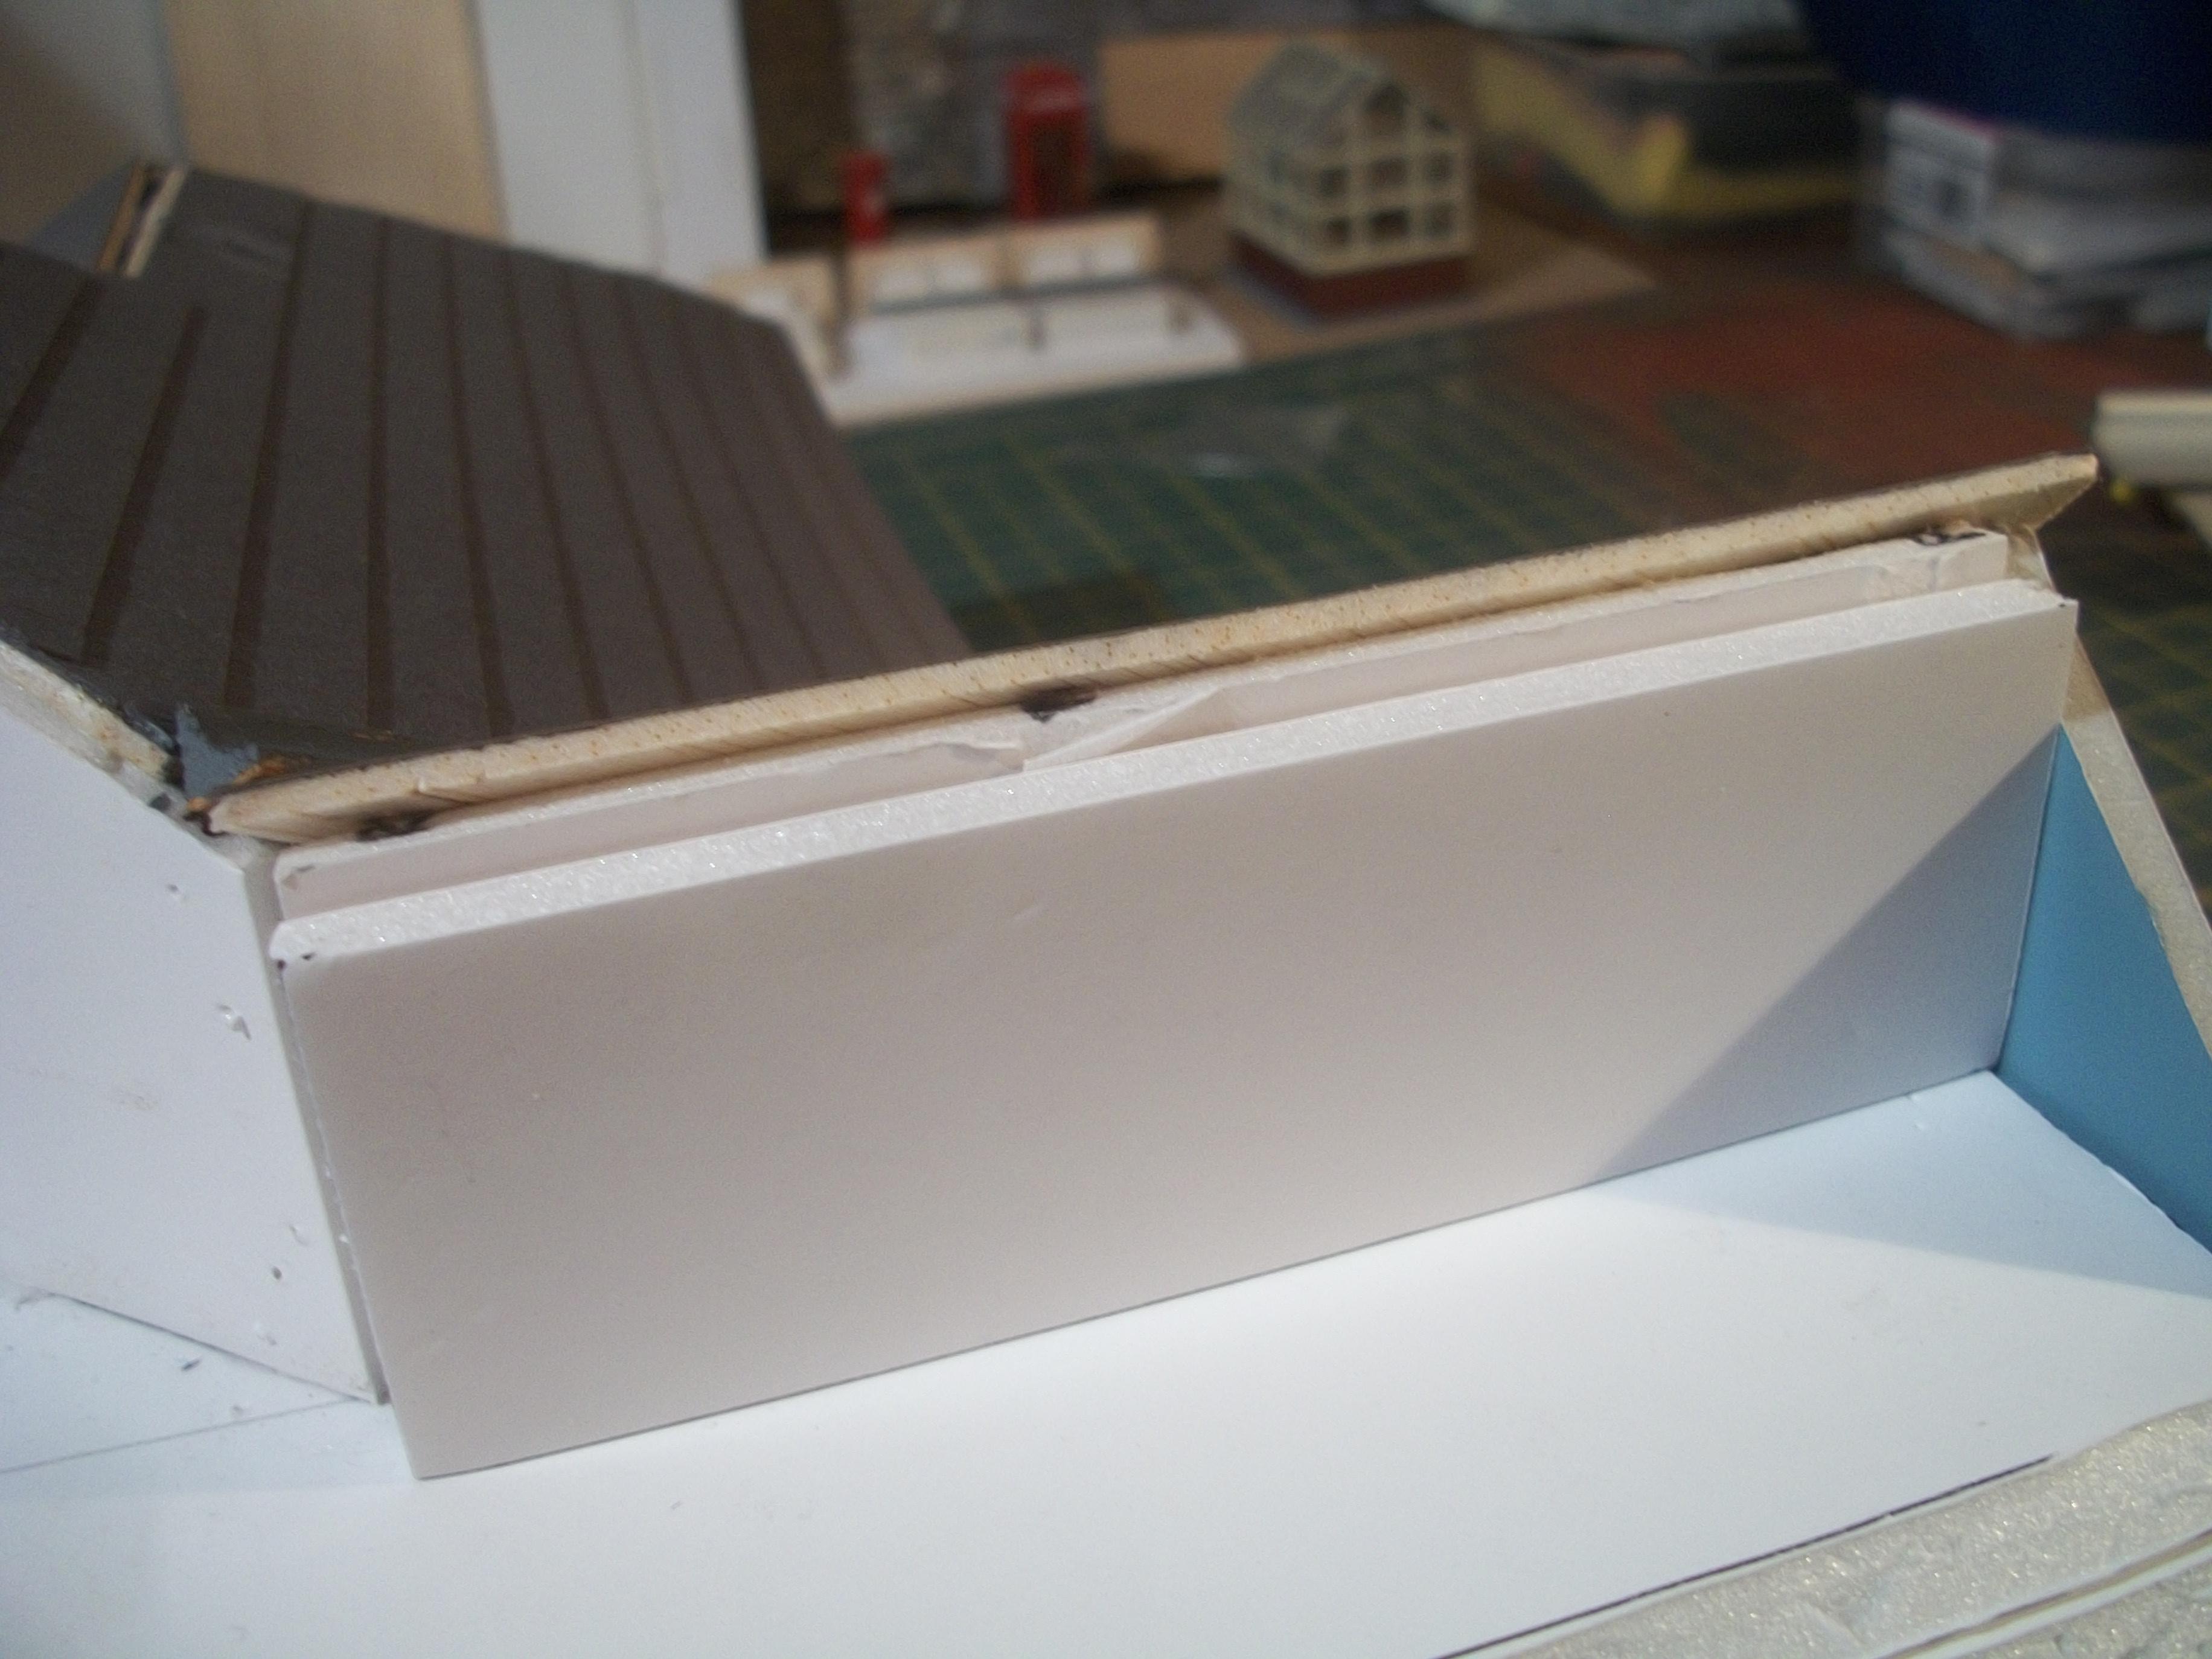
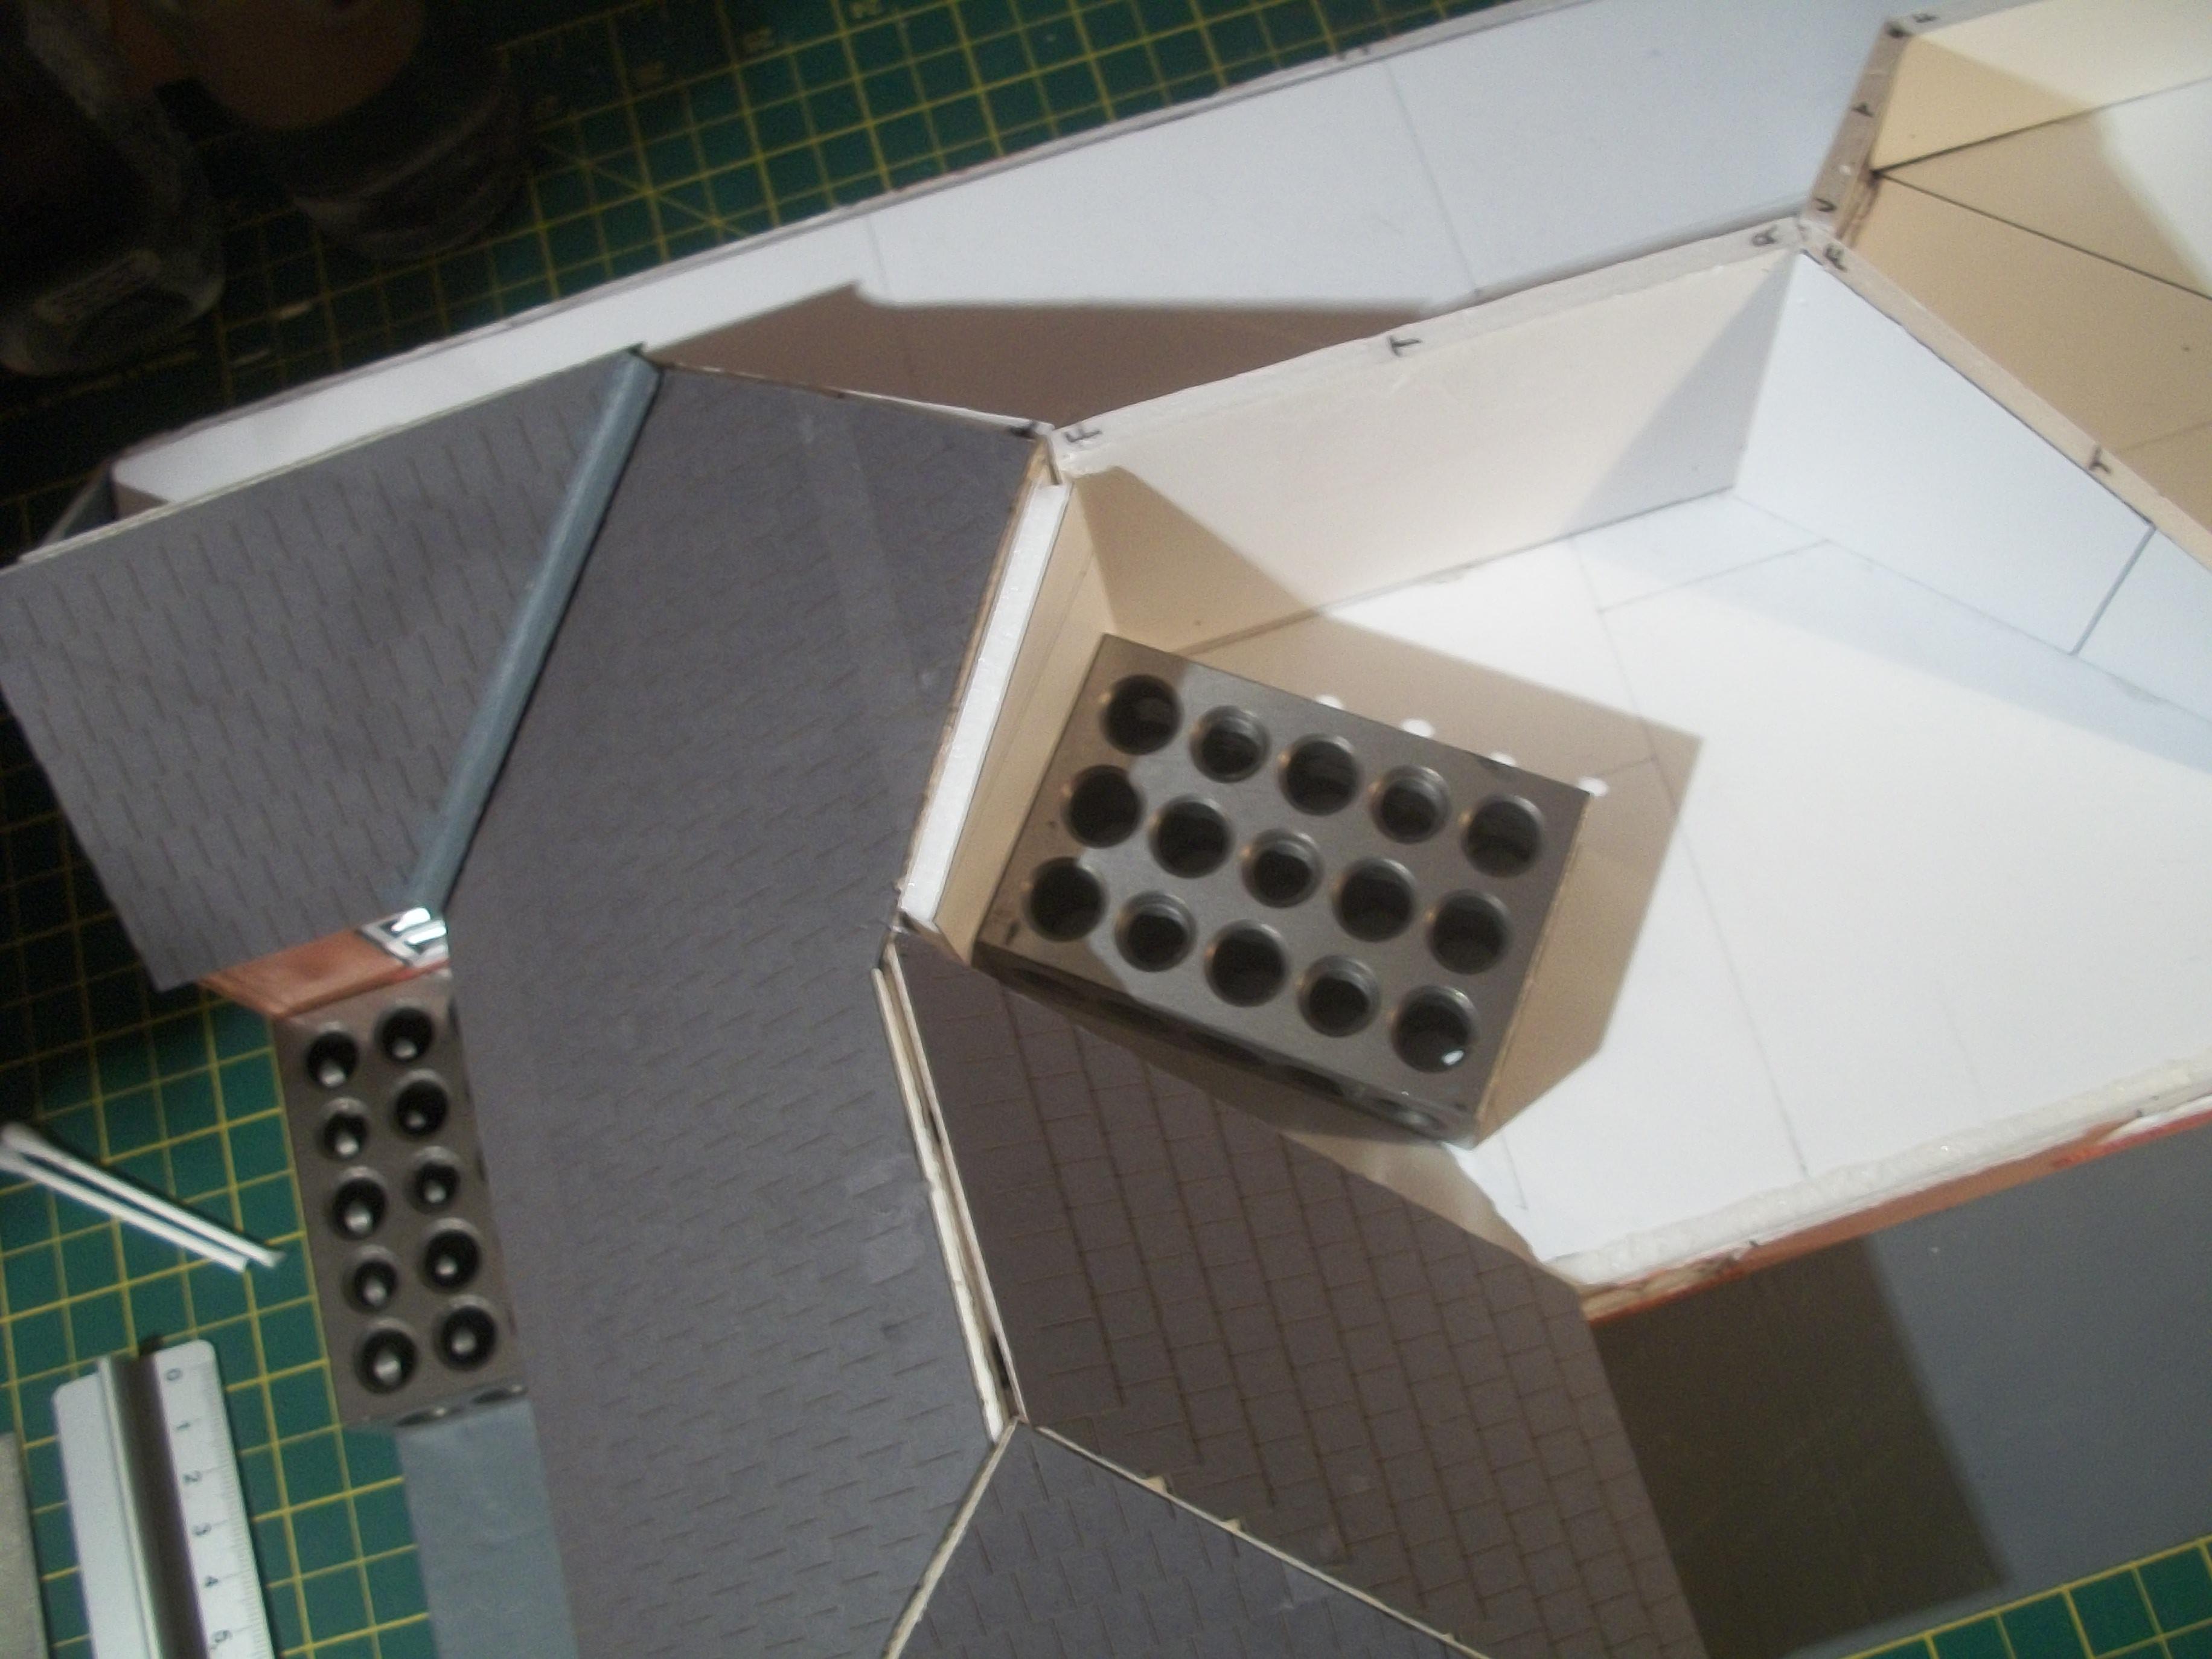
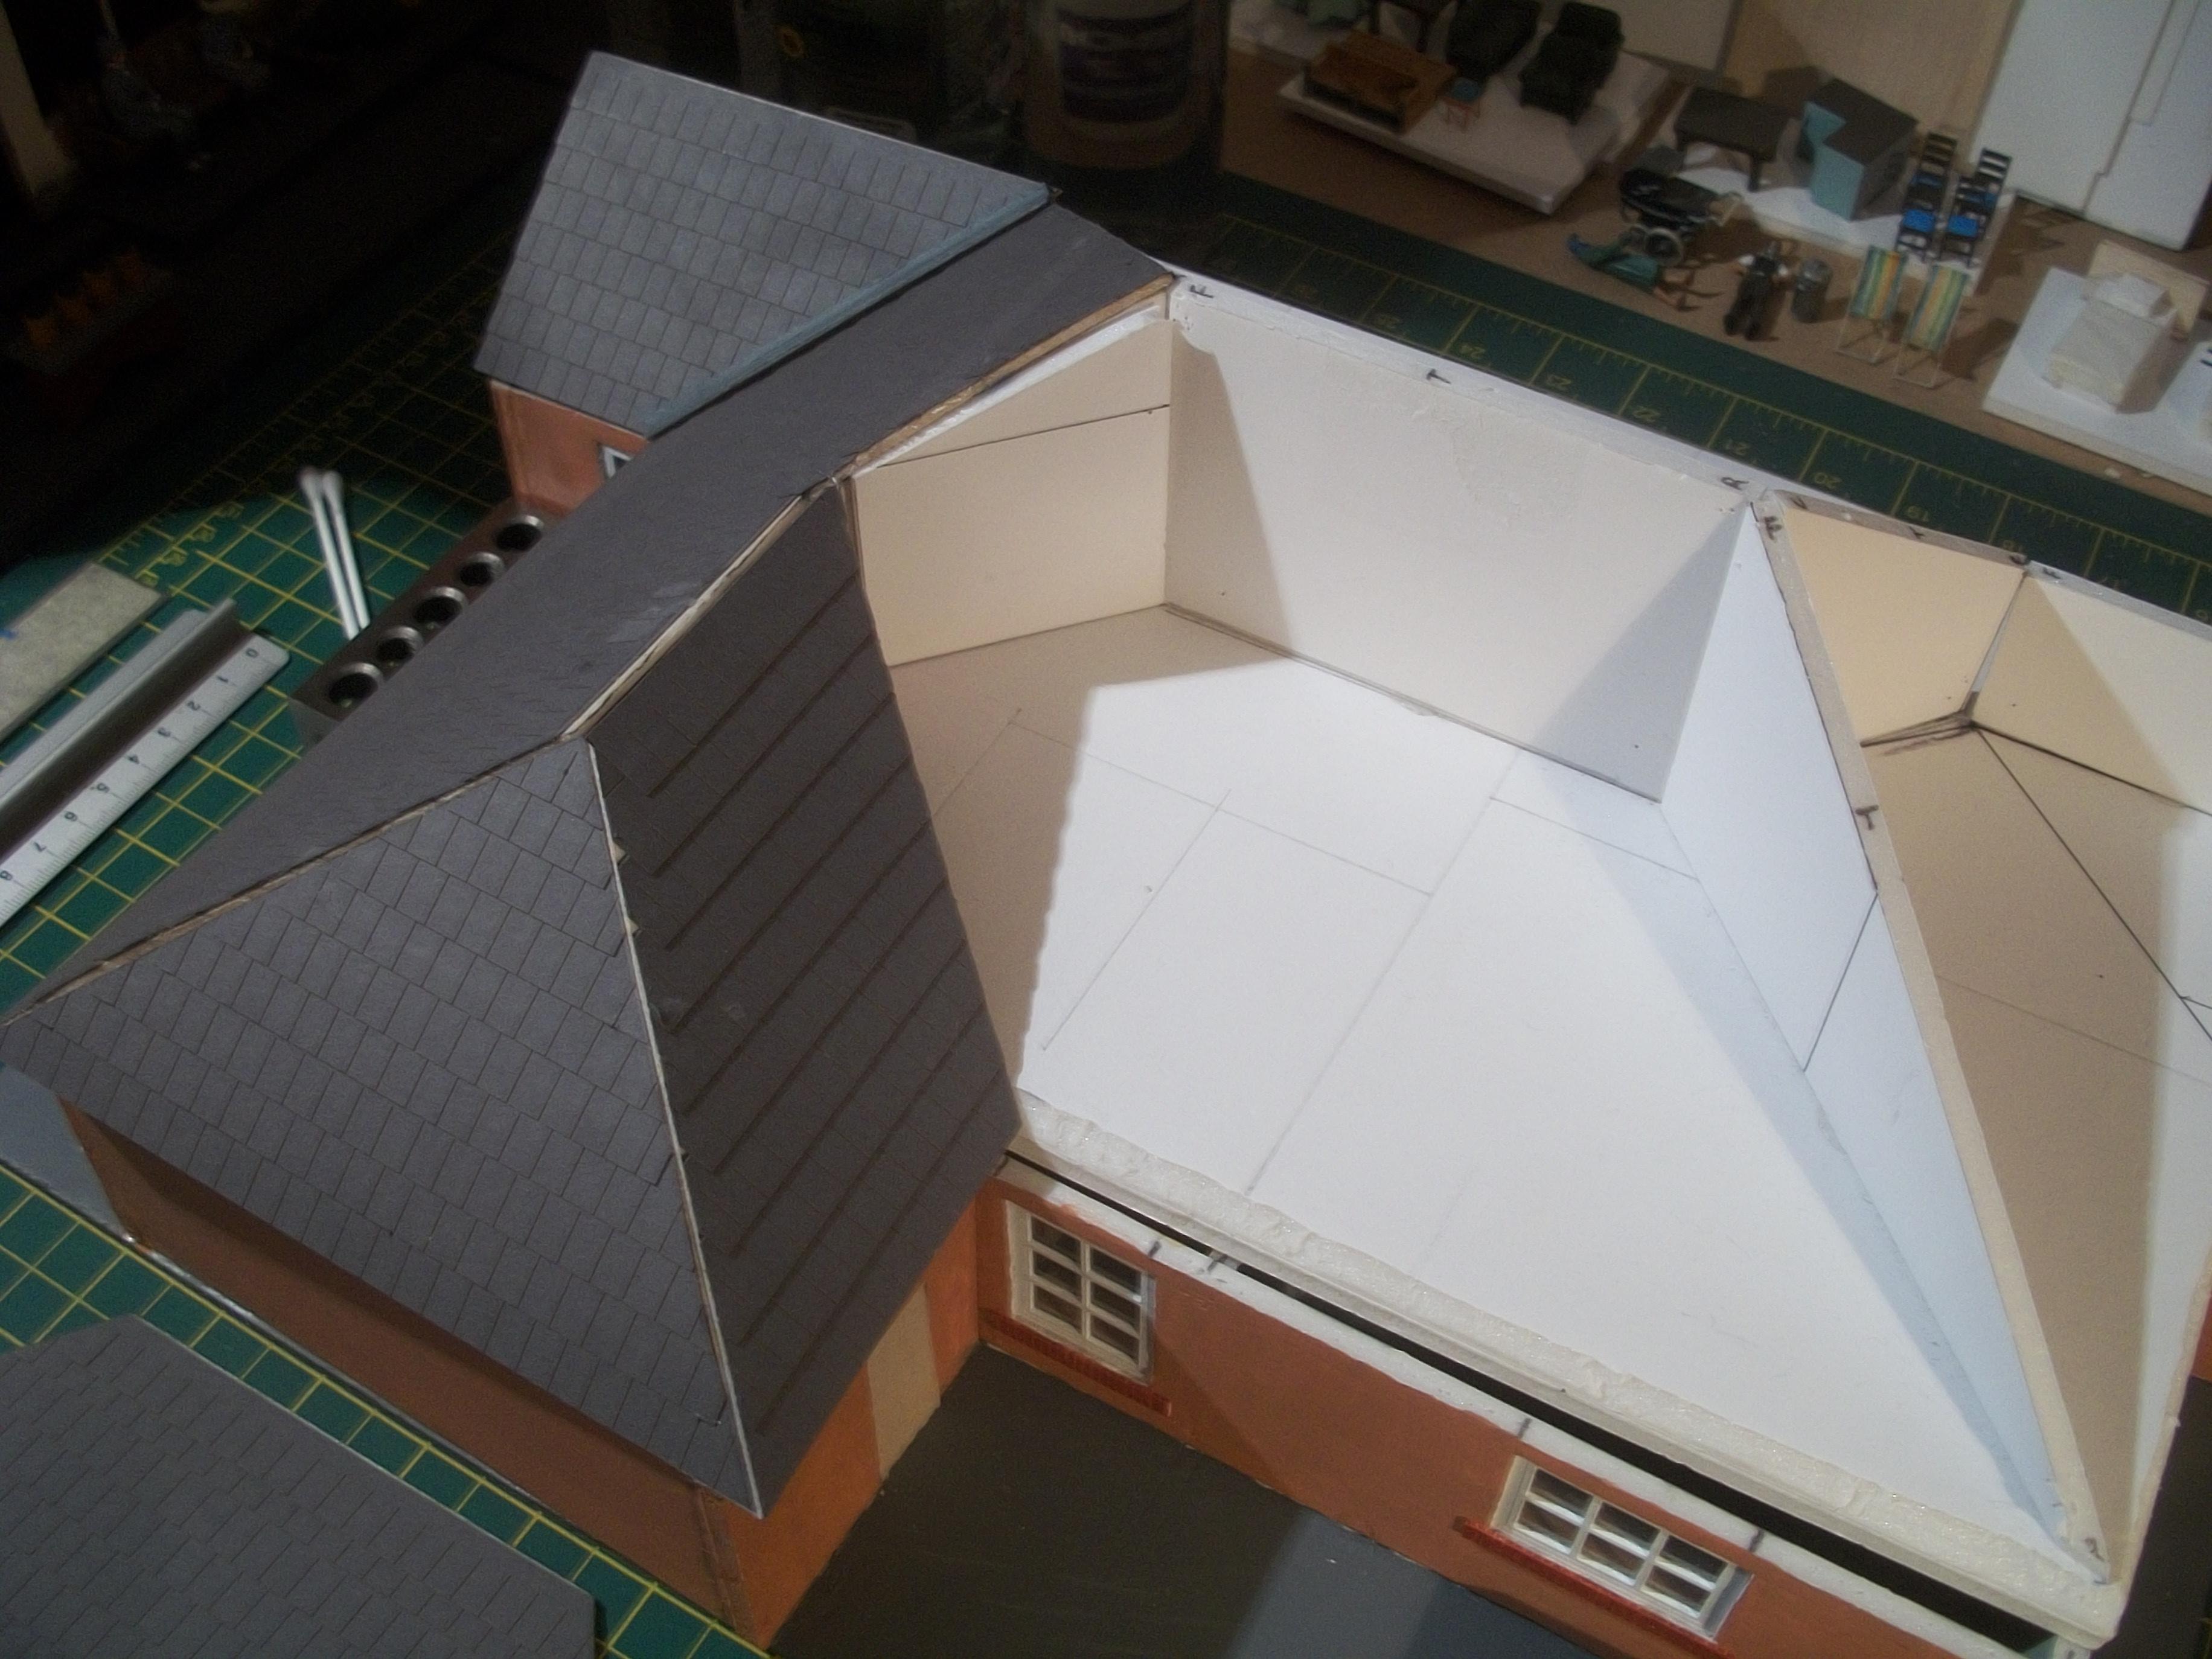
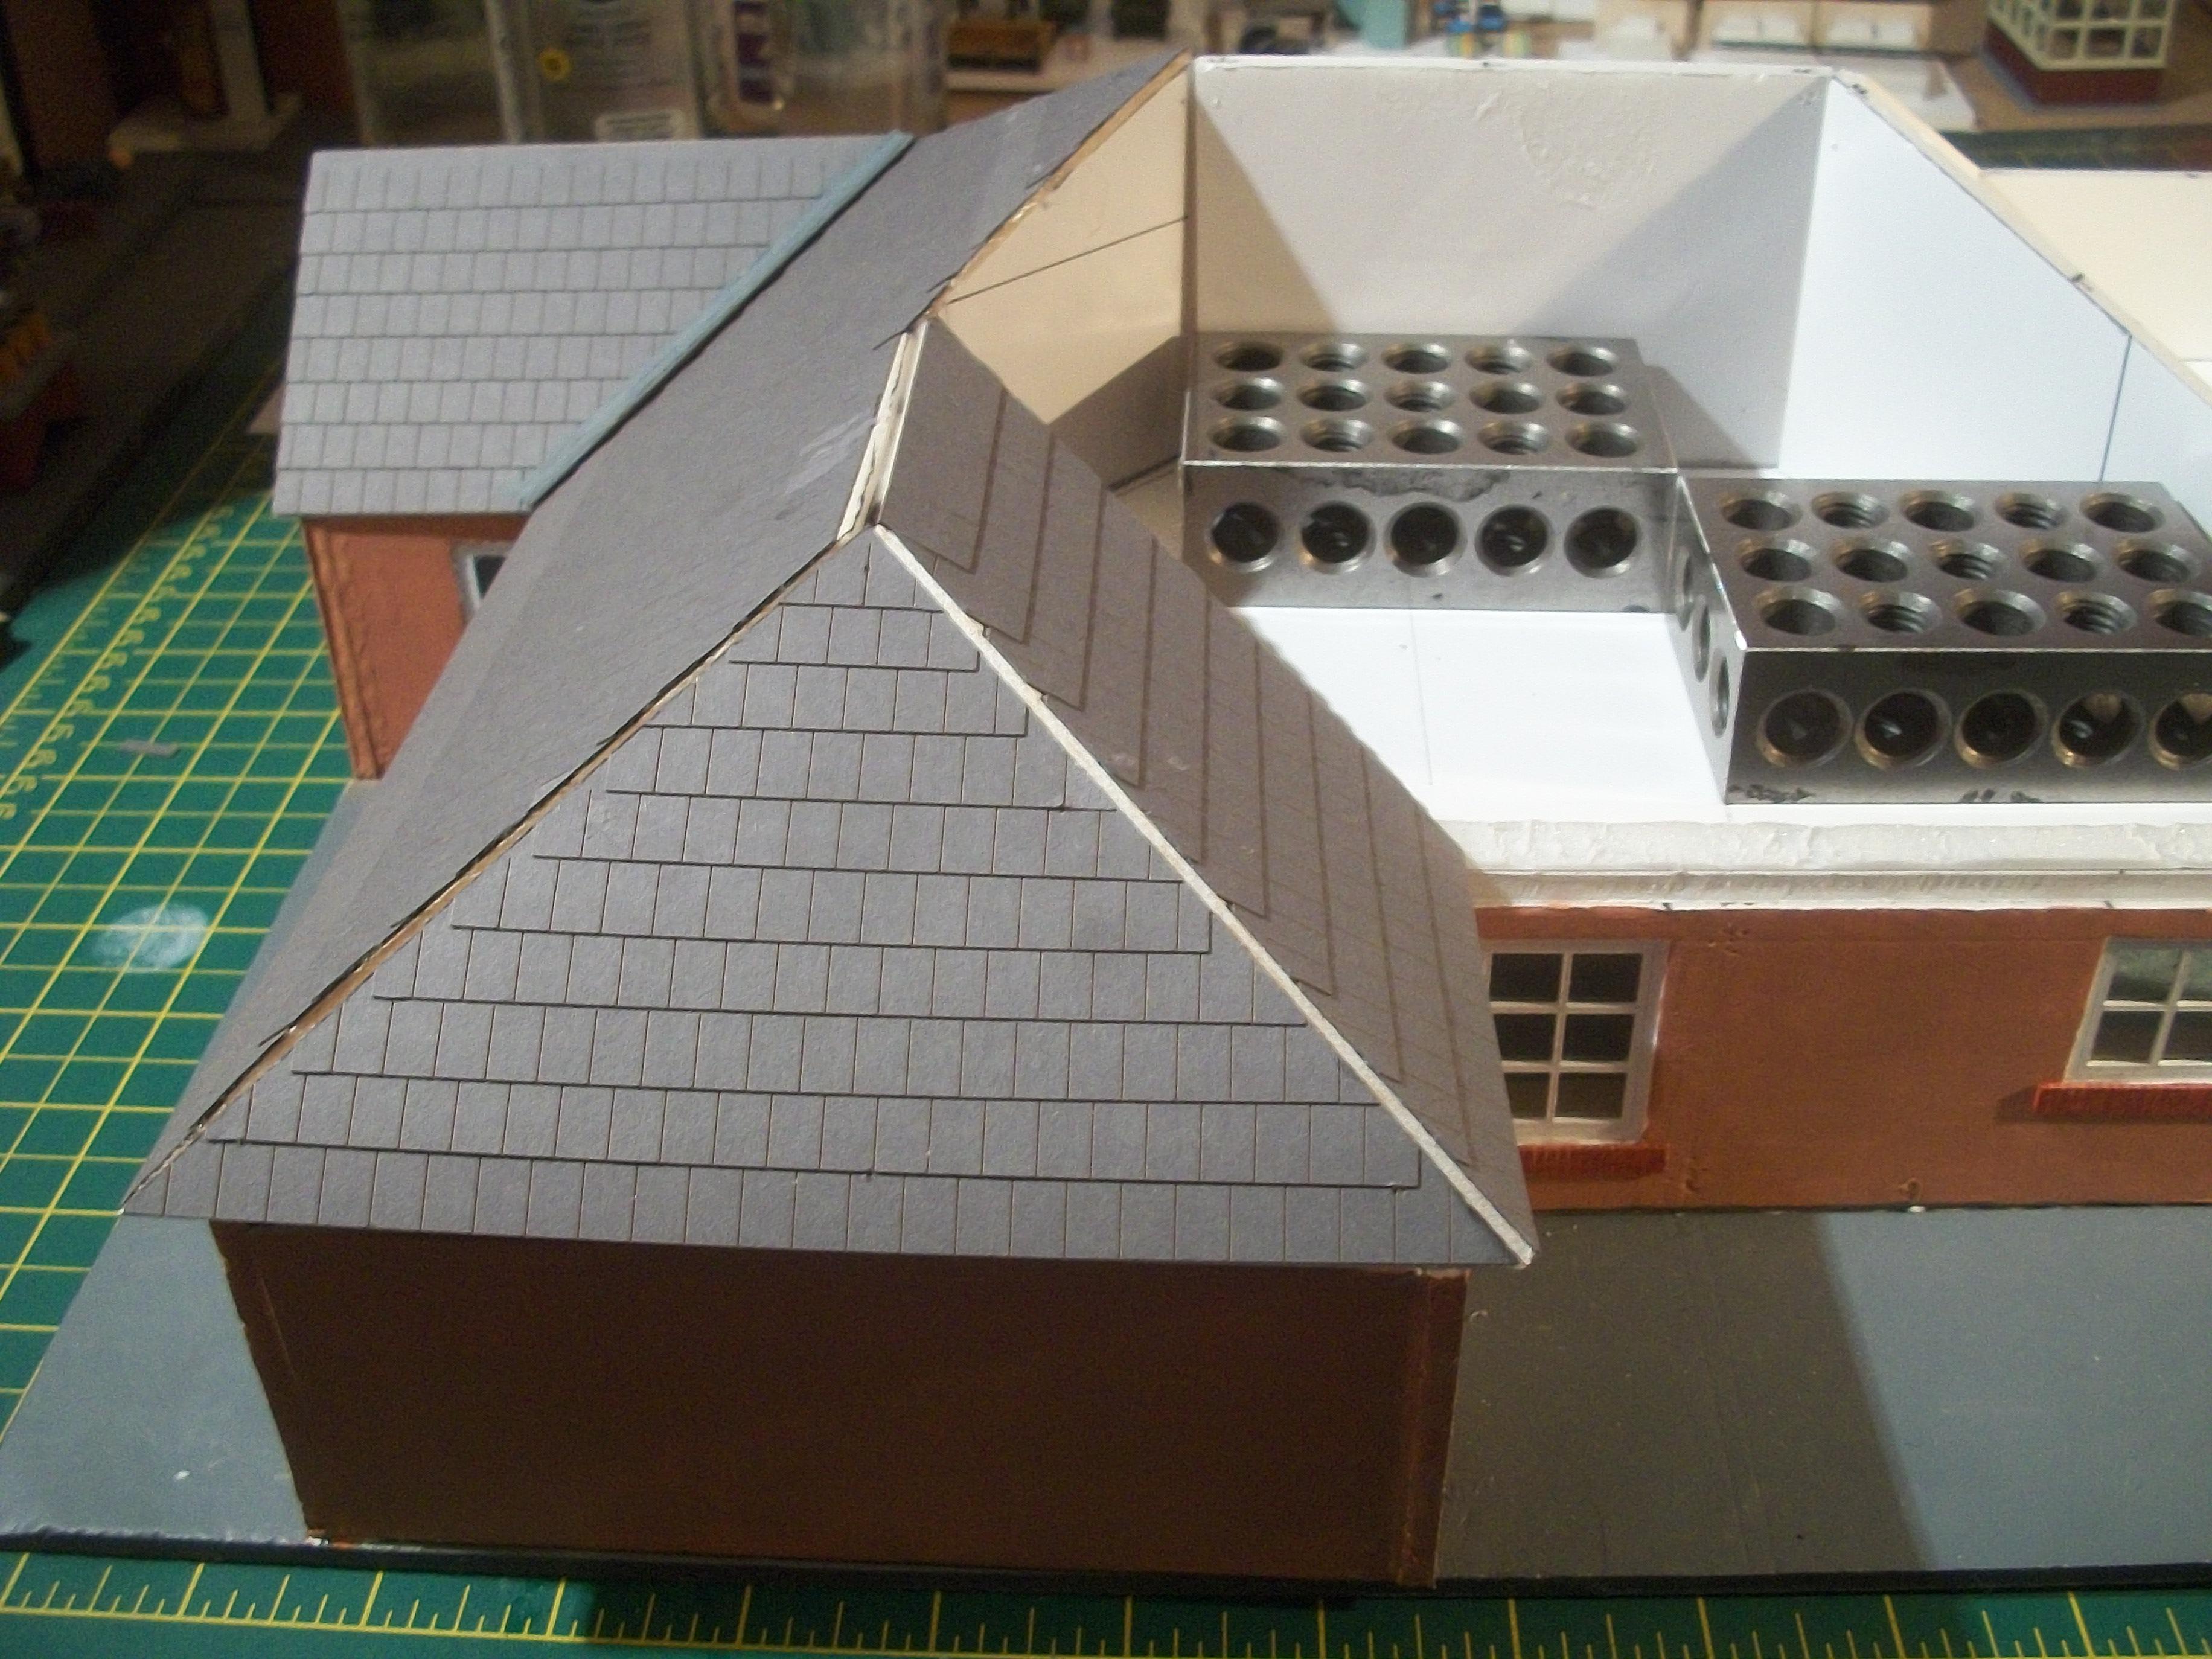
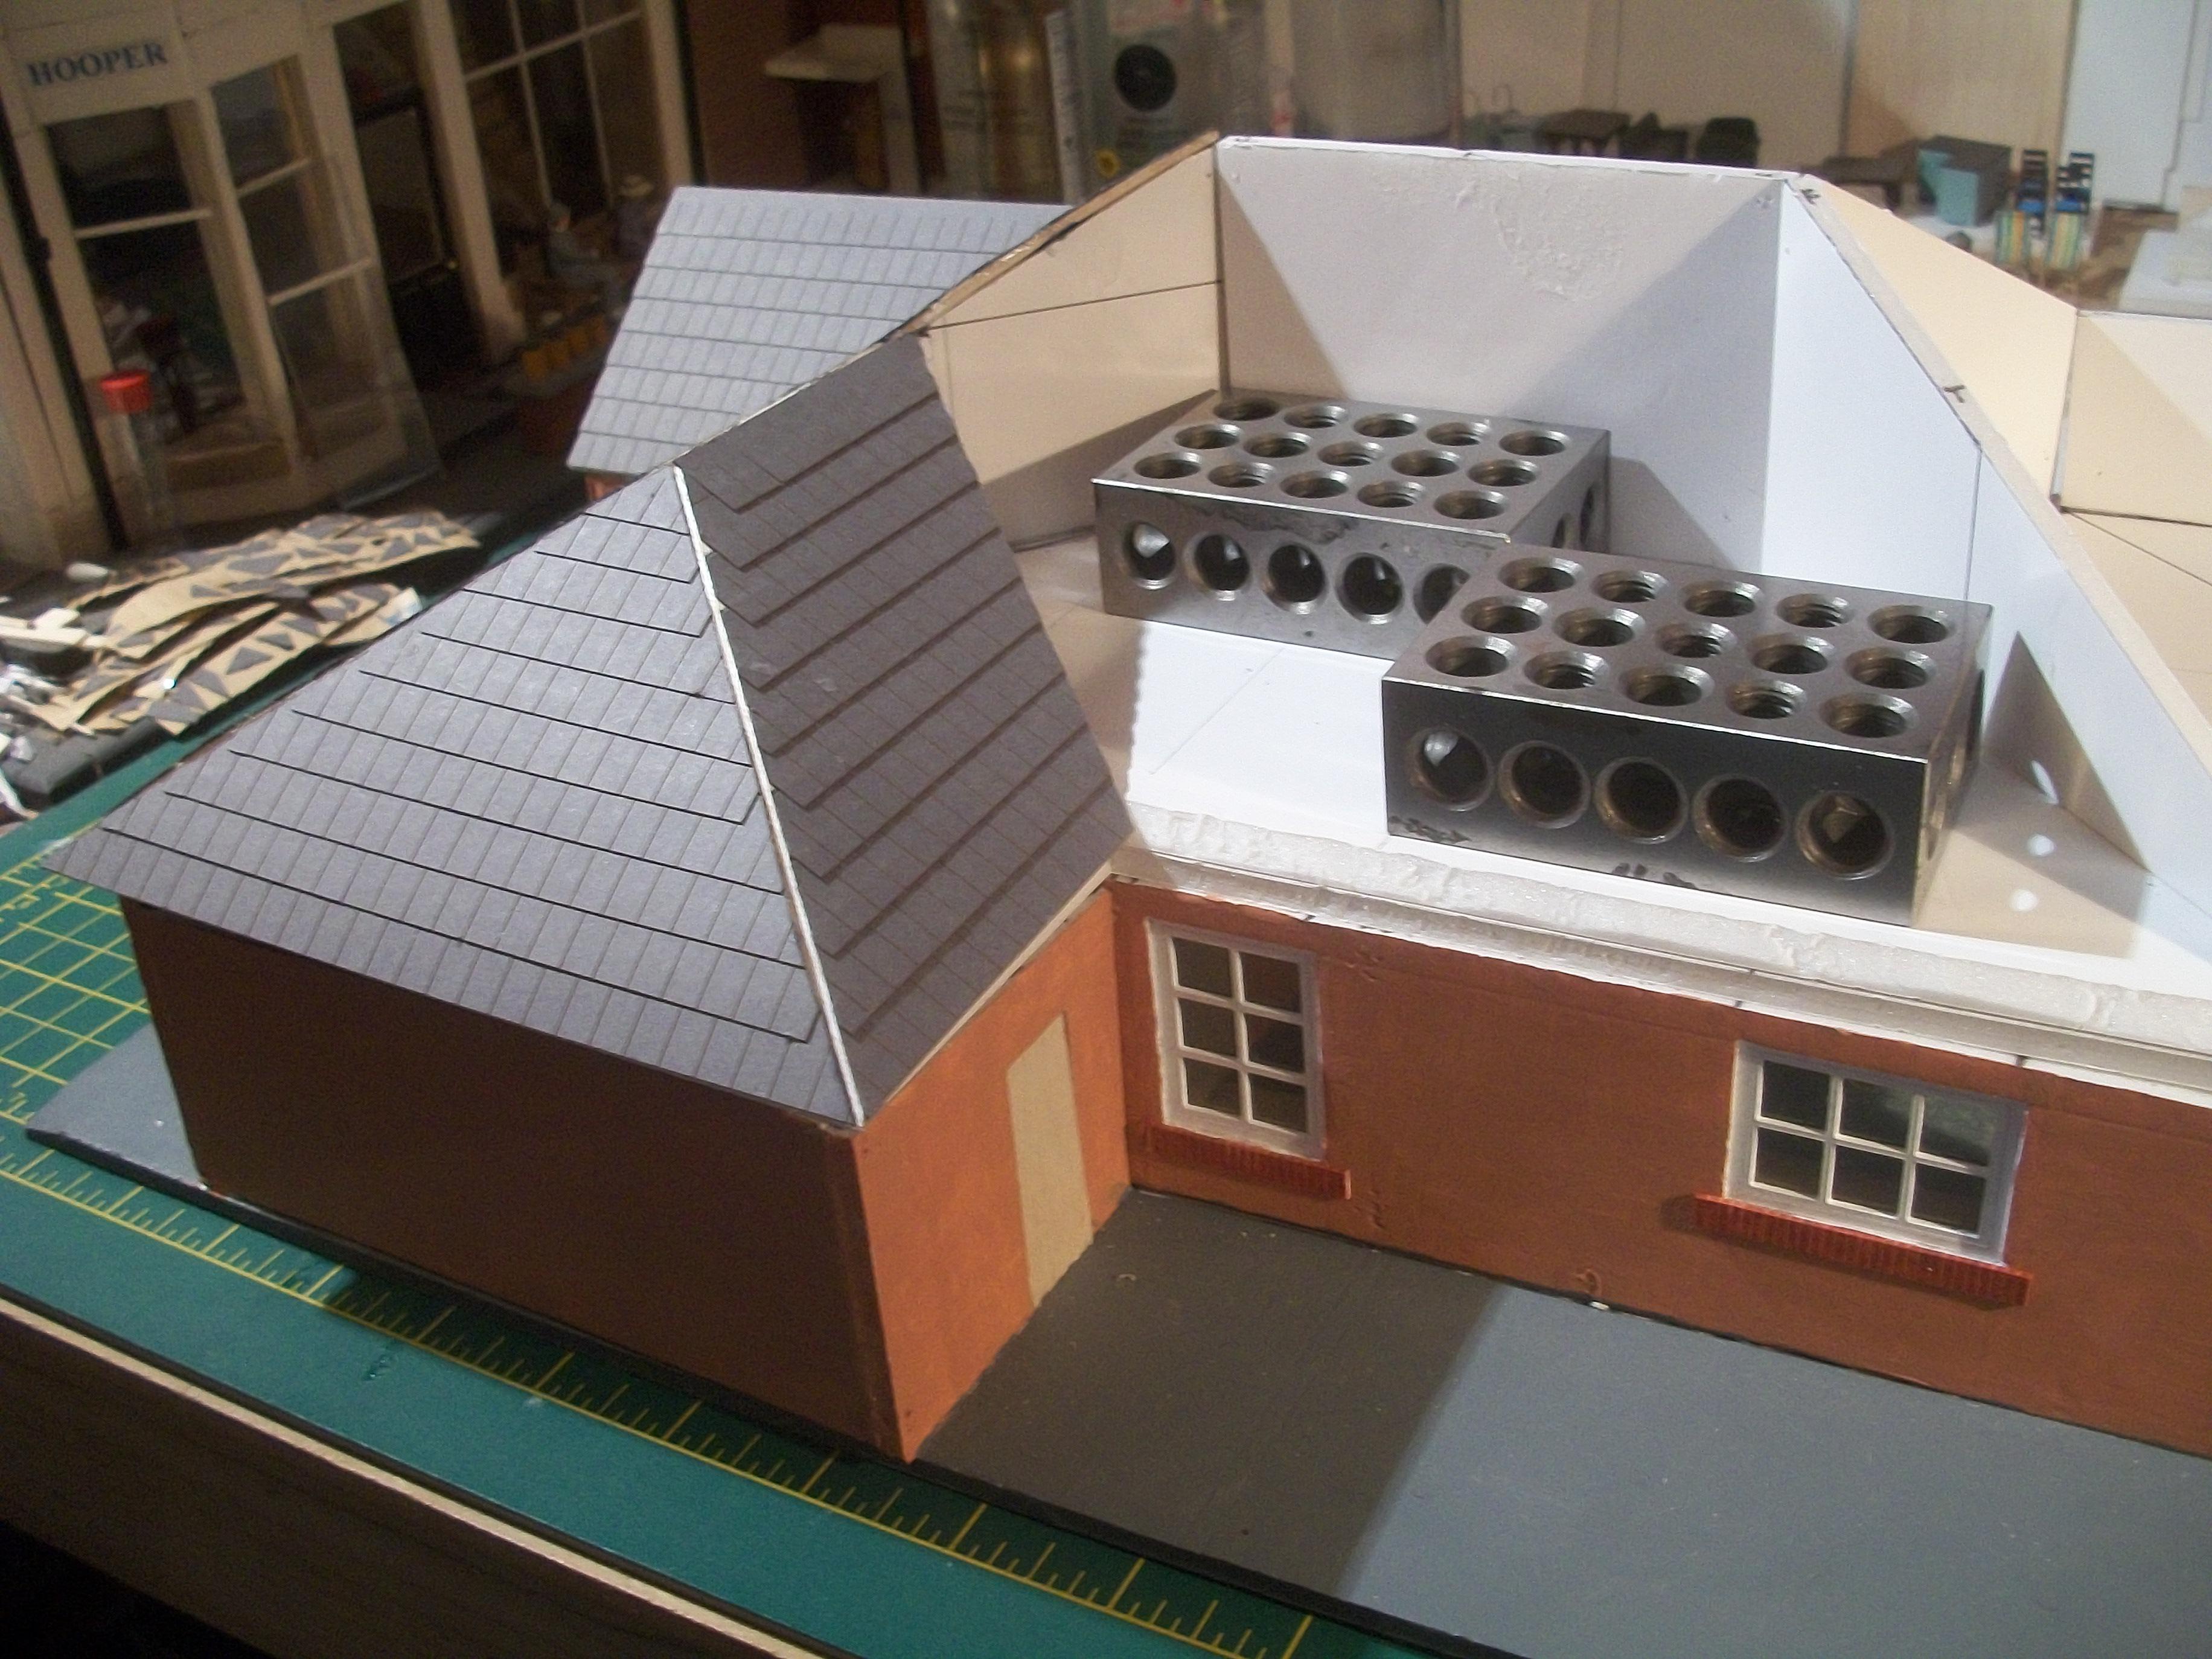
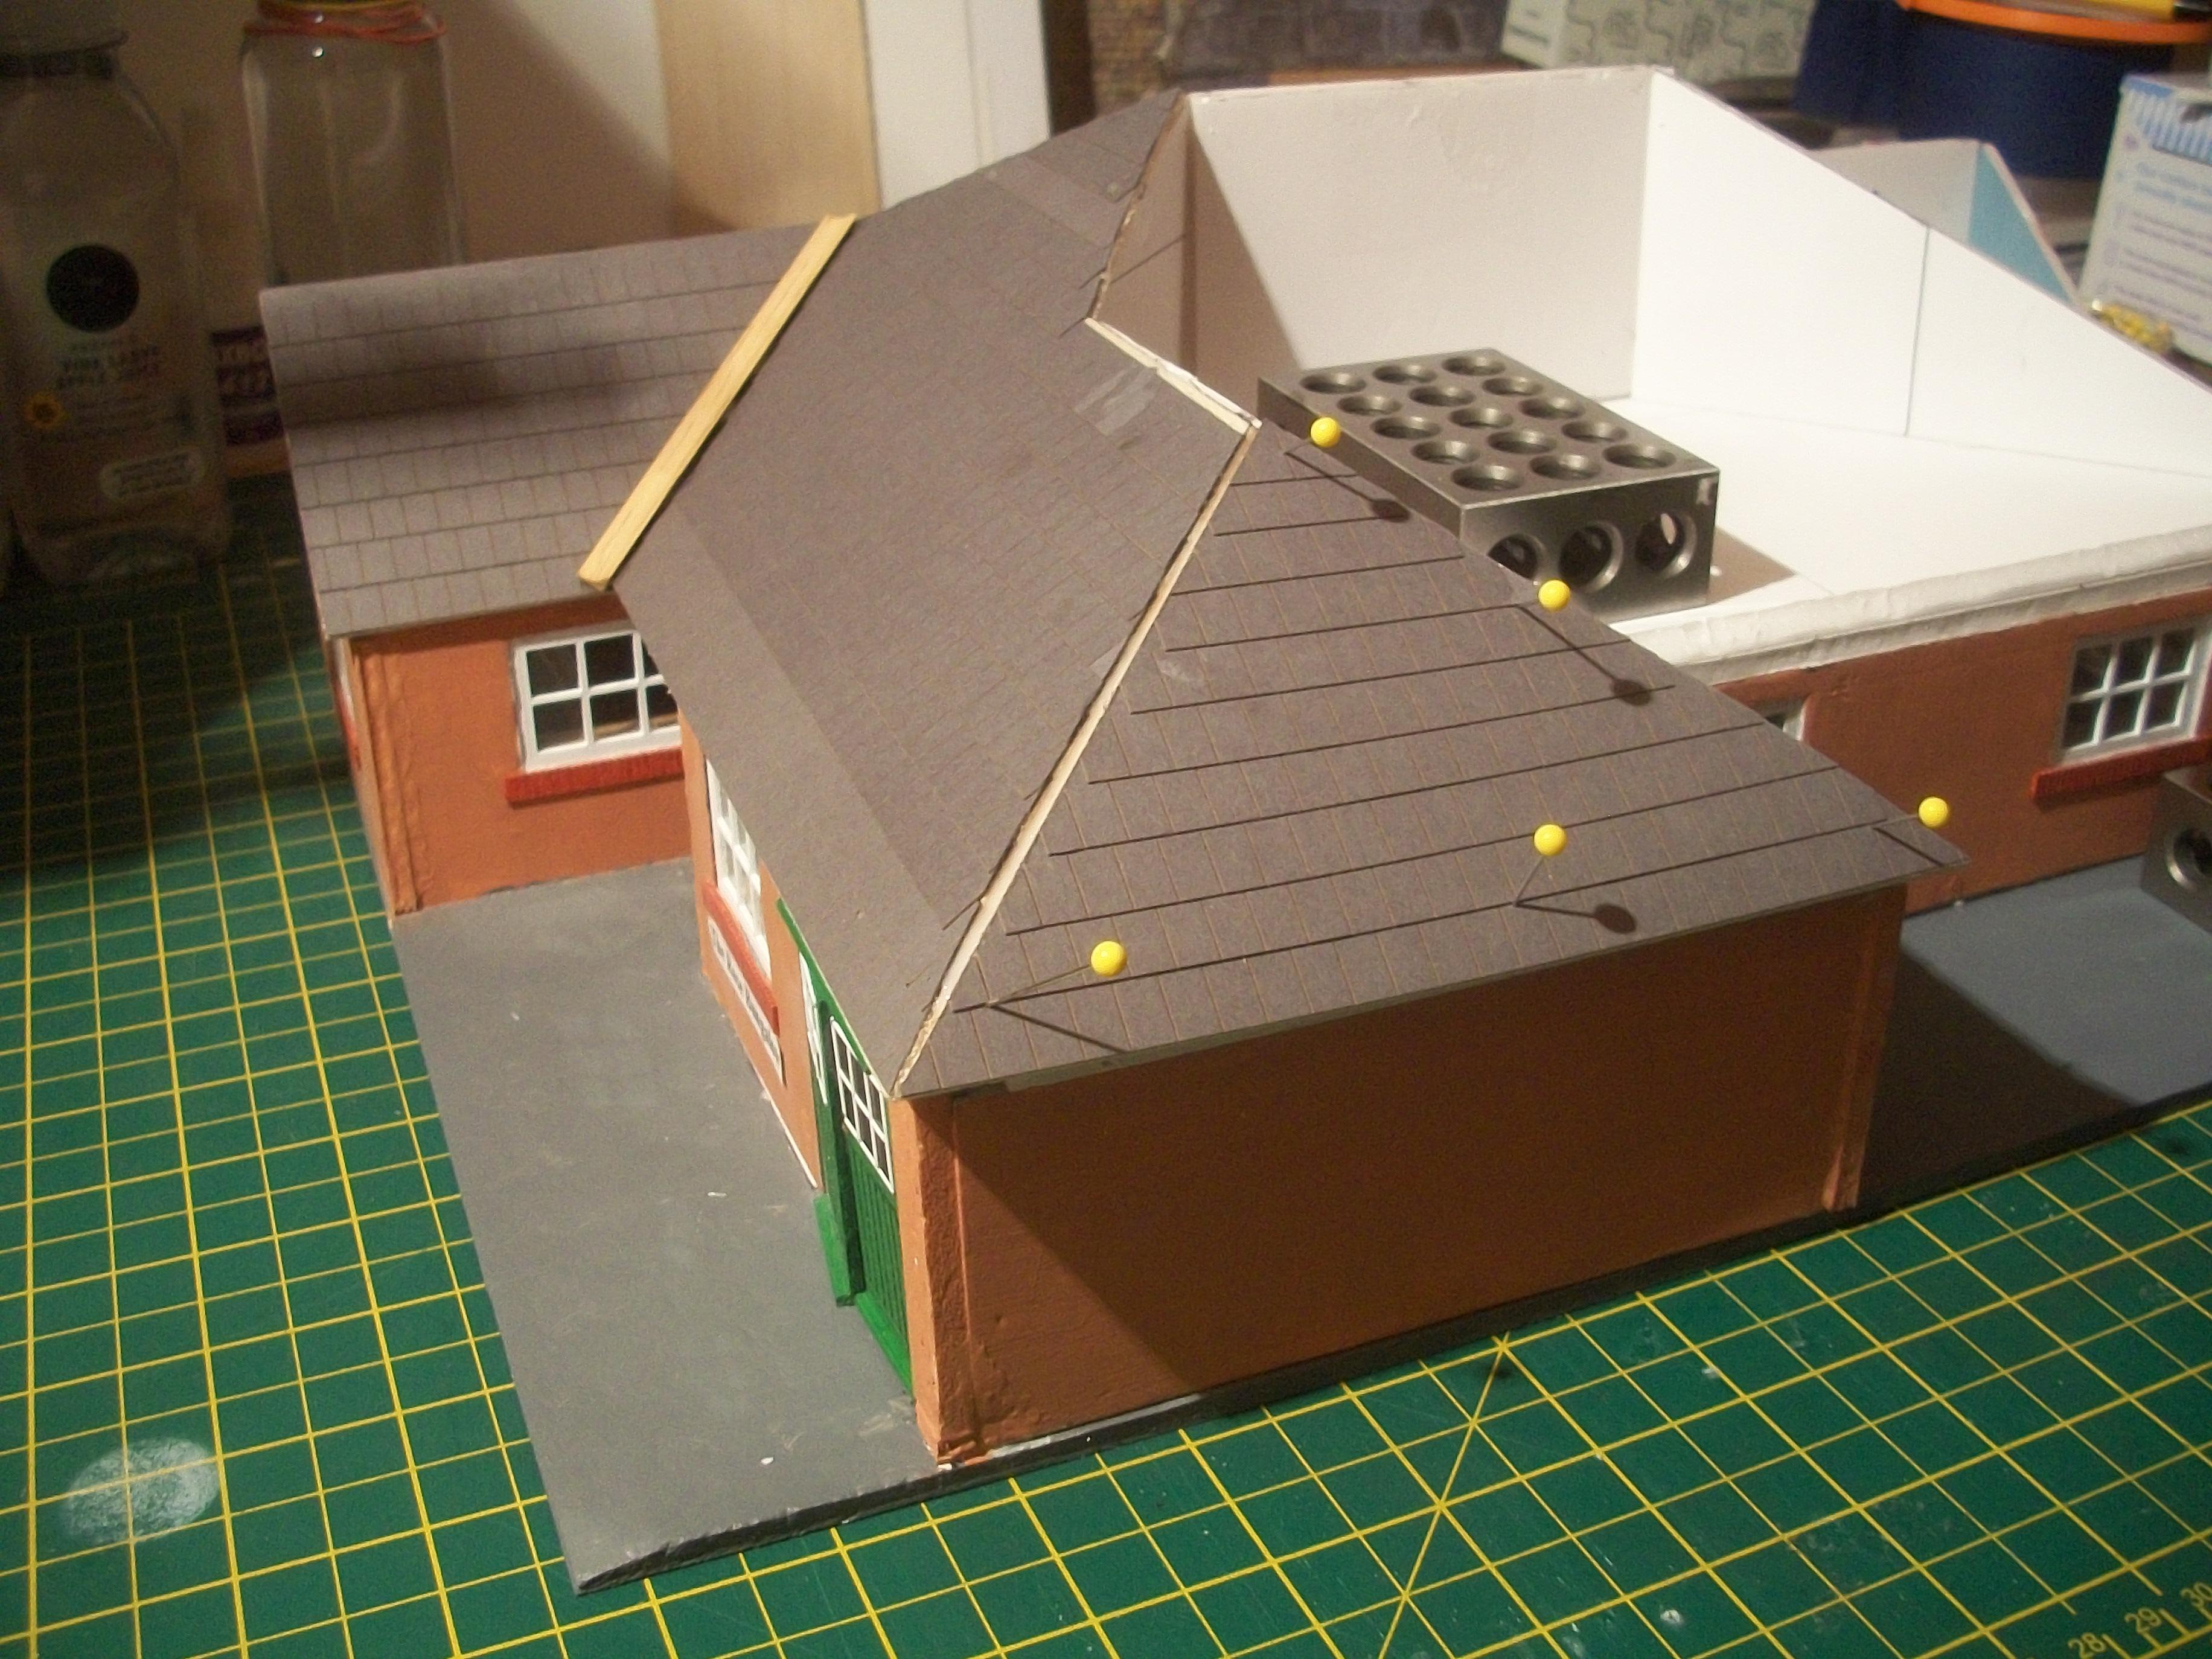
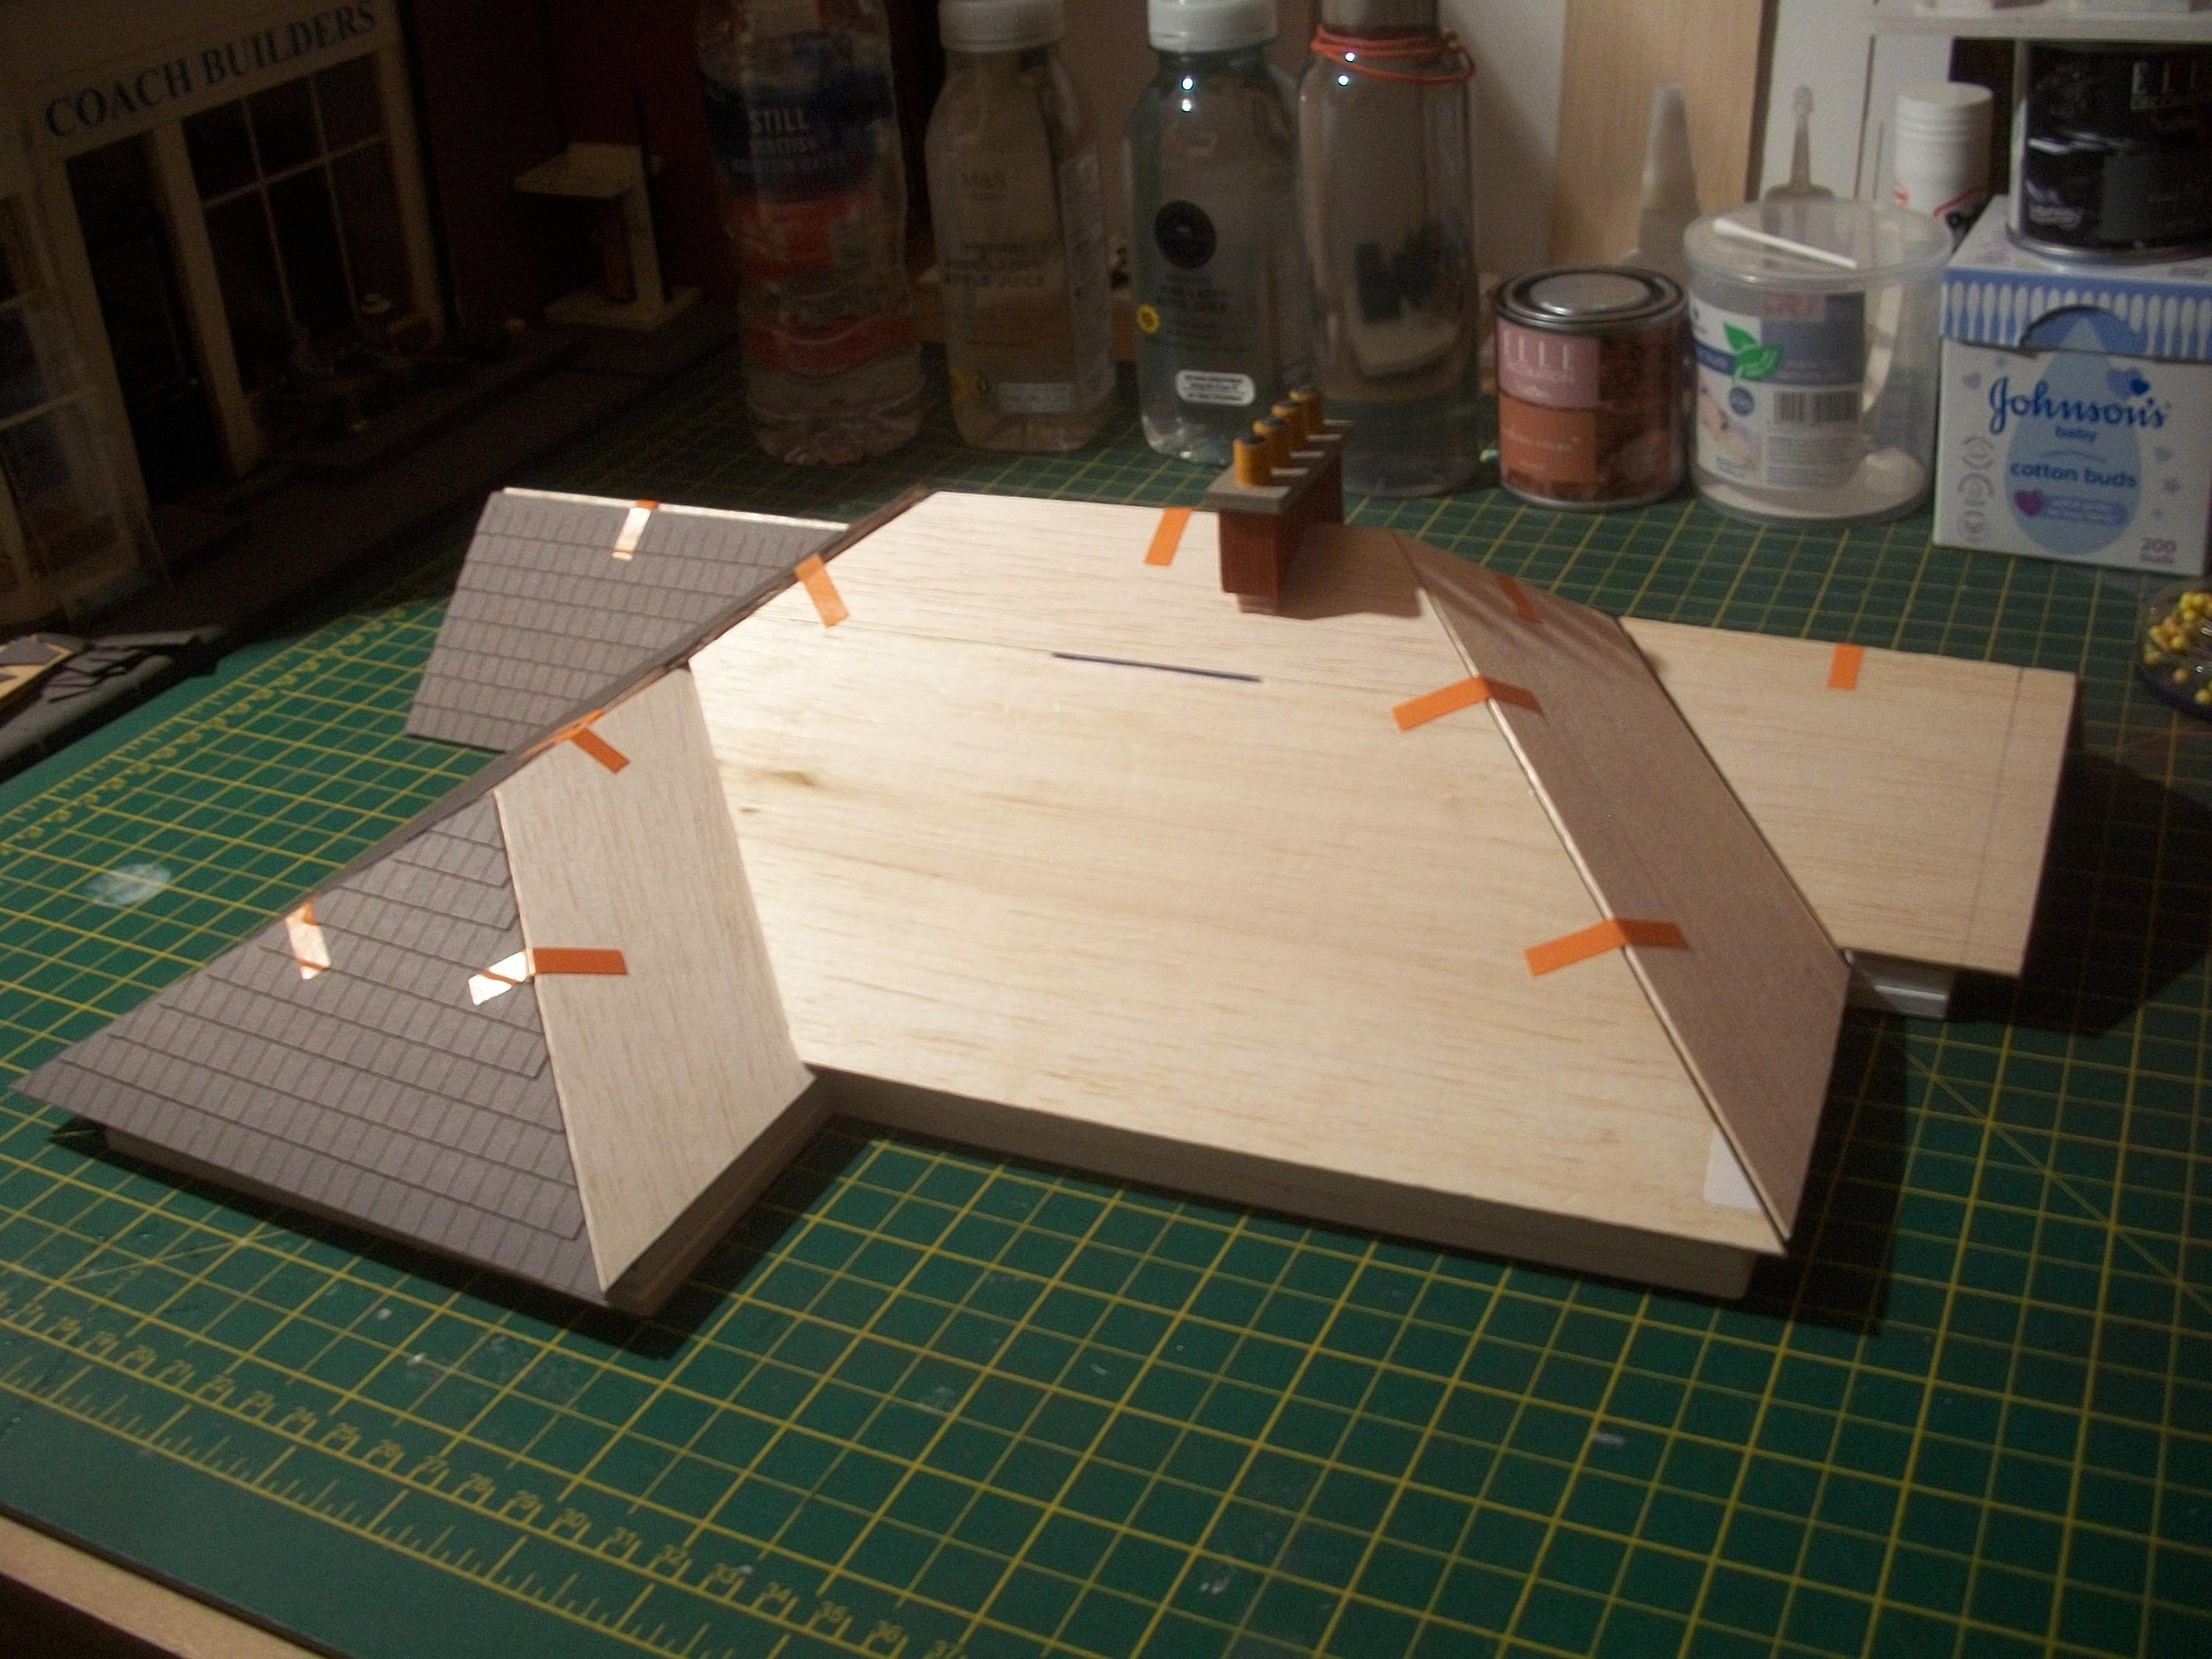
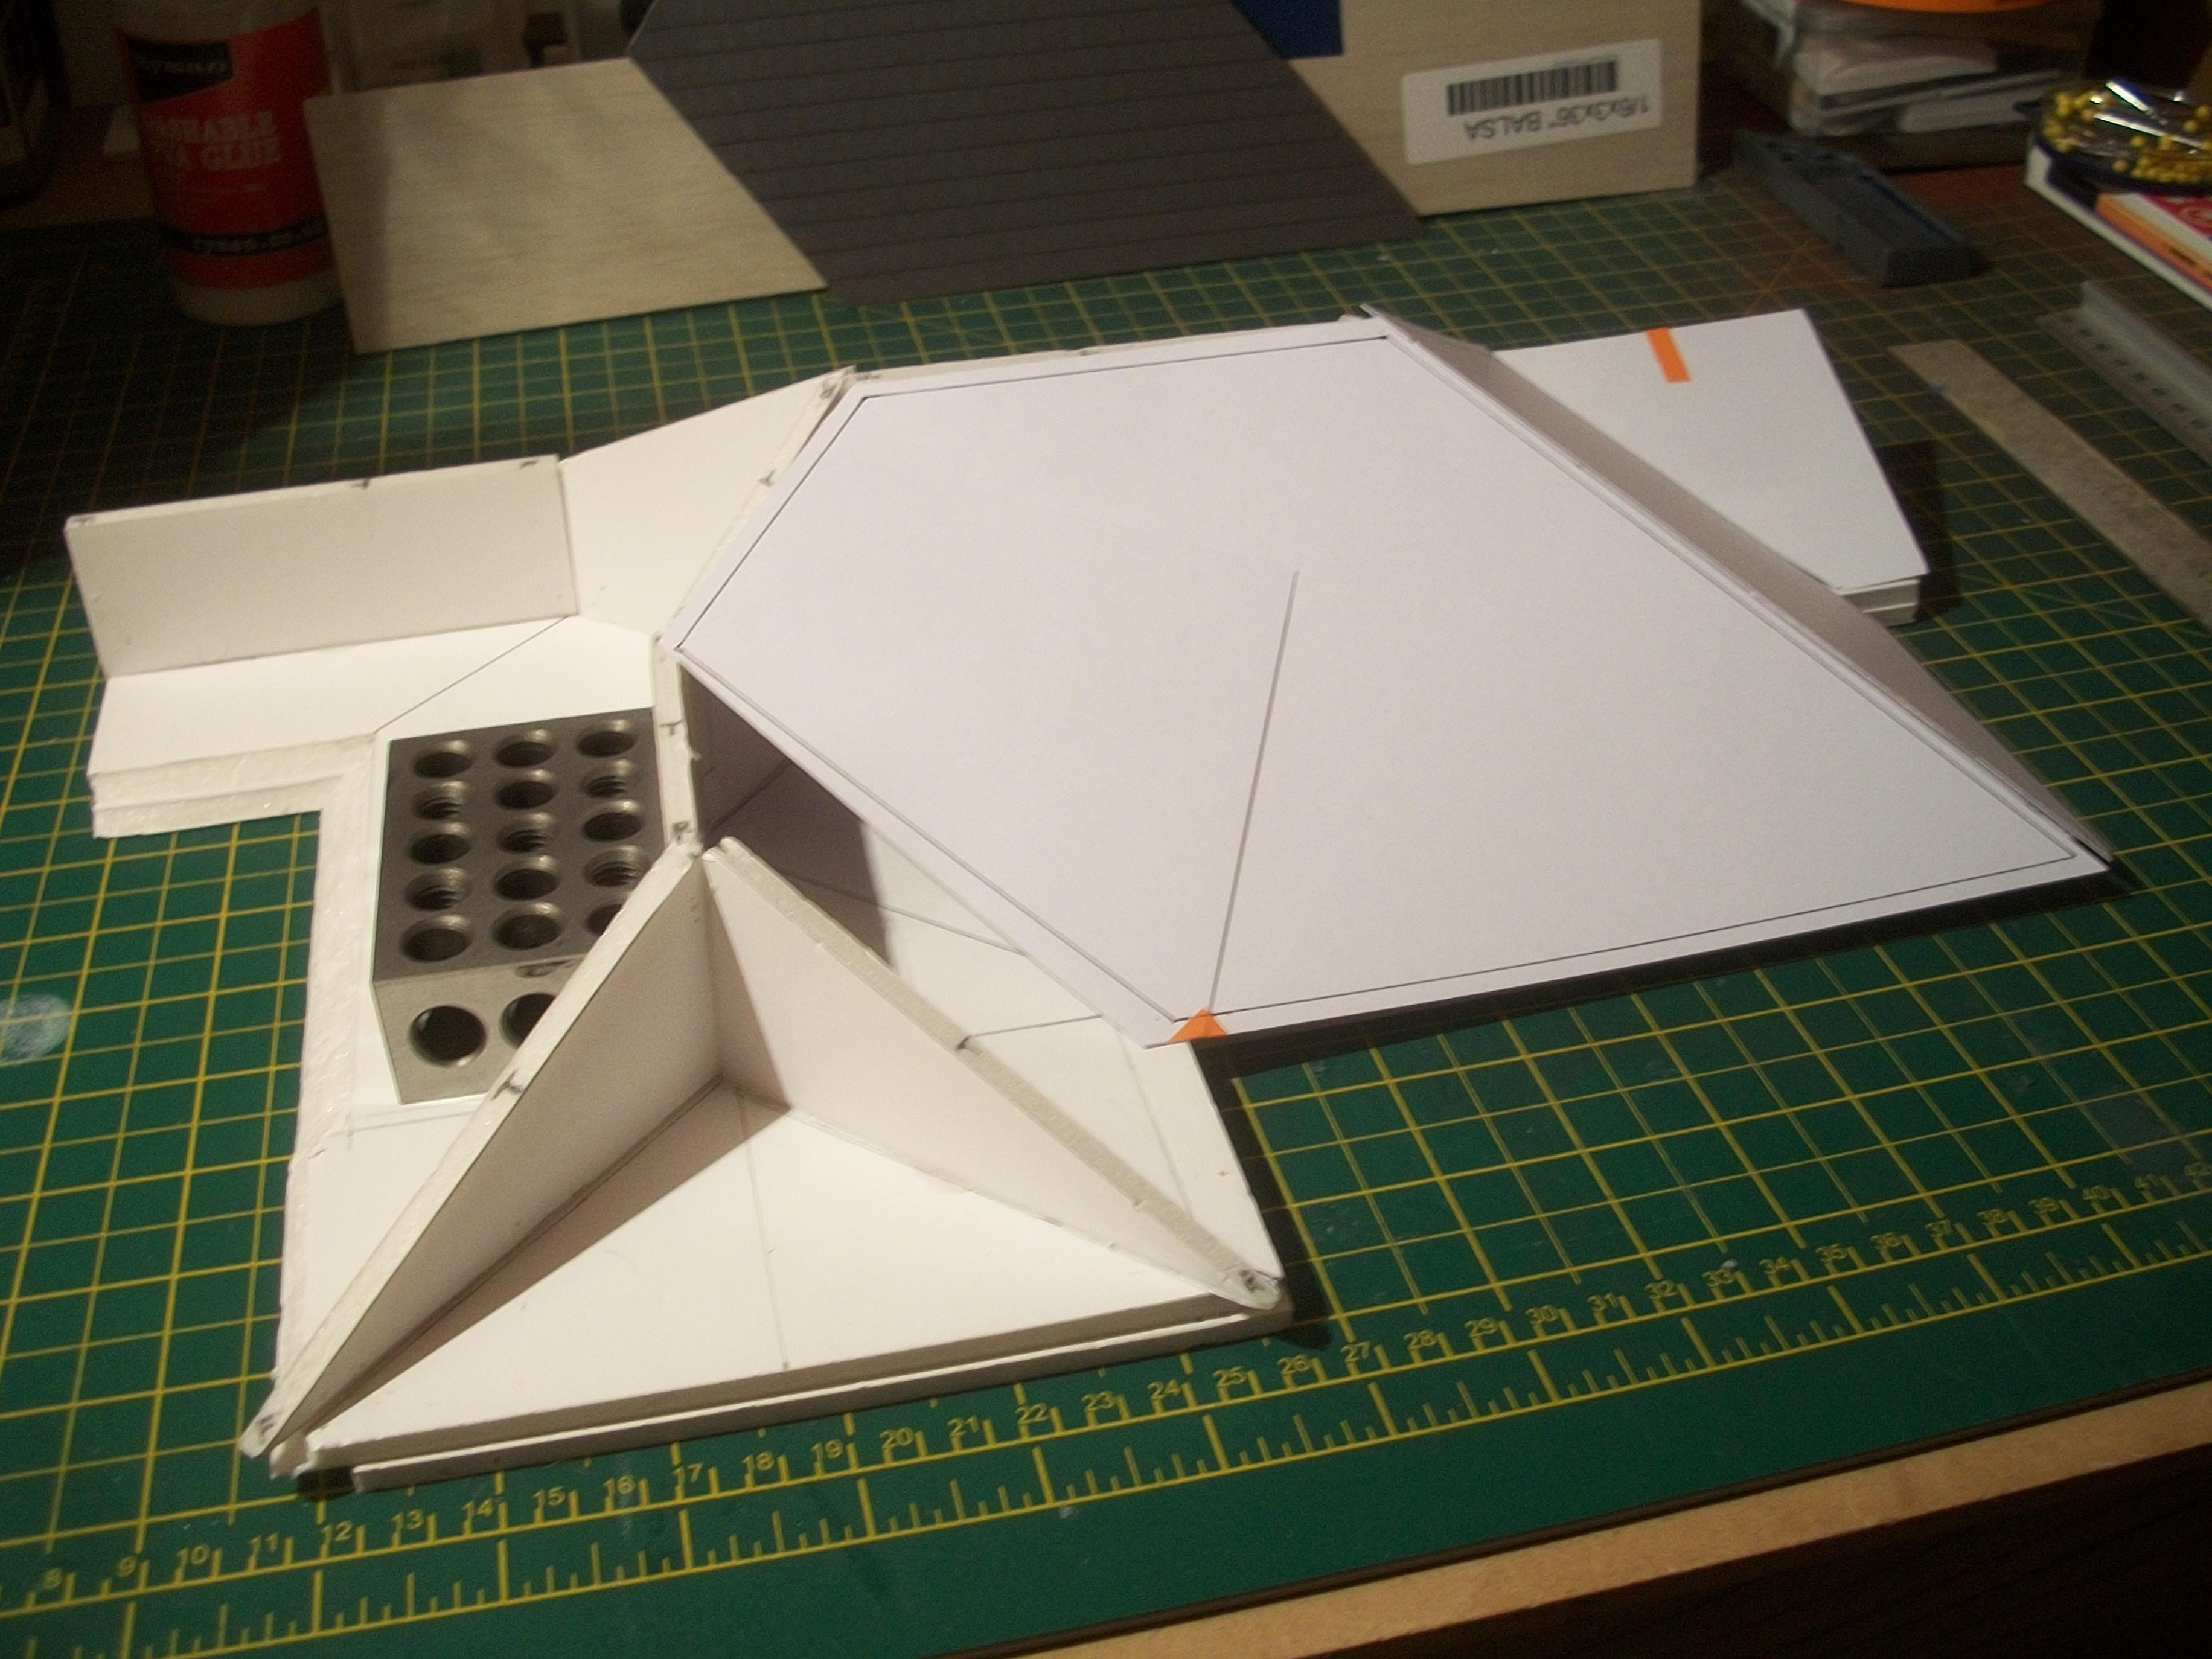
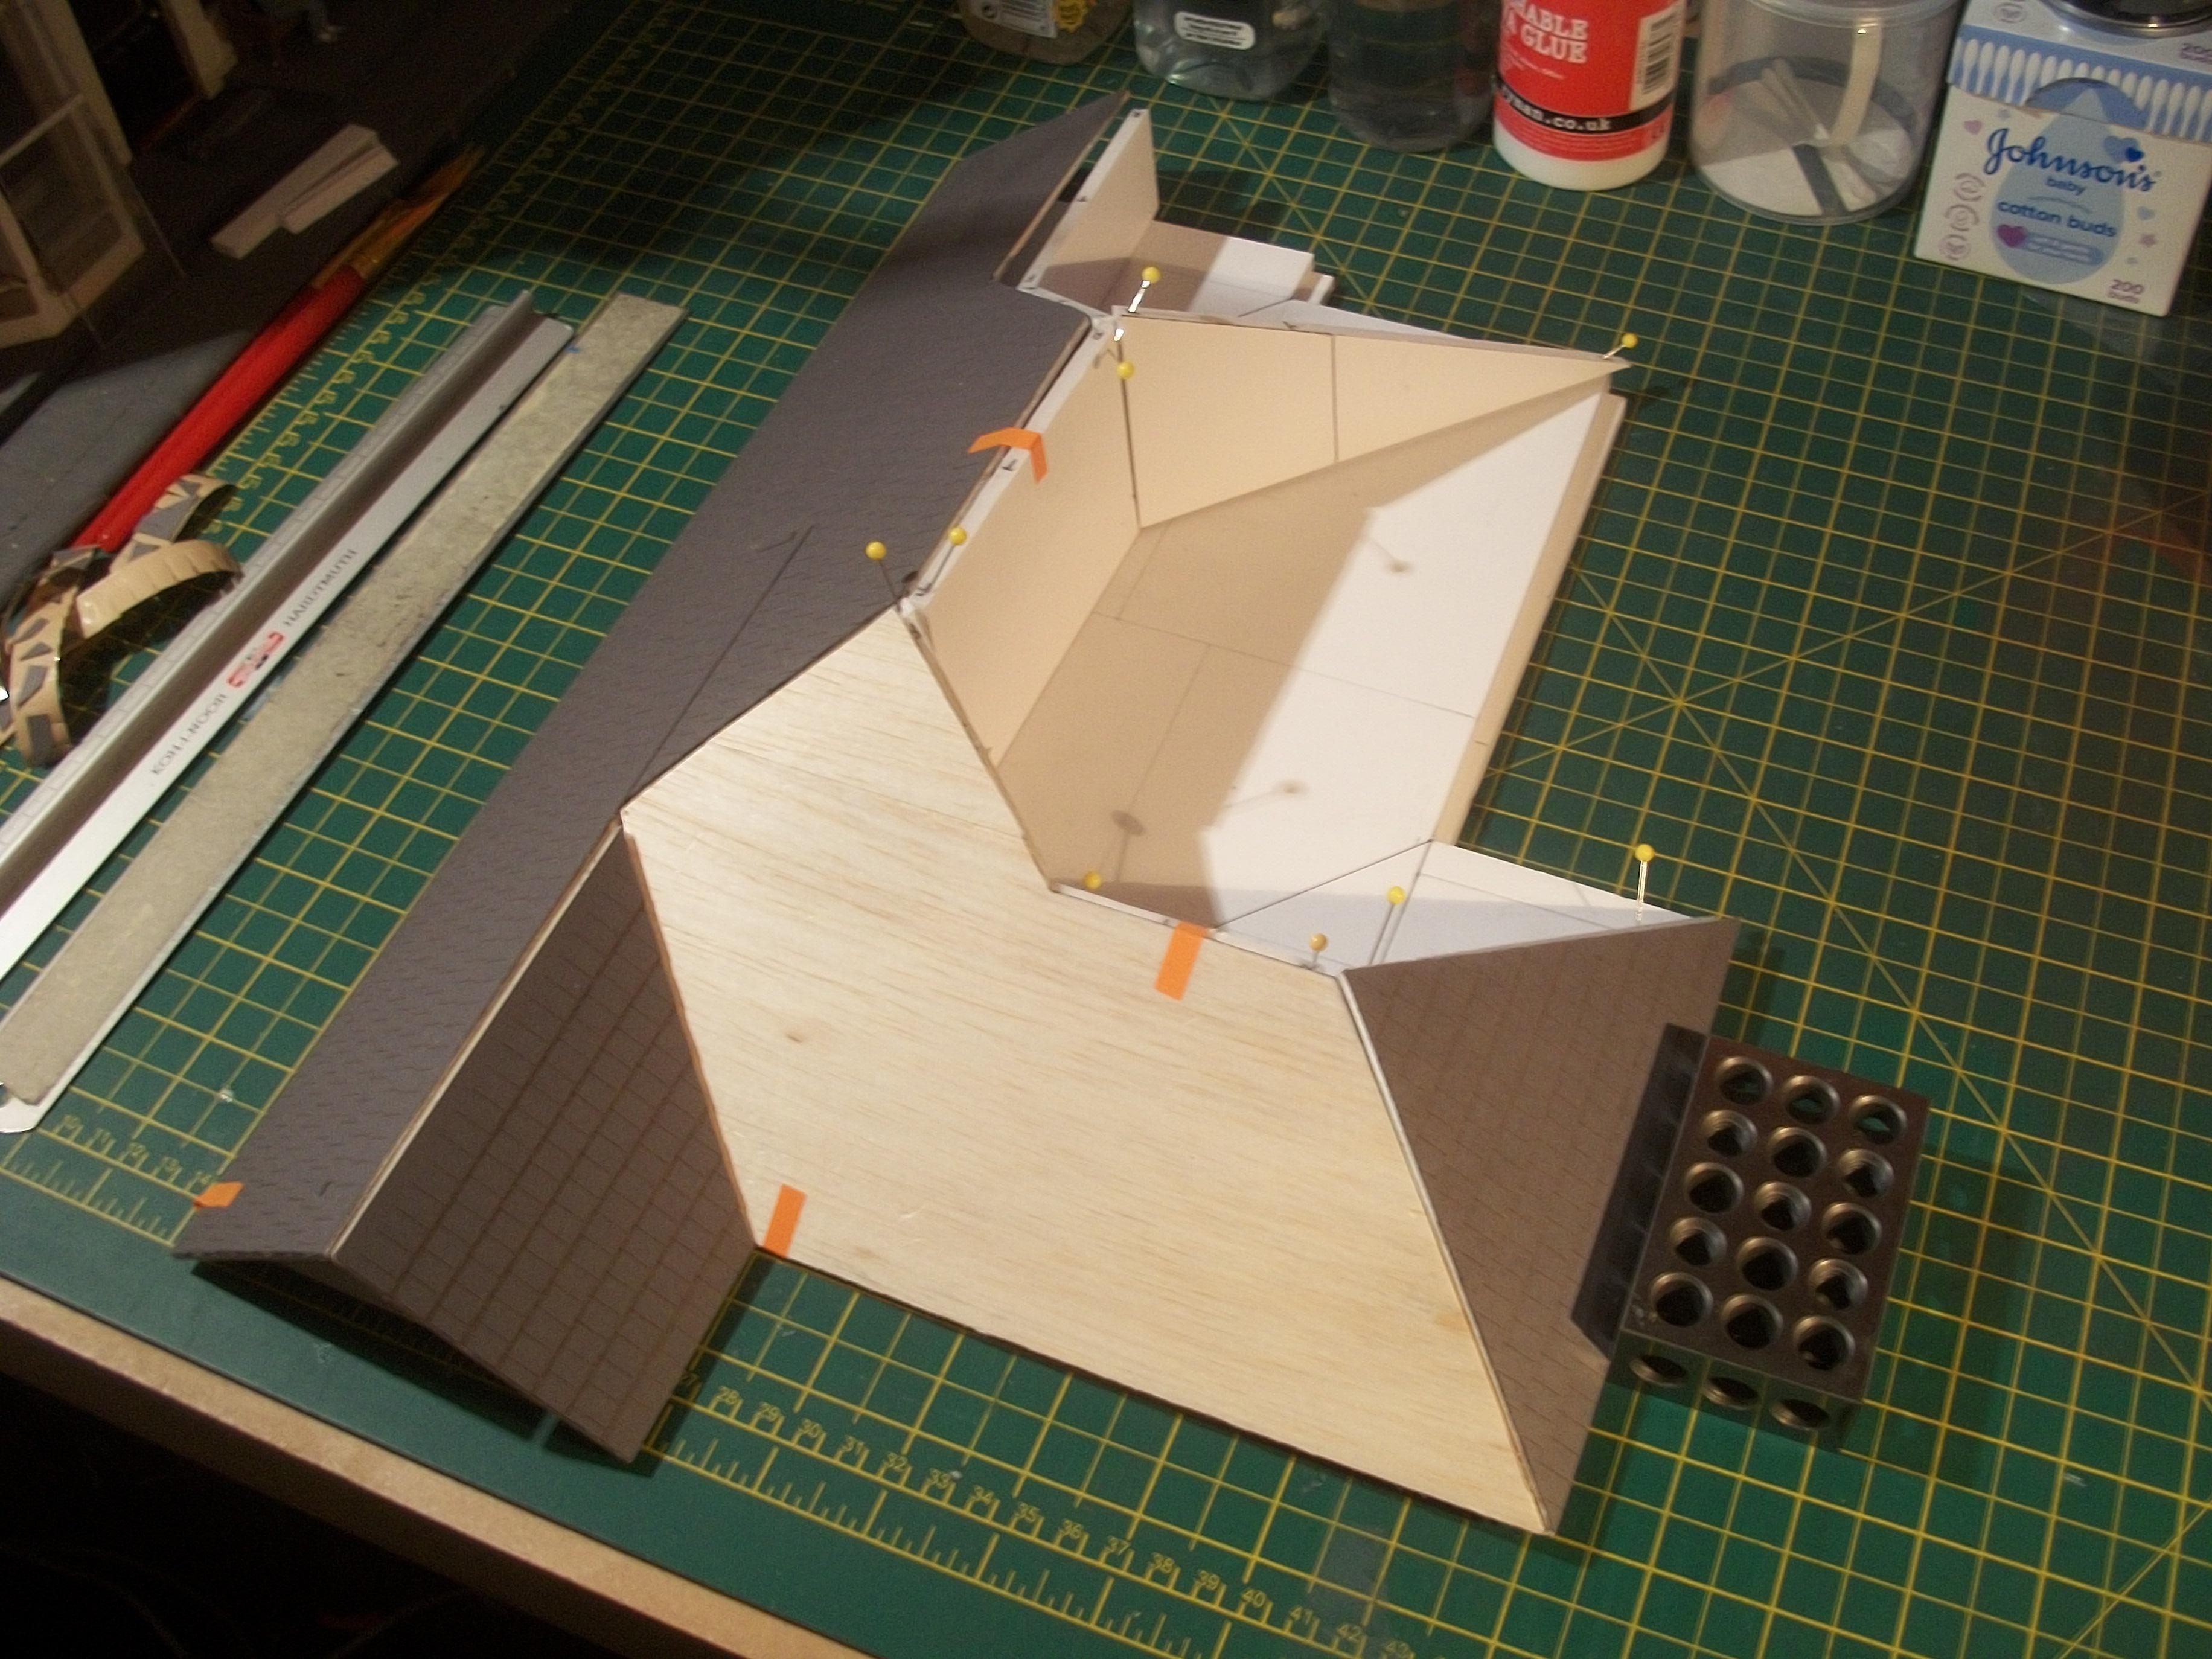
The roof trusses are much more rigid now, so the eight roof sections were taped in place and the ceiling panel, roof structure baseboard could be placed onto the lower rooms assembly . . . This showed up an obvious area that required attention. At the lower edge of the tiled roof section, where it forms the apex of the gable end at the rear of the bungalow, there was some foam board material protruding beyond the eaves . . . Harold was soon up his ladder and swiftly removed this excessive material, satisfied that the roof section was now fitting correctly . . . The chimney stack that you can see in the following test fit photos was 3D printed and painted by myself, after I had designed the chimney stack using FreeCAD software, probably around two years ago, before my 3D printer exploded in a blinding flash of blue ! . . . The chimney stack has been removed from the garage model it was intended for, as I want to use the part for this bungalow build. The length of shaped wood for the gulley was also test fitted at this stage, and I think this should work quite well . . . David
-
Thanks Steve . . . I didn't expect to get this far with the roof structure, before I go away on holiday in 12 days time. Your continued interest is much appreciated . . David
-
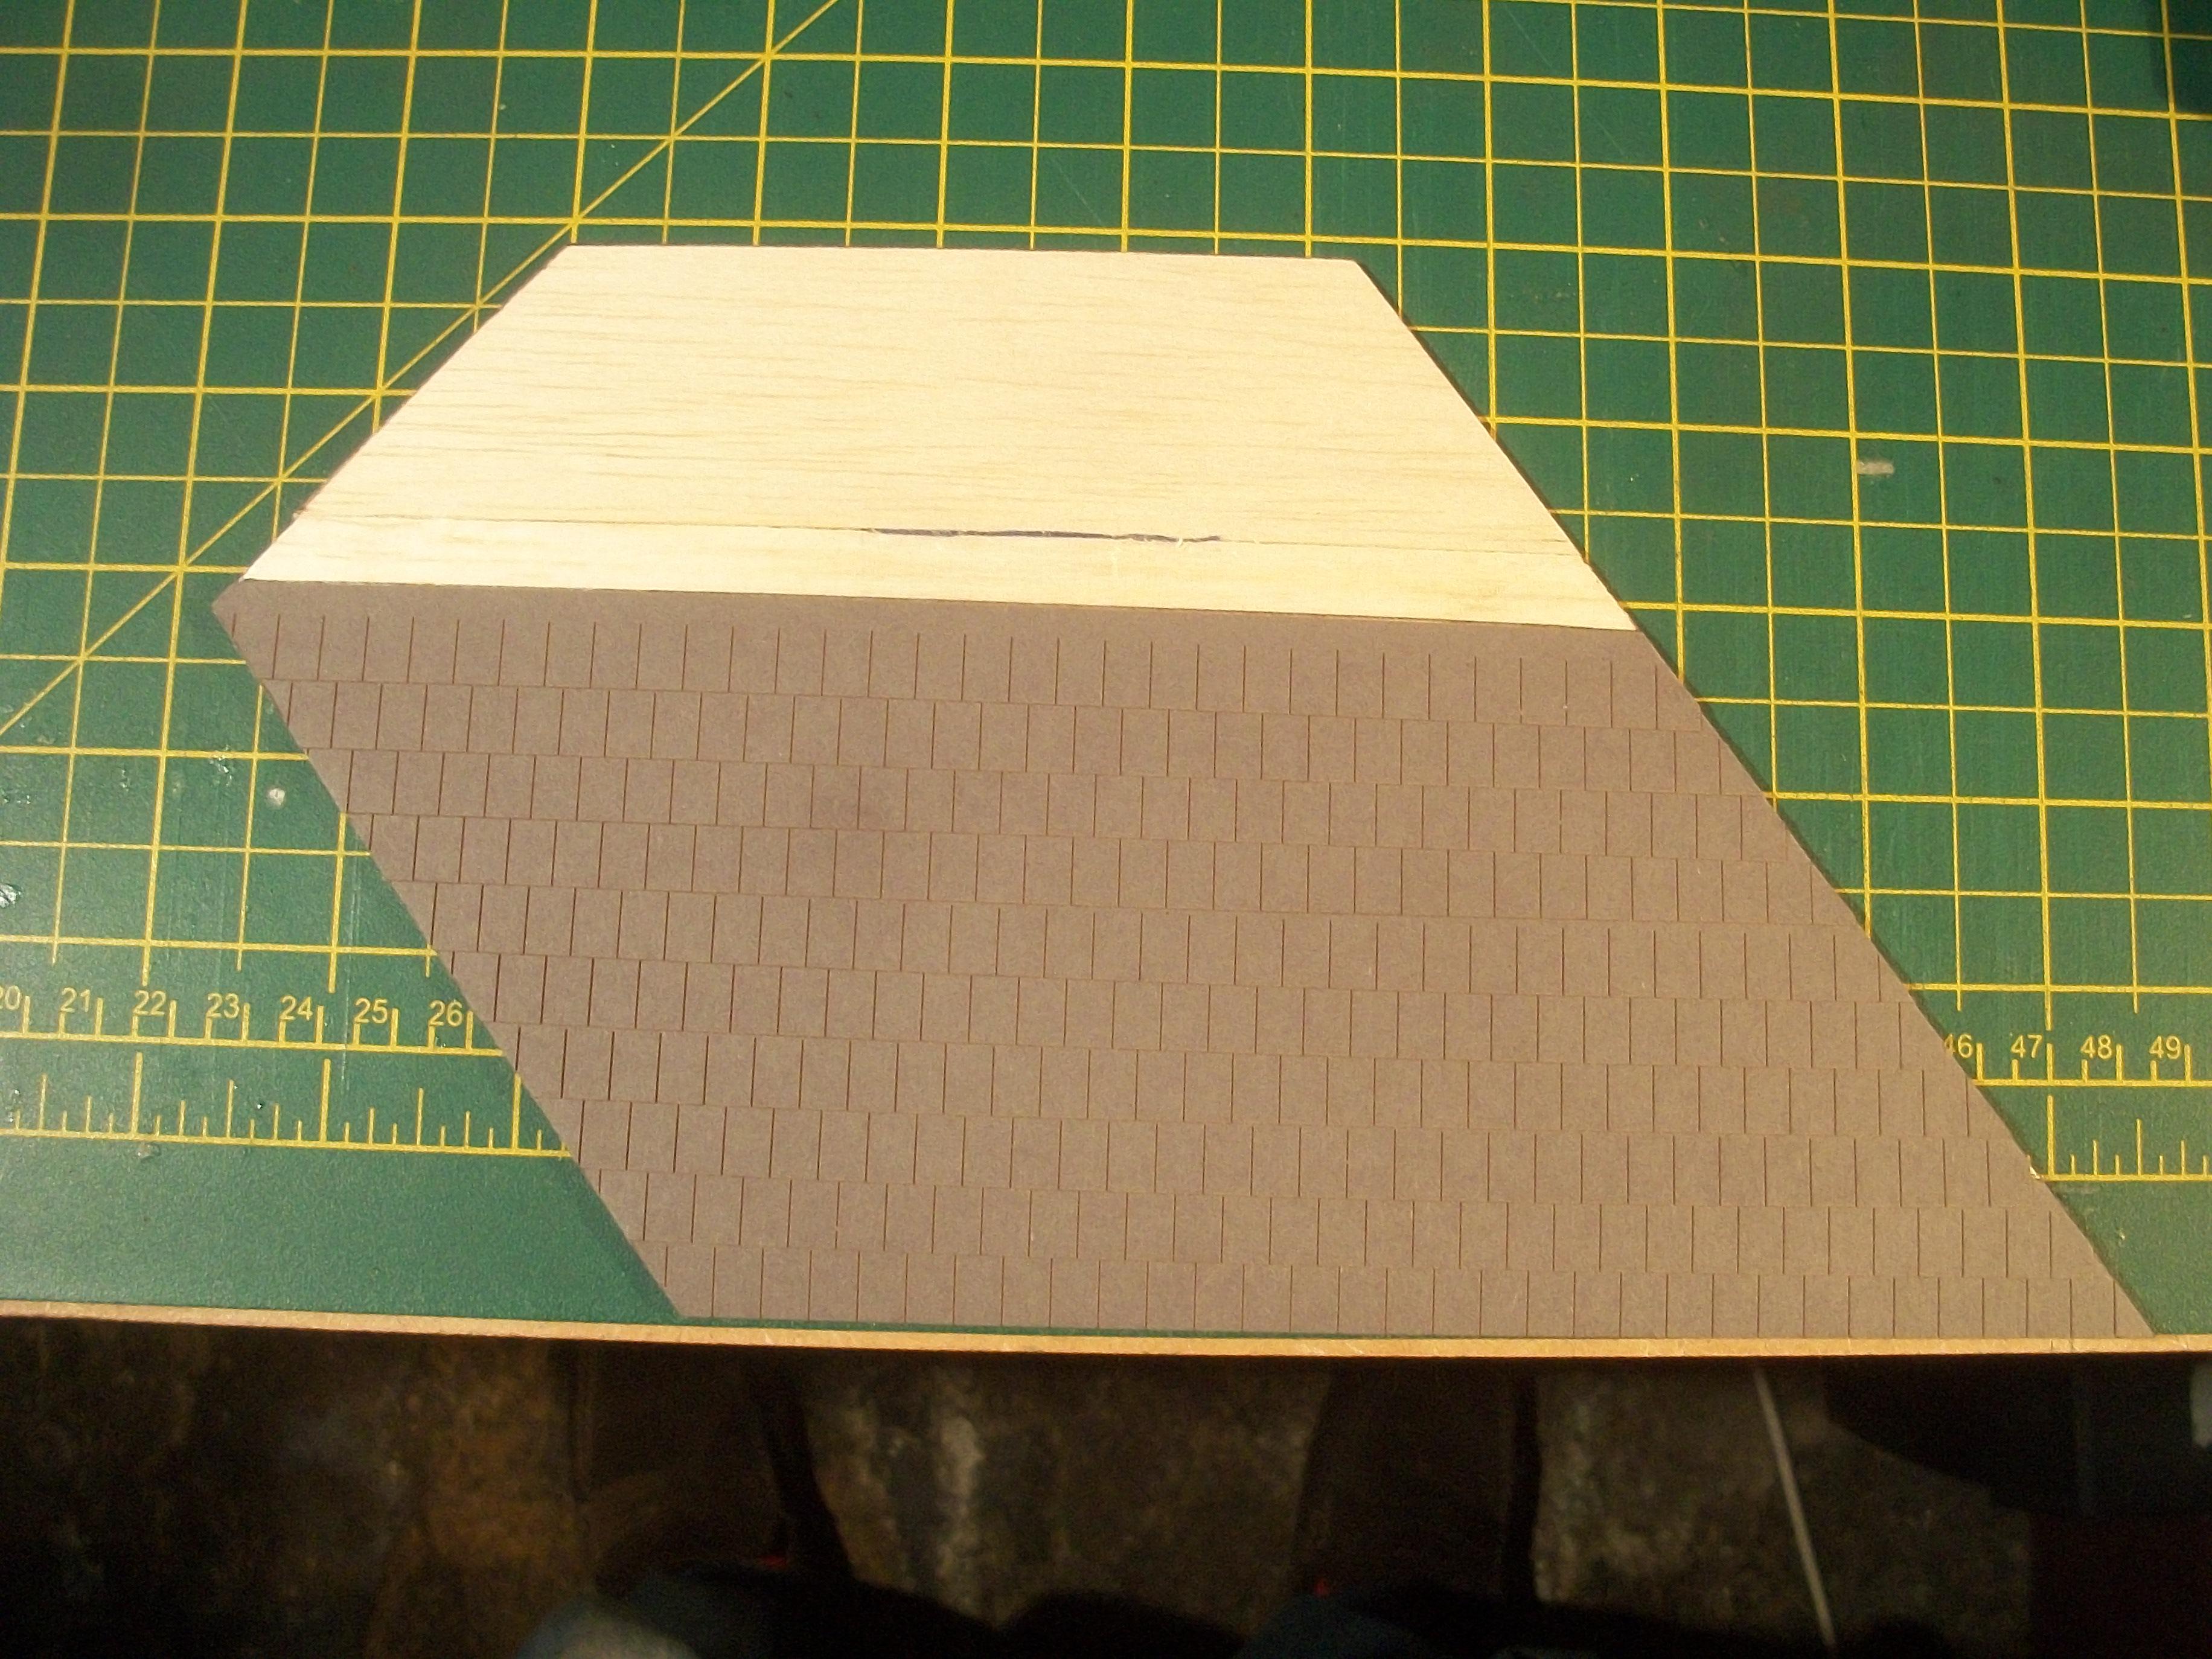
The remaining four roof section panels have been cut out of sheet balsa, and these do require some slight adjustment to fit precisely . . . I wasn't happy with the roof truss attachment to the roof structure baseboard, because they kept moving out of position as I was lining up the roof sections. This prompted me to secure the trusses, using PVA glue along the lower edges . . . All ten roof trusses are now PVA glued in place, and they will be allowed overnight setting. The eight roof sections will be completed once the remaining four panels have been tiled . . . David
-
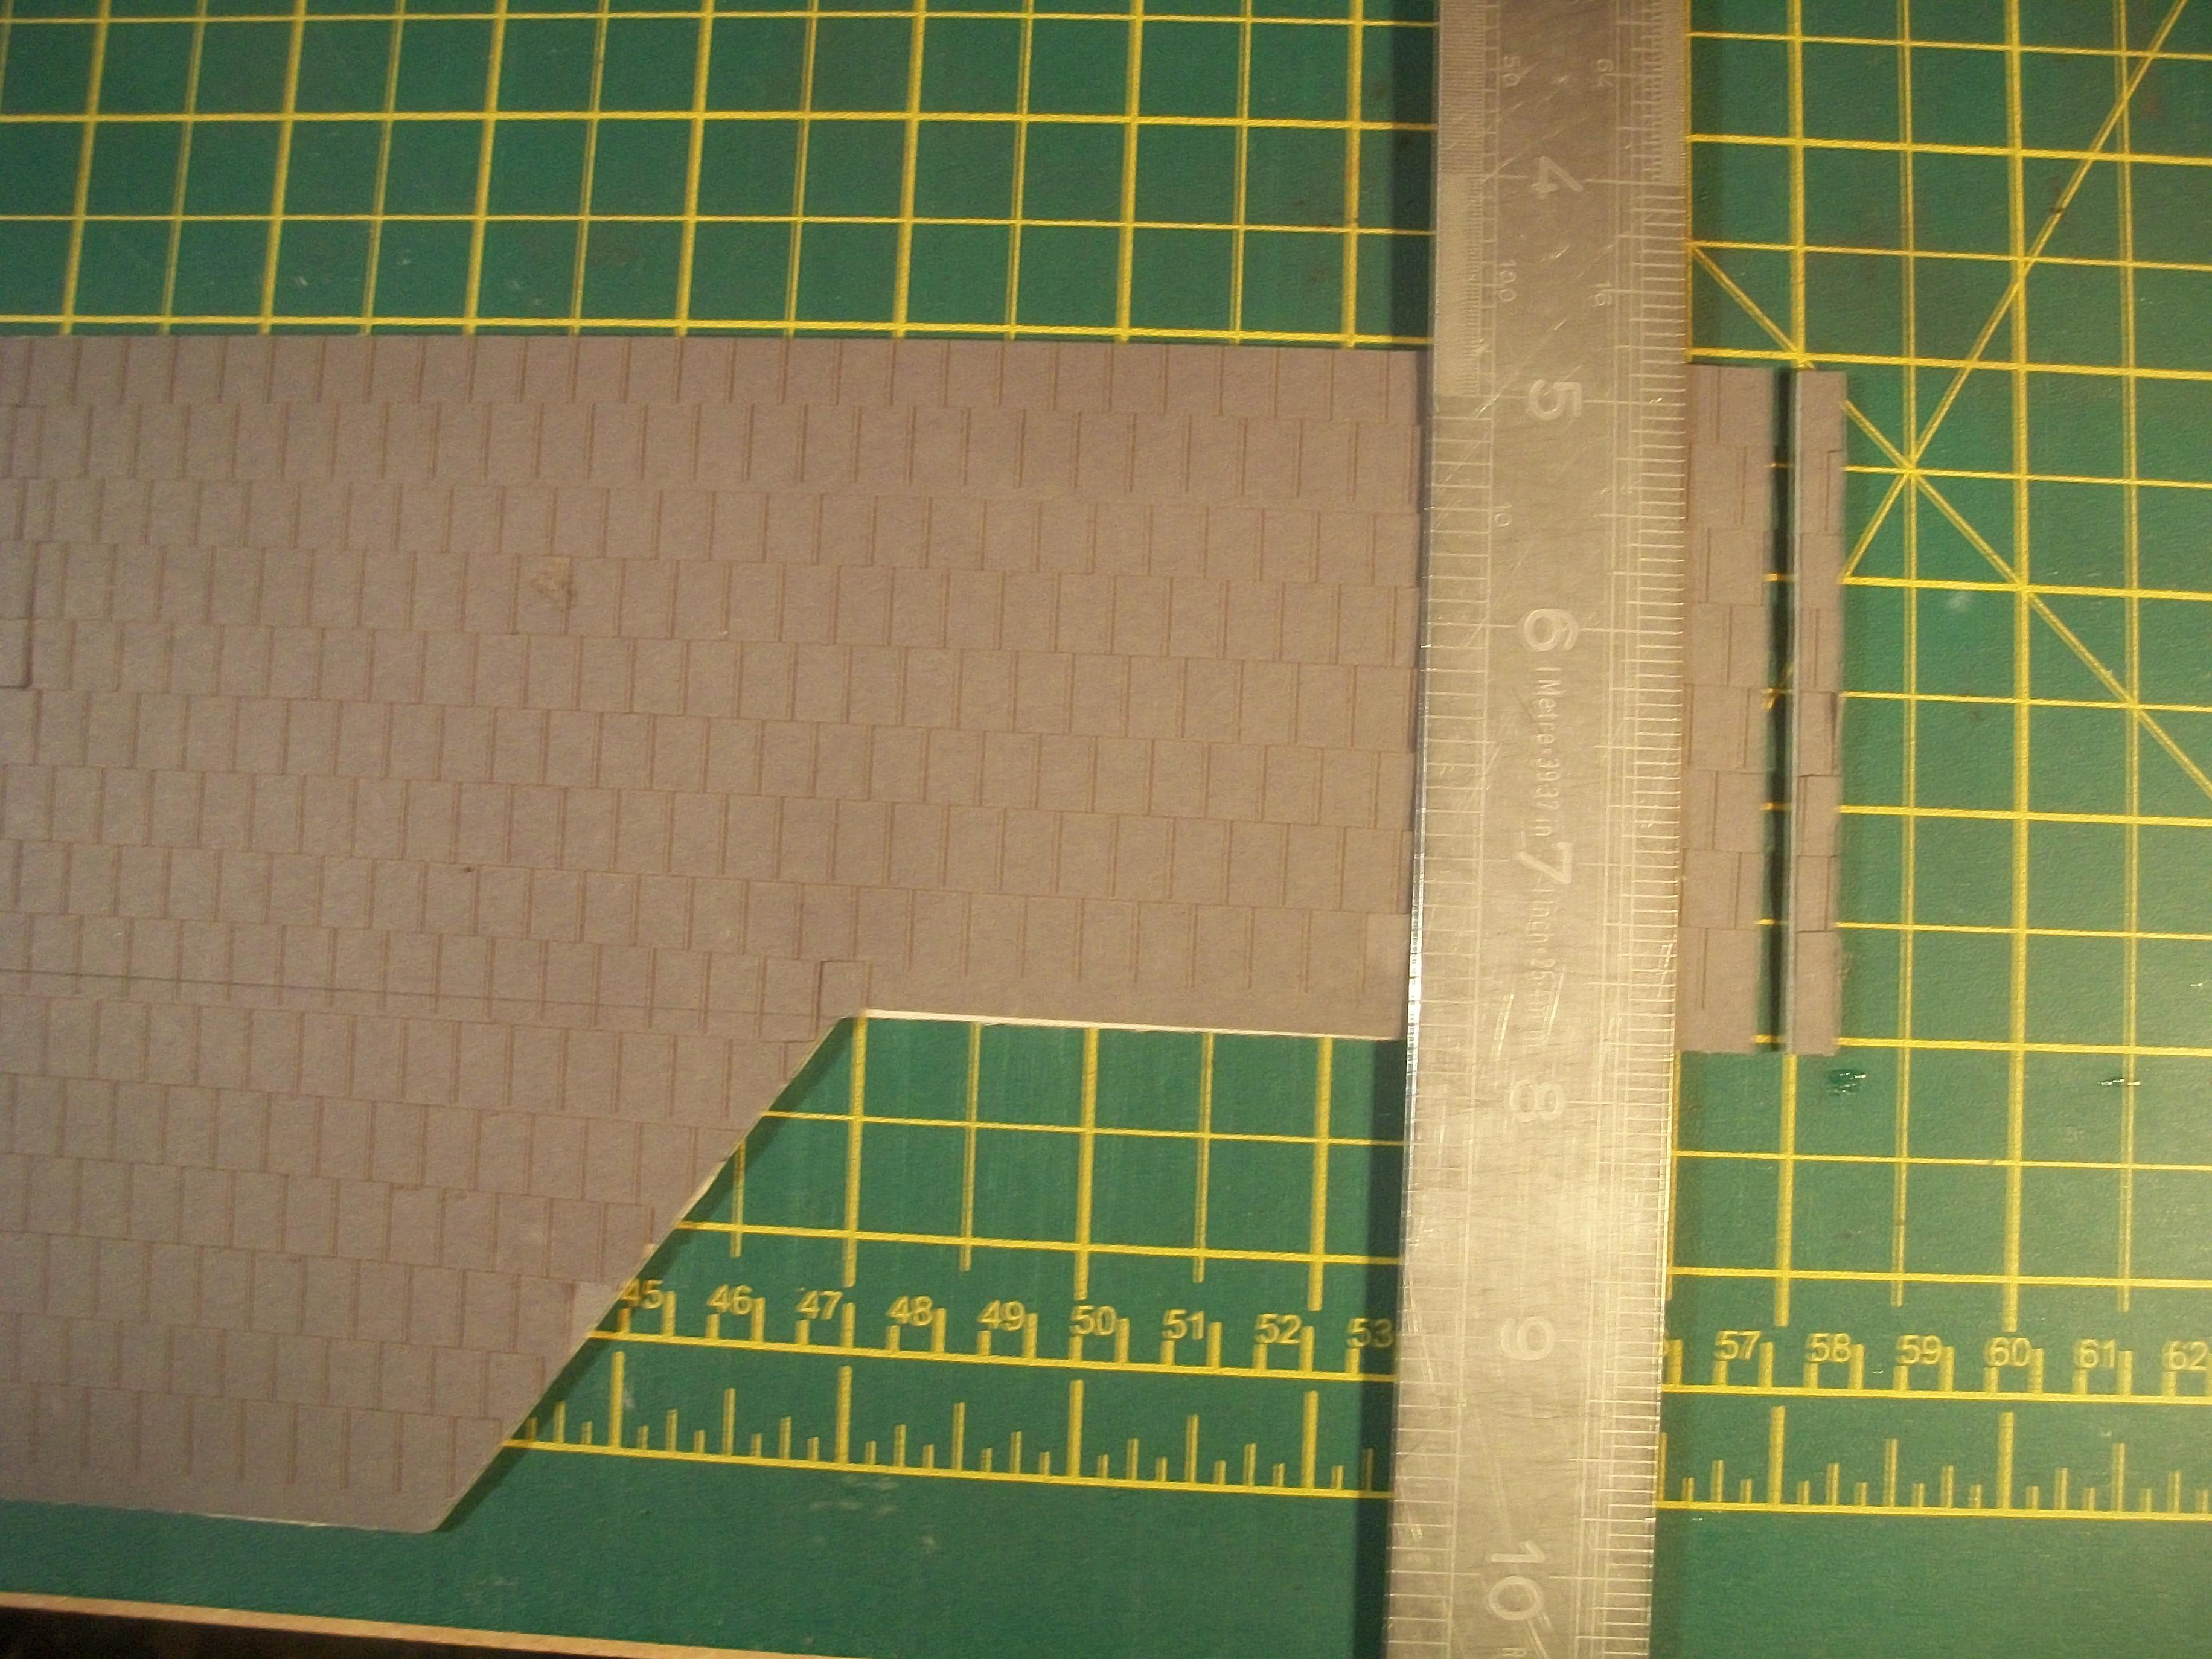
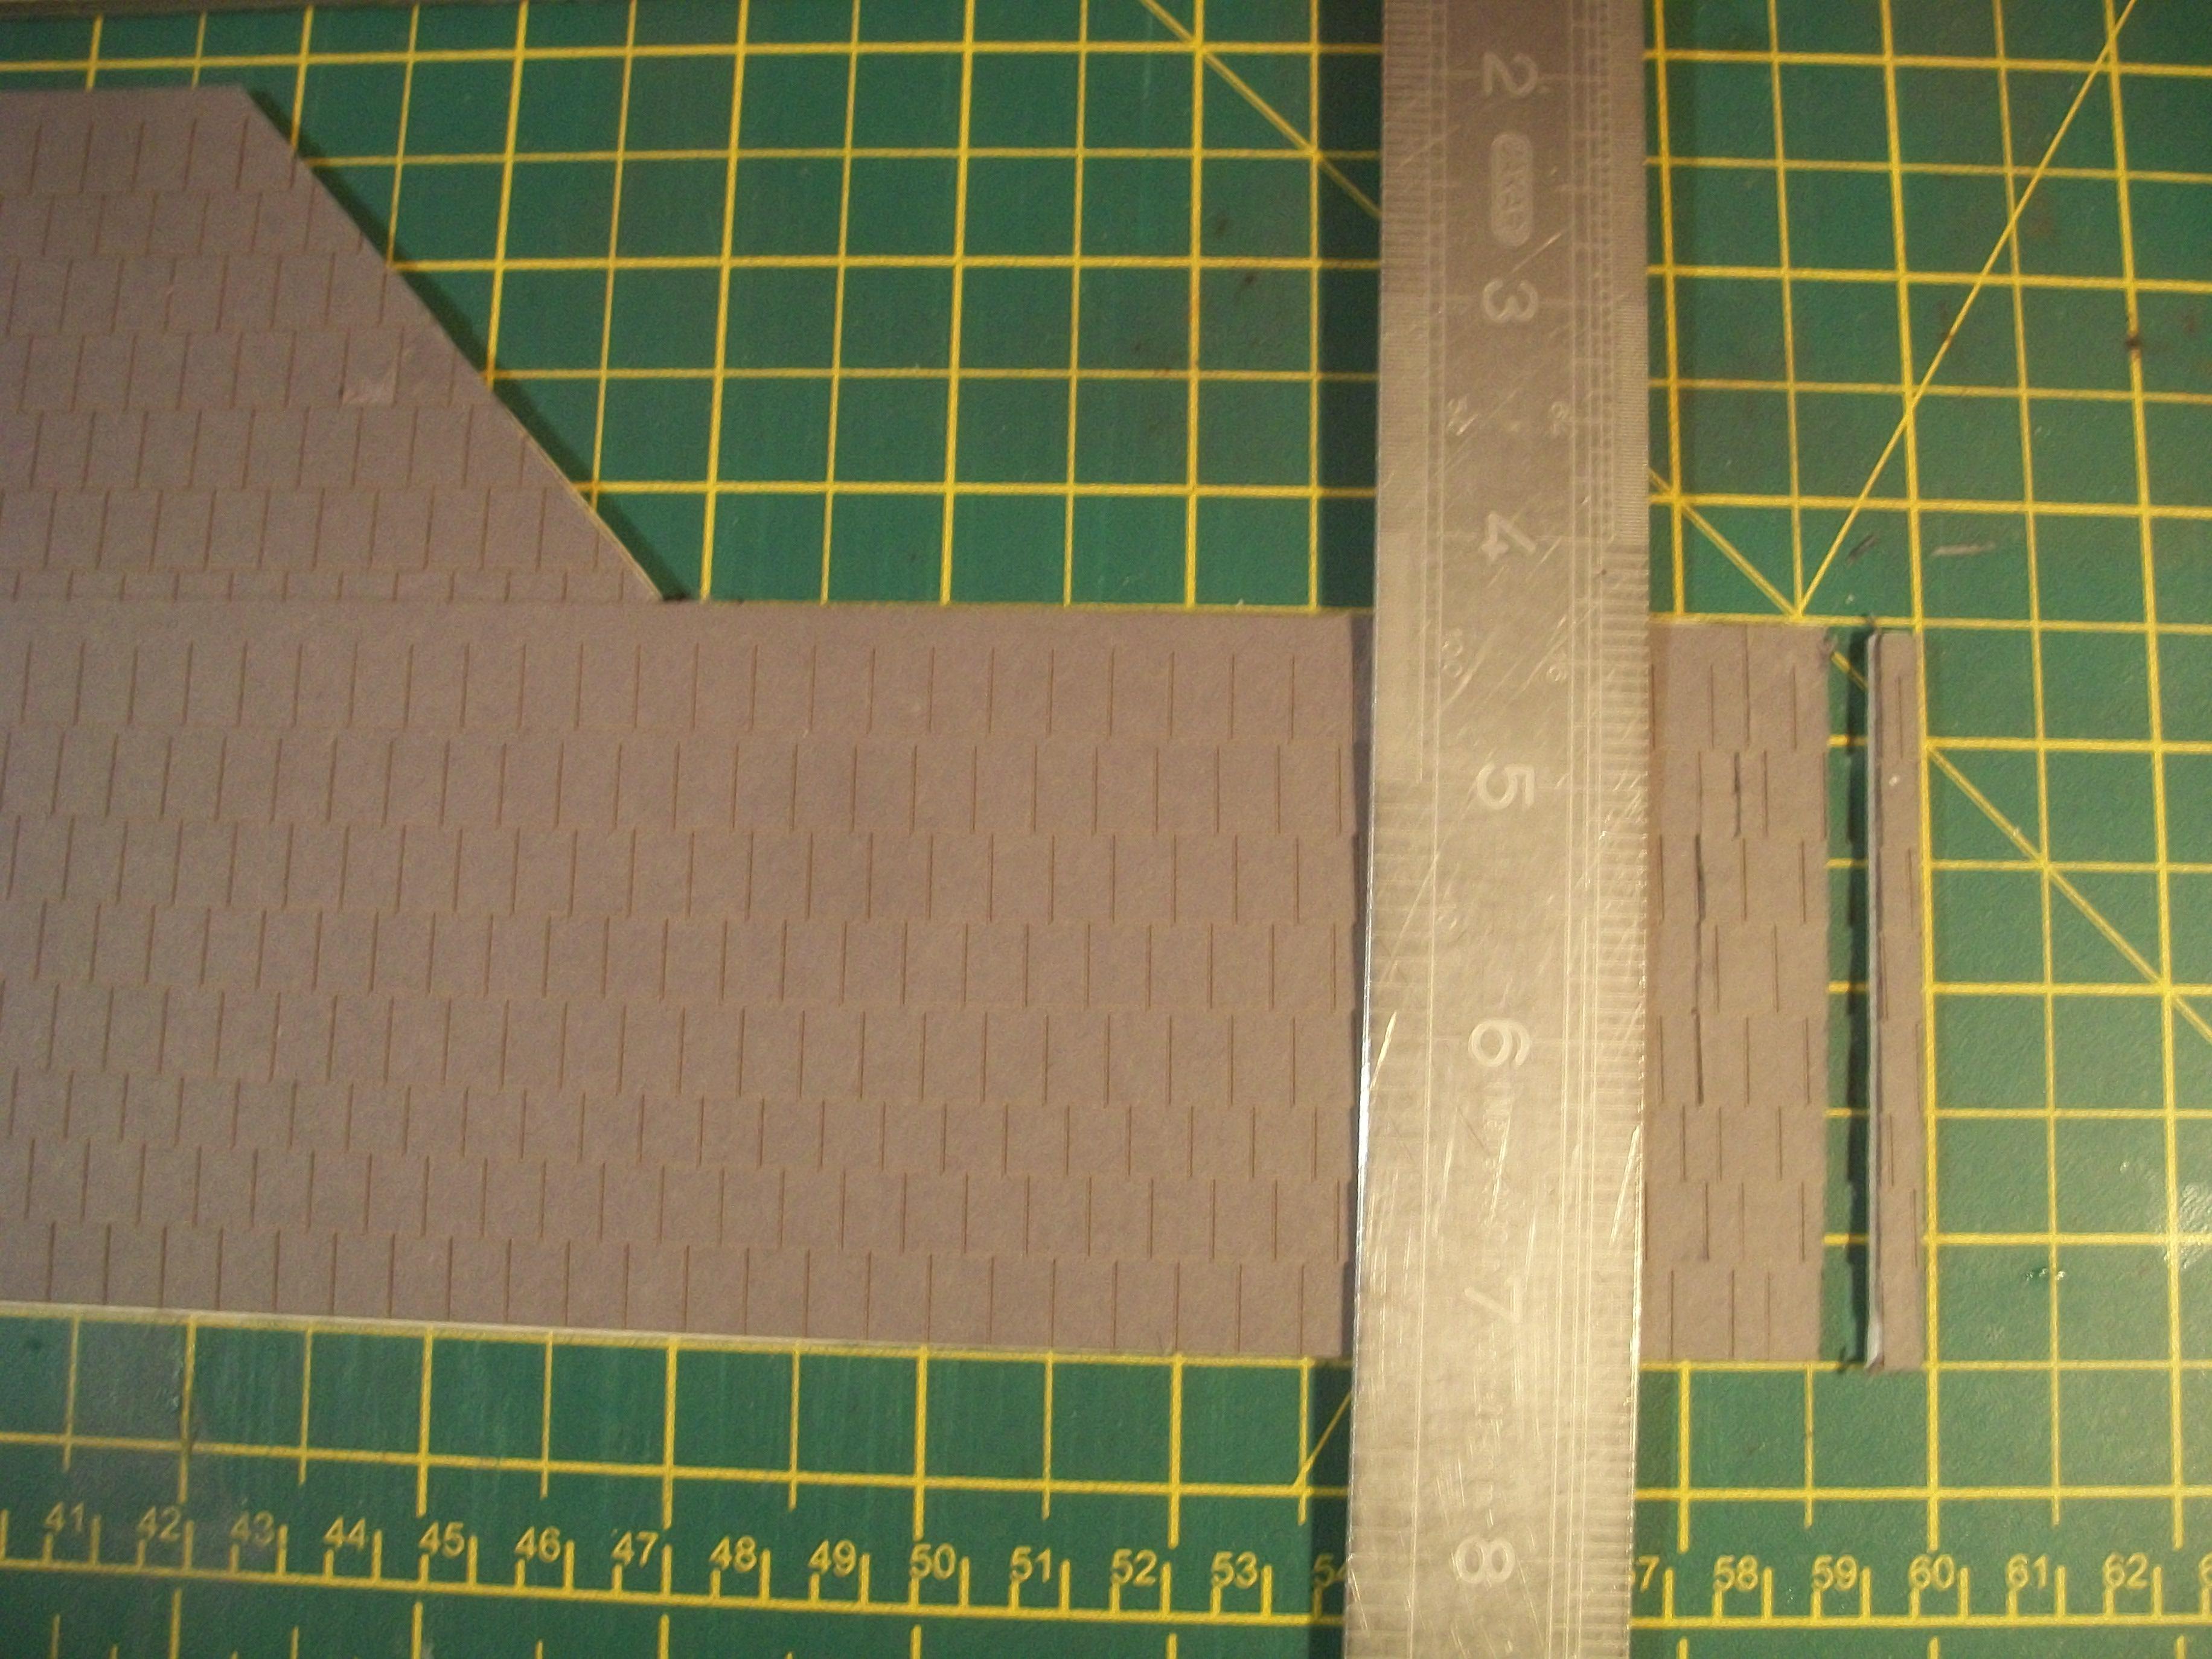
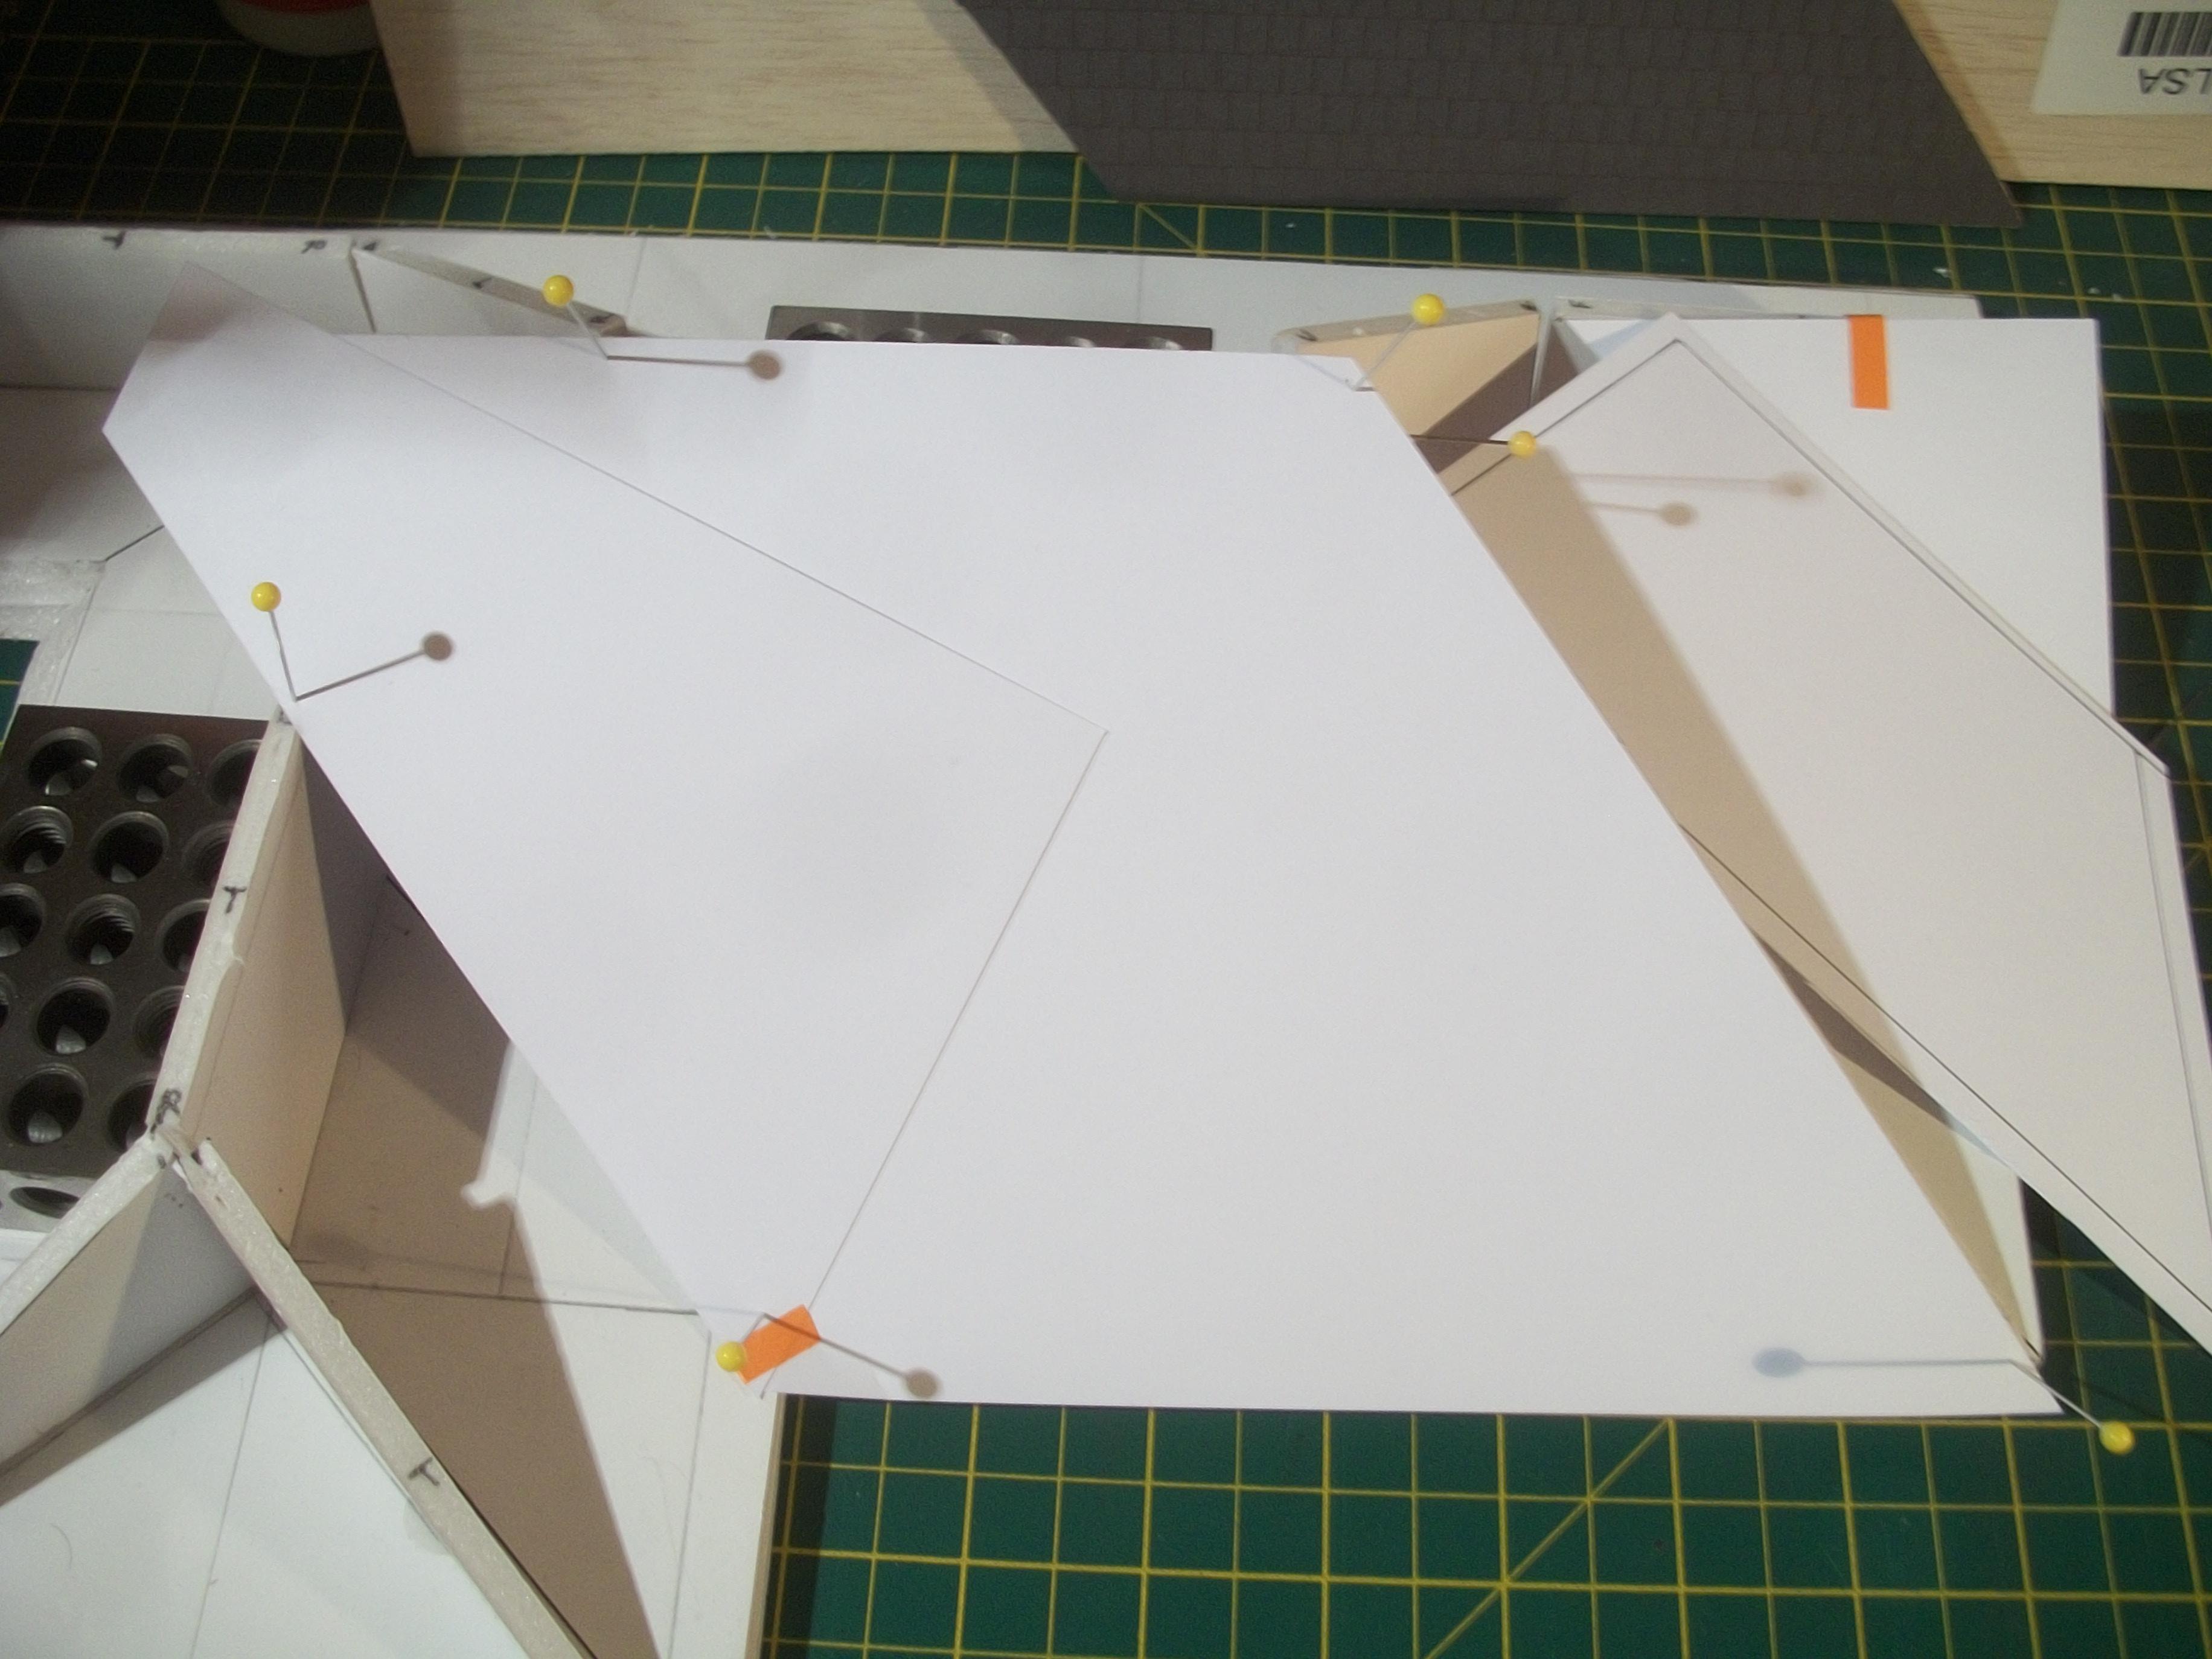
Your comments are always well received David, and I recognise that you have more years of experience in model building than I do. I do take your point regarding the thickness and volume of material that we are working with, although in this case it is entirely due to incorrect angles on my part . . . The lower edge of each template, and also the top ridge, is a simple horizontal on flat paper, but then you have inclines and also gulleys that cannot be measured on flat paper. As each template required two attempts to get anywhere near right, I ended up using the ' pin ' method . . . One pin at each corner of the card provided me with a precise point of reference, and by simply joining the dots ( joining the pin holes ), I was able to define the exact shape. Basically, this is a 3D visualisation of the problem, and not a 2D visualisation . . . Now I get it . . . David W.
-
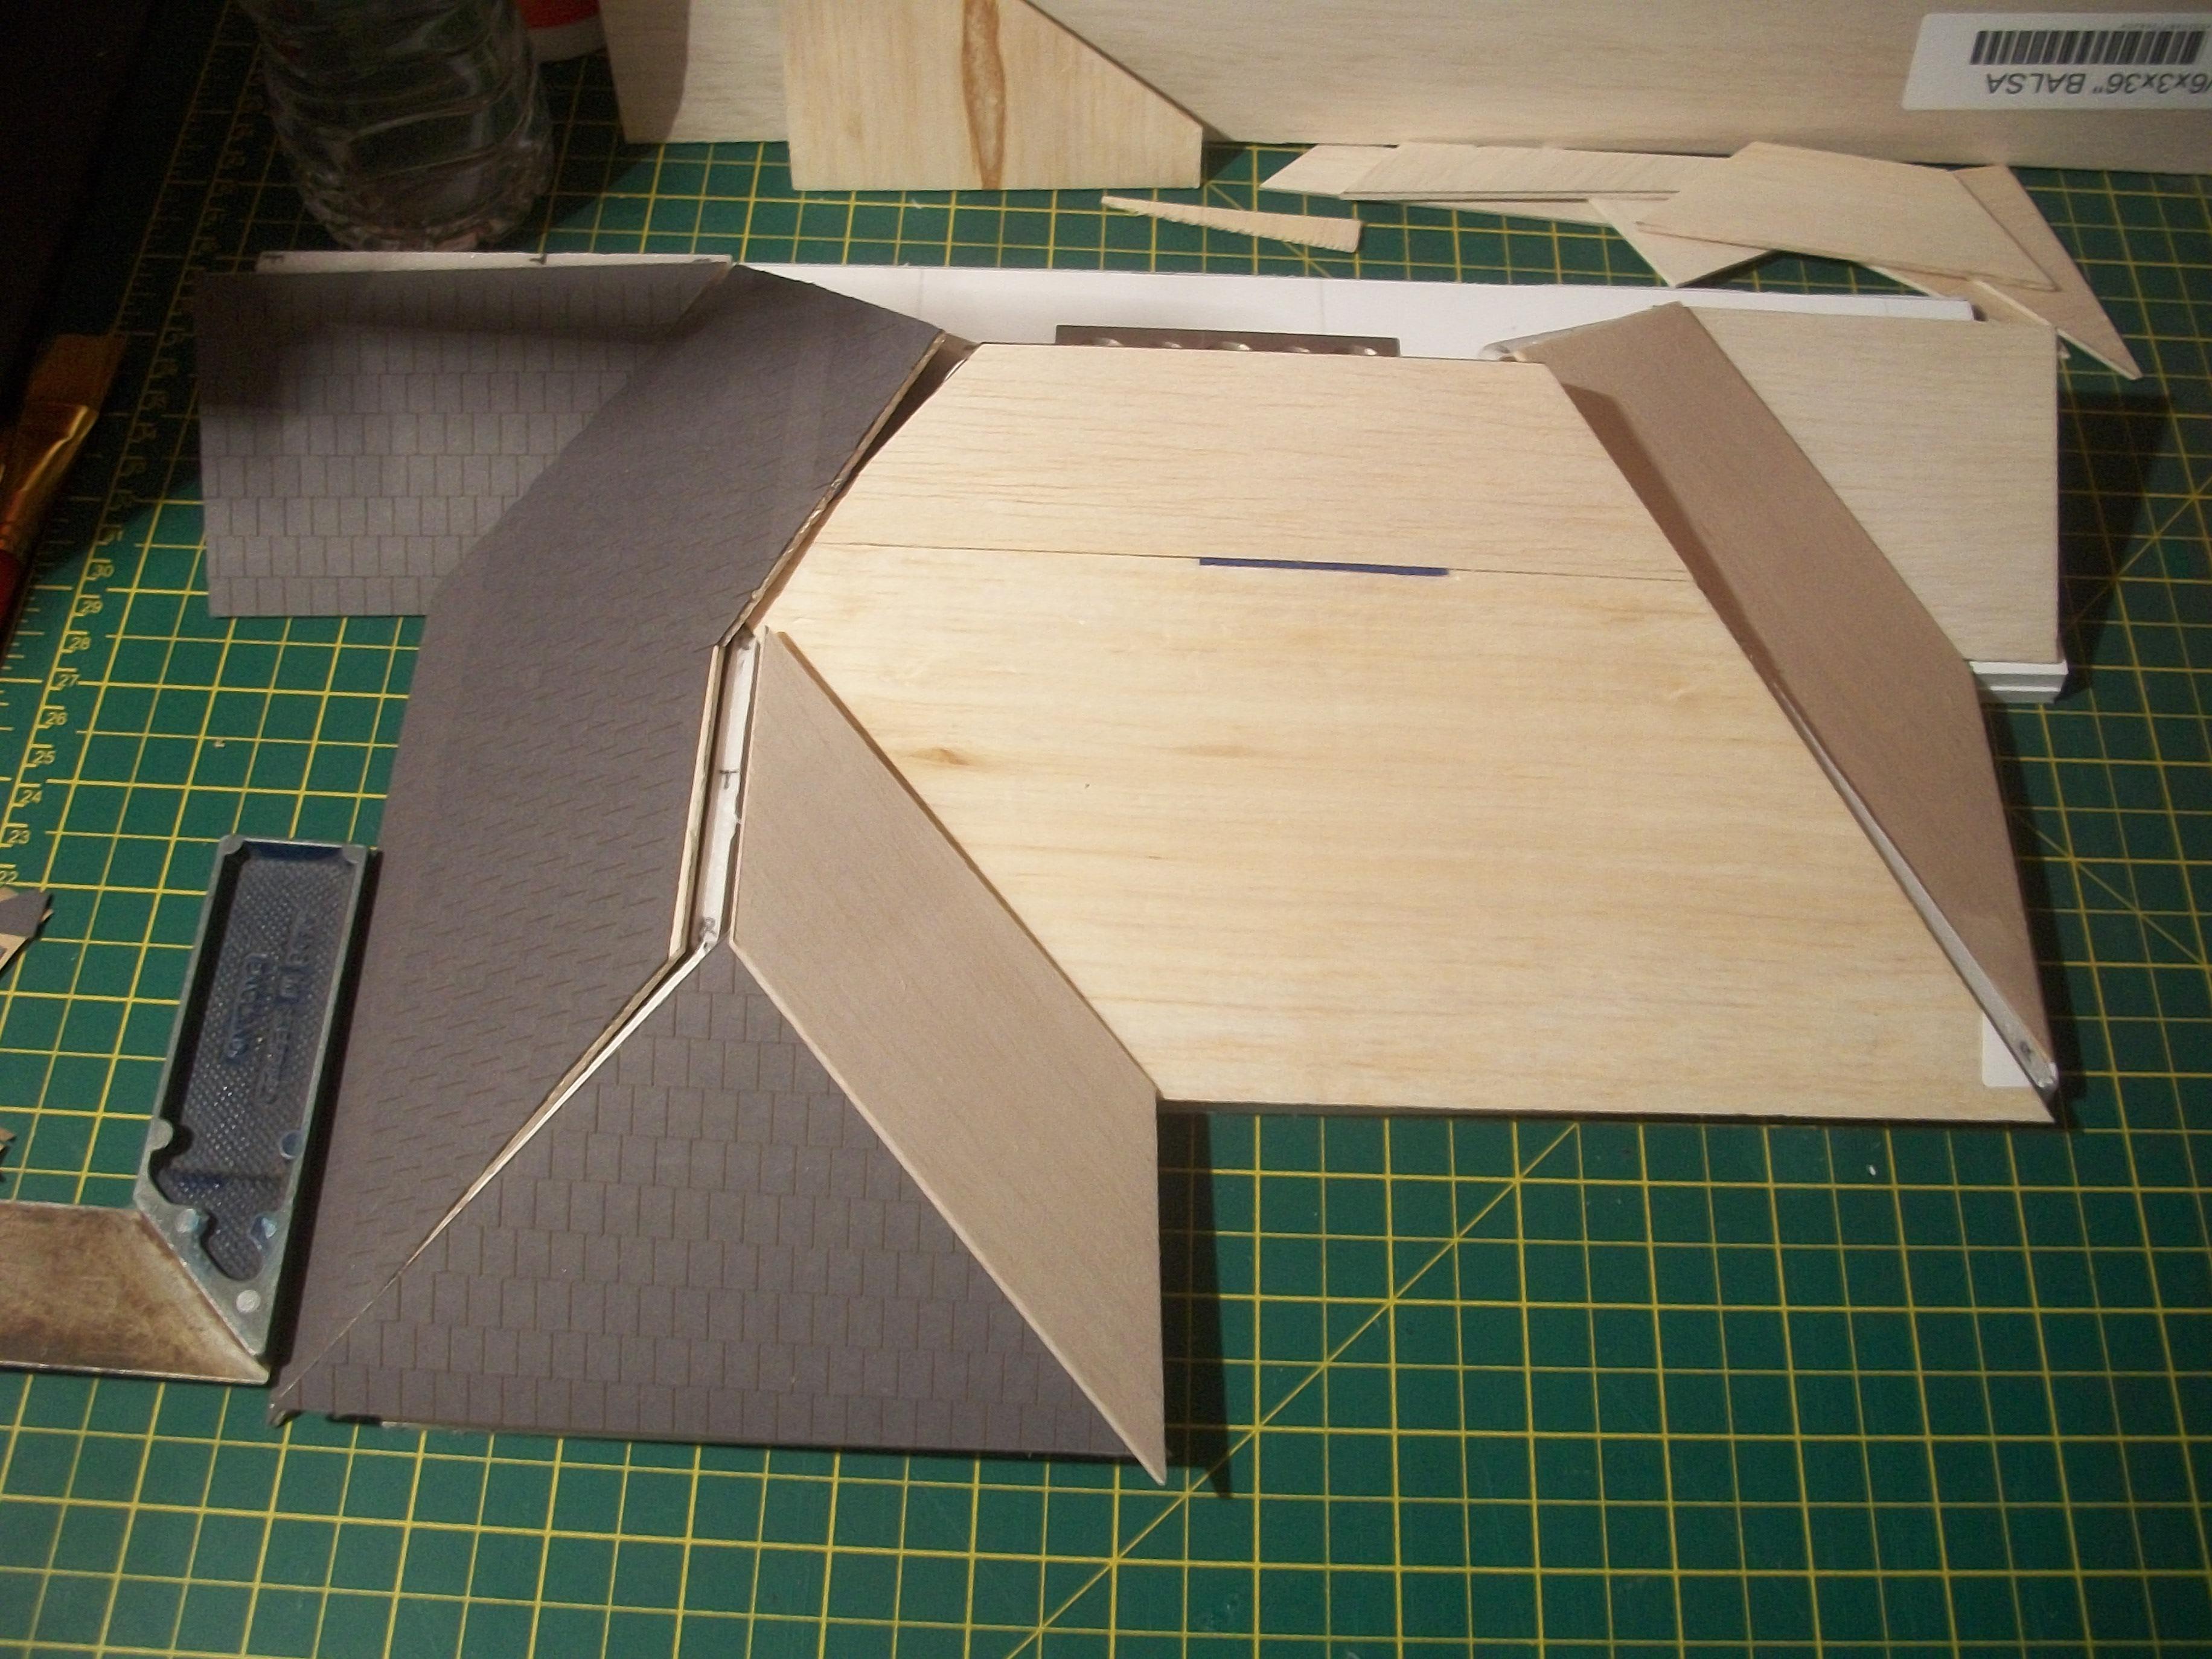
The three roof sections at the front of the bungalow have been fully tiled . . . For the next task, I positioned all of the ten roof trusses. Each truss was fixed onto the roof structure baseboard using Bostik Glue Dots, one glue dot in the centre of each truss . . . Today I was able to measure and cut out the remaining four roof section templates from thin white card. I realised that my method of measuring the length of each side of the roof sections was problematic, because each time the first attempt failed. The template did not fit onto the trusses properly, and was often out by a considerable margin . . . The problem was not the length in millimetres, but actually it was the ANGLES that were wrong. Then a new method came into my head, and this has worked much better. First I cut out a piece of card that was roughly the size of the area, and then I pinned each of four corners to the foam board trusses. Once the pins were removed, I could connect the four pin holes by drawing black lines between them . . . Cutting out the template by leaving about five millimetres just outside each of the lines allowed some margin for error. This not only worked well, but also this method was easier and quicker. Four templates were completed during the day, so these can be transferred to sheet balsa tomorrow . . . David
-
Those header pipes really tested your model building skills David G., . . . The alignment with the exhaust pipes adds further challenges ! Nice work on the grille trim chrome, and that was a good idea of yours to use the box art picture as a reference . . . Having built cars of this period, such as the Delahaye 135 and the Talbot Lago Record Cabriolet, neither of them American, maybe I should add this Cord 812 to my collection ? David W.
-
Thanks David G., . . . I have a feeling that this roof structure is going to look pretty good . . . fingers crossed ! David W.
-
Nice and easy to apply, although quite time consuming, and the process requires a considerable amount of patience as you have found Paul . . . ! David
-
Yes I agree . . . Which is why I am building the bungalow from foam board, as you can see in the W.I.P. Dioramas section. Makes a refreshing change from building cars . . . David
-
Today was all about applying the strips of roof tiles. These have a peel off self-adhesive backing, and they are a very nice product to work with. The wooden ' gully ' was also test fitted, and this will be glued to the roof sections, with grey emulsion paint applied afterwards. As well as this gully at the front of the bungalow, there are two more gullies at the rear of the property . . . The small roof section to the right of the front gable end was tiled first, and then the triangular section to the right of the garage was fully tiled. The larger centre front section will be tiled tomorrow hopefully, and then I can move around to the rear of the bungalow to measure and cut thin card templates for the sheet balsa roof sections . . . There are four of these, and one of them is a large complex panel, similar in shape to the front centre one. David