Anglia105E
-
Posts
3,487 -
Joined
-
Last visited
Content Type
Profiles
Forums
Events
Gallery
Everything posted by Anglia105E
-
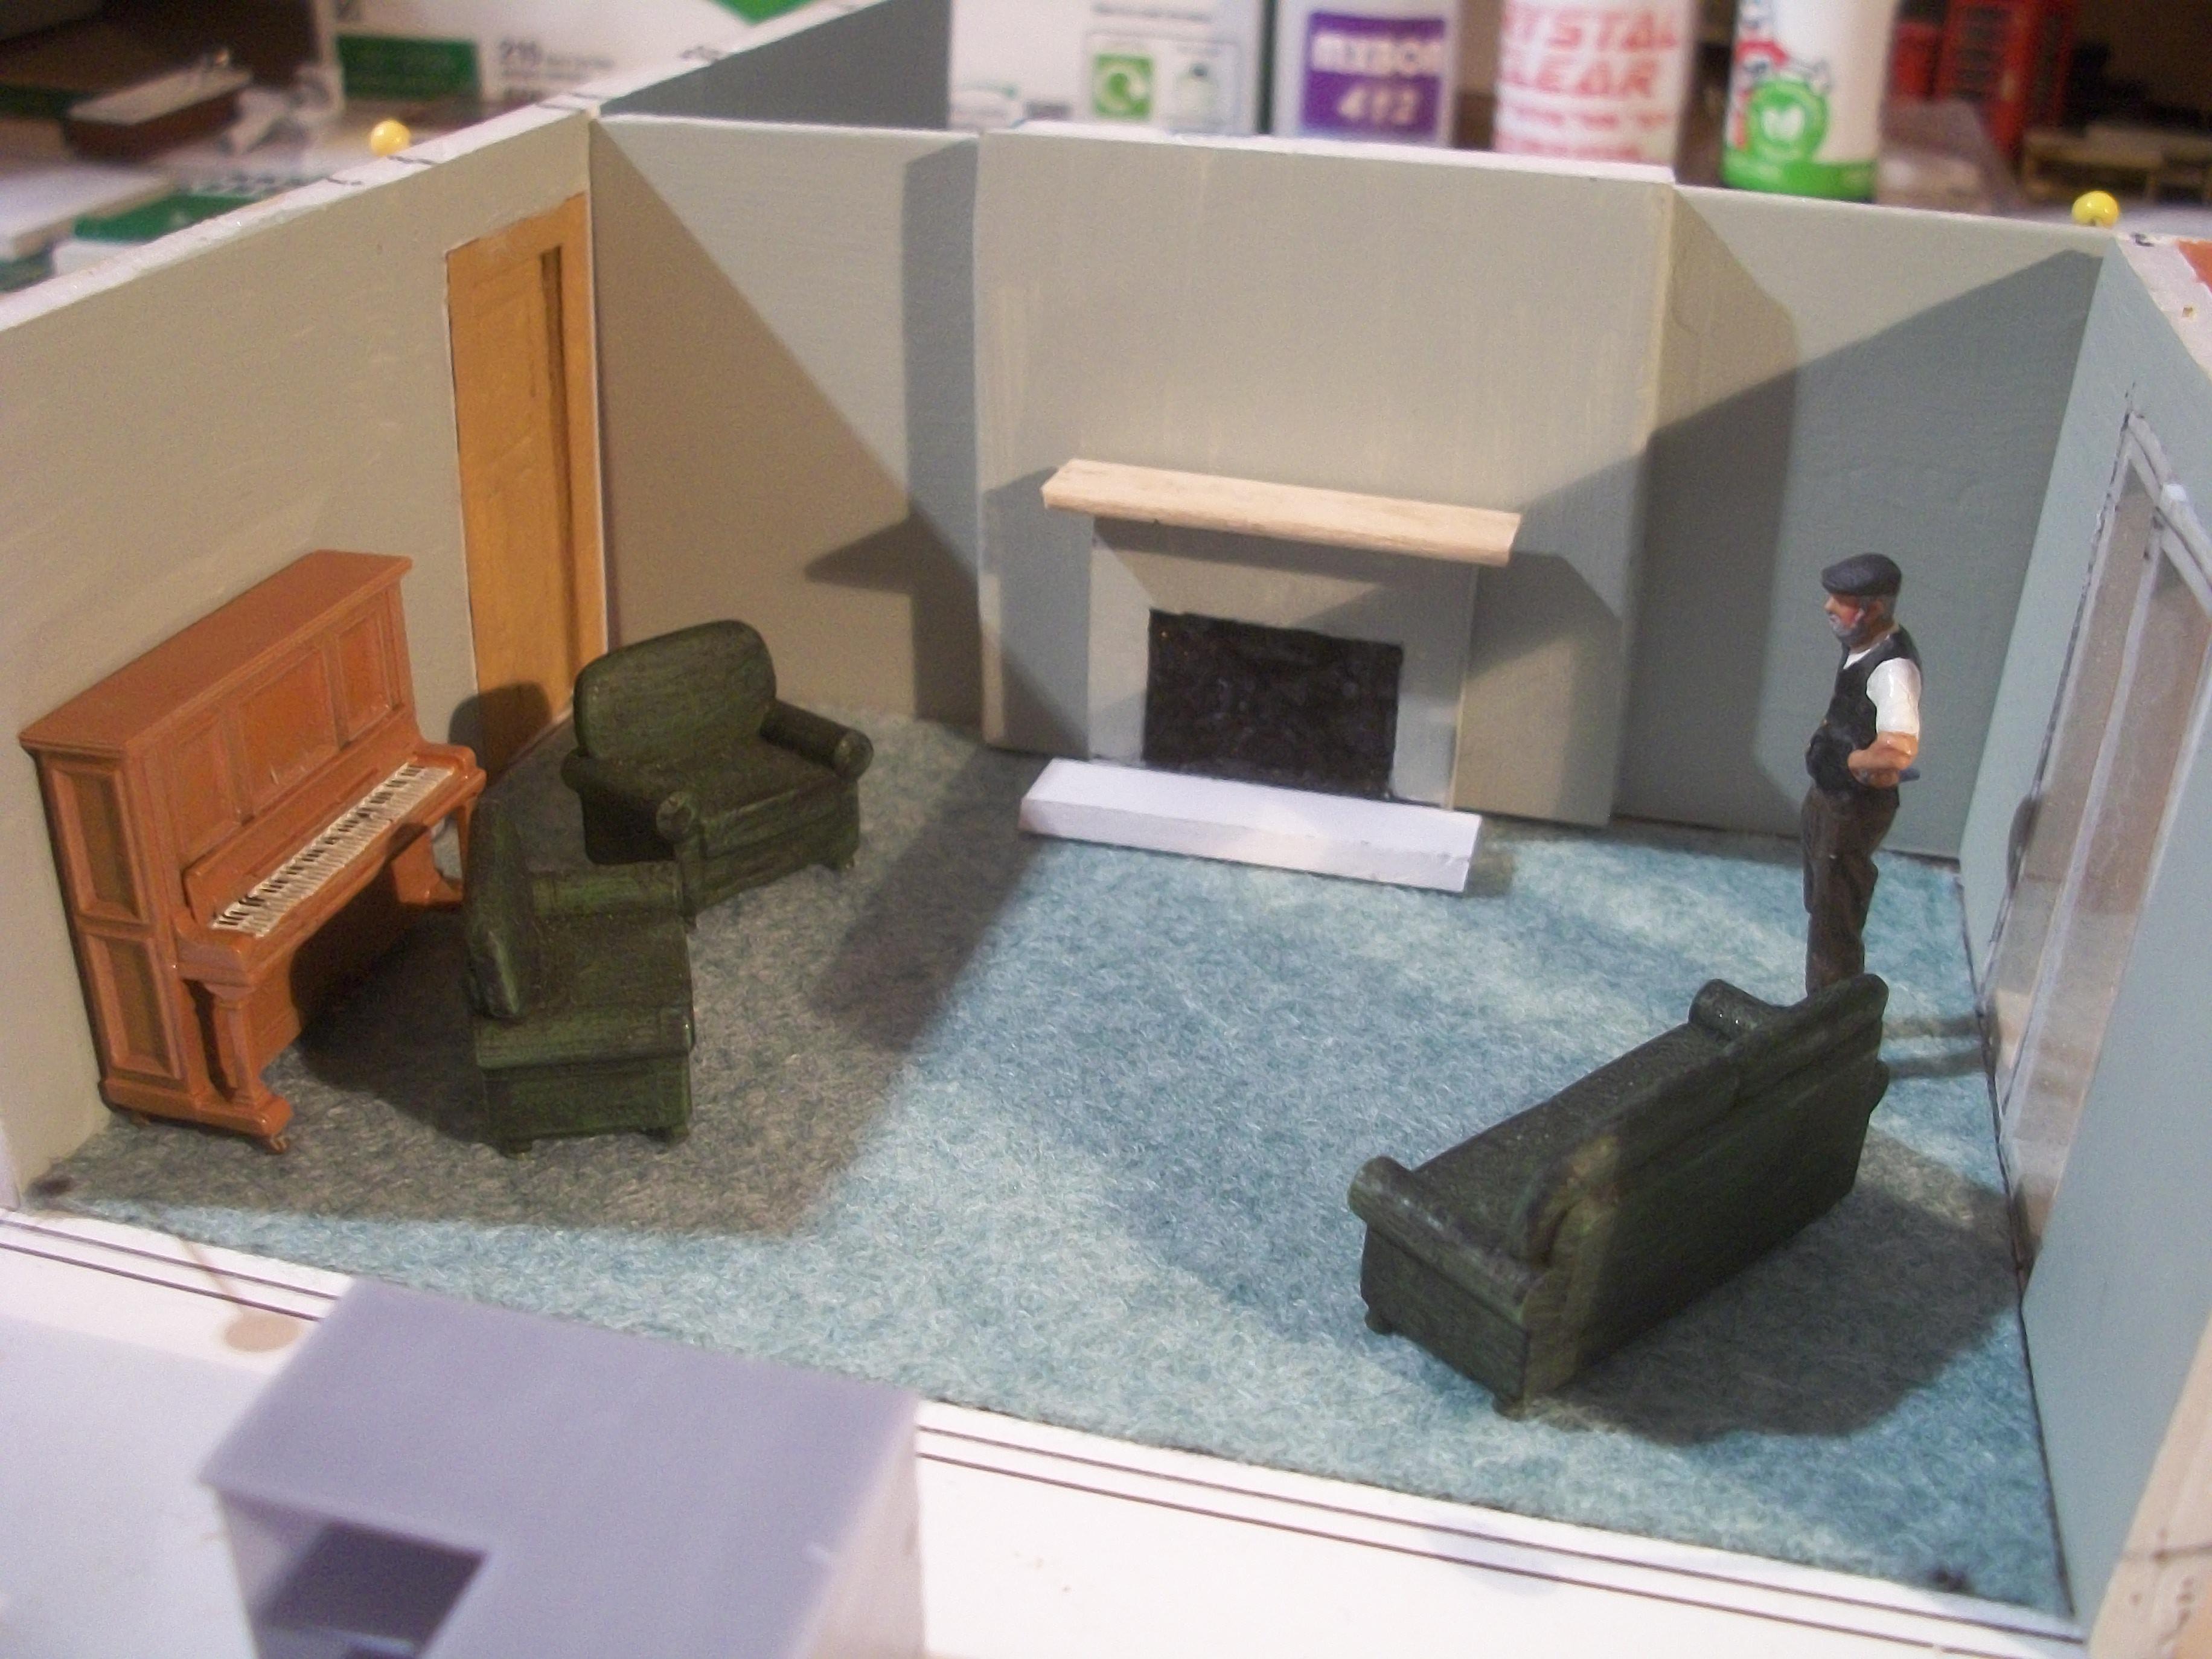
Recent work over the past few days has included painting the seat bases of the dining chairs in Vallejo Deep Sky Blue acrylic, and also the frames of these chairs have been given a coat of Vallejo Burnt Umber acrylic . . . Further work was done on the eight brick headers that will be placed below each of the exterior window frames. I have used Johnstone's Tile Red for these brick headers. While the paint was drying overnight on the chairs and brick headers, I worked on an idea for the hearth tiles on the kitchen fireplace. This involved sanding the edges of the hearth stone, and also scoring lines for the tiles. Now I shall need a suitable dark blue paint for the hearth tiles, and when the living room fireplace is done in the same way, this will have dark green hearth tiles . . . Four of the eight brick headers have been glued in place, using super glue, having tried PVA glue which did not work. The kitchen cupboards corner unit has been given one coat of Revell 49 Matt Pale Blue, along with the two doors. Both the corner unit top work surface, and also the mantlepiece for the fireplace will be painted with Burnt Umber acrylic shortly . . . David The ' Choose Files ' option is missing from my topic screen, so I cannot upload photos at the moment . . . Here is a link to my Google Drive (10 photos). https://drive.google.com/drive/folders/189M_9A5e4wAItApCsJtXlVbufSeBIYA9
-
That is a nice dirty realistic shop scene John . . . Just right for your Chevelle too. David
-
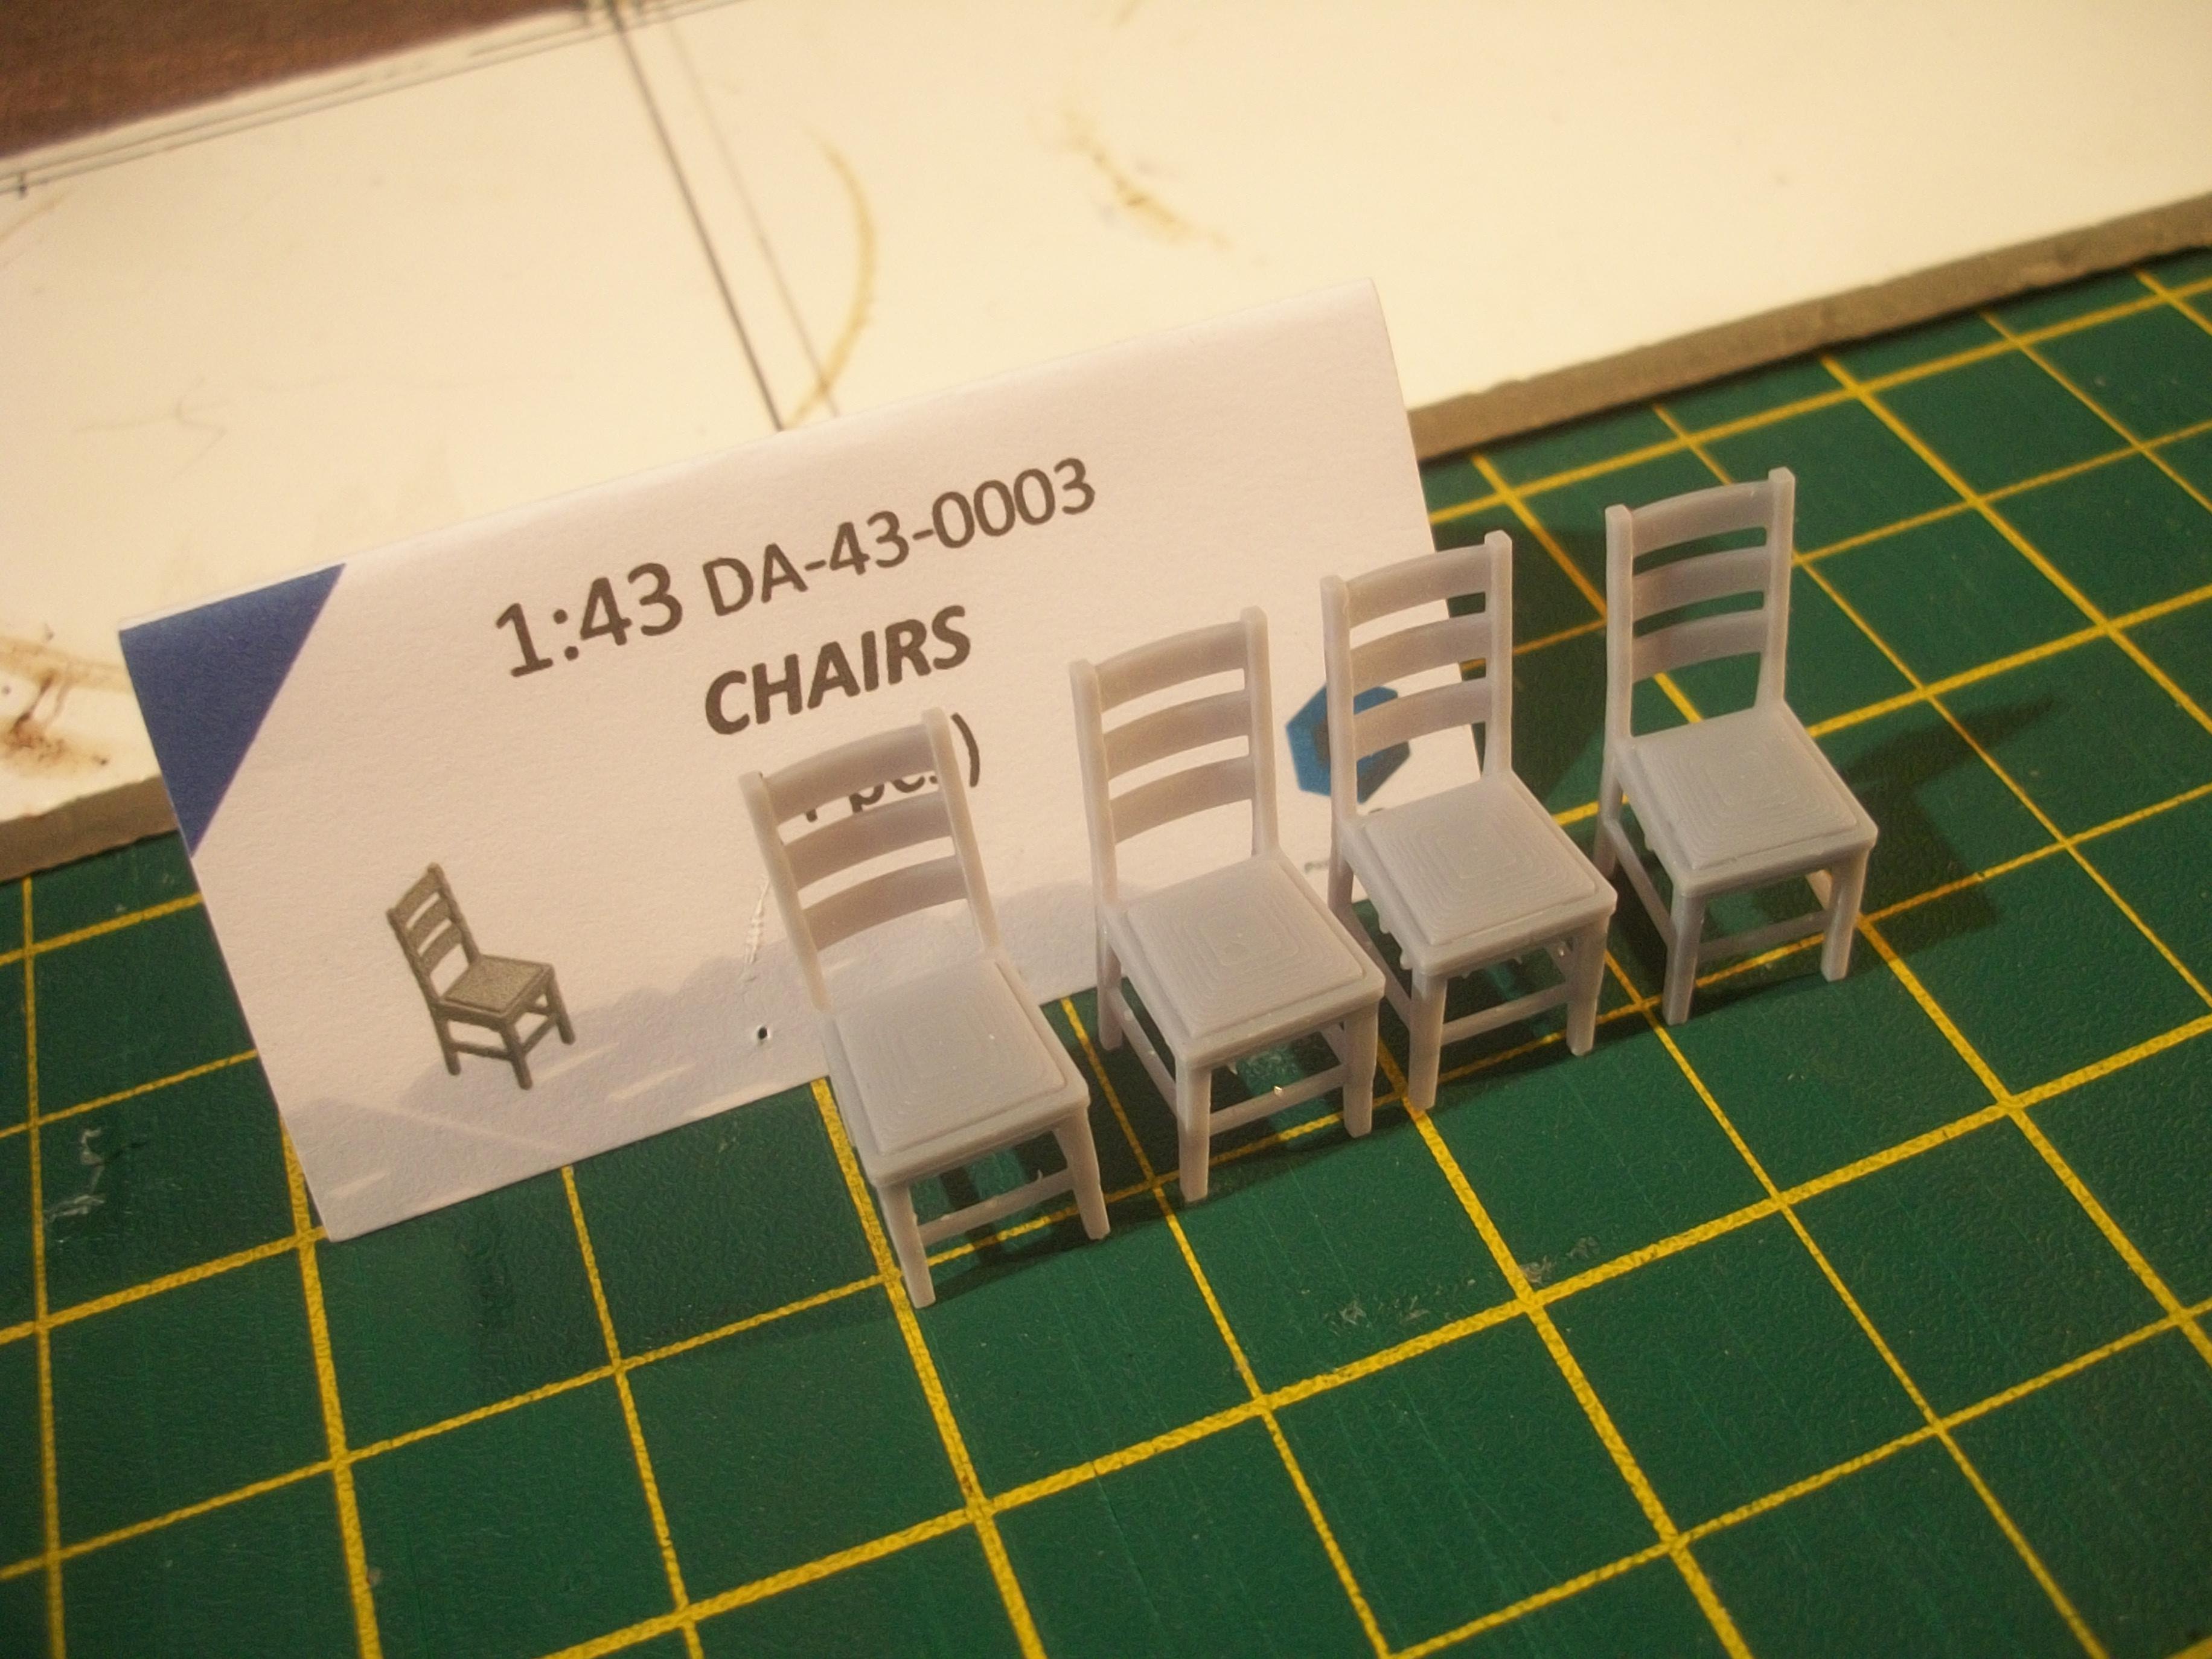
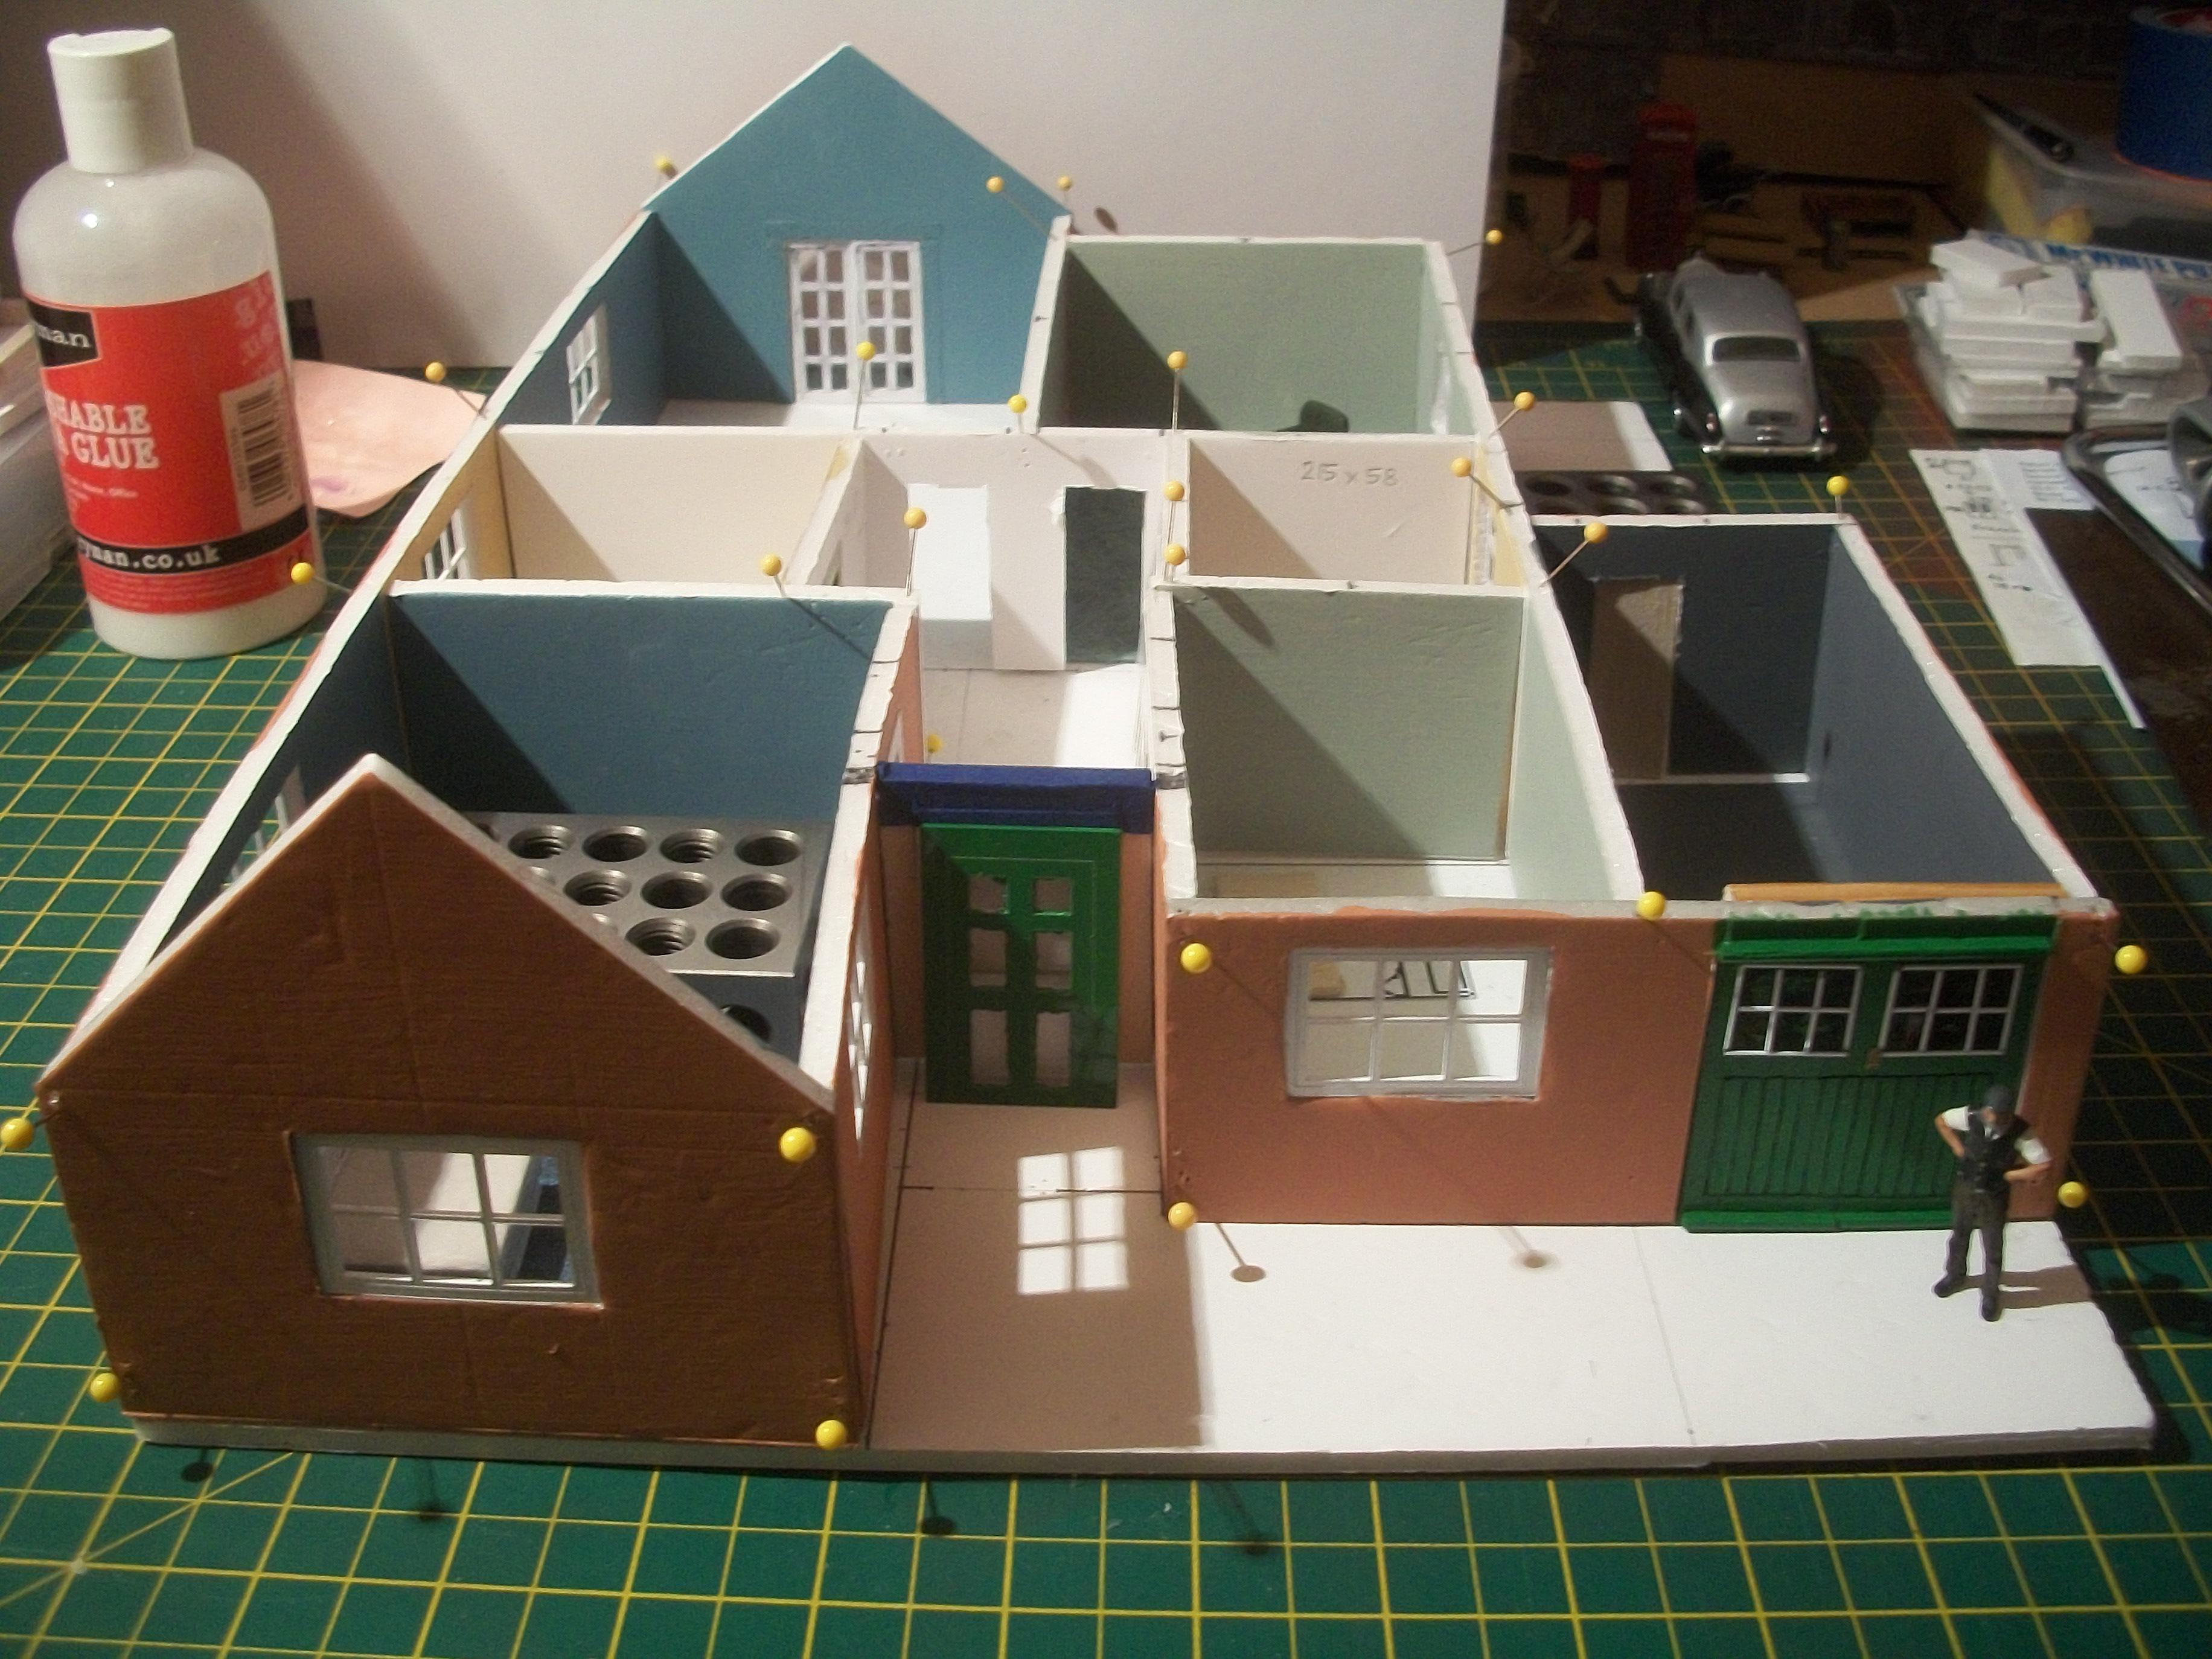
Both of the tables, so one for the kitchen and one for the living room. have been been given one coat of Vallejo Burnt Umber acrylic paint, Once the acrylic had dried overnight, the table tops have been given one coat of yacht varnish, to produce a high gloss shine . . . The wall panel, the chimney breast and the fireplace for the kitchen have been coated with pale blue emulsion paint, while the living room has these areas coated with pale green emulsion paint. Several wall panels are now pinned in place to examine the alignment and to double check precise measurements. Some 3D printed furniture items arrived in the post today, including four dining chairs for the kitchen, and also a corner cupboards unit for the kitchen. These pieces have been washed in hot soapy water, rinsed and dried, with one coat of Humbrol Light Grey Acrylic applied from rattle can. Following overnight drying, the chairs and corner unit will be ready for detail painting . . . The corner unit comprises four pieces, which are the base unit, the work surface, and two cupboard doors. Here are some up to date photos of the current progress . . . David

-
Thanks a lot Carl . . . I am pleased to hear that you like this work in progress. I hope that you can continue to follow my posts. David
-
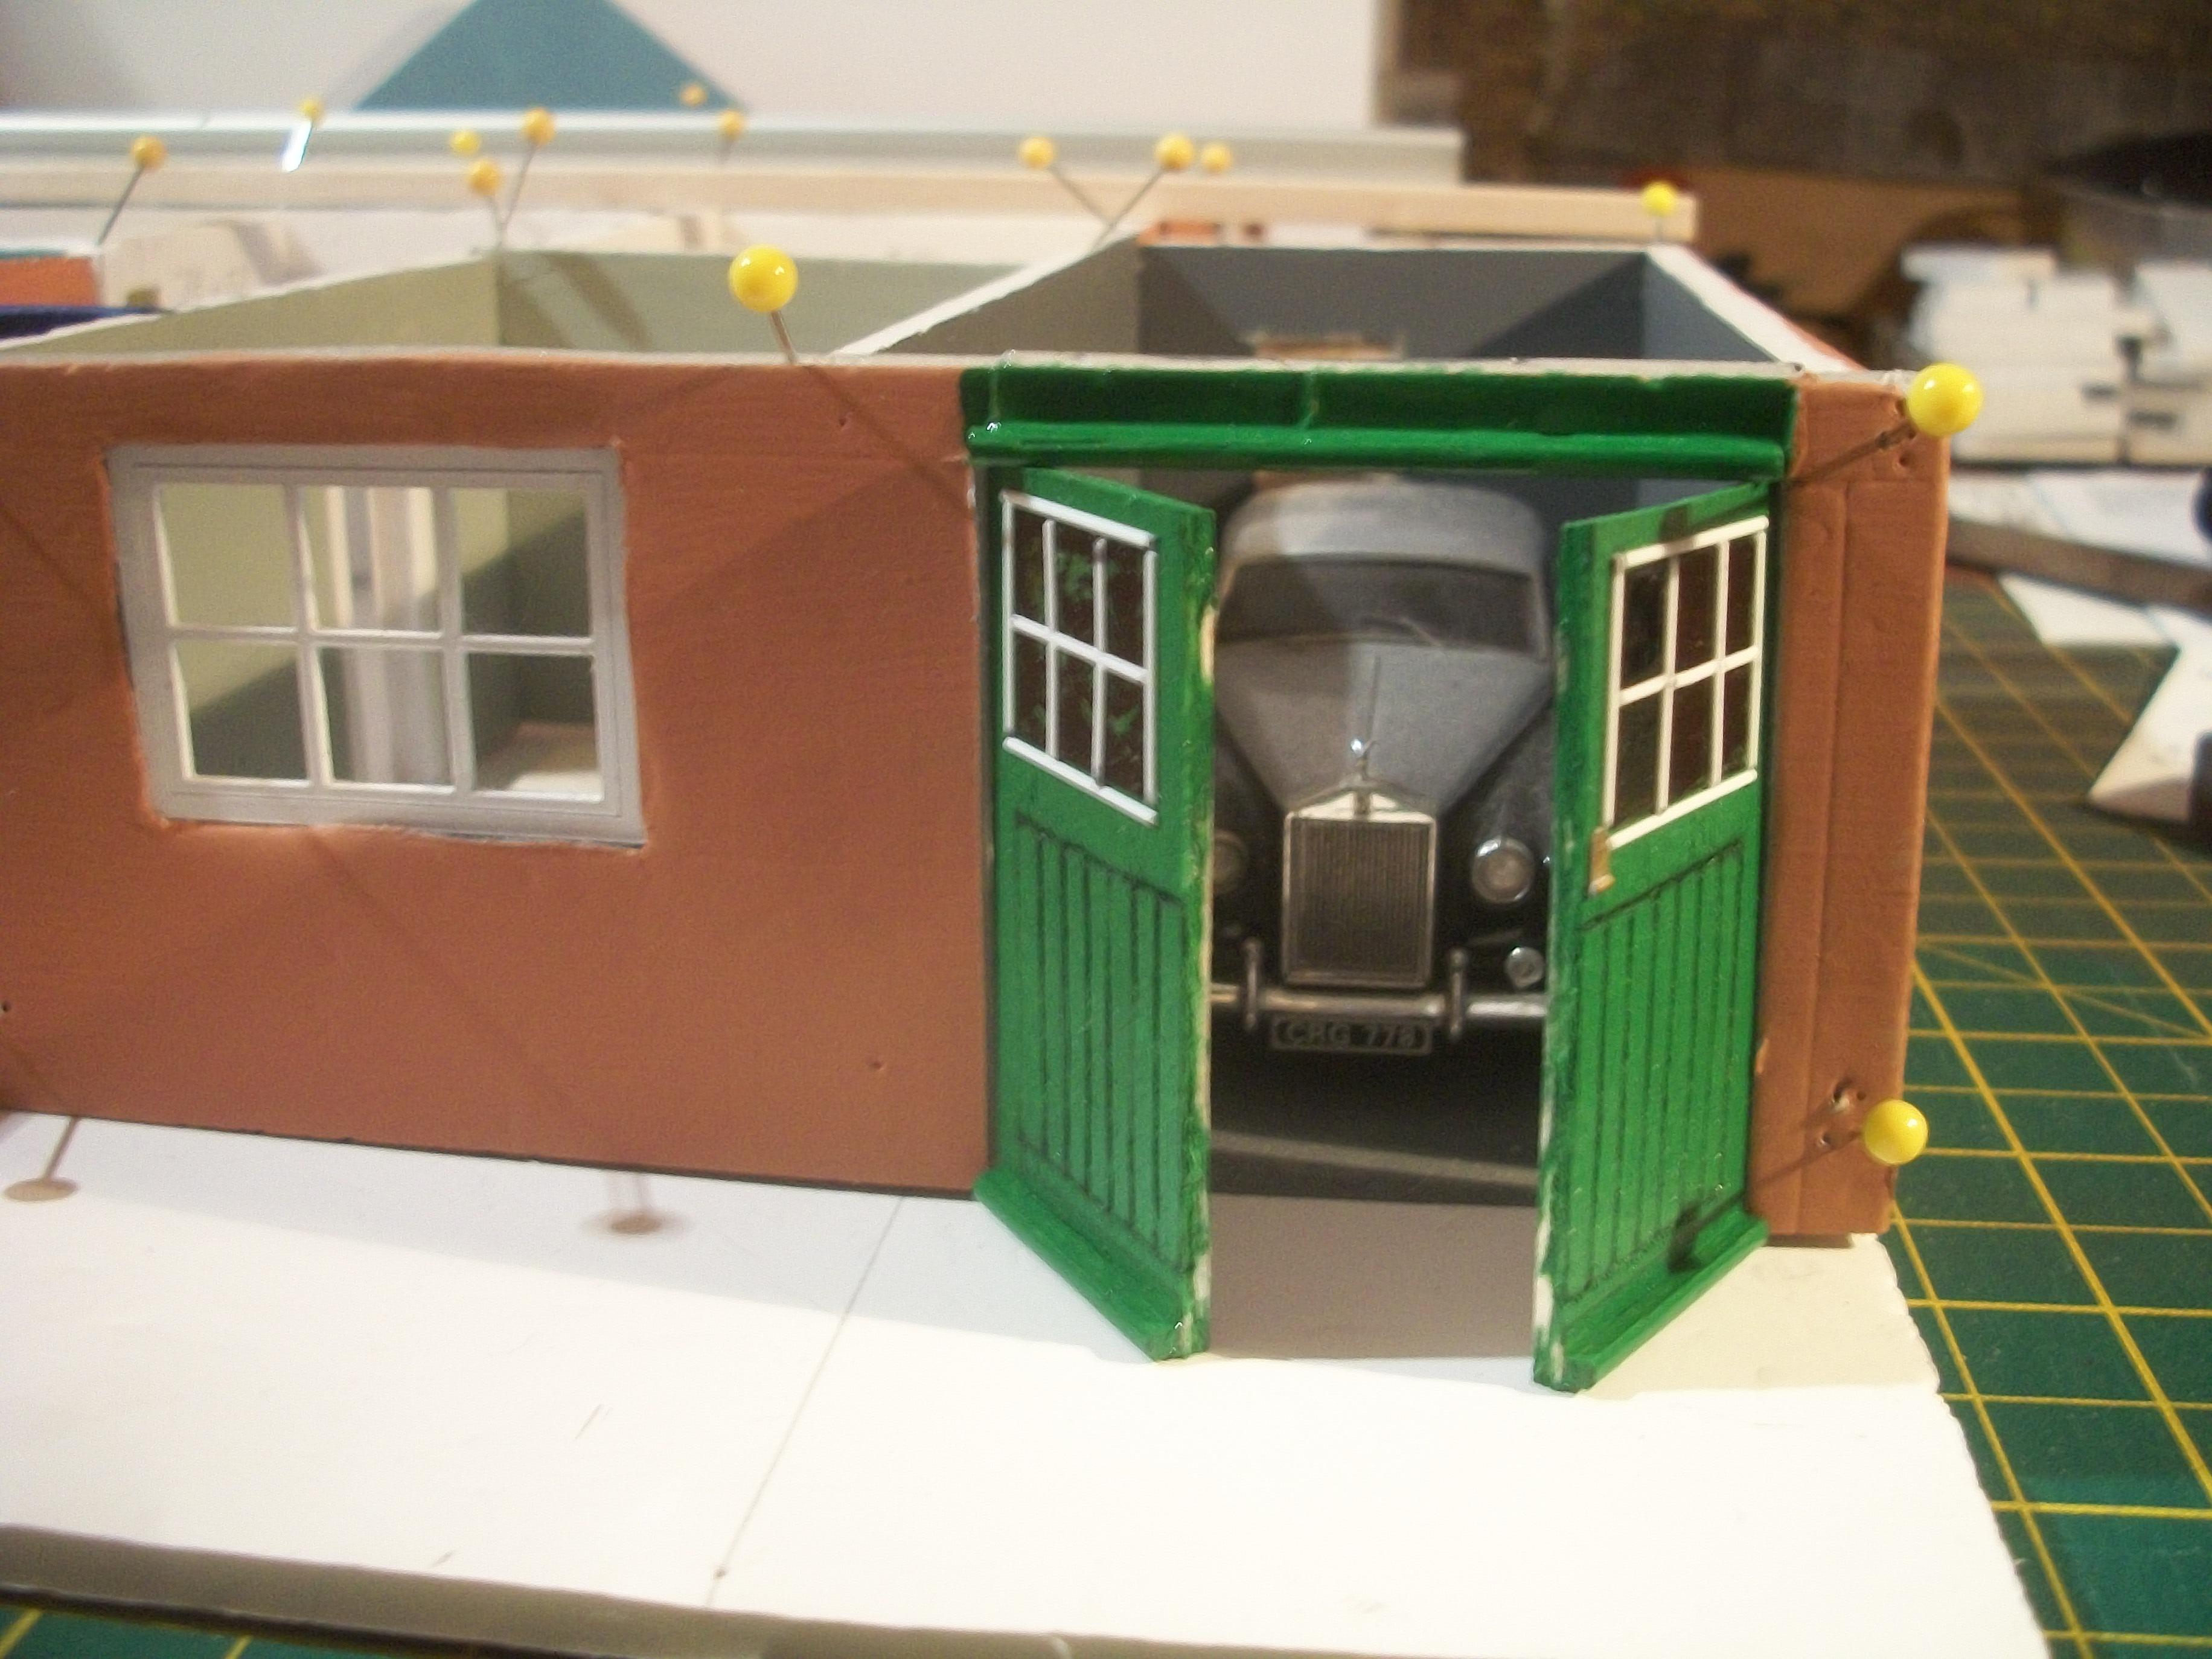
As you pointed out, Steve Grantham, the Rolls-Royce Silver Cloud I is indeed a very tight fit for this garage . . . Lengthways is not a problem, but to reverse the Rolls-Royce between the narrow door frames is challenging for the driver, to say the least ! David
-
Thank you very much Steve, and what a coincidence that you have used York Model Making / York Model Rail.com , , , Their products are of excellent quality, and I shall be ordering some ridge tiles in O-gauge (1:43) from them soon. This bungalow build is turning out to be most satisfying, and as you have found with the structures that you have built, making use of different materials provides a flexible approach to the overall structure of the building . . . David
-
Thanks a lot Paul . . . Hope your model building projects are going well . . . David
-
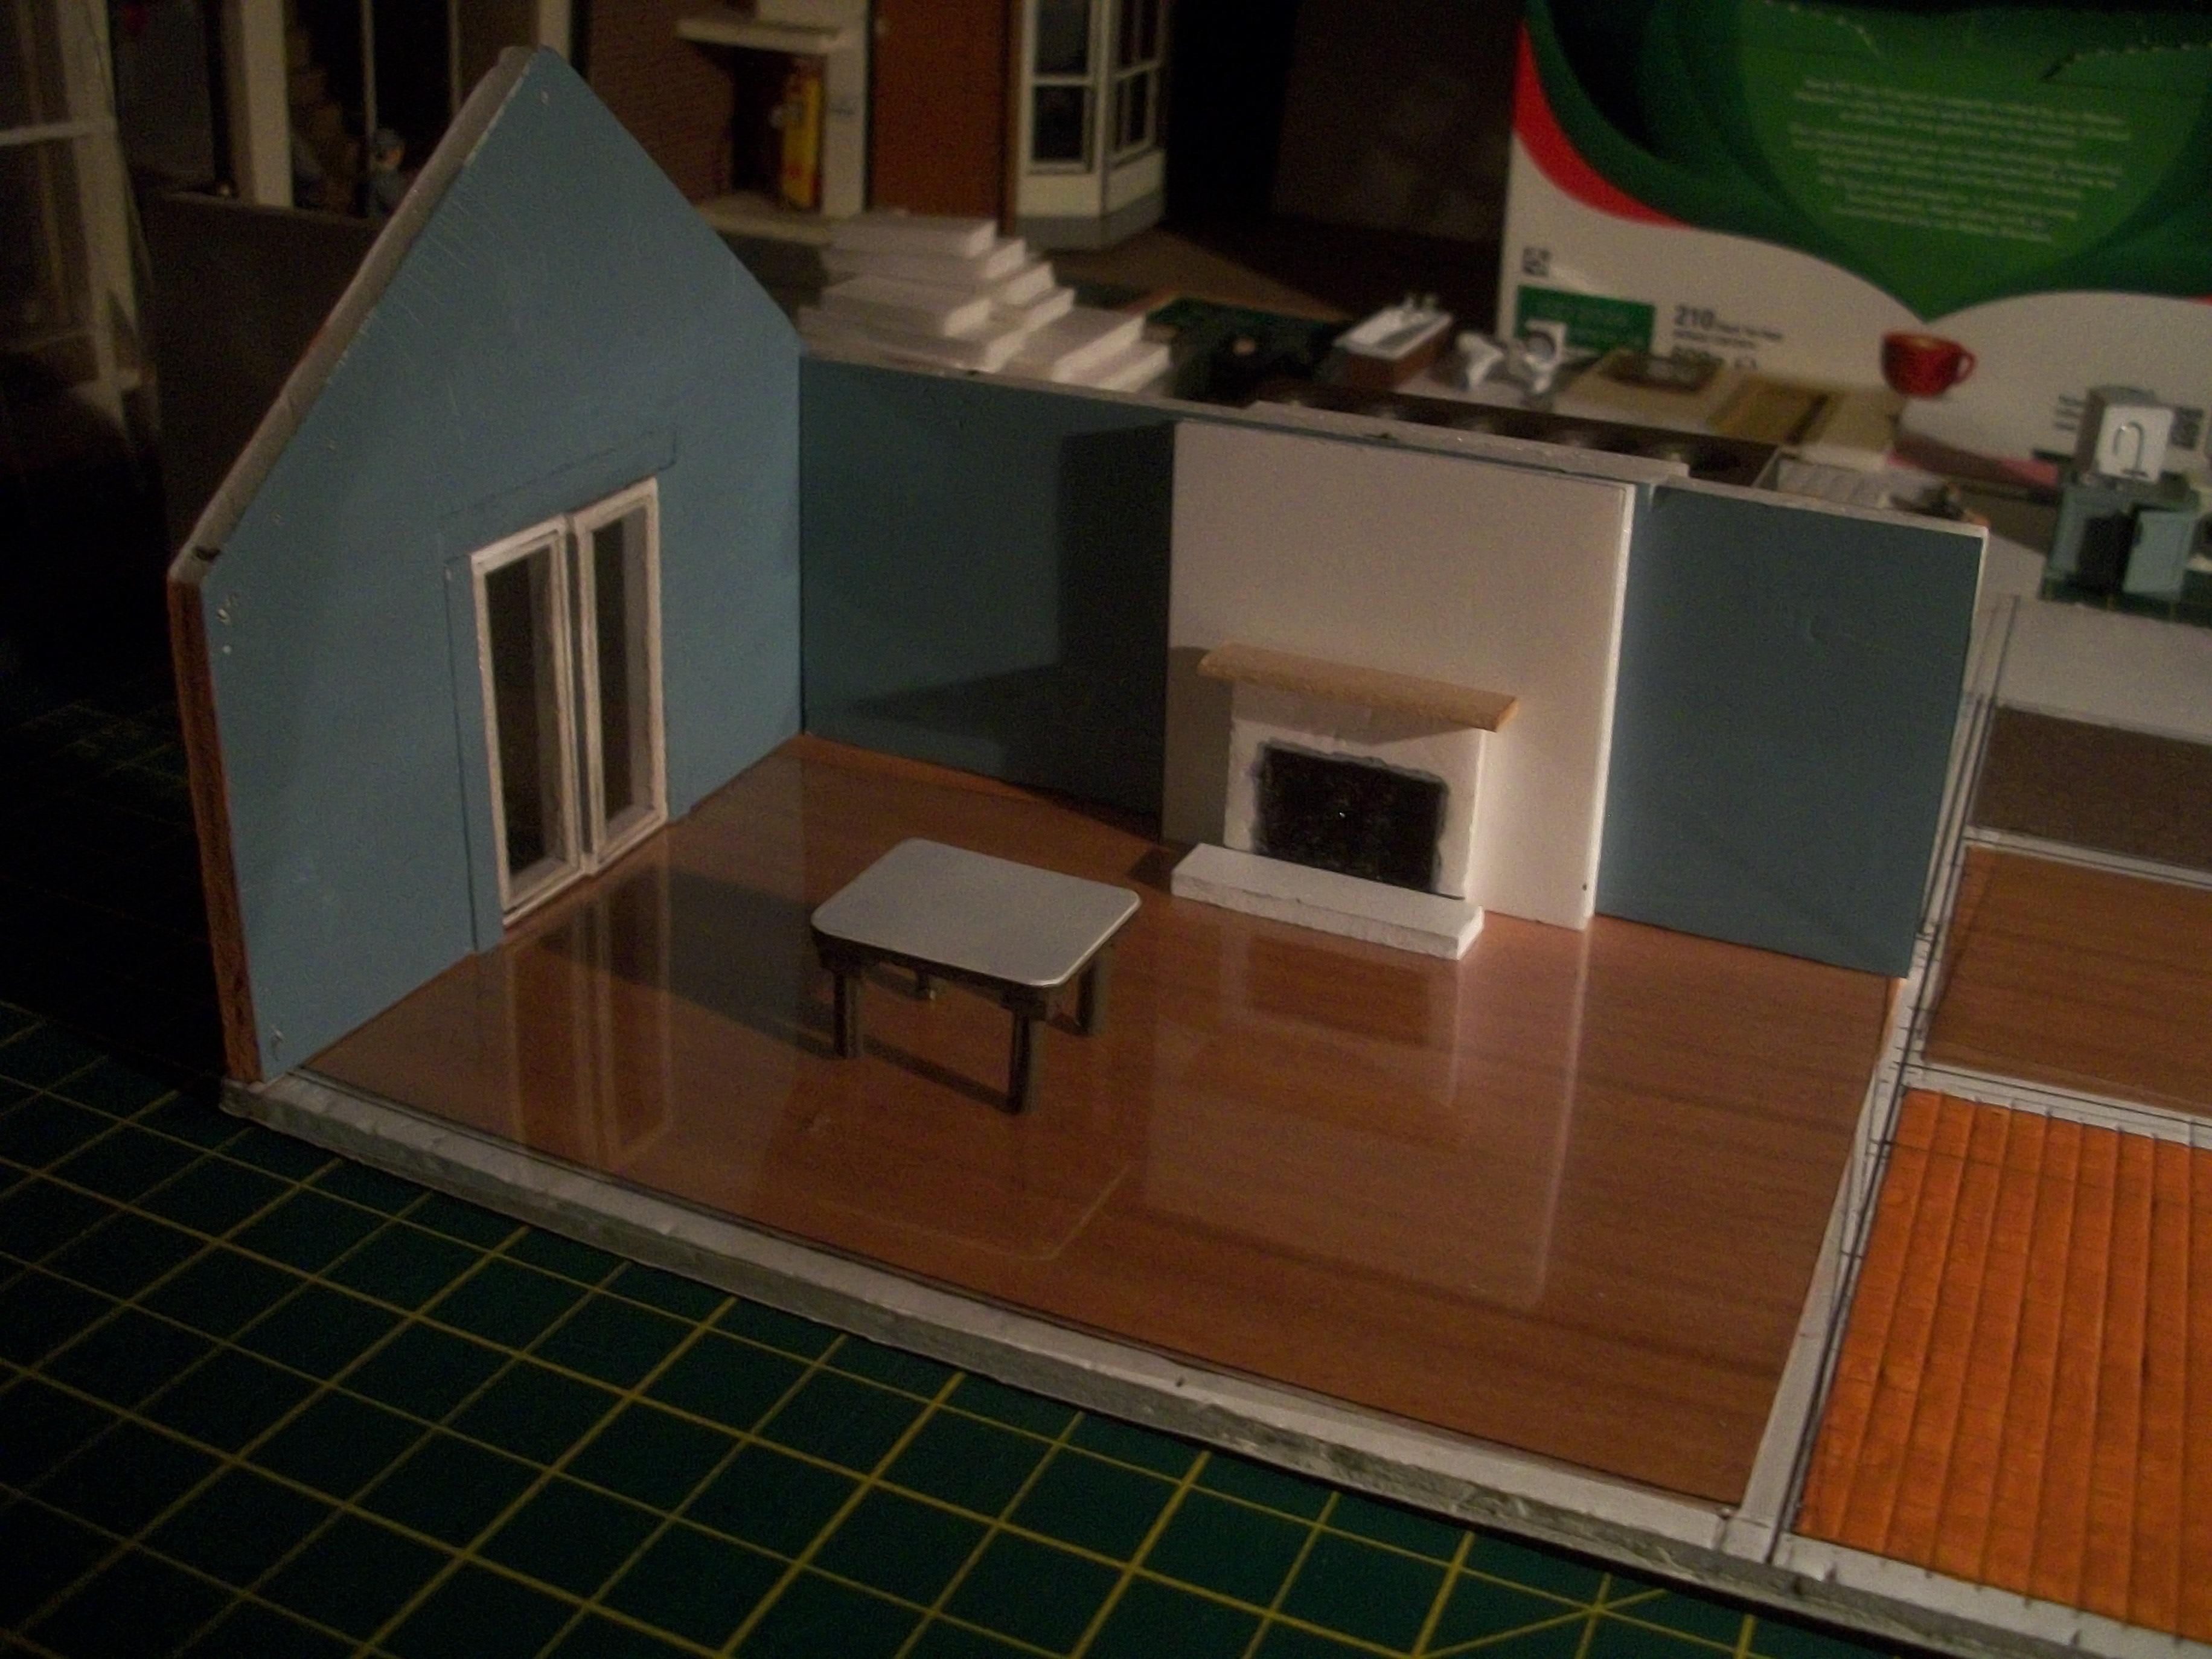
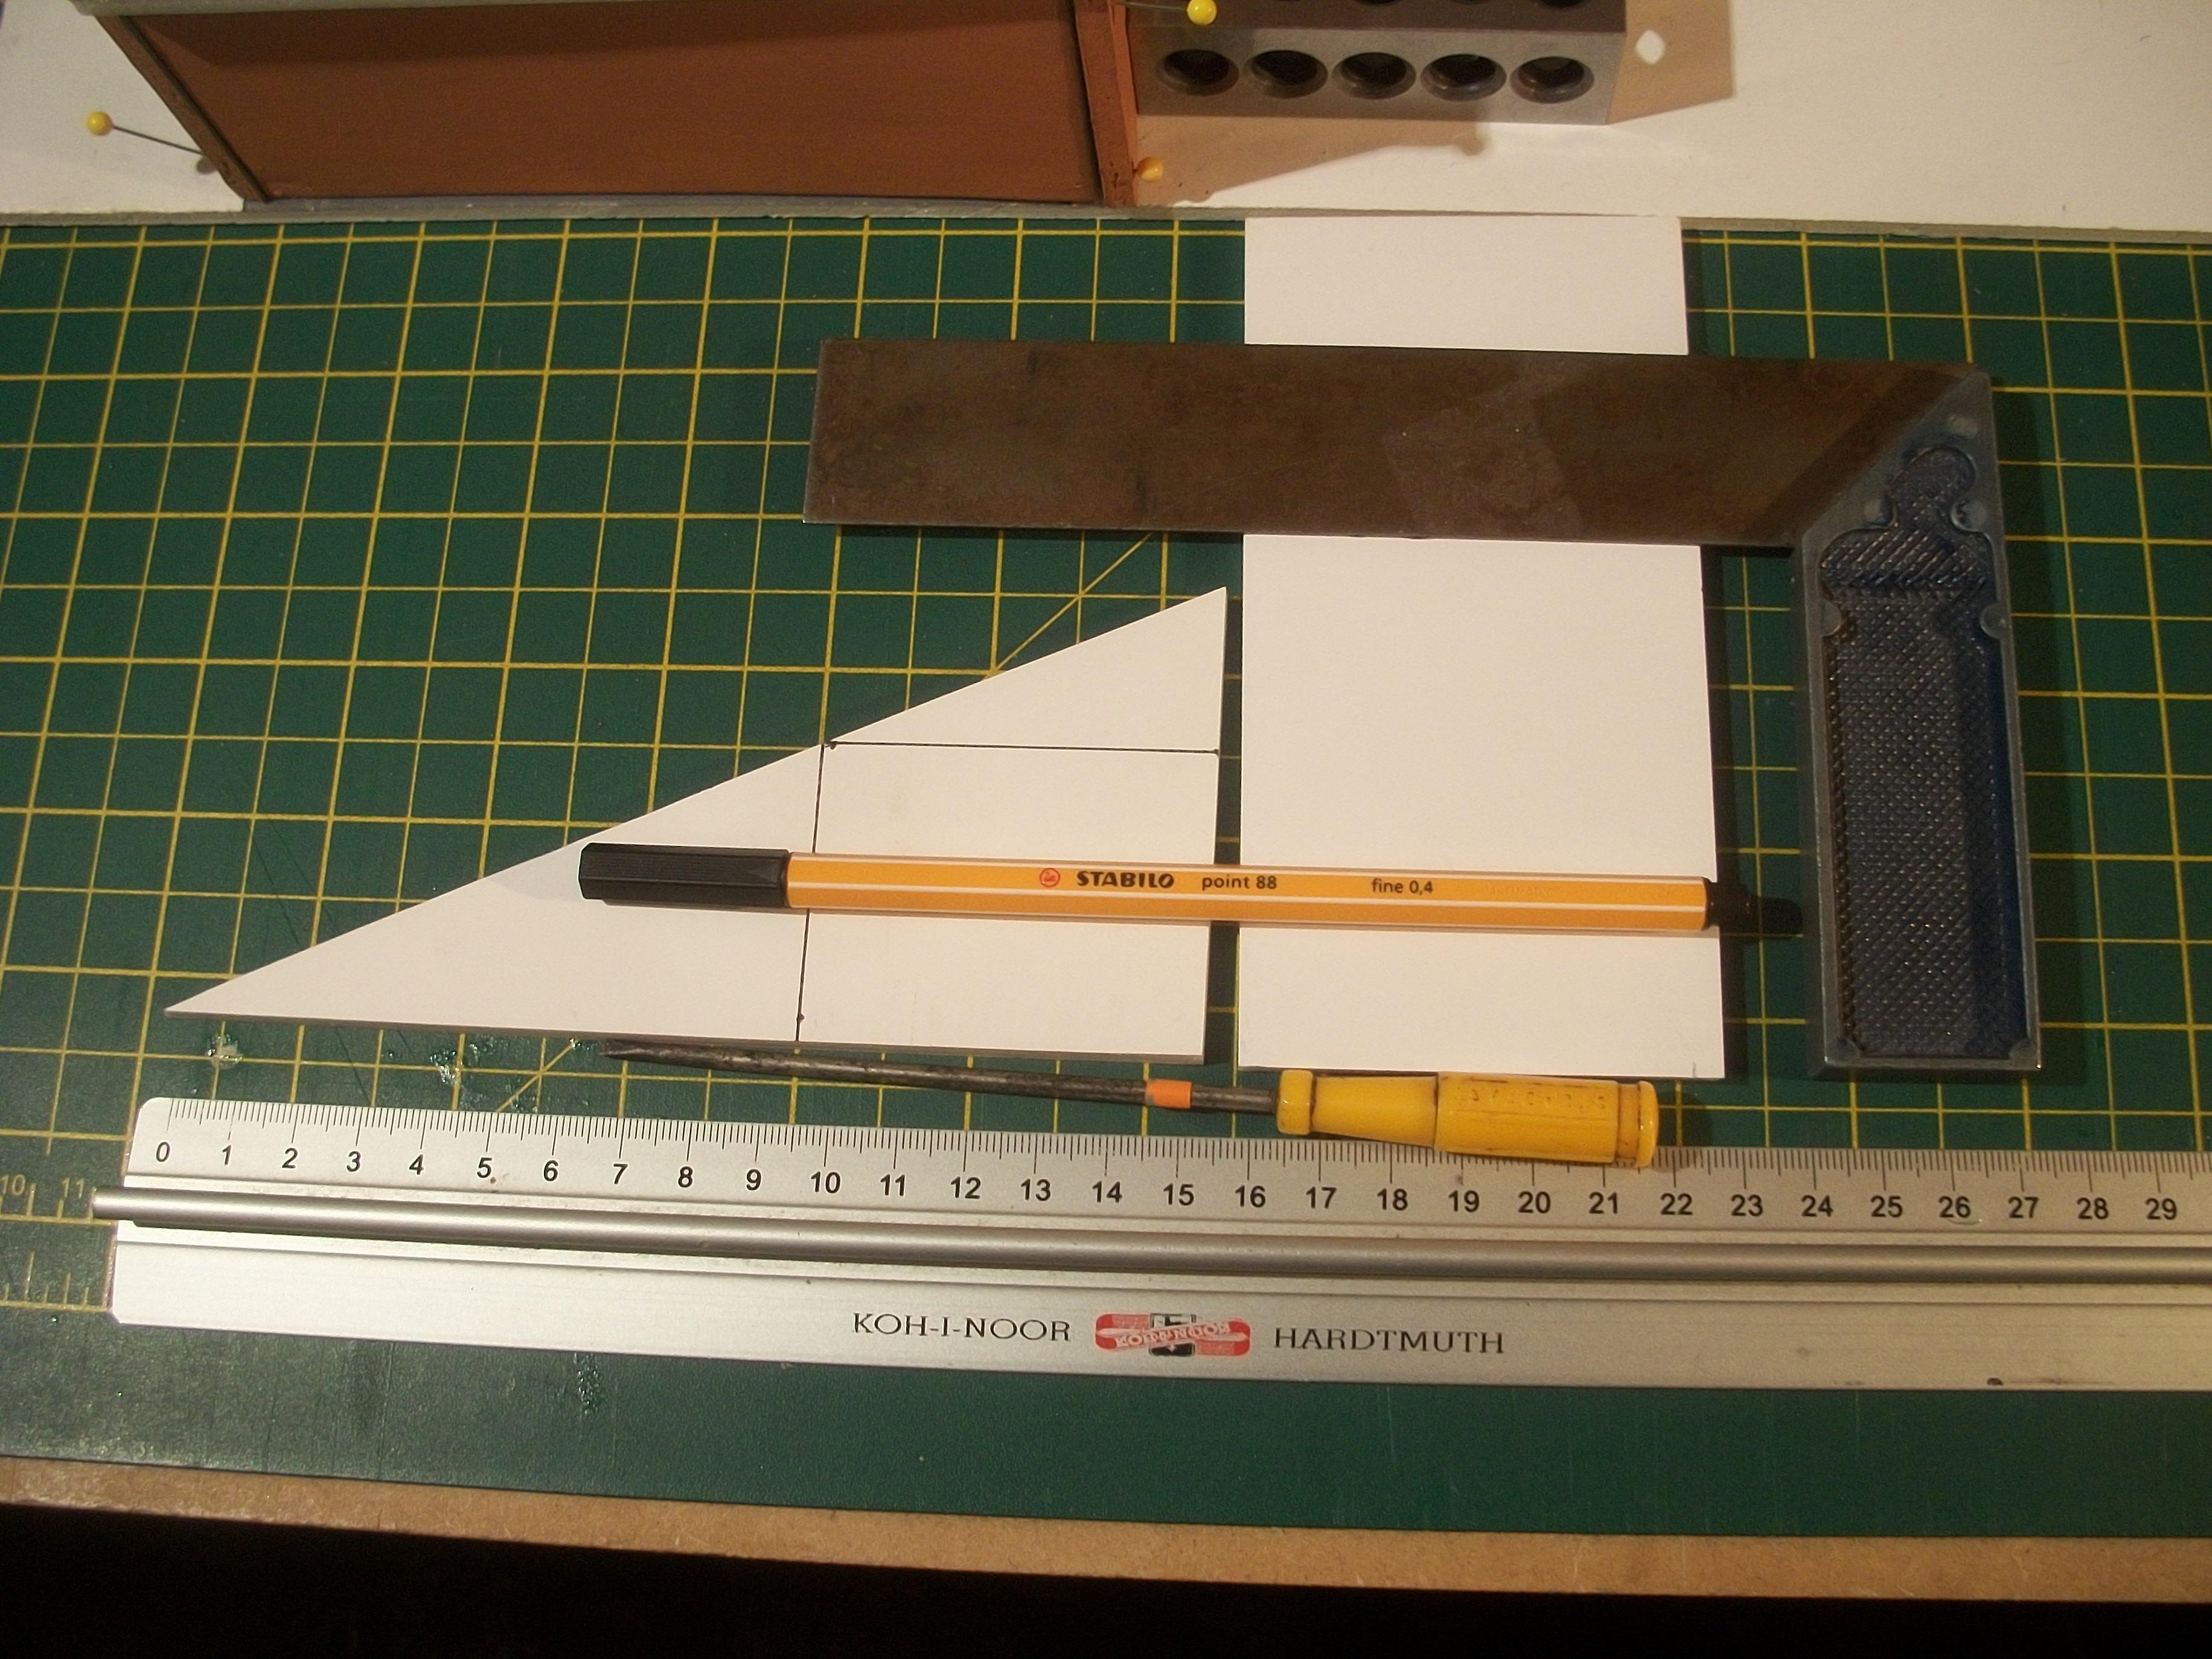
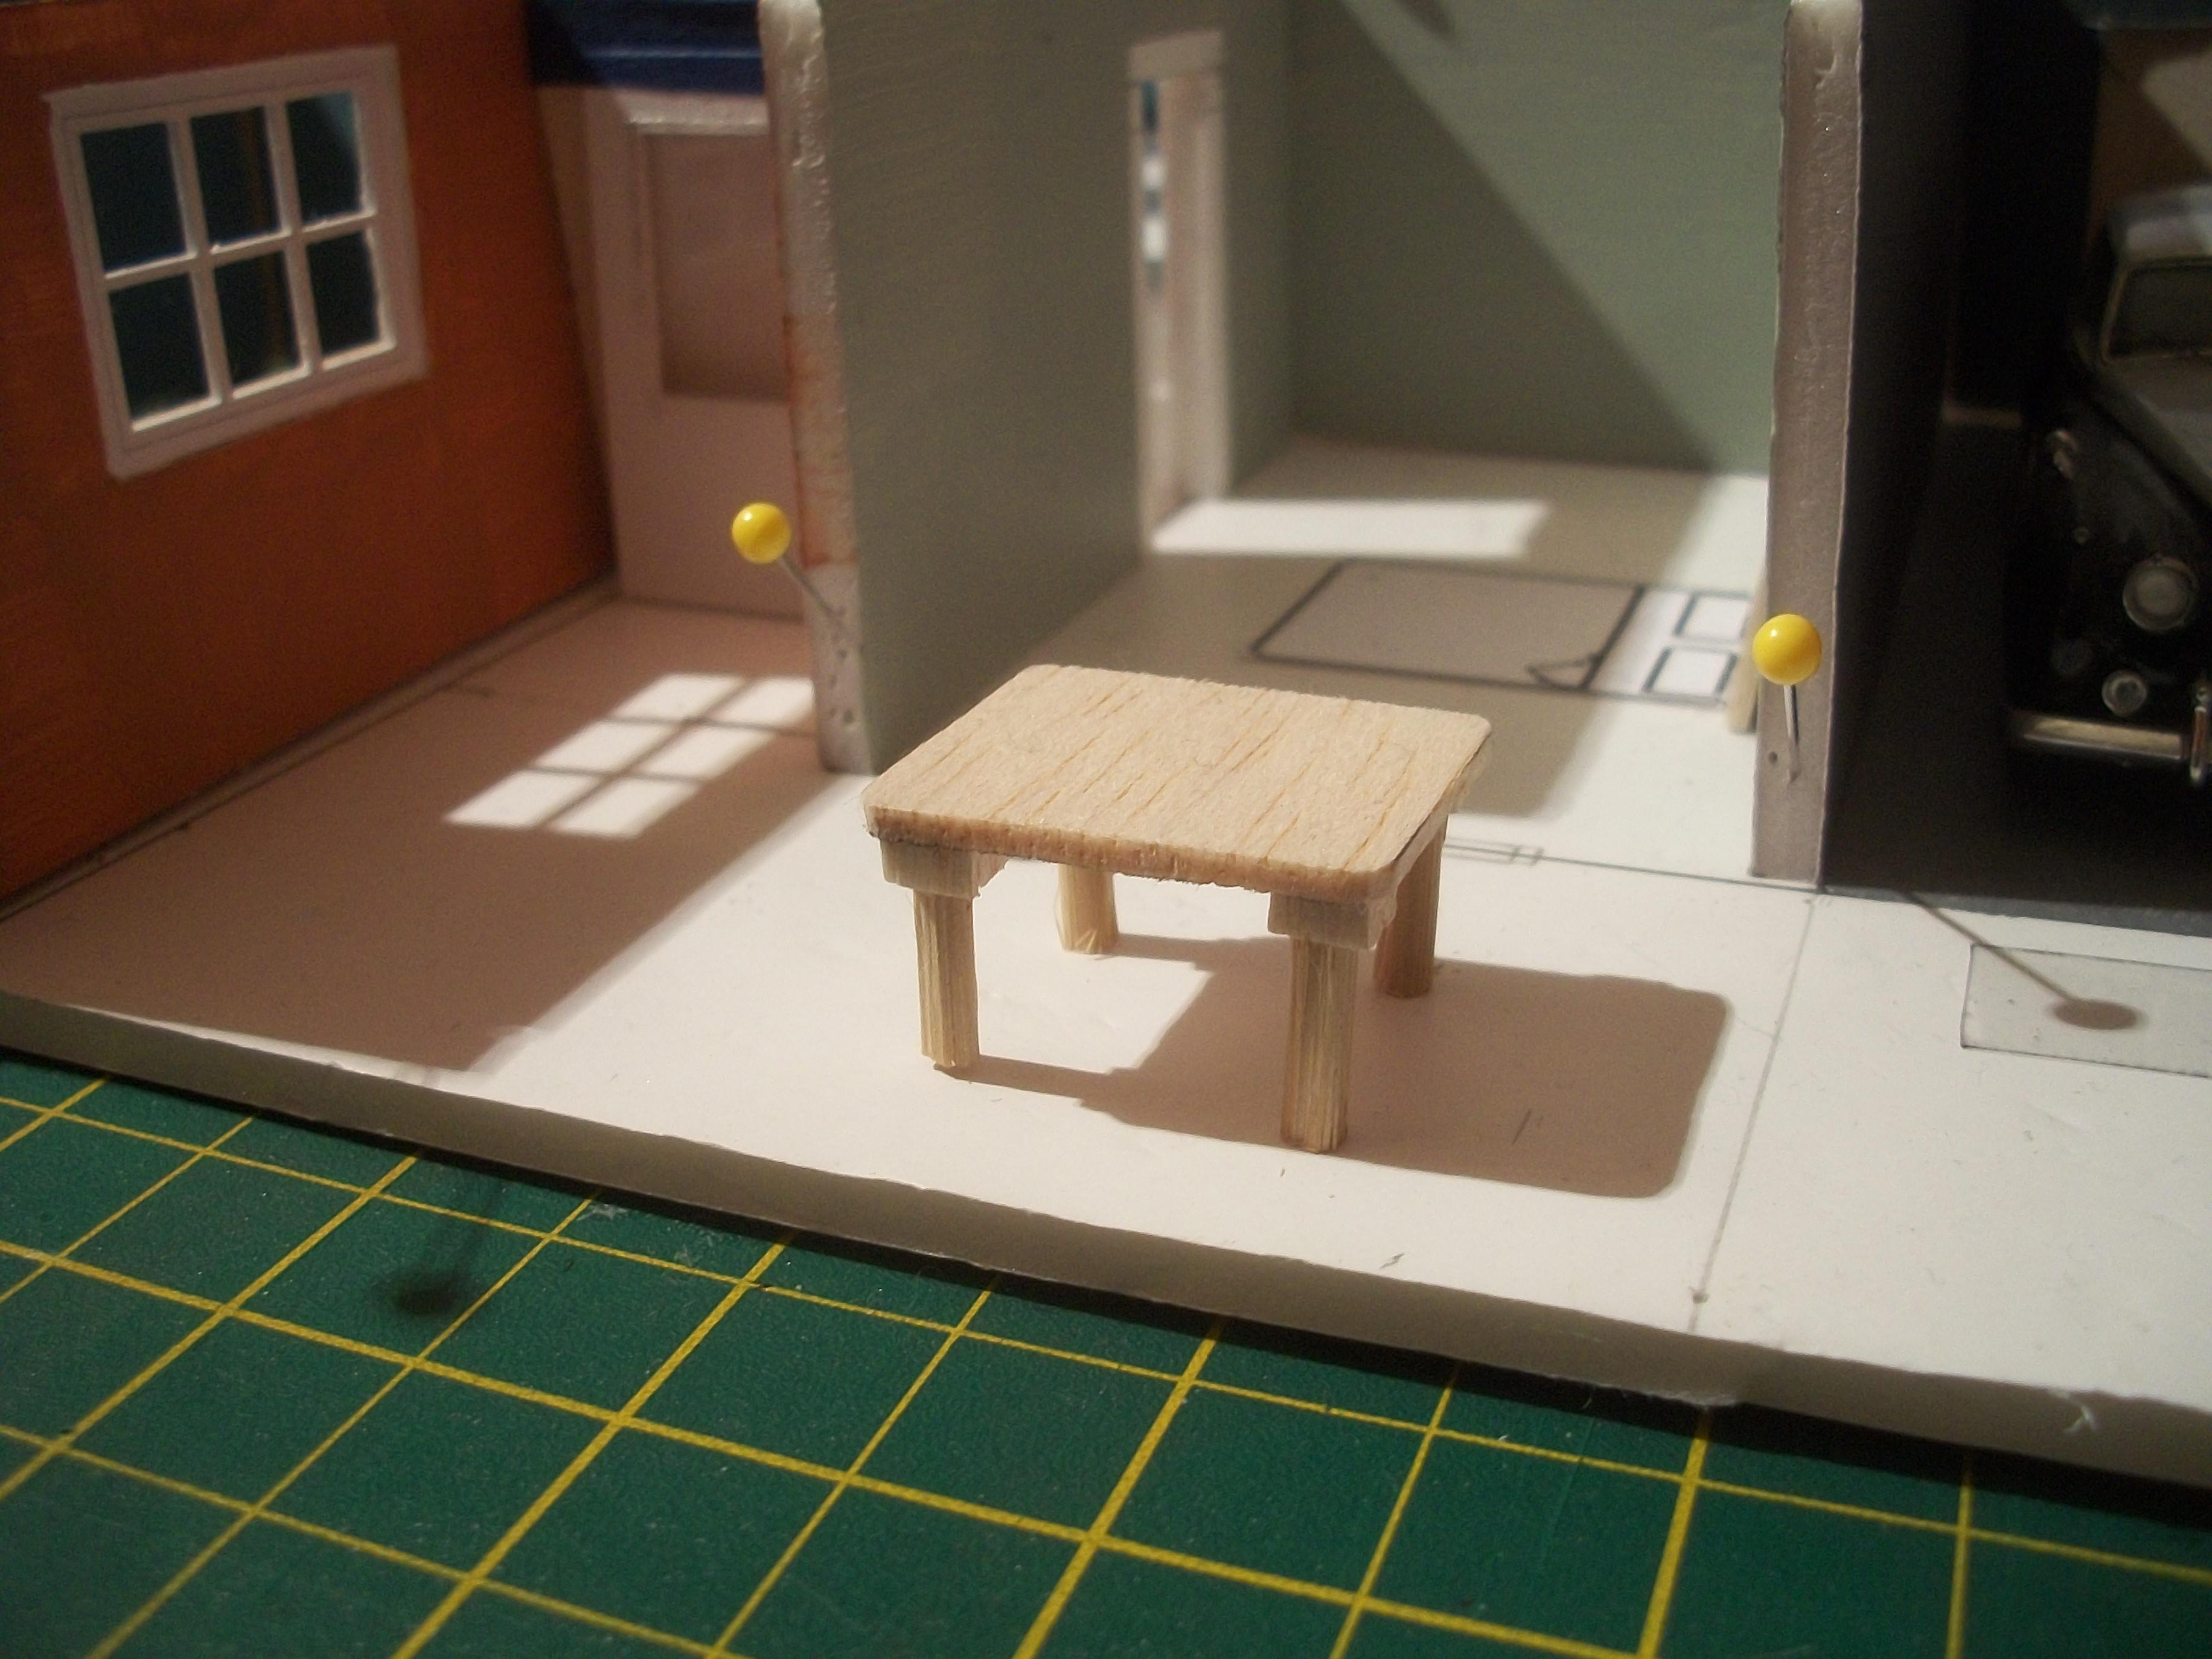
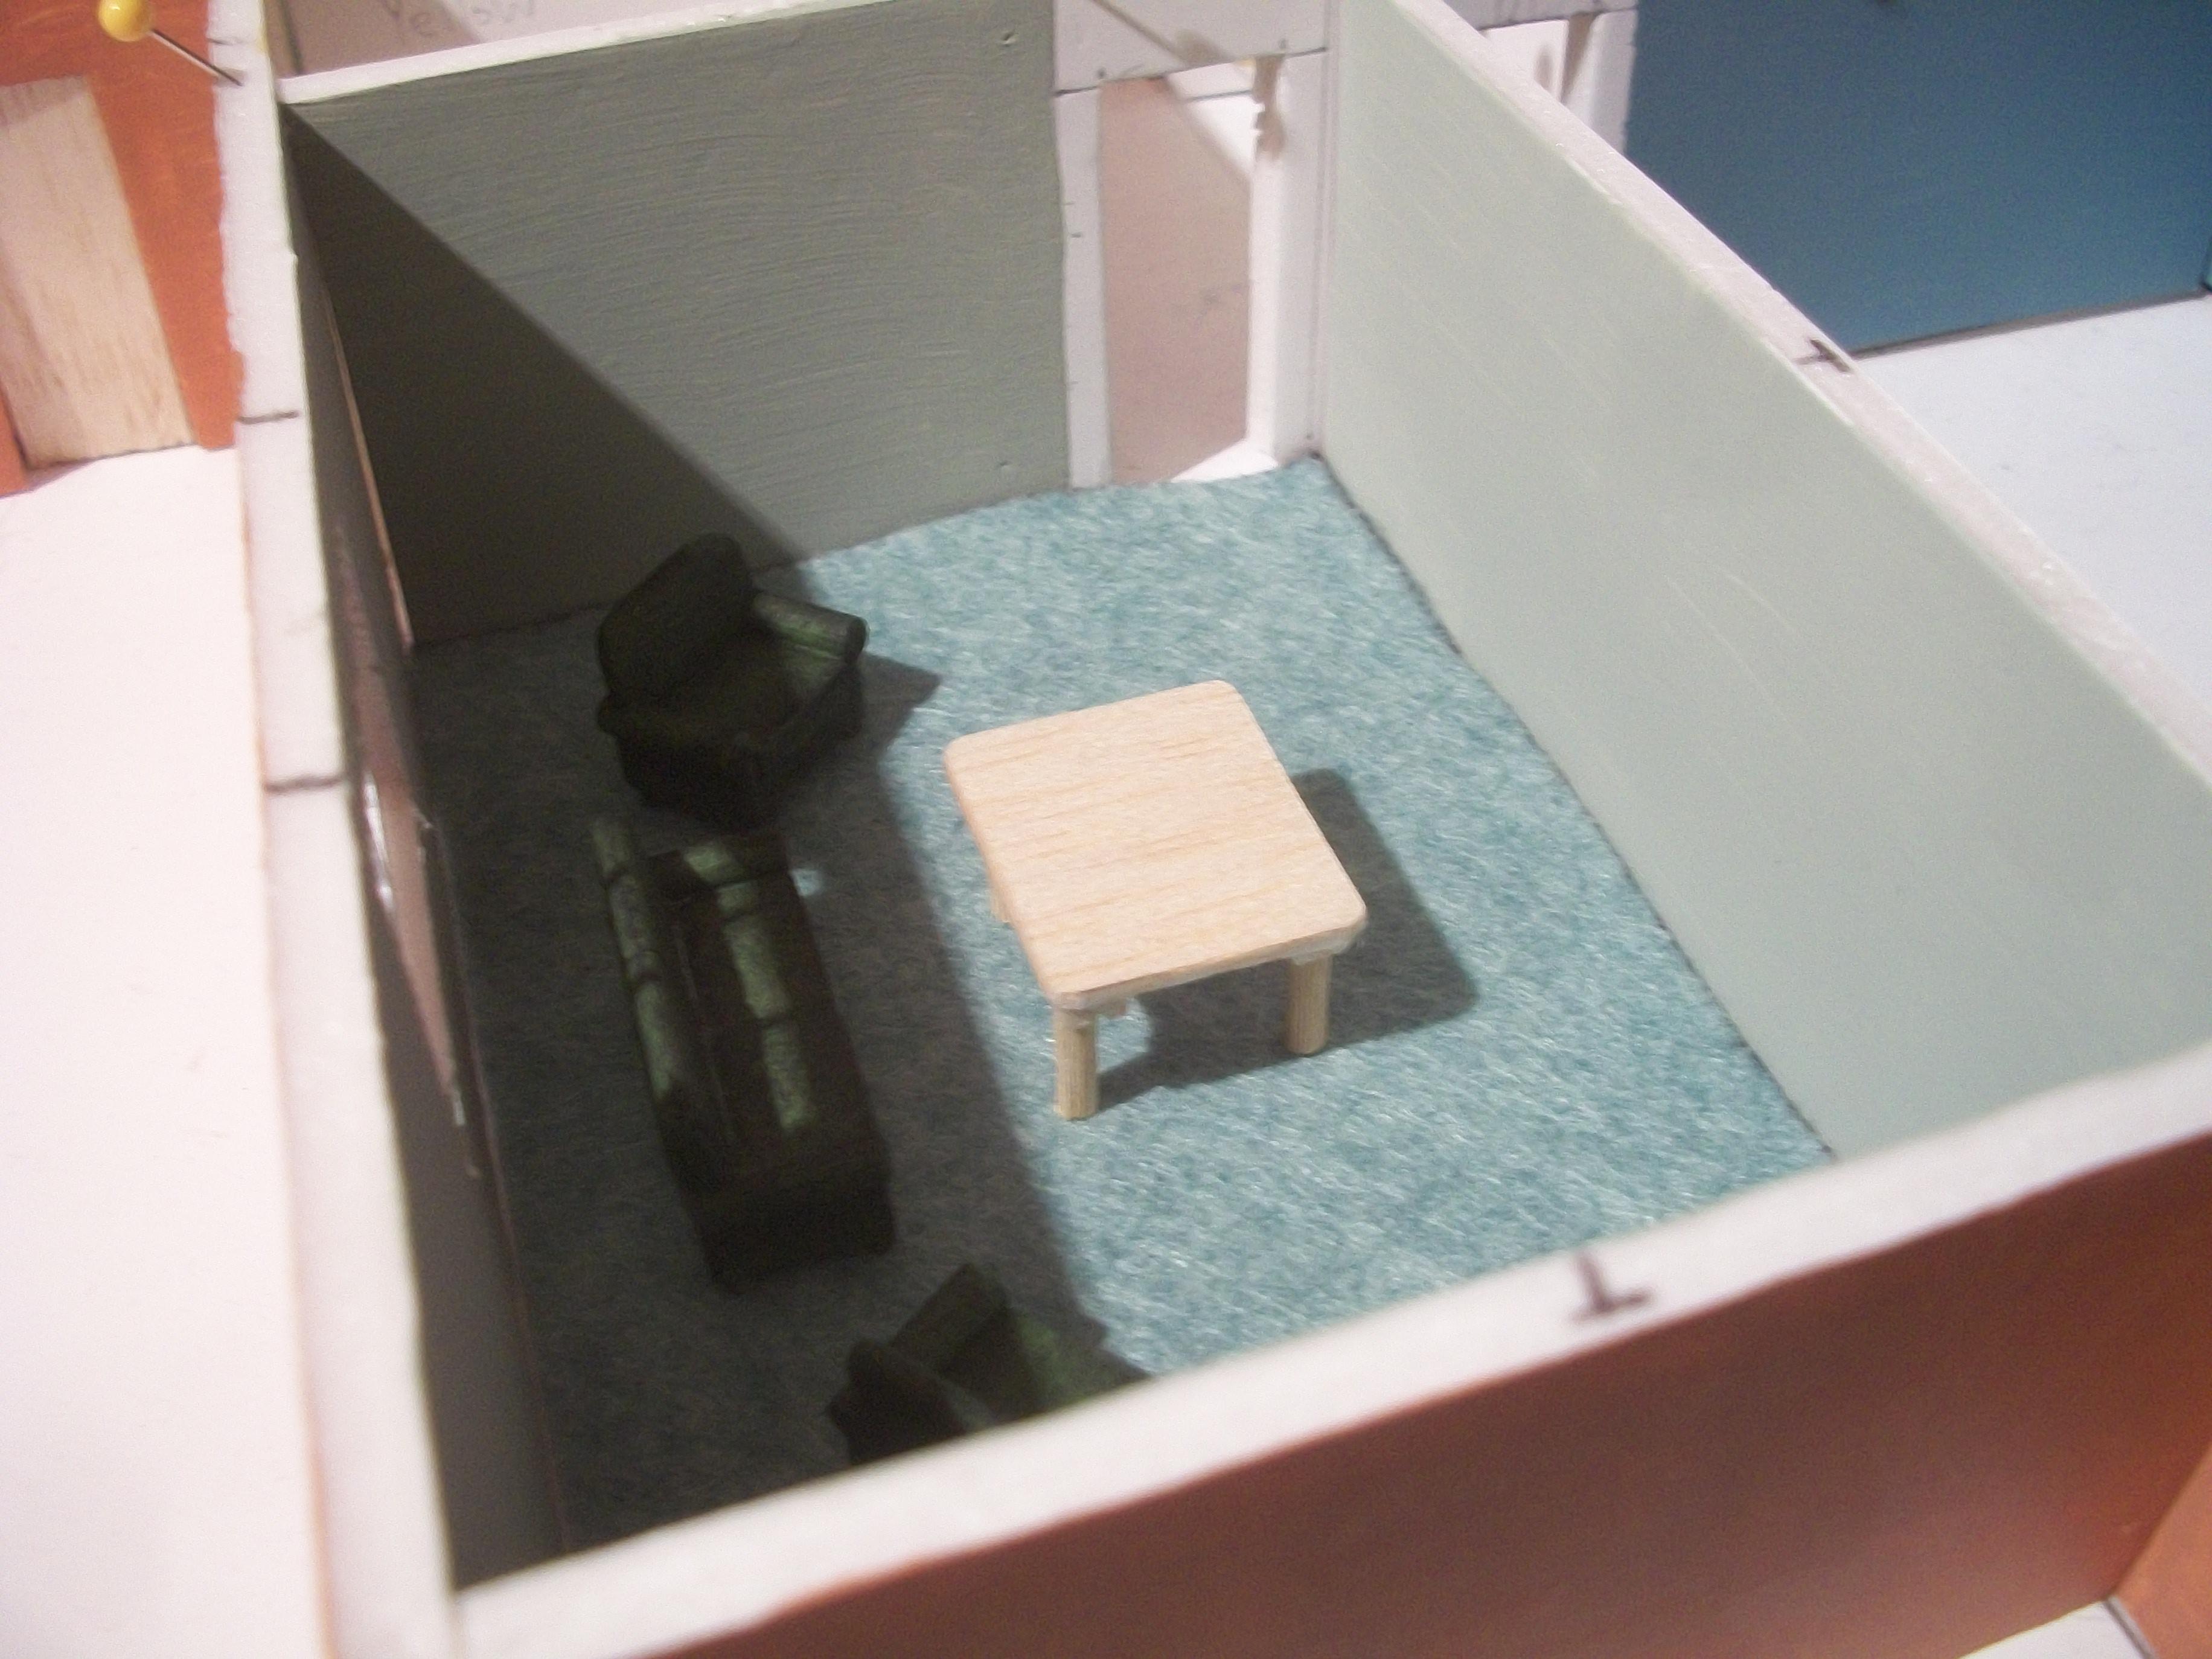
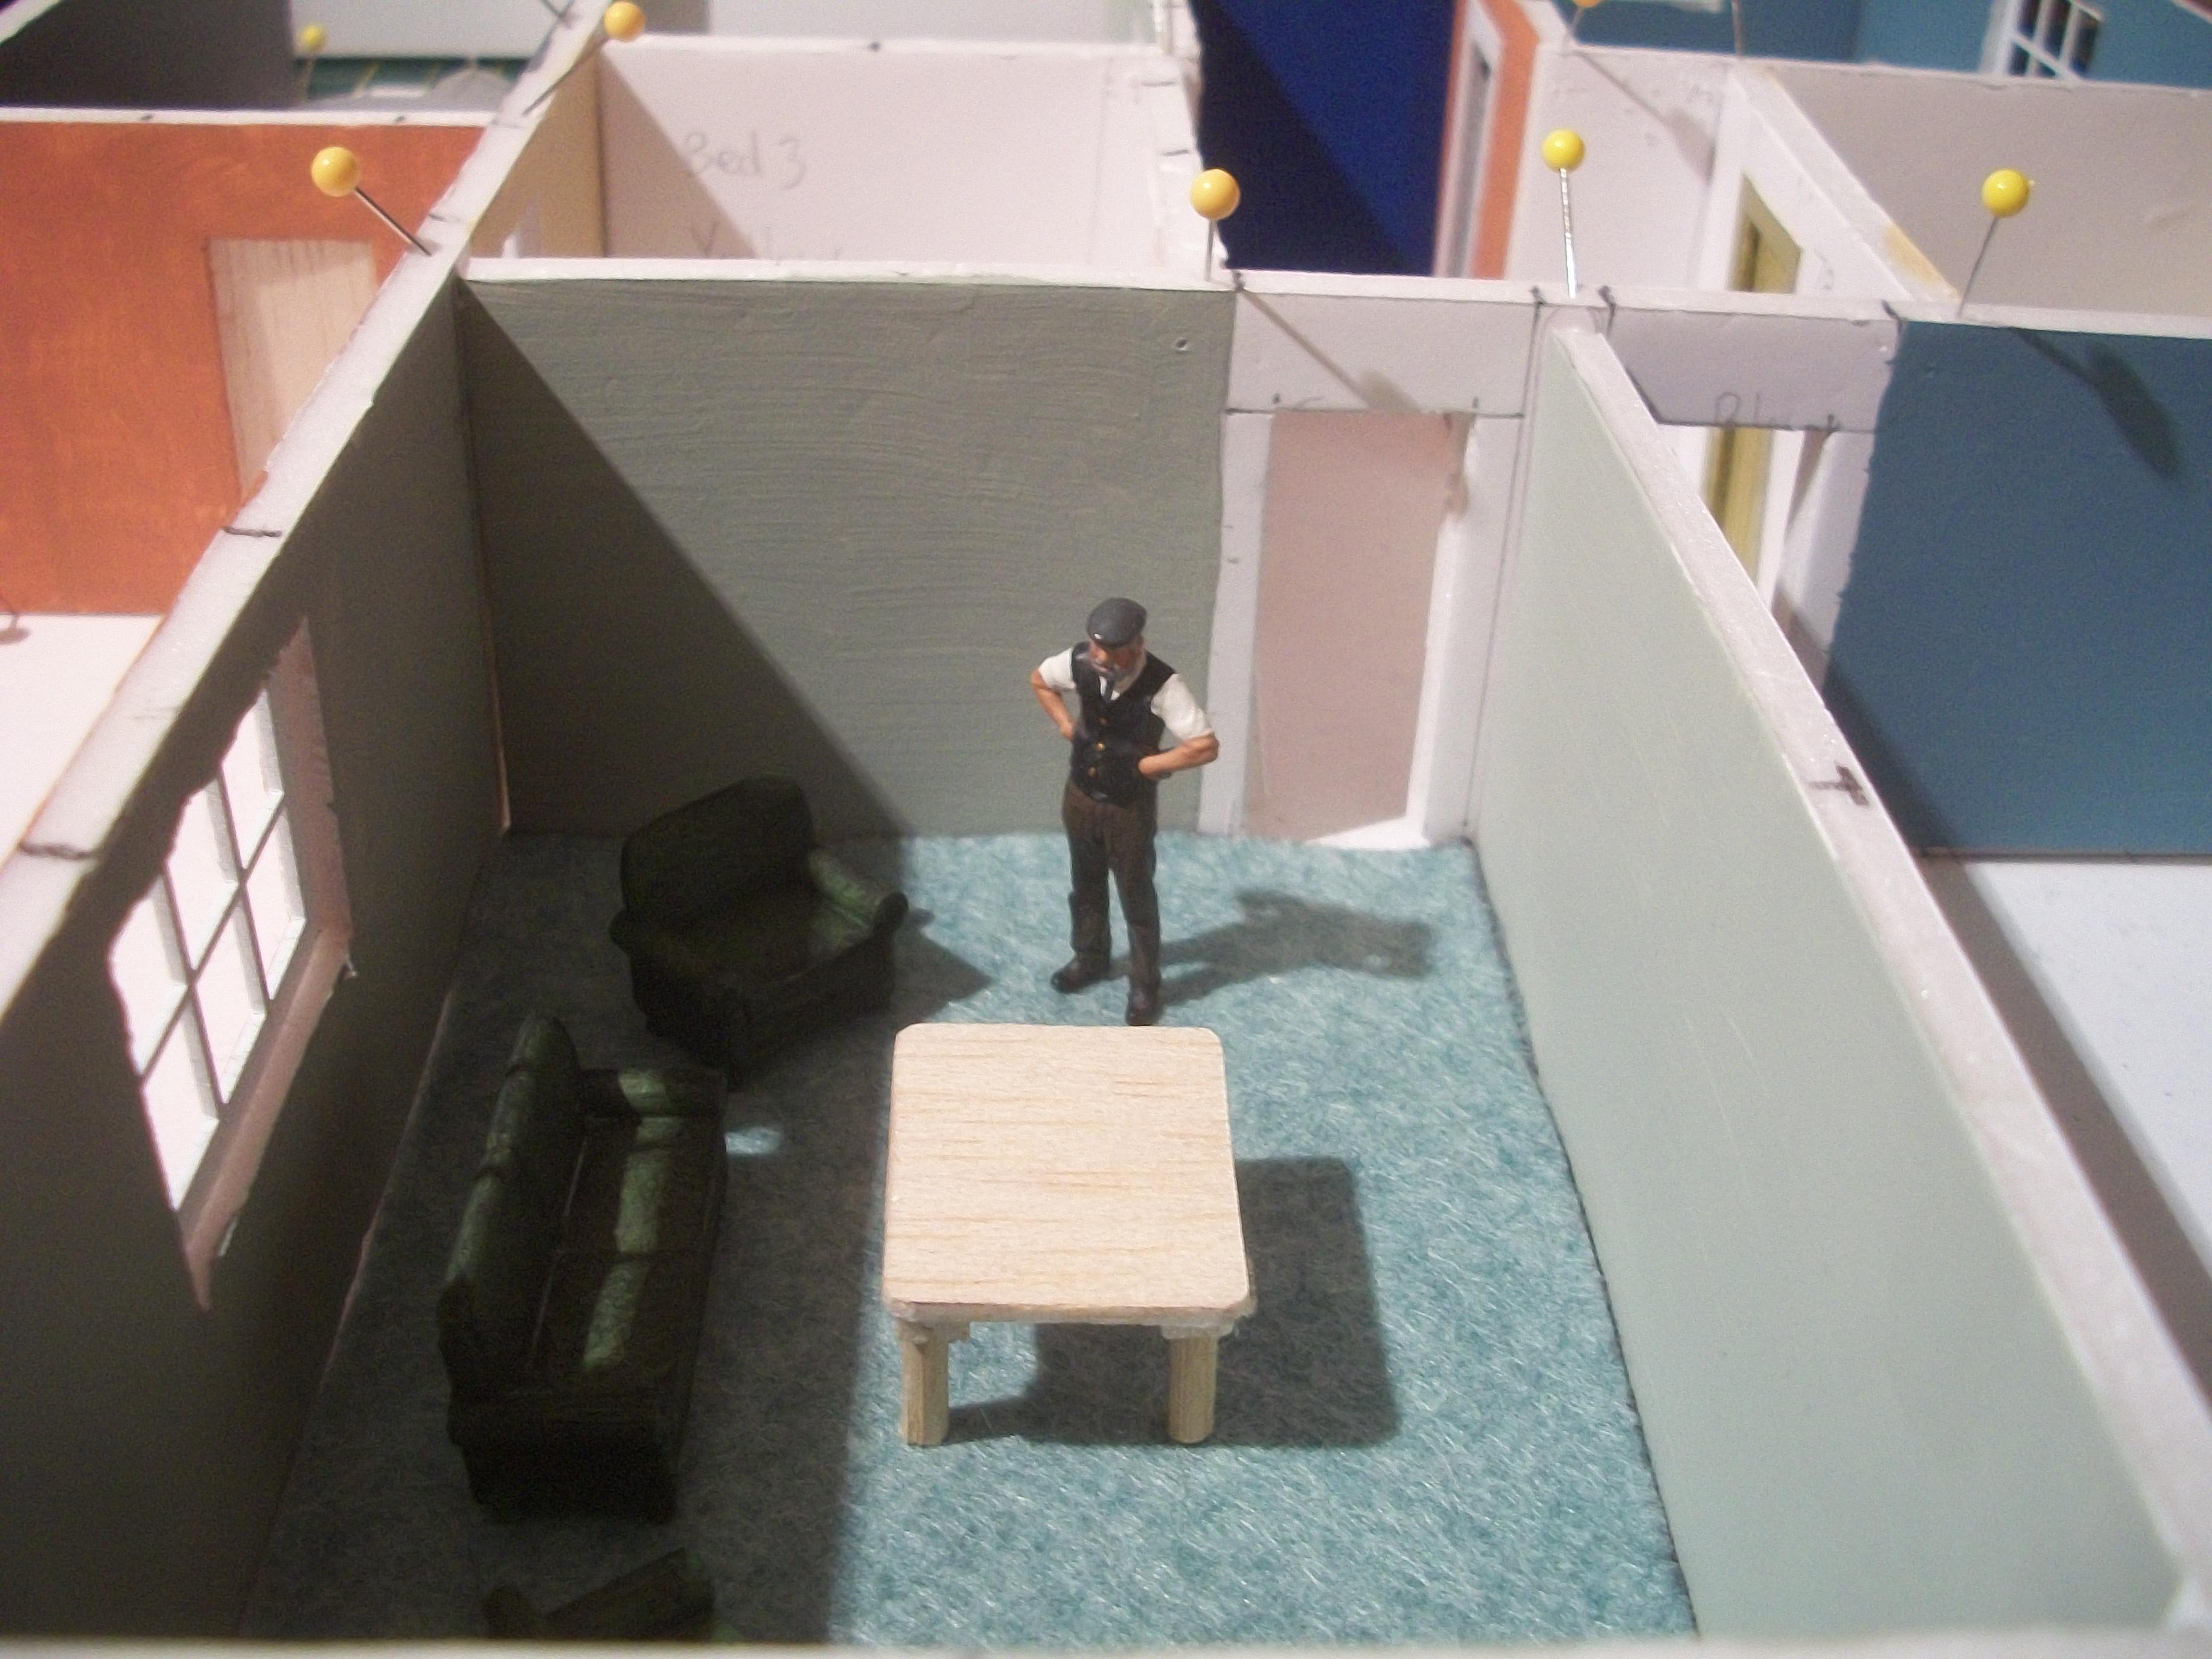
The baseboard floor plan was significantly warped, which was exactly what I had expected to happen, as I had applied PVA glue on one side only . . . The floor coverings of both carpet and printed card were glued onto some of the floor areas, and the bathroom has a tiled floor. Due to the fact that the underside of this baseboard has not had any paint or glue applied whatsoever, the foamboard naturally warped . . . This was rectified to some extent, by applying one coat of Magnolia emulsion paint over the entire surface of the baseboard, on the underside. There remains some slight evidence of warping in the opposite direction, but this should not be a problem because once all of the wall panels have been PVA glued to the baseboard, all warping should be fully corrected ( famous last words ) . . . In order to create the effect of a polished wooden floor surface for both the kitchen floor area, and also the living room floor area, I first tried applying yacht varnish, which is my ' go to ' reliable and trusty shiny surface friend. However, following 24 hours drying overnight, the printed image of a polished wooden floor on thin white card was clearly showing a MATT finish . . . Then I had the idea to place a sheet of clear film over the card image, and ' Voila ! ' we have the desired effect . . . two nicely polished wooden floor coverings in the kitchen and the entrance hallway. Recent work in progress has been all about the fireplace assemblies and the chimney breast panels. For both the kitchen and living room in this bungalow model, there is going to be a fireplace with a hearth and mantlepiece, which is mounted onto a chimney breast that rises from the floor to the ceiling. The fireplace assemblies are made from foamboard, wooden popsicle stick and Foamex board, with some black permanent marker applied to the stove area. Shortly, the chimney breast panels will have a coat of emulsion paint applied, this being pale blue on the kitchen side and pale green on the living room side. The paint colour for each room will extend to the fireplace surround . . . Thanks for viewing this topic guys, and I hope you like the work in progress . . . All comments are most welcome ! David
-
On my turntable I have a circular mirror from IKEA, which shows off the underside of a model car that stands on the mirror. Here is a link to my YouTube video that features the 1937 Rolls-Royce Phantom III : https://www.youtube.com/watch?v=1gOcKwcgl8Q The video is best viewed full screen and there is some nice background music . . . David
-
Nicely done Michelle . . . Liking the car and the figurine. I have one of those electric powered turntables, which is great for displaying finished models. David
-
Thanks Paul . . . To some extent I can relax a little now that I have managed to get this far with the roof structure. Today I am preparing the floor areas of this bungalow, which involves carefully measuring the inner boundaries of each room as an outline that I can work to . . . All of the wall panels will be unpinned from the floor plan baseboard, and laid out on a large sheet of foam board . . . There are 16 wall panels, 8 floor areas, 10 roof trusses, 8 roof panels, one baseboard, one ceilings board, one roof structure board, 6 interior doors, one front door, one rear garage door, two front garage doors, two pairs of French doors, eight windows and one chimney stack . . . David
-
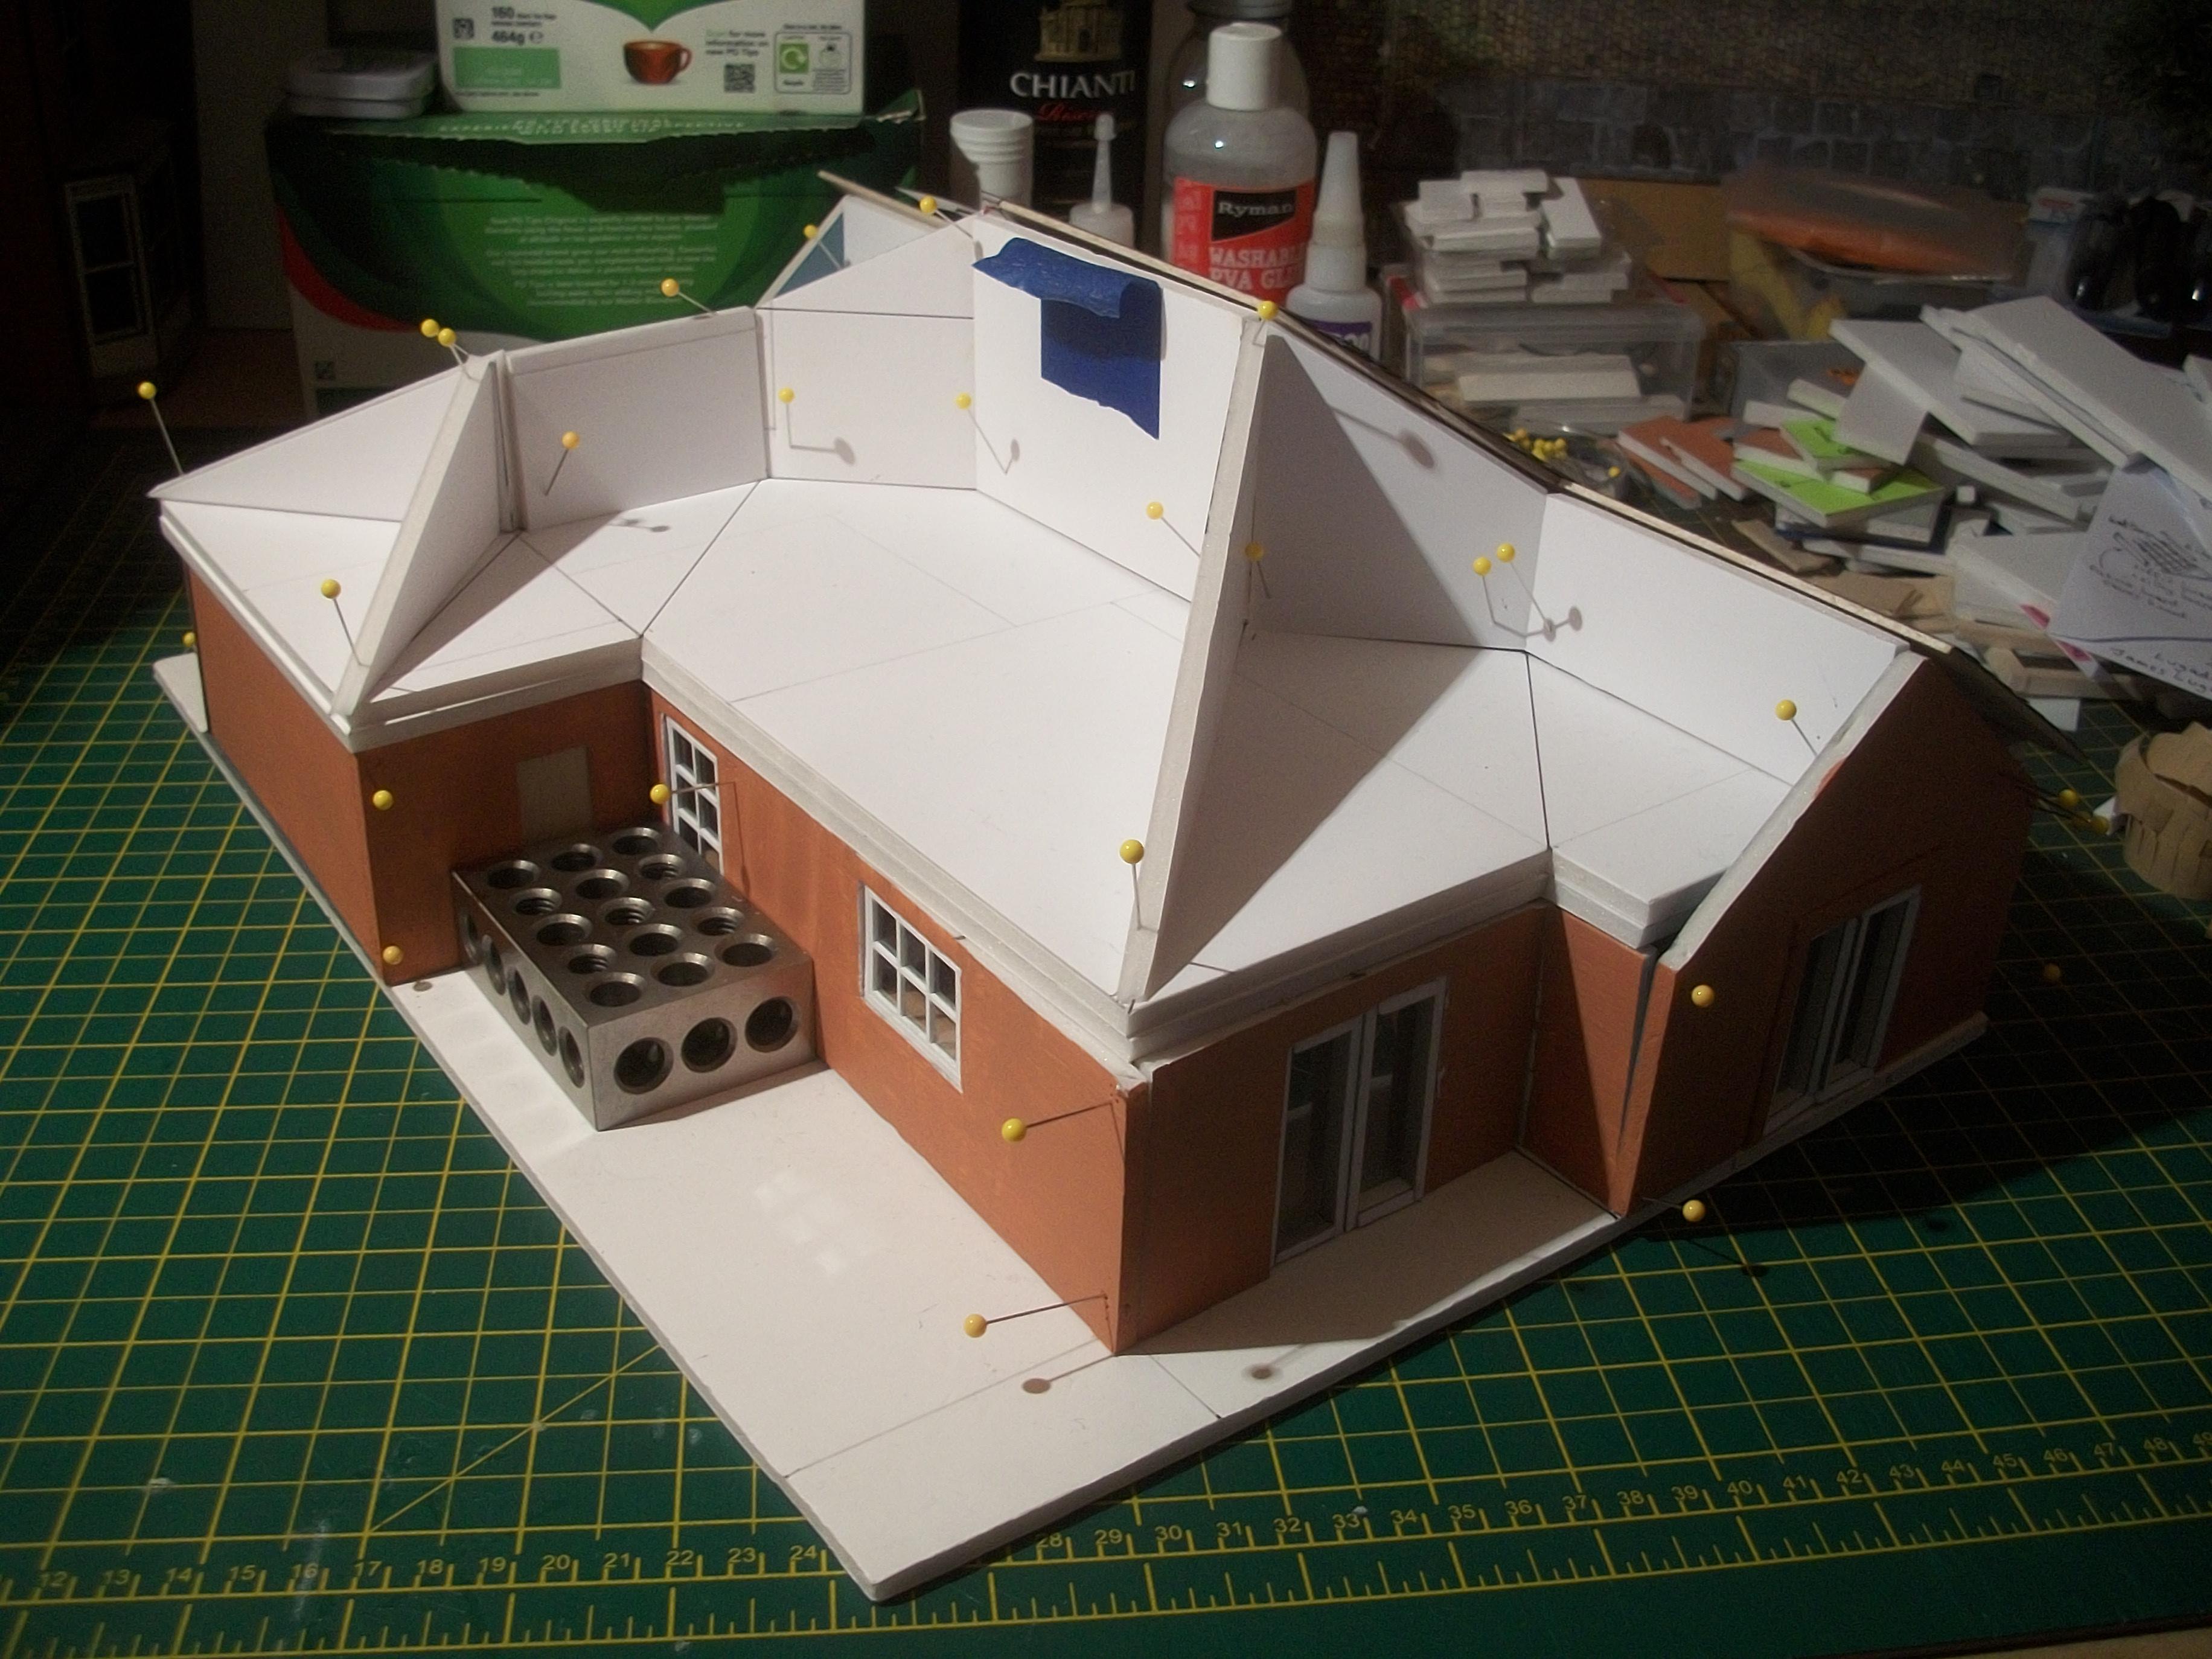
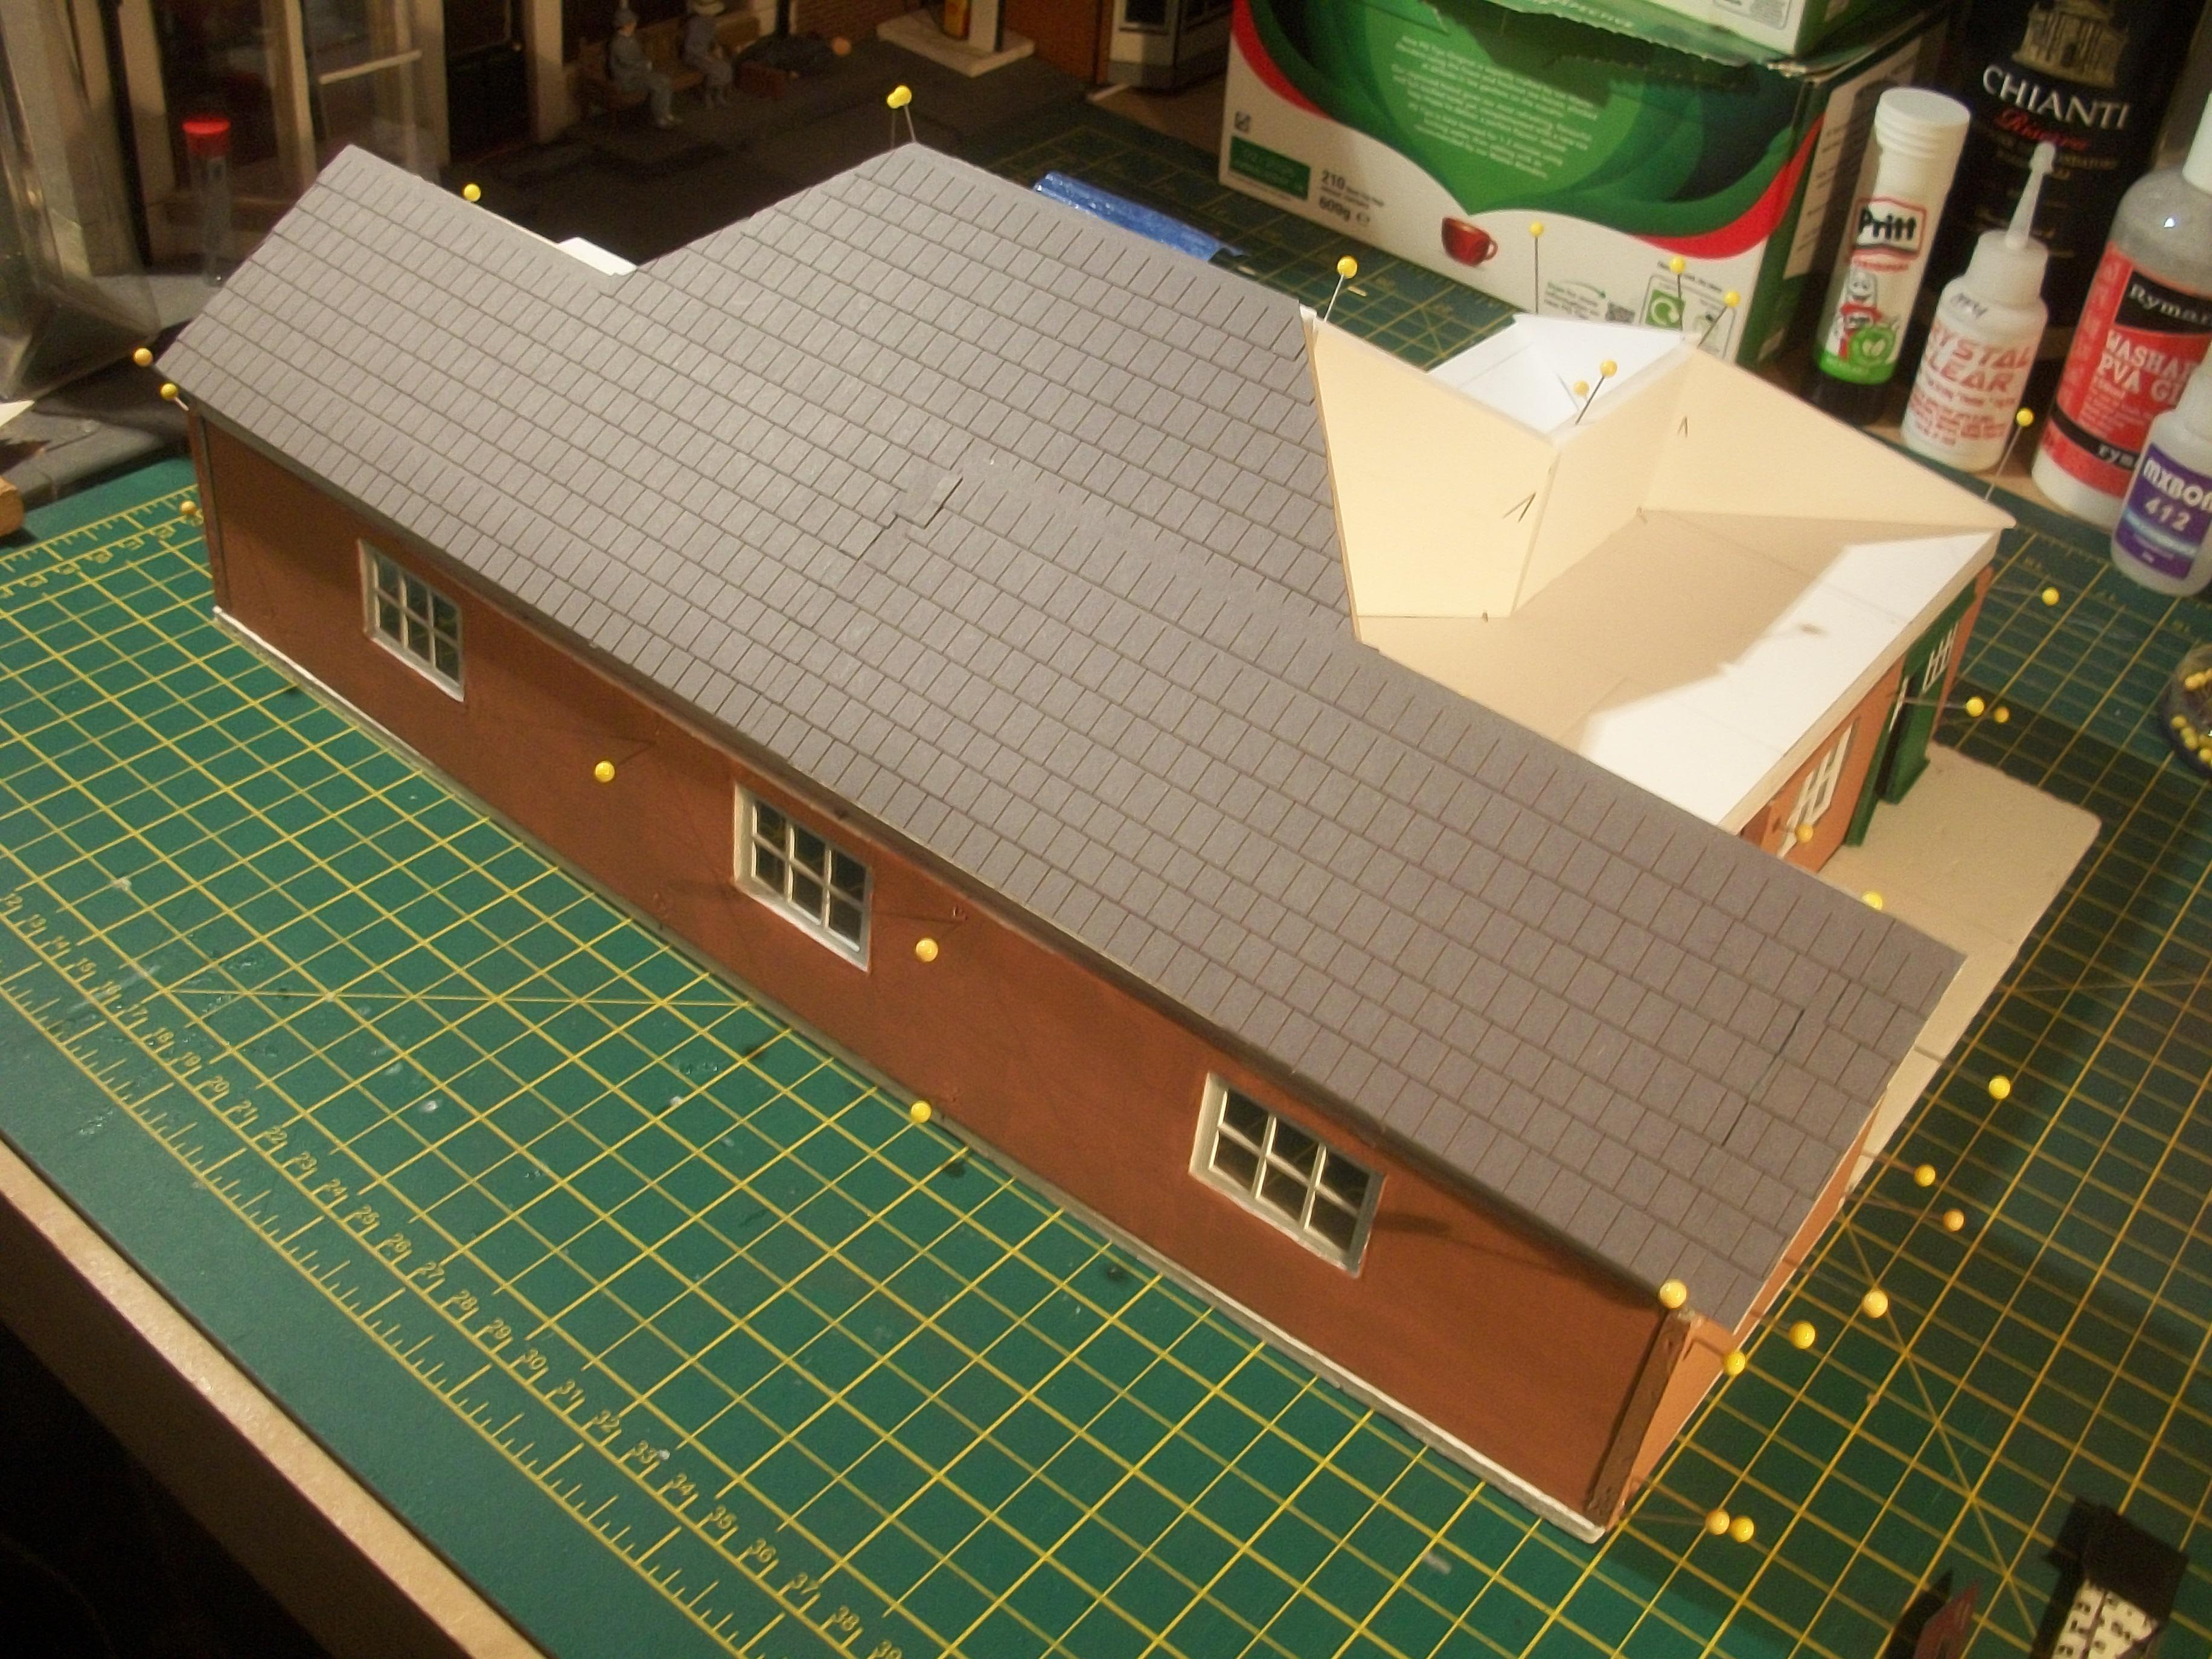
Having decided to turn my attention to the roof structure, I set about calculating the position and lengths of the roof trusses. This was no easy task, and it was something that had been giving me cause for concern and many sleepless nights for most of February . . . The precise location of the central ridge of the roof was absolutely critical, because all of the other nine trusses would be leading off this central truss. I was unsure of the overall height of this bungalow roof from the ground level, and although my complex calculations were telling me that 118 mm was the magic figure, I needed to obtain a more accurate estimation, such was the importance of that central ridge. This is the highest point of the building, so I emailed the company that had supplied me with both the floor plan and also the roof plan, explaining my predicament. They kindly sent me a figure of 6020 mm as the overall maximum height of the bungalow, at the point of the central ridge . . . I was able to divide this figure by 43 and arrive at the true magic figure of 140 mm, as opposed to 118 mm . . . Everything started to fall into place from this point onwards . . . I then carefully measured and cut out hand drawn pieces of foam board to form the ten roof trusses. The whole structure looked to be correct, and once these truss pieces were pinned in place onto the roof structure baseboard, I was able to work on the sheet balsa panel that forms the main area of the roof on the left hand side of the bungalow, looking from the front of the building . . . This is the largest of the eight roof panels, as it extends from both gable ends and all the way up to the central ridge at the highest point. Using strips of grey roof tiles that were supplied by a company in York, which have peel off self adhesive backing, I covered the sheet balsa panel nicely. This used up two sheets of roof tiles in one pack, and I have three more packs of of two sheets each to complete the entire roof area . . . The bungalow roof is a complex structure, and I was fully expecting this part of the build to be challenging at every level. I came up with a name for this property, which is ' The Rose Bungalow ' . . . The color of the exterior walls was one reason for the name, and also my Chinese wife's English name is ' Rose ' . . . Here are a few photos of the roof structure work in progress. David
-
Thank you Kyle . . . . Yes, that is a excellent way to bend the foam board cleanly, by scoring the reverse side. Certainly, foam board is a very versatile material, as long as you treat it gently . . . Painting the foam board on one side with water based paints does cause it to warp badly, but once paint is applied on the other side the sheet returns to a nice straight profile. I also found that if you exhibit a diorama structure inside a marquee tent during June, the humidity does cause extreme warping . . . . ! David
-
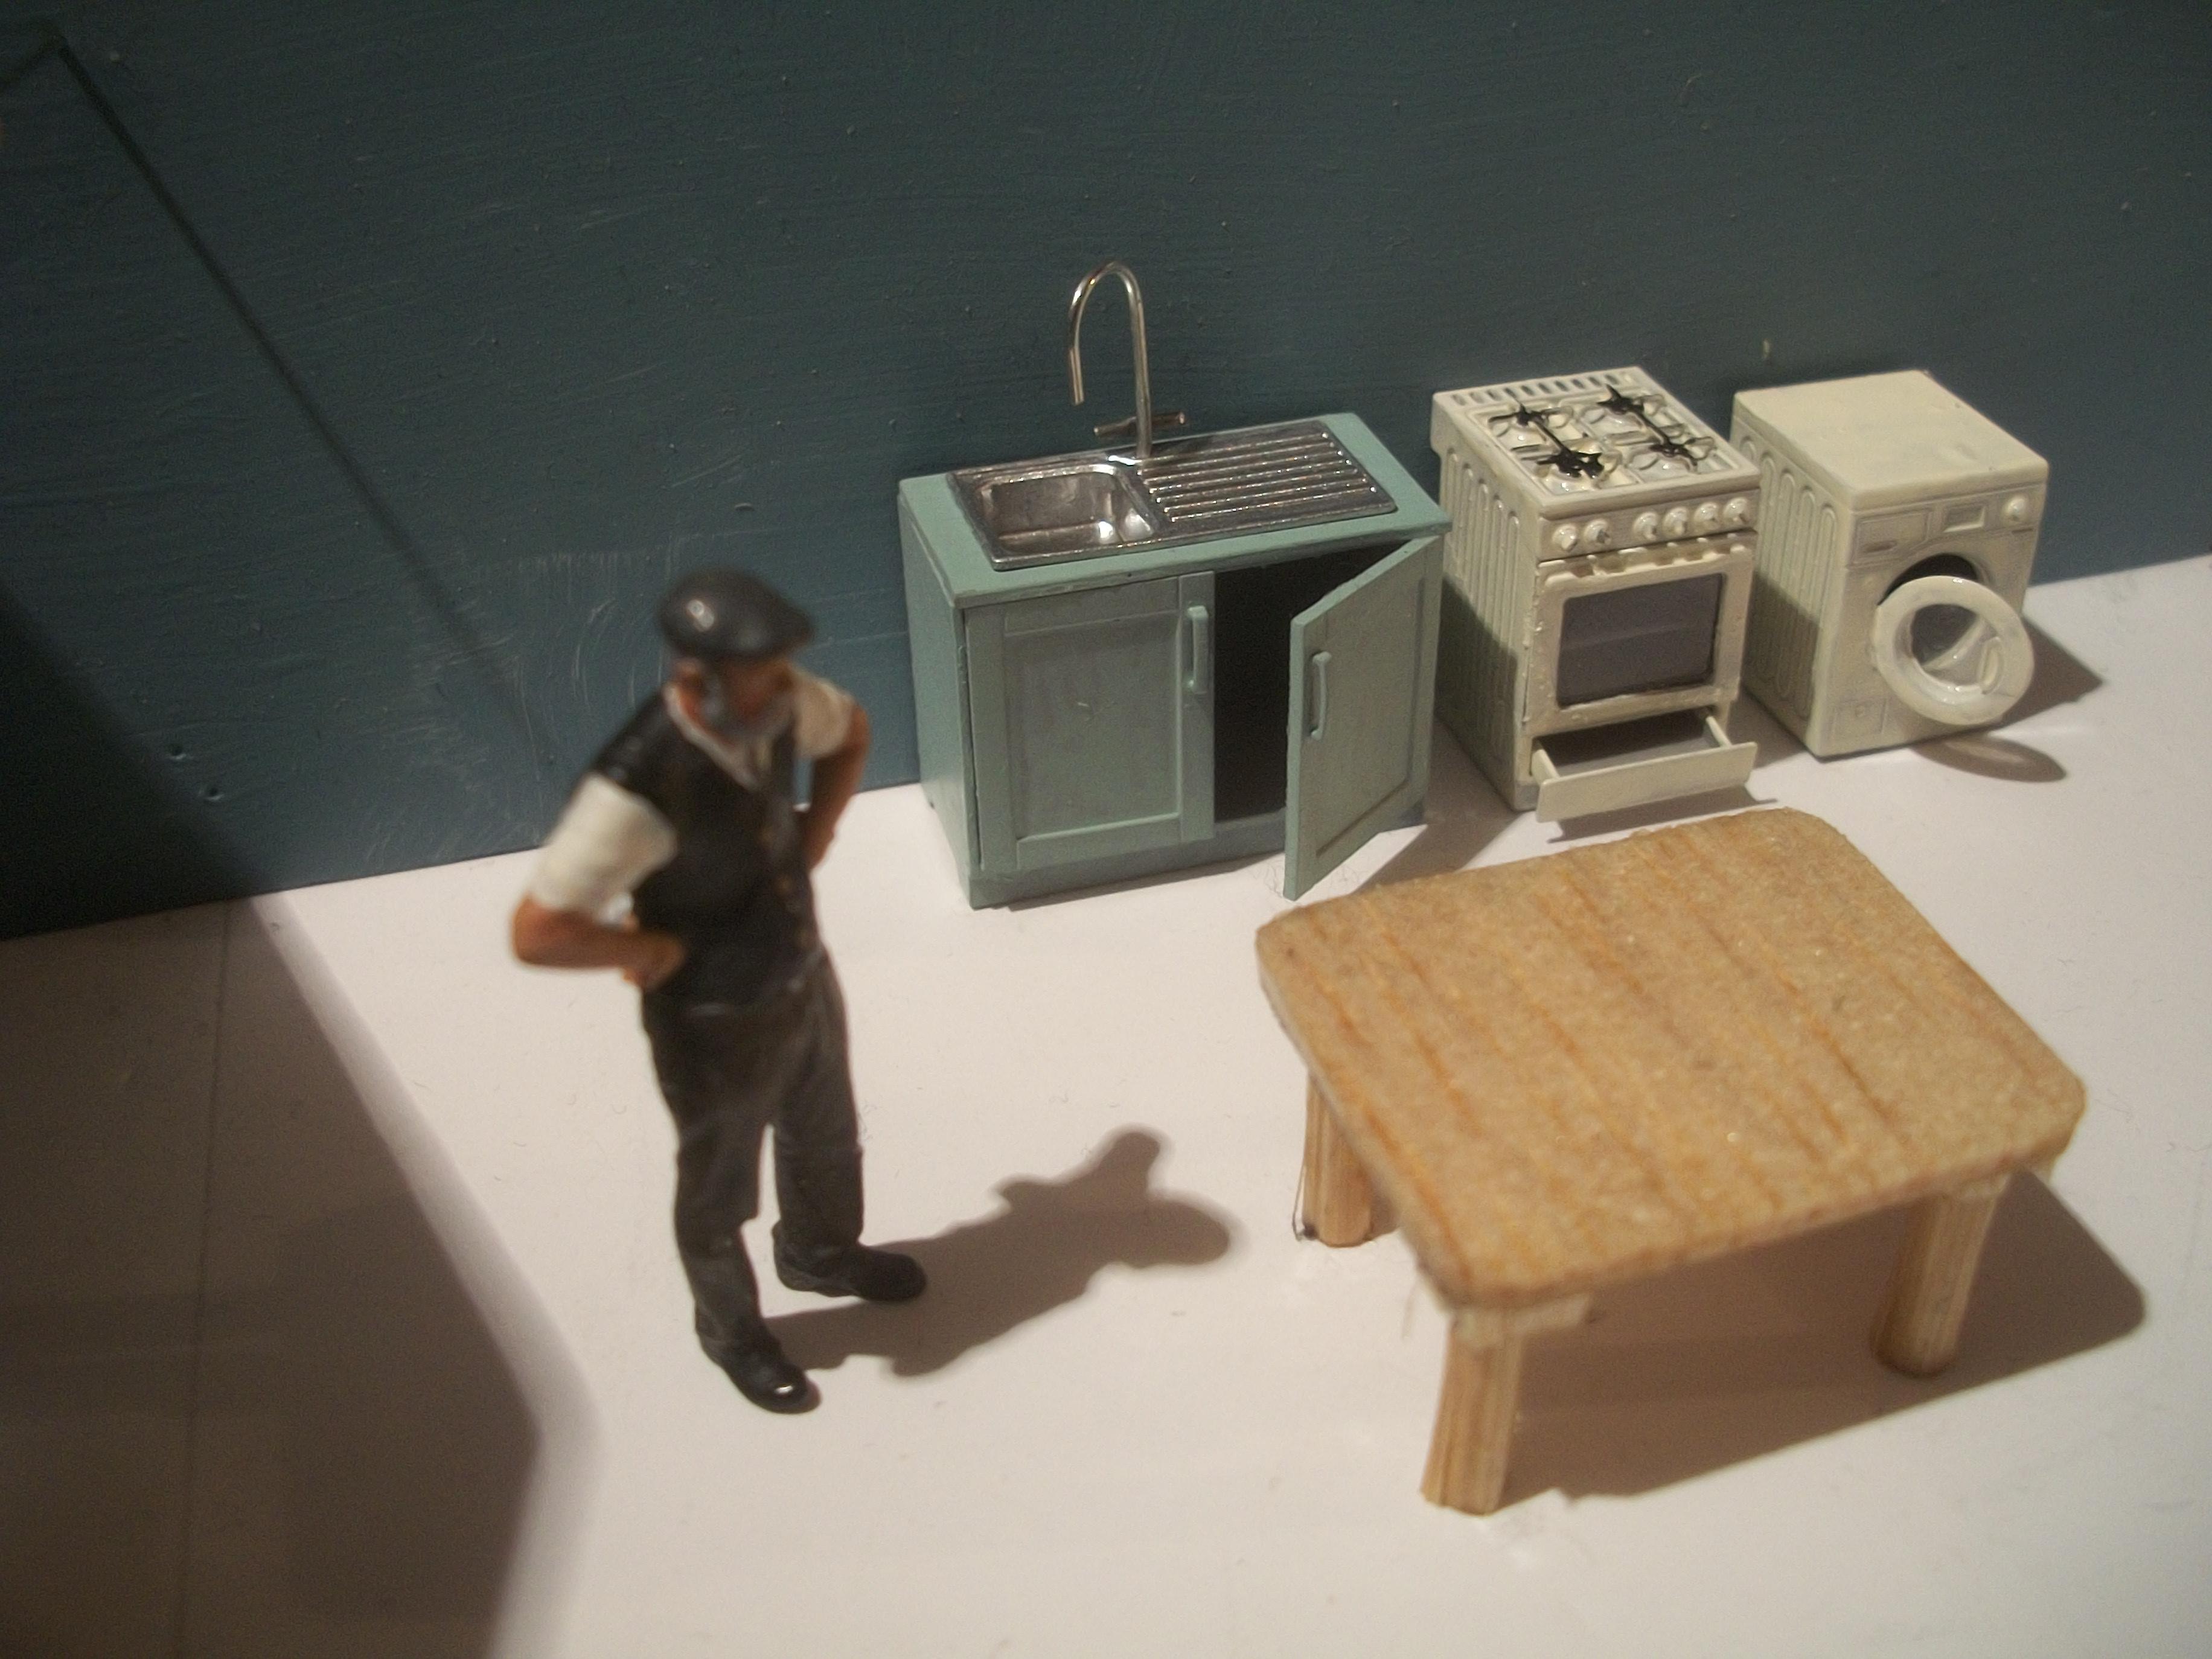
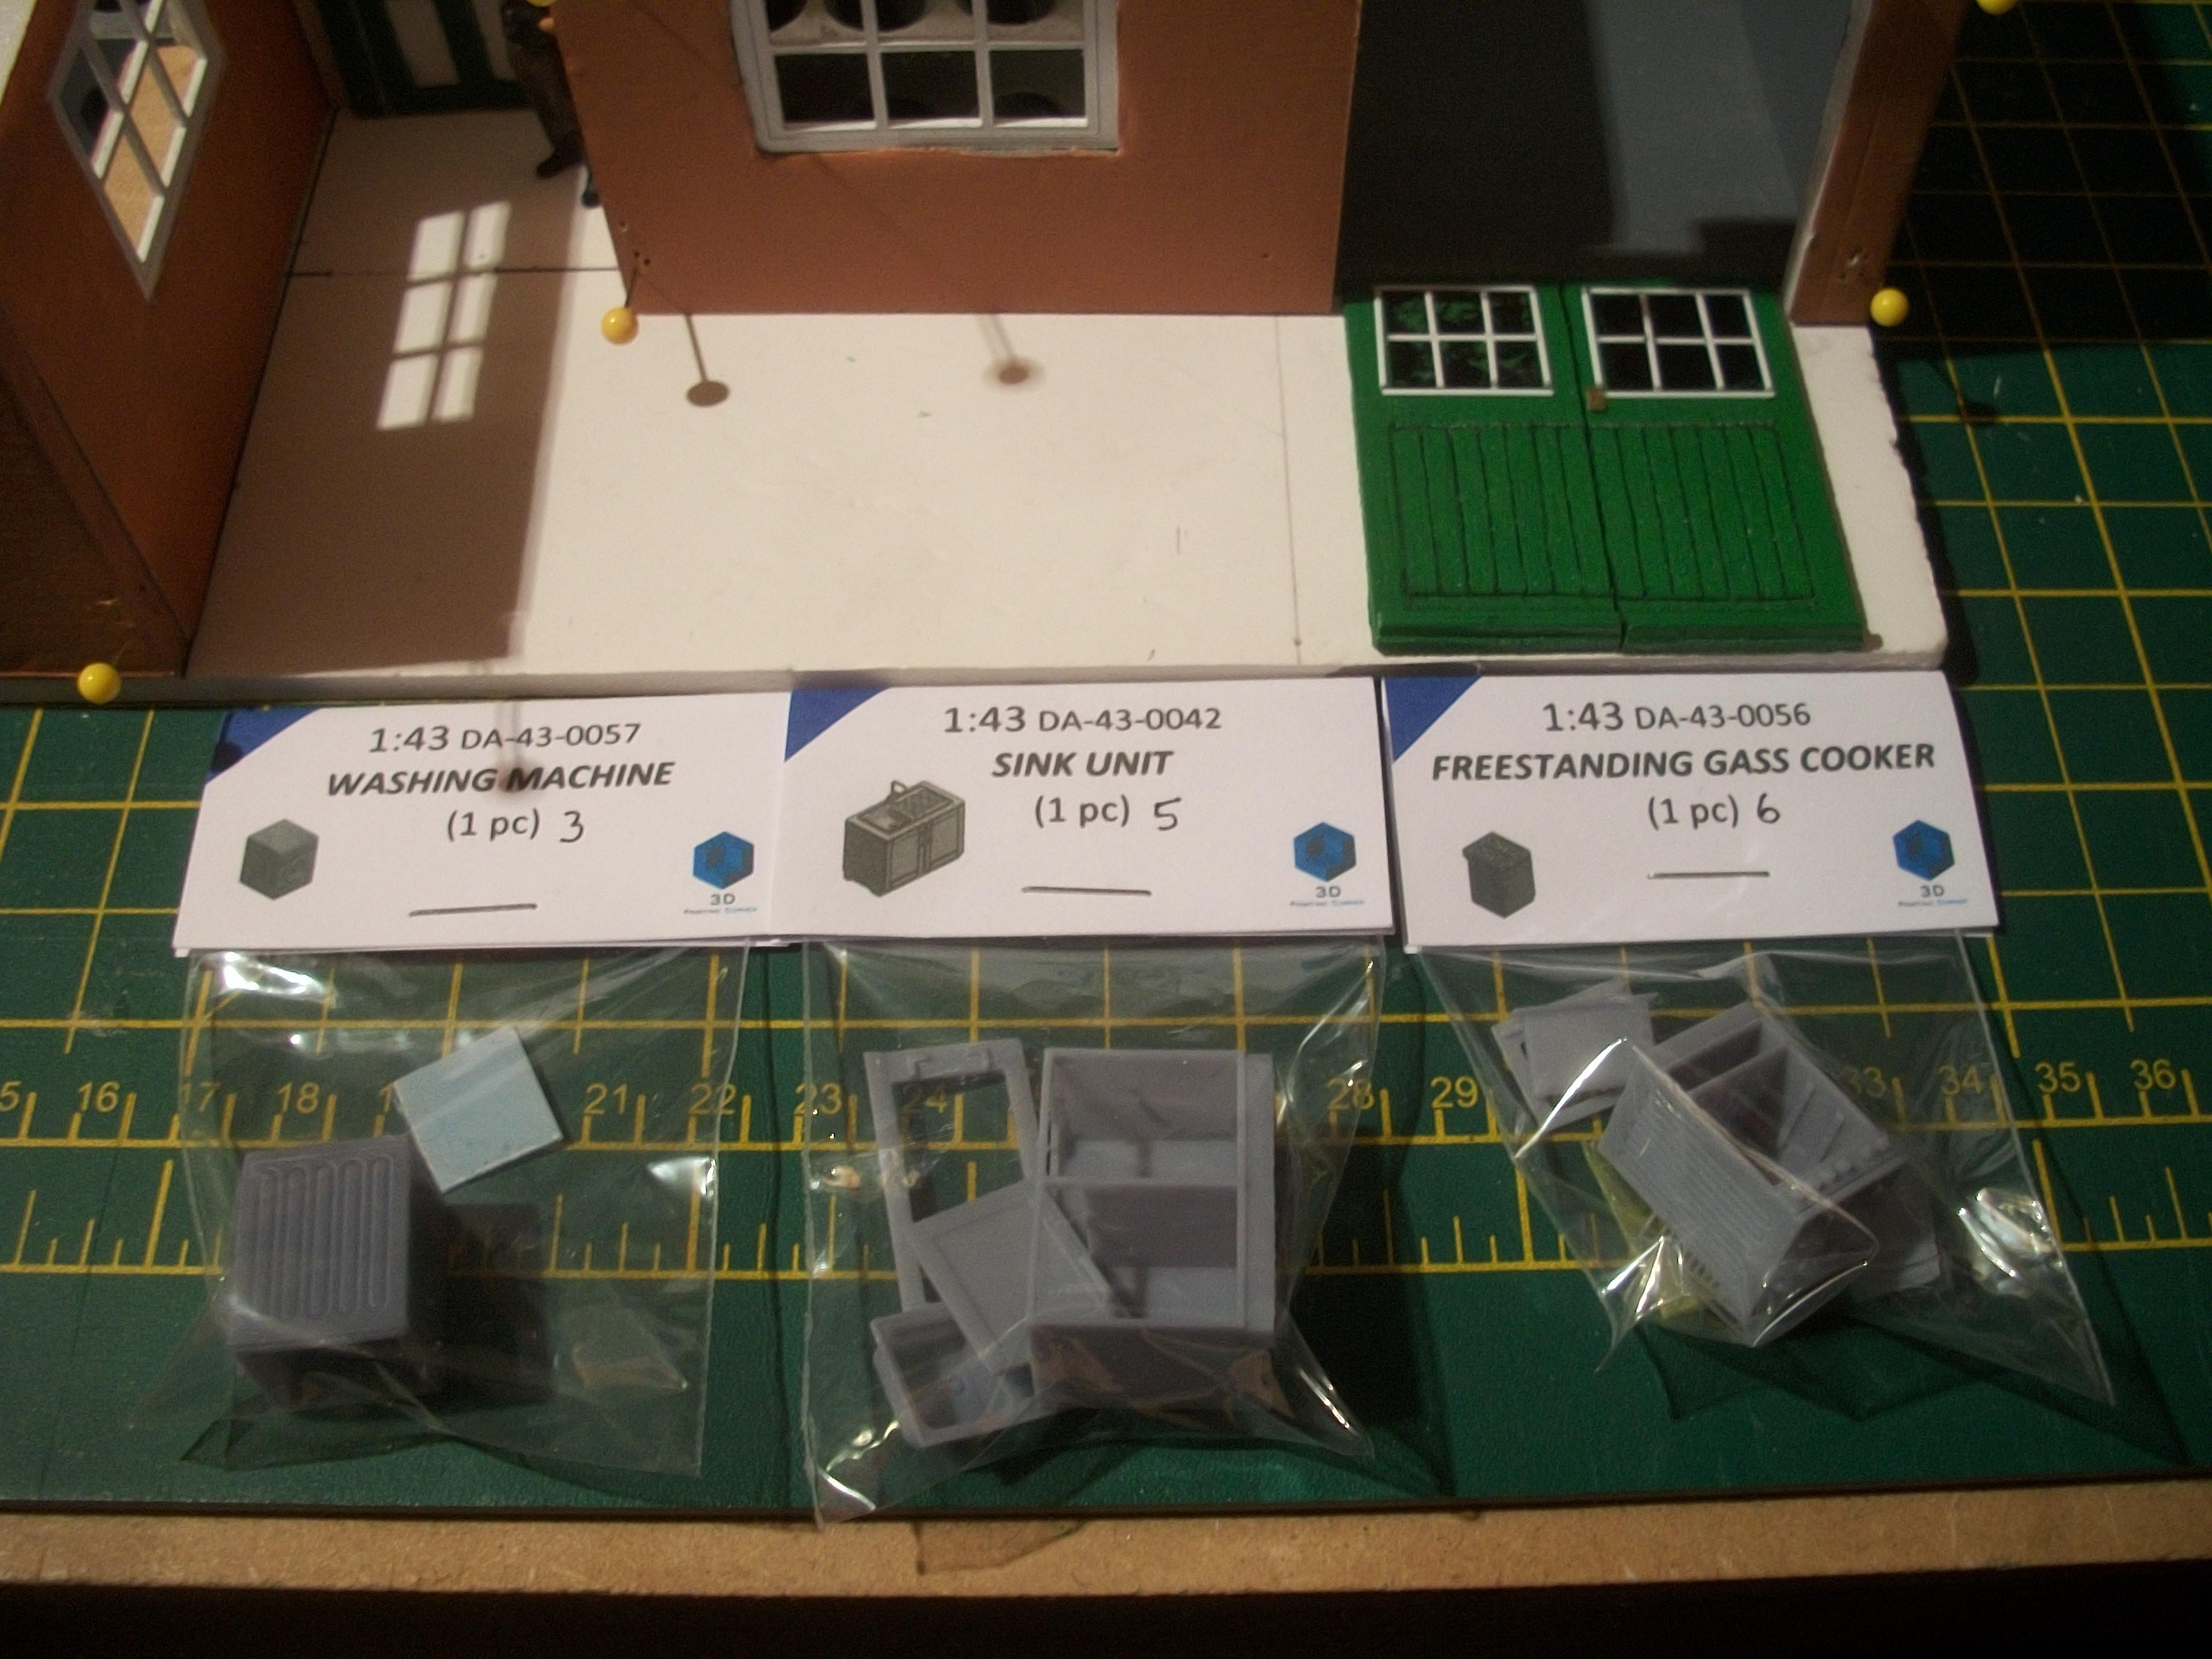
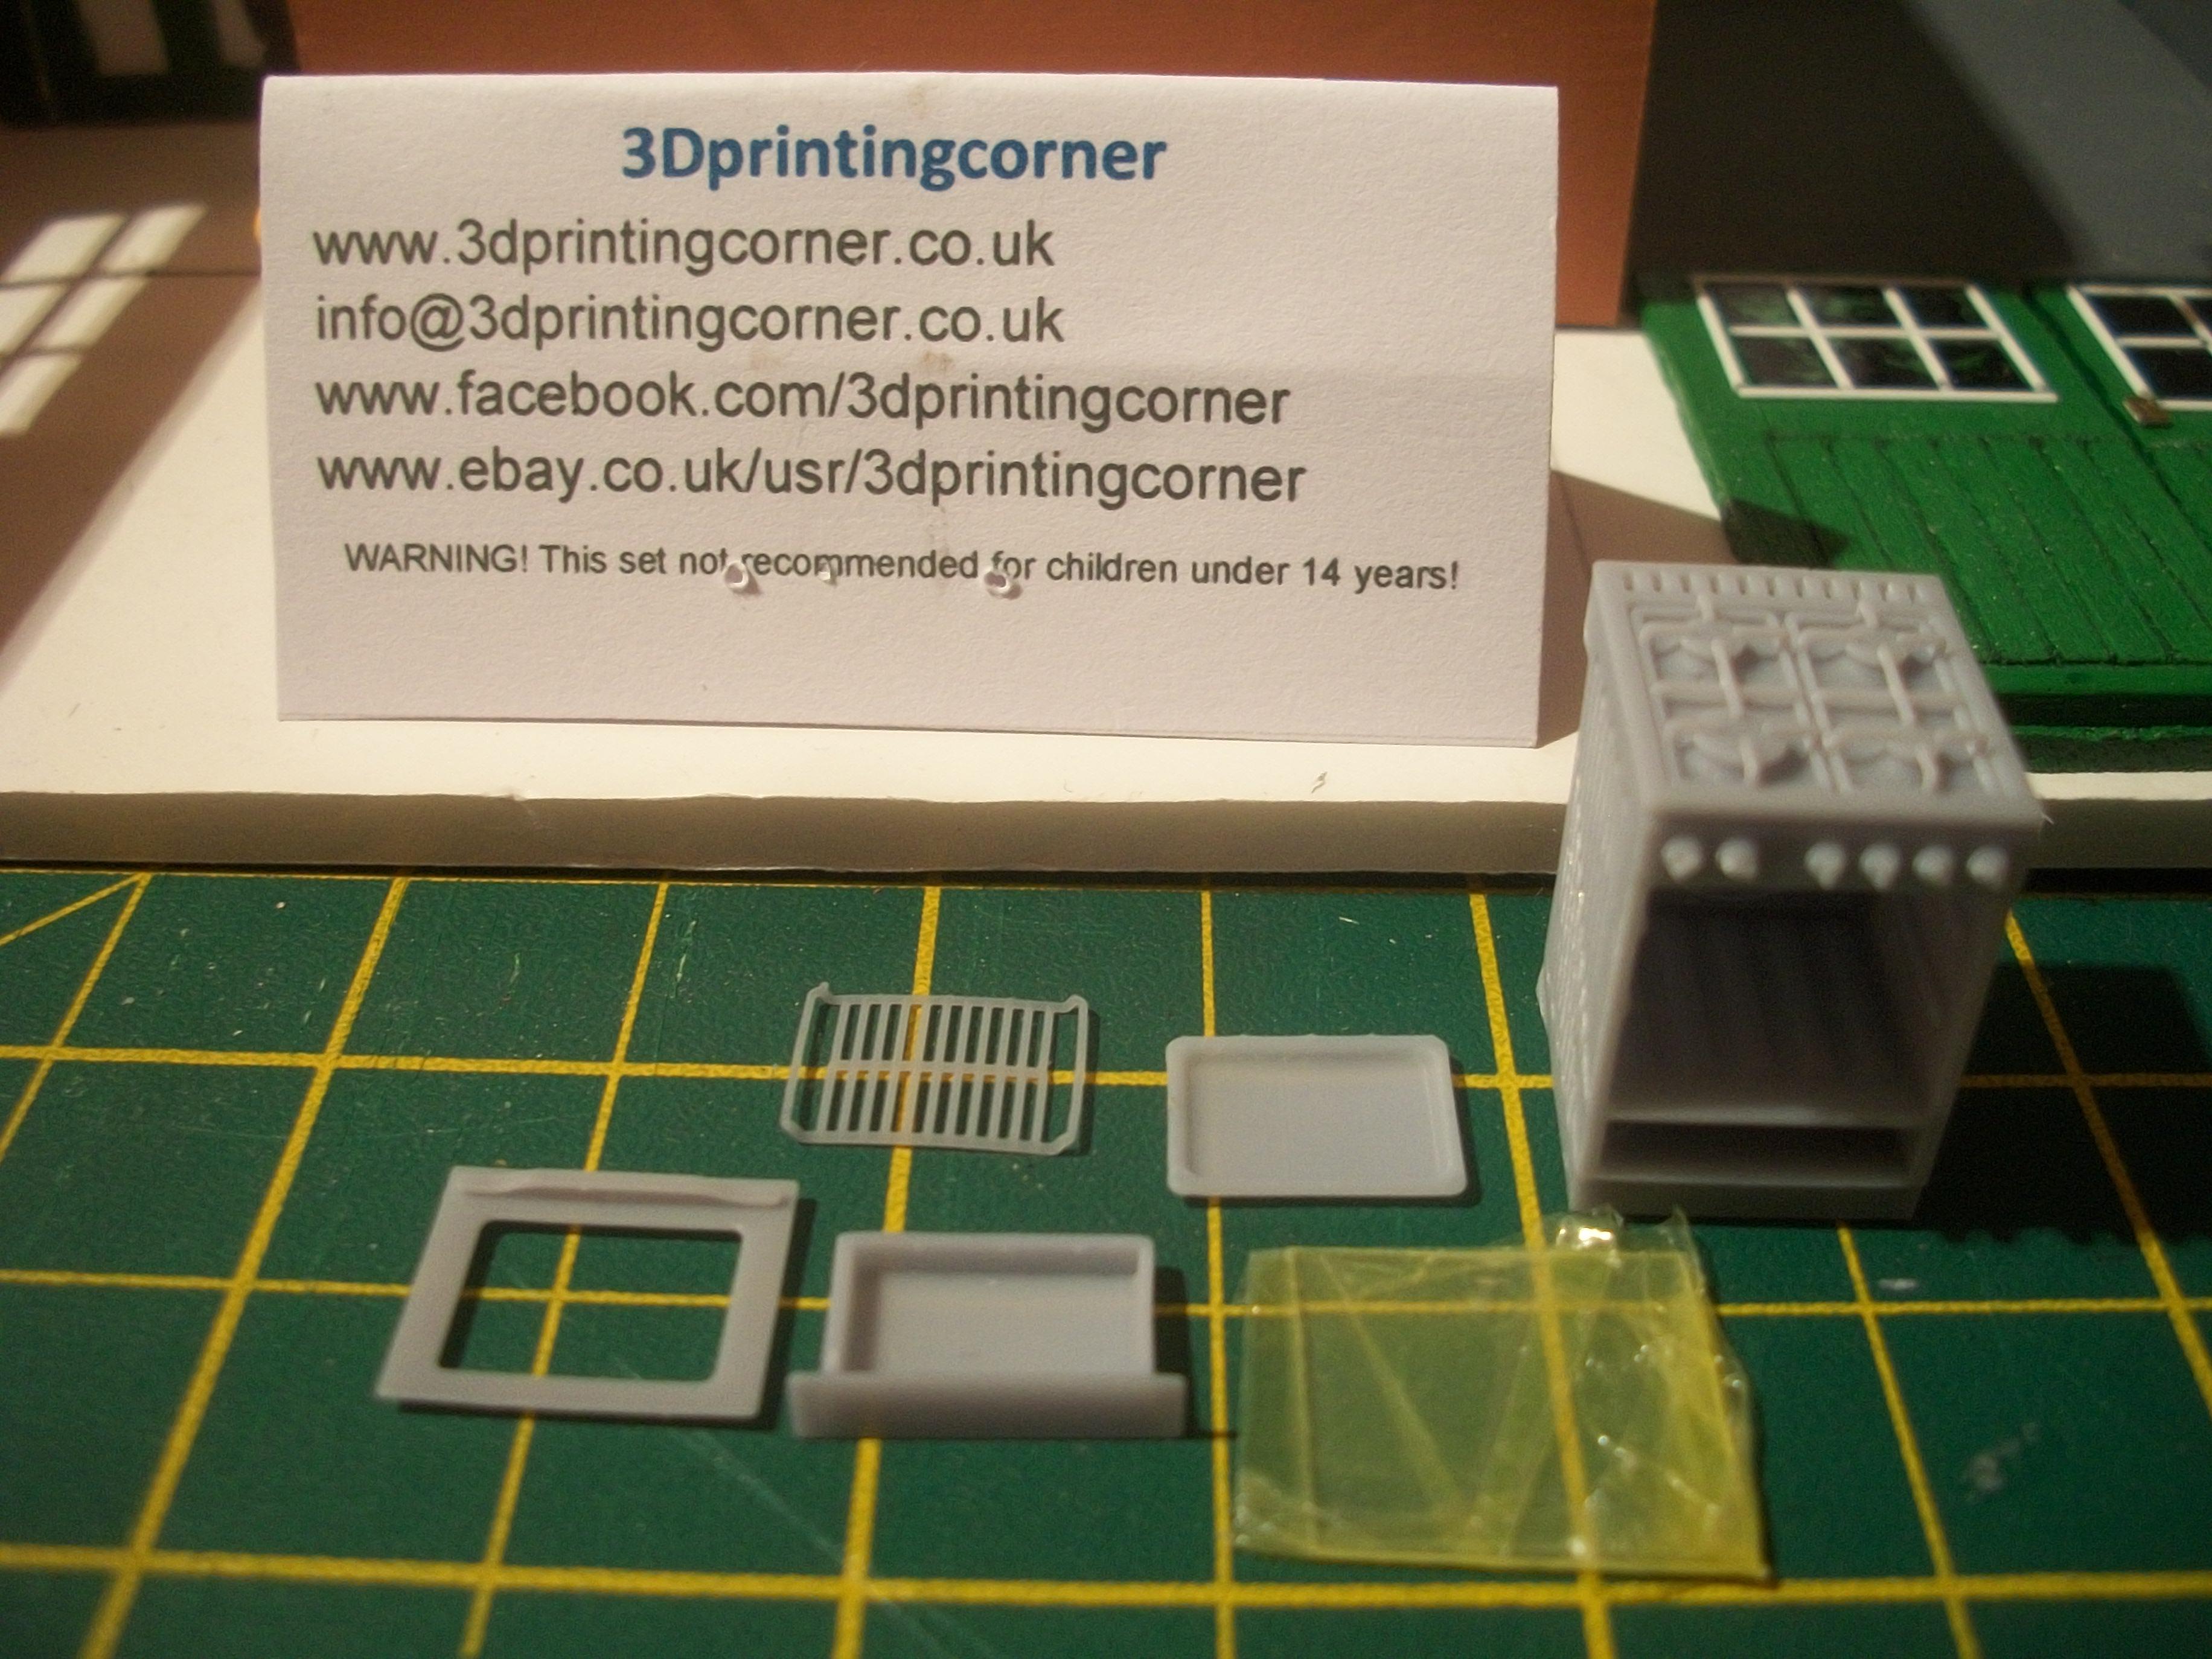
The French doors are now in place, both at the rear of the kitchen area and also at the rear of the living room area. I used a different material for the second set of French doors, which was Foamex Board . . . This is a more robust material than foam board, and I decided to redo the kitchen doors using the the Foamex board. Both sets of French doors hinge open and I dispensed with the idea of having eight panes of glass, so these doors have one pane of glass. All eight windows of the bungalow have glass panes on the inside, and they also have wooden window ledges . . . Emulsion paint has been applied to all of the interior walls, and the interior doors are painted using brown enamel. Three different colours have been used for the interior paint scheme, these being Earth Balance ( pale yellow ), Open Water ( pale blue ), and Trailing Plant ( pale green ). All the emulsion paints are ELLE by Crown brand, as supplied by Homebase . . . The exterior front door at the front of the entrance hall is painted Humbrol Gloss Green, and is fully hinged. Several kitchen appliances have been added, these being a sink unit, a freestanding gas cooker and a washing machine, There will be a fridge freezer added at some point, as I am waiting for the Ebay seller to 3D print this item . . . The sink unit has a sink and drainer brush painted with Molotow Liquid Chrome from a refill, also a fawcet fabricated from a paper clip, and one of the cupboard doors is in the open position. The washing machine has a circular door in the open position, and the gas cooker has an opening lower drawer. During the past few days I have removed all of the wall panels that were pinned to the baseboard floor plan, and then produced an outline on tracing paper that will allow me to cut out a large sheet of foam board, which will be the ceilings panel to cover all of the rooms. There will be a second identical sheet of foam board that will form the base of the roofing structure . . . David
-
Logged in with my email address . . . No problem. David
-
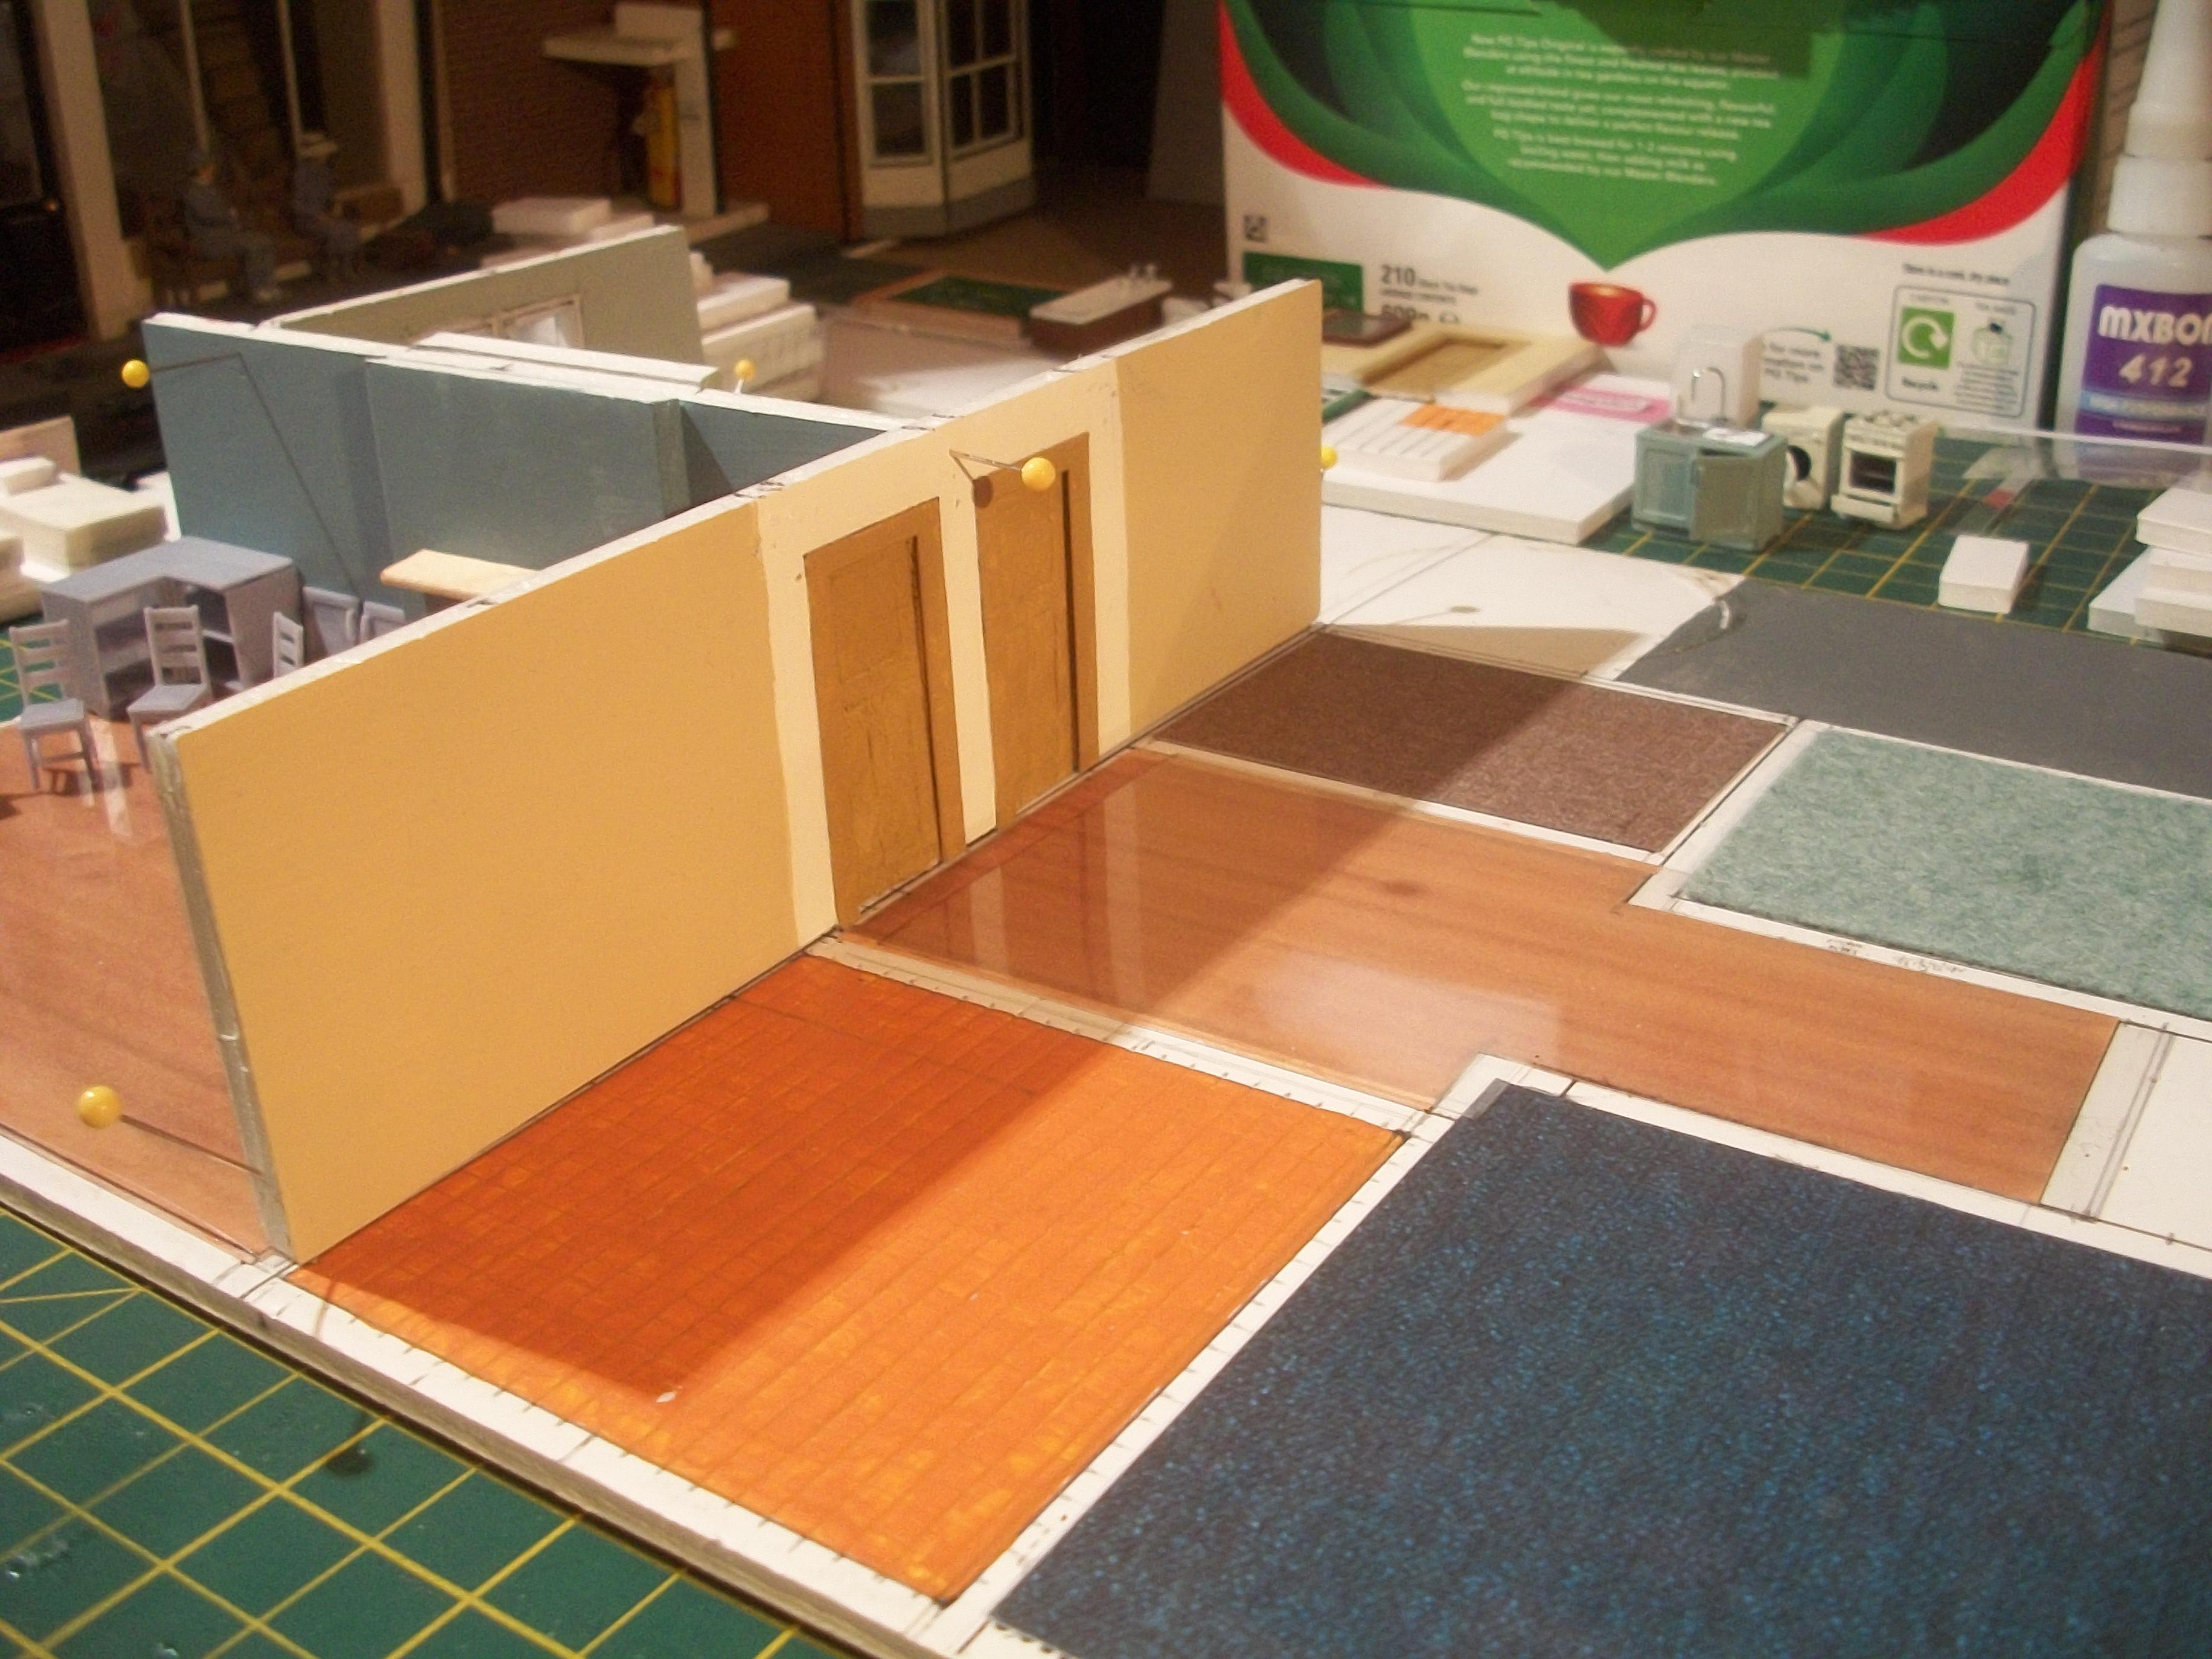
The six interior doors have been fitted in place around the entrance hall area, with each door leading to the six rooms. Also, the wall panels of the hall are now painted Magnolia emulsion . . . The process of hinging the front door was quite tricky, and I think it has turned out reasonably well. Having super glued a length of brass rod to the back of the door, on the inside, this rod fits into a tiny hole that is drilled up into the balsa lintel. At the bottom end, the rod fits into the foam board base board, and the door opens and closes as I had intended . . . The following photos show the front door with the brass letter box in place, and also the brass Yale lock fitted . . . David
-
The last couple of days have been spent productively, creating the paneling on the six interior doors, using the tip of a small screwdriver, and these balsa wood doors were then painted with Revell Matt Brown 88 enamel on both sides . . . I then made up 12 interior door frames from thin white card, which were also painted in the same wood brown colour. Following the overnight drying of the enamel painting, I have painted the remaining wall panels with emulsion paint, some in Magnolia and some in Earth Balance (yellow). The Magnolia walls are for the entrance hallway . . . The next stage will be the setting up of the green front door. This door will hinge open to the right, and it will have a brass letter box, brass Yale lock and a brass handle. The main front door support posts on either side of the door frame cannot be glued to the two adjacent walls until those walls have been glued to the baseboard later . . . David
-
Thanks Paul . . . Back when I was 3D printing, I found the PLA process quite complex, but as you say the process of printing in resin is even more challenging. This seller on Ebay has a wide range of small products in different scales, all of which are 3D printed in resin . . . The quality of these parts is excellent, they are nice and smooth, with no lines or flash. I was expecting the freestanding gas oven cooker to be more or less a one piece solid model, so it was a pleasant surprise to find that the cooker has 6 parts to it. There is even a piece of clear glass (plastic) for the oven door . . . The 3D resin printers are usually more expensive than the PLA printers, and you have to purchase additional consumable products to use them. David
-
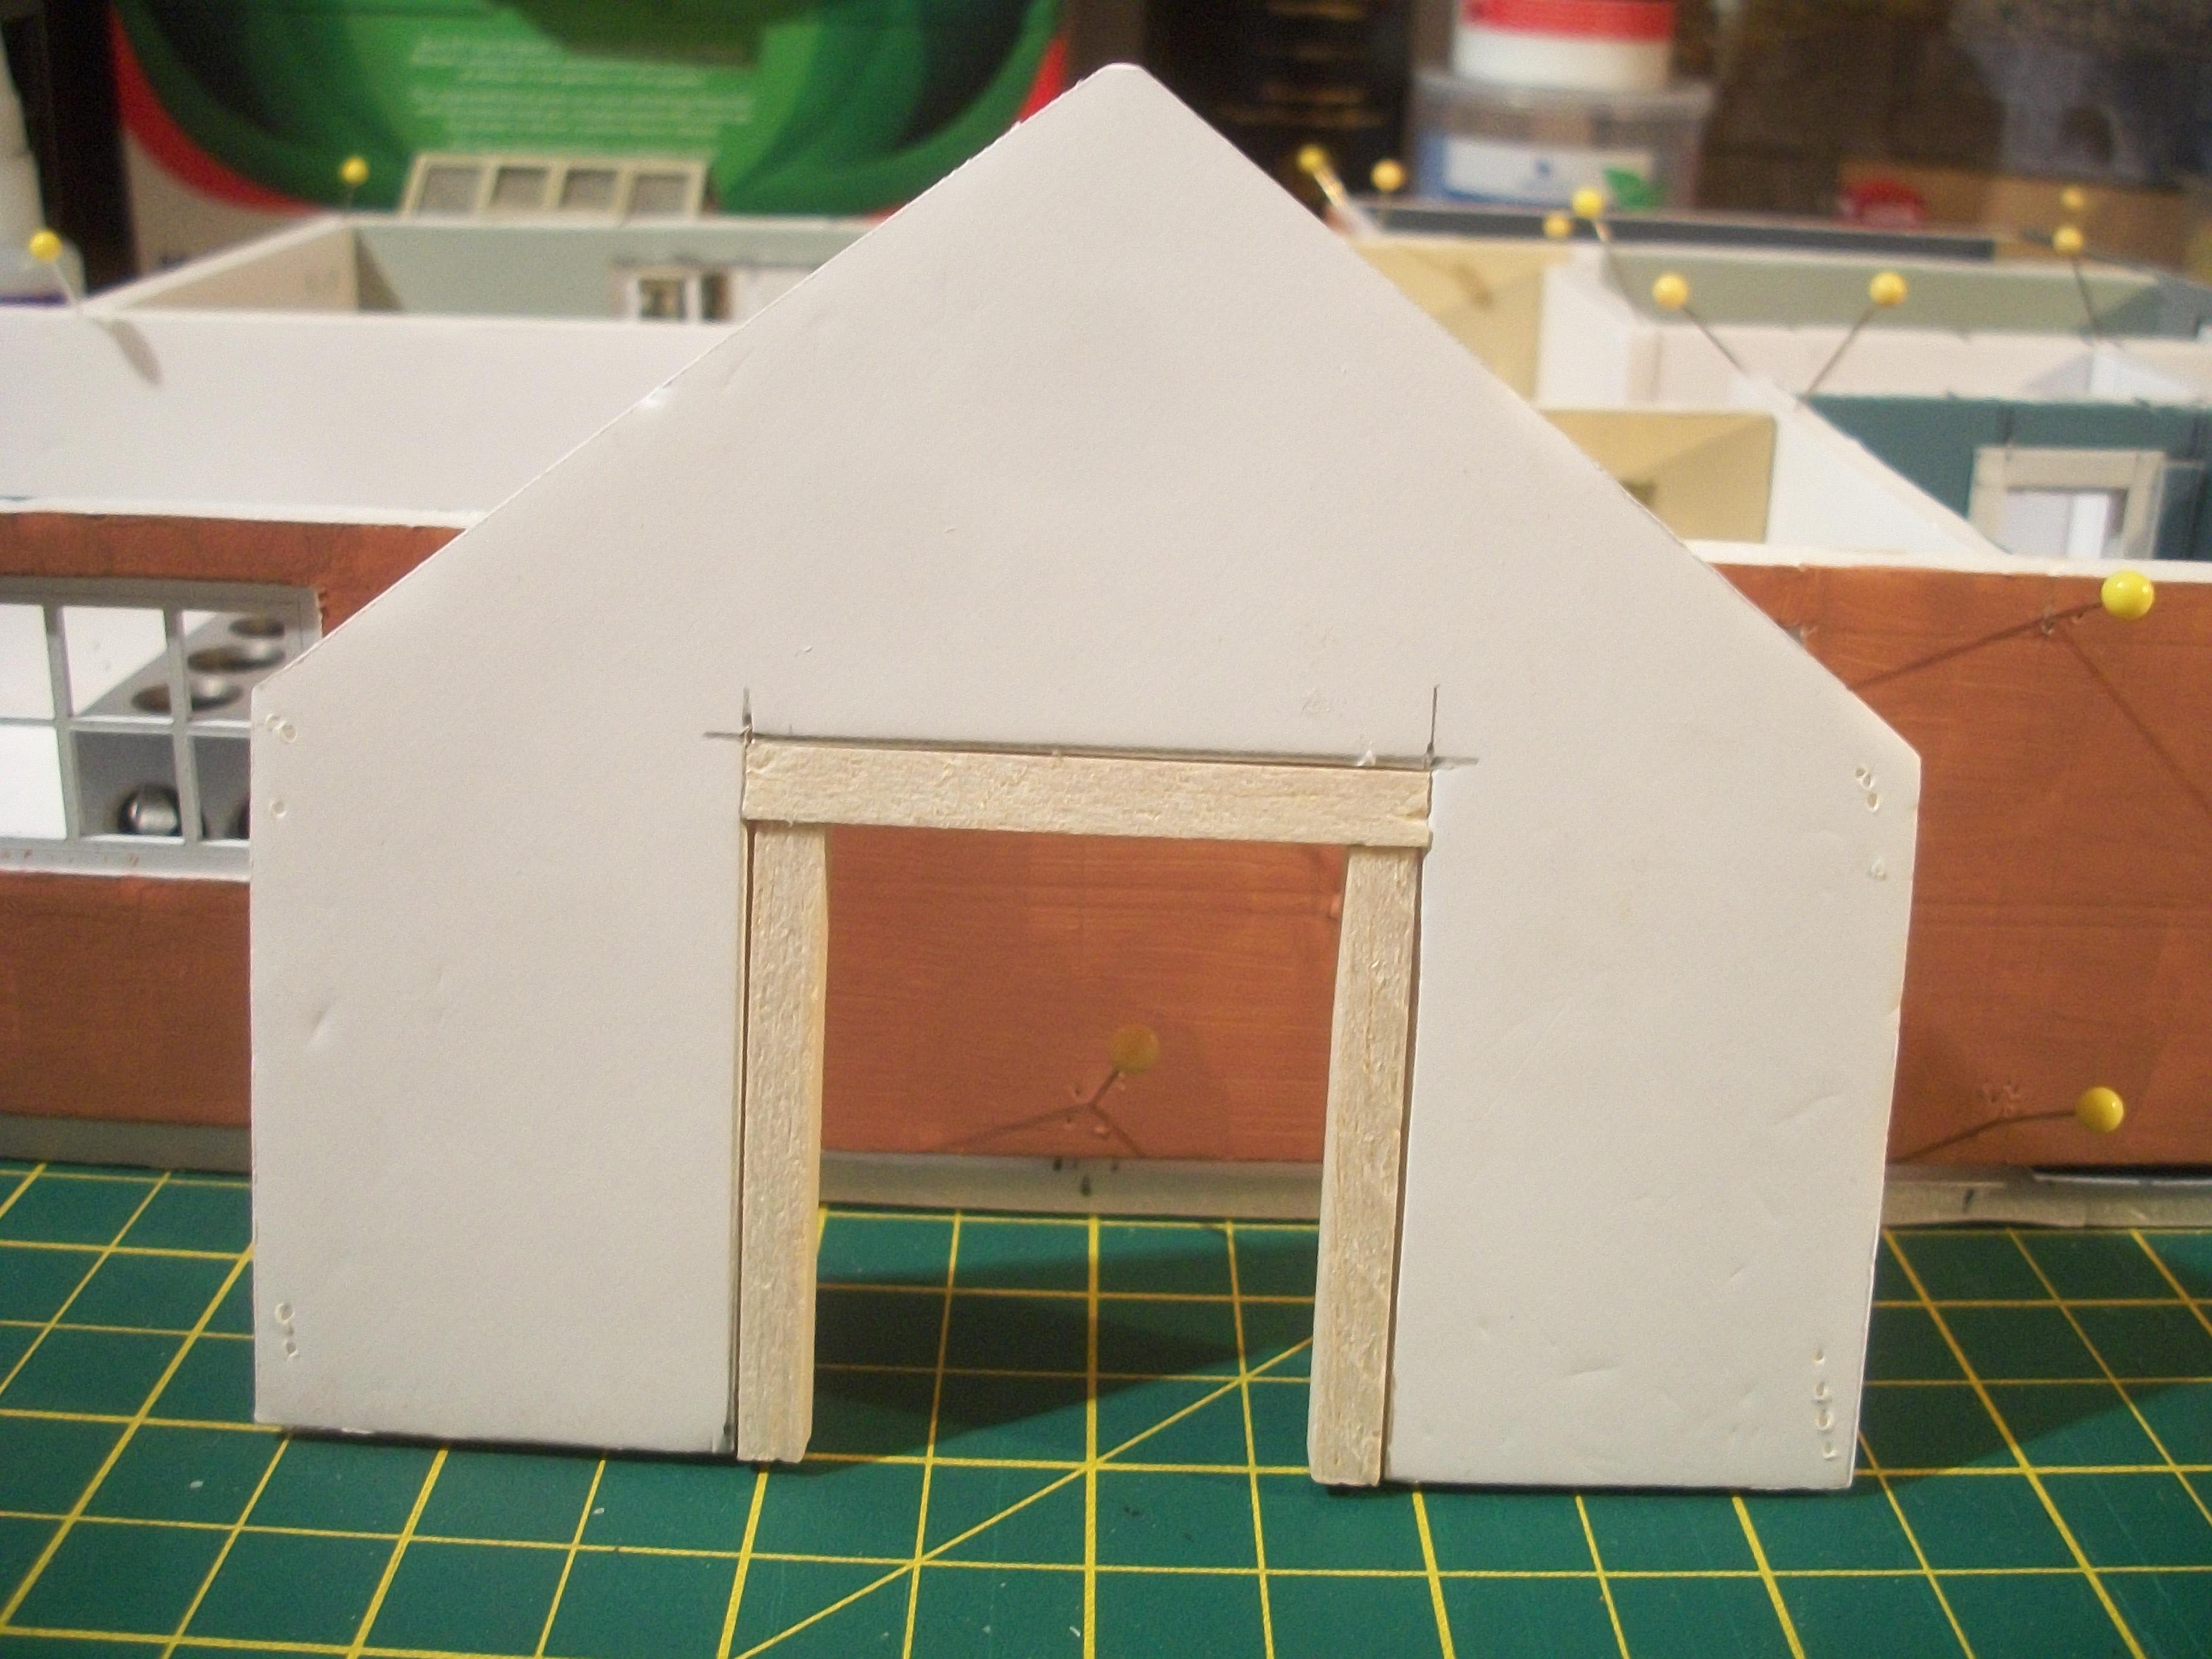
Having scratch built the double garage doors from balsa, I have made the hinges from 0.8 mm brass rod, so that they can be open or closed. Also, I have made up the main front entrance door from the parts sent to me from a company in York, and this is now ready to have hinges fabricated. The table for the living room was made from balsa, and a second table made for the kitchen area . . . I picked up some kitchen appliances on Ebay, which are 3D printed in resin, and these are really nice. The freestanding gas cooker has 6 parts, also a sink with 5 parts and a washing machine with 3 parts. I purchased some bungalow plan drawings from the company that provided me with the floor plan, and they kindly added a roof plan to the set, at a cost of £9.99. The drawings are in PDF format, and I got my A4 printed plans photocopied in A3 at the local library for one pound. David
-
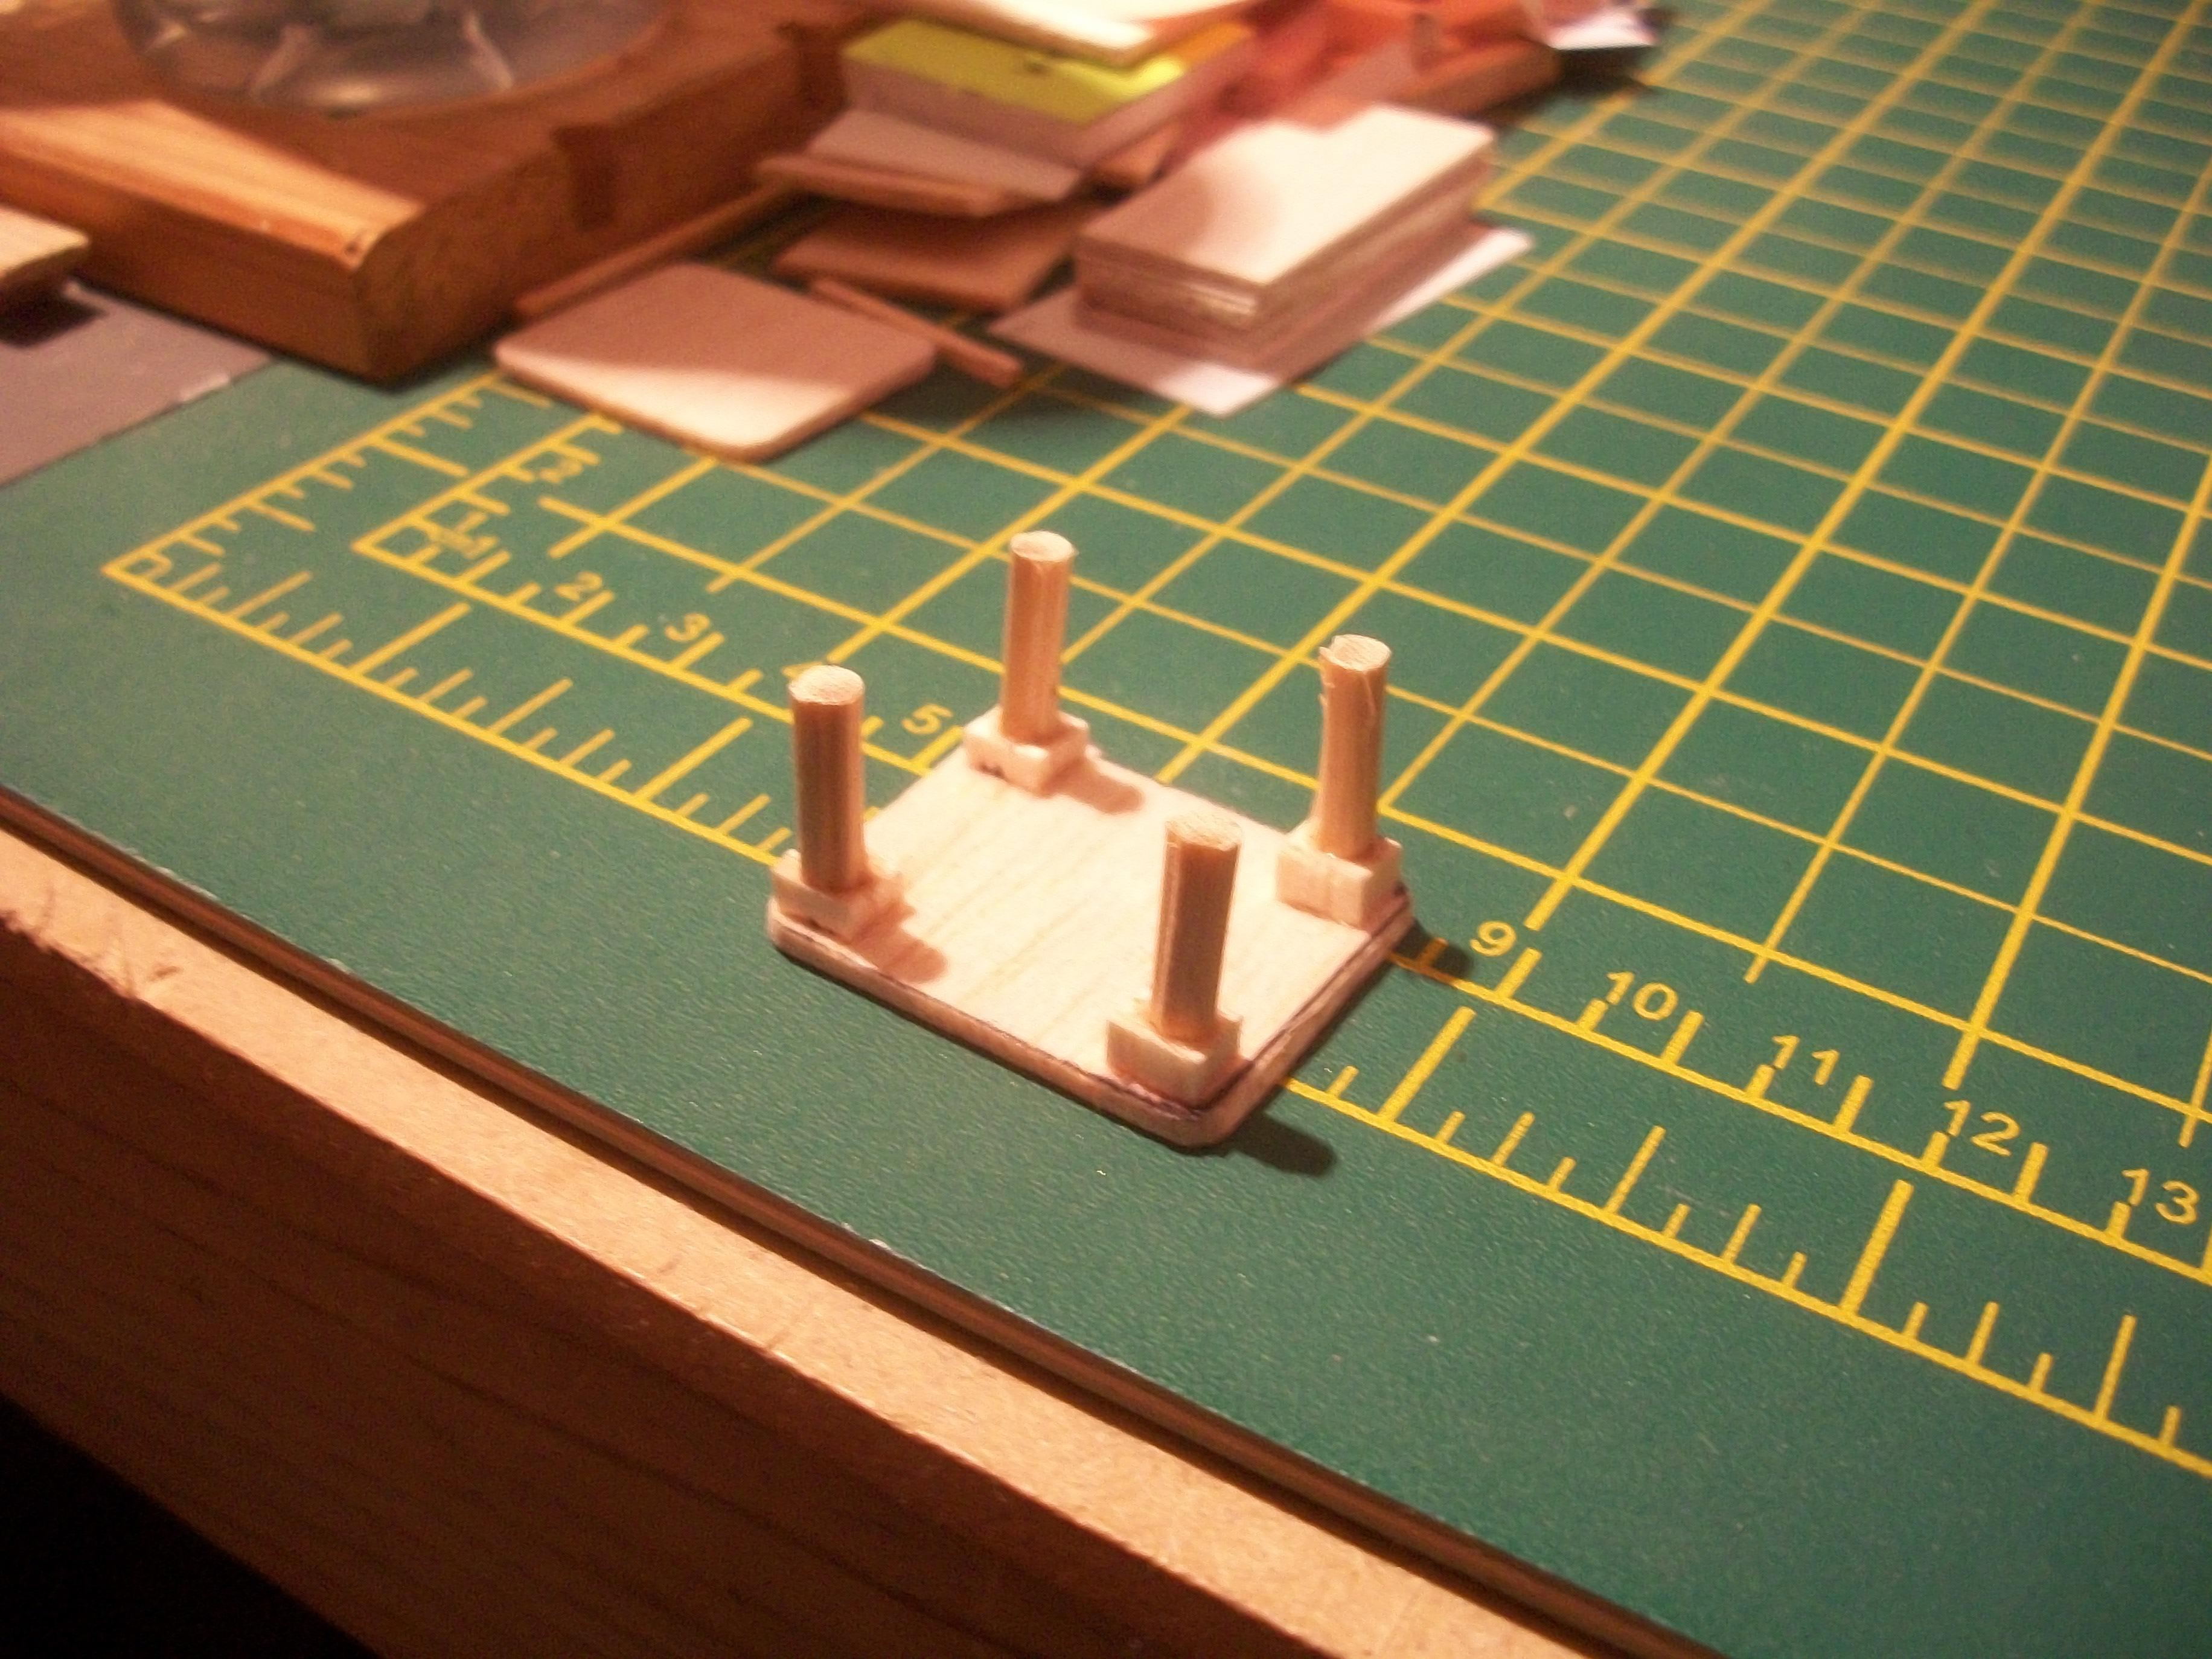
Today I managed to get hold of a PDF image file that shows the roof of the bungalow directly from above . . . This was a matter of concern for me, because the roof construction is rather complicated. There are eight panels of tiled roofing, and the few images that I had did not show how the roof must be constructed. Also today, I fabricated the double garage doors, using a photo of some 1930's Art Deco doors . . . These are scratch built in balsa, and I have applied two coats of Humbrol Gloss Green enamel paint, which is being allowed at least 24 hours to dry before handling. The main front entrance door to the bungalow has also been coated with the same gloss green paint. I have made a table from balsa, which has rounded corners to the table top and four sturdy legs. This table is for the living room and there will be a second identical table for the kitchen . . . David
-
Thanks Mark, and more is on the way ! David
-
Thanks Ulf, and your building looks great too . . . Recently I have been reading that super glue is not good with foamboard, as it attacks the foamboard core between the two layers of paper in a bad way . . . The PVA glue is what I would describe as a ' friendly ' glue, because it takes overnight to dry slowly, and you can move your walls around to position them correctly, before the glue sets too quickly, and it is washable in water . . . When I exhibited a foamboard building in a marquee tent during June one year, the foamboard warped very badly, as it does not like the high humidity. This time I am finding that with water based emulsion paint applied on one side only, the foamboard does warp a lot, but once the paint is also applied on the reverse side, the foamboard straightens out perfectly . . . David
-
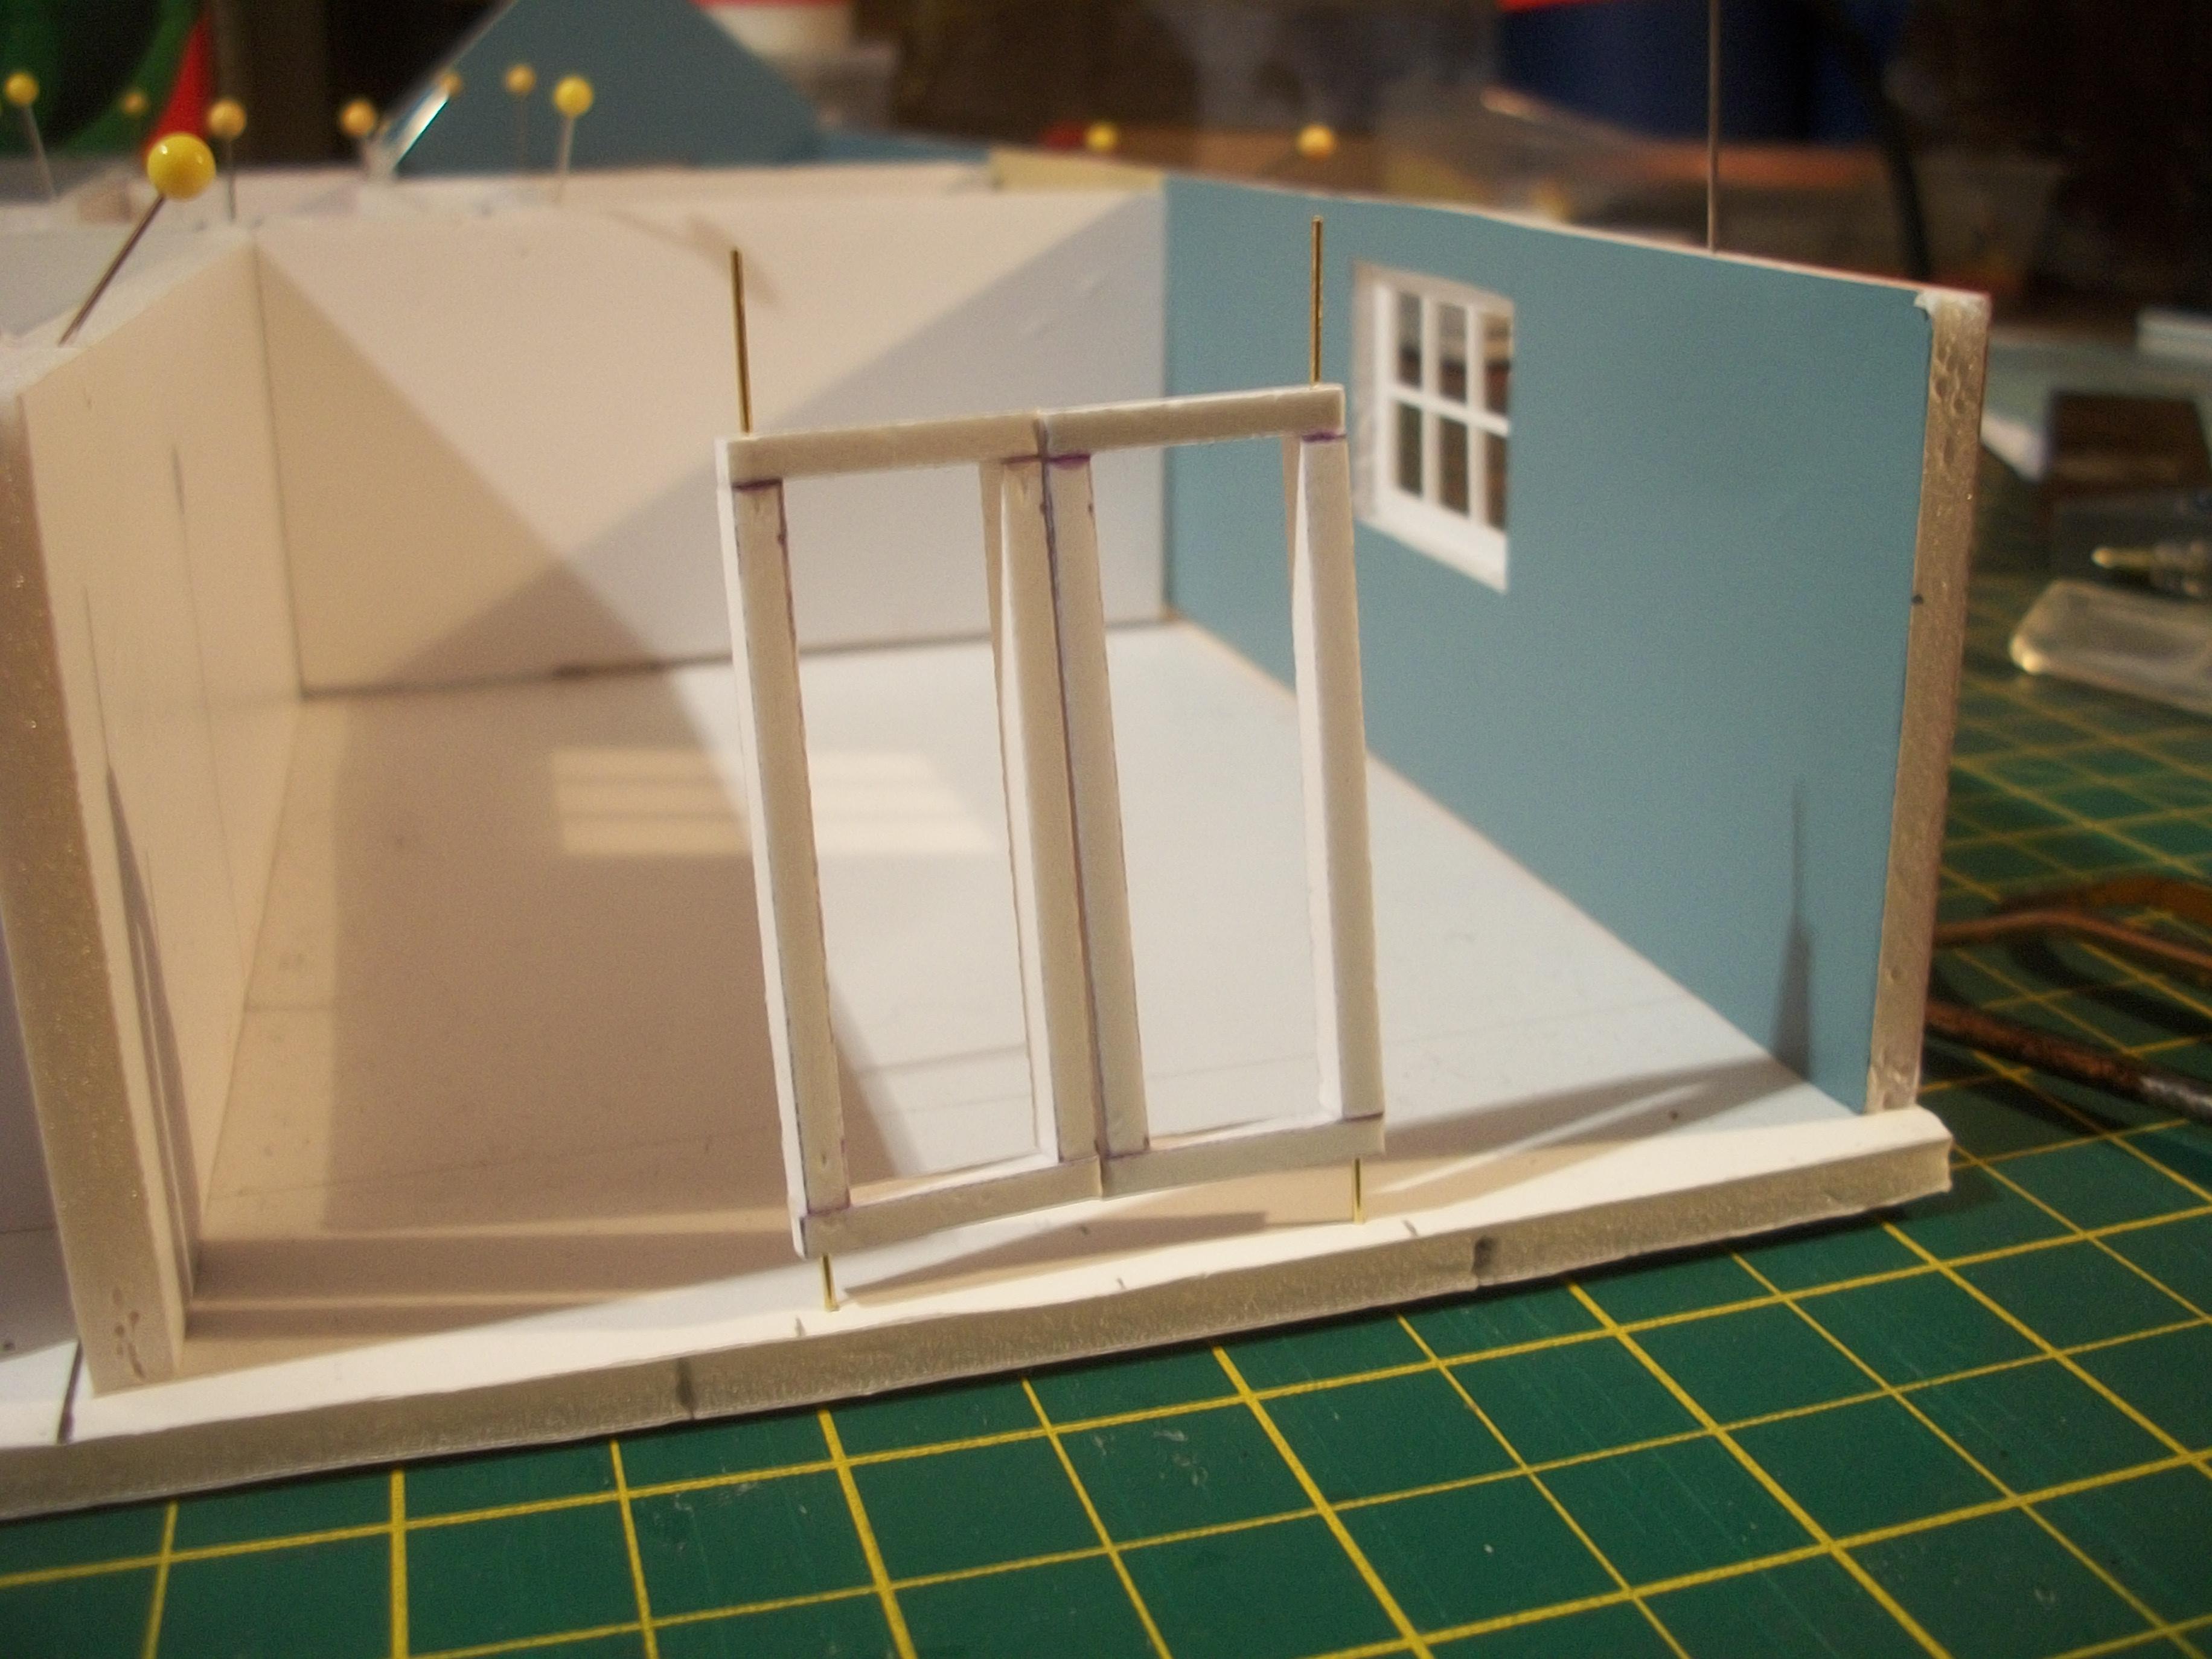
Here is a short summary of the recent work at the rear of the bungalow . . . The kitchen now has a pair of French windows, which have been scratch built from white Foamex board cut into strips for the frames. The outer frame is made from balsa square rod, with the glass cut from thin sheet acetate and glued onto the inside of the door frames , , , I have cut out some pieces of white card to form the horizontal and vertical bars that divide the window panes. Two tiny holes were drilled into the lintel above the doors, and two short pieces of brass rod were inserted into holes in the top edges of both doors. The same procedure was used at the bottom edges of the doors so that the doors can be hinged in the open or closed position . . . The next step will be to paint the outer gable wall of the kitchen in the pink colour emulsion, and paint the inside of this wall in the blue colour. David
-
The whole trestle and abandoned railway scene as part of your diorama has really come together nicely Paul . . . Just like you need HO / OO gauge railway stuff to go with your 1:64 scale format, I am using O gauge railway models with my 1:43 scale format, although strictly speaking the O gauge stuff is 1:48 scale, and not actually 1:43 . . . This is is particularly noticeable with the figures, which look smaller in O gauge. David
-
Yes Steve, my bungalow is intended to have been built during the 1950's over here, so the room layout might have been more common at that time. David