Anglia105E
-
Posts
3,486 -
Joined
-
Last visited
Content Type
Profiles
Forums
Events
Gallery
Everything posted by Anglia105E
-
This is quite a different subject for you Charles, and it really works . . . No trucks or Land Rovers, and this is not an industrial building ! David
-
Thank you kindly David G. . . . Certainly, this whole process feels like what I would have to go through in order to plan and build a real 1:1 bungalow !! David W.

-
This build of yours, of the 1937 Cord is really interesting David G. . . . I can see how you must have struggled with the pivoting headlamps, and also the hinged hood issues. Lifting off the hood to view the engine bay seems to be your best option, given the circumstances . . . The blue paint colour is absolutely perfect for a Cord, and also for this period of motor car production. Wheels, tyres, interior, seating, bodywork and soft top . . . All good !! This could turn out to be one of your most satisfying builds. David W.
-
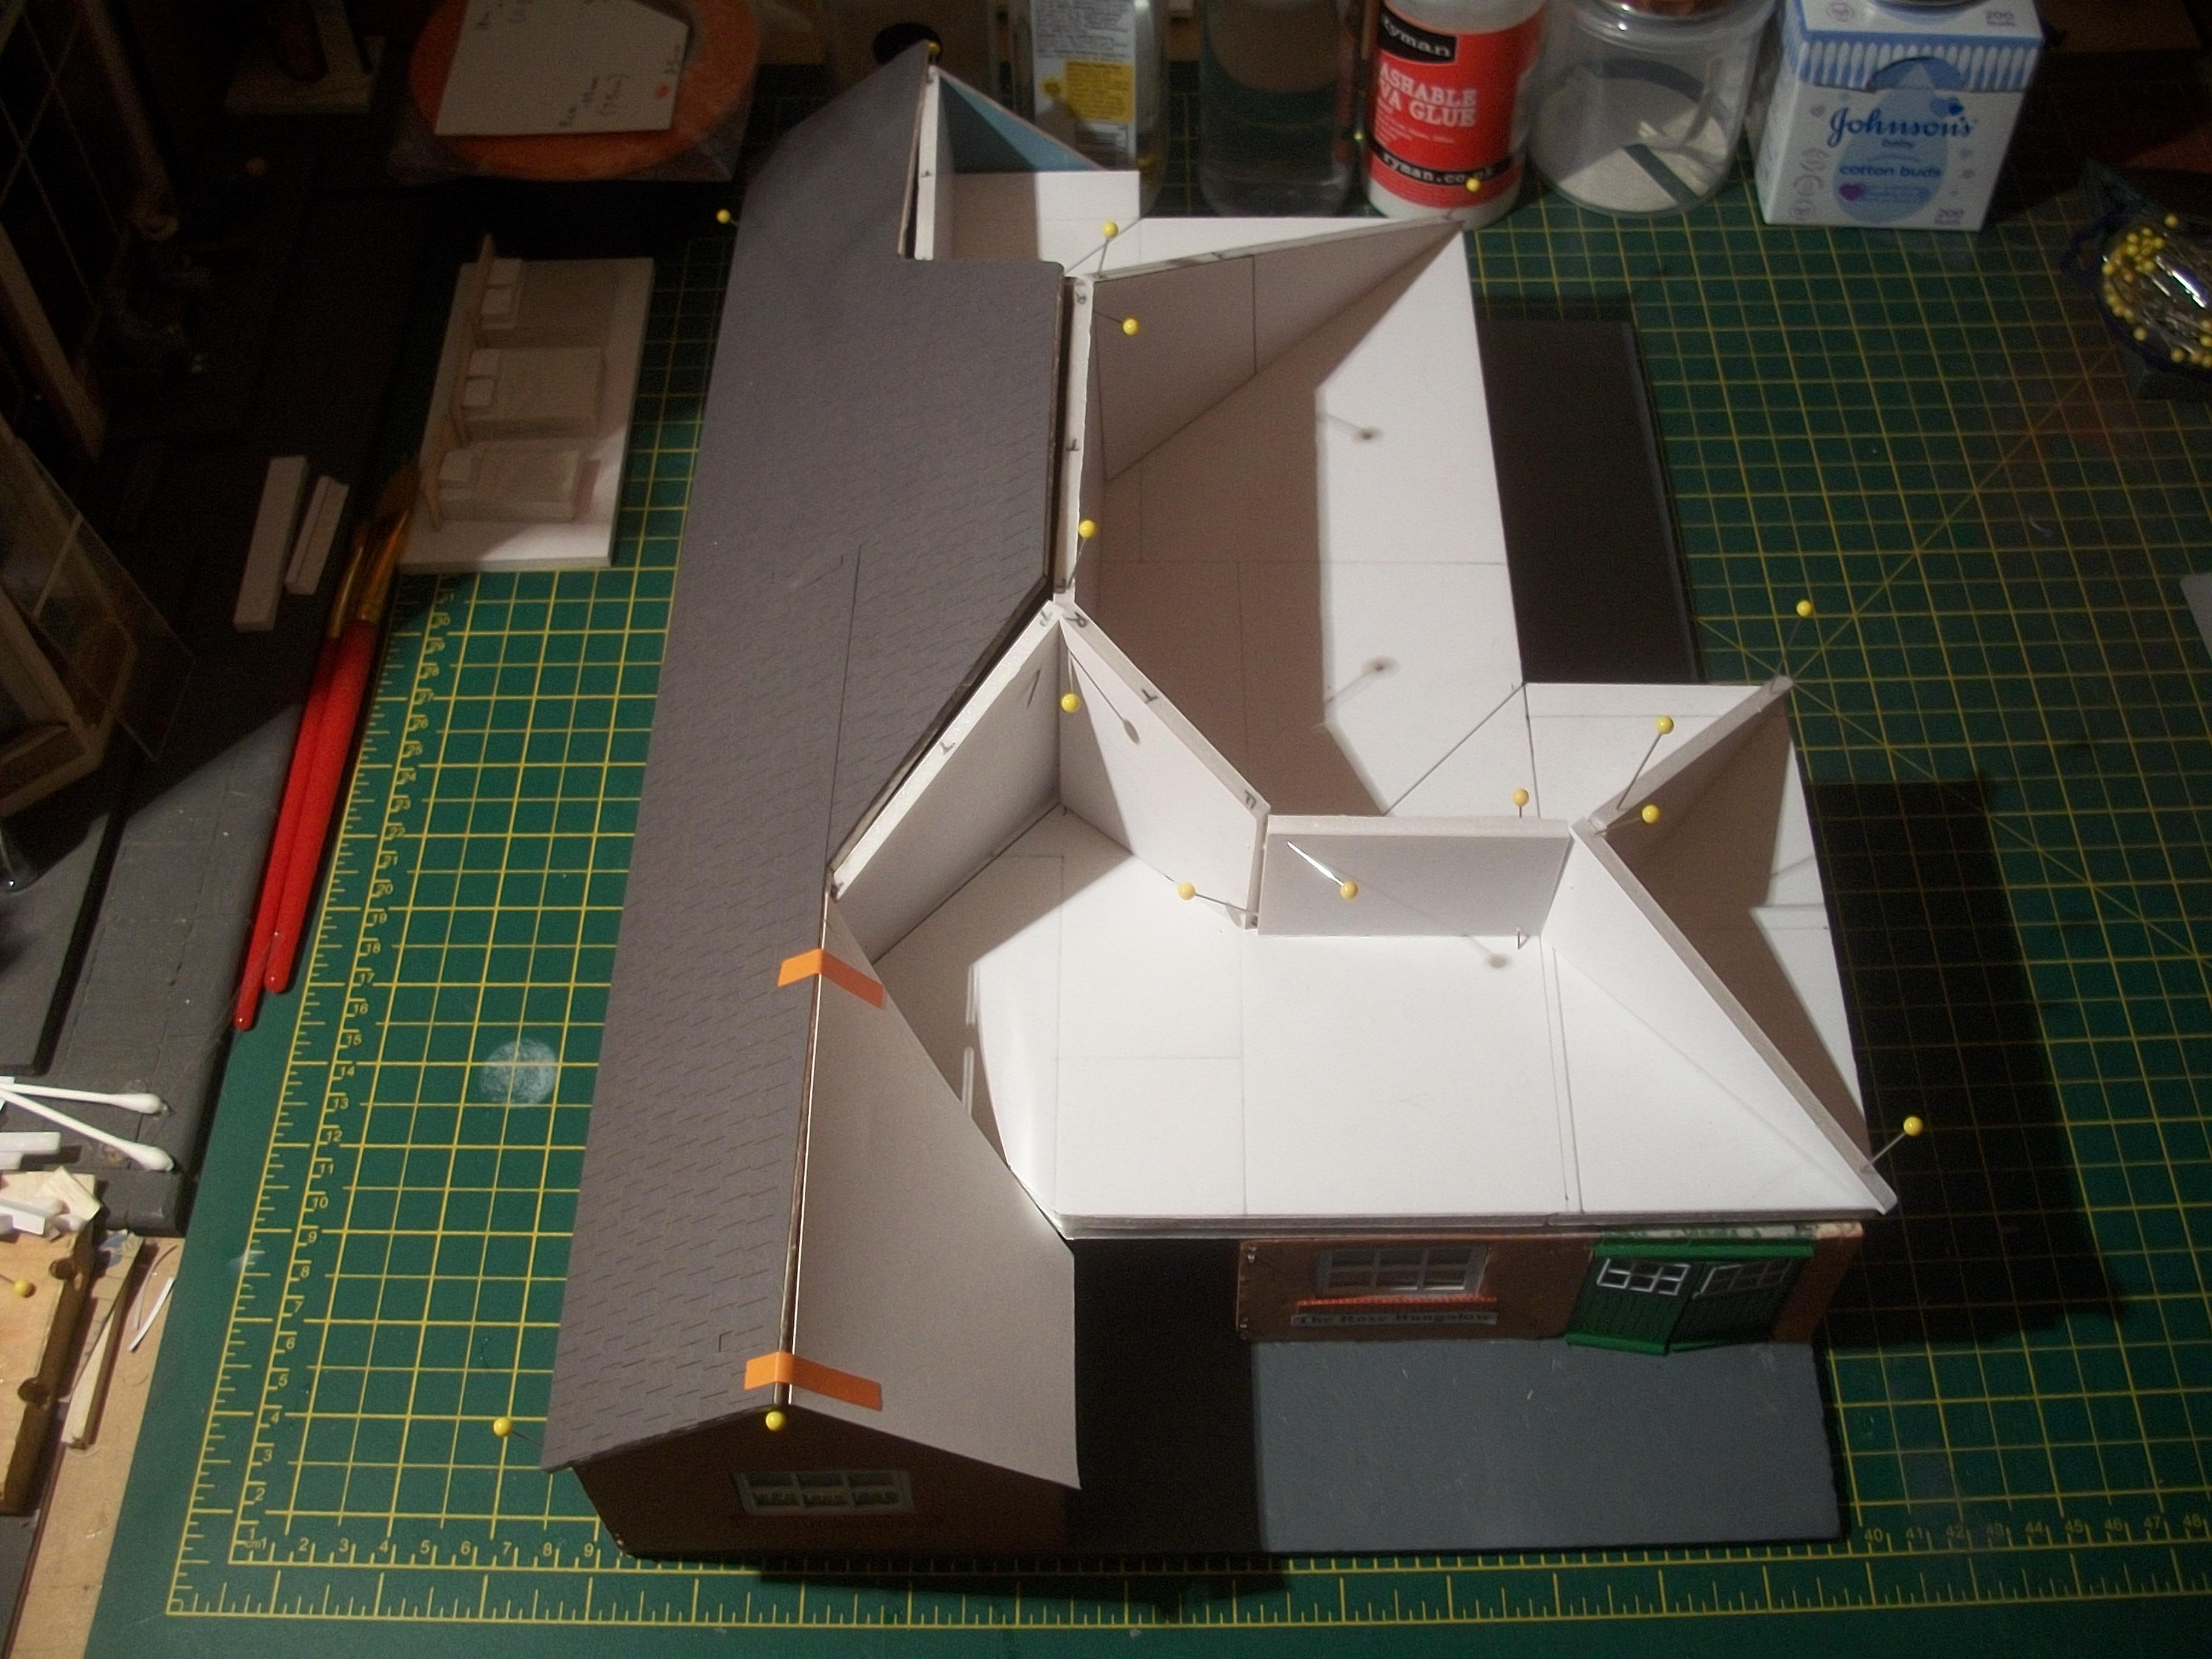
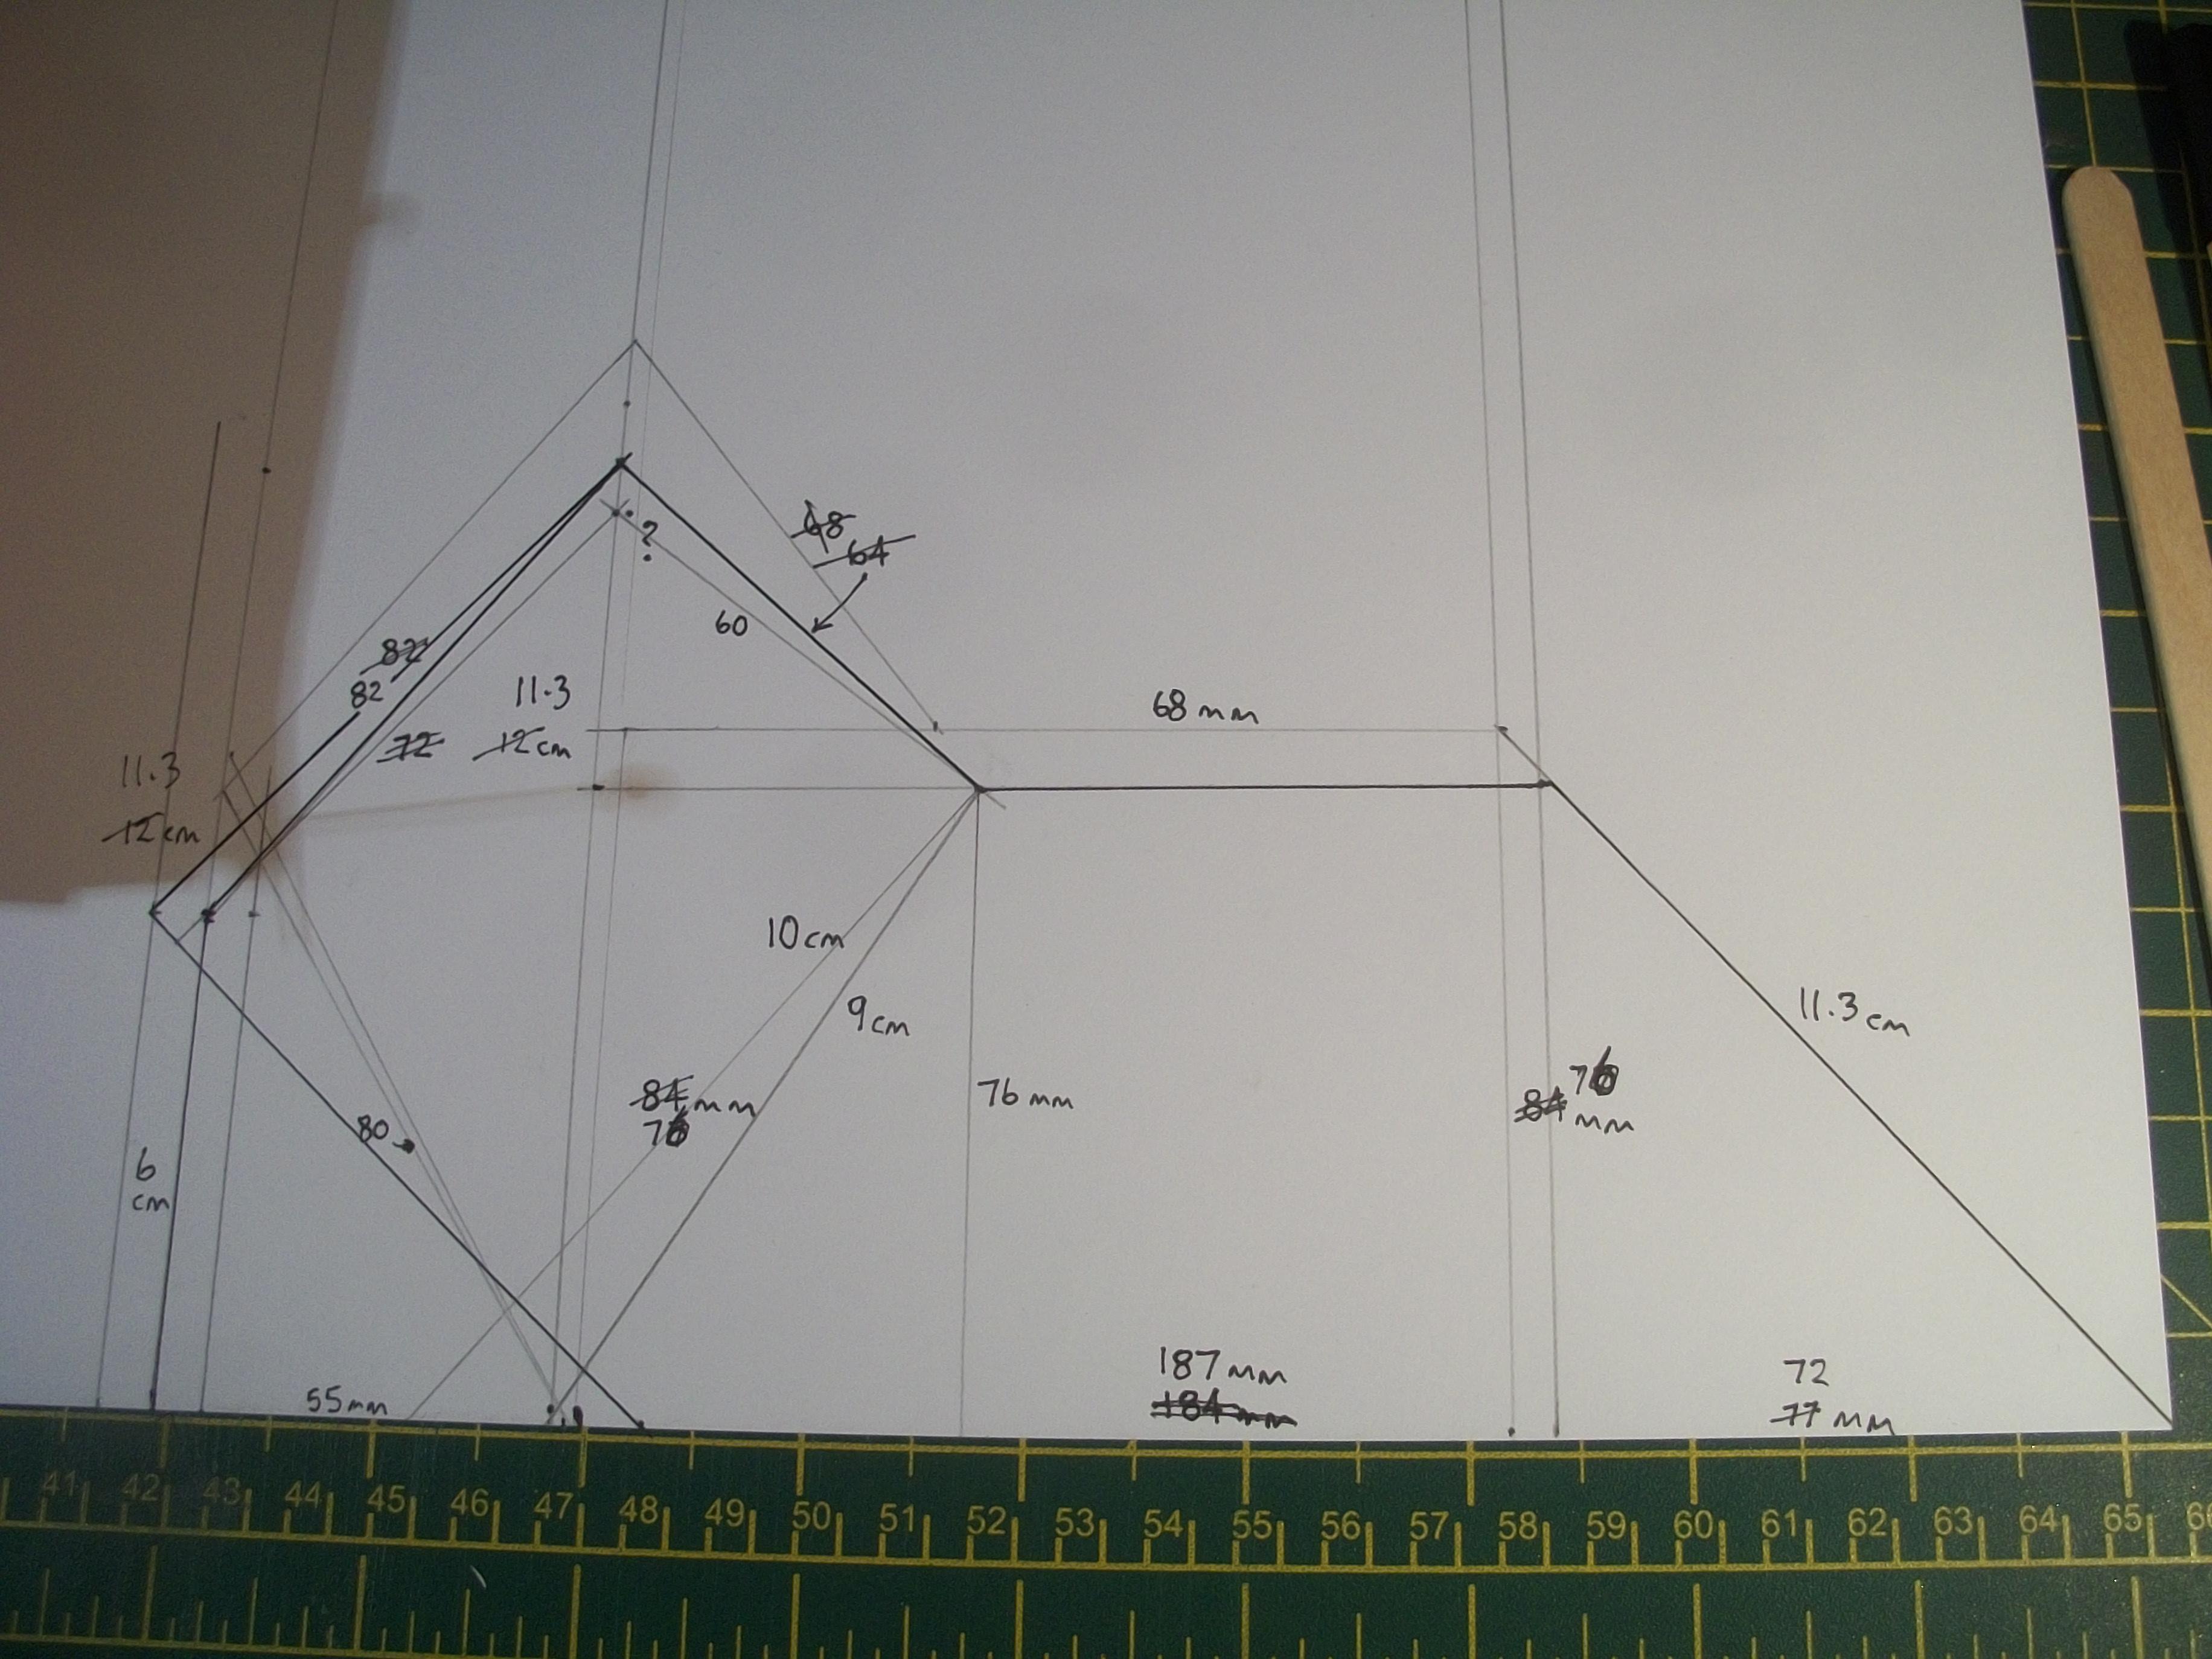
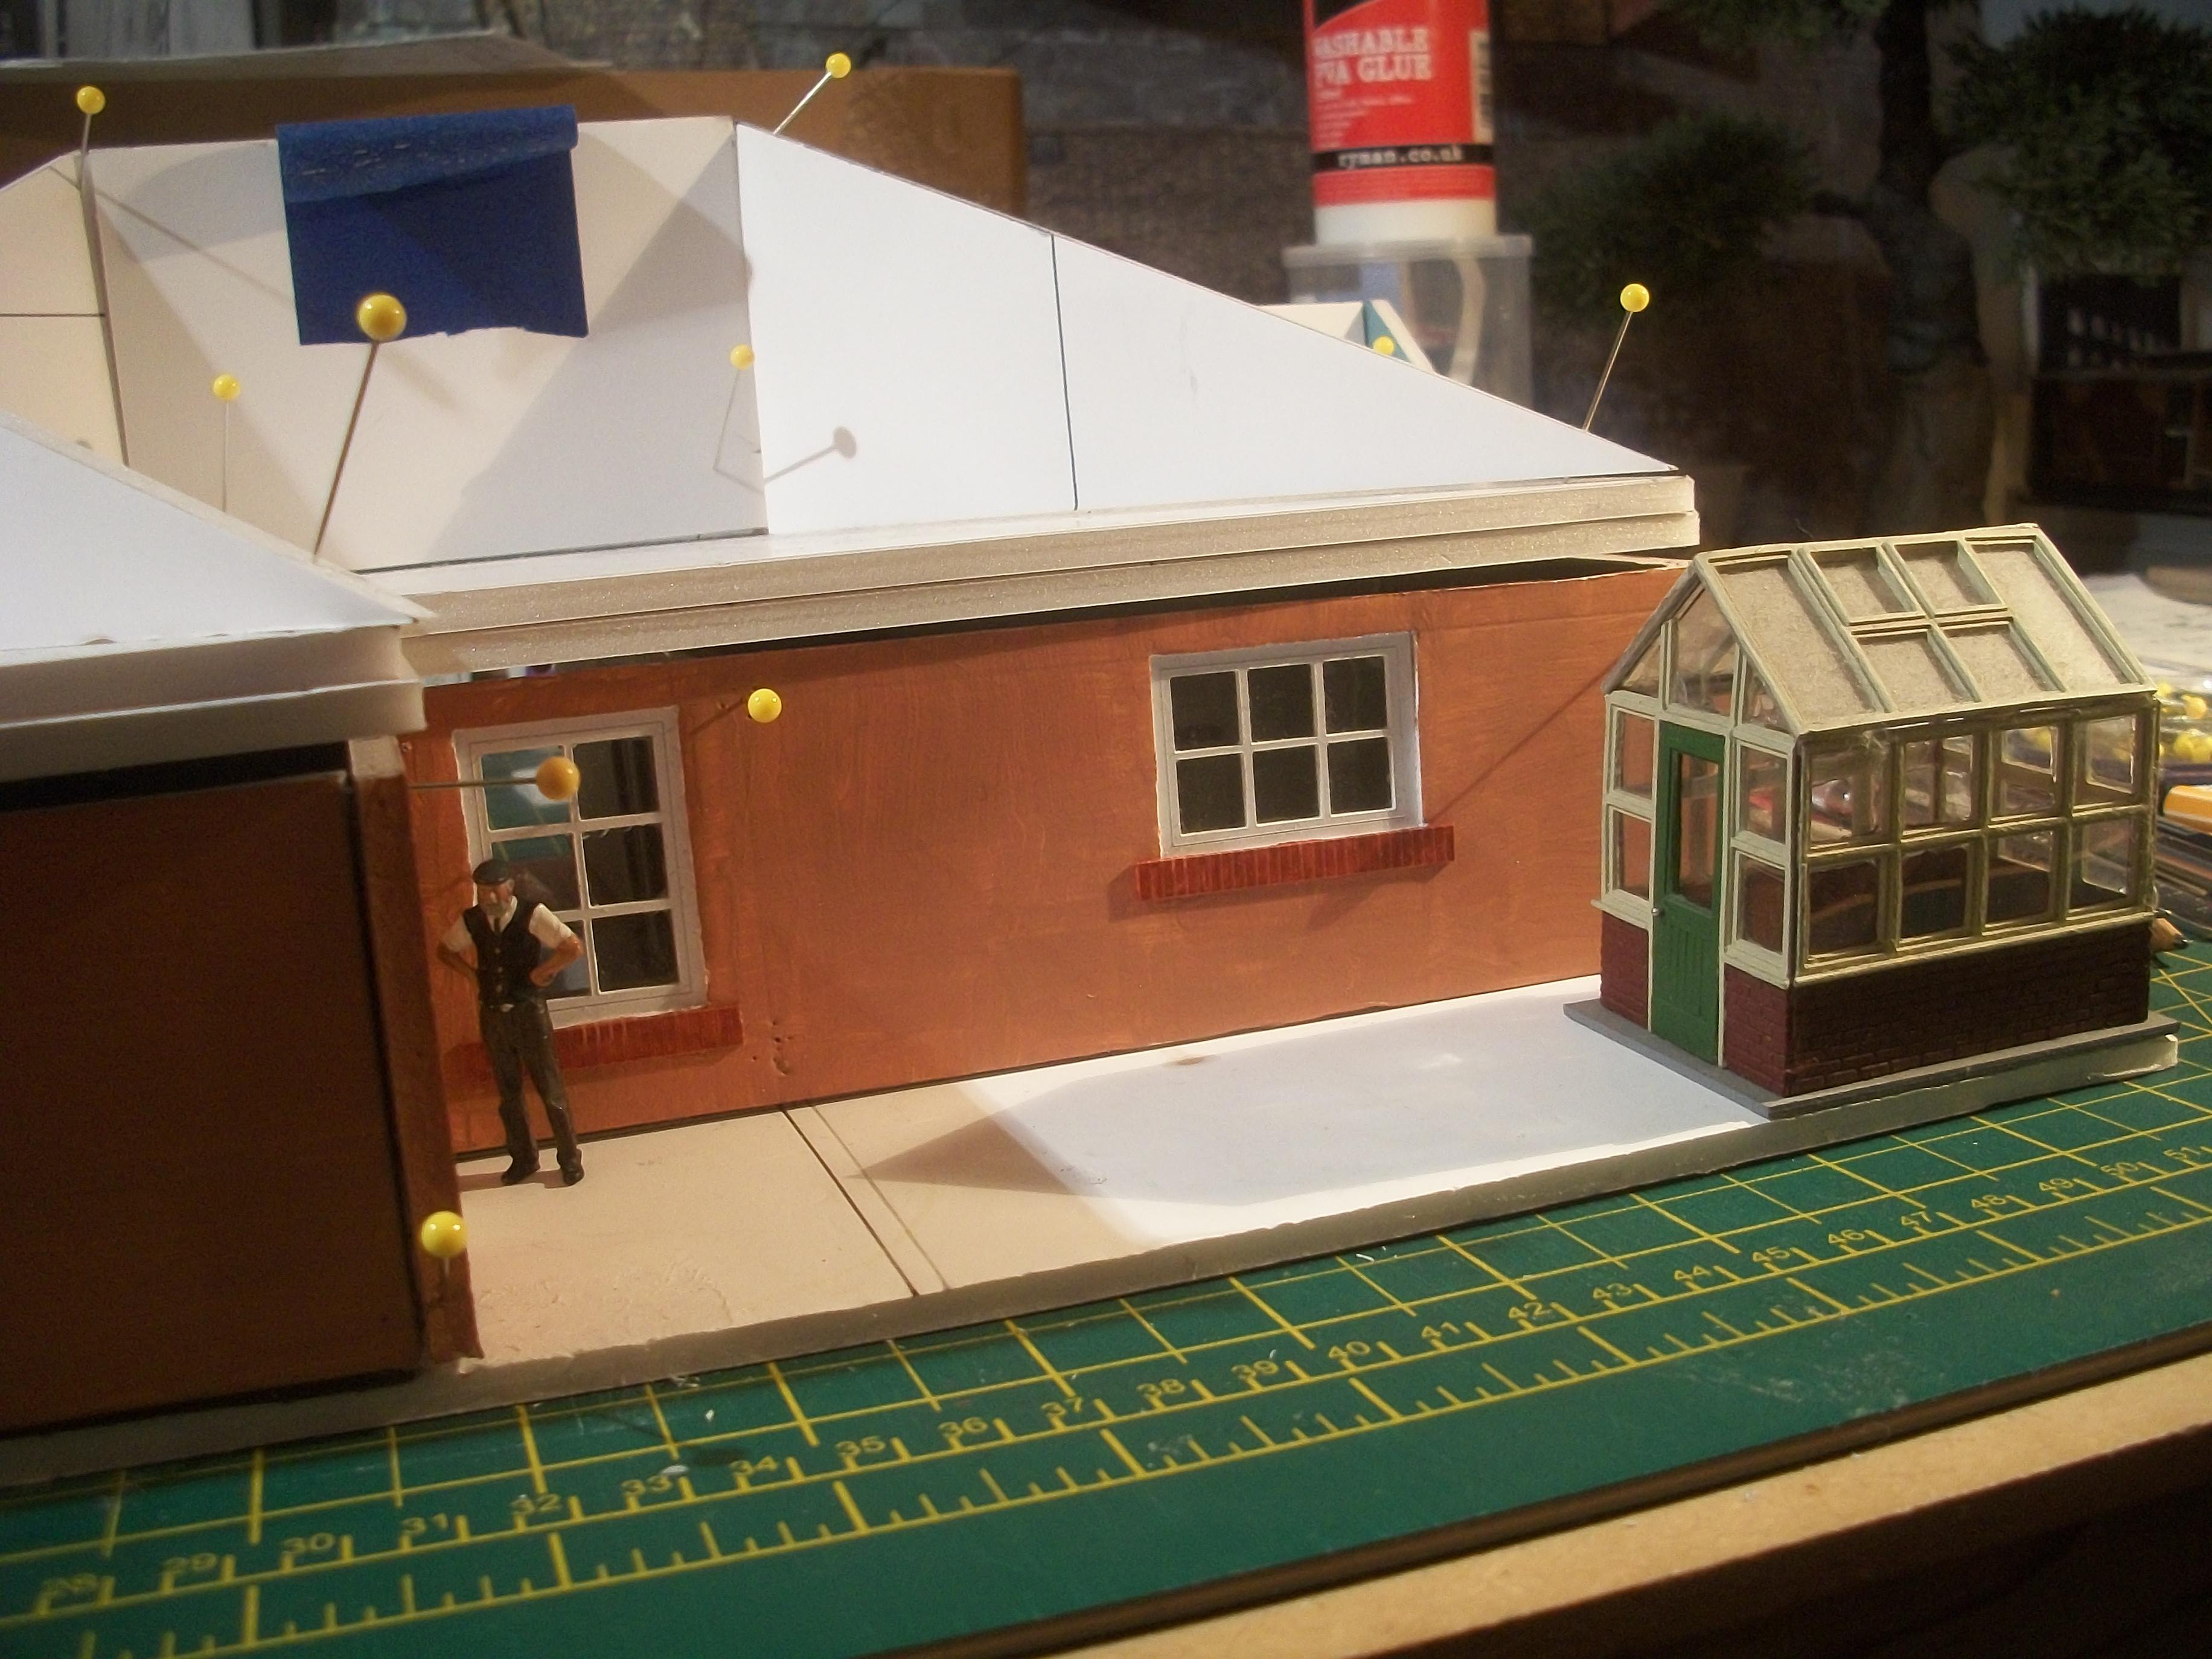
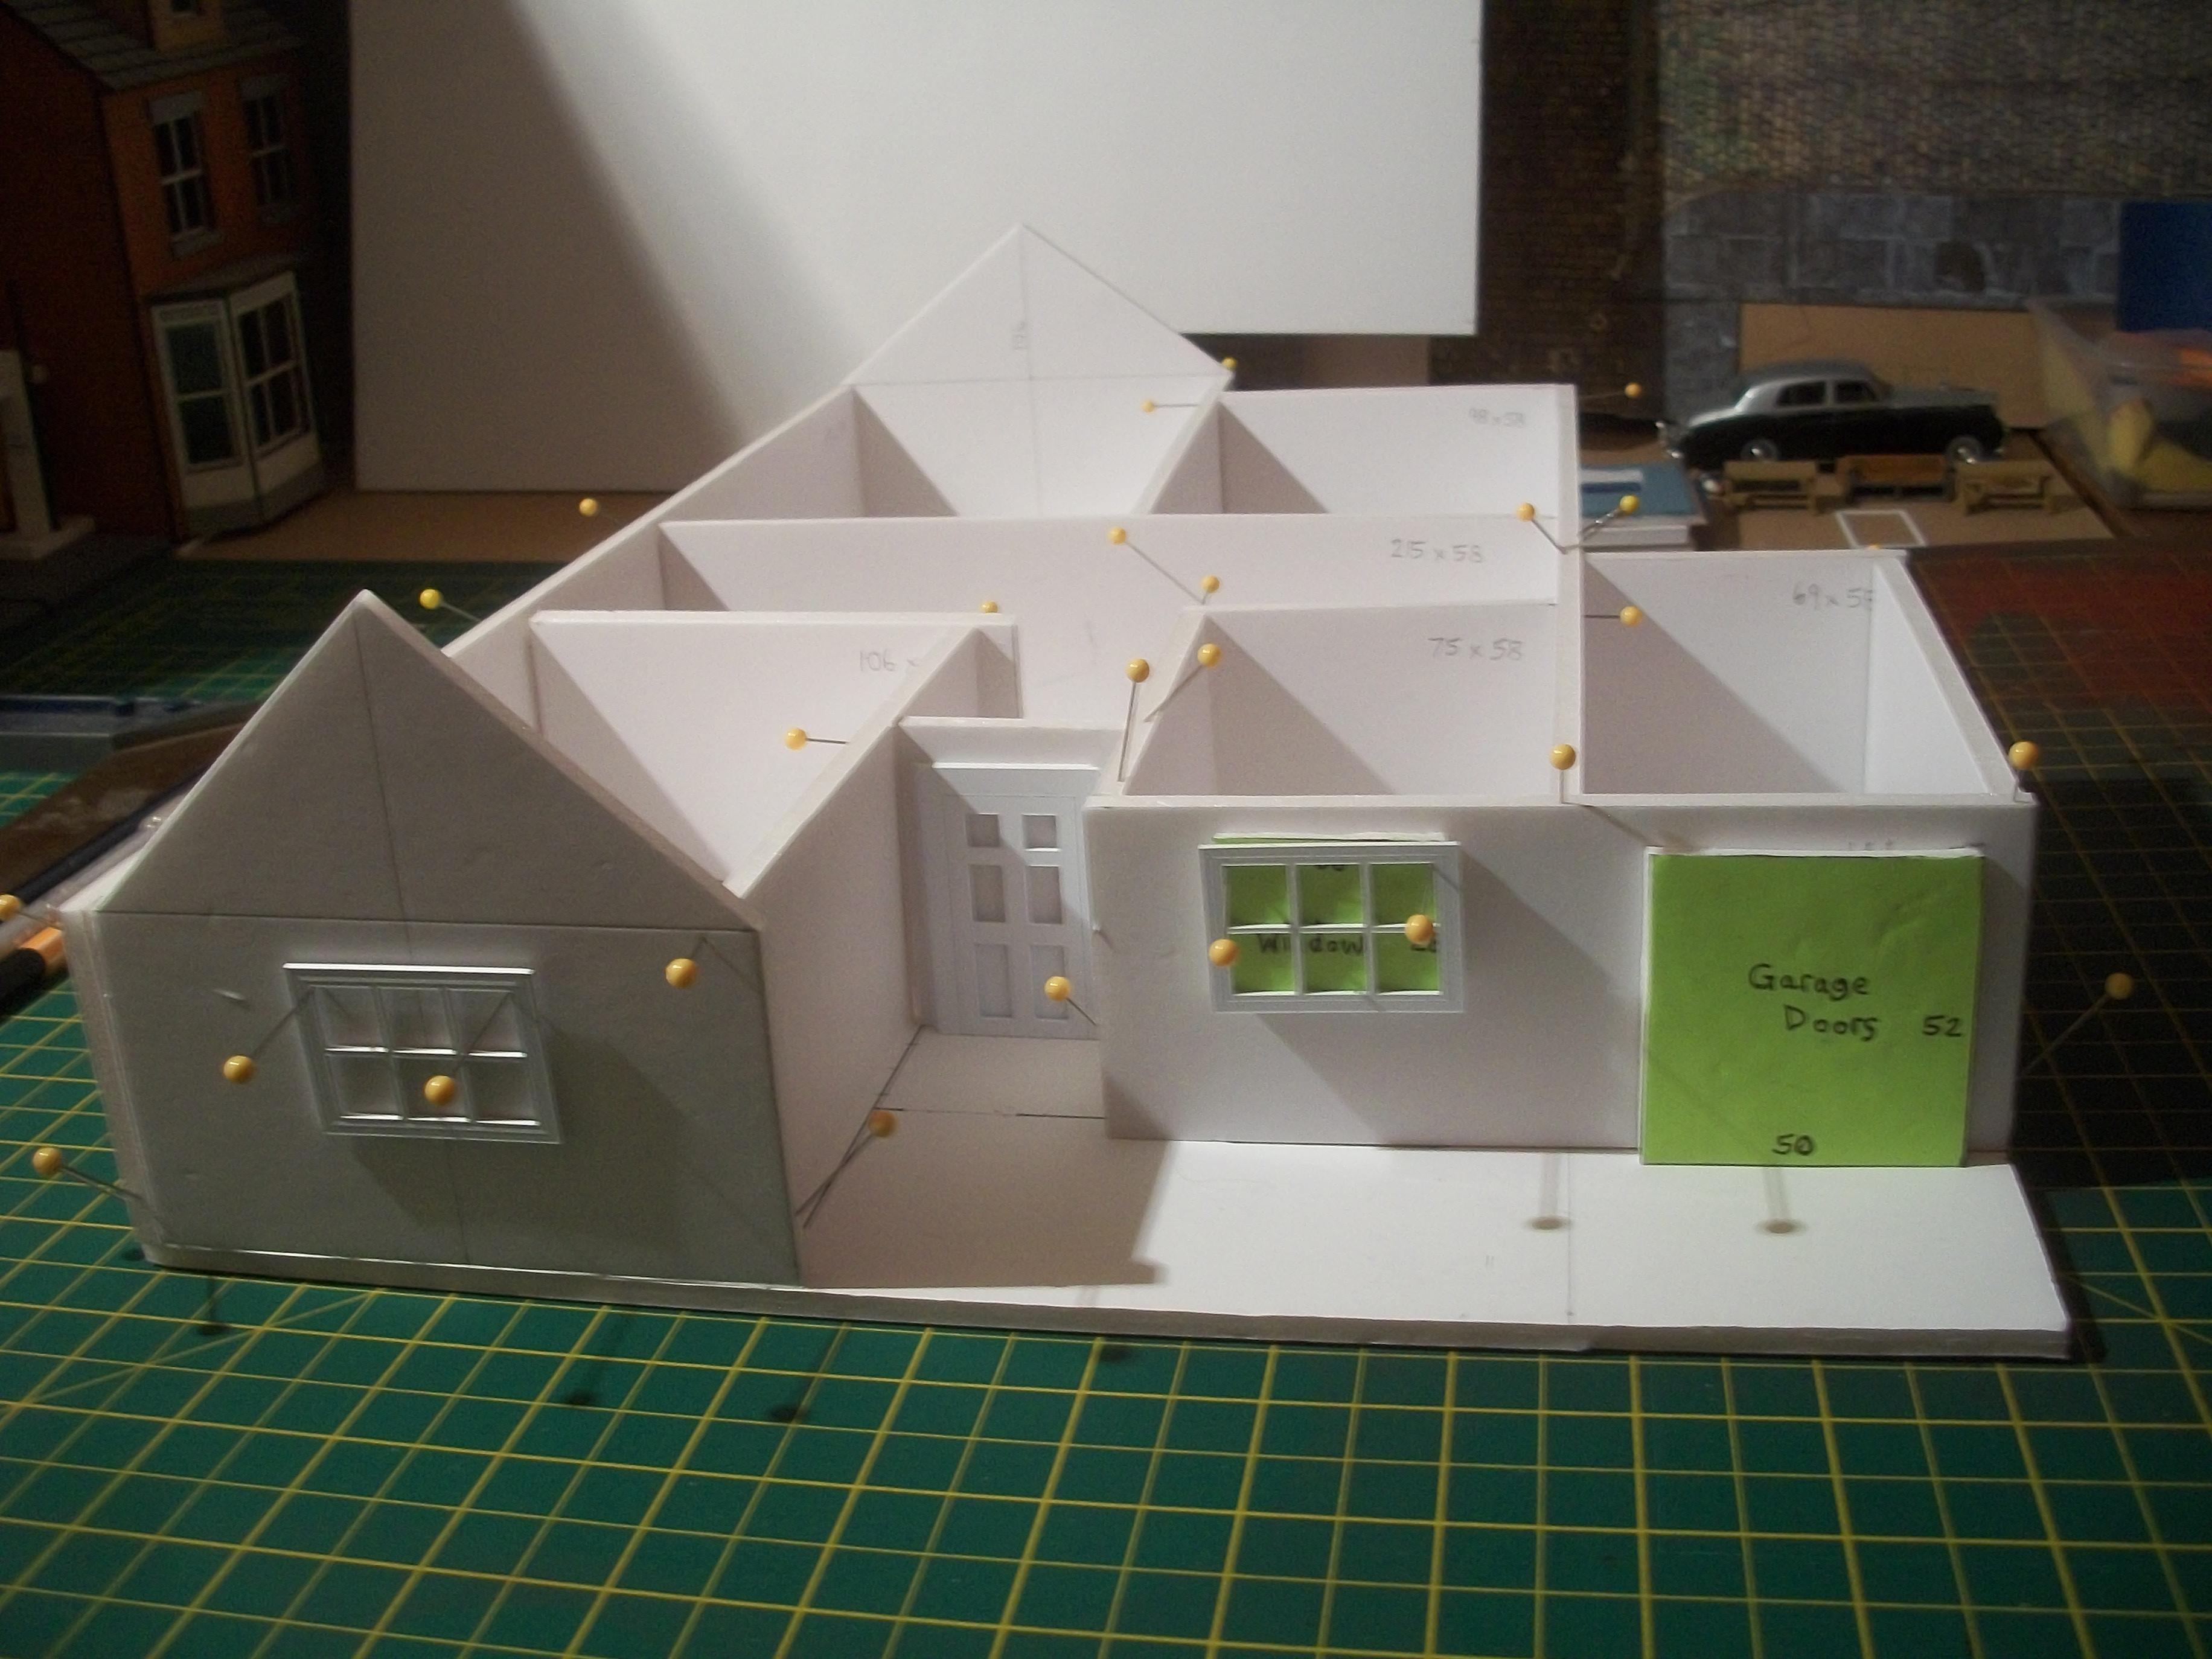
The central front roof section turned out to be extremely difficult to calculate, in terms of angles and dimensions. This was no surprise, as the shape of the roof area is quite complex, which is further compounded by the angle of incline, as the panel rises to the top ridge . . . Maybe I should have used a truss frame and rafters type of construction, rather than opting for the solid foam board trusses and the sheet balsa panels. Anyway, as I am now committed to my chosen method of construction, this involves painstakingly measuring and cutting out thin card templates, which are then translated into sheet balsa panels . . . Each template required two attempts to get the dimensions to an acceptable level of accuracy. Three balsa roof panels are now almost ready to be test fitted to the roof structure, using the orange tape to hold them in place. The largest roof panel is already in place on the left hand side of the bungalow at the gable ends . . . This represents four of eight roof panels prepared so far. I had great difficulty determining the length of the gulley in relation to the ridges, and consequently the required angles to align the whole structure precisely. Some foam board material was removed, in order to provide a chamfered edge to the front of the ceiling board and the roof structure baseboard. David
-
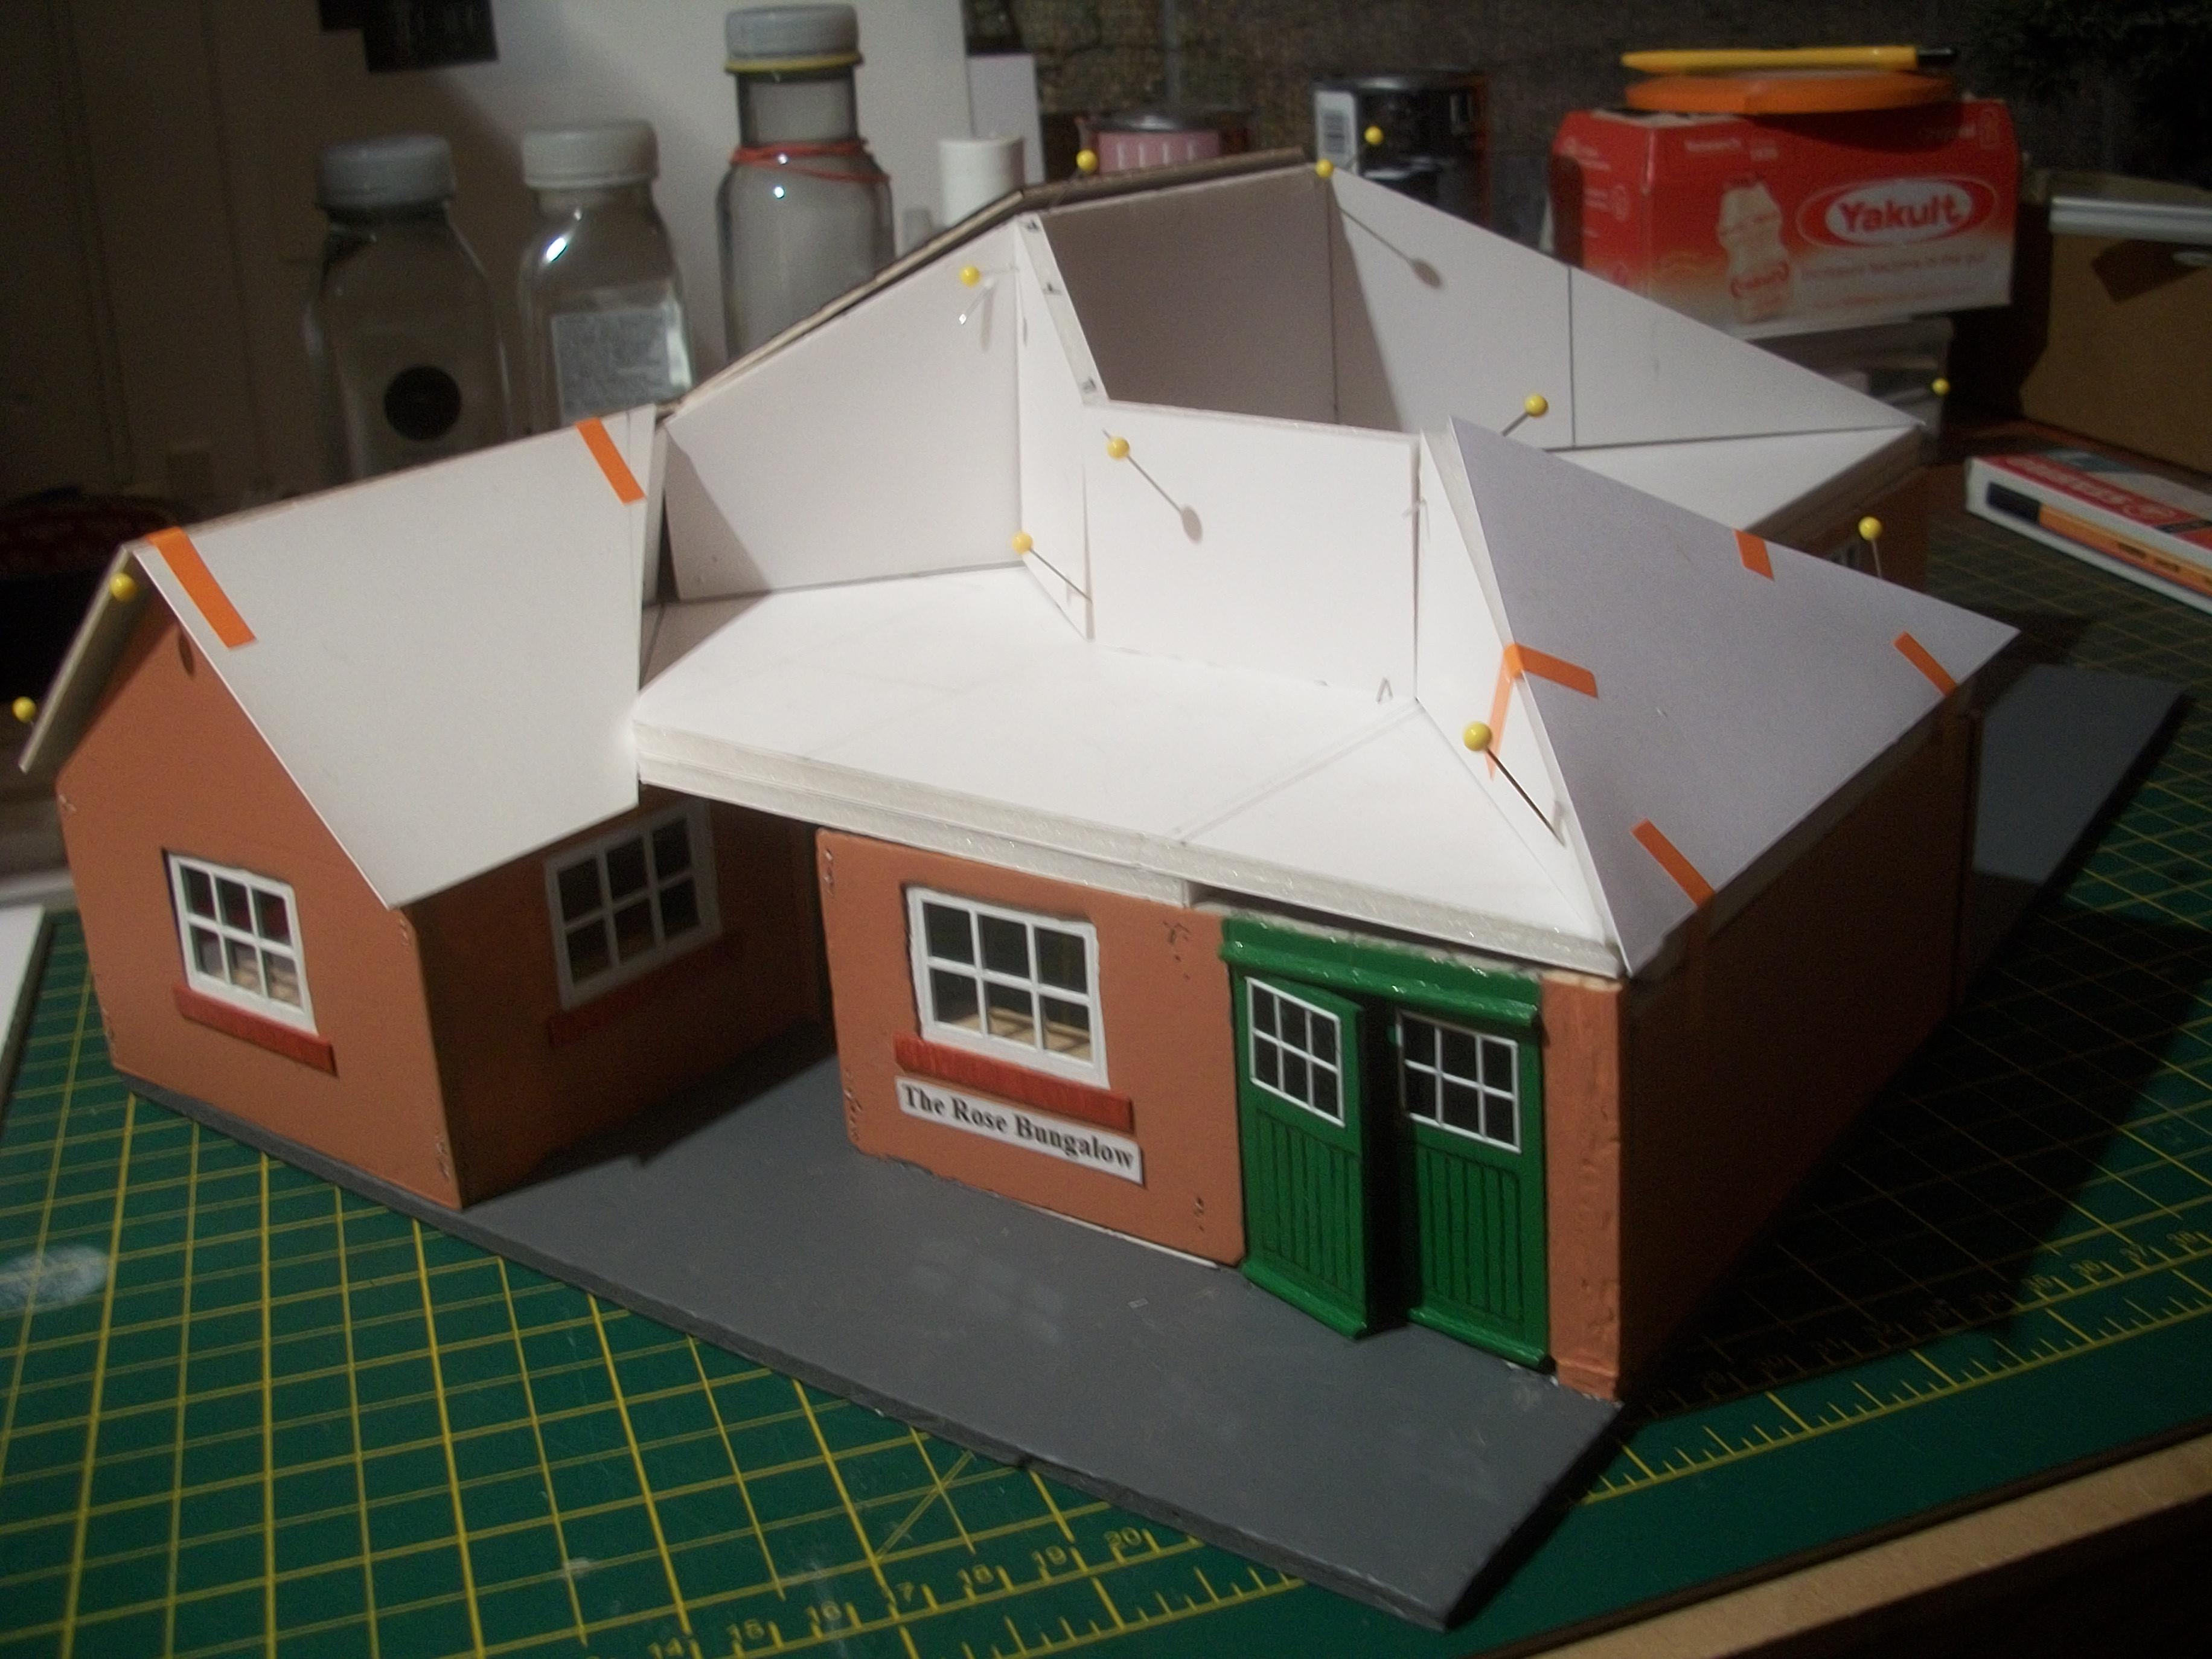
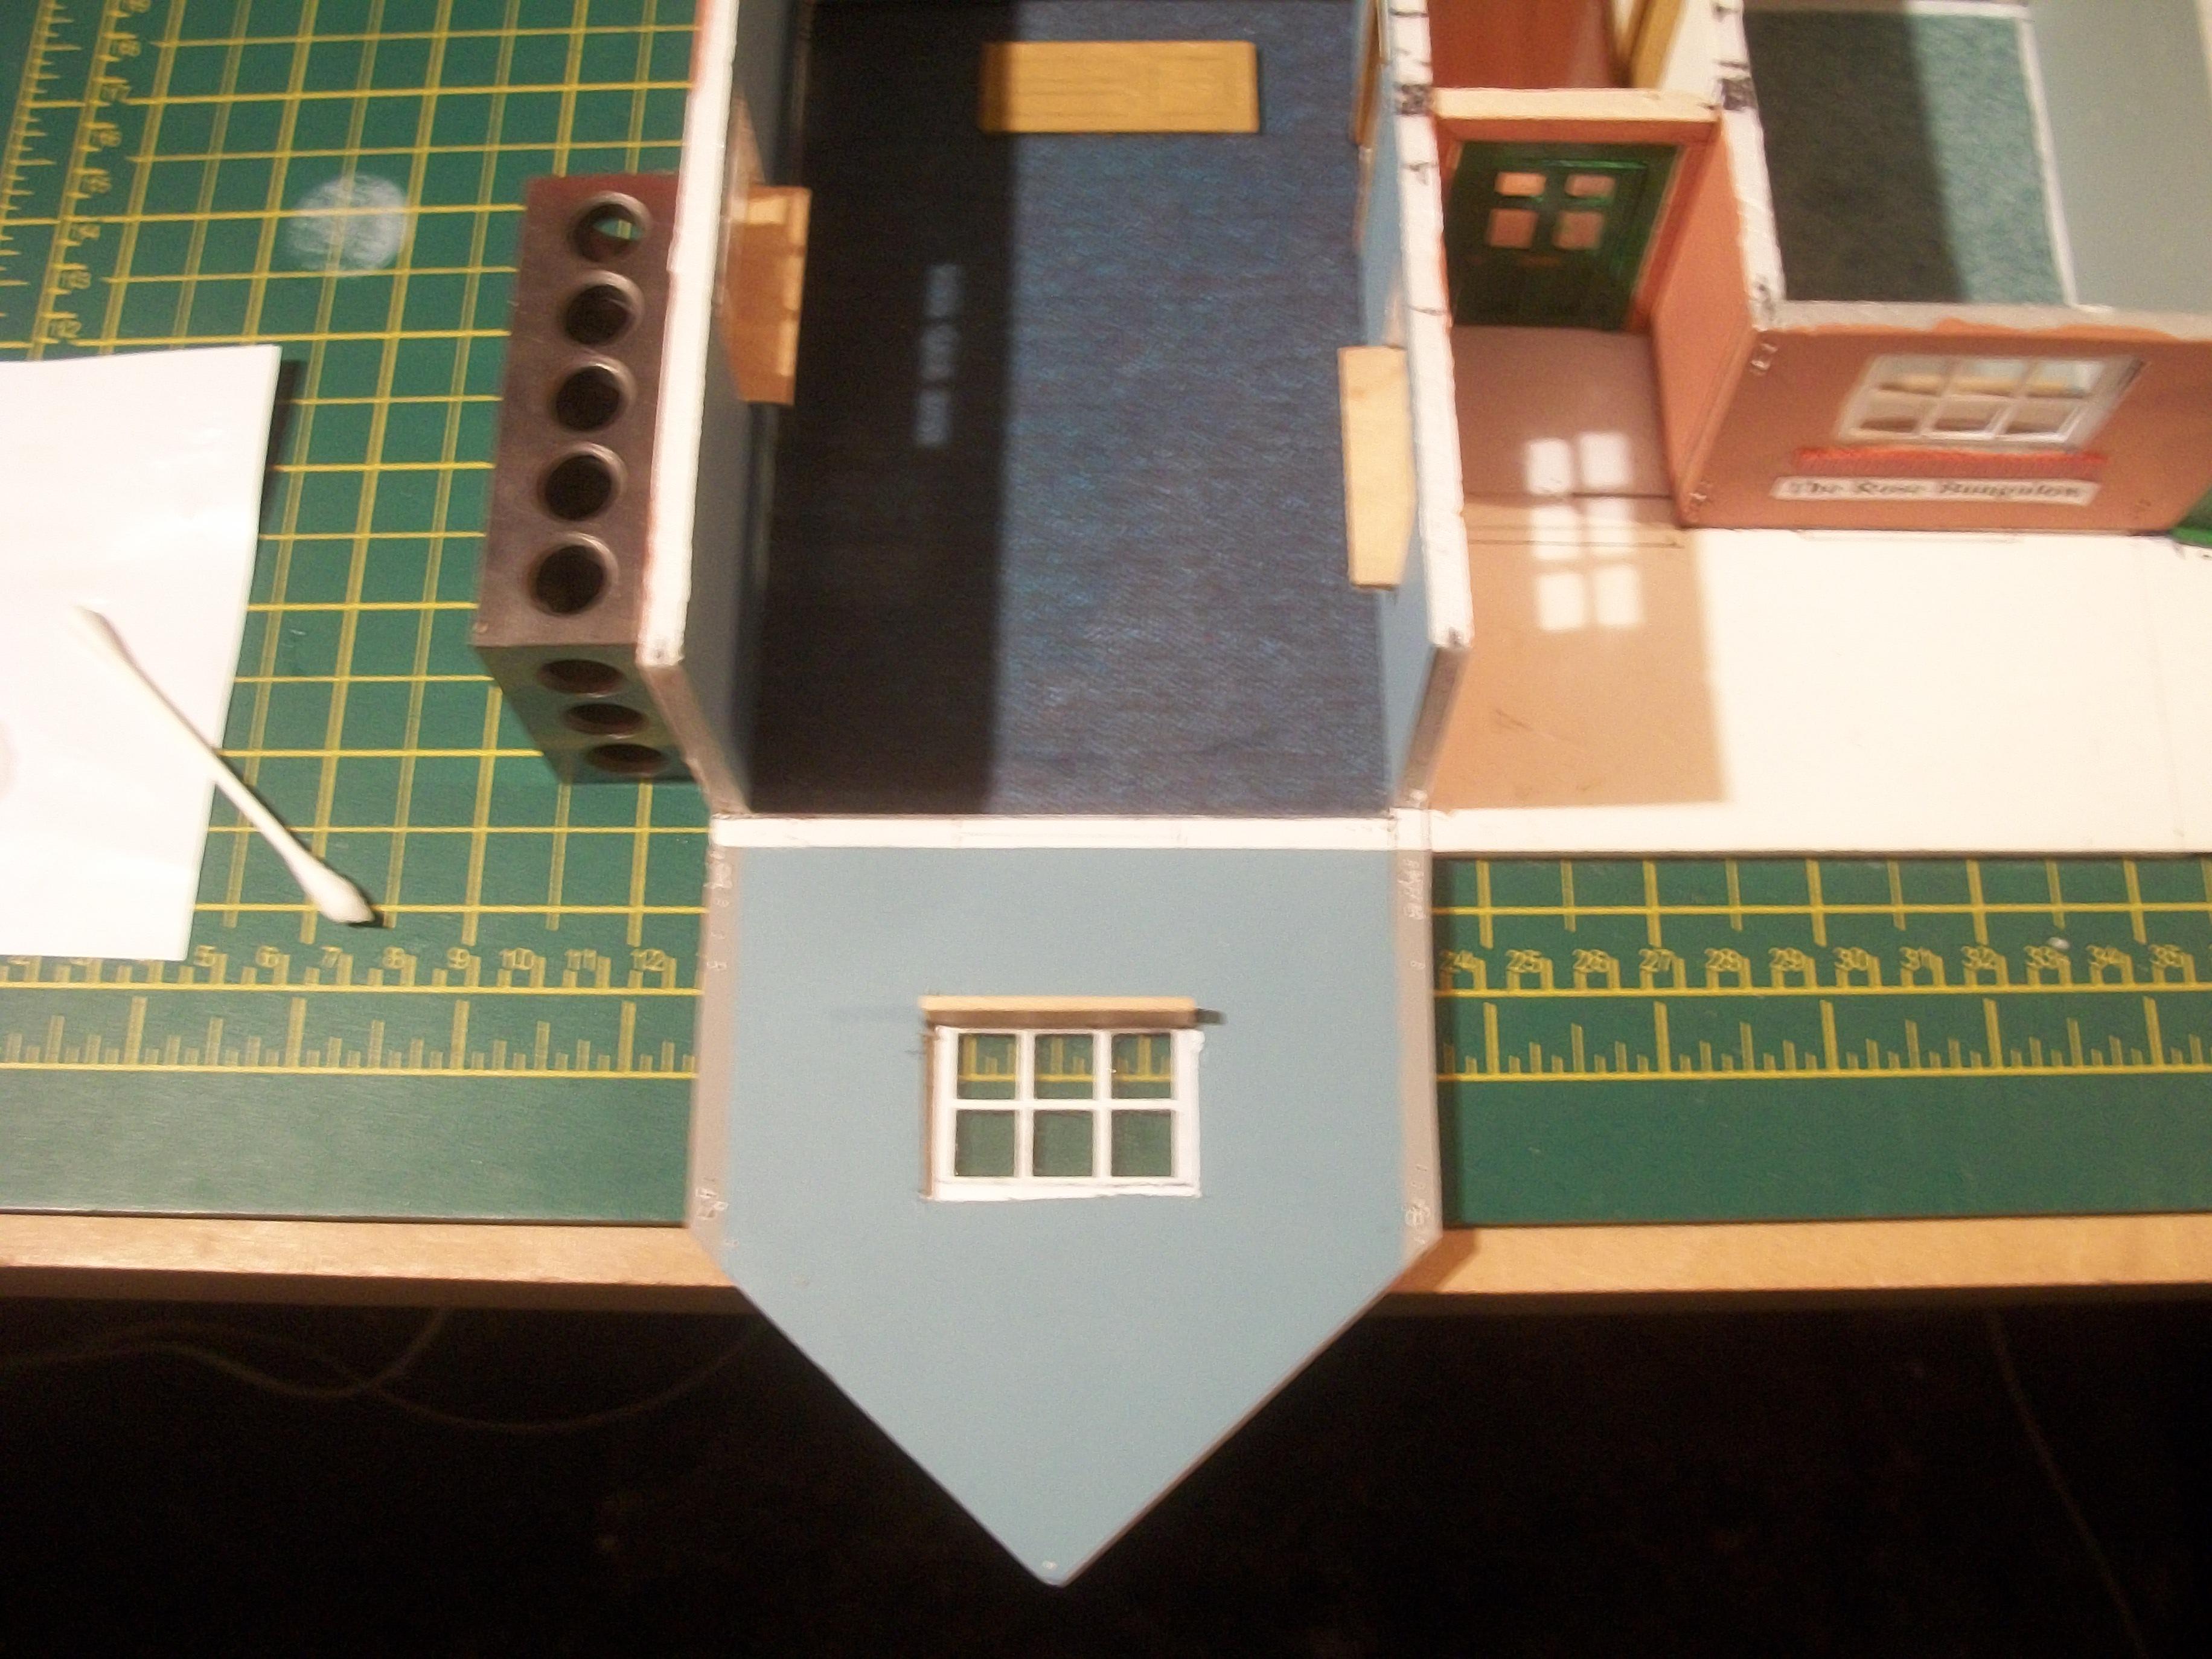
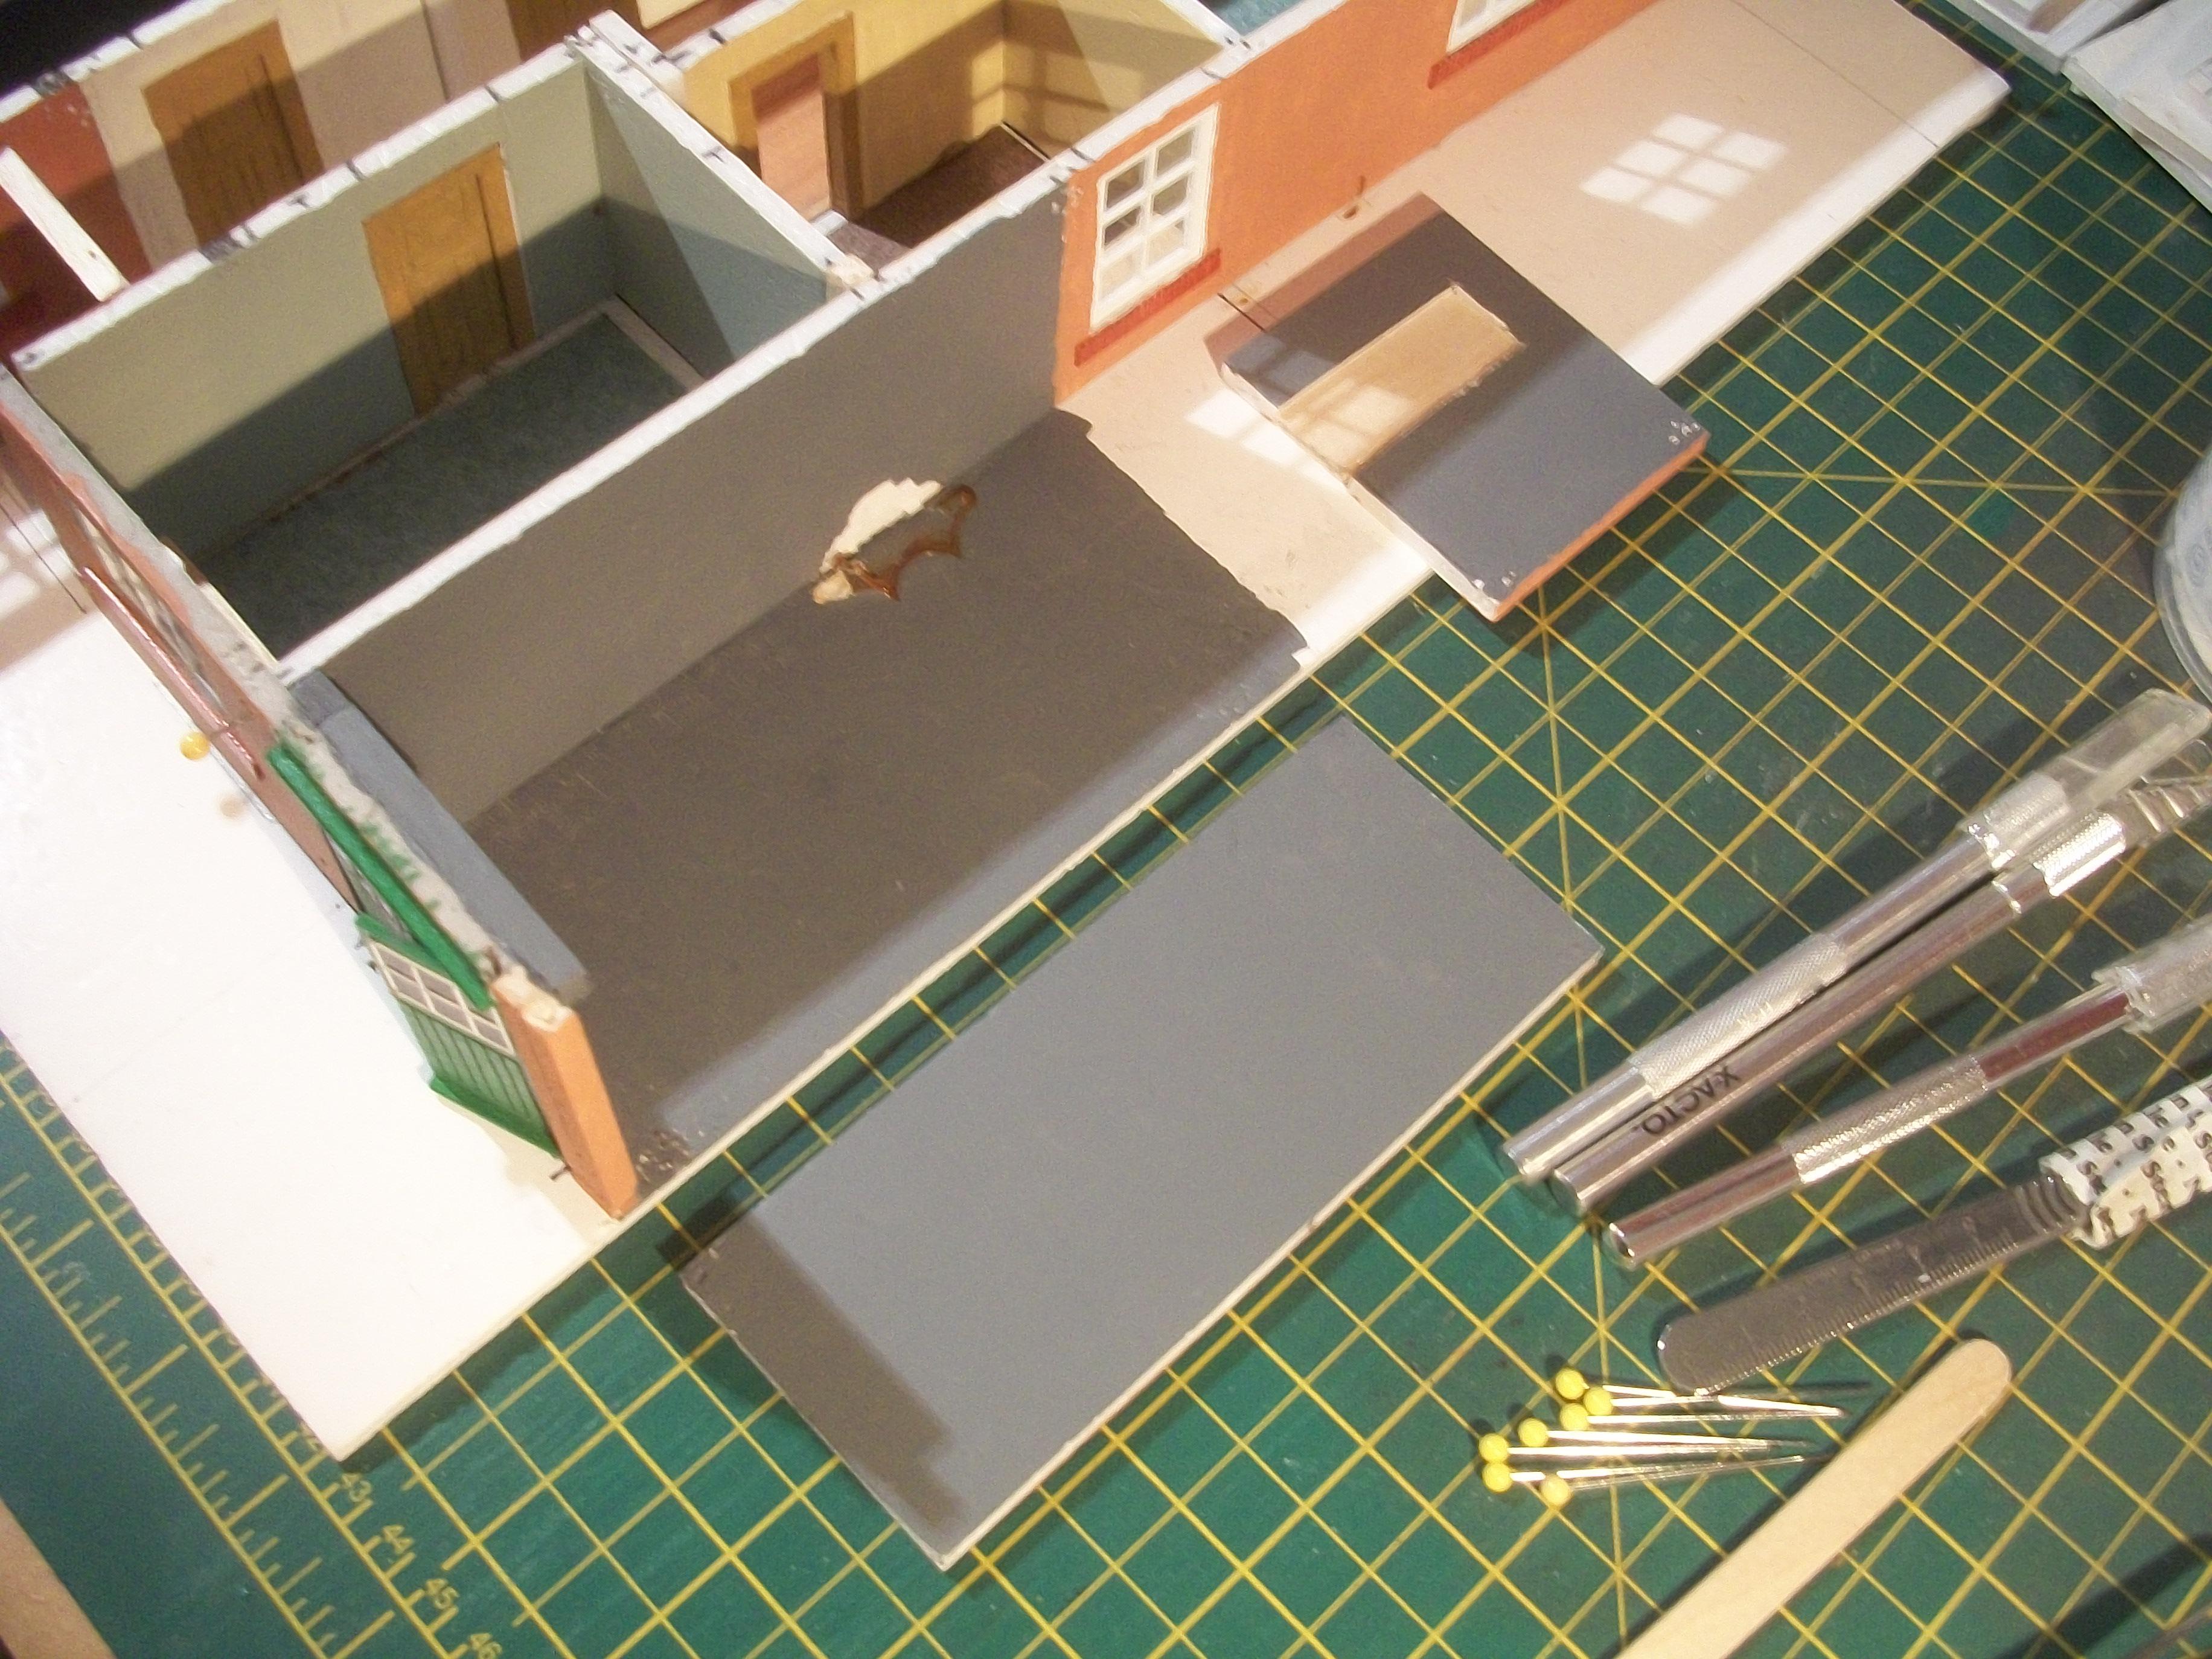
Having checked that the two sets of French doors at the rear of the bungalow open and close without issues, the garage doors and the main front door were also checked for normal functionality . . . Then the remaining white areas of the baseboard, including the outer edges, were given a coat of grey emulsion paint. Shortly I shall be applying Mr White Putty R filler to all of the exterior parts of the walls that have gaps showing. Once the filler is sanded smooth, I can then apply a further coat of emulsion paint , which is mostly the ' Cushion Craze ' pink colour . . . Meanwhile, I decided to carry out some work on the roof structure. The roof structure baseboard and the ceiling panel were separated, and the ceiling panel was placed on top of the lower rooms assembly. The outlines of all the rooms are marked in pencil on the ceiling panel, which will make it easier to position the lighting for each room, including the garage . . . From the following photos it can be seen that the roof trusses near the gable end wall needed a 45° angle to provide a tidy joint, so I set about cutting the angle manually. This was my first attempt at cutting a 45° angle, which I did using an offcut of foam board. As this turned out well, I repeated the cut with the actual roof truss, and this was also a success . . . To the right hand side of the gable end at the front of the bungalow there needs to be a small roof panel that slopes down to the gully. Before committing myself to cutting a piece of balsa wood, I first measured and cut out a piece of thin card. The measurements were then modified slightly, following a visual inspection, and a second version of the template was taped in place against the roof truss . . . I placed the largest roof section, which has already been tiled, up against the other side of the roof truss, and examined the overall alignment. I shall need to do some further 45° angle cutting at the edges of the ceiling panel, to allow the roof panels to be seated correctly . . . David
-
Oh I see . . . These are what I call my ' weight bottles ', and basically I fill empty plastic bottles with water, so they get used a great deal for holding things down, or bracing upright structures . . . Thanks ! David
-
Sorry Paul, just woken up and the brain is not fully functioning this early in the day . . . When you say creative use of ' bracing '. what did you mean ? David
-
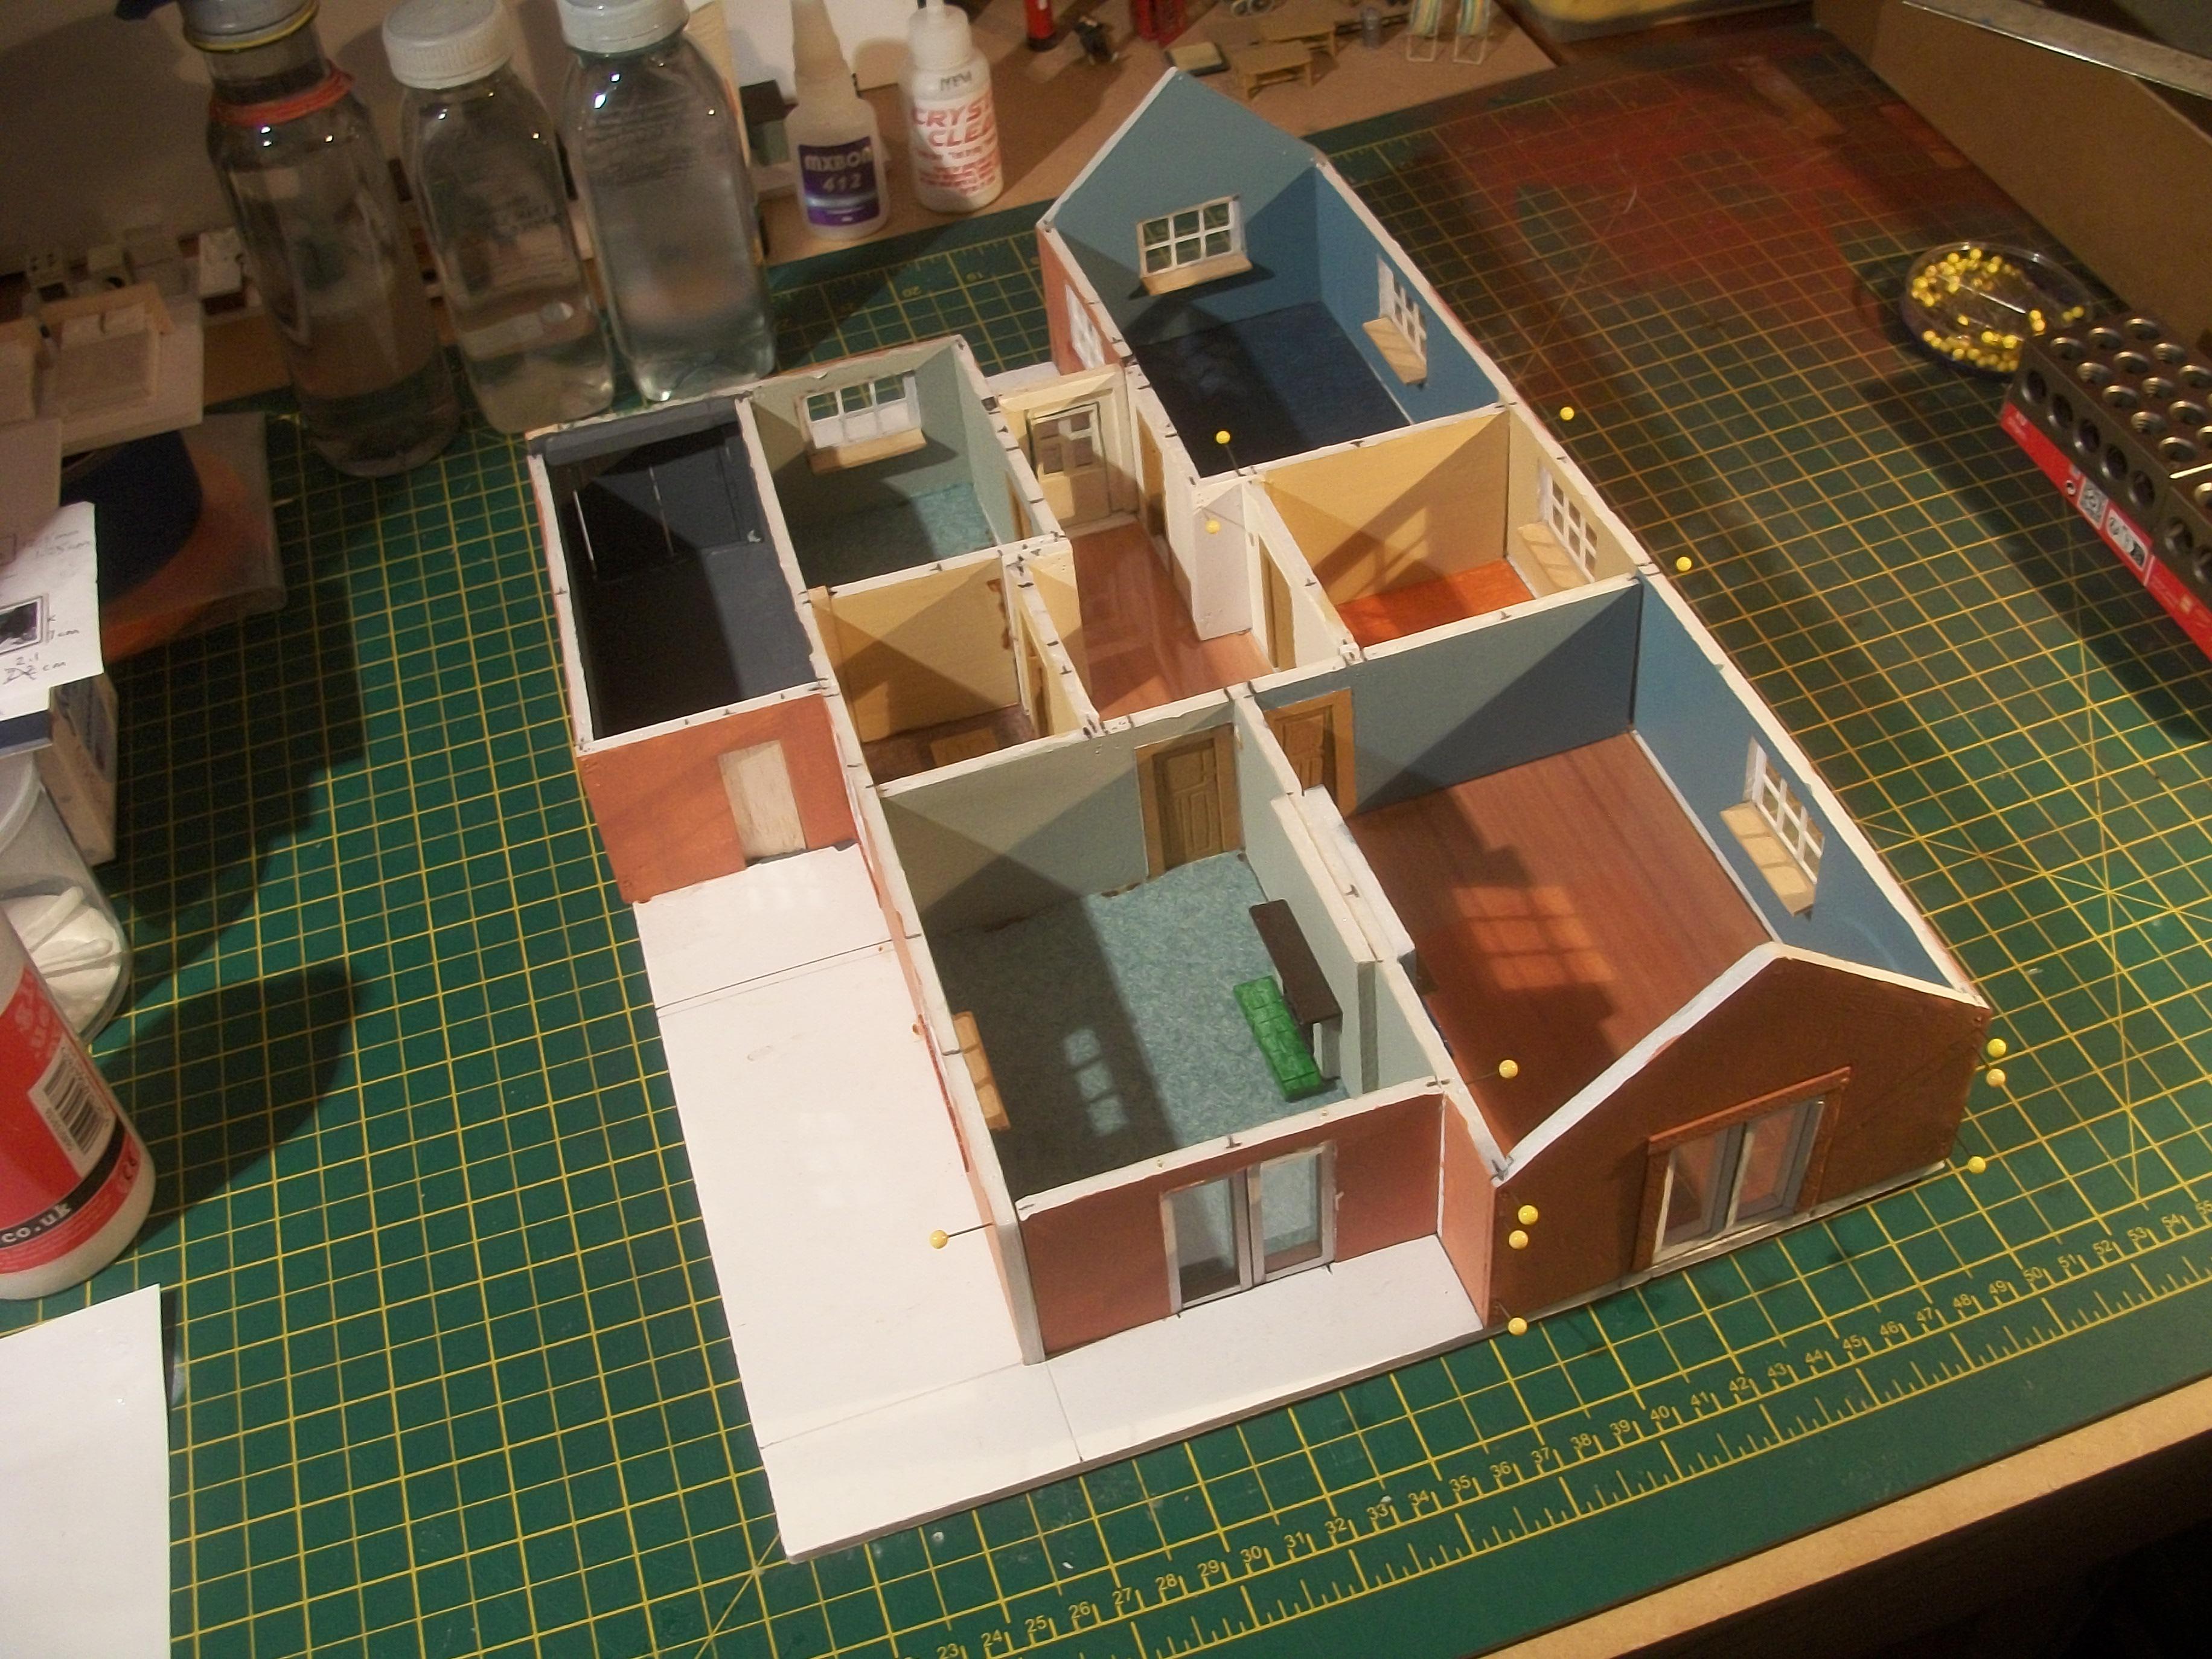
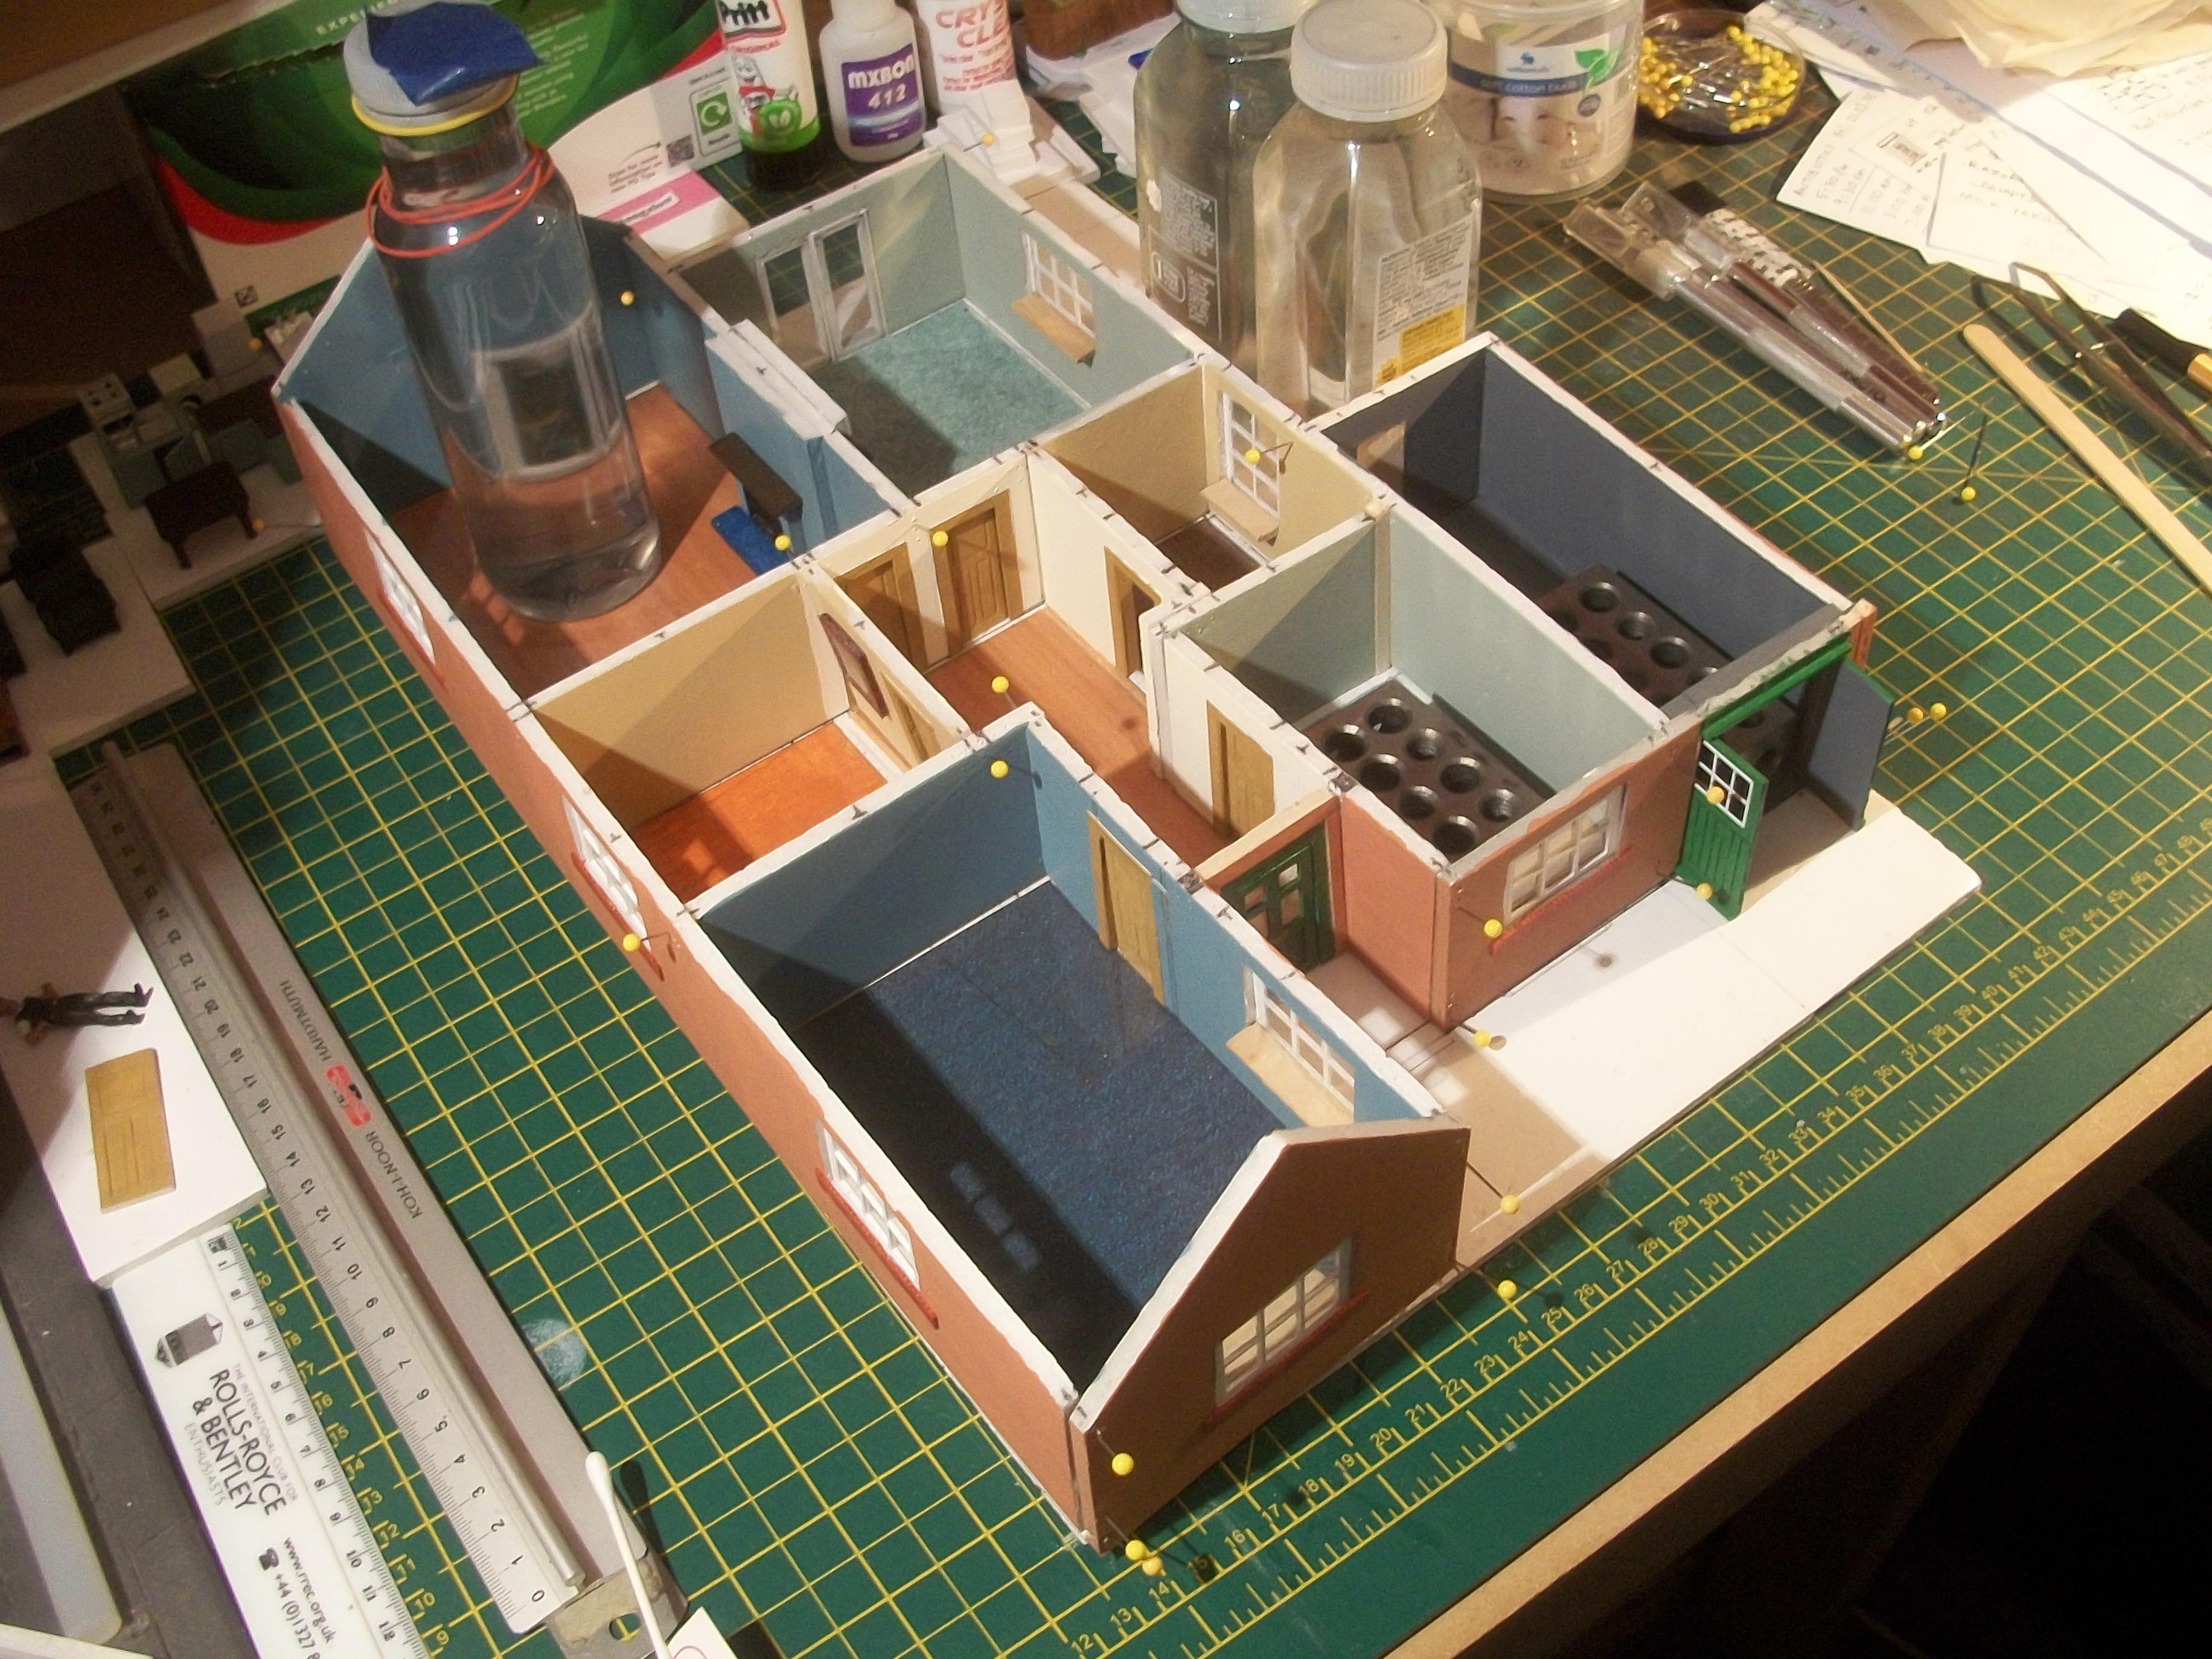
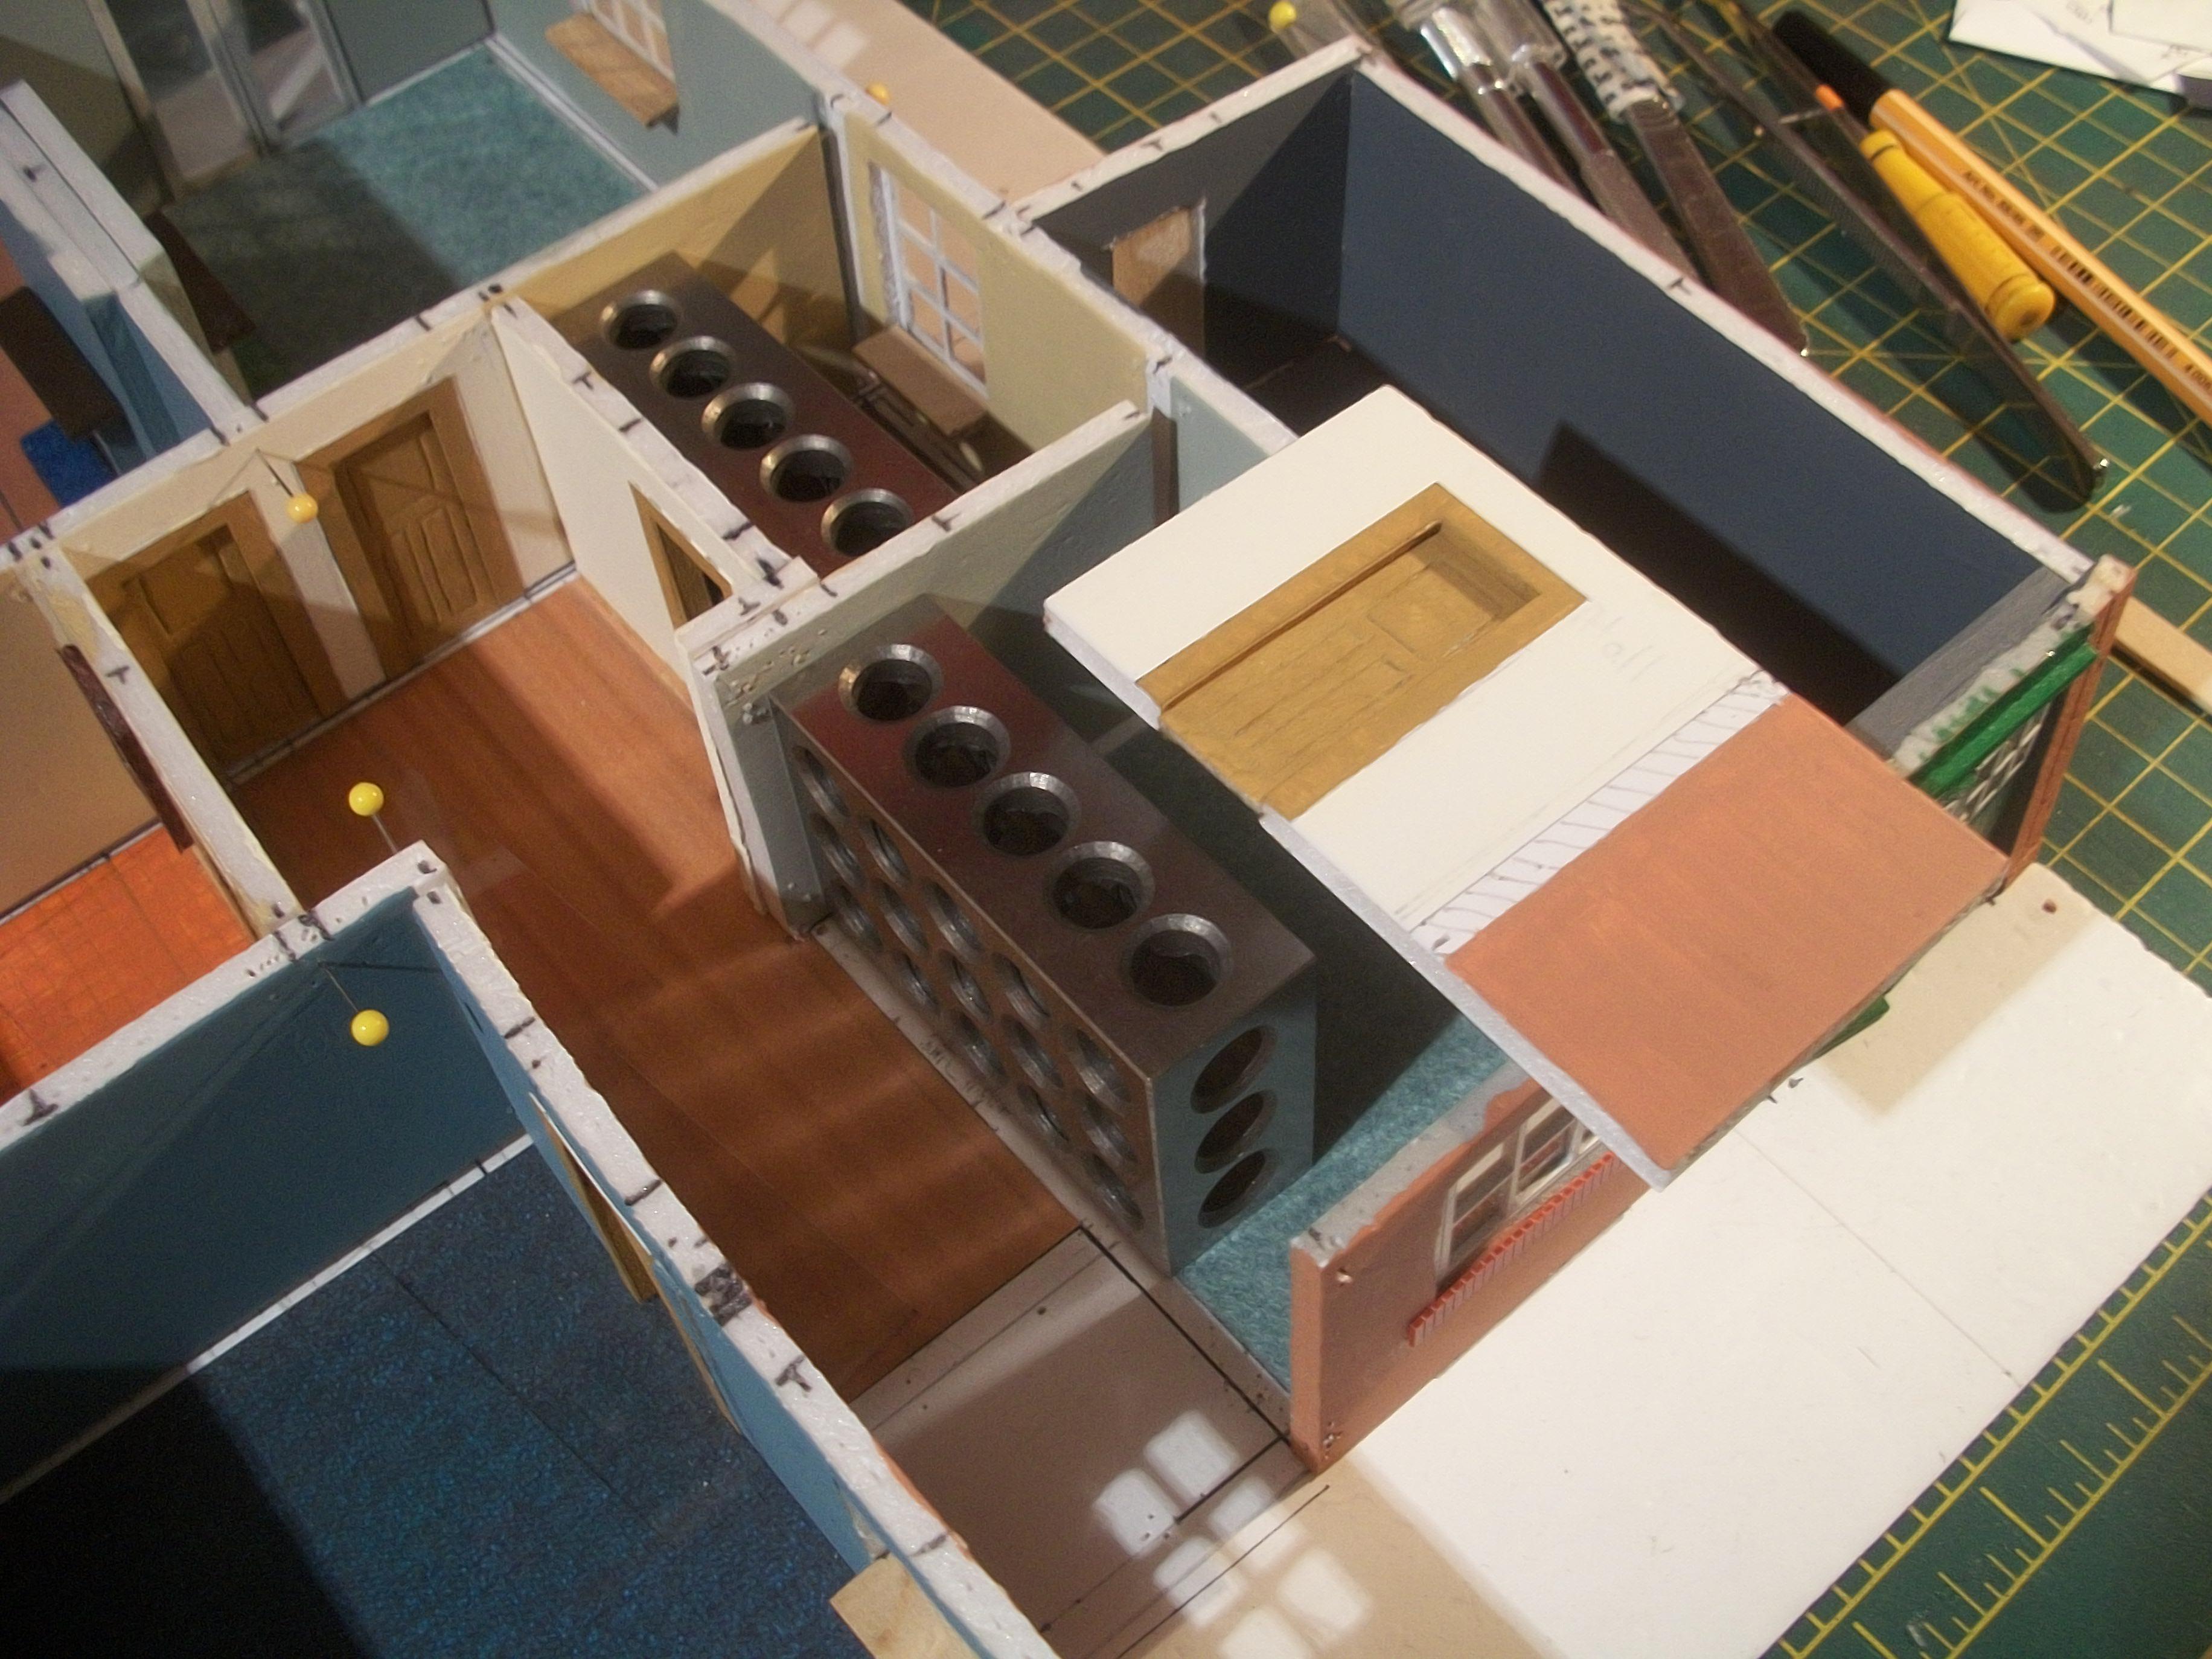
Having mounted both gable ends of the bungalow, I moved on to mounting the longest side wall that runs between the two gable ends. Prior to this, the front entrance door and frame was mounted between the walls of bedroom one and bedroom two . . . The bathroom has all four walls in place, and the hall is now nicely squared off at the corners. Three paintings by Edward Hopper are now hanging on the walls of three rooms, these being ' Gas ' in bedroom one, ' Hotel Lobby ' in the kitchen above the fireplace, and ' Nighthawks ' above the fireplace in the living room . . . There will be one more Hopper painting hanging in the hallway. The final wall of sixteen was mounted this evening, which is the back wall of the living room, including the opening French doors. Once this has been allowed to set over a period of 24 hours, the entire lower floor structure is ready for further painting . . . David
-
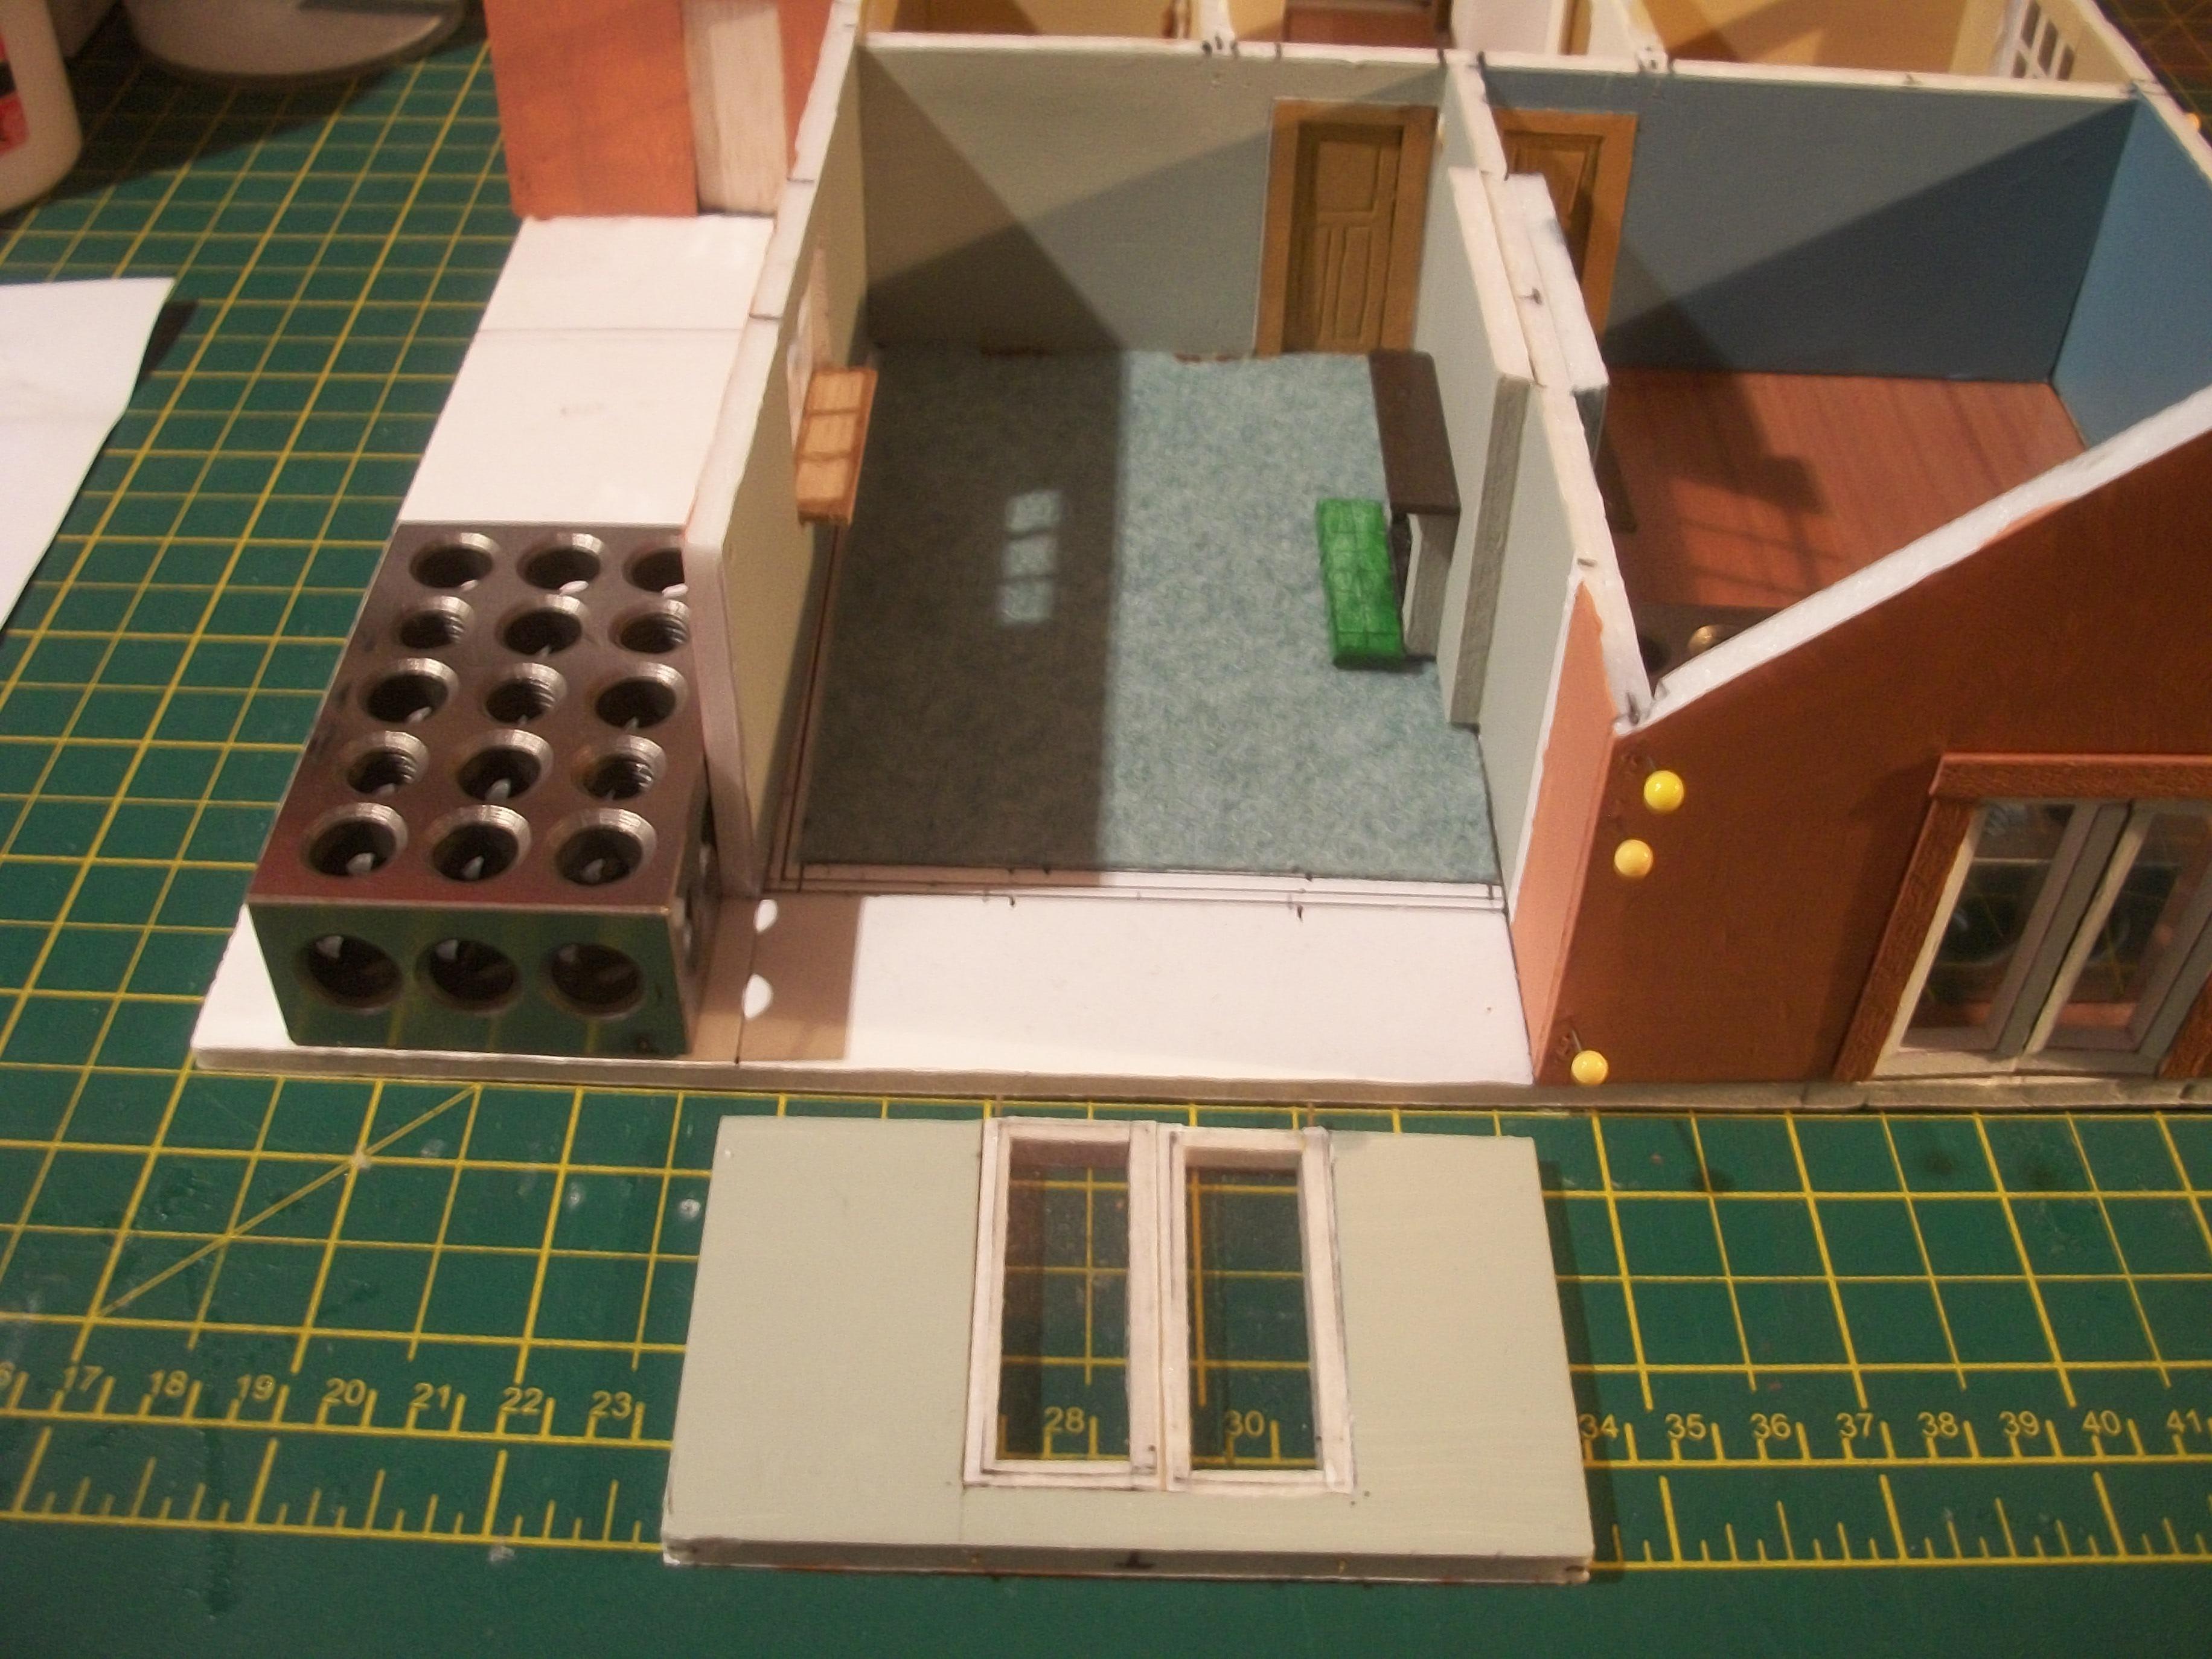
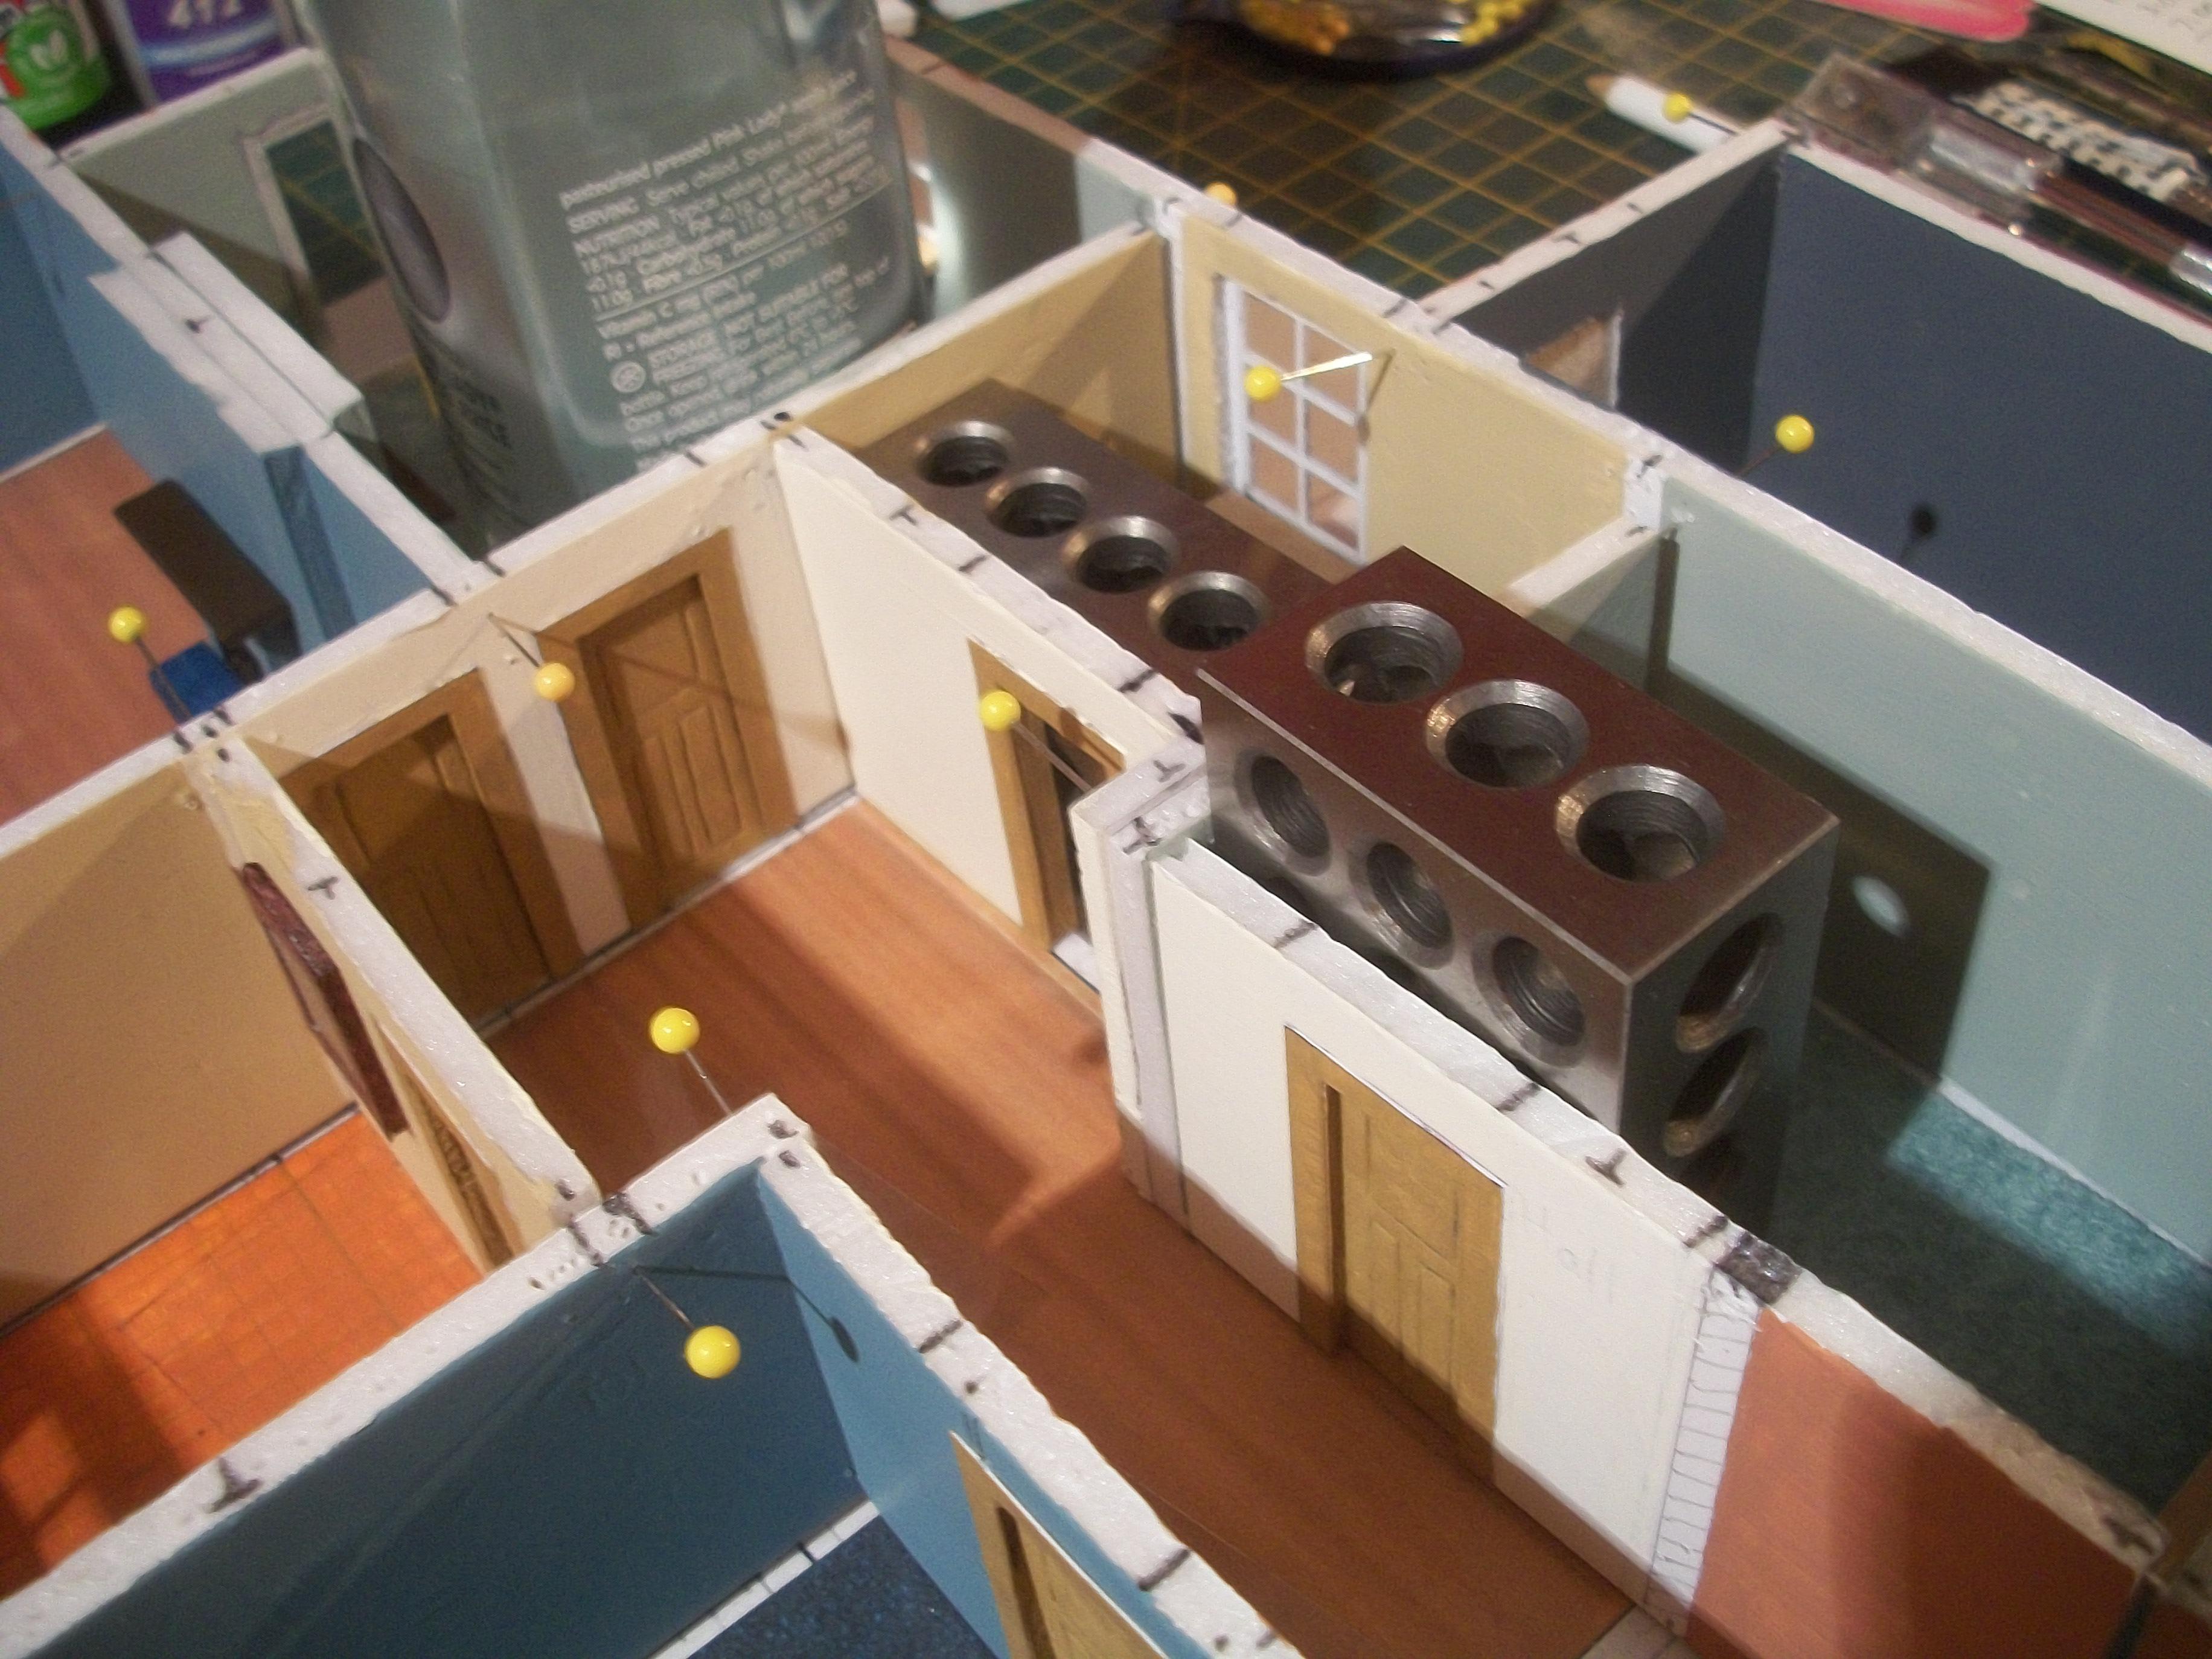
Thanks Paul . . . Generally, the PVA glue is what I would describe as a ' friendly ' adhesive, and I like using it. The lengthy and slow setting time doesn't bother me really . . . Super glue on the other hand, is what I would describe as an ' unfriendly ' adhesive, and I hate using it, but sometimes I am forced to use it . . . The damage from the PVA glue seeping under the 1-2-3 block is easily fixed, and actually looks like a typical garage interior after many years of use. David
-
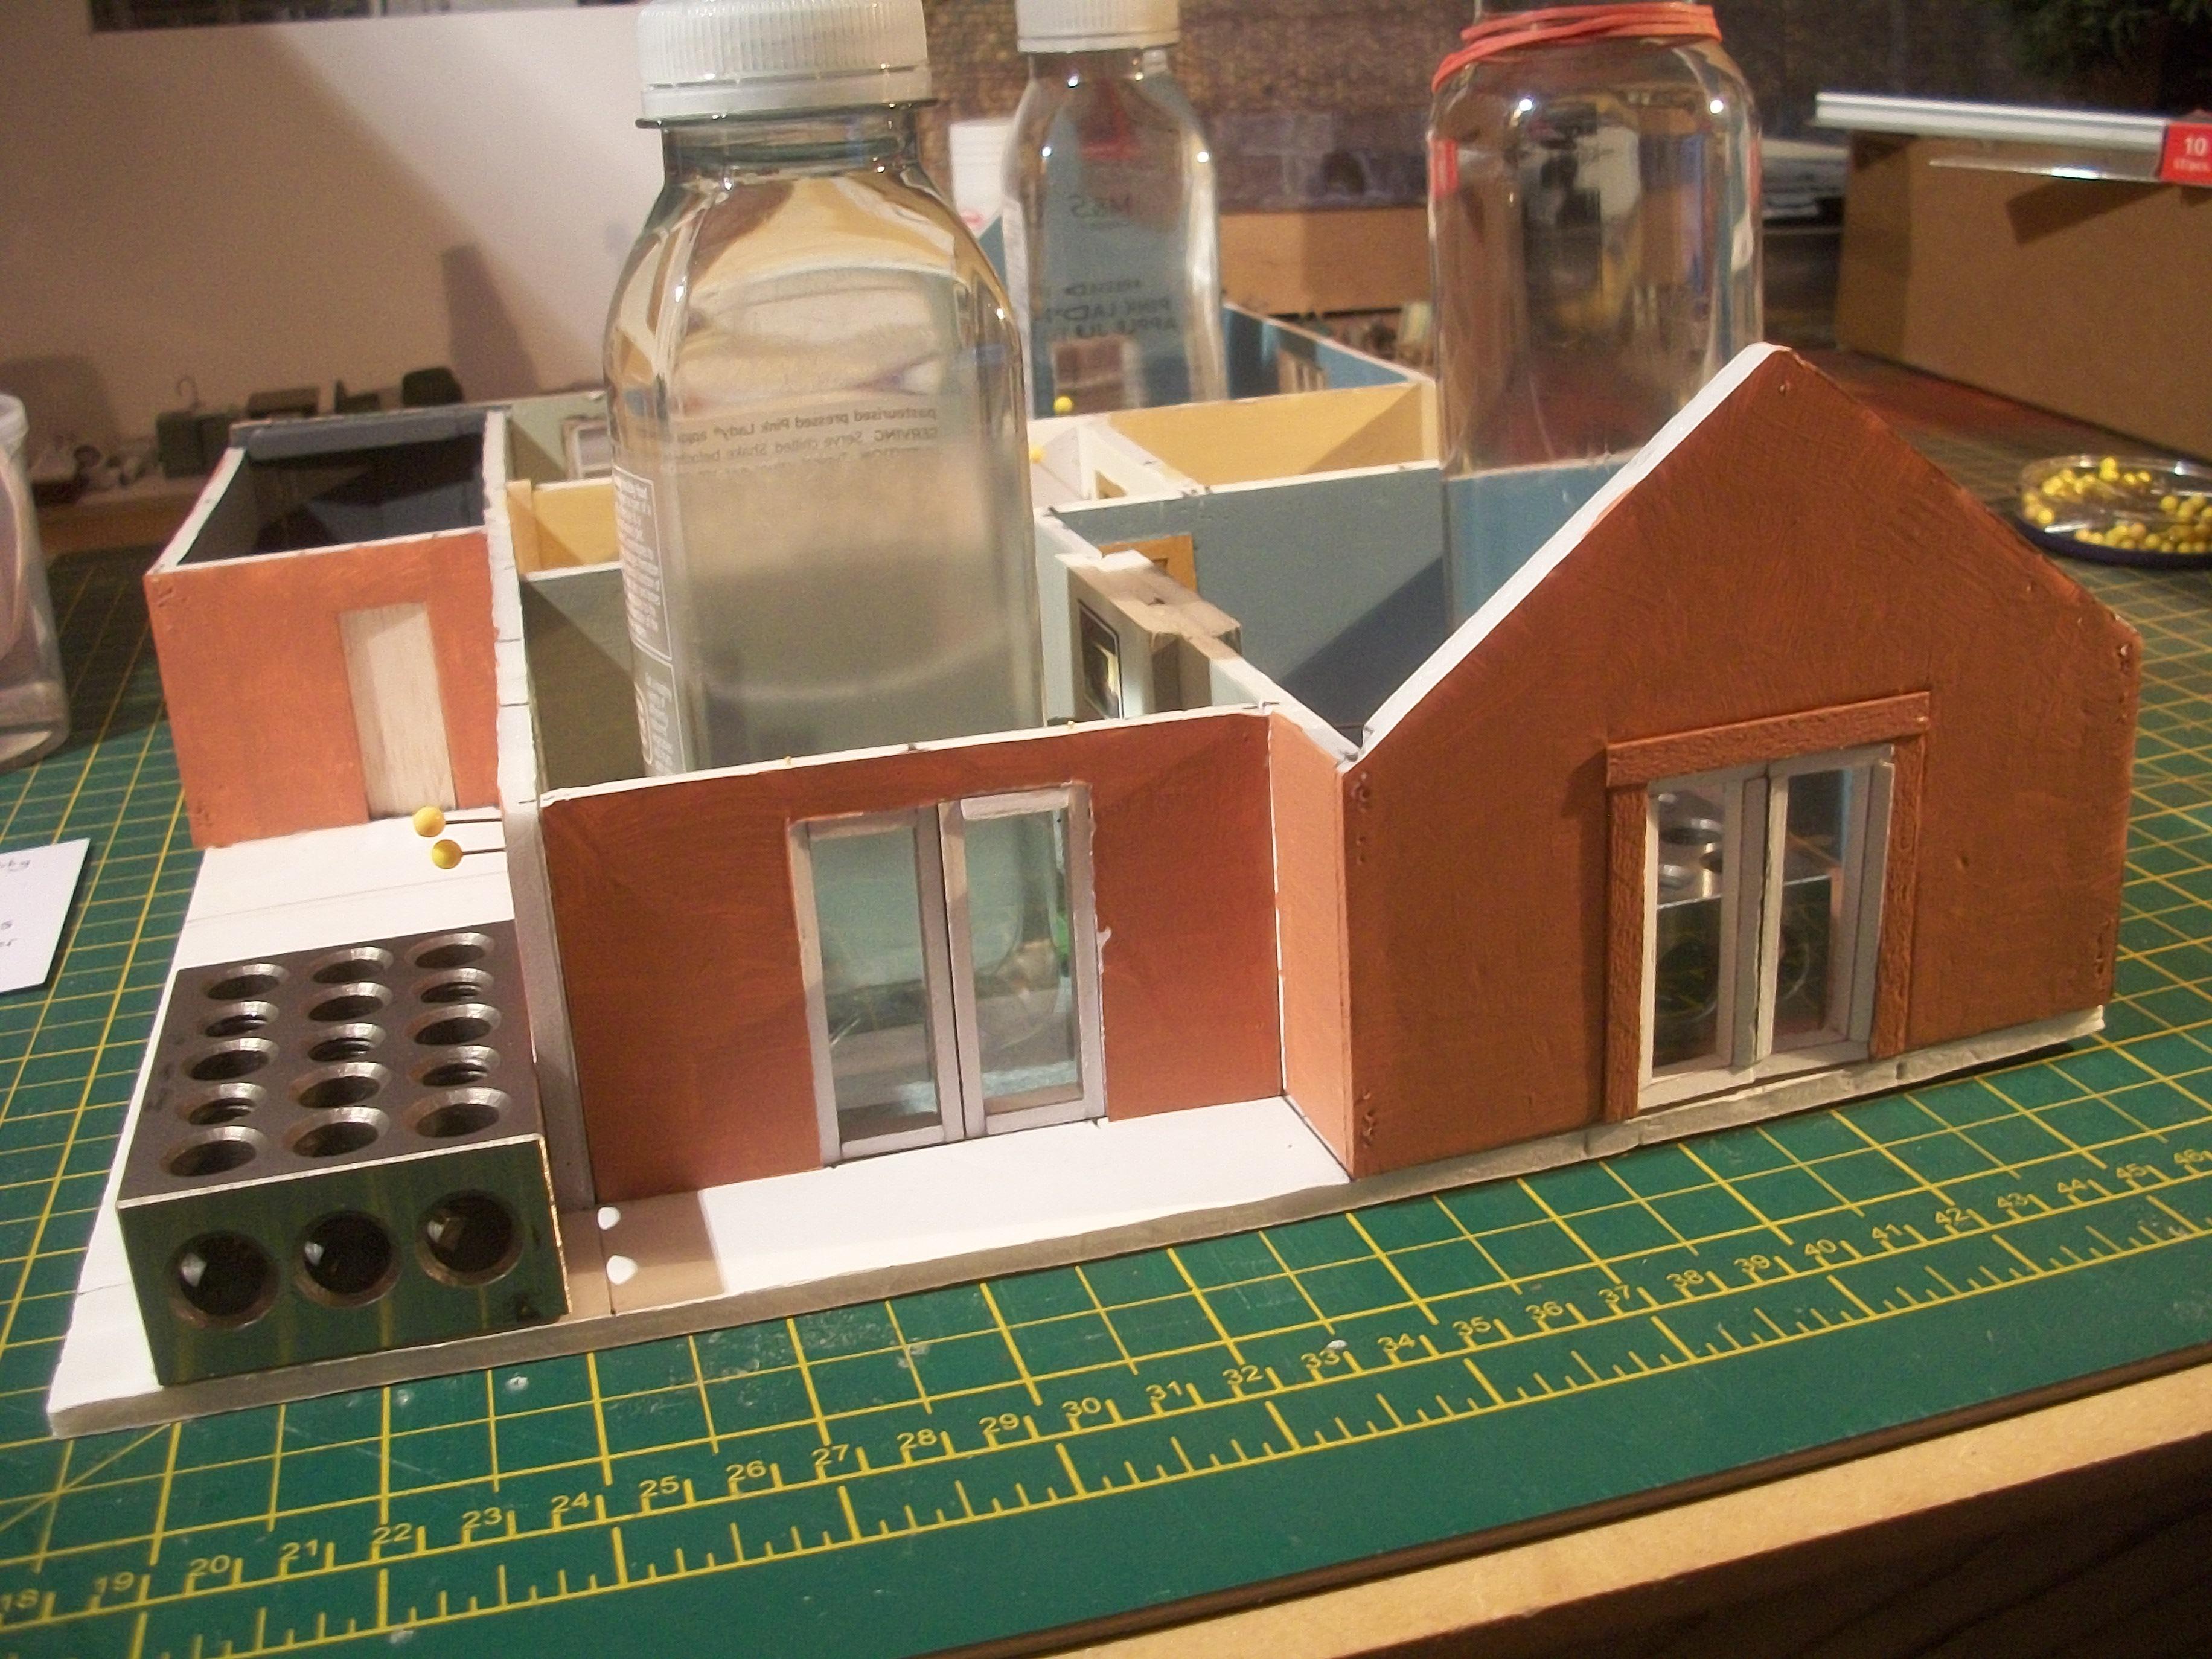
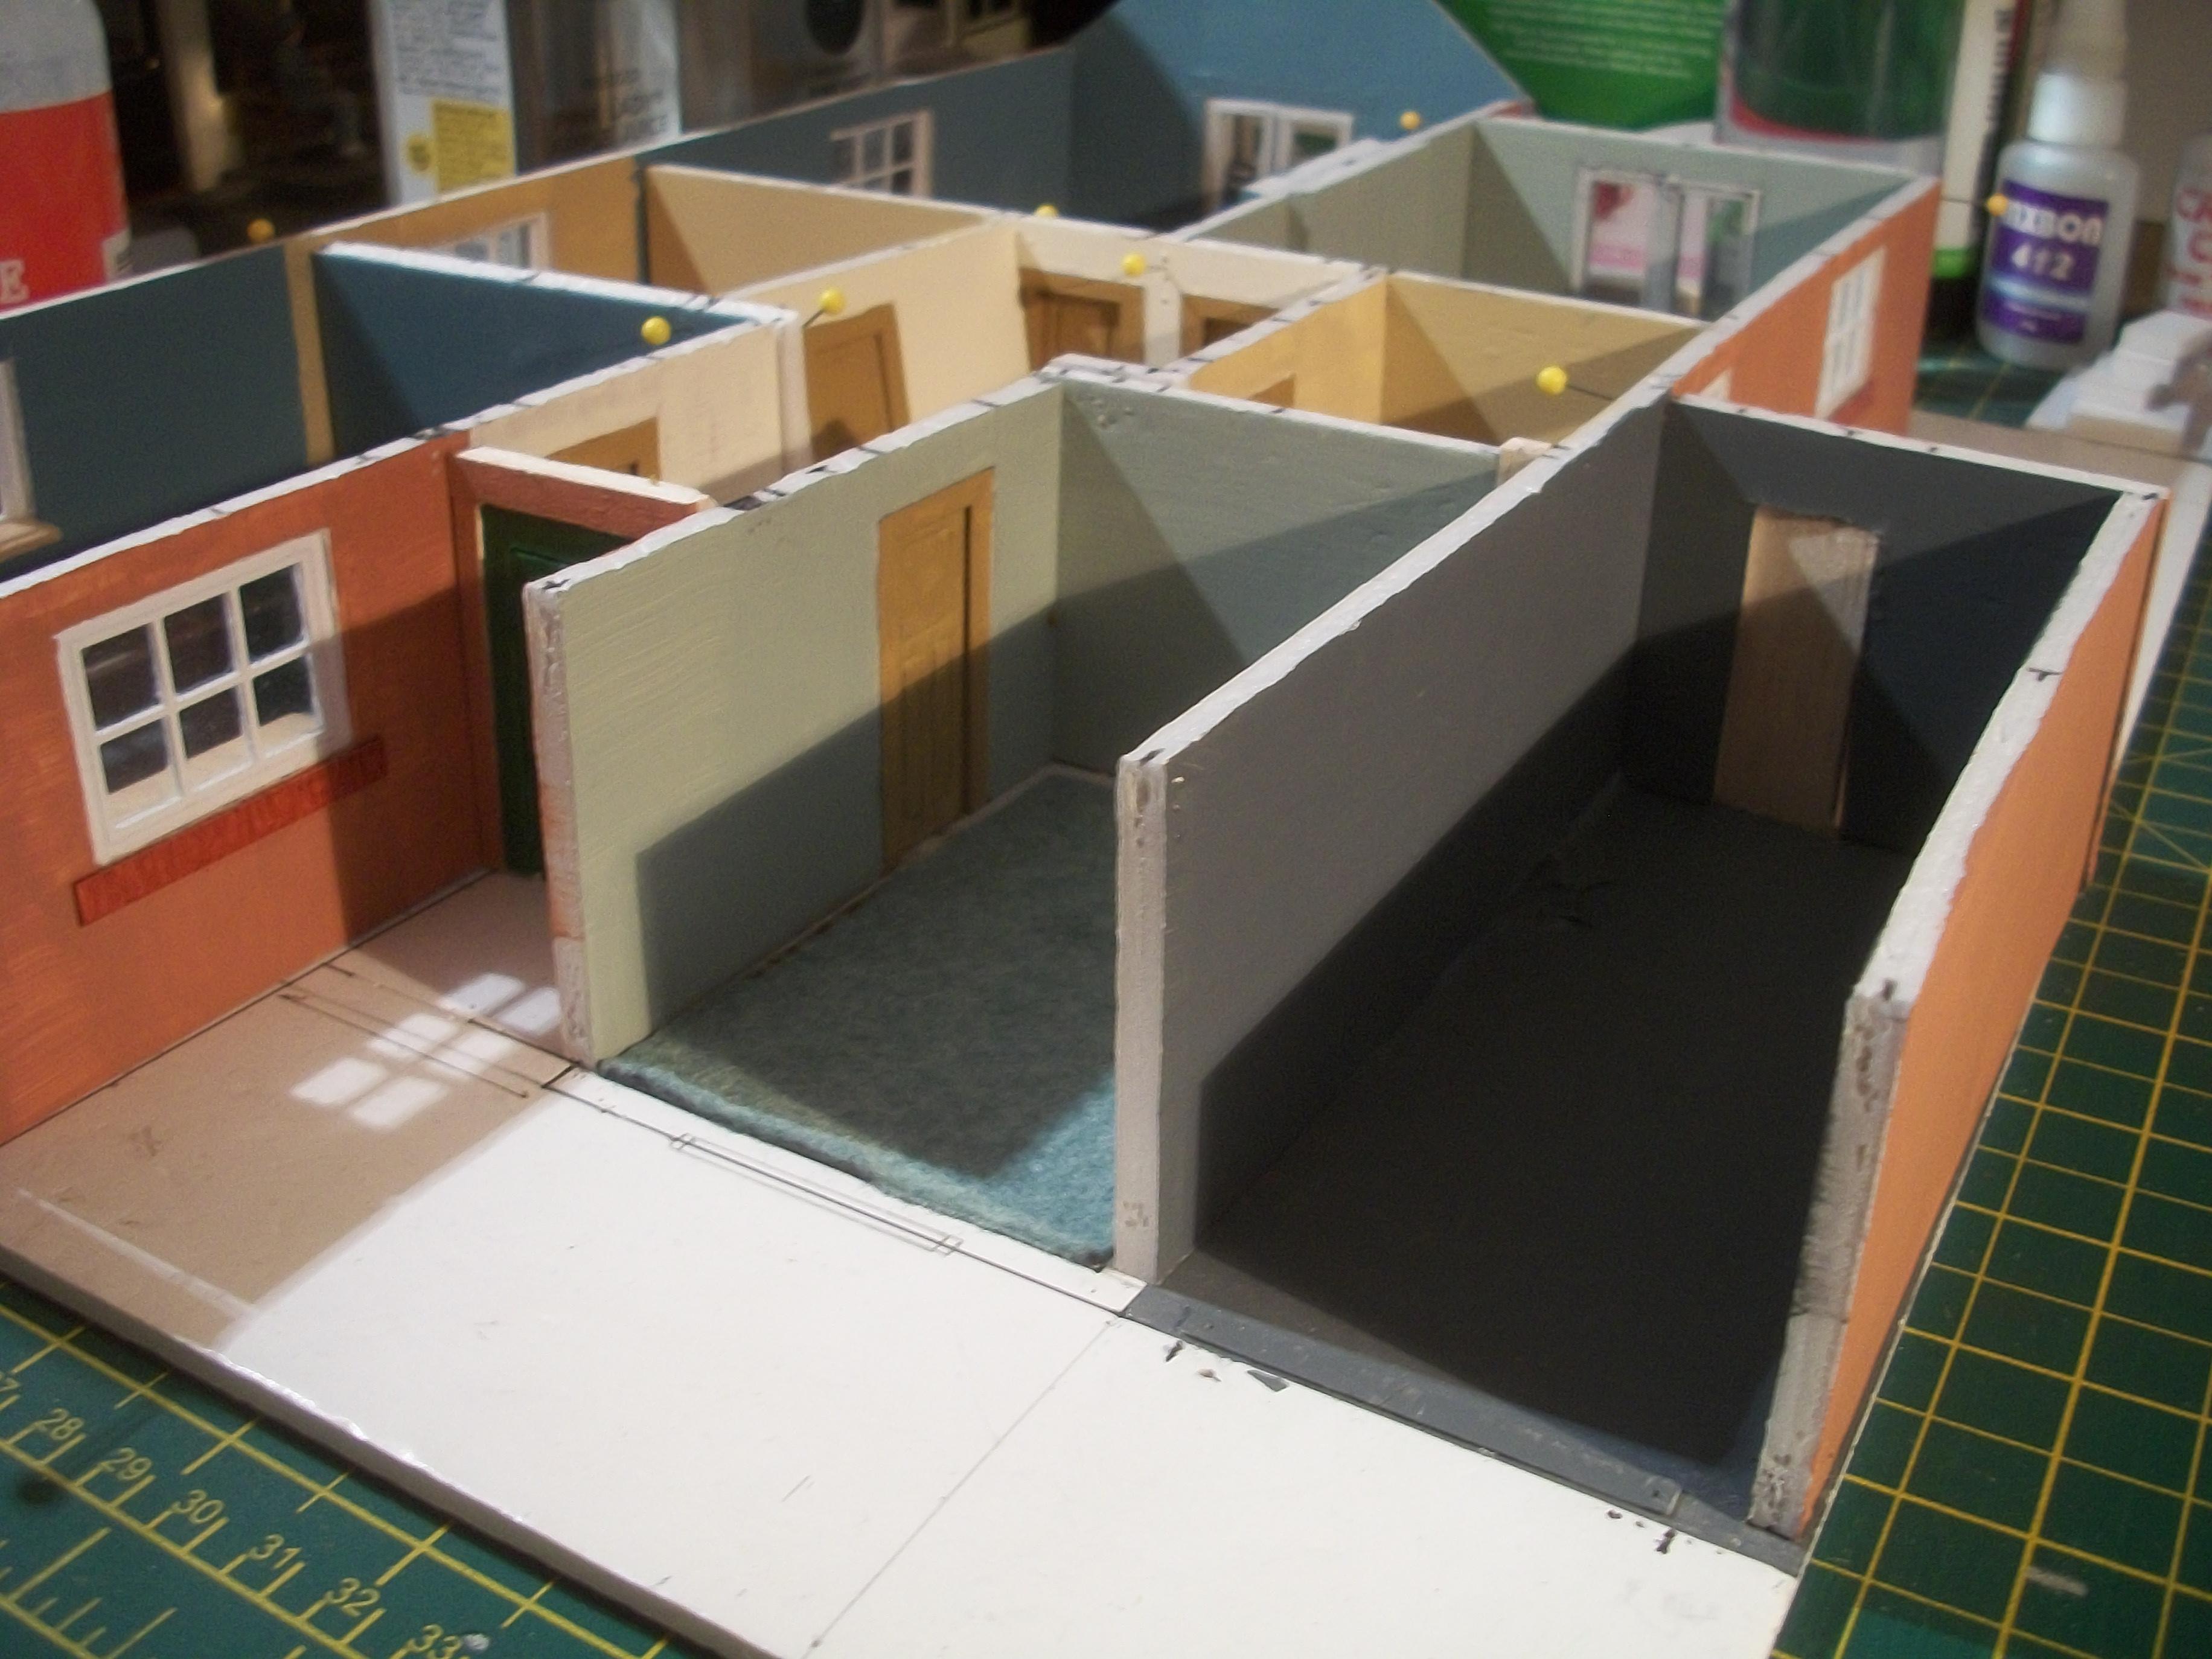
Steadily moving forward, as the wall panels are being mounted onto the baseboard, one at a time, with an overnight setting time of 24 hours to allow the PVA glue to dry completely . . . Yesterday, I did manage to mount two walls, which were the rear and side walls of the garage. Today, I carefully mounted the front wall panel of this bungalow, which is the wall that has the window for bedroom two and also the double garage doors. Now that this wall is firmly glued in place, the hinged double garage doors are locked into position, and cannot be removed. The two upper hinge rods and the two lower hinge rods are slotted precisely into holes that were drilled into the upper and lower styrene strips . . . Some PVA glue seeped out from under the garage wall on the inside, and found it's way between the 1-2-3 block and the garage floor. When I slowly removed the 1-2-3 block a section of the garage wall and floor was torn off . . . This damage has since been rectified, using some grey emulsion paint. Having started in the centre of the bungalow and gradually moved outwards, over to the right hand side of the baseboard, I can now continue across to the left hand side of the baseboard . . . The walls for bedroom one, the bathroom and the two gable ends are going to be mounted during the next few days, along with the longest wall that runs along the left hand side of the bungalow . . . This will leave only one wall at the rear of the living room, that has French doors, and also the main front entrance door of the property. Thanks for following the build this far, and pretty soon the roof structure will be coming together decisively . . . David
-
Once the rooms are completed and all of the 16 wall panels are firmly in place, the ceiling panel will rest on top of the upper wall edges. The ceiling panel will not be glued to the walls, or attached in any way. The lighting for each room, including the garage, will be mounted within the ceiling panel. The entire roof structure is being constructed on it's own baseboard, and this baseboard will rest on top of the ceiling panel . . . Both the ceiling panel and the roof structure baseboard can be lifted clear of the lower room compartments, giving a free and unobstructed view of the room interiors . . . I have made this bungalow model so that the ceilings and roof structure assembly fits within both gable ends, as shown in the photo below . . . David
-
Thank you Steve . . . I had considered removing the window sill or making it smaller, in order to place the sink unit under the window as you kindly suggested. There will be no dishwasher or tumble drier, as I think there are enough appliances in what is not a particularly large kitchen, but I take your point. M'Lady is welcome to wander out through the French doors and into the garden, once she has finished washing the dishes . . . David
-
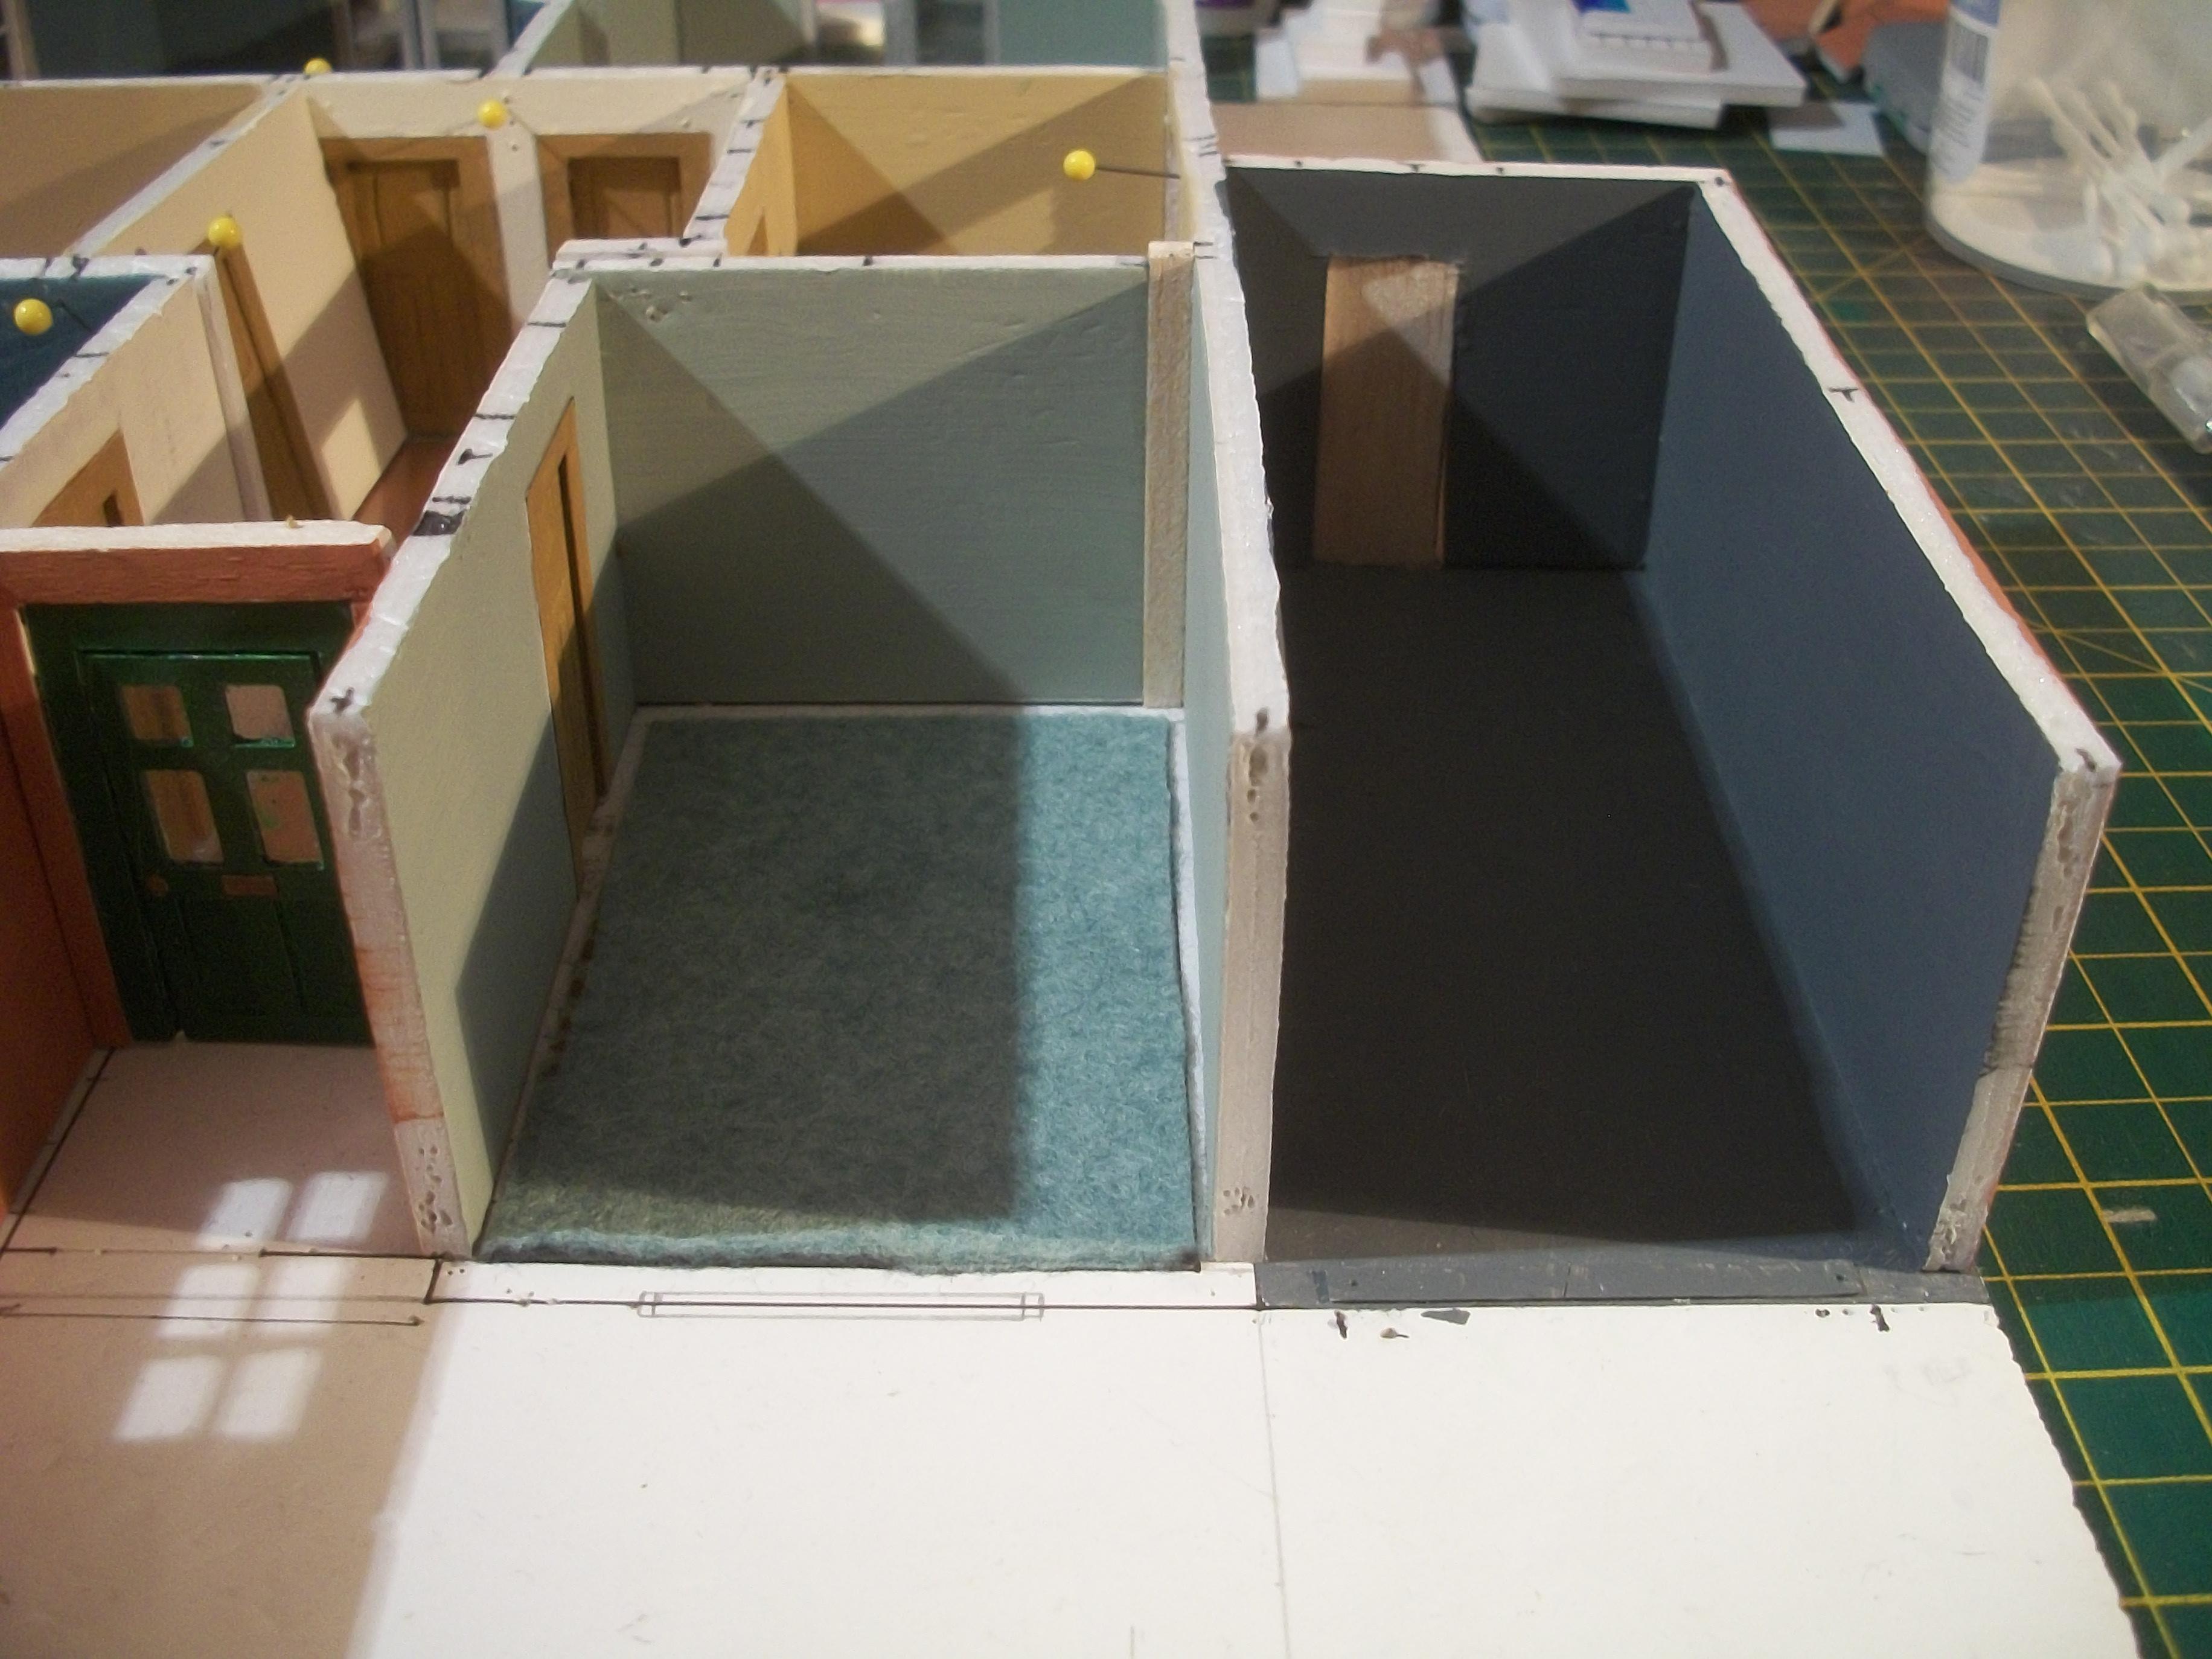
Two days ago the process of mounting the wall panels onto the baseboard floor plan began . . . Each individual wall panel is being carefully positioned, with PVA glue being applied to the lower edge, and also to the edge of the panel that is immediately joined to it. Using two 1-2-3 blocks, one weight bottle and also a few quilting pins to hold the joined panels firm, this is left overnight to set for a good 24 hours . . . By following this slow and precise procedure, I feel this gives the joints the best possible opportunity to achieve a strong bond with the baseboard, and also between each pair of wall panels . . . There were four different ways of approaching this process; one being to unpin all of the wall panels and remove them, leaving an empty blank baseboard, while the alternative was to leave all of the wall panels pinned in place, as they are now . . . Then there was the removal and refitting of each wall panel, starting from the outside and working inwards, or there was the option to start from the centre of the bungalow and work outwards . . . I decided to go with the method of leaving all of the wall panels pinned in place, so that I could be absolutely certain that they were all lined up squarely. I also decided to start from the centre and work outwards, which seems to involve less risk of misaligning the overall structure. So far, I have done this for three walls, and the one filler piece. The strength and the rigid squareness is evident with these first few walls, so I shall continue ! David
-
You know what Steve ? You are absolutely right on this one . . . I am seeing the layout of the bungalow kitchen purely from a man's perspective, which would be fine if this room was a workshop or an office, but the kitchen is usually a woman's natural space. Maybe I need to consult my wife or my daughter for good solid advice ! Thanks for your lateral thinking . . . David
-
Further work on the floor surface at the back of the garage was carried out, with some grey emulsion paint. The frame for the hinged opening garage doors has been strengthened and squared up, using some pieces of balsa . . . Every so often, I like to test fit the roof structure by placing it on top of the ground floor walls. The kitchen appliances and furniture have been arranged roughly where they might be located, so as to visualise how the kitchen space is used . . . Both fireplaces now have a coat of paint on the 5 mm square hearth tiles, and a coat of yacht varnish over the paint. Between the walls of bedroom two and bedroom three it has been necessary to add a filler piece of foam board, in order to close off a gap. Later, the small gaps between the pieces of foam board will be filled with Mr White Putty 'R' and overpainted after sanding flush . . . I have now arrived at the point where the walls can be mounted onto the baseboard floor plan, and fixed with PVA glue . This process needs to be carried out with due care and attention . . . Scary stuff for me ! David
-

Wonder what happened next?
Anglia105E replied to Earl Marischal's topic in General Automotive Talk (Trucks and Cars)
Man poses for photo with his wife by their overturned automobile, lights up a cigarette, pool of gasoline leaking from the tank . . . instant free cremation . . . -
I like to work in 1:43 scale for my dioramas too George, and your work here is extremely impressive . . . Your figure painting and weathering is top notch. David
-
Thanks Paul, and I know what you mean about the realism aspect . . . I would say that the foam board is very good for the wall panels, the baseboards, the roof trusses and generally the larger components of the construction, so I have introduced lots of smaller detailing parts to balance the whole assembly. Things like the furniture, the kitchen appliances, beds, doors and windows, figures for example are important to compliment the expanse of foam board . . . The funny thing is, that originally this bungalow started out as a completely white structure, just like in the Adam Savage video that inspired me in the beginning . . . David
-
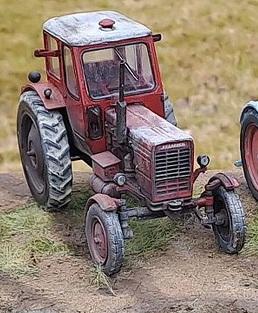
Do you have a favourite from this line up of six model tractors Charles? All of the six models have benefited enormously from your skilled weathering techniques, and for me the best is this one . . . David
-
Excellent " common sense " guidelines from Michael, and I must admit to being guilty of using my camera's high resolution 3664 pixels x 2748 pixels, without reducing the photos in size . . . My apologies for that 😞 . . . Also, thank you, as my ' Choose Files ' option is working as it used to before. David
-
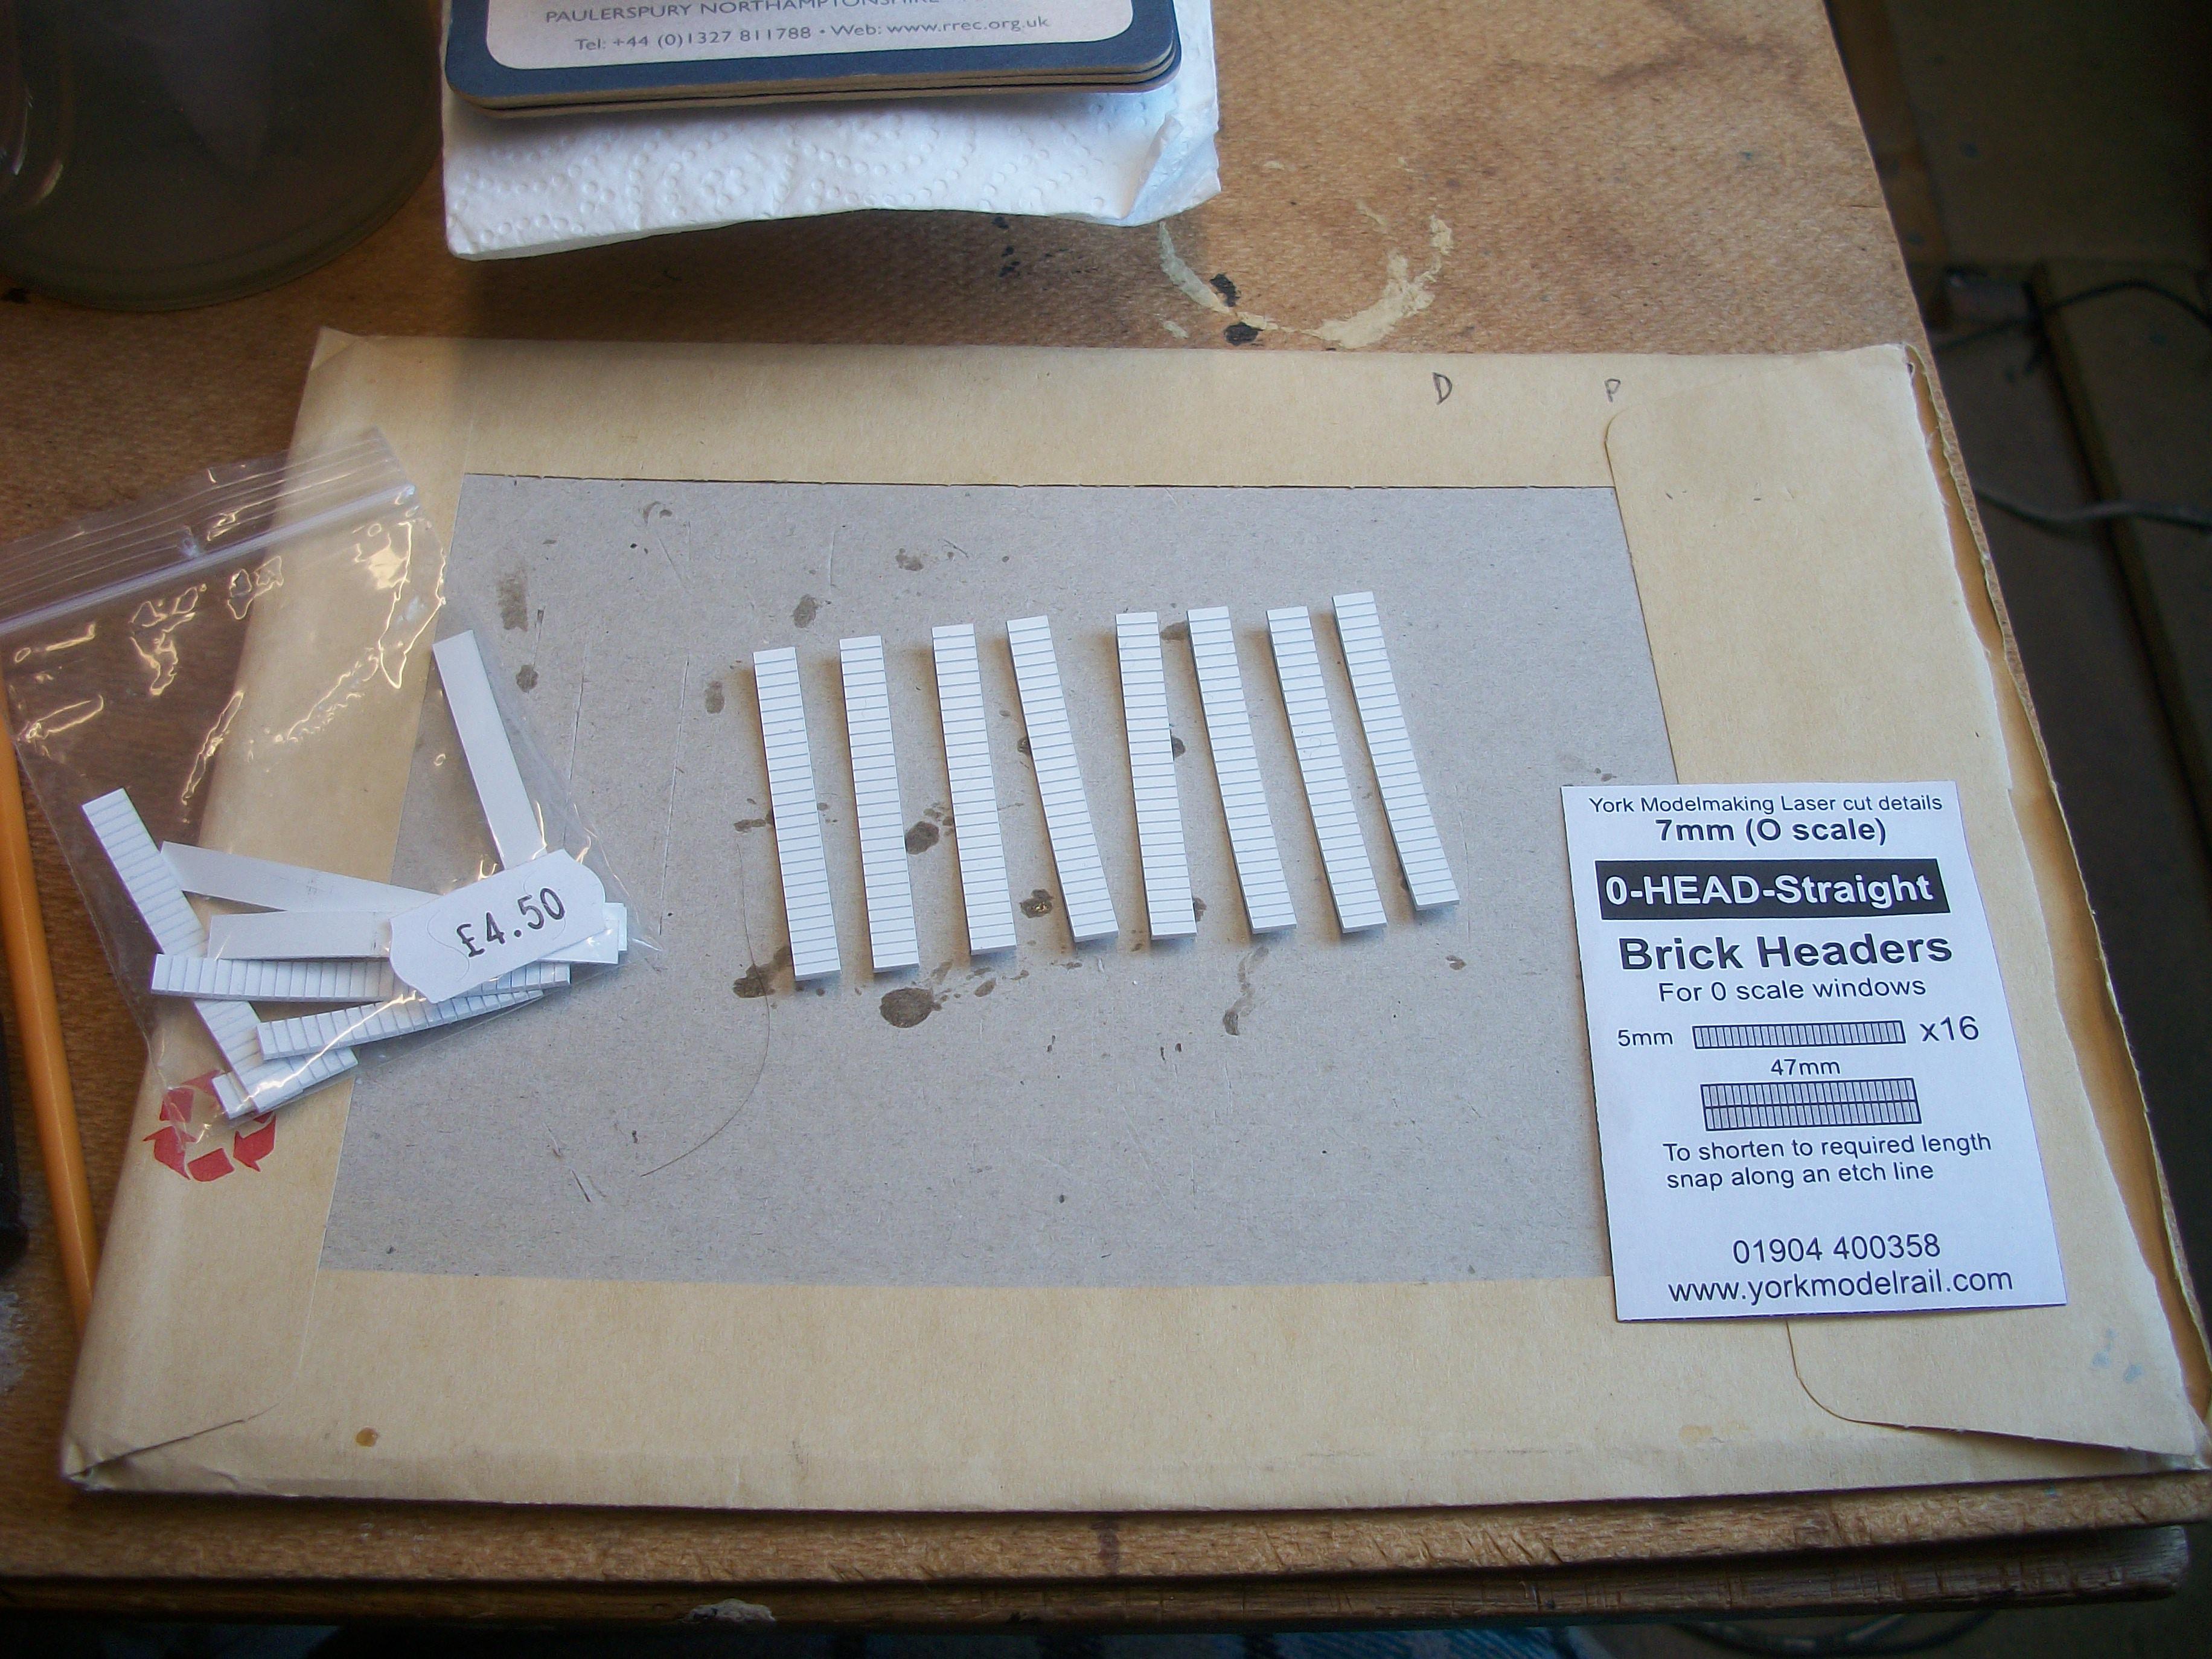
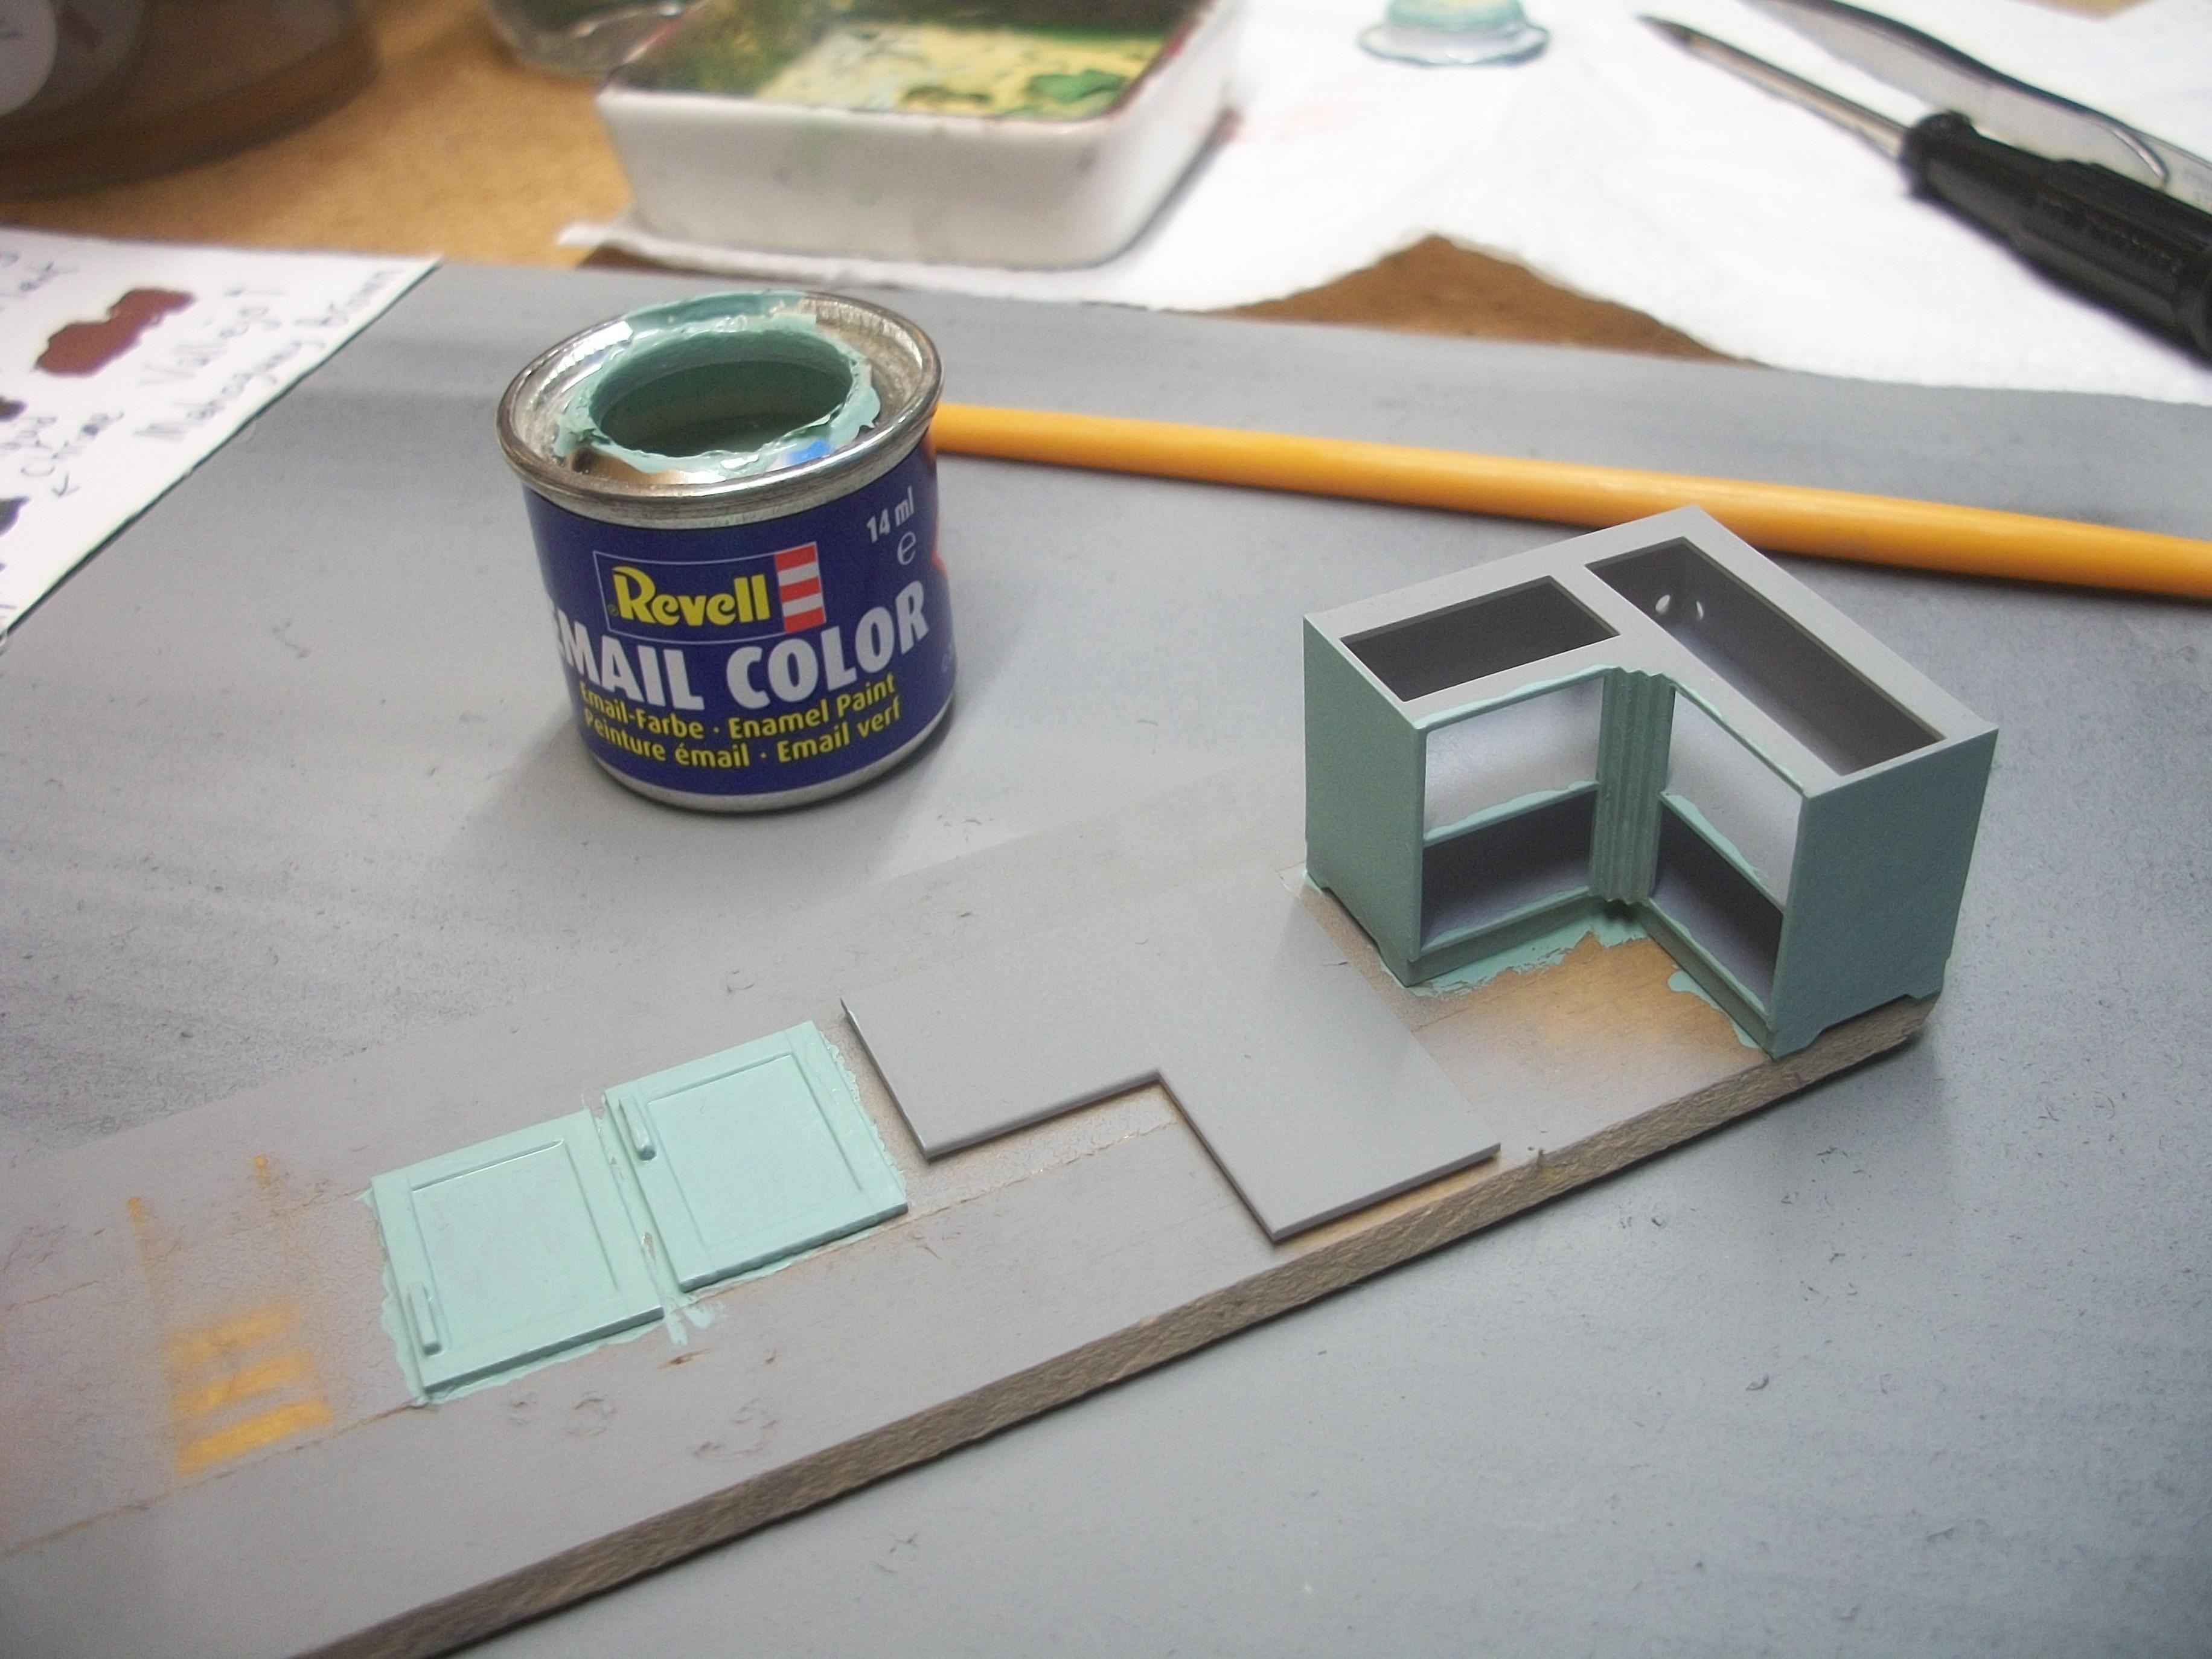
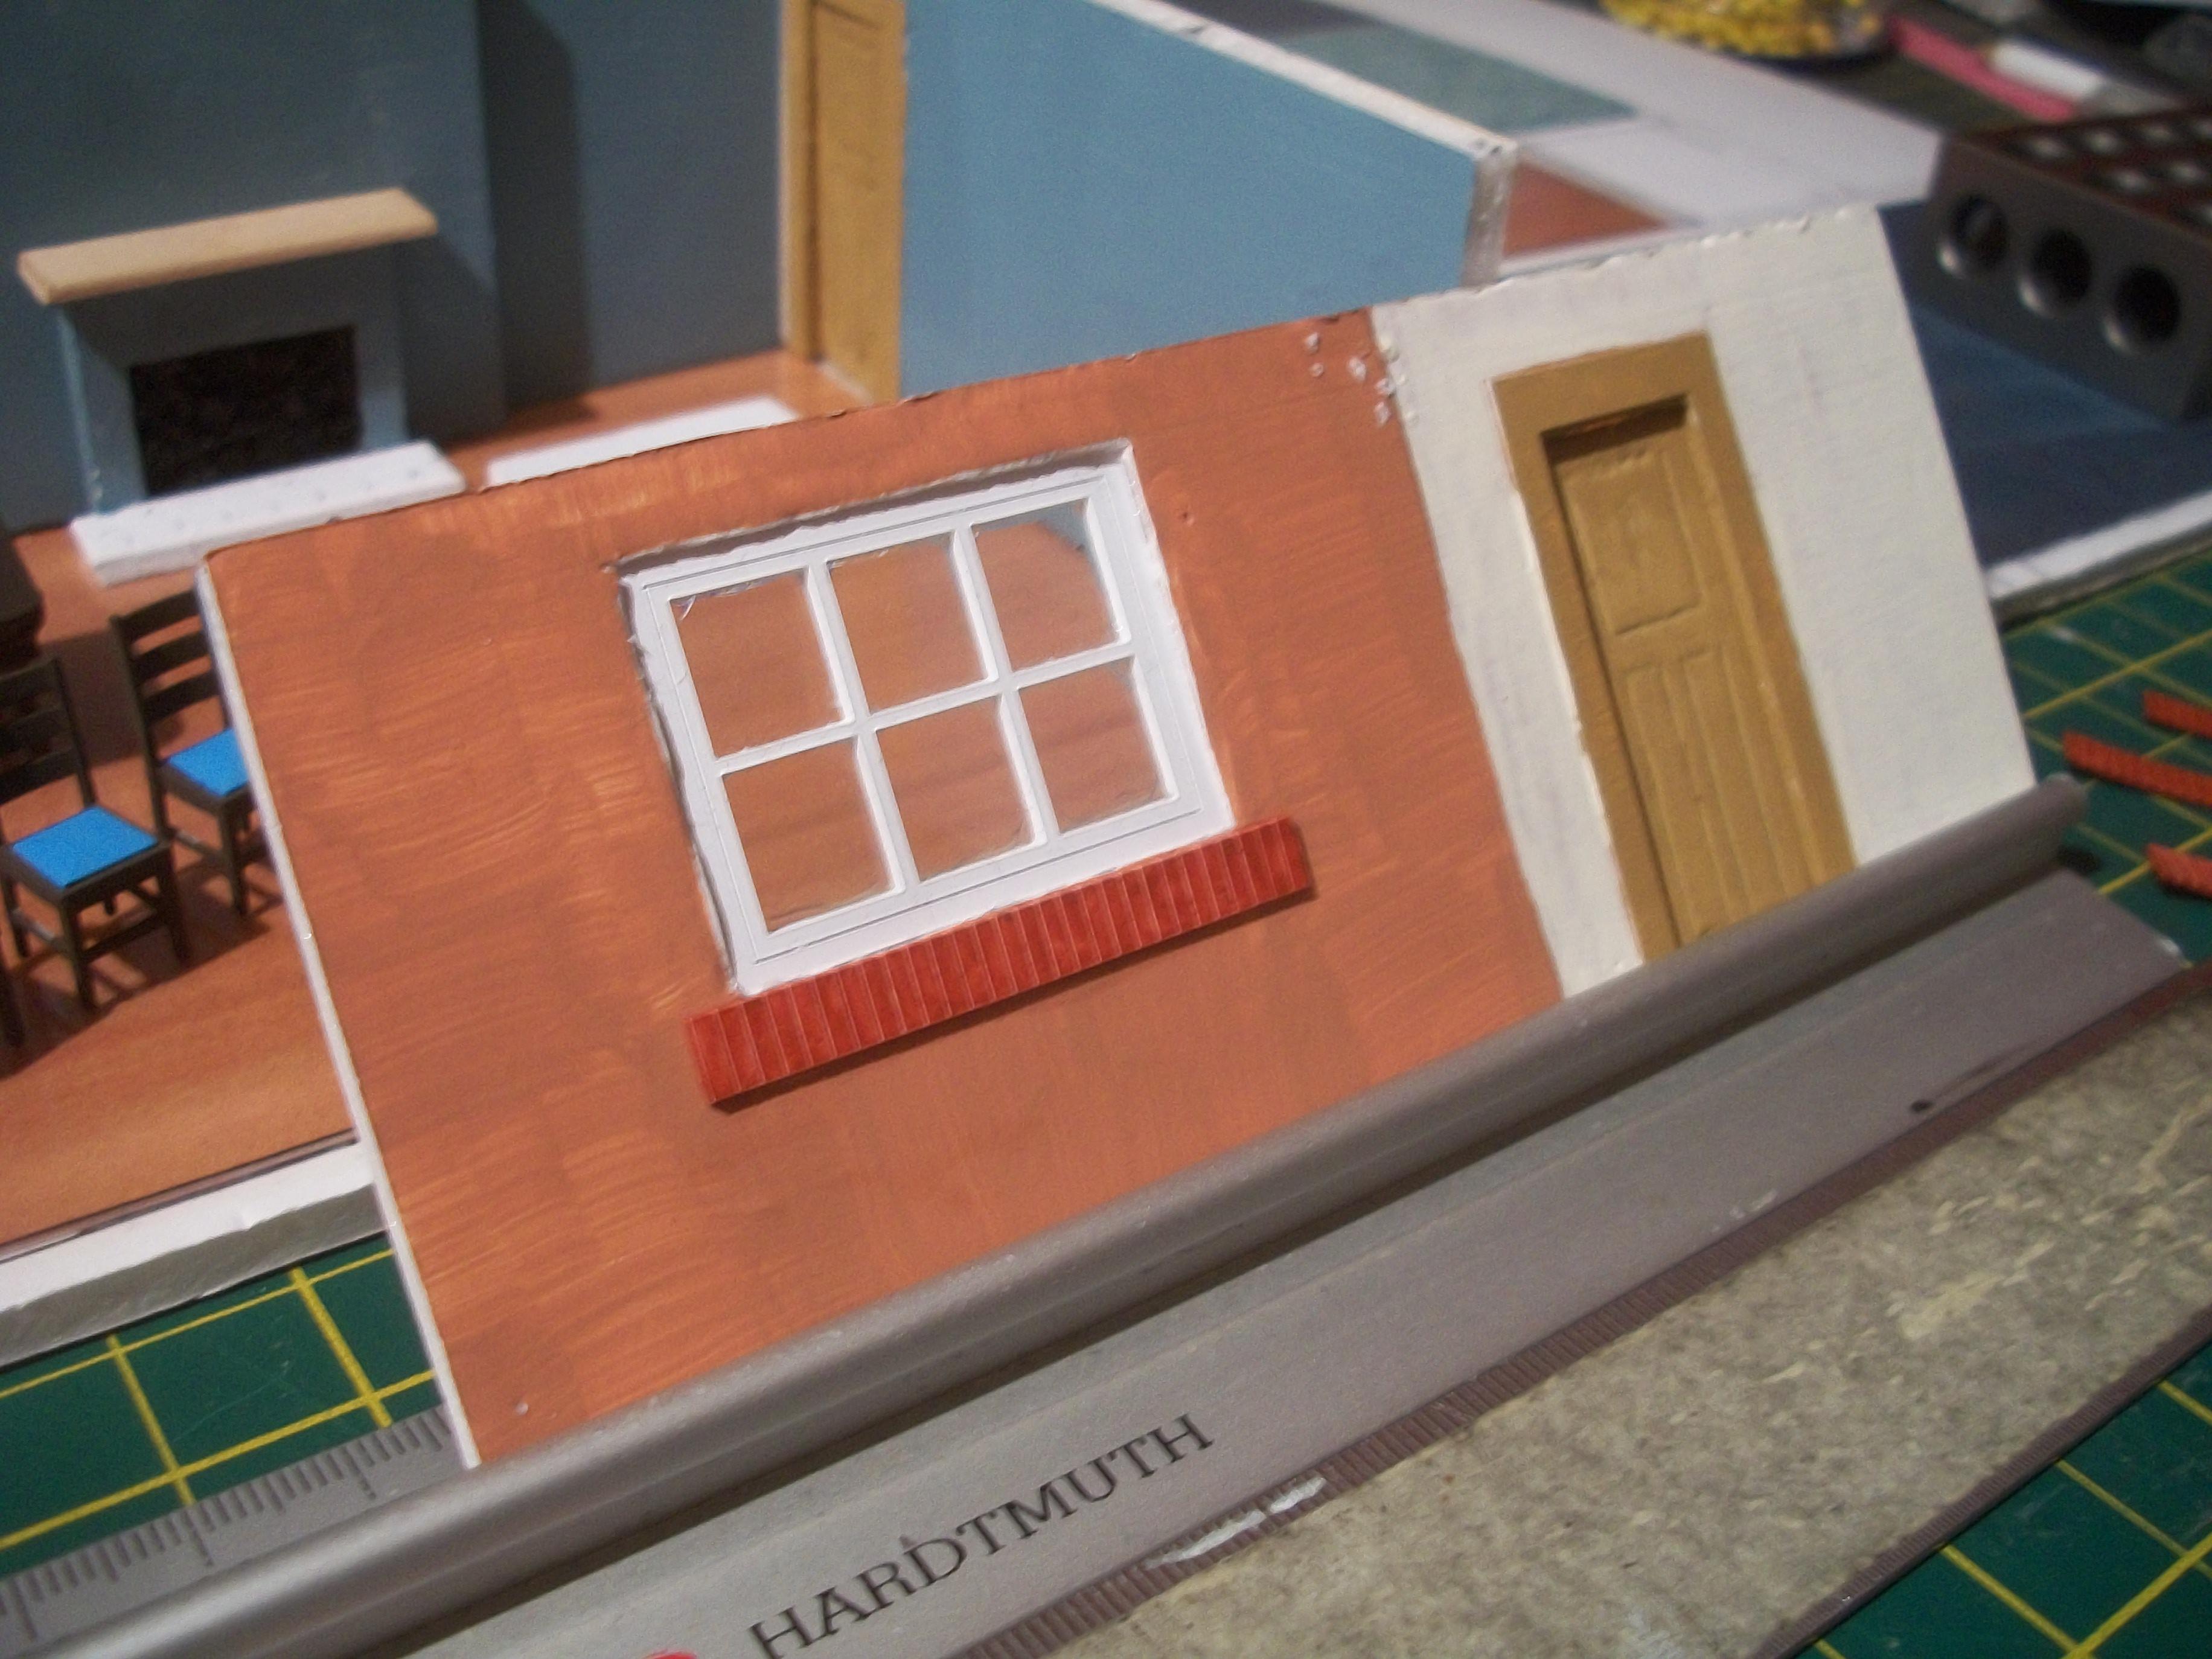
Recent work over the past few days has included painting the seat bases of the dining chairs in Vallejo Deep Sky Blue acrylic, and also the frames of these chairs have been given a coat of Vallejo Burnt Umber acrylic . . . Further work was done on the eight brick headers that will be placed below each of the exterior window frames. I have used Johnstone's Tile Red for these brick headers. While the paint was drying overnight on the chairs and brick headers, I worked on an idea for the hearth tiles on the kitchen fireplace. This involved sanding the edges of the hearth stone, and also scoring lines for the tiles. Now I shall need a suitable dark blue paint for the hearth tiles, and when the living room fireplace is done in the same way, this will have dark green hearth tiles . . . Four of the eight brick headers have been glued in place, using super glue, having tried PVA glue which did not work. The kitchen cupboards corner unit has been given one coat of Revell 49 Matt Pale Blue, along with the two doors. Both the corner unit top work surface, and also the mantlepiece for the fireplace will be painted with Burnt Umber acrylic shortly . . . David
-
Thanks Michael, Dave and the whole team for all your efforts regarding this minor glitch ( major glitch ) . . . I can see that you have many members raising concerns, so I won't add to your burden guys ! . . . Myself, I have worked in the IT industry for over 40 years, both in mainframe computers and the very first Microsoft Windows on the first PC's, and as a retired Technical Support Engineer this sort of situation is all too familiar for me . . . Good luck with the fix !!! For your information, my typical photo file size is between 1.80 MB and 2.20 MB, so if I upload 10 photos, which is typical, that is 18 MB to 22 MB in total. David Xie-Watson M.C.I.T.P ( Microsoft Certified I T Professional ) England
-
Still no ' Choose Files ' available . . . ( Just testing really ) David
-
To my surprise, there was no ' Choose Files ' option to upload photos, so I cannot add any photos to my W.I.P. topic . . . I tried a few alternative methods, but nothing works . . . Oh dear ( sad ) David
-
Recent work over the past few days has included painting the seat bases of the dining chairs in Vallejo Deep Sky Blue acrylic, and also the frames of these chairs have been given a coat of Vallejo Burnt Umber acrylic . . . Further work was done on the eight brick headers that will be placed below each of the exterior window frames. I have used Johnstone's Tile Red for these brick headers. While the paint was drying overnight on the chairs and brick headers, I worked on an idea for the hearth tiles on the kitchen fireplace. This involved sanding the edges of the hearth stone, and also scoring lines for the tiles. Now I shall need a suitable dark blue paint for the hearth tiles, and when the living room fireplace is done in the same way, this will have dark green hearth tiles . . . Four of the eight brick headers have been glued in place, using super glue, having tried PVA glue which did not work. The kitchen cupboards corner unit has been given one coat of Revell 49 Matt Pale Blue, along with the two doors. Both the corner unit top work surface, and also the mantlepiece for the fireplace will be painted with Burnt Umber acrylic shortly . . . David The ' Choose Files ' option is missing from my topic screen, so I cannot upload photos at the moment . . . Here is a link to my Google Drive (10 photos). https://drive.google.com/drive/folders/189M_9A5e4wAItApCsJtXlVbufSeBIYA9