Plastic_Passion
-
Posts
589 -
Joined
-
Last visited
Content Type
Profiles
Forums
Events
Gallery
Everything posted by Plastic_Passion
-
nissan hardbody Amt
Plastic_Passion replied to Breezy's topic in WIP: Model Trucks: Pickups, Vans, SUVs, Light Commercial
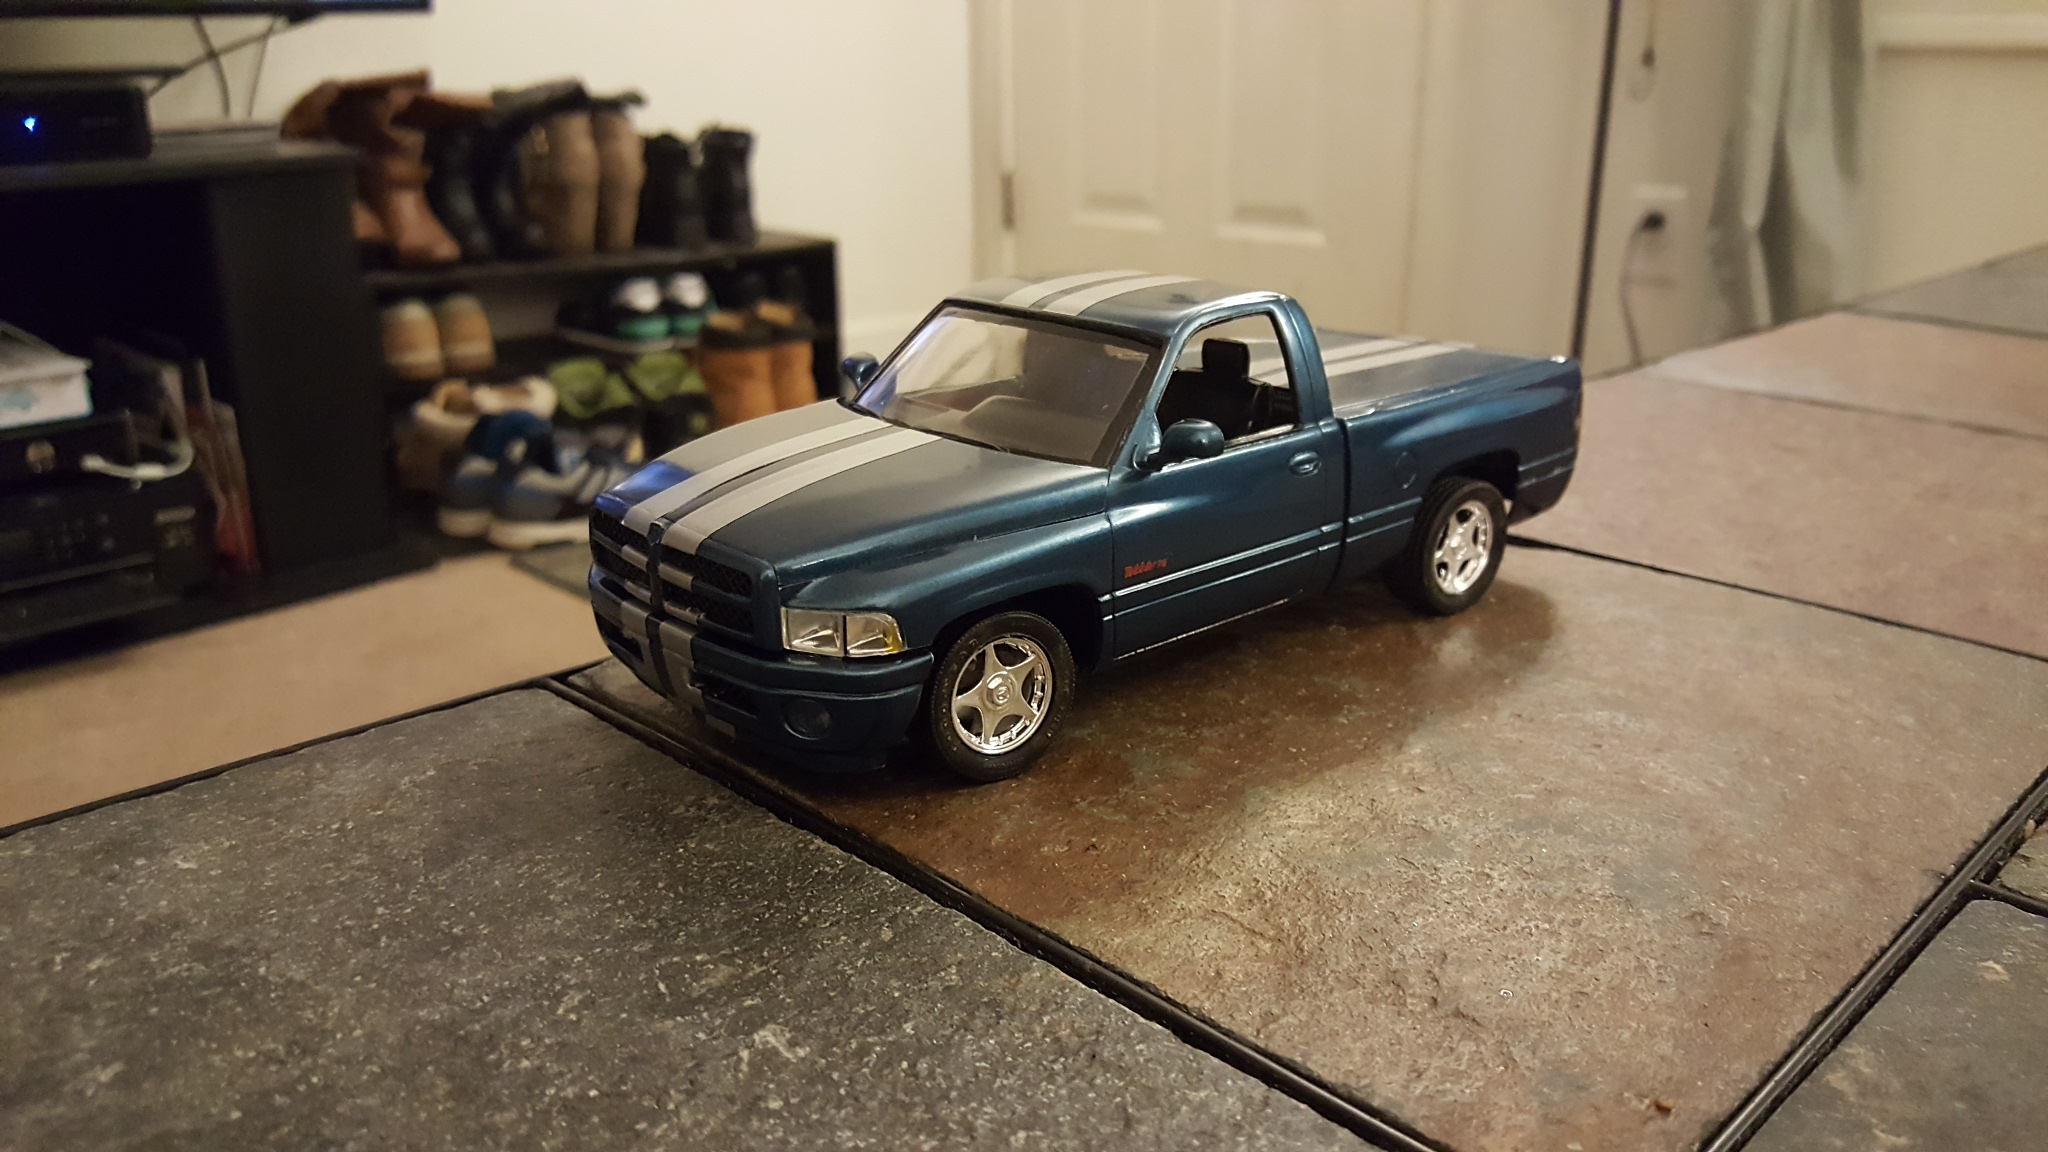
Lol hindsight is always 20/20. But also the way we learn. I tend to "build" my models quite a bit as I'm going to see how everything is jiving together. I have a ram vts pickup I had done a long time ago and hated it. So I bought another since I had lost the original. I dont mind the remake. Came out a bit darker than I wanted but I rolled with it. Now I have another vts kit. However.... this one wont be a 2wd sport truck. I'll be jacking it up. Lots and lots of fabbing parts up as the 96 ram has boxed upper and lower control arms for the front axles.... which nobody makes.... so I have to... -
Thanks man! I'll certainly post it. I have been on a short hiatus this year as I've made a few life changes. Bought a condo, a dog, and a new truck.... go big or go home right??? Lol but yeah I'll be hopping back in shortly.
-
nissan hardbody Amt
Plastic_Passion replied to Breezy's topic in WIP: Model Trucks: Pickups, Vans, SUVs, Light Commercial
Especially since it's an atm. And has pose-able steering which I see you havent mucked up. Amt models can take some finesse to put together and while they have a tenancy to really come together getting them there can make you question if it's going on the shelf or not. One amt that stands out to me in this statement is any of the c4 corvette models or the 93-2000 camaro/firebird line. Their trucks have been decent but like I said that steering can get tricky. -
nissan hardbody Amt
Plastic_Passion replied to Breezy's topic in WIP: Model Trucks: Pickups, Vans, SUVs, Light Commercial
Yeah! I have to agree. This is a few steps up than beginner. Looks great so far. -
I've always wanted to do a van. Why I havent yet I dont know. But it's on the ole bucket list. Your work is incredible. How did you make the door frames? They look like they're part of the kit. This is awesome so far!!!
-
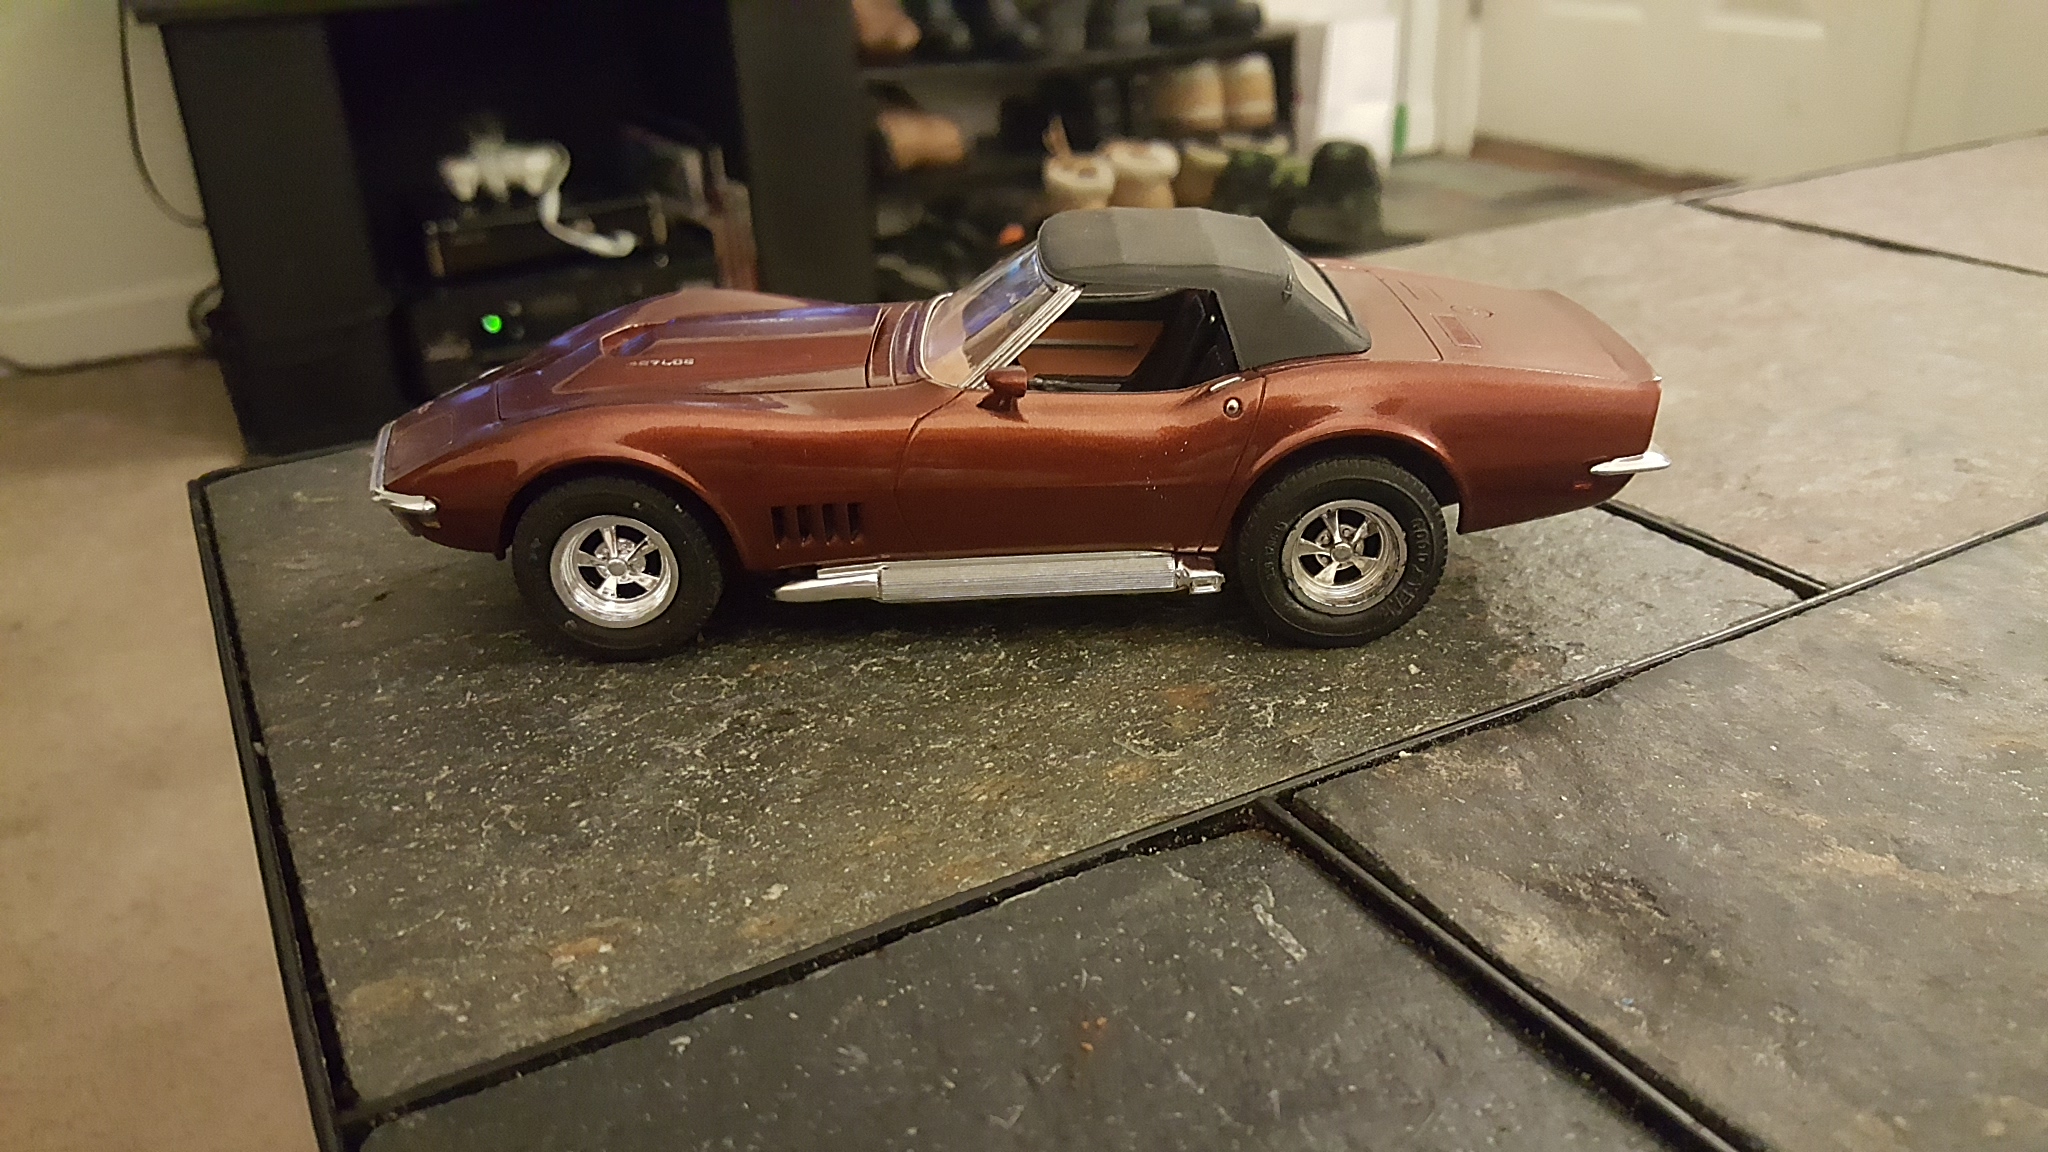
As for the '70.... well I've been getting some little things here and there. I have white faced gauges, the "tall" wrap around wing, and a p.e. kit for it so far. I will grab another hood other than the box stock and plan on maybe a Baldwin hood too. For that I'll drill a hole then file with a small bastard file till I get the shape of the opening(s) then I'll either use some shim stock from work(I'm a machinist) to use for good structure but easily persuaded. More trial and error. Probably a tube of contour putty to "bondo" it to a seamless finish.
-
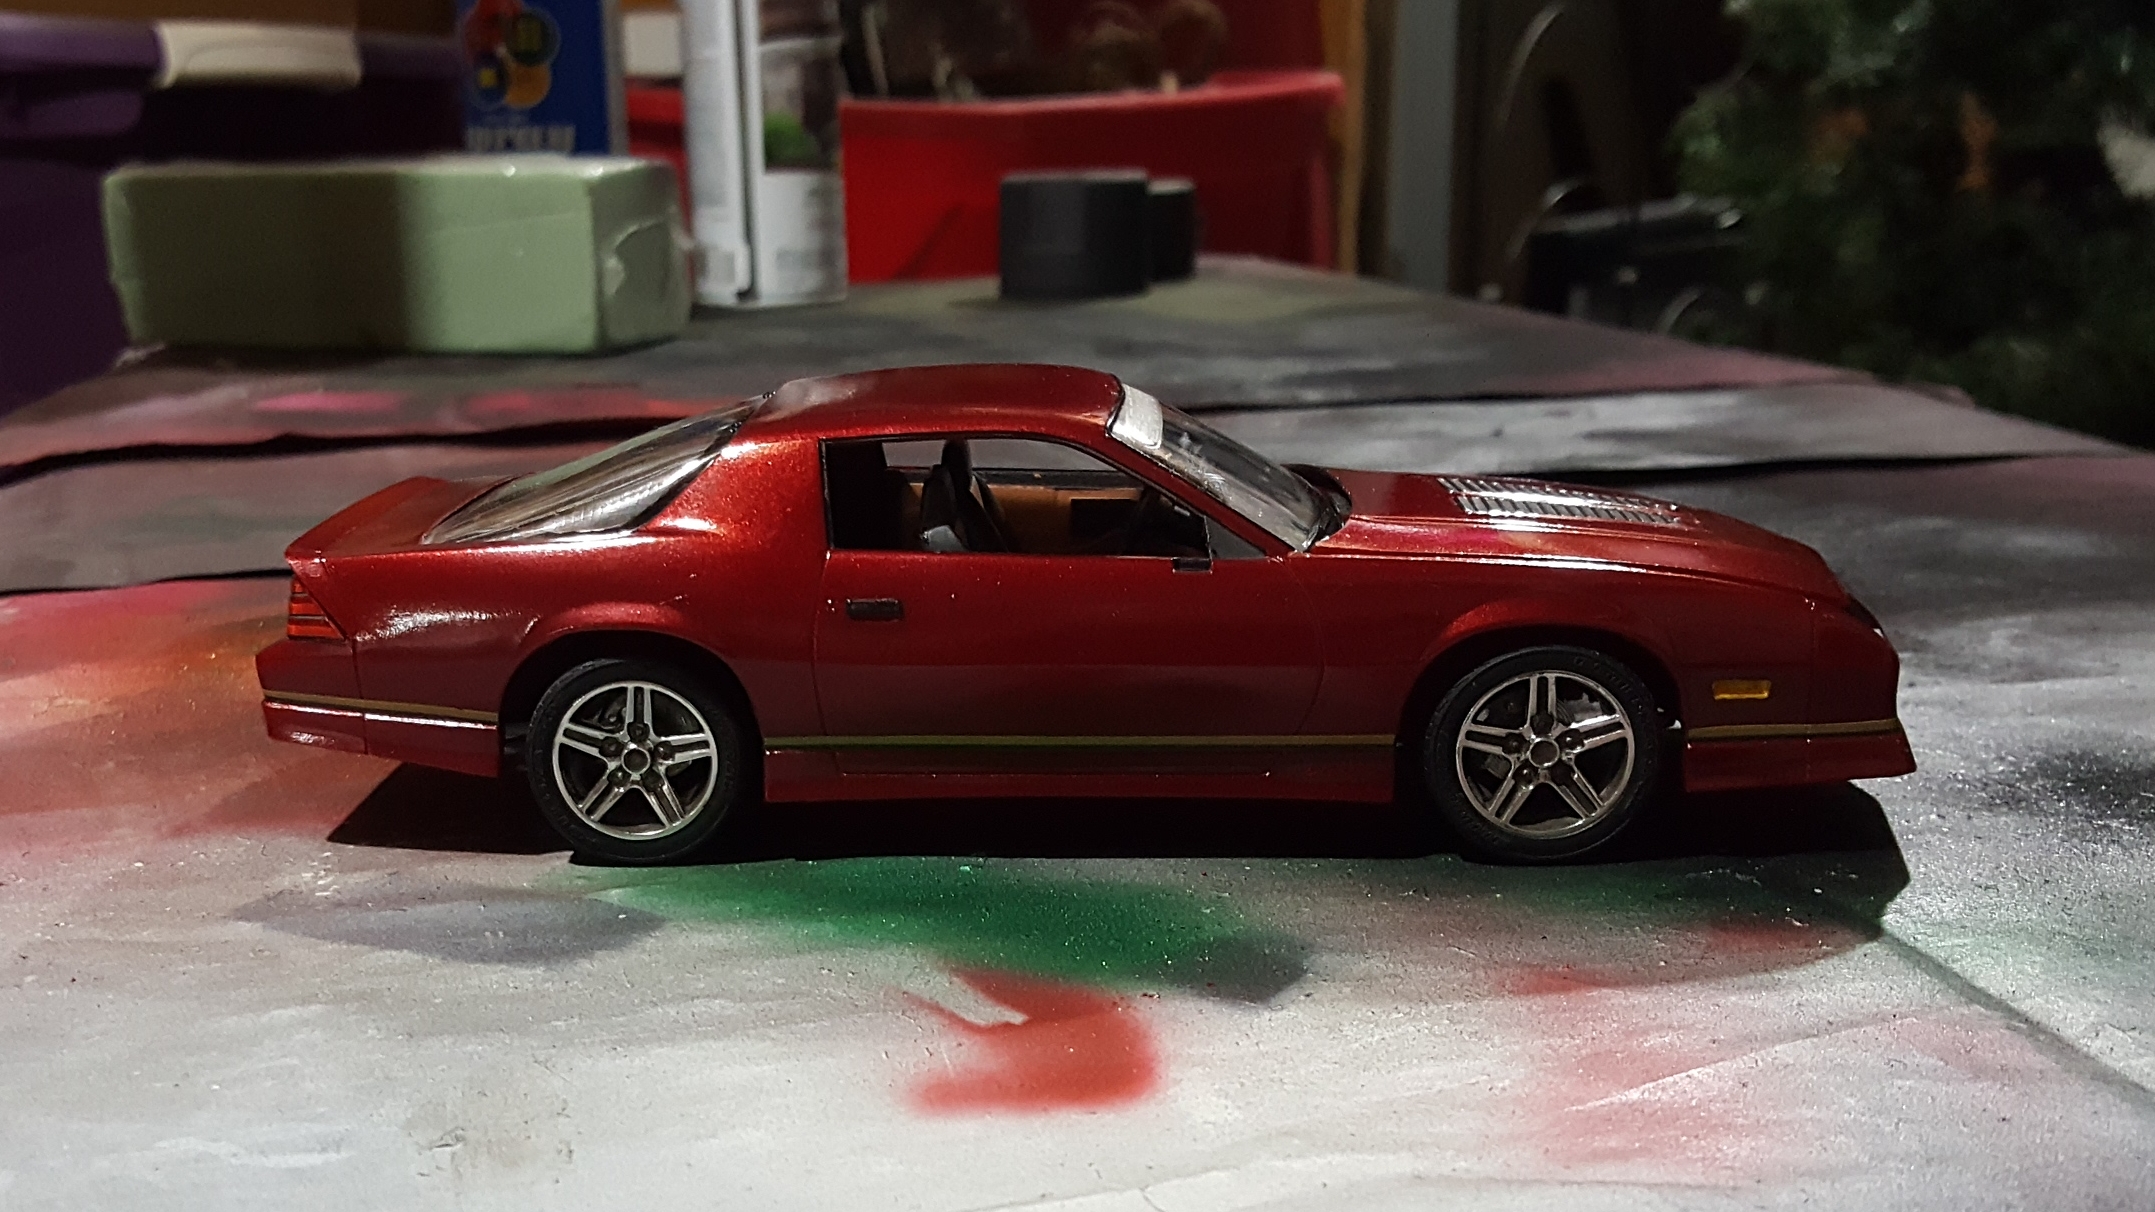
@THORDOOR220 it actually took me a bit of planning and a lot of trial and error. This kit is revell's motor works 85 z28 kit. And to be honest it's kinda a garbage kit out of the box. This is one of my adolescents survivors. I love the kit for the body and interior however it's like a step above a snap tire. The suspension however was pretty ok to work with. I didnt pin mine like you have. I really wanted to because this is so kitbashed that it would've been perfect however the rear control arms are too thin to pin. So to remedy this I used transmission governor springs that I cut to size. This kit has posts in the front that connect the front a arms to the engine bay(which is a seperate part from the body) so I cut the posts out and figured out my ride height and how much travel I wanted and super glued the springs in. Then for the rear, it was basically the same business as usual. However instead of shocks in the rear there were 2 posts that contacted the inside of the chassis. So I cut those off and glued my springs in and the axle to the springs. Then used a kind of rubber cement but not really. It has great hold but will allow flex. Since I only have stress up and down and in low motion its held up great so far.
-
Looks much better than the original. I hated all the space between the lights.
-
Revell '68 Corvette Roadster 2'n1
Plastic_Passion replied to Justin Dodson's topic in WIP: Model Cars
Also hear you on the fumage. -
Revell '68 Corvette Roadster 2'n1
Plastic_Passion replied to Justin Dodson's topic in WIP: Model Cars
I hear you on the acrylic texture. For me its lack thereof. I find it too watered down. However, I dont like testors flat or gloss black in enamel. It thickens too much after a bit. I do throw a bb in my bottles tho. -
Is that the grill f/the '71 revel kit?
-
I know you're right. What I should've said was I want to build an aar with the '72 taillights.
-
I really want to build an aar. But I want the 72 style taillights. Who's got some cuda's to show off?
-
Wasnt what I had planned... not bad... but not what i thought it would be.
-
I frequently have that problem

-
You're doing a bird as a replica of your 1:1 too right?
-
Revell '68 Corvette Roadster 2'n1
Plastic_Passion replied to Justin Dodson's topic in WIP: Model Cars
Sorry that was long.. -
Revell '68 Corvette Roadster 2'n1
Plastic_Passion replied to Justin Dodson's topic in WIP: Model Cars
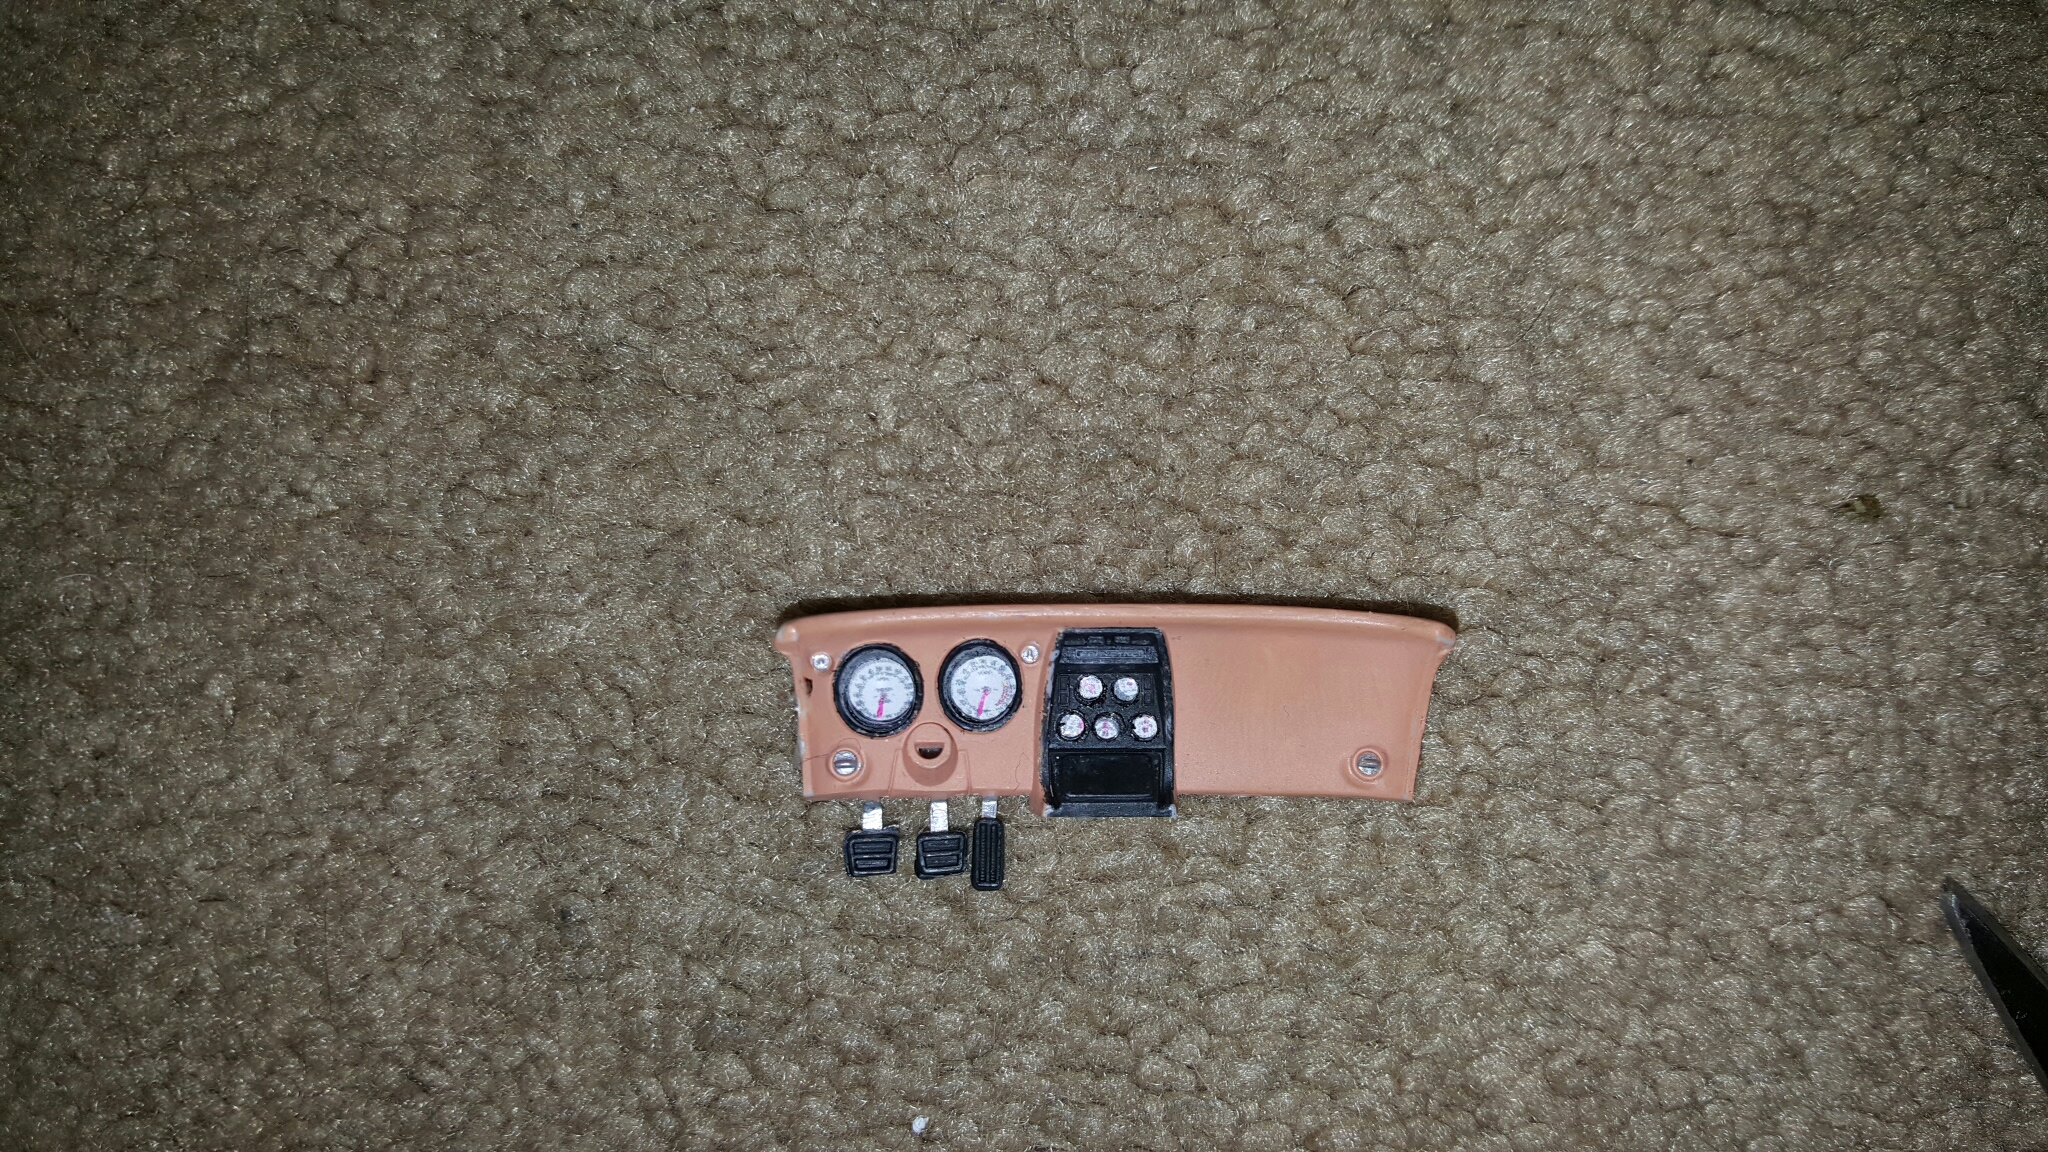
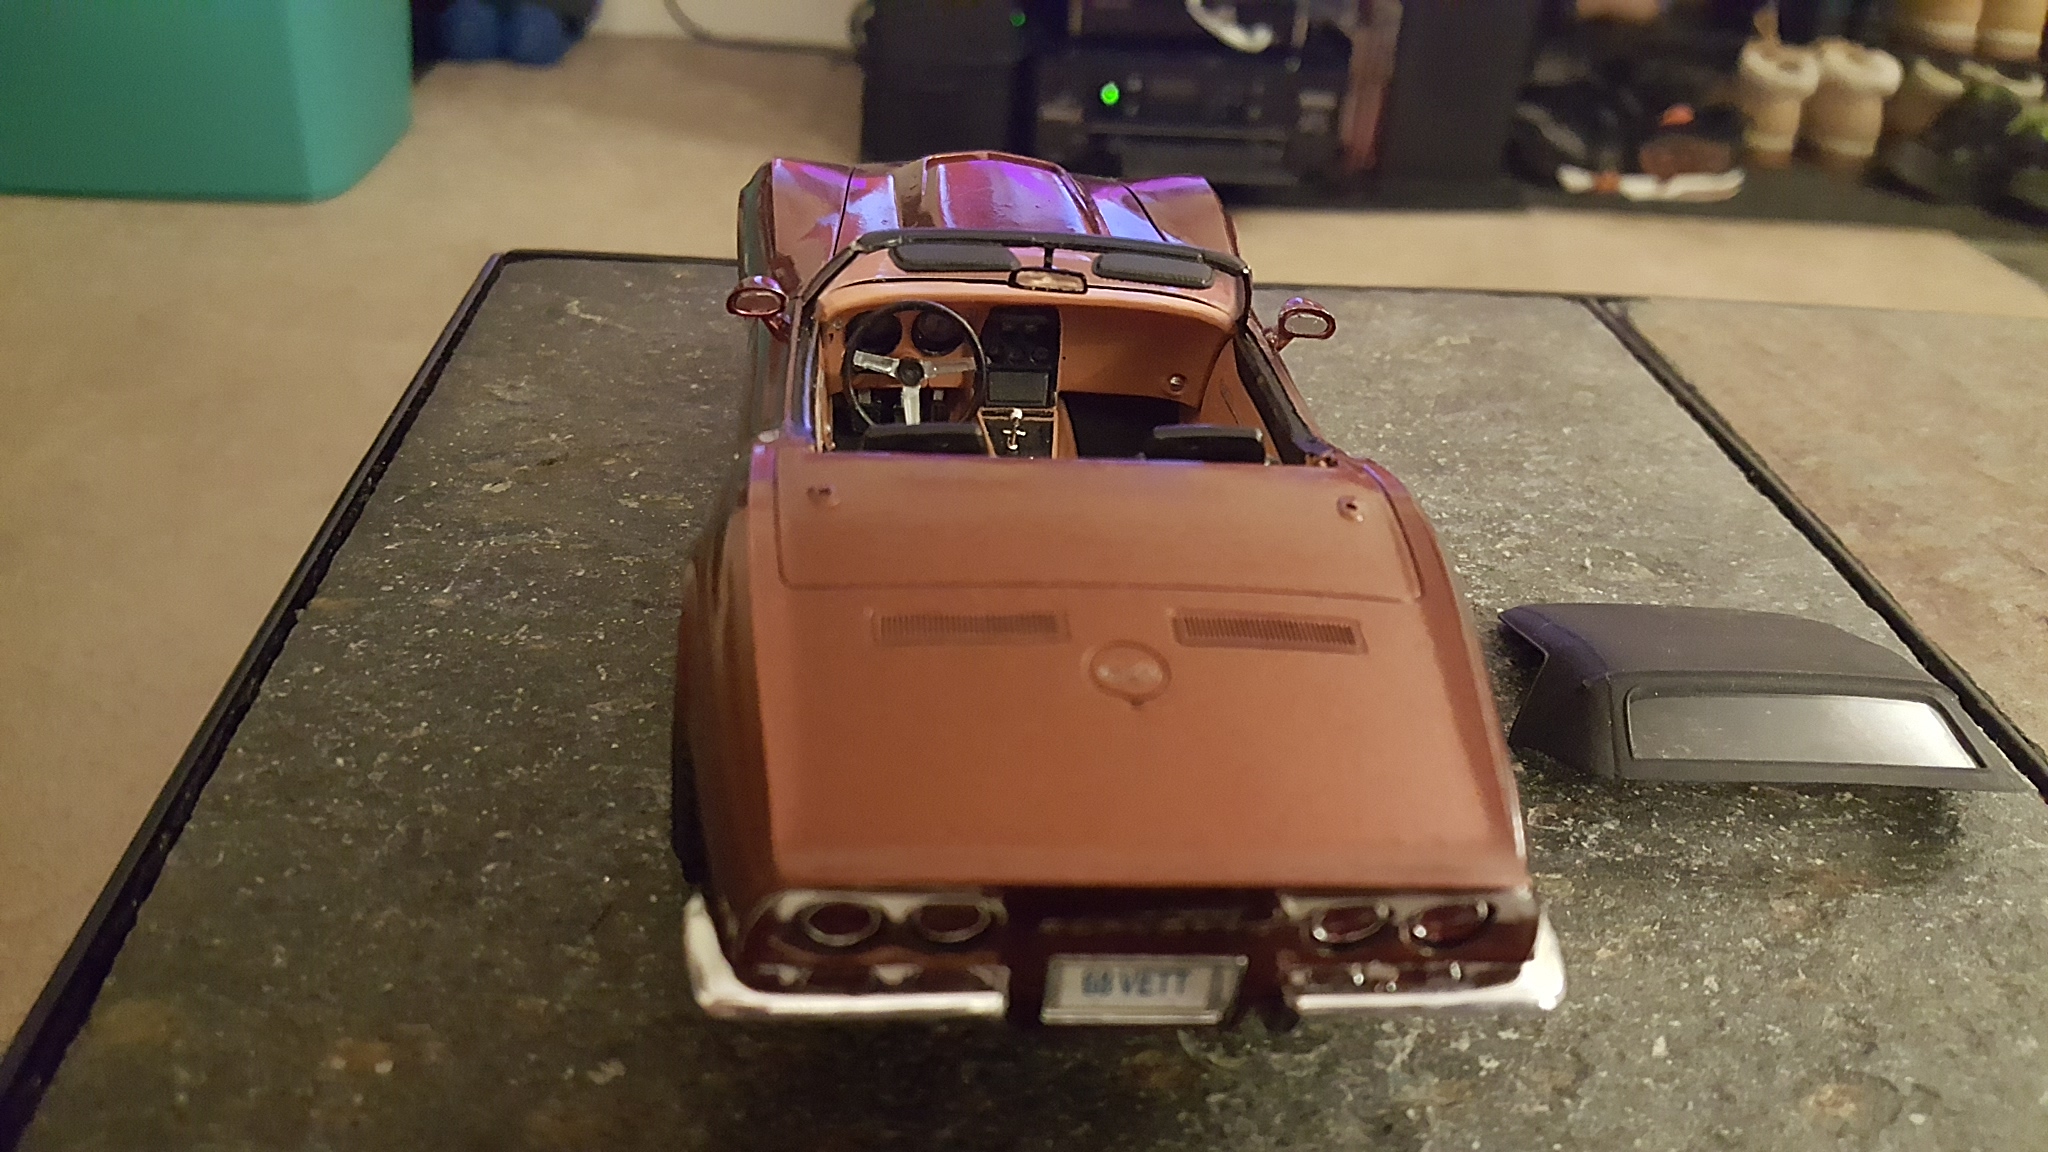
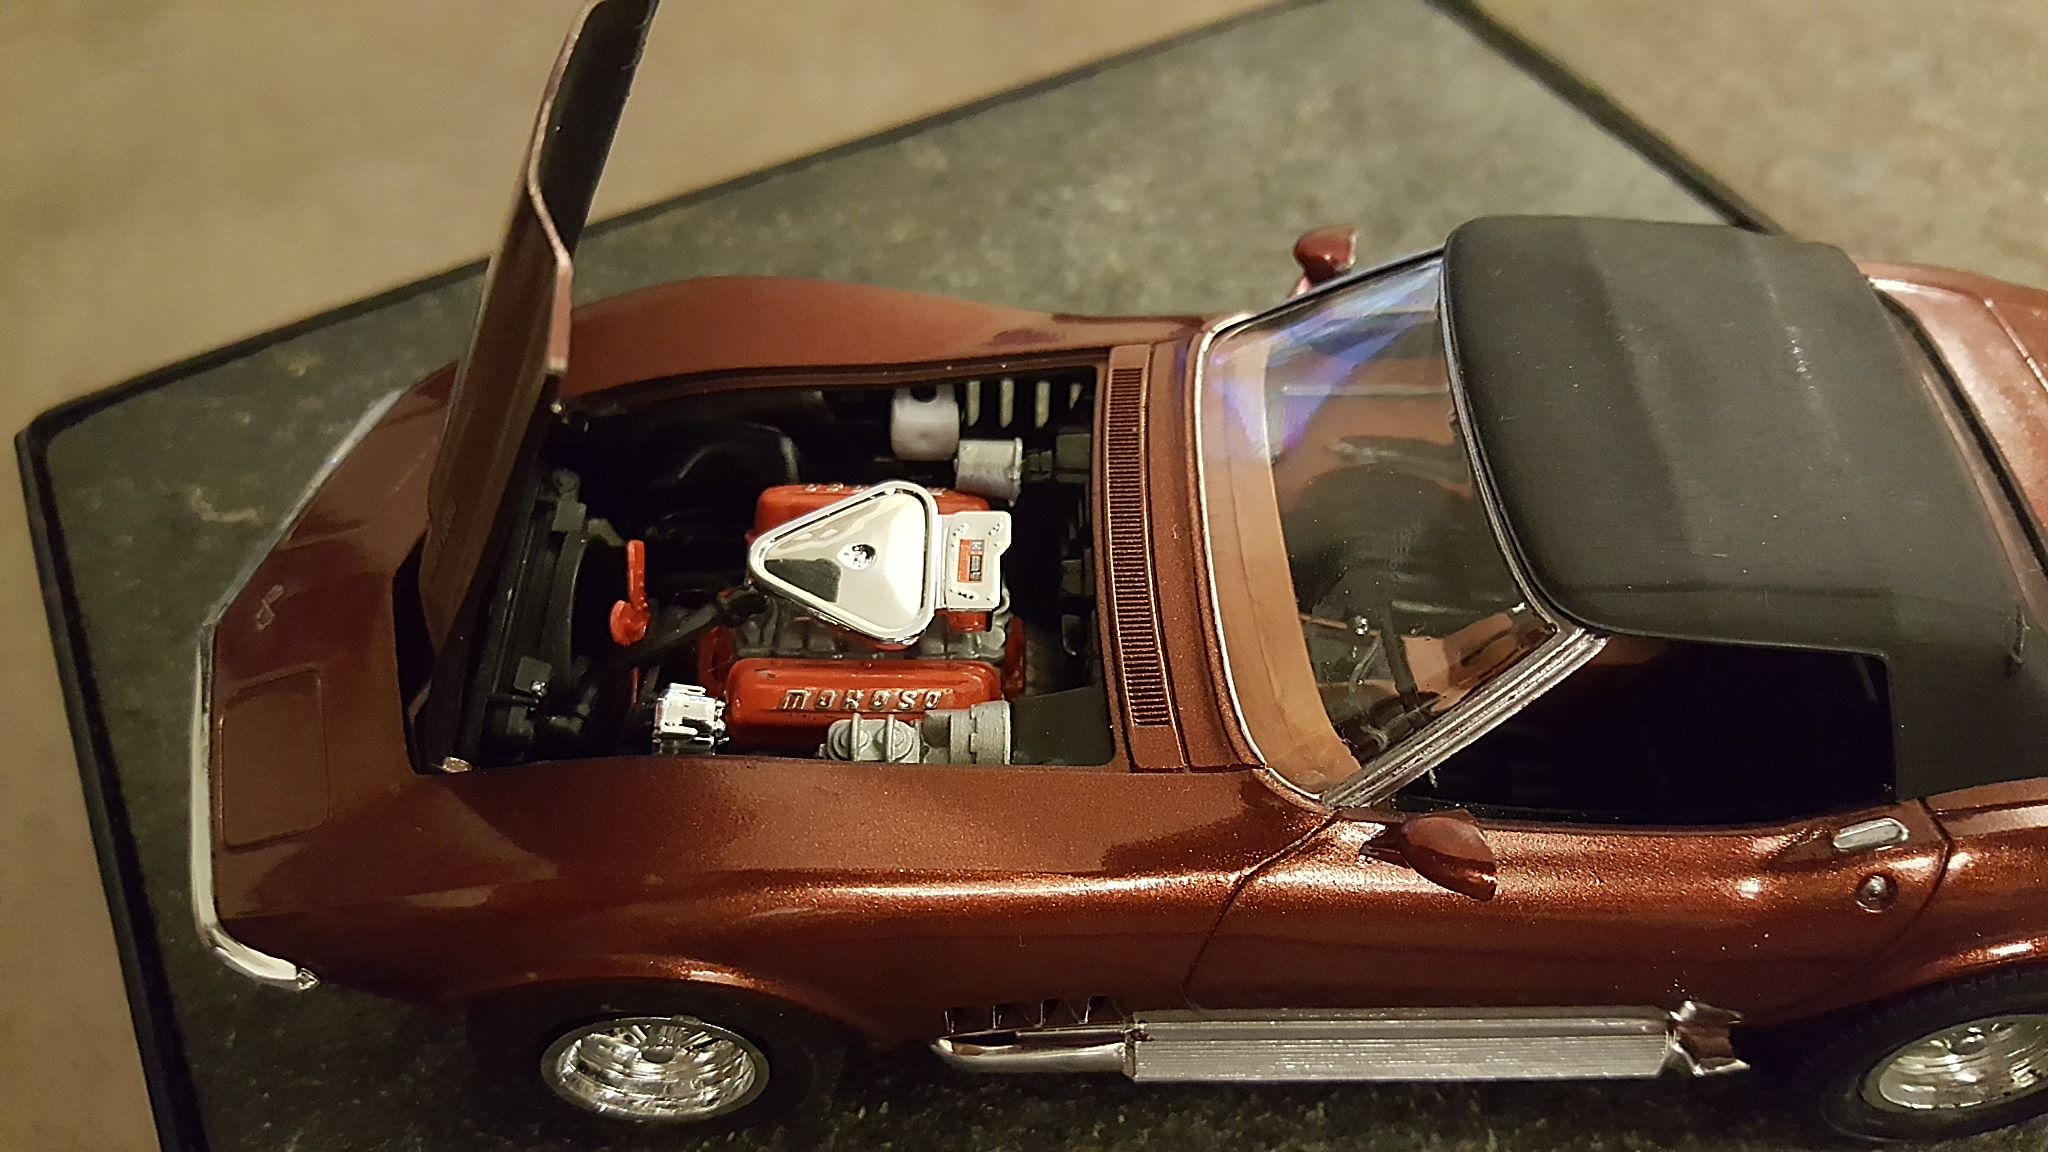
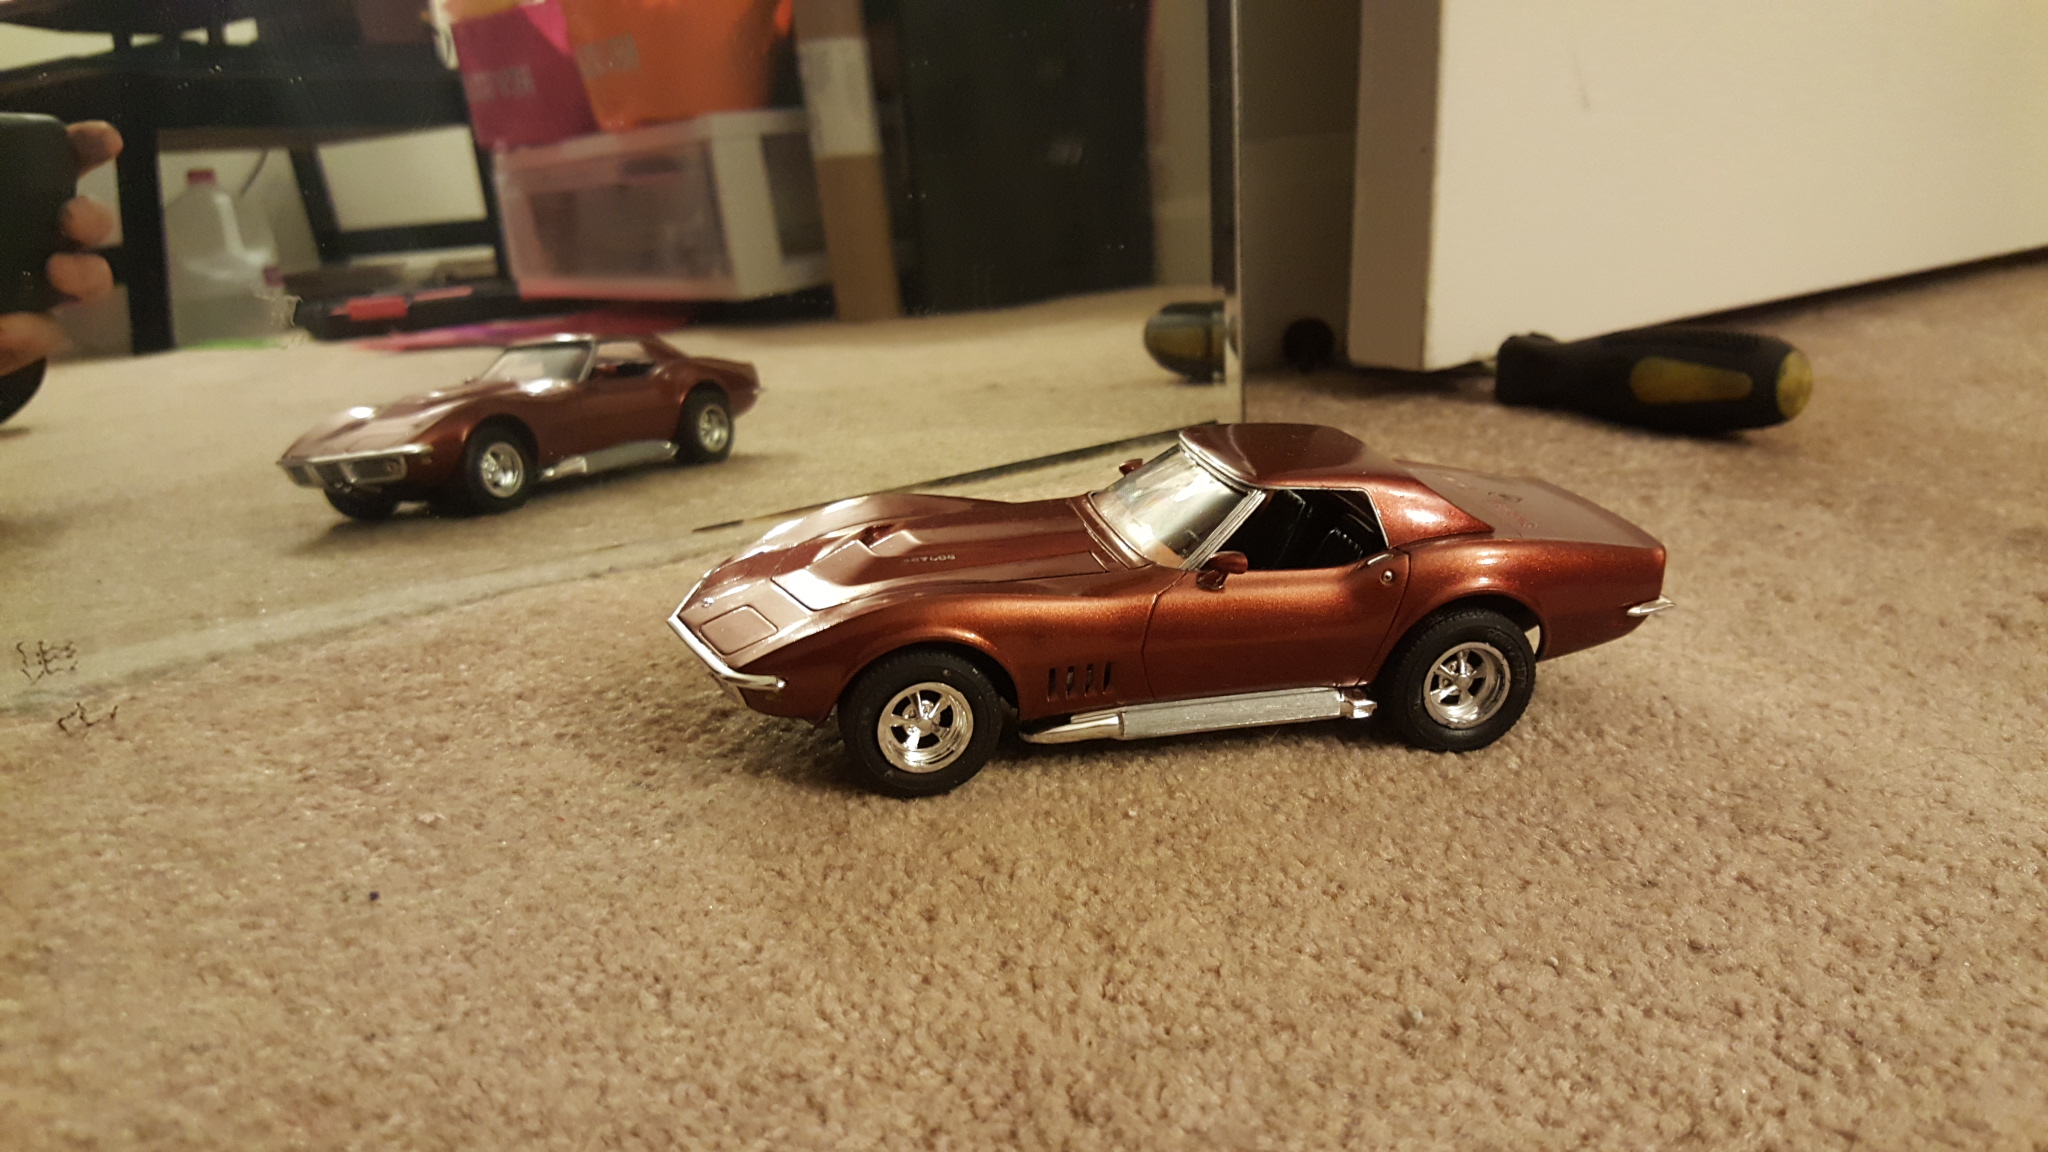
Man it's super annoying that it does that... when I have my phone in landscape it takes away the text box... anyway. I was just going to say you dont necessarily need a booth. It more about your prep work. Get a decent primer. I usually use 2 coats of primer. Light first then cover but obviously dont drench. Then I dry sand with 1000 grit lightly. Remove any mold lines as @Snake45 was saying. Btw Snake, that's a mix of aztek airbrush blue pearl metallic, a bunch of aztek airbrush red pearl metallic and a couple drops of testors gloss black all acrylic. Sprayed threw a knock off chinese iwata. @Justin Dodson after you've removed your mold lines and sanded and all that jazz wash your car and put it in some Tupperware overnight somewhere warm. This is to make sure it's completely dry and lint free. After that I set up my area. Try not to disturb things in your environment. Also limit traffic in that area. I use an empty spray can for my bodies. Put your body on over the cap with the cap edges sticking out the side windows. Spray the bottom of the car first. Then do the rest. Be careful how far you tilt your can. The car .at fall off. But itll also act as a drying stand so you don't have a run in your paint at the bottom/ the car wont stick to the paper you spray on. For clearcoat I used to use actual clearcoat. But I've ruined a few sweet spray jobs doing suck. Super wrinkles in the paint. No more.... now i use pledge floor polish. 3-5 coats depending on the shine all brushed on with a soft brush(its self leveling(for the most part)As for your dash... if you have a small drill bit... carefully drill out your gauges. Get a pic of gauges online and scale it down. Print cut scotch tape over them and glue them behind your dash. The gauges in my pic are a pic of actual after market white faced gauges. I scaled them down as I said and used the tape over them(each side)
-
Revell '68 Corvette Roadster 2'n1
Plastic_Passion replied to Justin Dodson's topic in WIP: Model Cars
-
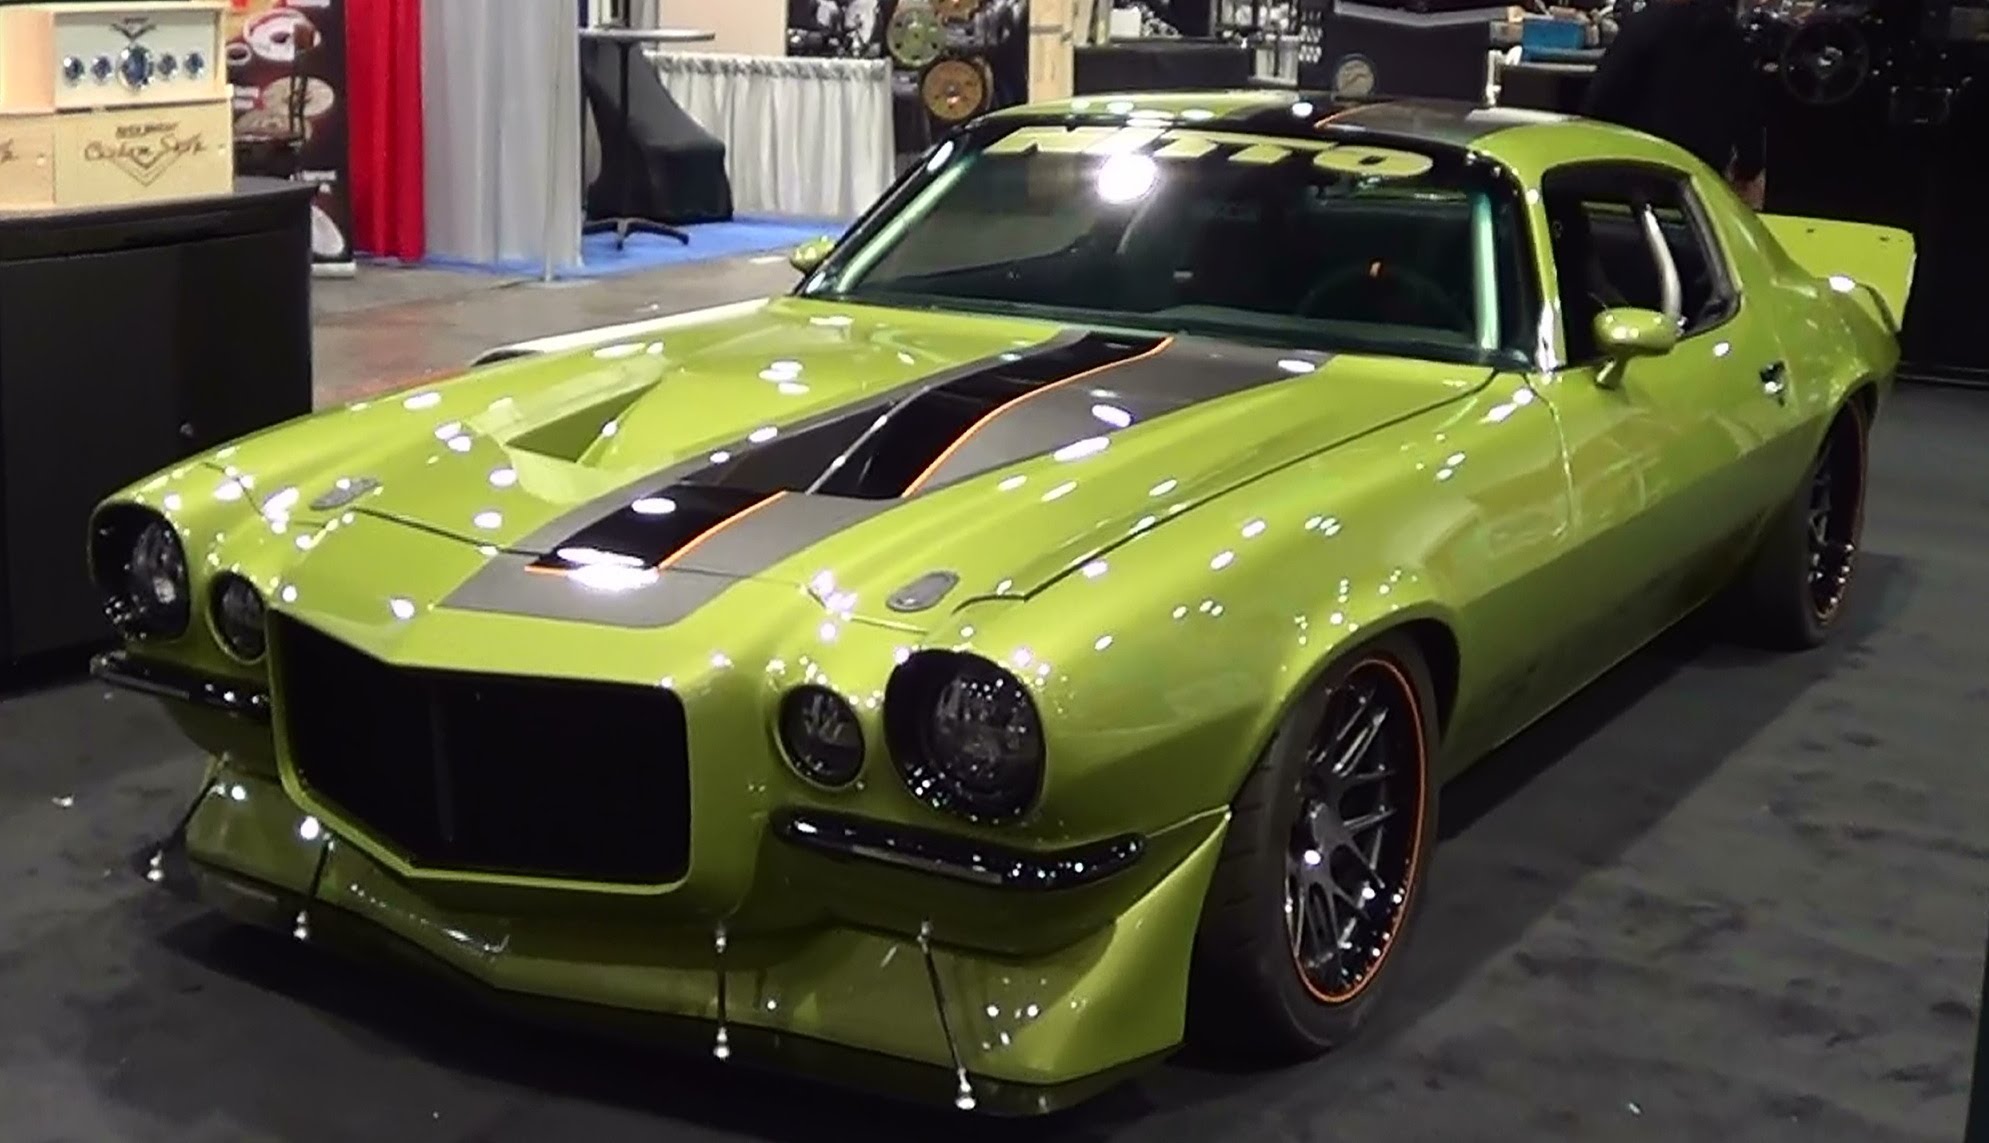
My '70 inspiration
-
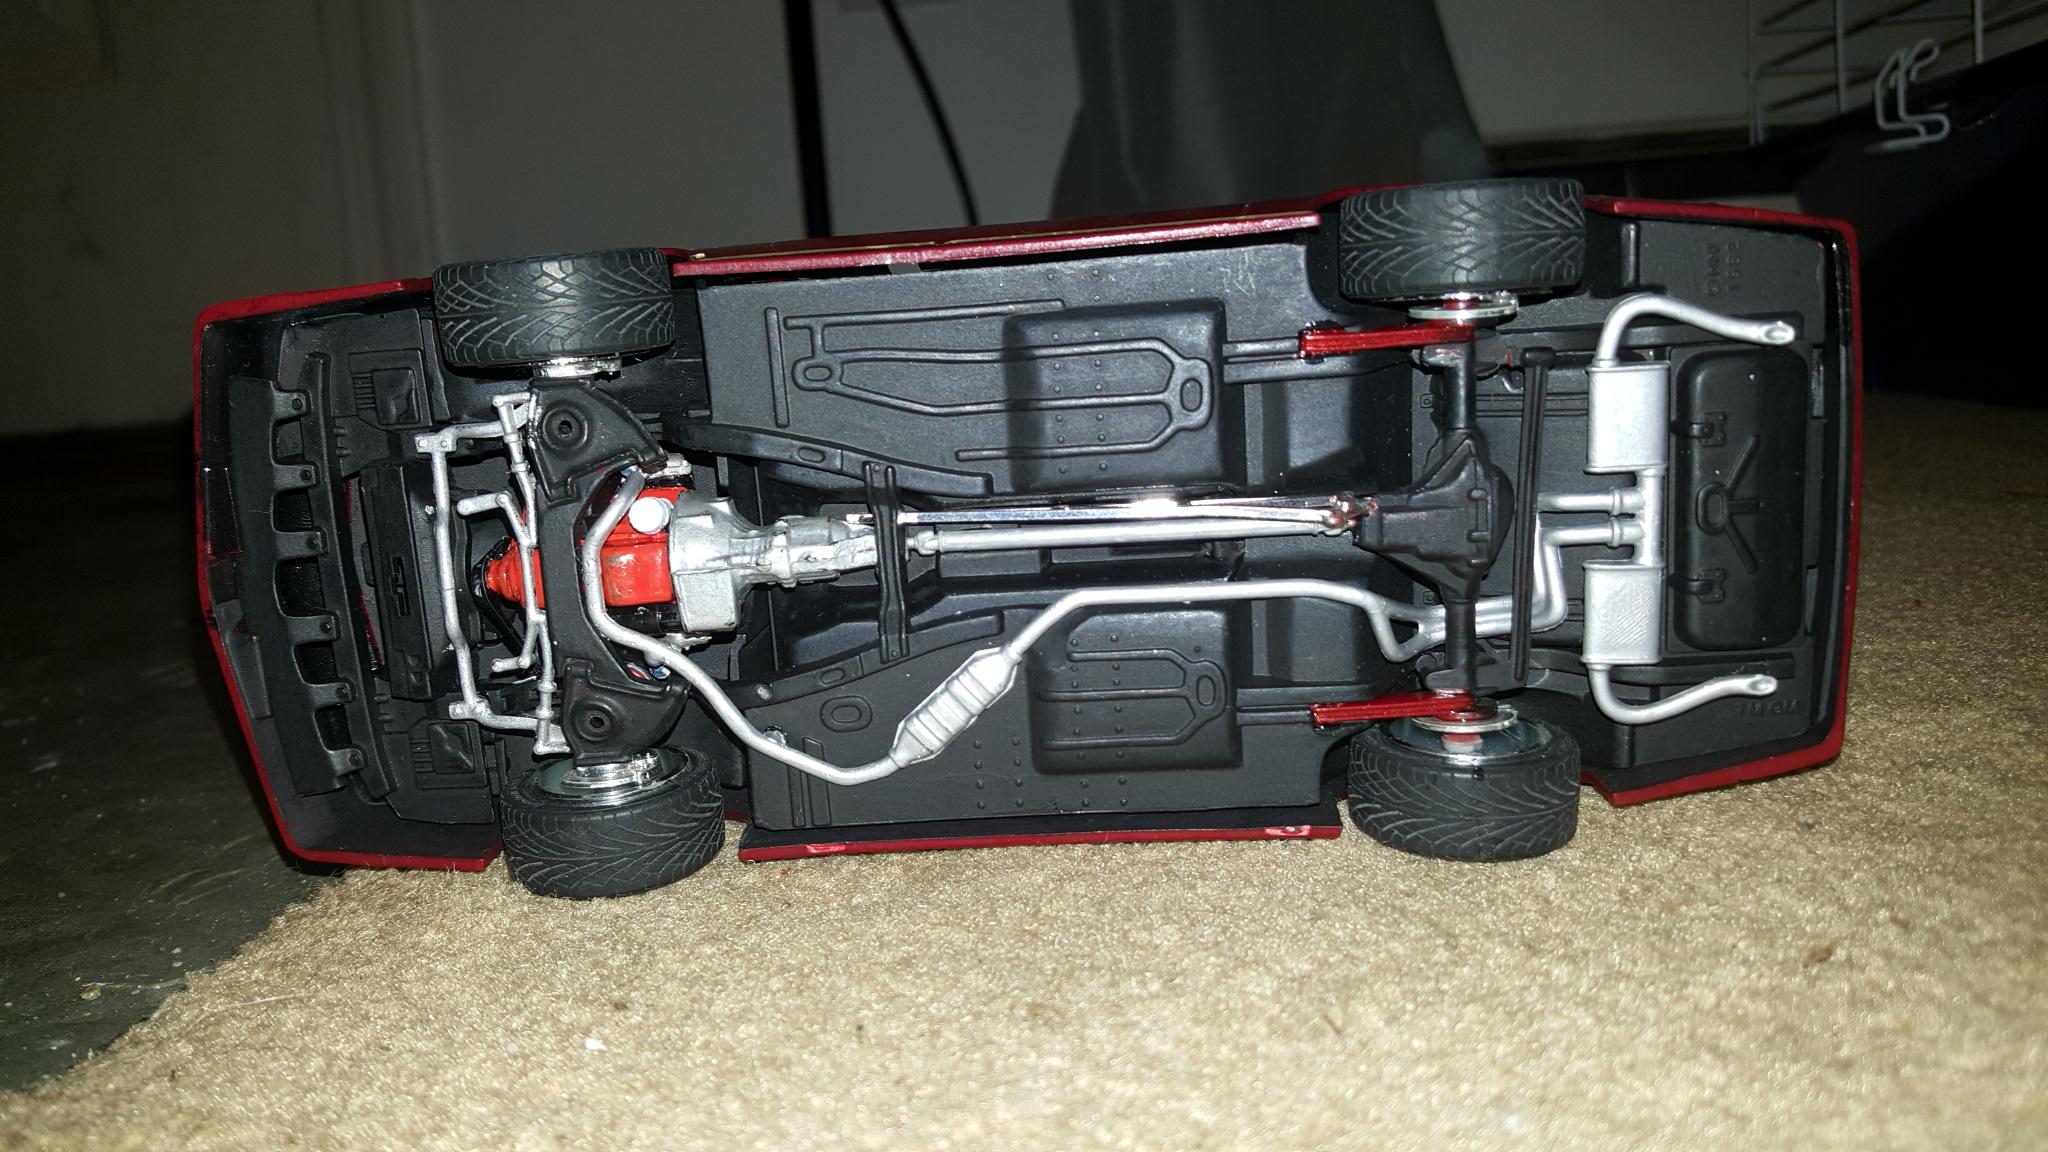
My camaro I did suspension in. Front and rear.
-
I did something similar to the front end you have going on here but not as dedicated. I fabbed mine up on an 85 tho. Very kitbashed. Love where this is going. I have a 70.5 that's not a Baldwin but I picked up the big spoiler for it.
-
Revell '68 Corvette Roadster 2'n1
Plastic_Passion replied to Justin Dodson's topic in WIP: Model Cars
Also I like where this is potentially going. You'll find out things as you go. No need to rush. I havent built anything in about a year but have many projects going. I wasnt sure where yo even begin with this.... but... this is how mine turned out... keep in mind I sprayed this in my basement and have 2 cats...
-
Revell '68 Corvette Roadster 2'n1
Plastic_Passion replied to Justin Dodson's topic in WIP: Model Cars
Sorry this site is weird on my phone... anyways... if you dont mind I thought I'd share a couple things with you. Obviously with your okay first. -
Revell '68 Corvette Roadster 2'n1
Plastic_Passion replied to Justin Dodson's topic in WIP: Model Cars