Rocking Rodney Rat
-
Posts
1,995 -
Joined
-
Last visited
Content Type
Profiles
Forums
Events
Gallery
Everything posted by Rocking Rodney Rat
-

Rat removed from the Roaster: '32 roadster
Rocking Rodney Rat replied to Rocking Rodney Rat's topic in Model Cars
Thanks, Paul! Merry Christmas! -RRR -
Thanks, Mike. I should have done that. Thanks for the tip. I just hate to see the waste of materials and cost, etc... -RRR
-
Rat removed from the Roaster: '32 roadster
Rocking Rodney Rat replied to Rocking Rodney Rat's topic in Model Cars
I know, a new version of this kit with limefire headers and a DuVall windshield! Bring it on!! -RRR -
Nice look build, Paul. Thanks for sharing.... -RRR
-
Rat removed from the Roaster: '32 roadster
Rocking Rodney Rat replied to Rocking Rodney Rat's topic in Model Cars
There are some in progress pix on the WIP thread that show how the bar was constructed. -RRR -
Rat removed from the Roaster: '32 roadster
Rocking Rodney Rat replied to Rocking Rodney Rat's topic in Model Cars
Thanks for the kind comments, all. I was looking for a car to use the spark arrestor air cleaners made by Norm Veber of Reps and Mins of MD. They fit nicely on those Rochester carbs from the Revell '29 roadster. -RRR -
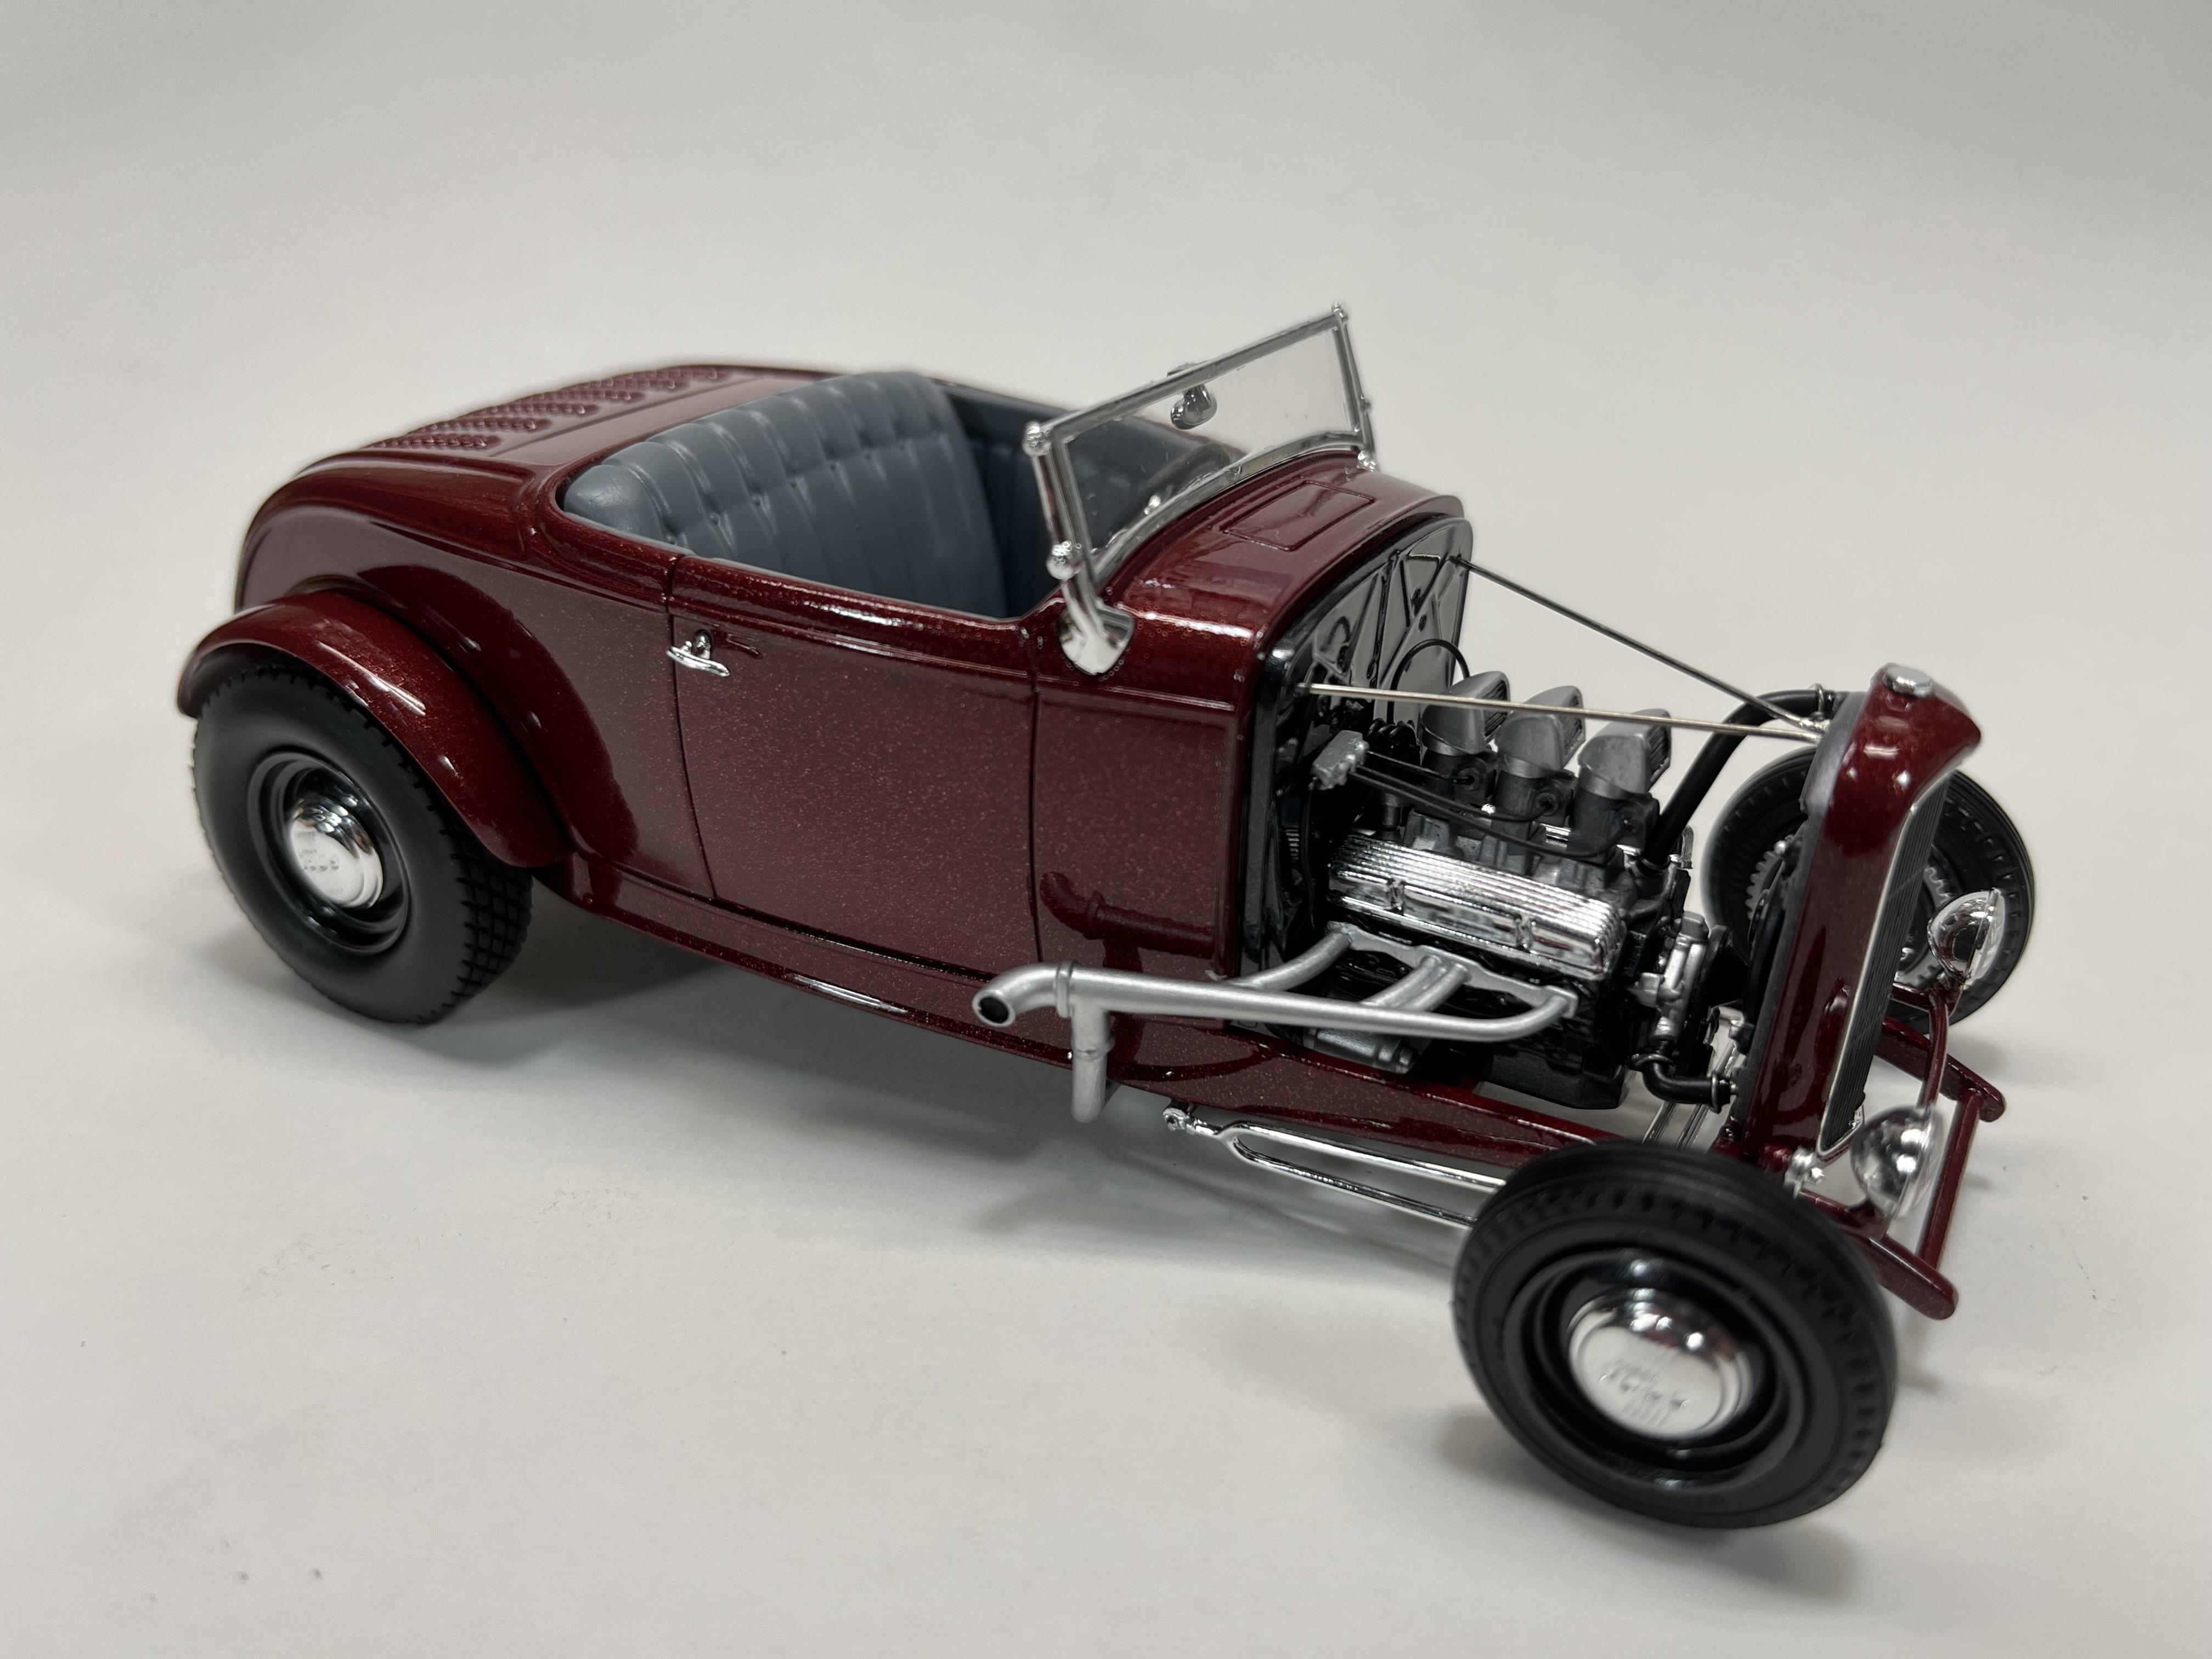
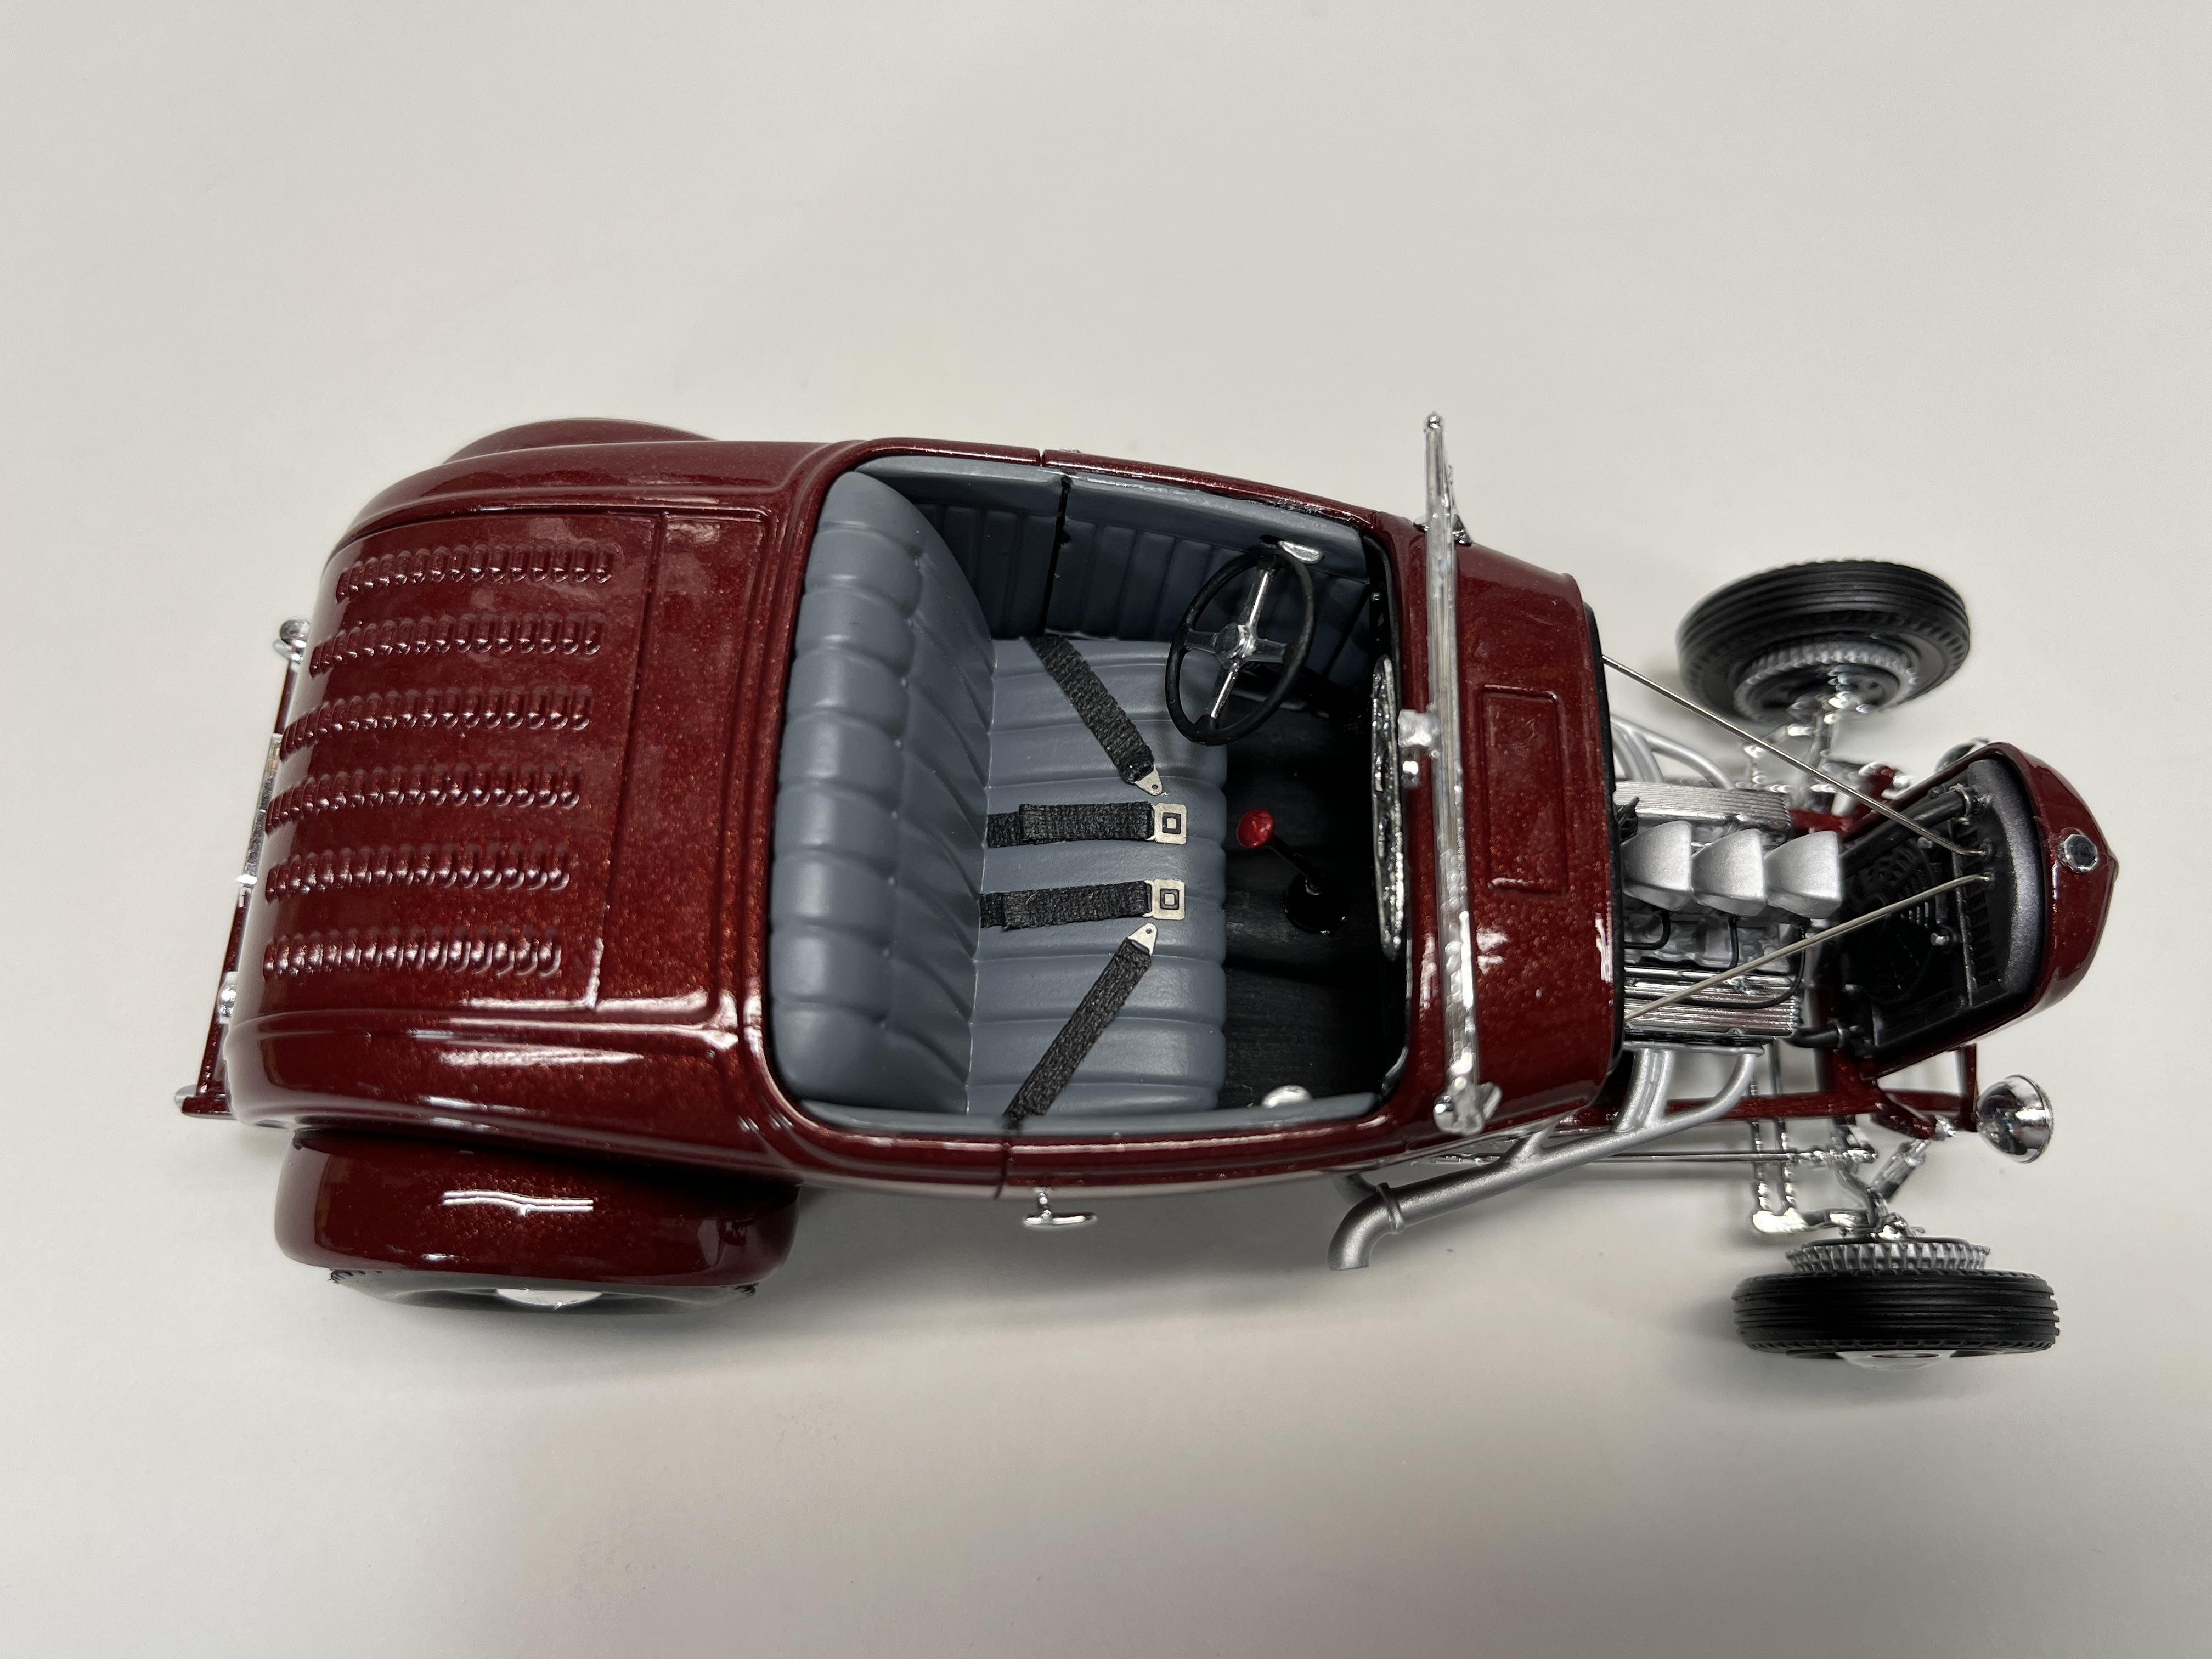
Removing the Rat from the Roaster
Rocking Rodney Rat replied to Rocking Rodney Rat's topic in WIP: Model Cars
It's finished....-RRR -
Most of the build is from the Revell Stacy David's Rat Roaster '32 roadster kit. I removed all the 'Rat Roaster' identifying parts and added parts from several kits (mainly other Revell '32 kits). Paint is Testors Mythical Maroon and Tamiya Metallic Black. -RRR

-
Beautiful work, clean execution, stunning paint. To quote The Dude: "I dig your style, man". -RRR
-
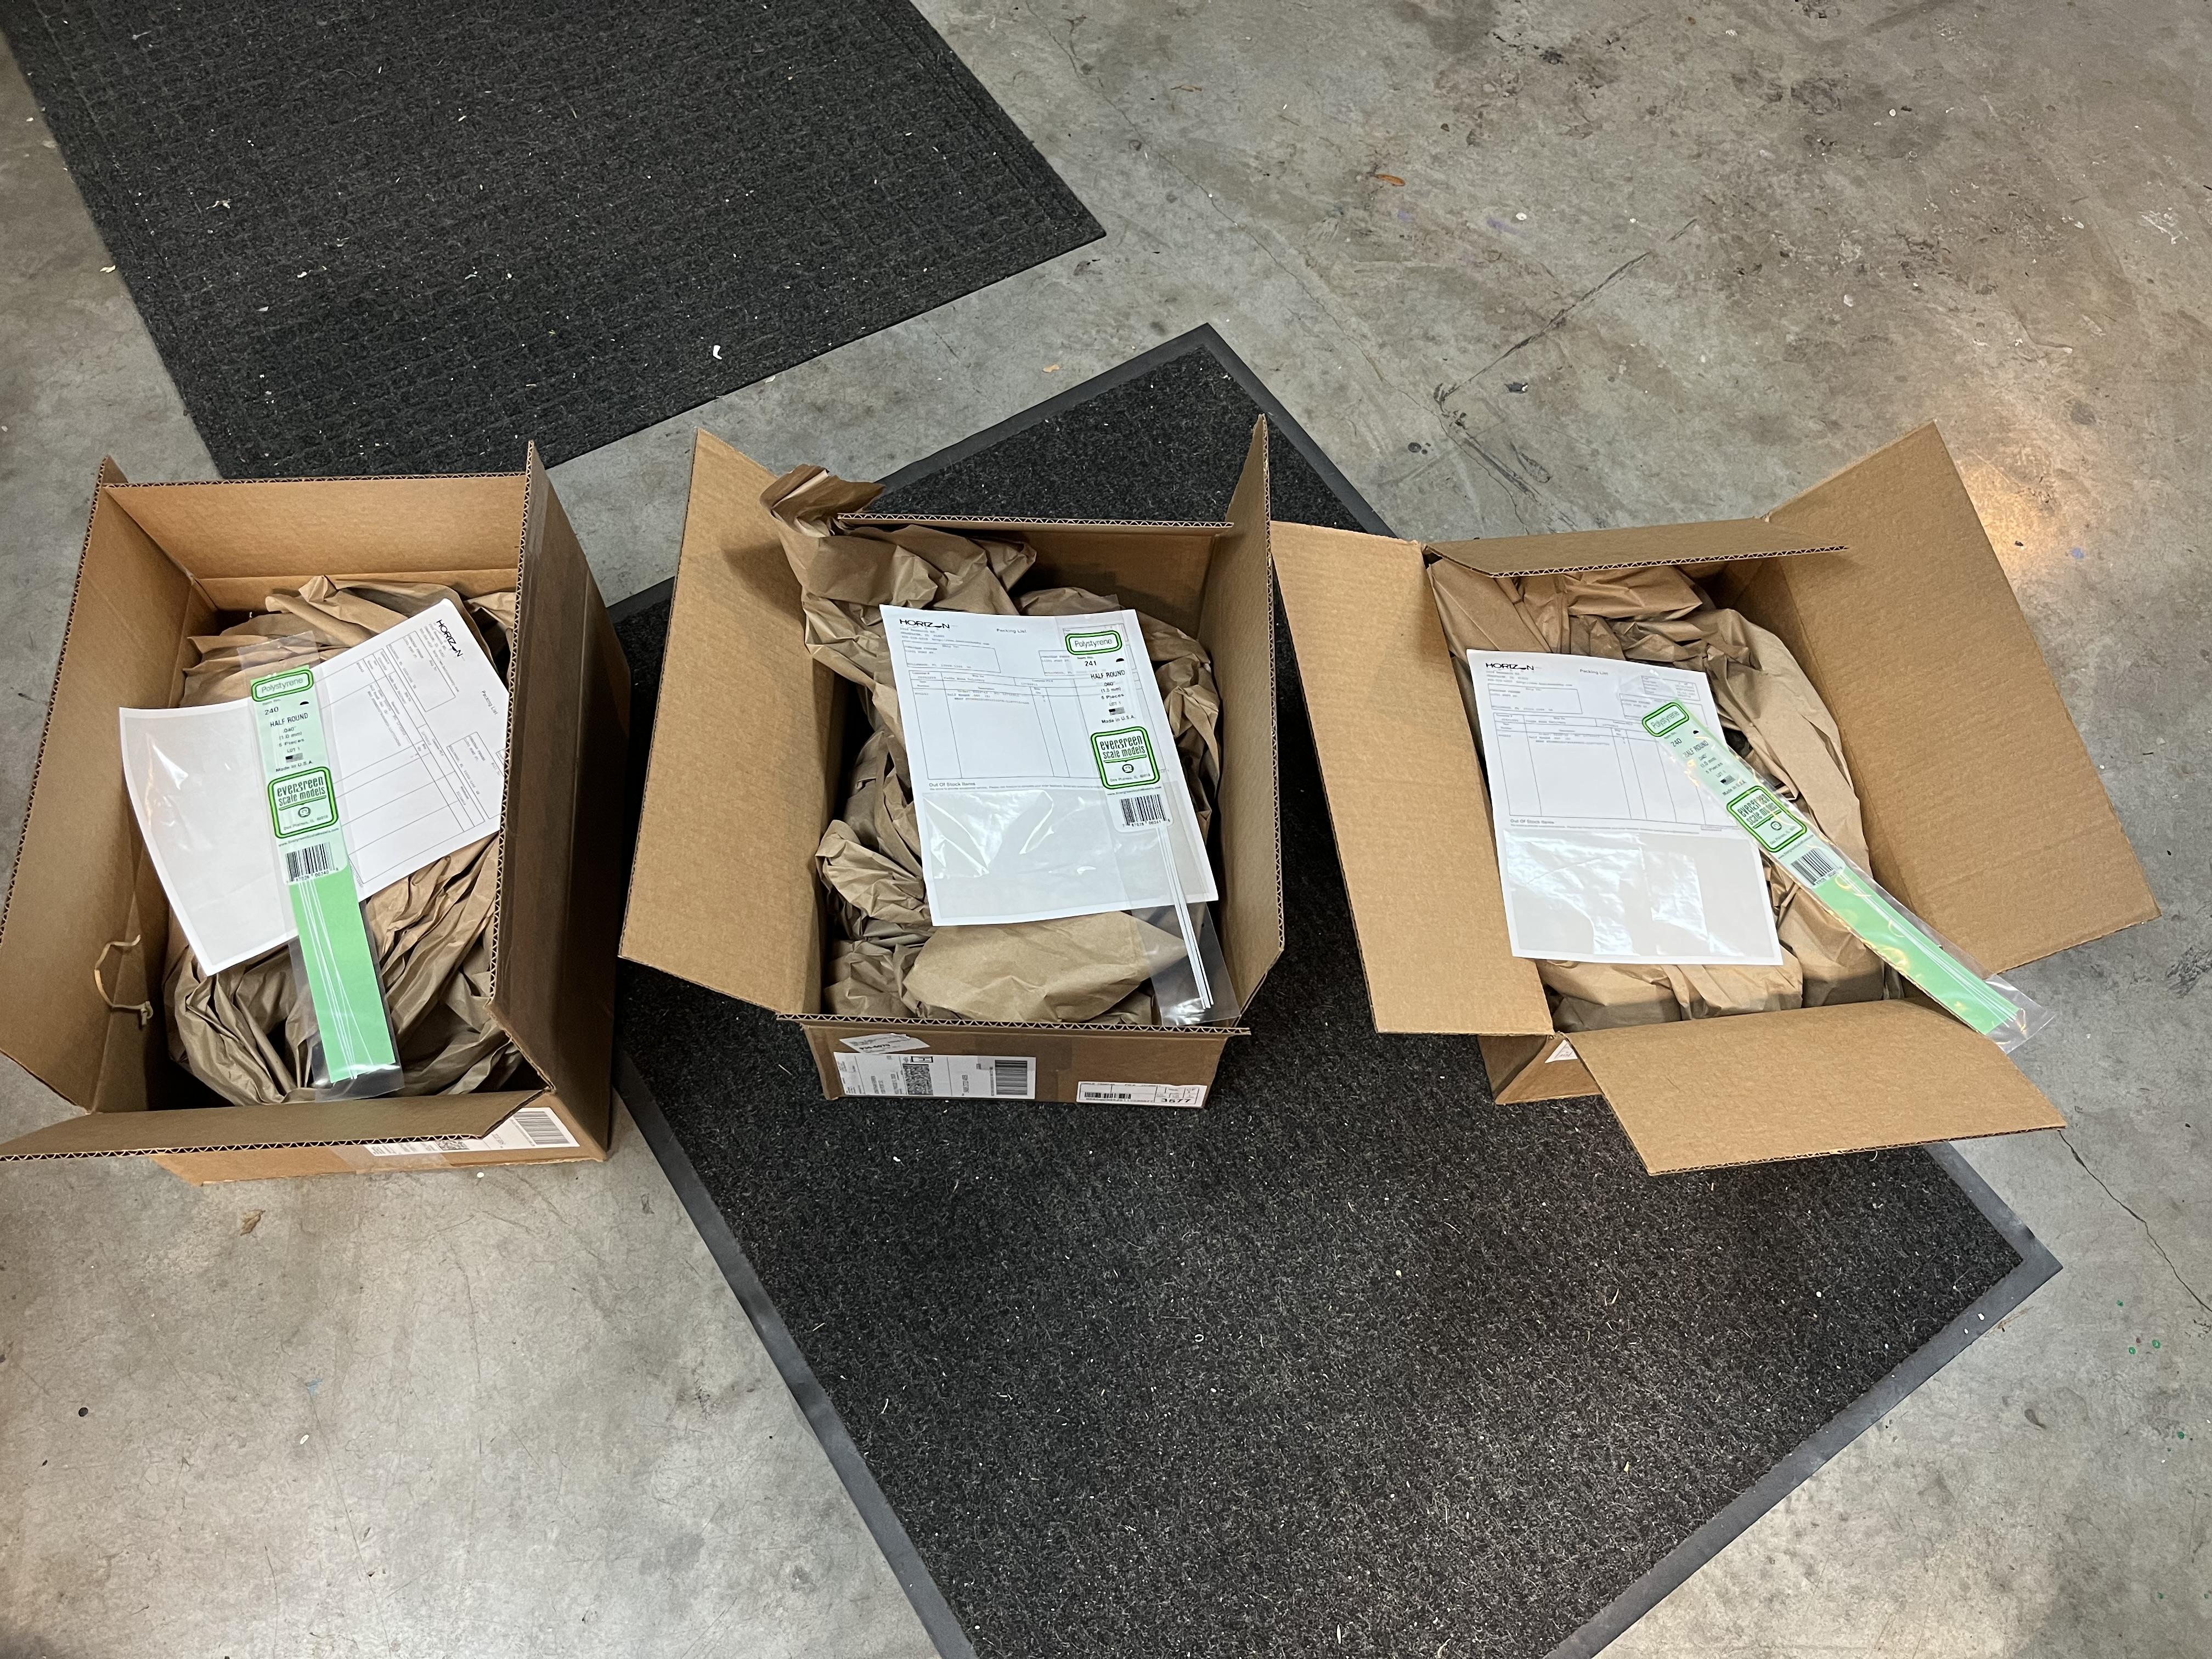
Here's my recent eBay experience. I wanted to buy three packs of Evergreen half round styrene. I found a seller and decided I would buy the three pieces through their eBay store. I put items in the shopping cart and noticed shipping was $30 in change! Figuring another seller would have a better freight rate, I checked one other seller's store. Same freight charge. As a 'buy it now' the price of each item was around $5.00 with $2.99 shipping. So, I placed three different transactions from the same seller for the items I wanted. It came to about $15 in merchandise and $9 in shipping (I really wish I had a local hobby shop I could just drive over to, but I don't).... Here's what arrived... Three big boxes, each with one item in it. As a point of size reference, those packing slips are standard 8" x11" pieces of paper.... -RRR
-
Thanks, Jim. -RRR
-
It doesn't have to be shiny.....
Rocking Rodney Rat replied to Rocking Rodney Rat's topic in Contests and Shows
The NSRA is allowing cars that are 30 years and older and modified into their shows now. Until 2010 a car had to be pre 1949 vintage. I don't really mind it. There were some stunning modified '60s muscle cars in attendance. I hope to see you at the model contest at the next show. -RRR -
Thanks, ADL. I don't think it's really "hard", I just envision how the particular panel should look and figure that if I cut the parts this way and glue them together this way and finish it, it will look like what I want. Part of building a model is making parts that look like real ones, but just in scale. I guess a lot of it is practice and eventually getting good at it, a skill anyone can acquire. Many times there are a few attempts that don't work until I get it right...Remember, it doesn't have to "work' it just has to look like it does... -RRR
-
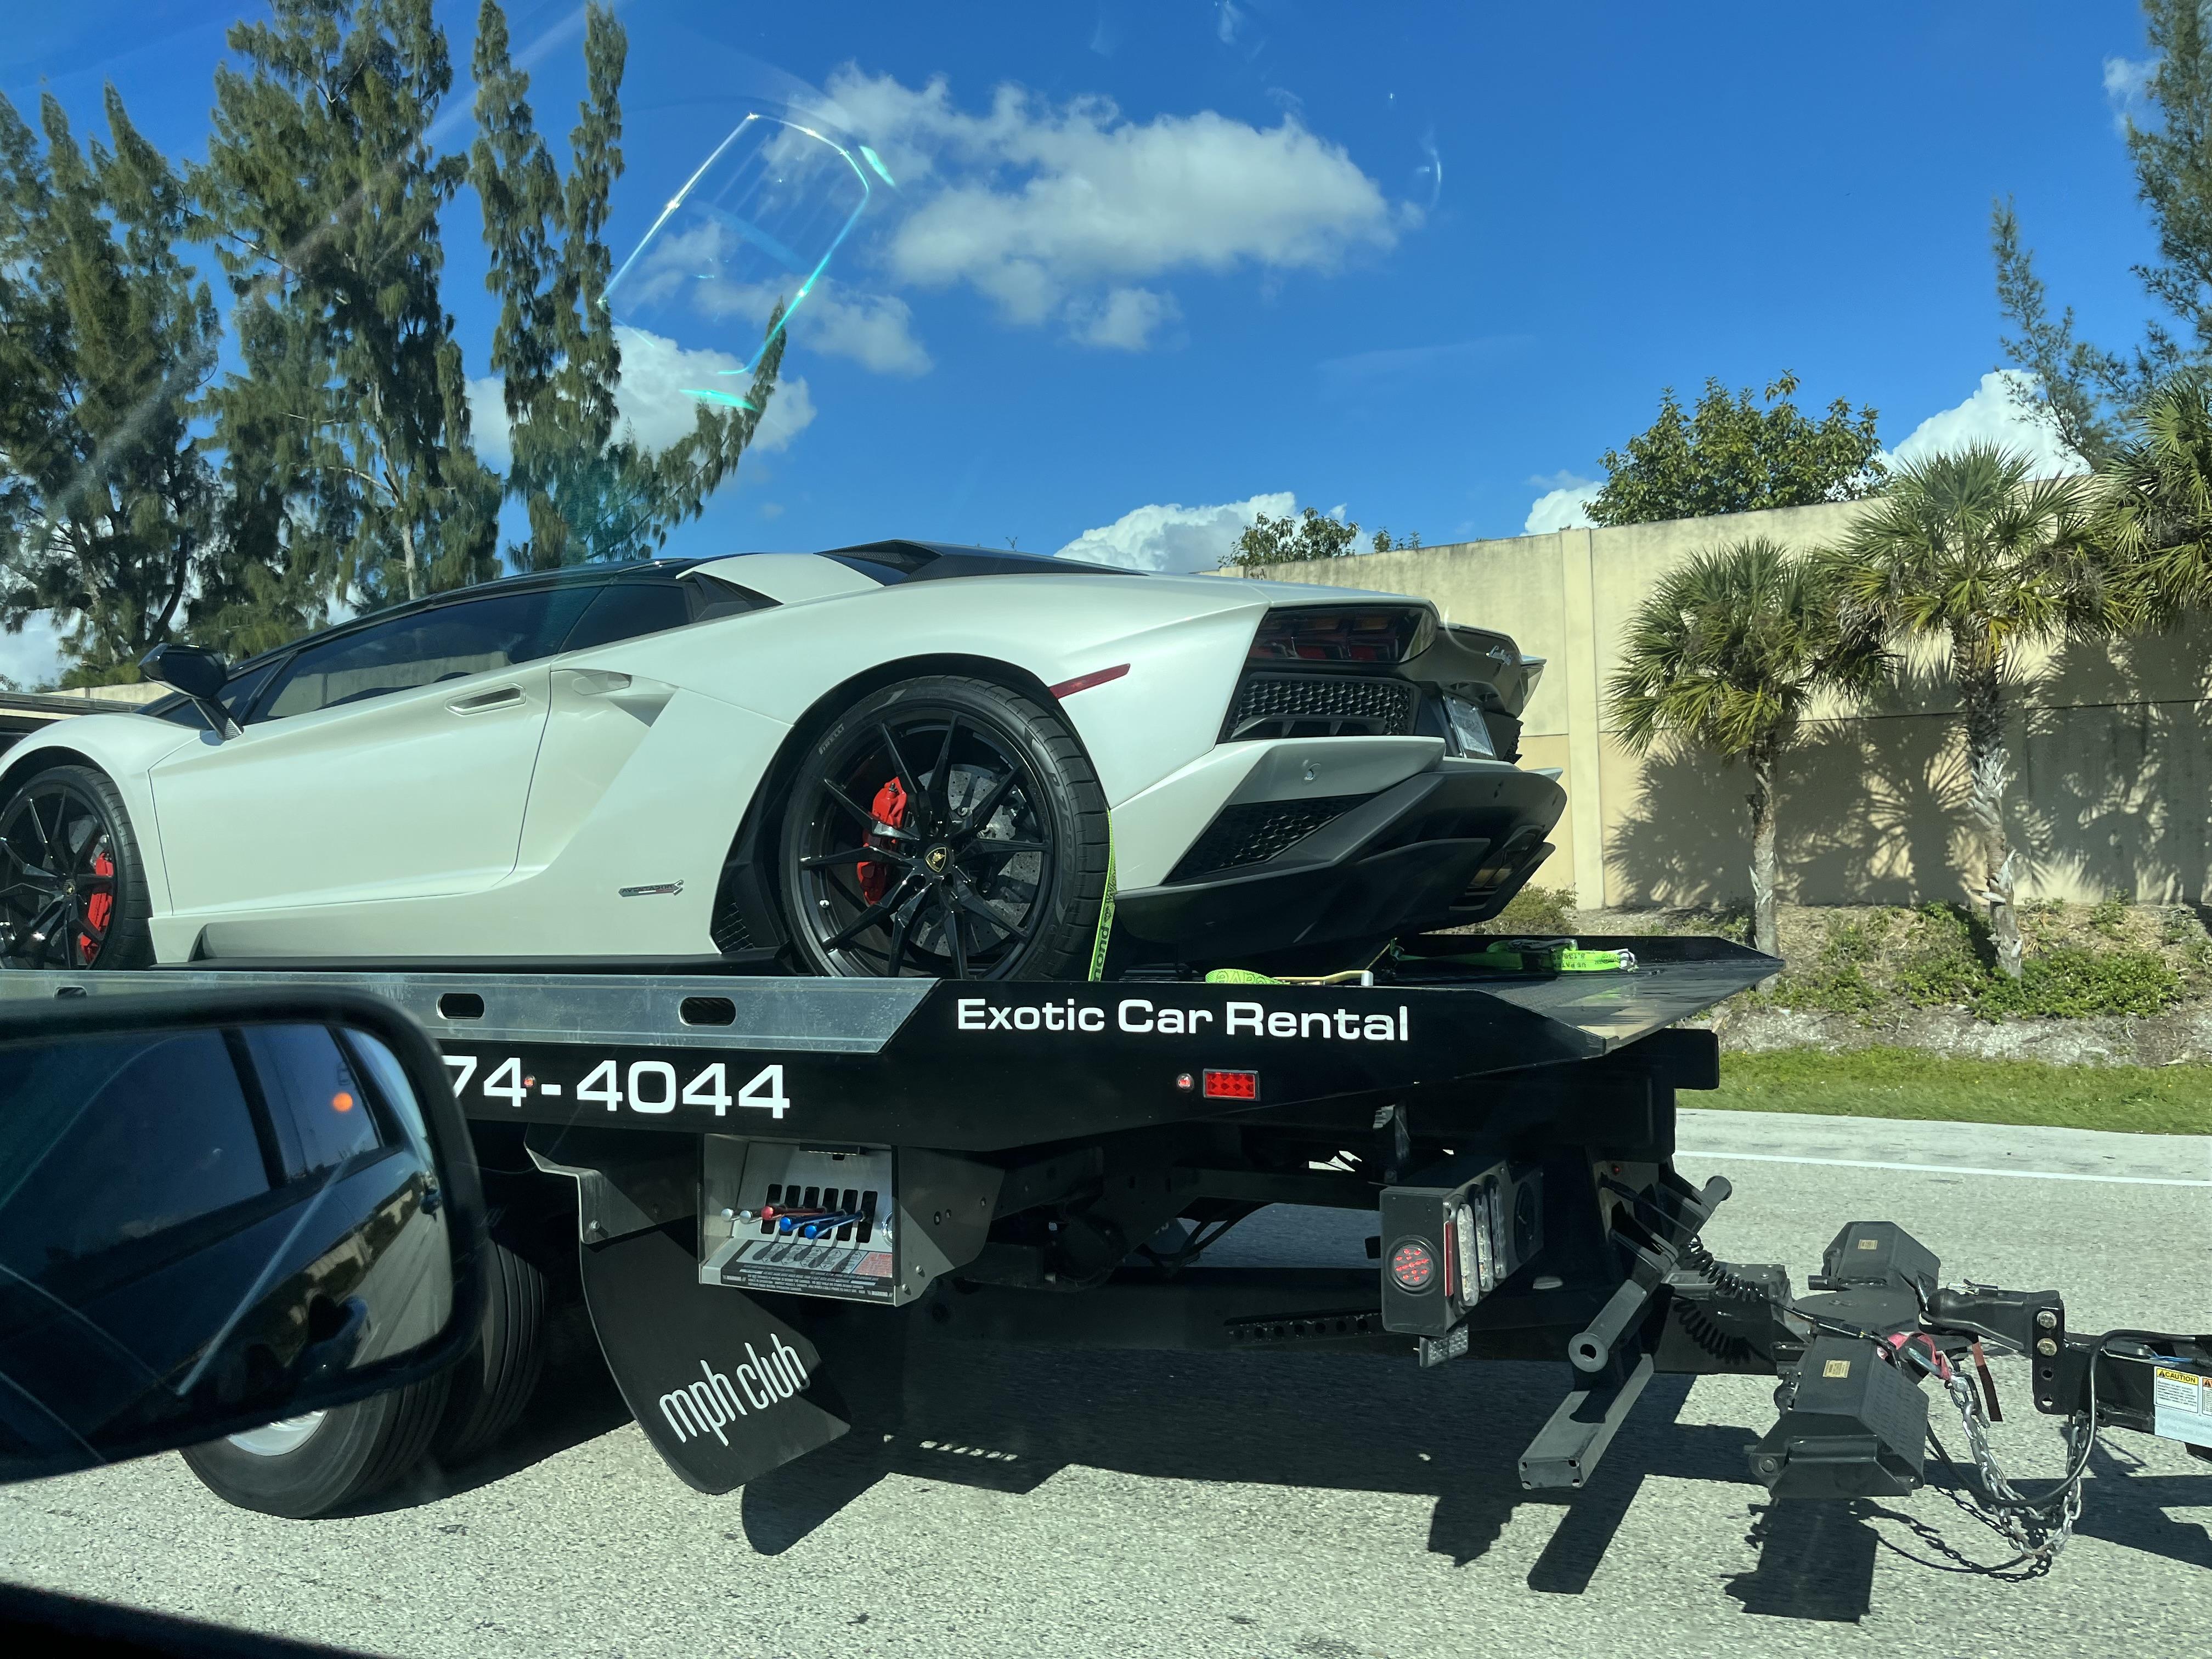
A Million dollars worth of Lambos on a flatbed and trailer... -RRR
-
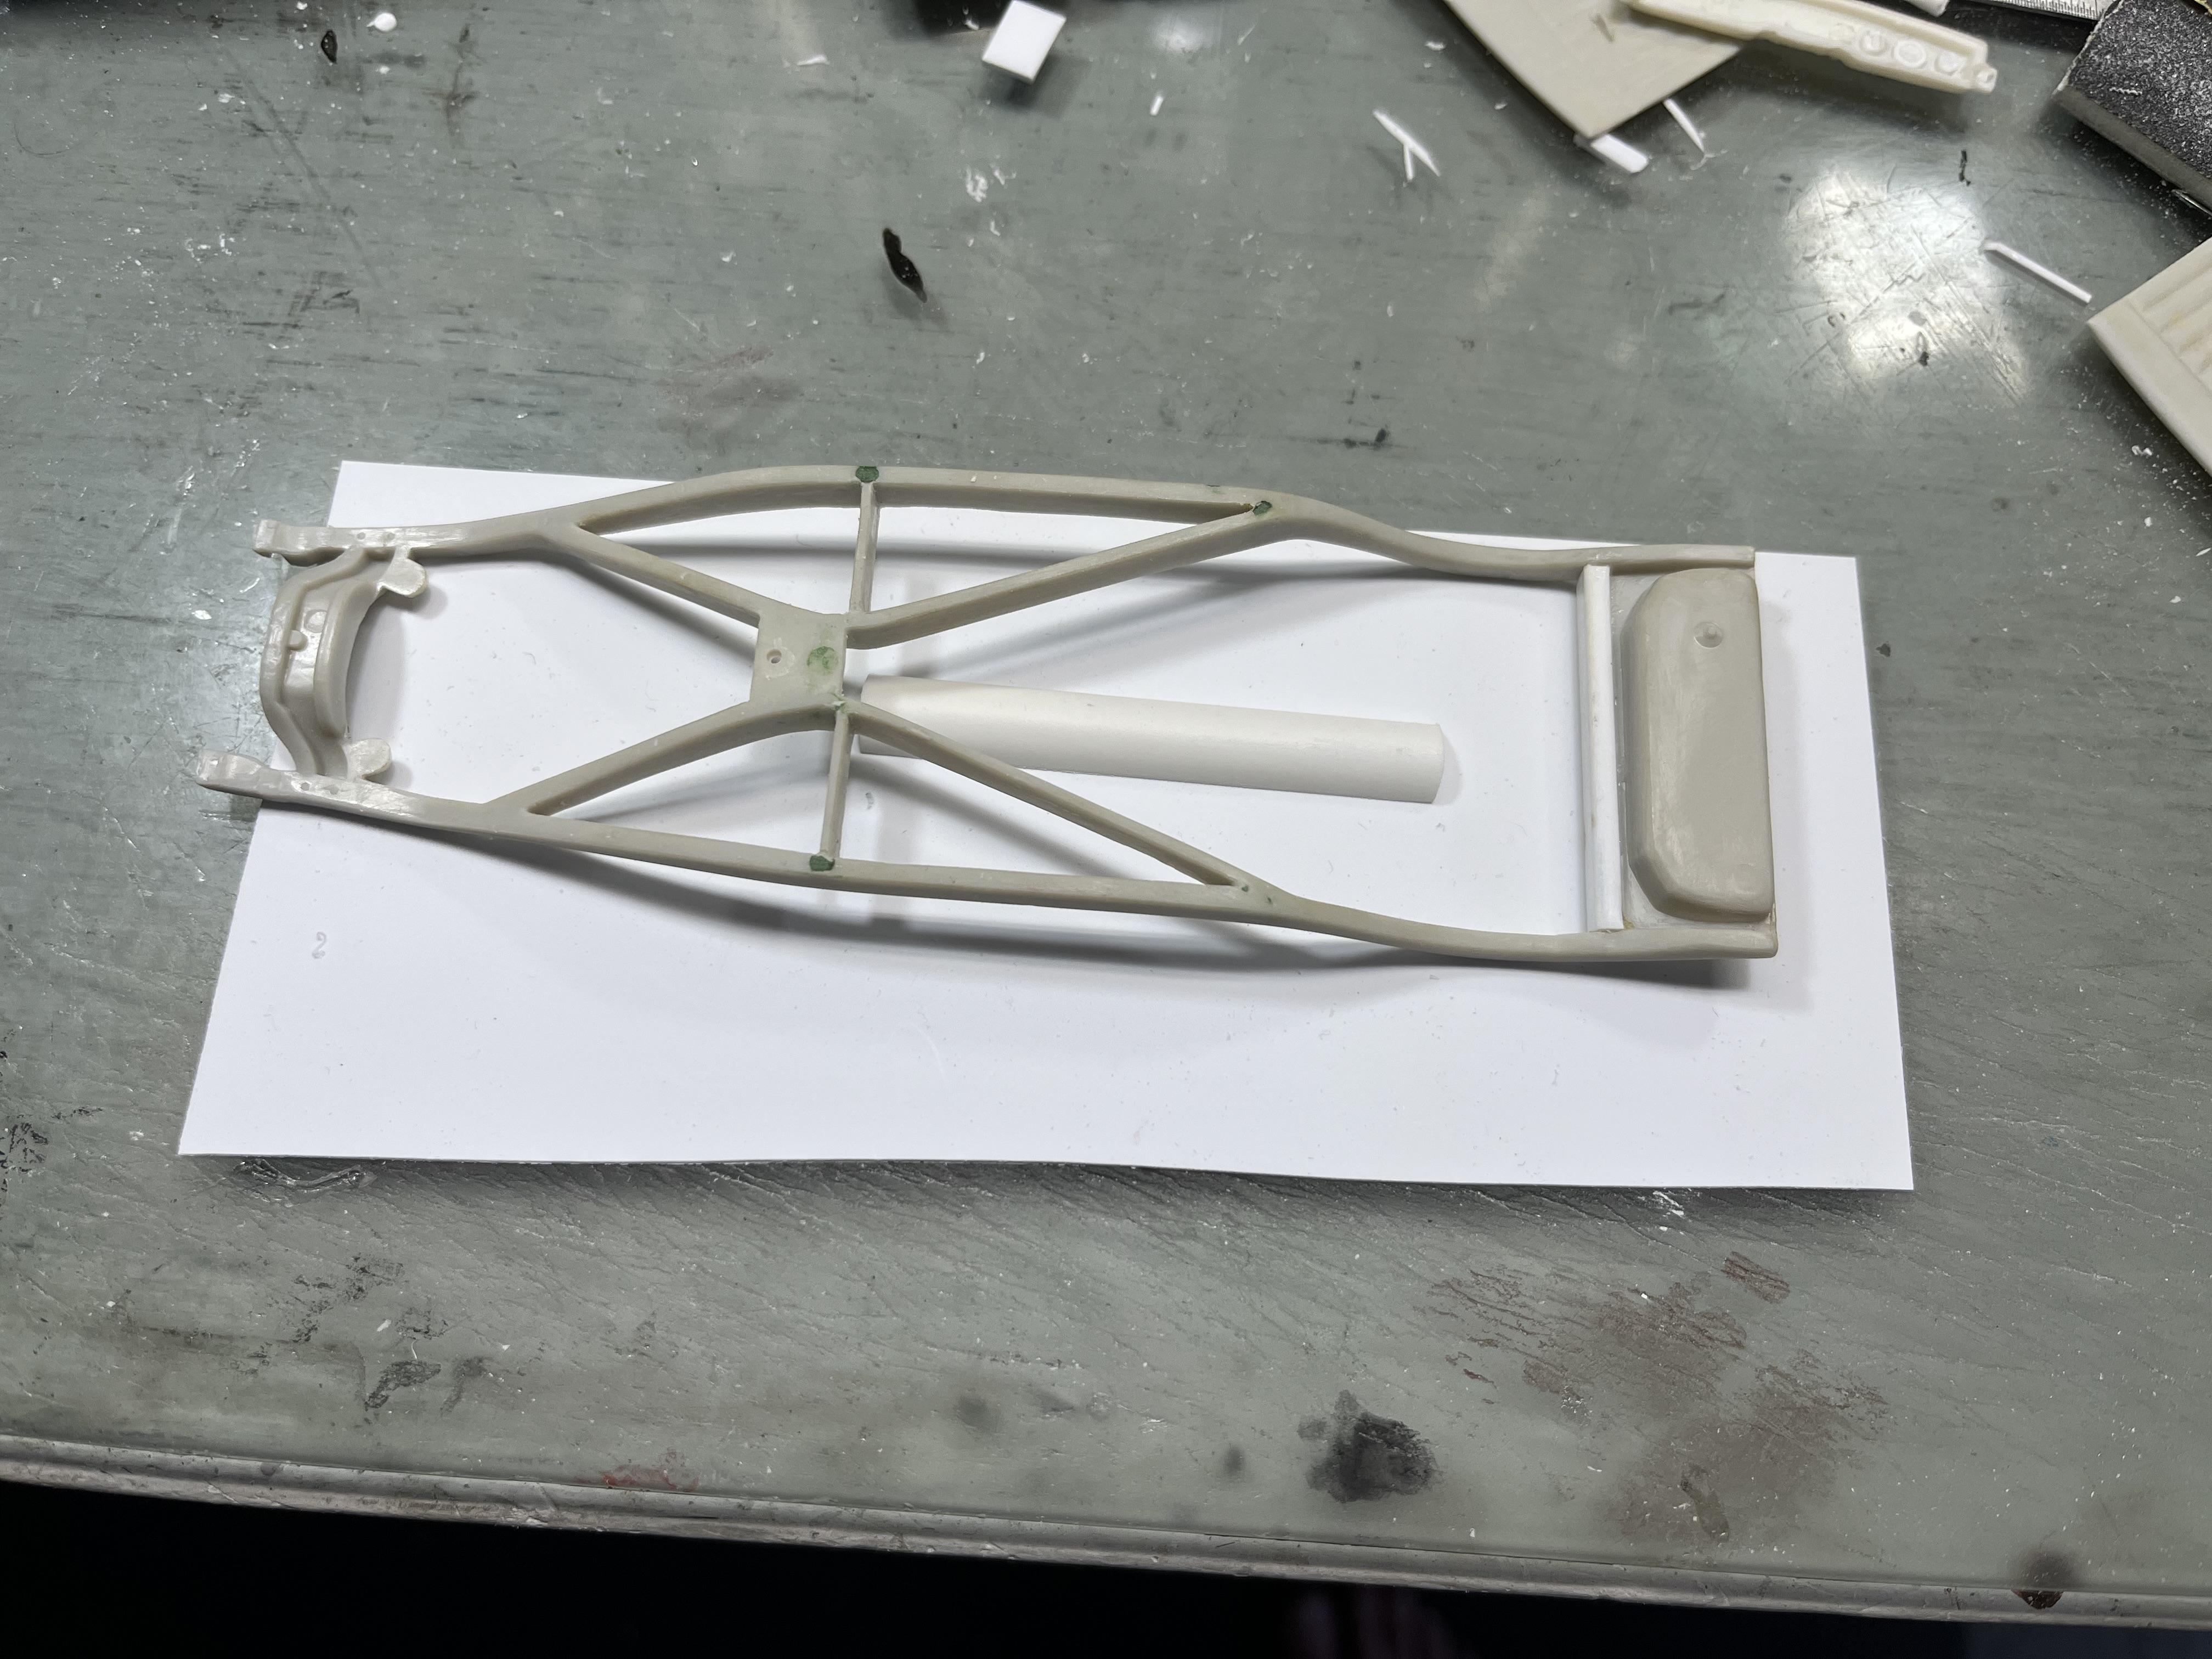
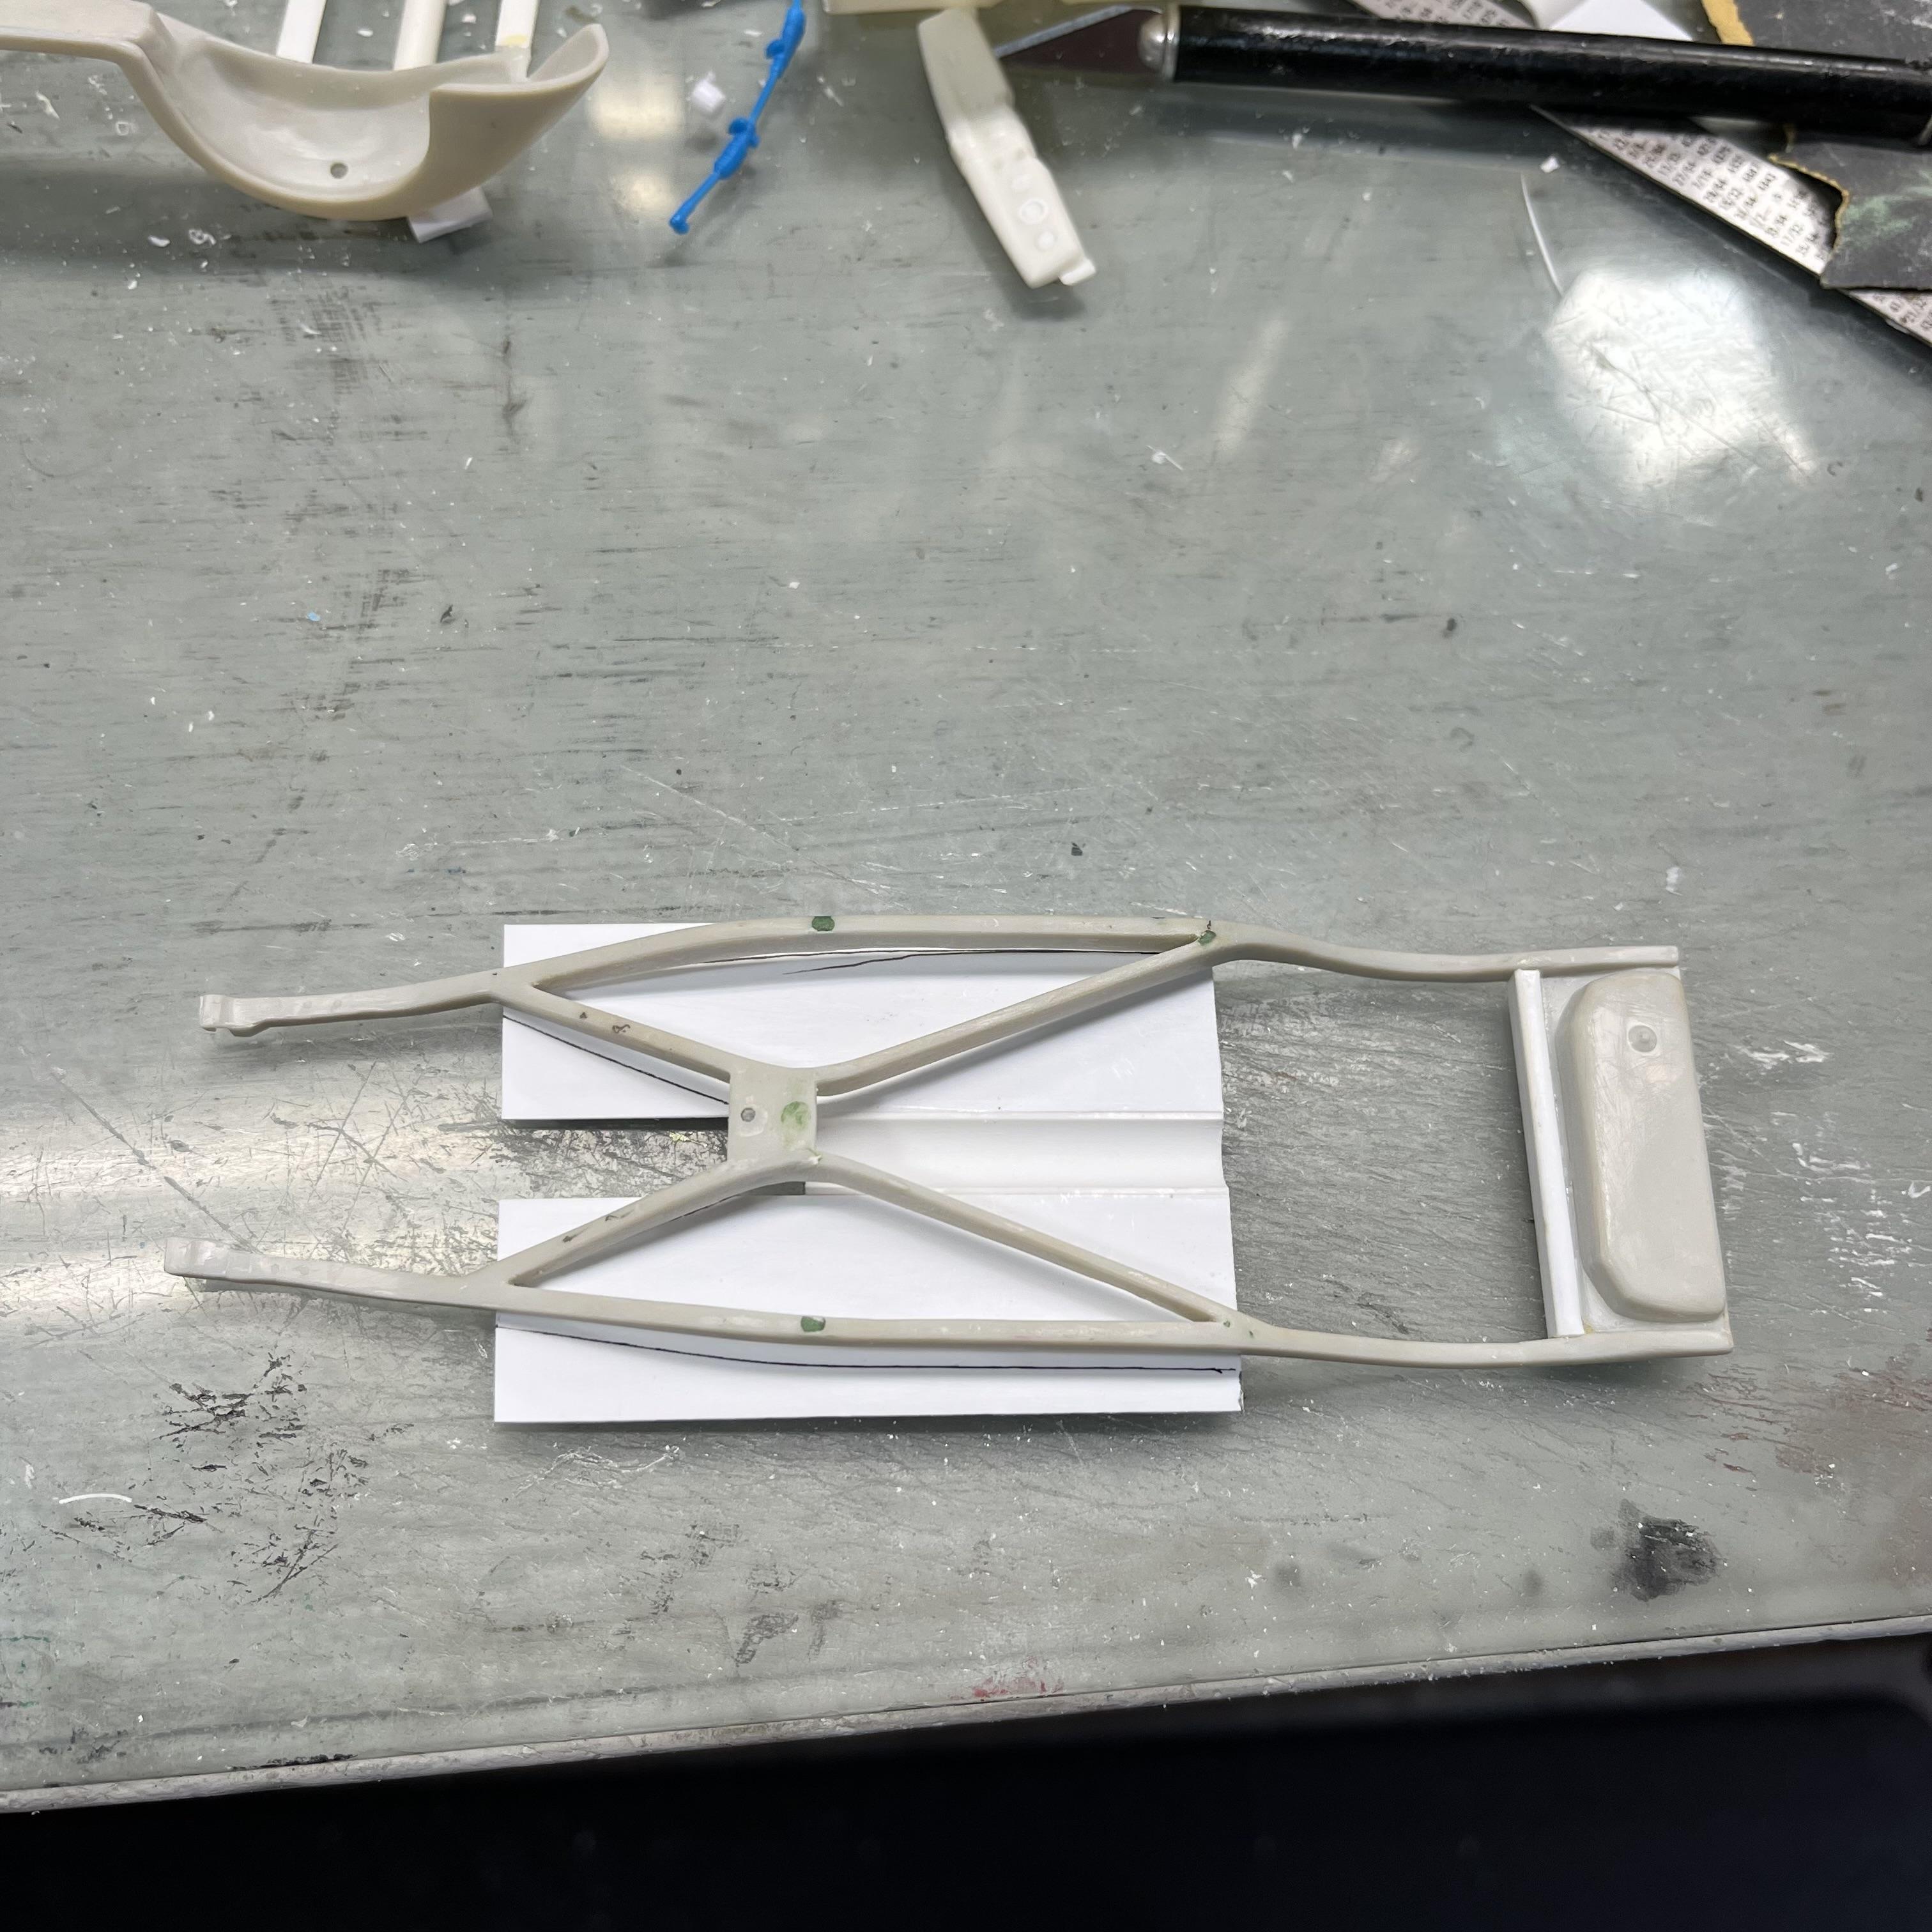
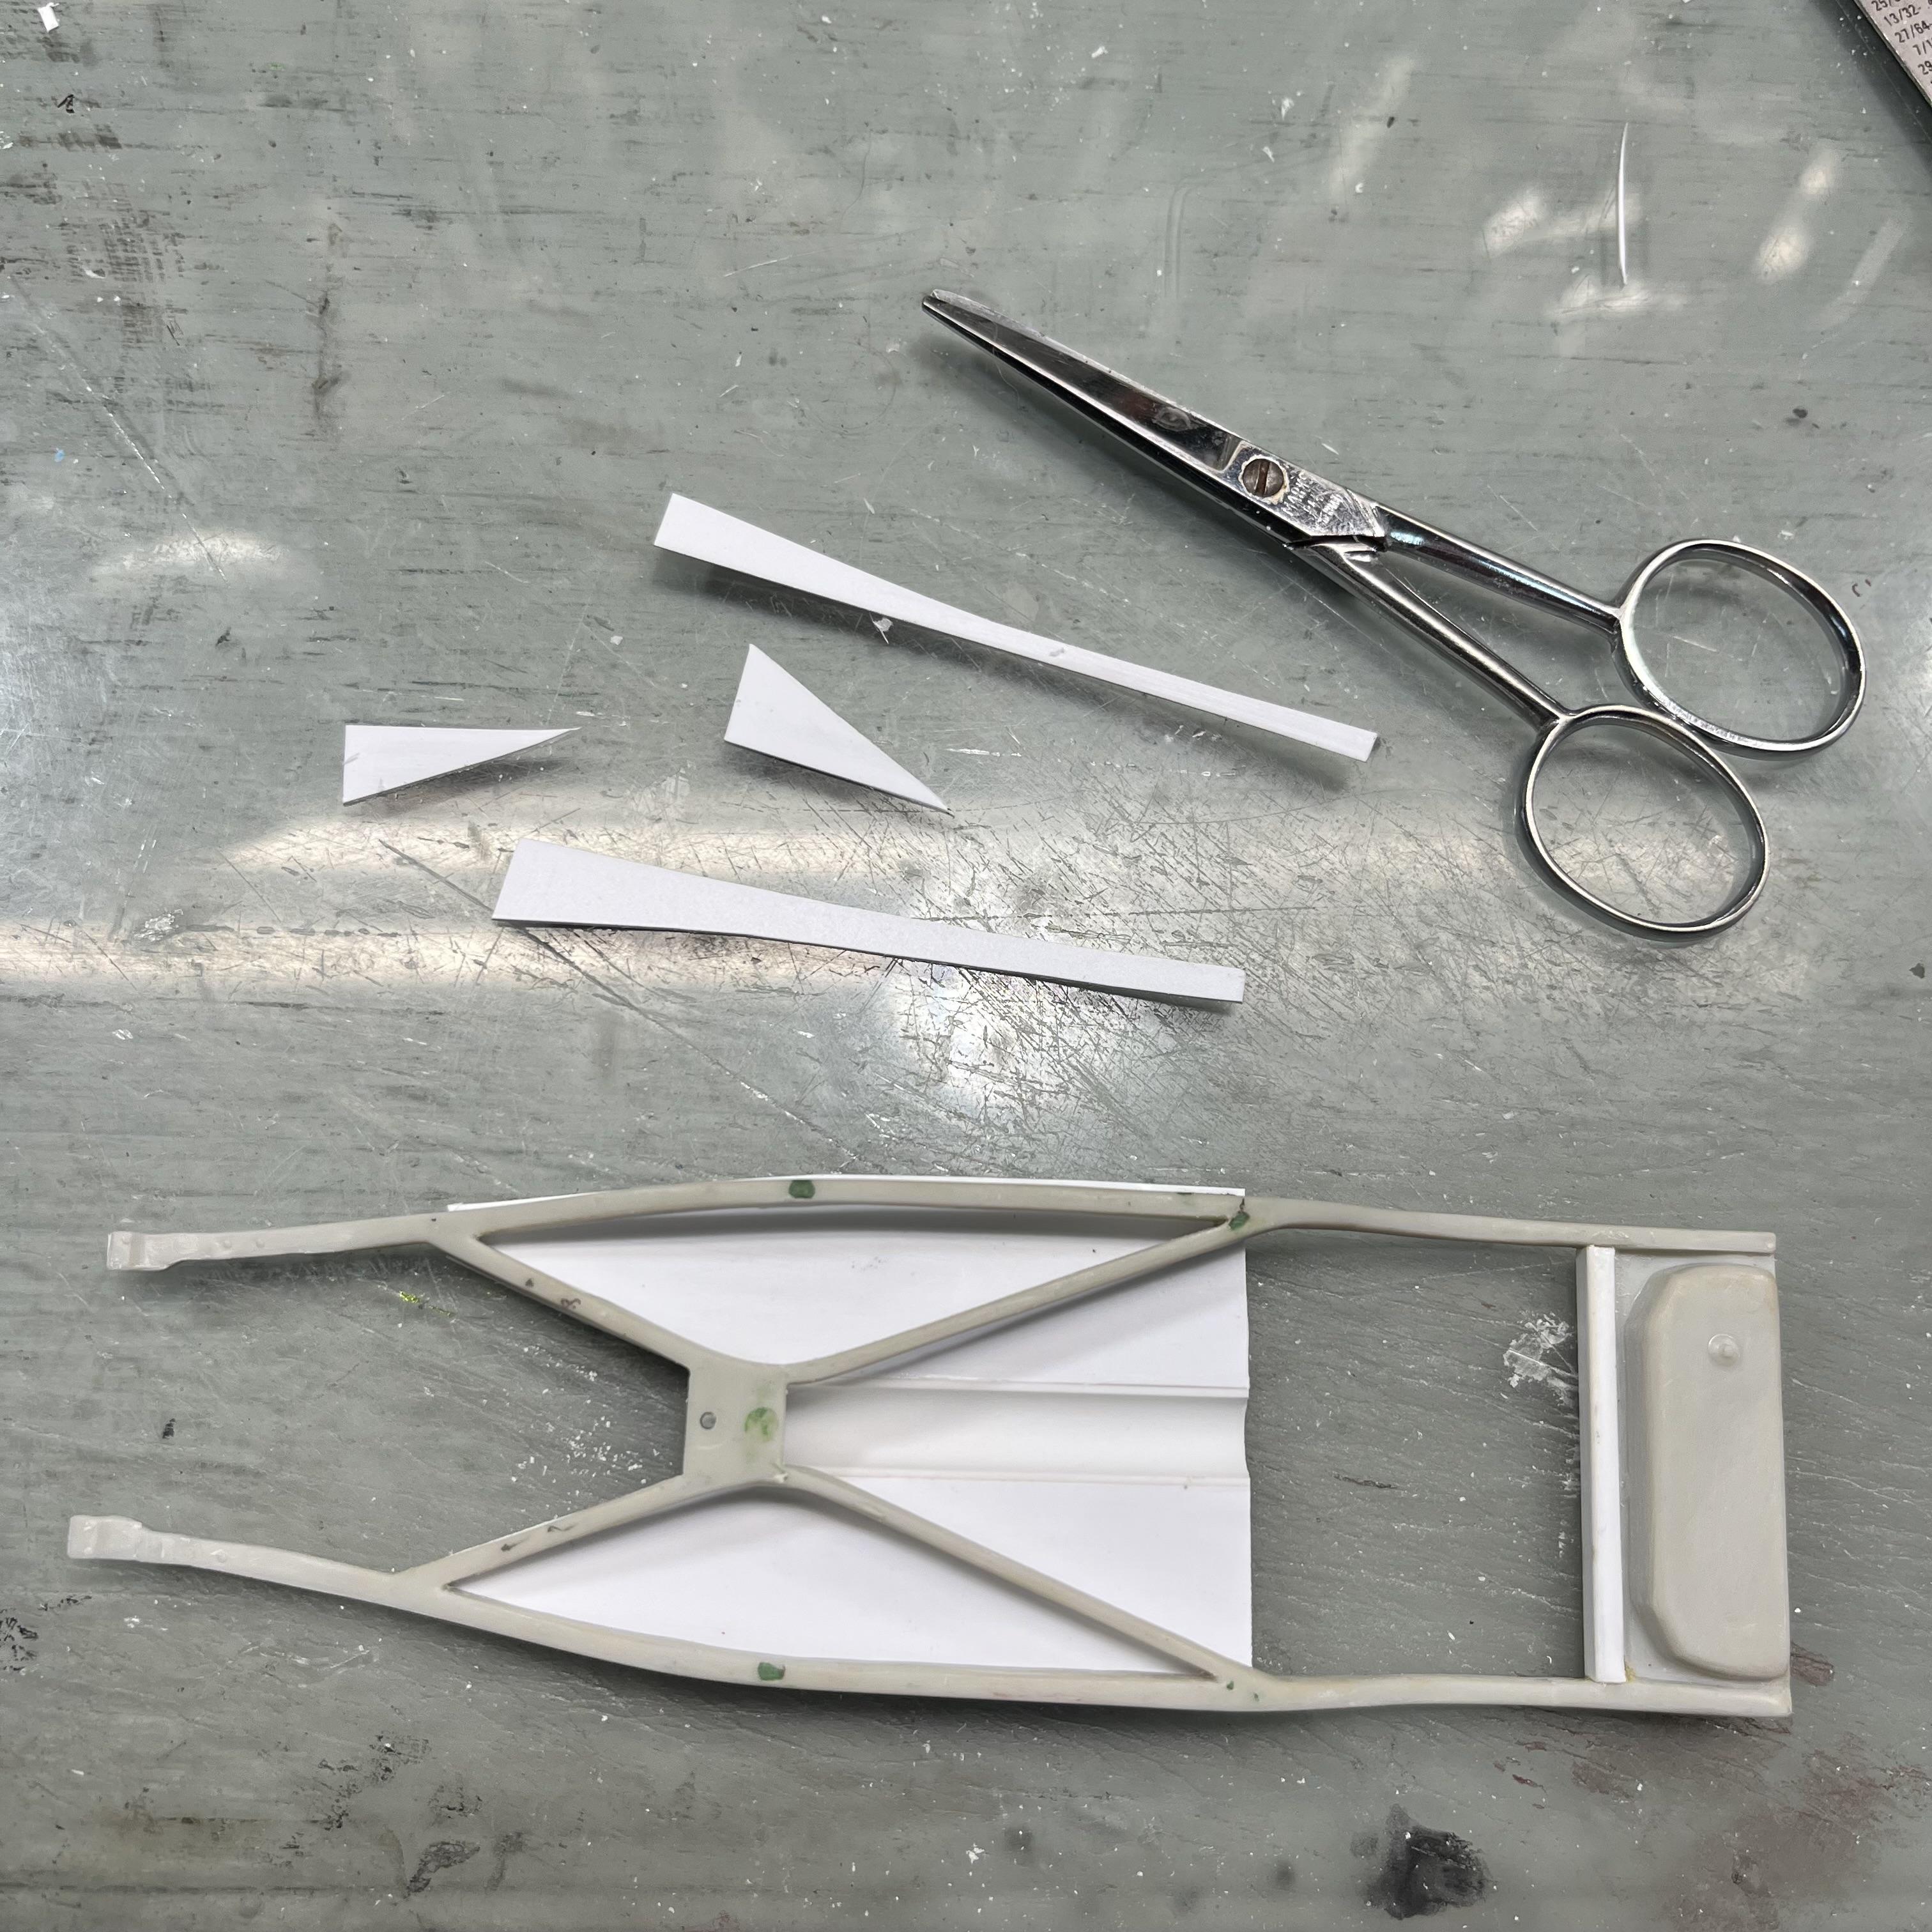
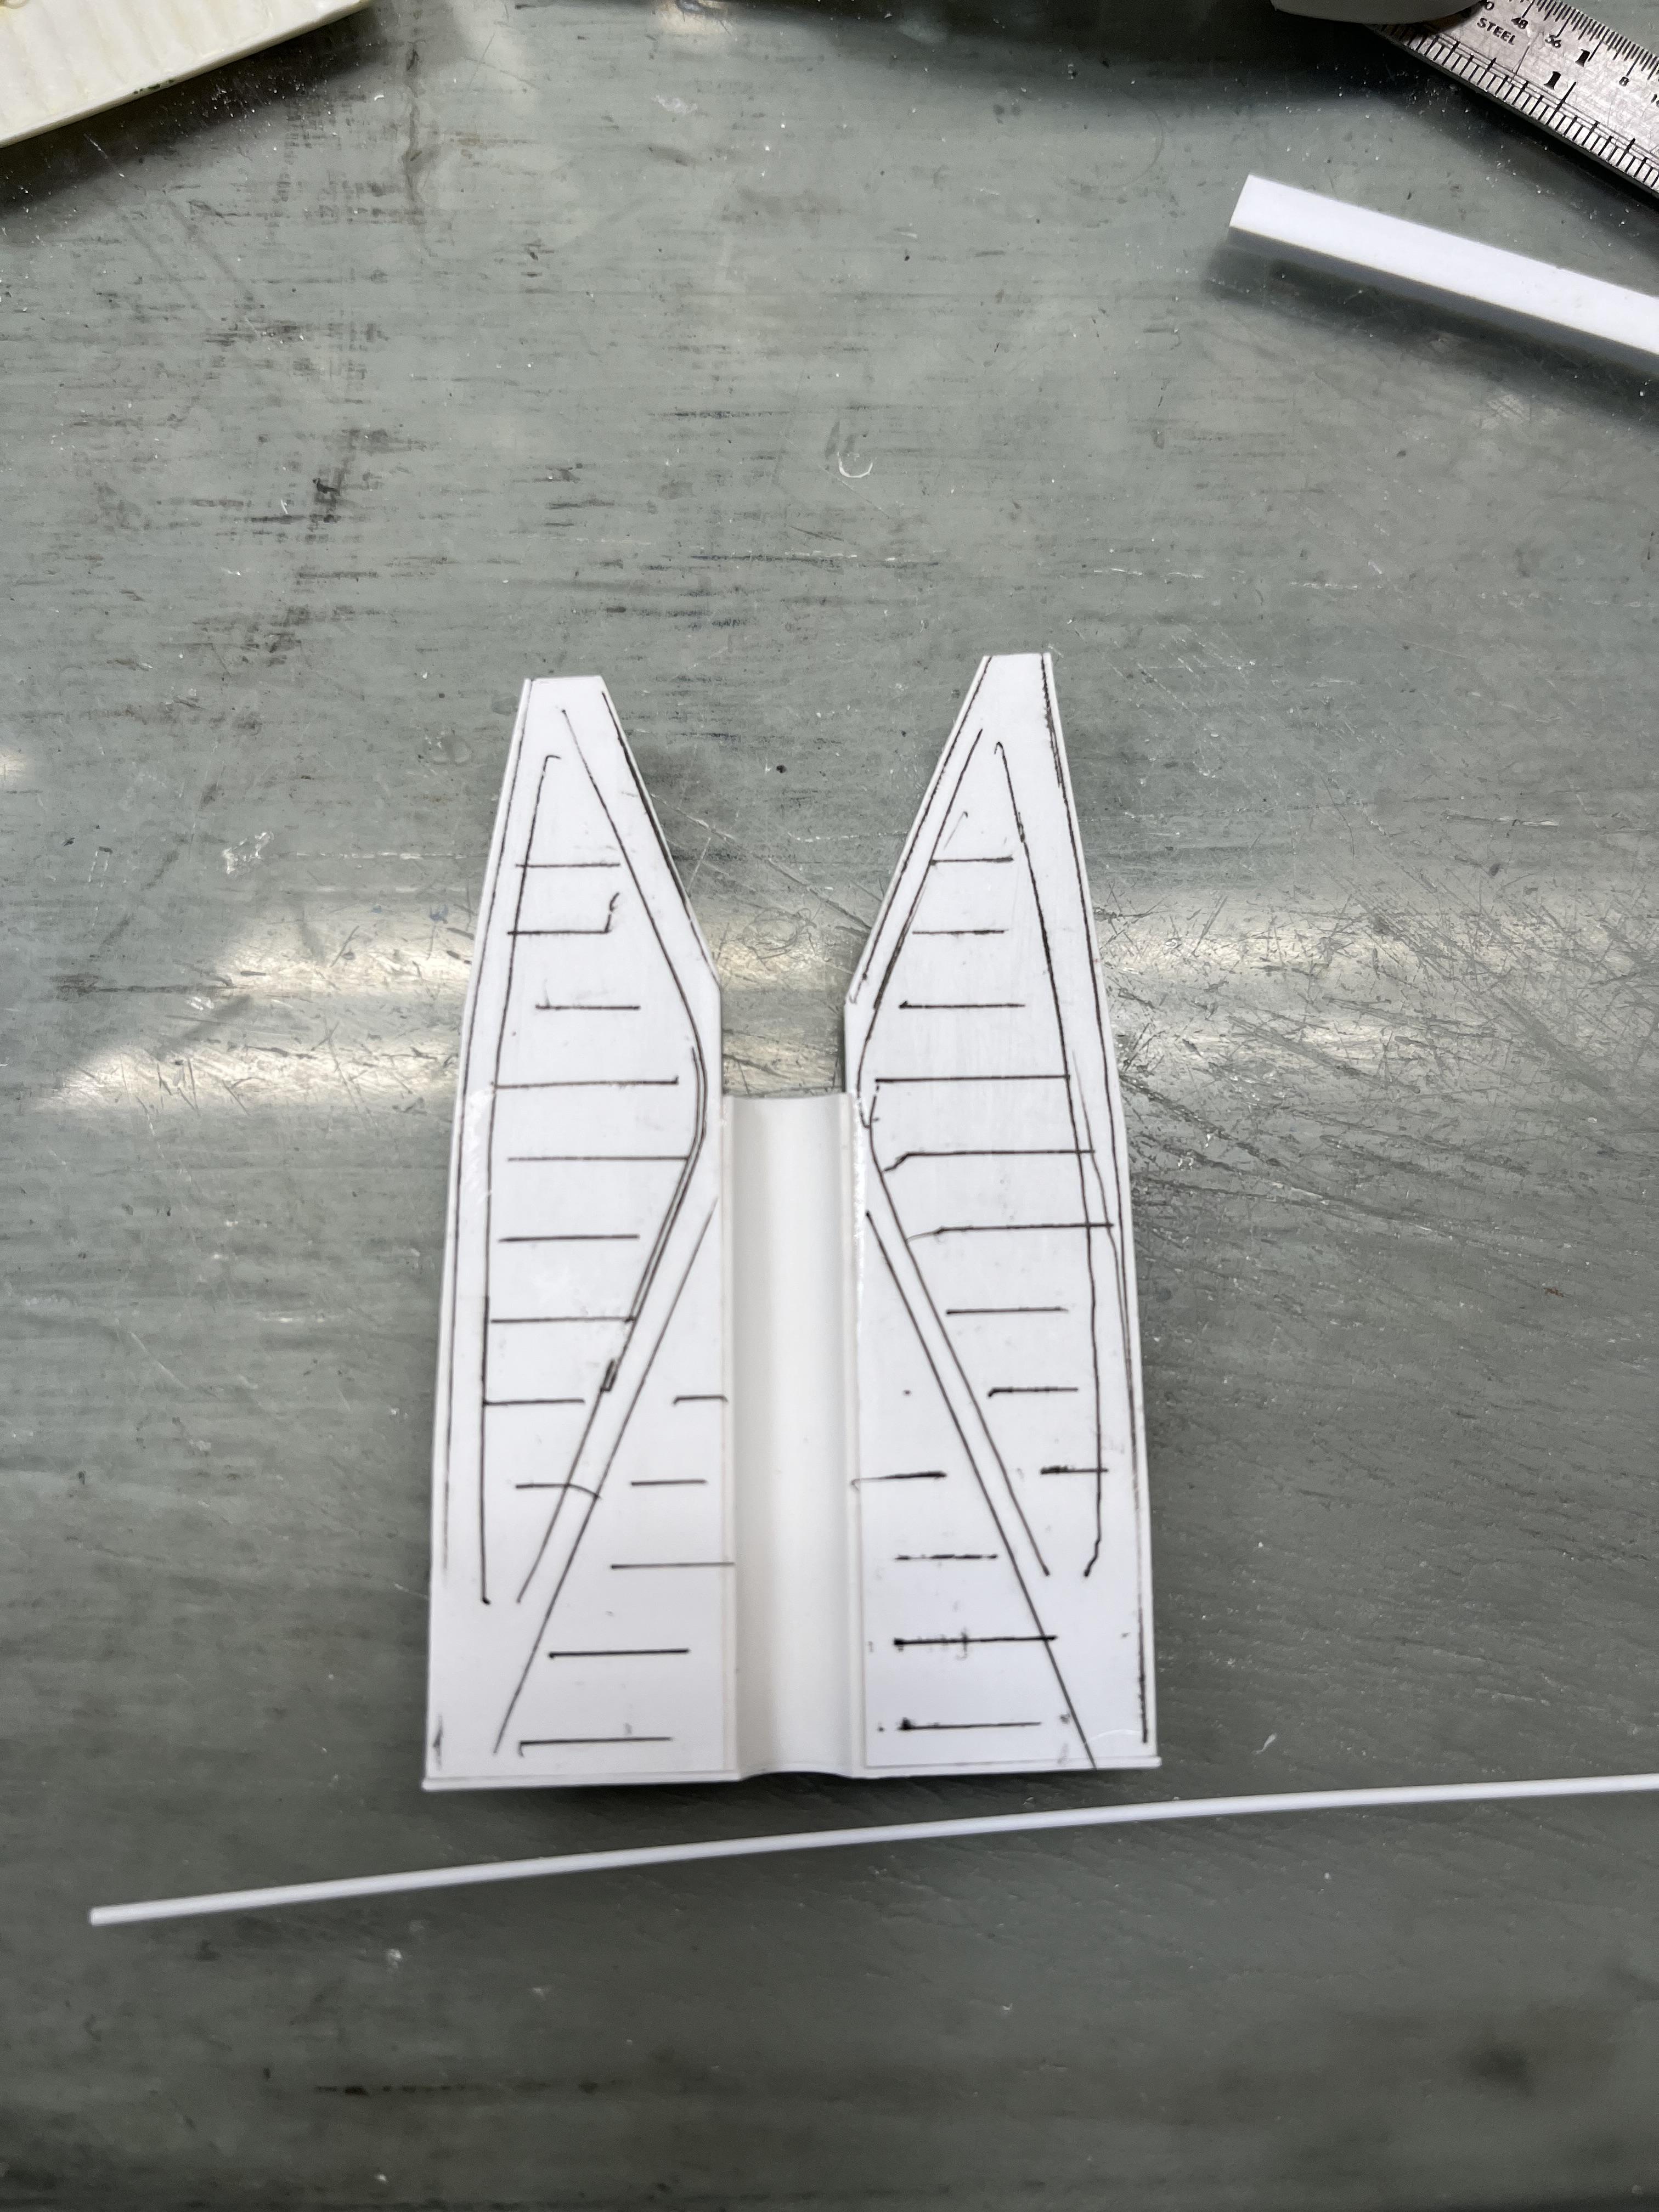
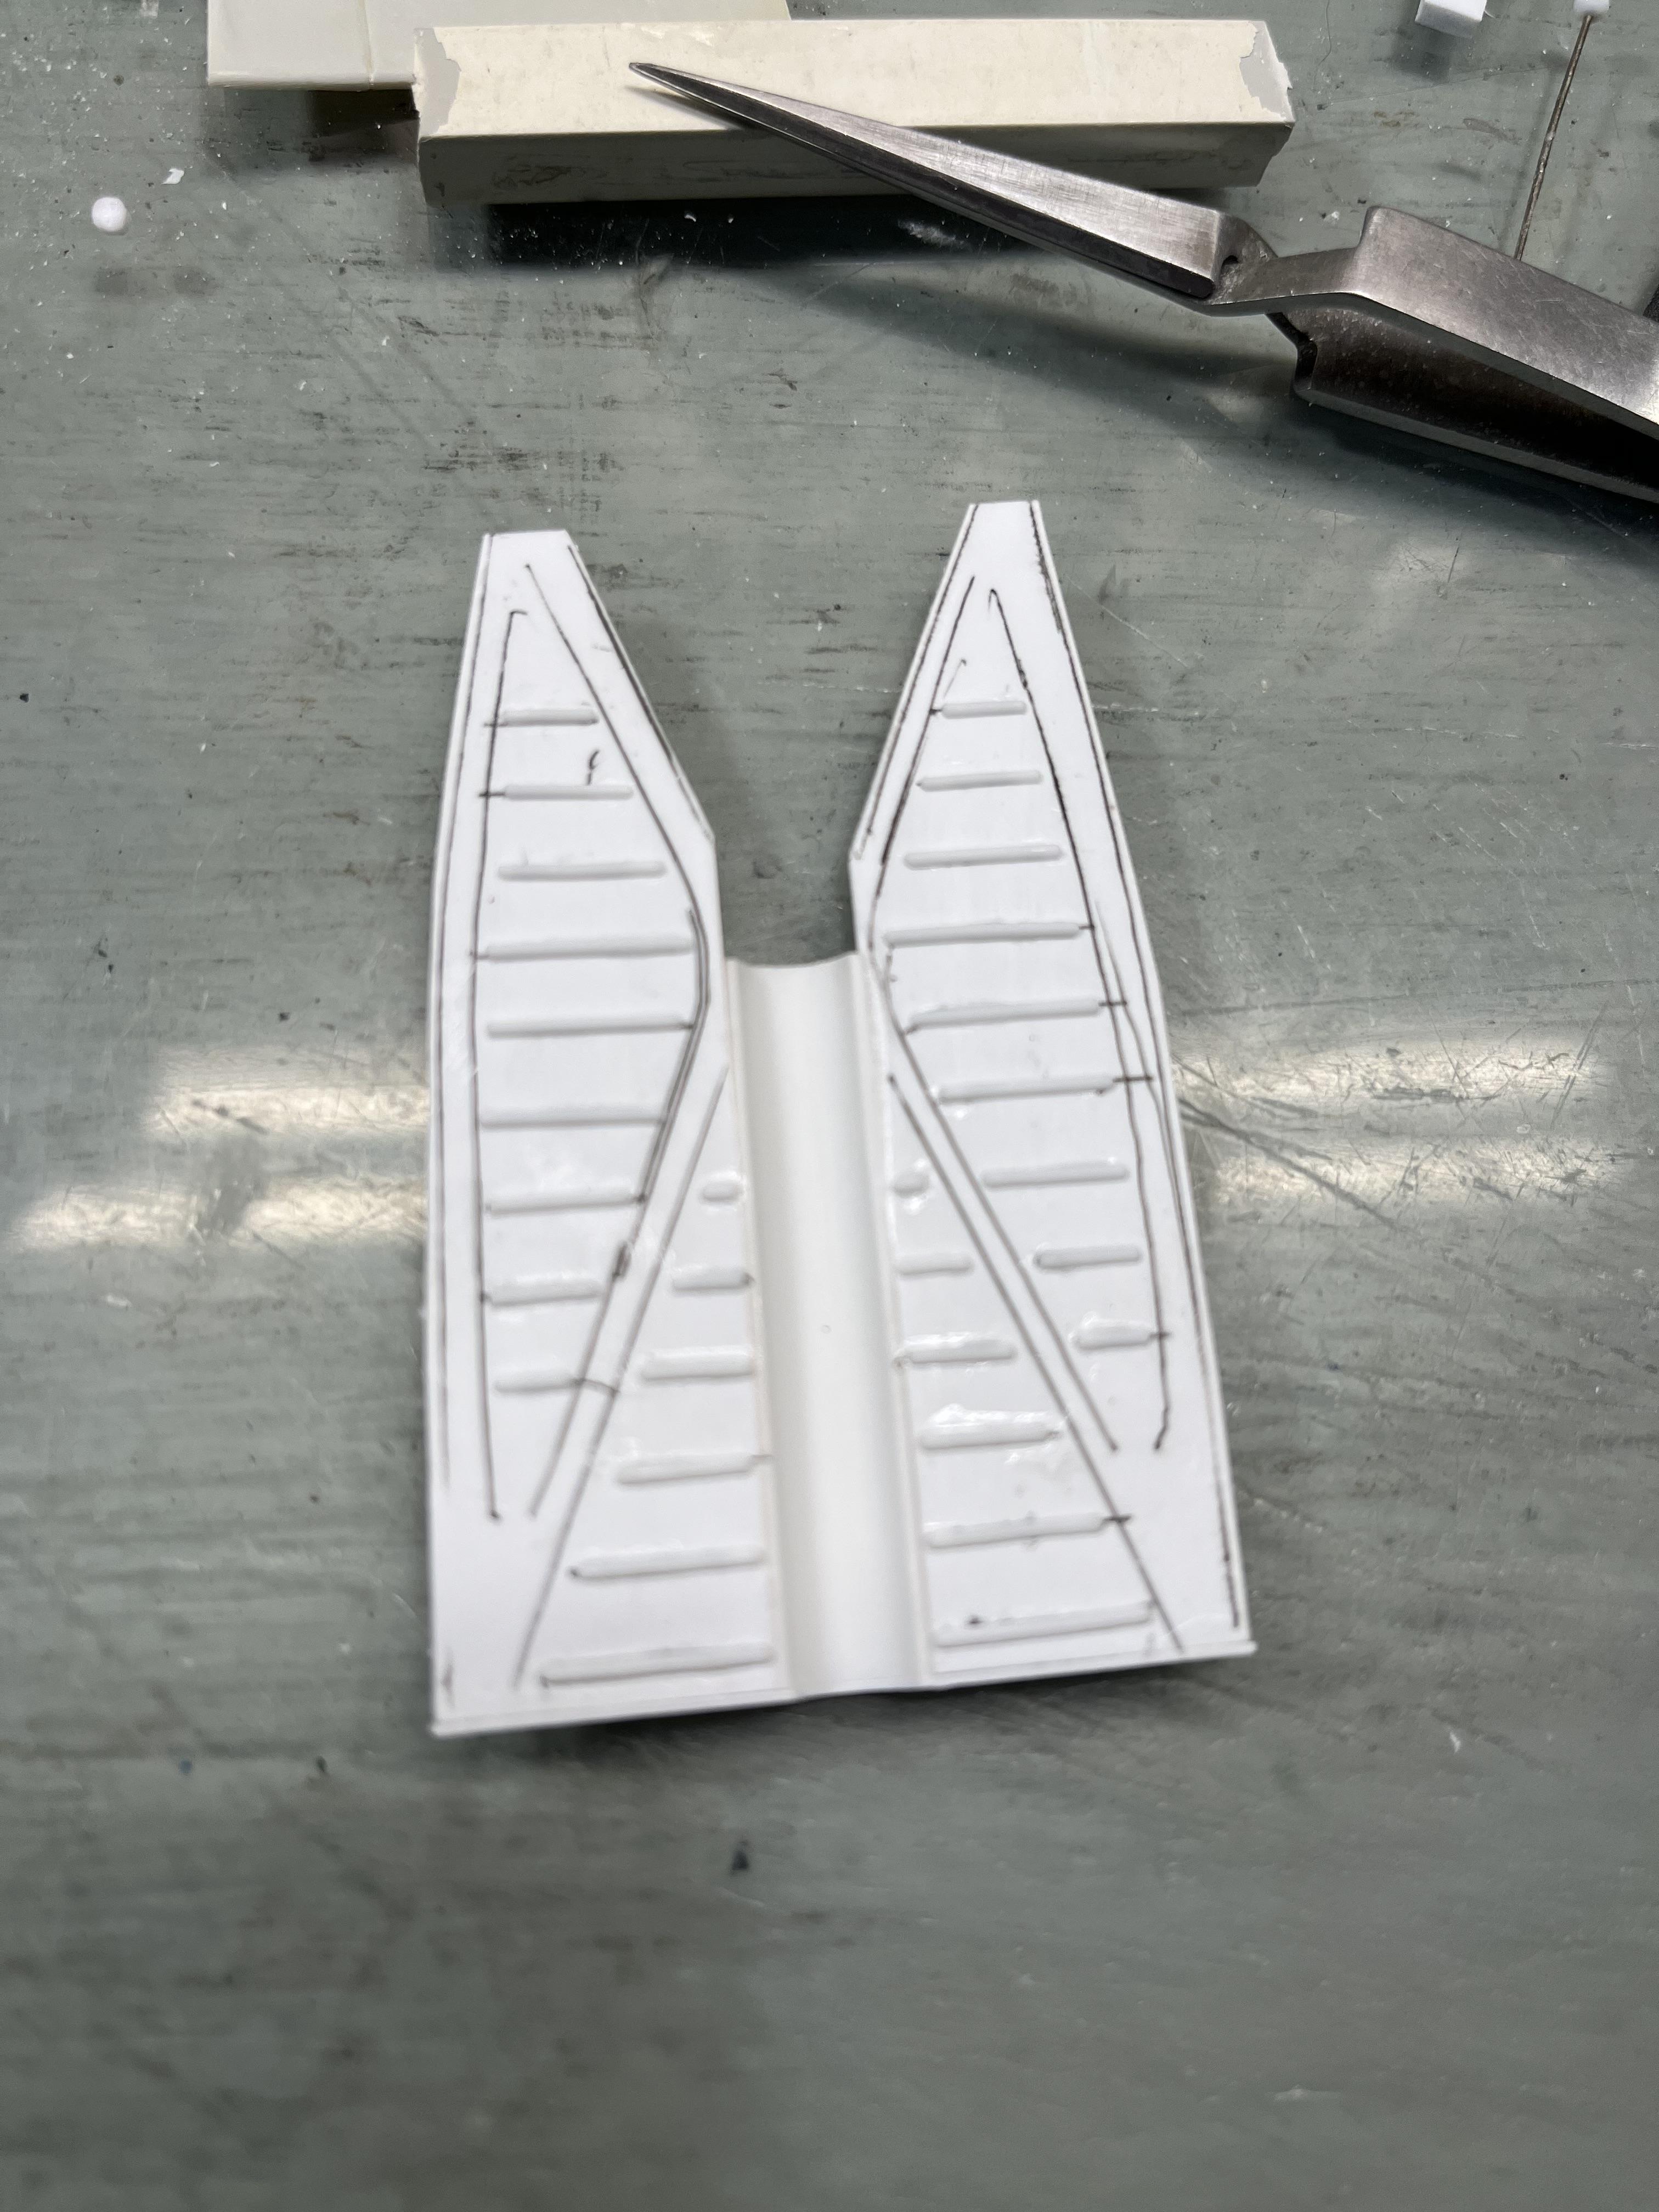
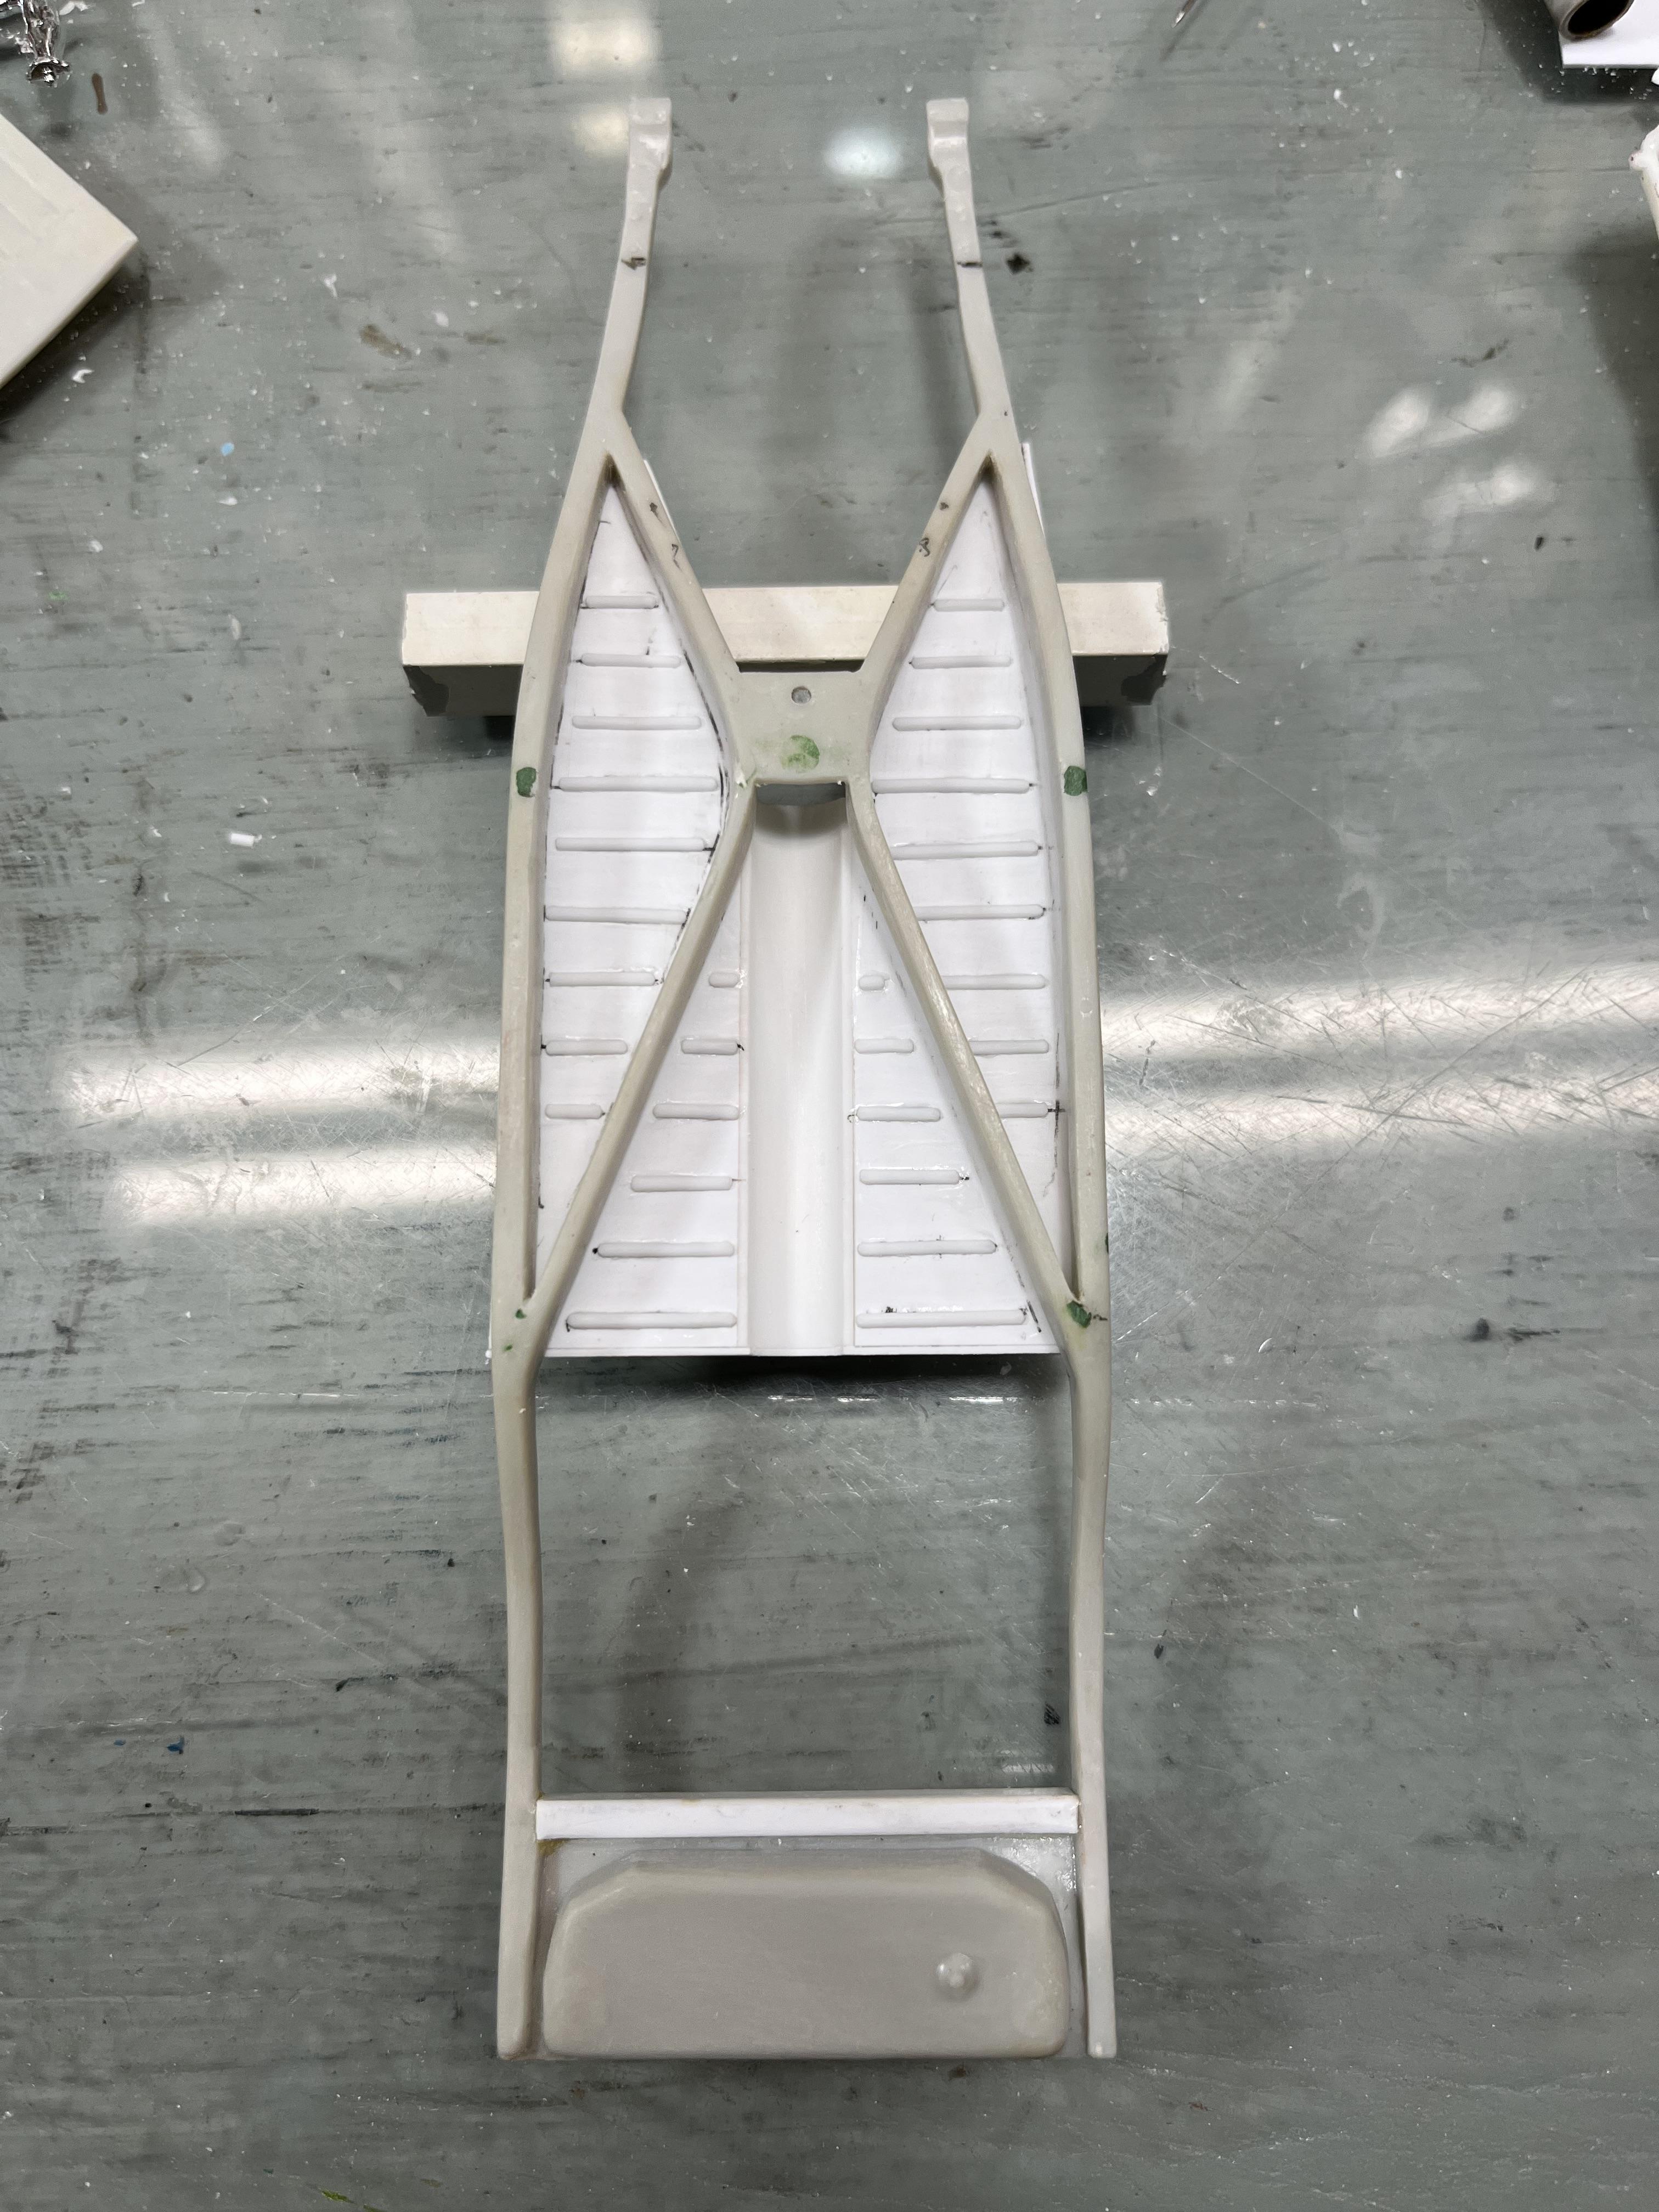
Today's installment concerns replacing the floorpan that was cut of the frame. Starting with a piece of .02" Evergreen sheet and a slice of tube for the driveshaft tunnel... Cut two pieces of the sheet plastic and slightly bevel the edges and then glue each piece to a side of the tube... It will sit on the frame like this... Viewed from underneath like this. Mark the frame and crossmember edges with a pen...somewhere along the way, the front xmember was cut out... Cut the edges off, leaving a bit of extra...as Kit Karson famously says "Leave the edge when cutting". It will be trimmed to fit later... The plastic is thin enough to cut it with scissors... I added a small piece across the back to give it some strength. The section where the tube goes across has since been cut away... The next step is to replace the ribs on the pan that would have originally made by an English Wheel https://en.wikipedia.org/wiki/English_wheel or a bead roller to give the pan some strength and not buckle under weight. In our scale world this is done by cutting strips of .04" Evergreen half round. I scribed where the frame and crossmember areas go under the pan and then marked off where the ribs will go, I used a piece of rectangle as a guide rather than having to measure... I cut the half round pieces to size, sanded the edges to round them off and glued them on...kinda tedious... I sanded the whole thing down to remove some of the gloo..it will fit like this. A lot of work for an area that will hardly be seen....next up is the finish the rest of the pan over the back end of the frame... Thanks for following along...More later... -RRR
-
Thanks for posting that link. I love the HAMB. I don't spend as much time on the site as much as I used to since the closed down the app. Those Swedes do some amazing work! -RRR
-
That was my first thought, too! Still, gotta a nice rake, build it your way... -RRR
-
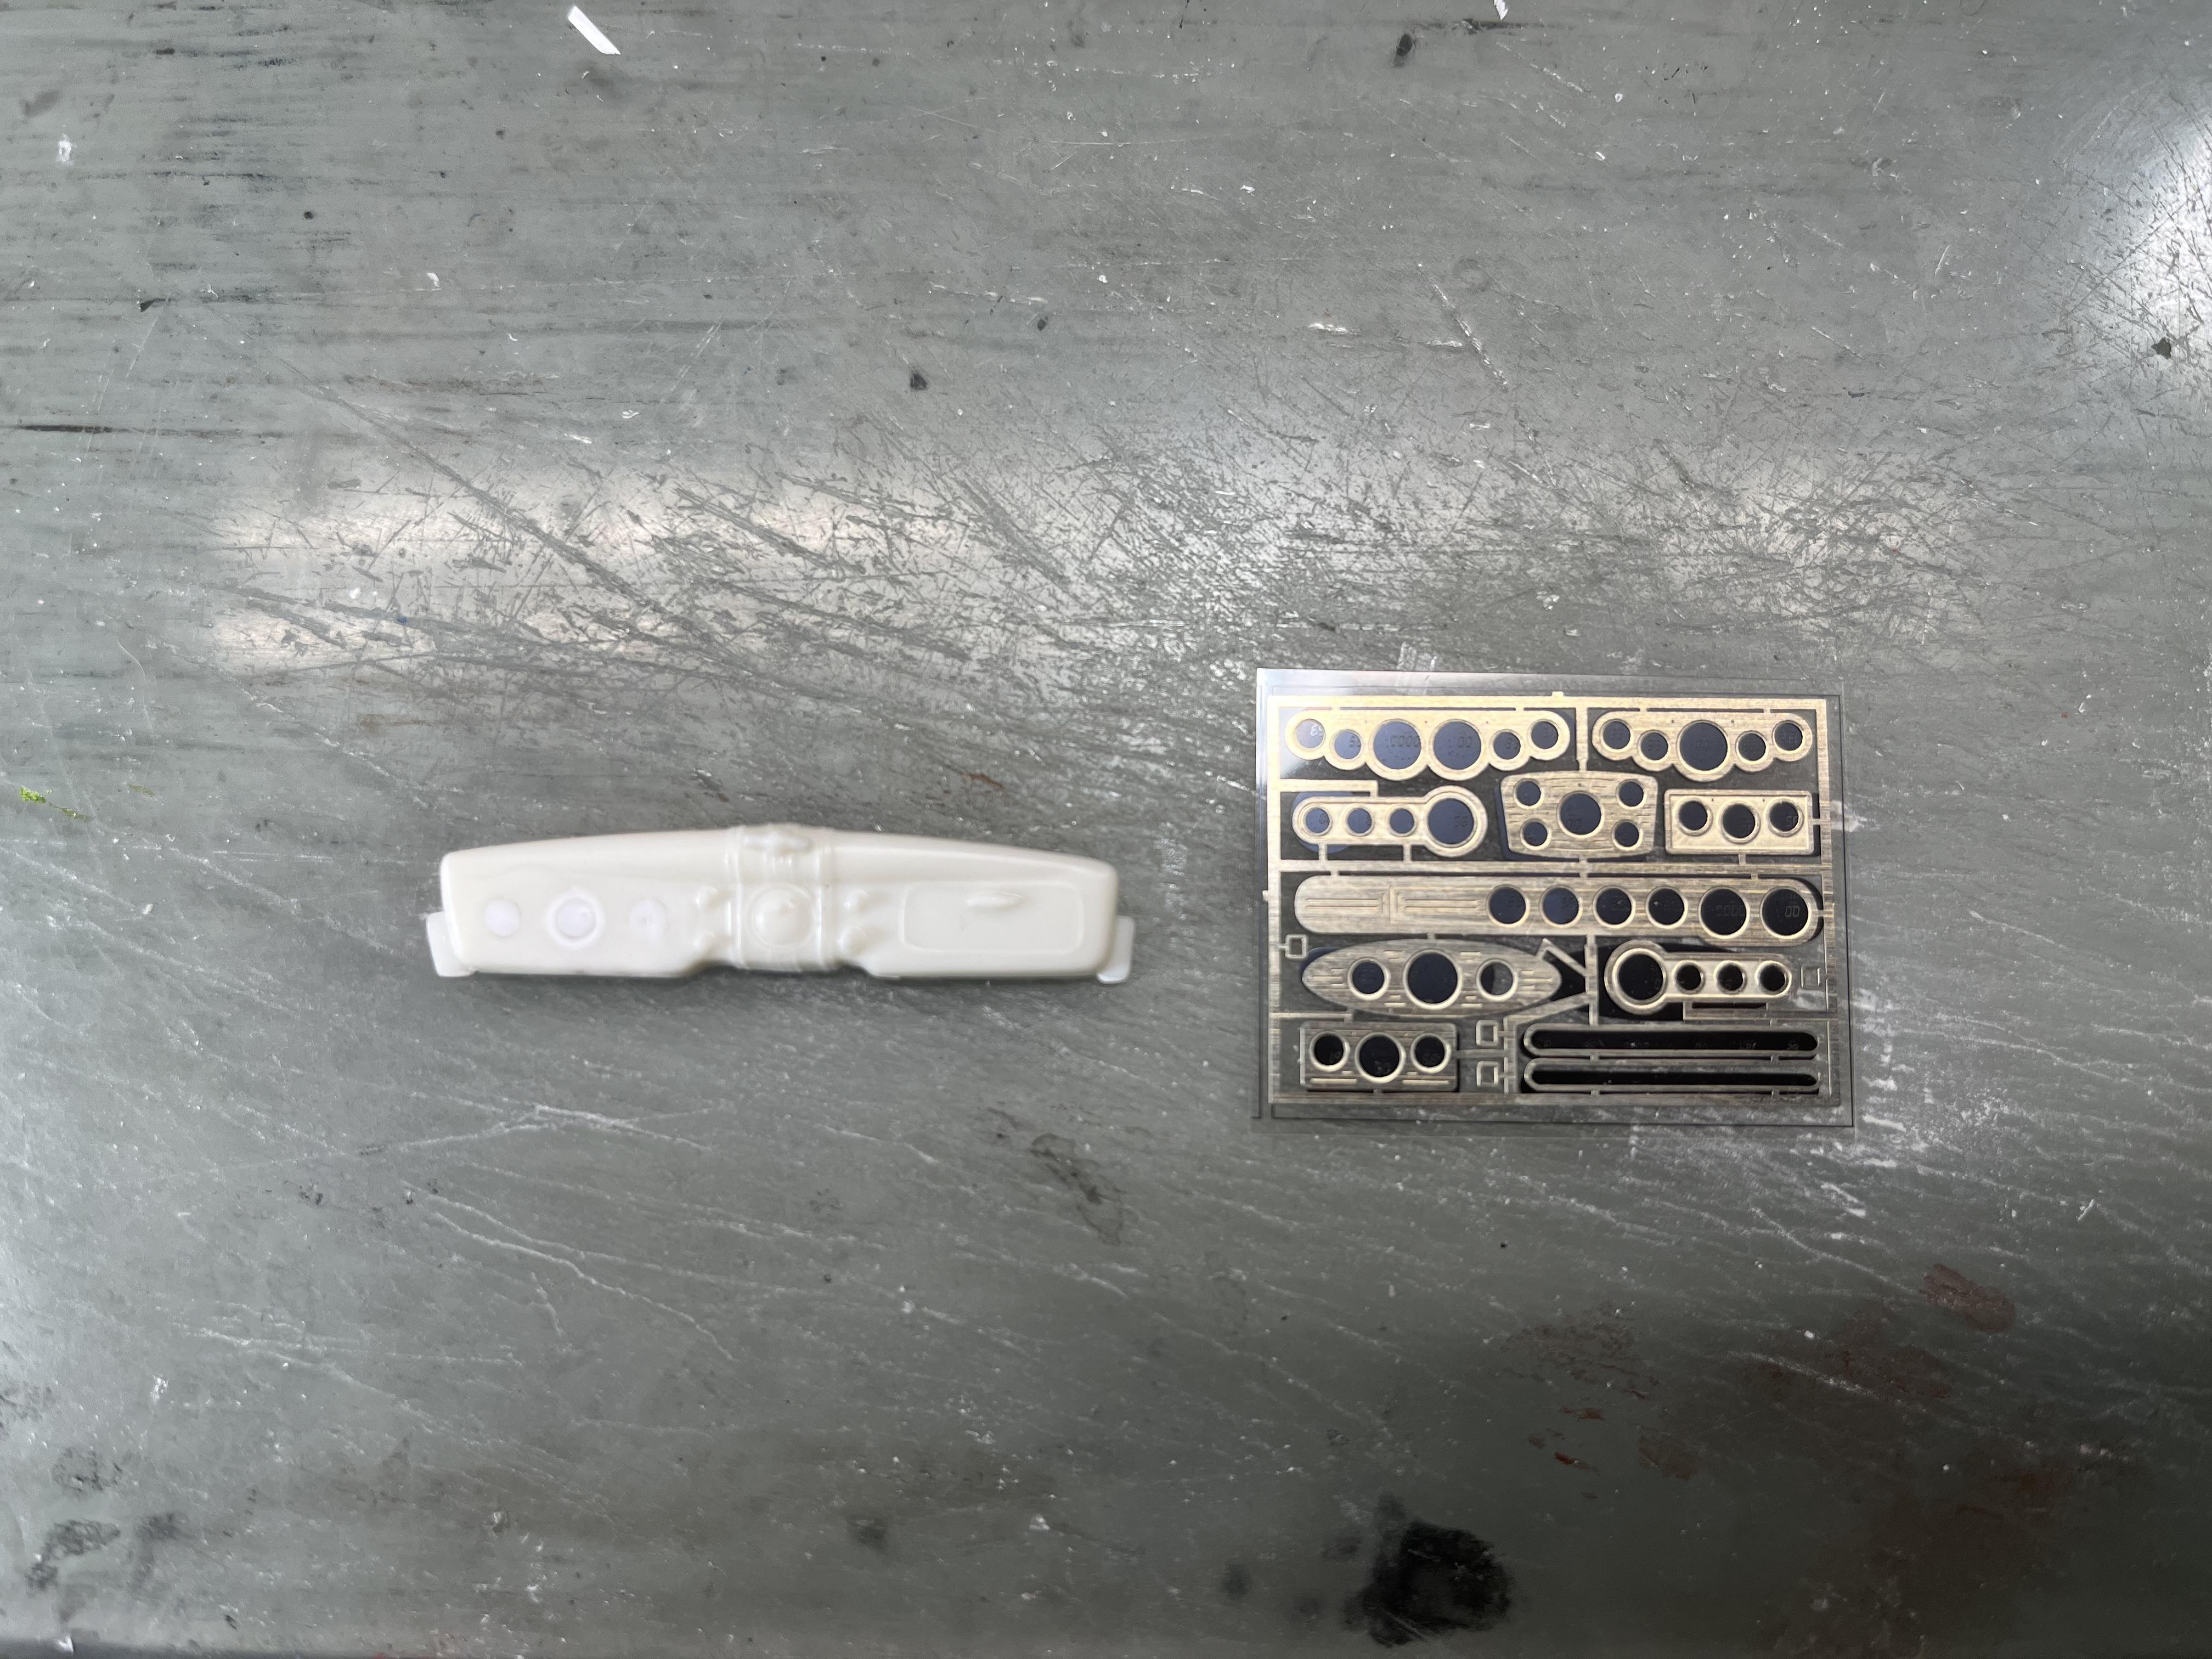
The interior has had the door panels cut out and the panels from the AMT Phantom Vickie [sic] cut in place, narrowed seat from the same kit will be used. The dash has had the gauge holes filed and a photoetched cluster from MCG will reside in that space. The five gauge cluster in the upper right in the below pic should fit nicely. The PH pieces are upside down in that pic? I'm not sure what to do with that sunken package tray, I might just fill it in with a piece of Evergreen sheet... -RRR
-
Thanks, ADL...-RRR
-
Looking real good! -RRR
-
Looks real nice! Yes, the AMT '36 Ford has has some funky stuff about it...-RRR
-
What primer did you use? Go down to the local auto parts store and buy same DupliColor Grey primer. Look near the bar code and grab the DAP-1699. This primer is made for that paint. Put on a couple of coats and sand lightly with 1000 or 2000 grit paper (you don't need to wet the paper, that primer sands easily). Wash parts with dish soap before painting and between primer and color coats. It's also a good idea to remove parts from the trees before painting and remove the mold parting lines and any flash and ejector pin marks before painting. It will give you a much better looking model. Sanding parts before primer will give better paint adhesion as well. It might seem like a lot of prep, but you will the results. I hope this helps... -RRR
-
That looks cozy. Now, fill out the cushions on the sides of the seats where they cut away. I hope Santa brings you some new sanding sticks for Christmas. The one in the pic above looks like it's more than well worn! -RRR
-
Sounds good, Misha. Looking forward to seeing your progress! -RRR
-
To match the dropped runningboard, I am also dropping the front edge of the fender along with a little cleanup..... I filled the bumper cutout and added two pieces of .04" Evergreen... then sanded it all down... so it looks something like that....a schmear of putty will clean it up... More later.... -RRR