89AKurt
-
Posts
8,429 -
Joined
-
Last visited
Content Type
Profiles
Forums
Events
Gallery
Everything posted by 89AKurt
-

Mercedes Outlaws & Hot Rods
89AKurt replied to 89AKurt's topic in General Automotive Talk (Trucks and Cars)
Happened upon this video. It's a fiberglass body, not the real thing. Getting OEM parts is crazy. -
I do wash all parts before any painting, which does give me more work to do in filling tiny holes. Heard of microbaloons, are they hollow?
-
without color ink
-
I've read some too. No info on exactly what glue. Wonder if climate has anything to do with it. But I look at old builds that used Testors tube glue and see melted lines, so there is that. Simple answer, no. Tonight was scraping mold lines, hard to take a picture of that. This kit was minimal. There are some sink holes, worst are in the floor mats, which will be impossible to hide. Added brass rod to stiffen the vac-form panel. Cut down the interior bulkhead. Hot-wire cut the windshield, was impressed that the driver window was open. I need to research, the engine bay panels block air flow to the side fender vents, that can't be accurate!

-
These could have been done that way. Would need a stout post to mount the bucks on. You bet! Yea, even though the one used for reference is yellow, and another one is red, I'm debating how authentic to go. Already keeping the 6 carbs, not duplicating the 250 GT Pininfarina Coupe donor engine. I'm considering lowering the windshield now, since I have to fix it. Painted a Daytona Spyder yellow (long time ago project), so not excited about another one. I like the blue of the 112 car with yellow nose. Undecided at the moment.
-
running on nitrous
-
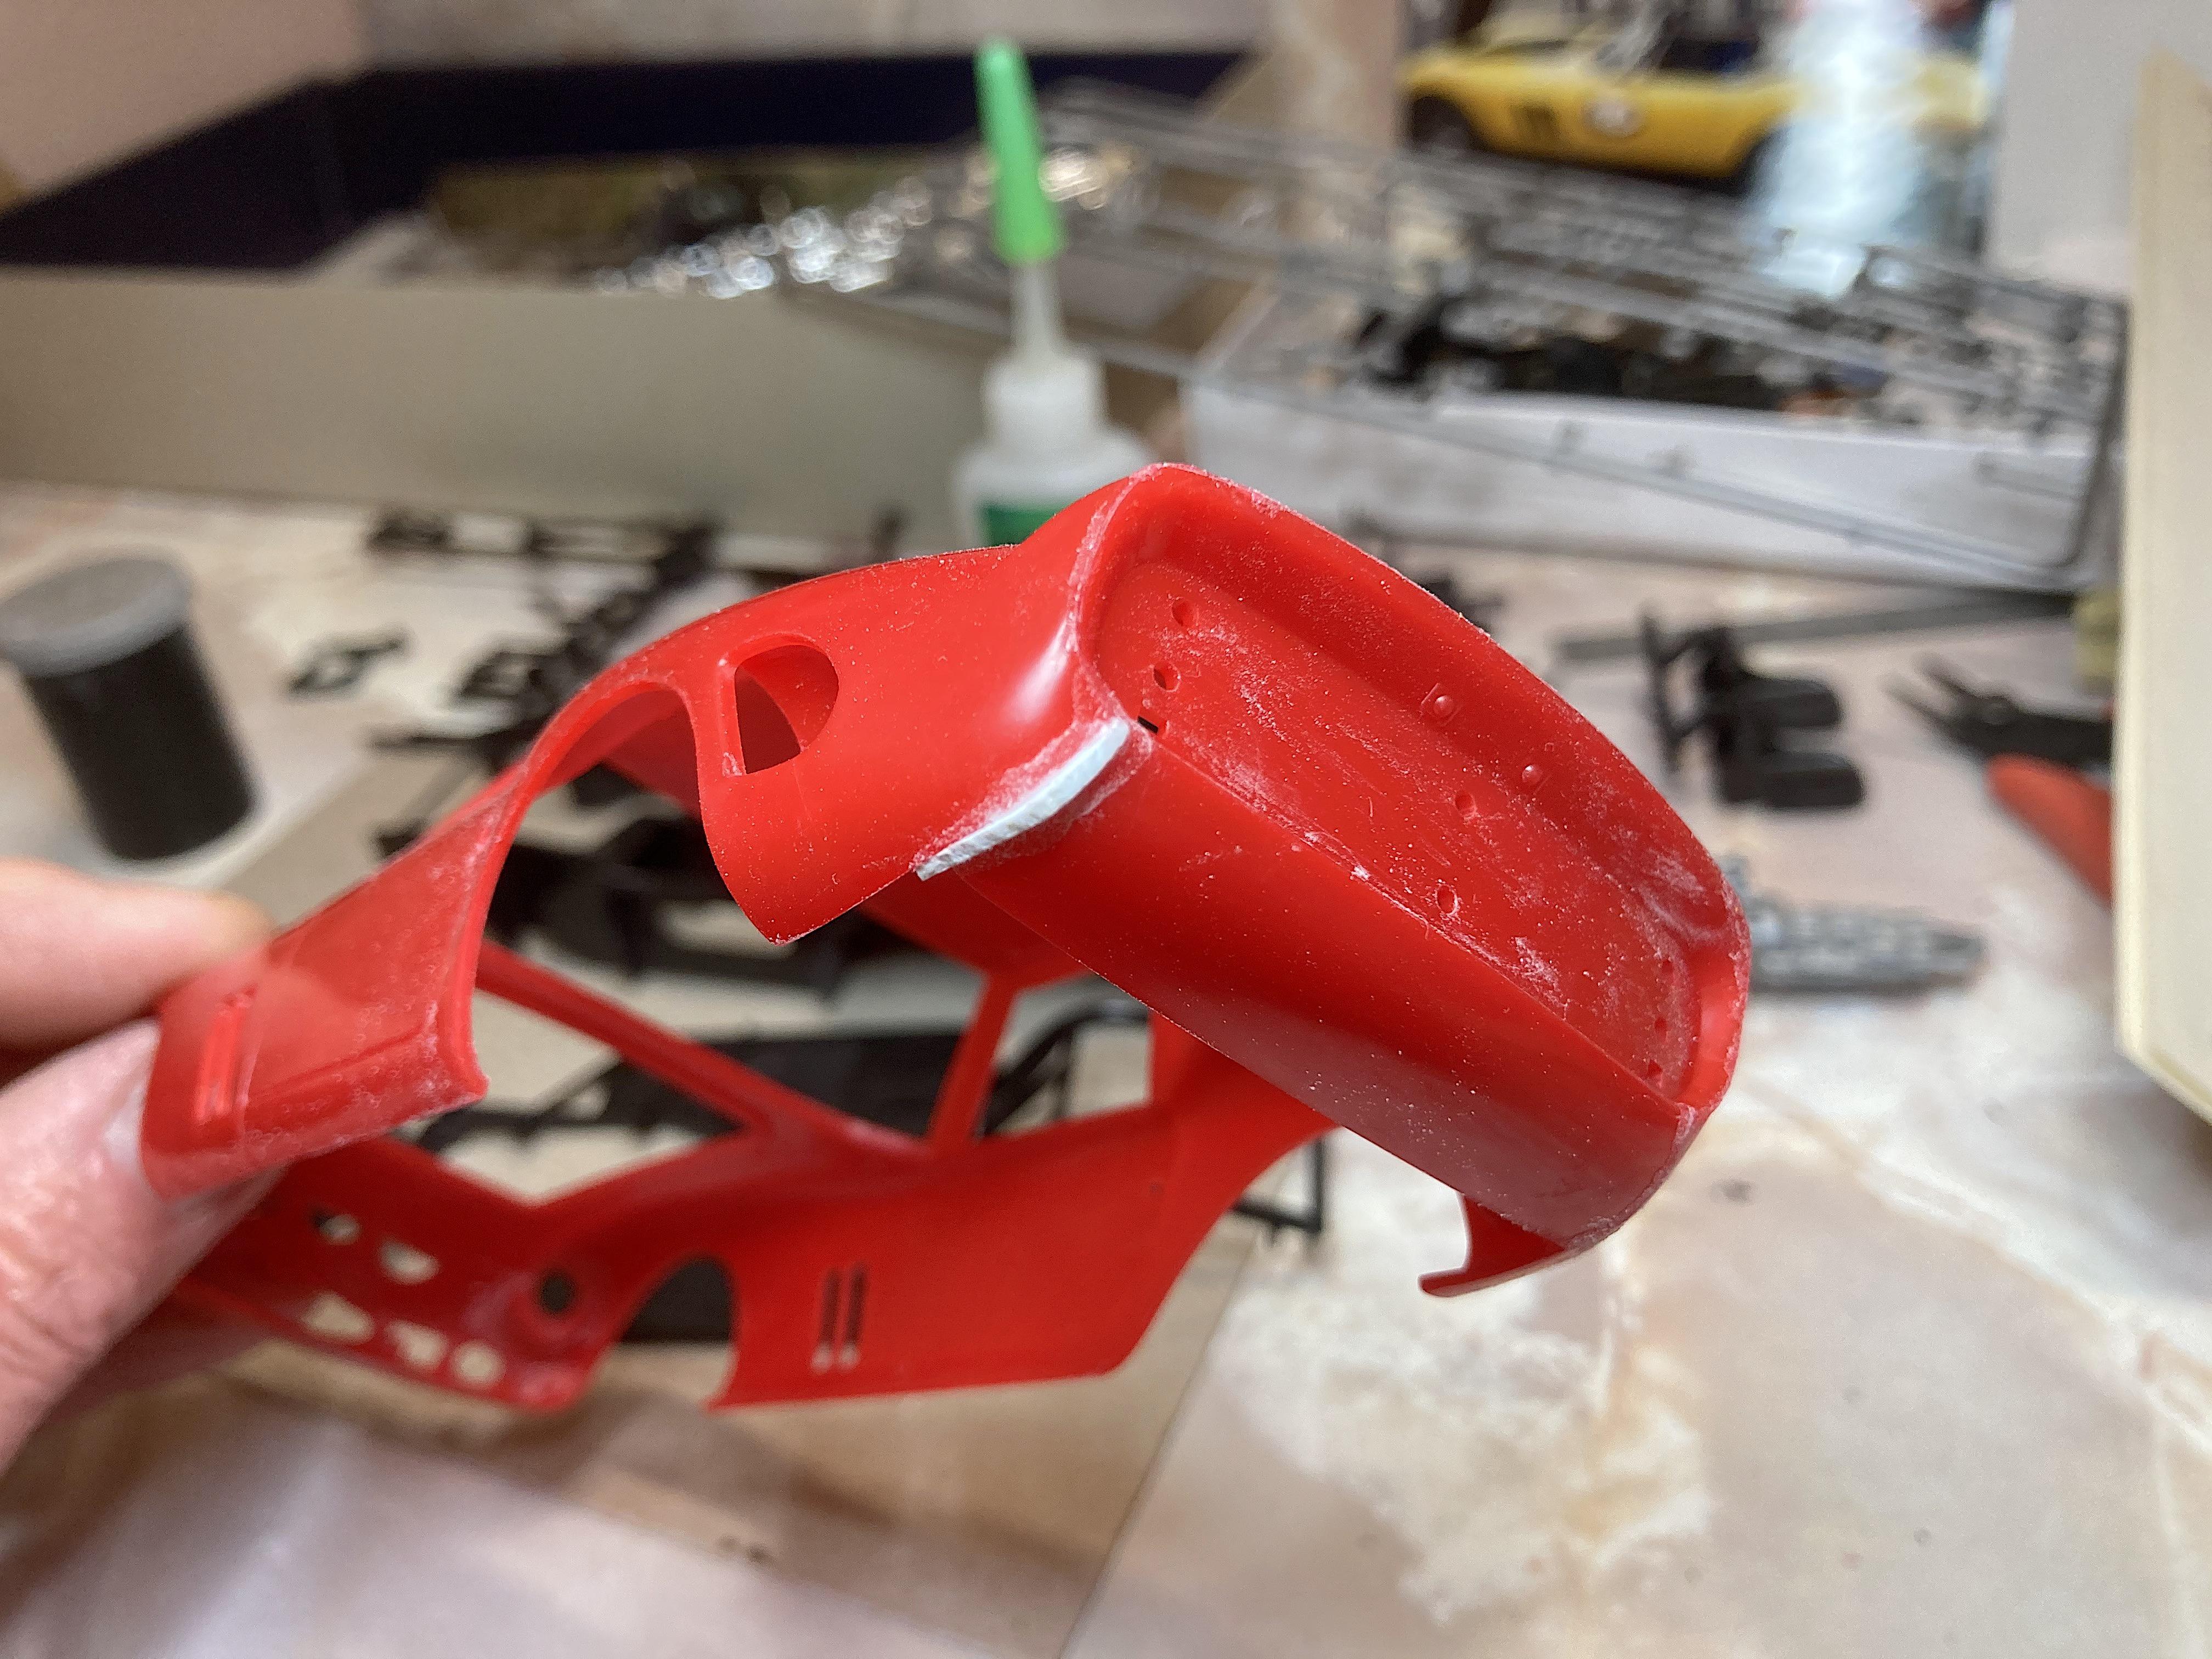
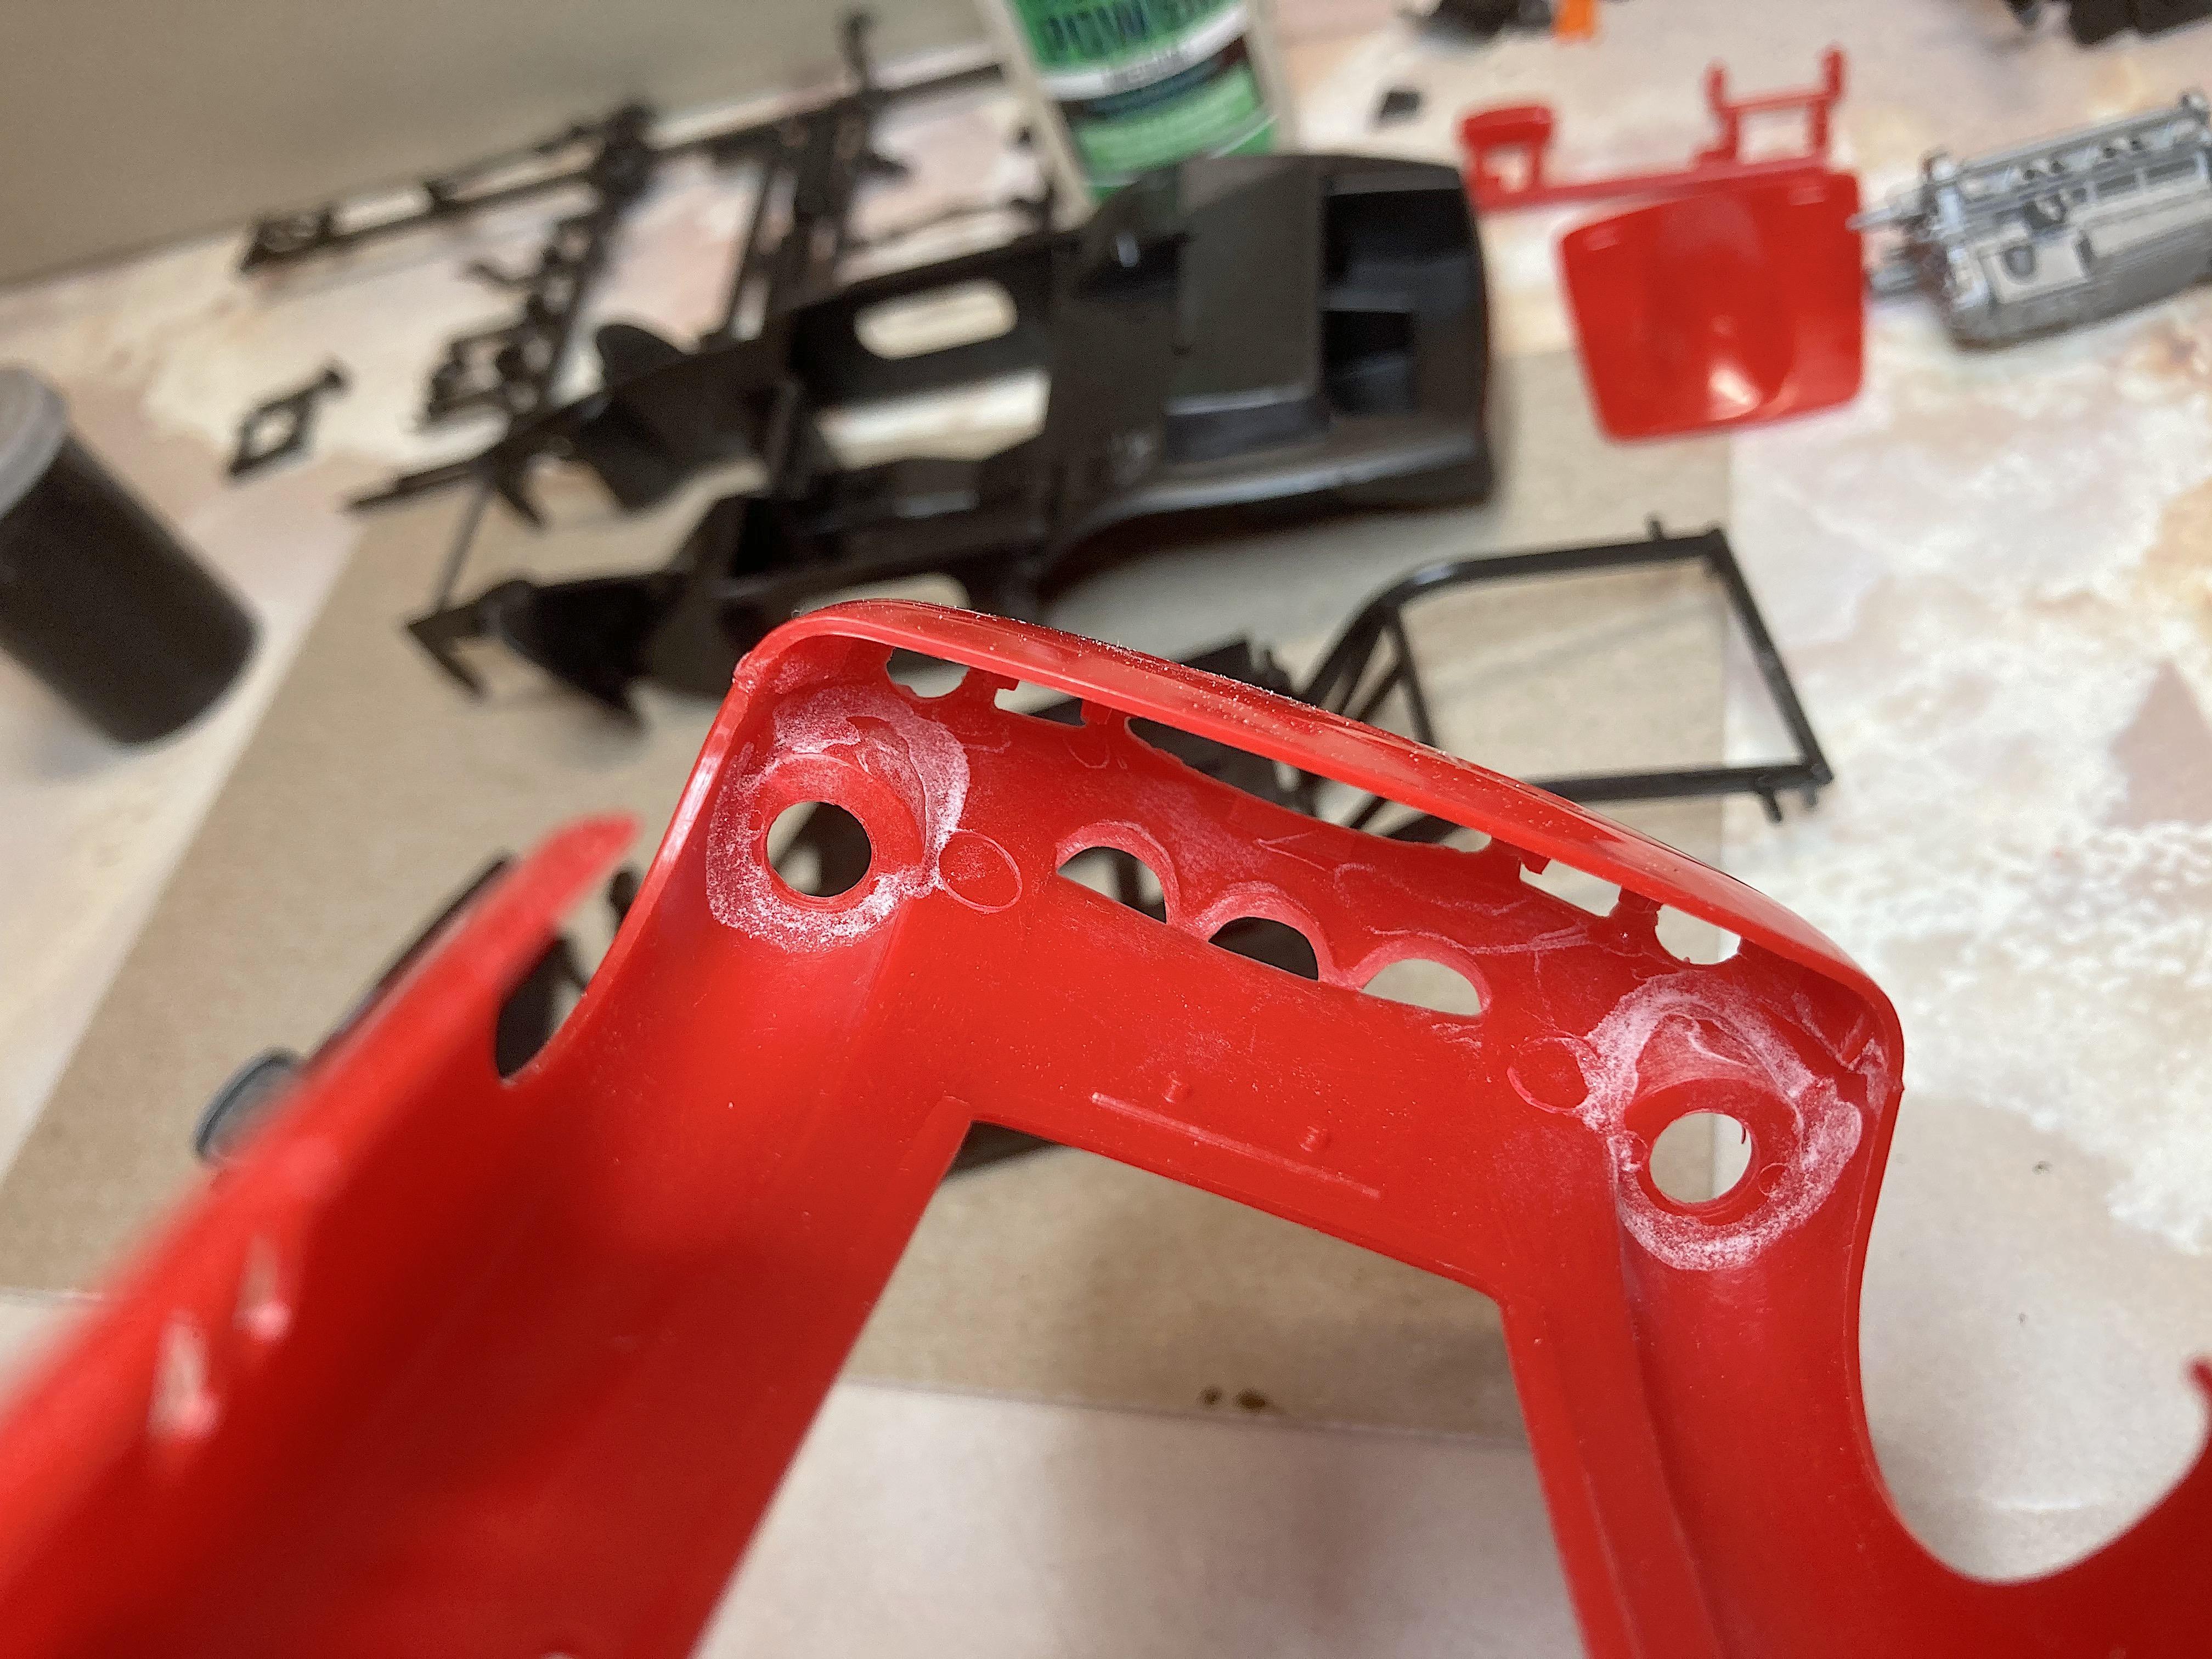
Thanks! Of course, why would I build an uncool car? ? See below: Today will explain my signature line......... Last night the vents were modified, added #3 up front, and larger on the rear. Made forms for the rear vents, which I'm happy about because the kit parts were too cupped with an ejection pin mark dead center. The grooves on the back are for air flow under the form. Second attempt (first was a total disaster) looks good at first, but..... I use the welders glove when holding the frame. ? Had an annoying ring. I figured this wasn't too flat a shape, but apparently air didn't flow good enough, is my guess. The vent scoops were good, so glued them in. Used this panel to make a pattern, to locate the fuel cap, latch, hood hinges, and tonneau cover shape, in order to drill holes. Used the pin vise, in the drill press to drill little holes. Didn't wish to risk breaking the bit, so only went about 1/8" deep. Drilled big holes on the back approximately under the tiny holes. Then hogged out with the Dremel, being careful to creep up to the tiny holes, using the light glow through the "Corian". Had the shop vac ready before I moved from the bench. ?️ This was #4, the third time was *blah blah*ed. I don't like wasting so much 0.20" styrene! ? But if I open the trunk, have a lid to use. I had drilled the fuel hole bigger since the drill press picture, that may have been enough. Cut close with scissors, sanded with the stick, being careful to not have too tight a fit that would warp anything. Taped in place with Scotch® tape, super glue at the corners, verified position, then worked the glue with baking soda around the edge, underneath. Then awhile later did the top with super glue and baking soda. I really like doing this method, the glue sets quickly, the baking soda makes it better to sand, and makes better filler than any putty. You can see holes on the spoiler, I just put glue in, and pour on the soda, and about 10 minutes later I can sand it. Roughed in pretty nice. I will use Tamiya putty for the final prep. Noticed I screwed up the interior door panels, the instructions are vague about which side of the little locator fins, but was able to fix that.
-
that shoots blanks
-
stacco for faking
-
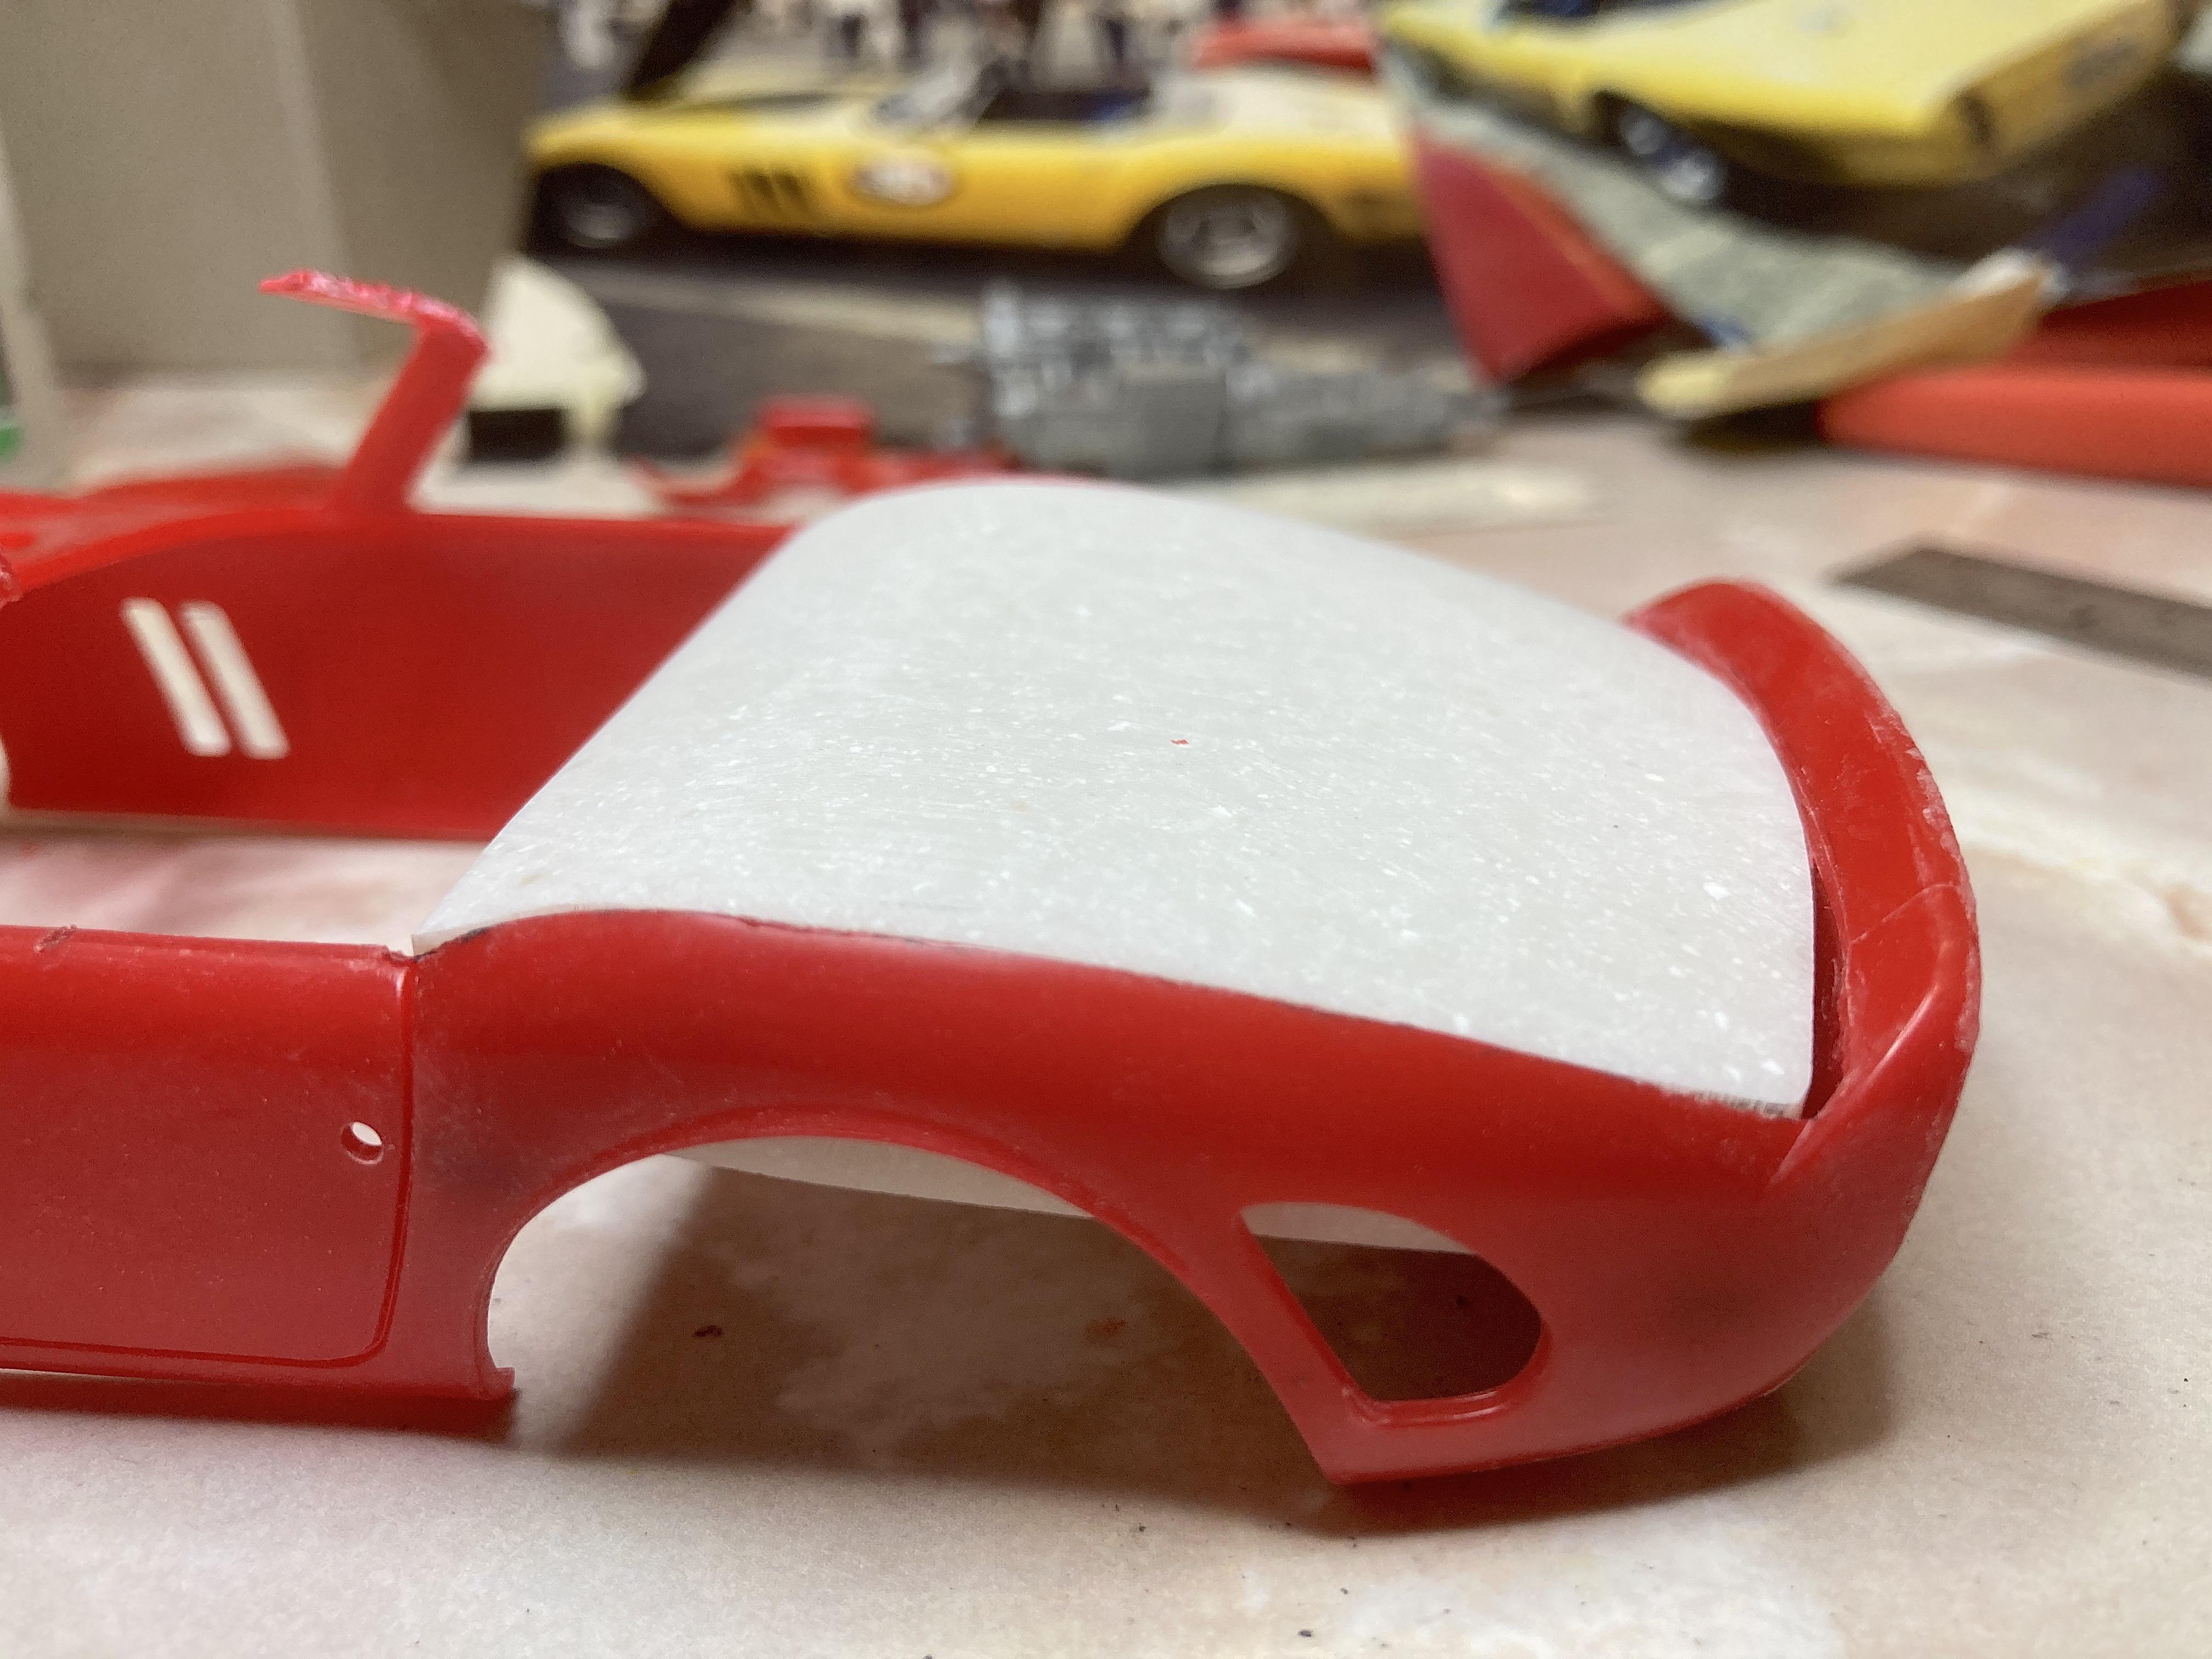
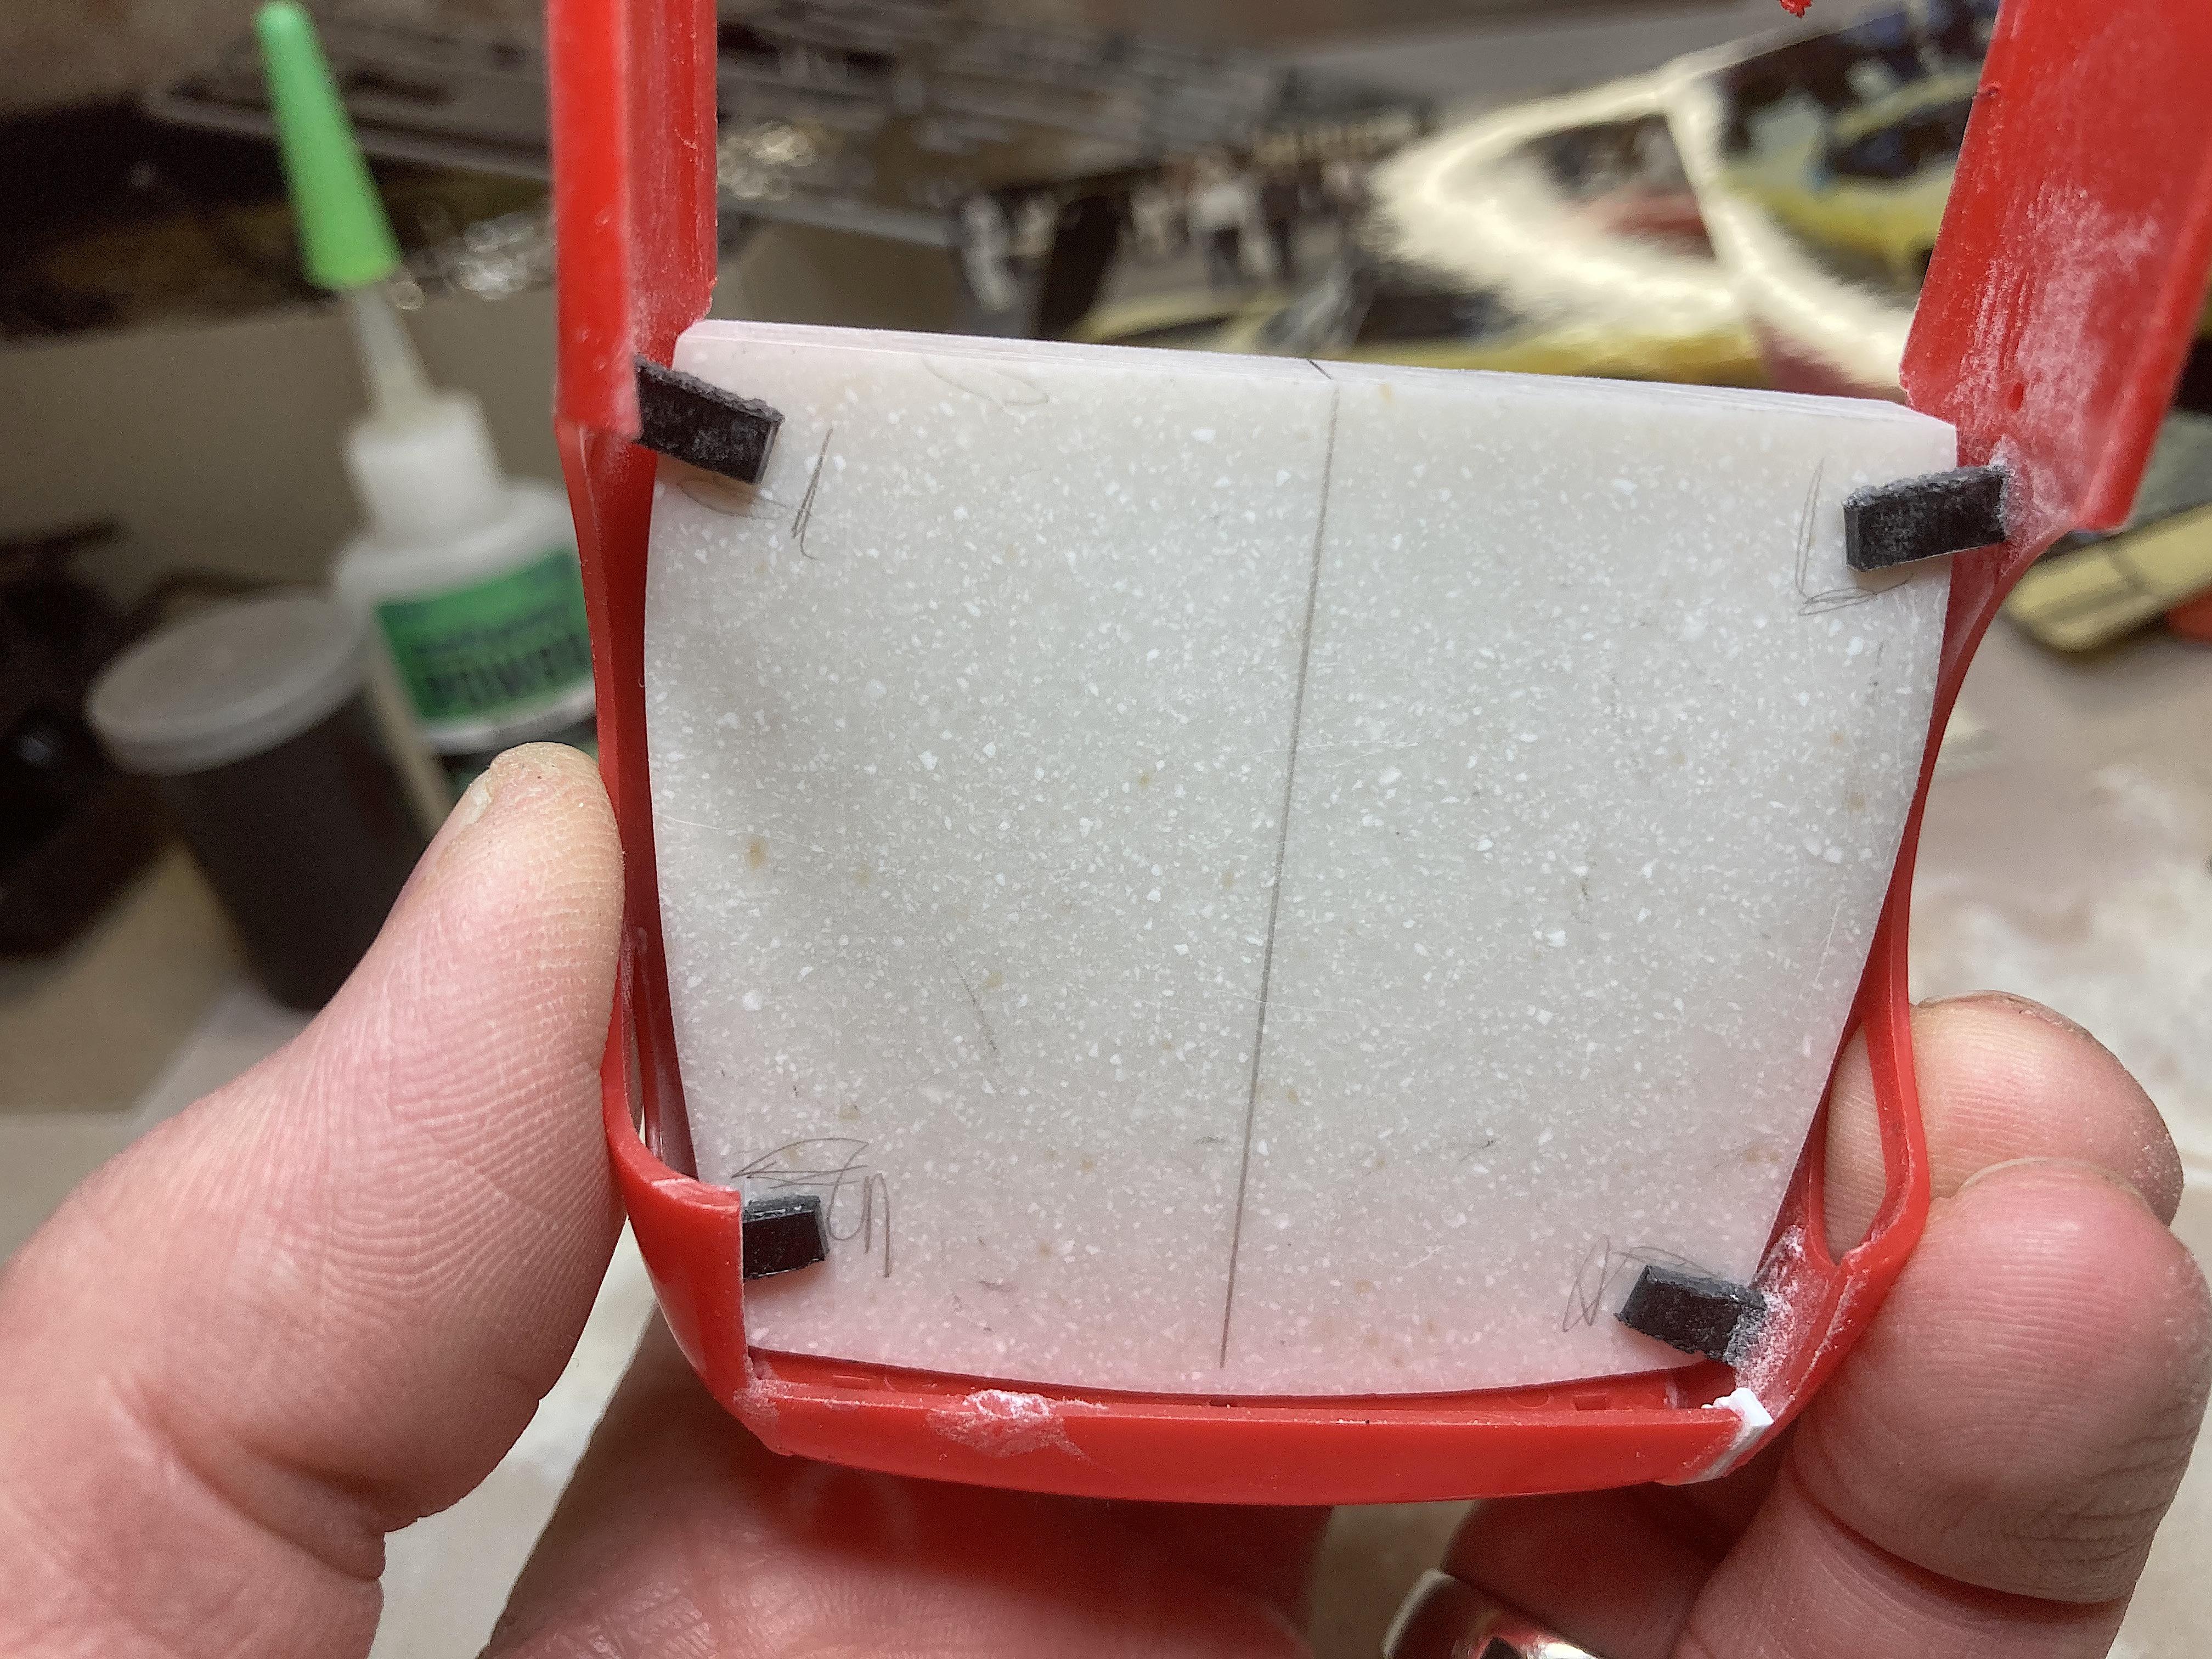
Did the drastic deed of chopping the roof. Used the hot-wire cutter, first step was undoing one end and slipping through a side window. Not surprised the windshield header broke, but gave it a try. Will make a steel one. This is a Corian® alternate, far as I can tell it works the same. First cuts on the table saw, then cross cut saw. The bench disk sander was used in getting the shape in plan view. After marking the side profiles, more disk sander to rough shape. Glued in temporary tabs so the slab would always be in the same position. On other projects, I've been able to use the Dremel to hollow out, but not this time. Corian® is brittle when thin, not risking it. Used the Dremel to cut the interior profile. Then attacked with the rough grit sanding stick to the final profile. This is an easy shape, the 375 NART has fender humps that would be a pain to work with. The spoiler will be reshaped to match the real car. This will be the form for making a vacuum-form panel.
-
with family gathered
-
Impressive!
-
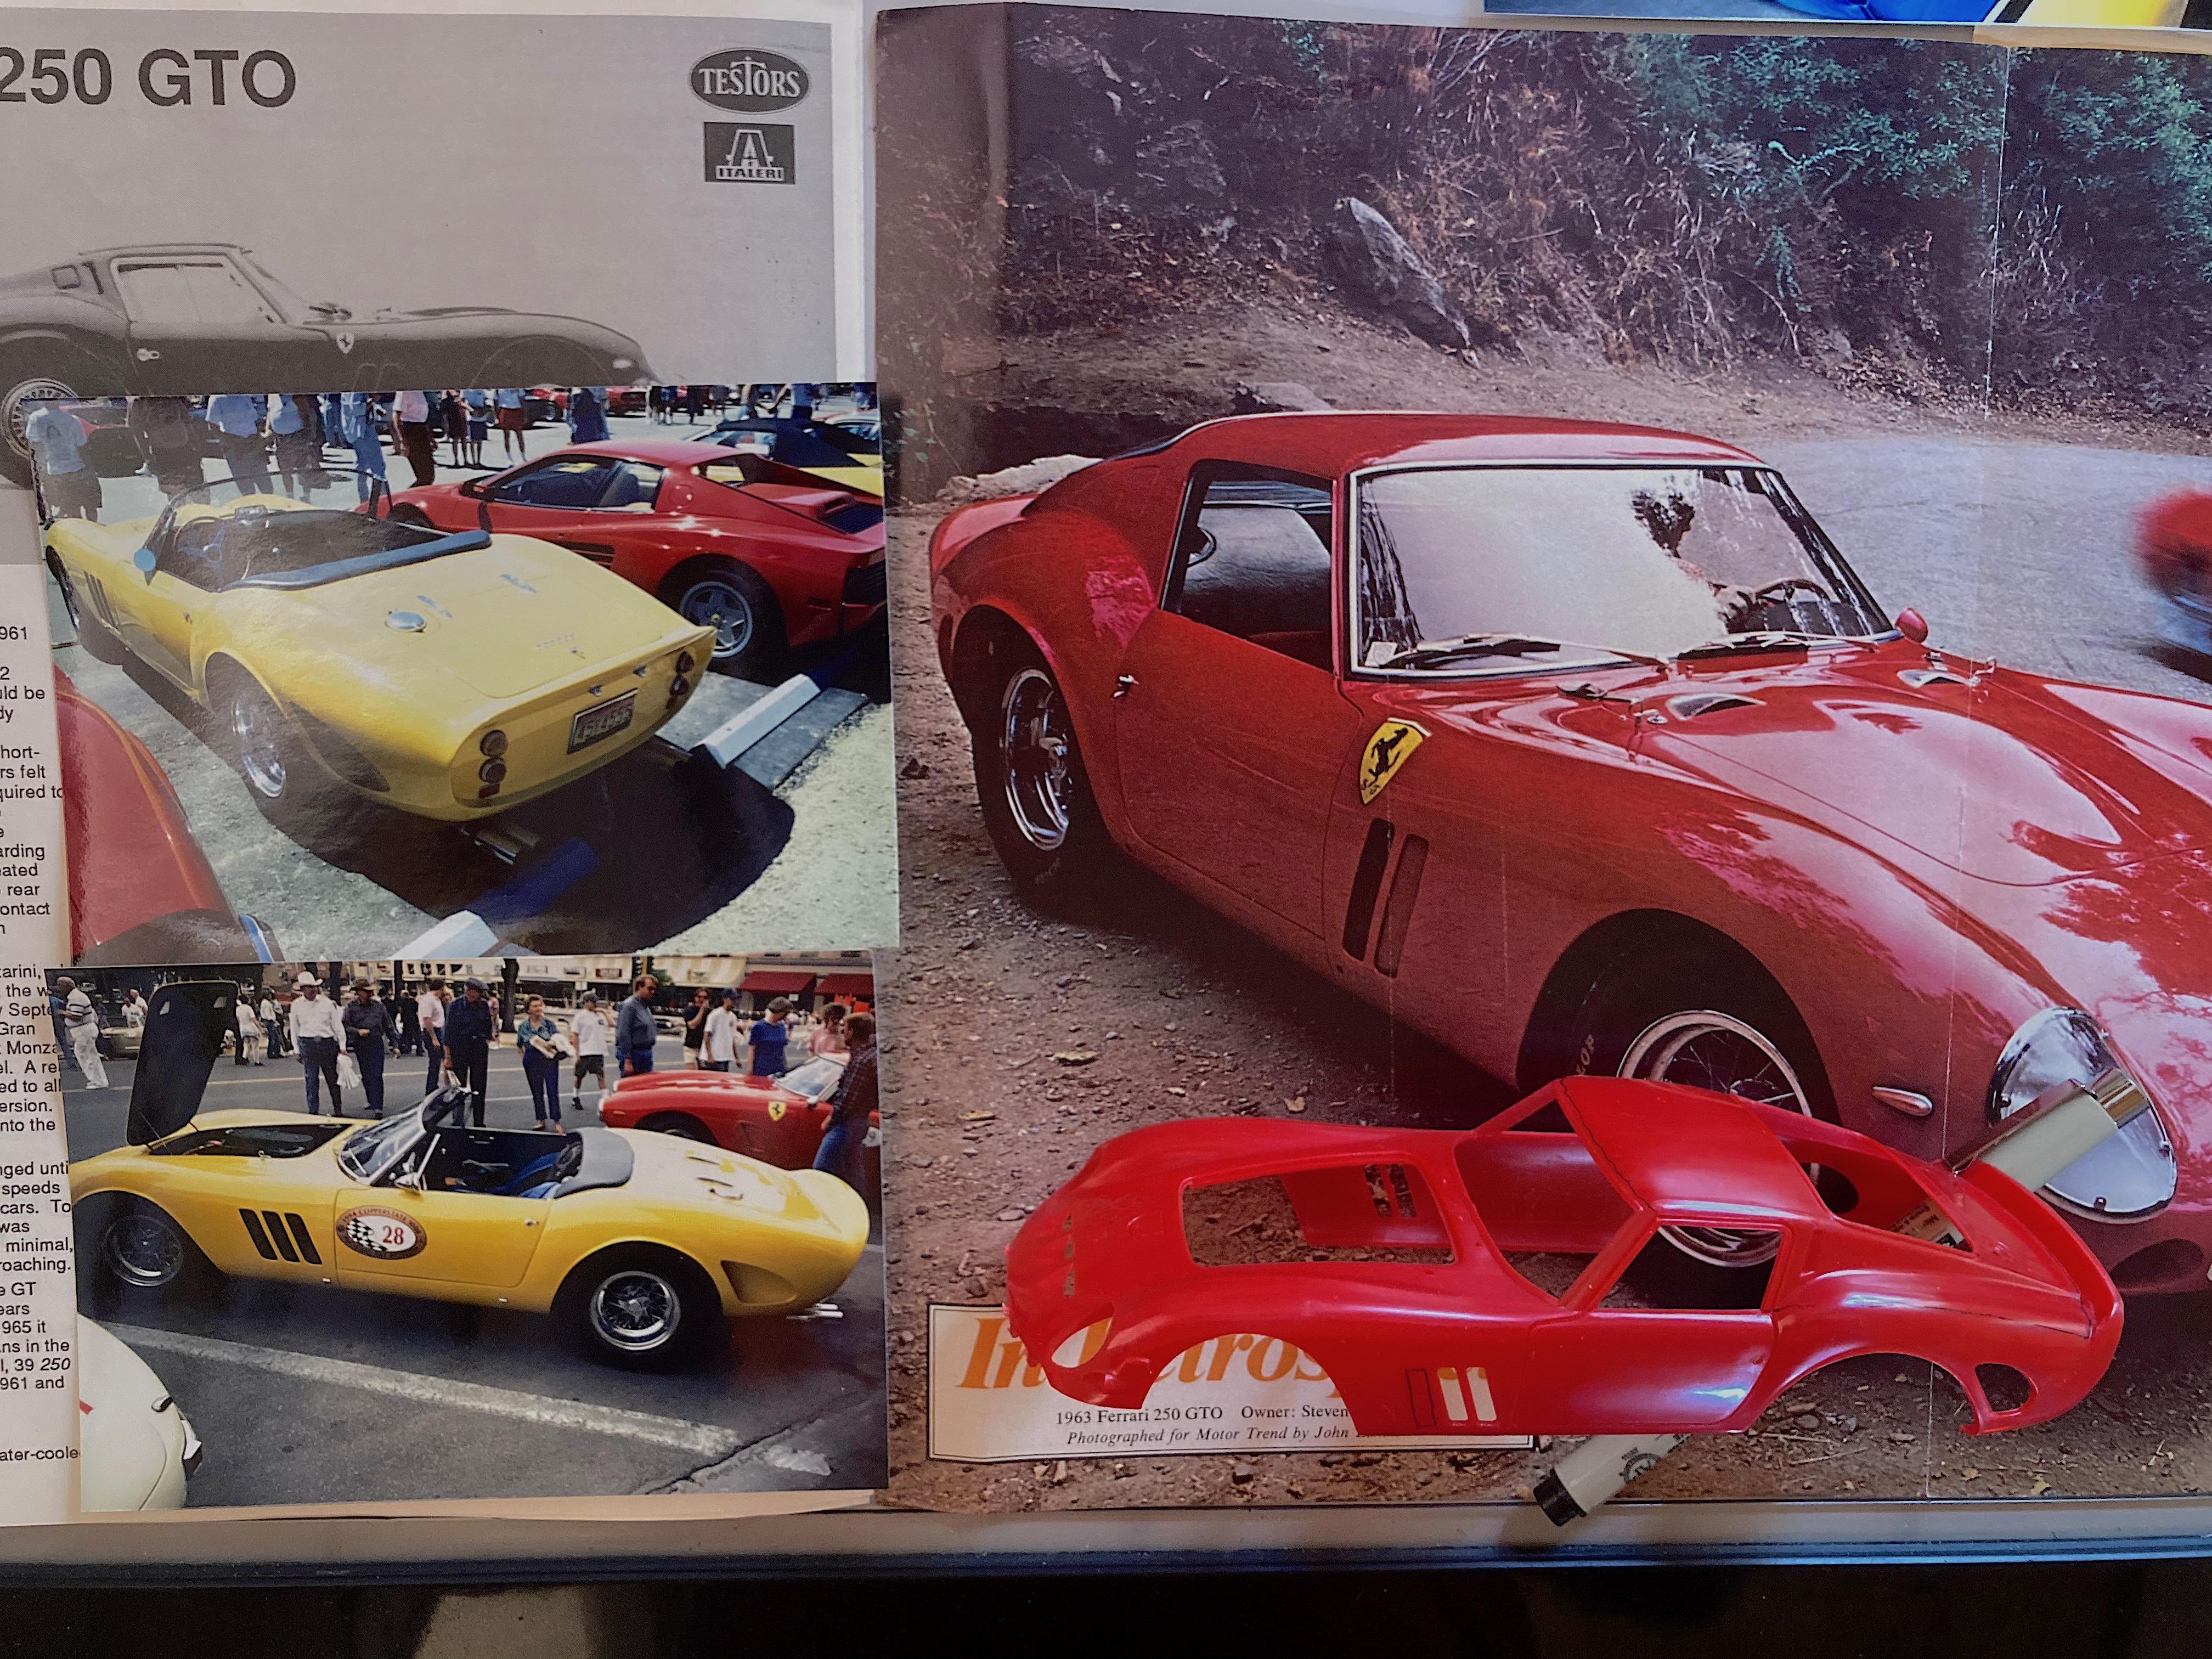
When I first saw it, knew it wasn't factory built. Now with the interwebs, I found this: Topless Ferrari 250 GTO? Your best bet is finding the Fujimi or Revell, the Gunze and Protar are scarce and expensive. Yes sir, just like they did with the Daytona Coupes, the Spyder is more desirable. Just like the '68-'72 Chevy pickups, they cut Long Beds to make Short Beds.
-
disguised as a
-
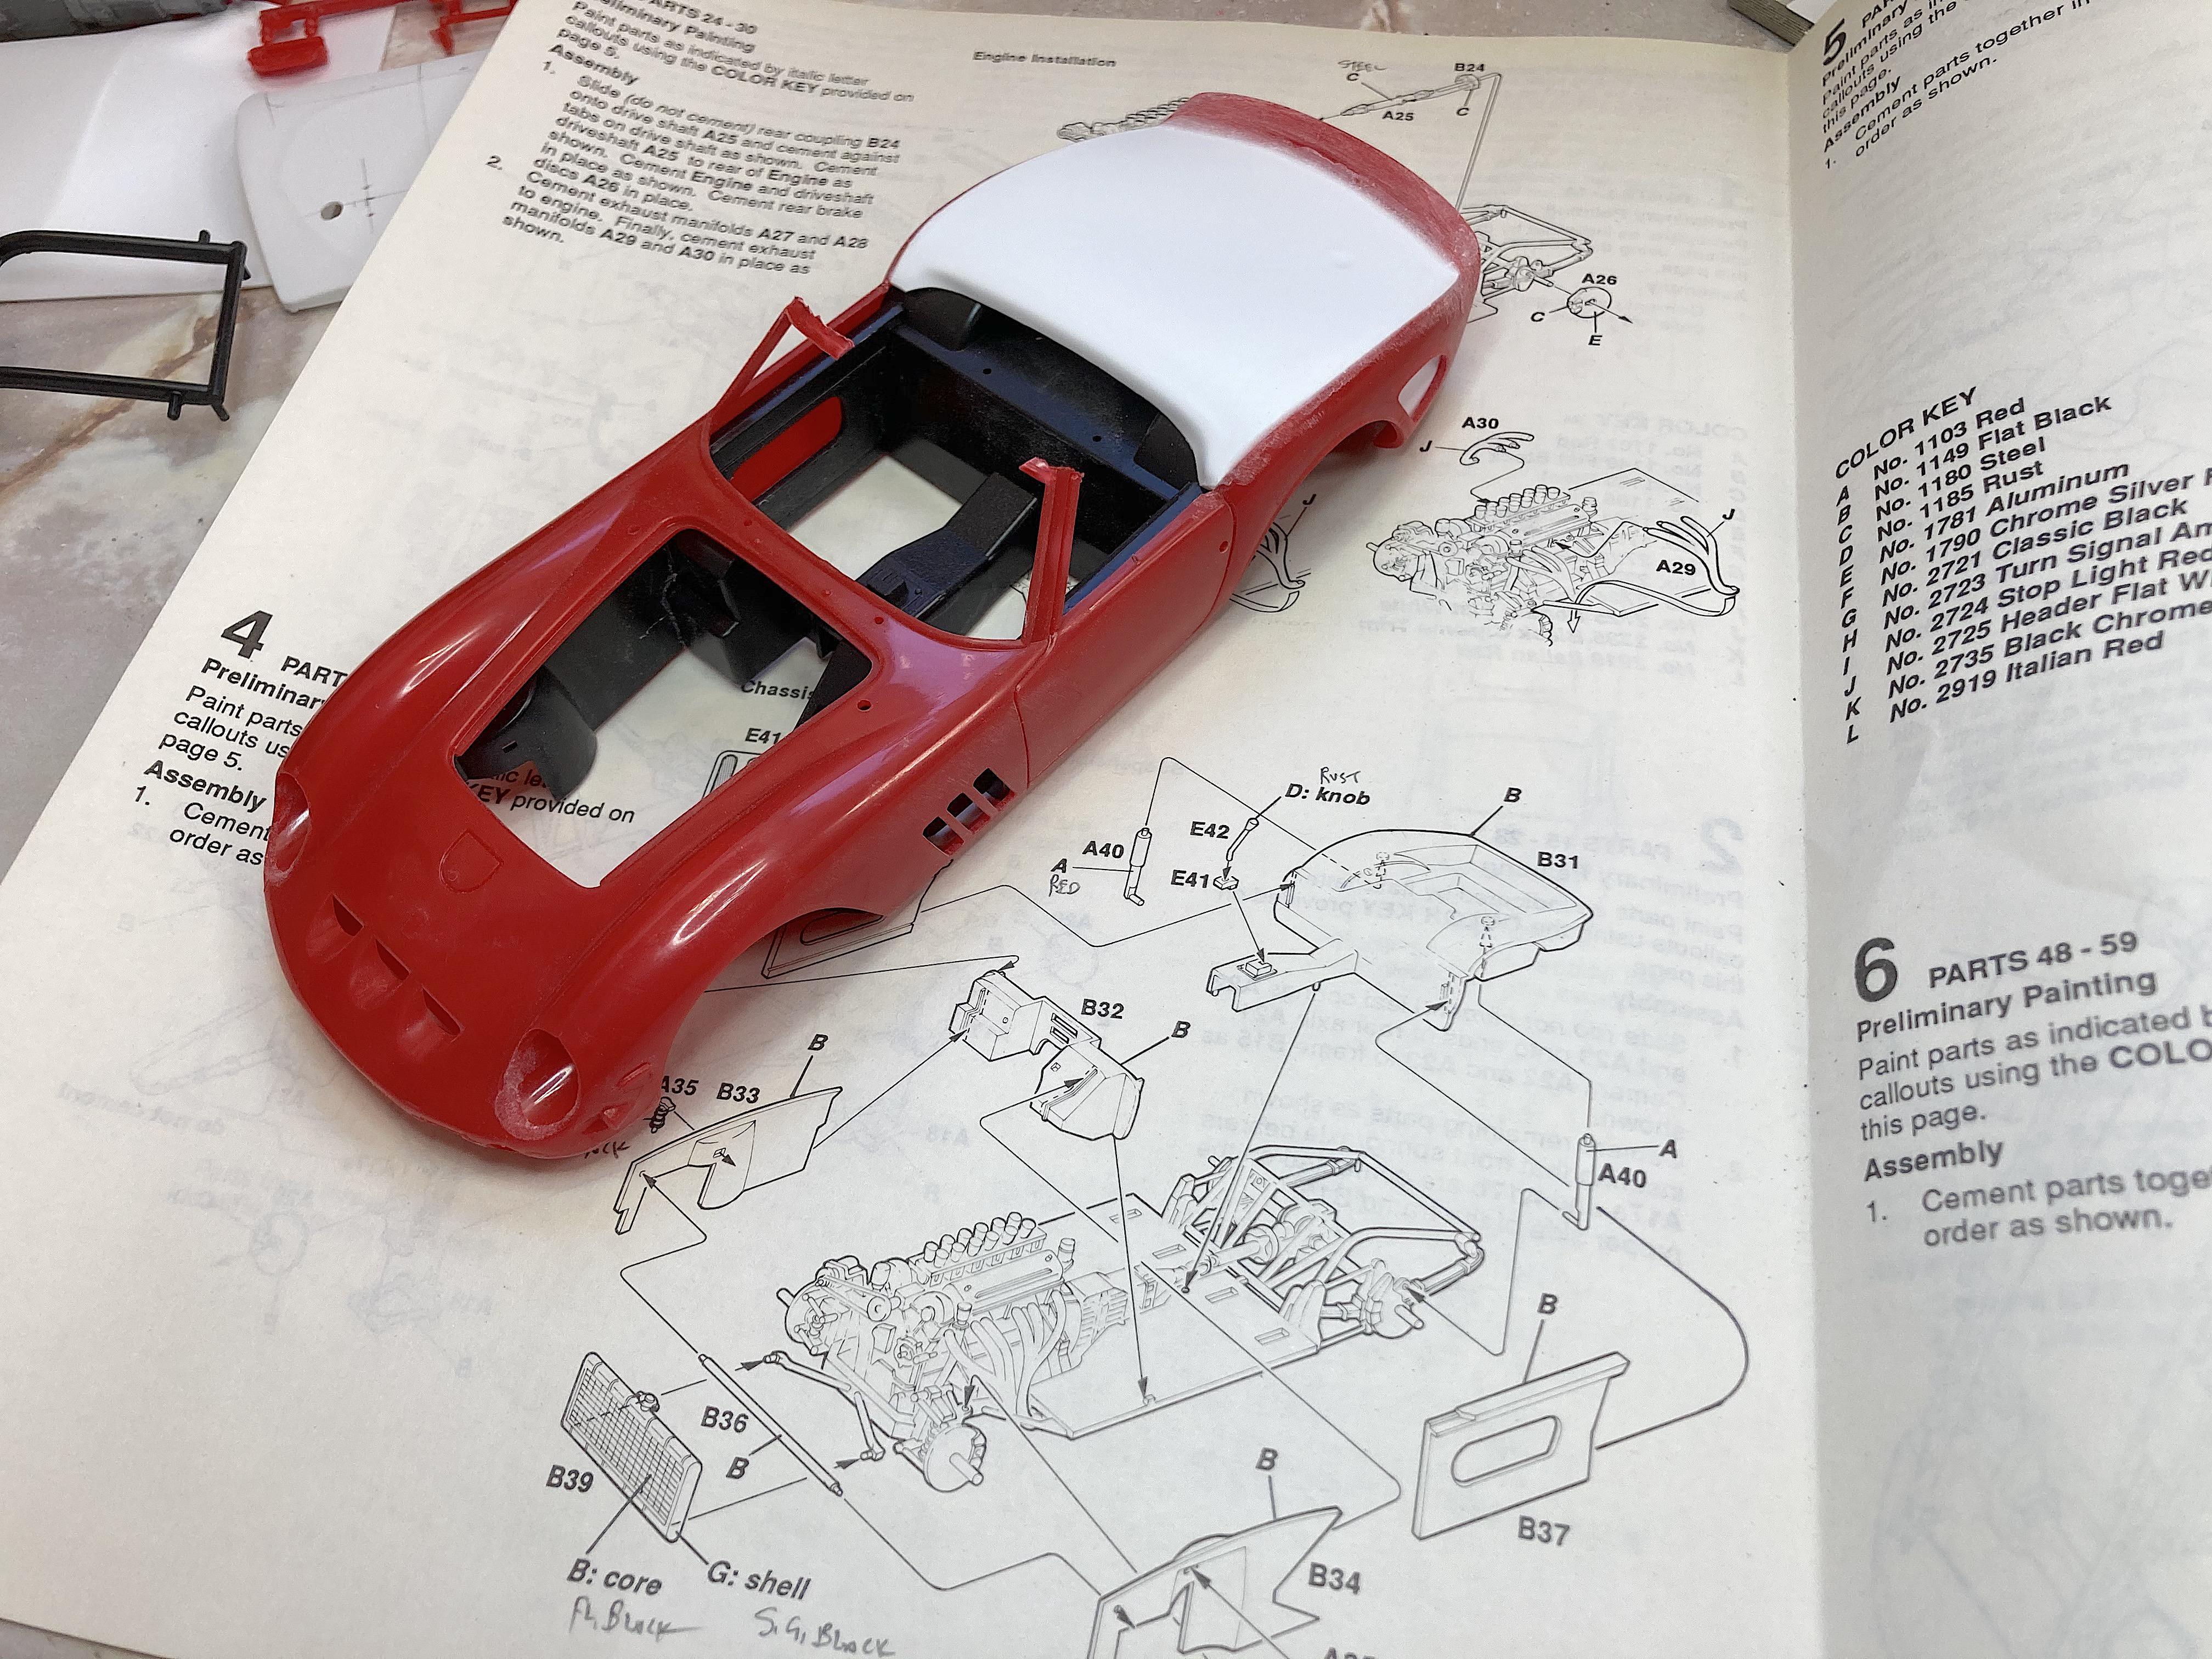
Because a Facebook group is having a Ferrari theme group build, it lit the fuse to get this done. I've only been wanting to build this 250 GTO Spyder for about 18 years. The pictures I took were in Prescott at a Cooper State rally, and the Monterey Historics 1994 when Ferrari was featured. There isn't much on the web about this particular car. It's not a real GTO for starters. This kit was chosen just because it was a bagged kit (no box), found at a model show. I have 3 other brand kits still in the stash, so I could build a real authentic model, someday. I had decided to build it this year anyway, so it got bumped up in my priority list. Comparison between kits (Fujimi kit was bought after taking this picture): My 2021 Resolutions list: Taking a look before starting: First session, got the body, interior tub, and short block glued together. It's a nice kit, so far everything fit together. Exception is a big gap filled with plastic, not a big deal. The headlight buckets needed some work to fit snug. All joints are lots of superglue with baking soda. Rough cut lines drawn on the body. I might do the whole deck with one piece of sheet styrene.
-
Welcome, do not apologize for pictures and translation. ? I have a rally version in the pile, so will watch with interest.
-
Statue Of Liberty!
-
RM Mack w snowblower....
89AKurt replied to gotnitro?'s topic in WIP: Model Trucks: Big Rigs and Heavy Equipment
Killer project! Love the chains. Need to keep an eye open for that mesh. -
is still floggible
-
The_Kyza PhotoShop rendering video
89AKurt replied to 89AKurt's topic in General Automotive Talk (Trucks and Cars)
Thanks for the link. Busy dude! -
Revell 57 Cadillac Brougham I have that in my stash, afraid to touch it! Cool that this old topic was bumped.
-
but not Route
-
Another world of goodies to blow money on, thank you! ?
-
This be me, want the model but have too many now, looks like fun, but OMG ...... What is the source of the photo-etch mesh?
-
Model show reference? ?