89AKurt
-
Posts
8,426 -
Joined
-
Last visited
Content Type
Profiles
Forums
Events
Gallery
Everything posted by 89AKurt
-
truck overturned on
-
humming a tuneup
-
I usually get models to build, not for collector speculation. In this case, I missed getting it from Hobby Search when it was available, and have seen ridiculous asking prices on eVilbay. I suspect the Ferrari license was not fully approved, no hologram sticker on the box. Seller shipped in a bubble pack bag! So of course the Post Office damaged it. It looks nasty, parts rattling around when I shake the box. I just messaged the seller. So I could open it, to see if the glass got broke, which would make it junk. If it's just a few small solid color parts, I could live with it. Will see what the seller offers, such as a partial refund. Doubt they have another one. This a sign that I should stop buying more models?

-
of Rosa's shoe
-

"Bring Out Your Dead" Completion Build--ROUND 2 Is On!
89AKurt replied to Snake45's topic in WIP: Model Cars
My project is back in storage, so will resurrect next round. LOL -
That's why I asked! Rather have others be the guinea pig than me. LOL This is why I'm not a fan of Revell kits, same thing happened on the 240Z. Think it would be wise to get Plastruct 0.02" clear plastic for cases like this. But the most important thing is, yours is built! ~thumbs up~
-
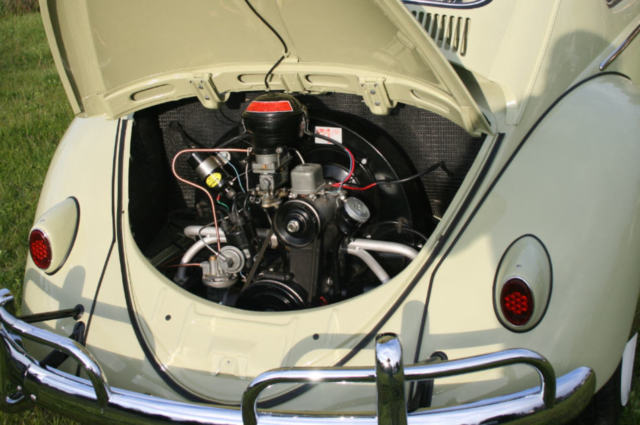
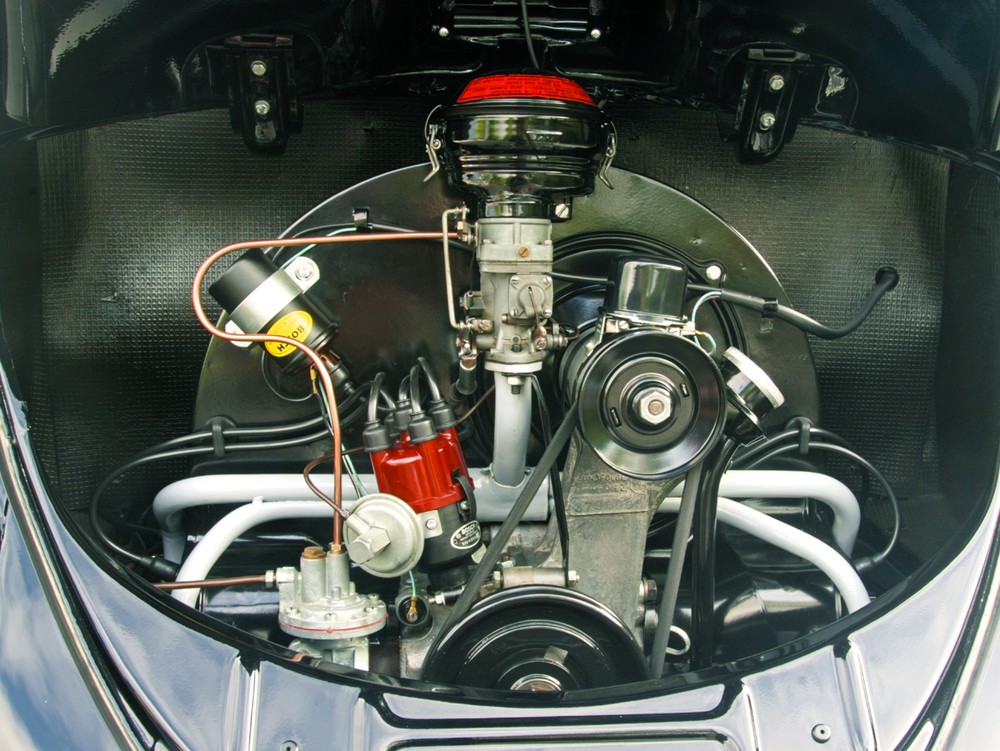
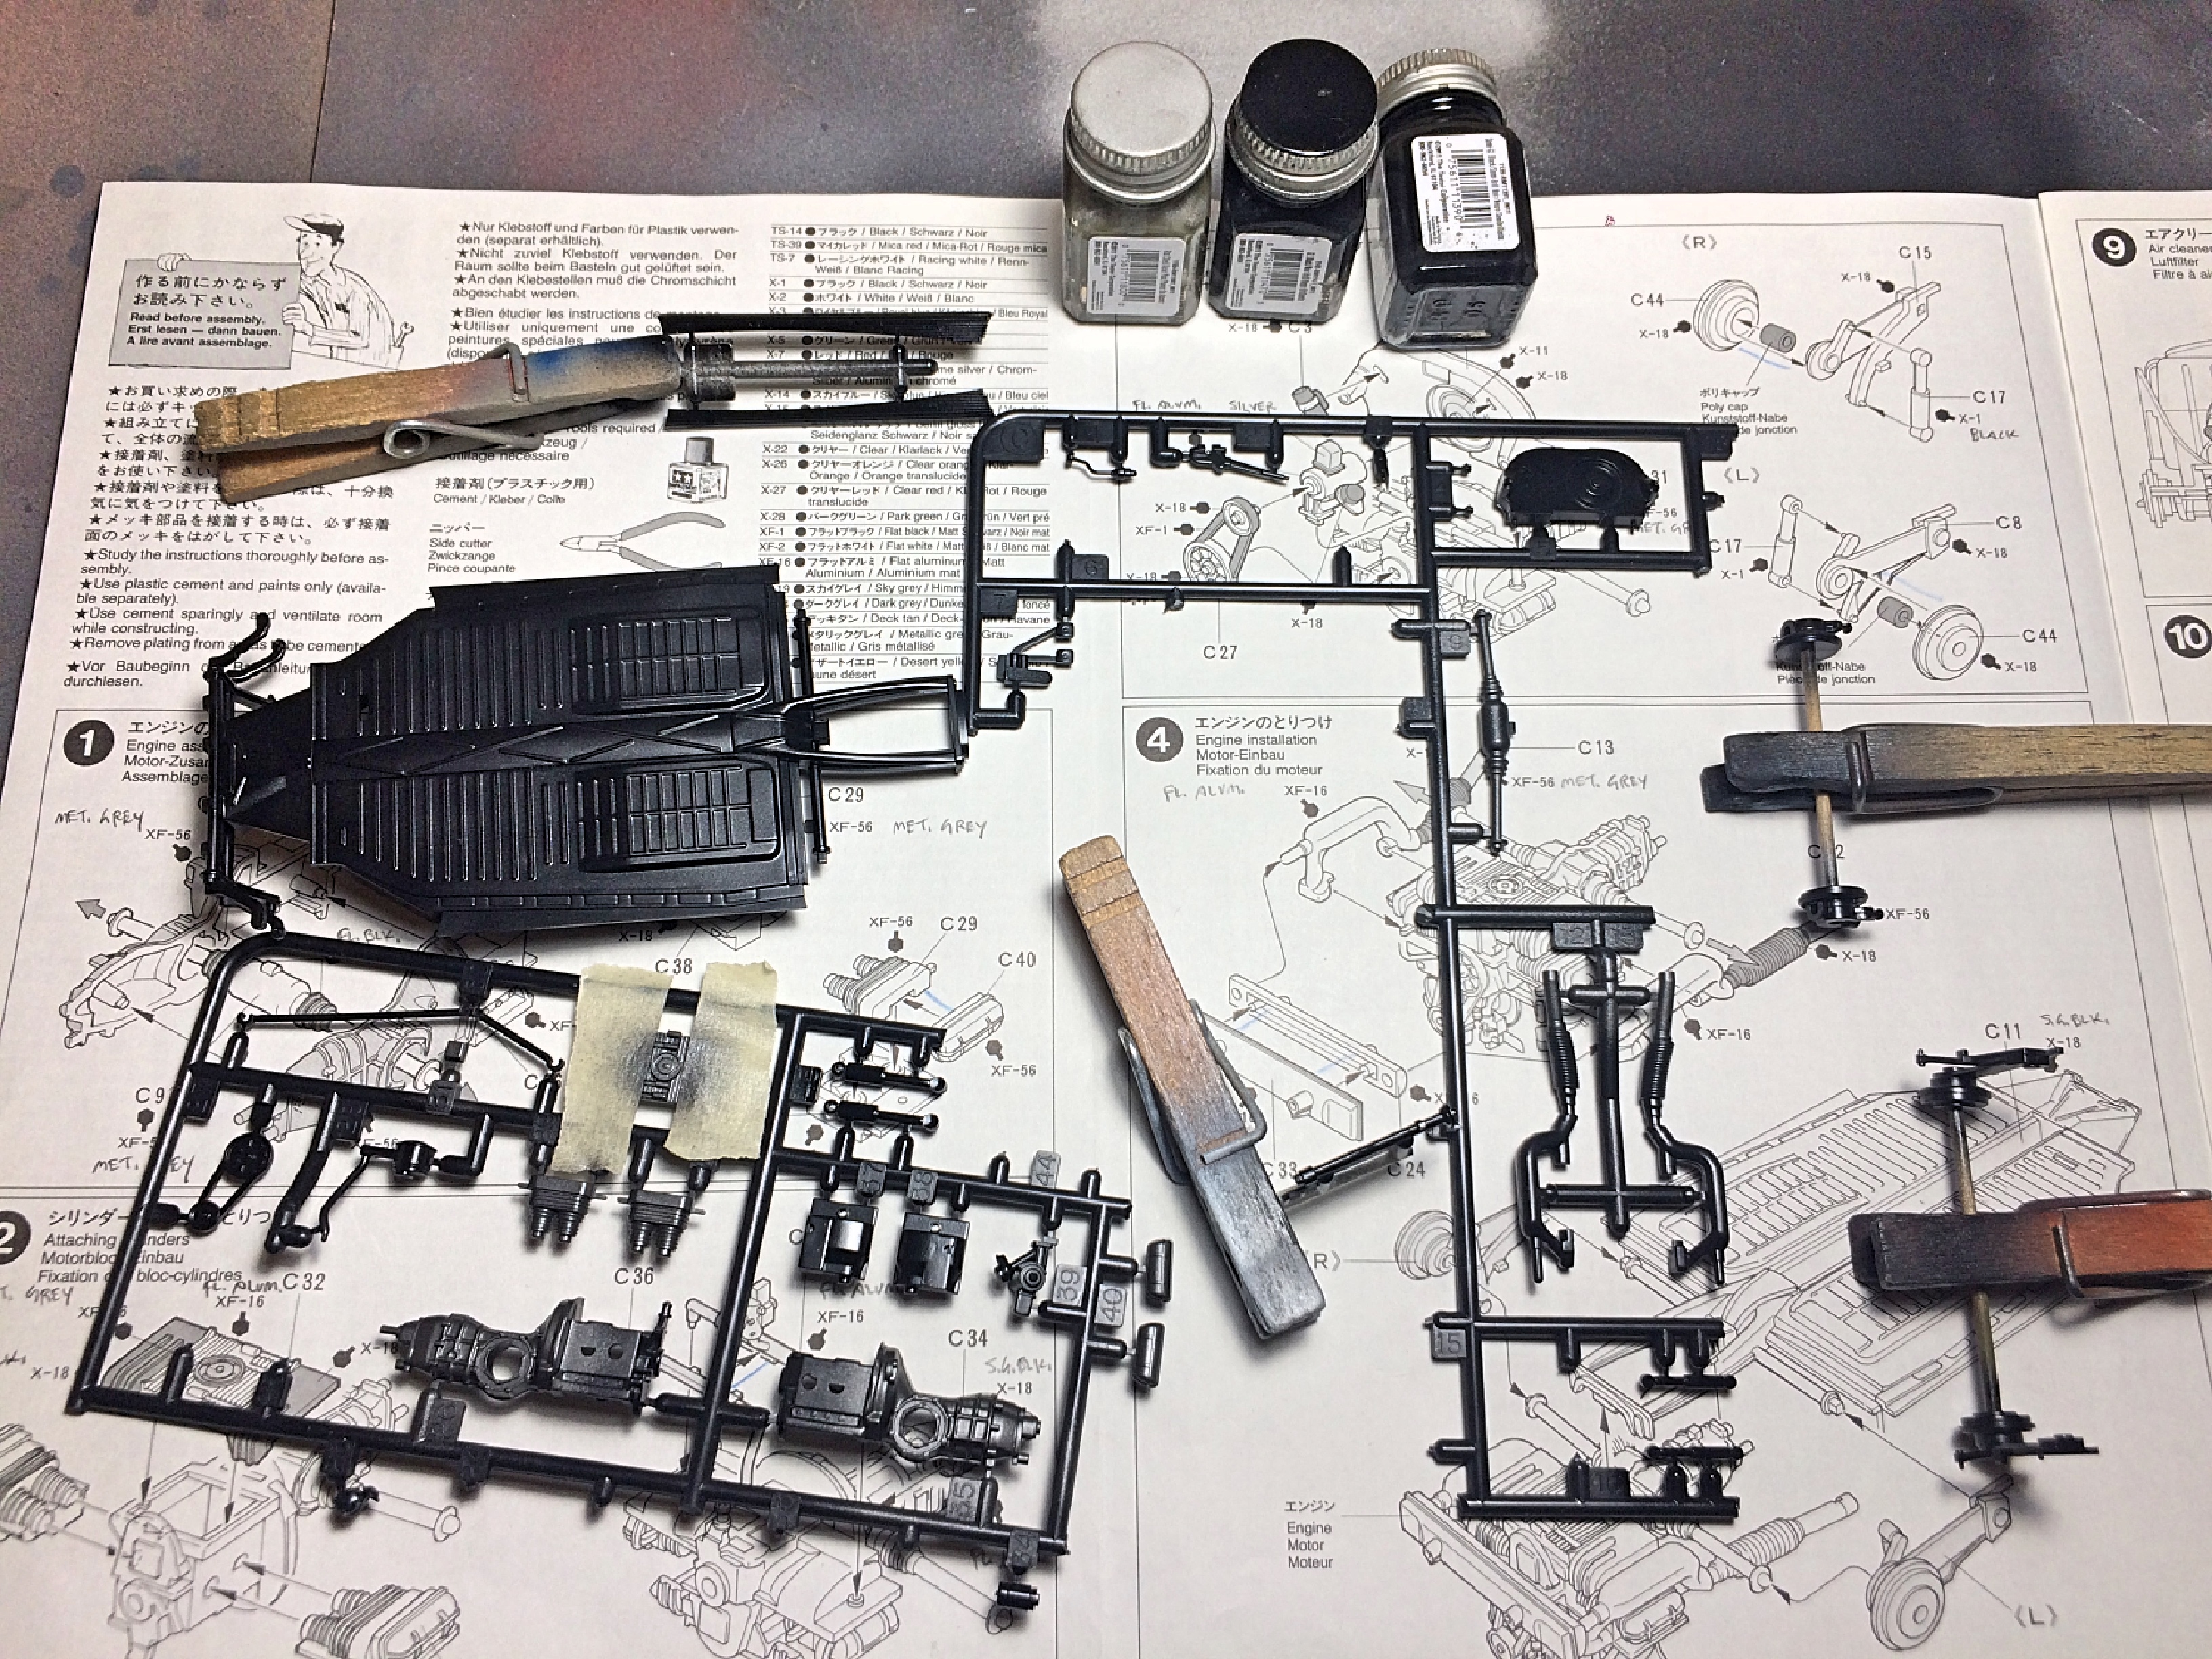
Good to know! How many millions were made? For example, I looked at the Hasegawa Kubelwagen, the pulley has 3 "holes", so it would not match the pictures I'm looking at, so not worth the effort. I know right? Thank you very much! This helps with the plug wires too. Hilarious stories! Thanks for the information. My wife's dad had a 2000 Cadillac, it's battery was under the back seat too, when it needed to be replaced, I avoided doing it because there is a box and vent, the dealer said it took two hours to accomplish the task. Baby step last night, sprayed the Testors flat aluminum.
-
Good to see one built! What would you recommend for lowering it a little?
-
Khrushchev crashed completely
-
separated with foil
-
That came out really nice! Just so everyone knows, he had moved recently, and his website is not working due to technical issues. He was able to make a few parts for me. Need to contact via email.
-
, but Tacky Glue
-
I was wondering about the name placement, and font size. From what I can tell, they added stickers after qualifying. The first event, before the race, when they were testing the brand new car, there were hardly any logos.
-
I want to pick your brain. On Facebook someone also owned a few, said the 1300 was unique to '66. Is there a huge difference in how the engine looks? I'm already primed to change the pulley. I also noticed there is insulation behind the engine, the kit has nice ribbed metal, but there is the part gap which would be nicely hidden with a piece of cigarette package foil painted flat black. I see a wire that goes through the firewall, does it go to the battery, which the kit does not have?
-
I have the instructions! I just have not seen these two tiny parts anywhere, all I need is which step shows where they go. Since you built this before, need to ask about how the engine deck lid operates. I would like to add a magnet, and add a steel plate to the hinge, so it stays up when opened. But it appears there is no way to figure it out until final assembly. Is there any room in there, and does the hinge barely miss the shroud or other engine parts as it is? I'm even thinking about adding a spring to the front boot lid; does it actually pivot on the hinge parts, or does it just rattle around sort-of fit with a lot of slop so it clears the body? I'm also thinking of the engine pulley, the part looks really nice, but looking at this engine picture they are plain round. I'm going to look at the Hasegawa Kubelwagen kit to see what it looks like, can copy if "correct".
-
in whale oil
-
The evil HB logos look good. That tire, looks more proper than the slicks.
-
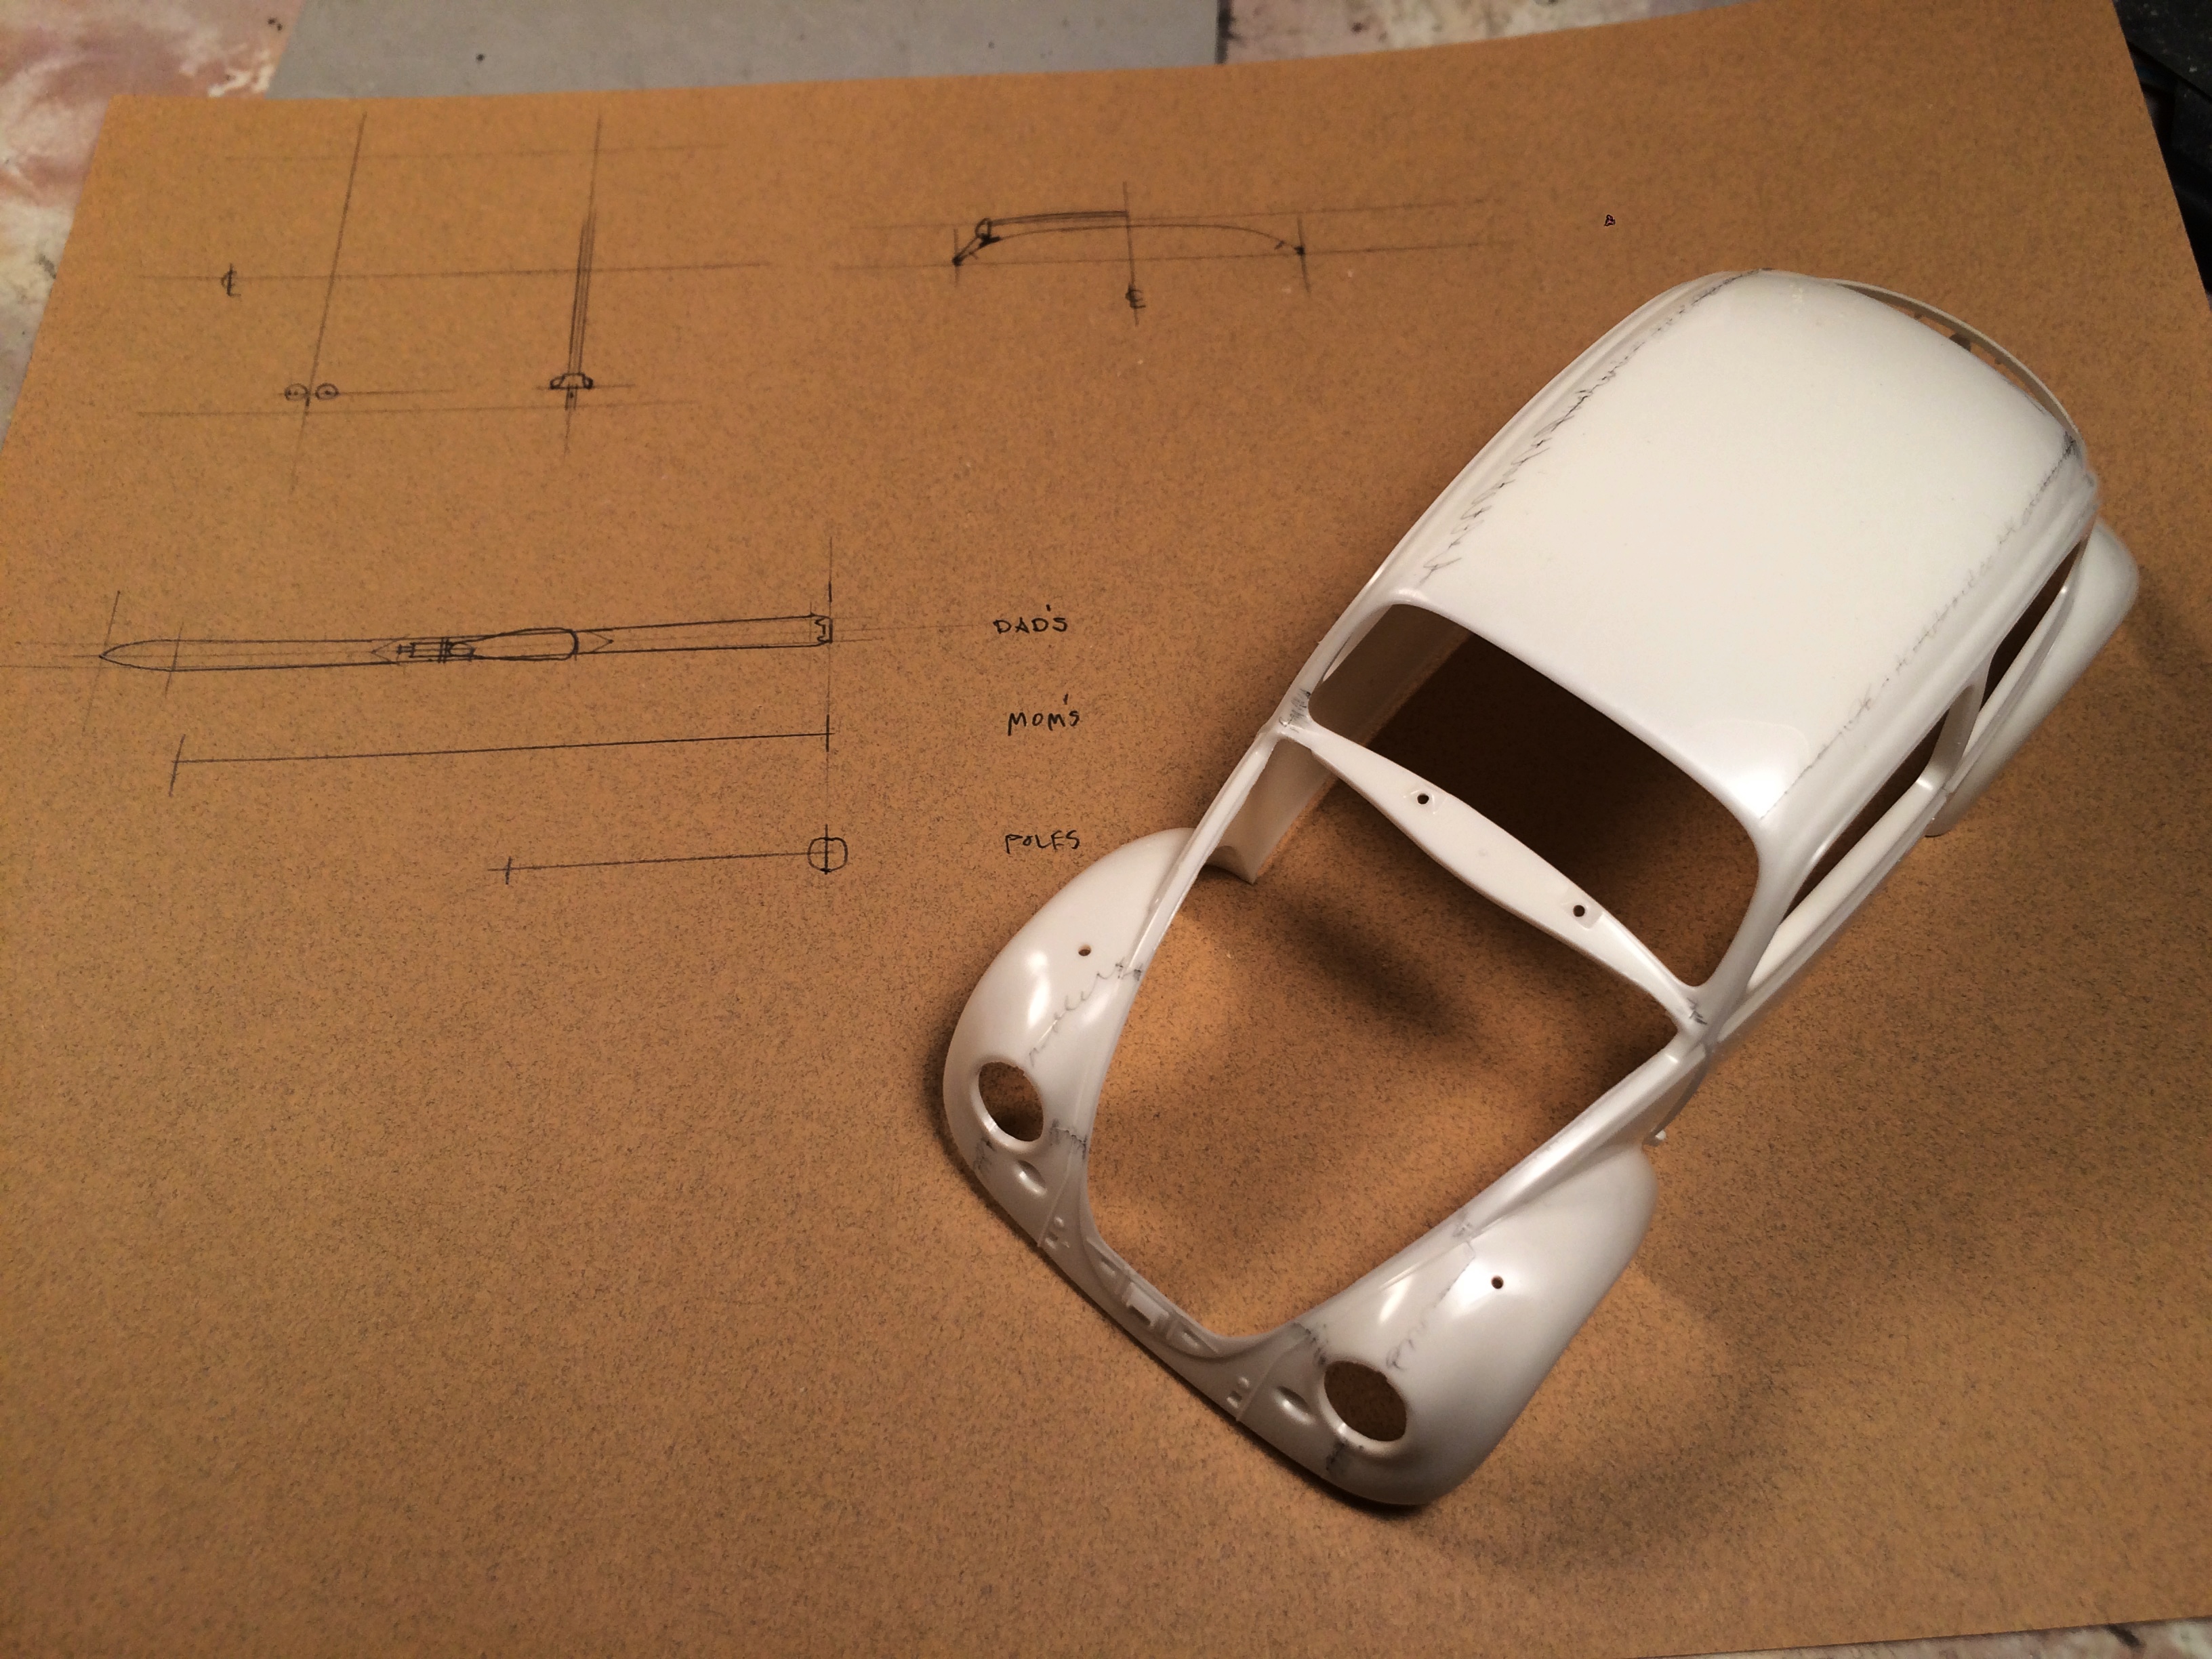
Appreciate you explaining what to look for. According to the 'Scribd' blog, windshield area increased 11% and slightly curved, door window 6%, rear side windows 17.5%, and rear window 19.5%. If I was to do that, it would require redoing every piece of glass with trim. That's the sort of OCD that has put too many of my projects back in the box, for decades. For the casual observer, the rear window would be most noticeable, then the windshield. Reducing the glass size would be easier than increasing, I can envision how to do the trim with solid plastic strip, which leads to needing to paint/chrome the inside too. No operable rear window, that's good. Now I see the vent wing divider is sloped on the newer model. And after all that work, would feel obligated to get it to someone who could make resin copies. Then I would have to make a fabric headliner. Oh yea, should the door lock slot be vertical or horizontal? I'm happy to get started on painting. Evaluated the mold lines on the body, really had to look for them! Always amazed at Tamiya quality. Drew the rack and a ski to scale. Thinking about steam bending real wood for the skis, which would require making a Corian form.
-
on Jimmy Buffet's
-
If it was me.... I would consider the purpose of the original hinge design. From what I can tell, it's not really a proper hinge, that requires a pivot point, but it's more of a locator pin, so the hood comes off completely? If it's not operable, above advice will work. But..... but if you want the hood to to stay on the car, make a metal part with a real pin. Thin down the underside of the part, superglue sheet metal on, hide with 'insulation'. I see that I never did a proper WIP for my Monster Miata, so here is a picture of my hood hinge. If you care to go this route, let me know.
-
rote spillchick's avatar
-
Thanks for your comment on my WIP. I see you started this 2009. Seems like the kit has become gold-plated.
-
Nice... and you have been working on it almost as long as mine has been sitting in the box. LOL The slotted wheels, I've discovered that is an issue when back-dating VWs. I just ordered wheels from Best Model Car Parts, I got the '57 Beetle conversion last year, inquired about getting wheels and engine lid, he was willing to do my special order.
-
Thanks for your comment on my WIP. That isn't the Tamiya kit? I like how you did the camber for the back wheels, that's like a trademark stance.
-
Oh good, I needed to ask where the two tiny round parts, C4, go. I can't find in the instructions! That's the primary reason I'm doing it, literally frozen in time. IMHO a model looks more realistic when weathering is done. Very good, thanks for the links!