89AKurt
-
Posts
8,426 -
Joined
-
Last visited
Content Type
Profiles
Forums
Events
Gallery
Everything posted by 89AKurt
-
for that prankster
-
Up on a mountain in Arizona is the place to be during the summer.

-
Very interesting. Much easier than looking at the Magic Eye images where you had to stare just right to see a 3D image pop out. ? When I was growing up, dad had a friend who was a PhD studying the brain at UofA. One dinner night, he got on a discussion about what he was doing, and he lost us after how the synapsis work. Sad that he was inflicted with Dementia. We are an amazing thing, until we aren't.
-
cats in armored
-
only when gold
-
Distortable body panels would make a good stealth getaway vehicle.
-
Got a "took you long enough" project done yesterday, pleased to take out the trash today and not have to hop skip and jump over sand and loose flagstone. Last year the first water filter system took a dump and that company was not in business, it was buried and in a plastic box that the sun had trashed. The steel cabinet came from mom's estate, cut the shelving so the new filter is hidden in that. Had to pull up flagstone to run new water pipes. Some of that flagstone is new, first time I infilled an area (always been new, working outward). Still have a hundred other projects to do on The Patina Palace. ?
-

What did you see on the road today?
89AKurt replied to Harry P.'s topic in General Automotive Talk (Trucks and Cars)
Saturday morning cruise, saw this perfectly preserved Ford. I'm frankly bored with all the hot rods that cost the price of a house, they are a dime a dozen. To see something like this being driven is extremely rare. Looked like the original engine too. Even the license plate is period, it's also Yavapai County. Wish the window was down more, interior looks like it was never used. The edge of all the laminated glass looked like mica. Bet it's history is interesting.
-
Today 100 years ago, the first model of a Studebaker was released.
-
were melted into
-
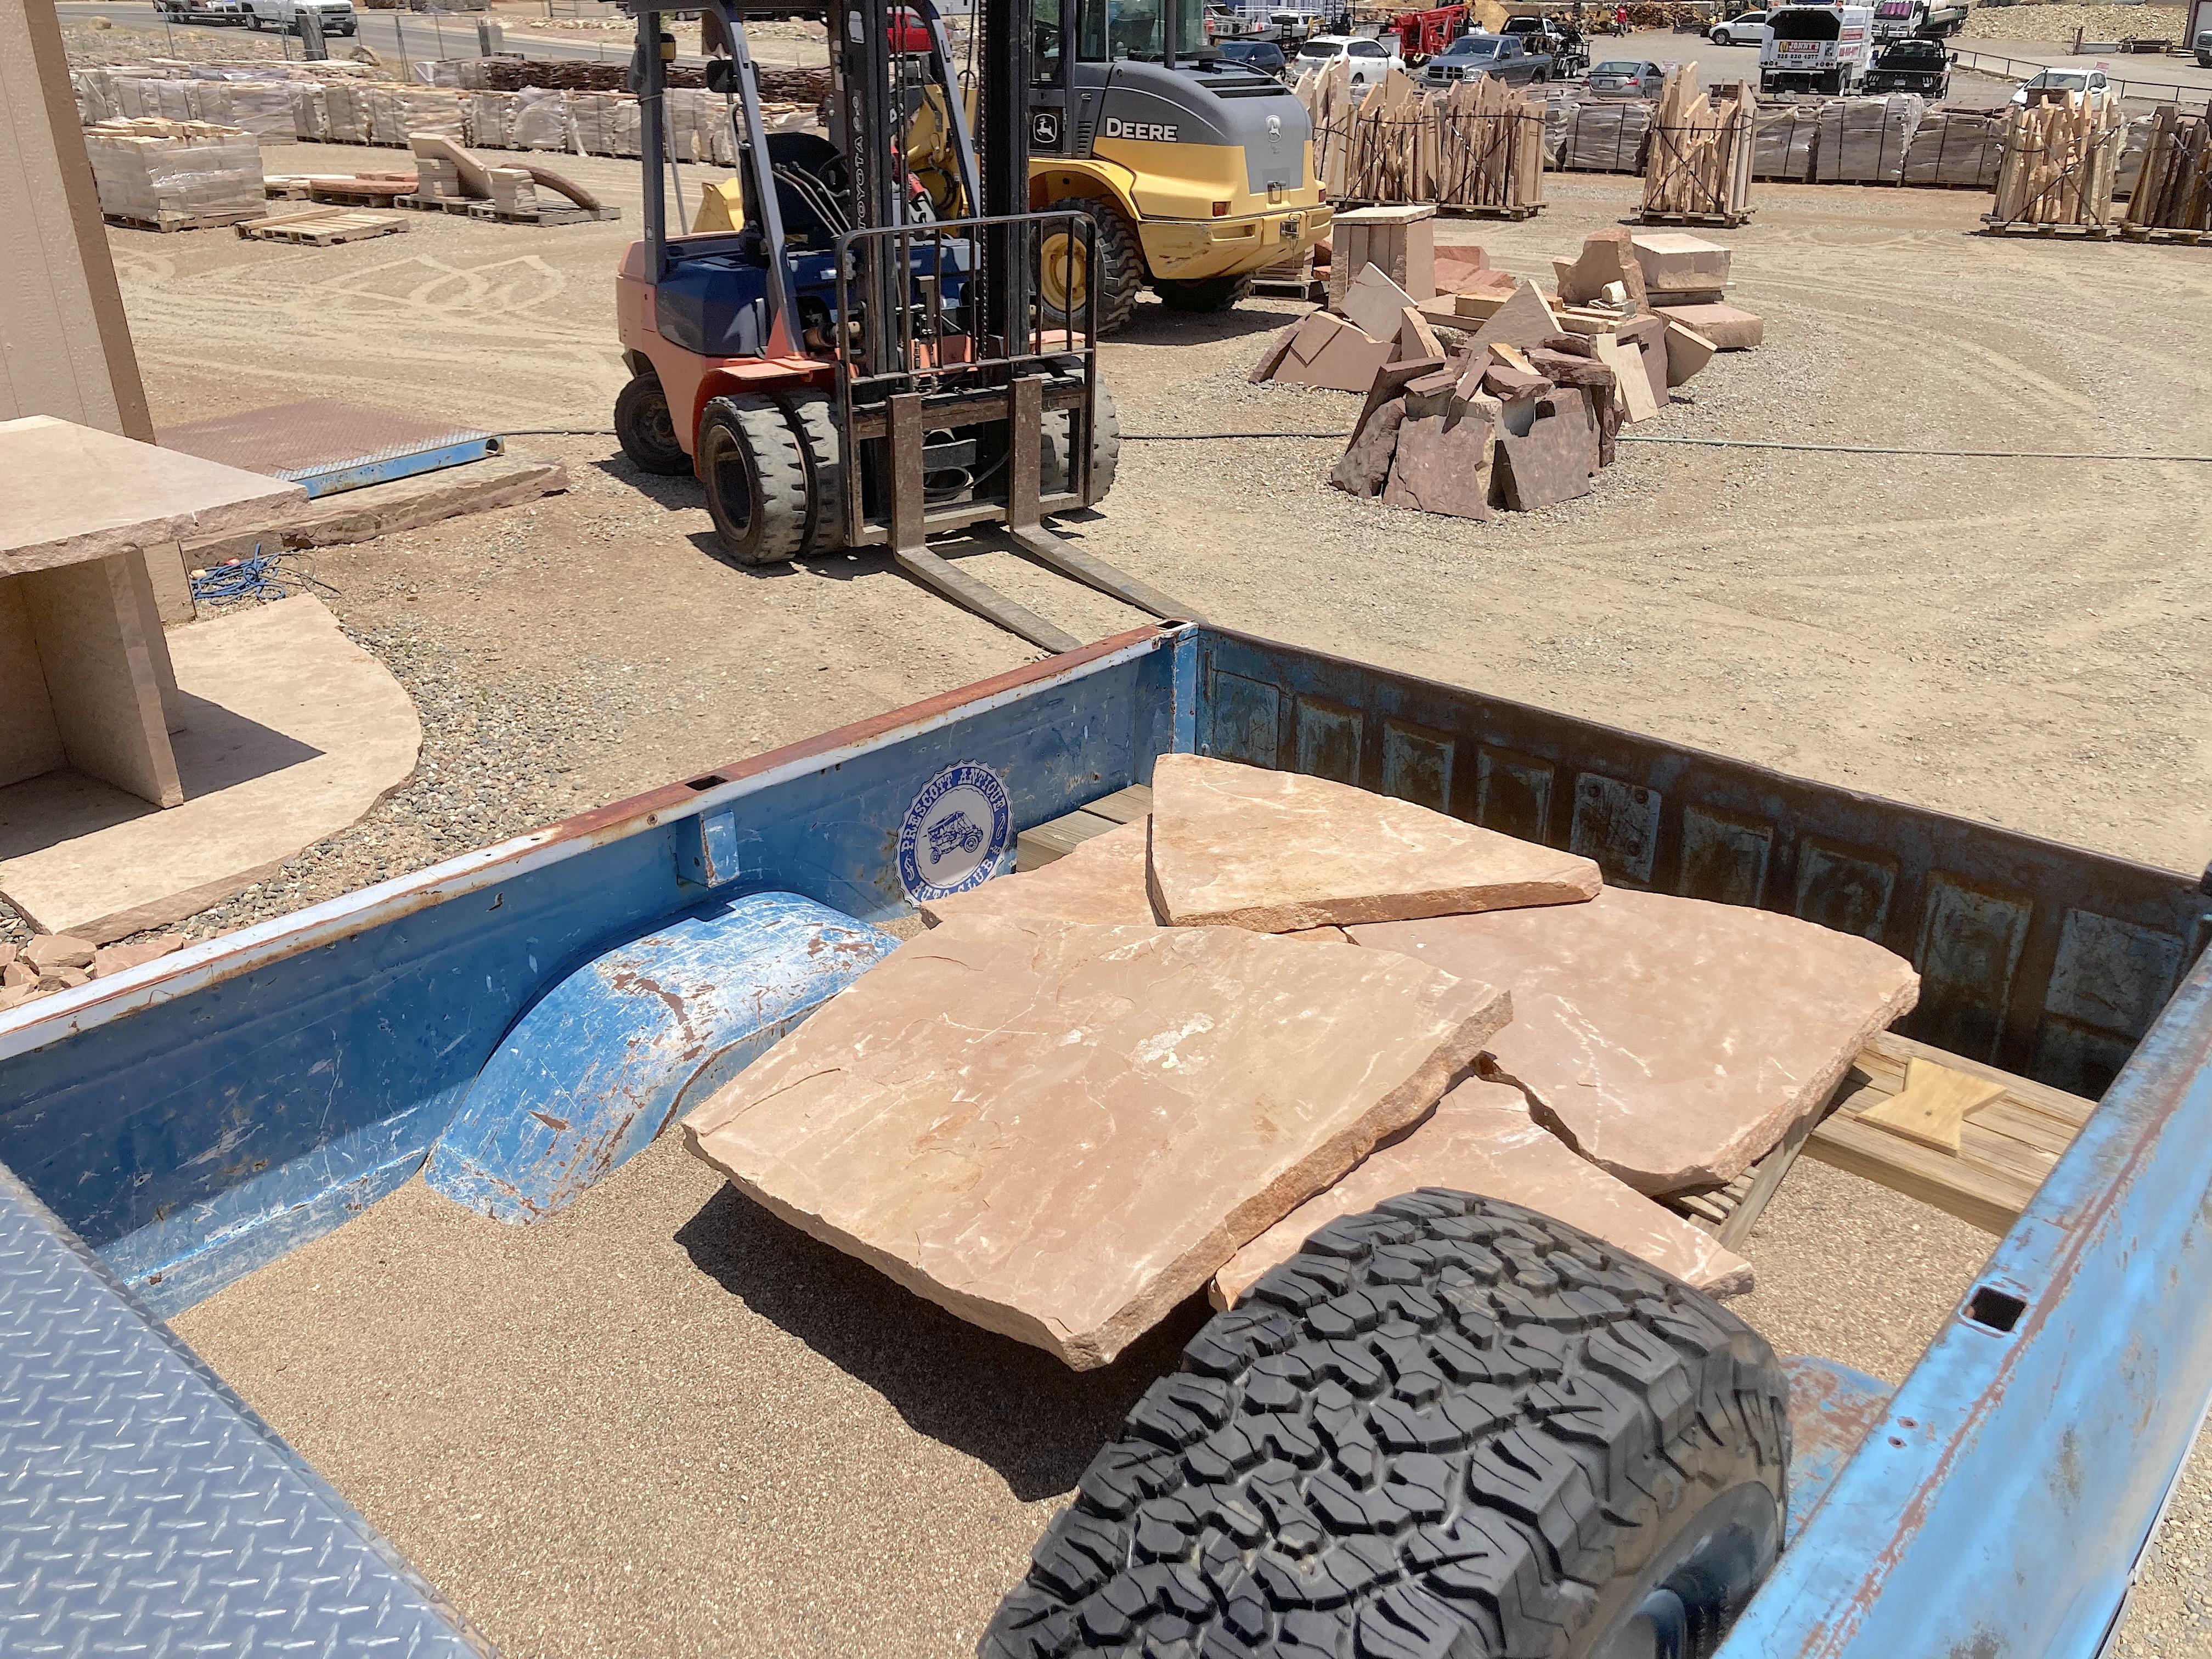
Think it's safe to say I have recovered from the Amoxicillin side effects that wiped me out last month. Yesterday got cloudy and was nice to start repairing a flagstone patio that was torn up several months ago. Needed sand, I never bought mortar sand, always found a wash, it's grain is a little larger, and it's free (ignore the gas for the long drive). Shoveled a short half ton this morning. Then I went to the stone yard, and got 250 pounds (minus pallet) of flagstone. I don't need no stinkin' gym! I'm pleased as punch that Blue Cloud is running like a champ. ?
-
15 business days ago I ordered a fancy cast aluminum differential cover from a website called Racing Power Company, and I still don't have it. Thought I gave plenty of time before the appointment with my mechanic, but NO!!!! I bet nobody who actually races gets stuff from them, if they respond to my email I will cancel the order, to heck with them. Summit at least has customer service, but that part was useless.
-
Fuzzy bean bags
-
Had to come up a generic term, so there would not be a confusion about what to call an abandoned vehicle. Not that I'm an authority, but I think 'barn find' would be a complete vehicle that isn't a rust bucket. Junk yard finds would be parted out, more rusty, qualify for making a Rat Rod. May I hijack your topic? What should my pickup be called? I was thinking 'Survivor Rod'. It was not found in a barn, must have sat outside its entire life. I have a new crate engine, disk brakes with power boosted master cylinder, and other mechanical components, but it's not an outright Hot Rod. It's not a Rat Rod, it's complete. I saved it from someone who was going to bag it. I explored an abandoned segment of Route 66 outside of Williams.
-
with Pink Floyd
-
to paint dry
-
What did you see on the road today?
89AKurt replied to Harry P.'s topic in General Automotive Talk (Trucks and Cars)
I saw one at the Williams show. Owners are attention whores in the wrong place. I *have to* post this:
-
What did you see on the road today?
89AKurt replied to Harry P.'s topic in General Automotive Talk (Trucks and Cars)
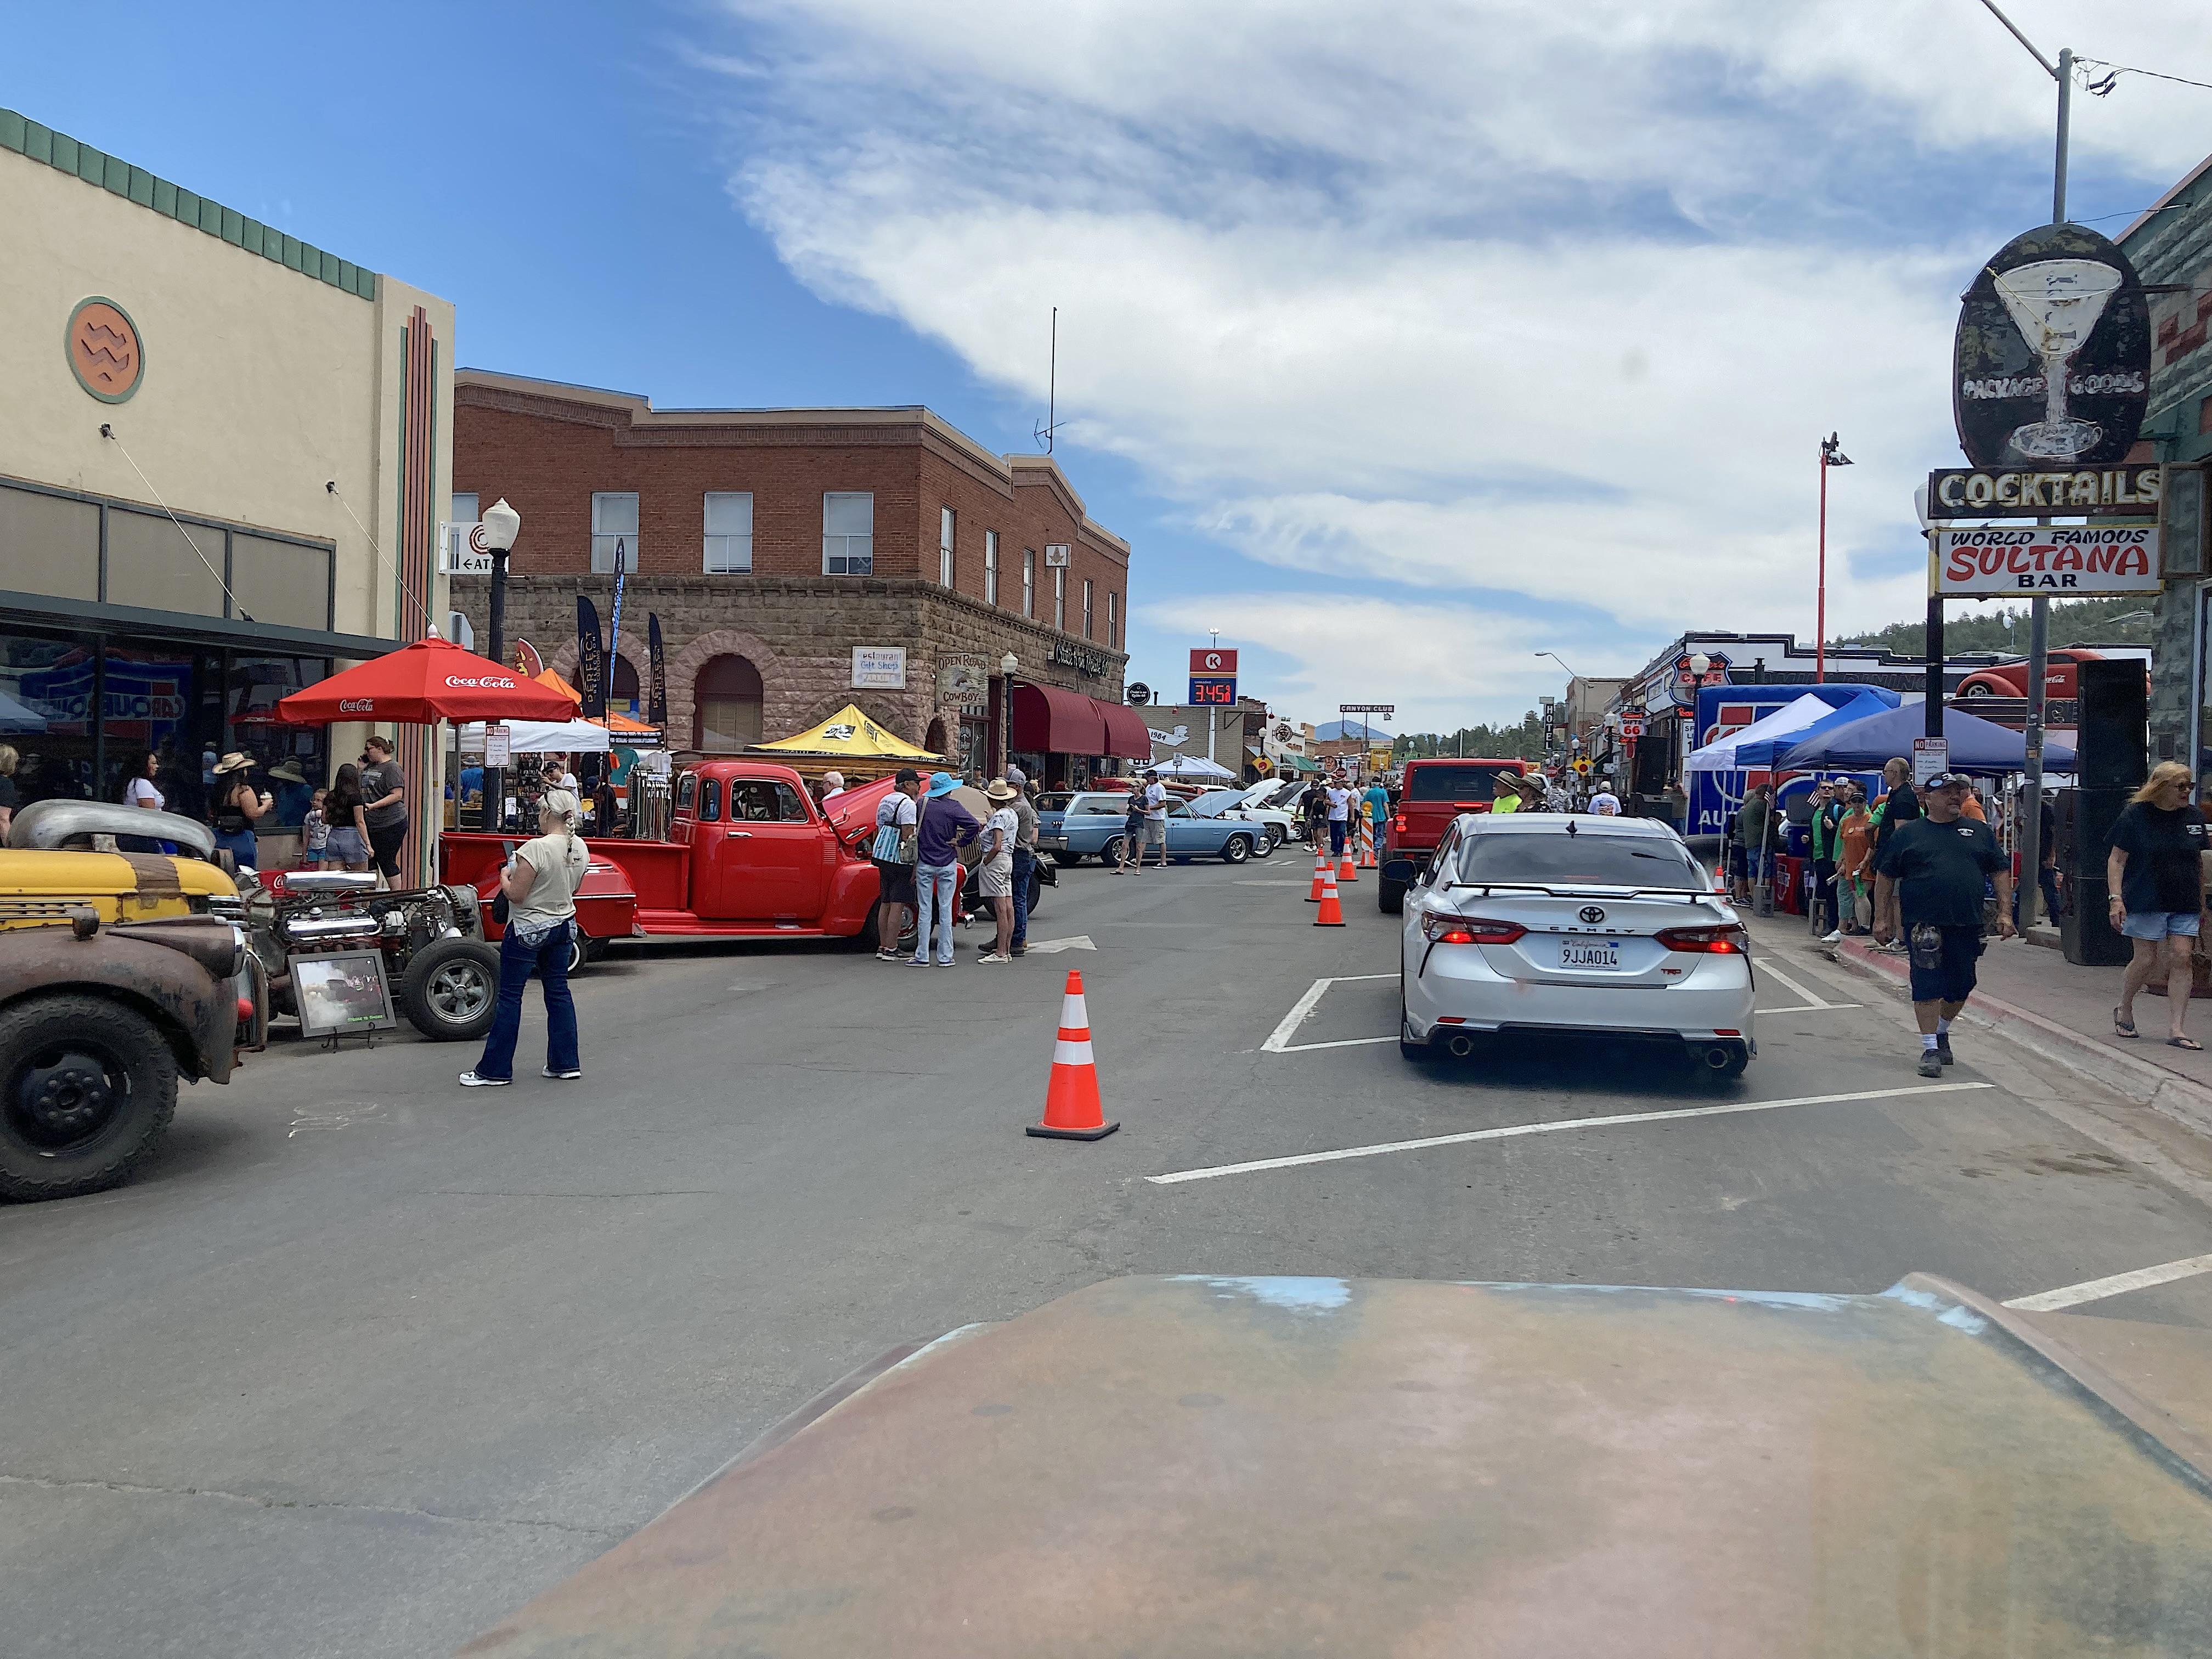
This was yesterday.... it was my birthday so I did a road trip with Blue Cloud. Williams (AZ) had their annual car show. Took the Chopper bicycle, which is the way to see this lineal format that stretches through the whole town, rode to the east end and took my time going west. Then I drove up Bill Williams Mountain. By the time I drove through around Noon, it was a madhouse. Rush hour. ? Paced that Jeep in granny gear for a few blocks.
-
the secret base
-
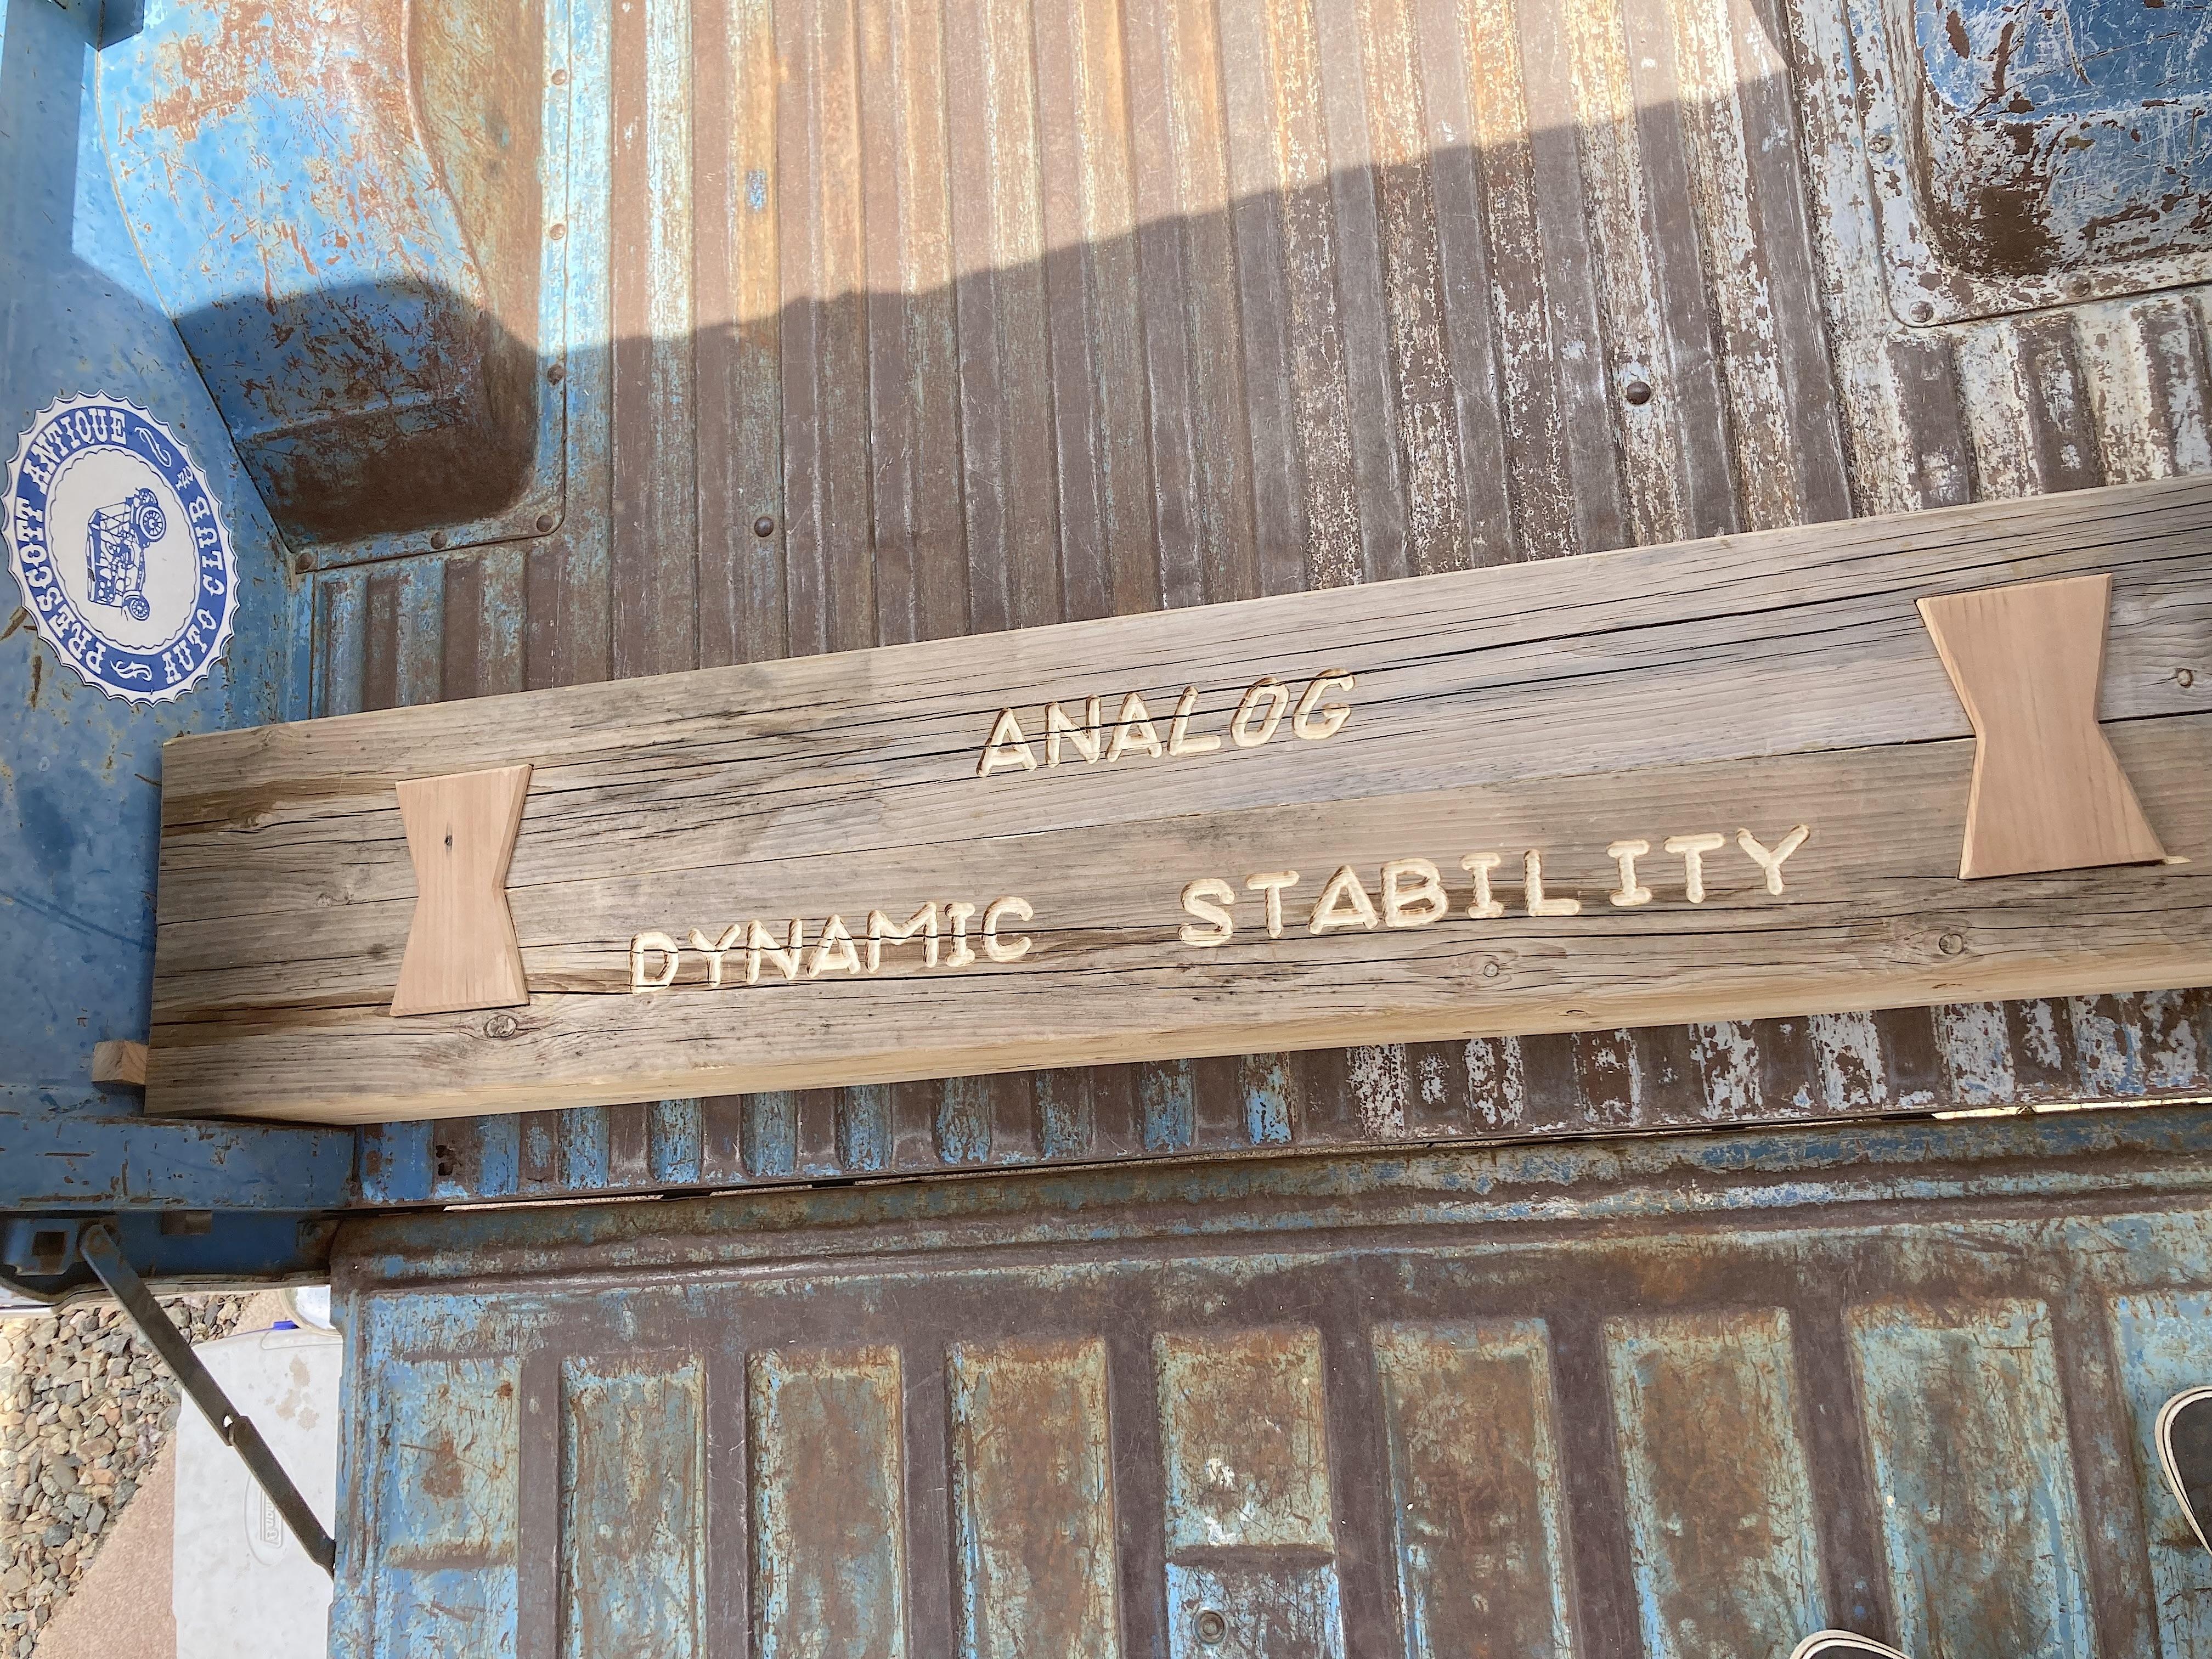
Did some woodworking! I've always like butchering wood, haven't really done much, now that I'm retiring, this could keep me out of the bars. My mechanic suggested throwing some sandbags in the back of Blue Cloud, and I just couldn't do that. Got a 92 pound square log (yes not all logs are round). Dovetails can be lifted out, to move them out. I've done signs before, so I had to name the Dorky Cheapskate modification.
-
uniform of Marine
-
Did a very nice job. Cool to see a rare kit get built, that's what they're for.
-
under every bridge
-
Tsk tsk, I should block you. ? I do much of the time too, and at 6 o'oclock. I move around more with the thin rim '68 Chevy than the '16 Honda which as as David pointed out 'hint-folks-hands-here' indents. Appreciate the confirmation from several of you.
-
destroying the Daytona