89AKurt
-
Posts
8,426 -
Joined
-
Last visited
Content Type
Profiles
Forums
Events
Gallery
Everything posted by 89AKurt
-
Jubba The Hut
-
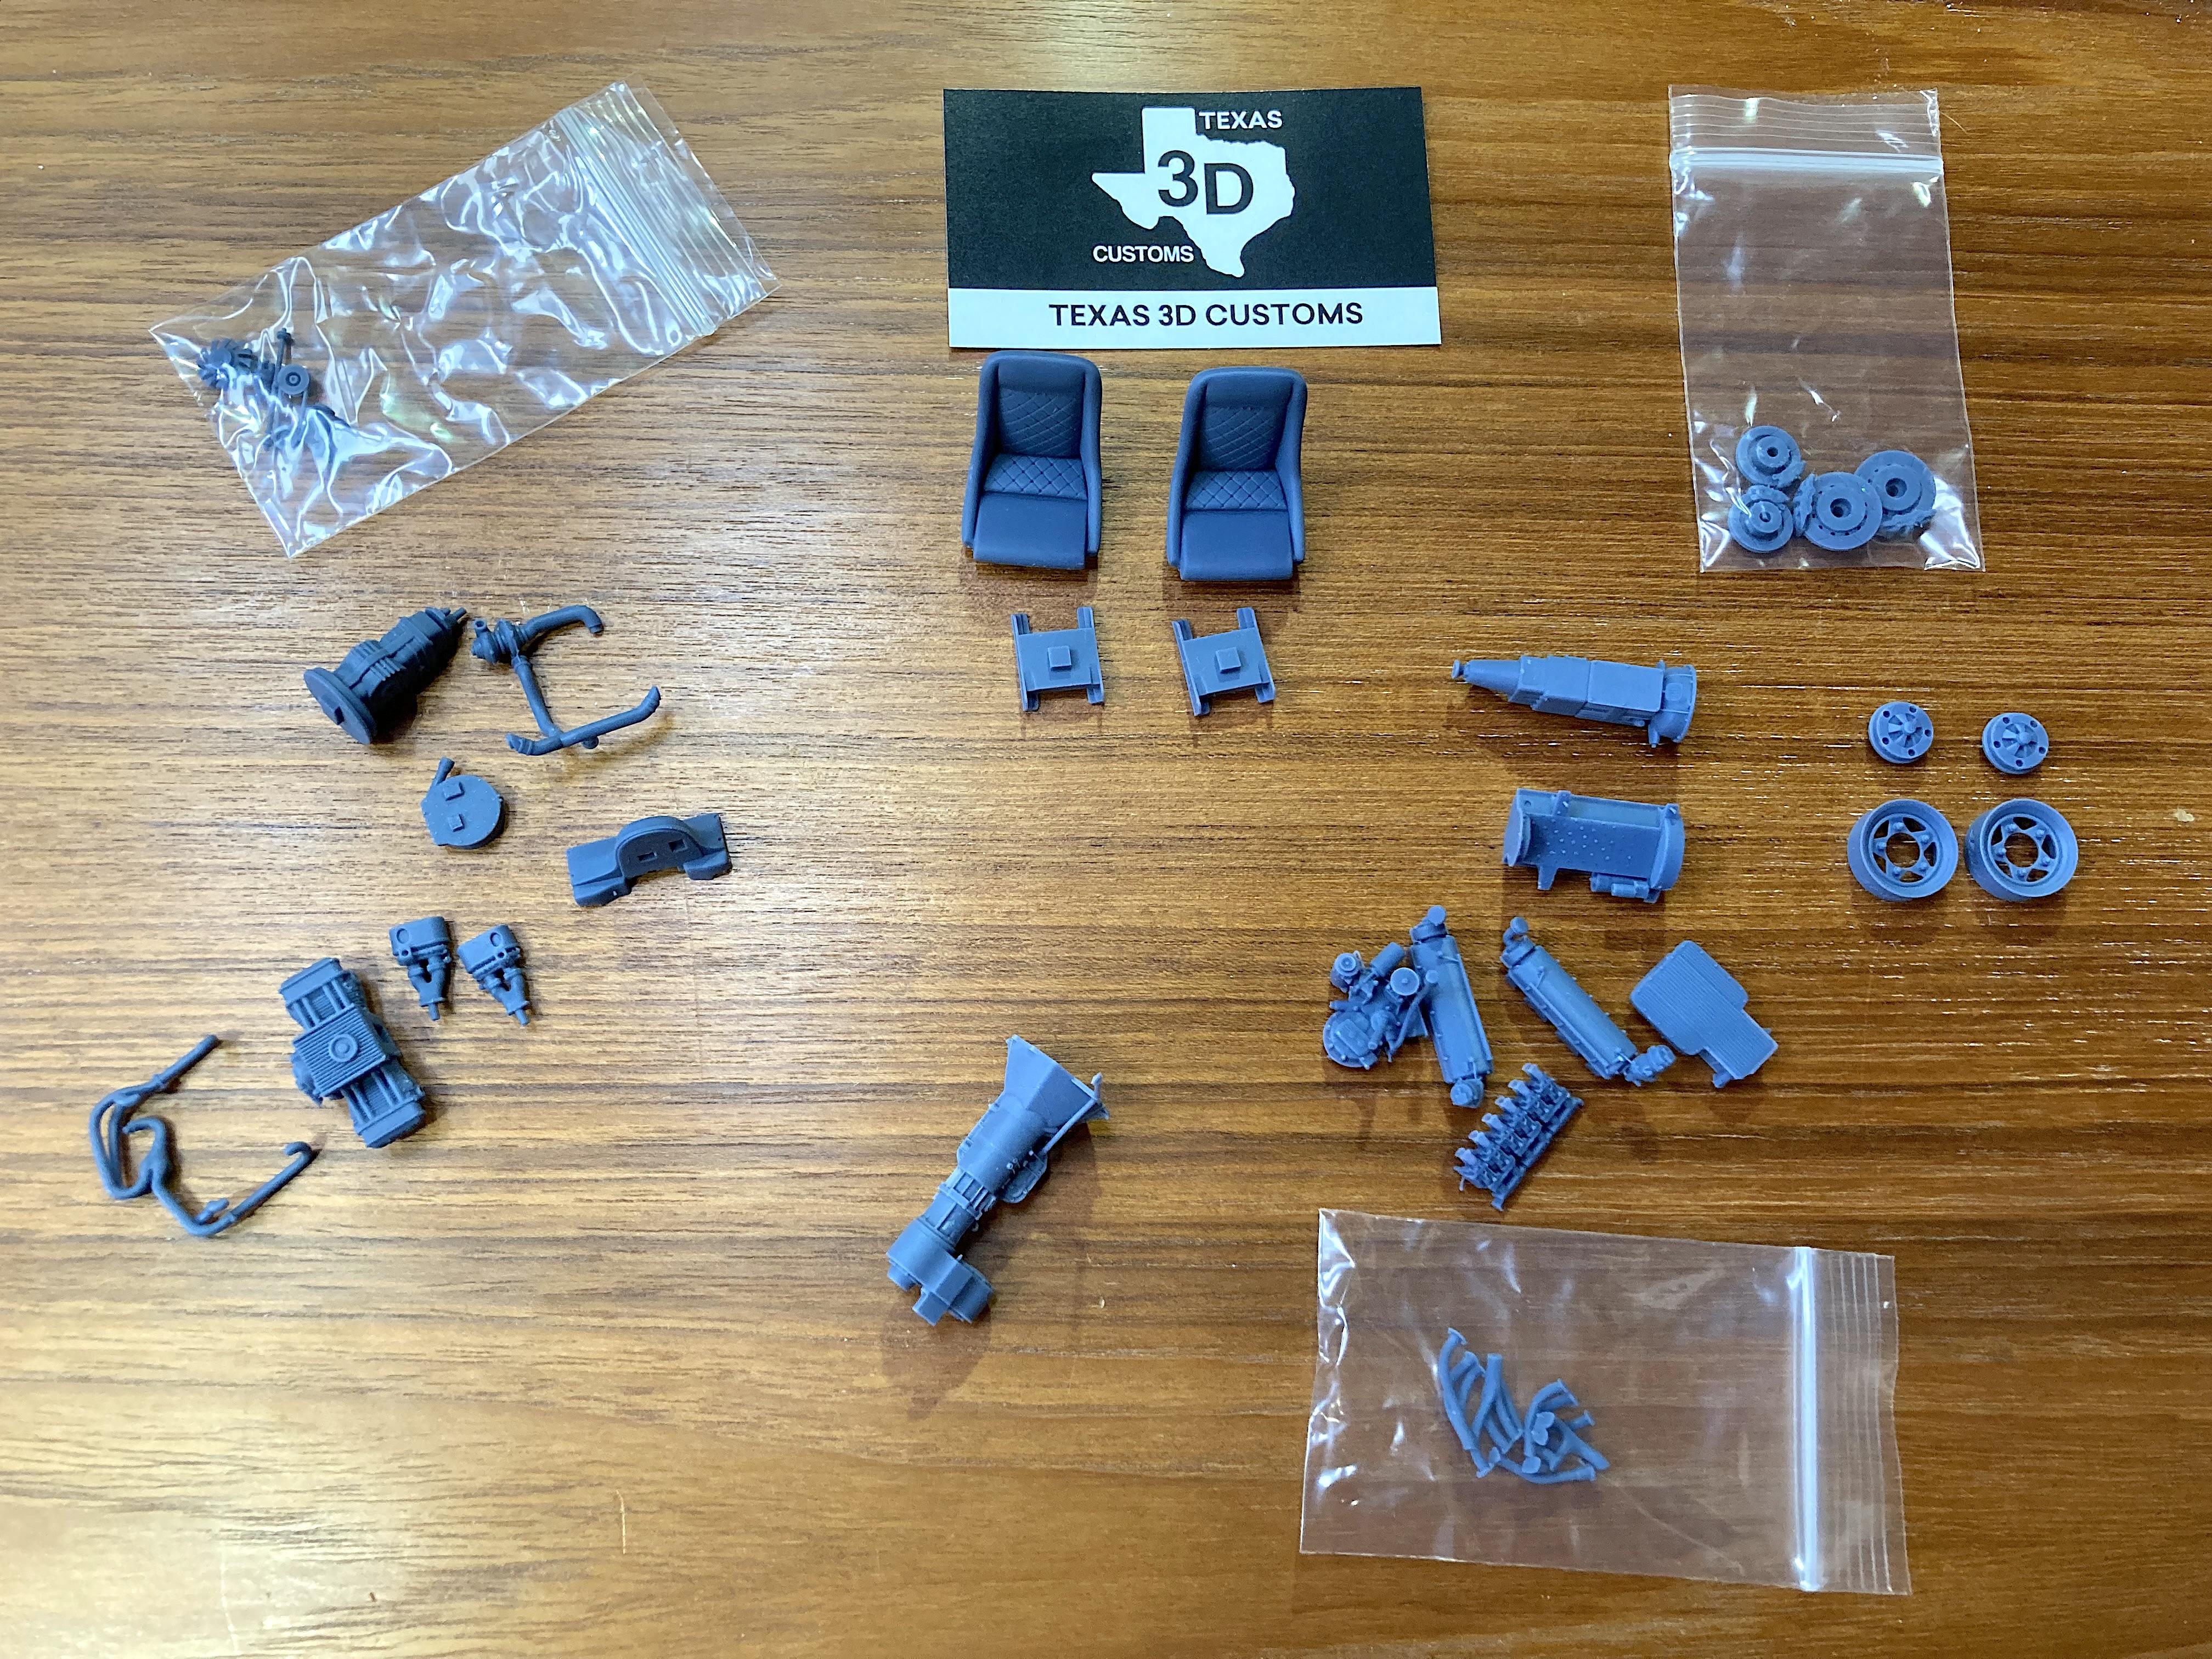
 Even though I haven't been on the forum much at all, and haven't sat at the bench since GSL, I'm still buying stuff. Intended to get just a few things, and it got out of hand. First batch, realized I should have got another pair of wheels, which led to more stuff. ? Don't know what came over me. ? Second round I got smart and printed pictures to go with the engines, since instructions don't exist.
- 39,135 replies
-
- 5
-

-
- johan
- glue bombs
- (and 1 more)
-
Call me Nostradamus, bow before me! ?
-
Island populated with
-
with hydrogen, hoping
-
This would be a fun model to build! He asks what would be a good term for this genre of car.
-
blow up the
-
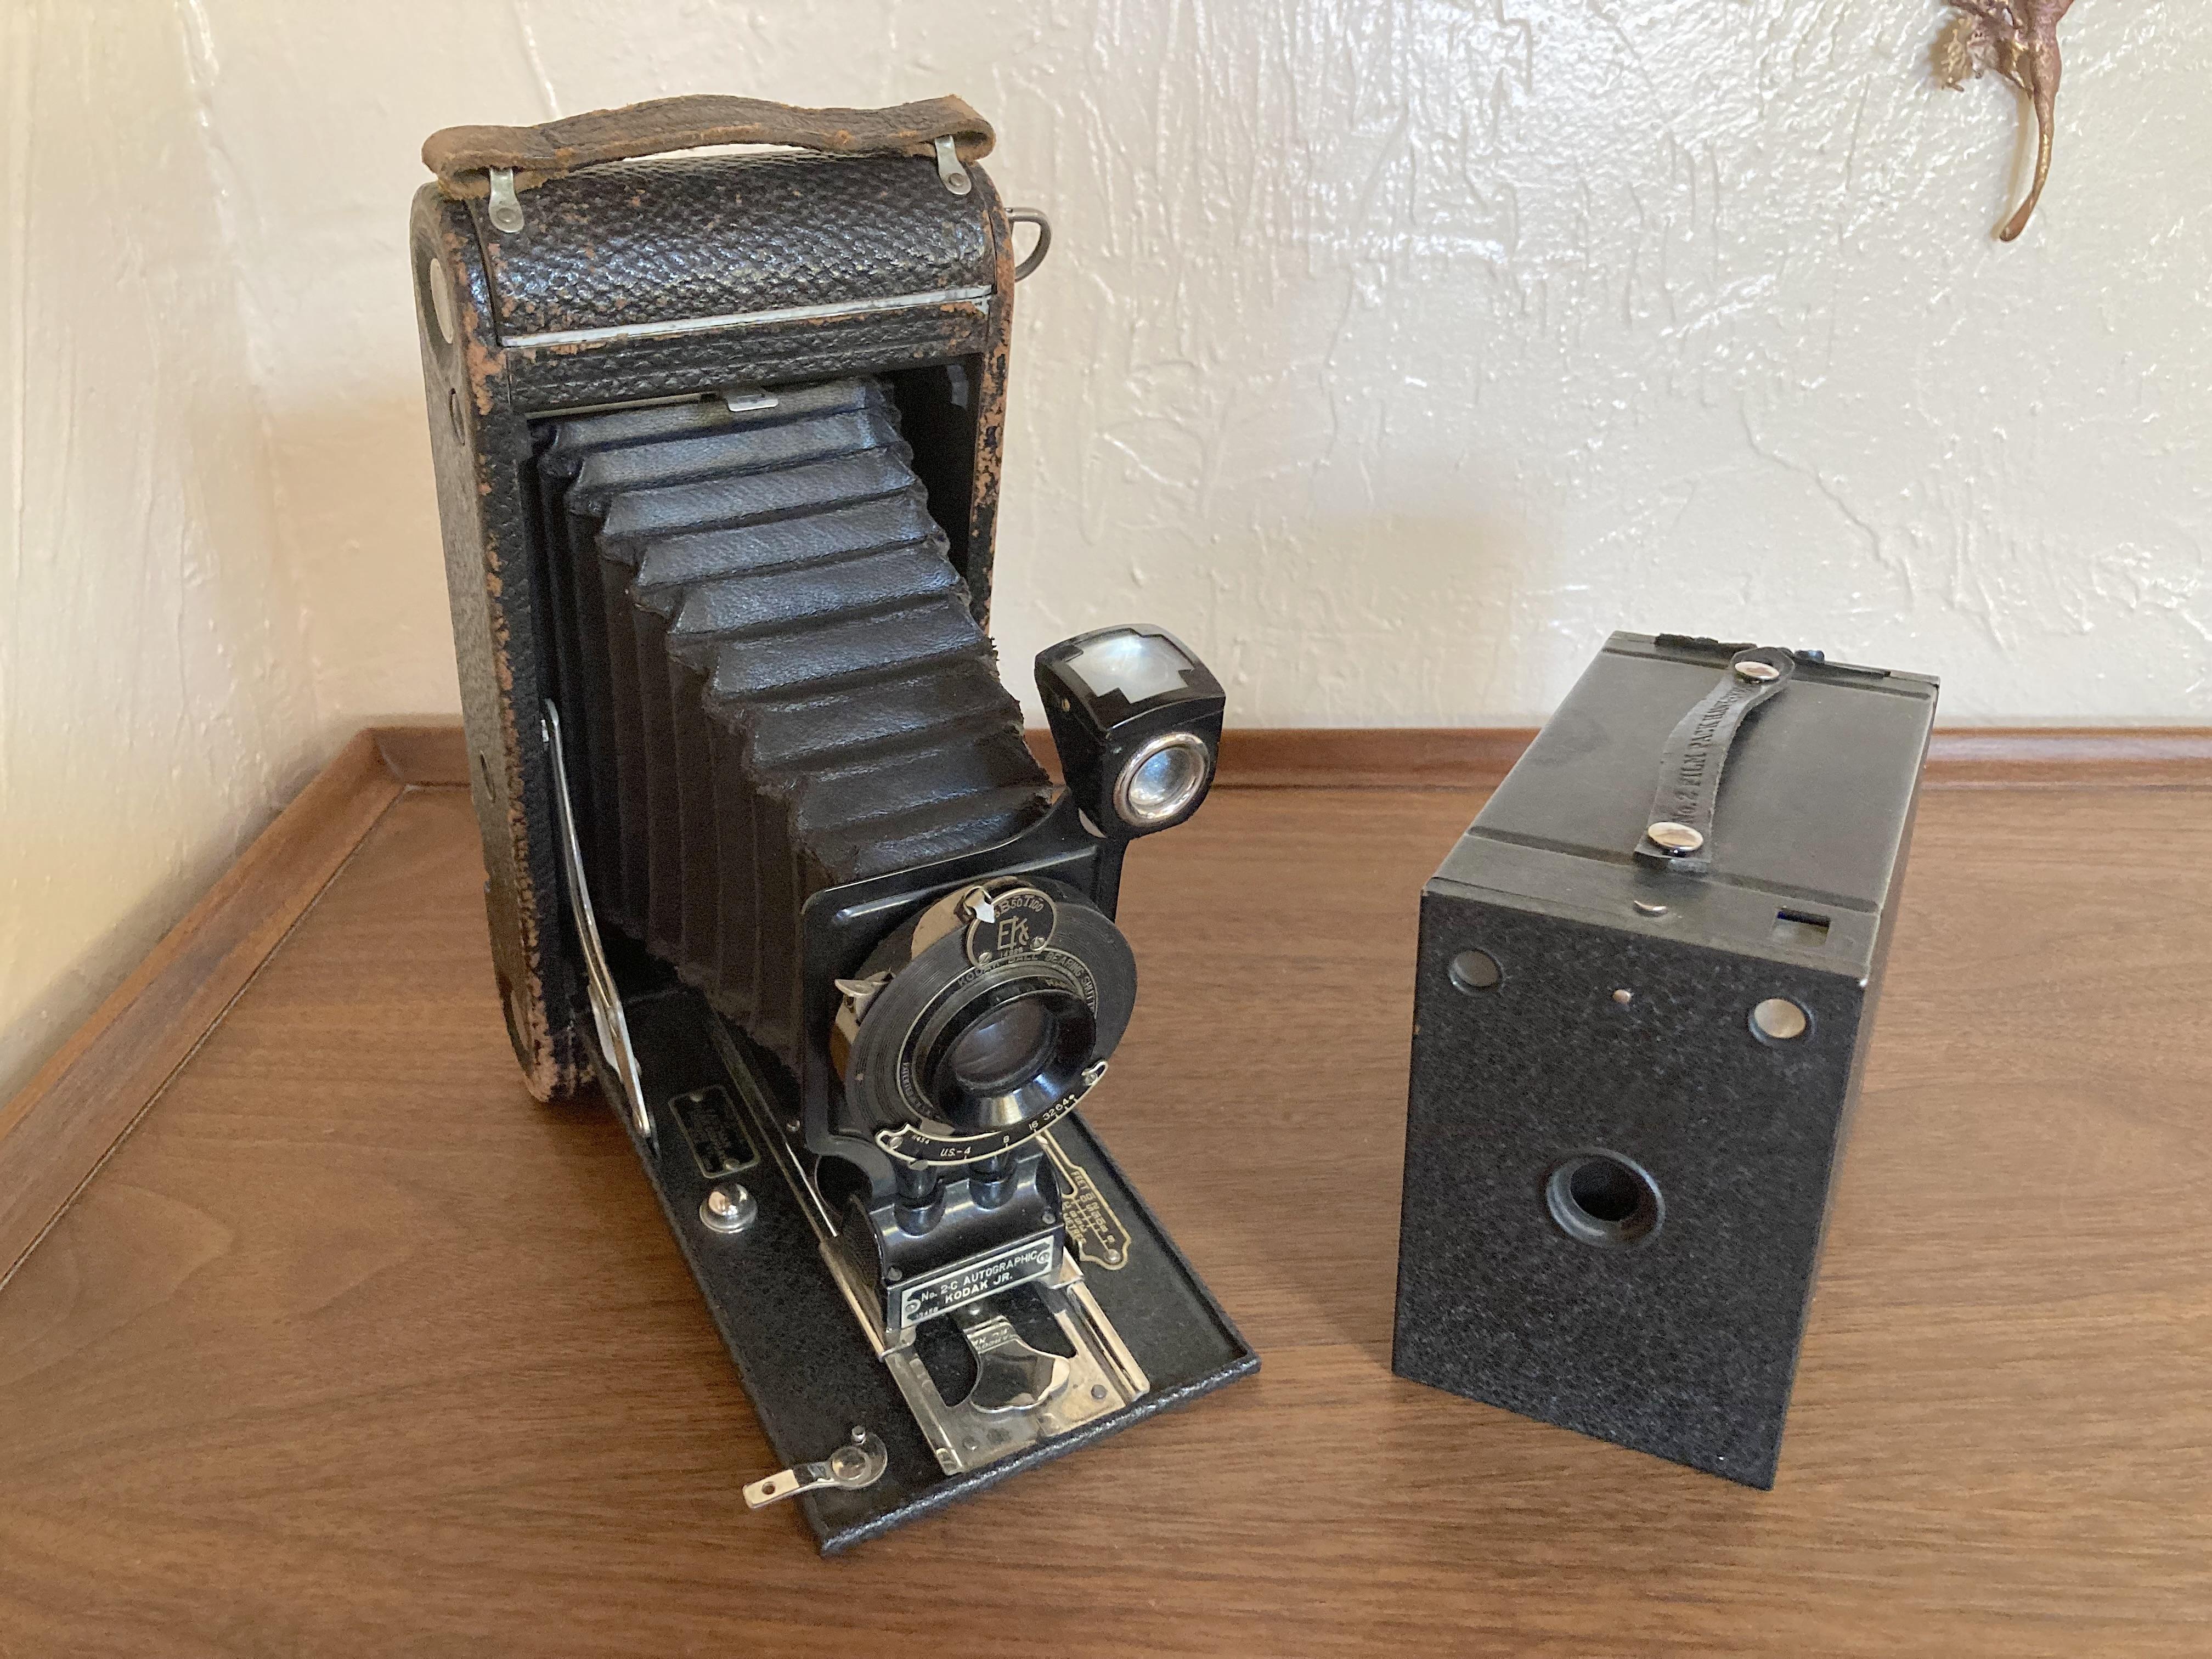
I found these cameras (older brother was throwing away everything, I had to dumpster dive to rescue many family heirlooms ?) aren't worth much, but they are too cool to just toss. Match books, I looked up some Fred Harvey - Grand Canyon on eBay, people want around $10, but these cameras are about $30. Go figure. I have a dust collector "pot shelf" to put them on.
-
smell like rotting
-
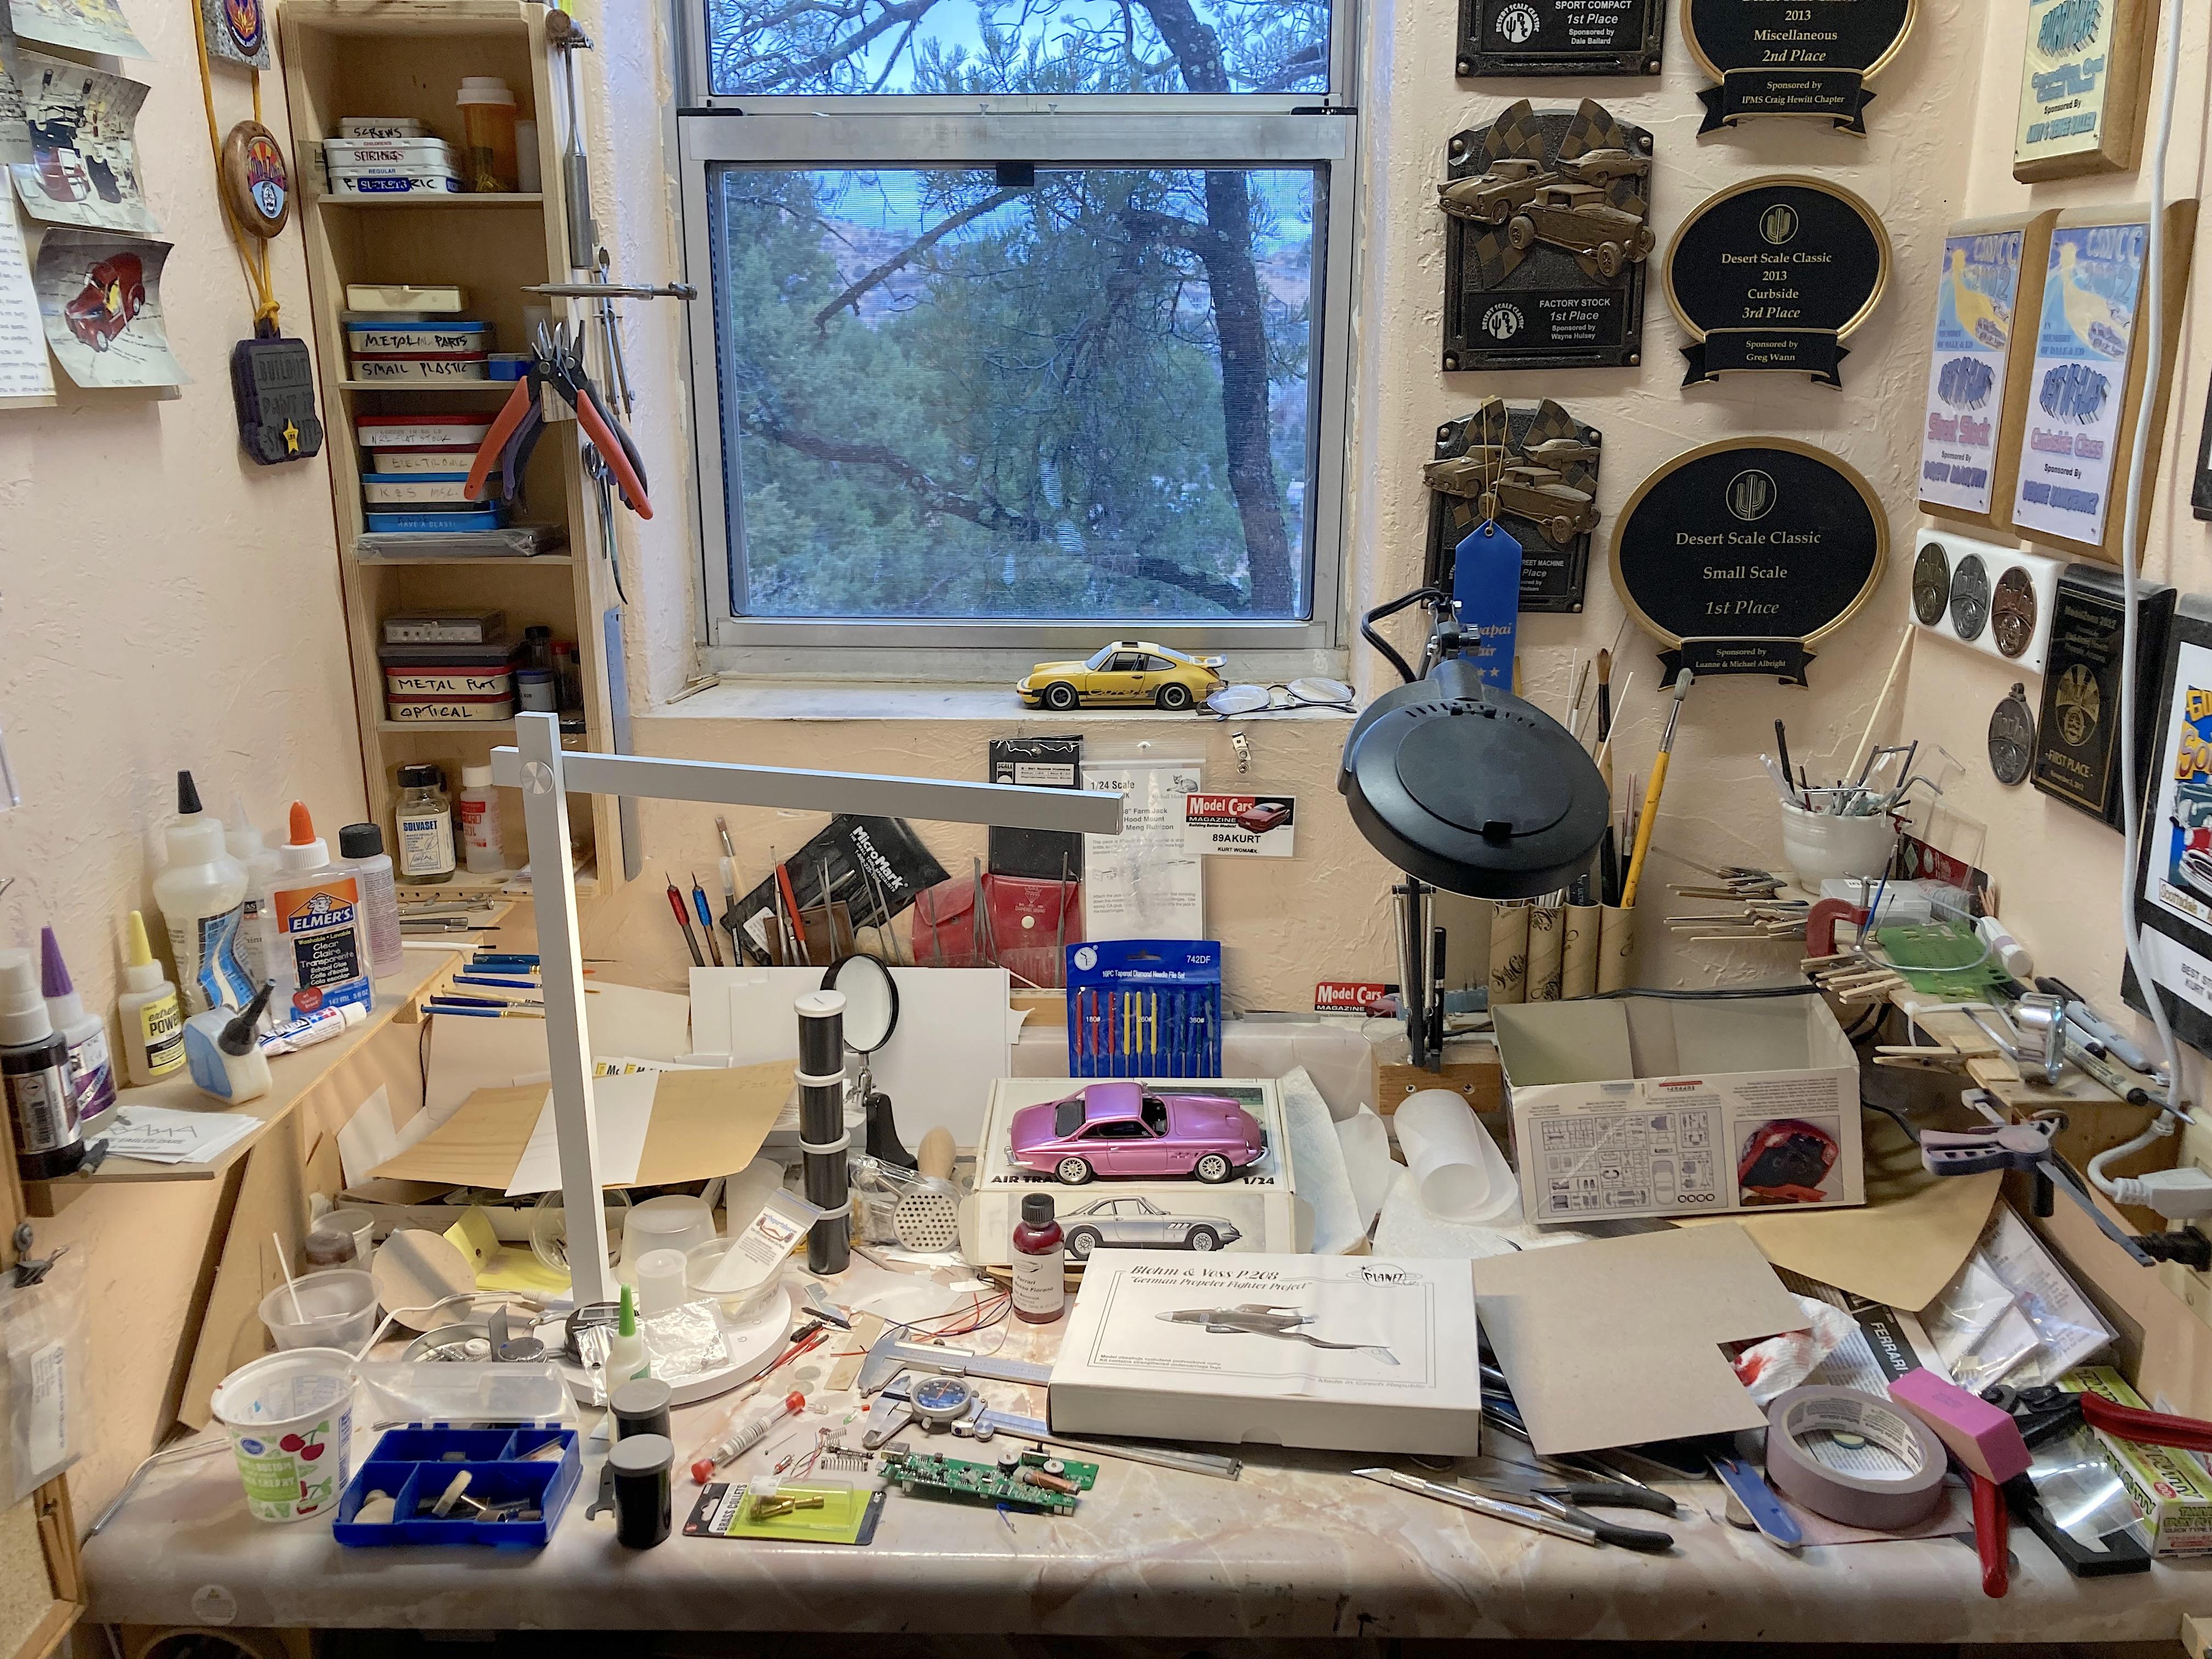
HAPPY NEW YEAR! ? The best laid plans of mice and men often go awry. I'm glad to see some of you took up the challenge and pushed some through the DONE window! Thank you. I got some projects around the house done, spray painted a steel table base, repurposed a steel cabinet inherited from parents to cover a new water filter outside (previous company went out of business), got new carpet and new furniture, among other things that life throws at you. There must be a topic about how to not fall into a rut of not building, and still still buy kits, so now I have to live to 300 years old to build all my kits. ? Don't know about you, but I need to be 100% obsessed and possessed to knock out a project. This year I am not starting a new topic of my builds this year, it was not productive. So here are links to my finished builds: Revell: '29 Model A Roadster - my GSL Common Kit entry STUDEJIMMY: 1953 Studebaker 4X4 pickup Last WIP: Ferrari 330 GTC + 575 M Superamerica Resto-rod Bring Out Your Dead, first runner up: Lamborghini Hellcheetah Now to show I'm still alive in 2024: Once Upon A Time game Now I should go clean up the bench.
-
Ferrari 330 GTC + 575 M Superamerica Resto-rod
89AKurt replied to 89AKurt's topic in WIP: Model Cars
I have changed my mind, but have not worked on this since my last post. I got some new paint, that is a Ferrari color that I think is more accurate. First thing to do is strip the paint, I'm afraid of spraying the new paint over this. I need to rewind and fix some things. Afraid of doing the windows and photo-etch trim. Also need to clean up the bench, have acquired a bunch of tools, and salvaged parts need to be put away. Got a bunch of film containers, those are becoming rare "vintage" things to have. ? Then maybe I will get in the mood. Was hoping doing an airplane would bust my slump.
-
There are 2 diffusers too. Dad had one surge protector with everything, easy to shut everything on/off.
-
I cook something in your honor. ?
-
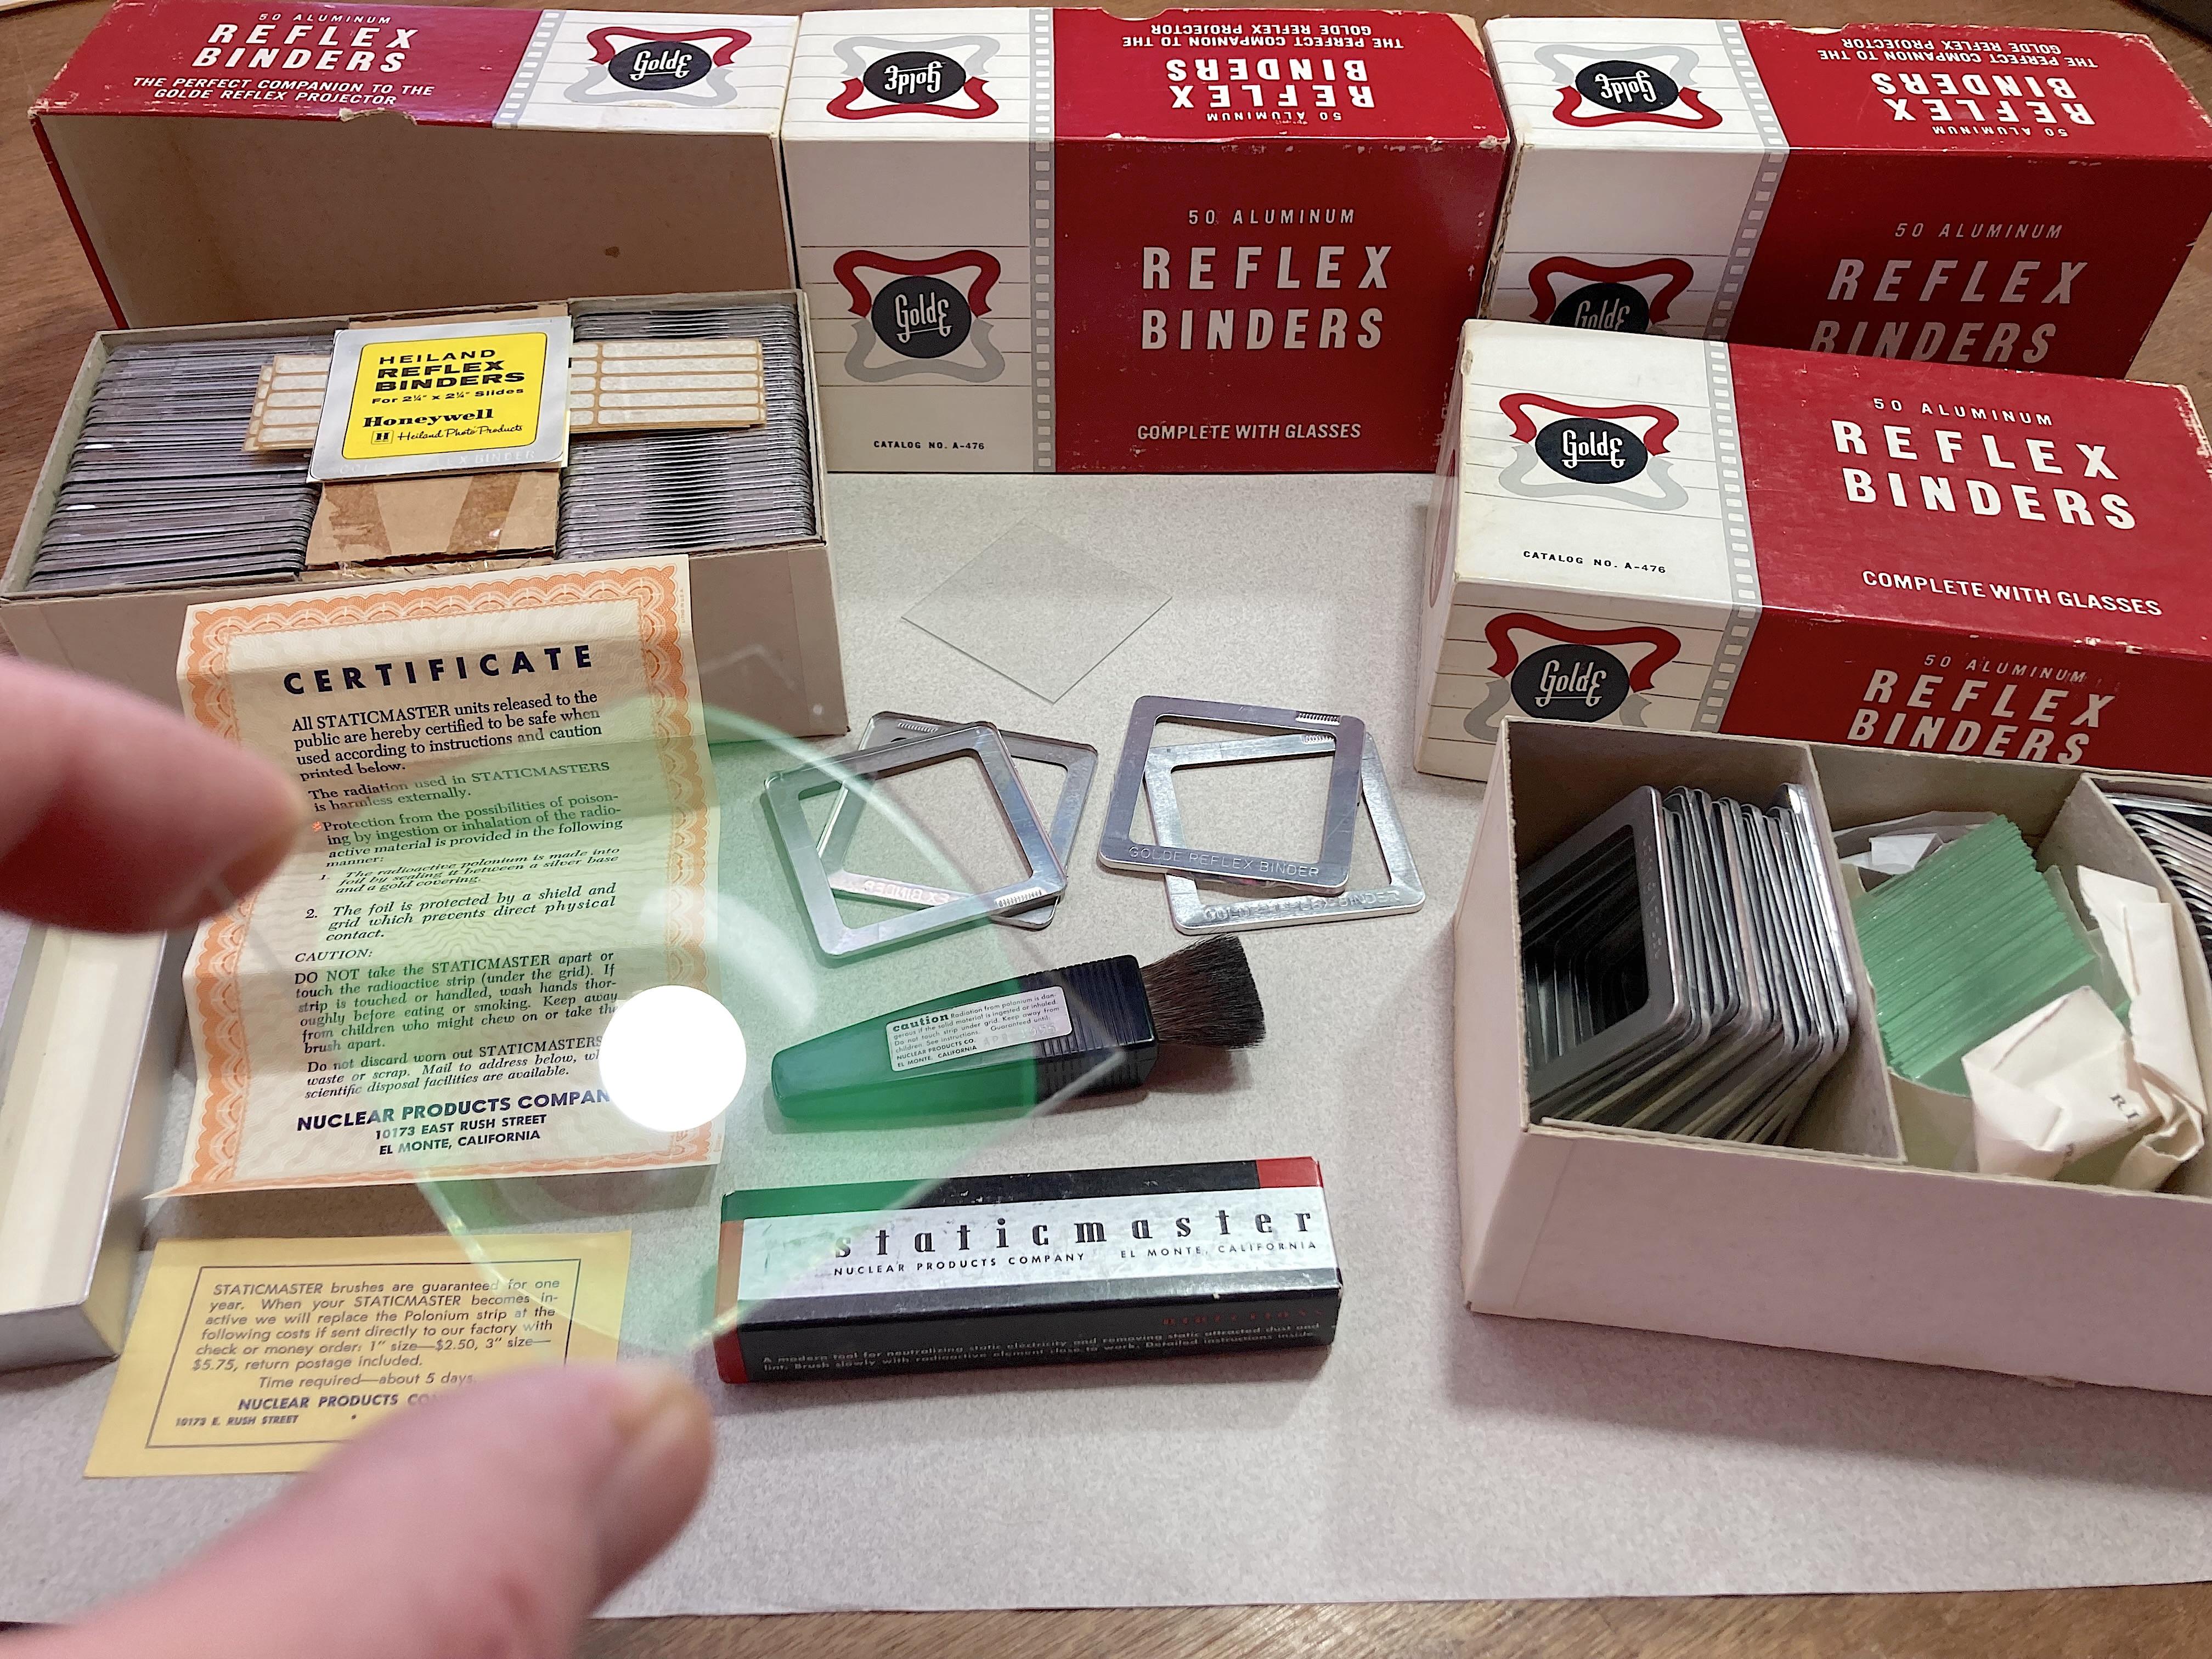
Can I interest you in some totally obsolete half a century ago slide mounts? Real Glass! ? Why do I have to be the one to toss all that? ?
-
How dare you tempt me! ?
-
The new Ferrari. ?? I will removed certain words copy/pasted from elsewhere. ? Seriously, almost all drama, not much racing. Except for the lead-up and tragic wreck where the driver in love with the hot photographer gets cut in half, so it's a remake of 'Red Asphalt'. I'm sure half the CGI budget went into just the wreck scene. Covers: I wasted most of my money on wine and women. The rest I just wasted (racing cars). Lesson: Don't loan money to family, his ex-wife is a witch, which leads to.... Woke level: About a 5 out of 10. It's not the cheating and having out-of-wedlock surviving children vs. dead one it's all dad's fault men bad. I missed something. Best scene: Will admit, when they were at Catholic Mass and stop watches were involved, that was good. At least: they used real Ferraris, exception with be the one logging airtime when the star in love with the hot photographer chick was viciously killed in the awesome wreck scene. ? Not sure I'm giving away any plot and letting the cat out of the bag that the old white haired driver won the big race, when the ? happened.
-
you know what
-
front bumper, hemp
-
Glad I don't live in Boston! We have other things, such as ancient history driving in the left lane below the speed limit, mixed with Californians who think it's a race. What irked me today, which has been building up for months for me, dealing with the County and City building departments. Picked up a client, who started his journey of dealing with the County before me, he asked them if he needed a permit to rebuild a deck, he was (alleged) told no if replacing like for like. So he tore it down, then the County shows up and says he does need a permit before the contractor from Phoenix does the job. That guy applied for a permit, but because he couldn't draw, it was rejected. So I drew it, got the Engineering, builder applied for the permit. The County contacts the guy to say he is in violation now because the permit had not been approved yet, it's a $10,000 fine! I contacted the County via email, asking what is up? Today I get an email from the County, apologizing for making a mistake, included the email address for the other Department to complain to. The guy is being savaged by the building department, and the County wonders why so many people don't get a permit. Once I finish up the 20 +- jobs on my plate, I'm retiring, screw this.
-
glued themselves to
-
Right on, that's the spirit! Time flies.
-
? There is one in every crowd. ?
-
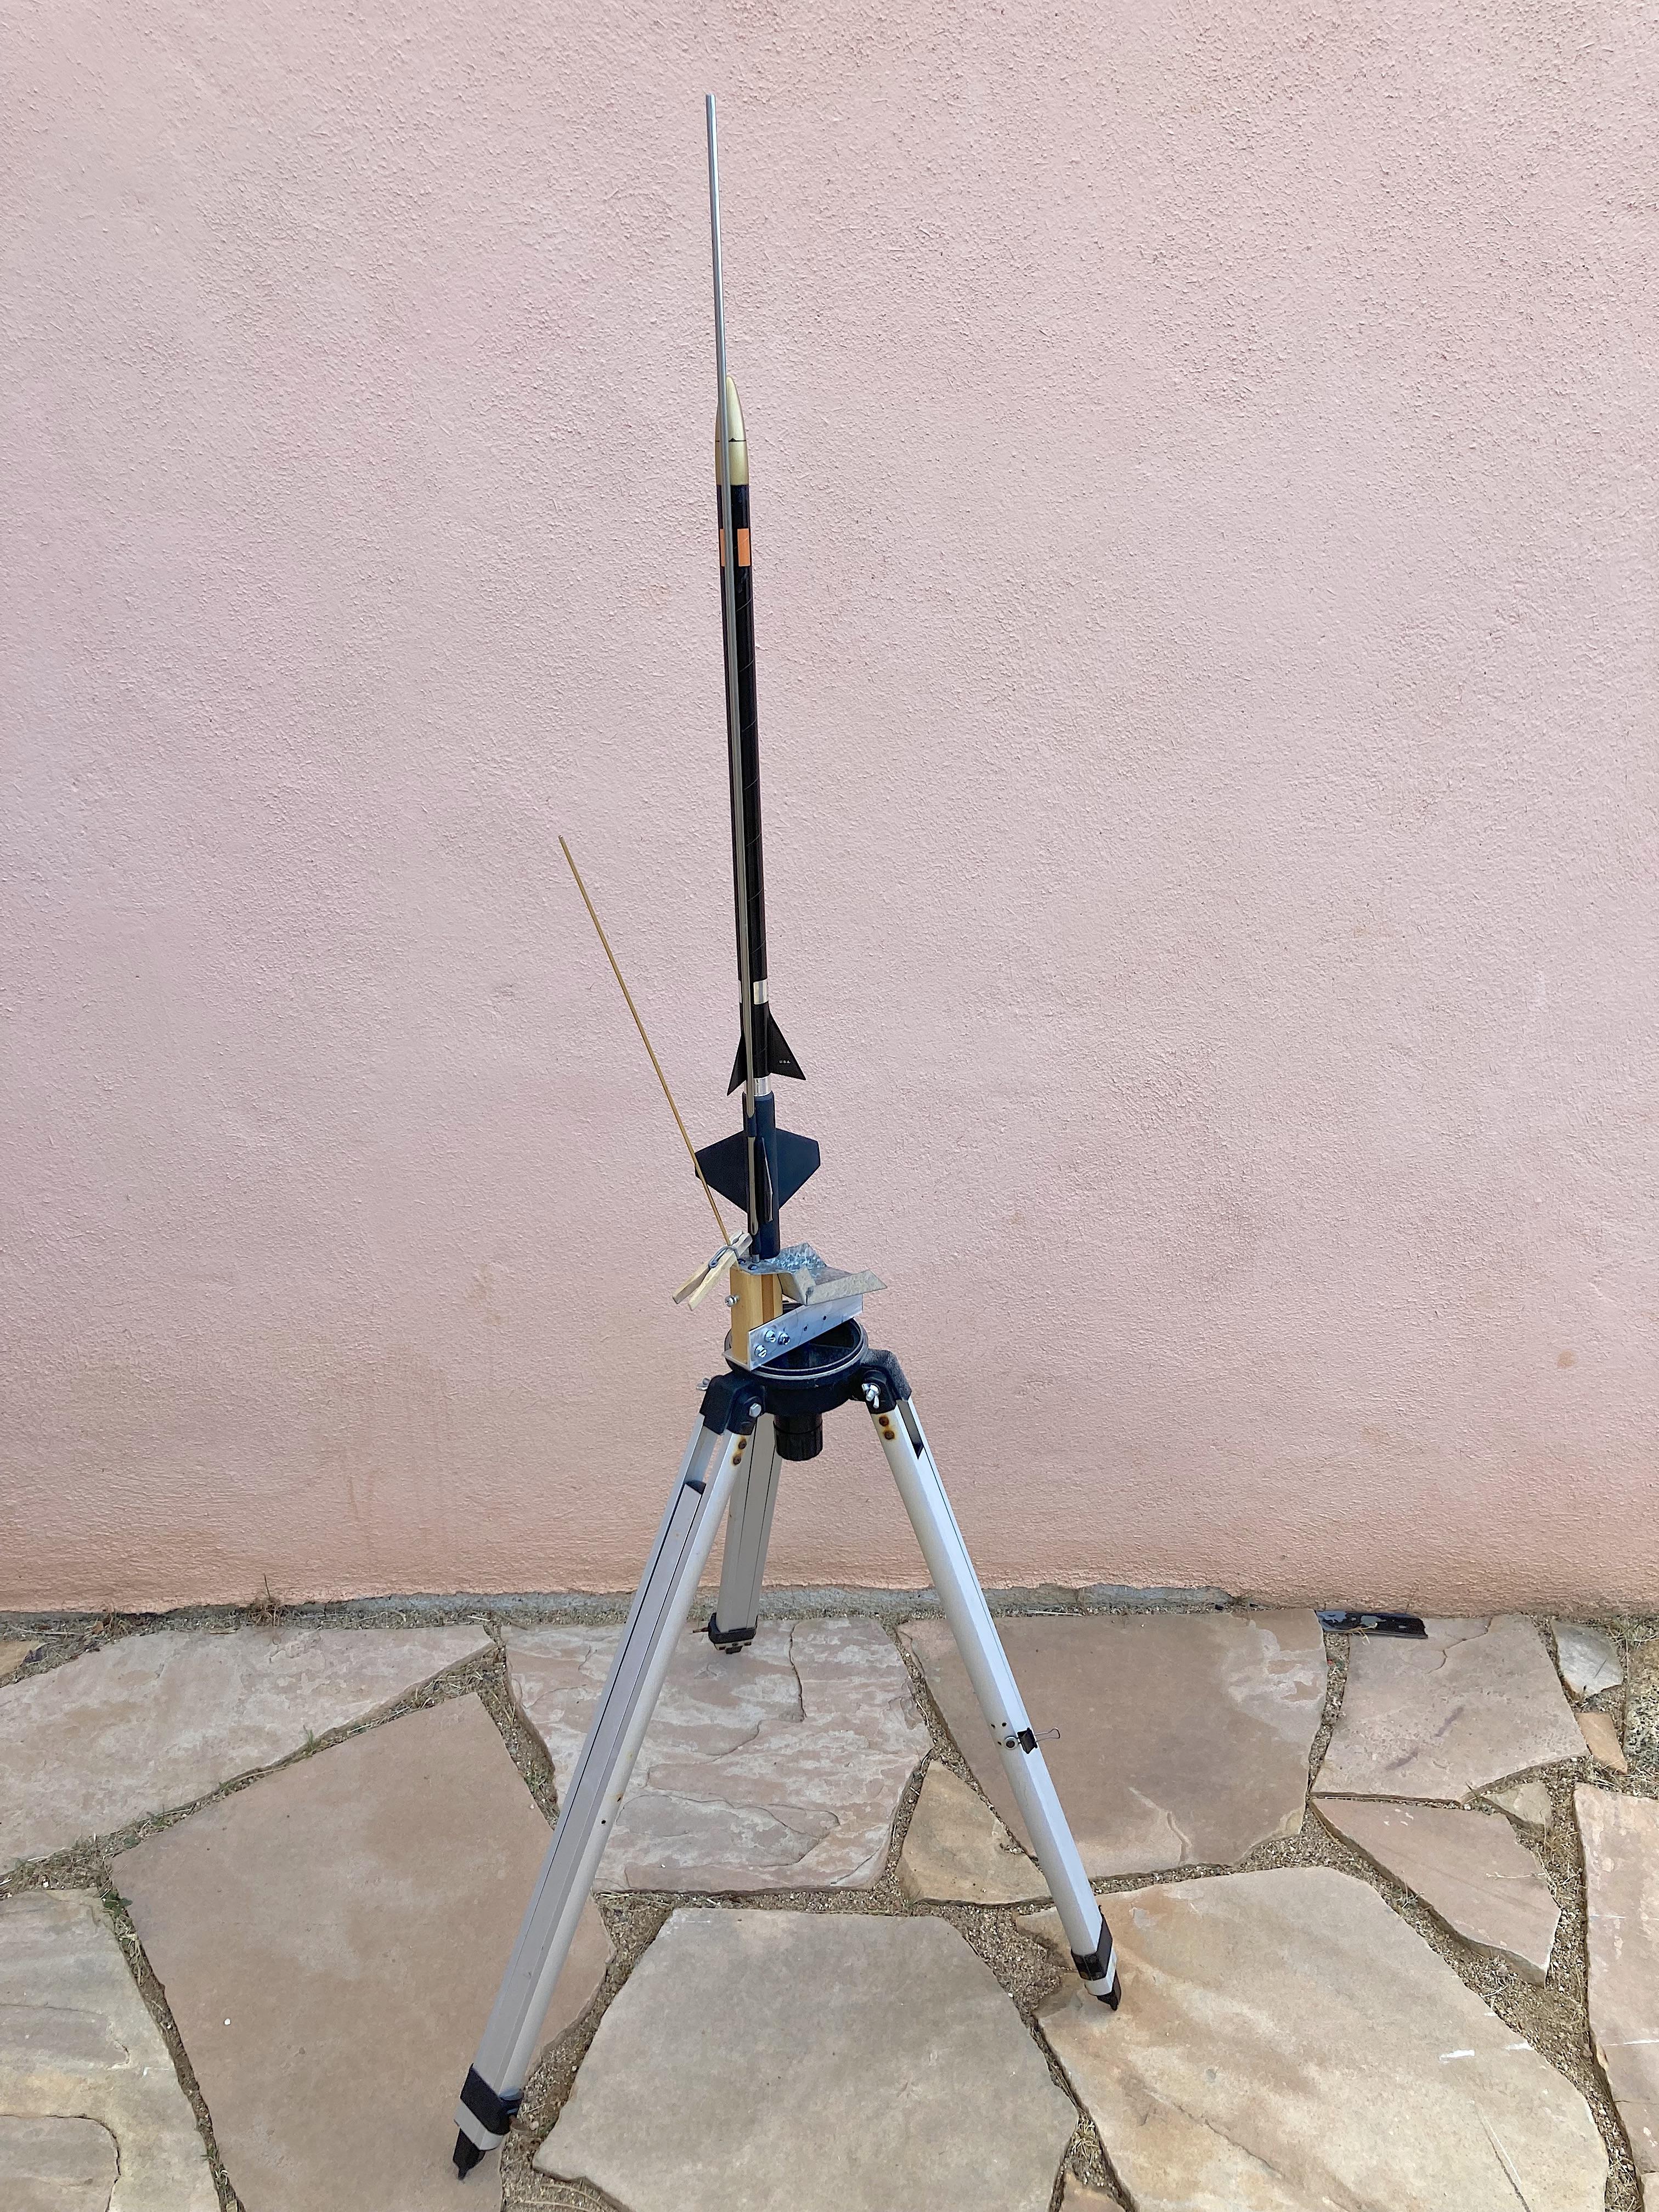
Since I'm so discombobulated at the moment, I'm not prepared to actually do this. ? I have tried to build something, usually a really easy kit, no modifications that waste time, improve if necessary to appease the OCD, before the end of the year. All the 'look at me I built 50 models this year' threads get me to looking at how unproductive I've been regarding model building. So this is unofficial, if this gets you off your butt to build something, please let me know. I'm also doing this as a challenge for myself, to pull out of the doldrums rut. I have a resin airplane that I might tackle. I know all of us have Bring Out Your Dead projects lurking, calling you..... "finish me". ? Since this is my topic, model rockets could count. I recently adapted the aluminum transit tripod that was on the way to a dumpster, into a launch pad. I had a poorly designed pad that got cut up, used the blast deflector and wood part that holds the 1/4" rod. Built the F.S.I. Dart rocket last century, still haven't launched it because of the pad. It's supposed to break the sound barrier. So I have been doing some model stuff, not enough to brag about. P.S.: It's fun to scroll down over the rocket picture. ?
-
the speeding ticket
-
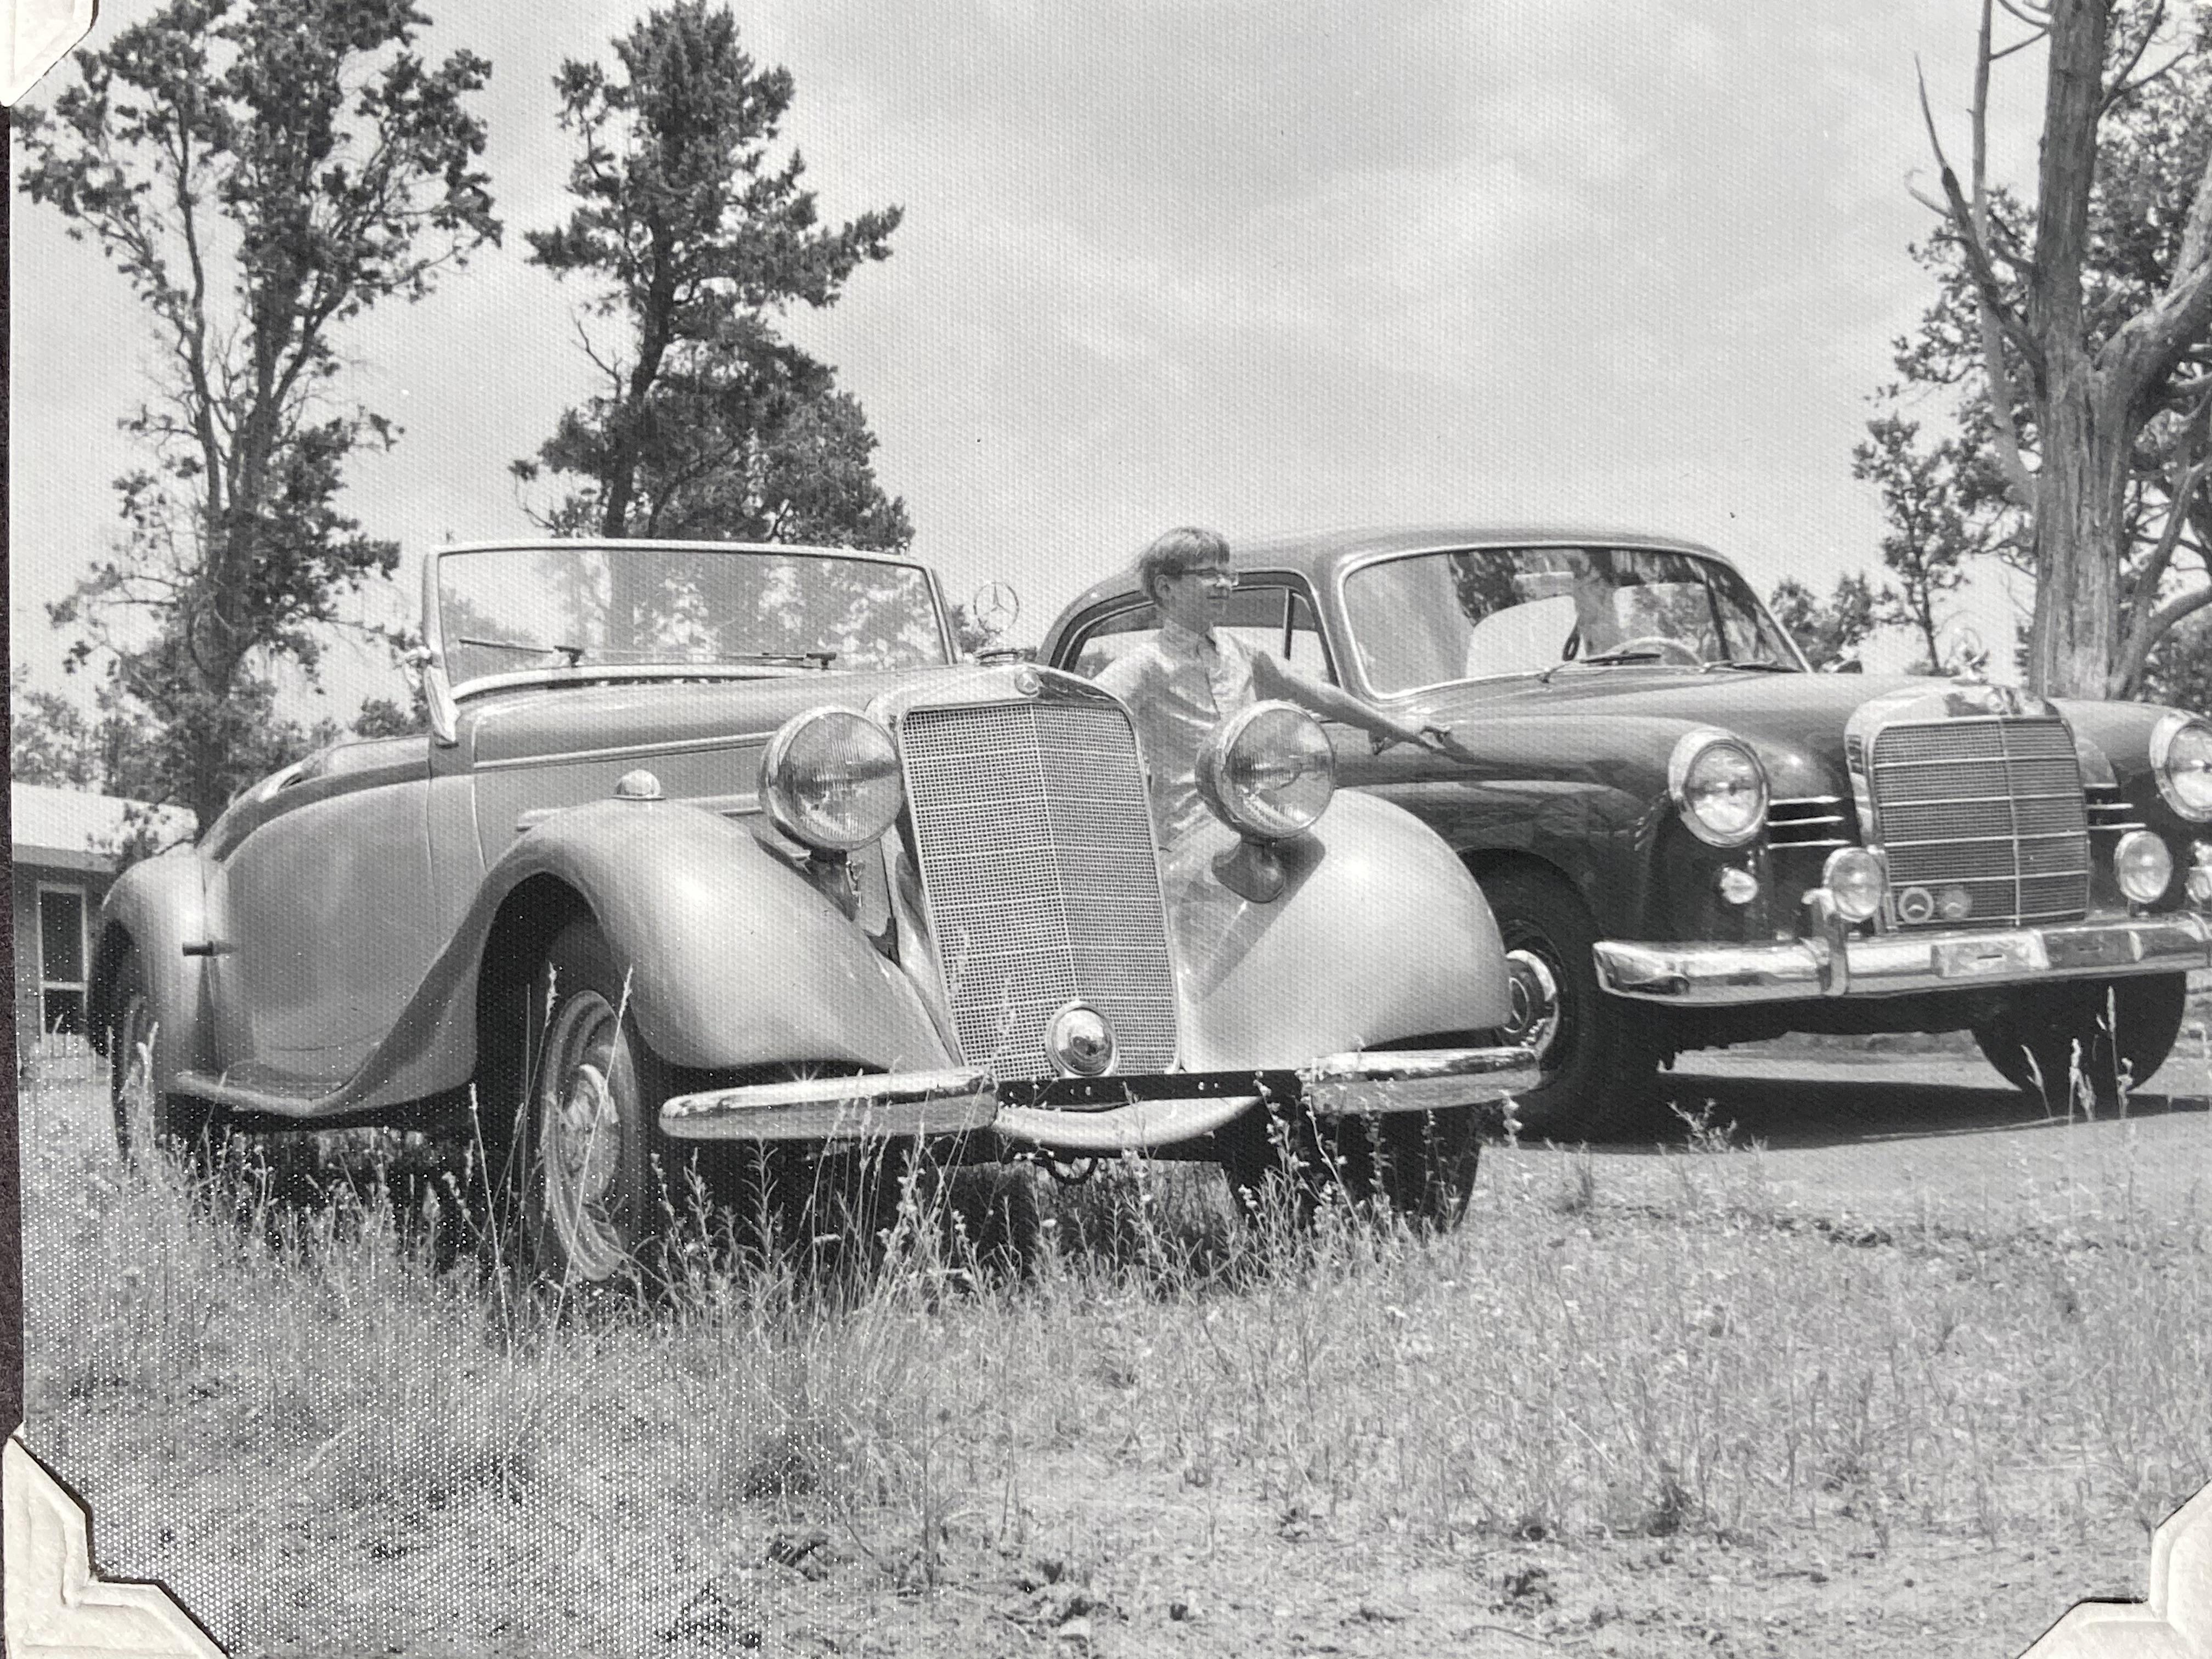
Mercedes Outlaws & Hot Rods
89AKurt replied to 89AKurt's topic in General Automotive Talk (Trucks and Cars)
The car I grew up with. The Roadster would make a cool hot rod, but talk about blasphemy.