89AKurt
-
Posts
8,426 -
Joined
-
Last visited
Content Type
Profiles
Forums
Events
Gallery
Everything posted by 89AKurt
-

What did you see on the road today?
89AKurt replied to Harry P.'s topic in General Automotive Talk (Trucks and Cars)
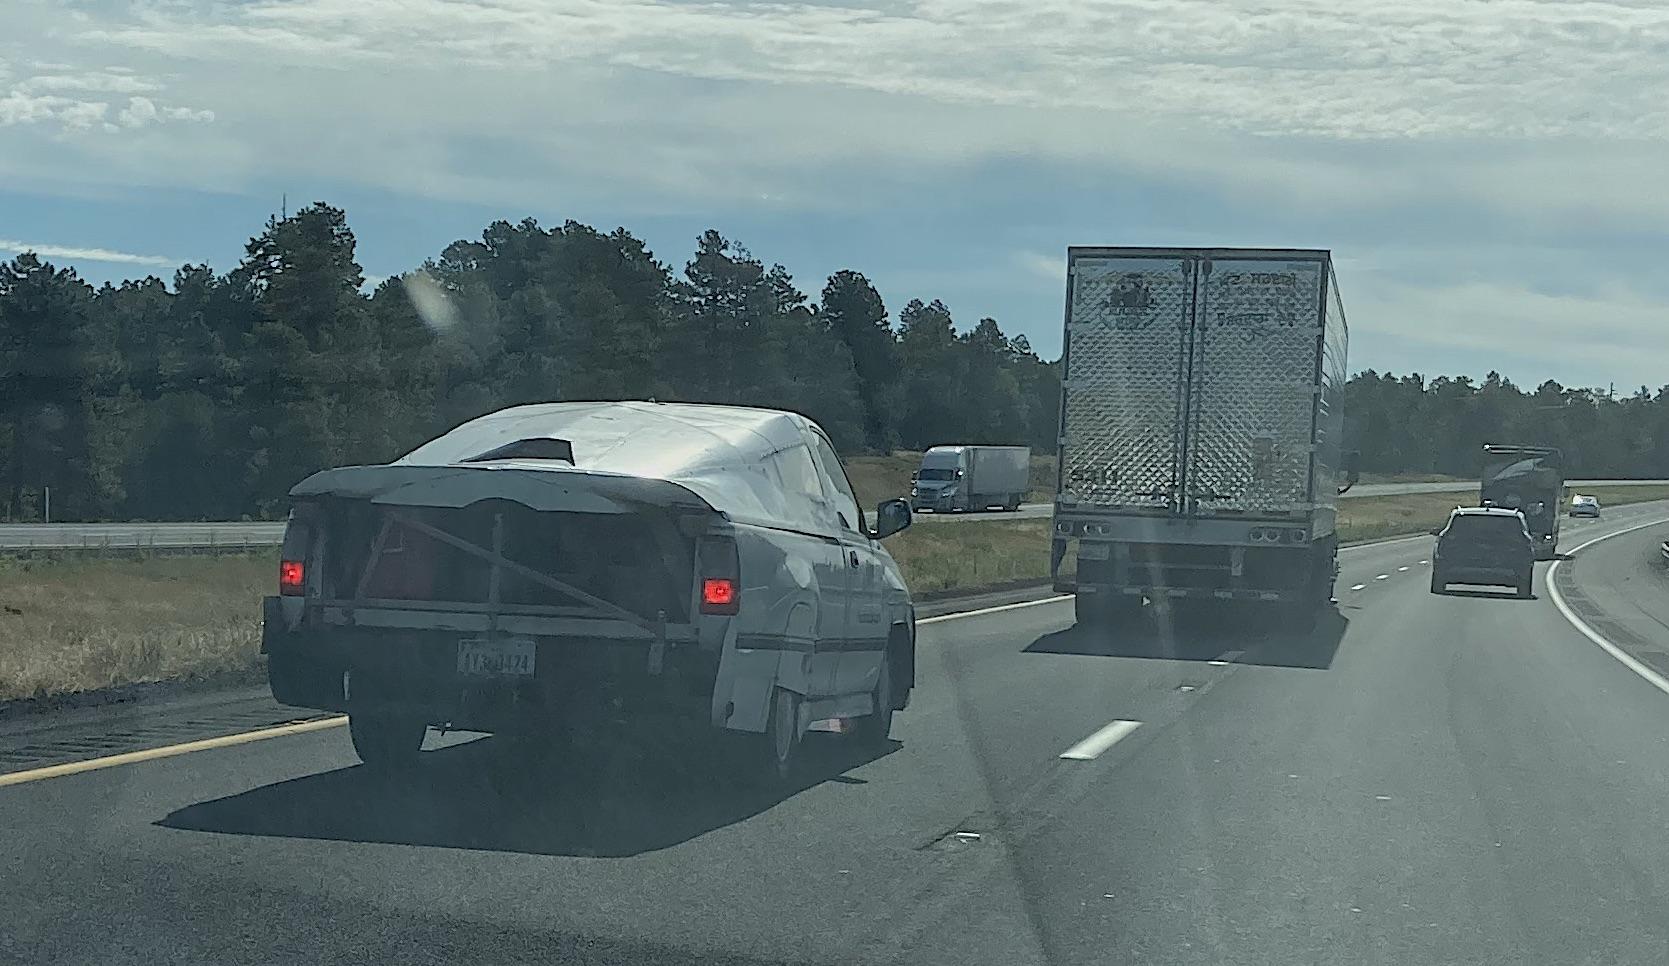
Spotted this homemade aero Toyota pickup on I-40 passing by Williams (last town on Route 66 that was bypassed by the Superslab). Couldn't wake up the phone fast enough to get the front, which has a Studebaker "jet intake", and the hood slopes up to the lower third of the windshield.
-
BMW Outlaws and Hot Rods
89AKurt replied to JollySipper's topic in General Automotive Talk (Trucks and Cars)
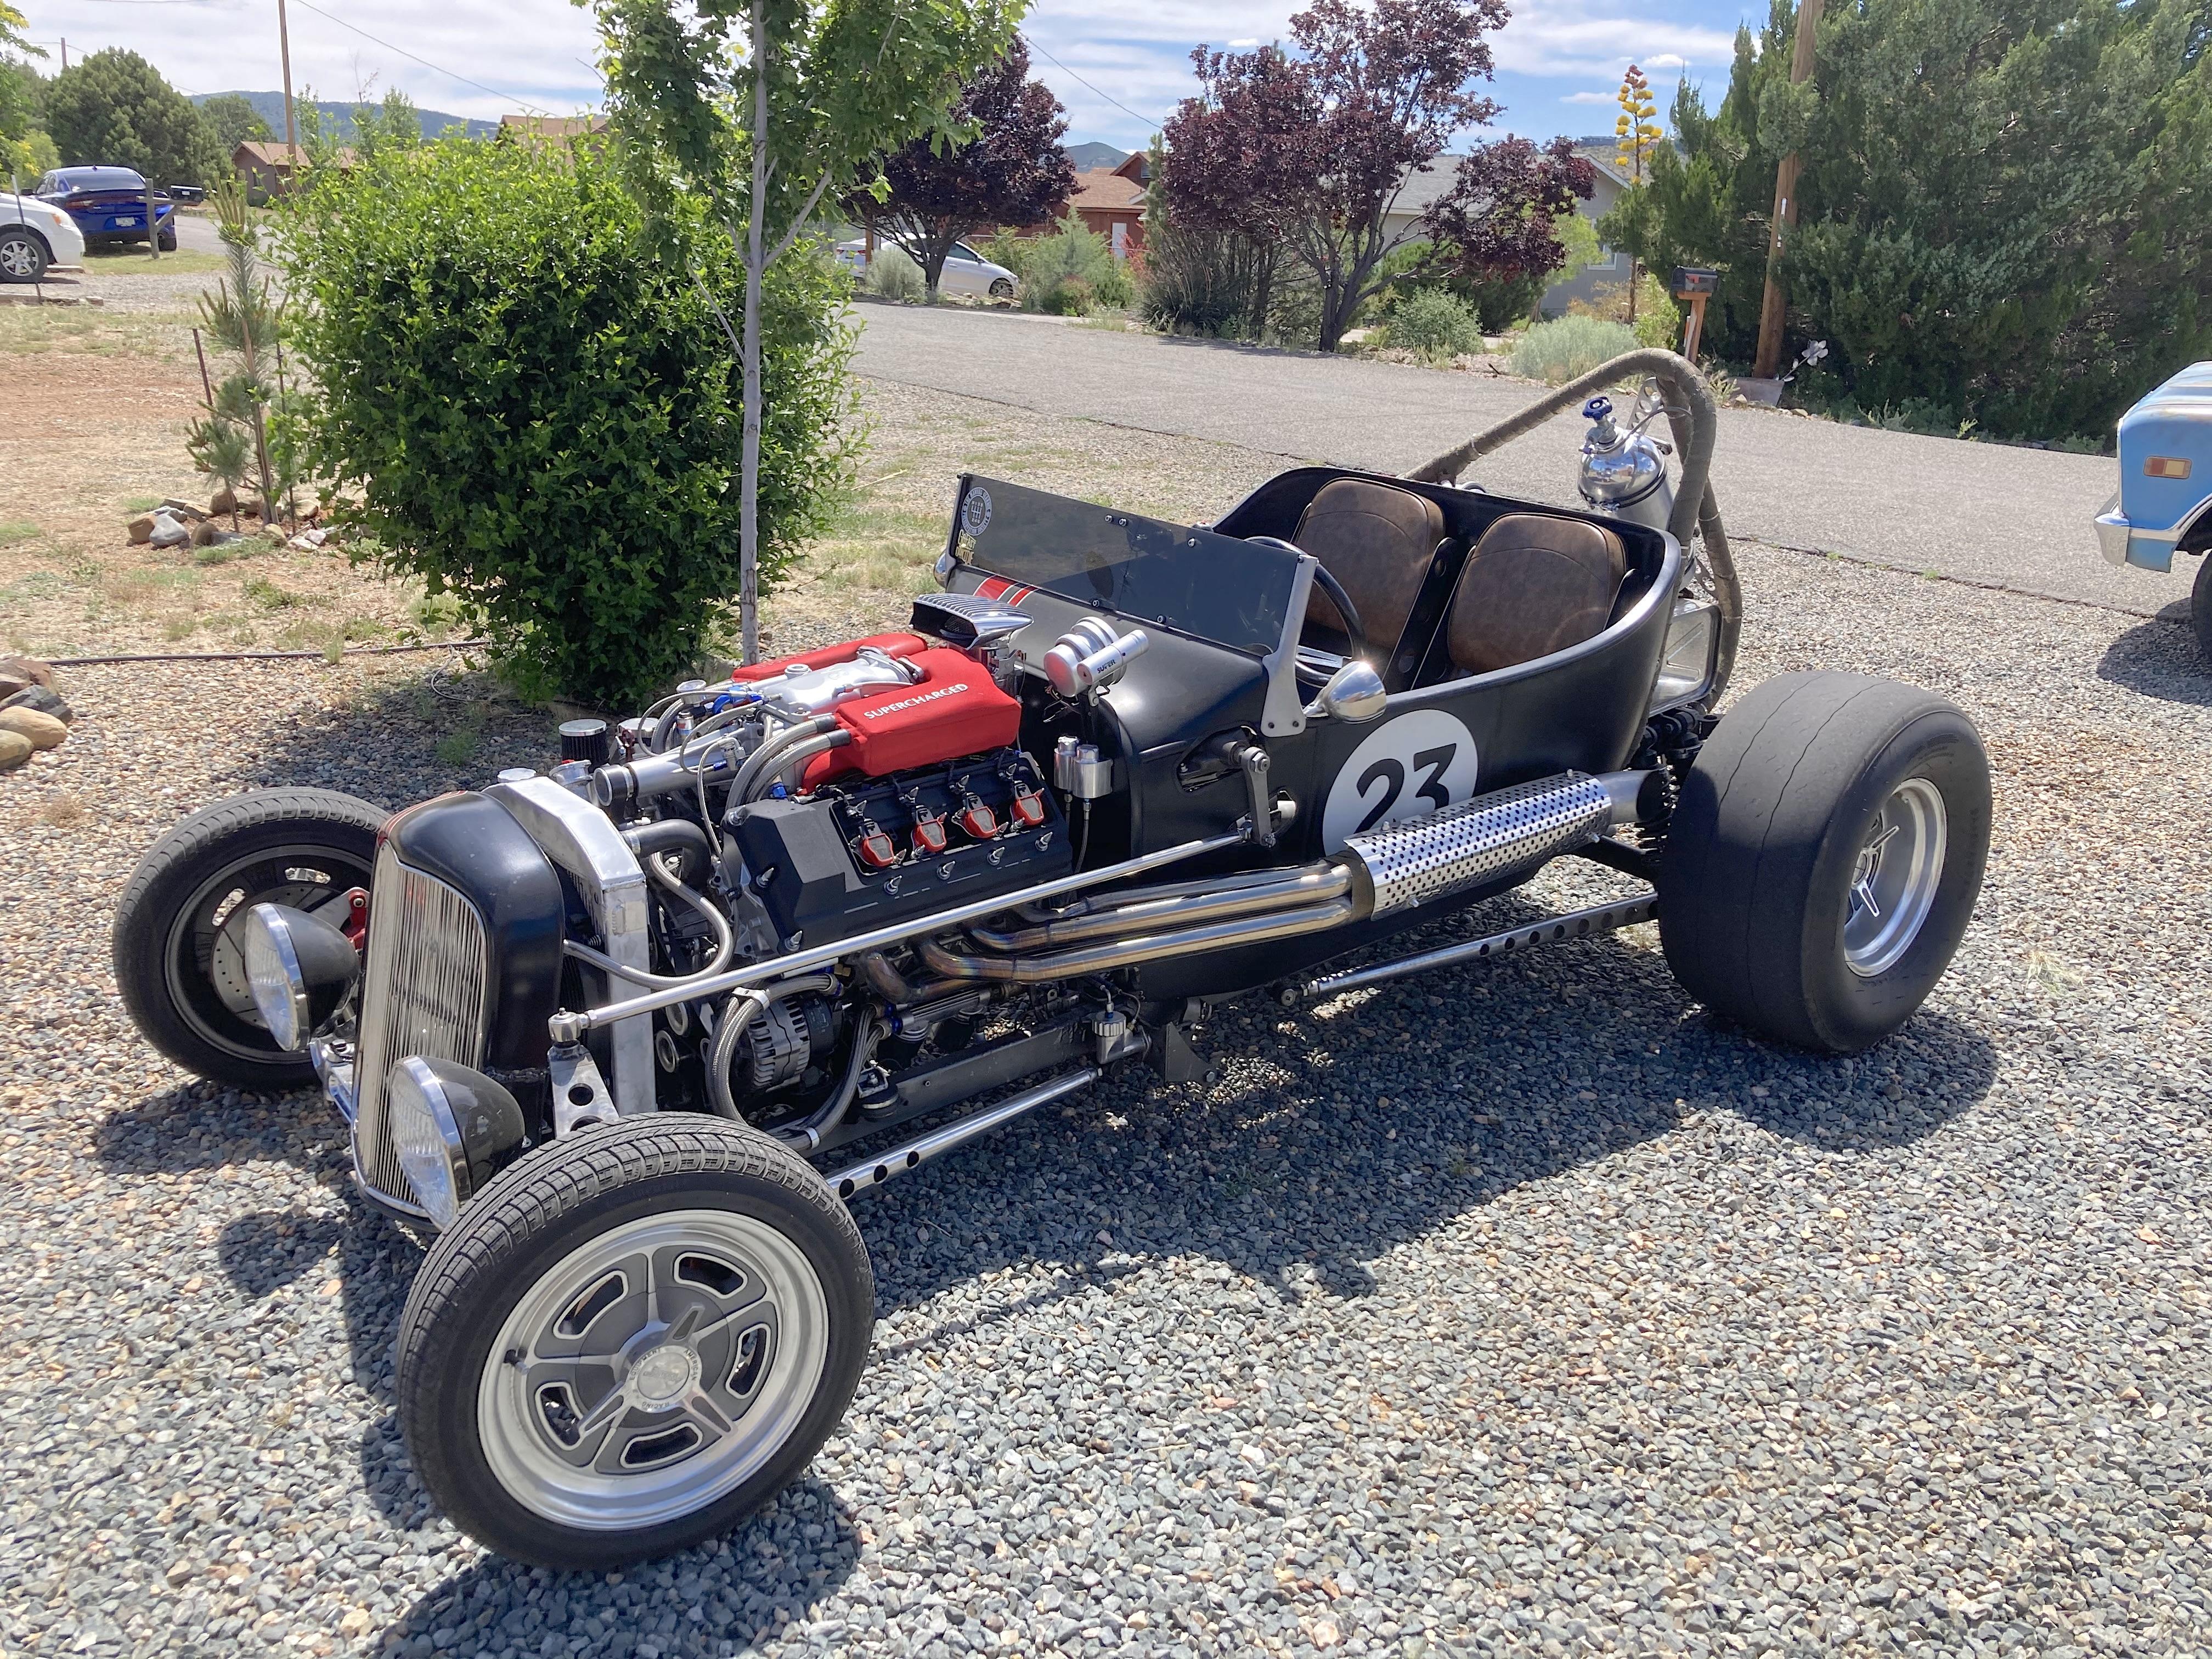
I forgot this Topic existed....... took this picture a few weeks ago, tell me what BMW engine with Jaguar supercharger that is.
-
Becoming a rock star at karaoke. ?
-
a half fast
-
I like the sort of turbine wheels, that's why I sprung for this kit. I built the other version with the "normal" wheels which are okay too. I lucked out having road tires that should work, and not be too wide (a peeve of mine with this kit).
-
Now I feel stupid....... I had a 'wanted' post a couple weeks ago looking for this kit, then decided to just get what I wanted off eBay. This is what I got for the cheapest price, shipping in a bag, at least it arrived faster than predicted. ? Lucky no parts got crushed. I also didn't know what this kit contained, the box art looks like a street version, I know there are a bunch of race versions. So it has slicks, and no back seat, so this will change my plans (of mice and men).
- 39,135 replies
-
- 3
-

-
- johan
- glue bombs
- (and 1 more)
-
under the table
-
Sentence varies with mileage, and who you are.
-
Been seeing a flood of posts on Fakebook showing disasters using this paint. Searched here and could tell the majority of comments are in the negative. If you have success, consider yourself lucky. Years ago I used Krylon clear and wrecked a model, never used spray paint again.
-
That would take more balls than a bowling alley to drive! Love the creativity. I have an Allison Salt Flat project sitting on the shelf of doom, so I'm looking at your details for the engine.
-
Better than museum quality!
-
for tax write-off
-
Ten Years Ago Today - RIP Granite Mountain Hotshots
89AKurt replied to Danno's topic in The Off-Topic Lounge
Thank you for posting this. This is my home town. I still remember that day when I was standing on my street looking at a massive thunderhead to the north, and feeling the change of wind direction with the cool downdraft and feeling some relief from that hot summer day, not knowing that 31 miles south of me this tragedy was unfolding. There was a tribute ceremony at the Courthouse Plaza/Square, listened to it on the radio. I stood on a bridge over 89A to watch the 19 hearses drive by, and listened to the powerful ceremony (wrong word, what is the correct word escapes me) on the radio. Attended the opening of the museum at the Gateway Mall. Hiked the trail to the Fatality site outside of Yarnell, can't imagine carrying all the equipment through that rough terrain, and then being overrun by the flames. Saw the movie, typical Hollyweird with the station in a beautiful setting (it was in the industrial area in town), otherwise a very moving tribute. I still need to hike to that Juniper in the photo, the Doce Fire that consumed much of Granite Mountain could have been worse without their work. Even after 10 years, still took a lot for me to type this. ? -
about the shortcut
-
legalese regulations defining
-
Fun project to use a spare body. I have one in the junkyard. Came out nice!
-
AMT 1972 Chevrolet C10 Pickup
89AKurt replied to Jim B's topic in Model Trucks: Pickups, Vans, SUVs, Light Commercial
Just because I owned a '69 and built a tribute, and currently own a '68, of course I like it! The important thing, you finished it, and didn't get bogged down correcting kit inaccuracies. -
Building Department, the County, hating this end of the process of architectural design anymore, know enough to be dangerous, but too stupid to figure out how else to make decent money. Just an addition, initial plan check said Engineering was required, which took 2 months and cost hundreds. Submitted into the wonderful /sarc off/ CitizenServe portal, a month ago. Today I went with a Contractor to look at the job, but before that I checked, and still no permit released, so I emailed the top bureaucrat asking what's up. After I got back home, no email yet, but a few hours later, the top bureaucrat replied with some confusion, then two lower desk clerks responded apologizing for the delay, got the permit. This area is still in a building boom, and everyone is swamped, but this is getting really old. Last century in High School, had to watch the propaganda flick 'Future Shock', which said computers would make our lives easier, would need to work only 3 days a week, no paper will be needed. Computers are nice for participating on this forum, but blows big chunks for work.
-
with Criminalbitcoin, first
-
to the sharks
-
Misao Hiro of Model Factory Hiro has Passed
89AKurt replied to Justin Porter's topic in Car Kit News & Reviews
I've seen where he included notes with shipments, customer service was apparently very good. Have only one of his kits in the stash. I'm only one year younger. ? -
Mercedes Outlaws & Hot Rods
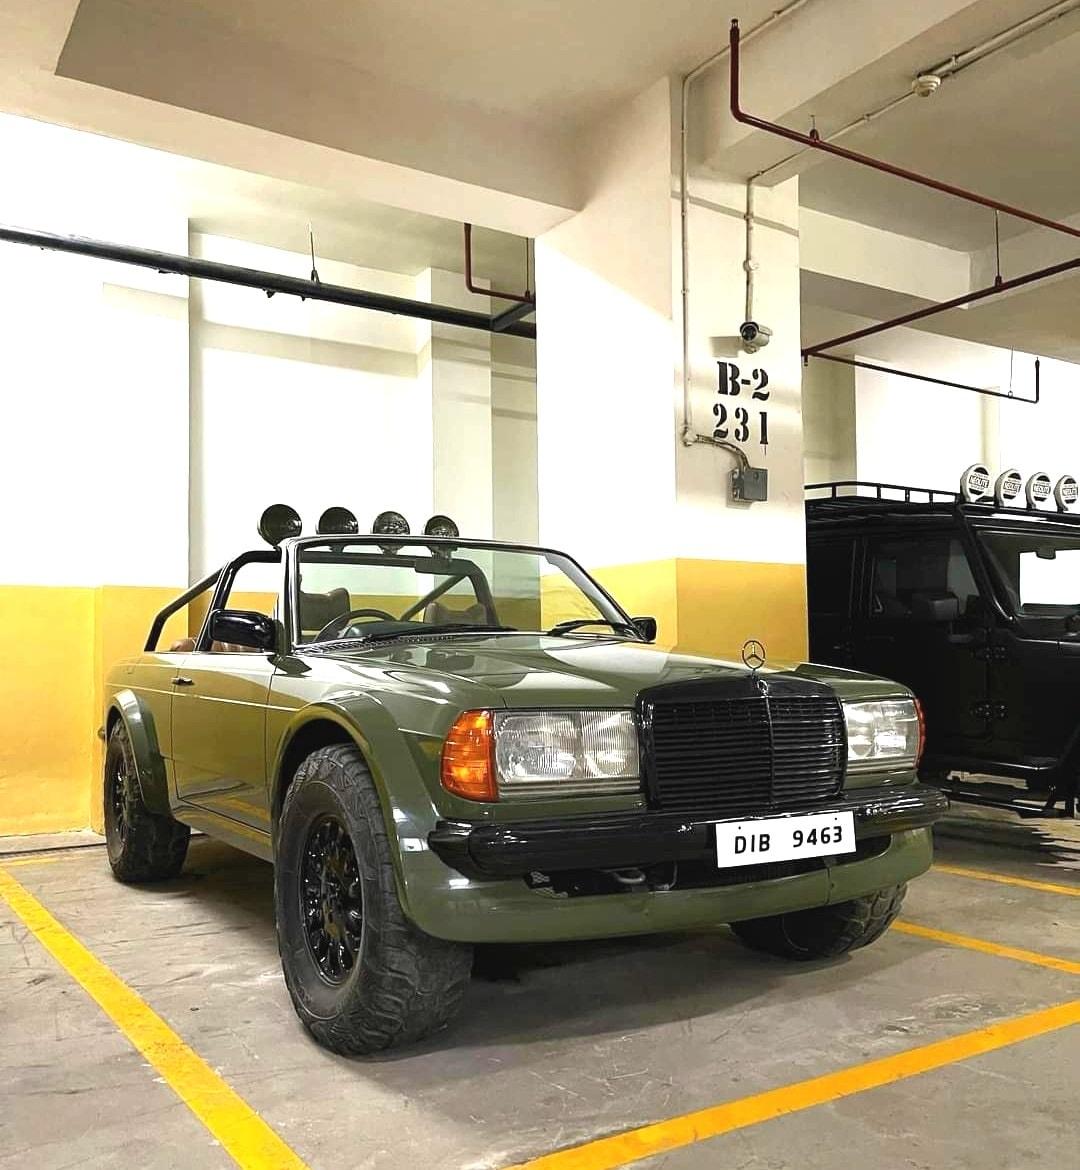
89AKurt replied to 89AKurt's topic in General Automotive Talk (Trucks and Cars)
Found on Facebook, Goblin Garage / sultanpur.
- 130 replies
-
- 1
-
-
- mercedes benz
- outlaw
- (and 2 more)
-
started a fire!
-
prenant persons surfing
-
in mid air