89AKurt
-
Posts
8,426 -
Joined
-
Last visited
Content Type
Profiles
Forums
Events
Gallery
Everything posted by 89AKurt
-
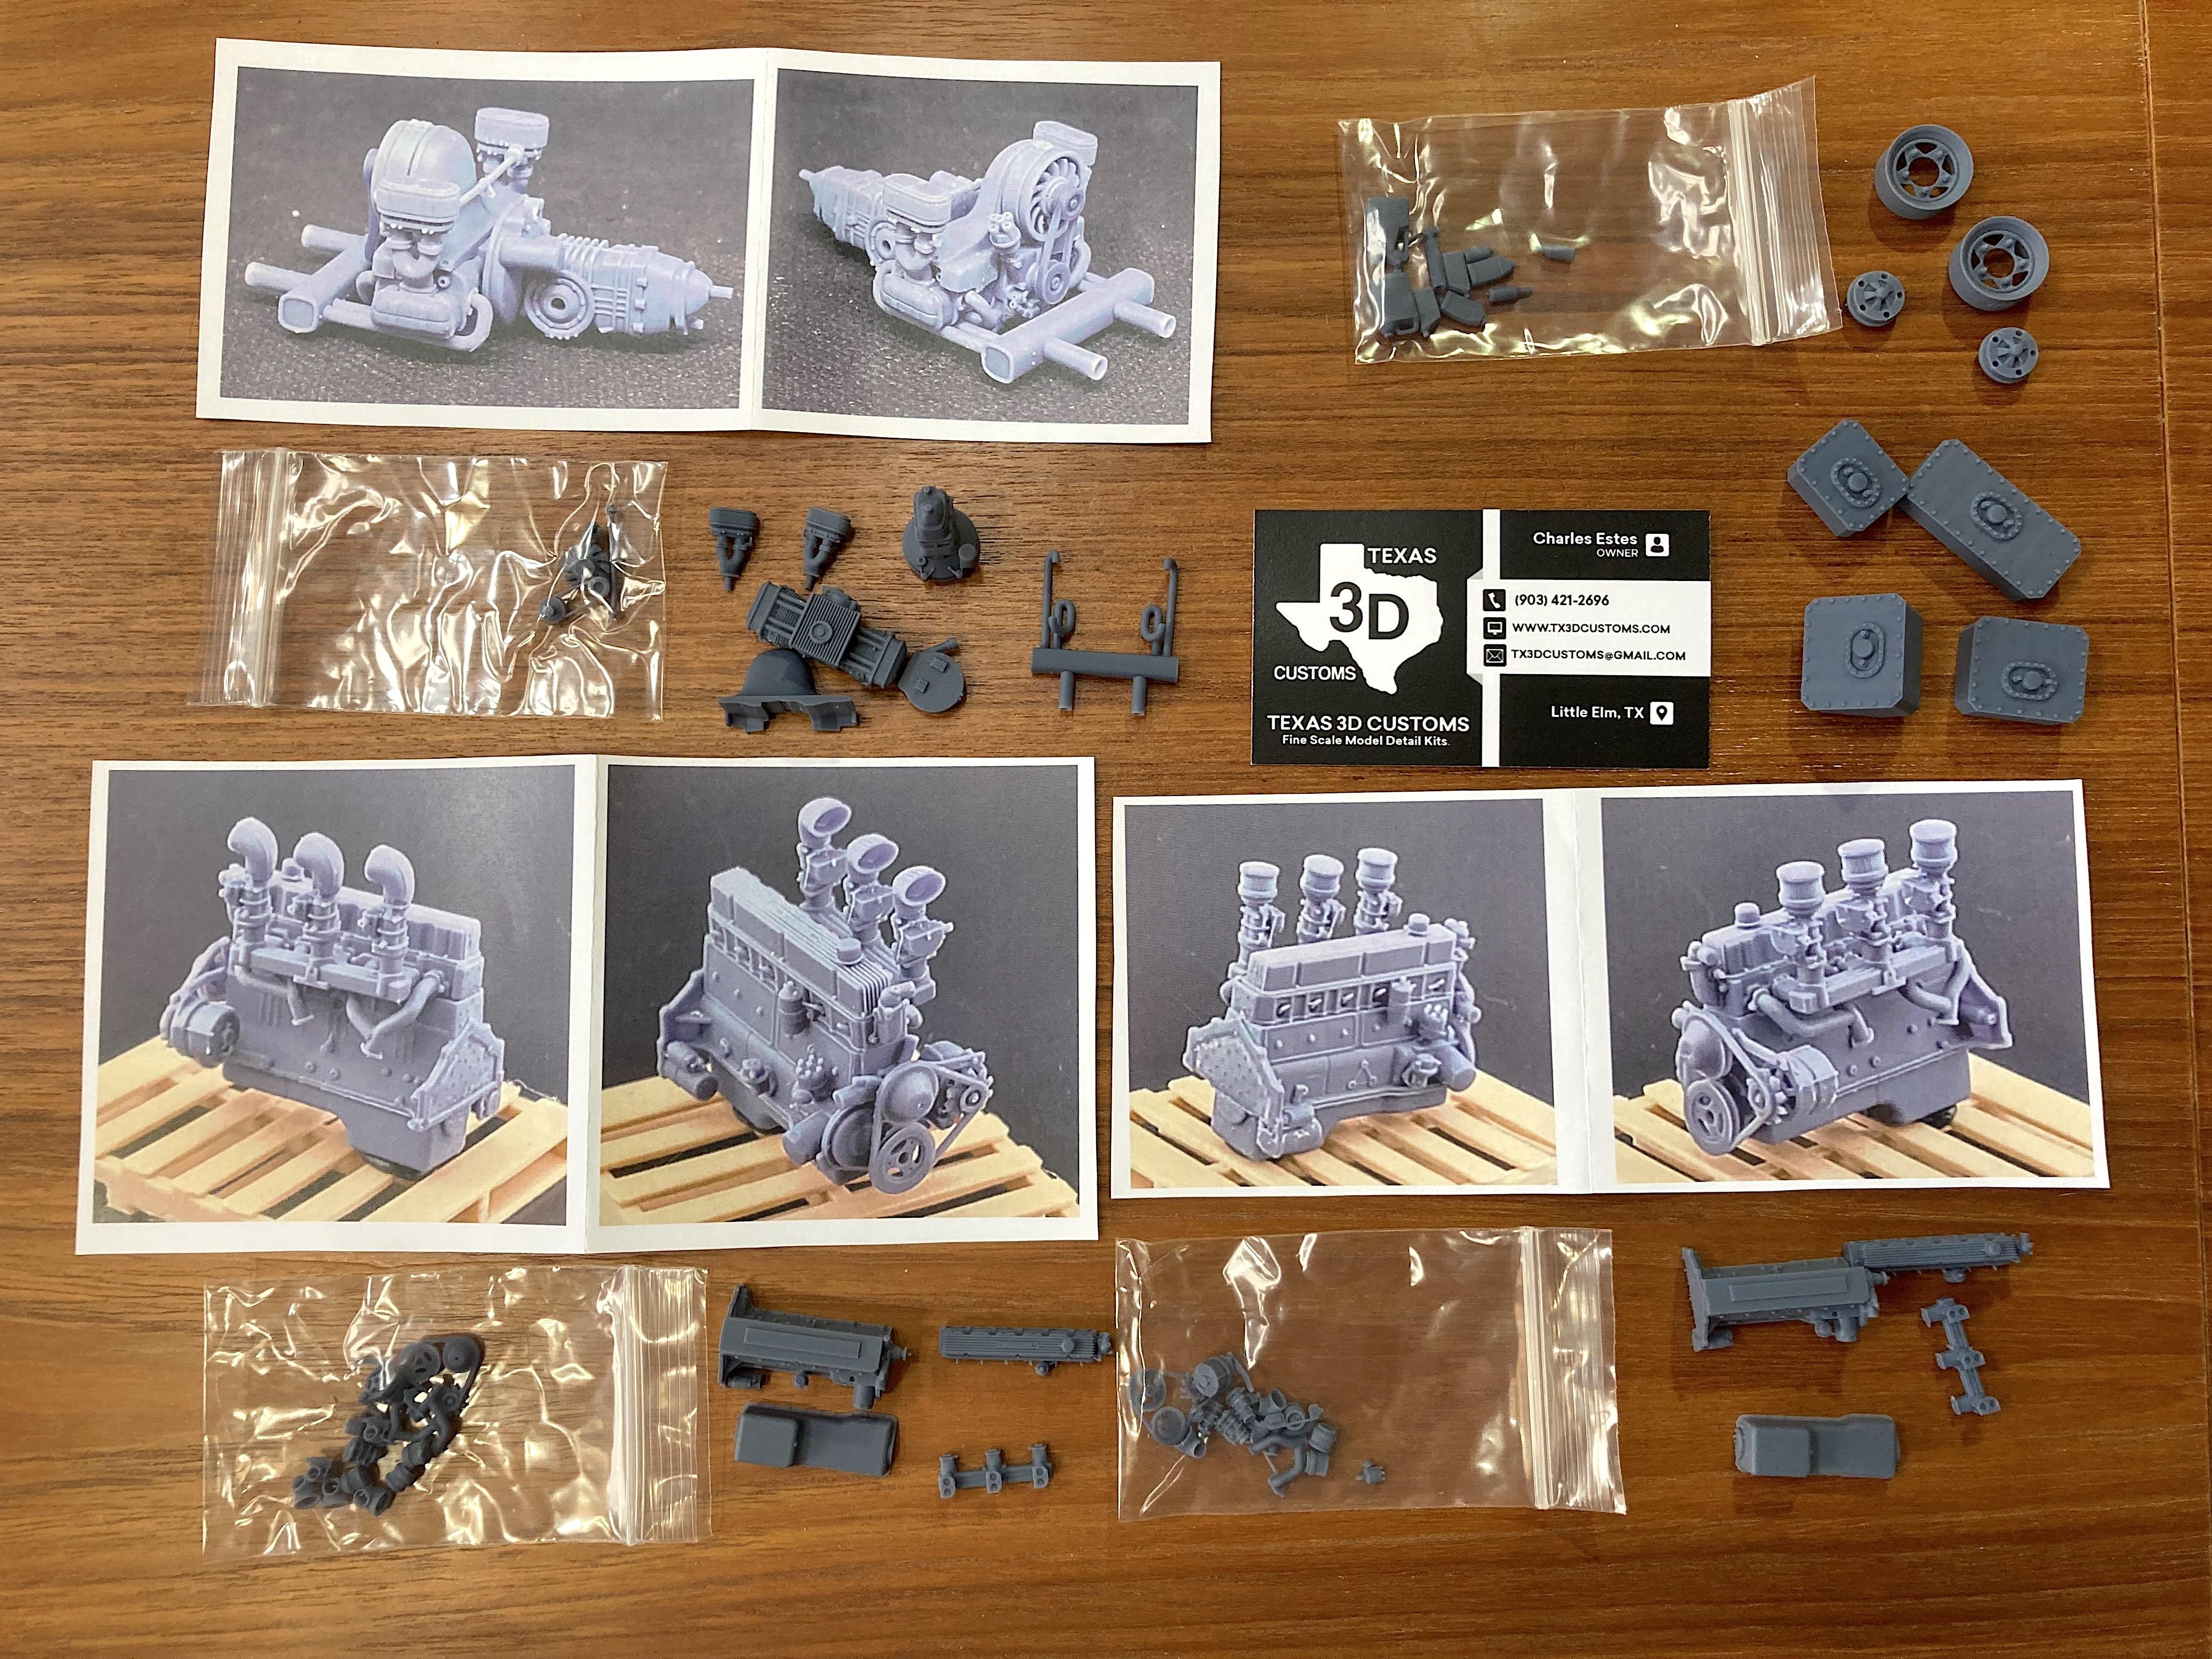
Awesome build! I recently got some Porsche engines from Texas 3D, so I could use yours for the color reference.
-
The same?

-
Themselves are non-binary elves.
-
Lawn darts dropped
-

What did you see on the road today?
89AKurt replied to Harry P.'s topic in General Automotive Talk (Trucks and Cars)
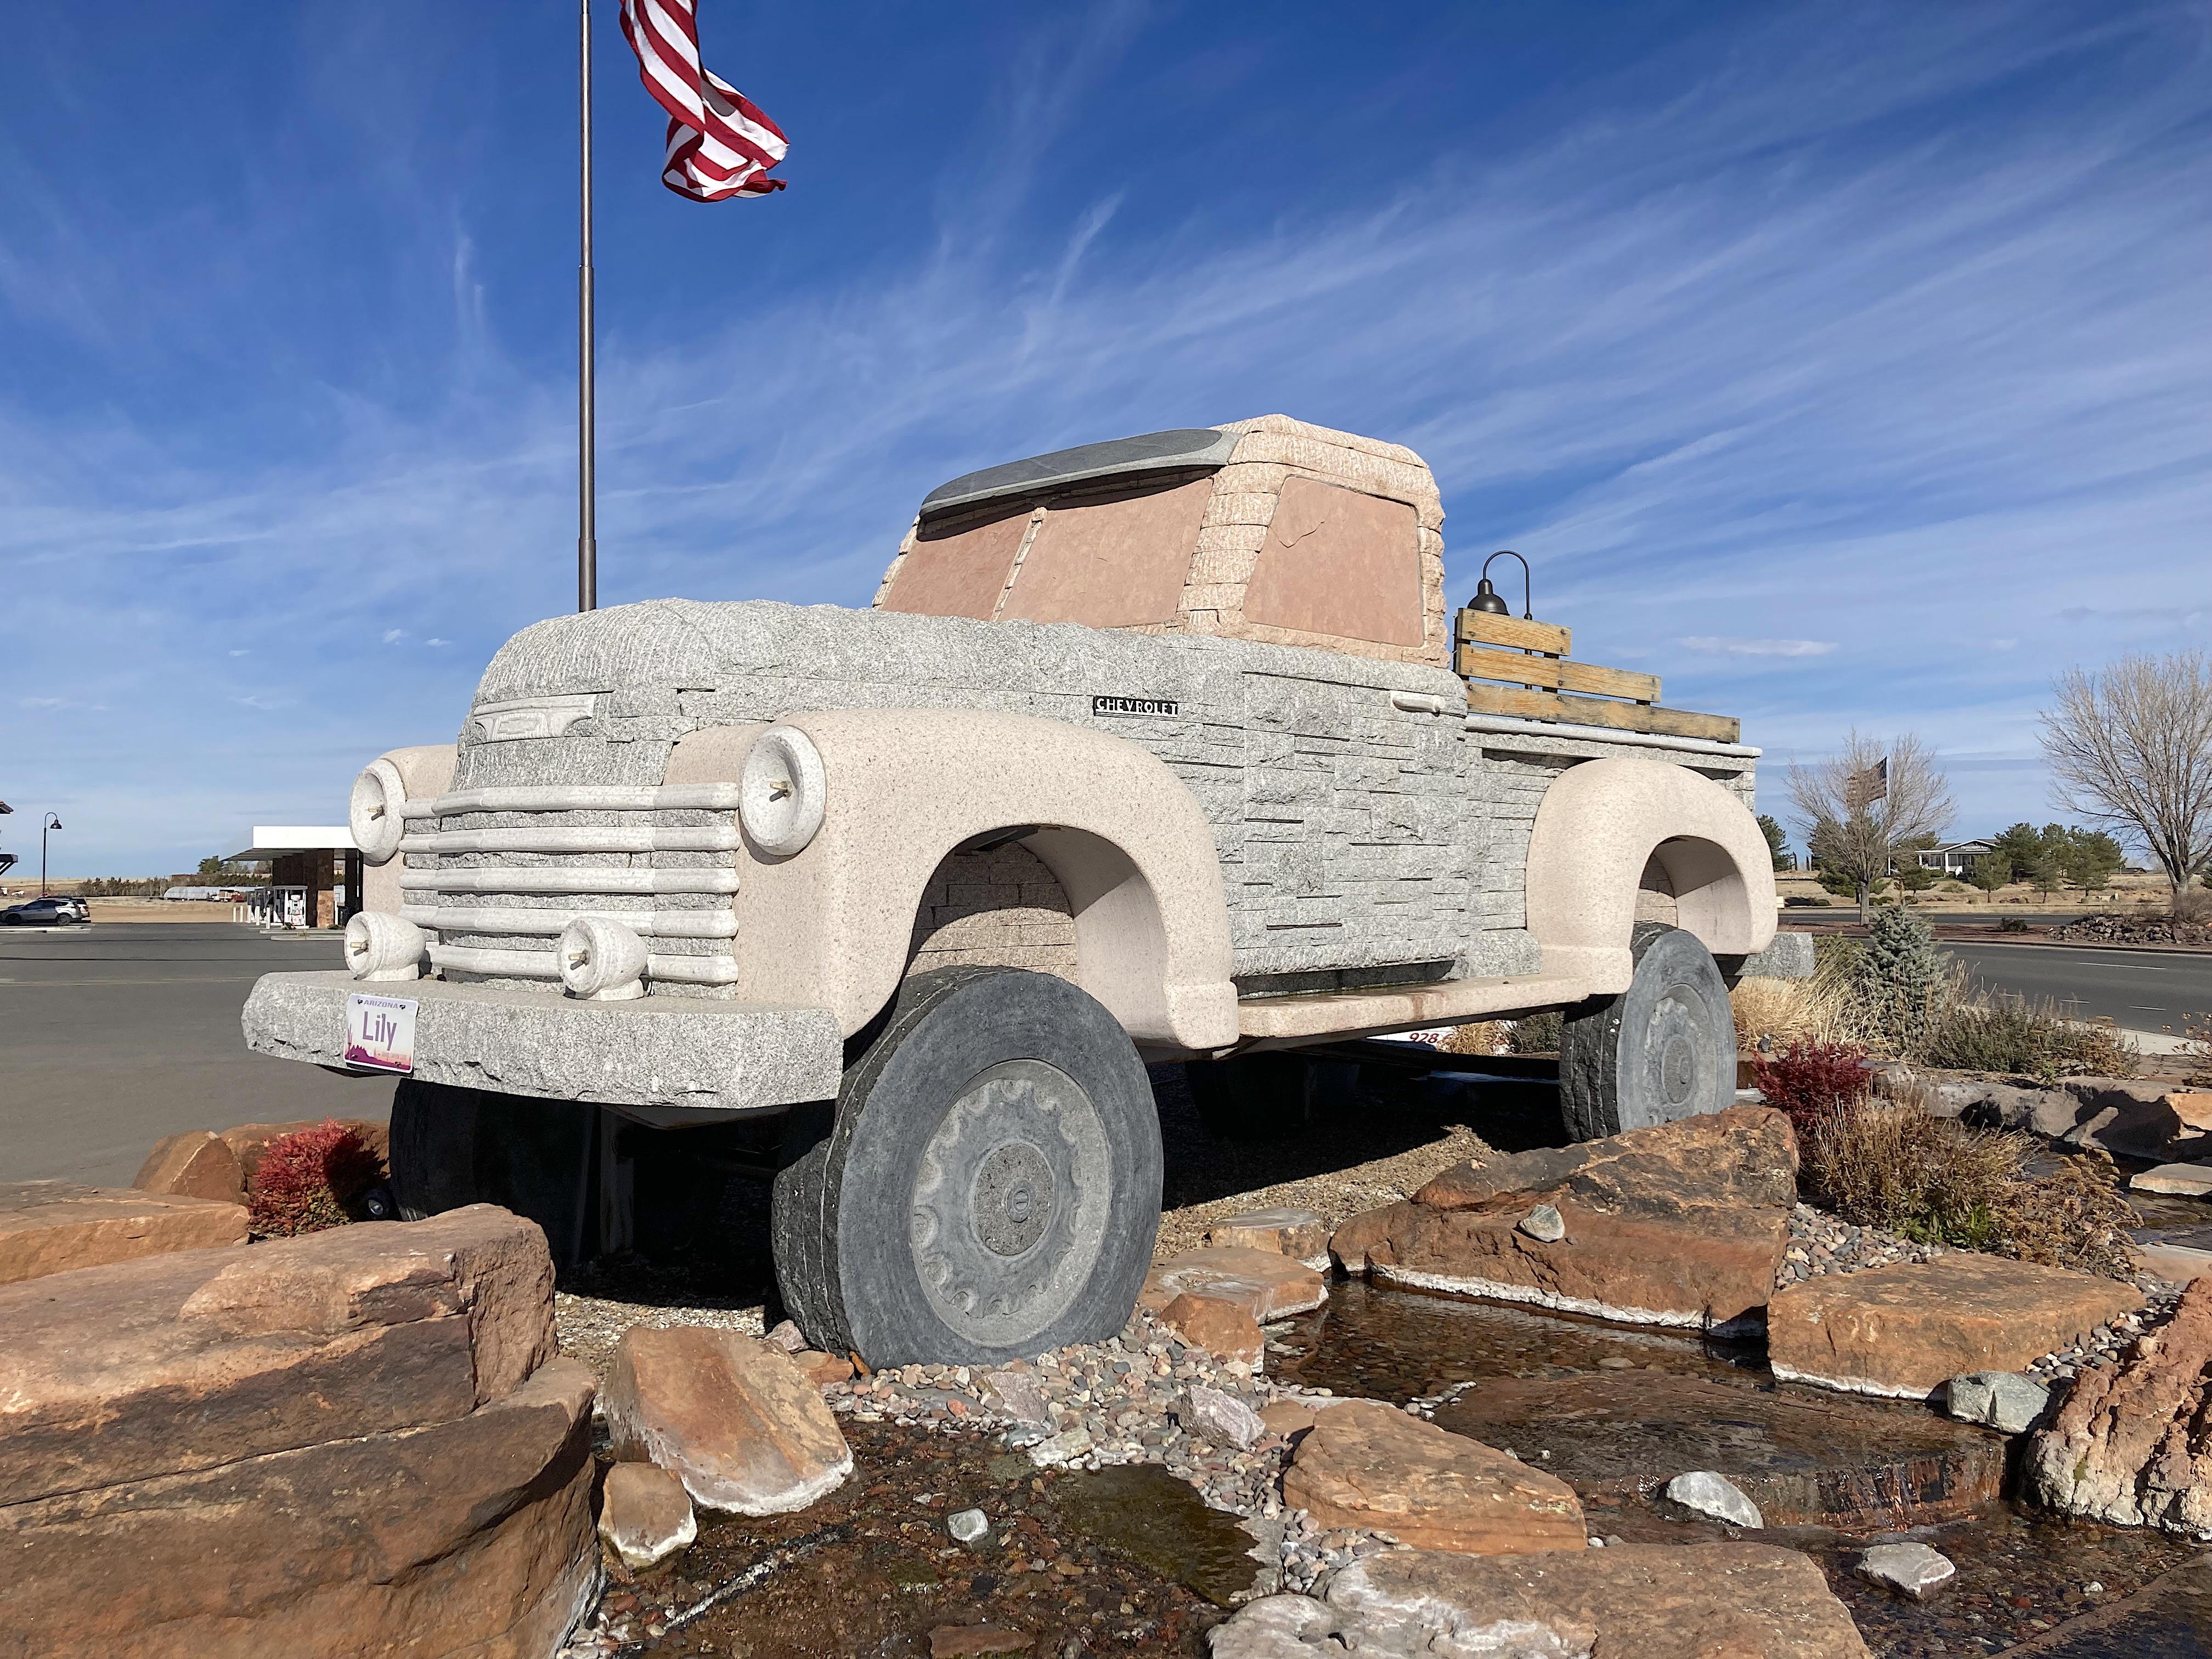
This was not on any road, can't imagine crashing into the 100 ton Chevy pickup. ? This is in Prescott Valley, AZ.
-
for Discus competition
-
Unfold was a popular Playboy activity.
-
barfbag salesmen circling
-
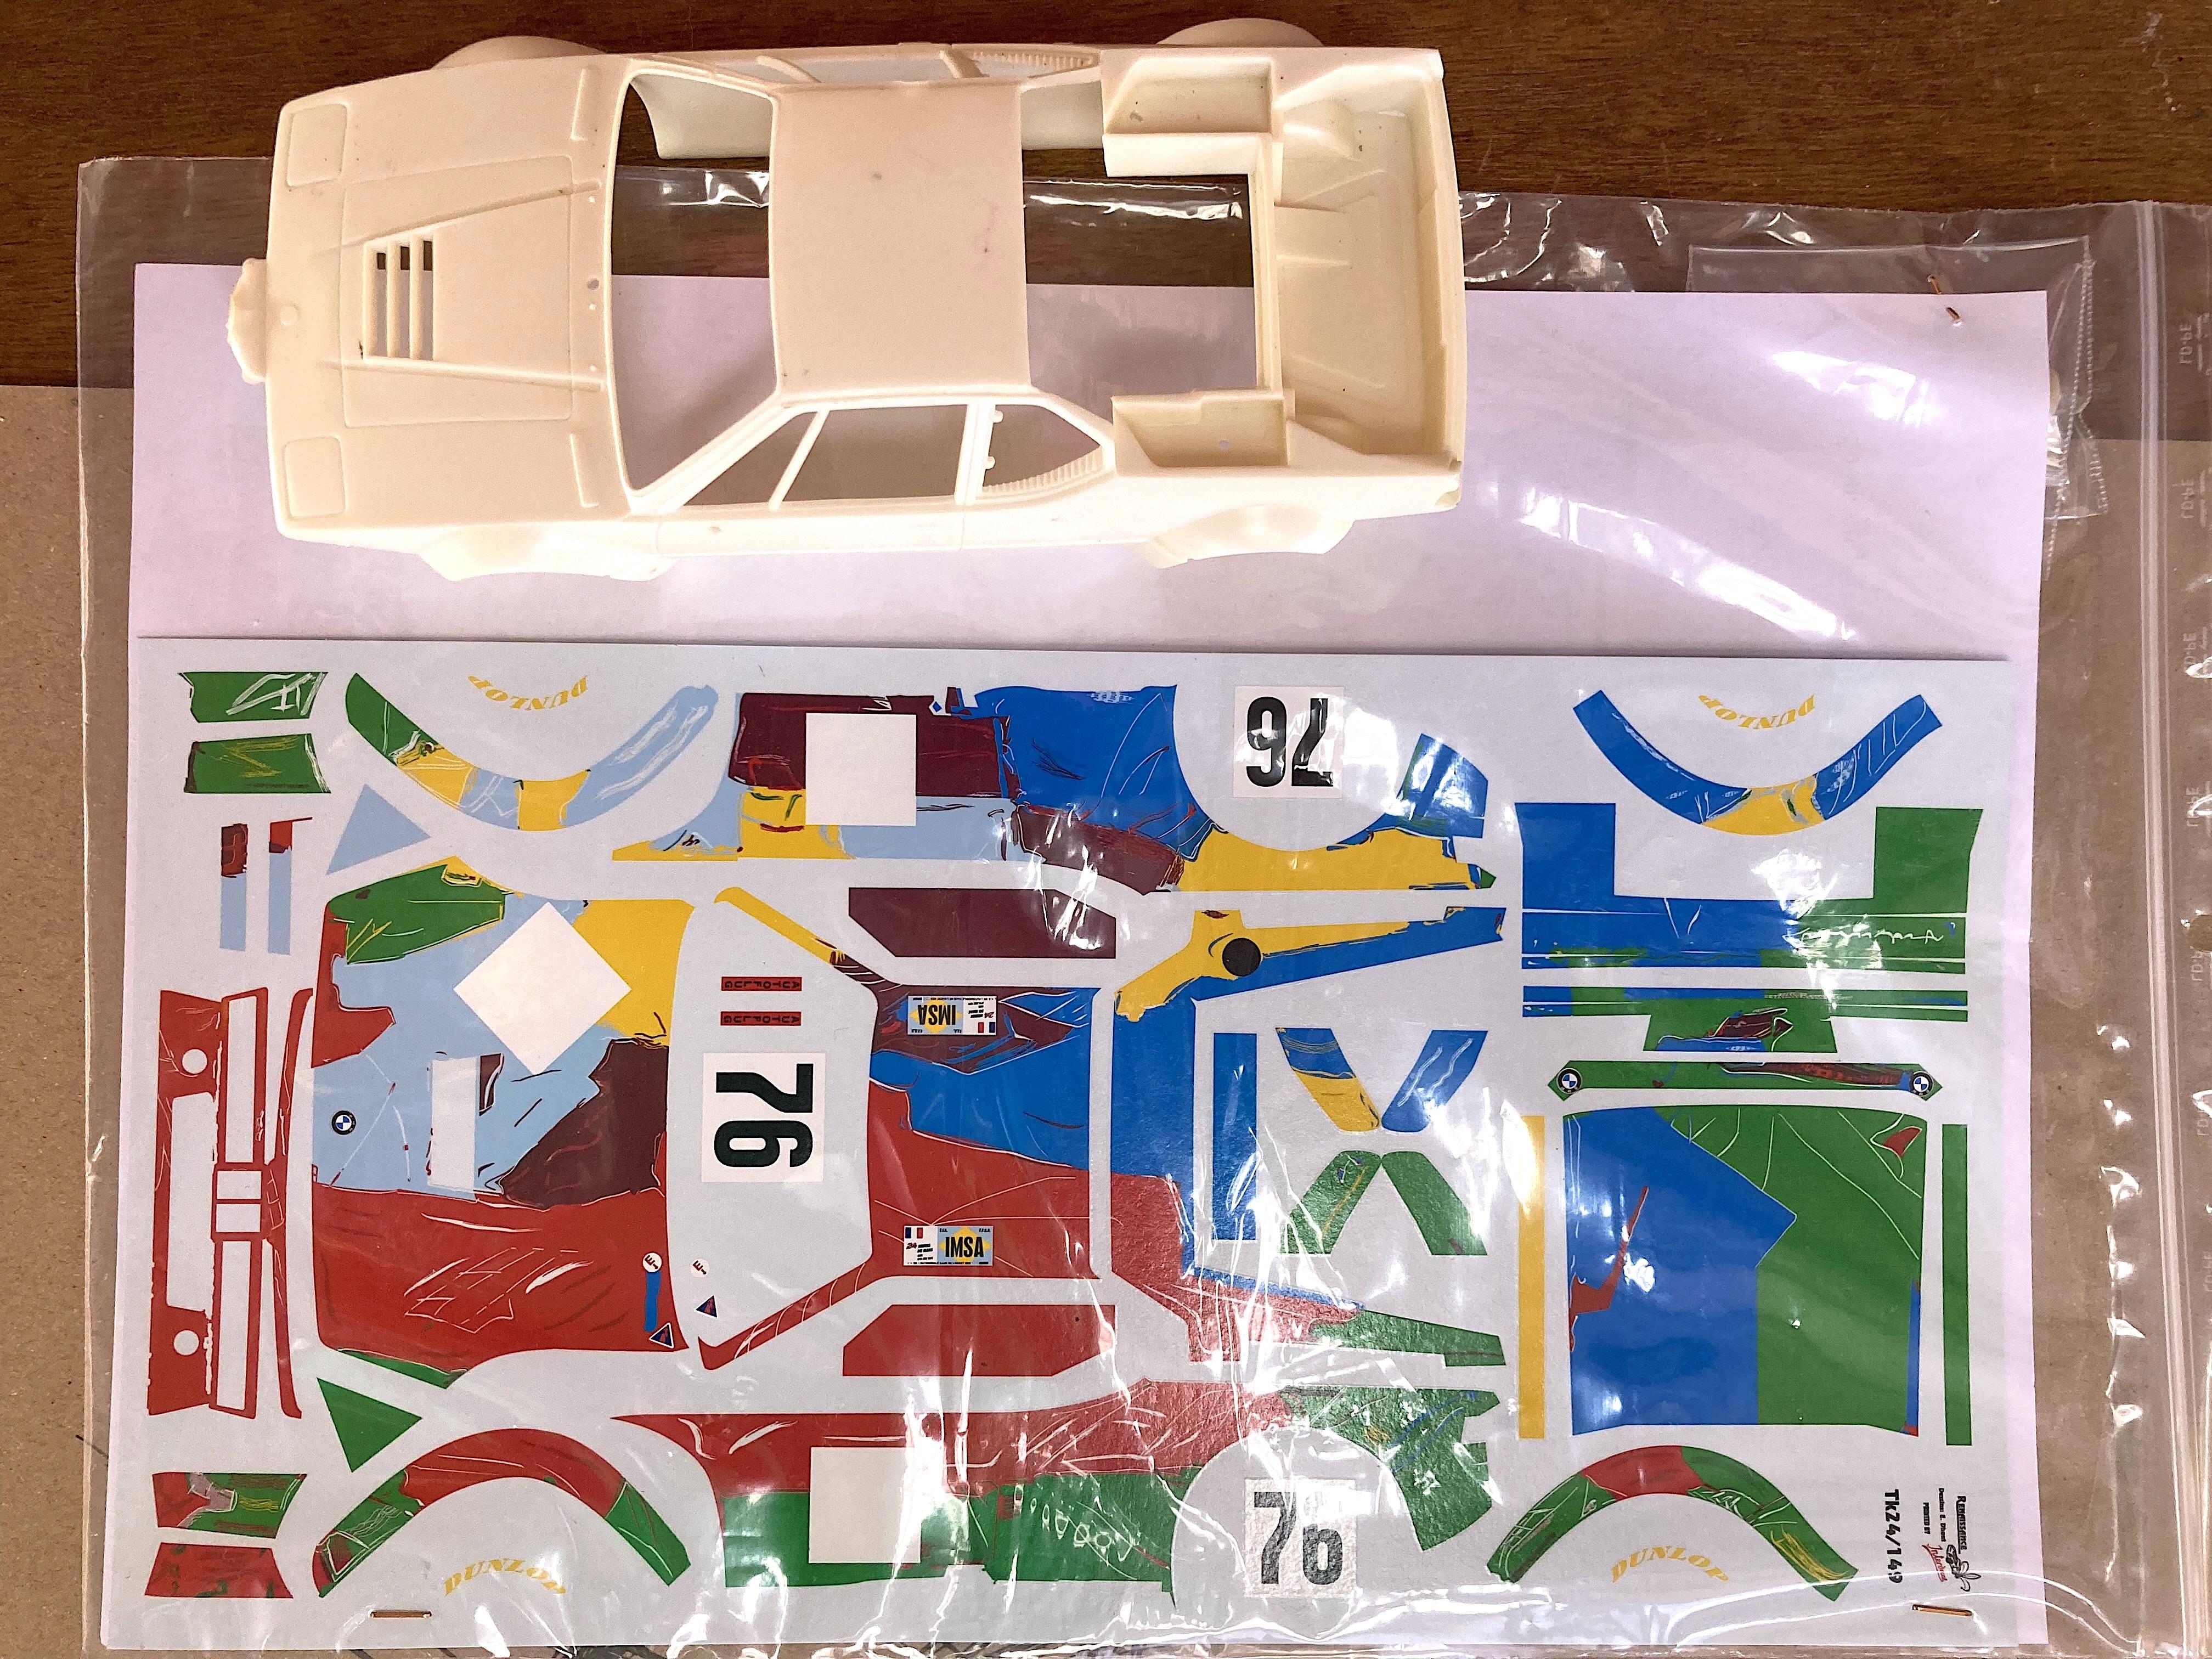
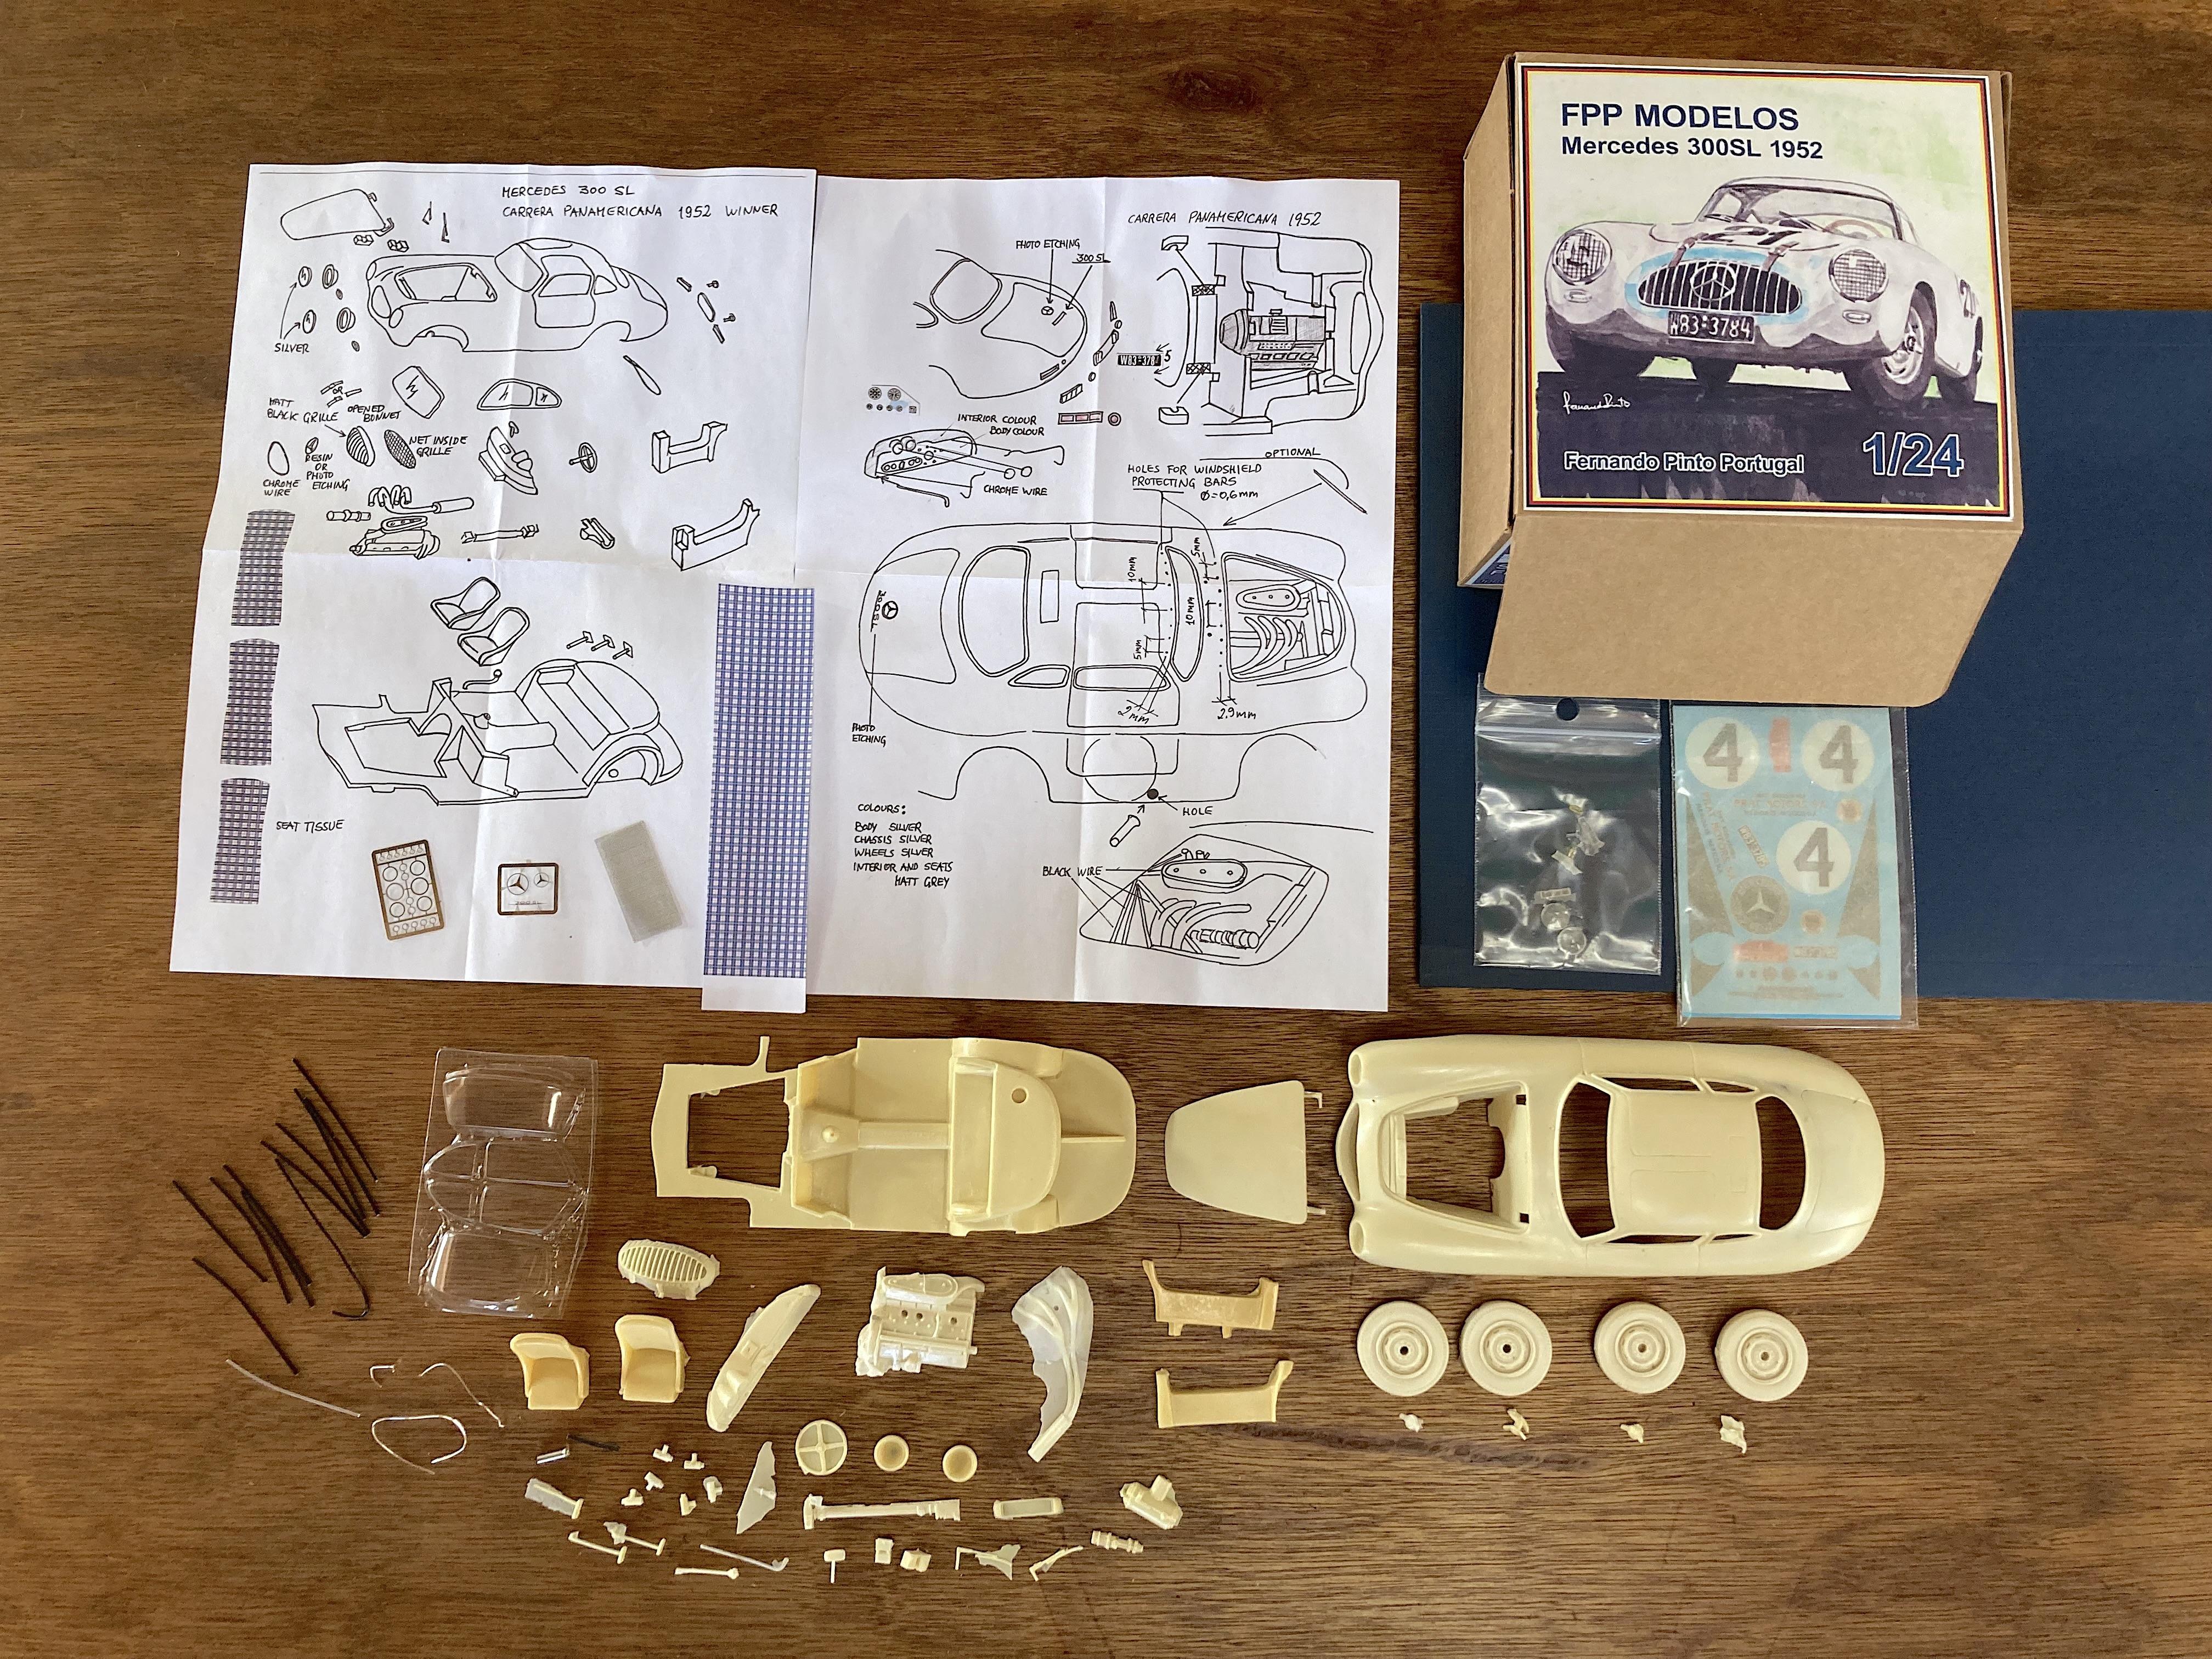
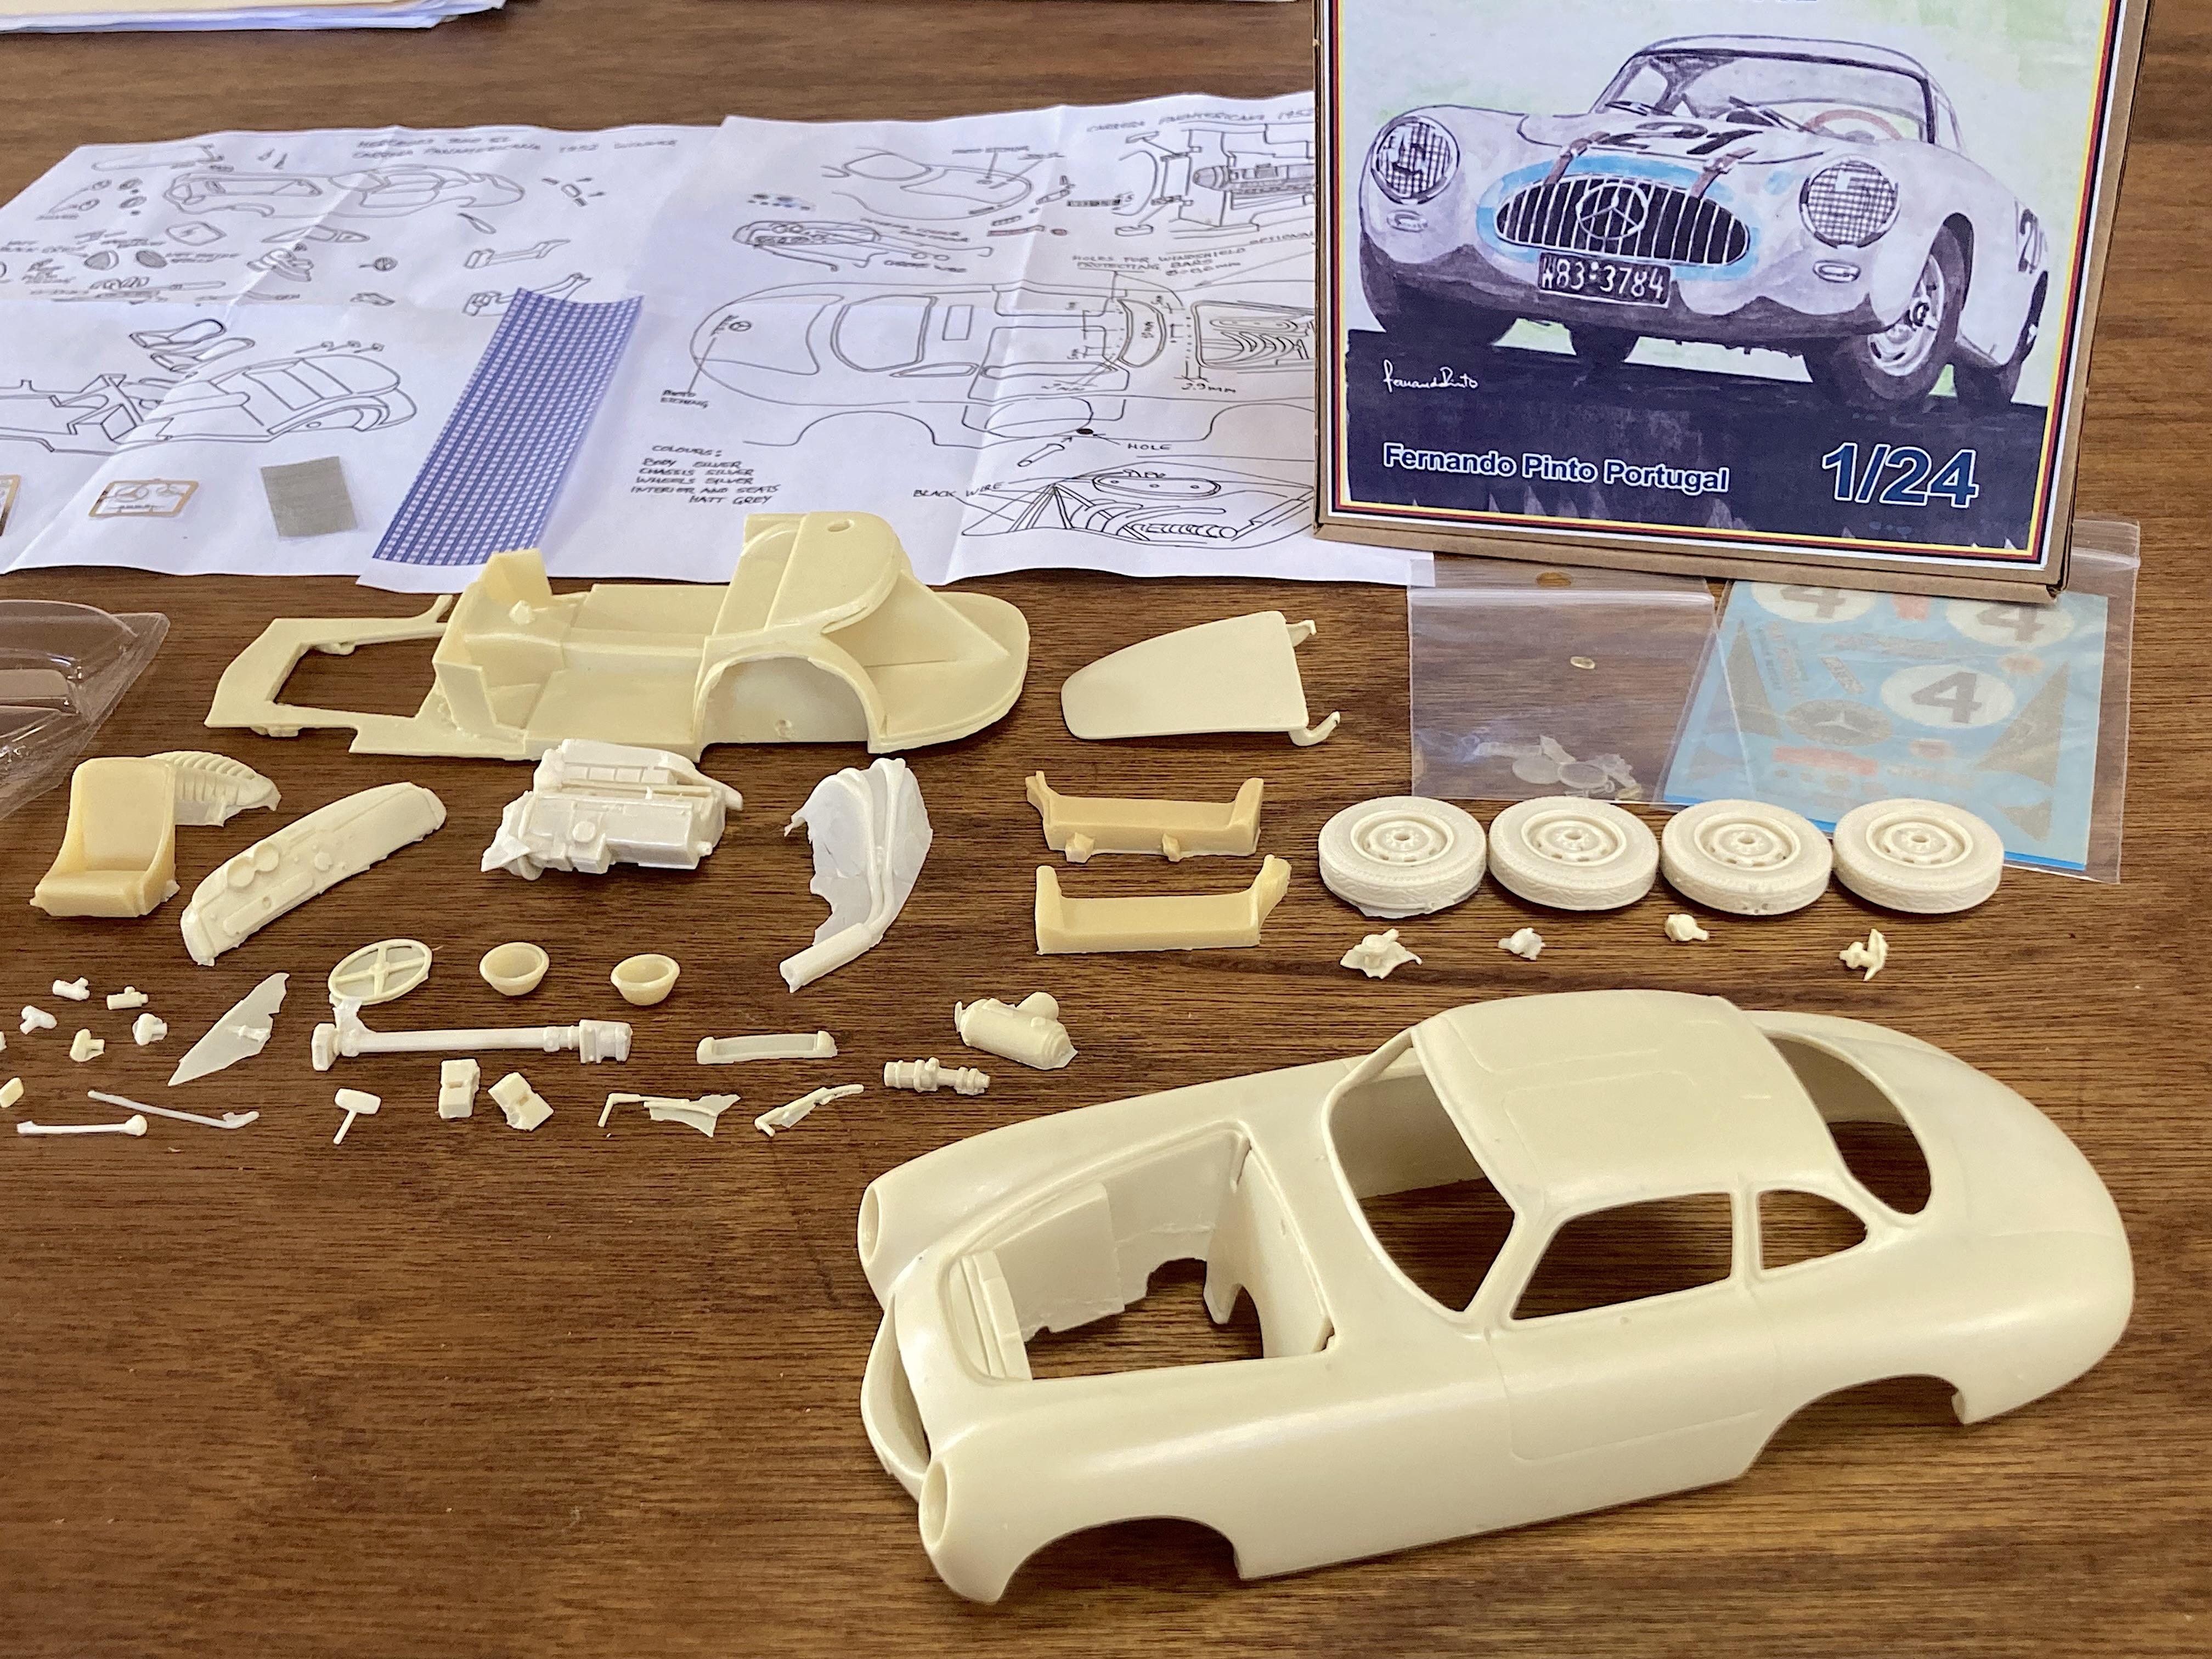
Seems like I said "no more models" last year. ? Well, I was checking out eBay and saw Fernando Pinto created the 1955 Panamerica winner 300SL. It's an ideal subject for "weathering", want to do the pit stop time when they arrived after hitting a Buzzard at 120 MPH. I ordered a couple other models too, still in transit. I was pleasantly surprised how quickly this got here from Portugal.
- 39,147 replies
-
- 4
-

-
- johan
- glue bombs
- (and 1 more)
-
1/24 Heller Talbot Lago T26C Grand Prix
89AKurt replied to kensar's topic in Other Racing: Road Racing, Salt Flat Racers
Welcome to the forum! Outstanding. I got the SMER kit of the Alfa Romeo last year, the way they represent the spokes is horrible, but there wasn't photo-etch back then (I assume). -
Circa, I thought that was an unfinished circle, with a lisp.
-
after a stroke
-
1/24 Fujimi Porsche 356
89AKurt replied to kensar's topic in Other Racing: Road Racing, Salt Flat Racers
That's sweet! The only thing missing is the buzzard bars...... oh wait, wrong car. ? Any relation to Michele Mouton? And welcome to the forum. ? -
I wanted to give a positive review! I ordered several engines and other parts recently. I like how you wrap each item in bubblewrap, it's like opening little Christmas presents. I also got your "catalog" pictures printed, which got put into baggies with the parts.
-
WORK is a 4 letter word.
-
earthquake shake table
-
Re-dos is the American way, hurry up and get 'er done, then fix later and charge extra.
-
Lexicon is the con artist version of Lexus.
-
hanging from powerlines
-
I didn't know the history. Check out his model that inspired the car.
-
Picnics used to be a thing, long before fast food restaurants were invented. (picture from family estate, grandpa was a sign painter)
-
I've seen his posts on Fakebook. Prayers. ?
-
impersonating Groucho Marx ?
-
The Official EBay Discussion Thread
89AKurt replied to iamsuperdan's topic in General Automotive Talk (Trucks and Cars)
Some sellers are high as kites! ?
-
Much was spent by Swampies on caulking from Home Deephole.