Oldmopars
-
Posts
2,058 -
Joined
-
Last visited
Content Type
Profiles
Forums
Events
Gallery
Everything posted by Oldmopars
-
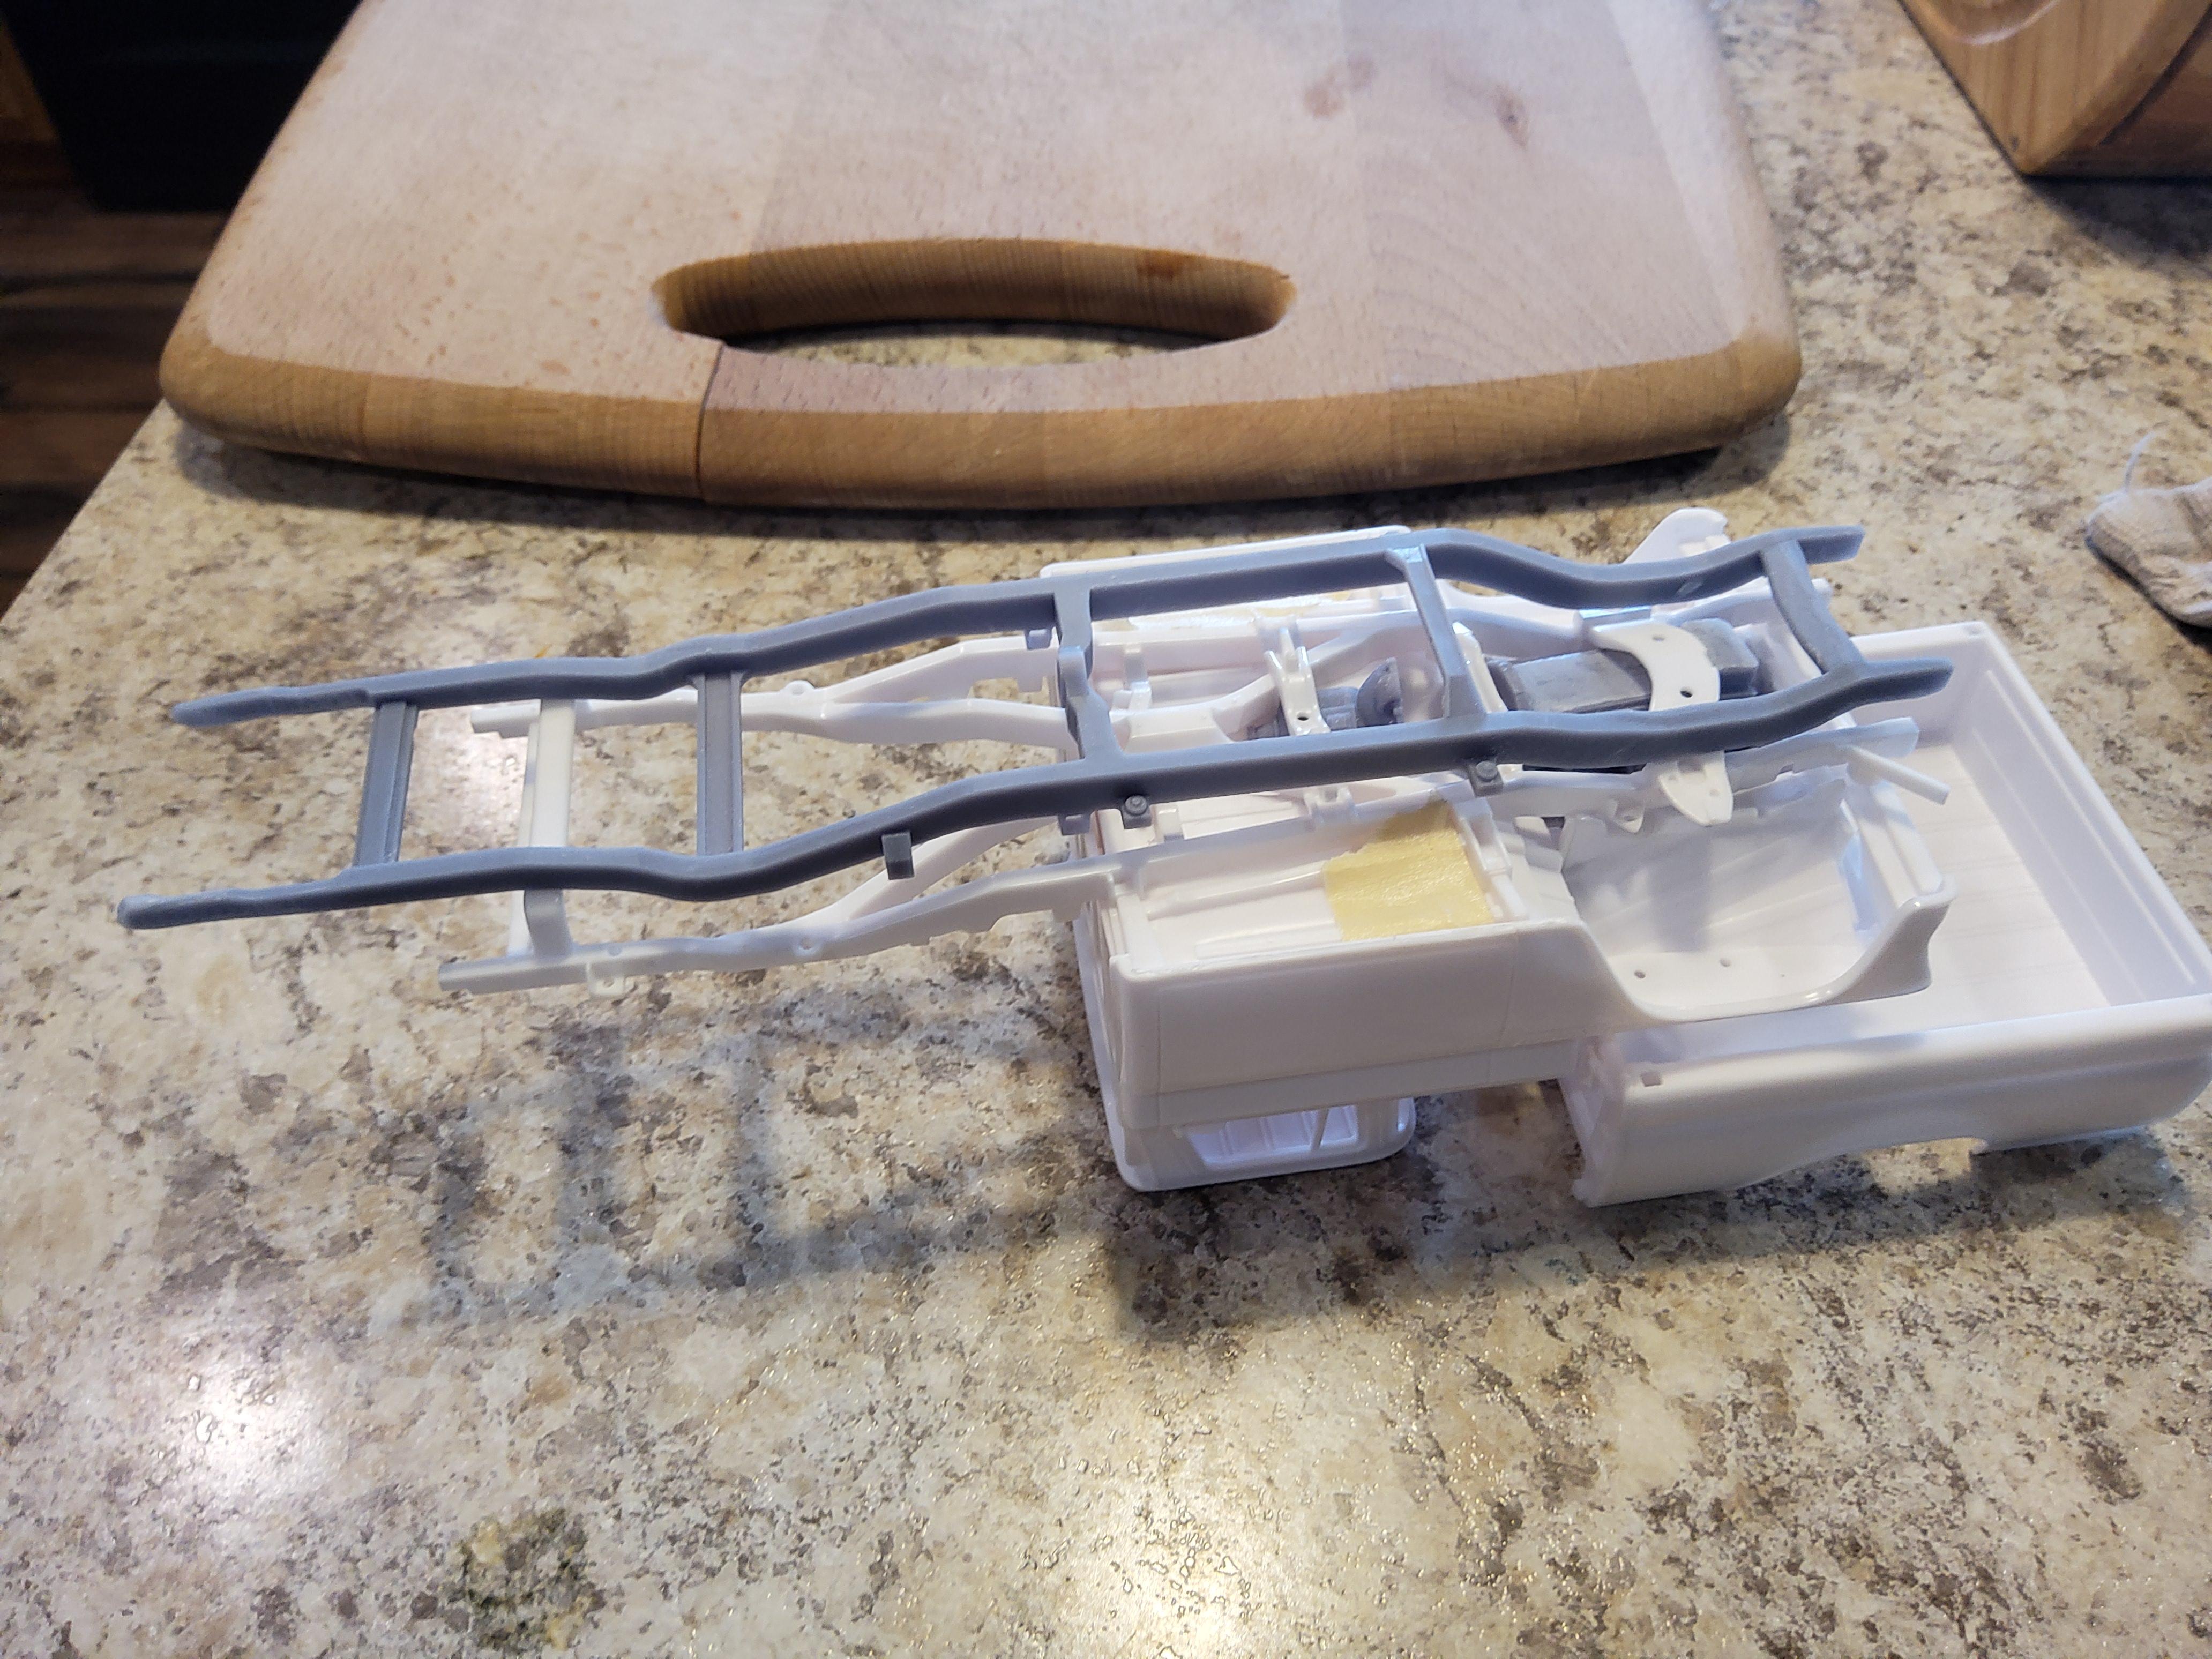
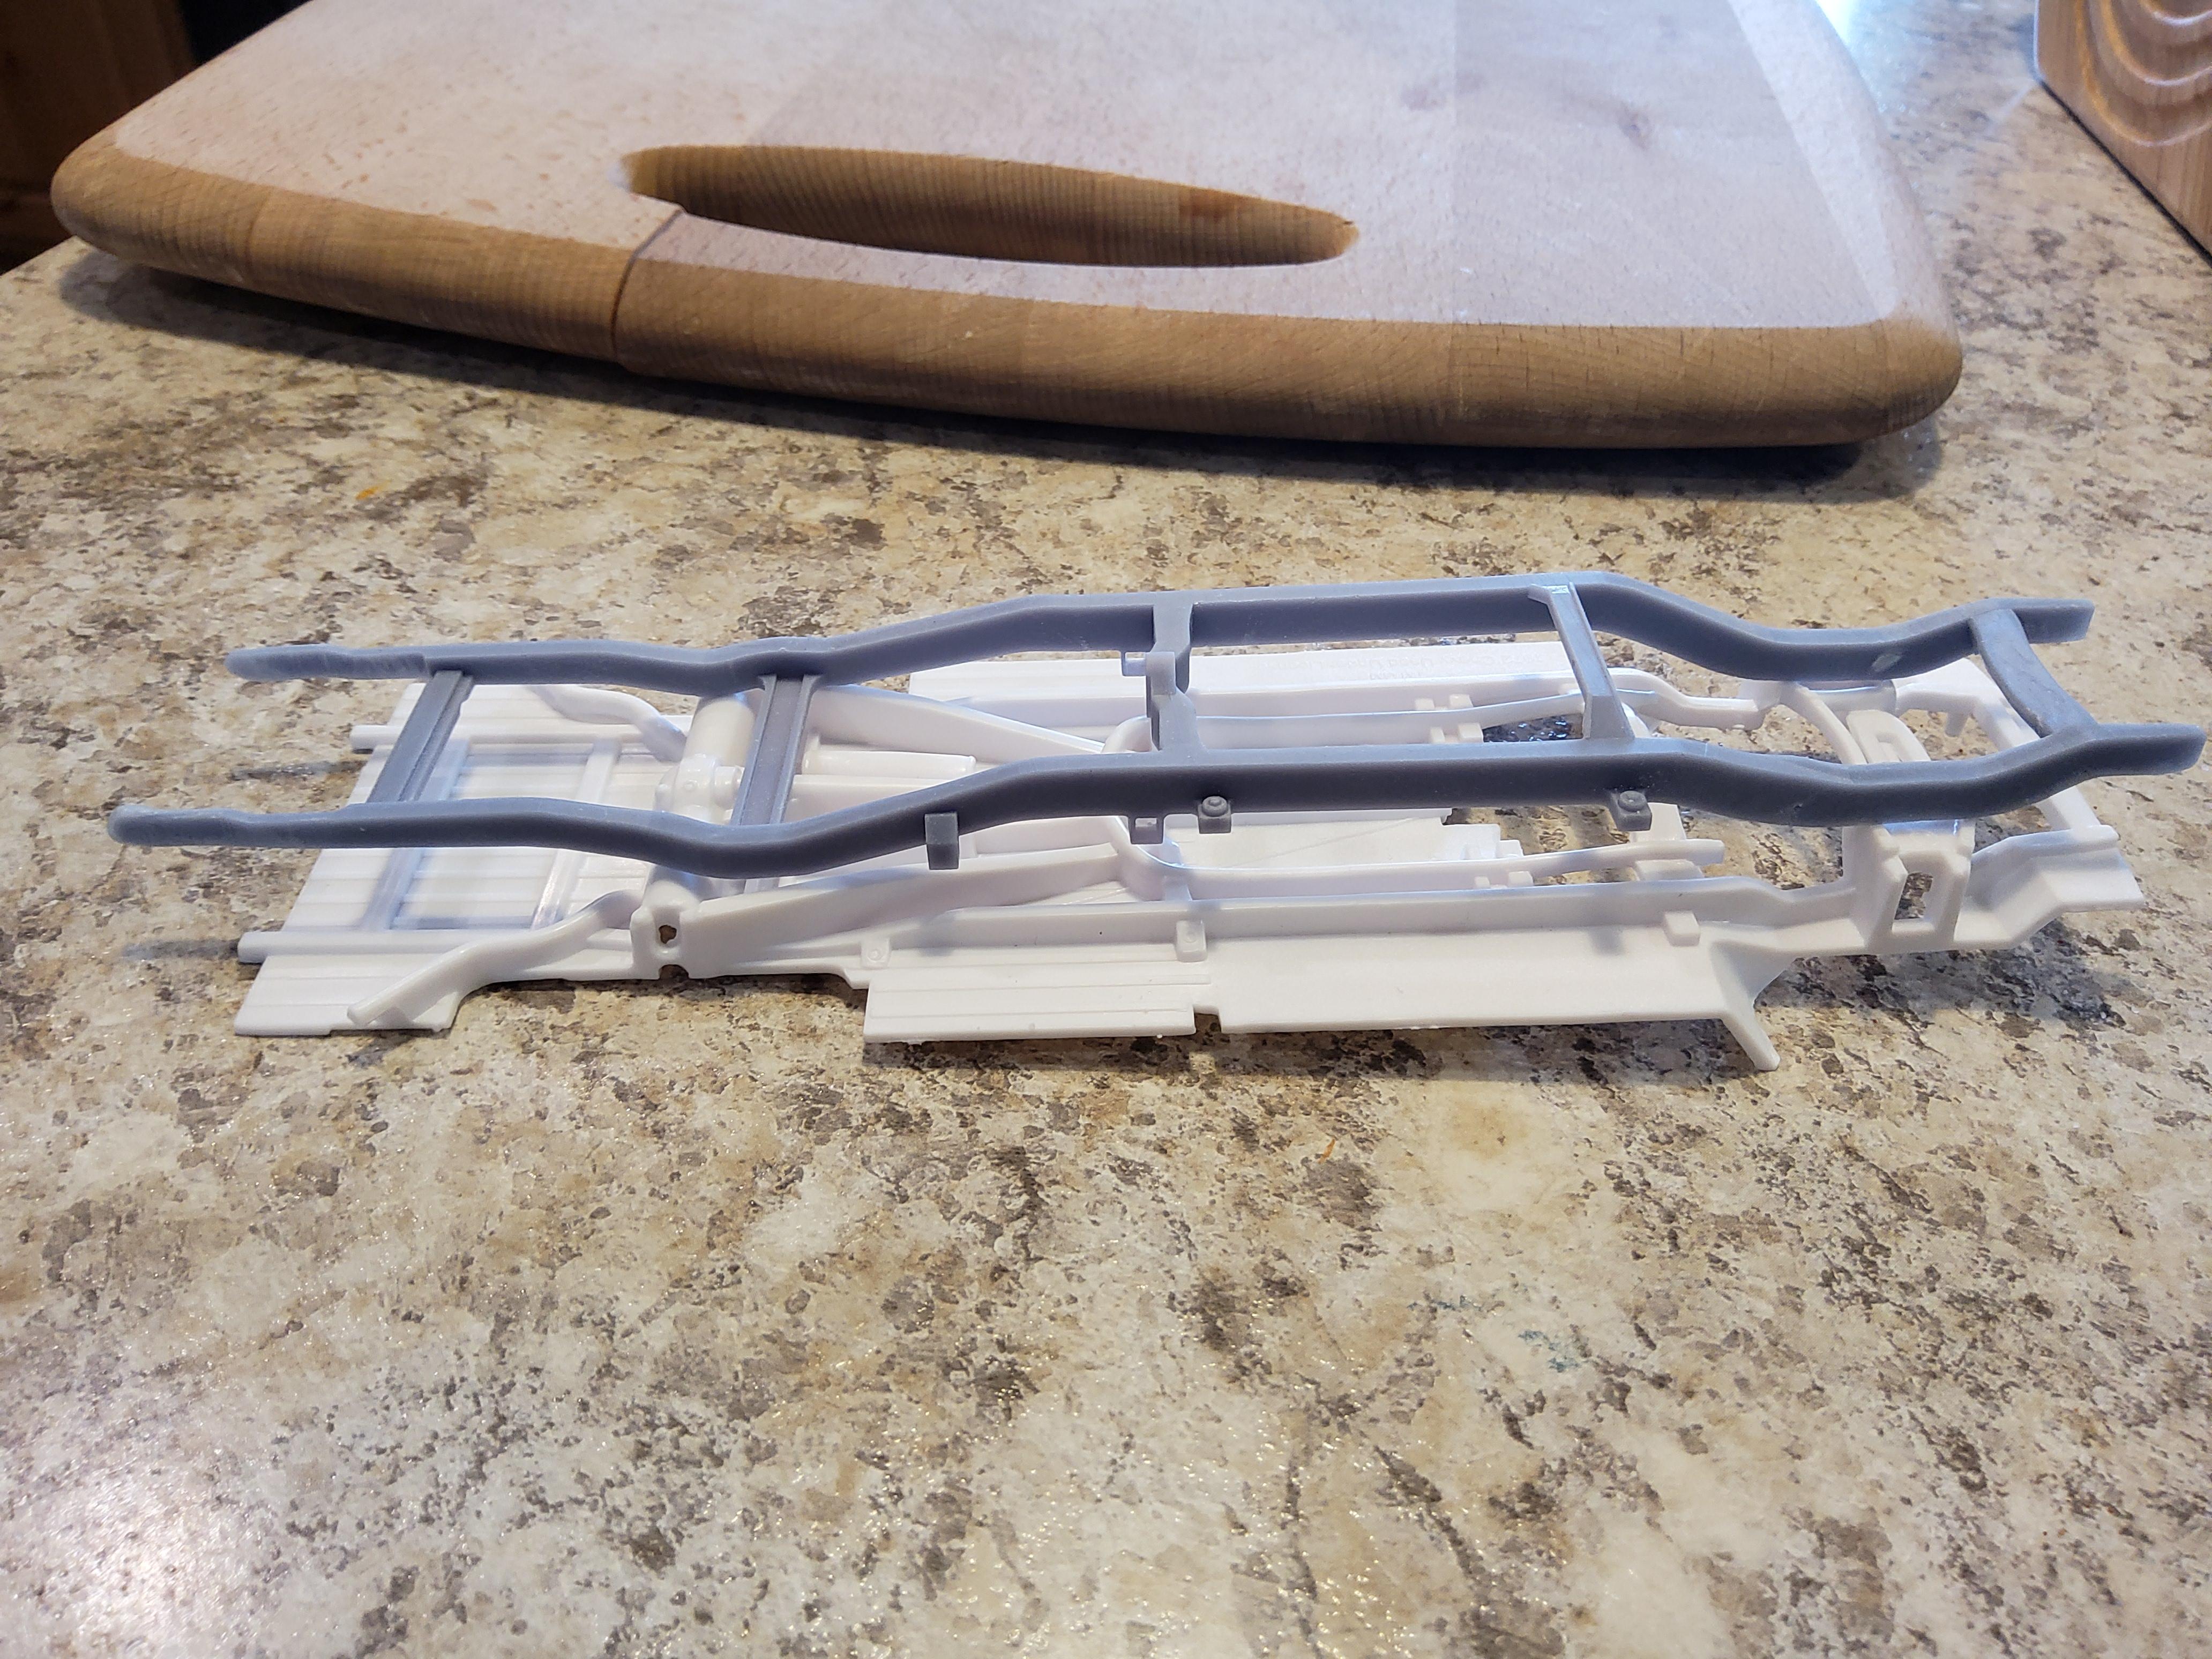
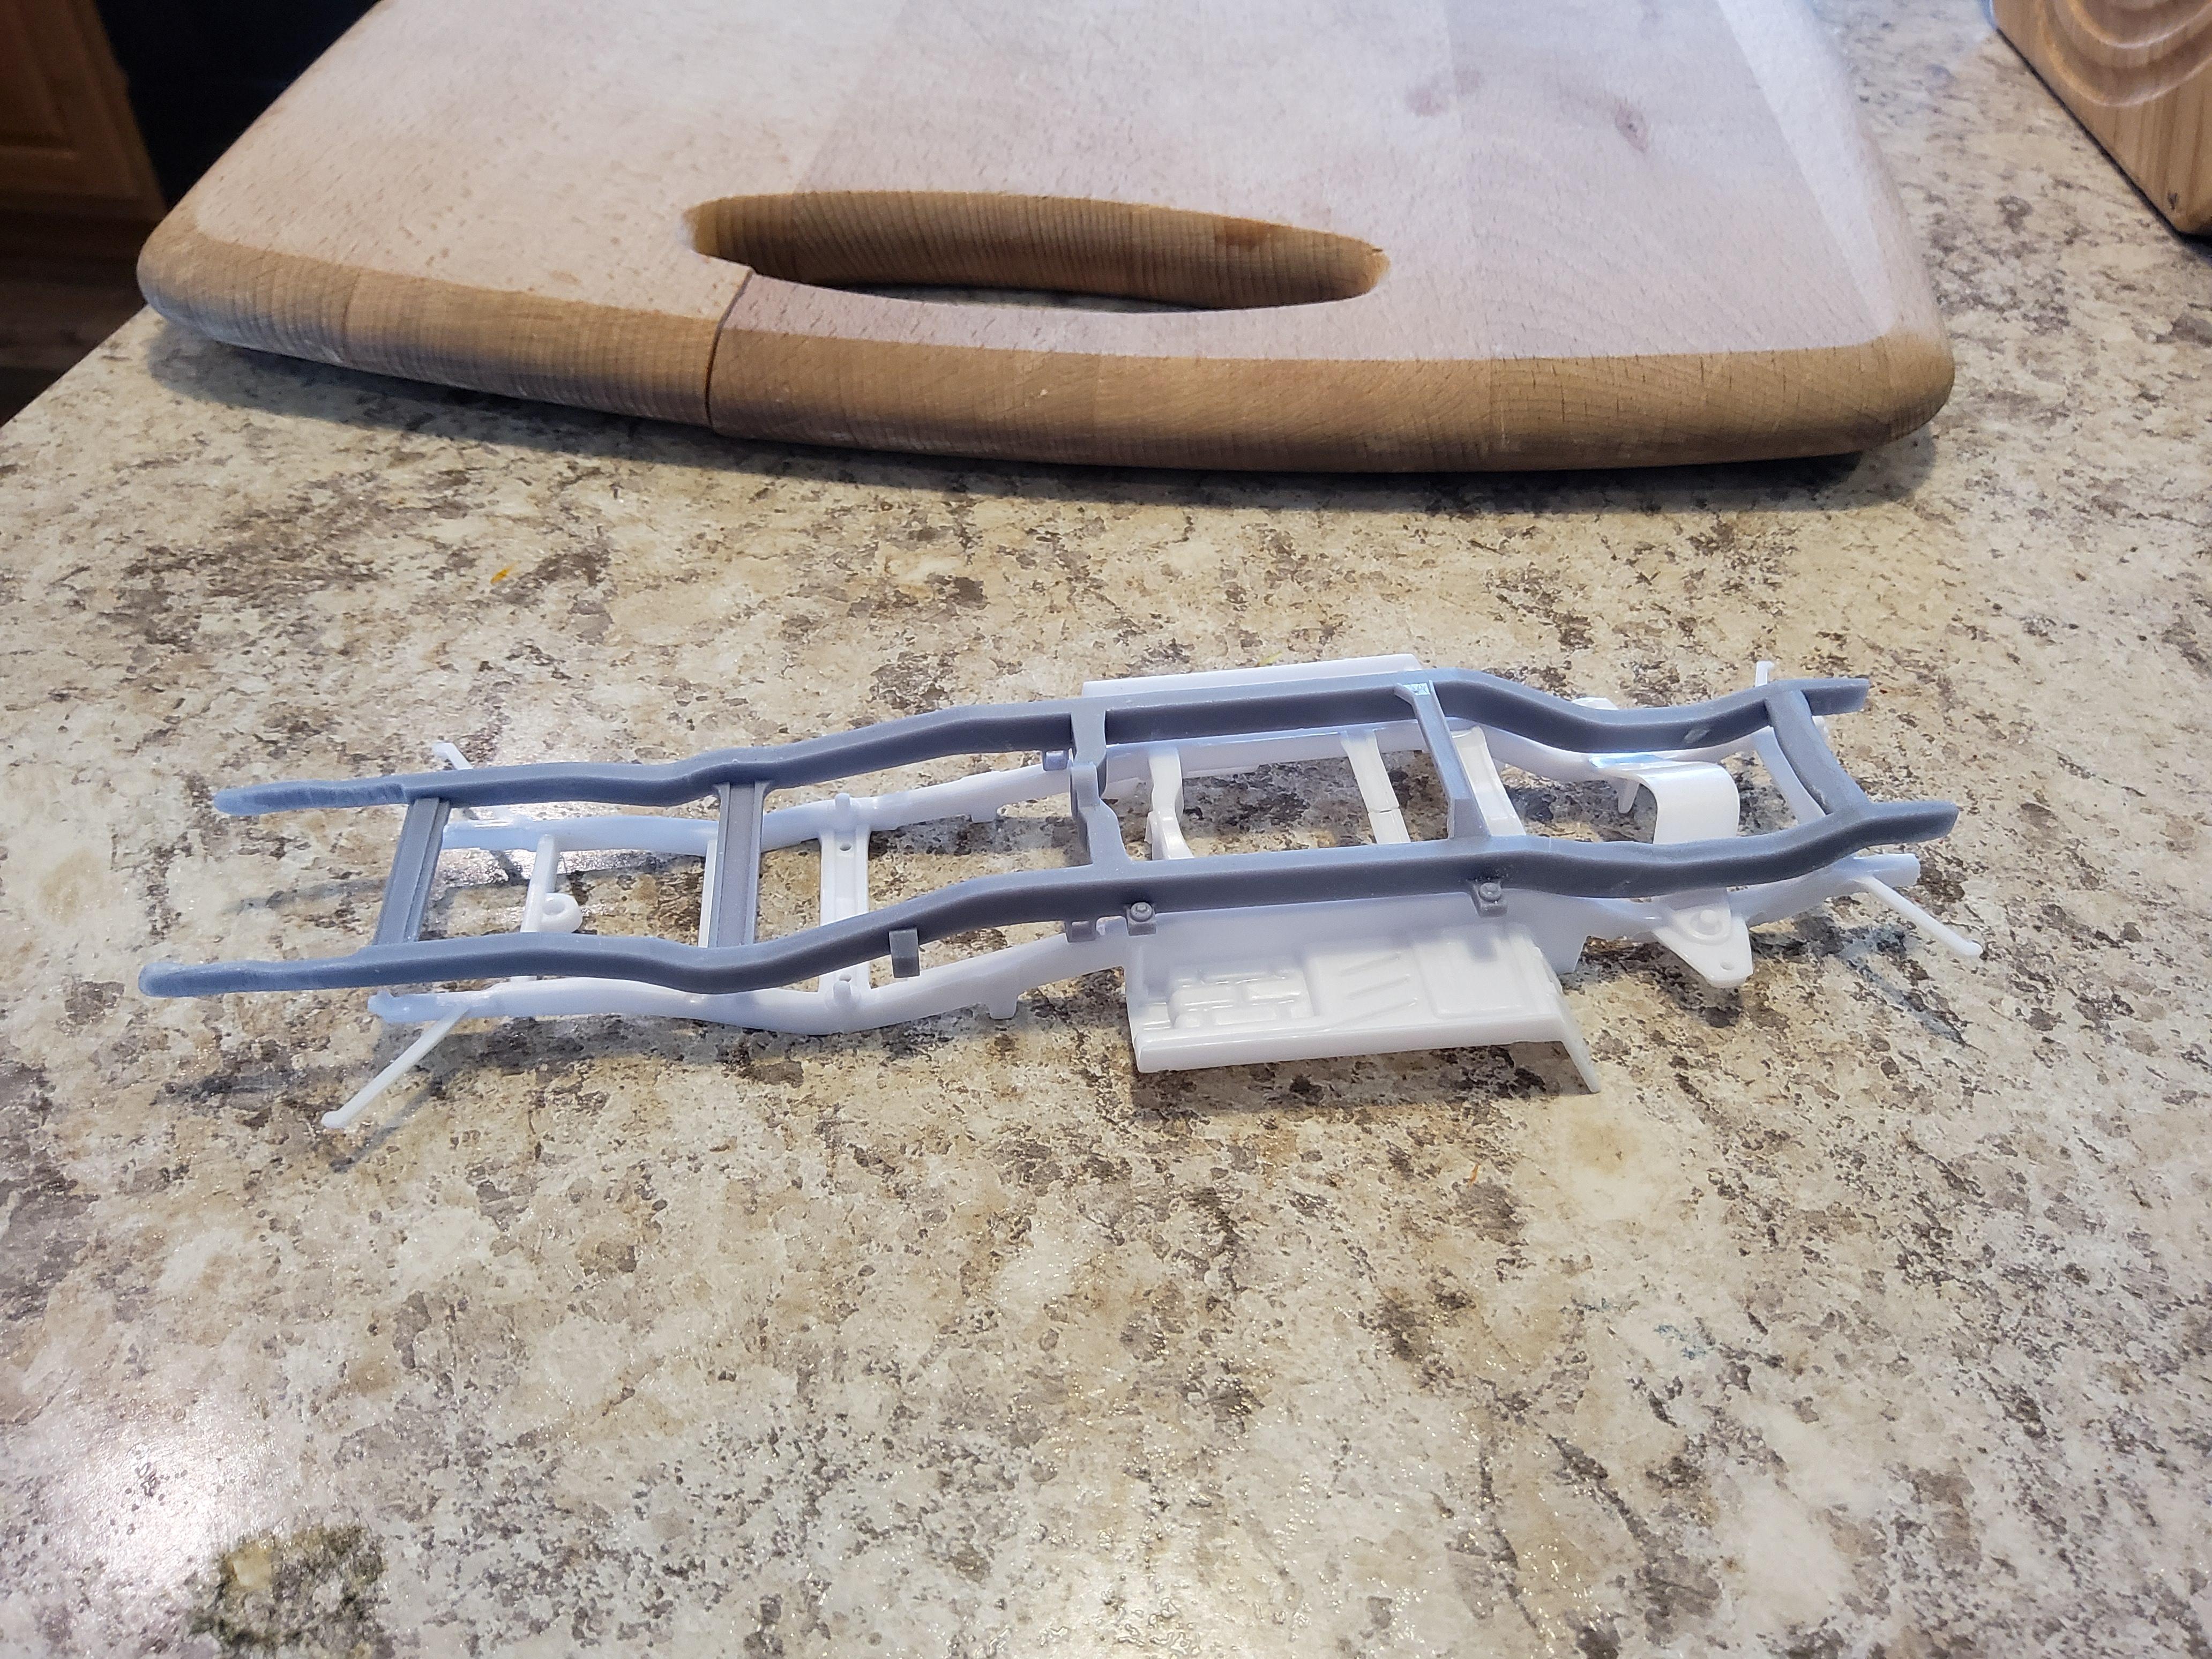
I have the first print of the frame for the 60-72 Chevy trucks. Ascan be seen in the pictures below, it is a great fit for the Revell 65-66 trucks. The frame fits great with te interior on the 72 Chevy trucks. If you are doing a long bed 4x4 1960 AMT, it will work but it is not "Correct" as they had an X style frame due to the torsion bar design. The 1960 is also wider at the rear. I am not sure if this is an early frame thing or an AMT thing. I modeled the frame straight off factory service manual drawings.

-
Awesome idea. Next time try and draw around the intended subject and fill only a little past that line. It should save epoxy and save a lot of sanding.
-
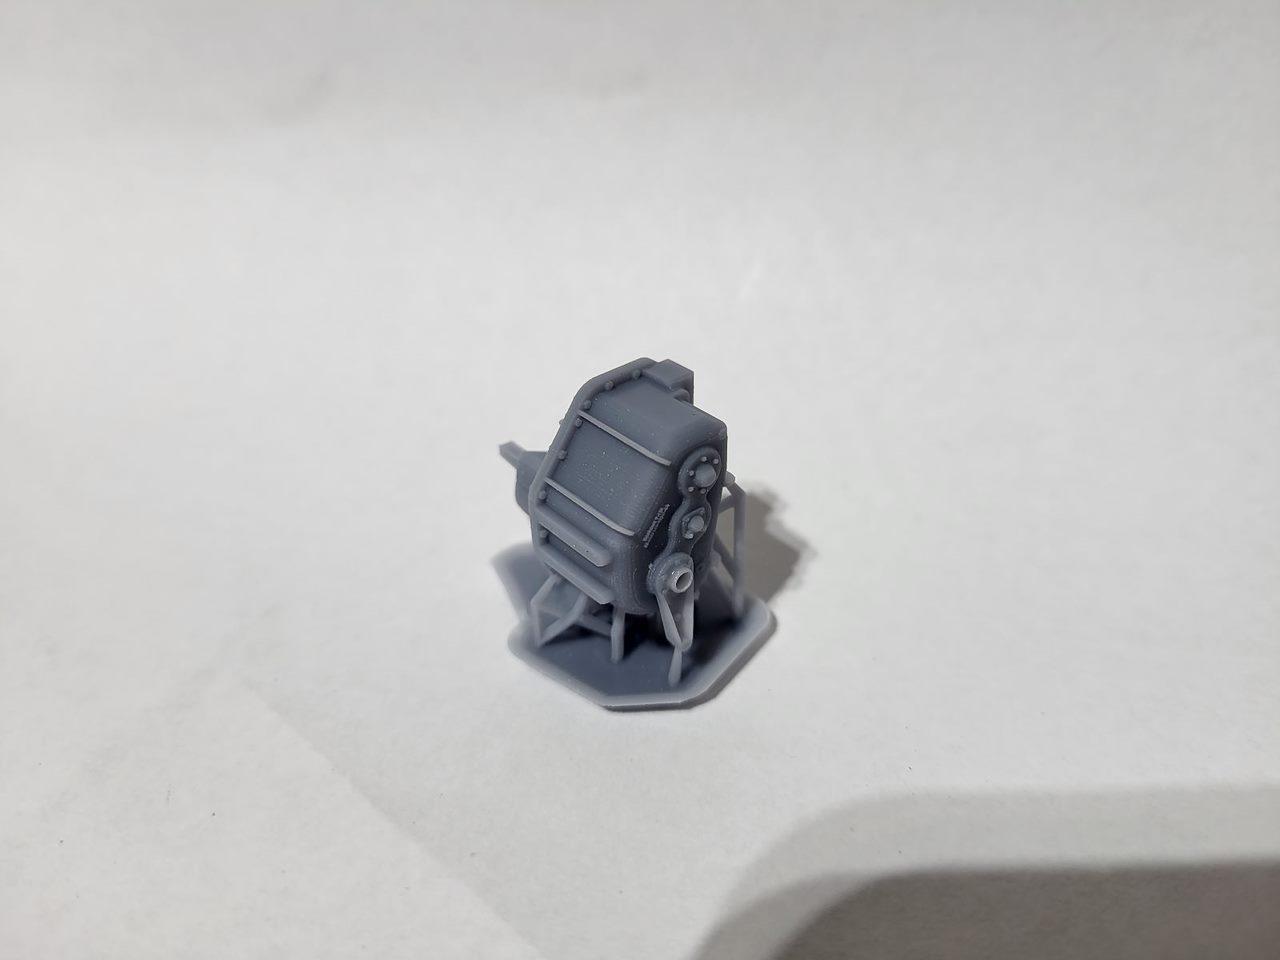
A few completed prints. 33-12.50 16.5 on white wagon wheels 20in Saltflat custom wheels dana 60ish center sections for making your own axles. Heavy truck driven front axle for 6x6 conversons, for use with the Rockwell T138 T-Case.
-
Driven Axle for trucks, 3D Print File
Oldmopars replied to Oldmopars's topic in Truck Aftermarket / Resin / 3D Printed
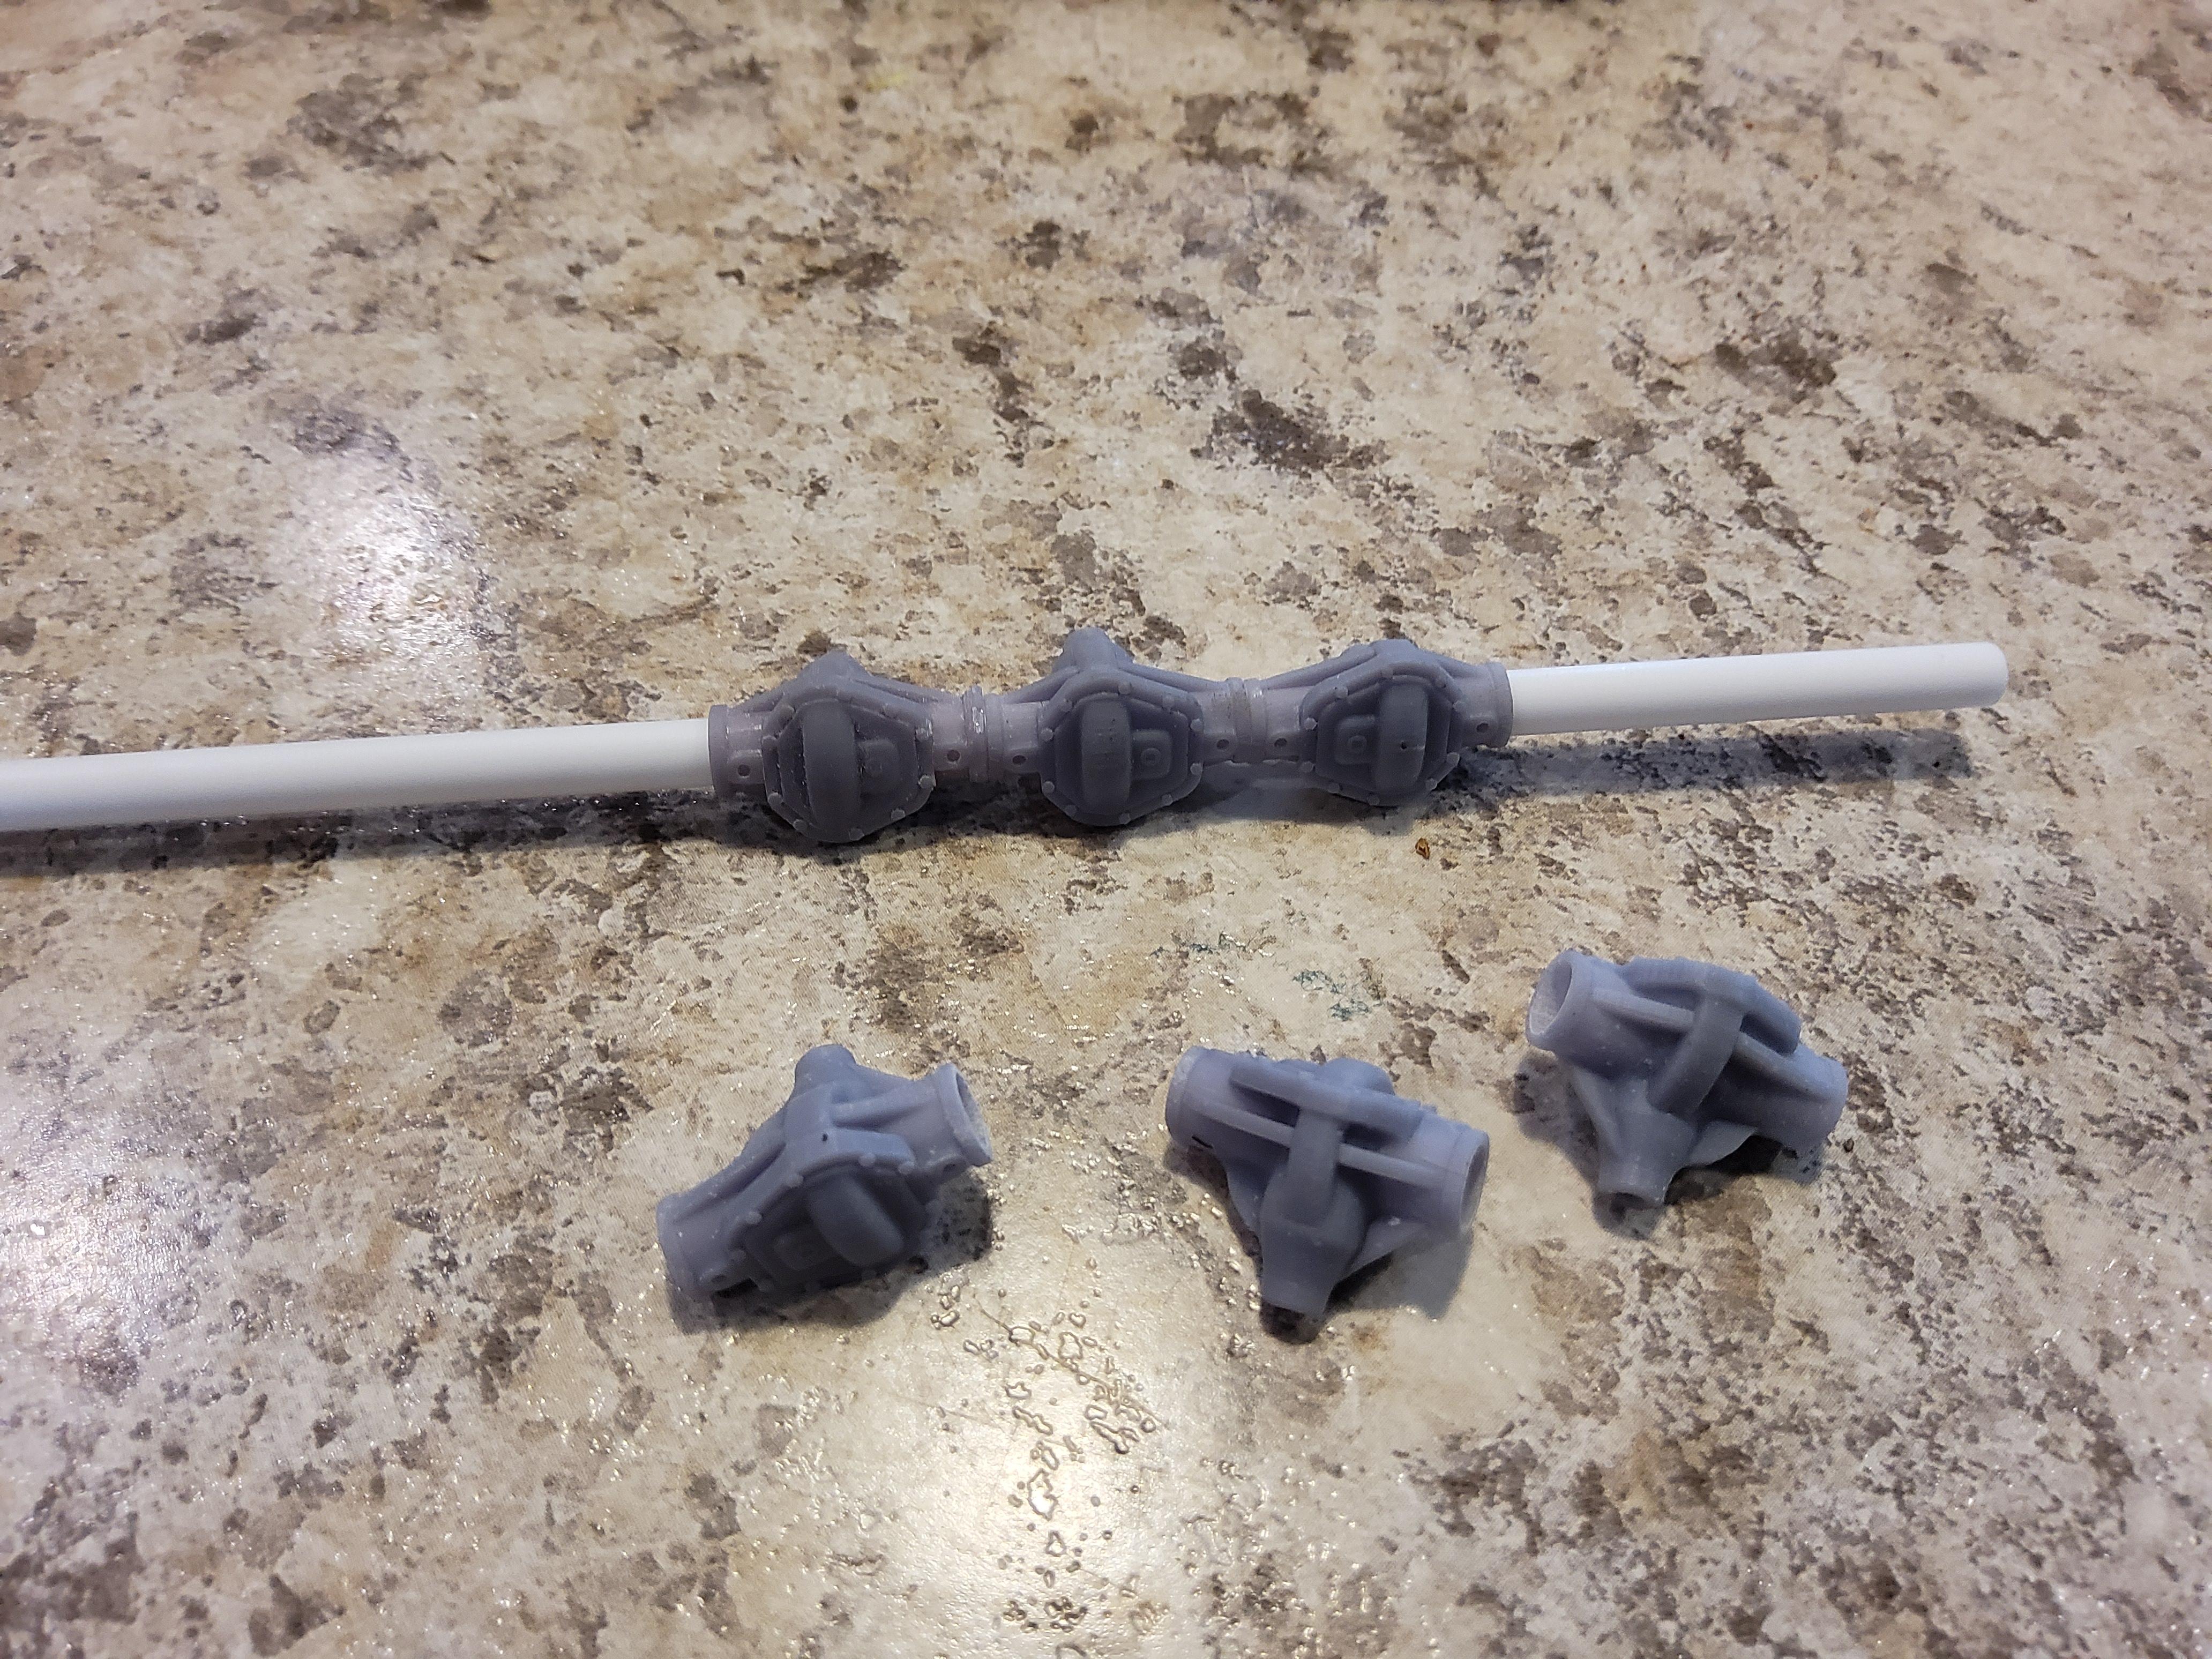
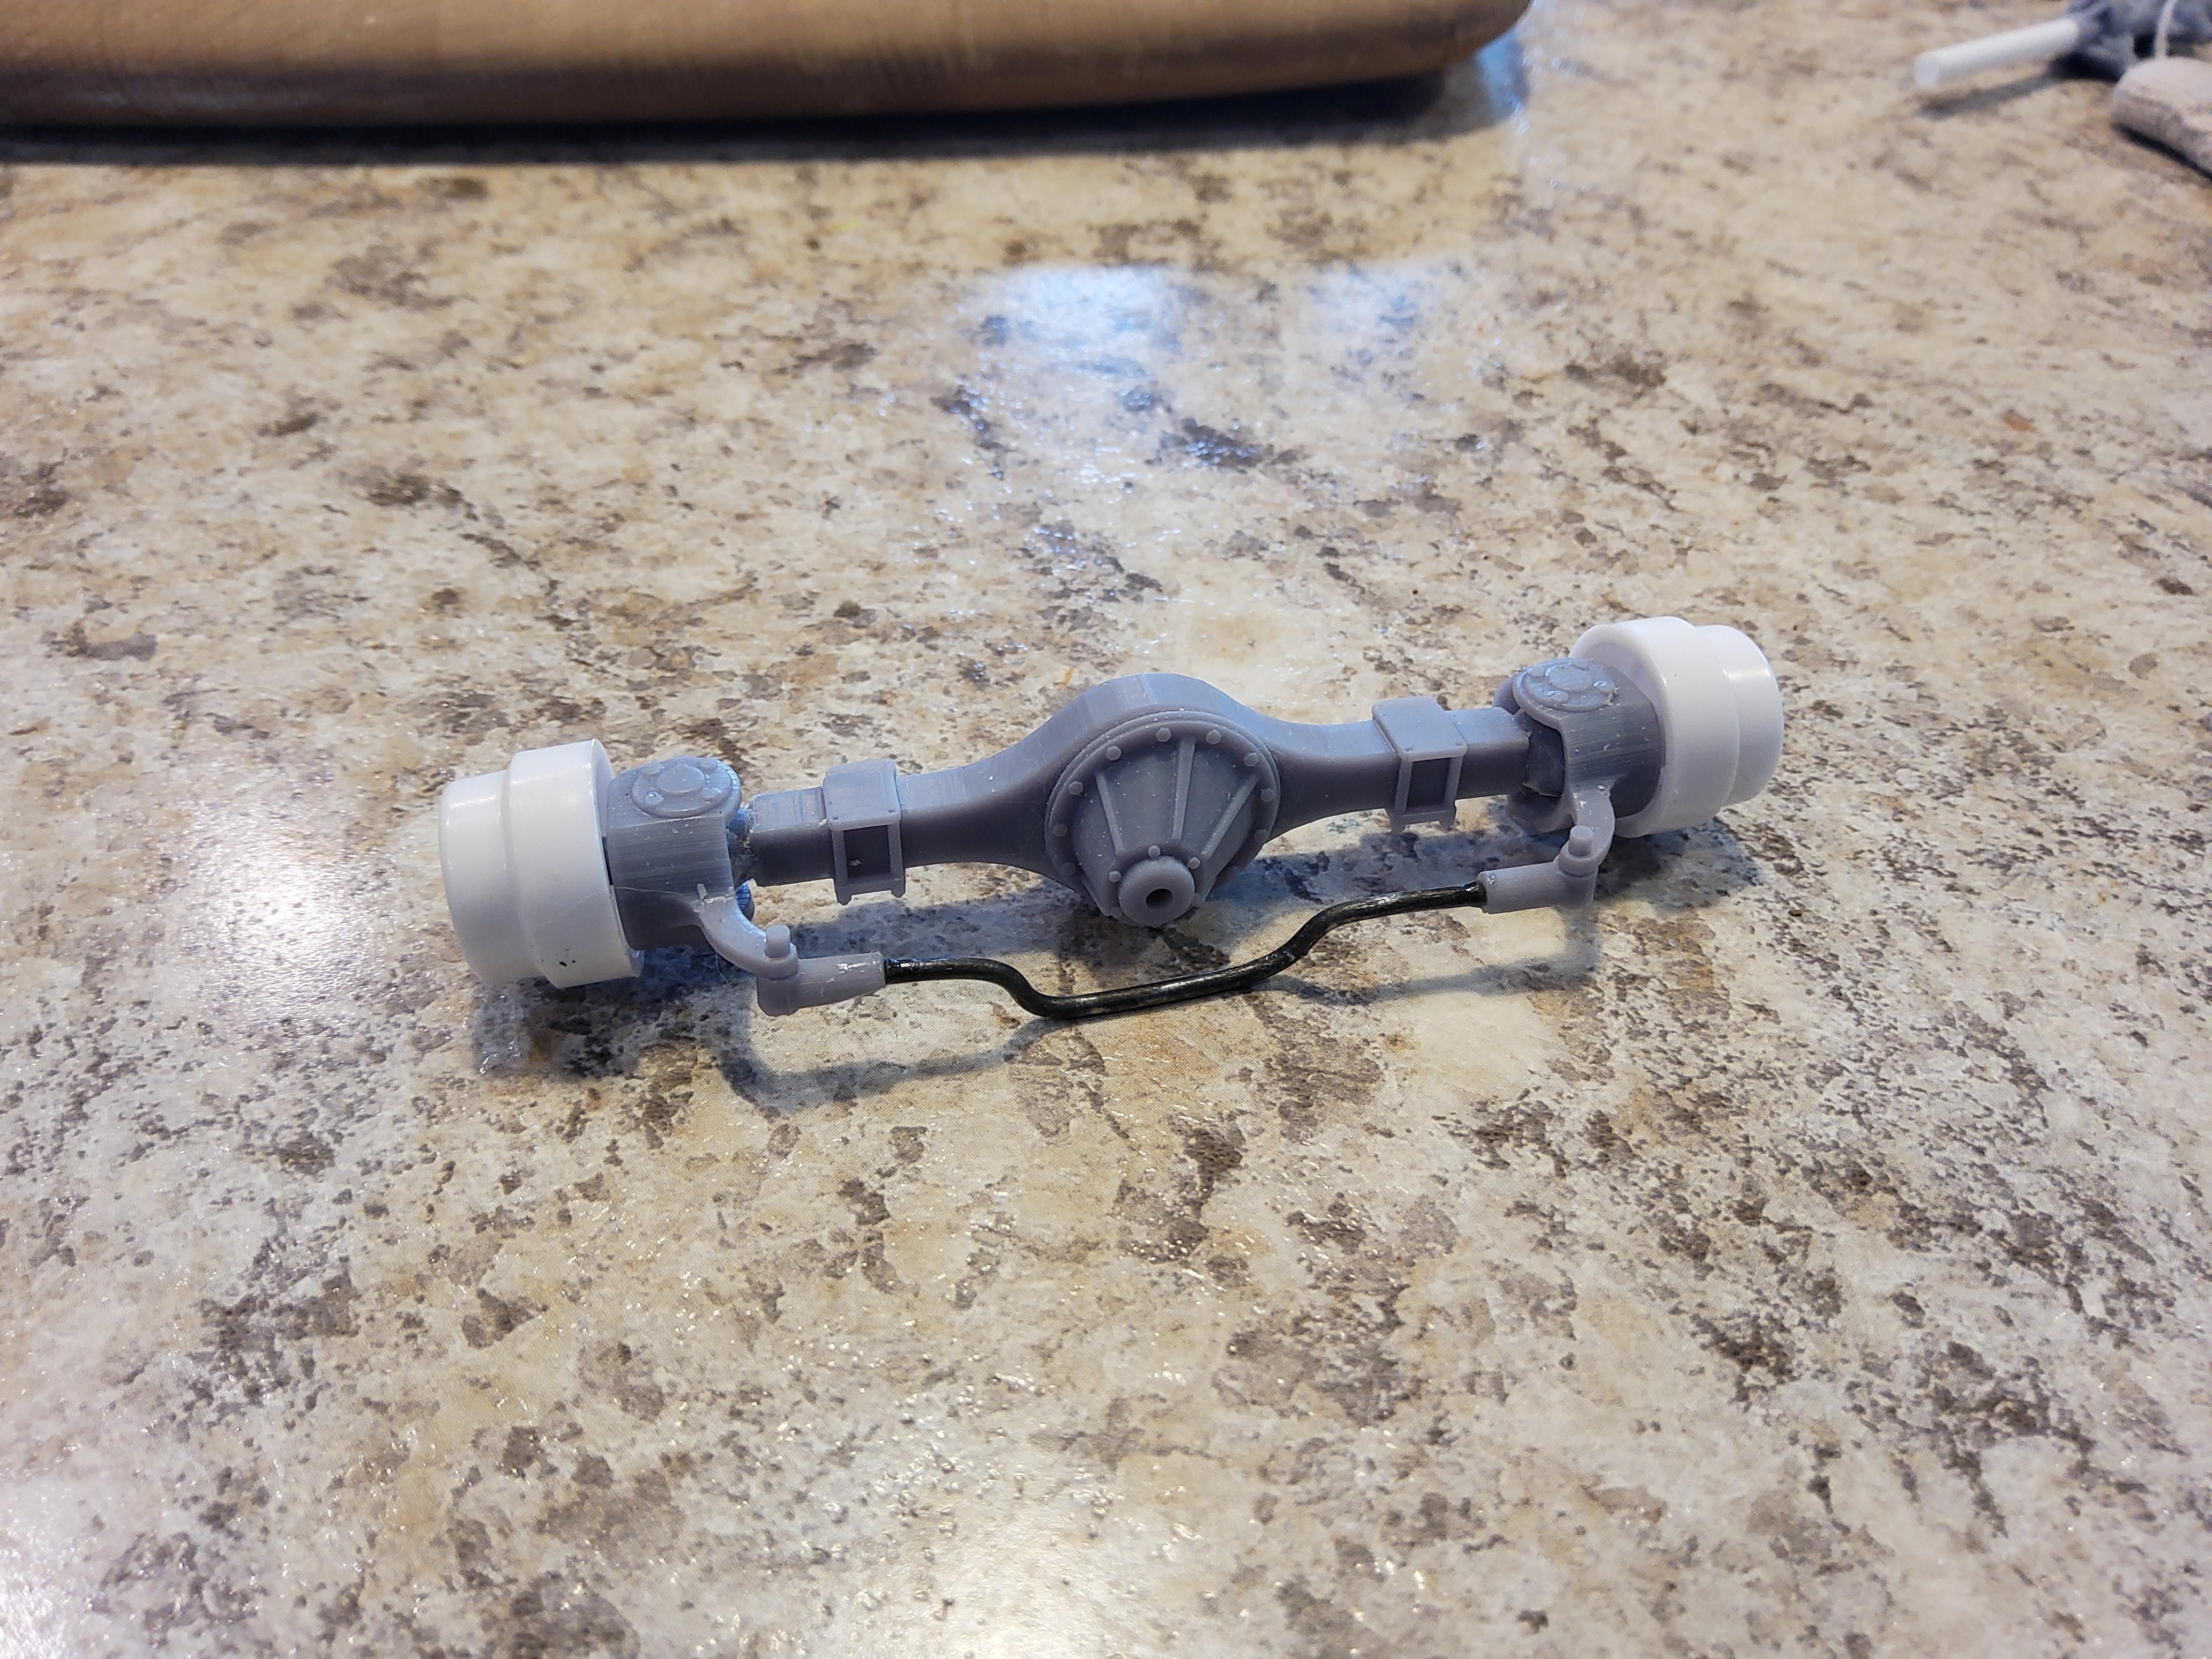
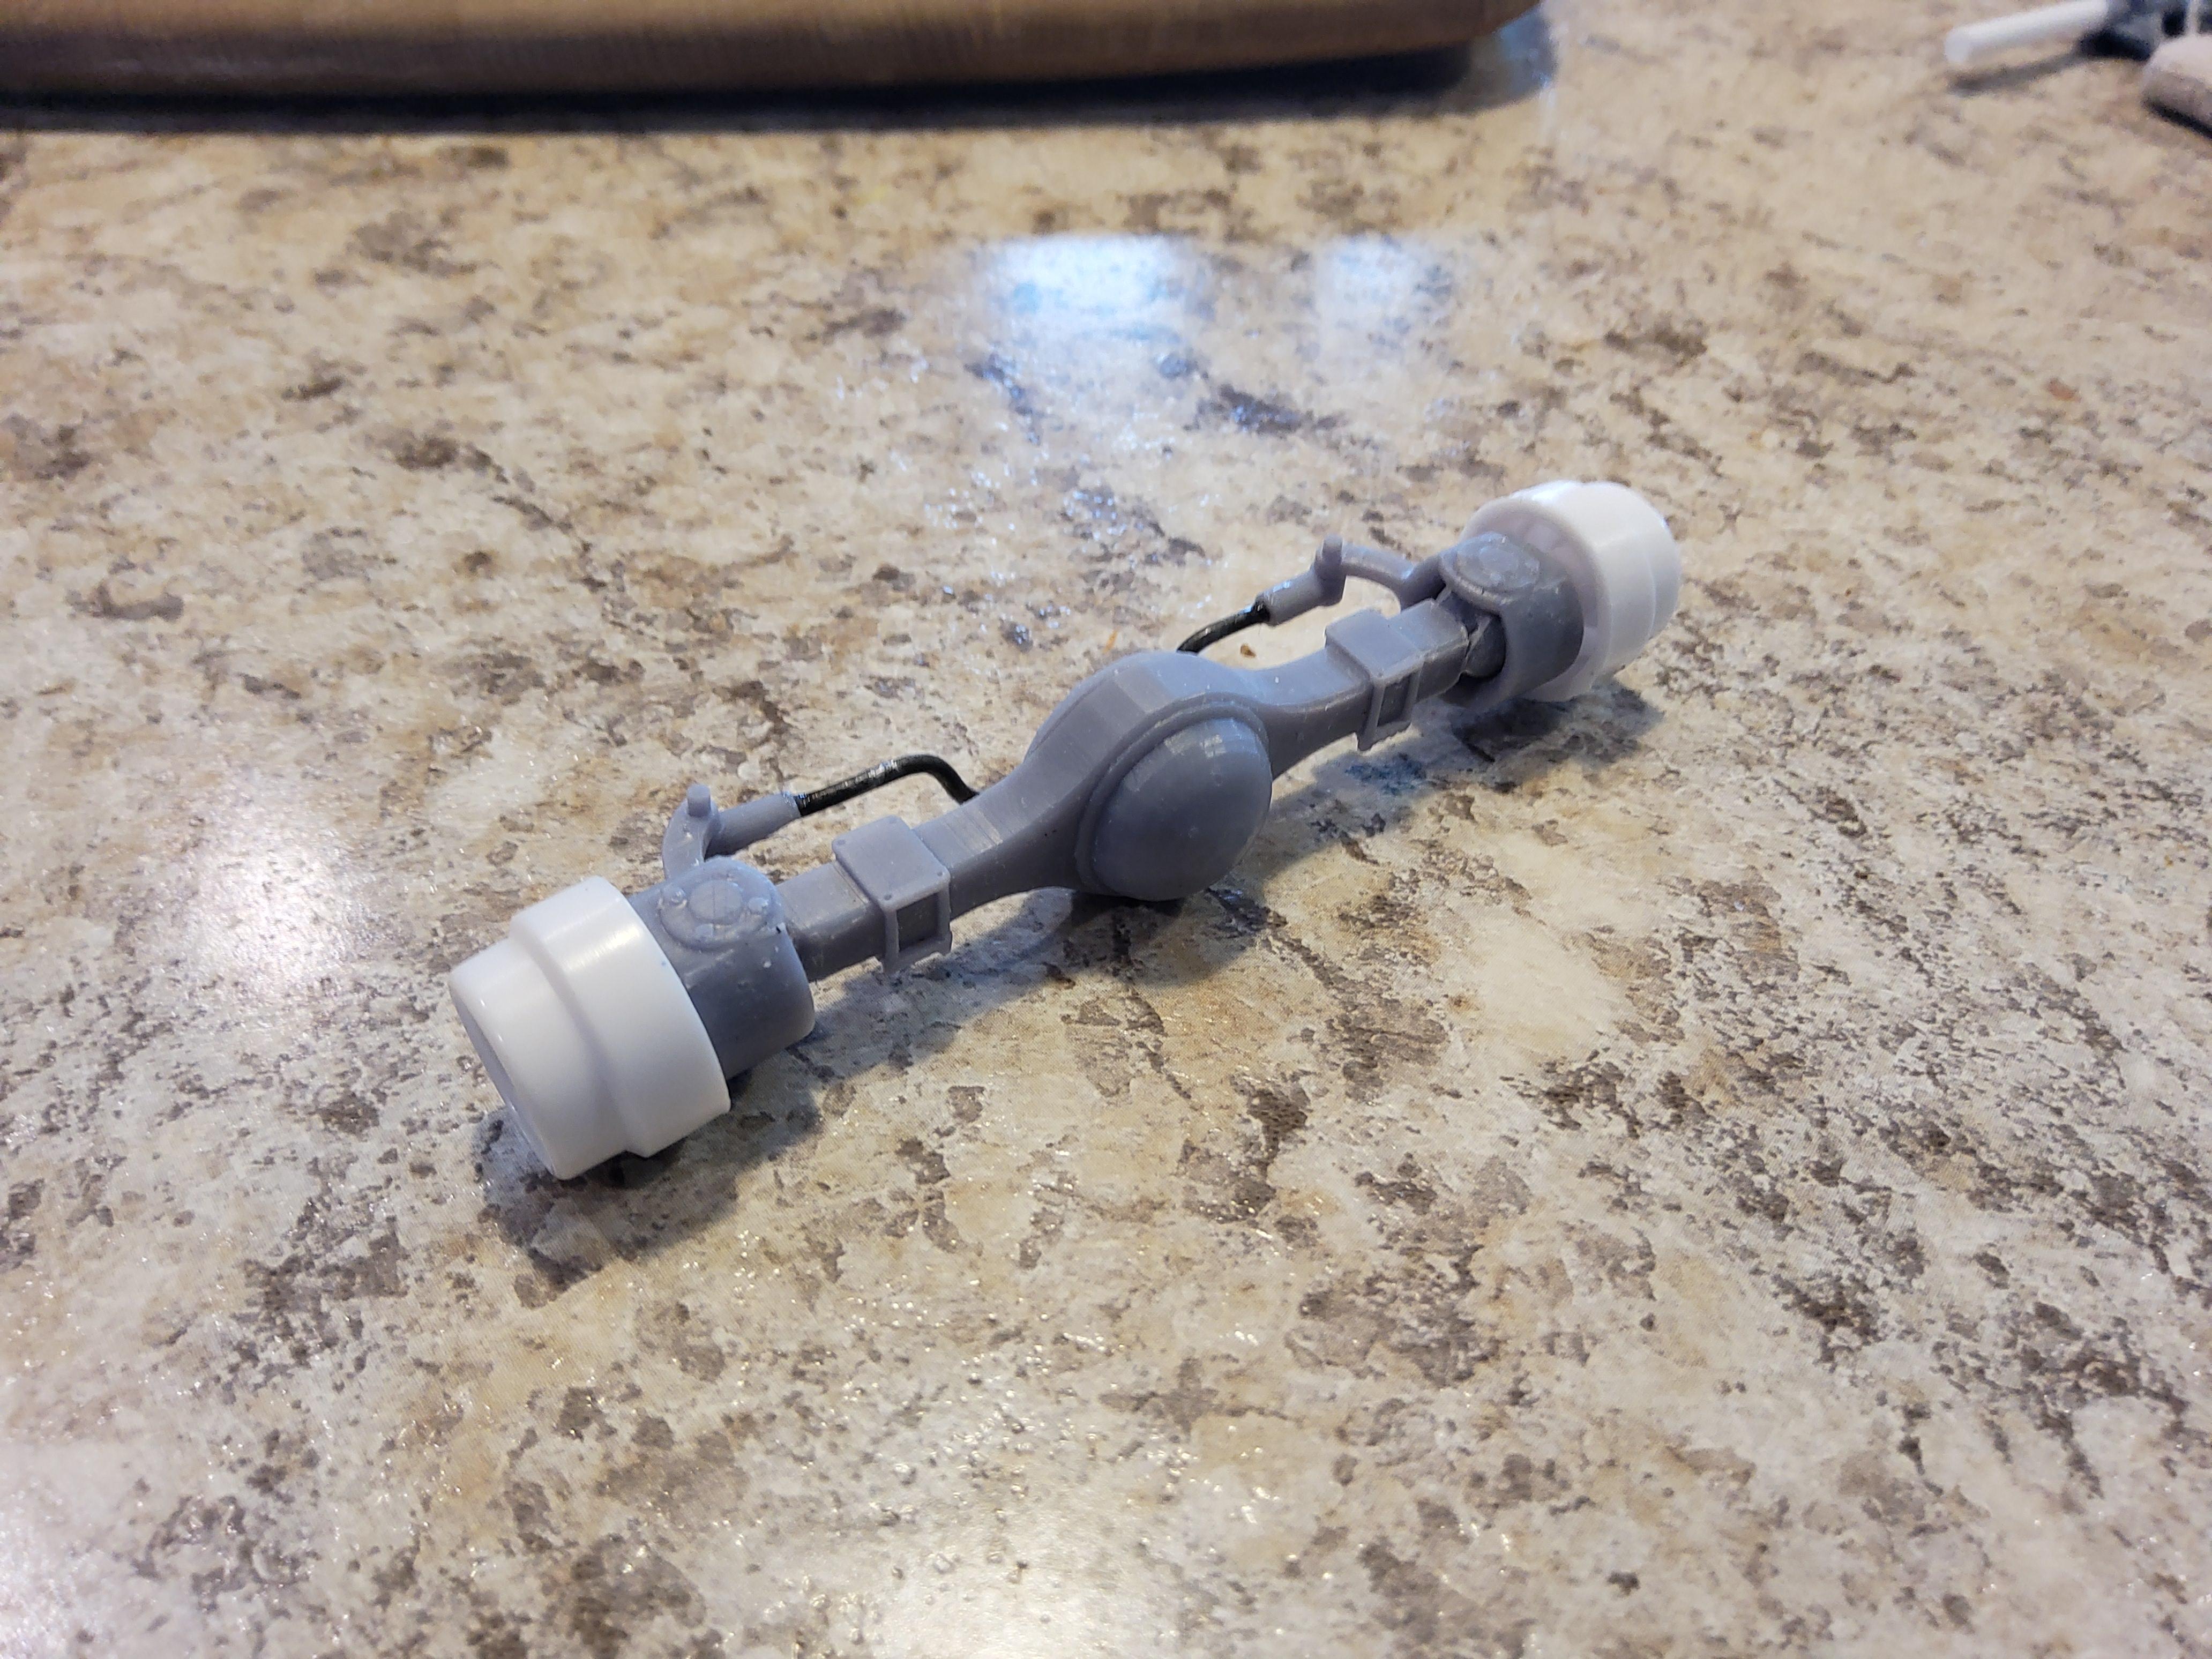
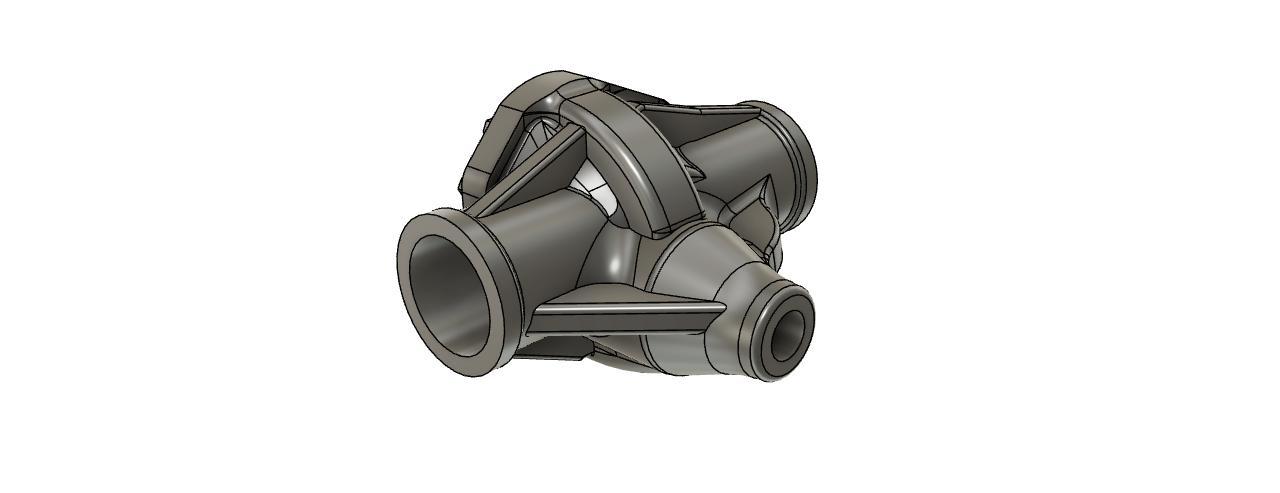
Well I got one printed. I had to go back and up size the tie rods and arms as thy were just too small. I used the Pete Tow truck as a model and these are the front drums from it. Total axle width is the same as the Pete. It is steerable. If you would like the file let me know.
-
Its just sheet plastic I found at Hobby Lobby. I have also seen it at Hobby Shops in Evergreen or Plastruct. Its better to find it in person, you can order it, but they offer several sizes and it is difficult for me to gauge what scale the pattern is.
-
I am attempting to get the most out of my printer by stacking the prints. Has anyone ever done this? My printer is large, but I still need to tilt these full size long-bed truck frames to get them on the bed. Have you tried it and if so, what was the results? Here is my plan:
-
The 2022 Cannonball Run Year of Birth Build Thread
Oldmopars replied to disconovaman's topic in Community Builds
I really like the 190, good looking car, but the features of the resin body all seem a bit "chubby". Like it was meant to be a 1/32 scale and was just scaled up. I am sure that you will make it into one great looking car. -
I just wanted to show you the results. I printed both the wheels and the tires. I wanted to show you the differrence between kit tires and the tires in scale you have on your truck. Kit tires are barely a 31-10.50-15
-
PM sent
-
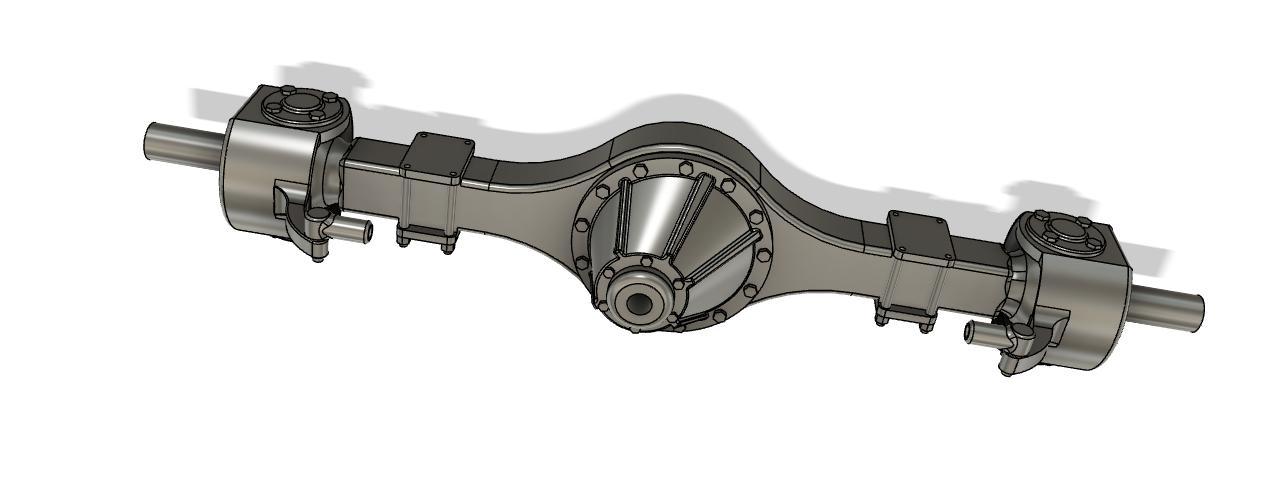
I tried to buy one of these a few months back and they are all out of stock. So, I drew my own. The tie rod will need to be made out of wire. It is in several parts so it will steer. I WILL NOT BE PRINTING THESE, However I will offer the file if you are interested.
-
Whte Western Star Tow truck
Oldmopars replied to Oldmopars's topic in WIP: Model Trucks: Big Rigs and Heavy Equipment
BTW, I will not be making this one a 6x6, but I now make my own Rockwell T138 Transfercase, now for a driven front axle.
-
Whte Western Star Tow truck
Oldmopars replied to Oldmopars's topic in WIP: Model Trucks: Big Rigs and Heavy Equipment
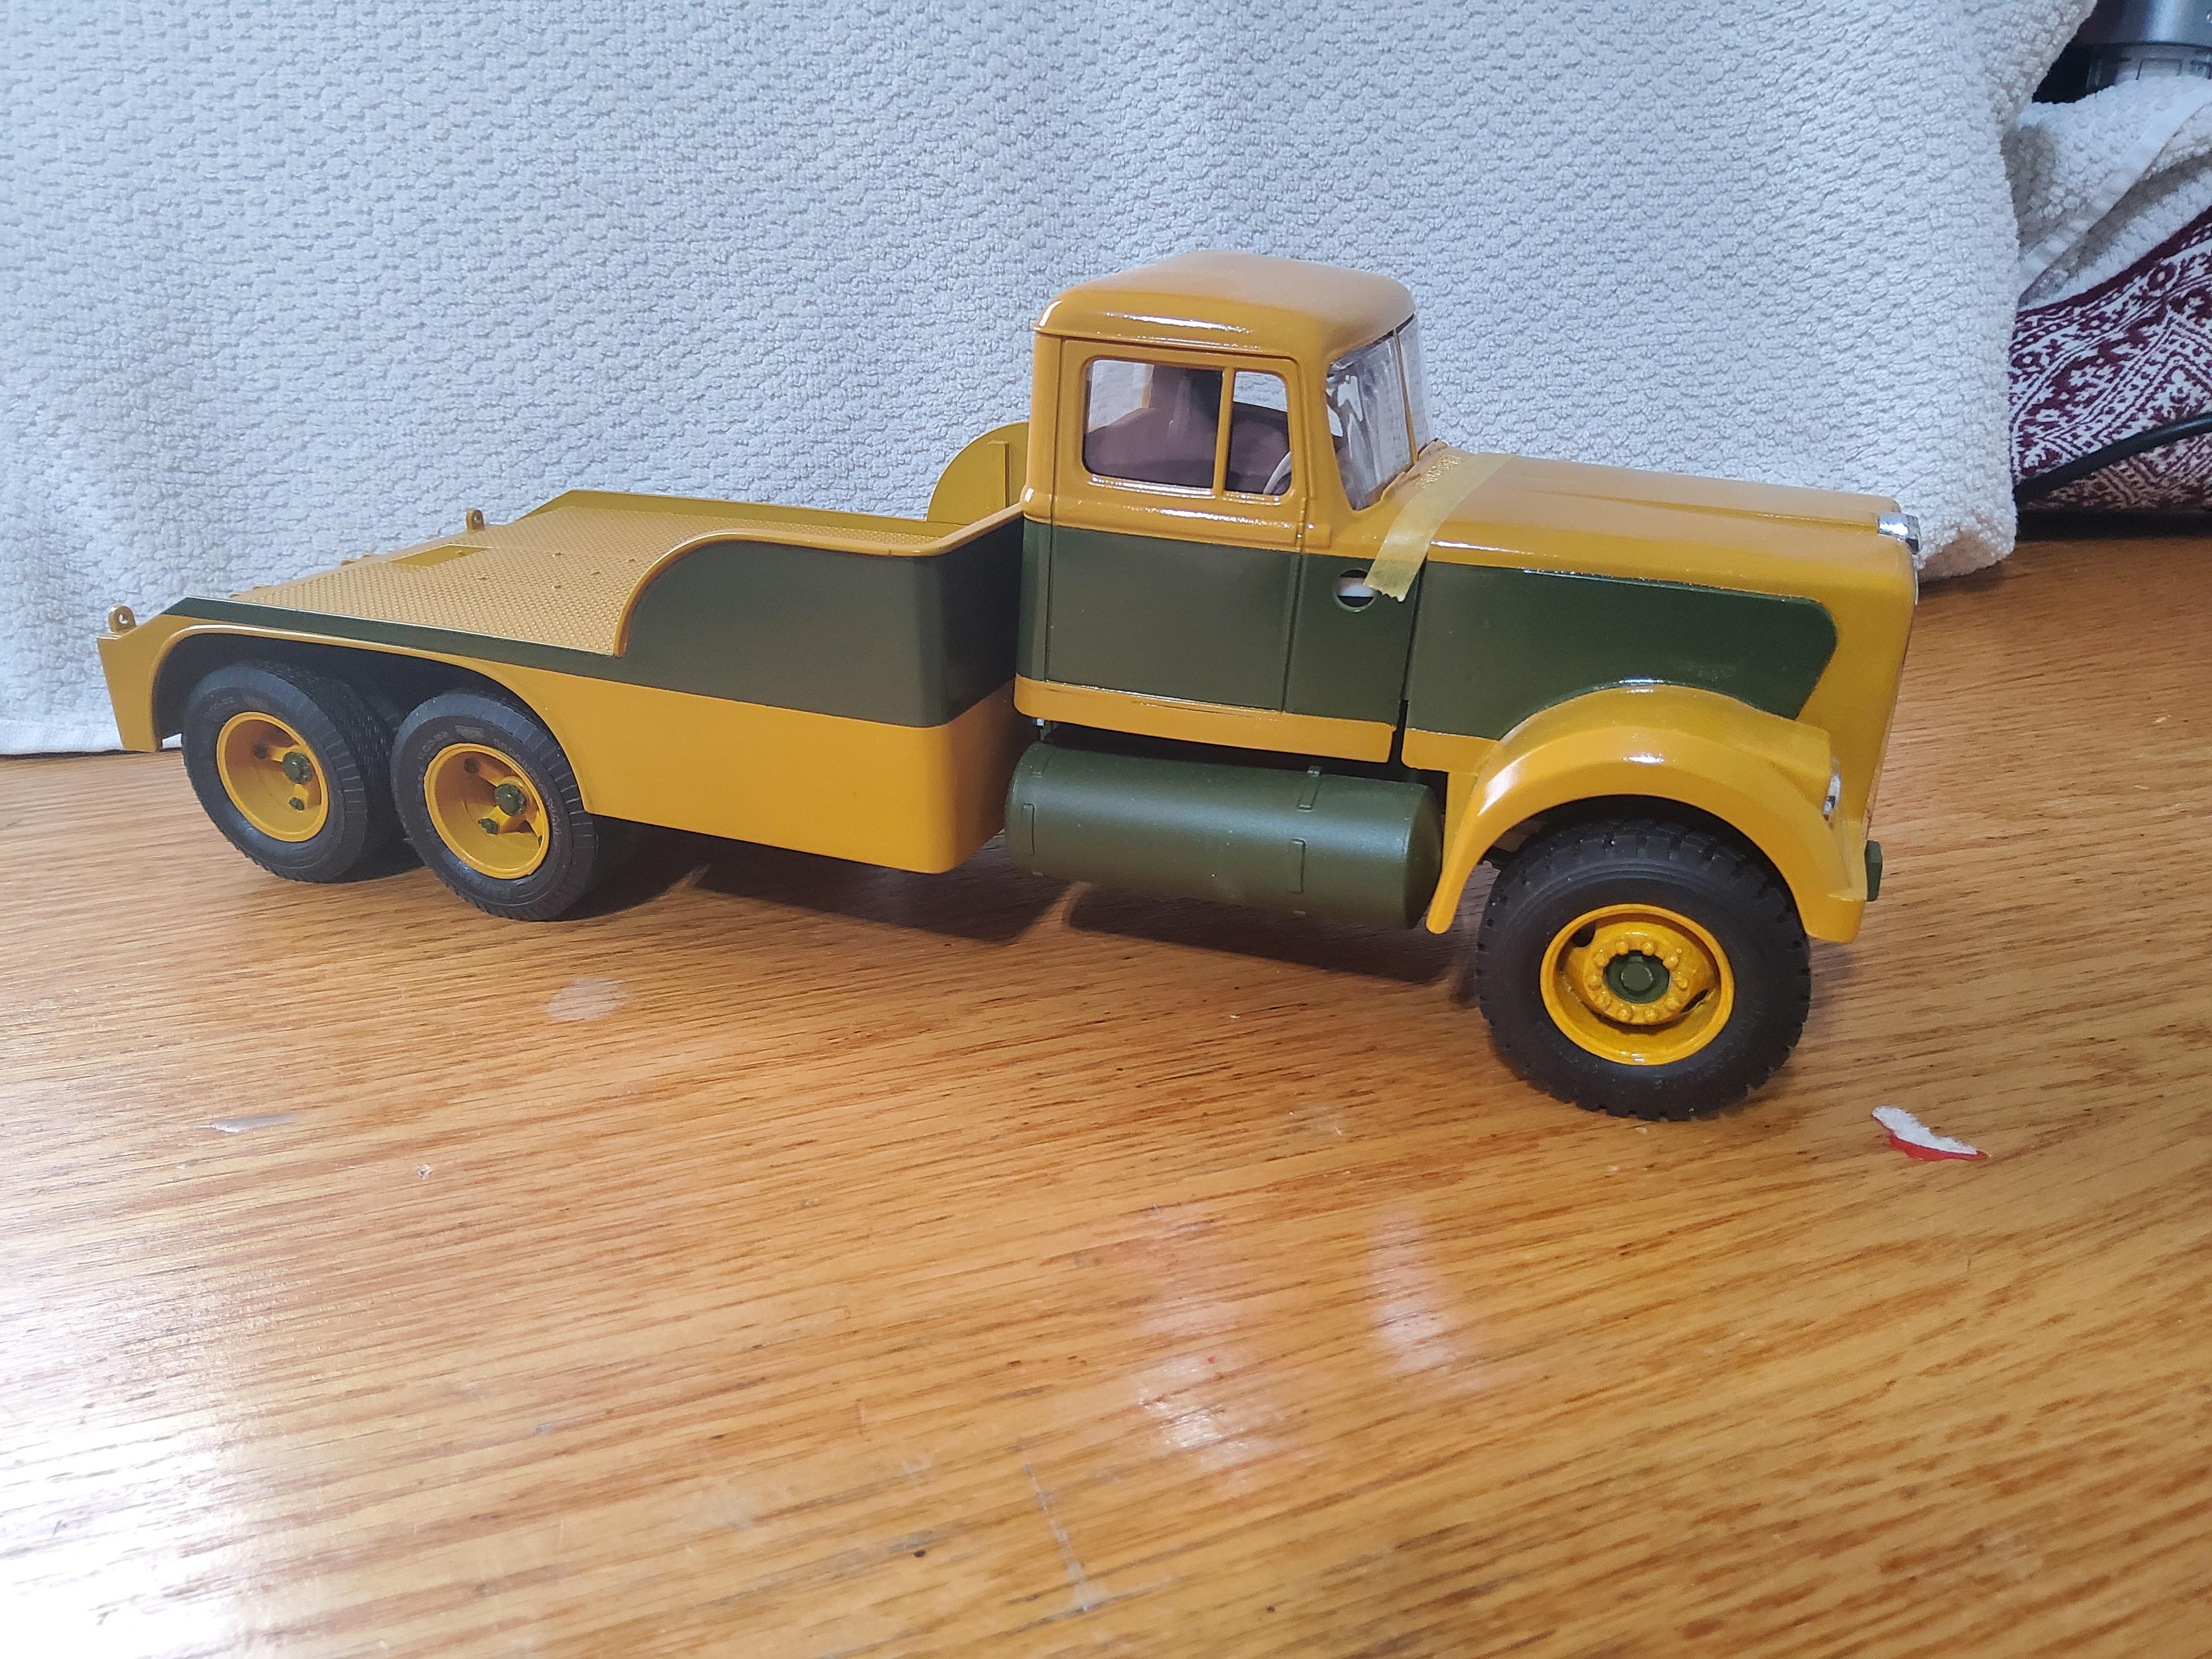
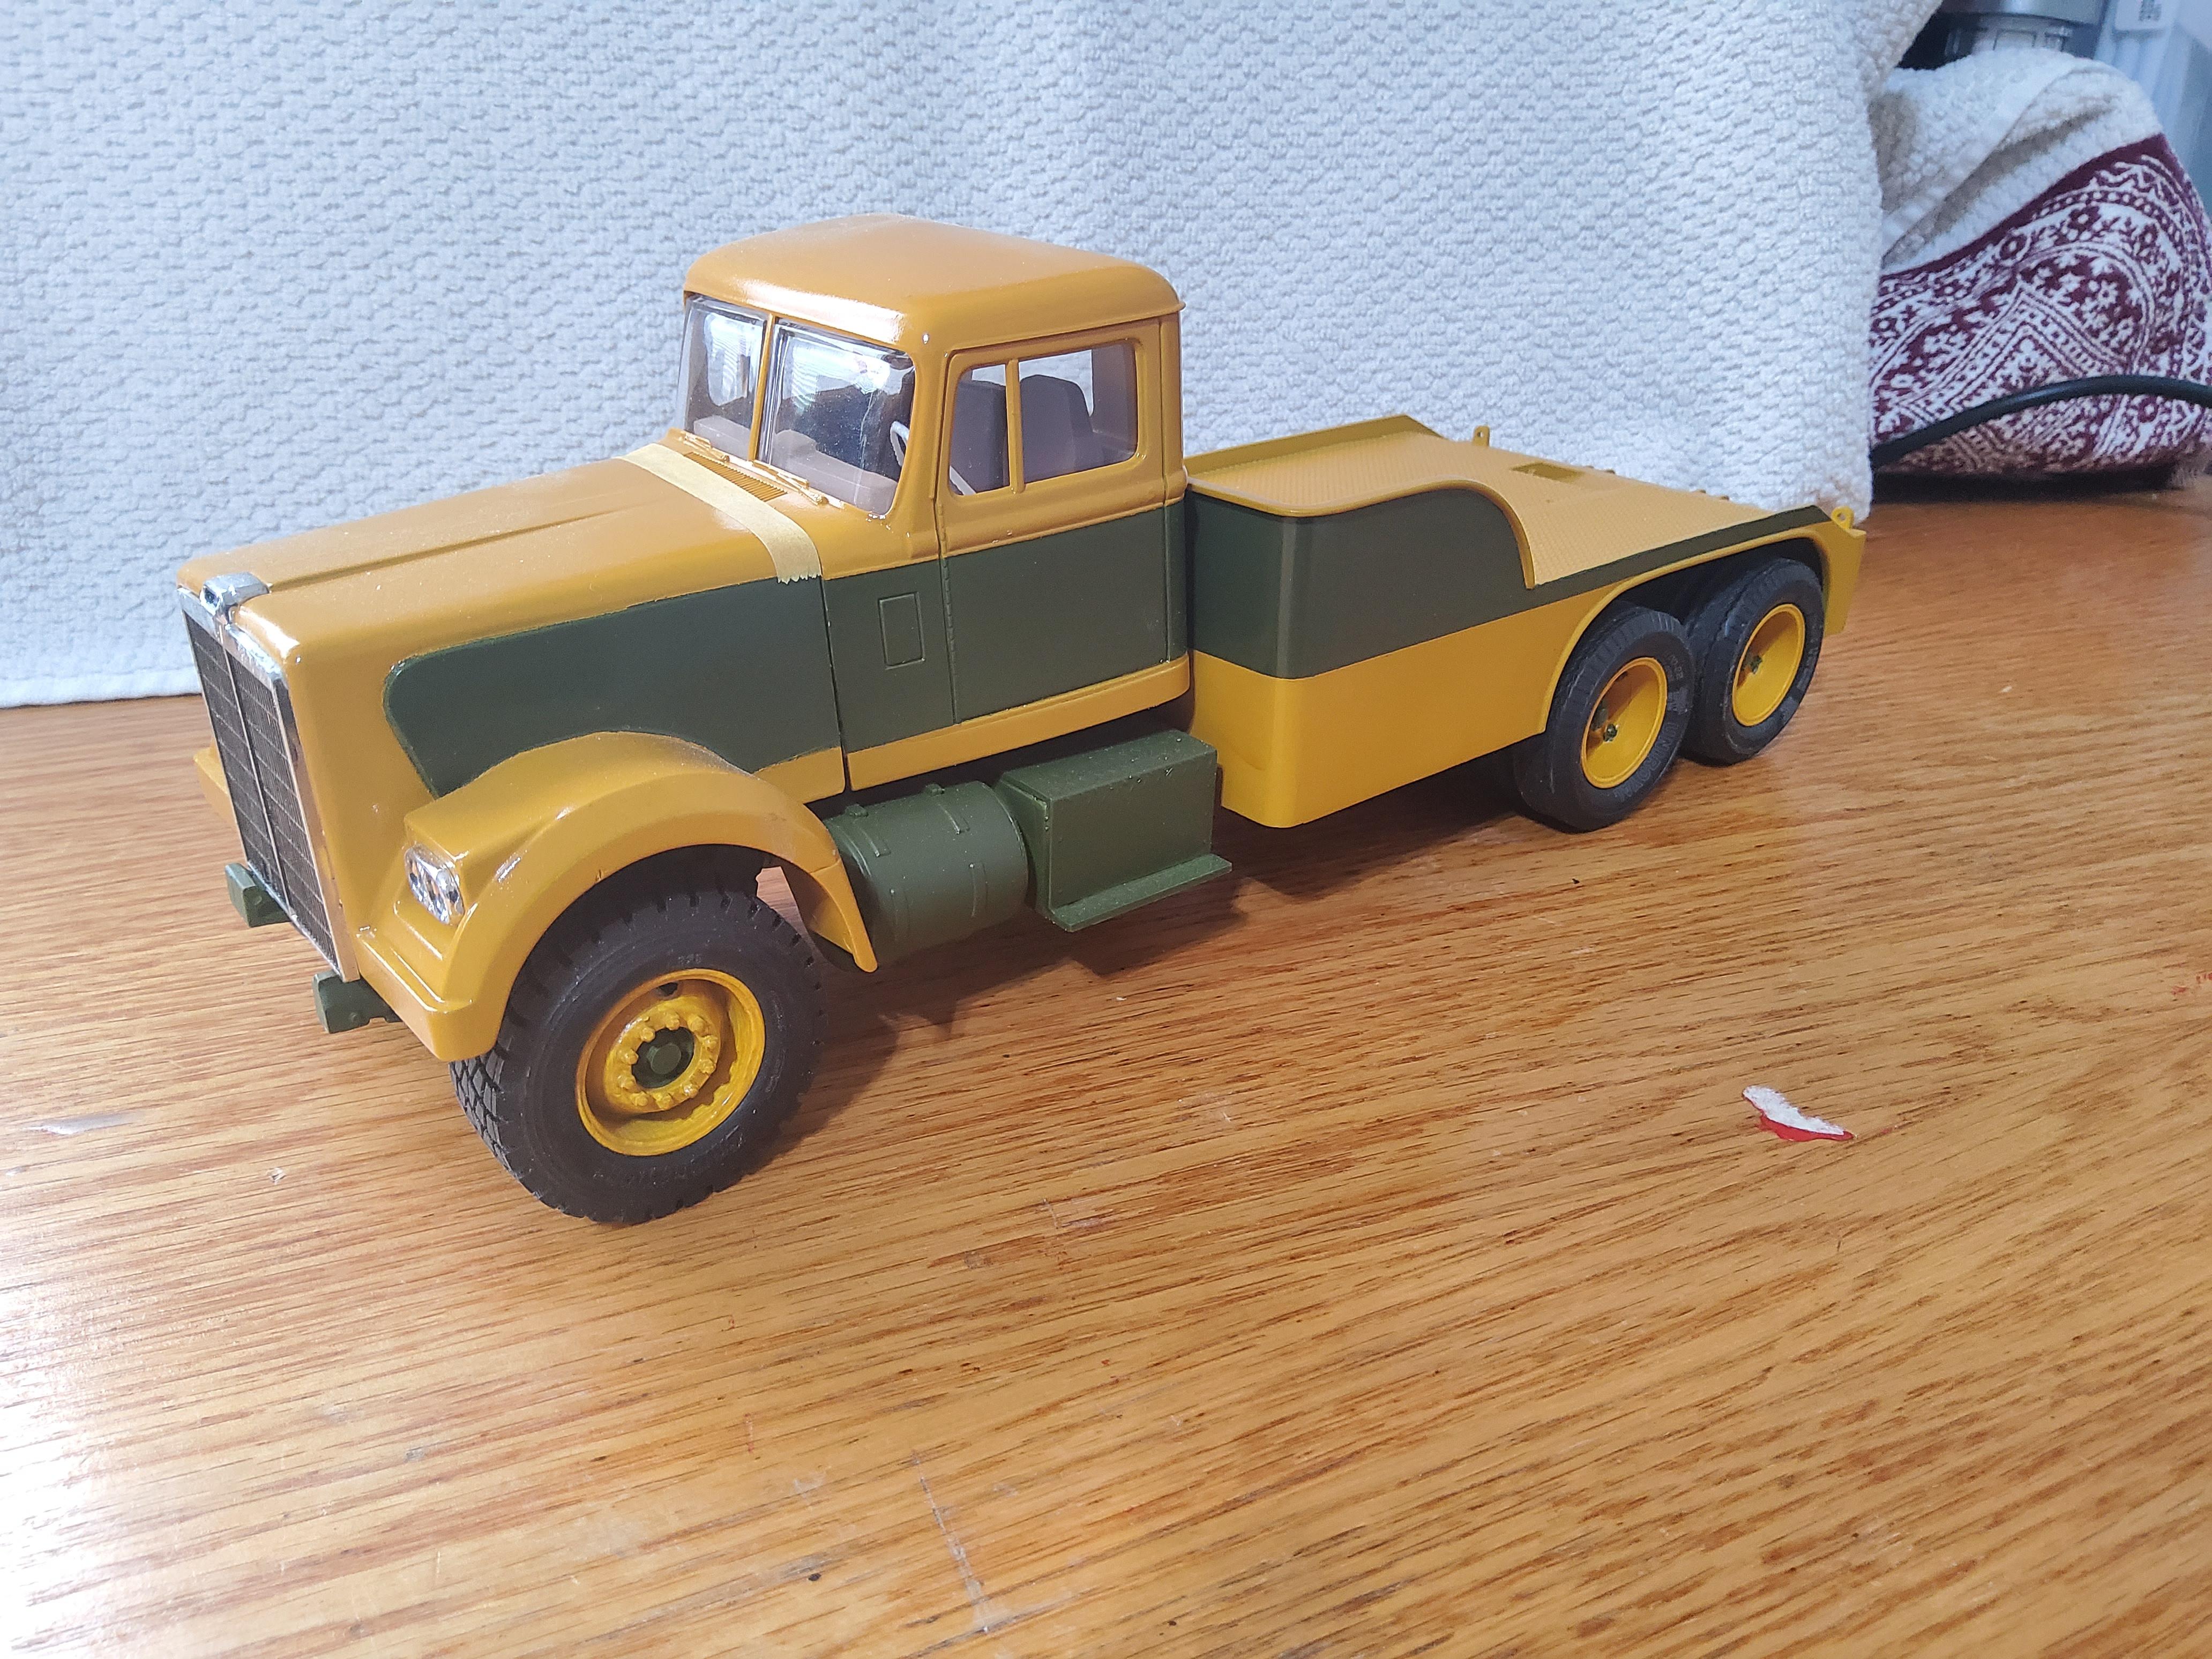
Well, progress has been very slow n this one. I have too many other projects ging and this one seems to be low on the priority list. However, have added some color. I am also using some wheels I designed and printed. As this is a early 70's truck, I figured it needed an early 70's color. This color combo just seemed to scream 1972. I have a long way to go on this one, but it was time for an update mock up in living color.
-
The 2022 Cannonball Run Year of Birth Build Thread
Oldmopars replied to disconovaman's topic in Community Builds
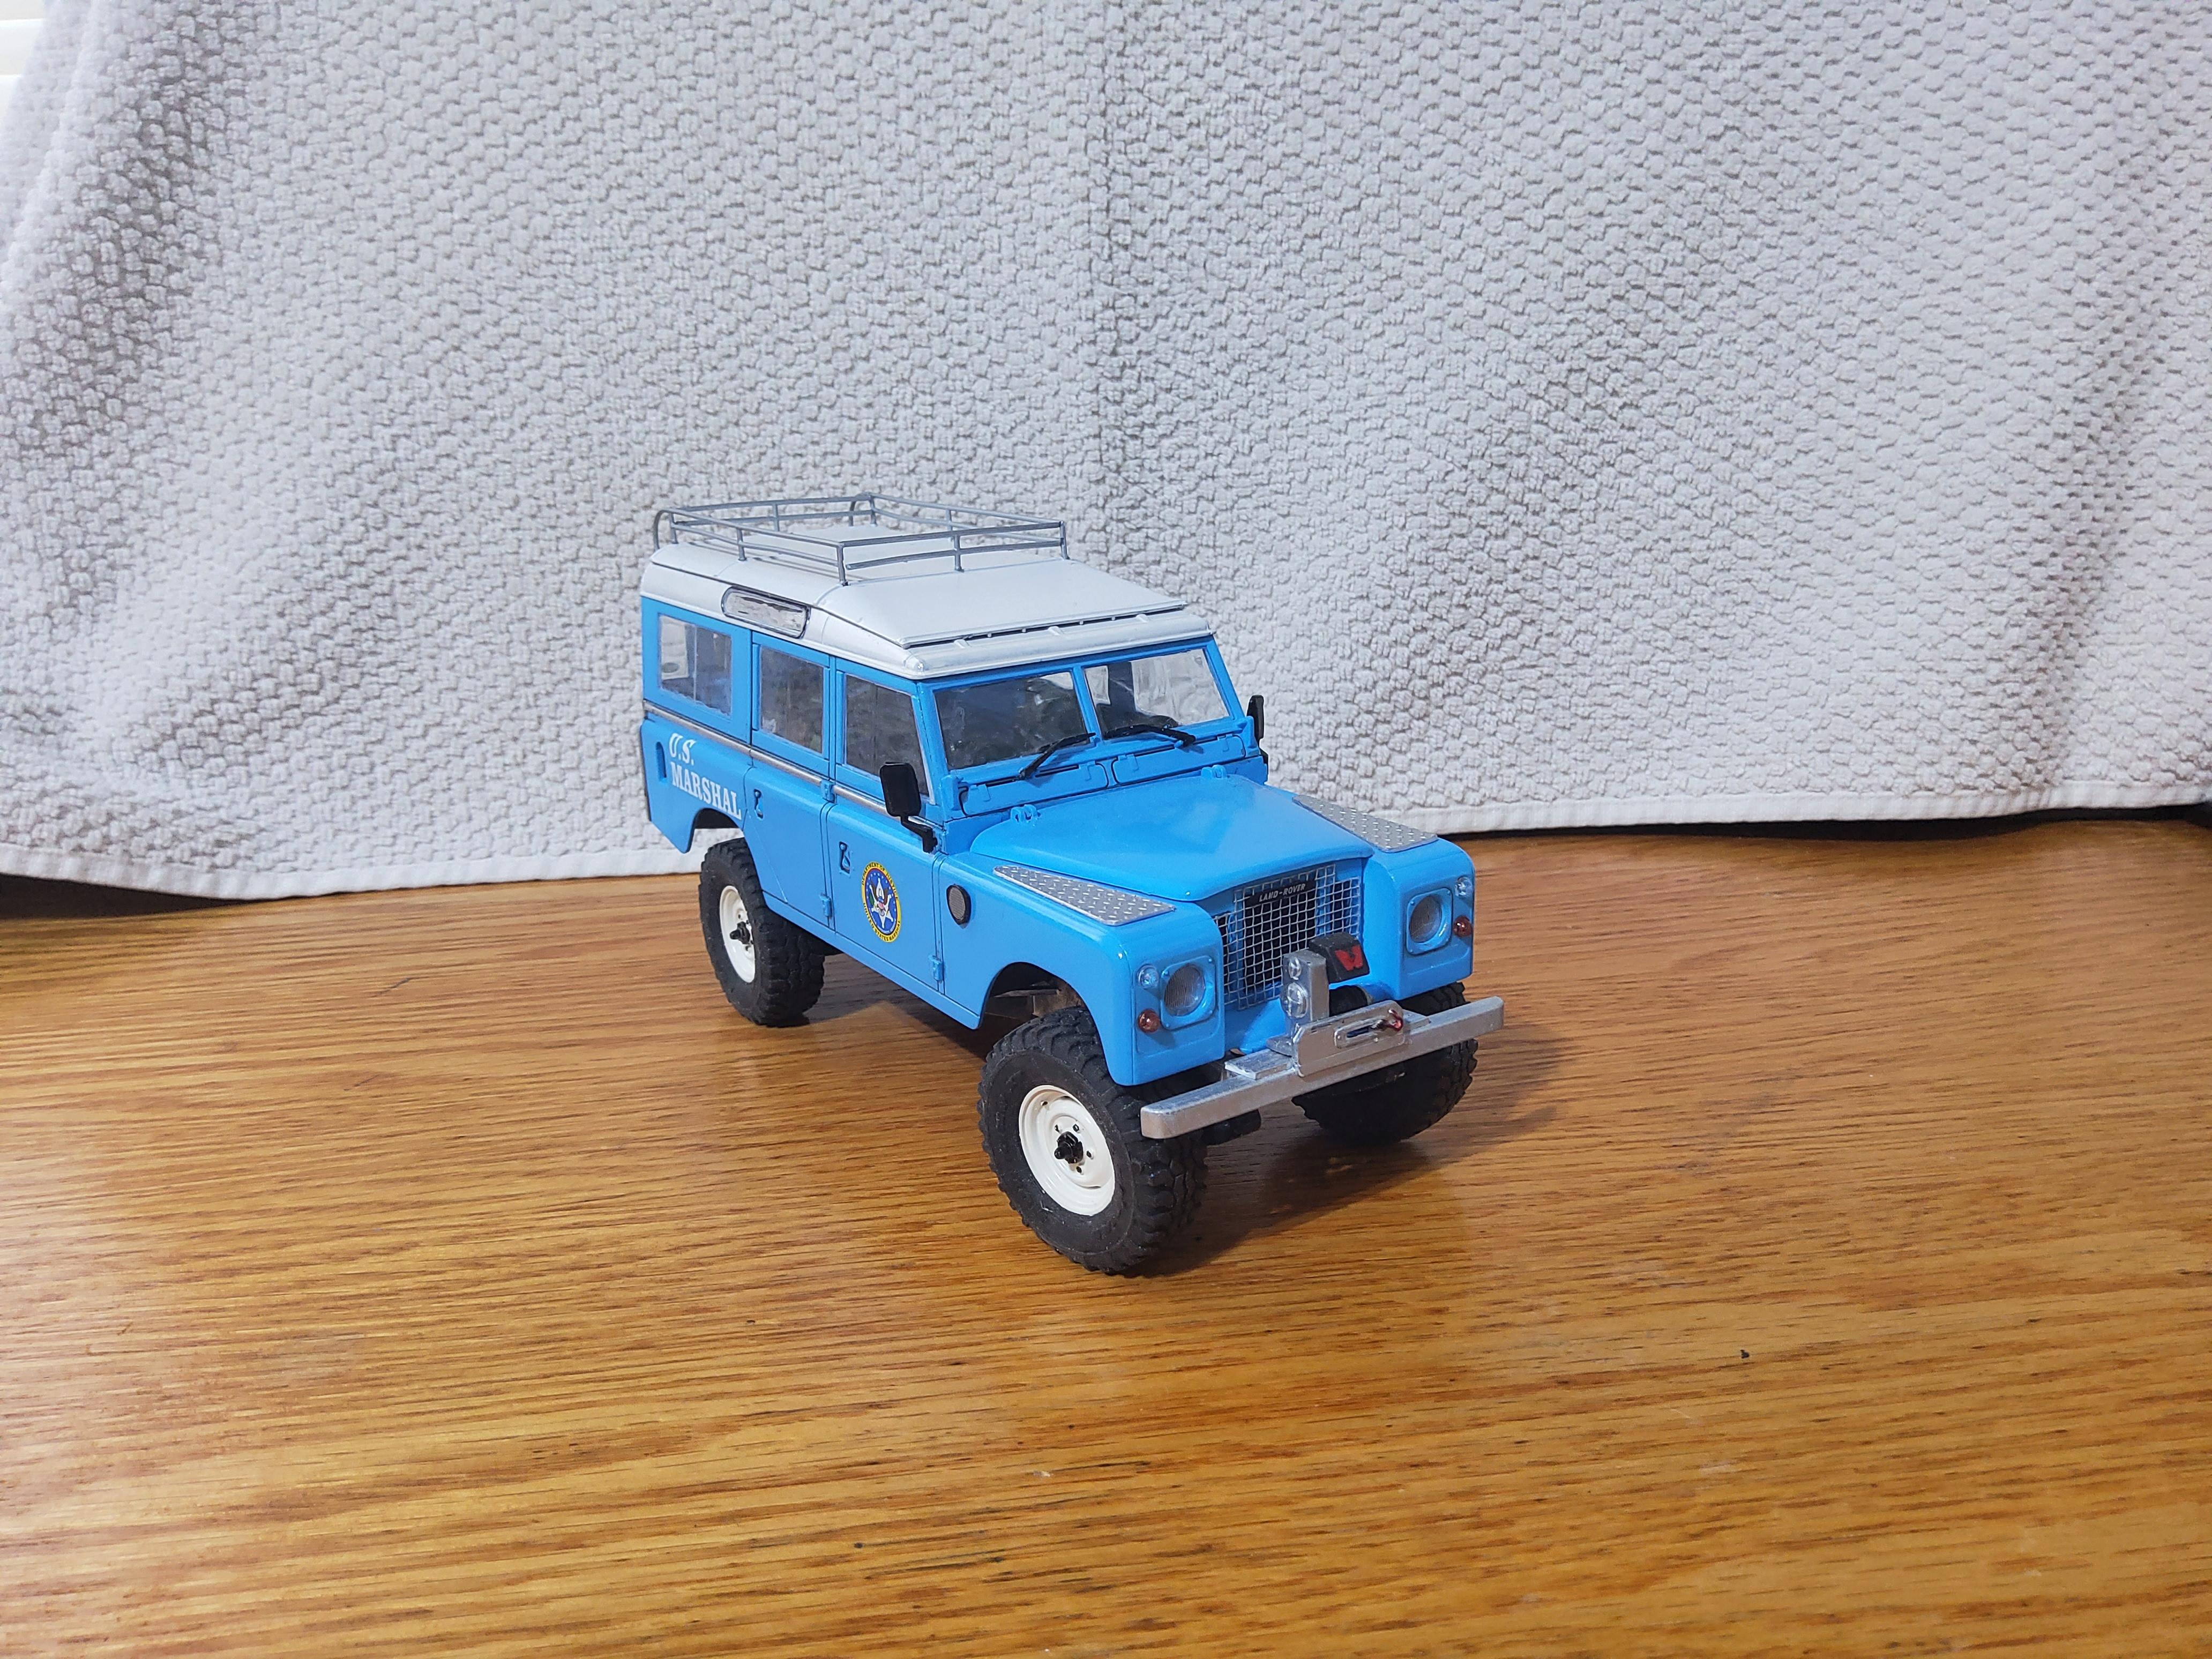
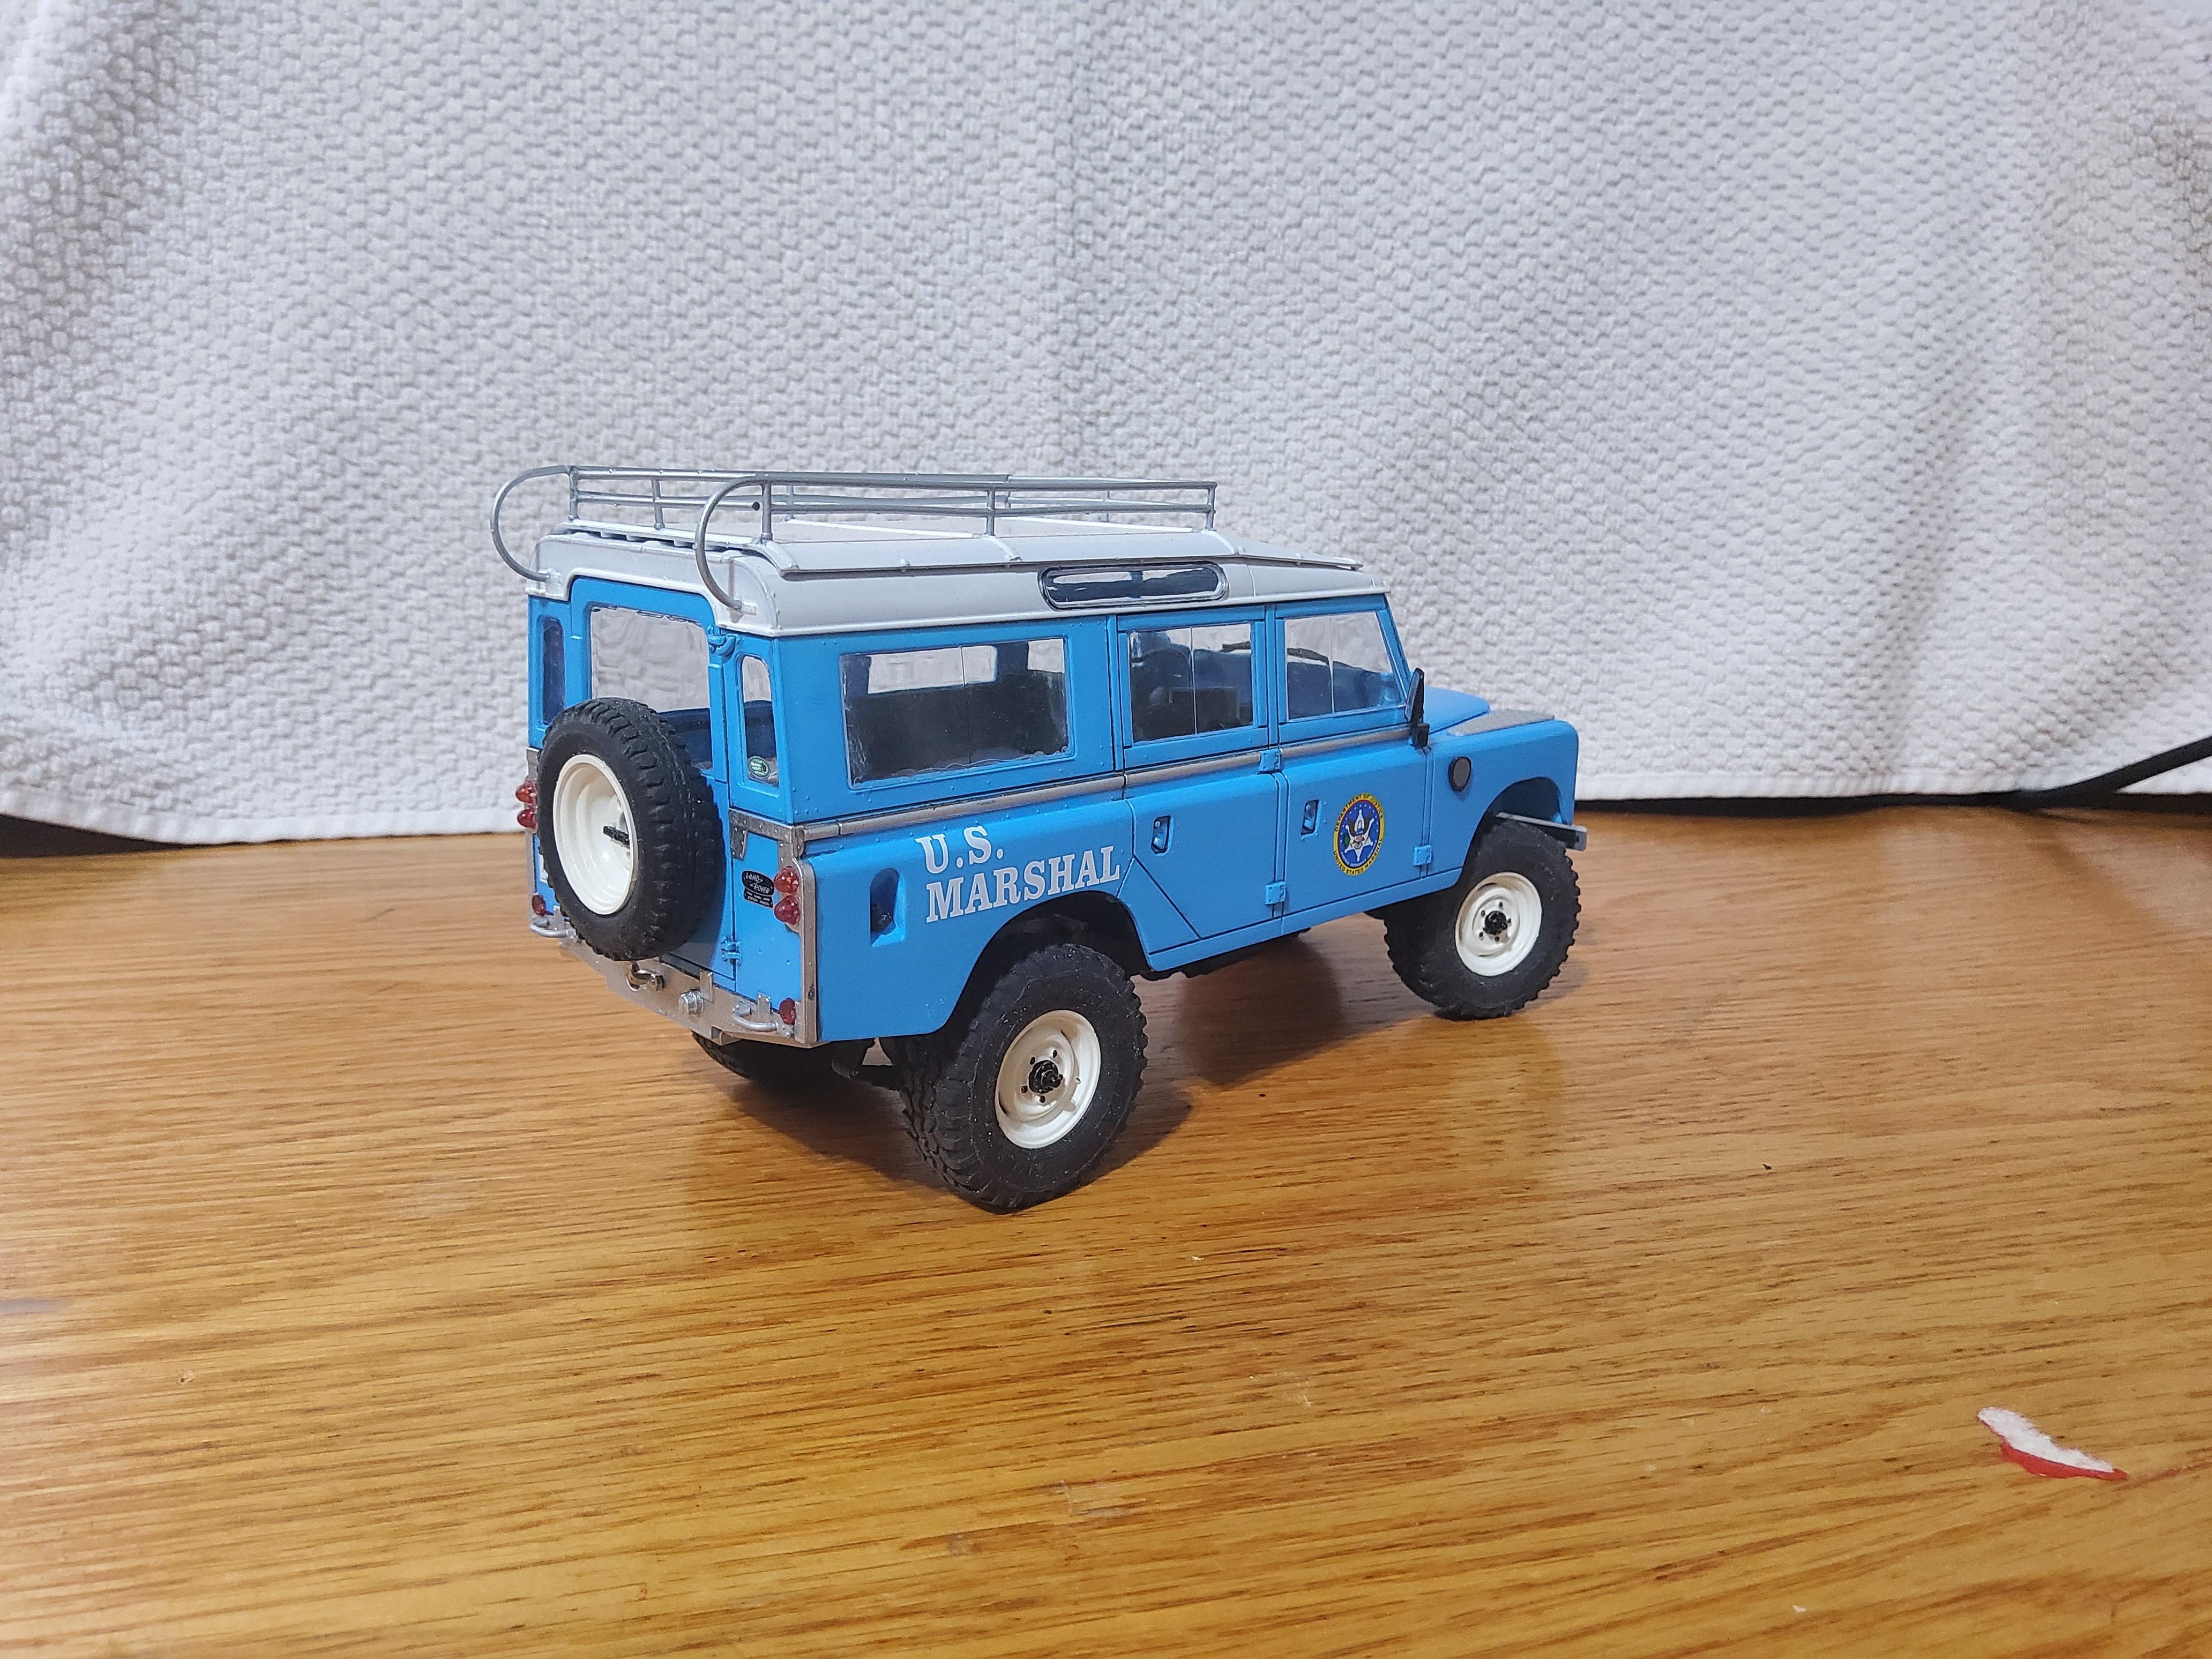
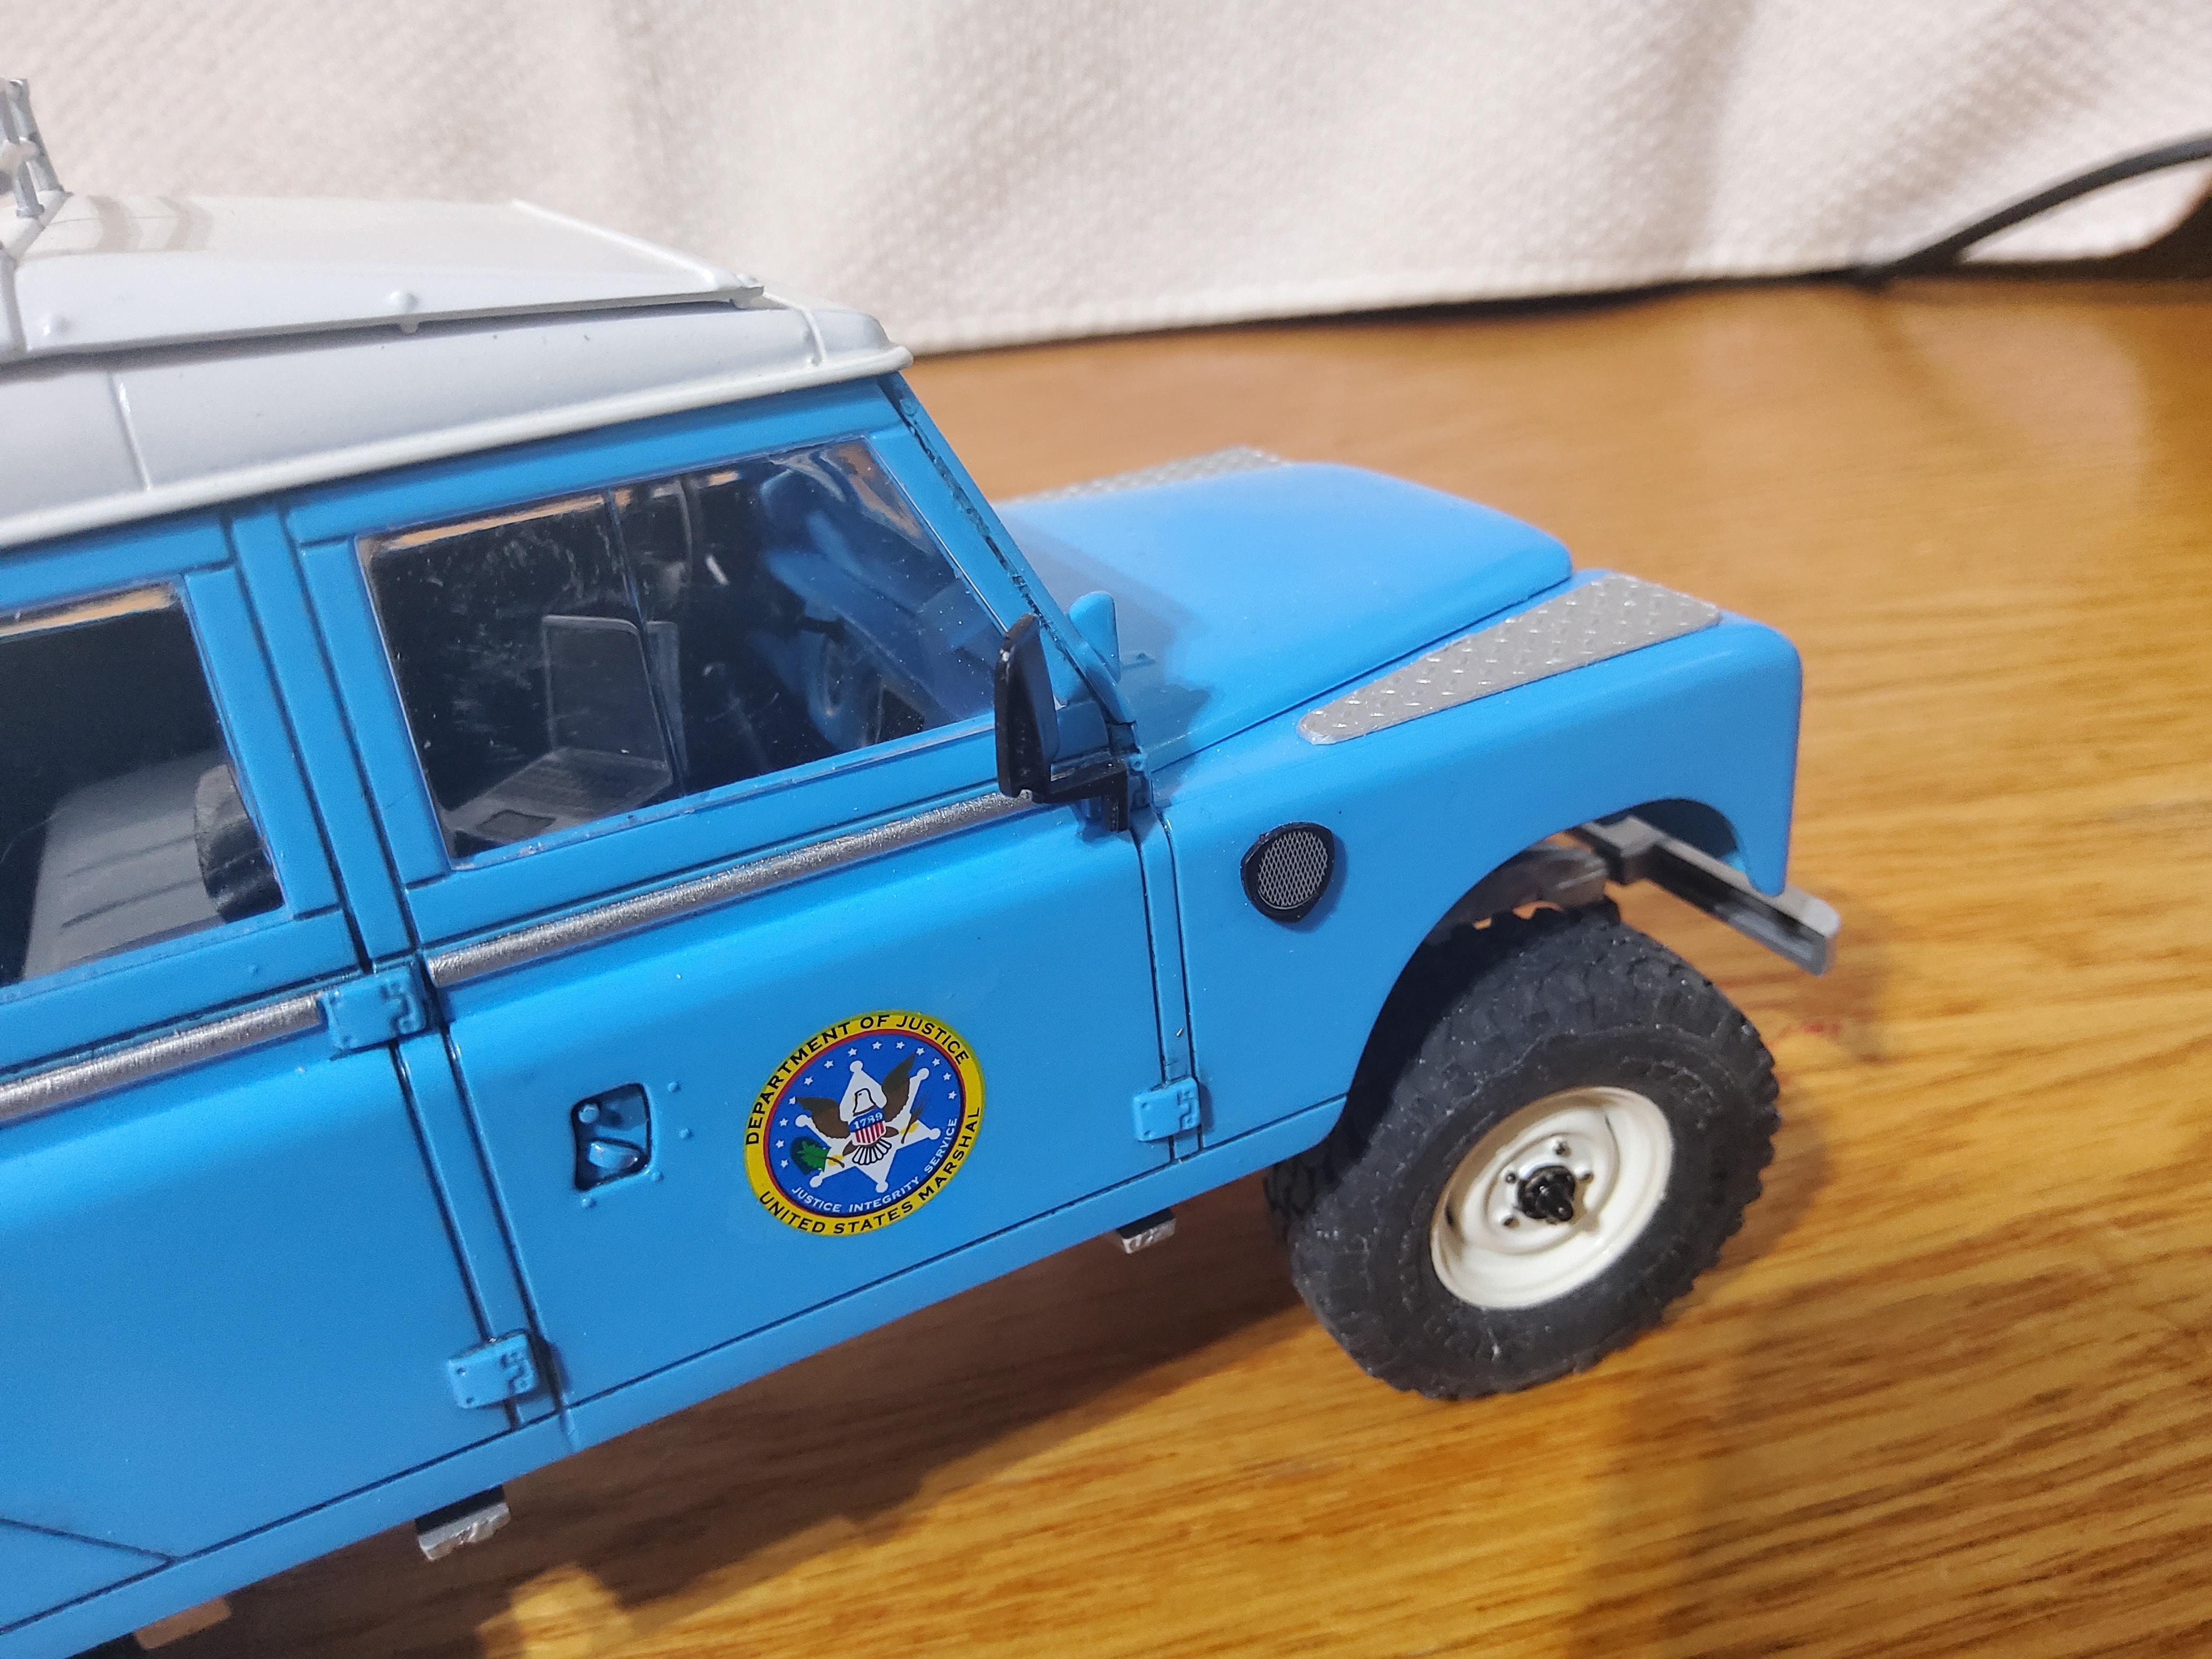
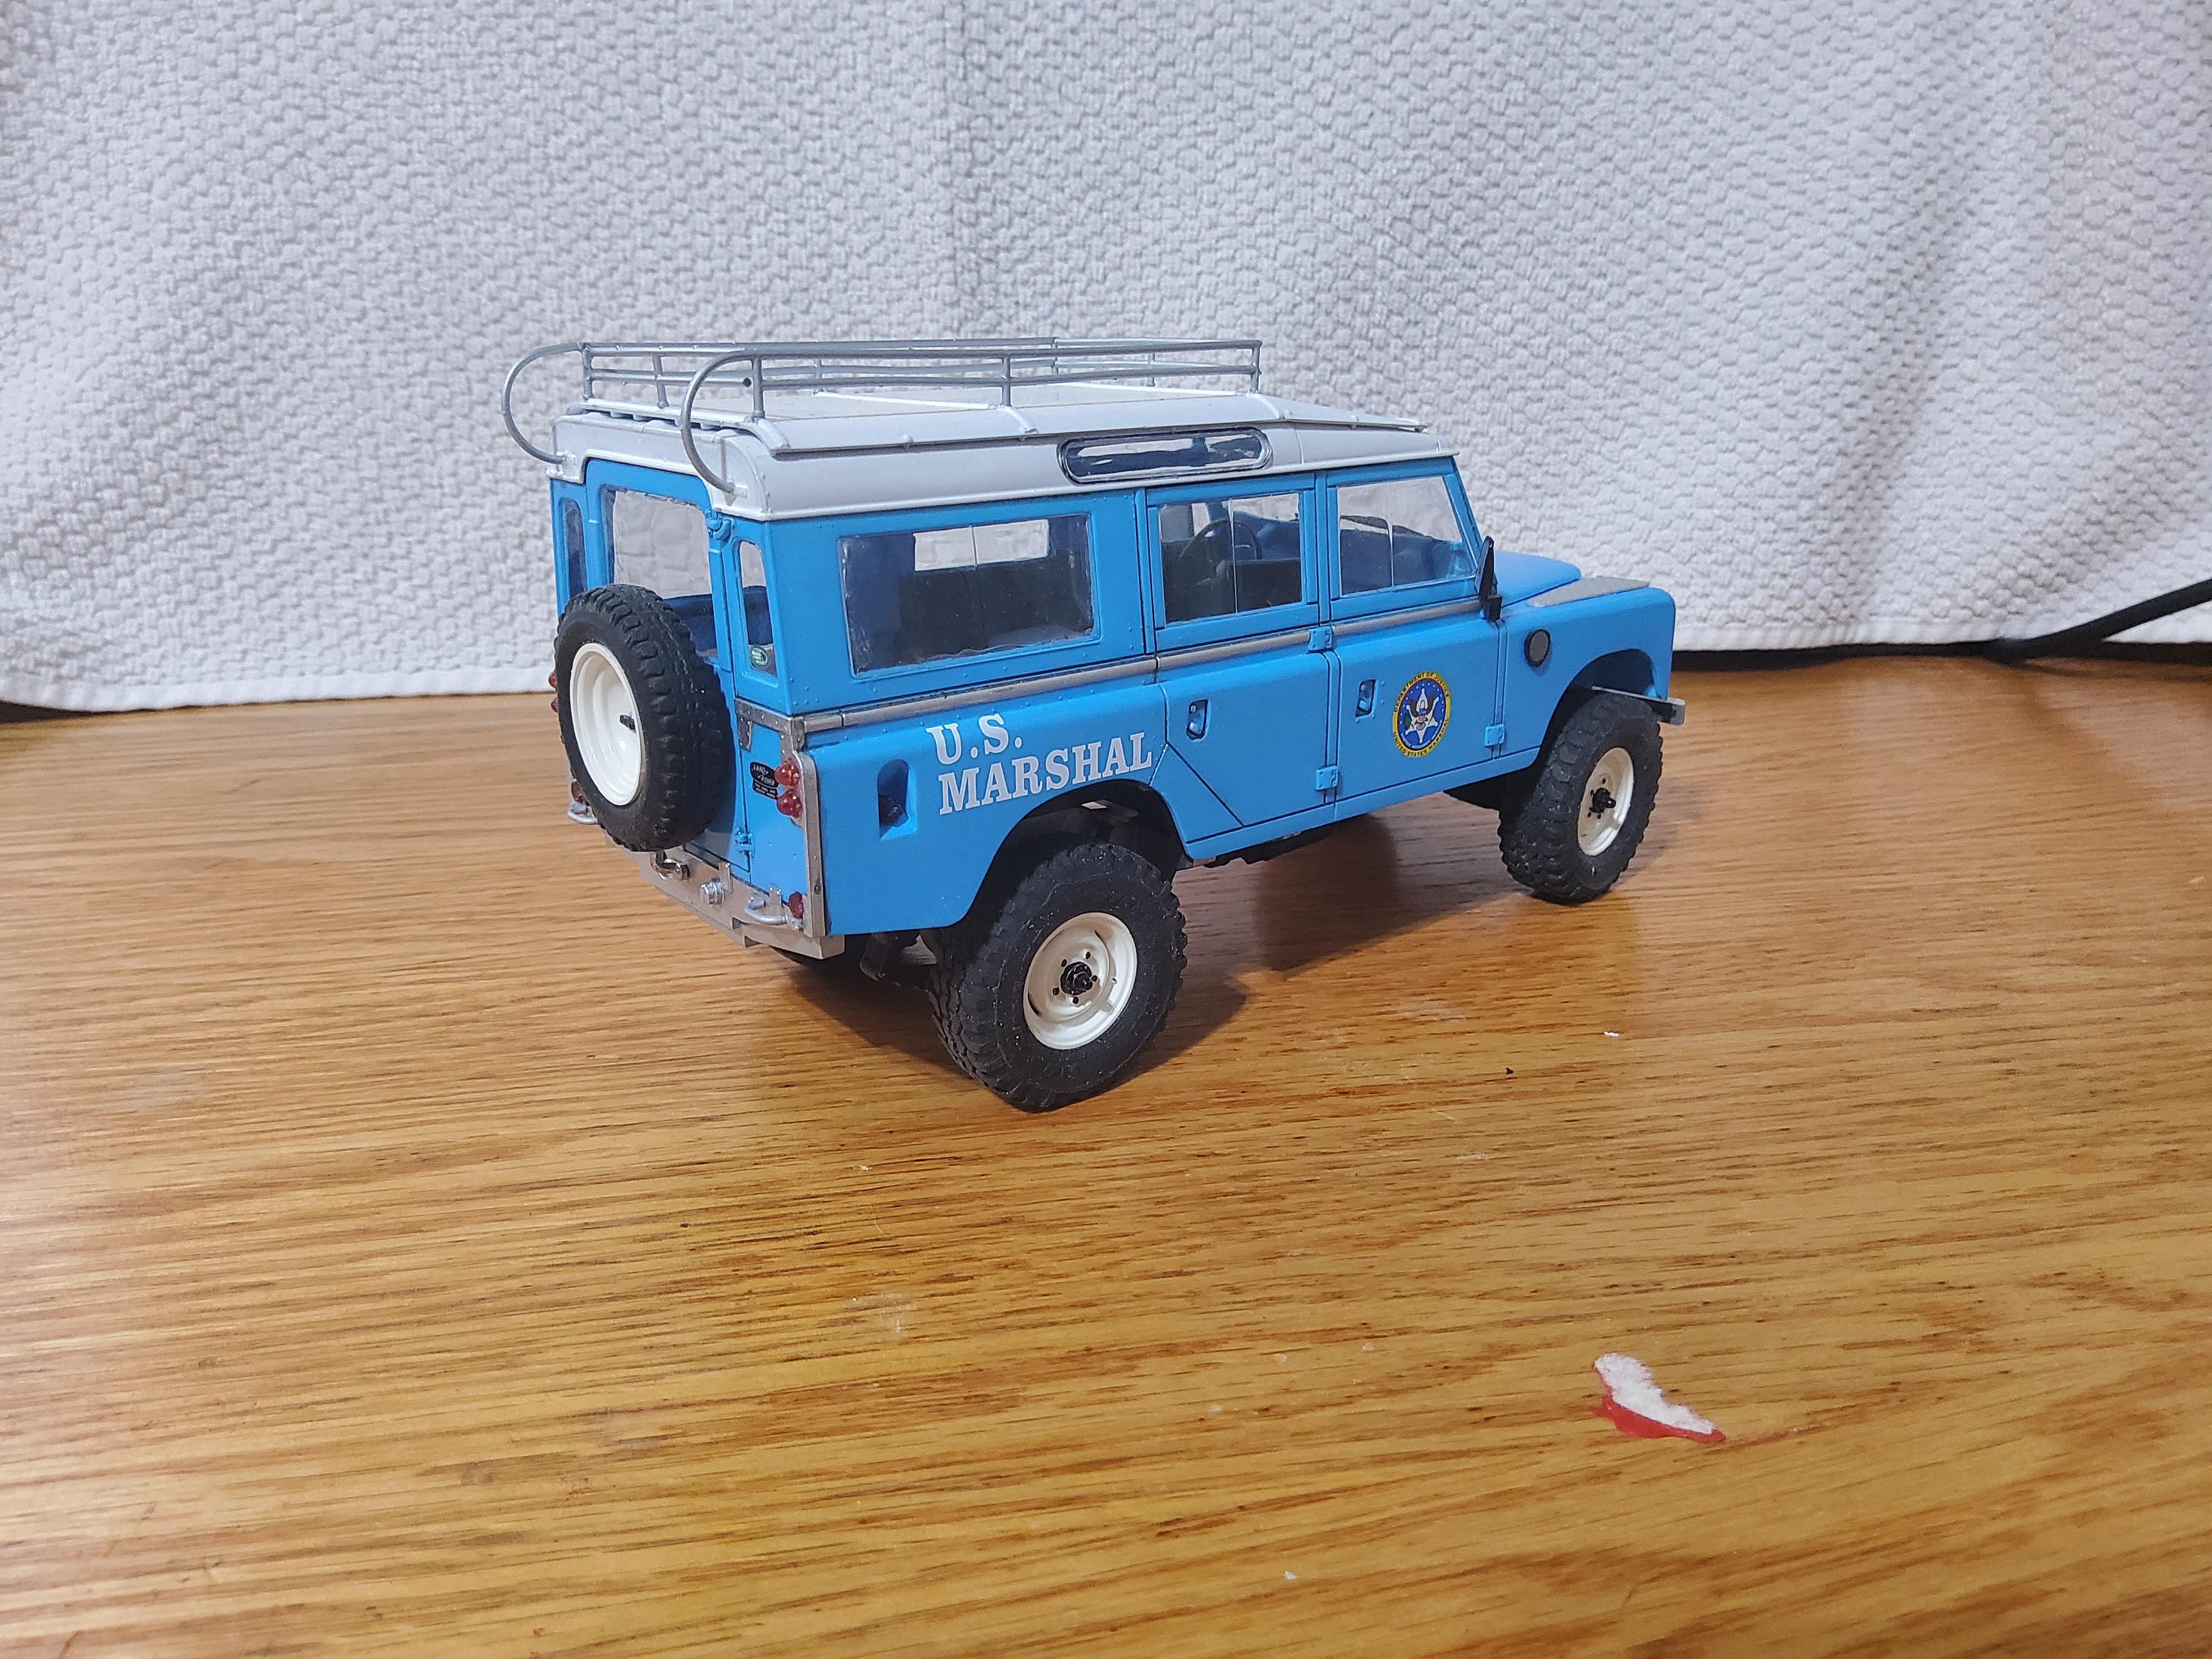
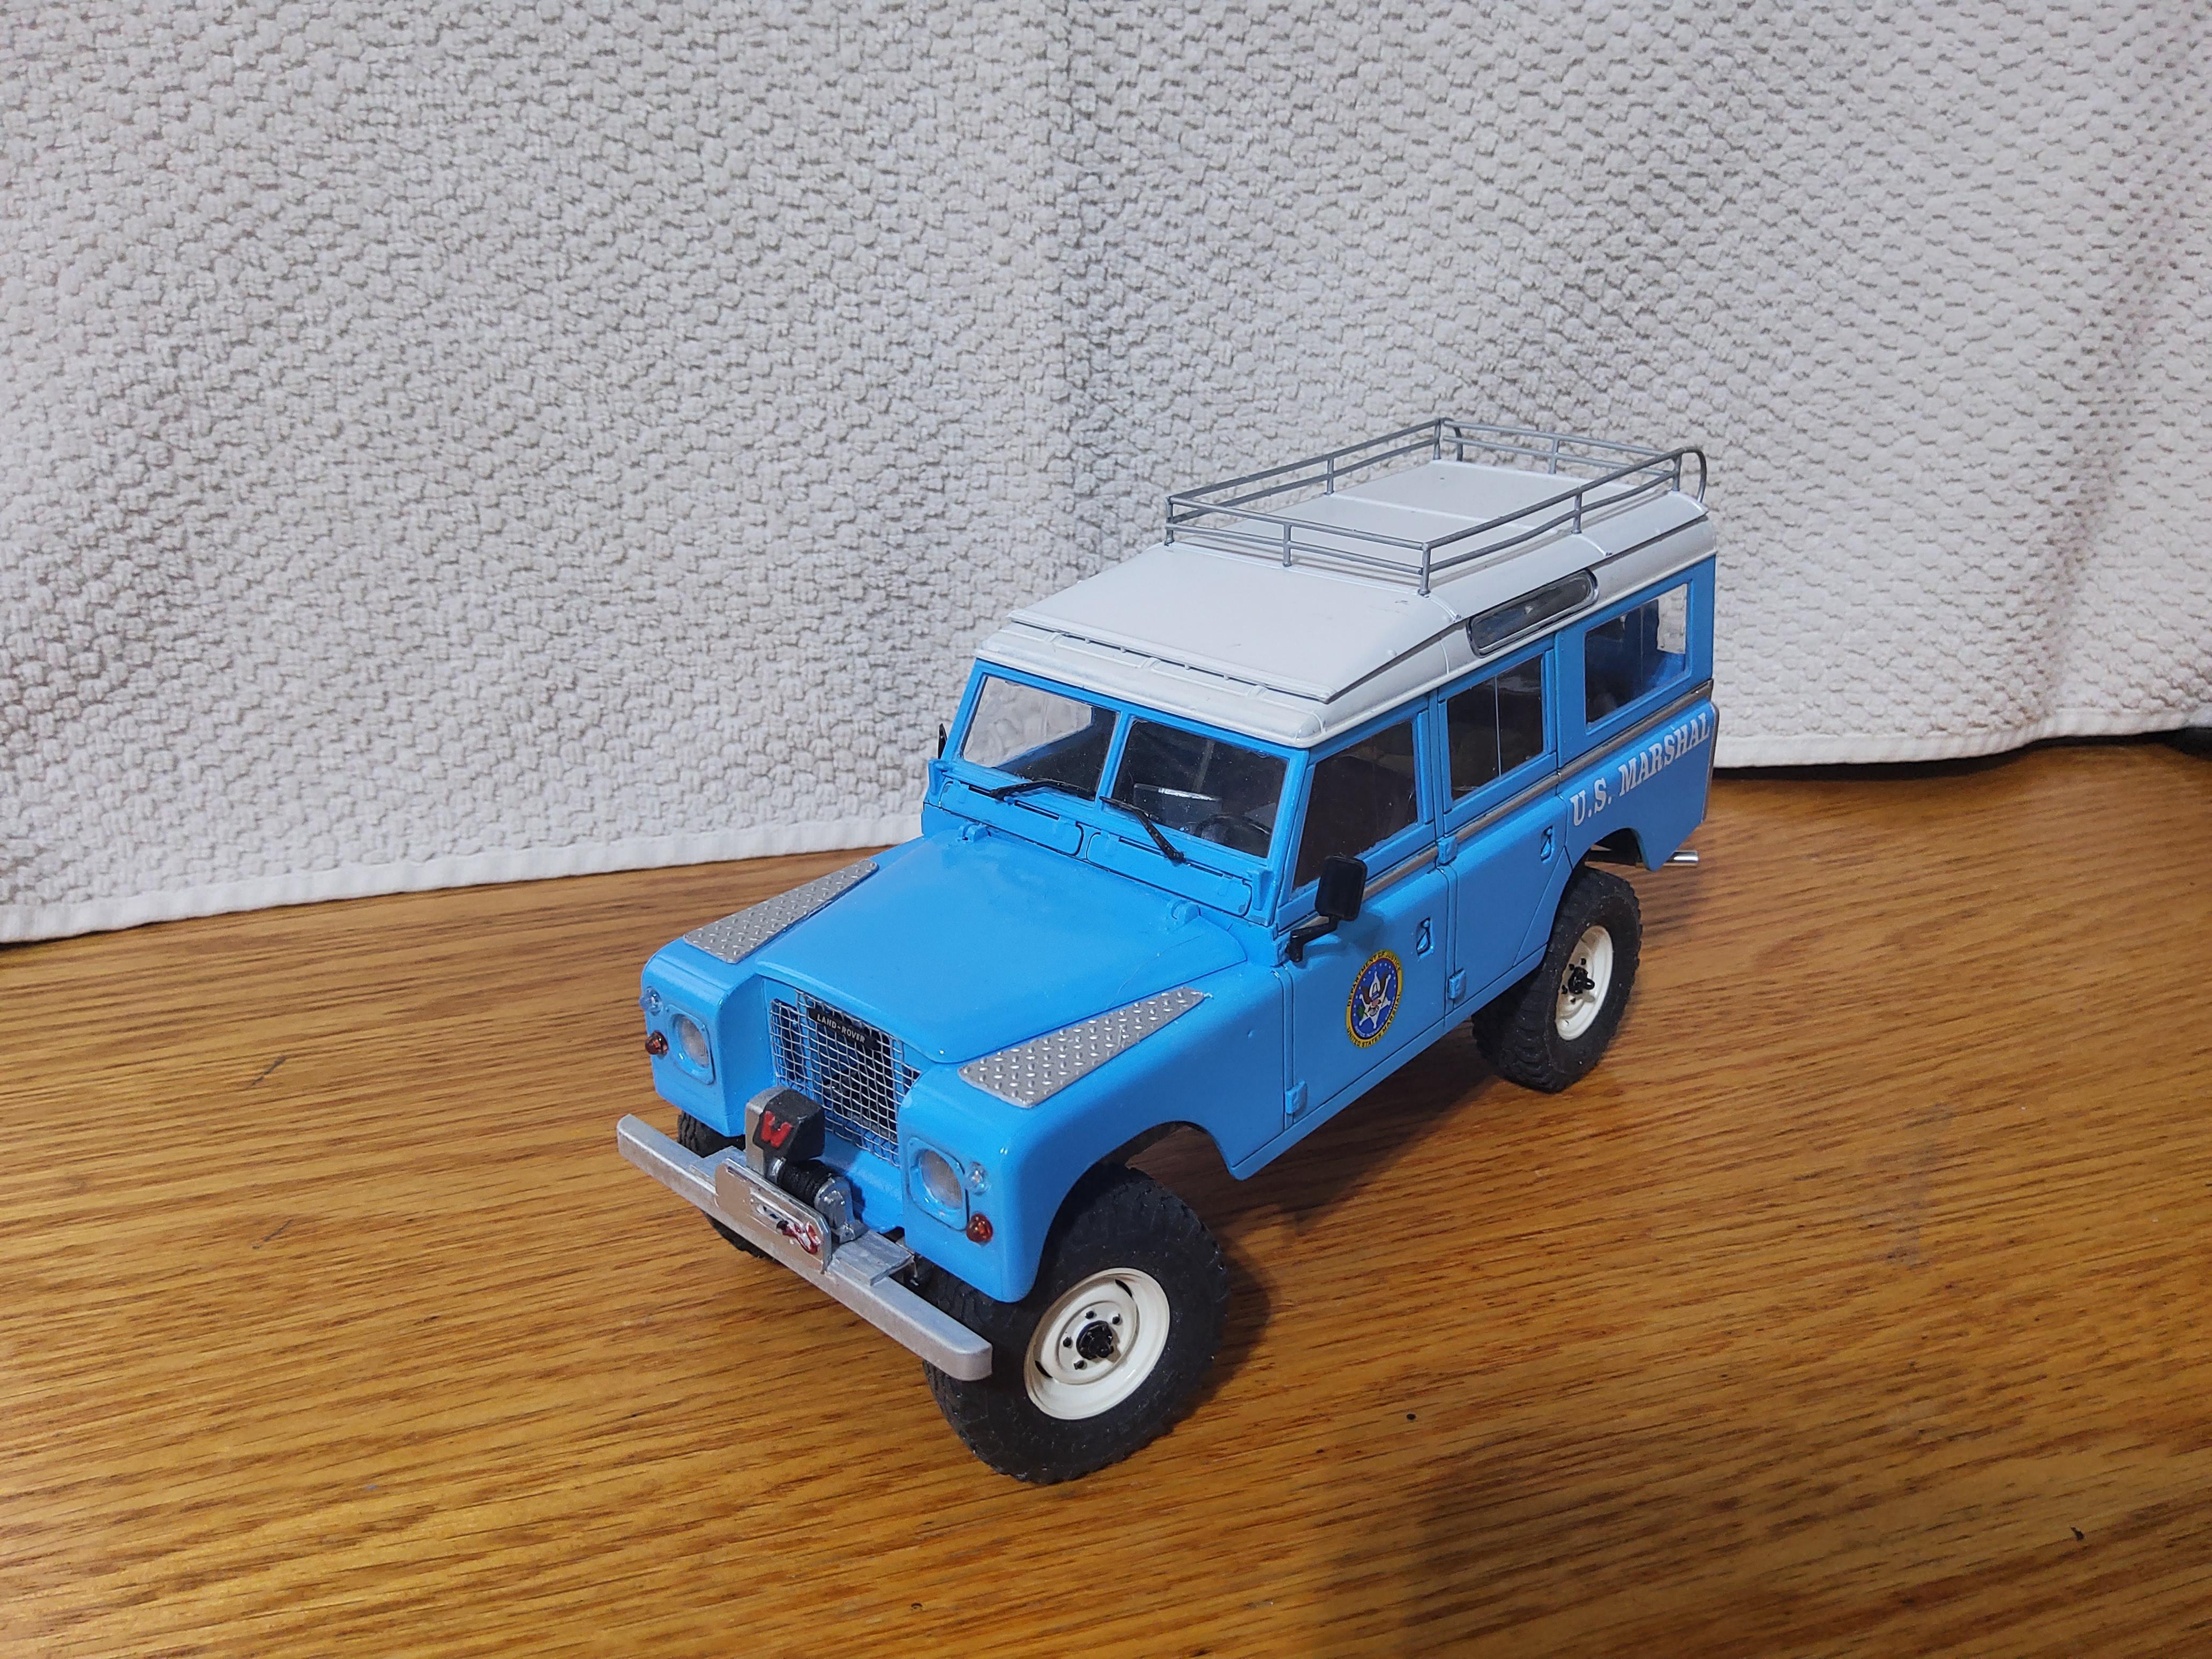
Well my entry for this years Cannonball is sitting at the starting line ready to go. My U.S. Marshals 1970 Land Rover SIIA is done. Please see it here Under Glass: http://www.modelcarsmag.com/forums/forum/54-model-trucks-pickups-vans-suvs-light-commercial/
-
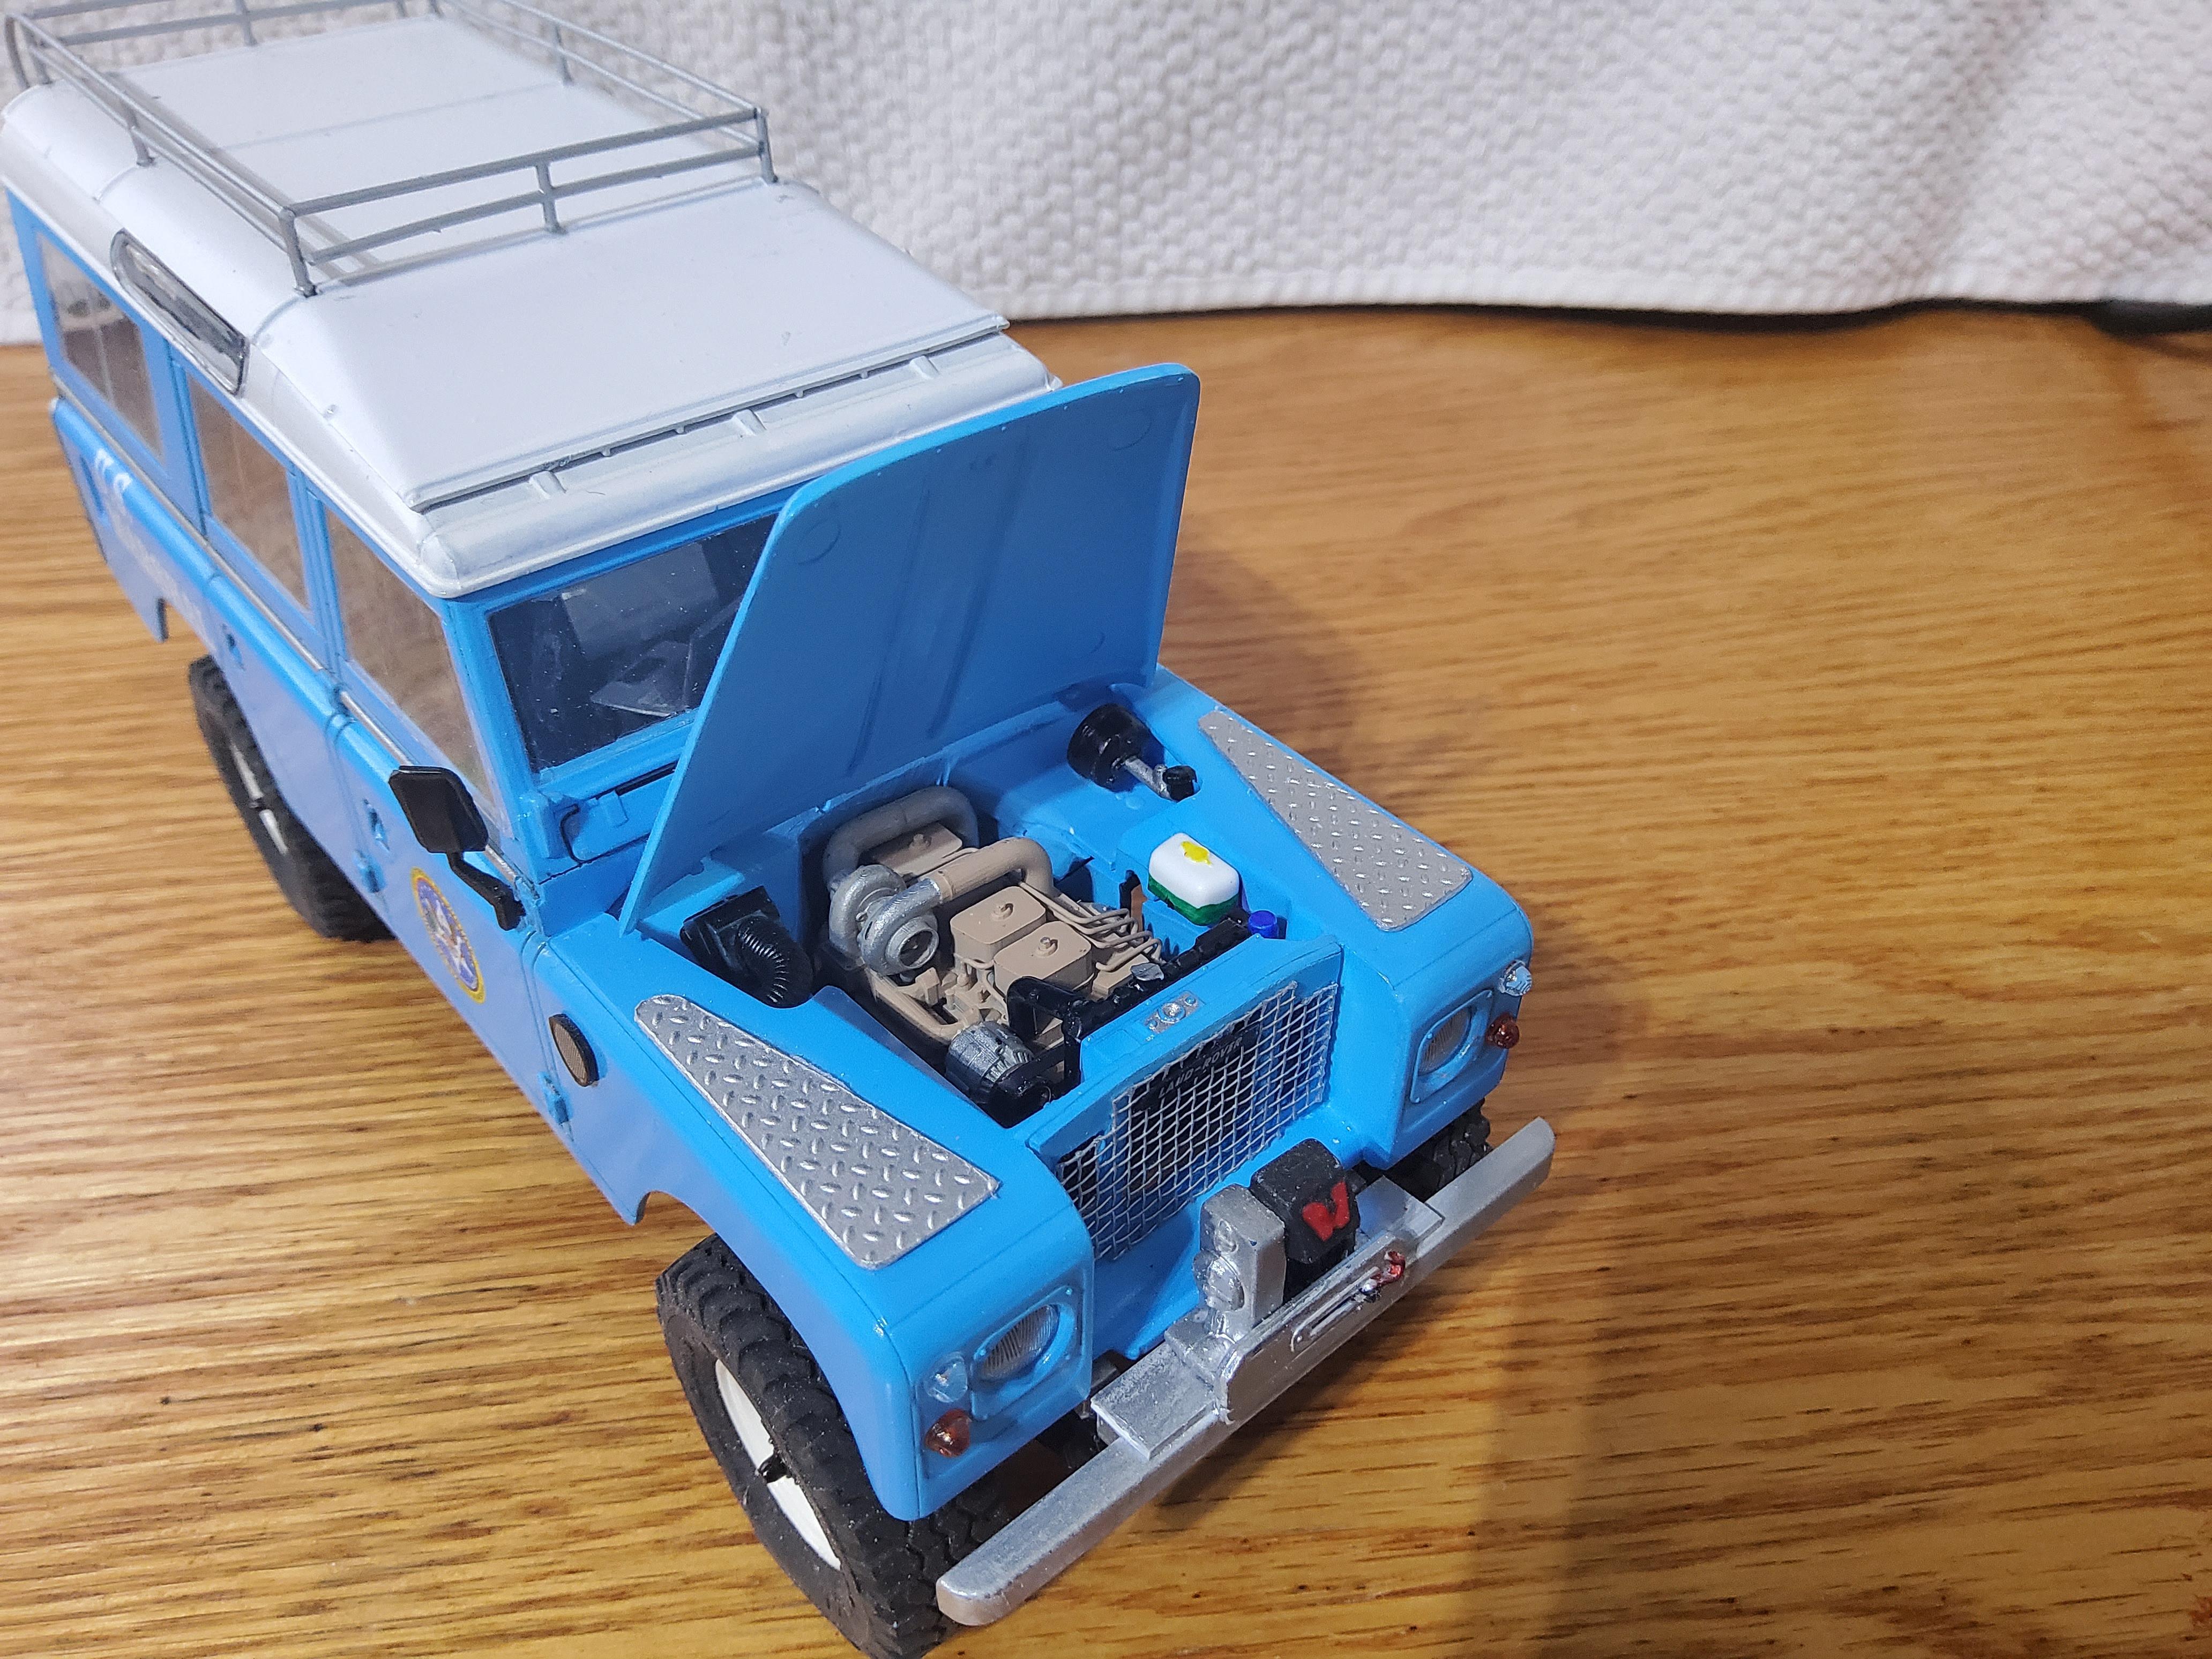
I am dne with my Cannonball run entry for this year. It seems that there is always more that can be done, but my ADD has moved on. I started with the very nice Revell Land Rover SIII and converted into a Series IIA to look like a 1970. This requiress a major rework of the grill and building a whole new dash. I figured why stop there, I swapped out the stock puny engine for a Cummins 4BT that I modified and then 3D printed. I had to add the turbo, all plumbing, injector tubes and all the front drive accessories. The body needed a little chopping to make it fit, but no major cutting. I did find pictures on line o this very swap in real life, so I know it can and will fit. I added a few inches of lift to fit larger tires from Scenes Unlimited(I think). Wheels are kit wheels to keep with the theme. The interior has sleeping bags, an Amazon box fr parts, Igloo cooler, MAC laptop, and GPS all scratch built except for the computer and GPS that were 3D printed. There is also a new stereo head unit (Jenson) that I 3D printed. I also made a sleeping platform for the drivers to swap out and rest. The front bumper was modified to accept a winch and diamond plate added to th tops of the fenders(Wings). Almost all the paint is craft paint airbrushed, or hand brushed. As for the theme, well, last year was race cars in disguise, the theme carried over a little for me this year as I decided to mask the truck in US Marshel trim. I figure that the local and state cops just woulld not stop a U.S. Marshal with a big DOJ emblem on the door, even if is doing 100+MPH. I may add ne of those red magnetic stick on lights, but with the aluminum body this has, I'm not sure how to attach it. The engine is missing the air cleaner, I will post the picture of it when it cmes off the printer. Sorry for the indoorpictures, its rainingright now.
-
I am calling this one done. I will post more pictures under glass.
-
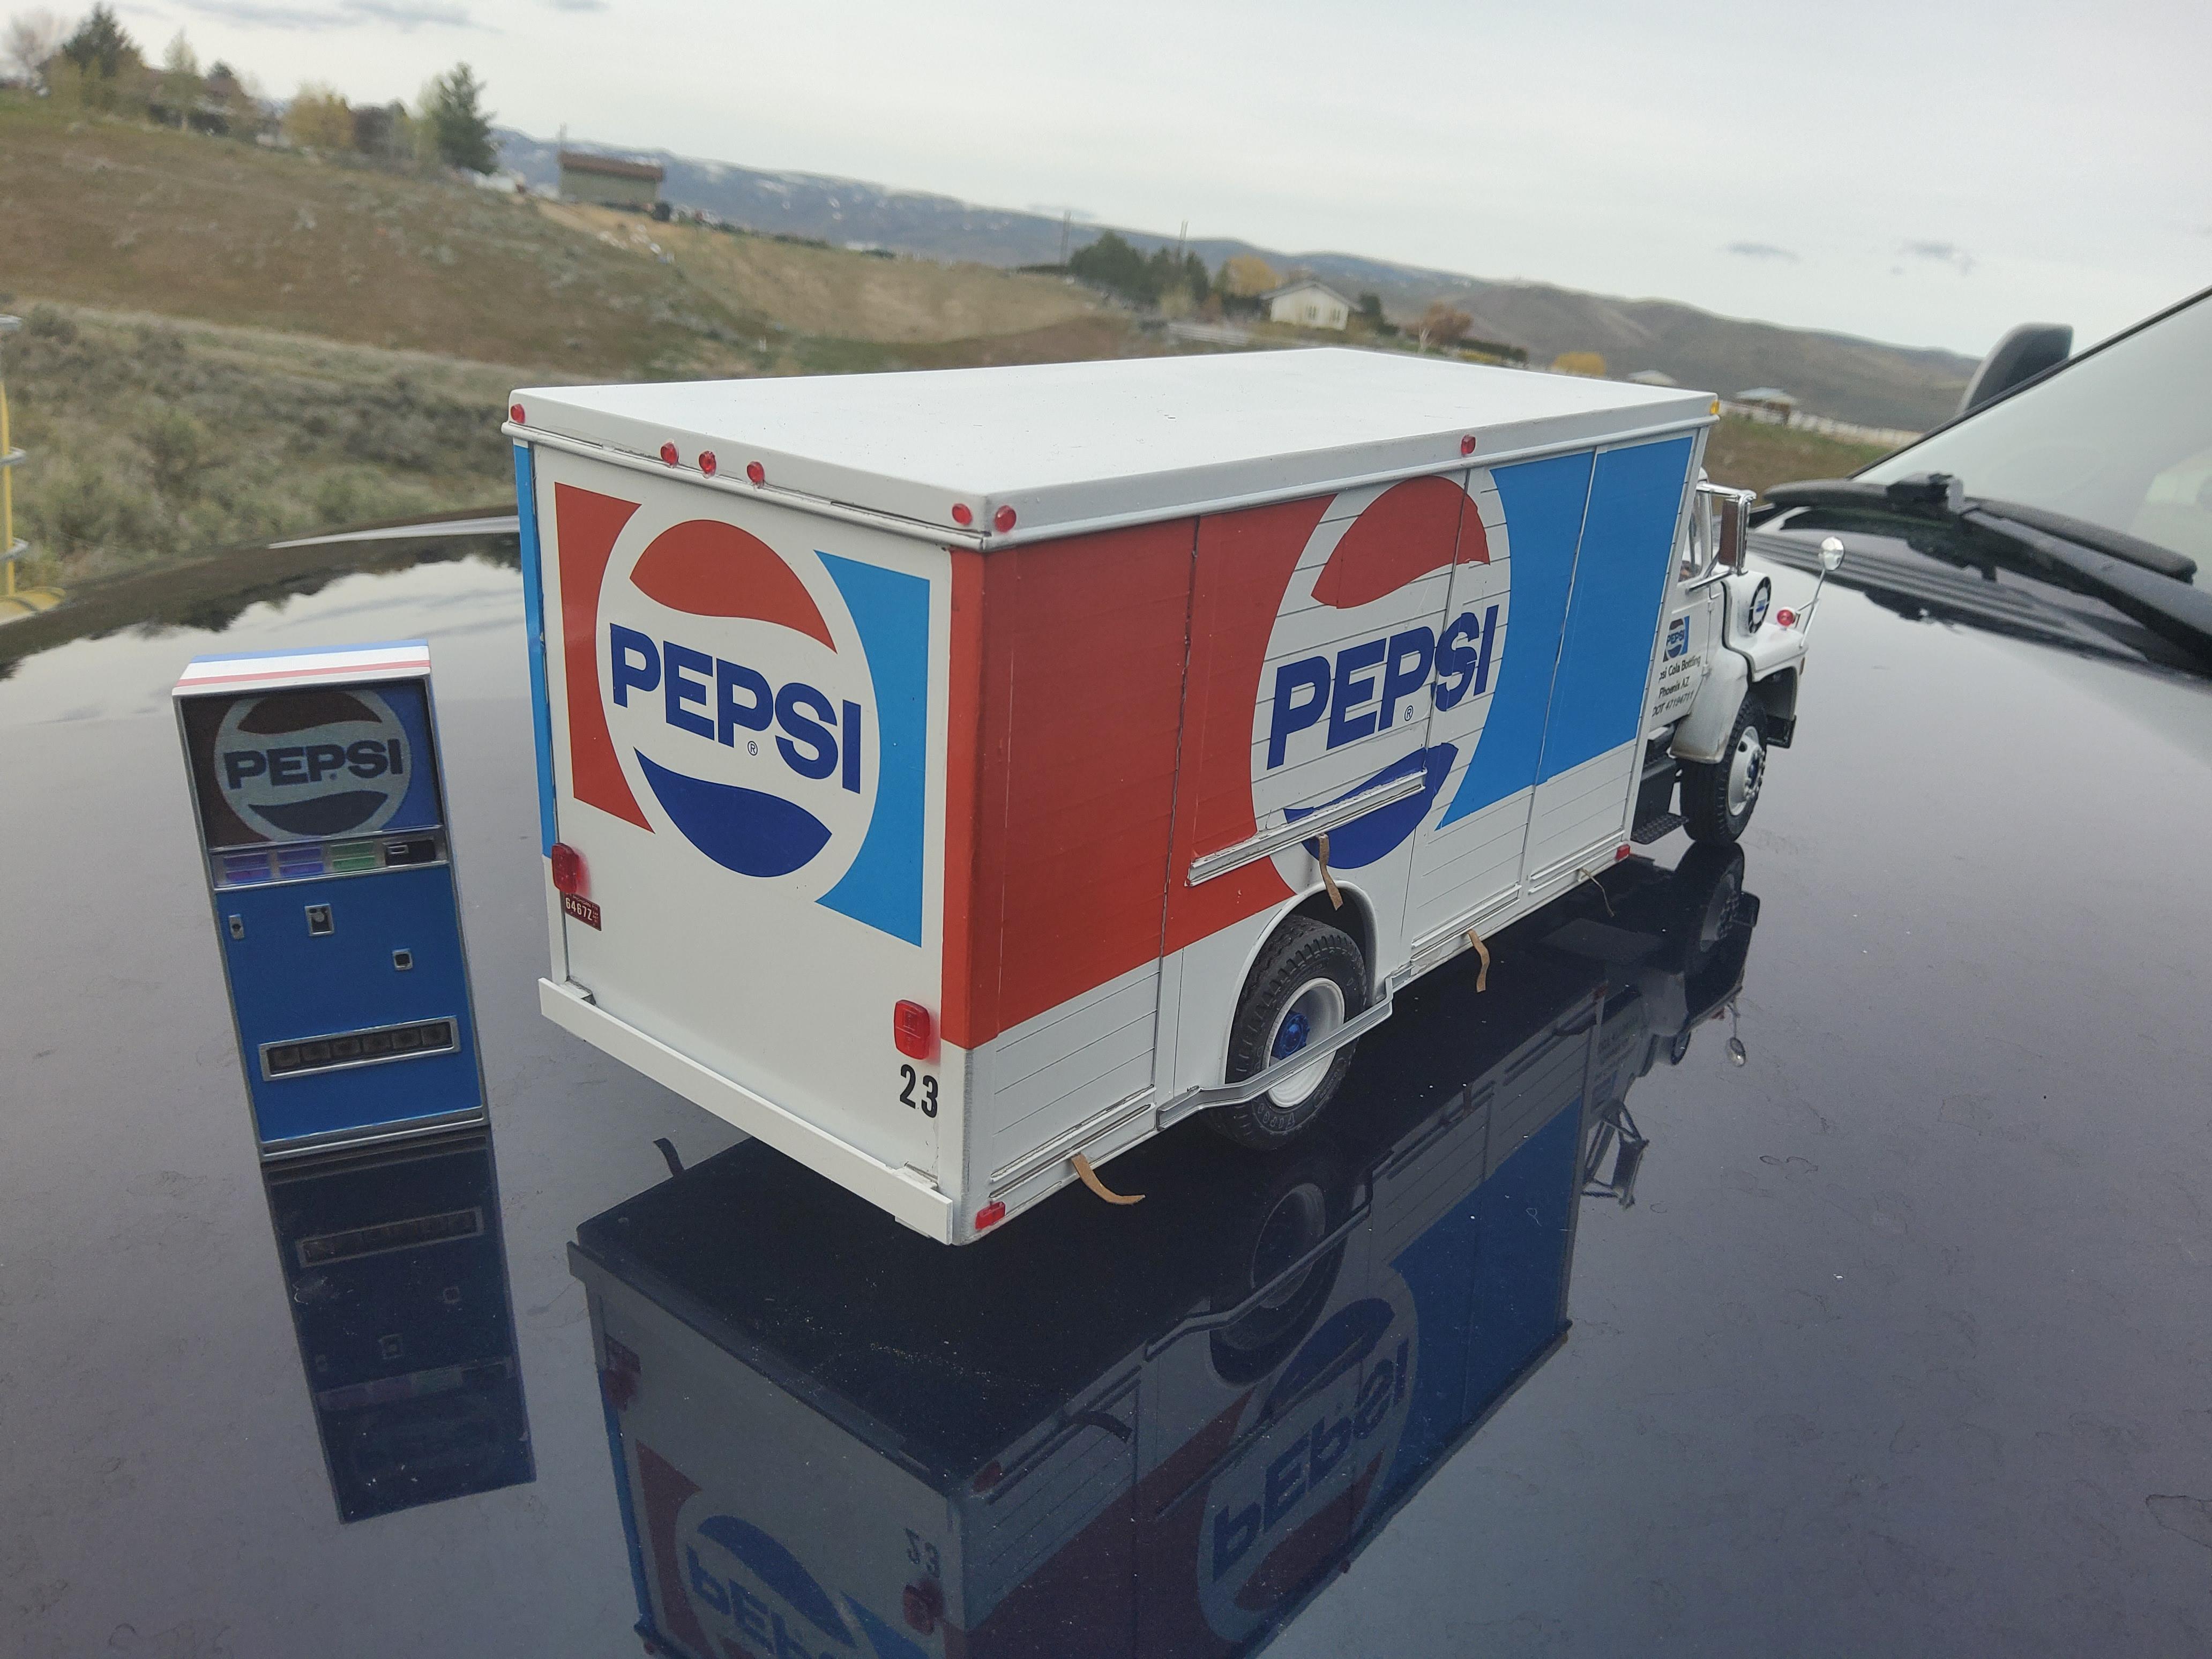
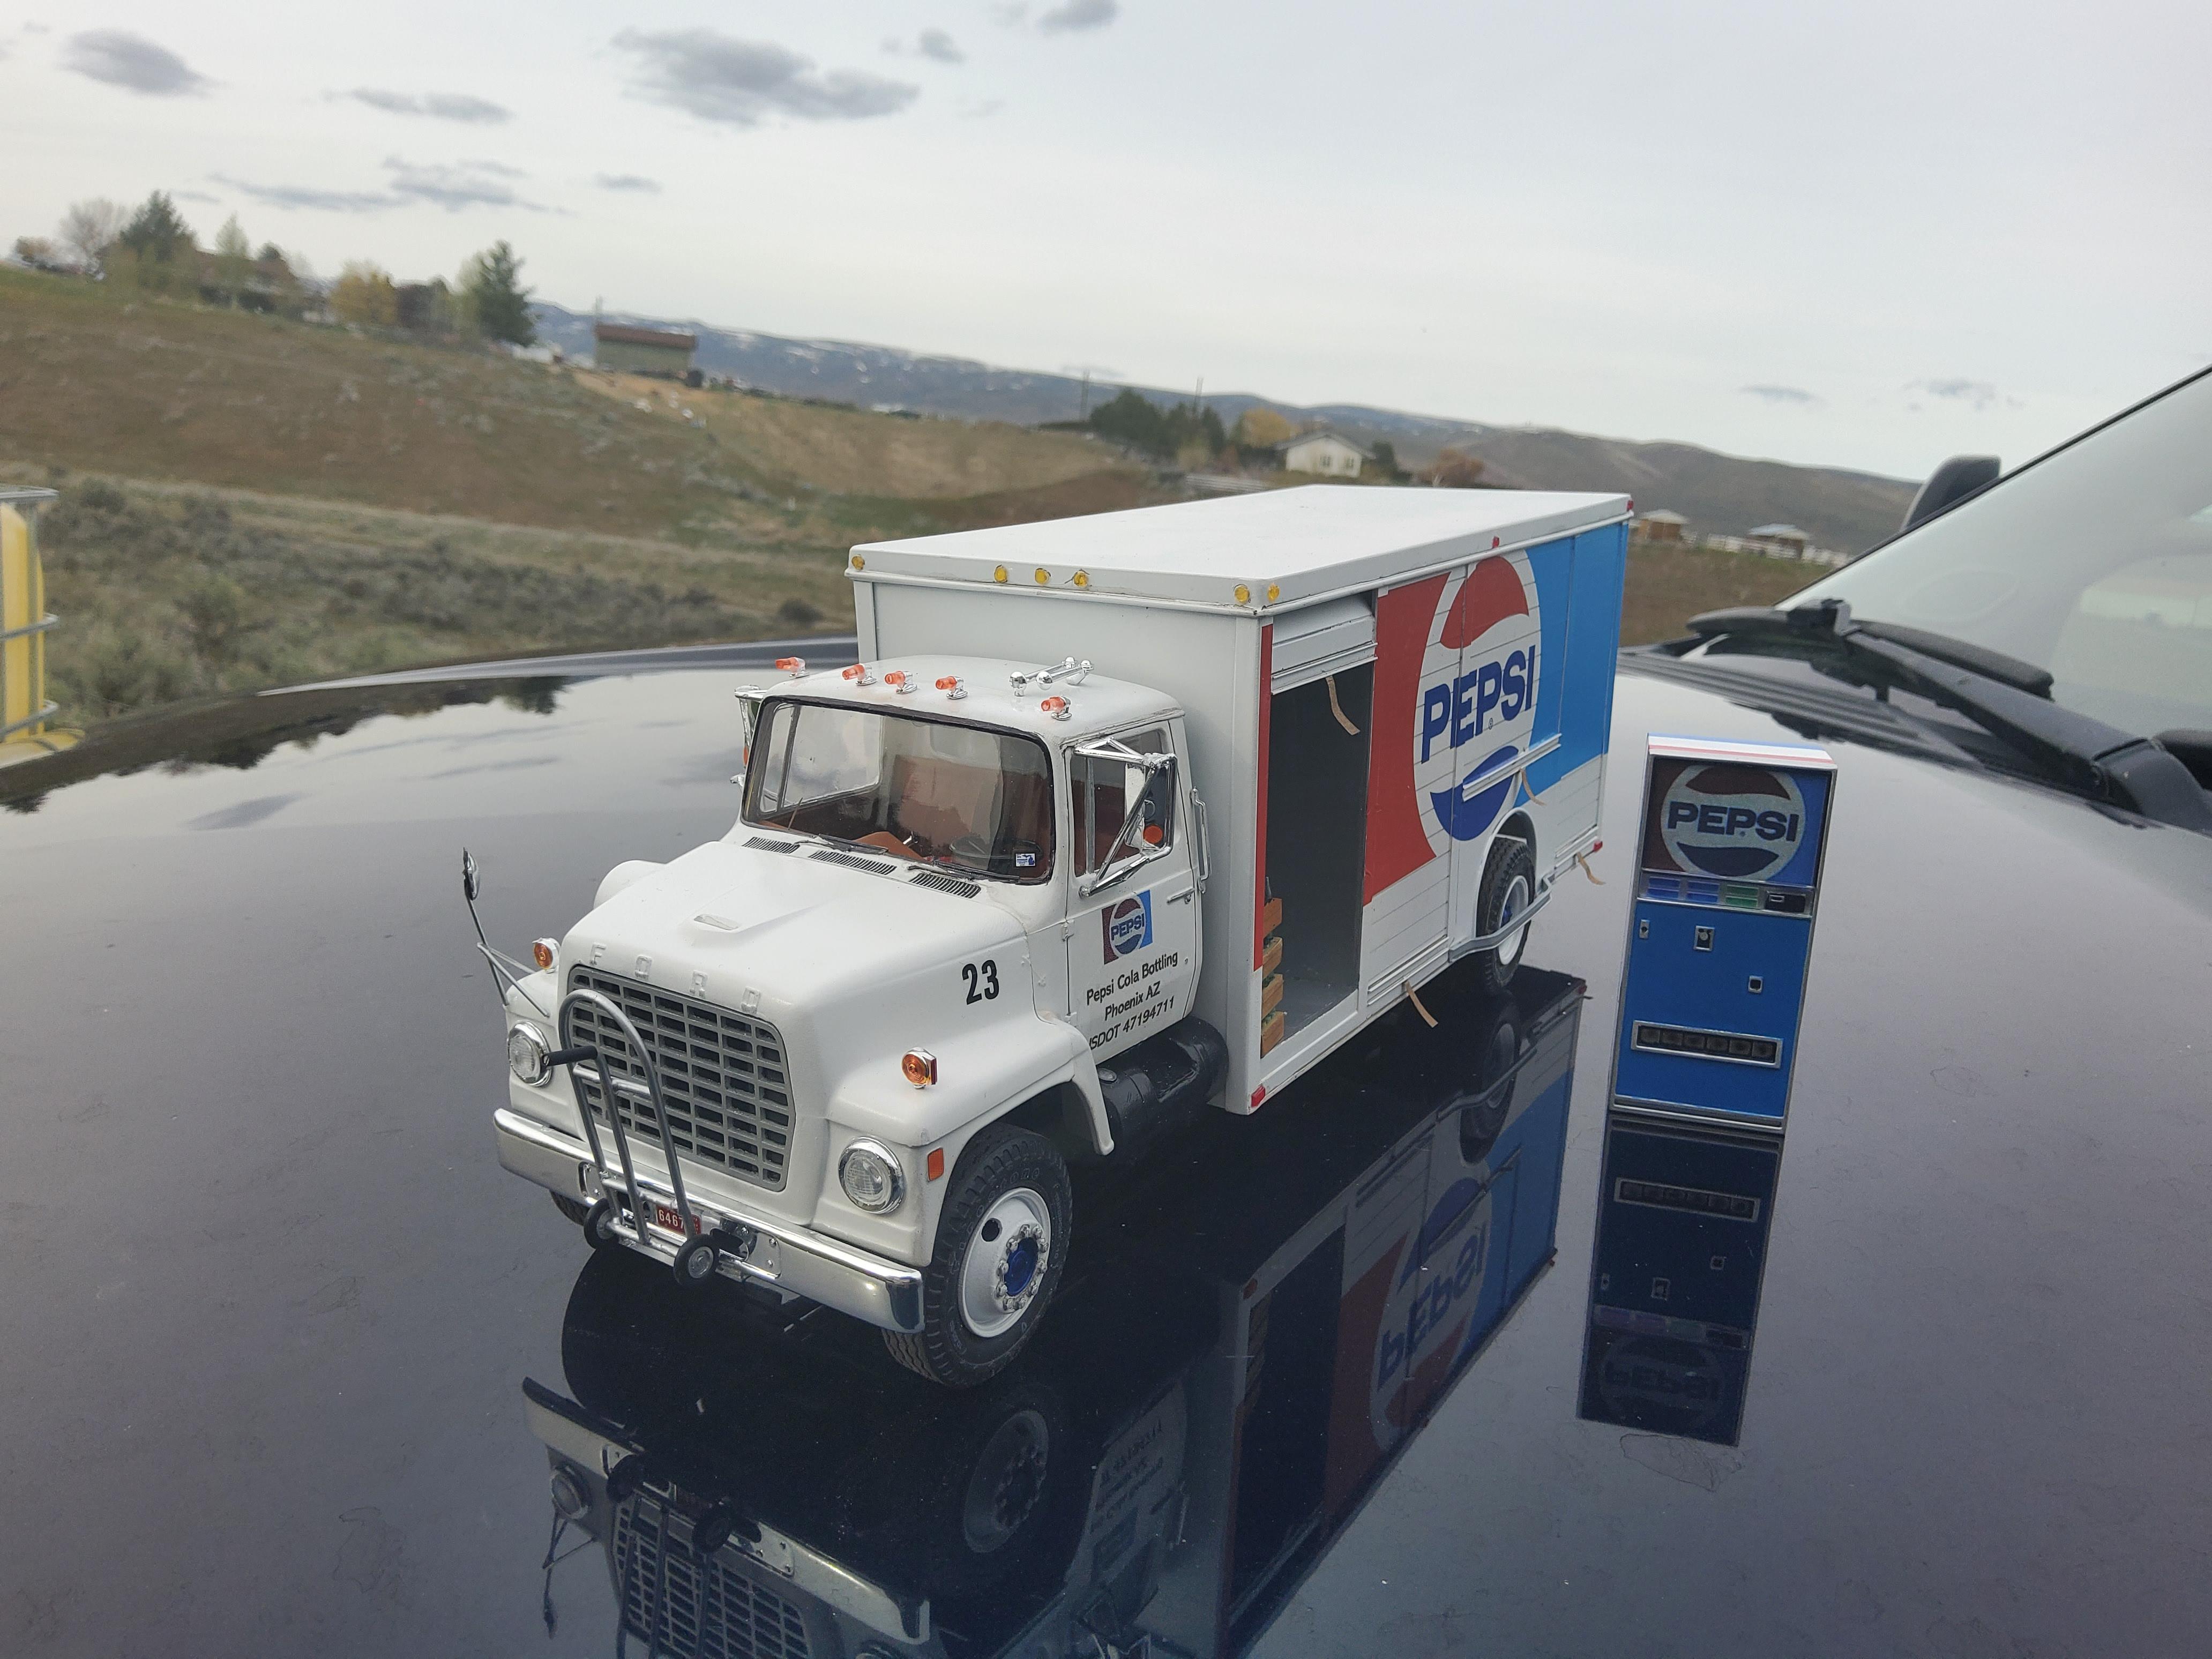
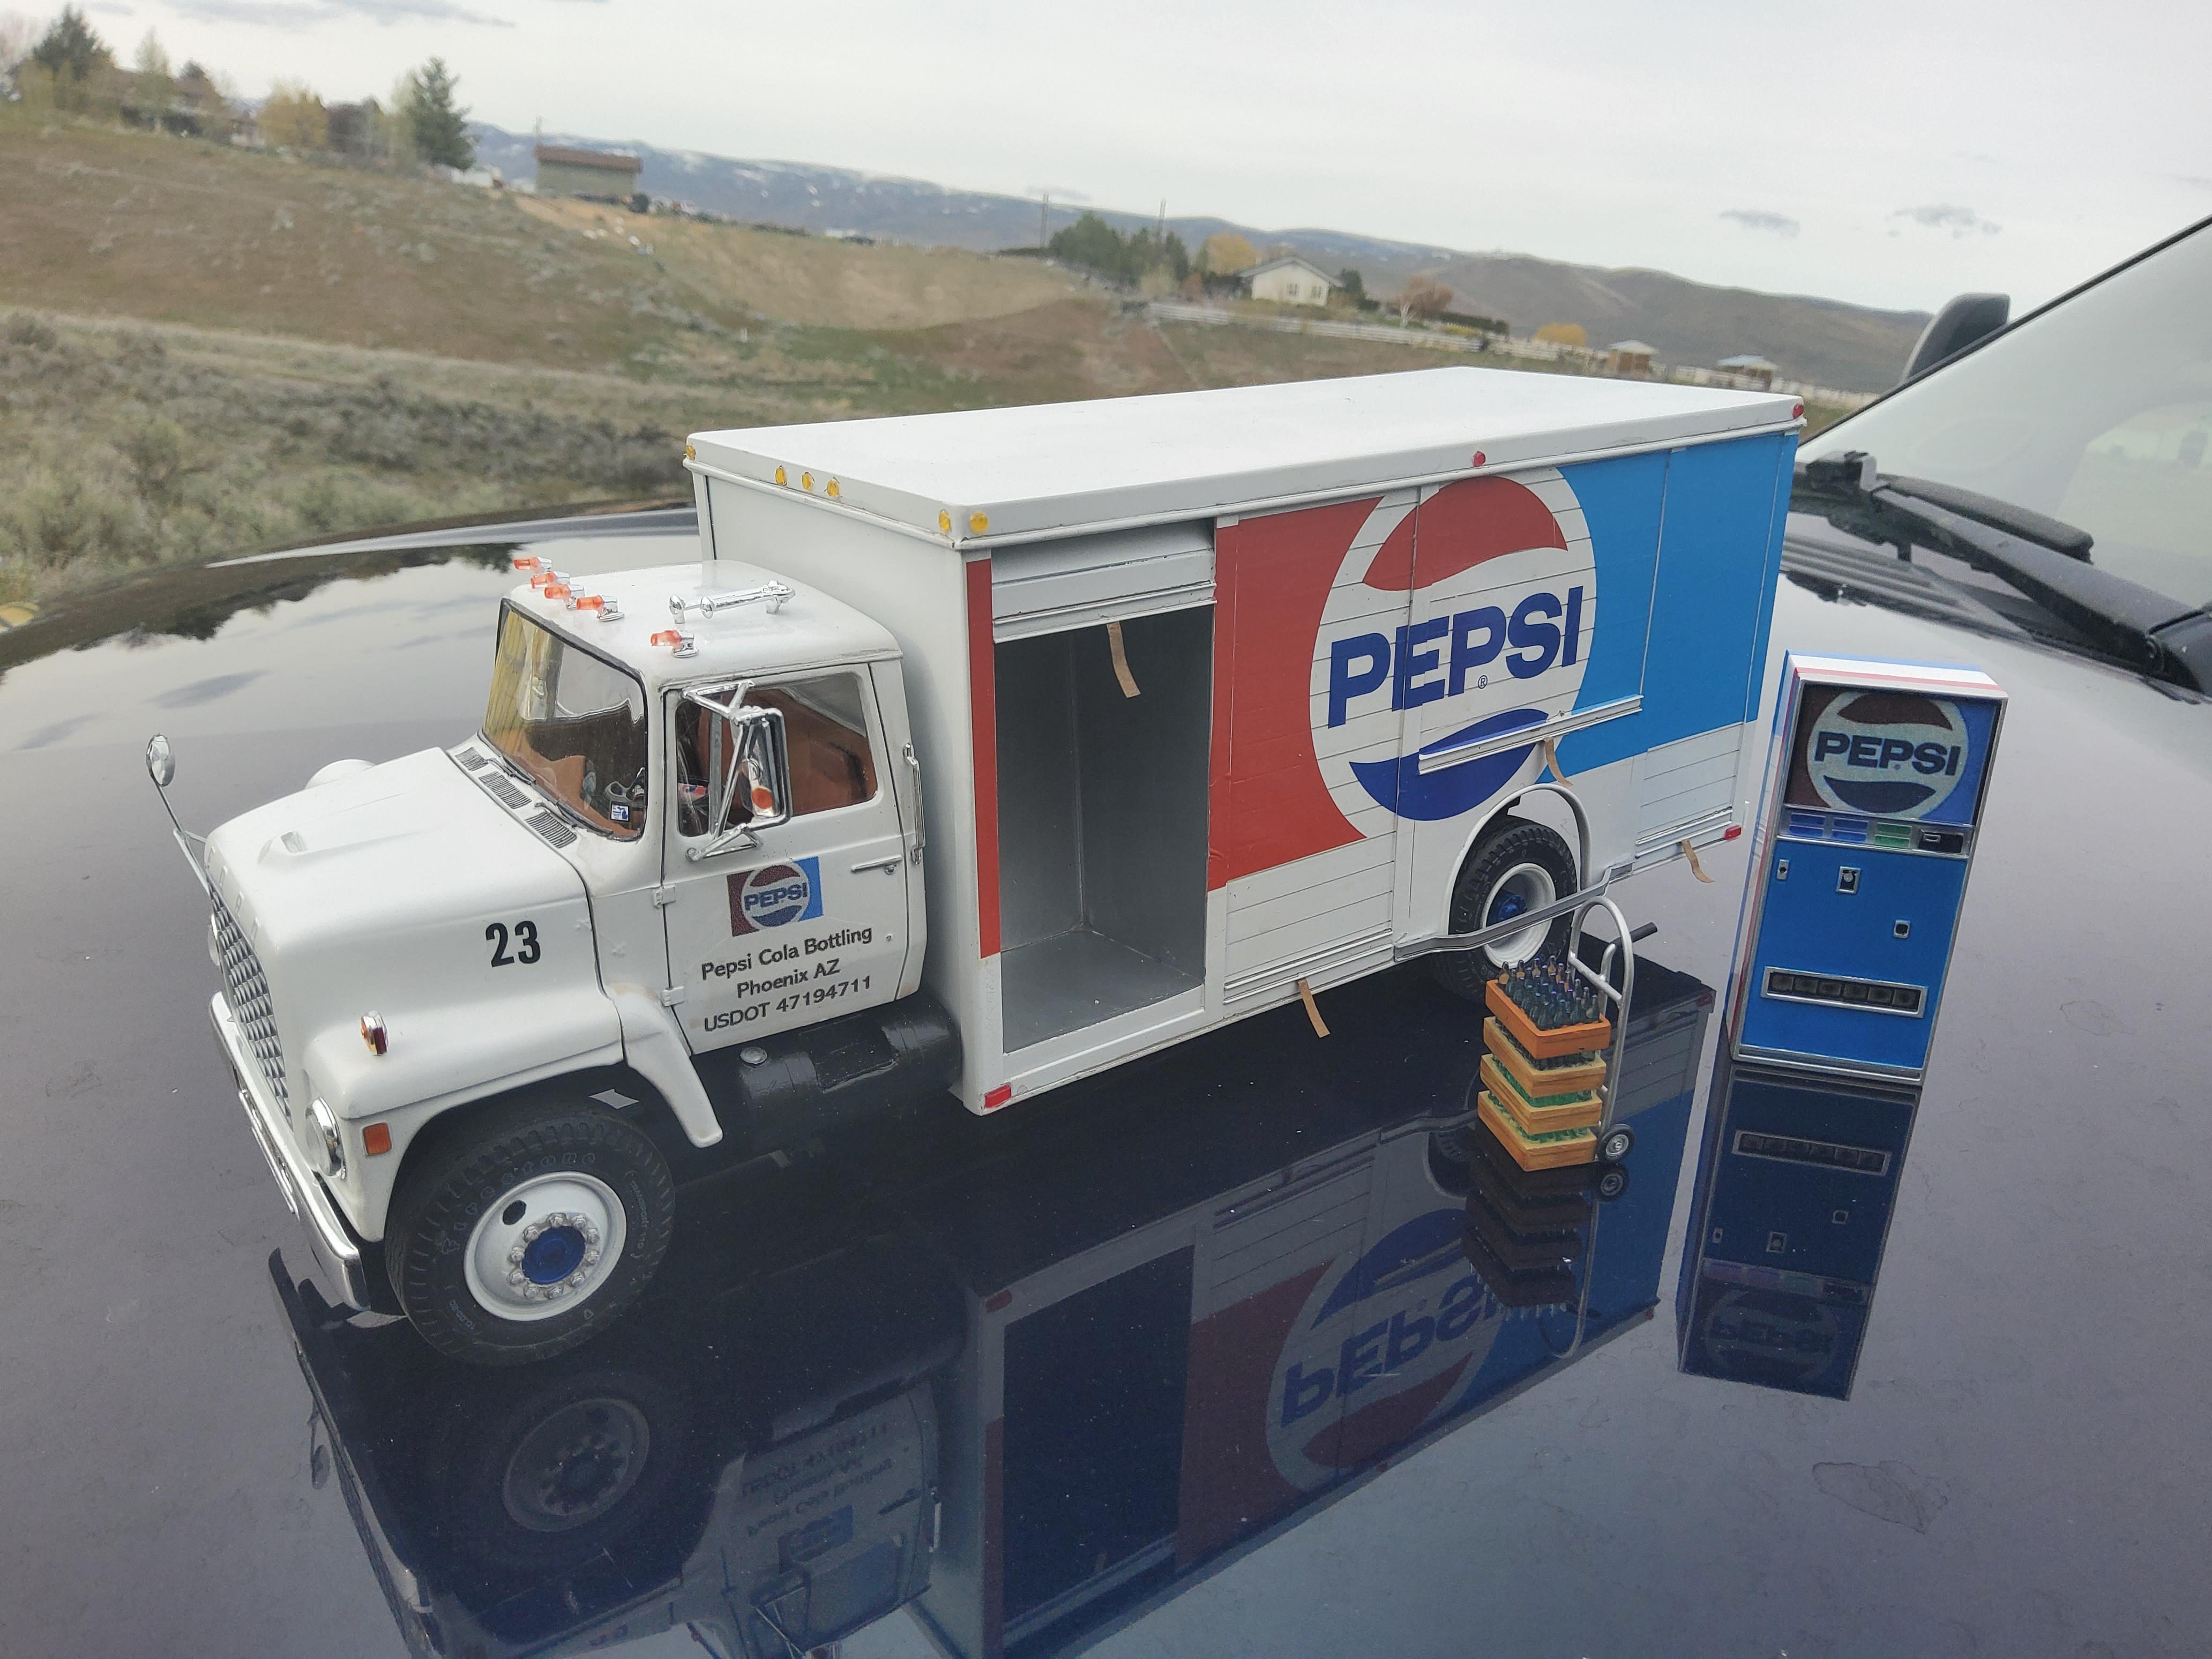
I started this build as a Coke truck, but with all the Coke stuff out there, and my preference for Pepsi, I changed it up to a Pepsi Delivery truck. The cab, engine and half the frame are from the LN8000 Snow Plow truck. I cut the frame and made it into a drop frame to allow me to have the side door open and display the insides. This required a removal of a large chunk of the frame and rebuilding it as a drop frame. I also lowered the cab and engine. The stock plow truck sat too high for a city delivery truck, so I lowered it about 1/4in. I also replaced the fuel tanks with a custom fuel tank I made out of sign foam and a modified battery box from the spares box. The wheels are from Scenes Unlimited, kit tires. Interior is detailed with a Pepsi Can and a clip board on the passenger seat. Most of the hard work was done in the rear. The back of the truck is completely scratch built. I opened one bay with a roll up door to display the Pepsi racks. Some Pepsi racks are from Coke kits, a few are 3D printed. The Pepsi Decals were from a forum member who gererously donated to the cause (Thank you, you know who you are). The Beverage dolly is scratch built with tires made from hardware store O rings. It stores in a slot below the front bumper when not being used. The Pepsi machine is a Coke machine with a display sign downloaded from Google and printed. The truck roll up door pull straps are brown paper bag dyed to look like leather. Under the hood it is mostly just the stock kit stuff, but lowered to fit the cab closer to the frame. I hope you like it, it was a fun build.
-
I think I am calling this one done. I will post the pictures under glass
-
Has anyone seen these wheels?
Oldmopars replied to hedotwo's topic in Model Building Questions and Answers
If you can find someone to 3D print them for you, I can design them and send the file to you. I can replicate the originals exactly. -
what to use to detail big rig frames
Oldmopars replied to Madd Trucker's topic in Model Building Questions and Answers
Hobby lobby also has a ton of wire and tubing that works great. Check the beading area. -
This was not as easy as other things to do. Too many complex curves. I think it is close enough once printed that it will look OK. I will try it and see. Otherwise I have a back up idea. I made the hole to fit 3/16 OD tube. About 4.6in in real life.
-
I think that one may be beyond my skills. I would also need something to copy, and I don't have any Mack Trucks available to me.
-
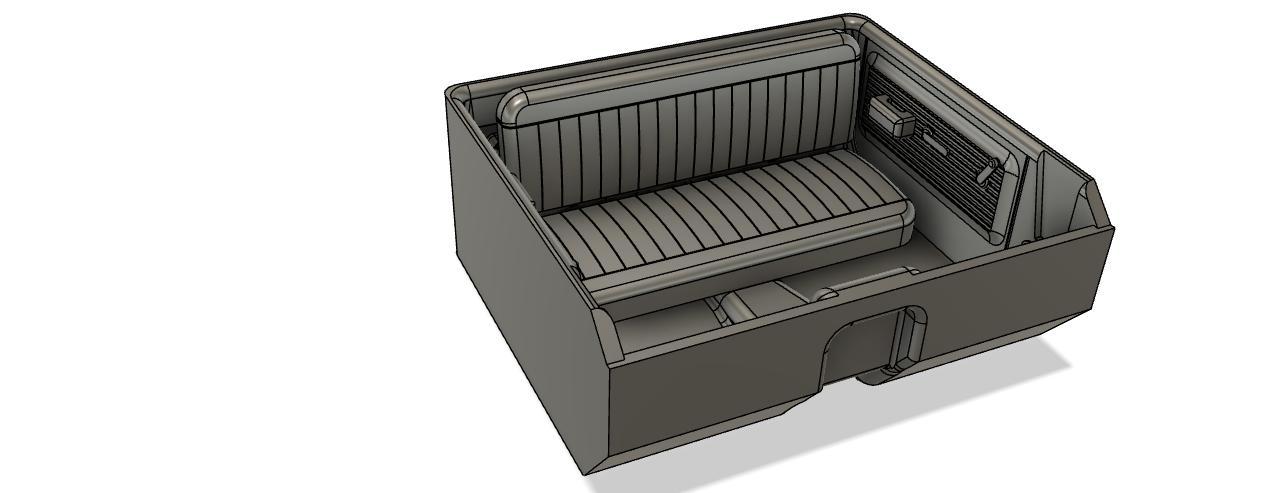
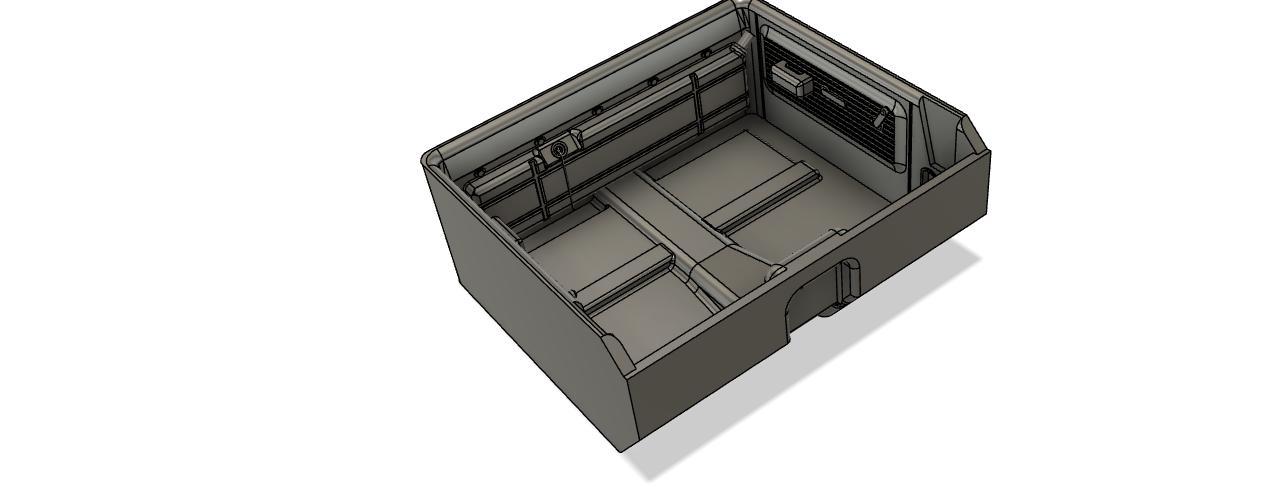
The 67-72 interior with seat. The seat will need to come up a bit, but I think it looks right otherwise.
-
Yes, it is easiest to work in mm.
-
I recently drew up the 60-66 Chevy truck bed in an 8 foot length. Someone asked me if I could make the frame. So, that is what I am working on. What I have found is that the 63-66 are so close to the 67-72 that in 1/25 scale the differences are imperceptible. I found the drawings, factory GM service manual drawings, and even laid on top of each other they are the same. So, I have the frame drawn up with no front cross member as I want to to a 4x4. I may add it in and design it to use the front suspension out of the Revell 64-66 kits. There are still 2 cross members missing, I need to see if they will work on both 2wd and 4x4. I also wanted an interior that has no bucket seats. So, I made a base model interior with removable fuel tank. This fits the AMT 72 Chevy kits (I hope).