Oldmopars
-
Posts
2,058 -
Joined
-
Last visited
Content Type
Profiles
Forums
Events
Gallery
Everything posted by Oldmopars
-
TinkerCad? Do you use it or other free 3D?
Oldmopars replied to Oldmopars's topic in Model Building Questions and Answers
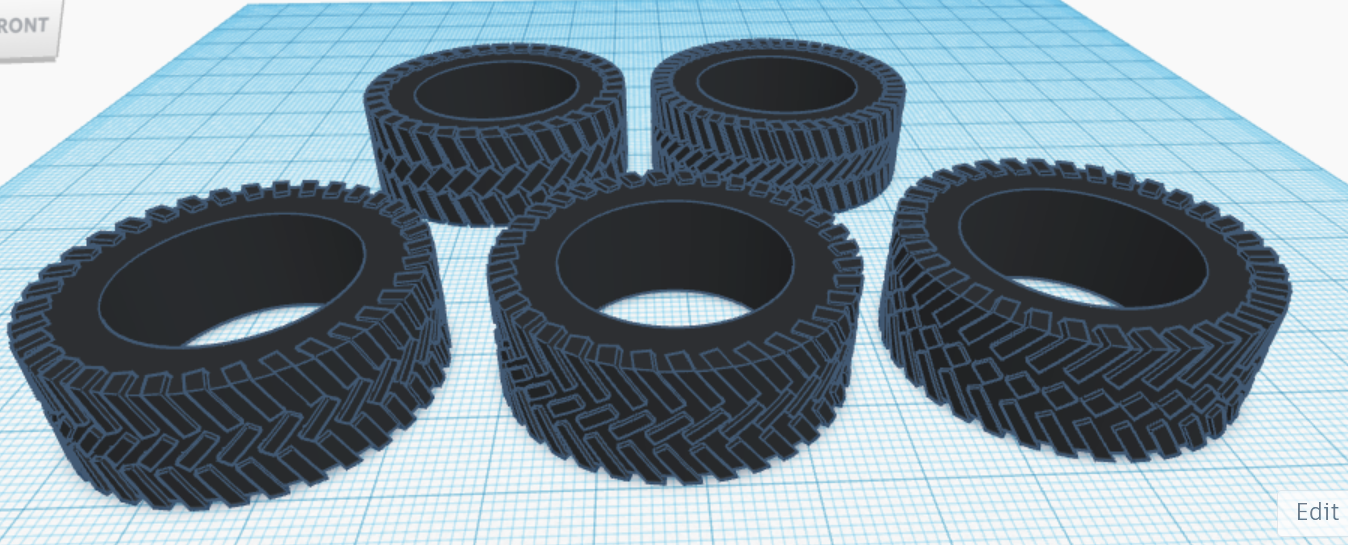
As I get used to this program, I am getting much better and learning more about it. I did make some 2 hole truck wheels. These are in 20in size. I will be making some 22.5 also.
-
Is there an effect you are looking for? I’m just wondering why are you wanting to use ink? There may be other ways to get there. As I said, I use the ink, but I find it great as a wash, panel lines, etc. Depending the look you are after, Future may be a good carrier. I am currently using Liquitex flat medium, for a flat finish. Let us know what you want to achieve and we may have better input.
-
Anyone ever "split" a body for 3D printing?
Oldmopars replied to MrObsessive's topic in Model Building Questions and Answers
What is the web site you got that from. I looked for 3Dprintables and 3Dprintables.shop and did not find anything. I would love to see what they have. Thanks. -
Hairspray weathering
Oldmopars replied to NWRMorpheus's topic in Model Building Questions and Answers
For great weather videos, go to YouTube and look for Scale-a-ton, Nightshift, Laser Creation World, Scale War Machines, and other military model channels. The techniques you learn will really help you out. -
I have not tried it, but I do use “ink” to paint with. I would think for best results you will need a carrier. Maybe mix it heavy with a gloss or flat clear. I use it with a flat Acrylic Medium, but I use it as a wash so the mix is light on black. I suspect if you try to spray just ink, there will be nothing to bind it to the plastic. I would sand a spoon and try it on that. See if it dries, if it does, see if it sticks. Then try tape. You may find it will stain the plastic, but not paint the plastic.
-
TinkerCad? Do you use it or other free 3D?
Oldmopars replied to Oldmopars's topic in Model Building Questions and Answers
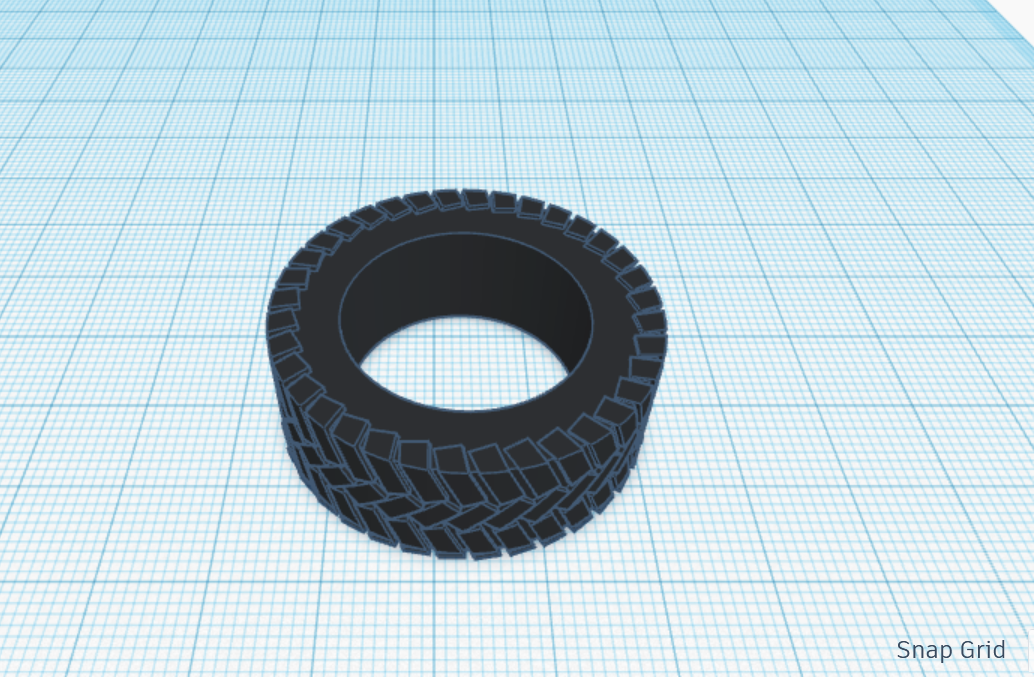
As you can see from the tires above, they are a bit flat and lack the realistic curves of the real tire. I played around a bit more and I added some contours to the sidewalls and rounded off the corners of the tread. I think this is getting closer to the look of a real tire. While I have no printer to print this and no project that this is for, it has proven to me that it is possible to do and I can do it. A few more tweaks and it will be good enough. I don't know that I will ever resin print a tire, but it was the most complicated thing I could think of to do with this program.
-
TinkerCad? Do you use it or other free 3D?
Oldmopars replied to Oldmopars's topic in Model Building Questions and Answers
I need to play more, but these are a few variations from the same Codeblock.
-
TinkerCad? Do you use it or other free 3D?
Oldmopars replied to Oldmopars's topic in Model Building Questions and Answers
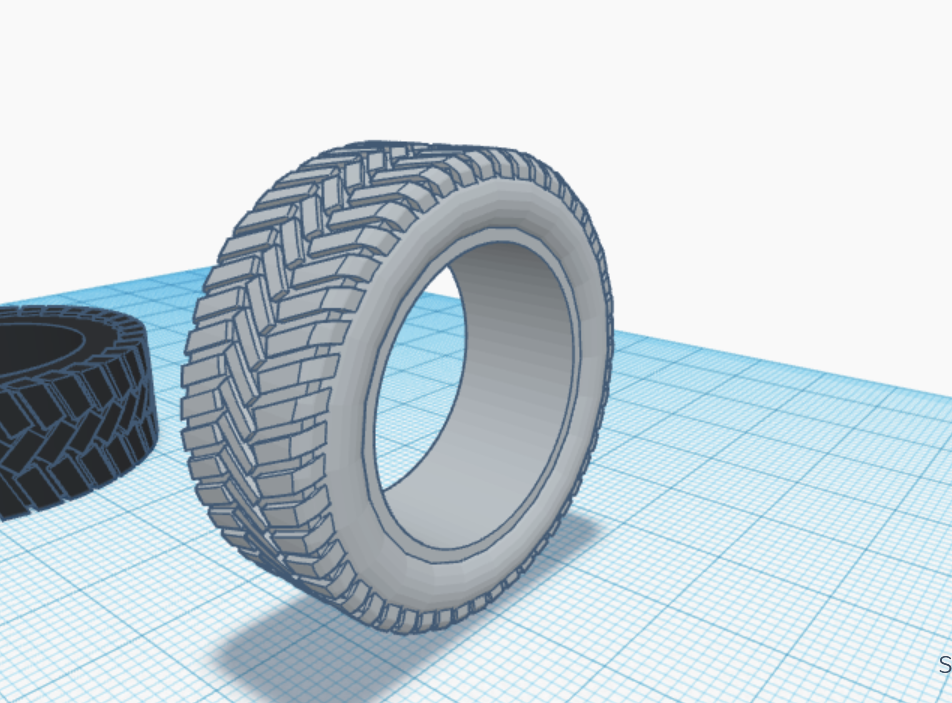
This was a challenge for me. I figure if I can create a tire, I can create anything. I spent a hour or 2 playing with the code blocks. This is the tool I have been missing. While it is still a little convoluted to get where you want to go, I was able to create this tire. It have a very uniform tread pattern, and by changing a few variables I can change the tires diameter, width, inner diameter, tread design, etc. I am still refining it, but I don't think it looks too bad, I just started using Tinkercad yesterday.
-
TinkerCad? Do you use it or other free 3D?
Oldmopars replied to Oldmopars's topic in Model Building Questions and Answers
Have you tried Code Blocks? I think that may be the secret to tires, and wheels. I will play with it and see it it does what I want it to. It has an Array or rotate copy feature, but you have to "Code" it. -
TinkerCad? Do you use it or other free 3D?
Oldmopars replied to Oldmopars's topic in Model Building Questions and Answers
I created the first block, then added the second, rotating into position, then the same for the third block to create one zig-zag. I then copied it, rotated it to match the radius of the "tire", I did this till I had about 1/4 of the tread. I then grouped it. I then grouped the tread already on the tire to the tire. Pasted the copied tread and rotated the tire till it matched up. I repeated this all the way around the tread. There was some unevenness at the sides, so I made a negative box at the side till it cut off the uneven tread. Both sides. Then to give the tread a roundness that matched the circumference of the tires, I used the cone with the hole in it, lined it up and reduced the inner diameter of the "Hole till it shaved off the sharp points of the tread. Like I said, once I get my head around how this program work, I think I can make it do what I want, it is just a very strange way of doing things. BTW, the tread did not line up perfectly, there is a point that there is a slight overlap of the tread pattern, I just rotated that to the bottom and if I were to really print it, I would make a flat spot there that would force it to be the bottom anyway. -
TinkerCad? Do you use it or other free 3D?
Oldmopars replied to Oldmopars's topic in Model Building Questions and Answers
Great tip. At this point I have no need for any of these items and they will not be printed, for now. They were just items I though would be fun to try to make. I will remember that as it will help in the future when I do want to print them. BTW, Thanks for the help. I'm getting excited that I may be able to really create something. As you, I tried the "Professional" versions and they are so complex there was no way for me to learn in the limited time I have. I would need to go to a class at the local Community College. -
TinkerCad? Do you use it or other free 3D?
Oldmopars replied to Oldmopars's topic in Model Building Questions and Answers
Well I am sure I went about this the hard way, all part of learning, but I did create a "tire" of sorts. I will play with it a bit more, but it at least looks like a tire. As for the radius, I did know about that, however sometimes I want to only radius one side or 3 sides, not all the sides at once. I wish there was a radius command to do just one side. But I will learn to work with it. It just takes learning how to work within its limits.
-
TinkerCad? Do you use it or other free 3D?
Oldmopars replied to Oldmopars's topic in Model Building Questions and Answers
Where is the radius command? -
TinkerCad? Do you use it or other free 3D?
Oldmopars replied to Oldmopars's topic in Model Building Questions and Answers
A better view of the filter.
-
TinkerCad? Do you use it or other free 3D?
Oldmopars replied to Oldmopars's topic in Model Building Questions and Answers
Well, with more goofing off I have figured a few things out. There are absurd ways to go about getting what you want. I found that using shapes to create negative tools that are then used to remove unwanted parts is the way to go. So, if you want a campfer, you create a negative of what you want and then use that the "Cut" off parts of the drawing. Not the best way to do things, but at least I have a means to get where I want to go. I played a bit and made a simple fuel tank and a Luberfiner. Next is to see if I can made a wheel. For me, this is a required step. If I can learn to use this software and make parts, then I can justify spending the money on a 3D resin printer. If I can't create anything, a printer is useless. So, I am on the road in the right direction anyway. Anyone know how to array something like a tread of a tire?
-
So, I feel that to further my modeling skills and end products, I need to get into 3D printing of parts. I know that many use TinkerCad. However I have tried using it and I am finding that it is very simple, but to modify existing shapes is not really possible, at least that I have found. There seems to be a lack of tools to edit existing shapes. I would like to put a chamfer on the edge of a box shape, or array shapes around a round object. Maybe I need to learn more? Is there a way to do this or do I need to look for another better 3D Cad program?
-
AMT Autocar Dumptruck kit questions
Oldmopars replied to PHPaul's topic in Model Building Questions and Answers
I am trying to get into 3D printing, no printer yet. I would love it if you shared the files. JimB is right, those would work well in about any AMT/MPC trucks or even many cars. -
Keep up the good work. I like your short WB version in the picture. I have been pondering a Phantom 1965 Chevy Blazer. A nice short WB like the 1970's ones, but from 1965. You will have to let us know if you do that with the one pictured.
-
From the looks of things, you may be dealing with "real" chrome. It looks like the car was coated in a copper coat then it was electro-plated with real metal type chrome. I am not clear on how it is done, but this is what the plastic chromed parts of your car are like. I have no suggestions on how to strip it off. When you figure it out, let us know.
-
AMT Autocar Dumptruck kit questions
Oldmopars replied to PHPaul's topic in Model Building Questions and Answers
Please, show us what you made. I would love to see your 3D solution. Never know, you make have a market here for some. -
The Land Rover in the back is my Cannonball entry, a 1970 SIIA conversion. Yes, the door straps are one of those details I have left.
-
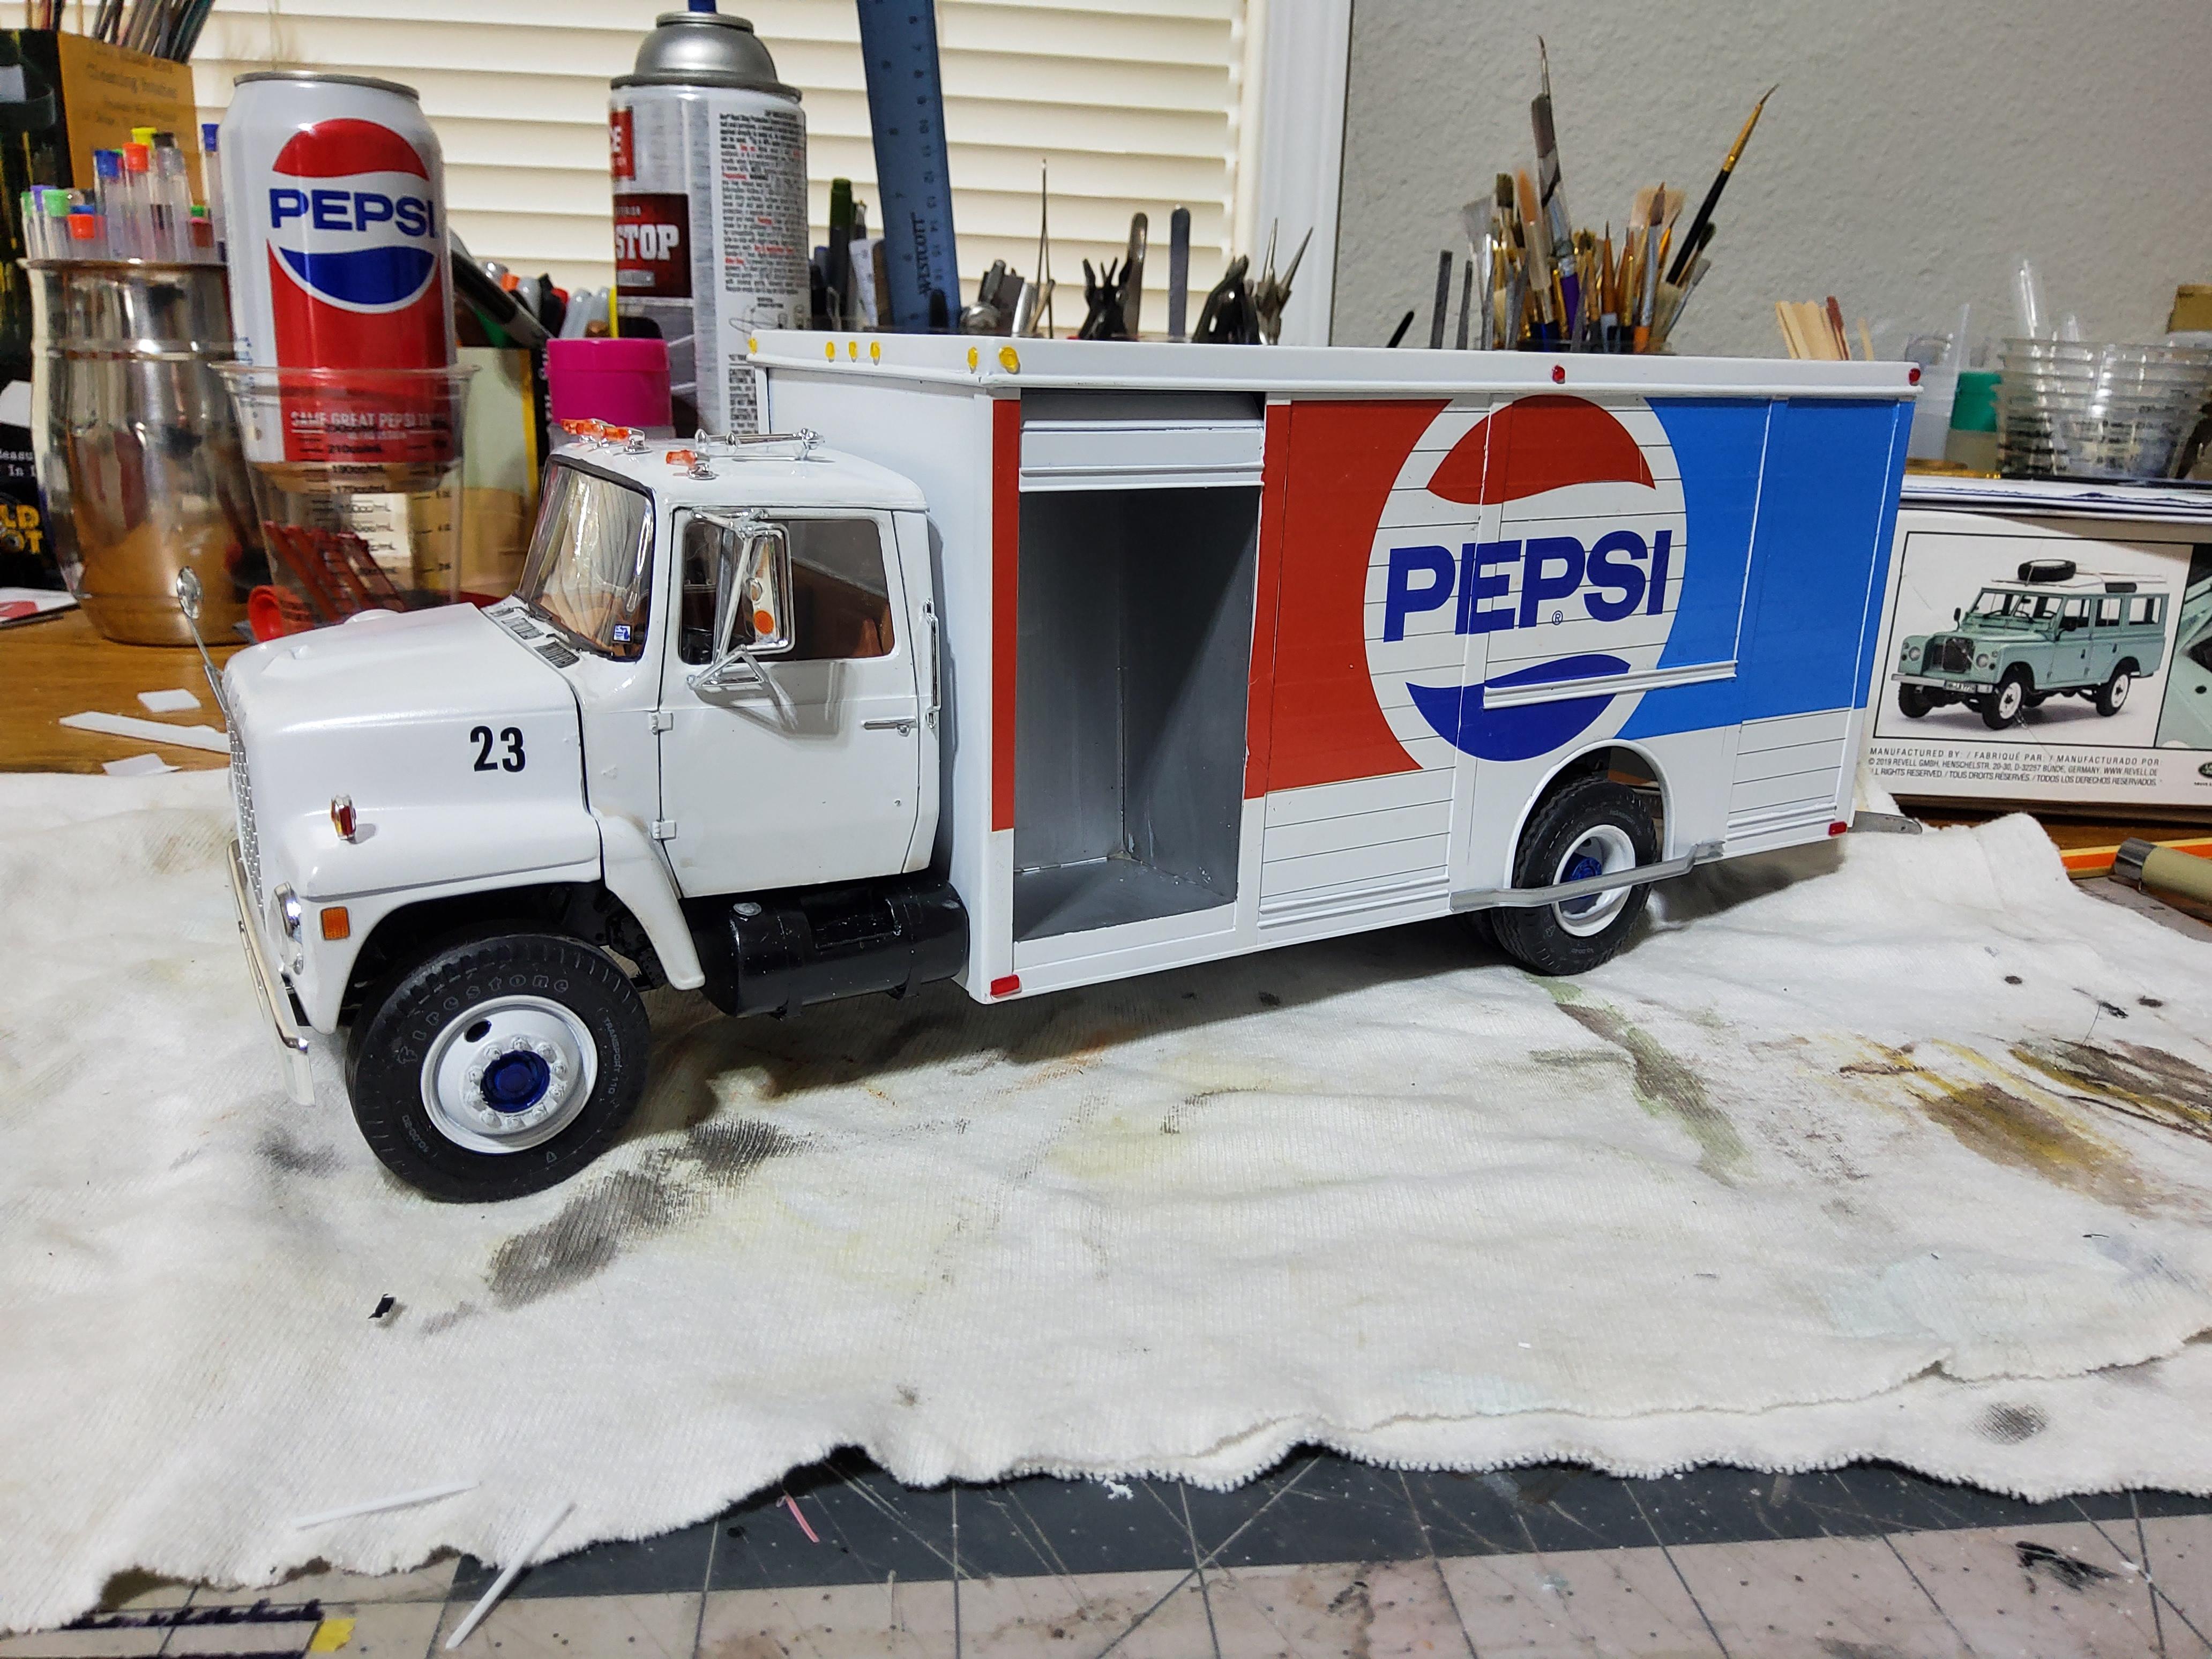
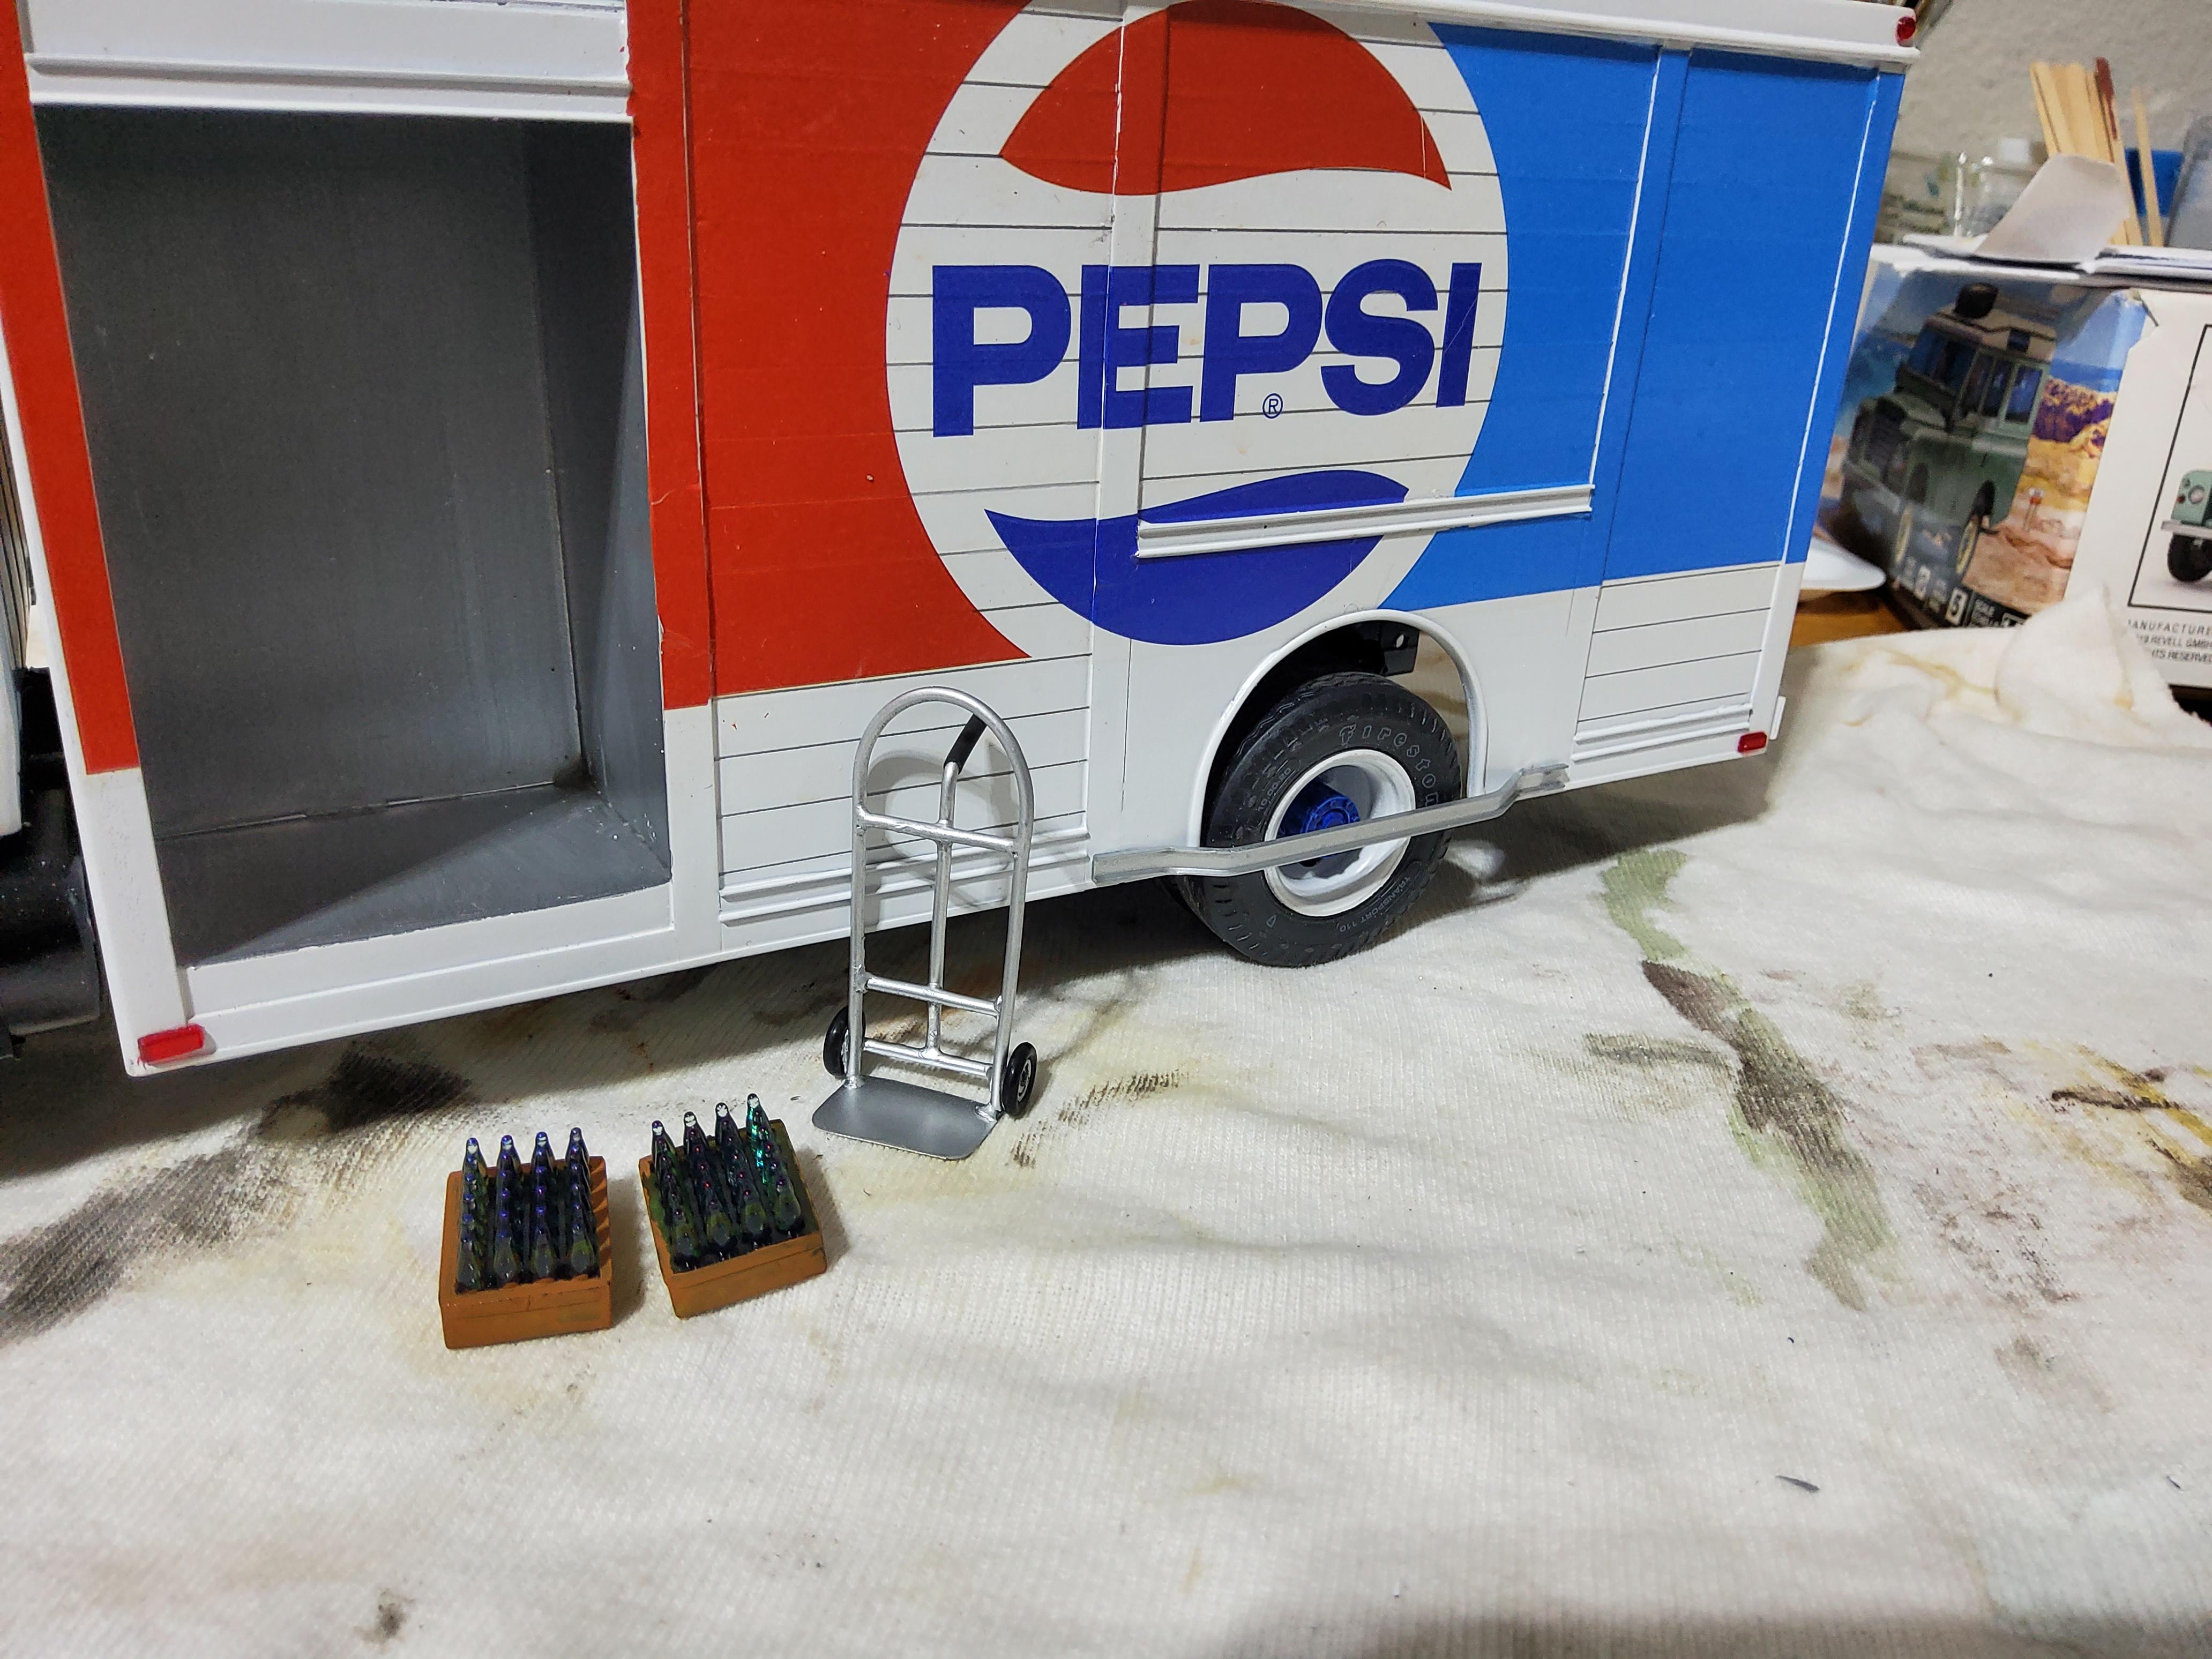
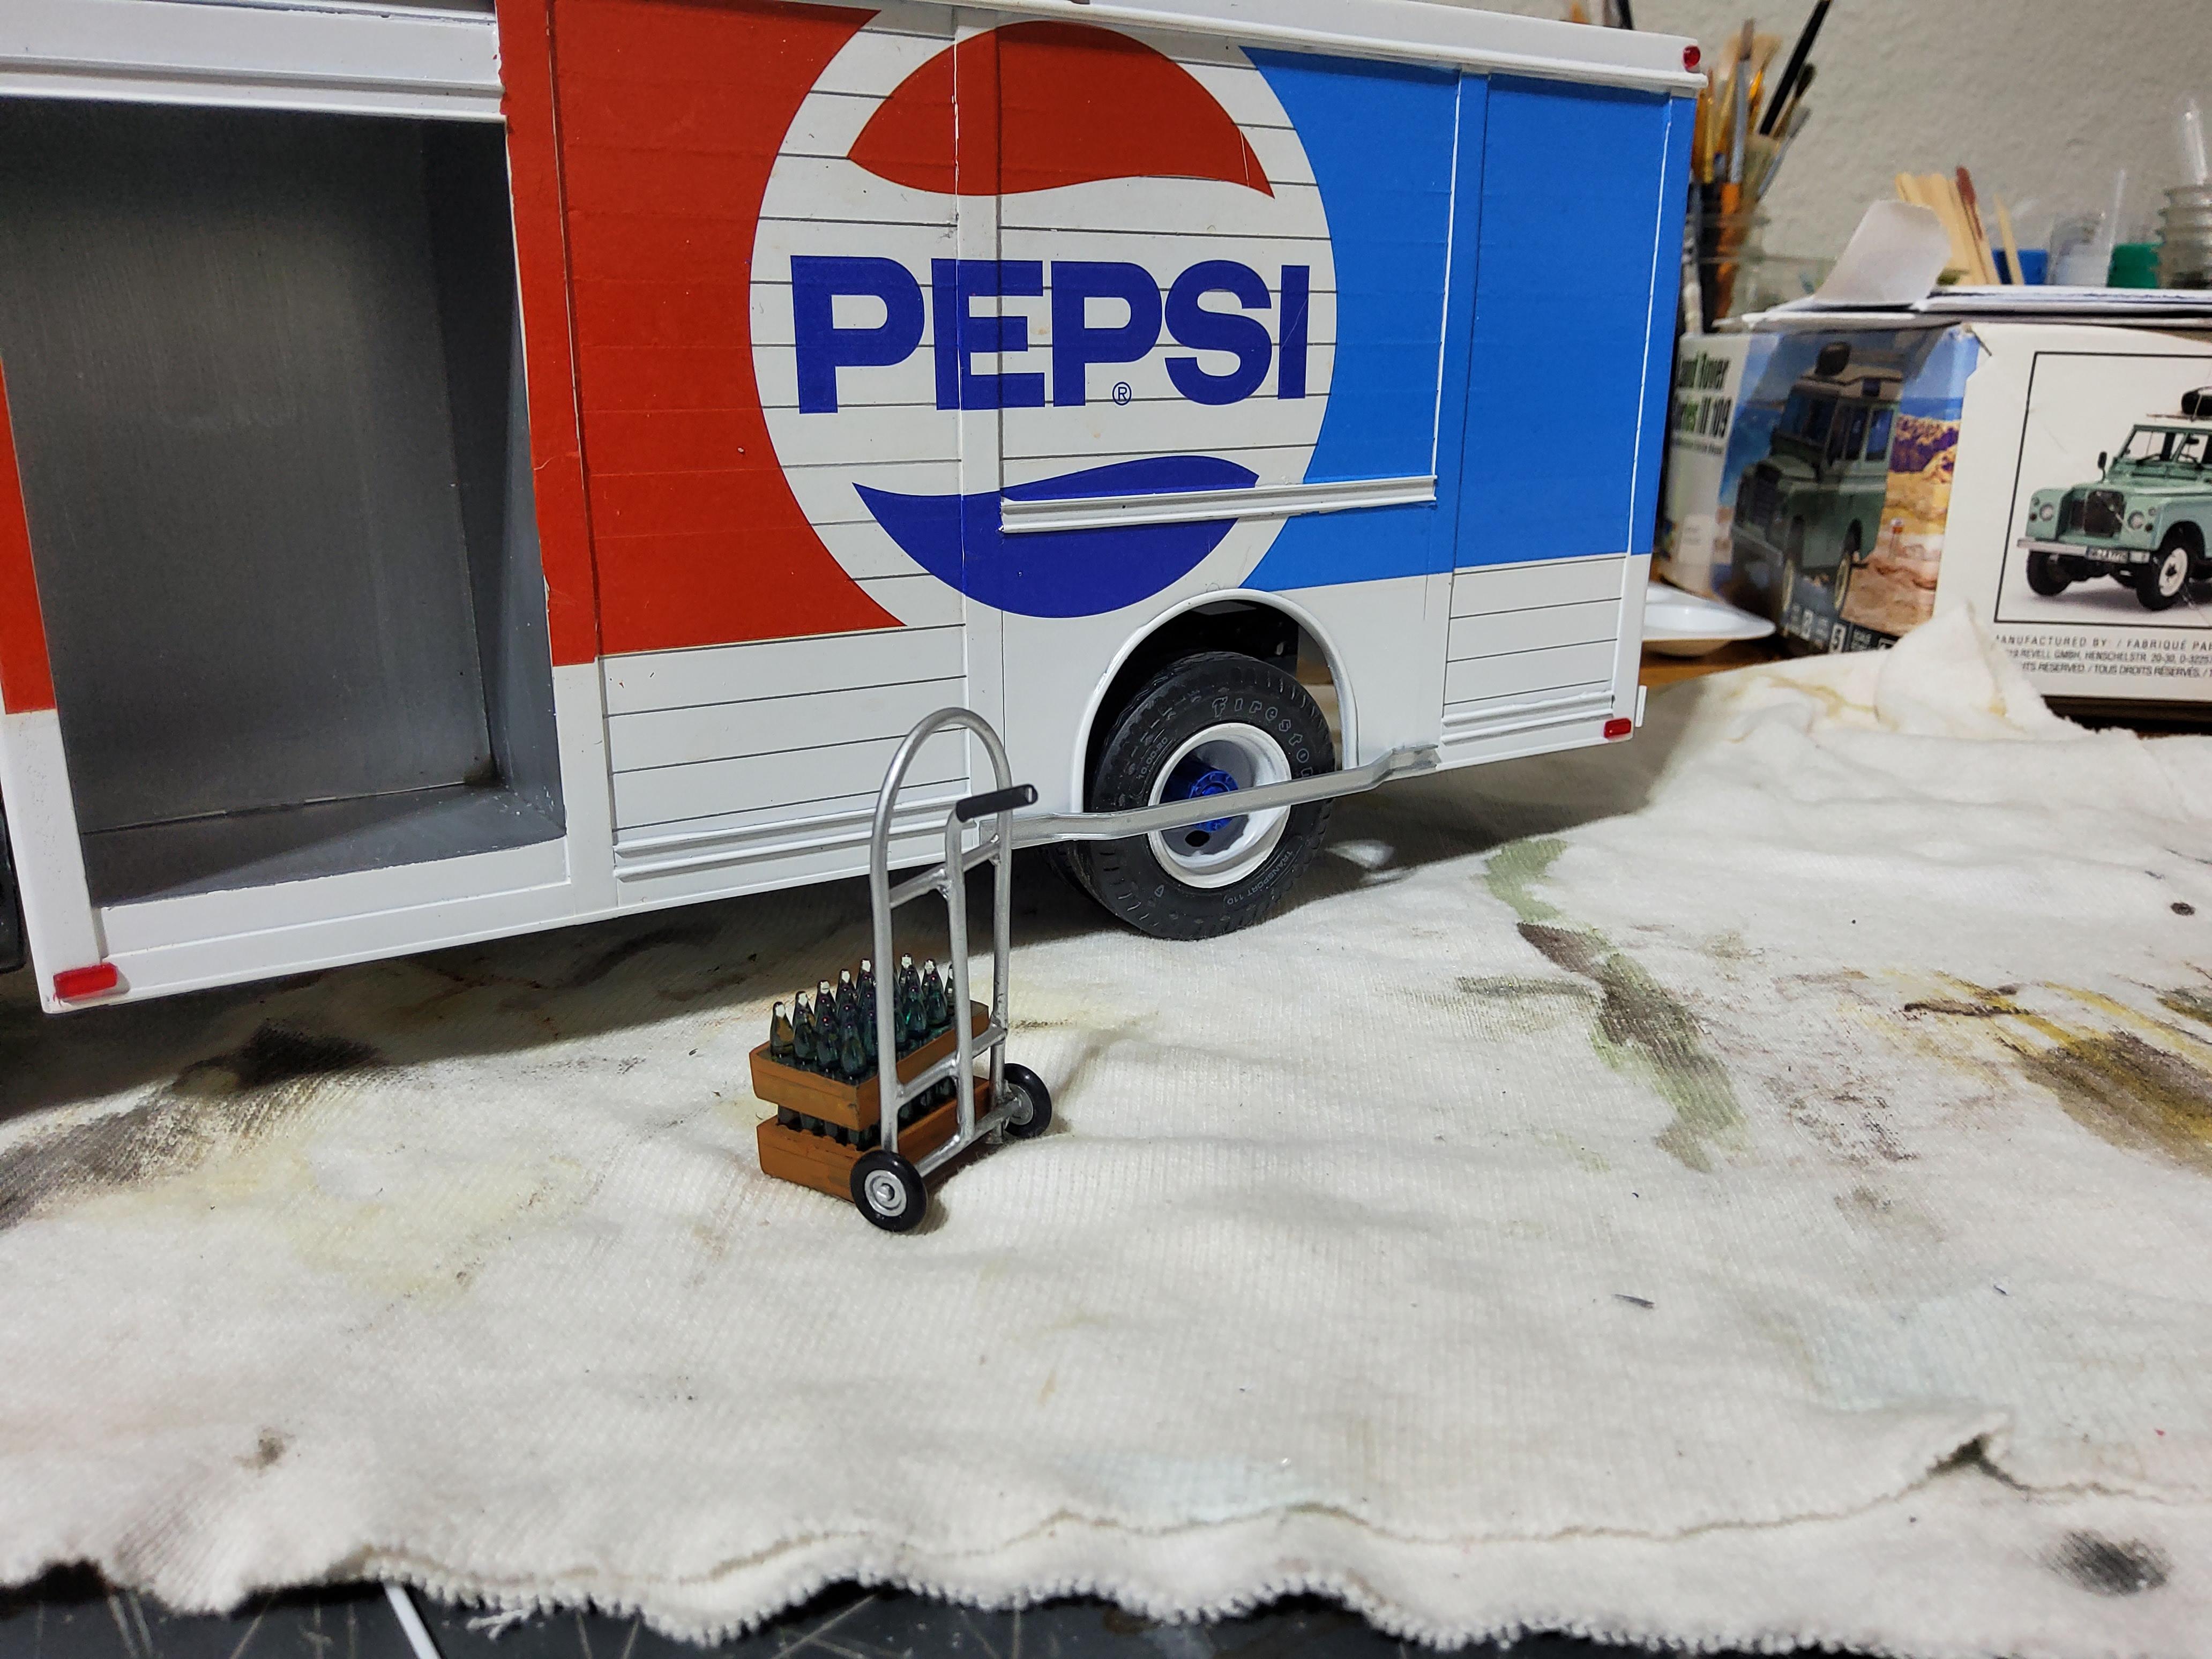
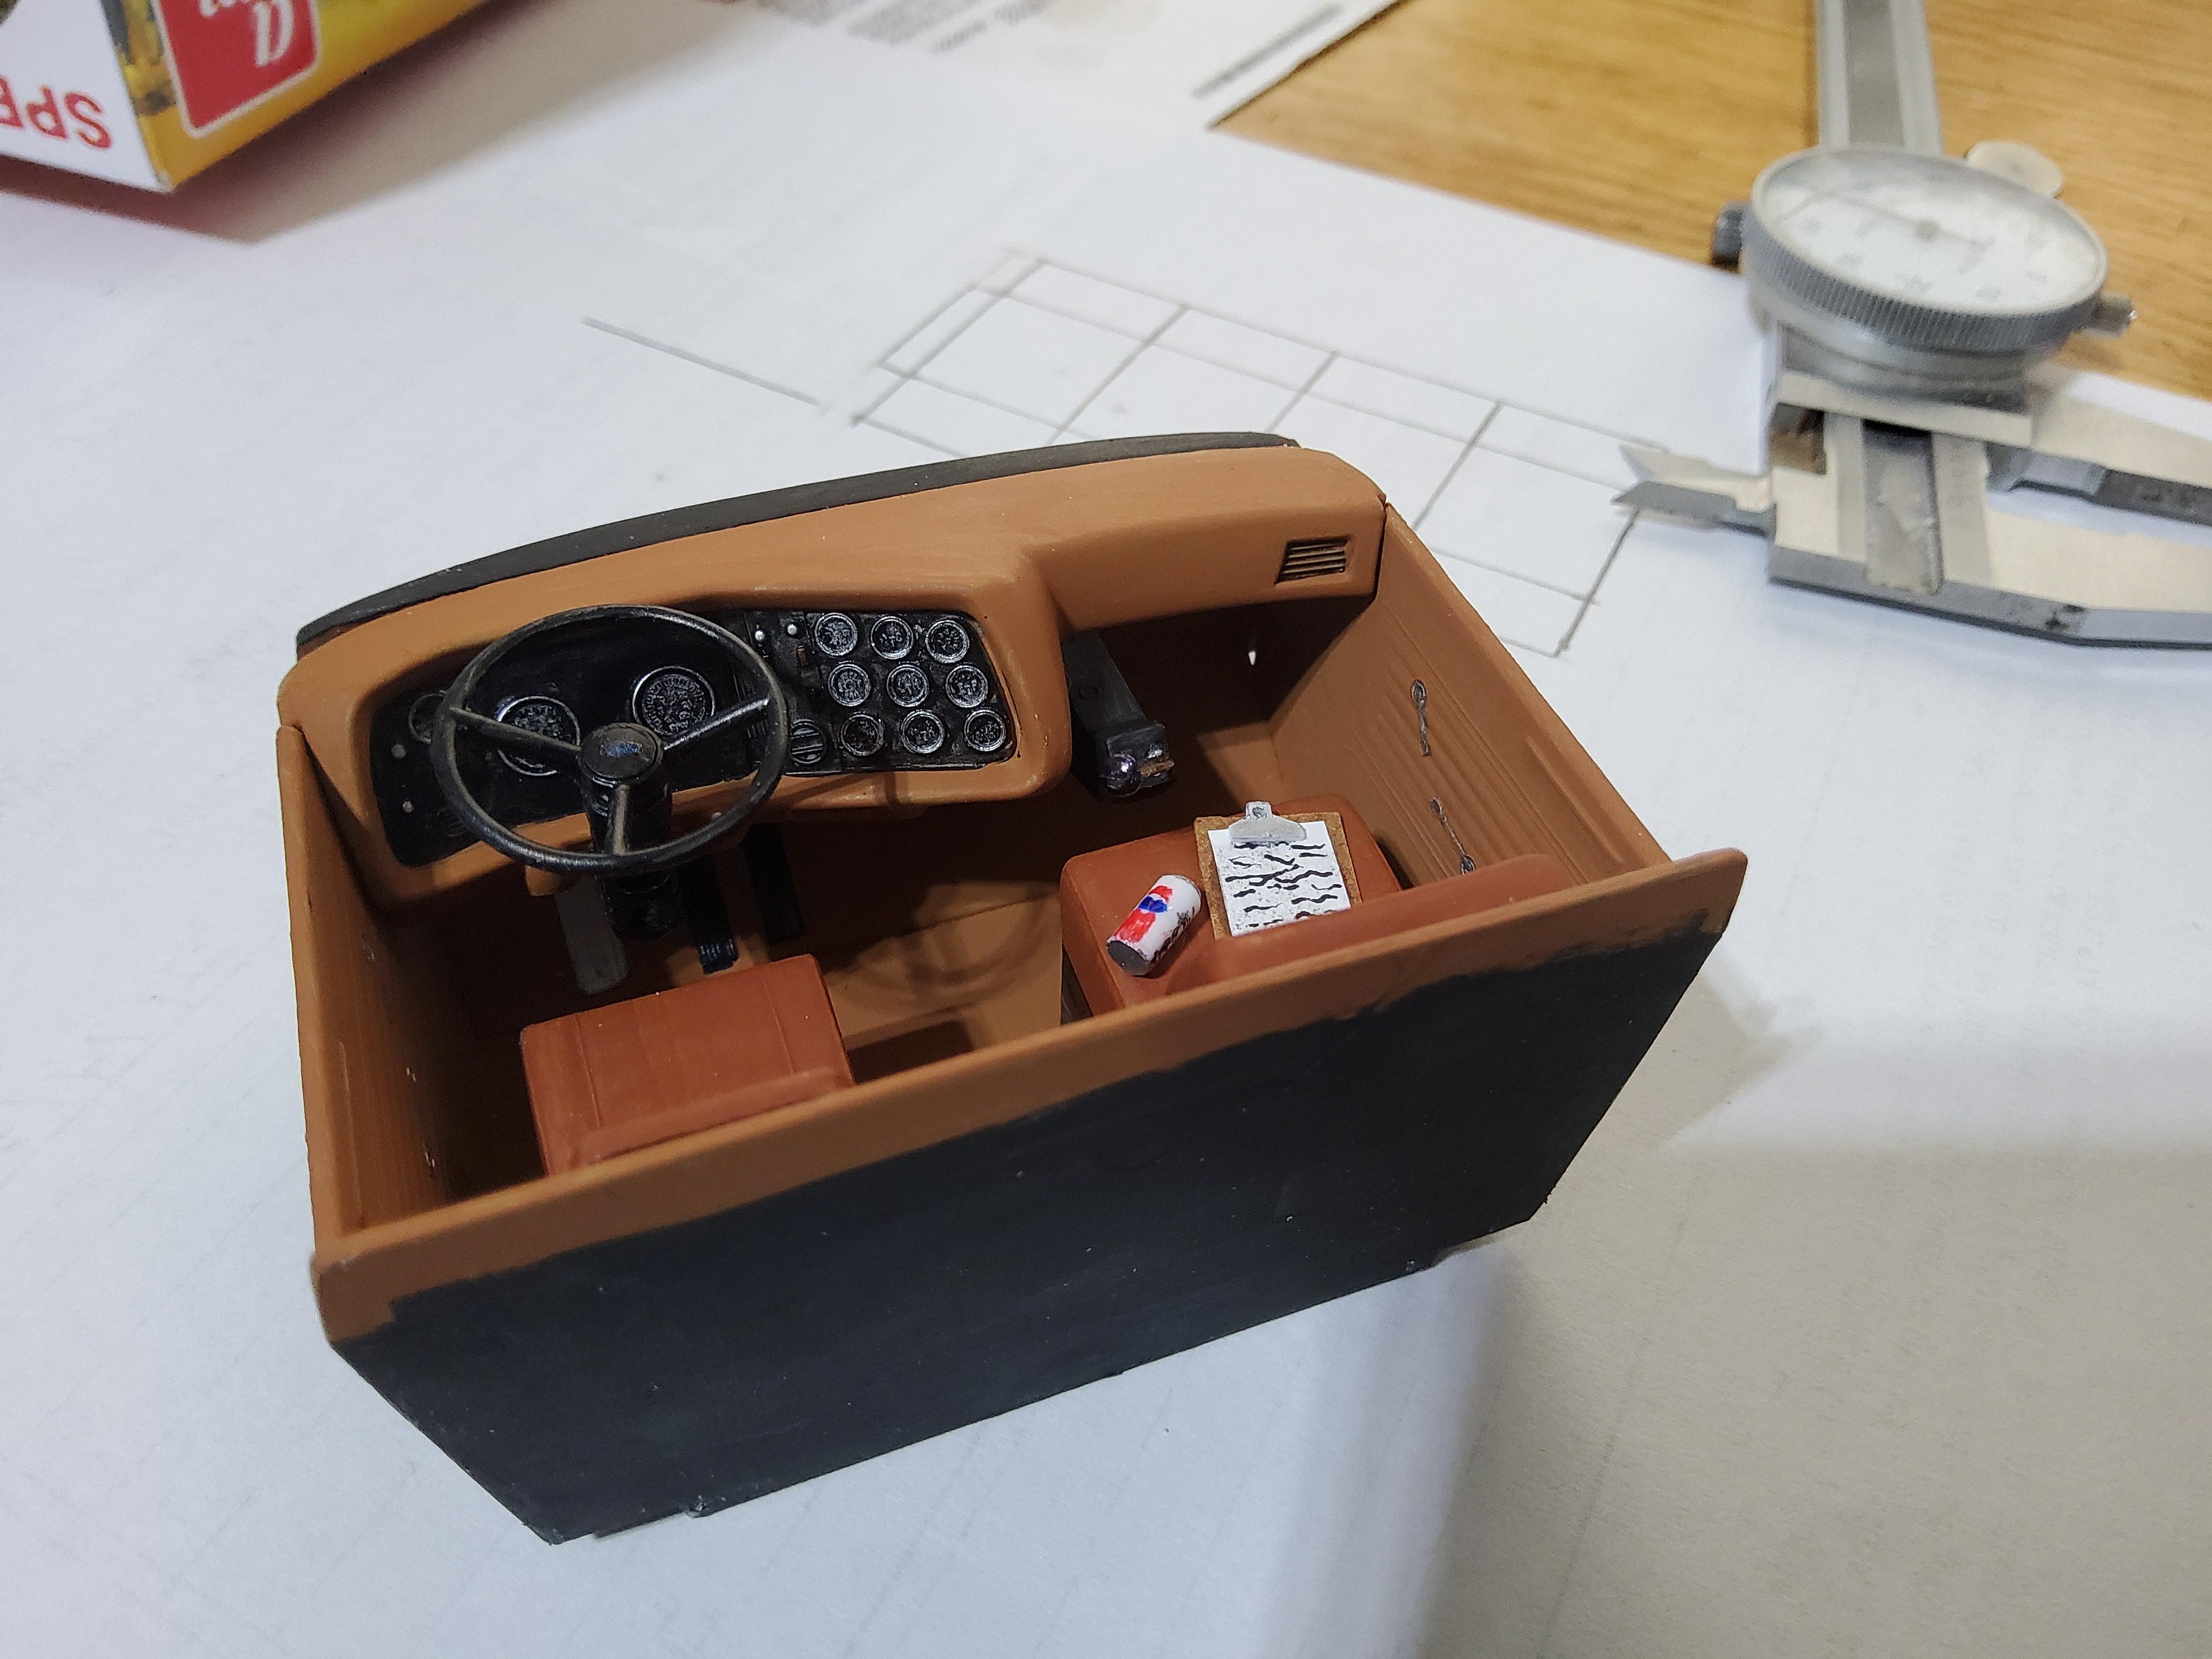
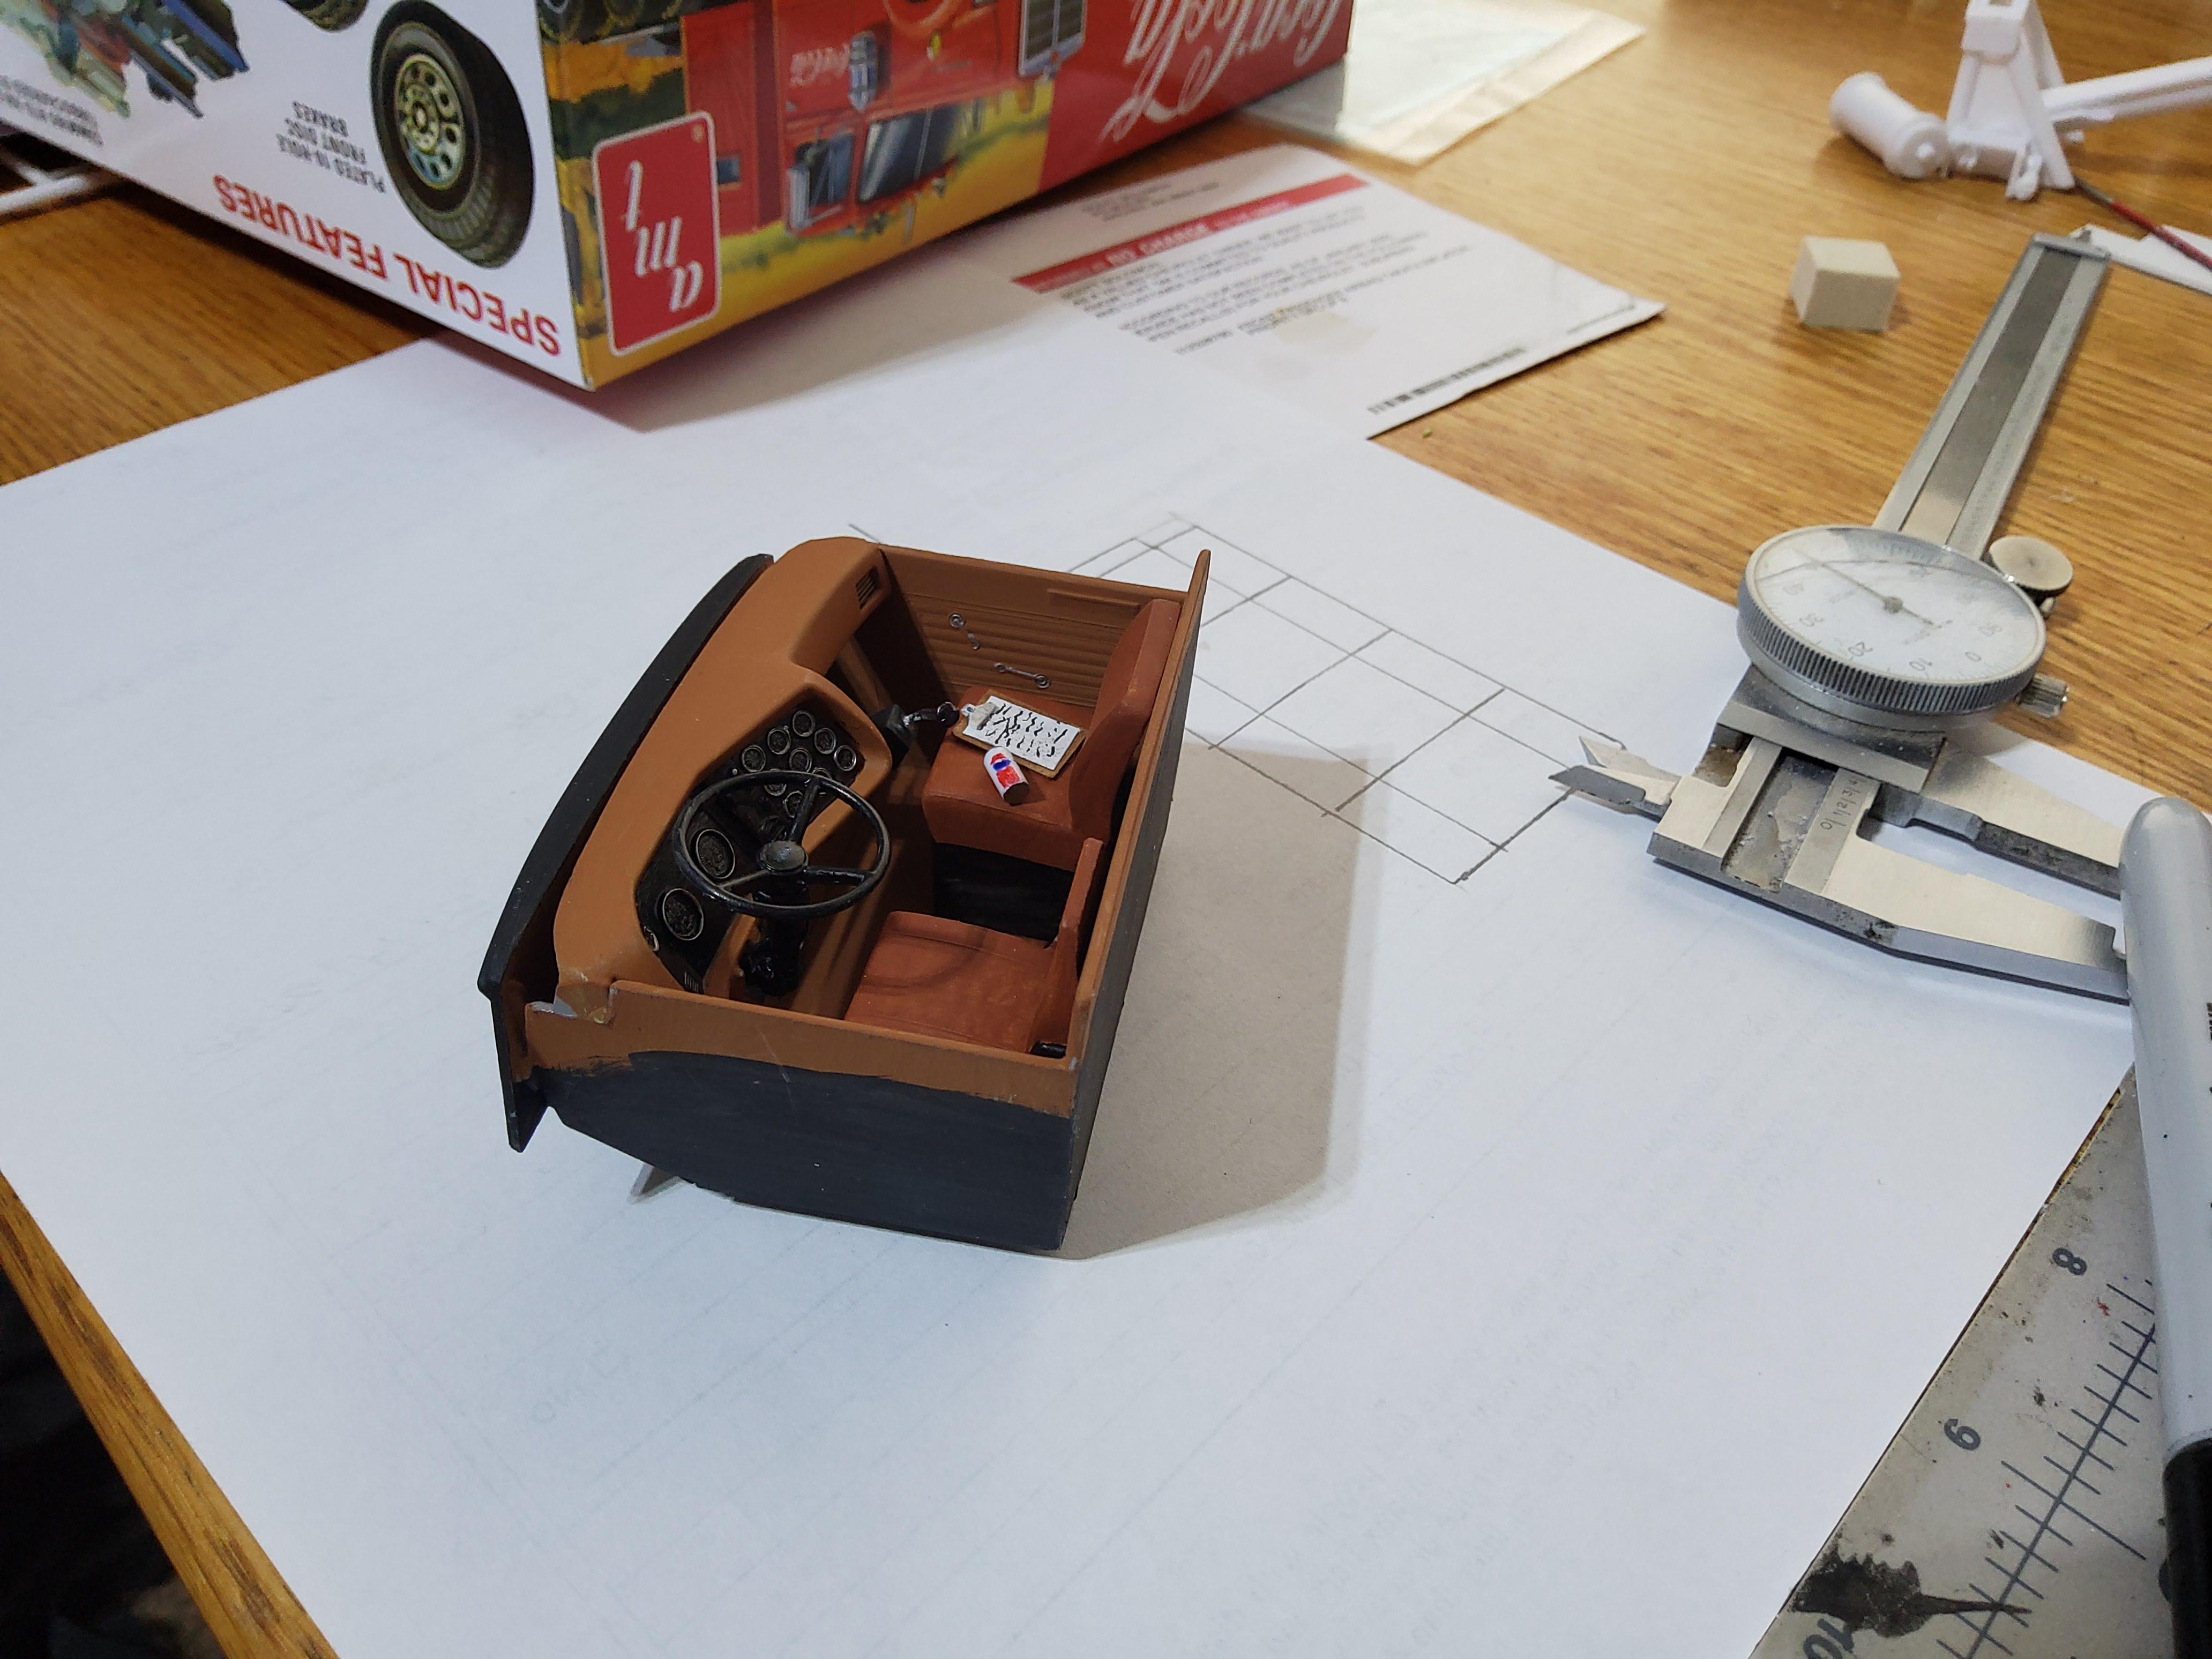
OK, she is starting to look like a Pepsi truck. I received the decals from tbill (thank you!!) and they went on. I also did some work on the cab. Added thhe lights, mirrors, etc. I also added some detail to the interior. A Pepsi can and a clip board, because you know he has to check off all the drop off location and have a cool drink on those hot days. I needed a hand truck to move the product around, so I made on out of some mechanics wire, 2 O-rings and heat shrink tube for the handle. he wheels are styrene, one tube inside another. I added lights to the box, added the gaurd around the rear wheels, exhaust, and holder under the front bumper for the hand truck. I also added the blind spot mirror on the hood. I ade it out of a chrome wheel cap from the kit and a paper clip. I would like to find some door decals that say Pepsi, or even get some made that have a distributors name and info on it. I'm getting very close.
-
1/8 Lindberg T bucket rod - building a short-wheelbase version
Oldmopars replied to vtecfour's topic in WIP: Model Cars
Let me know if you need any parts. I have a bunch of parts for the Big Red Rod. -
I am also working on this same kit with a slight different direction. I can confirm that you have done an amazing job here. This chassis is amazing. The kit one is poop. I can see the level of detail that you put in, very impressive. I also love the concept. Great job.
-
California hauler VS Pete tow truck
Oldmopars replied to Oldmopars's topic in General Automotive Talk (Trucks and Cars)
Wow, thank you both for that info. I just didn’t look that close at the, and I would have never known the kit history and numbers. Thank you.