Dragonhawk1066
-
Posts
3,932 -
Joined
-
Last visited
Content Type
Profiles
Forums
Events
Gallery
Everything posted by Dragonhawk1066
-
Very nice work!
-
Yes it is, and what I have may just last forever, lol. I must correct myself though, it's telephone cable that I got the wires from, not HDMI cable.
-
Thank you, much appreciated! I also use 30 AWG wrapping wire, I got a large spool on Amazon for $12. For the boots I use wires from an HDMI cable. There's brown, orange, blue, and green, and one of each color with white stripes. I cut about 6 inches at a time, pull out the copper wire, and use a sharp exacto blade to cut into little boots. I use the copper wire for several other purposes, including valve stems, door lock knobs, and holding parts for painting.
-
Thanks everyone, much appreciated!
-
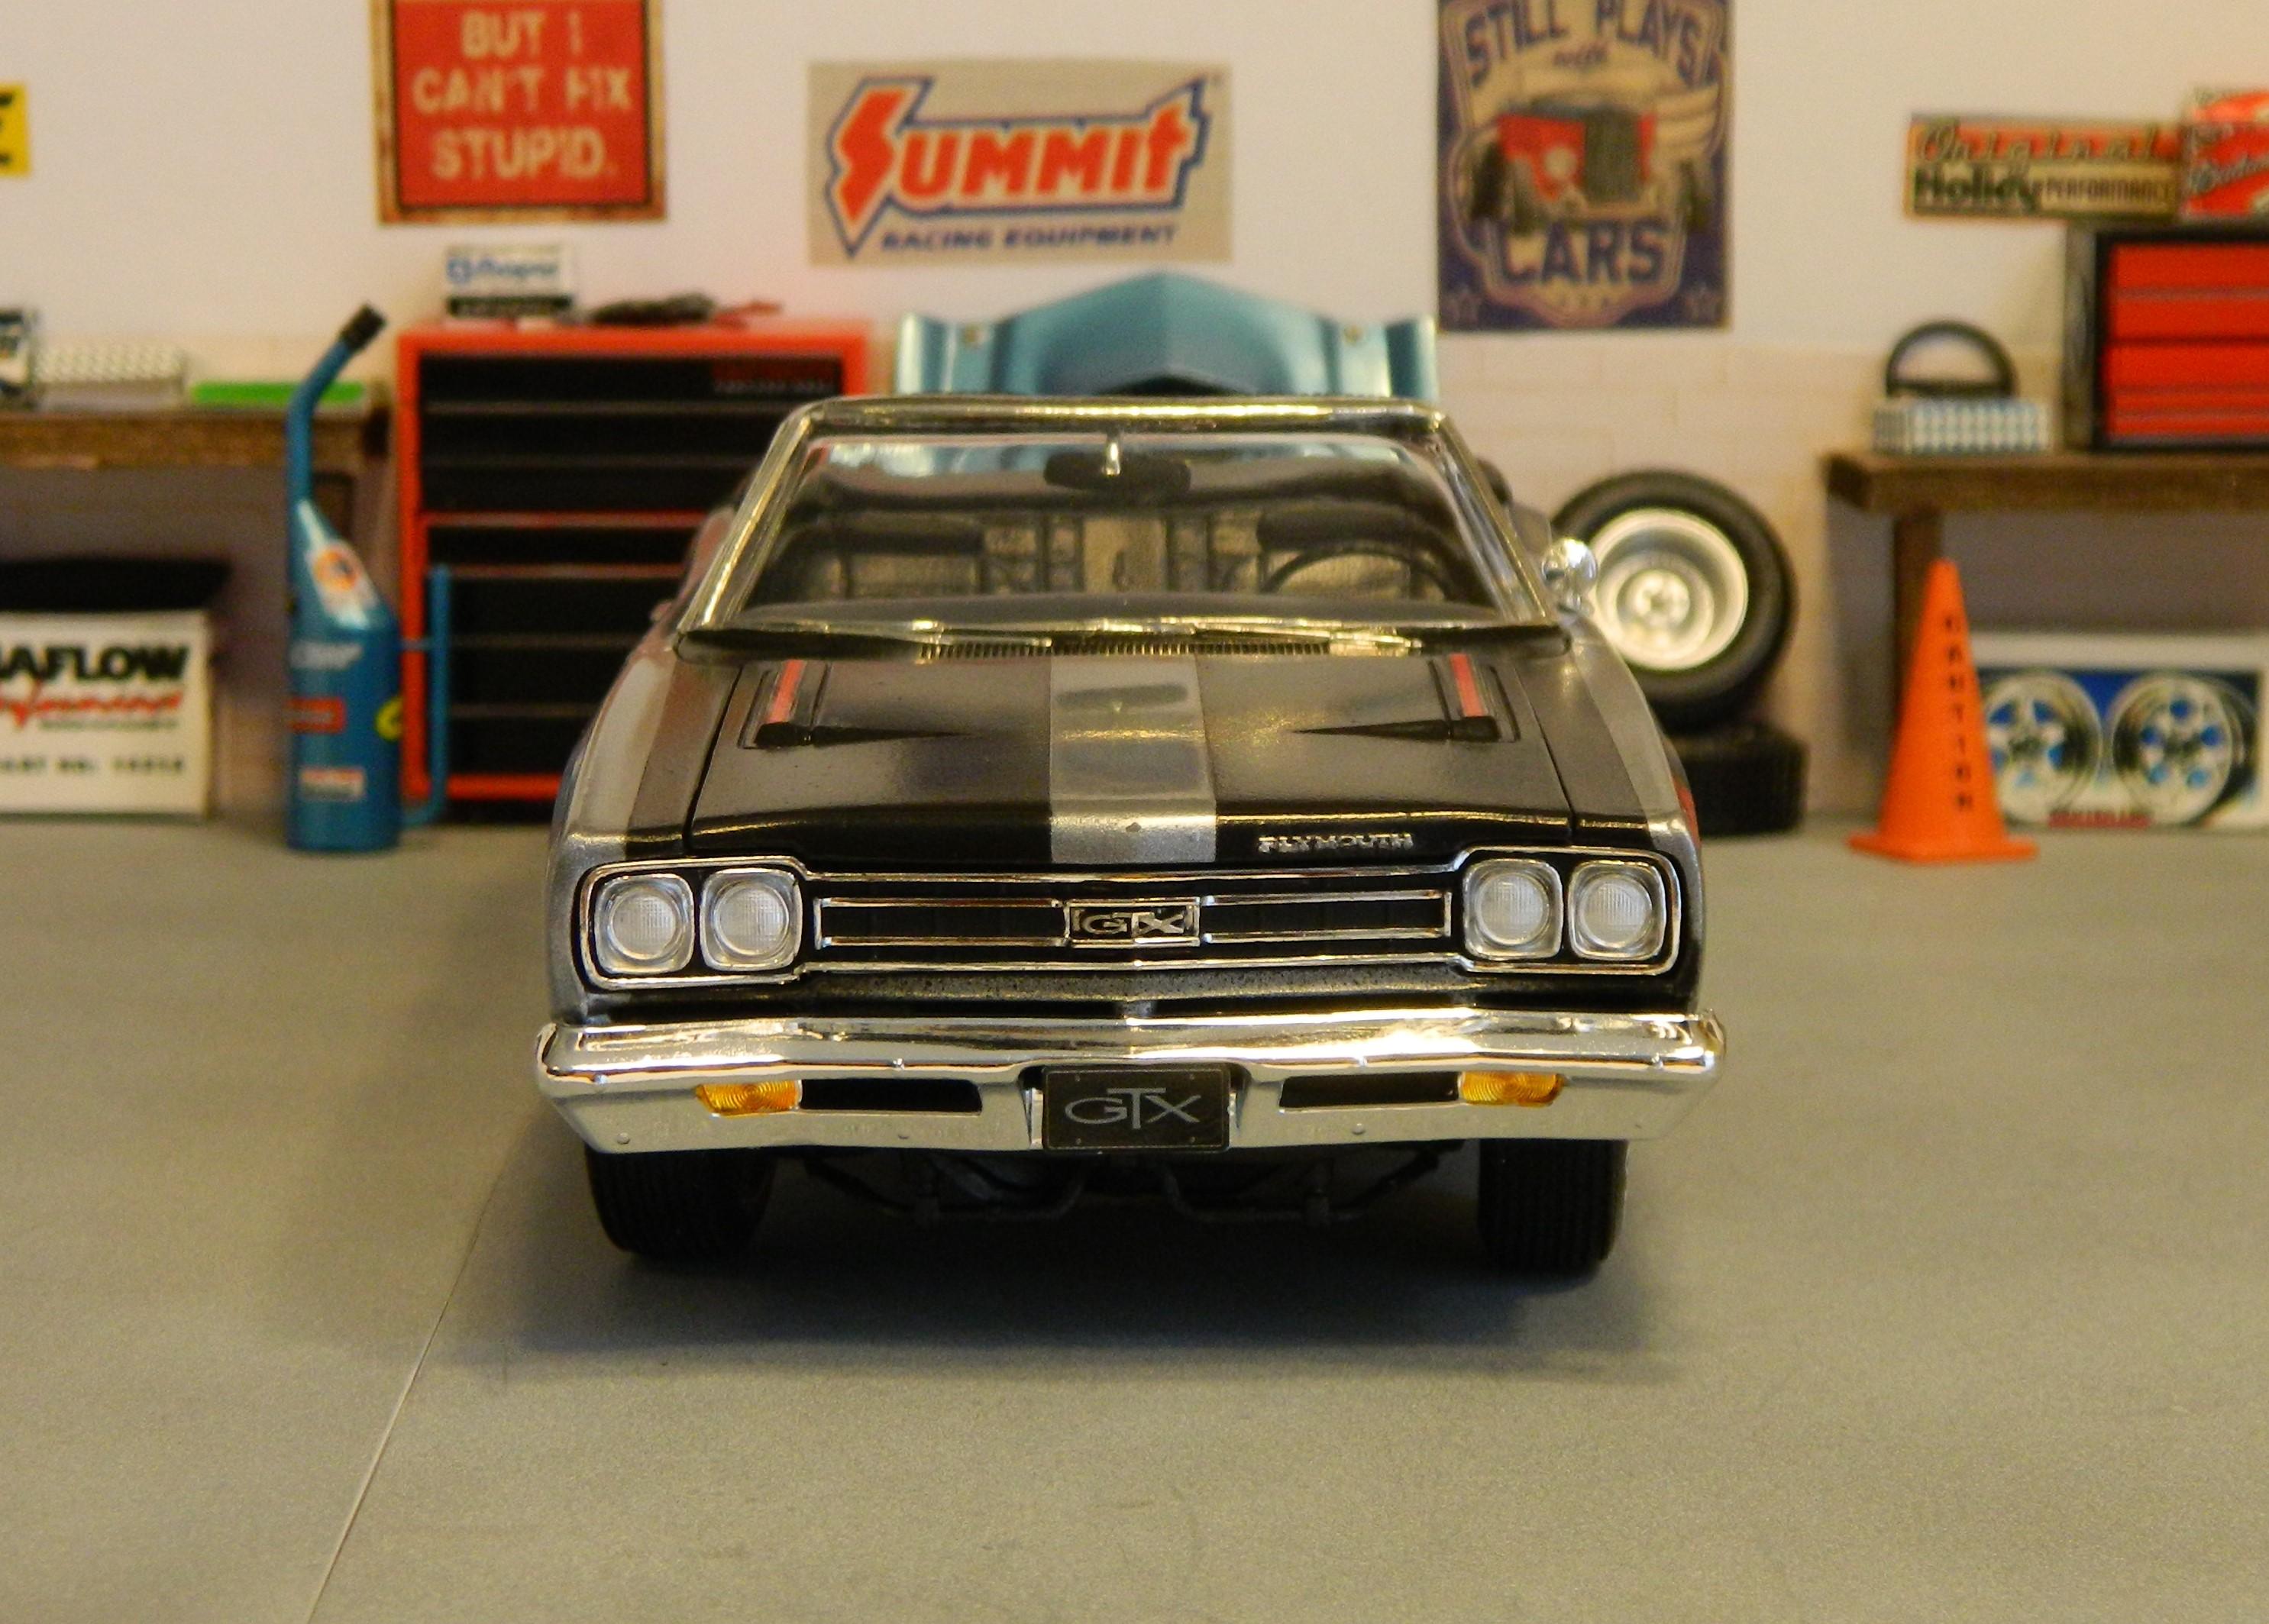
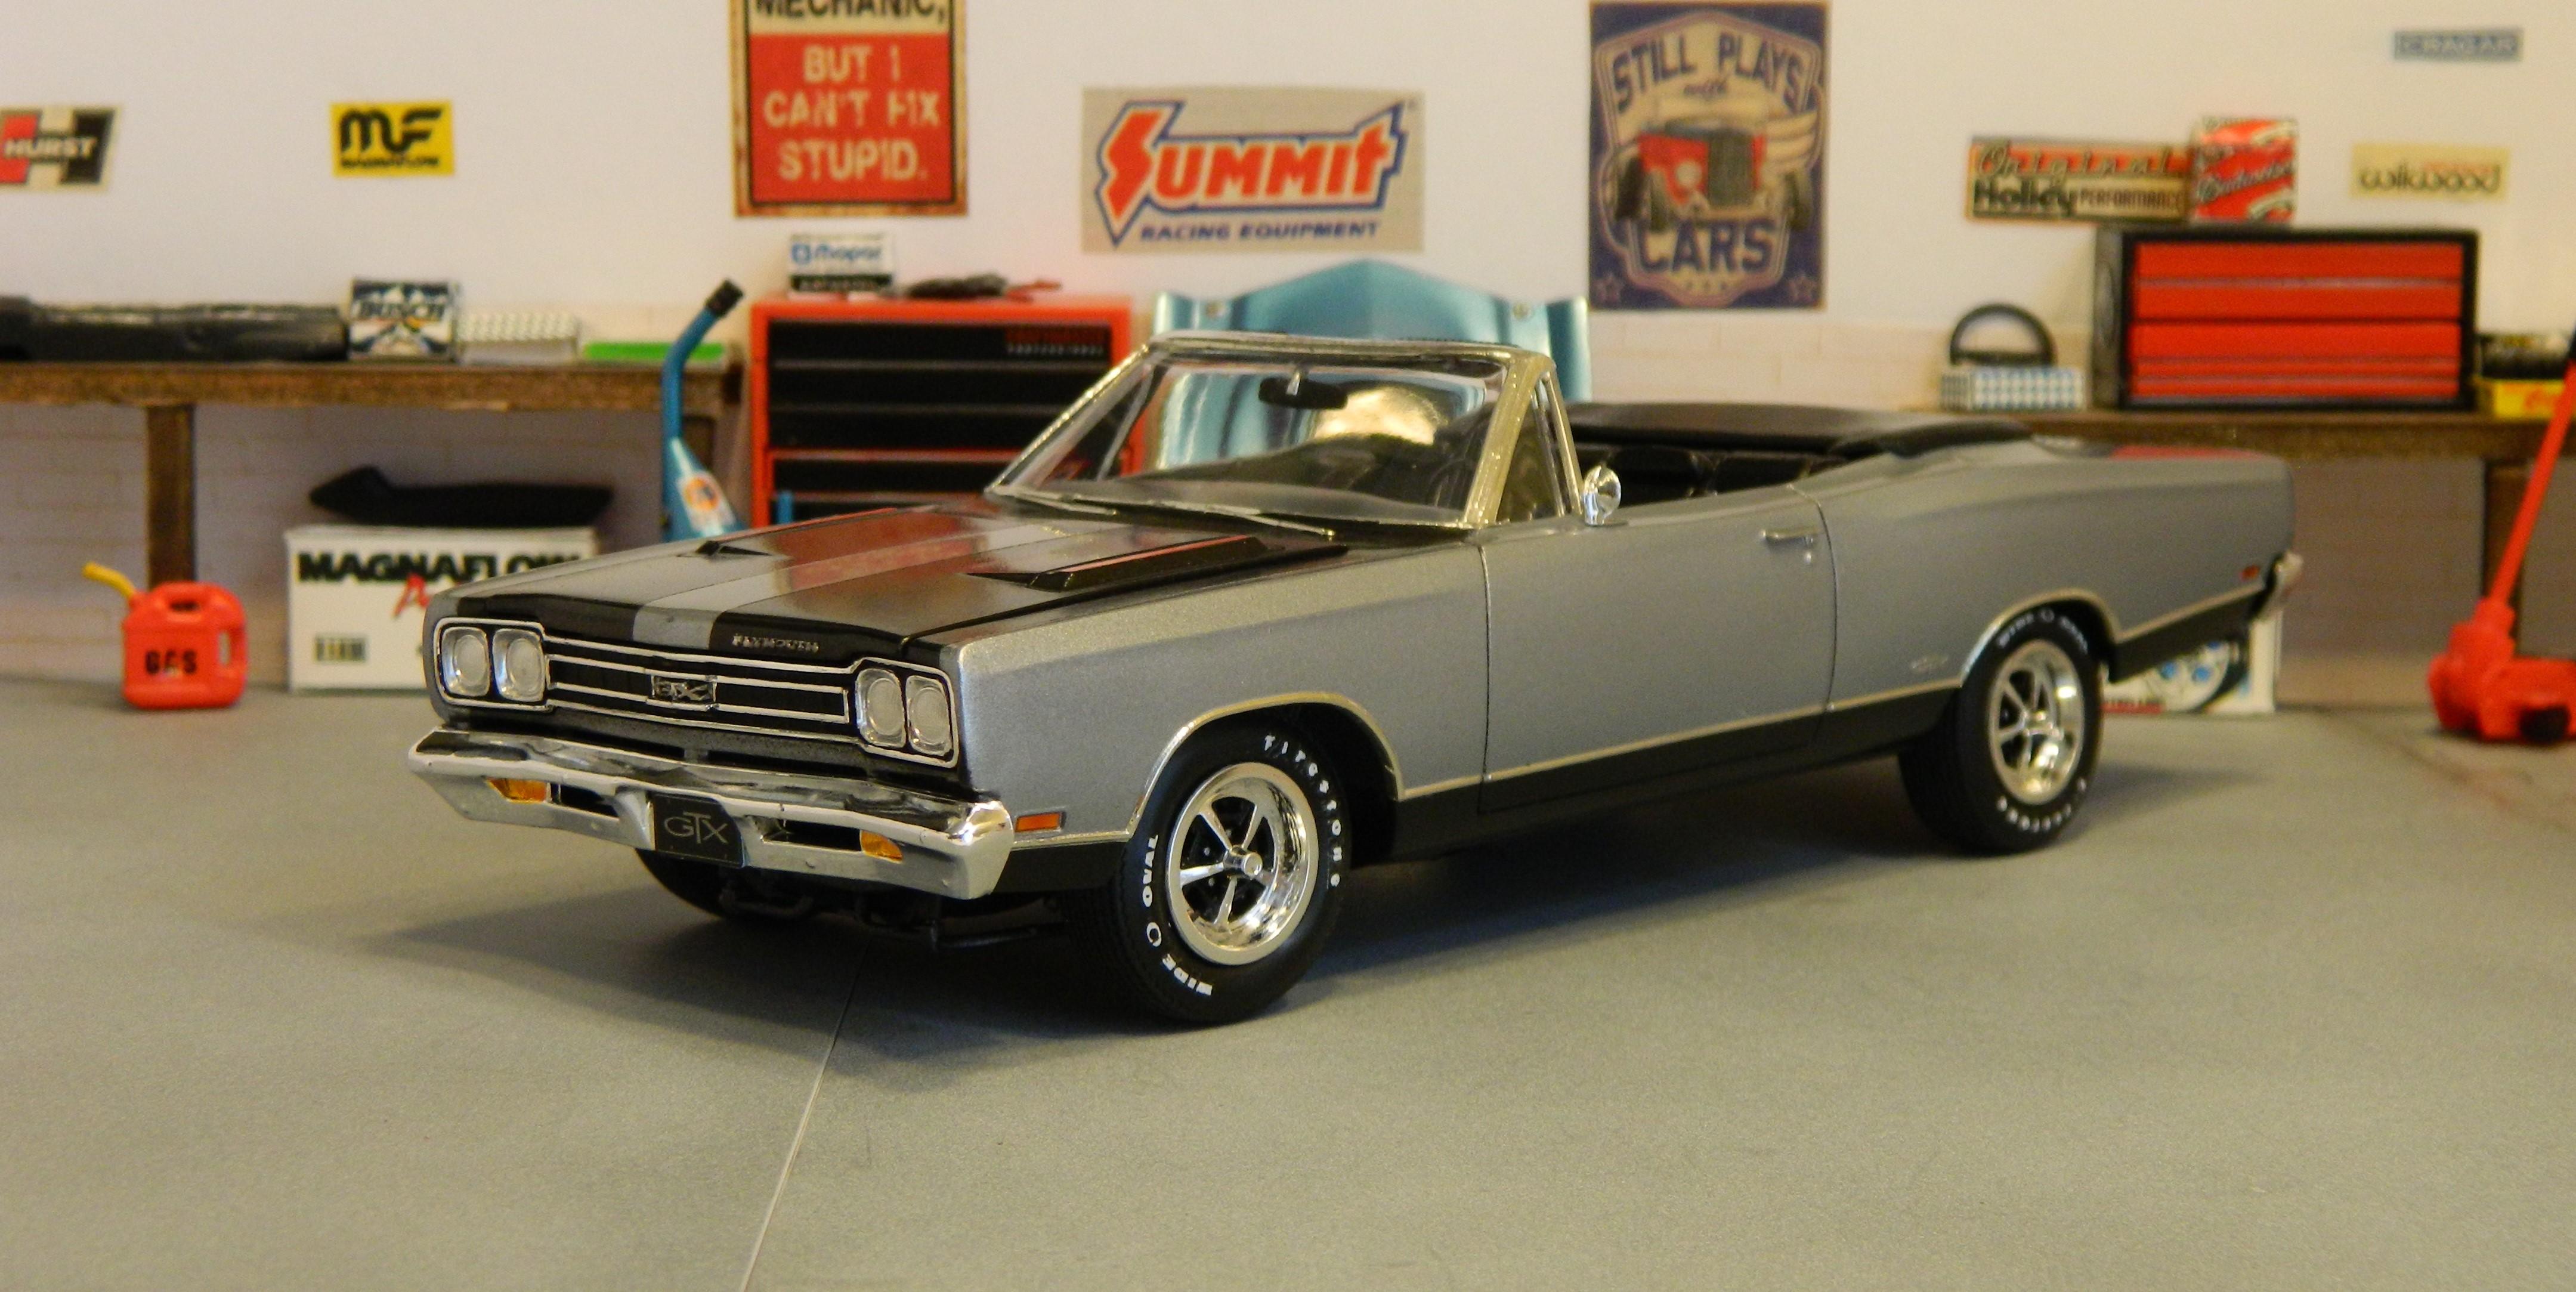
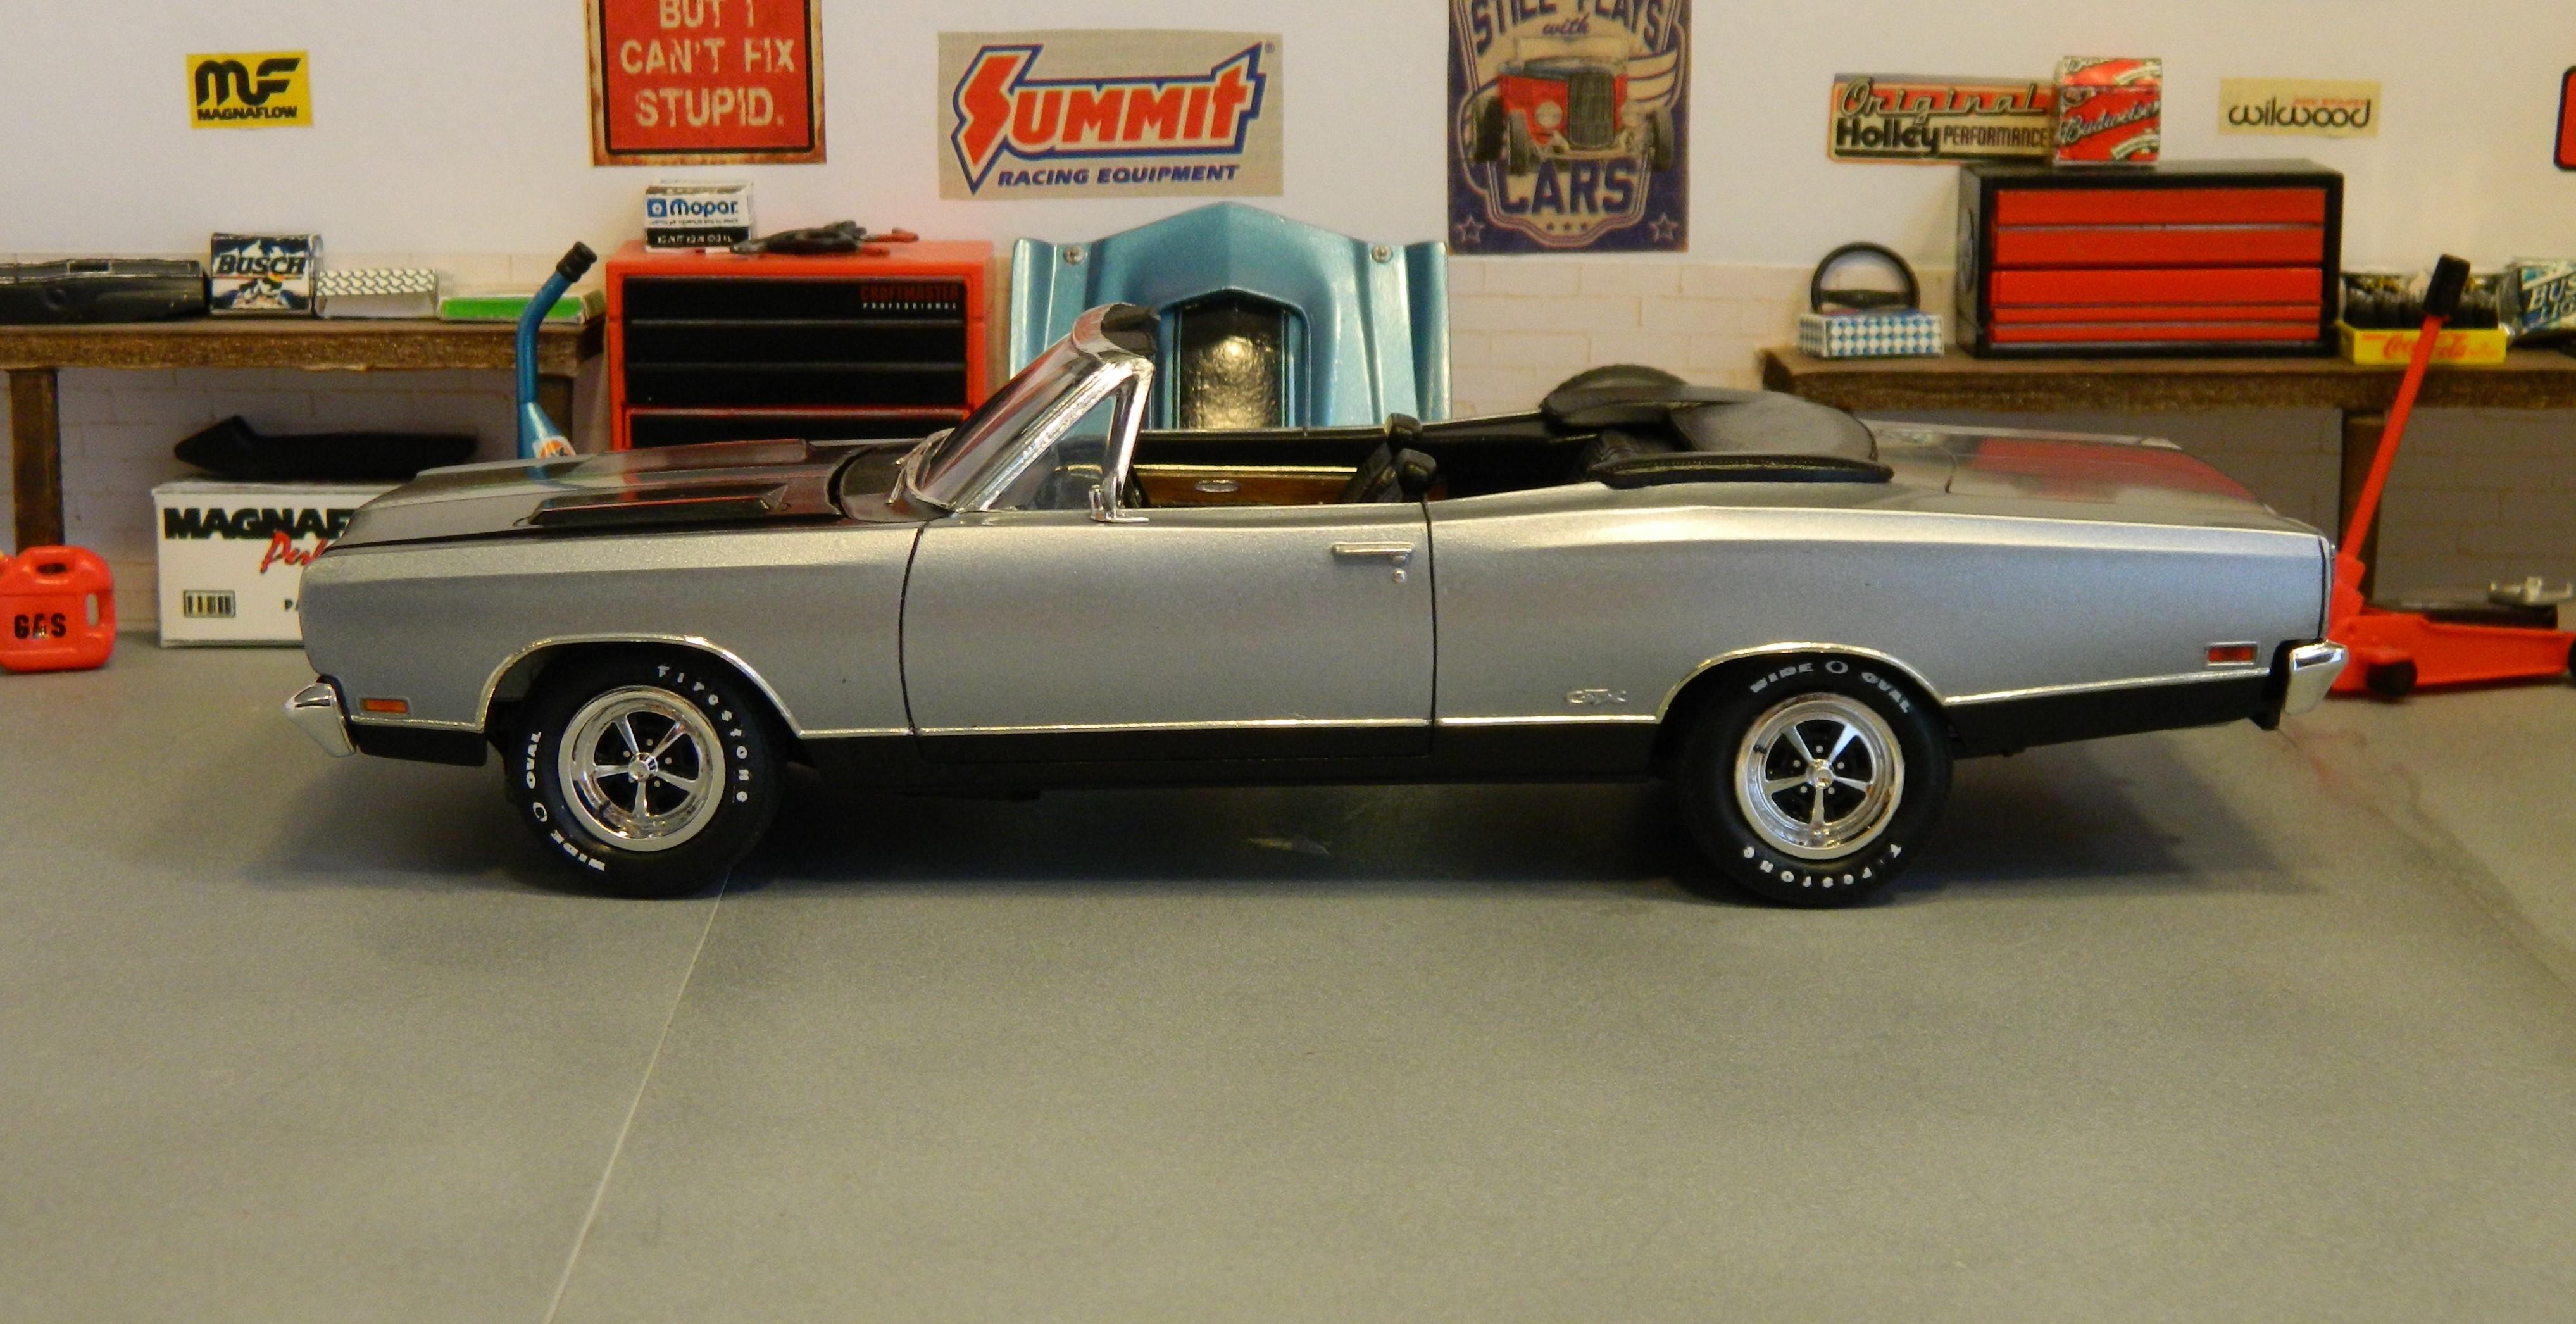
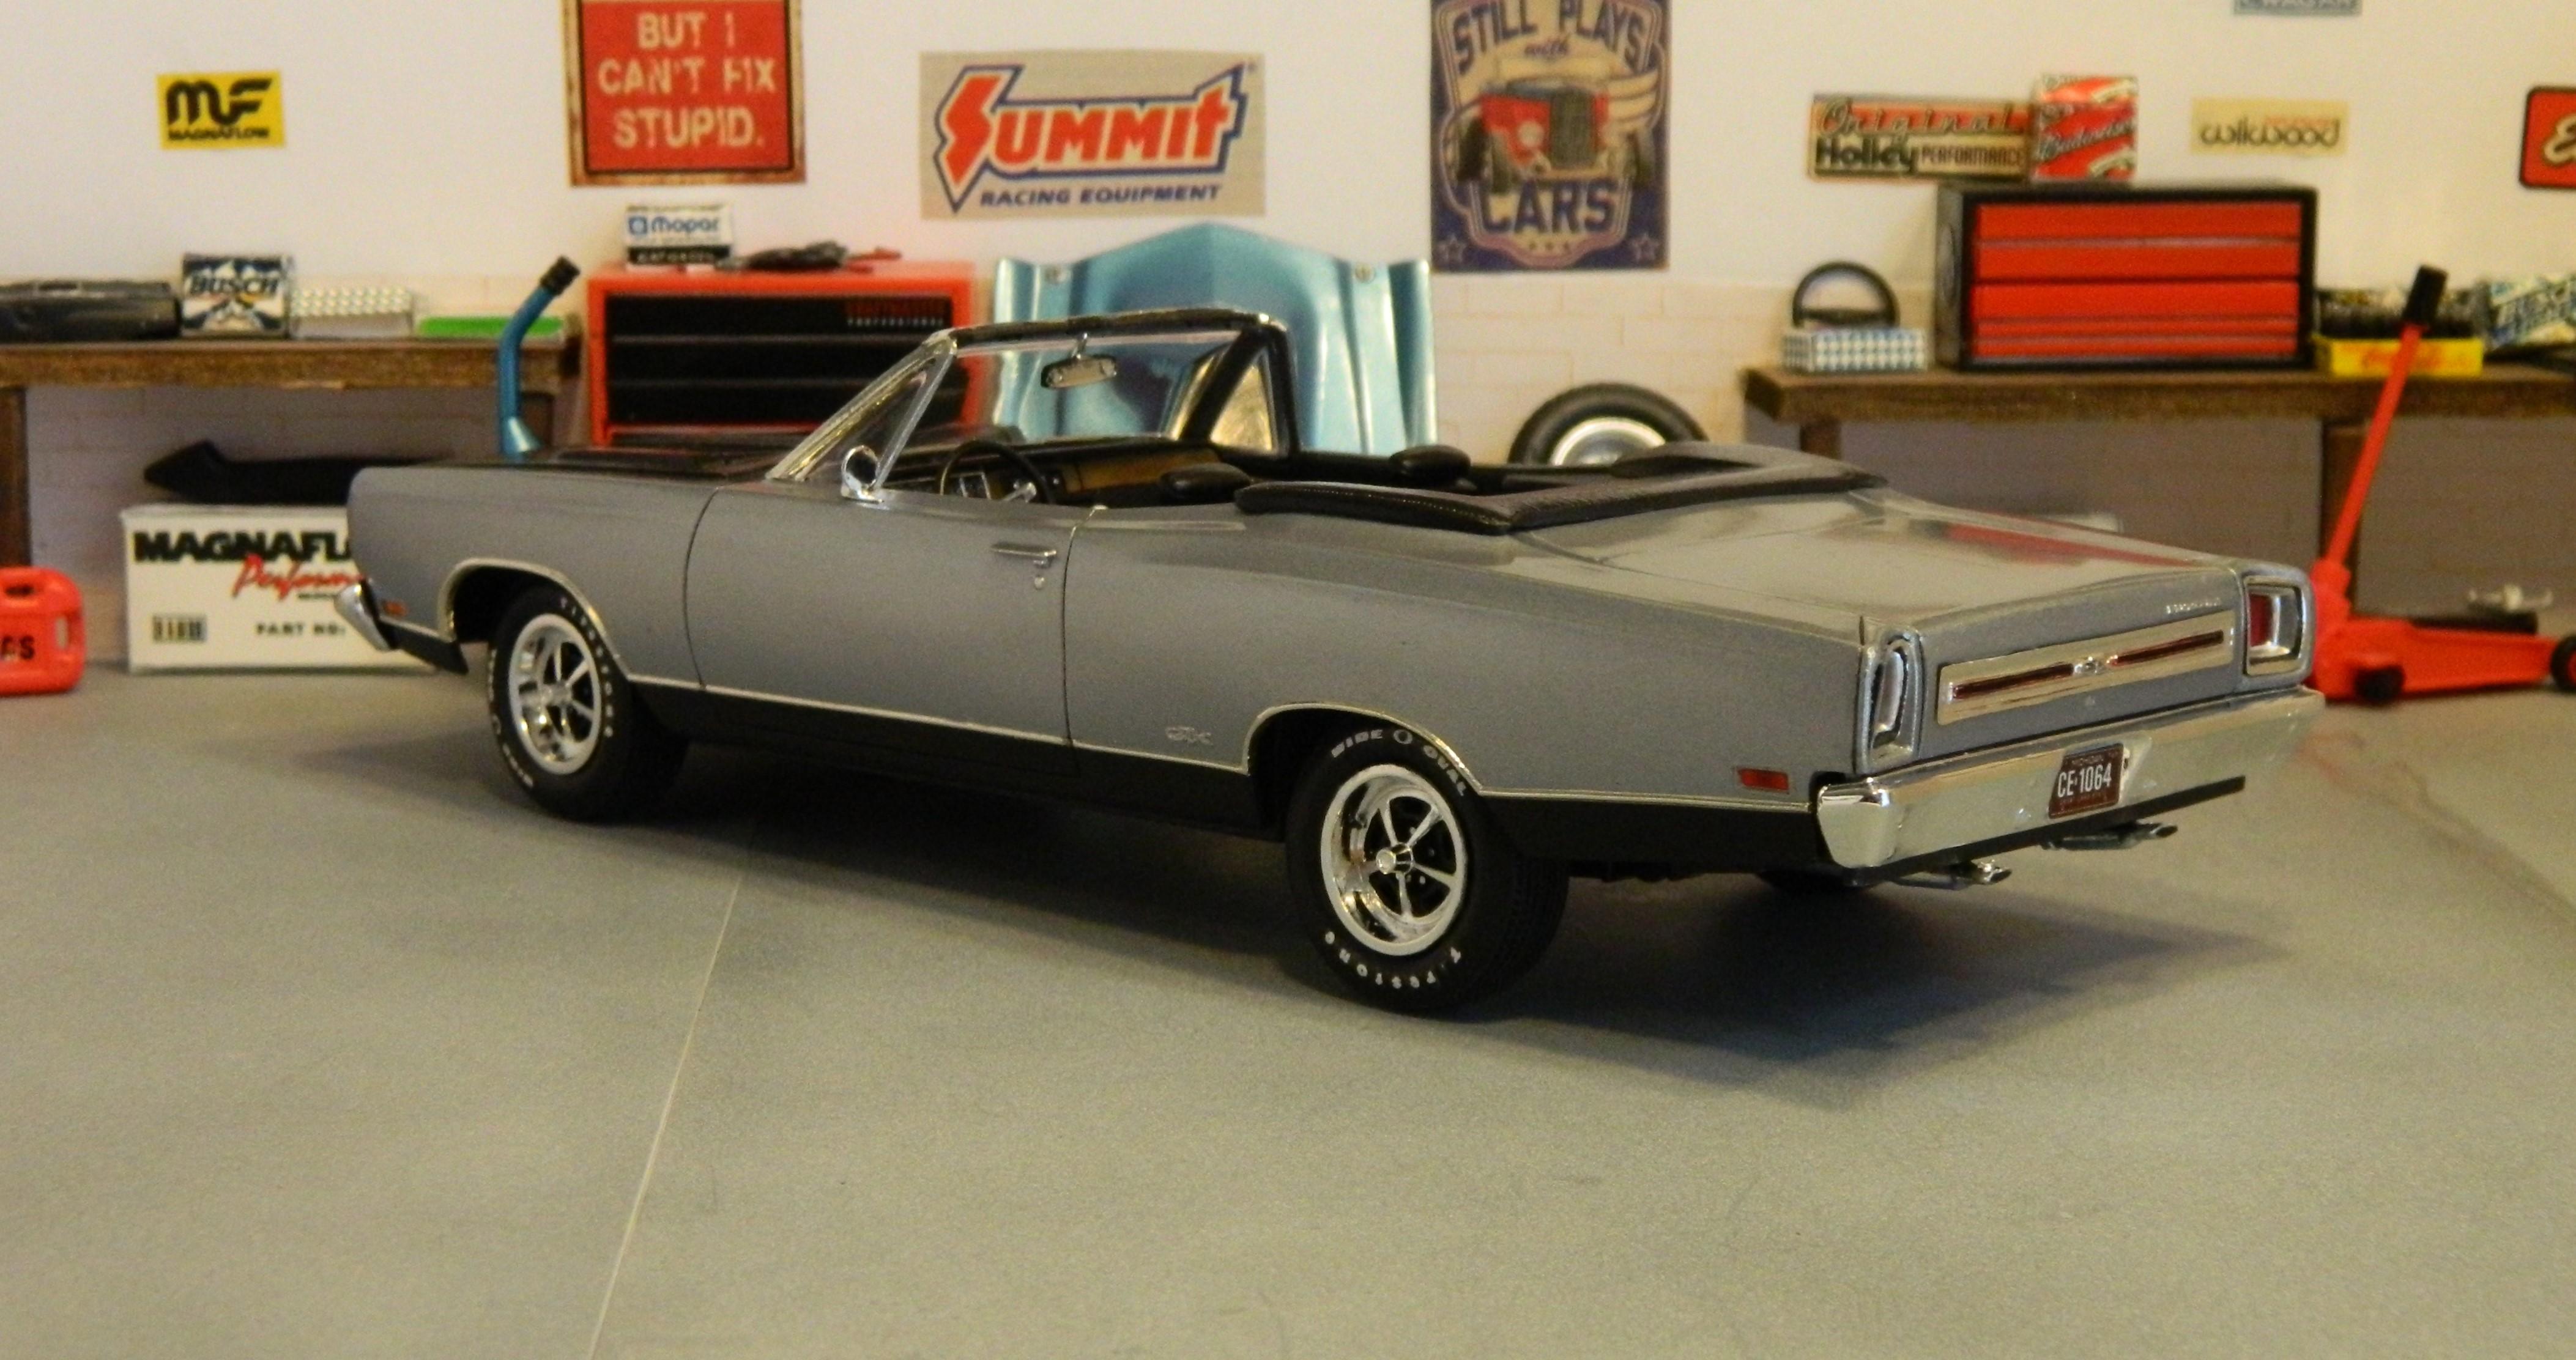
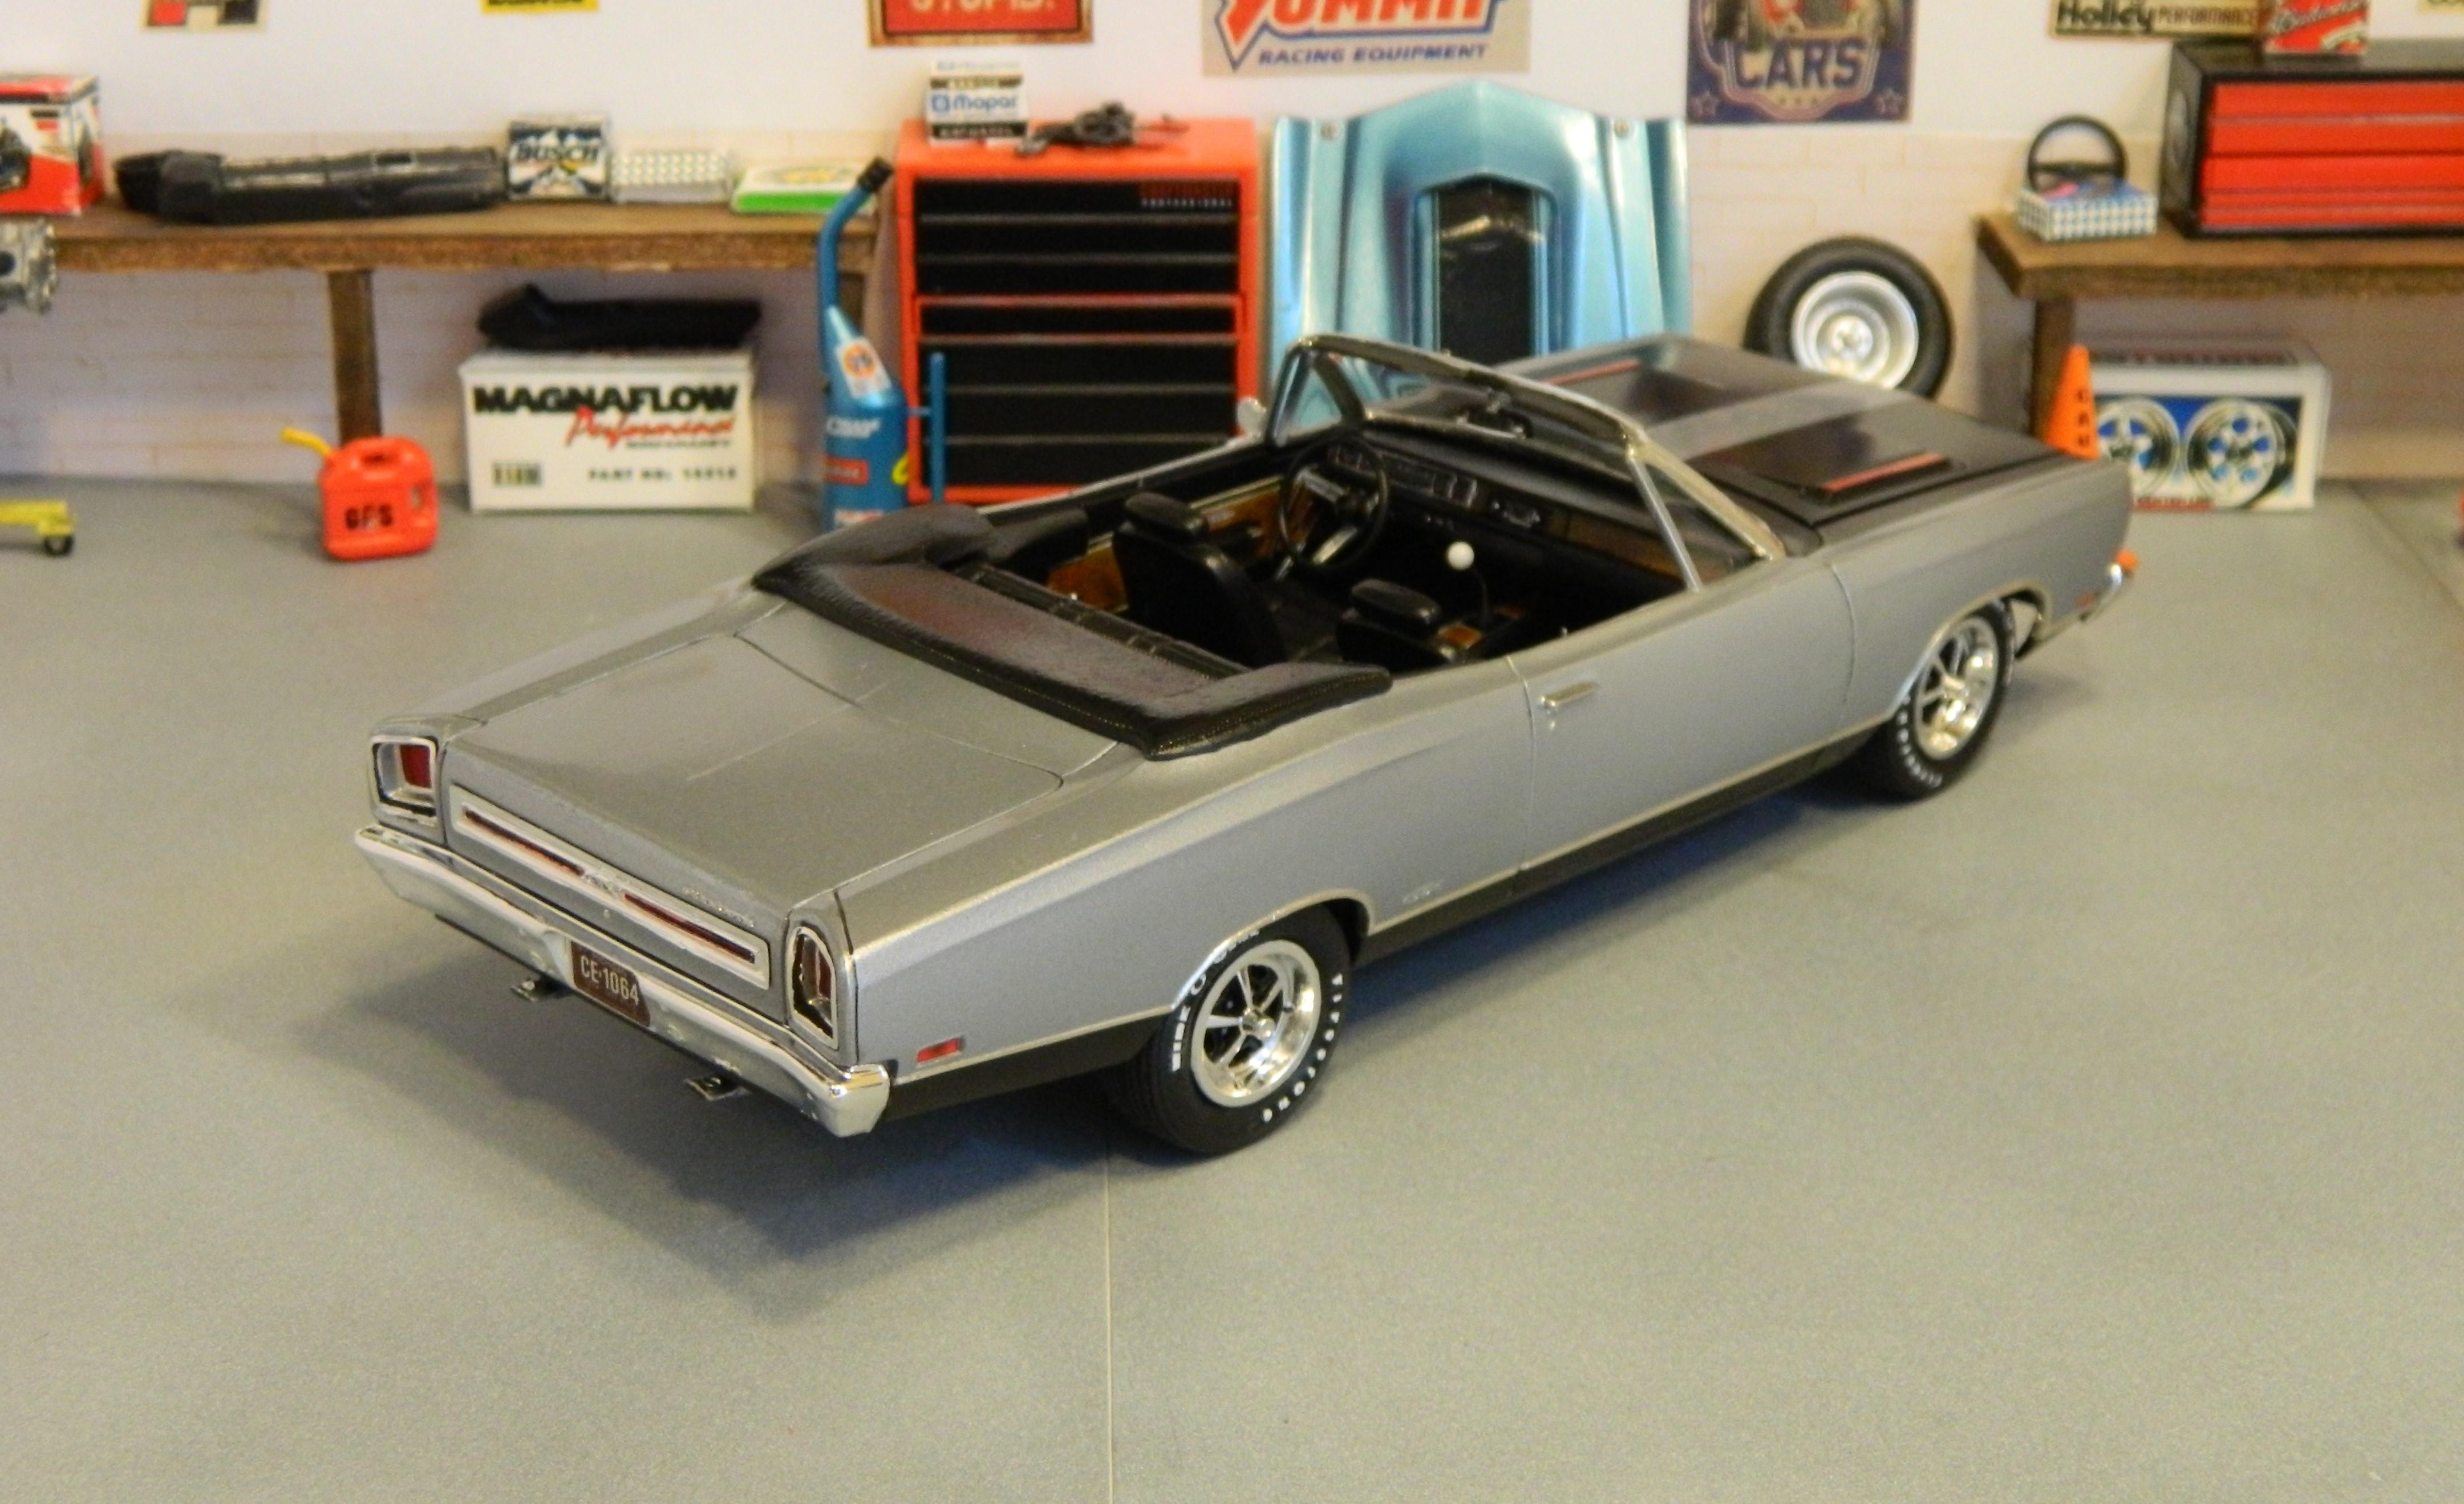
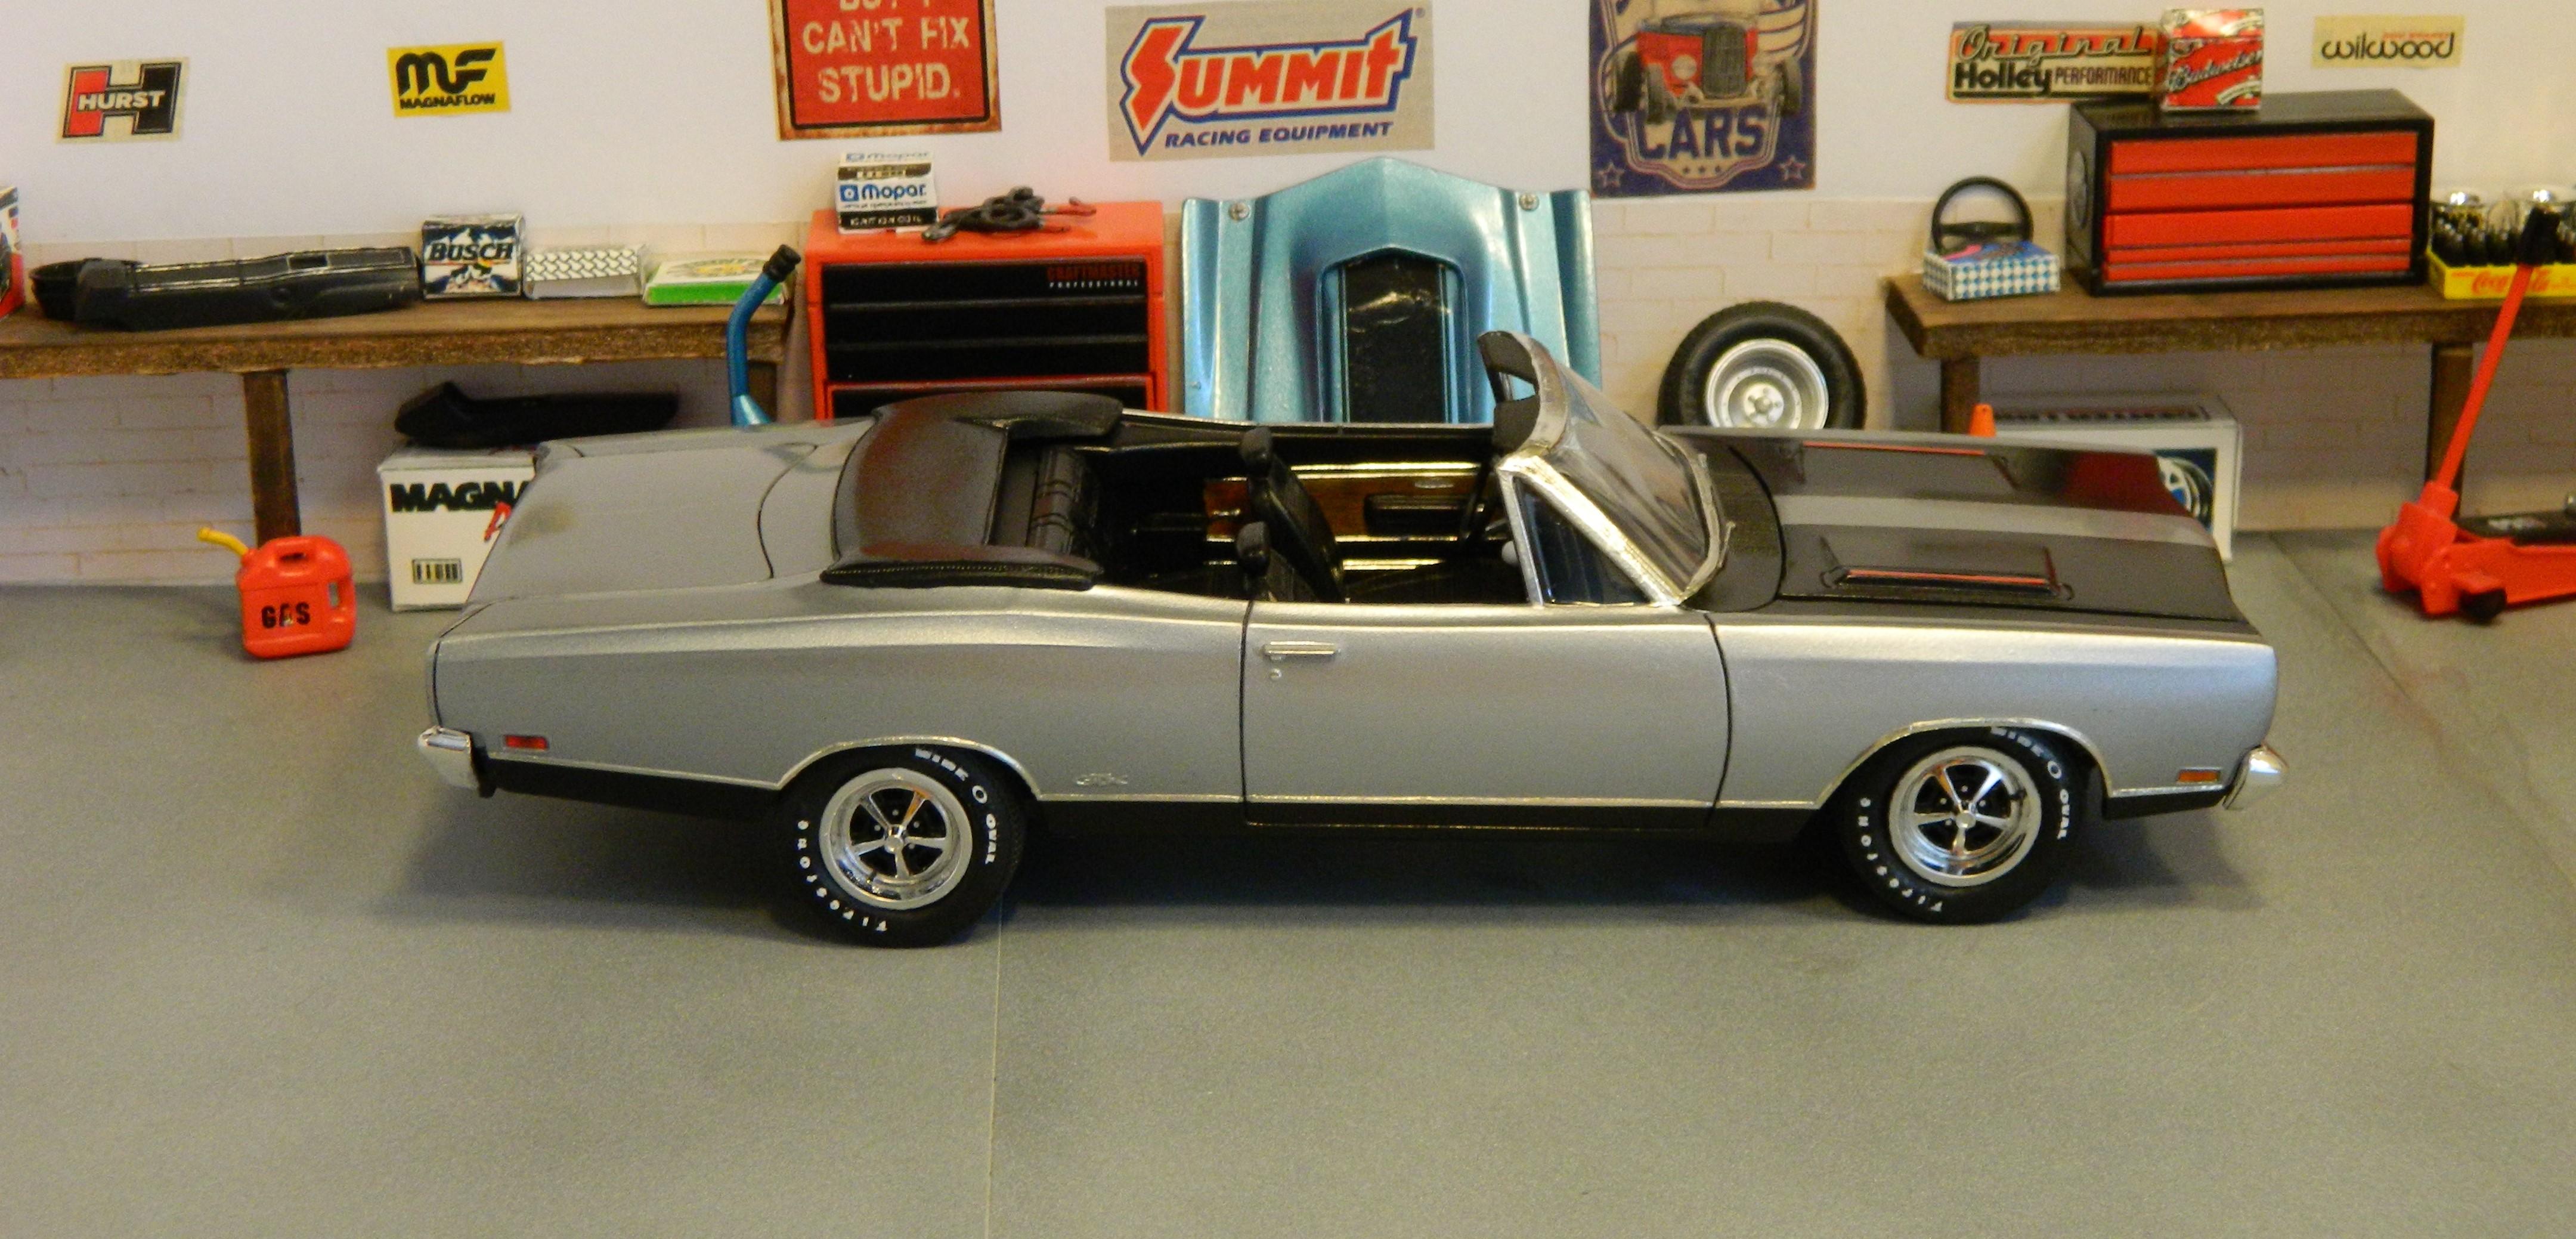
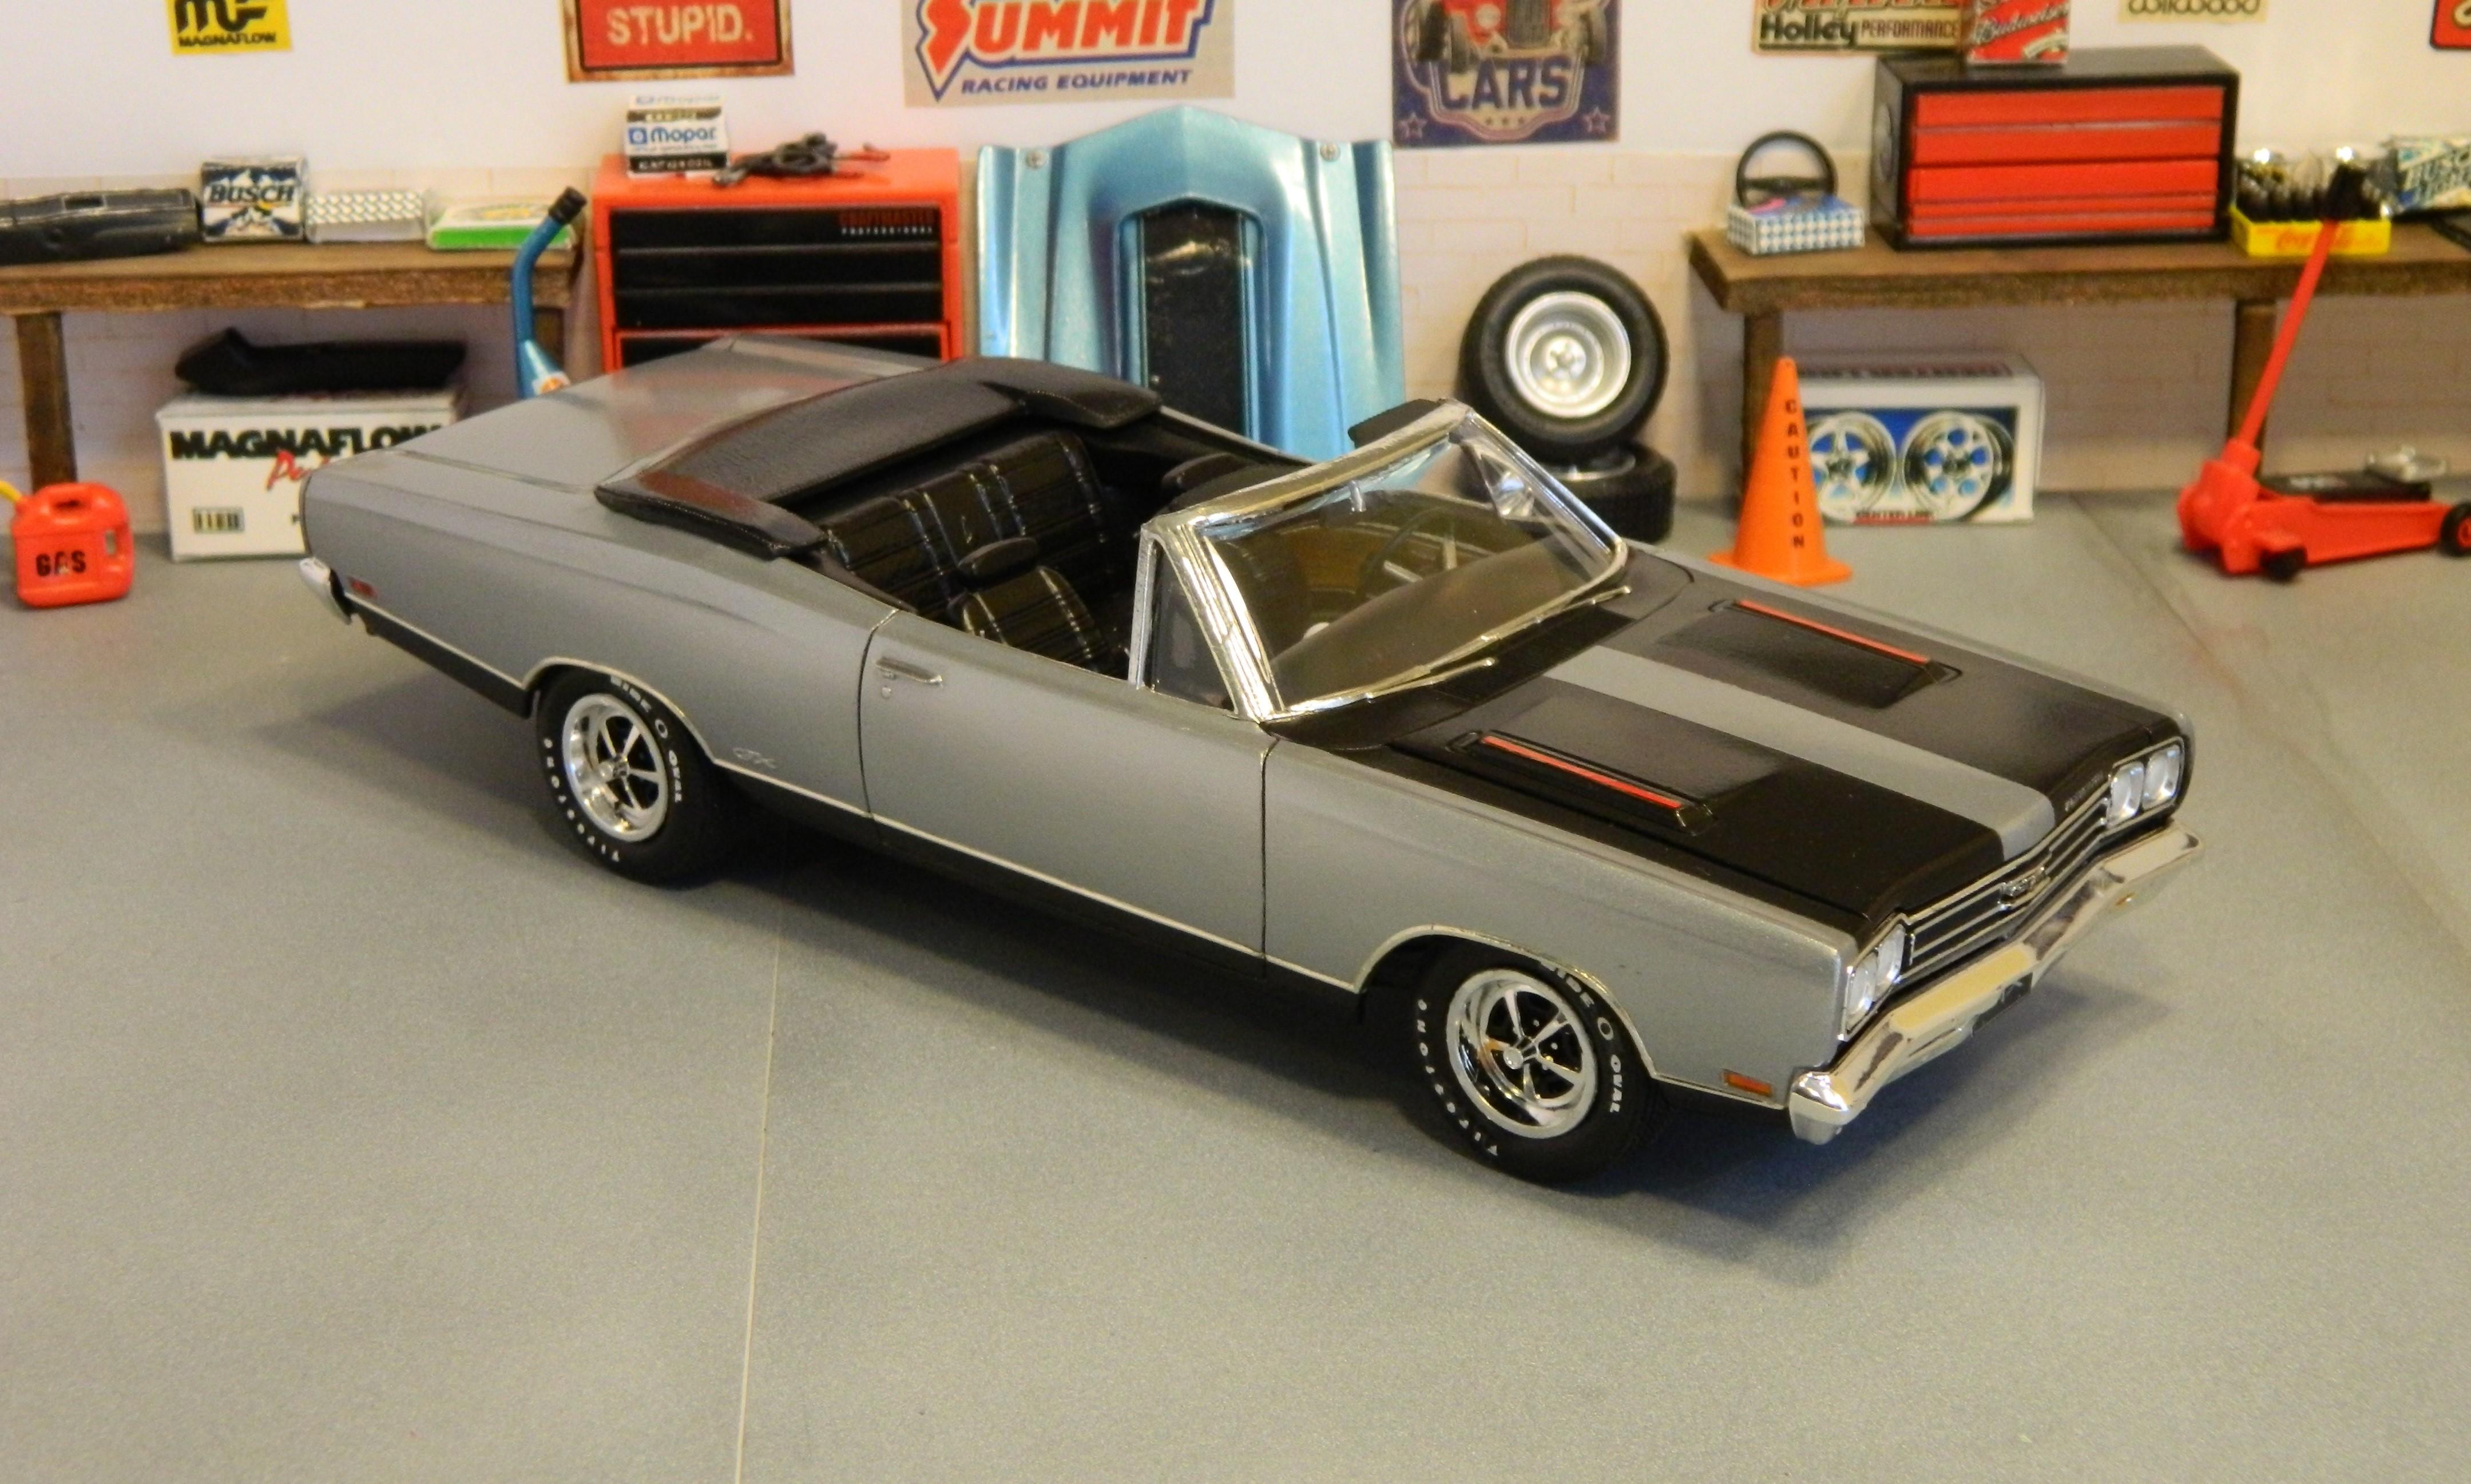
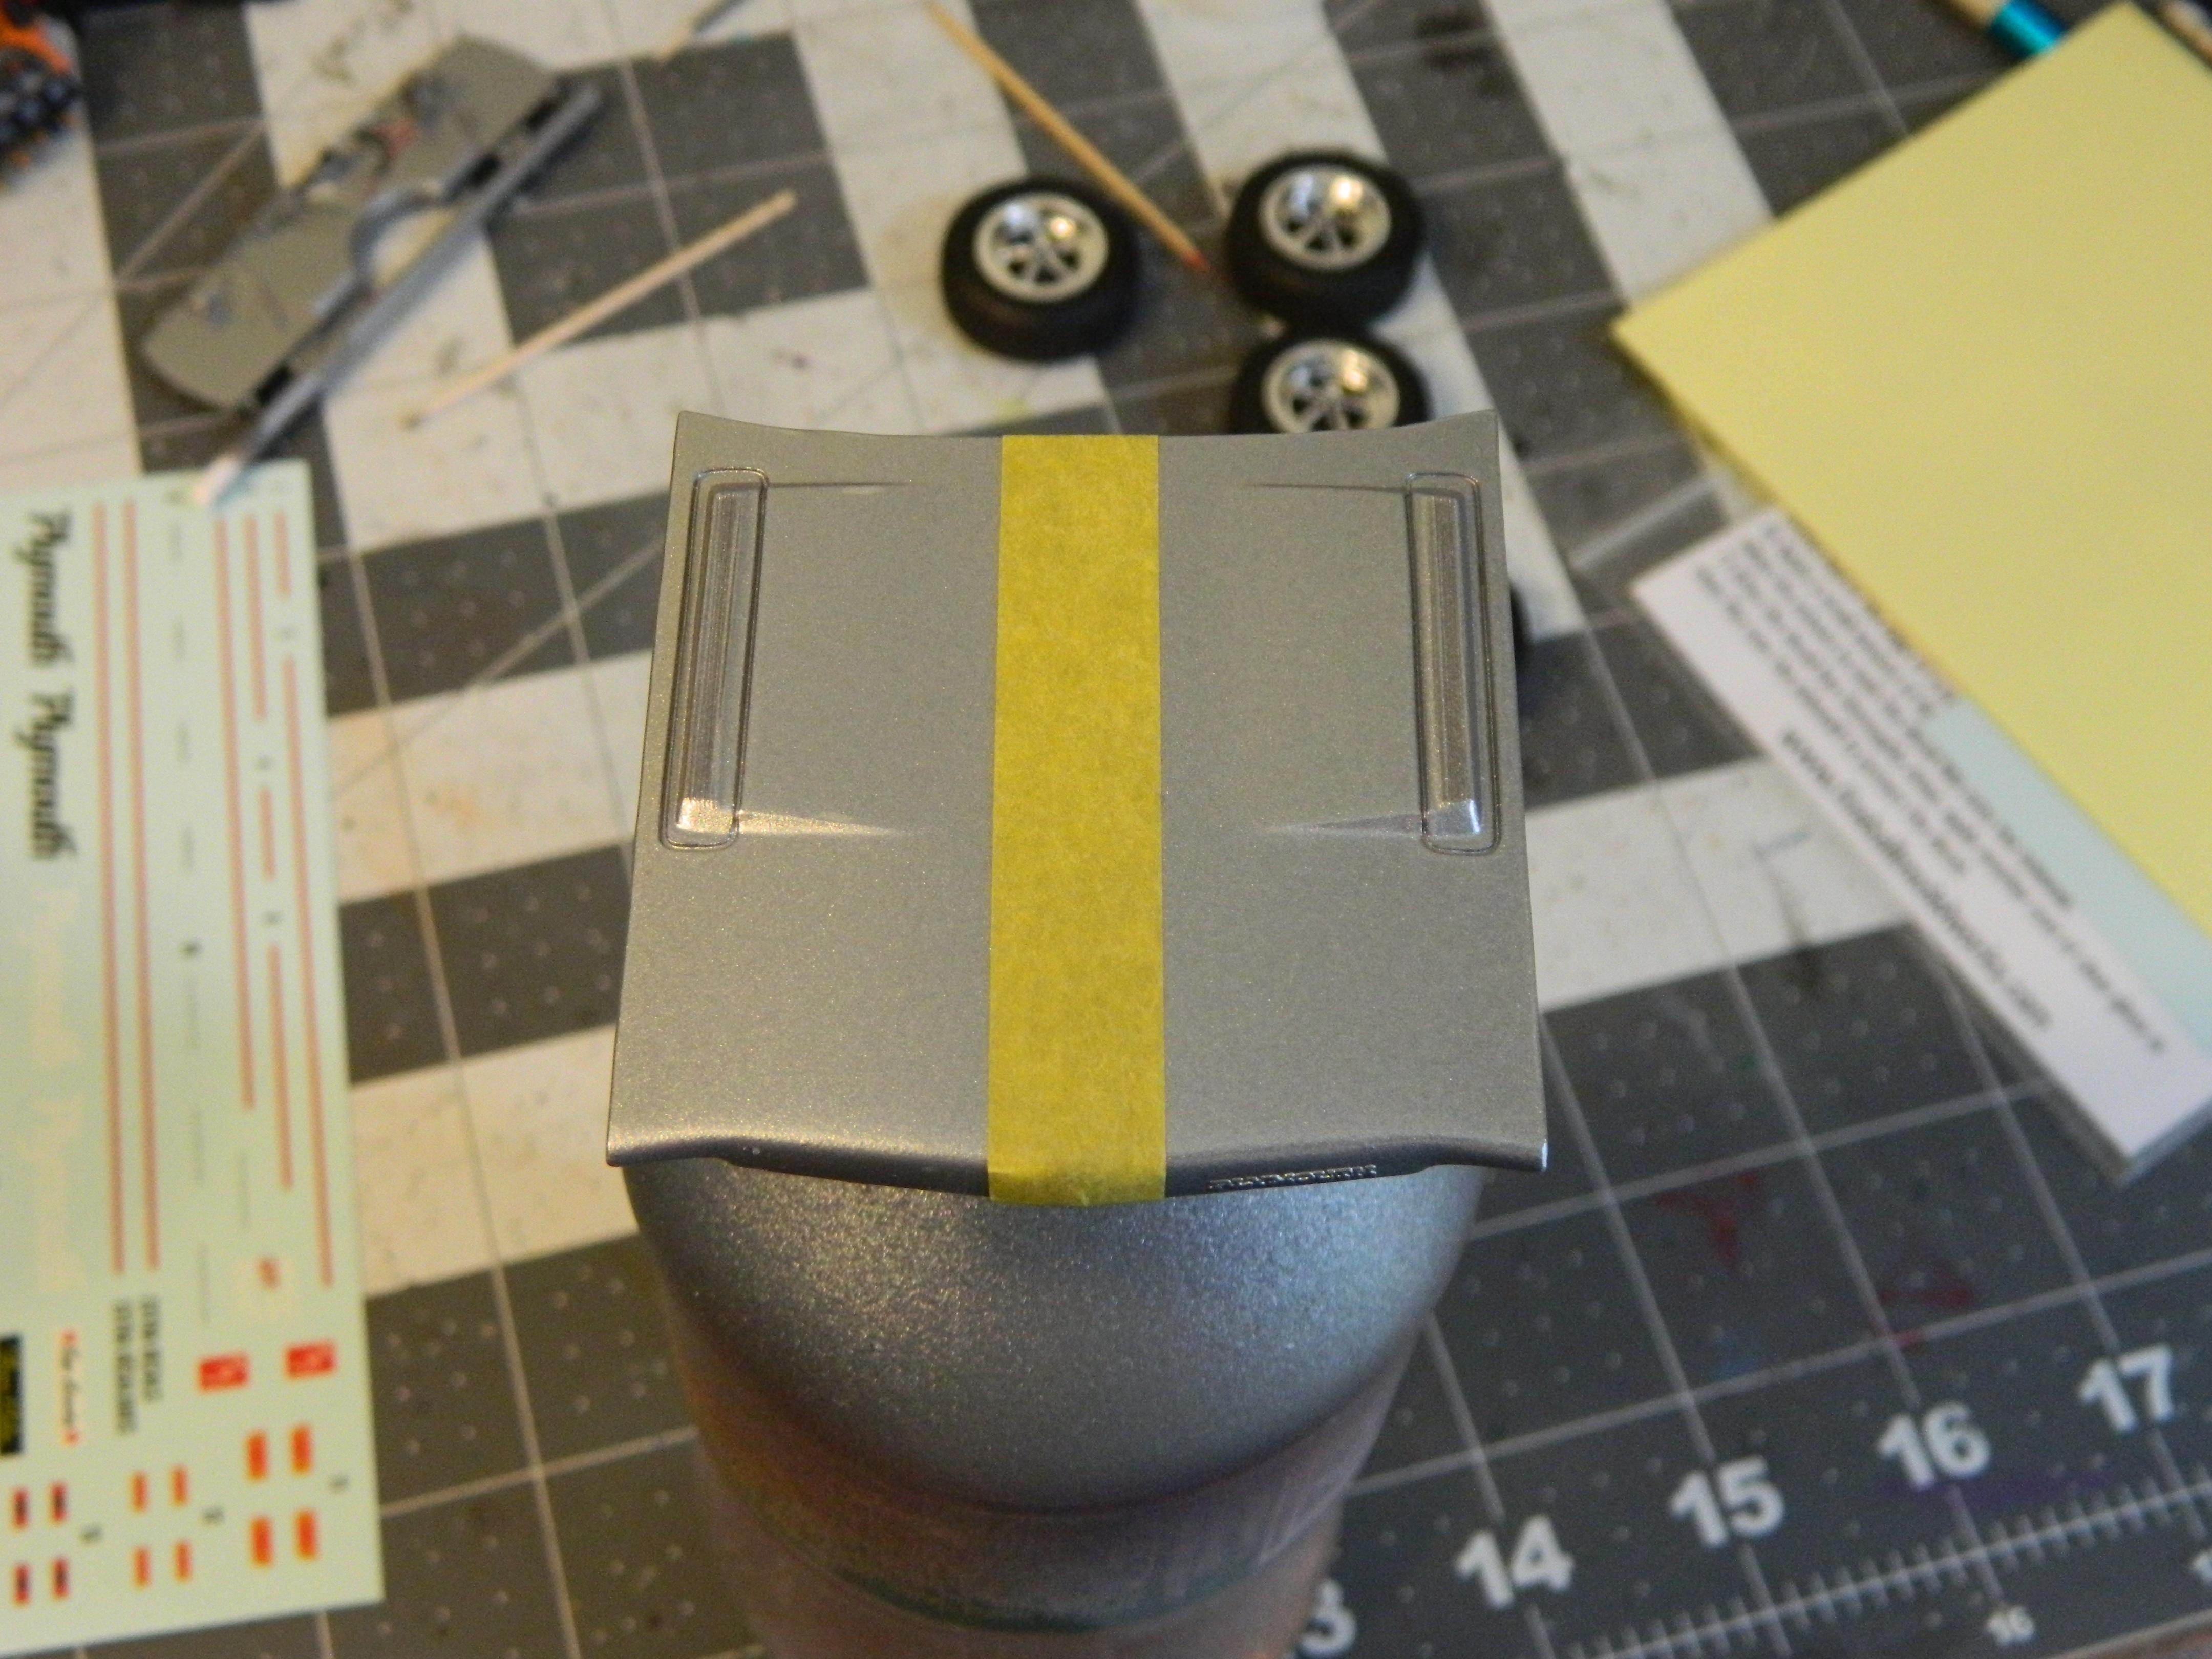
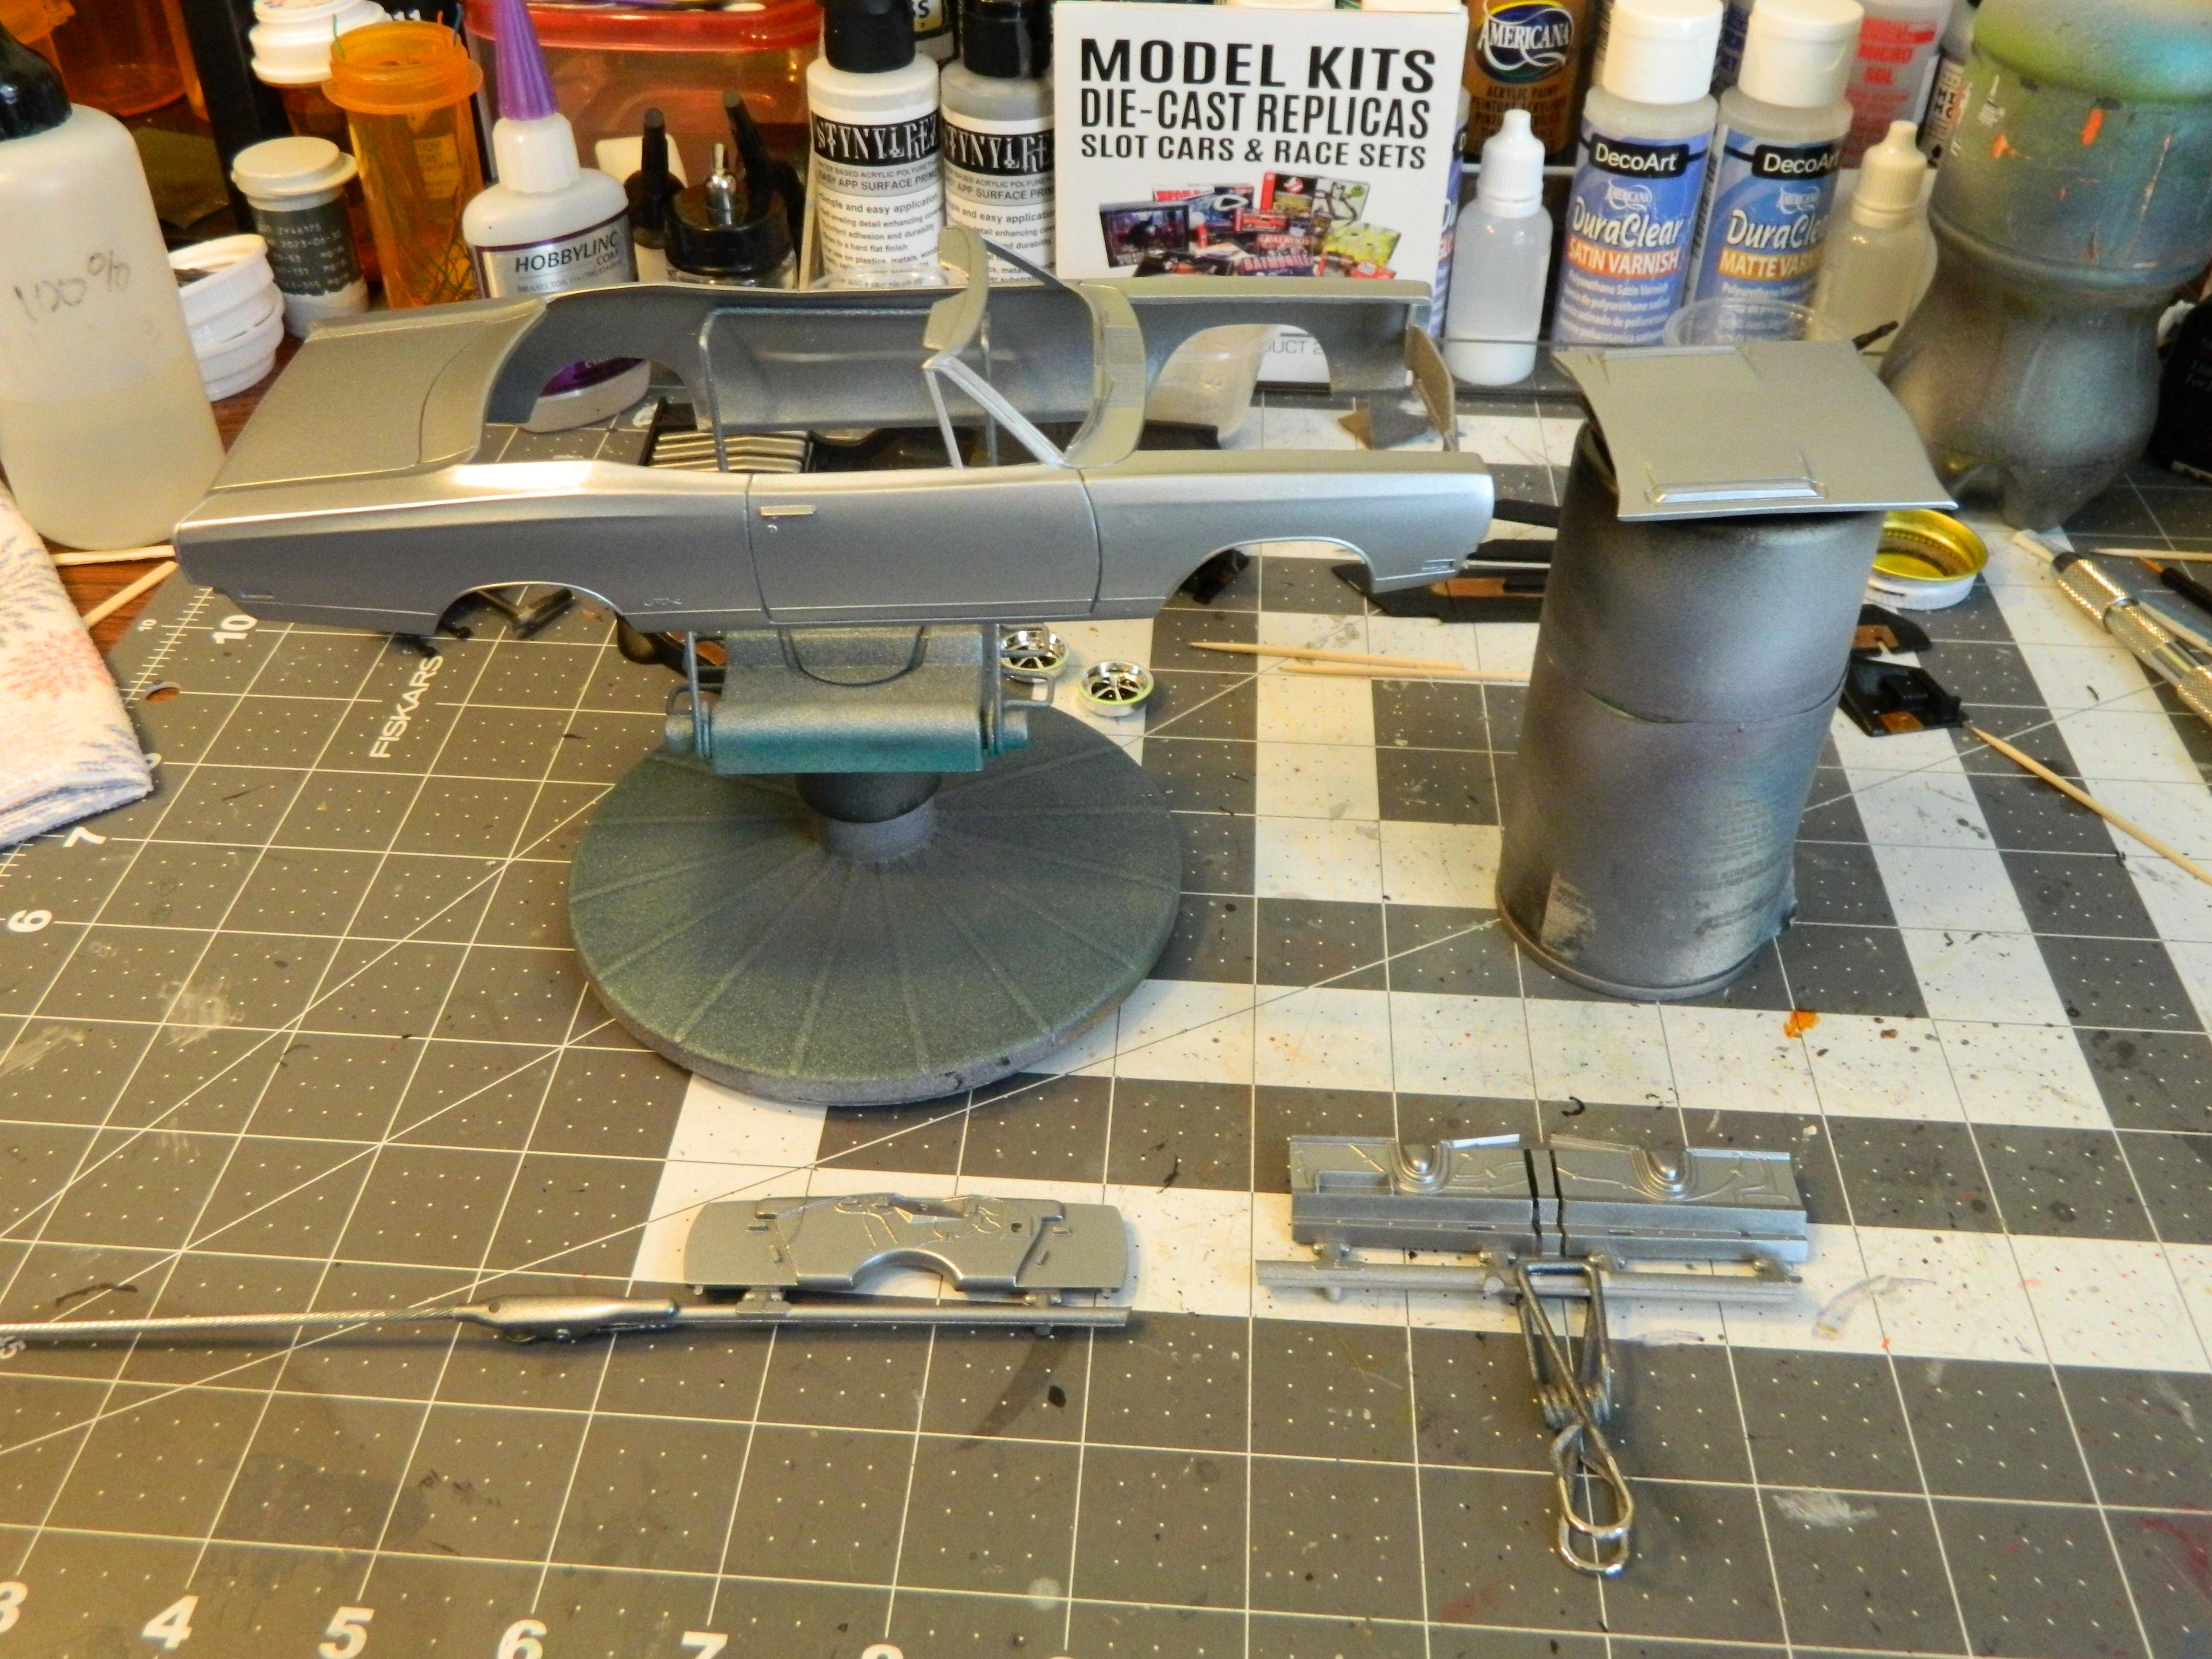
Here's my version of AMT's 1969 Plymouth GTX Convertible. Paint is Createx Pearlized Silver, with Anita's Glossy Black on the lower portion. Clear is Createx UVLS Gloss Clear. Interior and hood stripes are Anita's Glossy Black as well, with hand painted woodgrain highlighting the interior. Trim is BMF and Fireball Modelworks white letter decals adorn the tires. I added I added plug wires, door locks, and valve stems for extra details. This is a pretty decent kit all around that went together well, and overall I'm pretty happy with how it turned out. Thanks for looking!

-

AMT 1969 Plymouth GTX Convertible.
Dragonhawk1066 replied to Dragonhawk1066's topic in WIP: Model Cars
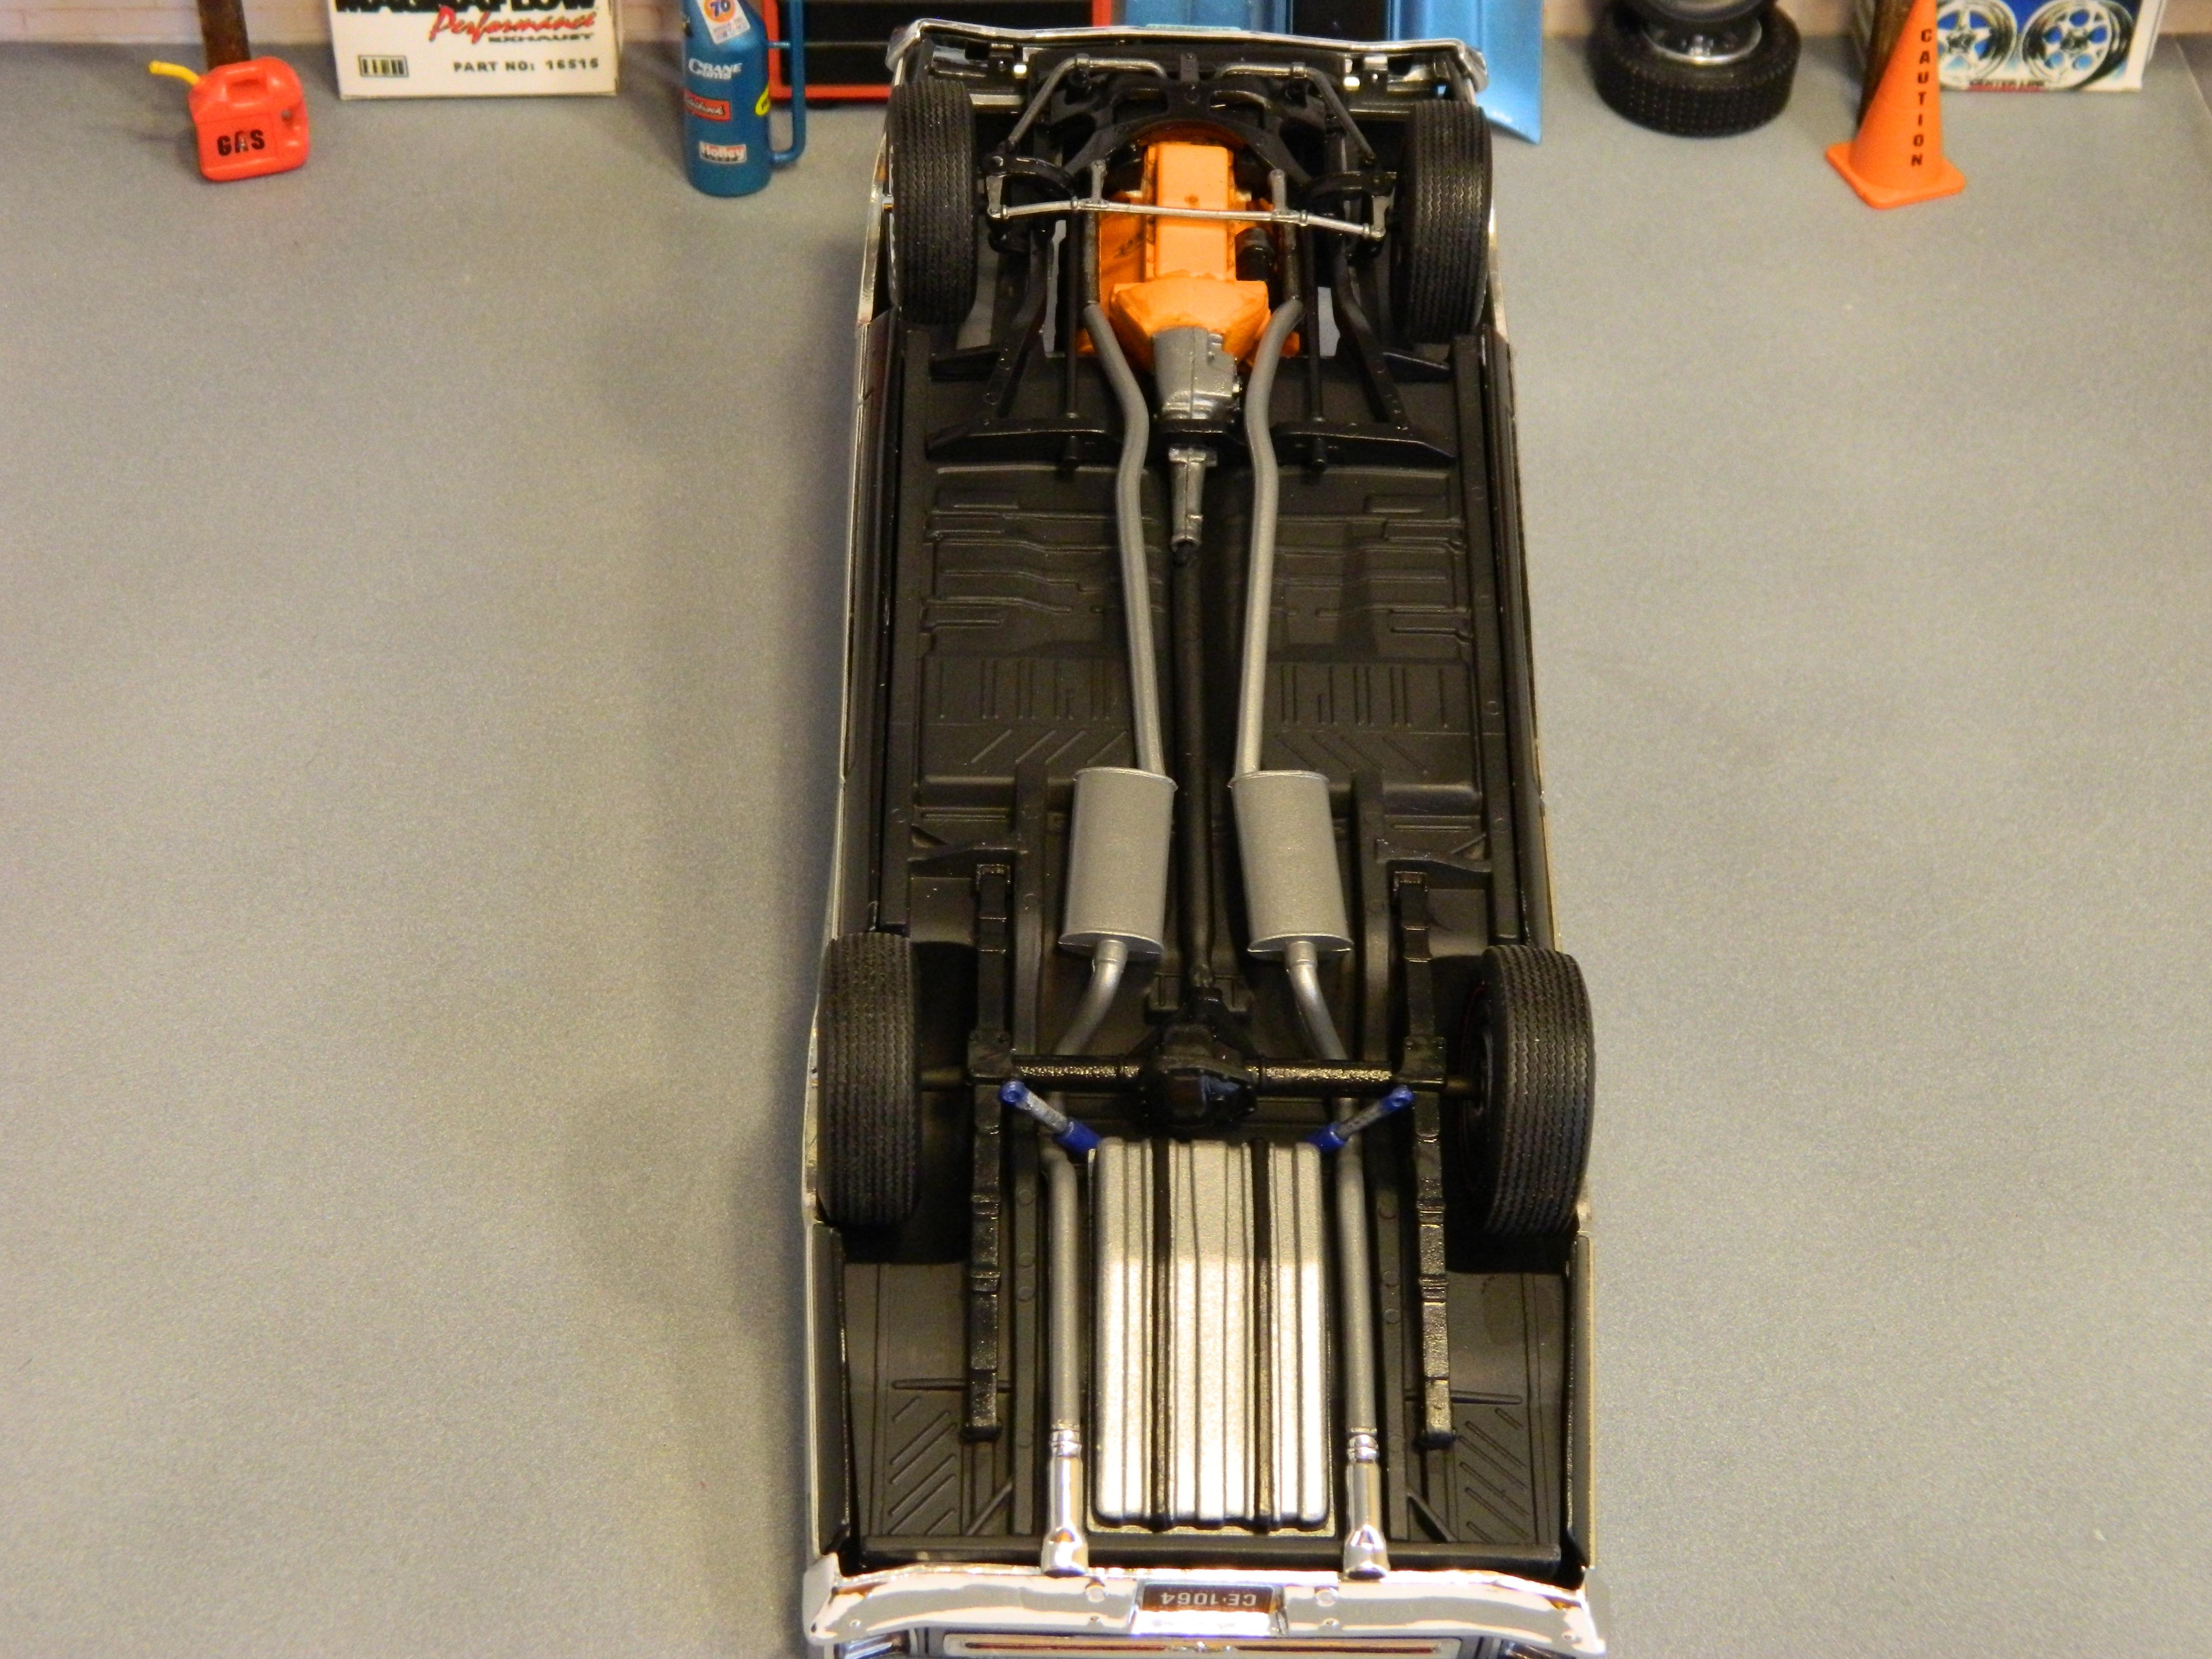
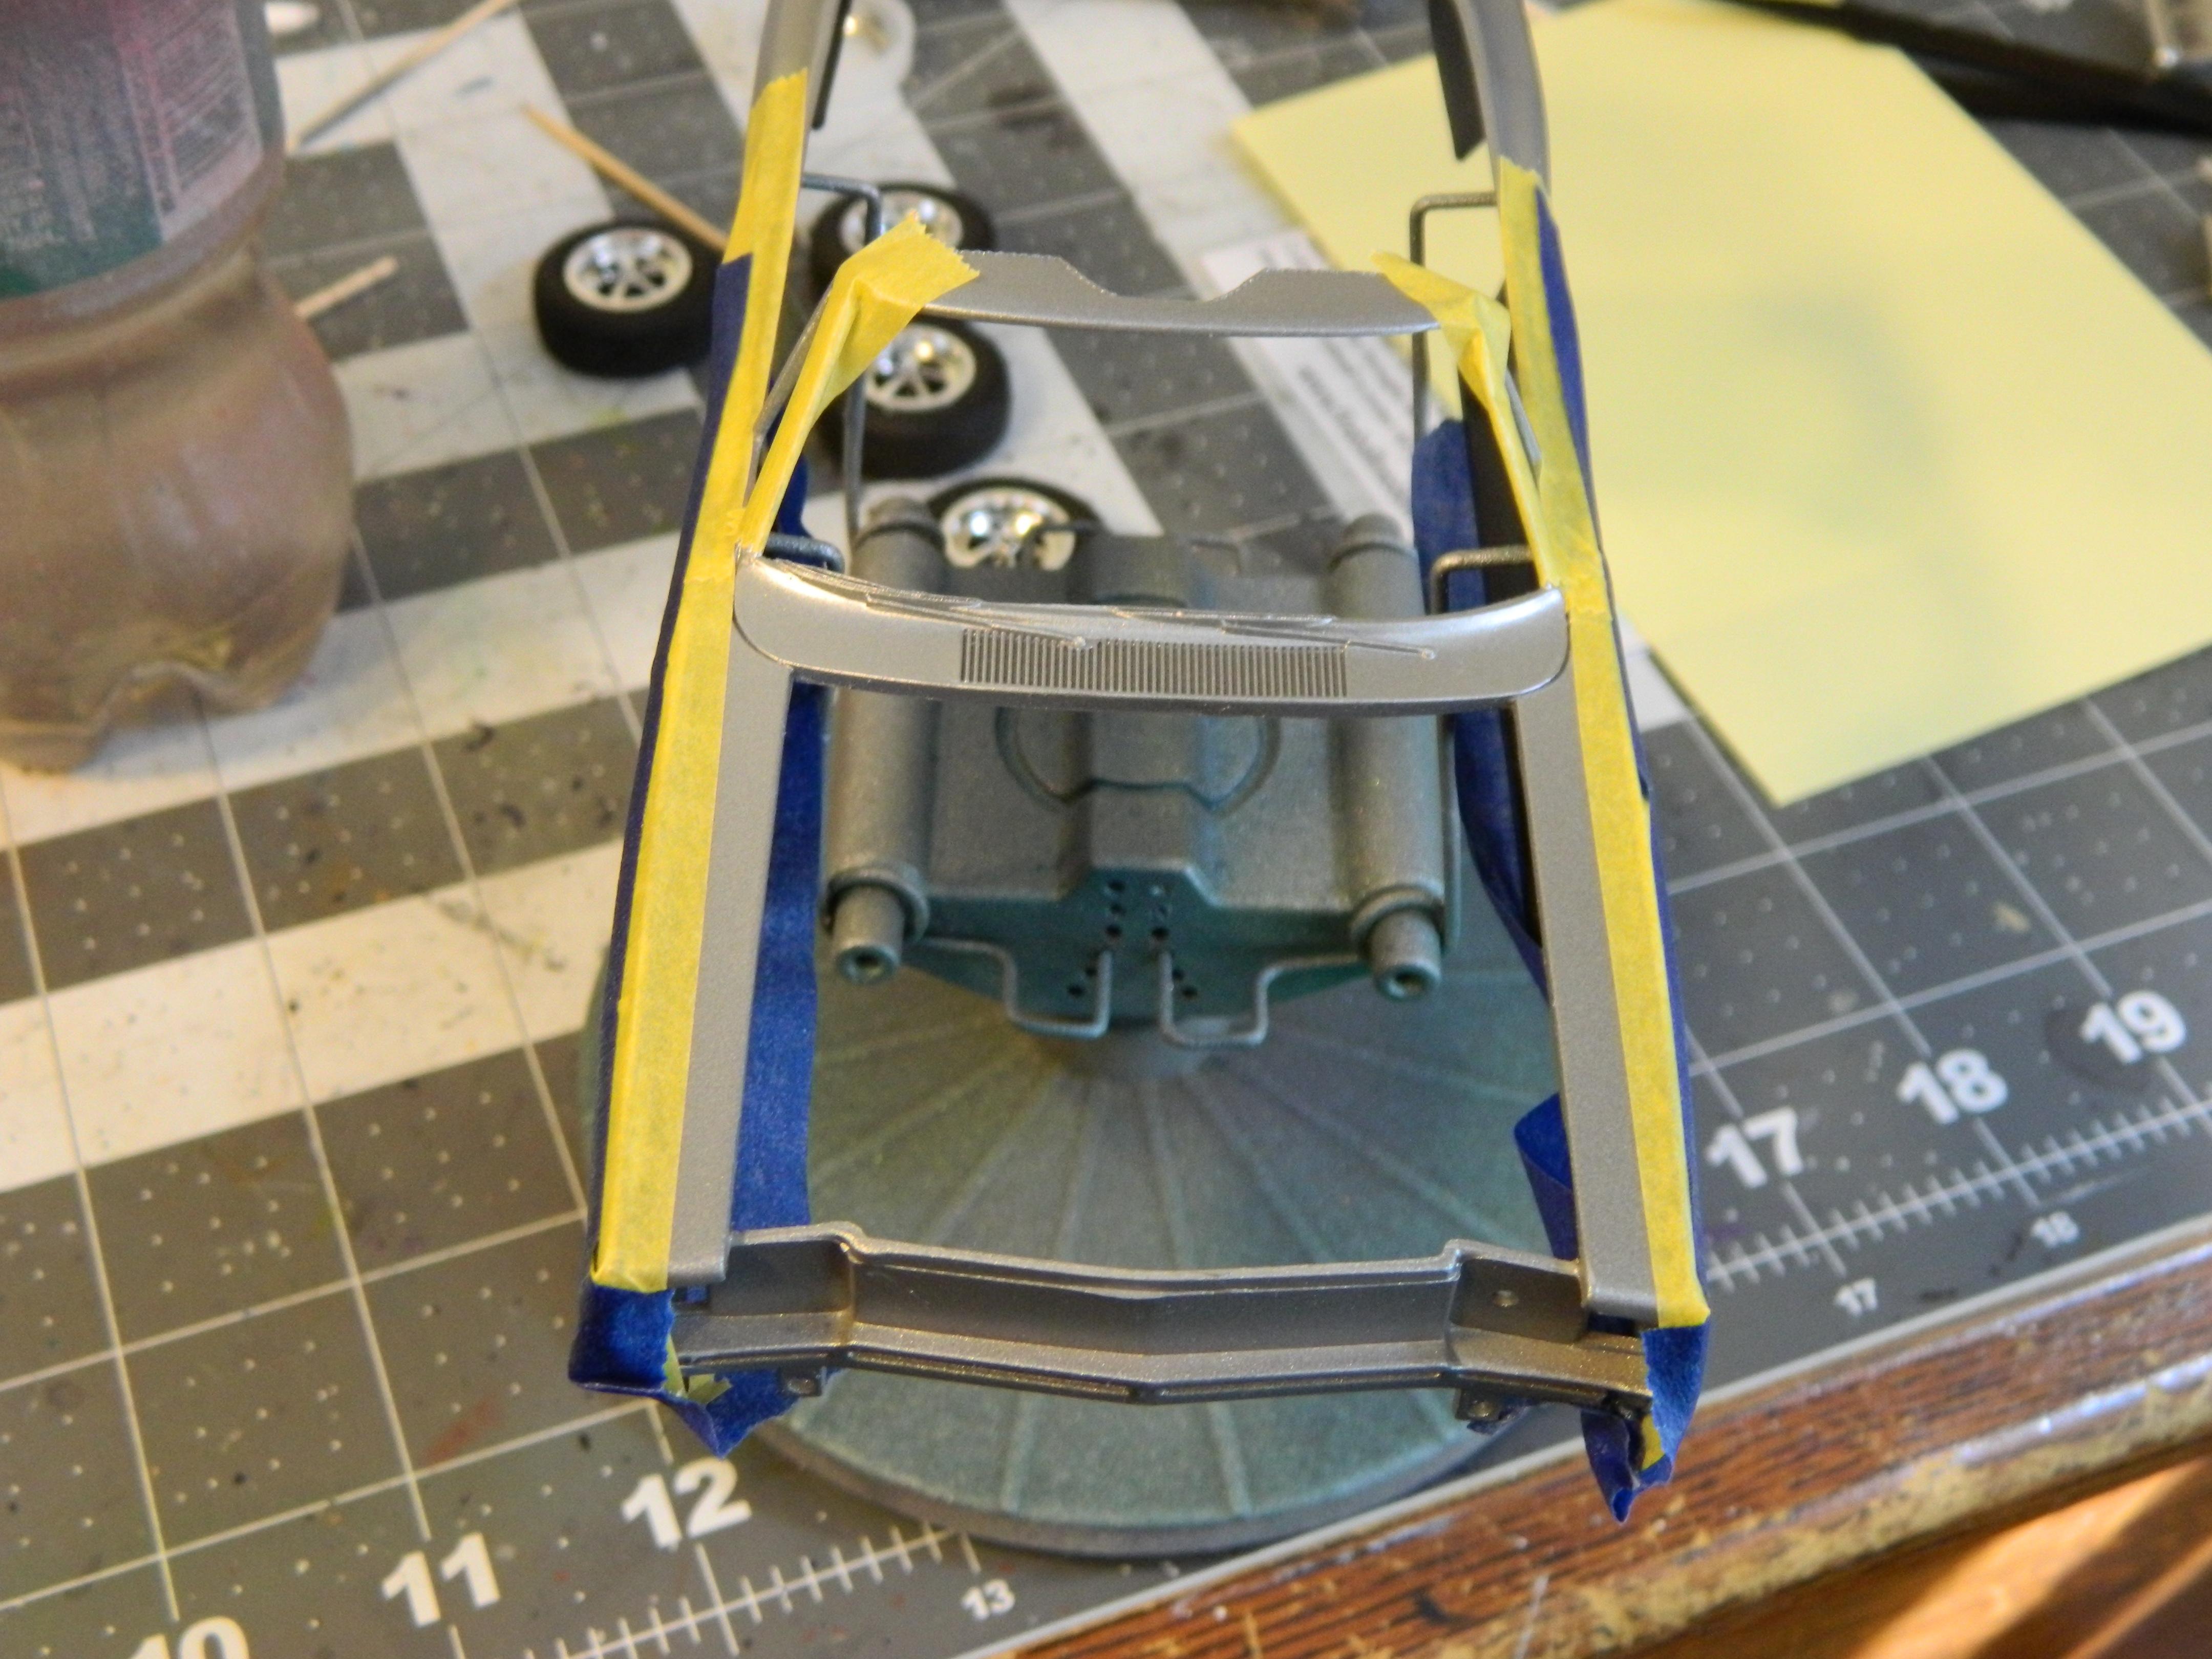
I spent Thursday morning wet-sanding, starting with 6000, then 8000, followed by 12000. After that I polished it with Novus #2. I started the final assembly process in the afternoon where I discovered that the rear wheels and tires rested way too far inside the fenders. I think I cut too much off the rear end pieces when removing them from the sprue. To fix this, I cut the hubs and tried to drill holes into the axles for the round styrene that I planned to use. This didn't work, so I just rebuilt the rear end using the styrene tubing. I measured the tubing for proper fit with the wheels on, then glued the leaf springs to the tubing. I glued that assembly onto the chassis, and glued, I'm guessing, the bottom half of the rear differential with the gear cover glued on. You can't really tell, but I didn't use the other half of the rear differential. Pics would probably be helpful in explaining what I did, but I didn't think to take any during the process. Thankfully the rest of the assembly went fairly smoothly today, and I was able to get it finished.
-
The Hemi should fit, my Convertible kit has the Hemi, if it's close you could always shave or trim the intake or carbs for clearance.
-
AMT 1969 Plymouth GTX Convertible.
Dragonhawk1066 replied to Dragonhawk1066's topic in WIP: Model Cars
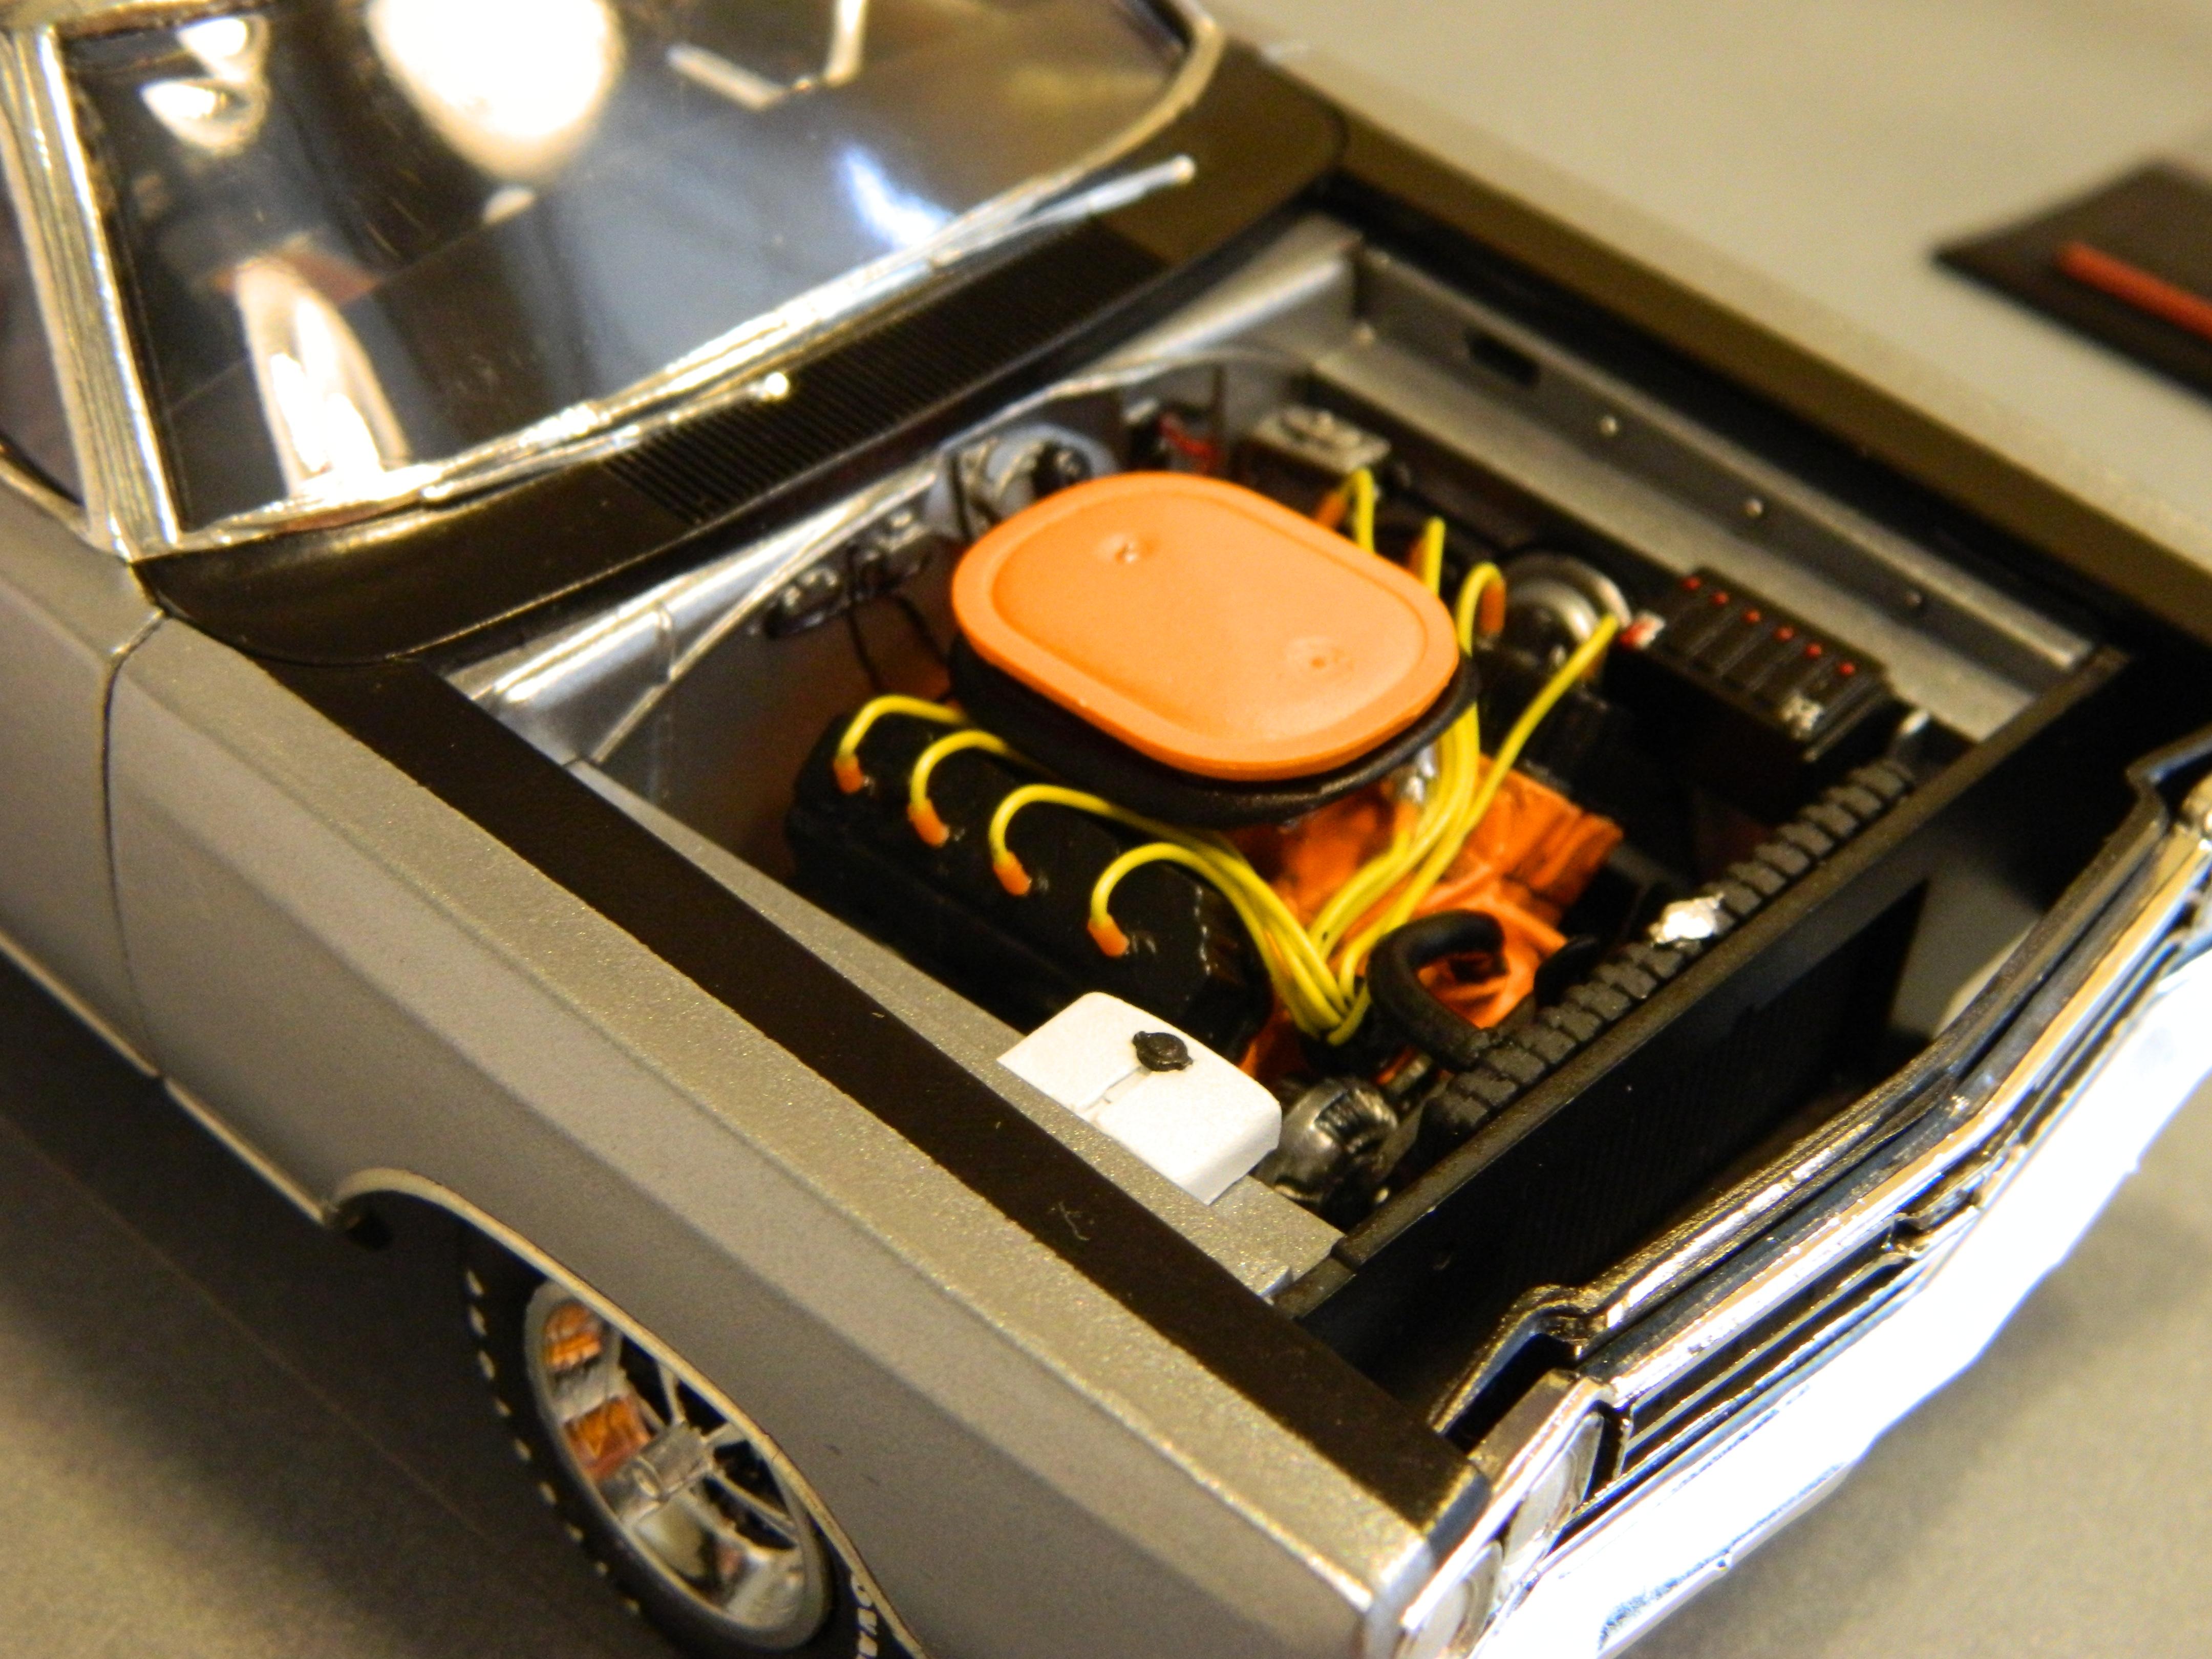
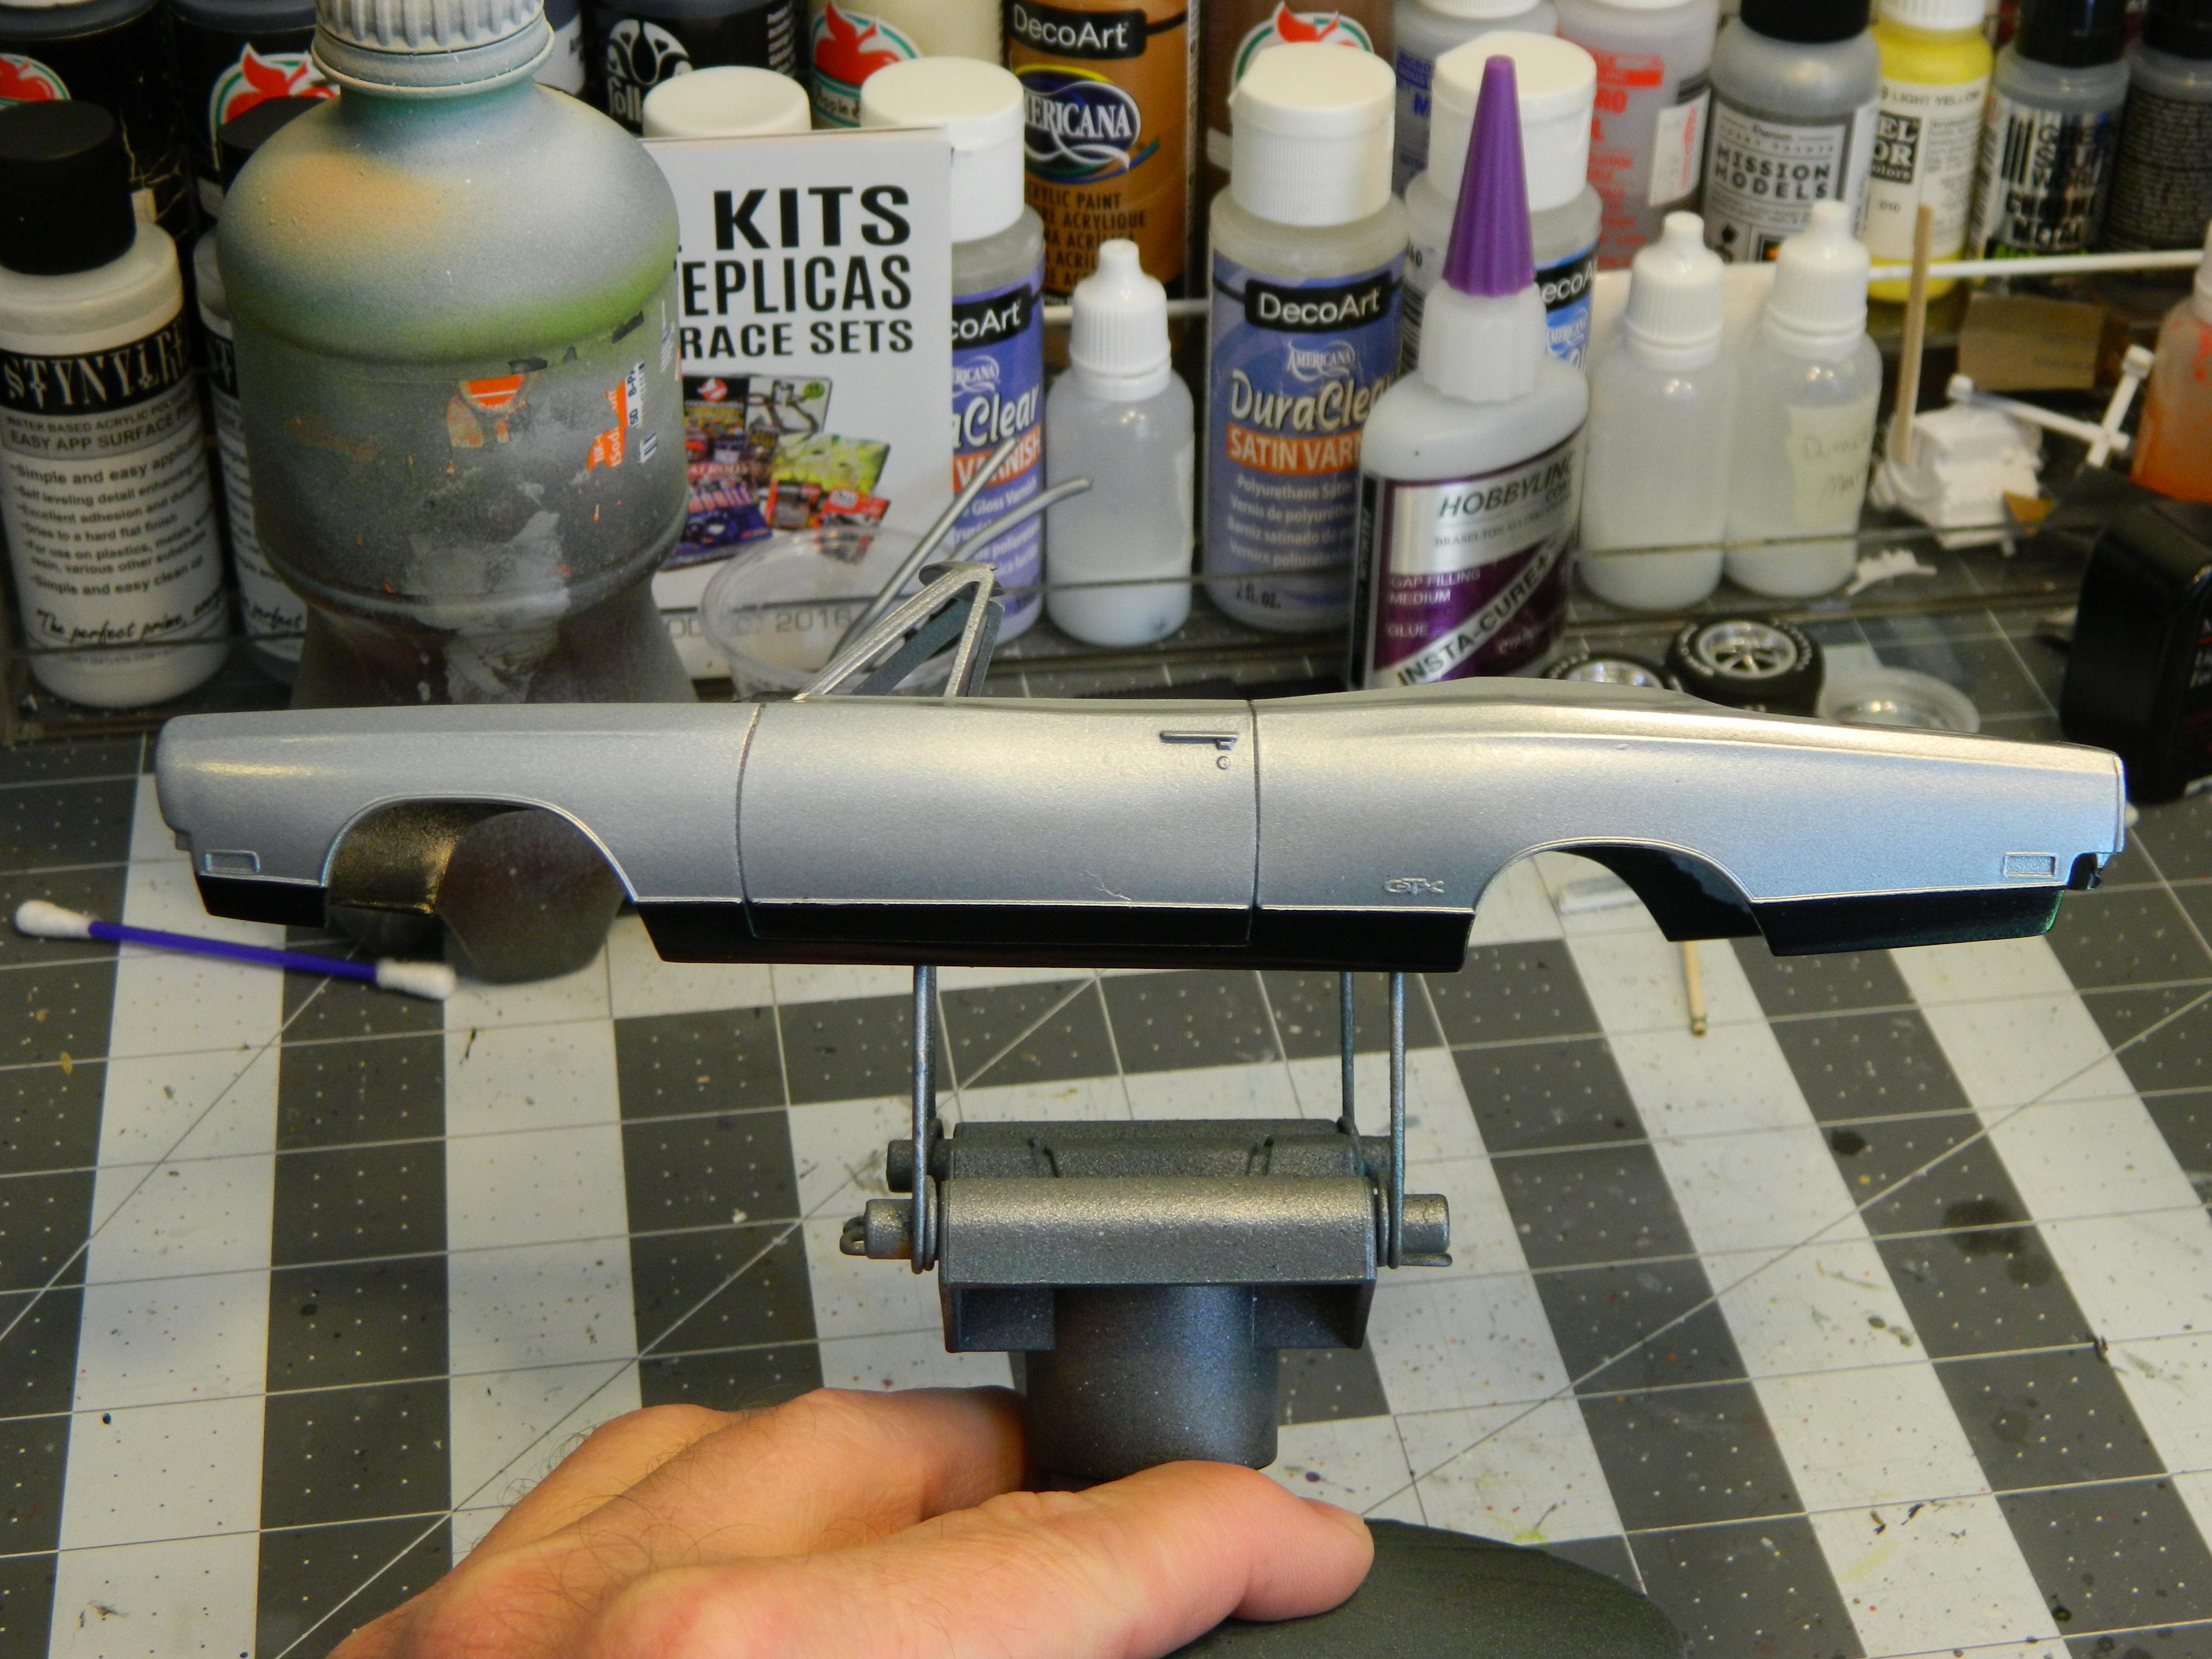
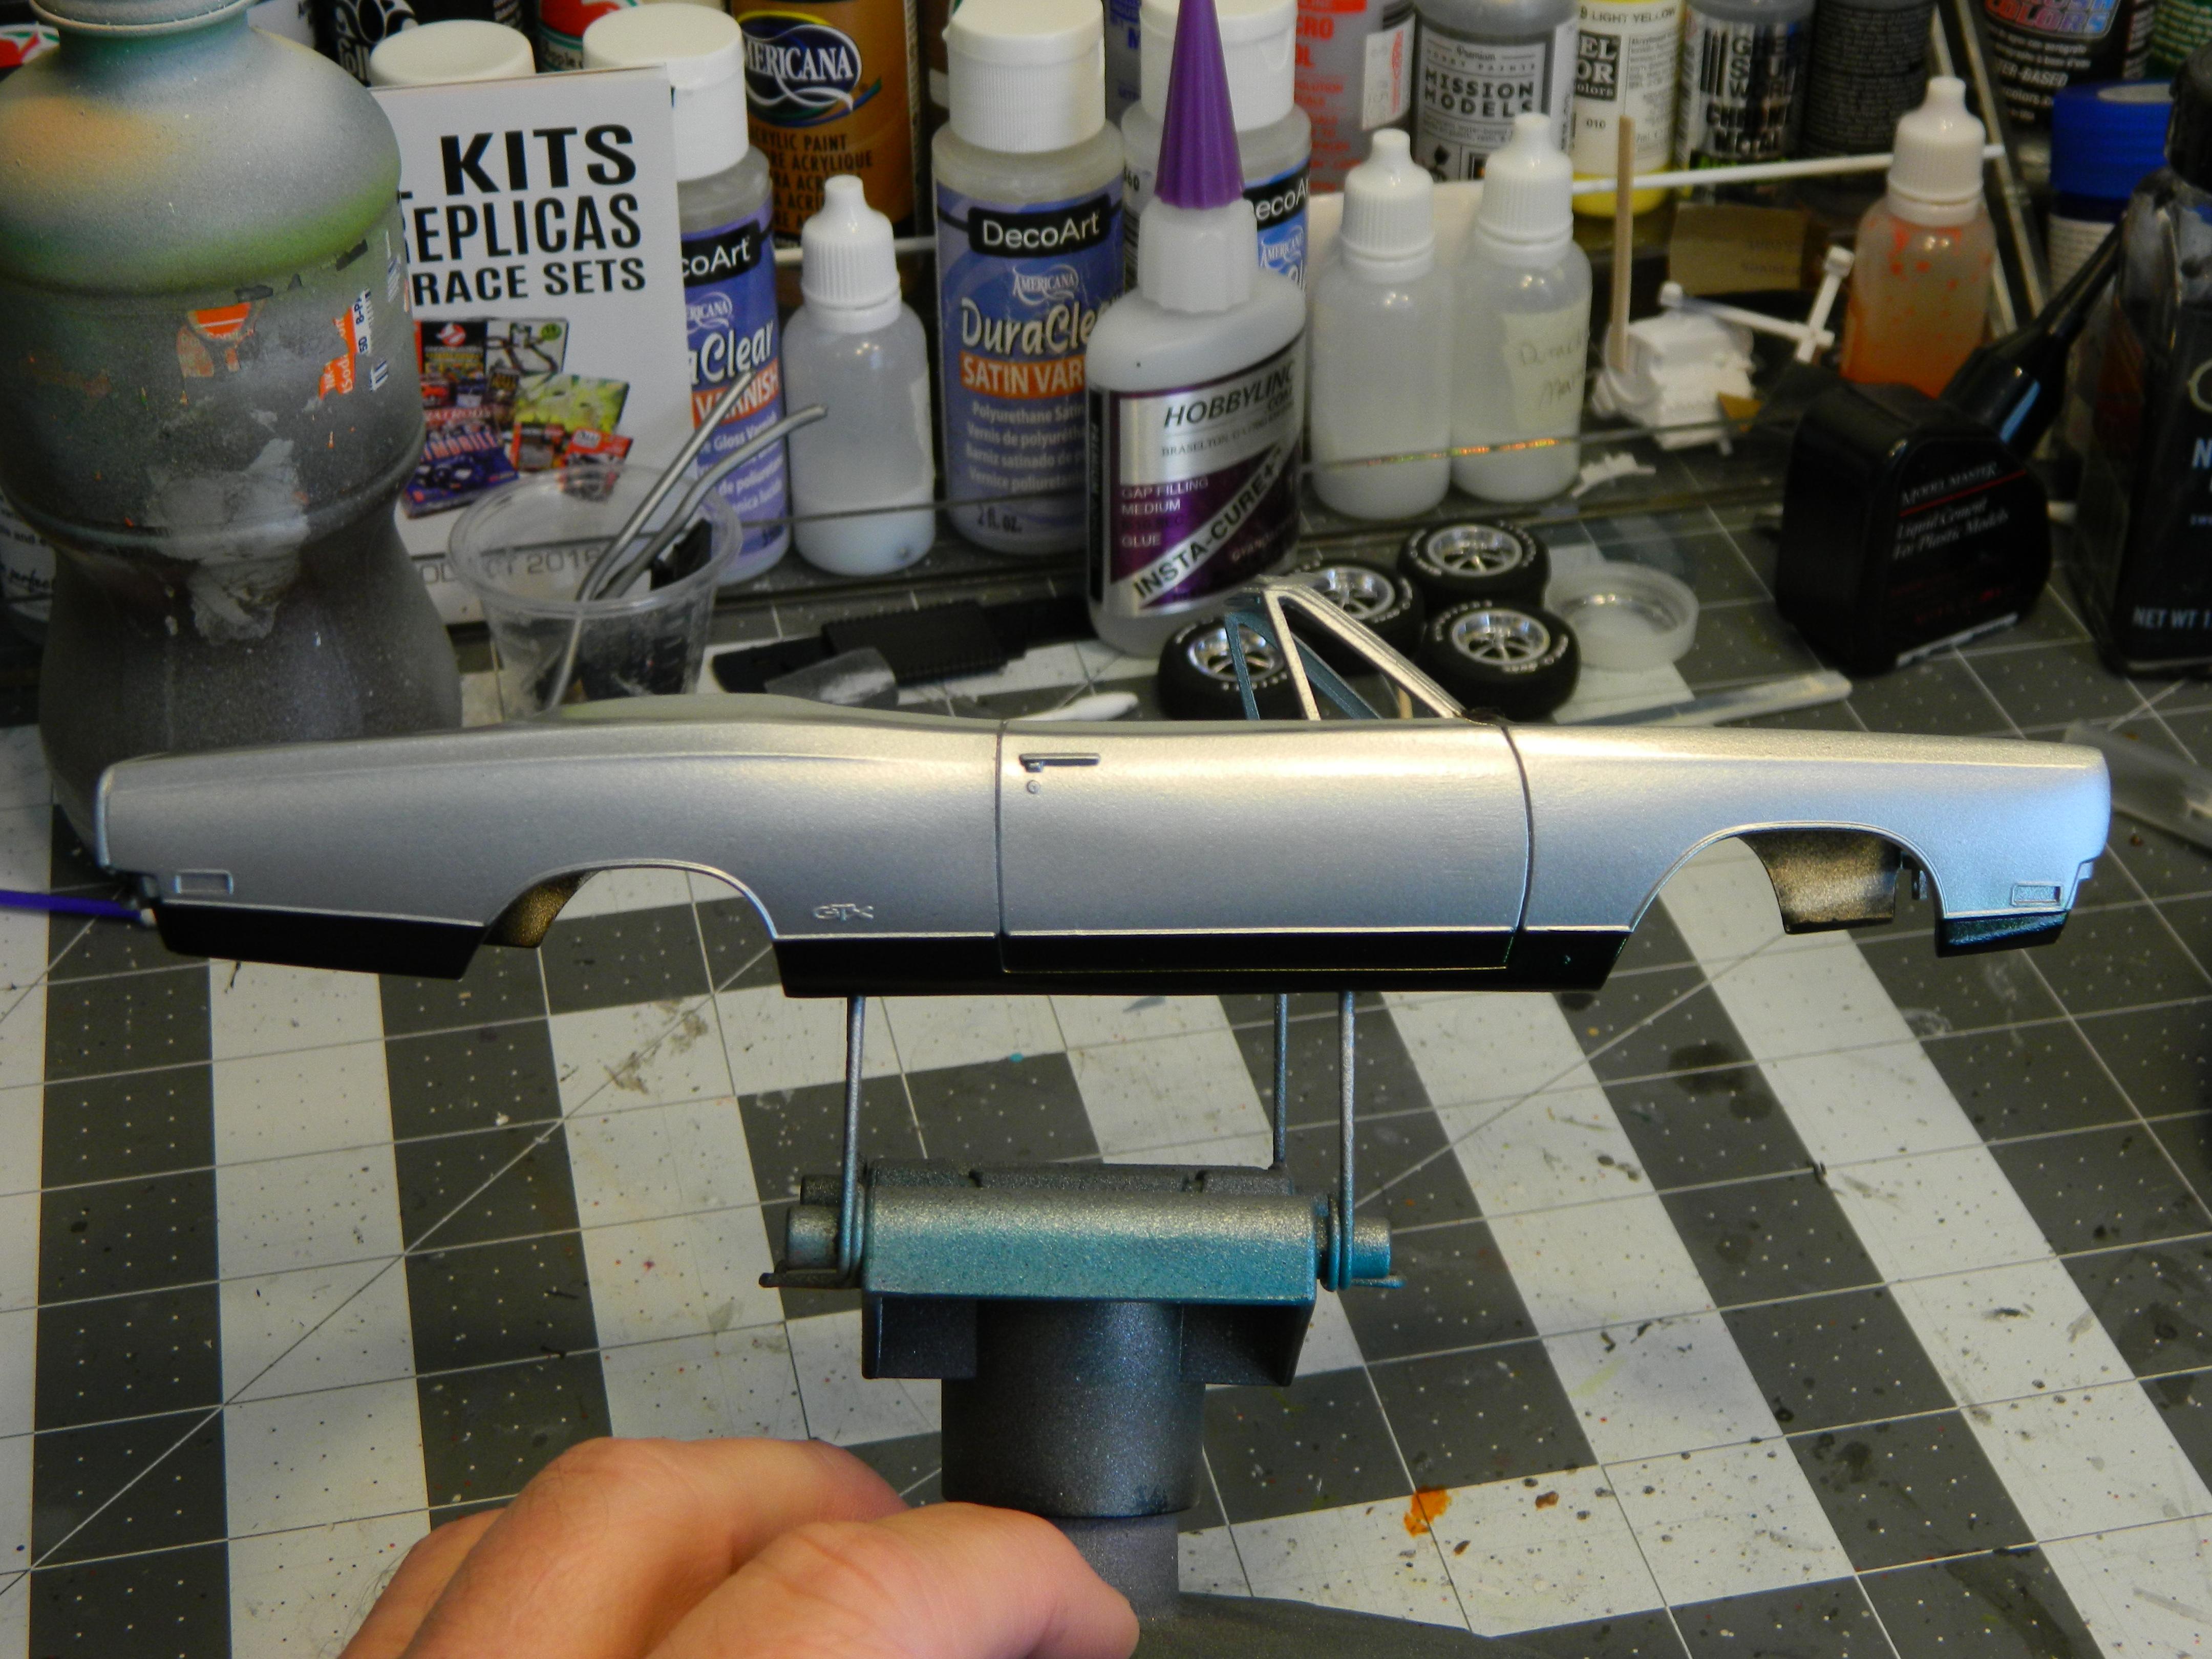
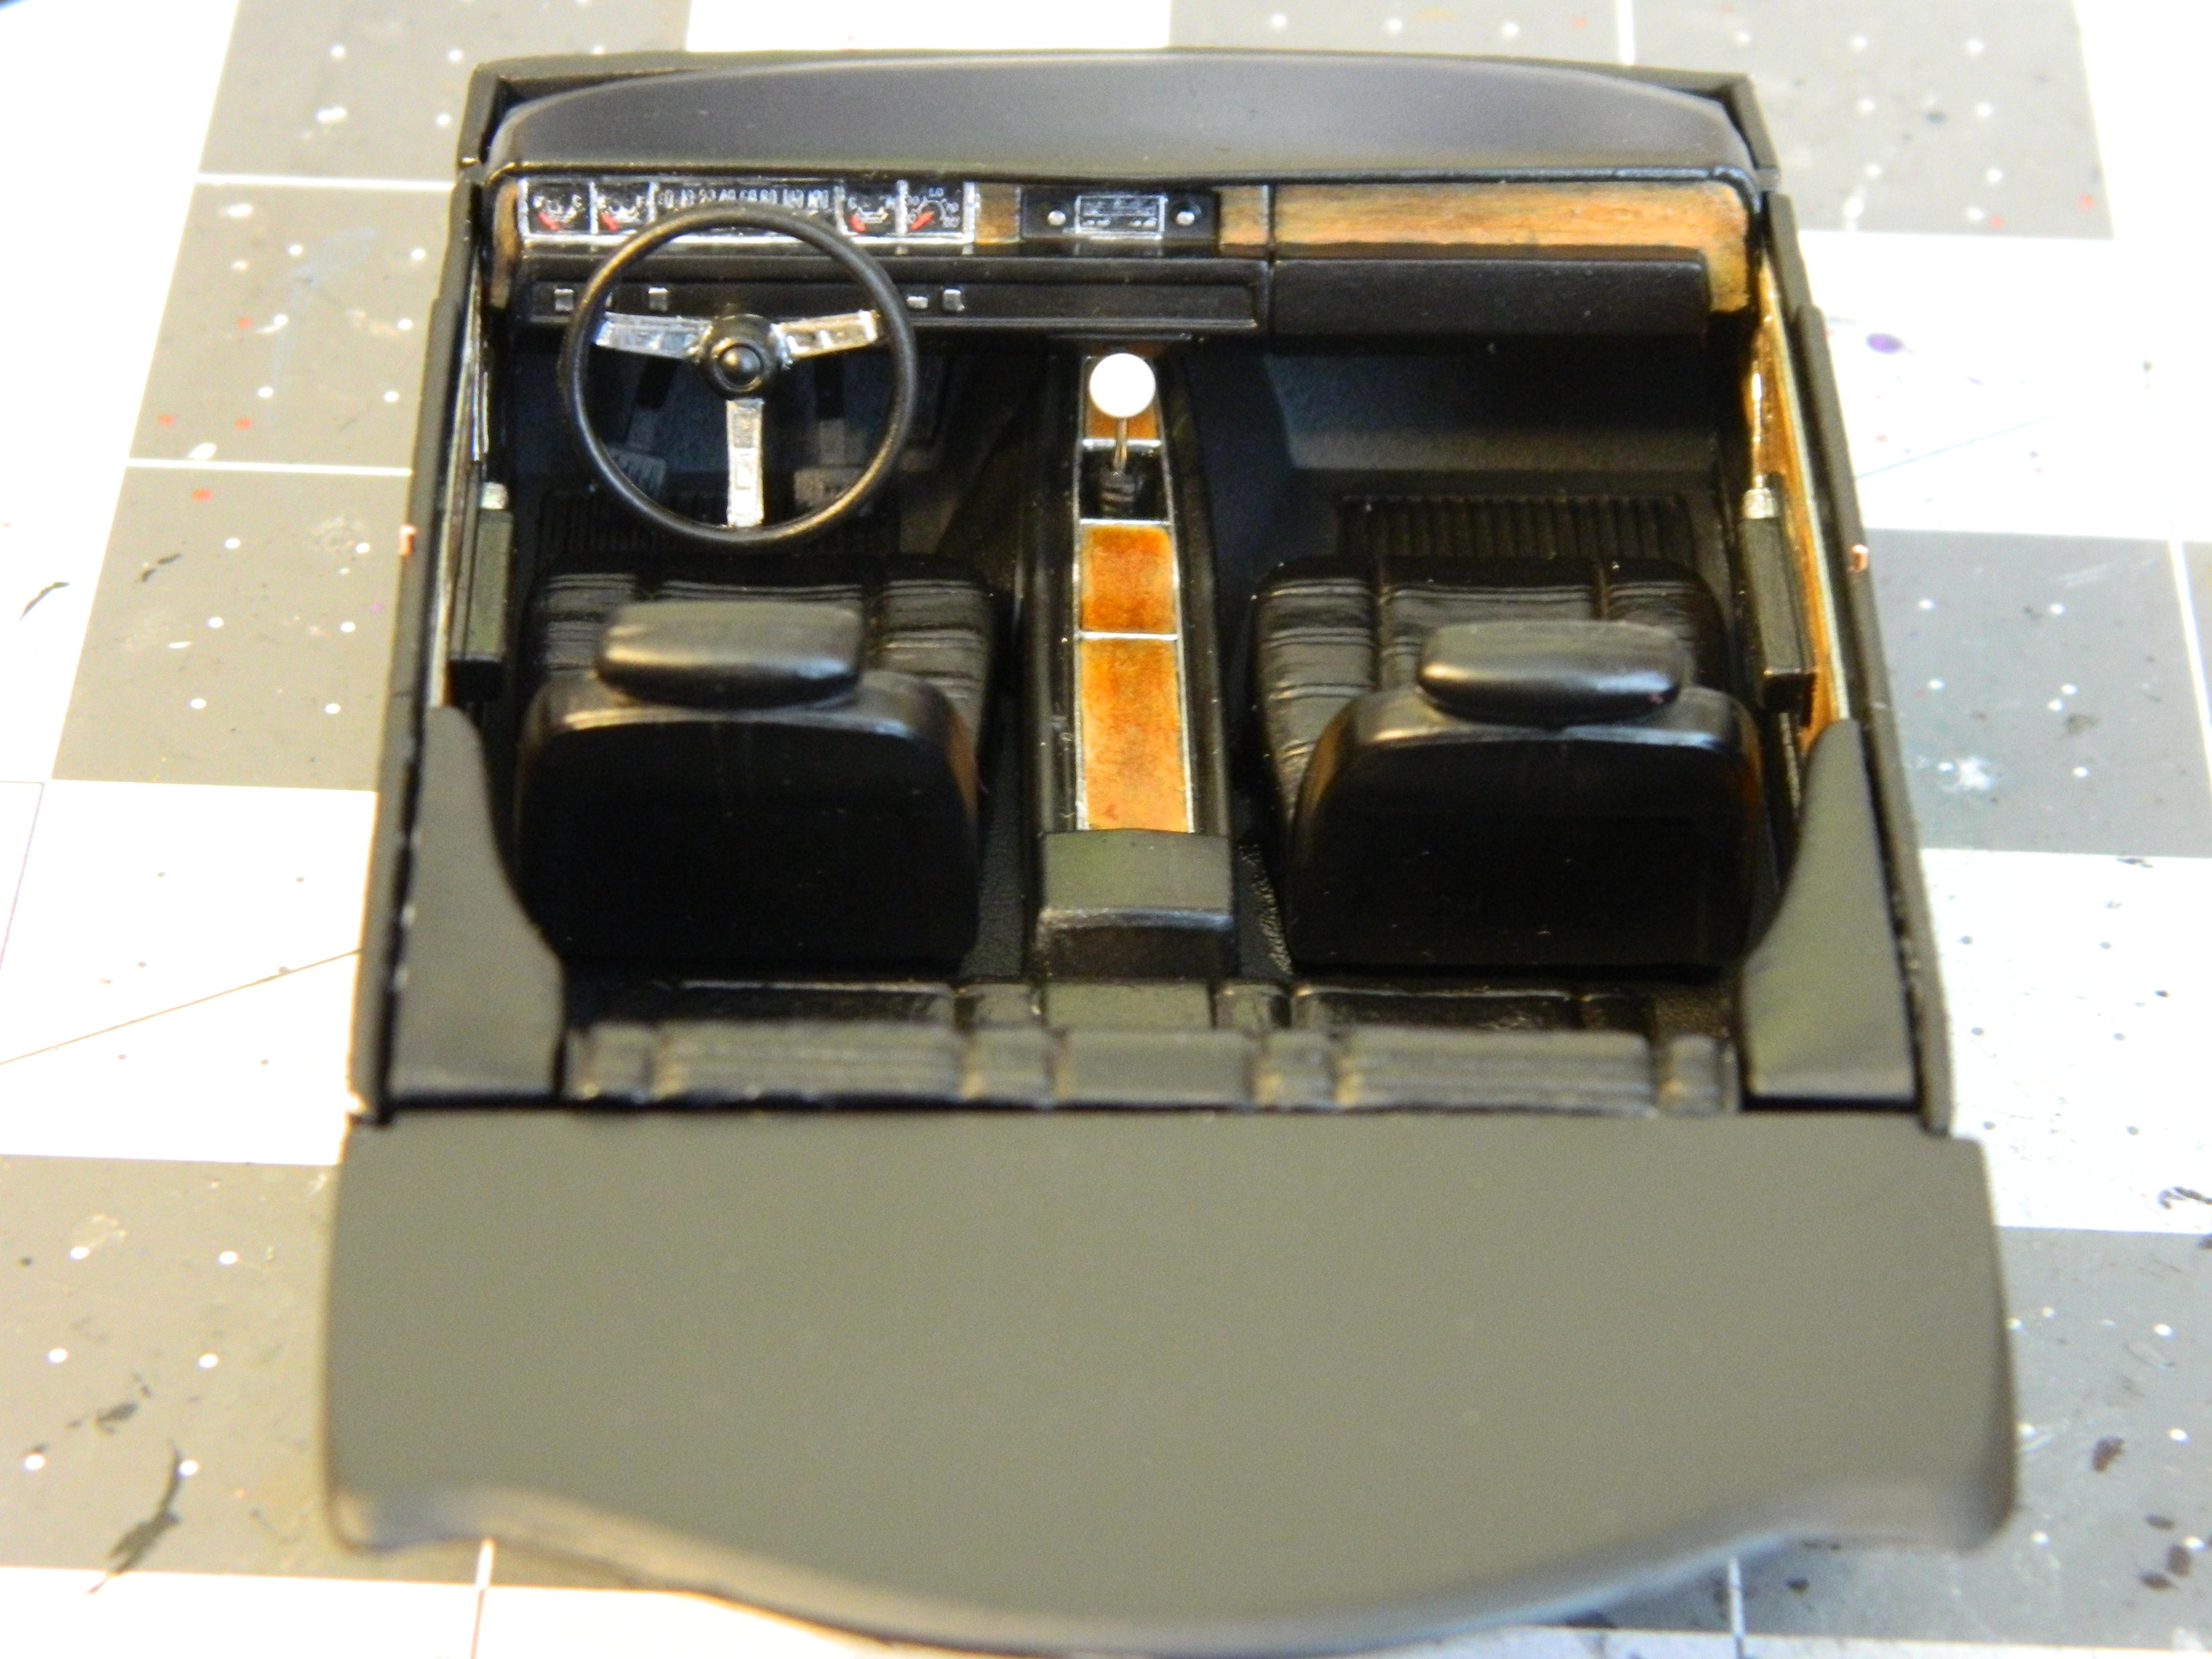
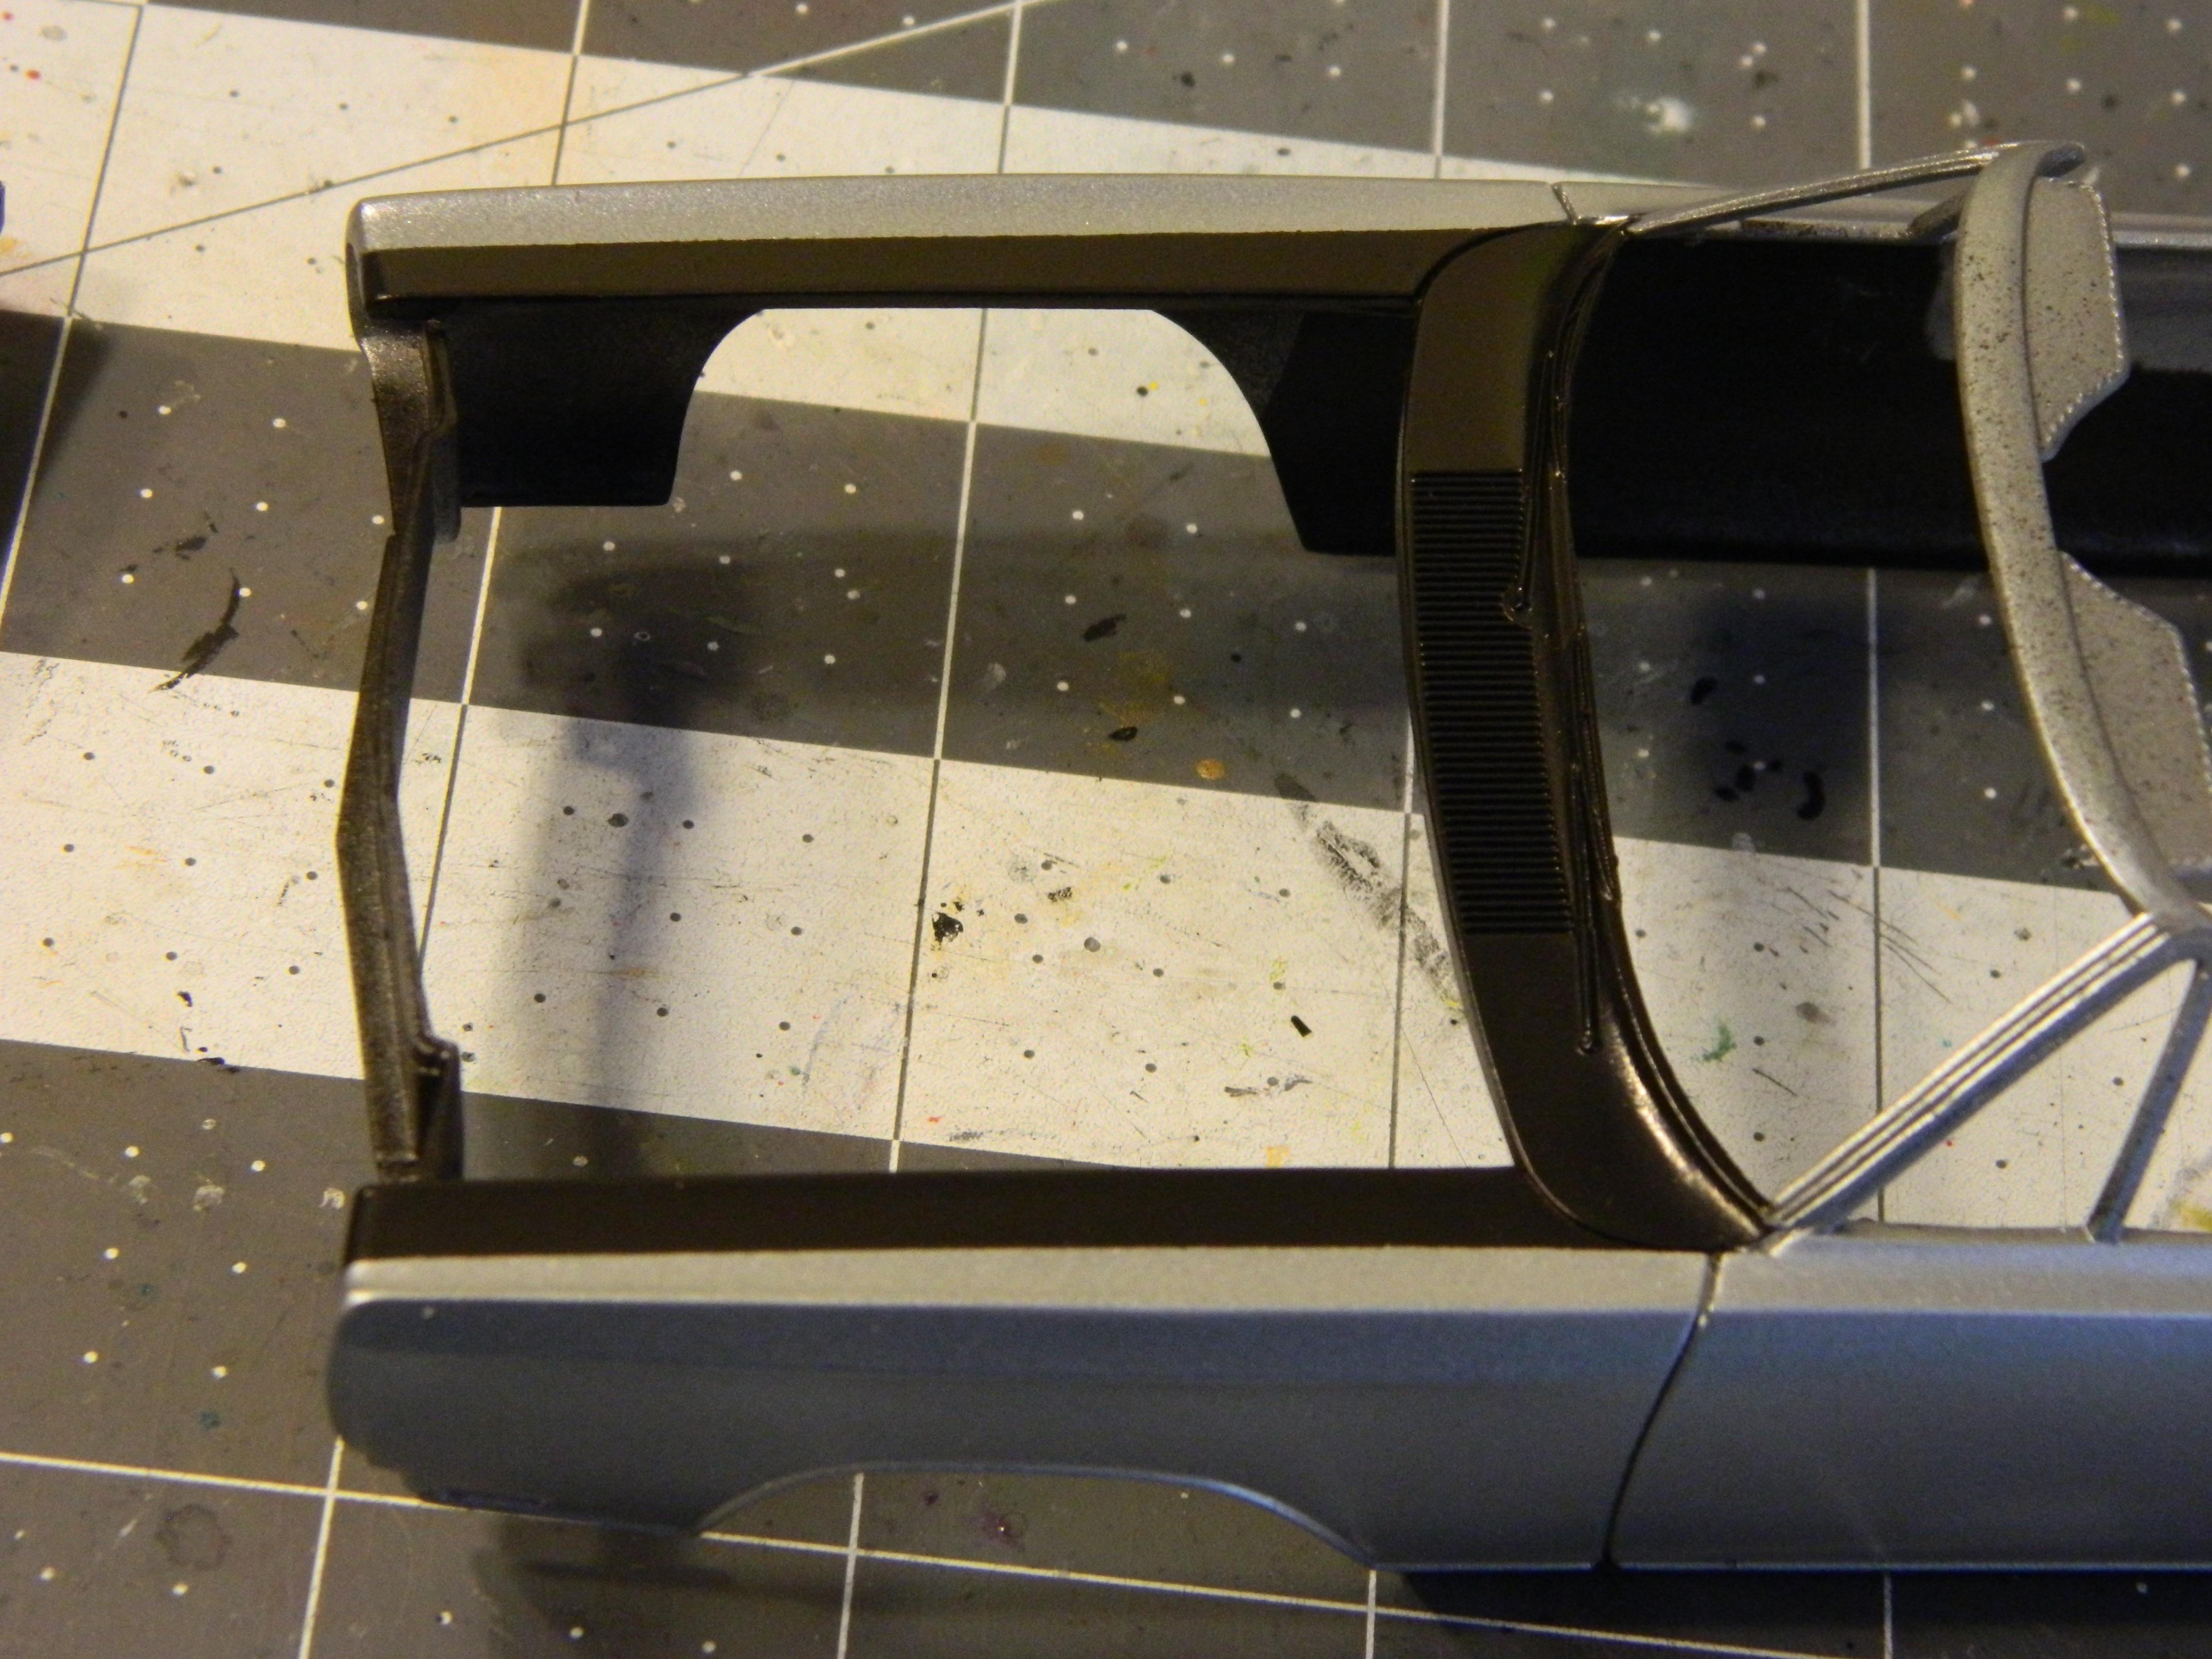
It's hard to tell, but I sprayed the Createx UVLS Gloss Clear on today. I taped over the hood It's hard to tell, but I sprayed the Createx UVLS Gloss Clear on today. I taped over the hood and fender stripes as they're not supposed to be glossy. I also finished the interior and assembled the engine compartment, the separate inner fenderwells are a bit of a different touch.
-
Good call on keeping it gold, it looks really good that color. I dig the Keystones as well.
-
AMT '67 Mustang Fastback-Now in Under Glass Section
Dragonhawk1066 replied to mustang1989's topic in WIP: Model Cars
Great looking front end and rear panel! -
AMT 1969 Plymouth GTX Convertible.
Dragonhawk1066 replied to Dragonhawk1066's topic in WIP: Model Cars
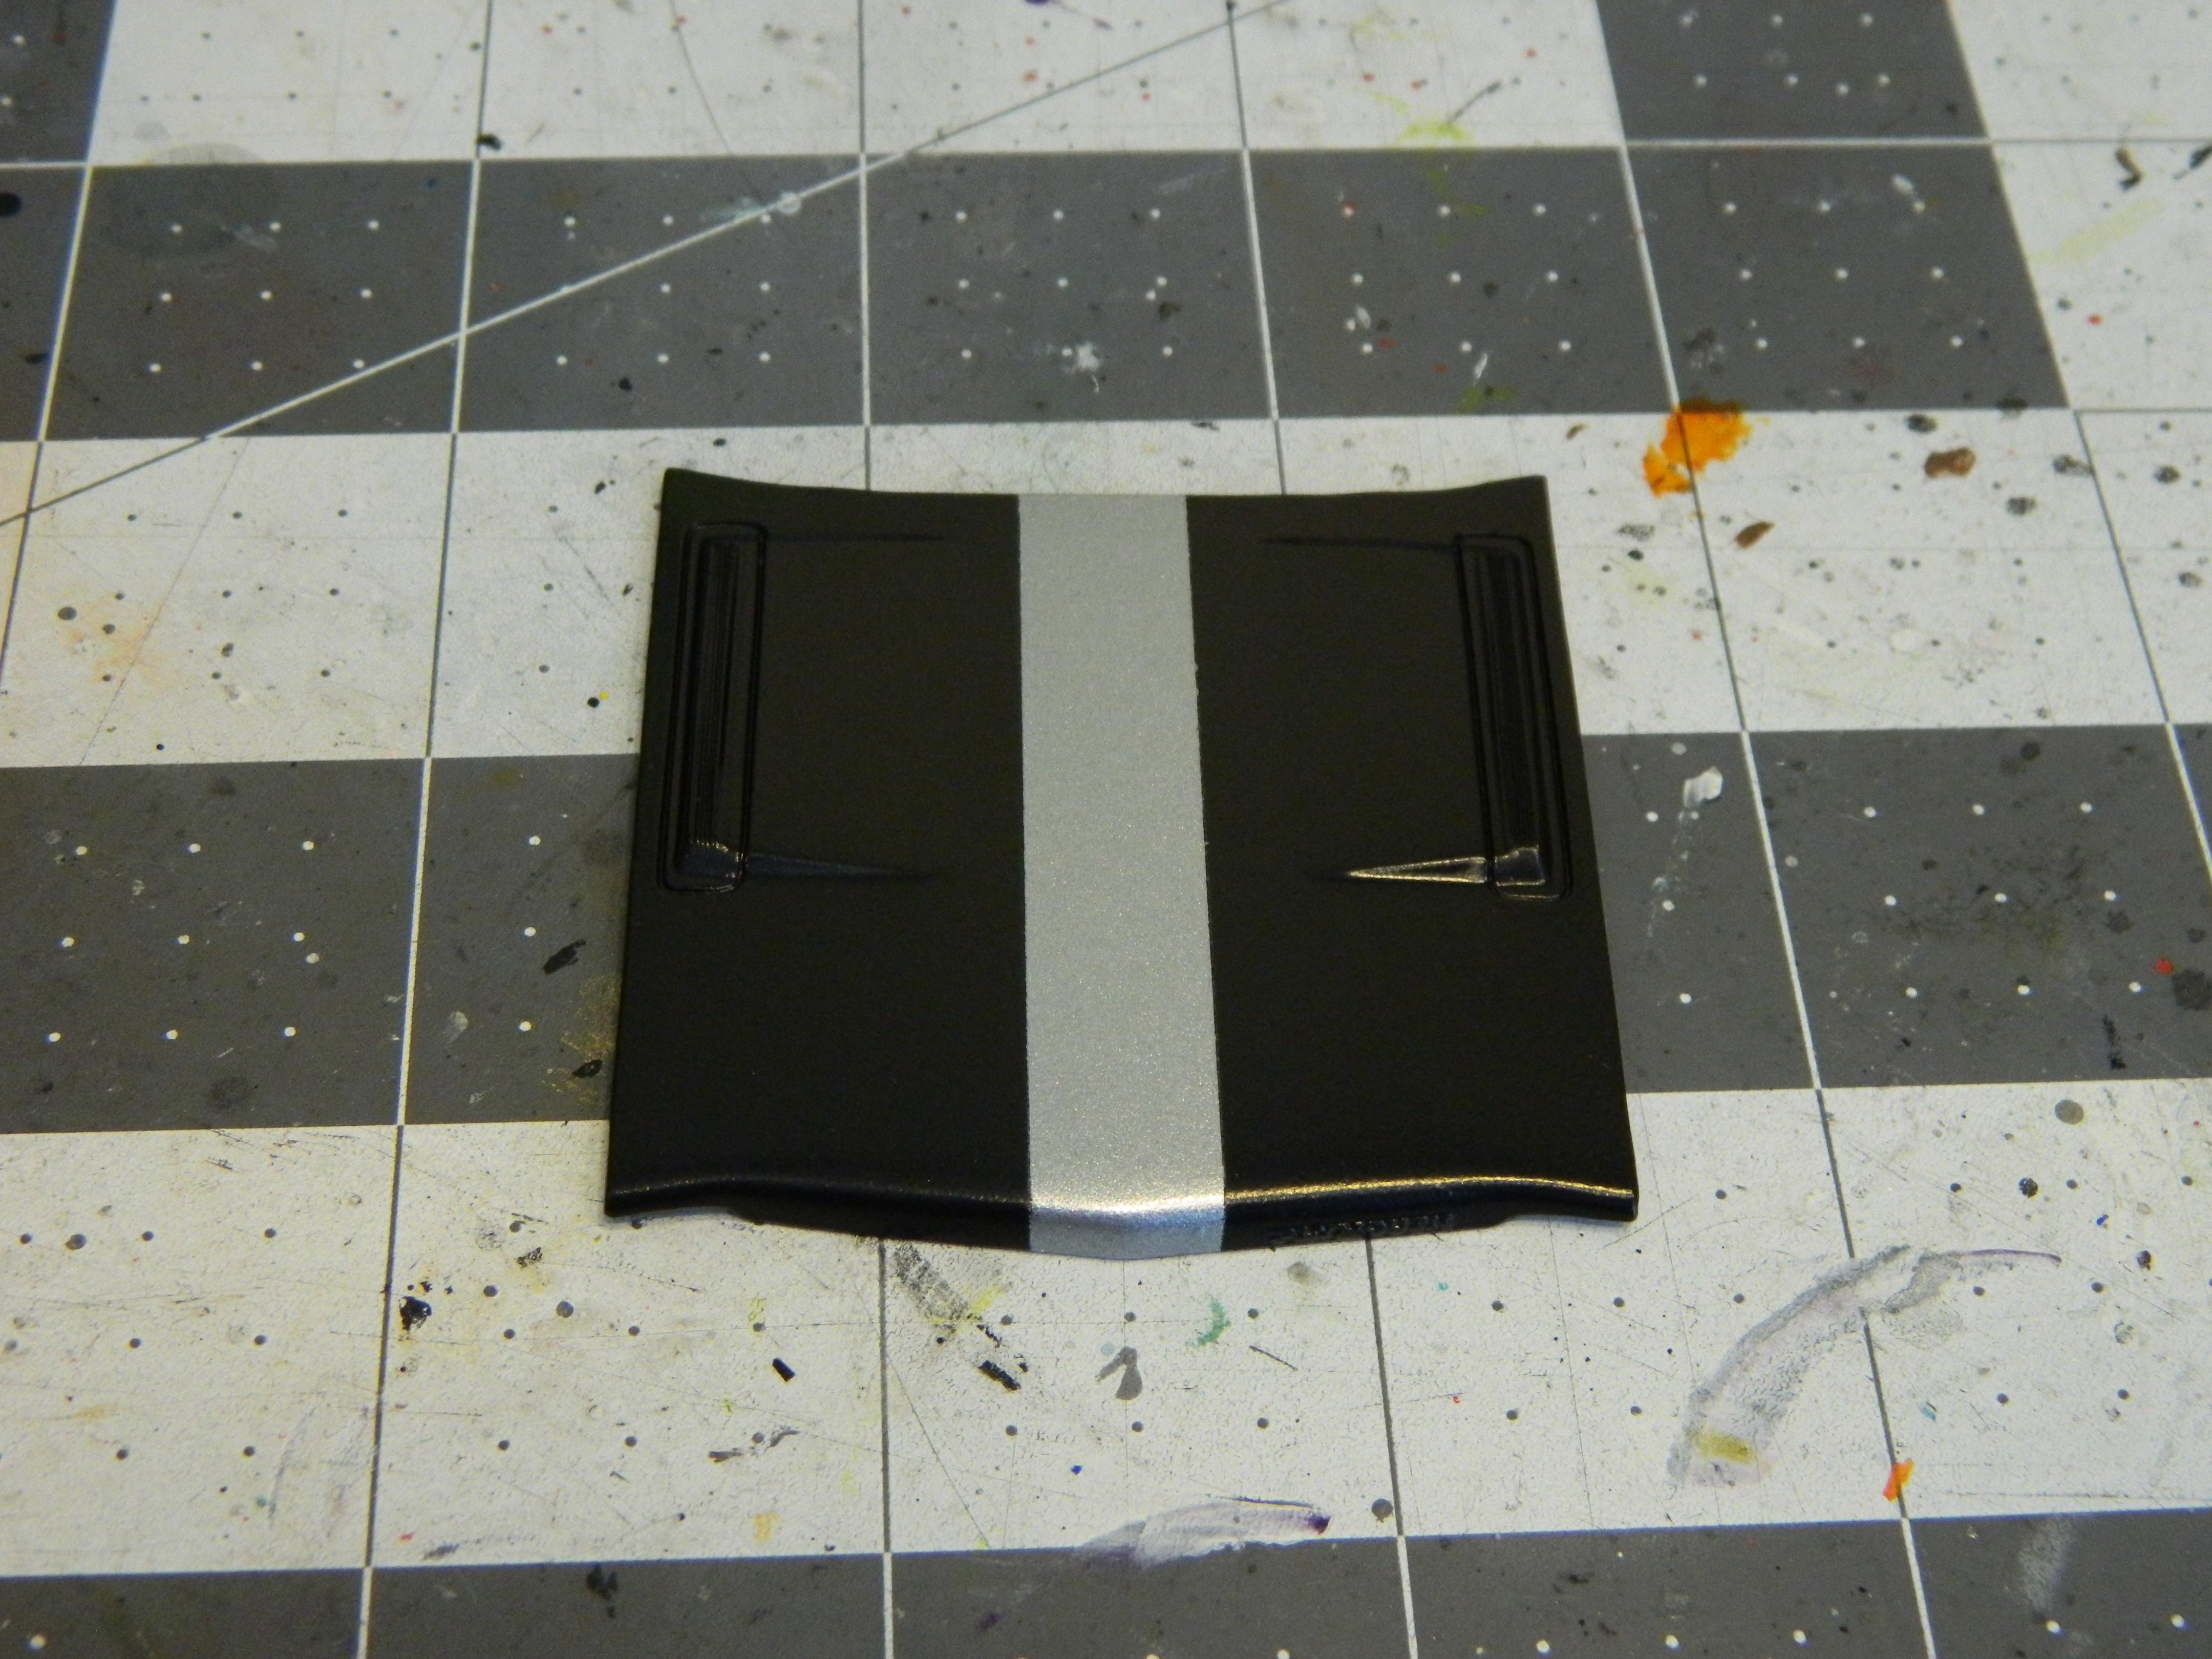
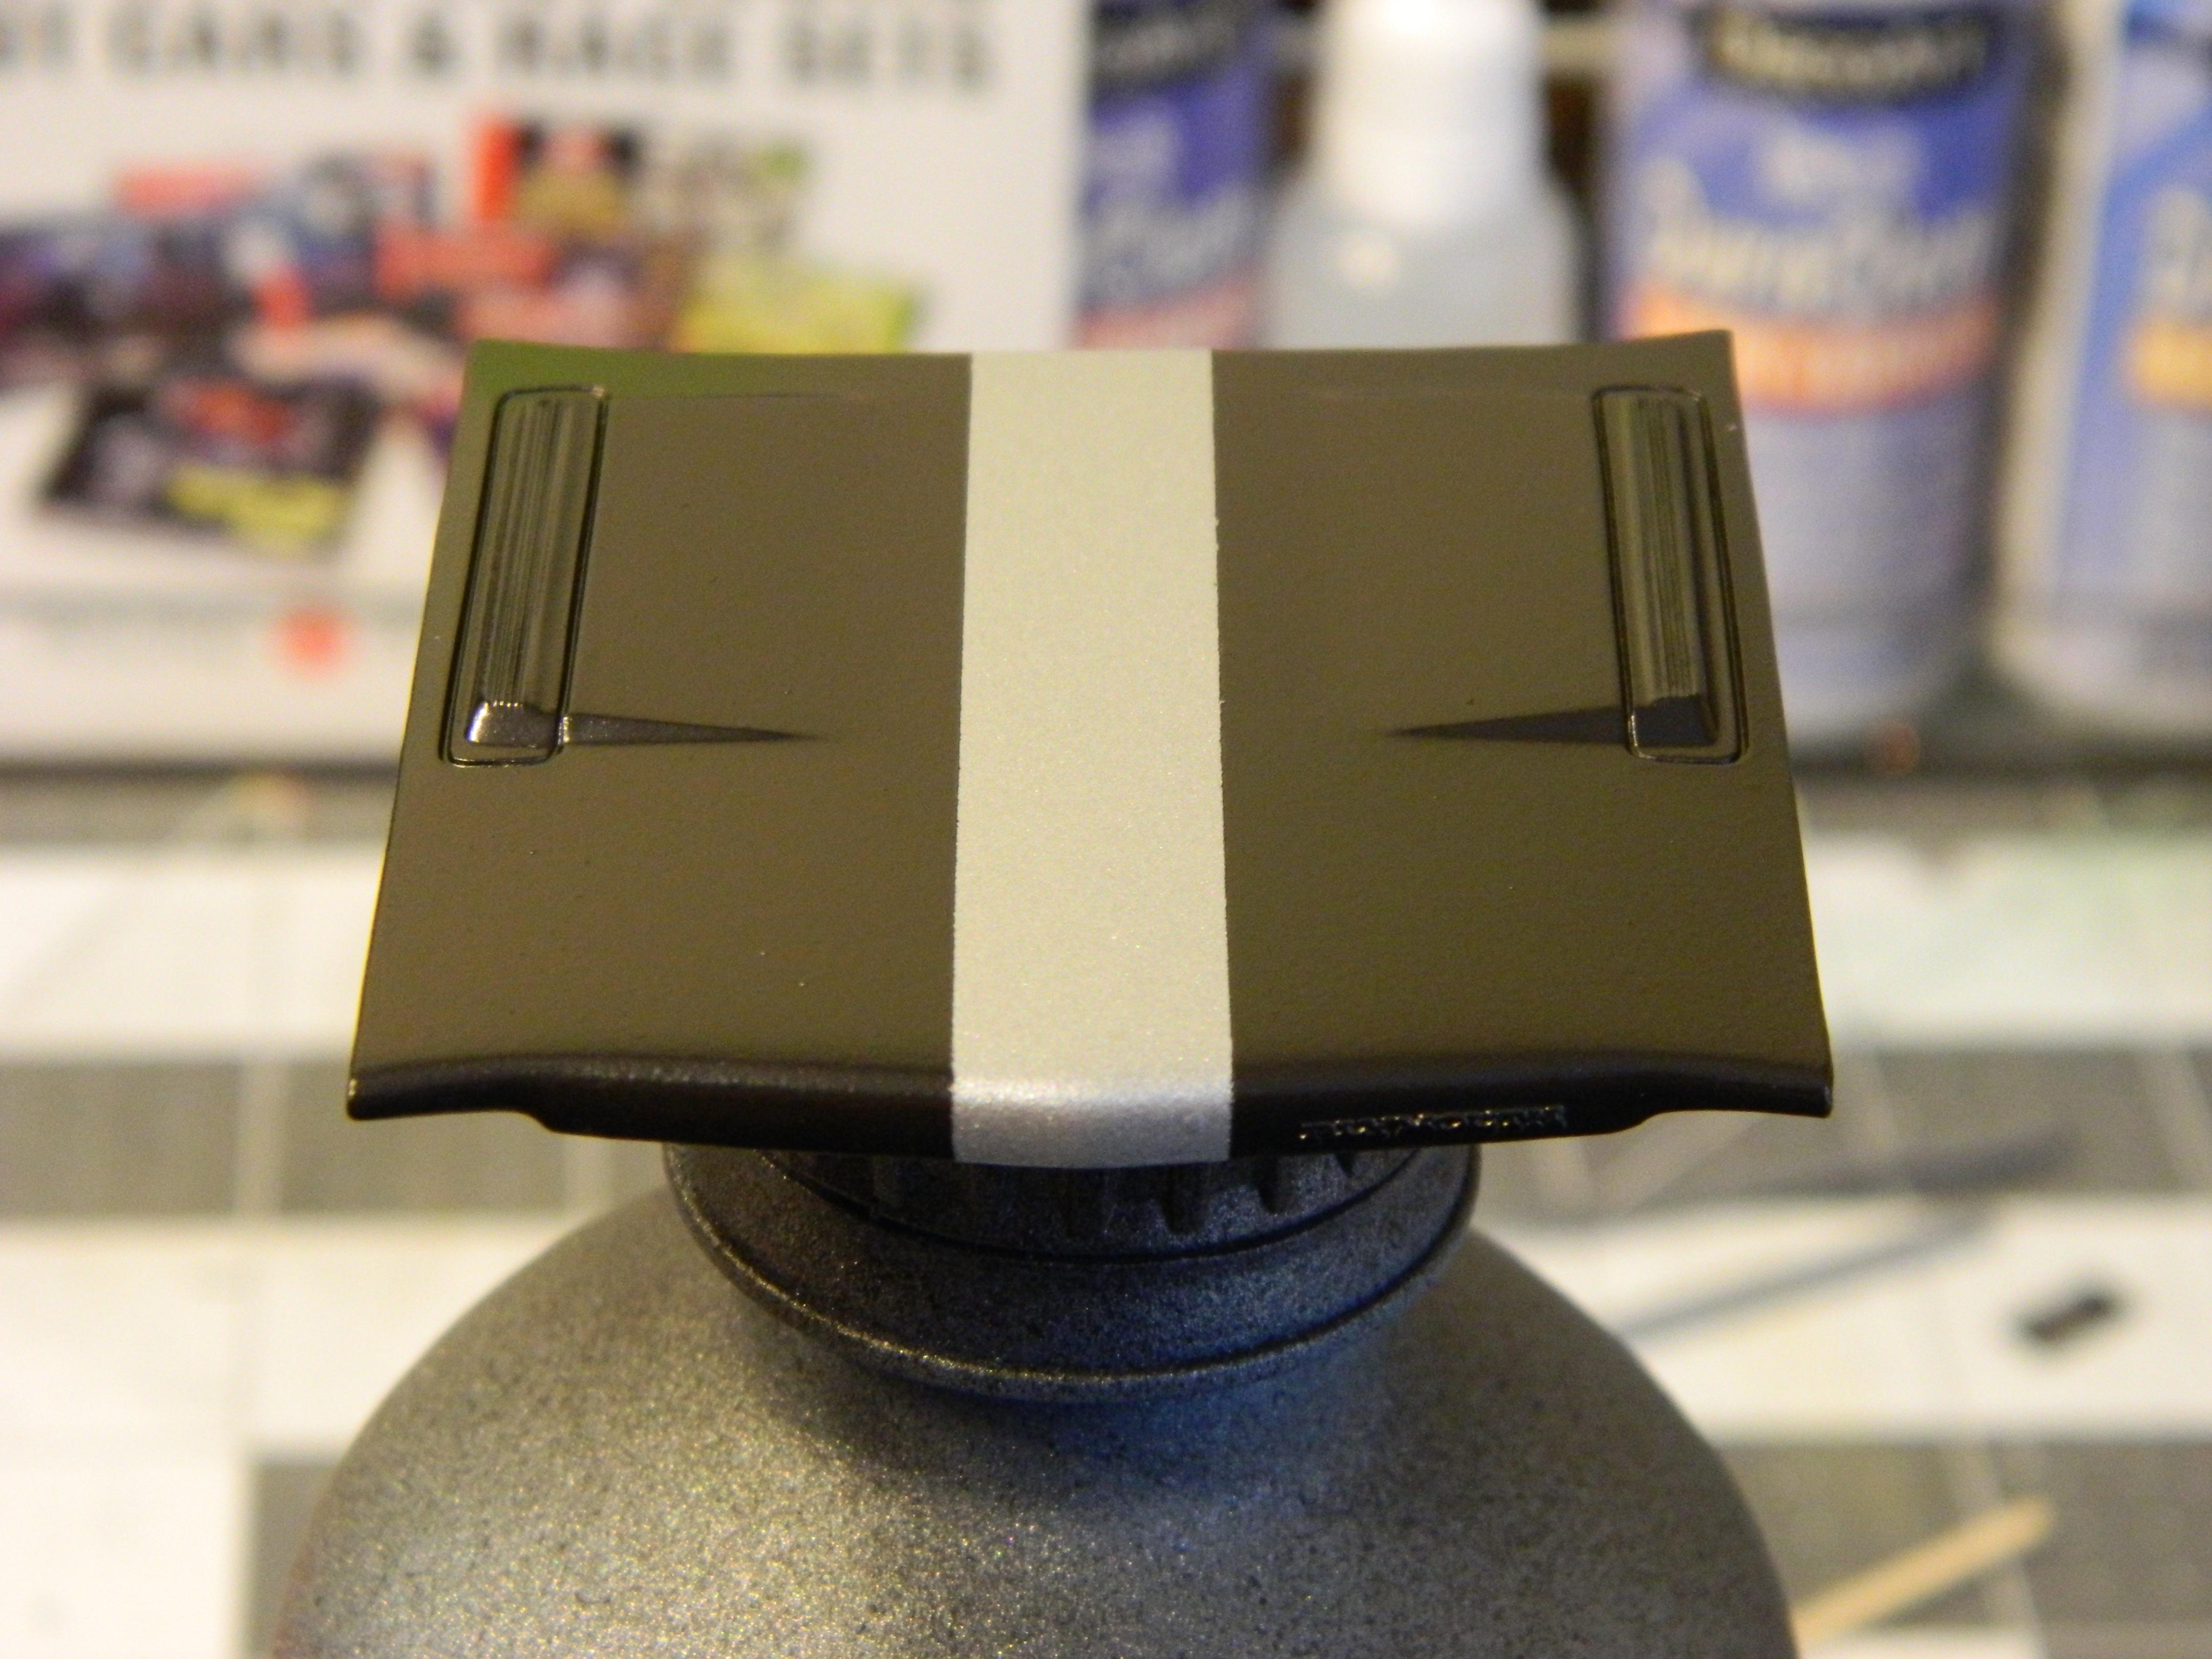
More progress on the '69 GTX. I painted the lower body this morning with some gloss black craft paint, and when I went to put the hood stripe decals on this afternoon I got the idea to paint them on instead. It seemed like it would be so much easier, and it was. So I taped off the hood and body and sprayed on some more of the black craft paint, three coats in all. Liking the results! I also decided to add some Firestone Wide Oval decals from Fireball Modelworks.
-
Looks great, and that's a cool set-up!
-
AMT 1969 Plymouth GTX Convertible.
Dragonhawk1066 replied to Dragonhawk1066's topic in WIP: Model Cars
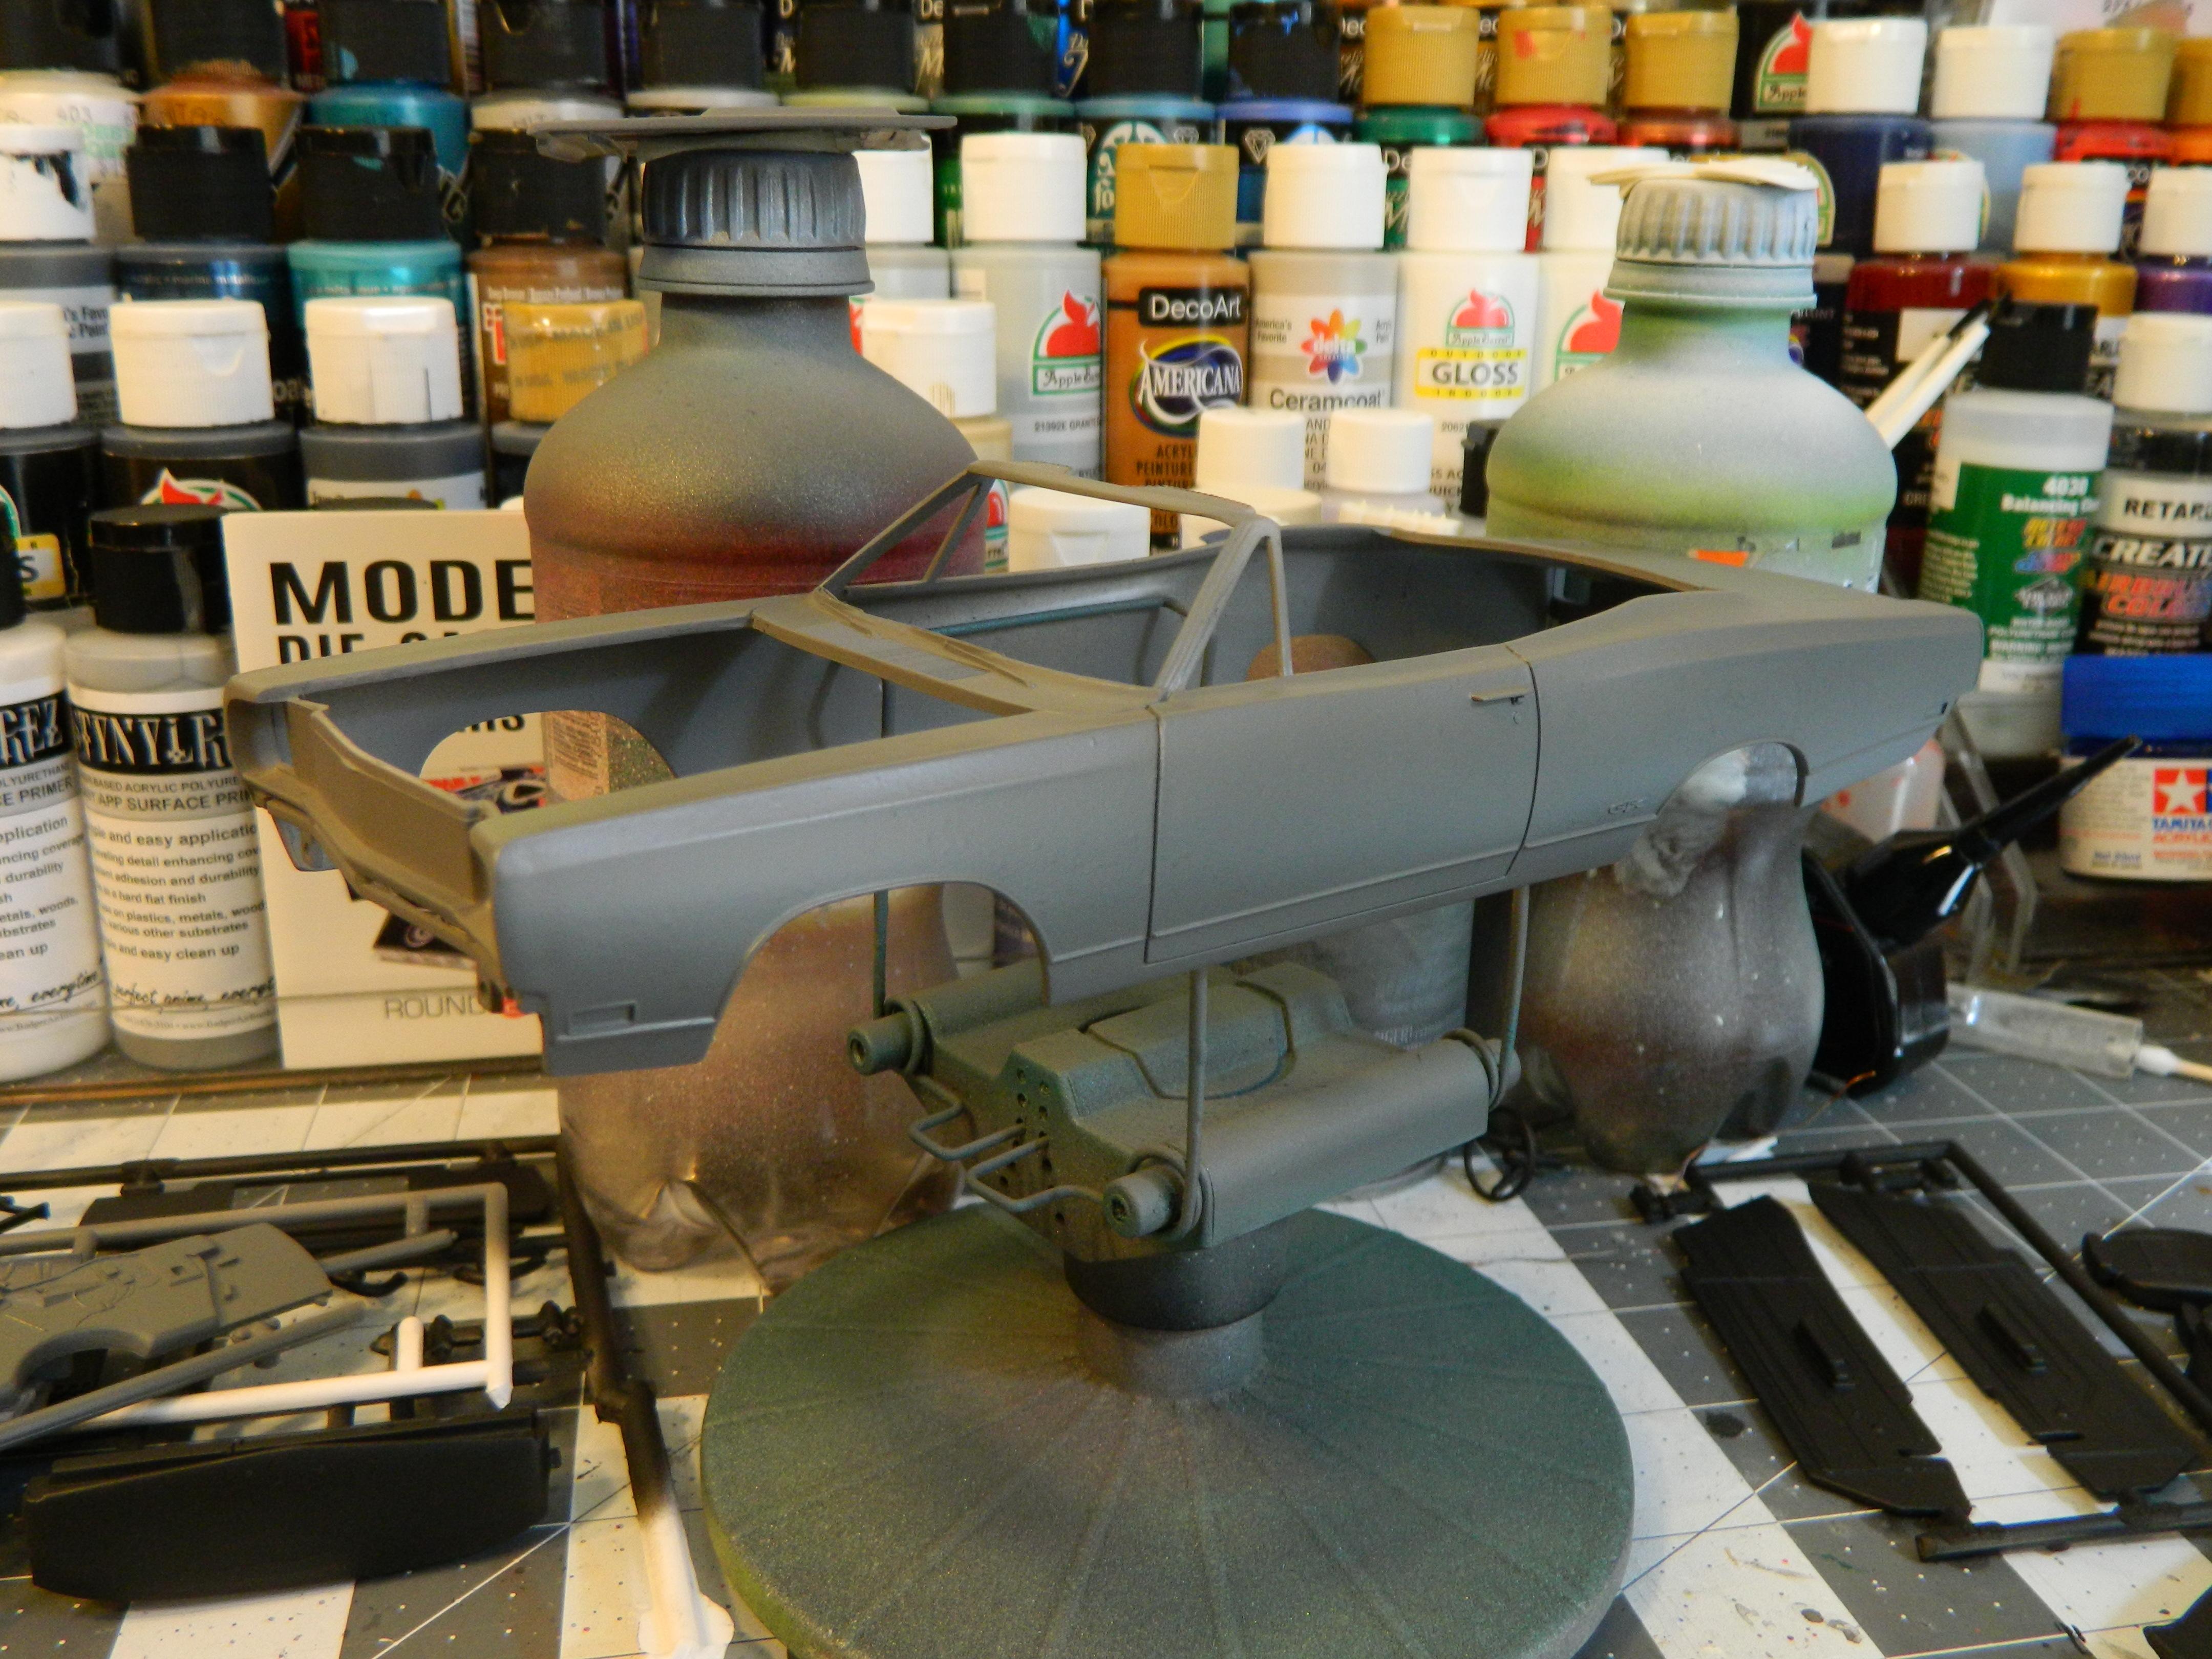
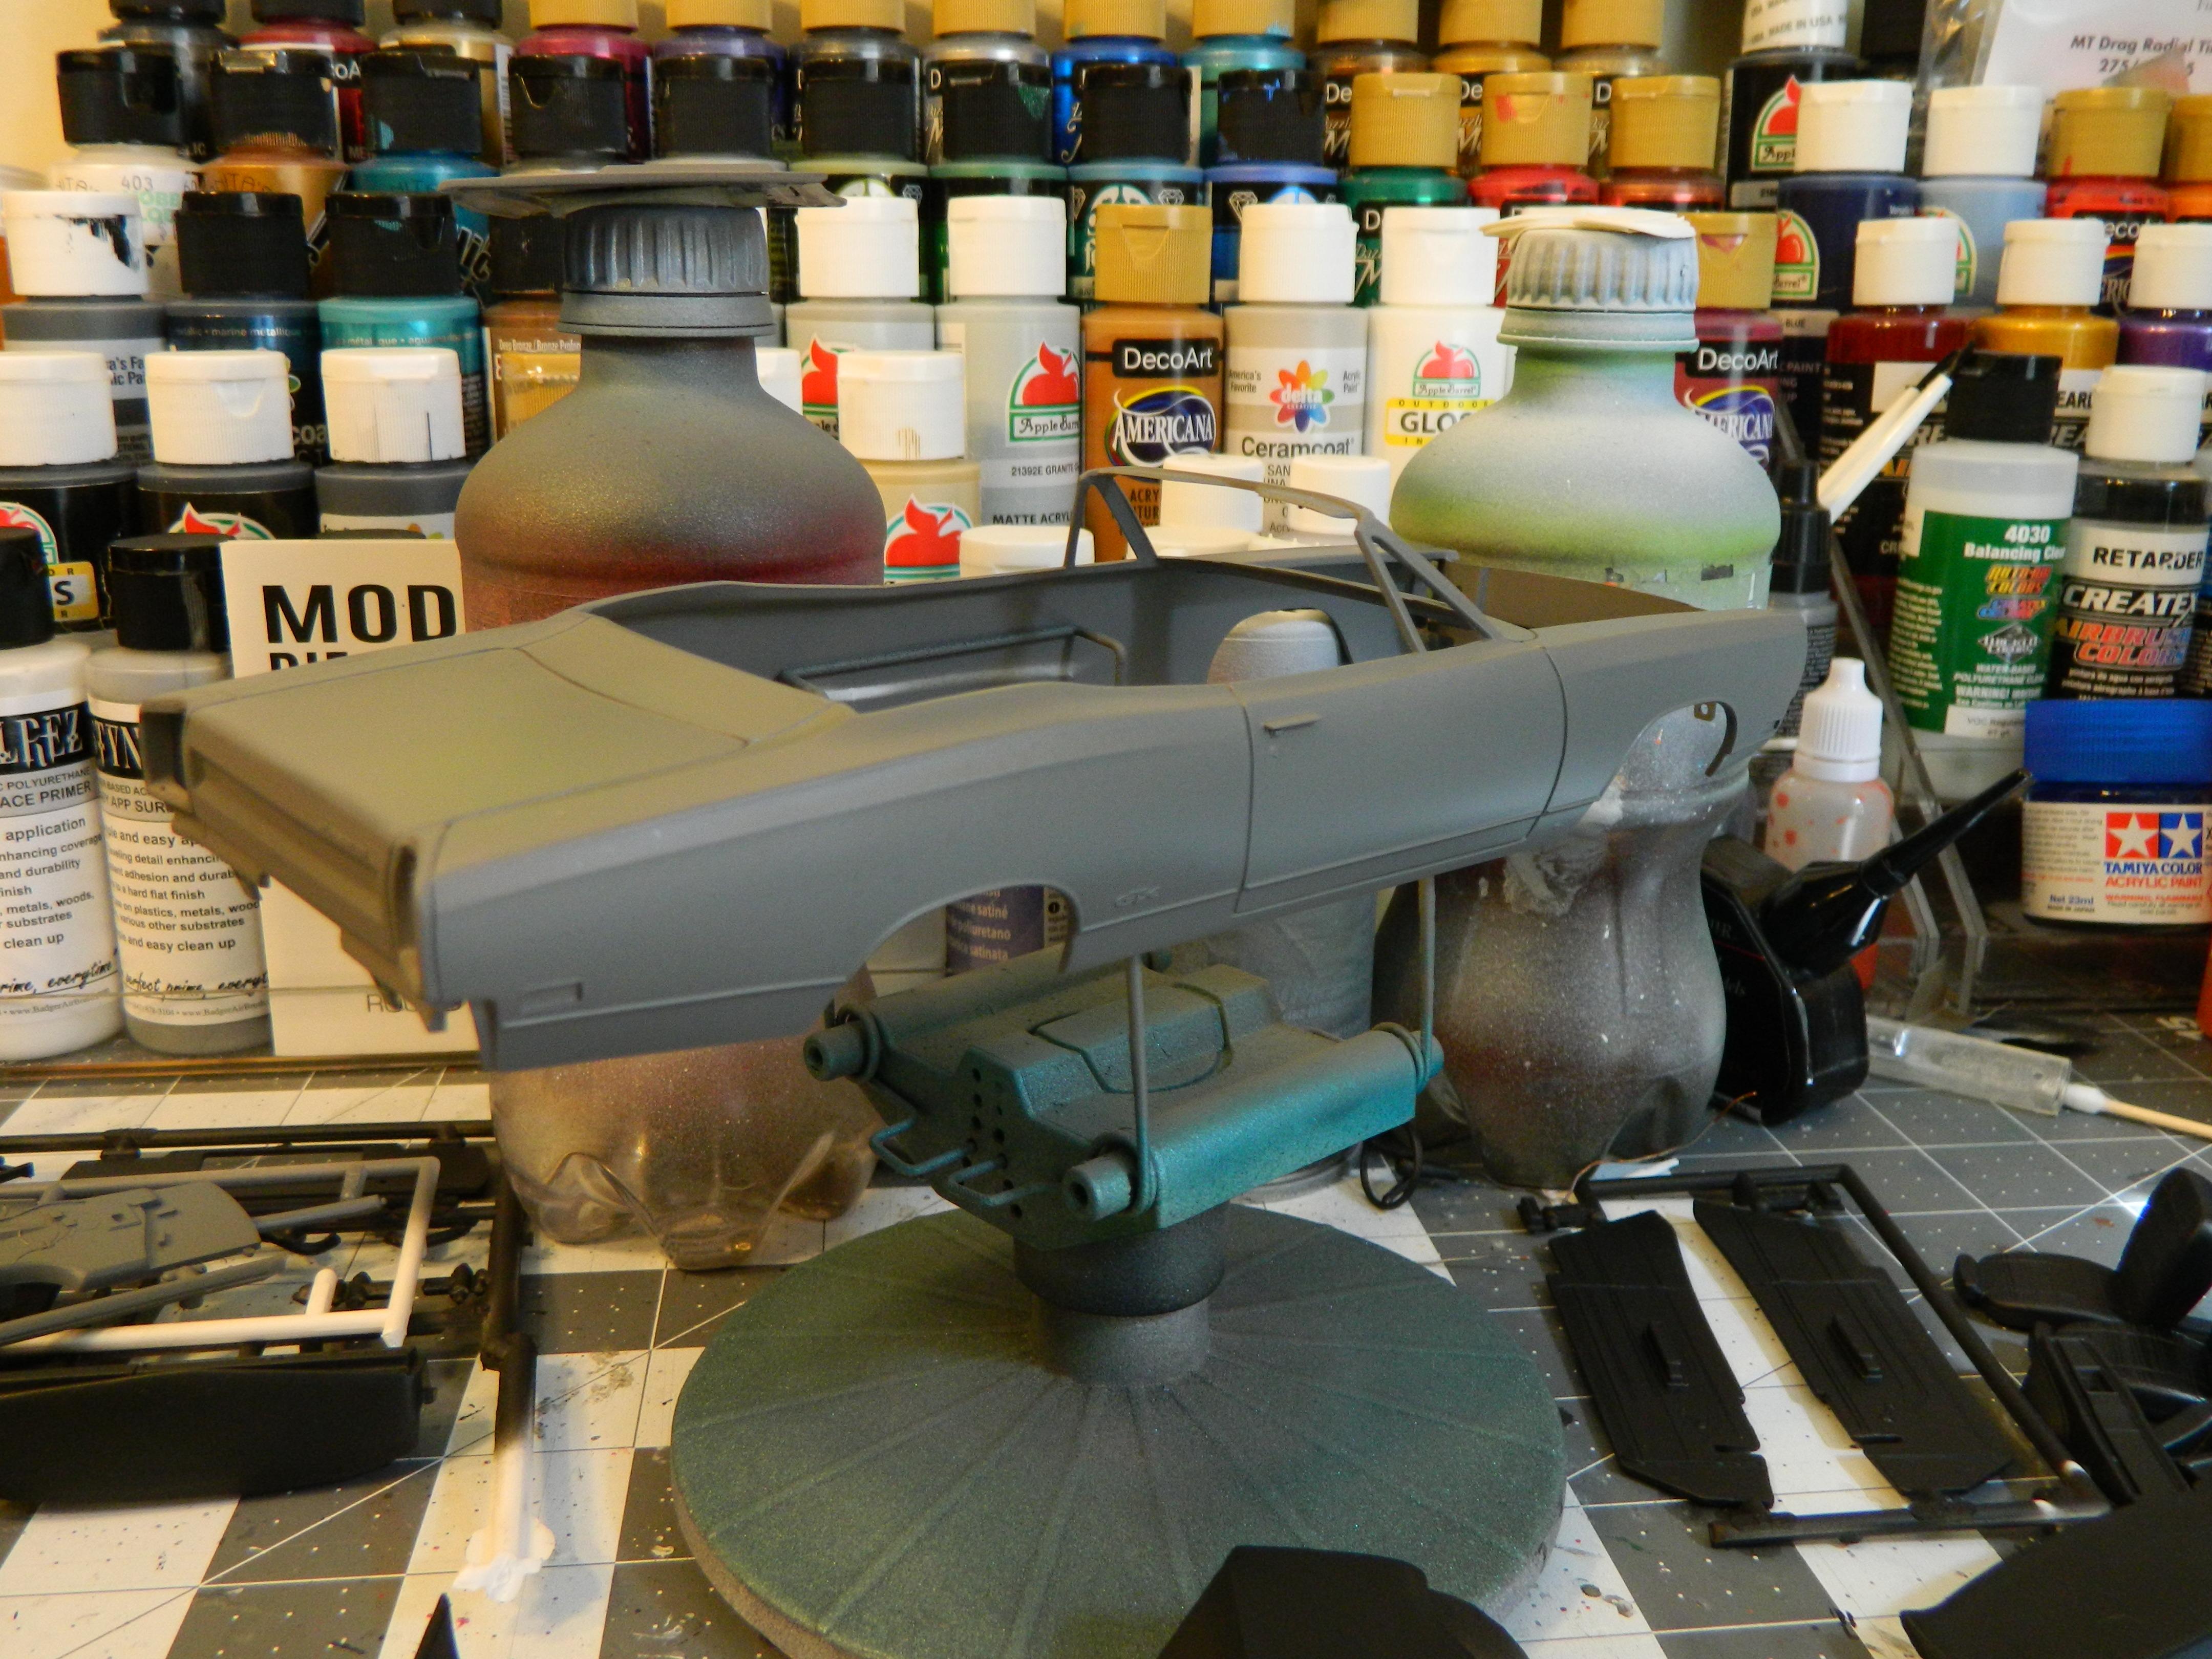
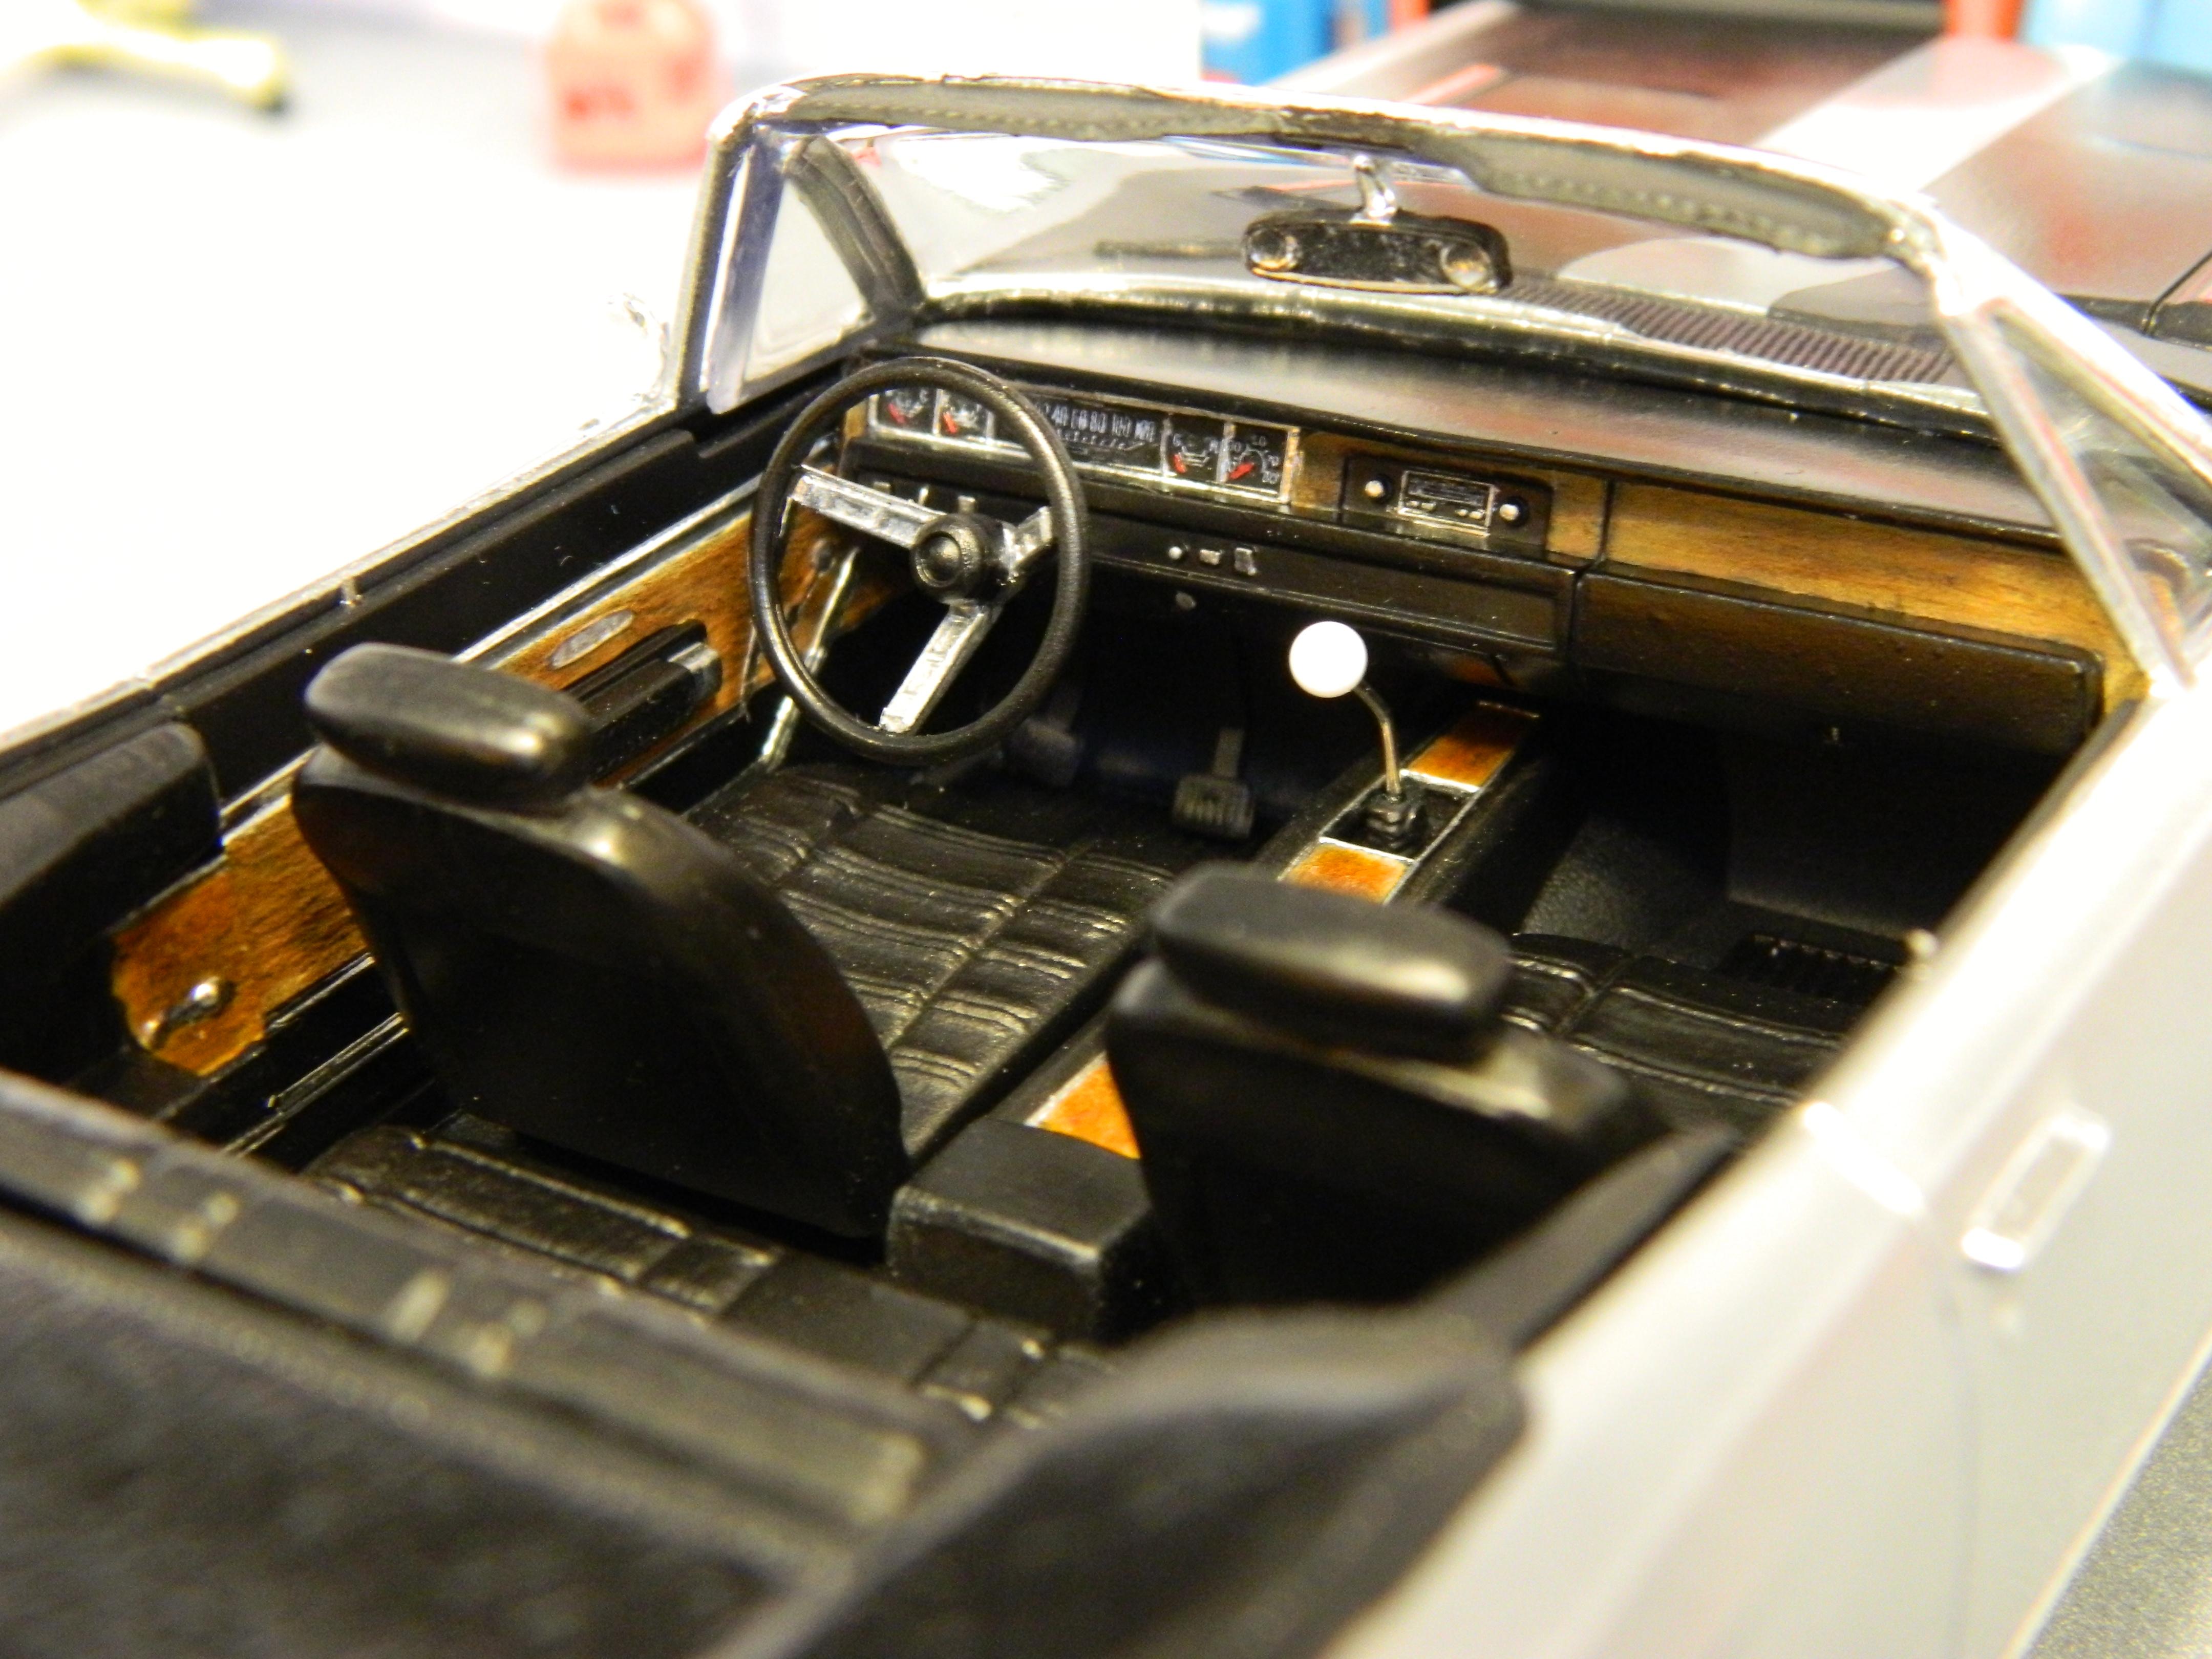
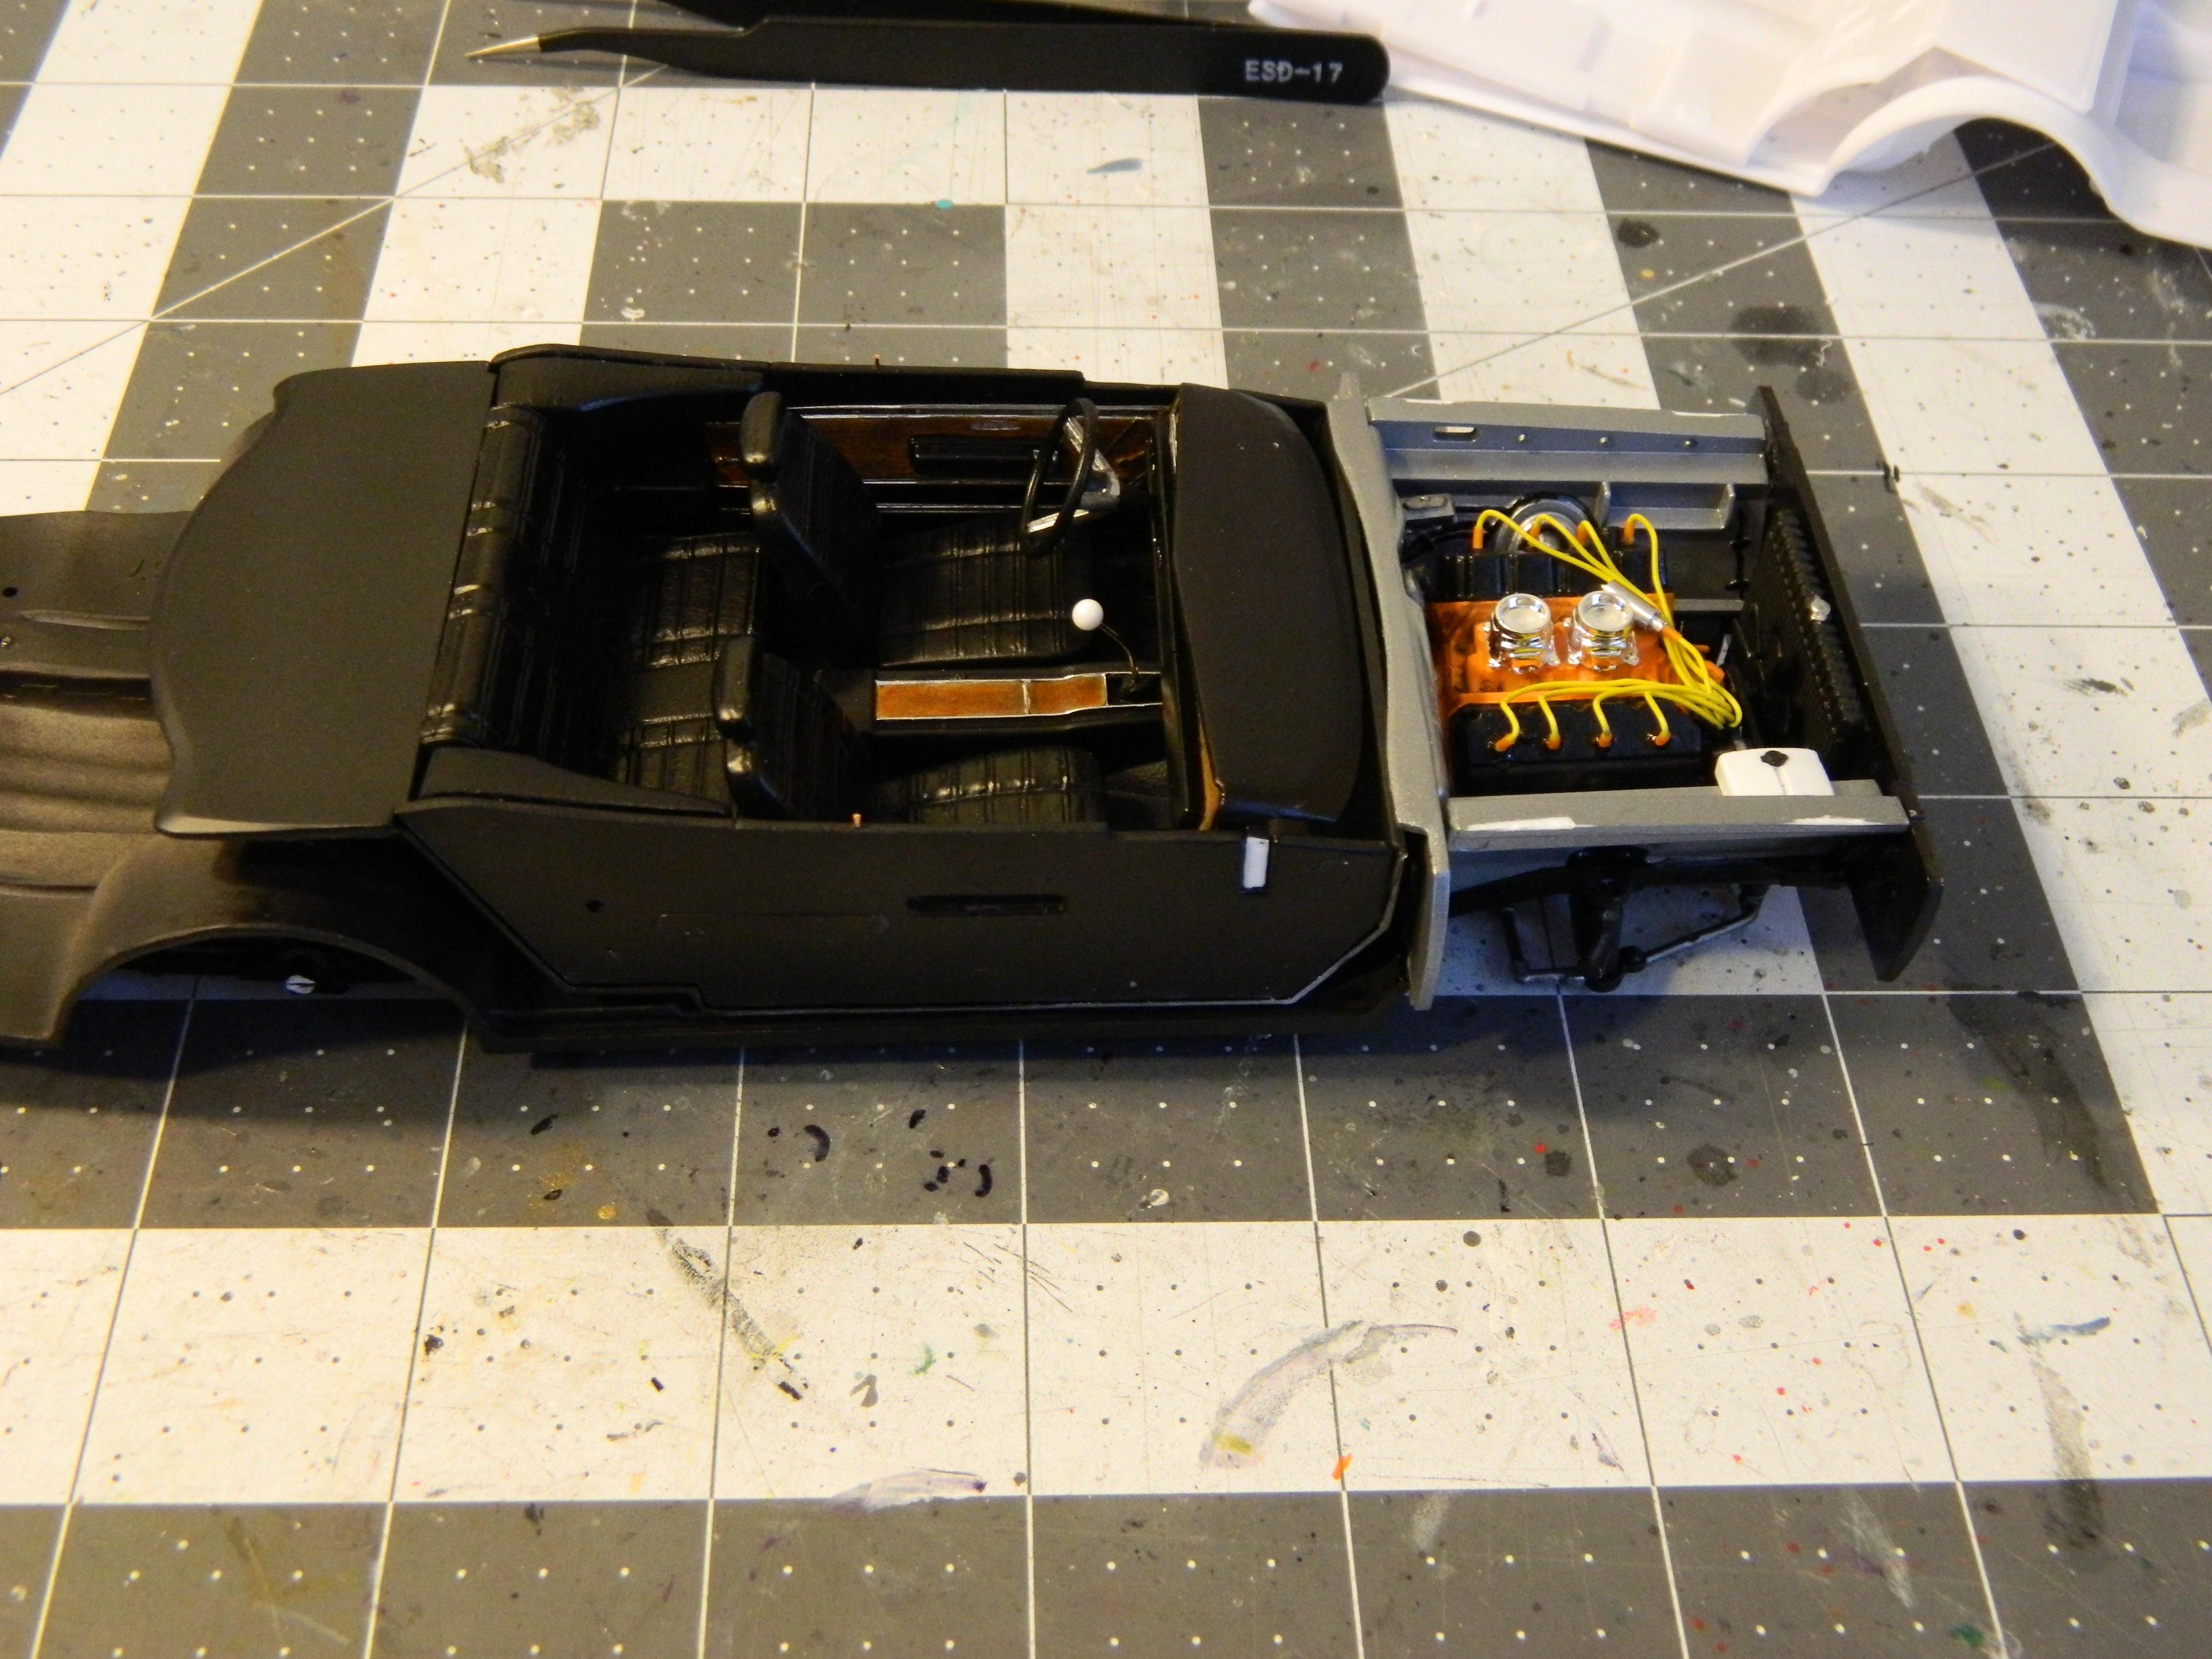
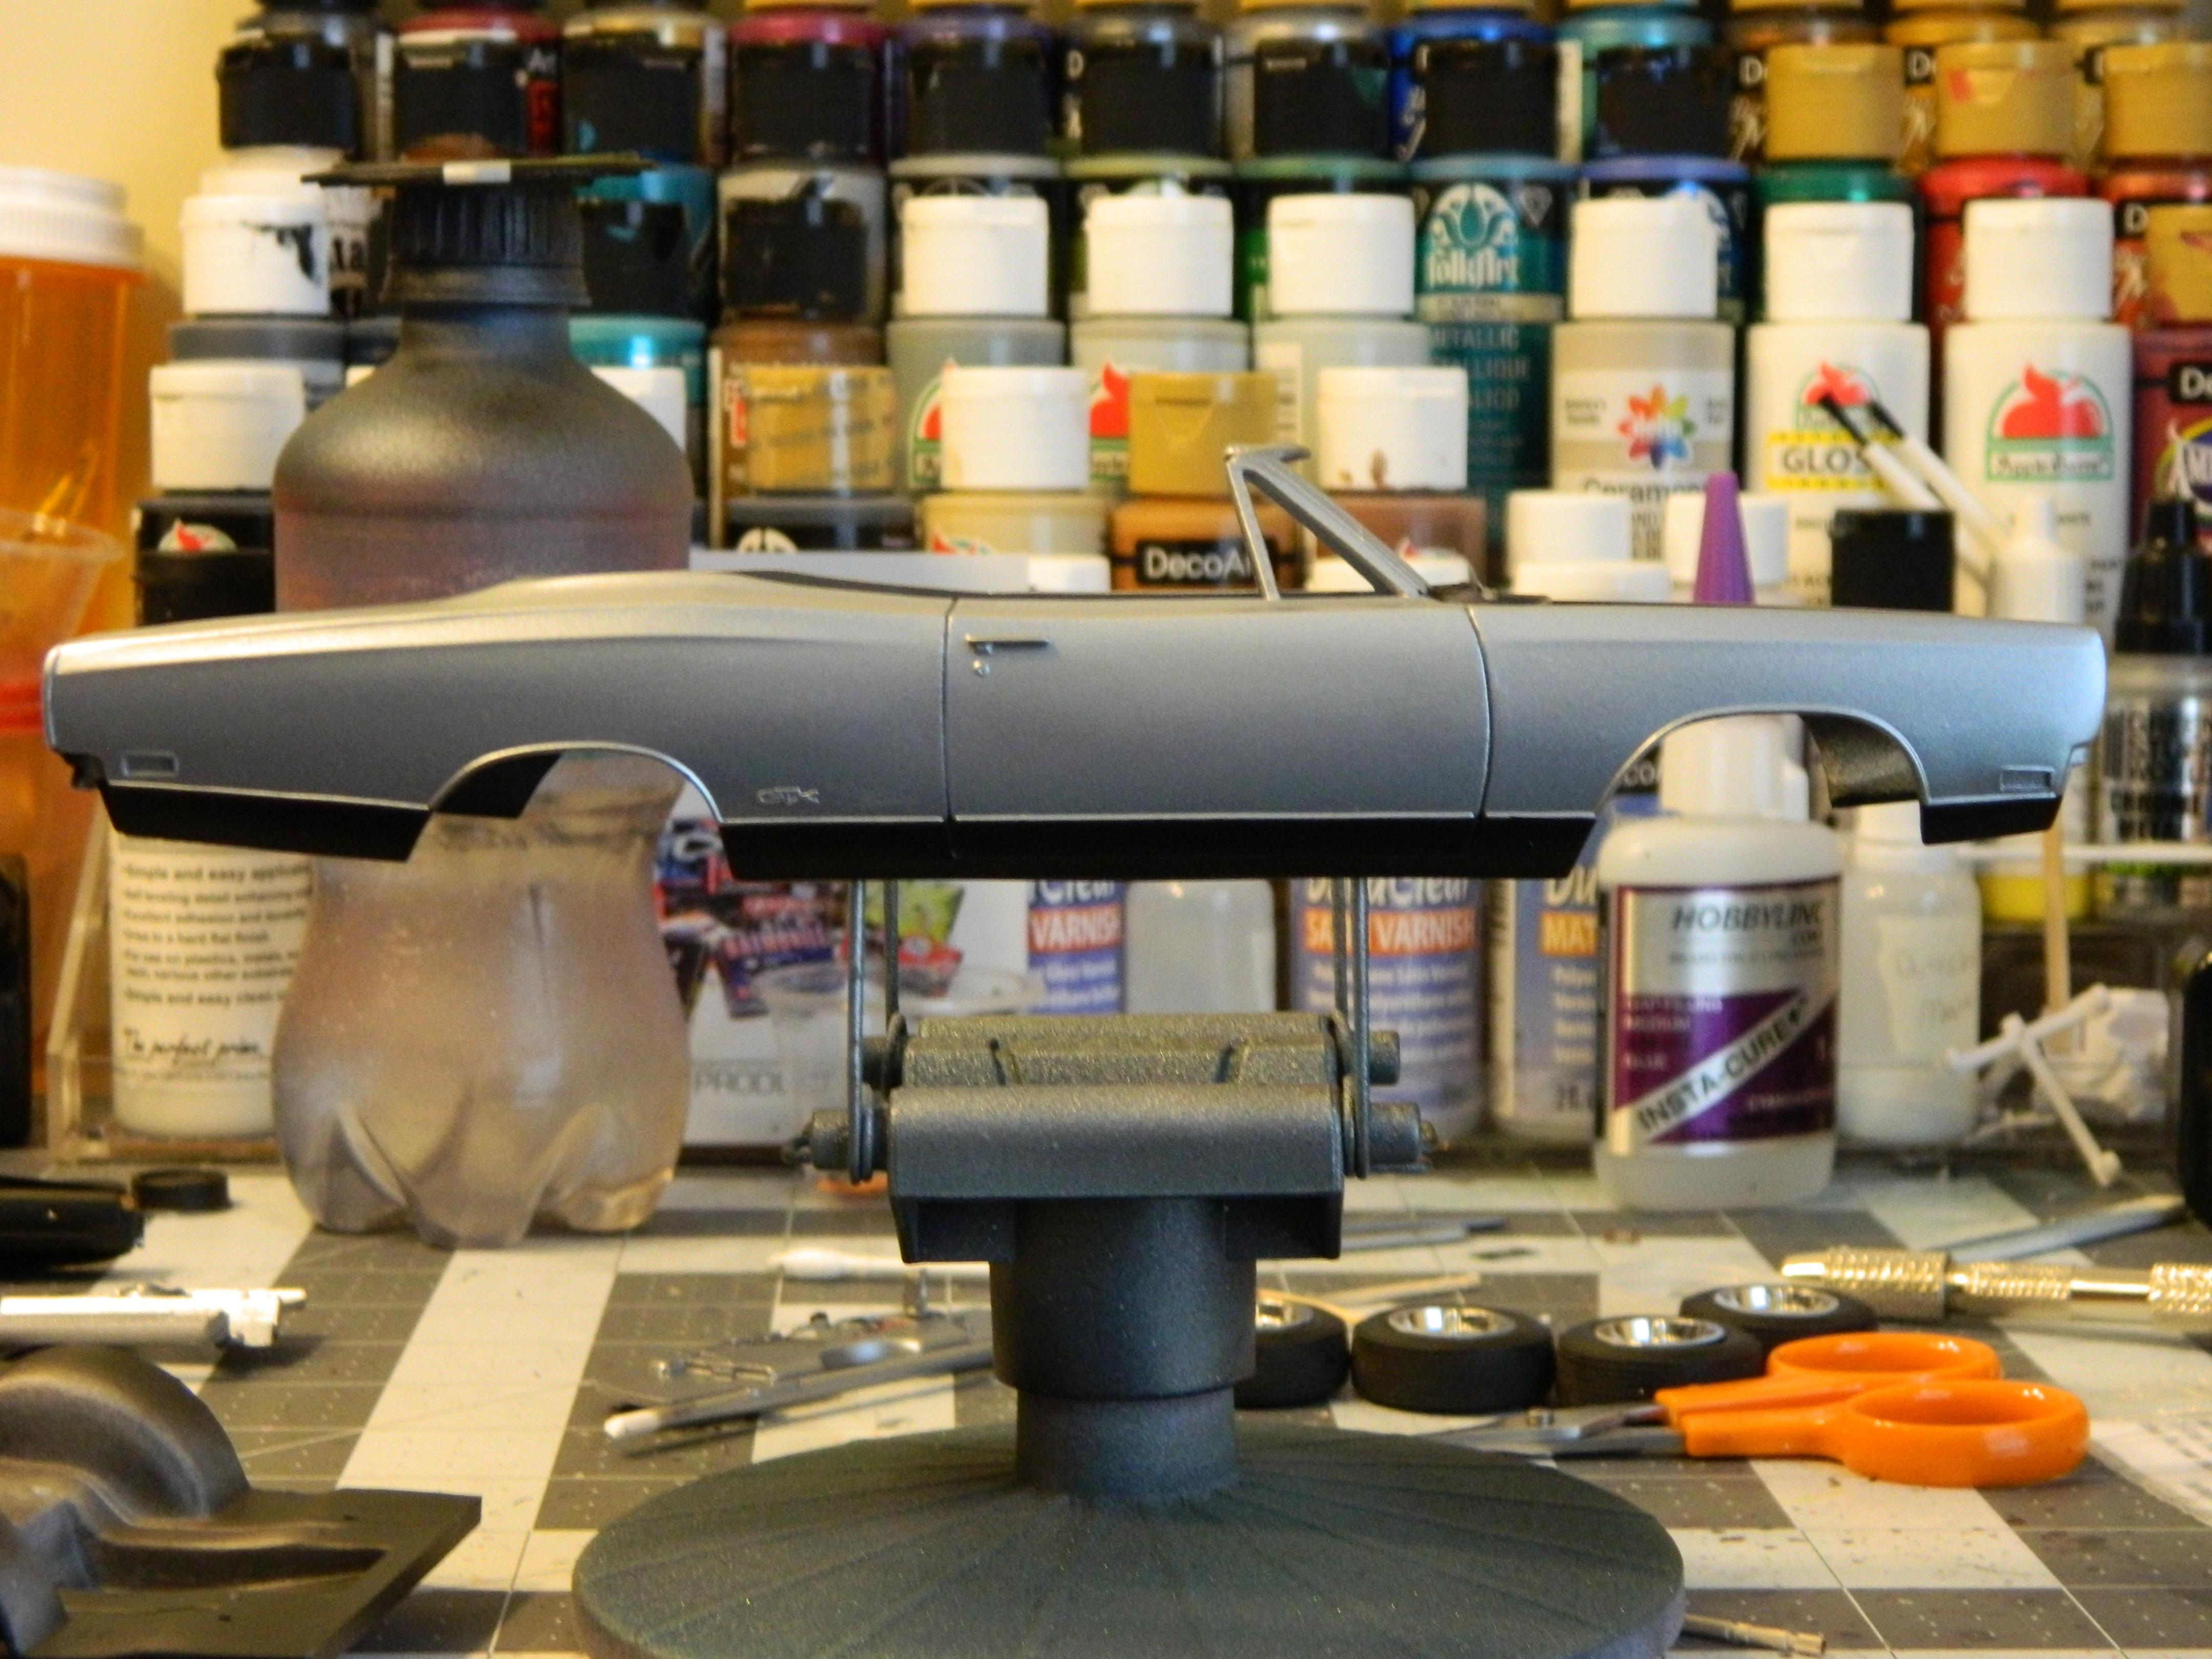
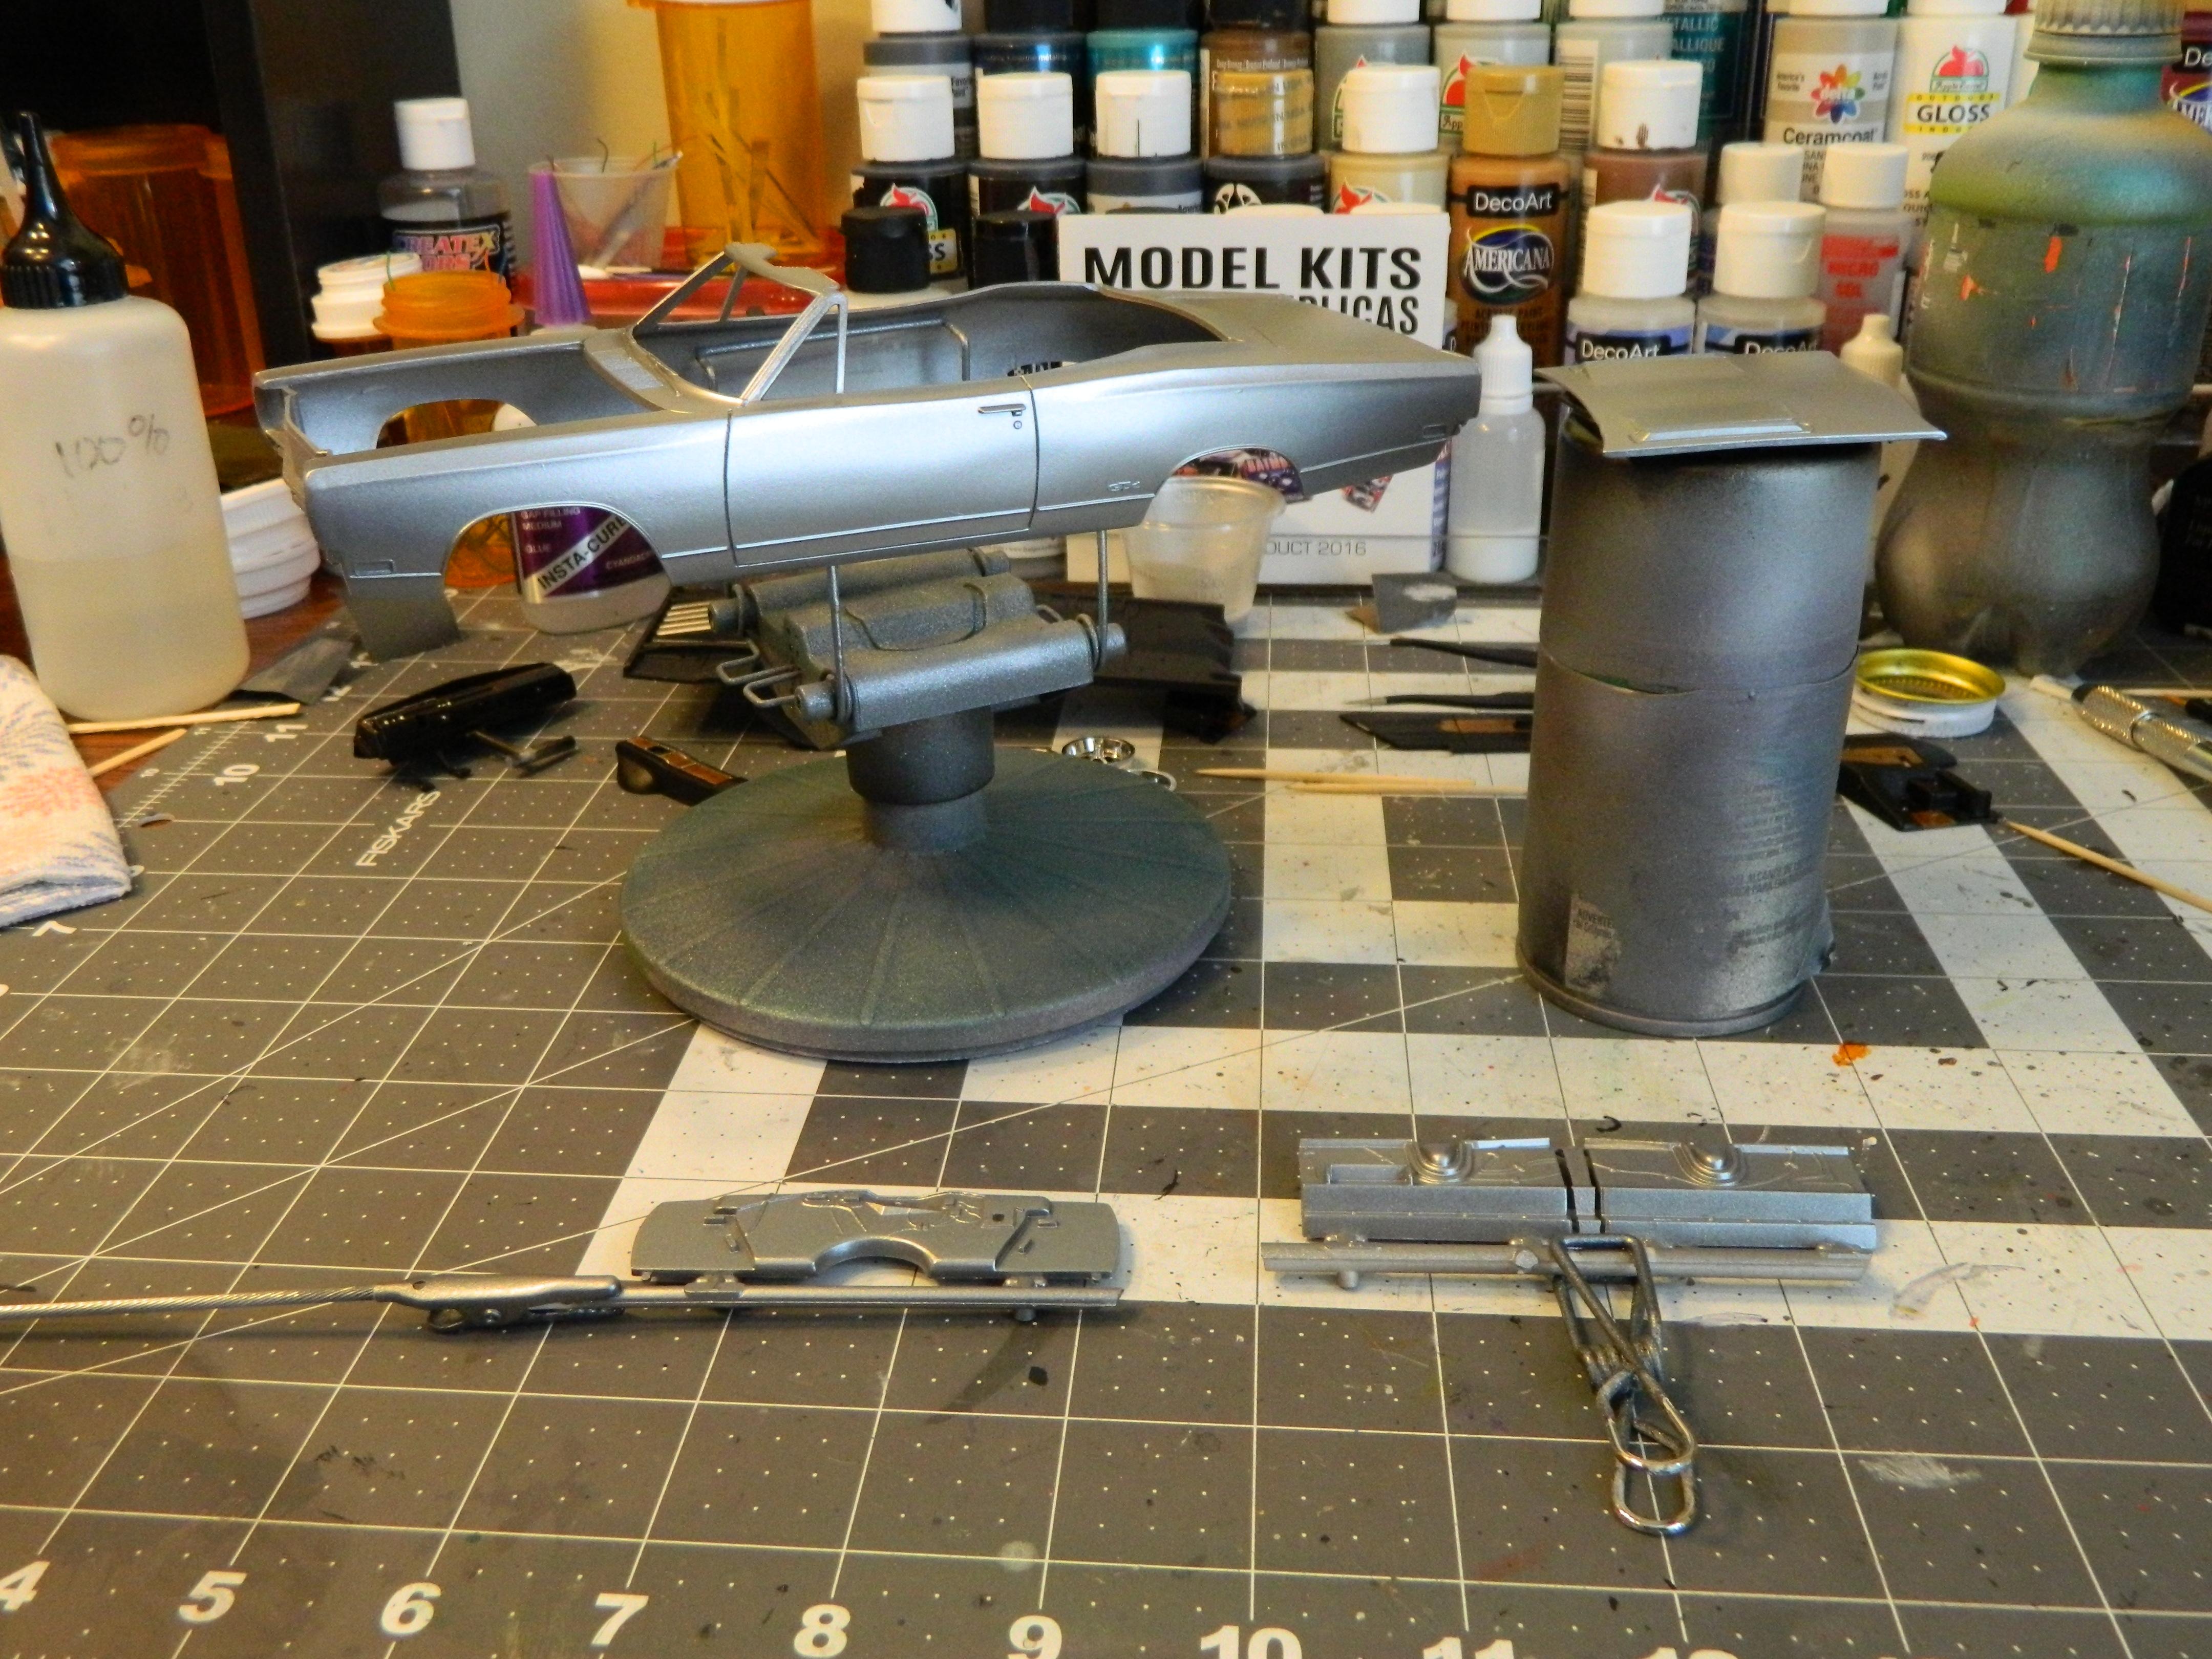
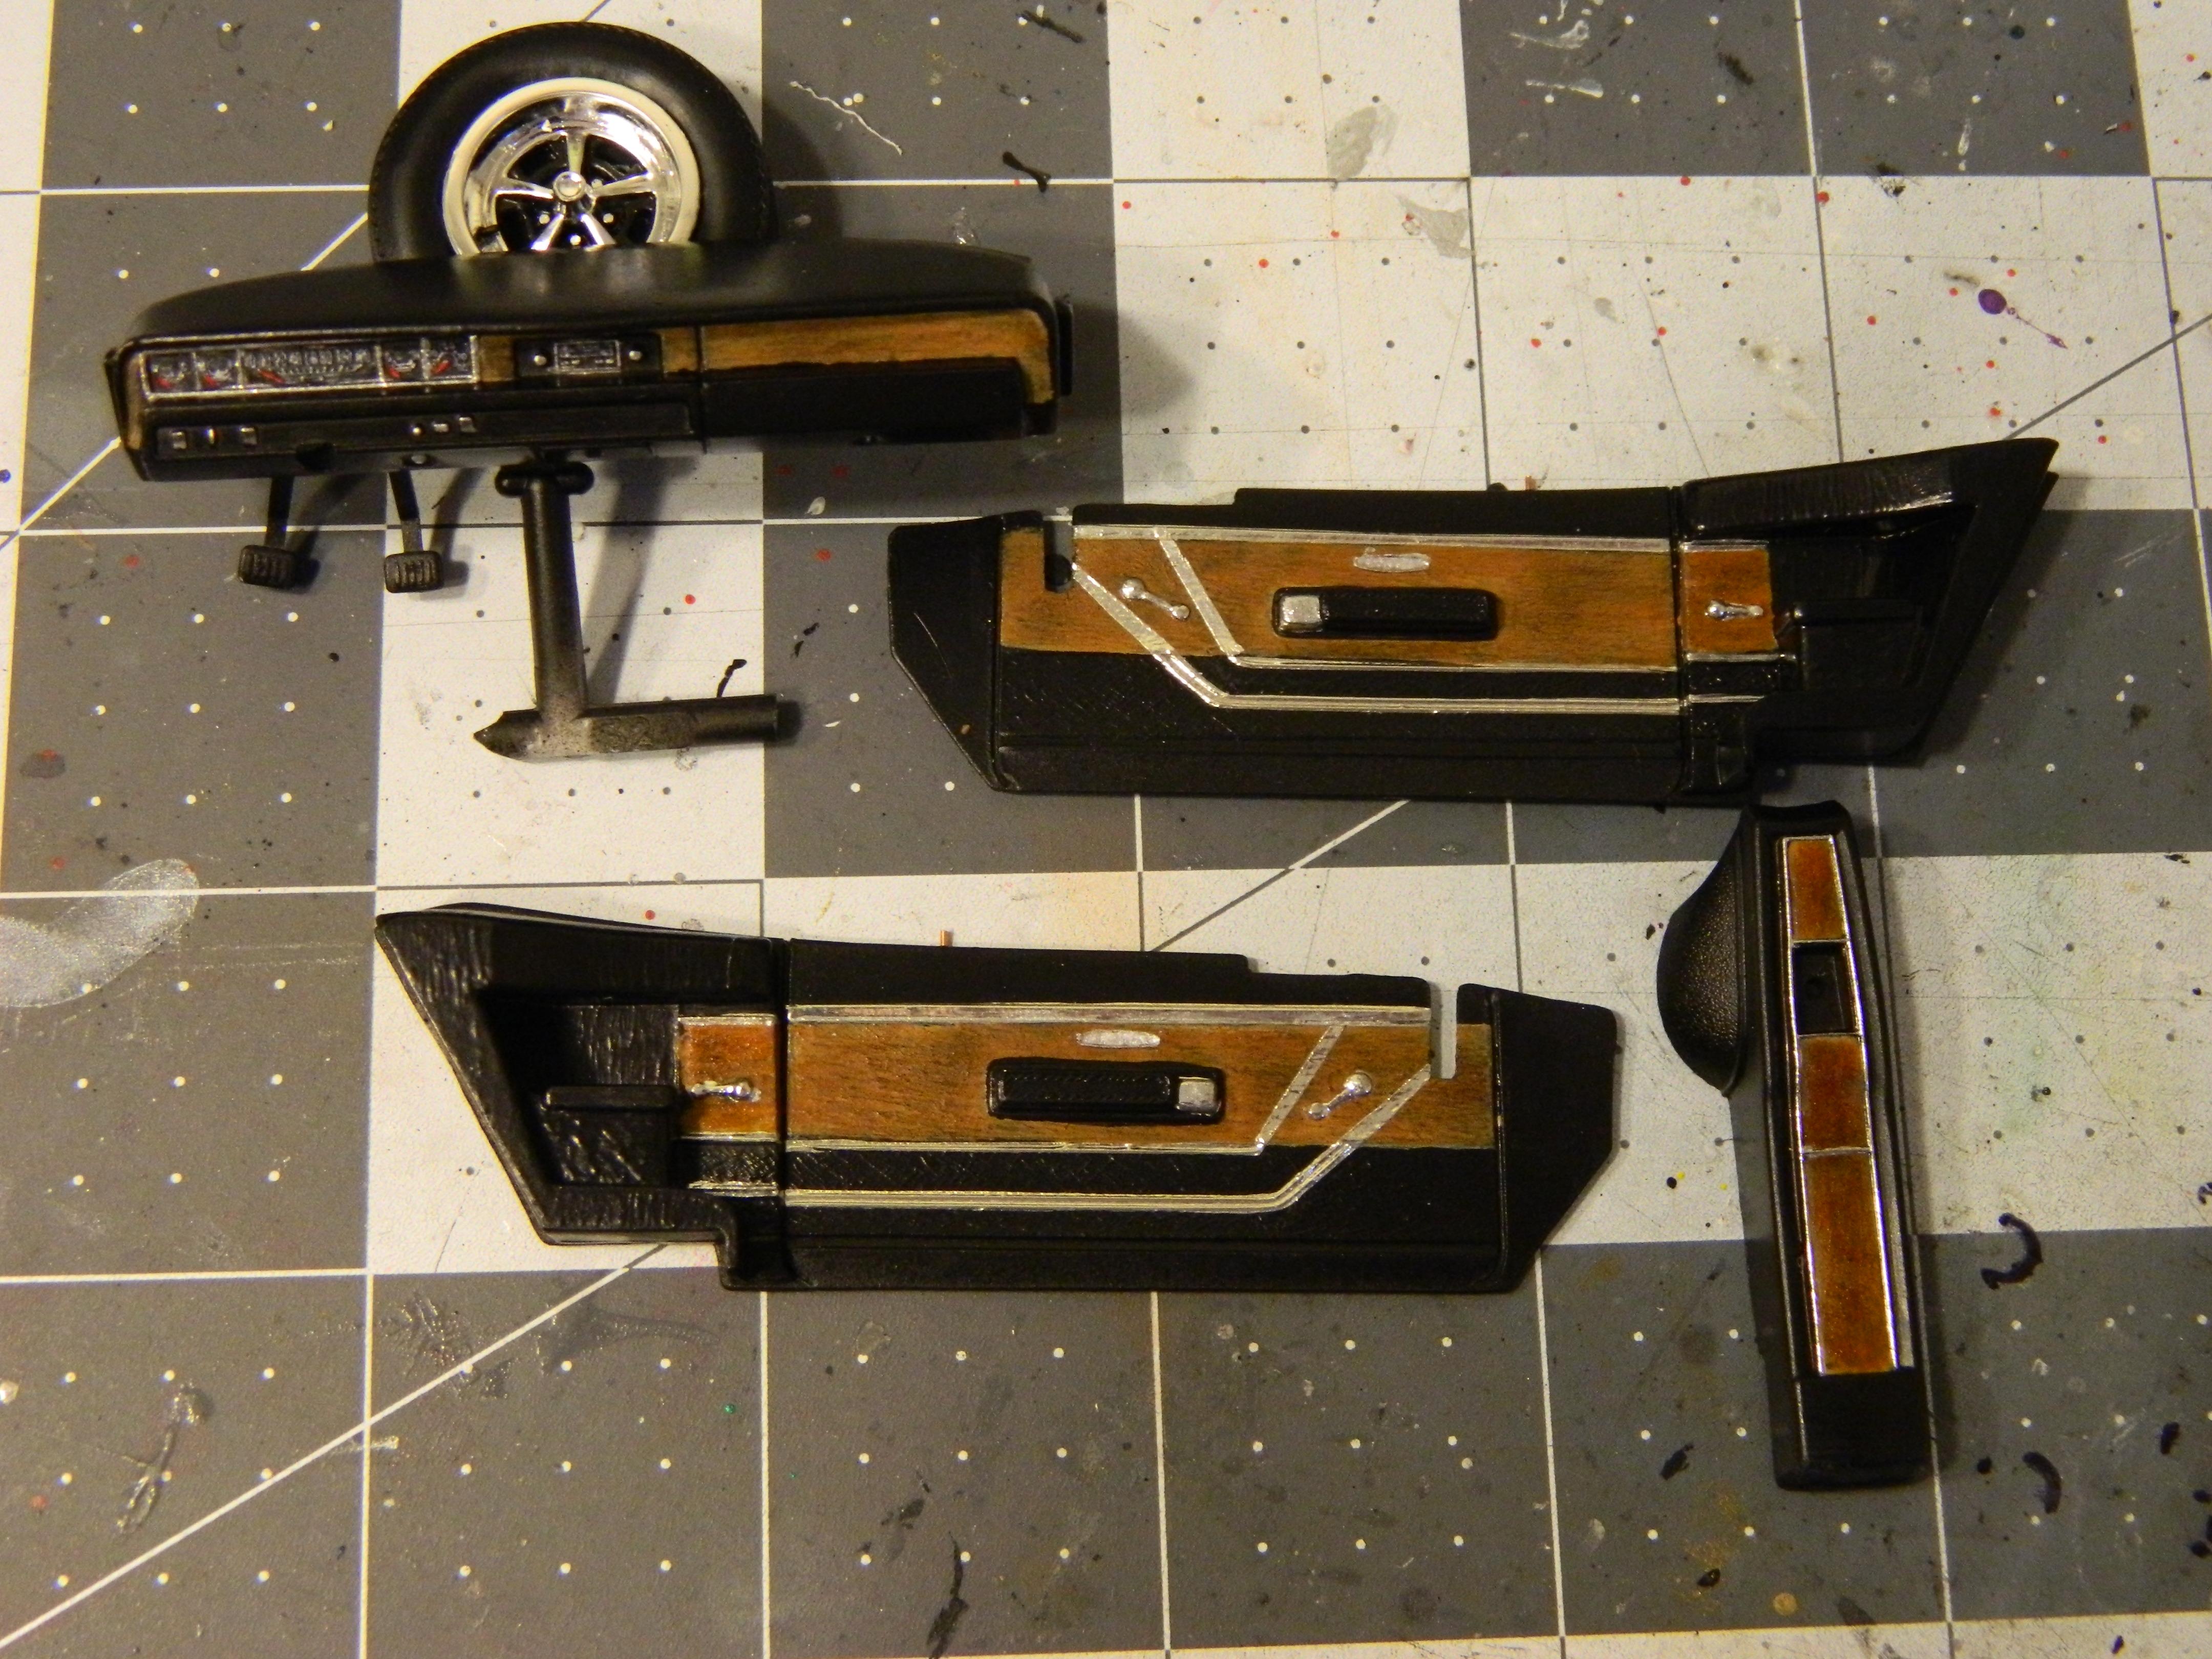
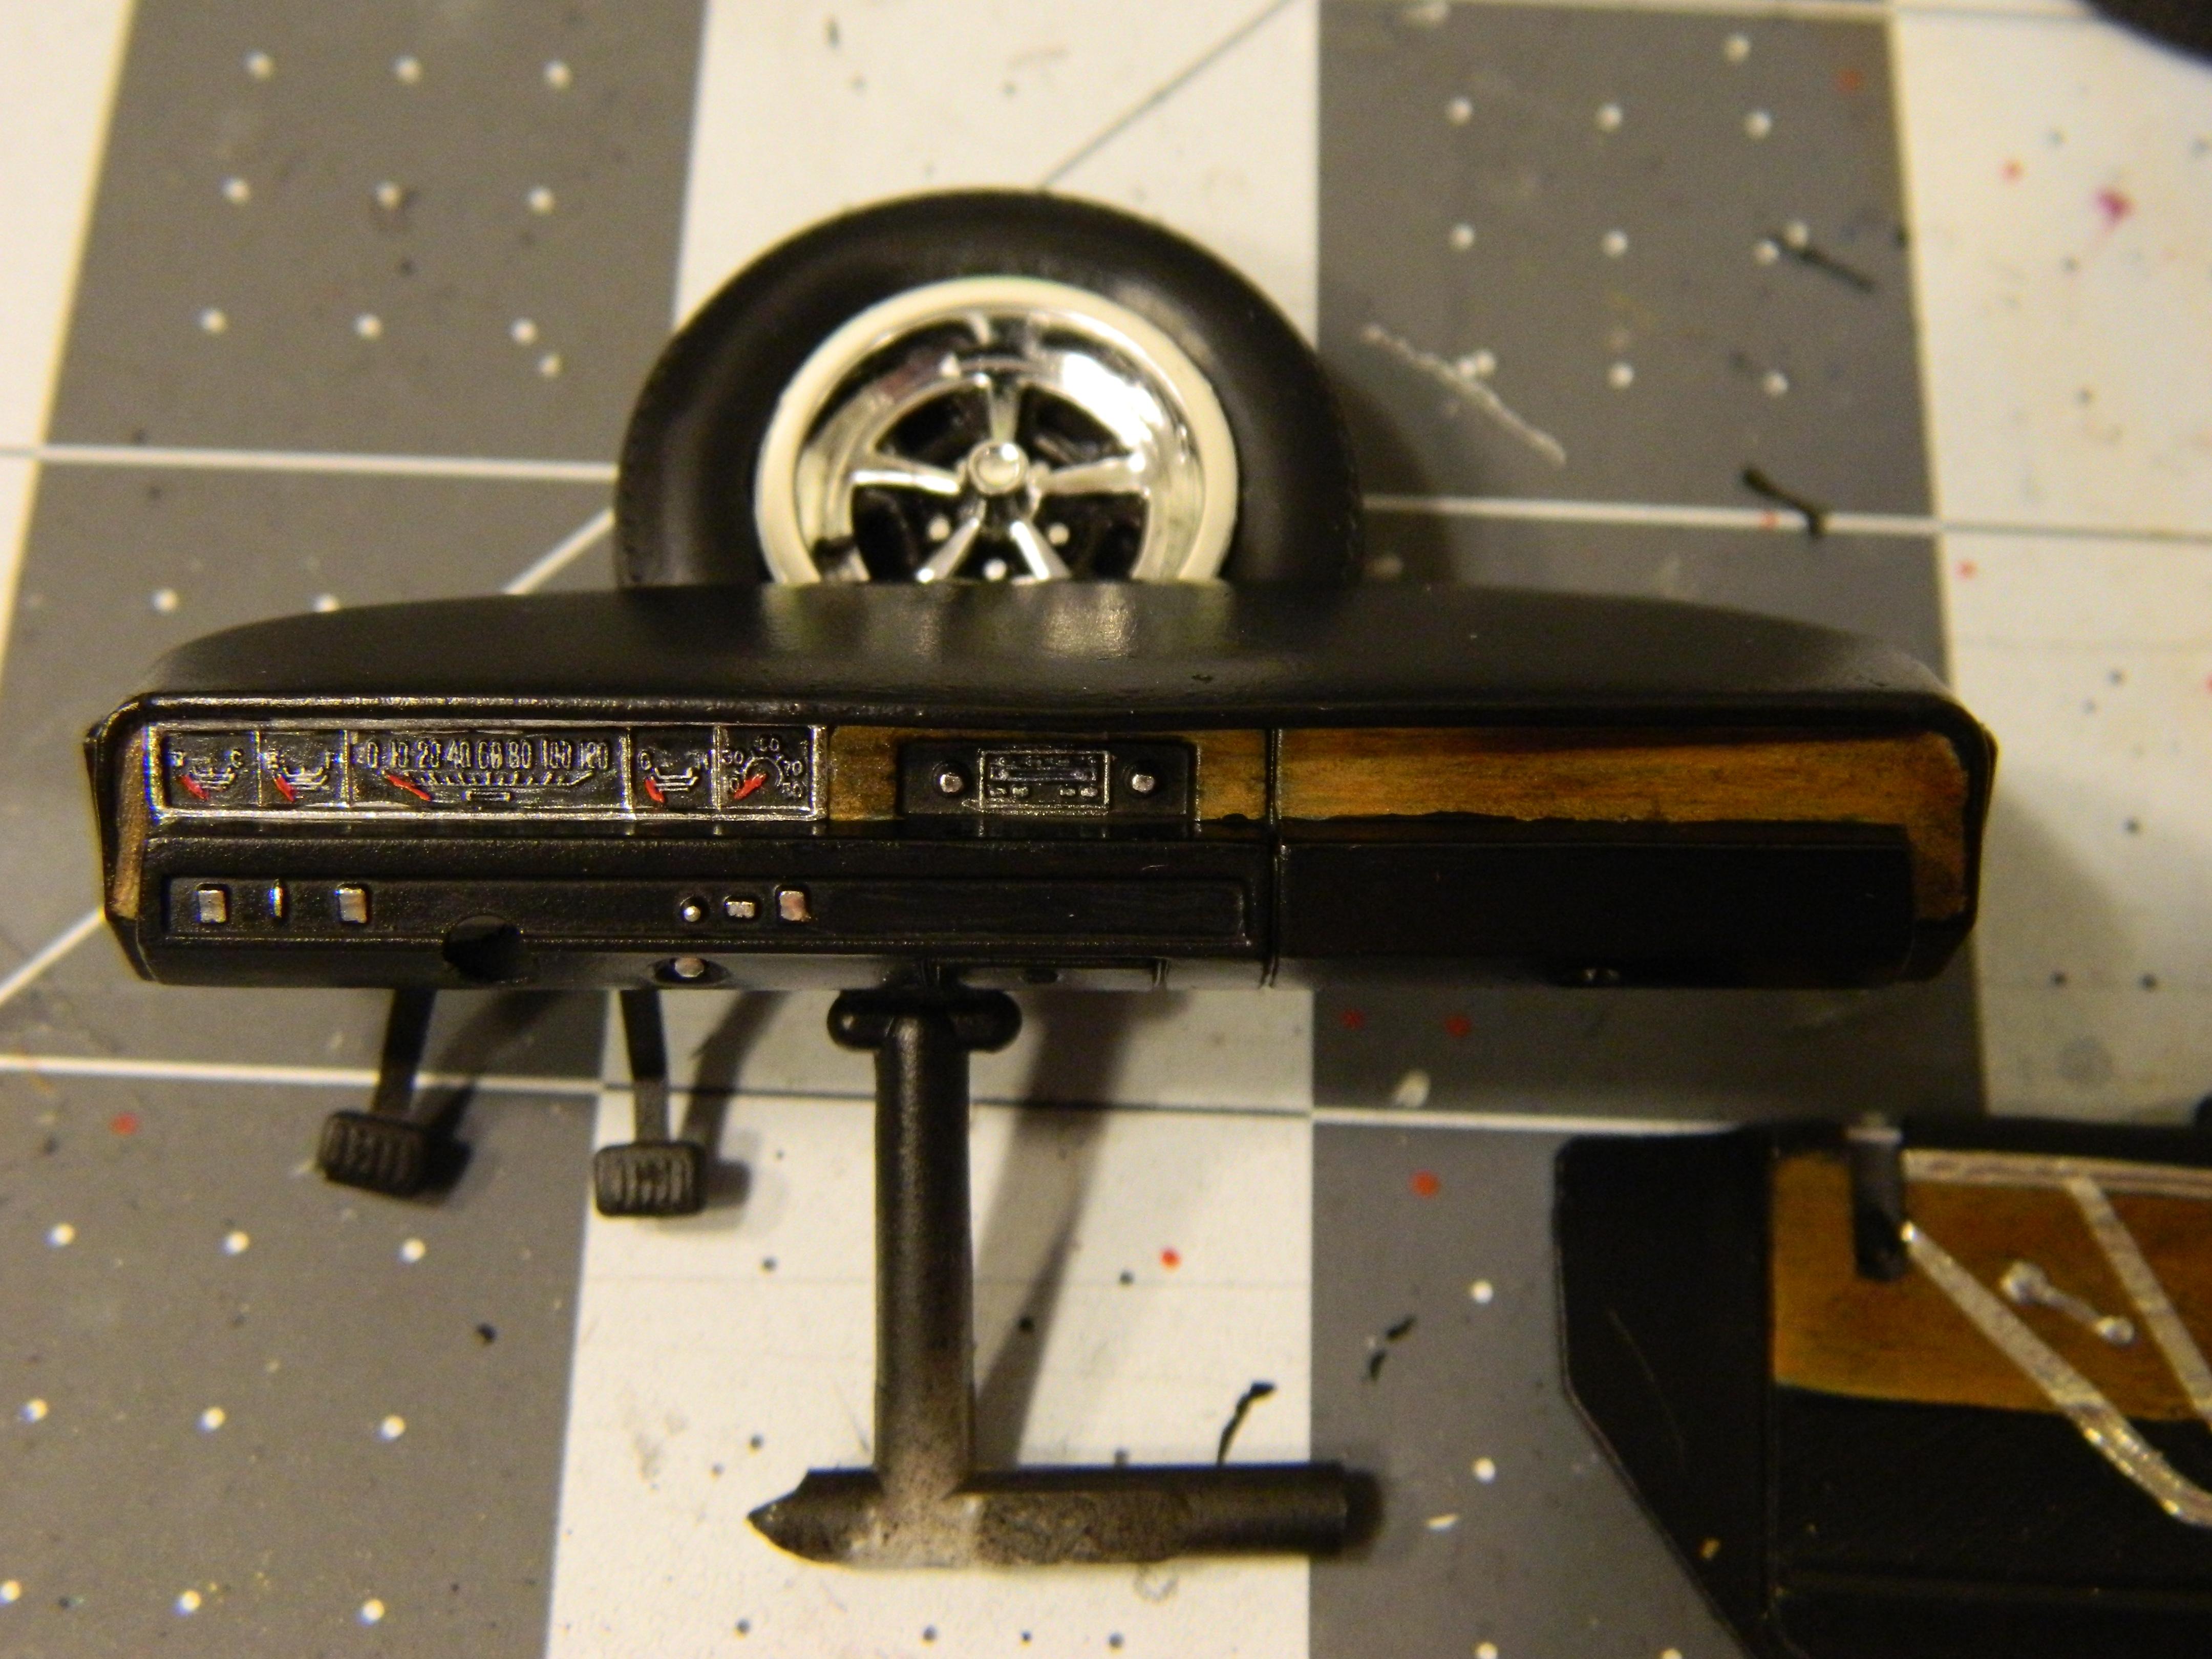
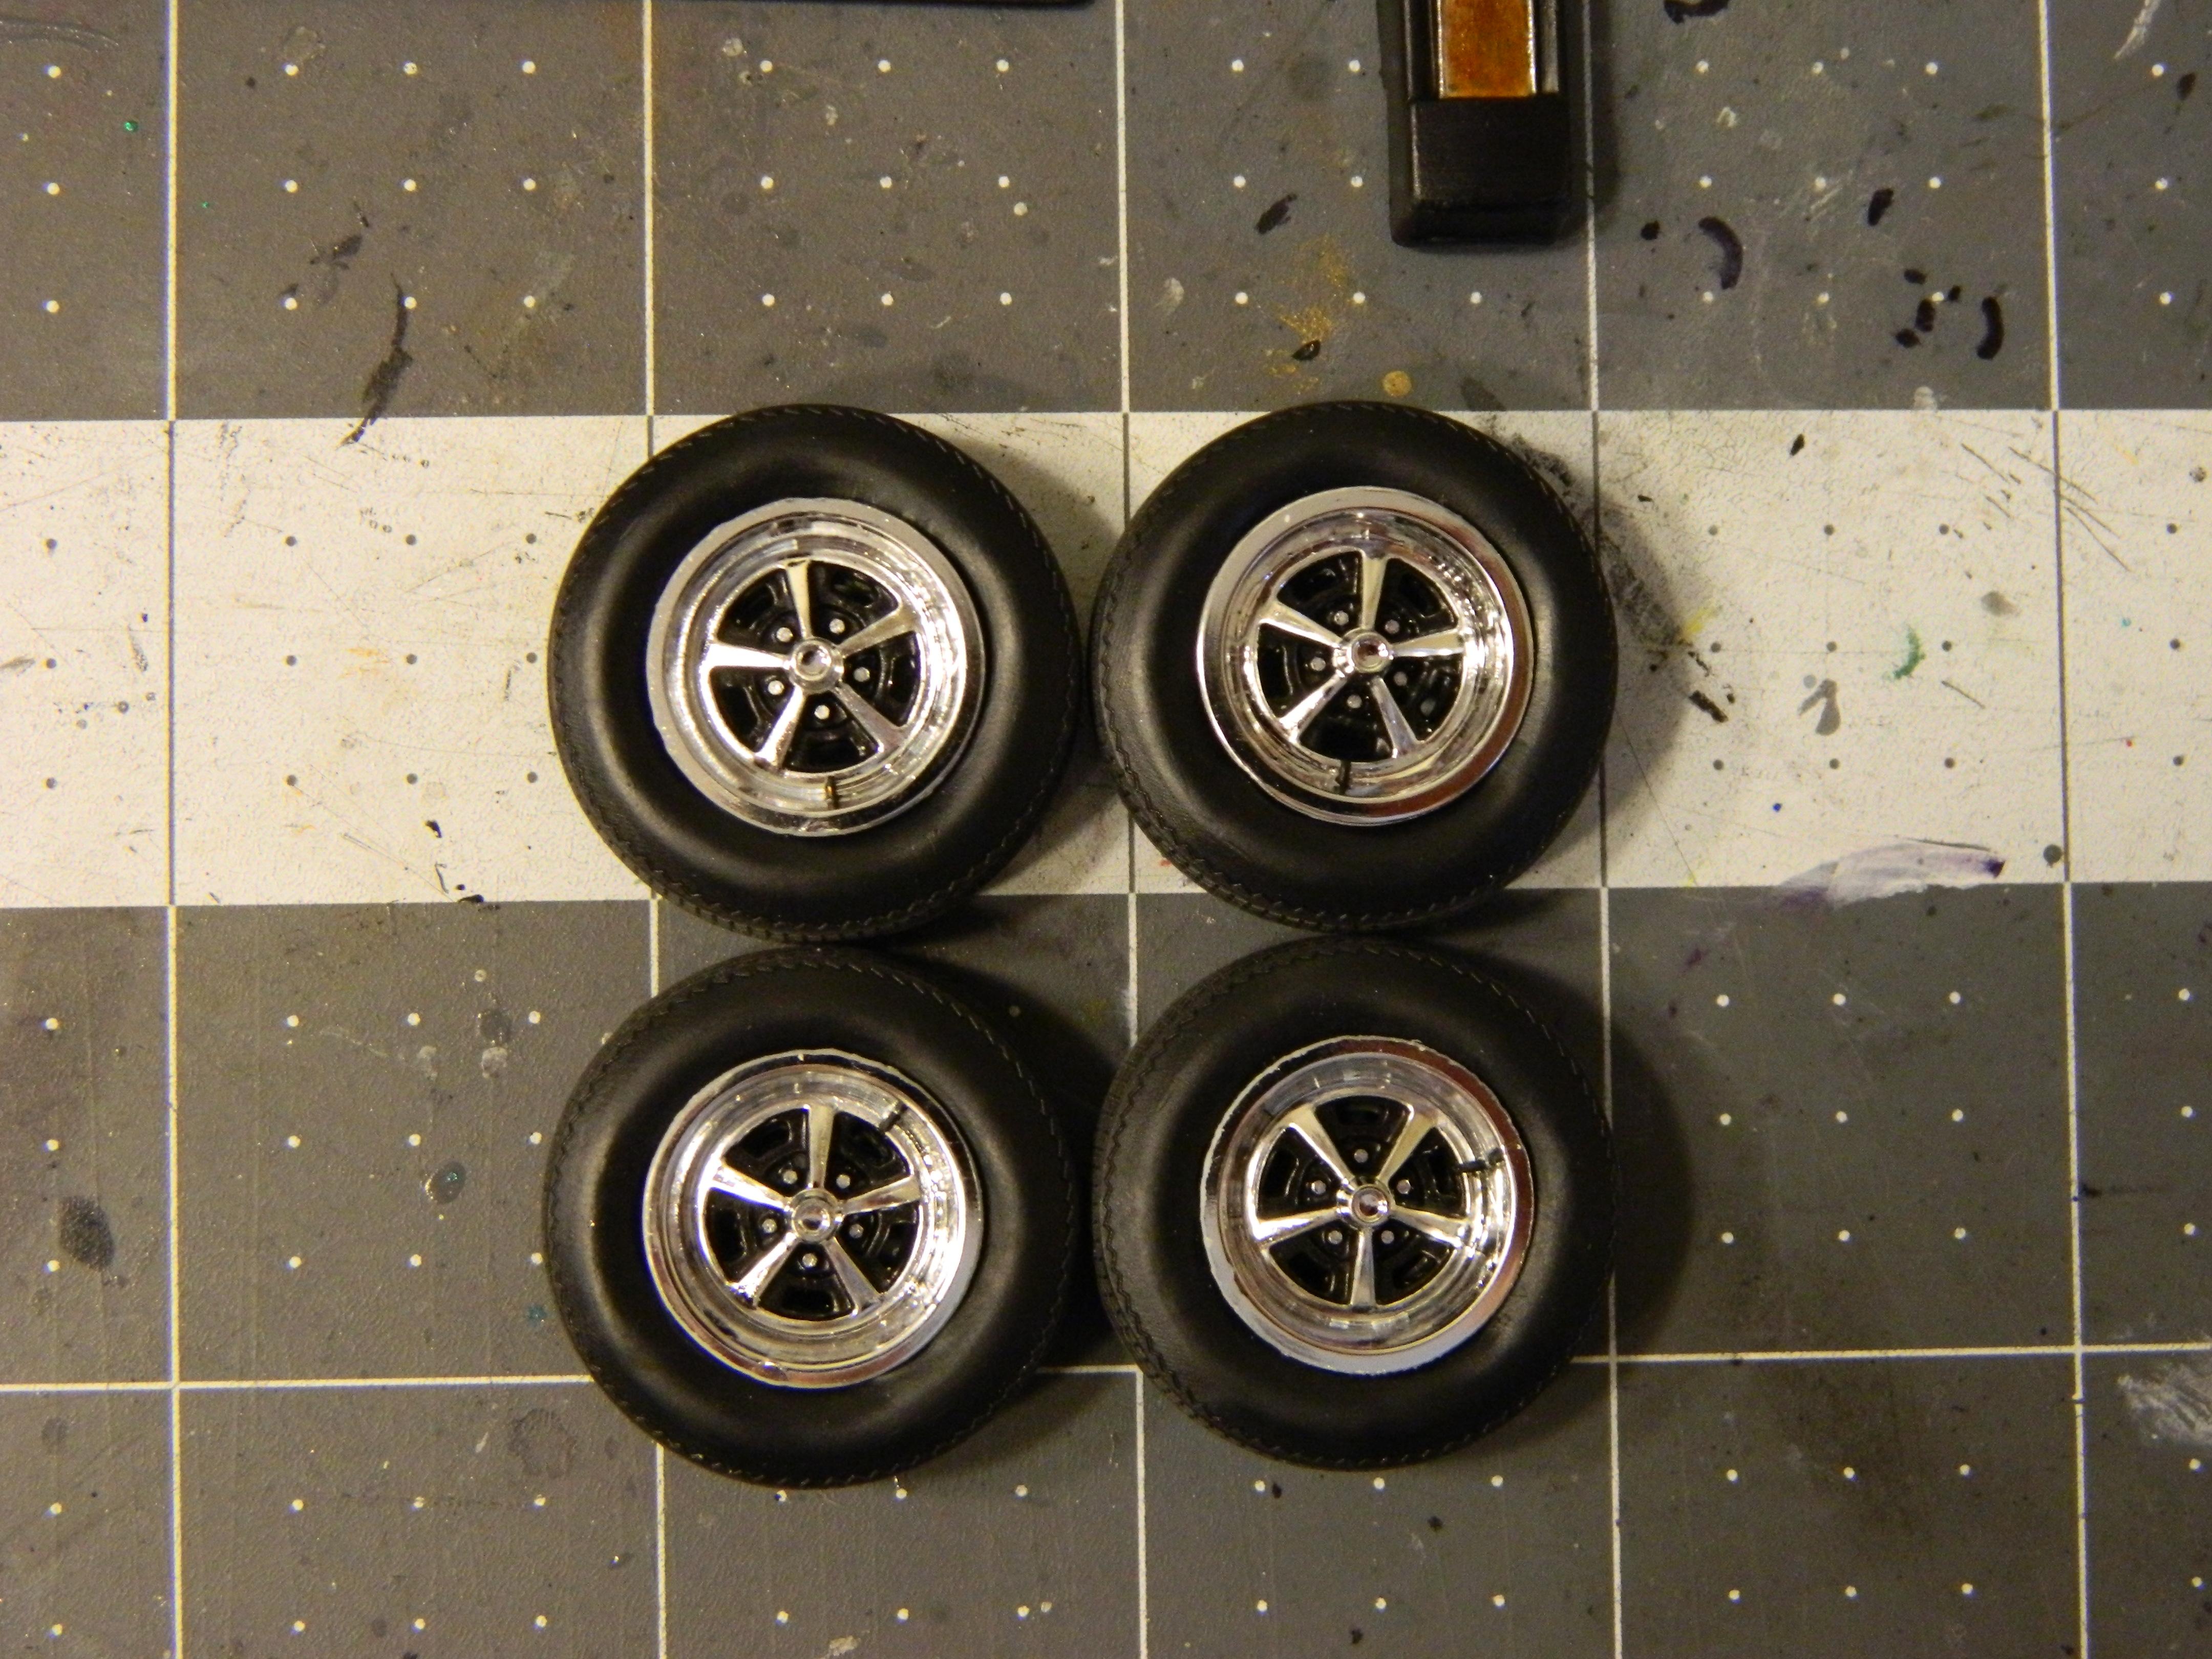
I got the body painted in Createx Pearl Silver this morning. I also finished painting the woodgrain and detailed the rest of the interior. I also detailed the wheels this afternoon and added valve stems to them. Pictures tend to point out blemishes that one can't quite see with the naked eye, especially bad ones like mine LOL, so I'll be doing some minor touch-ups on the woodgrain above the glove box next to the stereo.
-
Both are very nice!
-
Very sharp! Nice finish!
-
Very nice! The wheels look great on it!
-
Nice looking Javelin!
-
Both are very nicely done with excellent paint jobs!
-
AMT 1969 Plymouth GTX Convertible.
Dragonhawk1066 replied to Dragonhawk1066's topic in WIP: Model Cars
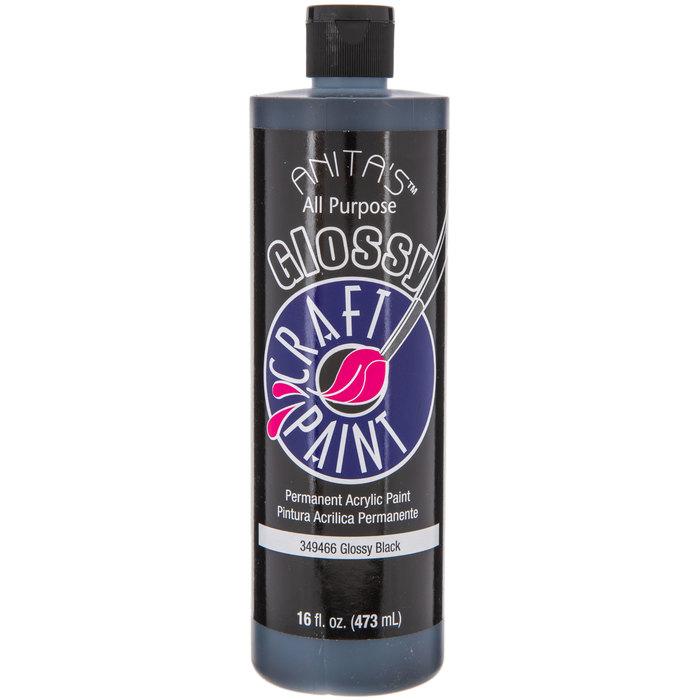
I had been using Apple Barrel Gloss Black, but when I ran out I bought an 8 oz. bottle of Anita's Glossy Black. Both will give you nice results, I just wanted a bigger bottle and the Anita's was a great price at Hobby Lobby.
-
AMT 1969 Plymouth GTX Convertible.
Dragonhawk1066 replied to Dragonhawk1066's topic in WIP: Model Cars
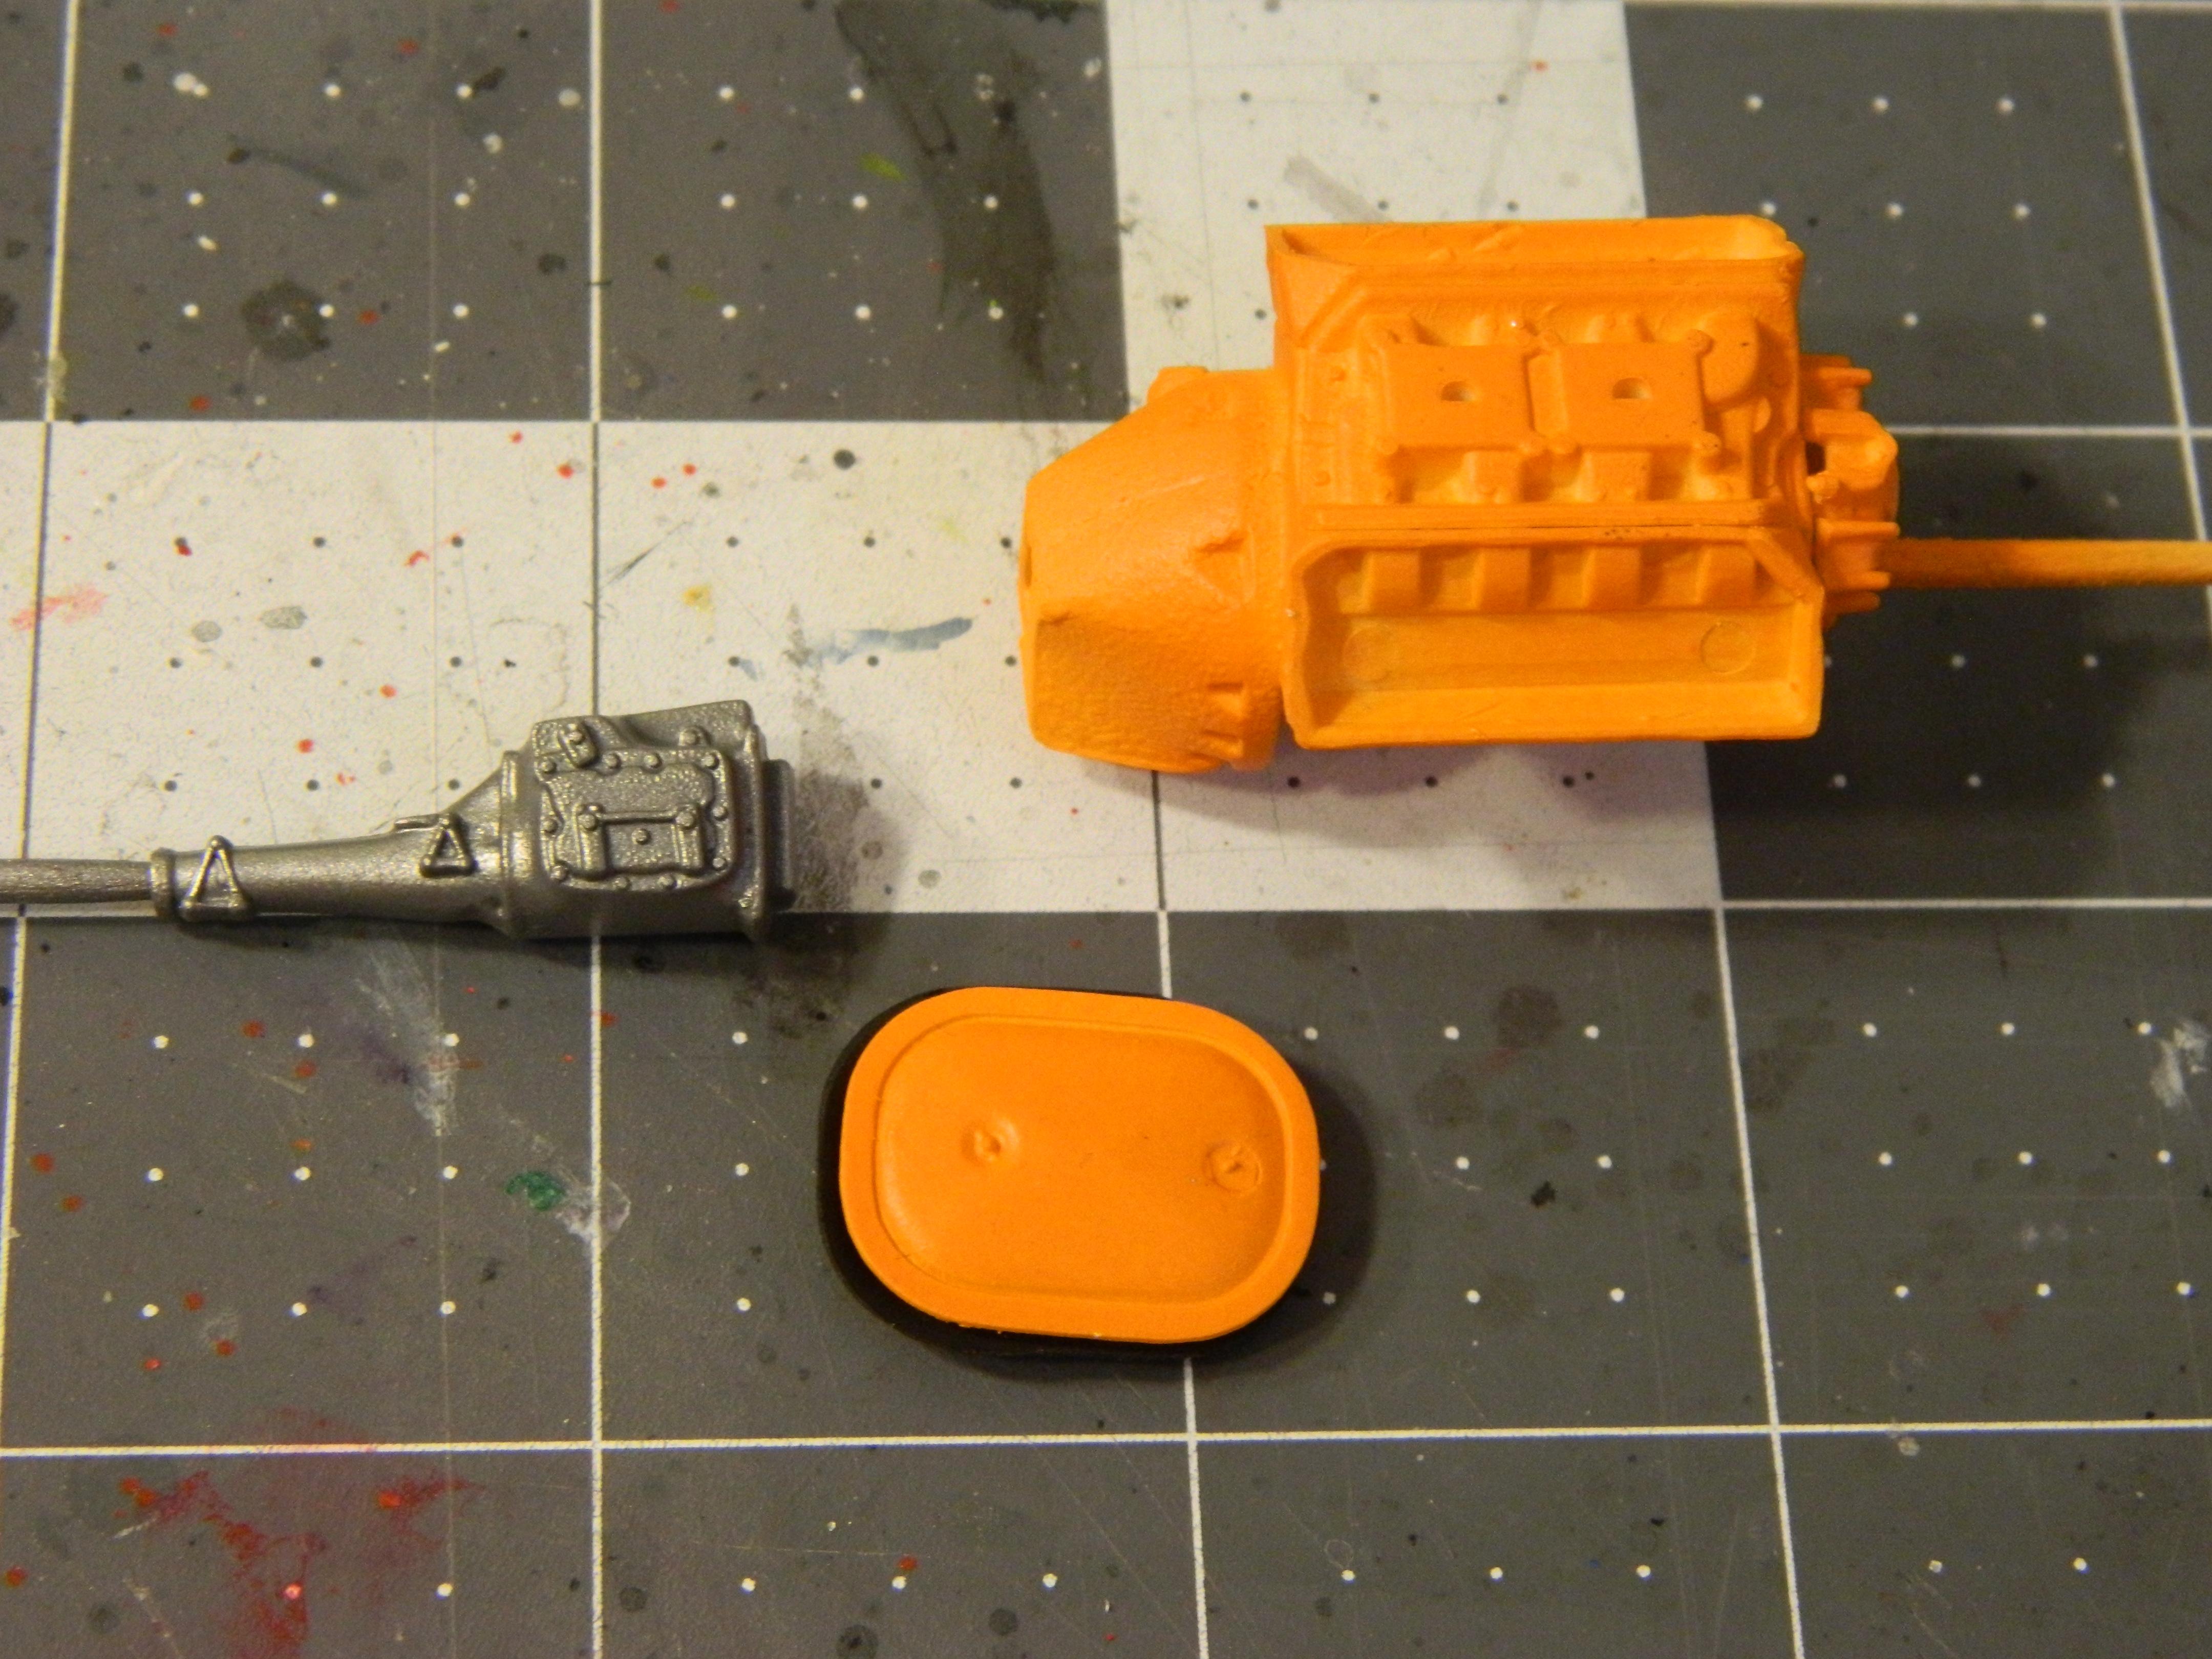
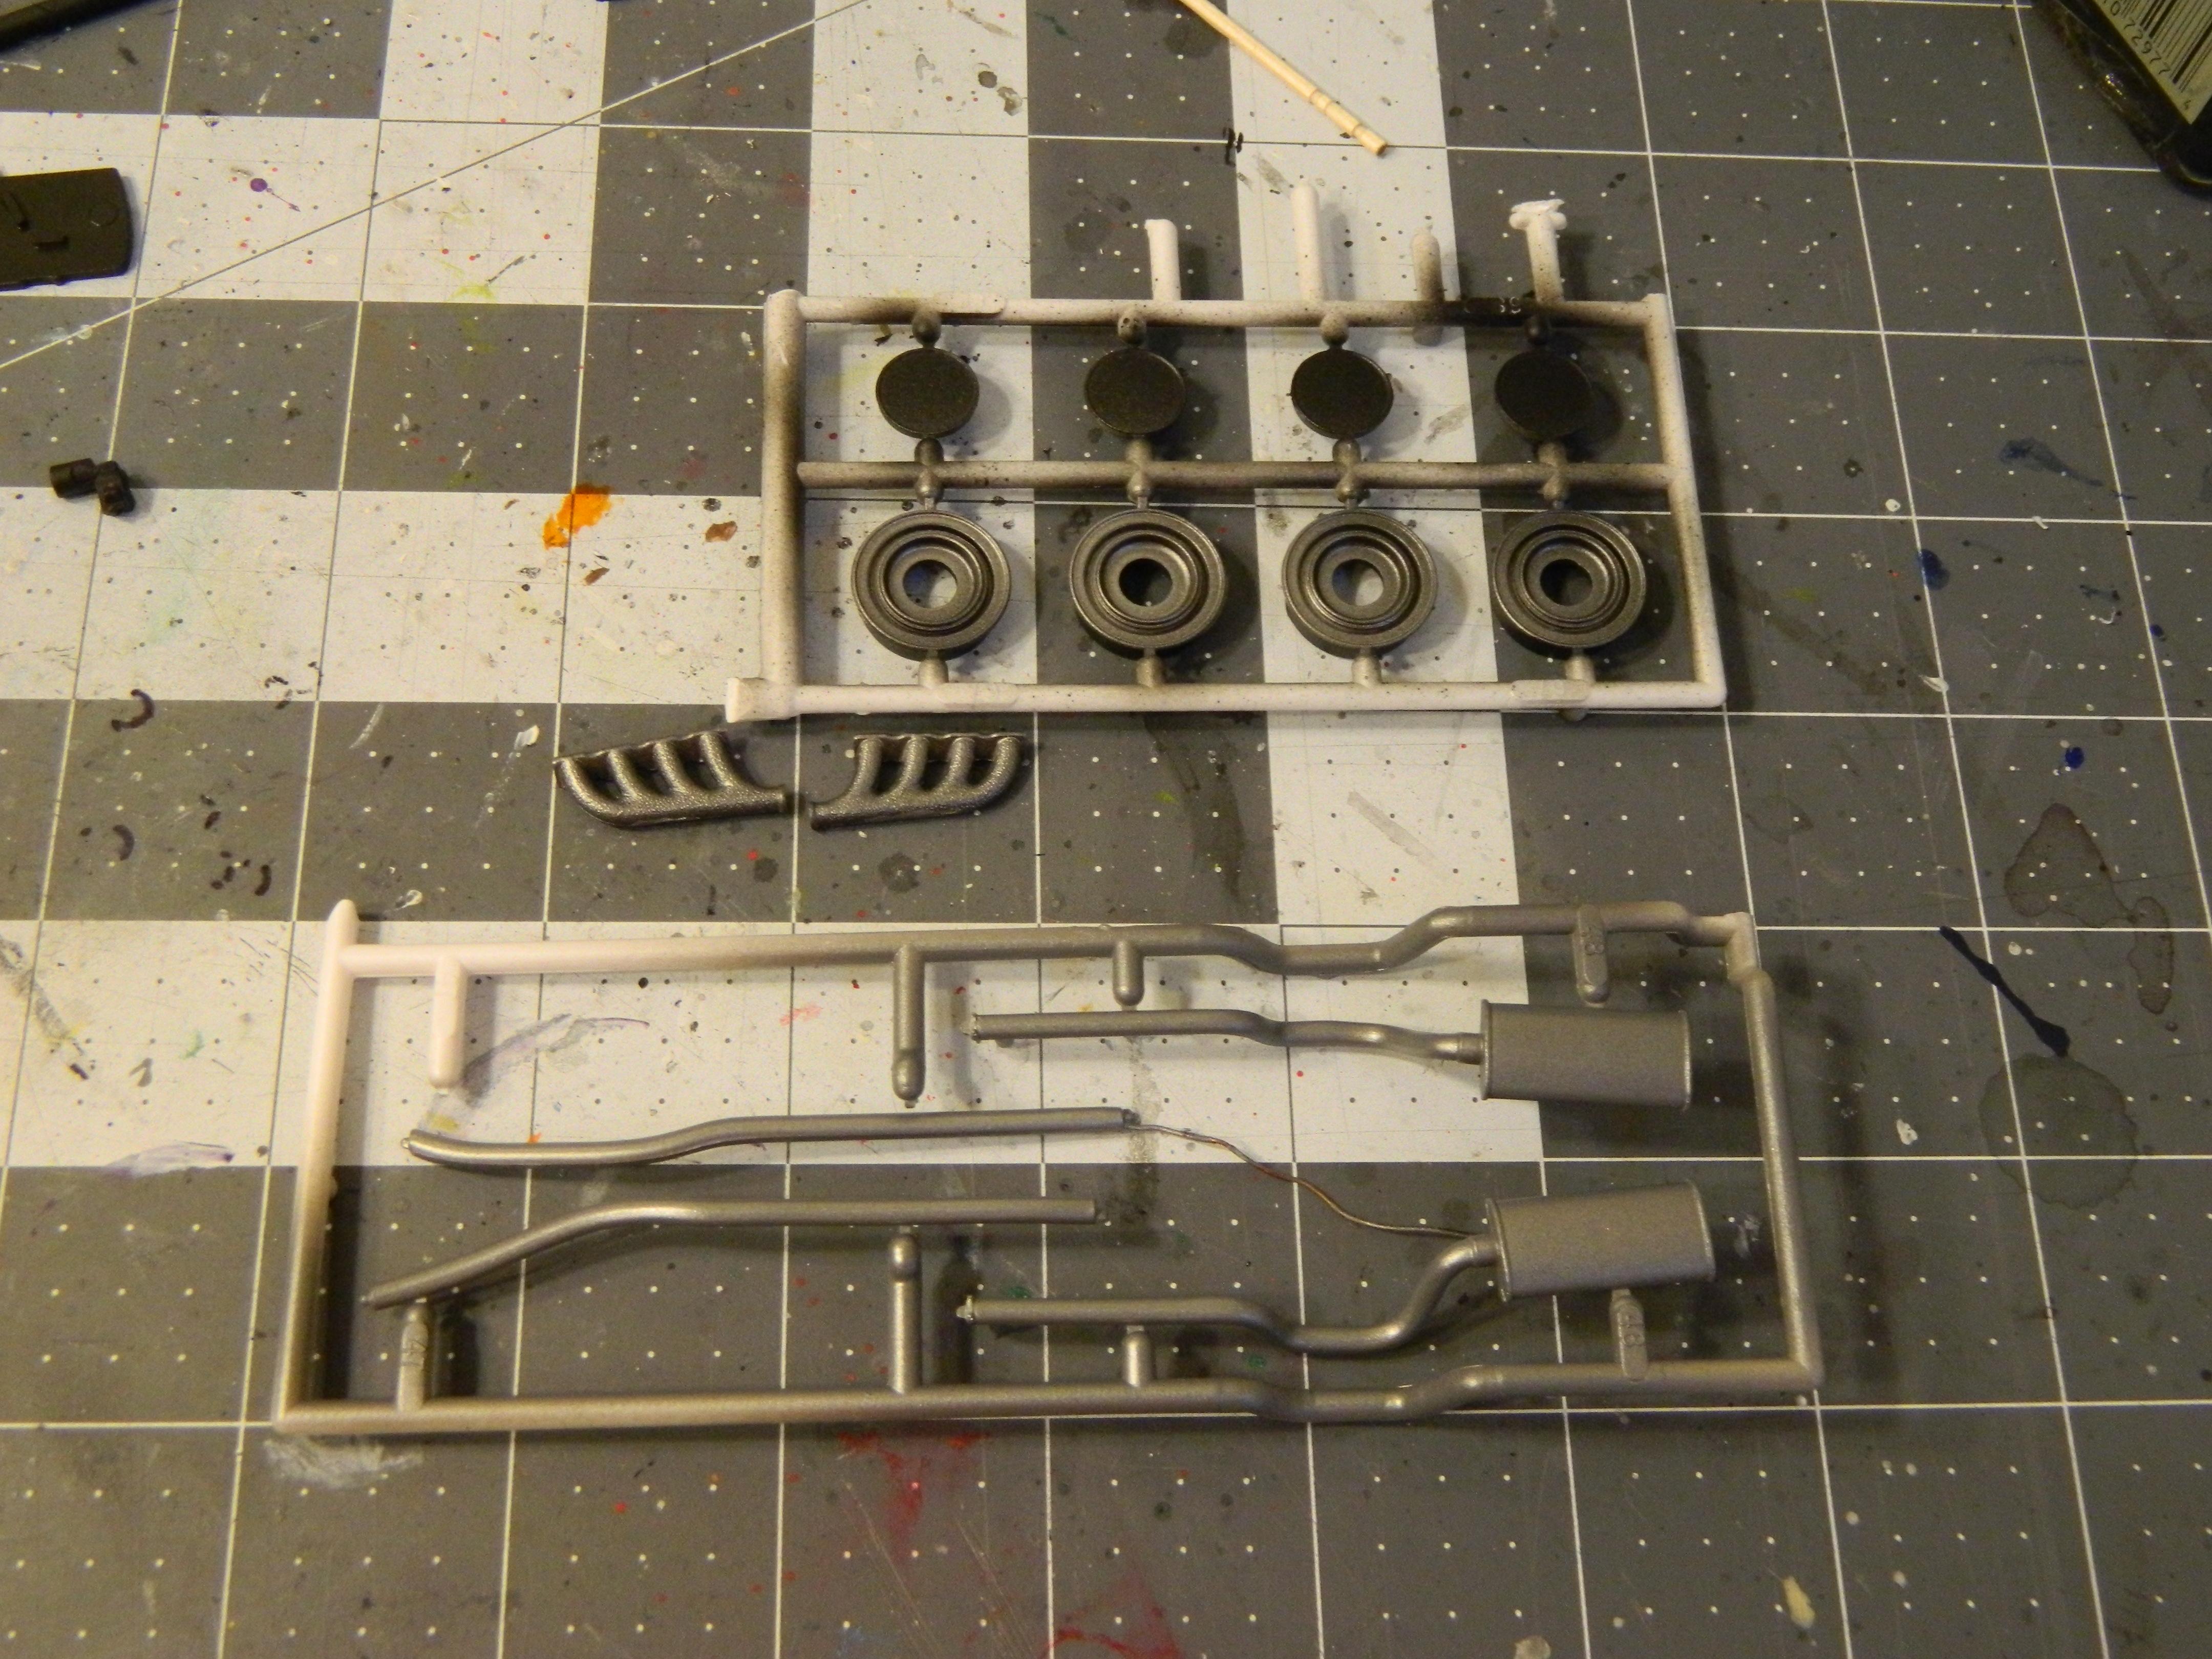
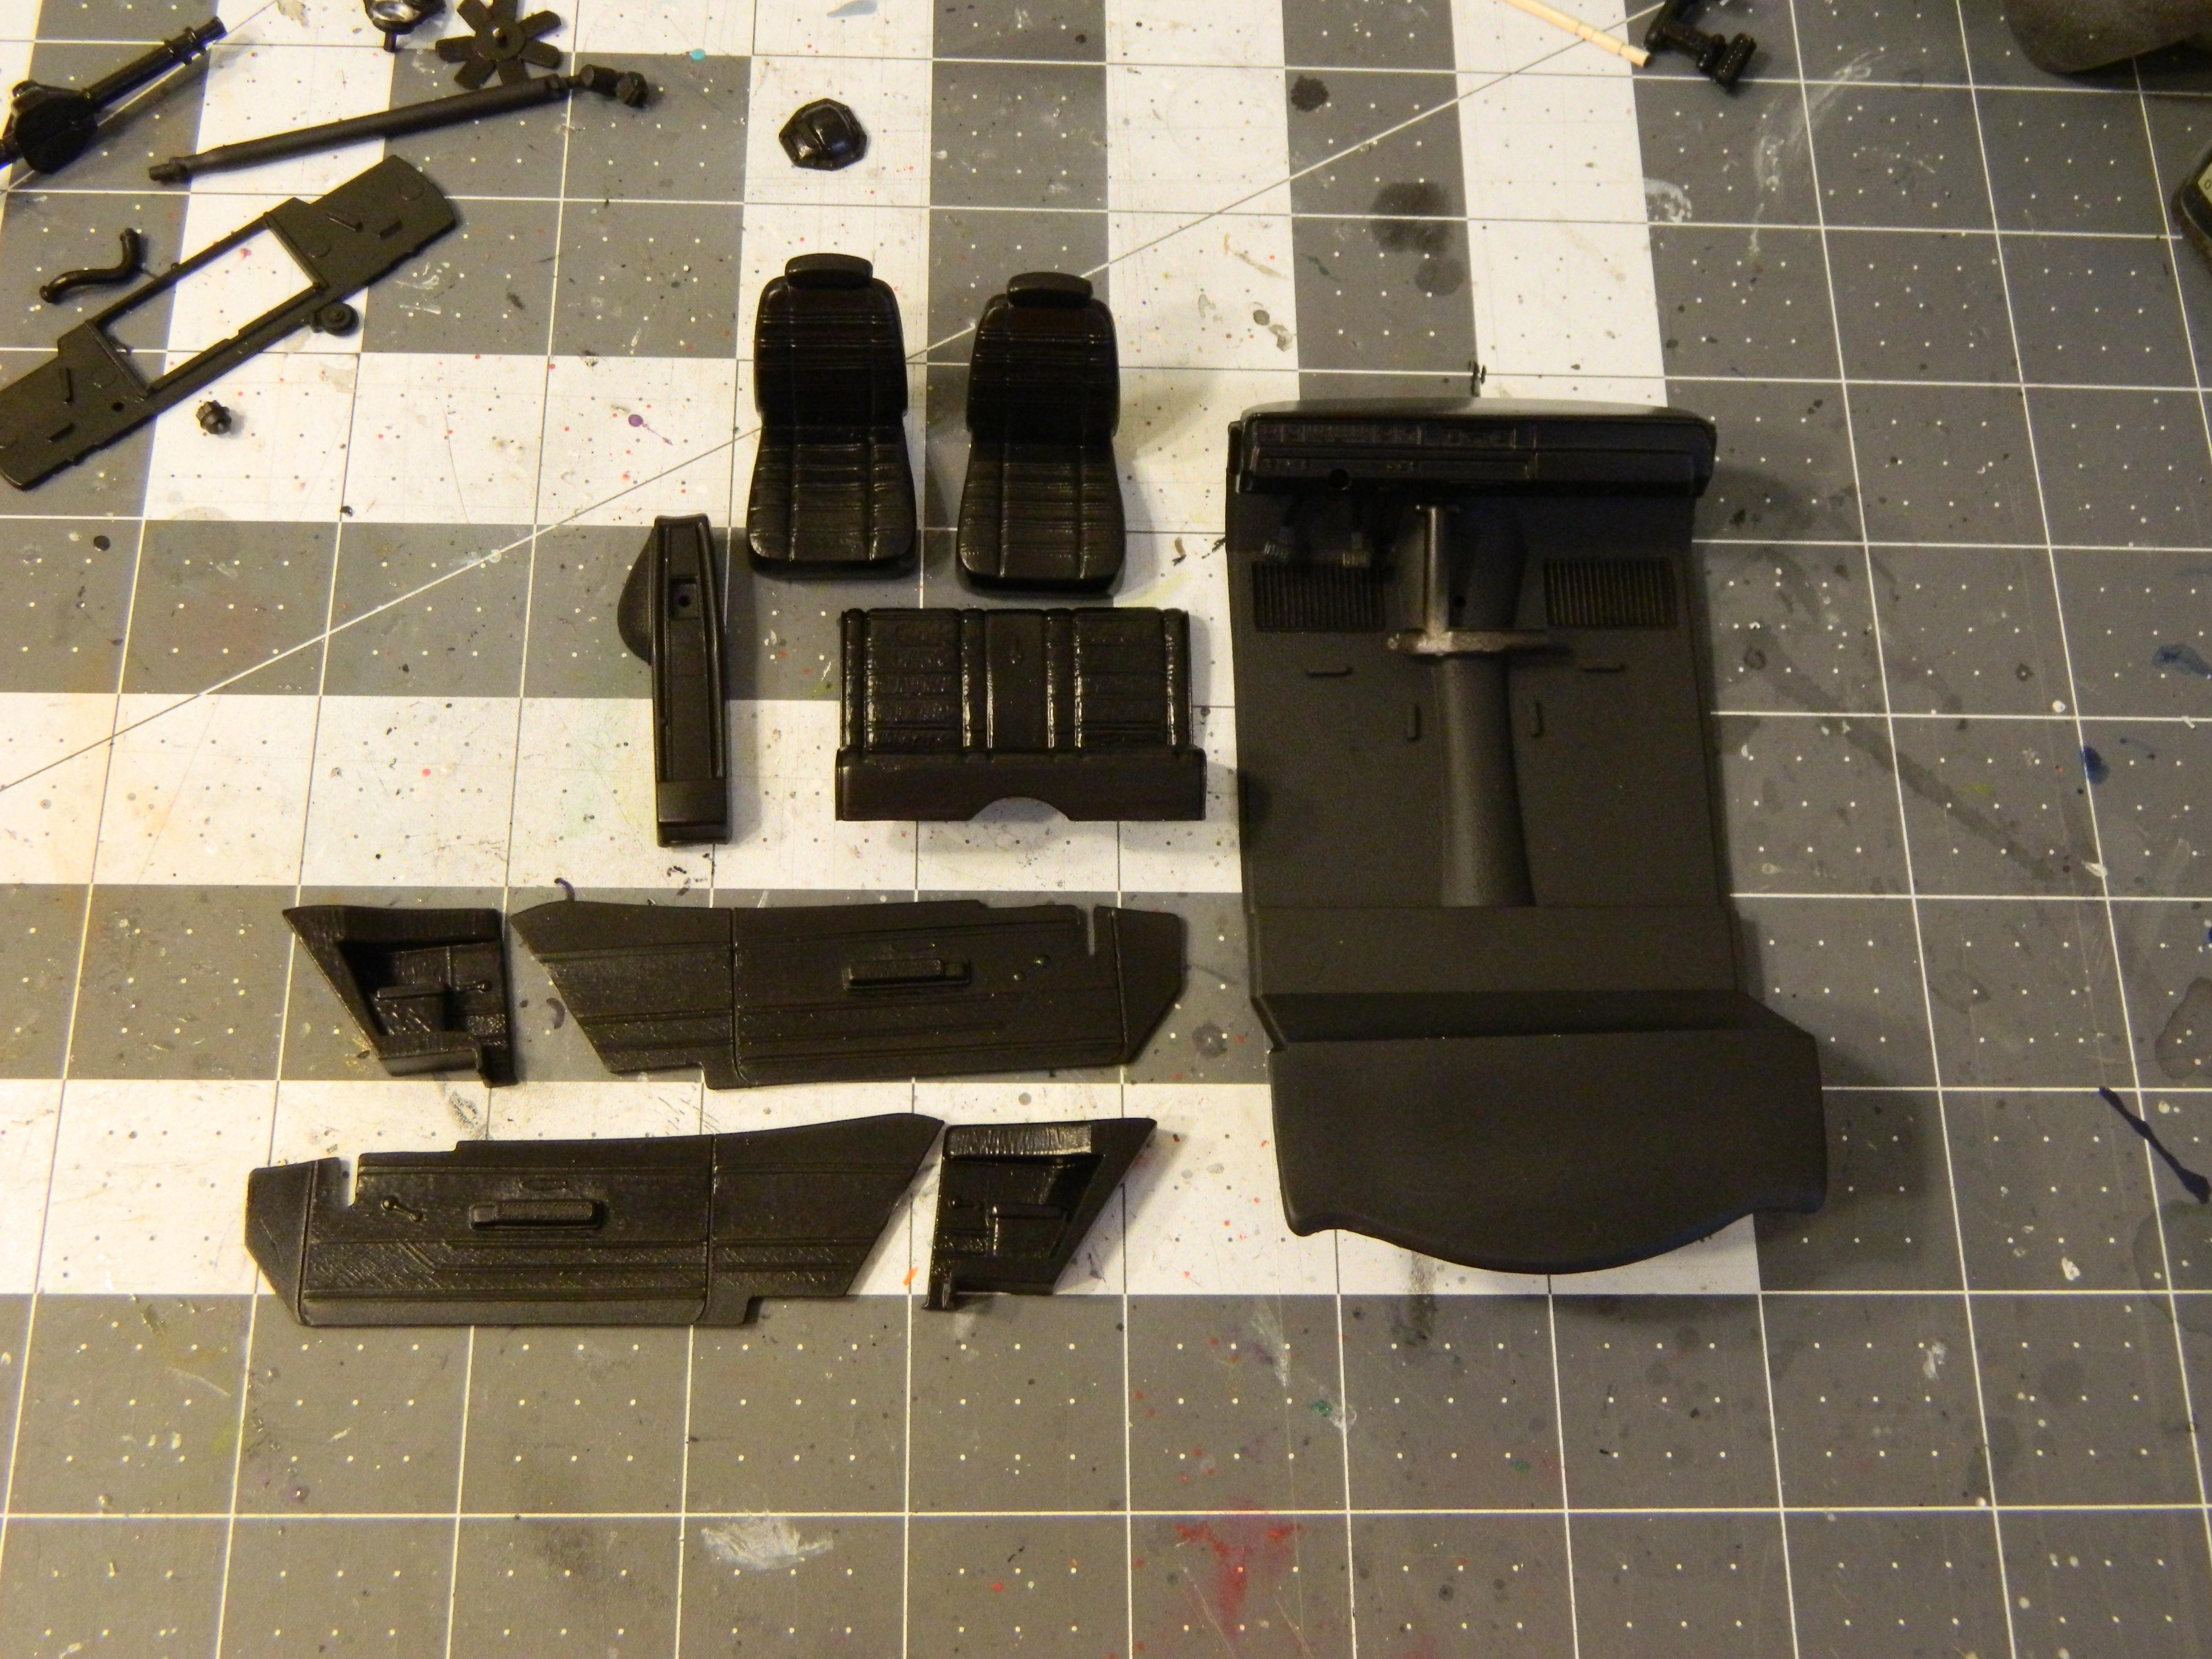
I got some paint work done today. I airbrushed the engine with Orange craft paint. The transmission, exhaust and manifolds, and wheelbacks were airbrushed with Mission Models Aluminum. The Mission Aluminum is thinner and more translucent than Vallejo Air Aluminum that I had used in the past. The trans and exhaust were primed in gray, while the wheelbacks, gas tank, and exhaust manifolds were primed in black, giving a more steel look. I also airbrushed the interior parts and suspension pieces with Gloss Black craft paint. I'll wet-sand the body and get started on the woodgrain for the interior tomorrow.
-
Nice!
-
Looks pretty good!
-
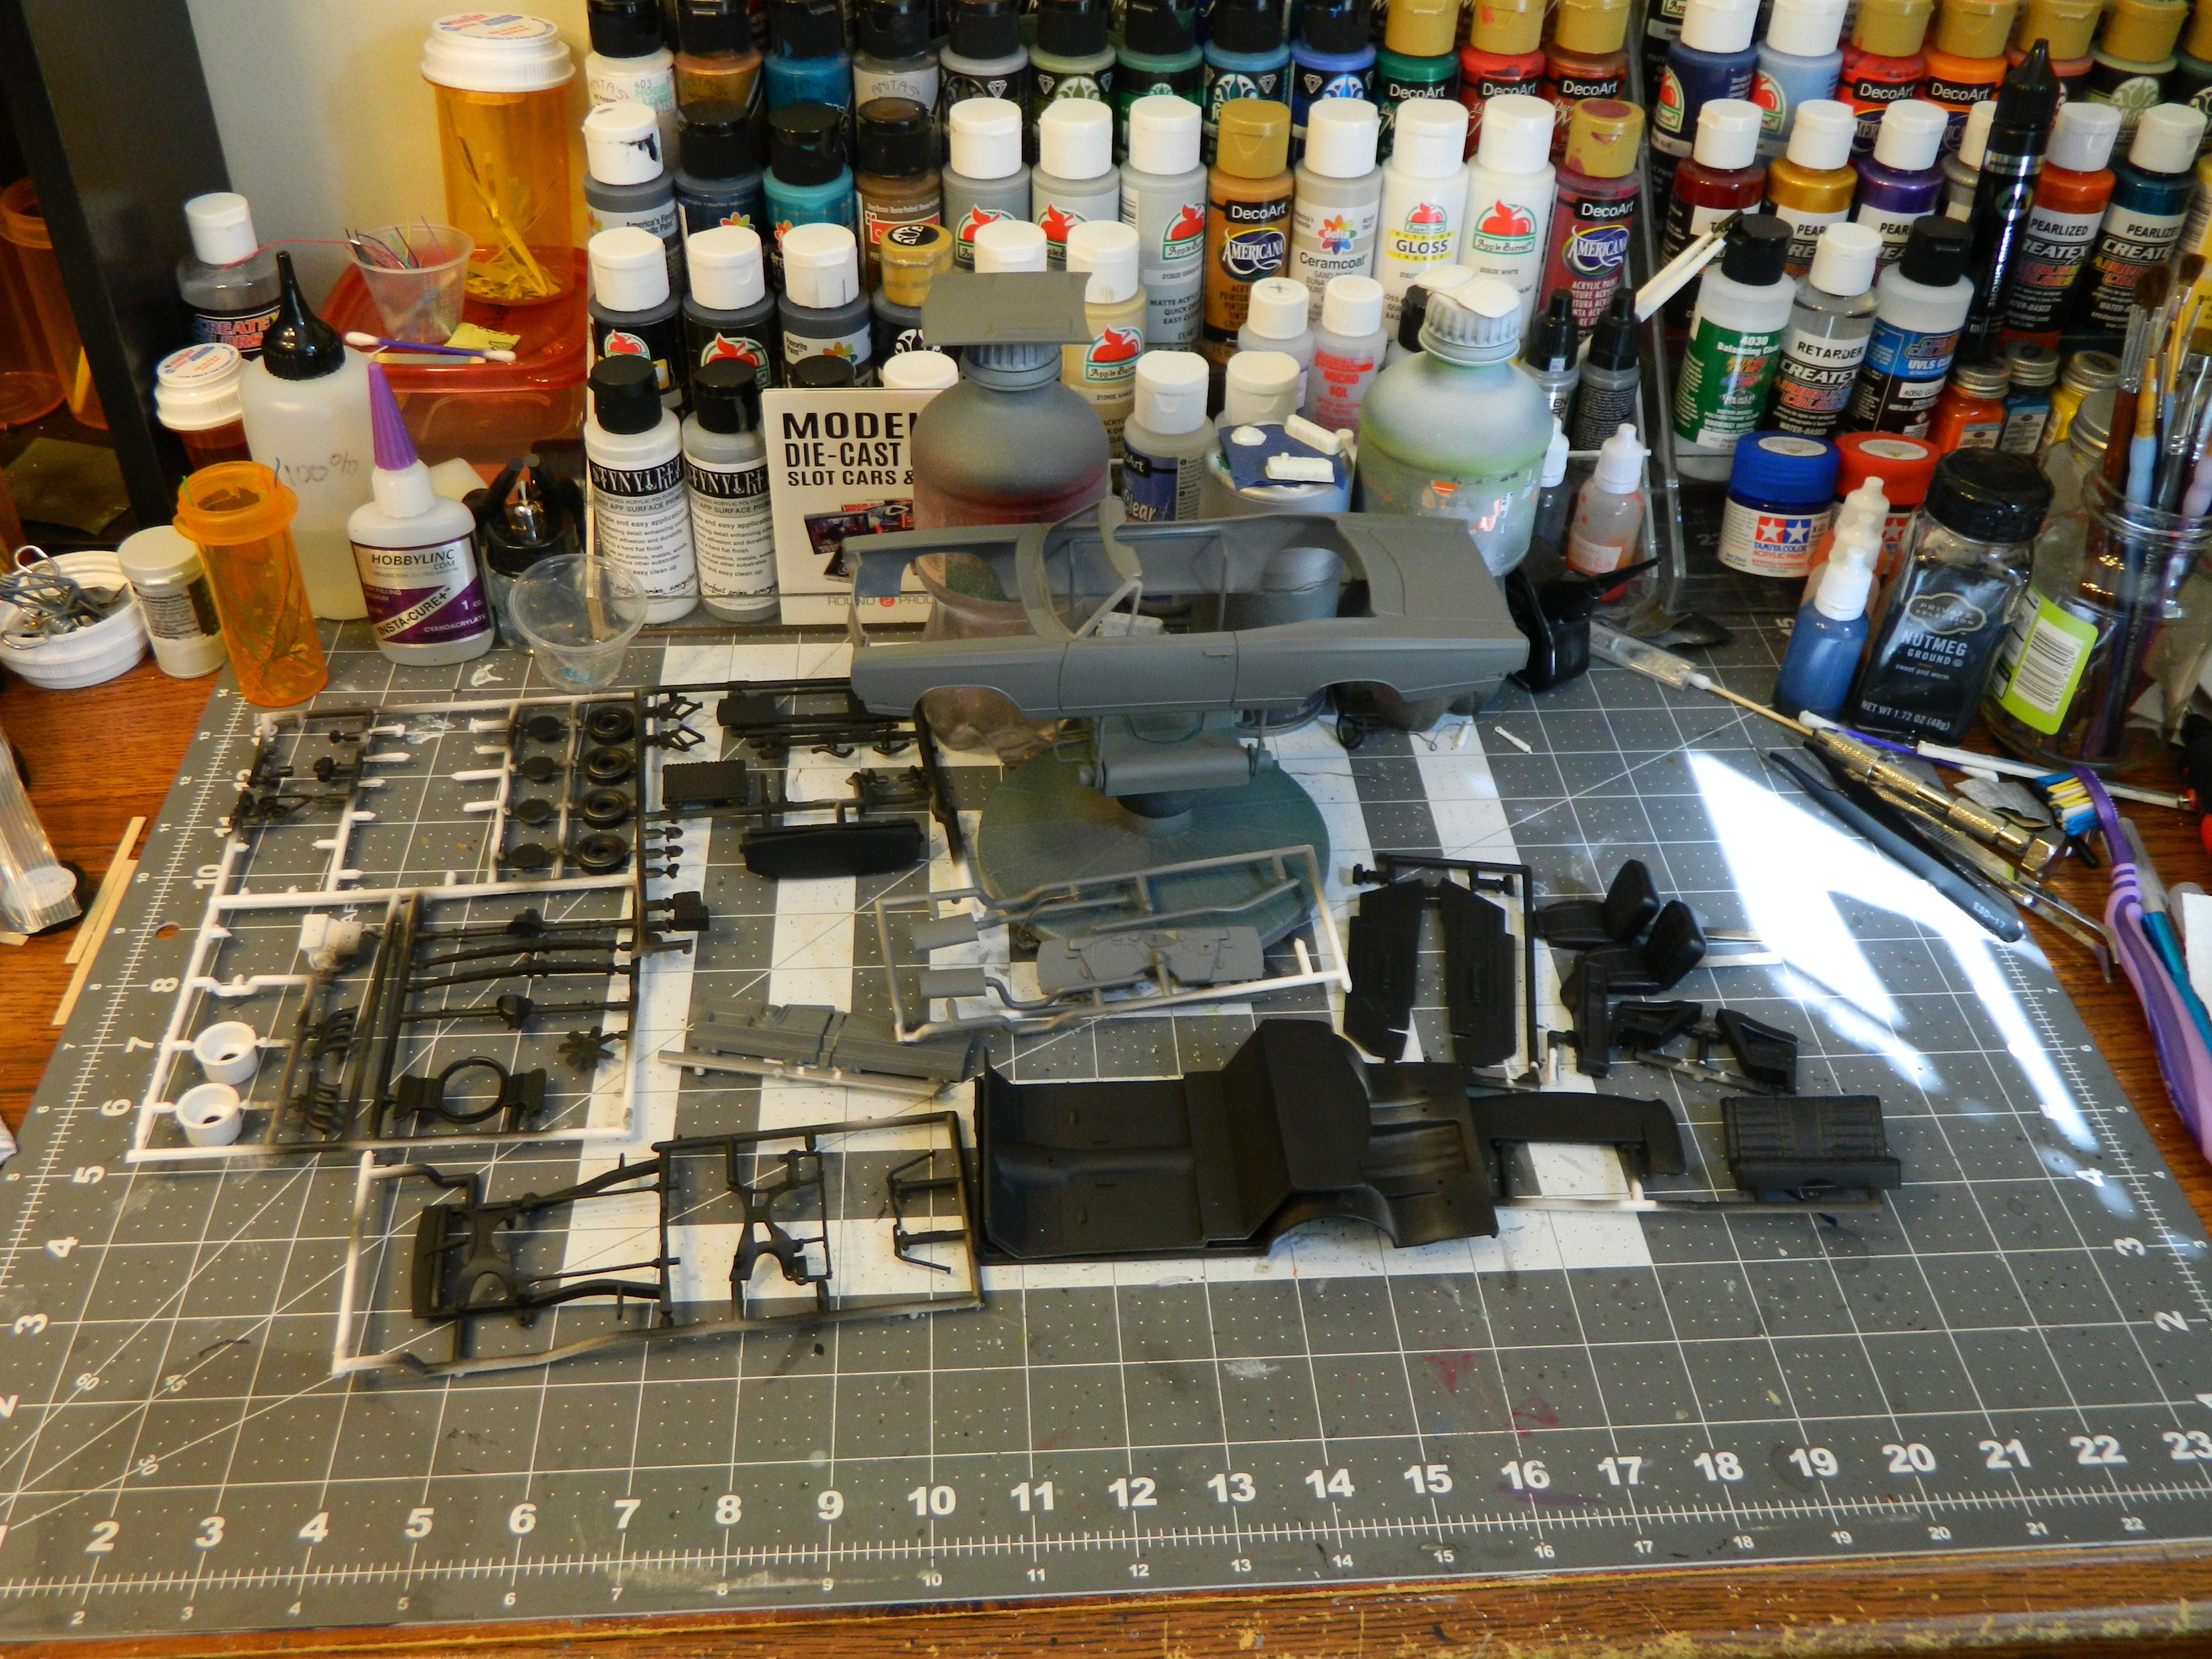
Next up for me is AMT's 1969 Plymouth GTX Convertible. This one will be done in Createx Pearl Silver with a black interior. I had previously prepped the body and parts by sanding and trimming the flash. I also scribed the panel lines using a dental pick, and then the back of a #11 Exacto blade. Then everything went into a sink full of Dawn dishwater and got scrubbed with a toothbrush, then rinsed and dried. Today I primed all of the parts using Stynylrez White, Gray, and Black Primer. Although it is airbrush ready, I do add 6-10 drops of flow improver into the 2 oz. bottles to help avoid a dry tip problem. I also pour the primer through a strainer to trap any dry pieces and clumps. Once I finally took these steps, knock on wood, I've been blessed with trouble free priming on my last few projects. I'll let the body sit until Thursday when it'll get wet-sanded, but in the meantime, I'll get started on the interior, and also get the engine, transmission, and a few other parts painted in Orange, Aluminum, and Steel.
-
Well done!


.JPG.2c105506c37a3f9285dbe7fe13c5de5a.JPG)