Dragonhawk1066
-
Posts
3,932 -
Joined
-
Last visited
Content Type
Profiles
Forums
Events
Gallery
Everything posted by Dragonhawk1066
-
Looks good in Root Beer! Nice work on the interior.
-
Thanks Guys! Wayne, I've used it a couple of times now with no issues, so hopefully it's a better formula in the smaller cans. Nigel, even though it's a fairly basic kit, it is pretty decent. ea0863, you're welcome. Everybody seems to have different results with all of the different paints. I do a lot of spoon and spare parts testing when trying new to me products.
-
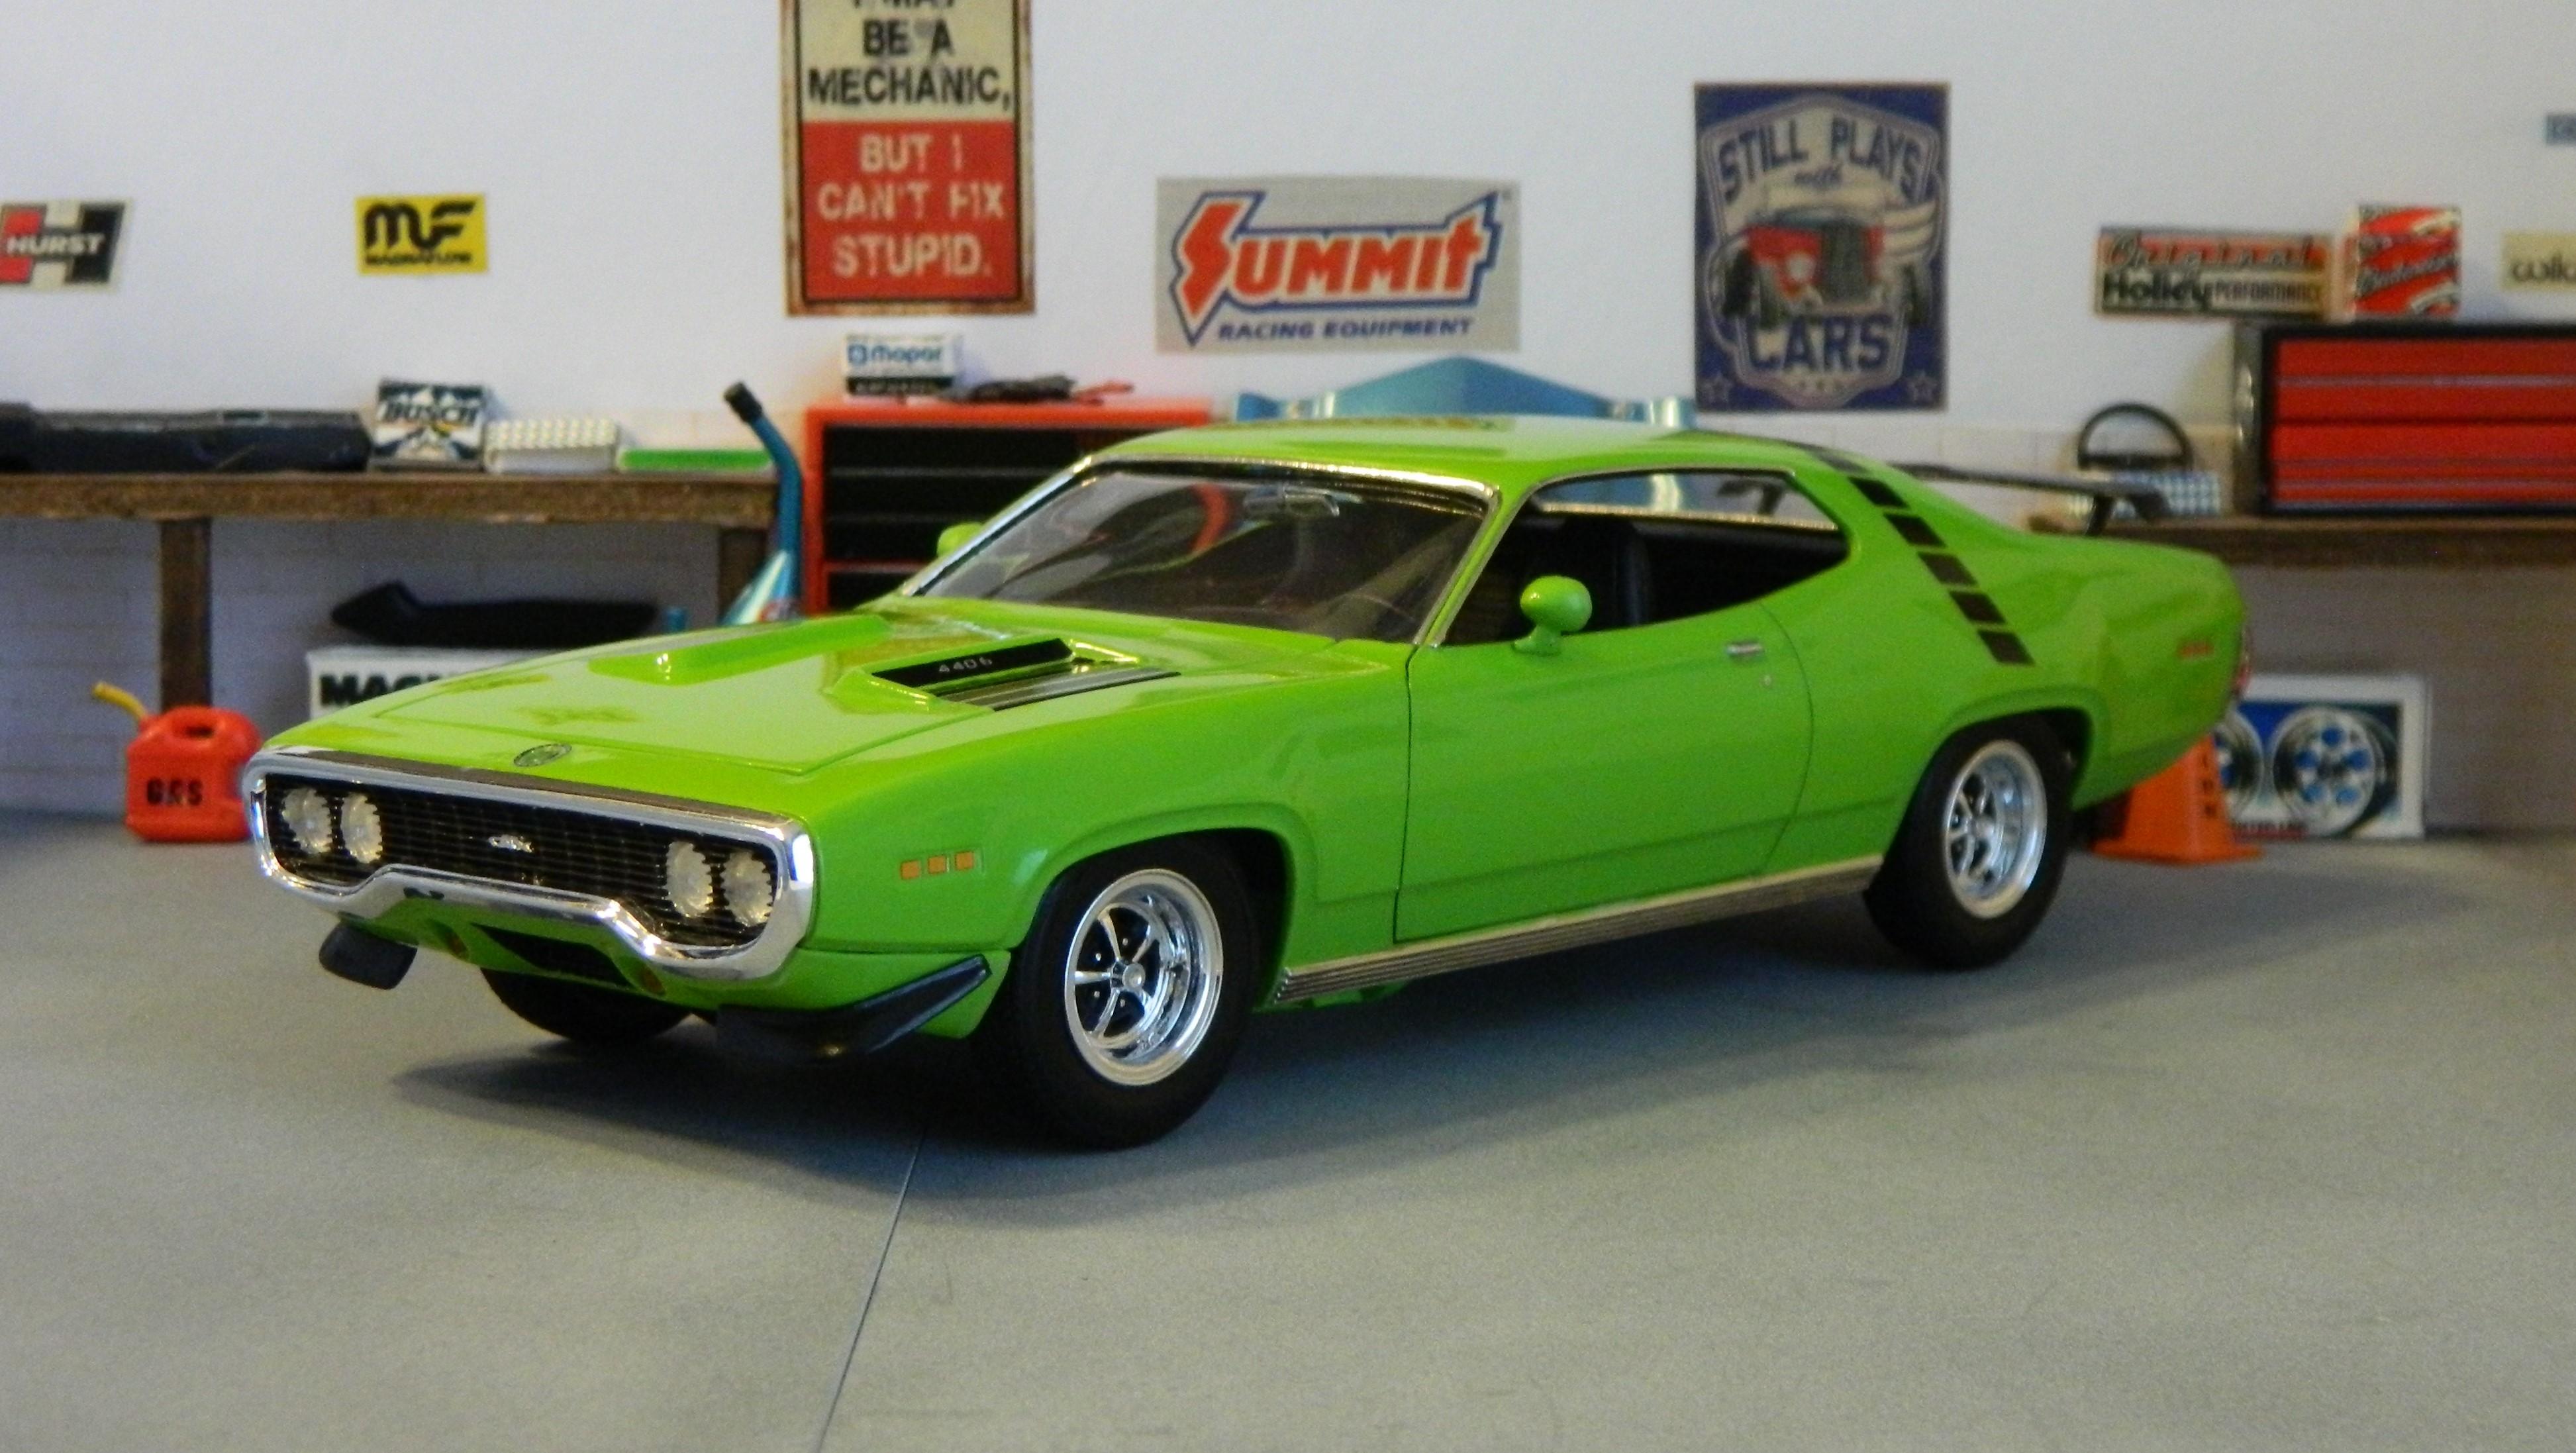
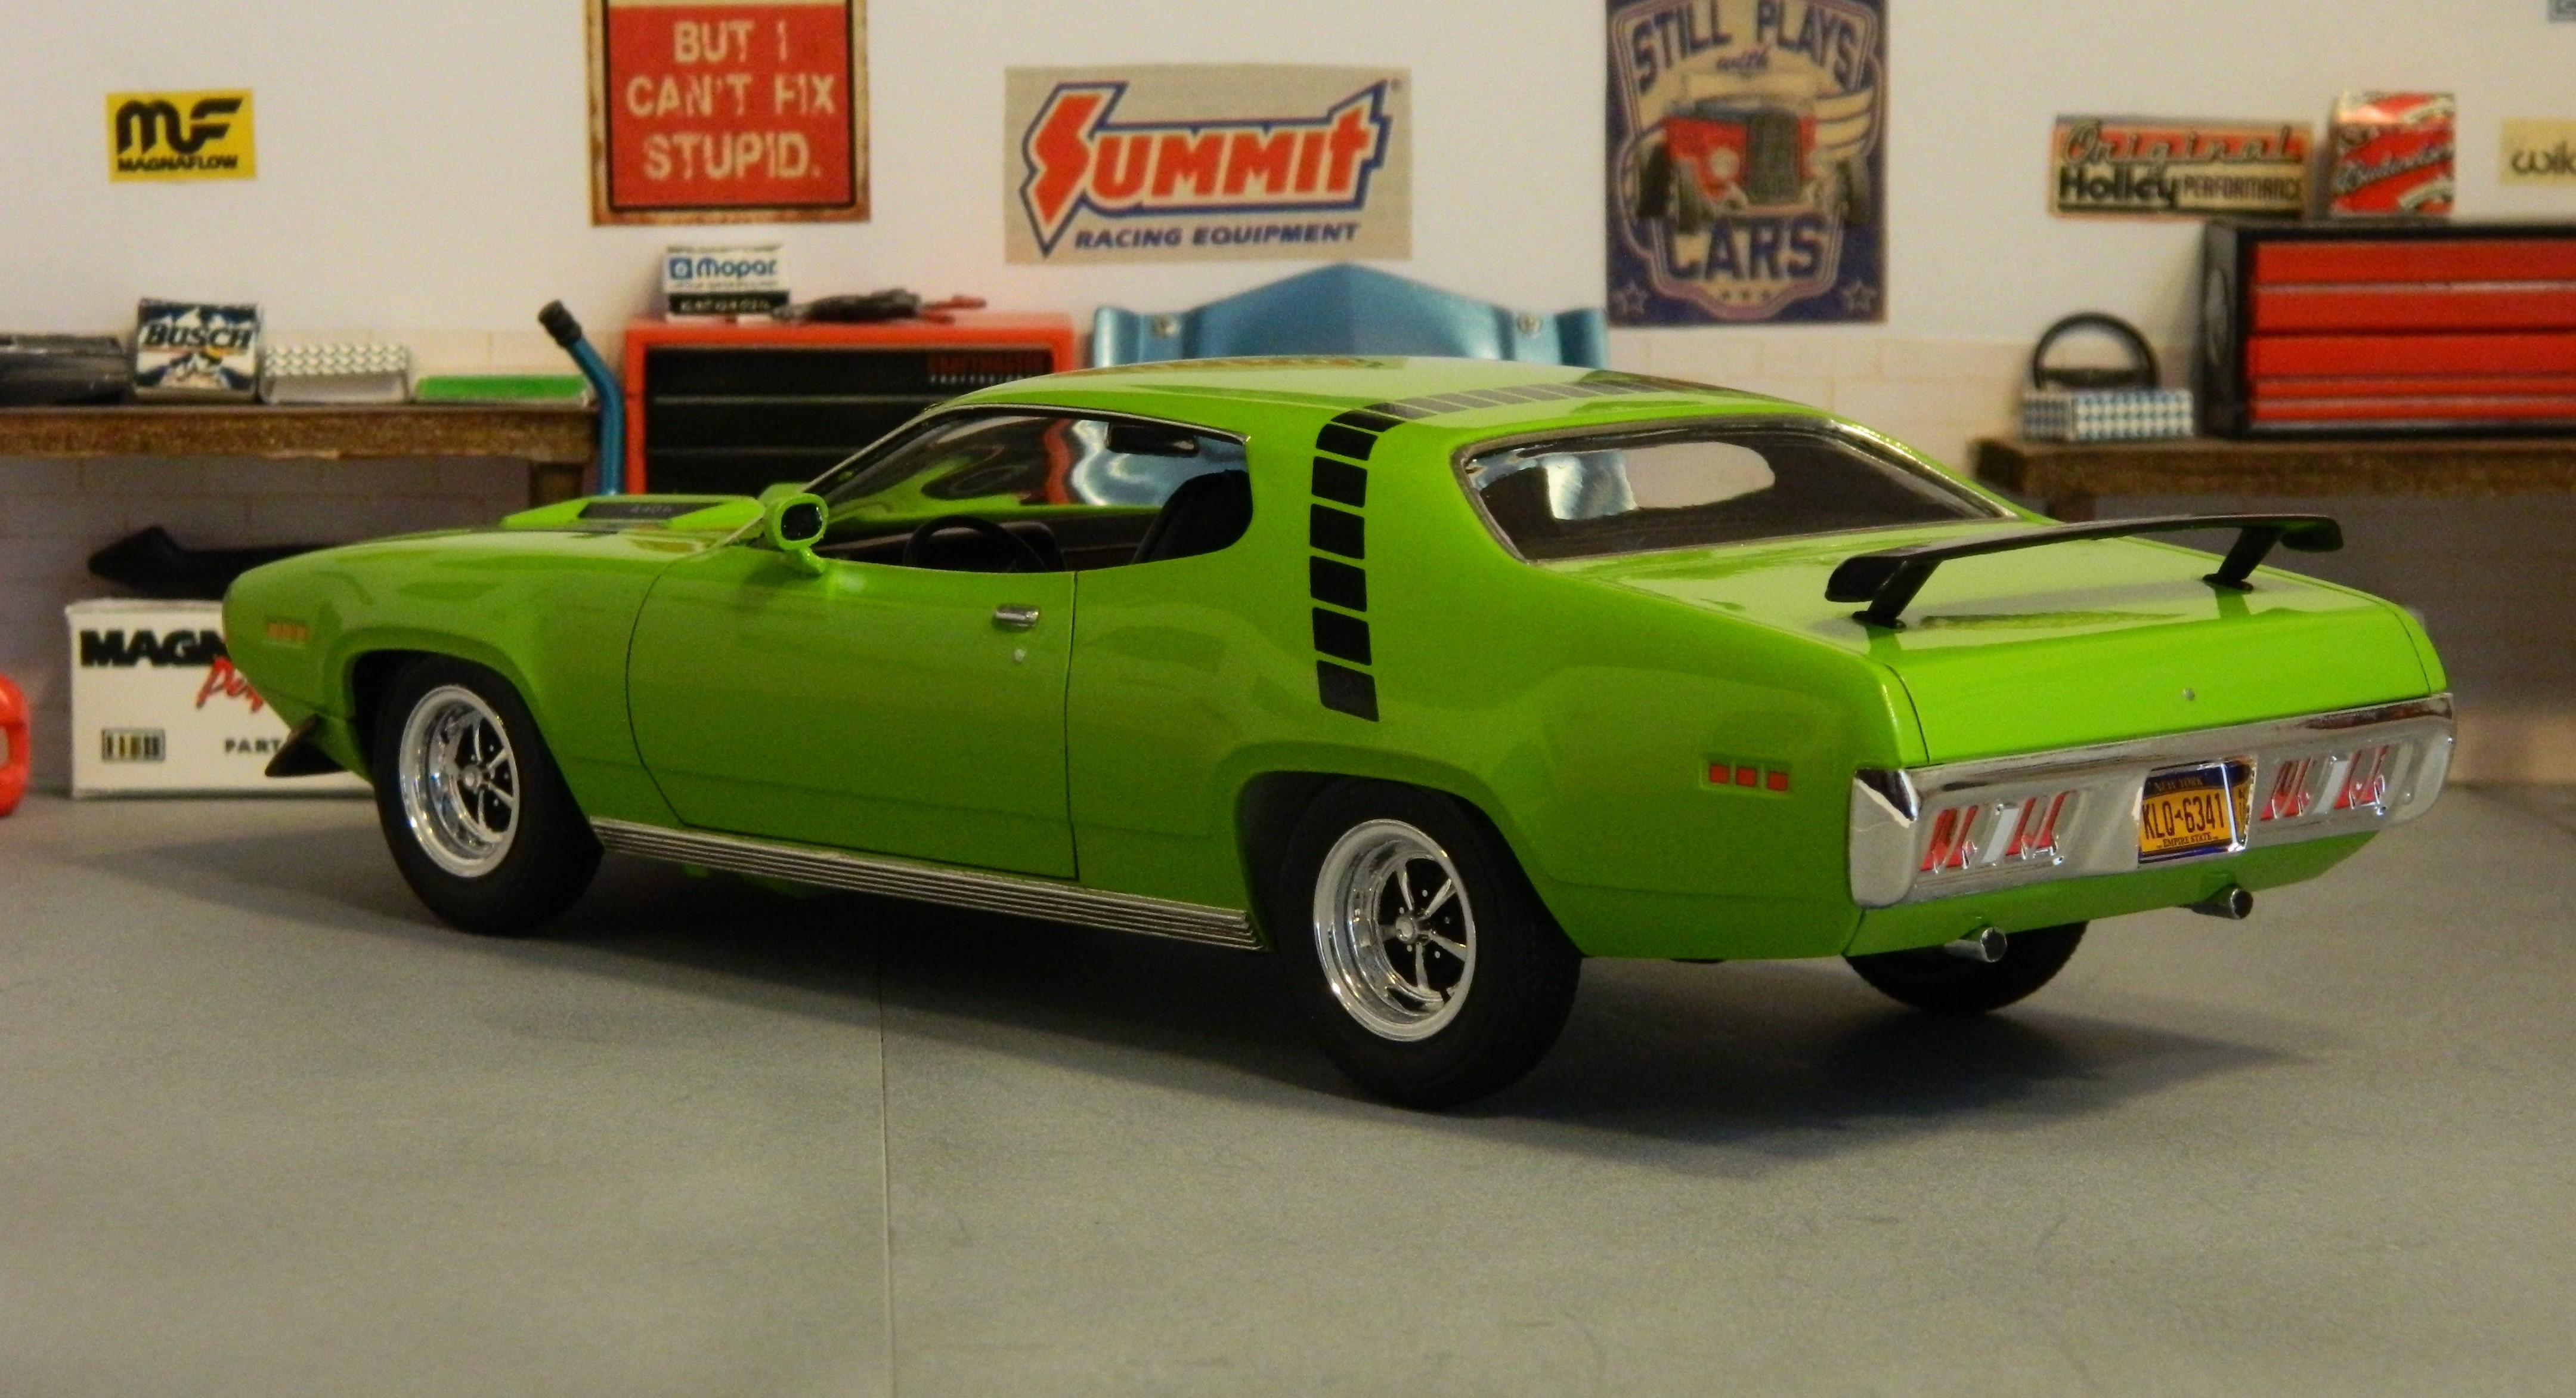
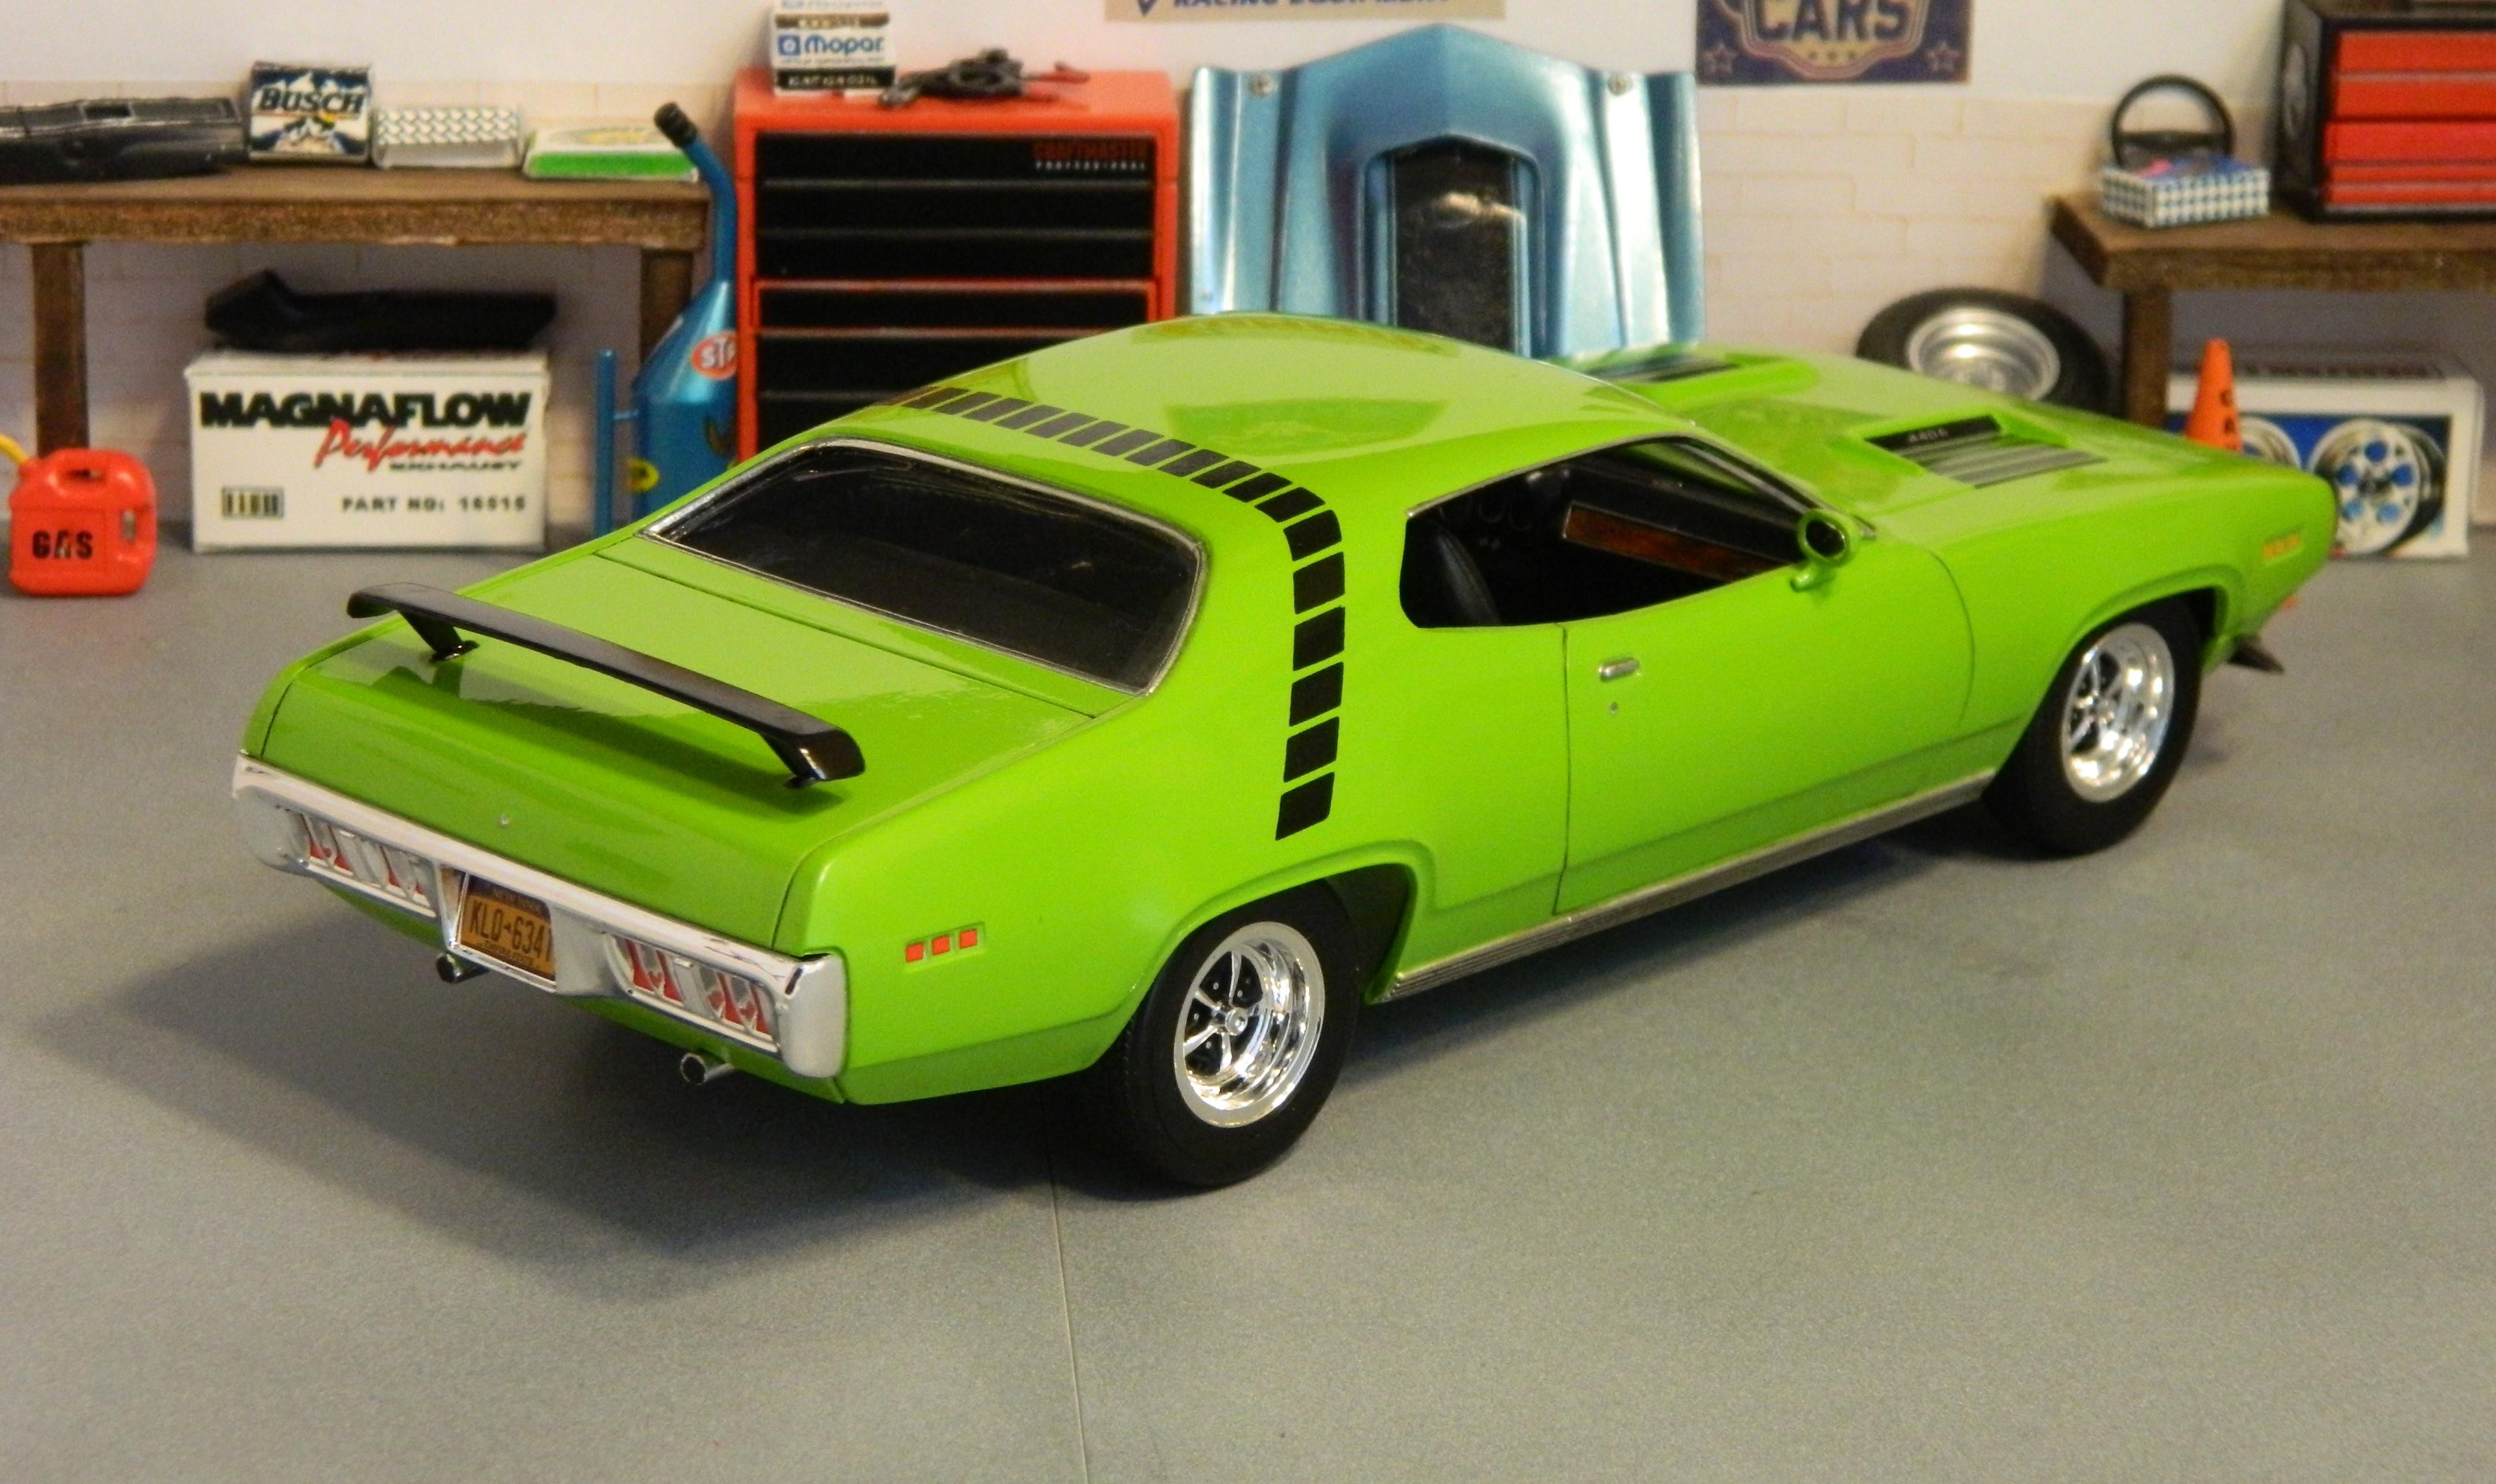
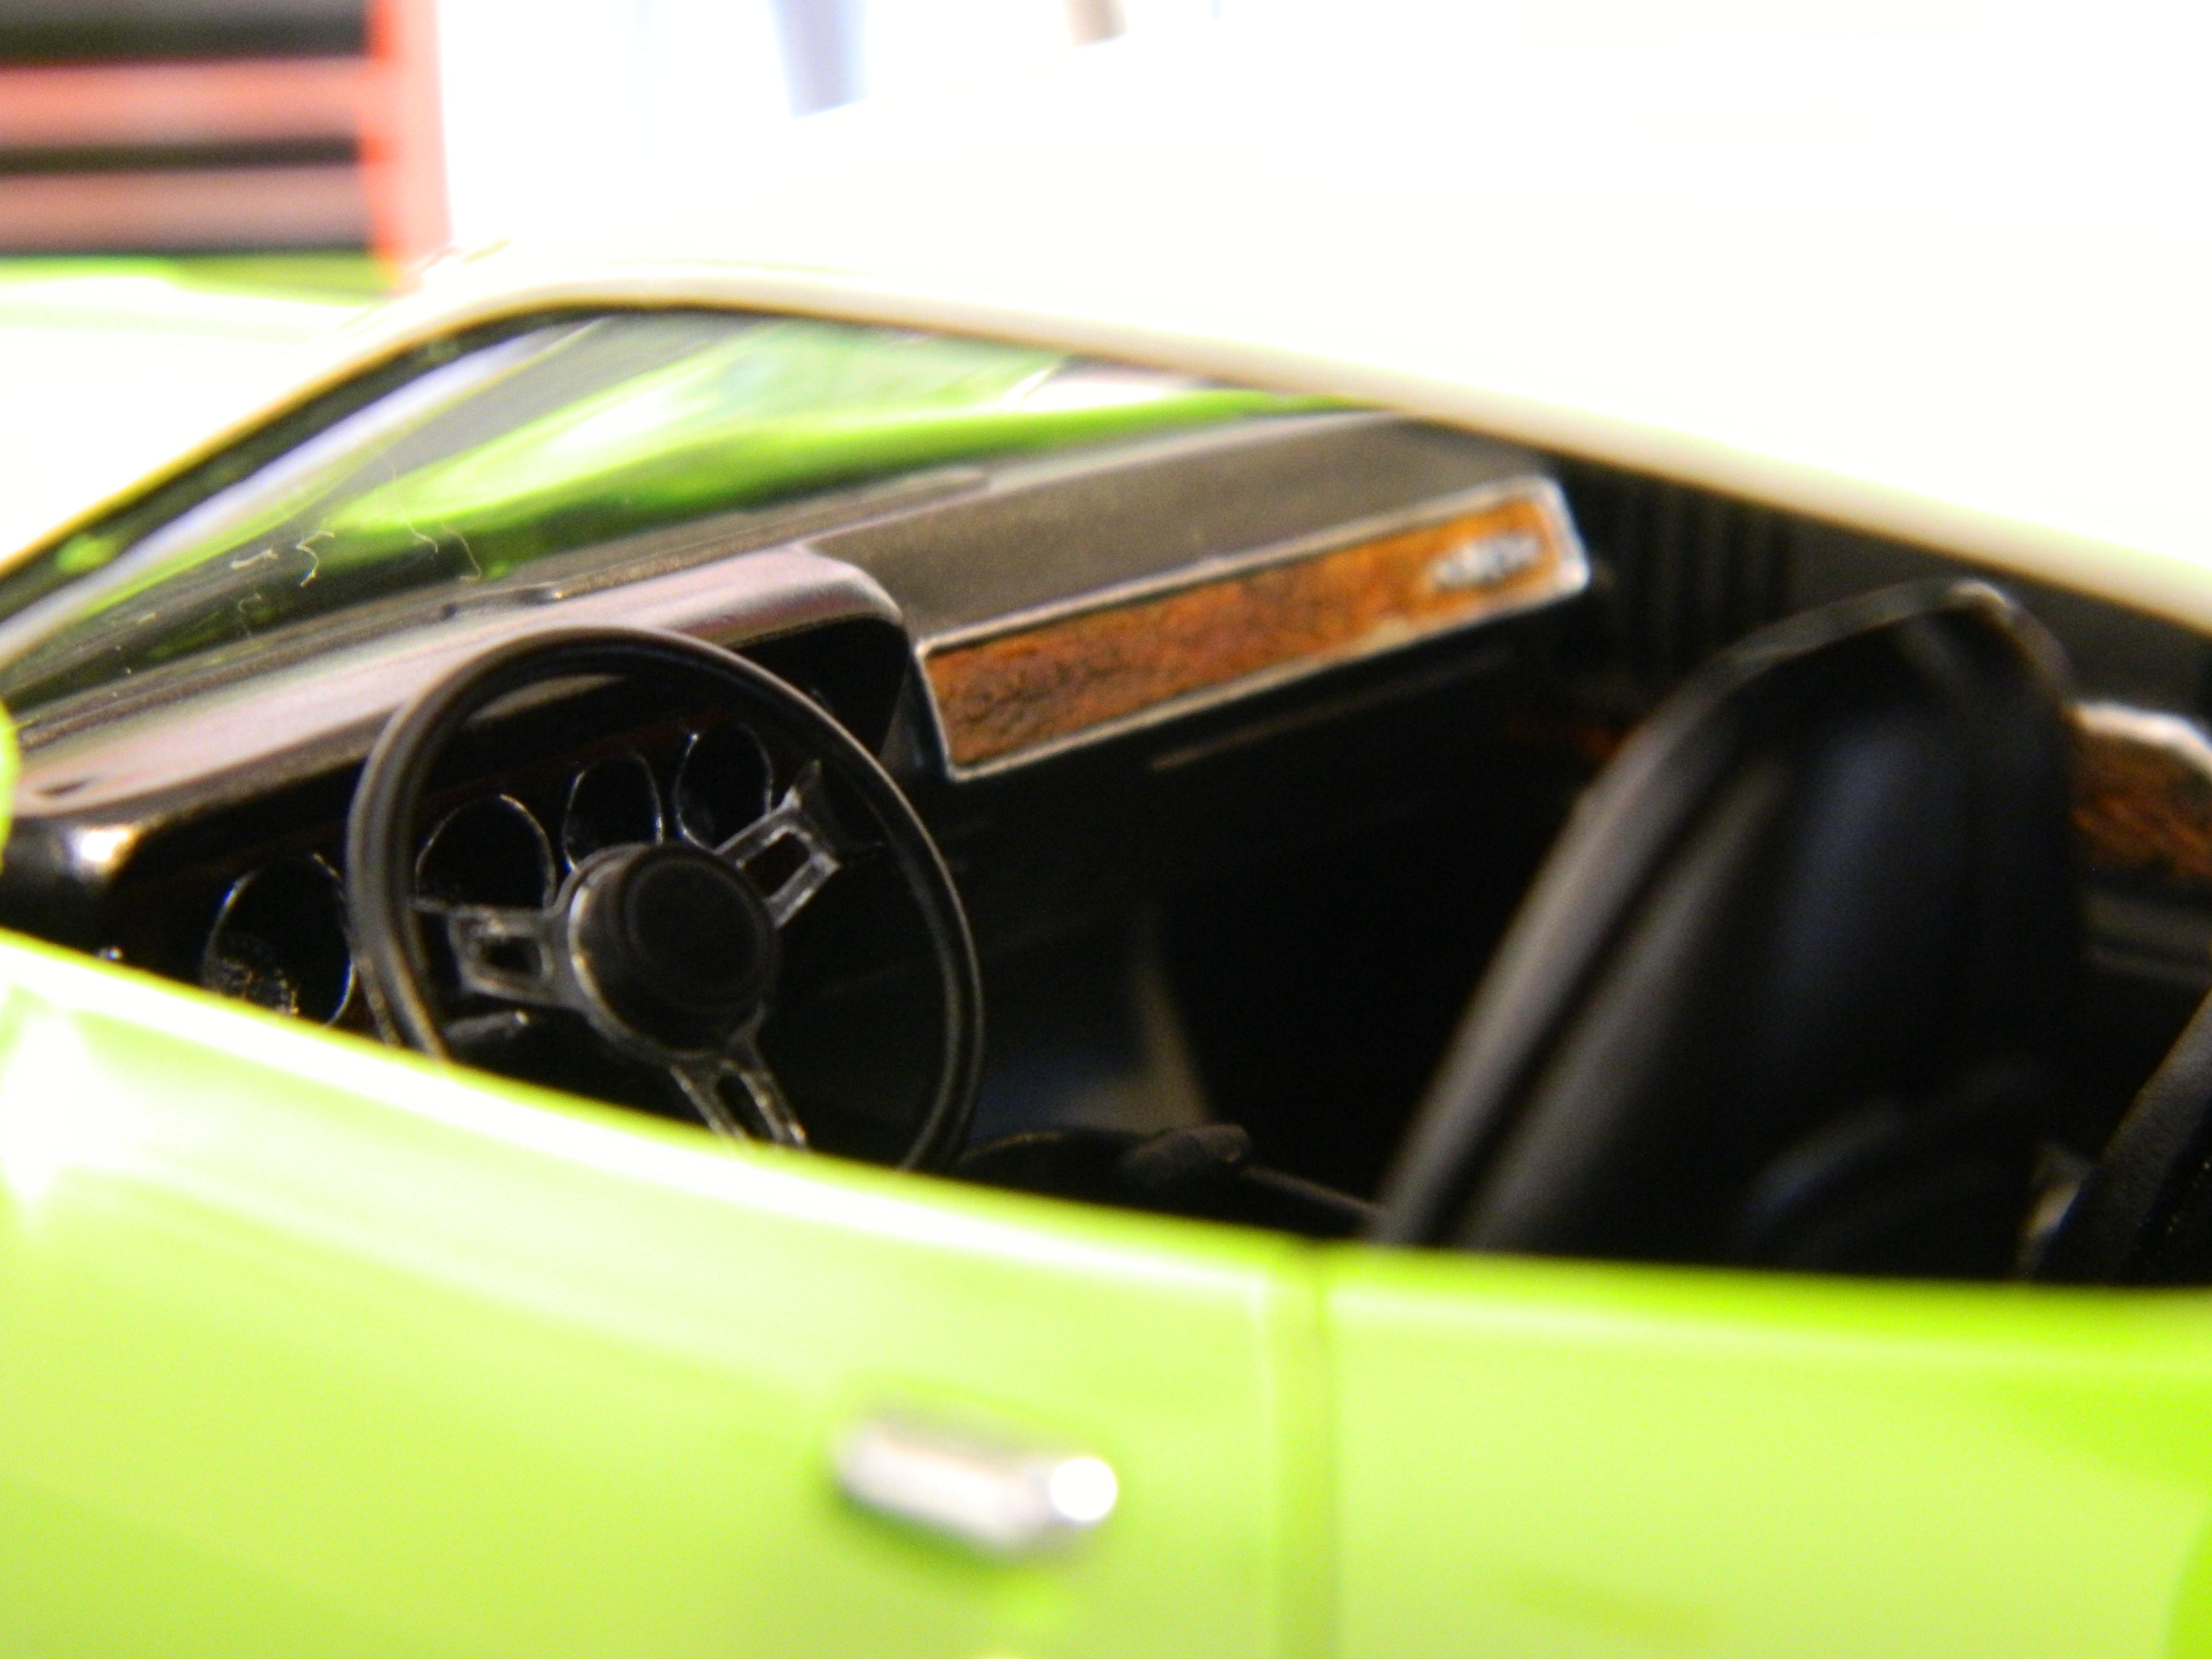
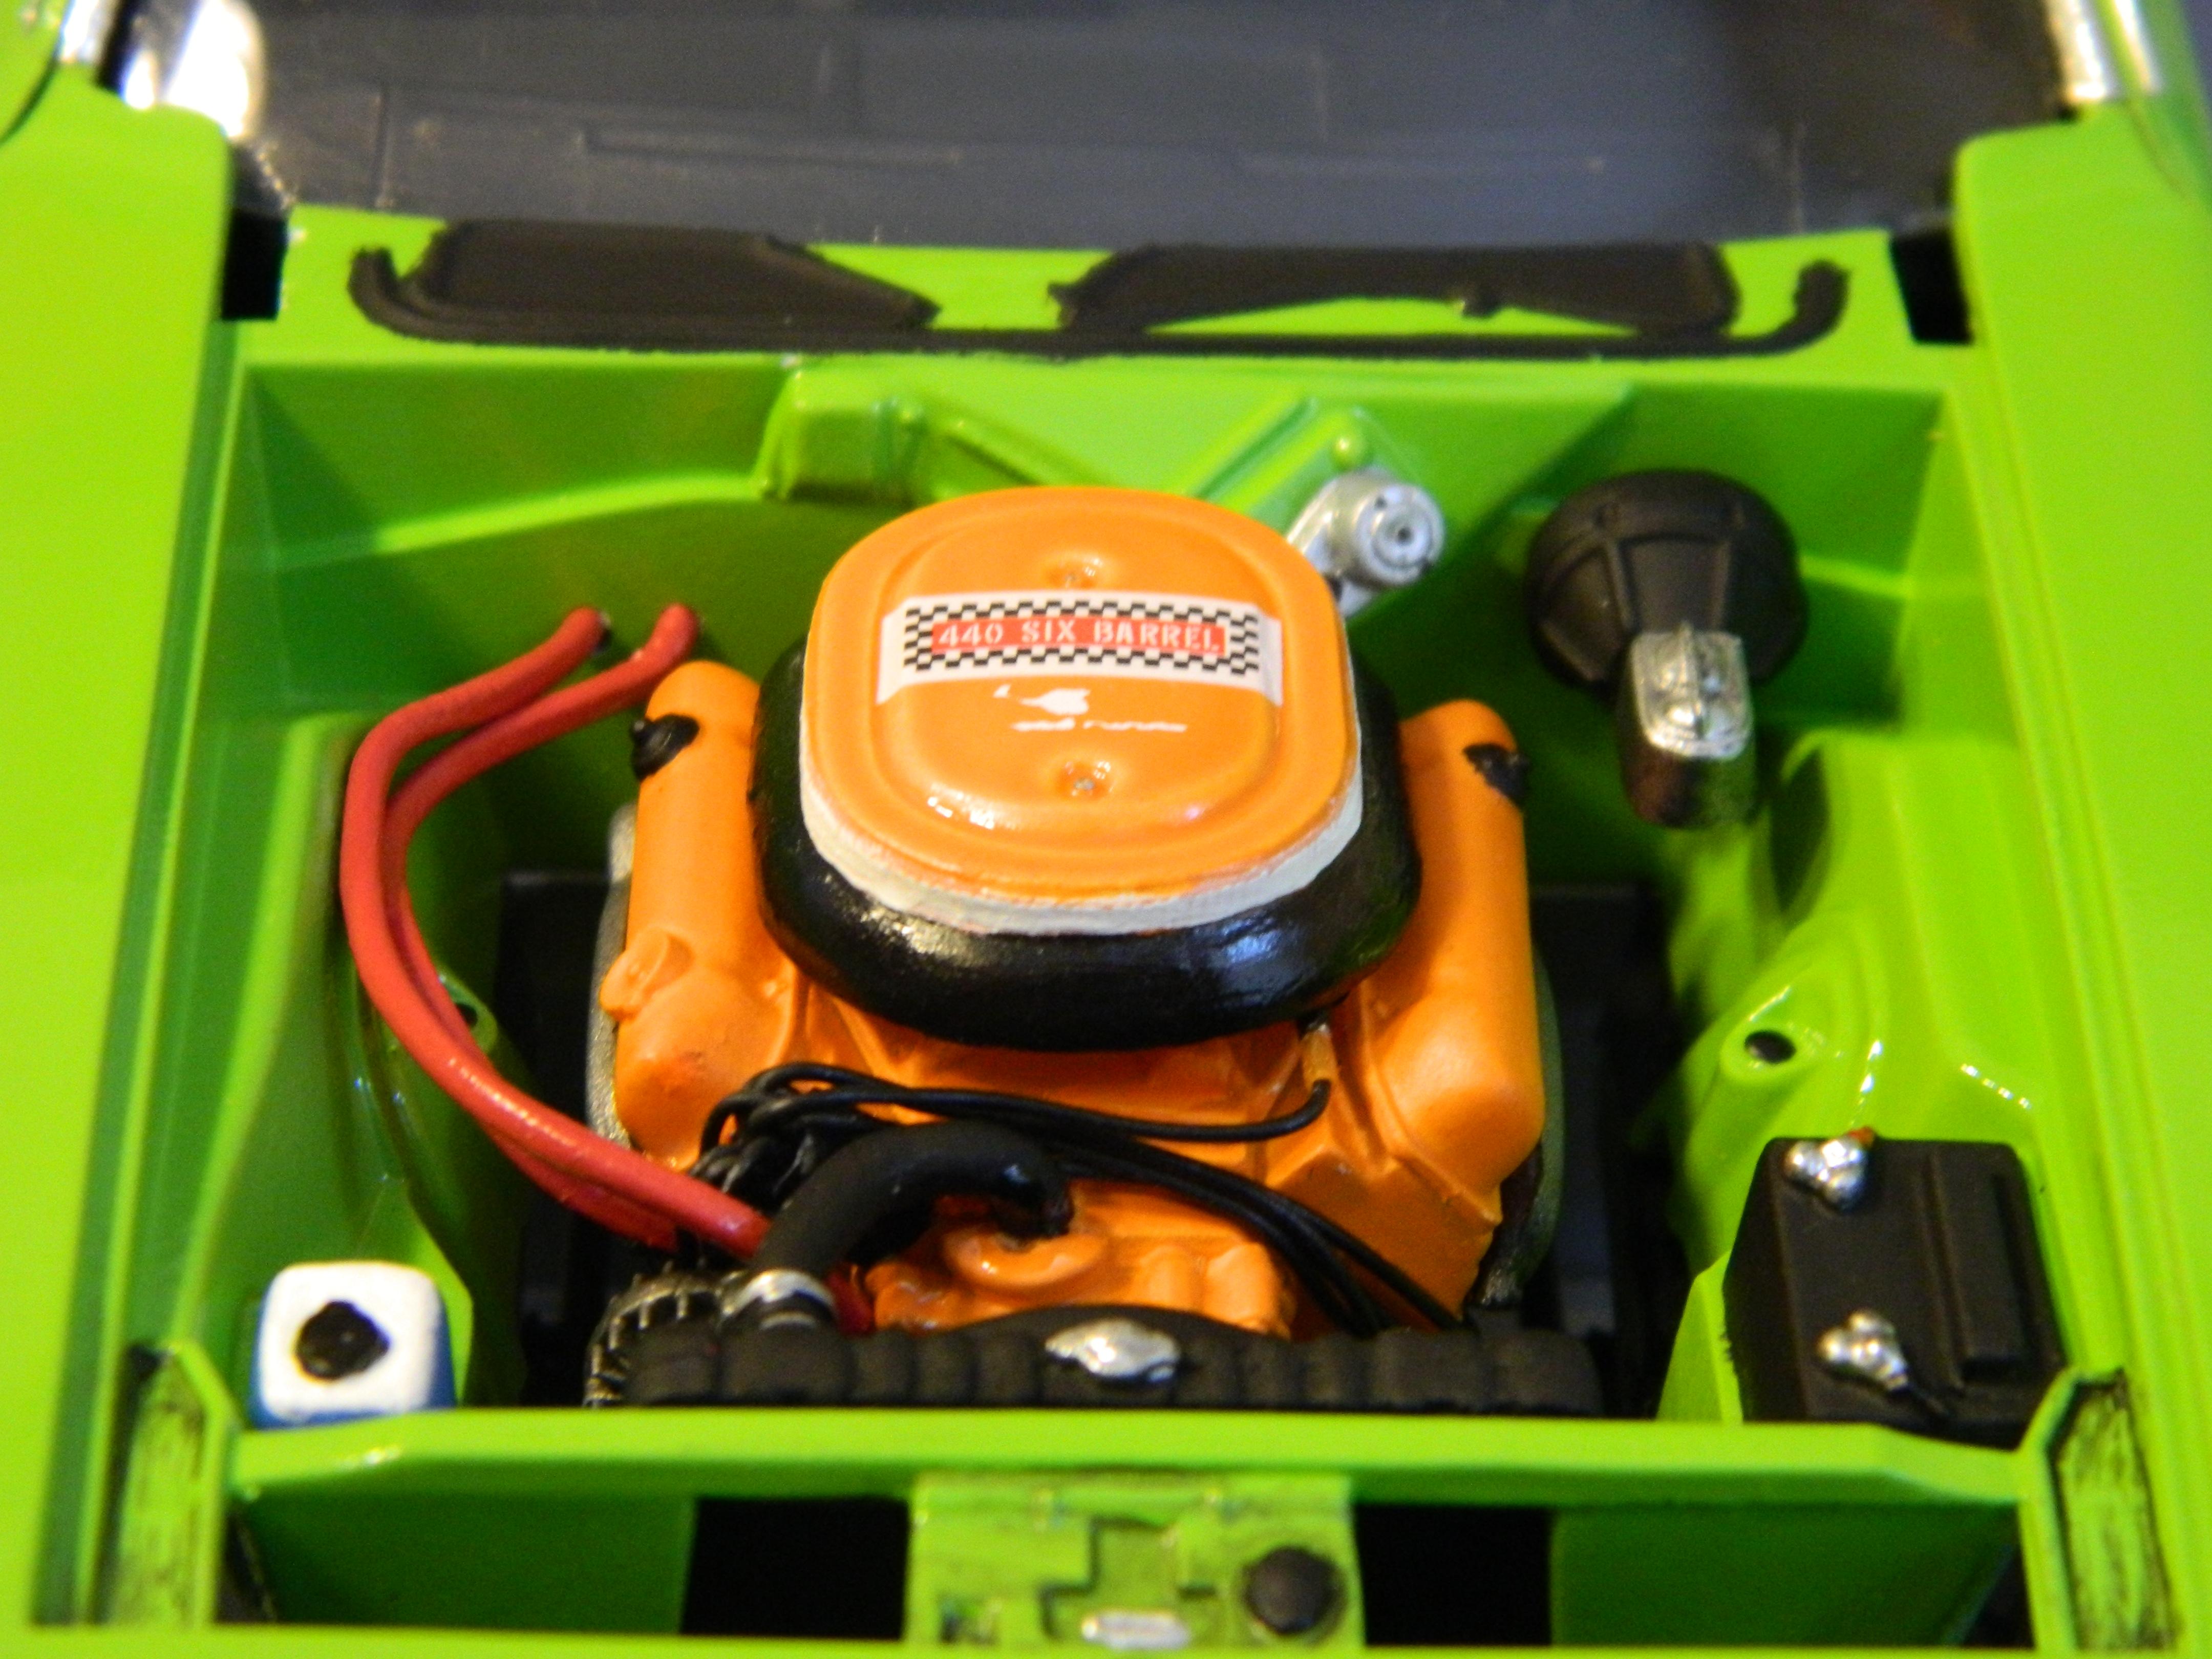
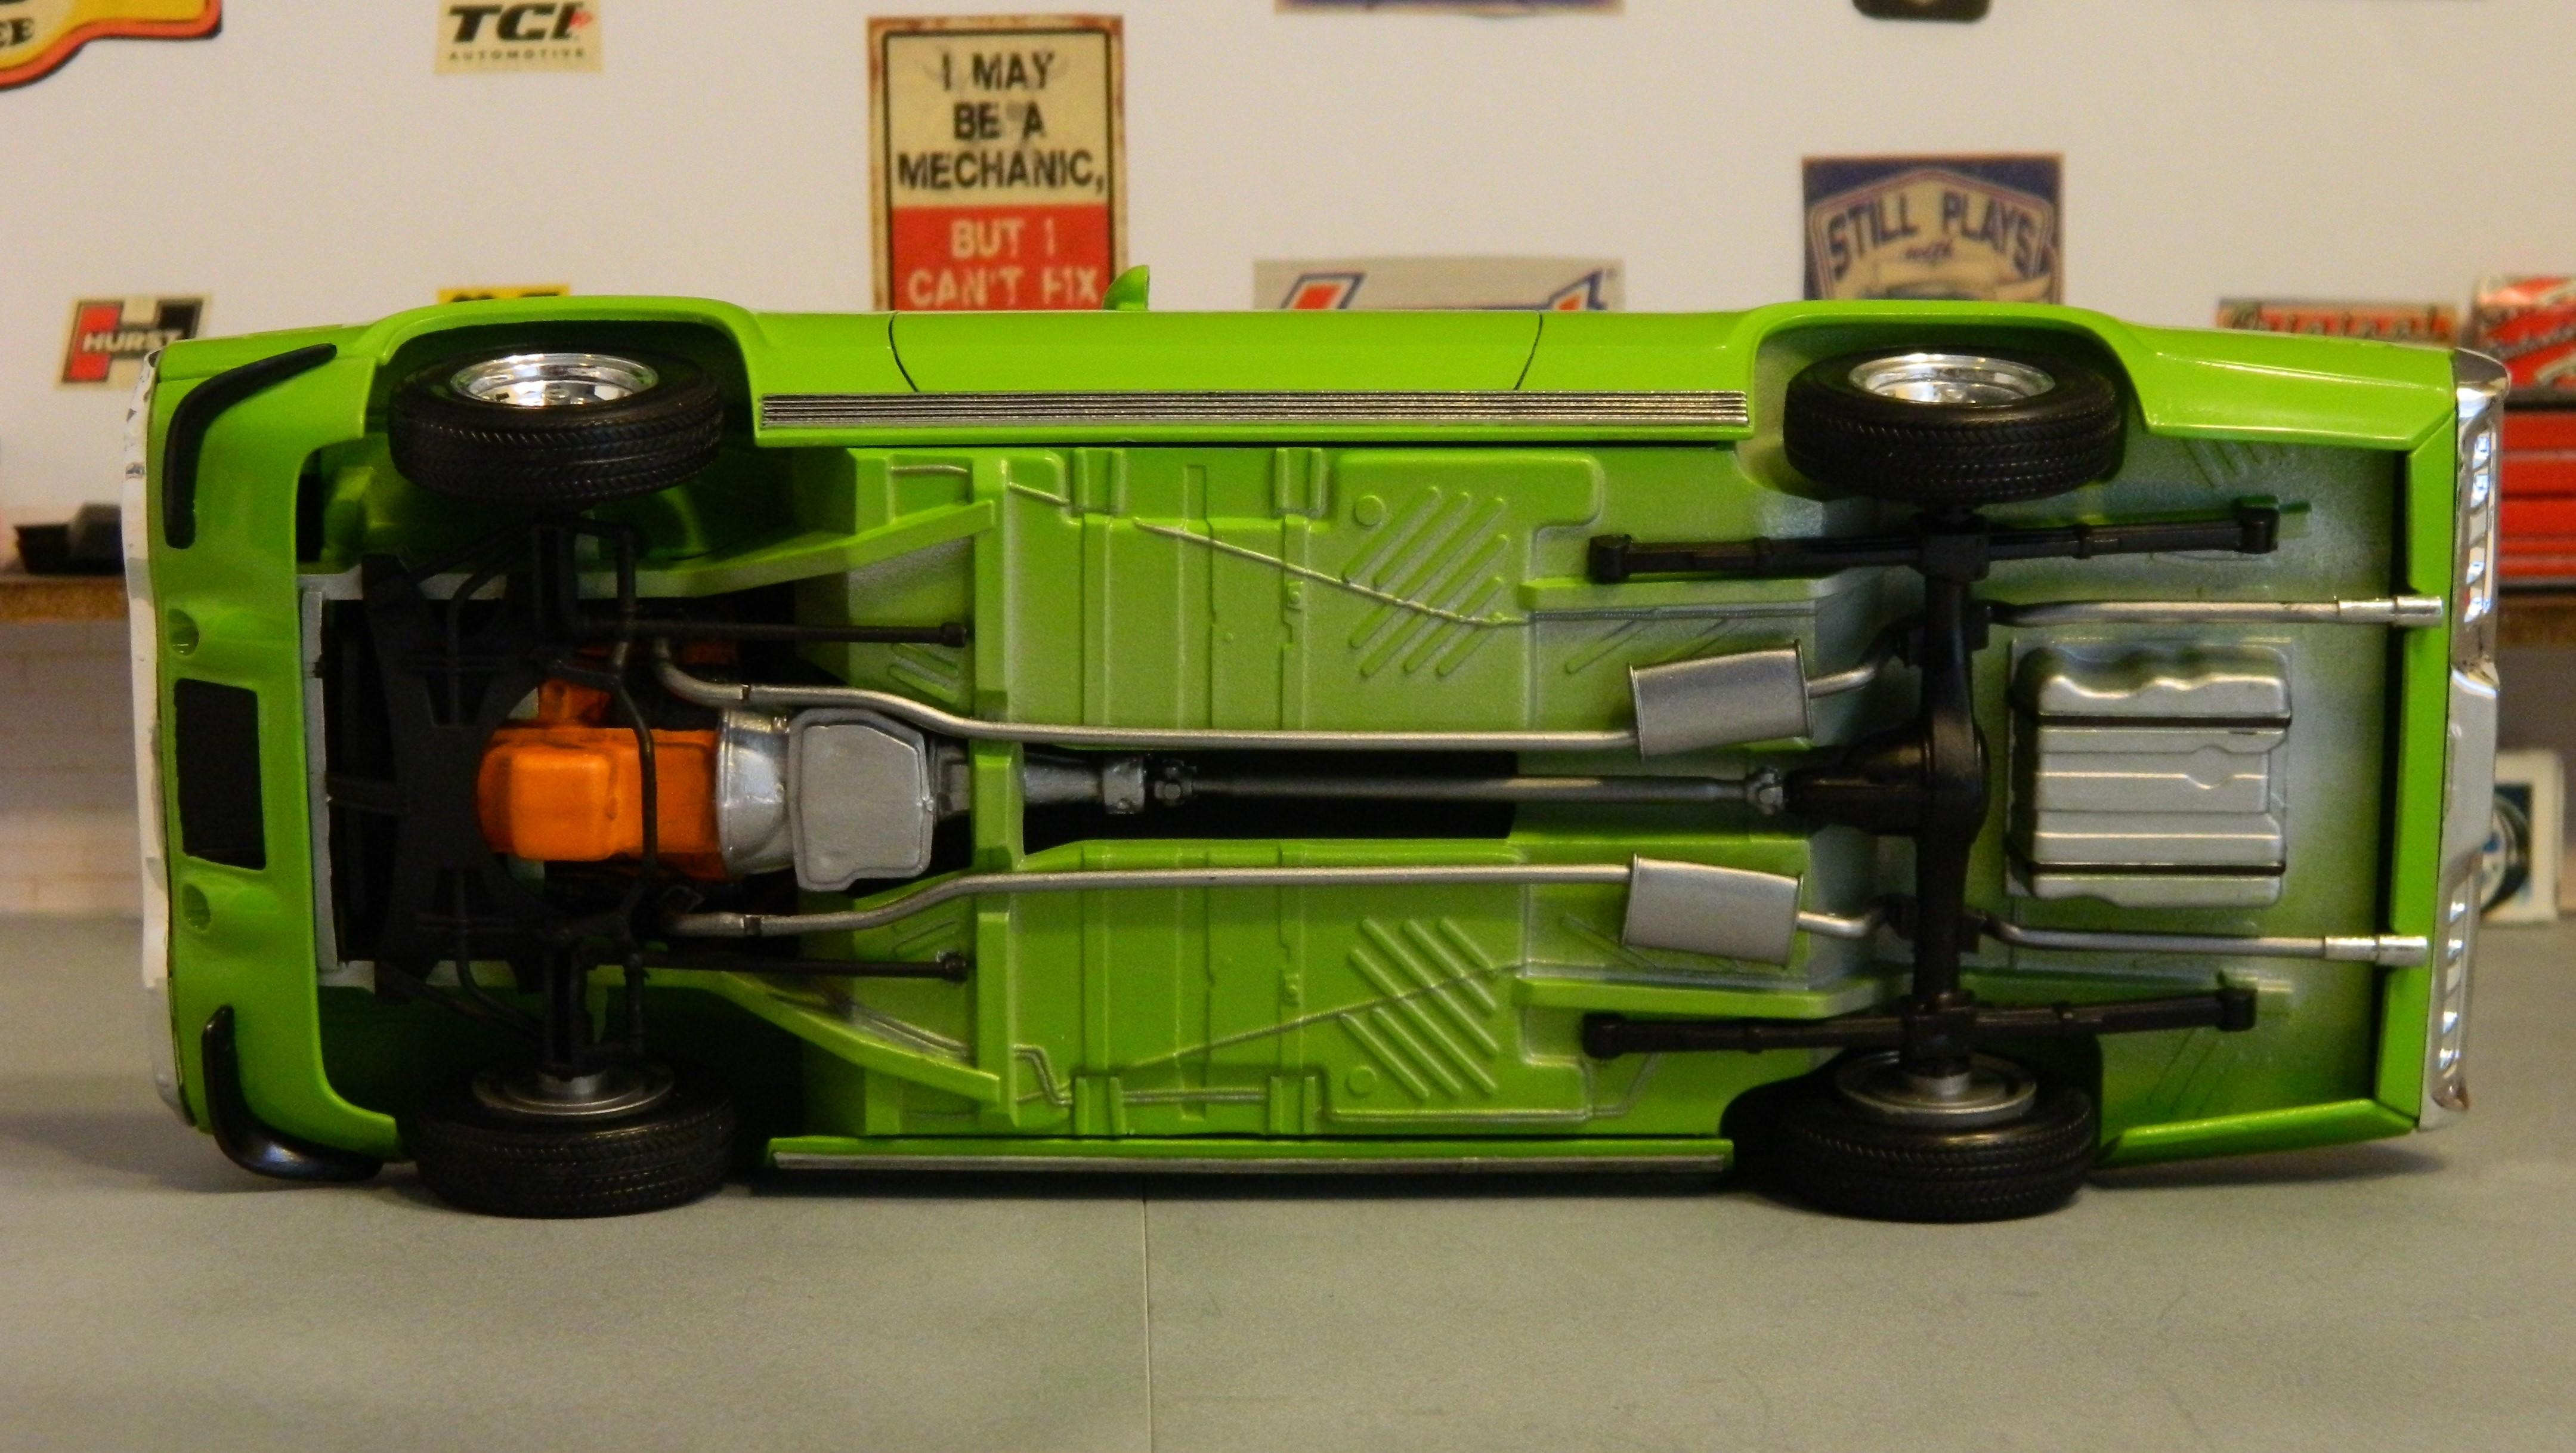
Here's my version of Revell's Fast and Furious Dom's 1971 GTX kit that I finished this morning. I had actually painted this one back in July of last year. I used Model Master Sublime Green Lacquer and cleared it with Krylon Short Cuts Gloss Clear (I'm pretty impressed with this clear, it sprayed and covered well and wet-sanded and polished very nicely). The decals are from Fred Cady. They're nice decals, but are thin and fragile so care and minimal movement when applying are highly suggested. The interior is just glossed over primer, with craft paints and Tamiya Clear Orange brushed on for the woodgrain. The wheels are 1/25 scale Magnum 500's from the Revell '68 Dodge Charger kit. They're smaller wheels so I cut the trim ring off the GTX kit wheels and glued the Magnum's to the rings to fit the kit tires. The trim is BMF, and I added valve stems, plug wires, and heater hoses for extra detail. This is still a pretty nice, but basic kit from the old Monogram 1/24 tooling. Thanks for looking!

-
Looks good! Great looking engine compartment!
-
Well done! Very nice!
-
Thank you!
-
Thanks guys!
-
 Well done!
 -
Very nice!
-
Mercedes-Benz S-class with Nissan RB26 engine.
Dragonhawk1066 replied to Jurva's topic in Model Cars
Very nice and very well done! -
Very nice!
-
Looks good, well done!
-
Very nice!
-
Thanks guys, much appreciated! Thanks! I thin the craft paints with a "homebrew" thinner consisting of 3 parts distilled water, 1 part isopropyl alcohol, and 4-6 drops of glycerin, as a flow improver, per 8 oz. batch. Plain blue automotive windshield washer fluid can also be used to thin, which is what I started out using until I found the thinner recipe. Thin to right around the consistency of milk, and it should be just right, but trial and error will let you know what consistency you are comfortable with. Pretty much any clear can be used, although I would be nervous with enamels. I've used Tamiya TS-13, Pledge Floor Gloss, and on this one, and several others, I used Decoart Gloss Varnish that I wet-sanded, polished with Novus #2, and waxed, all after about 4 or 5 days curing.
-
Everything everybody else said! This has to be one of the best, most detailed builds I've seen!
-
Outstanding! Beautiful paint job and great color combo!
-
Nice Corvair! This one's on my to get list!
-
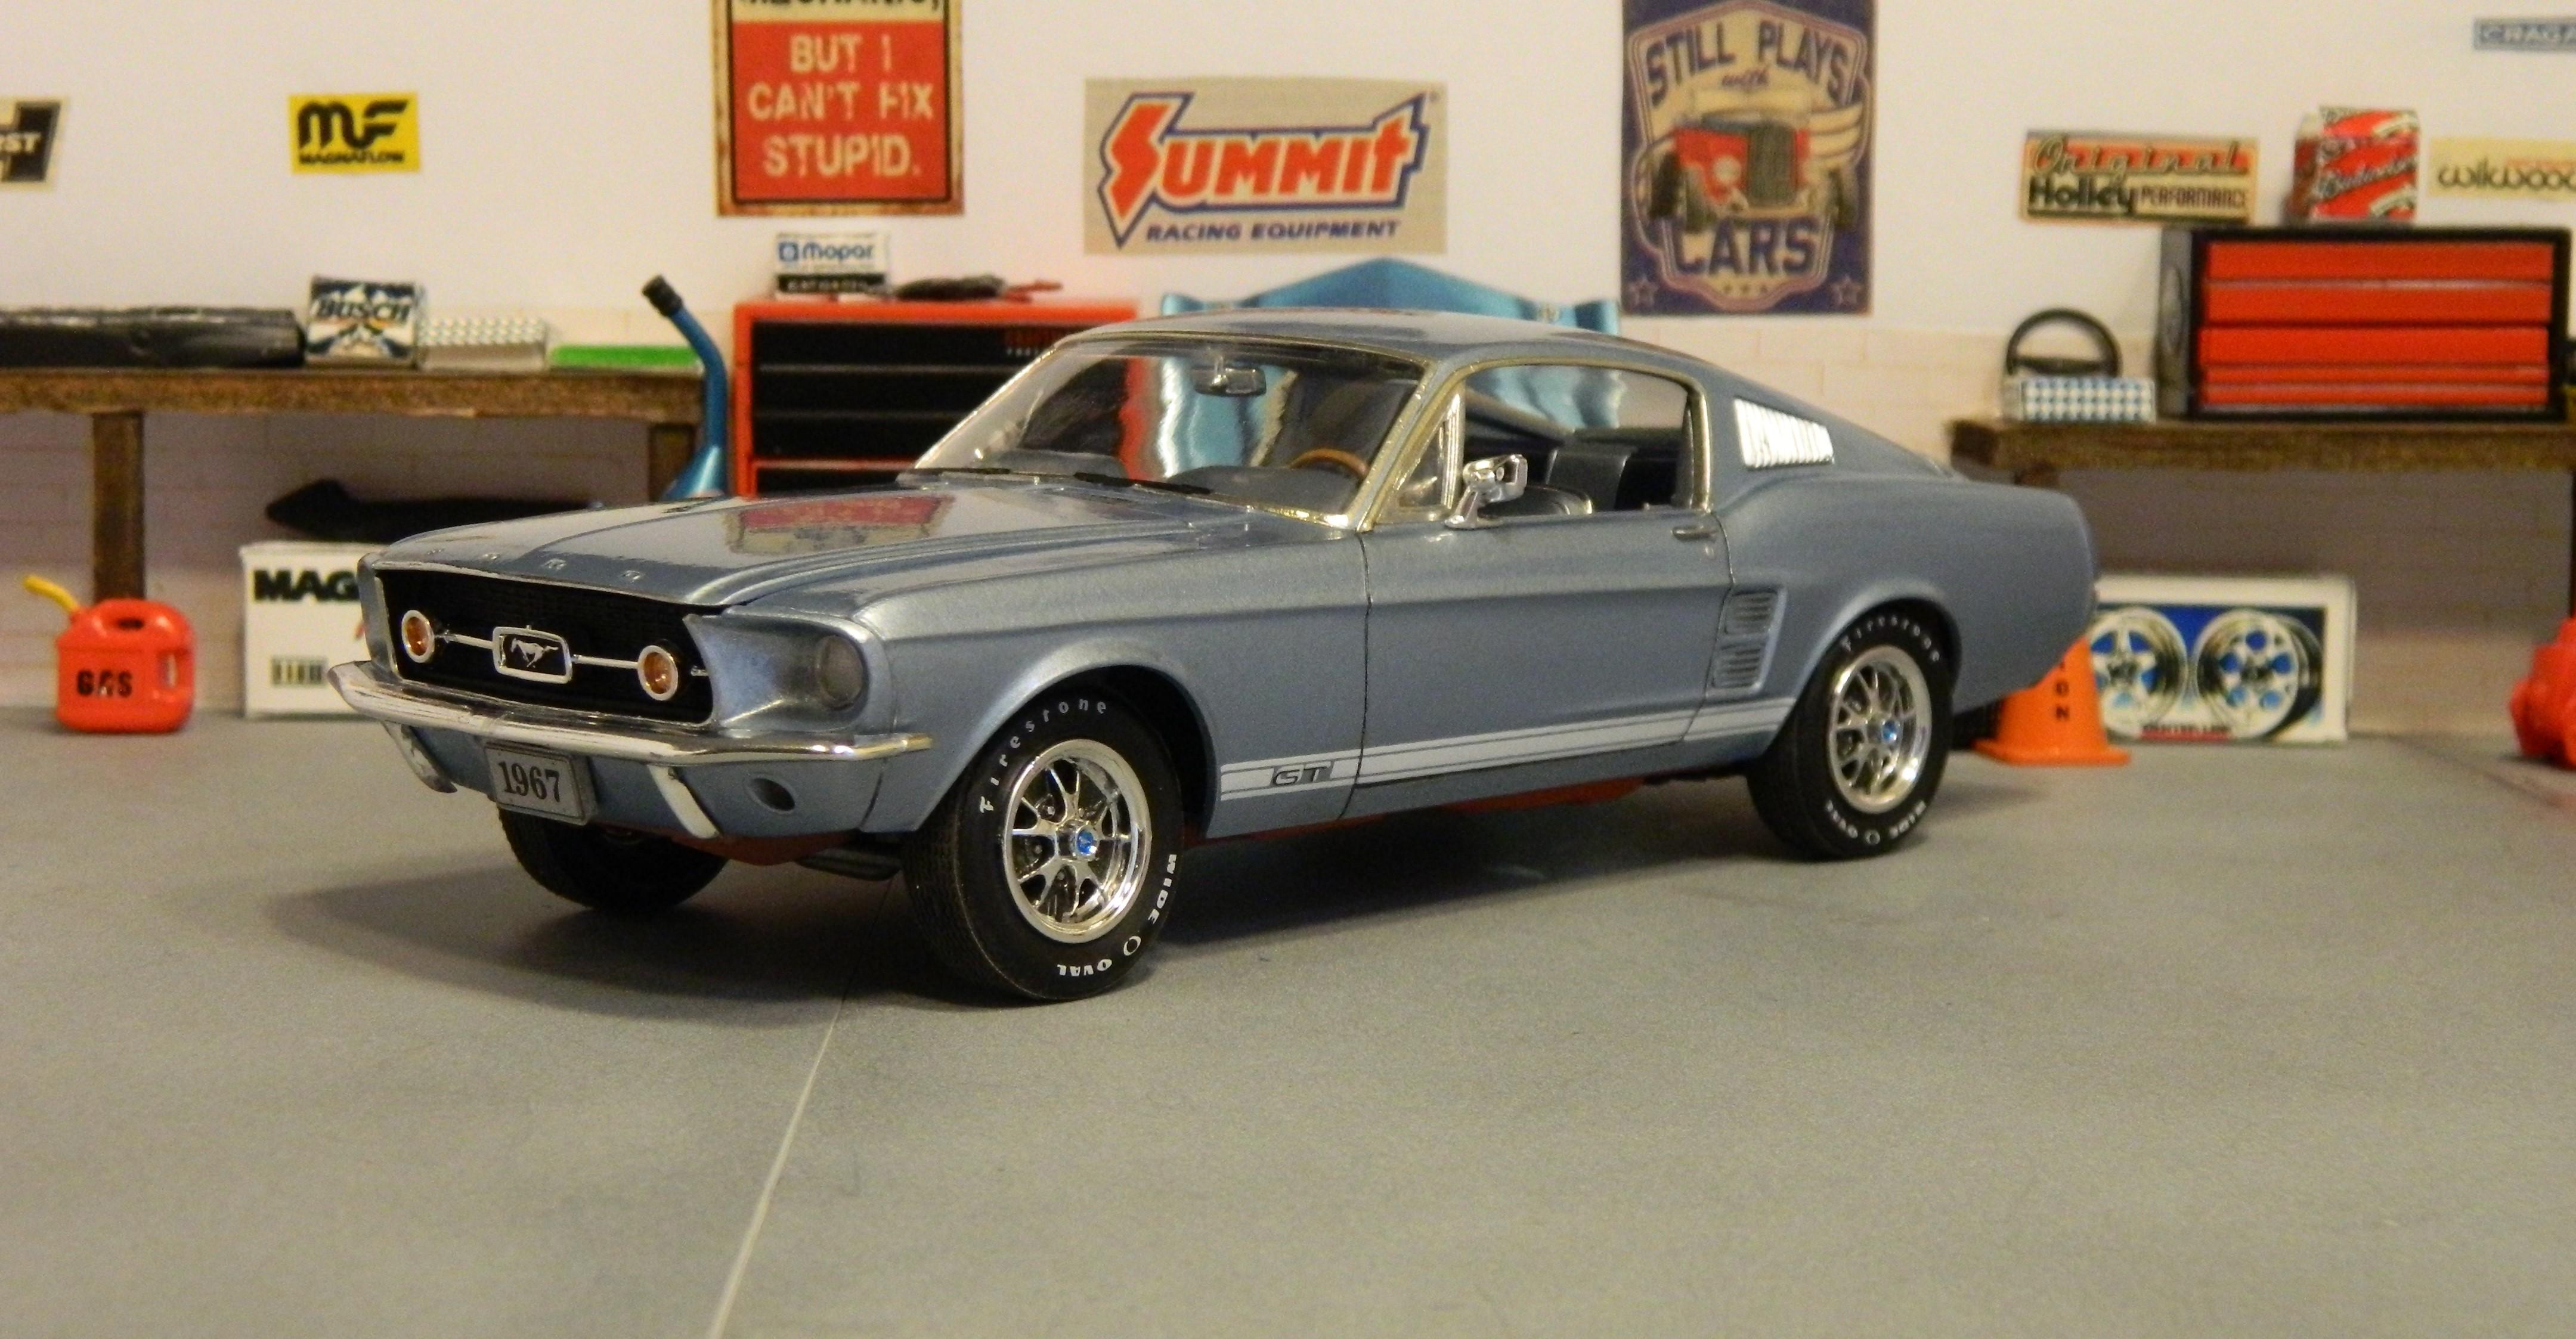
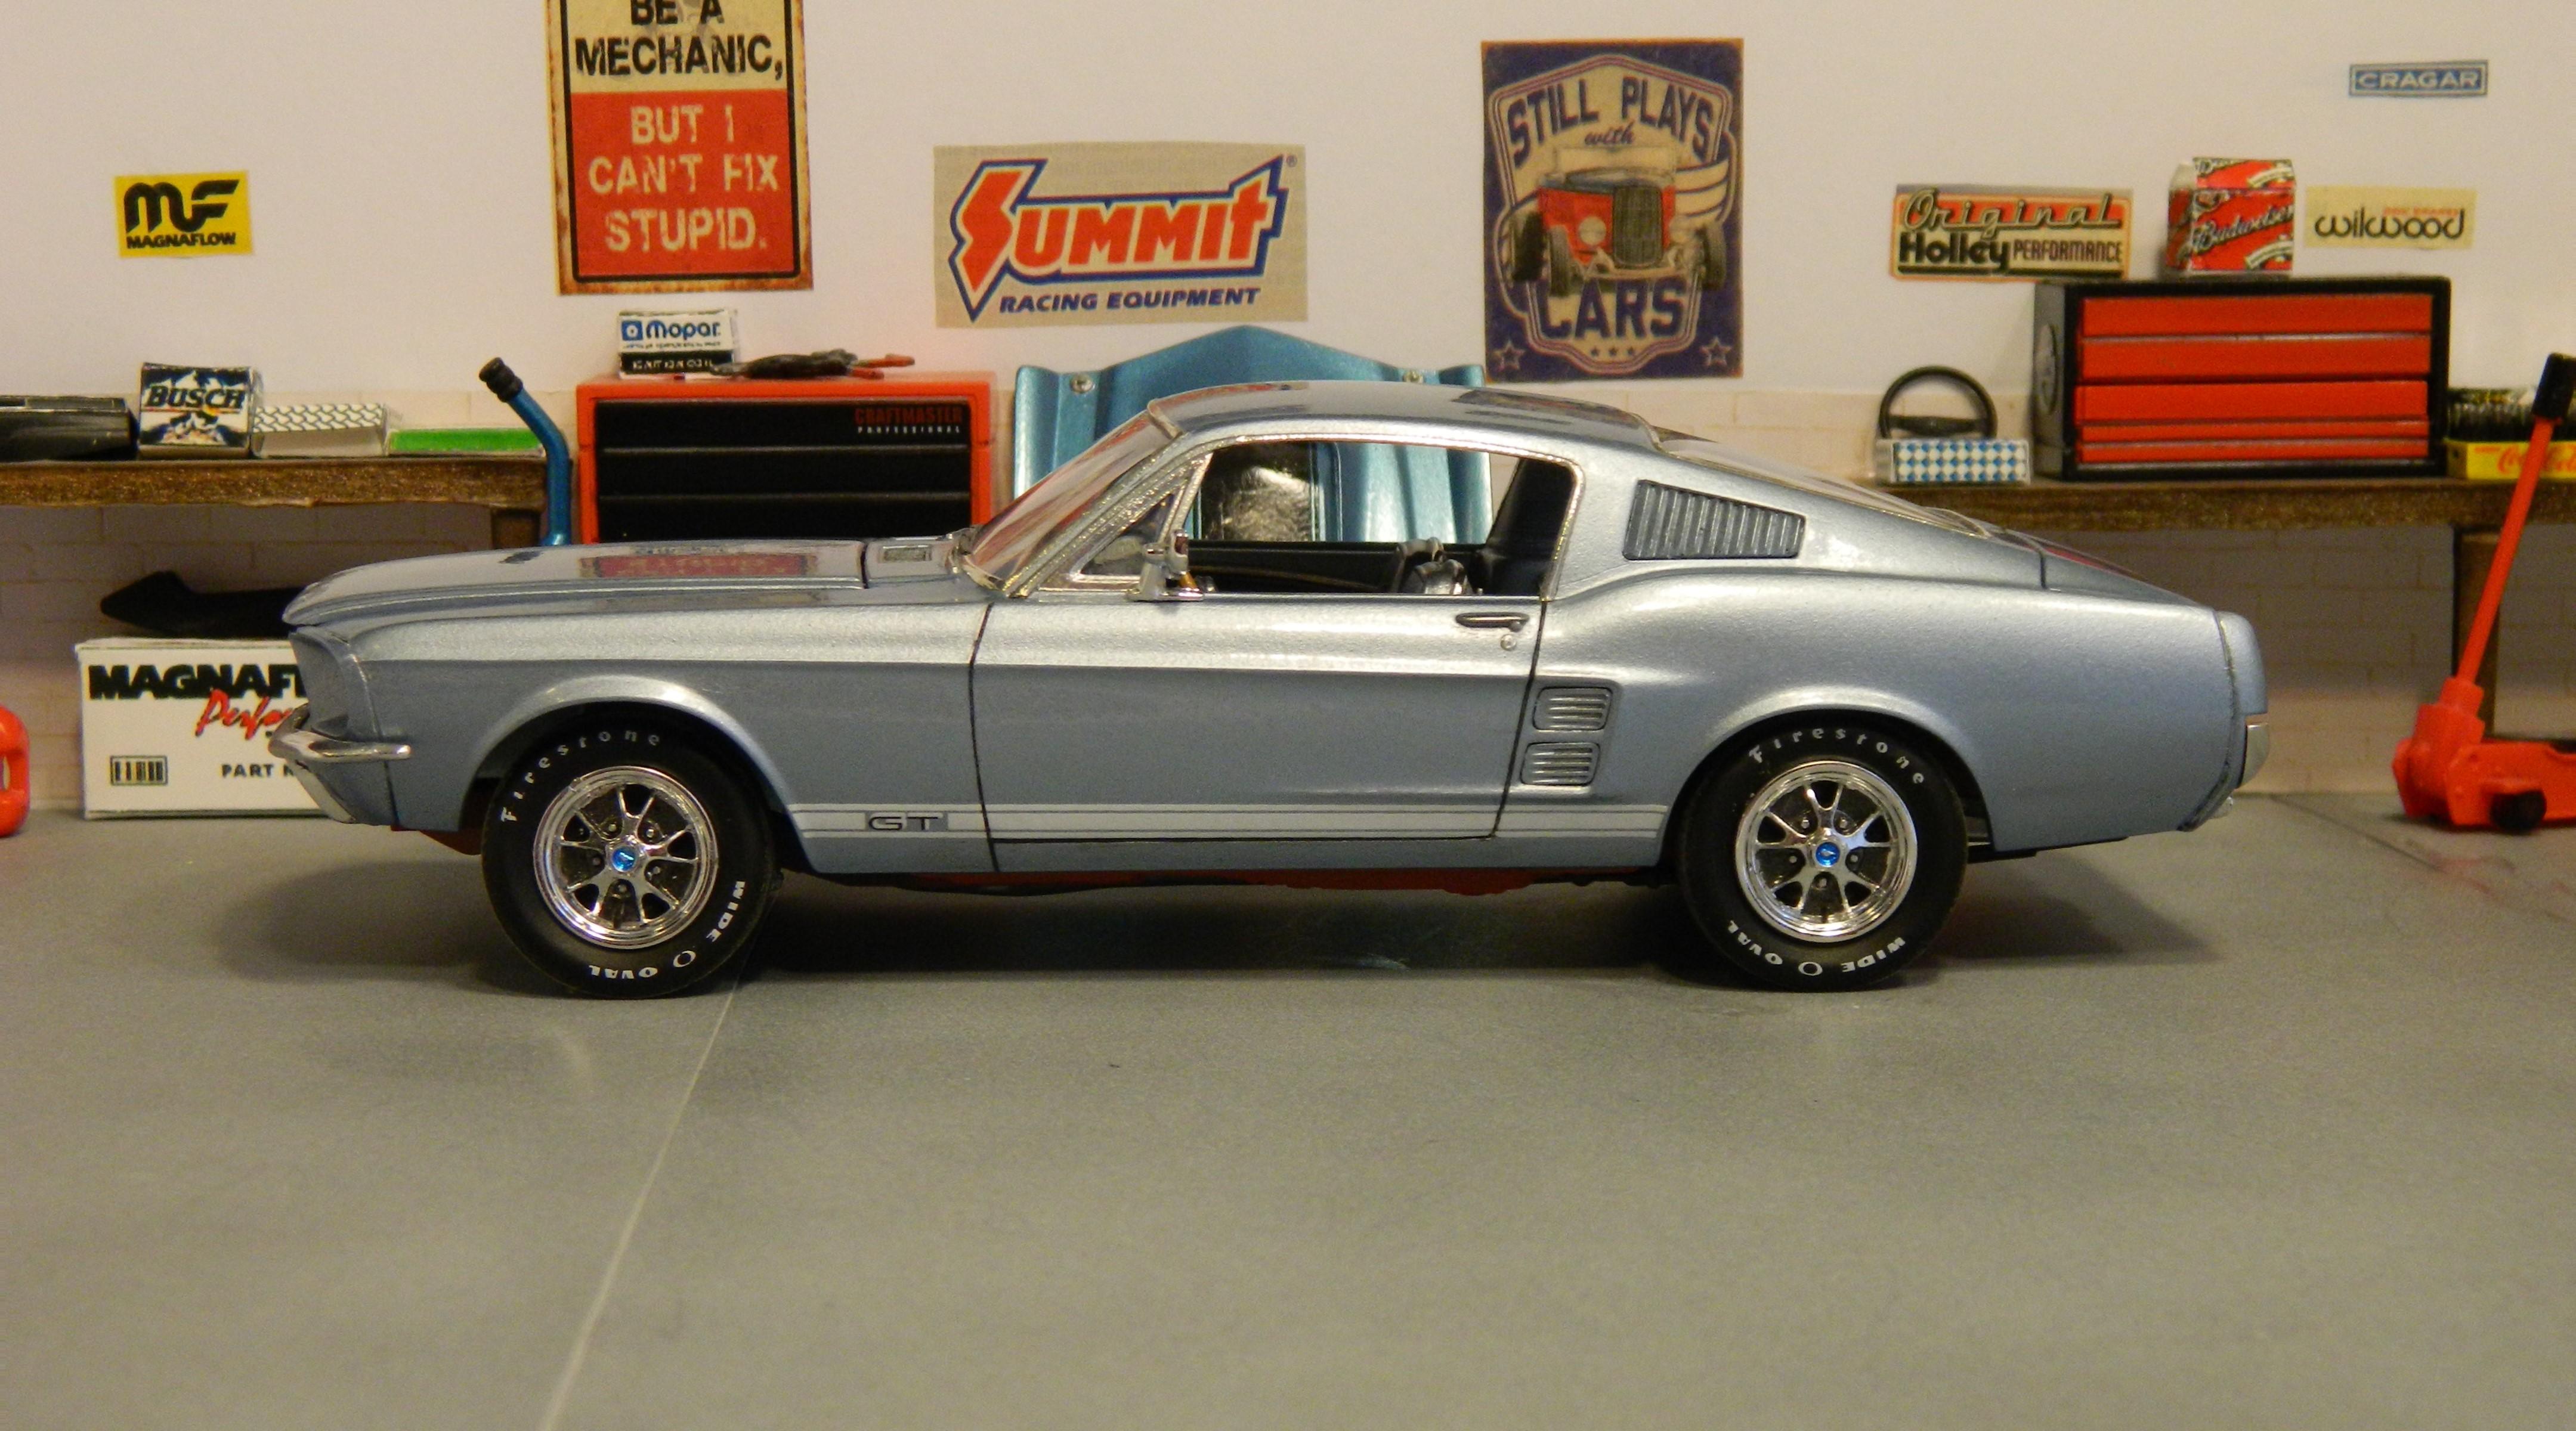
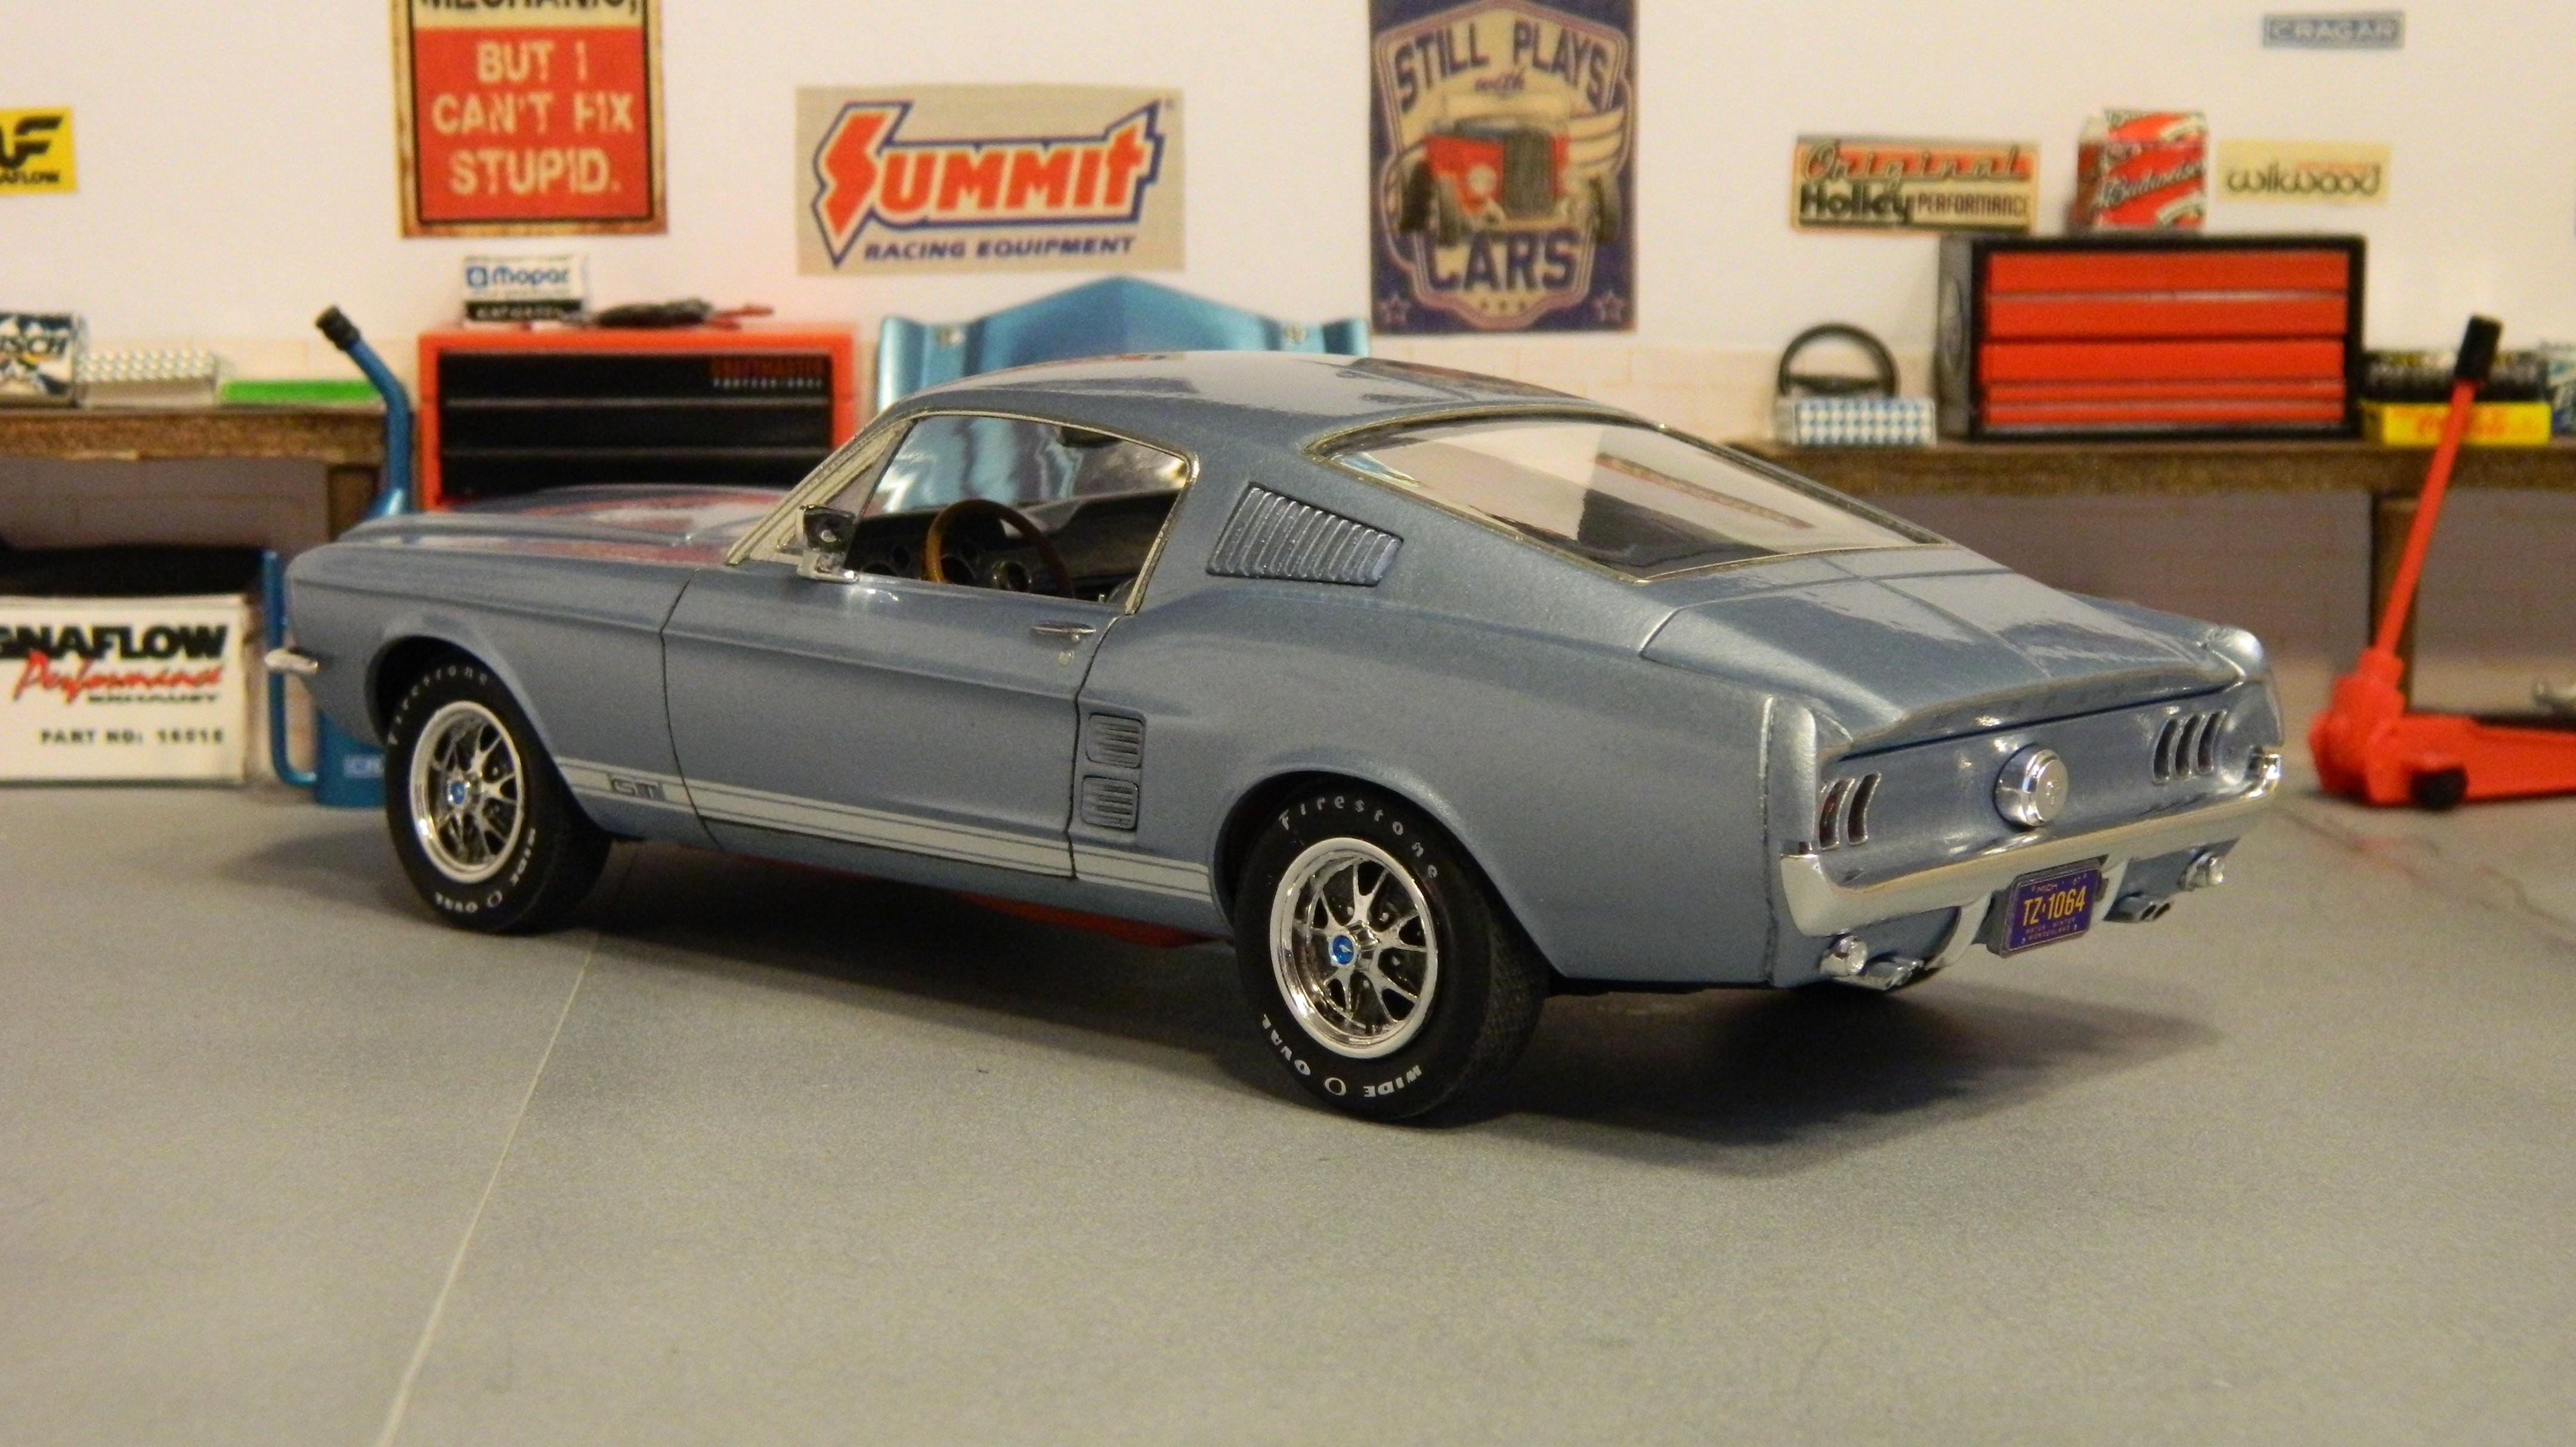
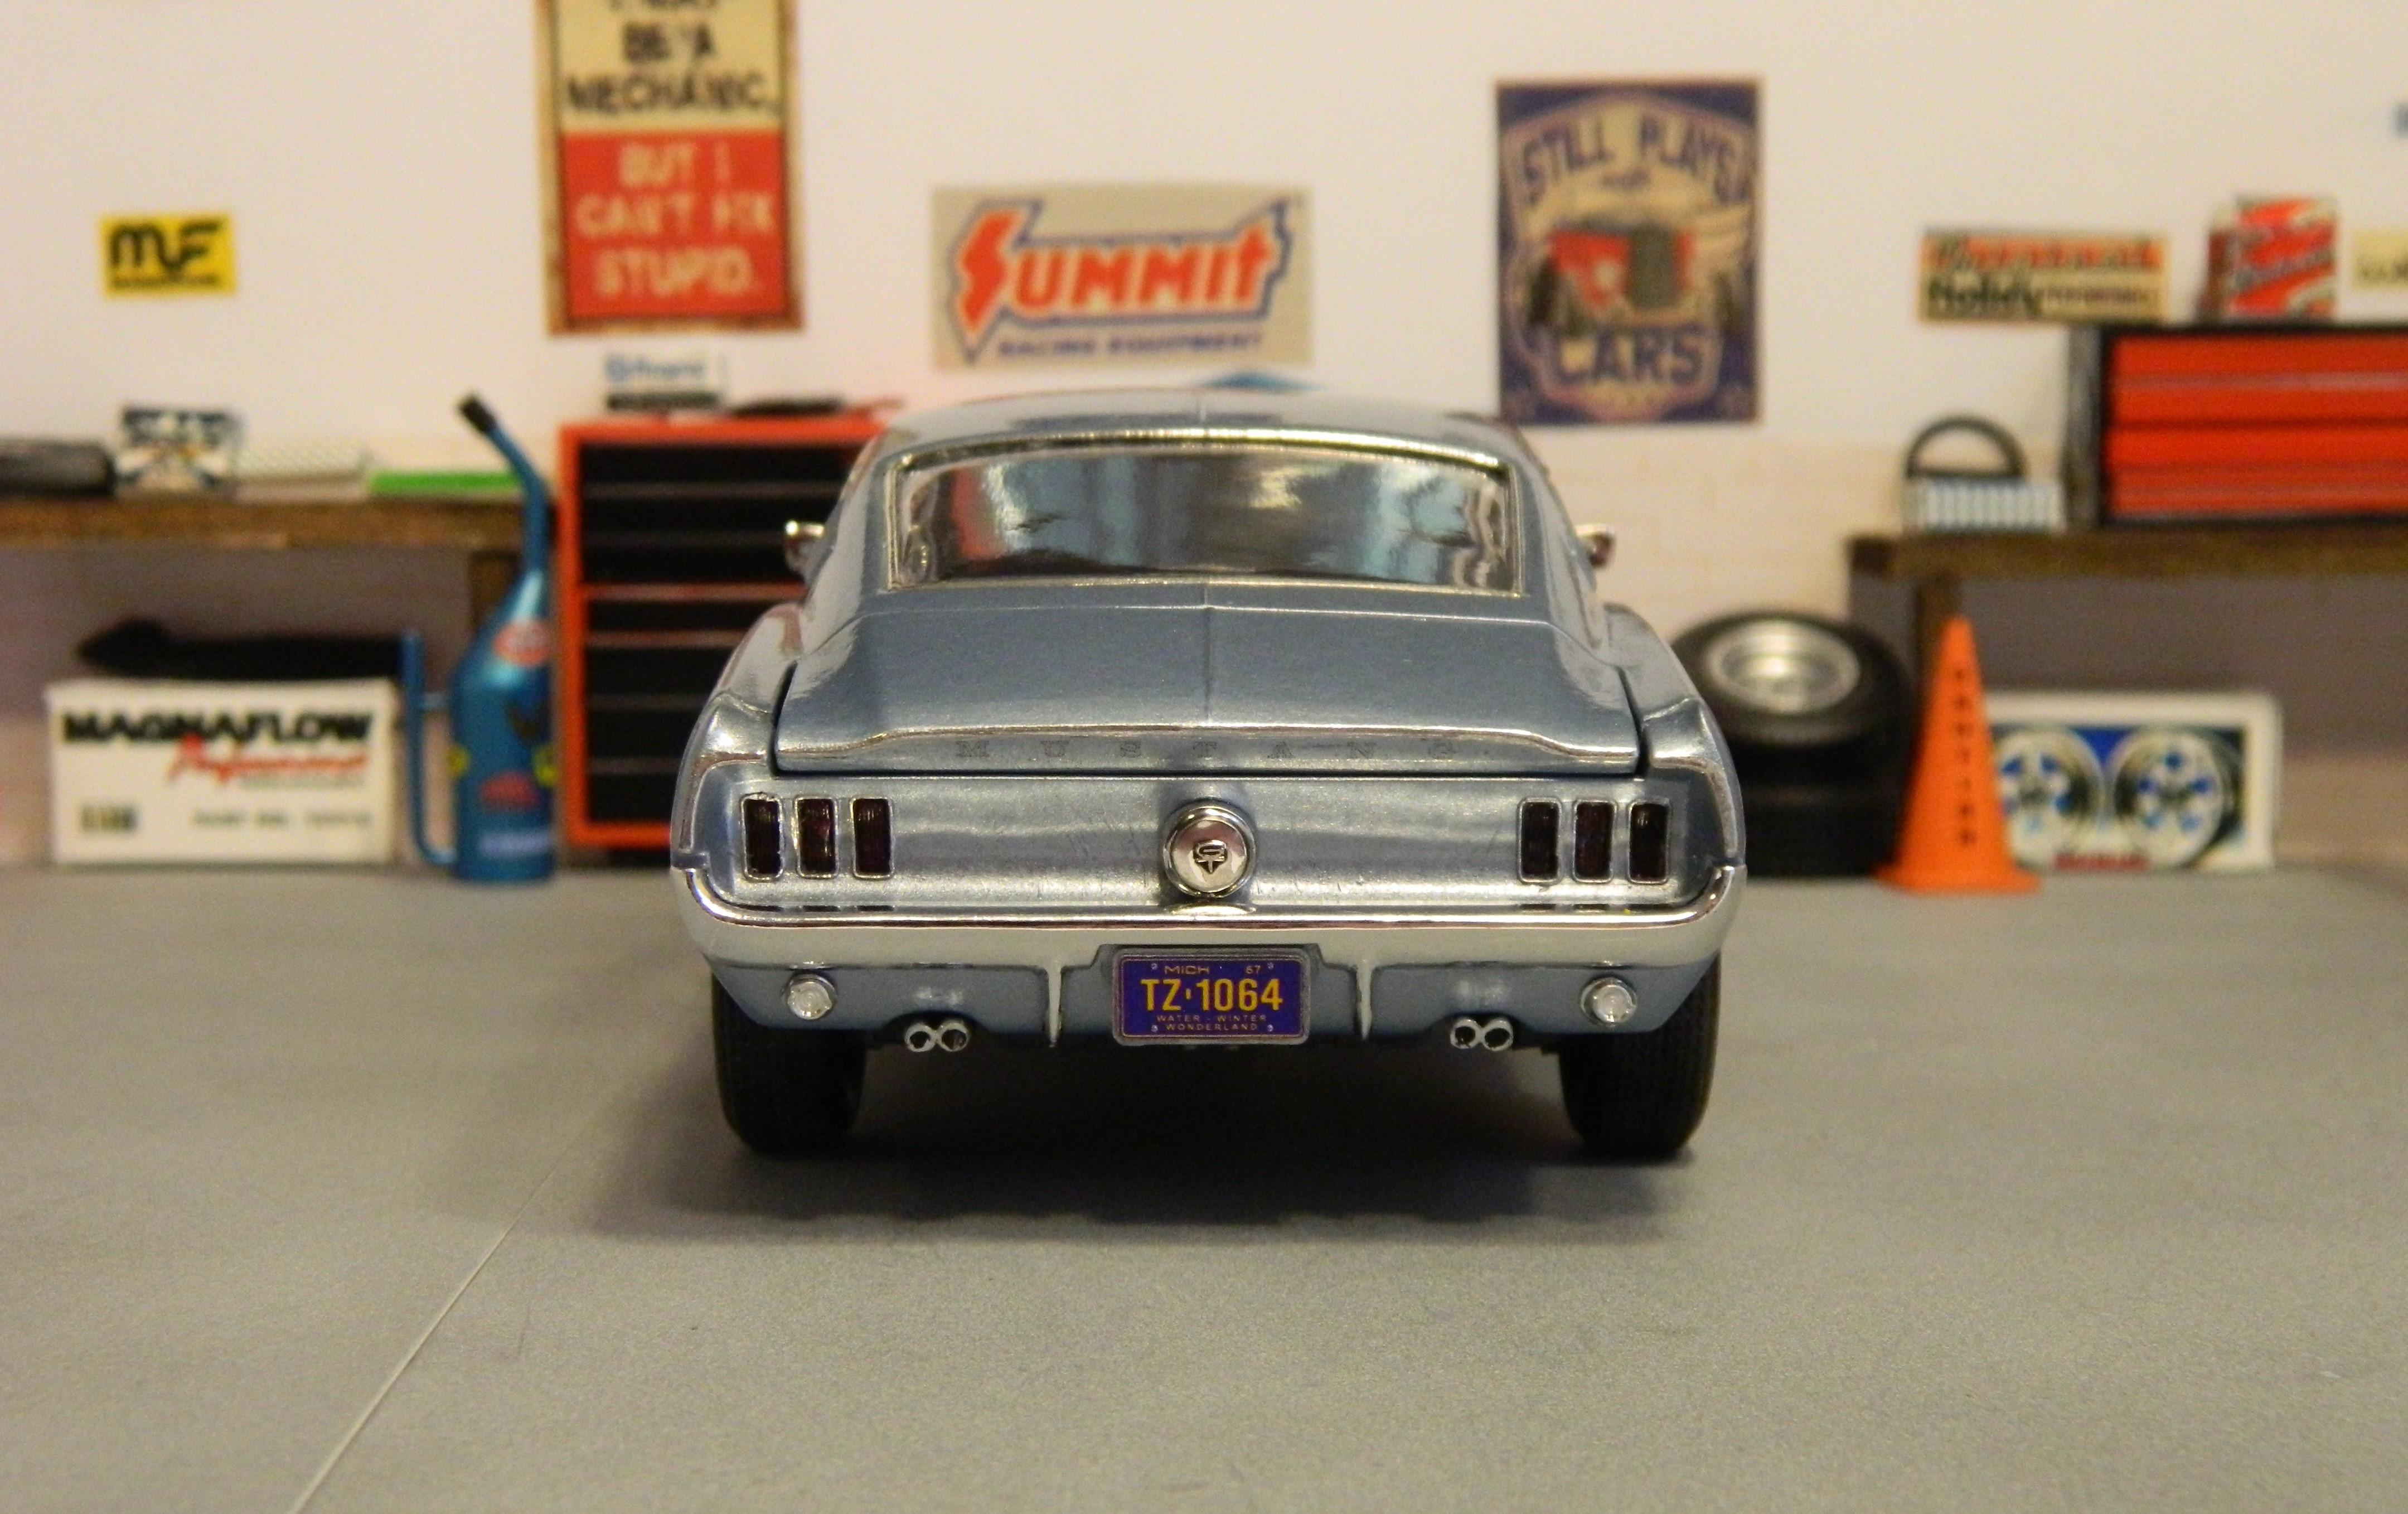
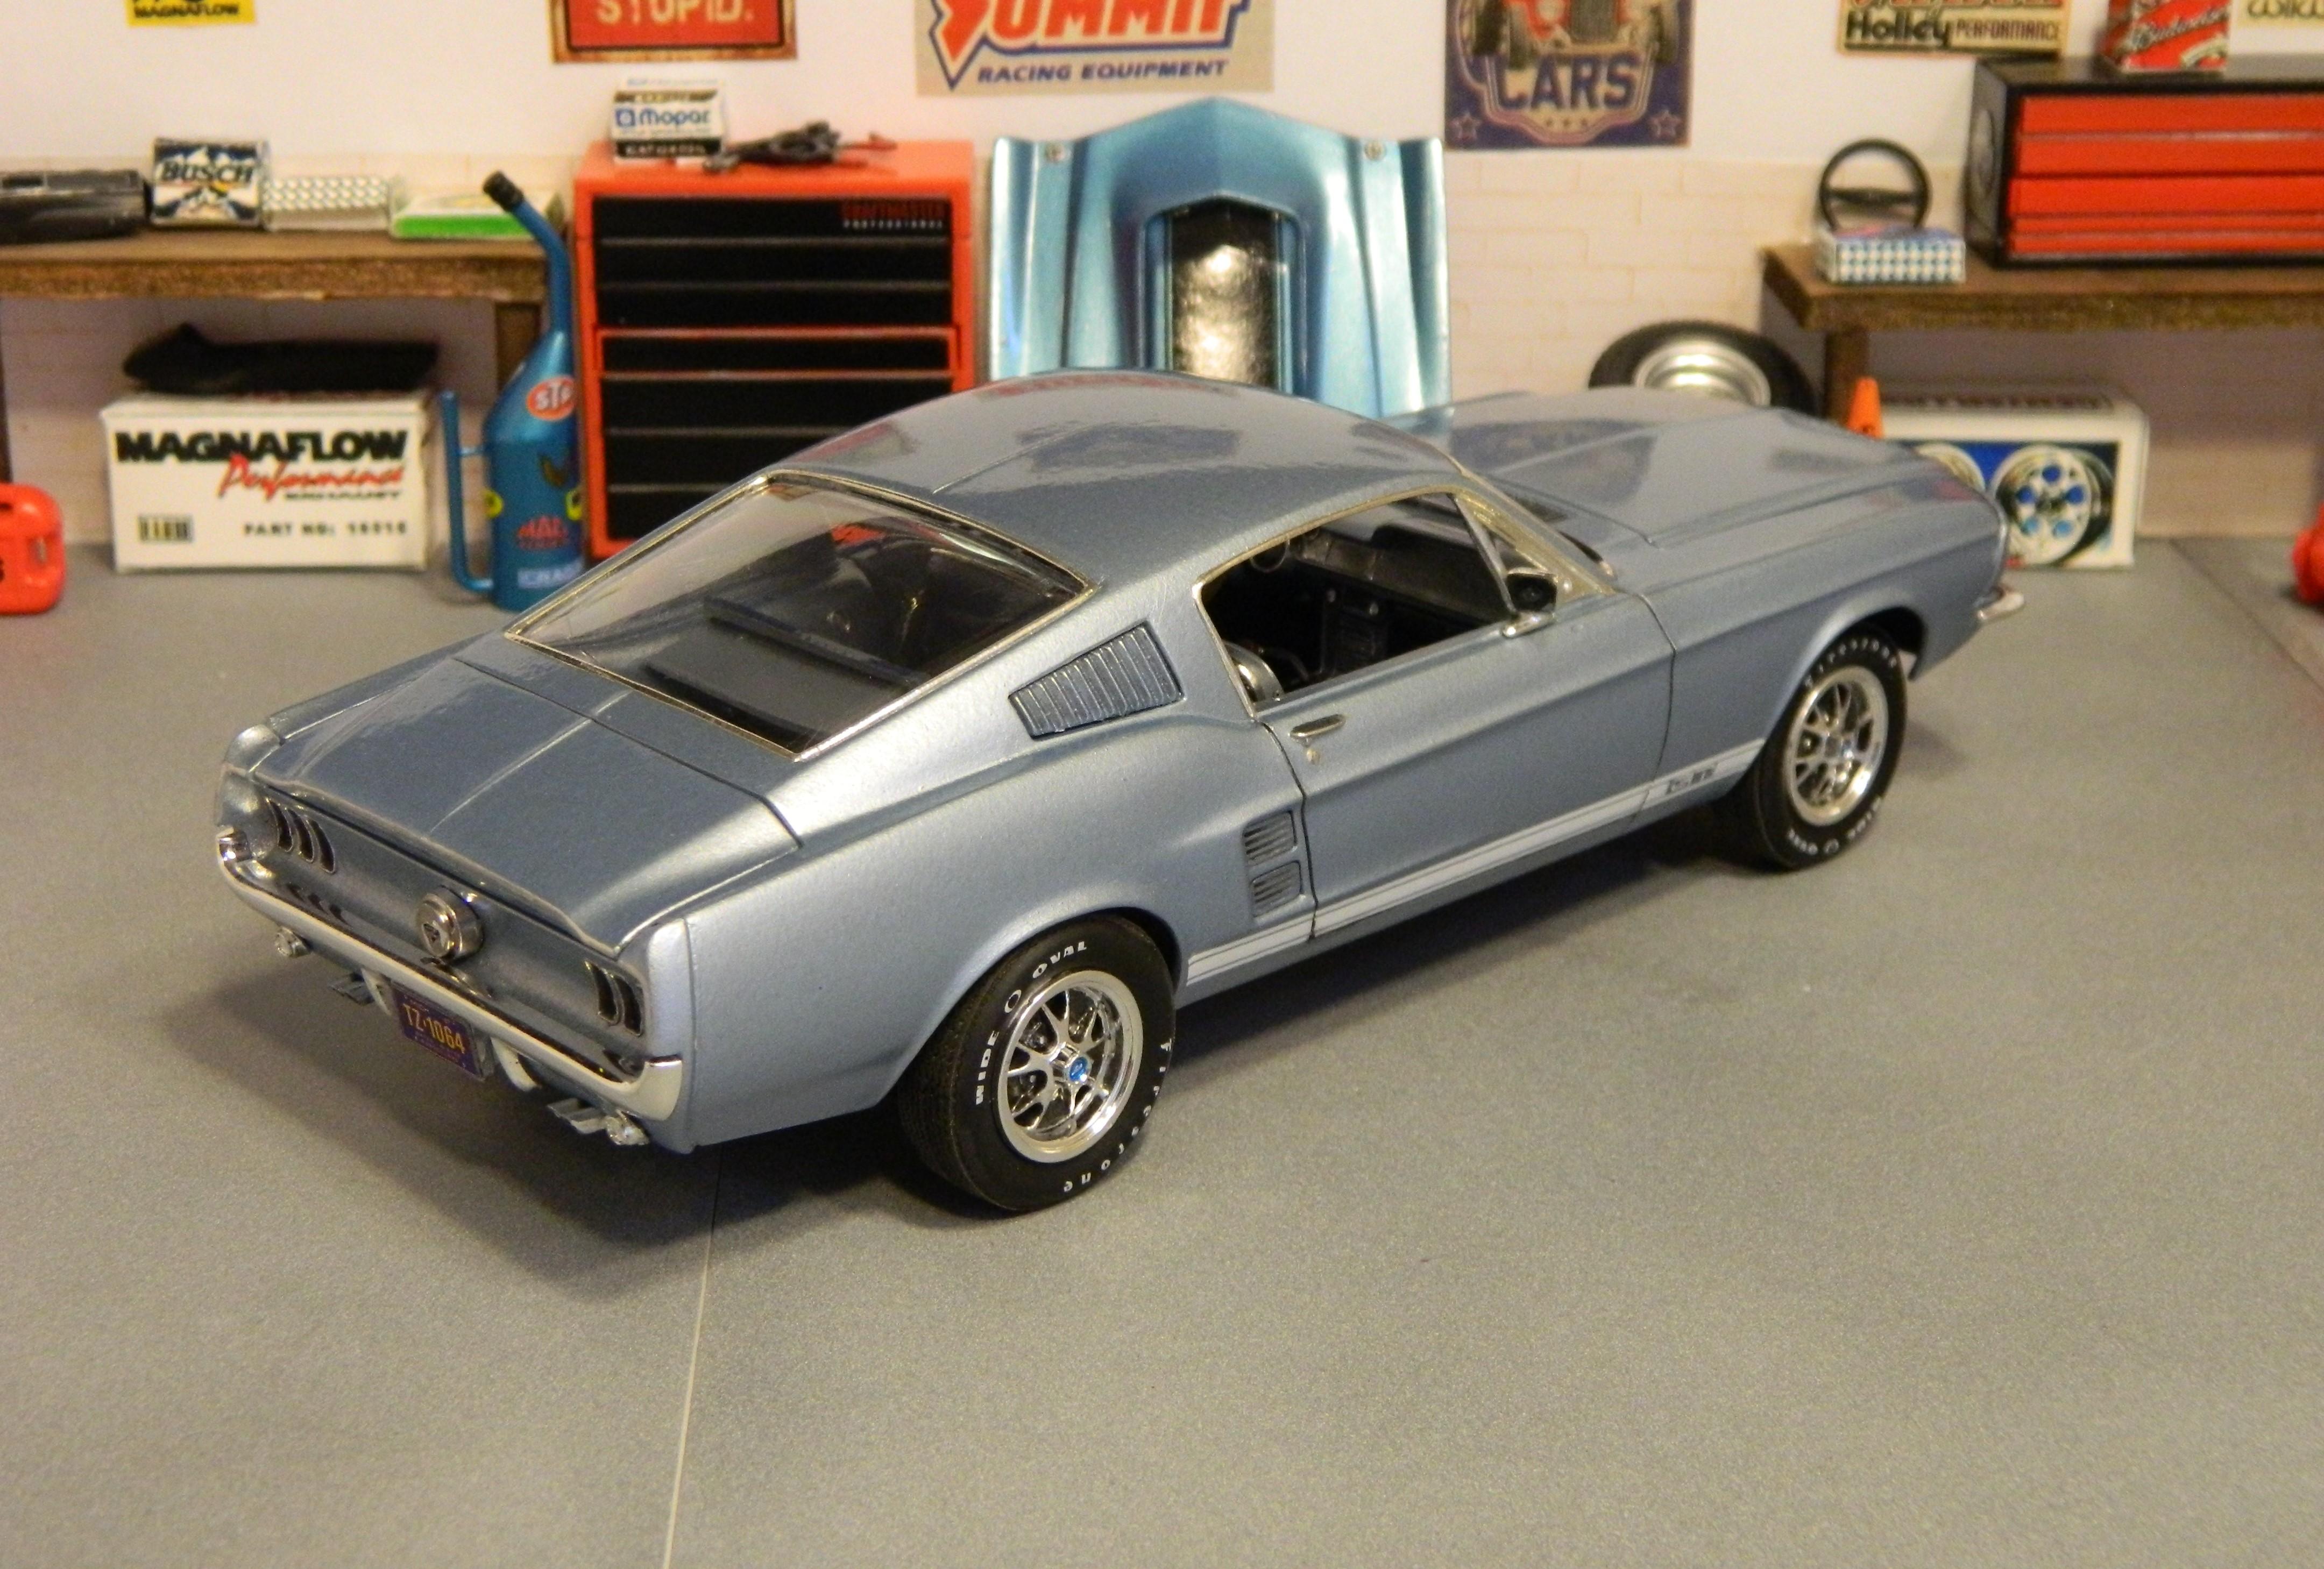
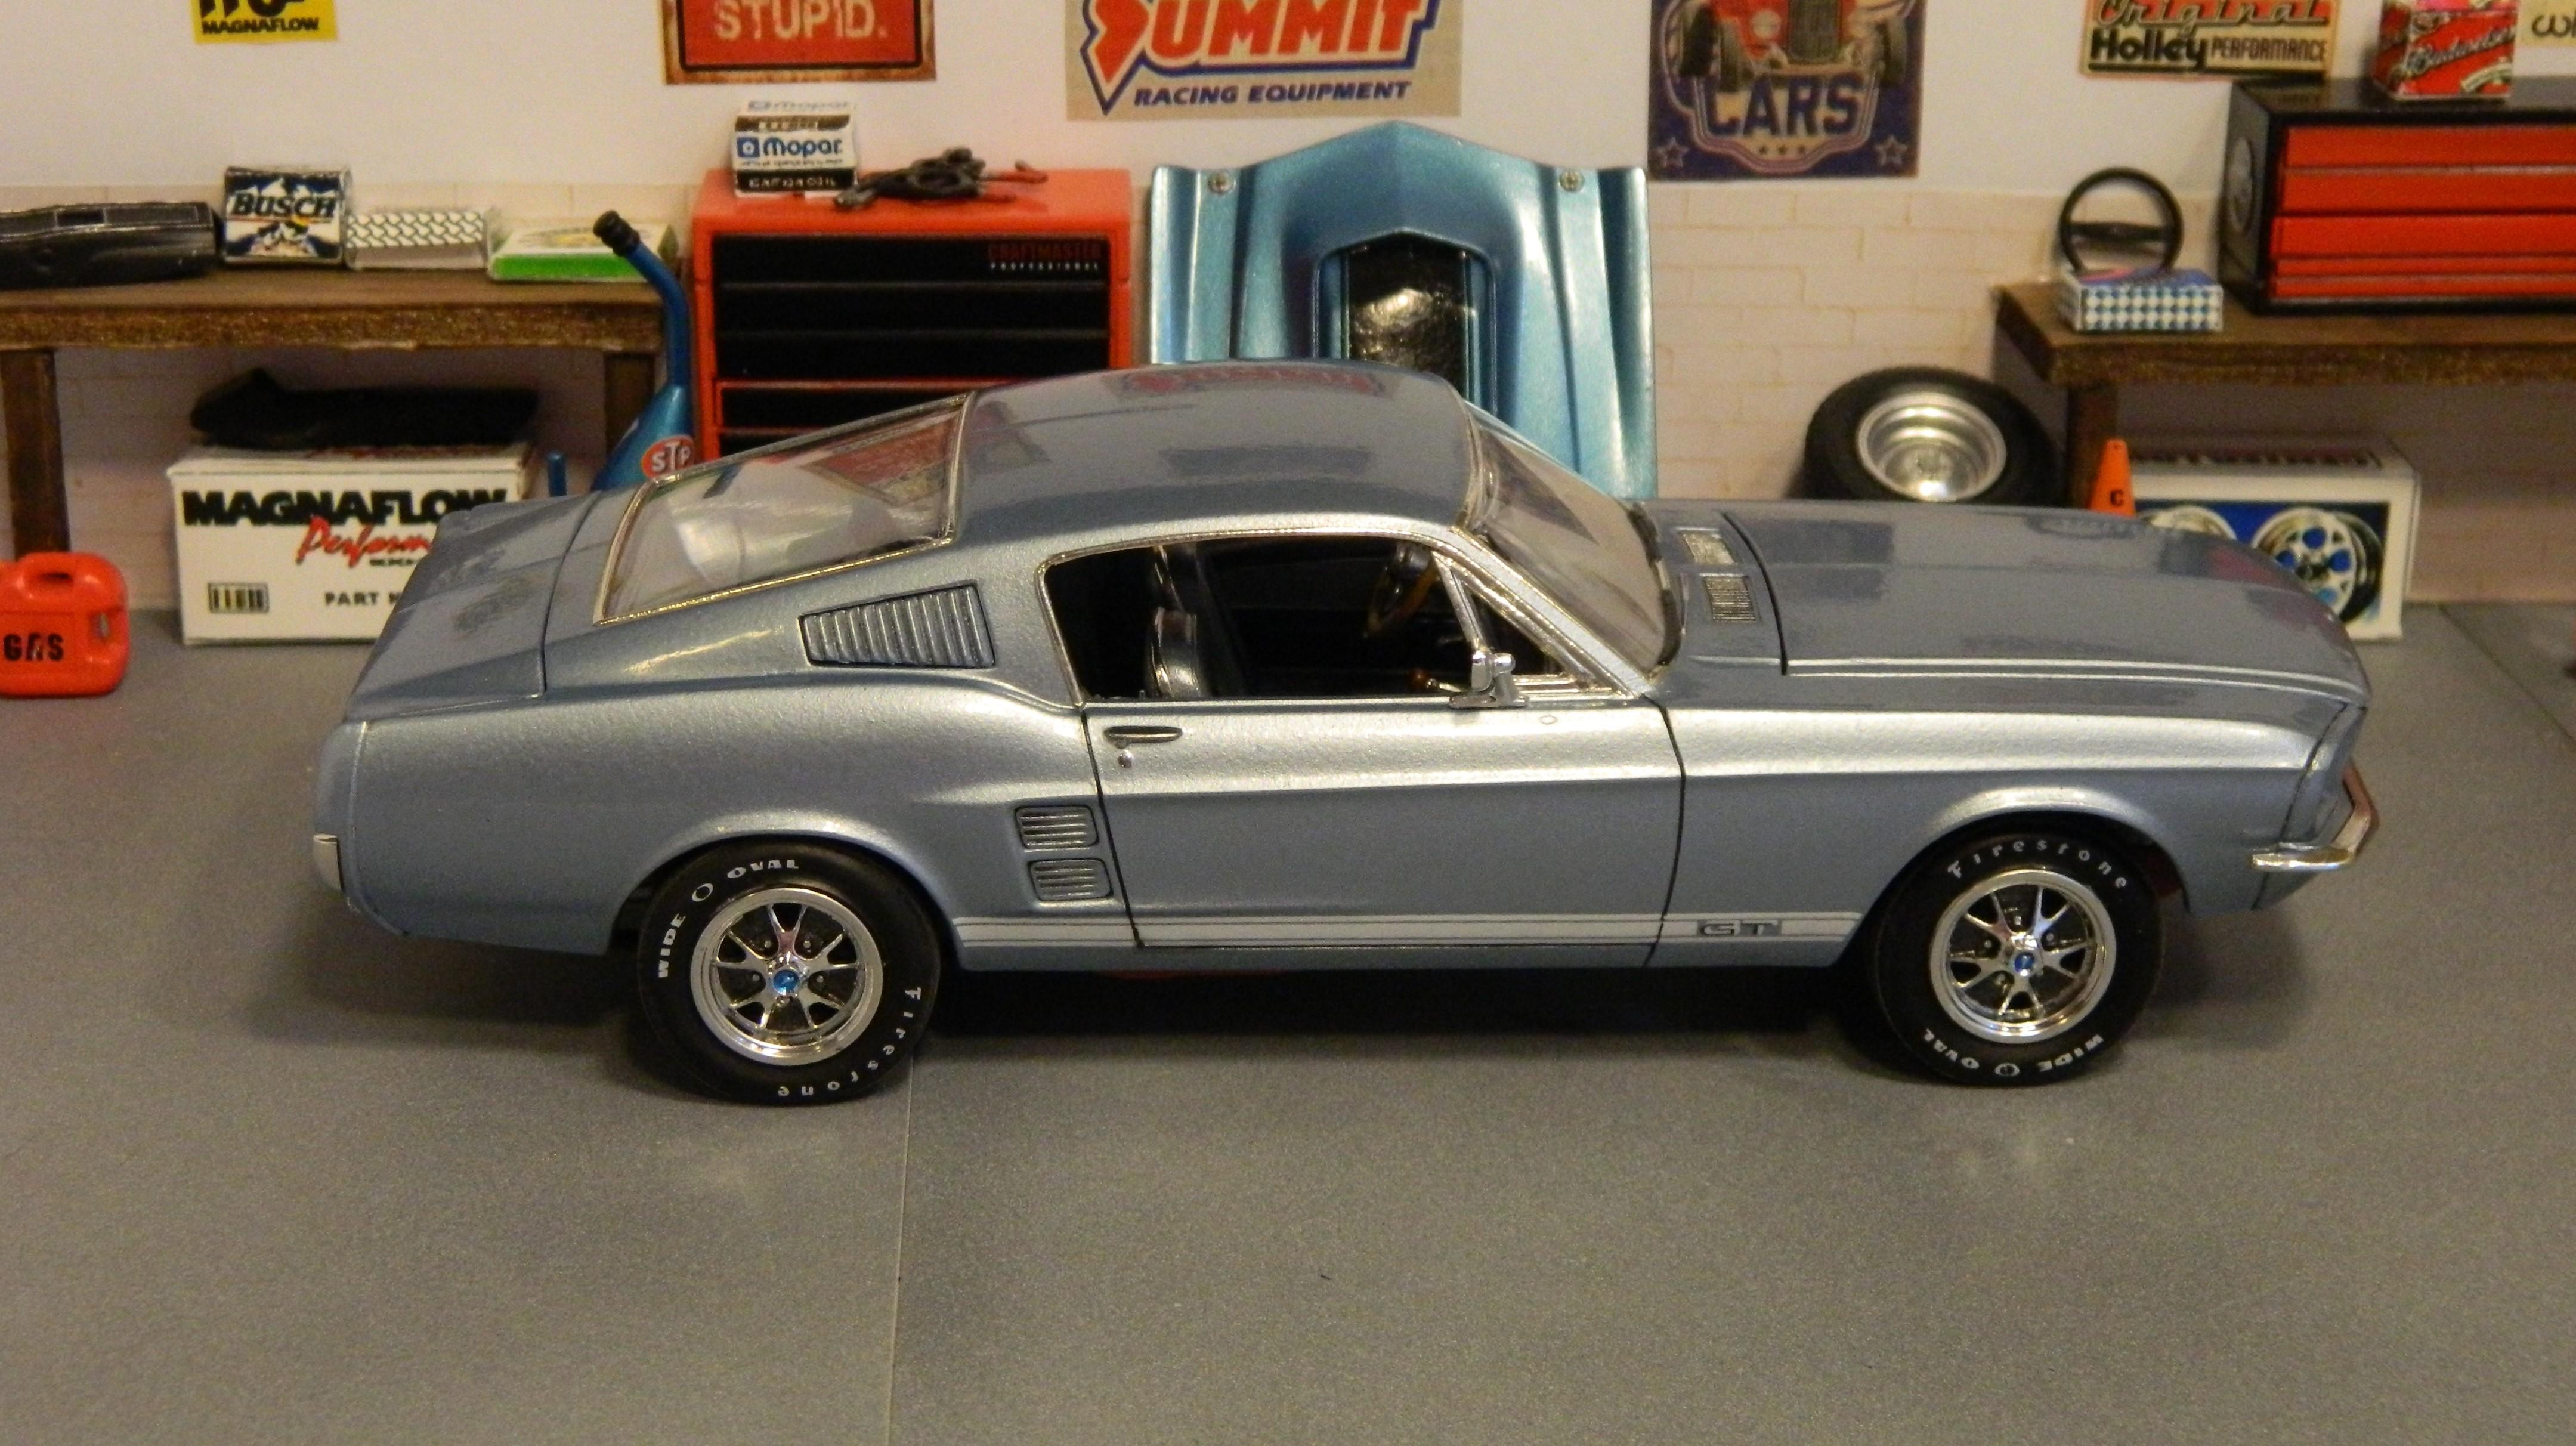
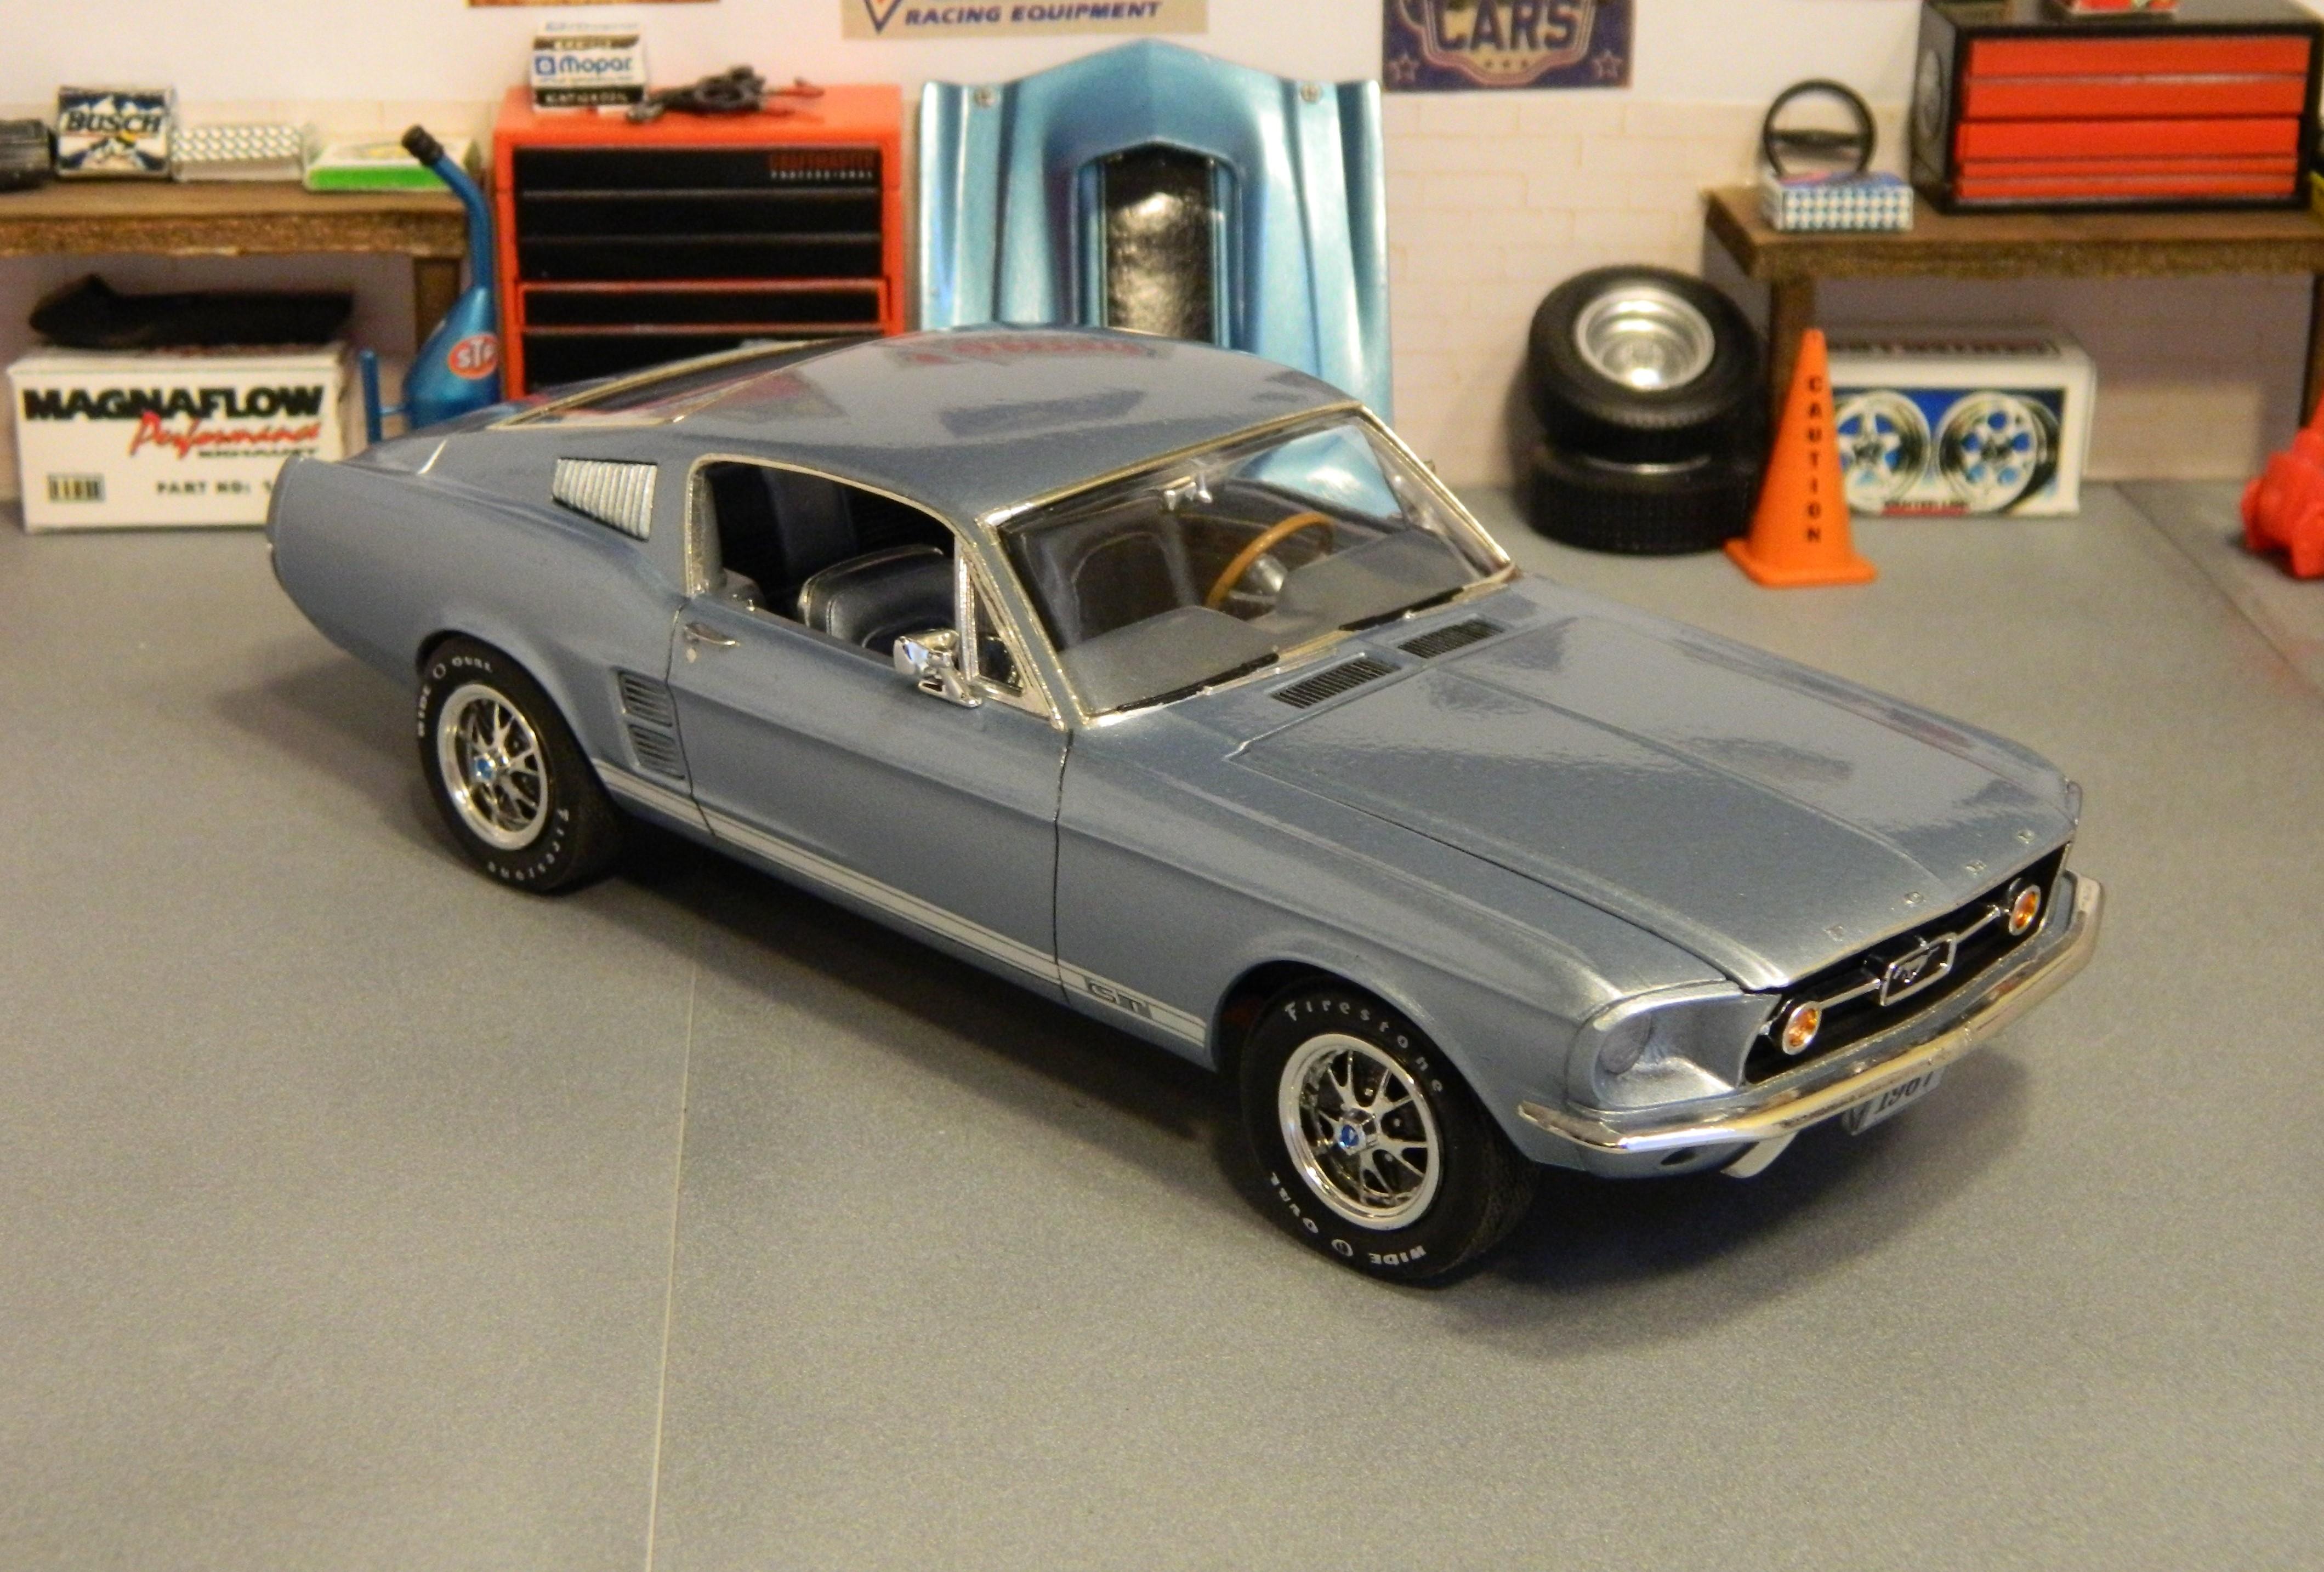
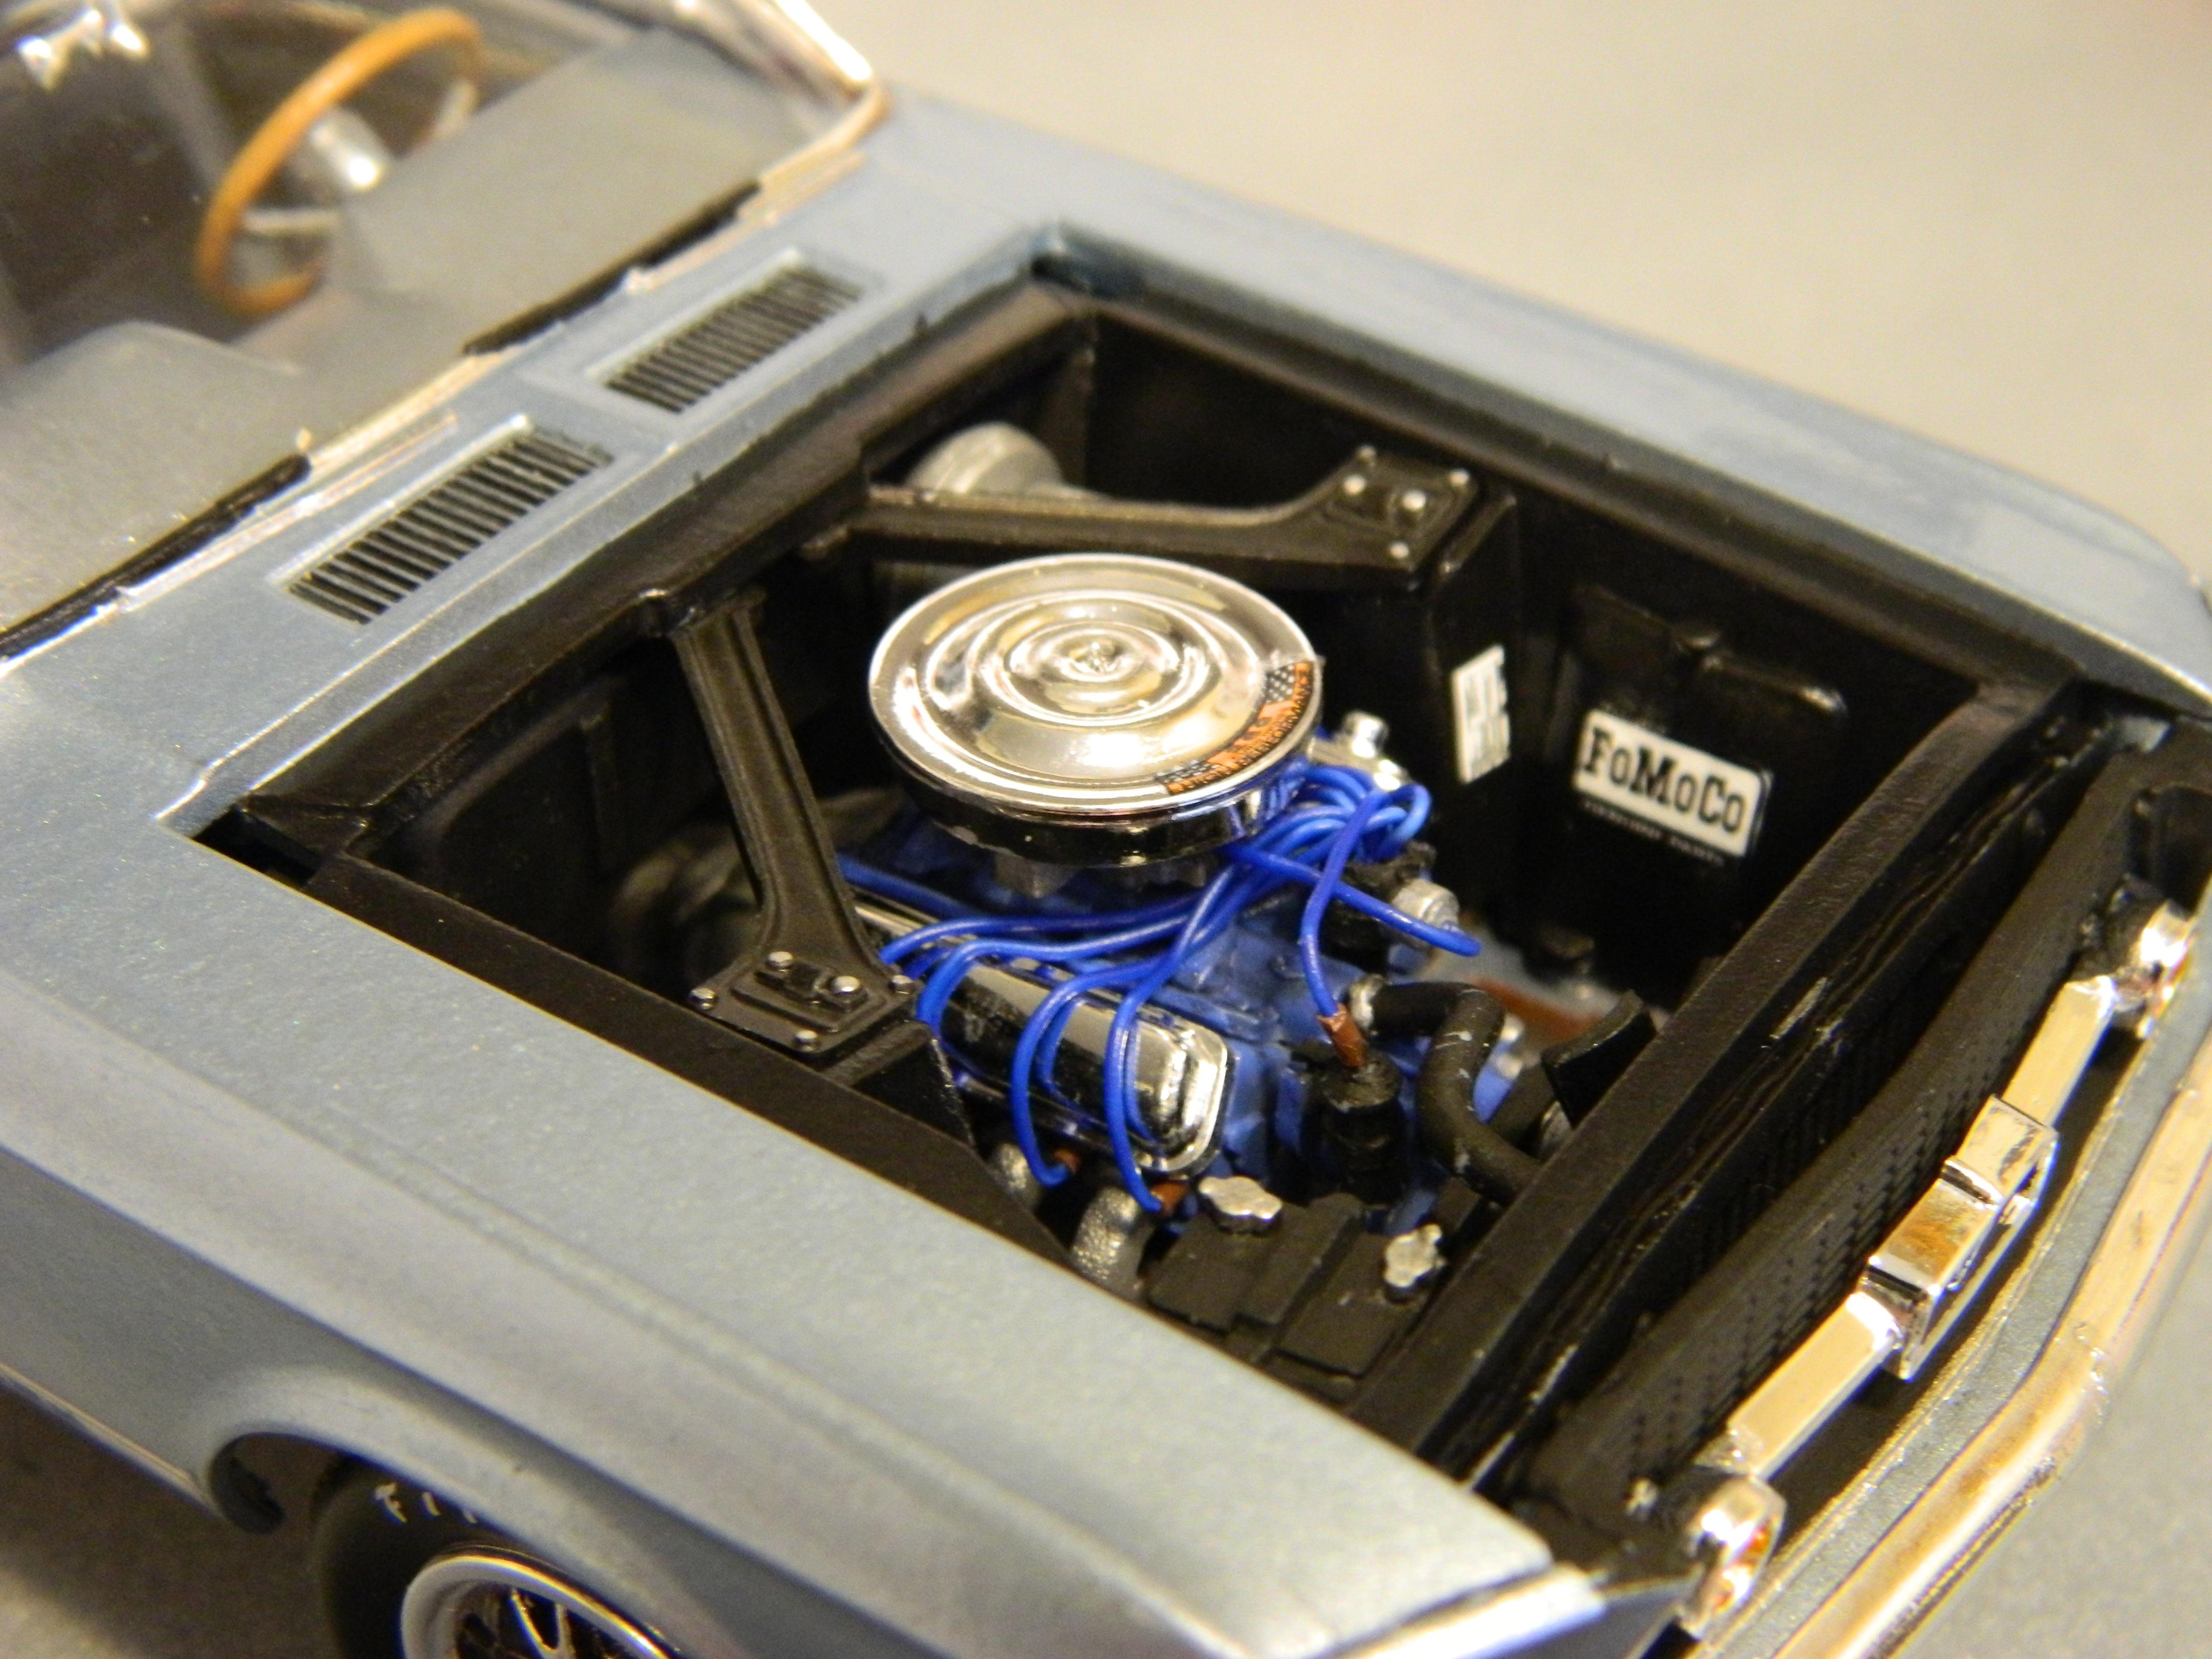
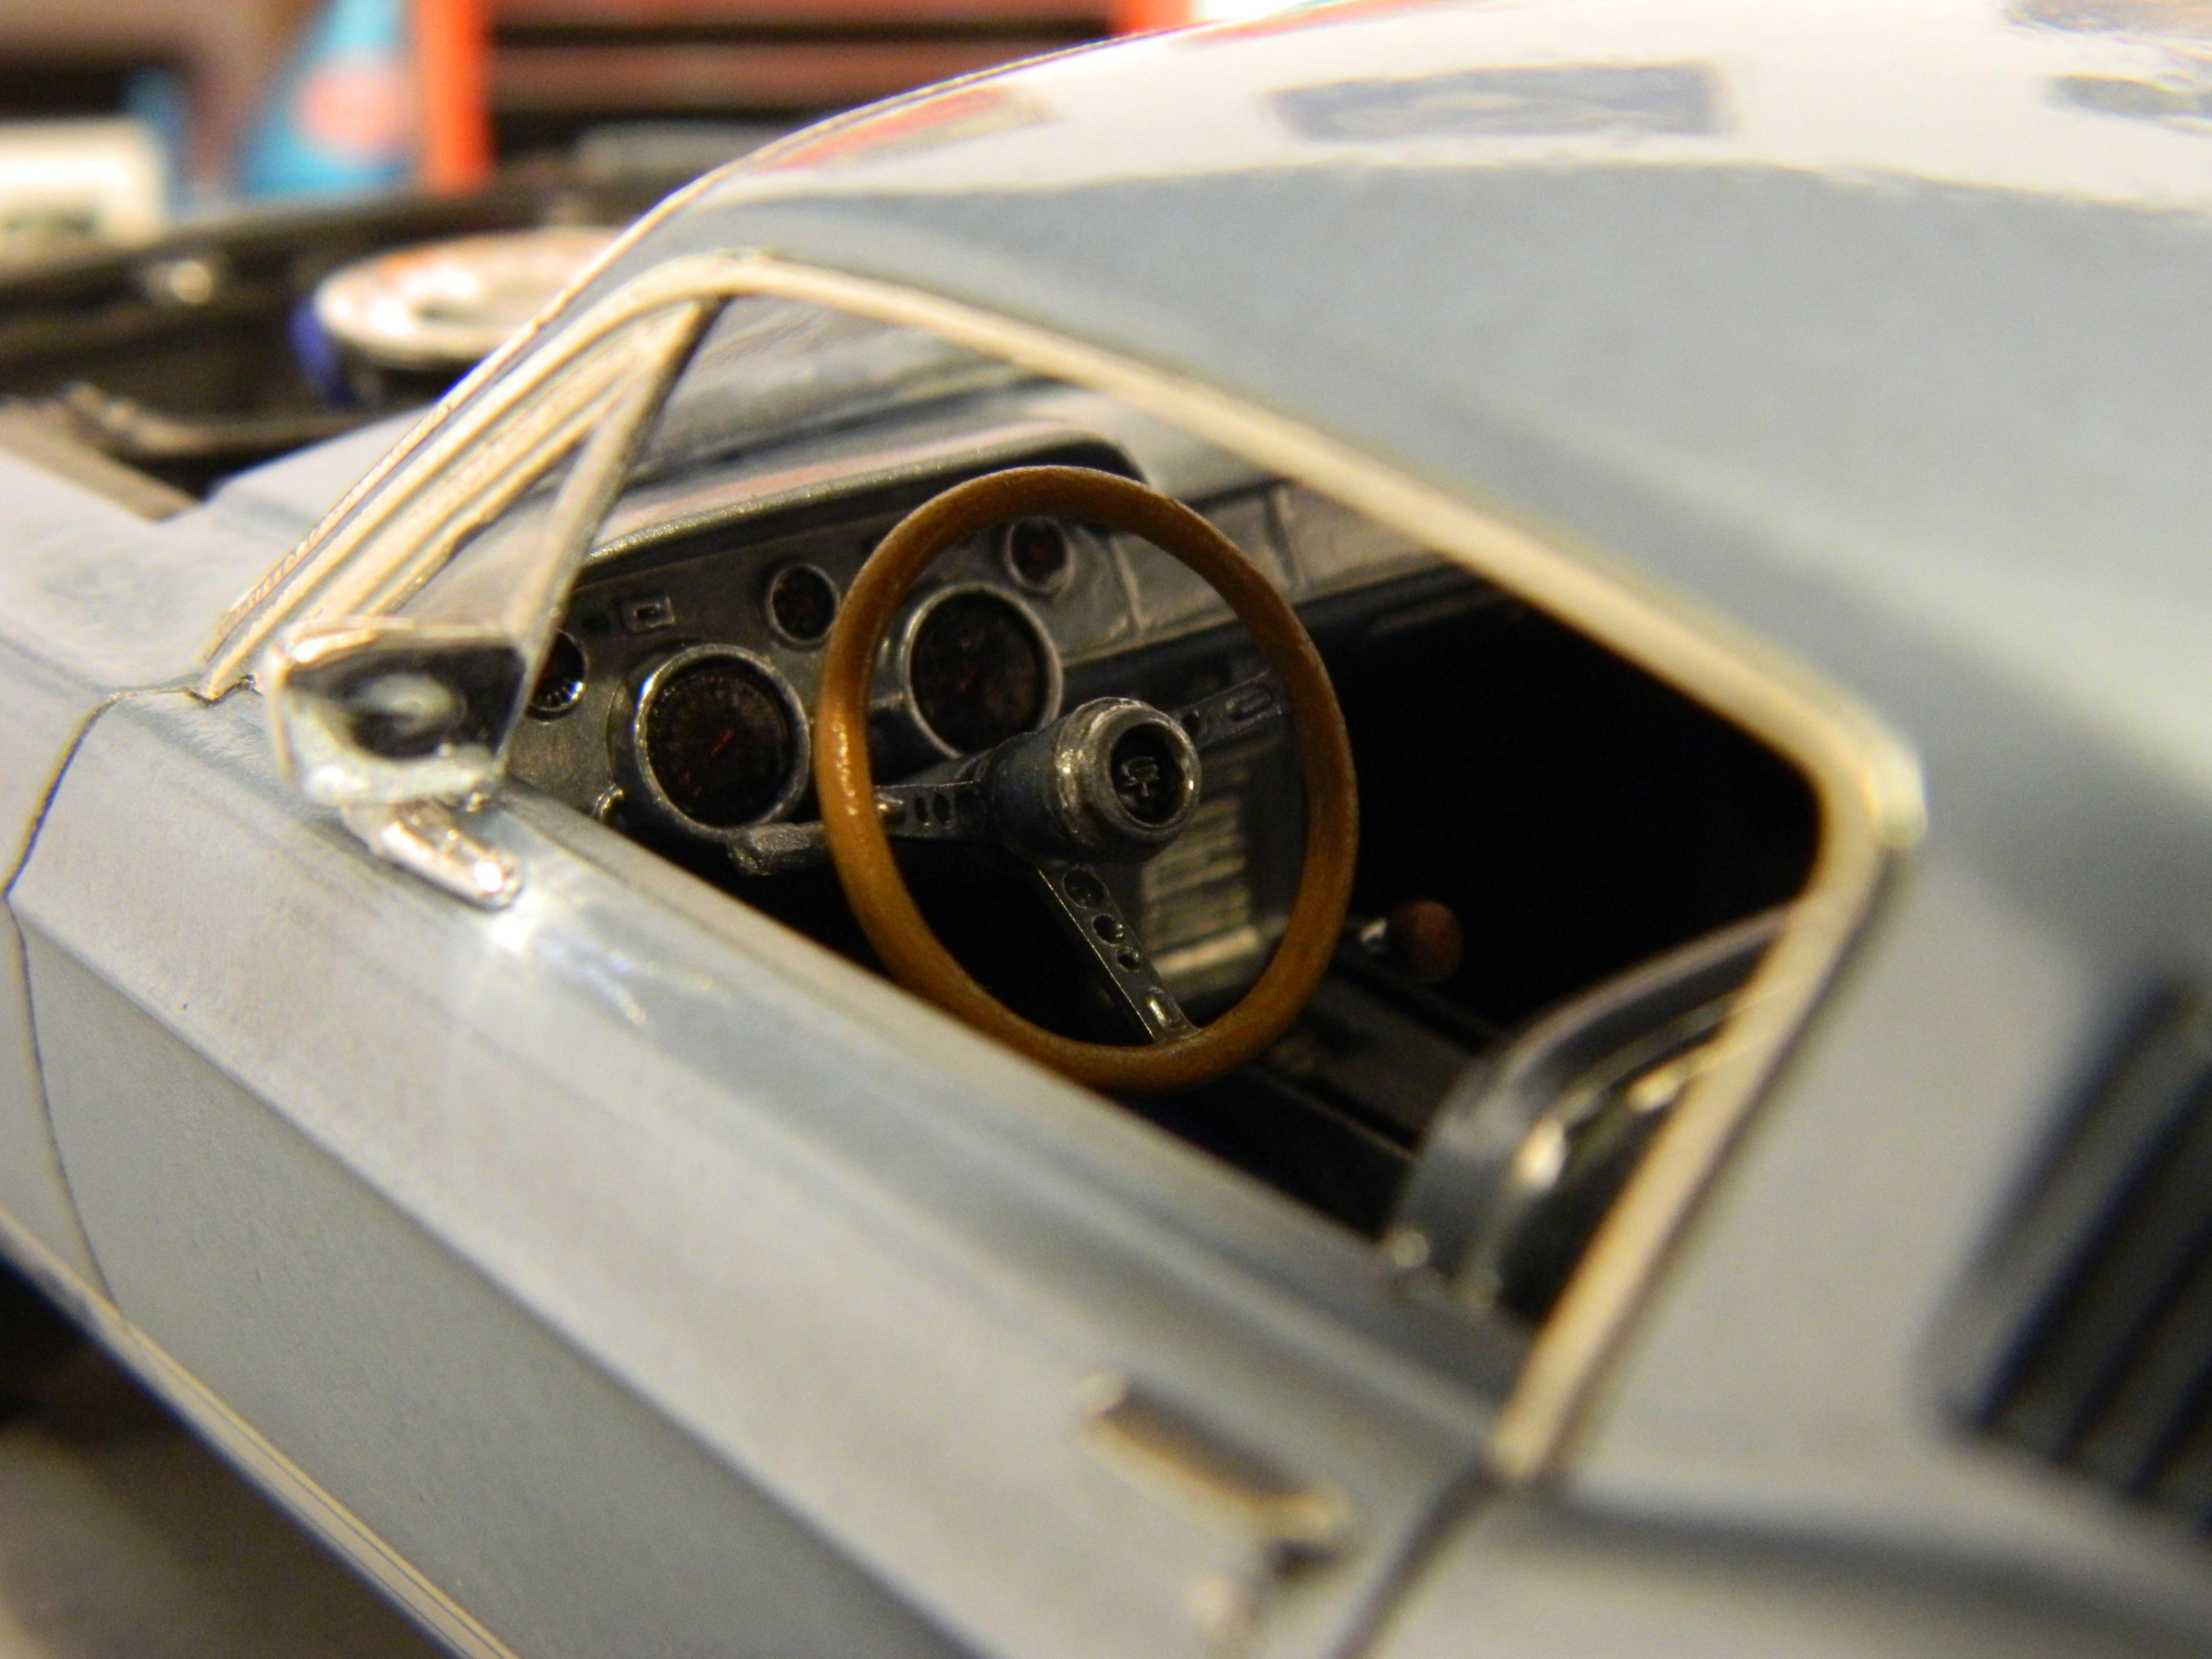
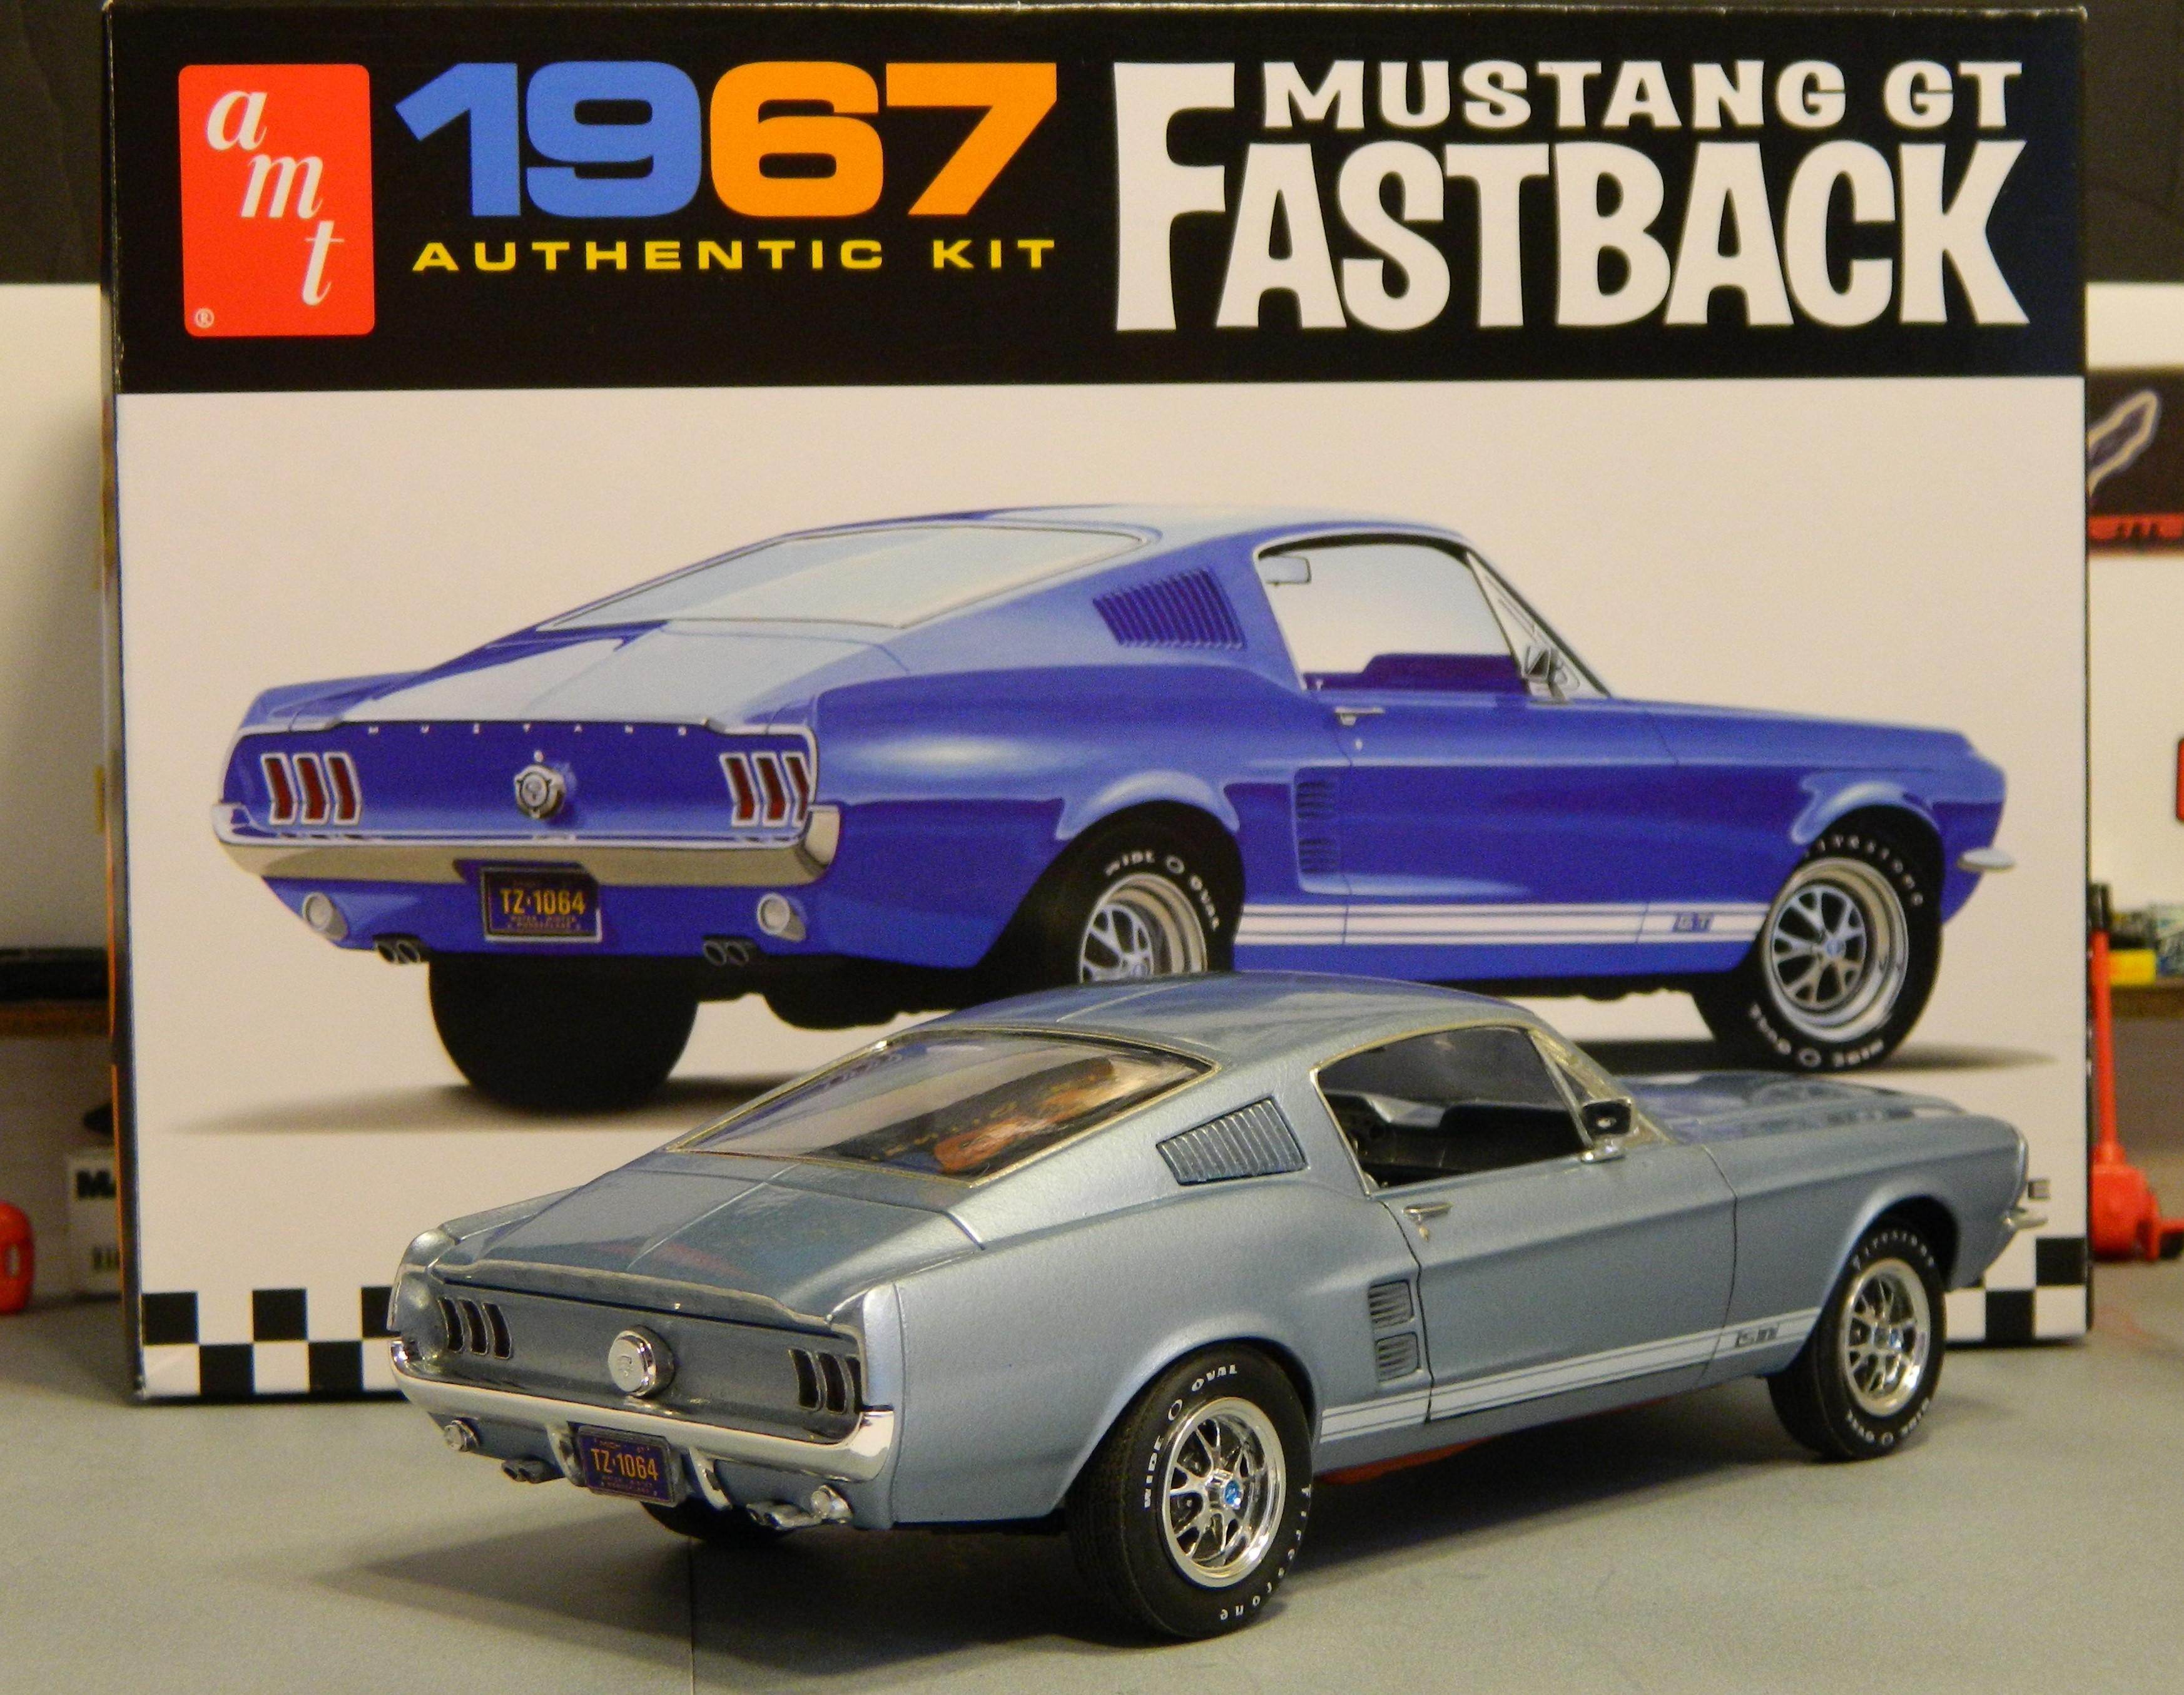
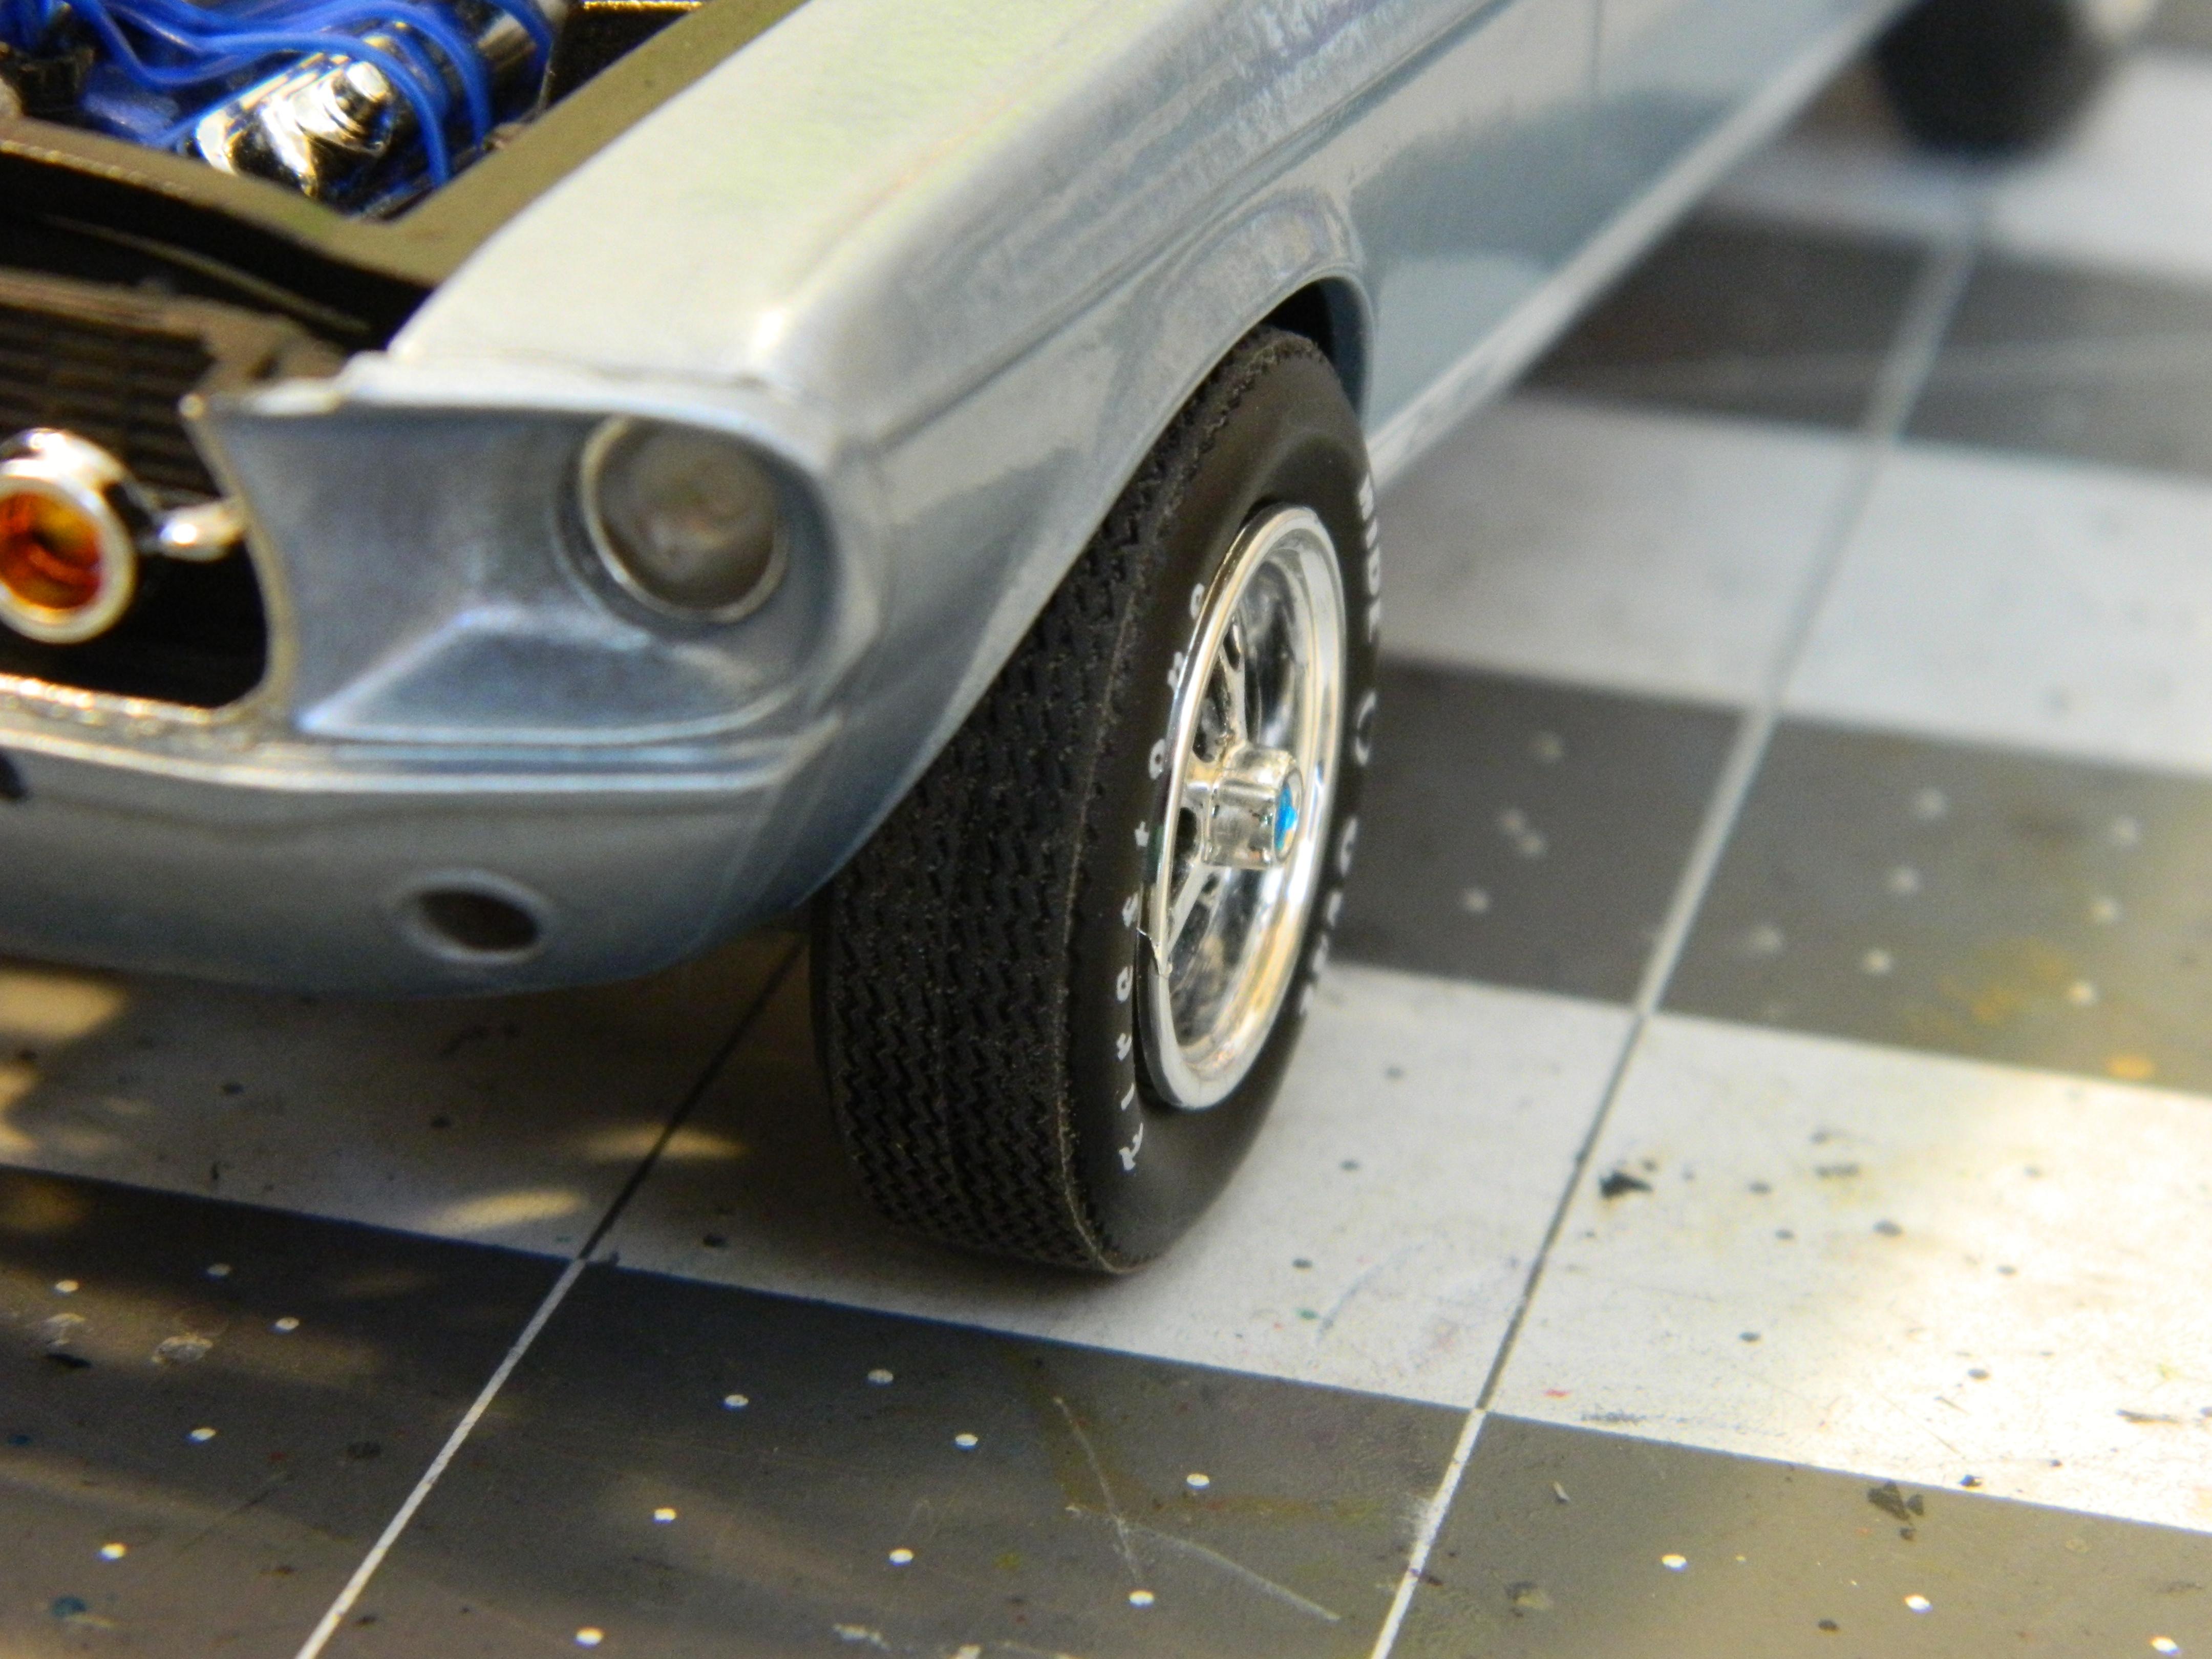
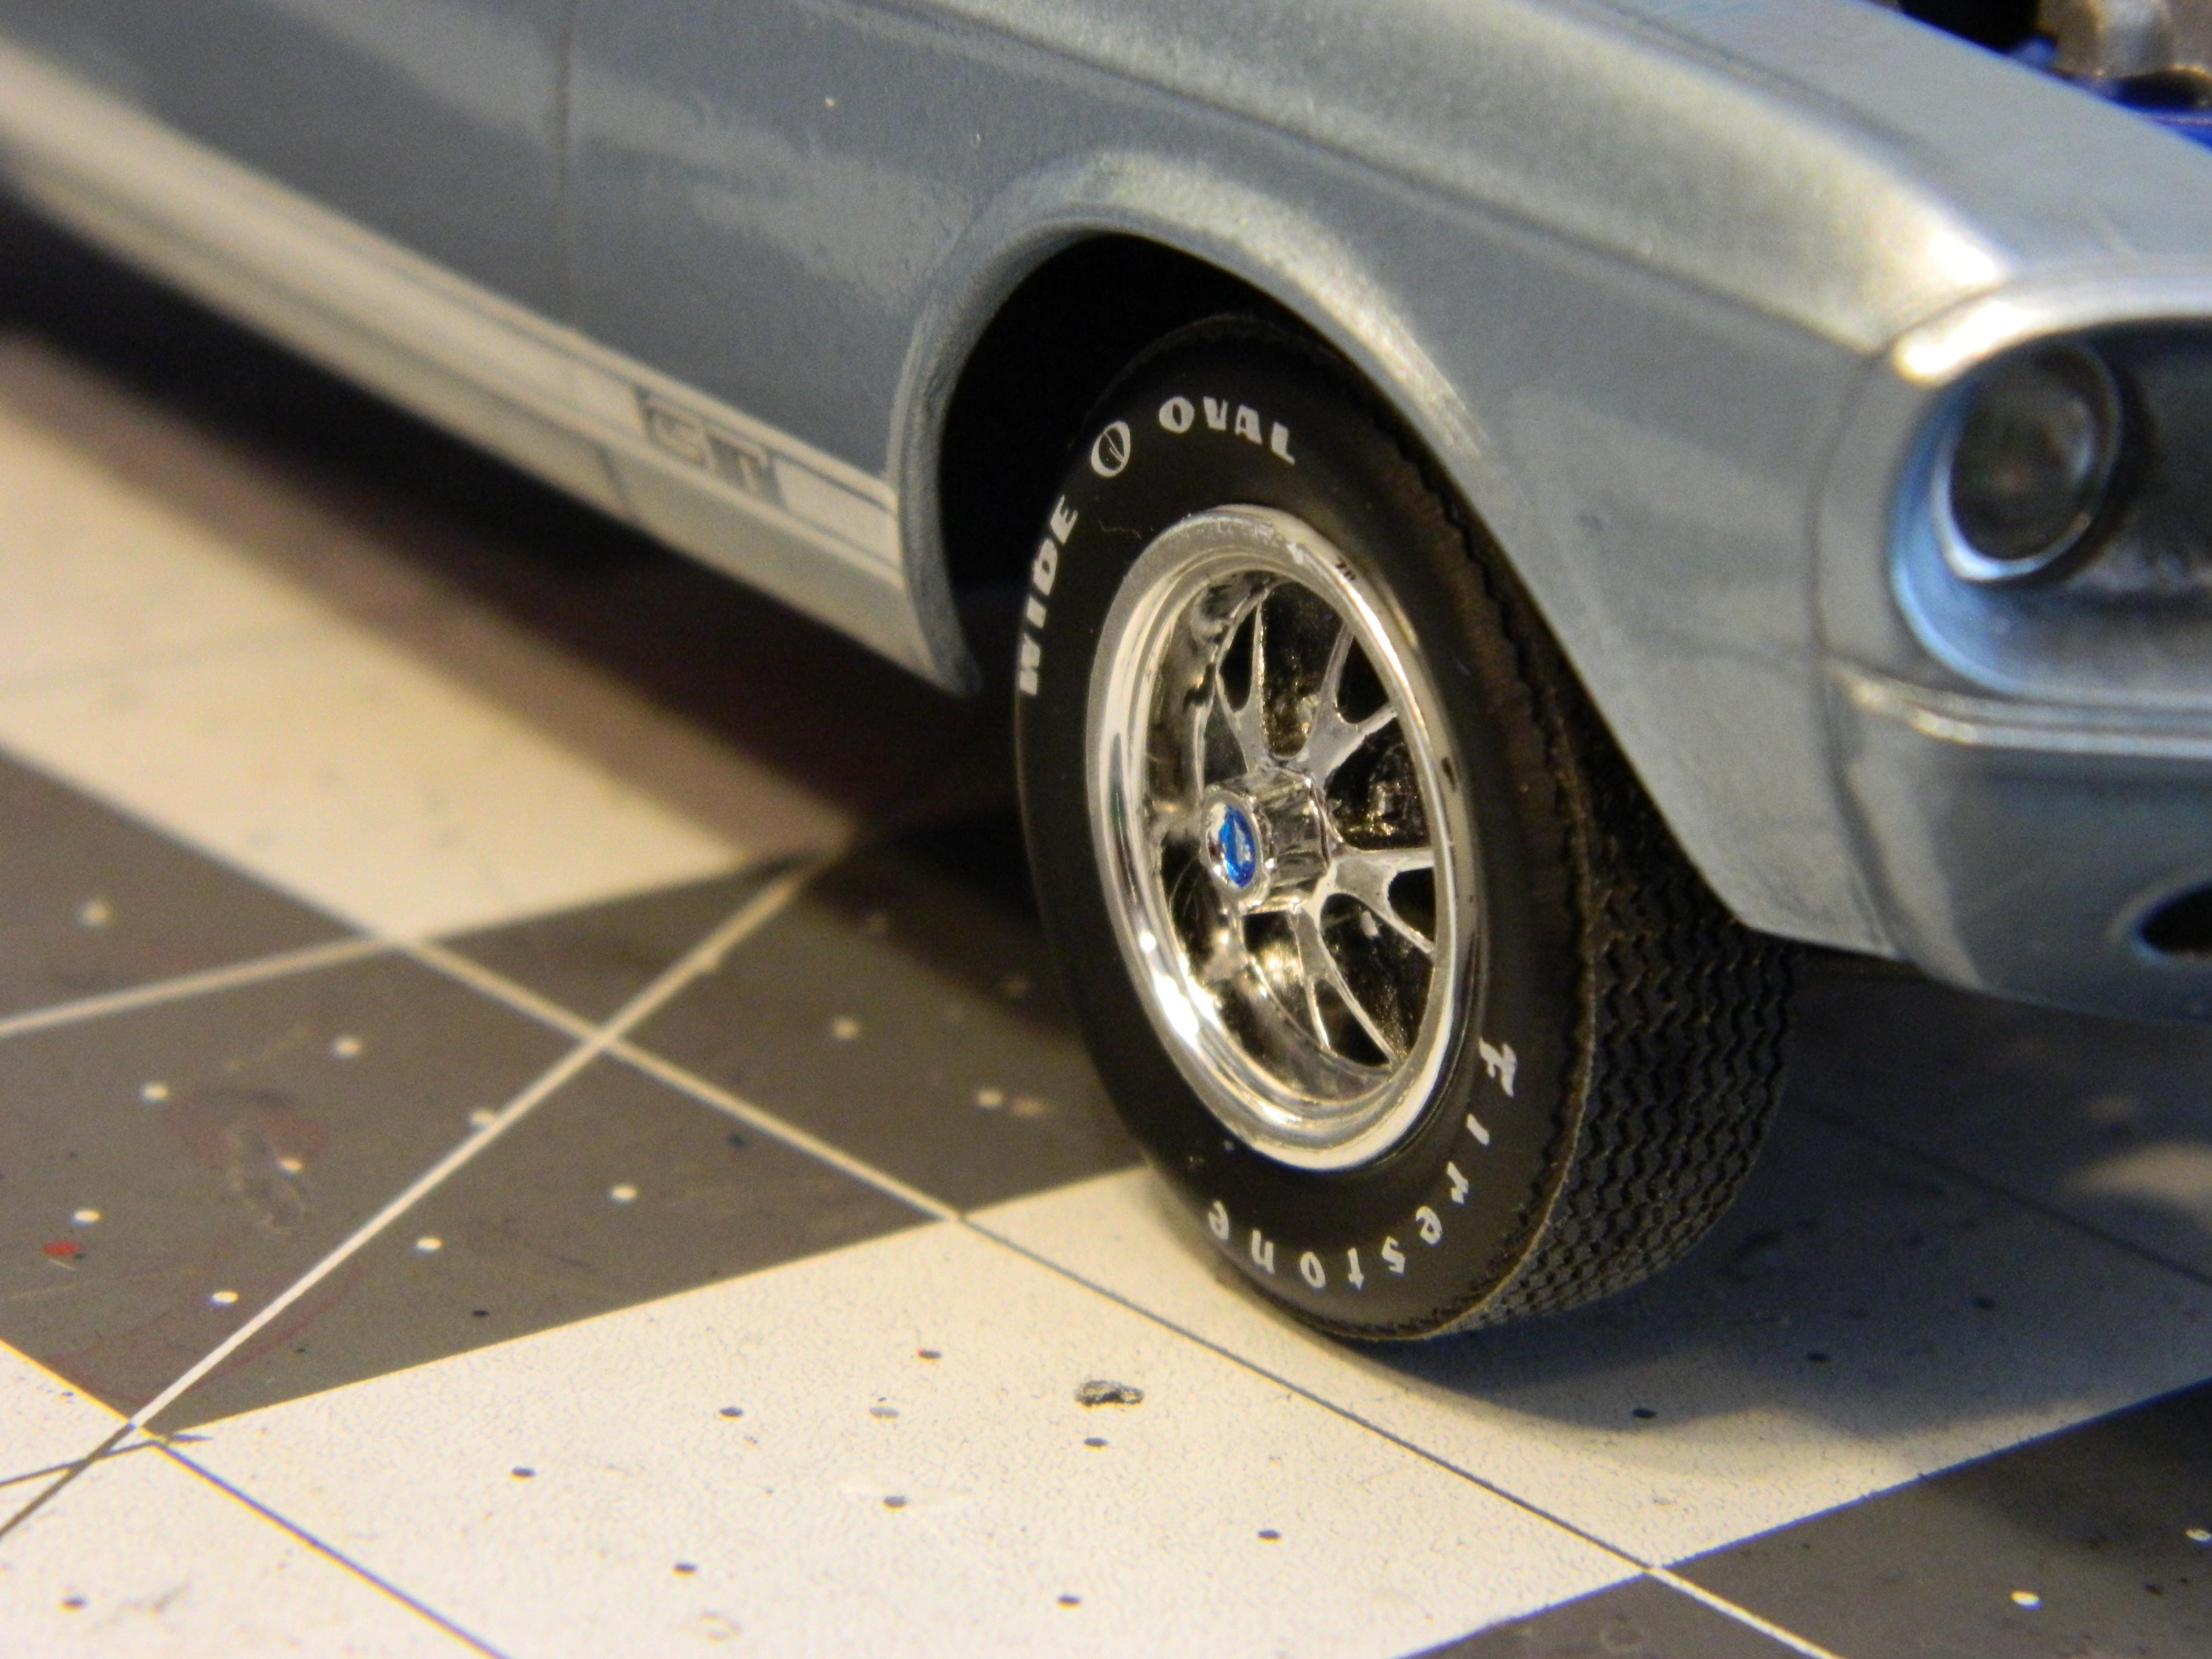
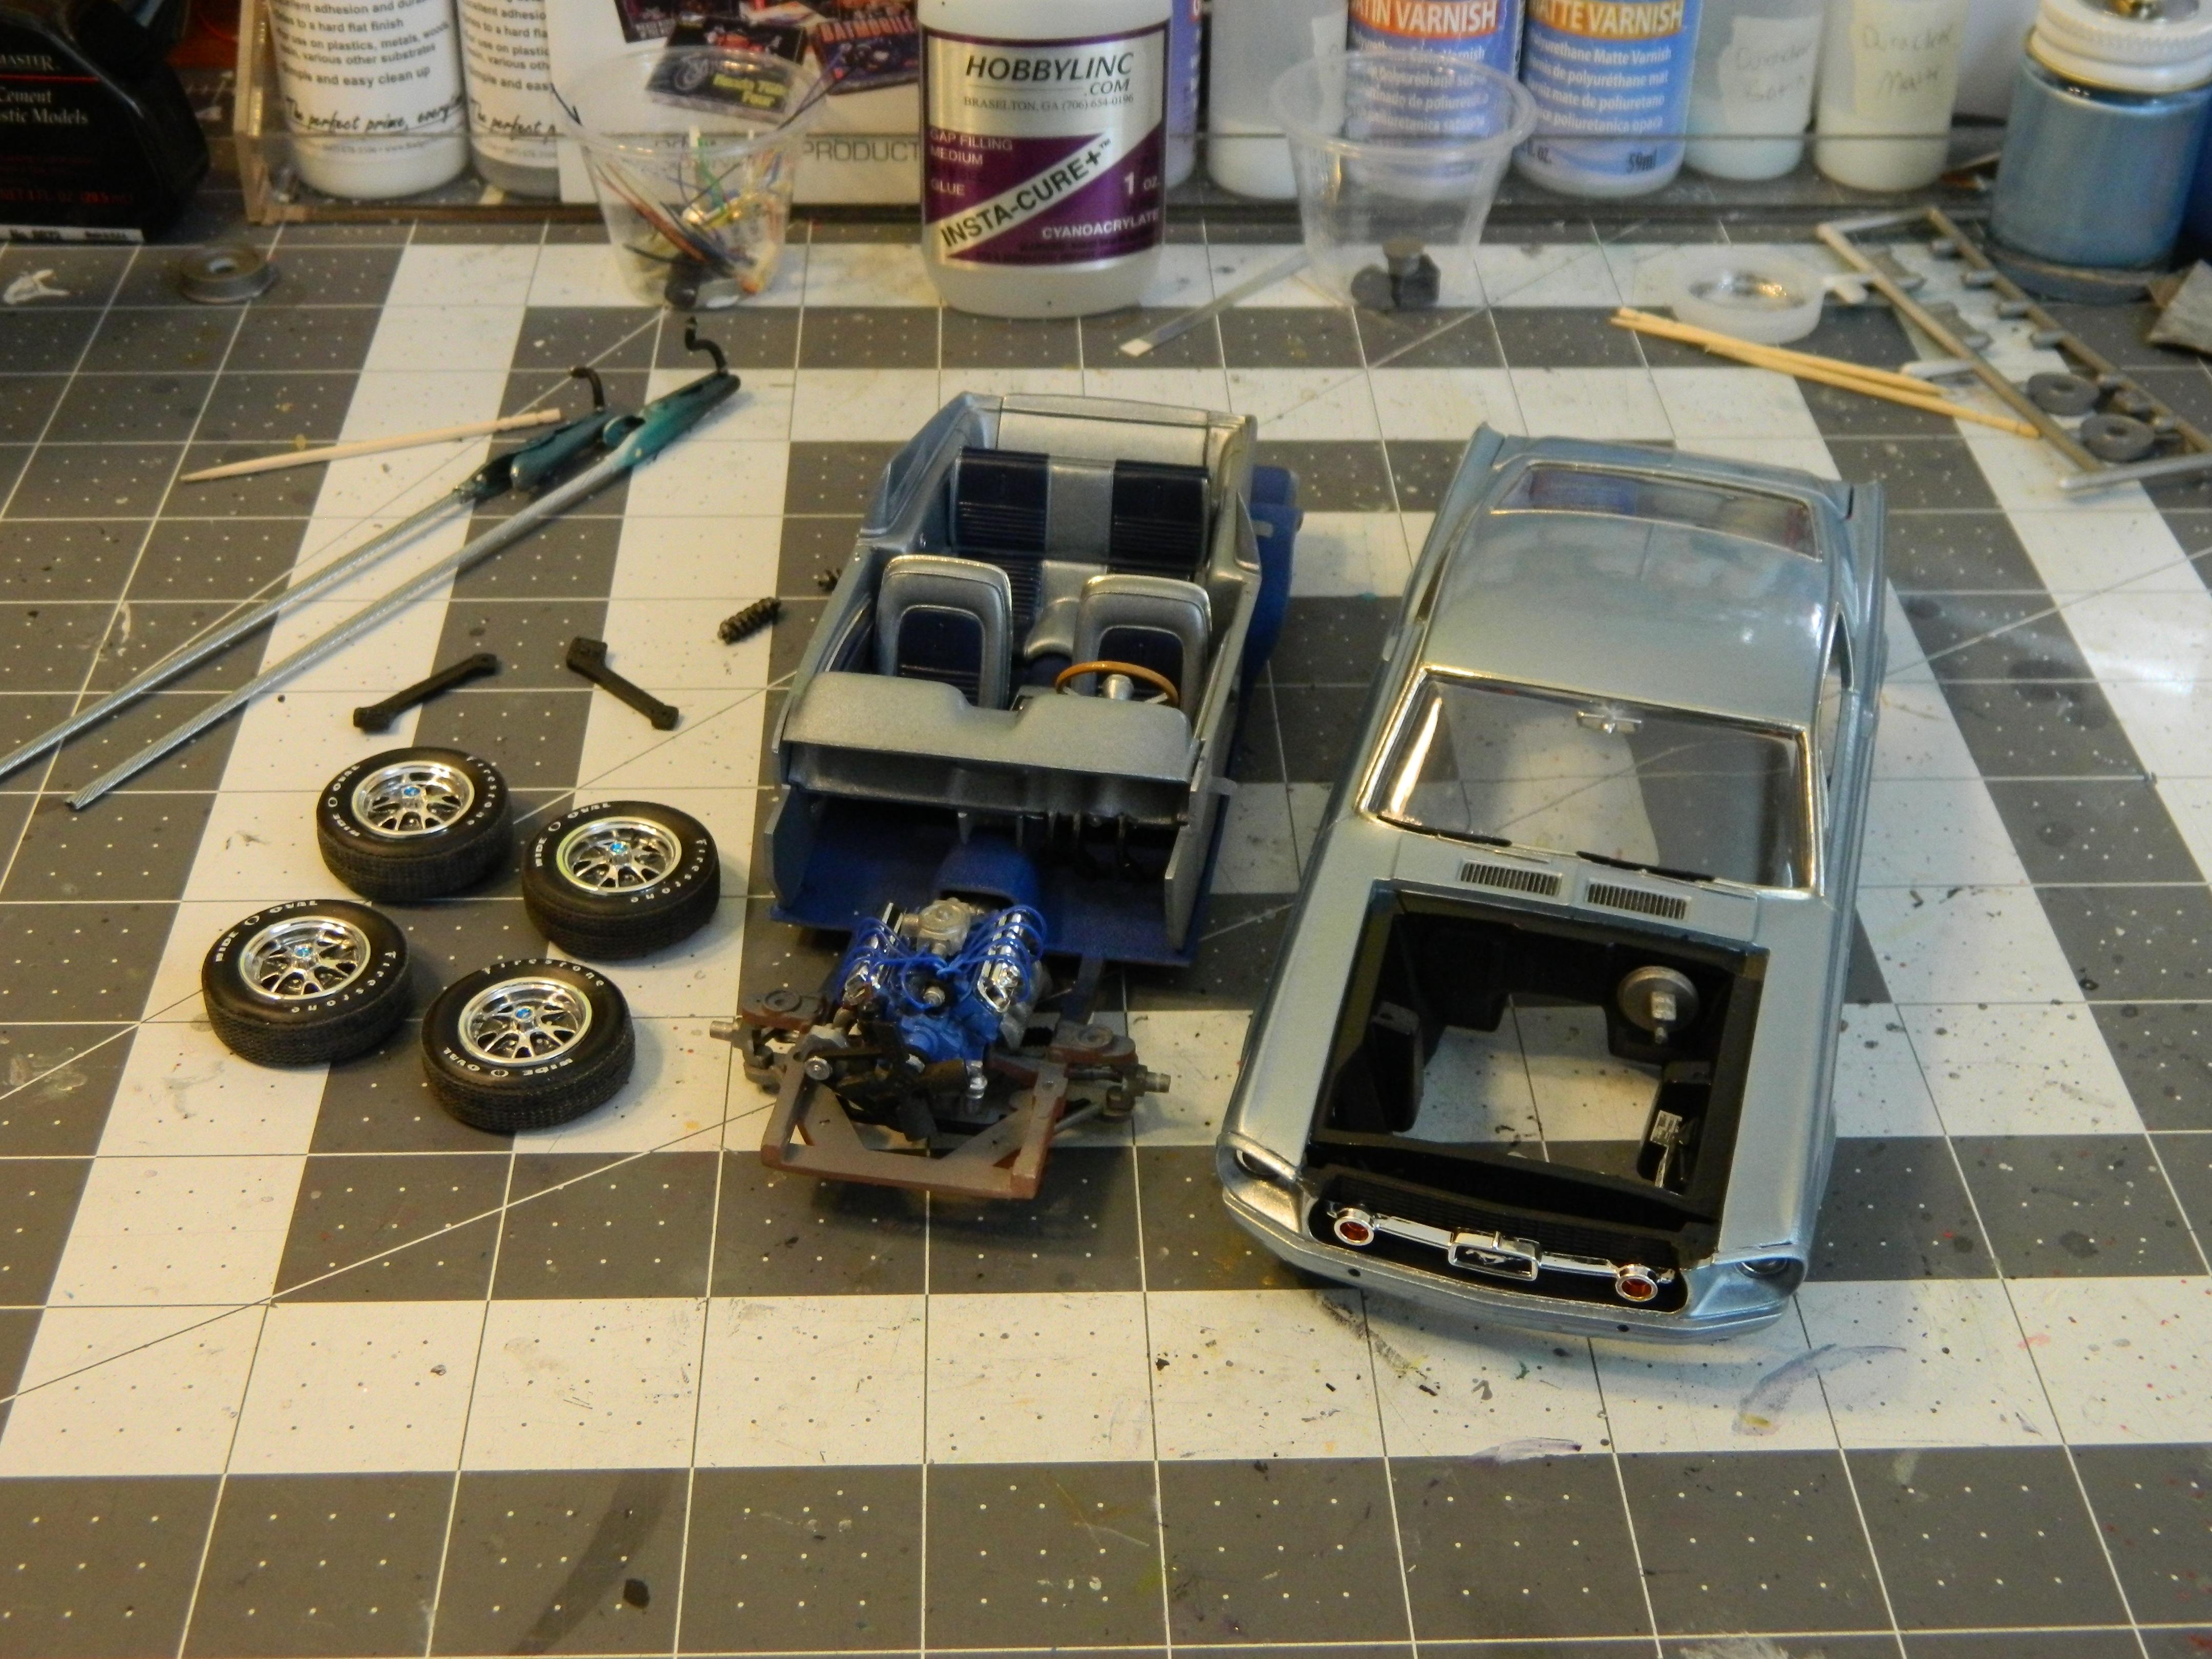
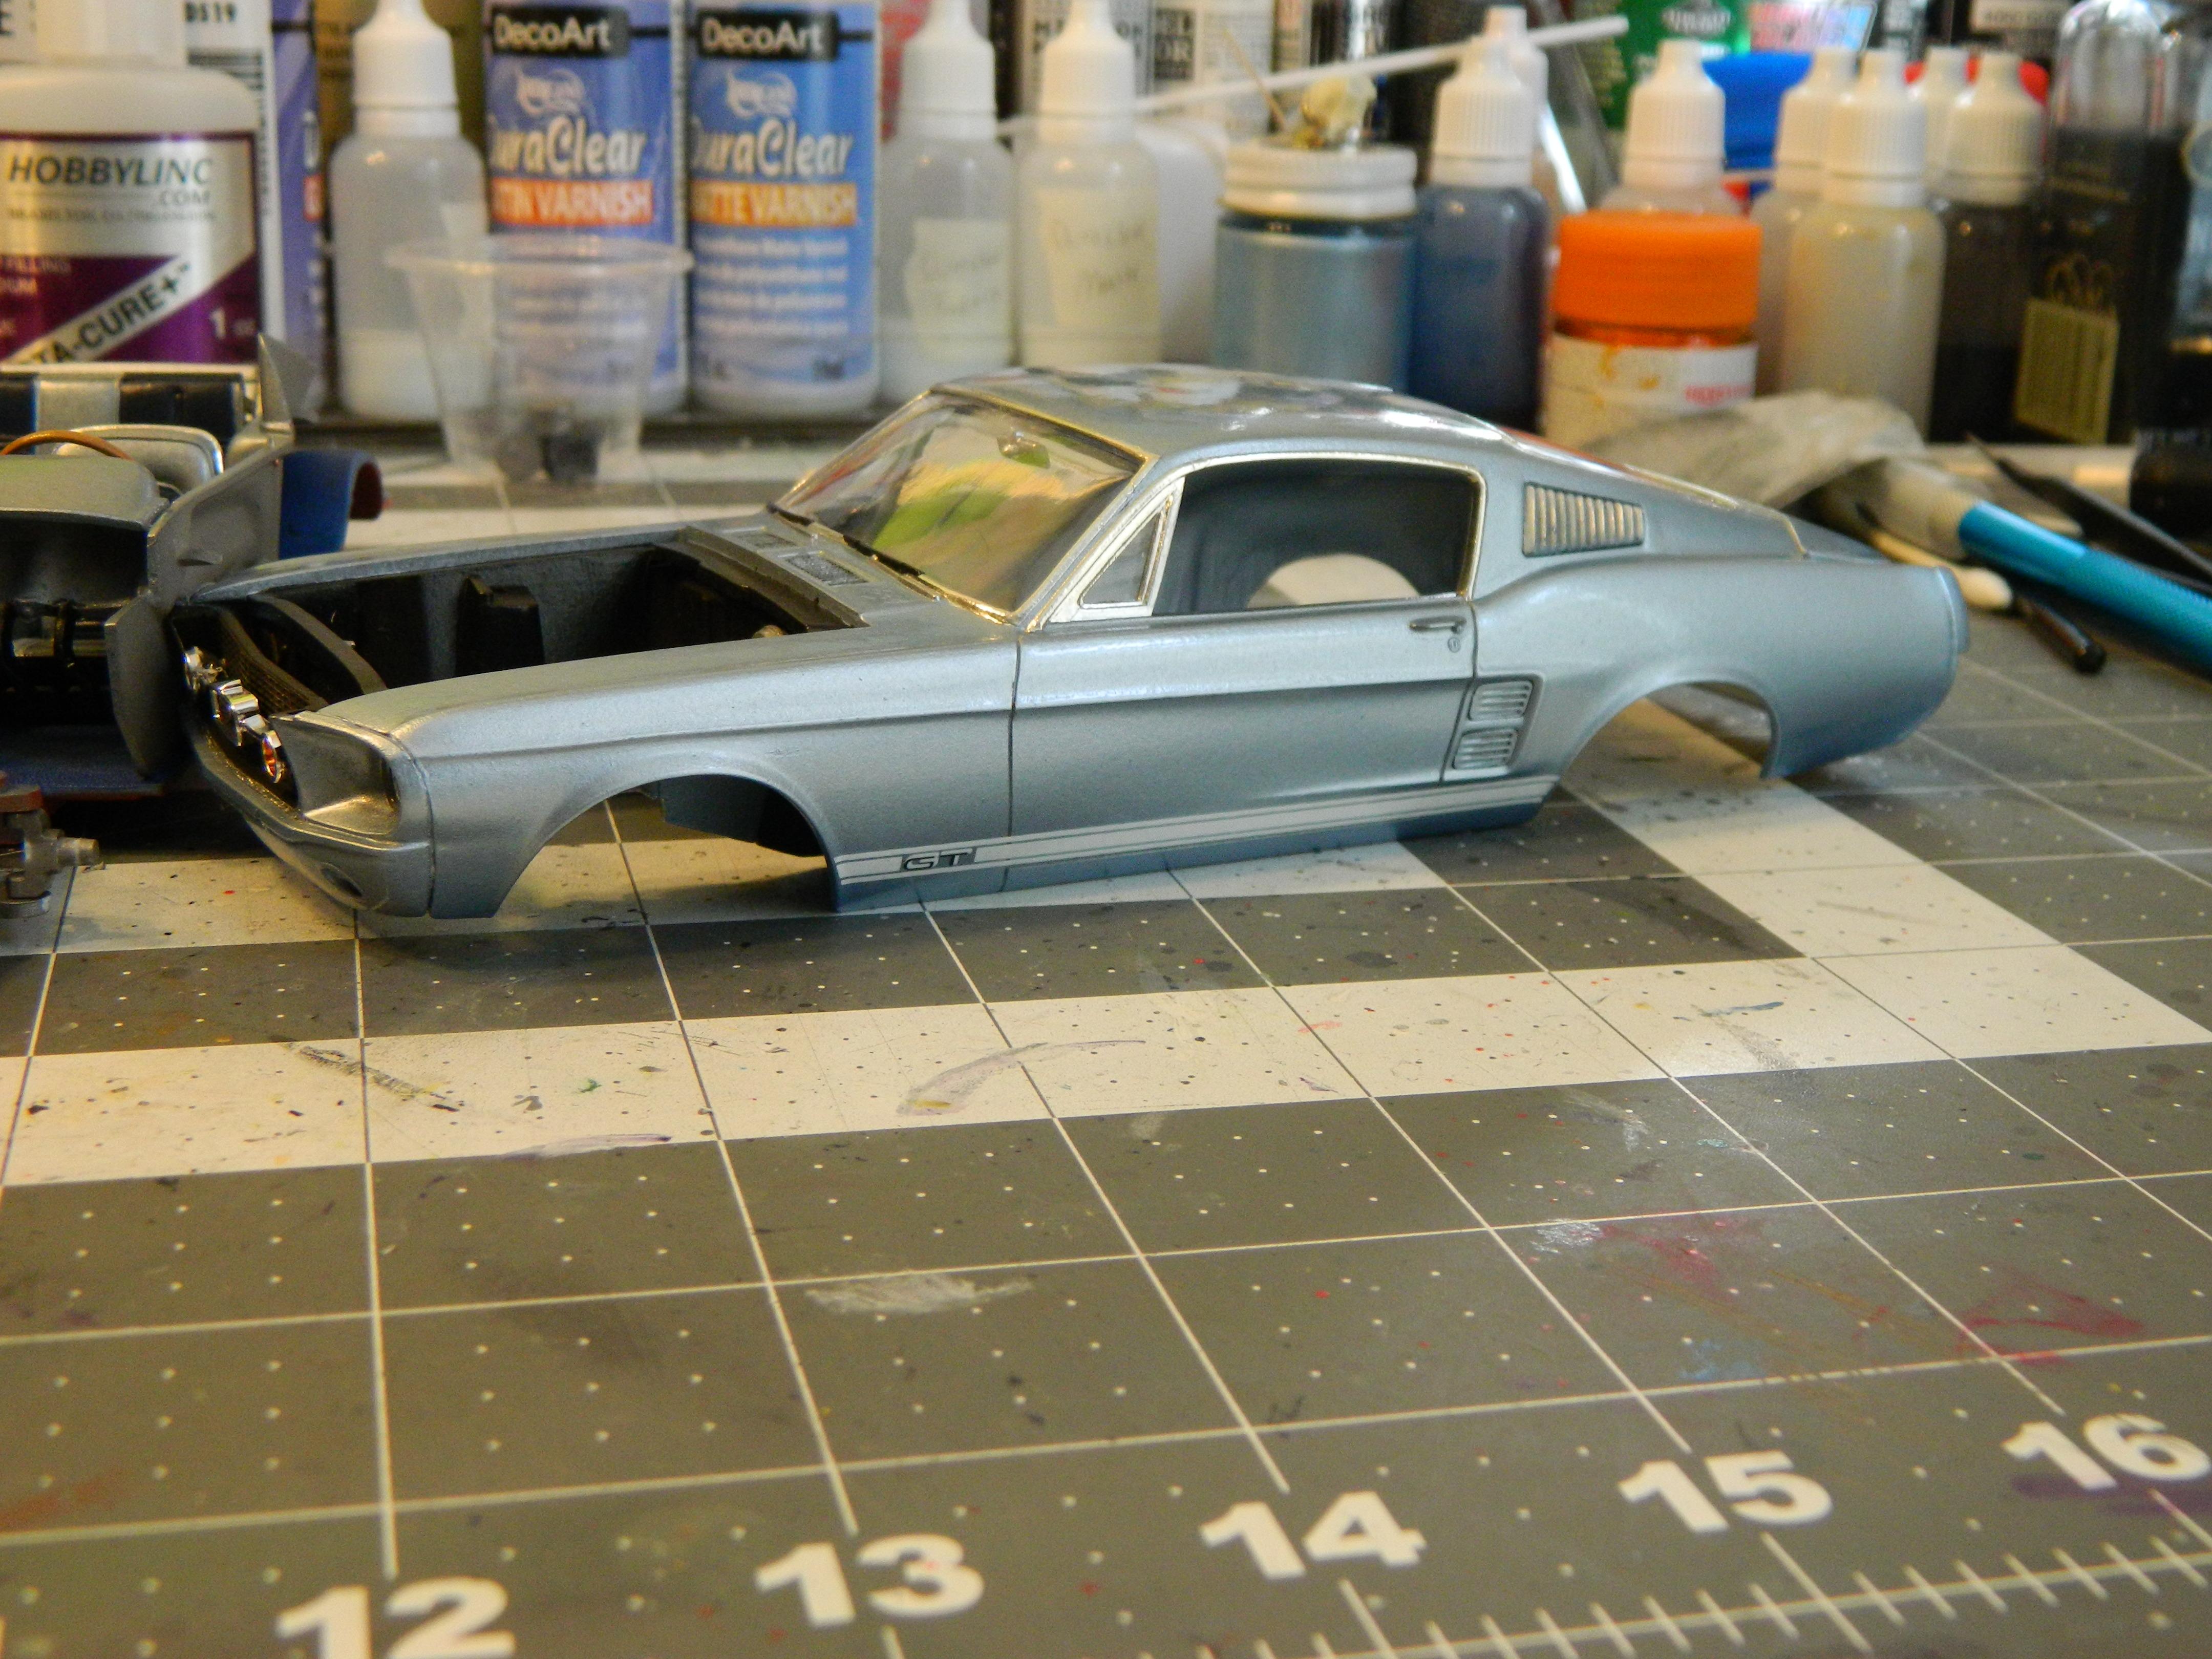
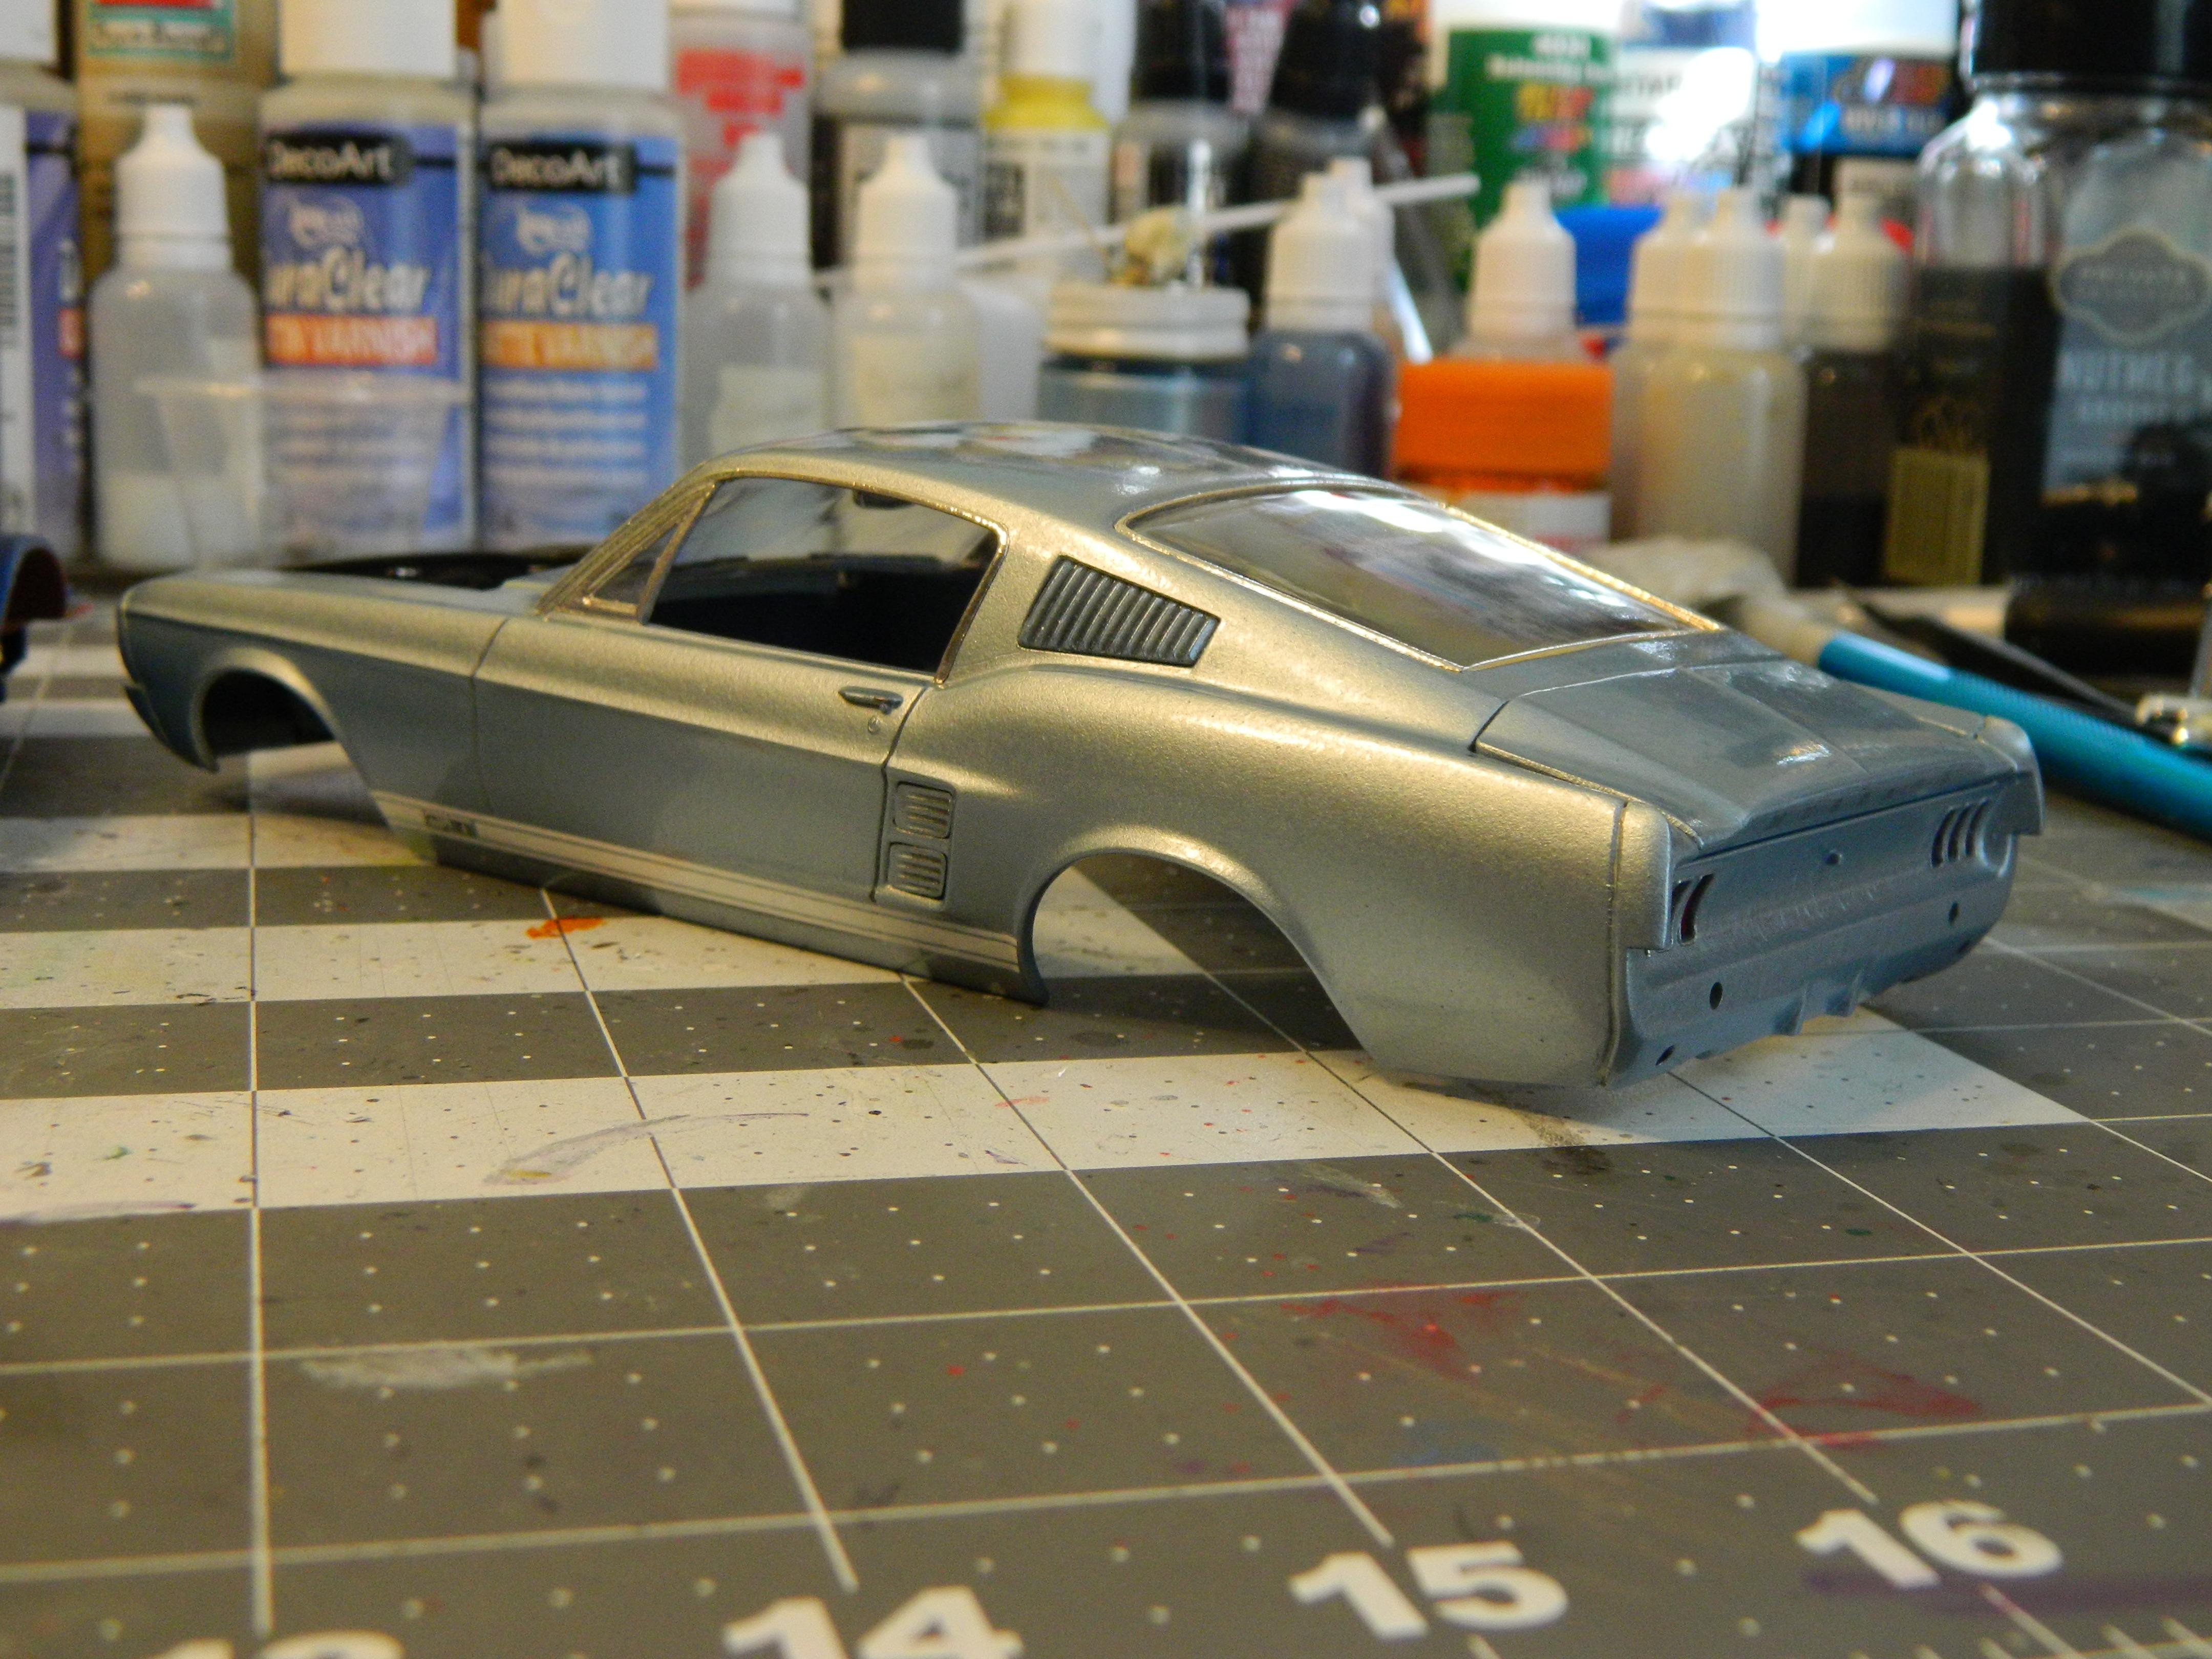
All finished with the AMT 1967 Mustang GT Fastback. It's painted in a custom mixed concoction of craft paints to emulate the factory Brittany Blue color. The two-tone interior was done using a couple of different mixtures of craft paint as well. The window trim is BMF, and the grill/trunk "trim" was painted with Molotow Chrome. The front end sits a little higher than I'd like, but research shows that a lot of the real ones look this way anyways for some reason. All in all though, It's a pretty decent kit with nice details, and most everything fits real well. It was a nice, fun build, and I'm pretty happy with how it turned out. Thanks for looking!
-
I finished up the final details this morning and this one's all done!
-
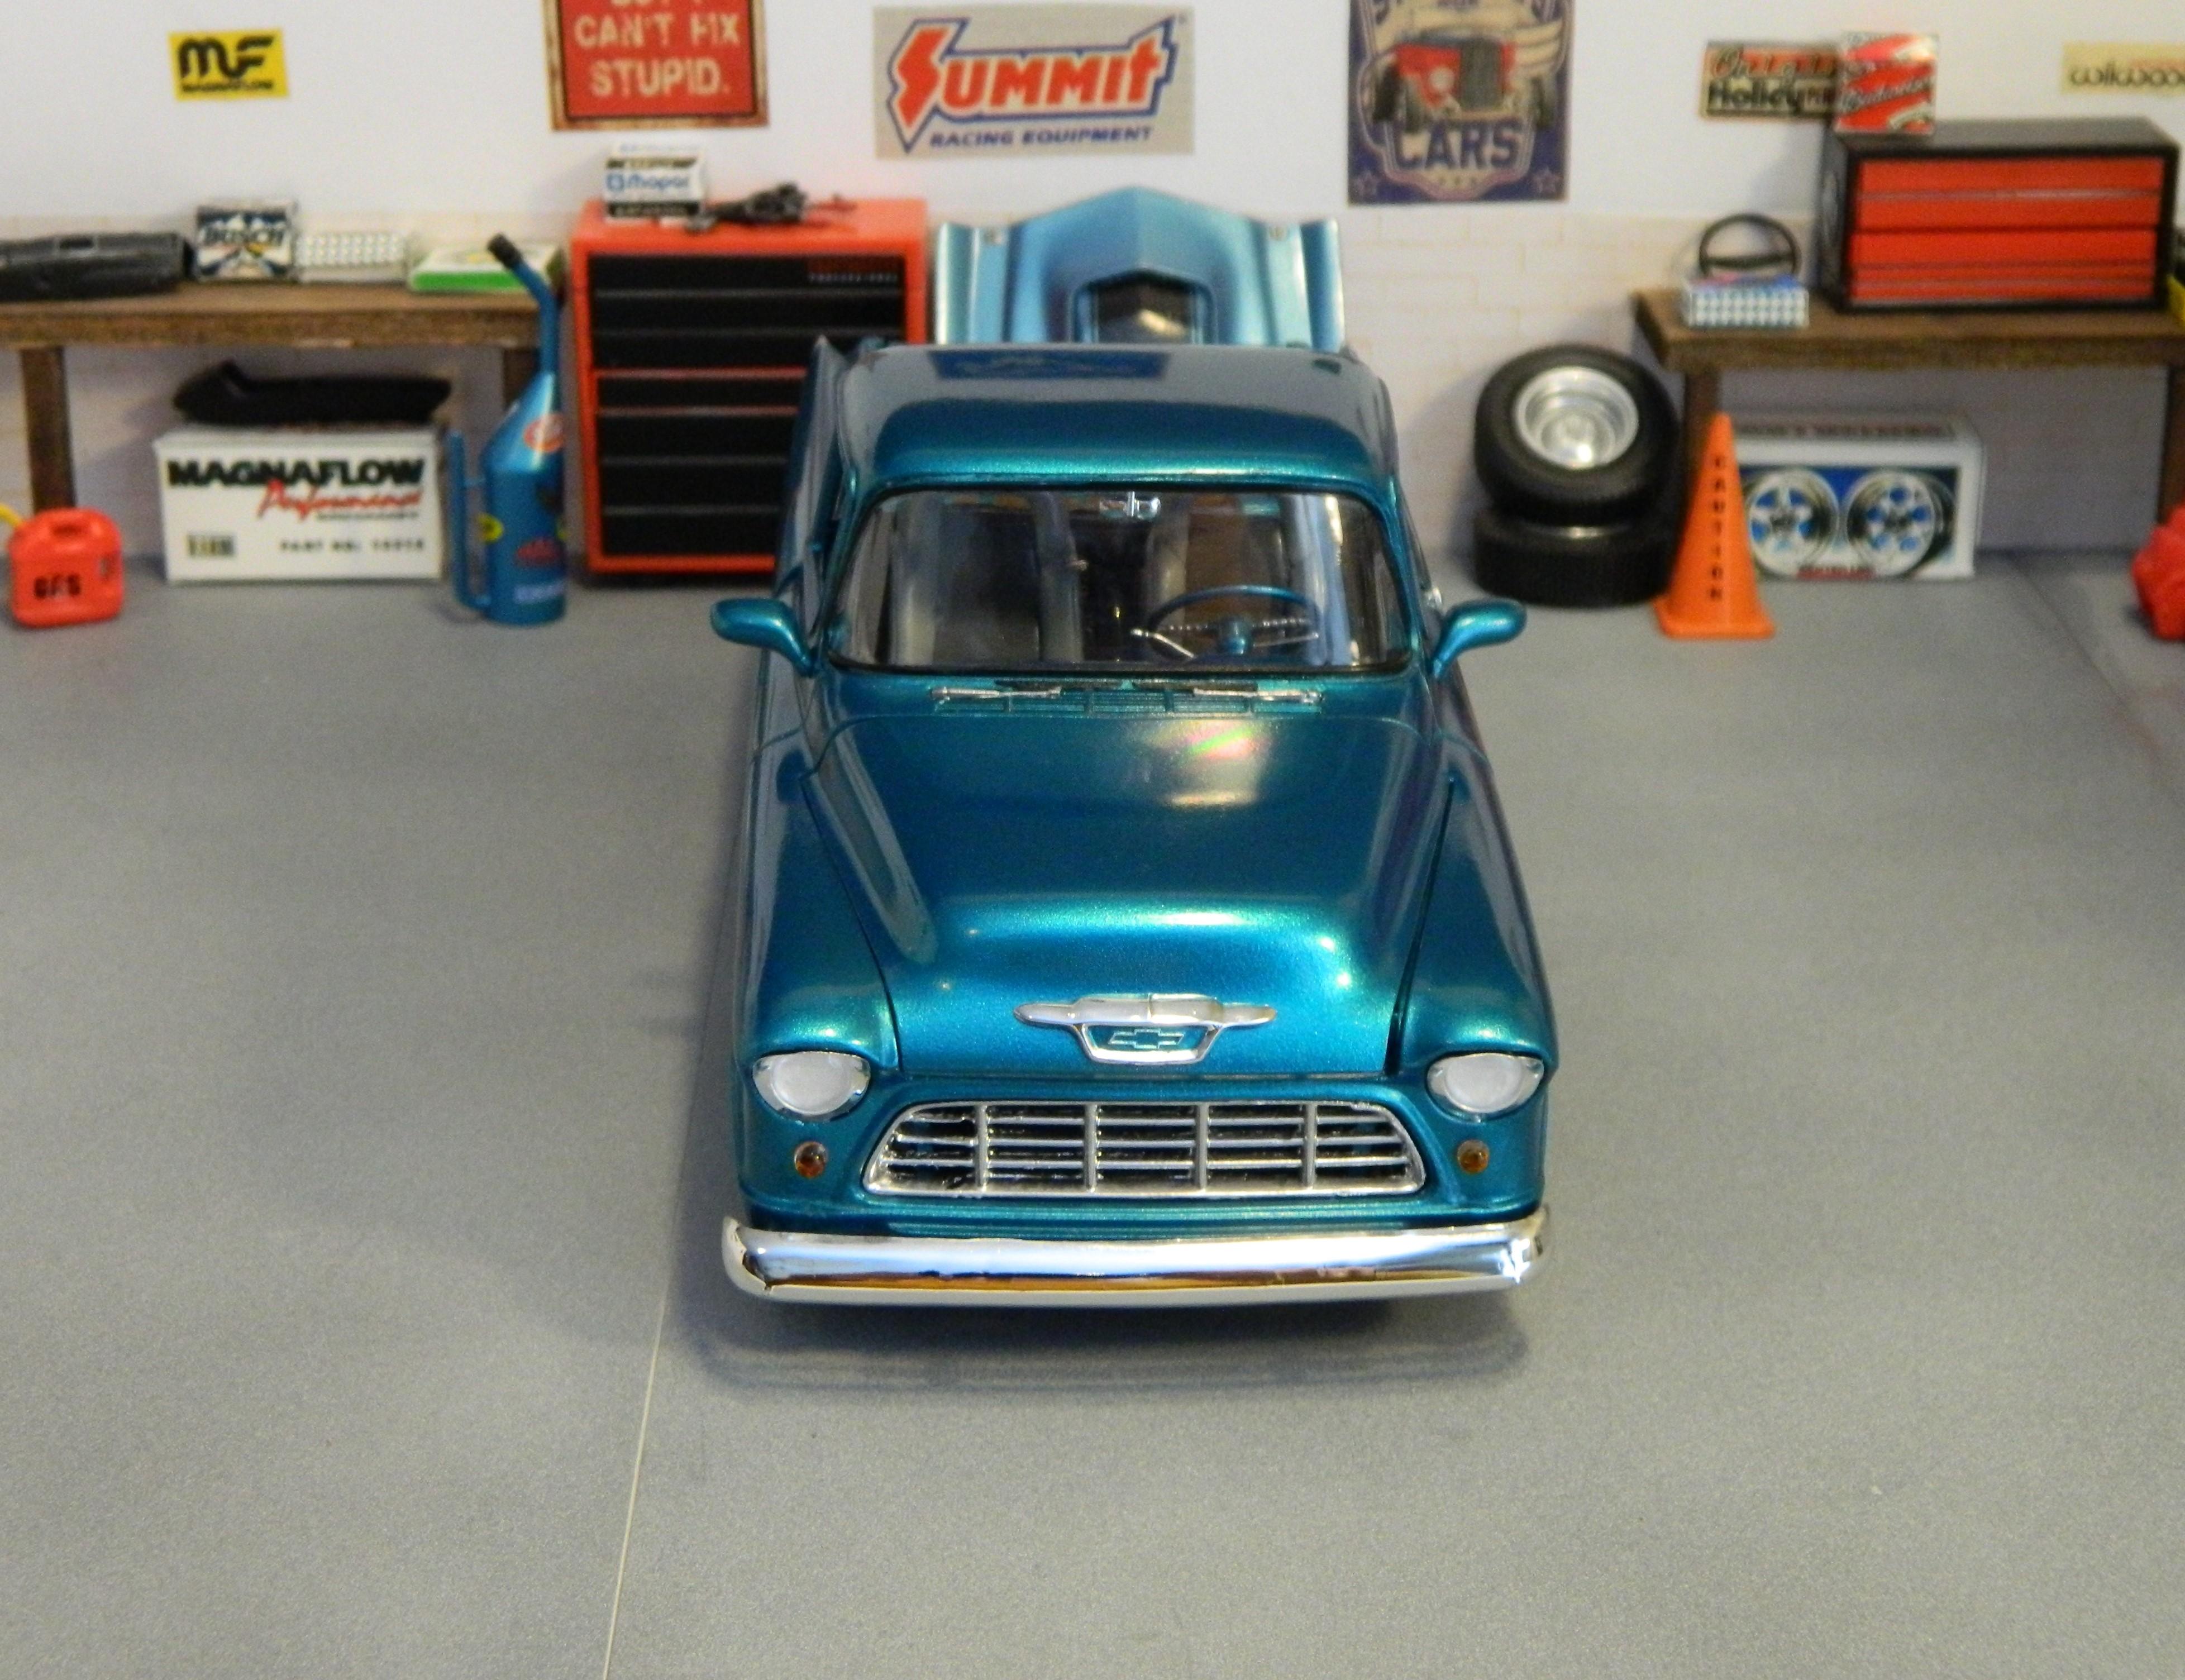
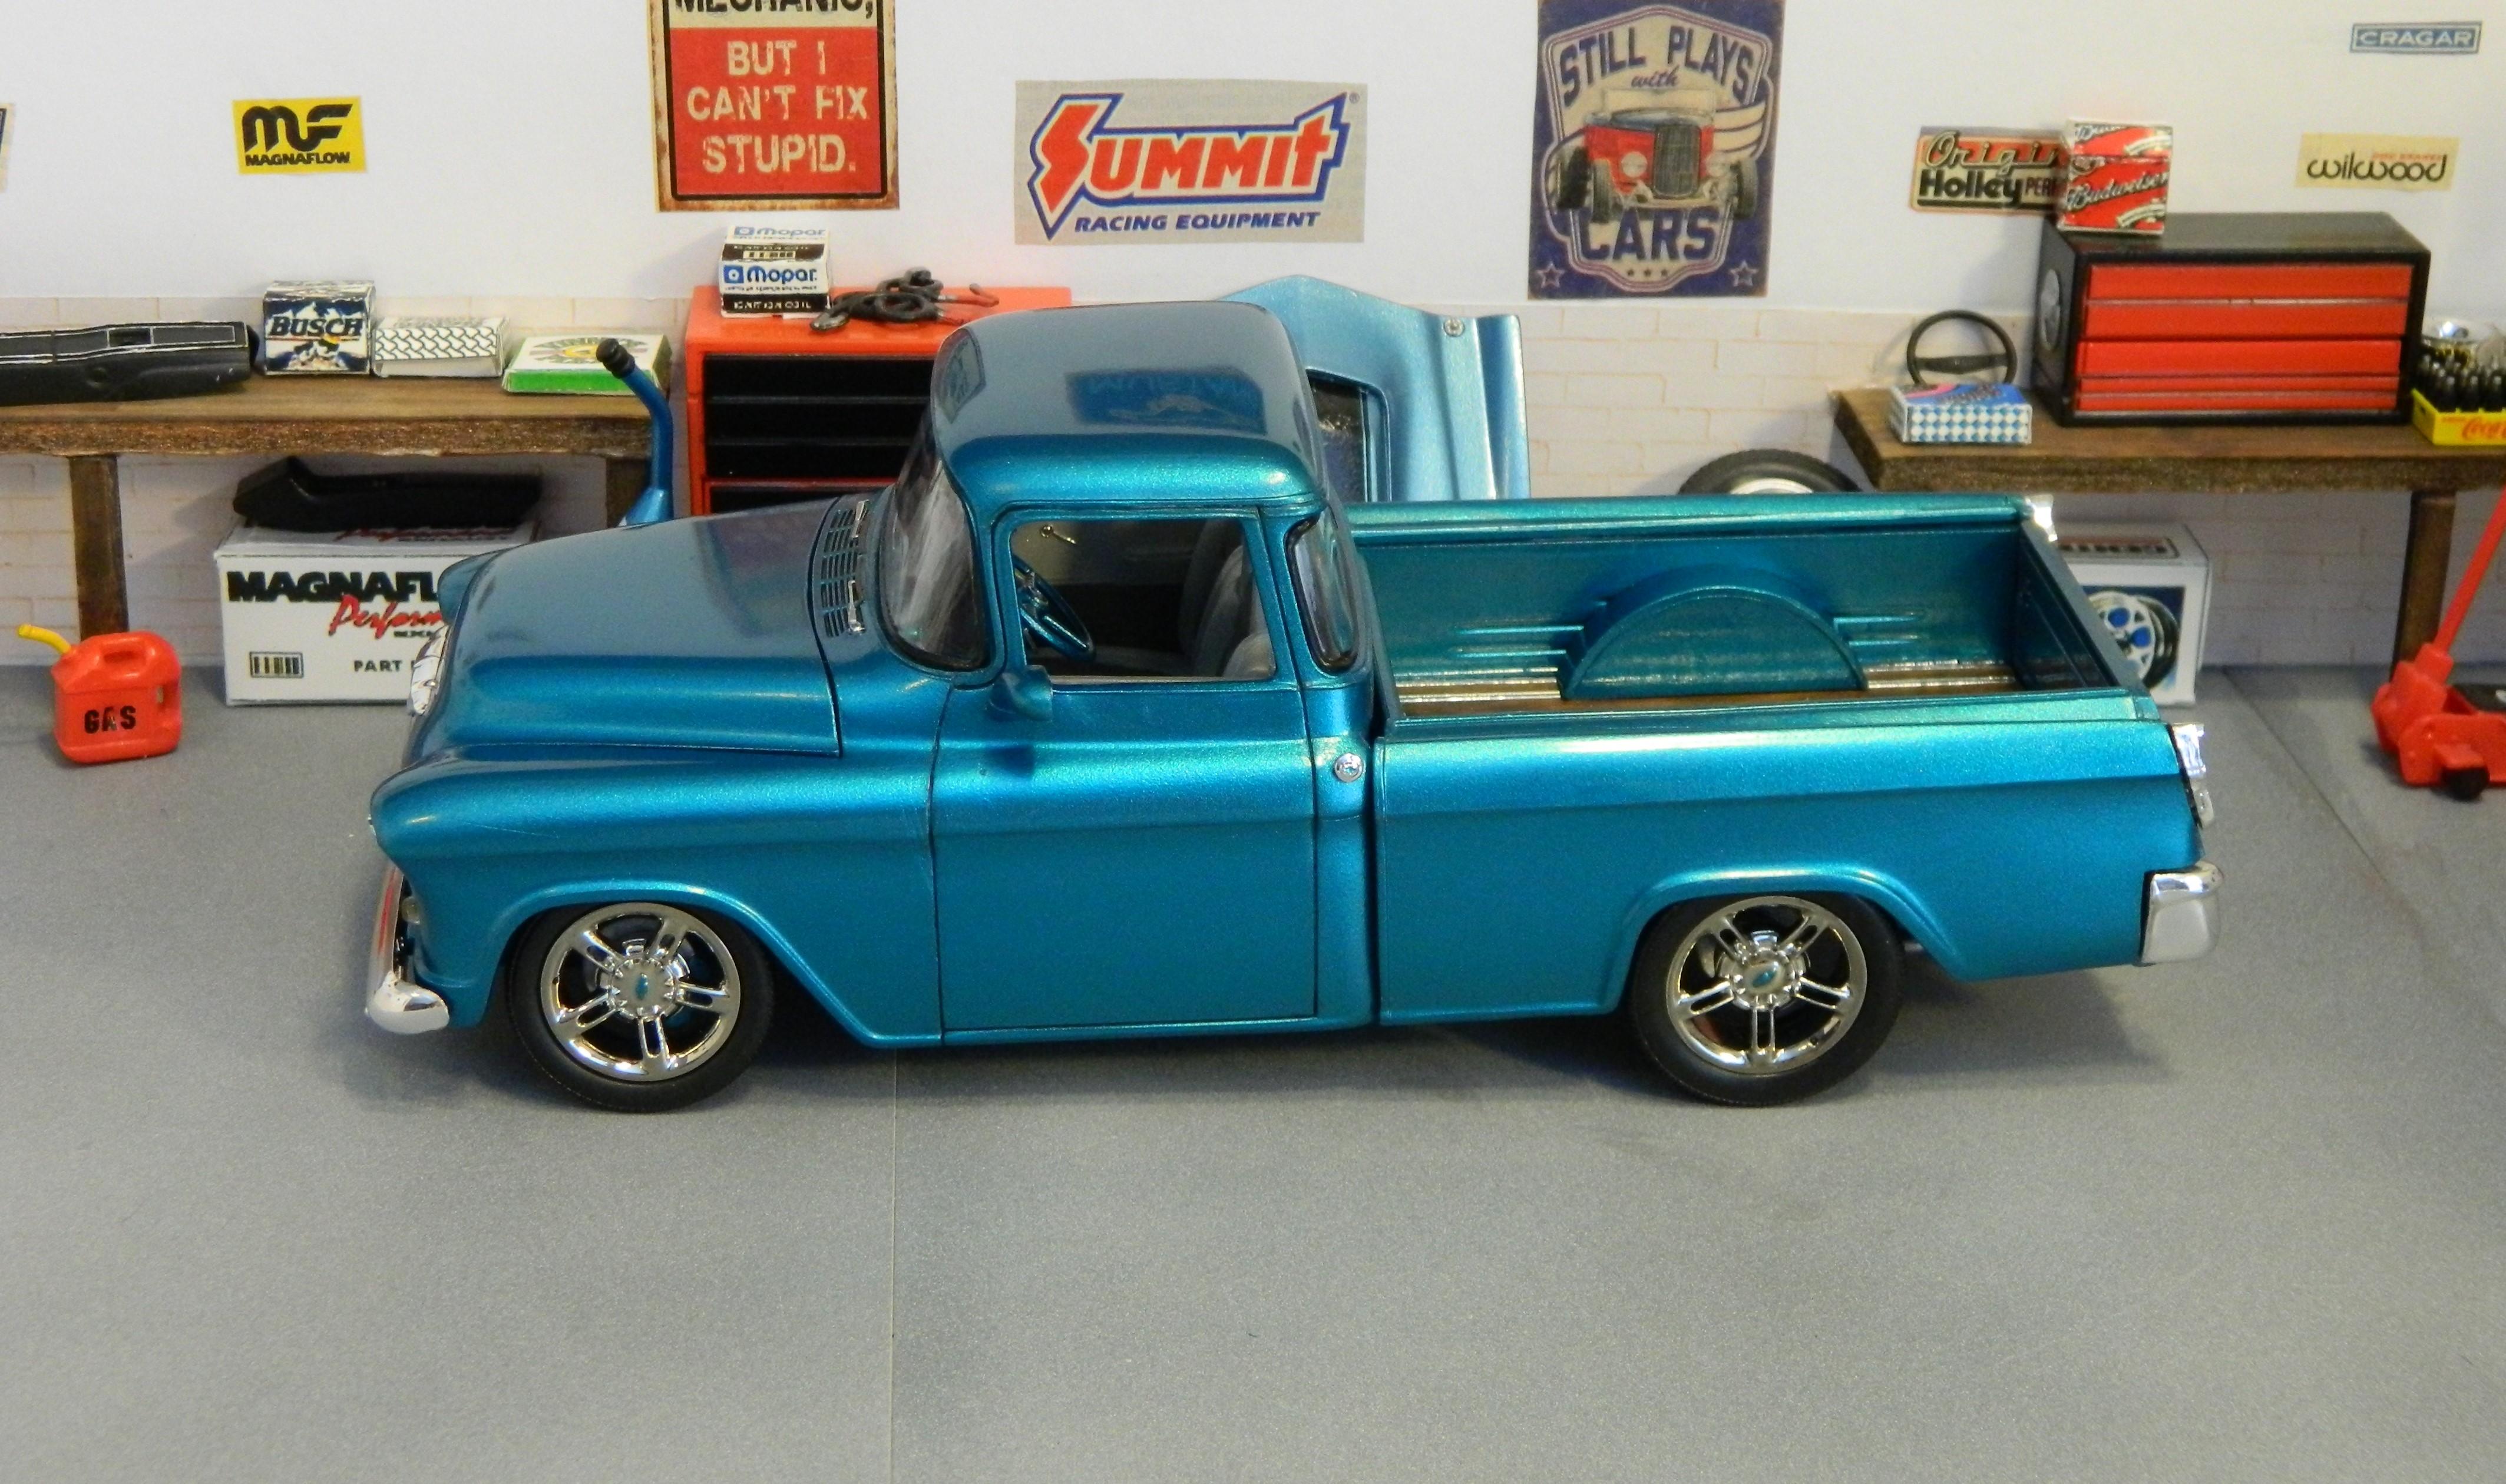
I've only used the Createx UVLS Gloss once so far and it does not go on shiny. I did wet-sand it, starting with 6000 and up followed by Novus and then wax and it shined right up. I can't remember if HL carries it or not, but I'm pretty sure Michael's does. I get mine from Meijer if you have any in Tennessee. This is with Createx Pearl Turquoise and UVLS Clear, it's in the Trucks section.
-
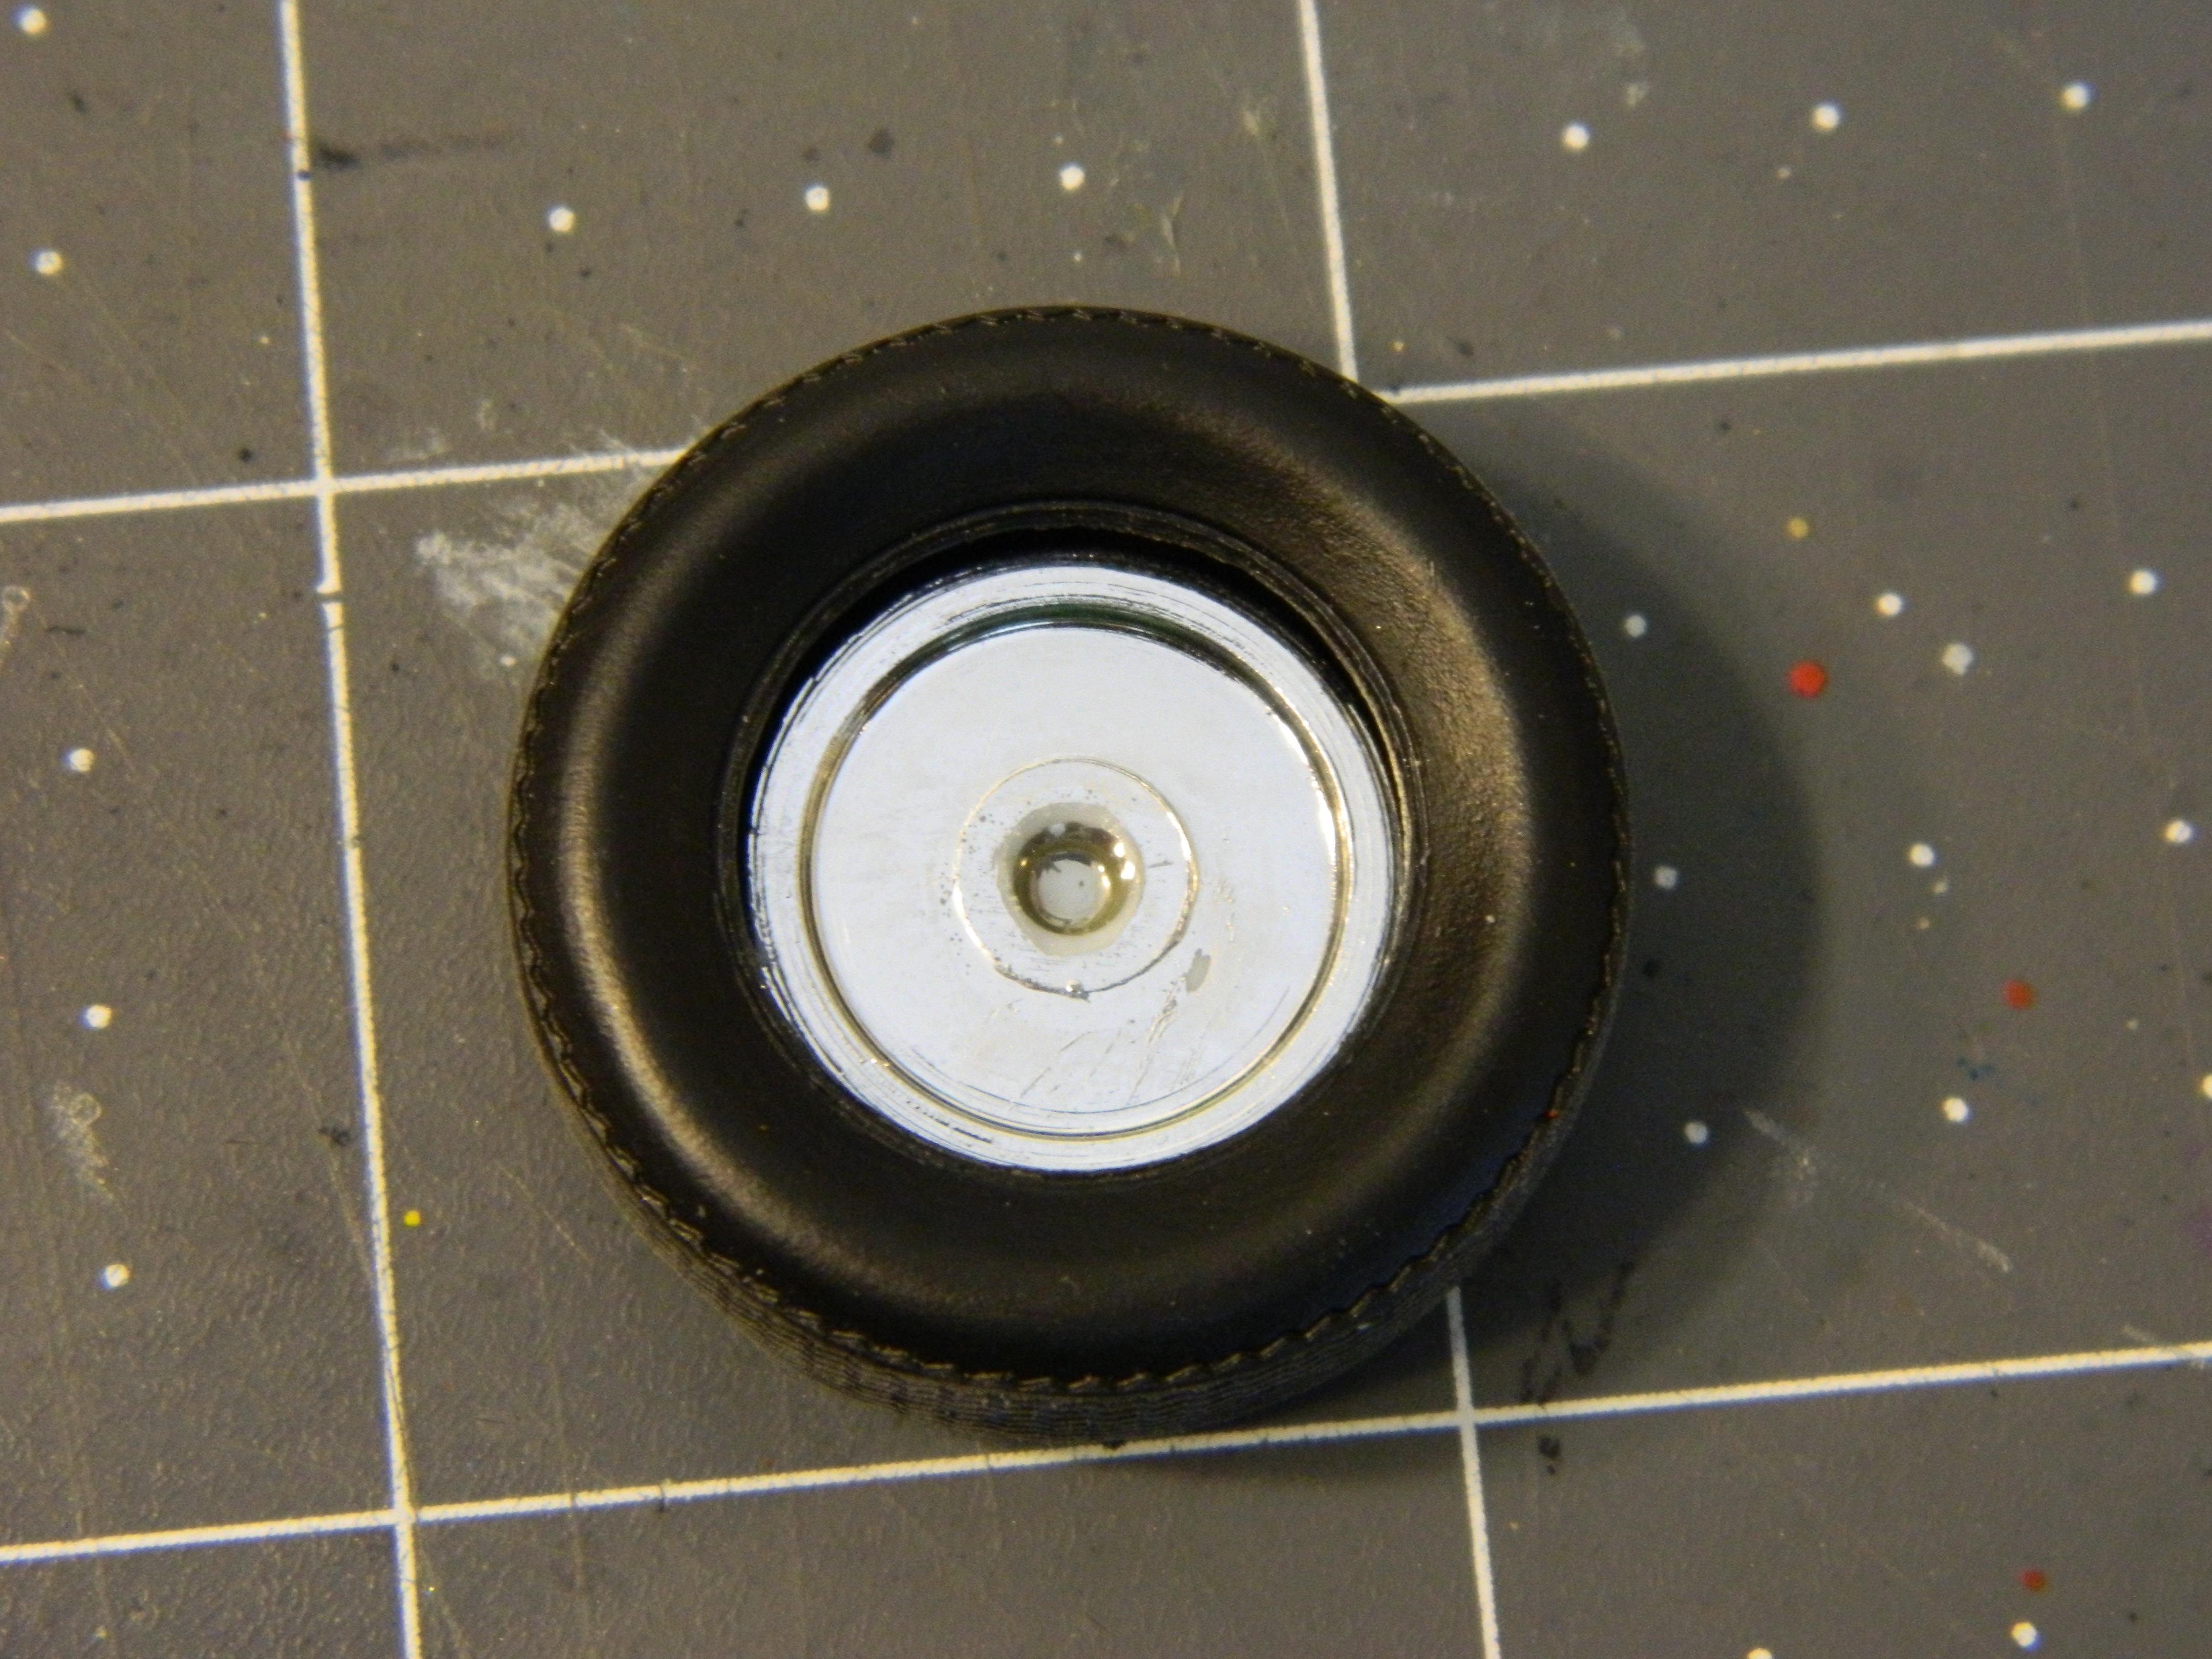
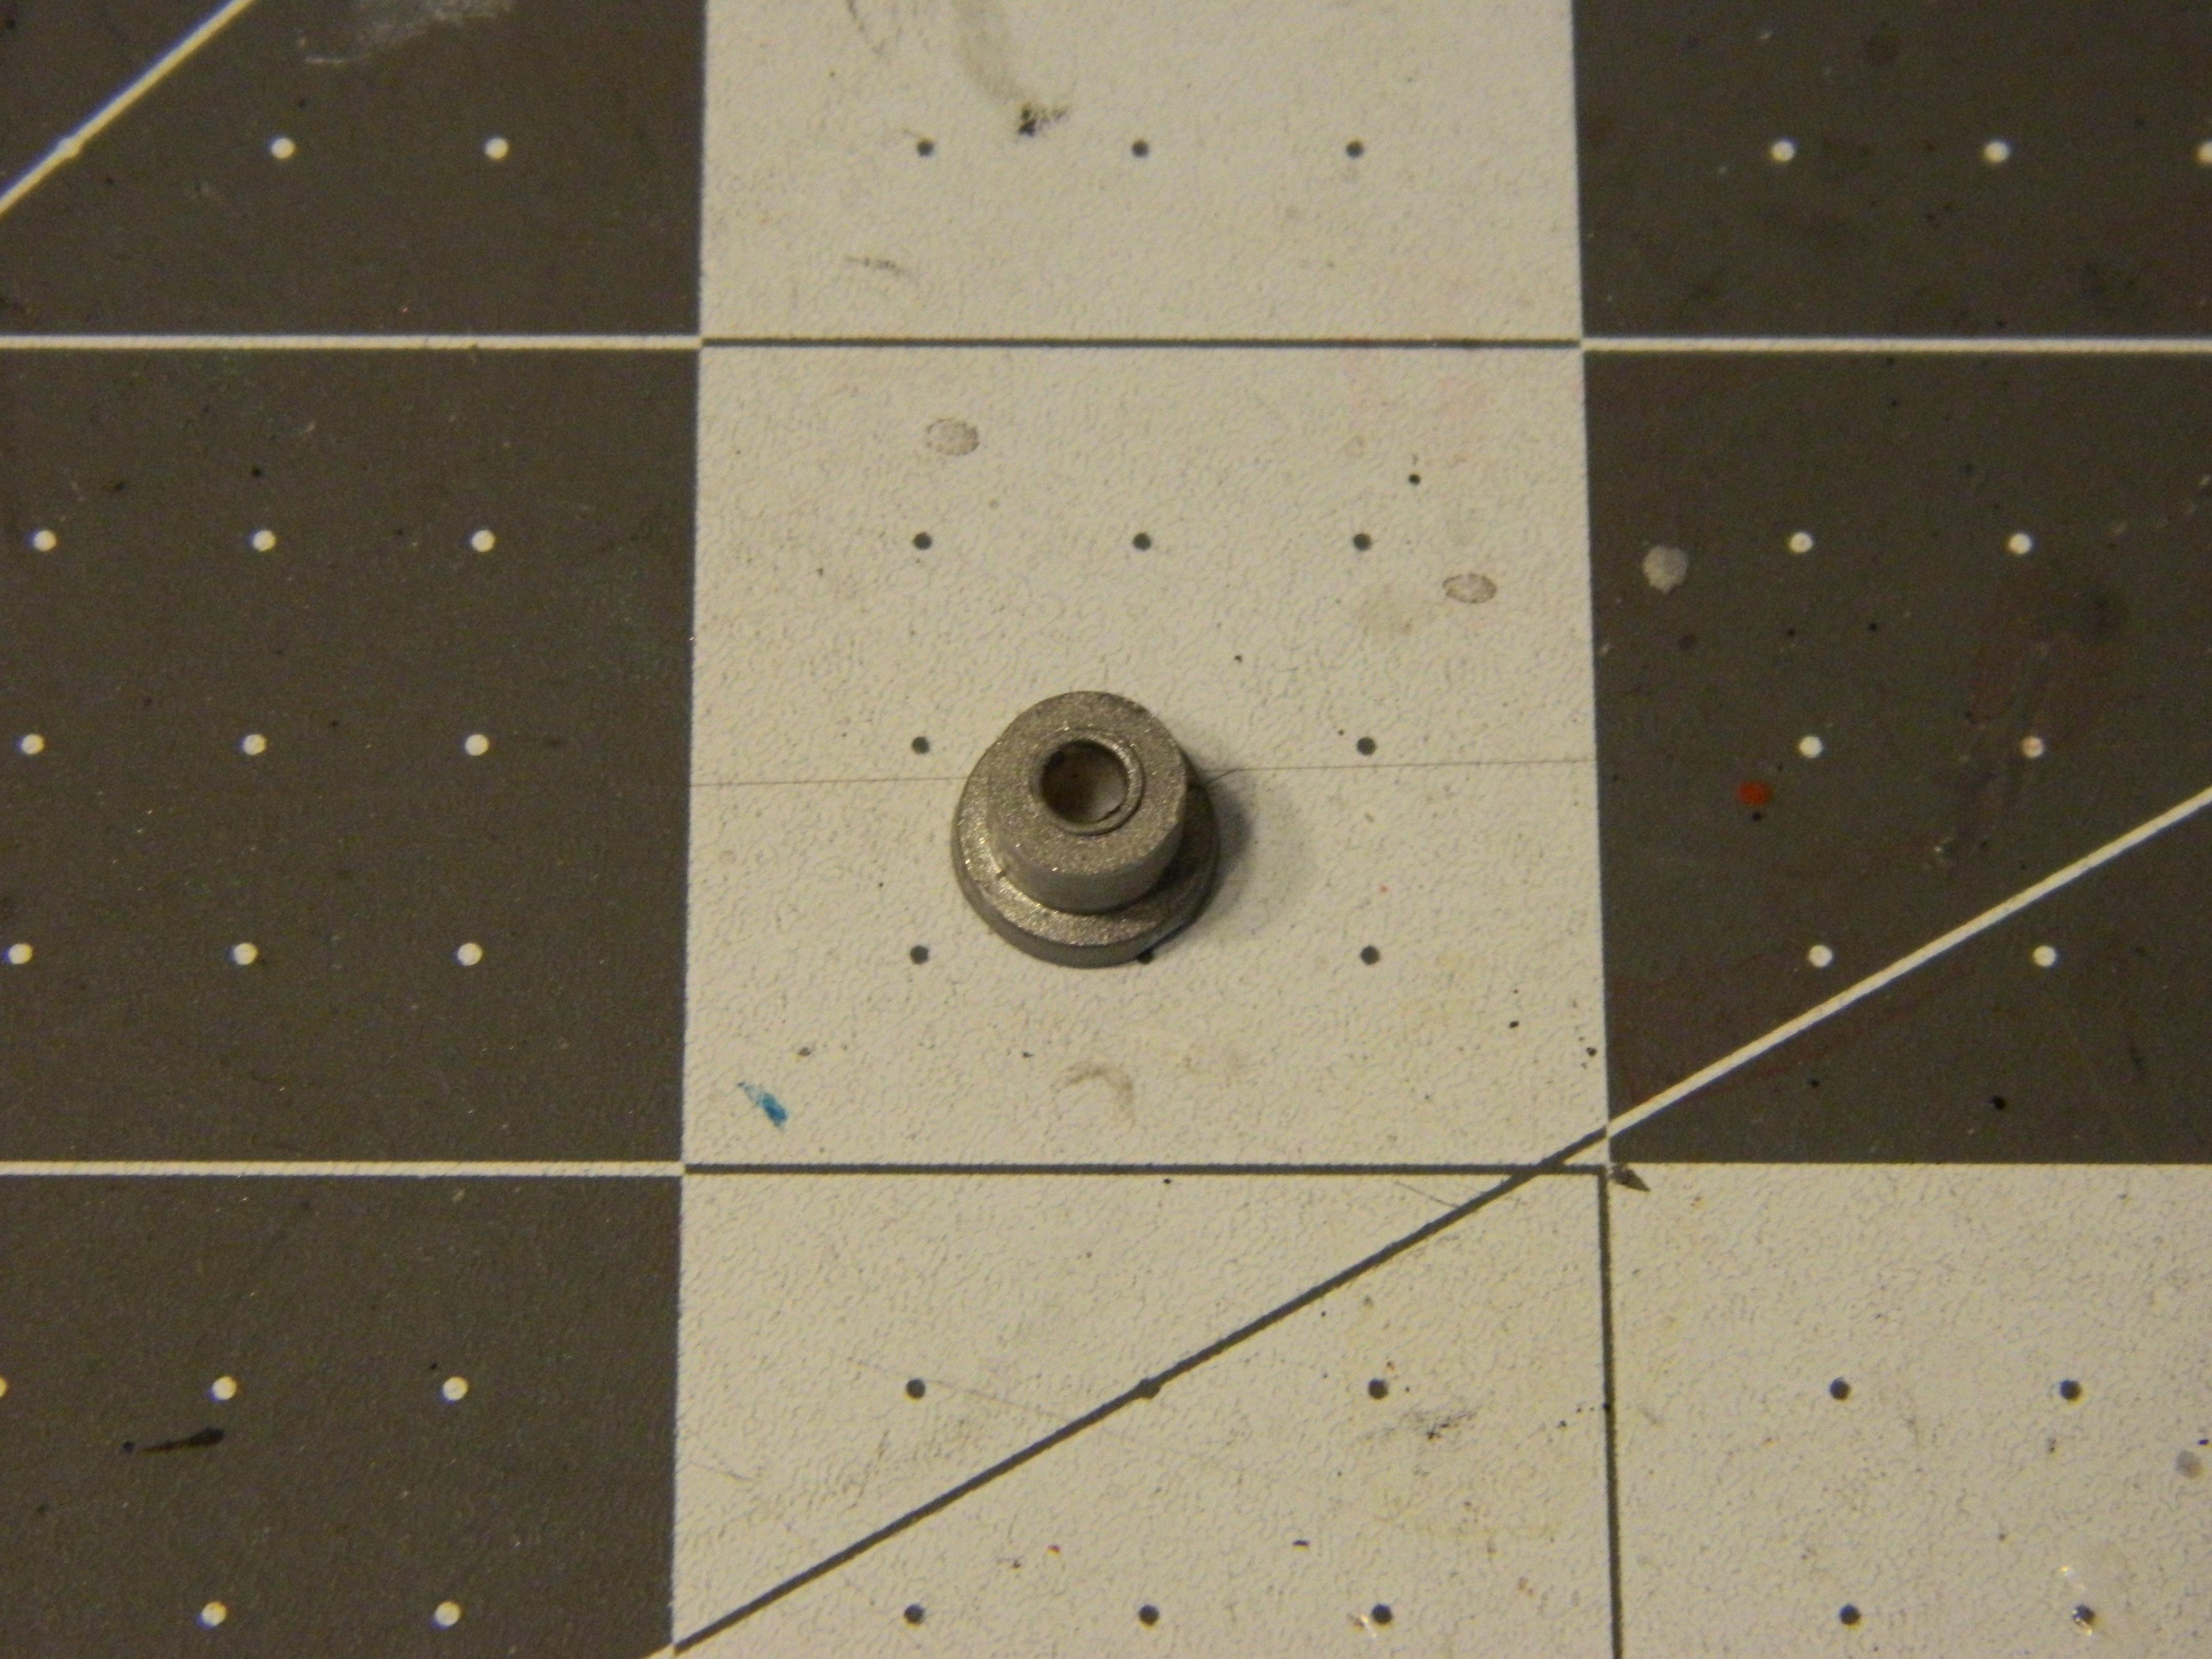
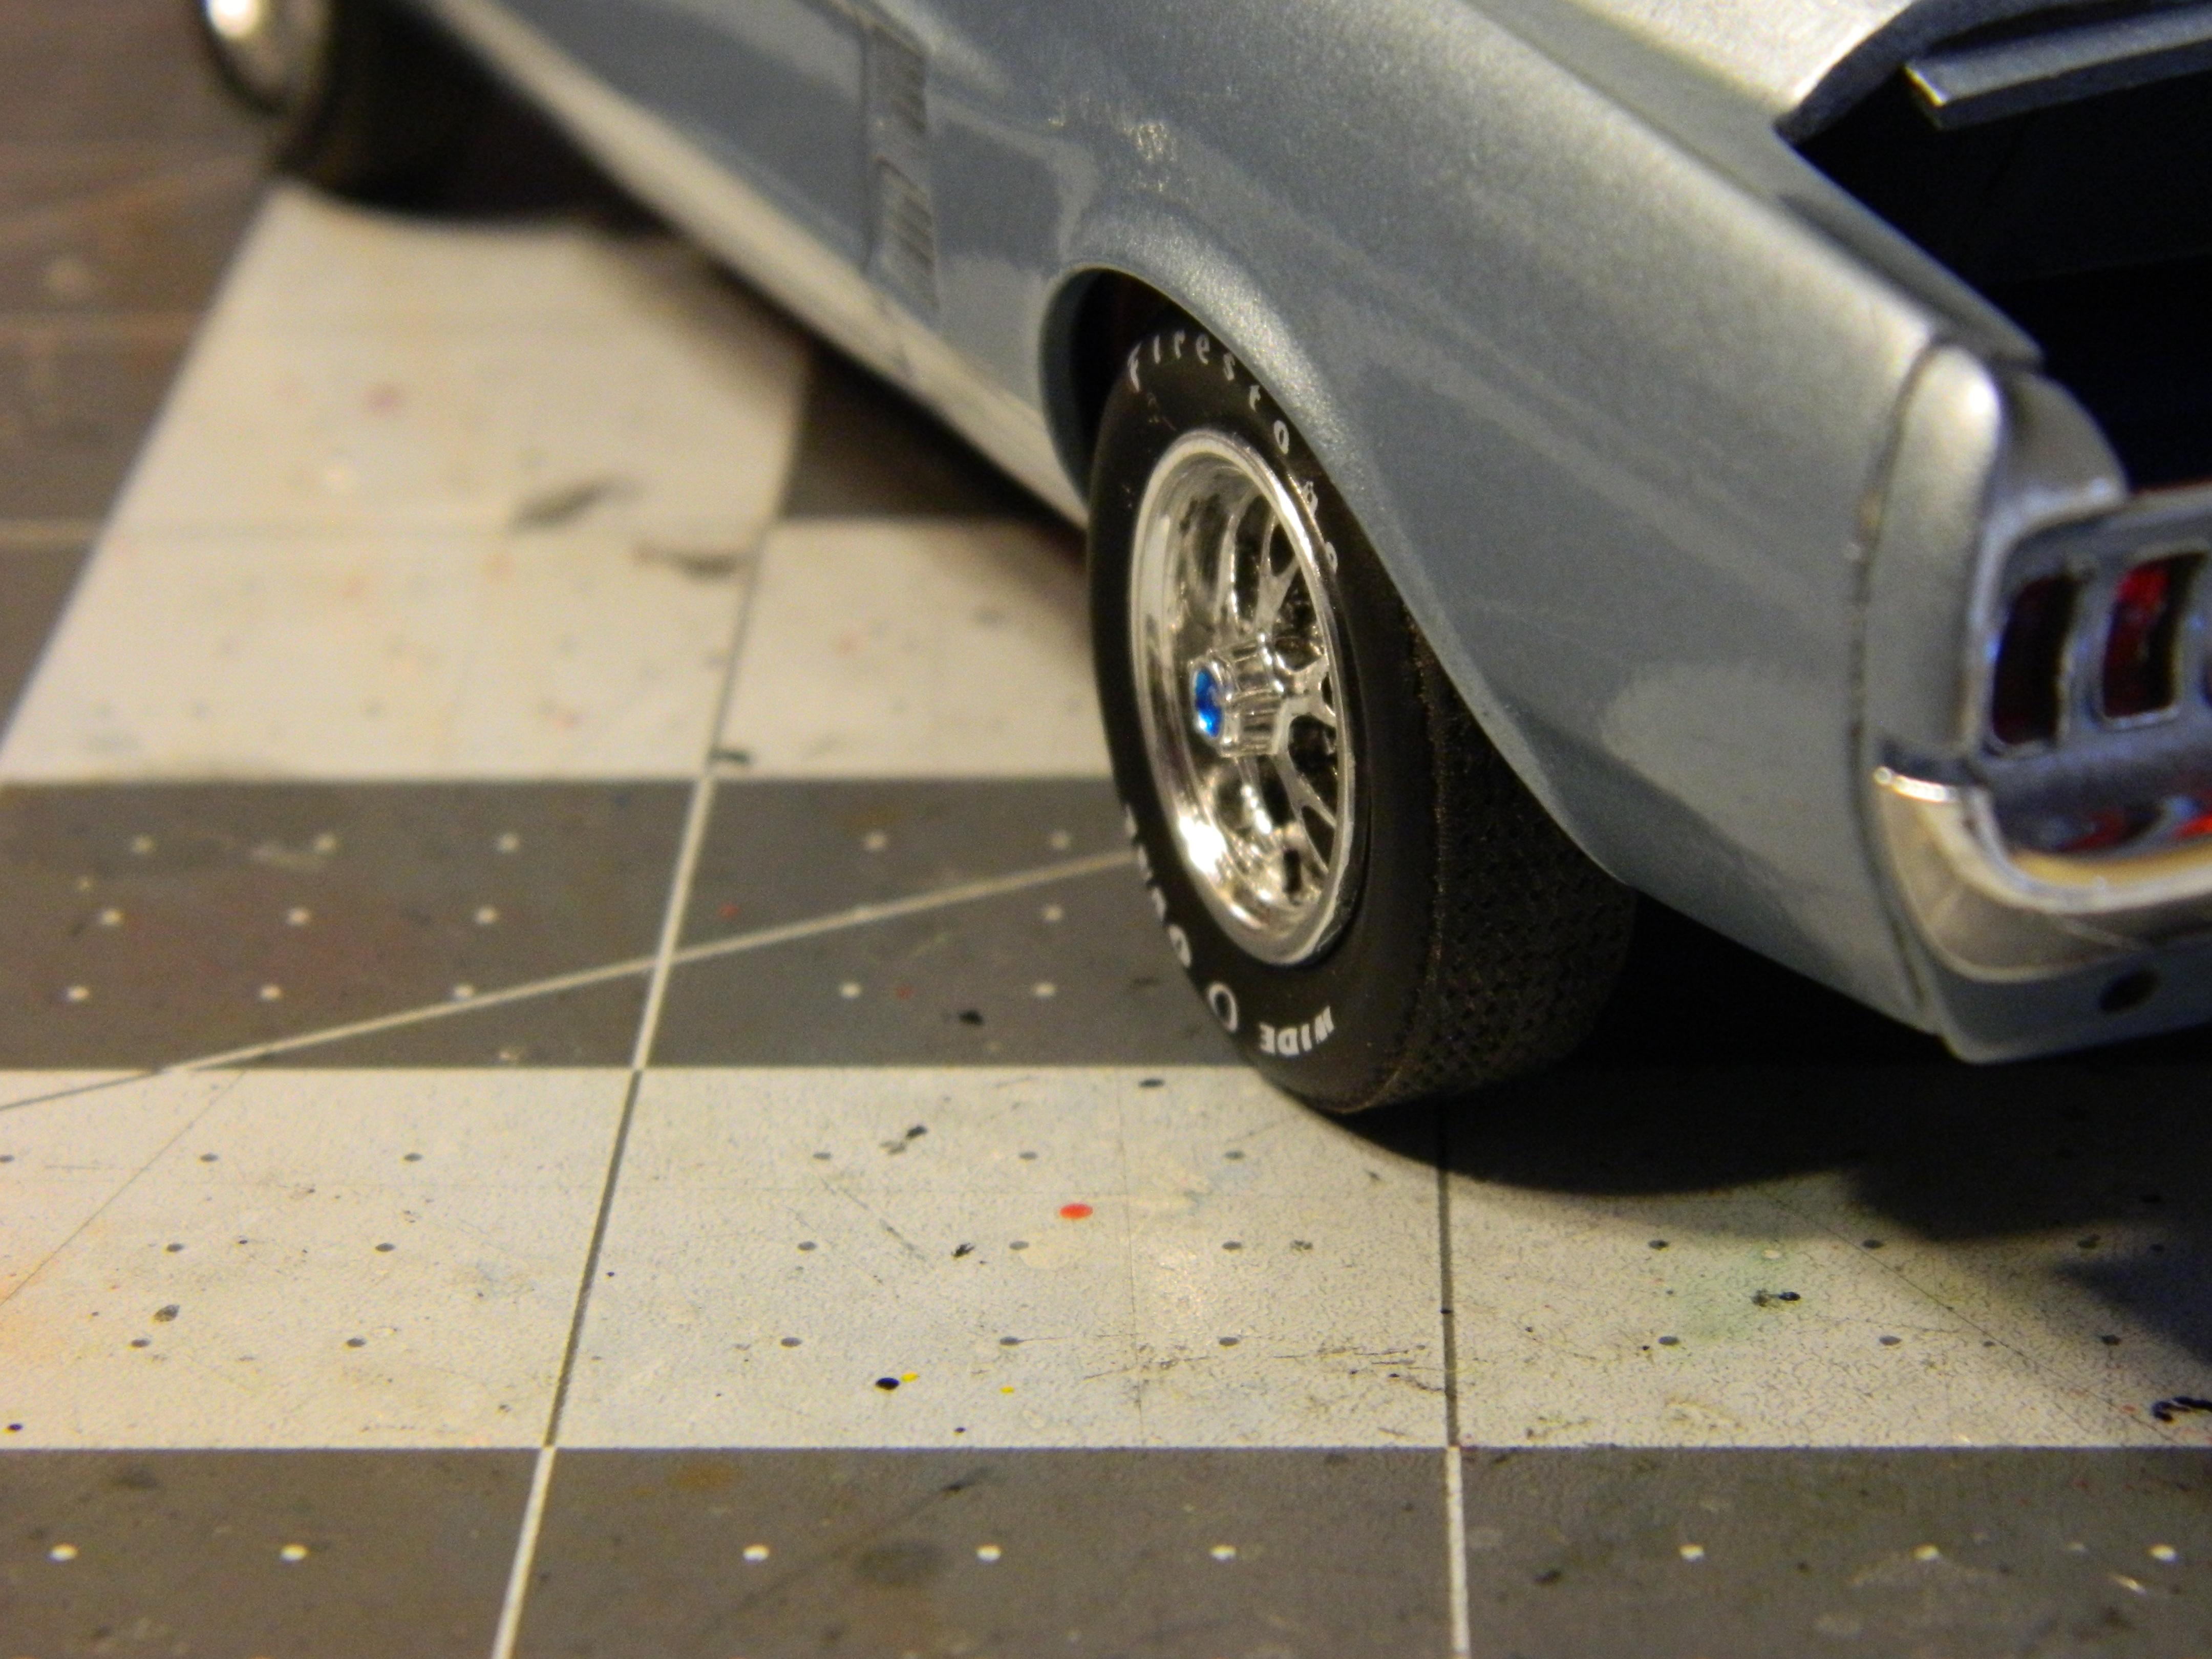
I mounted the body to the chassis/interior this morning. I also saved the mounting of the wheels and tires until after this step, as a previous mock-up showed a questionable wheel fit, the only real snafu on this kit. To start, the wheelback/wheel assembly is too wide for the tires. The fronts also protruded from the fender too much for my liking. Fortunately the fix was pretty simple. The indentation on the back of the wheels is a perfect fit for the front mounting hub, so completely foregoing the wheelbacks and inserts solved that issue. The rears fit under the quarters ok from the start, but again the wheelback protrusion had to be addressed. Again, the solution was fairly simple as I merely glued the inserts directly to the back of the wheel and didn't use the wheelbacks for the rears either. Thankfully a very easy work around and to me, a much better look. The previous releases of this kit must have had wider tires for the wheel/wheelback assembly, and for this release round 2 failed to make the adjustment when using these skinnier tires, but that's just my guess. Pic #4 is how it looked with the wheelbacks and inserts, pic #5 is without, a much better look.
-
Thanks! It's a water-based polyurethane that can be wet-sanded, although I don't get too aggressive with lower grits, normally 4000 or 6000 to start. I usually give it 4-5 days of curing time, but after that it's pretty tough. I would guess it's very similar to Createx and Vallejo clears. I've used it a lot on most of my acrylic paint jobs, wet-sand, Novus Polish, and Meguiar's Wax, just like when I use lacquer clears.
-
That's a really nice kit, you'll really enjoy building that one. That color is going to look great on it, too!
-
Thanks! I liked doing this one so much, I just bought another one to do a similar type build with it. Thanks Rusty!
-
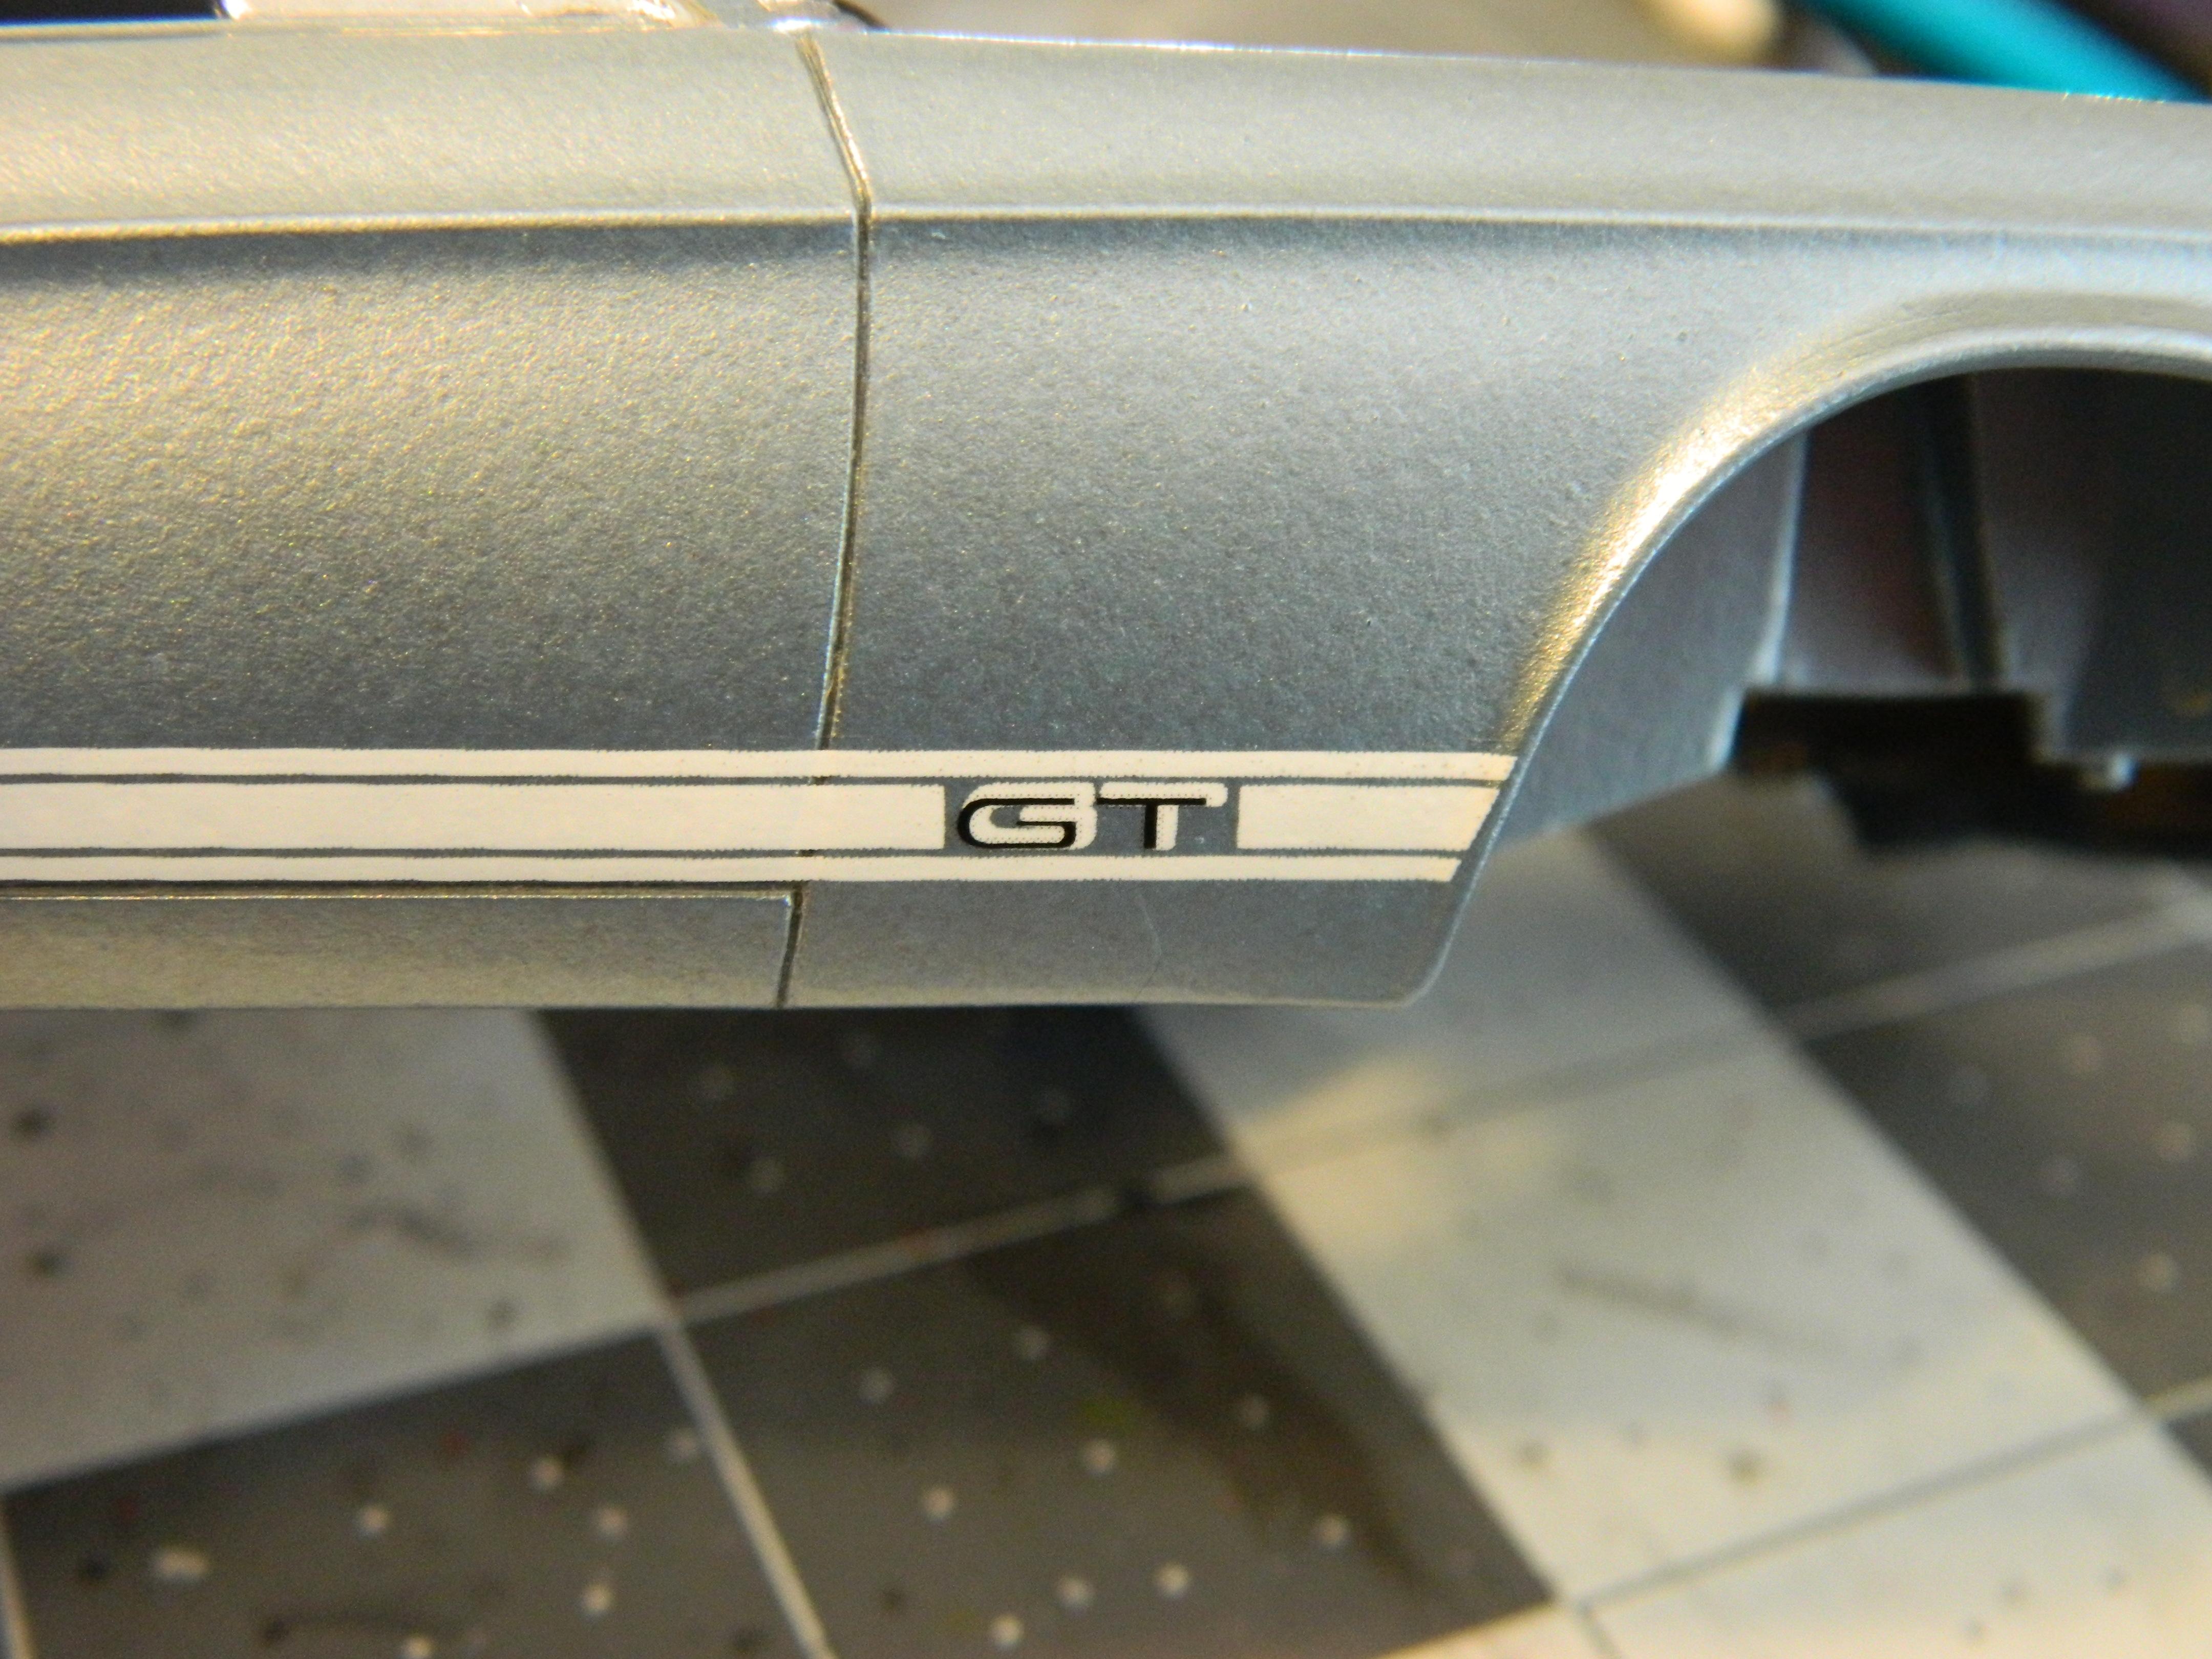
I've got the interior/chassis ready to be covered up by the body. I put the BMF on the trim, painted the engine bay, and installed the glass on Saturday. Then this afternoon I put on the decals. I'm a little put out that I didn't notice the off-centered printing on my decal sheet until recently. If I had, I would have contacted Round 2 for a replacement set. I still might, but until then I'll leave these on, as they're not too terrible.