bobss396
-
Posts
3,653 -
Joined
-
Last visited
Content Type
Profiles
Forums
Events
Gallery
Everything posted by bobss396
-
 I use a Faraday bag now and then. I give them out to friends too. If I go to the shooting range or gun shops... the phone goes into the bag. If we are talking while out eating and don't have bags handy, we park our phones under a thigh while we talk.
 -
Do you also have 1:1 project cars?
bobss396 replied to ctruss53's topic in General Automotive Talk (Trucks and Cars)
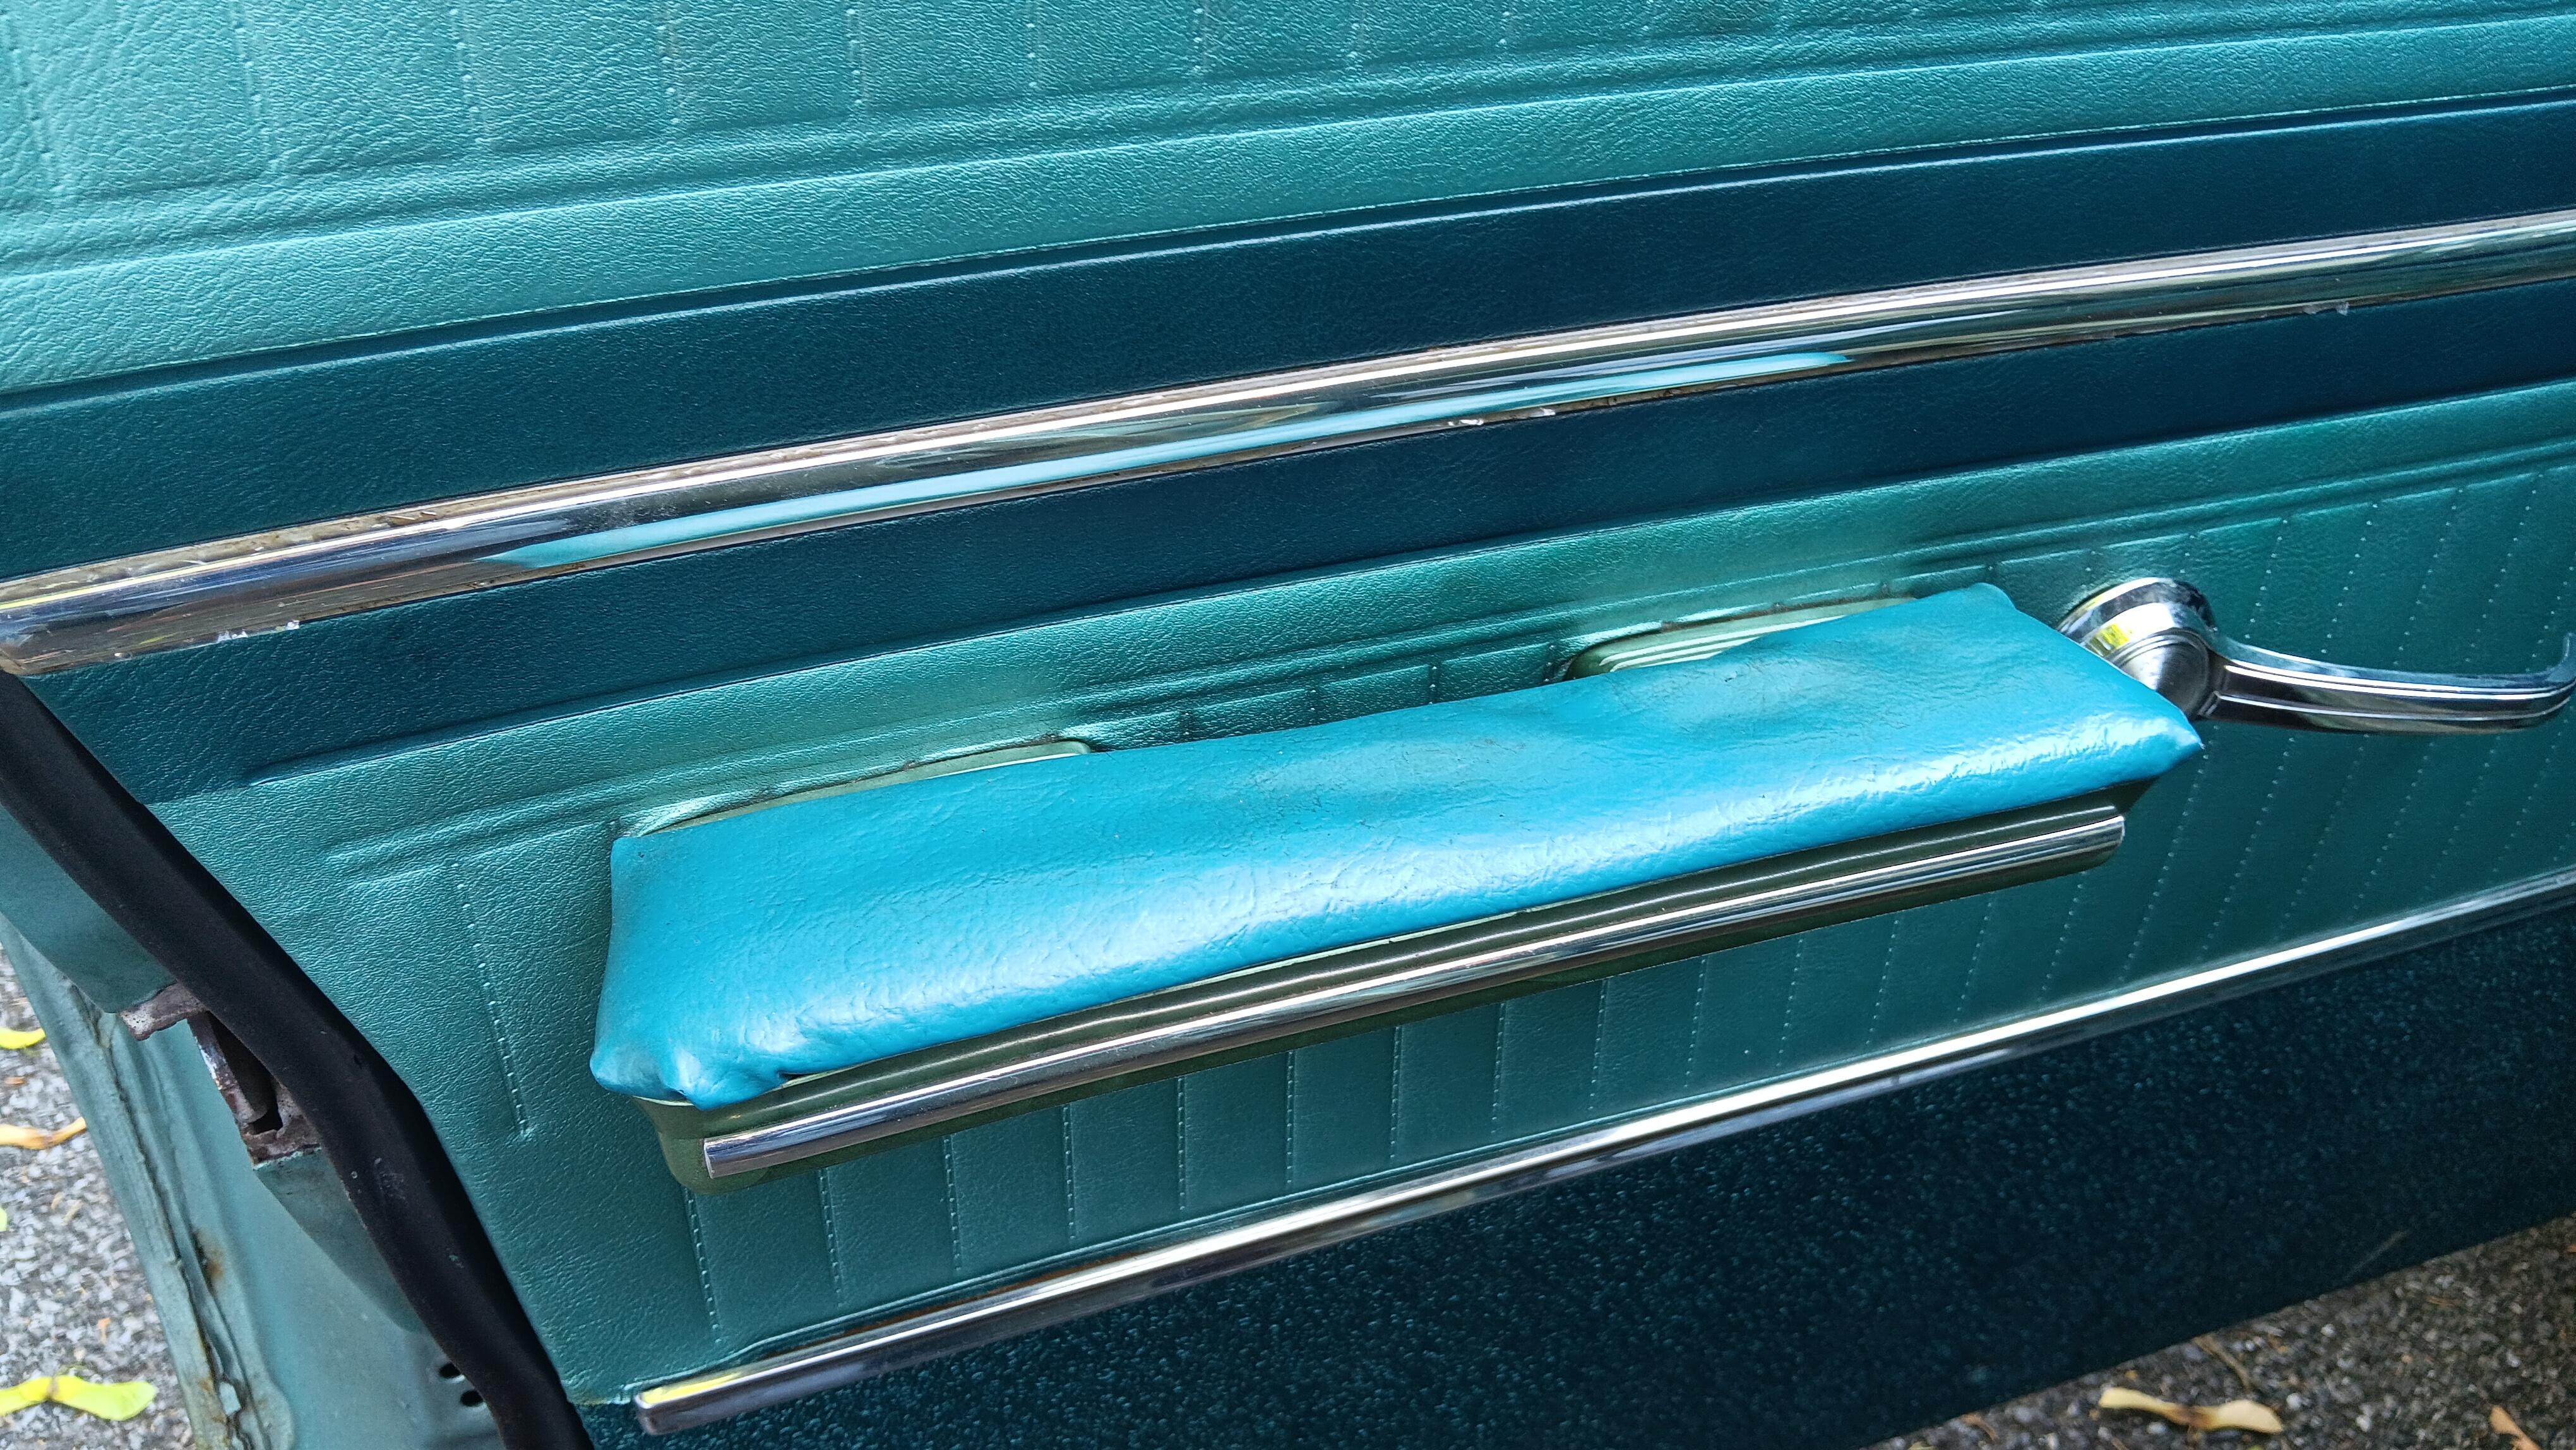
Thanks, it has "fixed" rust issues but I'm going to run it. The door cards look new, getting the arm rests done too. I took the rear ash trays out, gave them a citric acid soak to get the rust off. I coated them with 1K clear so they are smooth inside. In just 5 weeks it is a different car already. The gauge cluster is a hot mess on the back side. So I'm looking to do that over and since I need access to the oil sending unit, I'll be doing new plug wires at the same time. I may have to pull the distributor out. The new dimmer switch is installed. -
It was a different formula and I could shoot it outside in the real cold, no blush issues.
-
I have a couple of those, the stock and custom versions. I built the stock one around 1967 and it was one of the first ones I used the old AMT spray paint on. Some sort of metallic red. Of course the chassis and interior were painted with the Testors #49 flat black brush paint. And silver for the accents.
-
The X22 clear stays soft for too long. I'm lazy plus I don't have a permanent model area, so I use spray cans. I would consider trying the Splash paints if I can dig out my airbrush stuff.
-
My 1st one I built around 1964, I did another around 1995, I just gave it to a club member for a diorama he is doing. The OG kit WW tires were stick-ons. I have 2 OG kits, one is the big box and the other is a smaller box version. Both are complete, one the tube of body filler is still good. They build up nicely. My one gripe is the kit has no vent windows. But do keep on doing what you are doing. One of the key elements is getting the windshield and frame together with no glue smears.
-
Tamiya TS cans are the bomb. But they go on thin and if I have to handle things like a chassis, the paint will wear through. I have not used a Testors enamel in maybe 20+ years. I like the MM Extreme Lacquers, the clear is also excellent.
-
We had a parts store change owners, maybe 20 years ago. They were blowing out the old Duplicolor stock at 99¢ a can. I'm still using some of it. I had a can or 2 go bad over time.
-
That is a NO from me dawg. I do Instagram only and am careful about what I post.
-
I worked with a guy who raced dirt bikes competitively. He said that when a racer is hurt bad, the edge is off and they are never as fast again. I have to agree with that. Guys like Waltrip, Elliott and Petty were not the same after a badly broken femur, etc. Force is definitely wired differently than most. I'd like him to race again, to go out on a better note. I have crashed stock cars badly. It was hard to face that fear and strap the car on the next week. A couple of times, my right foot was shaking on the gas when I drove back on the track. Once the green flag flew, I was fine.
-
I like the wheels and disc brakes. I use both gunmetal paints for the chassis. Another is TS4 German Gray. Getting hot here on the Island, humid too. Model work has slowed with the Belair and stuff around the house and garden.
-
Do you also have 1:1 project cars?
bobss396 replied to ctruss53's topic in General Automotive Talk (Trucks and Cars)
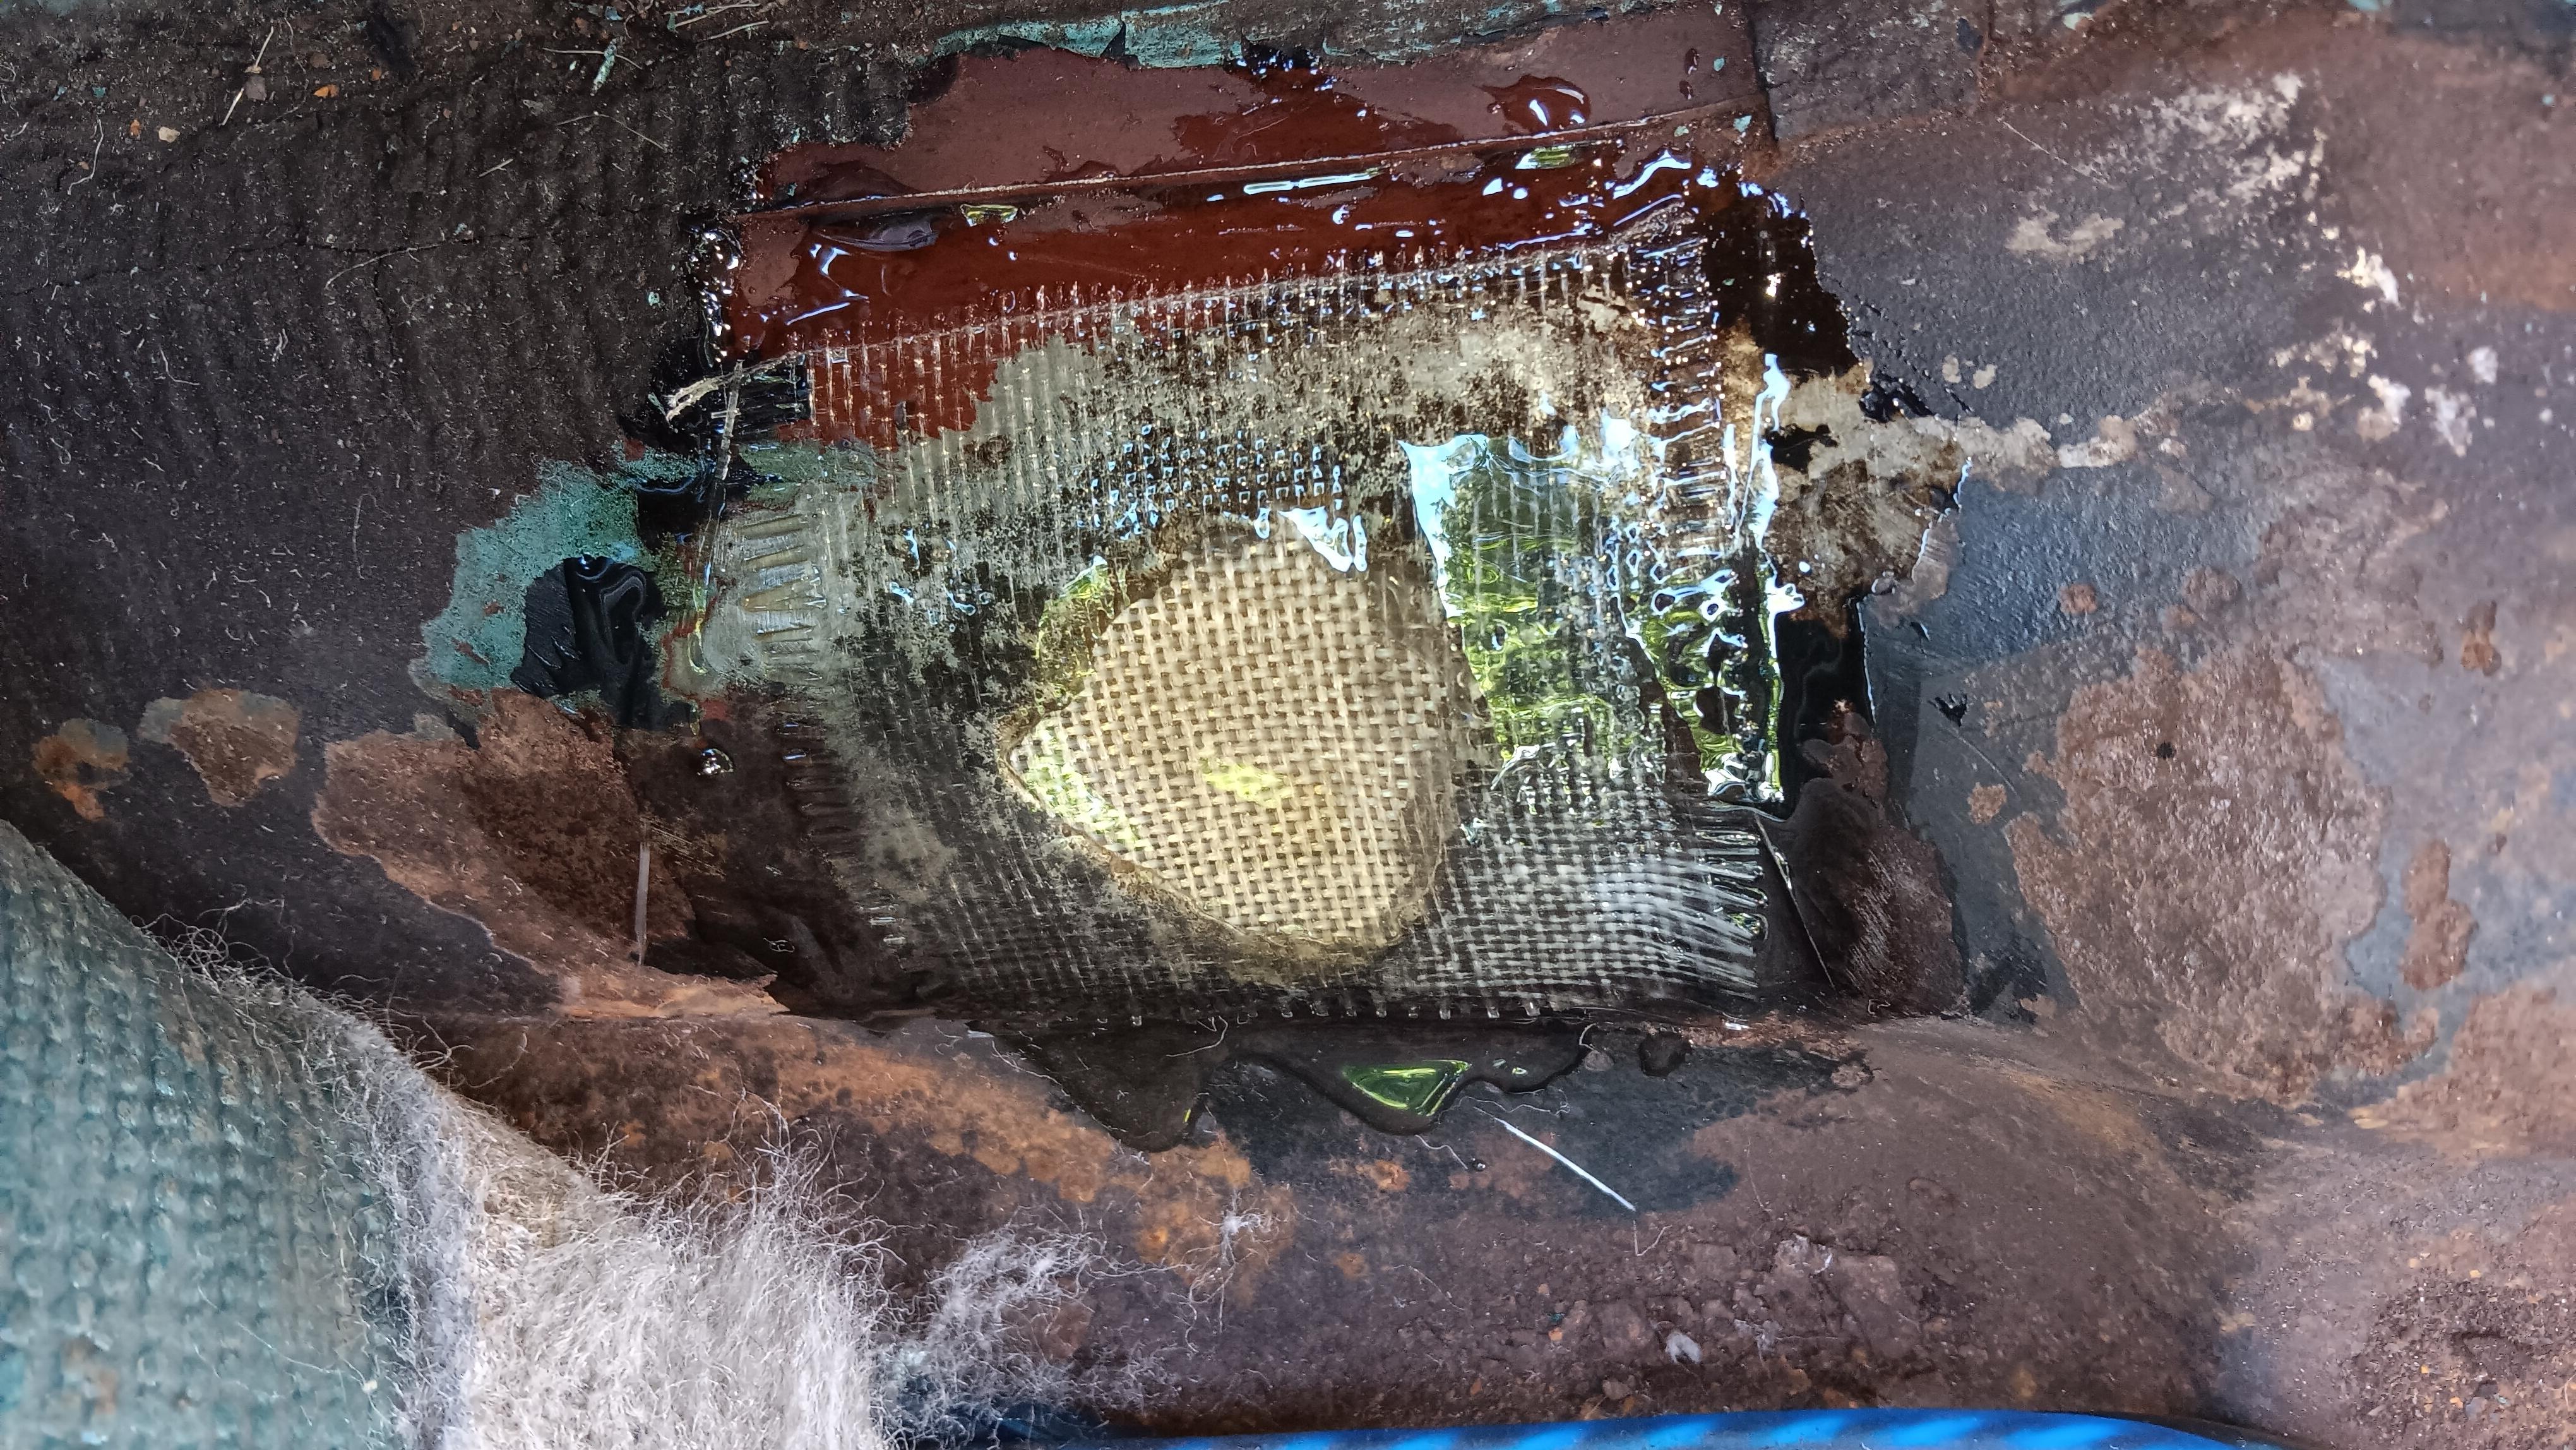
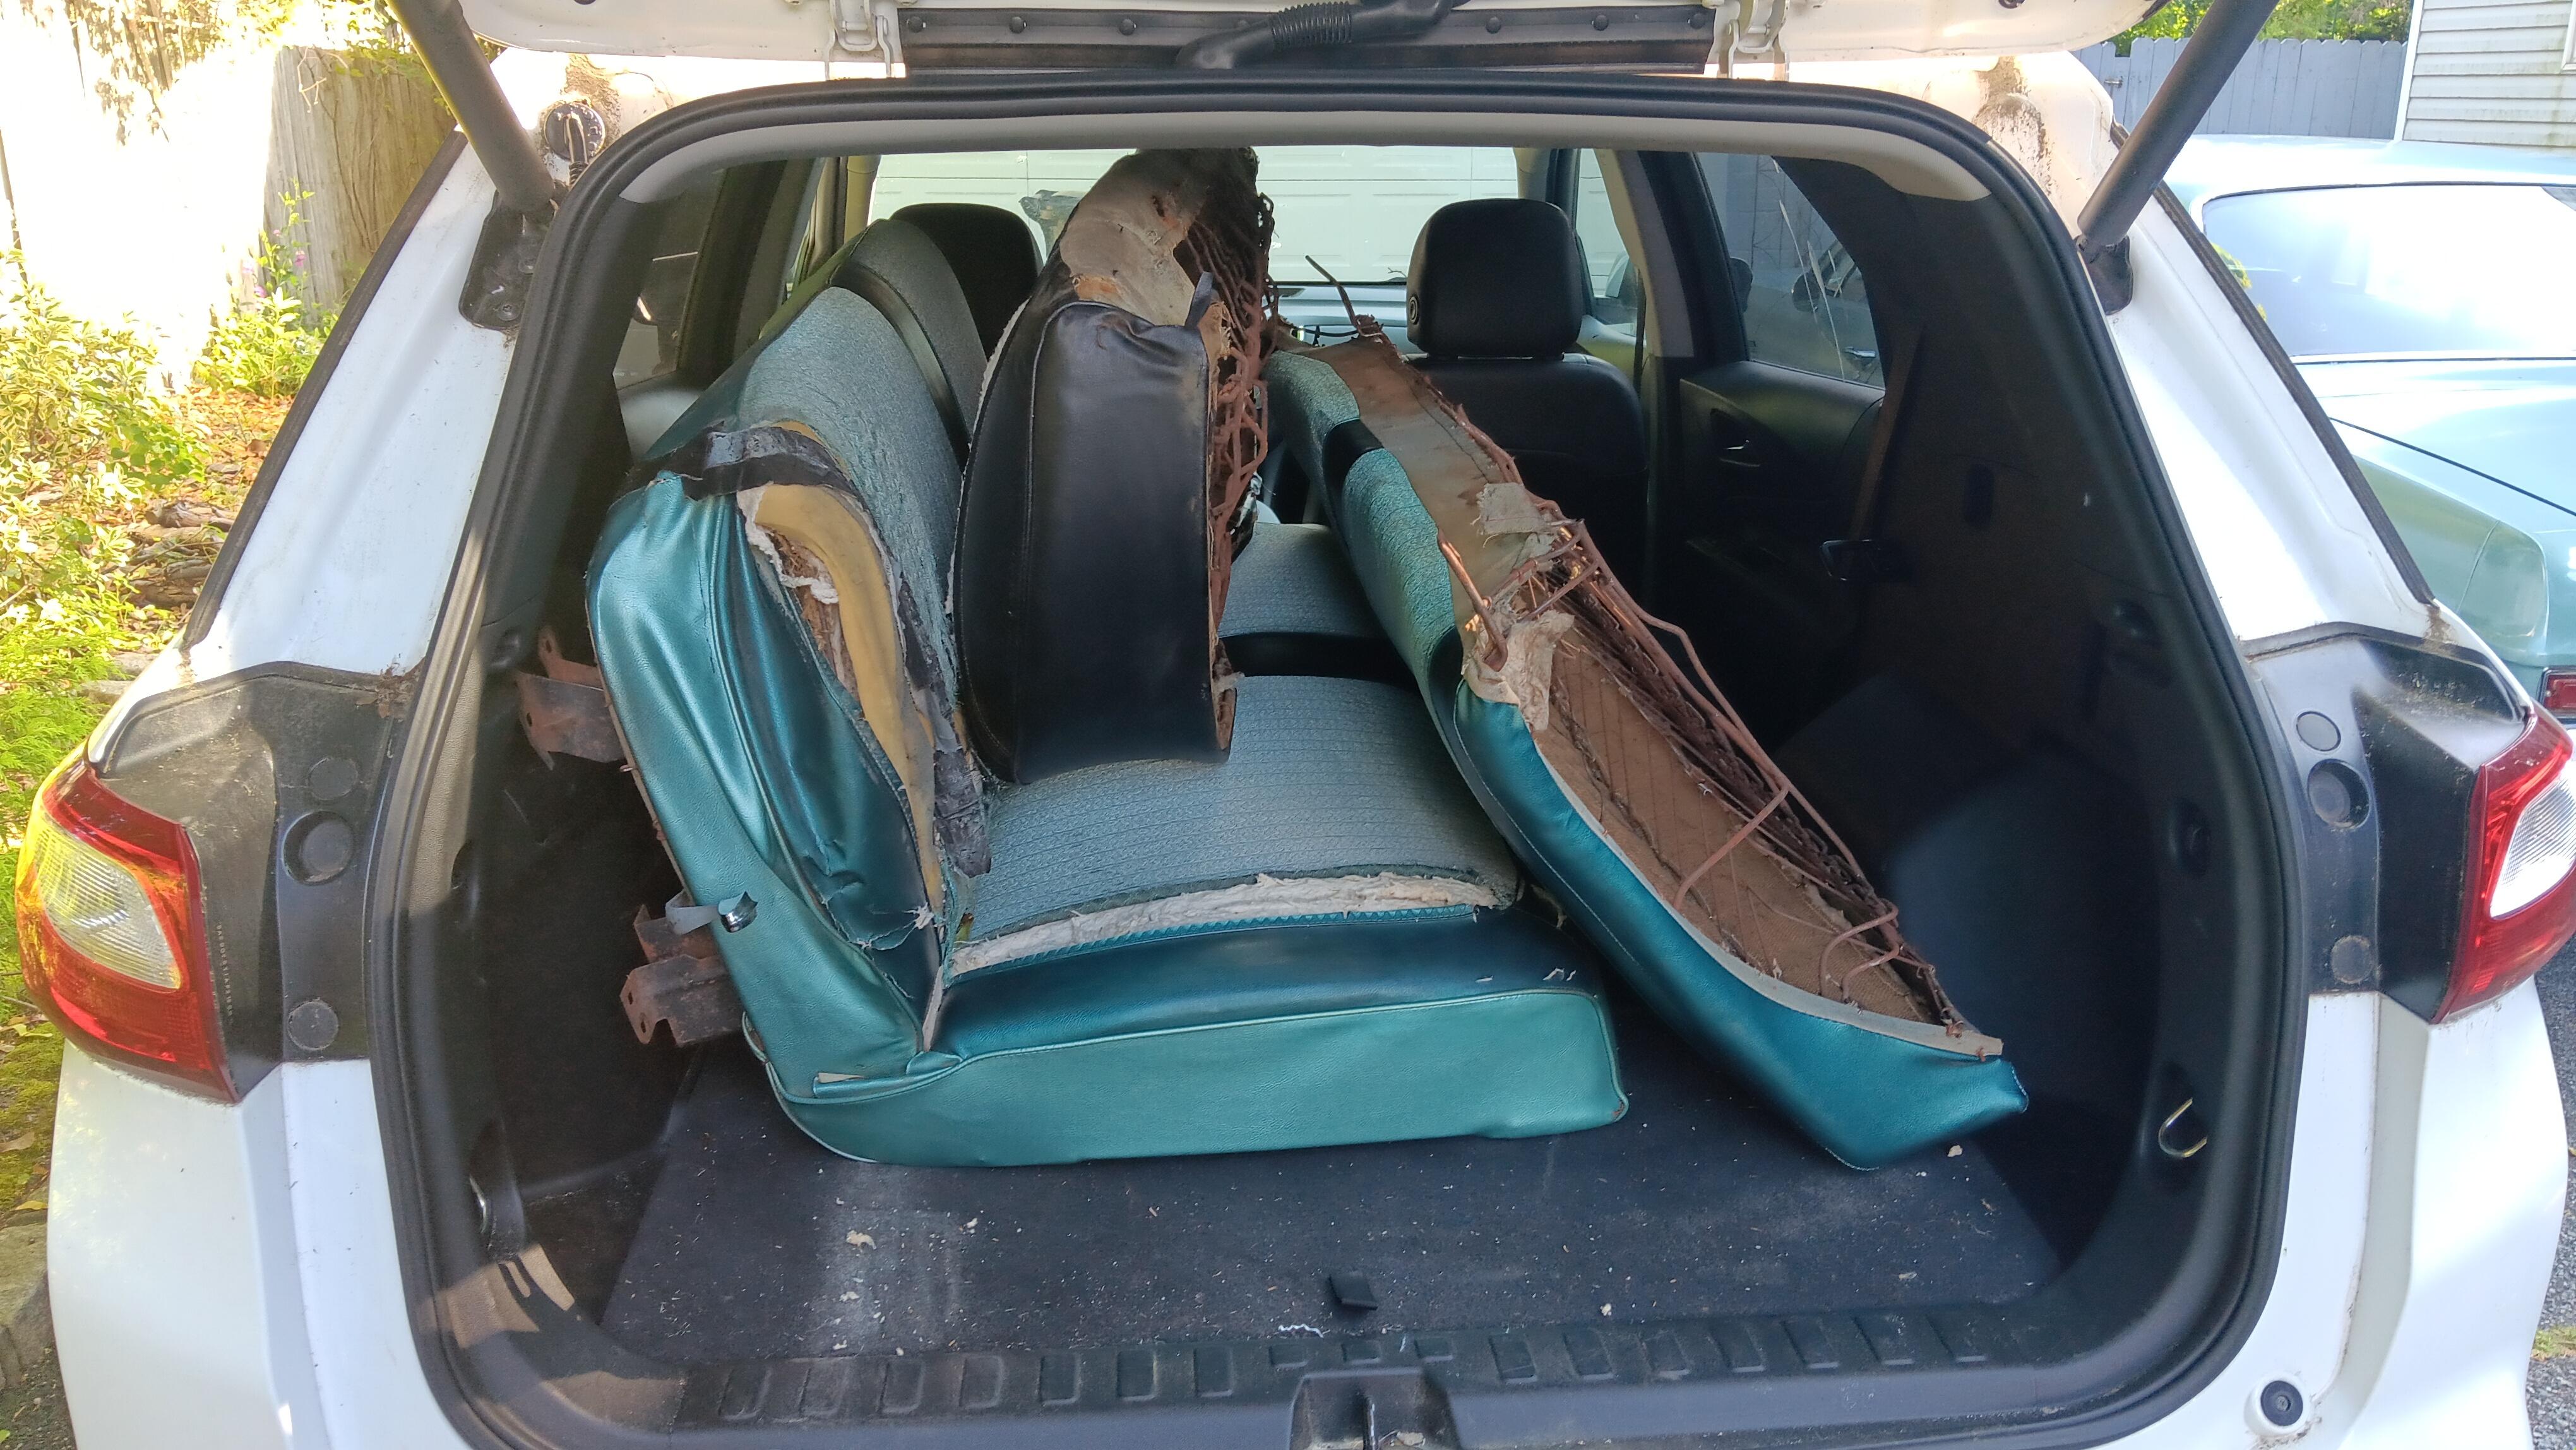
Chipping away at it. Seats are in for recovering. Arm rests too. New sill plates are on order. So is a seat spring kit for the tracks. Going factory turquoise for the vinyl and something else for the fabric inserts. Inspection and plates are done. Hagerty added it to my existing policy for $95/ year. I got the cruddy pin stripe tape off it and washed the car on Sunday. I had 2 rust holes in the front floor in an odd spot. Dug all that out and used fiberglass to patch it. Looks great. Next is rug cleaning, I vacuumed it out before it got hot.
-
Jimmy Spencer’s Sirius Dodge
bobss396 replied to Horrorshow's topic in Stock Cars (NASCAR, Super Stock, Late Model, etc.)
Brawls in the pits happened often when i raced. I heard a POP POP one night from the other end of the pits. Someone pulled a gun on another crew member. Another guy was banned for life after a knife incident. One thing I learned fast.. if someone runs up to the car when you pull off the track.. it won't be to tell what a great race you ran. Put the helmet back on and turn the top to the window net. I had one guy punch my helmet. I pitted next to another crew, they backed us up if things got ugly. -
I saw it like this... EVERYONE wants you on it and to be active on it. A major red flag to me.
-
I get the results of the stress test tomorrow. Saw my pain management doc yesterday, whizzed in a cup... every 6 months. Didn't kill myself yesterday and will take a few days of taking it easier. I'll clean up the interior on the Belair, I have to go out while the driveway is still in shade.
-
That is sweet. I'm thinking of getting an emotional support kitten for Mr. Ivan.
-
Now I gotta go look at my local store.. thanks buddy....
-
I was talking to one guy at the club last week that also struggles. We both suffer from the "BACK IN THE BOX" syndrome. Get disgusted... put it away for a while.
-
Jack up the radiator cap, slide a new car under it.... GO RACING. I have no doubt that JF will be back. He's had other serious wrecks, but at 75 ya gotta be thinking about packing it in.
-
Jimmy Spencer’s Sirius Dodge
bobss396 replied to Horrorshow's topic in Stock Cars (NASCAR, Super Stock, Late Model, etc.)
Very nice and the window black looks crisp, one of the hardest elements of these kits. I was a big JS fan when he ran the #24 modified. He was very approachable at the track and always took the time out for the fans. The local "hot shoes" would hole up in their trailers after a race. -
Decal removal advice needed
bobss396 replied to Bbo1974's topic in WIP: Stock Cars (NASCAR, Super Stock, Late Model, etc.)
I have wet sanded off stubborn pieces of decals that failed the tape trick. My fear was I would be pulling off the paint with the tape. -
In my last FB days in 2019, I found it very tough to navigate and find things again. It could be overwhelming. I have family that LIVES on FB, take a good poop... post it on FB. Everyone on Randy's forum were great. I was a Hobby Heaven member for a while, but found it way too easy to get into fights with members. Someone always had a chip on their shoulder. I said adios to that around 2012.
-
Best 50’s and 60’s OOB builders?
bobss396 replied to NOBLNG's topic in General Automotive Talk (Trucks and Cars)
The AMT kits with the steerable wheels always were good builds. The '56, '57 Fords, the '58 Chevy. -
Best 50’s and 60’s OOB builders?
bobss396 replied to NOBLNG's topic in General Automotive Talk (Trucks and Cars)
Been there, done that.... -
Stock car... slap a decal over it.... seriously.