NOBLNG
-
Posts
10,231 -
Joined
-
Last visited
Content Type
Profiles
Forums
Events
Gallery
Everything posted by NOBLNG
-
Excellent work! And I like your "build it how I wanna build it" ethos.
-
Excellent job!
-
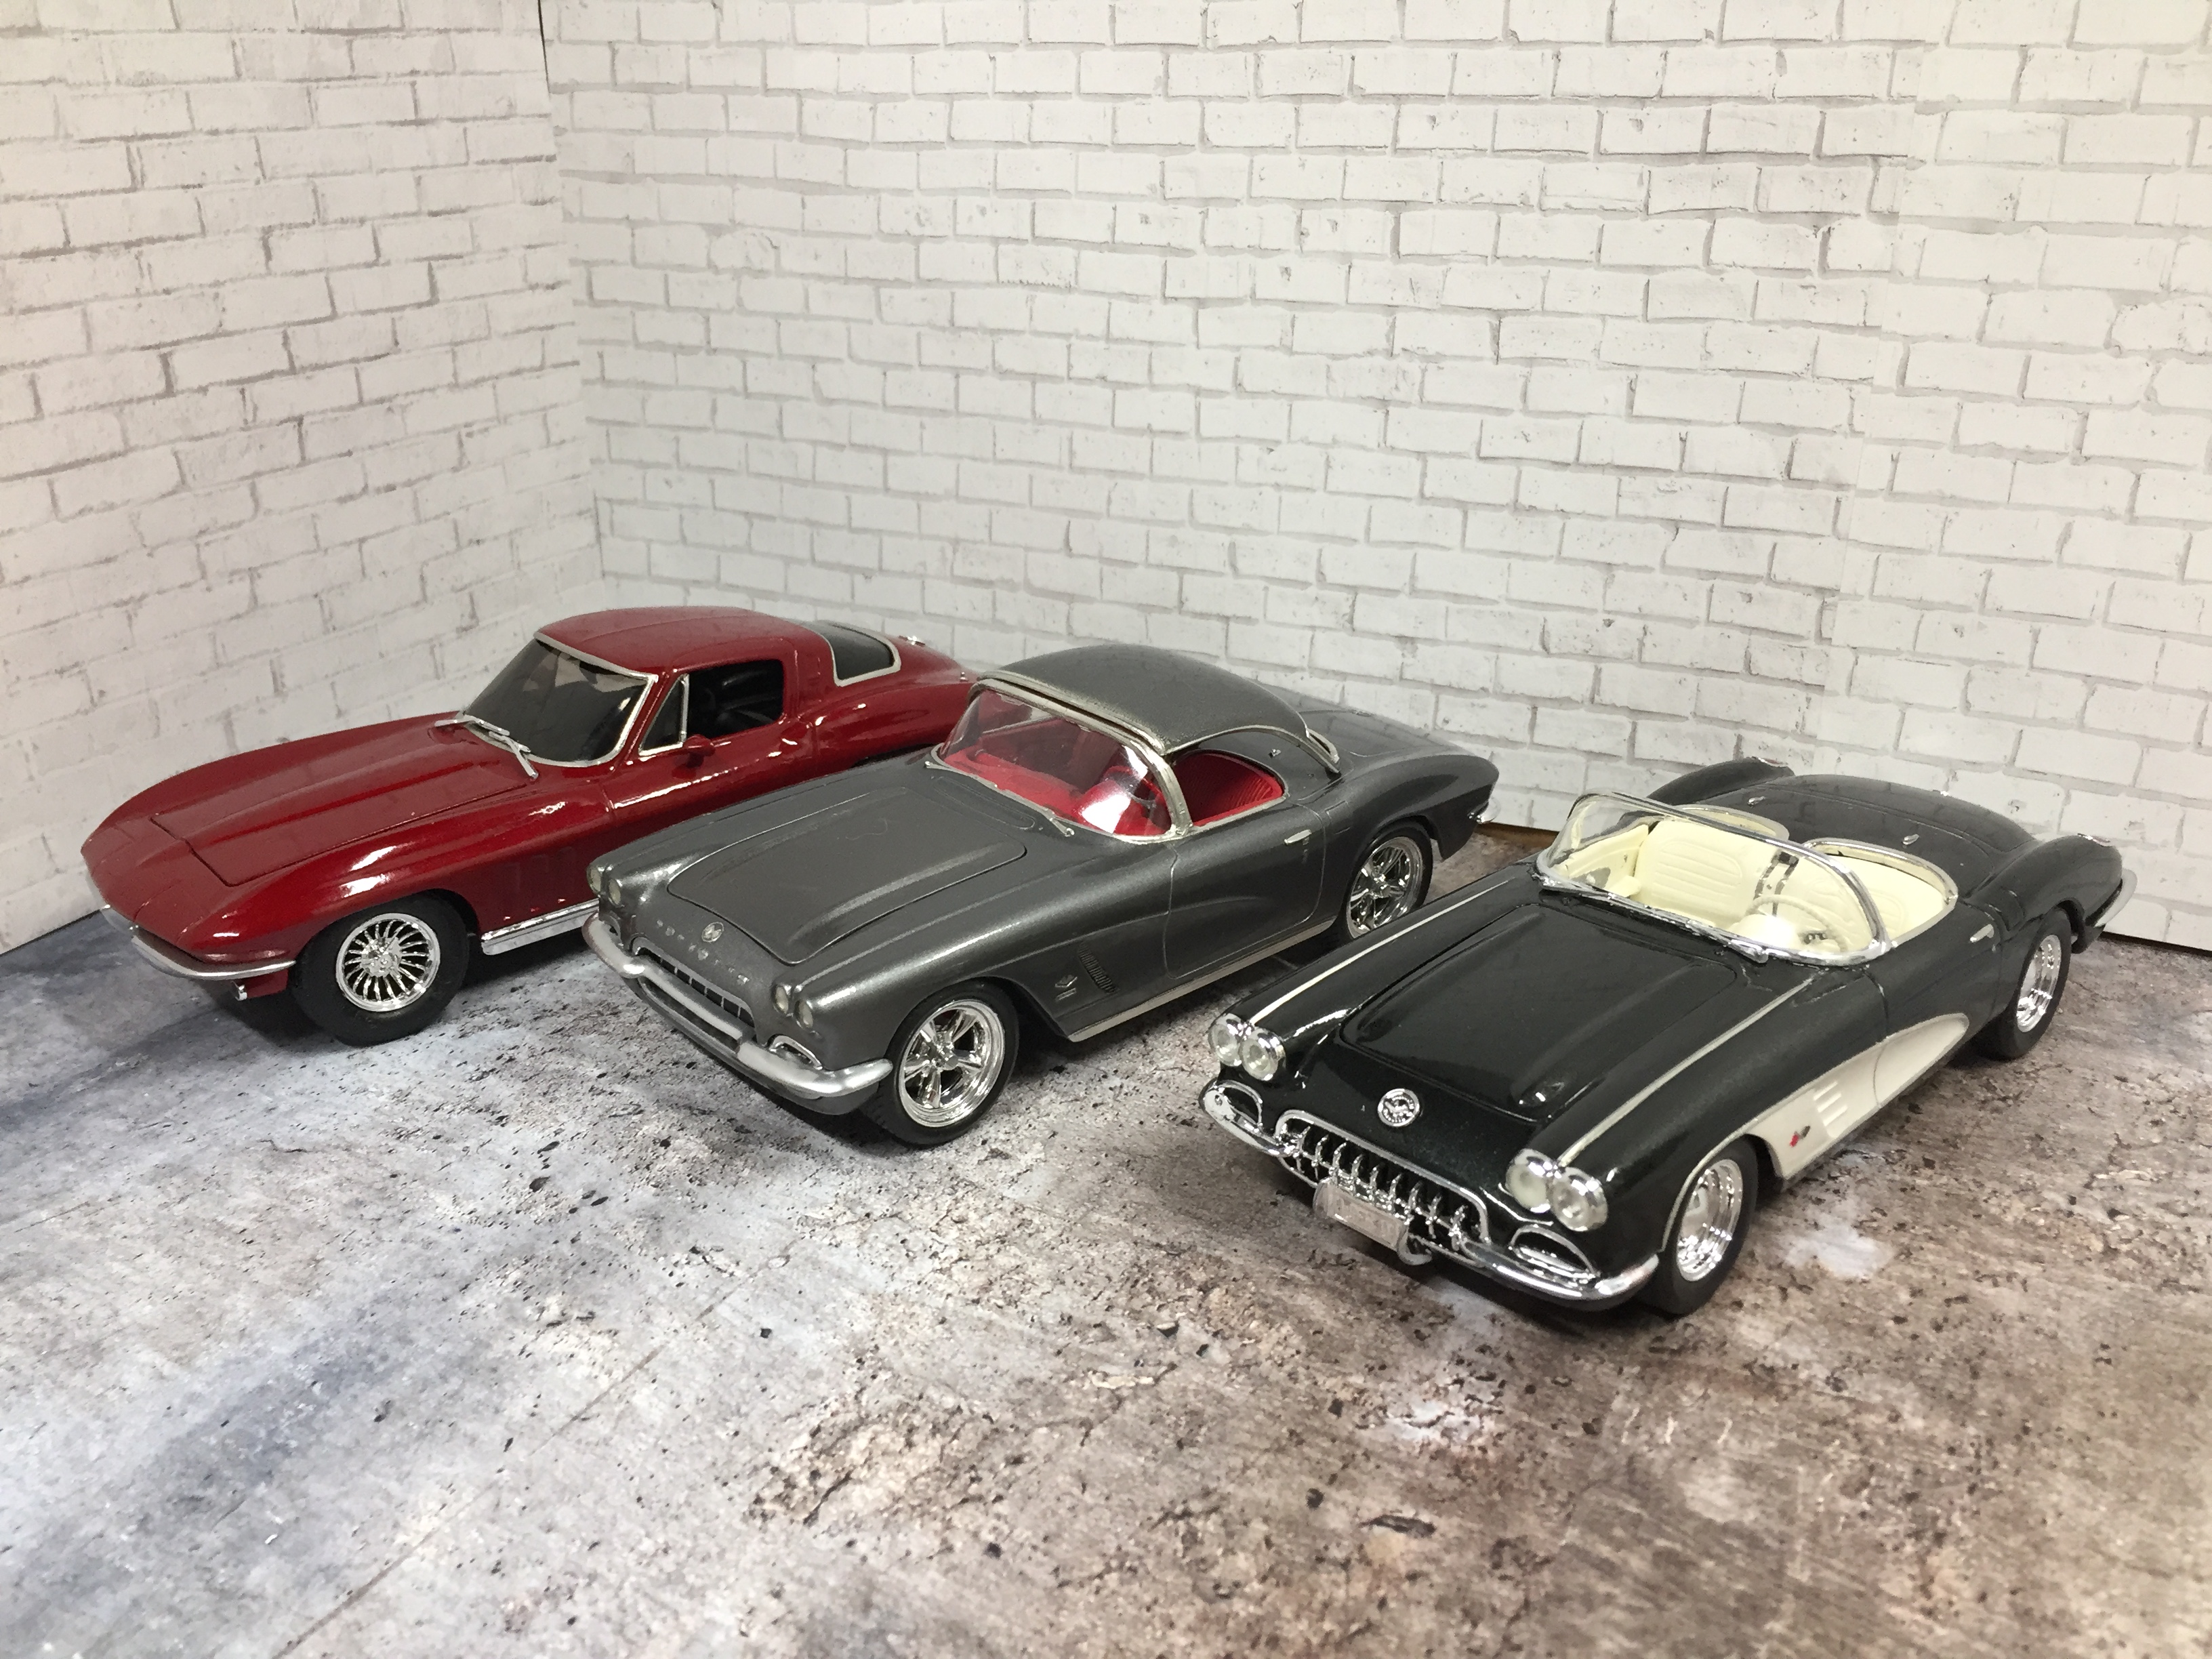
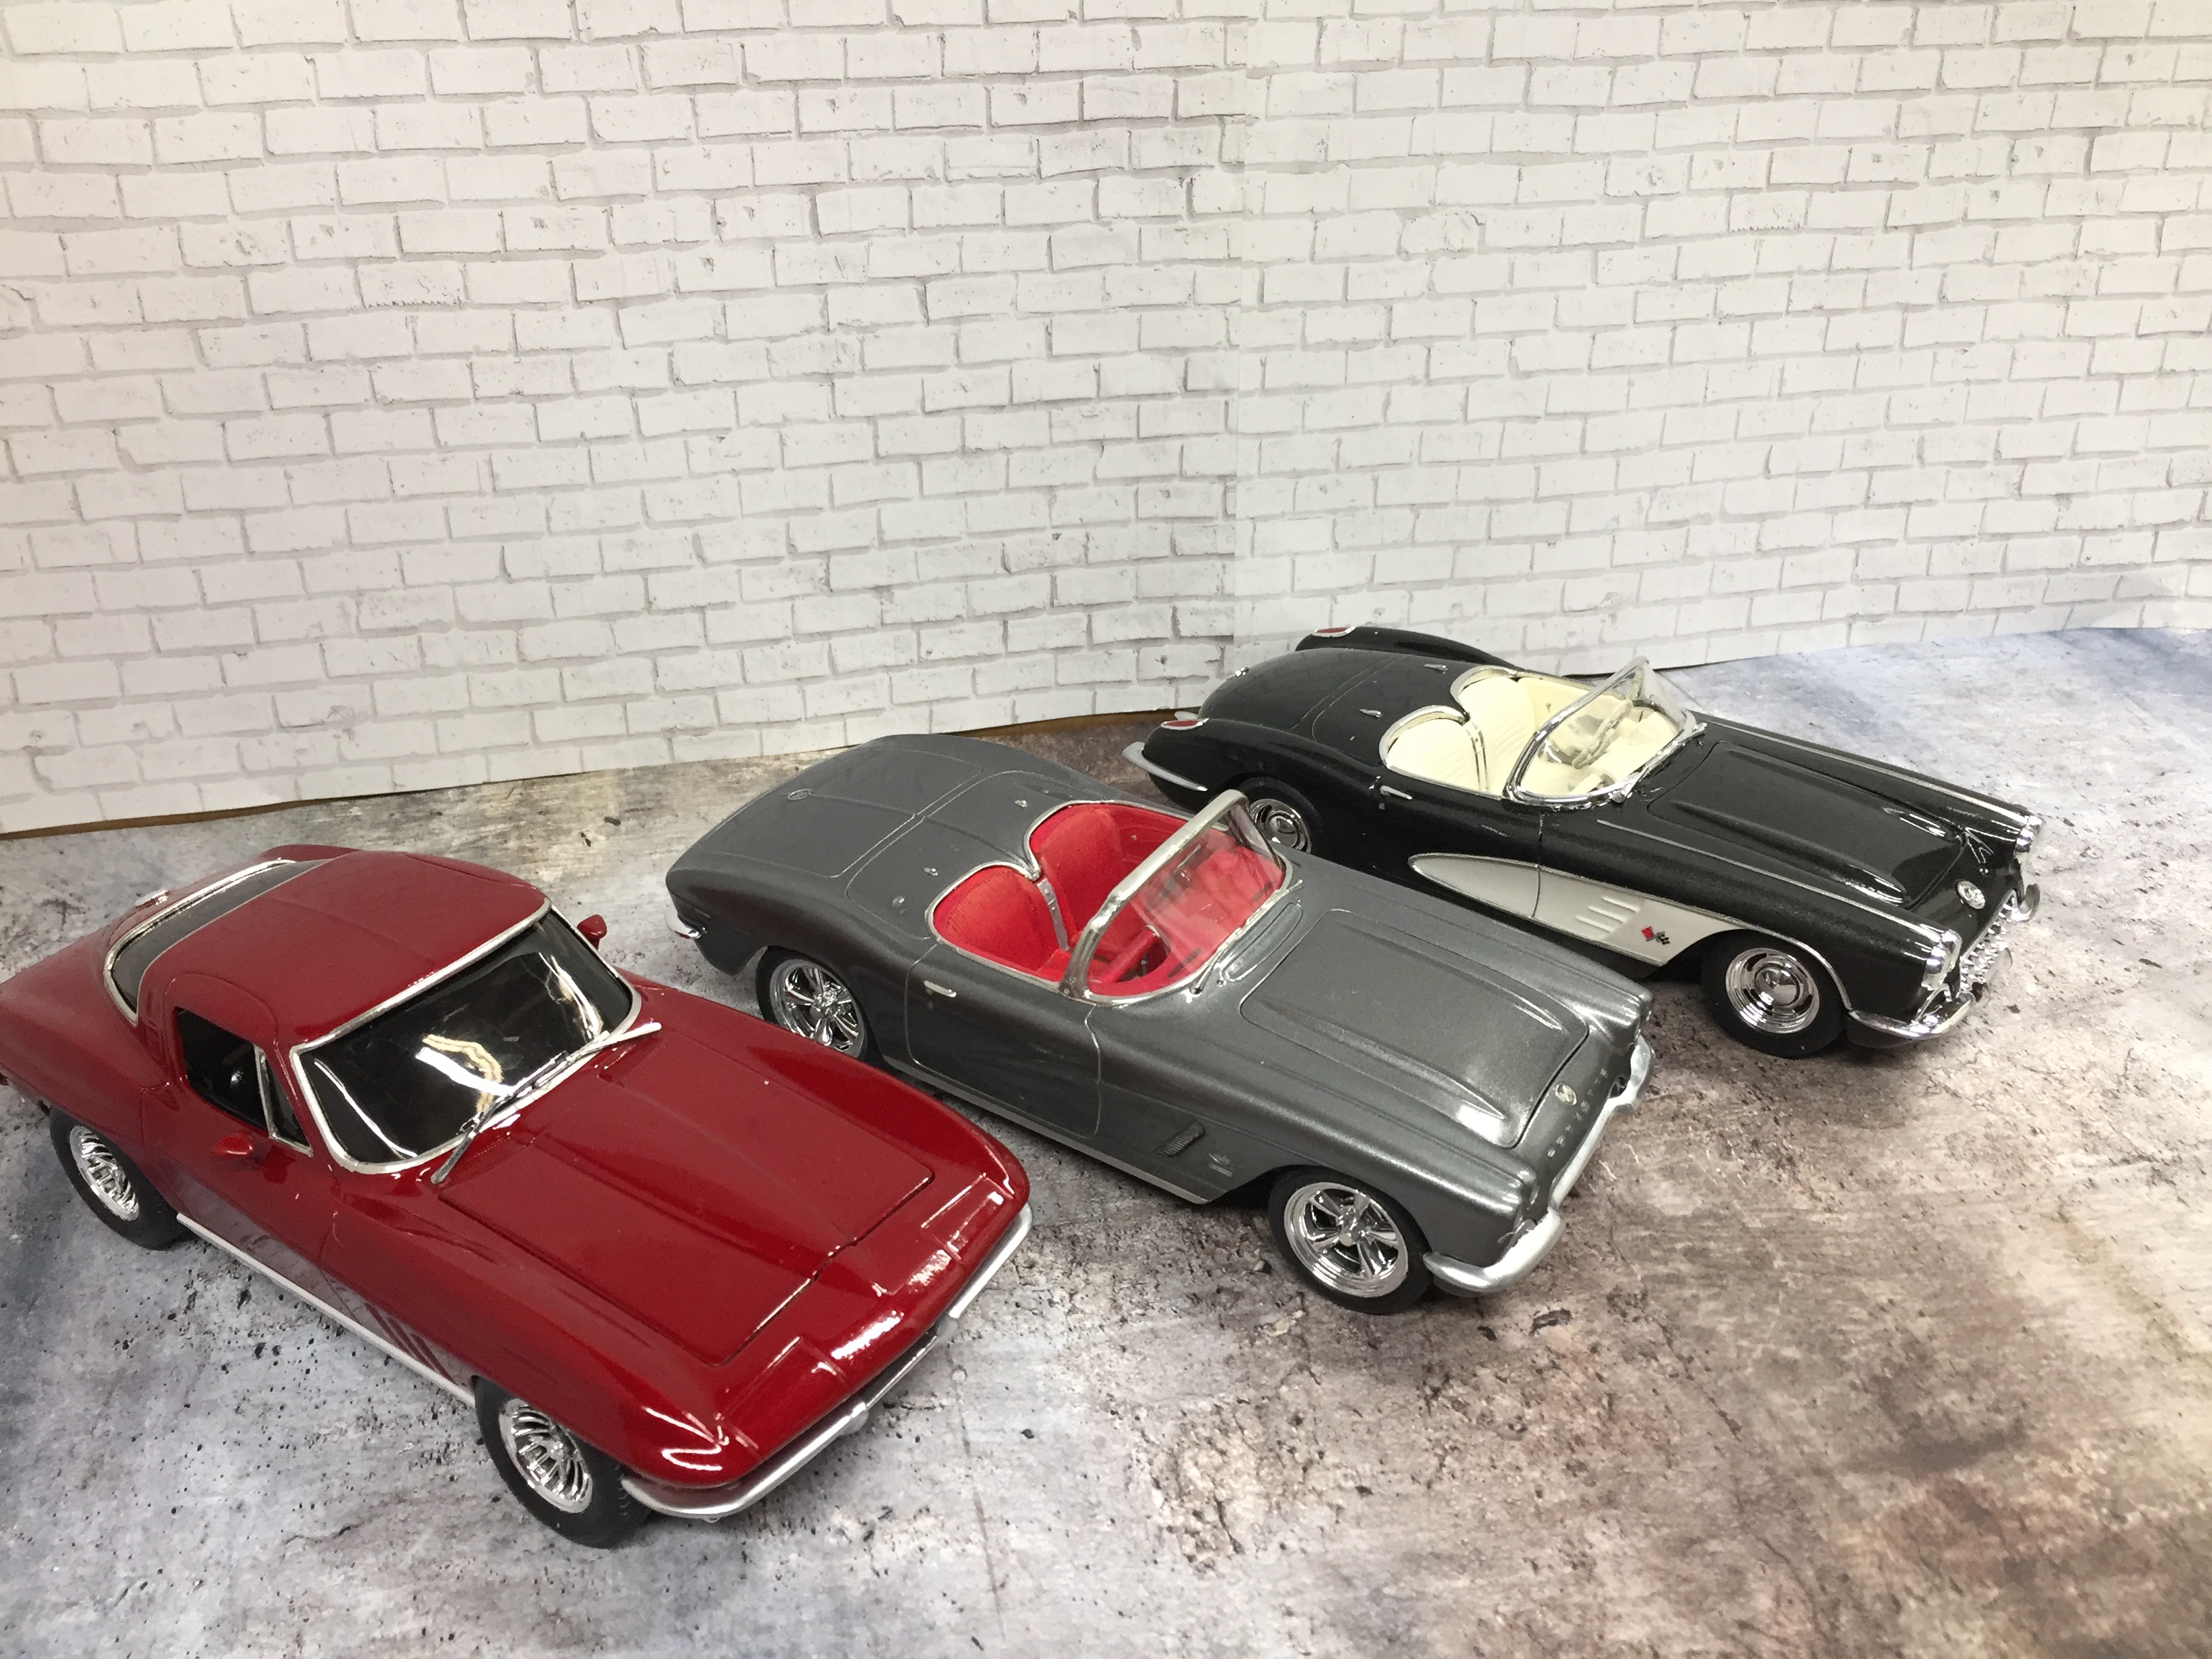
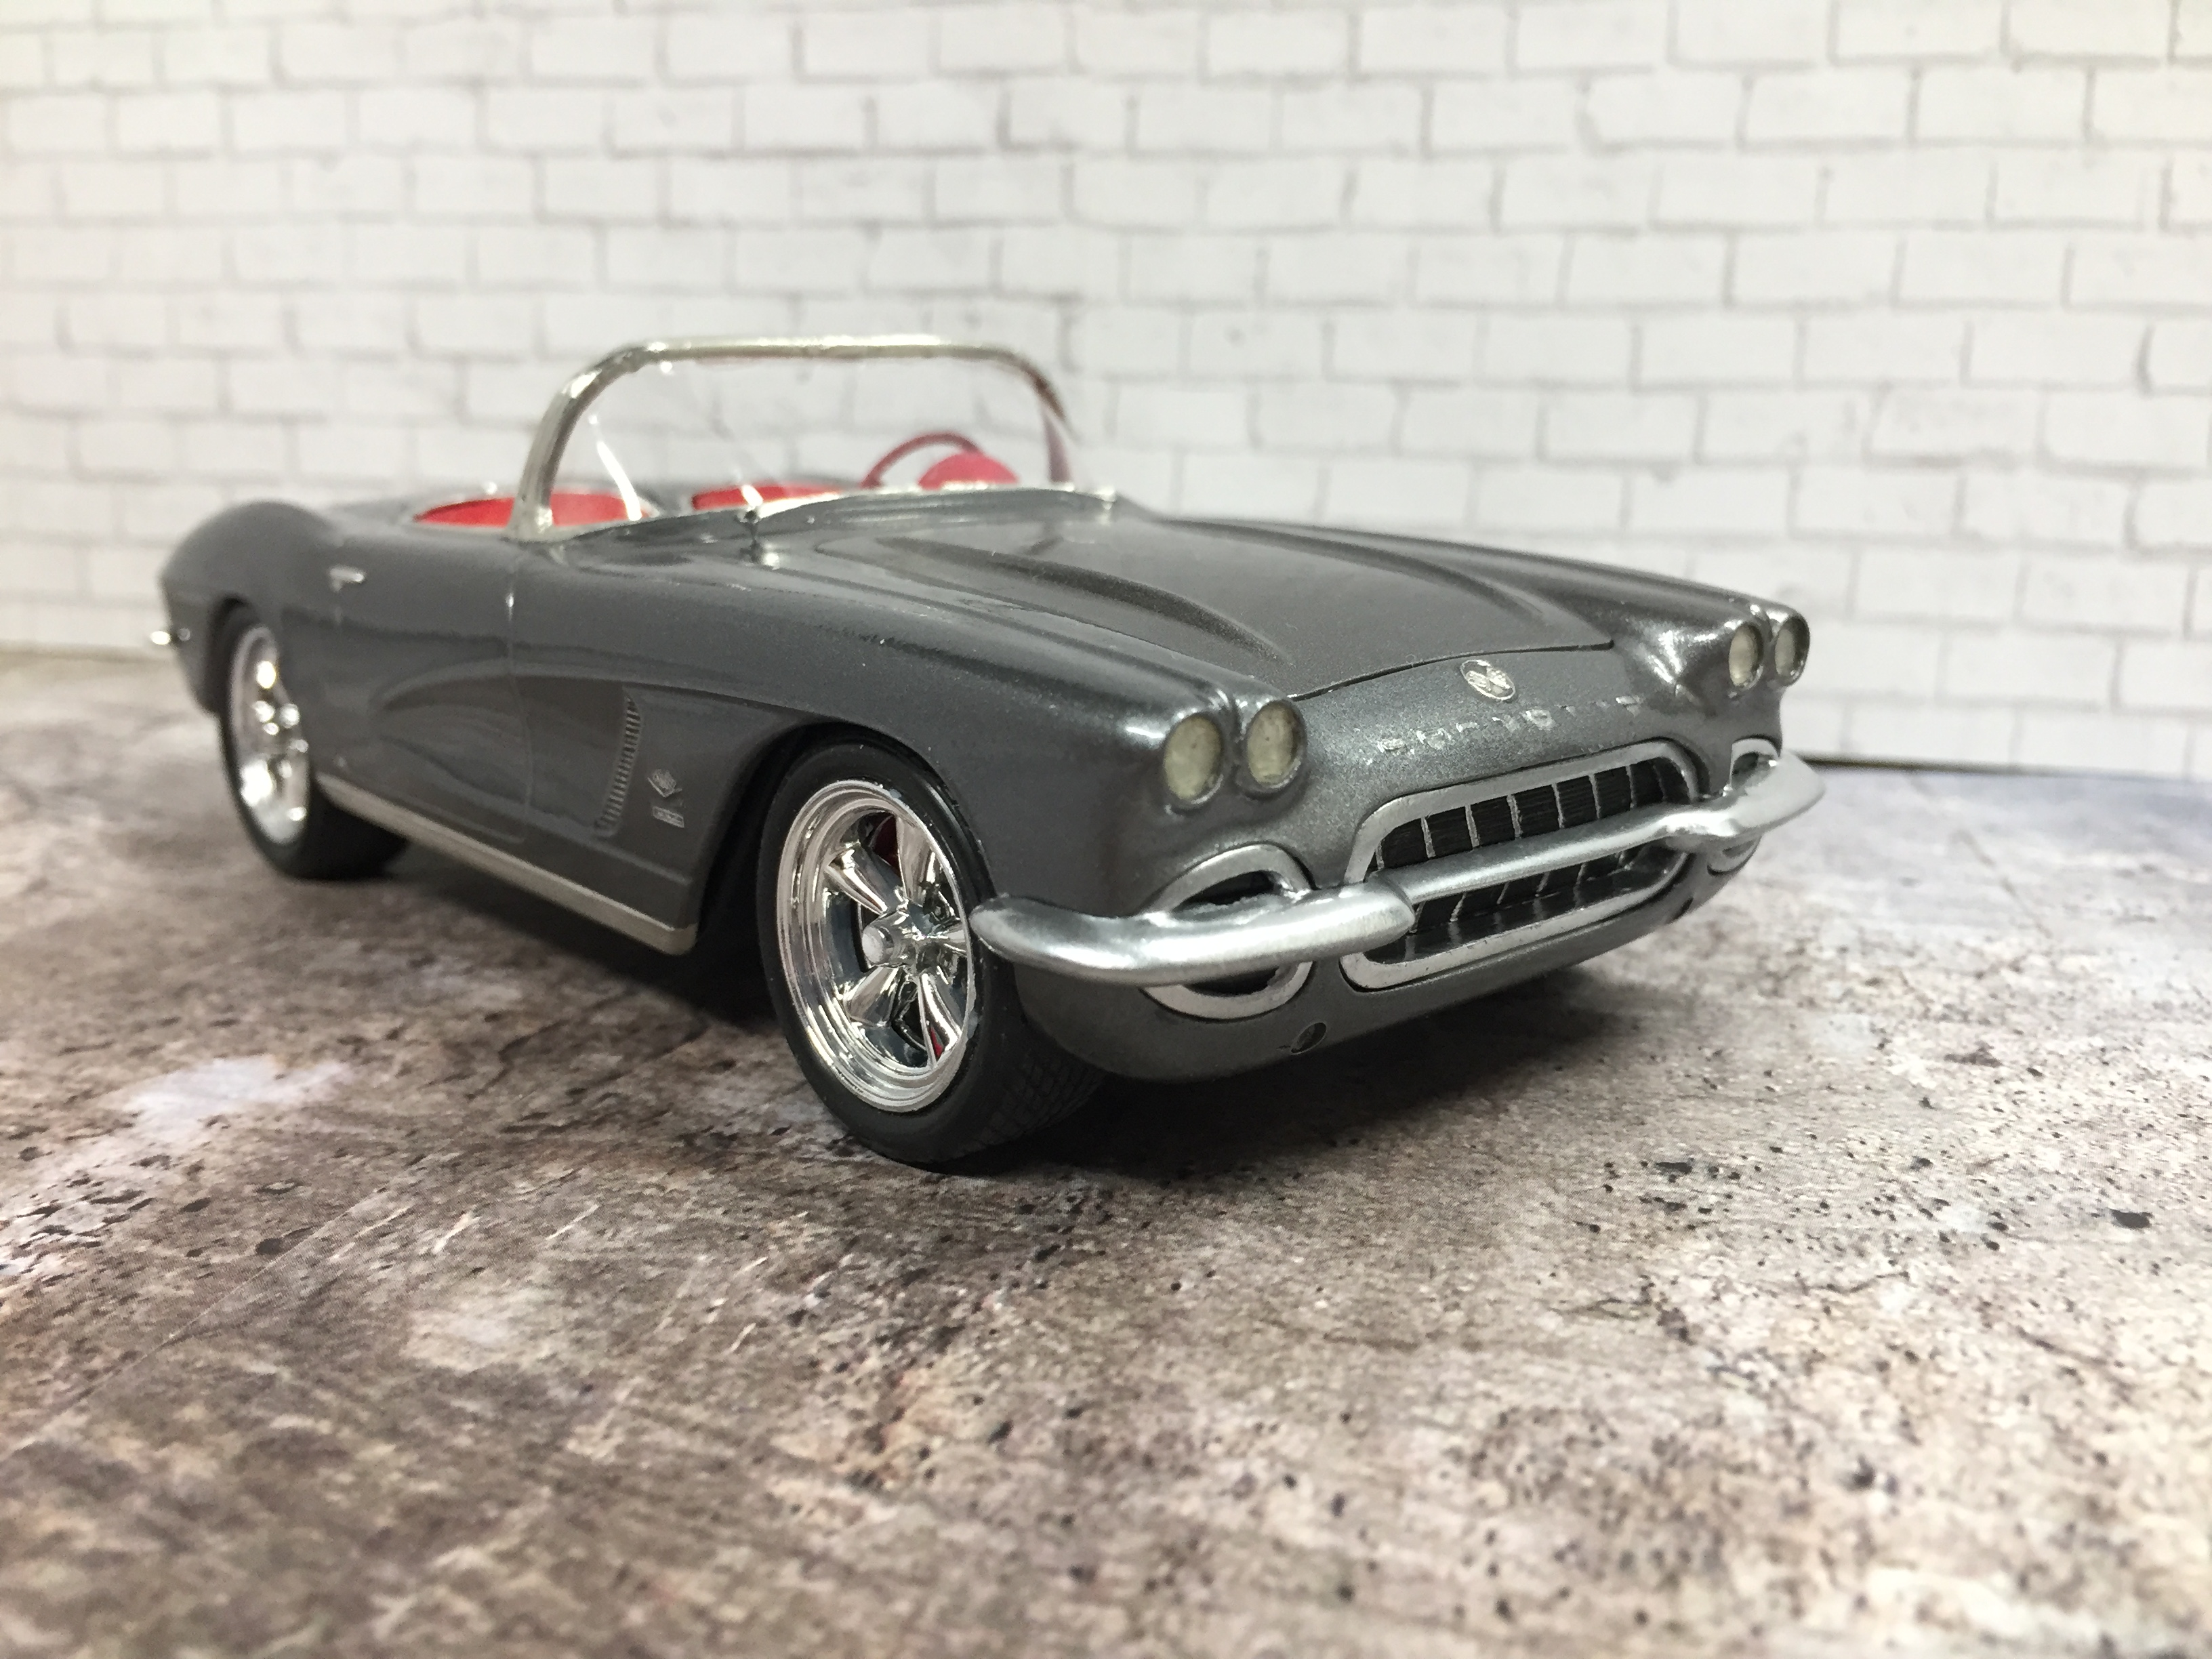
The grey one in the middle is an older AMT kit.
-
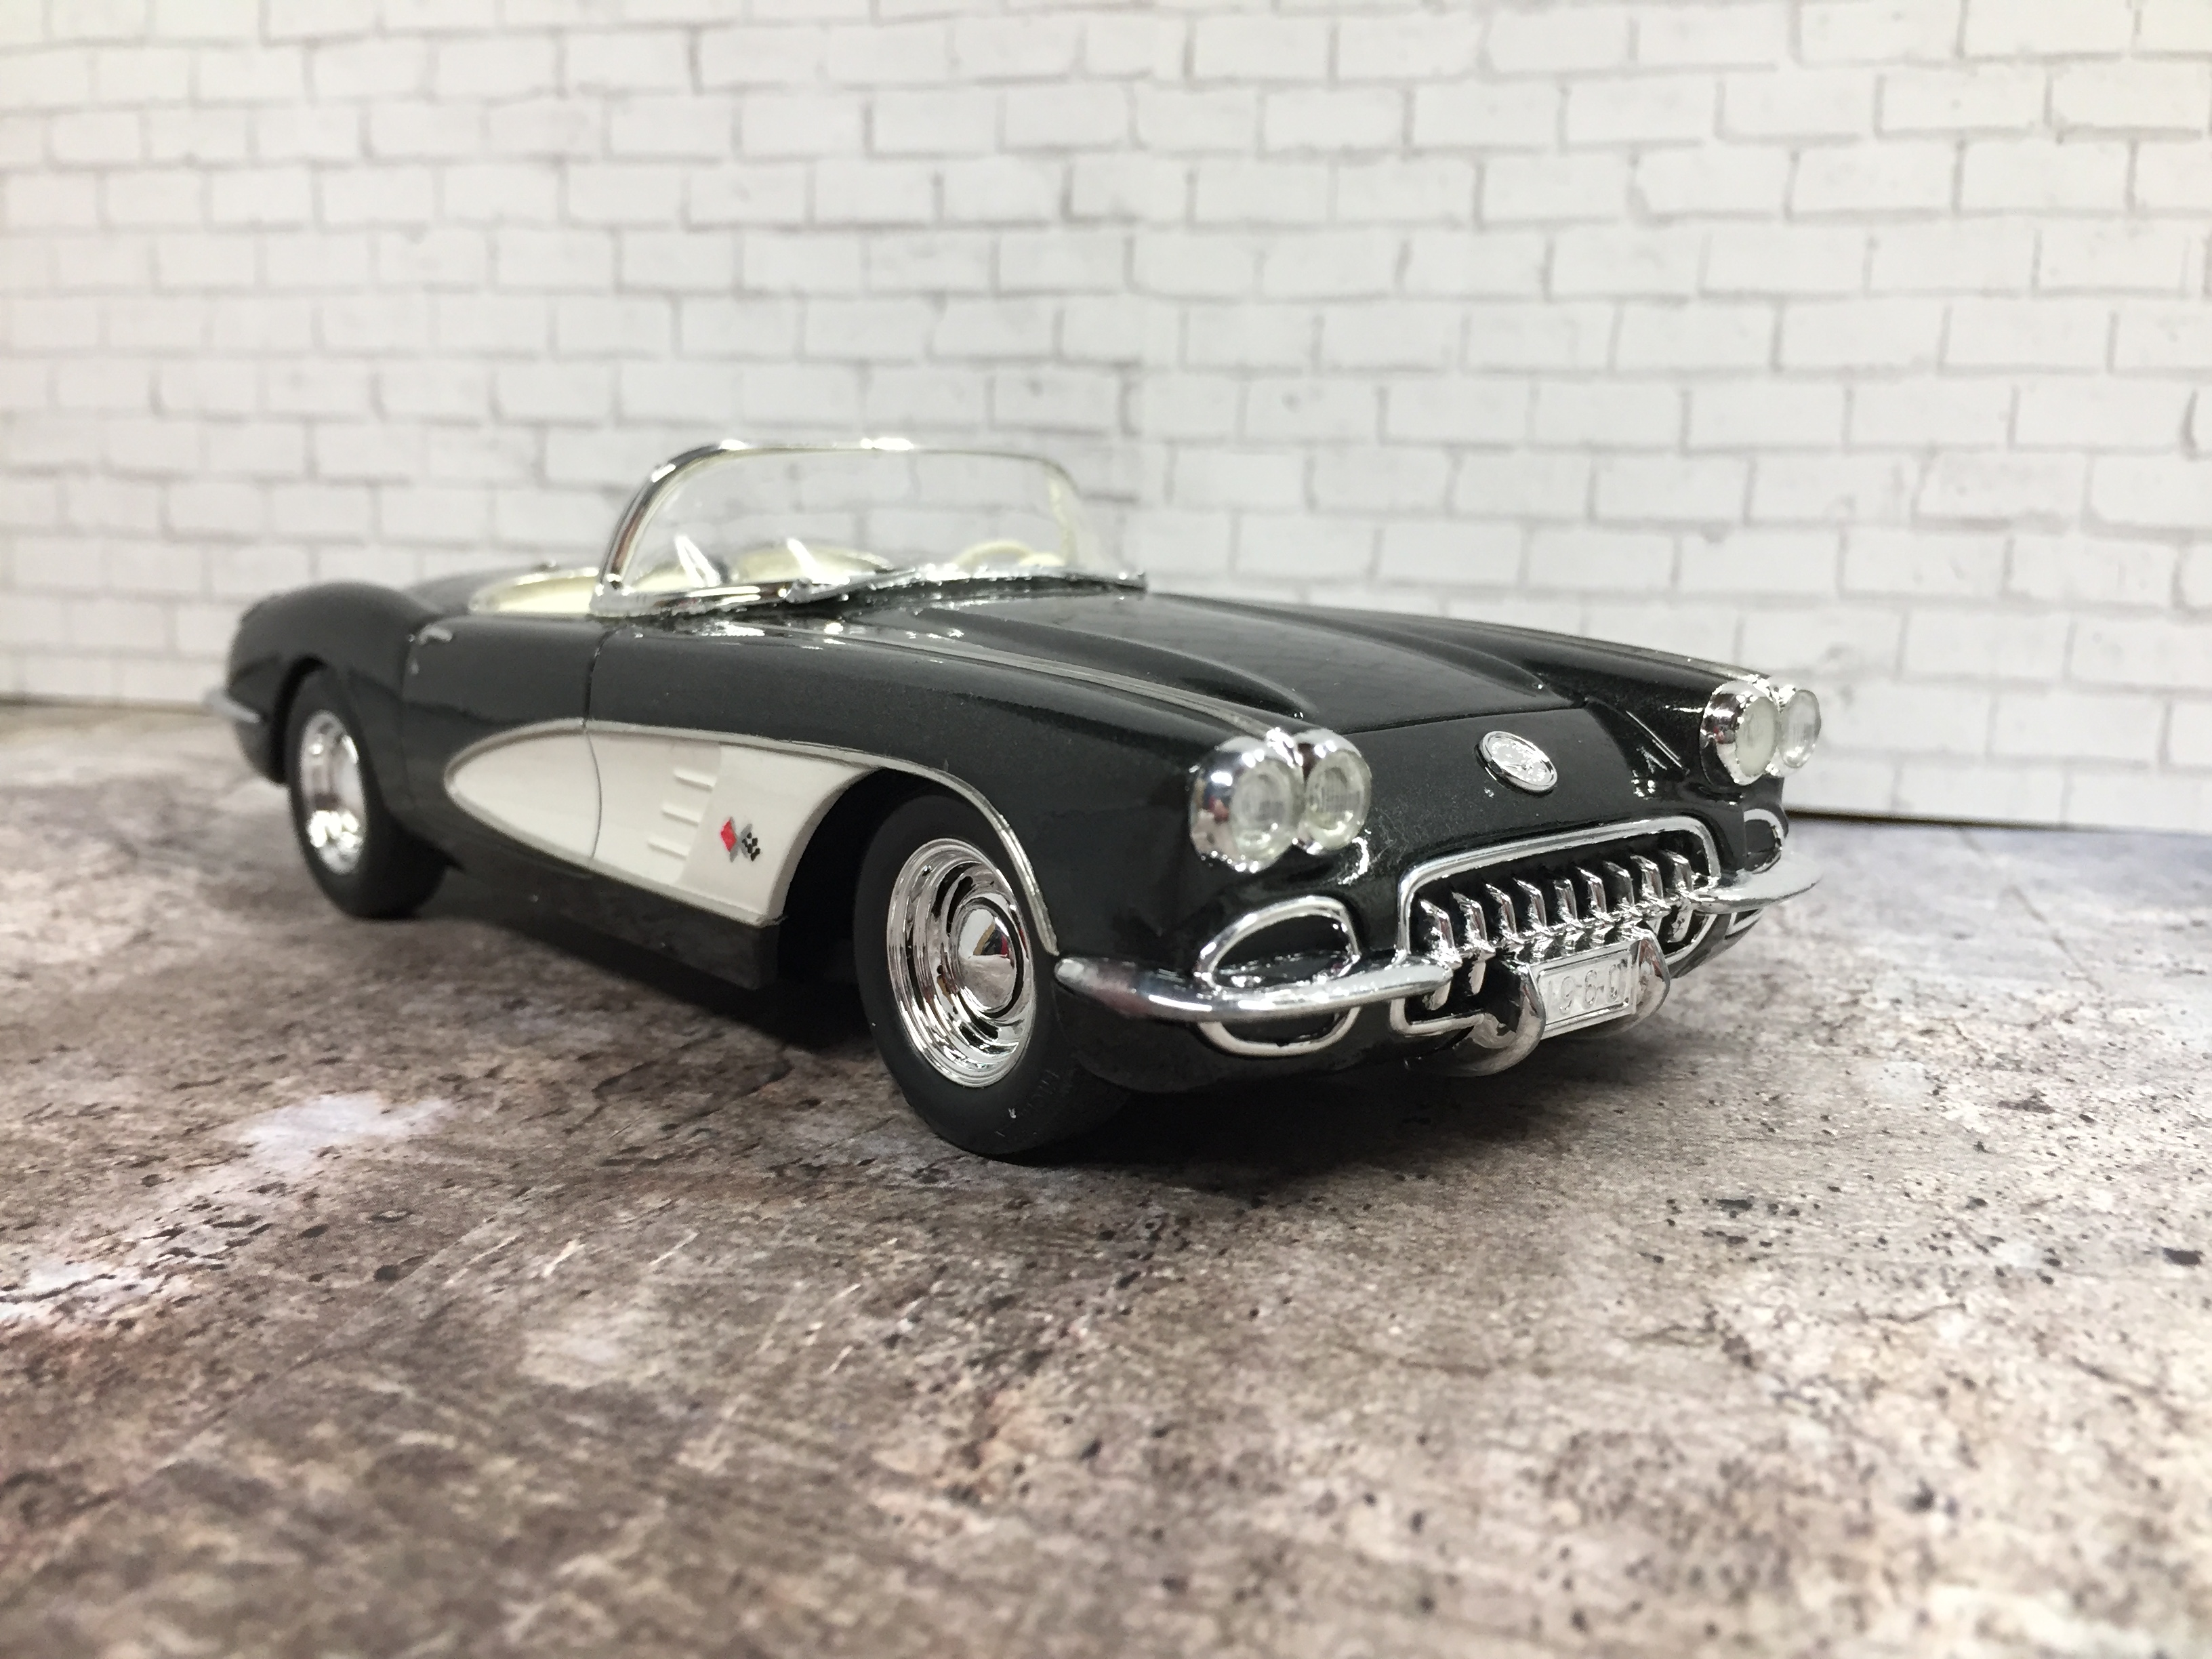
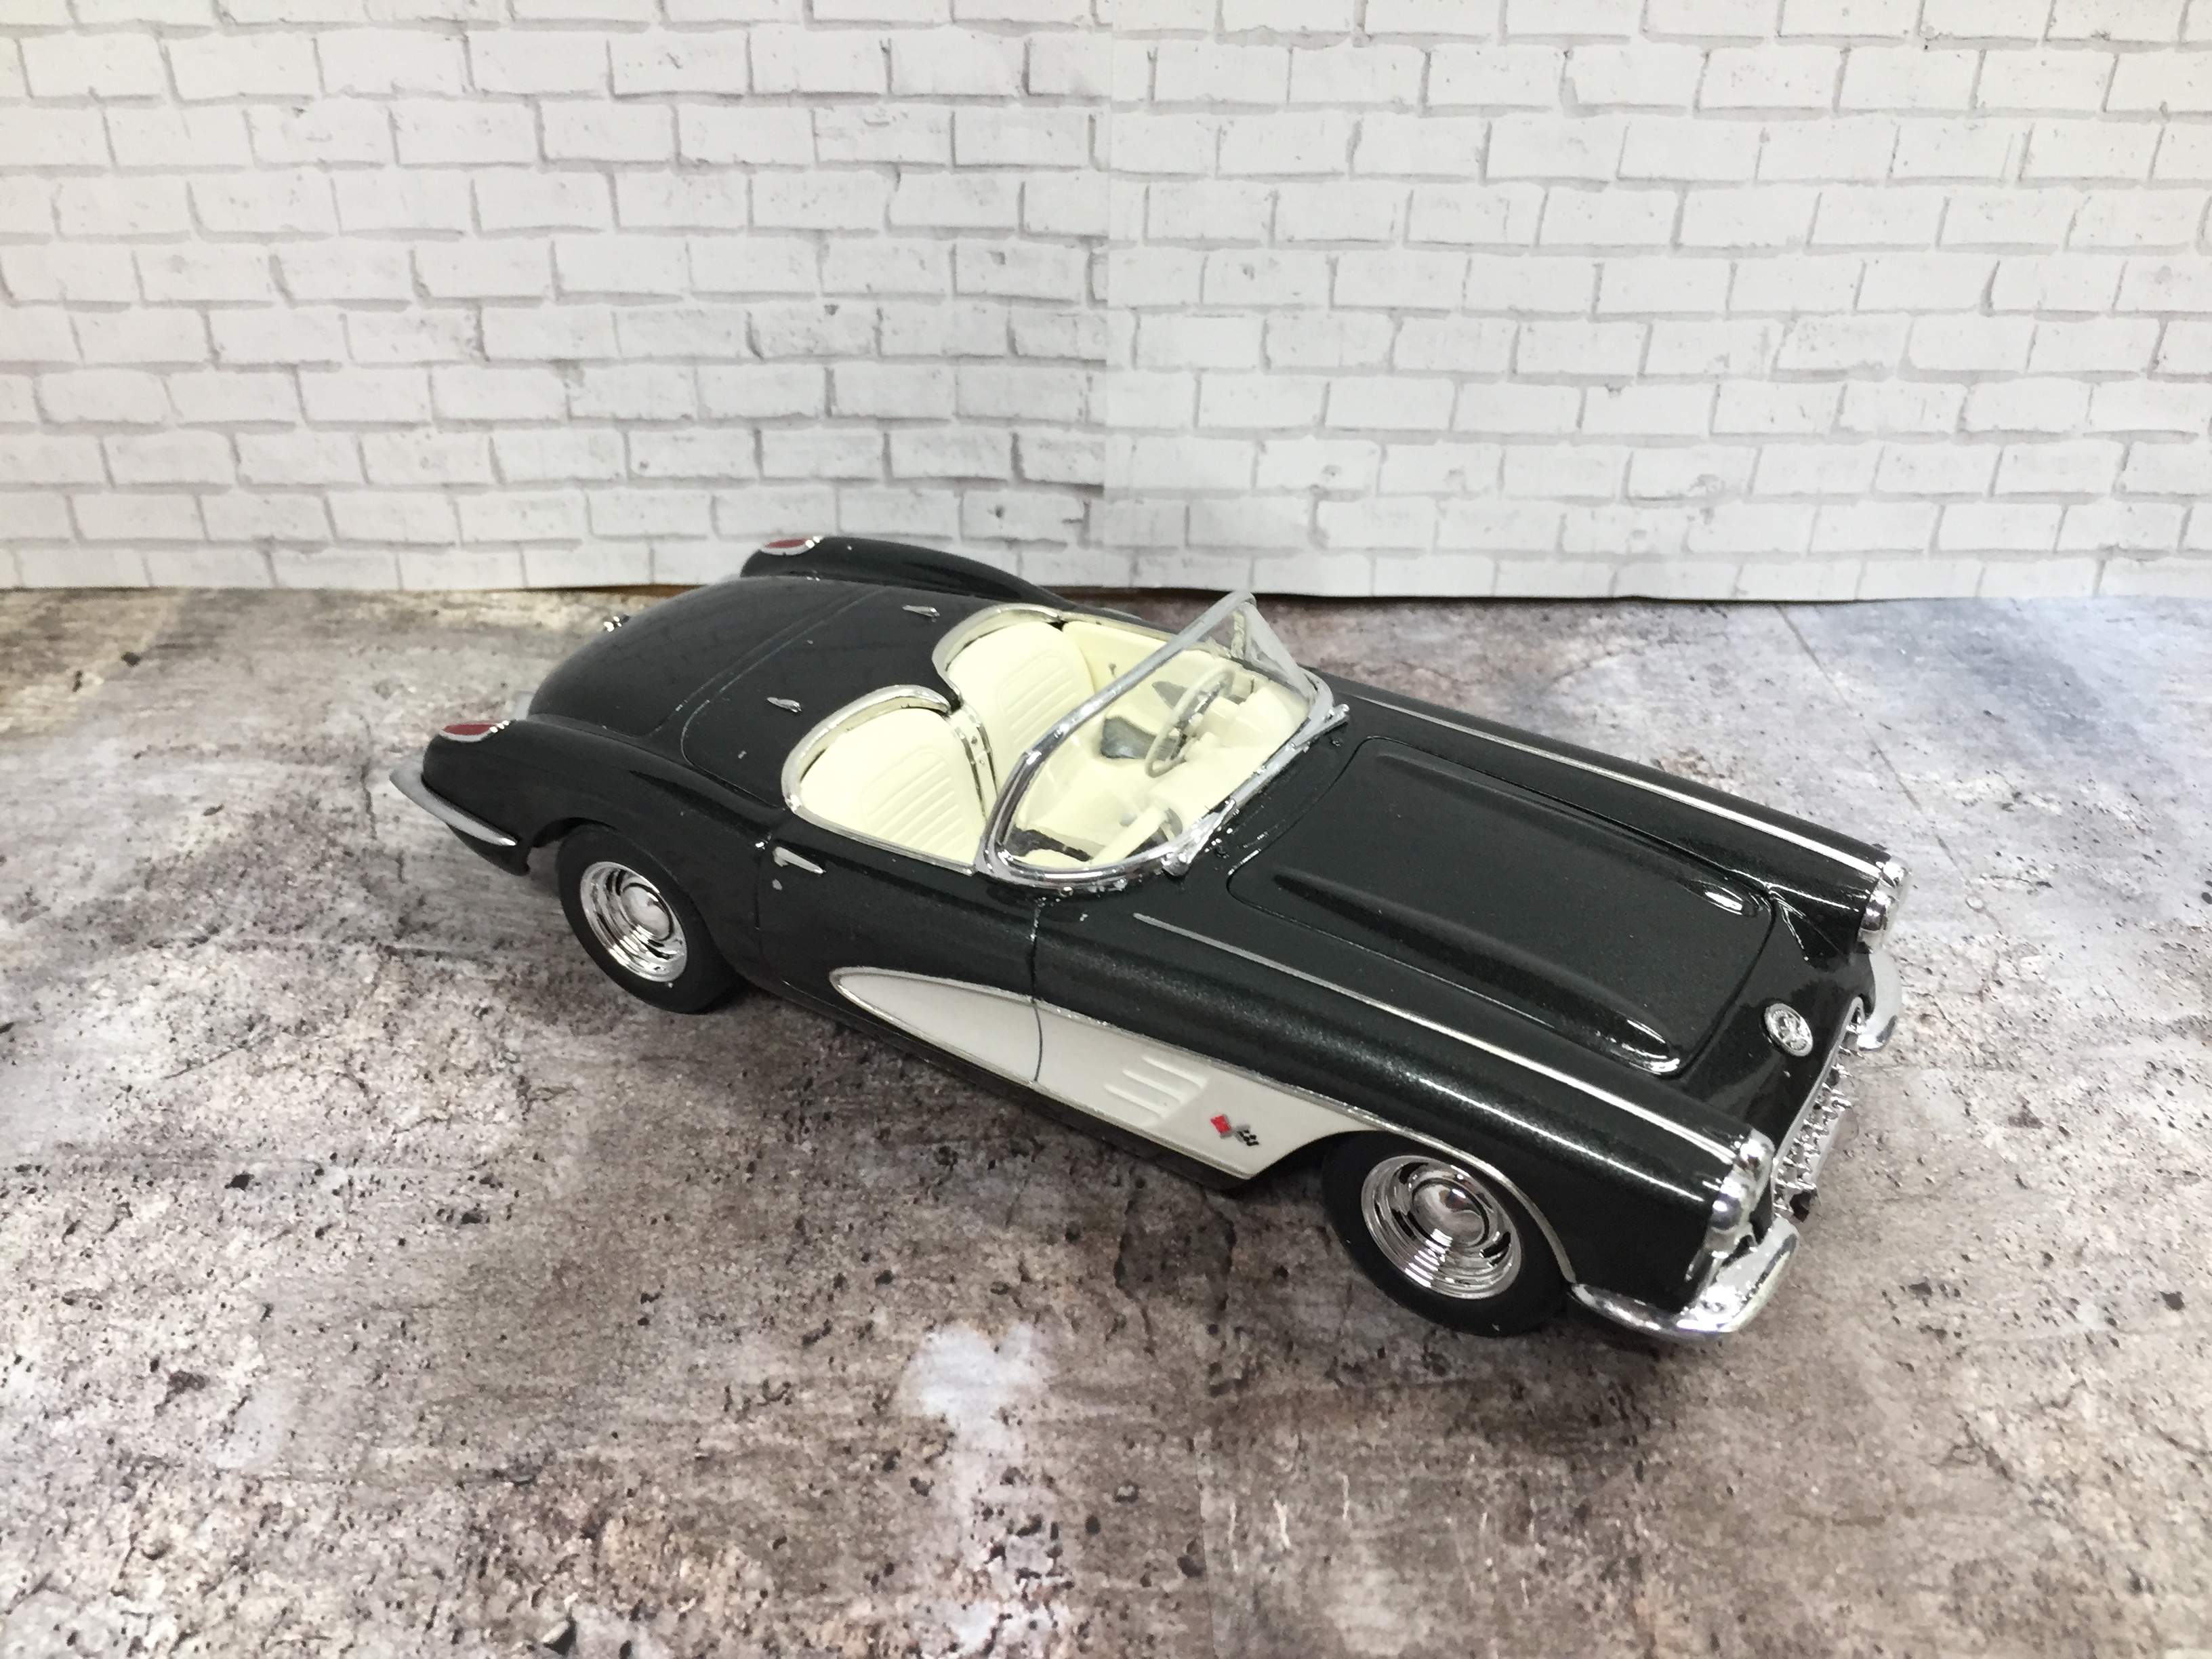
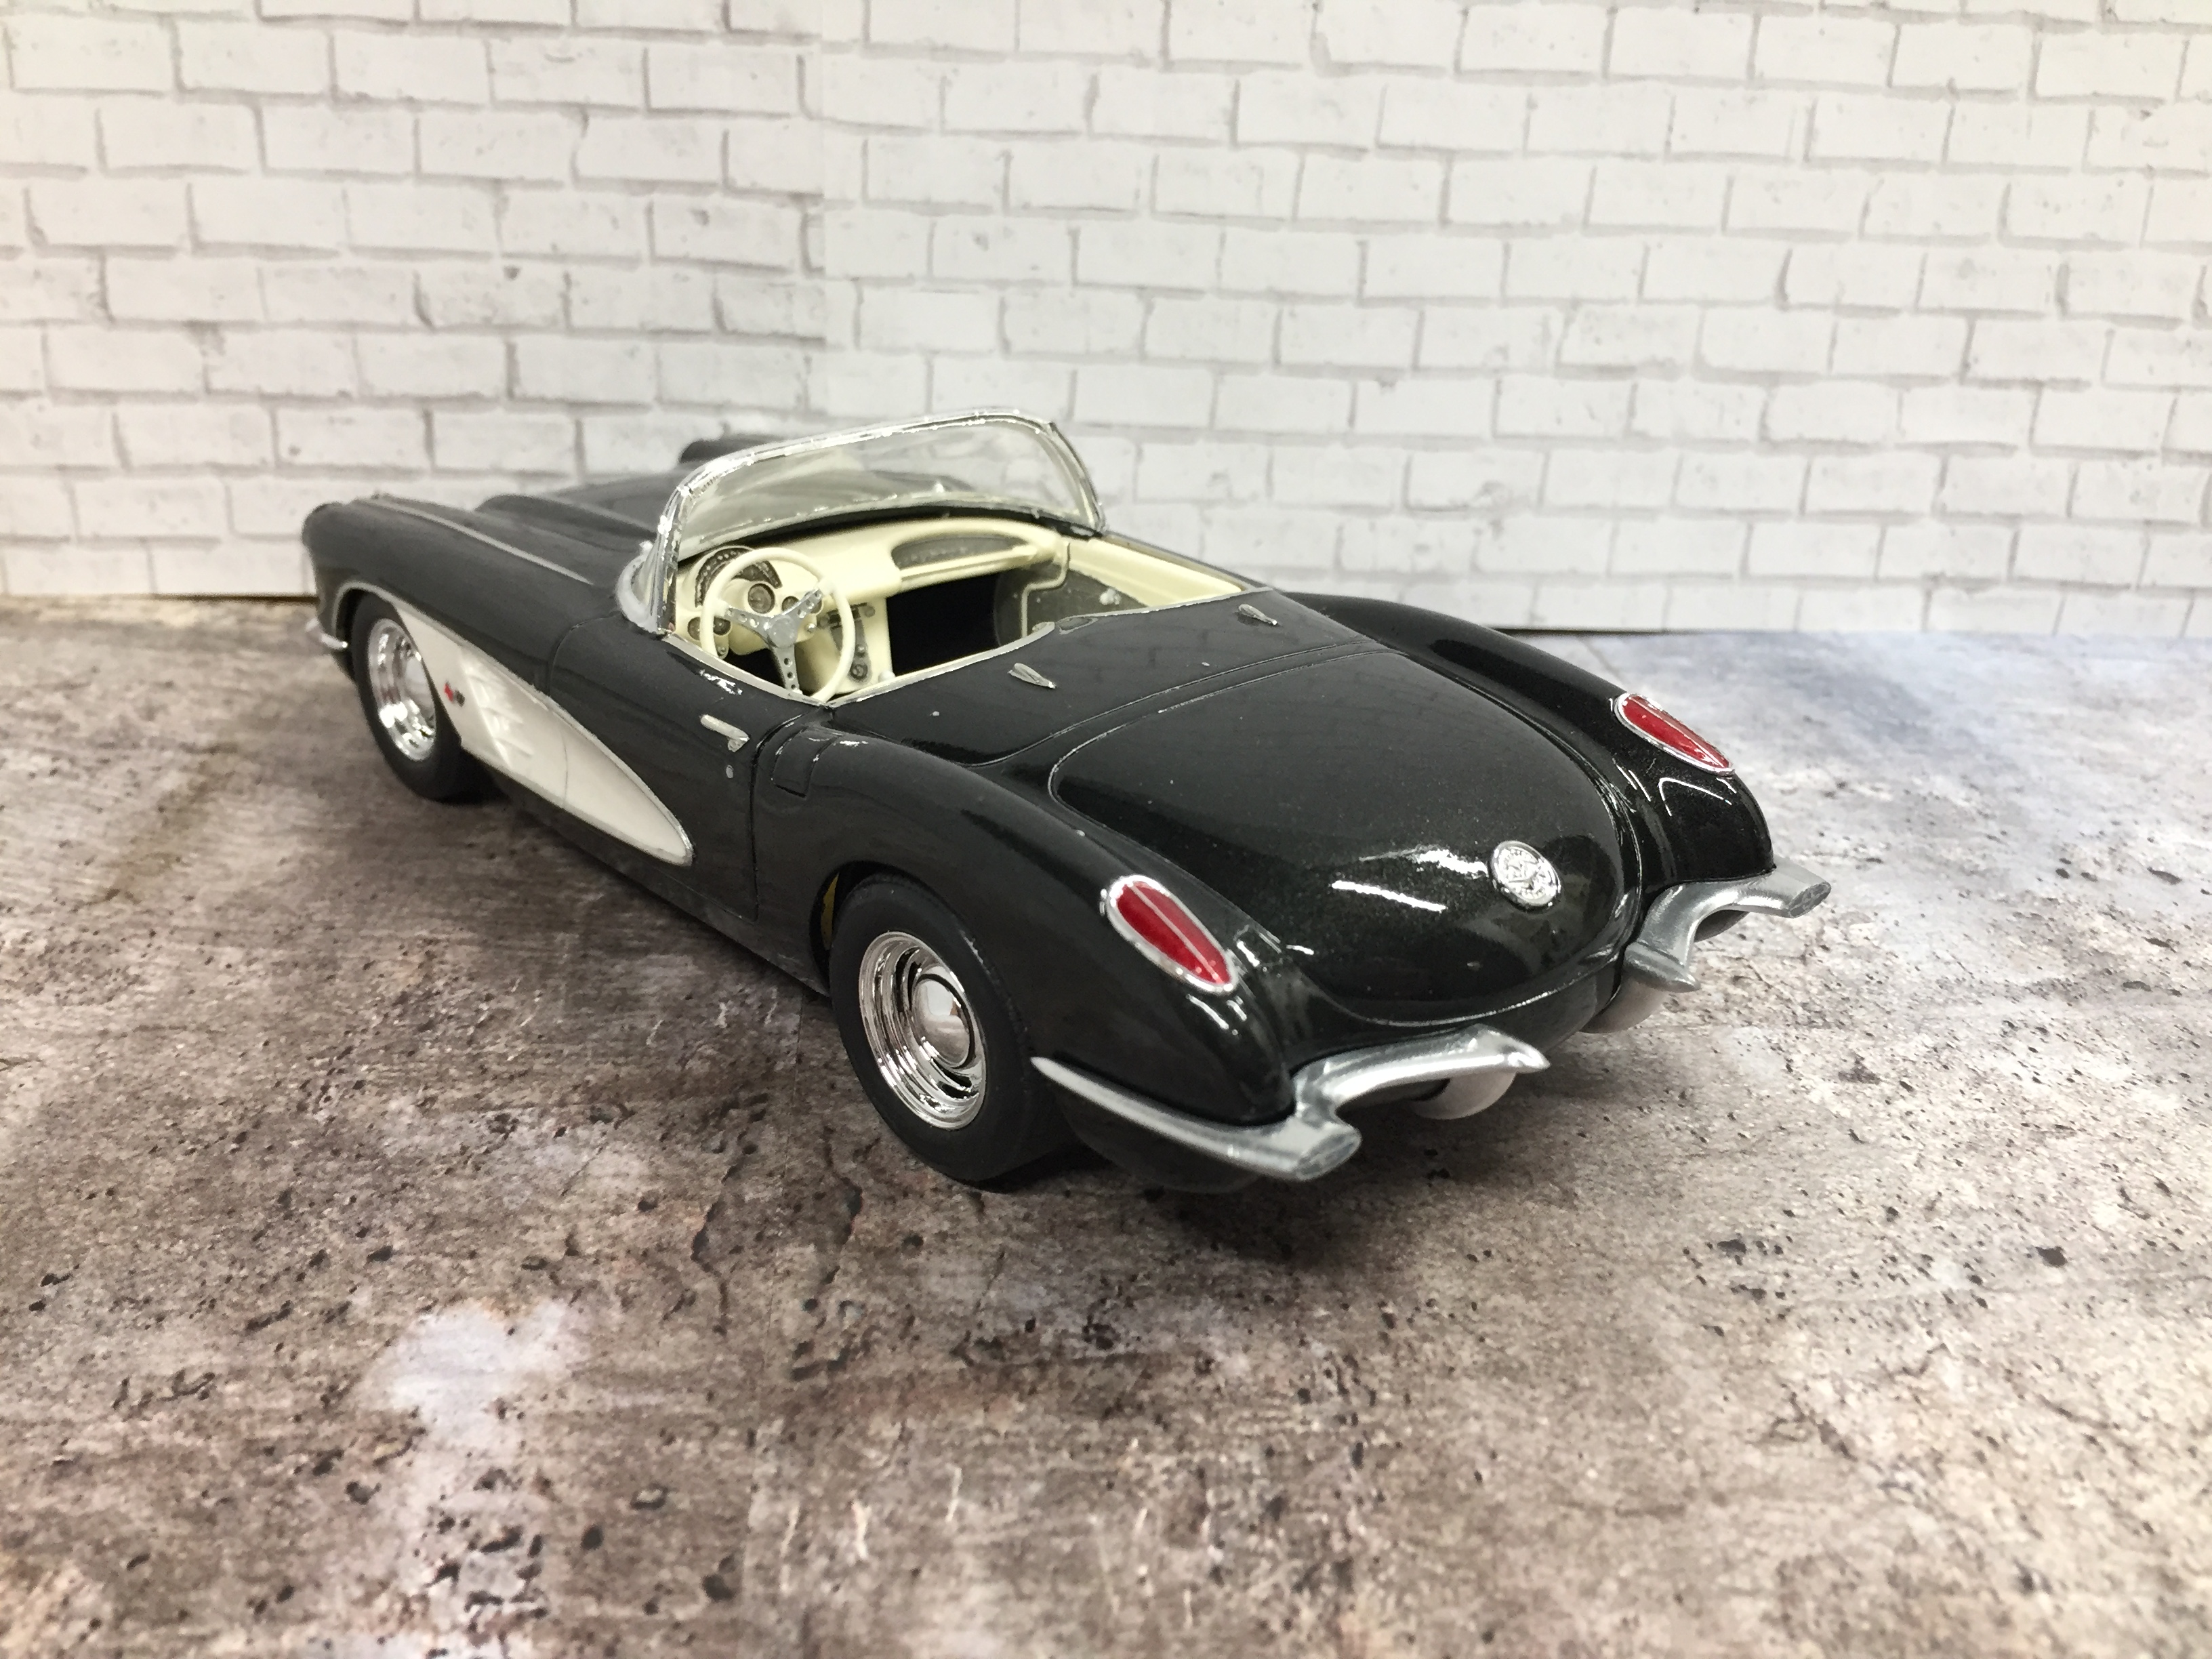
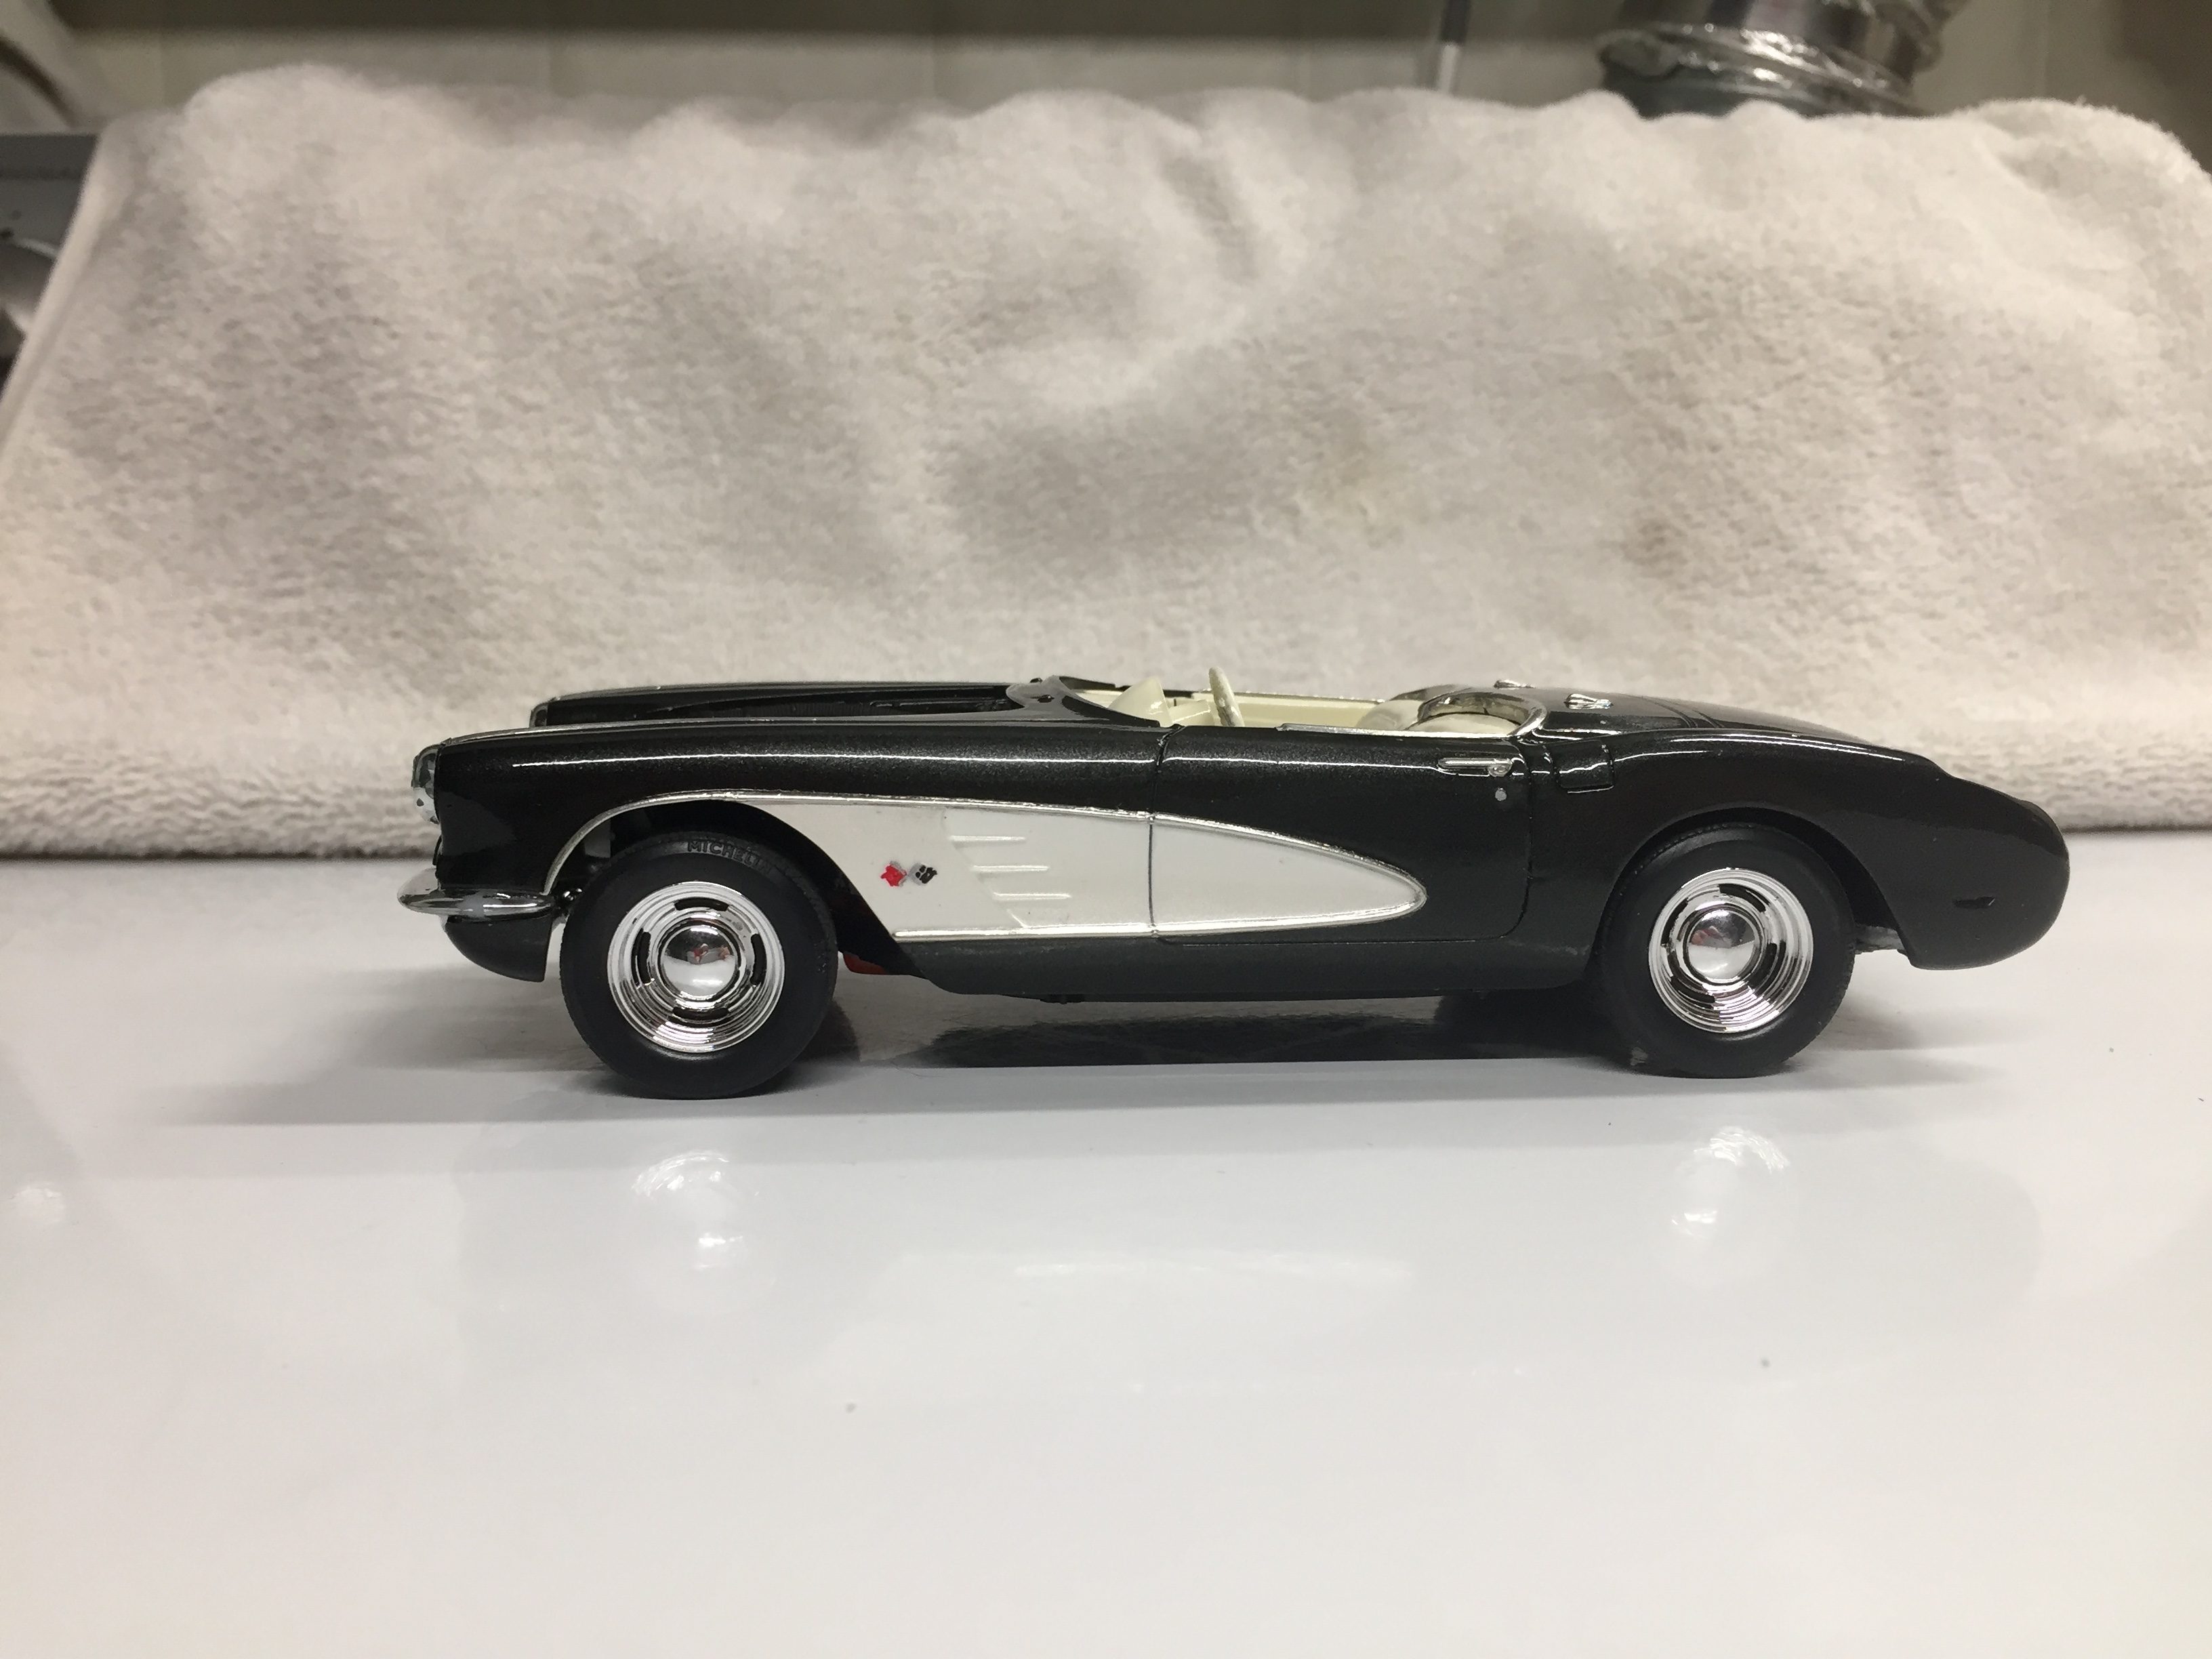
Well I finally finished these three. I don't know what I'll tackle next, but it won't be a Corvette!

-
This one is done also.
-
I am calling this one done. Sometimes it's hard to describe the effort one must go through to mount a simple windshield without the use of expletives, but let me say it challenged me greatly! Very little definition of any mounting surfaces or keys! Anyways, here it is, I am putting it on the shelf and never touching it again!
-
I am not really up on my engines, but I will take a wild stab. A forklift of some type?
-
Right now I am just folding up the box tops and pressing them flat to save space. I could likely chuck them, but I know myself, and I know I would wish I didn't sometime in the future!
-

Rear Tail light conversion
NOBLNG replied to Snoopy47's topic in Model Building Questions and Answers
Any old busted chunk of 1:1 tail light lens plastic could be shaped and sanded to size for the tail lights also... or a red taillight repair kit from Napa?? Any other sources for thin transparent red plastic? -
Very nice! Do the doors and trunk open? If not, your panel lines are really well done!
-
I have never experienced this...but I will check all my cans. I can see why that would cause it to stop working, but causing a leak?? Maybe it's good idea to shake all the cans once or twice a year?
-
Fabulous work on that engine and interior! Love it!
-
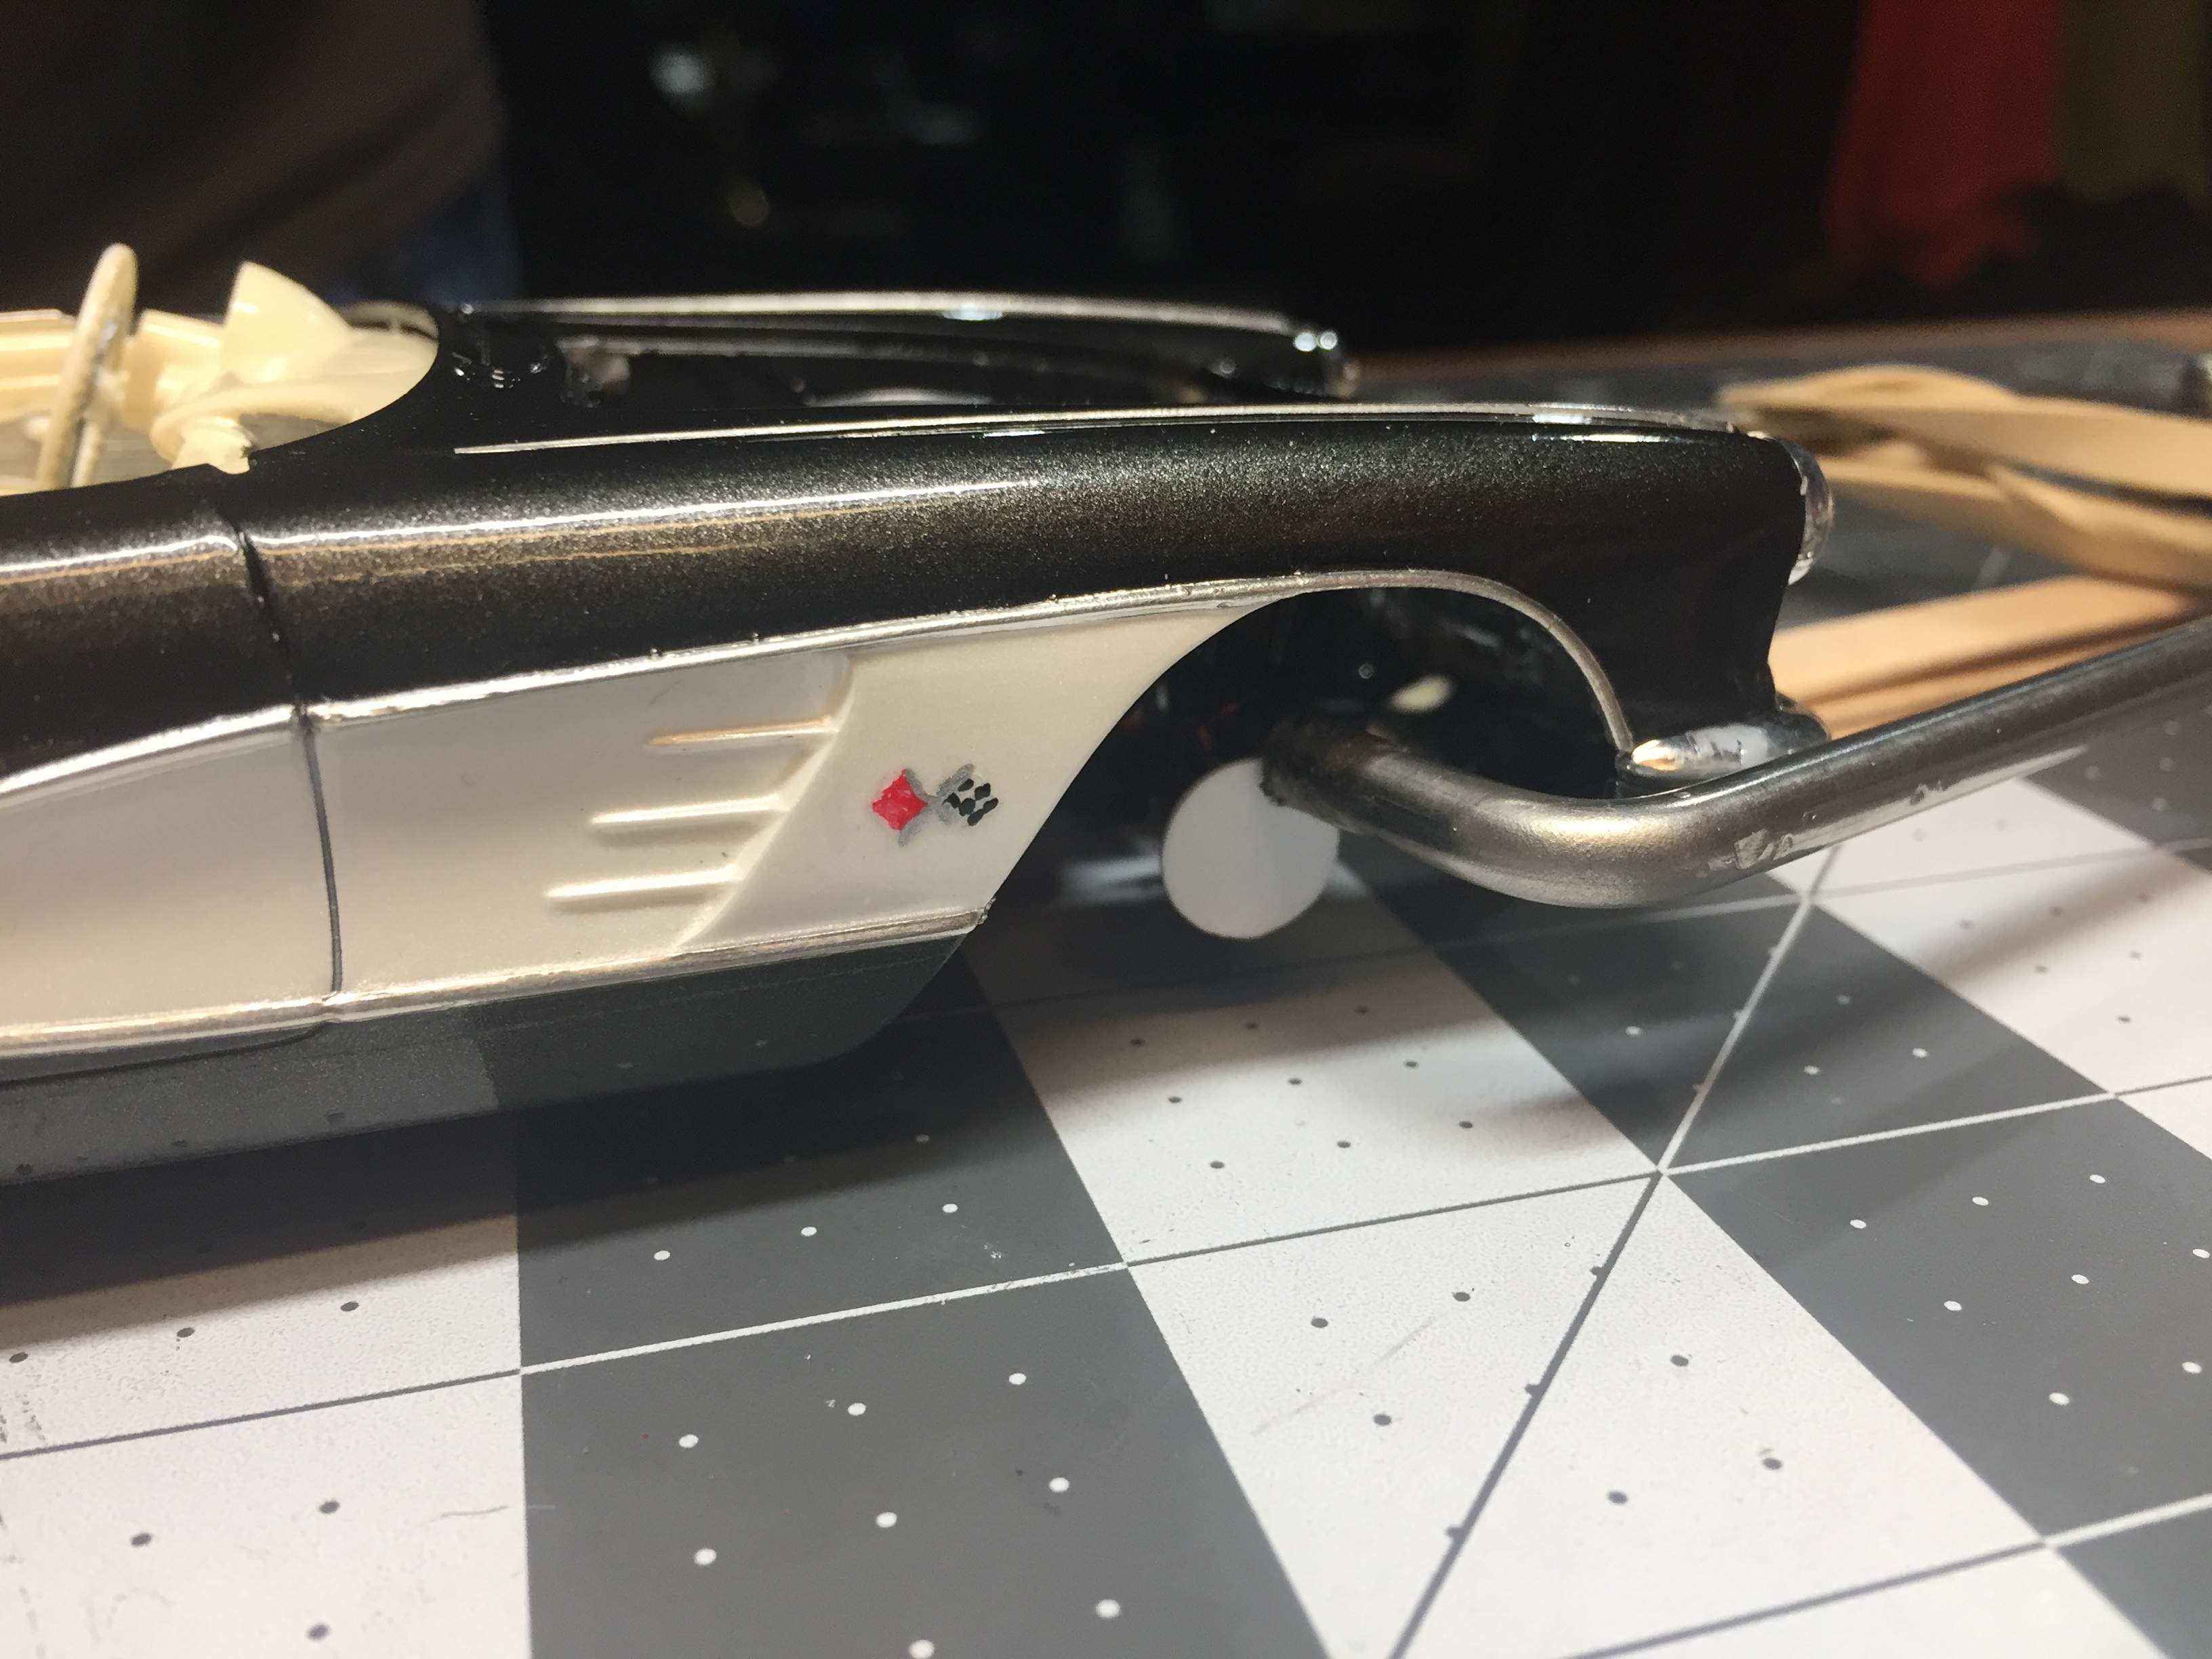
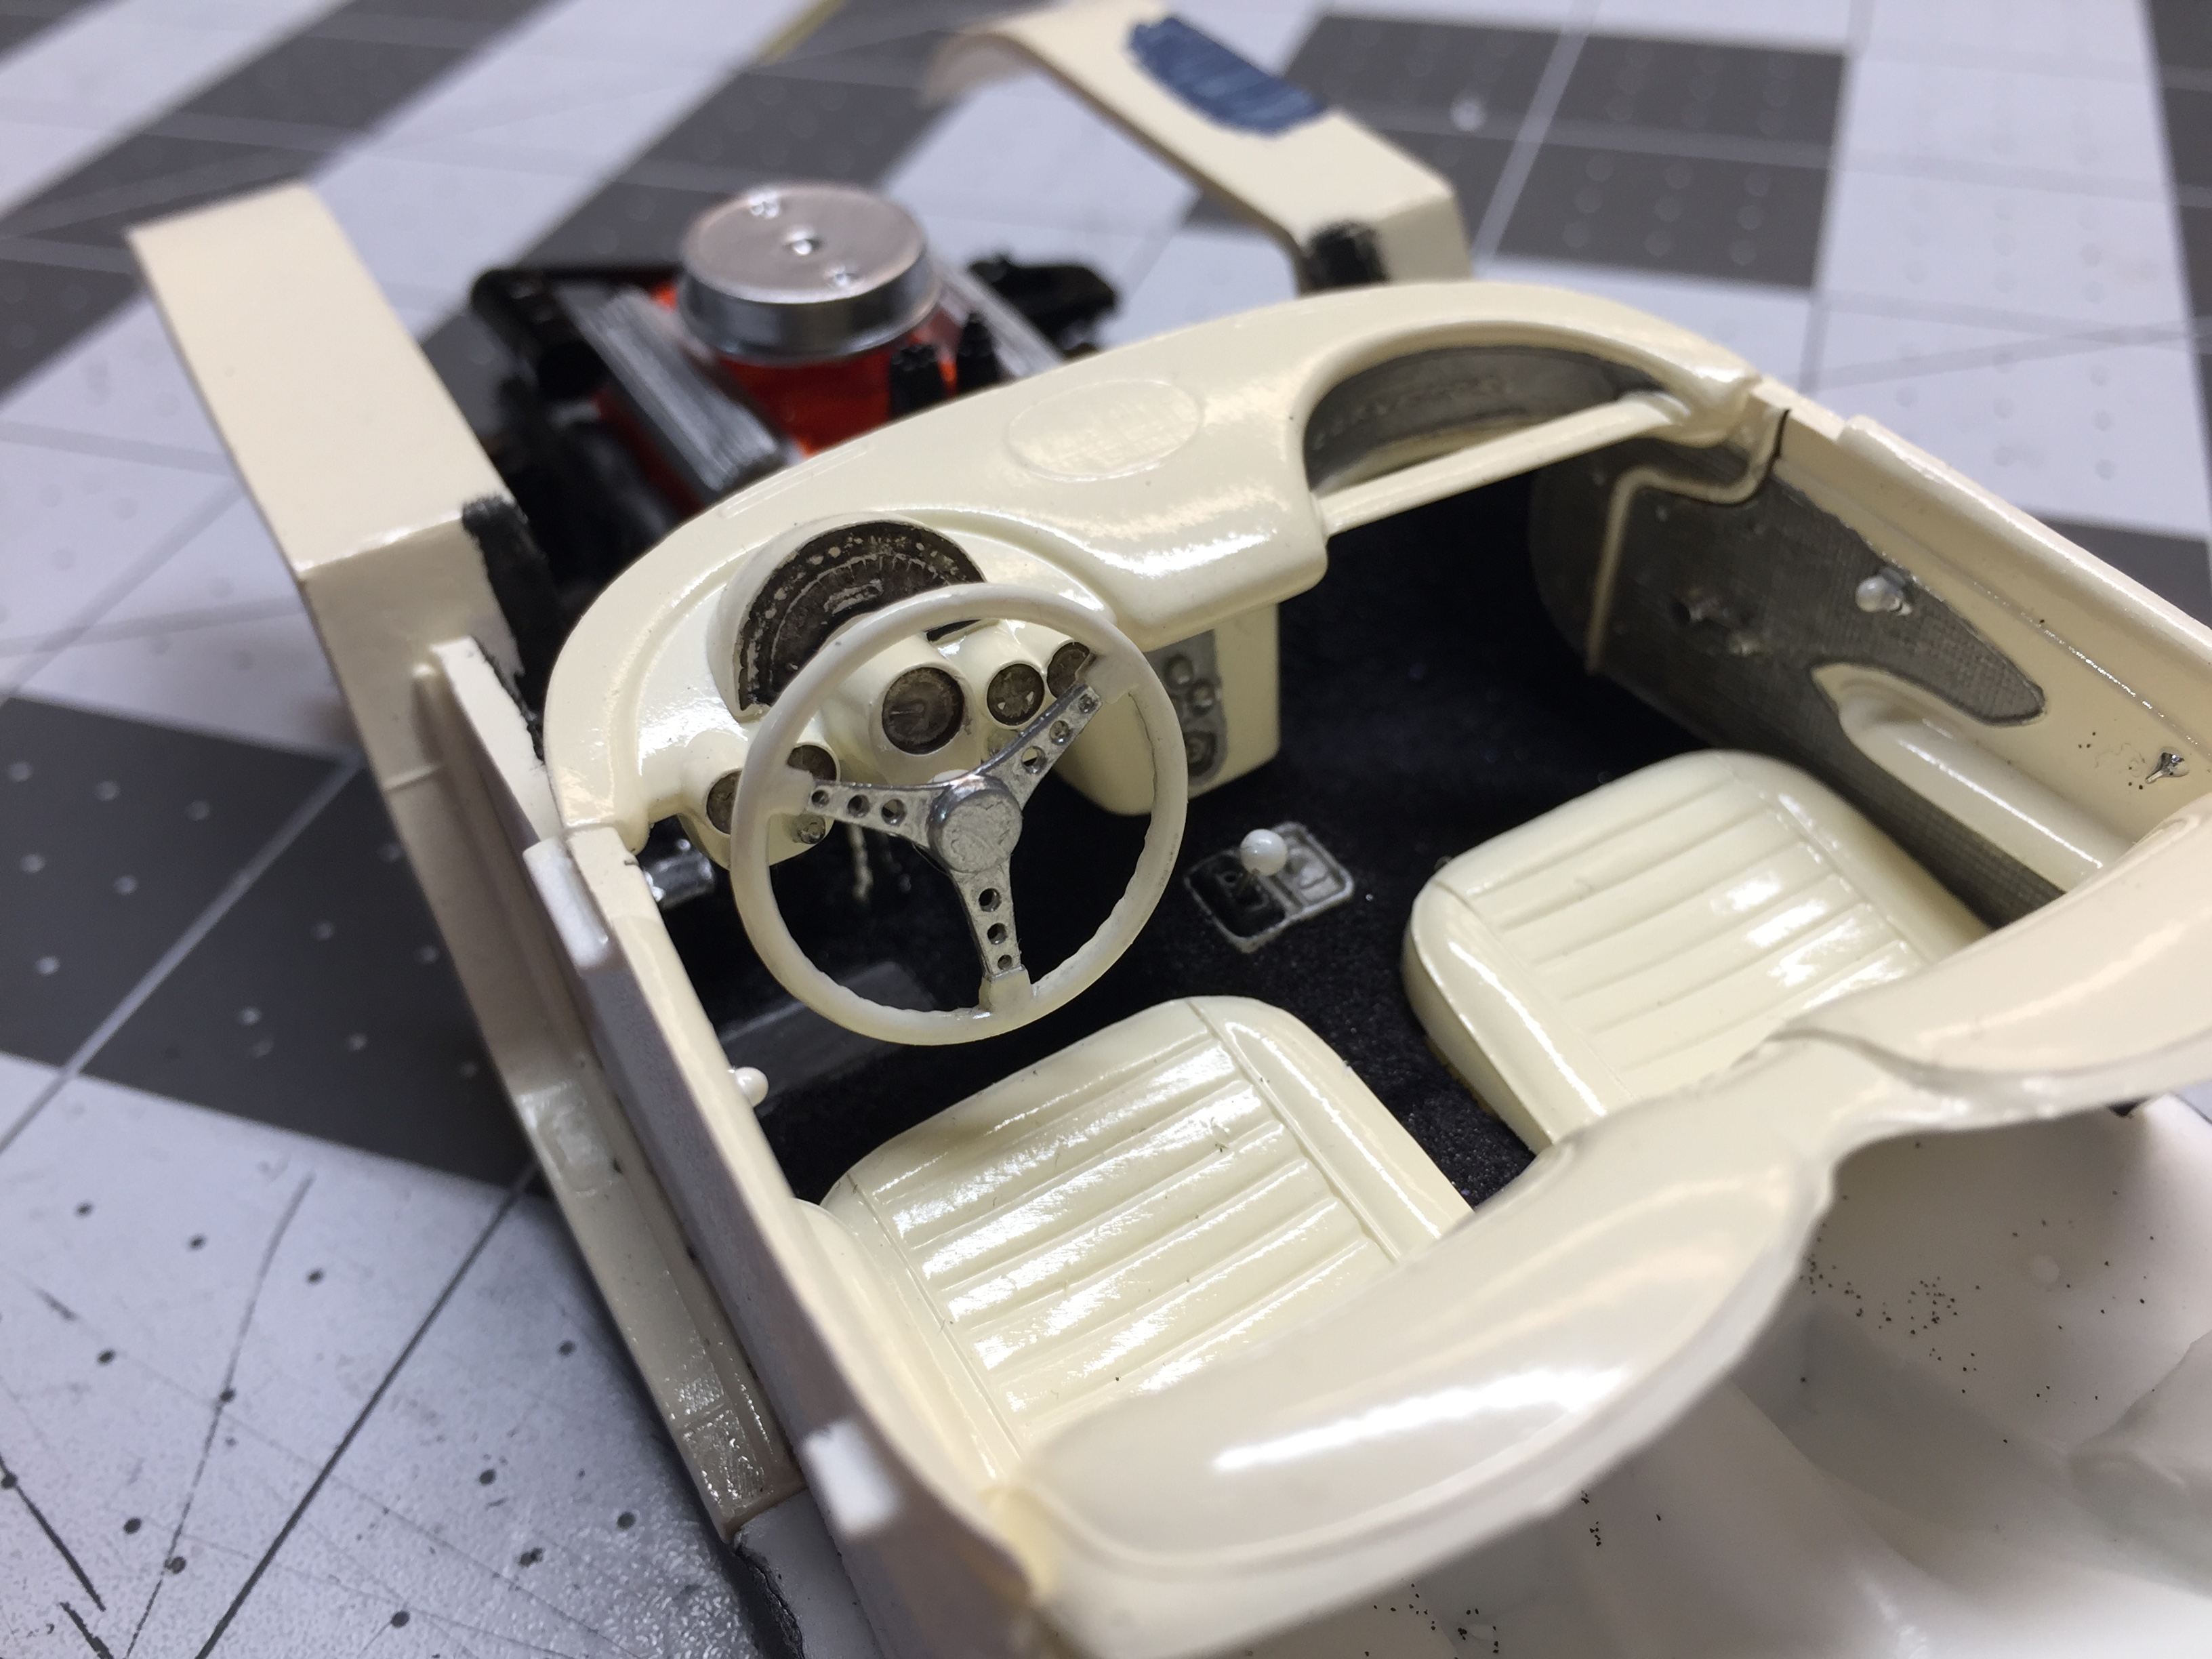
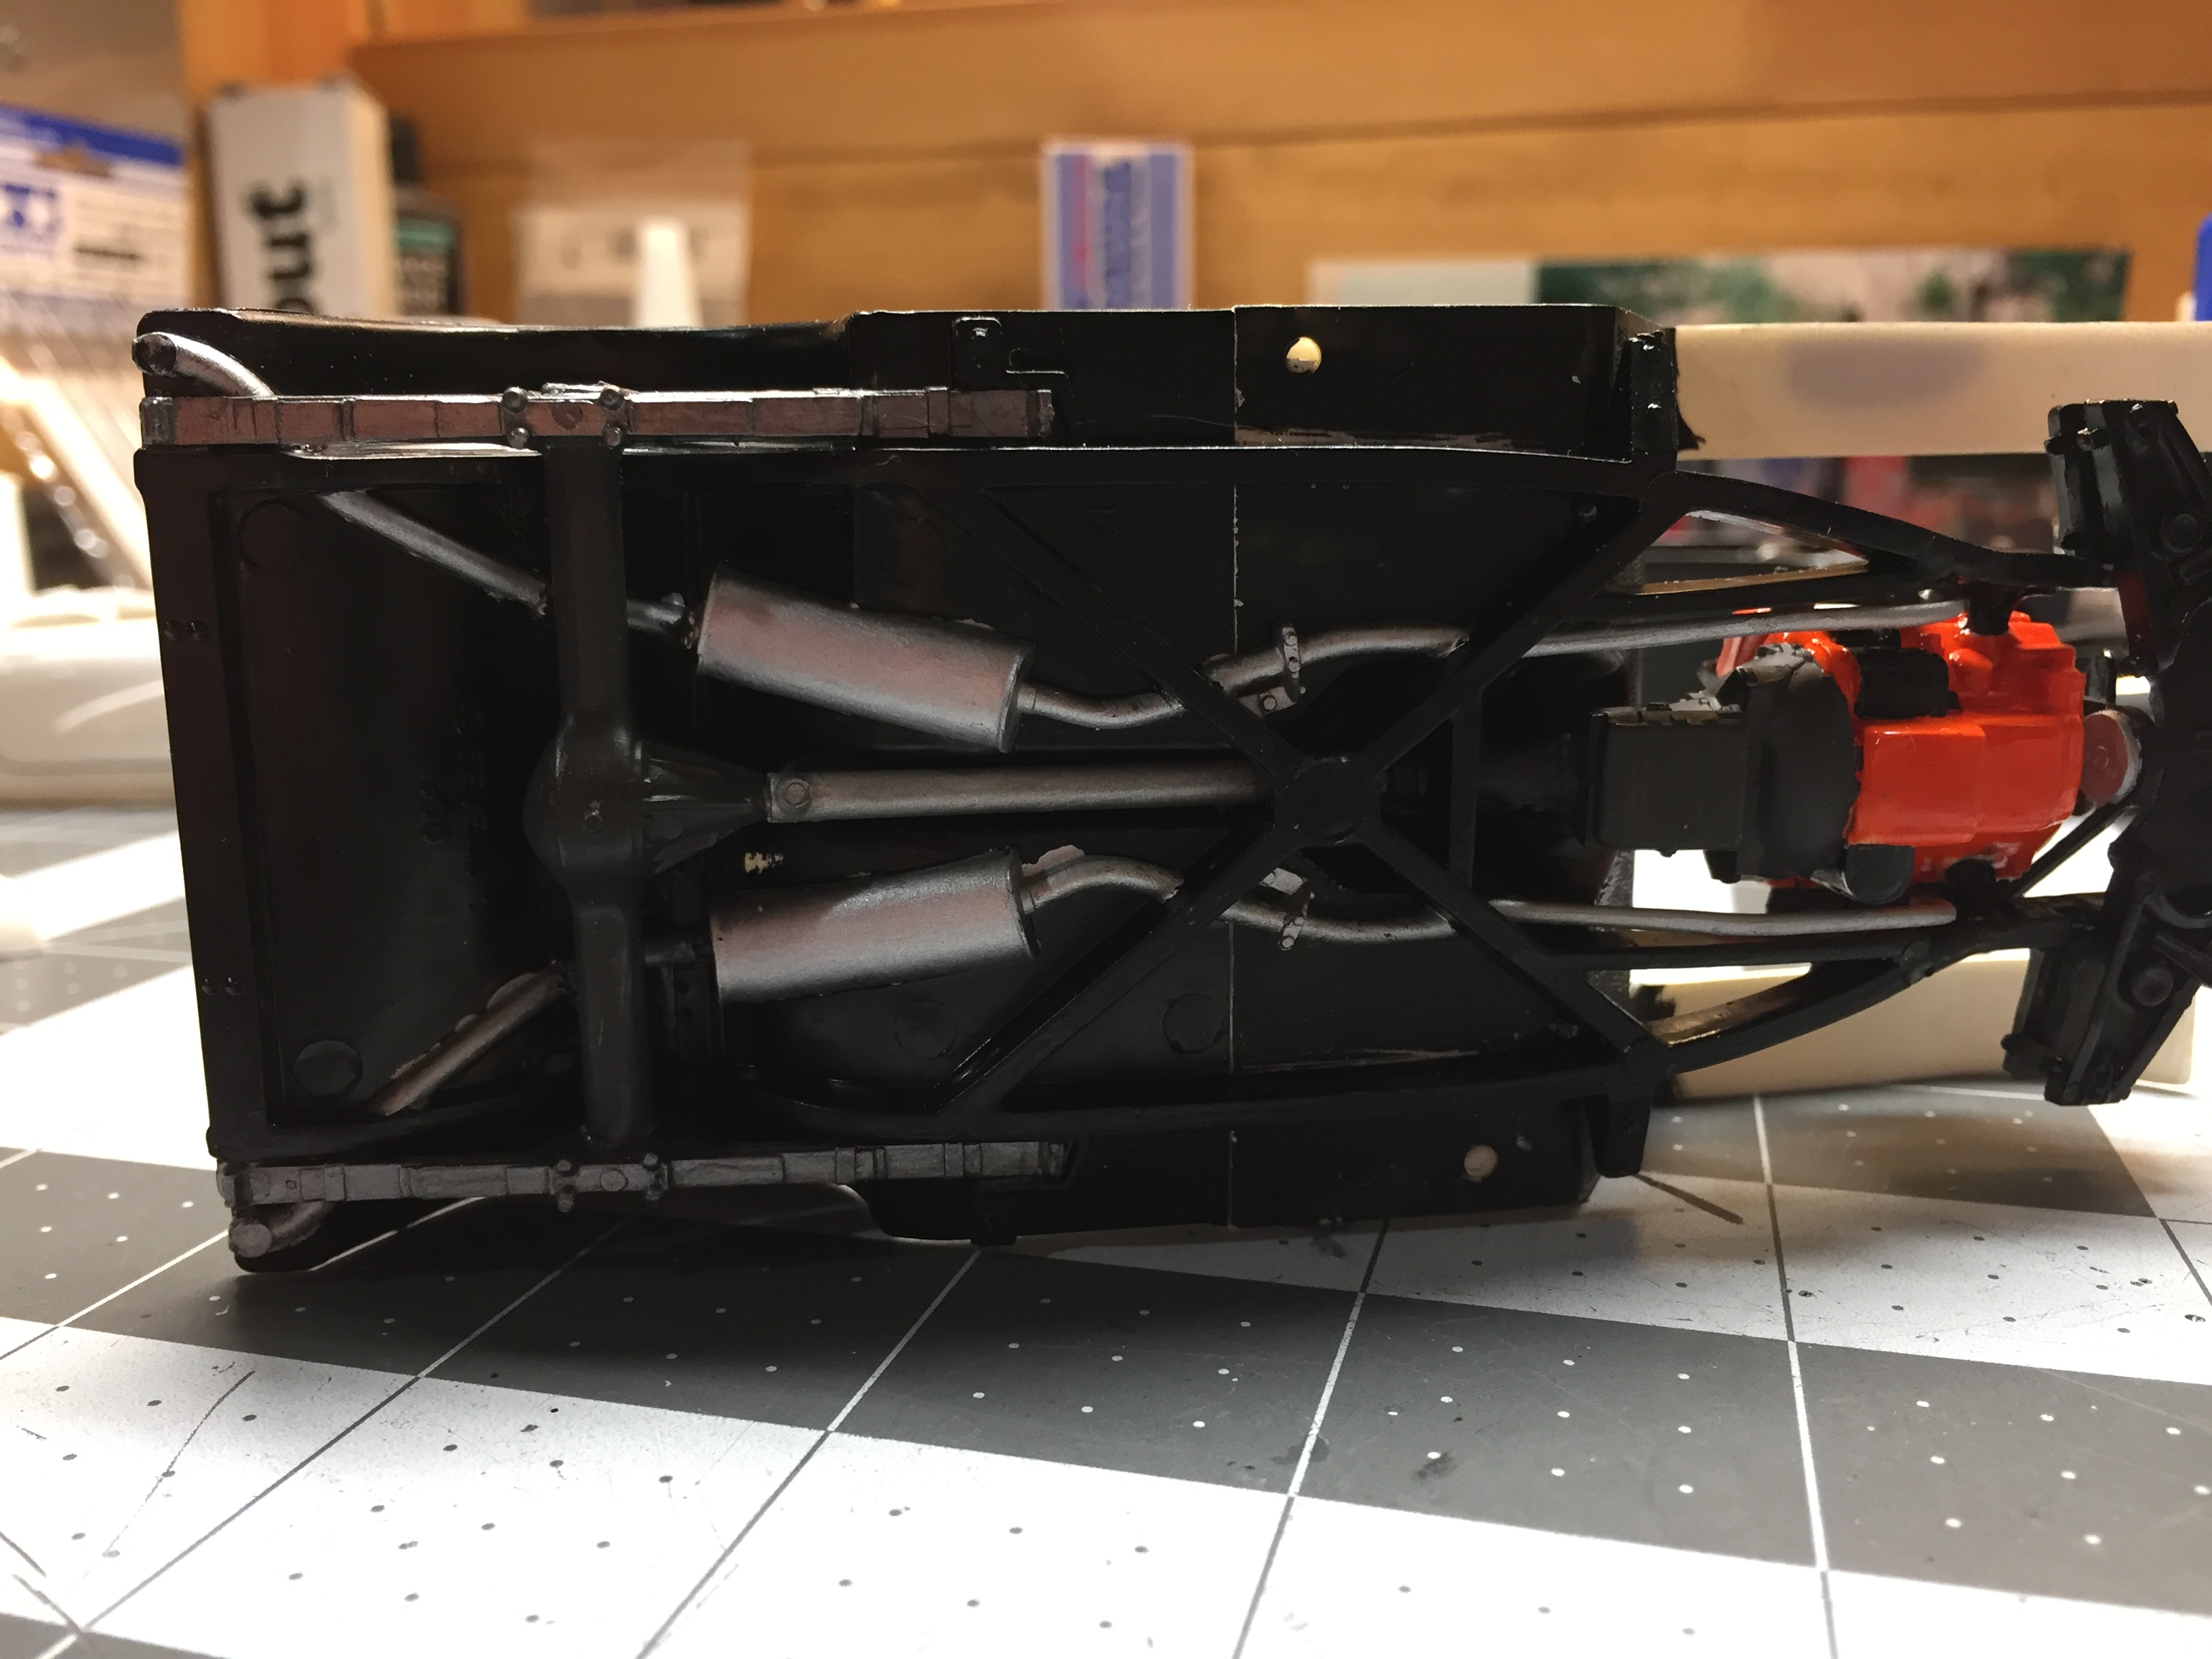
This kit comes with solid styrene rod that slides through the front A-frames and under the oil pan to connect the front wheels. This leaves the front of the car way too high I think! The front track width leaves the tires beneath the fenders also. To fix this, I trimmed the nub on the back of the wheels flush to bring the wheels inboard slightly. I ditched the solid axle and glued two .030 discs to the ends of the A-frames after filing them as plumb as possible. I then set the ride height with a stack of popsicle sticks and glued the front wheels to the discs. This also fixes the fact that it only sat on three wheels at a time with the original setup.
-
A local hobby shop was having a sale, so I picked these two up. My first Tamiya kits ever. Up till now I have only built AMT, Revell, Monogram and Polar Lights.
-
Fast forward to nearly done. I have had to strip the rear bumper chrome on this one also due to large sink marks!
-
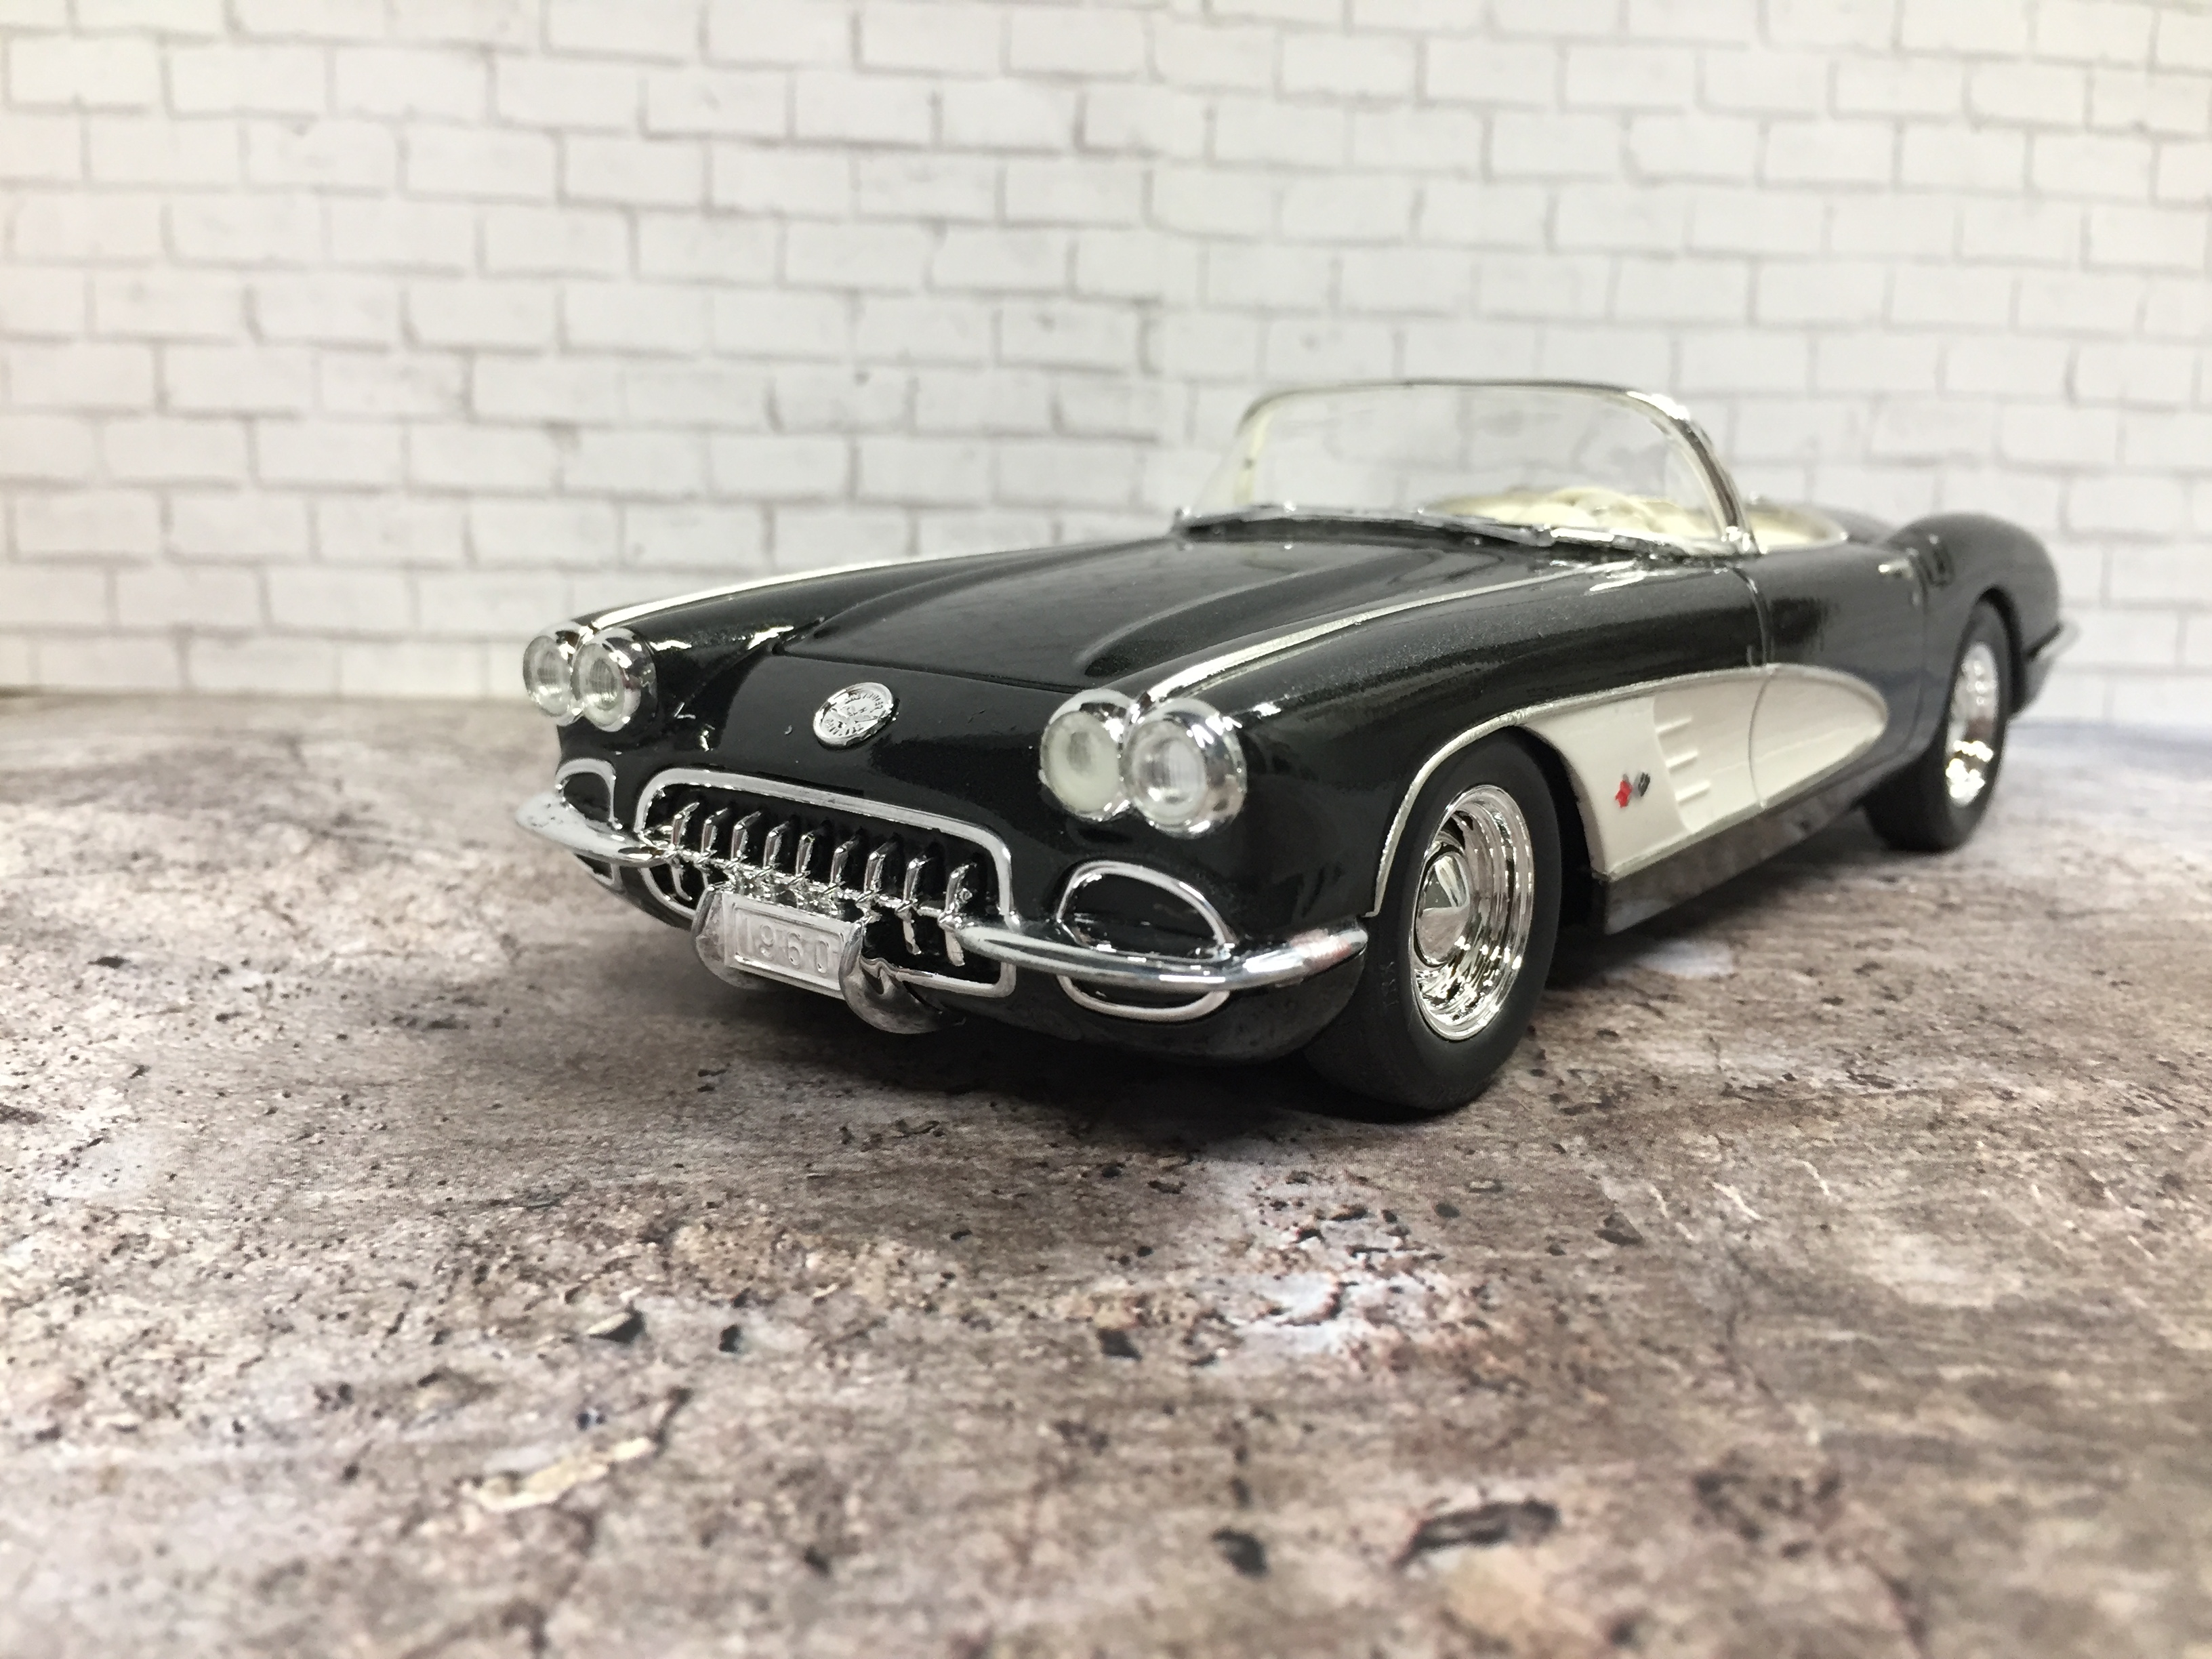
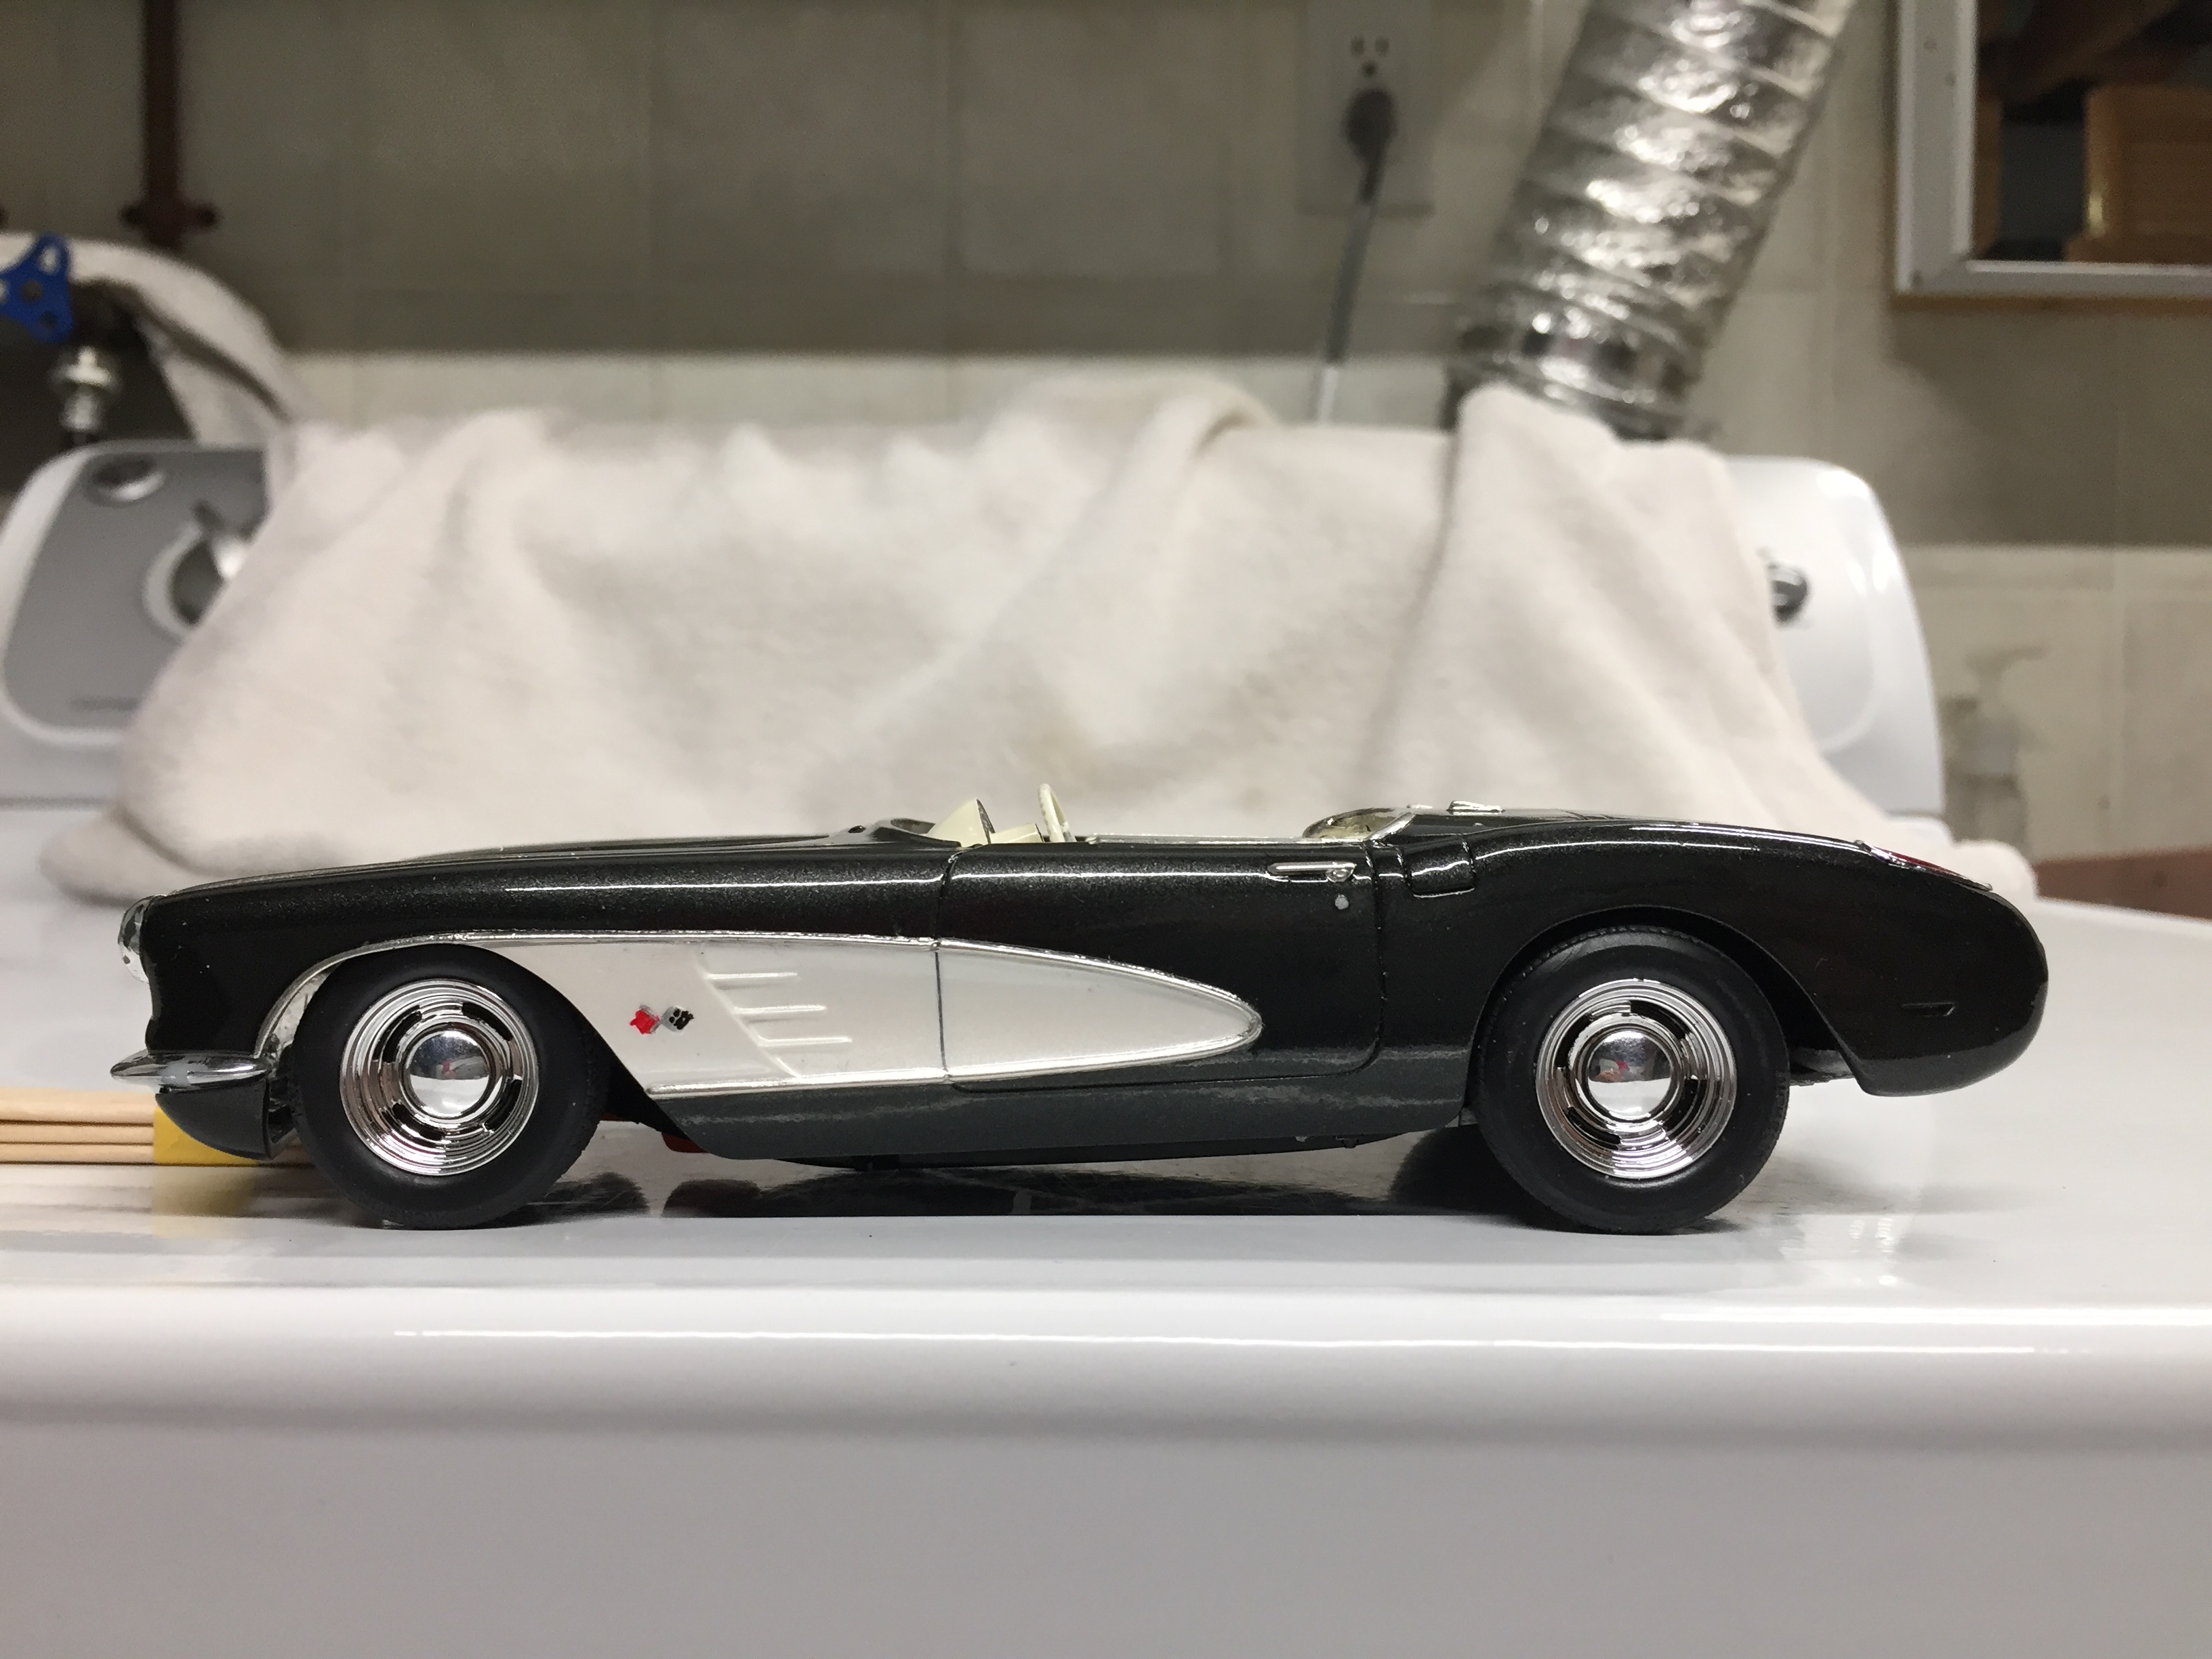
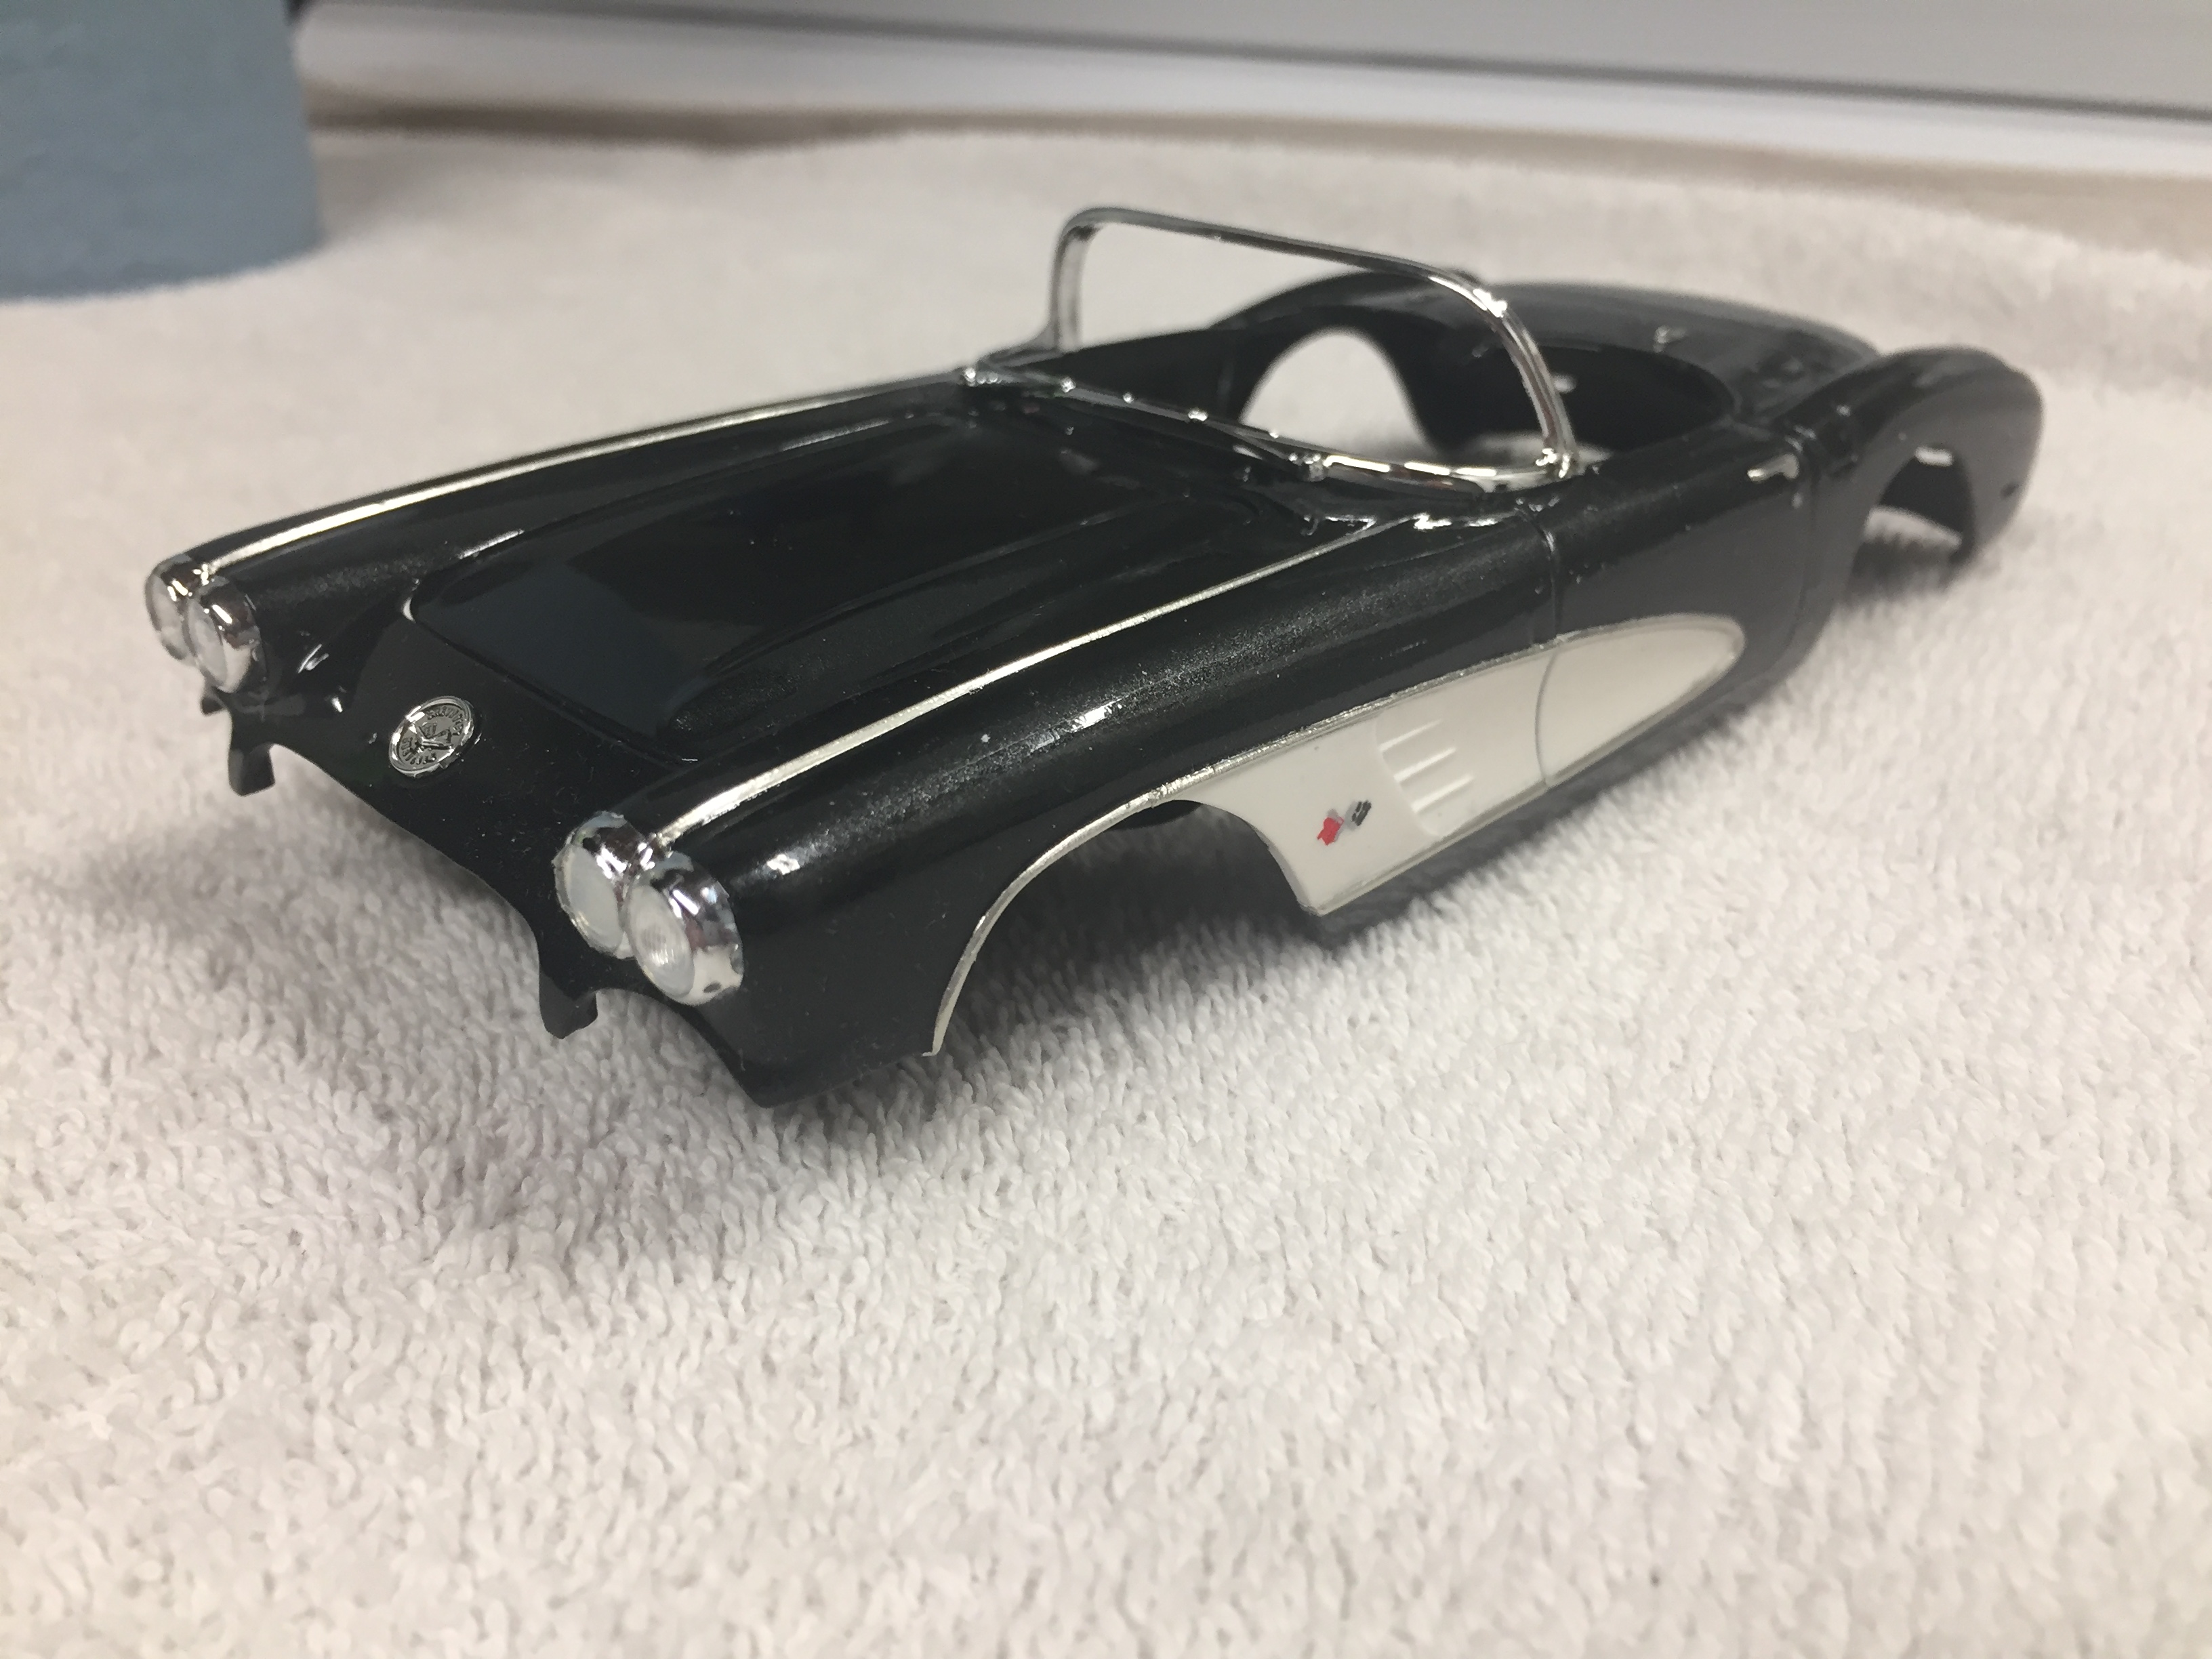
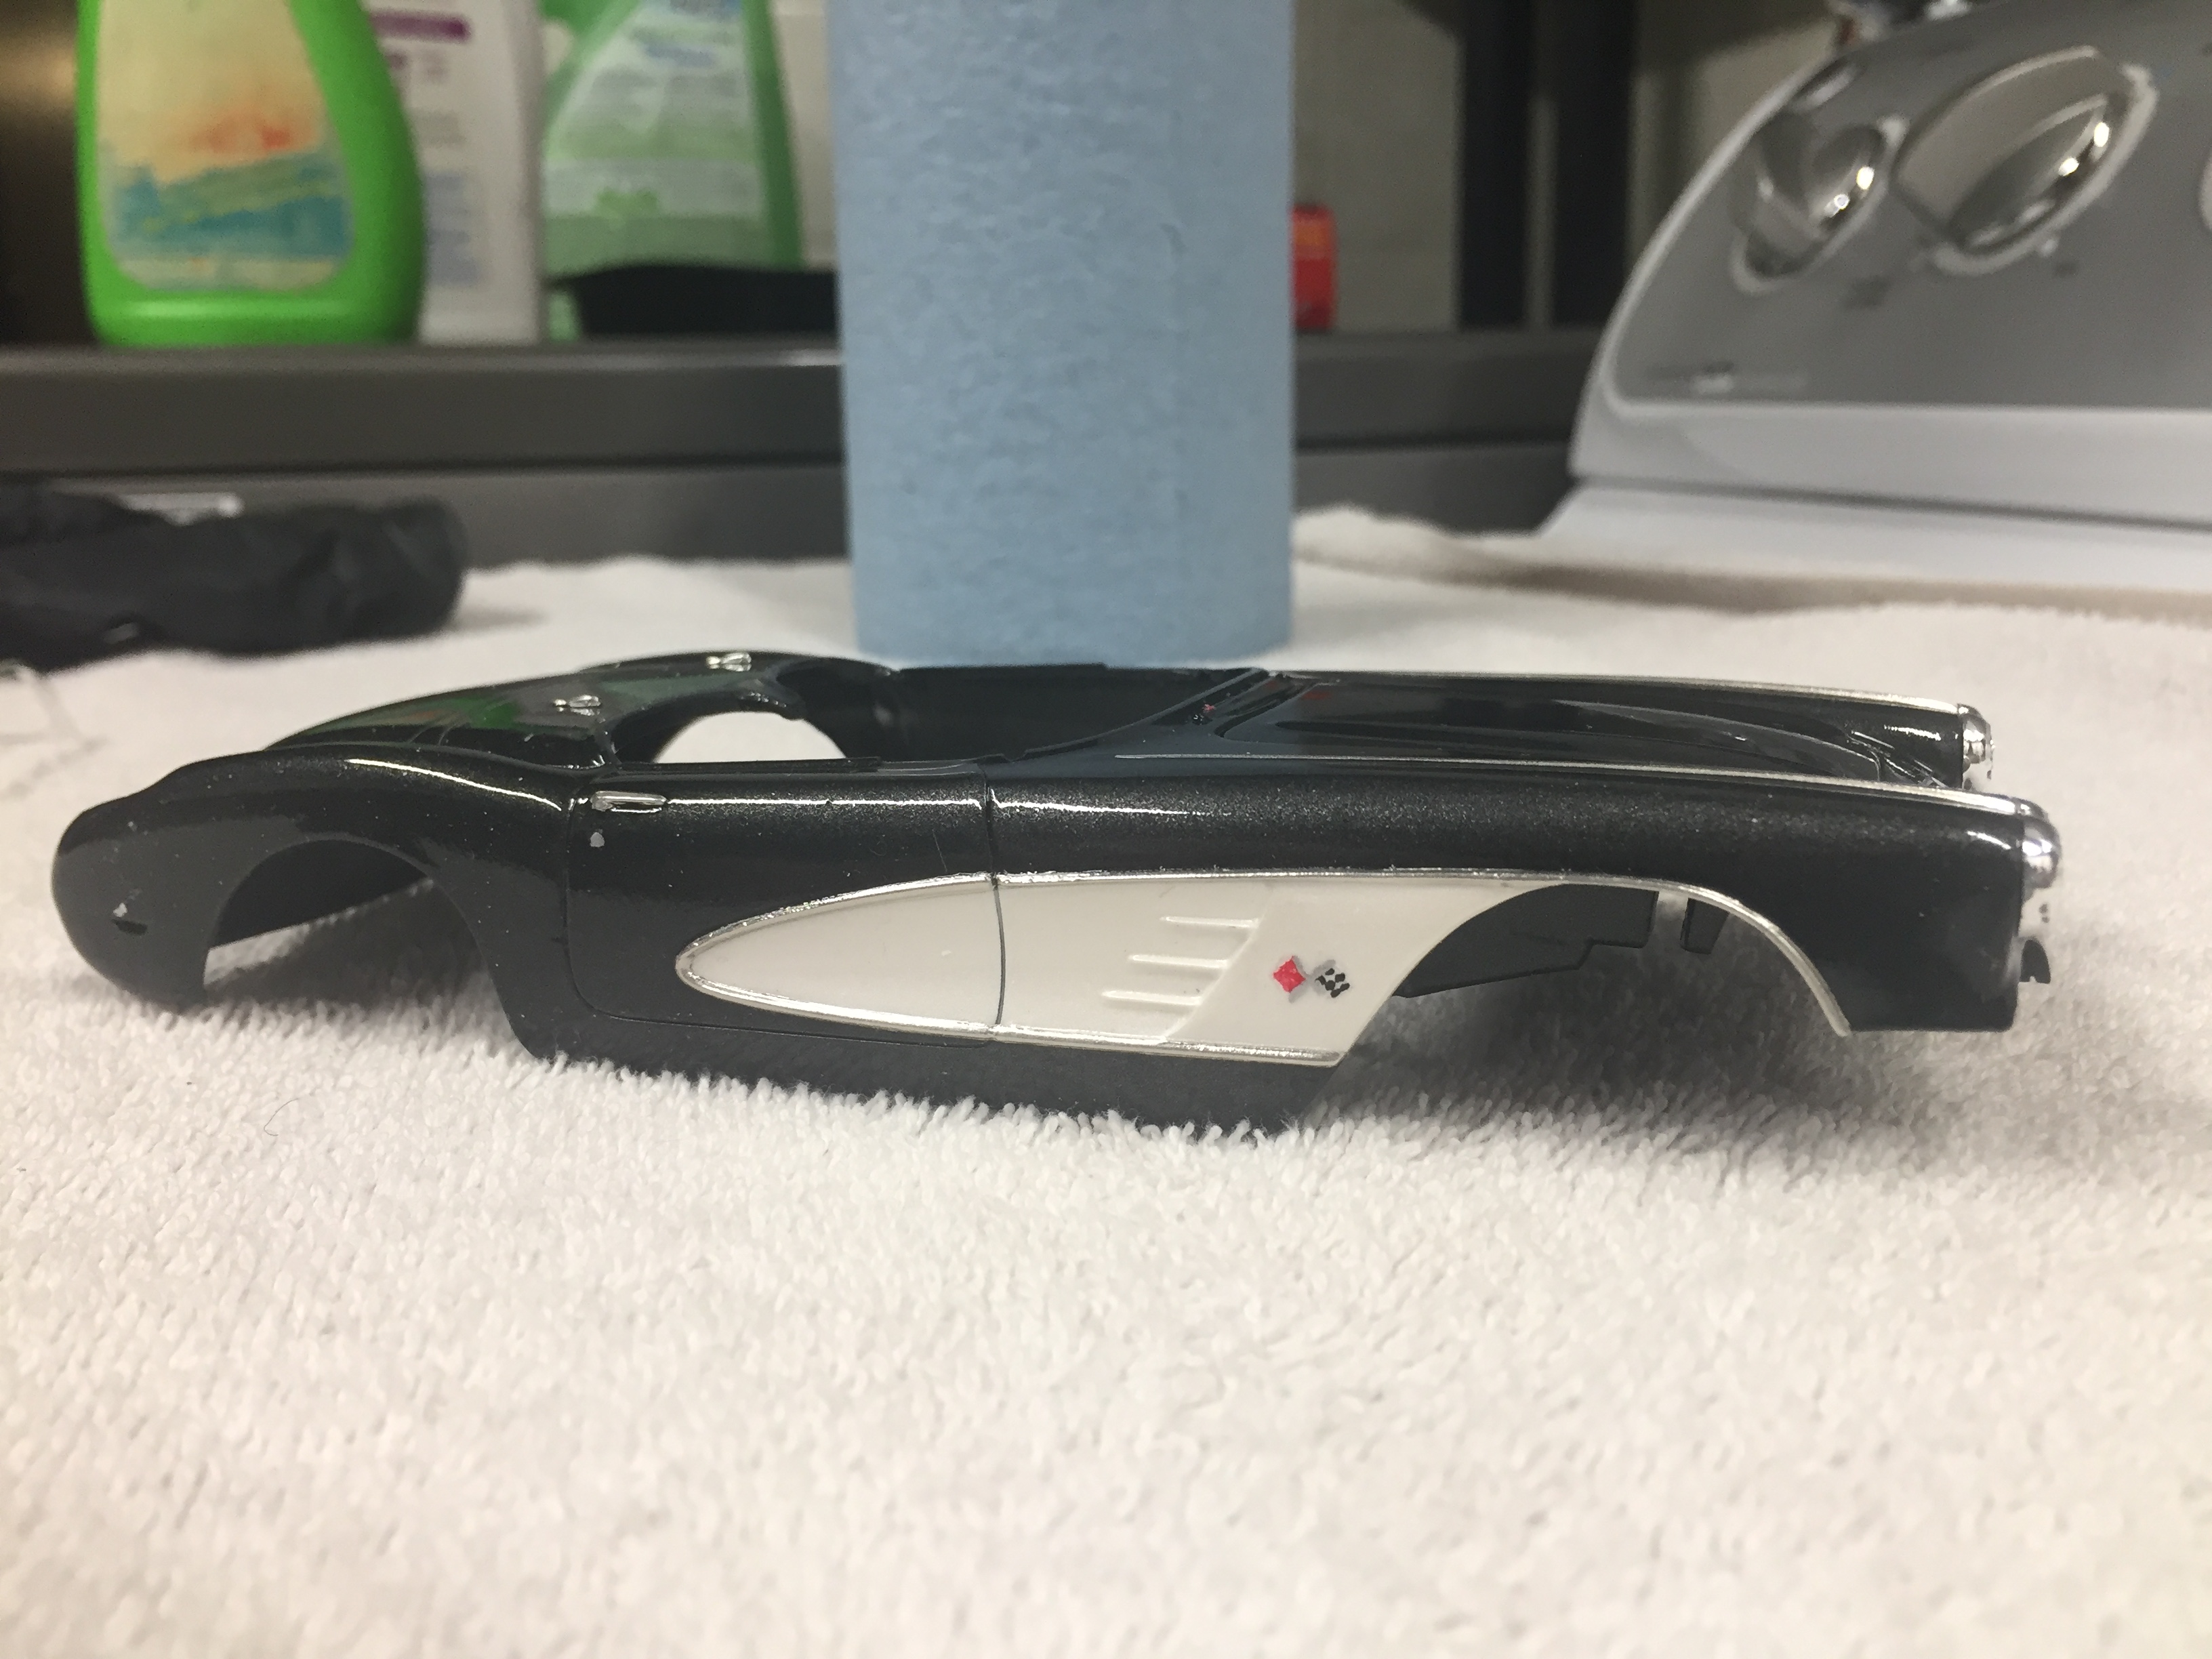
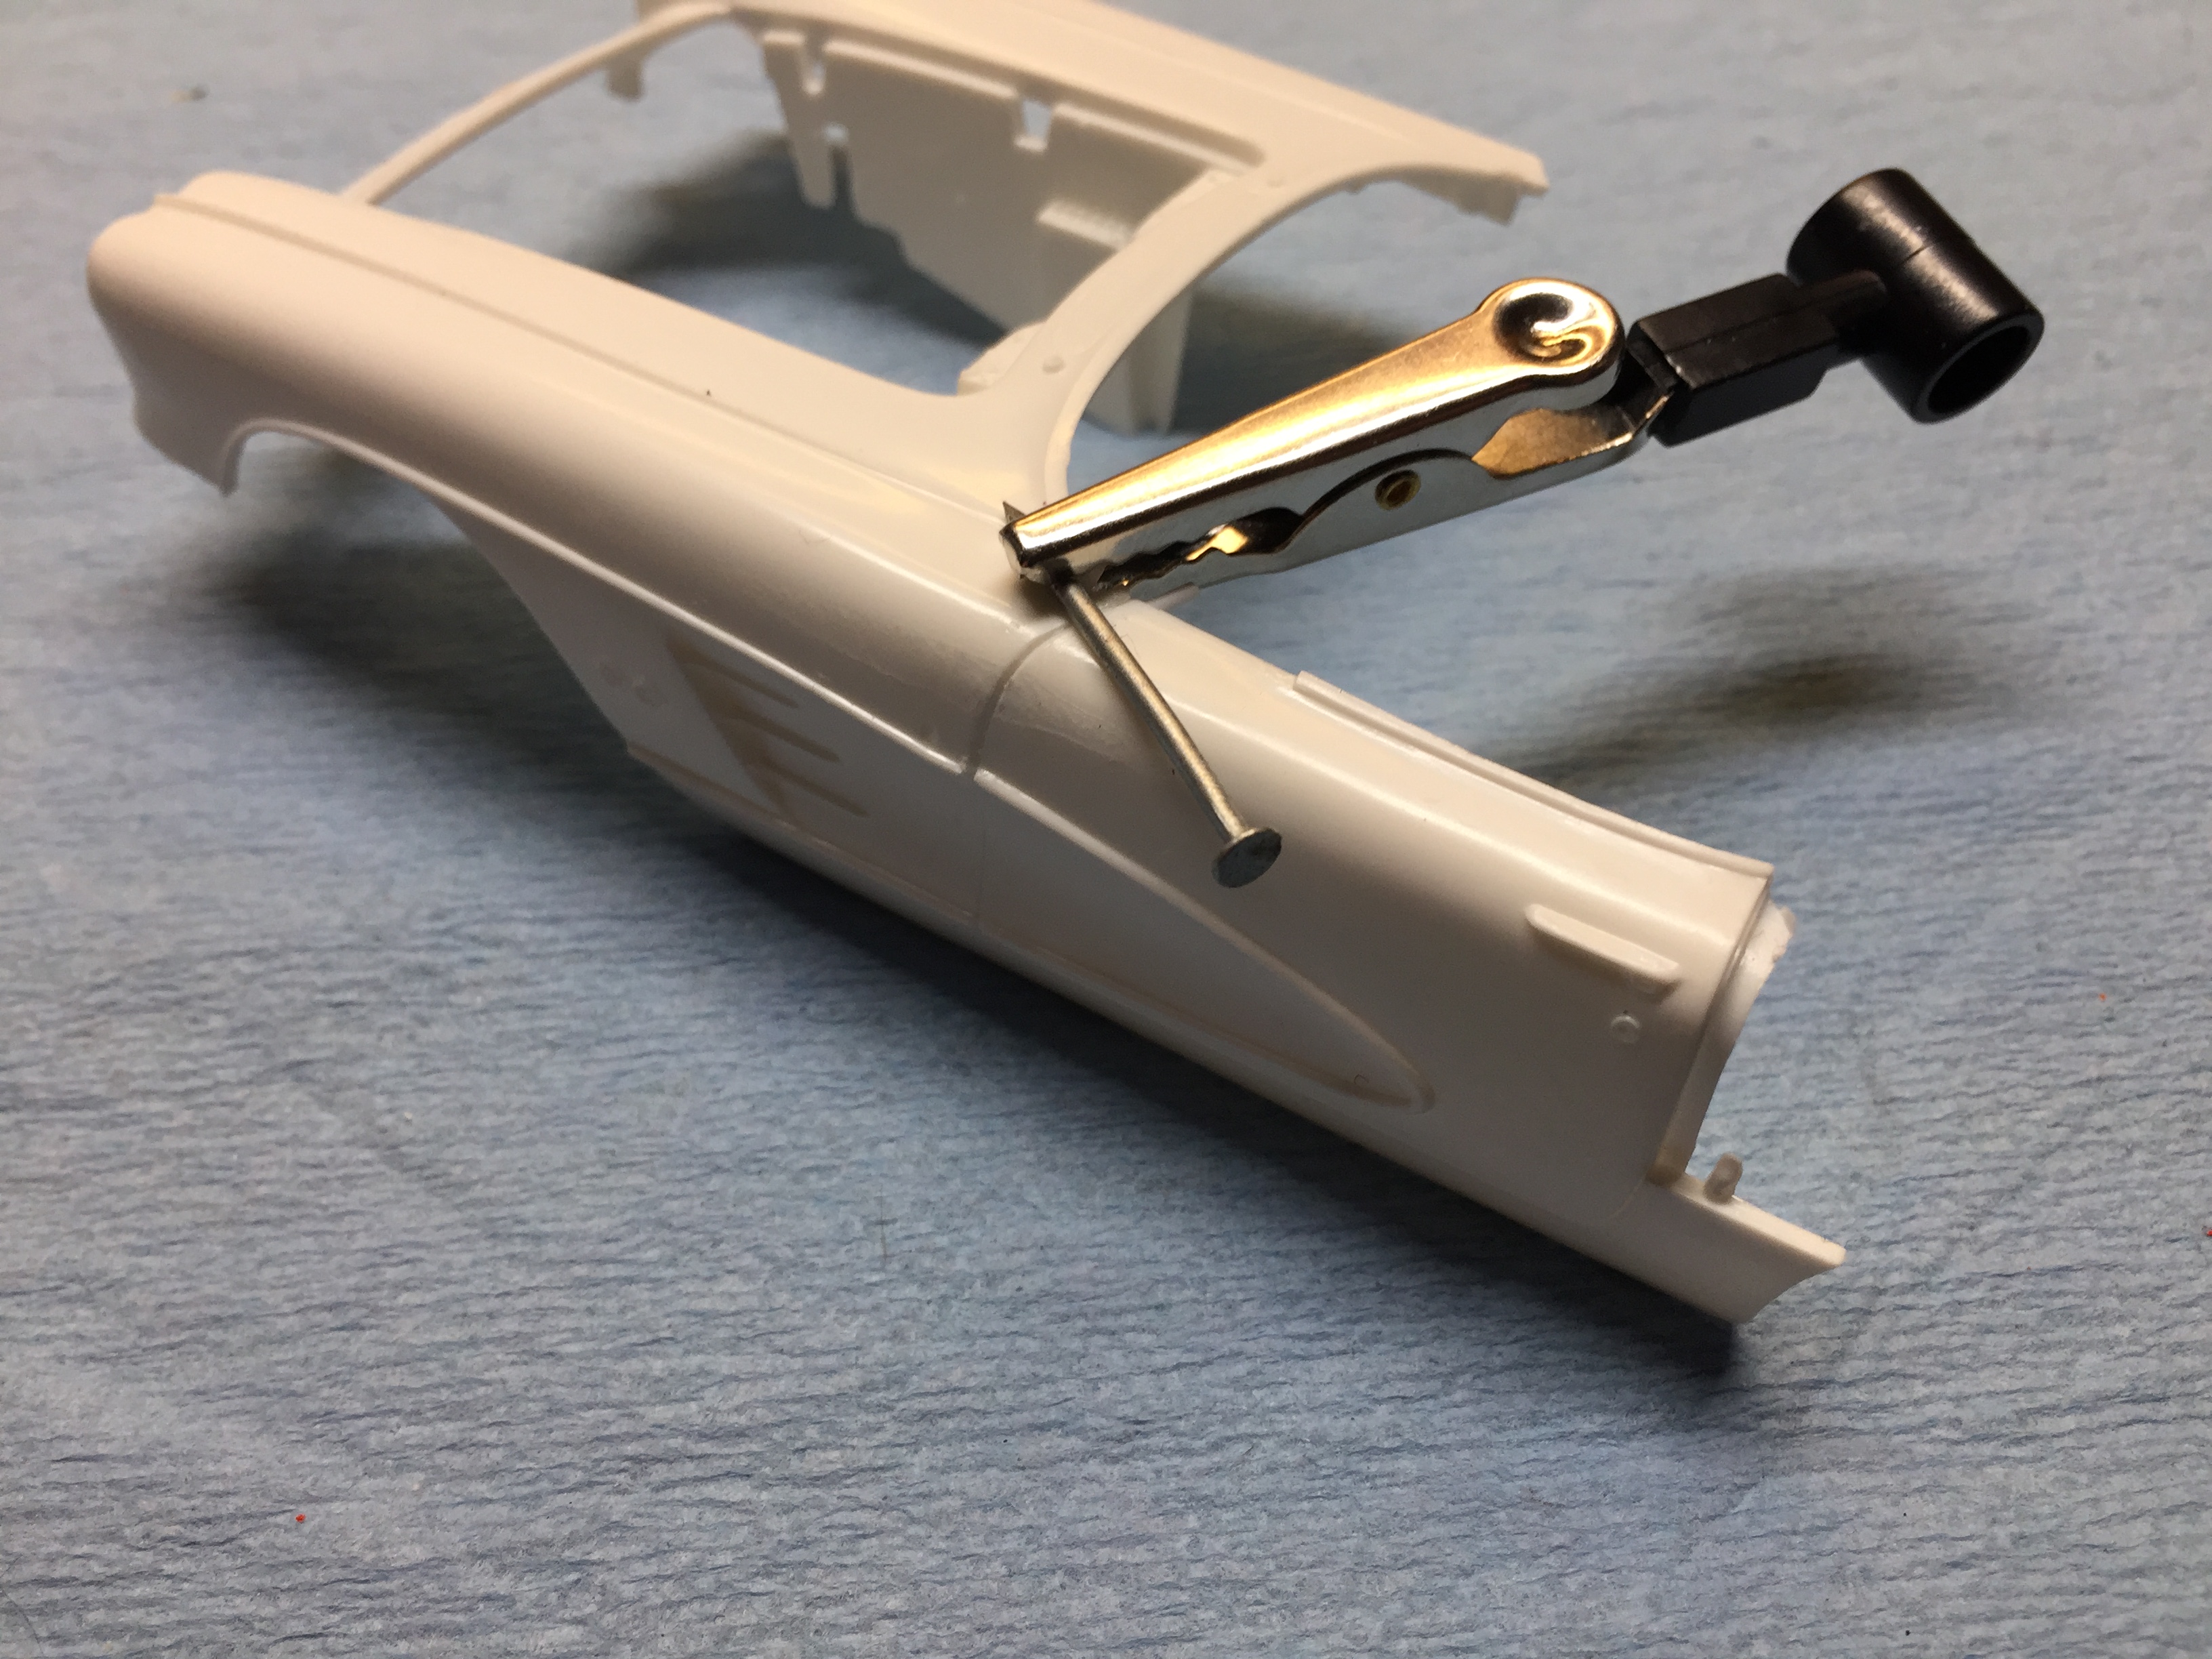
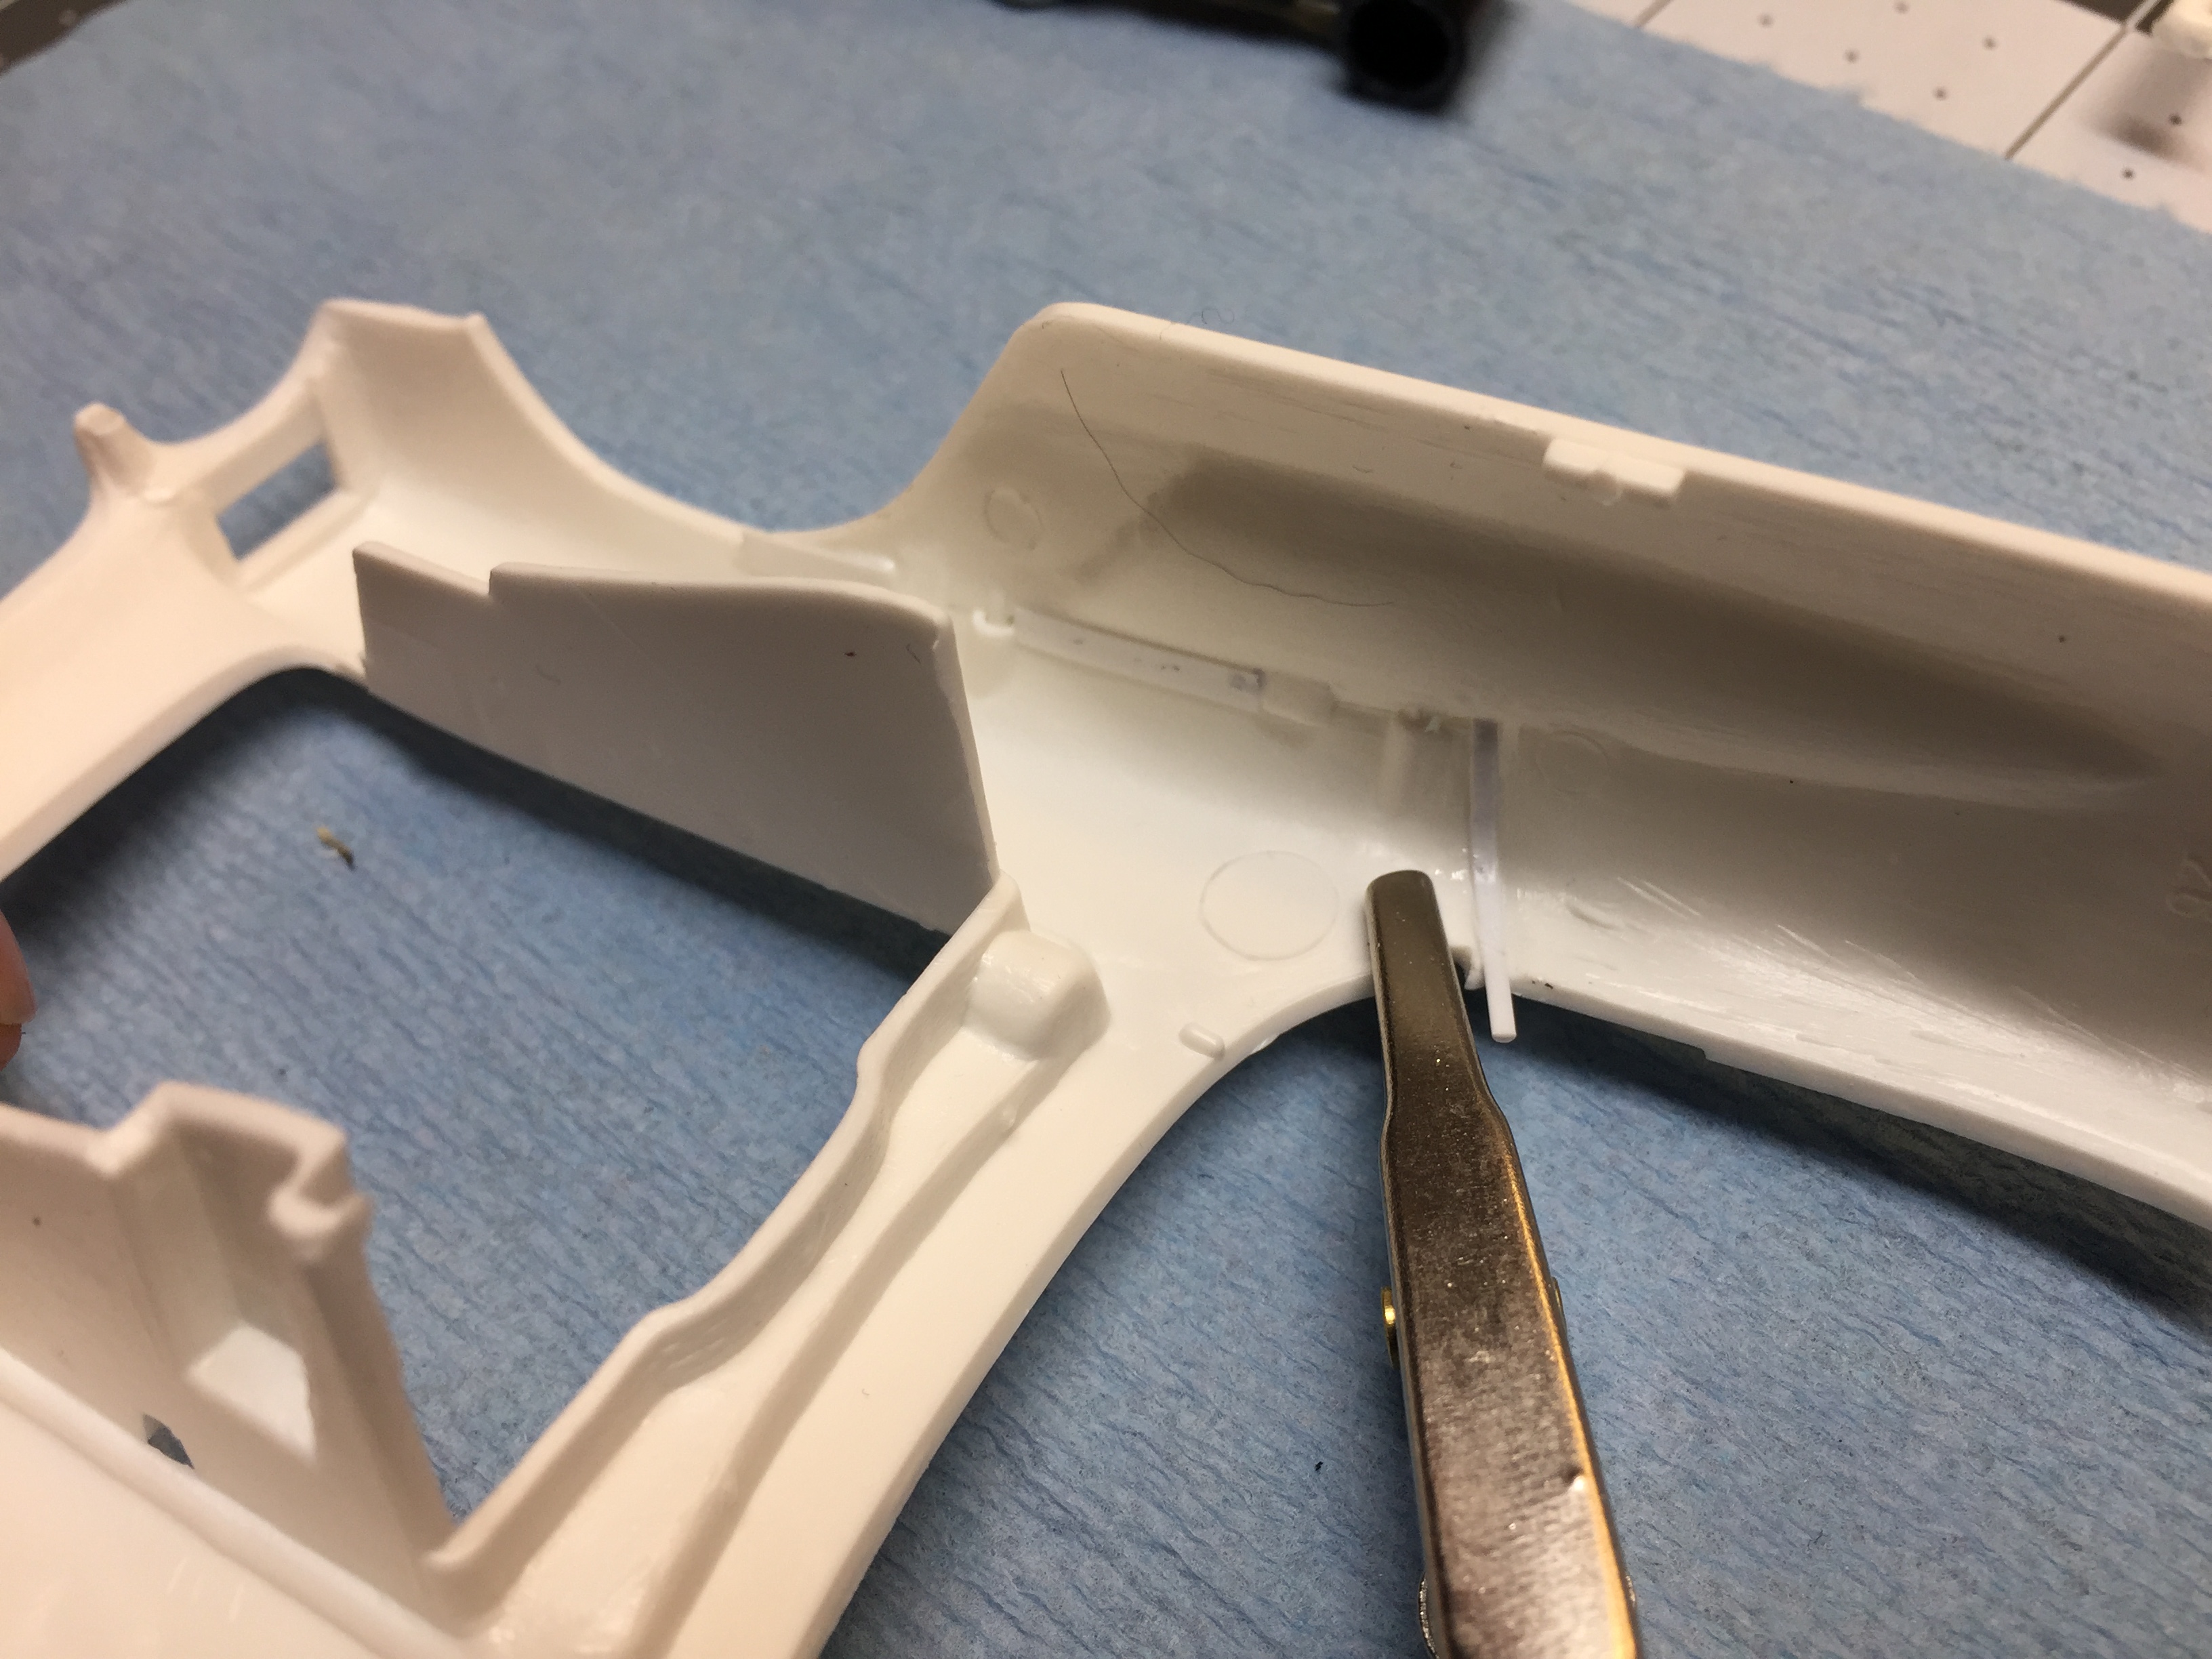
This is another one I started during my Corvette kick. Not much detail on the engine or chassis. Door panels are very nice though?? The body was fun to put together, the nail is to try to keep the panels at the same level. I added strip material behind all the seams to beef them up. The last thing I want is a body seam splitting after I've painted it.
-
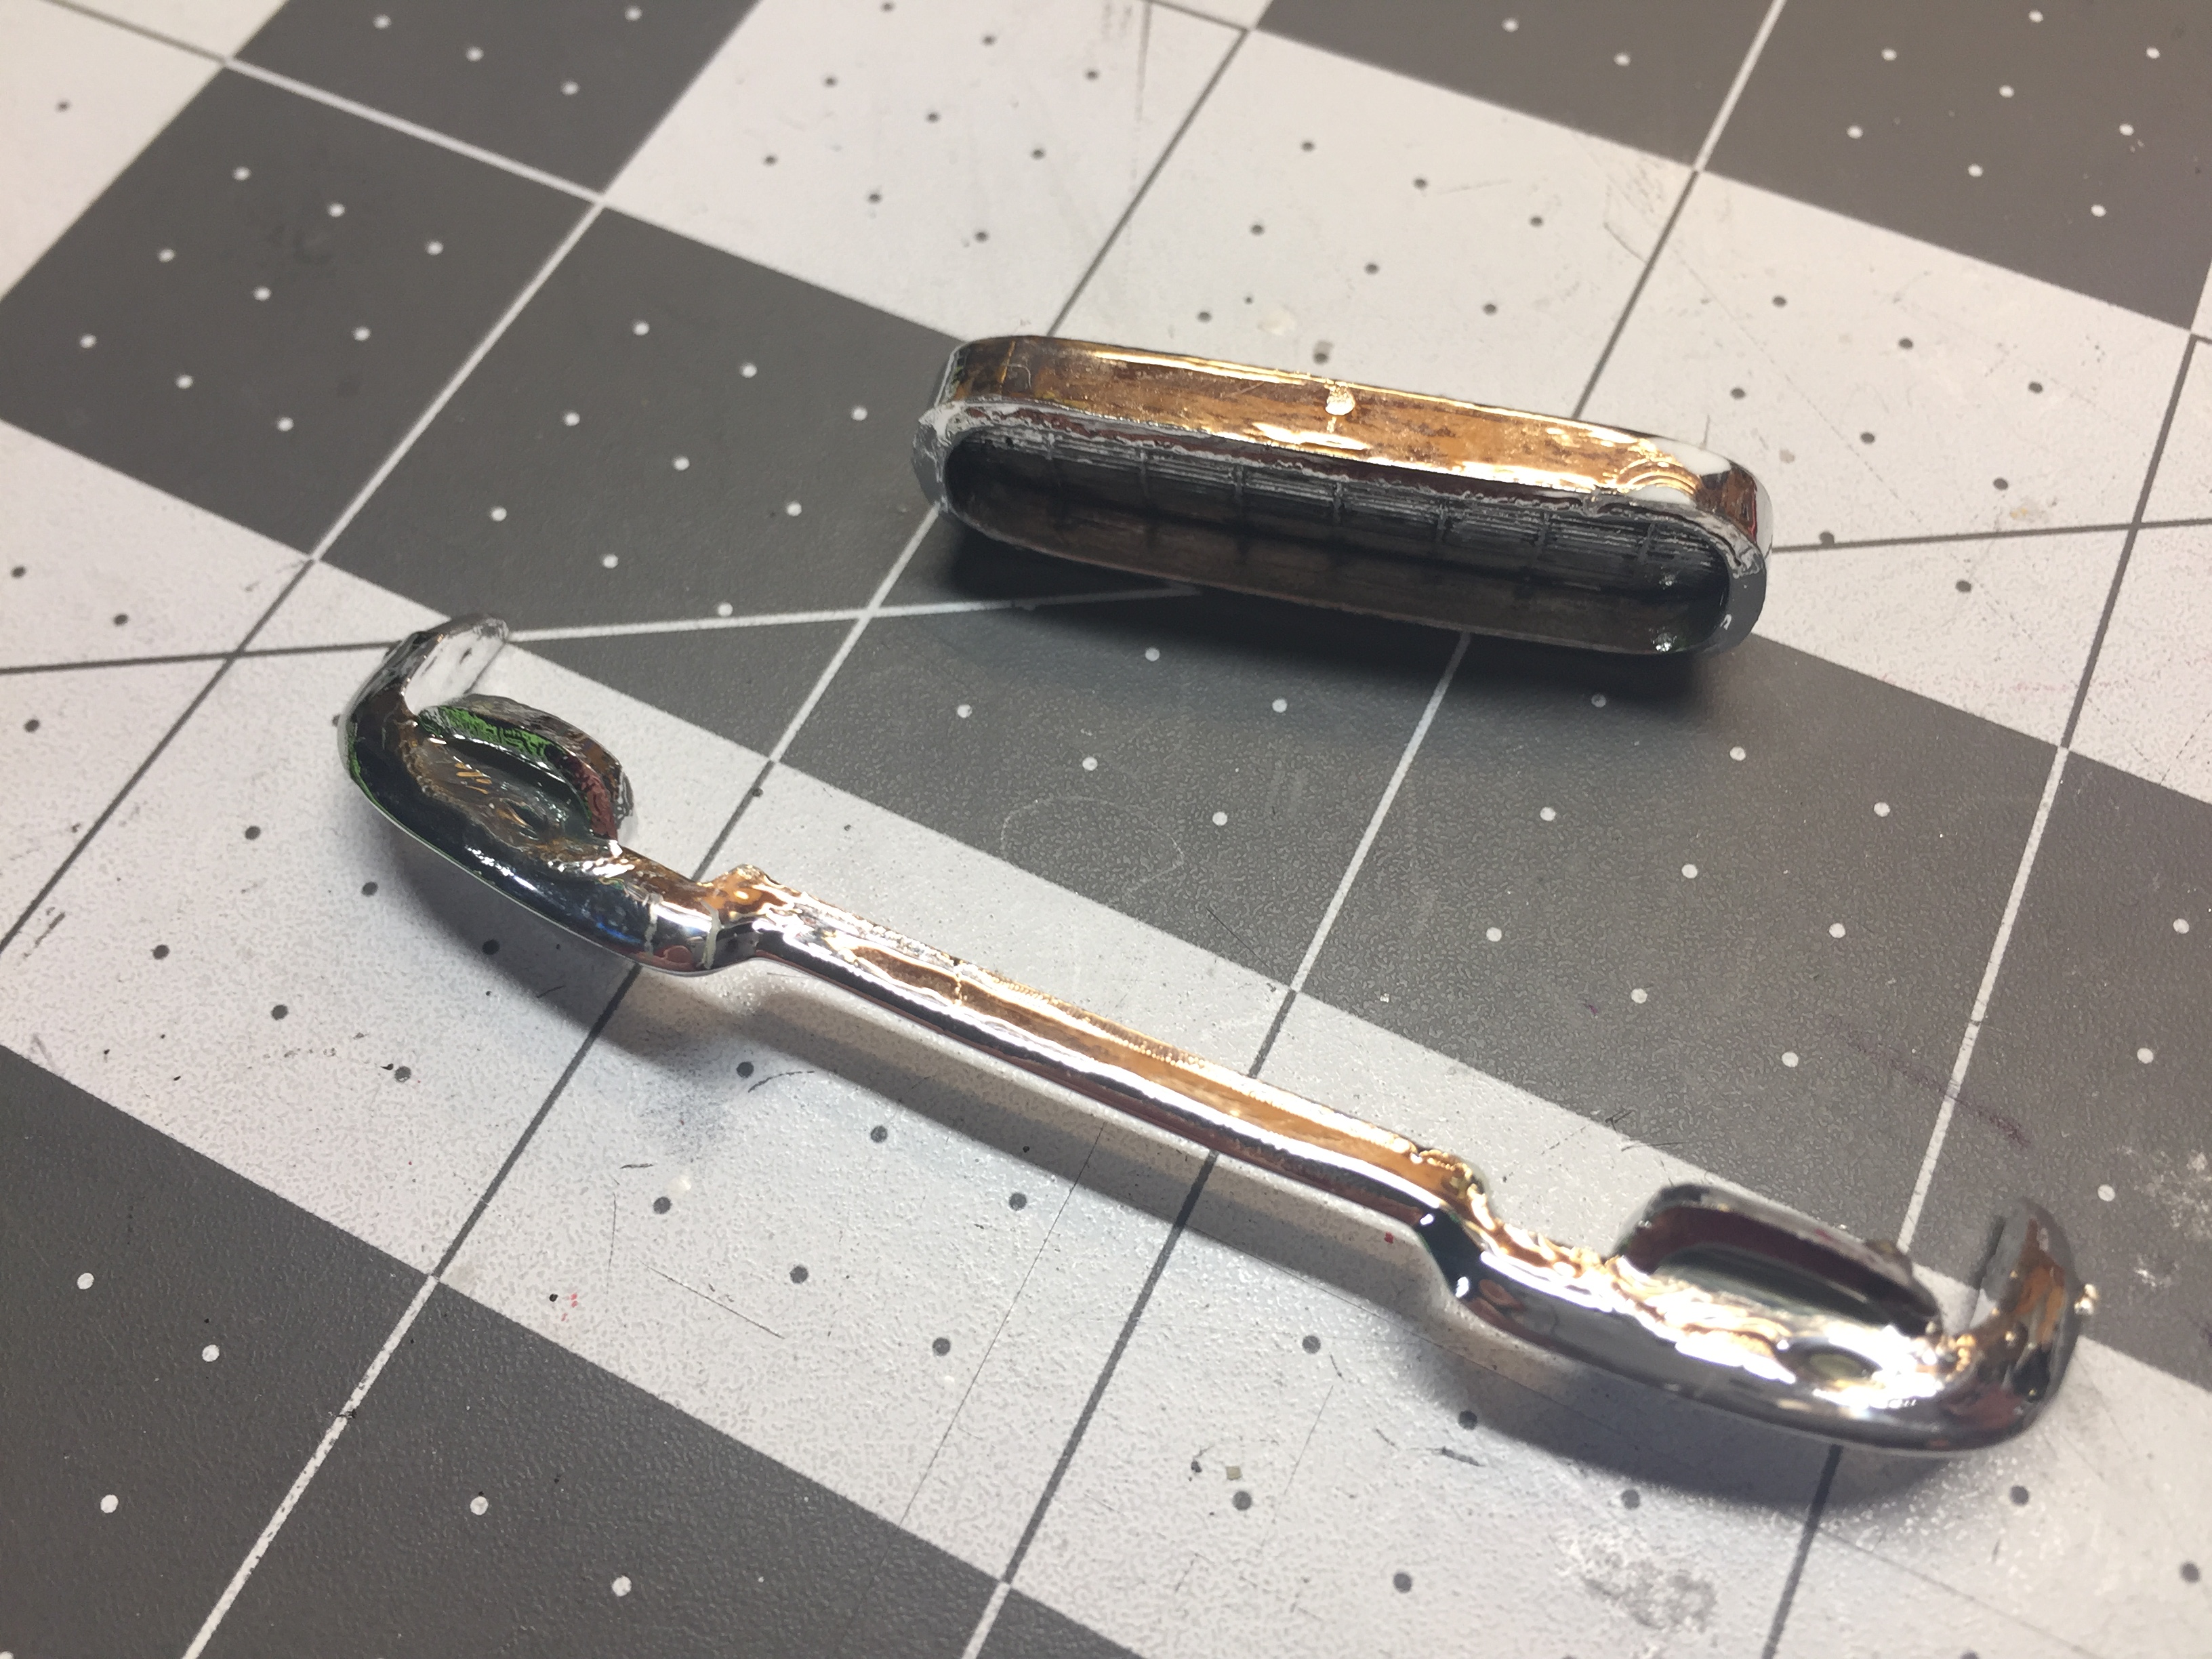
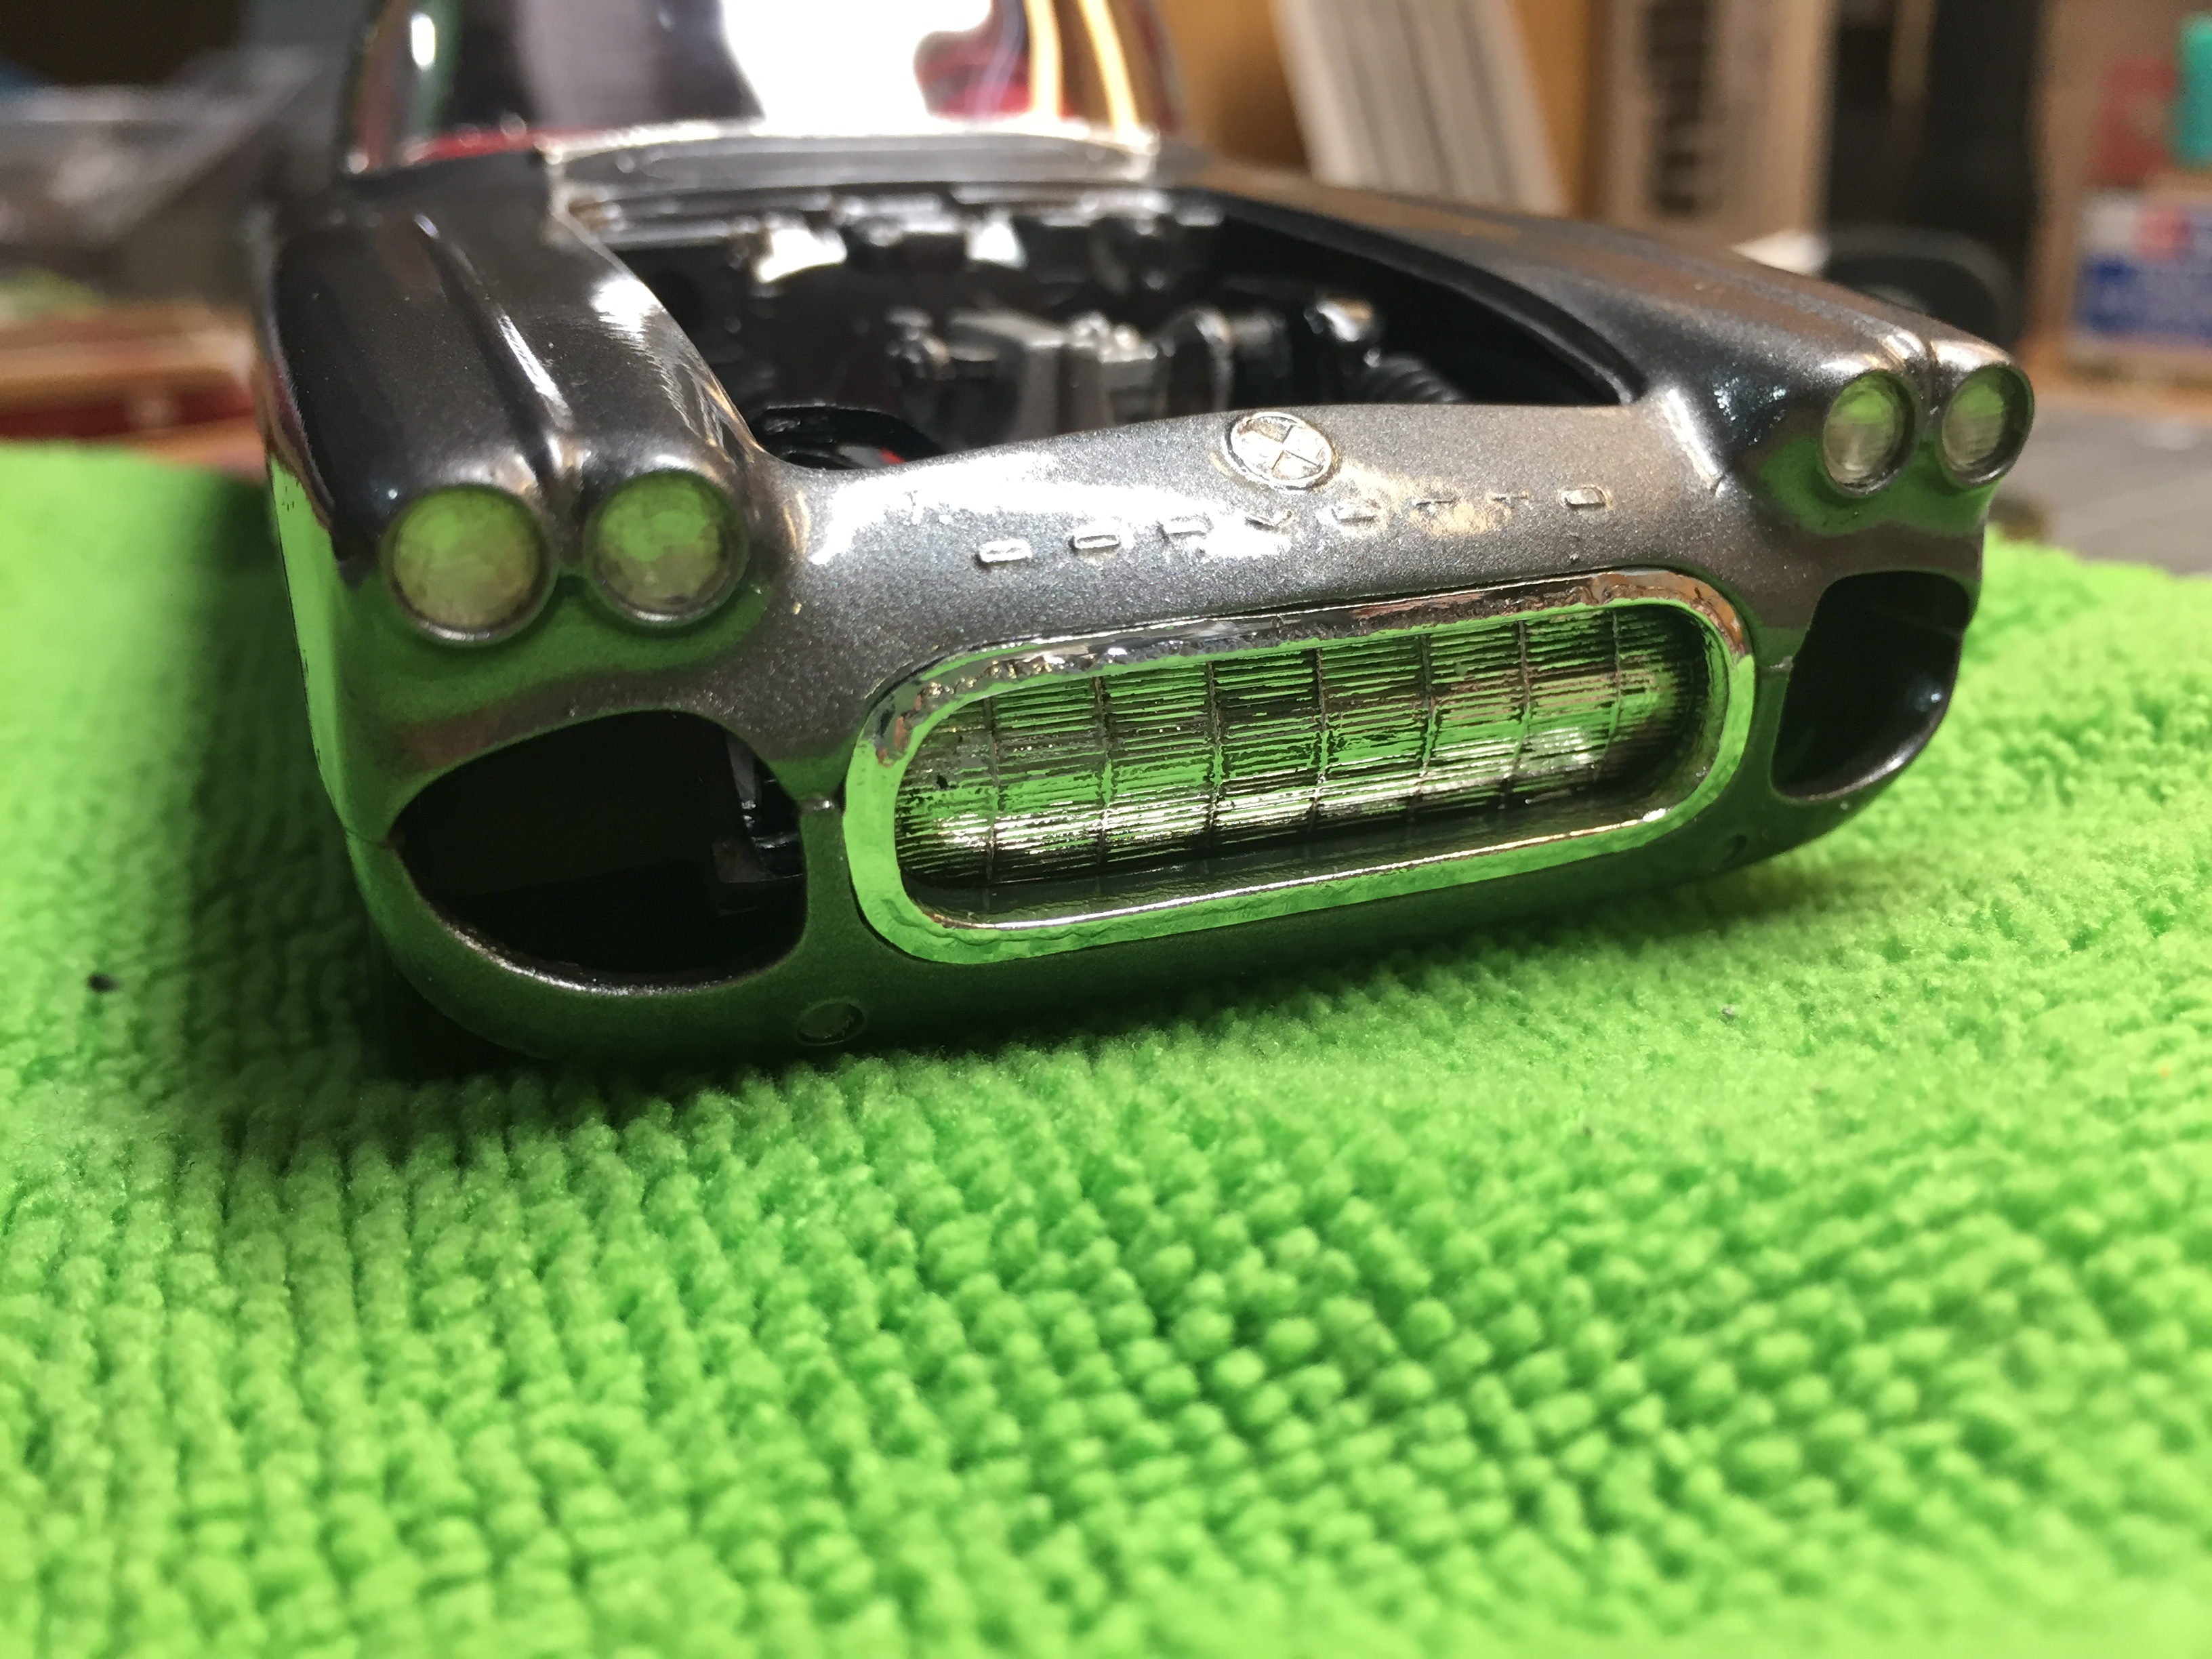
The chrome on the front bumper and grill in this kit are terrible. Plus there are huge sink marks on the topside of the bumper. The bumper also requires a fair bit of sanding to fit properly, so stripping it was a no-brainer. After cleaning it up, filling the sinks and re-shaping the ends a bit, I will spray it with Krylon chrome. It may not be as nice as Alclad or Molotow, but good enough for this kit! The grill fits OK, but the chrome on it is poor also, so I've stripped it too.
-
I did a google search of this site and came up with these threads. you can comb through them to see if anyone mentions the colors? https://www.google.ca/search?q=site:modelcarsmag.com+gravedigger&source=lnms&sa=X&ved=0ahUKEwjinZinpJ3hAhUSVK0KHeiWBJEQ_AUICSgA&biw=1280&bih=563&dpr=1.5
-
All of 'em !!
-
I just bought a can of this at Michaels with a coupon to see what it looks like. The two spoons on the left are Testors 1290 chrome. The two on the right are Krylon chrome. I recently bought can of Testors extreme wet look clear lacquer, so I tried it on the two outside spoons, but it dulled them both down quite a bit! The best looking one is the Krylon I think.
-
WOW! Amazing work! I have a hard time believing that this level of quality and detail can be done in 1/25 scale!
-
I have never used them but understand micro-balloons require some caution in use!
-
Pretty much done except for fabbing up some replacement door handles.
-
Ok, here they are. I put a small circle of silver duct tape in behind the cast headlights, since there was a large hole that I think would have been visible through the lens. Then glued them in with MM clear parts cement. Much better looking than the chrome ones I think.
-
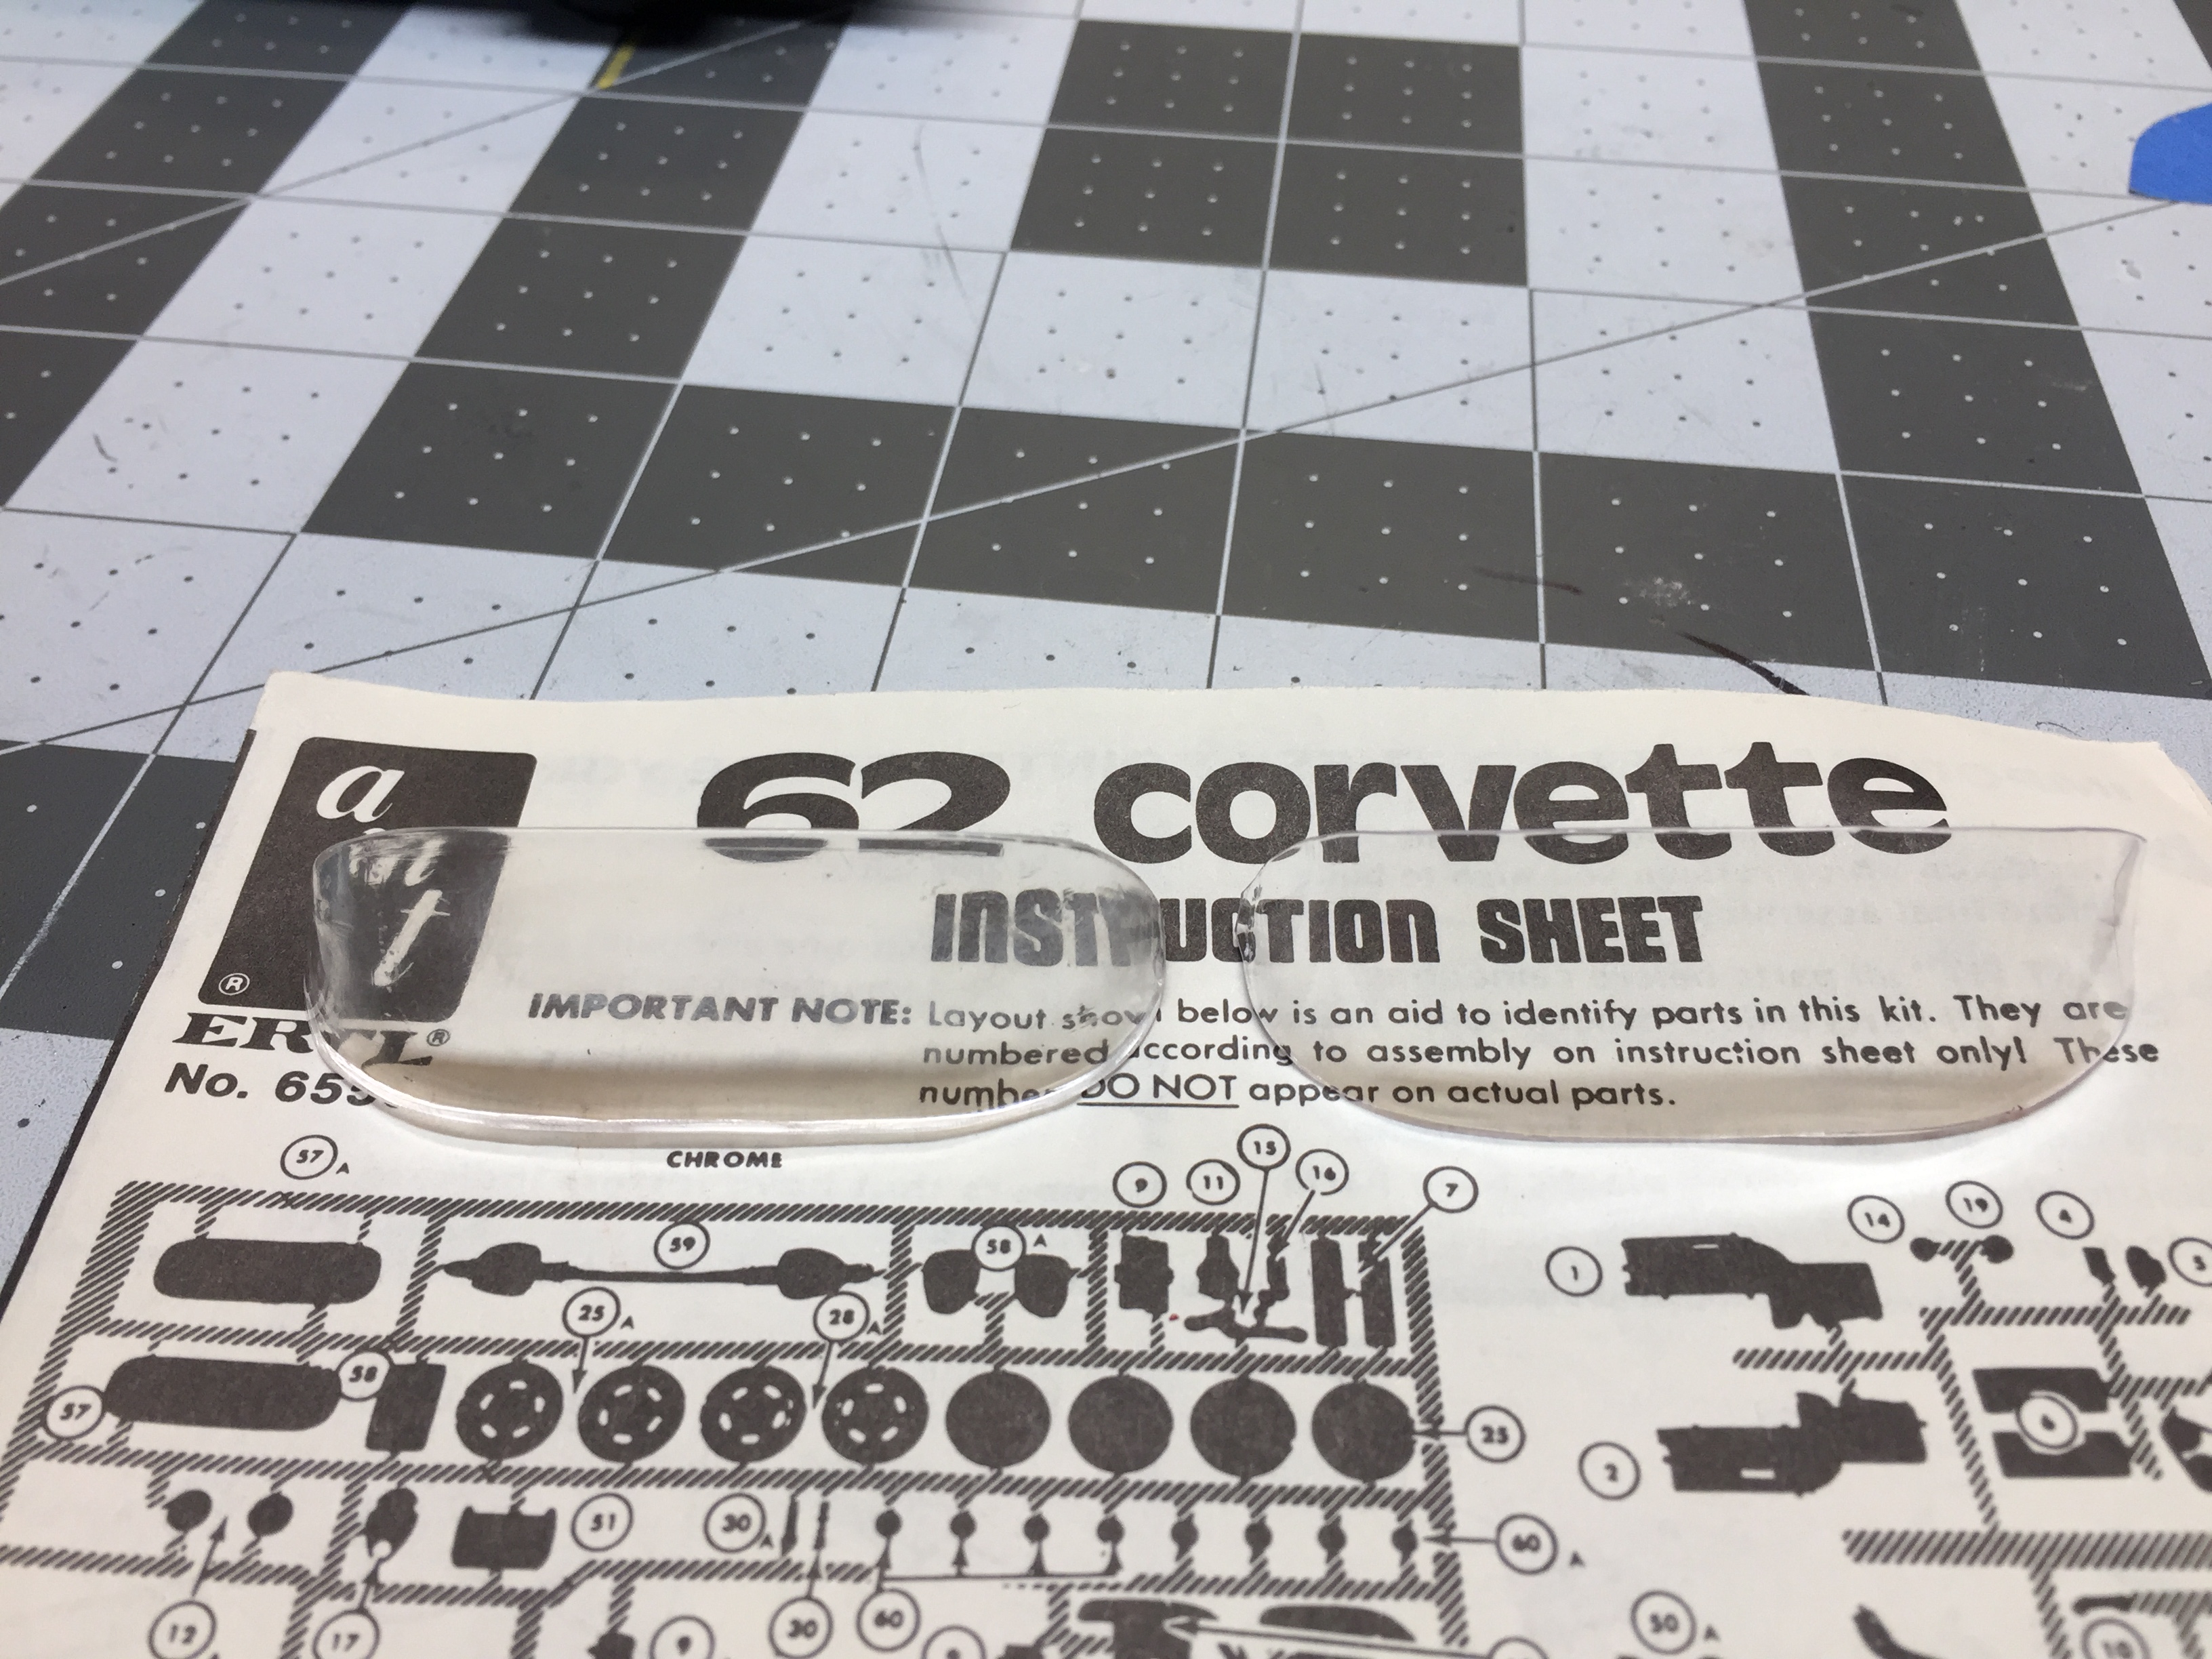
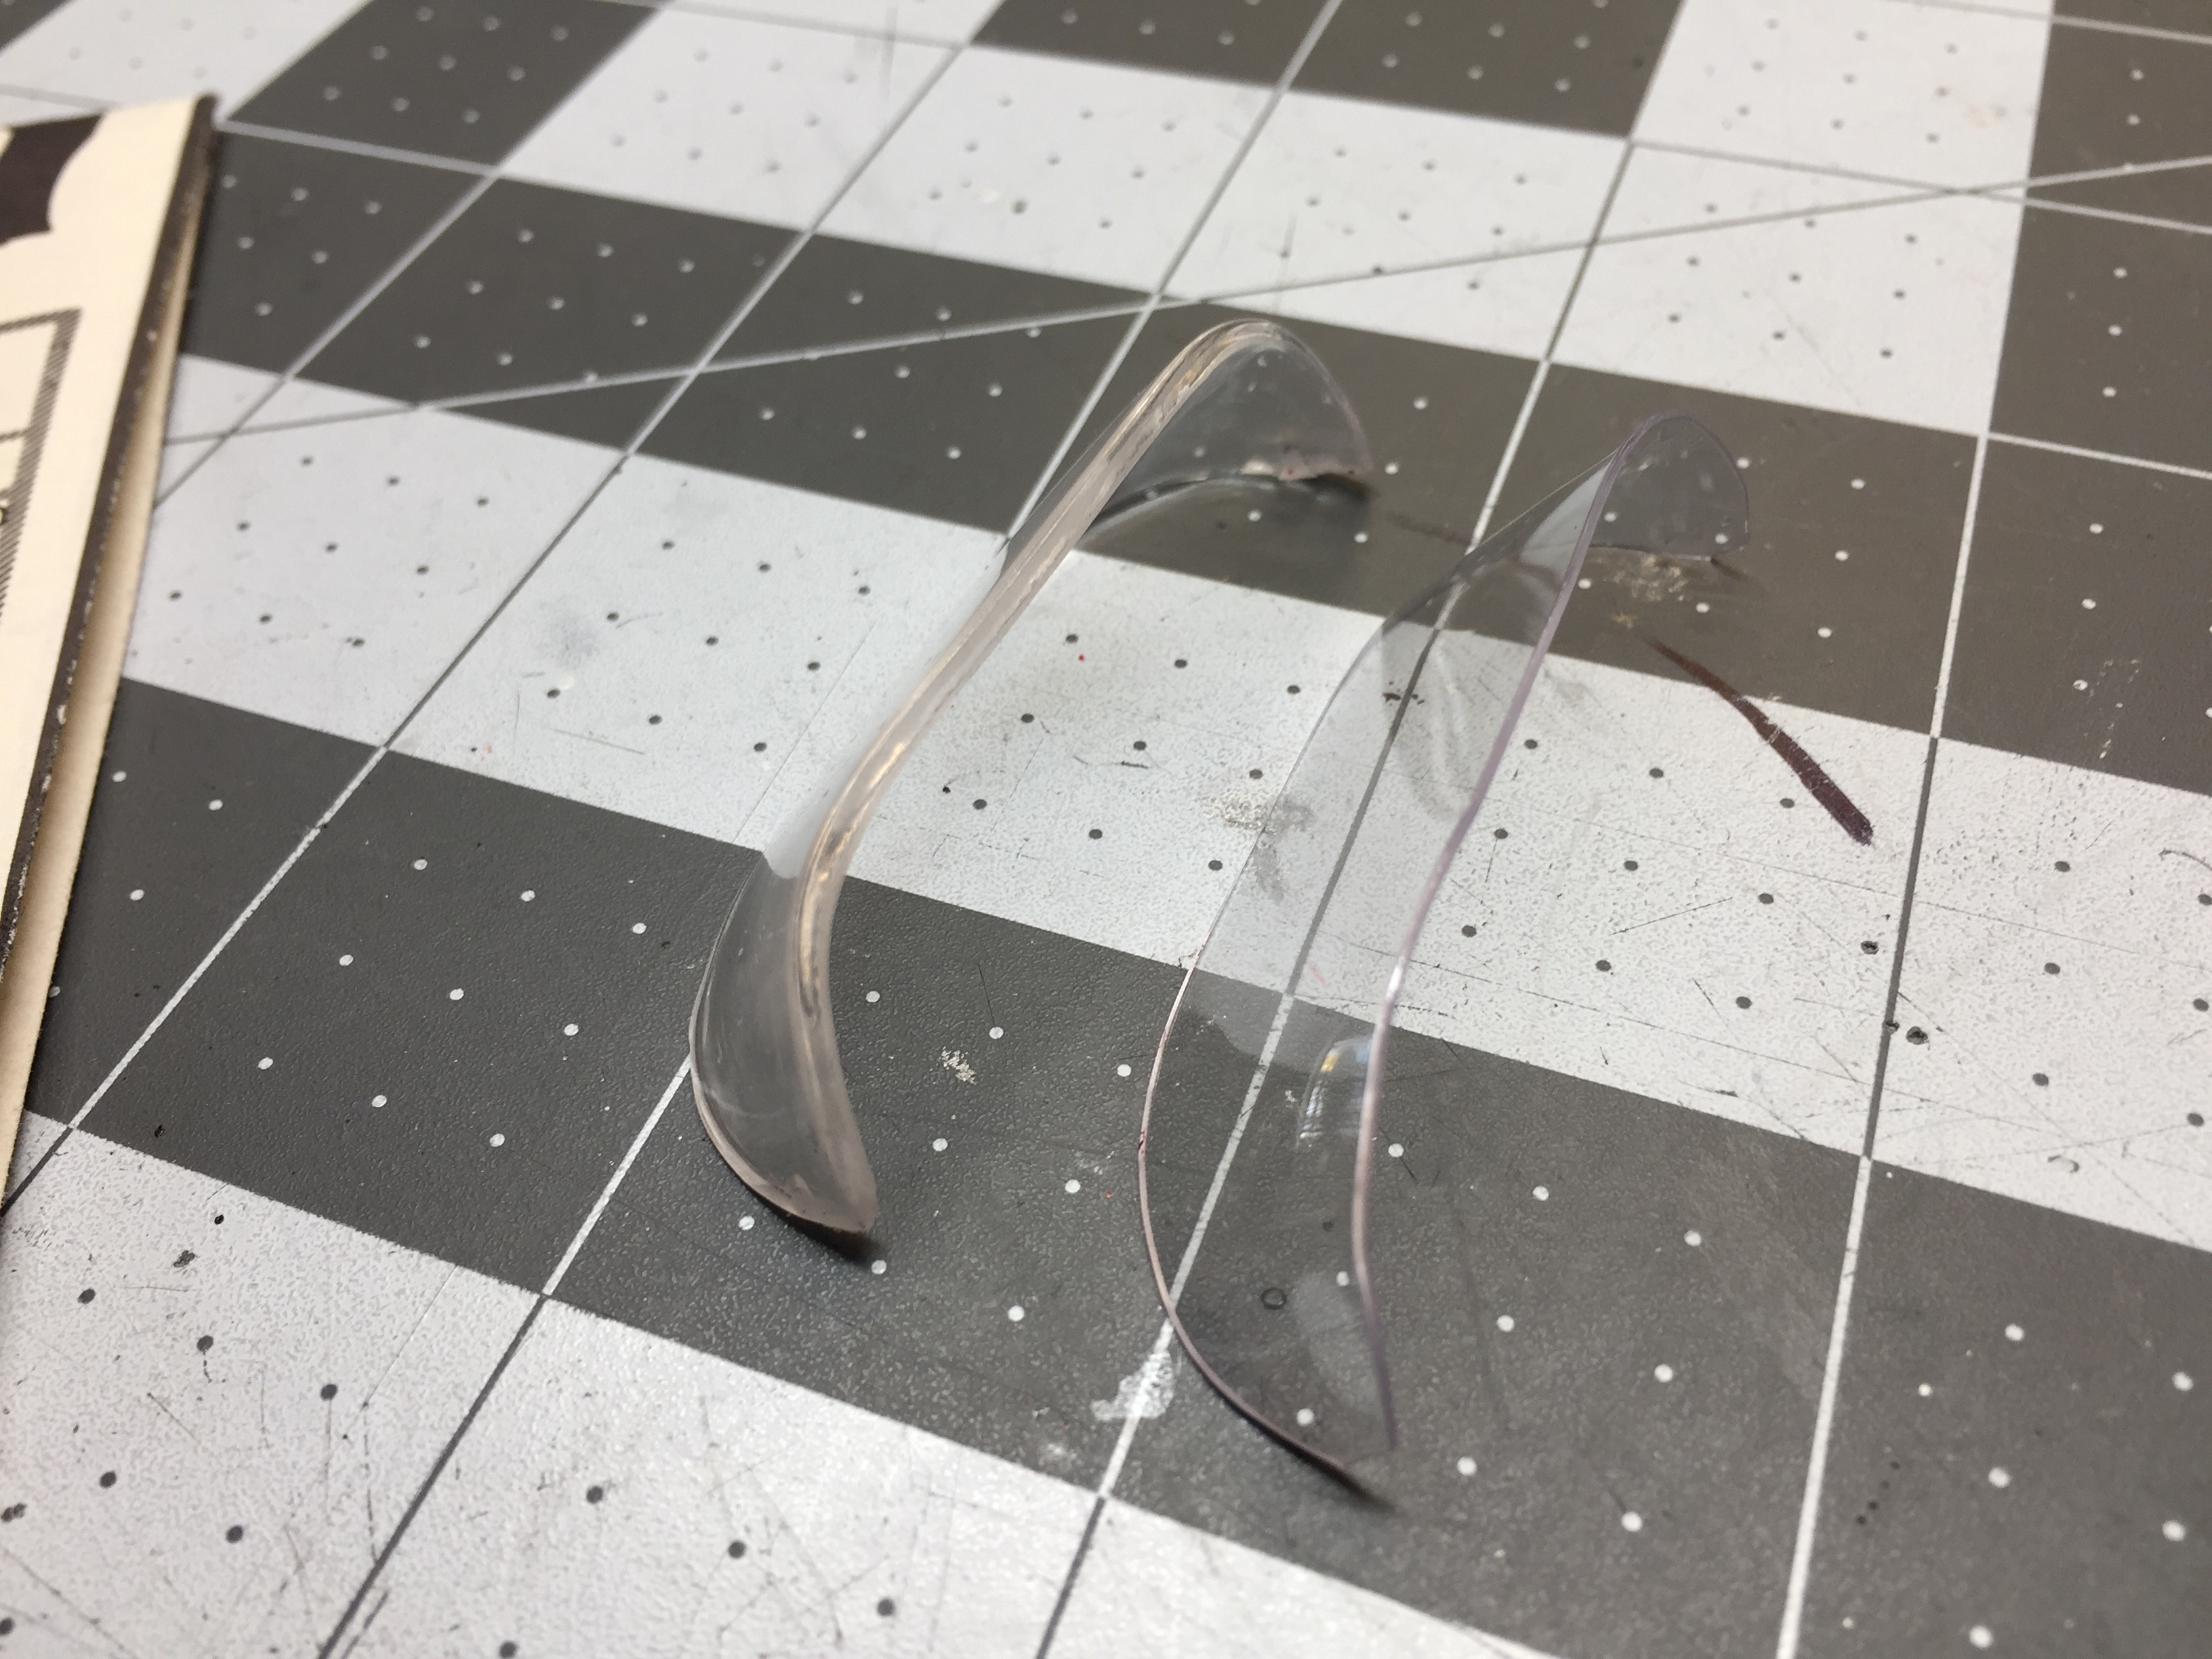
Now this stuff is clear! The original kit windshield is on the left. I was able to form it with a little heat from a hair dryer, and it kept it's shape. LePages superglue does not seem to cloud it and neither does MM liquid cement. My first try at forming the windshield doesn't quite conform to the frame, but for $5 a sheet, I can make a few attempts to get it right!