NOBLNG
-
Posts
10,231 -
Joined
-
Last visited
Content Type
Profiles
Forums
Events
Gallery
Everything posted by NOBLNG
-
I like that shade of blue on it.👍
-
Great looking paint and foil work Joe!👍😎
-
The color looks great on it Gary.👍 I tend to like full fendered rods over fenderless too.😎
-
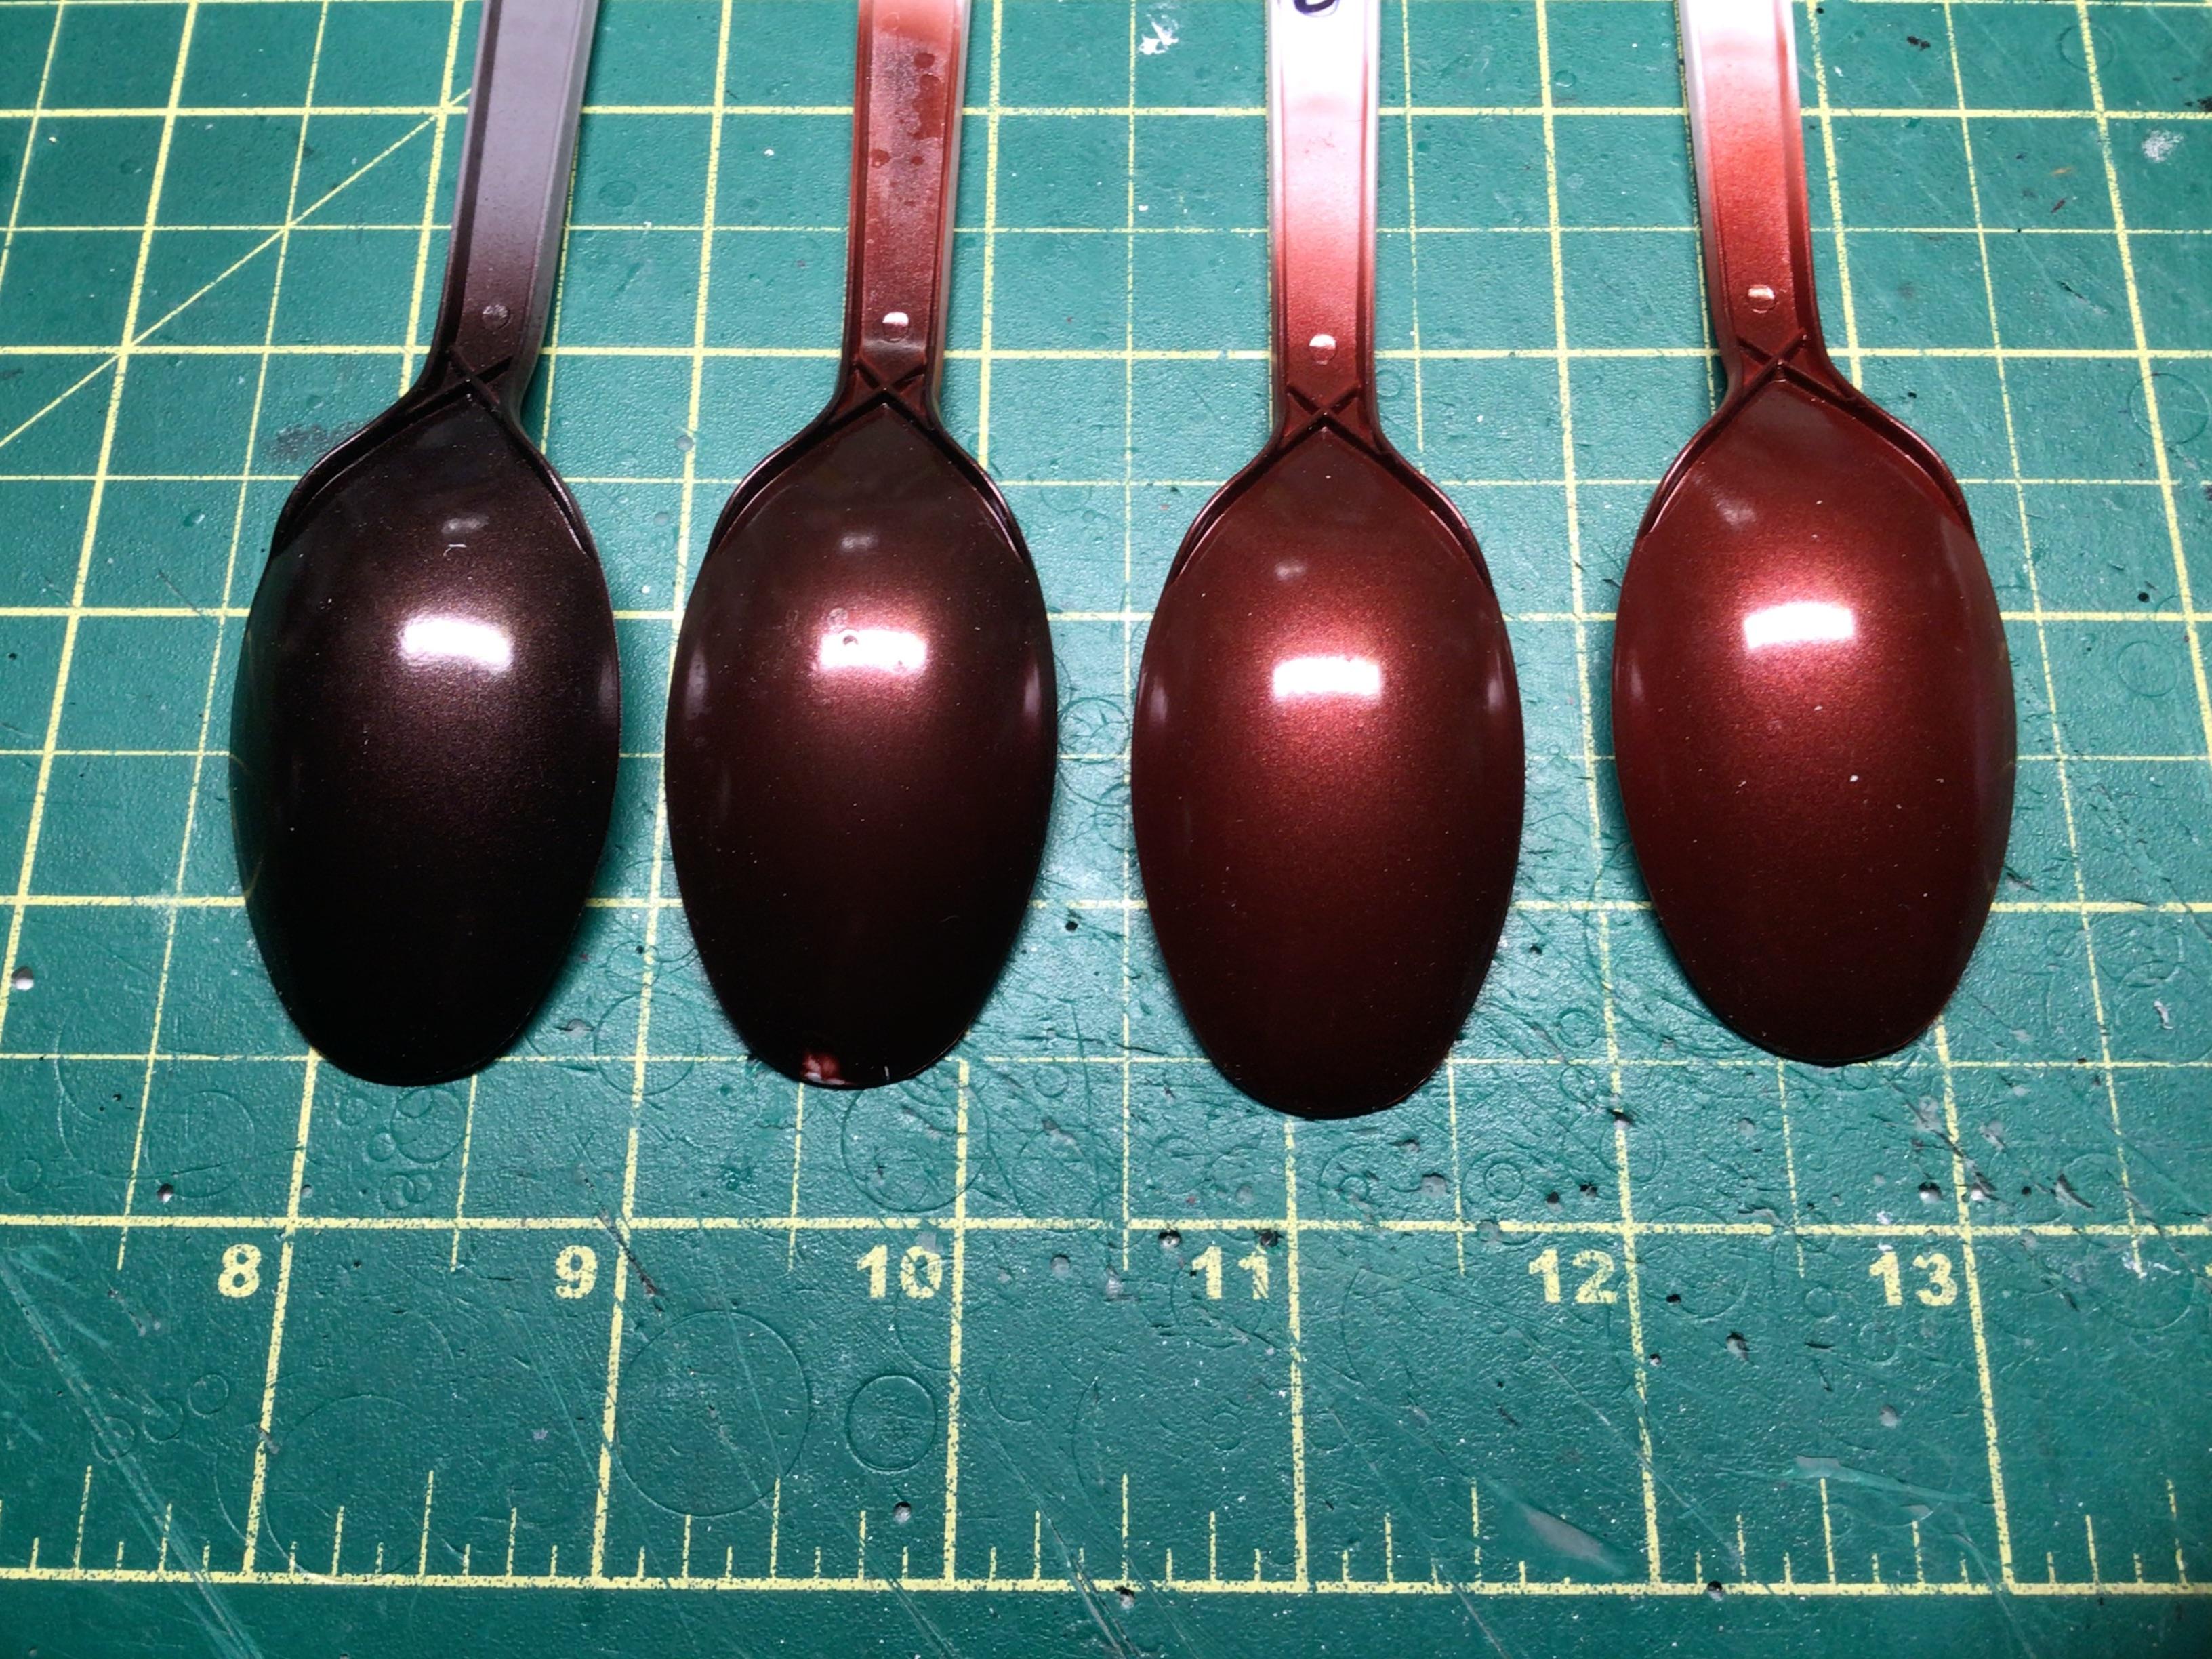
Looking good👍 I buy the Tamiya primer in the square bottle, thin it with lacquer thinner and airbrush it. It’s the same primer as the spray cans I believe. I keep a jar of it for my Paasche mixed so I don’t have to clean the cup each time.🙂
-

1982 Dodge Street Van
NOBLNG replied to mrmike's topic in WIP: Model Trucks: Pickups, Vans, SUVs, Light Commercial
Looks like too heavy of a coat in one pass. I haven’t used a spray bomb in a while, but when I did I would start spraying off the model, make a brisk pass over it and stop after I’m past the model. Probably 6”-8” away and multiple light coats. -
Since you asked….I would not waste time trying to resurrect it. You could build half a dozen new kits in the time it would take to fix it. Throw it in the parts box or make a demolition derby car out of it. JMO.
-
Convincingly assembling your model you are said Yoda.
-
Nice work Eran! I like all the extra accessories you are adding.👍😎
-
Land Rover Series III
NOBLNG replied to Technics's topic in WIP: Model Trucks: Pickups, Vans, SUVs, Light Commercial
Wow MM…I like your weathering technique! It looks awesome!👍😎 -
‘55 El Camino
NOBLNG replied to NOBLNG's topic in WIP: Model Trucks: Pickups, Vans, SUVs, Light Commercial
Thanks Chris. I plan on painting it a mixture of metallic red and metallic black. The roof will be gloss black. I have mulled over the idea of ditching the LS and putting a 409 in it instead. Hmmm….🤔
-
‘55 El Camino
NOBLNG replied to NOBLNG's topic in WIP: Model Trucks: Pickups, Vans, SUVs, Light Commercial
Thank you all Fellas! I am happy with the roof profile now.🙂 The extension does make huge improvement in my mind. I think I will go with the hubcaps and white walls unless I can find a set of baby moons in the parts box. I’d like a slightly wider set of tires for the rear, but unless I can splice two tires together or find a suitable pair that I could paint I will use the kit tires -
Use 0.030” for the handle part if you have it. It looks less clunky and a little more in scale than the 0.040”.
-
Well that sucks! Your mockup looks great though…from a distance.🥴
-
Me, myself and I is the main concern of too many people these days.
-
The city wants to change the zoning laws so that they can grant a permit without any public input to build a 40 foot tall fourplexs in neighborhoods like mine. We are all single or split level homes on 50x100 foot lots. This all came about when the feds decided to hand out cash to cities to solve the housing crisis that they created. Edit: I don’t want to move because I am easy walking distance from a mall and there are lots of stores and restaurants nearby. But if my next door neighbours house got bought and torn down by a developer to build a 4plex…🤬
-
I would have followed you on that build Jim.👍
-
Mercury Rising..
NOBLNG replied to brit's topic in WIP: Model Trucks: Pickups, Vans, SUVs, Light Commercial
Nice project.👍 They were workhorses that’s for sure. -
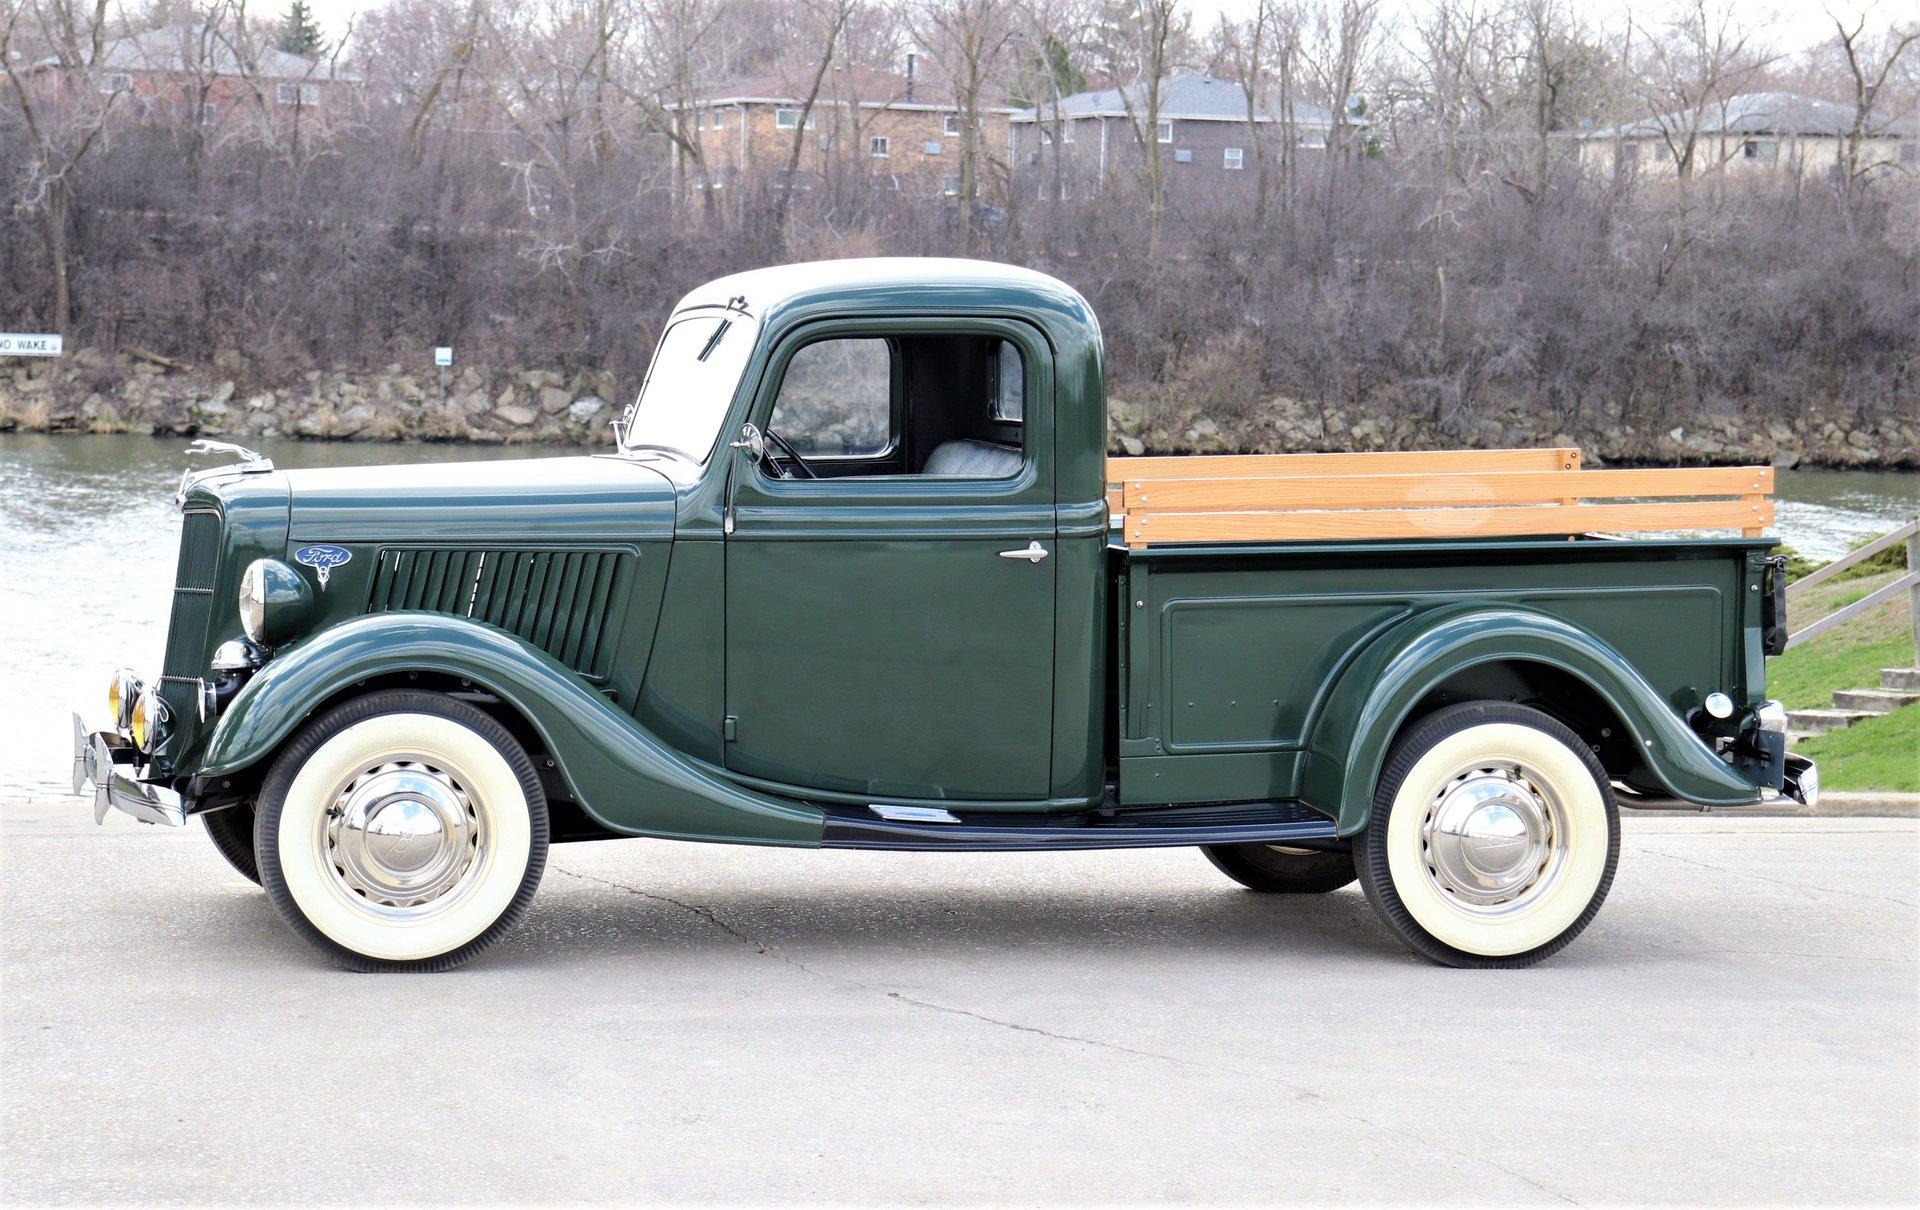
I don’t think that cab represents any real world vehicle, so you can basically do whatever works best for you. Here is a ‘36 Ford for reference.
-
1 thing I know is that 4 breakfast I 8 yogurt and muffins.
-
It turned out great looking despite the issues!👍😎
-
1971 Ford F250 4x4
NOBLNG replied to Chuck Most's topic in Model Trucks: Pickups, Vans, SUVs, Light Commercial
Great looking rig!👍 -
49 Mercury panel
NOBLNG replied to Modlbldr's topic in Model Trucks: Pickups, Vans, SUVs, Light Commercial
Super clean looking panel there Tom. Beautiful work all around. I particularly like your leather work on the interior.👍😎 -
Very nicely done…it looks fabulous!👍😎
-
Fine looking Ferrari. All the upgrades really add to the beauty of the finished product.😎
-
Nice stance, and the blacked out bumpers and trim look good on it.👍