Hermann Kersten
-
Posts
595 -
Joined
-
Last visited
Content Type
Profiles
Forums
Events
Gallery
Everything posted by Hermann Kersten
-
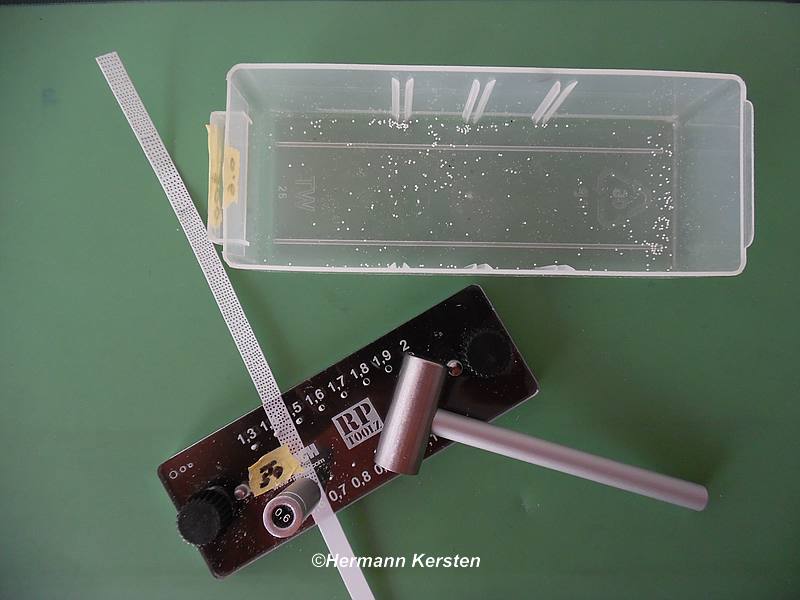
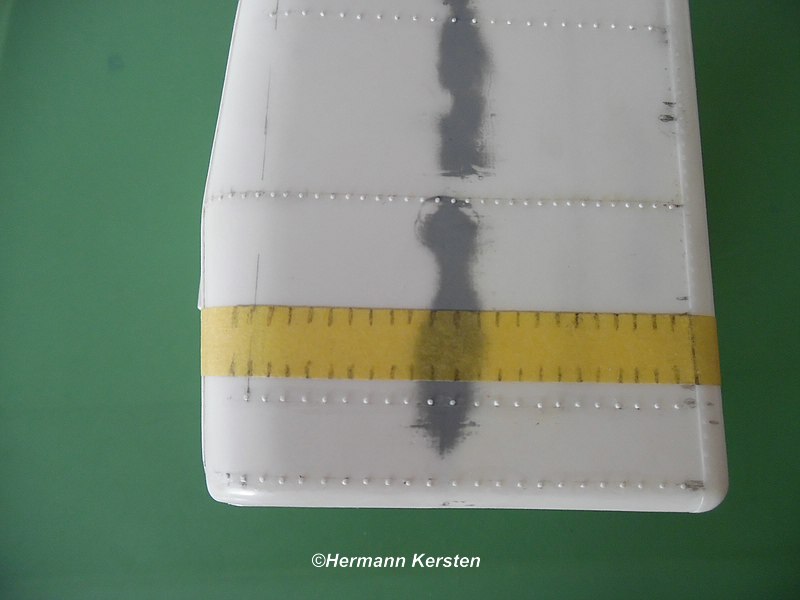
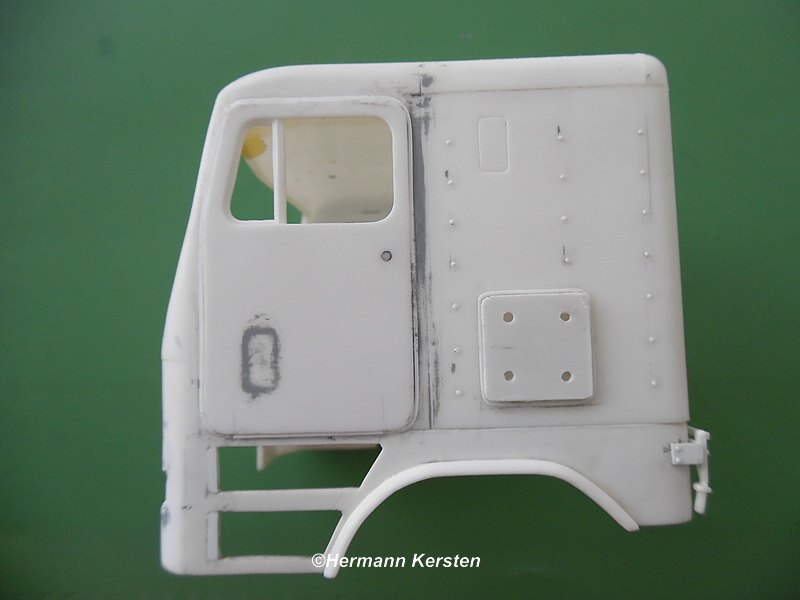
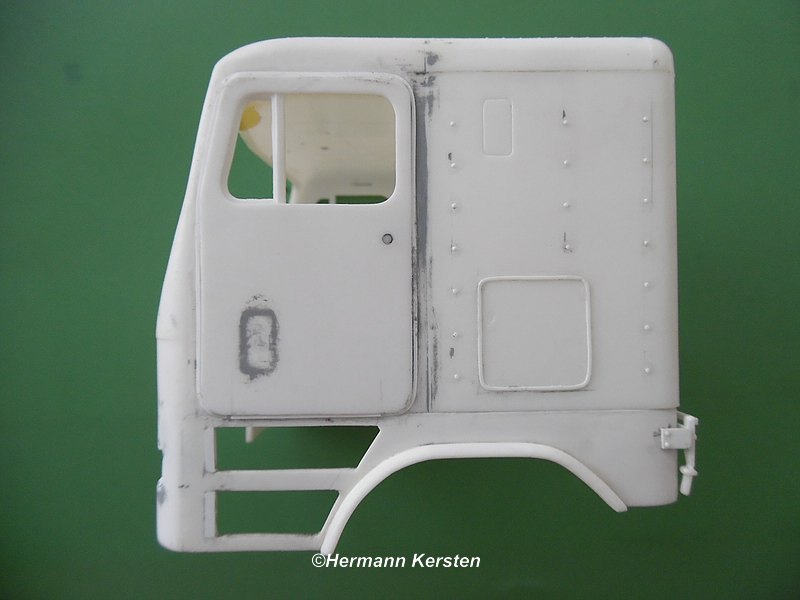
 And we continue! Perry, Andre, Brian and Richard, thanks for the comments! Thank you Richard, i do my best to achive that.. Yep gents, today i show you the progress on the cabin what is intended for Koos. Here also a lot of work and the cabin don't leave the table until it's good and smooth. Today i show you the rivetting of this cabin, first of all, the tool and the box with 300 rivets...........yep, i counted them. Than the rivetting it self..... The cabin was completely sanded, and therefore the edges of the storage compartments have to be made again. For this I made a mold and glued it to the cabin with wood glue , wood glue is a good temporary hold, does not affect the plastic, is easy to remove and clean when the job is done. Then the result of many hours of a patient job, the grill....... And finally, all loose parts for Koos, neatly in a bag. He is very eager to start with this truck. so at this moment, this cabin has the priority, and it would be fun to finnish both this duo build at the same time. Thats all folks! See you next round! Hermann
-
BRBO 2019 Mack R
Hermann Kersten replied to gotnitro?'s topic in Model Trucks: Big Rigs and Heavy Equipment
Nice Mack with a nice colour, just a work horse, i like this kind of builds. Hermann. -
1/87 Autocar with Sealand container
Hermann Kersten replied to Pete68's topic in Model Trucks: Big Rigs and Heavy Equipment
Nice rig, and with this scale you can make a nice dio indeed. Hermann. -
1/87 GMC Crackerbox A&H Truck Lines
Hermann Kersten replied to Pete68's topic in Model Trucks: Big Rigs and Heavy Equipment
Very nice, i like it also. Hermann. -
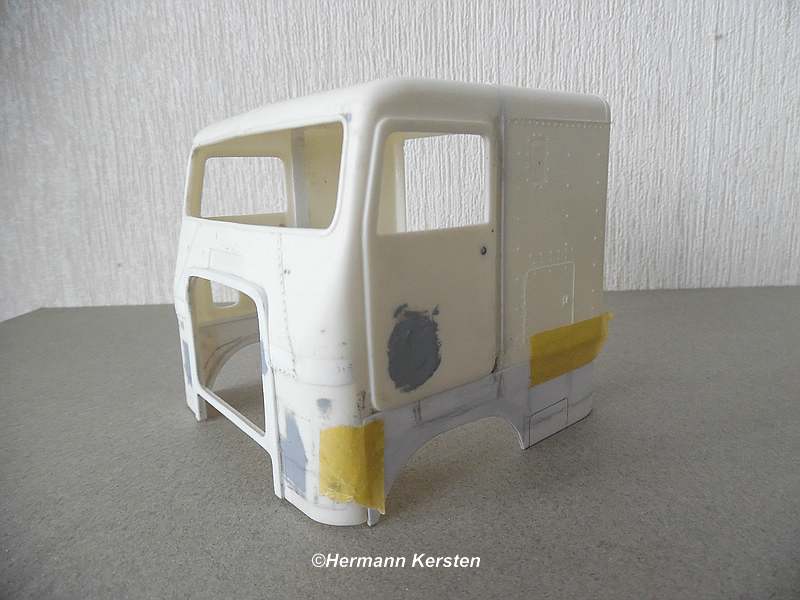
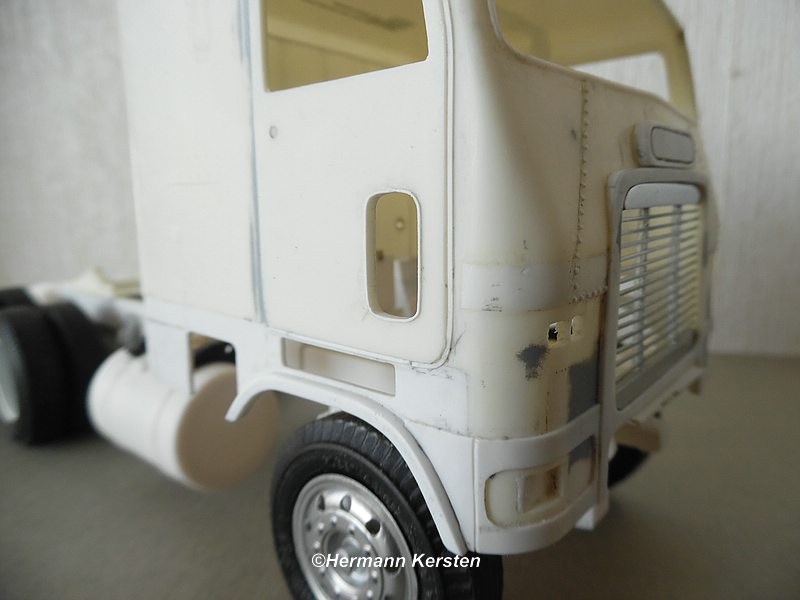
Thank you guys, for the nice comments and welcoming this FLB! Yes Chucky, the additional air spring set that is included in the last 1/24 FLD kit is suitable for this scale, "if " you cut off the cross bars of the airsprings, because these are too wide. The normal airsuspension set with the big air sacks are too big for this 1/25 scale. This additional airspring set is intended for another Freightliner conversion. The rivets will be made with a Punch & Die set, i have to smasch every single rivet out of a 0,25mm thick styrene strip. At some pictures you can see the first rivets in the front of the cabine. How it looks after all is done, you can see in my FLA FSBA 1/25 topic. Then just 2 more pictures, this shows that the rivets, and some things were cast here that no longer belong to this version, are all sanded away from the rear, and later will be renewed by new rivets. For this rivetting I have some good reference pictures. And on the other side i drill a hole, put a brass tube for a light housing, so that this later becomes a nice light. Ok guys, thats it for today, and see you next time. Hermann.
-
A hell of a job to strip and clean everything, but the progress on first pictures looking good. Hermann.
-
Looking really good, the red color of your chassis looks good. Hermann.
-
Very nice project Vince, and i'm very surprised how detailed this truck is in this small scale. Apart from that, I find it very admirable that you can still put more details into it. Keep up the good work! Hermann.
-
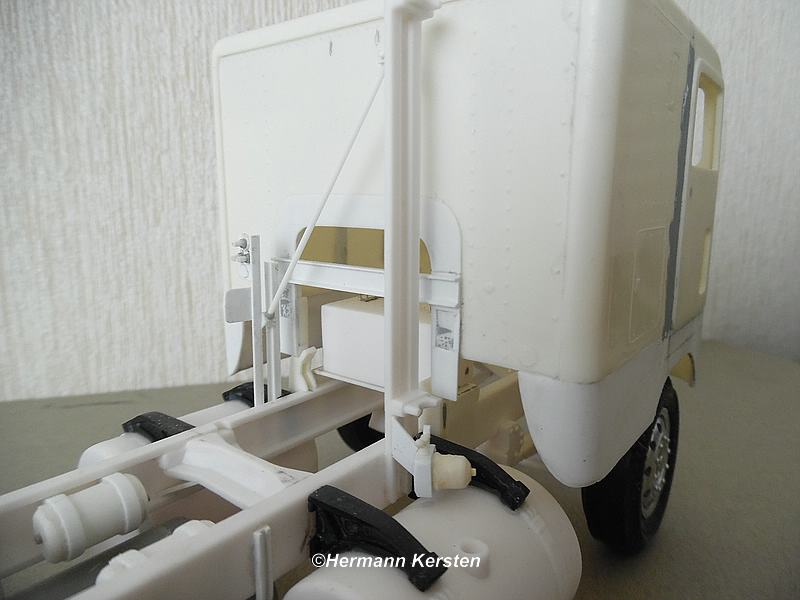
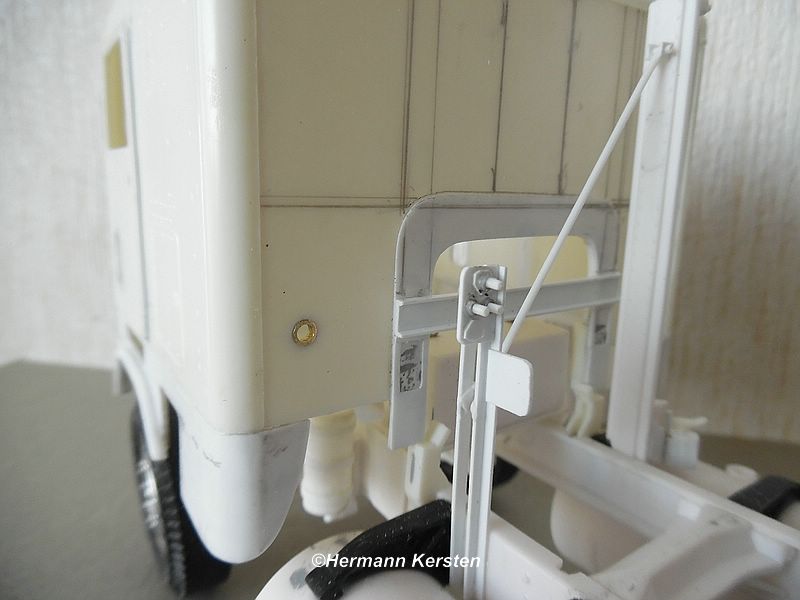
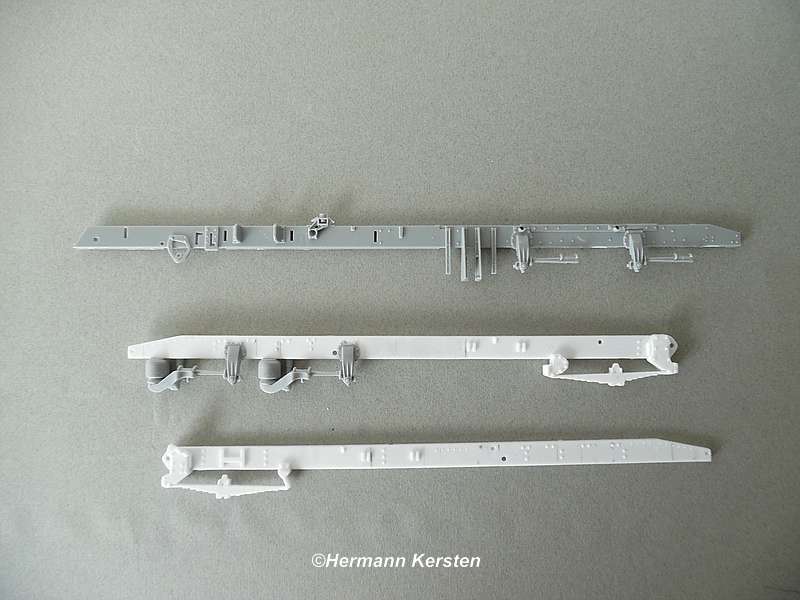
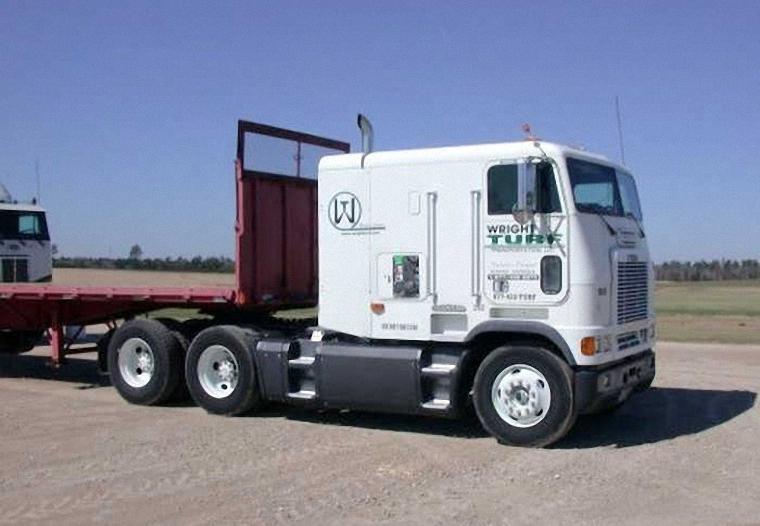
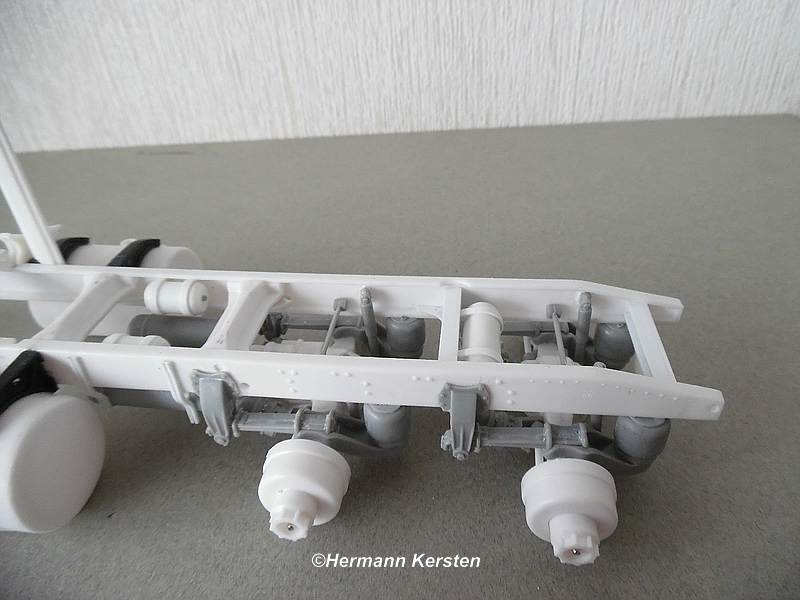
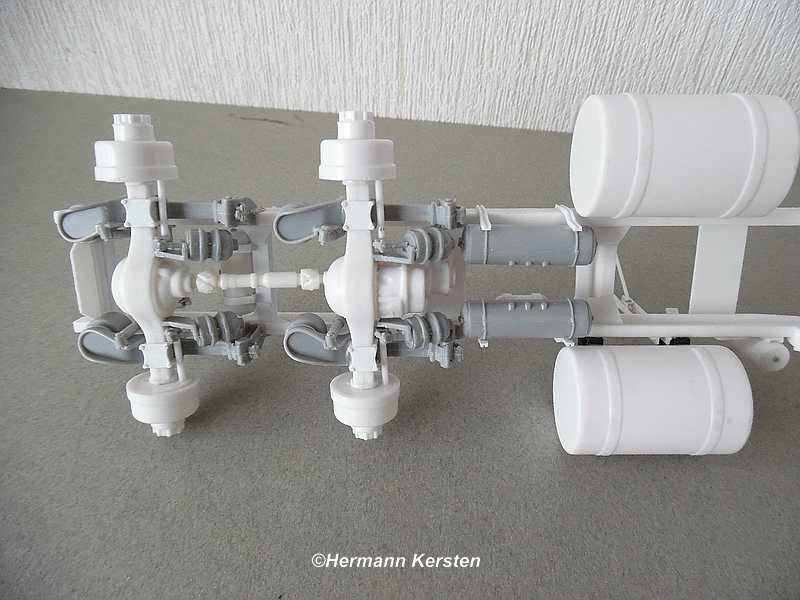
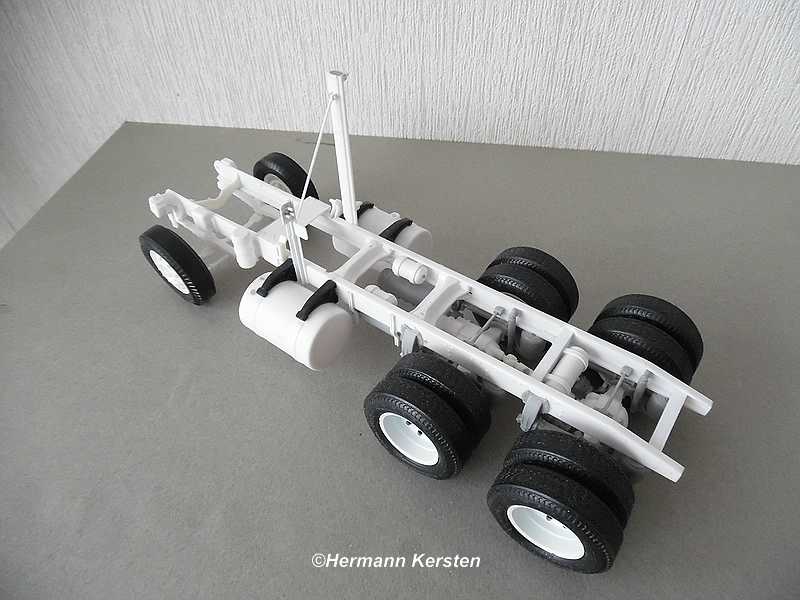
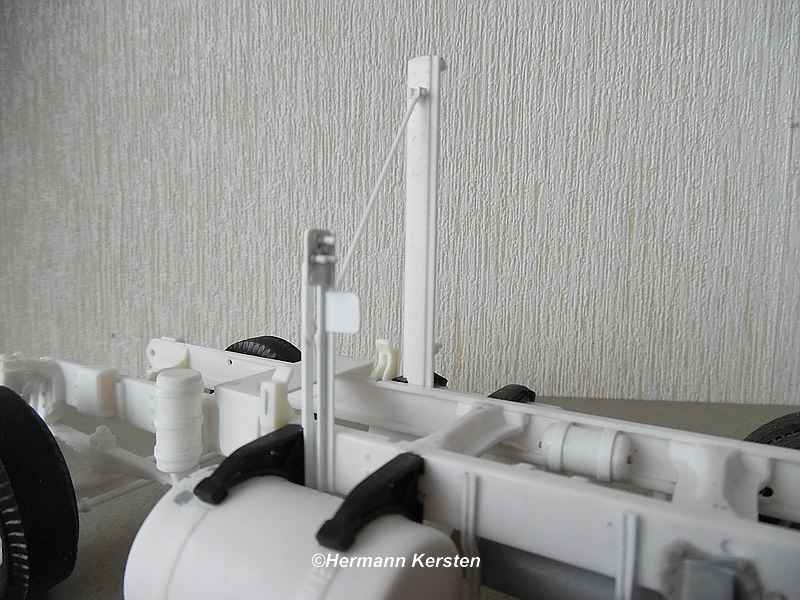
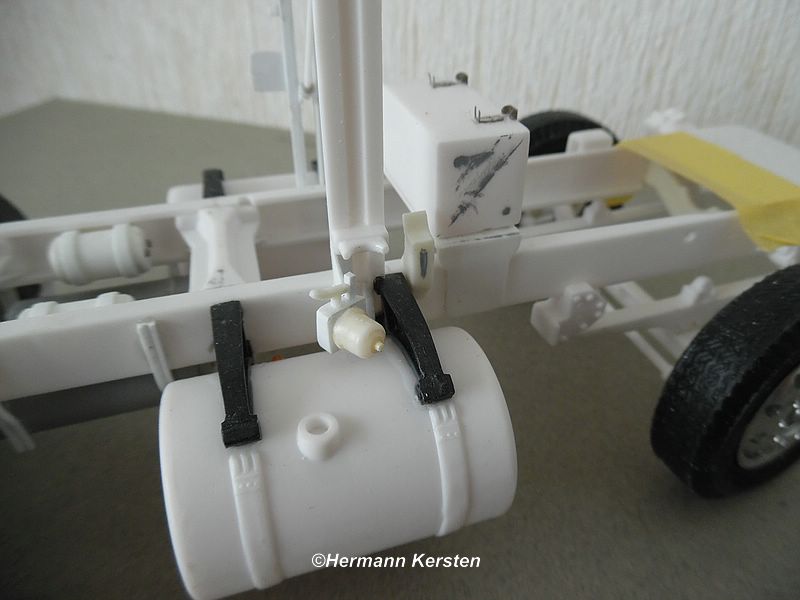
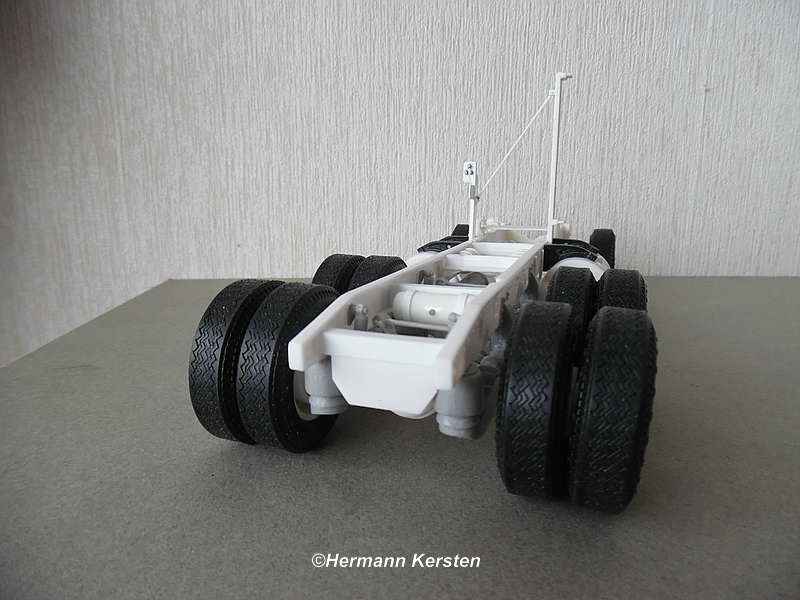
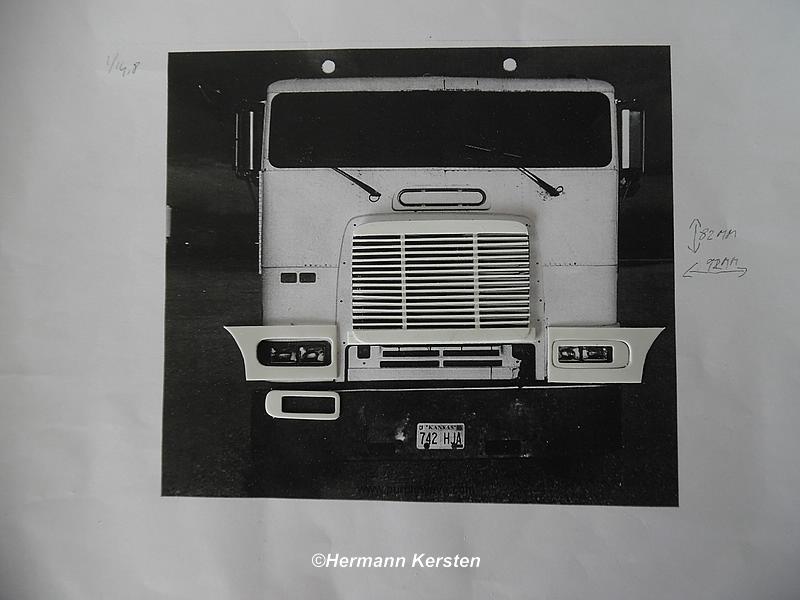
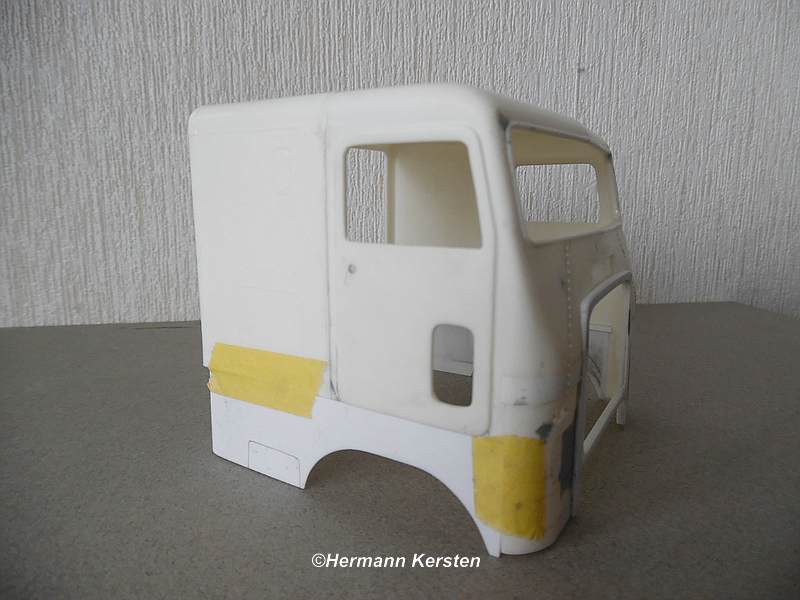
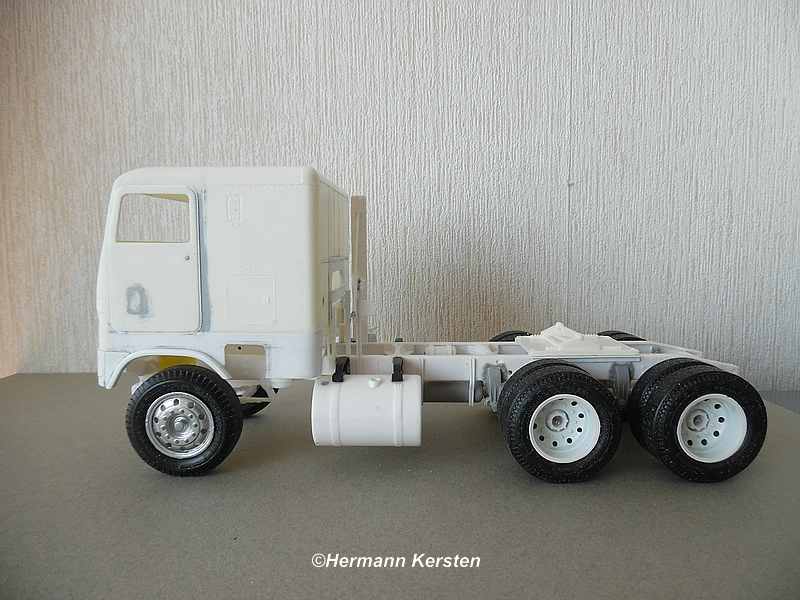
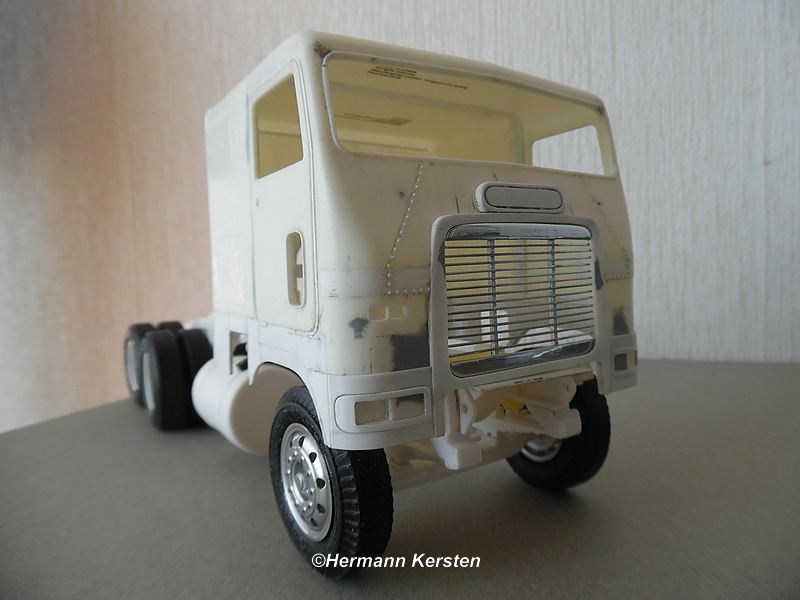
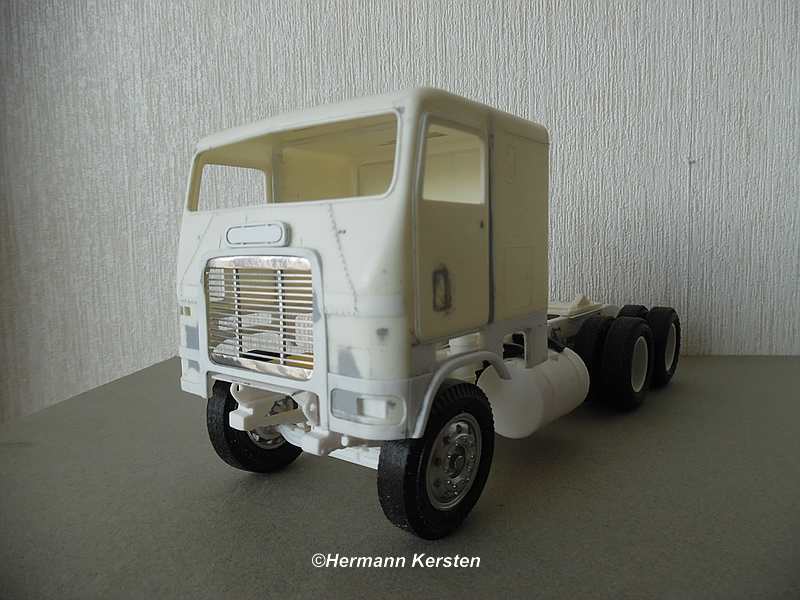
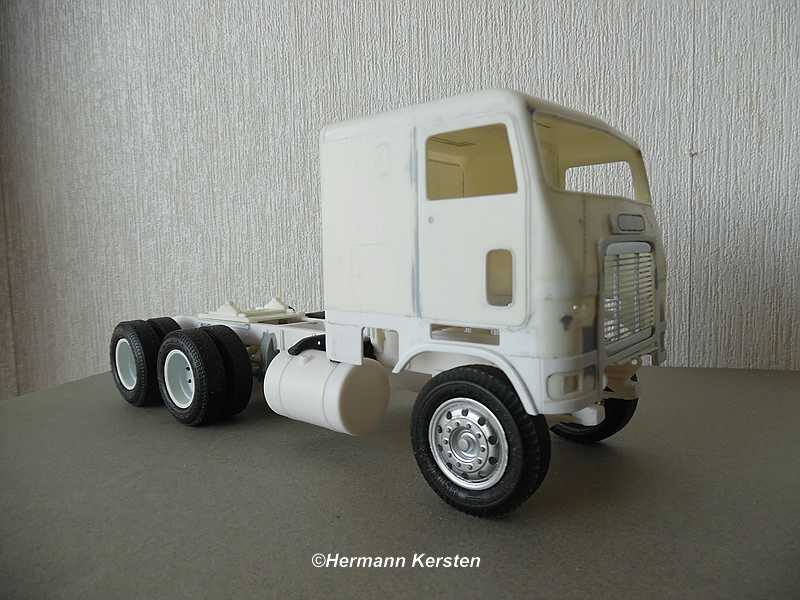
Hi guys, I have to admit I couldn't wait any longer, but today i start a new topic of an another AMT Freightliner conversion. The inspiration came from Hanks Truck Pictures and i really liked to build this one.... Source; Hank Truck Pictures. It will be the smaller cabin version and the chassis will approach the real version as much as possible. The source for the chassis info comes from the auction site; Purple Wave. Here you find a lot of detail pictures of the chassis, engine, interior and other stuff from this and many other Freightliners, and afcourse also other trucks. OK, we start to modify the chassis into an air suspension on the rear axles. For this I use the Peterbilt air suspension, and cut it from the peterbilt chassis, sand it to the right thickness, and attach them on the Freightliner chassis. The trusses of the kit will be used, these wide crossbeams from the AMT kit are narrowed and reused for this chassis. After a lot of sanding and gluing, scratching extra crossbeams and air reservoirs, this is the result. Then the next job is to modify the exhaust tower, the tilt-pump for the cabin comes again on this tower, and on the other side a small tower on which the connections of trailer cables will be attached. Then the conversion of the cabin. I know this FLB cabin is also available in resin, but making it myself is more fun for me to do. First of all, we start with the sides with the wheel arches and the front grill. Than the headlighjts and the grill..... And glue the wheel arches on the cabine and cut the foot steps out. The outer headlights are deepened because they are in the curve of side of the cabin. As everybody can see, all the rivetting will be renewed, just like with the other Freighjtliner. Than at last, the steps under the door and a rubber around the small window door. This small window is also modified because it has to be a little wider and more straight instead of the old Freightliners. The floor plate and the interior will be completely scratchbuild, because this is a much newer type. Seats will be used from the Peterbilt or Freightliner FLD kit, i'm not sure yet but I'll look at that later. Ok guys, thats it for today. See you later! Hermann.
-
Absolutely beautiful! For me, the rims are really stand out, perfect build in this small scale. Hermann.
-
Freightliner COE
Hermann Kersten replied to Hmann68's topic in Model Trucks: Big Rigs and Heavy Equipment
Nice truck, i also like the colour scheme. Hermann. -
White Road Boss
Hermann Kersten replied to Ken Gilkeson's topic in Model Trucks: Big Rigs and Heavy Equipment
Great build of a great truck. Nice dio also. Hermann. -
MB New Actros Lowliner
Hermann Kersten replied to Hermann Kersten's topic in WIP: Model Trucks: Big Rigs and Heavy Equipment
Thank you Tom! Hi gents, today i show you the progress of the cab. The last small details inside this cab are, some bookxs and a small box in the storage compartments of the inner roof, that i made before, small black curtains and a magazine in the storage compartment of the passenger door. And in the dark.... And the outside so far. The wiring of the lighting runs on the inside of the window interior post, to the bottom plate. From here, the wiring will later run along the chassis, and end up on the trailer connection bar. The external power supply can then be connected on these trailer couplings. Behind the windscreen you see the camera of the automatic brake assistant, or in other words, the ABA. With this system, this truck can brake itself on a dime, even fully loaded. This safety feature is a common in all the New Actros trucks. Well, gentlemen, this was it for today and see you next round! Source Hermann. -
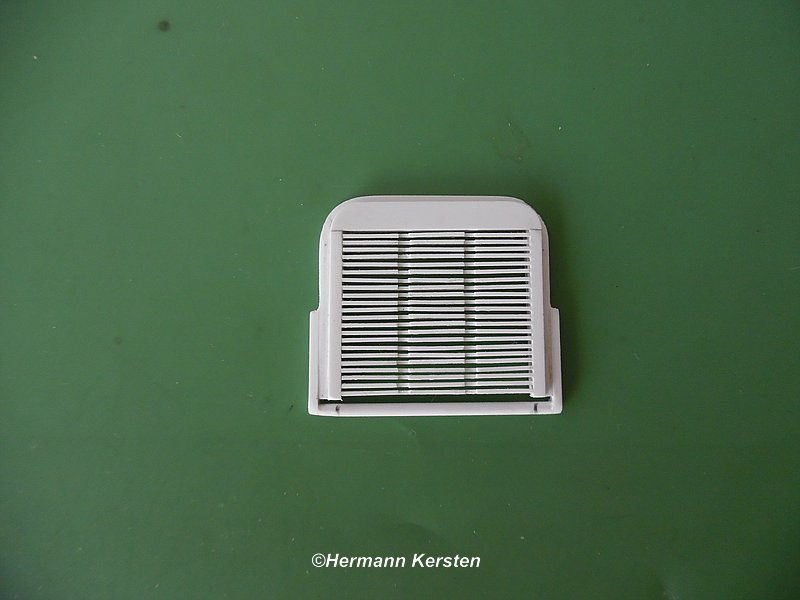
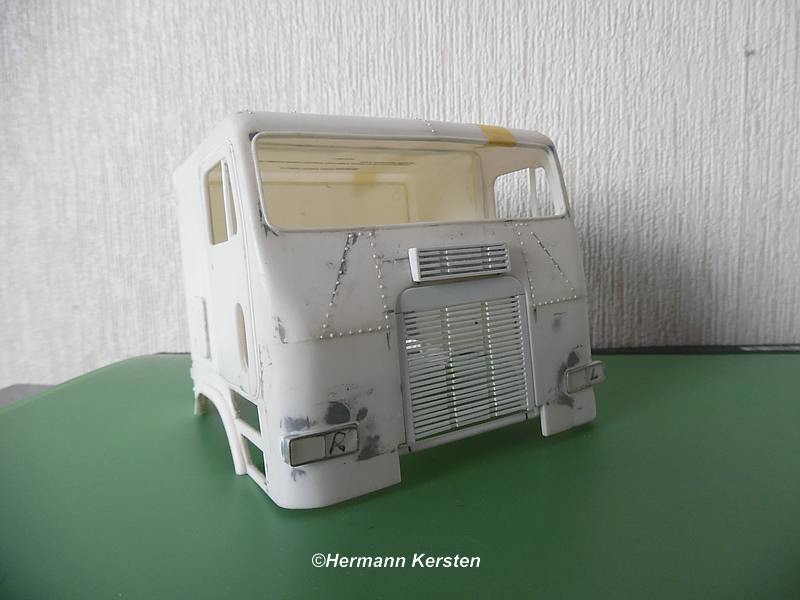
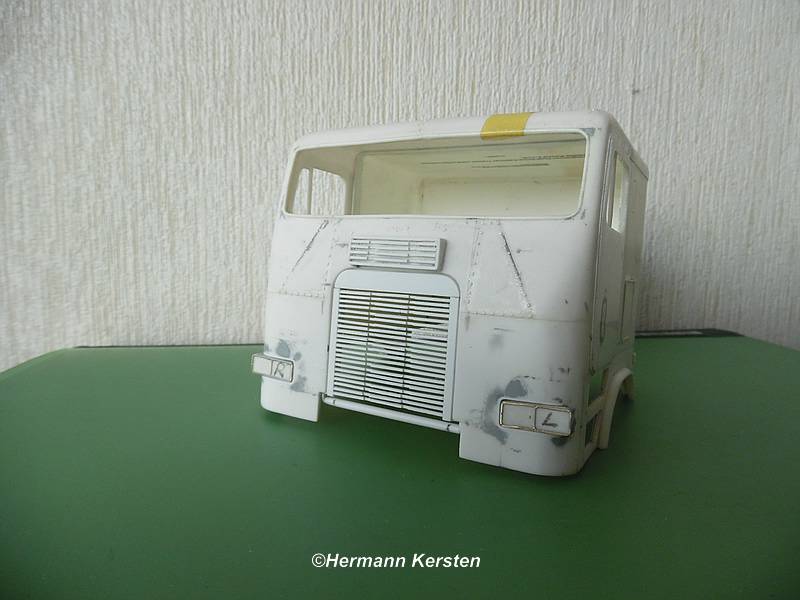
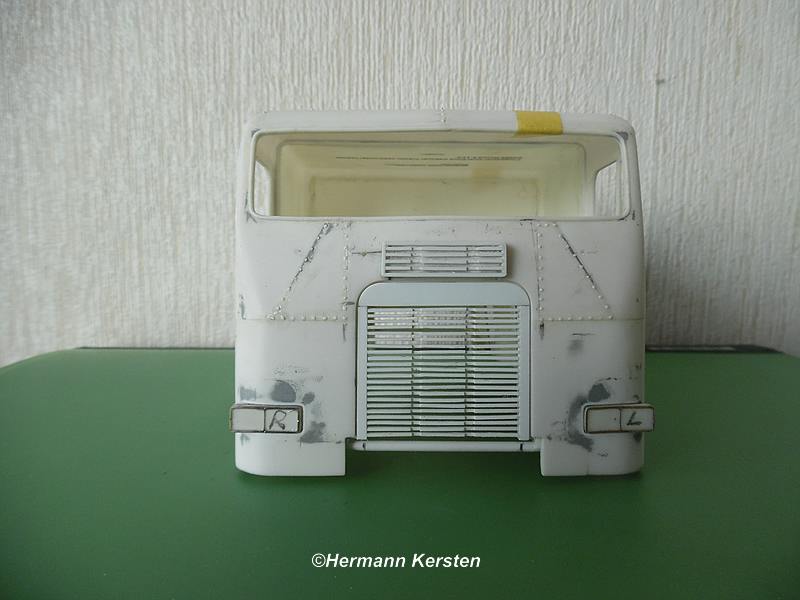
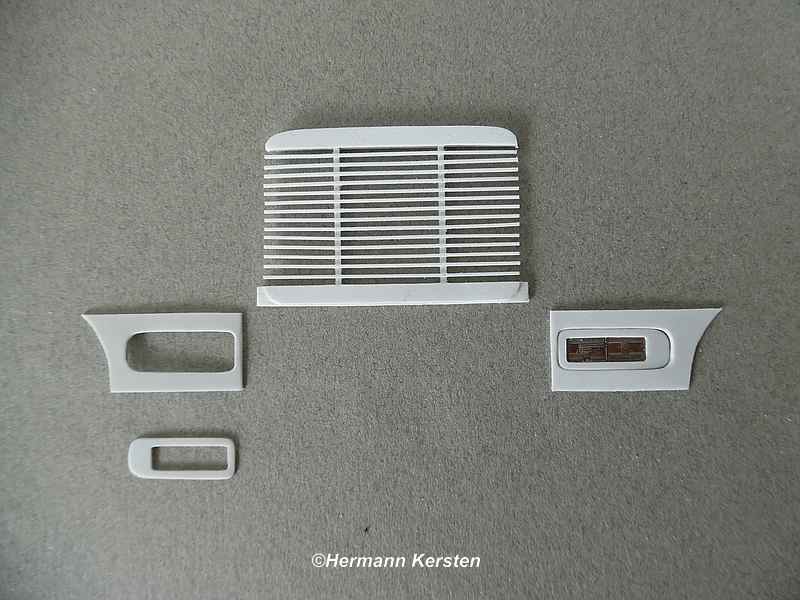
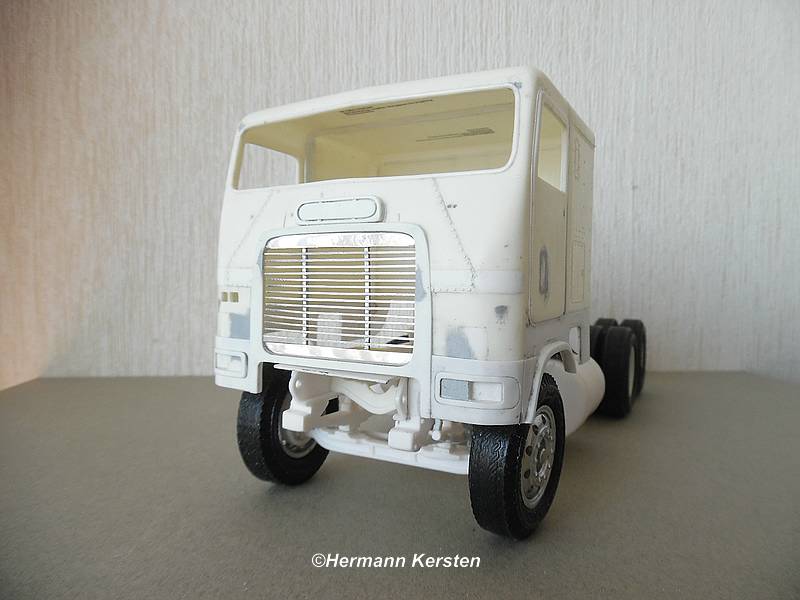
Hello gents! Yes Richard, i've got the the reissue and exchanged the Freightliner emblems already, thanks for the comment Today i show you the small progress on this Freighjtliner. First of all i modified the tiltpump for the cabine and put it on place on the exhaust tower. Than it's time for the grill and the small upper grill above the main one. First i had to modifie the hinges for the cabine, because i make this grill exactly like the reference pictures i have. With this conversion, the tilt support will be slightly higher placed, and that is why I made the tilt supports myself to the new situation. Then the grill itself, the grill grid is made out of 0.25mm x 0.5 mm styrene strips and glued them one by one. Than with a self made tool, i cut the smaller parts for the grill grid and glued them on the first strips, to get the real looks for this Freightliner grill. And how it looks on the cabine.... Looks totally different than the original parts of the kit. The duplicate is for Uncle Koos his Freightliner. I hope you find this an interesting update., see you next update! Hermann.
-
Absolutely incredible in such kind of small scale! Hermann.
-
MB New Actros Lowliner
Hermann Kersten replied to Hermann Kersten's topic in WIP: Model Trucks: Big Rigs and Heavy Equipment
You're welcome Richard. Thank you Vince. And we continue. The interior is ready now, and it took a lot of time for making these small details inside the cabine. First i show a few features that are standard in the New Actros Solostar together with some small and very small details inside the cabine. We start with the folding table at the bed and the folding table in the dashboard. And the 1/24 version.... Some cans and sigarettes with a lighter.... A tissue- box with a real piece of tissue, shades, a modern car key.... Supports where the upper bed hangs , what is absent in my model..... Than the completion of the Solo-seat.... The electronic key box with 2 small keys for the add blue and the fuel caps..... Then making the floor mat, this is done with paper and sewing thread. With the pictures below, the requirements for making this small mat. And the result after a patience job, together with the safety belts which are also made of paper..... From the thin layers of a paper handkerchief, making and painting the curtains ..... A fluffy teddy bear that comes from a car - asseccoire set of Fujimi. You have to paint the lighter color nuances and the eyes on the bear by yourself, the fur on the bear has already been done by Fujimi. Then the ceilling spots, which are made with small train lights of 1,2mm x 3,6mm and 1,2Volt. With these small axial lights, I can keep the real shape of the ceiling spots, when the cabine is closed and a little dark, i can on the lights, so that everything is still good visible. And finally, the test with the lights inside the cabine....... These were the progress so far. Now I can place the interior inside the cabin and close the cabin. See you next round! Source Hermann. -
Very nice to see these small scale models. I am also surprised that there is so much detail possible, in such a small scale. Great work! Hermann.
-
MARMON coe 86" cab
Hermann Kersten replied to CRUSADER2's topic in WIP: Model Trucks: Big Rigs and Heavy Equipment
Yes Geoffrey, the time consuming work.....Details and other small things. The resin dash mixing with styrene is also a good solution, ah yes.......dont forget the ashtray on the co-rider side. The details on the seat looks also awesome. Hermann. -
Hello fellow builders ! I didn't notice this, but i will see what i can do or change it to a normal Freightliner emblem. Thanks for the remark Richard! Yes gents, today i show you some small progress on this one. The windshield is finally placed and with a styrene strip of 1mm hemisphere, I glued ithis center strip of the windowframe on the windshield. Than i placed the modefied sunvisor on the roof, it is not on the cabine glued yet, for the looks. The next job was to make the side fenders of the cabine. I made them out of 0,5mm styrene plates, and glued them together so that the top could be curved or rounded. When the glue is hardened than the curve will remain. After all is hardened and cleaned, than it's time for the paintjob and the attaching of the tax stickers. For this model i put the tax stickers on the fenders because I saw this regularly with the real ones . The handlebars on the innerside and outside of these fenders, will be mounted later on. Now it's time to make the frontgrill and the bumper. Ok guys, this was it for today and until the next round! Hermann.
-
Mack Cruiseliner
Hermann Kersten replied to Joe Thomas's topic in Model Trucks: Big Rigs and Heavy Equipment
Great rig and nice idea to make a Ryder version, fits good to this Mack. Hermann. -
Very nice build and paintjob. The interior look also great. Hermann.
-
1978 Mack U-Model "Overnight"
Hermann Kersten replied to DRIPTROIT 71's topic in Model Trucks: Big Rigs and Heavy Equipment
Very nice copy of the real one , only the front tires need also a little wash, just like the rear tires. The small details in the cab are also awesome. Great build! Hermann. -
Wow....... absolutely beautiful model. I really love to see one in 1/24 instead of 1/35. You got me with the hoses, they look incredibly realistic, Just what i said, WOW! Hermann.
-
MB New Actros Lowliner
Hermann Kersten replied to Hermann Kersten's topic in WIP: Model Trucks: Big Rigs and Heavy Equipment
Hello gents! First of all, thank you all for the nice comments ! Richard, the module is an aquatarder, this one works on the cooling system of the engine, this model, what I'm making , get also the same aquatarder, just like the other Actros models. All the Mercedes Benz have the Front under run protection or bar, this safety feature starts already with the Actros MP2. At the Actros MP2 and MP3 lowliner, you can actually see them, it sticks out a bit below the bumper. The radiator shiels are on every New Actros and Arocs models. If you wanna know something, just ask. Yes gentlemen, and we continue with this Lowliner. First of all, i have modified the inner doorwindow frames, the kit is already well detailed, but the inner frames are missing. With these self made frames, i don't have to glue the windows in to the frames, but glue the frames around the windows. In this way, you dont have the risk for glue mistakes with the doorwindows. Then a heat cloth under the floor plate, this is formed with styrene and covered with normal paper . After all the glue is dry, i painted the whole thing with Matt black. Then the polishing of the cabine to make it shine. i used a real car polisher, because the cab is painted with car paint, after this polishing, i polished the whole cabine with car wax. The result..... Then put the innerside of the front cover in the real colours and placed the Mercedes star into the cover. The star is marked with a molotow chrome marker. Then paint all the rubber and plastic caps on the back of the cabinde, and paint the bolts of the cab supports with silver. After this fine detail job i cut the long sticks from the fuel tanks, and paint and place the covers at the spot where the sticks have been cutted. Then with a slightly thicker styrene tube, i simulate the rubber hoses, which are placed on the cooling water pipes of the aquatarder. And then.....then it's time for the details inside the cabine. This model is the solo star version, this means that the passenger seat is exchanged for a large relaxing chair in its place. Source Source Of course this chair is a self made one, and now i have the lower part ready. And for a nice detail and for fun.......a lady form Master Box. And finally, the result so far ..... ..... Yes guys, this was it for today, and until the next round! Source Hermann. -
B.R.B.O Chevy Titan 90
Hermann Kersten replied to Sam I Am's topic in WIP: Model Trucks: Big Rigs and Heavy Equipment
Nice build, the cab color is also well chosen. Hermann.