Hermann Kersten
-
Posts
595 -
Joined
-
Last visited
Content Type
Profiles
Forums
Events
Gallery
Everything posted by Hermann Kersten
-
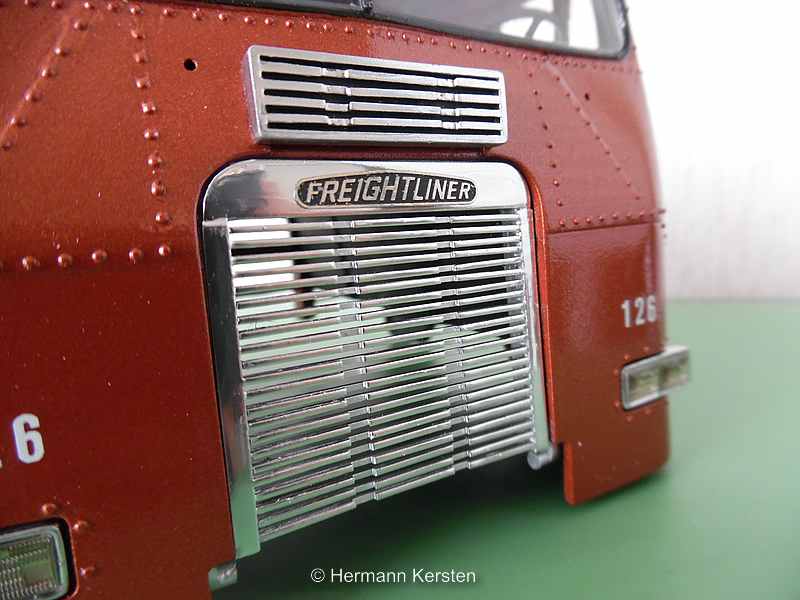
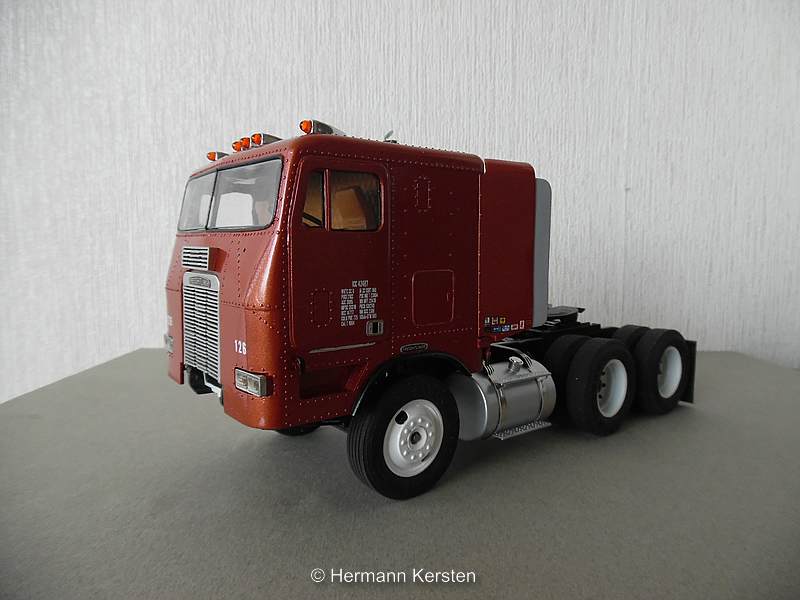
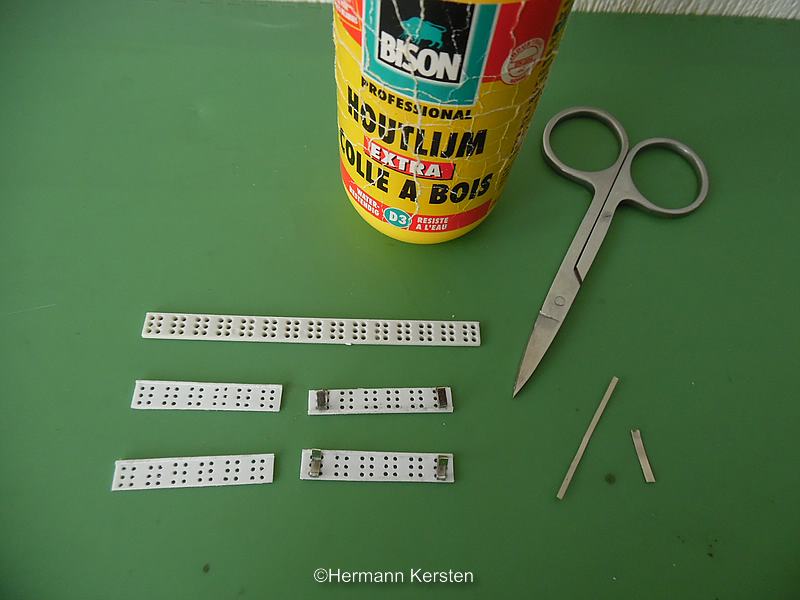
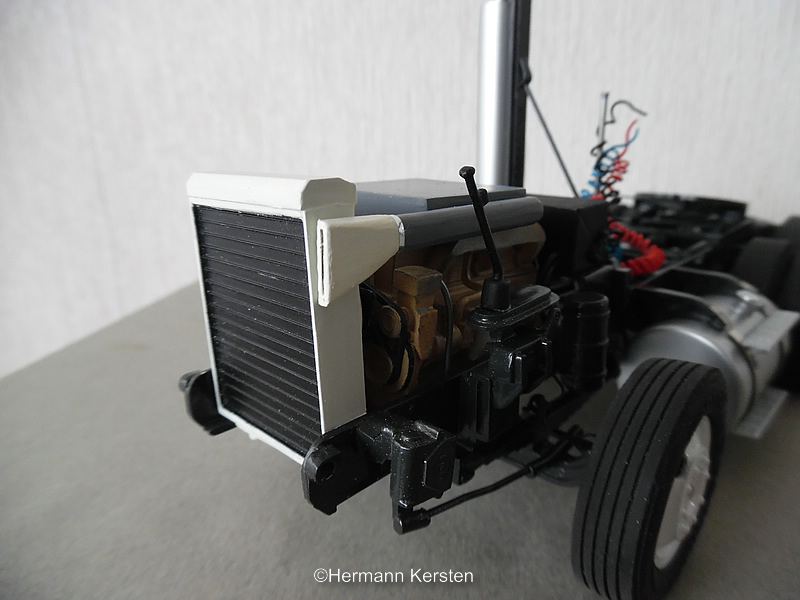
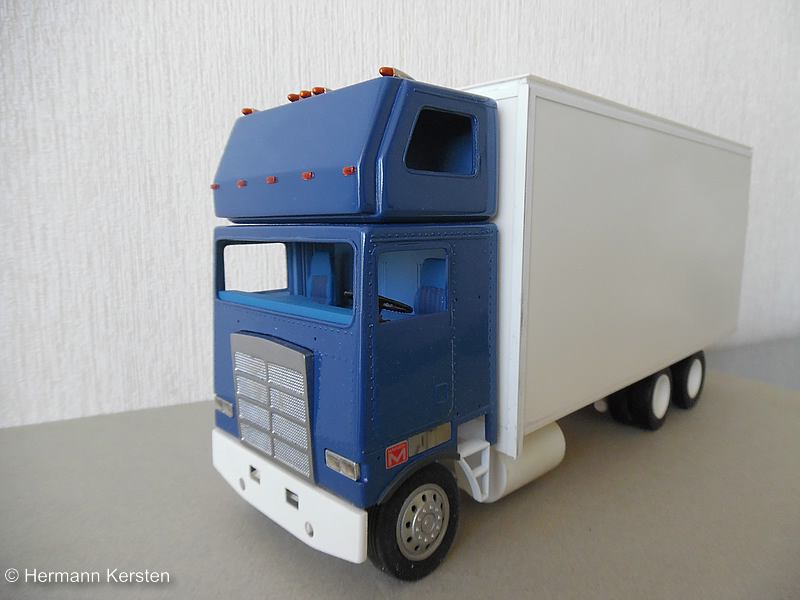
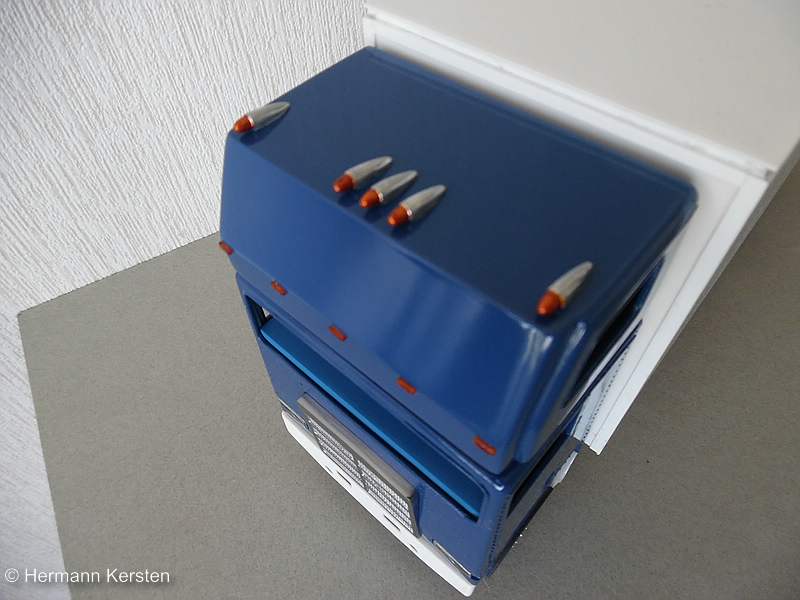
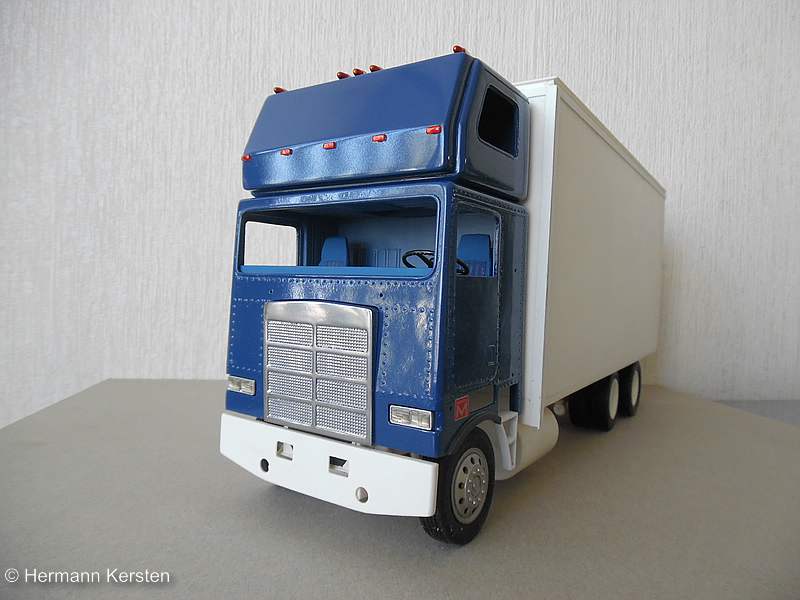
 Yep, and 2 blue fingers. lol Ok guys, the brass connectors of the trailer cables, and the grill are now also completed. On the grill I have glued the 66 pieces of small styrene strips, 0,5mm x 0.5 mm x 10 mm , to the main strips of the grill. After this job i made the grill chrome with a chrome marker and added a CTM Freightliner emblem , what was first blackened, and then later the paint, on the higher surface, was scratched away. And an overall picture so far .... Ok guys, thats it for today is till the next round! Hermann.
-
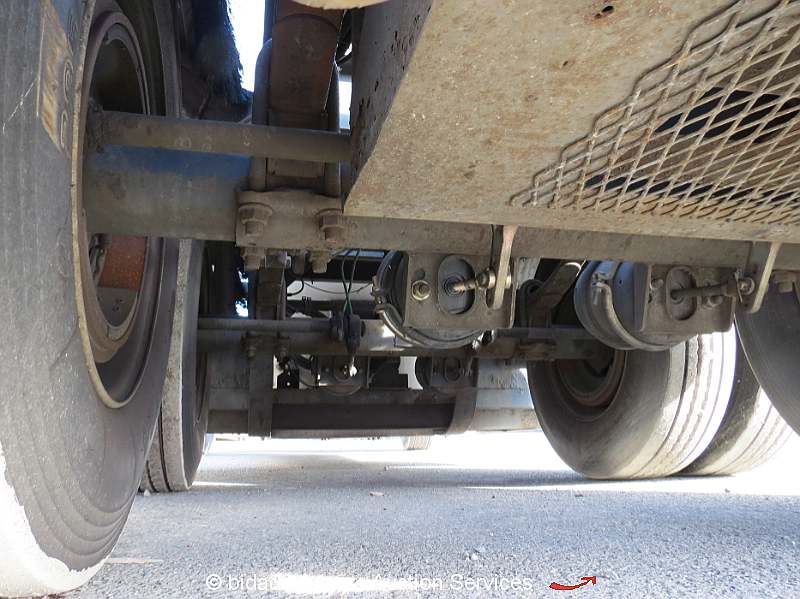
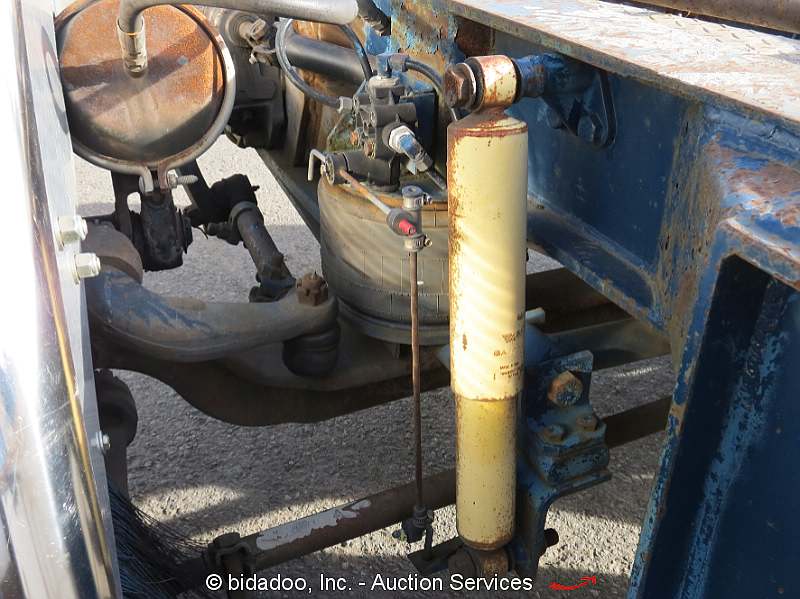
Hi Kerry, I read it again and yes, they have brakes, but the steer car driver can't brake, it's the truck in the front who activate the brakes, just like with a trailer. On the internet search, i found a selling on Ebay of an Callahan Steer car. This Steer car is already sold, but in the google image, there is a lot of detail pictures, also pictures of the brakes on the front and rear axles. Just type in google image, Callahan Rear End Steer Car. Here are some of those pictures..... I hope it will help you out. Hermann.
-
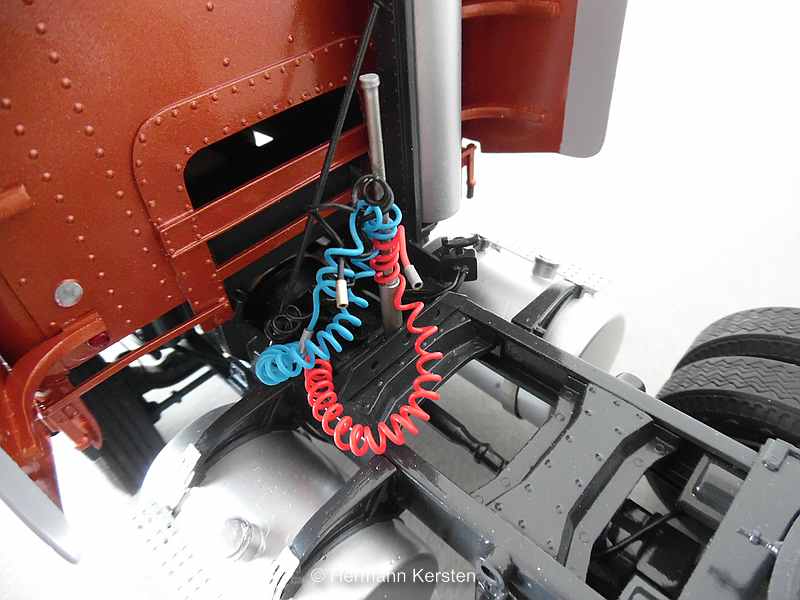
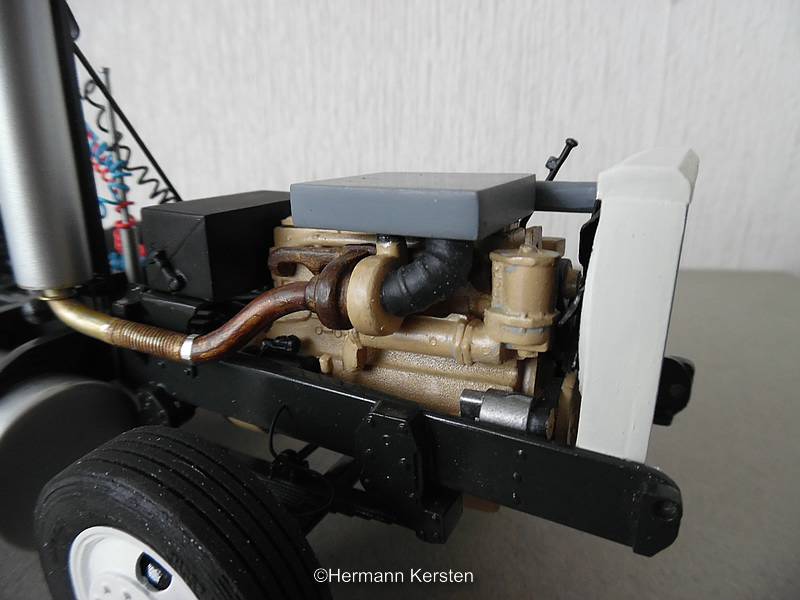
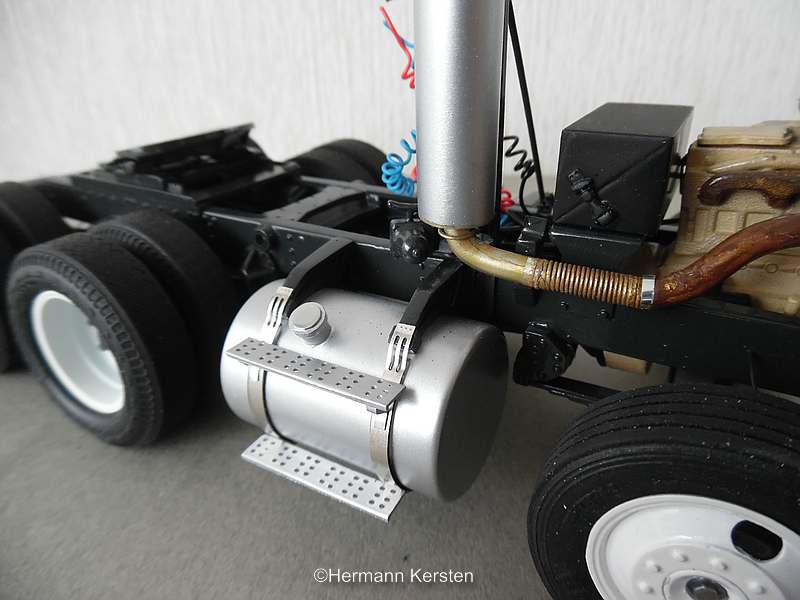
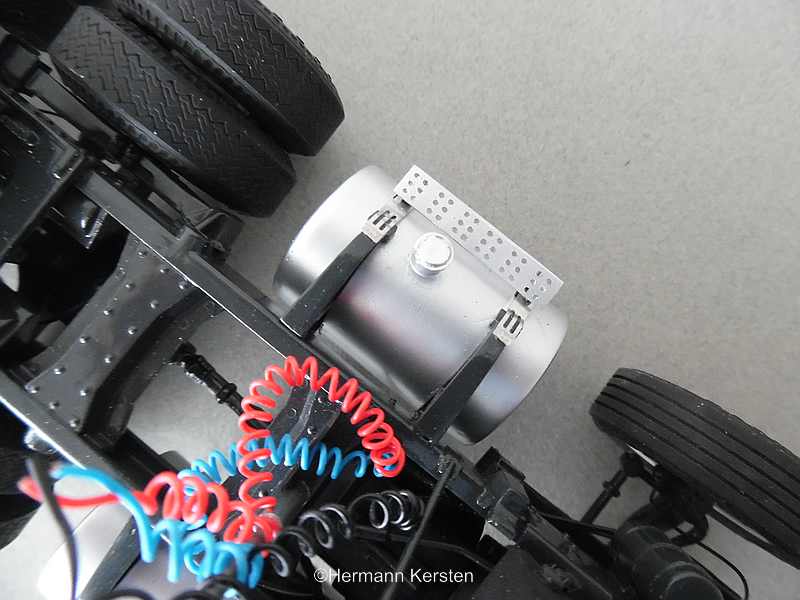
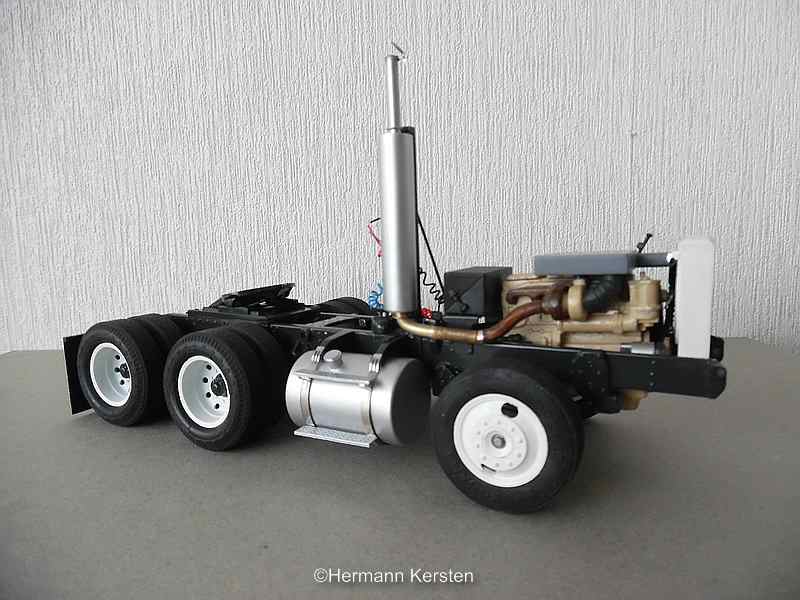
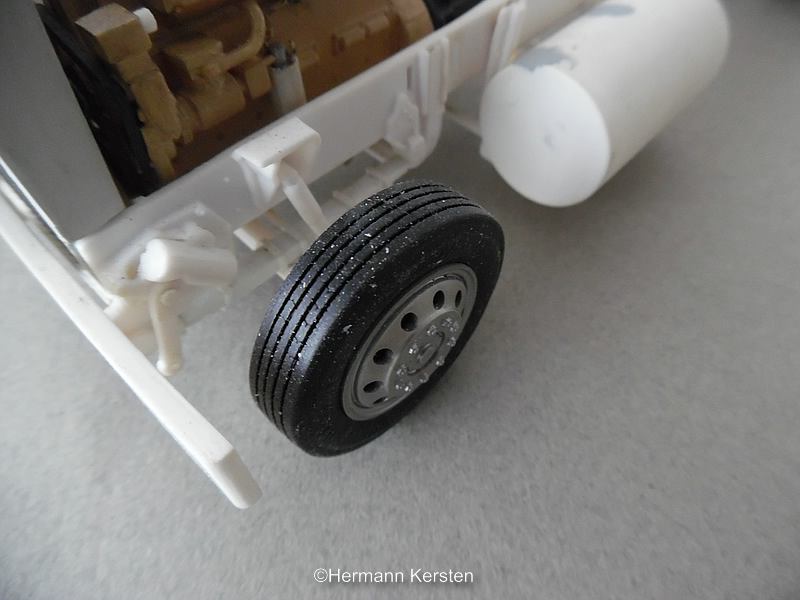
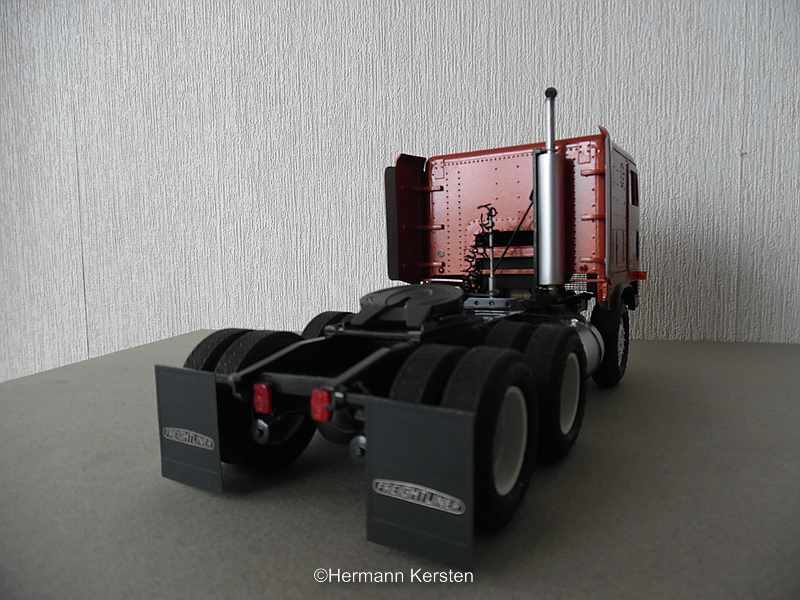
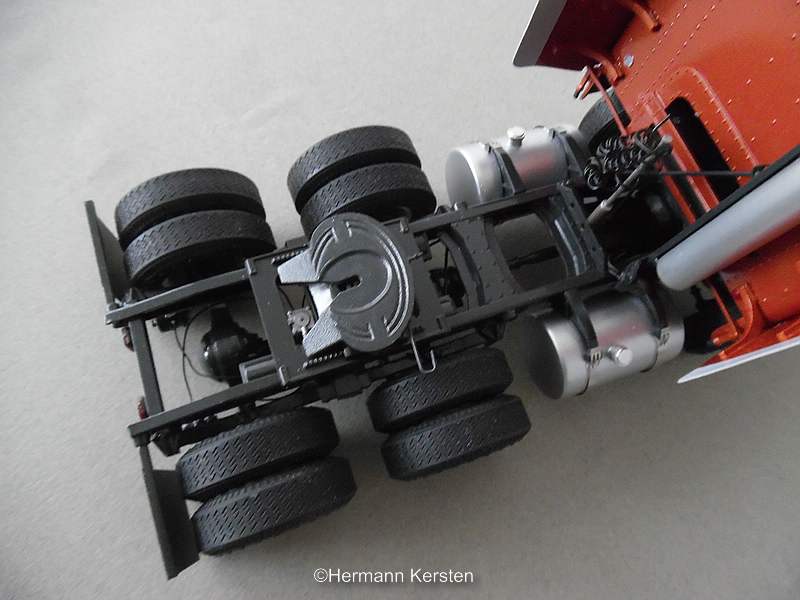
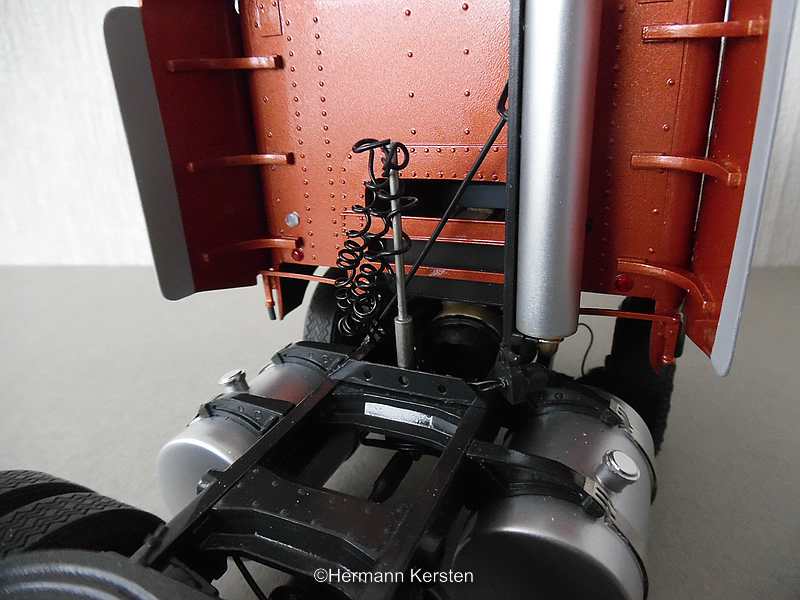
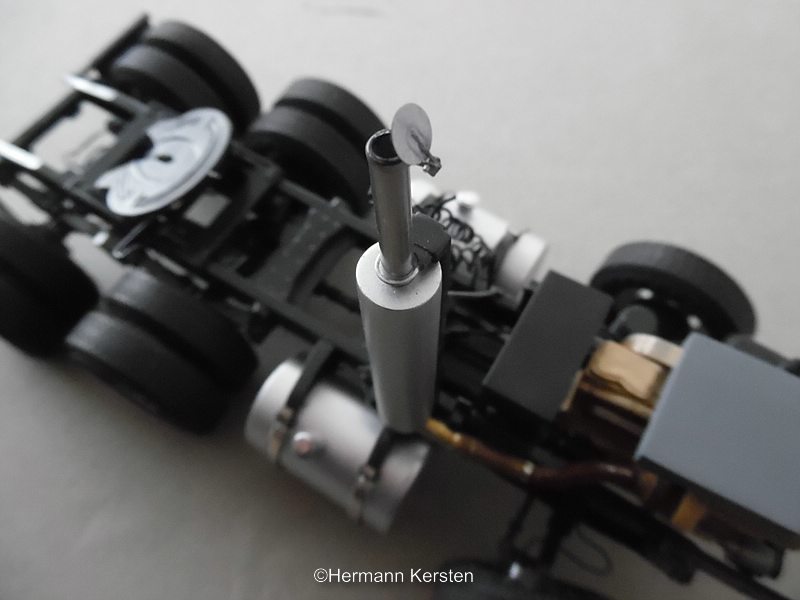
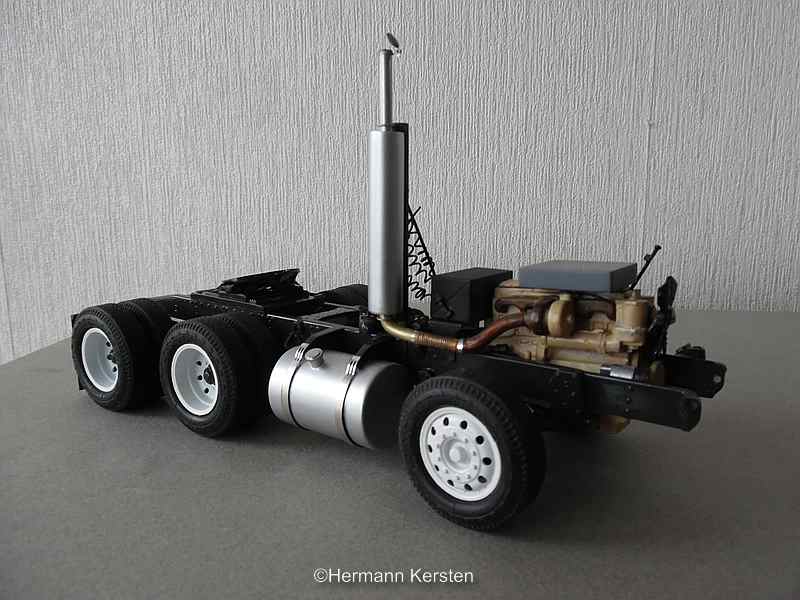
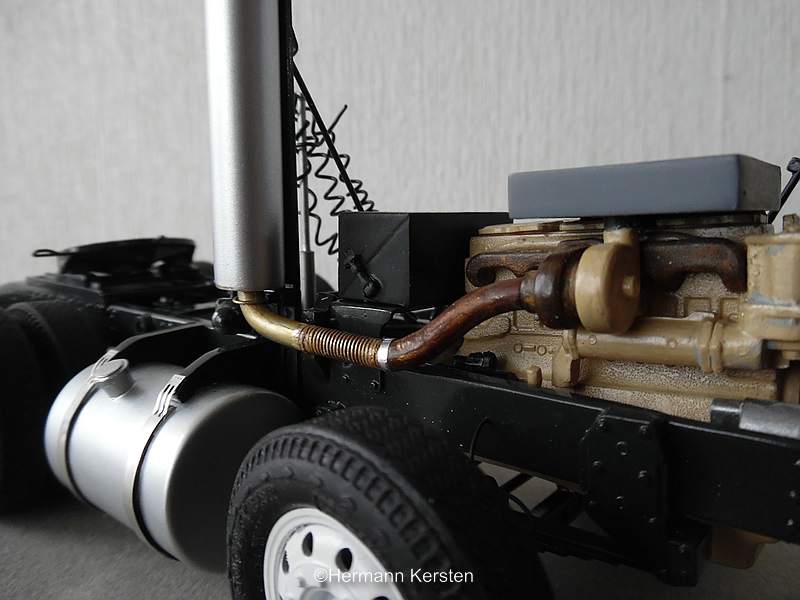
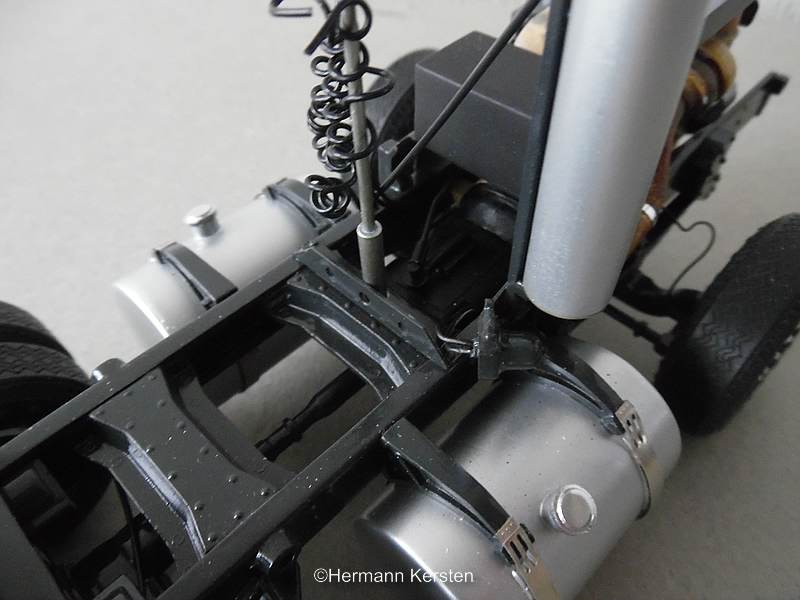
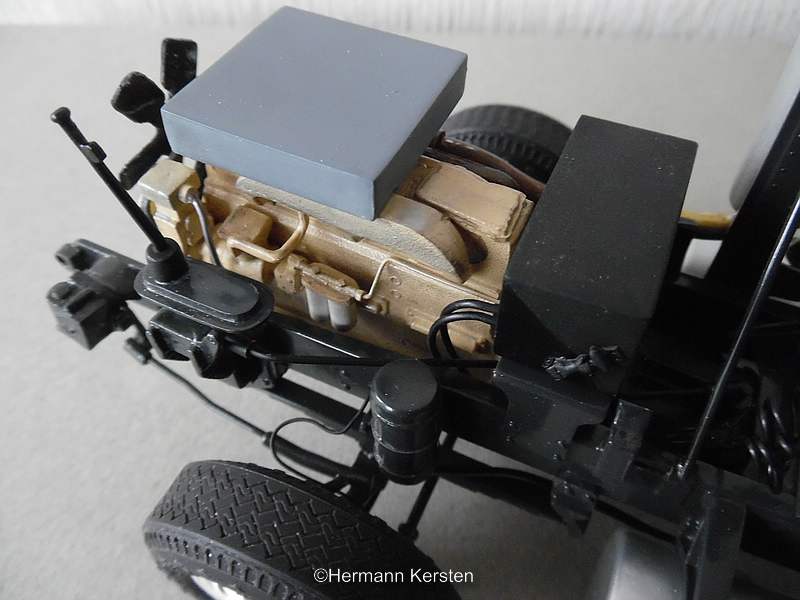
Thank you Vince! Today i show you the completion of the engine and the chassis. The only thing that i have to do, are the connectors on the trailer wiring. After my computer mouse was not working anymore, i saw on the inside of the insulation, the right wires in size and colour, that I needed for the right wiring. I cut the blue and red wires and exchange them with the black ones, that i attached before. I copied the steps from the 1/24 Freightliner kit, and made them in the right scale, little less wide, and attached them on the sides of both fuel tanks. The supports are pieces of metal waste of the CTM set. The engine still needed a connection on the air supply and the last thing was to make a breather that is going from the airbox, to the front and next to the radiator. I saw a picture of this system on an auction site who sold a Freightliner FLA. Ok guys, now it's time for the pictures..... That's it for today and see you next round! Hermann.
-
B.R.B.O. 2019 KFS Mack F Series
Hermann Kersten replied to Bennyg's topic in WIP: Model Trucks: Big Rigs and Heavy Equipment
Nice project and the cabins from KFS are of a very good quality. Hermann. -
Extended cab Fl Coe.
Hermann Kersten replied to clayton's topic in WIP: Model Trucks: Big Rigs and Heavy Equipment
Good start of a nice project. Hermann. -
Marmon coe Topsleeper
Hermann Kersten replied to Hermann Kersten's topic in WIP: Model Trucks: Big Rigs and Heavy Equipment
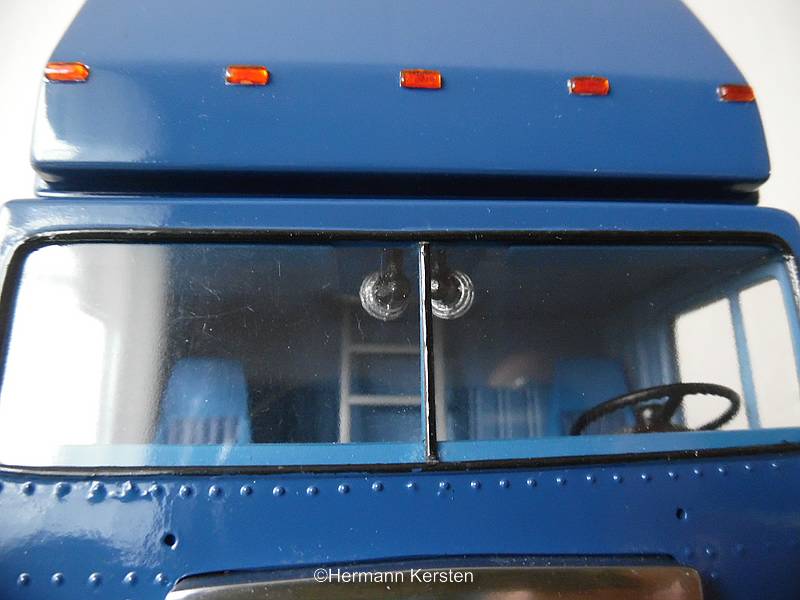
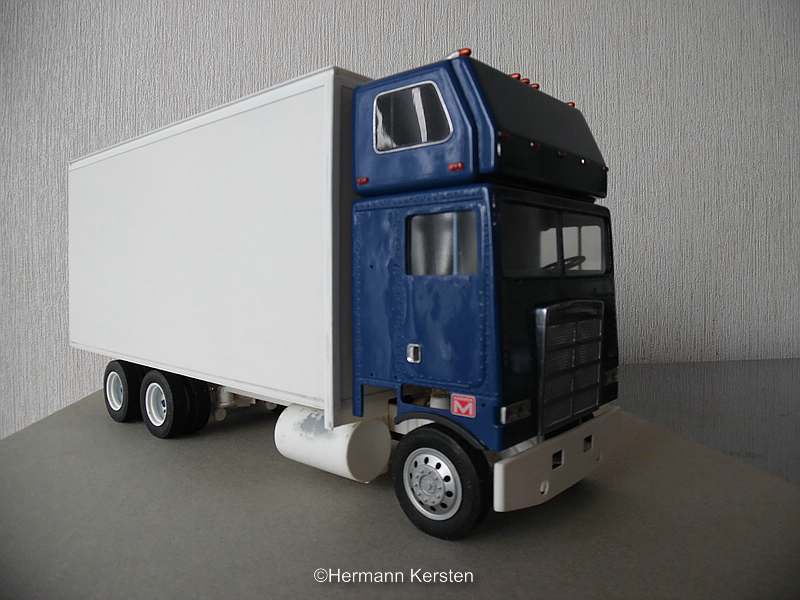
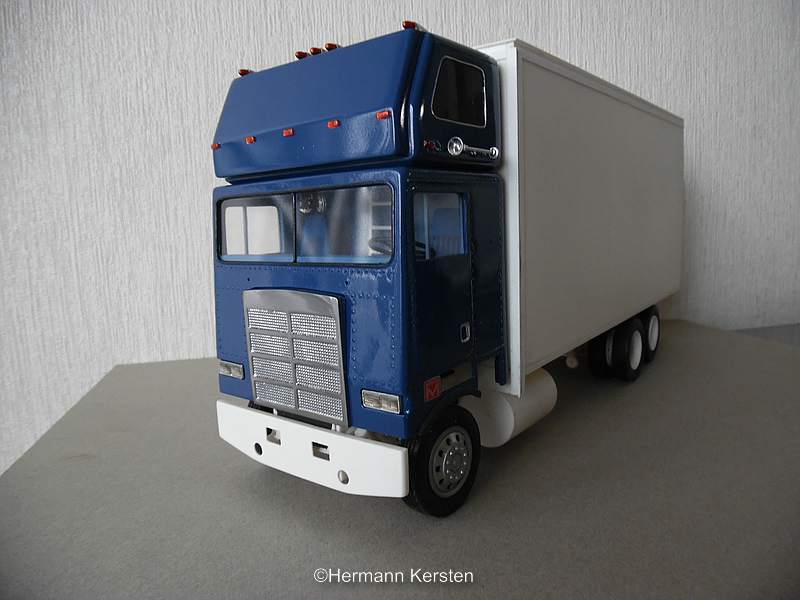
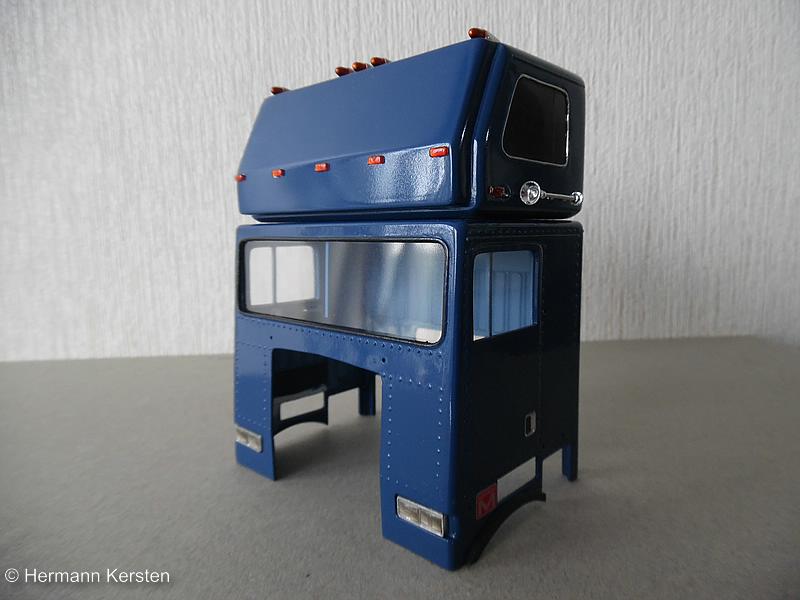
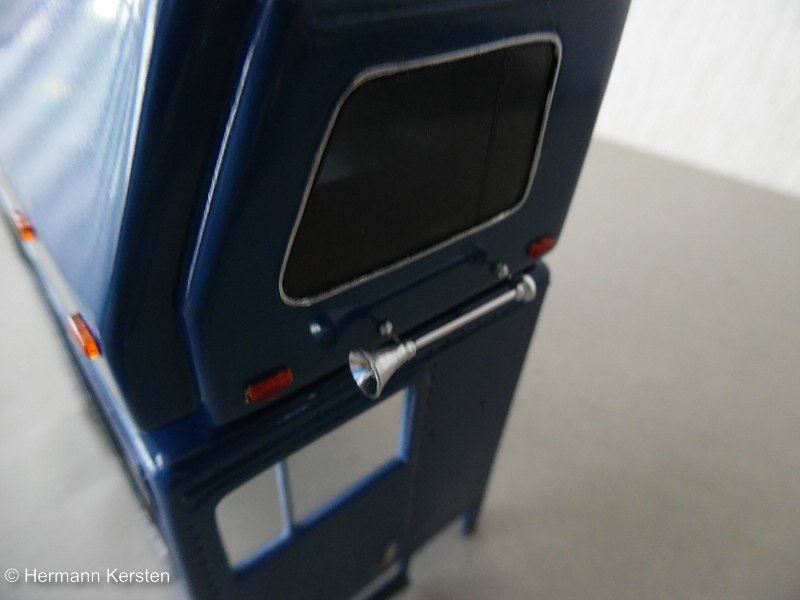
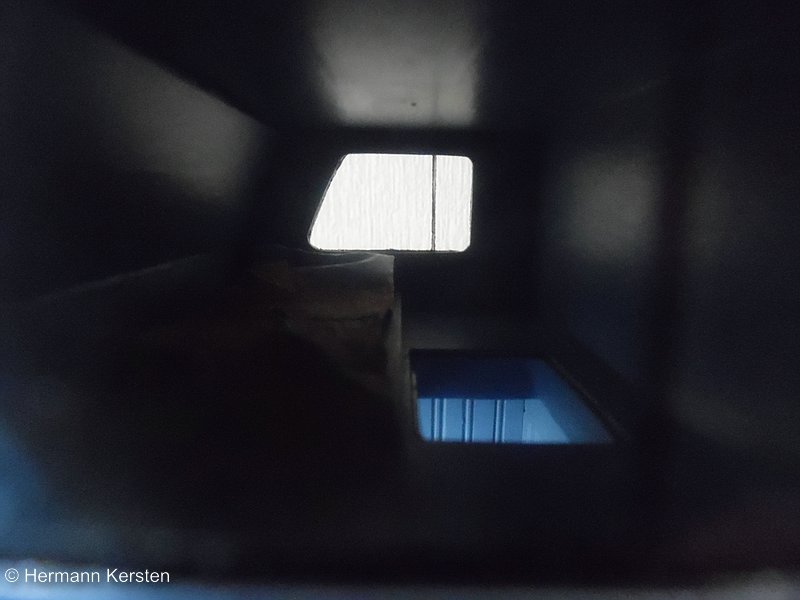
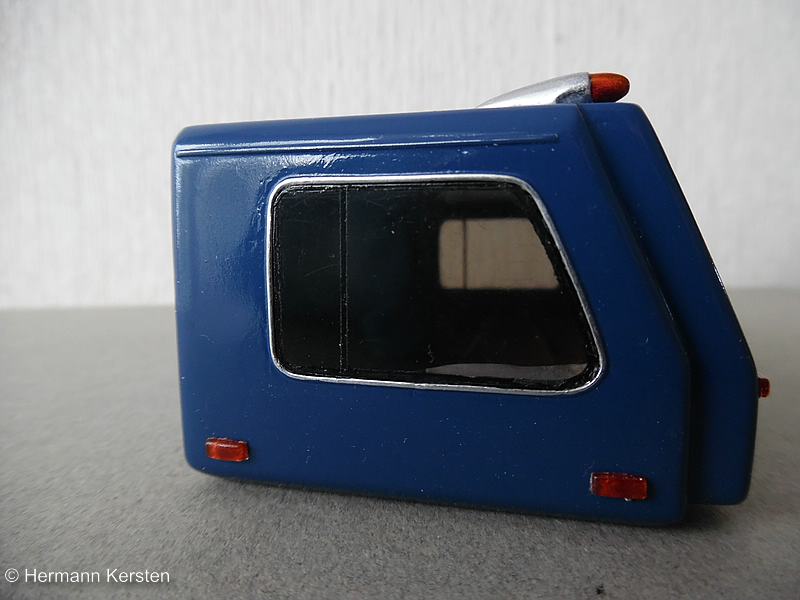
Thanks for the comments gentlemen! I will remind that Clayton, i also used sometimes nail polish on the car, when a tiny spot of paint is chipped by small stones, works very good with nail polish. Ok guys, the sleeper is done now, the windows are made out of a transparent smoke sheet. All the lights are attached and to finish it wel, the horn is also attached now. Also the cabine has his windows now, all the glass work is just attached, not gleud. During the construction of the cab, I prepared the inner window frames for this. Then attach the 2 fans, that i ordered by Double Take Replicas.... I also ordered by Moluminum the 1/25 low rider tires, drive- and steer tires, and replaced them with the 1/24 low rider tires from KFS. The rims are also replaced with the more original rims and hubs, these rims and hubs are also from Moluminum. And all together so far..... That's all folks! See you next round! Hermann.
-
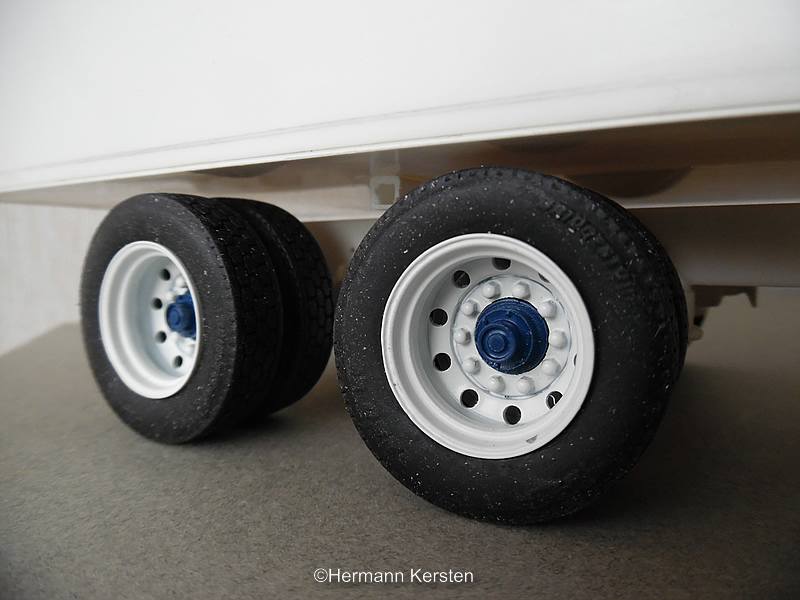
Larry and Brian, thank you for the nice comments! In the last post, i showed you the conversion from the 1/24 bud-hole rims into a 1/25 bud-hole rim. The last thing to do before i could paint them, was to attach the smaller nuts on the rims. These nuts are done by the punch & die set and smashed 1mm rounds /nuts out of a strip of 0,5mm styrene, for these front rims, in exactly the same style as the AMT rear rims. After this job i painted them first in a black primer, and then in the white paint. The black primer gives the white paint a brighter shade and makes the white paint even more whiter. For this Freightliner i put the bud-holes only on the front axle, bec i saw that also in my refernce material and for this Freightliner it looks, in my opinion, also nicer. After the rims are dry, i put 2 nice steer tires, buyed from Double Take Replicas, on the rims and attached the wheels on the hubs. And it immediately gives a different look. That's it for today and till the next one! Hermann.
-
Nice progress of a nice " movie star" . Hermann.
-
The Longest VOLVO ( F-12 )
Hermann Kersten replied to Сергей's topic in WIP: Model Trucks: Big Rigs and Heavy Equipment
Great details, looks very real. Hermann. -
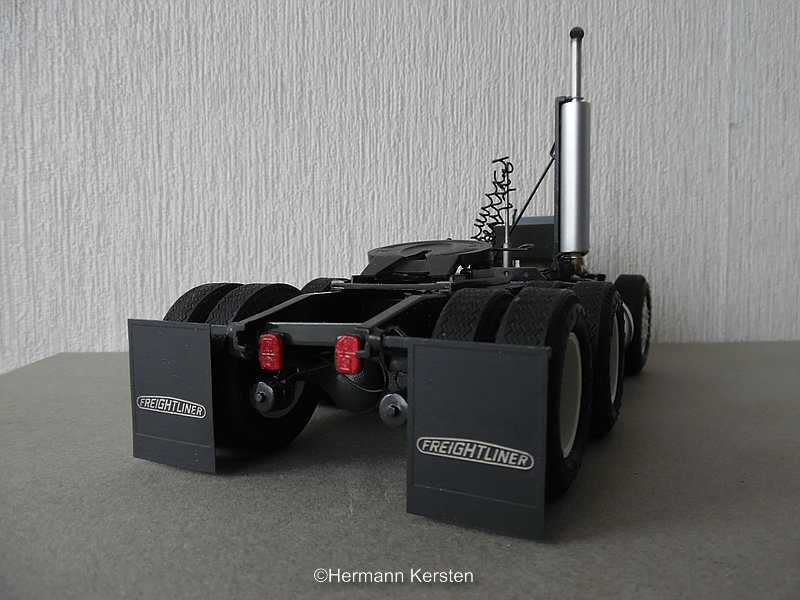
Thank you vince, that info helps indeed, thank you for that. Later i found out that there are 2 sizes, the 2" and 3,5" kingpin. Ok guys, i made some little progress on this one. Everything of the chassis is painted now, and i attached the wiring for the brakes and air supply. The engine is in between the chassis and after placing the engine, i could attach the batterybox on his support. Then the exhaust pipe and a cover for this exhaust what i used from the CTM-set. On the back i exchanged the AMT mud flaps with the CTM mudflaps, because these mudflaps are much thinner and nicer than the thick ones. For these mud flaps i had to make new supports. For the trailer wires i still need to make the connectors. With these connectors i will make coloured rings for the red and blue wires, I could not find a suitable size of these coloured wires. For the front wheels i will use bud hole rims. I have some 1/24 rims and i converted them into a 1/25 version. Later i will look wich one looks better for this Freightliner, the standard AMT rims, or the modified 1/25 rims. And together with the cab...... Ok guys, that's it for today, then i will start to finish the front grill and make a start with the 2 bumpers and lower grills. The small cabine details will be attached when the cabine has been permanently installed, this is an easier and safer way to do with the small details, instead to pick up the cab and have the risk that something will break off ........... at the very last moment. To be continued. Hermann.
-
Truck and trailer look great, and the start of the dozer looks good, still a lot of work for that one. Hermann.
-
Look really good, love this unusual project. Hermann.
-
It is too bad that you experience so much trouble with the resin cabs, while it is a very nice project. If the problem only occurs at the drivers door, maybye it's an idea to cut out the resin door and replace it with a styrene version. As far as i can see, the shape looks pretty easy to me. Hermann.
-
Marmon coe Topsleeper
Hermann Kersten replied to Hermann Kersten's topic in WIP: Model Trucks: Big Rigs and Heavy Equipment
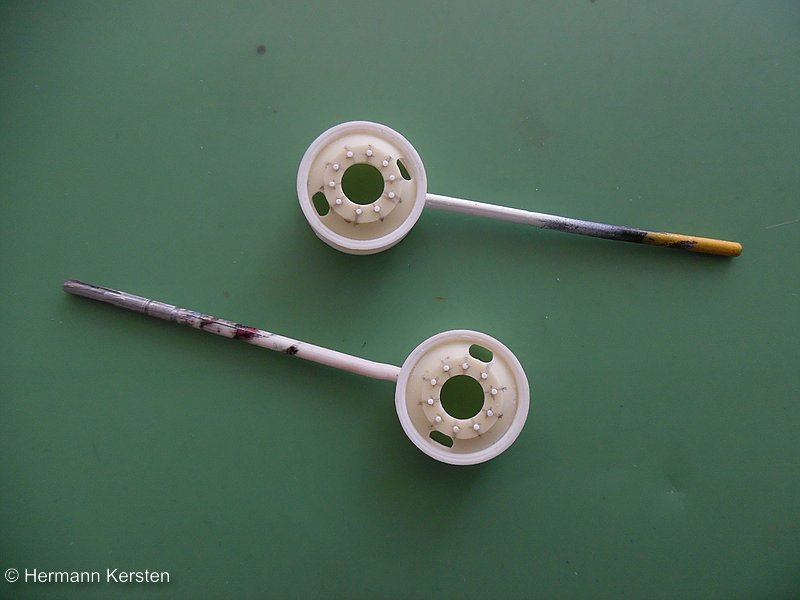
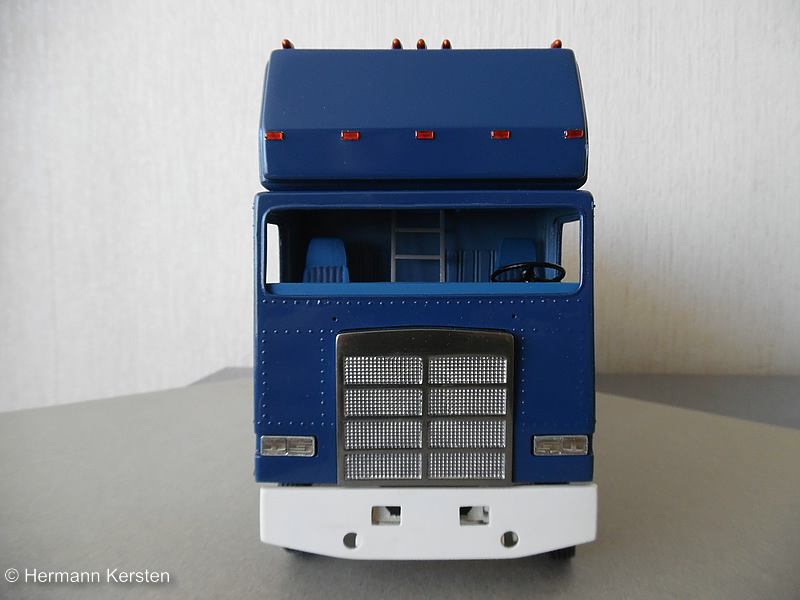
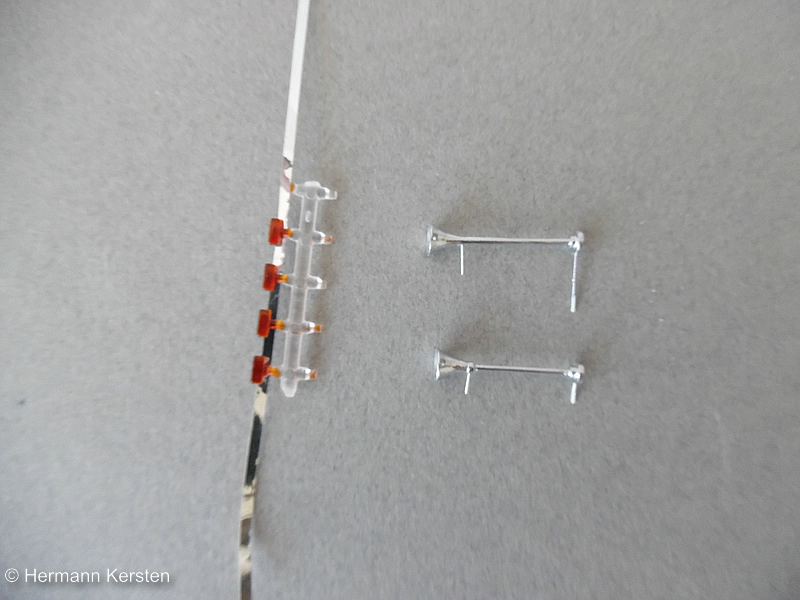
Thank you Vince! Today i show you the start of the small details at the sleeper. First to begin with, is the two air horns with two different sizes, because I am not sure yet which size is the best. The cones themselves come from an another kit and the backside of these cones are selfmade, including the supports. Then the transparent glasses panted with Tamiya clear and glued them with superglue on a strip of BMF foil. In this way the glasses and the top lights are attached to the top sleeper as stickers, and i don't have to be affraid for glue mistakes with attching this stuff with normal glue. The danger of normal glueing is that you have to move the lights a little bit to the right position and with this movement the superglue can damage the paint or you see glue spots on the fresh painted surface. I renewed the stairs in the inside of the cabine, this time a little bit thinner than the first one. And with the first lights attached.... Now the Marmon finally starts to look like the reference pictures.... Source: Hank Truck Pictures Thats it for today guys, and see you next round! Hermann.
-
Marmon coe Topsleeper
Hermann Kersten replied to Hermann Kersten's topic in WIP: Model Trucks: Big Rigs and Heavy Equipment
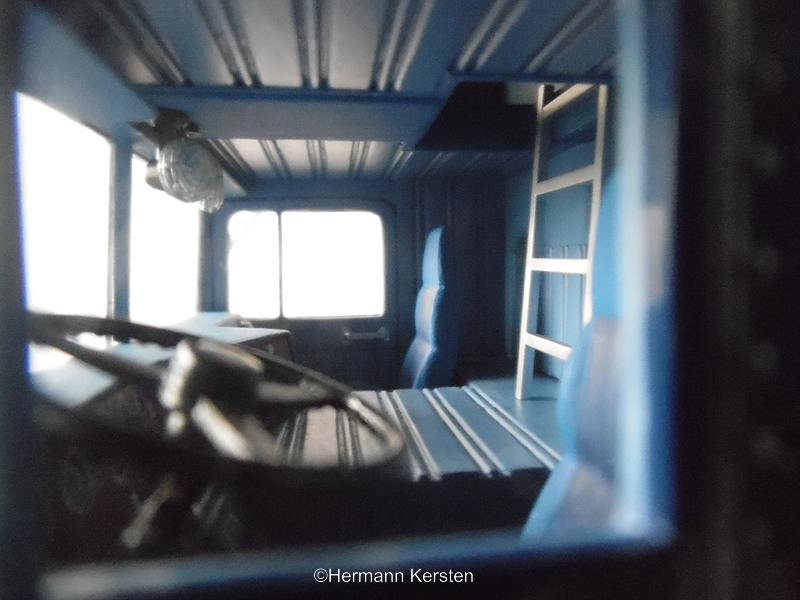
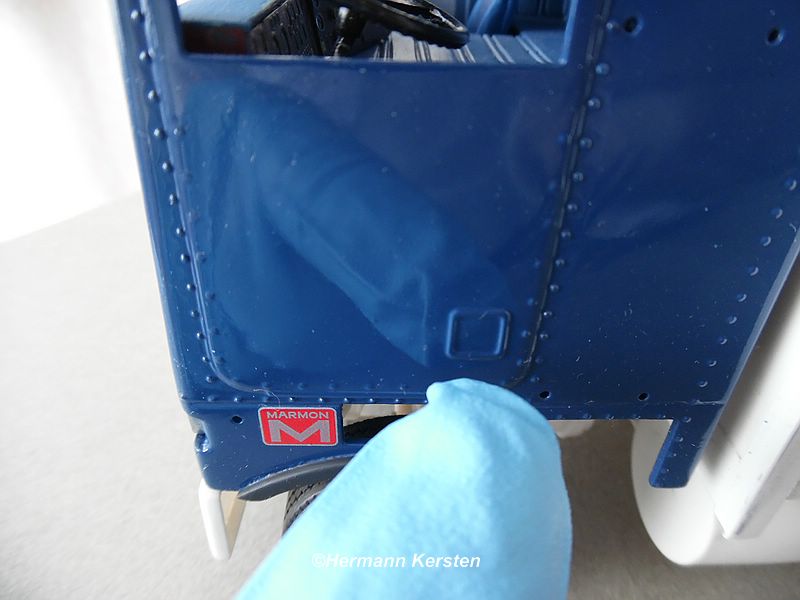
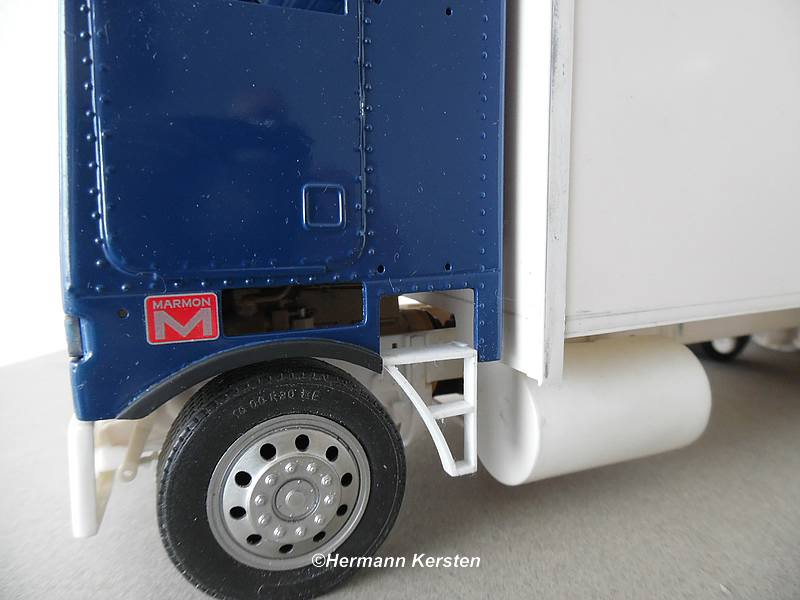
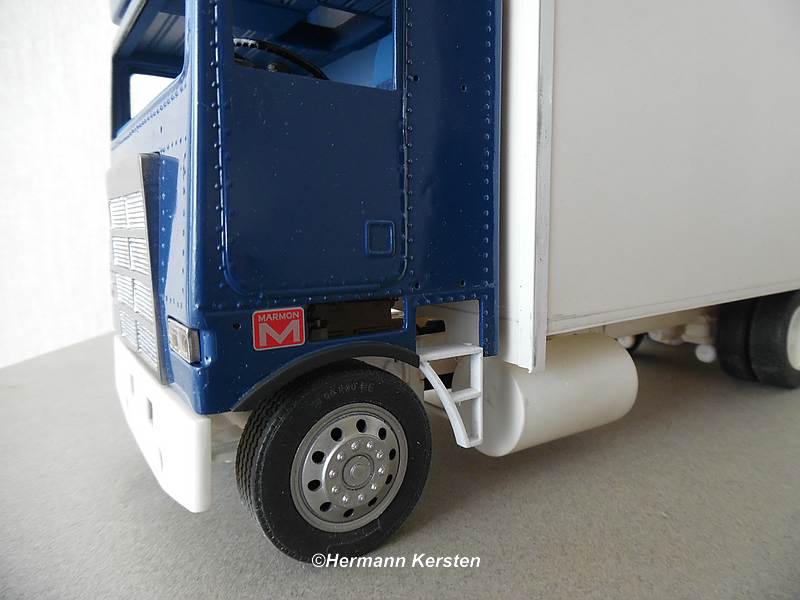
Hi guys, Today some progress on this Marmon. After all the rivet work and primer, it was time for the final colour. I sprayed the cabin with Motip - dark blue. The color will not be exactly exact, but it's pretty close to the real color. After the paint was hardend, i polished the cabin with carwax and the cabine shines incredibly well , much more than i expected. Then i painted the rest of the interior. Currently I cannot close the cabin yet, because I am still waiting for a package from the states, and in this package there is also some interior parts that i really want to have inside this cabine. Out of styrene i duplicated the steps from the AITM parts. In color, this Marmon suddenly looks very different instead of the white plastic. And finally, a few fun pictures. Next job is to polish the top sleeper. That's it for today! Hermann.
-
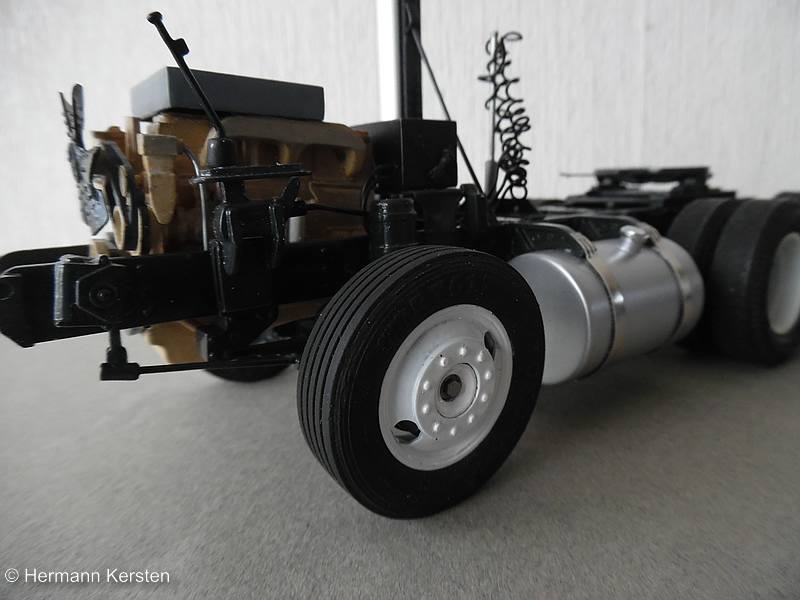
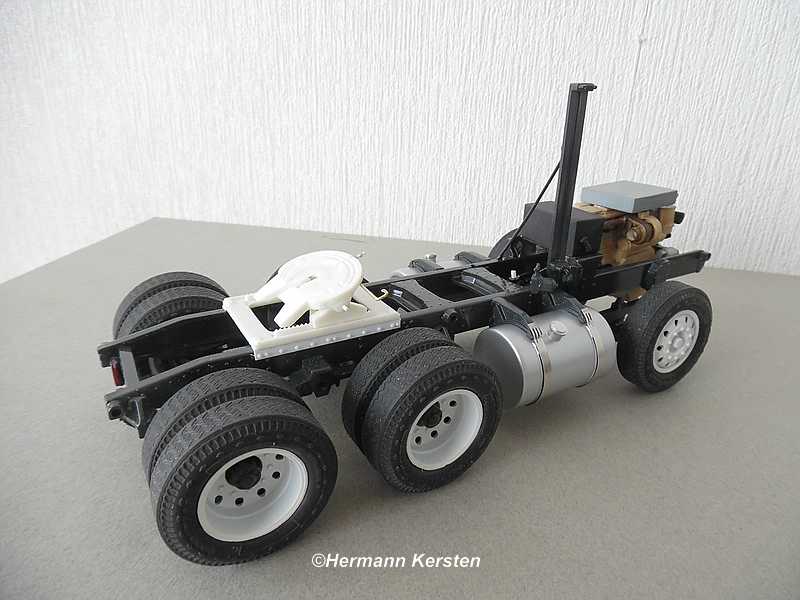
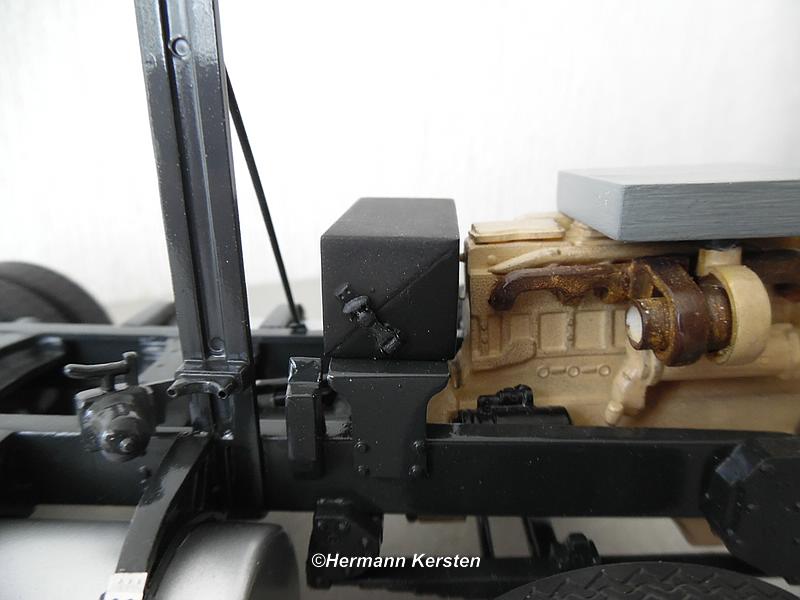
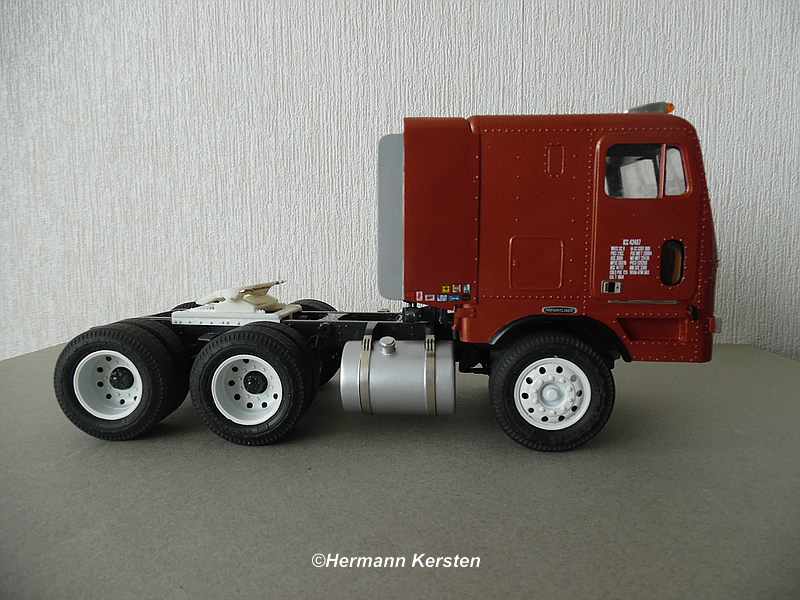
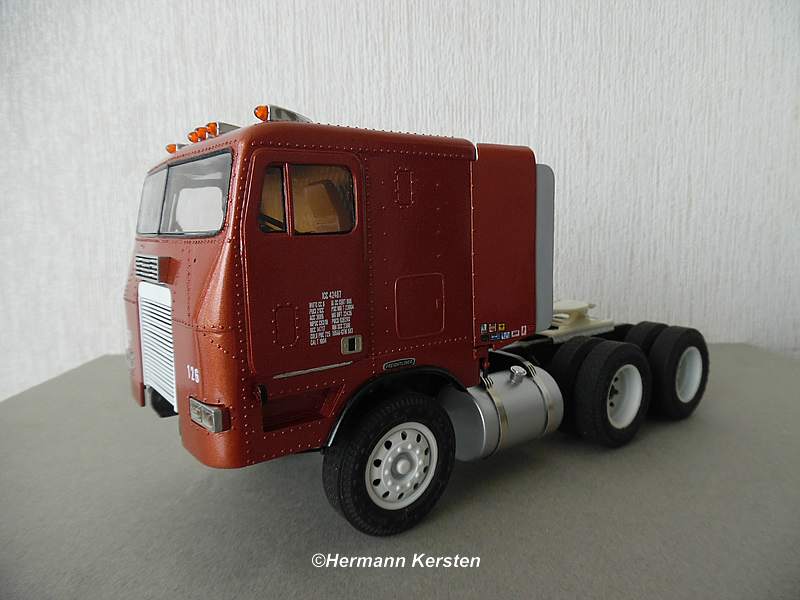
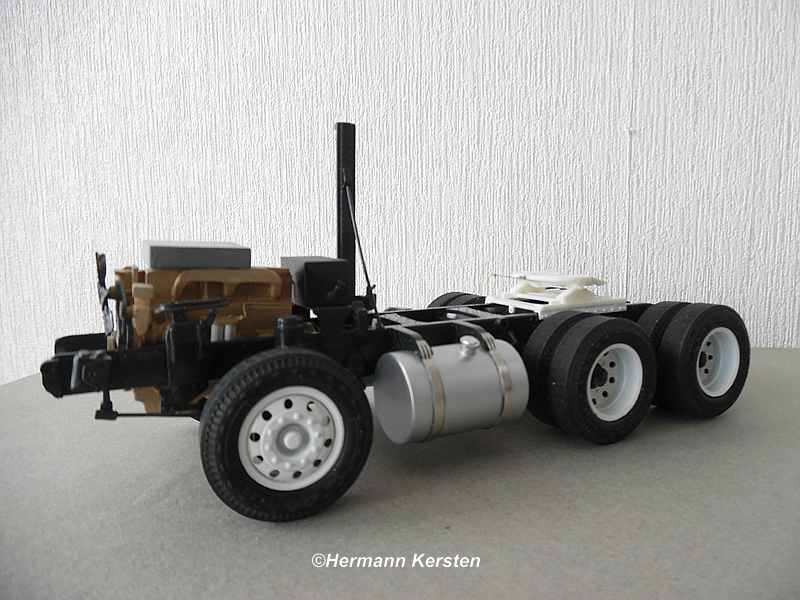
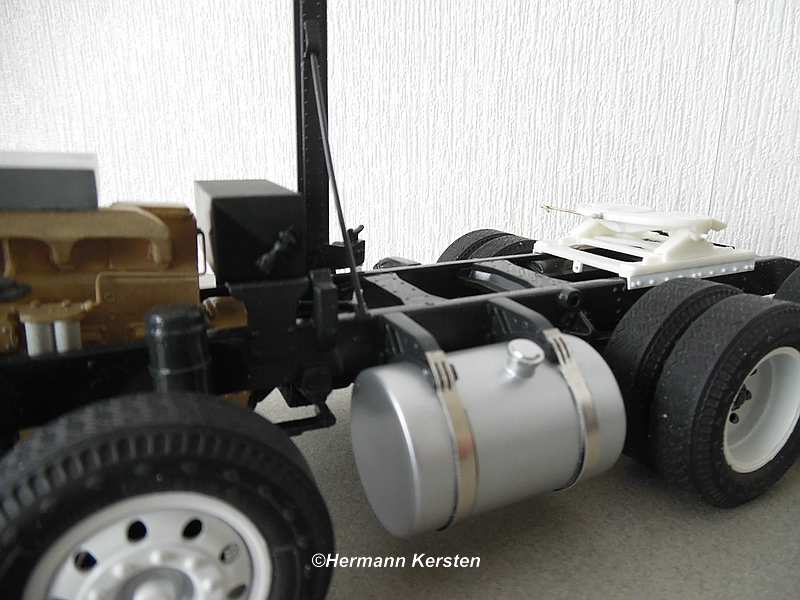
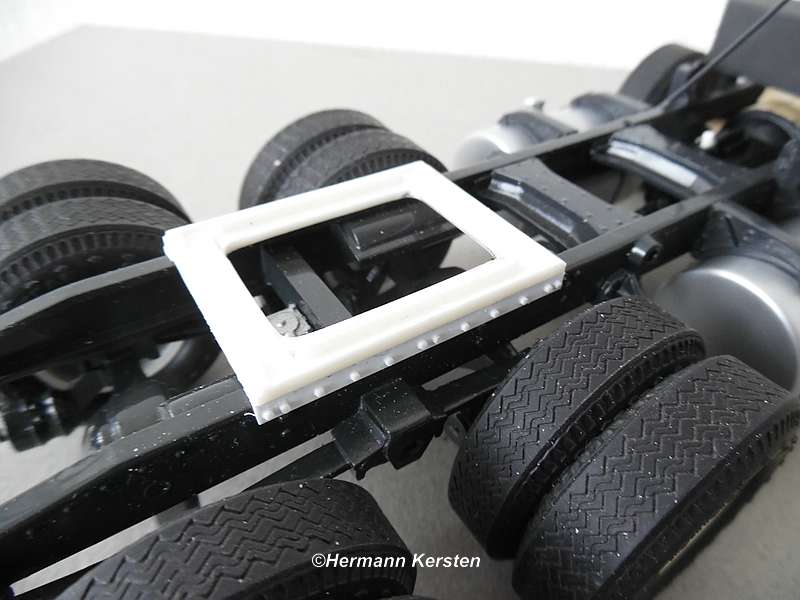
Thank you for the nice comments guys! Today i show you the progress on this one. The chassis and the fuel tanks are done with painting, I still had to spray 1 layer of dark grey for the chassis and the tanks with silver for car rims. After the paintjob it was time for the small details like, the battery box, CTM tank straps, and put the engine between the chassis for the full picture . After this job it was time to modefy the 5th wheel. I used some reference pictures and made it as the real one. The threaded end and the nuts on the front of the fifth wheel is also attached, i really don't know what it do or means, but i saw it many times in my reference material. The tail lights are painted with Tamiya clear and attached and the air valve block is also attached to the crossbeam. And the cabin on the chassis for the looks and for fun. And slowly it is going to the final stage. Next job is the wiring for the brakes and air supply, mudflaps for the rear and afcourse, the final work on the cab and a bumper. Thats it for today and see you next round. Hermann.
-
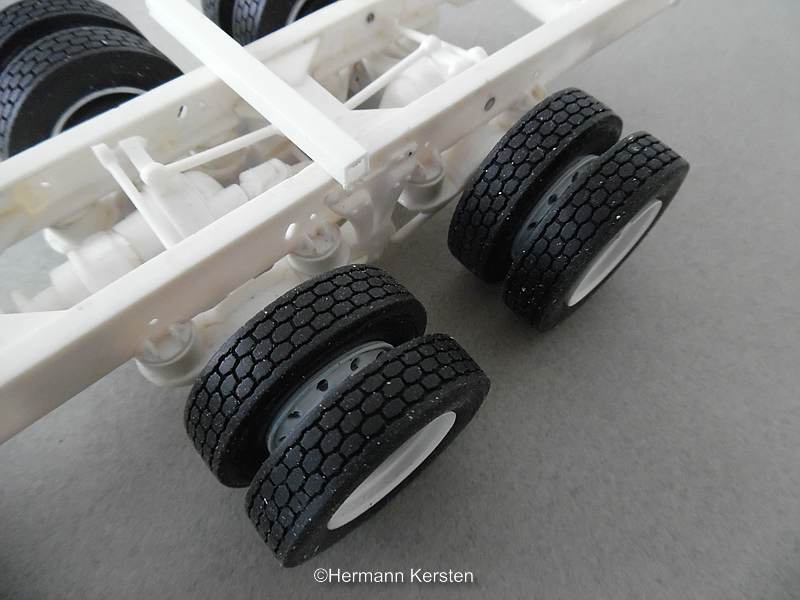
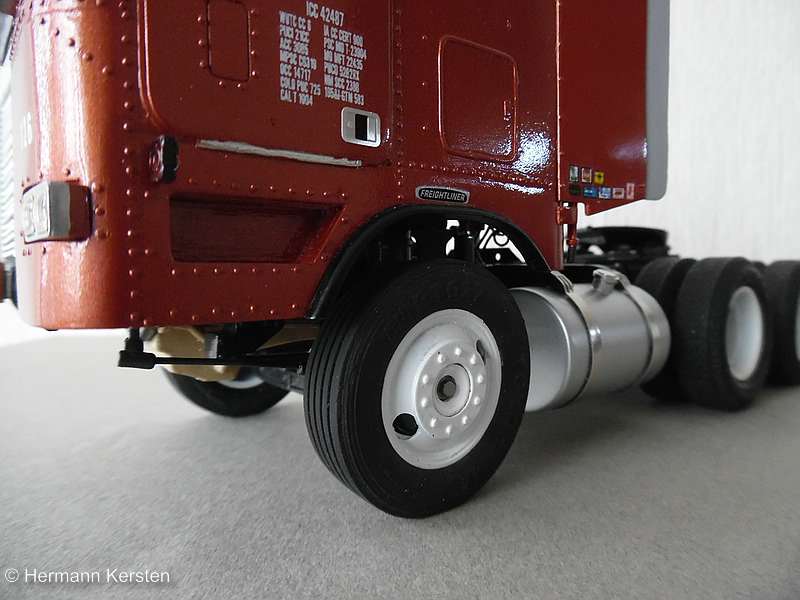
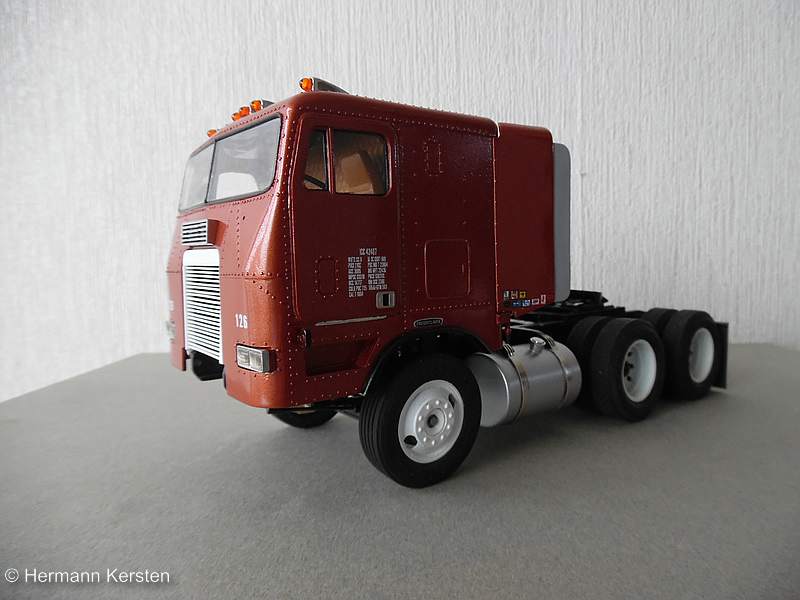
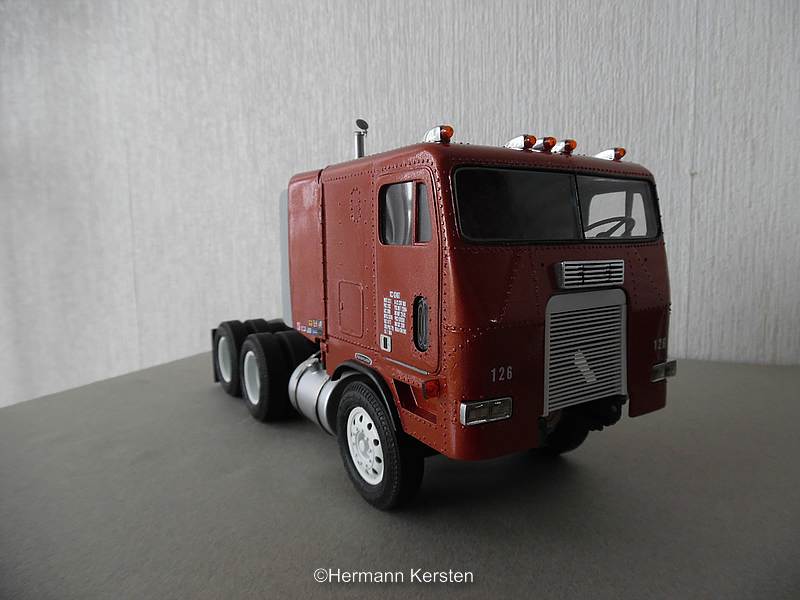
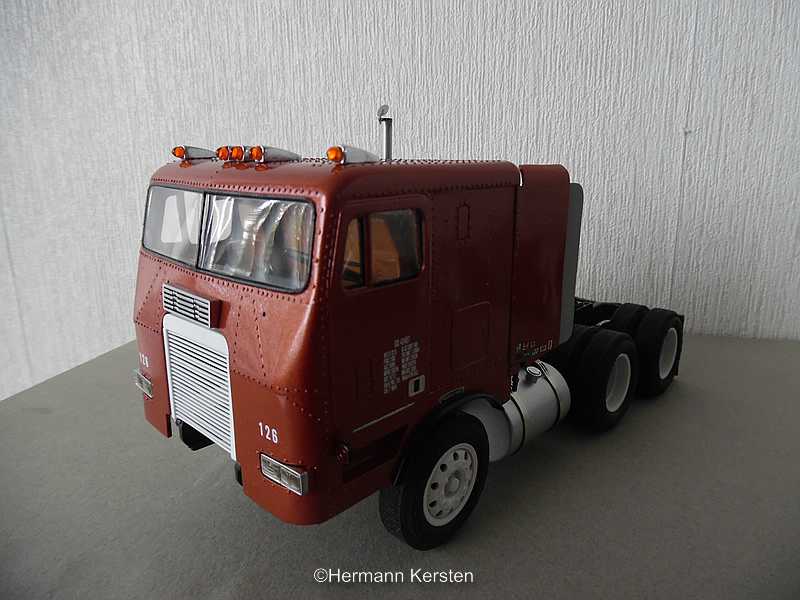
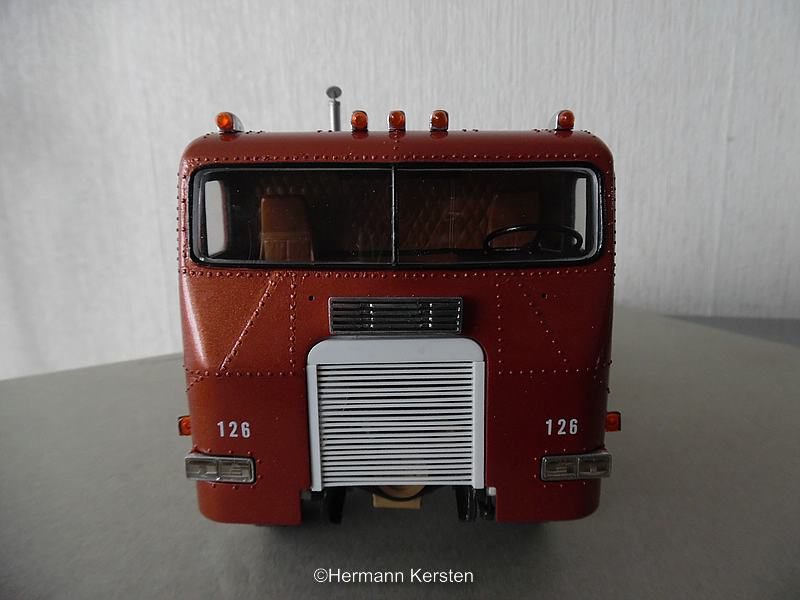
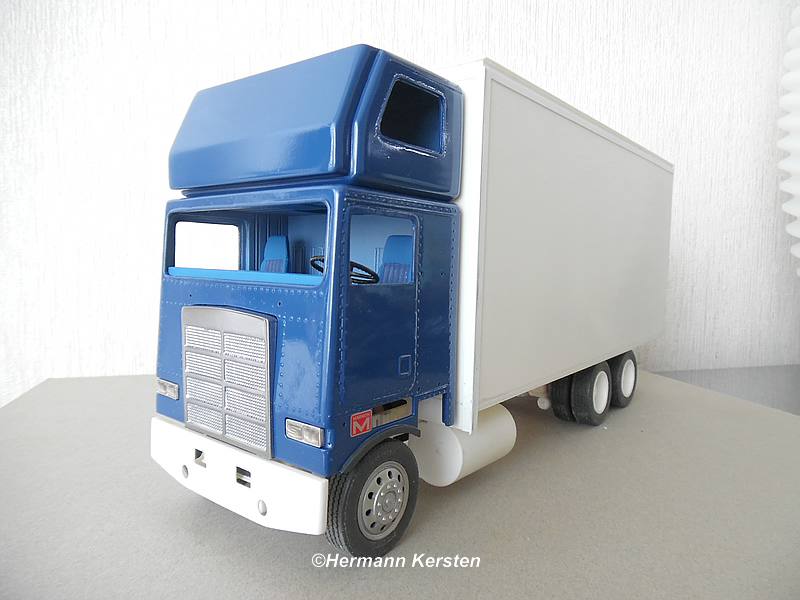
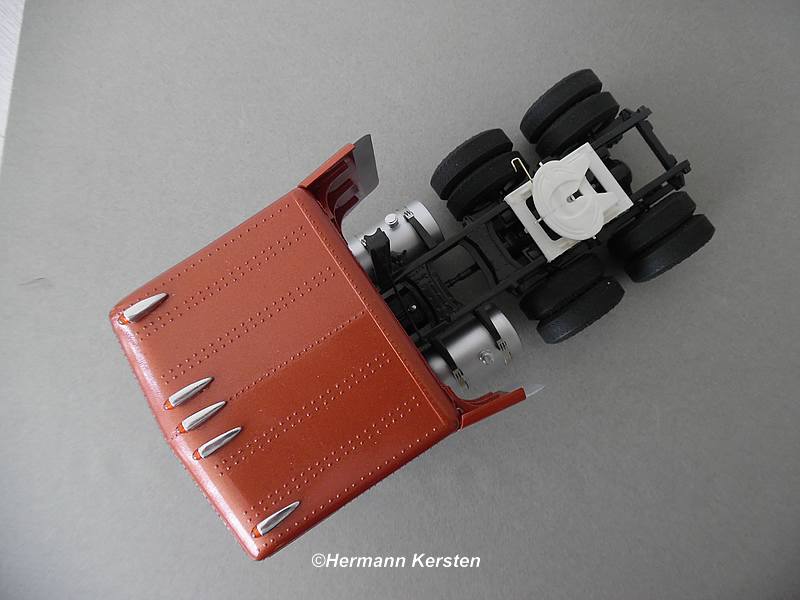
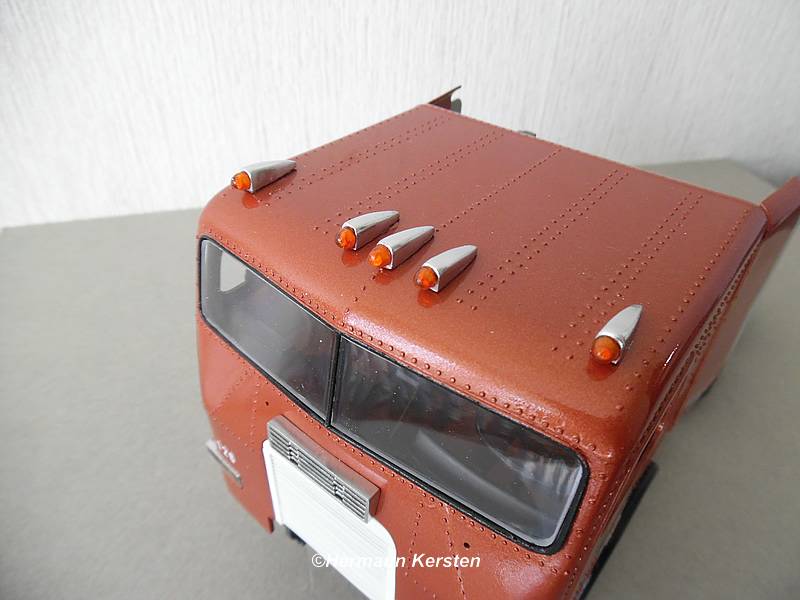
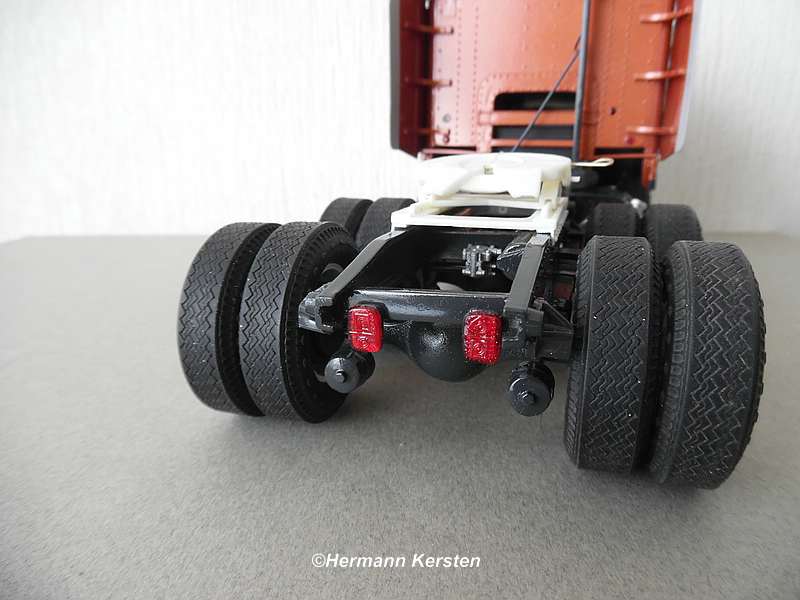
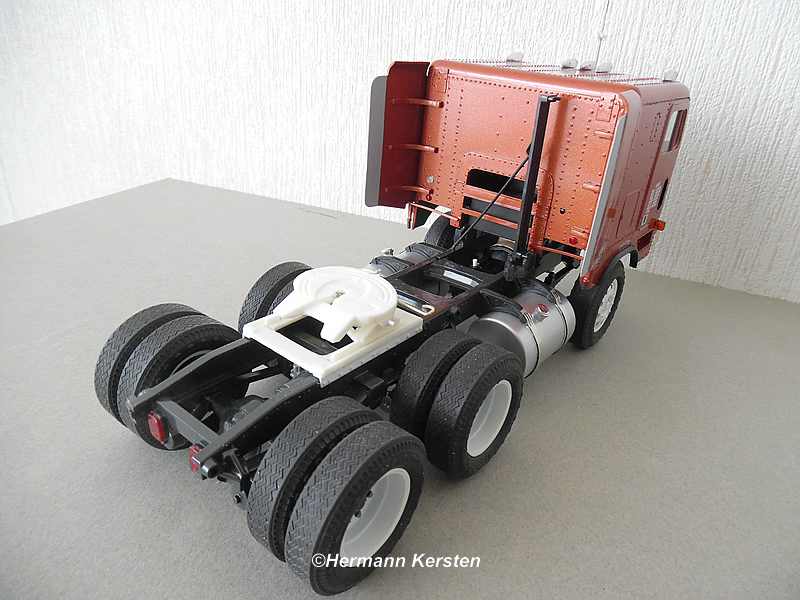
Hello gents, Today some progress on this Freightliner. After some doubting and comparing with the many reference pictures, i decided to shorten the chassis with 15mm. With this shorter chassis, the proportions look better as i see in the many reference photos i have. The extended fuel tanks that are modefied for this Freightliner, will be exchanged with the shorter "normal" tanks, and the bigger ones are for the Freightliner FLB. The AMT tires are rubbed with ash to get a better rubber looks, and nooooo....there is no smell. the modified fuel tanks that have already been varnished, and the 2 new shorter tanks..... In the meantime, replace the "White Freightliner" decals with "Freightliner" decals, mounted the indicators, edit the roof lights with Molotow chrome marker and paint the orange glasses with Tamiya clear, and finish the chassis in a dark gray color. The 1st choice was matte black, but did not find this give a nice contrast with this bronze-colored cabin and the white rims. The brake boosters have also been modified to this newer Freightliner model. Attach the small light glasses on the back of the cabin....... Ok guys, thats it for today and see you next time! Hermann.
-
Marmon coe Topsleeper
Hermann Kersten replied to Hermann Kersten's topic in WIP: Model Trucks: Big Rigs and Heavy Equipment
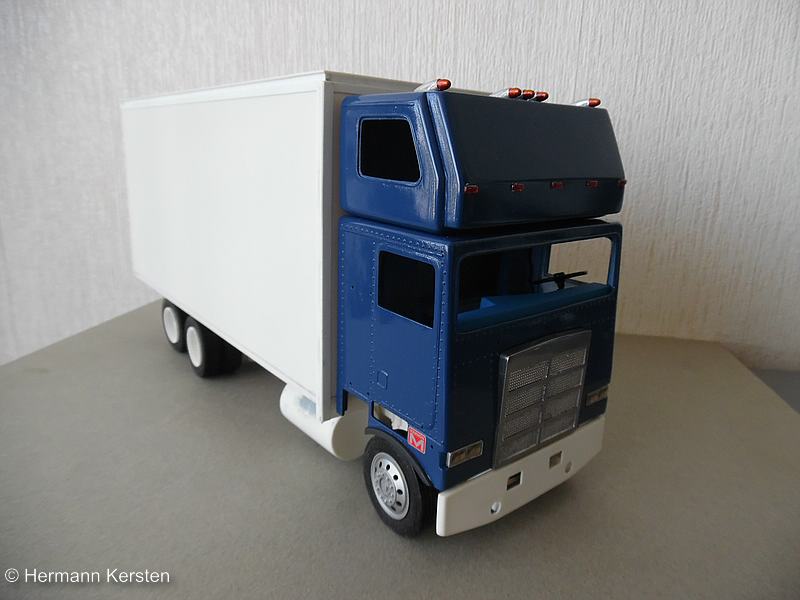
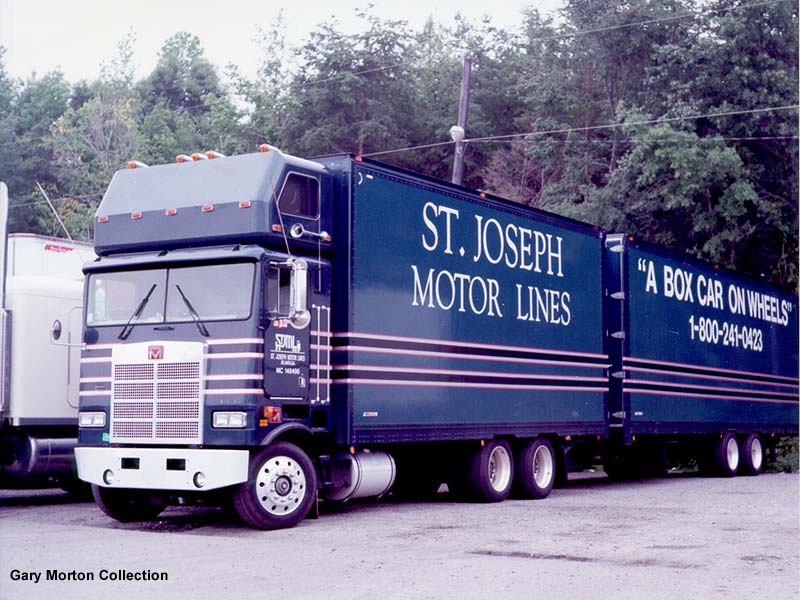
Hi guys, thank's for the nice comments! To be honest, i don't know wich state exactly the are active, the info is pretty poor on this one. As far as I could find it, these magnavans rode in various states of the United States. There were also different types of magnavans or volume transporters active in the states, like Internationals, Freightliners and even Kenworths, all of them COE's afcourse. Maybye you can trace the states by the company names, st Joseph Motorlines, LHT and Charles Chips, these 3 company's drove with this type of Marmons. Hermann. -
Marmon coe Topsleeper
Hermann Kersten replied to Hermann Kersten's topic in WIP: Model Trucks: Big Rigs and Heavy Equipment
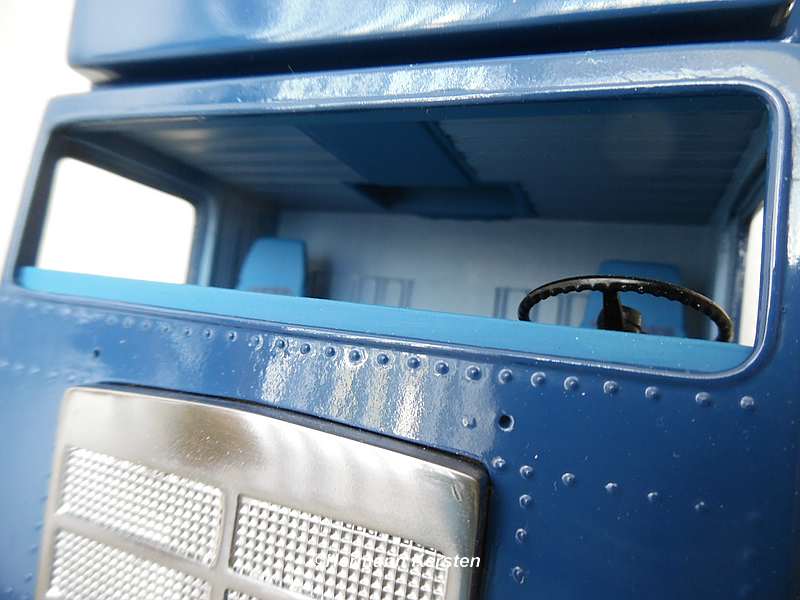
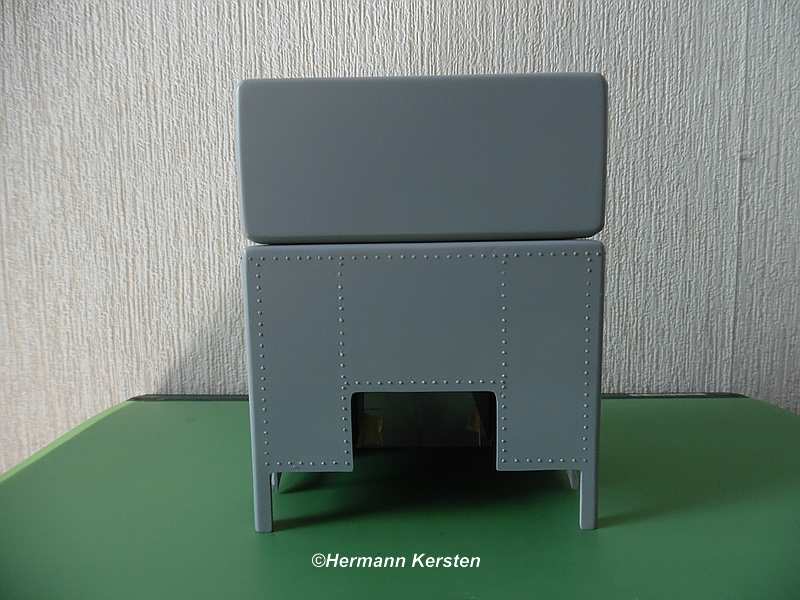
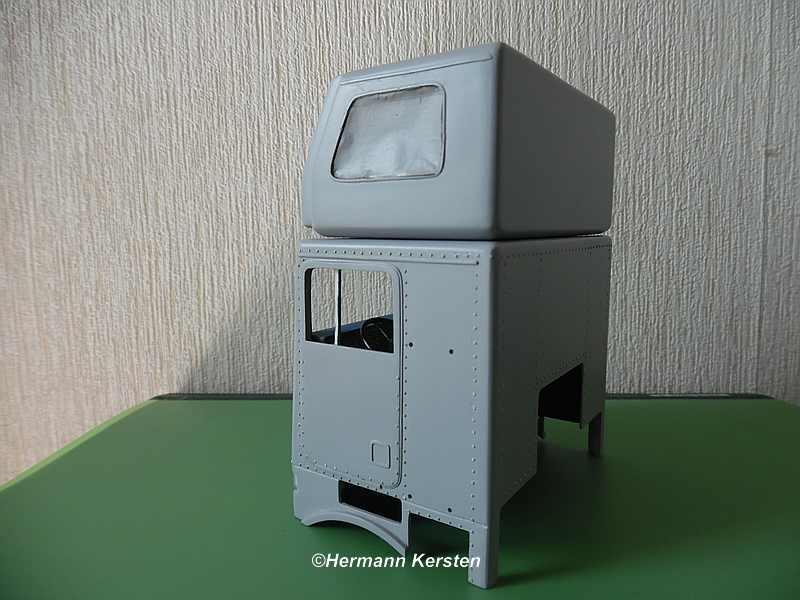
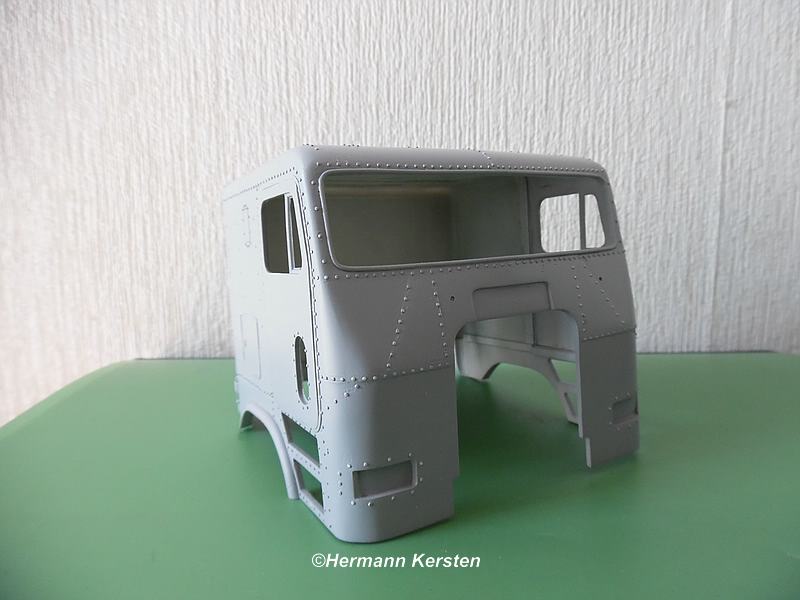
And we continue! With all the rivetting with the Freightliners, i also complemented the rivets for this cabin. This cabine is shorter than the Freightliners, and that's why I "only" needed about 250 till 260 rivets. The edges of the door handles are made out of 0,25mm thick styreen and i have cutted and sanded this completely to the right size, and i can guarantee you, these edges are quite thin and small. After all this work I sprayed the cabin in a primer and all look good and smooth. The only small spot i found, is an edge in the corner of the left headlight. And with ther cabine on the chassis for the looks..... Looks more better with the primer instead of all that white plastic. Thats it for today guys, and see you next round! Hermann. Hermann.
-
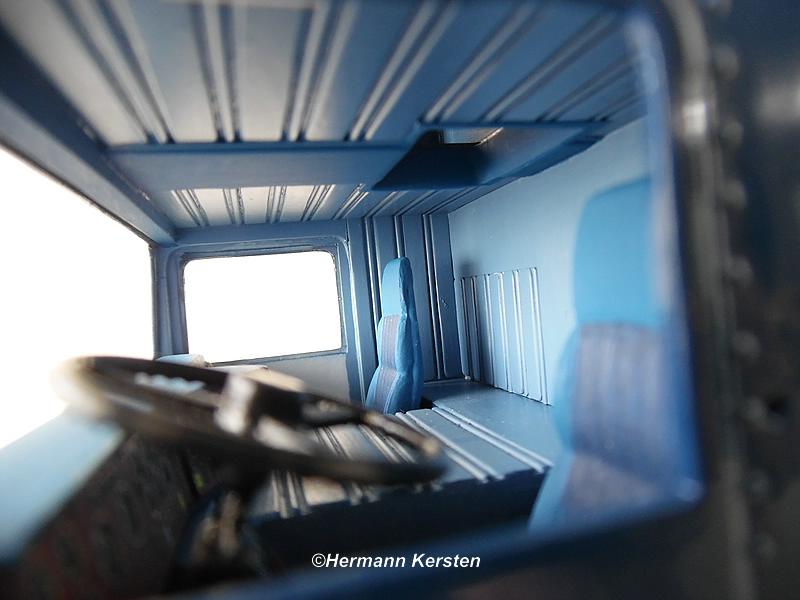
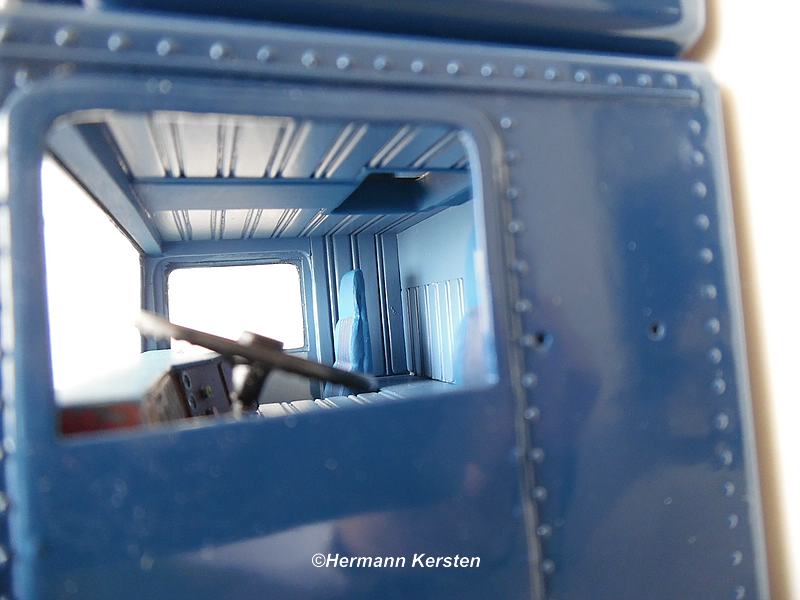
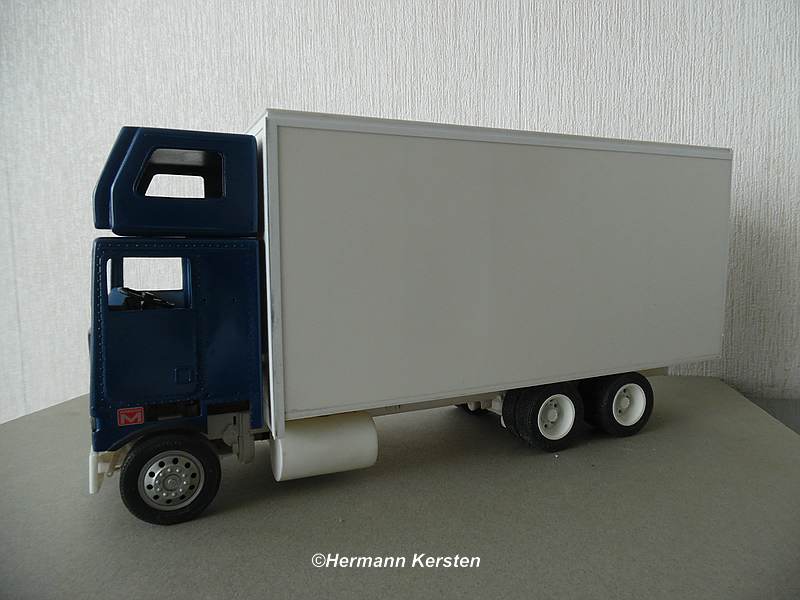
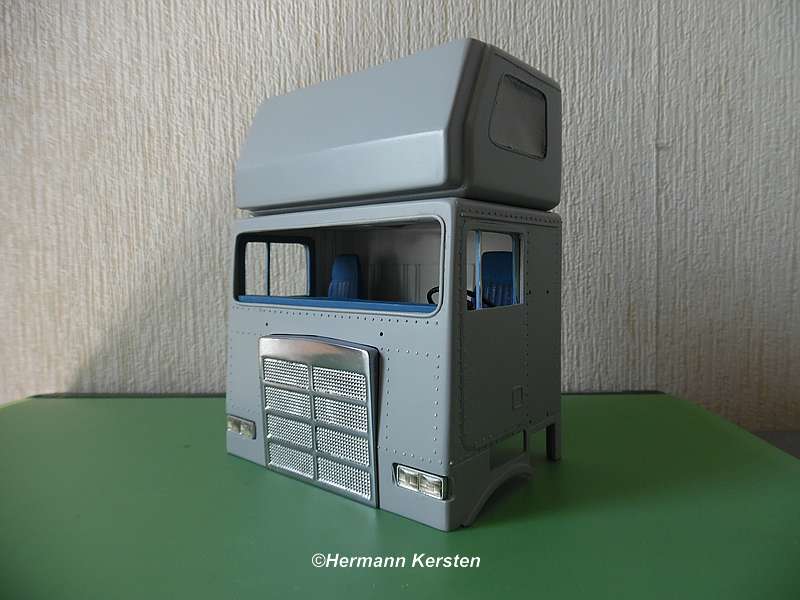
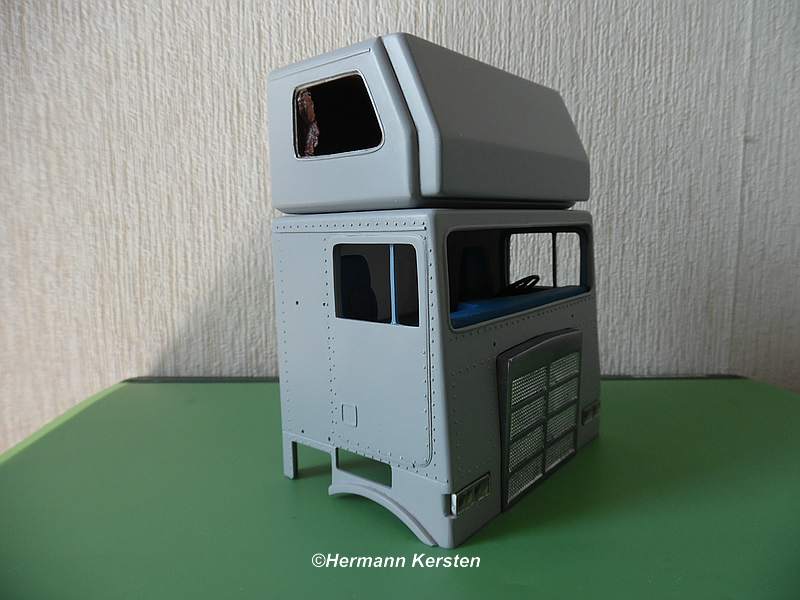
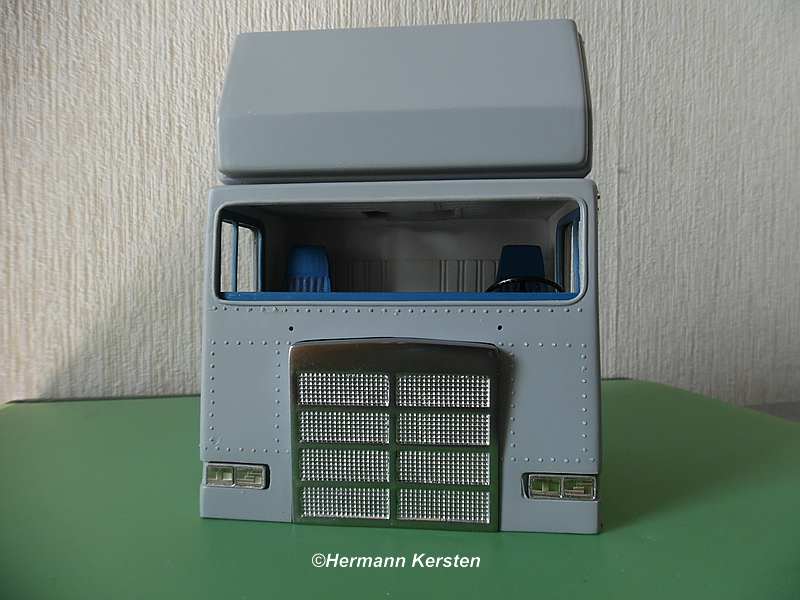
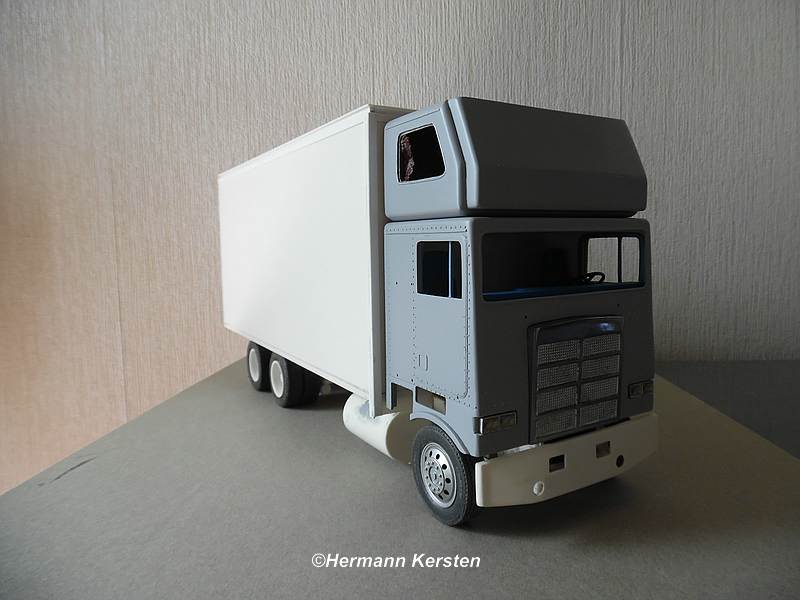
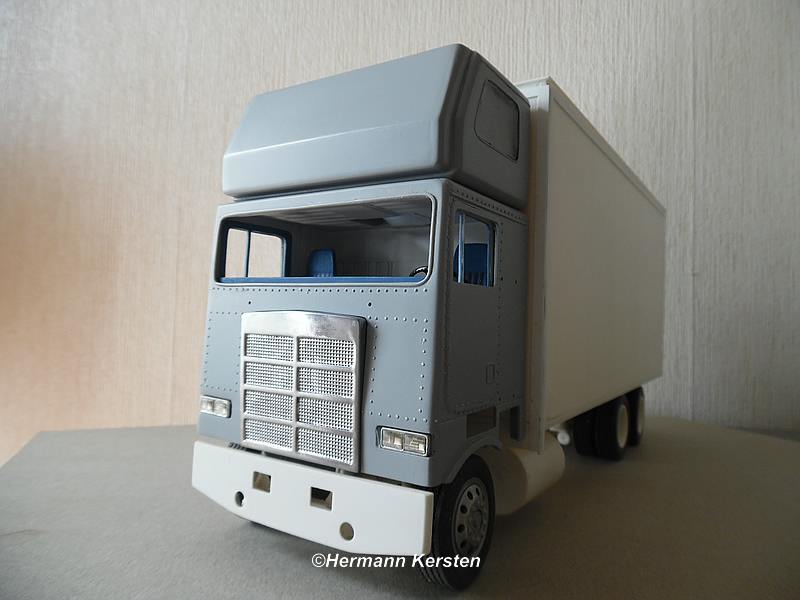
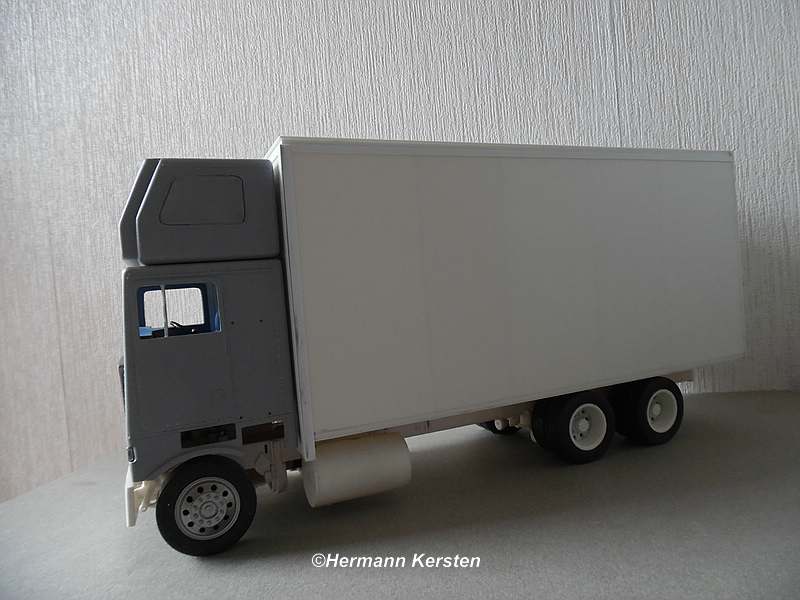
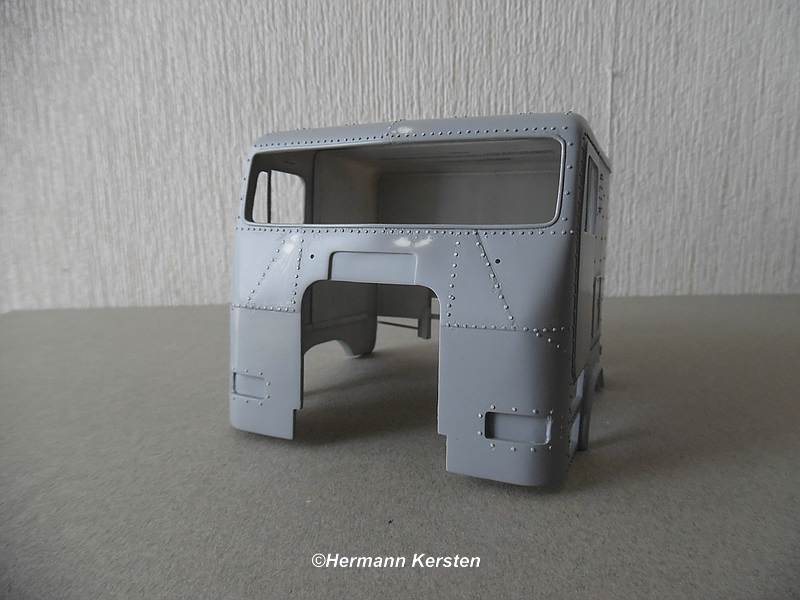
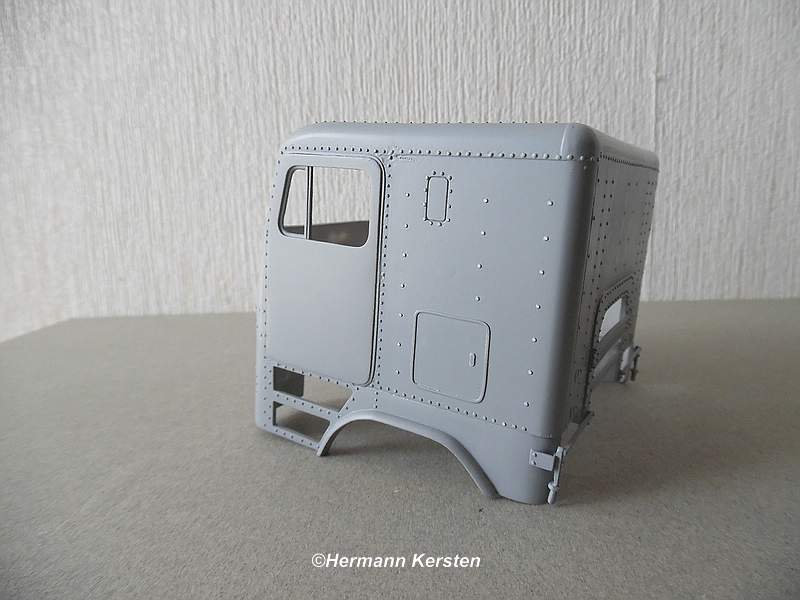
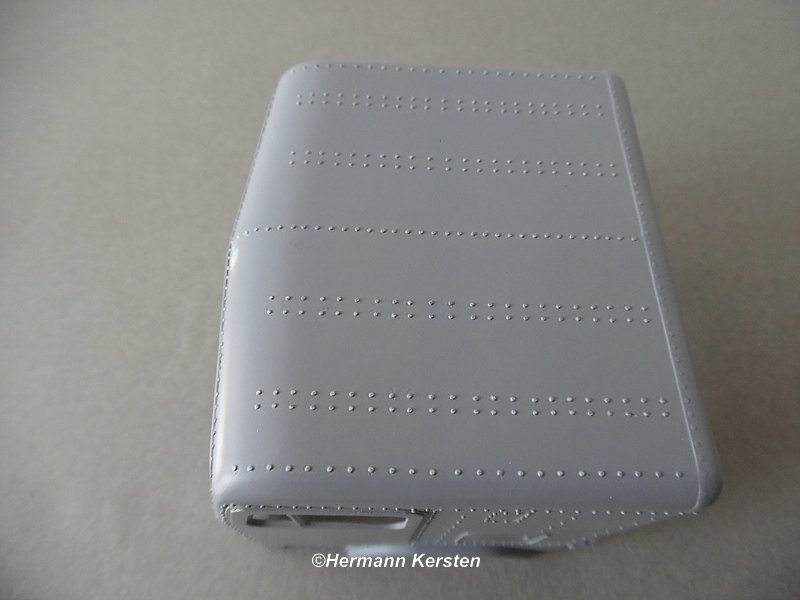
And the cabine is done! All the rivets are attached now, cut a new windshield out of 0,5mm transparent styrene, and the inner roof modified. After all this work , i sprayed the cabine in a primer and found 3 small spots, which have been filled, sanded and smoothend. No i can hand out this cabine to Koos, so that he can start the paintjob and continue with his Freightliner. In the meantime, I still have to make 2 under grilling, and 2 bumpers for both Freightliners. Thats it for today and the progress of this cabine, will be continued in Koos his topic. See you later! Hermann.
-
Hi Jürgen, Absolutely fabulous, exactly as we are used to from you. Hermann.
-
1950 Ford F5 / F6 coe
Hermann Kersten replied to BIGTRUCK's topic in Model Trucks: Big Rigs and Heavy Equipment
A real eye cather with these colors , great job. Hermann. -
Dodge Truck
Hermann Kersten replied to DumpyDan's topic in Model Trucks: Big Rigs and Heavy Equipment
Nice build, looks great with the 2 cars on it. Hermann. -
Great build arose from a great idea! Hermann.
-
Here is another one for kids today.....