Rich Chernosky
-
Posts
2,103 -
Joined
-
Last visited
Content Type
Profiles
Forums
Events
Gallery
Everything posted by Rich Chernosky
-
FIA 289 Cobra
Rich Chernosky replied to Rich Chernosky's topic in Other Racing: Road Racing, Salt Flat Racers
-
FIA 289 Cobra
Rich Chernosky replied to Rich Chernosky's topic in Other Racing: Road Racing, Salt Flat Racers
-
1963 Chrysler Turbine car - JoHan's best ?
Rich Chernosky replied to 1959scudetto's topic in Model Cars
Helmut...for a 35+ yr old build that still looks pretty darn good. I always liked this car but never managed to aquire a kit of it. It belongs in my TV and Custom section. Chrysler recalled all 50 of these cars and destroyed them. There are at least five that were never turned in. -
FIA 289 Cobra
Rich Chernosky replied to Rich Chernosky's topic in Other Racing: Road Racing, Salt Flat Racers
Rex...thank you for all the pictures. I believe this was the group at the glen. That must have been quite the visit. -
FIA 289 Cobra
Rich Chernosky replied to Rich Chernosky's topic in Other Racing: Road Racing, Salt Flat Racers
Rex........whose collection is this?? . I remember a Shelby reunion at Watkins Glen some years back and most of these cars were there. At least the same numbers. The owner of the Cobra GT that won the manufacturers championship let me sit in his car and told me all about while I took pictures. It was one of those memorable moments. My Gunze Cobra GT was modeled after the pictures. -
FIA 289 Cobra
Rich Chernosky replied to Rich Chernosky's topic in Other Racing: Road Racing, Salt Flat Racers
-
FIA 289 Cobra
Rich Chernosky replied to Rich Chernosky's topic in Other Racing: Road Racing, Salt Flat Racers
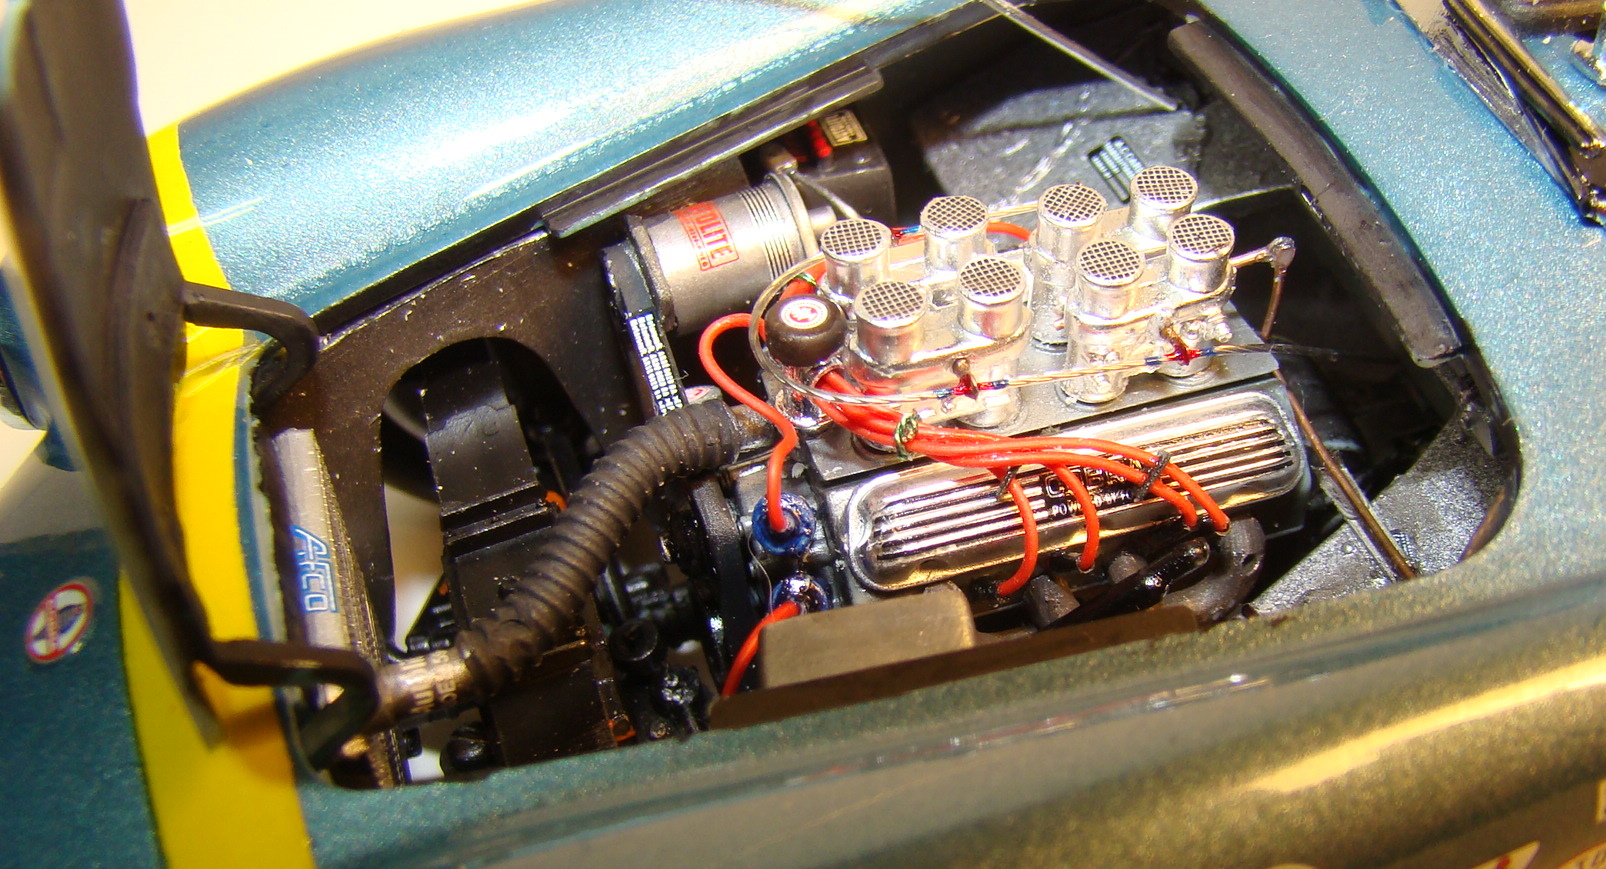
John...those are decals and they came with the kit. I had originally intended to machine new trumpets and add the center tube but it was more work than I wanted and the decal screens looked almost as good. The restored car I modeled this after is up for grabs BTW....just in case you are actually serious. -
FIA 289 Cobra
Rich Chernosky replied to Rich Chernosky's topic in Other Racing: Road Racing, Salt Flat Racers
You are certainly welcome to, as always. -
FIA 289 Cobra
Rich Chernosky replied to Rich Chernosky's topic in Other Racing: Road Racing, Salt Flat Racers
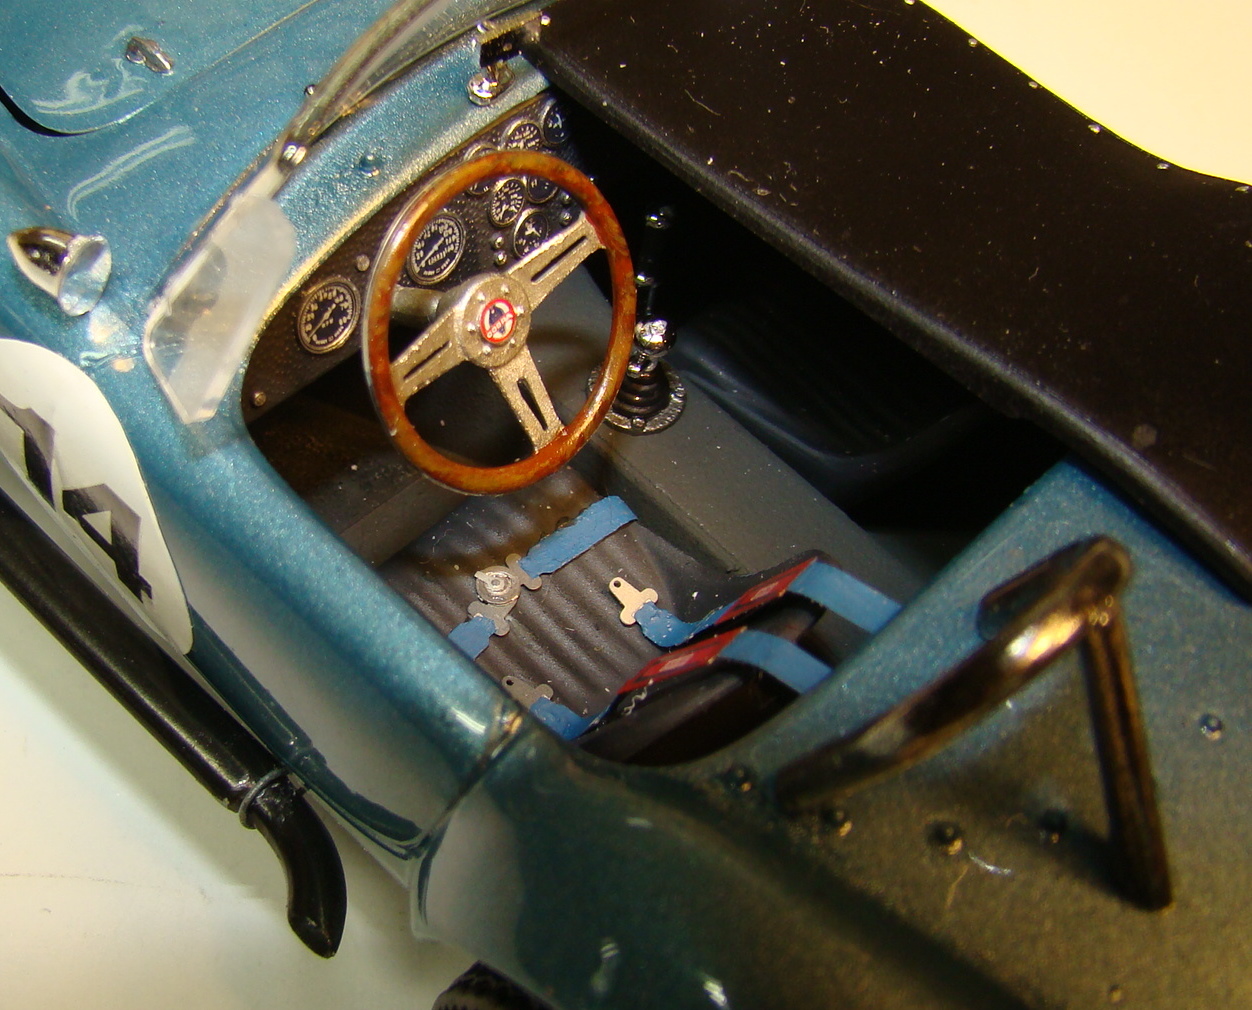
Forgot to add this shot of the interior. Special attention was paid to the steering wheel. the seat belts are photo etch items that came from the Fujimi 427 Cobra kit. I suppose that was fitting.
-
FIA 289 Cobra
Rich Chernosky replied to Rich Chernosky's topic in Other Racing: Road Racing, Salt Flat Racers
Thanks Ray..I thought you would. You are correct Rex, I built one when it first came out. It was like re-visiting an old friend. Thanks you -
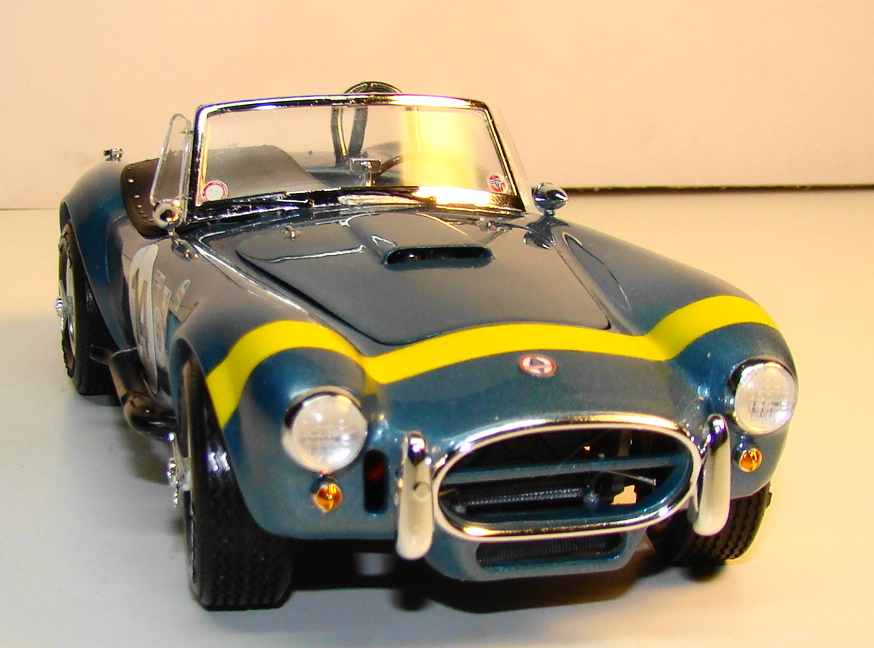
My collection of Cobra's would not have been complete without a FIA Cobra. I was so pleased when Revell released this kit. I had considered converting AMT's kit to one of these but Revell saved me the trouble. Color is Testors 1804 Pearl metallic with 2K clear. I left the body mostly stock and concentrated on the details, in particular the engine and the steering. This model is my version of a restored car. And yes...I took a few liberties. The rest of the details are in the picture captions. Much work was needed to get the wheels to steer prototypically. The front uprights required the most modification with the addition of several hinge points. Lots of love went into the detail of this engine with wiring, fuel lines and carb linkage, and of course detail painting. Finished car up on its wheels. The white roundel was cut from white plastic tape and the numbers came out of archives. Attaching the wing windows to the window took special care. The exhaust was fist painted Alcad chrome then a light spray of Tamiya X-19 semi black. the wire holdiung it to the rear of the body was a necessity. Front view shows the agressive stance of this car. I cut the oil cooler open and added a radiator. the opening was way too small and the molded in radiator just didn't look right.
-
LSR finished
Rich Chernosky replied to cobraman's topic in Other Racing: Road Racing, Salt Flat Racers
Pretty cool Ray....have you found anyone crazy enough to drive it yet. -
Maserati 8CTF (1939 Boyle Special)
Rich Chernosky replied to Dave B's topic in Other Racing: Road Racing, Salt Flat Racers
Beautiful job Dave. Your attention to detail shows. The paint is awesome. -
Sweet job Helmut, that three tone paint job couldn't have been an easy trick. You pulled it off nicely.
-
That is a great idea. My local hobby shop (owned by a fellow business associate) also has one. It has a rotating table we affectionatly call the "spinner". There is also an anonymous comment box. There is competition to get models on the spinner and encourages others to build. Great idea...thanks for sharing.
-
1988 Roberto Guerrero STP Lola
Rich Chernosky replied to 1320wayne's topic in Other Racing: Road Racing, Salt Flat Racers
Very nice, those kits were a little troublesome but you got er done. What did you use for the flourescent red...it looks good. -
Justin...that turned out great. Does your hobby shop have a display area where customers can enjoy you work too.
-
Those Fujimi kits are wonderful and you did it justice. The color is killer on that model. Like it a lot.
-
Jordon-Mugen-Honda 1999
Rich Chernosky replied to bbowser's topic in Other Racing: Road Racing, Salt Flat Racers
Great job on this one, Bruce. If I remember correctly, the wheels don't steer on Revell F1 kits. Did you make them. ? -
Mercedes C Class DTM 1994
Rich Chernosky replied to dougwintz's topic in Other Racing: Road Racing, Salt Flat Racers
Nice build Doug. I leave those panels on the bottom of the car clear too. Your under carriage is so nice it would be shame to hide it all. -
Very nice start Justin. Your decal work is spot on. This should make a great looking model. Tamiya 1/20 F-1 kits rule !!
-
1964 Ford GT40 #12 Le Mans
Rich Chernosky replied to Gramps46's topic in Other Racing: Road Racing, Salt Flat Racers
That's a great story Gary. For many of us each piece we have in our collection is a treasured memory. Its why we can't bear to part with the piece. It would be like getting rid of the memory. And the older we get, the more valuable those memories are. -
1964 Ford GT40 #12 Le Mans
Rich Chernosky replied to Gramps46's topic in Other Racing: Road Racing, Salt Flat Racers
Gary...this is outstanding work.....really like those wire wheels. -
Sauber C30 F-1
Rich Chernosky replied to Rich Chernosky's topic in Other Racing: Road Racing, Salt Flat Racers
Thanks Dave, you are not the only one pushing me to do that one. -
Sauber C30 F-1
Rich Chernosky replied to Rich Chernosky's topic in Other Racing: Road Racing, Salt Flat Racers
Thank you, Larry, I enjoy a good challenge and this certainly fit the bill. Thanks Ray, but I think you will enjoy my next project even more. Thank you Brice. Thank you. That's the ultimate compliment...thankyou. Thank you, Gary Always appreciate the compliment and incentive.