
RCprofile.JPG.6b95b19b856bf00a3becd6aeaaa48f3b.JPG)
Ian McLaren
-
Posts
1,360 -
Joined
-
Last visited
Content Type
Profiles
Forums
Events
Gallery
Everything posted by Ian McLaren
-
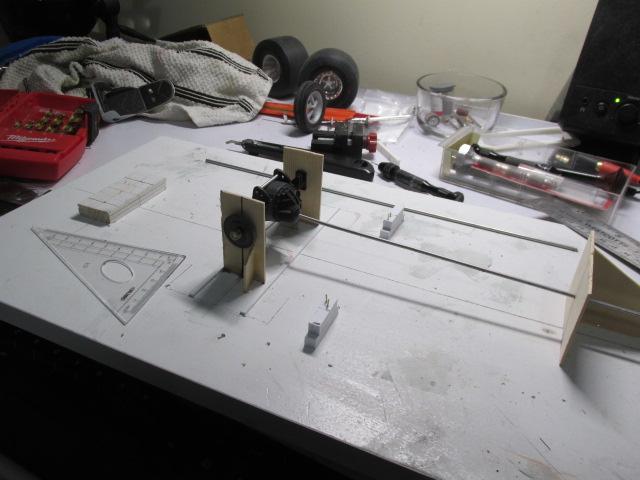
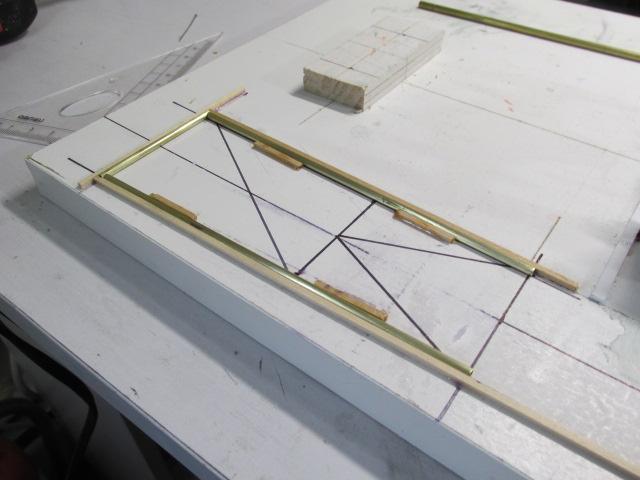
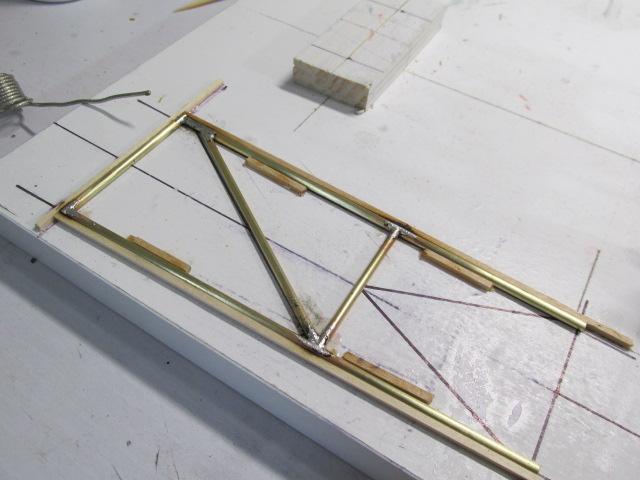
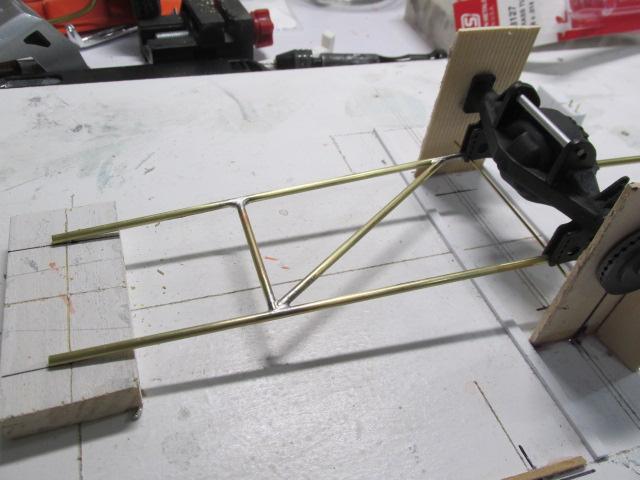
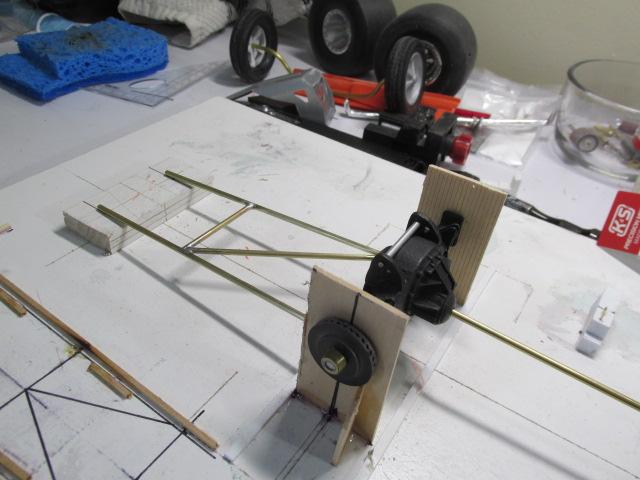
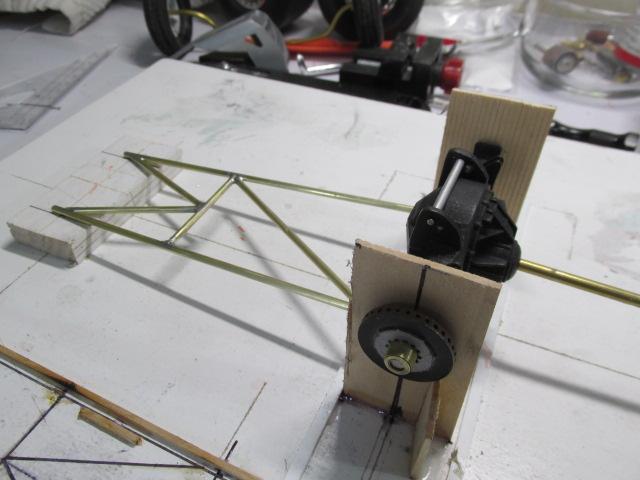
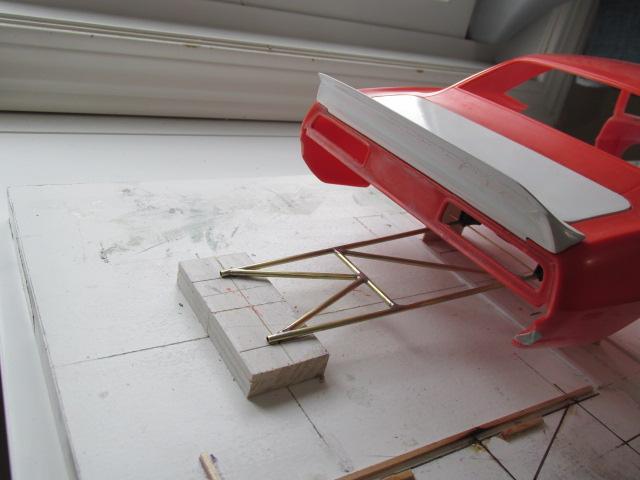
RCprofile.thumb.JPG.1691ea753d0f0897fdc1b2510cf06775.JPG) Redid the body work on this again and I'm setting it aside for a while to let everything cure and settle, it will need at least one more set of refinements but at least it's getting close. Next on the body will be hinging the drivers door and if that goes well I'll open up the other side as well. Now it's back to the chassis and the current project is the wheelie bars. As this is a lower horsepower, heavier, older style Top Sportsman car I'm using a 60" McAmis style bar. I built a simple jig and will set the bars wheels at nominal 4 to 5 inches of the ground ( this would be the typical starting range for this type of car.
Redid the body work on this again and I'm setting it aside for a while to let everything cure and settle, it will need at least one more set of refinements but at least it's getting close. Next on the body will be hinging the drivers door and if that goes well I'll open up the other side as well. Now it's back to the chassis and the current project is the wheelie bars. As this is a lower horsepower, heavier, older style Top Sportsman car I'm using a 60" McAmis style bar. I built a simple jig and will set the bars wheels at nominal 4 to 5 inches of the ground ( this would be the typical starting range for this type of car.
- 352 replies
-
- 2
-

-
- brass
- tube chassis
- (and 2 more)
-
48 Ford Ranchero
Ian McLaren replied to Butter 1's topic in WIP: Model Trucks: Pickups, Vans, SUVs, Light Commercial
I'm not much of a truck guy, but I like good design where ever it's found. The truck looks great, the color should work well on this body and your four link is excellent. In fact I may borrow your technique if my RB Motion order does not get here soon. -
Thank you so much Francis and I have to say I'm really enjoying watching your new project progress as well as picking up a few Ideas and tips from it as well.
-
Thanks Marcos I'll post some better photos of that area shortly once I have finished the cables and post clamps.
- 352 replies
-
- 1
-
-
- brass
- tube chassis
- (and 2 more)
-
Thank you Randy, yes the paint really helped solidify the design and made me comfortable enough to continue down this path. I have since the photos pulled the sides of the new valance in some to narrow the profile ( less road race style) and now is a little sleeker.
-
Nostalgia Fuel Dragster--Blower Manifold (01/28/23)
Ian McLaren replied to Straightliner59's topic in WIP: Drag Racing Models
Daniel you are making great progress. I admire that you have gone back to some of the sub assemblies which most people would have called finished, and have redone/replaced them to improve the look. No where is this better shown than on the parachutes and lines, your final version is one of the most convincing I have seen. The rest of the sub assemblies follow suit, and I love your version of the battery/ electronics box and mounts. Well done! -
Bob Gliddens undefeated Ford Fairmont
Ian McLaren replied to Mopar2's topic in WIP: Drag Racing Models
I can see photos of in progress and close to finished. Looks pretty good from here -
Progress on the interior, the floor panels have been redone and a 16 volt battery has been fabricated and the hold down bar and retaining rods are ready to be installed
- 352 replies
-
- 1
-
-
- brass
- tube chassis
- (and 2 more)
-
All weekend taken up with the new restaurant opening, not much time for modeling, but the front valance is aligned and attached and the process of molding it in is started, Also started is the rear spoiler. As I am depicting an earlier Top Sportsman entry I am not using the current picnic table style rear wing assembly and instead opting for an oversized stock type unit, trying to keep the earlier look intact.
- 352 replies
-
- 2
-
-
- brass
- tube chassis
- (and 2 more)
-
’72 Dodge Demon Drag Racer 1/25 scale
Ian McLaren replied to AmericanMuscleFan's topic in WIP: Drag Racing Models
Great job so far on this Francis, as usual your attention to detail is off the charts. I also have to agree with your assessment of the brass verses styrene situation, especially in the case of the Mopar unibody construction (there's a term I haven't used in decades) where unlike other manufacturers everything was body color from the factory. -
Darn, that is very unfortunate. His products were great, especially for railroad and armor modelers. I've used his details on several racing themed models, they were a unique solution to adding surface details to any model, especially his weld beads. I'm not aware of anyone else making a similar product. The hobby has lost a valuable resource.
-
Nostalgia Fuel Dragster--Blower Manifold (01/28/23)
Ian McLaren replied to Straightliner59's topic in WIP: Drag Racing Models
WOW Daniel you are really in the zone on this one, great progress, all of the details look very convincing, love your blower belt solution. Very well done! -
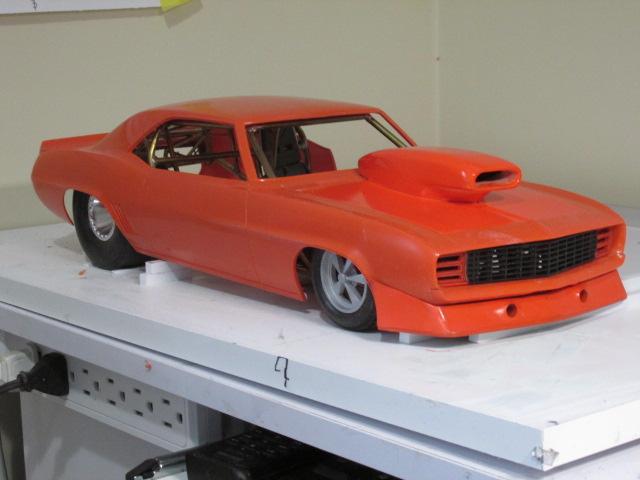
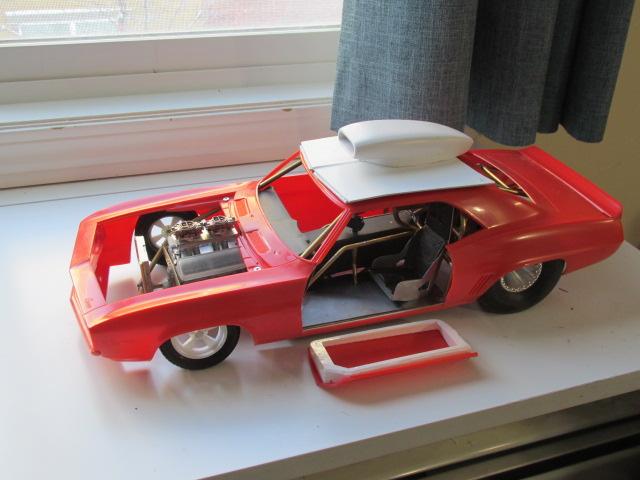
More changes to the body shell, new front lower valance. Had to add color to check the surface contours. The original lower valance is still intact as I'm deciding if I want to go down this route. As it sits the body is as low and it can go because of tire to fender clearance issues and it still gives me the required 3 inchs of ground clearance at the lower edge of the valance. Also pretty sure the car is going to remain Orange but that might change yet
- 352 replies
-
- 2
-
-
- brass
- tube chassis
- (and 2 more)
-
Yes it is and quite brittle, I've used Nicks parts before and it takes very sharp, high quality drill bit and a gentle touch to drill it, but it does sand surprisingly easy.
-
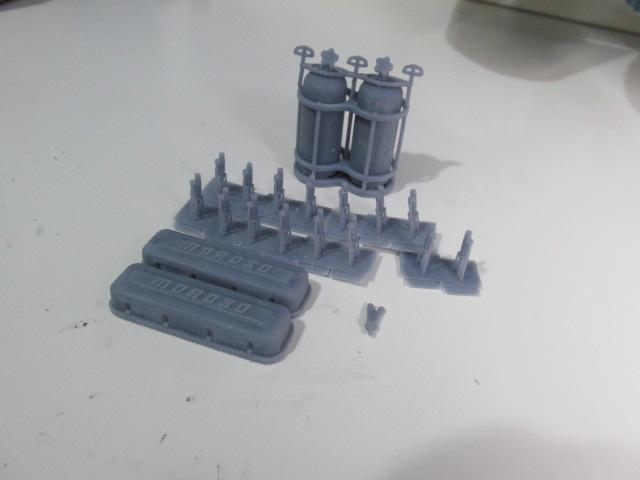
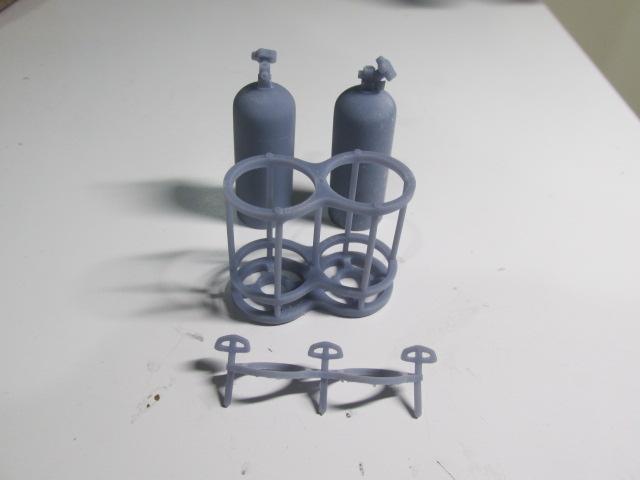
Deck lid cut out and mounting flange added, fuel system parts have arrived from Nick Bradshaw and they are awesome. Rae body mount points are starting to be added (lower edge of rear body in photos)
- 352 replies
-
- 3
-
-
- brass
- tube chassis
- (and 2 more)
-
Even with hobbies, if you spend too much time in one area it can become a chore to move ahead. So this is kind of the modeling equivalent of a staycation. Even with lots left to do on the chassis and power train I've decided to do some of the body work for a change of pace. Beside some of the plans for the body will have an impact on areas of the chassis. Hinges, inner door panels and rear valance to wheelie bar clearances are some examples of items that can cause issues. Also a consideration is the amount of details required as panels are opened up. So here is the start of the next phase of this project.
- 352 replies
-
- 5
-
-
- brass
- tube chassis
- (and 2 more)
-
Daniel, I have tried and discarded many options, among them wood glue out of a syringe, glue on the tip of a needle, several materials pounded flat and cut into strips. But the two I keep coming back to are Archer surface decals ( available in welds of many styles , tig , mig and something that looks like I did it LOL, rivets, embossed lettering and a myriad of other surface details) Originally for railroad, aircraft and armor modelers I have found several of them useful (see photo). The other method I have tried was to scribe the weld line and then rough it up with a very small (but fairly coarse) carbide bit in my mini die grinder. Even though it gives a depressed detail rather than a raised one, once painted over with very thin paint the effect is actually quite good. The Archer decals, although a pain to install on fabricated headers give a fantastic result.
-
Looking great Marcos!
-
Nostalgia Fuel Dragster--Blower Manifold (01/28/23)
Ian McLaren replied to Straightliner59's topic in WIP: Drag Racing Models
Great update, you have really improved the engine. Both the block and heads make a big difference. Well done! I can however see a possible issue with boring the block to fit the 4 D shaped pistons. It must have been an early "D"onovan deal. -
The tunnel is now ready for C/F decals and has been split so it now will fit into the completed cage thus easing construction issues MVI_0318.MOV
- 352 replies
-
- 1
-
-
- brass
- tube chassis
- (and 2 more)
-
Marcos, I know exactly what you are talking about regarding mistakes, my 1/12 Camaro has had several corrected (brass construction is easier to change/ adjust than plastic in a lot of cases) That being said there are things I know about that unless actually measured would not be detectable and have no real bearing on the model as a whole so they remain. I finally learned that there is no such thing as the perfect car (full size or model). I have seen people literally spend hundreds of thousands of dollars on world class show cars to get to the perfect car and fall short. The best you can hope for is each successive model is better than the last and that you have fun doing it. Your work is fantastic, don't sweat the small stuff my friend.
-
Thank you Francis, waiting for rod ends from RB Motion to be able to move forward and I hope I can do justice to both the front and rear assemblies
-
Yes those look great but, they don't appear to be polished, but the black is cool. Also I have not seen the wheel Jeff did modeled to this point ( I may be wrong on that). I finally got a good photo of the wheels, the center is the axle end, there is no centering ring just like the full size wheels. Also these wheels have separate individual RB Motion bead lock bolts ( not installed yet on both front and rear faces..
- 352 replies
-
- 2
-
-
- brass
- tube chassis
- (and 2 more)
-
Dwayne, Thank you, the wheels and tires were custom made for this car by a gentleman by the name of Jeff Faris. and are not commercially available. He and I have done a few projects together, I think he indulges me as I usually have something a little different in mind and he enjoys the challenge. He is a very talented machinist.
- 352 replies
-
- 1
-
-
- brass
- tube chassis
- (and 2 more)


.JPG.9d11f51ea4fad0a37c30d64127823f66.JPG)


