
Pete75
-
Posts
538 -
Joined
-
Last visited
Content Type
Profiles
Forums
Events
Gallery
Everything posted by Pete75
-
Nice clean work! Not seen this kind of nanging bodywork assembly before - seems to fit together nicely. Cool magnet strategy! ?
-
Martini Porsche 911GT3R
Pete75 replied to Rich Chernosky's topic in Other Racing: Road Racing, Salt Flat Racers
Nice one! Cool kit - may have to make a purchase!? -
More freaky skills! Hope you feel better soon, mate?
-
Thanks Dann. This makes me feel much better!!?
-
Thanks guys, appreciate it ?
-
Time to get serious about a kit I was given last year. The car was a big player in the Japanese Touring Car Championship in 1996, apparently. Not an area I know much about, but it's certainly an impressive (and very blue) beast, powered by a twin turbo, 2.5 litre straight 6, putting out 450bhp. I'd been putting it off a bit because it looks challenging, but after a few weeks of dabbling it's time to grab the bull by the horns. The first challenge encountered is that 1:1 reference photos are thin on the ground in English speaking search engines: I have a few (not great) pics, but I'll have to refer to other peoples models a fair bit. Anyway, here's one in the flesh: I started with the shell. The massive body kit on this thing renders the R33 almost unrecognisable, and needs a bit of gluing and a lot of paint! The primer went ok but I didn't do a great job of the colour (TS-44 brilliant blue), as the intended top coat wasn't "wet" enough, leaving it a bit rough. I ended up putting another coat over it & flatting it with sandpaper & polishing compound. In retrospect I might've done this the other way around, but it looks ok after the TS-13 clear coat & I'll repeat the flatting/polish before the decals go on. (The spoiler was an absolute pain and needed re-gluing twice, and goodness knows how much time to re-sand & touch up: I hate spoilers!) The last couple of sessions have been spent studying/organising & I feel like I'm properly on the case now. The chassis has been primered & the wheels stripped, and I'm starting to sort out the fiddly small bits. Gonna need to order some more TS-44 for the chassis: man, this thing really is BLUE...

-
Don't know anything much about DeTomasos, but I can see I've been missing out! Kind of like a Lamborghini Urraco/early Countach rear-ended a Ferrari 308! ? I definitely like the front skirt/body kit - makes it even meaner!
-
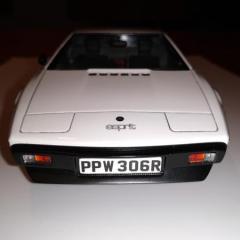
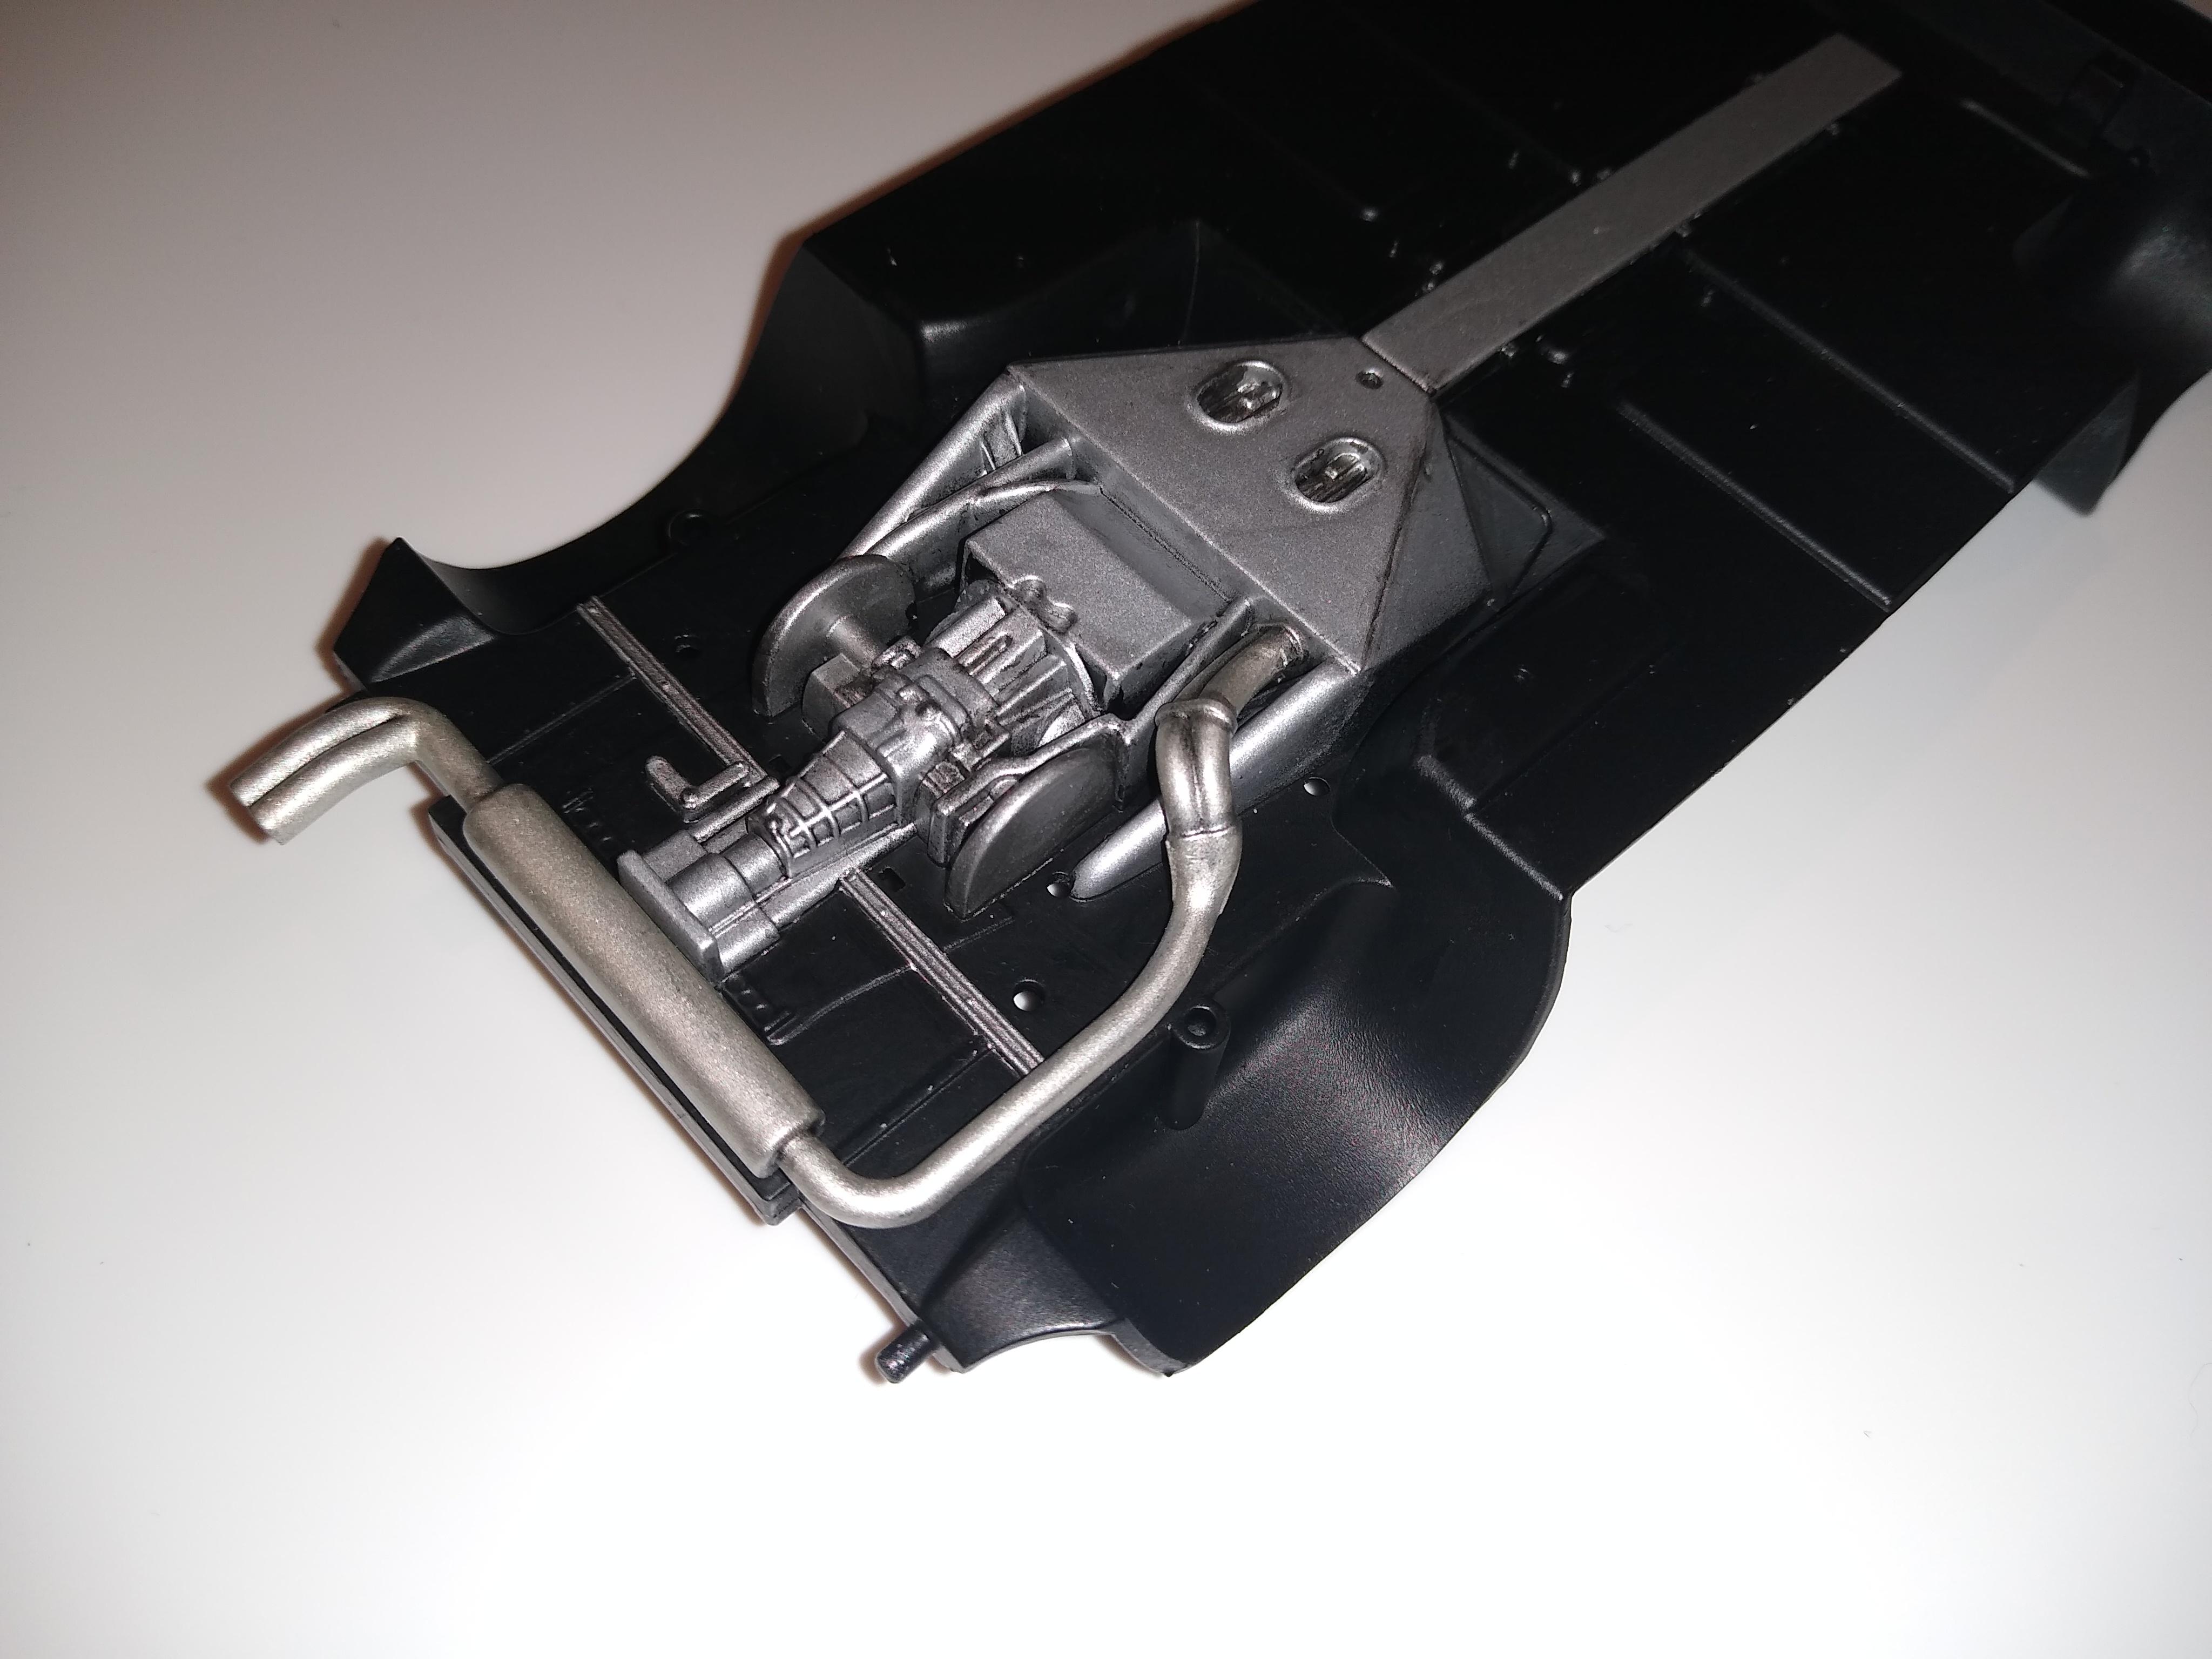
The missing sprue - which basically contains the running gear - has necessitated the purchase of a new kit: not the easiest, nor cheapest, replacement with the pandemic it seems! I eventually found one place in Hong Kong that had it in stock, so all I can do is keep my fingers crossed it gets here soonish. The extra kit means I'm going to forgo the brake fluid scrubbing & start a new body from scratch; and this time I'll be using white primer! Meantime, I've got most of the rest done: I have little idea what the underside of an S1 looks like as I could only dredge up a grainy reference pic of a dirty car that looked almost all black to start with! It seems the illustrators at Fujimi didn't have much more luck as the instructions only call for either black or silver! Oh well, I just did the best I could (not being terribly mechanical). I was annoyed with the masking template for the windscreen which turned out to be semi permeable: I got a misted tarnishing that almost seemed to be melted into the surface. (I decided to use a different spray for the rear partition glass & it seemed ok, so I dunno.) Although I'd already ordered the new kit, I went nuts for an hour with the polishing compound (in front of the TV) to see what I could do. I got 95% of it out, and I suppose I could redo it from scratch (not my favourite word at present) but I'm feeling windscreened-out & might just leave it at that. Time to recommence battle with a Nissan Skyline I was given for Christmas, so I've got something to show my sister by way of progress/gratitude! ?
-
Brilliant stuff. That intricate suspension work is a new one on me! ? Great choice of build: saw Gone In 60 Secs again the other day - forgot how good it is!
-
All good, thanks Dann. Got the body cleared & cured ready for a sand & polish. Not sure of the timeframe though as I'm wrestling with 2 other builds that have to take precedence. I did strip the MASSIVE wheels the other day - might do them next ?
-
Great job! Really like it ?
-
Otaki 1/12 Lamborghini Countach Twin Turbo...Mission Statement
Pete75 replied to Dann Tier's topic in WIP: Model Cars
Took a while catching up with this one - just mind blowing!! ? I kept finding myself laughing because it's beyond anything I could imagine. Twice the normal size & twice the inspiration! -
Thanks Sean. It'll certainly be slow; fingers crossed for nice! ?
-
Hey, thanks. Appreciate the support ?
-
Too kind, as ever, sir! ? Got it cleared safely now - always makes me feel relieved!
-
Thanks Dann - great to see you're still here! Bit of a setback today when I discovered a whole sprue tree is missing!! Guess I should've checked earlier ?
-
The Spy Who Loved Me - Lotus Esprit S1 Hi guys. Slow progress for me, but a milestone reached in (finally) finishing the interior. All brush painted with plenty of masking tape. I’ve included a reference pic of a standard S1 cabin that would’ve been fairly close to the one in the movie, although the film footage was altered in post-production making the fabric appear charcoal grey: I chose to straddle the fence with my colour choice! I’m going to finish up the chassis next because the body has just been dunked in a brake fluid bath prior to starting again!! Keep up the great work folks ?
-
Thanks for looking in Sonny - good to be back! ? Finally, the interior is done! The orange carpet took countless coats to cover the dark green, otherwise it was pretty much just the micro-masking fest I was expecting. I briefly thought about using Molotow marker for the chrome trim, but it’s much too fragile so I stayed safe & brushed on Revell Aqua silver; whilst doing so I painted on a crude ash tray and moved the door levers which were in the wrong place. Turned out better than the bodywork, which ran into issues & has taken a trip to the brake fluid bath... I’ll get the rest done whilst that’s soaking. Time’s running out but I hope to still make the Cannonball deadline ? ?
-
Excellent - you're much braver than me!?
-
Made some progress on this one, although not straight forwardly! First thing was a case of spot the glaring error: I hadn't noticed the gaps on the door sills (above) that shouldn't be there, so I had to pry the doors back out & reset them. One side still wanted to leave a (smaller) gap so I got busy with the cement & some filler. Did the same in a couple of other spots on the side vents then sanded it back & touched up the primer. After flatting with 800 grit all over it was ready for colour, finally! With all the angles on this thing, it takes more paint than most body shells! I wasn't happy with the first attempt (I put it on too "dry" & it came out a bit dull & rough) so I spent a night wet sanding it smooth with 1200/2000 grit. Today I put a proper wet coat on and voila! A lot of work but I'm happy. Probably going to clear coat it tomorrow, then shelve it to cure properly ?
-
Liking this - nice one!
-
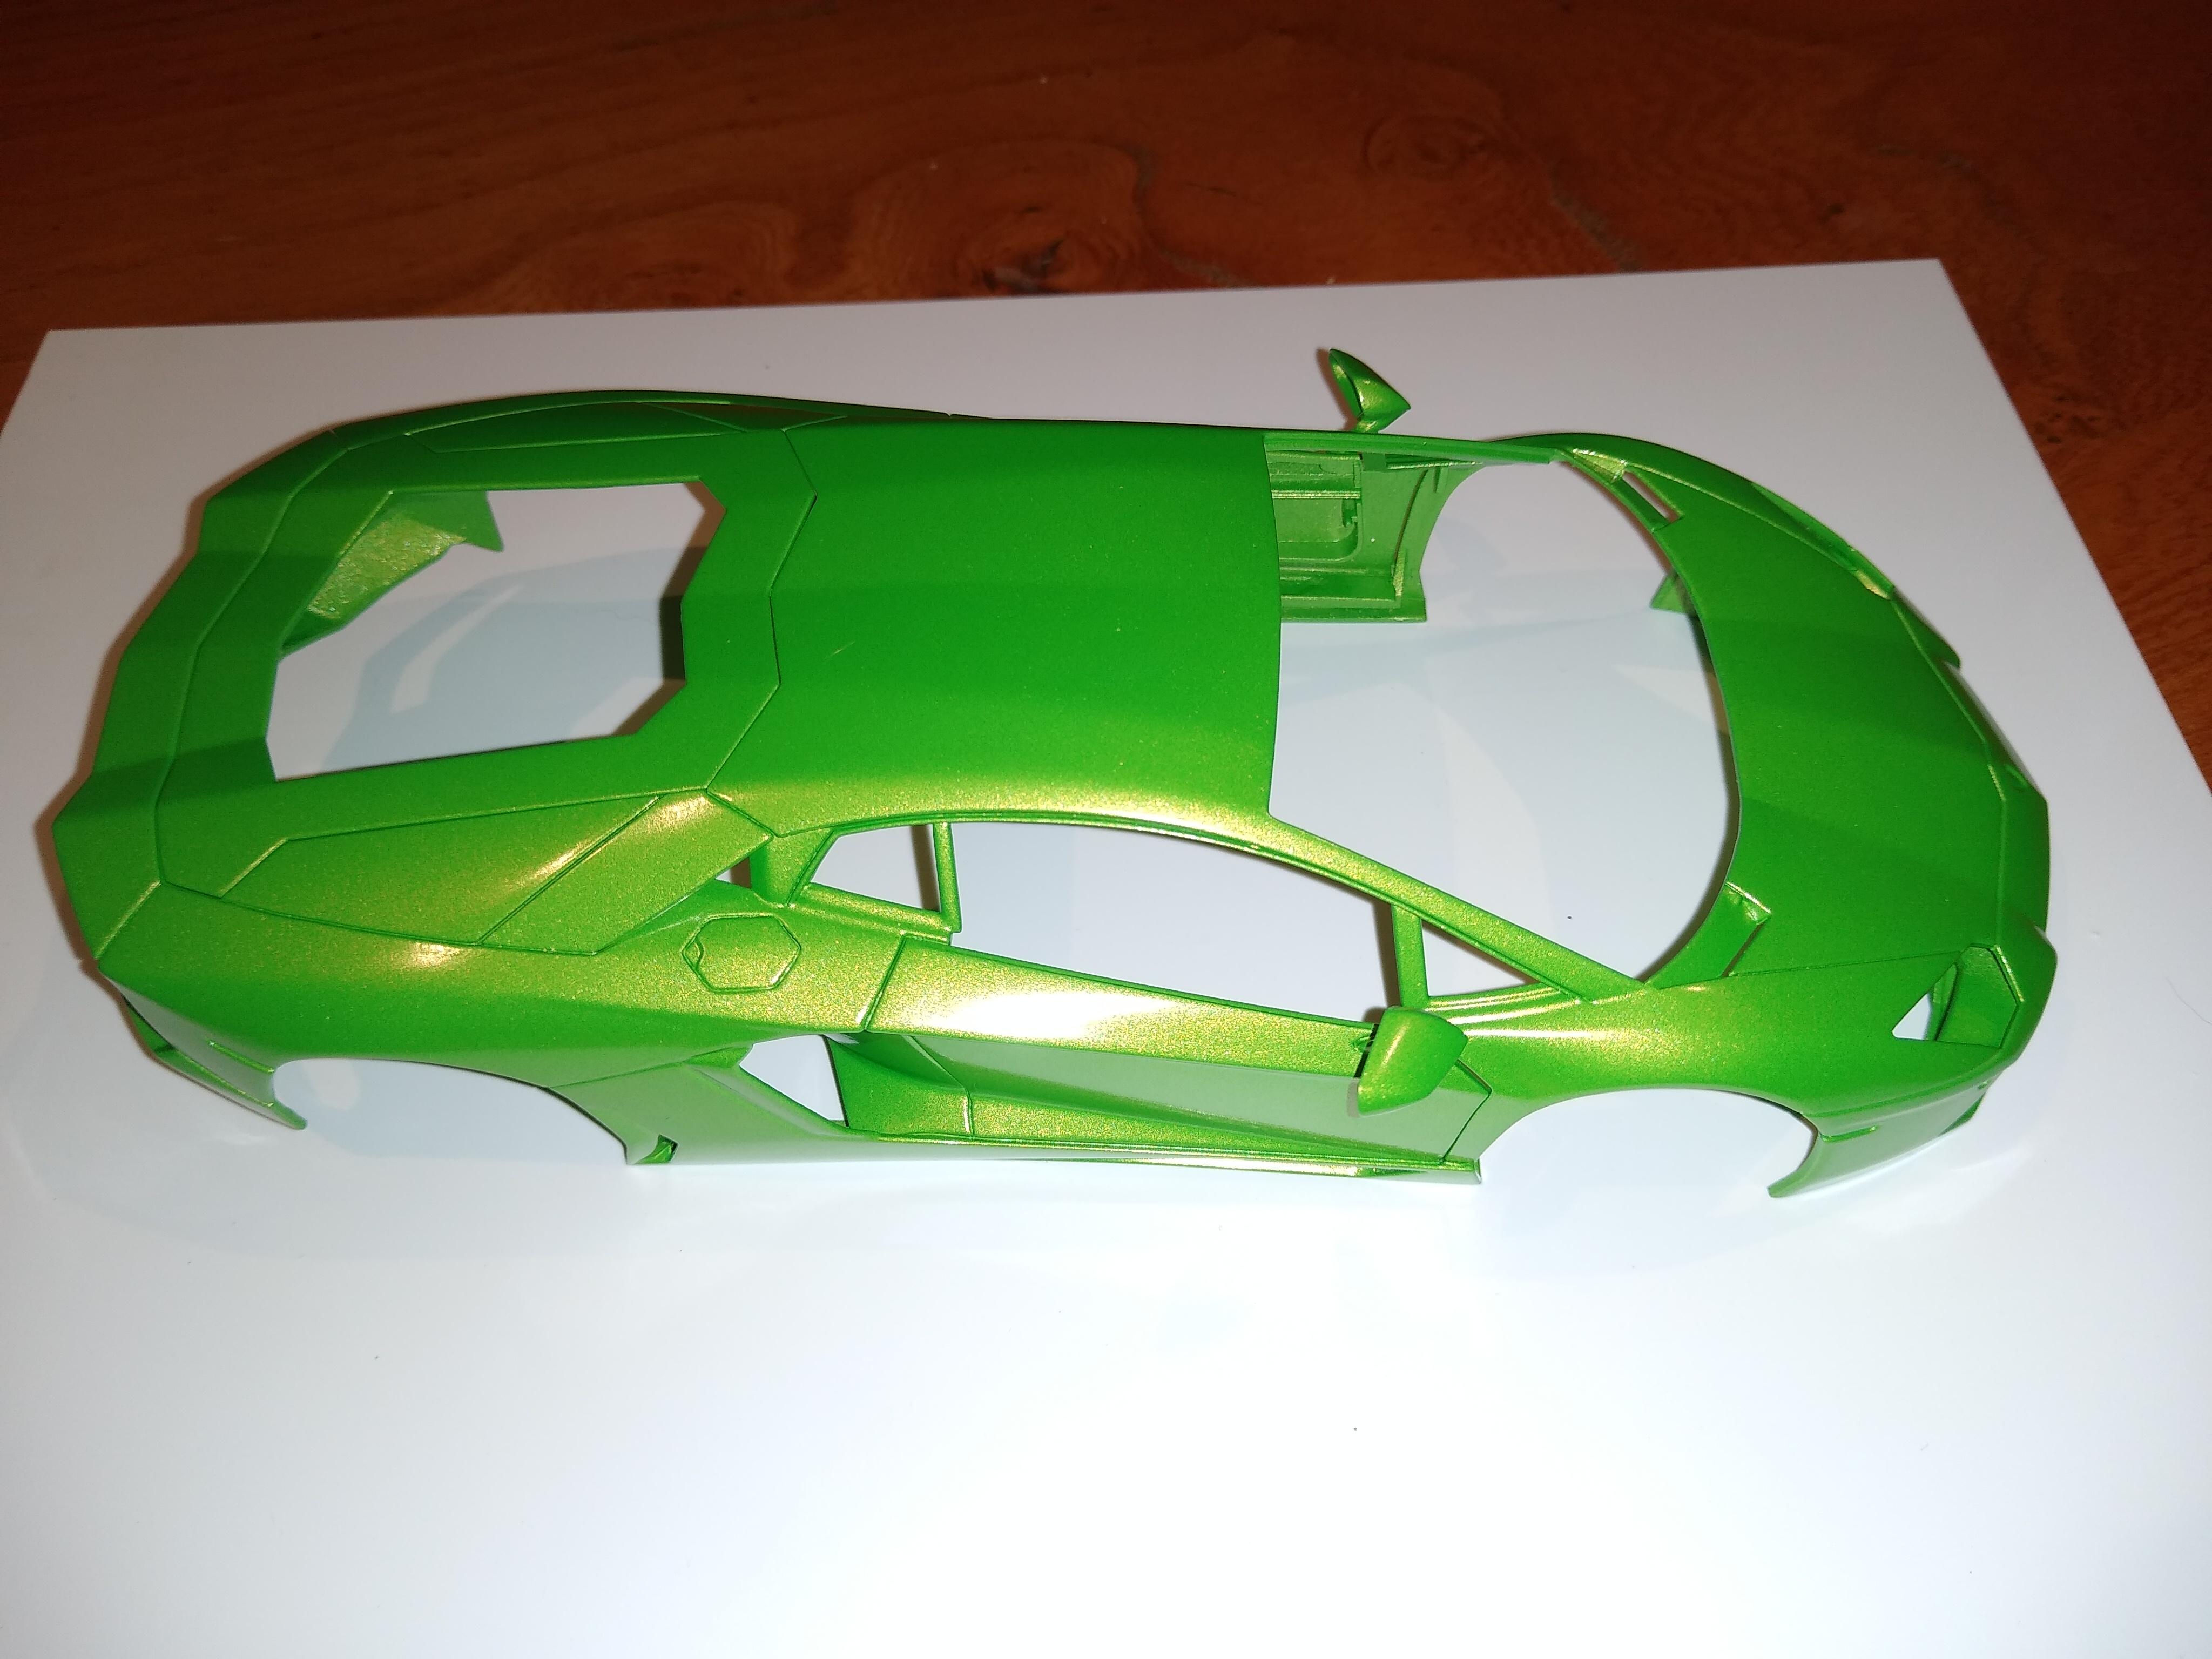
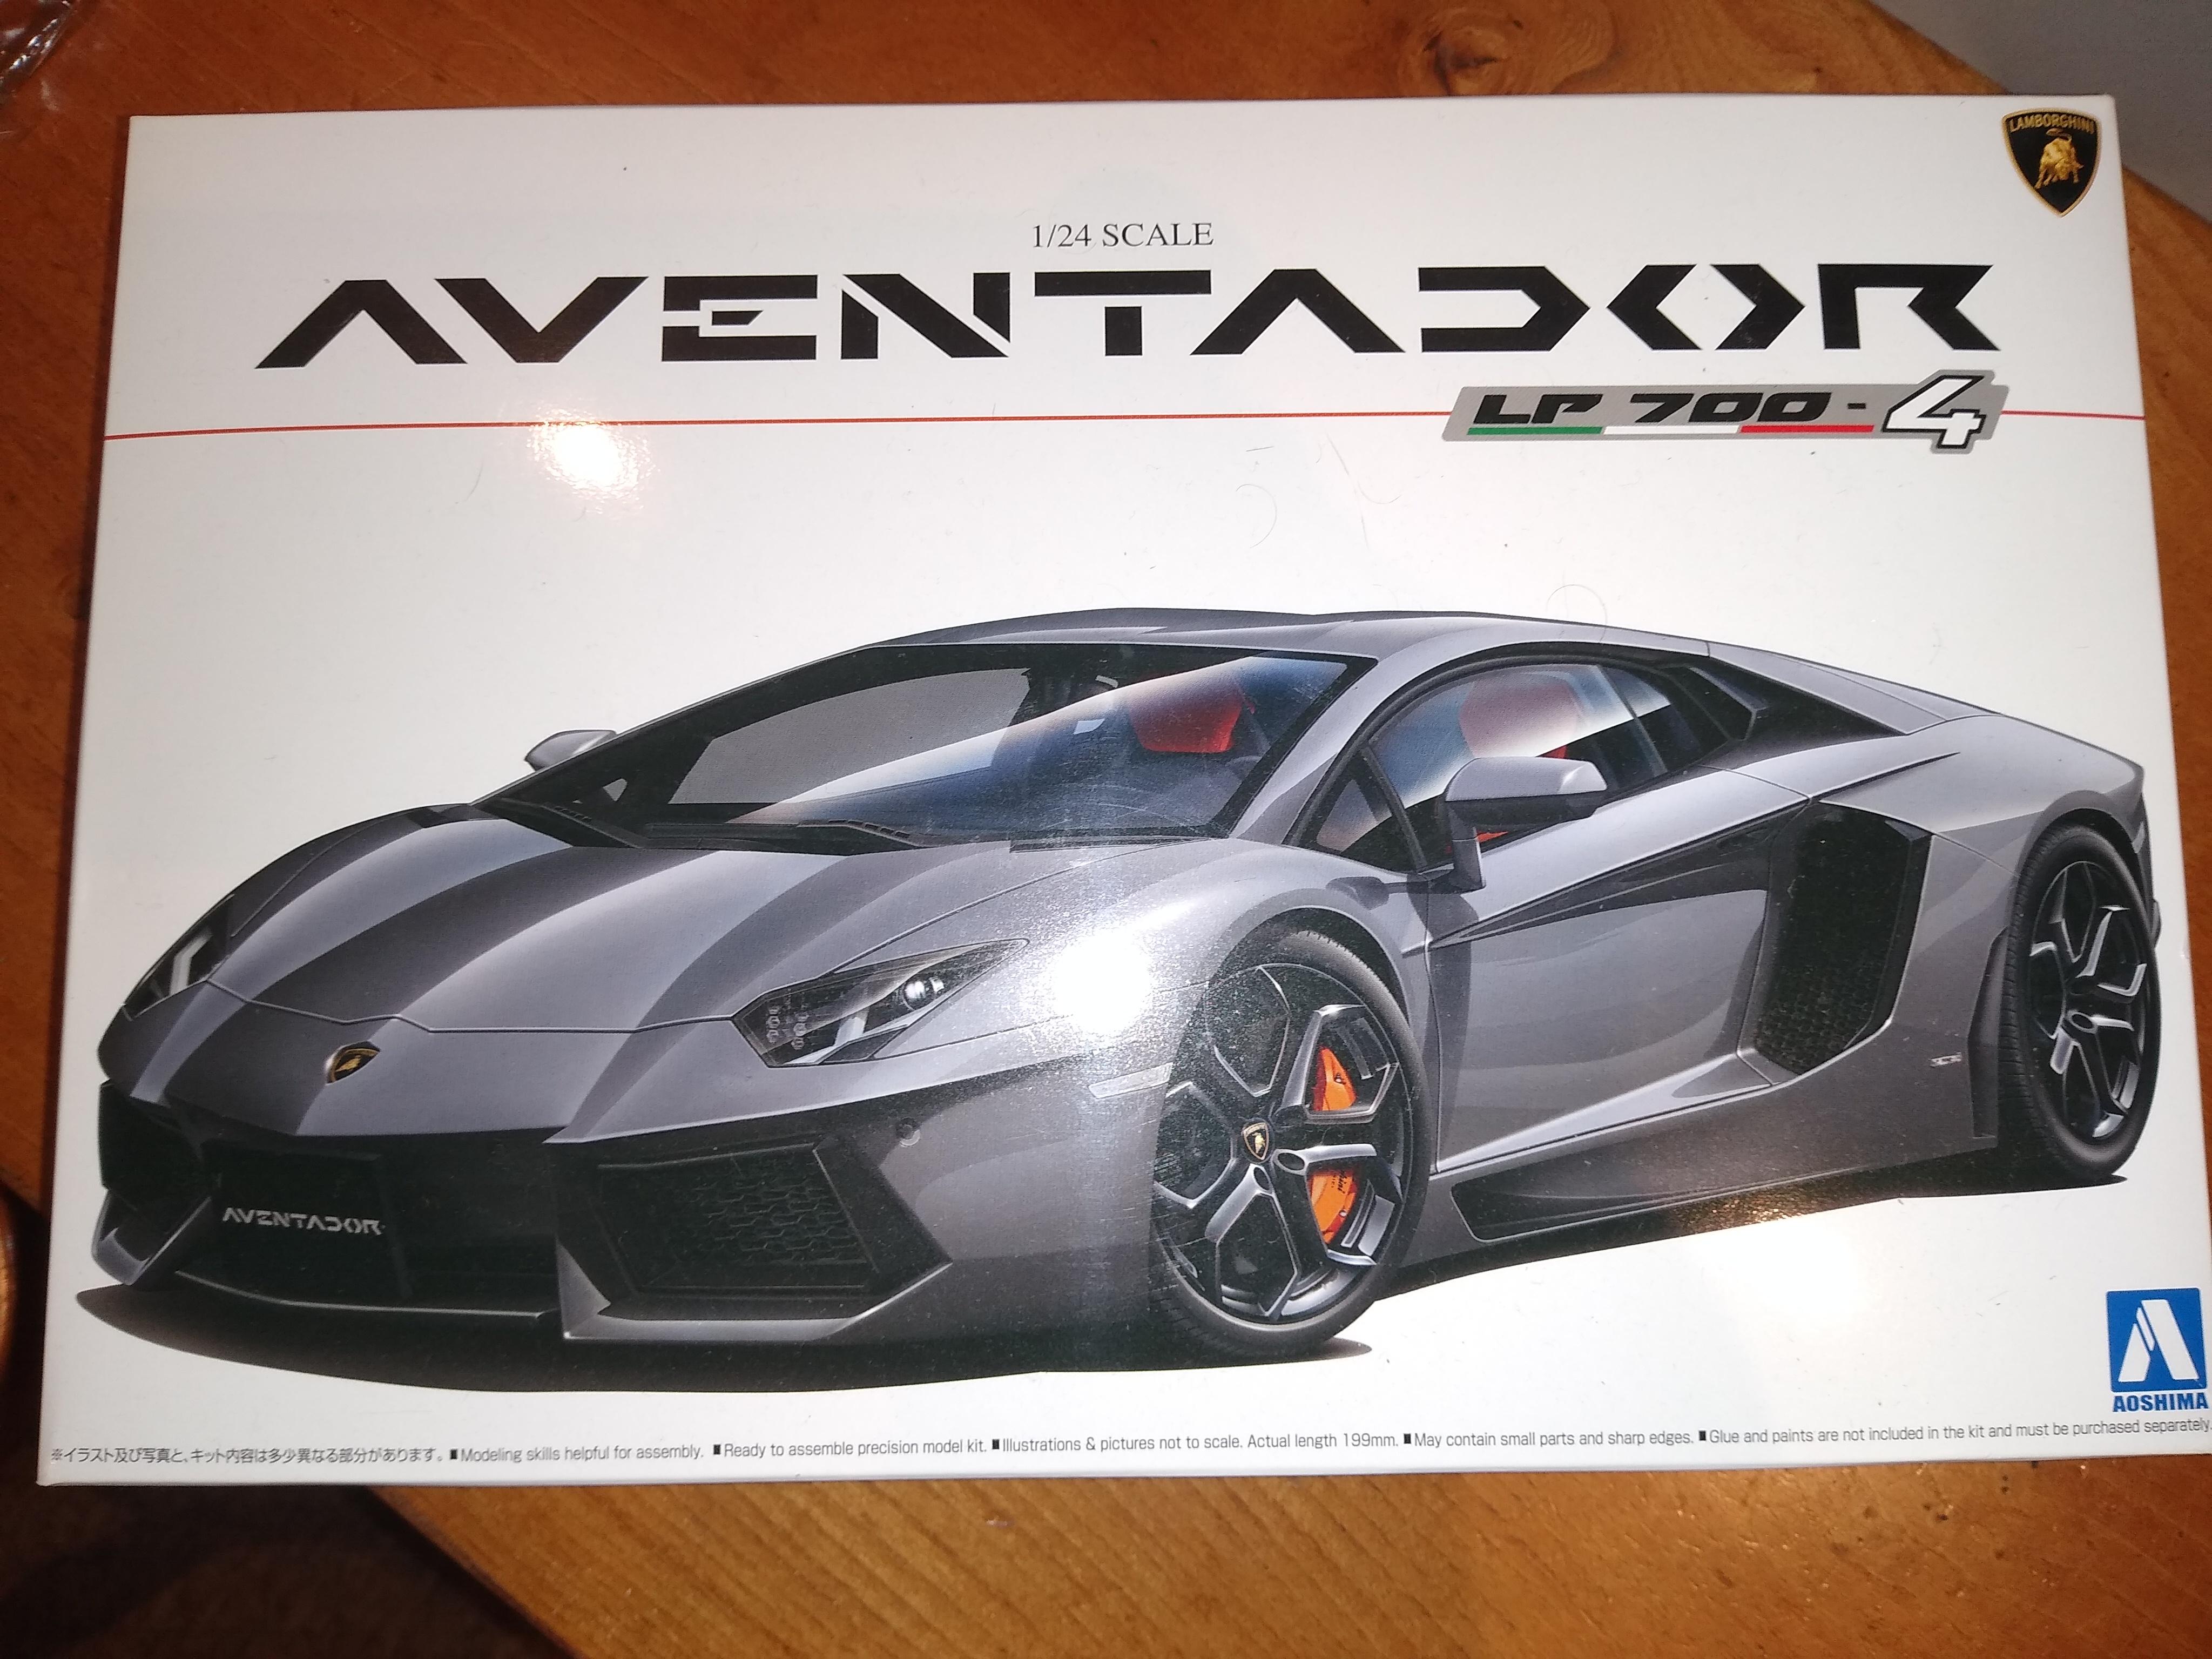
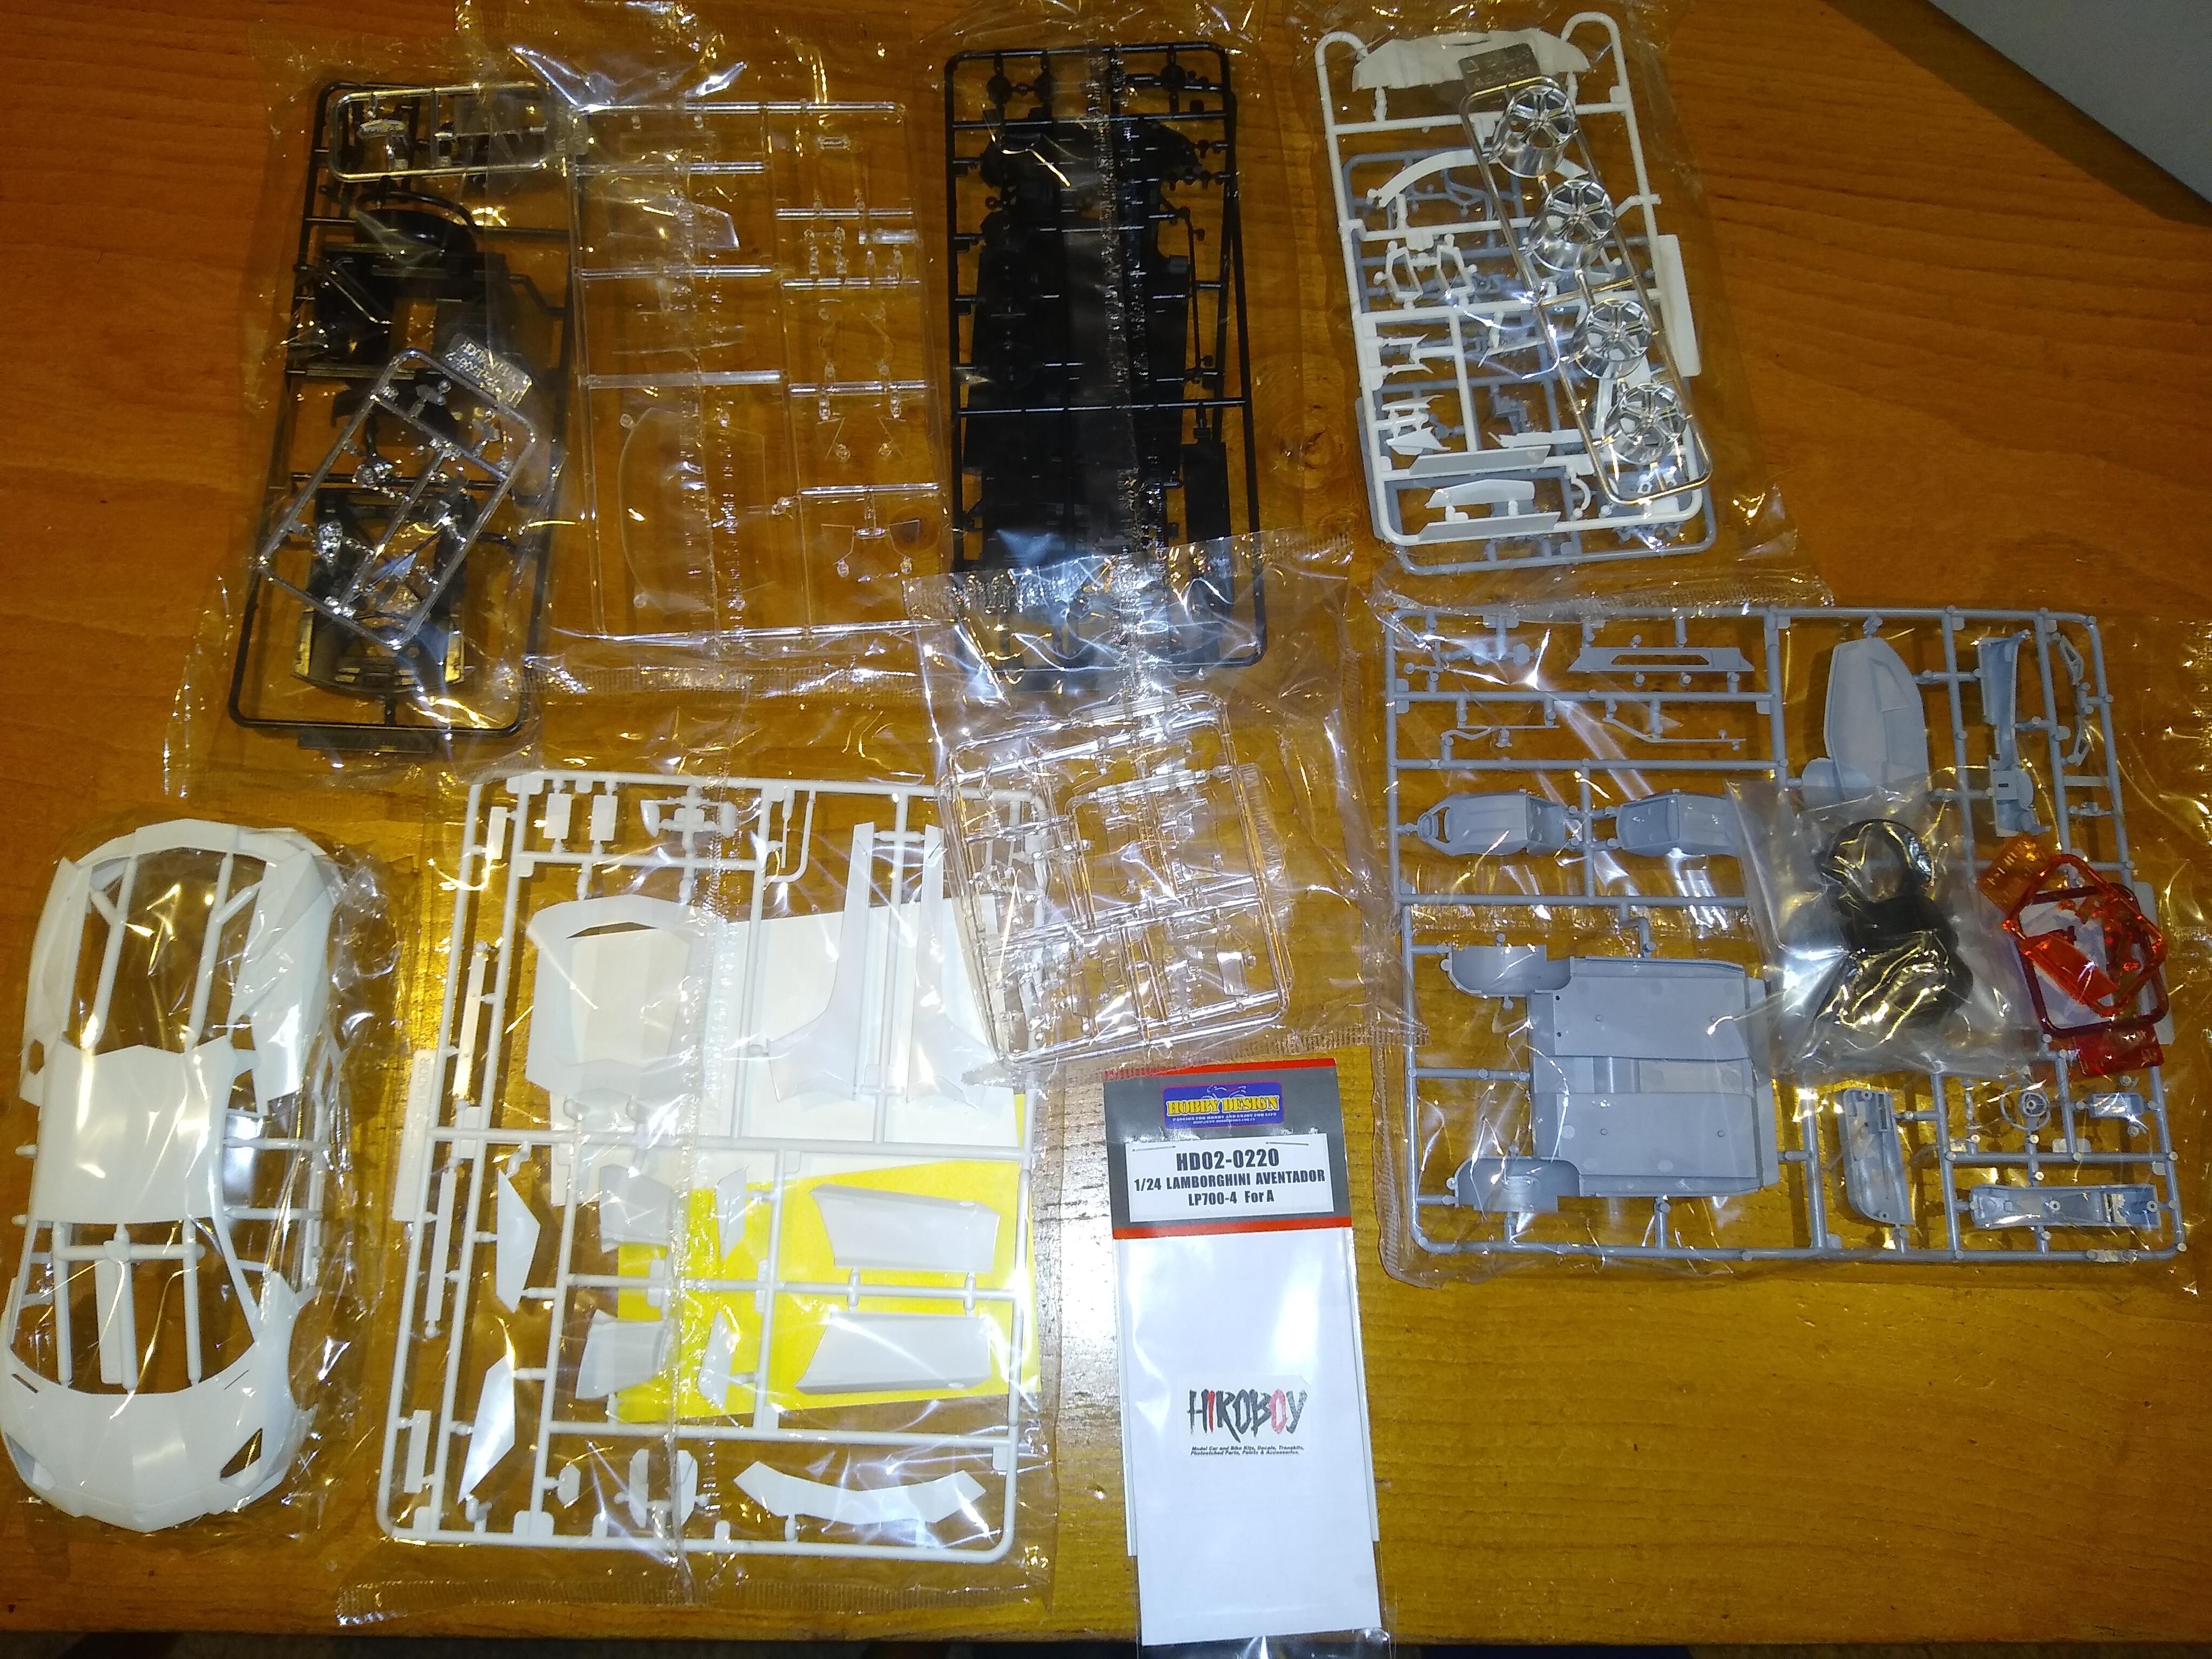
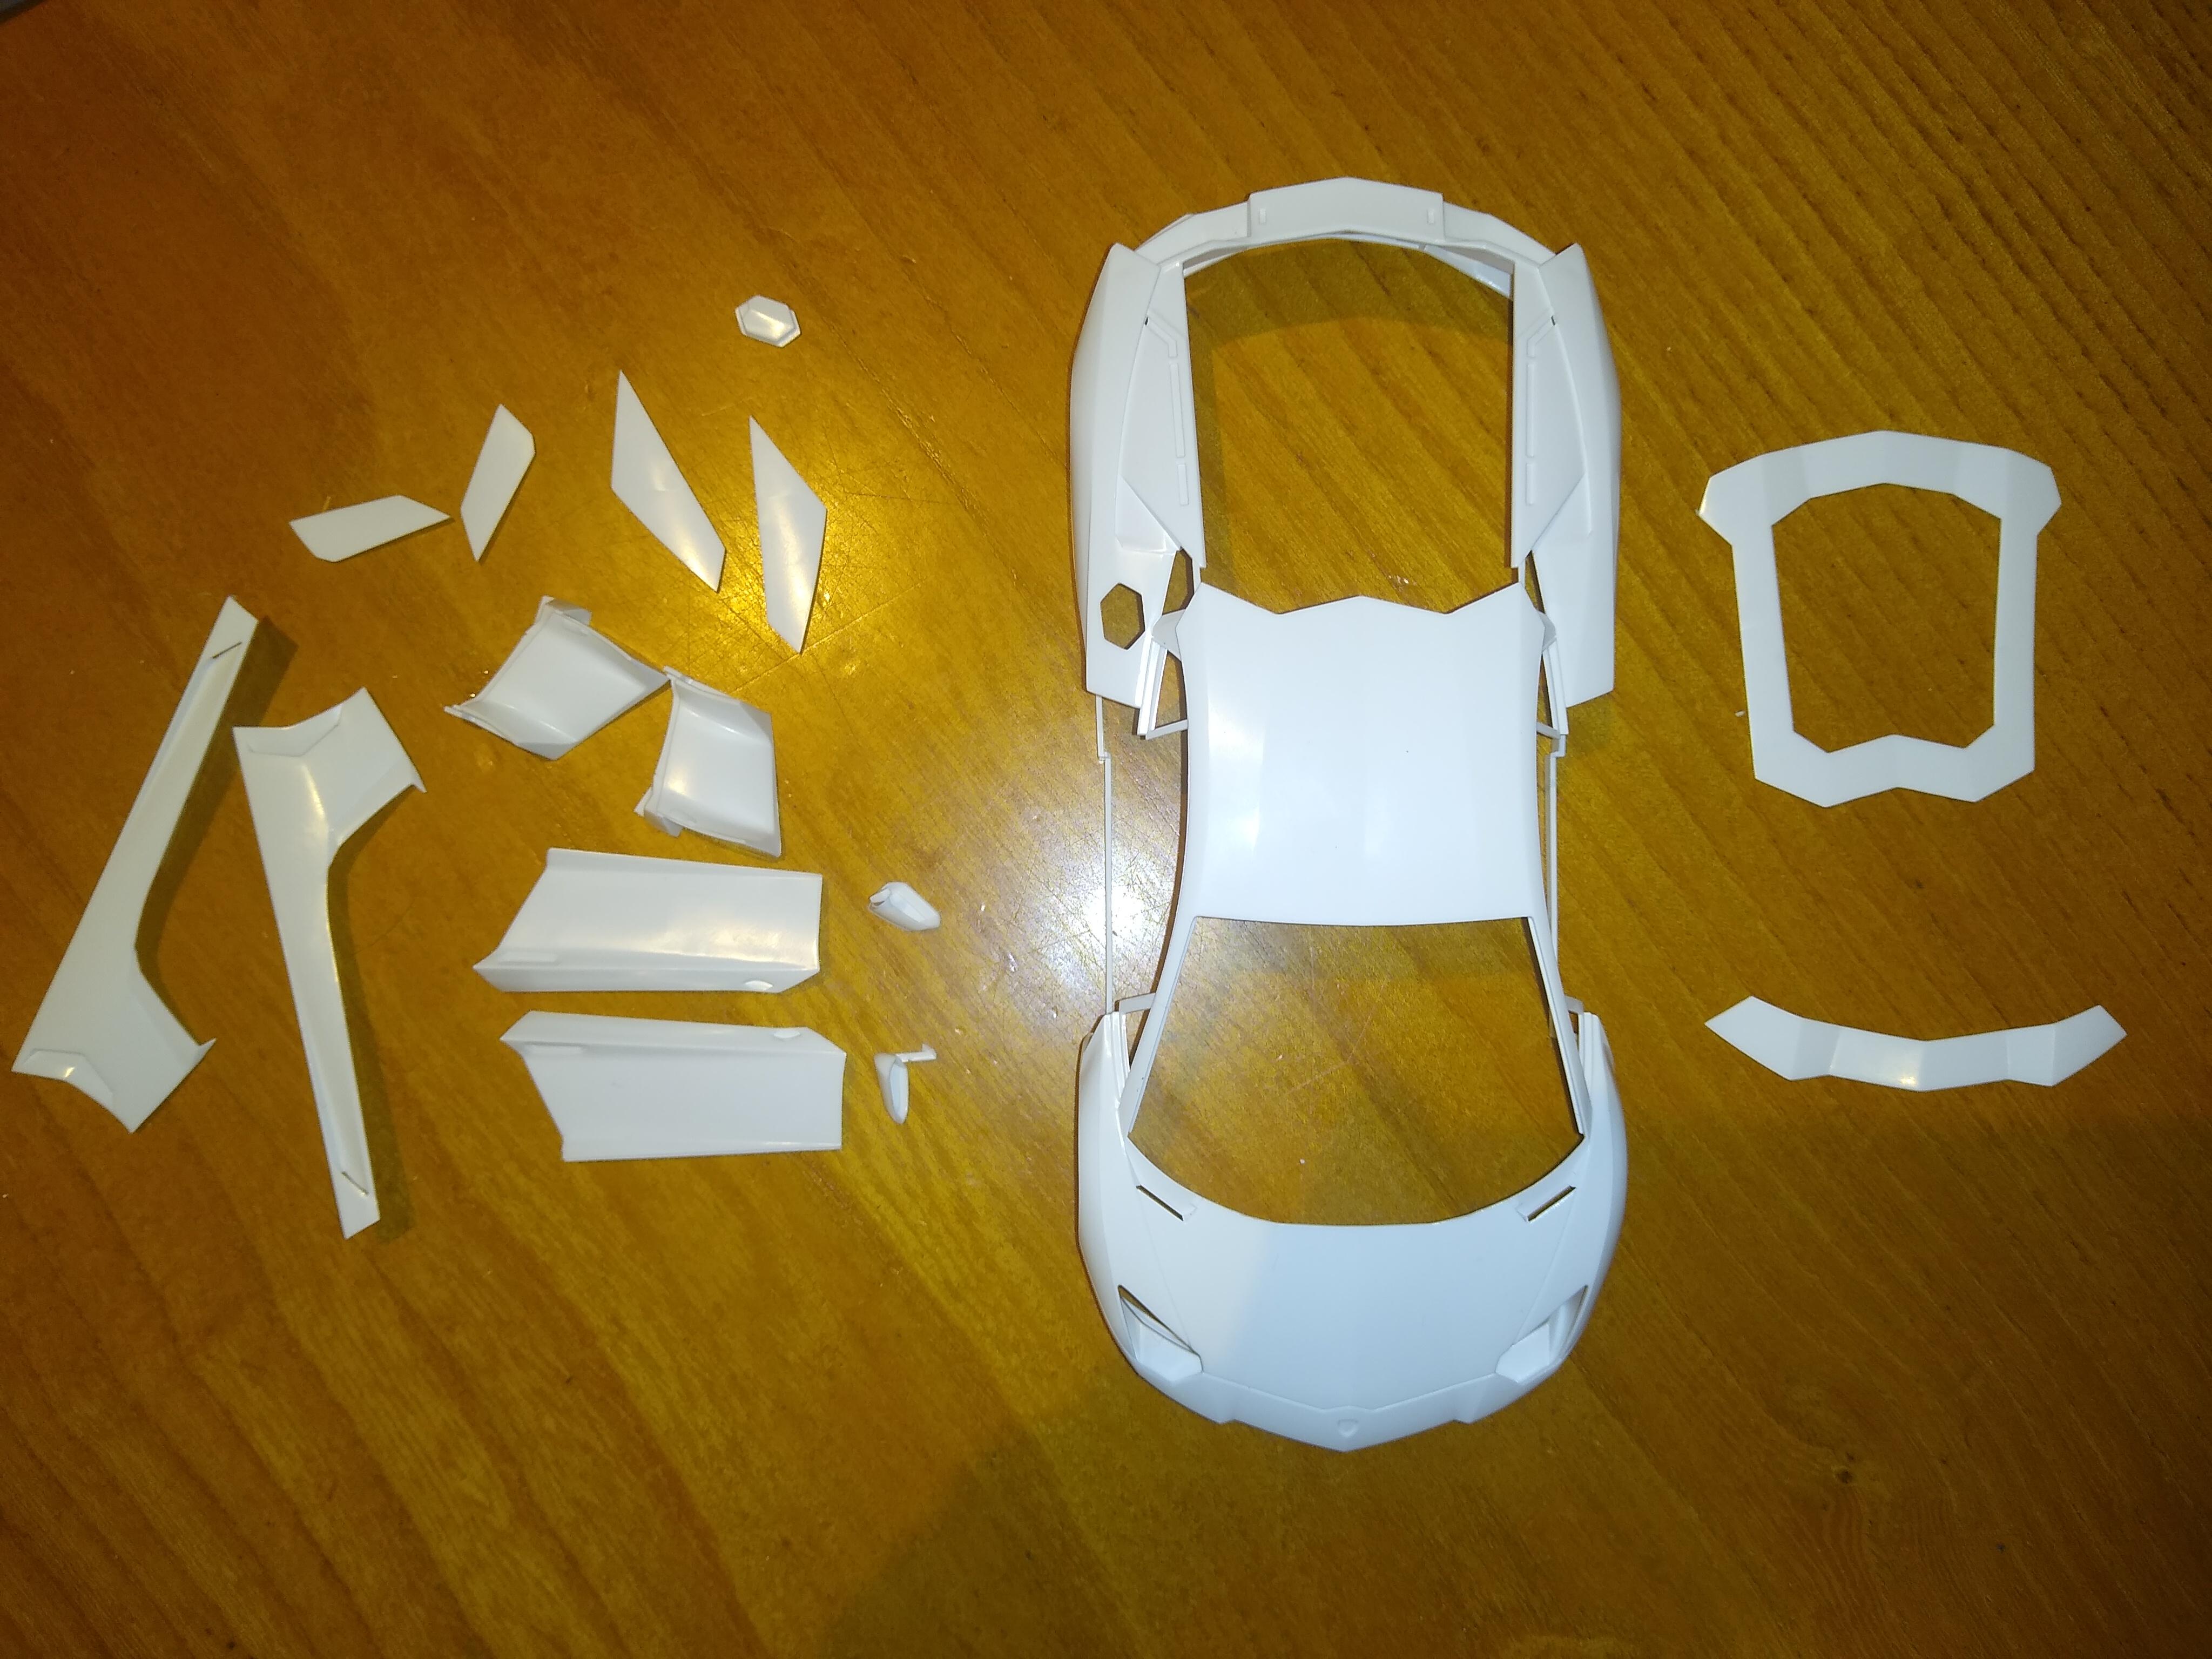
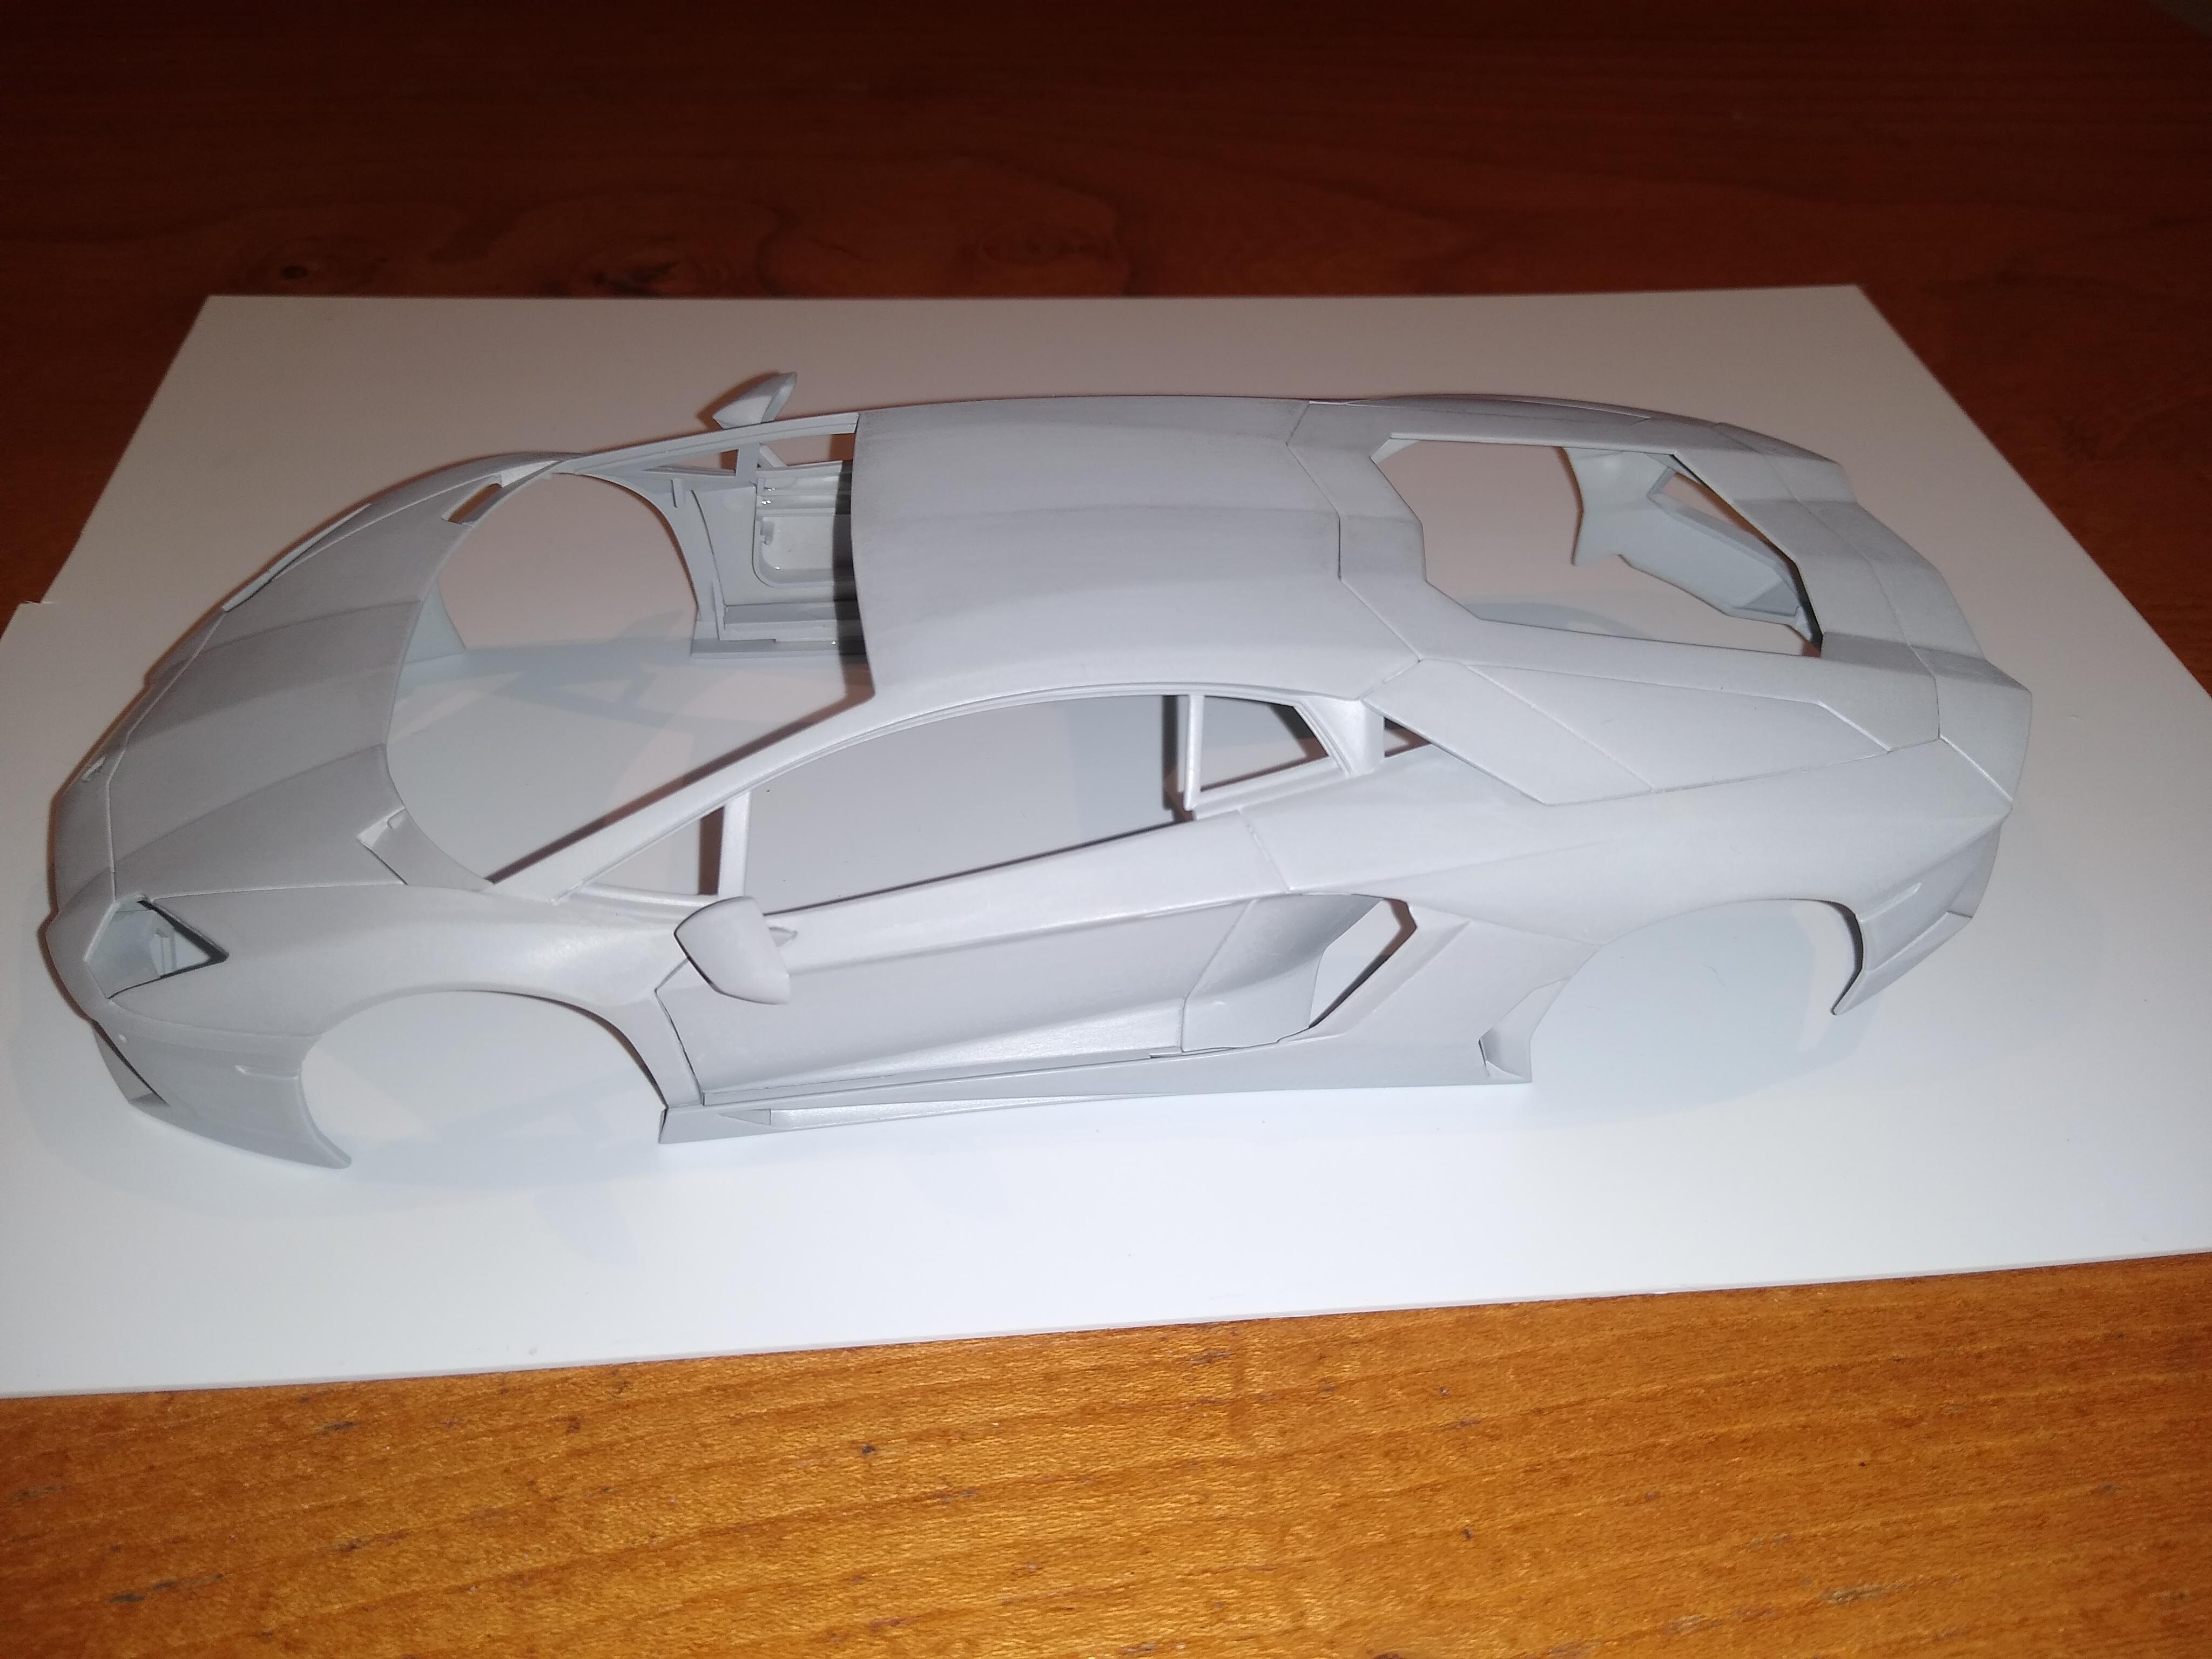
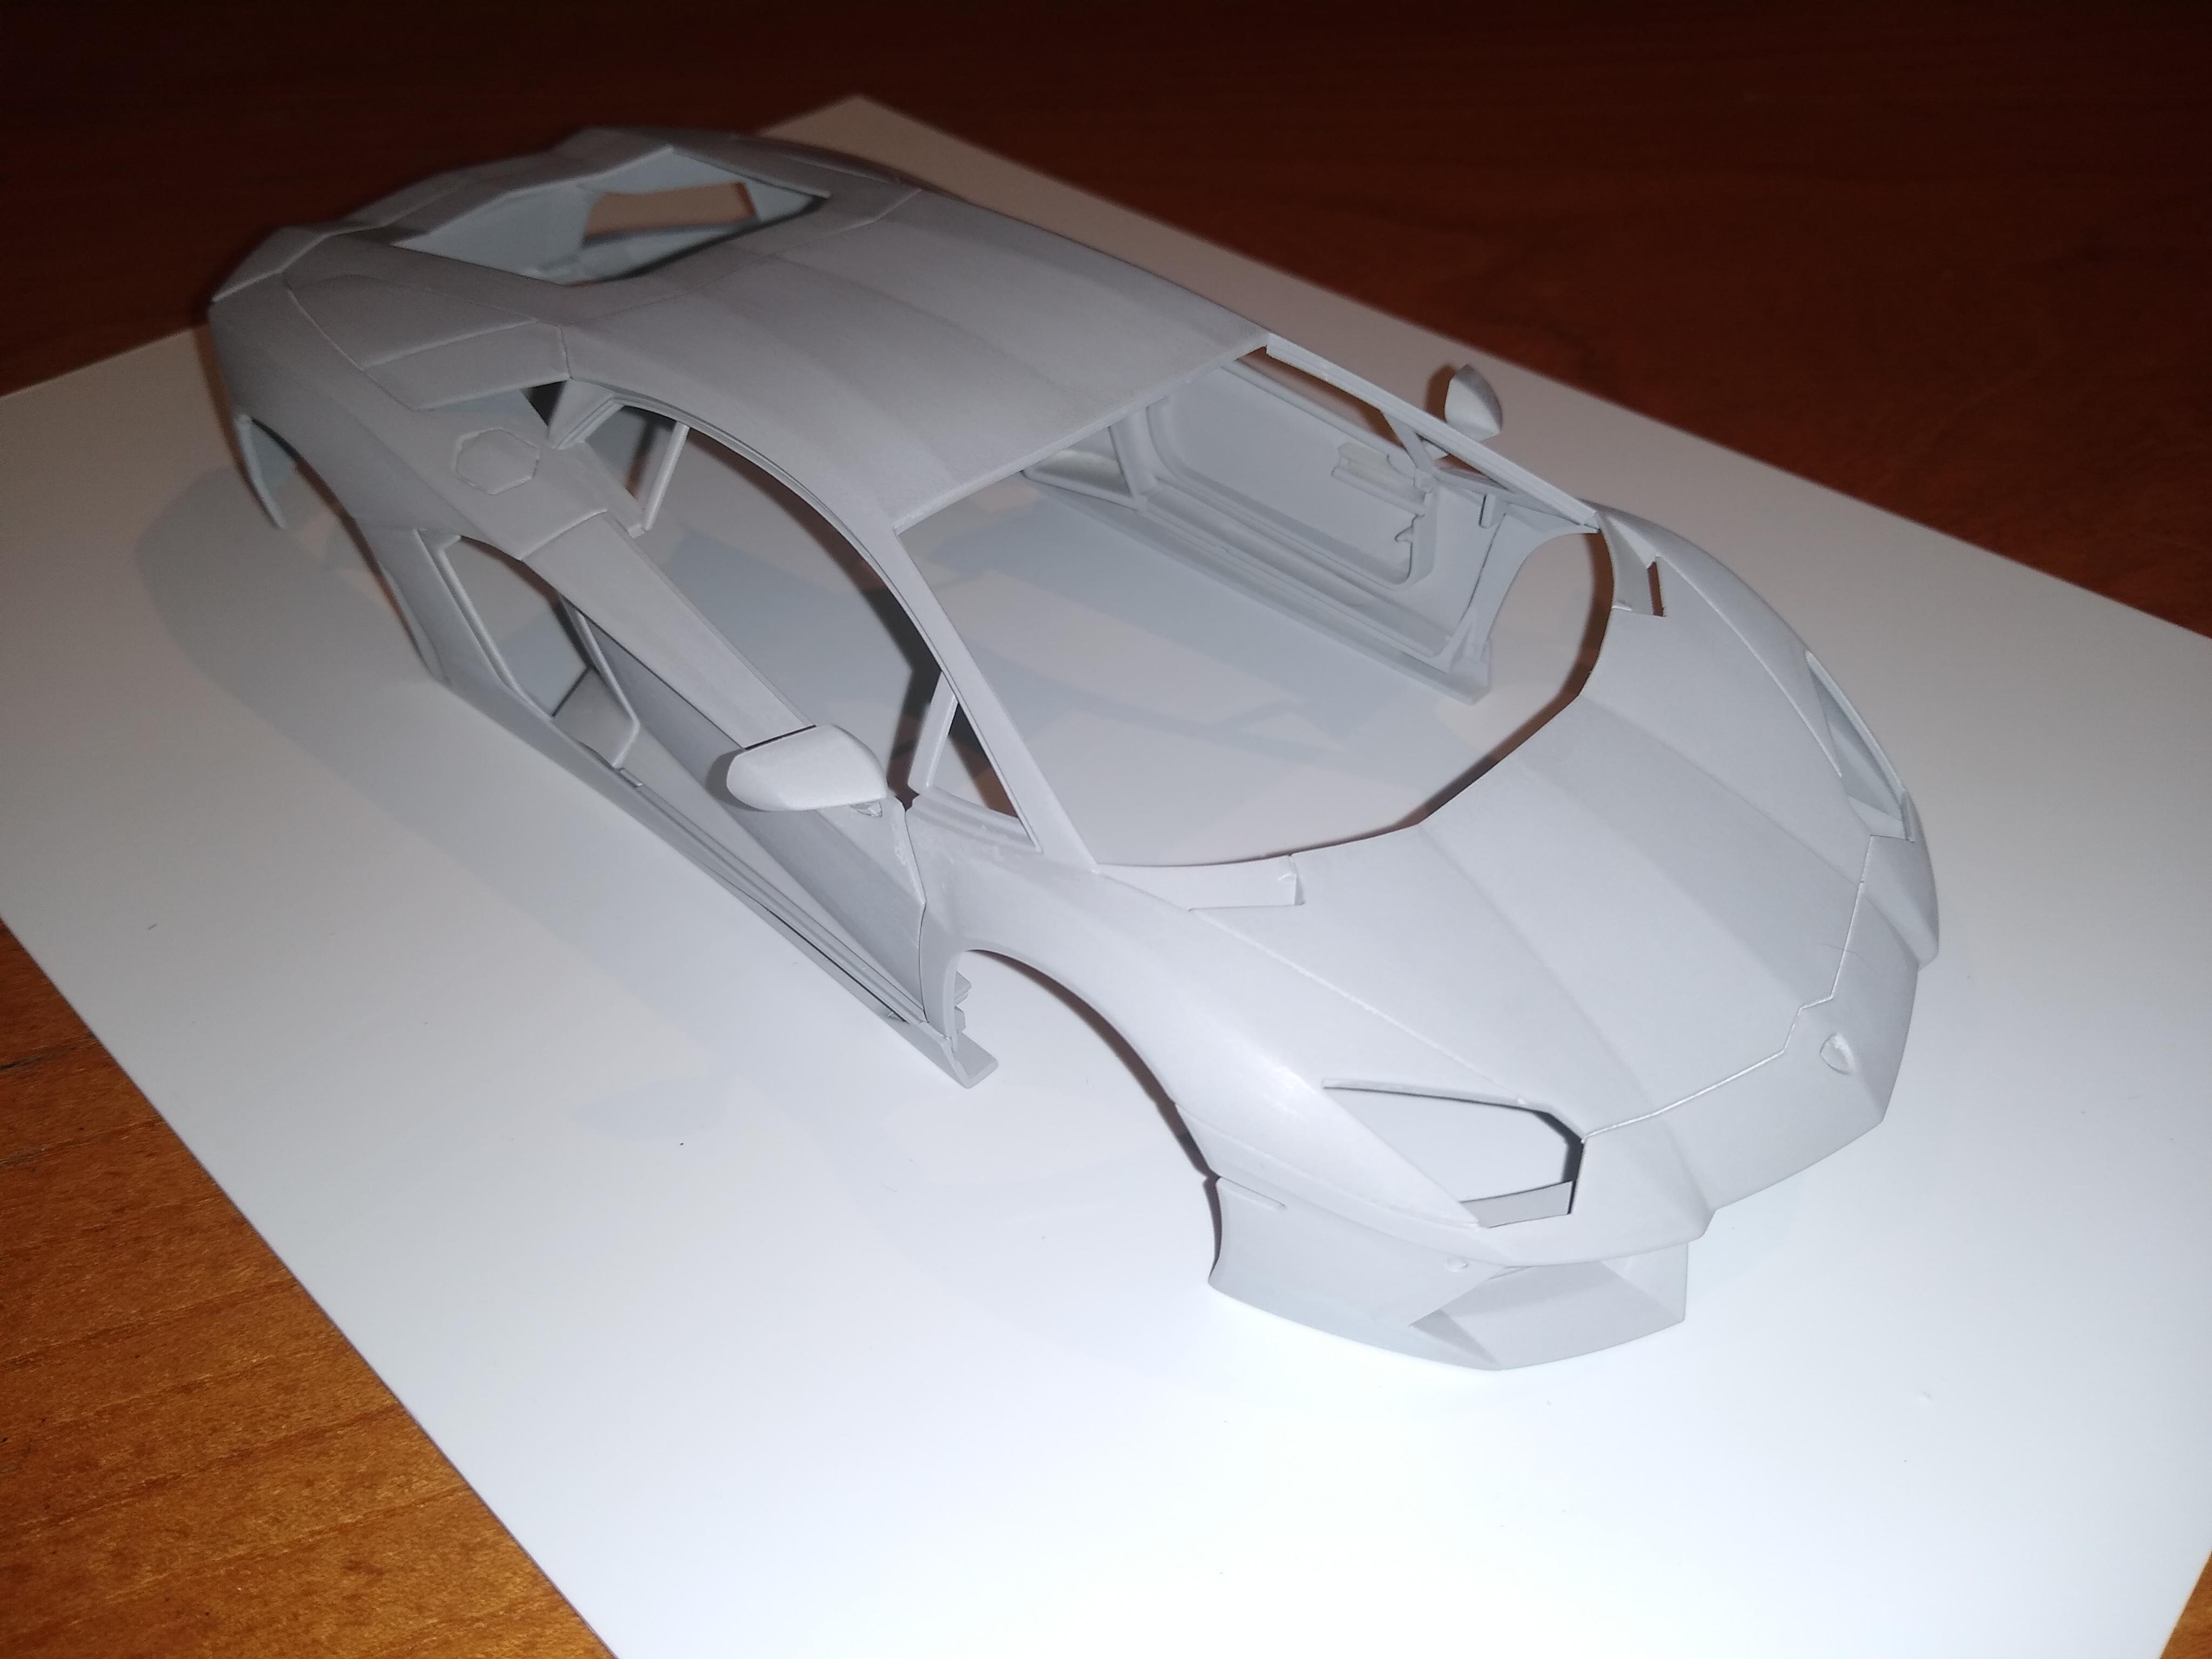
I already have two other projects in progress but I’m starting this because I want to get another body shell sprayed while the weather is still warm. (I use rattle cans outdoors and things can get a bit tricky here in the U.K. in the winter months). I’ve wanted to do this one for a while now but waited to develop my skills a bit in order to do it some kind of justice & reduce the risk of mishaps. The moment has arrived! It barely all fitted in the box! Twice as many parts as I’ve been used to but looks amazing. The goal is to turn it into something resembling this: Controversial colour choice but I thought long and hard about it: the car is so exotic & spaceship-like that something a bit outrageous seems to fit. I’ve chosen Tamiya candy lime green which has got more flake in it than the above, but it’s pretty close. I’ve watched a number of forum and YouTube builds in preparation, which is just as well because the thing is relatively complex for me and it would take me forever if I just had the instruction sheet. I started with identifying, detaching and tidying every piece that is going to be body coloured. This task would normally be fairly quick but, with all the bits and treading carefully, it took me an evening. How much of it should be assembled before paint and how much after? When researching, I couldn’t find two builds the same here, so I elected to keep the tradition going! A major fork in the road was whether to attempt the opening doors. It would be great to have an interior easily accessible to show off all the hard work that normally gets entombed, but, having observed the experiences of highly proficient modellers, the risk of getting towards the end of the build and discovering the doors don’t fit properly is too high for my liking. Essentially, I have gone for maximum pre-assembly. This even includes the wing mirrors: a copied idea which appealed to me because putting glue on to a finished body brings me out in a cold sweat! The gluing took me another evening, followed by another sanding-out mould lines/surface prep and scribing panel lines. Then, just as it was ready for paint, I noticed small-but-unwelcome gaps on either flank above the big side vents. I was able to close one with just some pressure and quick-drying cement, but the other side needed a dab of filler and leaving to dry. Delayed another da, but pleased to catch the oversight in time. Wet sanded everything with 1200 grit. All went quite well but I discovered that, owing to the fact that panels surrounding the lifting engine cover have some play in their positioning, the cover is going to be a touch more snug than I would've liked by the time it's fully painted & cleared. I did a bit of (very minor) sanding & touching up to try & mitigate this, but I didn't want to risk messing with size/shape to any real extent. Anyhow, she's ready to go green... Thanks for looking ?
-
Cool! It's on my list for future builds.
-
James Bond Underwater Car
Pete75 replied to styromaniac's topic in General Automotive Talk (Trucks and Cars)
+1 Fujimi kit. They released the sub version and the land version of the Lotus a short time apart around about 2016. I'm currently doing the latter. -
And I thought the yellow one was good! Mind-blowing stuff, sir.
.jpg.3bebaccb0f6ad6af6732fe86b1b7cbd3.jpg)
.jpg.1554b7a360c507520bbdd21609470459.jpg)
.jpg.2897c10c51f41f16a63a81dbfd41a59b.jpg)
.jpg.9e1d08455a2818066747767d2aaaa704.jpg)

.jpg.1c304319ef593cc9d4d91ca369939ff9.jpg)

.jpg.1c01880481c04d4e8df85366644523da.jpg)
.jpg.186fdbdd55e10db7f7e4b2348b5310c1.jpg)
.jpg.f1a83bcf55e5457e343f20c96629bc99.jpg)
.jpg.3fac7106b57f5724f35f0f3a41cfb8c0.jpg)


.jpg.7ee6f9cdb70a6c0eeb4dadb7496923cf.jpg)