AmericanMuscleFan
-
Posts
3,058 -
Joined
-
Last visited
Content Type
Profiles
Forums
Events
Gallery
Everything posted by AmericanMuscleFan
-

’72 Dodge Demon Drag Racer 1/25 scale
AmericanMuscleFan replied to AmericanMuscleFan's topic in WIP: Drag Racing Models
Thanks for the suggestions Will, orange is my favorite color but the GTX is already painted that color and I also built a 69 Coronet several years ago and painted it orange as well. People would think I'm colorblind if I painted another one that color... ? Time will do its work and the inspiration of other models on the forum could influence me in the right way! Francis -
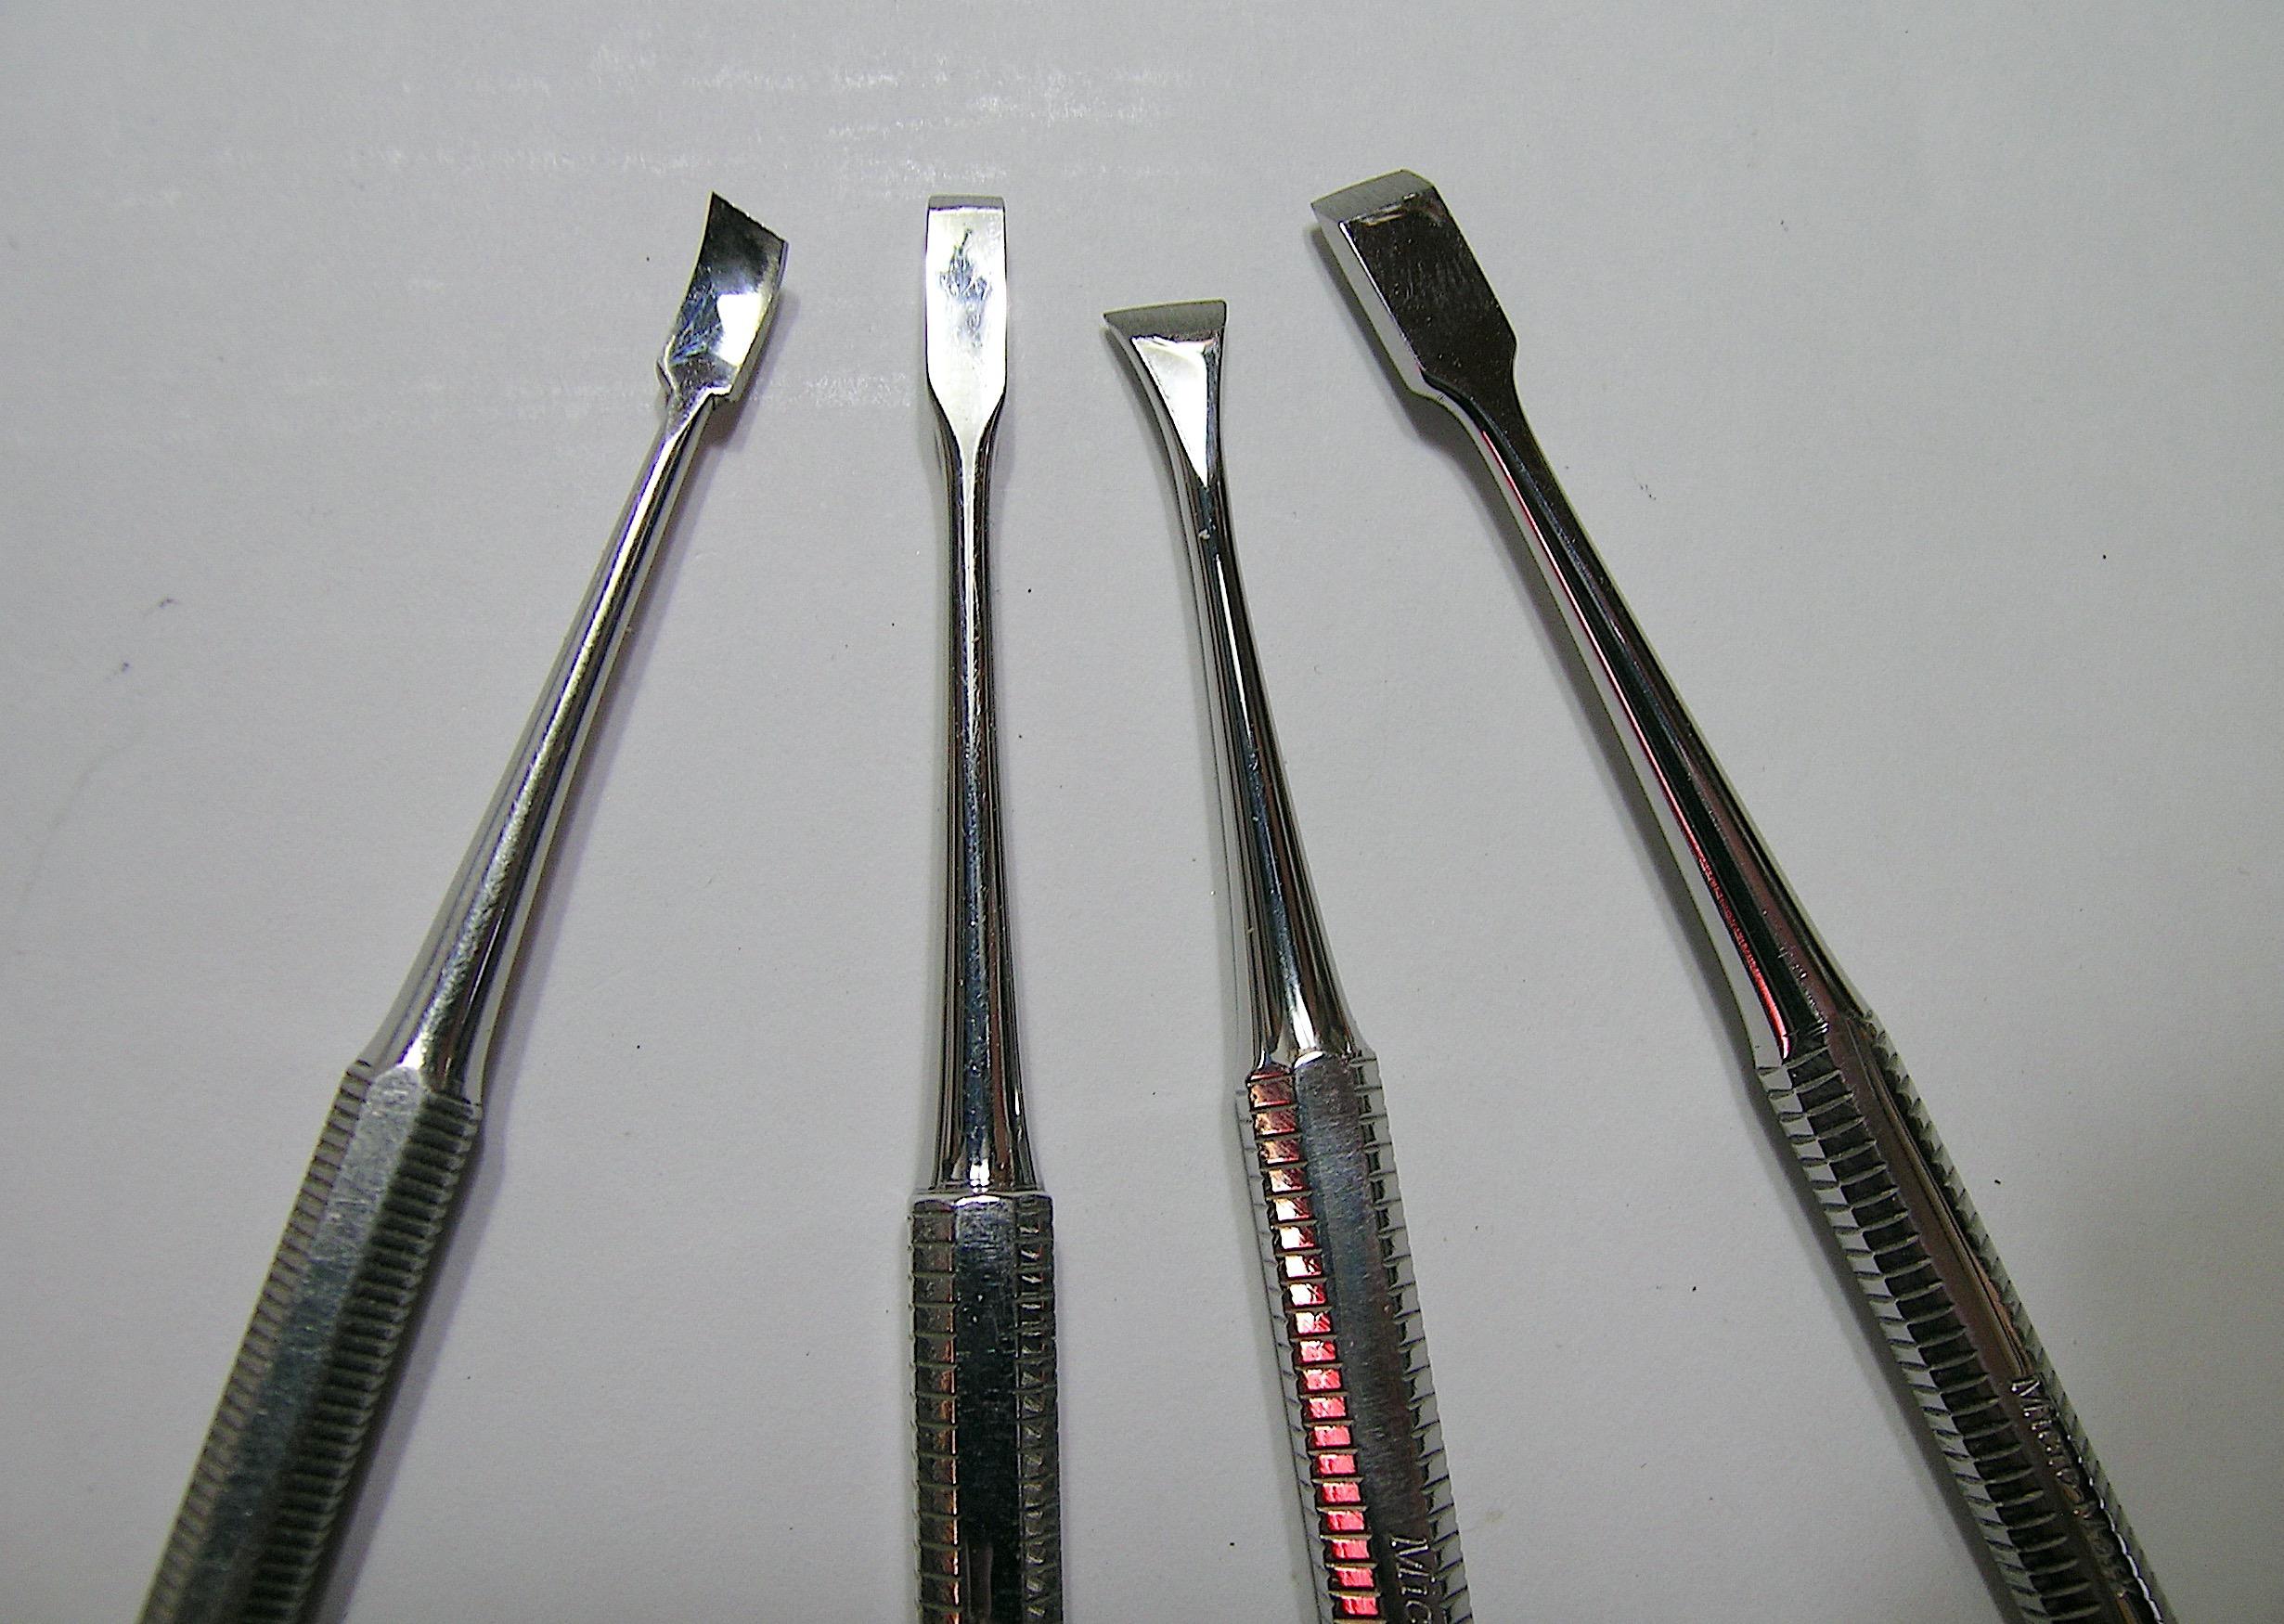
If this tip can help anyone, it's worth sharing! ?
-
’72 Dodge Demon Drag Racer 1/25 scale
AmericanMuscleFan replied to AmericanMuscleFan's topic in WIP: Drag Racing Models
You can also find many at Micro-Mark, but like anything else, there is different quality in this type of tool and I don't hesitate to buy good quality because a good tool lasts a long time. For ice I use de-icing salt and it works wonderfully. ? -
’72 Dodge Demon Drag Racer 1/25 scale
AmericanMuscleFan replied to AmericanMuscleFan's topic in WIP: Drag Racing Models
Thanks Mike, it's a pleasure to share even if it takes my some building time, It's not a race anyway and that makes my WIP more relevant I think! More to come soon! Francis -
’72 Dodge Demon Drag Racer 1/25 scale
AmericanMuscleFan replied to AmericanMuscleFan's topic in WIP: Drag Racing Models
Thanks Will, your comments are fuel to my engine! I love all Detroit muscle cars from the late 60's to early 70's, regardless of manufacturer, I am just more in my comfort zone with Mopar cars. I also love Mustangs, the '70 BOSS is my favorite but the '69 isn't far behind. As for the color for the Demon, it's a bit like the rest of the build, nothing definitive but probably a light color as black or dark colors tend to make details less visible. I had even thought about pearl white and satin black hood but I will be open to suggestions. ? Francis -
1/16th Scale Top Fuel Dragster Eddie Hill 4:99
AmericanMuscleFan replied to Ian McLaren's topic in WIP: Drag Racing Models
Yeah, you haven't rested long my friend! ? -
Very nice car and good choice of color, white suits the GSX perfectly. ? This is one of my favorite GM bodies, one of my uncles has one back in the day and I remember the beautiful console, cool and rare car!
-
’72 Dodge Demon Drag Racer 1/25 scale
AmericanMuscleFan replied to AmericanMuscleFan's topic in WIP: Drag Racing Models
Thanks Will, I'm a Mopar guy as you can see so it's hard for me to say which one I prefer but the '70 RR/GTX are really nice cars. I'm not making a replica or a tribute car so this will give me a certain freedom to put the "inspiration of the moment" under the hood without making connoisseurs cringe. On the other hand, I will stay in "the family" when it comes to the engine, the price of the components is not an obstacle when you make miniatures! ? Francis -
’72 Dodge Demon Drag Racer 1/25 scale
AmericanMuscleFan replied to AmericanMuscleFan's topic in WIP: Drag Racing Models
You're right Andrew, I use these kinds of scrapers and chisels all the time, they are very useful and effective for carving fine, precise details in styrene or resin parts. I bought them many years ago and still use them today, it's the kind of tool that remains relevant even today with all the technology. ? As for the cold, I think it keeps us awake around here and it's good for the hobby! ? Francis
-
’72 Dodge Demon Drag Racer 1/25 scale
AmericanMuscleFan replied to AmericanMuscleFan's topic in WIP: Drag Racing Models
Thanks Trevor! No matter how hard you try, it can always be better, but at some point you have to tell yourself that the primary goal has been achieved and move on. It would be hard to hide that I like super clean and well defined parts, the under hood detail elements are a good example of cheap improvements that a skillful modeler can make. You just have to convince yourself that it's worth it and do it for your own satisfaction and according to your limits, the effort is always rewarded! Speaking of effort, it's still going to take me quite a bit to finish this thing... ? Francis -
’72 Dodge Demon Drag Racer 1/25 scale
AmericanMuscleFan replied to AmericanMuscleFan's topic in WIP: Drag Racing Models
Thanks Bob! These are the kind of fairly simple details that I like to create and which, in a certain sense, can be done by any model who wants to go a little further into the details. Of course, most don't have a milling machine, but I have done it several times with good results using simple good old hand tools back in the day, but it takes more time... ? Francis -
’72 Dodge Demon Drag Racer 1/25 scale
AmericanMuscleFan replied to AmericanMuscleFan's topic in WIP: Drag Racing Models
Yes Will, that's the plan! I don't know yet if it will be a HEMI or wedge engine but a big block for sure. There is a guy from my little village who races with a '72 Swinger equipped with a 528 Indy block, it would be a great challenge to reproduce, perhaps with B1 heads...? It's funny that you refer to my GTX's engine because it generates more comments than my D100 pickup which I think the engine is much more elaborate and accurate but you are not alone. I think the GTX is a more plausible car than my pickup, but most of the machined parts are better executed in my opinion, It's a question of taste! For now I'm going to put the car on its wheels, this will be a long process as there are a lot of parts to make. Thanks for your question by the way! ? Francis -
’72 Dodge Demon Drag Racer 1/25 scale
AmericanMuscleFan replied to AmericanMuscleFan's topic in WIP: Drag Racing Models
Thanks Claude! No magic here... I put pressure with my hand (I only have one free...?) on the part when cutting to prevent the end mill from making grooves in the part. It is in these moments that it would be practical to have a third hand and that is why I do not have a photo of the process to show you! ? The rest is sanding, it's boring but you know very well how to do that my friend!!! Francis -
This only makes the fun last! ?
-
Superb job Christopher, you can be proud! ? I like to see that you grafted the section under the hood from the most recent kit, it makes all the difference. I've always loved these Barracudas and I also have this one in my long list of potential next projects, a super stock version has been in my head for quite some time!
-
’72 Dodge Demon Drag Racer 1/25 scale
AmericanMuscleFan replied to AmericanMuscleFan's topic in WIP: Drag Racing Models
Thanks guys! I am very happy with the work accomplished so far. However, it will be good for me to machine a few parts, it will give me a break from styrene, I think some people prefer aluminum and brass, there will be something for everyone if I may say so! ? Francis -
1/16th Scale Top Fuel Dragster Eddie Hill 4:99
AmericanMuscleFan replied to Ian McLaren's topic in WIP: Drag Racing Models
Rest well, you and your partner Ian, the dragster will be waiting for you, there's no rush and I'm sure you'll come back strong!- 78 replies
-
- 2
-

-
- scratch built
- super shops
- (and 2 more)
-
’72 Dodge Demon Drag Racer 1/25 scale
AmericanMuscleFan replied to AmericanMuscleFan's topic in WIP: Drag Racing Models
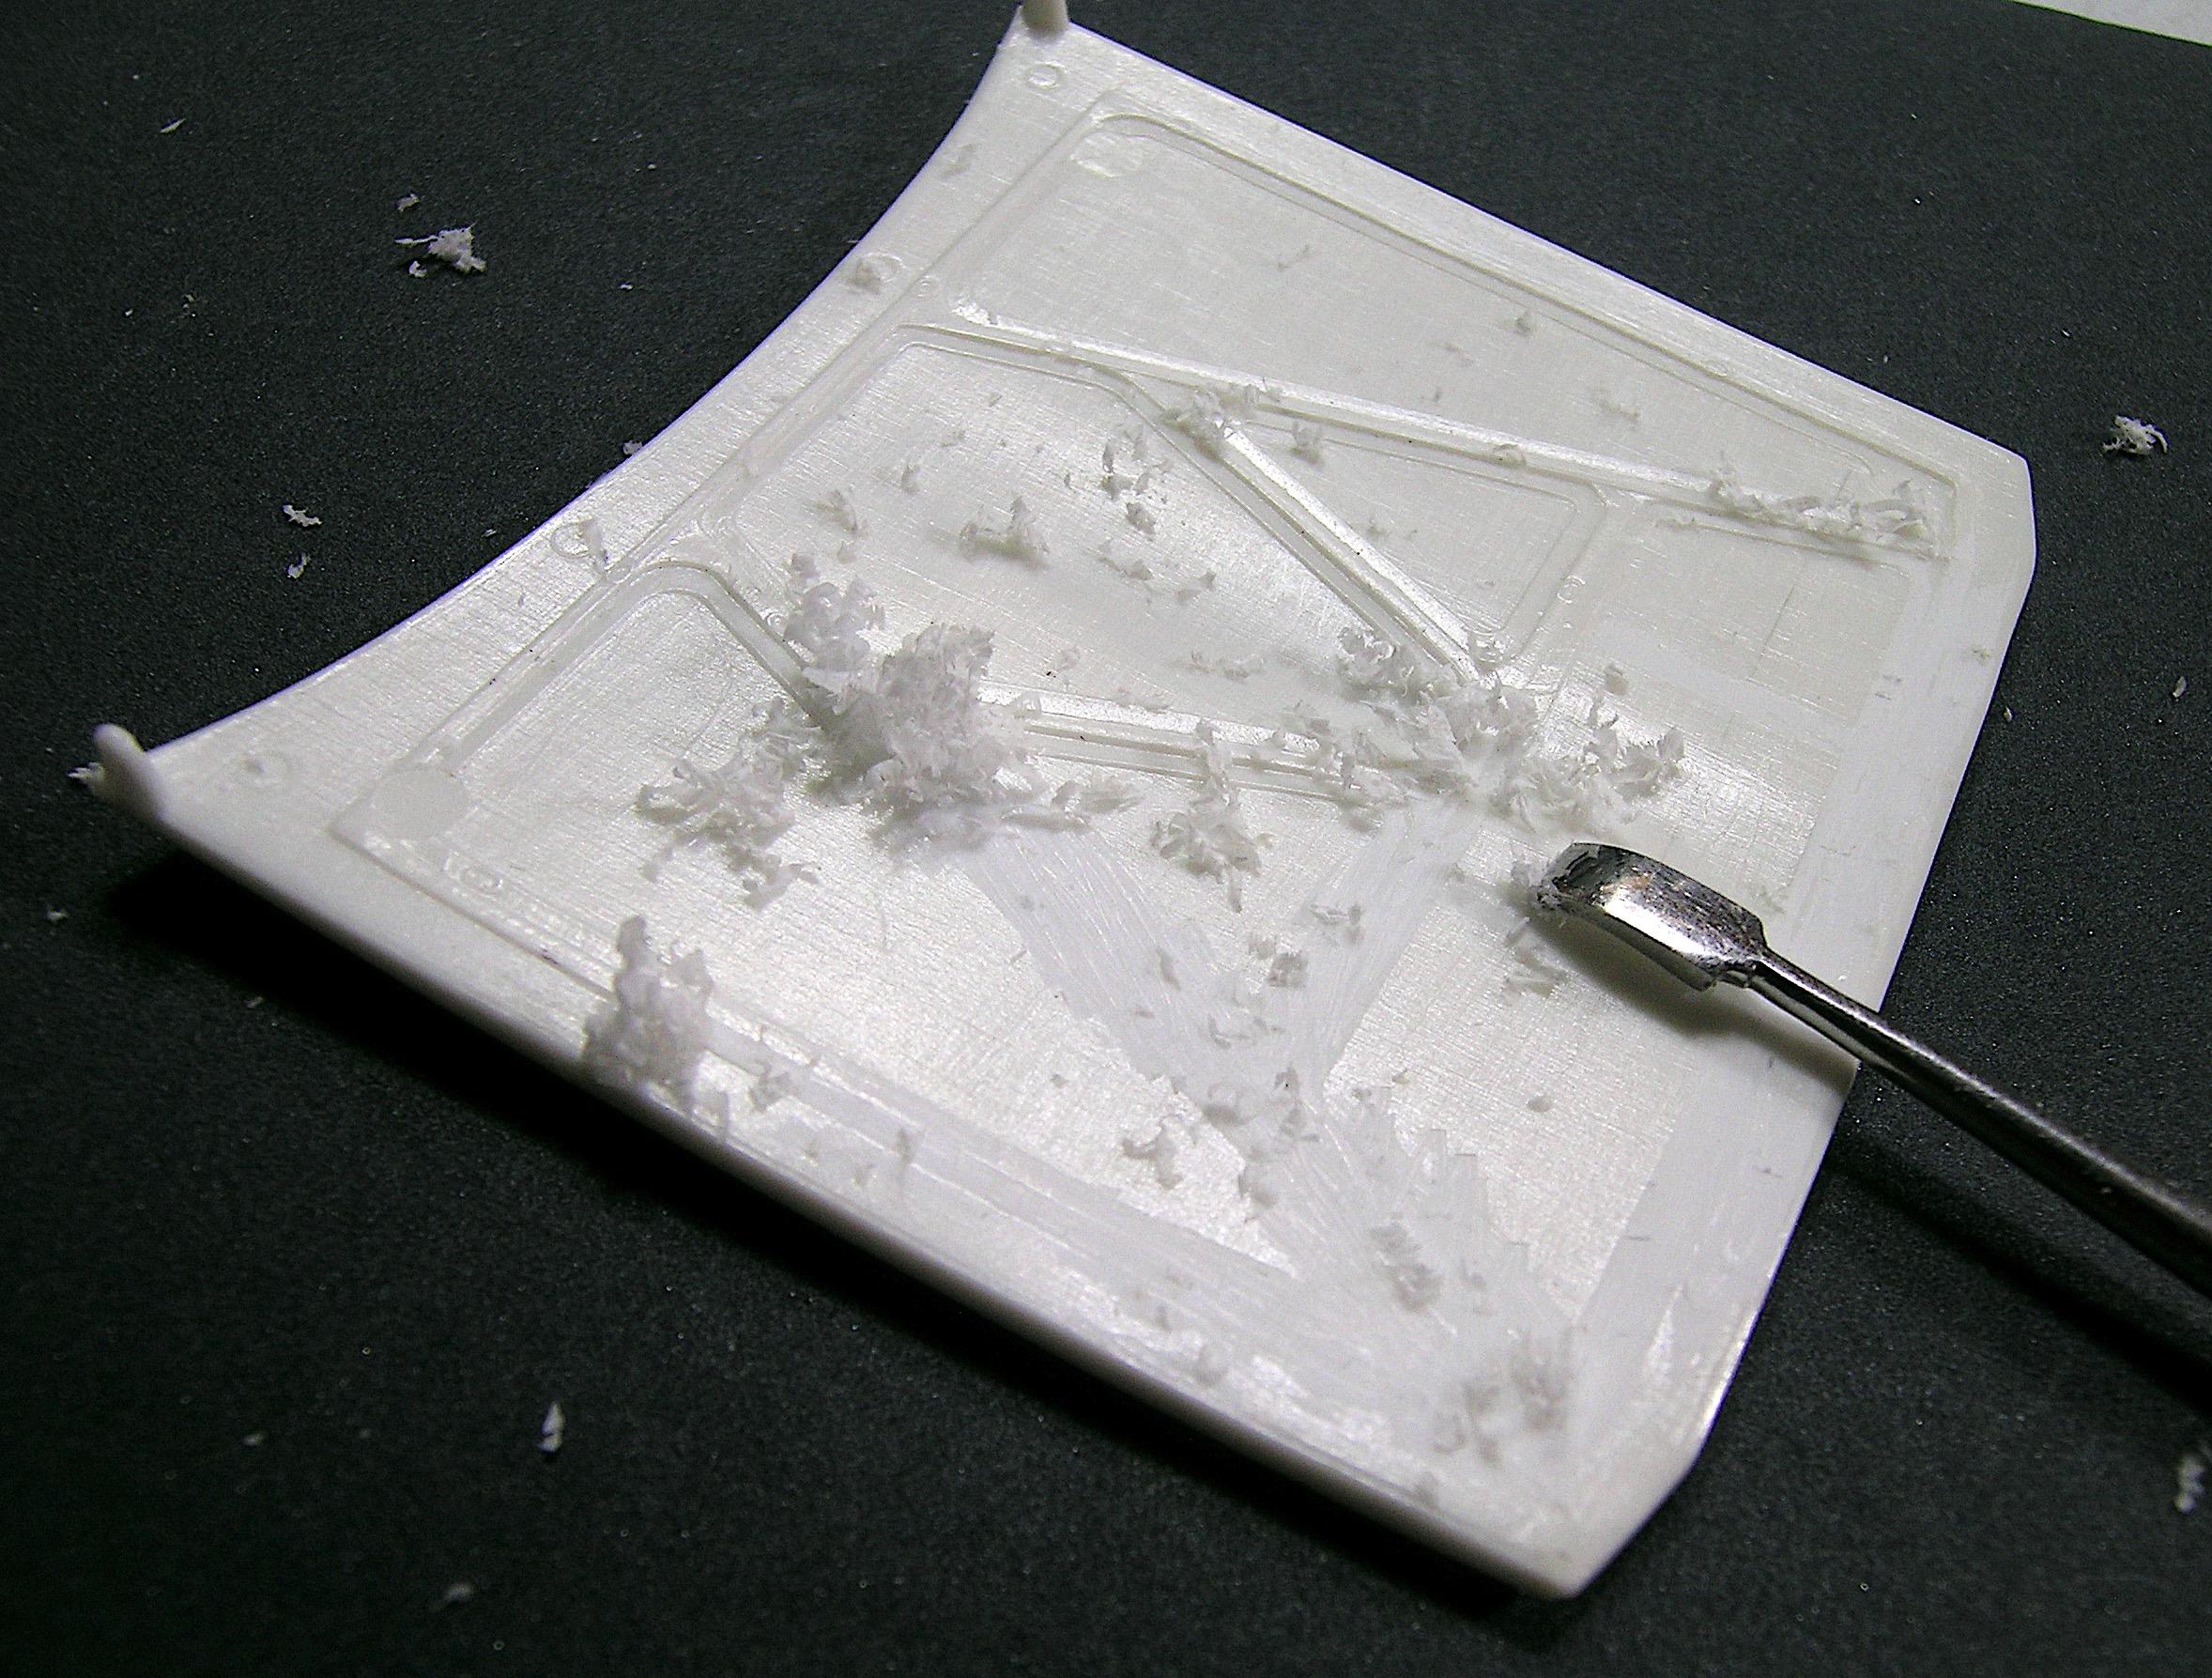
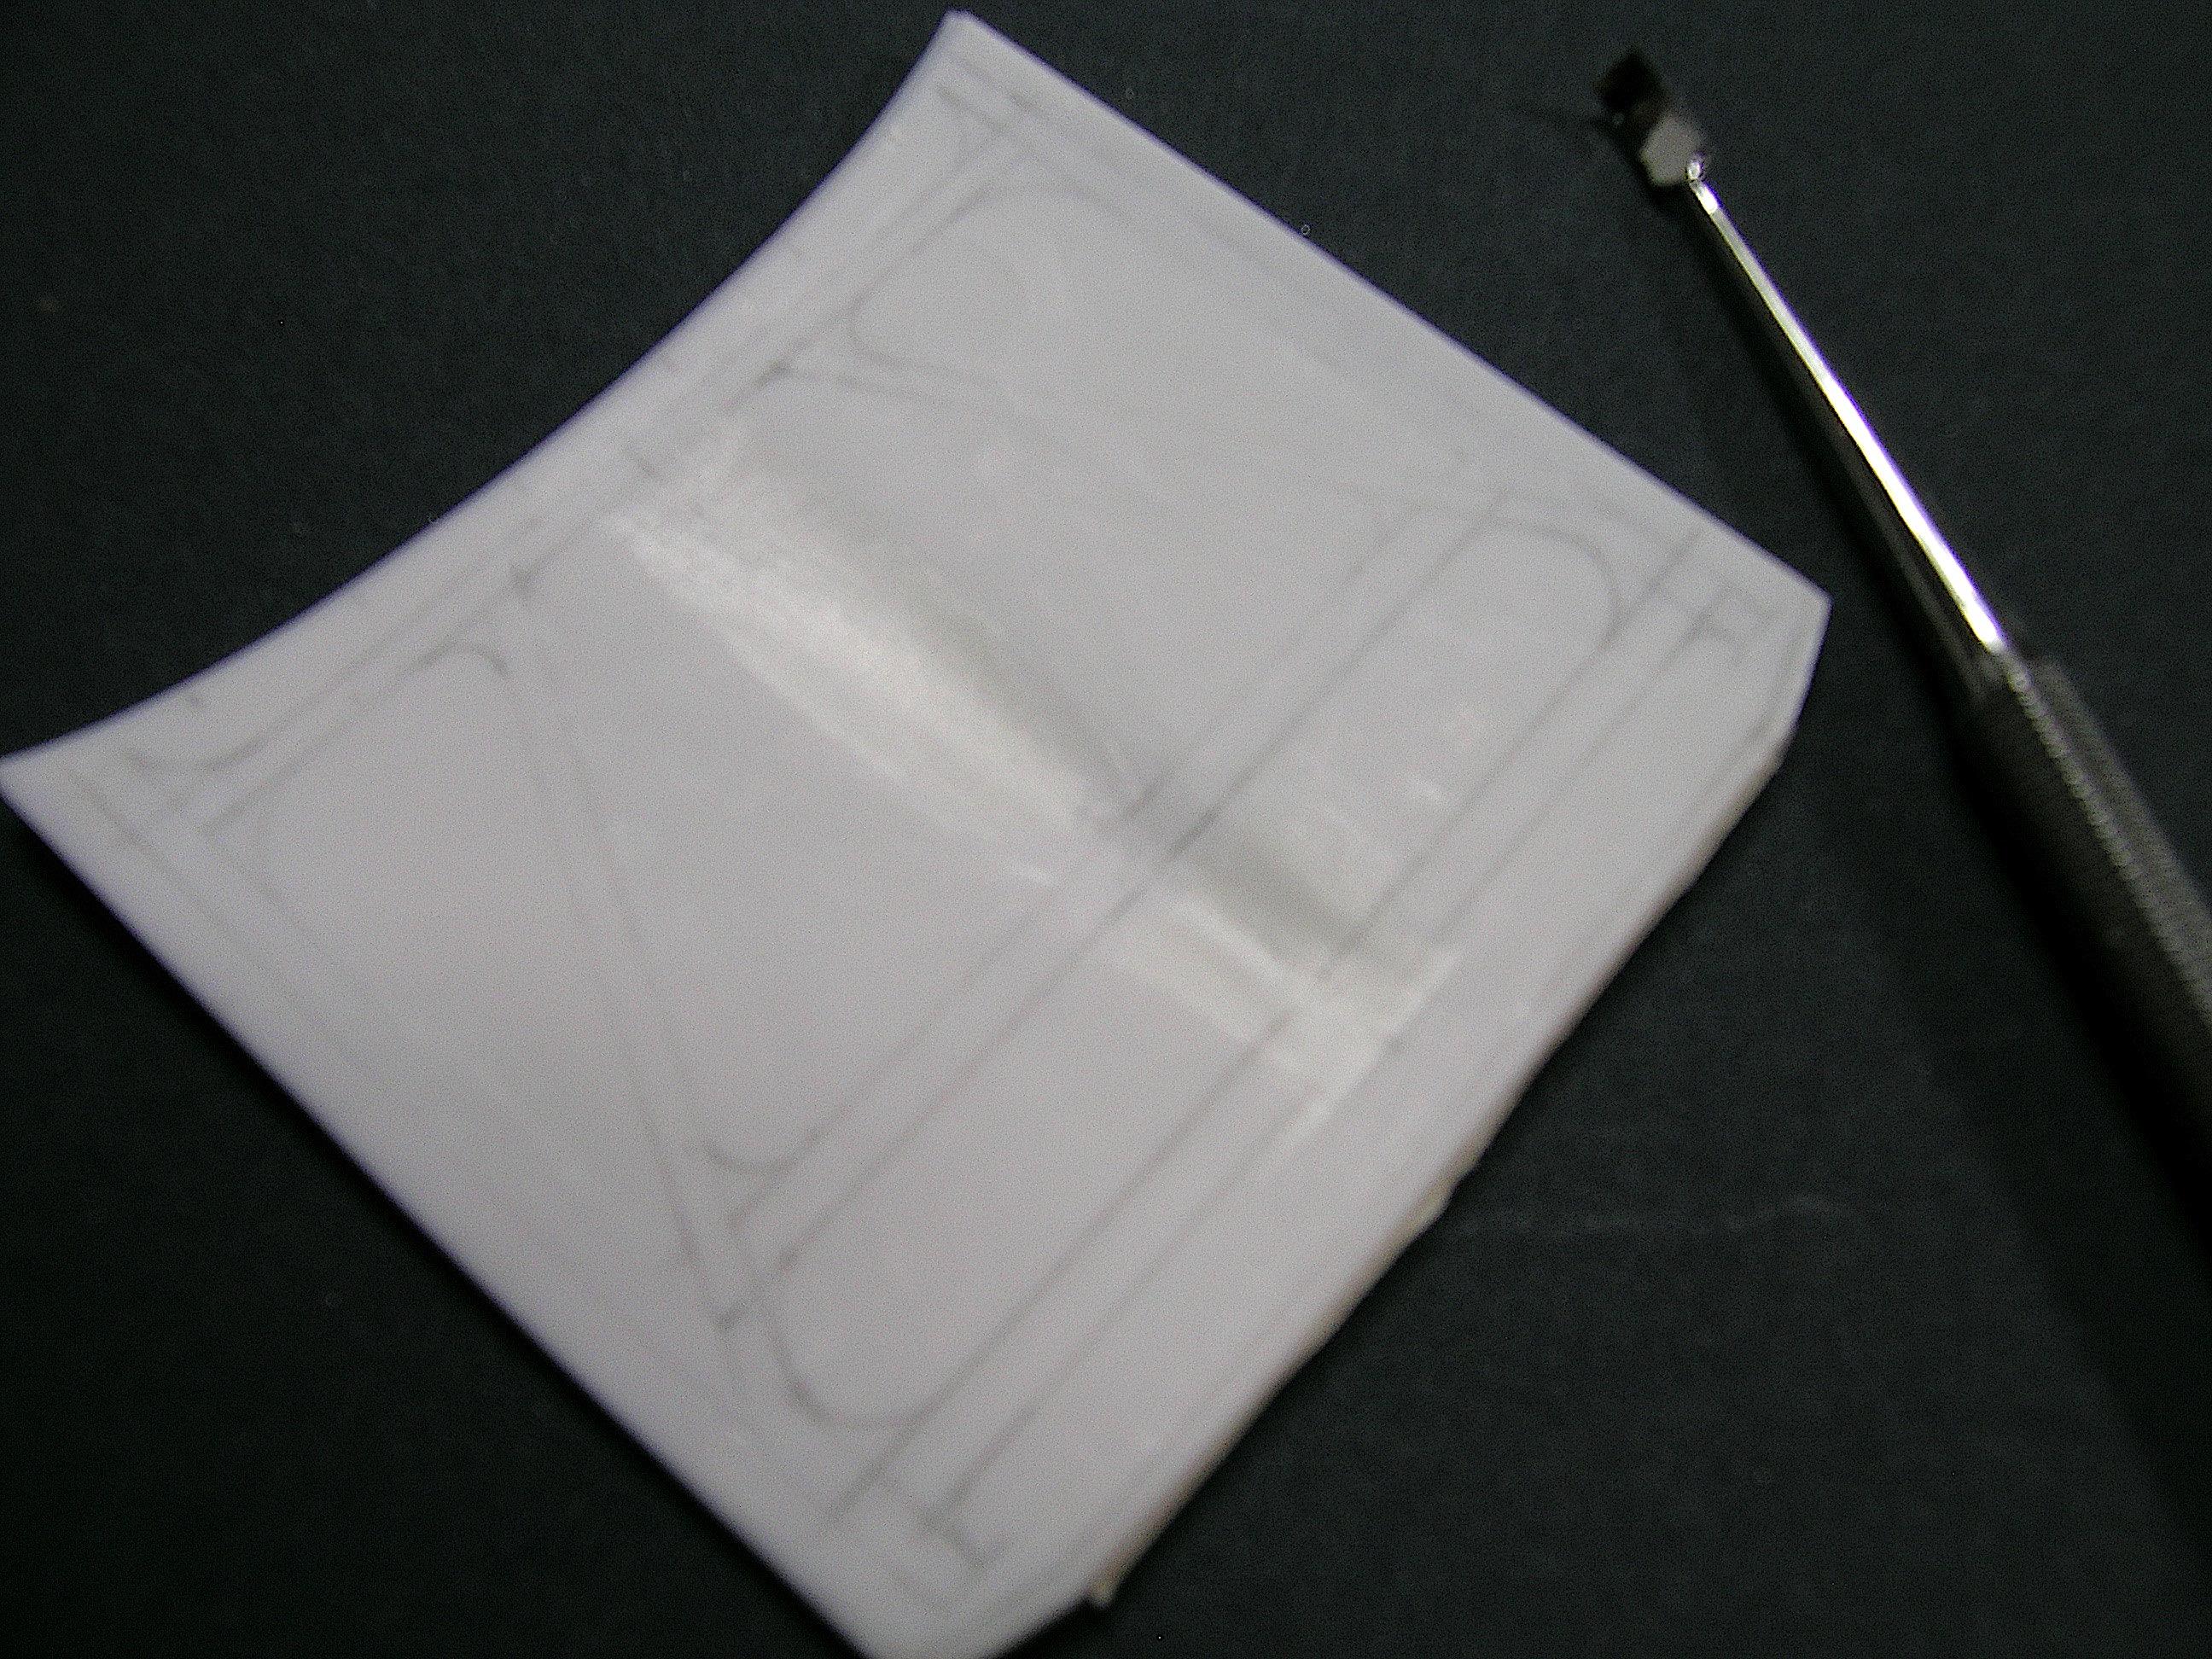
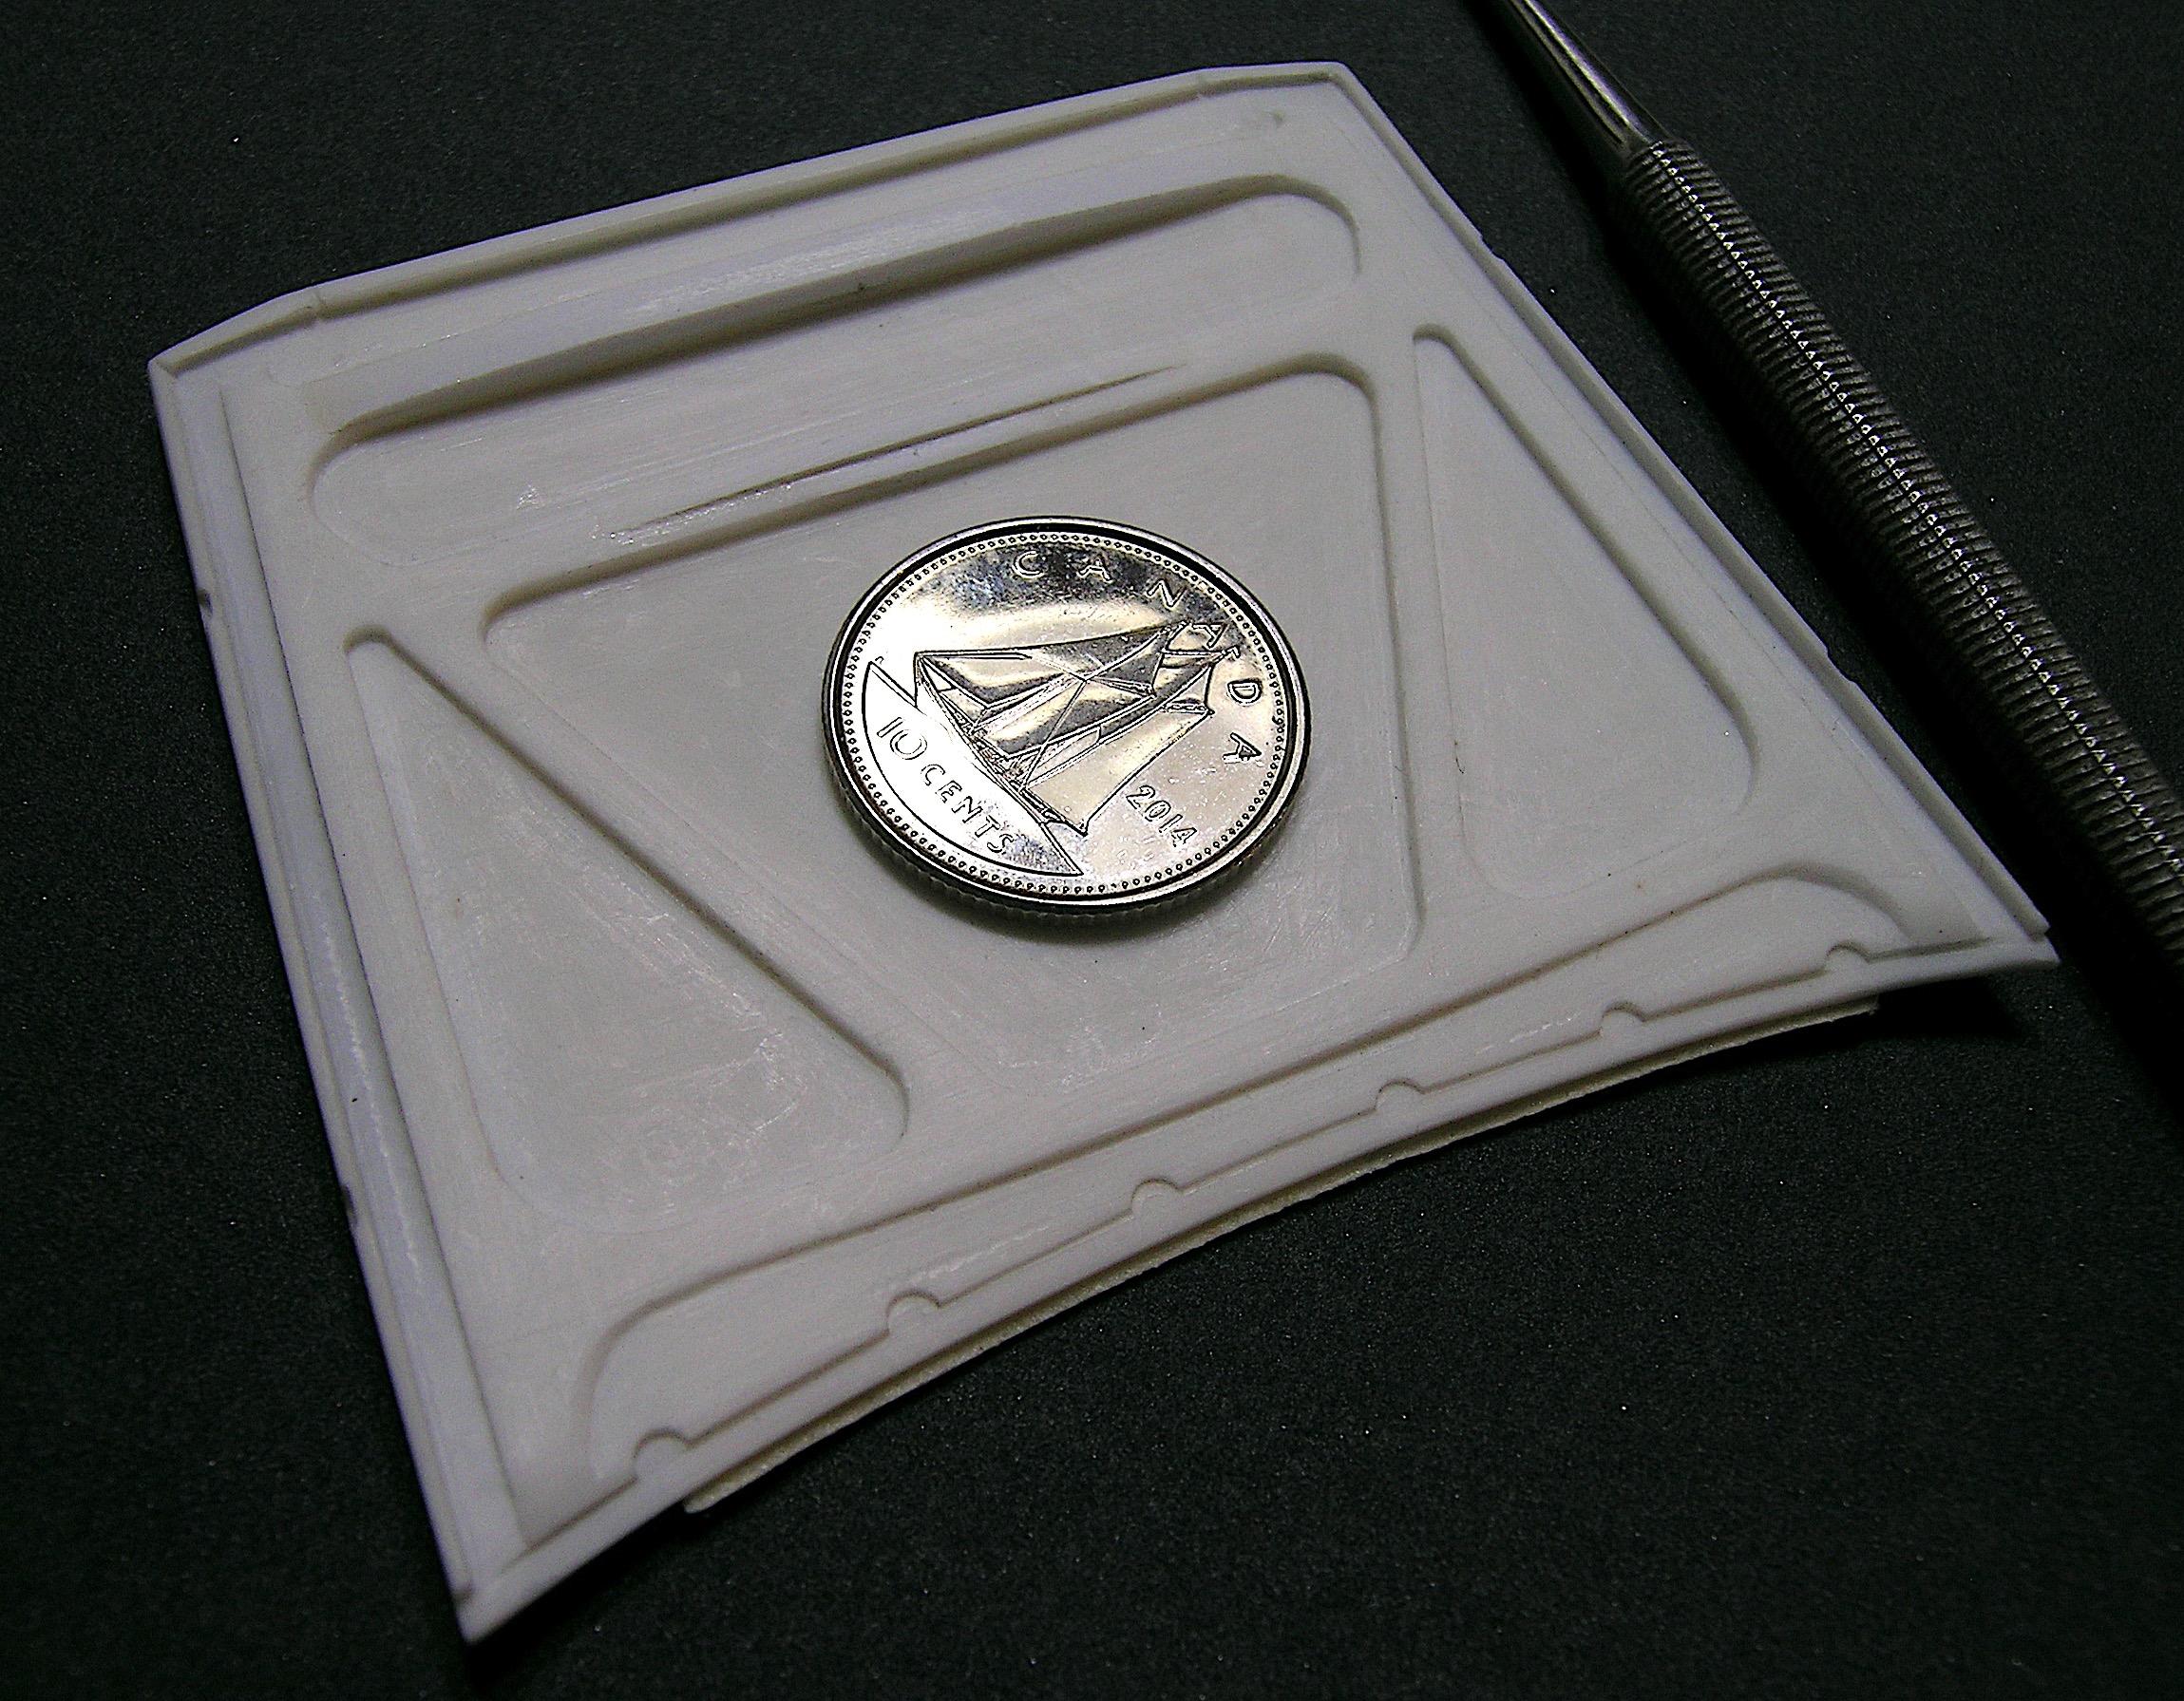
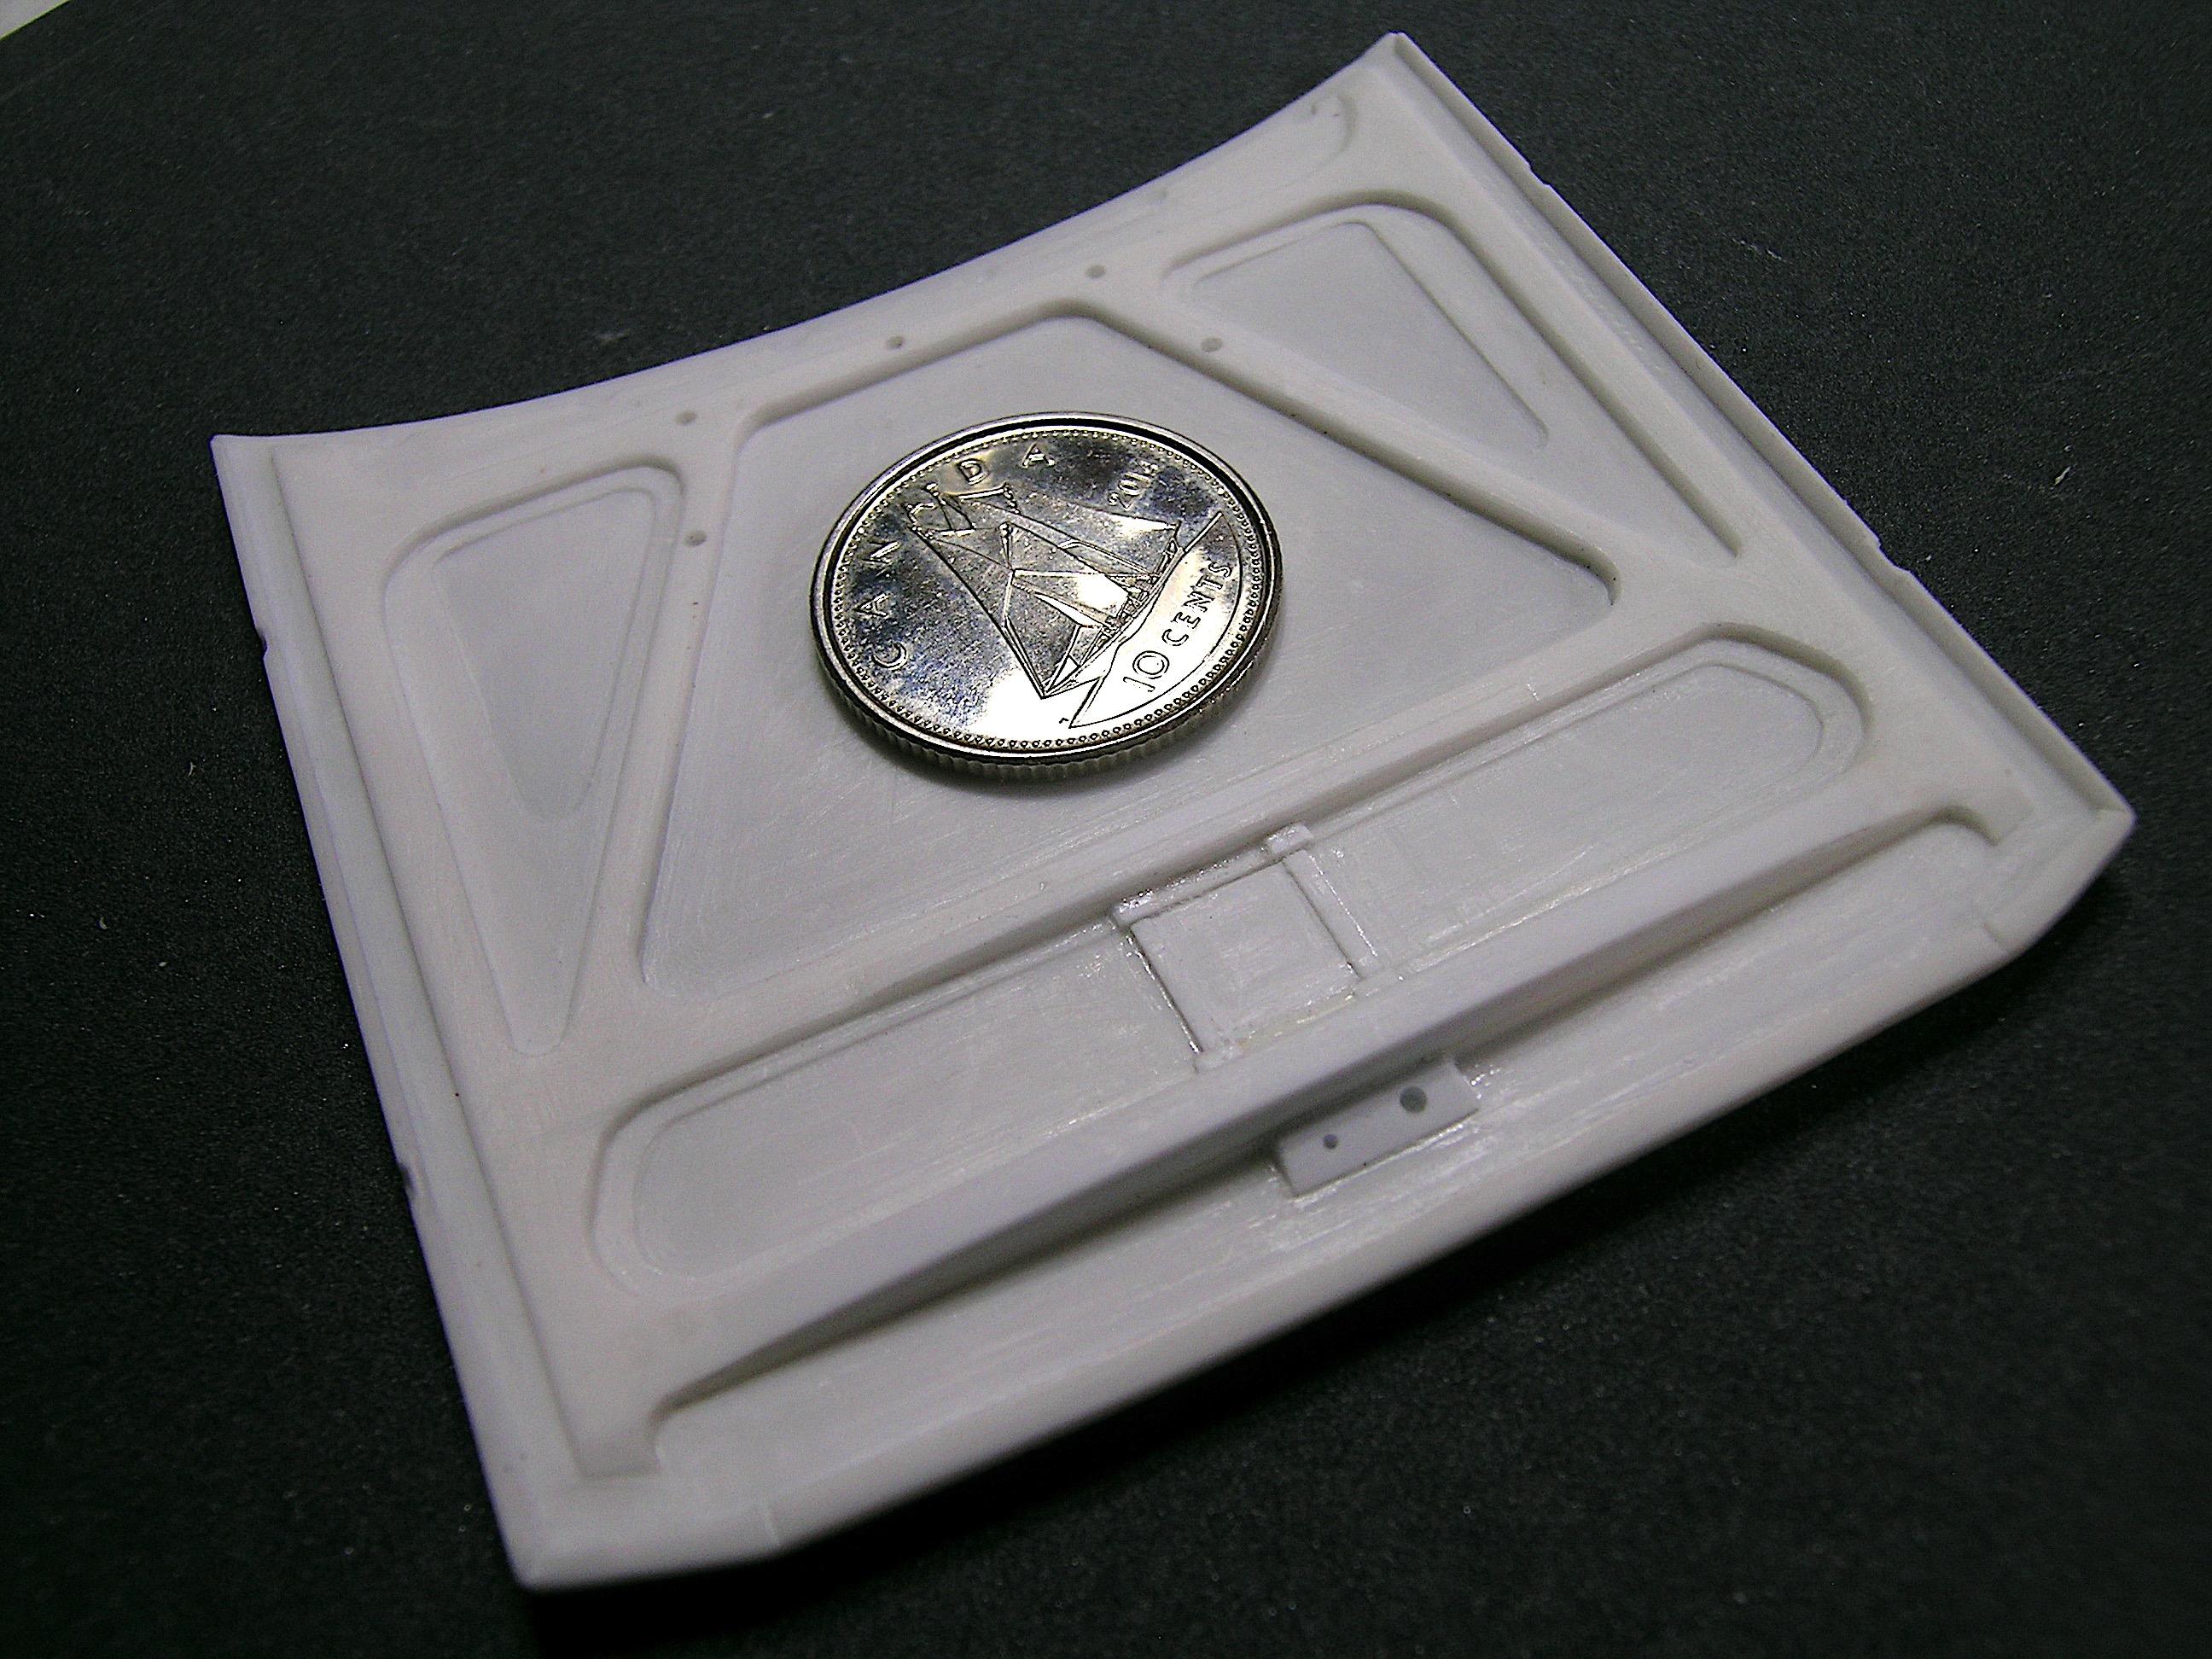
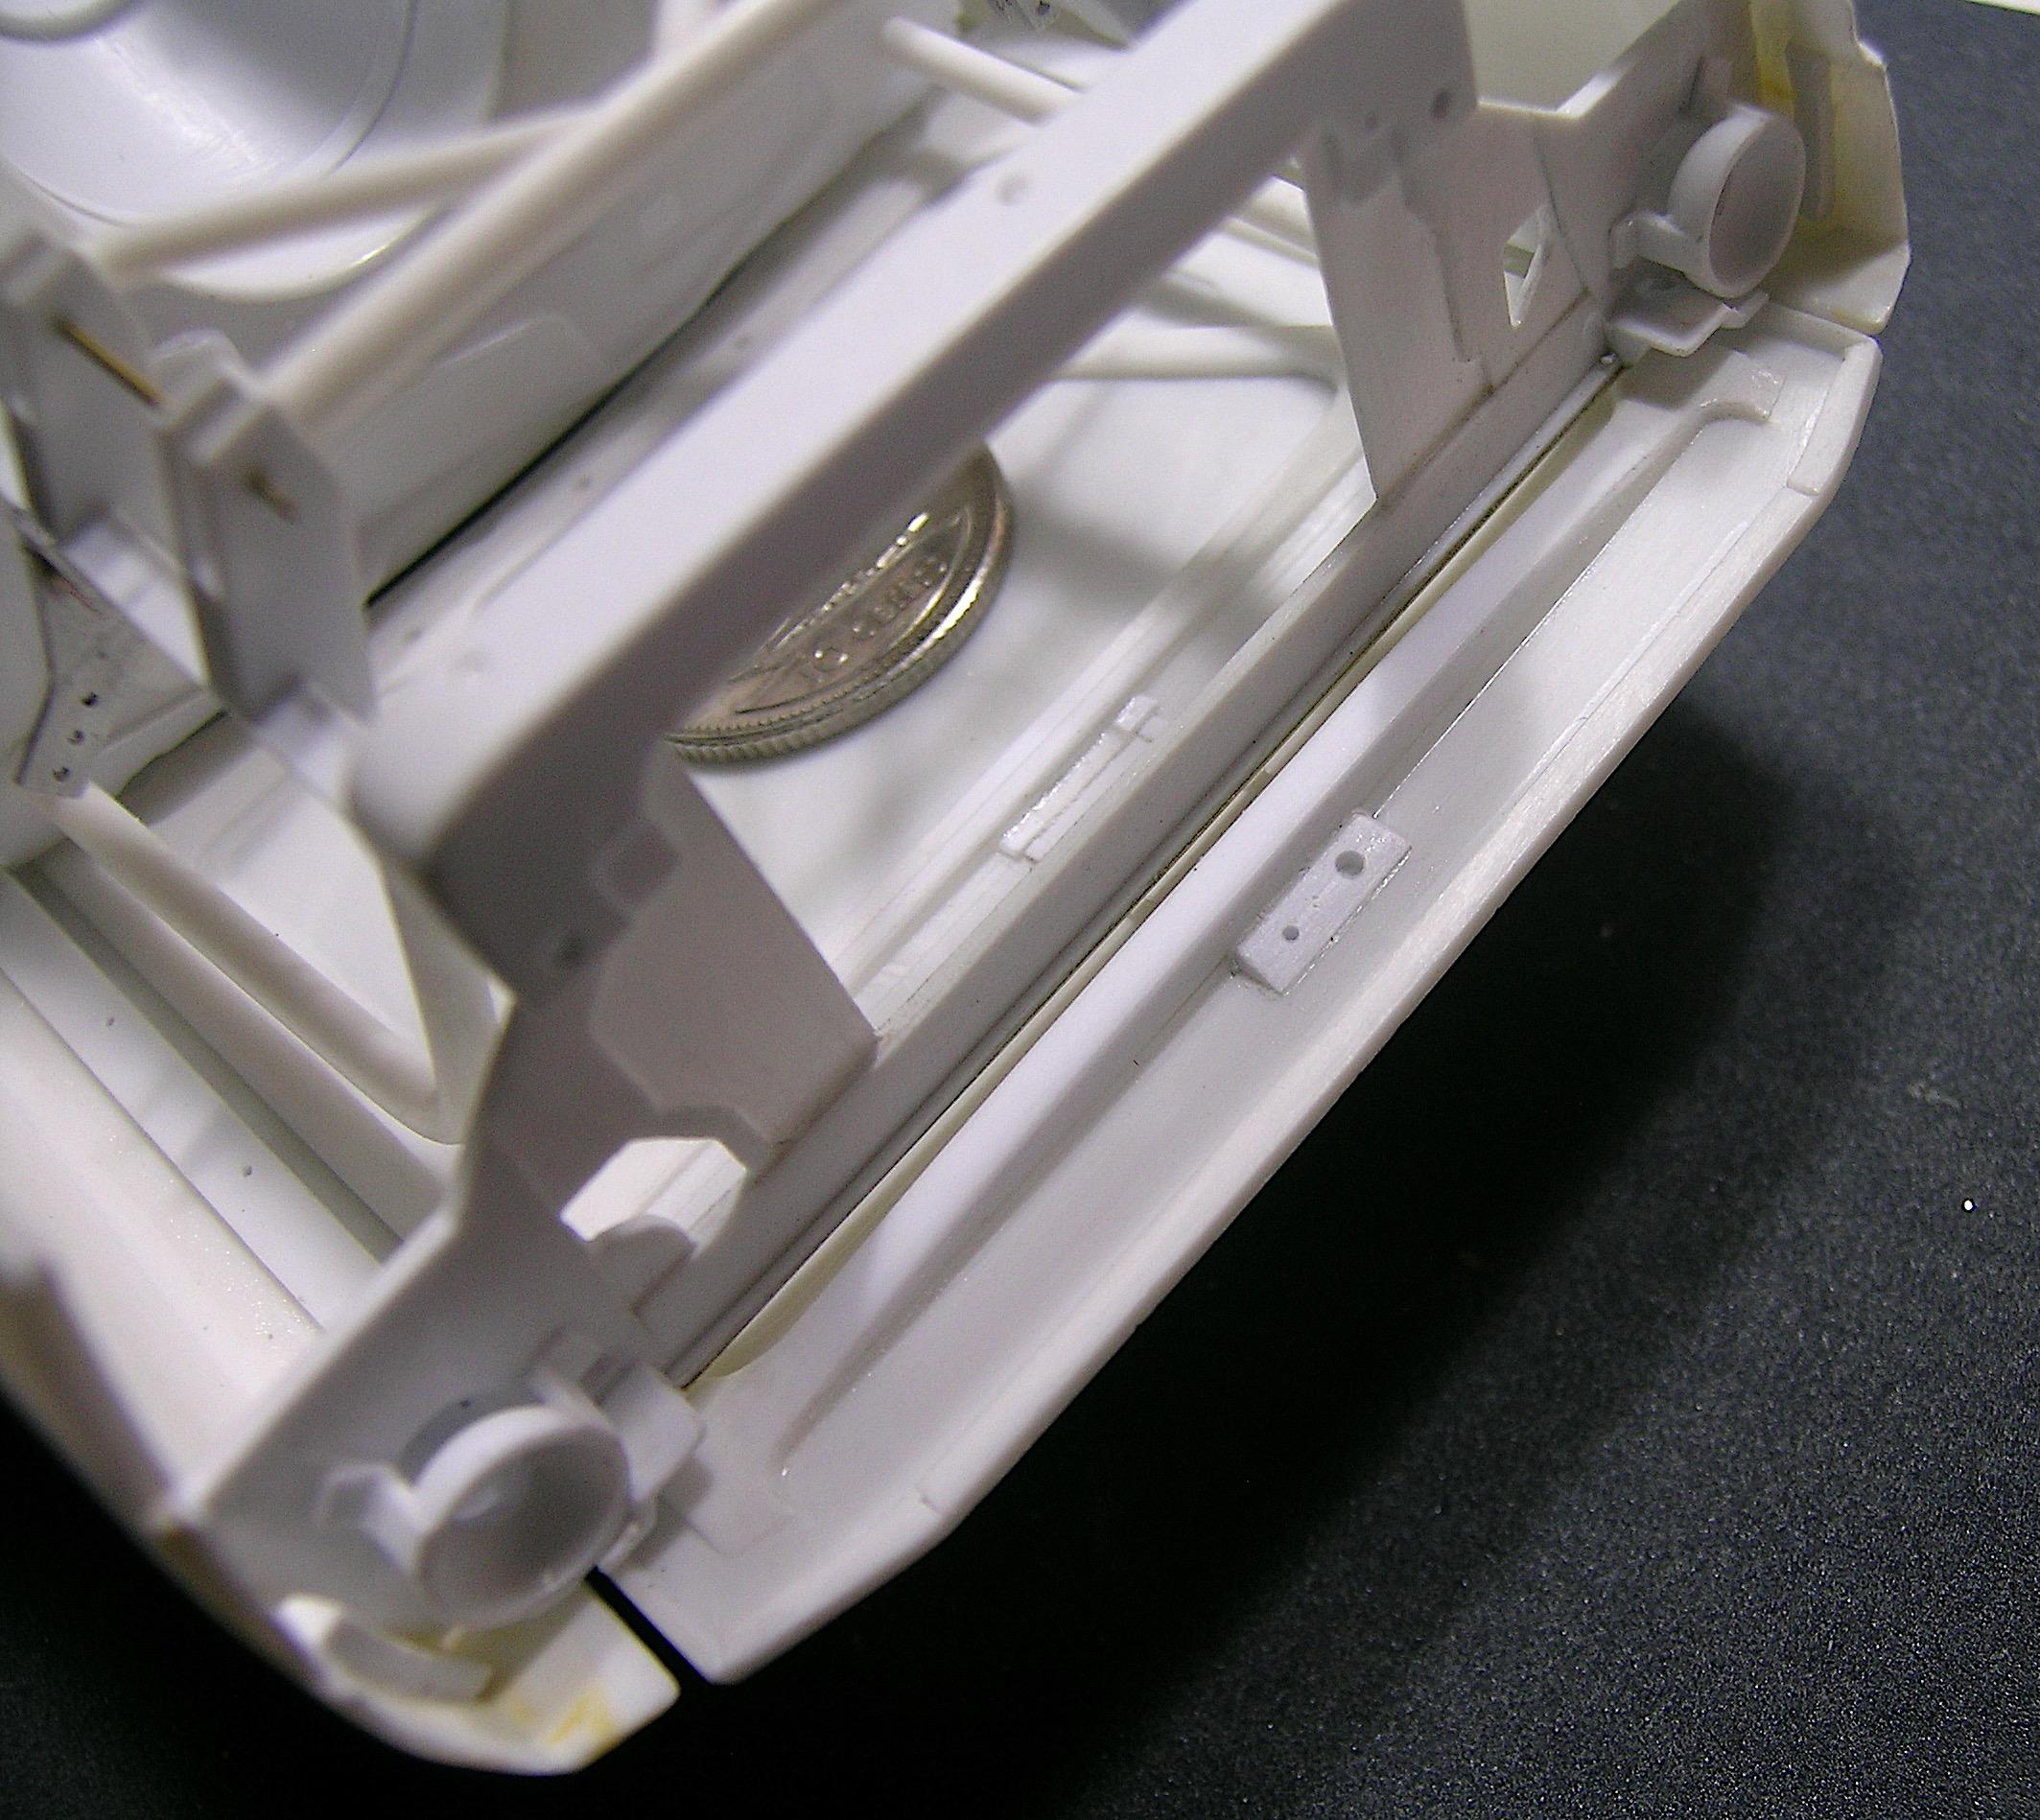
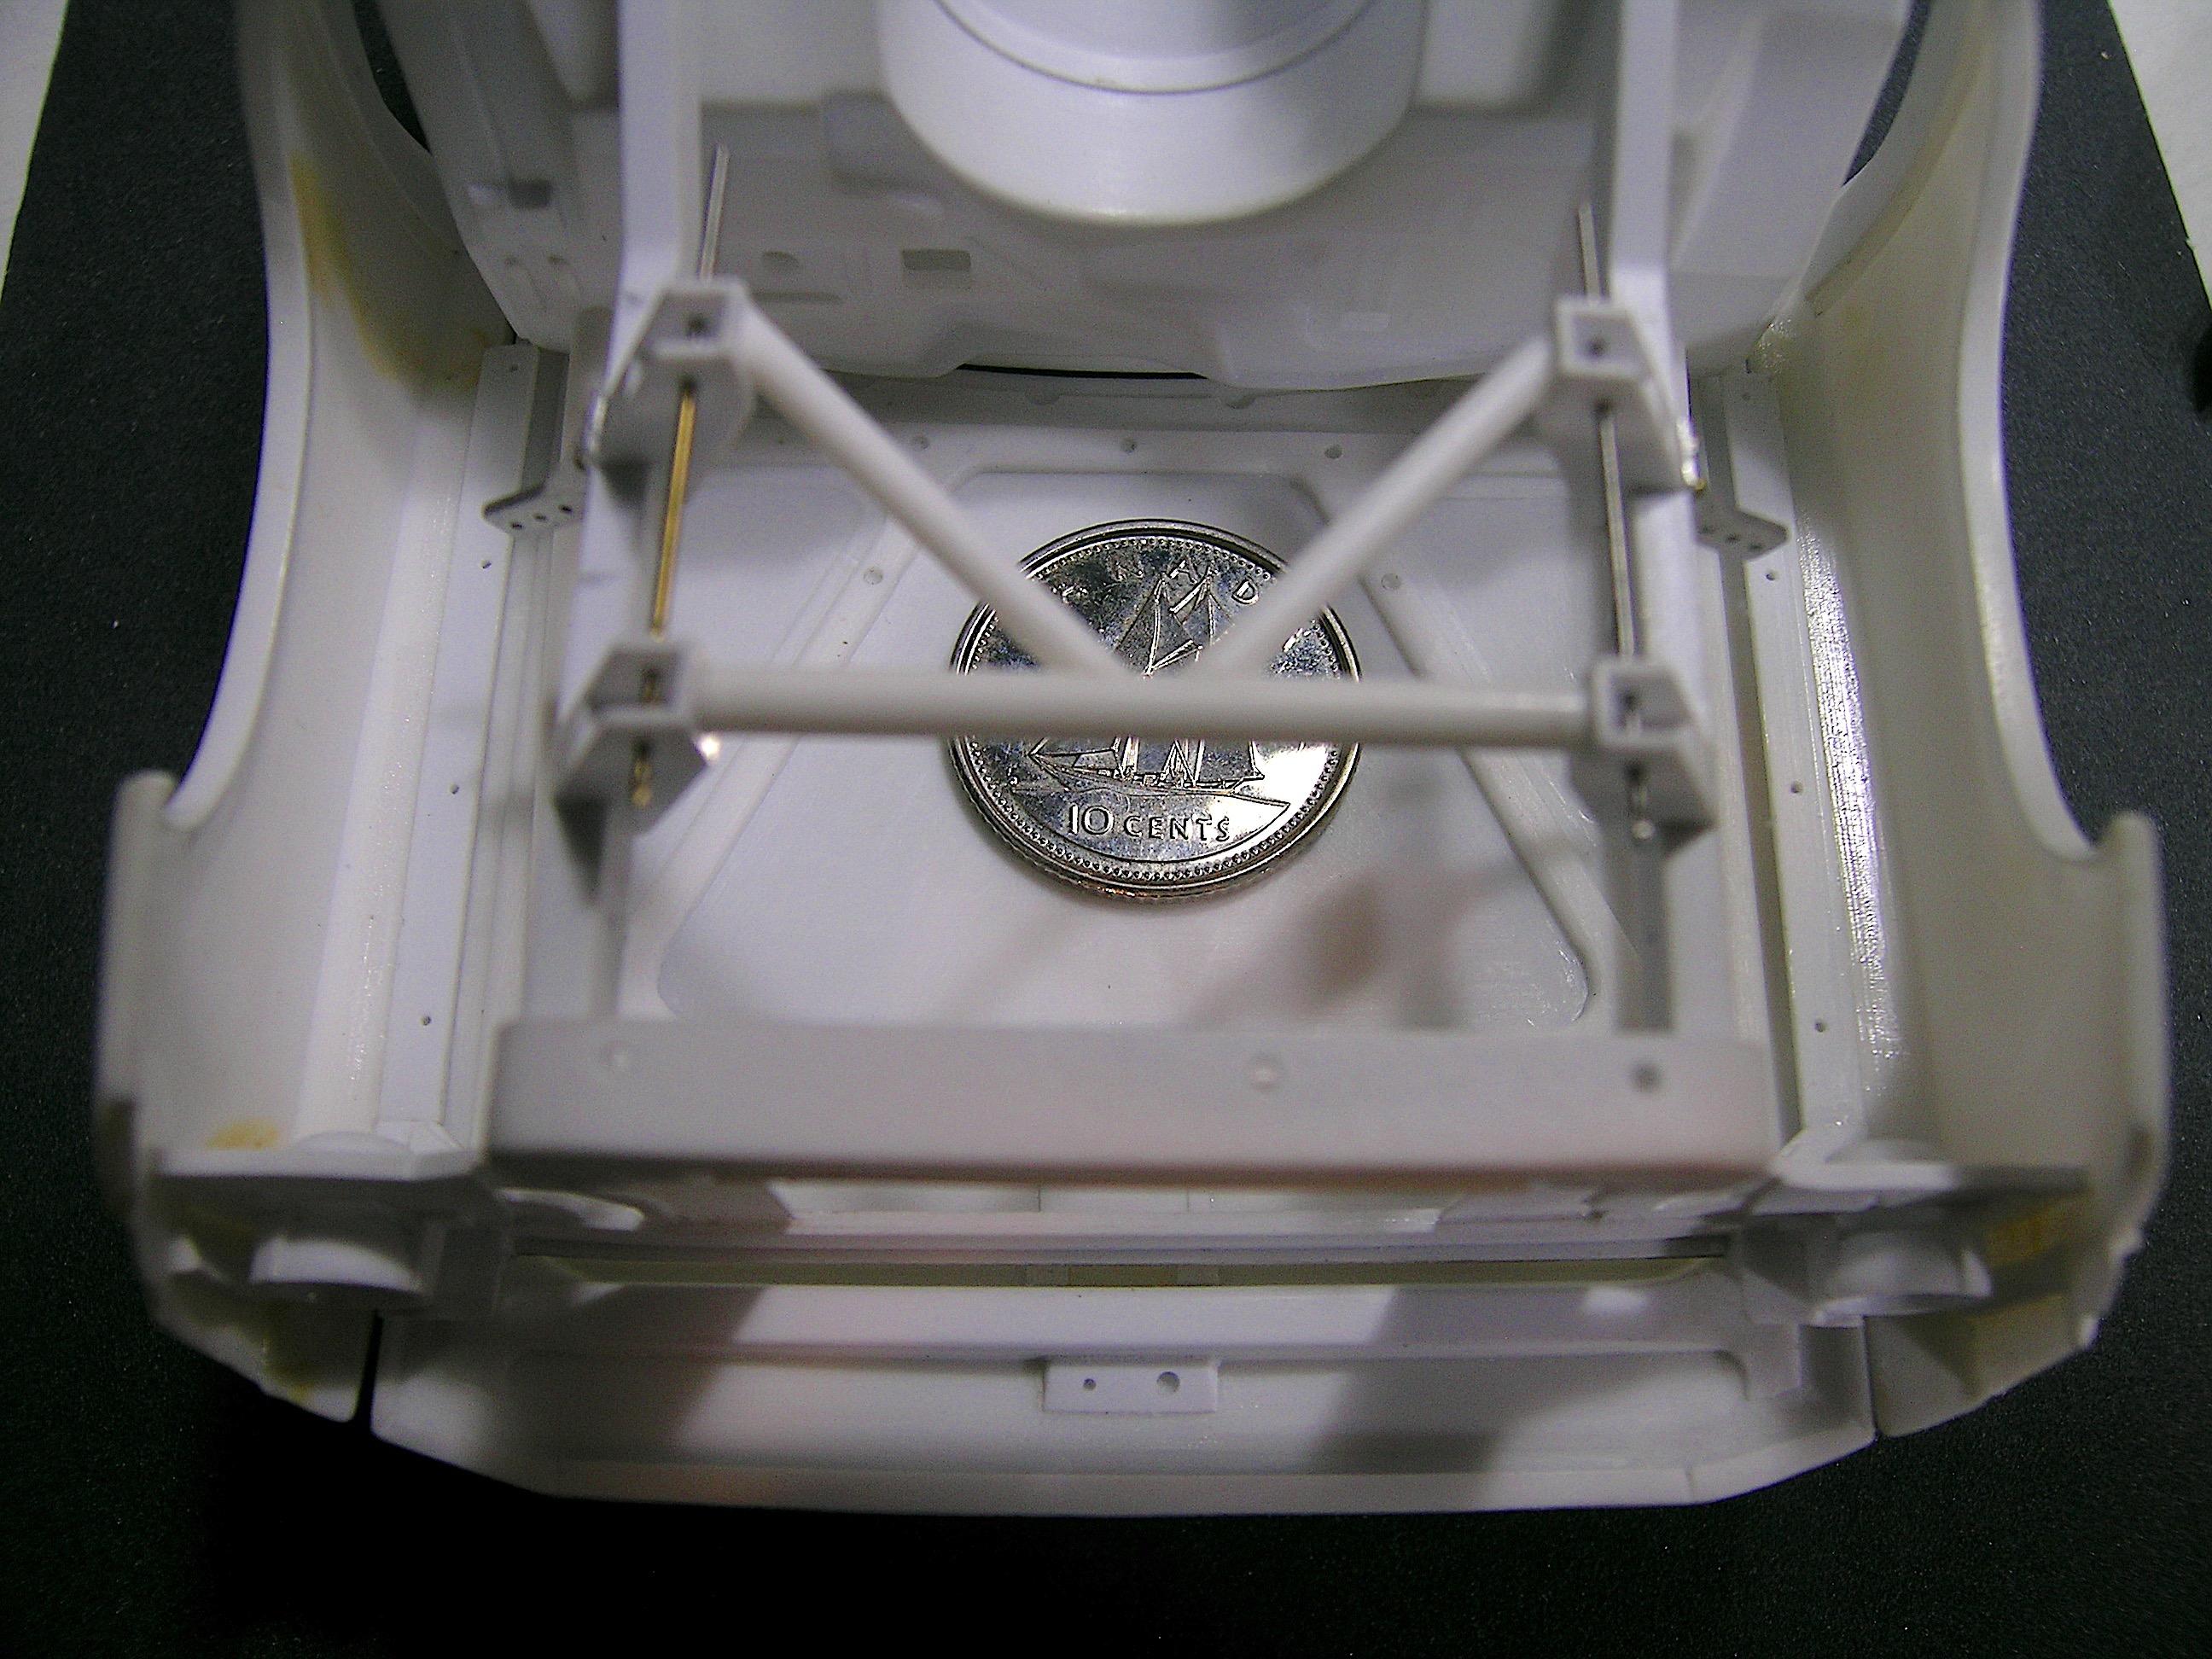
Hello everyone! The good times are flying by and it's already time for me to make another update to show you my latest progress. I spent the last few days working on the under-hood details. I usually sand the surface and add the structural elements but the hood was very thick (like the doors) so I decided to take the opportunity to engrave the details instead of adding them. The engine I plan to install (big block) will take up a lot of space so I need all the space available so the hood closes properly. The hood was about 0.080" thick but it's always a bit risky to take the route of engraving especially when you don't have another one to start over in case of disaster (the new Demon kit from Round 2 is not yet available here and it may be difficult to get your hands on it). Anyway, I'm pretty happy with the results and you can judge for yourself, I tried to replicate some of the original details but kept the center section free for when I add the scoop. I would dare say it's a hybrid between the OEM and an aftermarket replacement for drag car. ? I'm now going to take a break from the styrene elements (the majority is done) and start making some aluminum and brass components, I need to get this thing on its wheels. The time has come to make shiny chips... ? Francis The details aren't good, so I started by removing them and sanding the surface to find out how much thickness was available to work with. I drew guide lines for the engraving based on images of the real hood (sorry for the blurry picture). Here are the engravings after the first pass, the hood is still thick enough for me to add more detail. After the second pass and sanding. I drilled a few holes, glued a few strips of styrene. I don't want to add too much time and details because I'm going to make an opening later for the scoop. I had taken measurements at the beginning to be sure that the reinforcements would arrive at the right place. The fit is good and I'm happy with the results, I hope opening the hood scoop doesn't affect all this work too much... ?
-
’72 Dodge Demon Drag Racer 1/25 scale
AmericanMuscleFan replied to AmericanMuscleFan's topic in WIP: Drag Racing Models
I think we share more than you think Daniel, you quote Neil Peart's lyrics and RUSH is one of my favorite rock bands, one of my favorite songs of all time is: Working Man. Maybe the song has something to do with my career as I left a management job to go to work (with my lunch box) as an employee in a factory. The good thing is that I now have a little more free time to do what I love... ? Francis -
’72 Dodge Demon Drag Racer 1/25 scale
AmericanMuscleFan replied to AmericanMuscleFan's topic in WIP: Drag Racing Models
Thanks Will but you'll have to be patient, I'm not the fastest builder on the forum and what's more, I chose the longest path... If you like it, let's just say that it will make the fun last! ? Francis -
’72 Dodge Demon Drag Racer 1/25 scale
AmericanMuscleFan replied to AmericanMuscleFan's topic in WIP: Drag Racing Models
Thanks for your kind words my friend ! When I look at all this, I sometimes wonder where it's going to end but I'm still having fun so I think the ultimate goal has been achieved: having a good time and expressing my artistic side by making things I love! We're not that far apart in age and like you, I prefer the good old methods. I created my own version of 3D: Determination, Dremel and Dust. It's certainly slower and I'm not sure of the accuracy but I'll live with that for now knowing that horseshoe makers are rare these years, tractor makers have taken the place. ? By the way, I find that you are still very present on the small screen for a retiree, what would it be like if you were really retired? Hint: even more wonders!!! ? Francis -
Simply superb work Charlie! It's not easy to make this kind of hinges oriented like this work correctly, alignment is critical and it's nice to see them working perfectly! ?
-
’72 Dodge Demon Drag Racer 1/25 scale
AmericanMuscleFan replied to AmericanMuscleFan's topic in WIP: Drag Racing Models
Thanks for your kind comments Will, I really appreciate it! If you look closely at the photos when I machine parts, you should see the name Sherline on the chuck and I do not hesitate to give this manufacturer the praise it deserves in my posts, I really love these tools! You can go to my personal page and click on the "about me" tab to view my previous builds and a short explanation of my origins and motivations. By the way, welcome to the forum and rest assured that I intend to add many more details to this thing! ? Francis -
It looks good Daniel ! A good night's sleep is often the best time to find a solution to a particular problem (at least for me). If this is your case too, you must have a good night's sleep my friend! ??
-
My year in styrene- the 2023 edition
AmericanMuscleFan replied to Claude Thibodeau's topic in Model Cars
Dear Claude, 2023 was what we could call a "grand cru" as we say in French for the master of styrene and thank you for this forum to offer the opportunity to a large audience to be able to appreciate! I had the chance to see them in the flesh as you say so well and I can confirm that the camera lens did not improve these gems in any way because they look just as beautiful on the exhibition table! ? Thank you for the endless inspiration you produce my friend, fun with styrene! ?