AmericanMuscleFan
-
Posts
3,058 -
Joined
-
Last visited
Content Type
Profiles
Forums
Events
Gallery
Everything posted by AmericanMuscleFan
-
 This is just great Charlie! If it wasn't for your tools that we can see on some of the pictures, we could mistake your construction for a real car and that's an understatement... You can be proud of the work you've done so far and I can't wait to see what's next, it's promising !!! ?
 -
64 Dodge D100 Pickup Pro Street
AmericanMuscleFan replied to AmericanMuscleFan's topic in WIP: Drag Racing Models
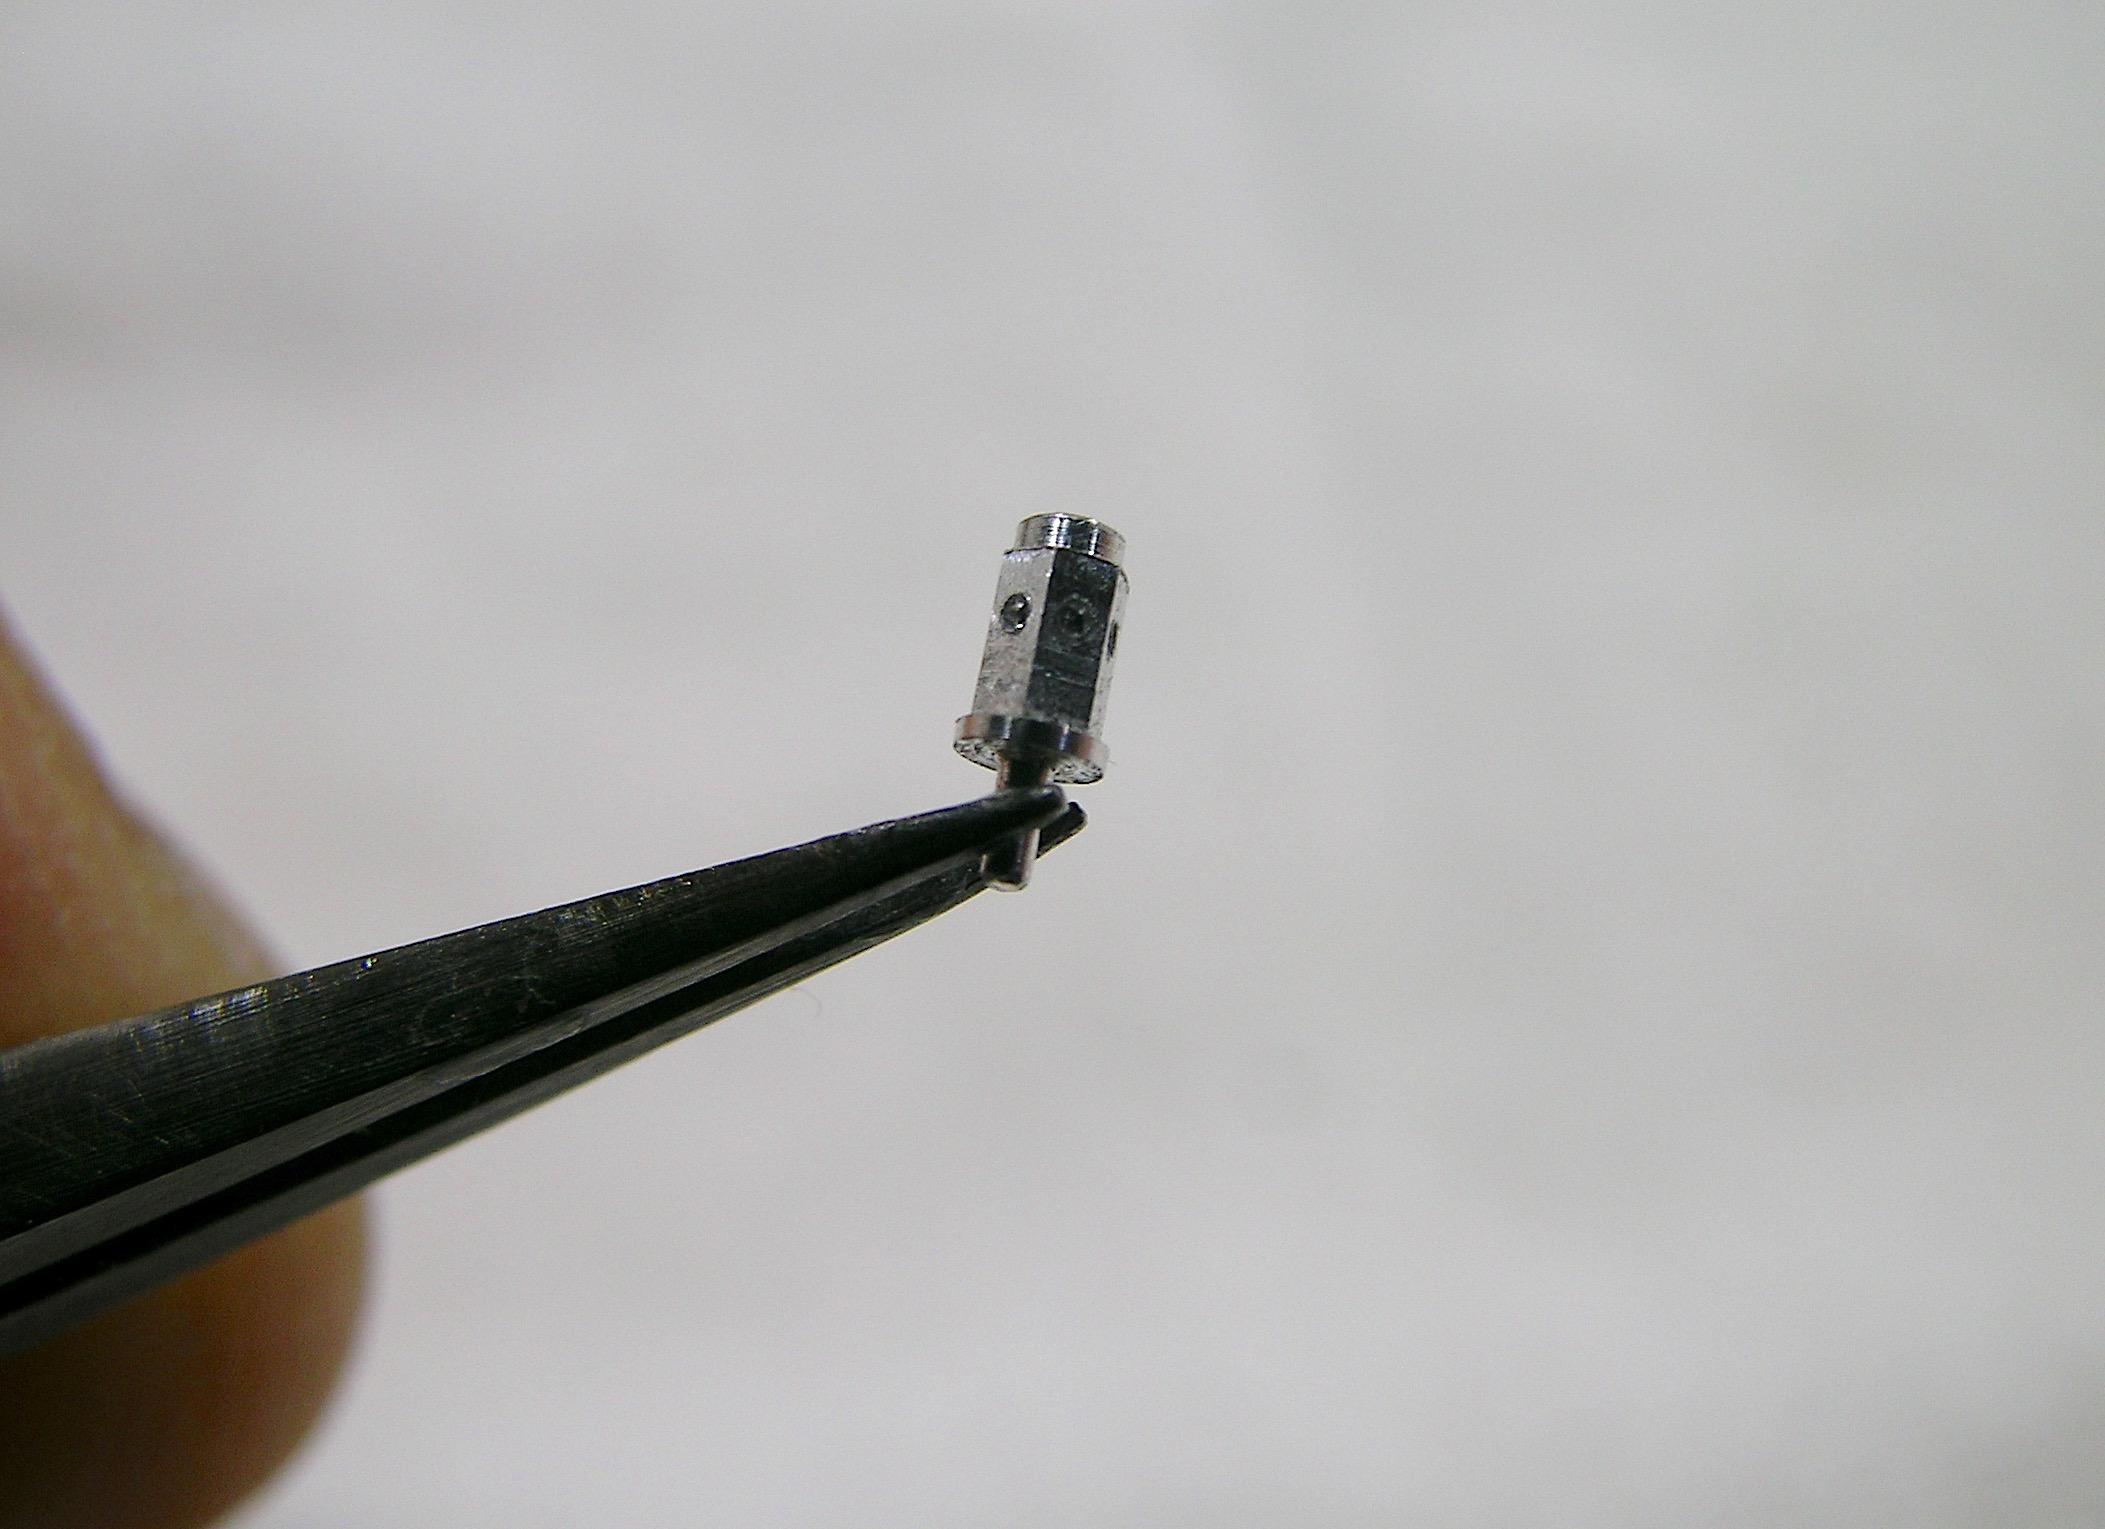
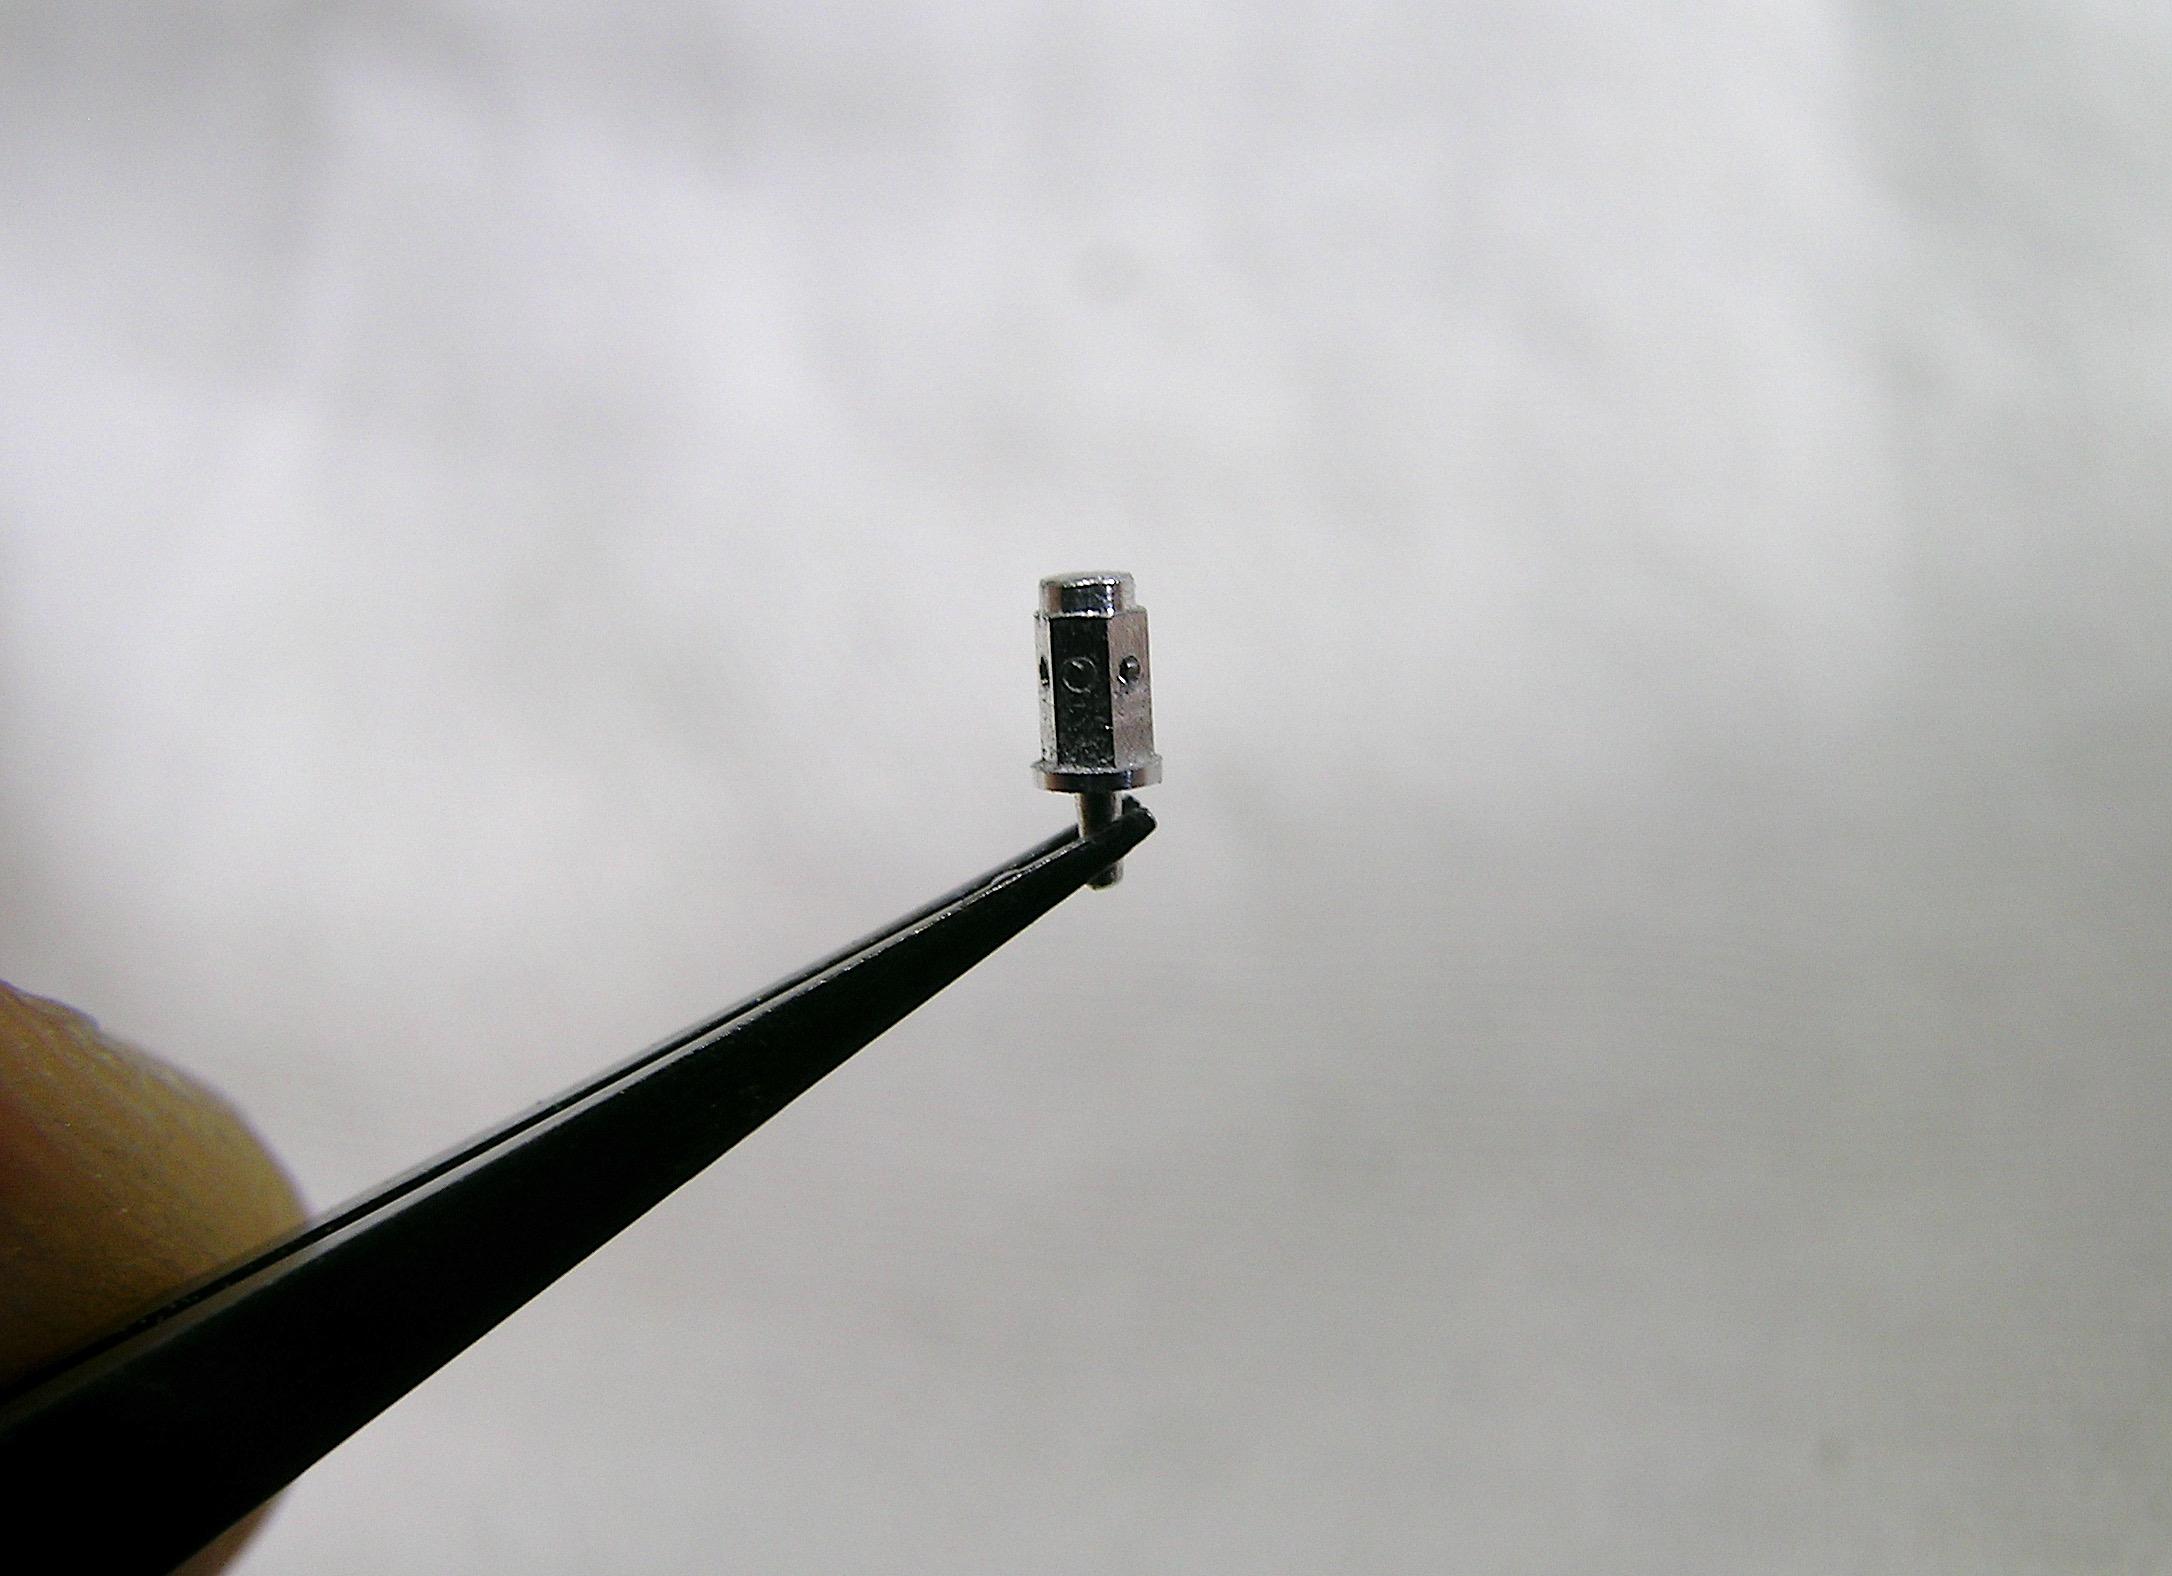
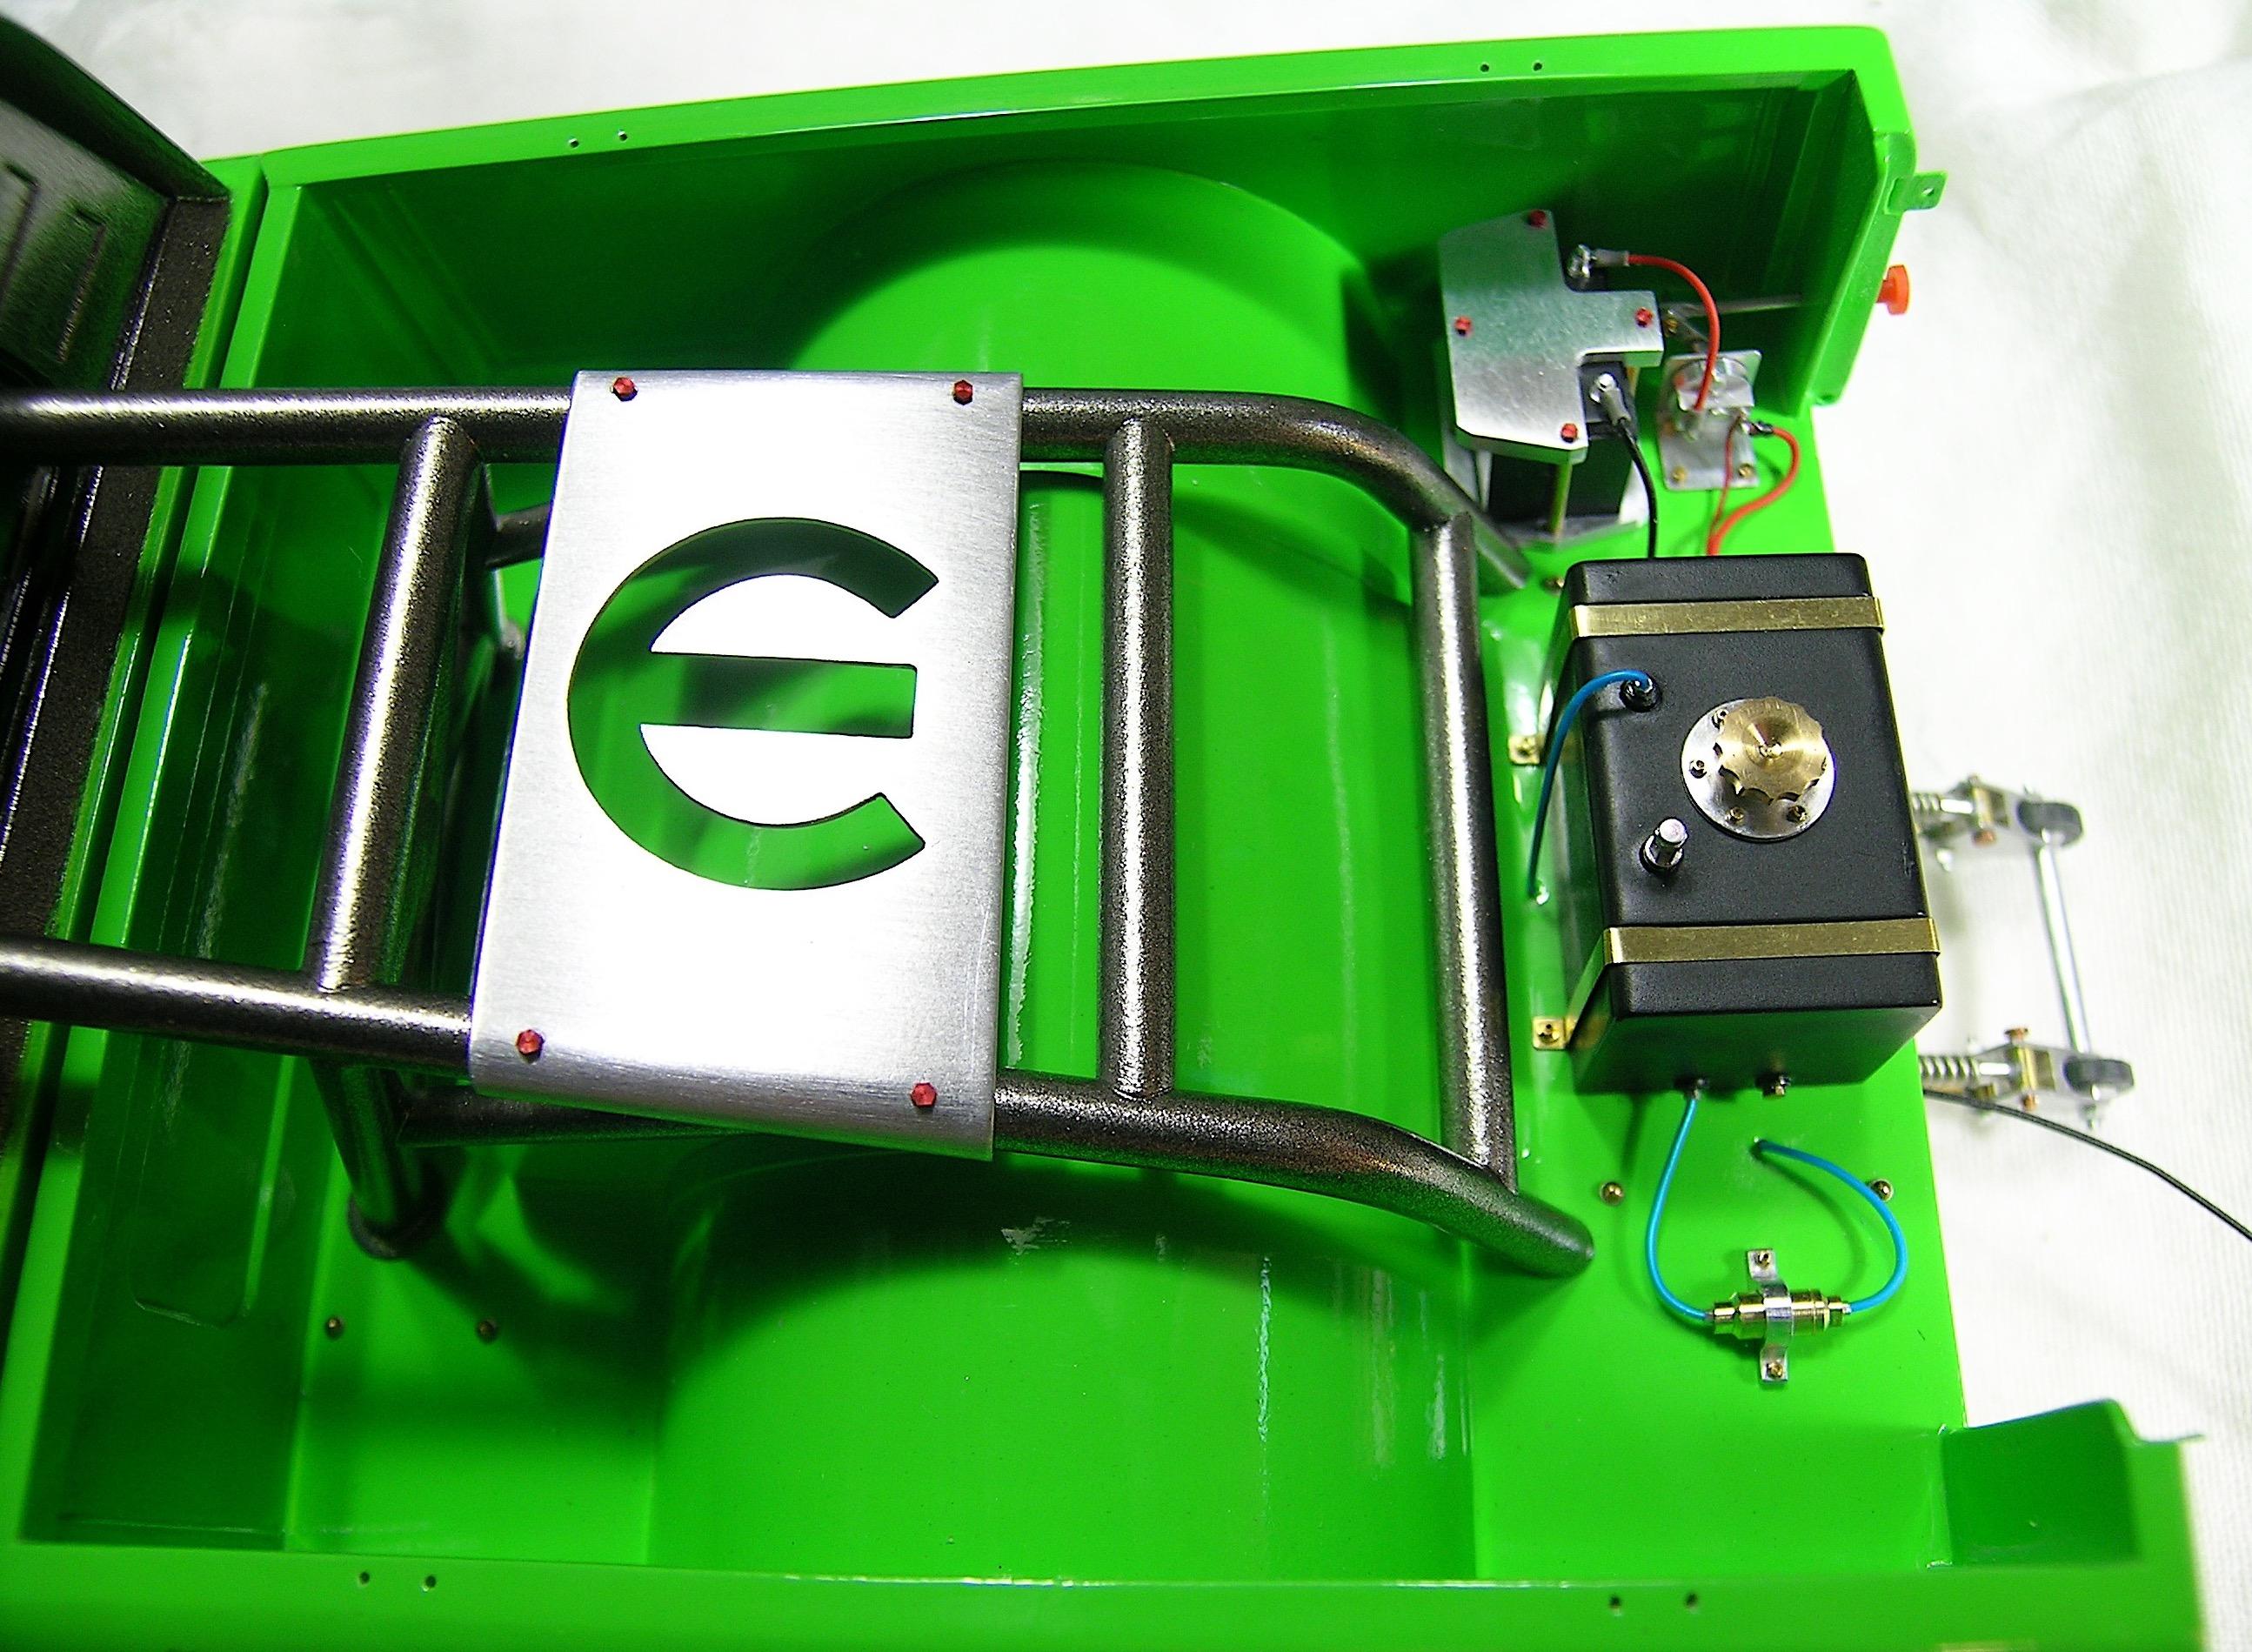
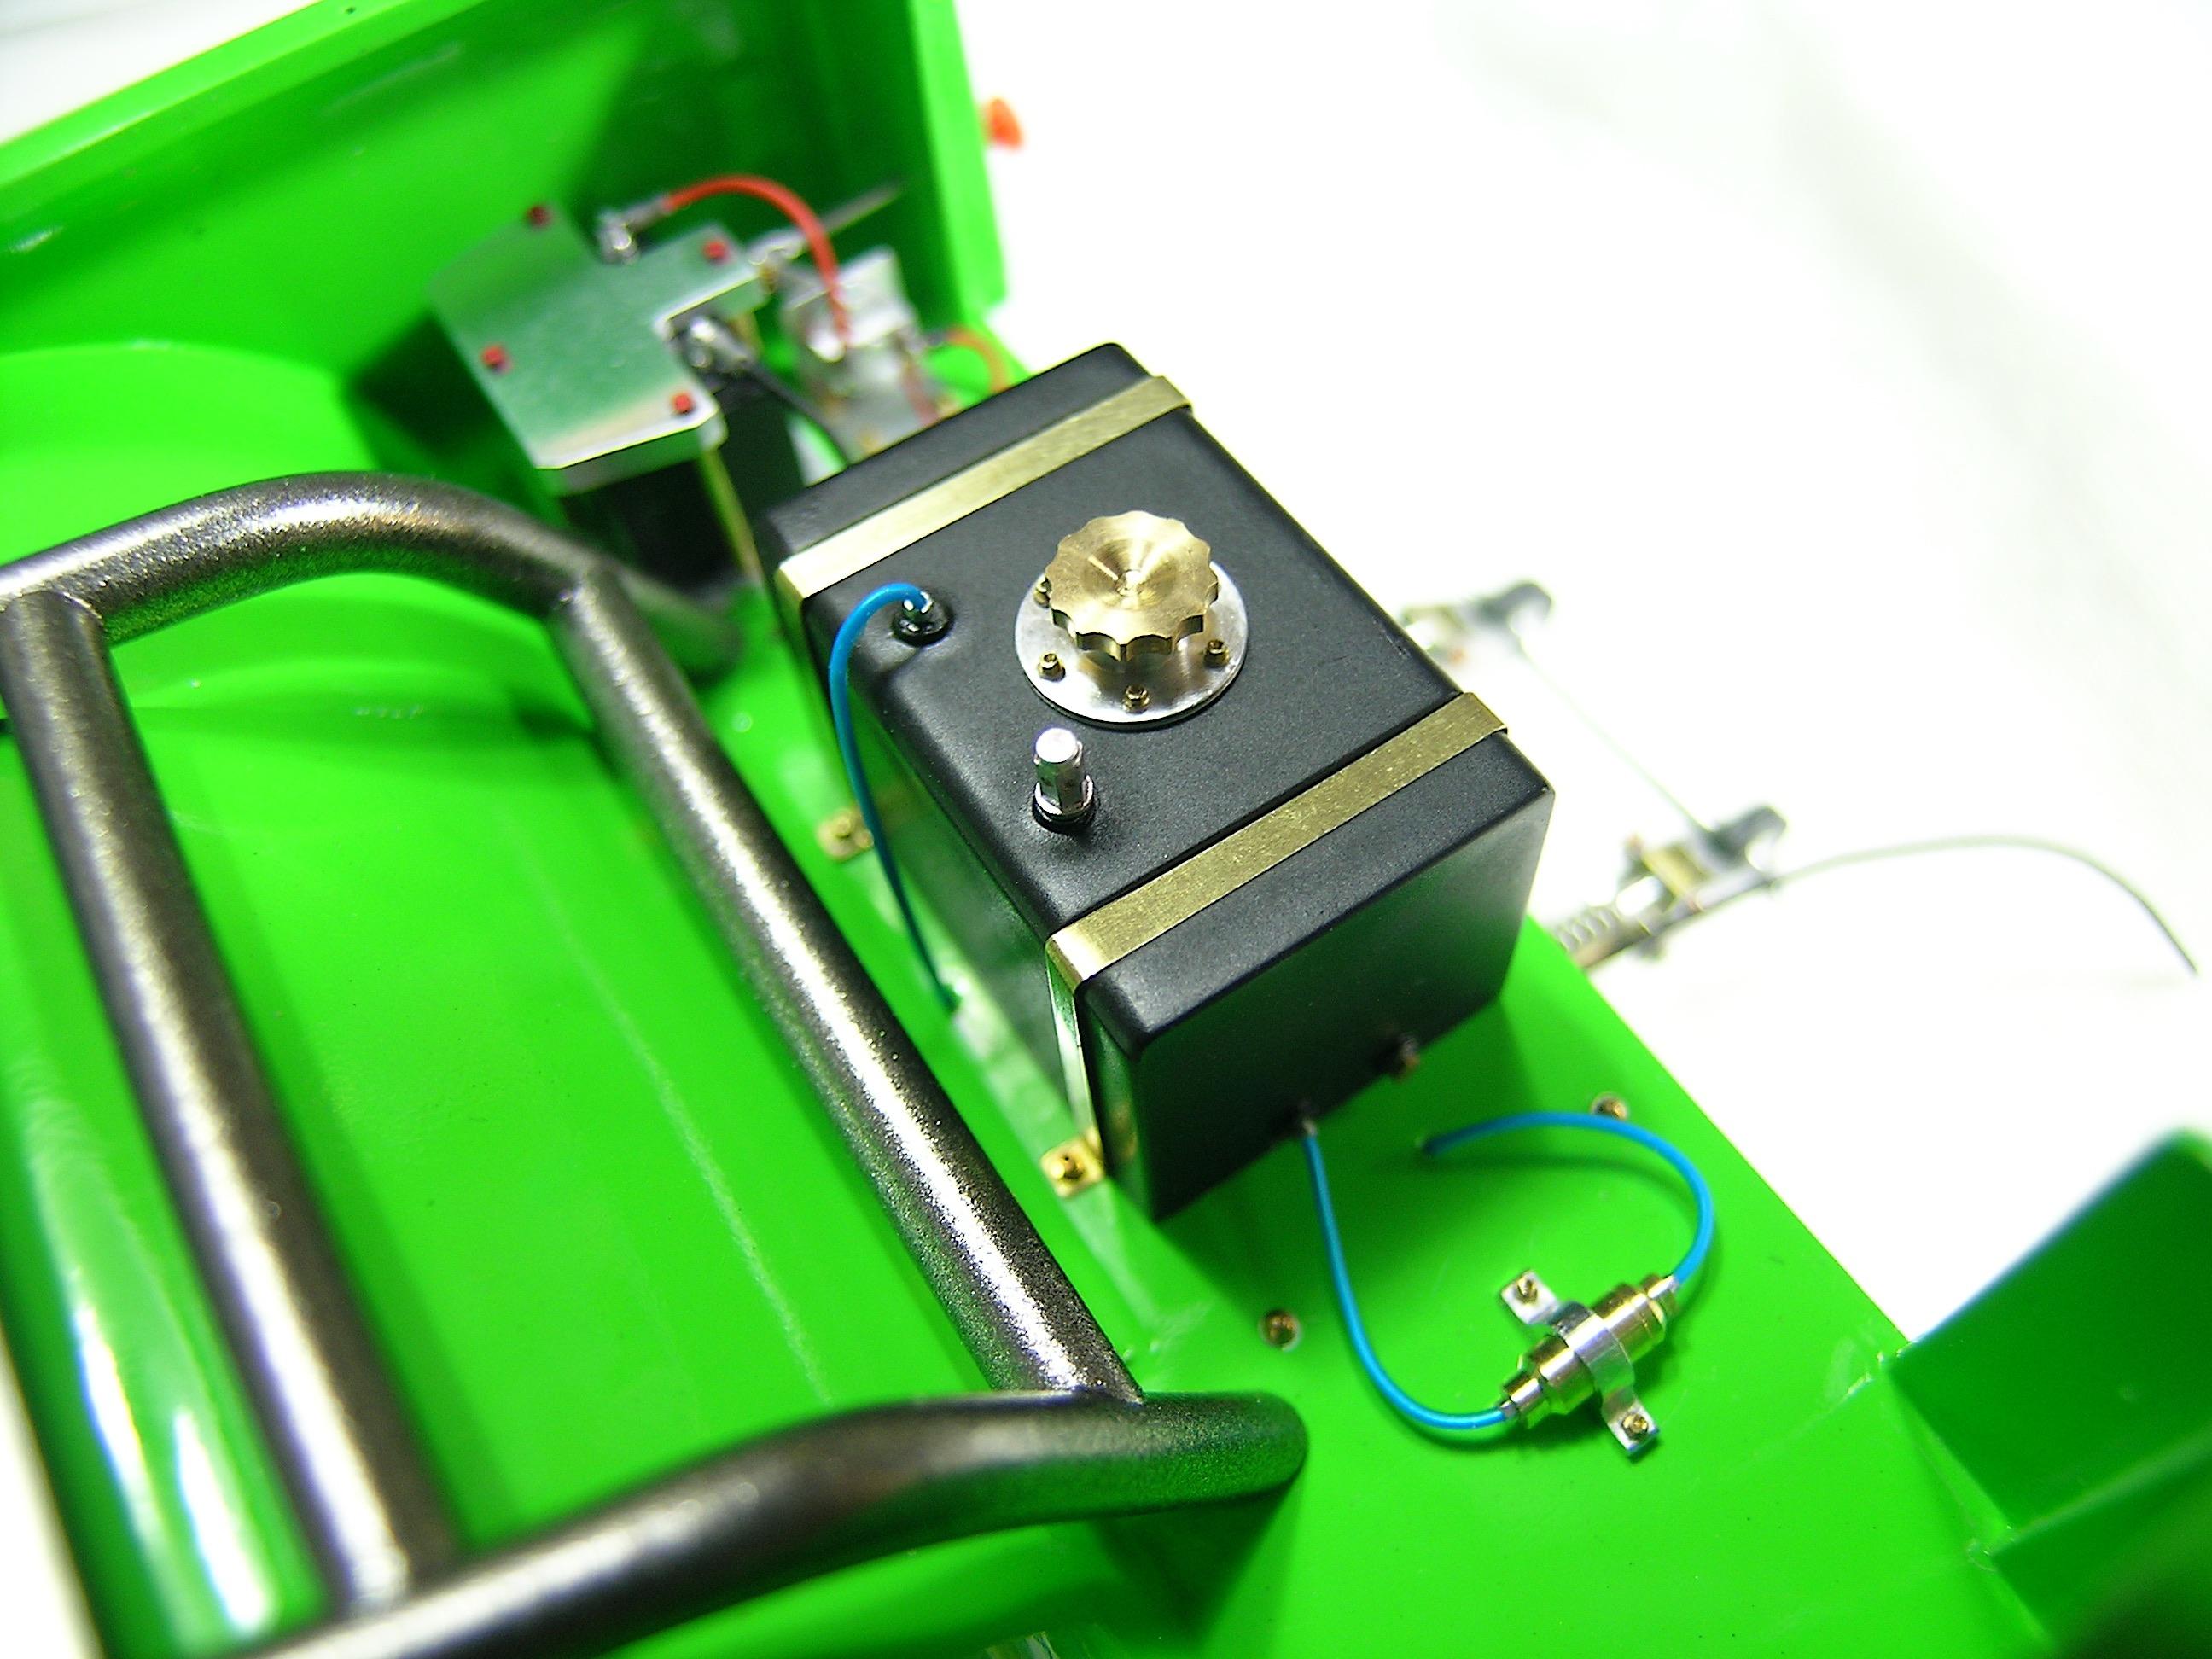
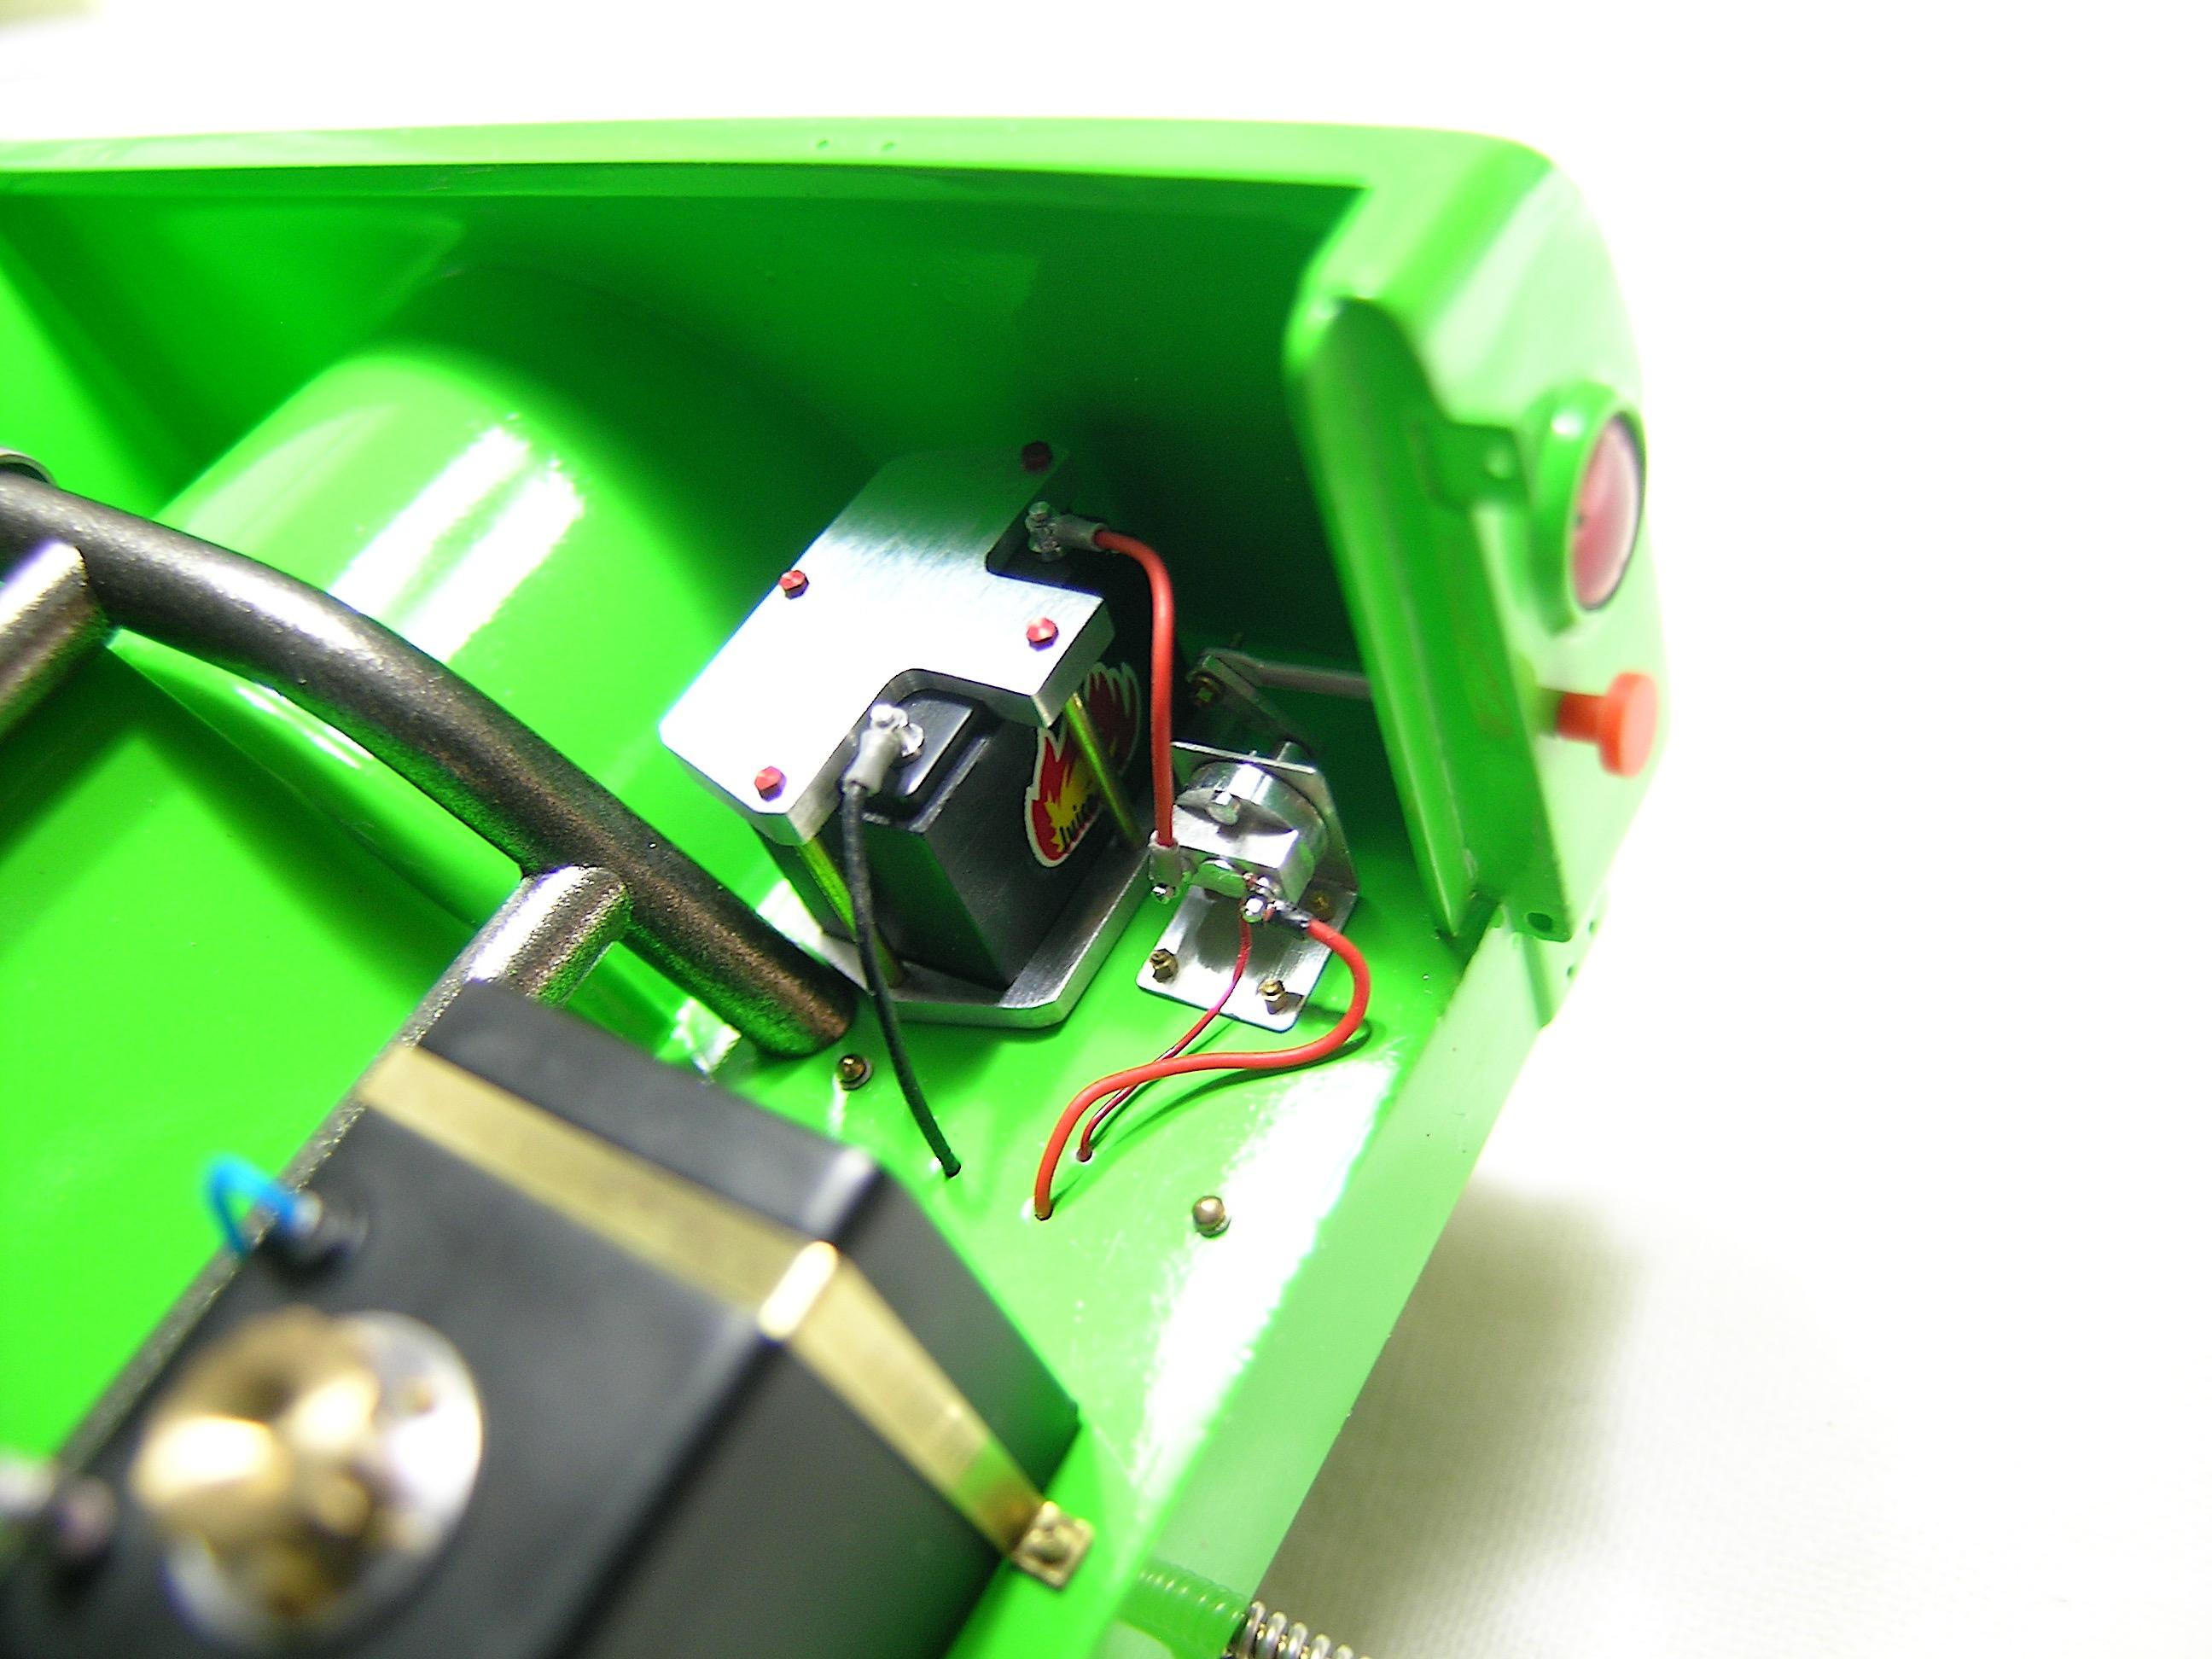
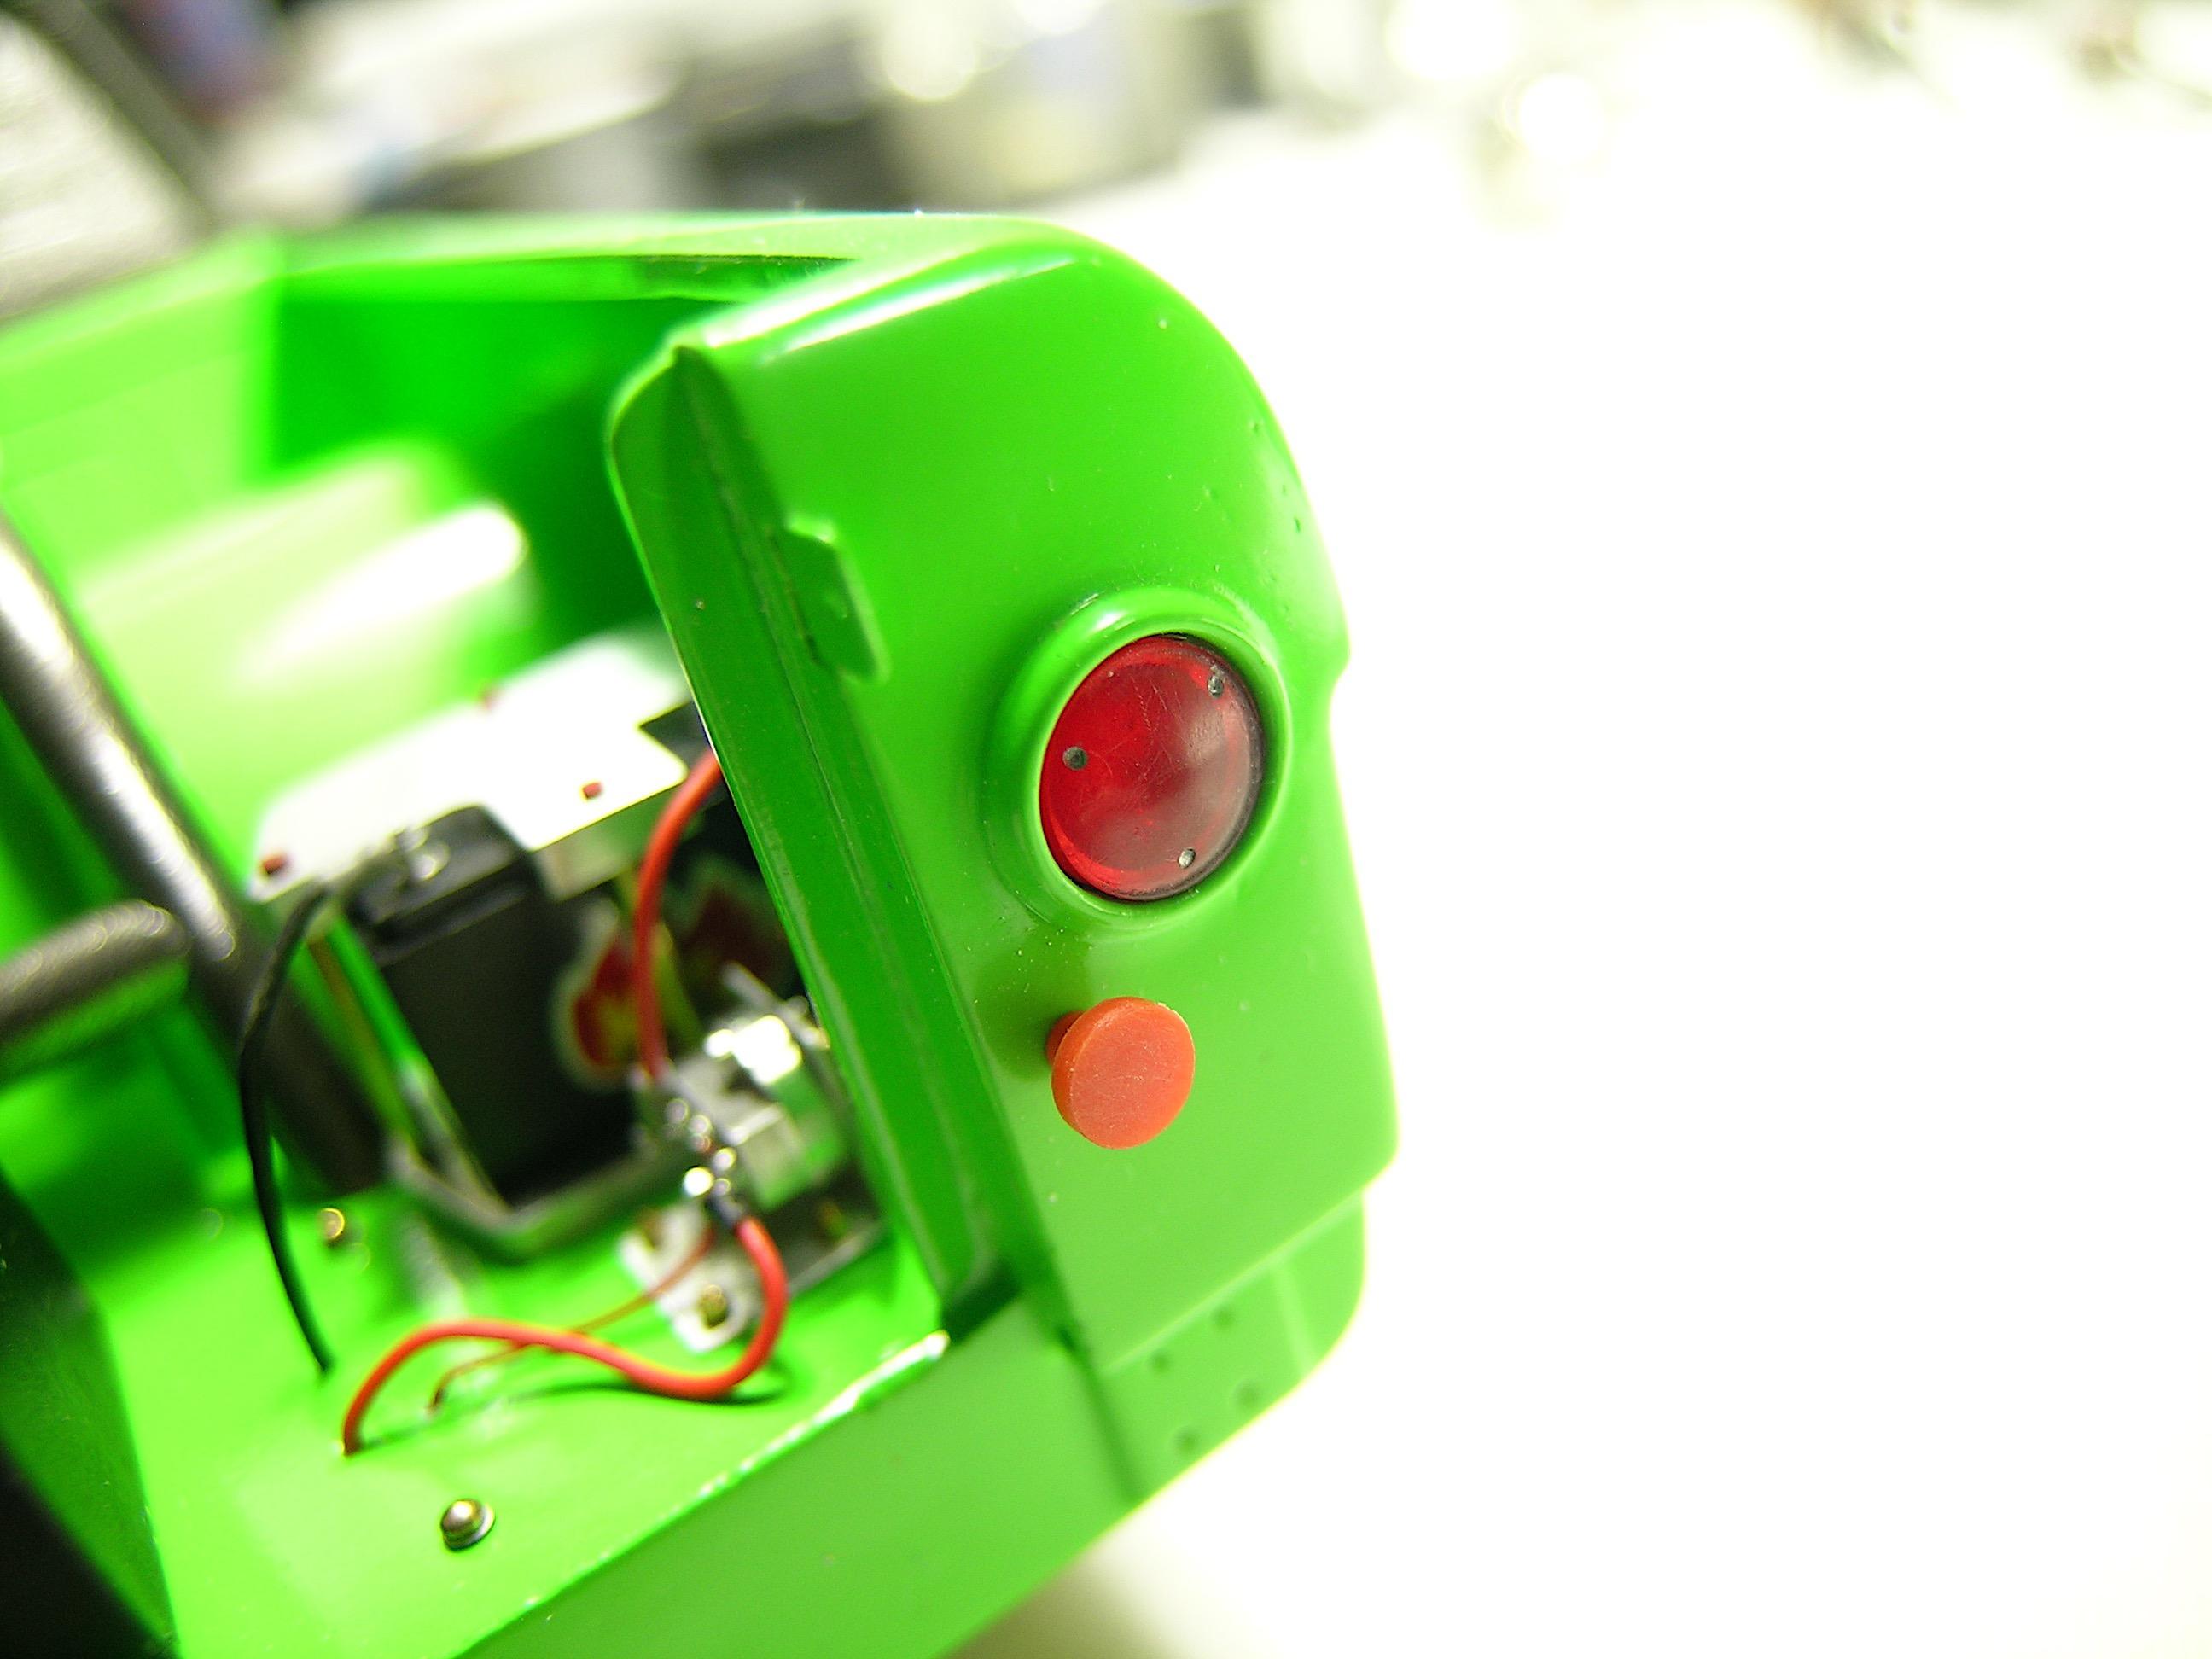
Hello everyone, Time flies when you're doing what you love... It's almost time to get back to work so I wanted to show you my latest progress in the D100 bed. The assembly is not fully completed as I still need to install the two brass brackets that are bolted to the bed fenders. In fact, I want to do a little polishing and waxing before I install them for good. As you can see, I found some other little missing details that I made and I hope you will like them. The assembly continues, I'll get back to you later with more pictures as I progress in the project. Your comments are always welcome, Francis Fuel filter in progress in the rotary table. Fuel filter support in progress in the rotary table. Final parts. Fuel cell vent made in aluminum. Different view. Close-up view of the battery and the kill switch. View of the installed in line fuel filter and the fuel cell, I think it looks good in black, what do you think? Overview of the bed and components installed so far. The brass bolt heads visible in the bed floor connect to the frame supports and hold the bed in place. I drilled 3 holes on the taillights to simulate the mounting screws.
-
Revell Ford GT Lemans 2017
AmericanMuscleFan replied to cobraman's topic in WIP: Other Racing: Road Racing, Land Speed Racers
Very cool car Ray, the Ford GT is one of the most beautiful super cars and it looks like you are off to a good start! -
I really like the hood Daniel, it's very well done, the use of aluminum is a good choice and it would have been rather difficult to make all those curved shapes with styrene. Using the right material in the right place gives the good results we see on this project... ?
-
64 Dodge D100 Pickup Pro Street
AmericanMuscleFan replied to AmericanMuscleFan's topic in WIP: Drag Racing Models
Thanks Scott ! The next update will be on the bed assembly, so check back in a few days, I want to have a little more done before I post the photos. It's been almost 1 year since you last updated your thread on the FXI Hot Rod Peterbilt, this project is really cool and I hope you didn't give up, you did so much work on it... Francis -
Cool, very cool Tim! I have the same O-ring kit and they are very useful. The trick you used on the boots is great and your machined parts are flawless as usual... ?
-
64 Dodge D100 Pickup Pro Street
AmericanMuscleFan replied to AmericanMuscleFan's topic in WIP: Drag Racing Models
Thanks for your kind words Dave! This thing has been on my workspace for so long that I feel like I'm not making a lot of progress... The last few miles are the hardest and I hope I don't get any bad surprises before I cross the finish line! I'm glad to know that my photos and explanations are of some interest, it takes a lot of my time but I'm honored that it is appreciated and highlighted. More pictures to come soon ! Thanks Daniel, You set the bar very high yourself, your work is an inspiration to everyone and I always find great tips in your posts! Your continued support is greatly appreciated my friend! Thanks Sergey! Most of the details of the Lenco shifter and the parachute deployment system will be quite hidden with all the elements in place (seats, roll bar) but I think it was worth doing it just for my personal satisfaction. The cockpit is rather small, fortunately the doors will be open to allow a better view during the shows. I had a lot of fun making the alternator and I'm honored that you like it, I put a lot of effort under the hood, it's often one of the major points of interest but I hope the whole model will be a success... ? Thanks to all of you, Francis -
Fantastic job Charlie, the dash is very realistic and the rear suspension is simply work of art my friend !!! ? Winter doesn't want to end here in the north, it snows constantly and the temperatures are nothing like spring. Nevertheless, it's not a bad thing for modelers like me who live north of the border... ?
-
WOW, great job on the wing and brackets Daniel, this little thing is impressive my friend, you nailed every detail and the pictures speak for themselves! ? Thank you for the pictures of the process, they are very instructive and useful for anyone who would like to try to make one.
-
64 Dodge D100 Pickup Pro Street
AmericanMuscleFan replied to AmericanMuscleFan's topic in WIP: Drag Racing Models
Thanks for your superlatives Charlie! I have to say that I am very happy with the color and the general comments about it. It's always hard to choose the best color for a particular subject (at least for me...), sometimes you have to compromise to get the best of both worlds. A light color brings out the details better than a dark color, and since I made a lot of parts, I wanted them to be as visible as possible. The assembly of the back part of the truck has started and I hope to show you some pictures soon, it looks promising... ? -
64 Dodge D100 Pickup Pro Street
AmericanMuscleFan replied to AmericanMuscleFan's topic in WIP: Drag Racing Models
Thanks Tim! I've lost count of the number of times I've changed my mind about the color choice for the truck during the build, but I eventually went back to my first choice to stay true to the spark that led to this project. It would be hard to say that the color is not showy but it has the advantage of bringing out the details but also the flaws... I can't believe that I started this pickup almost 4 years ago, I think in all modesty that my skills have improved since the beginning of this project. The motivation generated by the members and their projects on this forum only adds to the desire and ideas that are germinating in the back of my head... ? Francis Thanks Bob! I moved to the back of the truck and hope to bring you more details in the coming weeks. I hope you'll like what follows as well, my motivation is still present despite the number of hours that have been accumulating since the beginning of the project. At least the pile of parts I made is starting to produce something concrete... ? Francis -
Very cool project Todd, the Warren Johnson pro stock was such a cool car, I always liked the stance and color of this drag car. It was still the good old days when cars looked like their original version... Welcome to the forum by the way!
-
Great build Claude, you have proven time and time again that the theory that nothing is lost everything is created (I may have already used this one...) !!! You start to empty my vocabulary but not my admiration, I hope your wife thinks so too... ? The choice of components also proves your motto "Fun with styrene", that's what I call delivering the goods... ? Is Kings Custom Body a fictitious name? In my opinion, this is a brand that fits you like a glove, my friend. By the way, I see that the green air valves are back... Bravo encore !
-
1960 chevy Apache
AmericanMuscleFan replied to 53gmc's topic in Model Trucks: Pickups, Vans, SUVs, Light Commercial
Perfect weathering and attention to detail, to be mistaken for the real thing! The patina can produce beautiful things!!! ? -
64 Dodge D100 Pickup Pro Street
AmericanMuscleFan replied to AmericanMuscleFan's topic in WIP: Drag Racing Models
Thanks Ian, I know I can do better so that leaves me room for improvement for my next build... ? Francis Thanks Trevor, I'm not totally satisfied but I'll let the truck live with its little flaws without constantly redoing what I don't like. Hopefully some of the details inside the cab will be barely visible at the very end. I hope that overall the truck will have a lot to offer to those who will take the time to look at it as a model built from scratch... ? Francis -
ROYAL CANADIAN 1/16 SCALE TOP FUEL DRAGSTER
AmericanMuscleFan replied to Ian McLaren's topic in WIP: Drag Racing Models
Great work Ian, the FED's are in a class of their own and you are paying a beautiful tribute to this one, no surprise everything comes together with great precision my friend! I can't wait to see the rest! ? -
I really like the project and the 3d technique discussed on this thread, this method offers almost infinite possibilities and the contribution of judicious advice from those more advanced in this field can only make this technique more attractive! As we often say, the important thing is to be different and obviously it is!!! Thank you for your good advice gentlemen! ?
-
64 Dodge D100 Pickup Pro Street
AmericanMuscleFan replied to AmericanMuscleFan's topic in WIP: Drag Racing Models
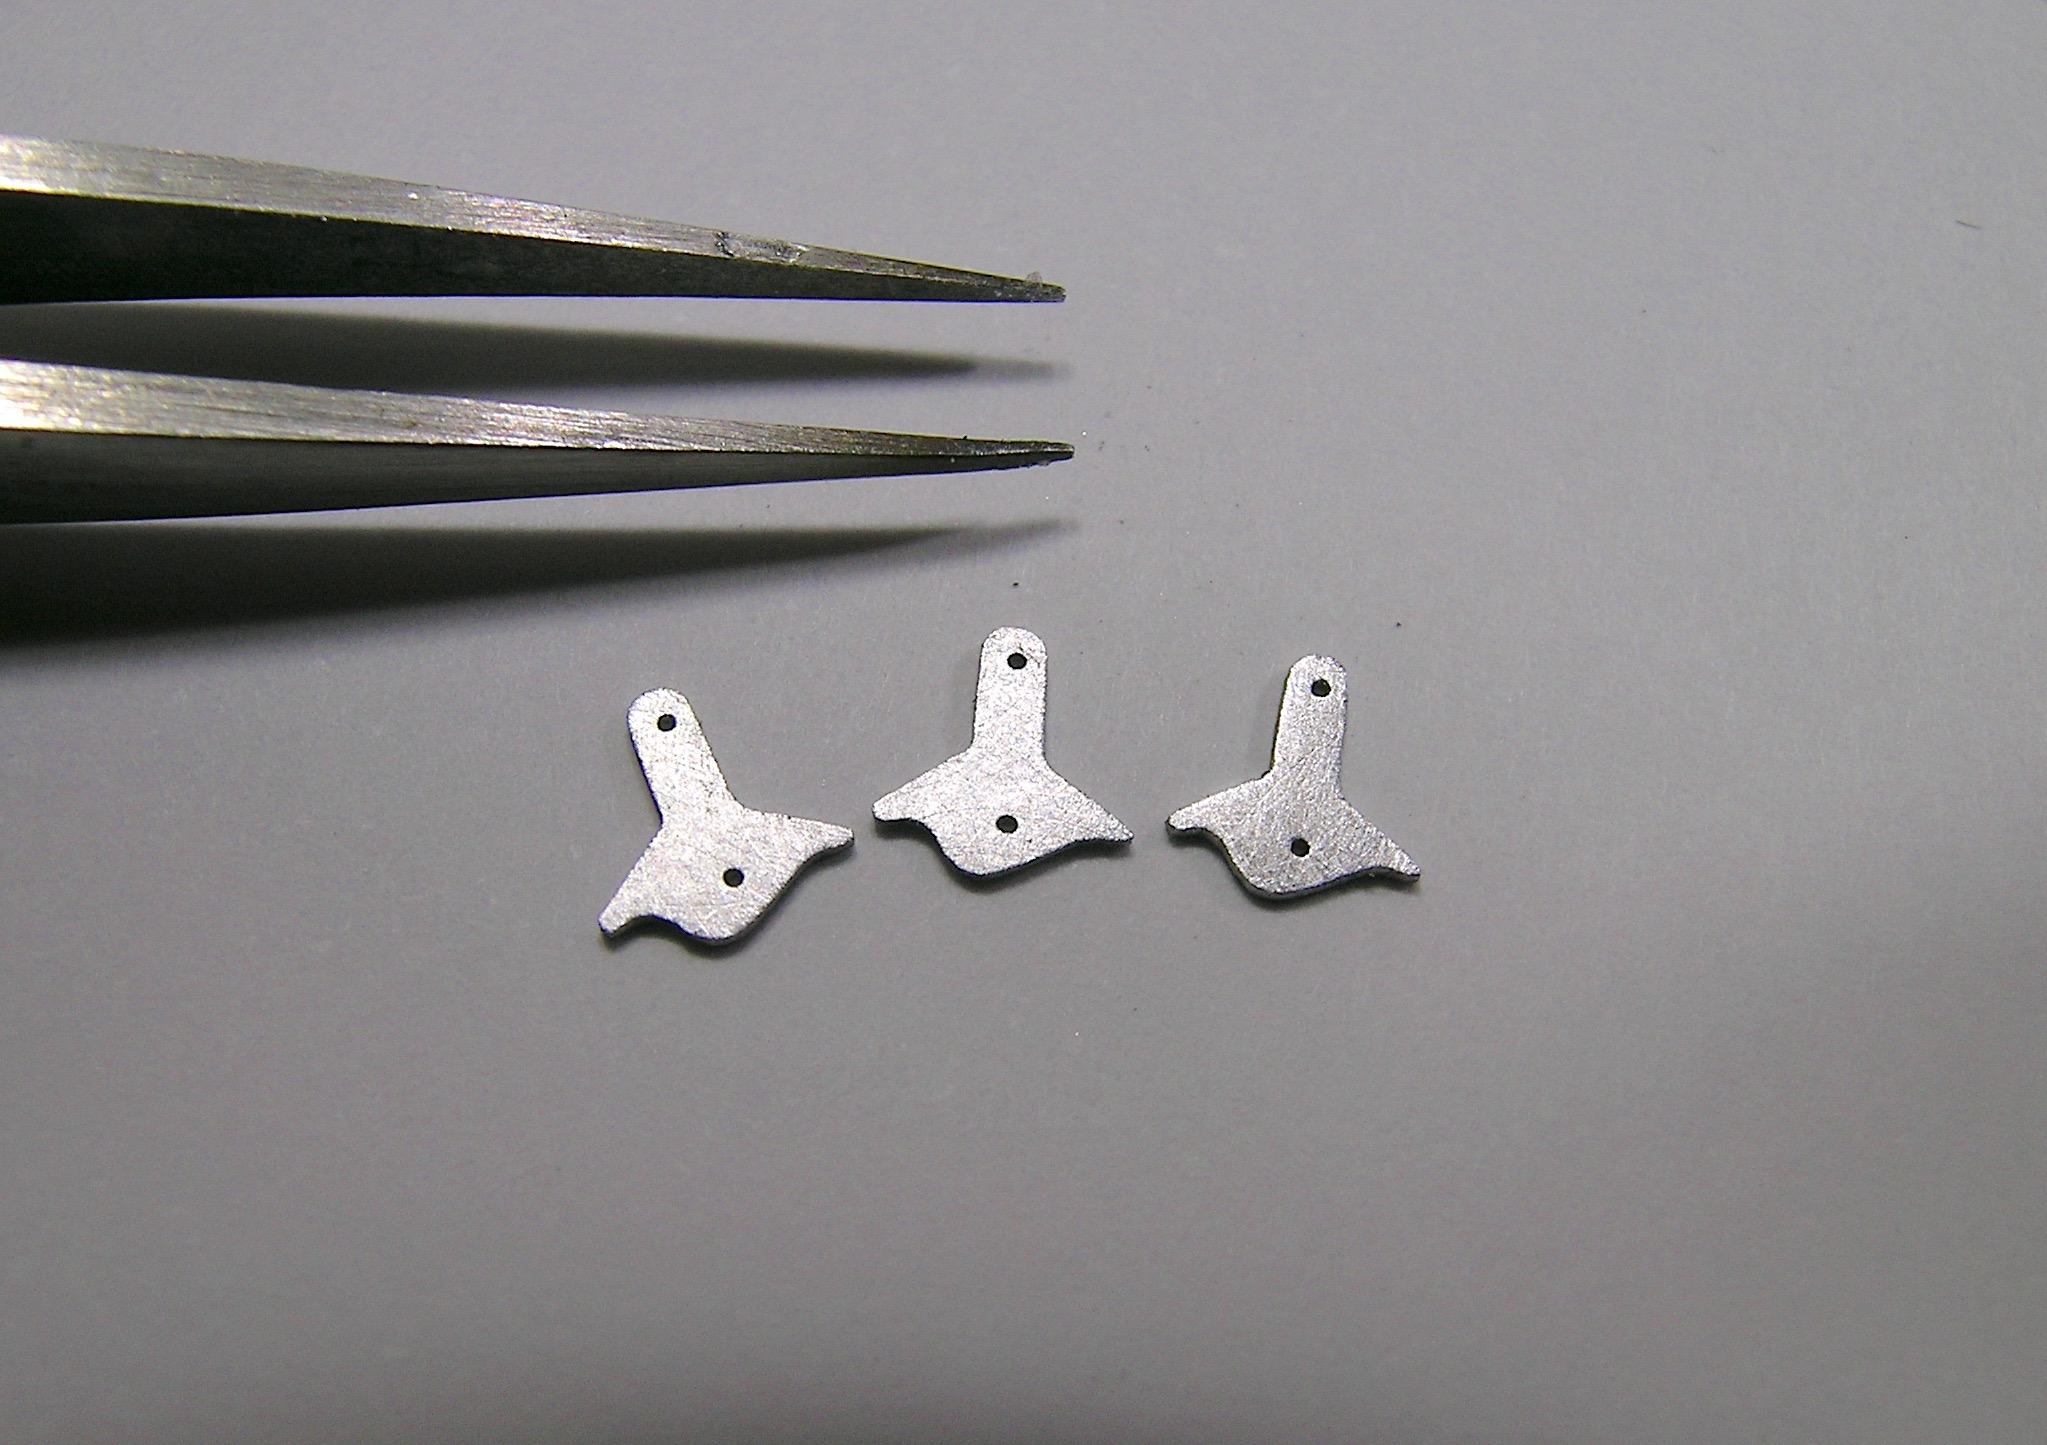
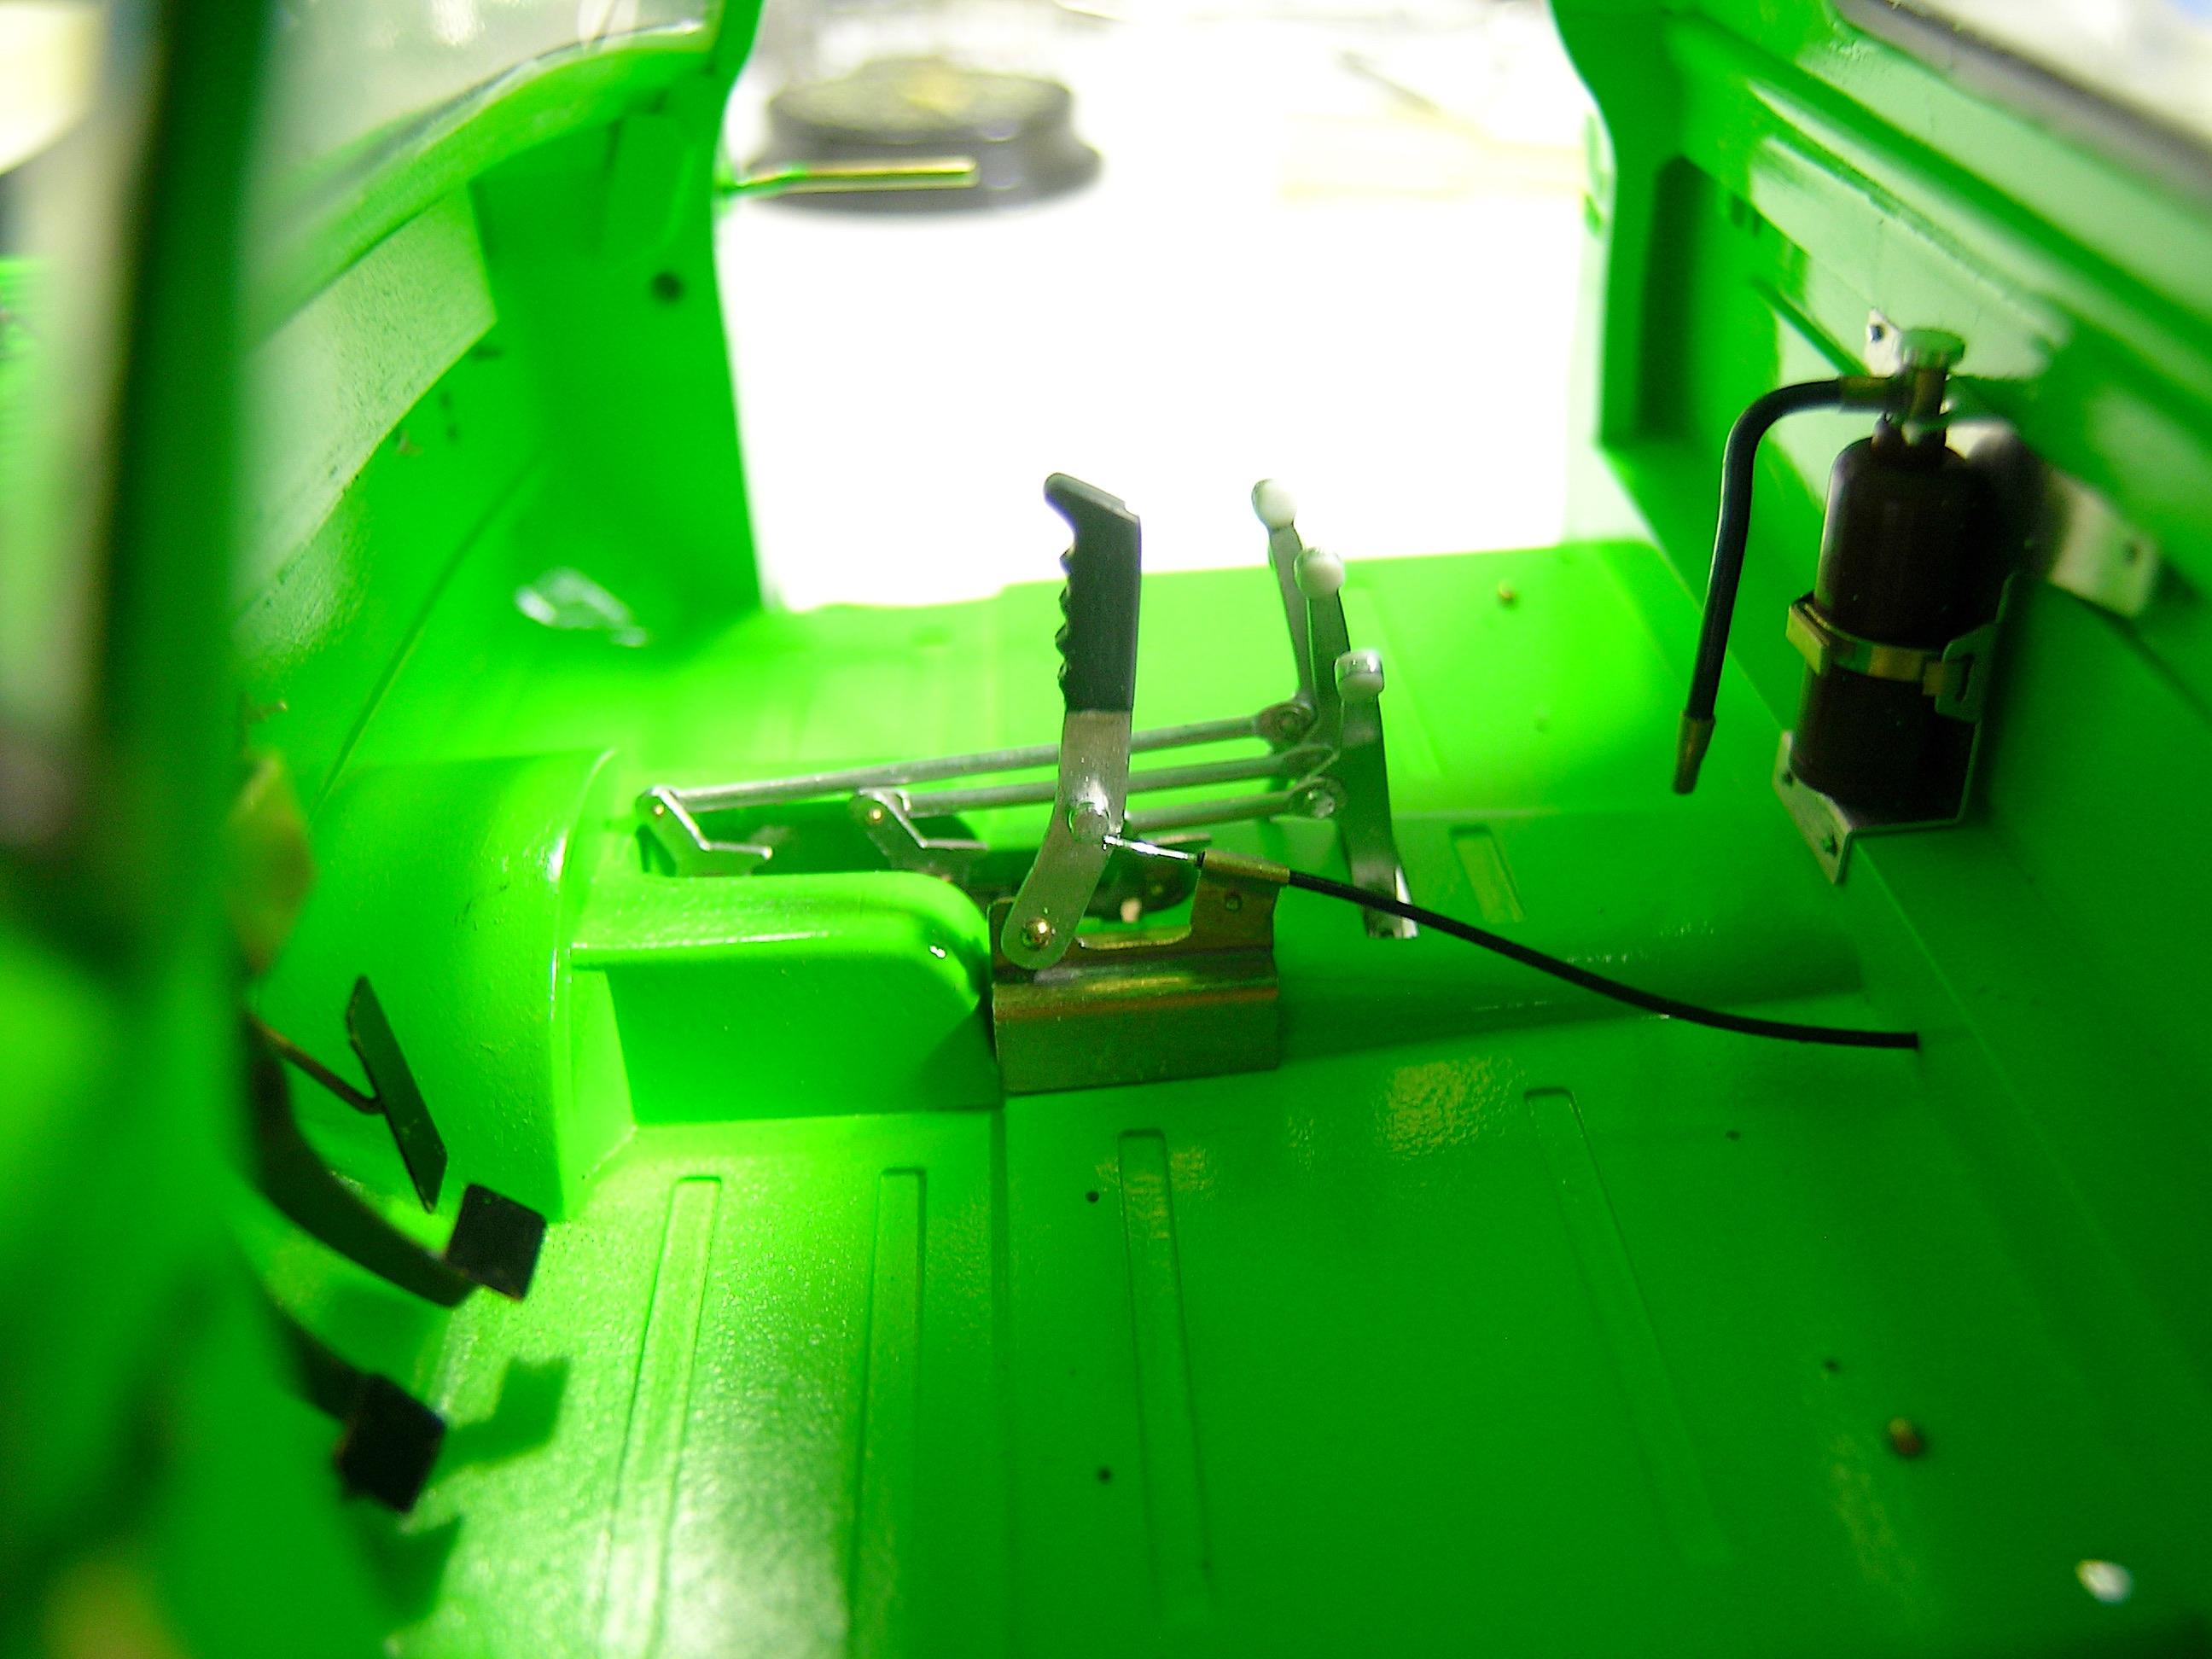
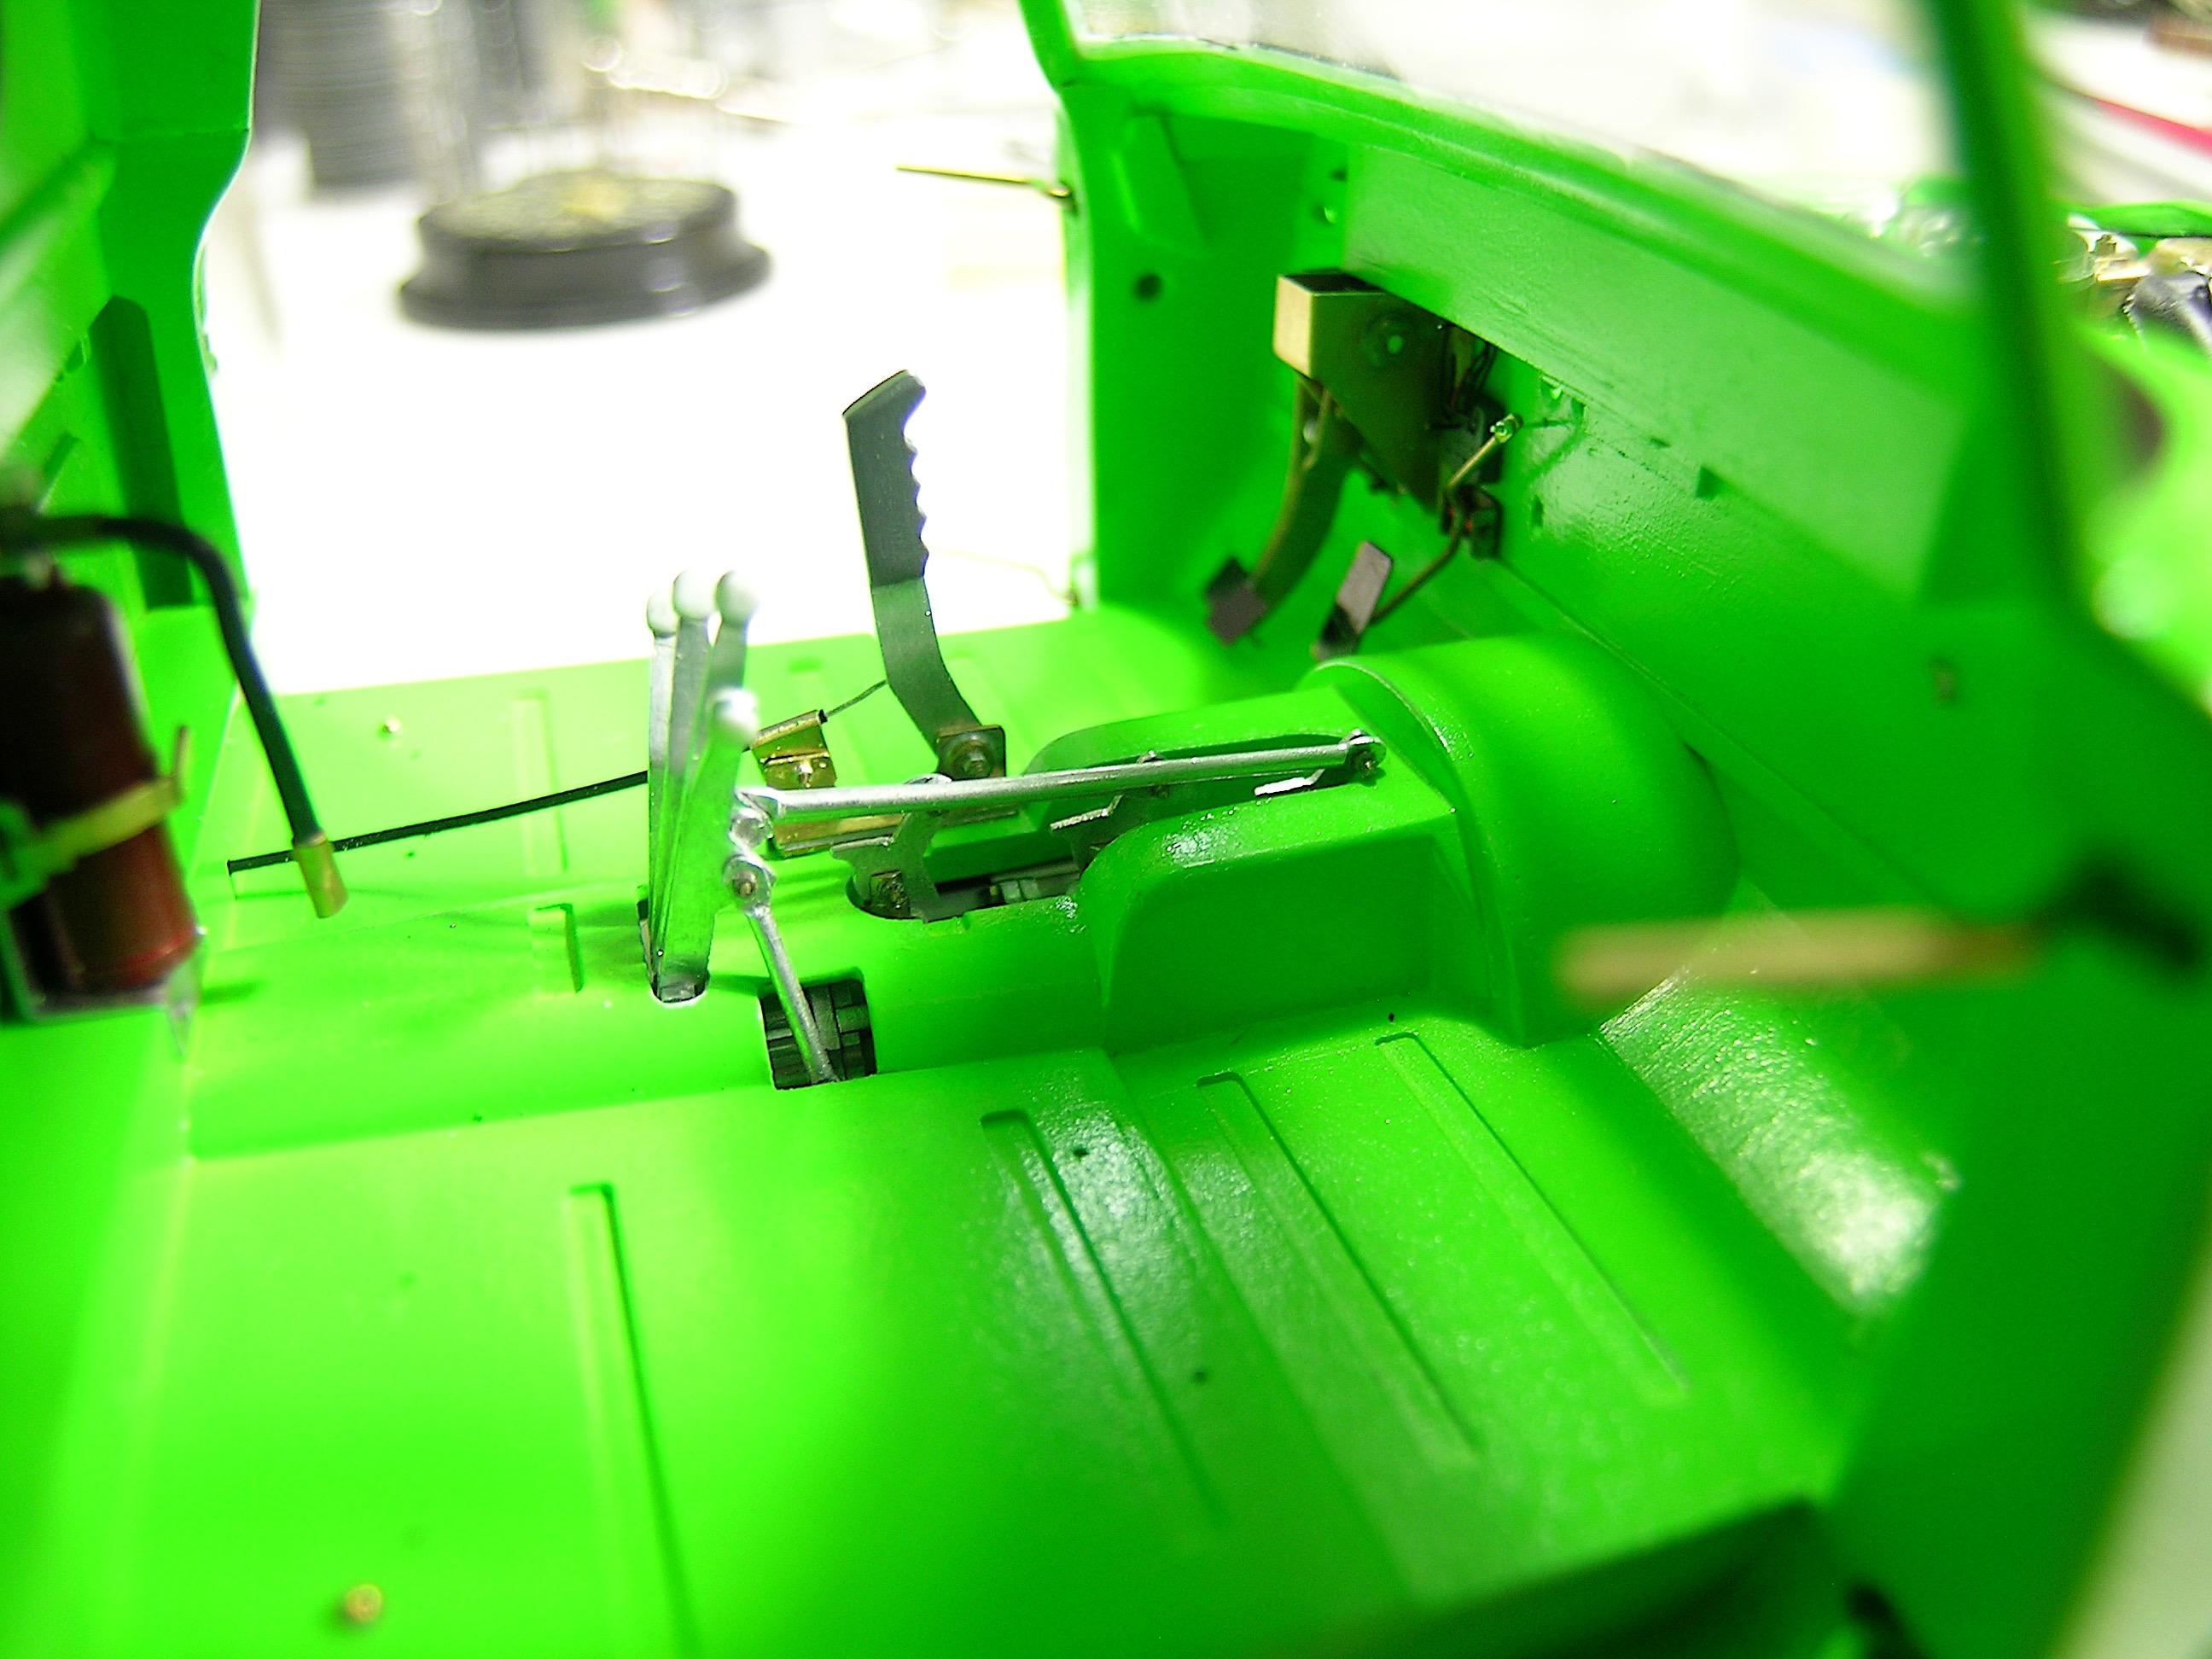
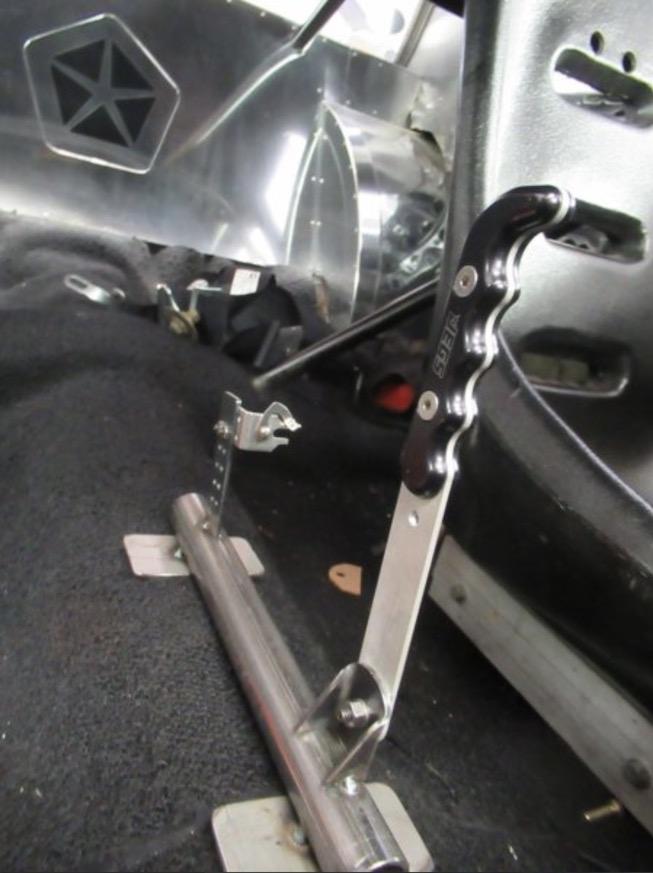
Hello everyone, Sorry guys, I was supposed to post these pictures yesterday before I left for the night shift but I ran out of time. Before I moved on to assembling the bed I thought it was time to install the Lenco shifter inside the cabin, I knew I was in for a good challenge, using eyelash clamps to get all the components in place was something that had been bothering me since the first day I decided to make the cabin with the glued down floor in place. Let's just say that to a certain extent, I felt a bit like I was putting together a sailboat in a bottle... Before assembling the shifter, I decided to redo the levers because my first design was not correct and I was able to find a better reference to make them more realistic even if they won't be very visible once installed. I also installed the parachute release system, I included a picture of what I had taken as a model, the support will probably not be visible with the seats in place, to follow... The interior assembly is by far my least favorite part, I saved it for the end, usually we do the opposite and save the best for the end but in this context, I don't see how I could have done otherwise... I'm now going to focus on the back of the truck, I'll get back to you later with some pictures of my progress. See you later, Francis New shifter levers in progress. Almost finished... This shape is closer to the real ones. View from the driver side. View from the passenger side. The model I was inspired by.
-
64 Dodge D100 Pickup Pro Street
AmericanMuscleFan replied to AmericanMuscleFan's topic in WIP: Drag Racing Models
Thanks Sir! Now imagine the size of my passport, the customs officer will need a magnifying glass... ? Thanks Ian! I'm going to be a bit of a killjoy but I'm pretty worried these days, our good old earth isn't doing well and it puts a lot of things in context... however, I'm quite happy to know that my humble work can put a smile on anyone's face! Thanks Tim, You yourself have inspired me a lot and I am still learning from your amazing skills, this is in my opinion one of the good reasons why this forum is so relevant, everyone finds something to learn no matter what their skill level. Your kind words are very much appreciated sir, your knowledge and persistence motivate me a lot! -
64 Dodge D100 Pickup Pro Street
AmericanMuscleFan replied to AmericanMuscleFan's topic in WIP: Drag Racing Models
I will have to renew my passport... ? -
64 Dodge D100 Pickup Pro Street
AmericanMuscleFan replied to AmericanMuscleFan's topic in WIP: Drag Racing Models
Don't go too fast my friend, I have to finish it before I think of exposing it... As for the commotion, considering the quality and diversity of the offer I can see on the site, I think our neighbors will be rather well served! Thank you by the way Claude, coming from an artist like you, it's all the more surprising, you yourself have caused your share of commotion in the last year! ? Francis -
64 Dodge D100 Pickup Pro Street
AmericanMuscleFan replied to AmericanMuscleFan's topic in WIP: Drag Racing Models
Thanks Ron! I agree, some colors, especially the lighter ones, are better choices to bring out the details and this lime green is also a "racing" color that is appropriate for this subject. A lot of these trucks were originally green and I think the shade I chose suits it pretty well without distorting it too much... Francis -
ROYAL CANADIAN 1/16 SCALE TOP FUEL DRAGSTER
AmericanMuscleFan replied to Ian McLaren's topic in WIP: Drag Racing Models
WOW Ian !!! This is great art my friend, I don't see any hammer marks or stress on the aluminum. Did you use standard epoxy or special glue to join the different parts together? By the way, the oil filter color is a perfect match, not many people would have taken the time to do this! ? -
64 Dodge D100 Pickup Pro Street
AmericanMuscleFan replied to AmericanMuscleFan's topic in WIP: Drag Racing Models
Thanks Andrew, I like them a lot, the effect is quite great, it looks like an artist who made watercolors of them. It's amazing what you can do with these apps. ? -
64 Dodge D100 Pickup Pro Street
AmericanMuscleFan replied to AmericanMuscleFan's topic in WIP: Drag Racing Models
Thanks Scott ! Thanks Brad ! Thanks Trevor ! Thanks Jim ! Thanks Ian ! Thanks Andy ! Thanks JC ! Thanks Edgar ! Sorry for the long delay in answering you, my work has not allowed me to connect to the forum since Wednesday. I want to thank you all for your kind words and encouragement, you are helping in your own way to confirm my commitment to finish this project. I have probably mentioned it before but you are the fuel for my own tank, the motivation is always there but your comments can only keep it at its peak! Francis