AmericanMuscleFan
-
Posts
3,058 -
Joined
-
Last visited
Content Type
Profiles
Forums
Events
Gallery
Everything posted by AmericanMuscleFan
-
 Very cool build Pat ! ? The color combination is very typical of this era, it suits it very well. It's always interesting to see a more rare variation. I don't know if they produced a lot of them but for its big brother, the FORD version, we don't even ask the question! ?
 -
Another great build my friend and for this one I can also say that everything stays in the family, everything holds together well! The beauty with styrene is the sheer fantasy it offers without breaking the bank, a 58 TBird being a rather expensive and rare "bird" as a donor for a project of this sort in real life. Hours of fun with styrene as you say so well and pleasure for the eyes I might add! ?
-
64 Dodge D100 Pickup Pro Street
AmericanMuscleFan replied to AmericanMuscleFan's topic in WIP: Drag Racing Models
Merci mon ami ! Francis Thanks Mike, I am always honored to have your support! Francis For those who are interested, all these little things are already put to work, the assembly and the details of the engine compartment are in progress, I hope to propose you some pictures next week. I have a lot of wires and pipes to connect to all these things... ? Now, back to work, the one who pays for all these expensive tools... ? Francis -
It's not easy to invest in a 24-hour build when you're a detail freak like you Daniel ! ? Maybe you didn't meet the deadline but the final result obviously didn't suffer..... This is a beautiful, well assembled vintage drag car that you can be proud of. A little entertainment that can only be good to escape a little from a more complex project...? Bravo my friend !!! ?
-
64 Dodge D100 Pickup Pro Street
AmericanMuscleFan replied to AmericanMuscleFan's topic in WIP: Drag Racing Models
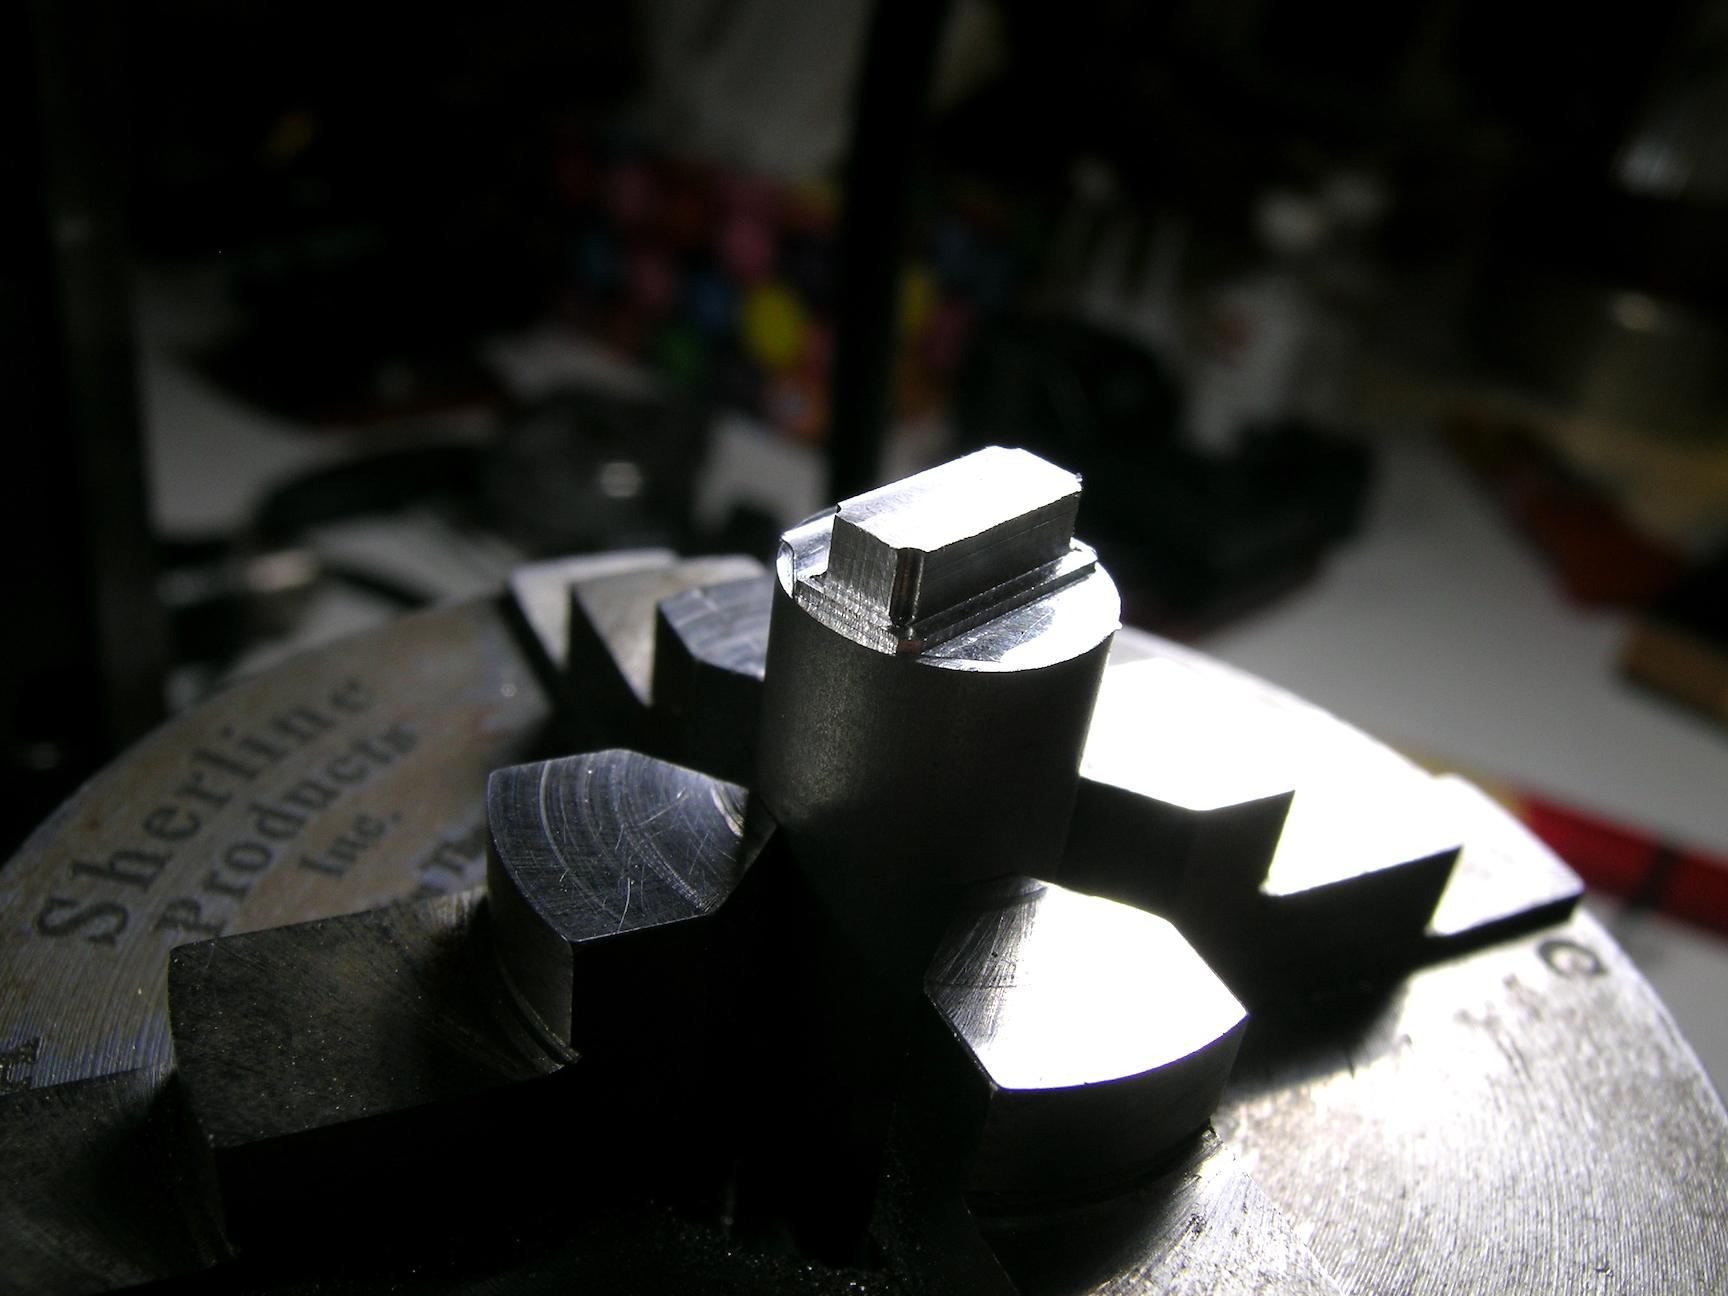
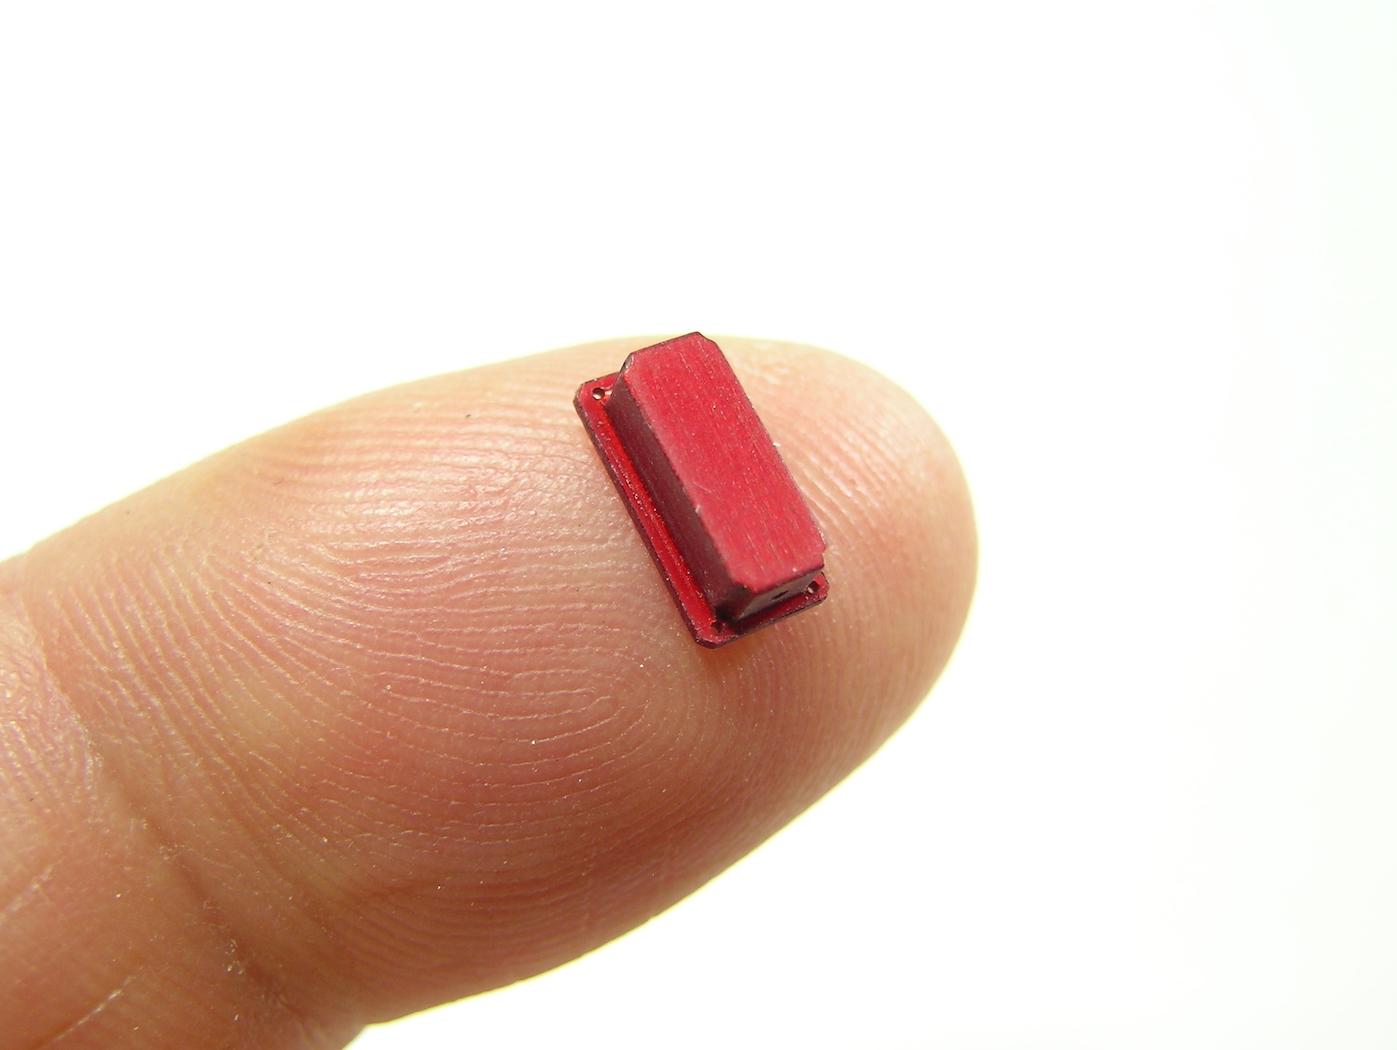
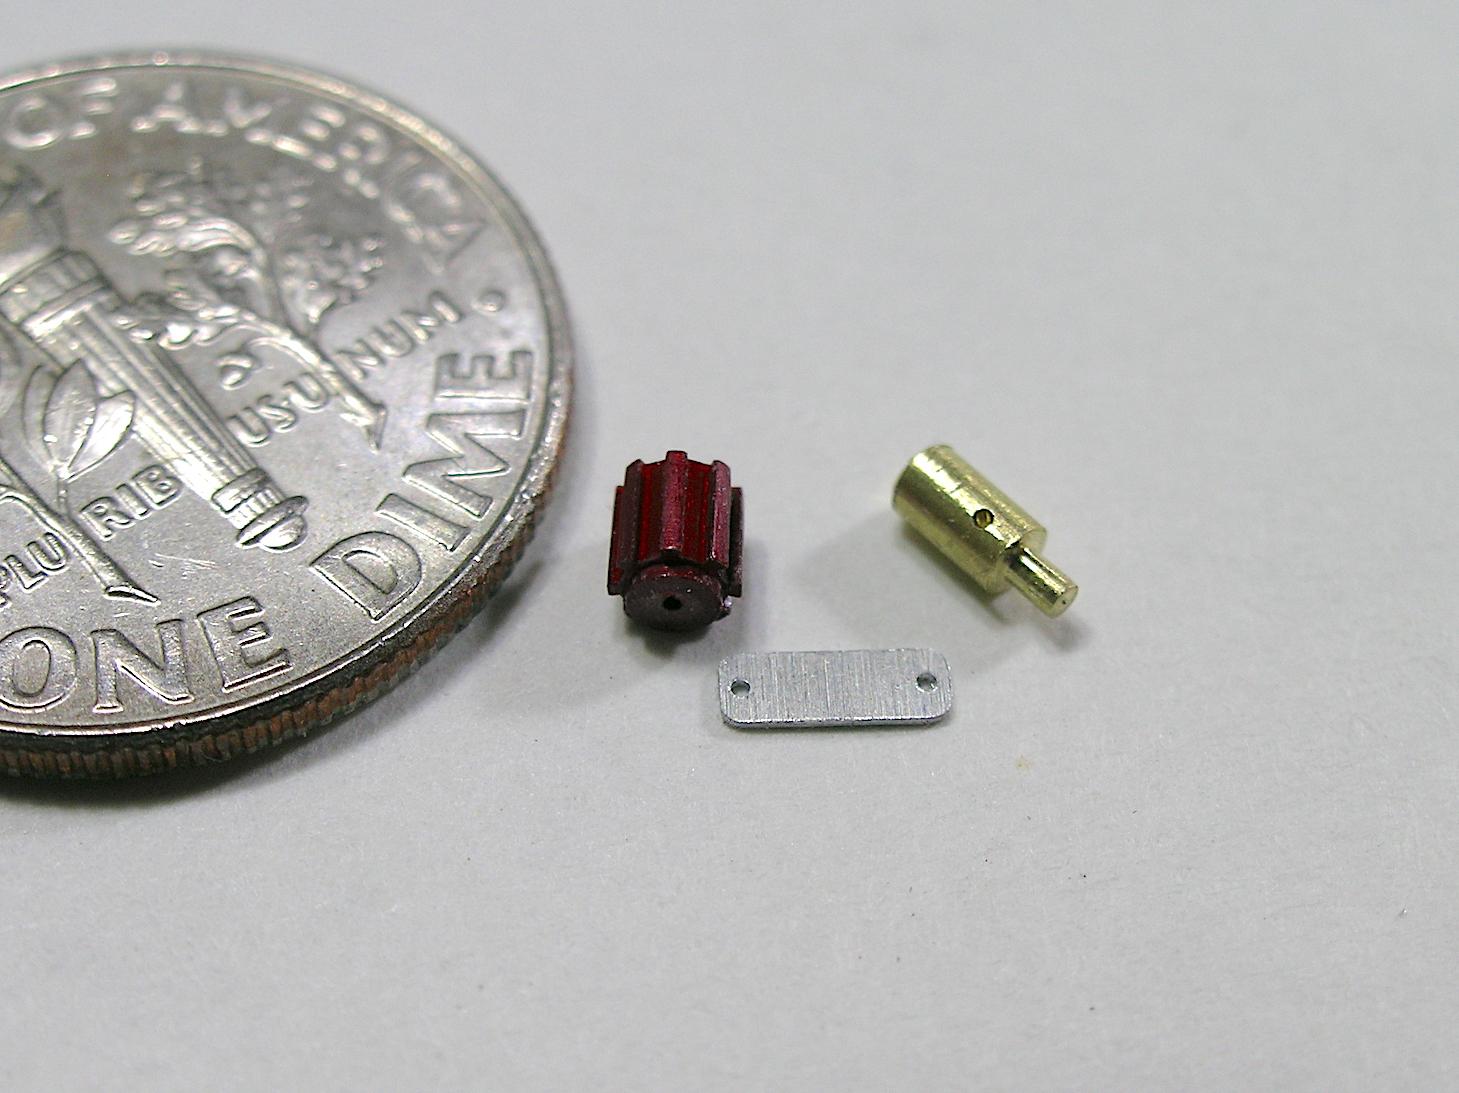
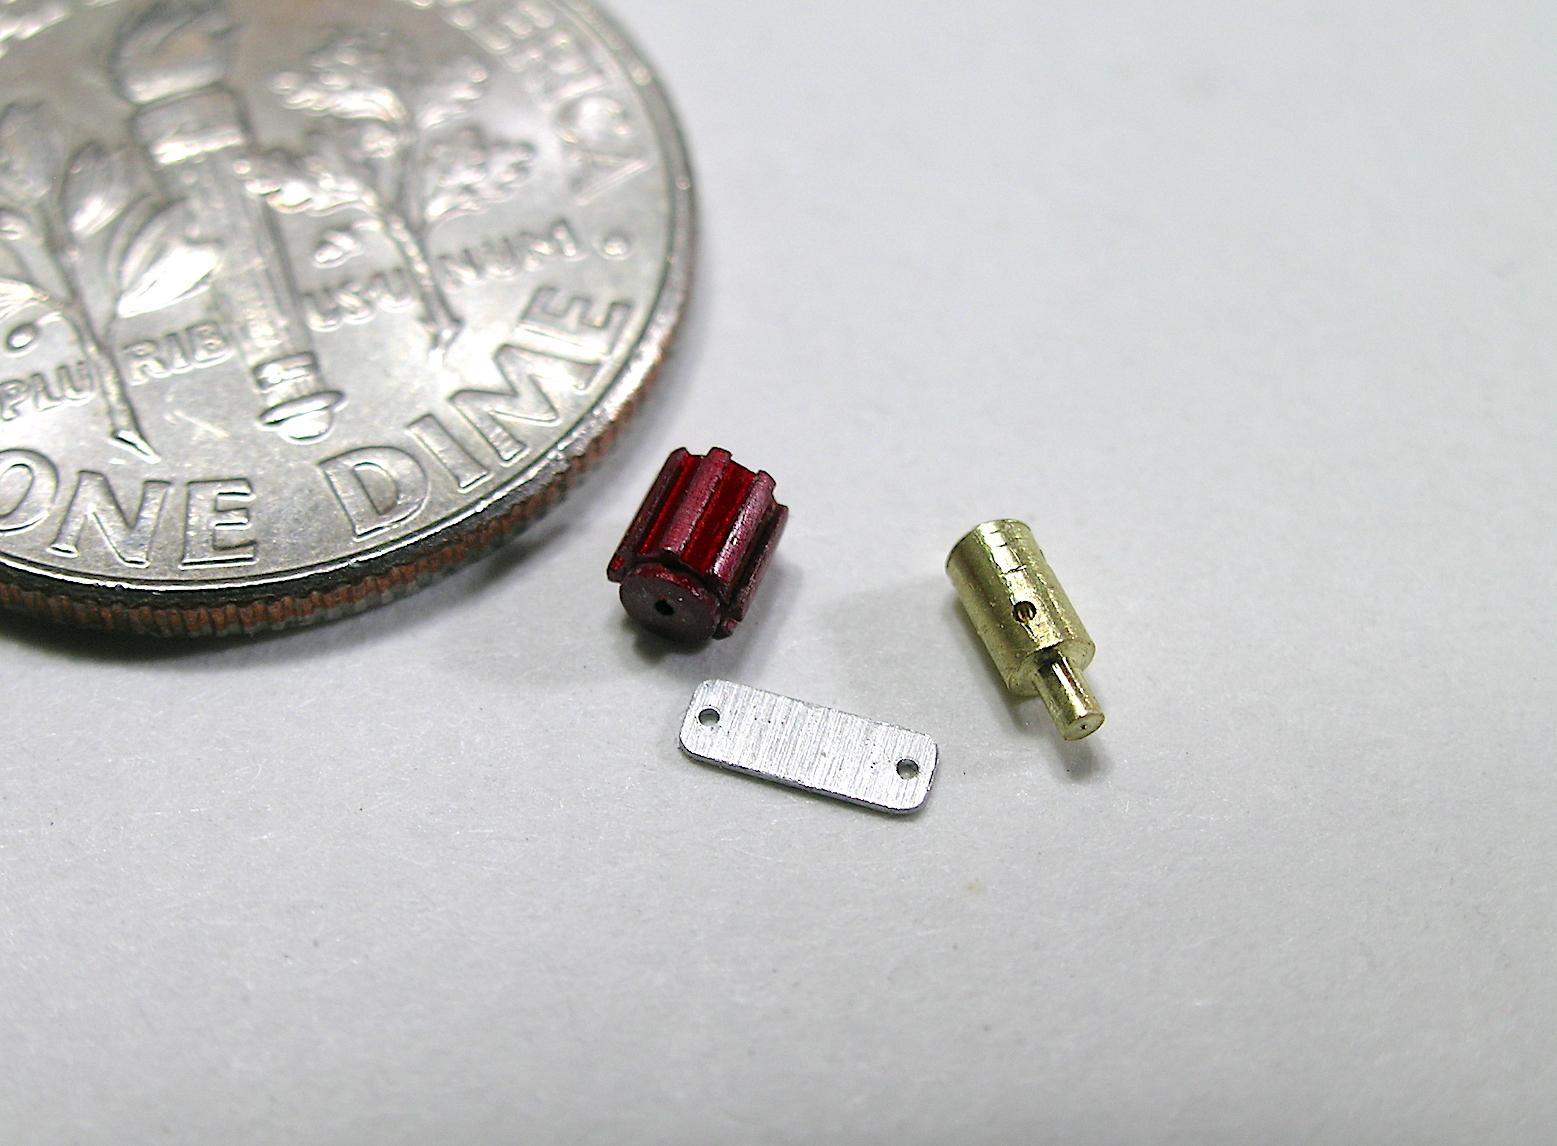
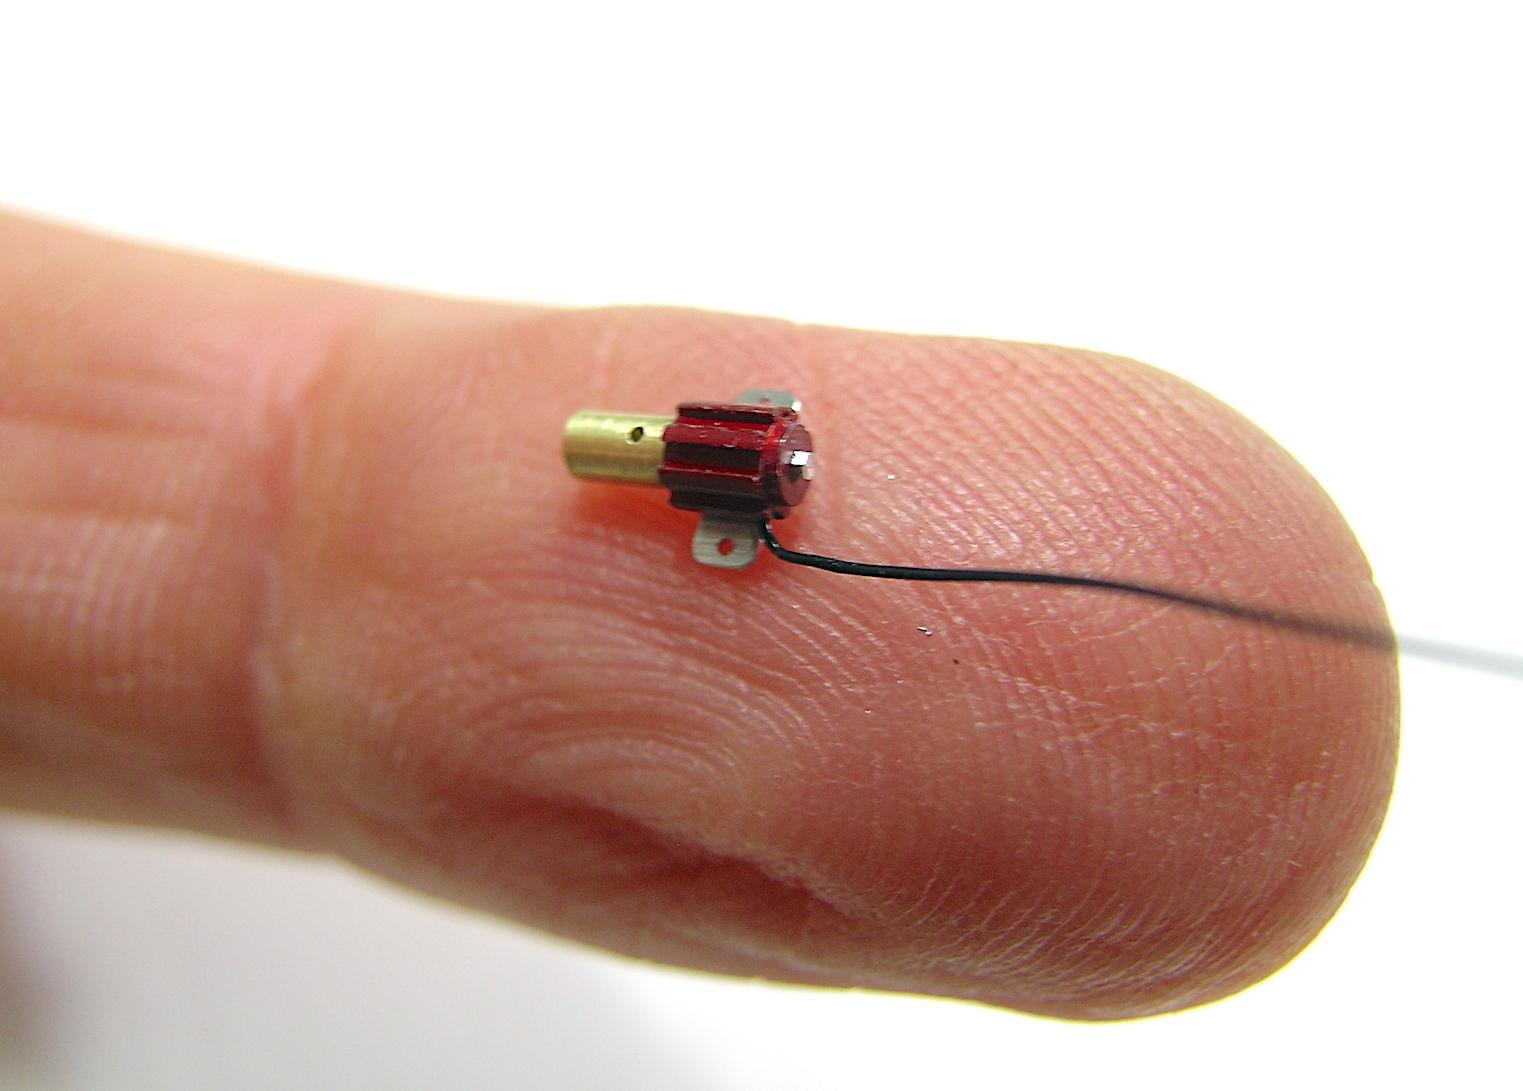
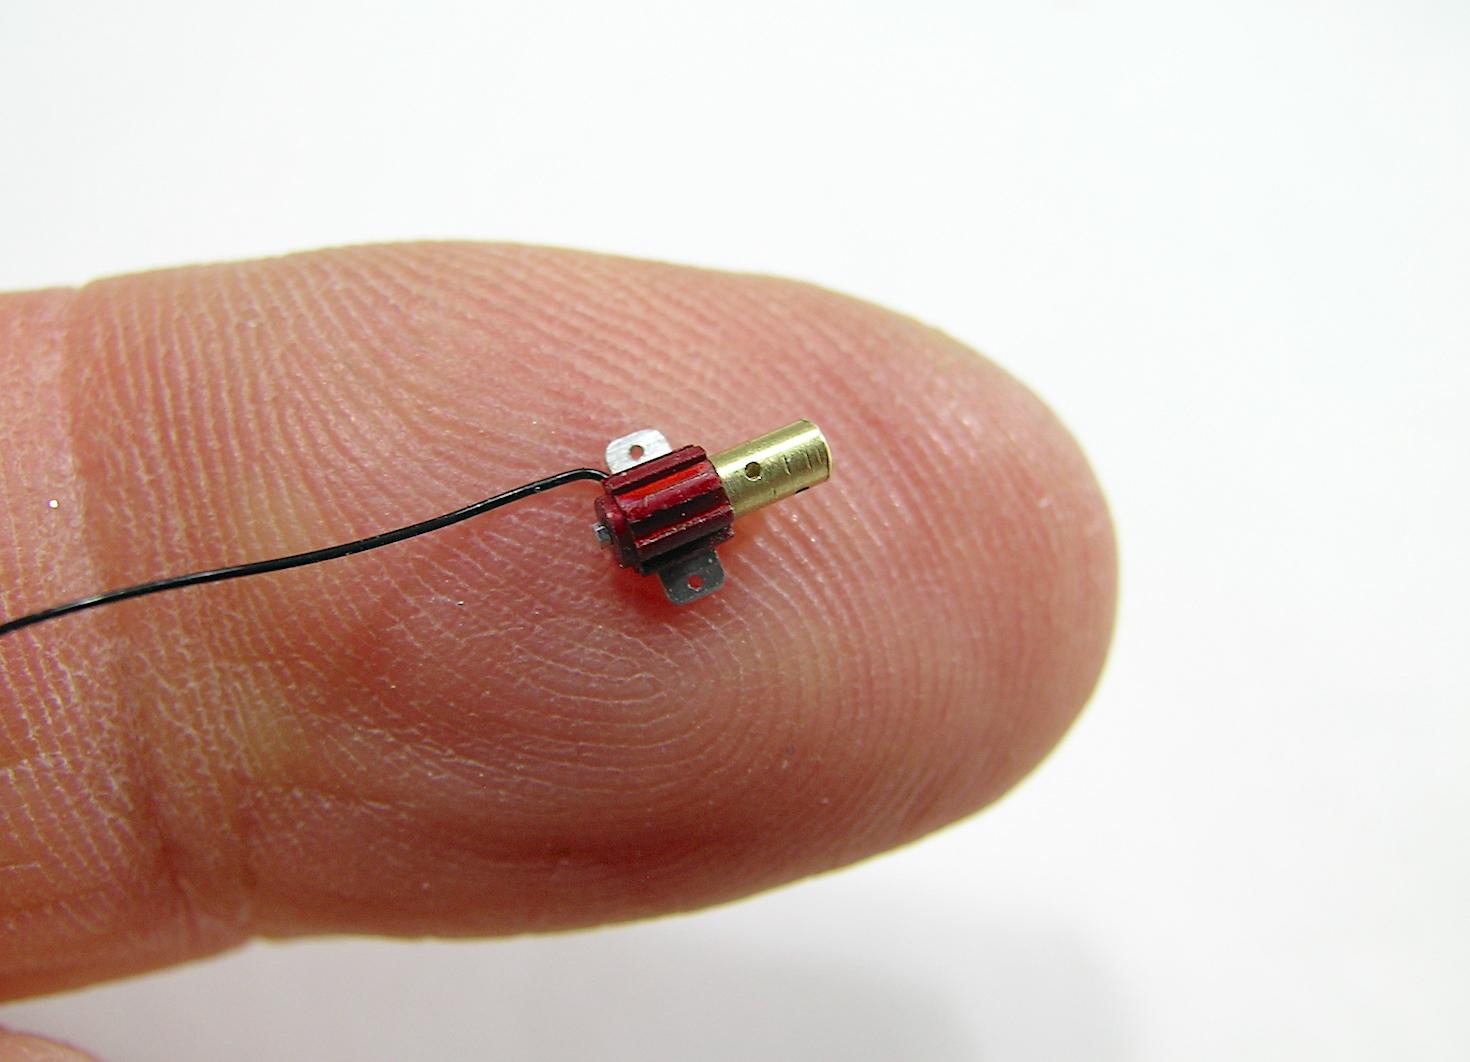
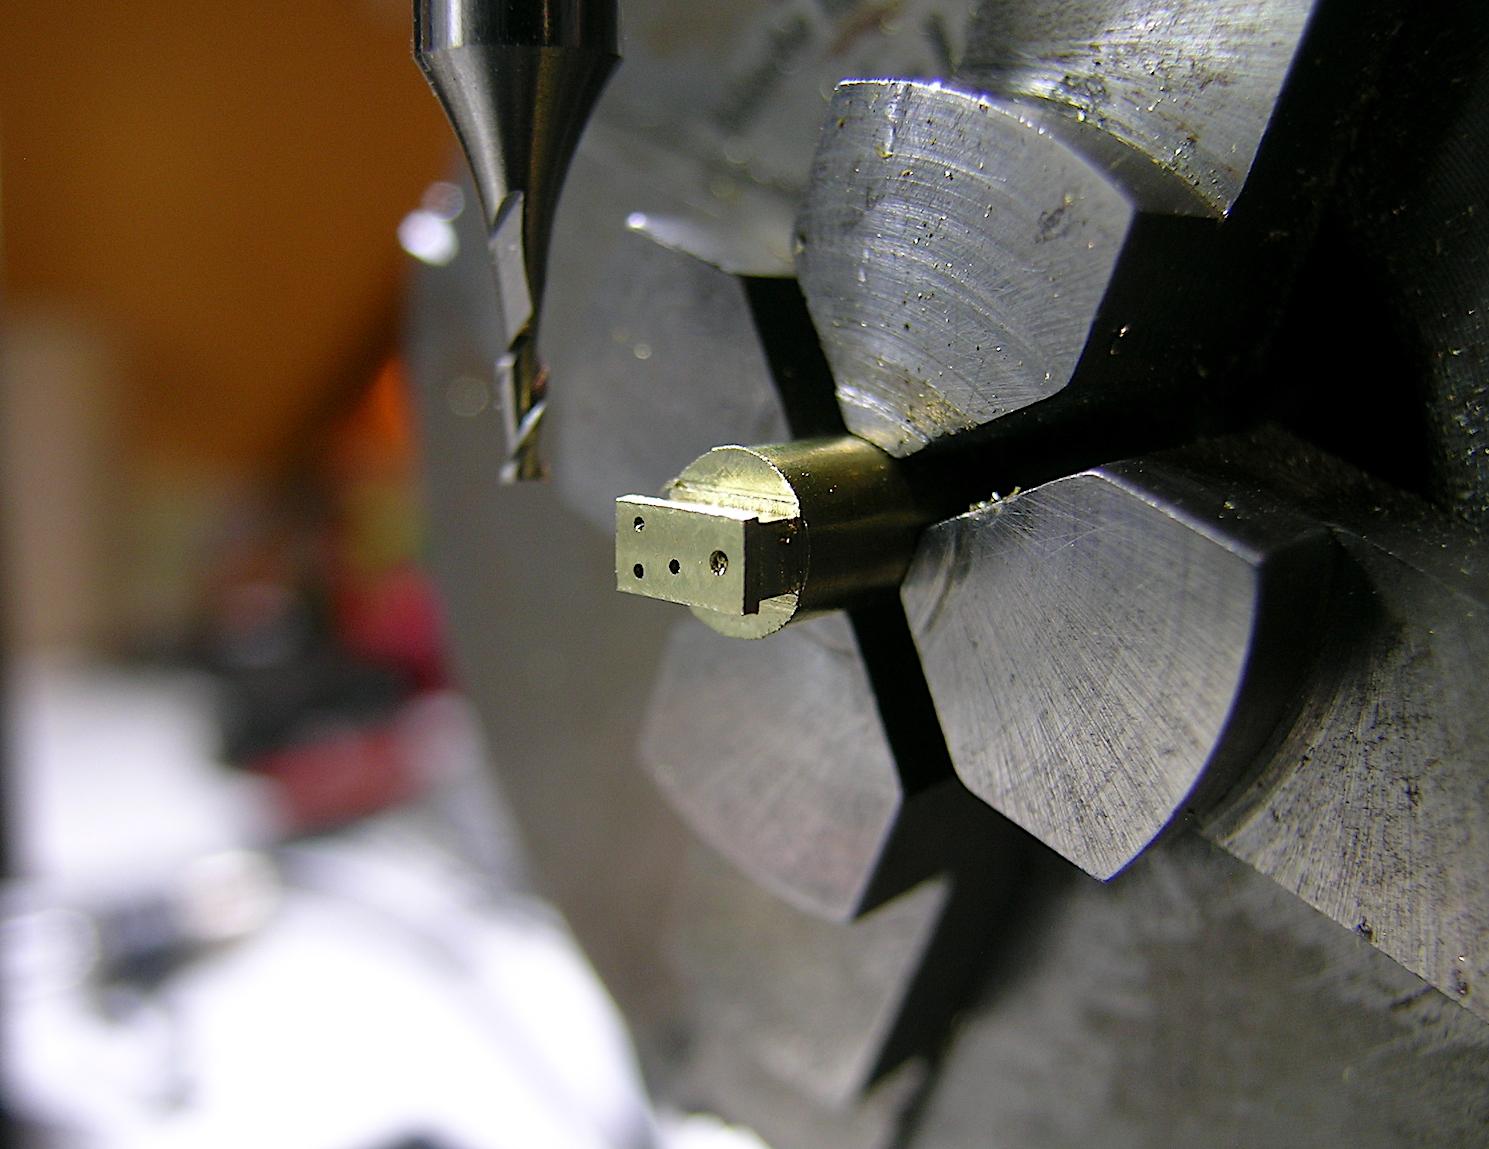
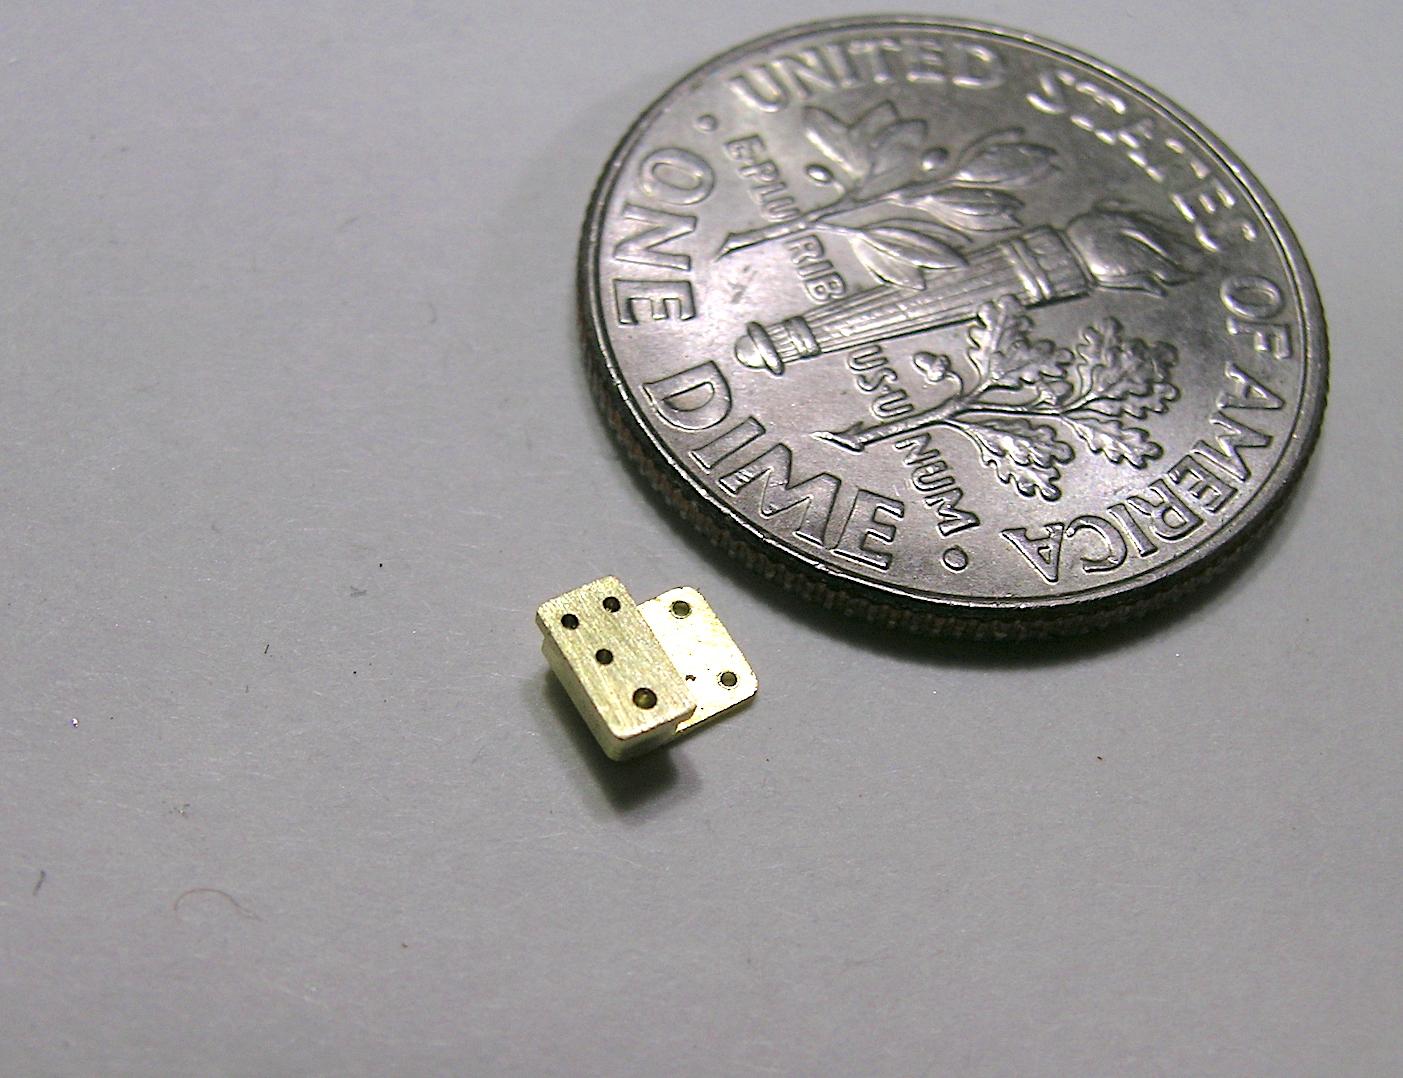
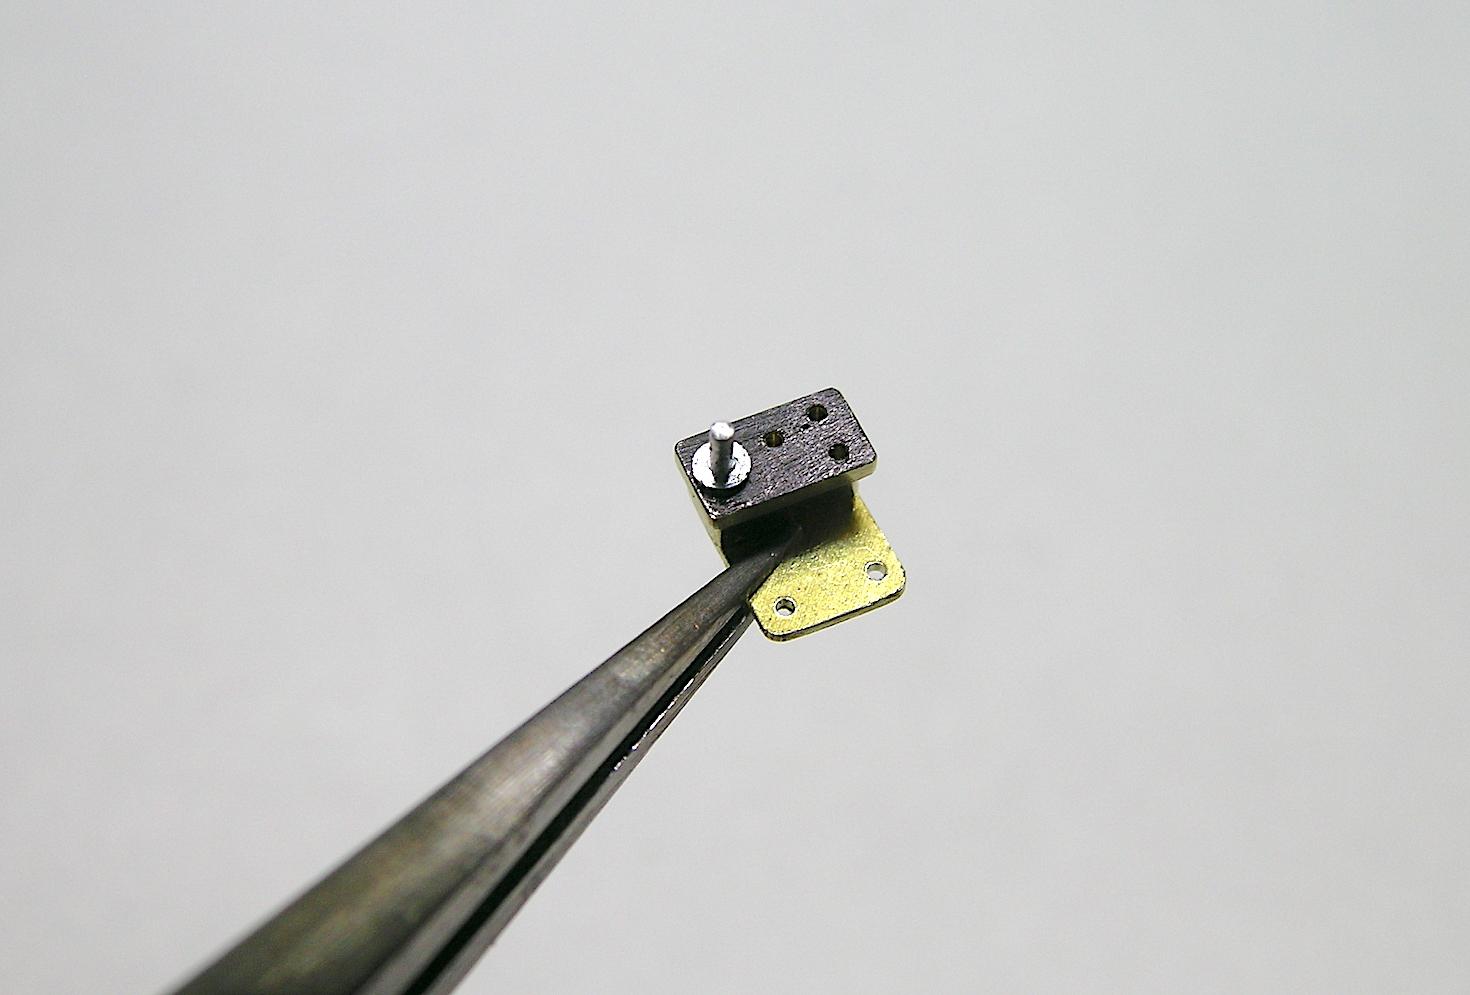
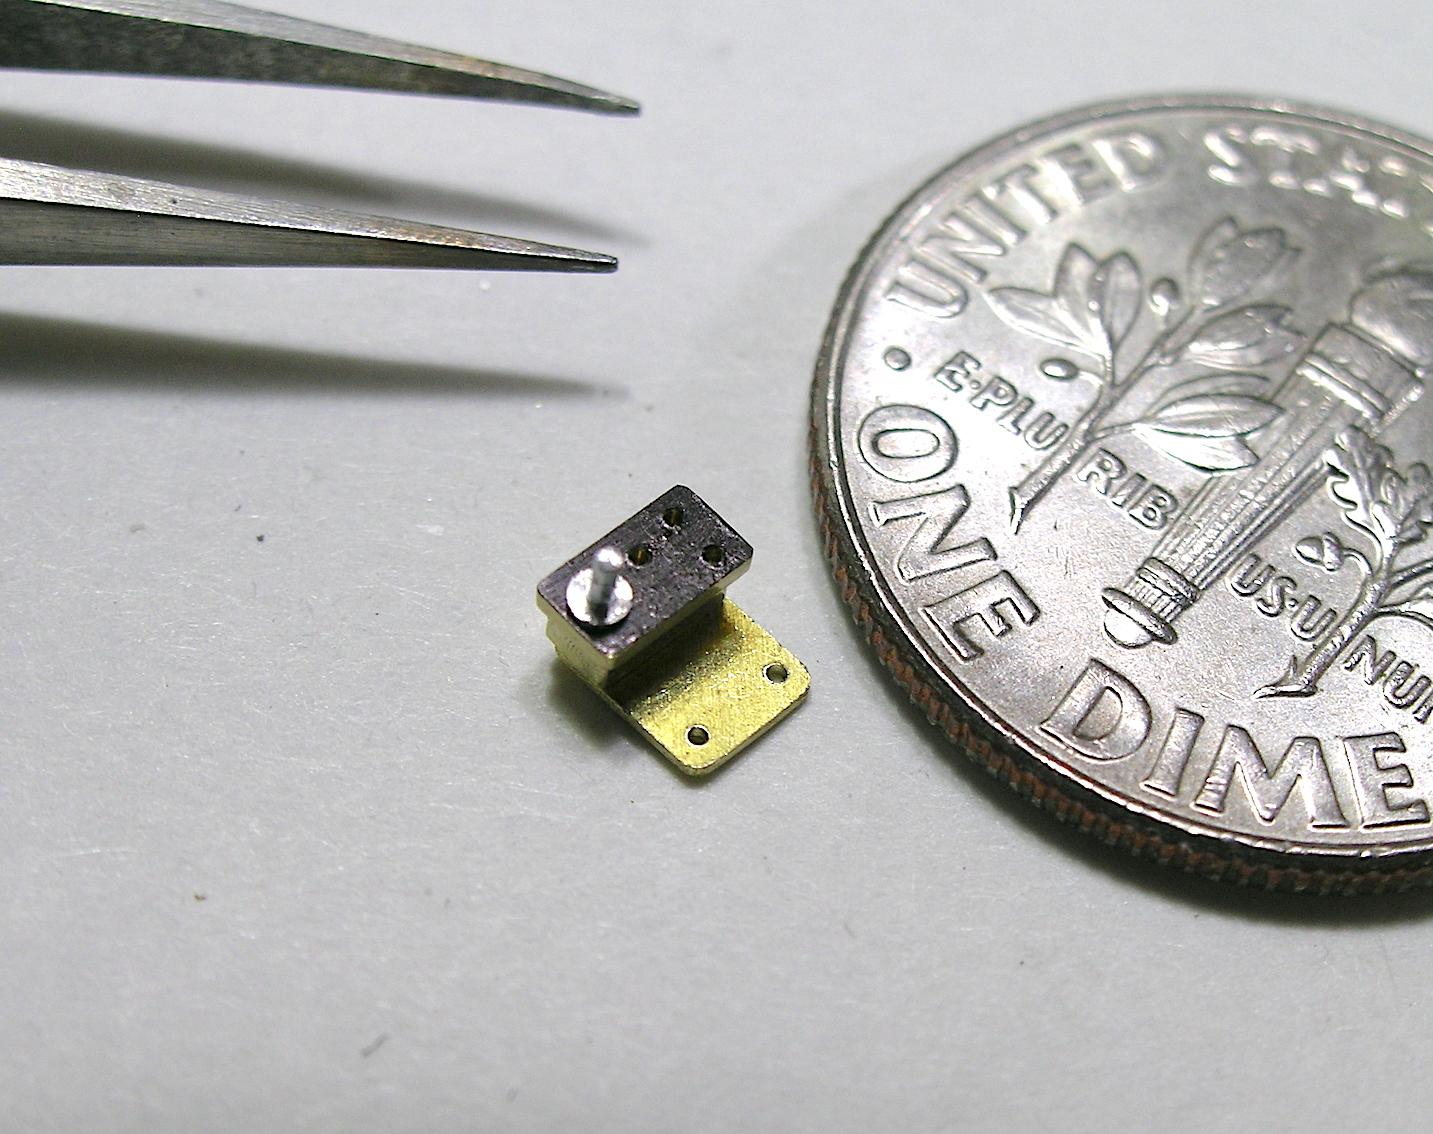
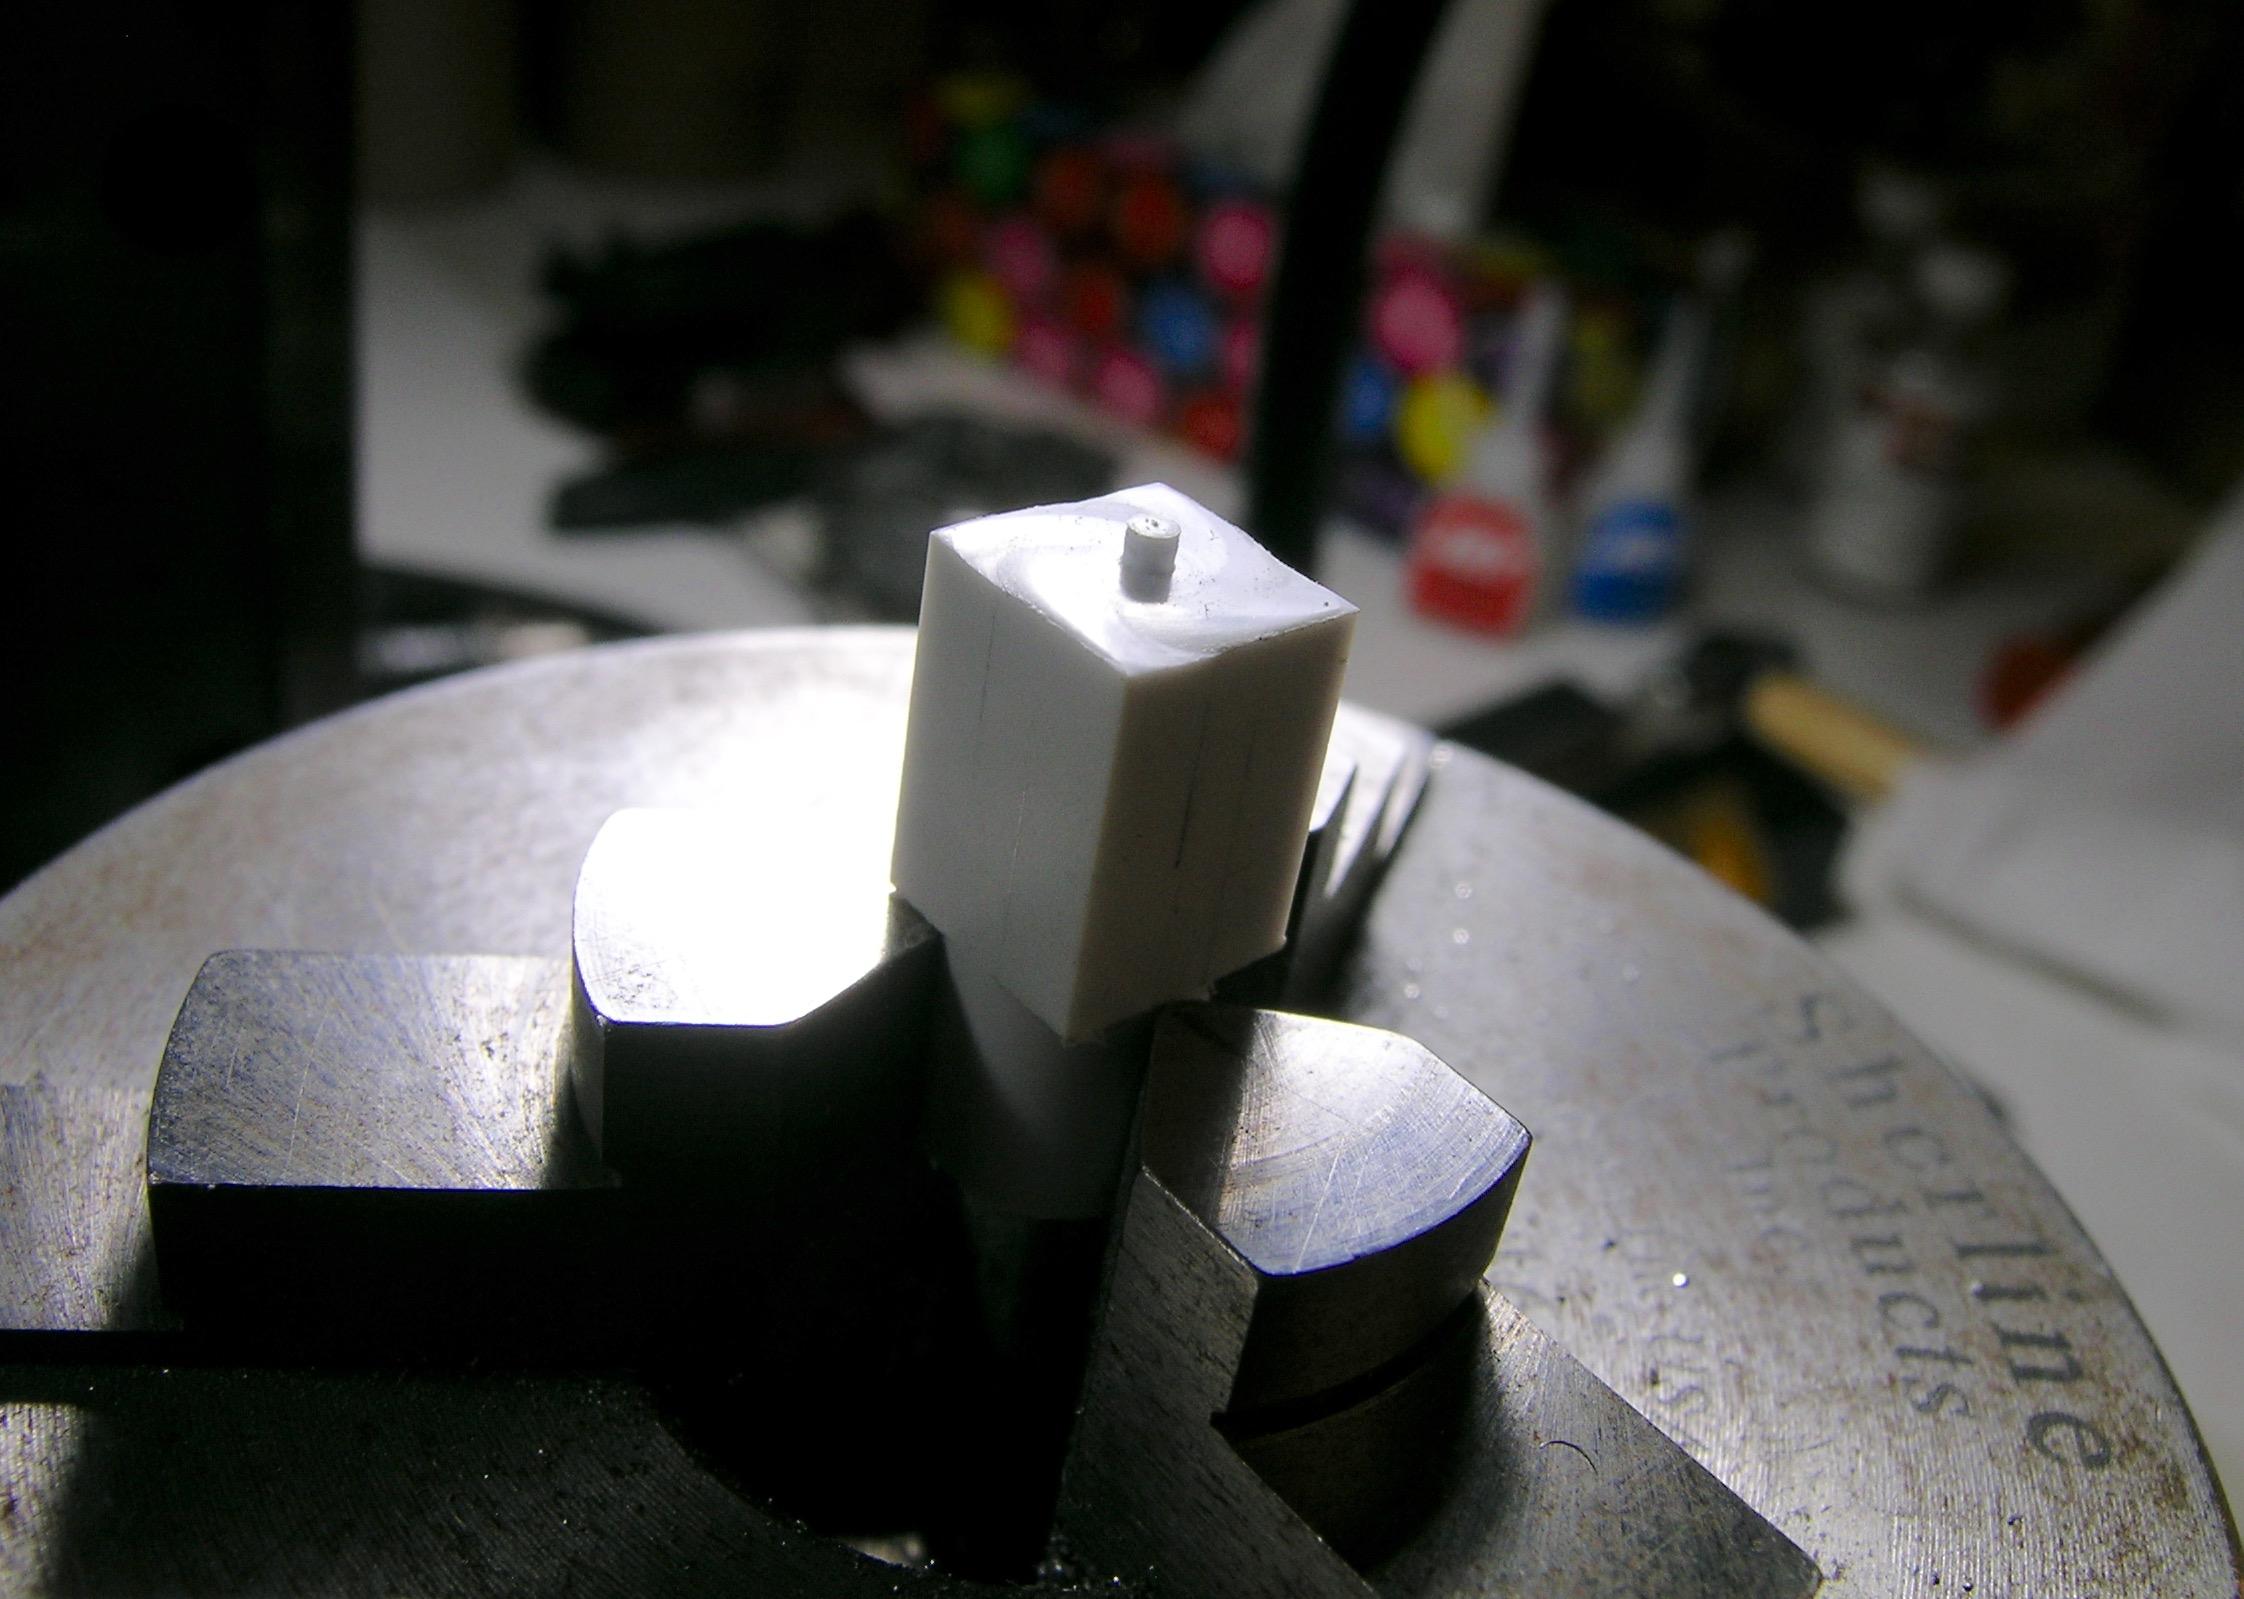
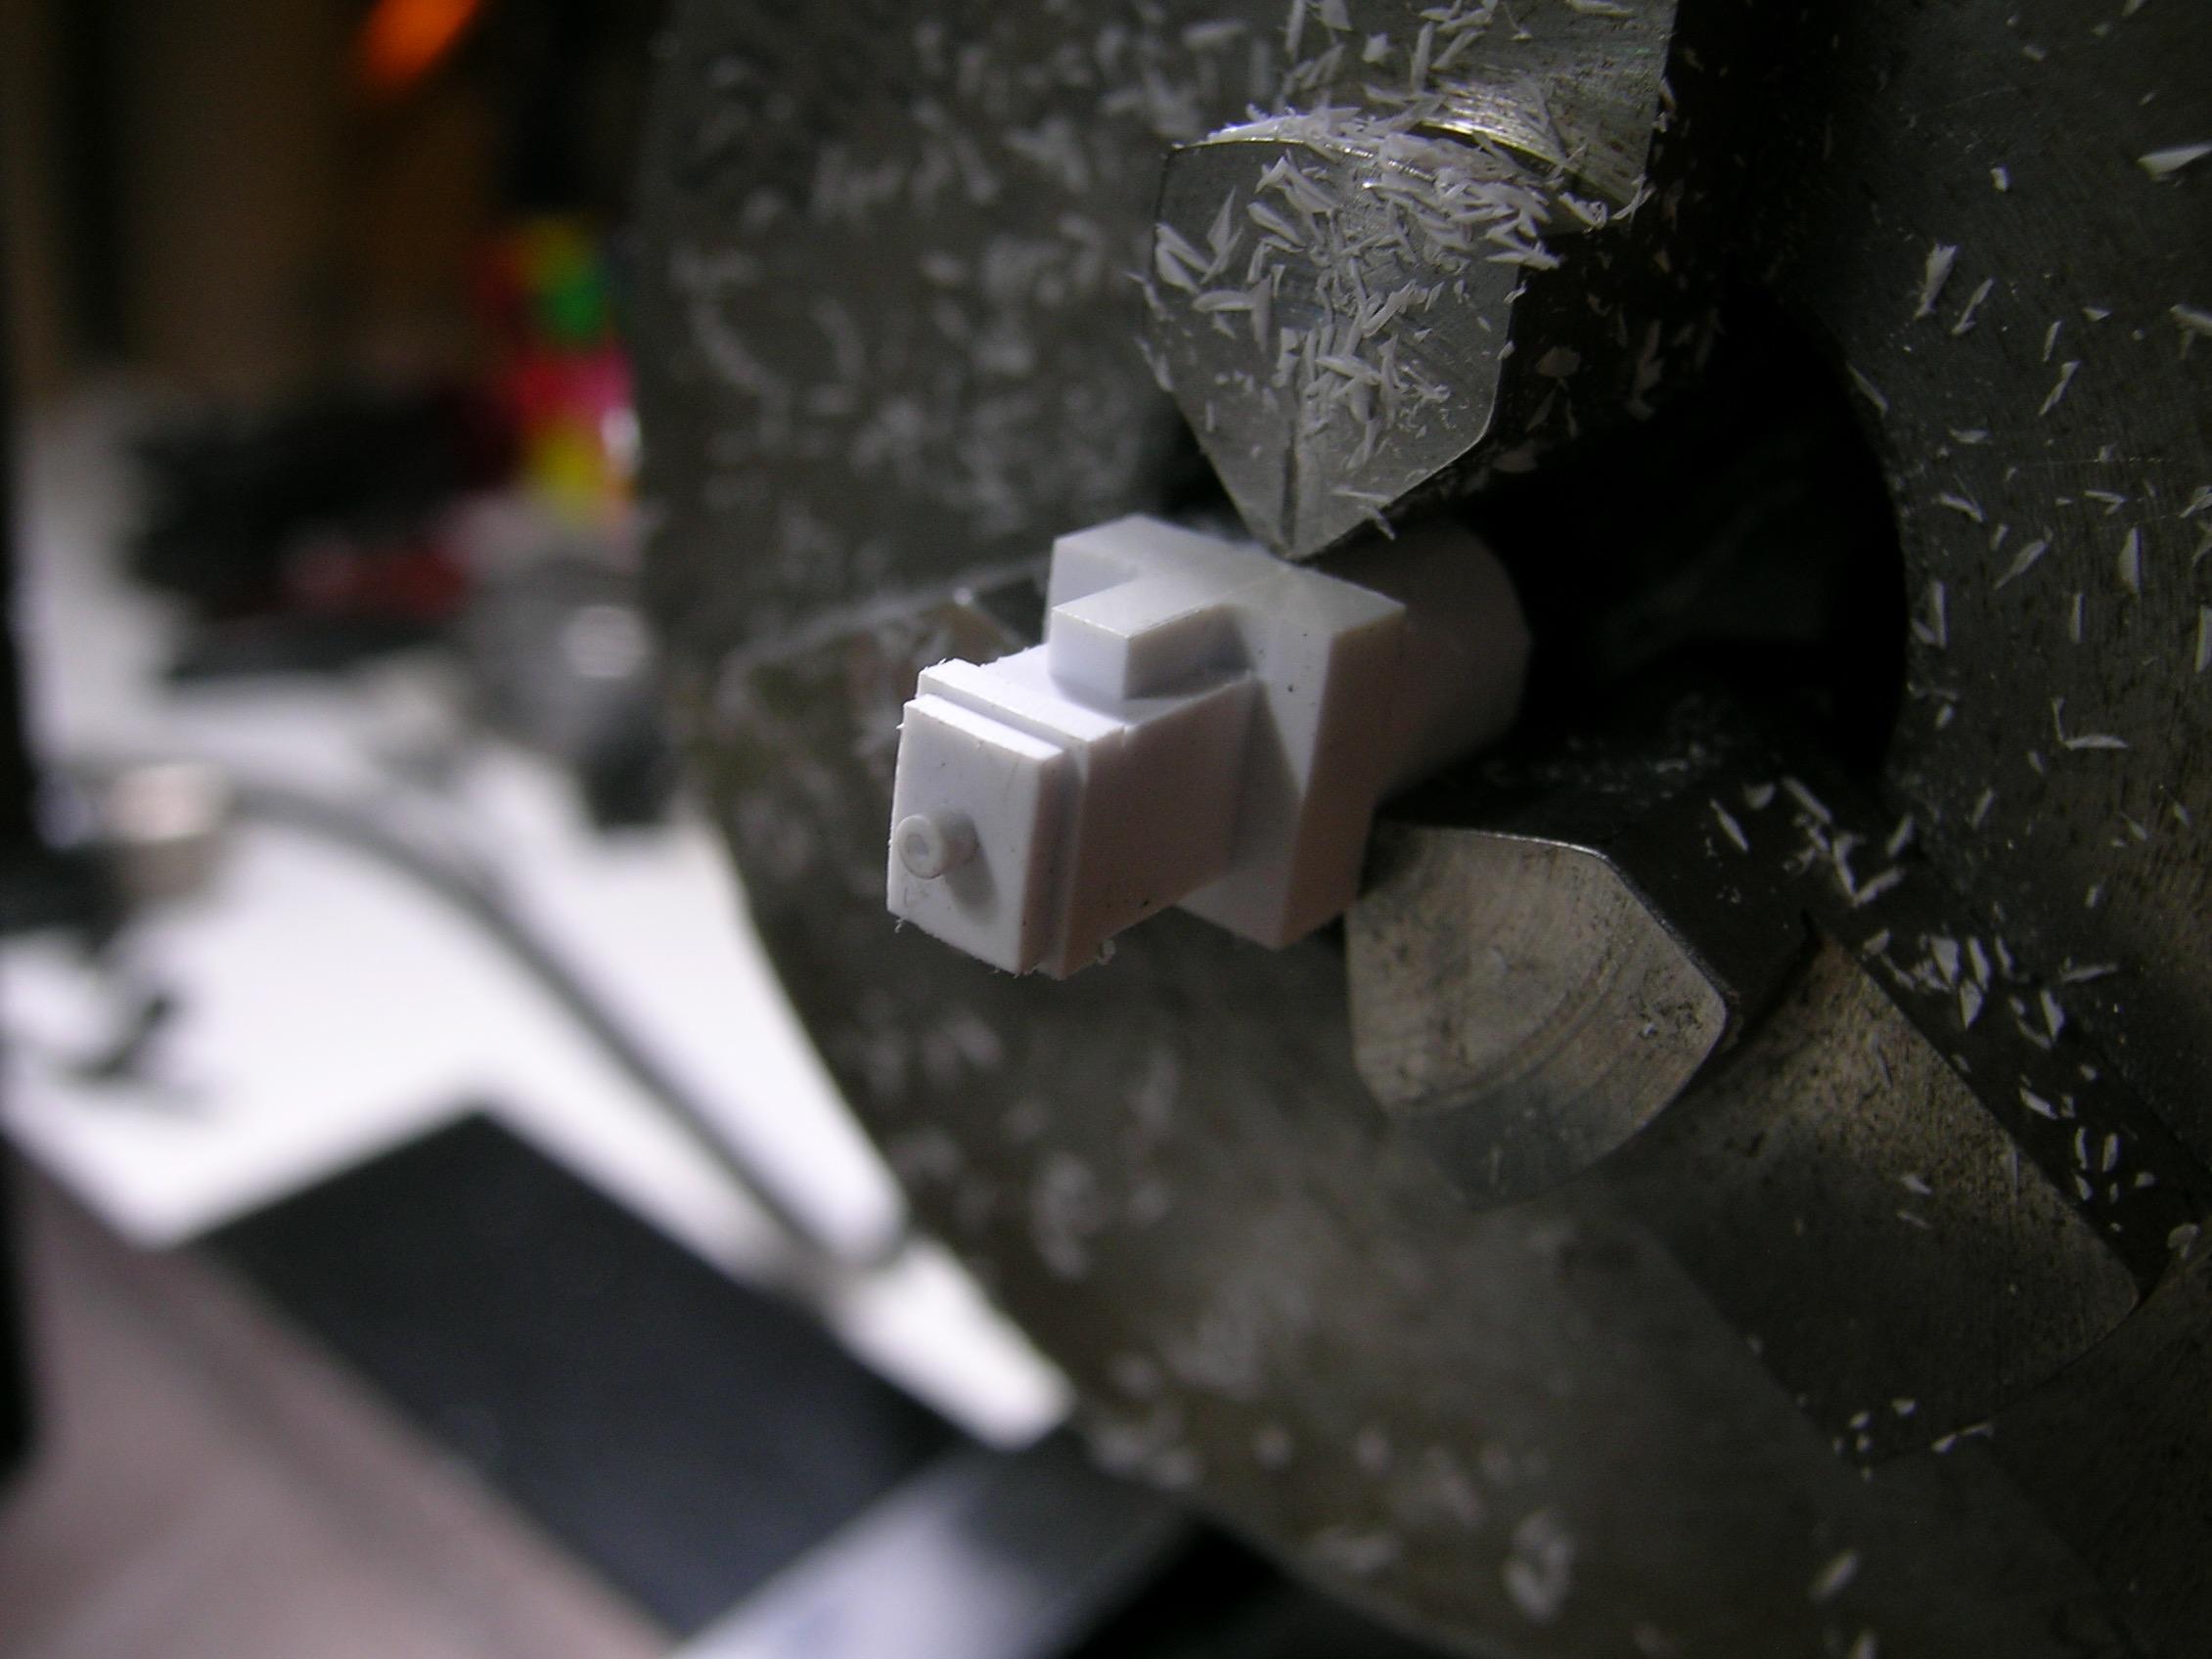
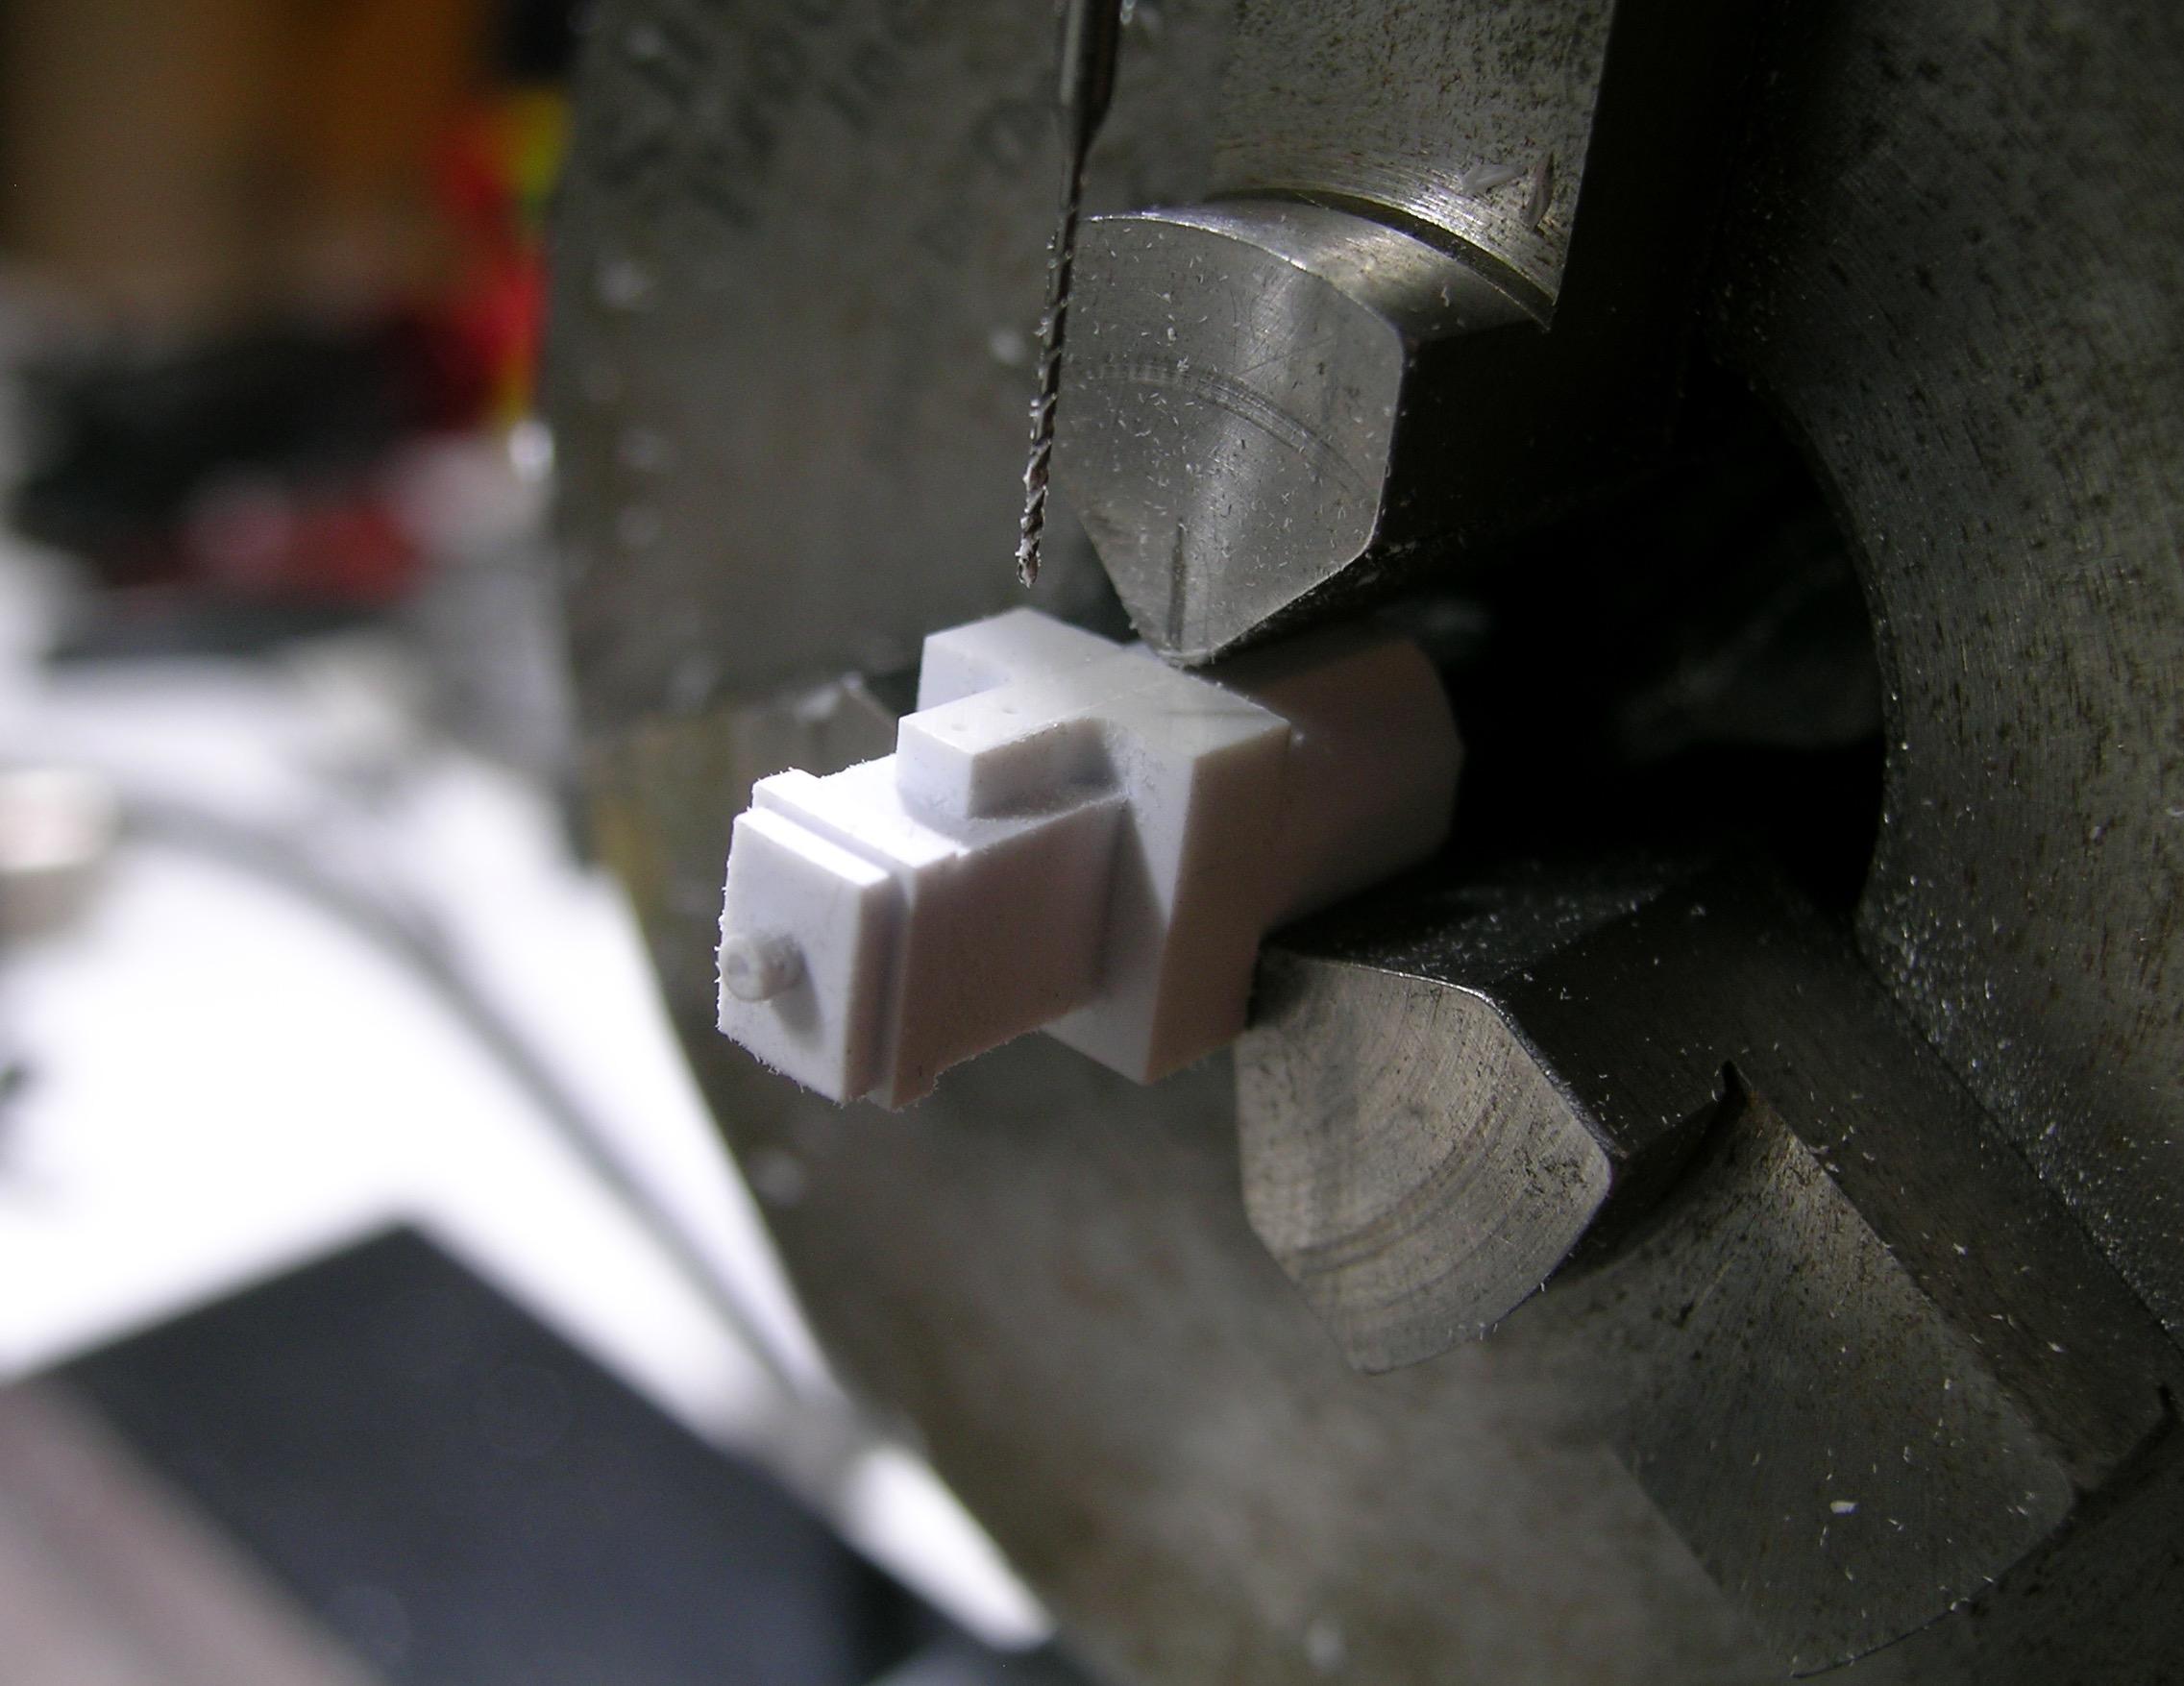
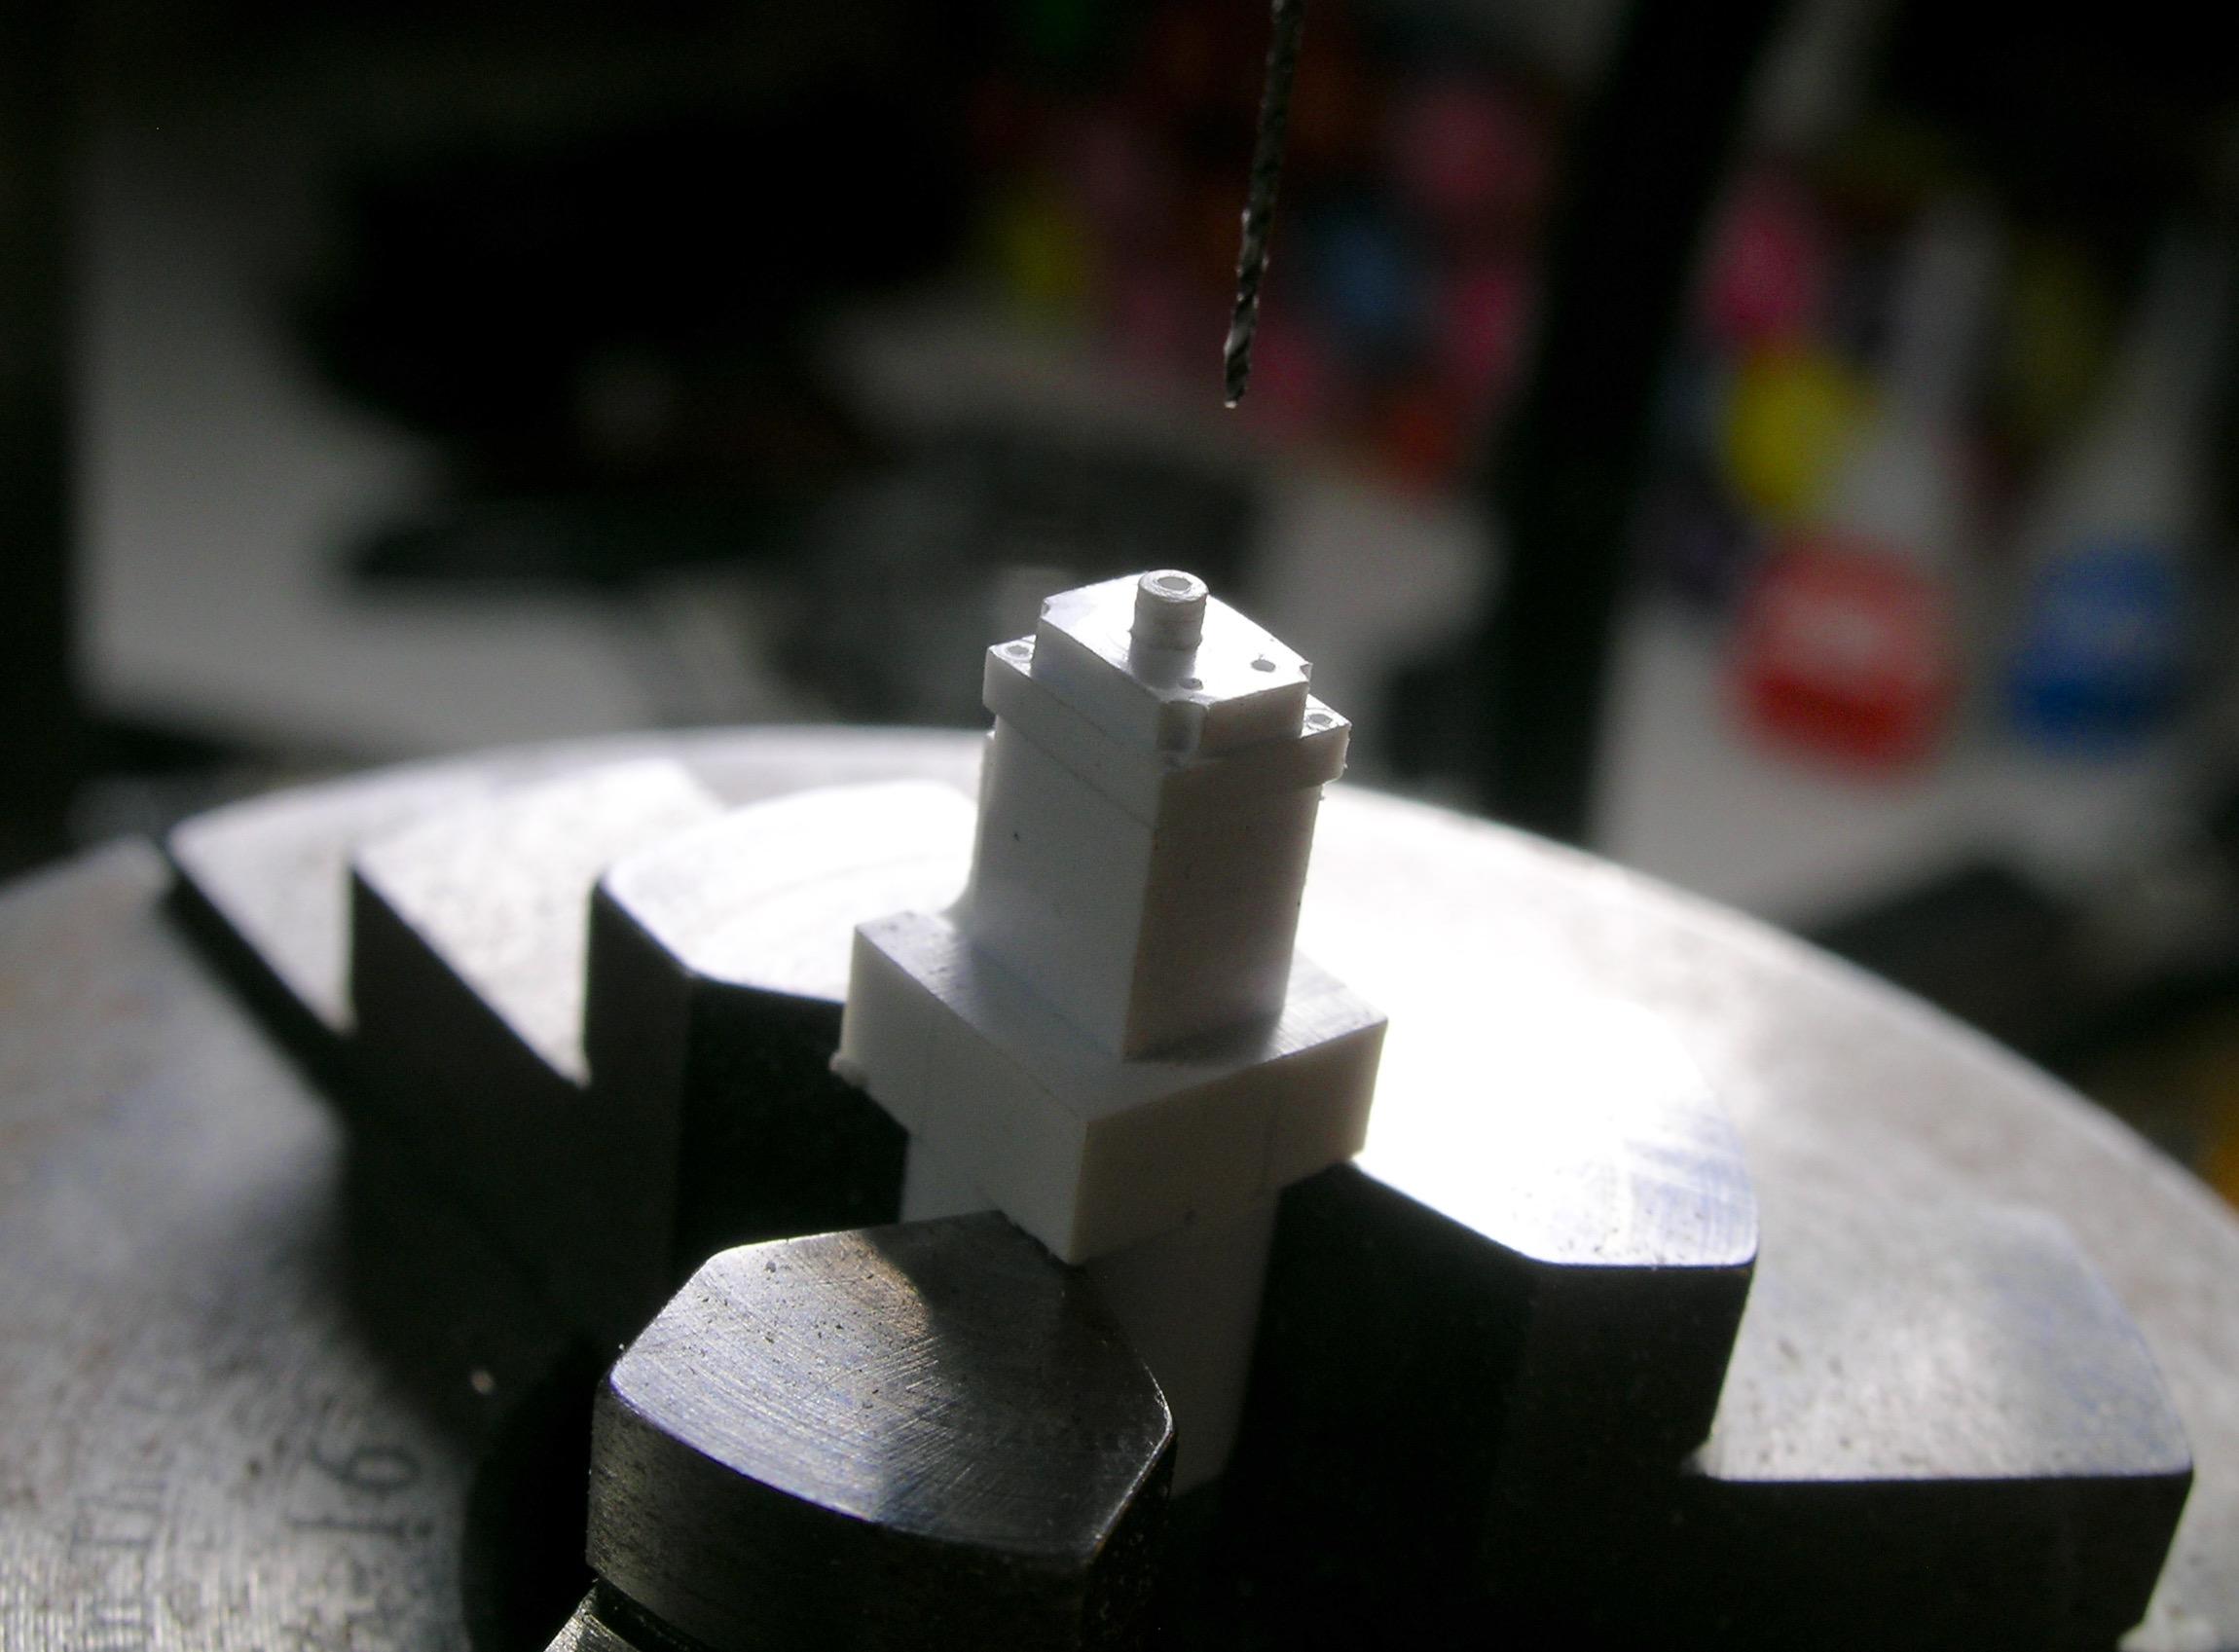
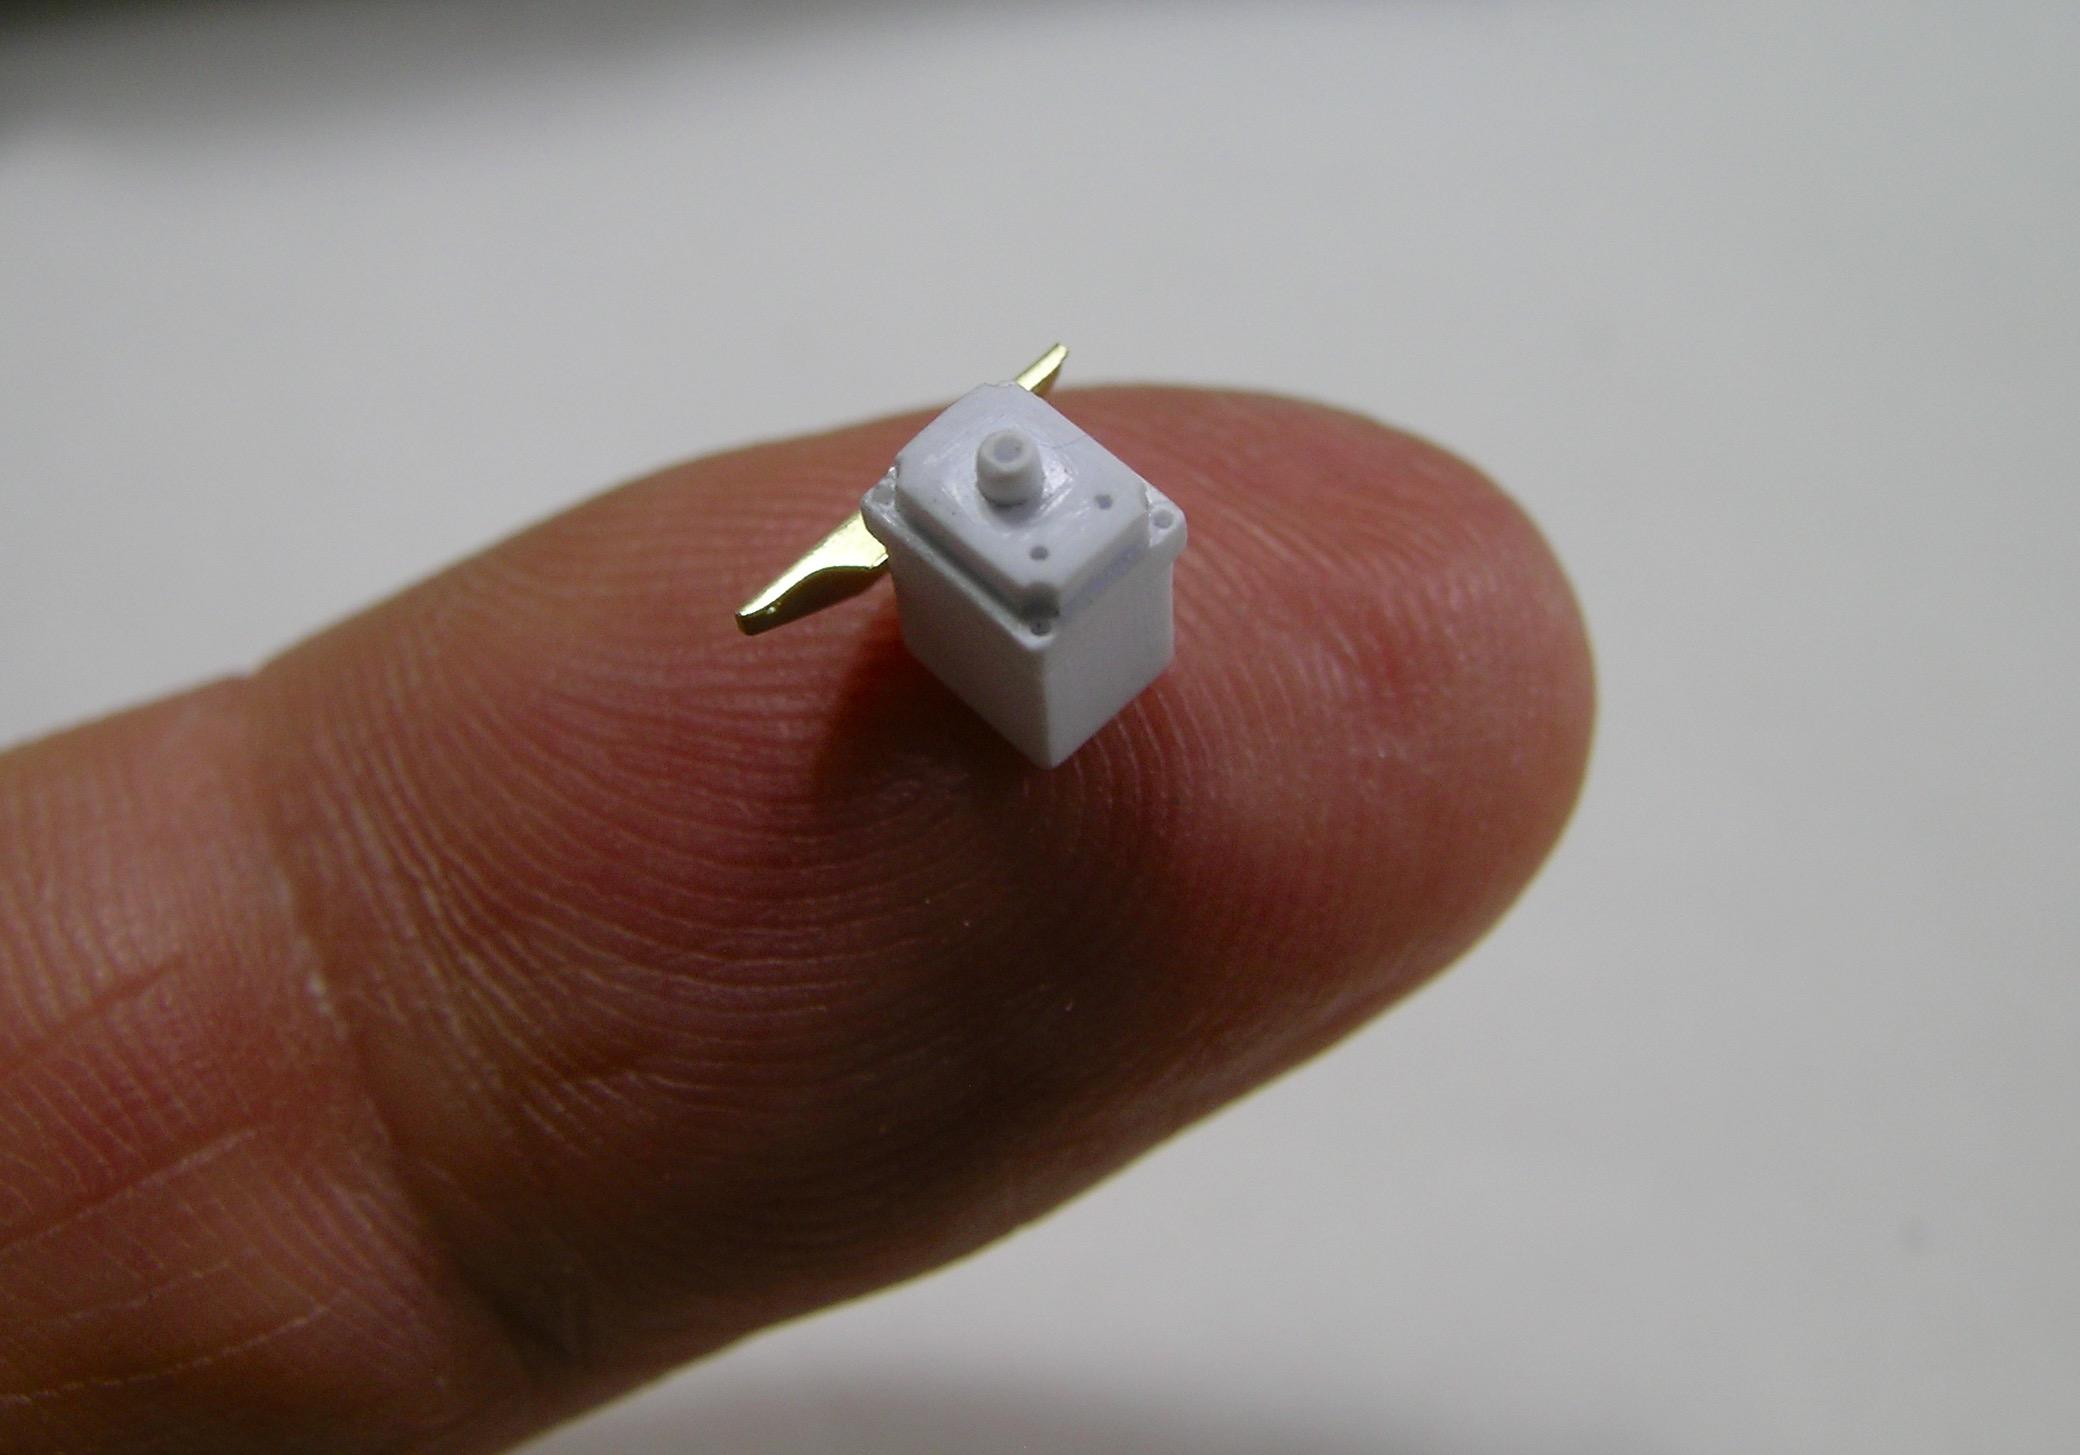
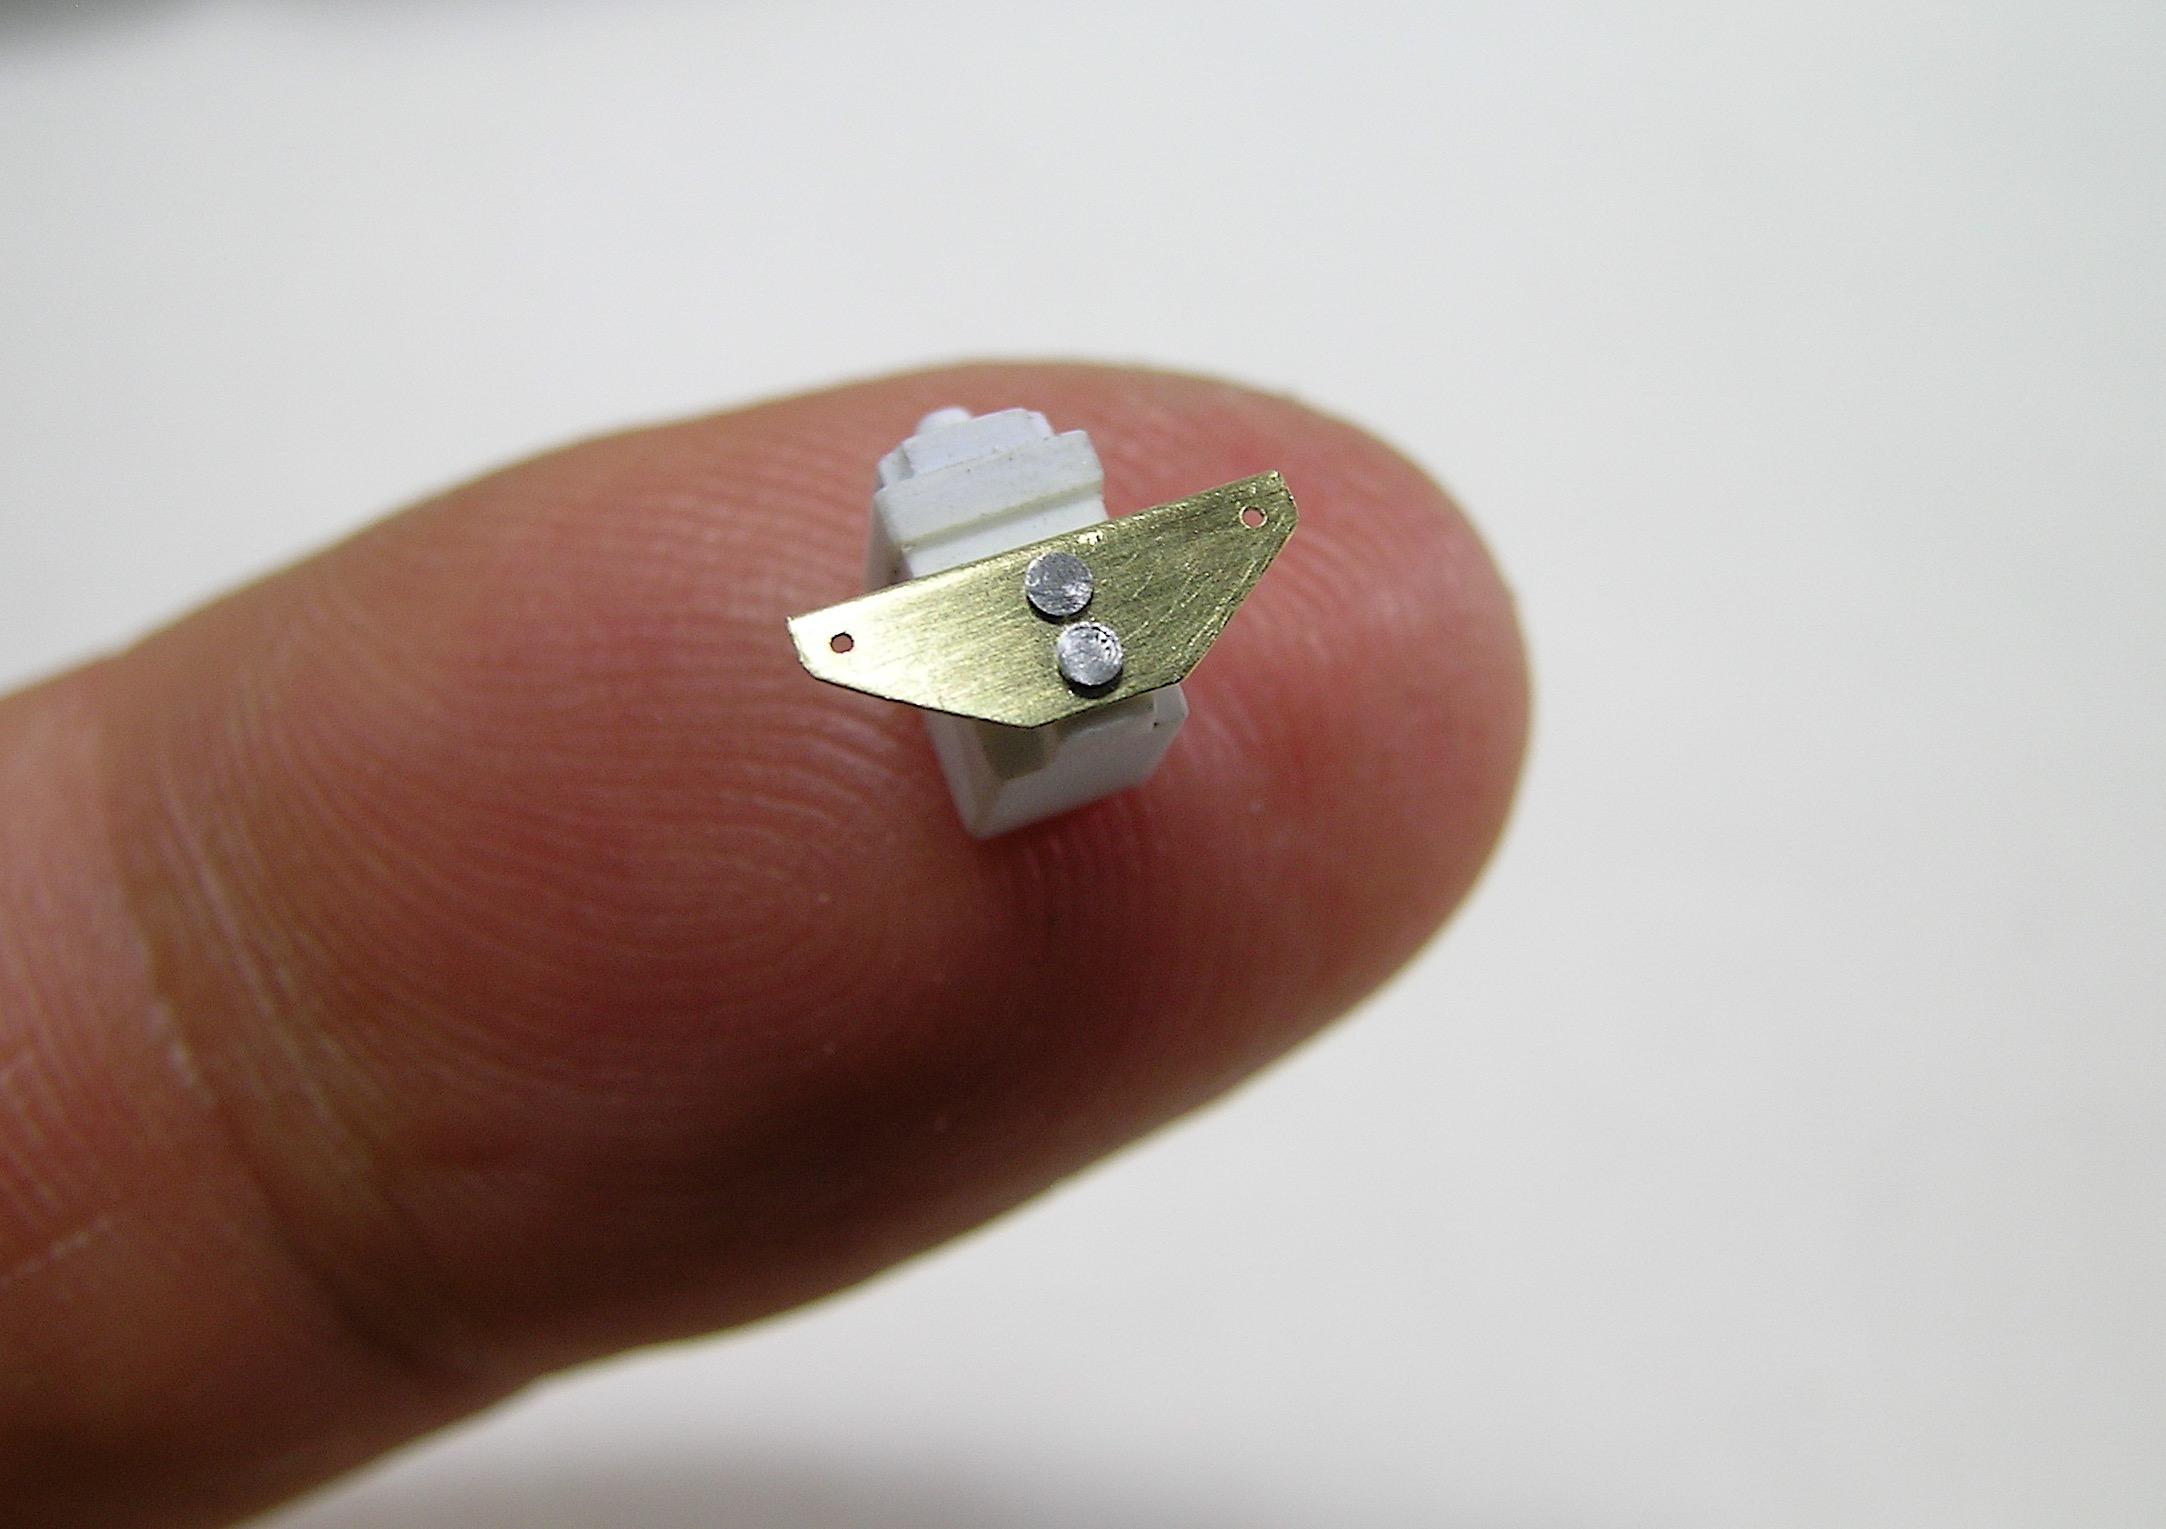
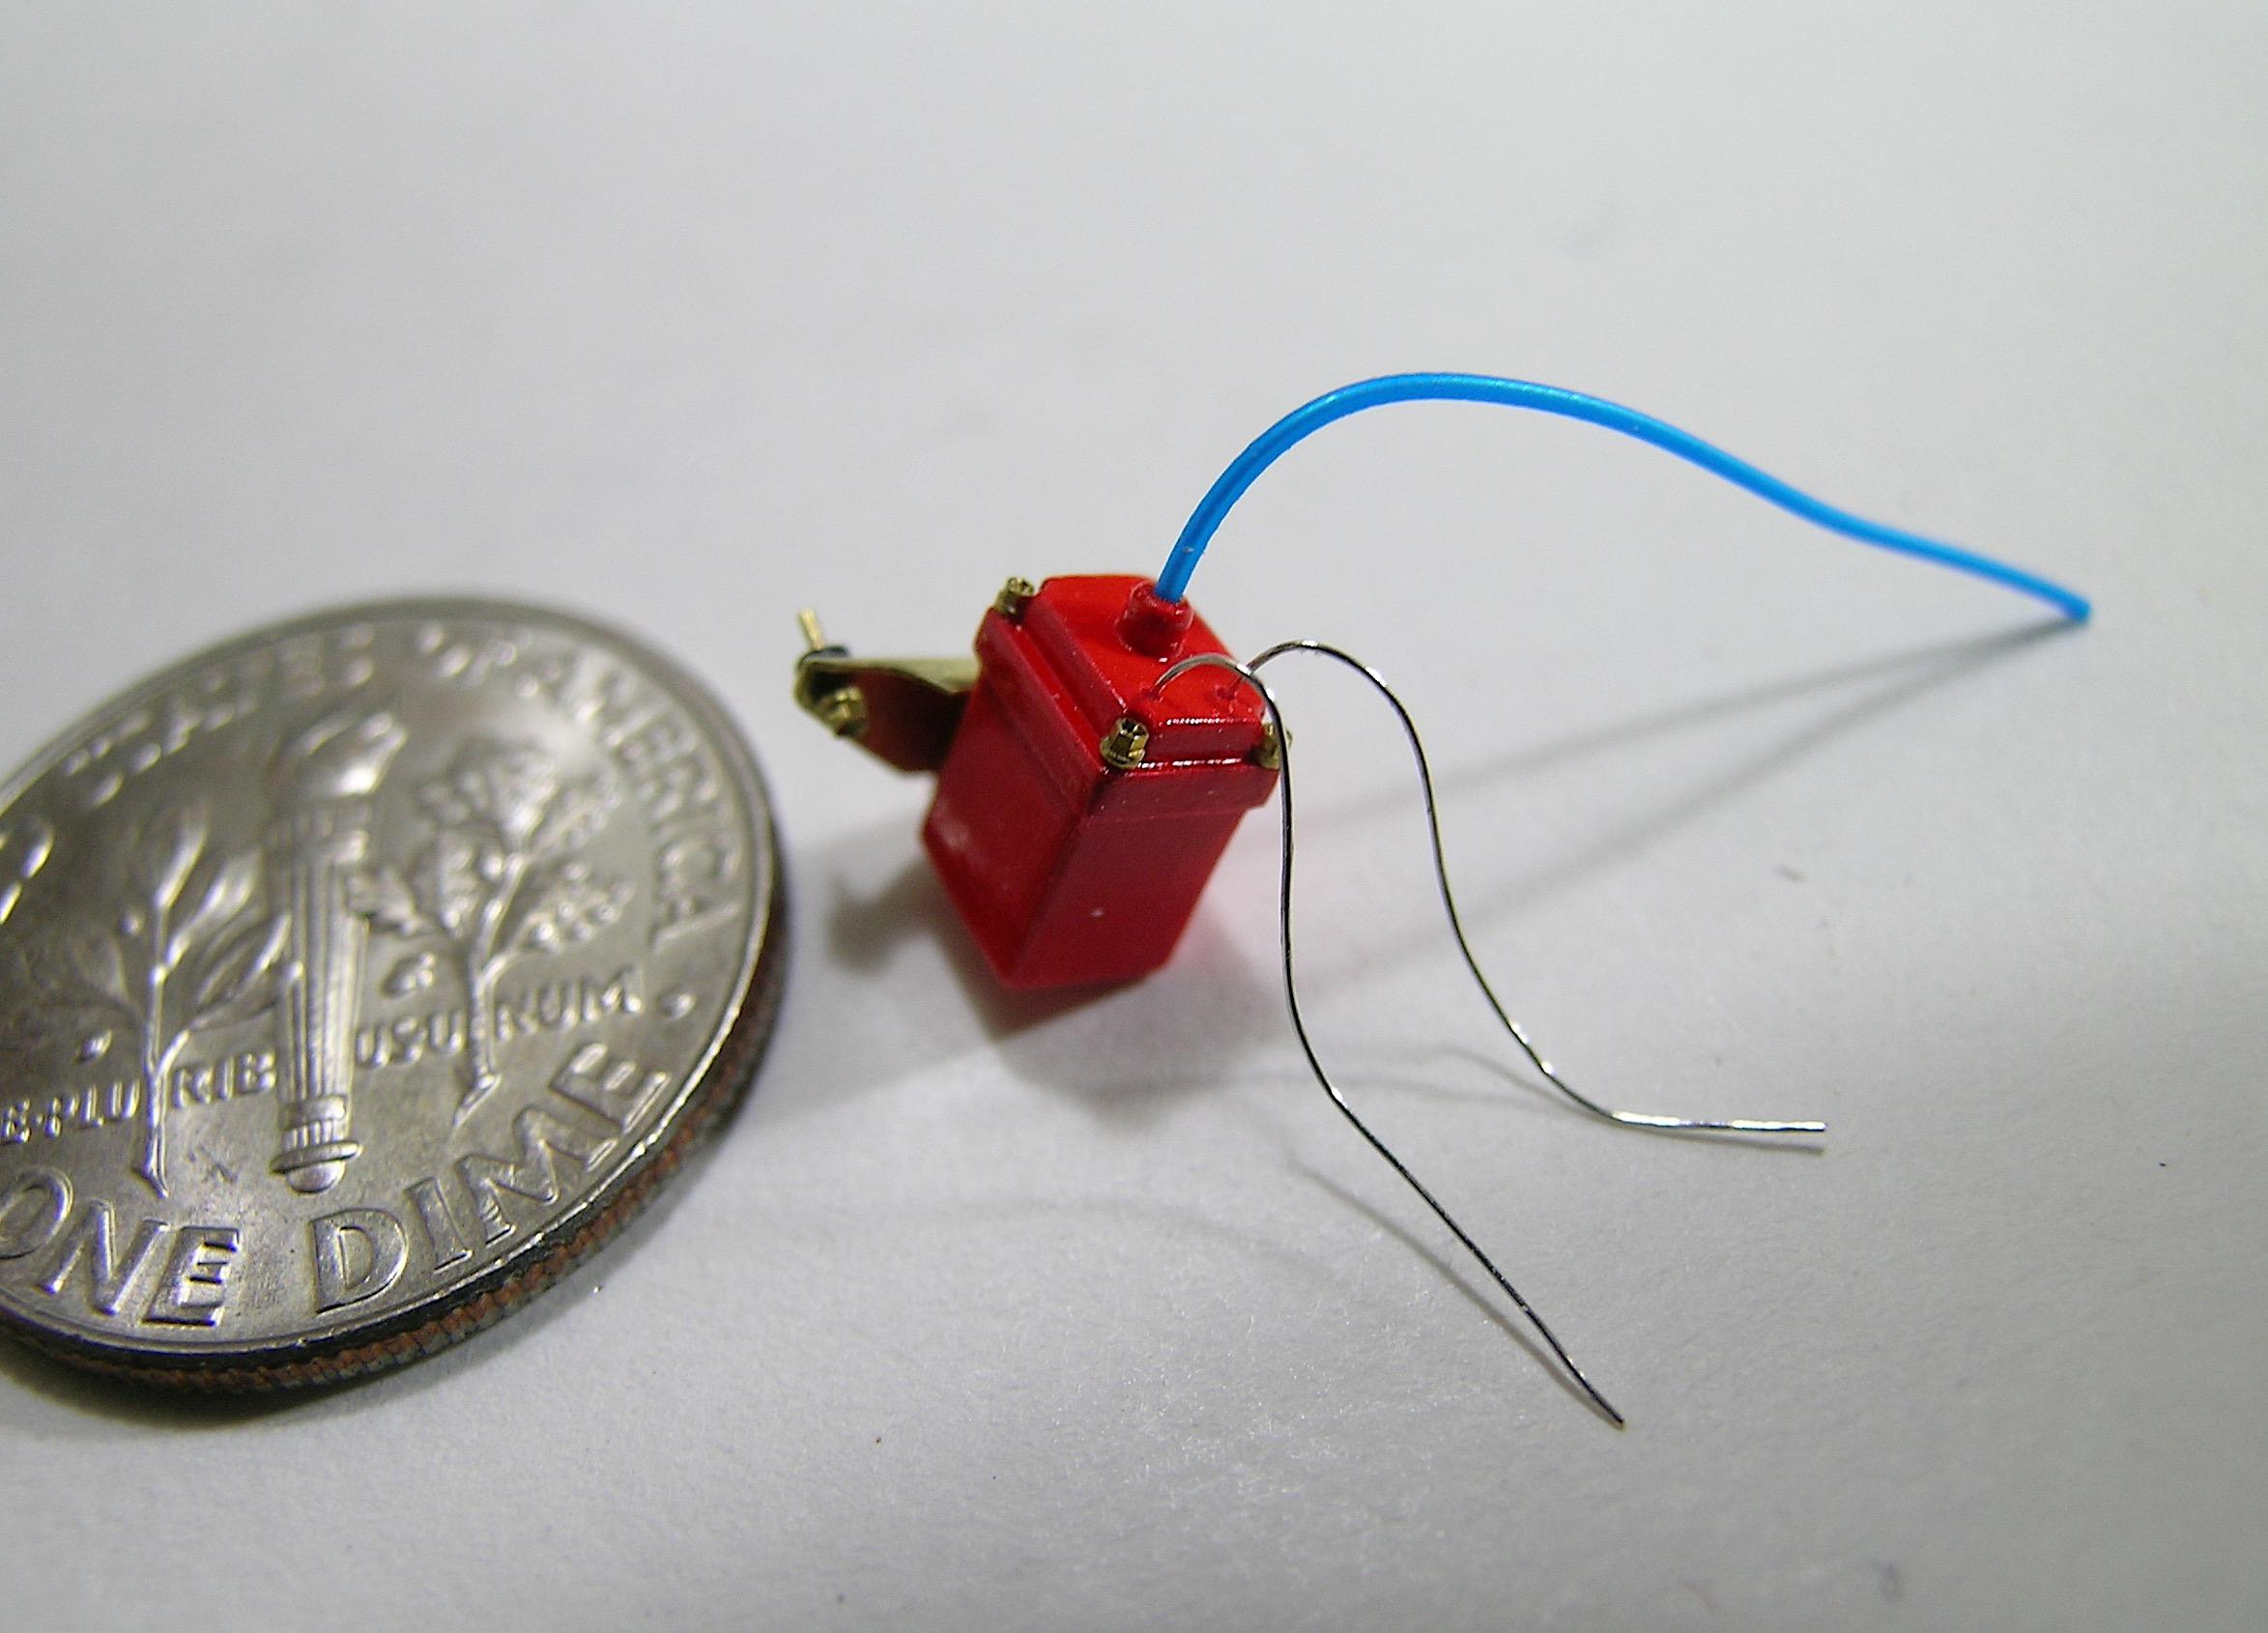
Hello everyone, As promised I'm posting the pictures of the little detail pieces made last week, I was supposed to do it yesterday but something came up so I'm doing it tonight. I hope to post some pictures of the engine compartment in the next few days showing all these little elements installed in their respective places, it seems that the under hood will be well filled in.... ? I am slowly but surely coming to the end of the fabrication of the parts, the final assembly is on the menu for the next step. Francis MSD box in the rotary table. Final part separated from the aluminum rod. Final part anodized in red. Front brake line locking solenoid. Final part with wiring. View from another angle. Starter relay in the rotary table. At a more advanced stage, the relay and the support are made of brass. I added an aluminum terminal. Relay completed next to the big dime.
-
In the same vein: Remember that you were born as dust and that you will return to dust! Amen. ?
-
Claude my friend... you are my hero! I have to say I'm not a VW fan but this thing is so cool, you got me hooked on it and I can only say bravo again (and I have a feeling it's far from over...)! Your imagination is limitless and nothing is lost from your spare parts bin, it seems infinite... ? I see that salt is just as devastating in the south as it is in the north but I have no doubt that our southern neighbor's is doing it for a good cause! Obviously, you still have a lot of gas in the tank my friend!!! ?
-
WOW, amazing work here, this is my kind of project, the level of craftsmanship is absolutely fantastic! I'll be back to enjoy the rest of this. ?
-
64 Dodge D100 Pickup Pro Street
AmericanMuscleFan replied to AmericanMuscleFan's topic in WIP: Drag Racing Models
Thank you Trevor, I appreciate your support sir! I have more new photos in the bank and will post them soon, it's rare that I have a lot of bench time, it feels good and it makes the project progress! It will start to look like something more concrete in the next few days if everything goes well... ? -
64 Dodge D100 Pickup Pro Street
AmericanMuscleFan replied to AmericanMuscleFan's topic in WIP: Drag Racing Models
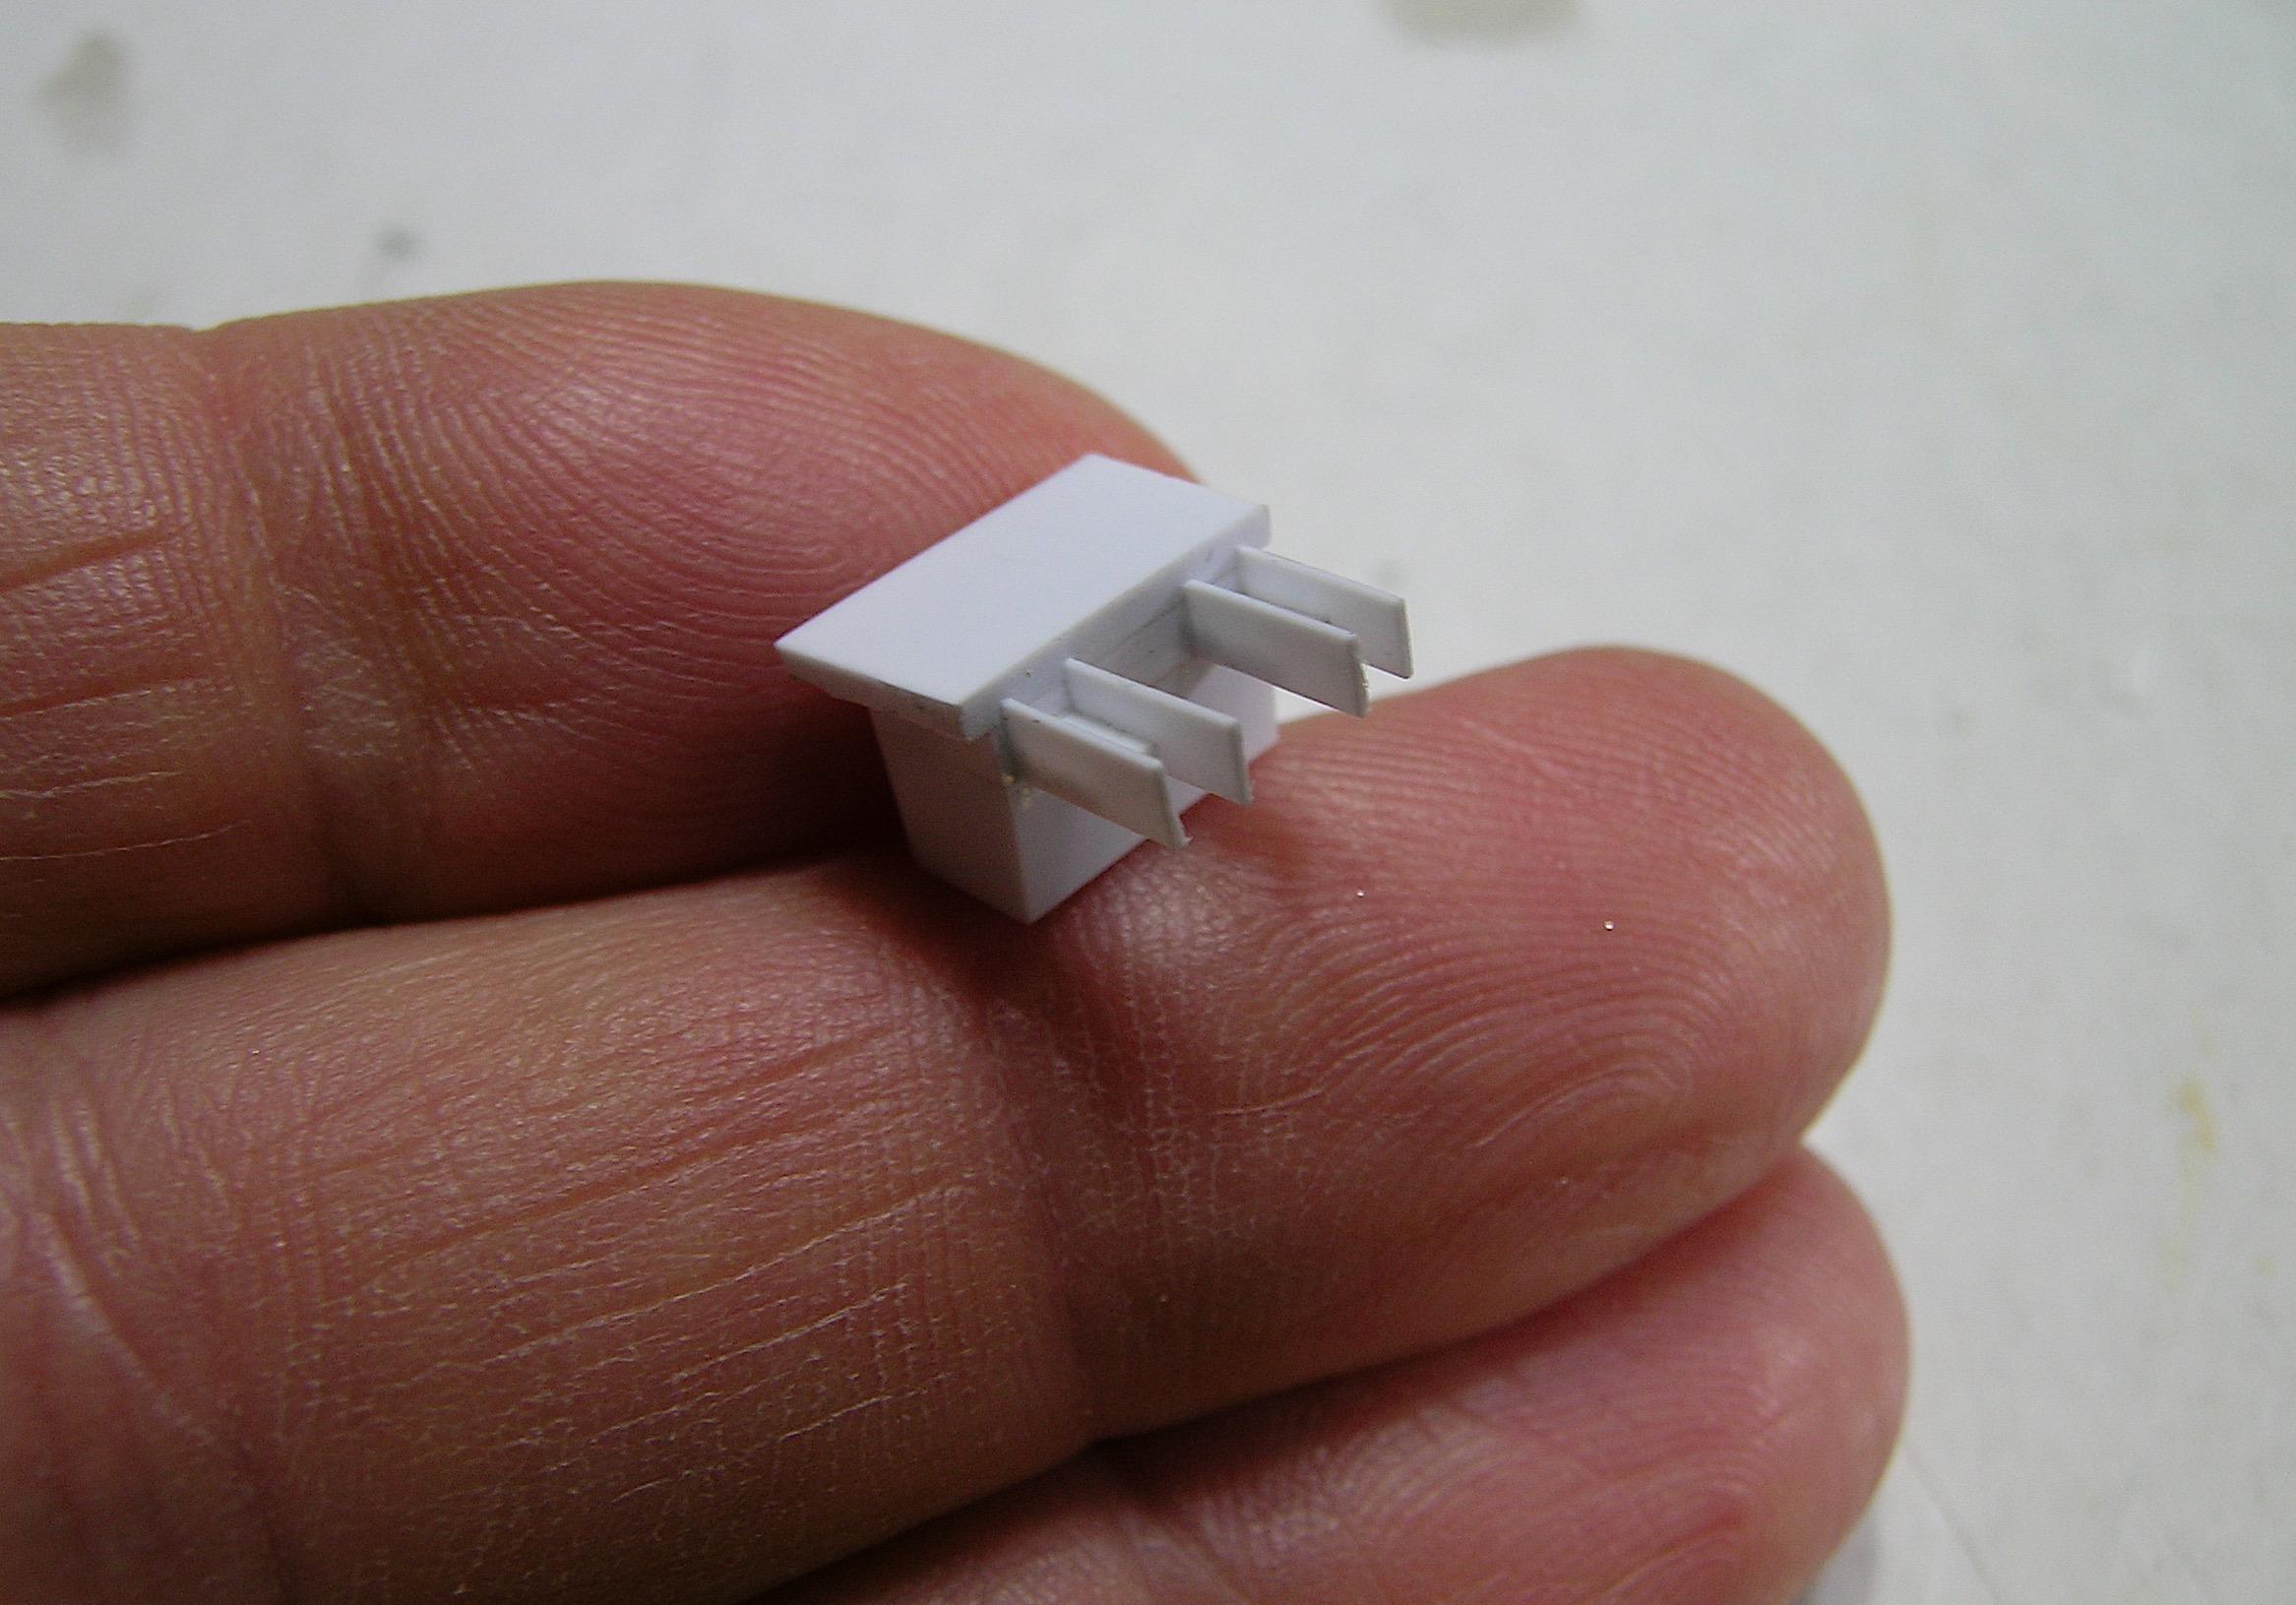
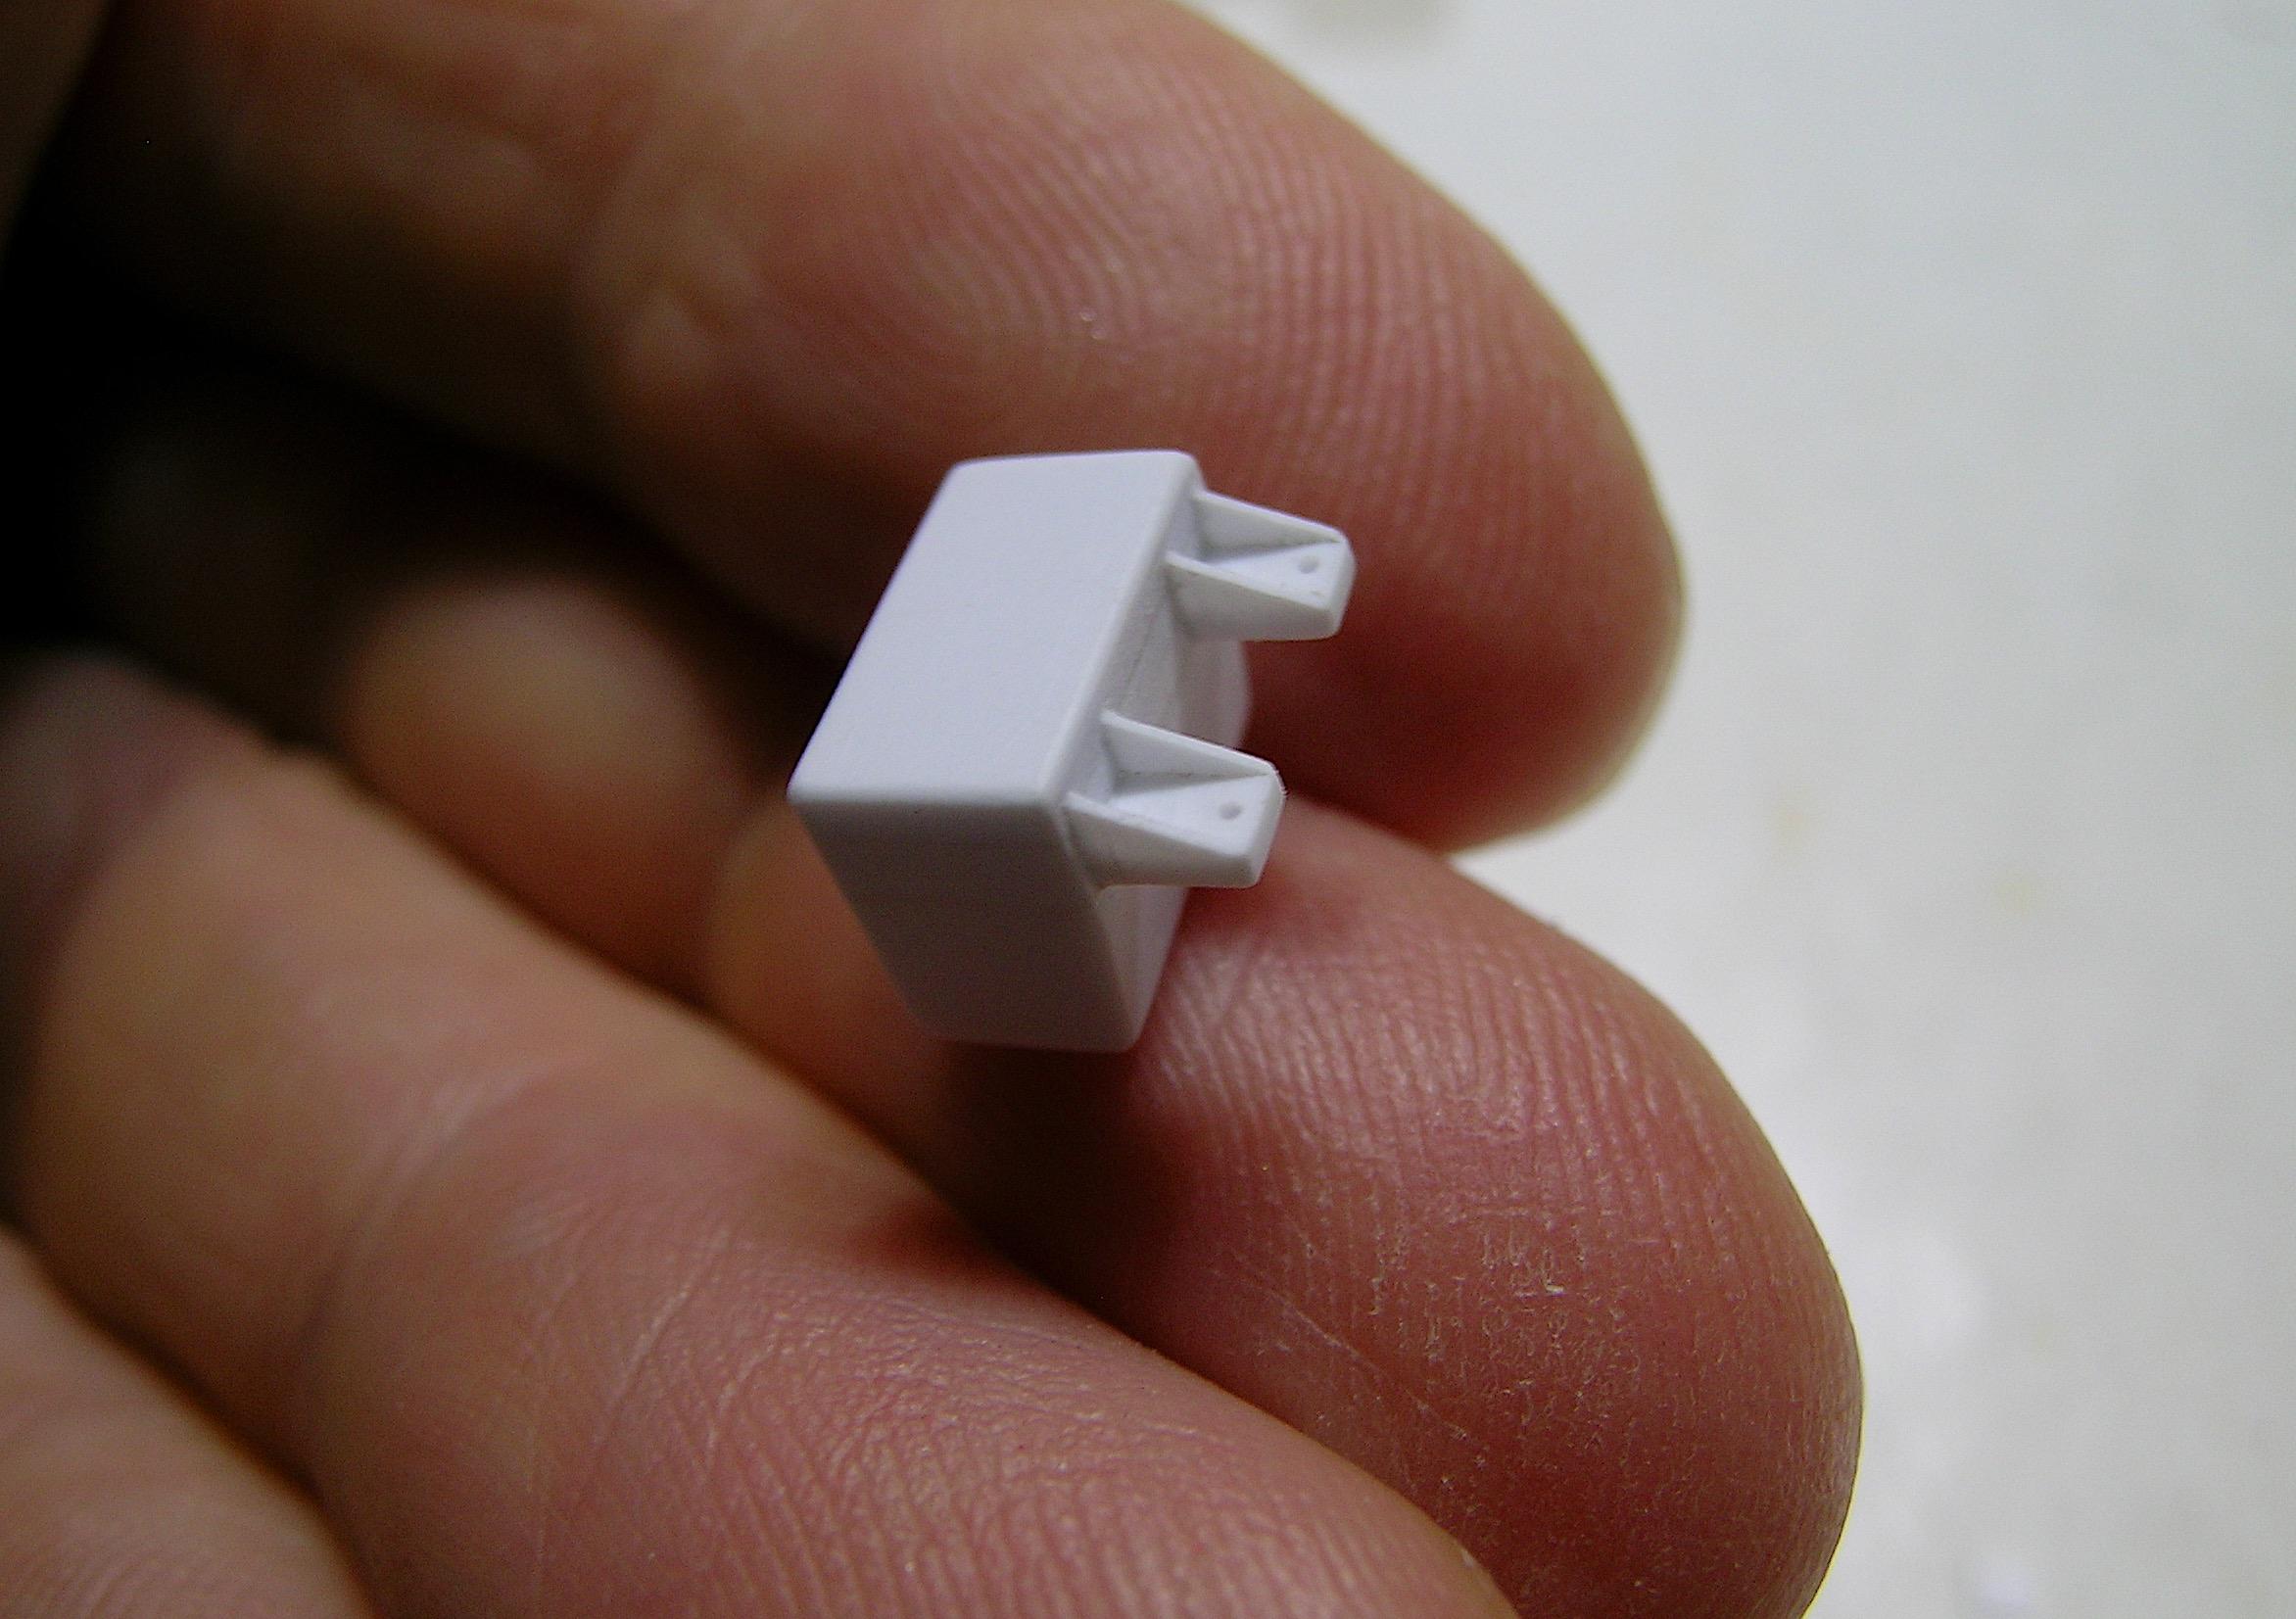
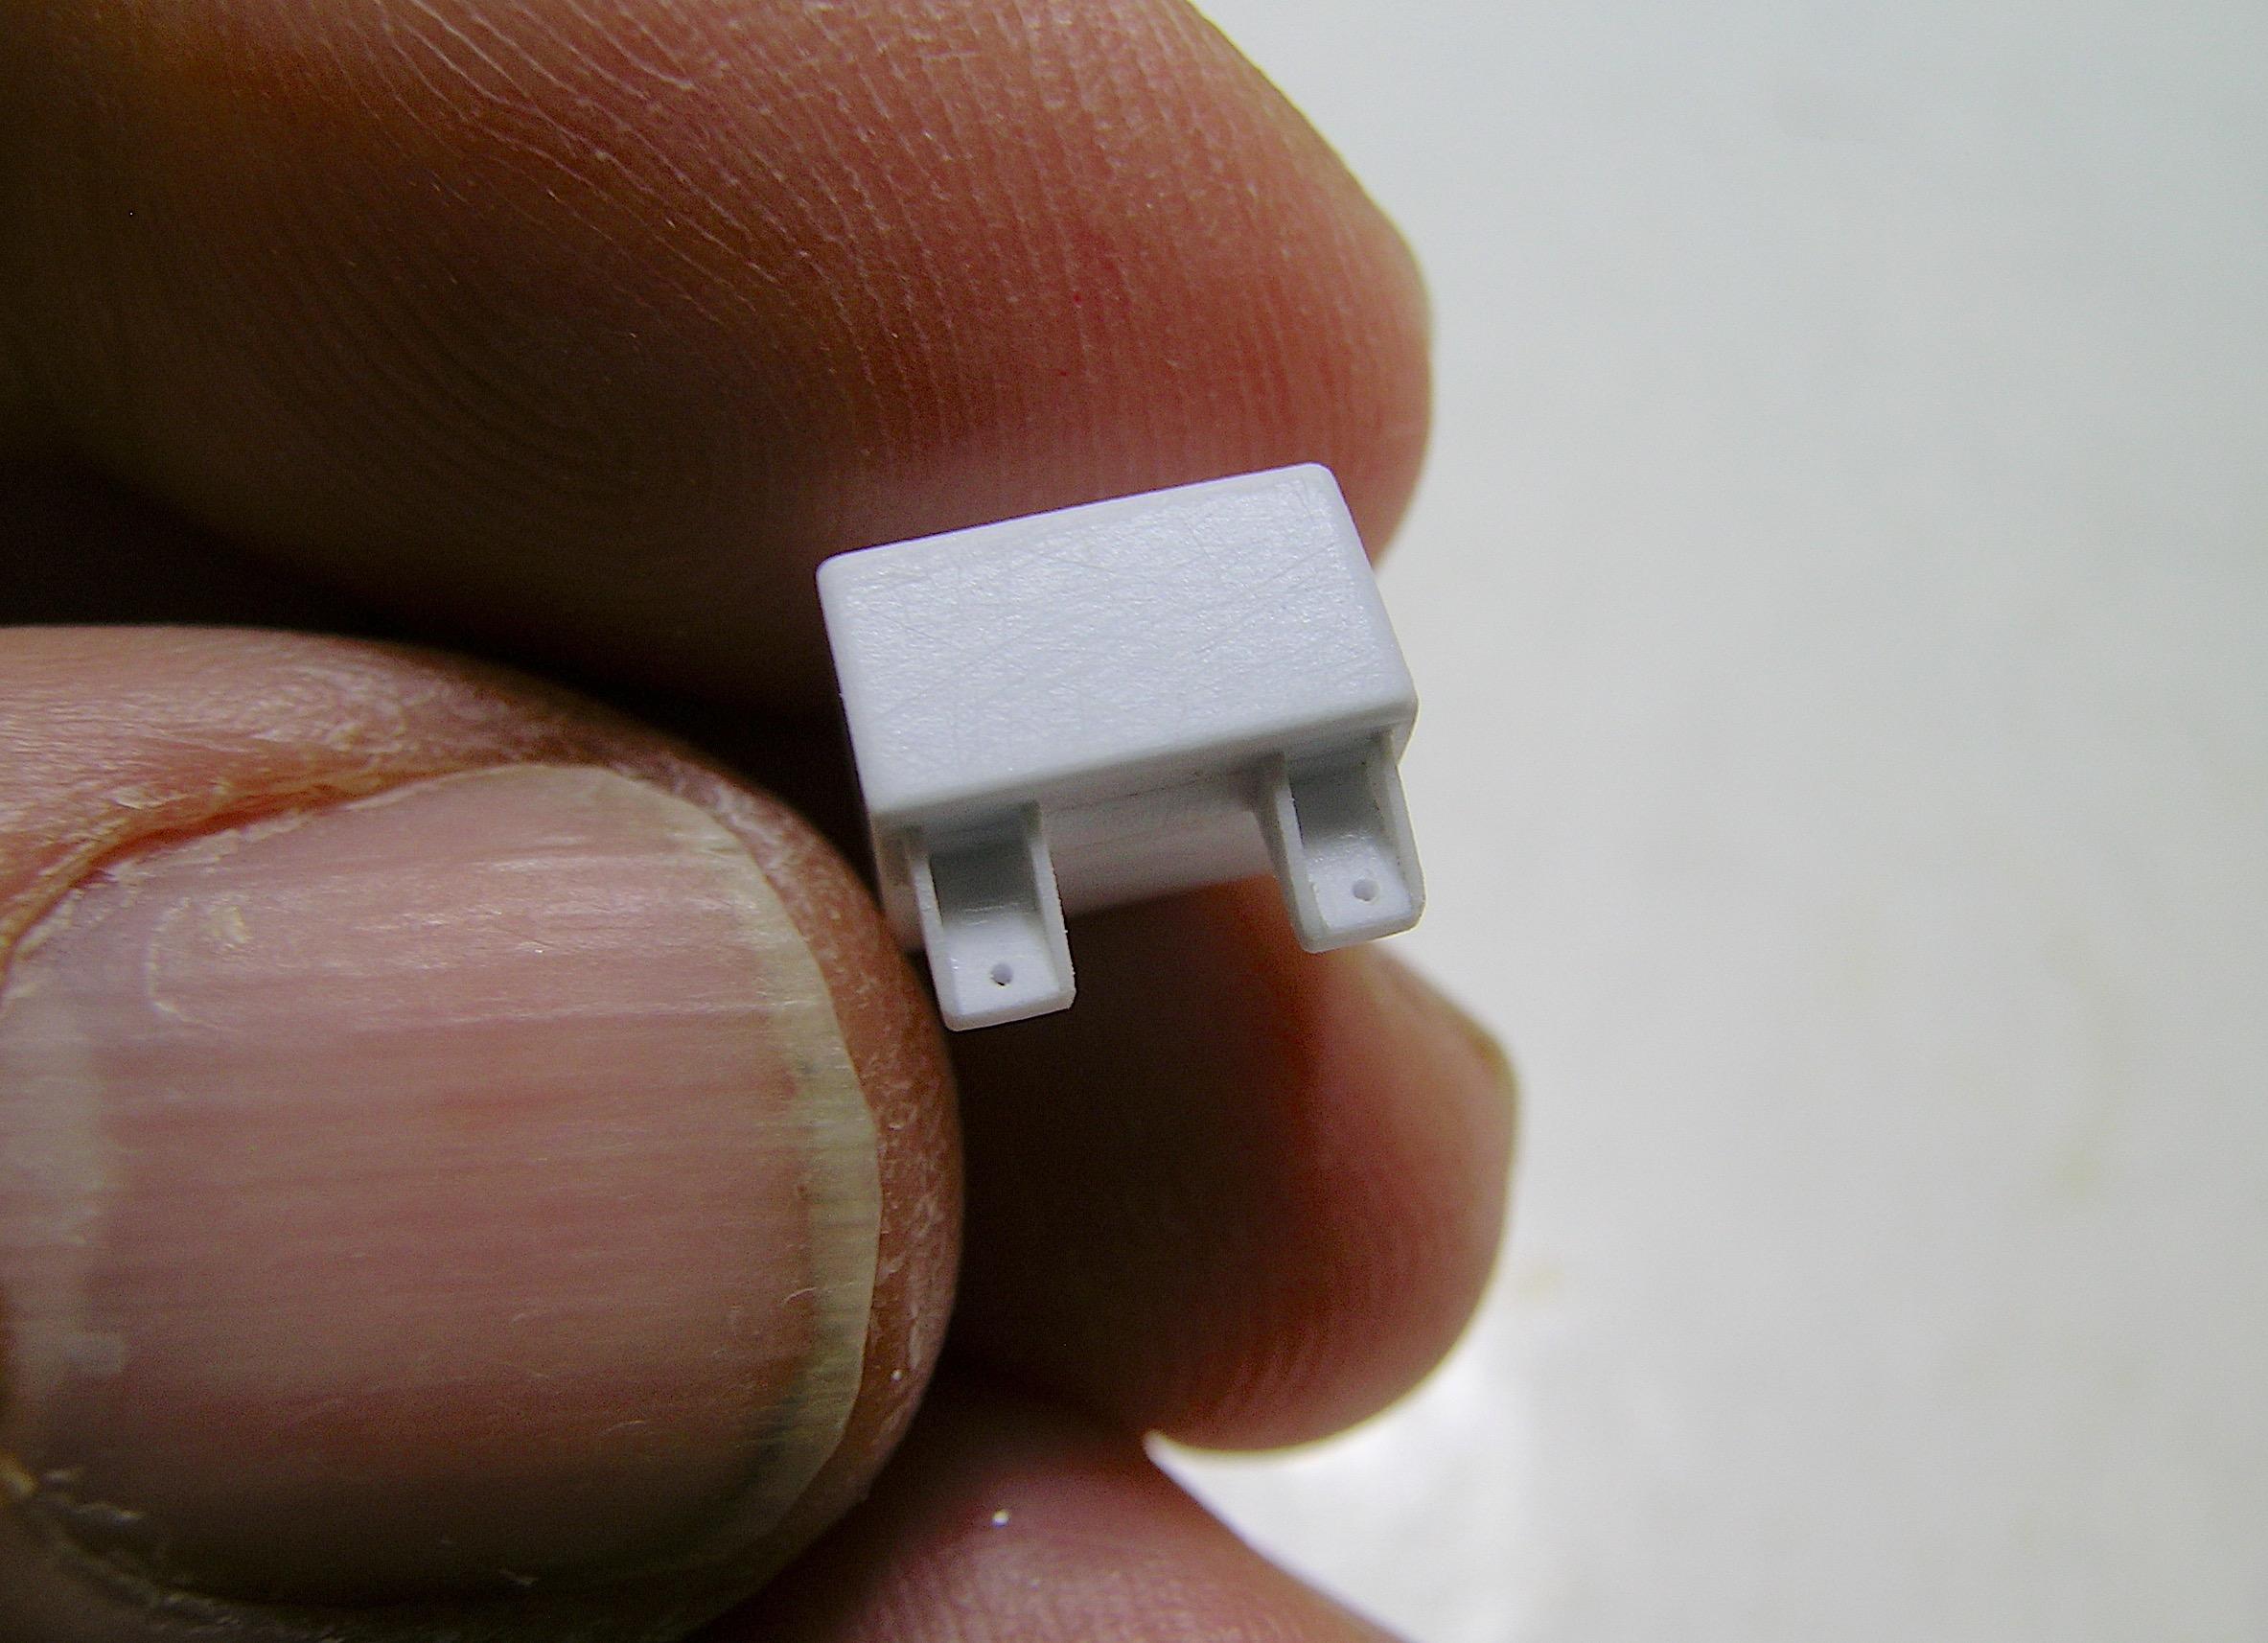
Hello everyone, I don't usually update on Saturdays but I made more progress than usual, I was on vacation this week and took the opportunity to spend more free time on the truck while the winter stretches out and before the nice weather arrives! I've started making the components to trim the engine bay although I'm sure the Hemi engine will have the the biggest visual impact. Enough blah blah blah, here are some of the results of my work, I've done more, I'll do another update soon. Francis Super coil in progress made from Evergreen styrene square rod. On the rotary table set at 90 degrees. Drilling holes for the bracket. More holes for the cover bolts and coil wire of course... Bracket hand made with 0.005" brass Different view, it hold in place with 2 aluminum pins. I put some color on it and fine tuned the bracket shape. Different view, the wires are for picture taking only Coolant overflow tank in progress made from styrene. At a more advanced stage, after some filing and sanding. Different angle. Final part.
-
64 Dodge D100 Pickup Pro Street
AmericanMuscleFan replied to AmericanMuscleFan's topic in WIP: Drag Racing Models
Thanks Tim, I still have a ways to go but putting some color on the styrene gives me a second wind and hope. Yes, it's good to put a smile on your face and hope for the best for the future... It's coming along piece by piece! ? -
64 Dodge D100 Pickup Pro Street
AmericanMuscleFan replied to AmericanMuscleFan's topic in WIP: Drag Racing Models
Thank Tim, I am always a little surprised but happy to know that my work still has this kind of effect on you, I can say the same about what I see of your talent with brass! ? When you start and invest yourself in this kind of project, it's hard to think of everything that needs to be done and the details get added along the way. When you start, it's hard to refrain from creating all the pieces of the puzzle and make a product that holds up as they say. I think that people (rightly) are more critical for this kind of project and we run on this kind of challenge (I speak for myself here...). As for my filing system, each part and its components are stored in small zip lock bags (I have dozens of them) until they are needed for final assembly. It is sometimes difficult not to have to redo parts or to want to improve them because you gain experience during the construction and sometimes you think that you can do better. Unless it is unavoidable due to a major change (structural or measurement error), I try not to redo parts knowing I have the tools and ideas to do better next time. It allows me to see the evolution (positive I hope...) of my models over time and to see where I am coming from in my favorite hobby. The bar is high today, modelers have a renewed passion for this hobby and it shows on everything you can appreciate on this forum! ? I have some of the small "missing parts" made and I will update the thread soon! Francis -
64 Dodge D100 Pickup Pro Street
AmericanMuscleFan replied to AmericanMuscleFan's topic in WIP: Drag Racing Models
Thanks Ron, I really appreciate your comments! My free time is already well spent maintaining the property but rest assured I will start a new project when the truck is finished. I'm not sure yet where this one will go, I often get carried away and my desire to always do better results in projects that drag on and on, not easy to find the balance when you're an eternal dissatisfied... ? Francis -
Glad to see you back in the saddle Tim! There are no small updates, just small victories for each completed part that slowly but surely lead to the finish line. These two small components are obviously part of it!
-
Your 3D printed pieces are very nice, Jason.? I've probably asked you this before, but I assume you have an SLA printer? If so, do you have any problems with the parts, I've read in comments that the parts are more fragile and brittle than those produced with FDM technology and that they should not be exposed to direct sunlight. The possibilities of this technology are almost infinite and open the door to very interesting subject, I've been thinking about it for a while... more toys for the workbench...?
-
Simply beautiful my friend, the top of this engine will be the icing on the cake! ?
-
64 Dodge D100 Pickup Pro Street
AmericanMuscleFan replied to AmericanMuscleFan's topic in WIP: Drag Racing Models
Thanks partner! I always appreciate your support and comments because I know how much you love the details, you are an example to others! I have more little details in the works, so I'll get back to you soon! ? -
Nice job Gerg! I have heard of this technique many times but have never tried it. Is it possible (if lacquer is used as a clear coat) for the BMF to lift? Does the lacquer adhere well to the BMF? I know some modelists use BMF as a mask for clean lines so I'm wondering what your experience is with this.
-
WOW, very nice work Greg, I missed this thread but I am glad to see one of these beautiful 68 Chevelle in the WIP. You are very meticulous, the interior is beautiful as well as the color, I love that blue. The vinyl top looks great on this body type, a must have! ?
-
64 Dodge D100 Pickup Pro Street
AmericanMuscleFan replied to AmericanMuscleFan's topic in WIP: Drag Racing Models
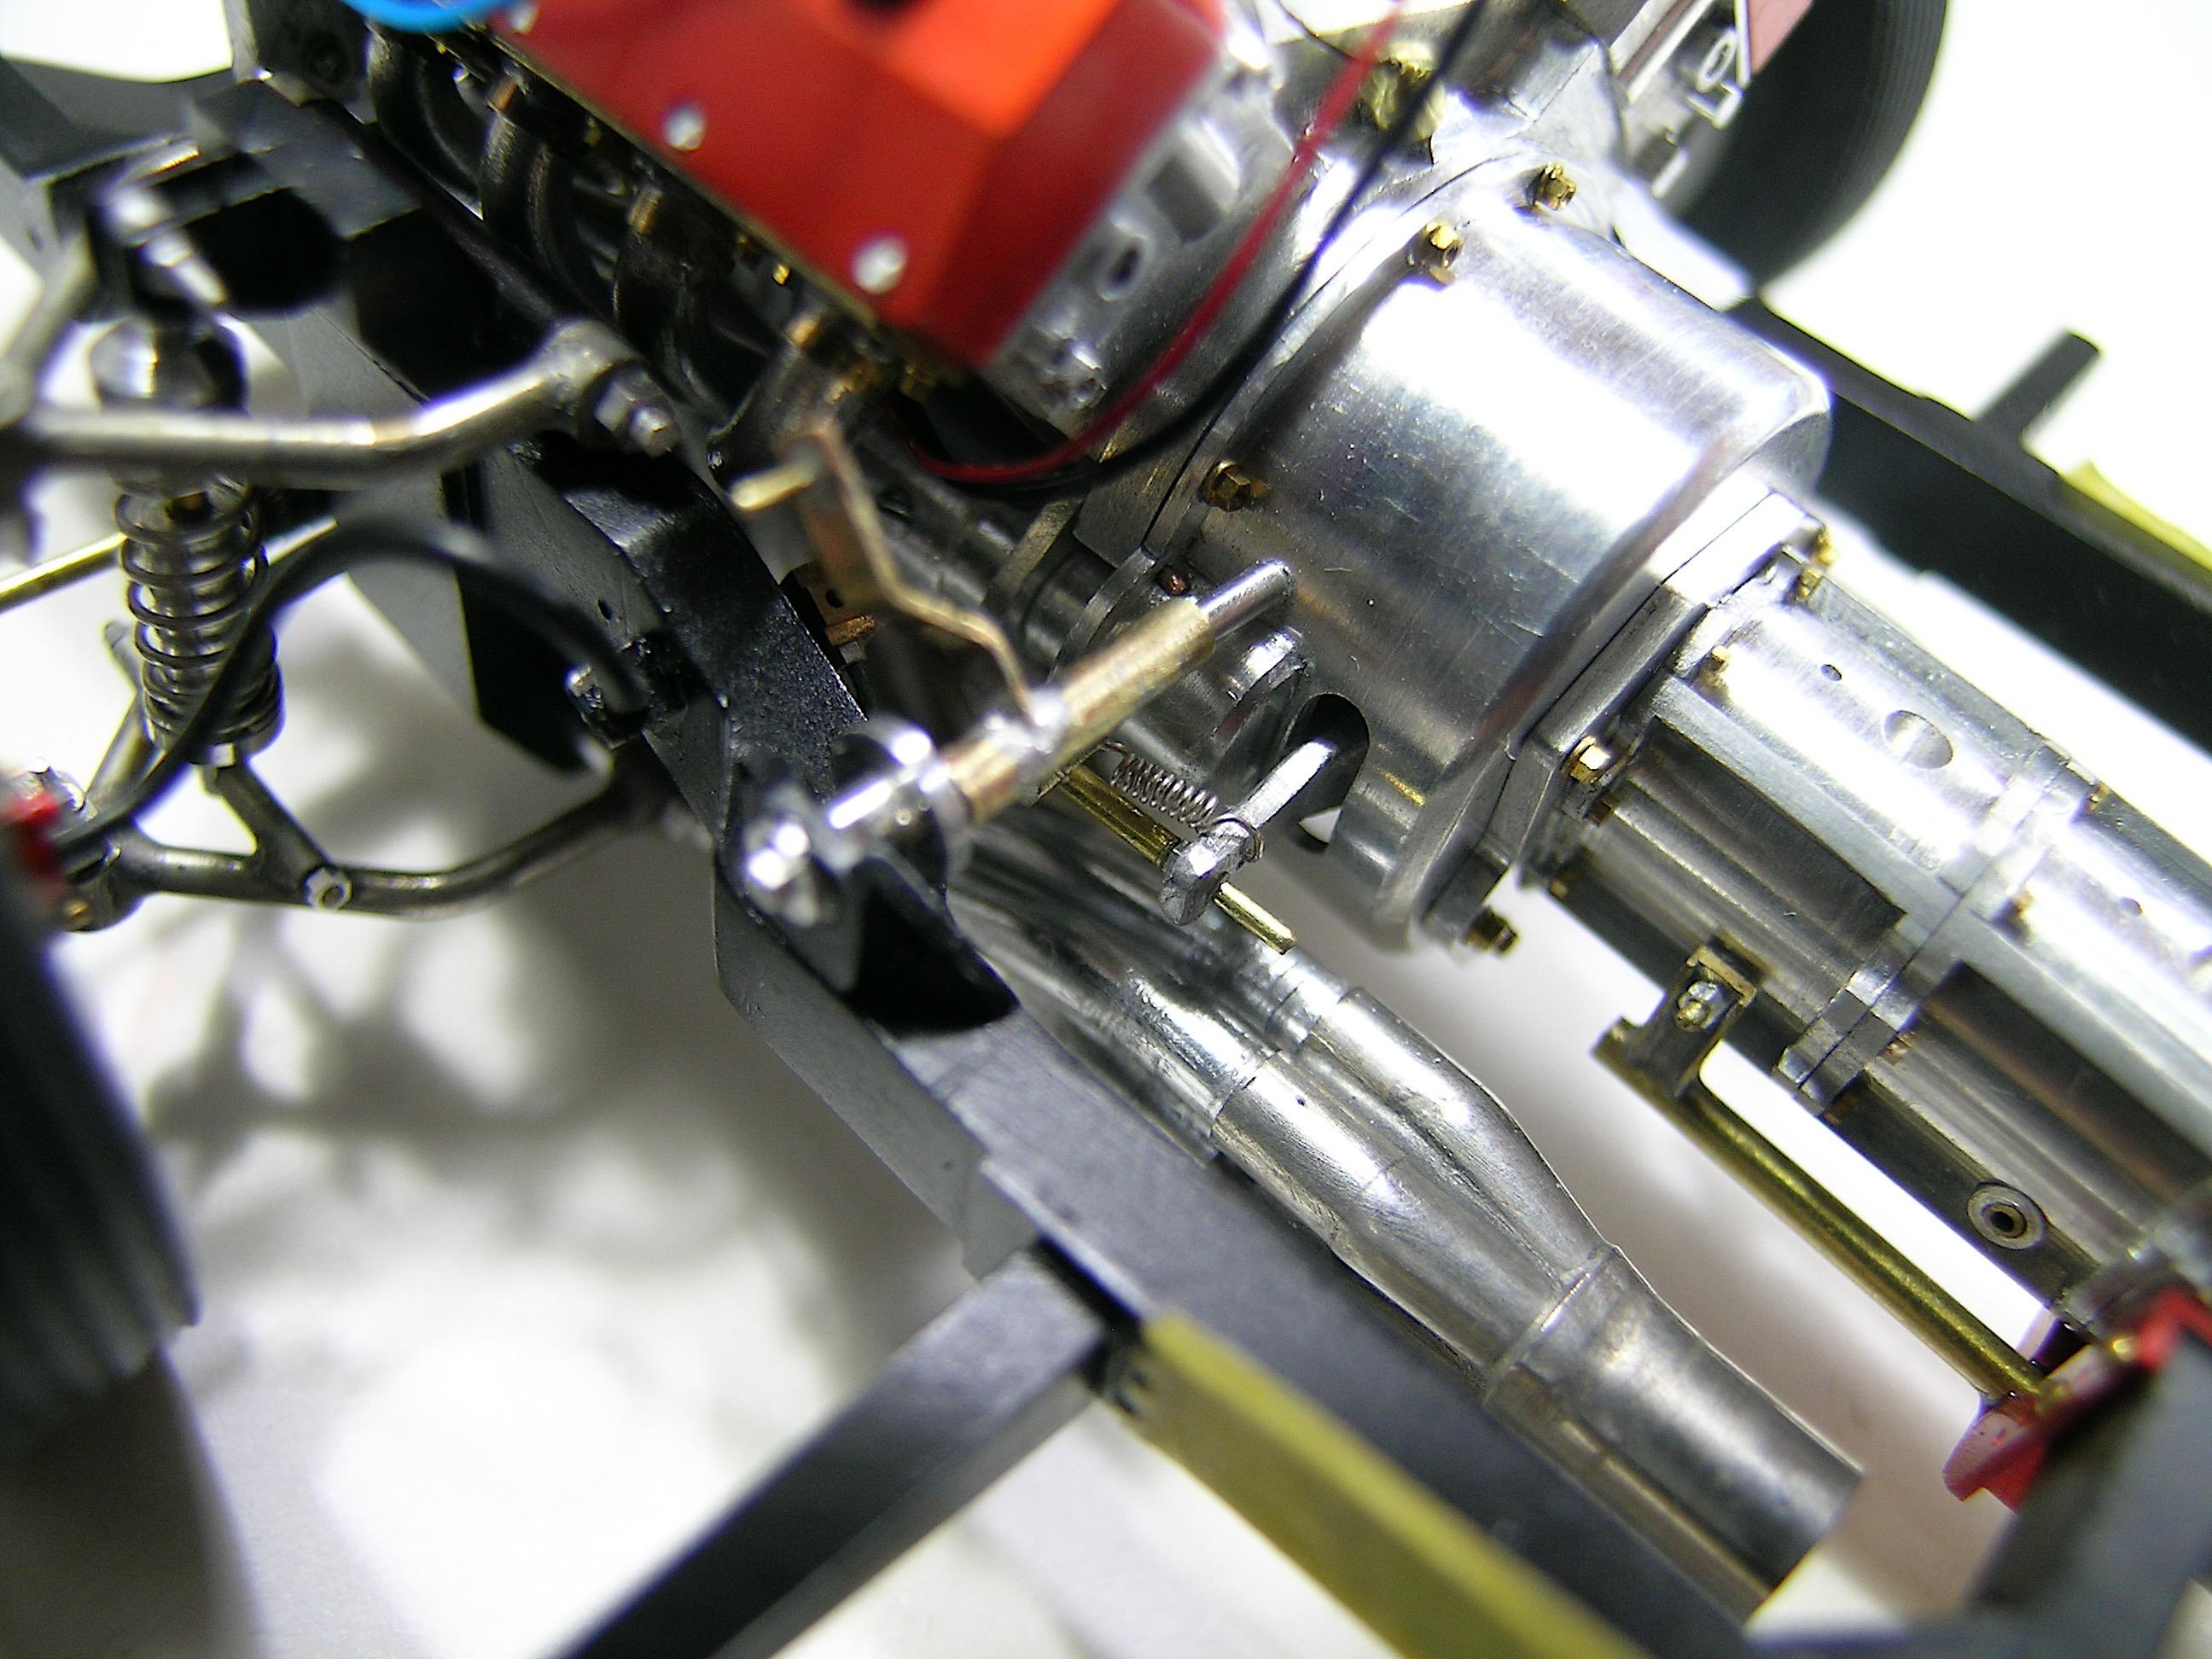
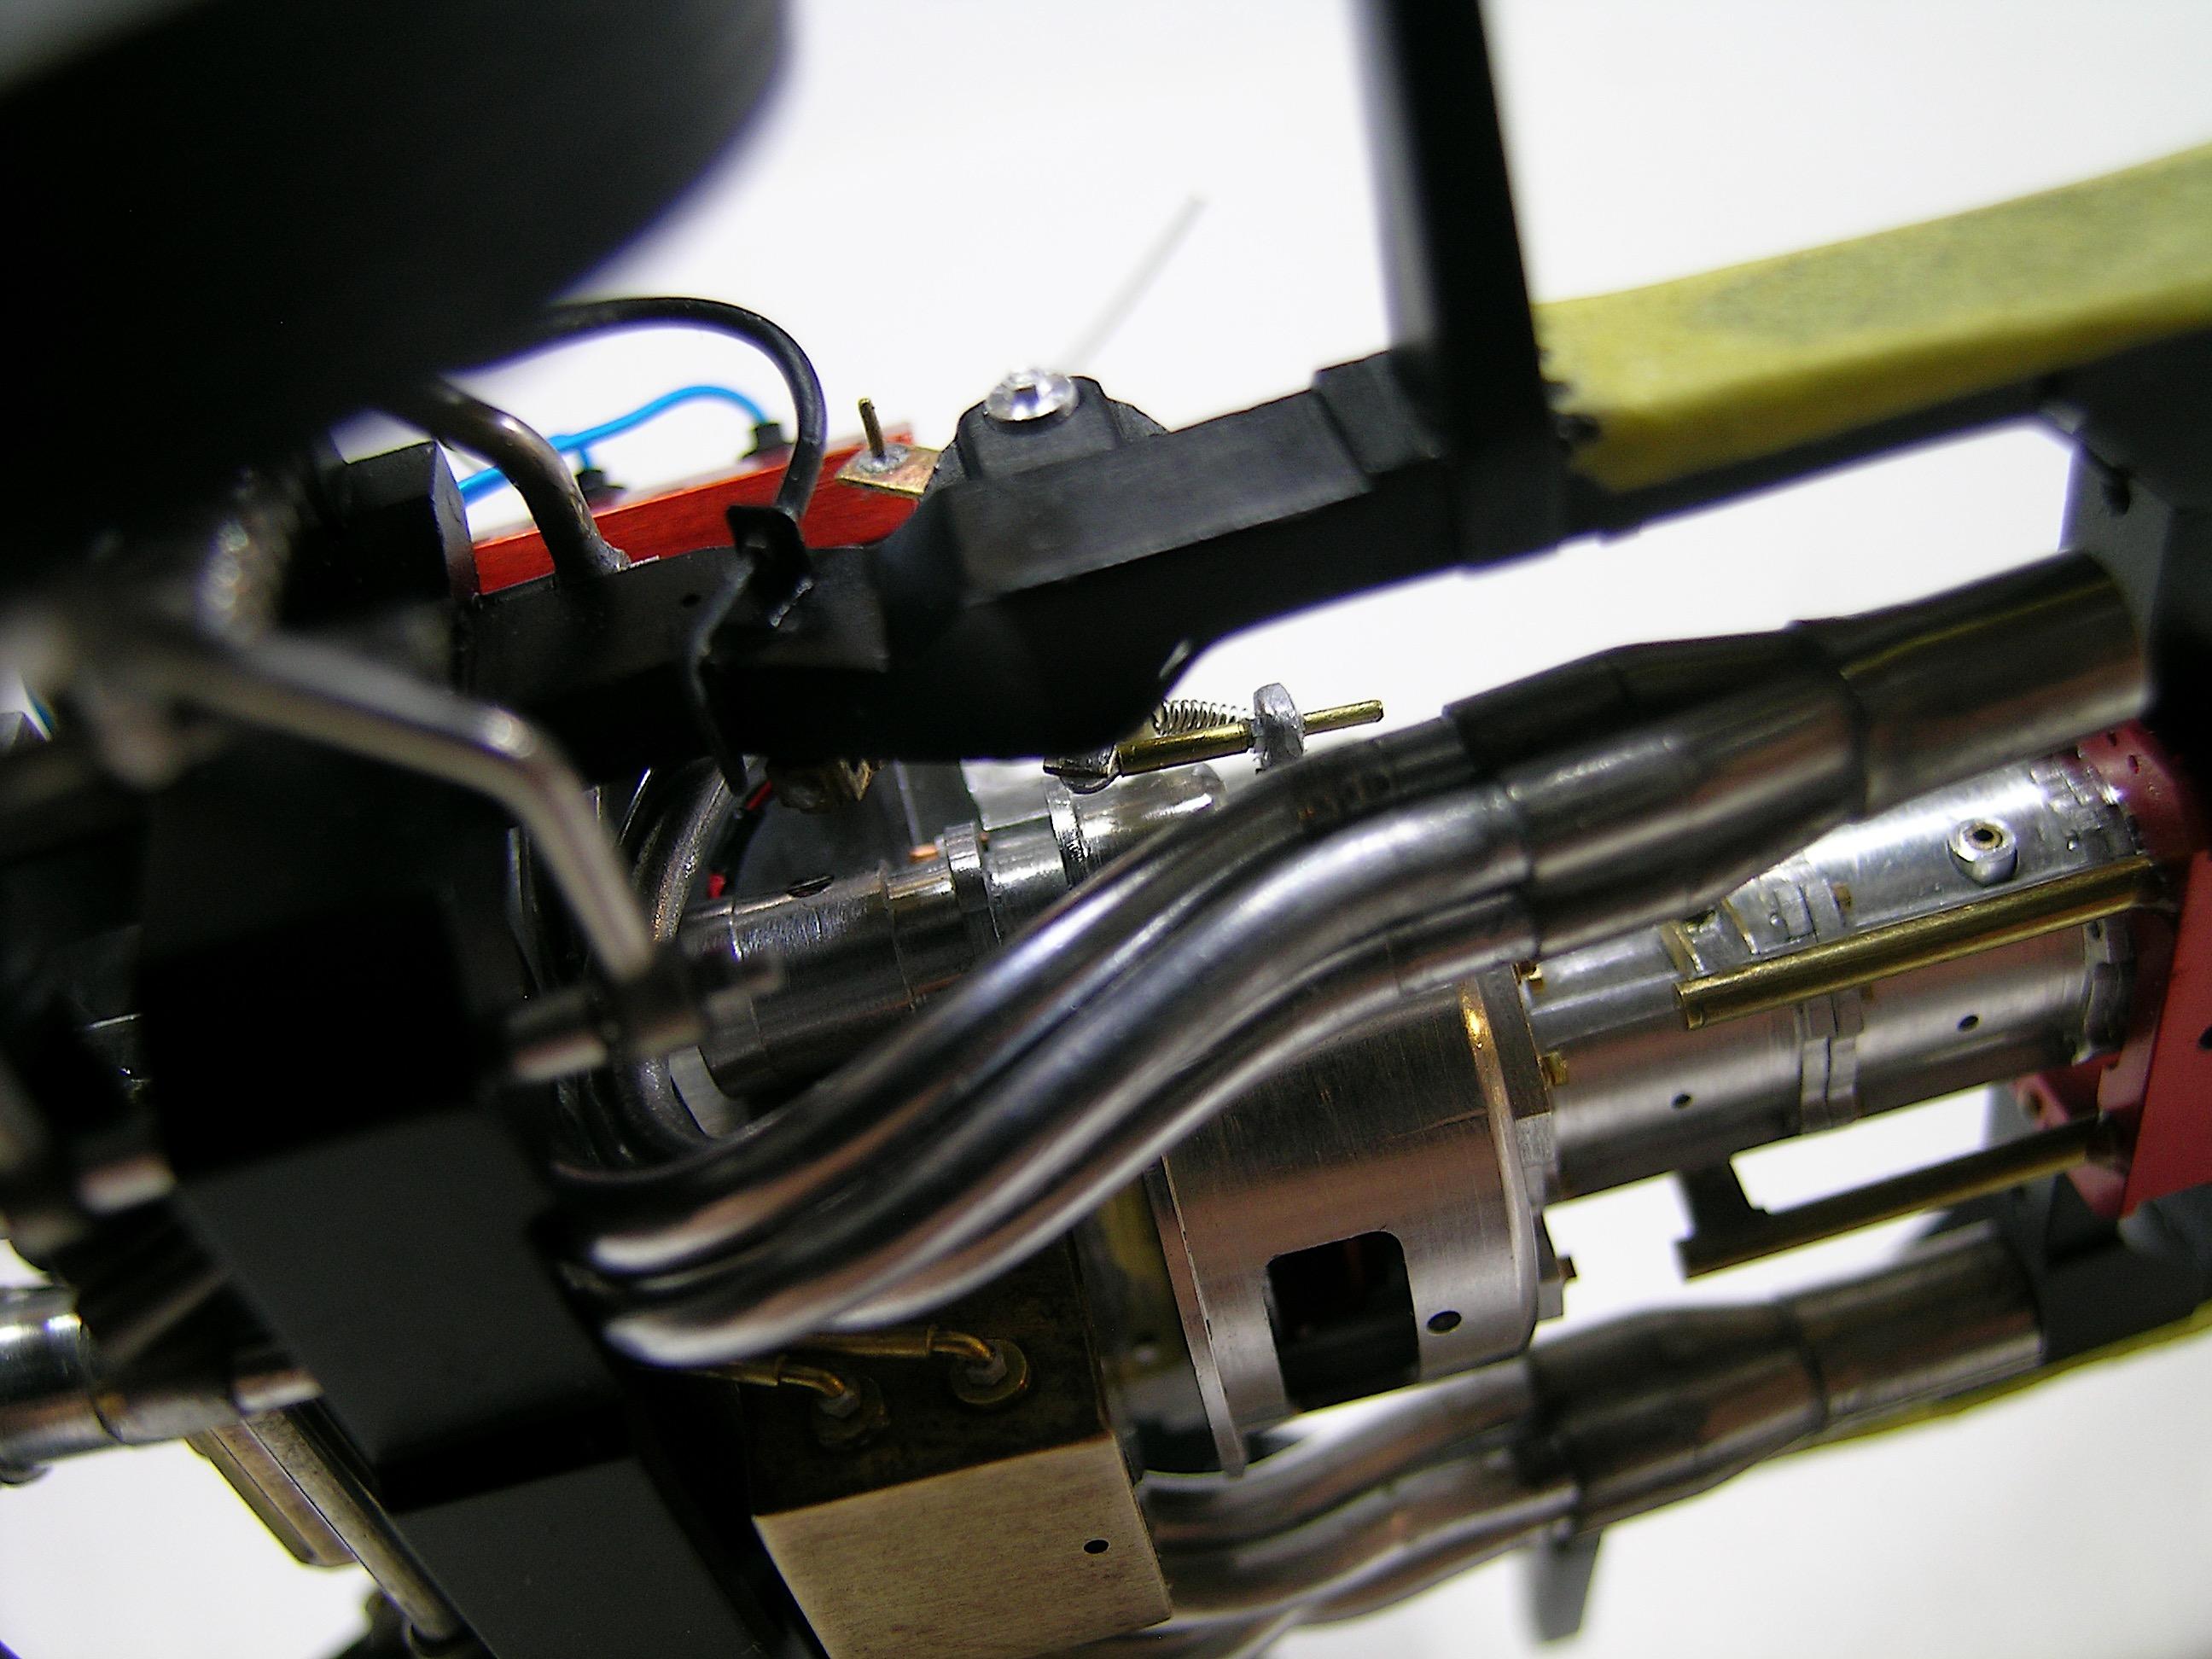
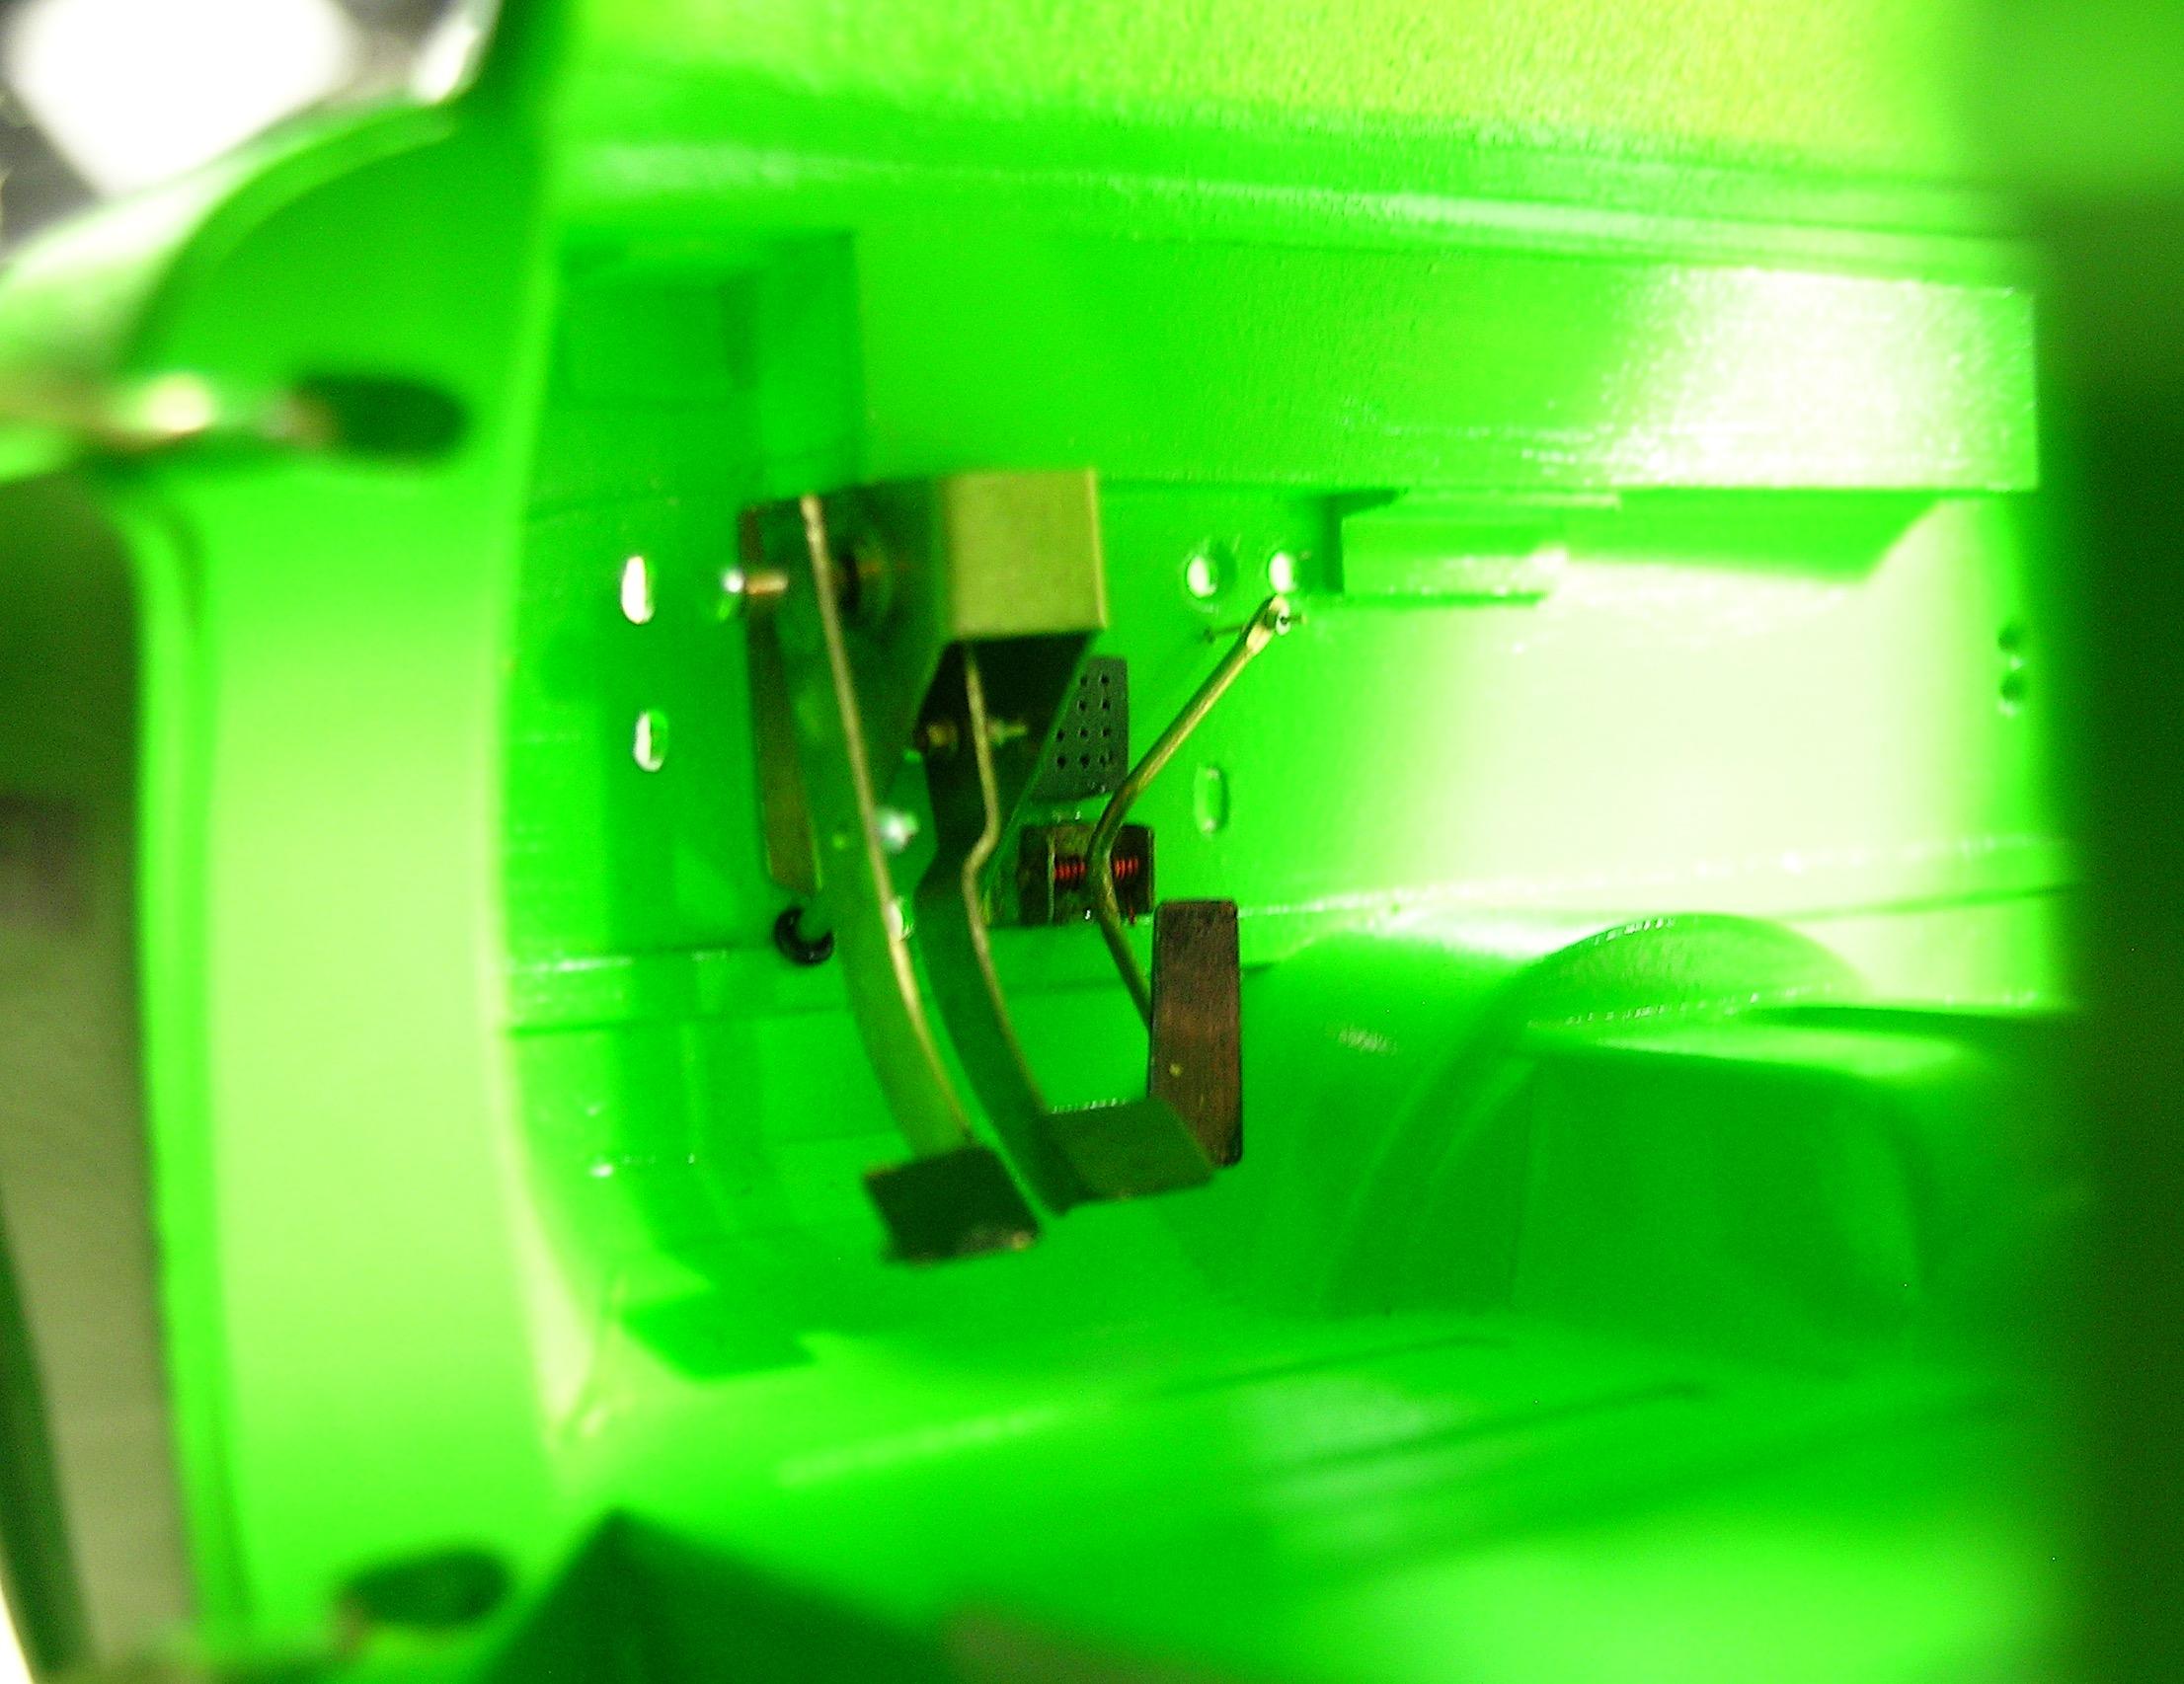
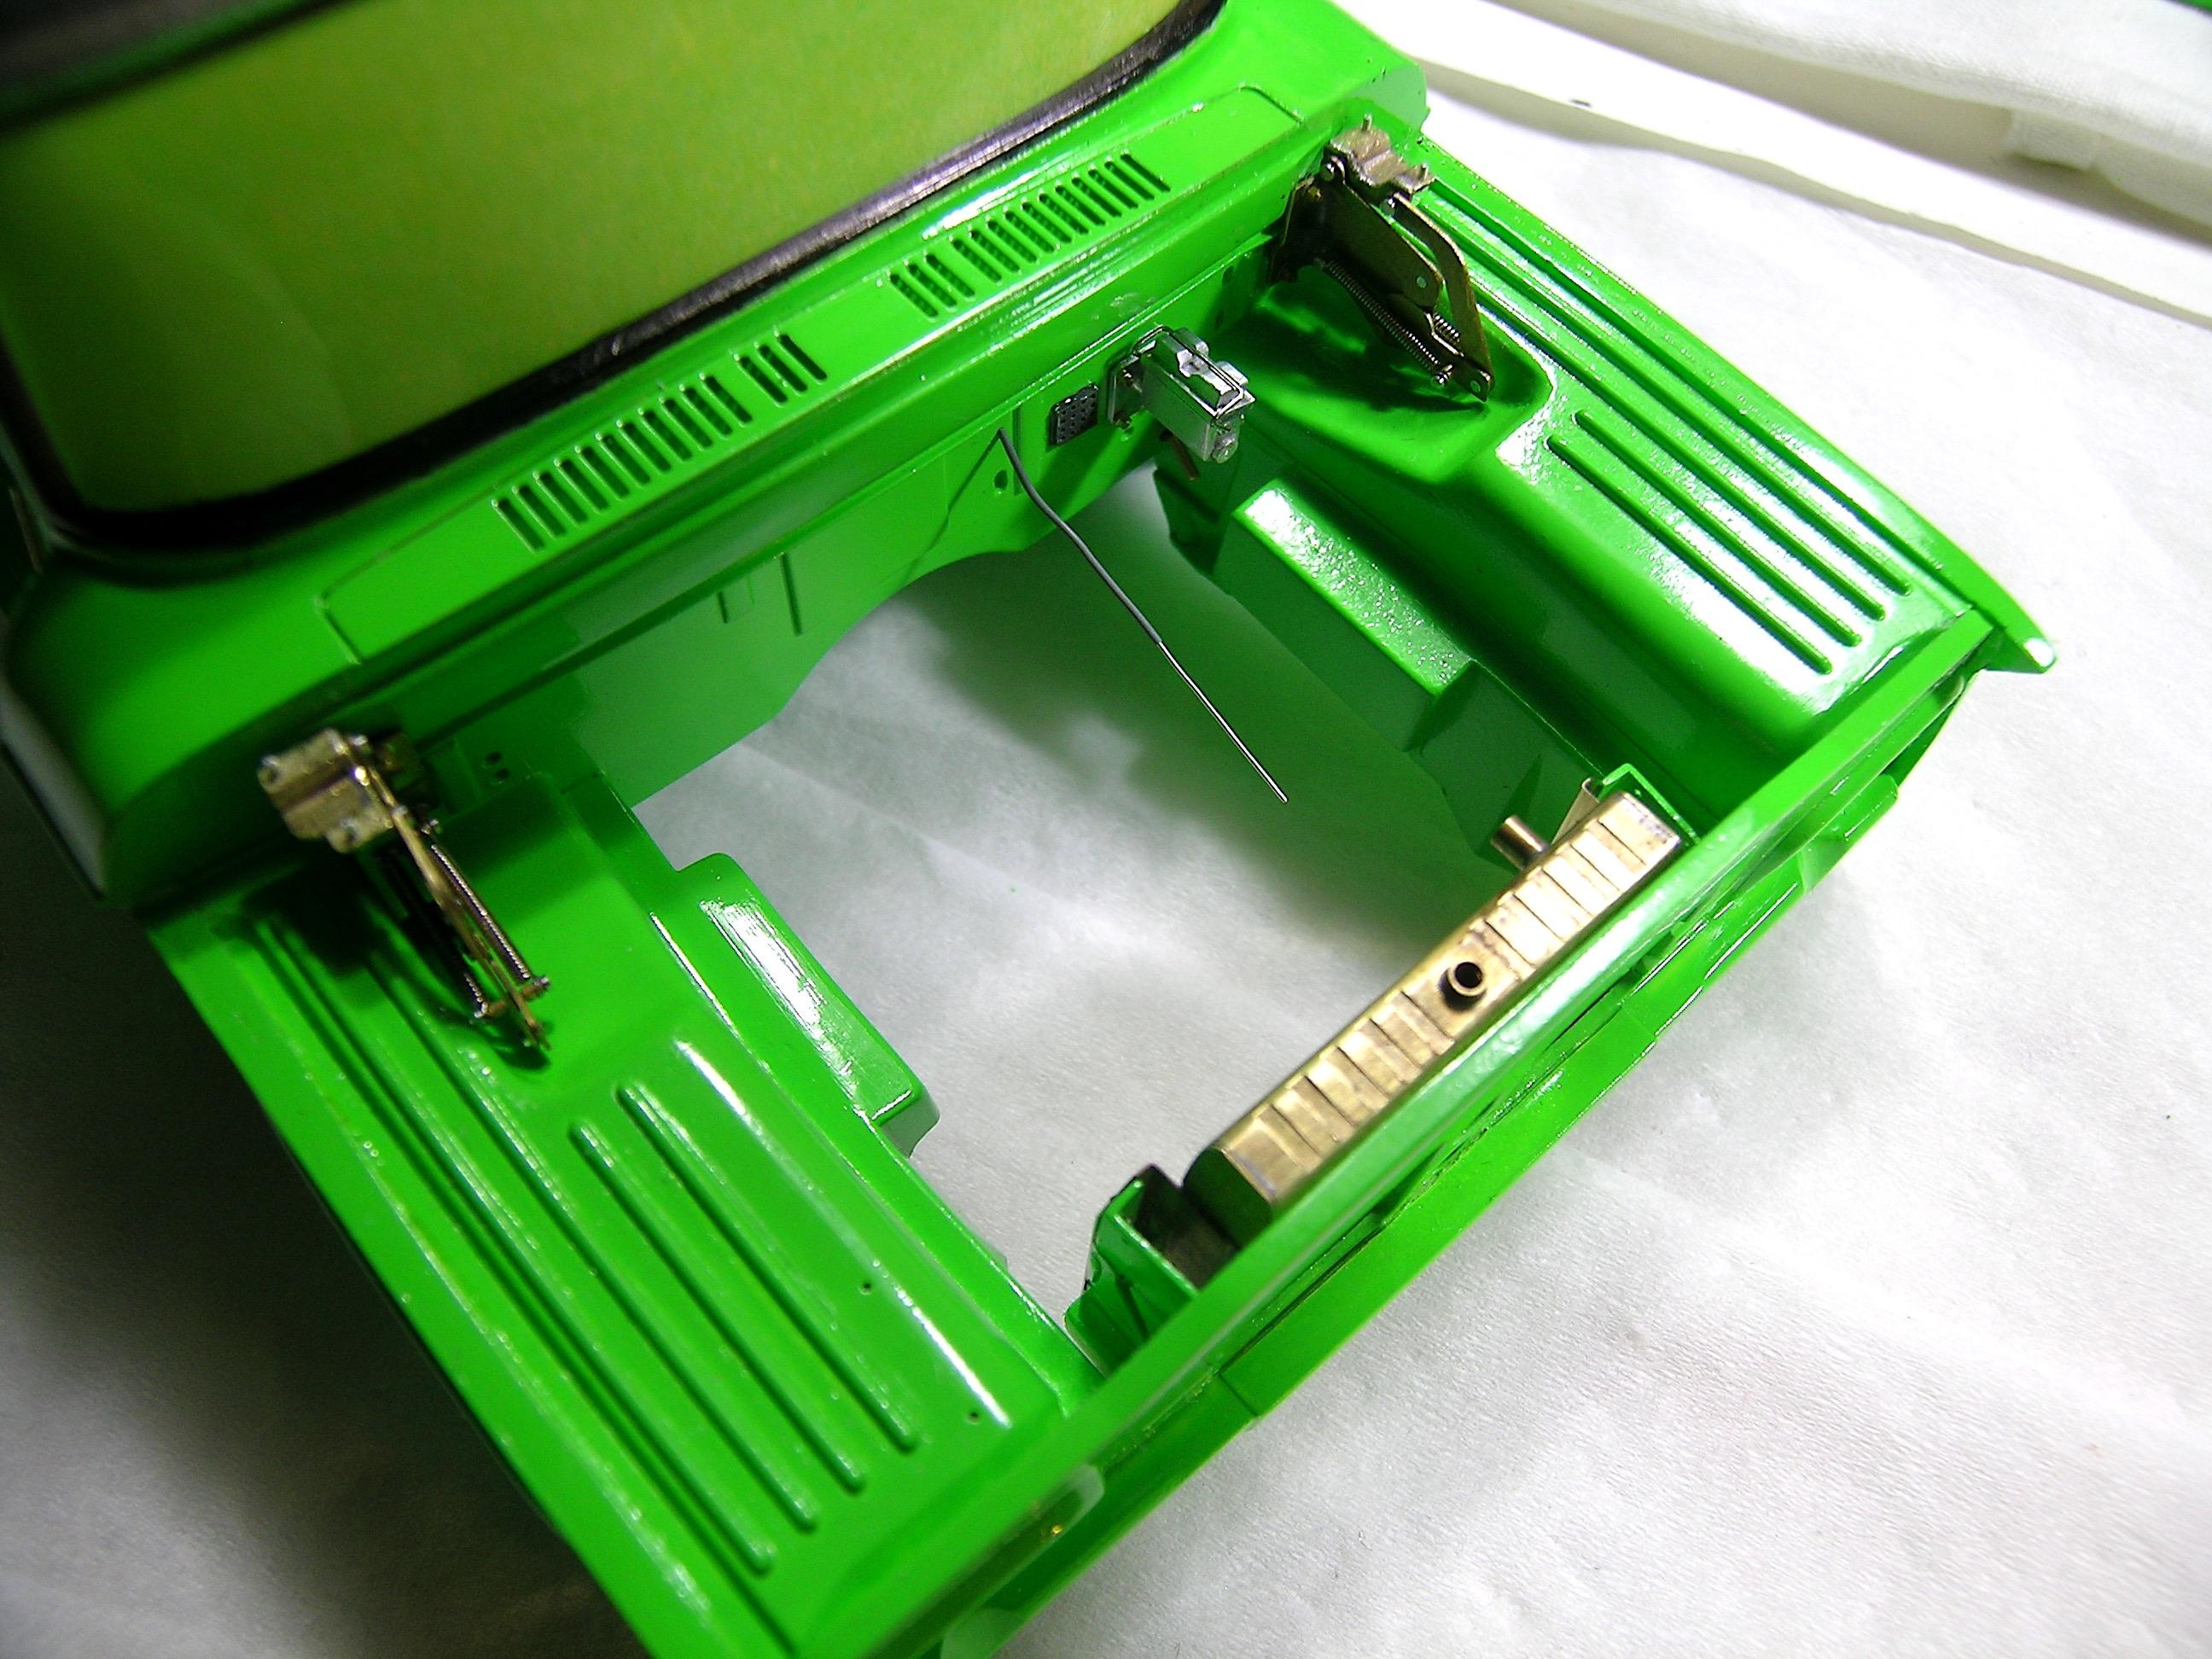
Hello everyone! The assembly continues but I don't have many pictures of the process because my workspace is not the best place to take nice pictures and sometimes the light is too strong or too weak to show the details I want to show you. One thing is for sure, when I will be at the end of the assembly process, I will take the time to settle down and offer you something more professional. The engine is finally installed in the chassis, the radiator is glued in the right place and the master cylinder is also in place. You'll notice that the hood hinges are no longer connected to the hood like when I made them because it was impossible to hide them before painting. I removed them and mounted them in their final location, I will just have to glue the hood on them at the very end. The pedal assembly is finished and the piston is connected to the brake pedal, the throttle cable is connected as planned, I will drive the other end to the carburetor when the time comes. I still have some missing parts to make for the engine compartment, I will start making them including more assembly, things are going well so far... Thanks for your comments and support, I'll be back soon, Francis Clutch linkage assembly. Sorry for the blurry picture, my camera sometimes has trouble focusing... Seen from below, you can also see the starter bolted to the bellhousing. The pedals are in place and connected as intended. Some progress in the engine bay. The radiator is in place.
-
De Foosing the FD-100
AmericanMuscleFan replied to butter's topic in WIP: Model Trucks: Pickups, Vans, SUVs, Light Commercial
I agree with the other guys, the color is superb and its a perfect fit for this pickup. Good polishing job, Chip Foose would be proud of you! ? -
64 Dodge D100 Pickup Pro Street
AmericanMuscleFan replied to AmericanMuscleFan's topic in WIP: Drag Racing Models
No harm done Sean, I must admit that I went with what I had on hand. Not easy to find a decal that is small enough to not go around the filter twice... ? I'd have to get sponsor decals for 1/64 I think, maybe I could find a nice STP one! ? -
64 Dodge D100 Pickup Pro Street
AmericanMuscleFan replied to AmericanMuscleFan's topic in WIP: Drag Racing Models
Thanks for the reassurance Scott, my mechanic has been using them on my vehicles for as long as I can remember and it's worked out pretty well so far. Maybe it's not the first choice for an engine over 1000hp? ? -
You can be proud Derek, it's a pure beauty, the attention to details is awesome! I LOVE it!!! ?