AmericanMuscleFan
-
Posts
3,058 -
Joined
-
Last visited
Content Type
Profiles
Forums
Events
Gallery
Everything posted by AmericanMuscleFan
-
 WOW !!! This is absolutely gorgeous Brian, I think I should spend less time on my personal project and come check out the high quality work going on in the other categories.... I missed your whole thread but I can admire the finished product. ? Another success, there is something about your builds that make them so real, it must be called determination and talent!!! ?
 -
64 Dodge D100 Pickup Pro Street
AmericanMuscleFan replied to AmericanMuscleFan's topic in WIP: Drag Racing Models
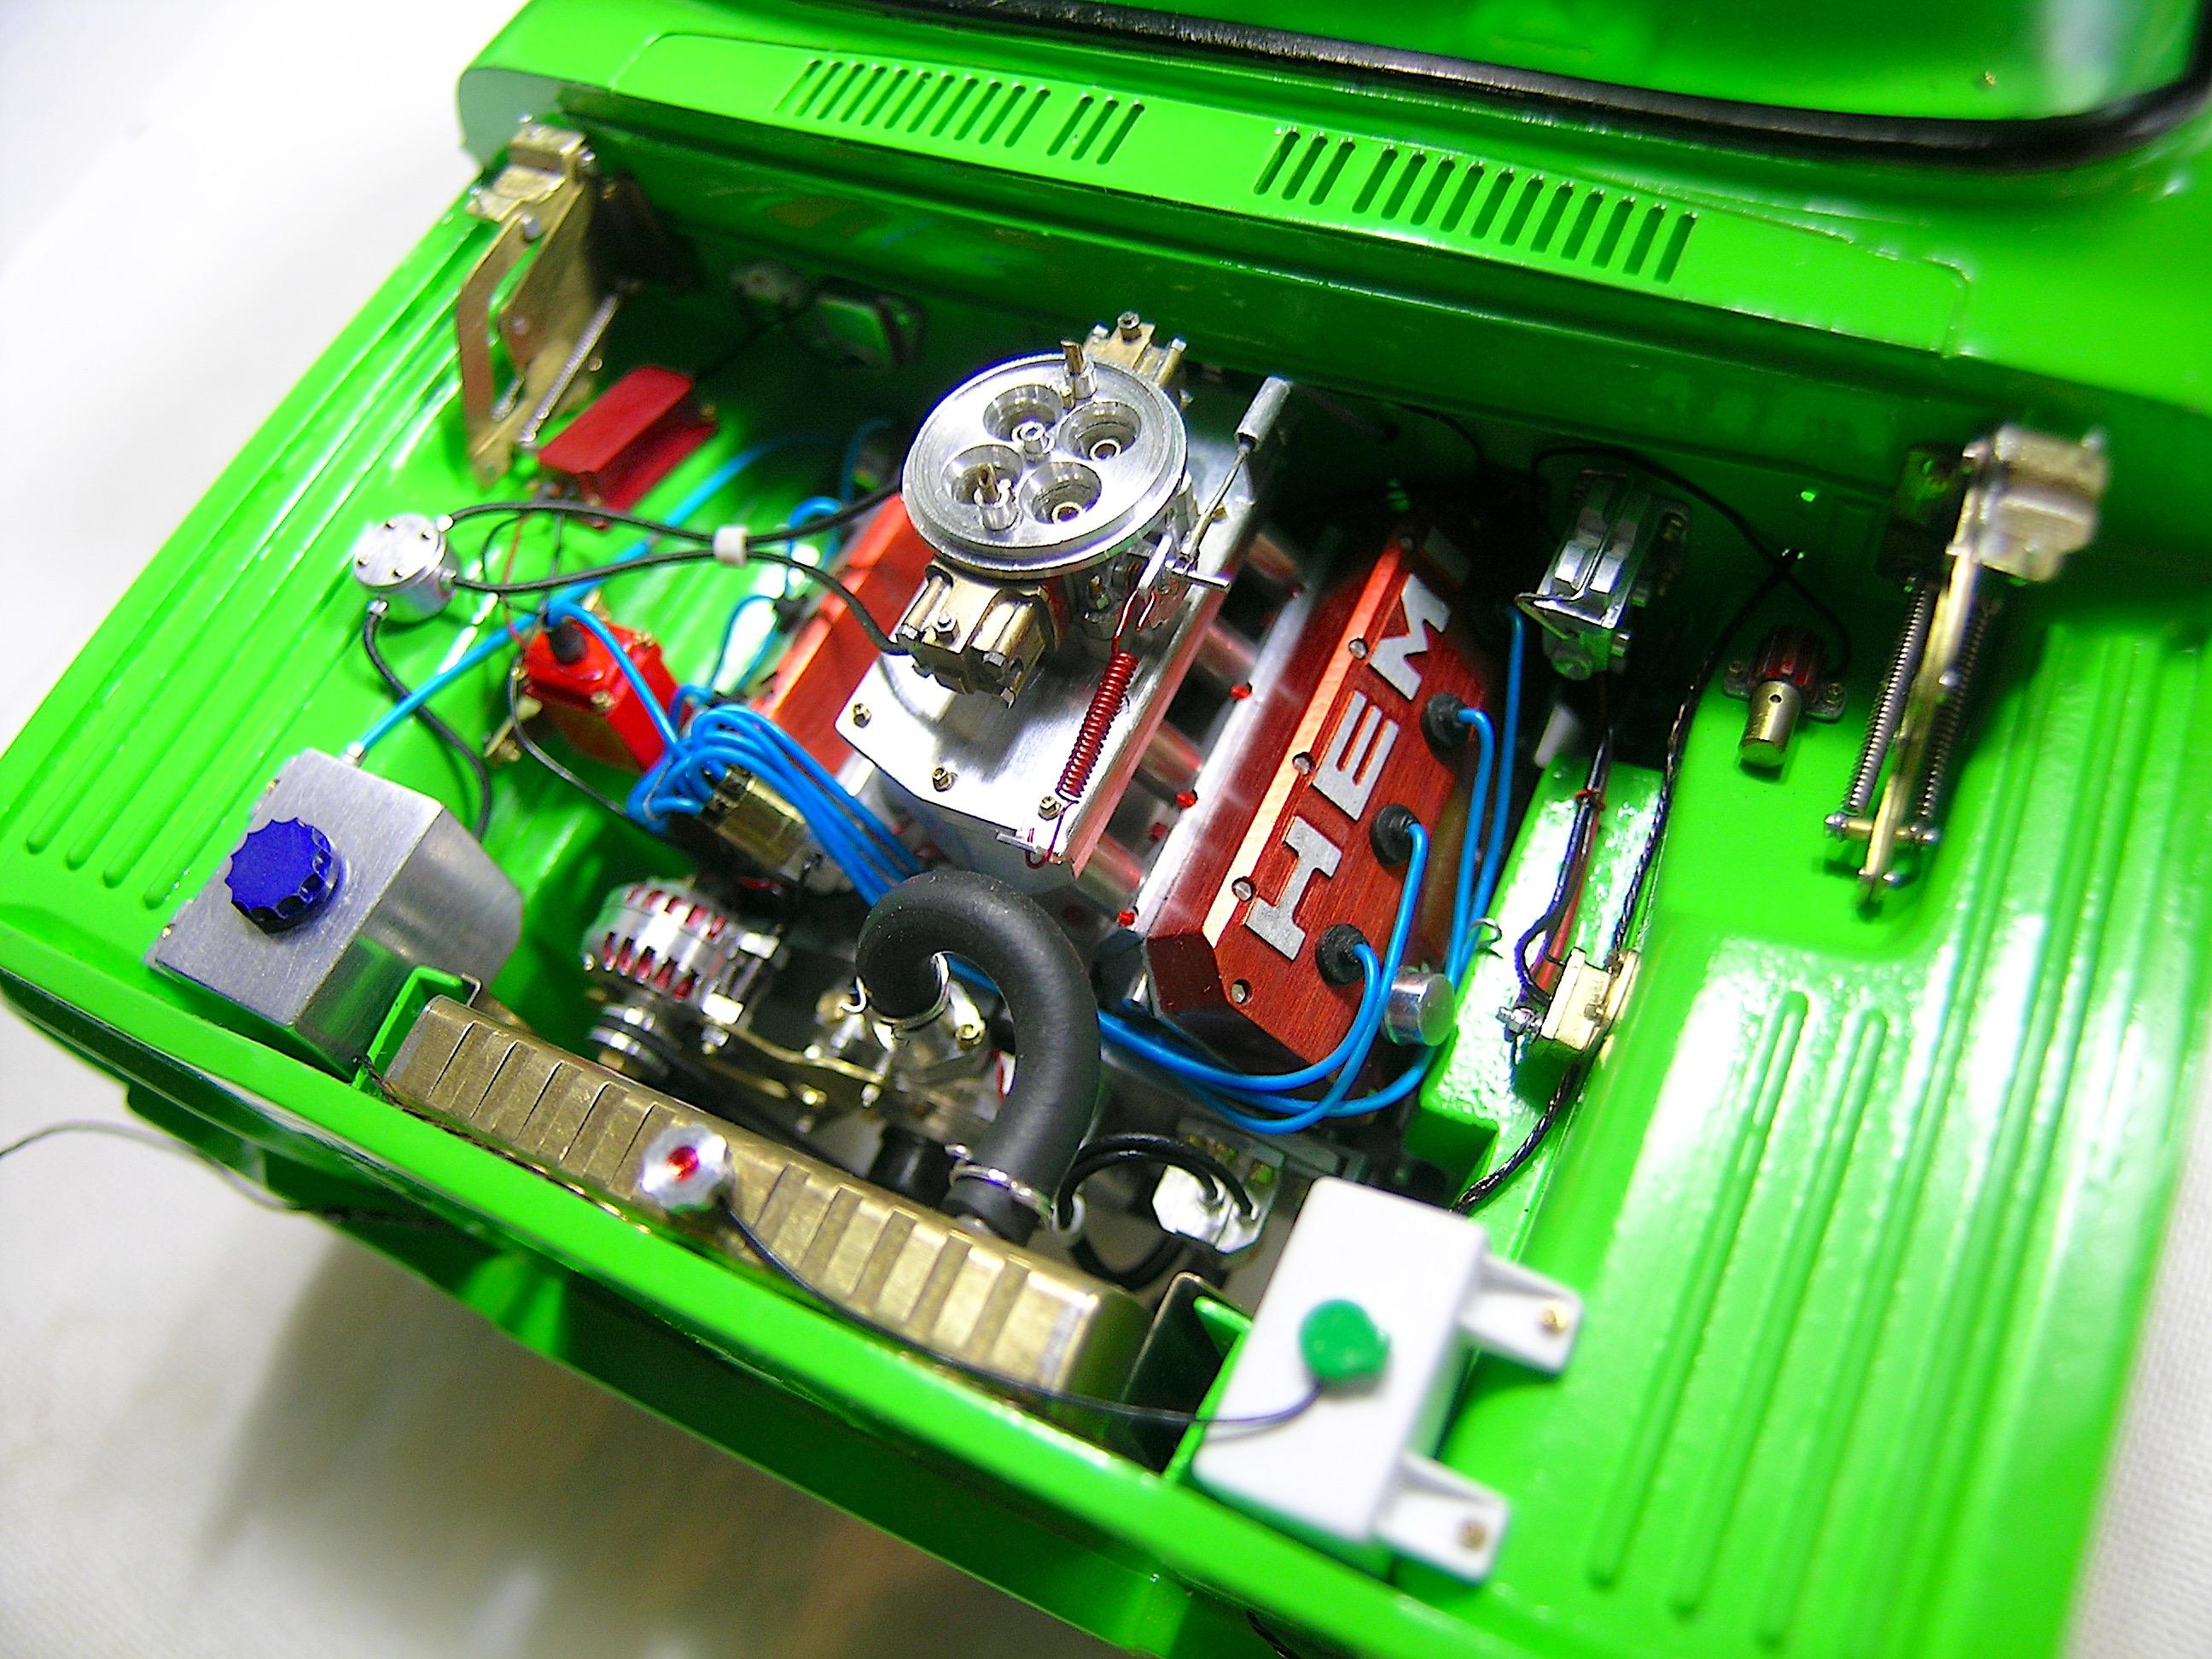
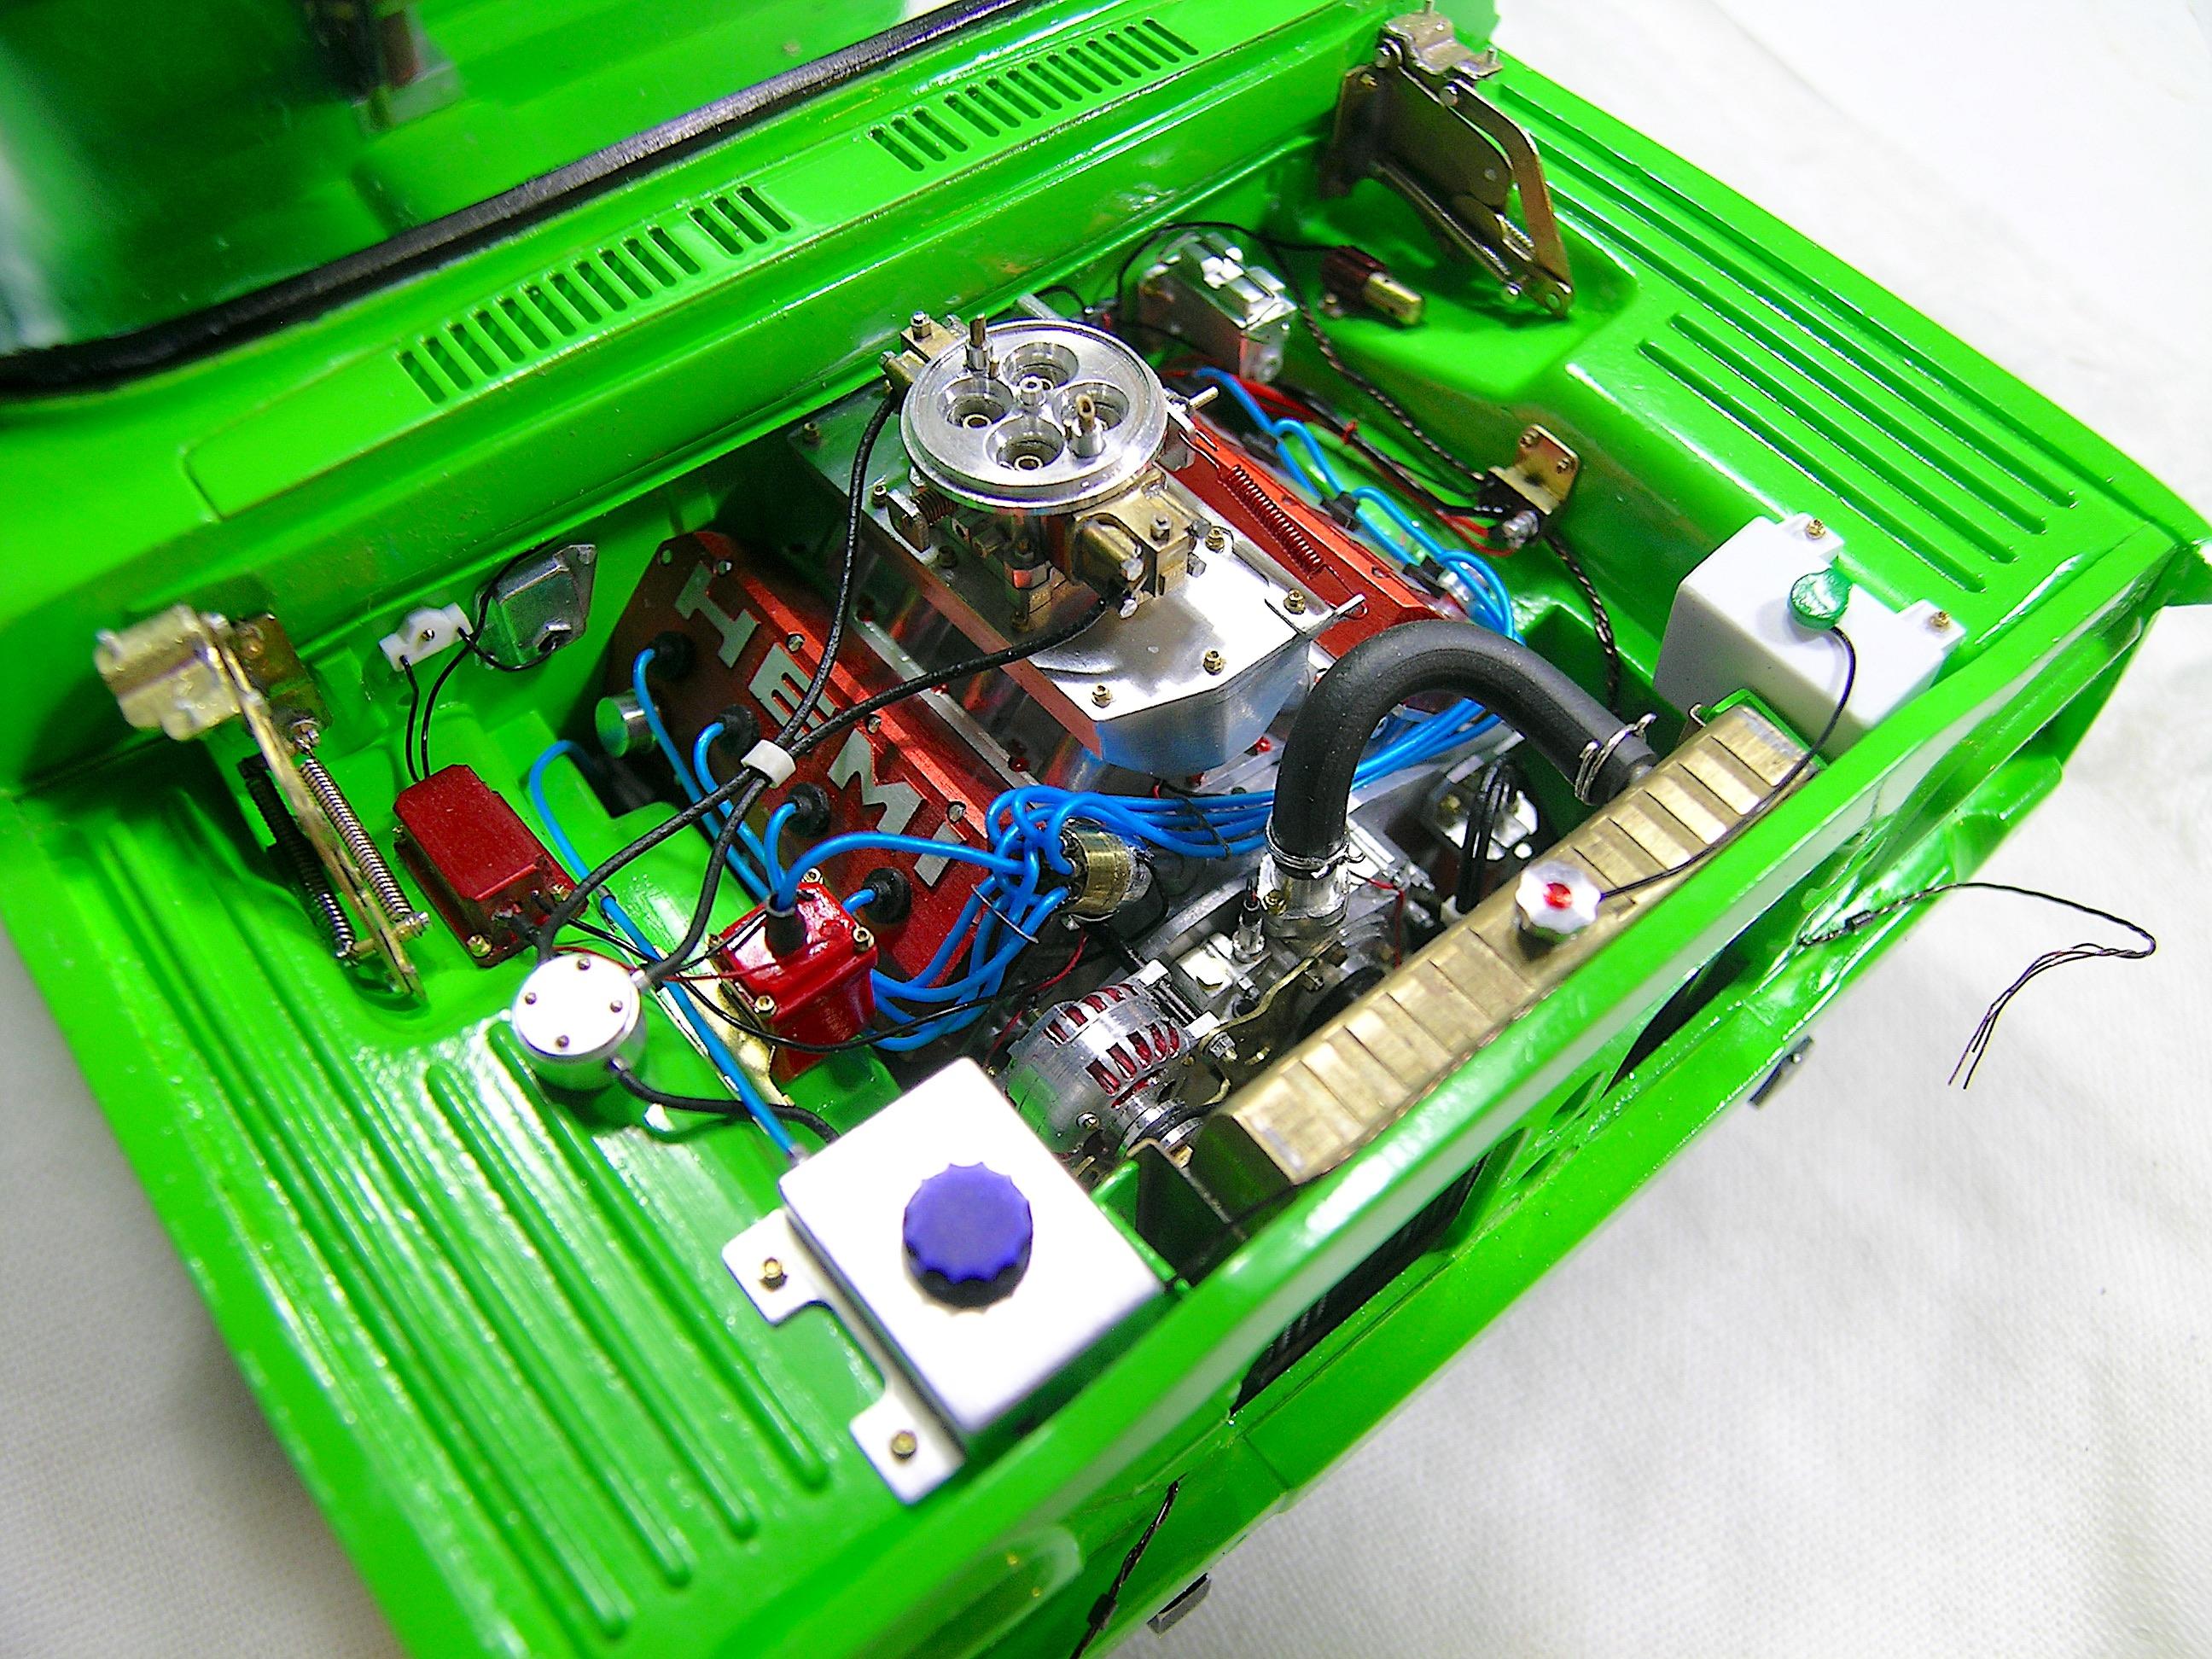
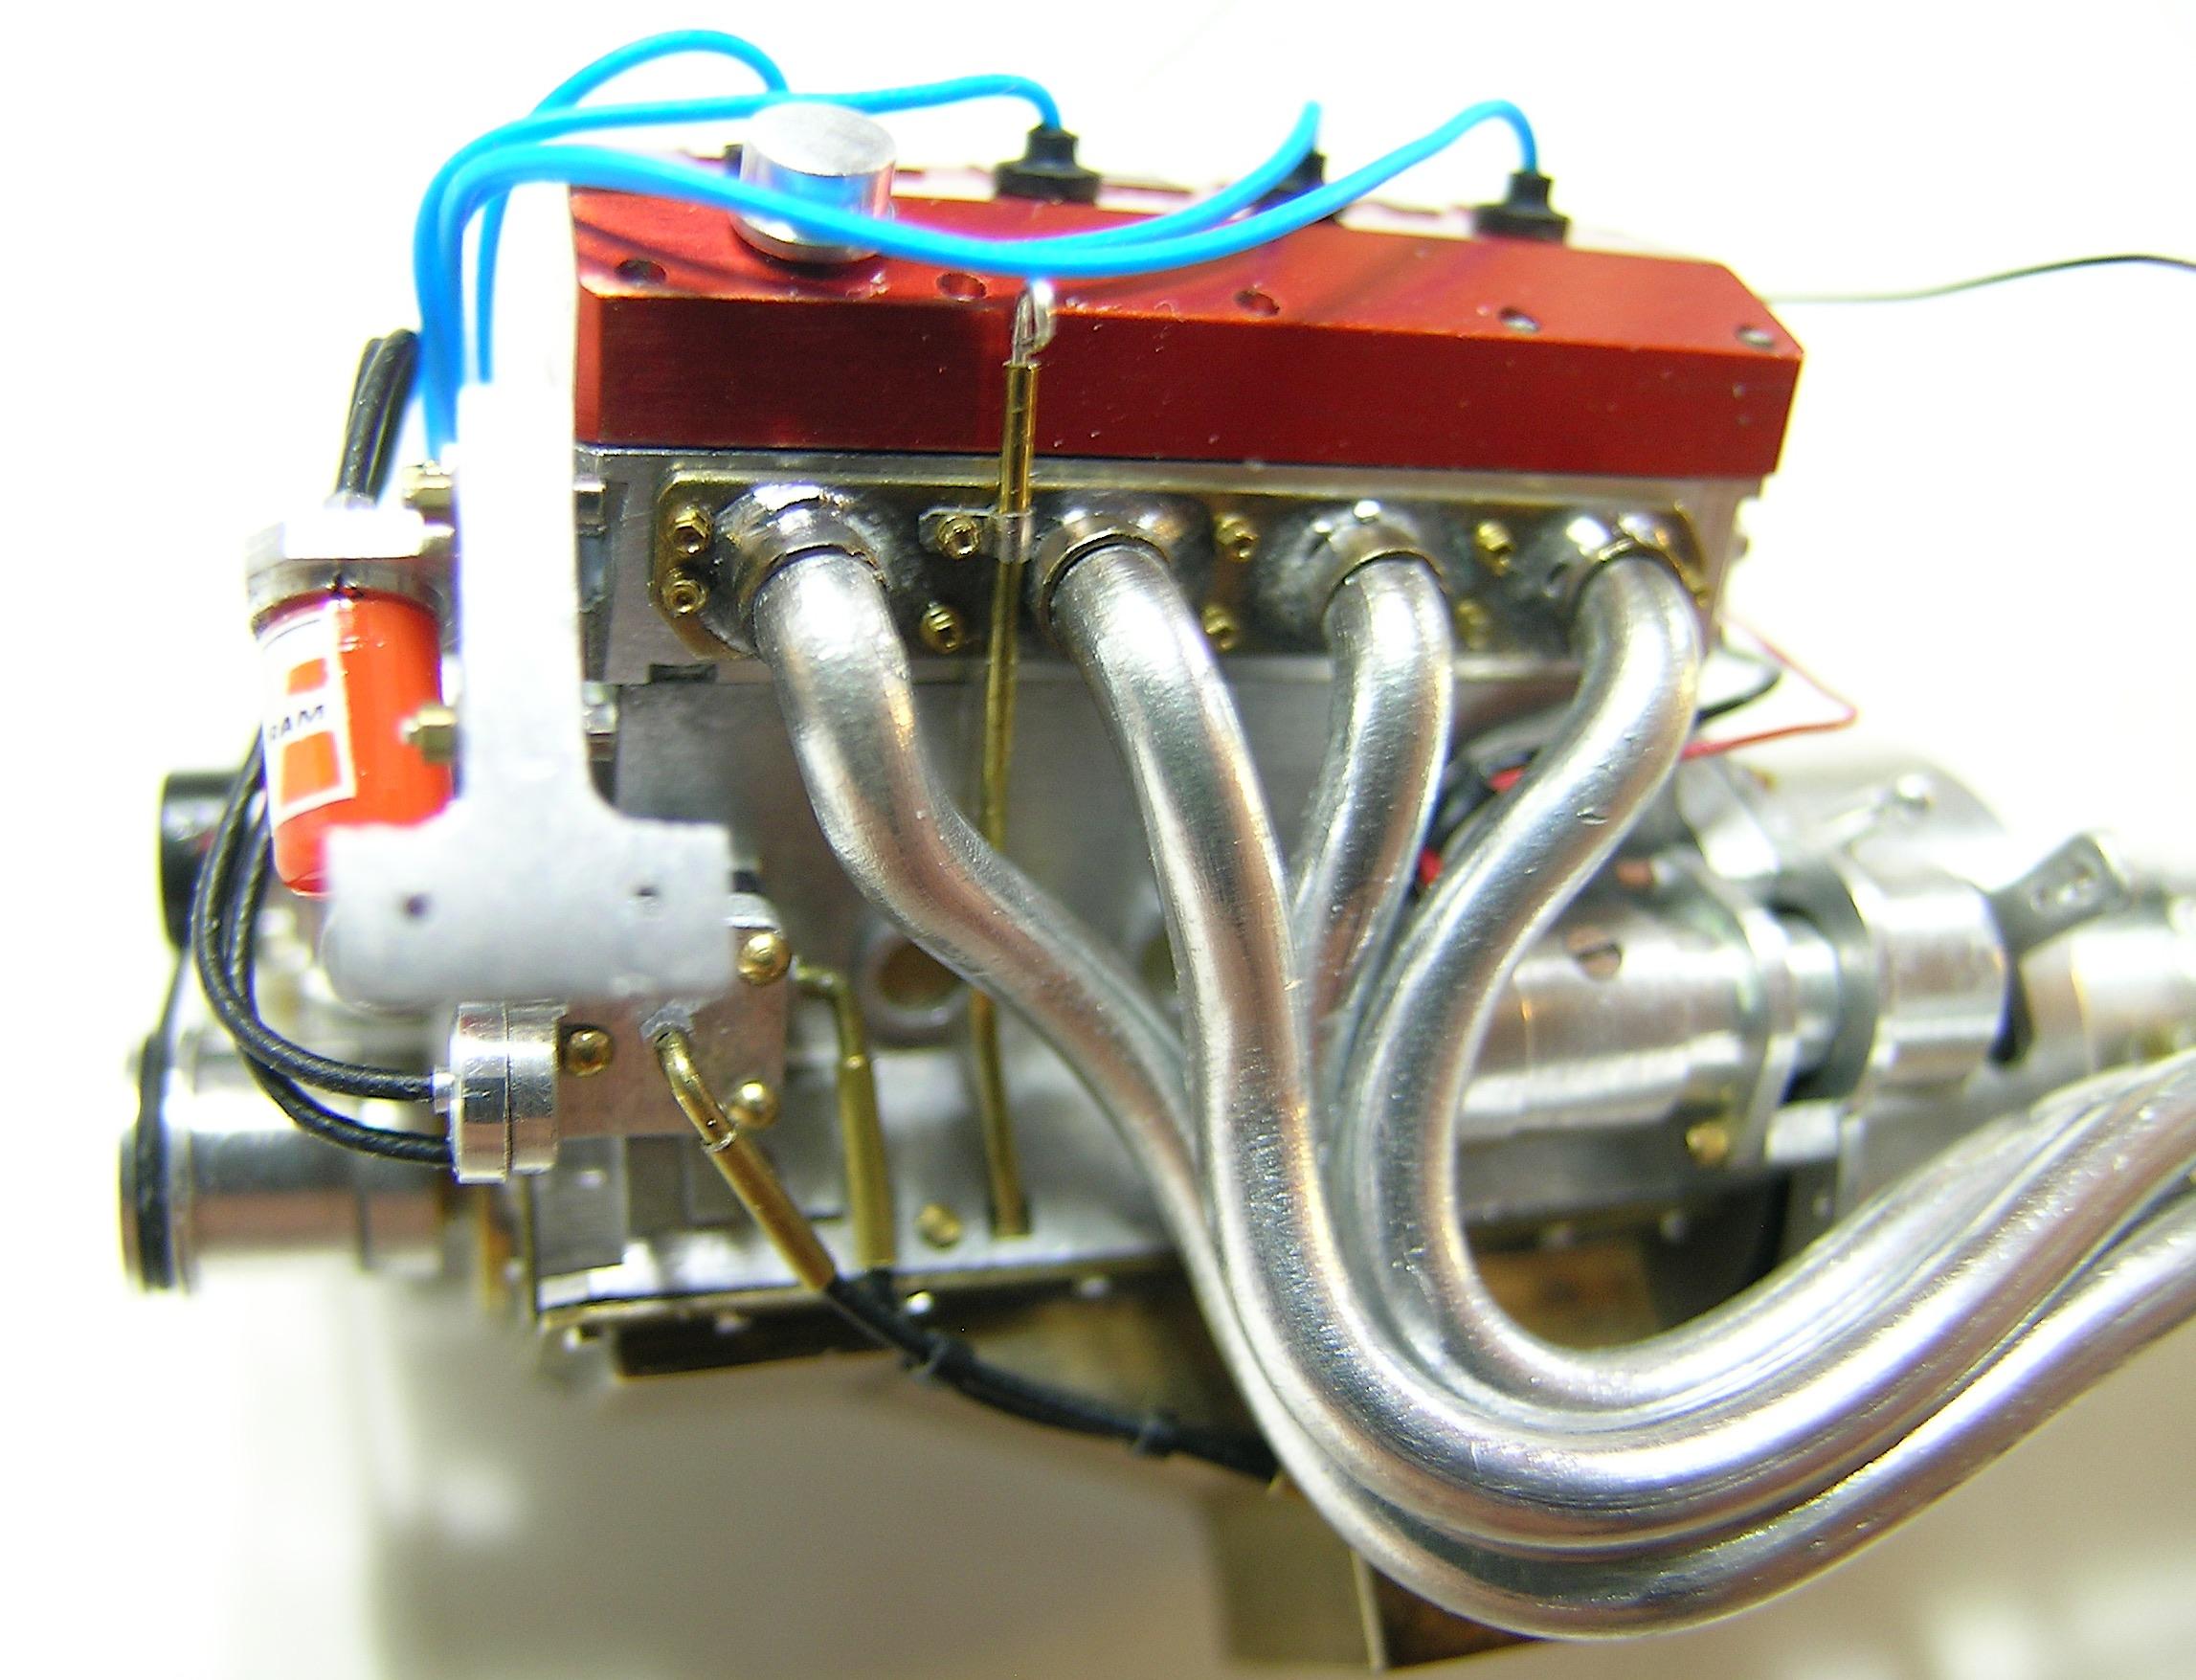
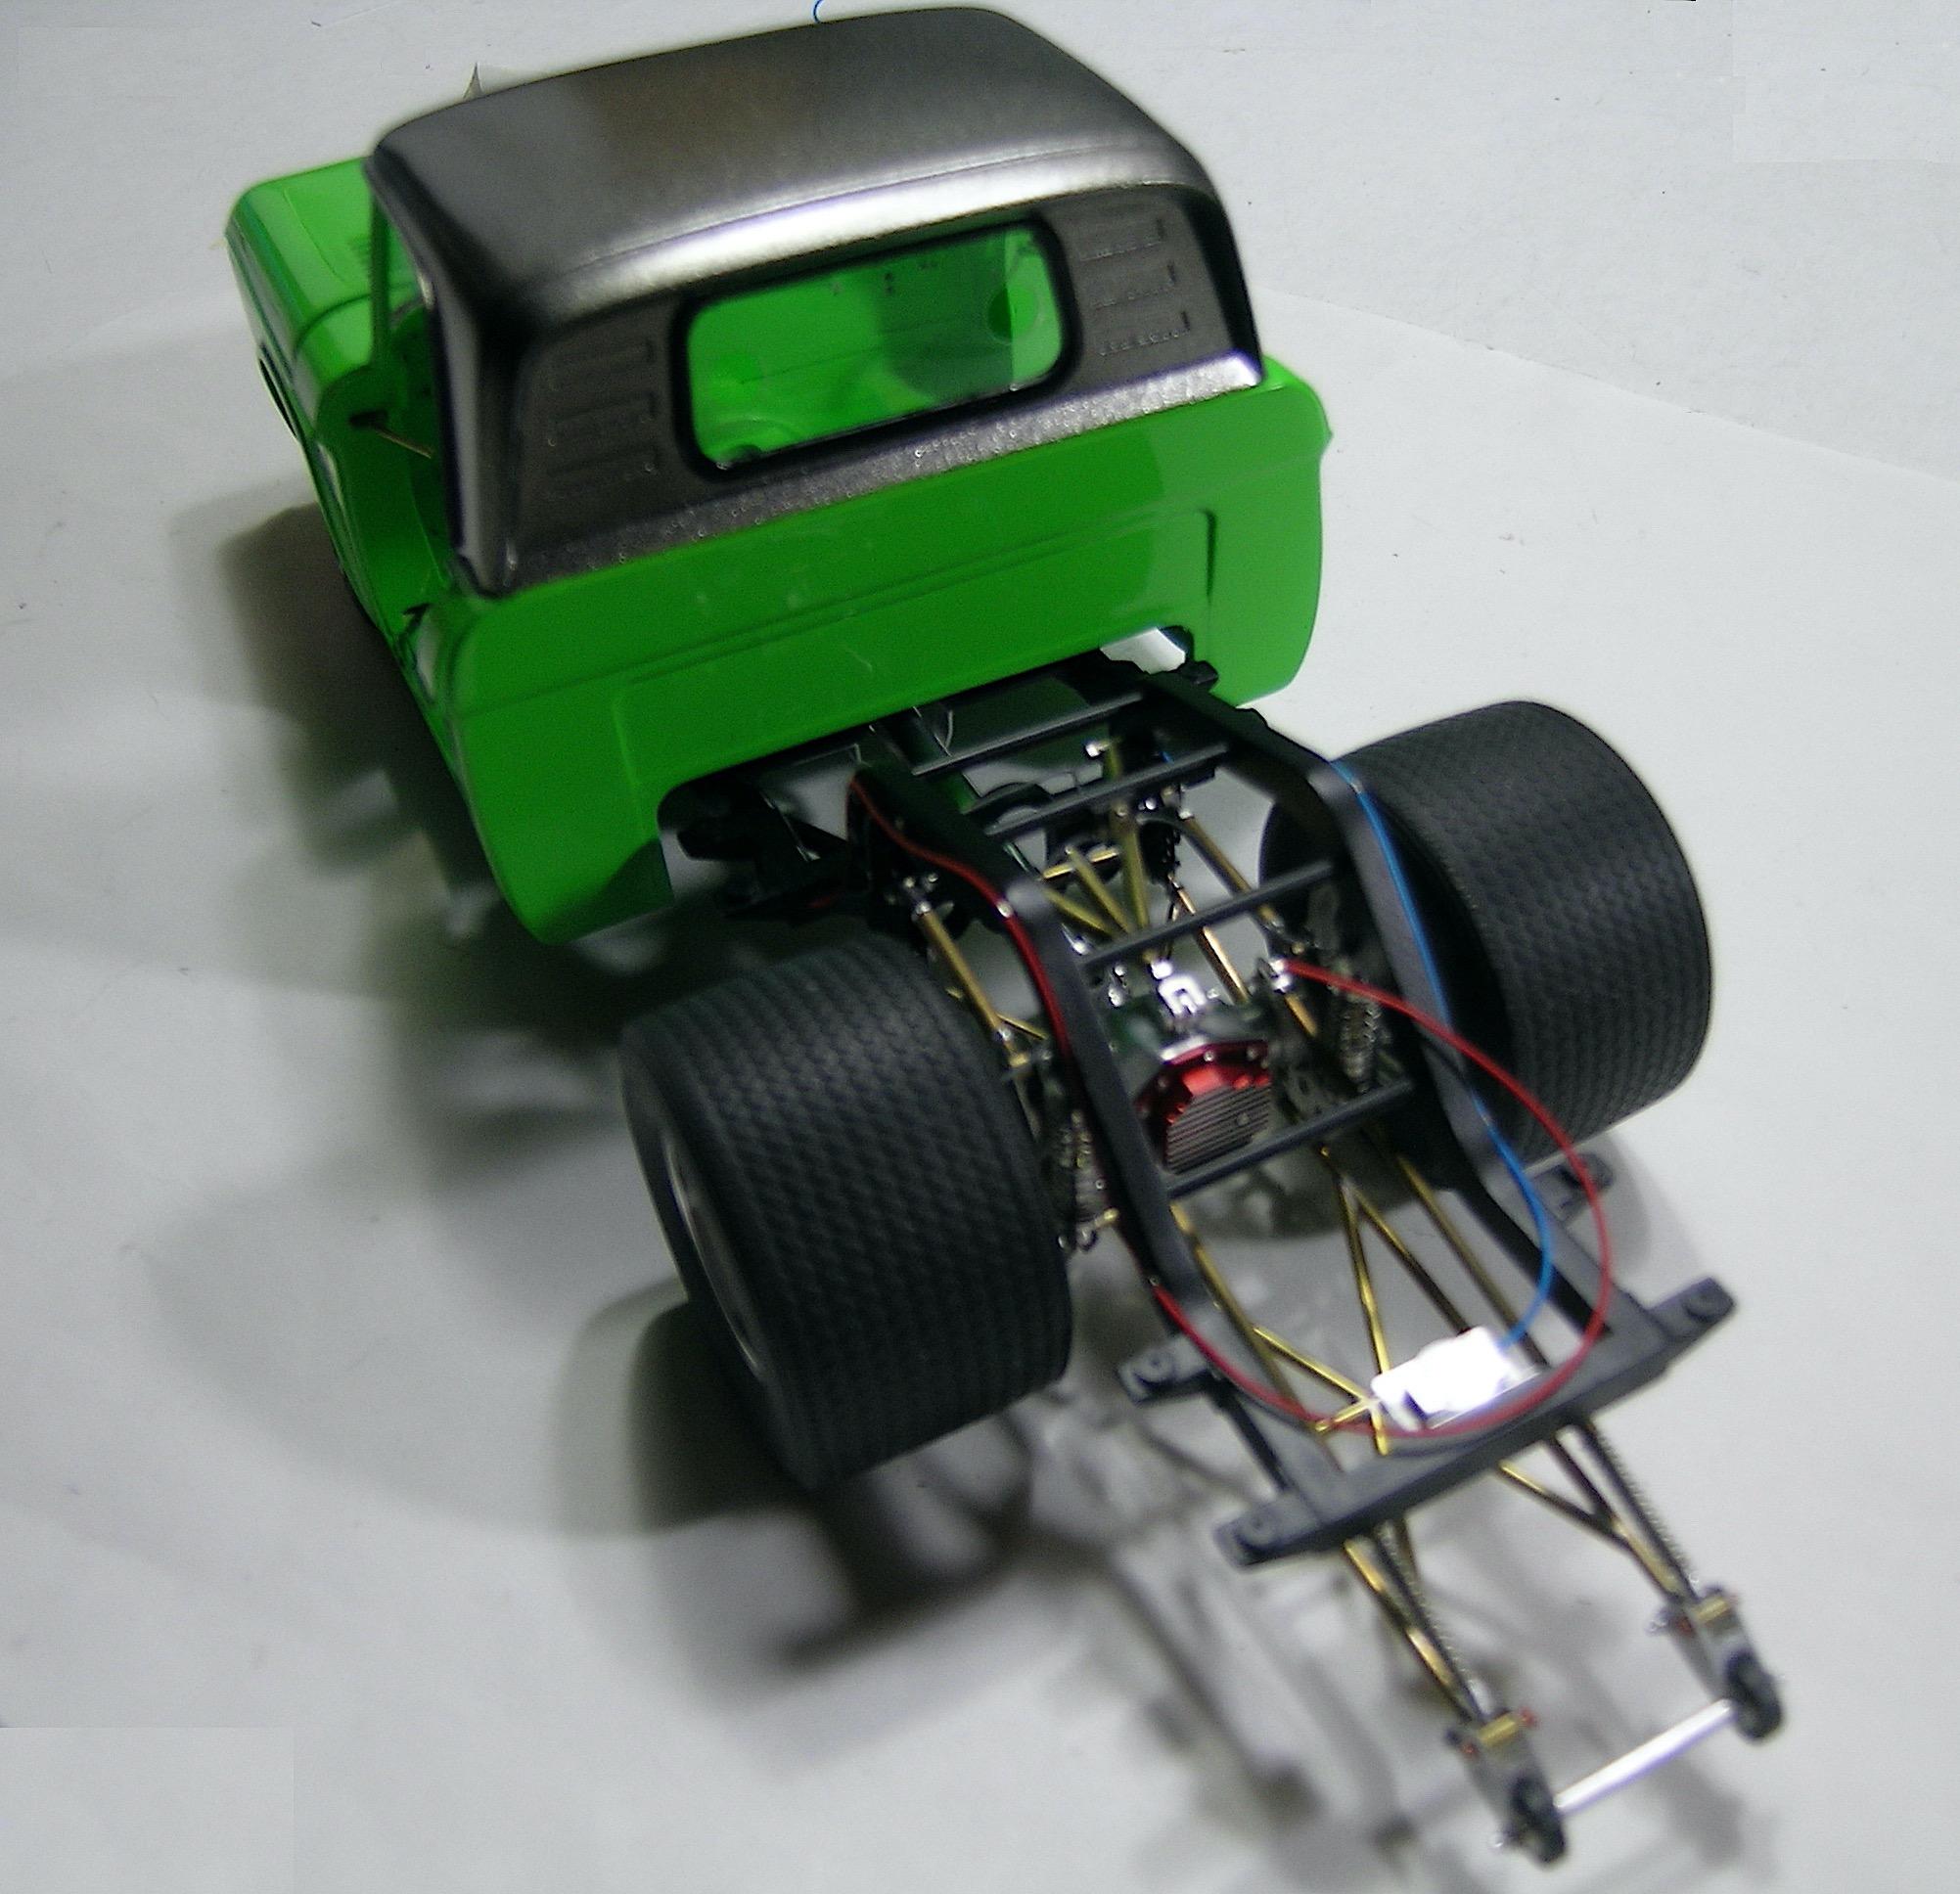
Hello everyone, This is what I could call a milestone in the build, the engine compartment is 99% complete, I only have minor details to add but overall, I can say mission accomplished !!! Everything fit as planned and I can now move on to the bed and all the elements I made to fit in it. I don't know how many times I assembled and disassembled the bed before painting it so it should be fine... I don't have much comment to add to explain the pictures, I think that as the saying goes, a picture is worth a thousand words, I hope you'll like it, on my side I'm quite satisfied ! See you soon, Francis I still need to install the brake lines on the master cylinder and on the brake line lock selenoid. View from another angle, It gives you a good idea but in all modesty, I must say that it is even better in real life.
-
64 Dodge D100 Pickup Pro Street
AmericanMuscleFan replied to AmericanMuscleFan's topic in WIP: Drag Racing Models
Thanks James, I put all this to work and the photos will follow shortly. -
64 Dodge D100 Pickup Pro Street
AmericanMuscleFan replied to AmericanMuscleFan's topic in WIP: Drag Racing Models
Thanks Claude! You are a true NHRA encyclopedia my friend... I'm going to have to redo my homework on my next project or keep you in my closet for your knowledge with every piece produced! Alright, I'll buy your silence and the burger will be on my arm. Actually I win on all counts, I go under the radar and eat a good burger in good company... ? Francis -
De Foosing the FD-100
AmericanMuscleFan replied to butter's topic in WIP: Model Trucks: Pickups, Vans, SUVs, Light Commercial
WOW !!! Great replica Ron, the dash is superb and a perfect match of your real truck ! ? -
I love the Coke can Daniel, it's cool... no it's hot... ? The wing is very nice and well made as are all the elements of this build! Your perseverance is paying off !!! ?
-
Plymouth Salt Flat Slammer
AmericanMuscleFan replied to OldNYJim's topic in WIP: Other Racing: Road Racing, Land Speed Racers
No need for more details, it is a pure beauty and you fully deserve the article and the special exposure they gave you ! ? -
Great job Charlie, the seat looks very comfortable, it's a hit on the first try... ? The Optima bettery looks great too but you put a lot of work into it, I would have thought you would have made it with Delrin or some other amazing material from your secret arsenal. Anyway, you can never use too much brass, a noble material for a construction that goes the same way... ?
-
64 Dodge D100 Pickup Pro Street
AmericanMuscleFan replied to AmericanMuscleFan's topic in WIP: Drag Racing Models
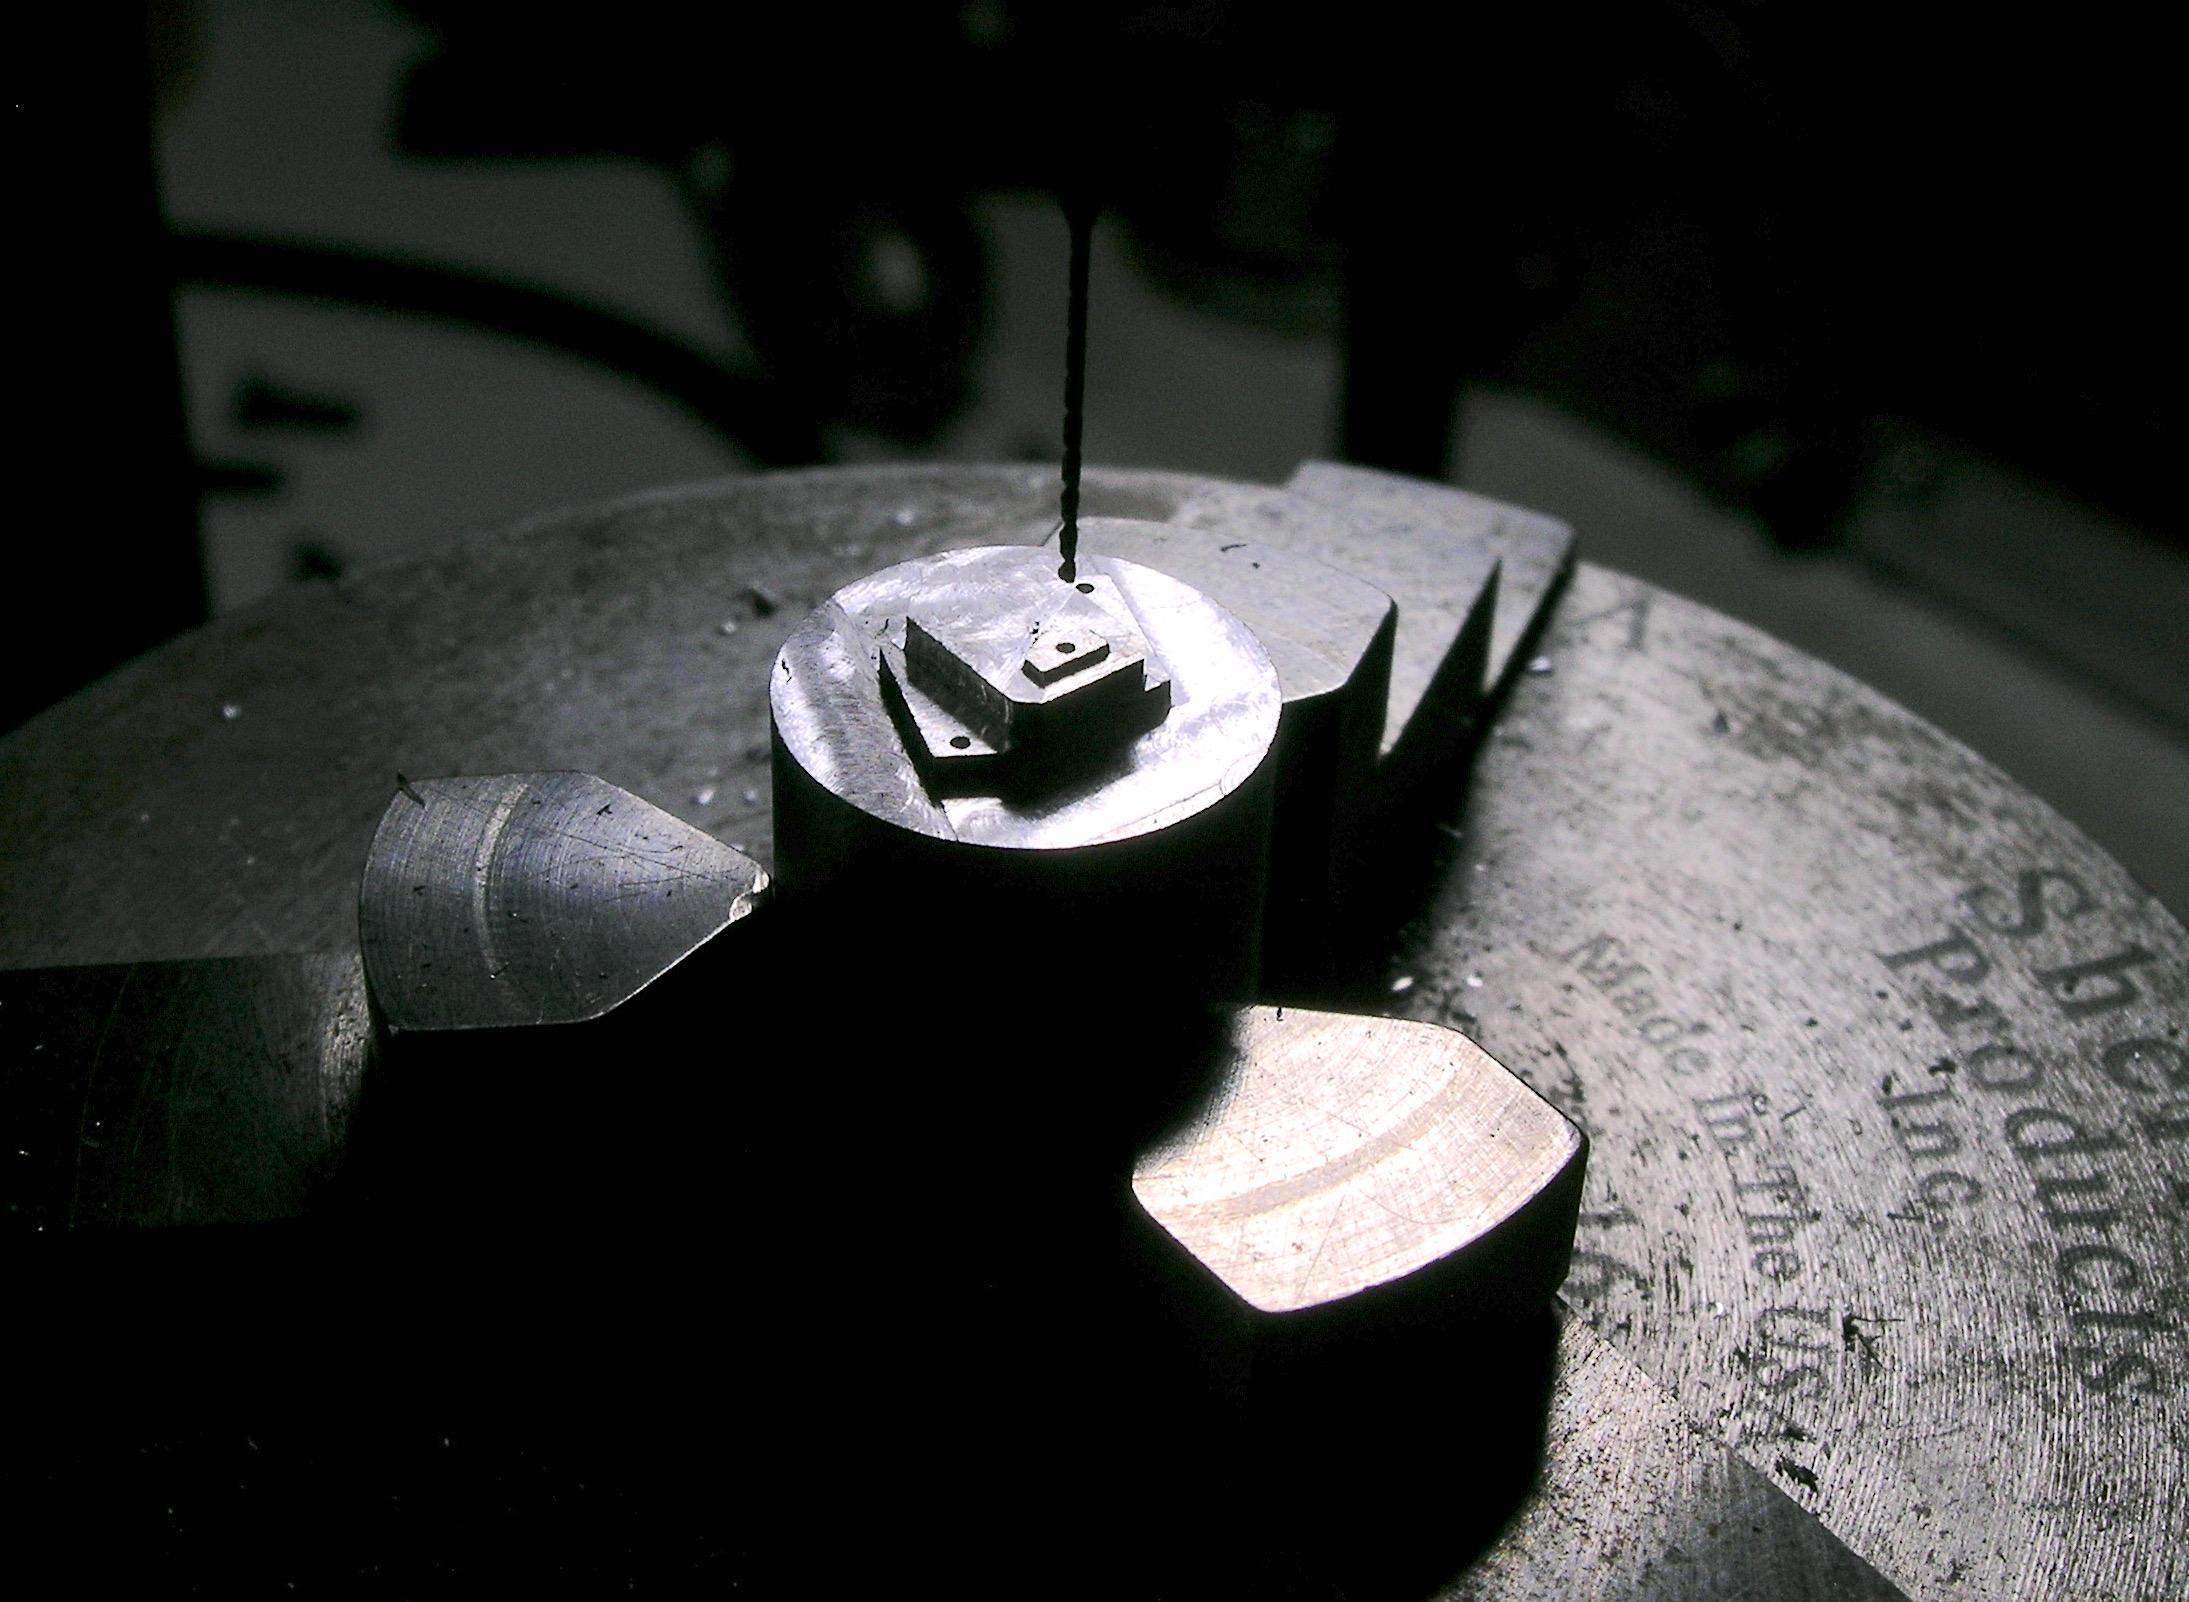
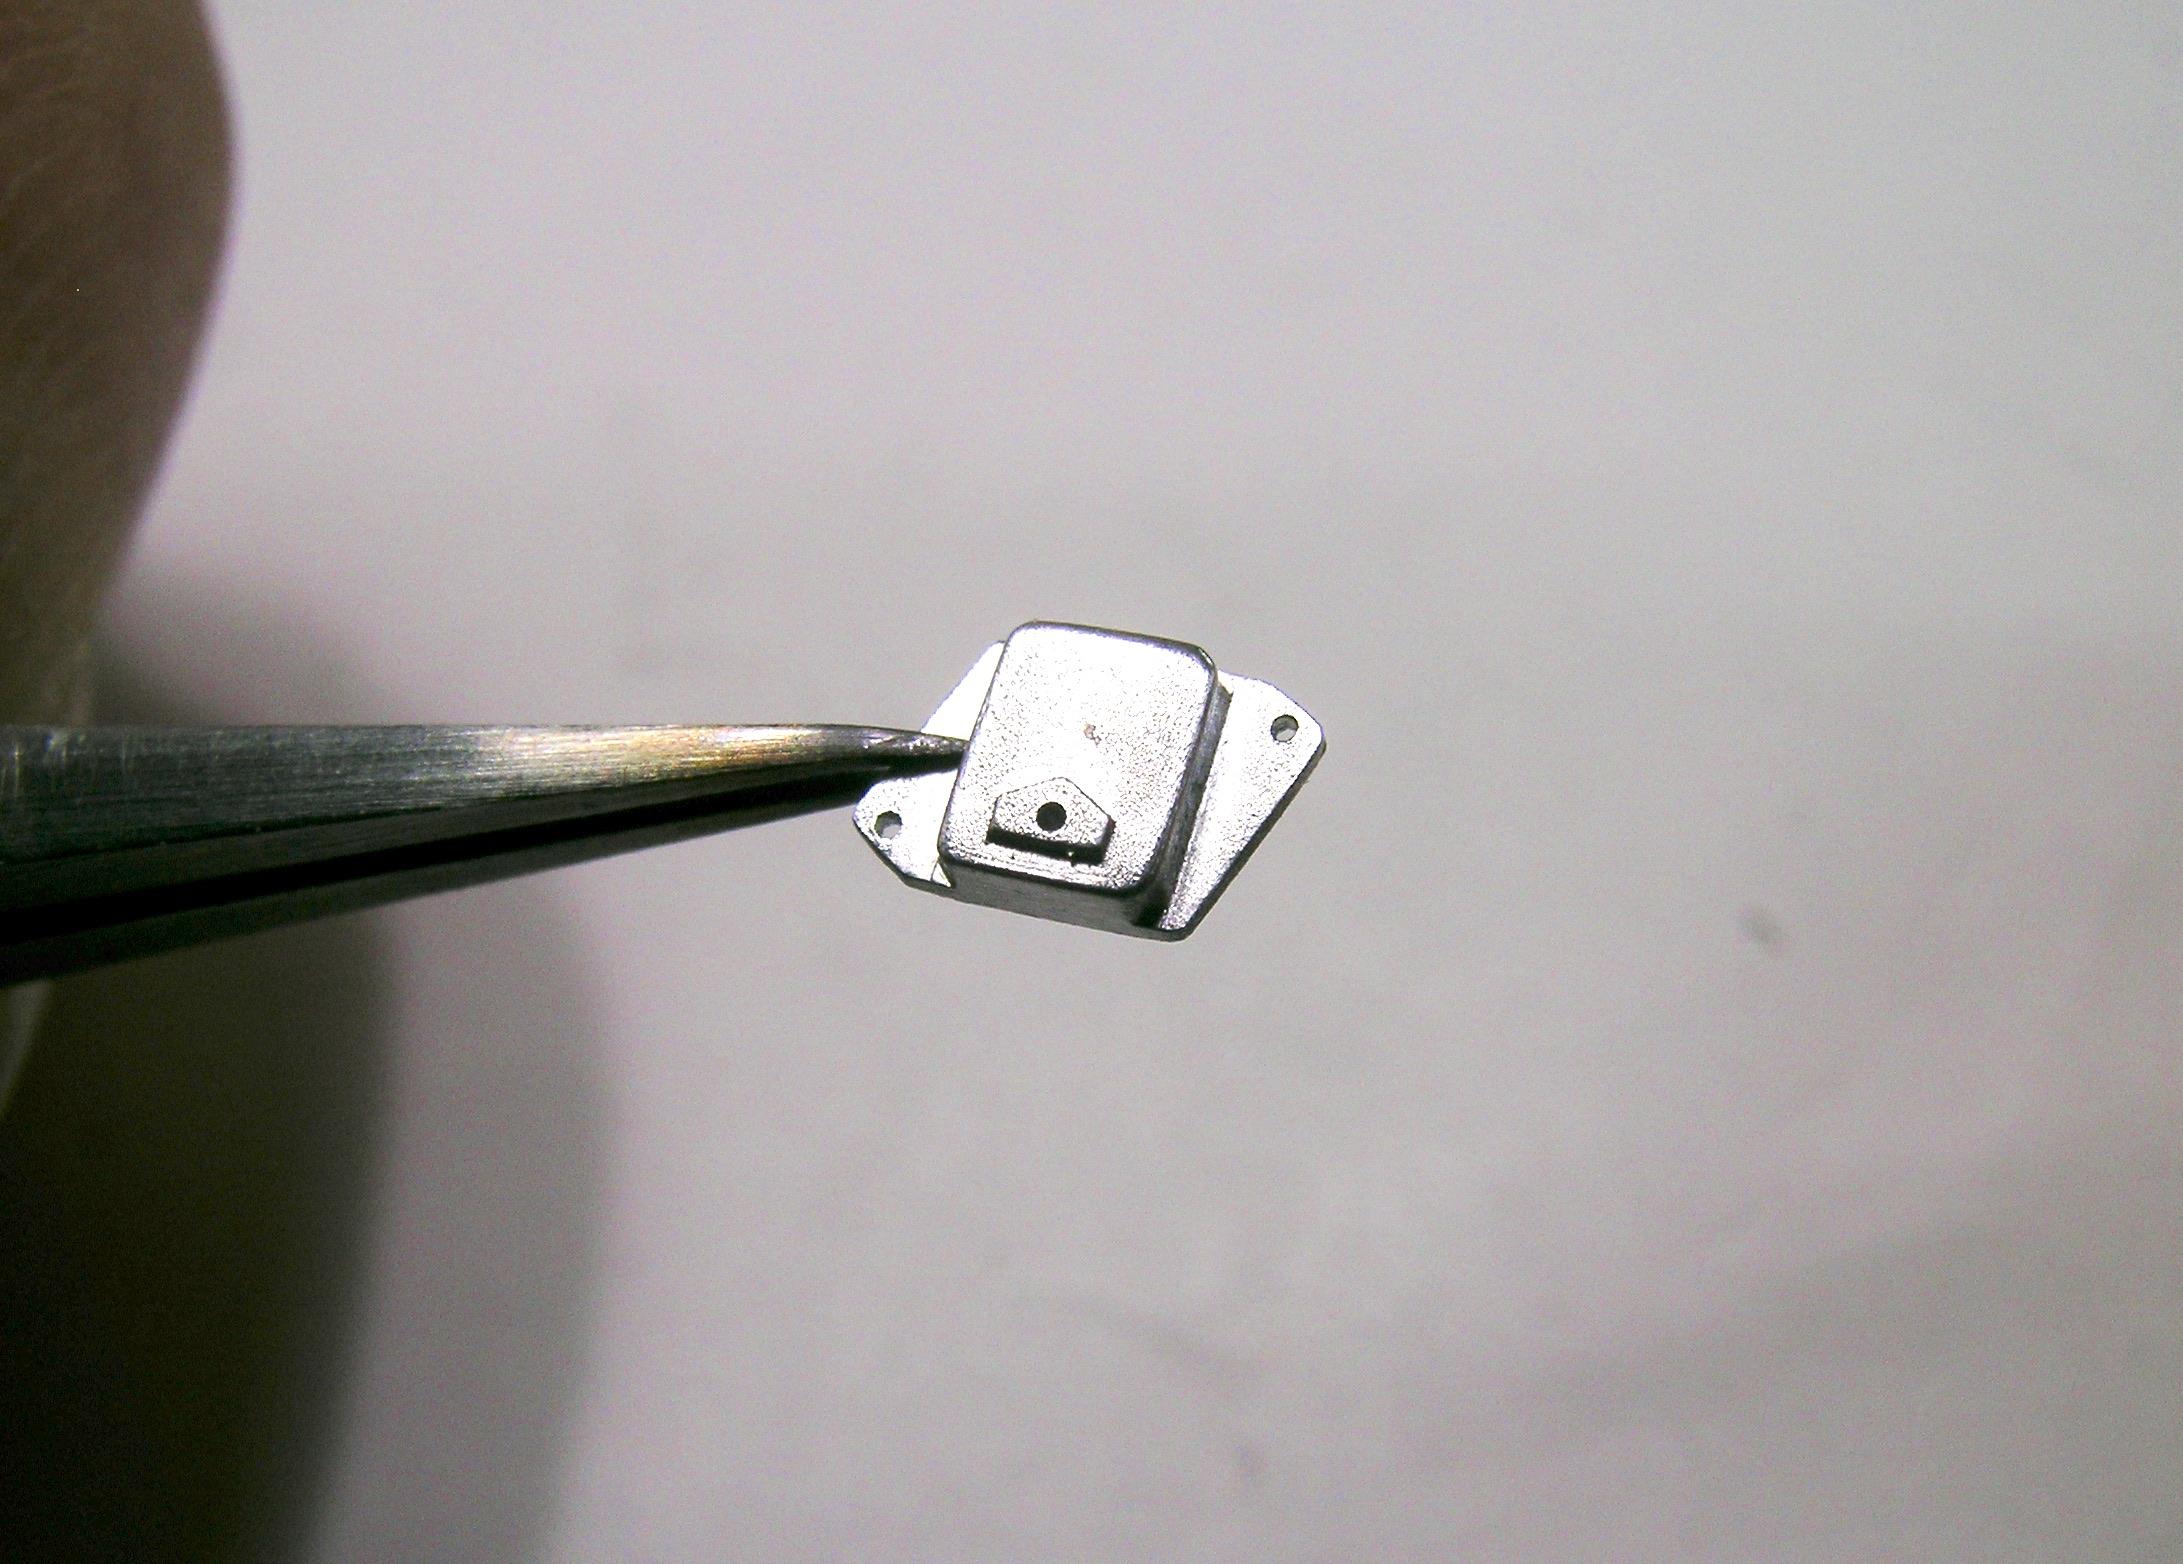
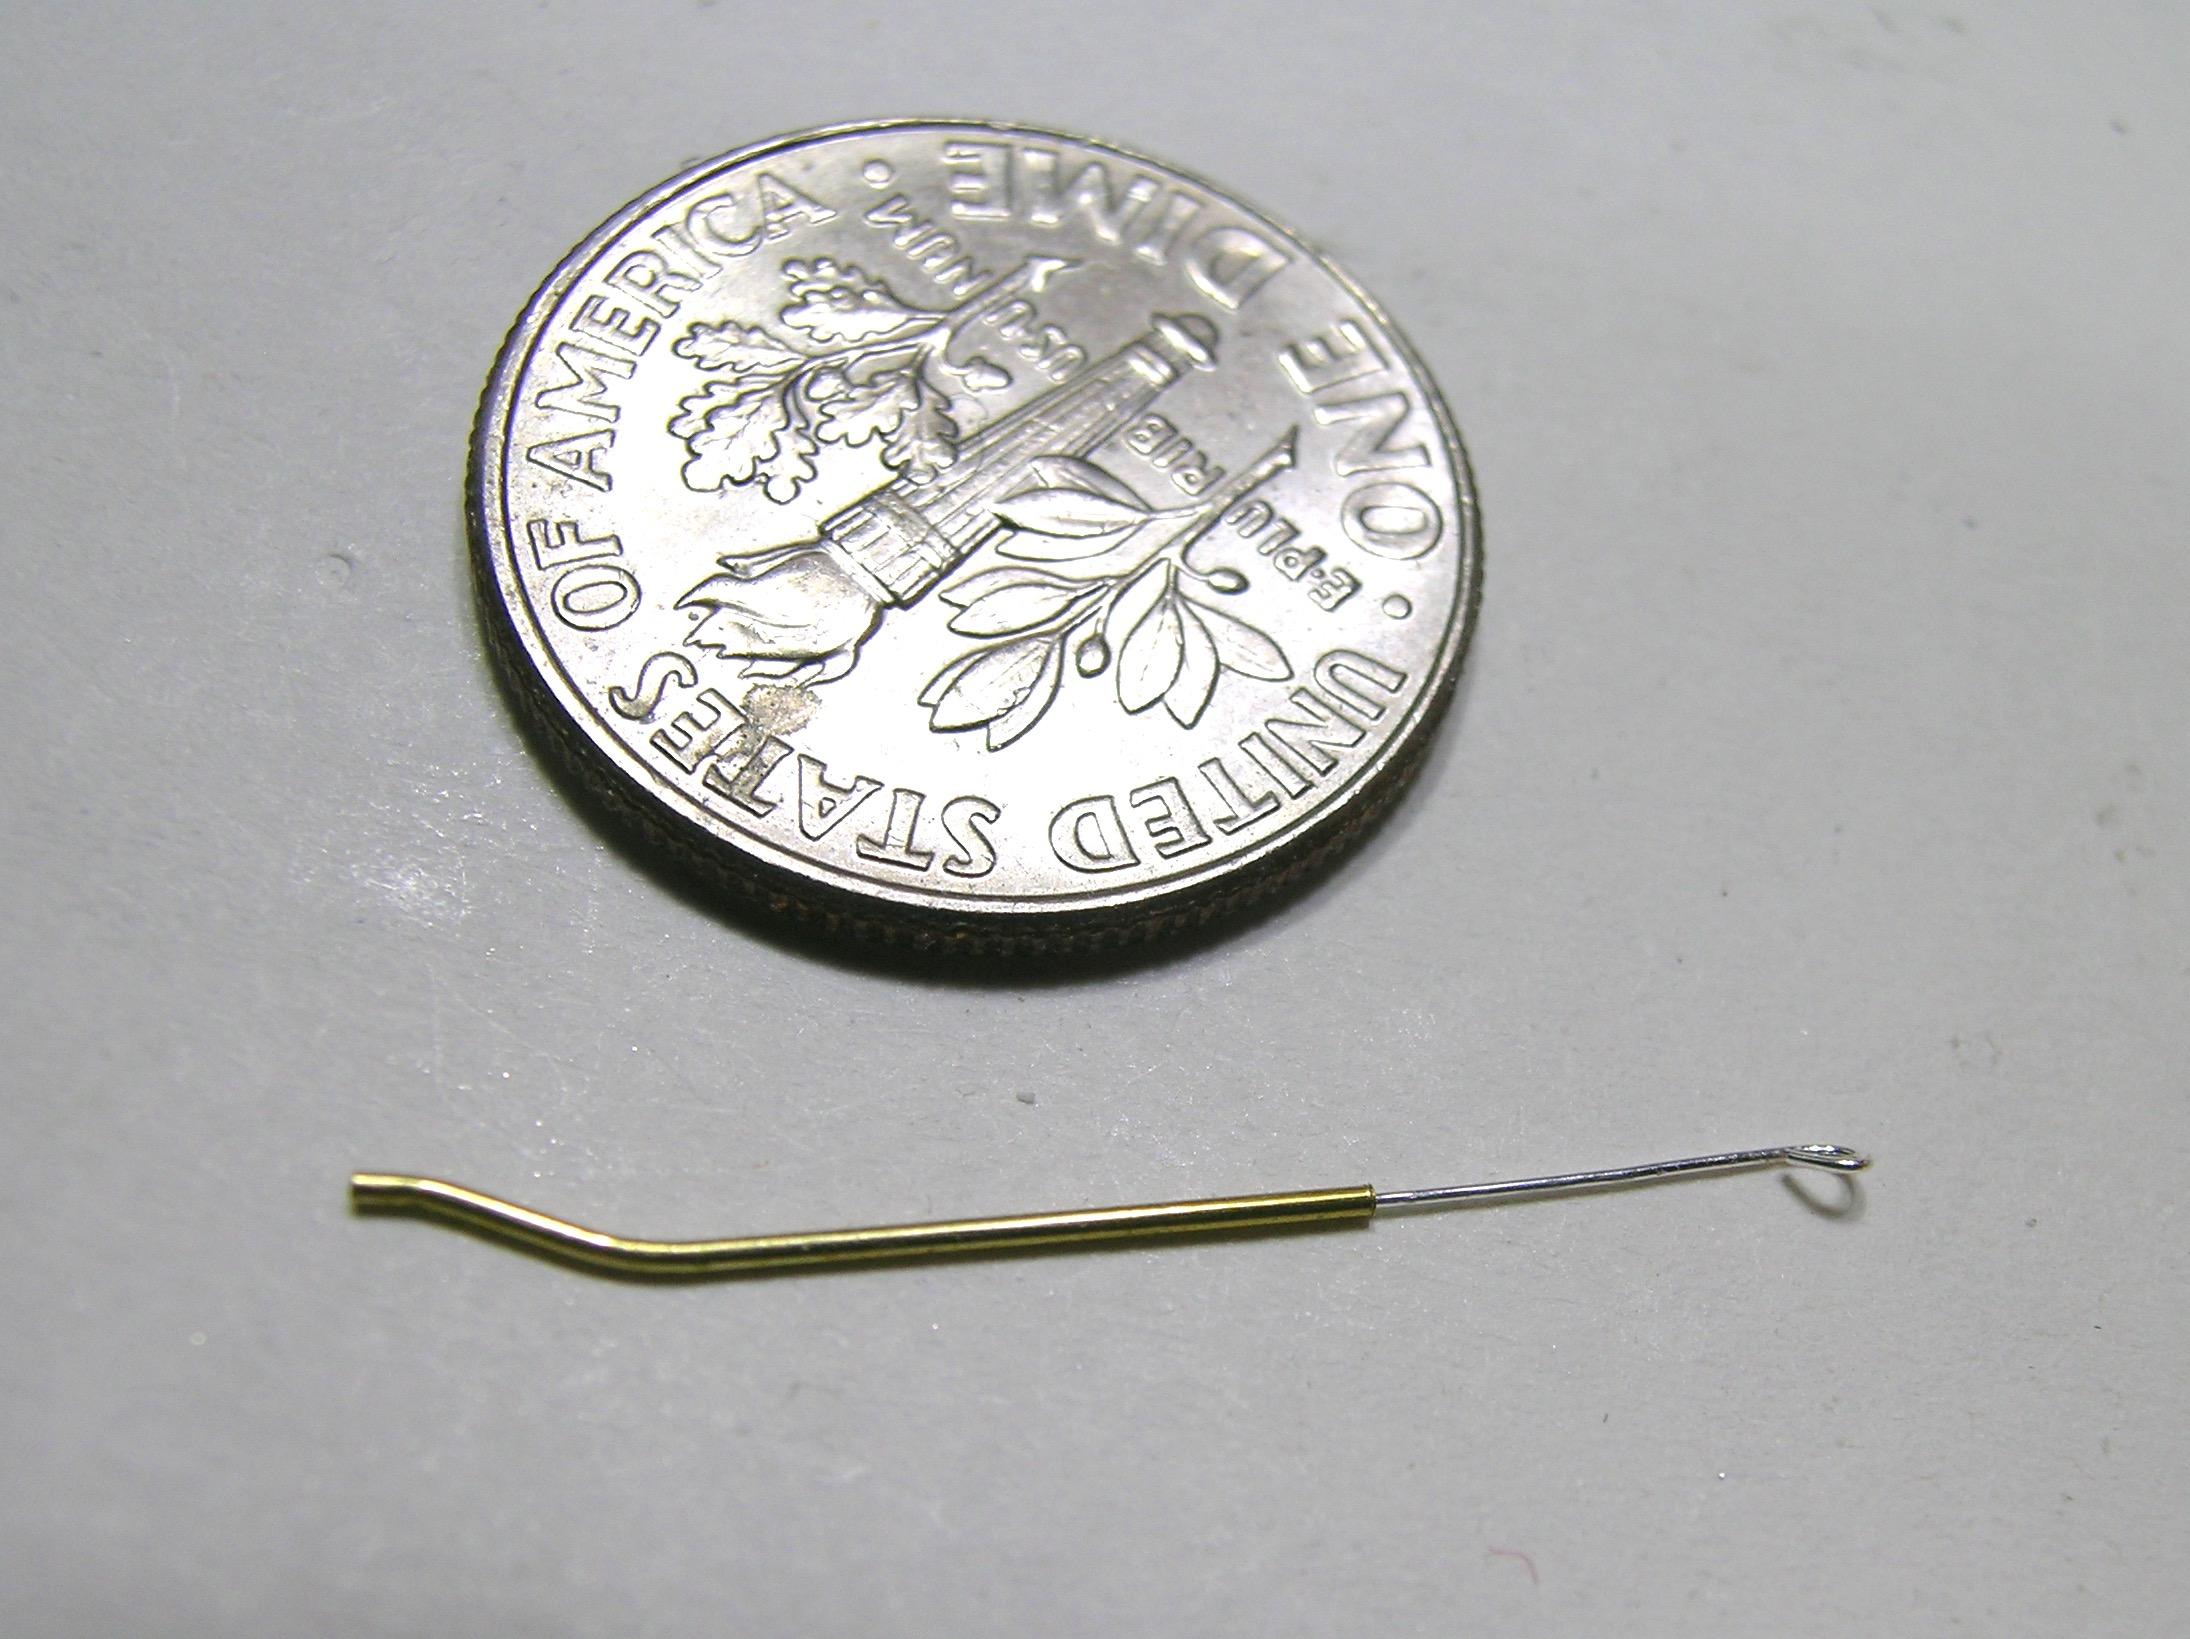
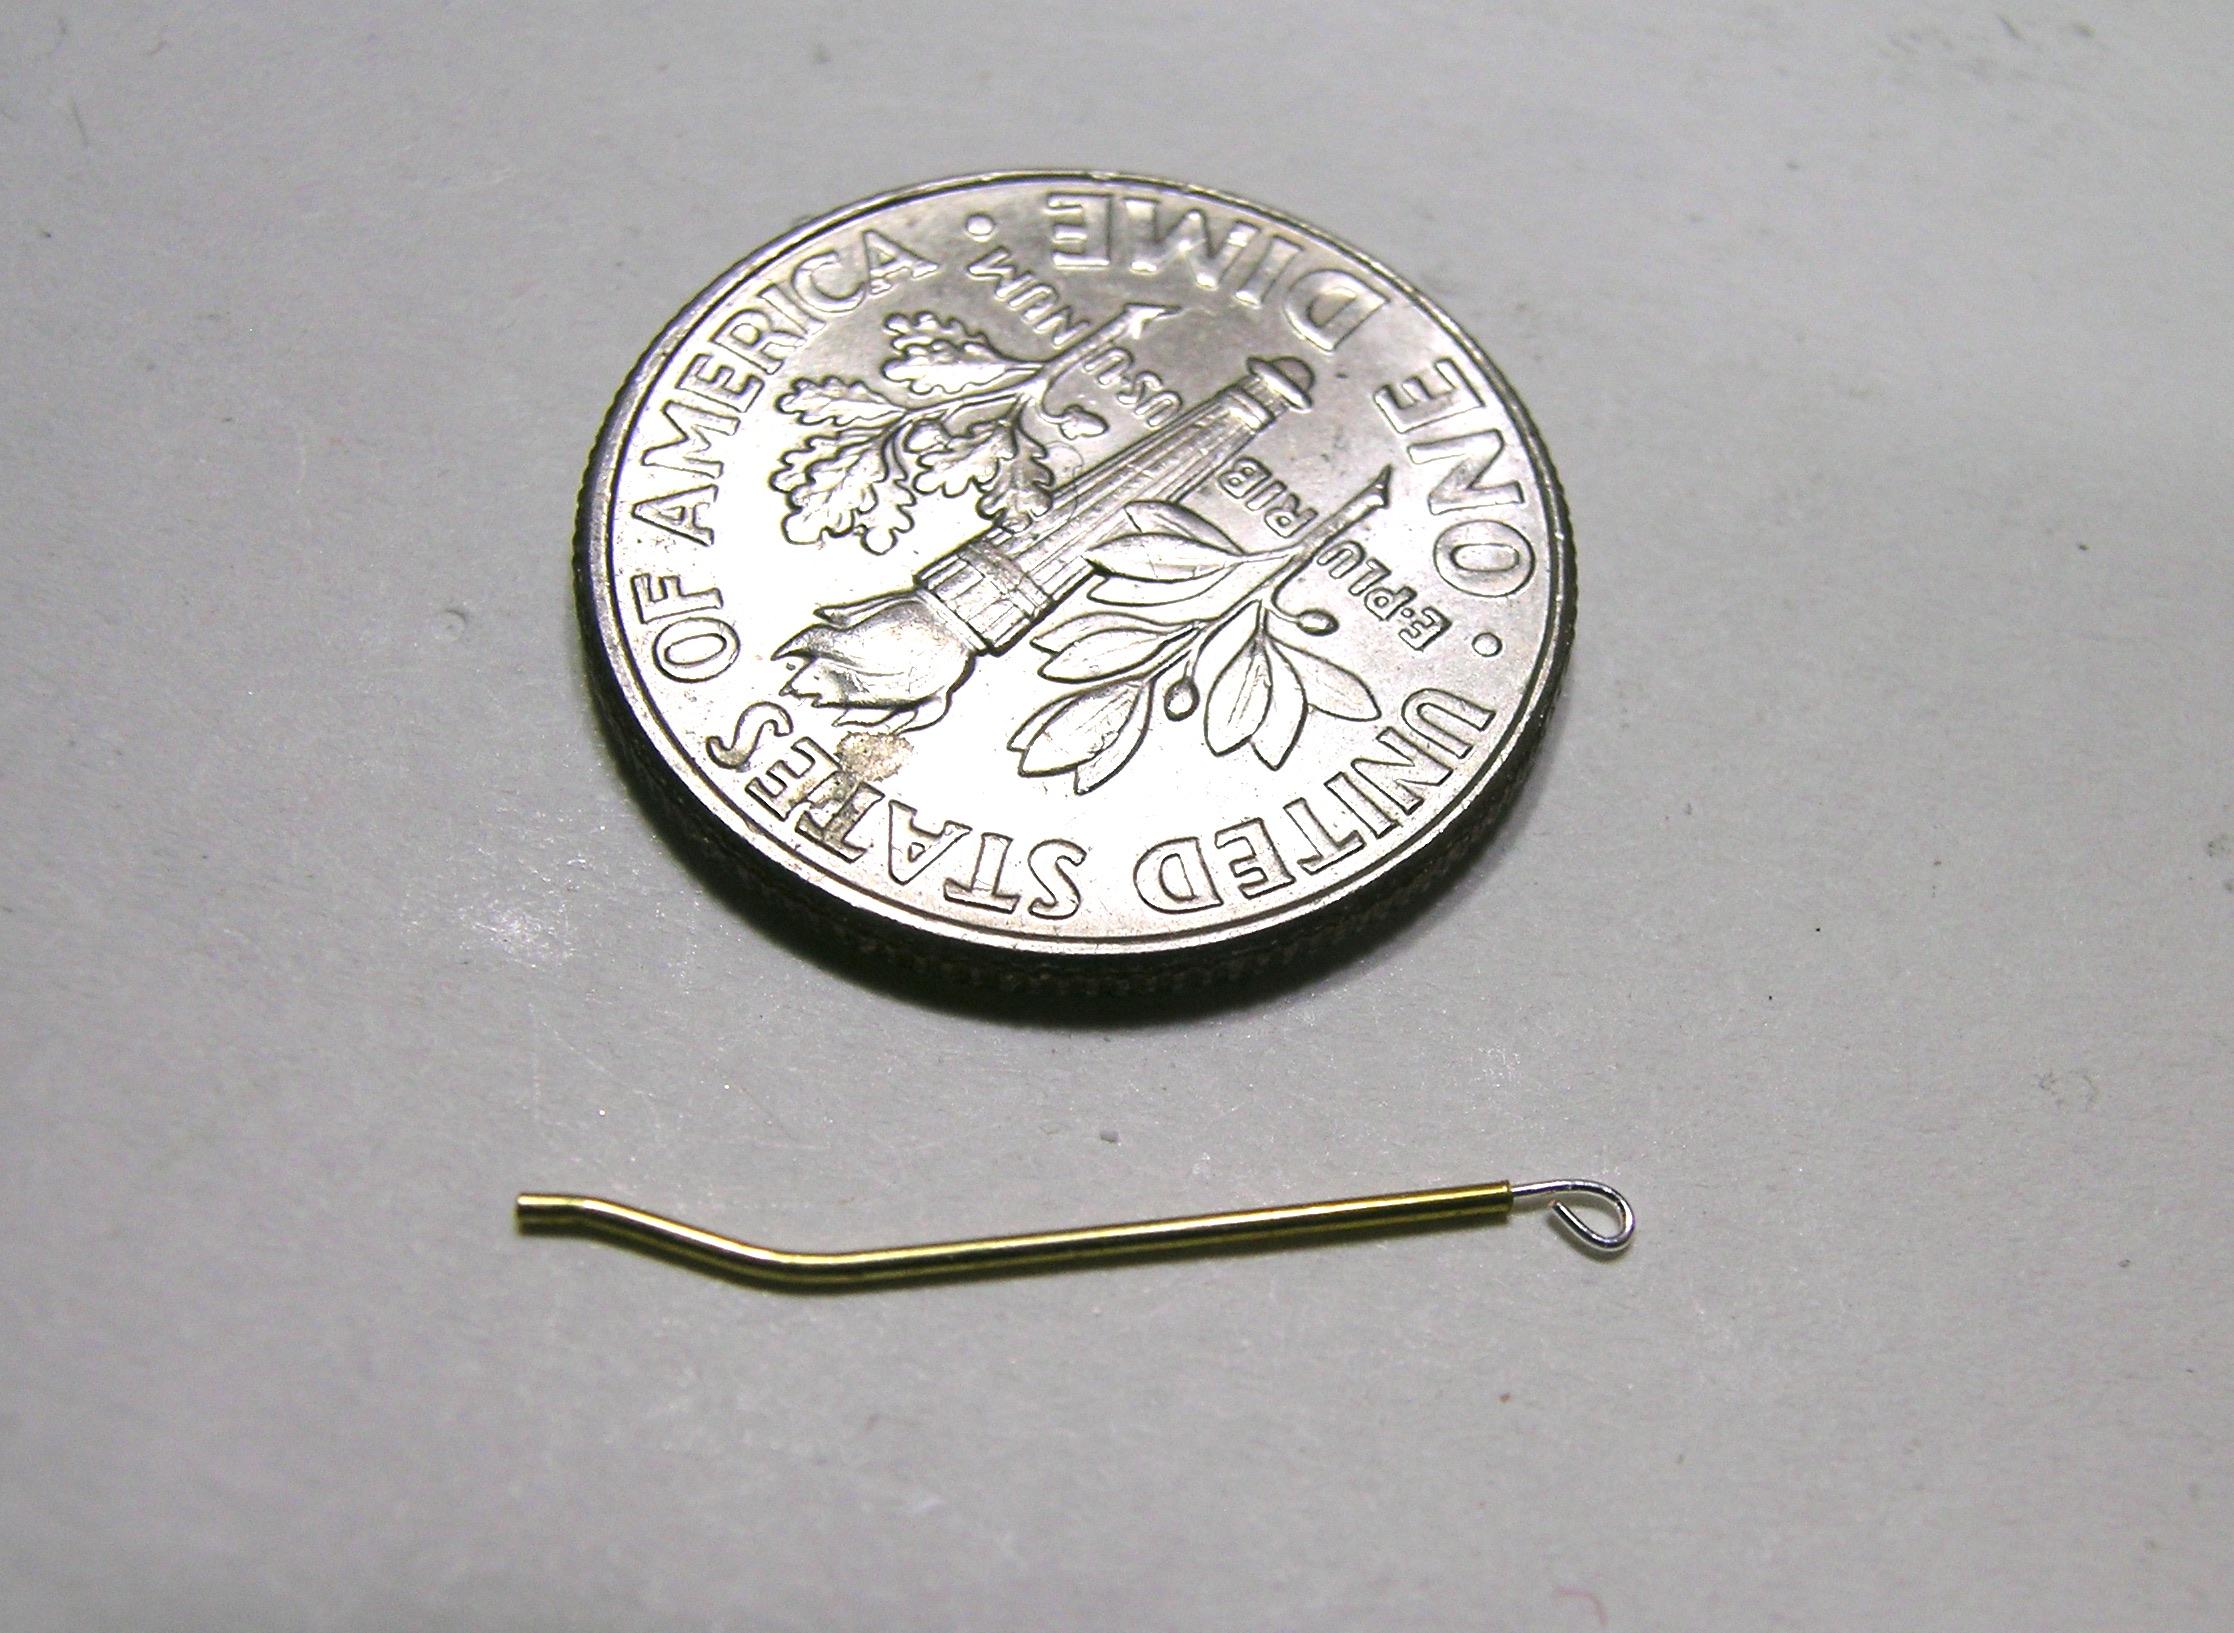
Hello everyone, I made the throttle cable bracket and took the time to upload some pictures to show you what it looks like. I can tell you that there is a lot of stuff under the hood but all the elements have found their place... I'll do the final installation tomorrow and I'll upload some pictures of the engine compartment before my work week starts. See you soon, Francis The throttle bracket was handmade using 0.005" aluminum, the return spring was also handmade using a small wire from a turn signal coil. I use my finger to give you an idea of the size (I have little fingers by the way...). ? Adjustment test on the intake manifold, it will soon be definitively mounted on the HEMI.
-
64 Dodge D100 Pickup Pro Street
AmericanMuscleFan replied to AmericanMuscleFan's topic in WIP: Drag Racing Models
Thanks Charlie, I was a little afraid of being crucified but it seems that it passes the test, at least for those who talked about it... Nice to hear from you, winter is hanging on here in the north, I hope the temperature is not too bad in the south. The truck is going well (by my standards...) and I hope to finish it soon, I can't wait to start a new project... Francis -
WOW !!! Sorry but that is the first and only word that comes to mind... ... ... ... Now it's coming back to me, I love that kind of detail ! ?
-
64 Dodge D100 Pickup Pro Street
AmericanMuscleFan replied to AmericanMuscleFan's topic in WIP: Drag Racing Models
Thanks Brian ! What I miss the most is having access to real physical measurements and I have to rely on photos found on the web to recreate my pieces. Maybe overall it makes some sense and the final assembly will tell everything I think. I have a good part of the engine compartment assembly completed and I must admit that it looks pretty promising, you'll be able to judge soon. I just have to make the throttle cable support and I'll be able to mount the intake manifold and carburetor assembly in place. Come back soon and you'll be able to judge for yourself! ? Francis -
64 Dodge D100 Pickup Pro Street
AmericanMuscleFan replied to AmericanMuscleFan's topic in WIP: Drag Racing Models
Thanks Ian ! Nothing is perfect but overall, I am quite satisfied with the work done knowing that it is always possible to do better (I am an eternal dissatisfied...). I still have work to do and I think in all modesty that I can improve the finish and details of my machined parts. Obviously, I am not doing this for competitive purposes but only for my personal satisfaction. It is however very nice to see that all this is appreciated by other enthusiasts like you who aspire to take their projects to a second level for the love of the hobby! As far as wristwatches are concerned, I still have a lot of crusts to eat but I know one or two who are closer than I am to that level and it inspires me to no end!!! ? Francis -
64 Dodge D100 Pickup Pro Street
AmericanMuscleFan replied to AmericanMuscleFan's topic in WIP: Drag Racing Models
Thanks again for your kind words and appreciation of my efforts, Mike! This is what this hobby means to me and I am truly proud and humbled if I can inspire modelers of your caliber. It is sometimes very amazing what you can accomplish when you are inspired by a particular subject that interests you to the highest degree. I'm not done yet but I still think there is room for improvement, I've learned a lot since the beginning of this project thanks to everything I see on this forum. It is often said that the grass is always greener on the neighbor's side but sometimes you have to appreciate what is in your yard! Thank you for keeping me fully motivated my friend, your work inspires many and I count myself among them! Francis -
64 Dodge D100 Pickup Pro Street
AmericanMuscleFan replied to AmericanMuscleFan's topic in WIP: Drag Racing Models
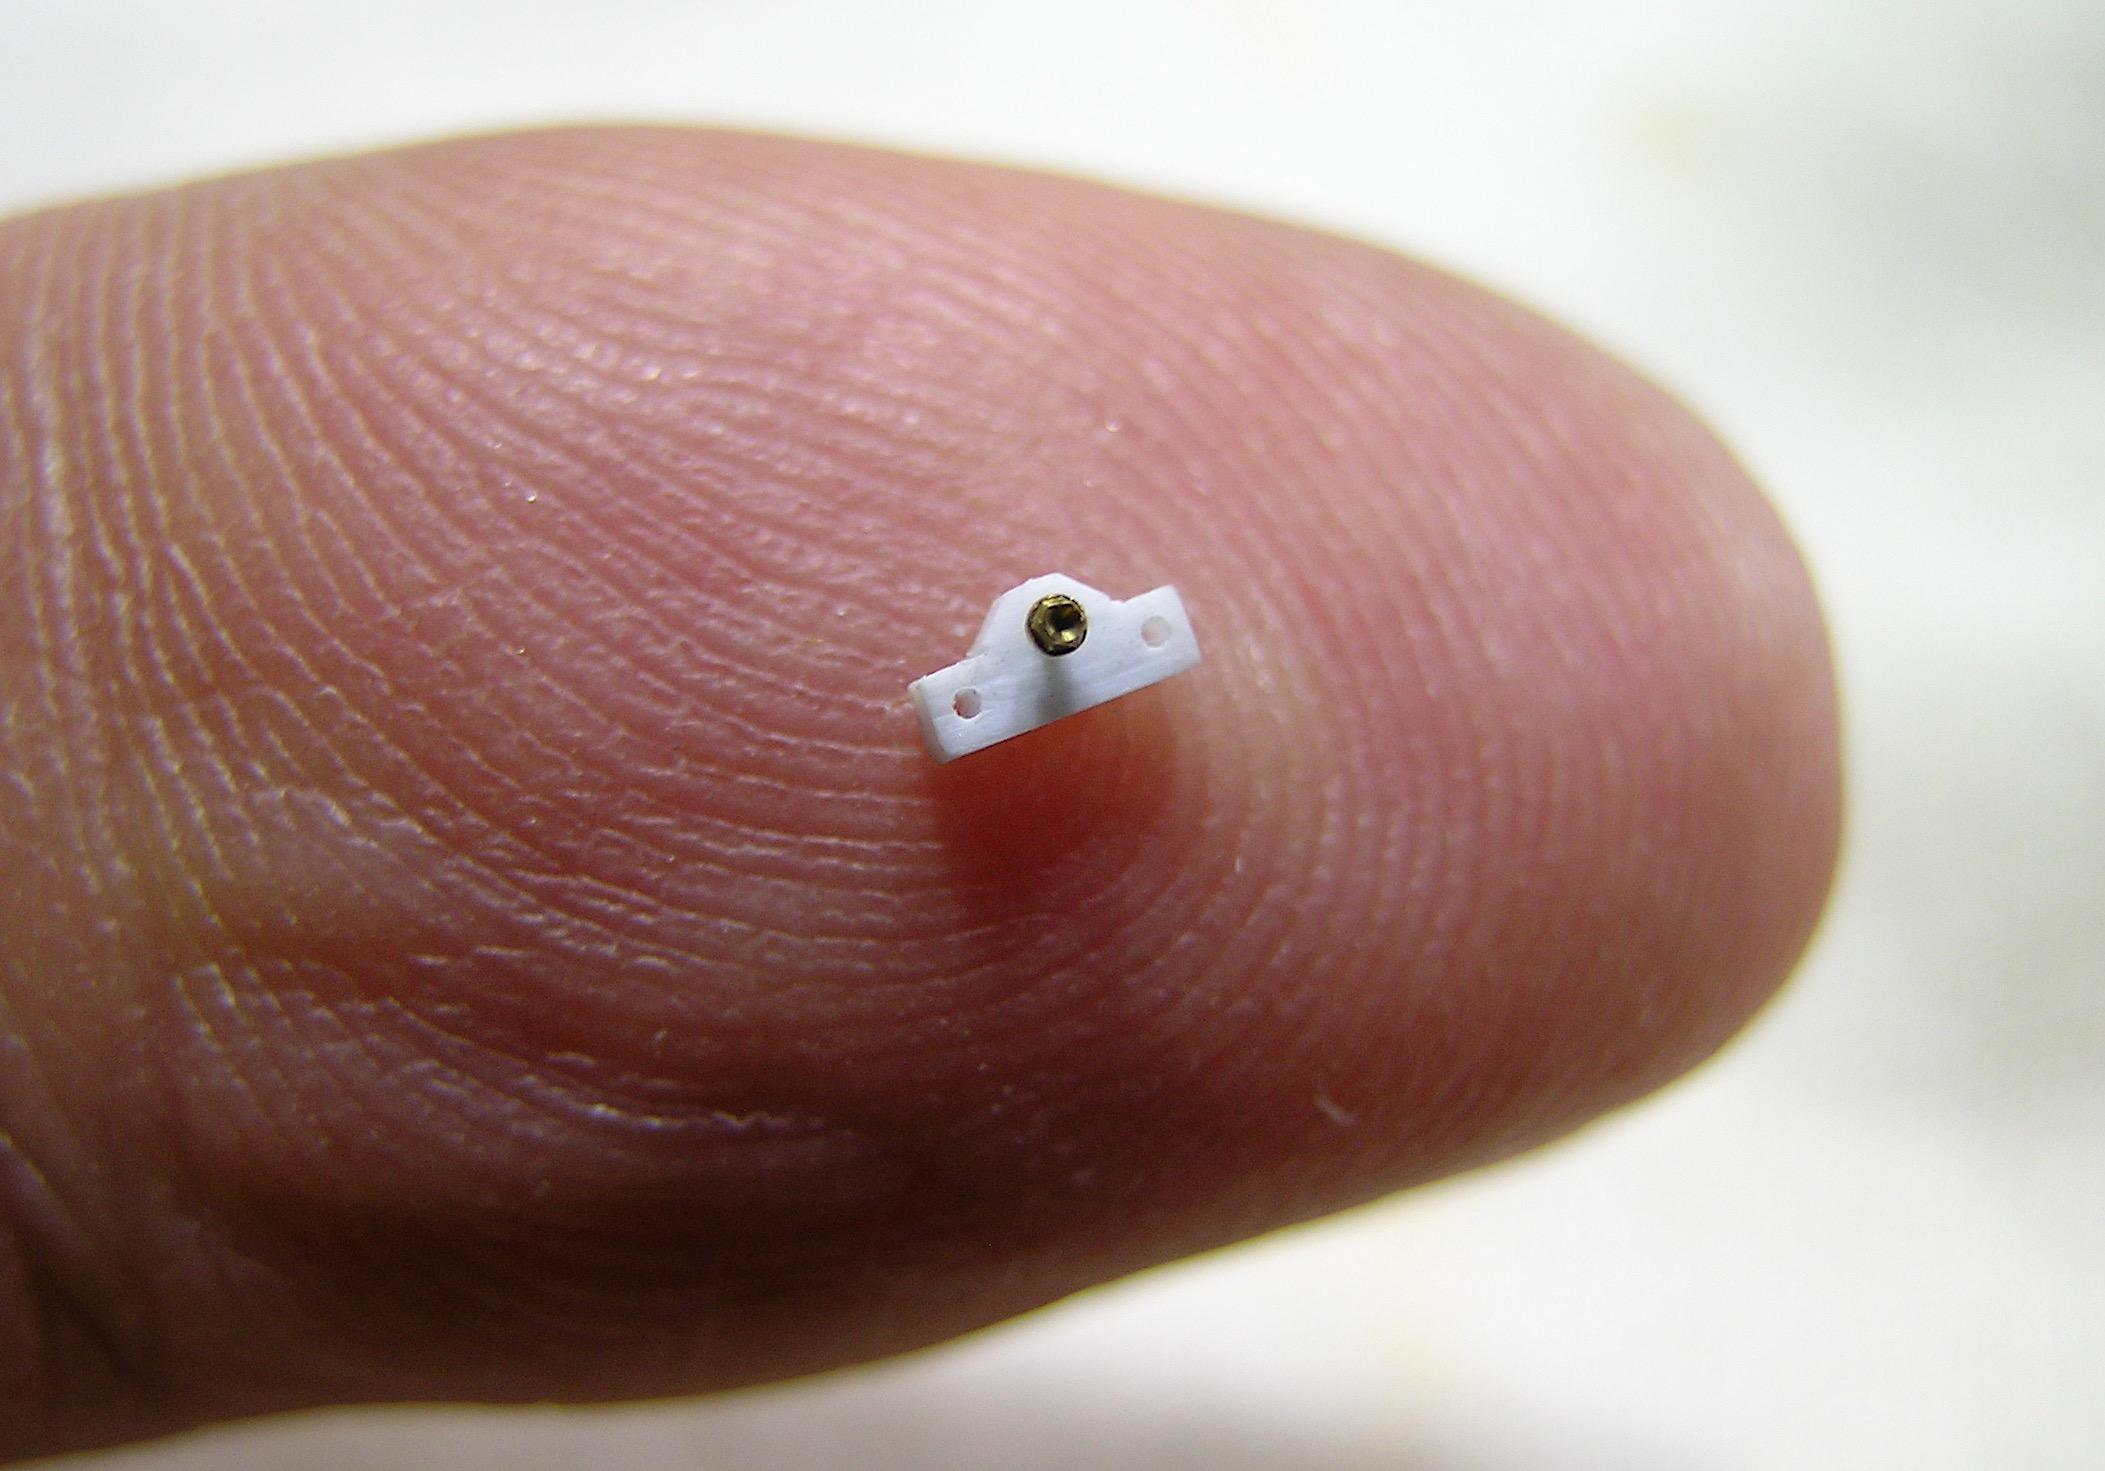
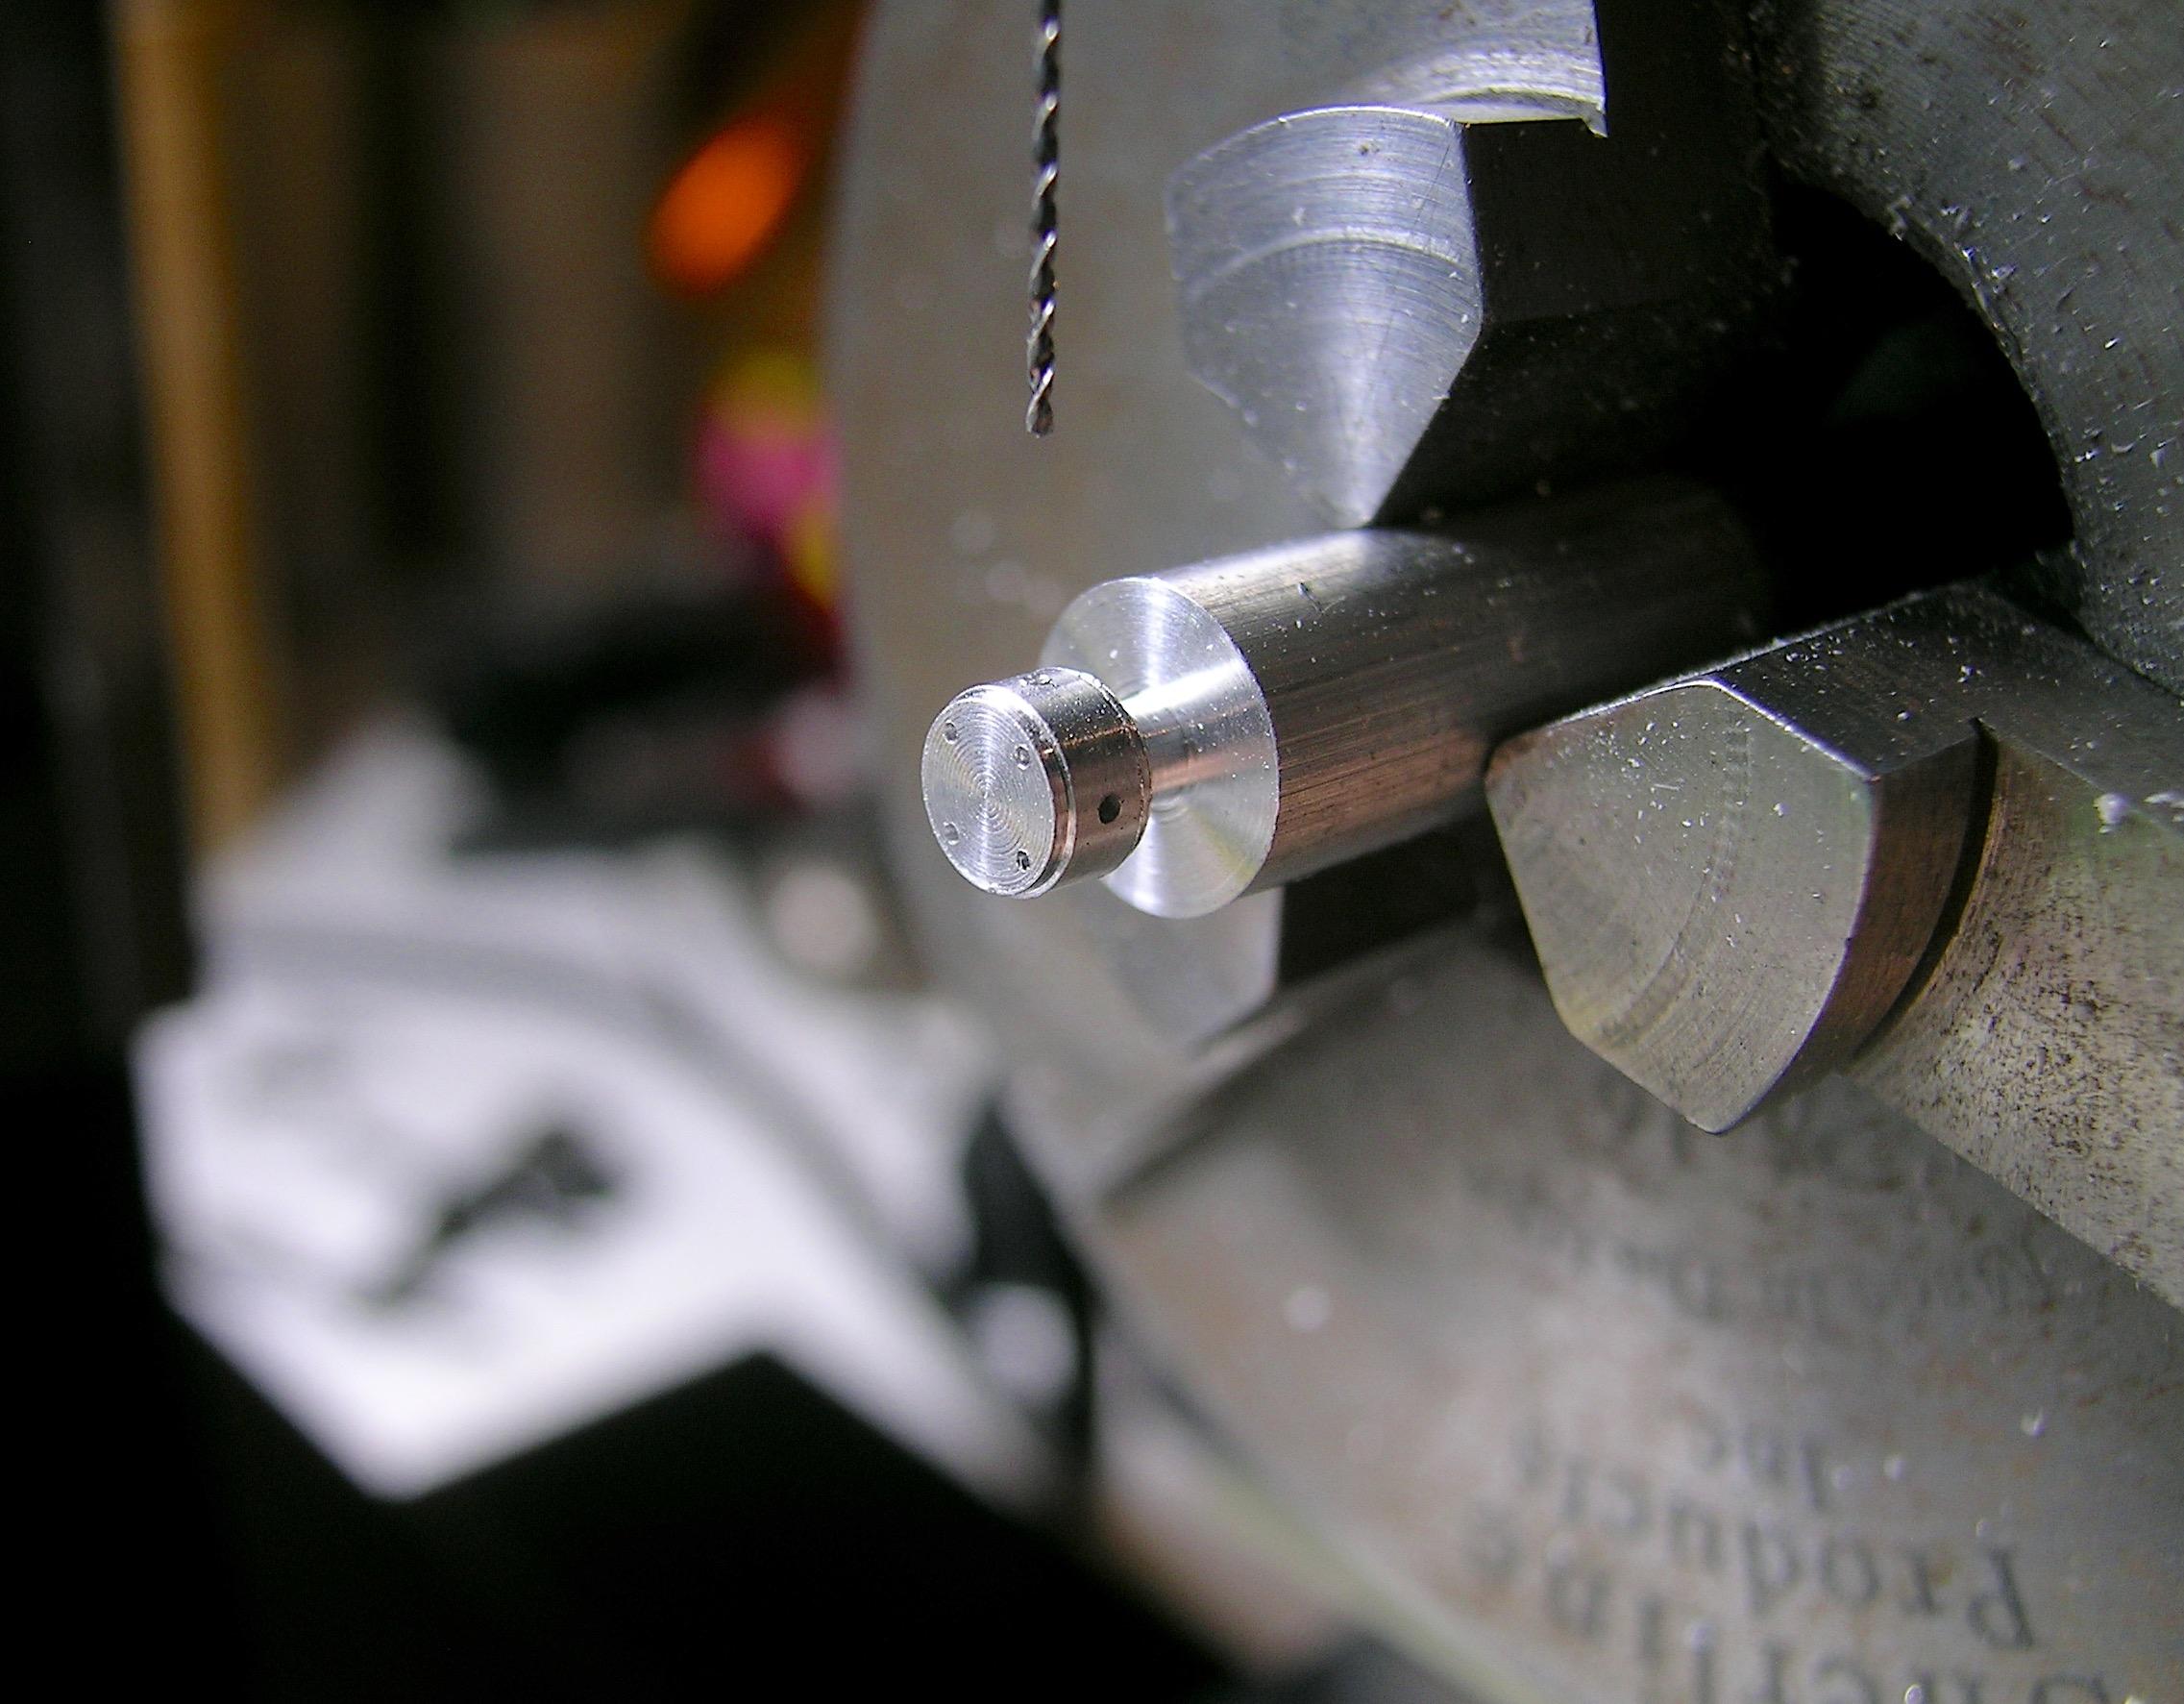
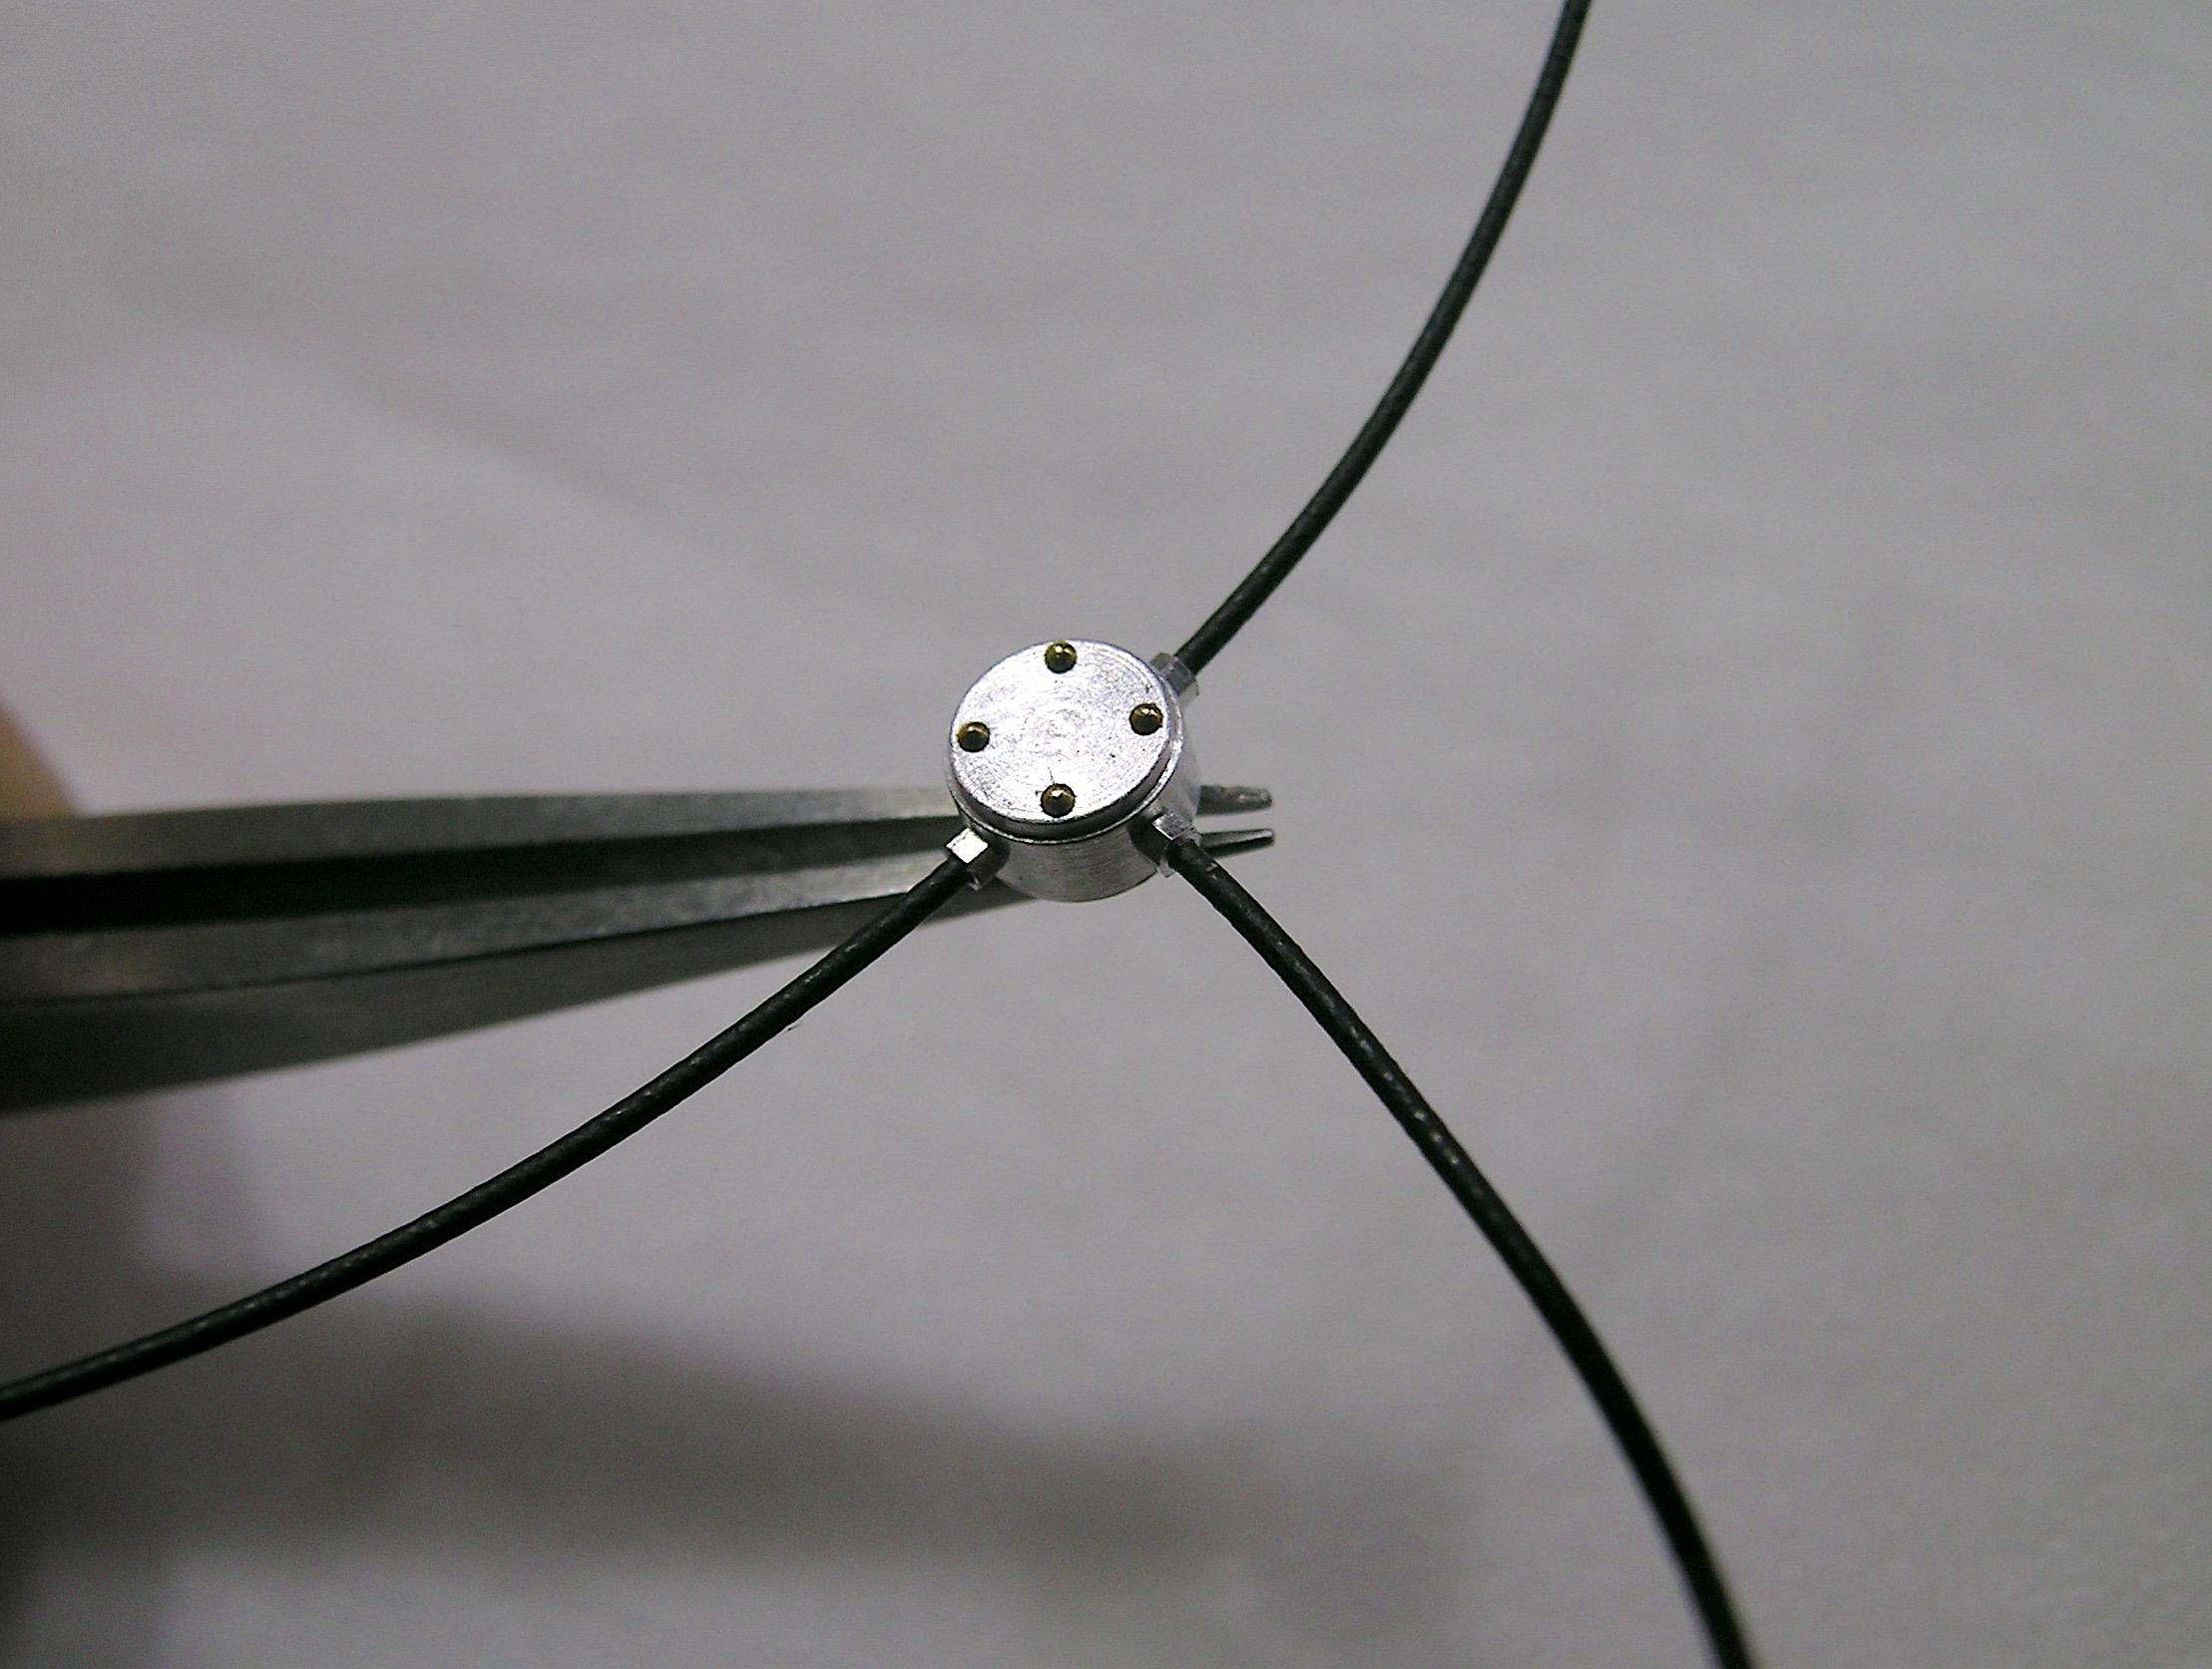
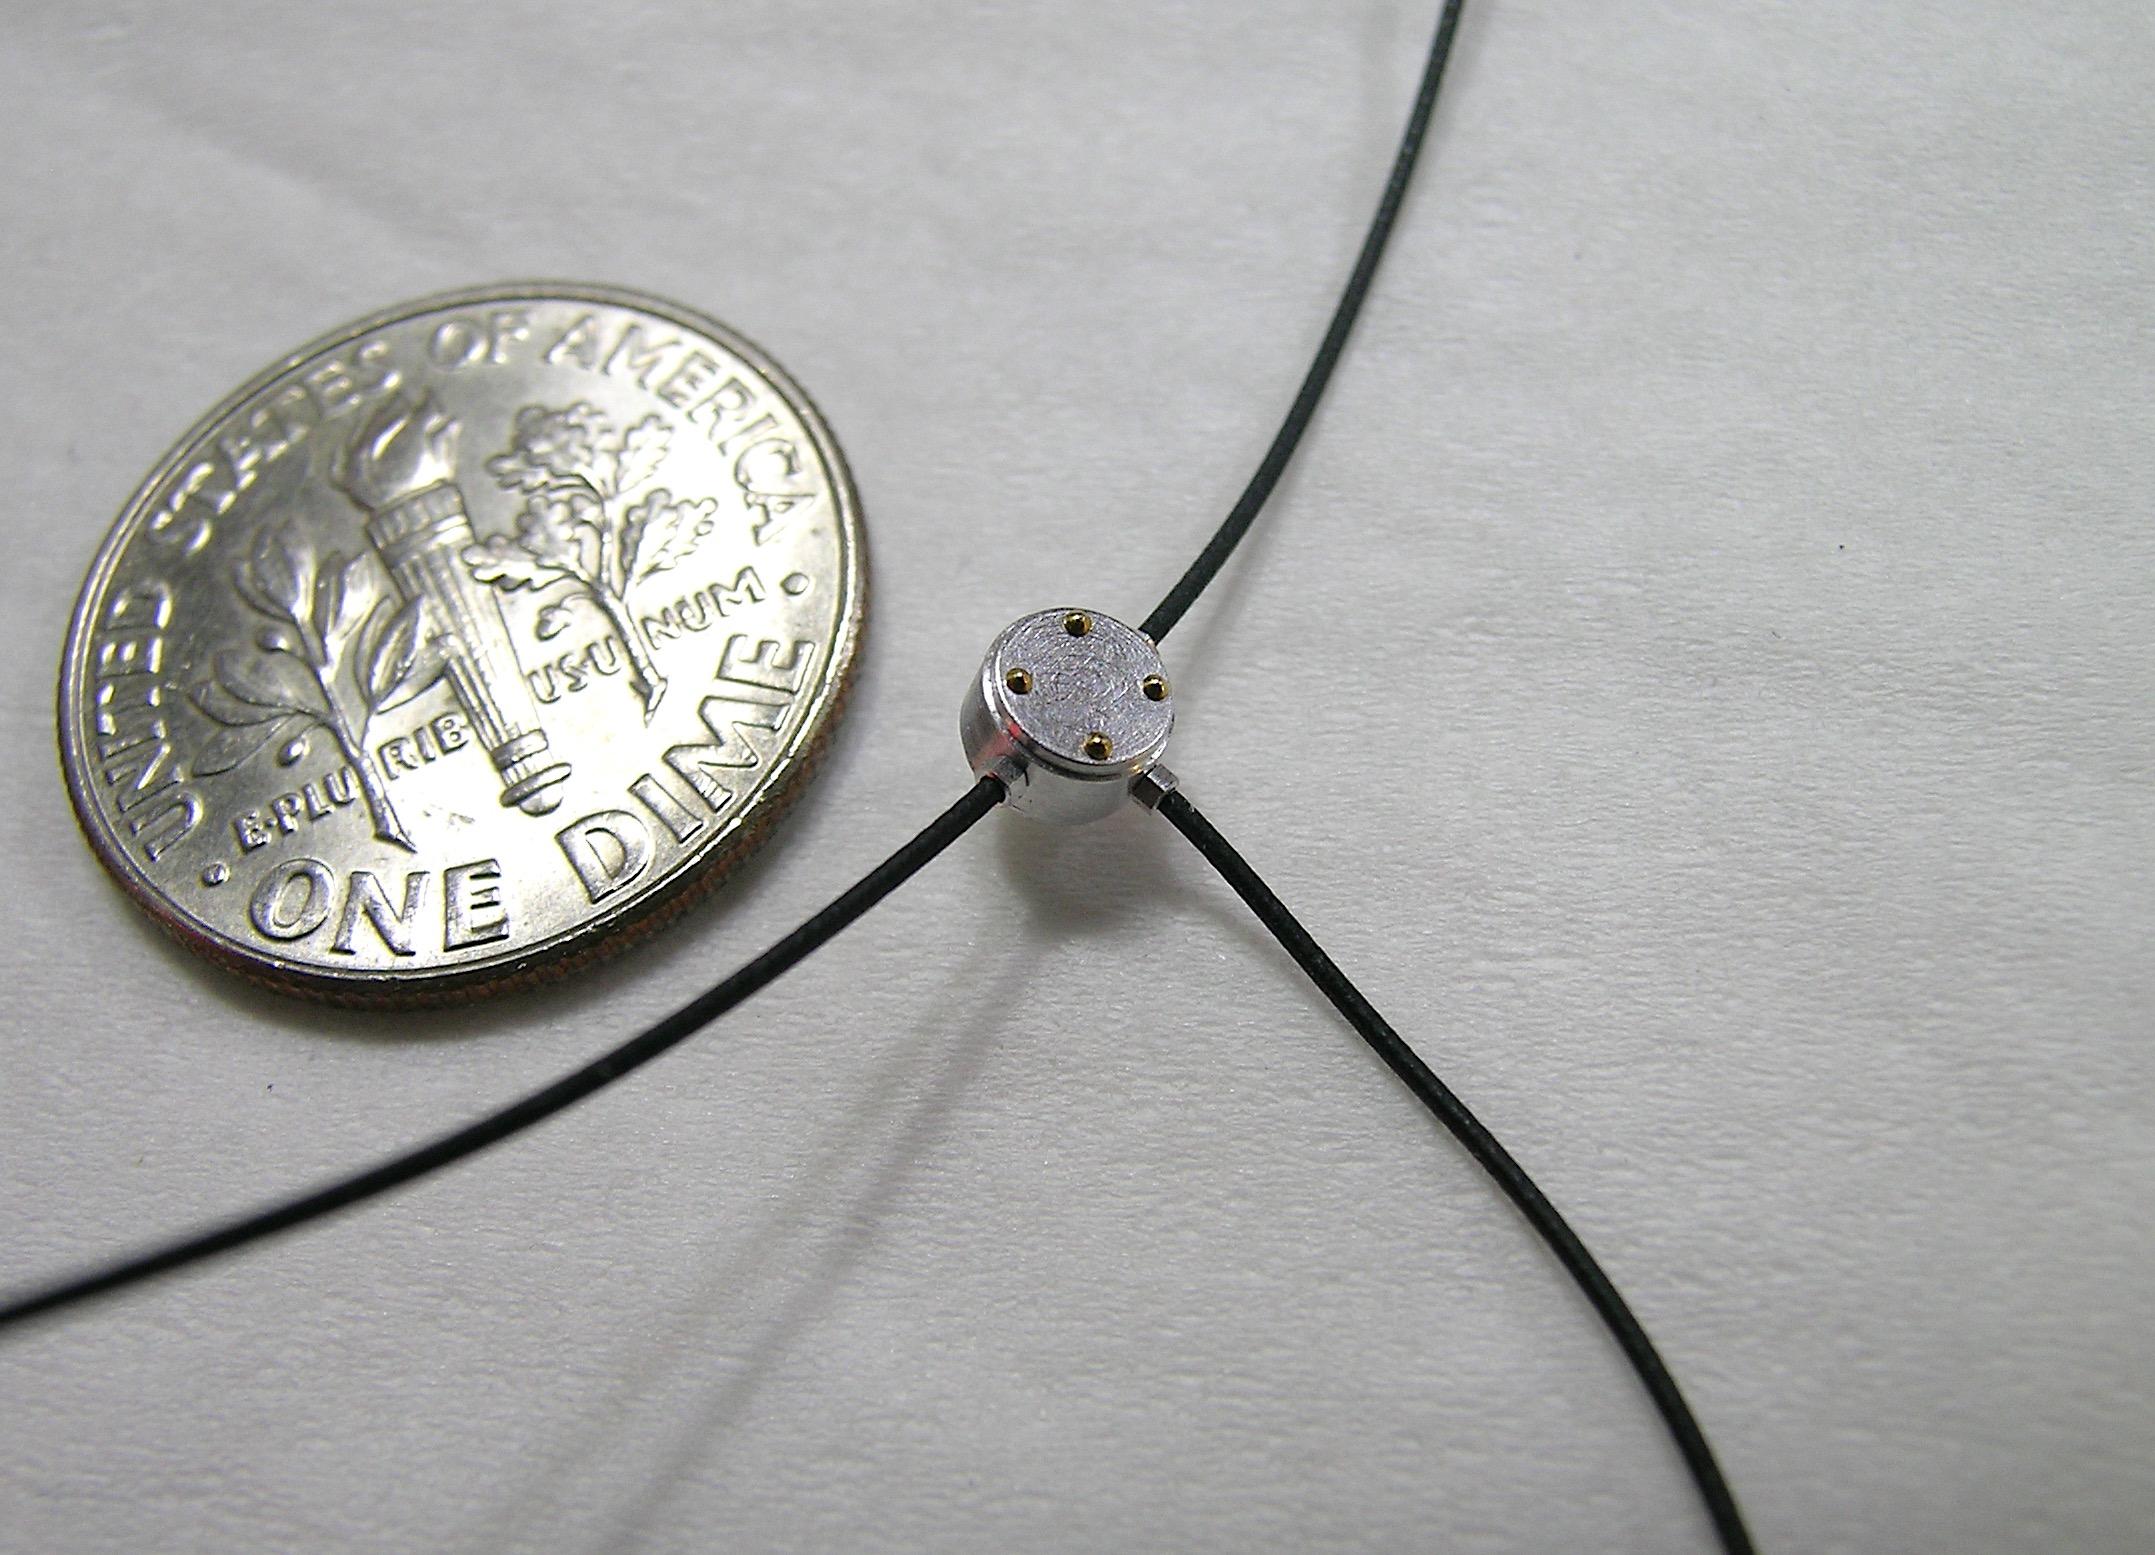
Hello everyone, I've made a lot of progress under the hood and done what I think are the last few pieces of detailing... I hope because the space is shrinking... ? While sorting out my pictures, I realized that I had forgotten to show you a picture where I installed the oil dip stick, you can see more clearly the engine side and the headers permanently installed (with all the bolts). I think I'm starting to have too many pictures in this directory... ? I'll be back soon with pictures of the engine compartment, I still have to make the bracket for the throttle cable and finalize everything (under the hood of course...). See you soon, Francis Oil dip stick. A second one. Installed on the motor, I added a small photo etched retainer as you can see on the headers flange. You can also see the starter bolted on the bell housing.Voltage regulator on the rotary table. Final part. Ignition resistor made from styrene. Another one. Fuel line splitter (I don't know the real name) on the rotary table. Final part, will lead the gas line from the cool can to the carburetor. One last one with his good friend.
-
64 Dodge D100 Pickup Pro Street
AmericanMuscleFan replied to AmericanMuscleFan's topic in WIP: Drag Racing Models
Thank you Captain !!! Thanks Tim, the picture is not my best but it gives an idea of where I am on the construction of this long project... ? -
WOW, my god Tim, your fingers must be hurting, there is a lot of sanding to achieve this beautiful finish... No matter how much time was invested on this project, the final result looks very promising! ?
-
64 Dodge D100 Pickup Pro Street
AmericanMuscleFan replied to AmericanMuscleFan's topic in WIP: Drag Racing Models
Thanks for your comments Ian, I think you have really described well the paradox of taking pictures where we want to show the details as close as possible without showing all the little flaws in them. The smart phones that just about everyone has are becoming the magnification tool of choice at exhibitions but we have to remember that these toys are supposed to be appreciated by the naked eye. As for the finishing of the pieces, it is always possible to do better but at some point, we have to accept our limits and move forward, otherwise, we don't see the end of it. In any case, the experience acquired on the past work becomes a good reference for the future and it keeps one well motivated...? Thanks again for your support, Francis -
Well Tim, you beat me, 53 years is probably a Guinness record and I really don't want to try to beat you on that! I am however happy to see that you are also an excellent modeler with the styrene... ? You got me at first glance as orange is my favorite color but the whole piece has much more to offer than a nice paint job... Impressive my friend, it's my favorite year for the GTO by the way. ? This kit is overpriced and very hard to find today, it's like money in the bank, it's crazy to see the price these old kits can be worth no matter the condition. Bravo!!!
-
No problem Claude, you are not alone in this clan, it's a big family and Ford enthusiasts are real ones, no doubt you are a good ambassador of the brand my friend. You don't have any more proof to do but you can continue to impress us, we are capable of taking it... ?
-
I like everything I see Daniel, free time well spent... ?
-
64 Dodge D100 Pickup Pro Street
AmericanMuscleFan replied to AmericanMuscleFan's topic in WIP: Drag Racing Models
Hello, Just a little preview of what's to come, the cabin is now installed for good on the frame, I'll post pictures of the engine compartment when I'll be more advanced in the details, there's a lot to do... and I realized that I have other small parts to do to integrate on the wheel apron and the firewall... ? Stay tuned, Francis
-
64 Dodge D100 Pickup Pro Street
AmericanMuscleFan replied to AmericanMuscleFan's topic in WIP: Drag Racing Models
Thanks Ian, It is not easy (at least for me) to do justice to the product in photos, I am really more comfortable on the milling machine than with my camera, each has its strengths and weaknesses! Francis -
ROYAL CANADIAN 1/16 SCALE TOP FUEL DRAGSTER
AmericanMuscleFan replied to Ian McLaren's topic in WIP: Drag Racing Models
WOW !!! It would be hard to say this isn't a good reproduction of the real thing, your work is exemplary Ian. ? -
De Foosing the FD-100
AmericanMuscleFan replied to butter's topic in WIP: Model Trucks: Pickups, Vans, SUVs, Light Commercial
You do a great job Ron, the door panels and seats are a good match with your real pickup! ?