BIGTRUCK
-
Posts
2,739 -
Joined
-
Last visited
Content Type
Profiles
Forums
Events
Gallery
Everything posted by BIGTRUCK
-
Nice, really a great job..
-

New Upload Limits
BIGTRUCK replied to Dave Ambrose's topic in Forum News and Questions (formerly: How To Use This Board)
Its back to normal -
New Upload Limits
BIGTRUCK replied to Dave Ambrose's topic in Forum News and Questions (formerly: How To Use This Board)
It also tells me to manage attachments to free up space. ???? but where. Work in progress pictures I use an Ipad or a android tablet or phone not my Fotki account -
New Upload Limits
BIGTRUCK replied to Dave Ambrose's topic in Forum News and Questions (formerly: How To Use This Board)
Nope.. -
I was able to add some clear yellow and yellow mixed with alcohol and put on lower part of the light. Added chrome strip to lower trunk too. At 70 years old I over look and miss alot .😃 Yay able to add pictures

-
New Upload Limits
BIGTRUCK replied to Dave Ambrose's topic in Forum News and Questions (formerly: How To Use This Board)
Cant do anything with pictures..it tells me Ive used 40727% 3.98 GB of my 10MB -
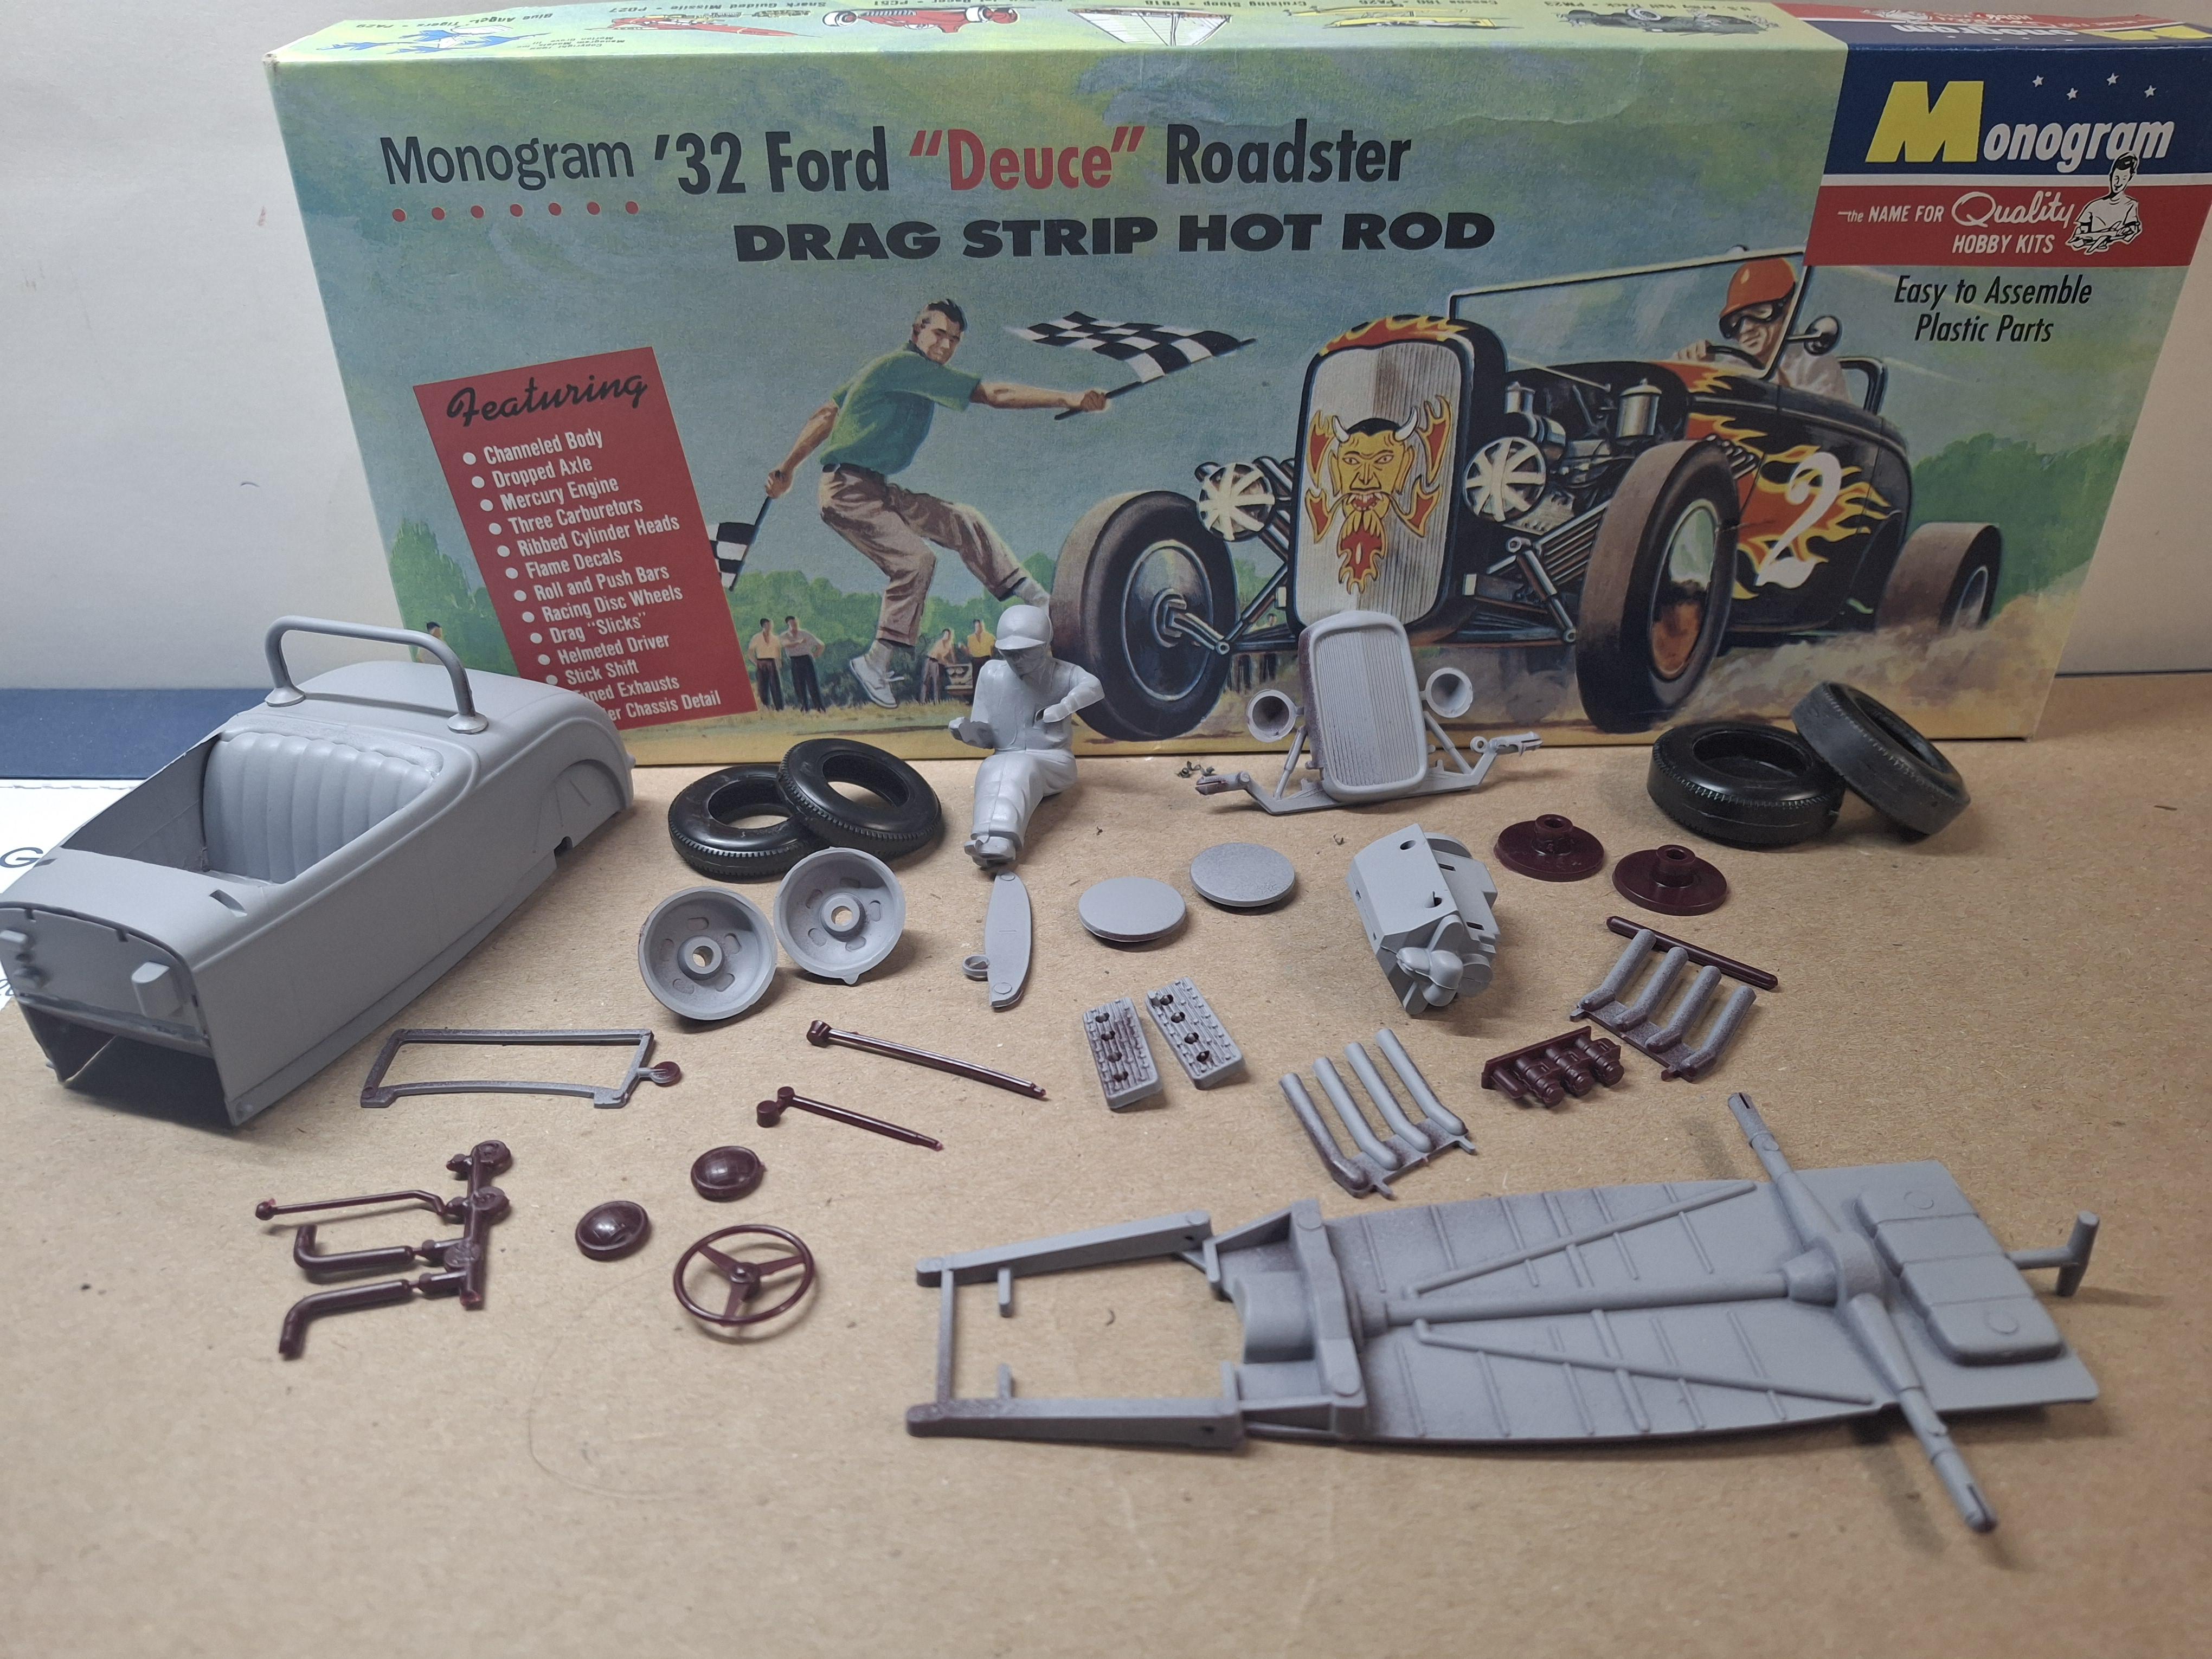
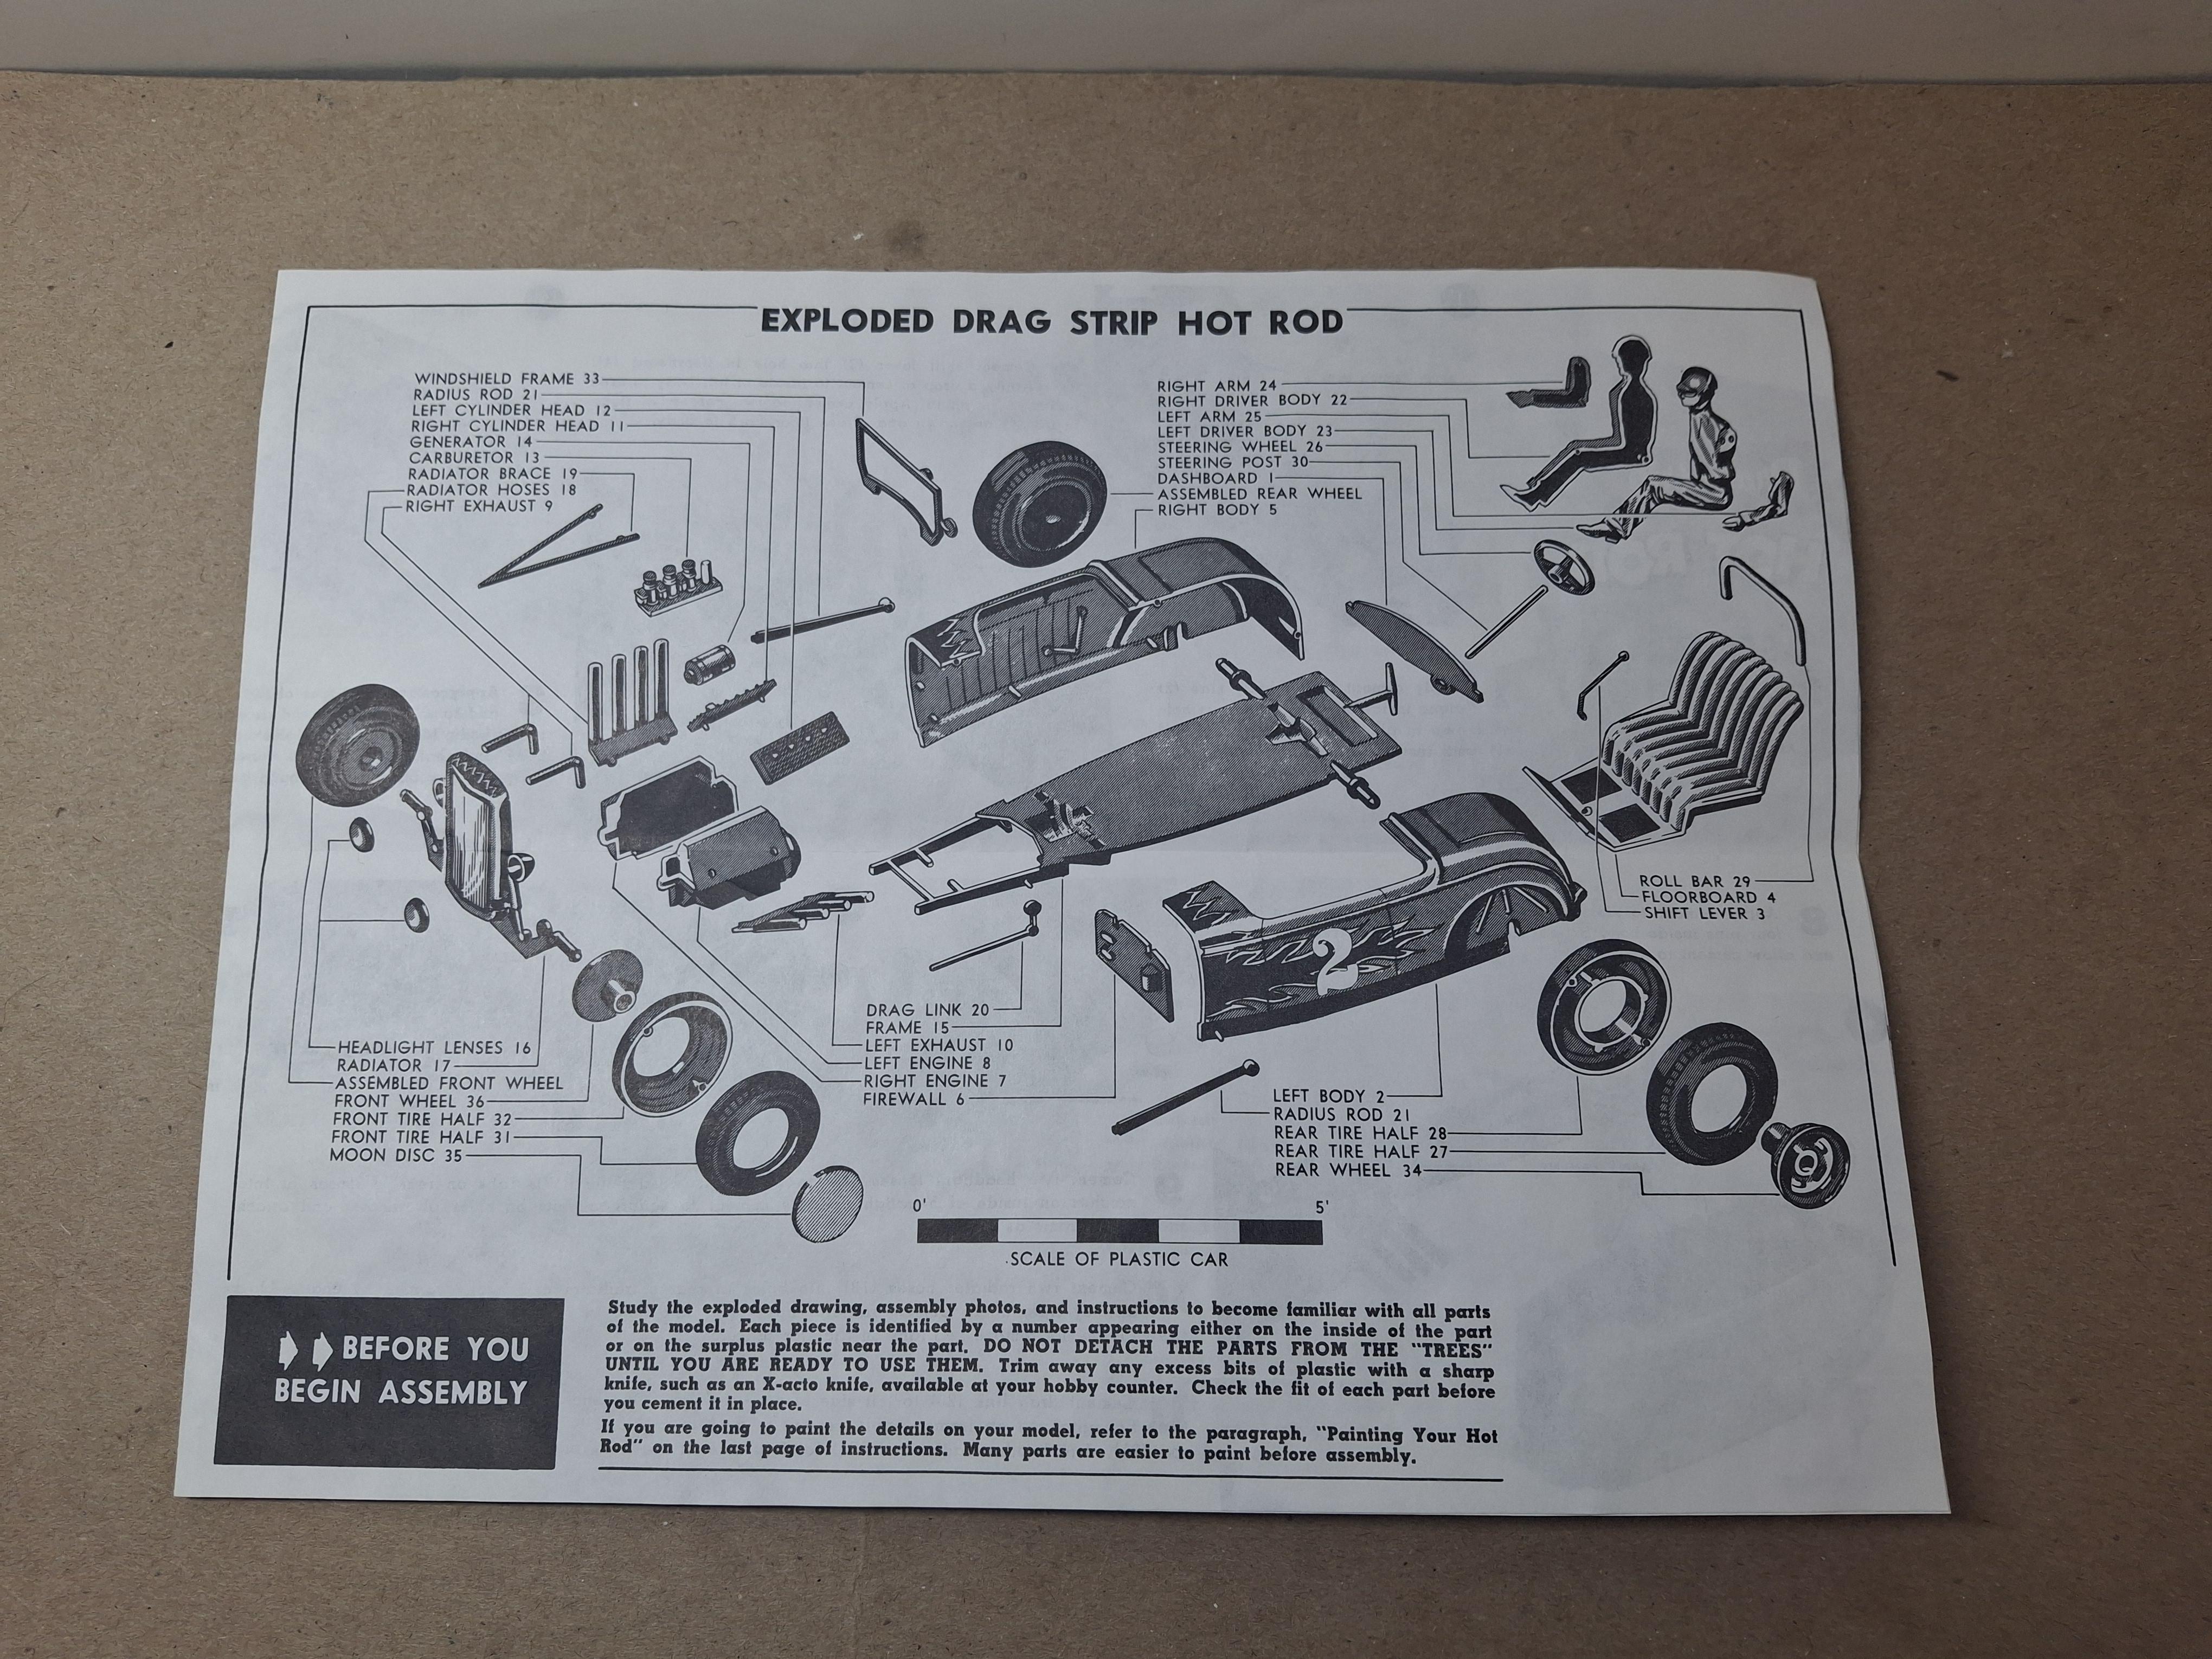
Monogram 1932 Duece dragstrip hotrod
BIGTRUCK replied to BIGTRUCK's topic in WIP: Drag Racing Models
Yes thanks, I may change or make a set . Theres a few kits where they put error pipes on a flathead. -
This is a repop of kit PC55 from 1959. This is a 2 pc body that went together without issue and since I use liquid glue the seam sanded out nice without the use of putty.Inside I used epoxy on the seams. Decals look good too . Color will be pretty close to the plastic color except I'm thinking semi gloss. Interior undecided right now. I really enjoy building these early kits.The smoking cigarette in the last picture is really back in the day old school..😄
-
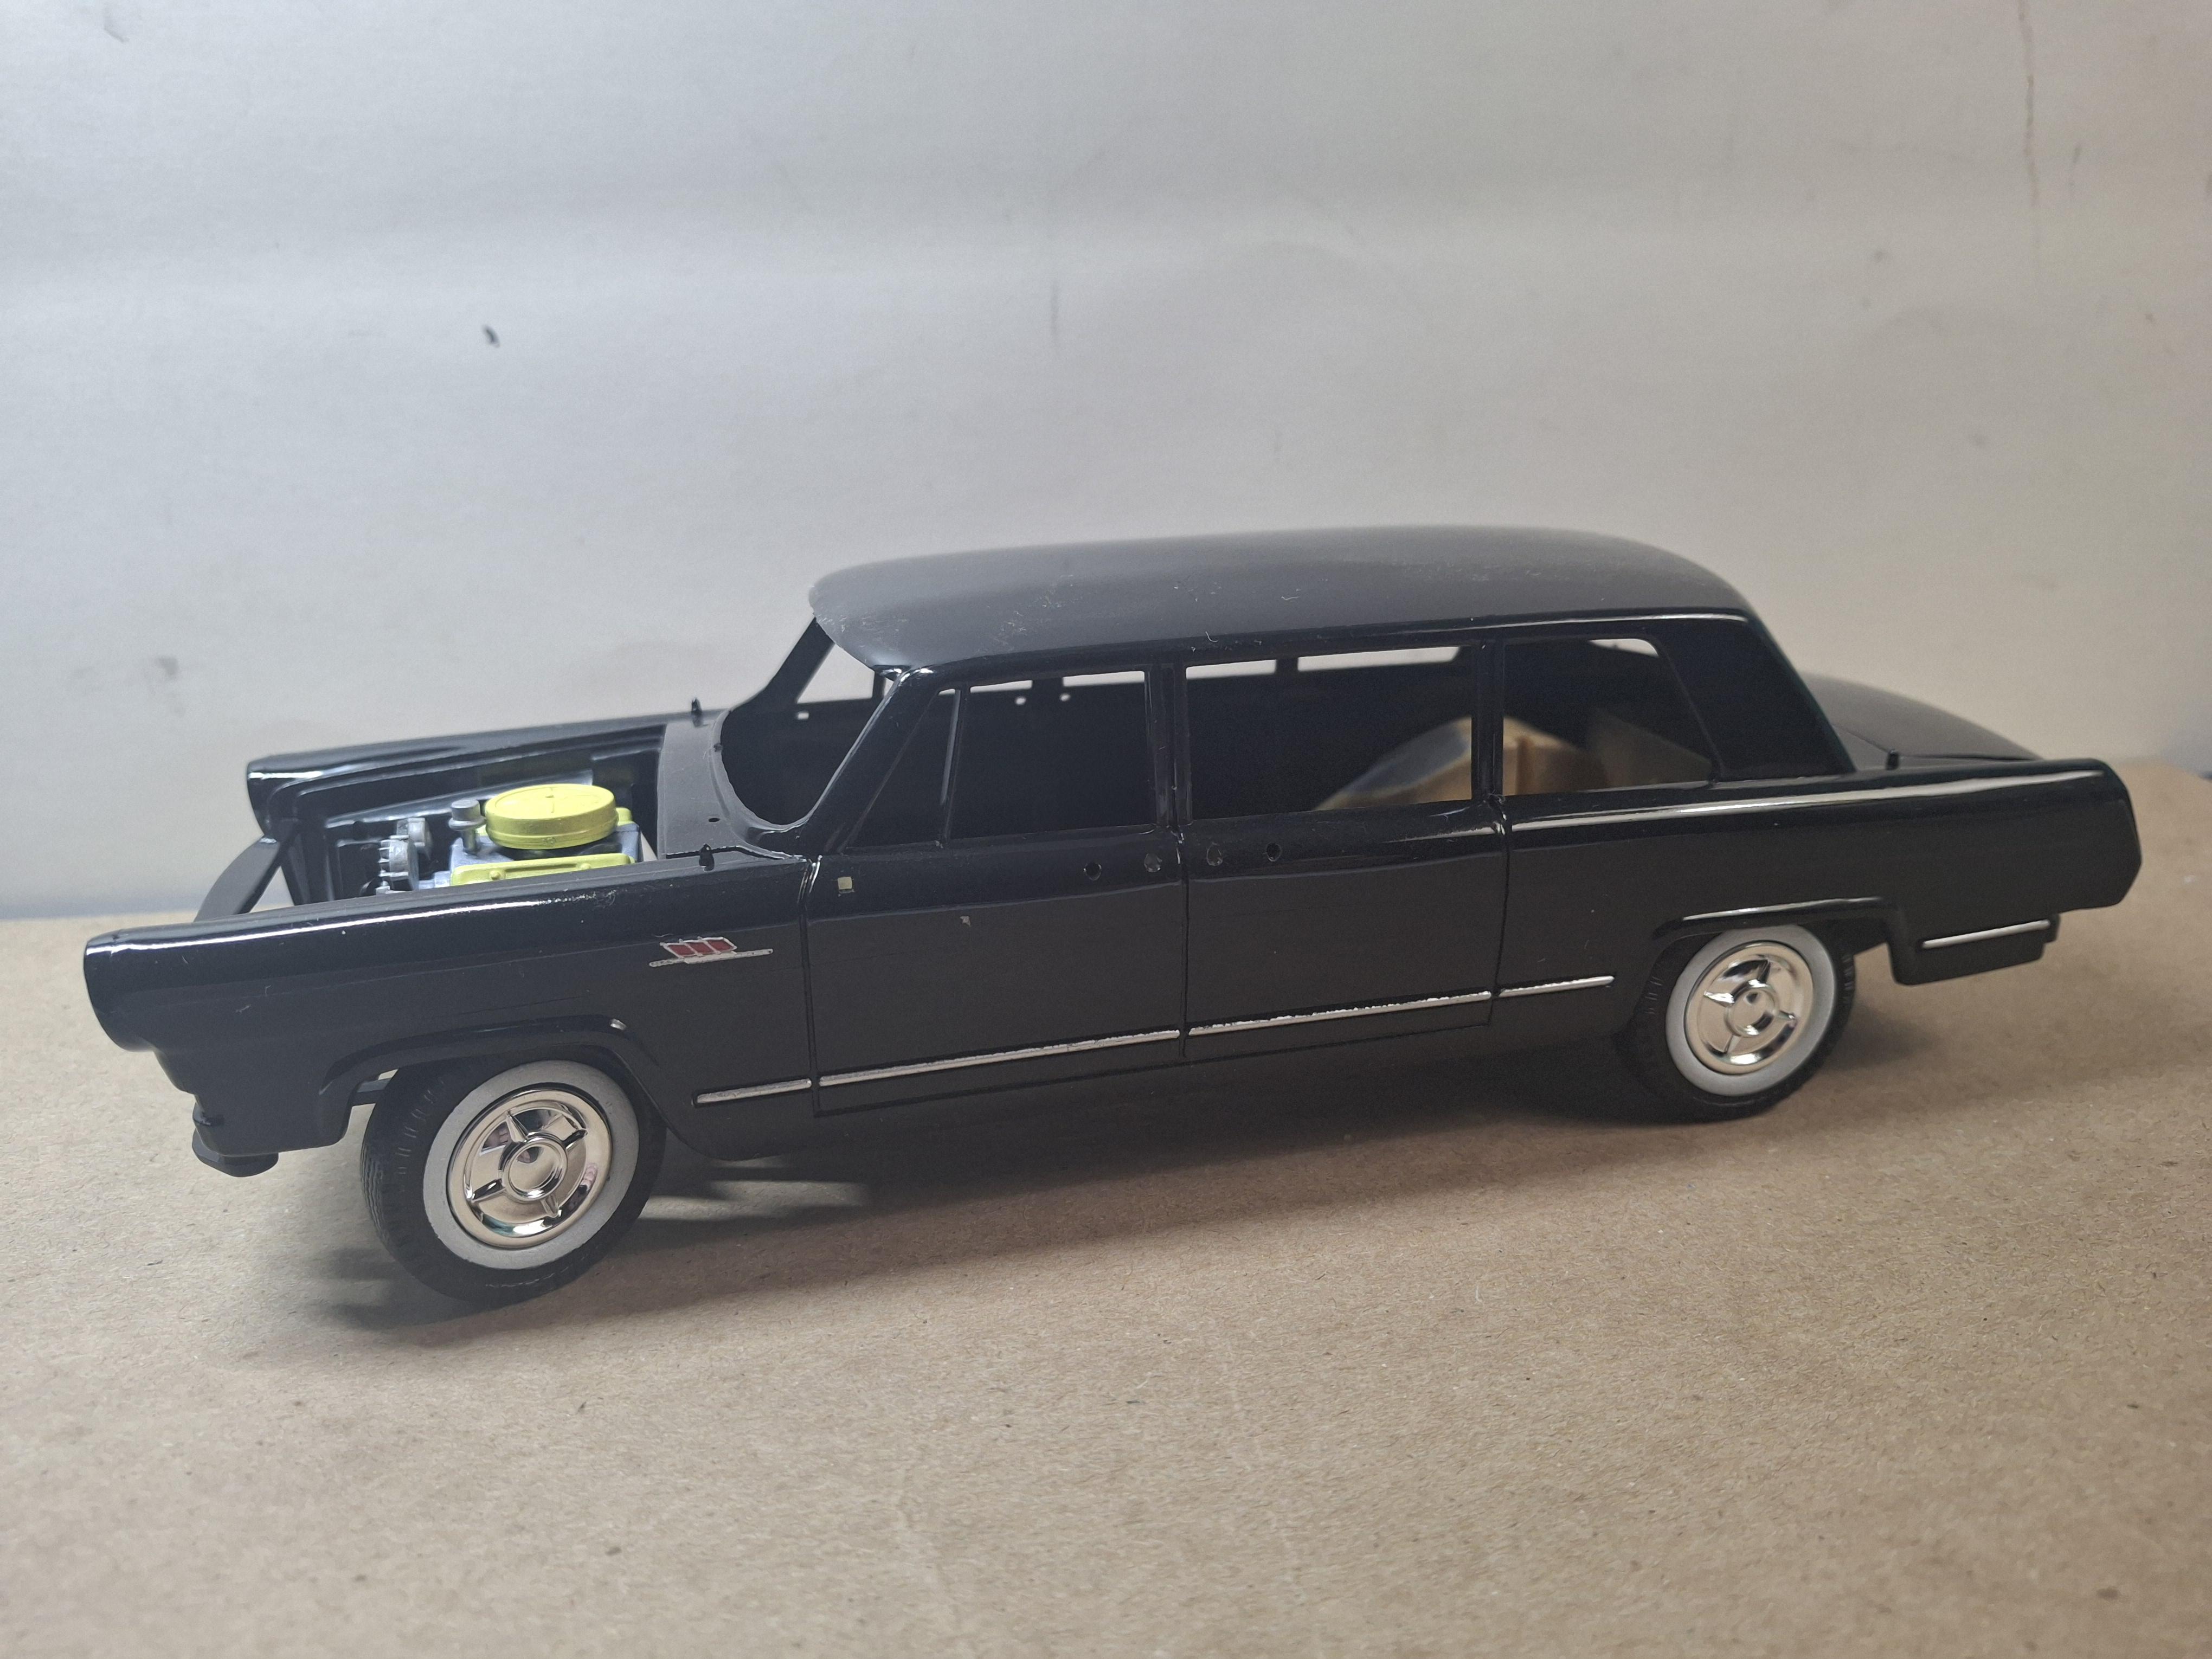
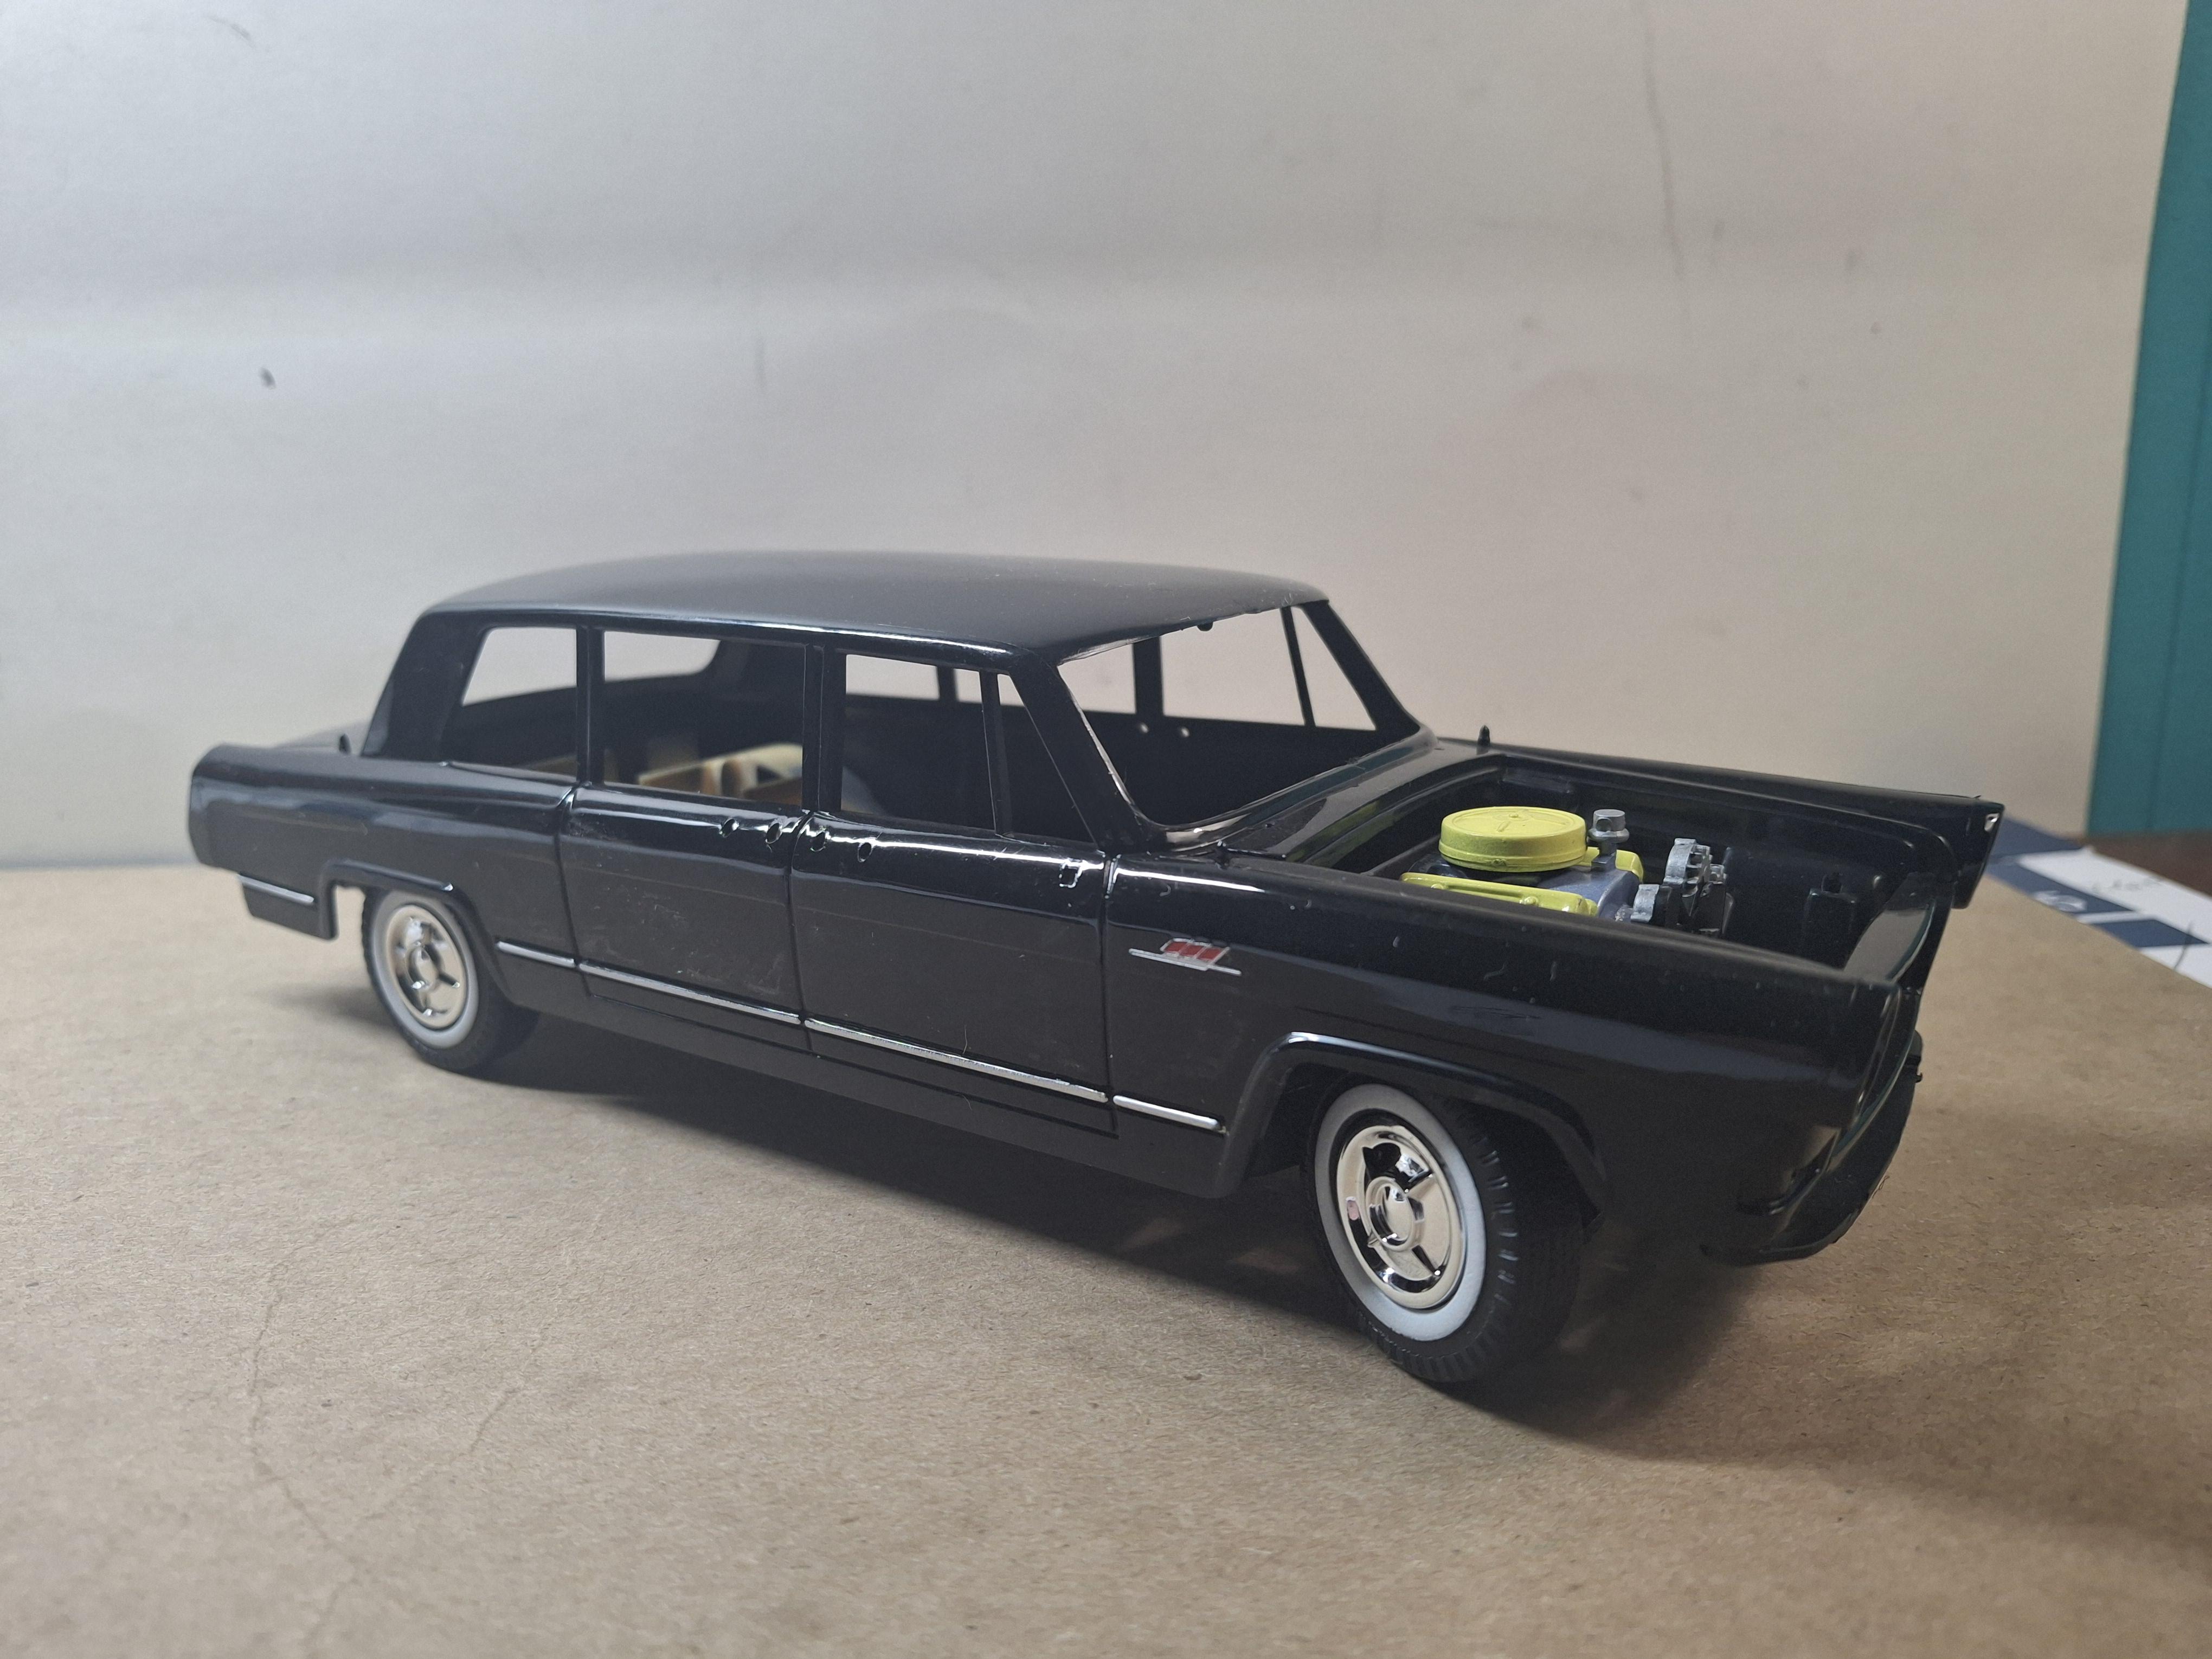
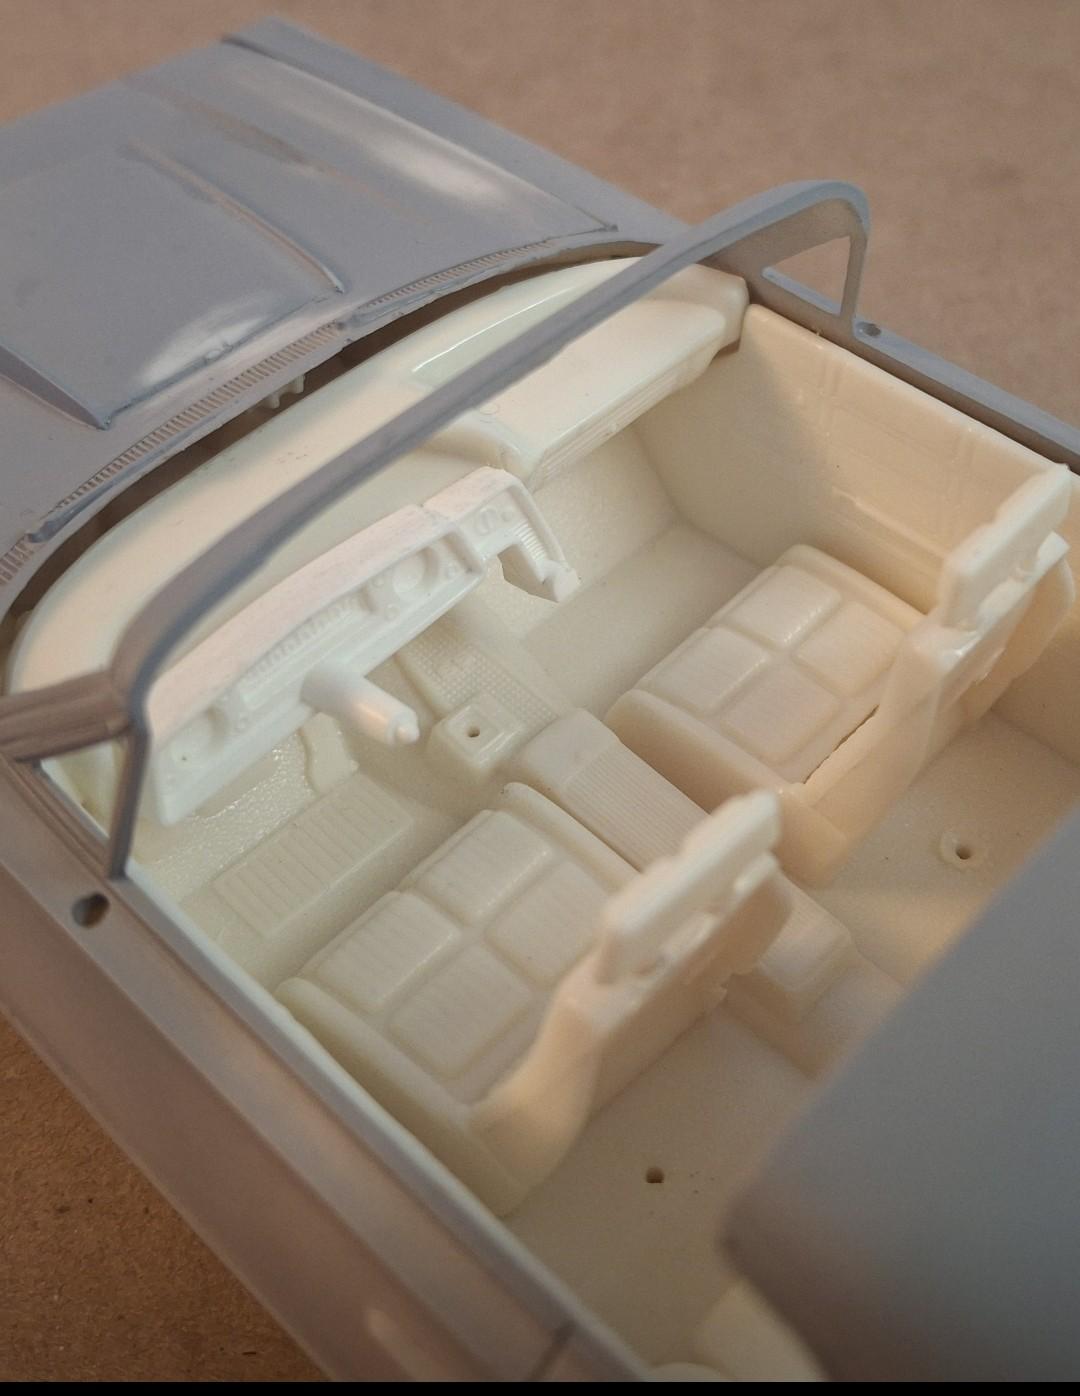
Not a hard build , if parts had a better fit it would be considered a snap kit. Some parts needed to be trimmed to fit the locator holes and others holes needed to be bigger. The kit just needs detailing to look decent. All lights are clear so rear lights were hit with clear red and same with the front amber lights. The hood is hard to open when the hinge is installed but the engine is a pretty lame so closed is fine with me. I built it with rear passenger privacy shield installed on the rear seat sides. Interior is Buff Tan with Maroon dash. I'll make some front red flags one day when I find some really thin material.
-
Great save and rebuild.
-
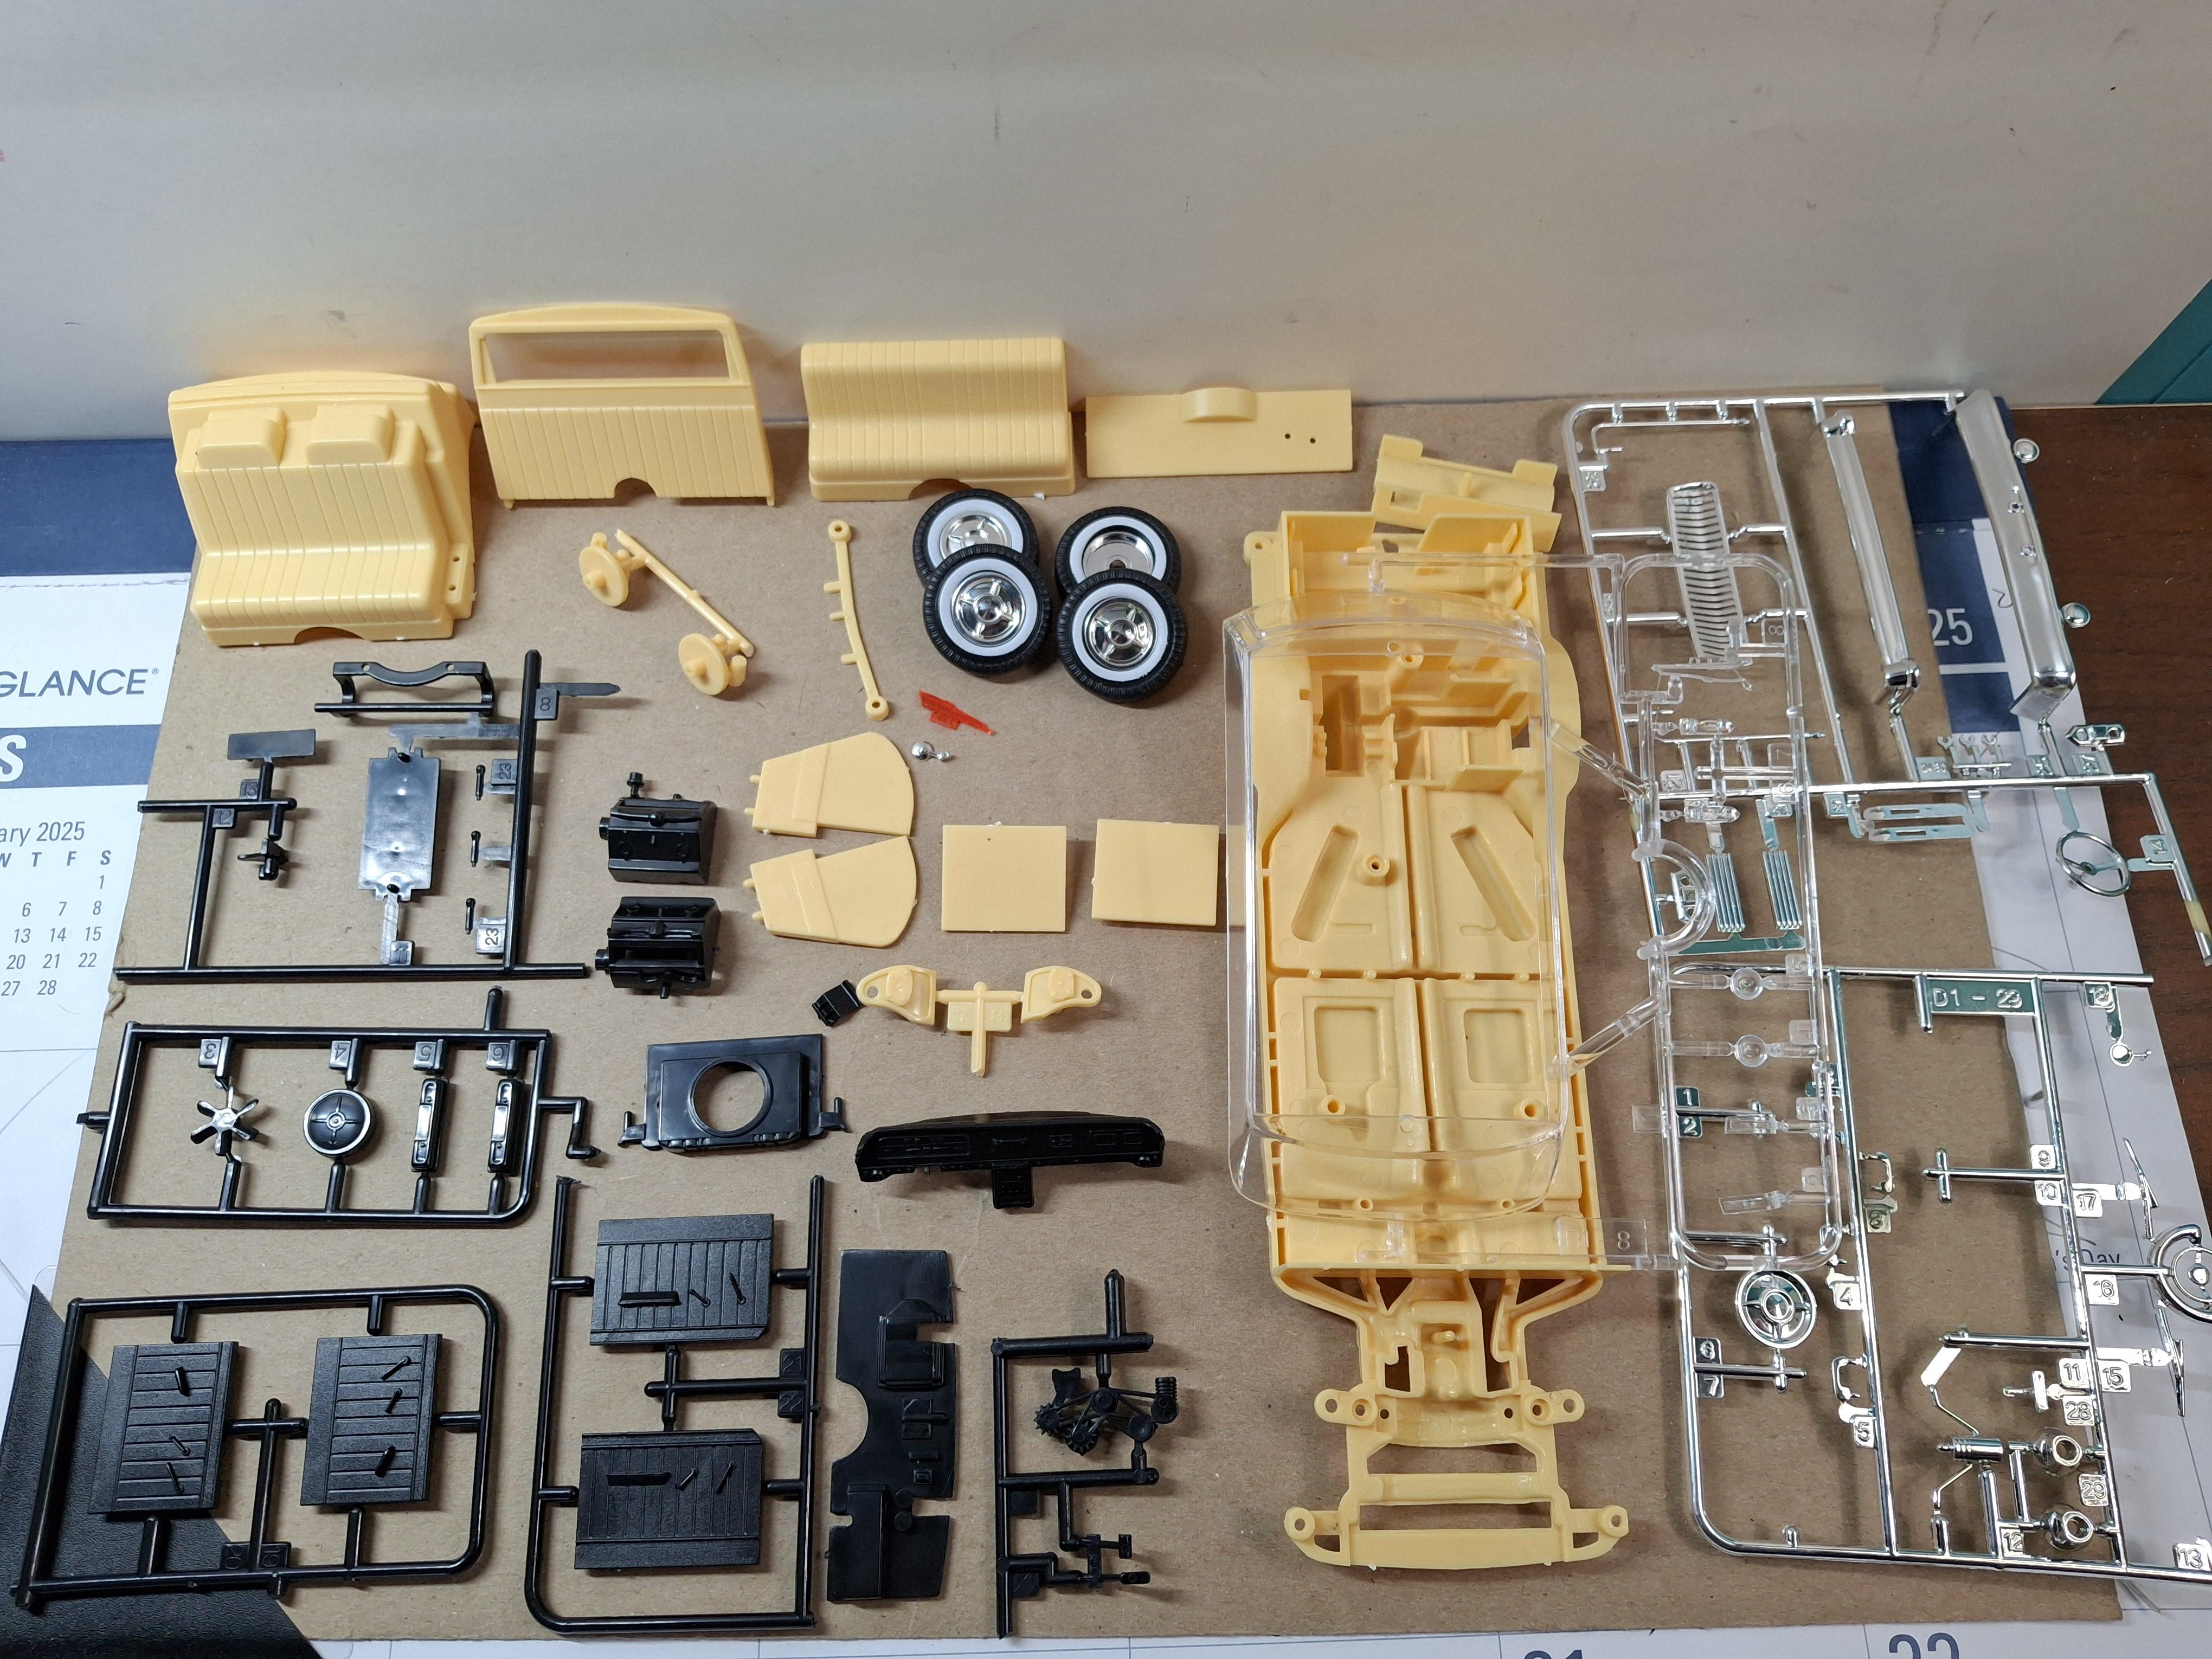
Small updated progress, all the base interior color is dry and ready for detailing, seat and wall just mocked in for picture. Engine was a simple item. Front suspension and chassis base painted and screwed together and needs detailing also.
-
AMT '63 Chevy custom done using all custom parts in the box
BIGTRUCK replied to BIGTRUCK's topic in Model Cars
I did the 64 Merc,62 Buick,65 Lincoln, 66 Tbird,65 Riv ,58 Chevy, Falcon Ranchero, 55 Chevy ,57 TBird,59 and 62 Vettes all AMT kits all with the custom parts..I still have many other AMT customs to do with their radical parts. -
This is probably the nicest 442 I've seen. Bumpers look awesome.
-
Pretty neat , thanks for doing that.
-
It should be easy to find something sheer , would'nt need much.
-
AMT '63 Chevy custom done using all custom parts in the box
BIGTRUCK replied to BIGTRUCK's topic in Model Cars
-
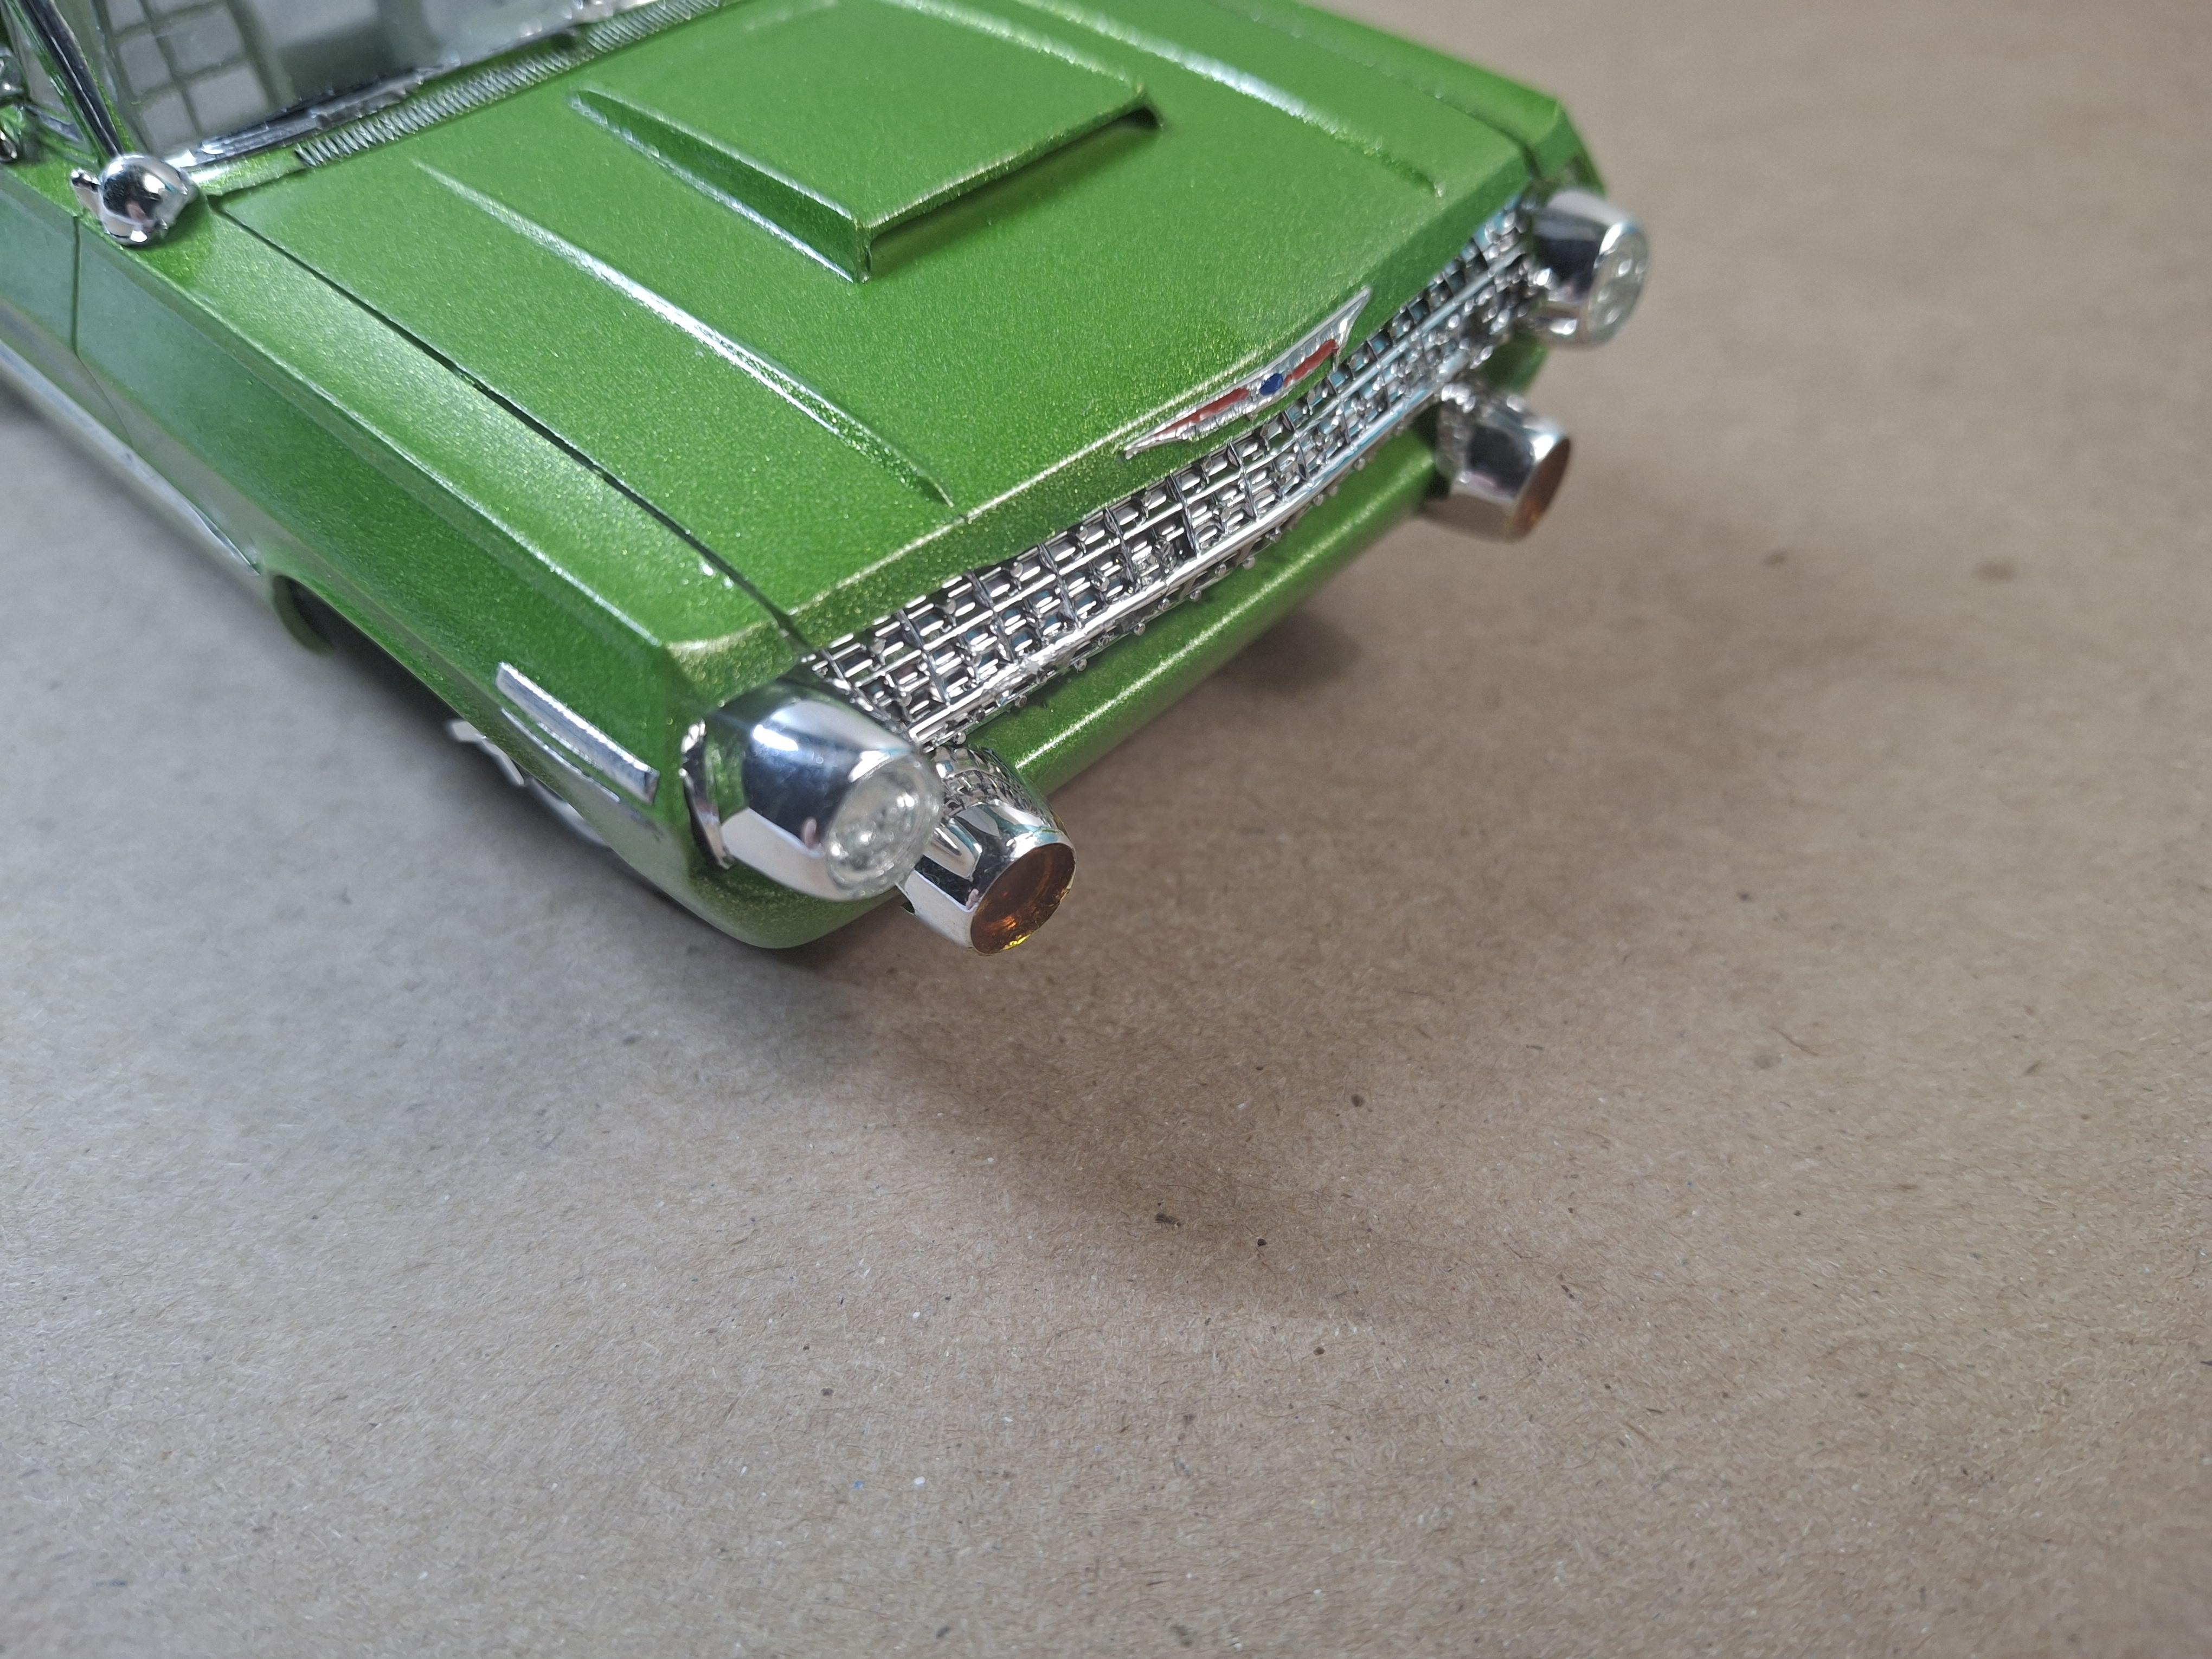
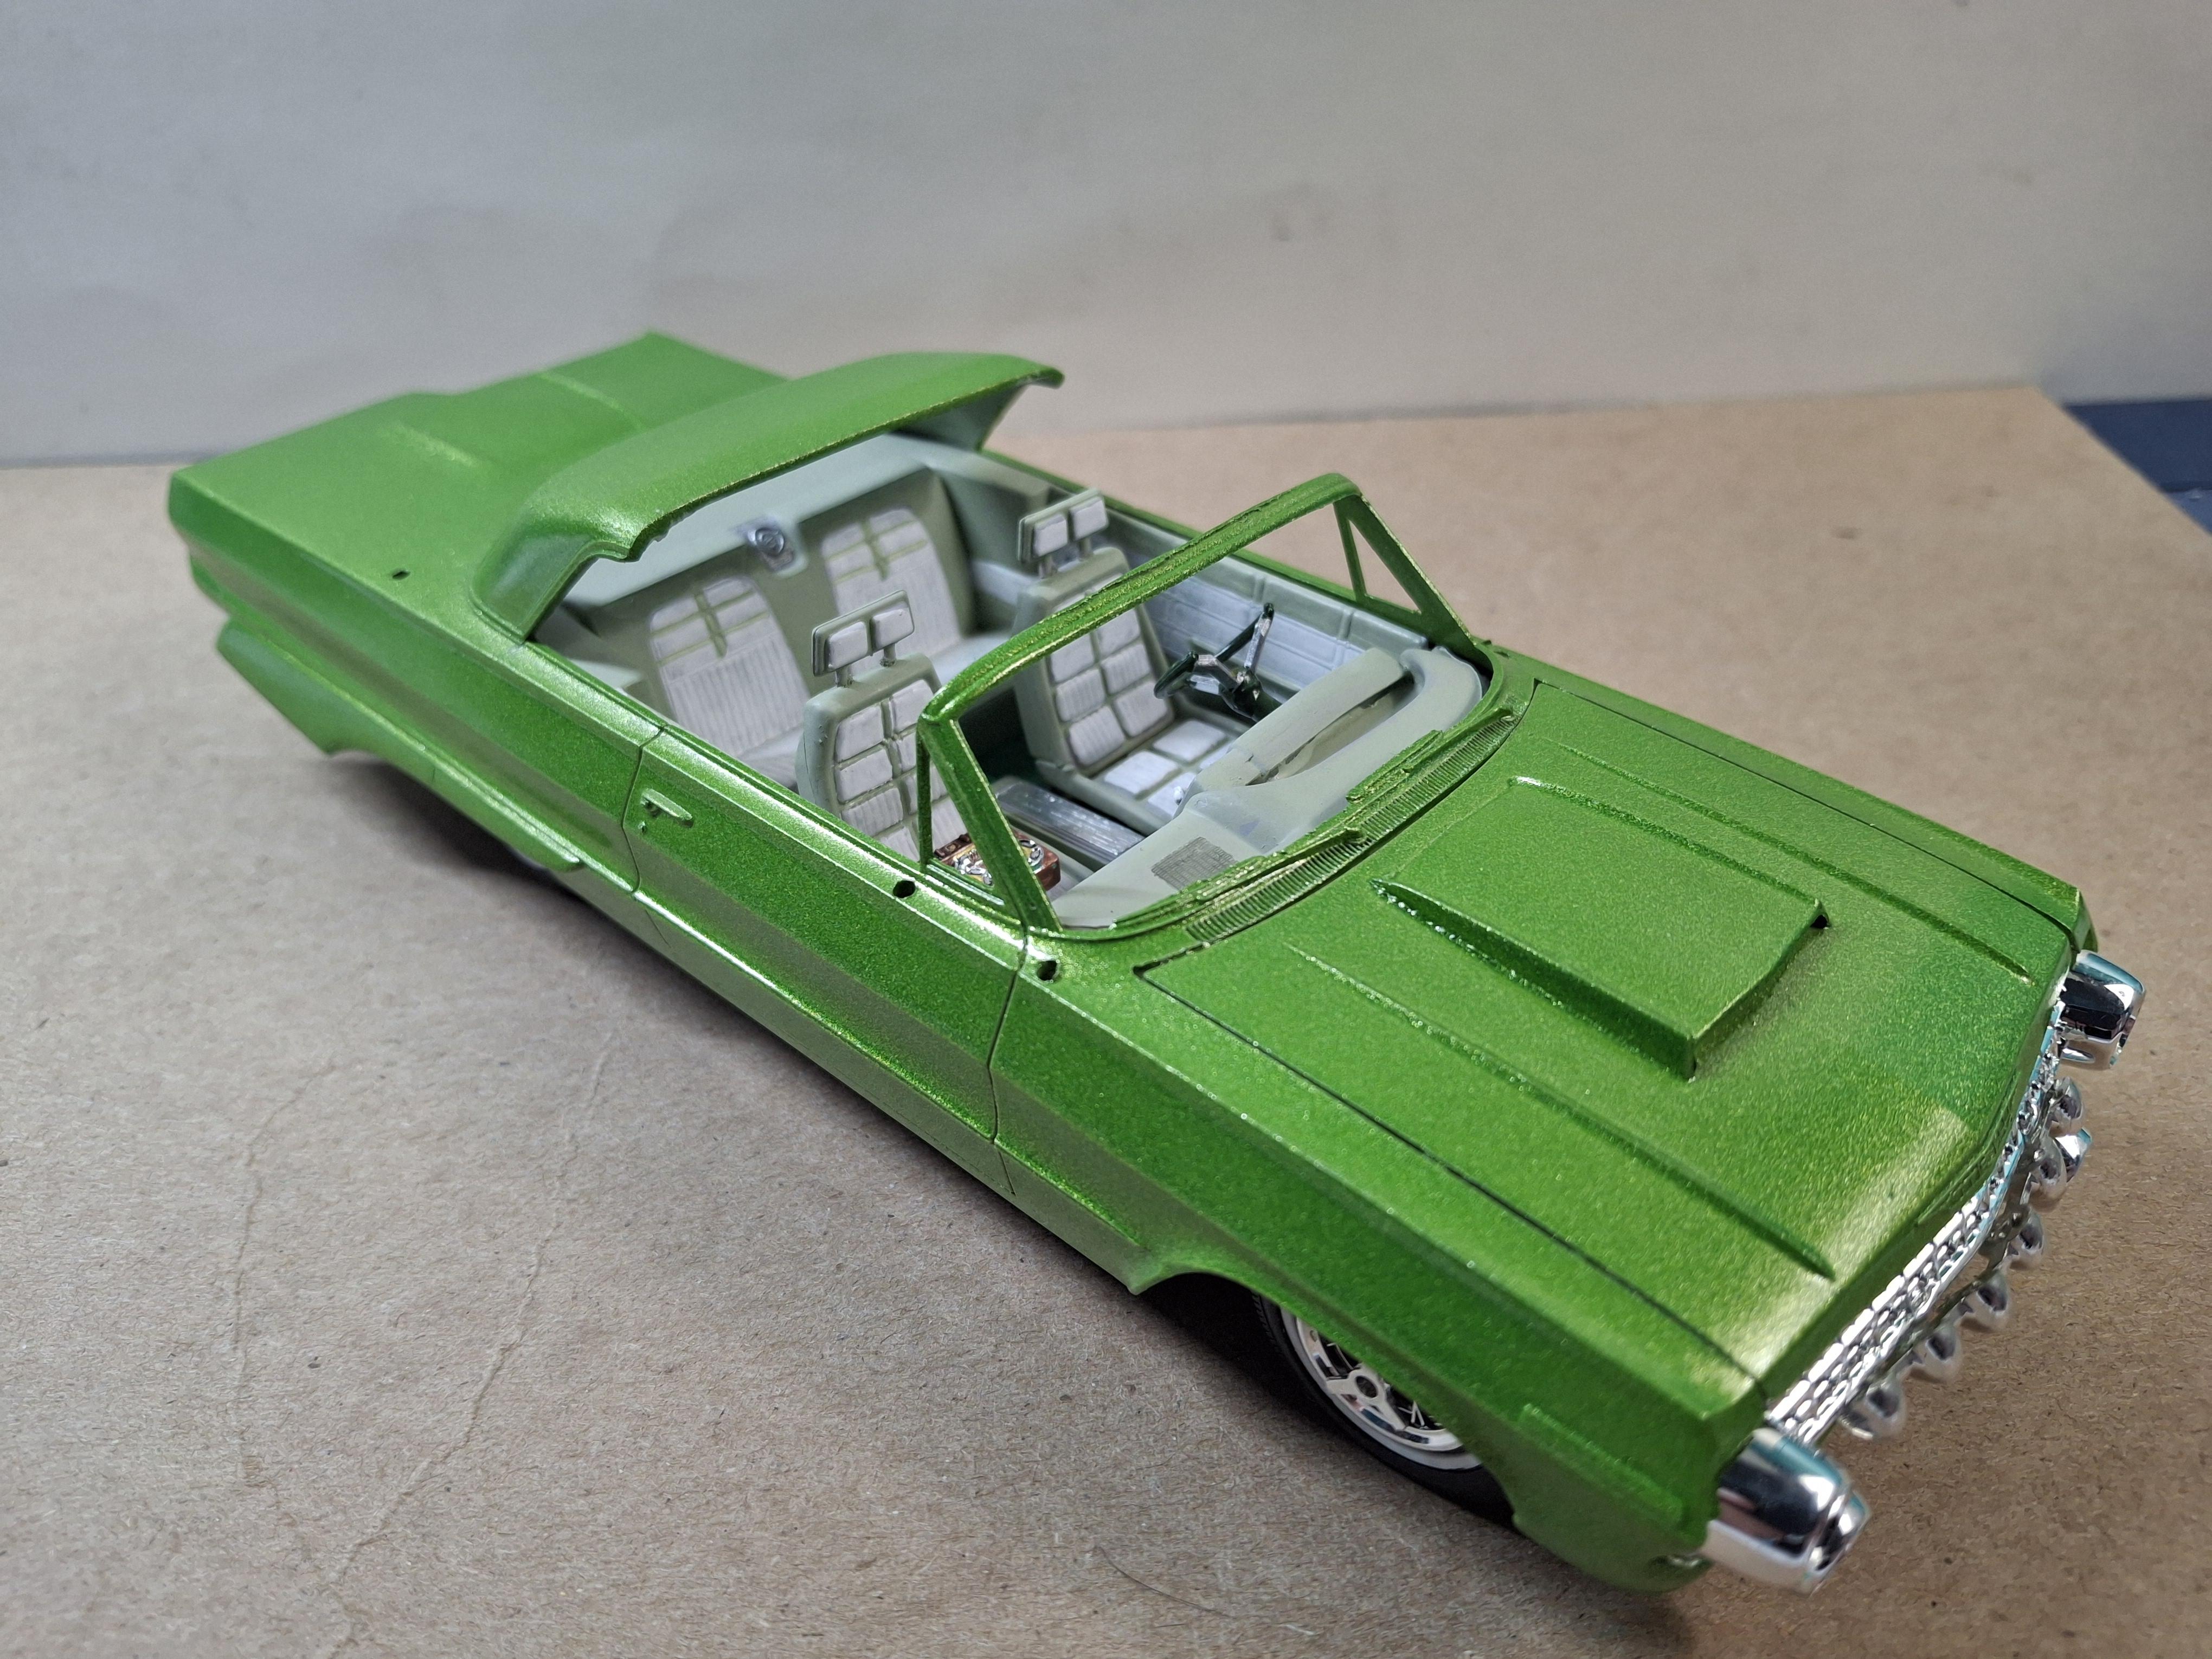
I wanted to do this kit with the custom parts the way a kid would have opted to do this 3 in 1 kit back when this kit first came out. Exhaust pipes coming out next to taillights on the right, bugeyed headlights , giant side body panel skirts and no bumpers. The 5 things I changed was cutting the roof and added visors, longer red taillights, gas door custom dash front and spoke hubcaps. No 409 engine I used the engine plug. Bare metal foil and Tamiya paints.
-
The body was molded in black and pretty nice looking so I lightly scuffed it and shot it with high gloss clear. I let it sit about 2 weeks and it has the finish I wanted and saved time painting it black. The interior and motor are really cheesey looking and needs a lot of detail to make it look ok. Trunk opens to put batteries in but I wont use the motorized option. I'll redo that area and put in some luggage. They did do the grille right by opening it up instead of flat and solid. Front wheels are steerable, good chrome and whitewalls. Comes with the clear red hood ornament I just have to make the 2 flags. Everything in Chinese.
-
About 60% done. Still need to bare metal foil the body, add glass, chrome accessories (spots ,mirrors etc.)rear lights ,exhaust pipes and make some sun visors. Interior took time as I worked it with brushes and added MCG flocking carpet . I modified the dash and still have a few more interior things to do. Even tho' I used an engine plug instead of the 409 I did some chassis detail. Tires and spokes are from Hasagawa 65/66 Chevy. Also needed to crazy up the front to go with the crazy rear.
-
Nice work so far. I need to do the PieWagon as the one I did was done as the Taco Wagon
-
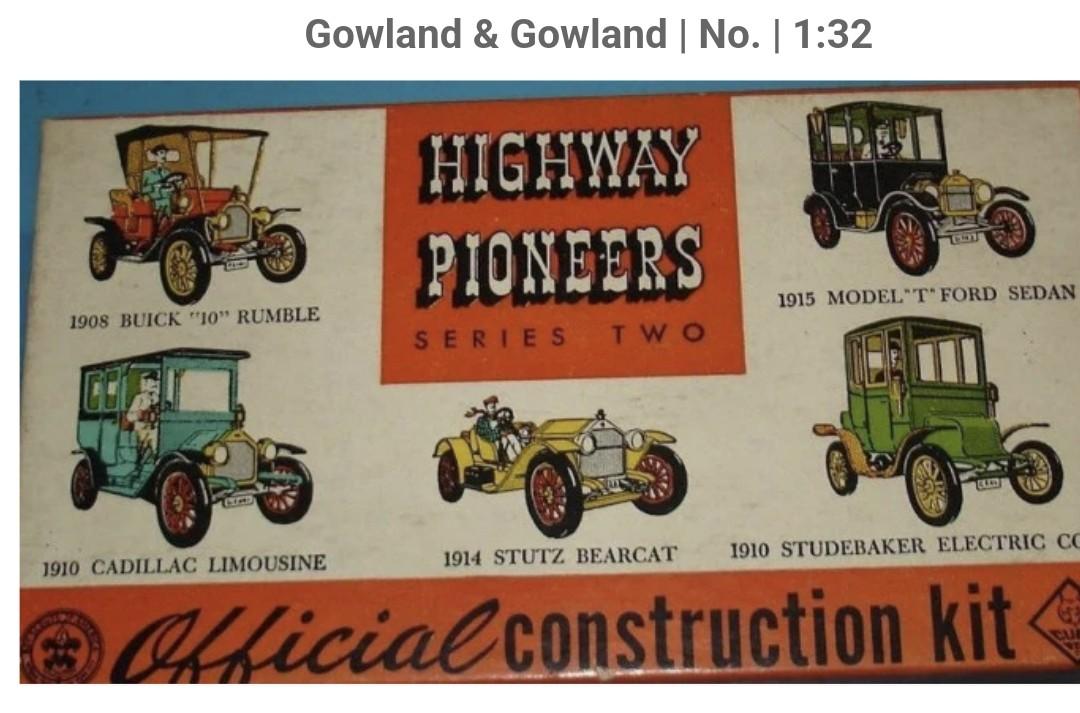
Can you tell if that body is a 2 piece split down the middle? From the pictures it looks heavily modified. The closest I could tell Gowland and Gowland had a gift set with a 1915 center door Ford made in 1952, but the hood was attatched to the body, no motors. The 1st and 2nd ictures are from the the net, pic 3 is a 1/32 1915 Ford I built, pic 4 is a 1925 Ford in 1/25 and pic 5 is an MPC version of the Gowland 1/32 kits with a partial motor that went on top of the hood ,motor parts , tires and wheels were 1/25.
-
Paint on , I'll leave it for awhile before I start the foil. Waiting on flock for interior so time to start another project😄
-
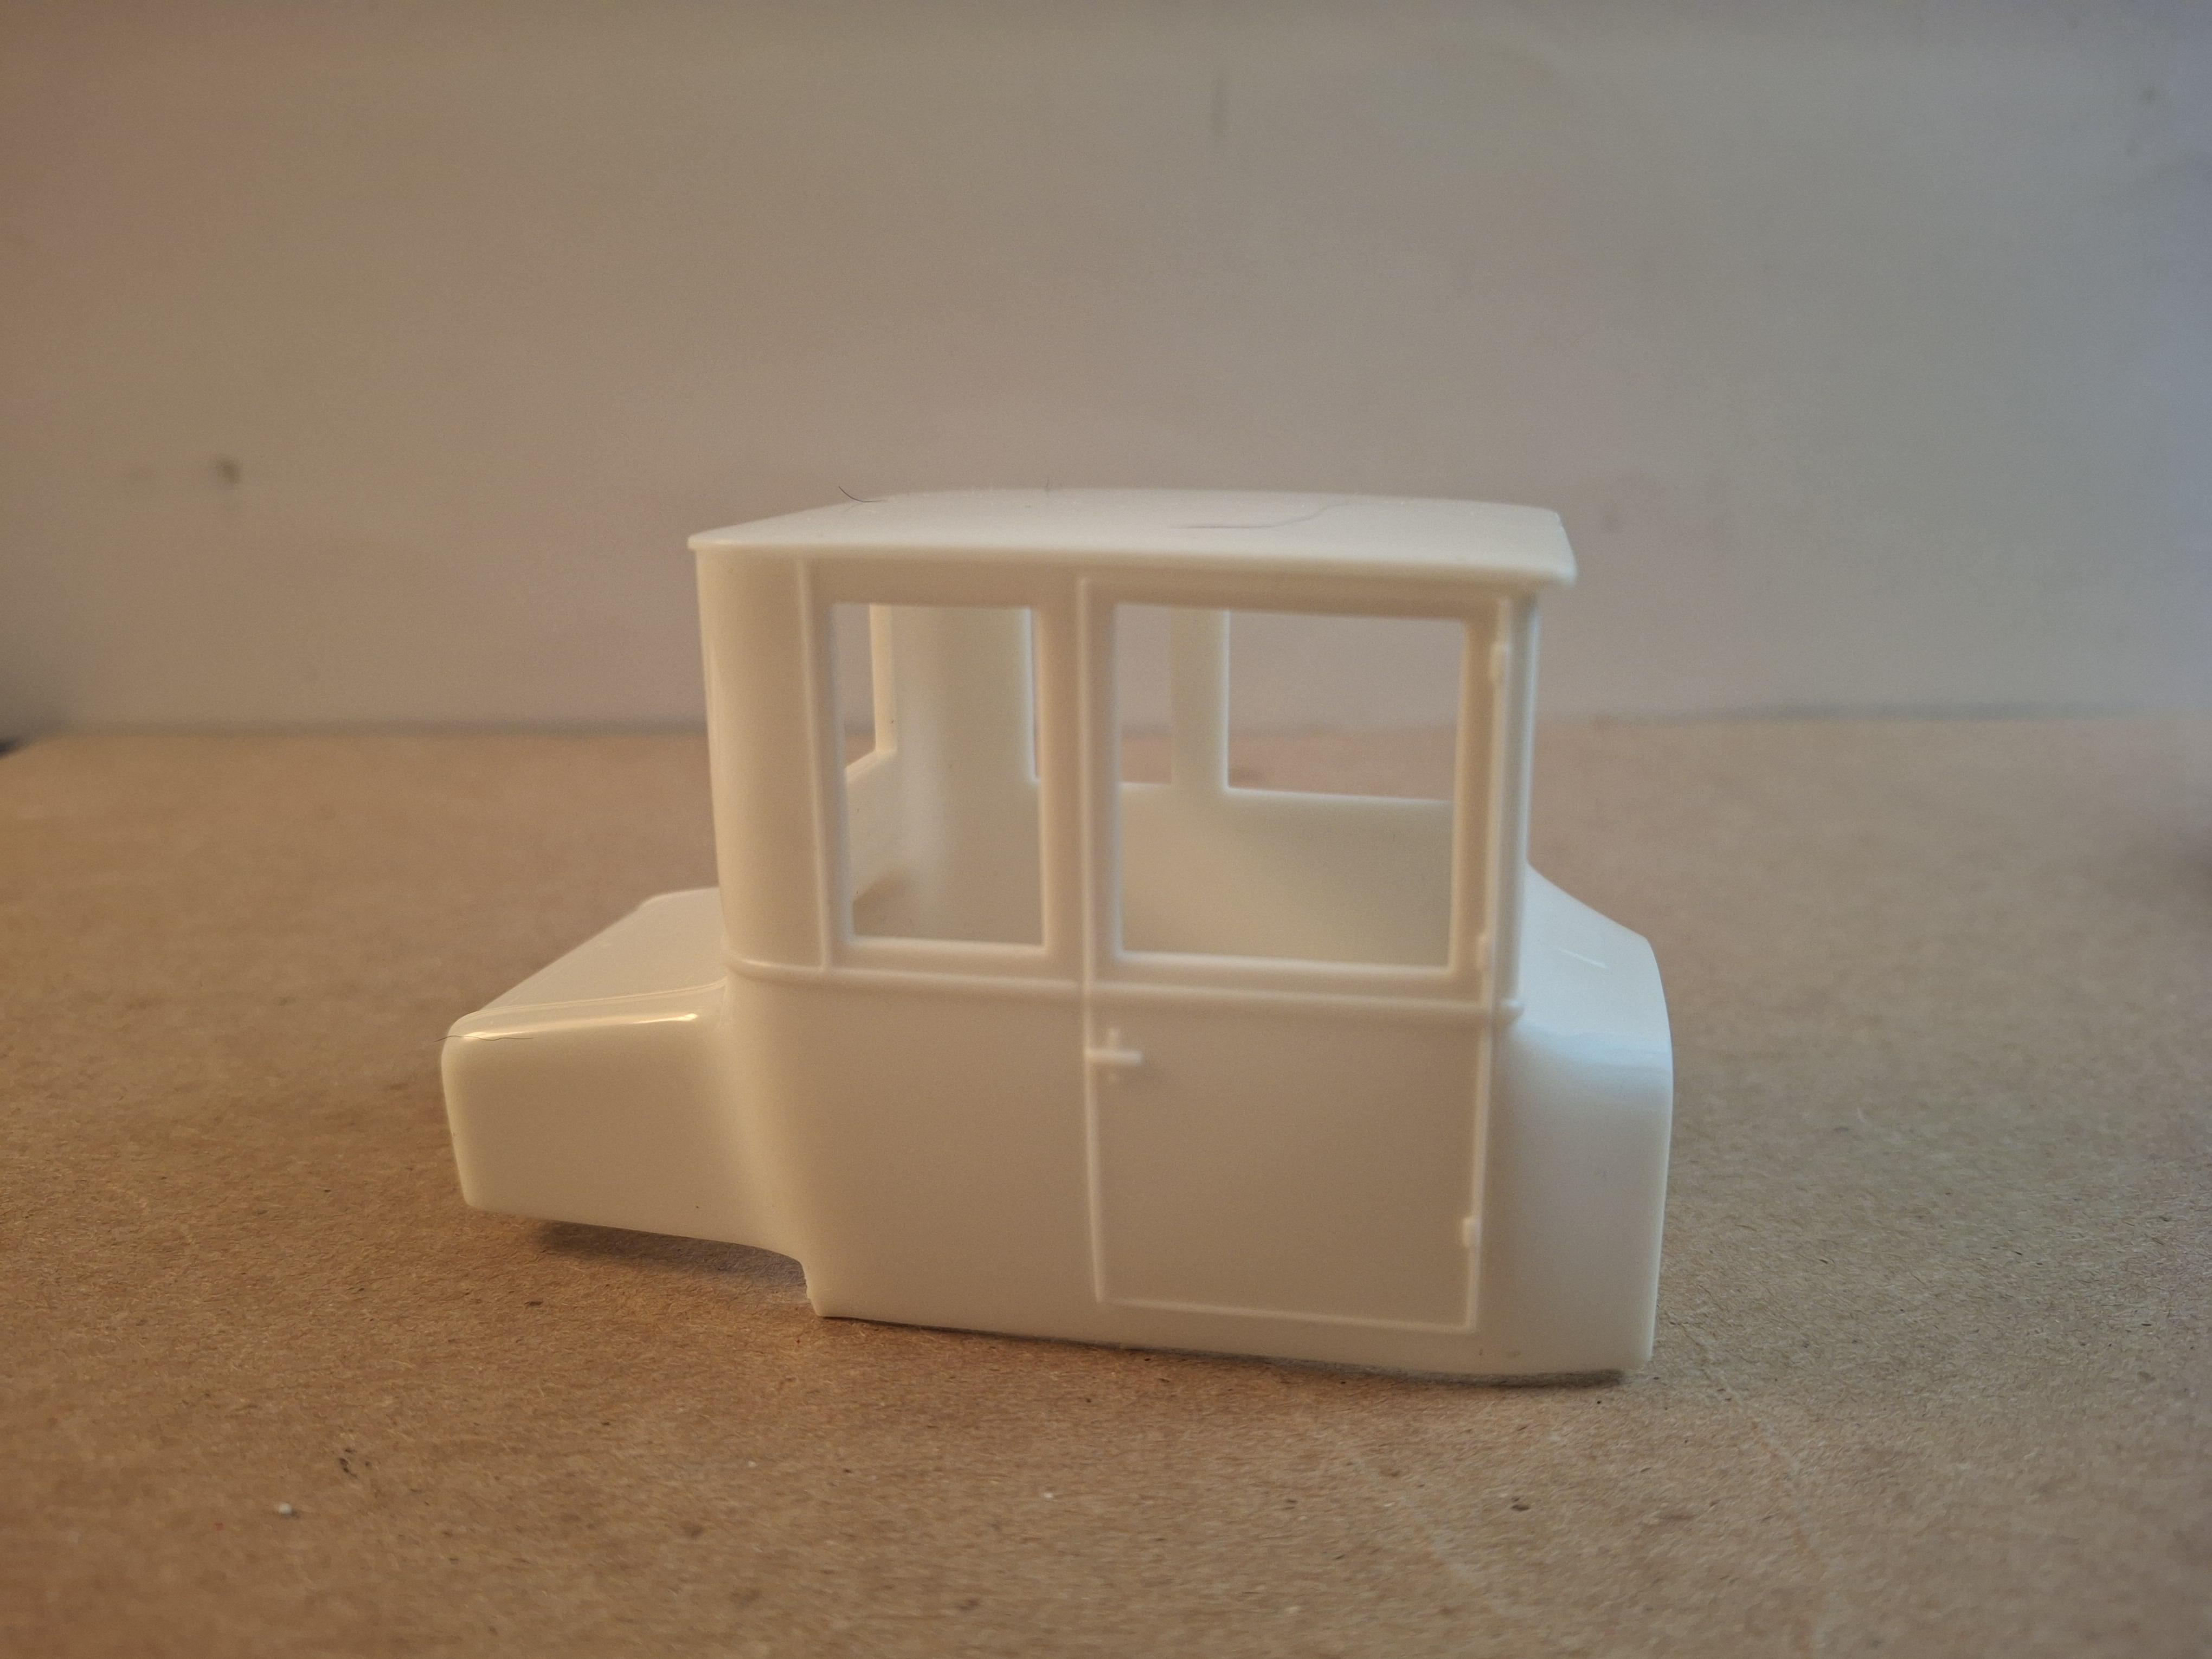
All smoothed out and ready to start looking a color inside and outside,I changed the dashboard with an insert I found in a parts box but dont have a clue what its from. Lowered it as far as it can go and grabbed these whitewalls and spokes from the Hasagawa 66 Chevy kit.
-
Yes they are typical showrod items.