BIGTRUCK
-
Posts
2,739 -
Joined
-
Last visited
Content Type
Profiles
Forums
Events
Gallery
Everything posted by BIGTRUCK
-
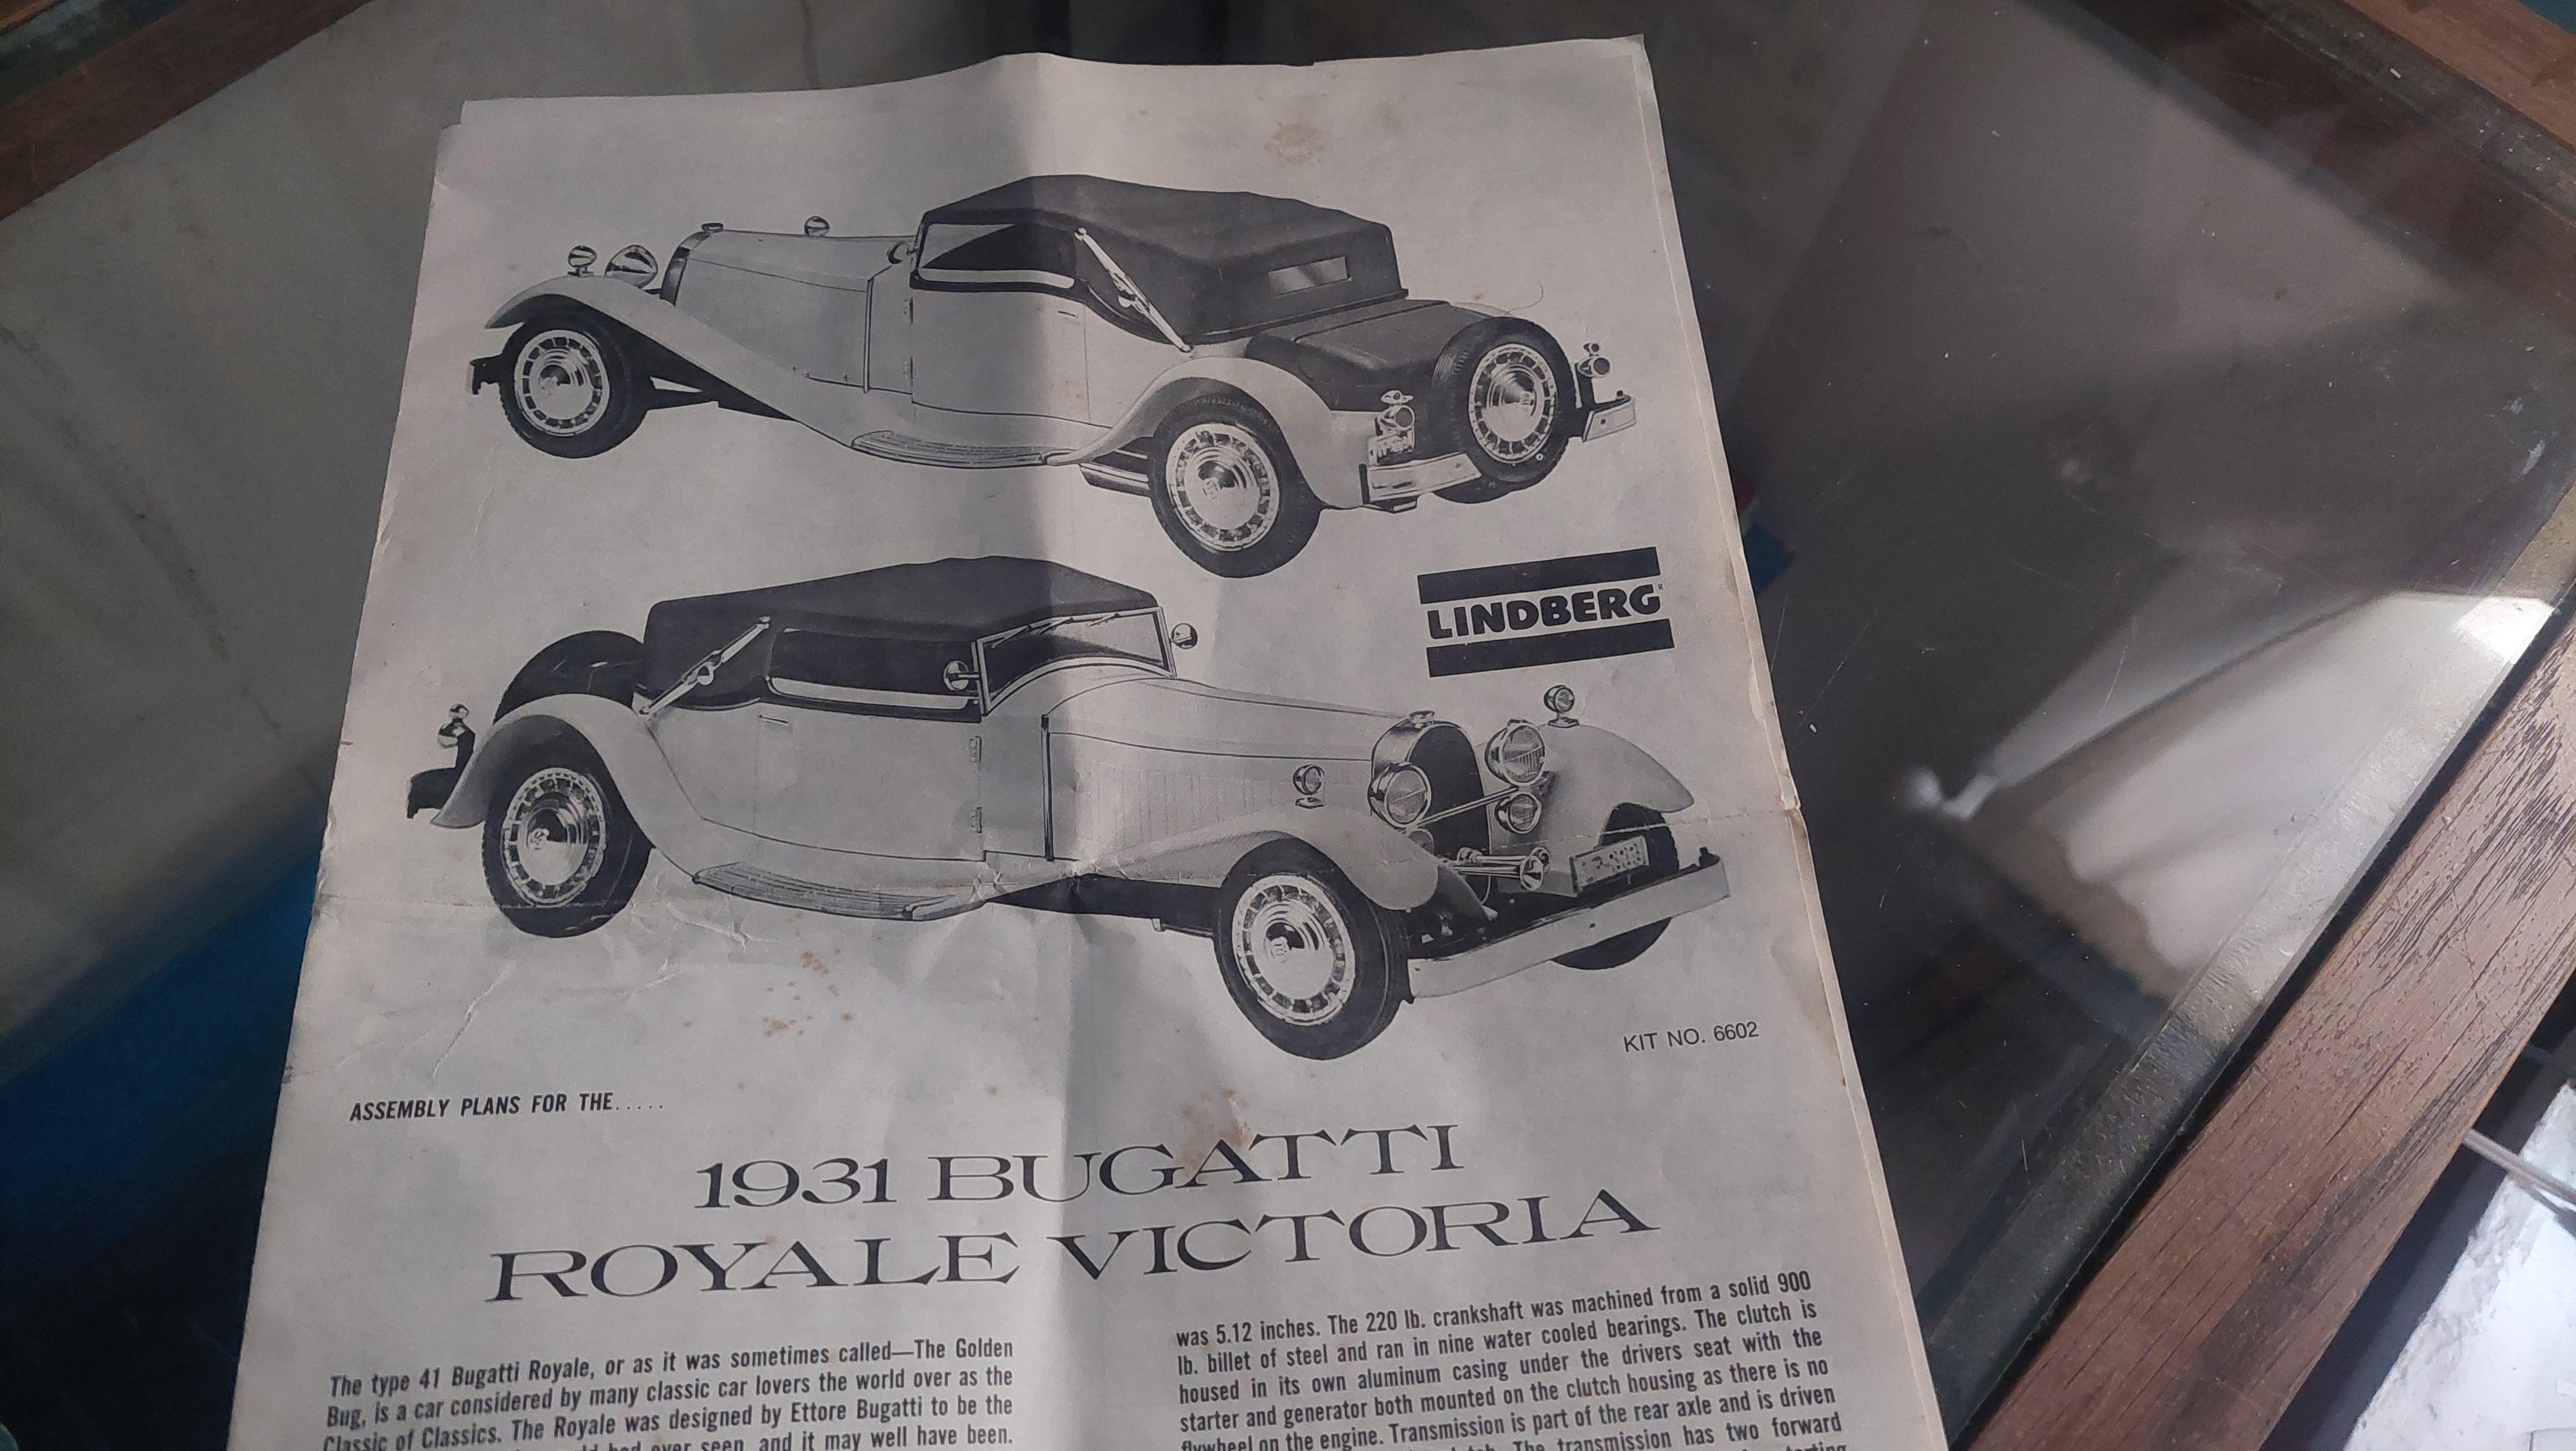
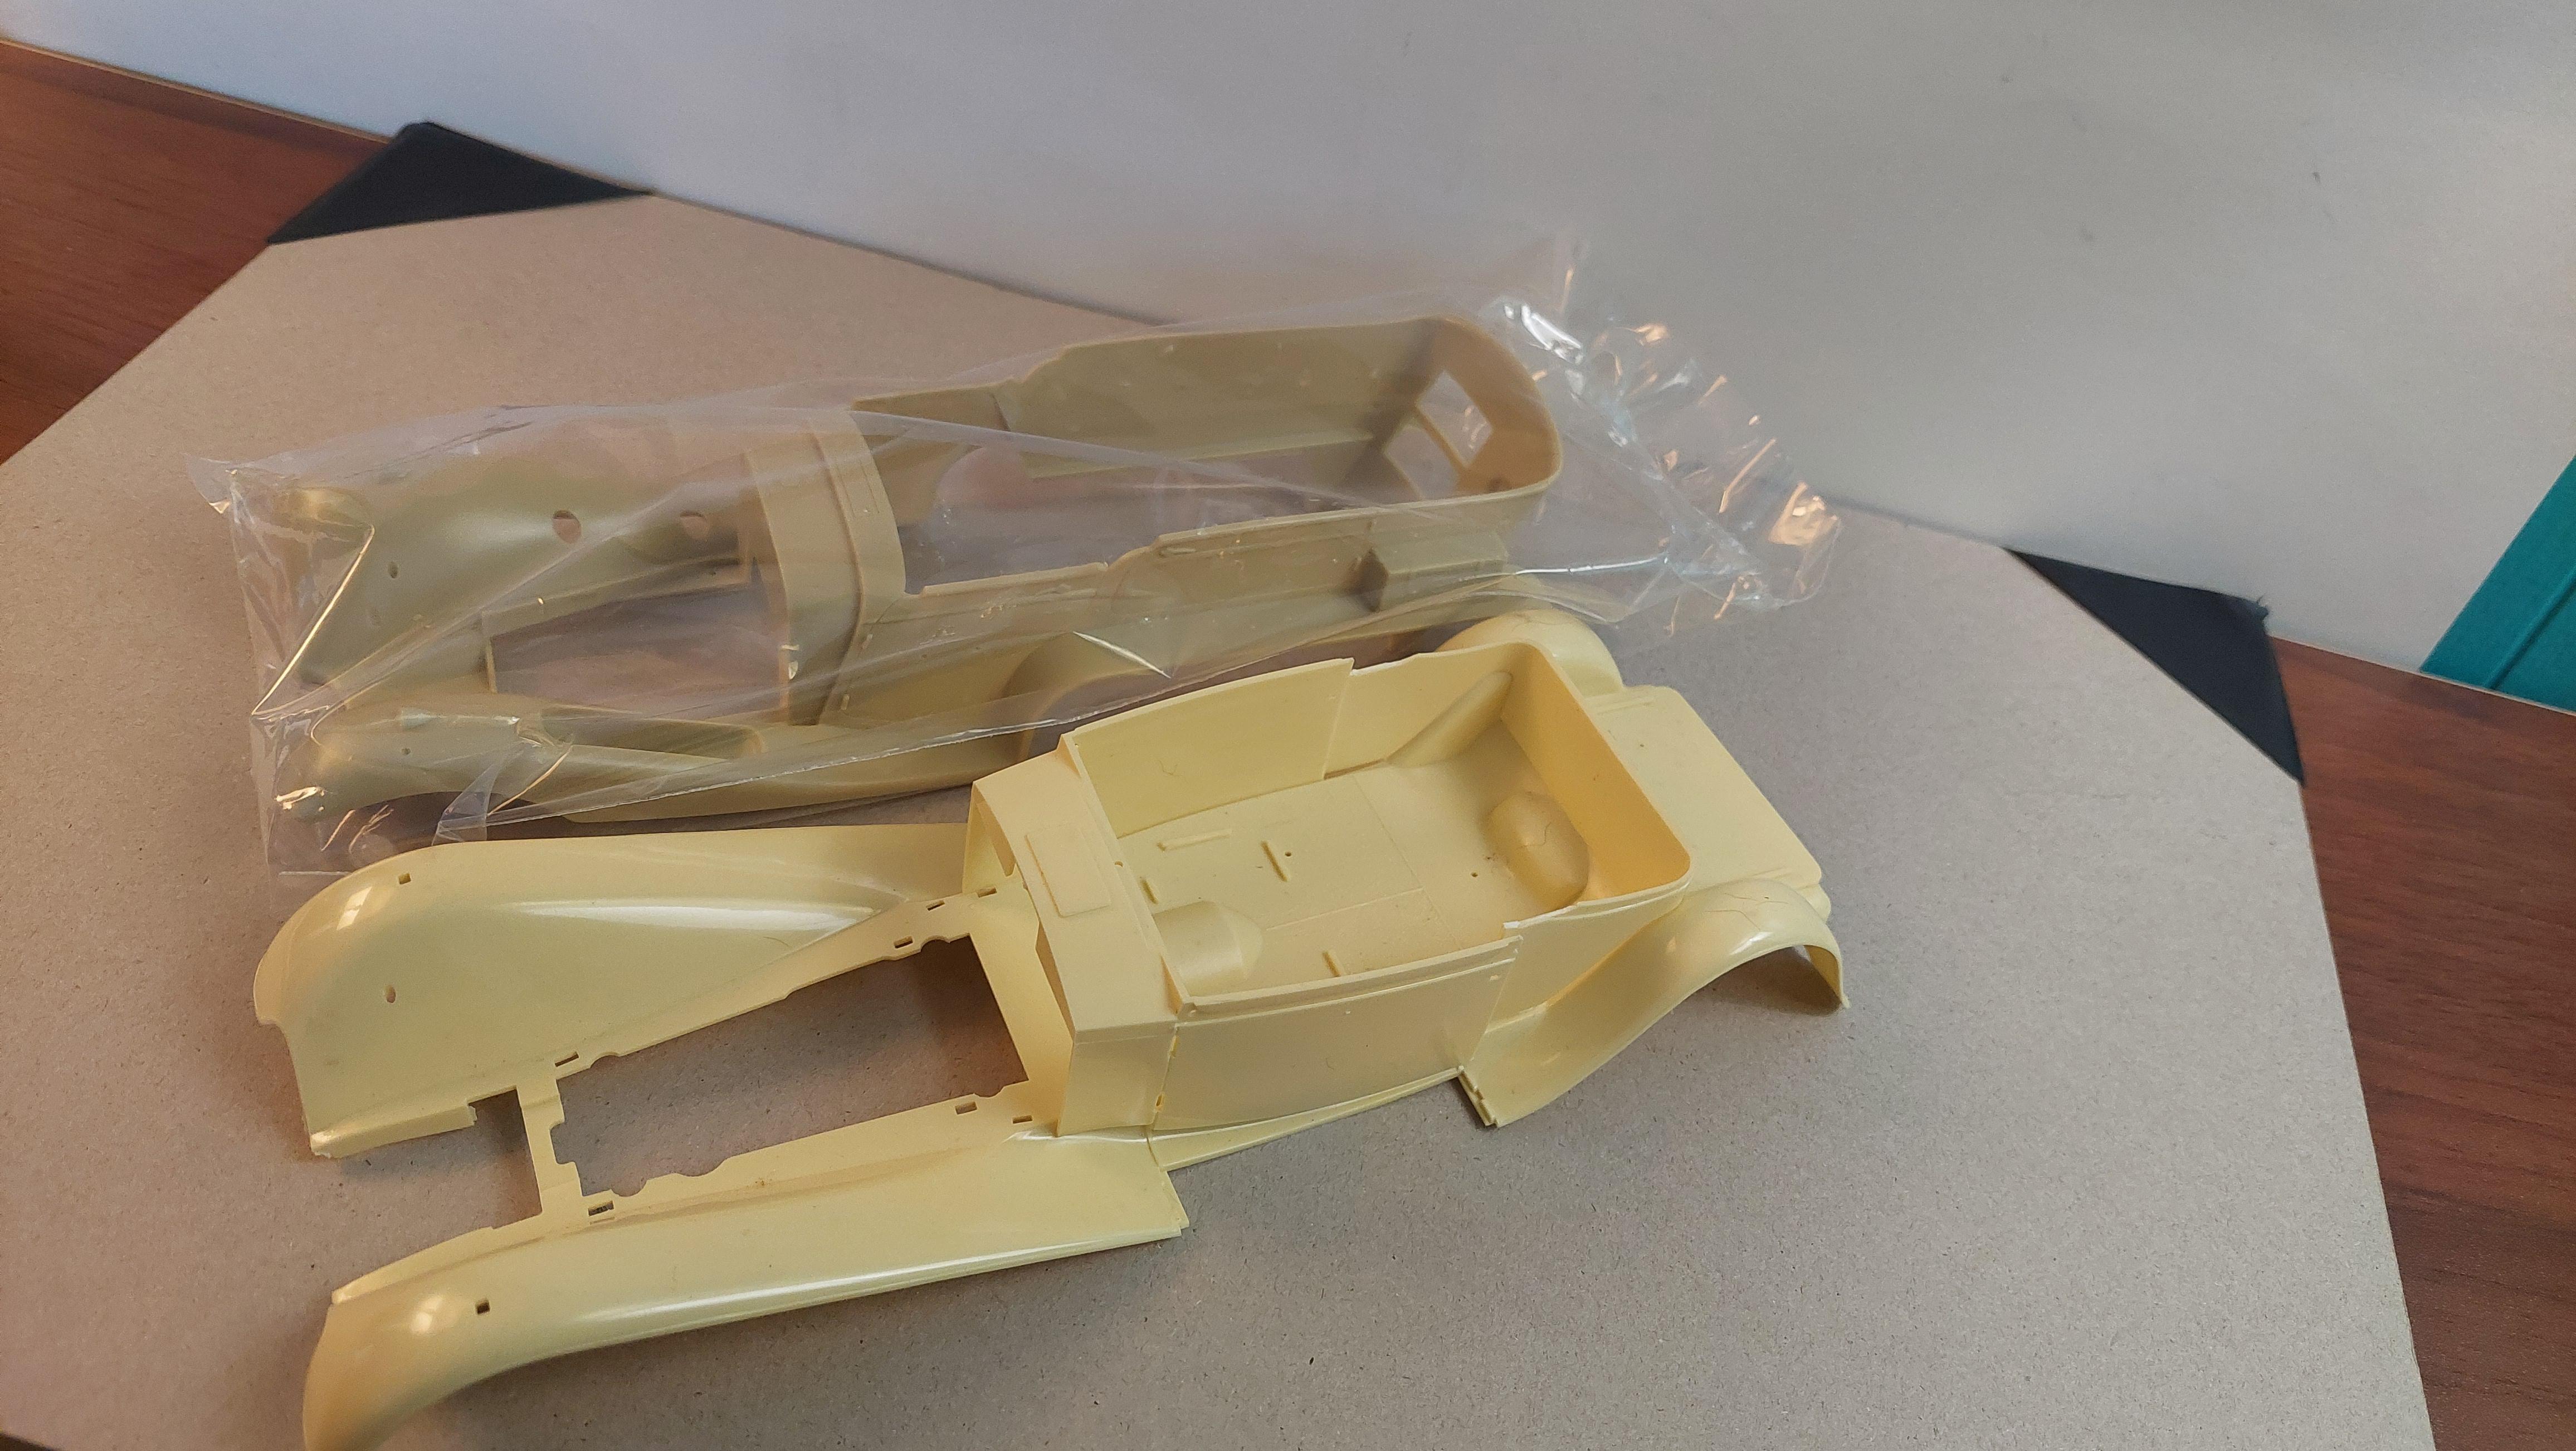
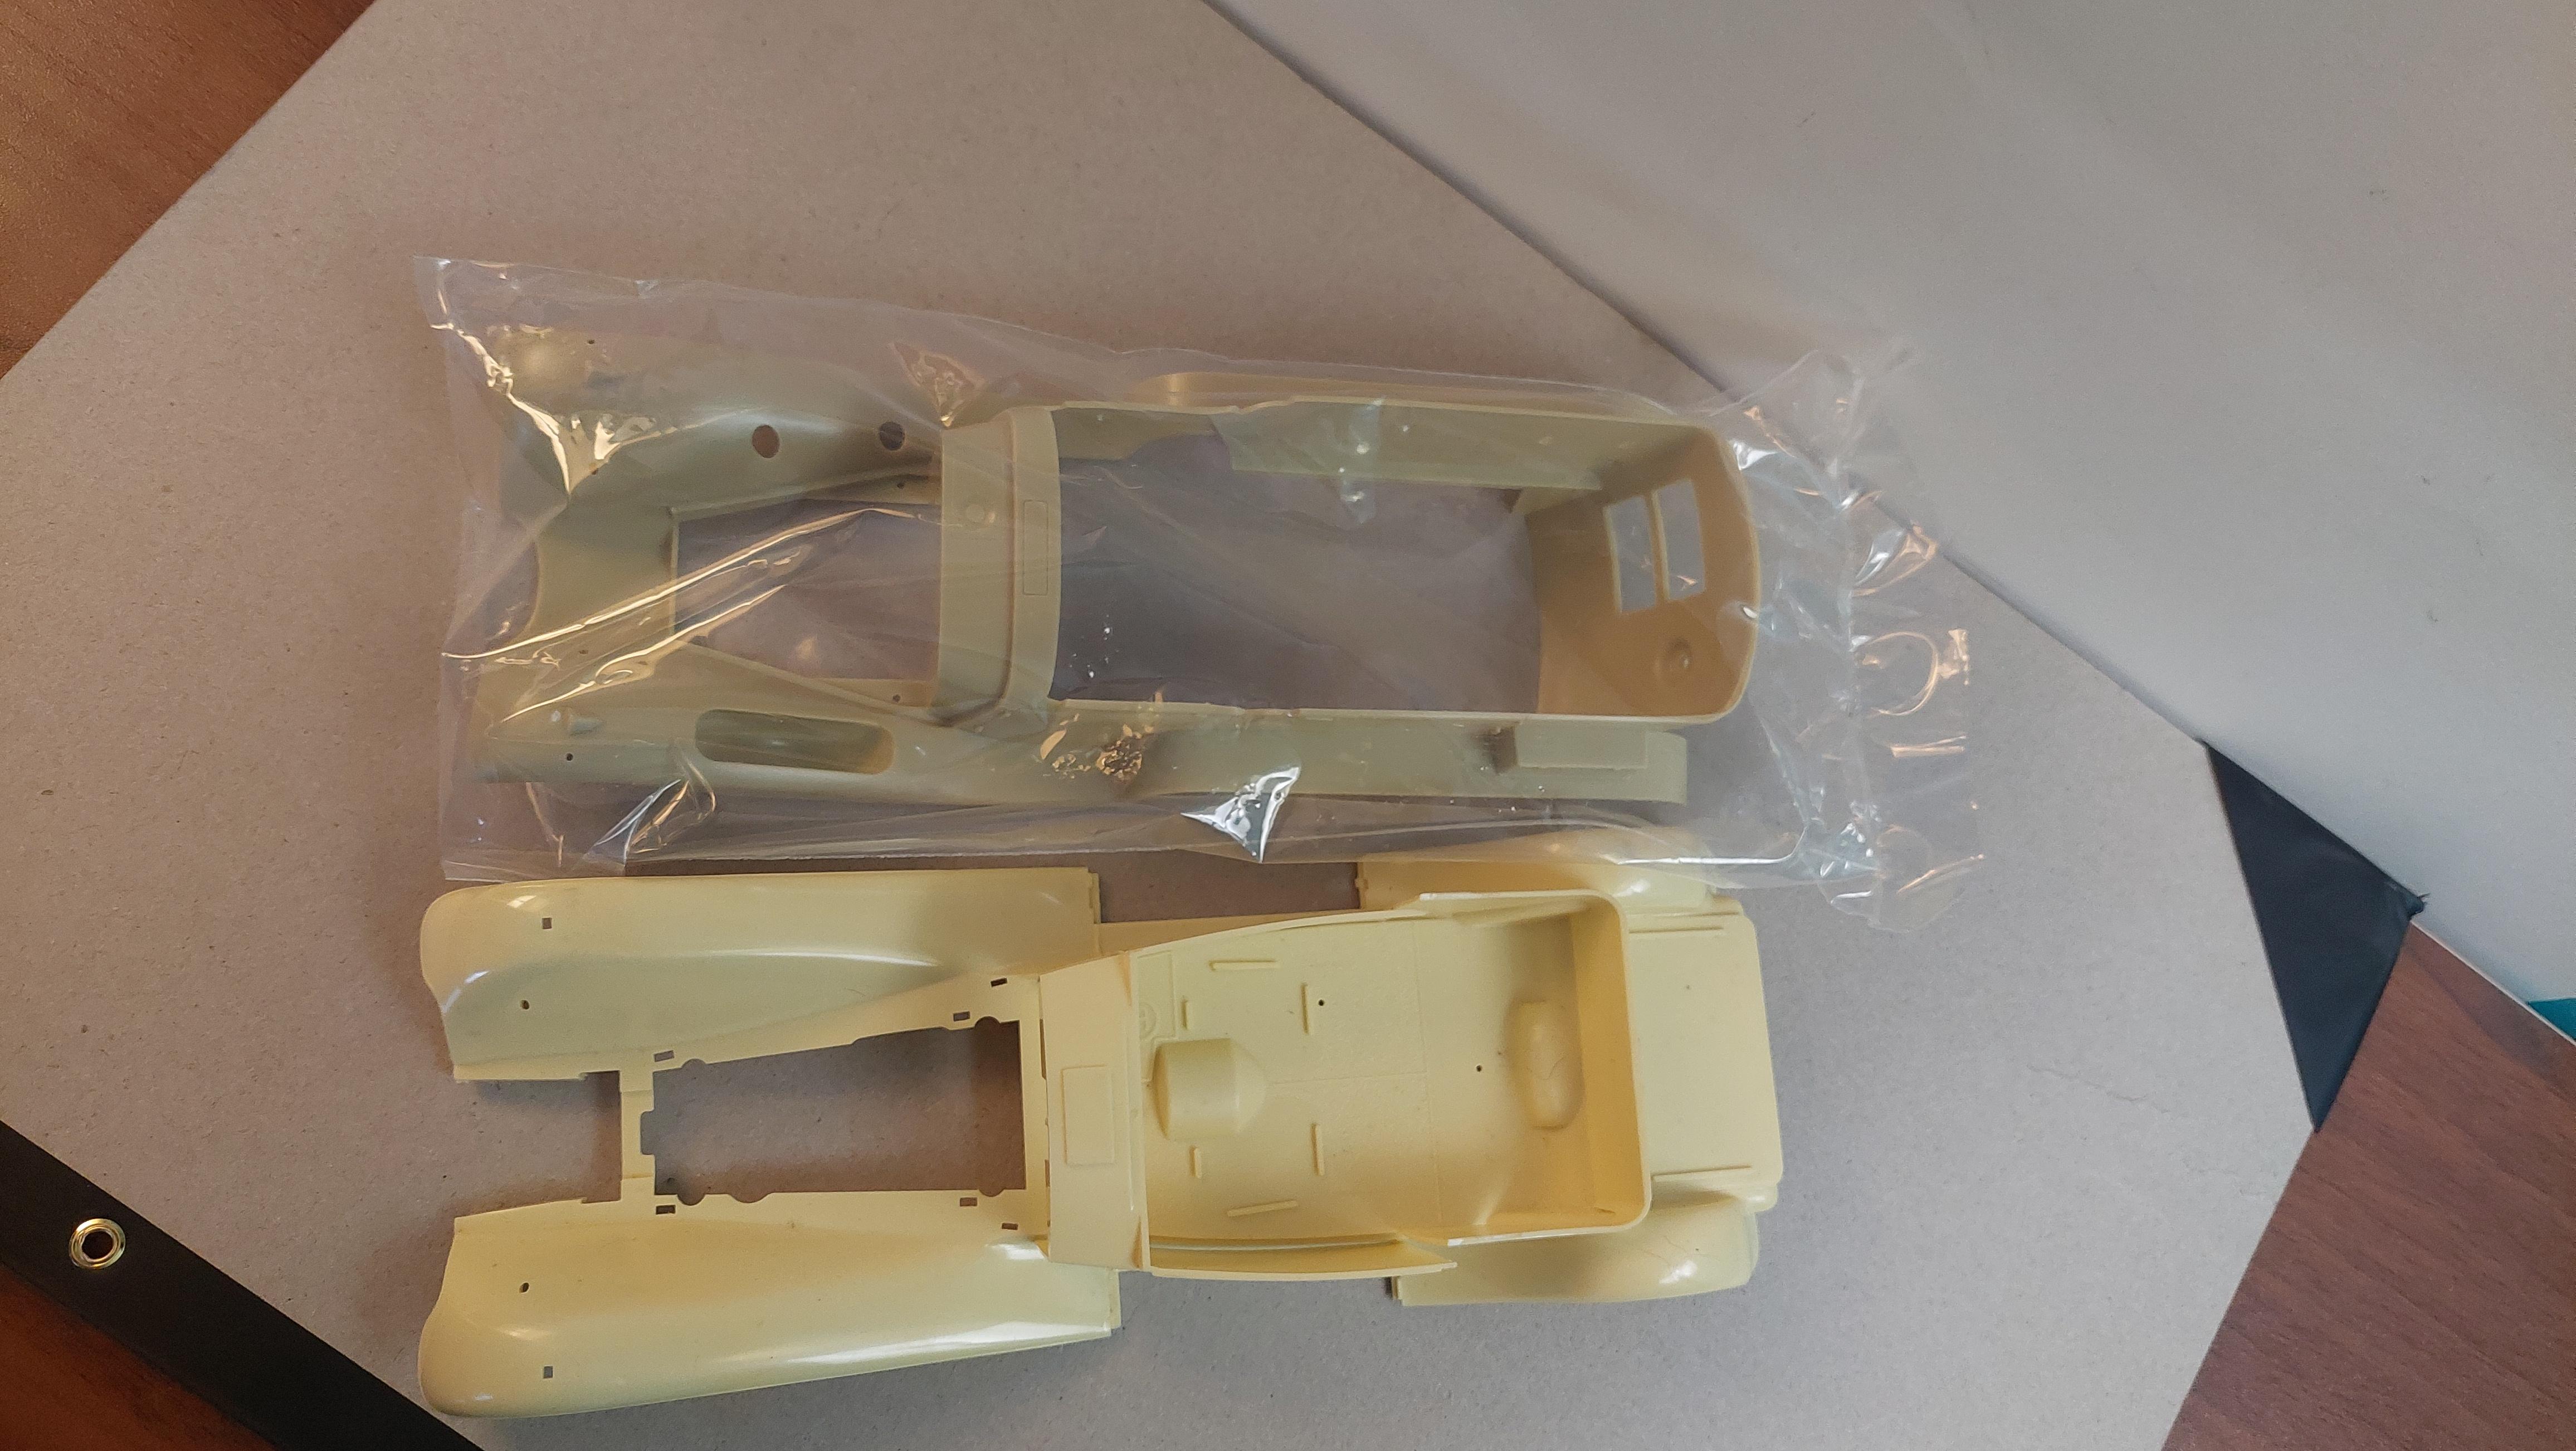
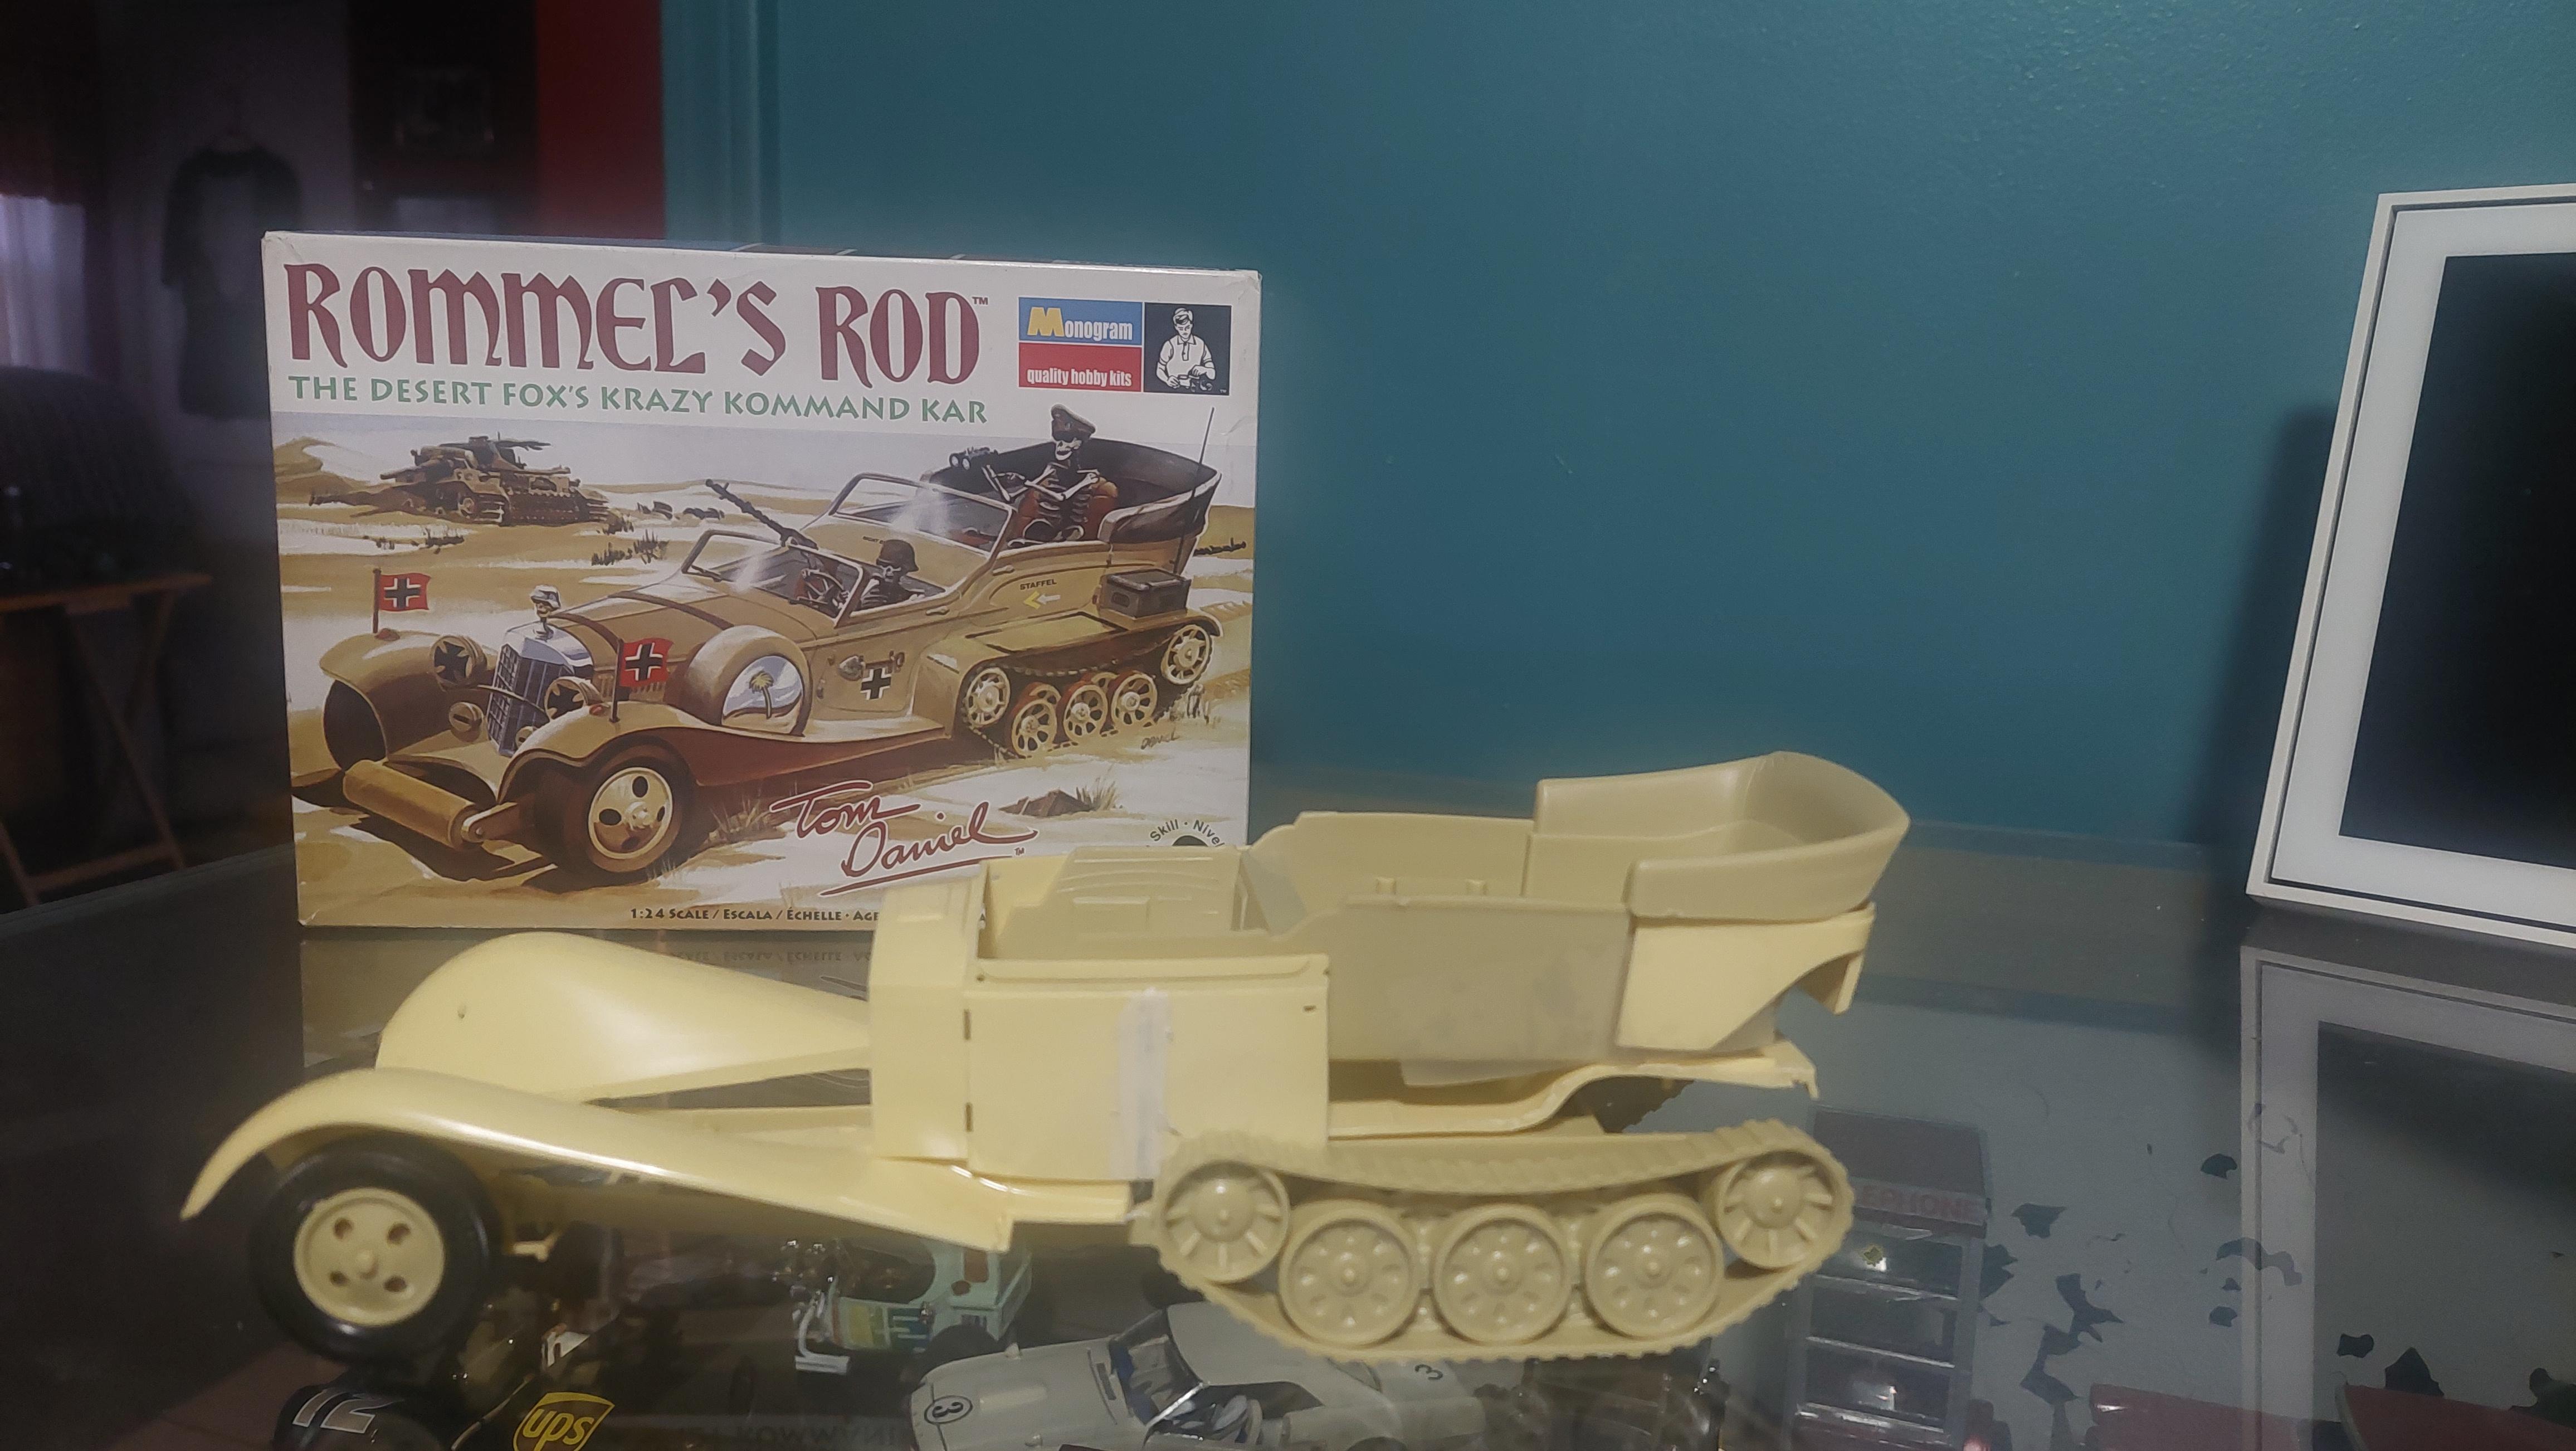
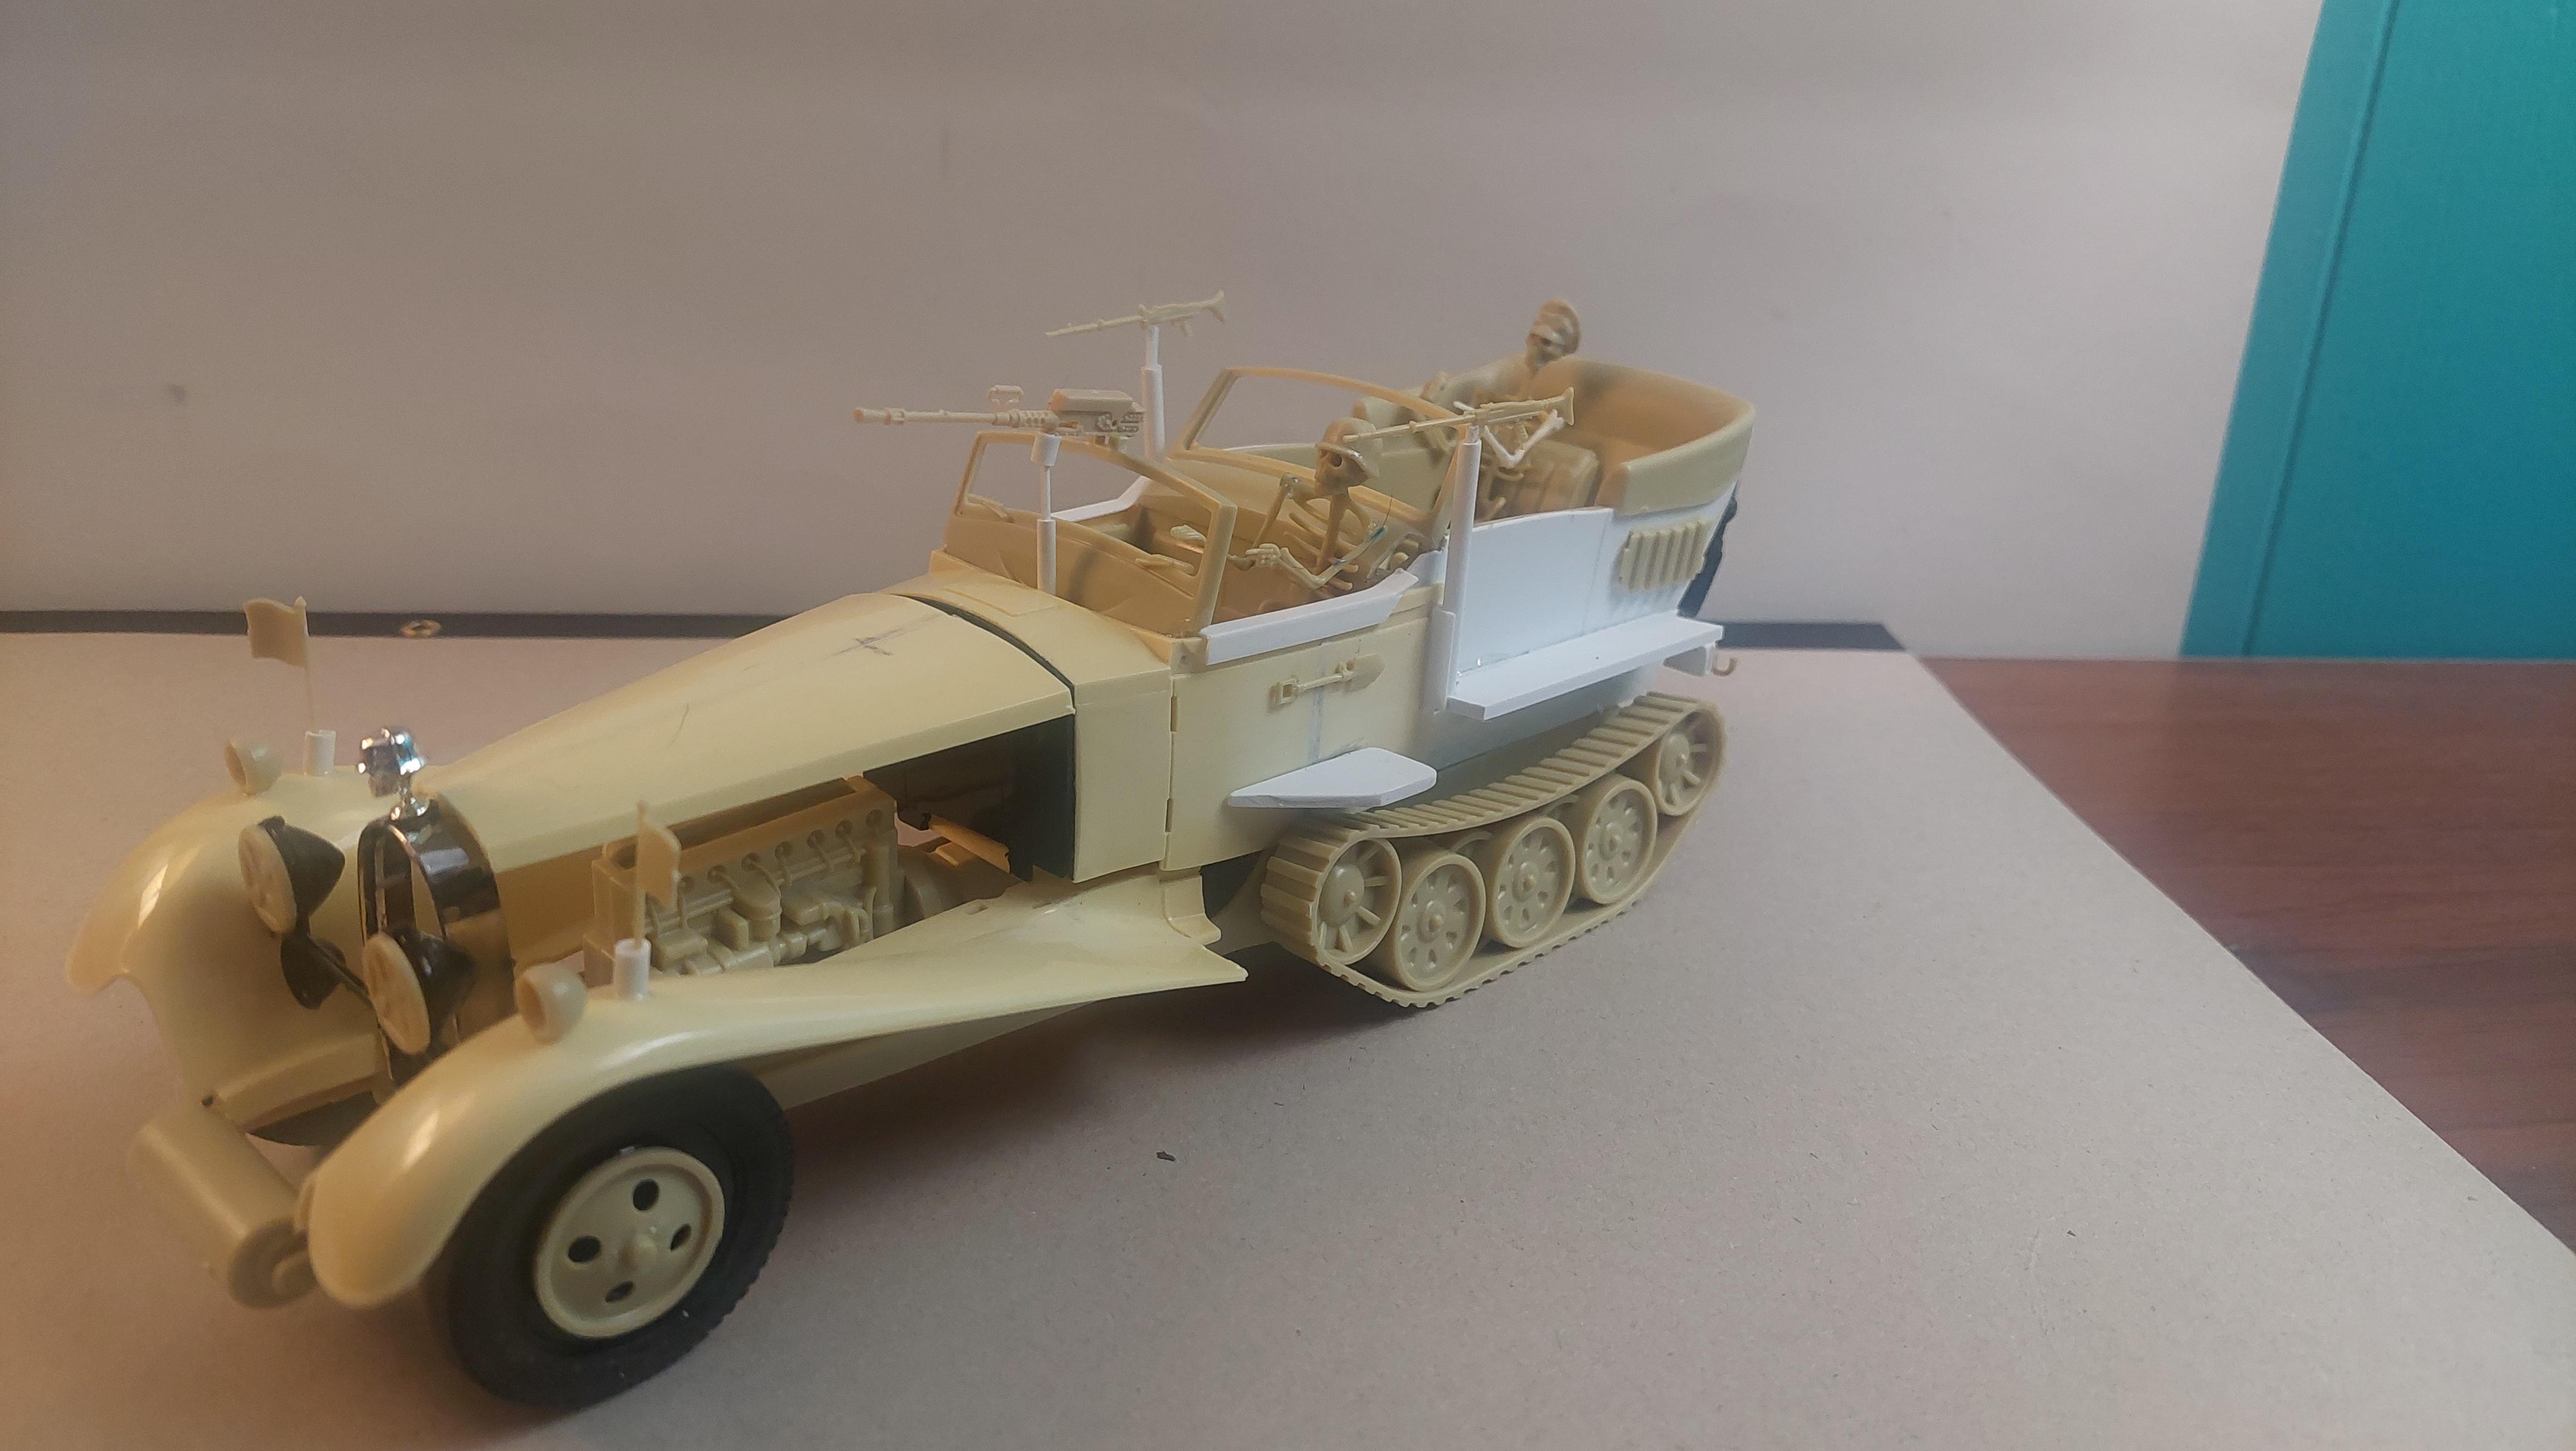
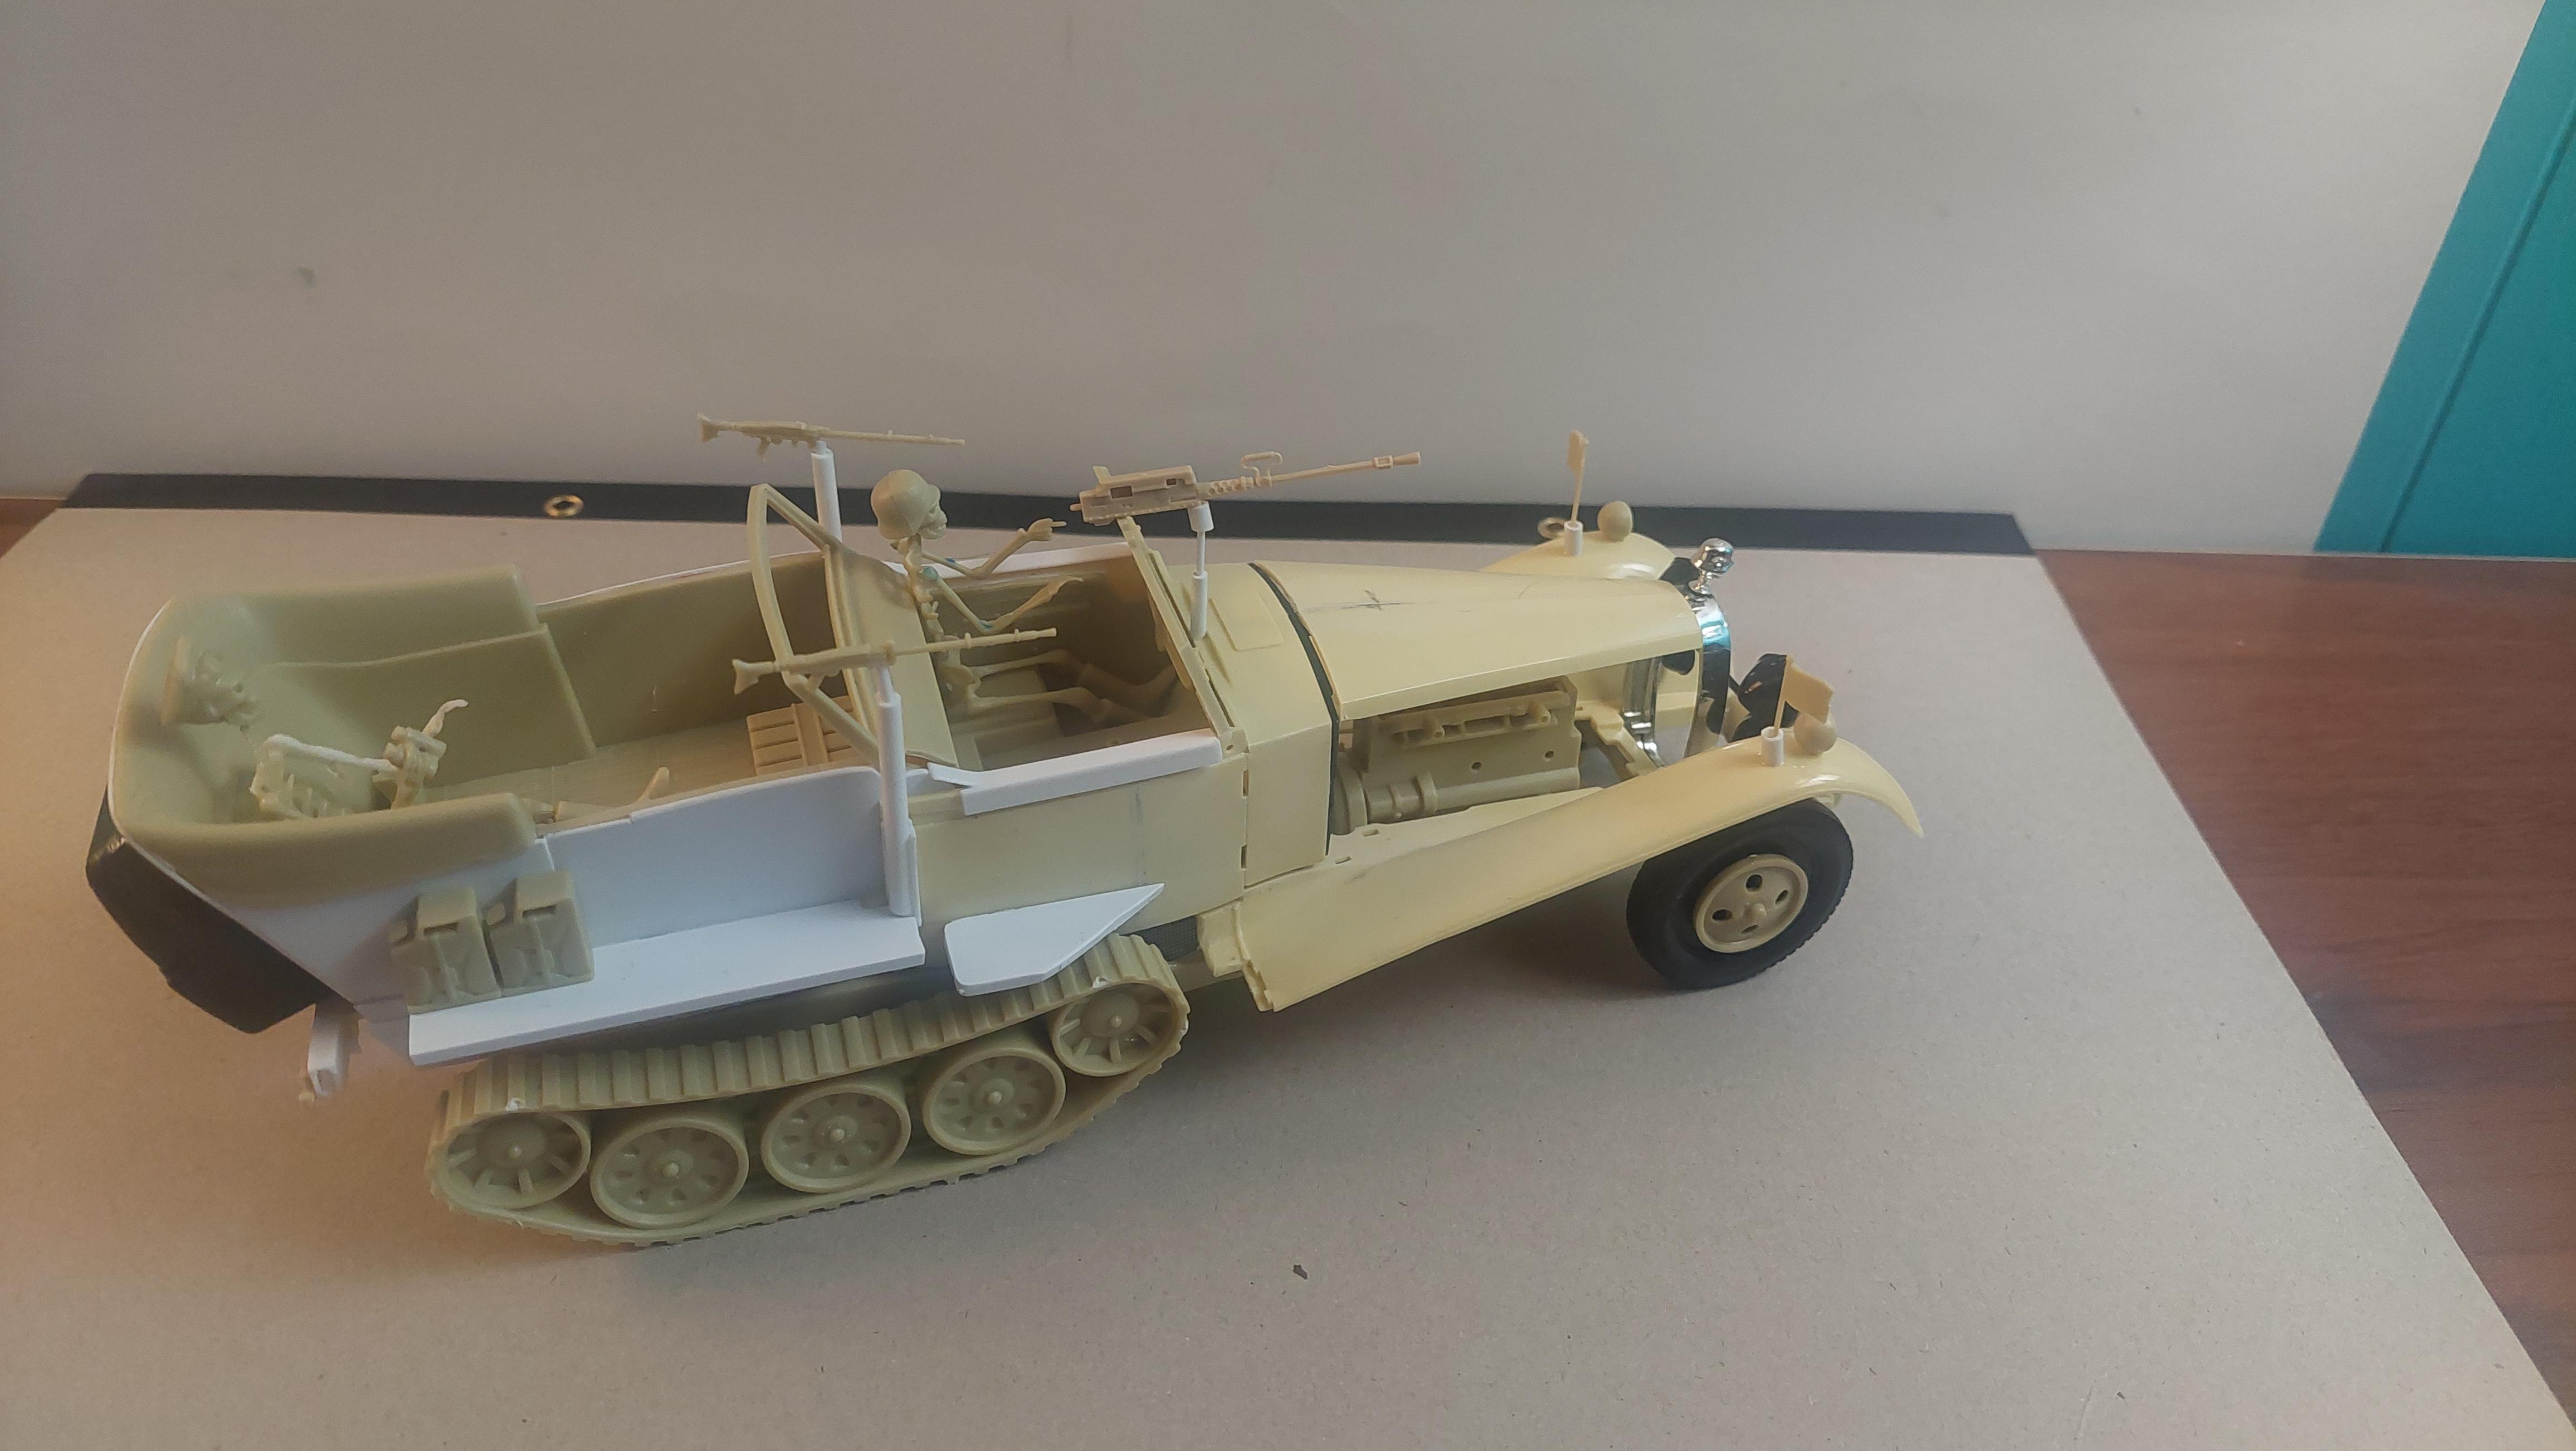
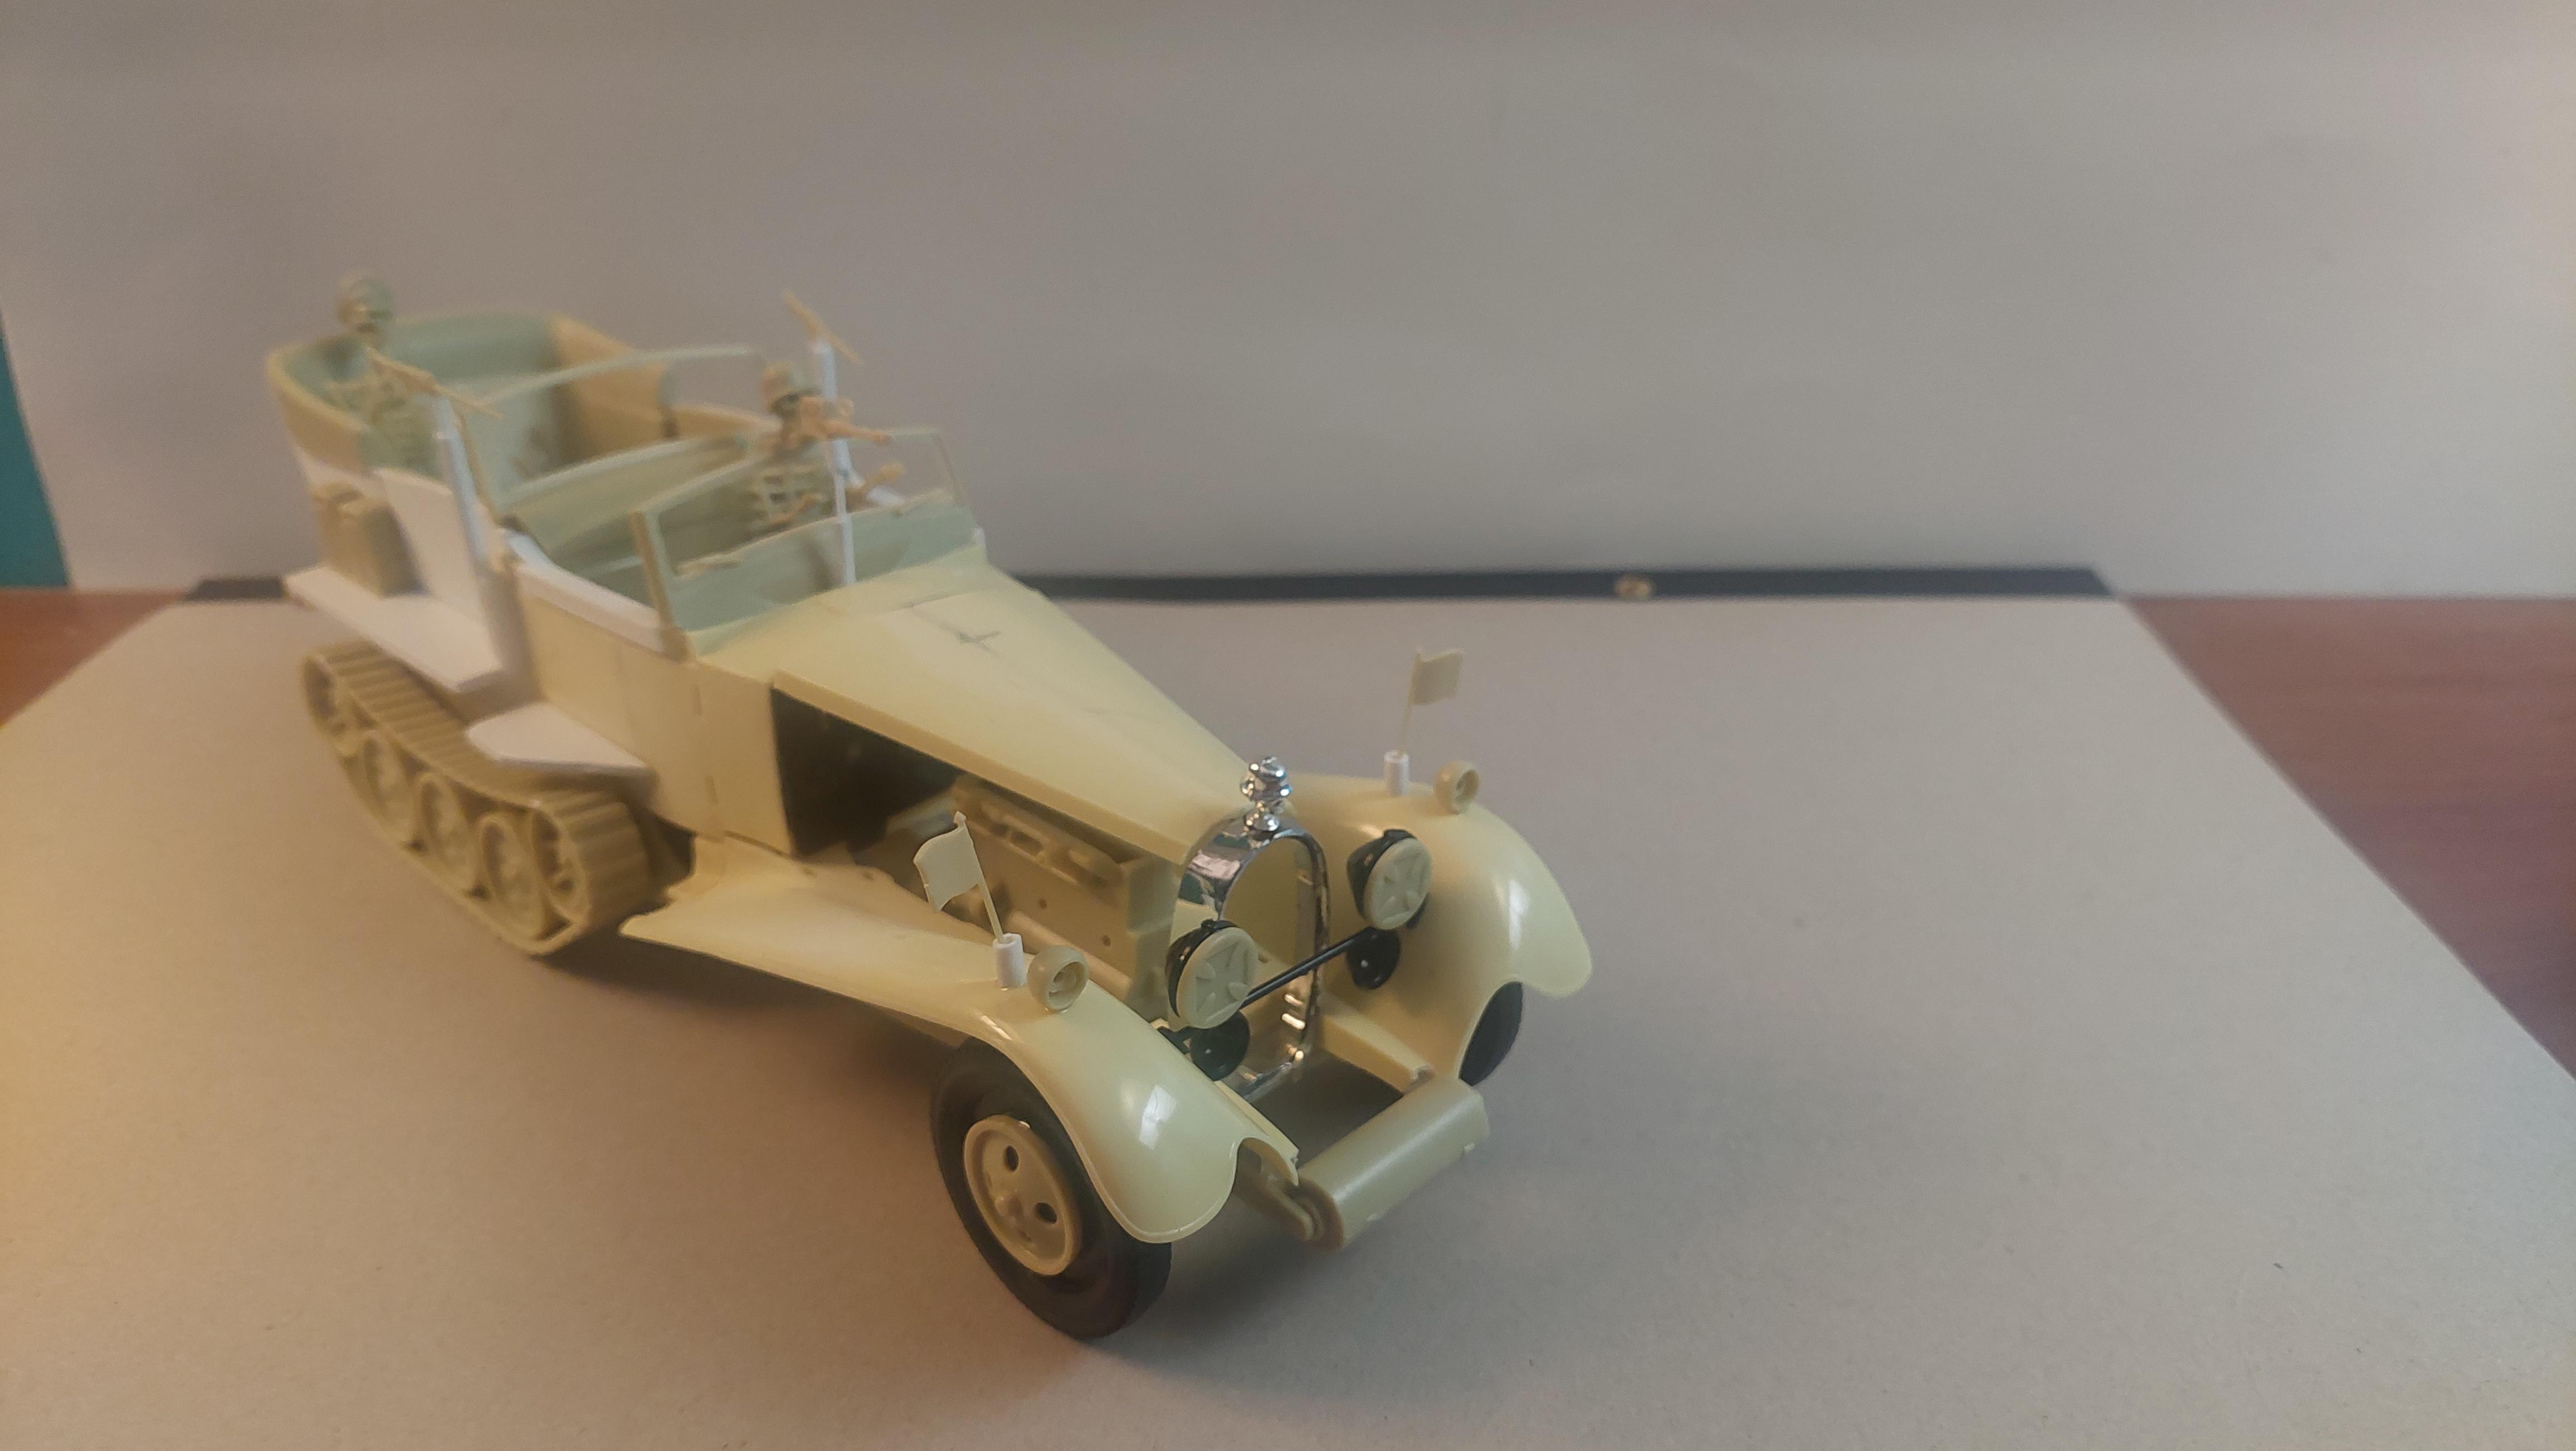
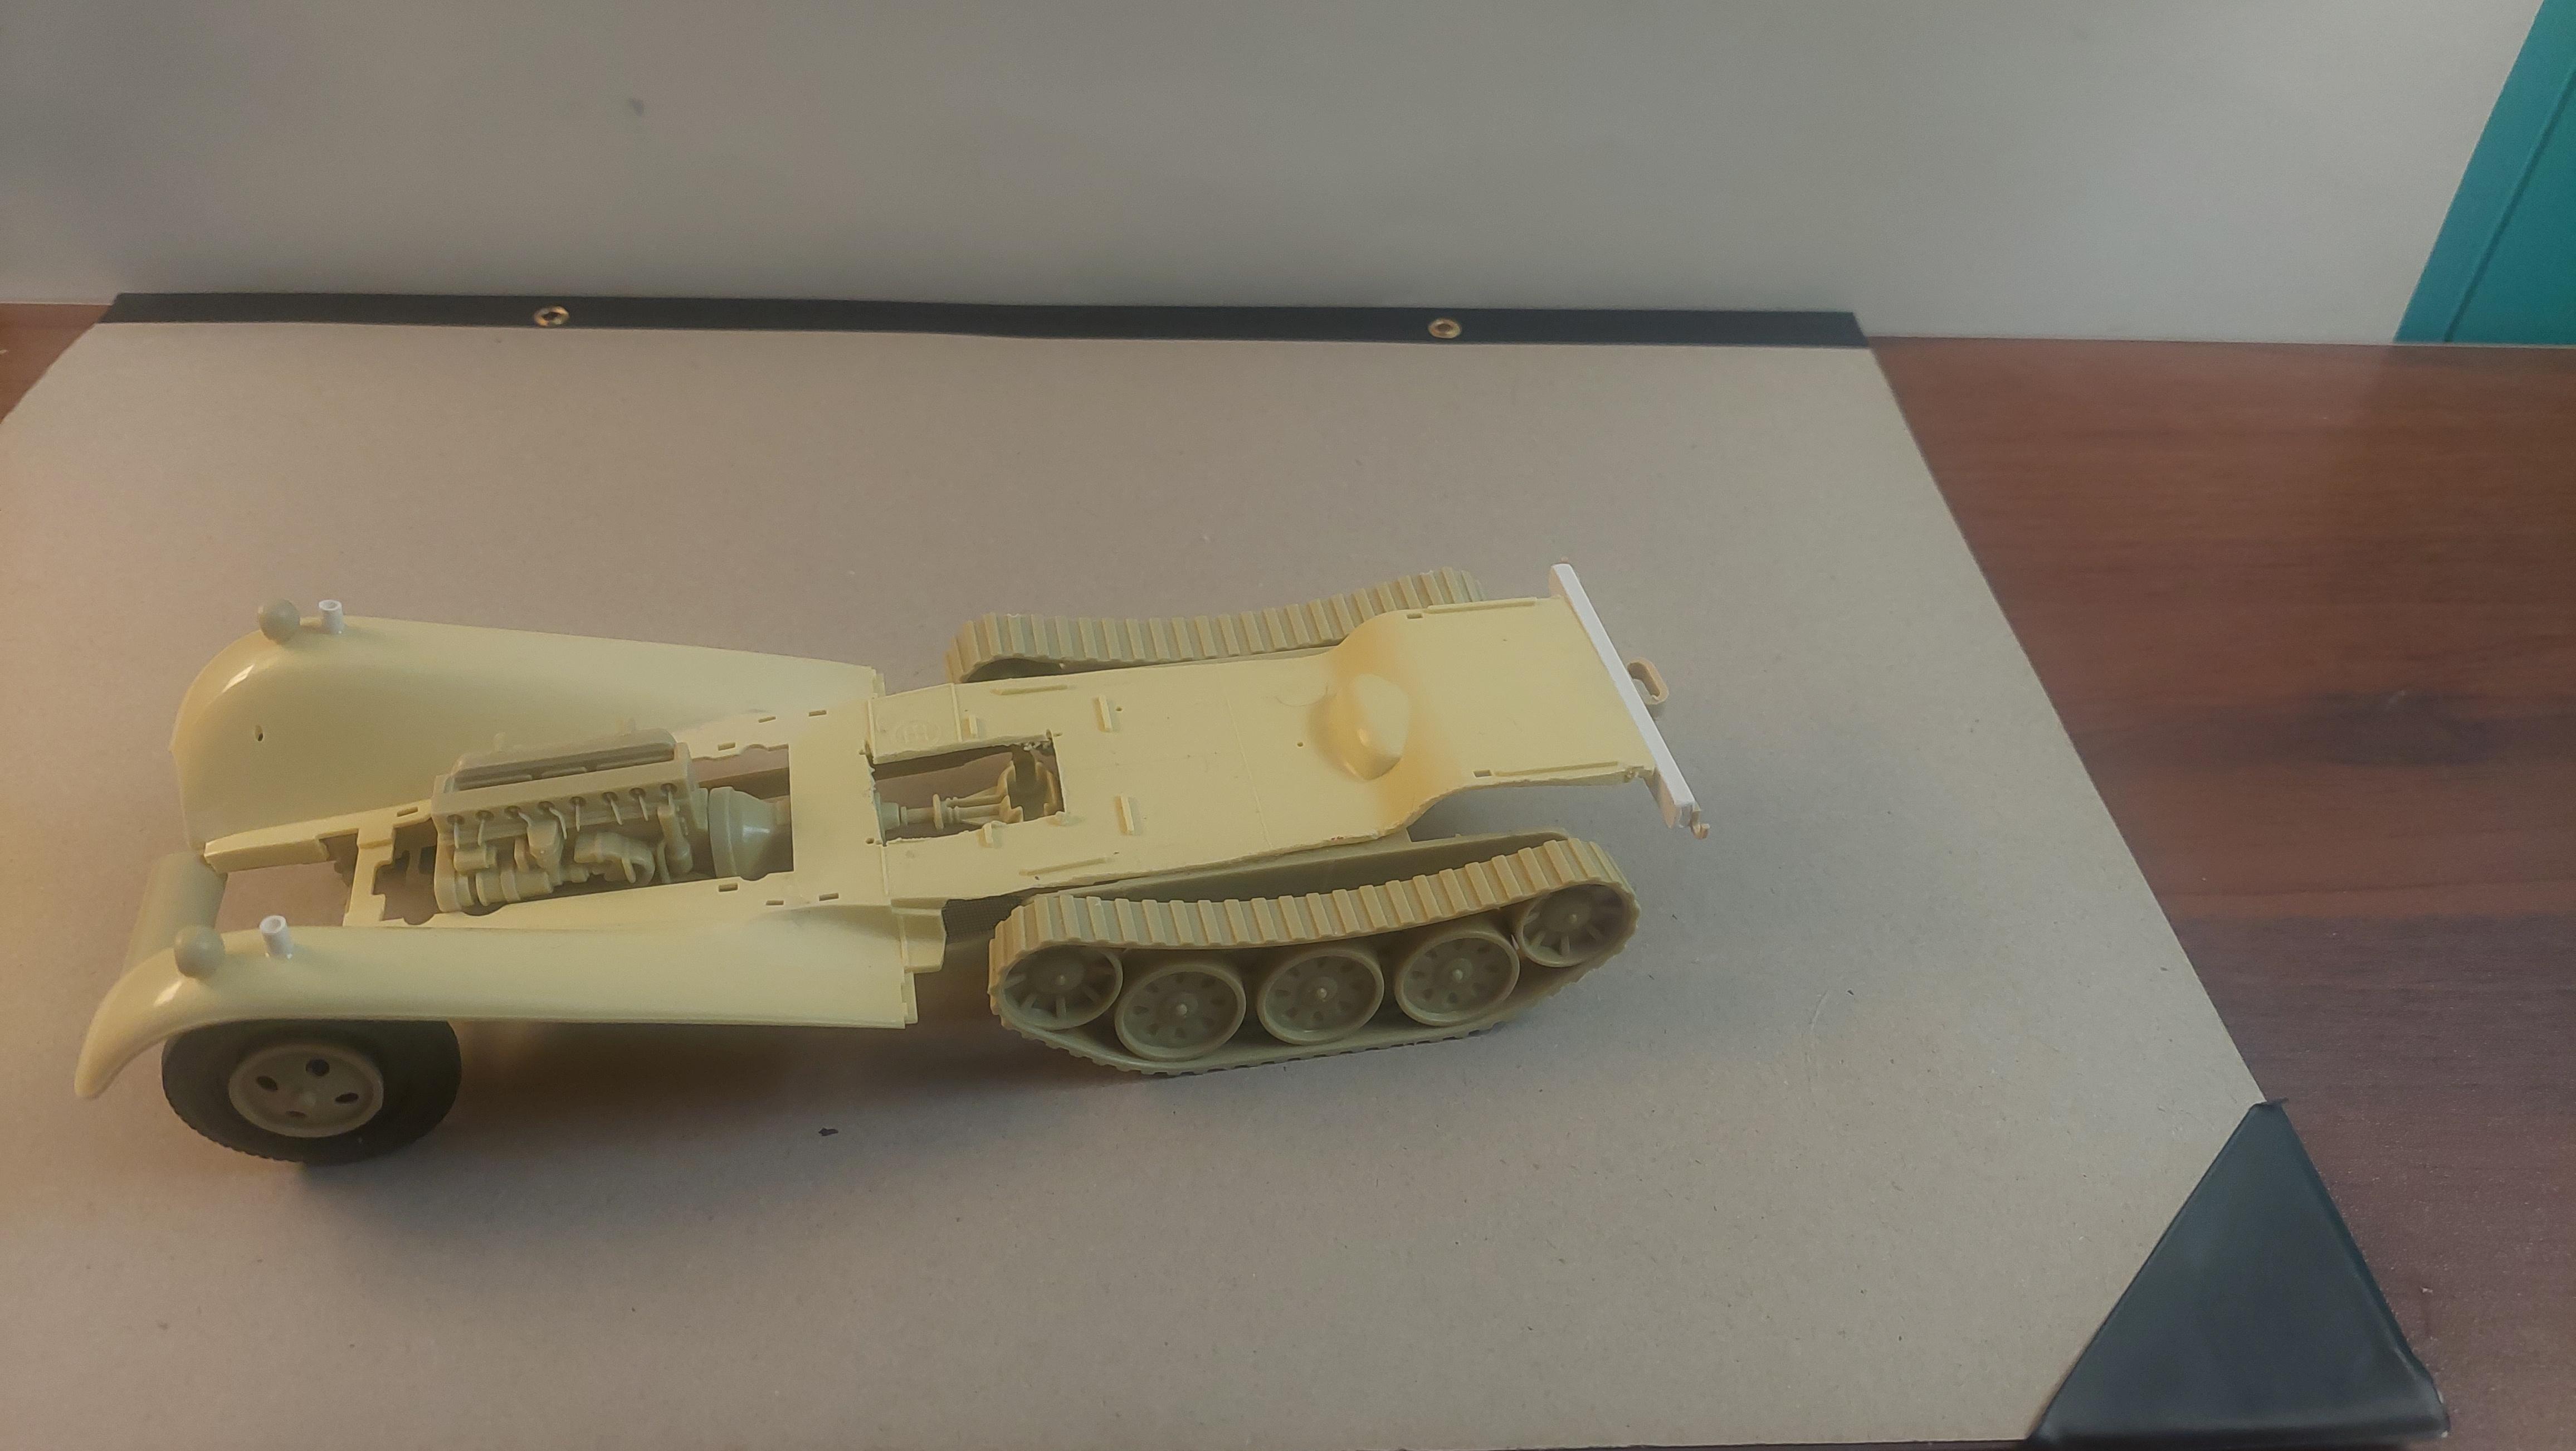
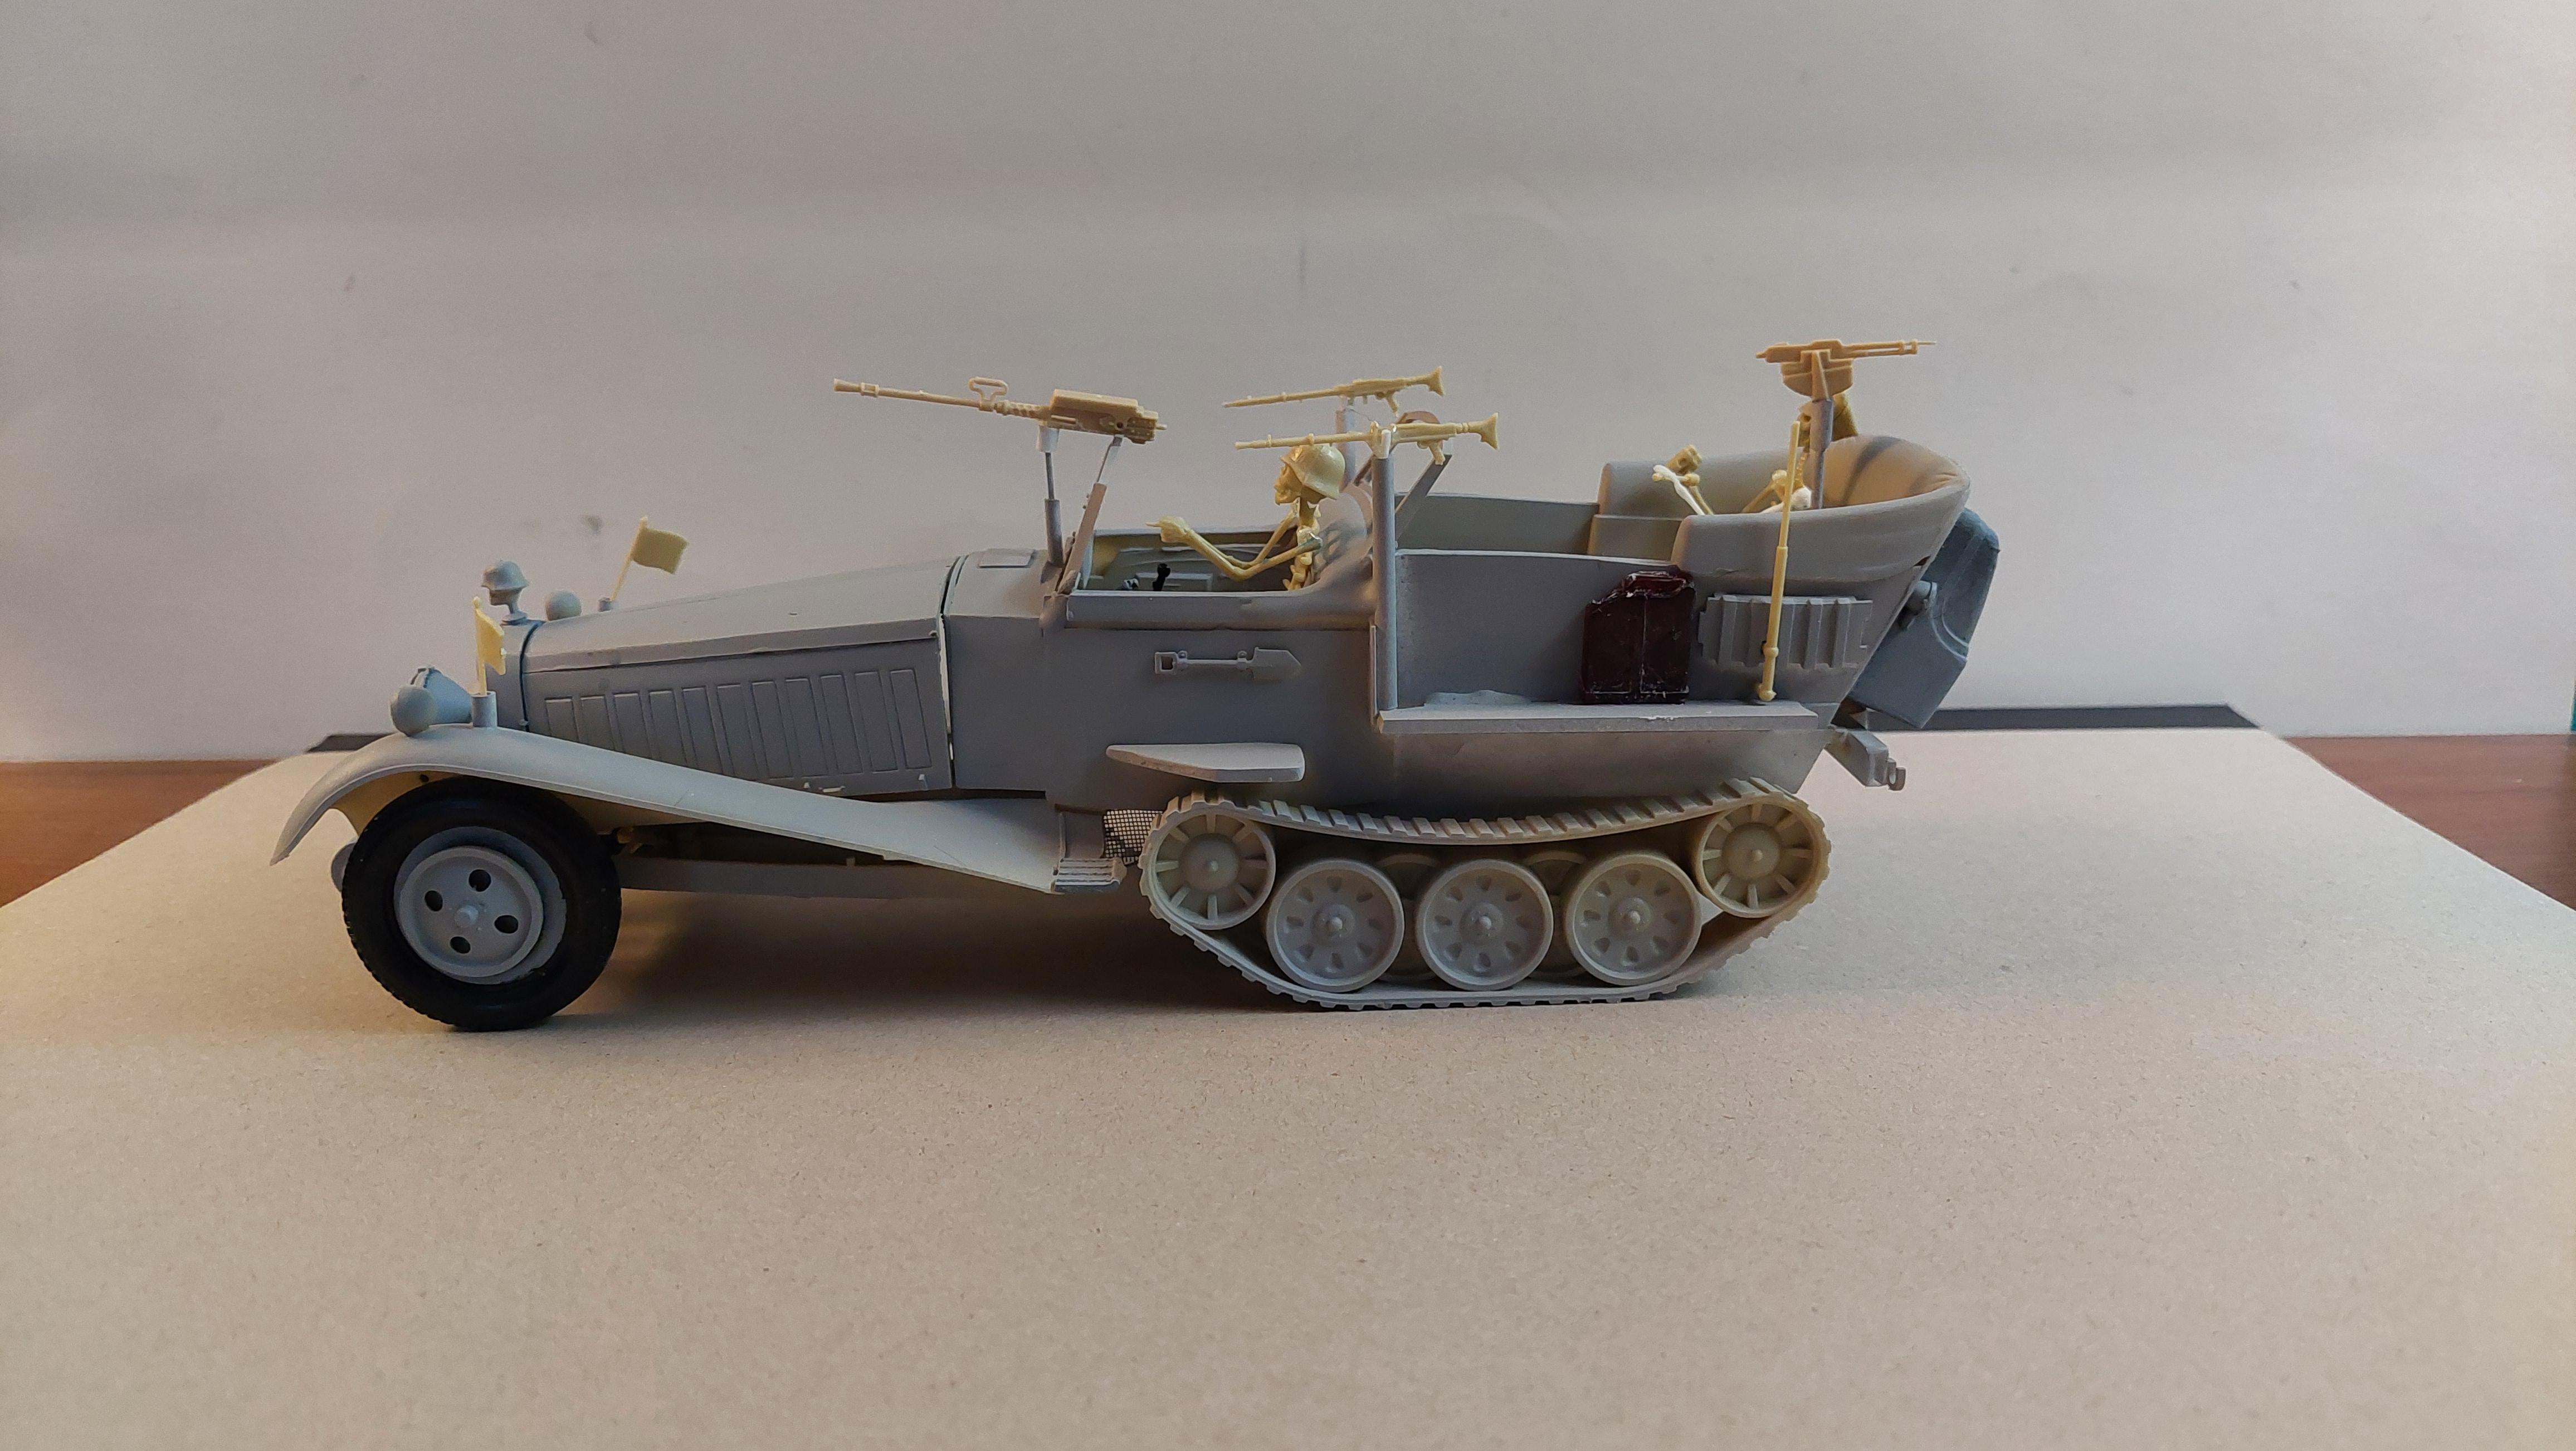
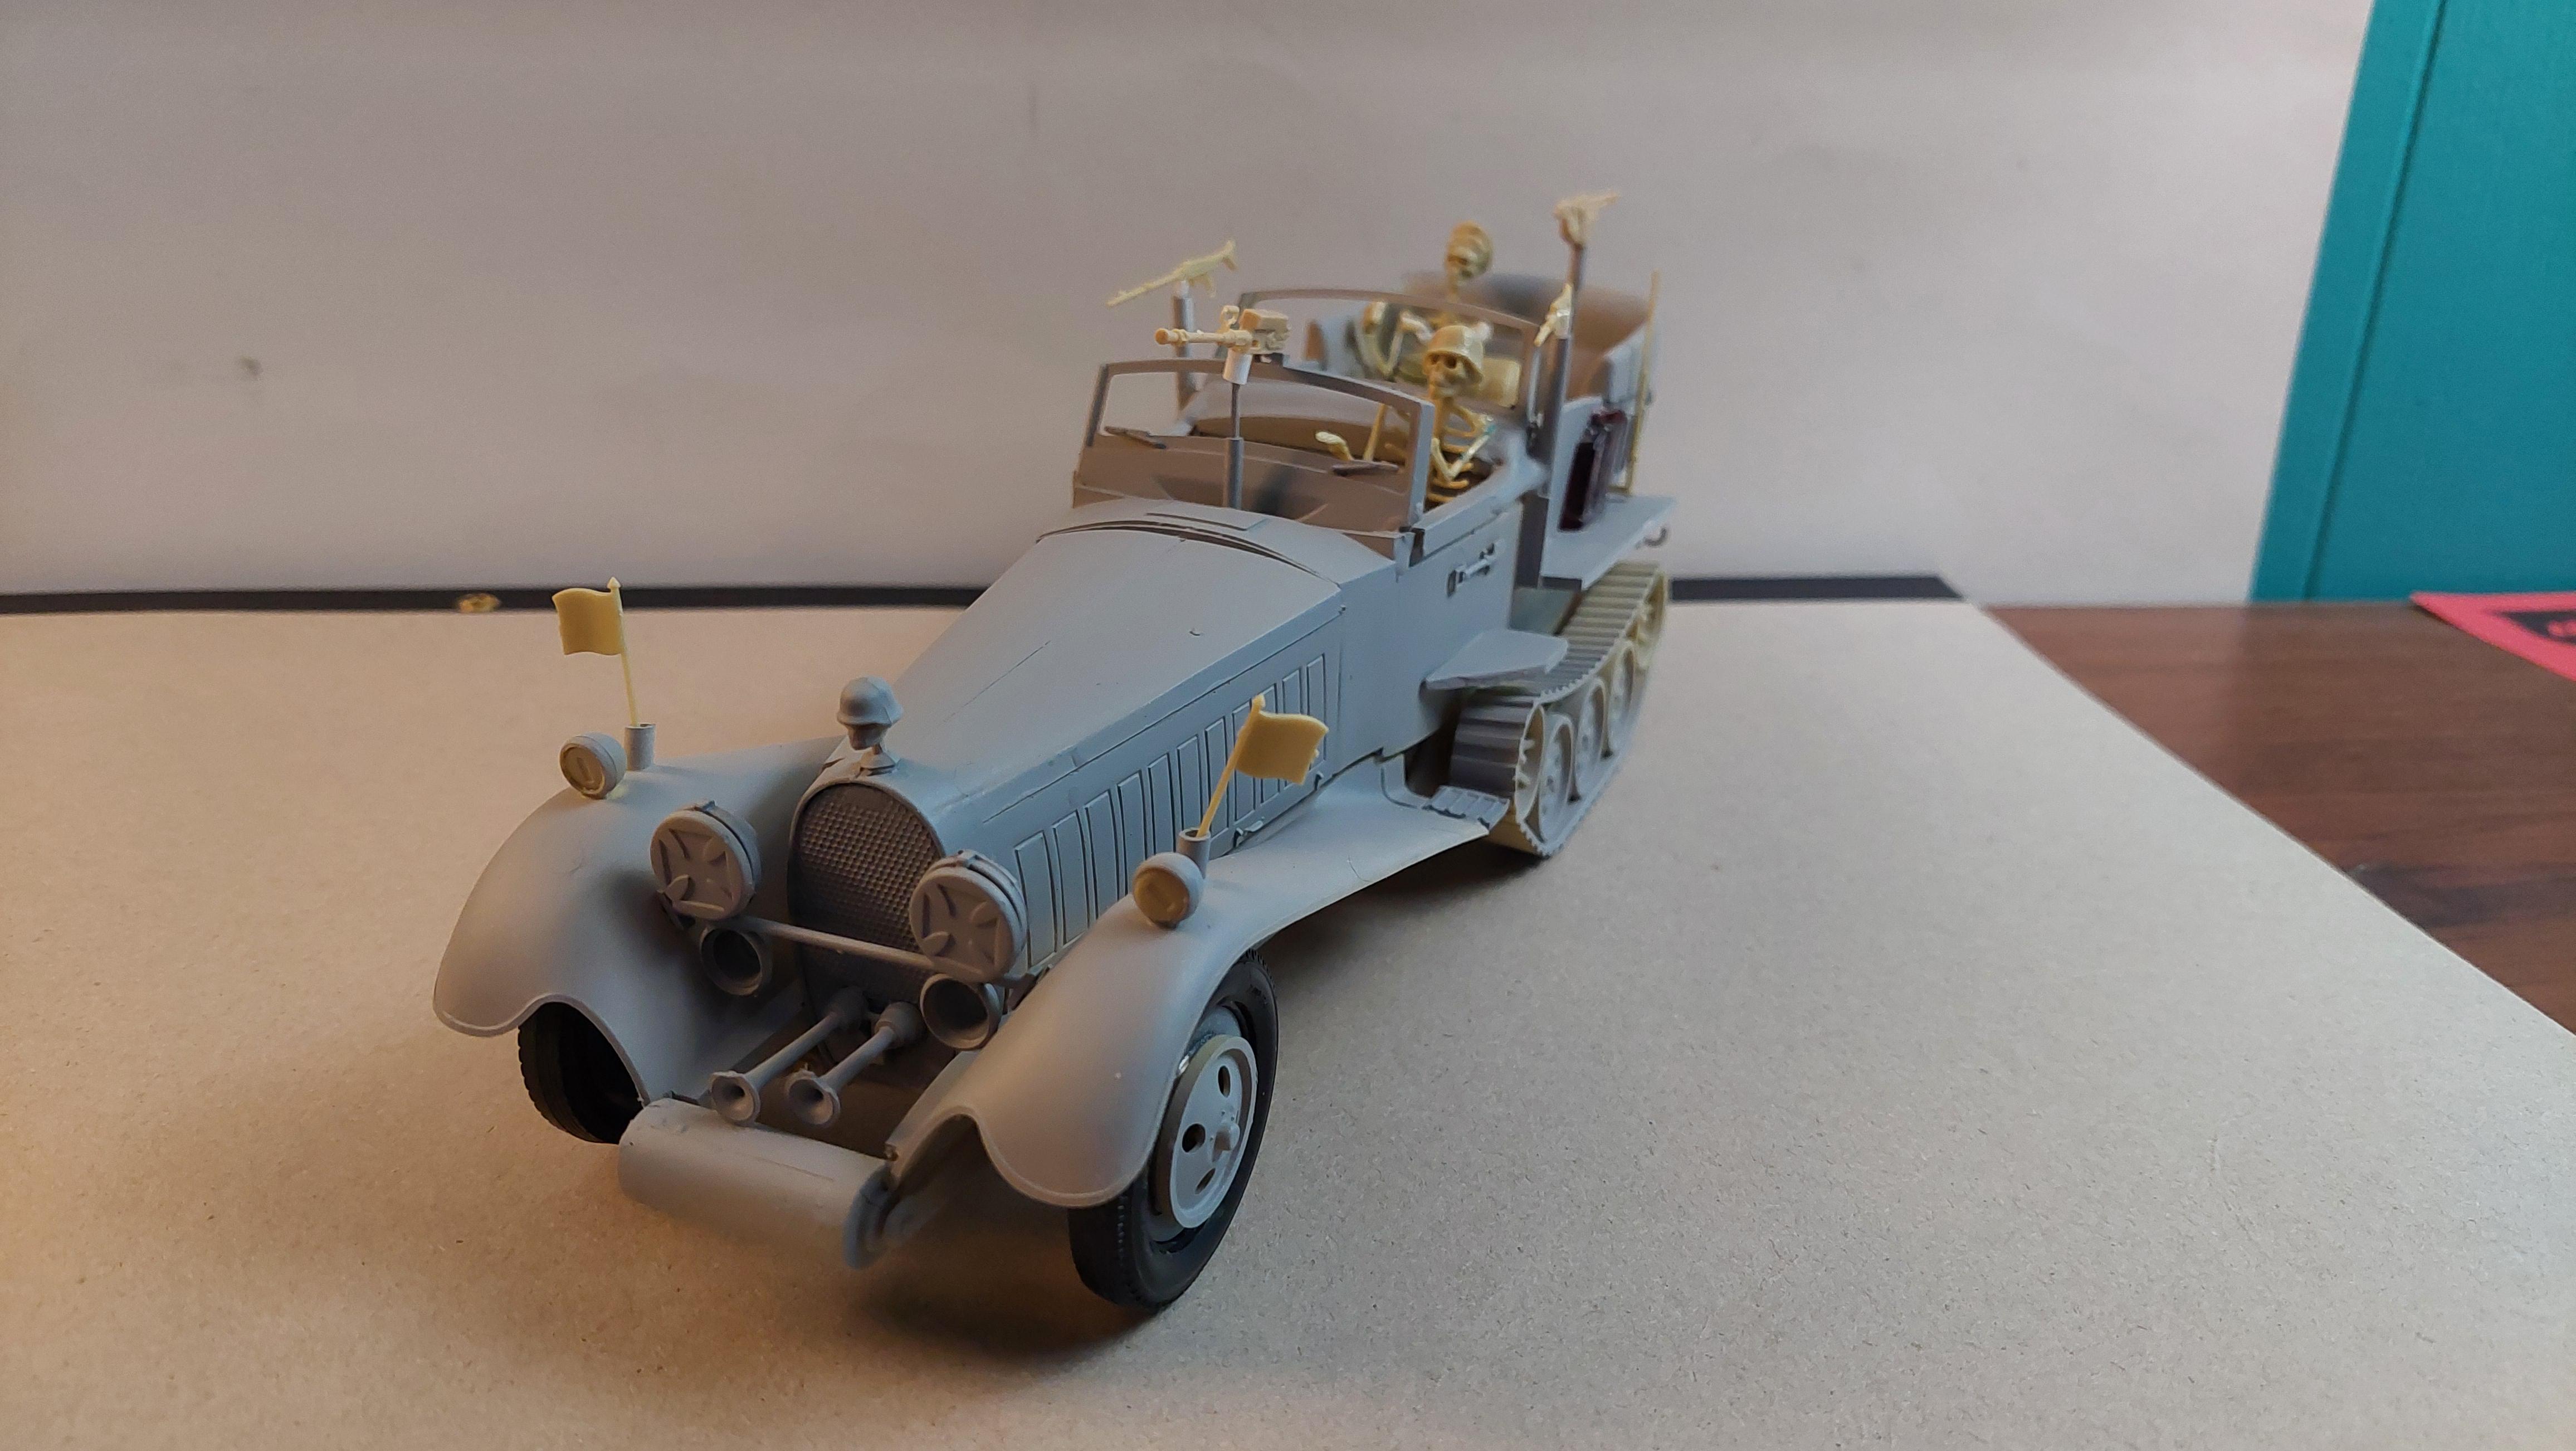
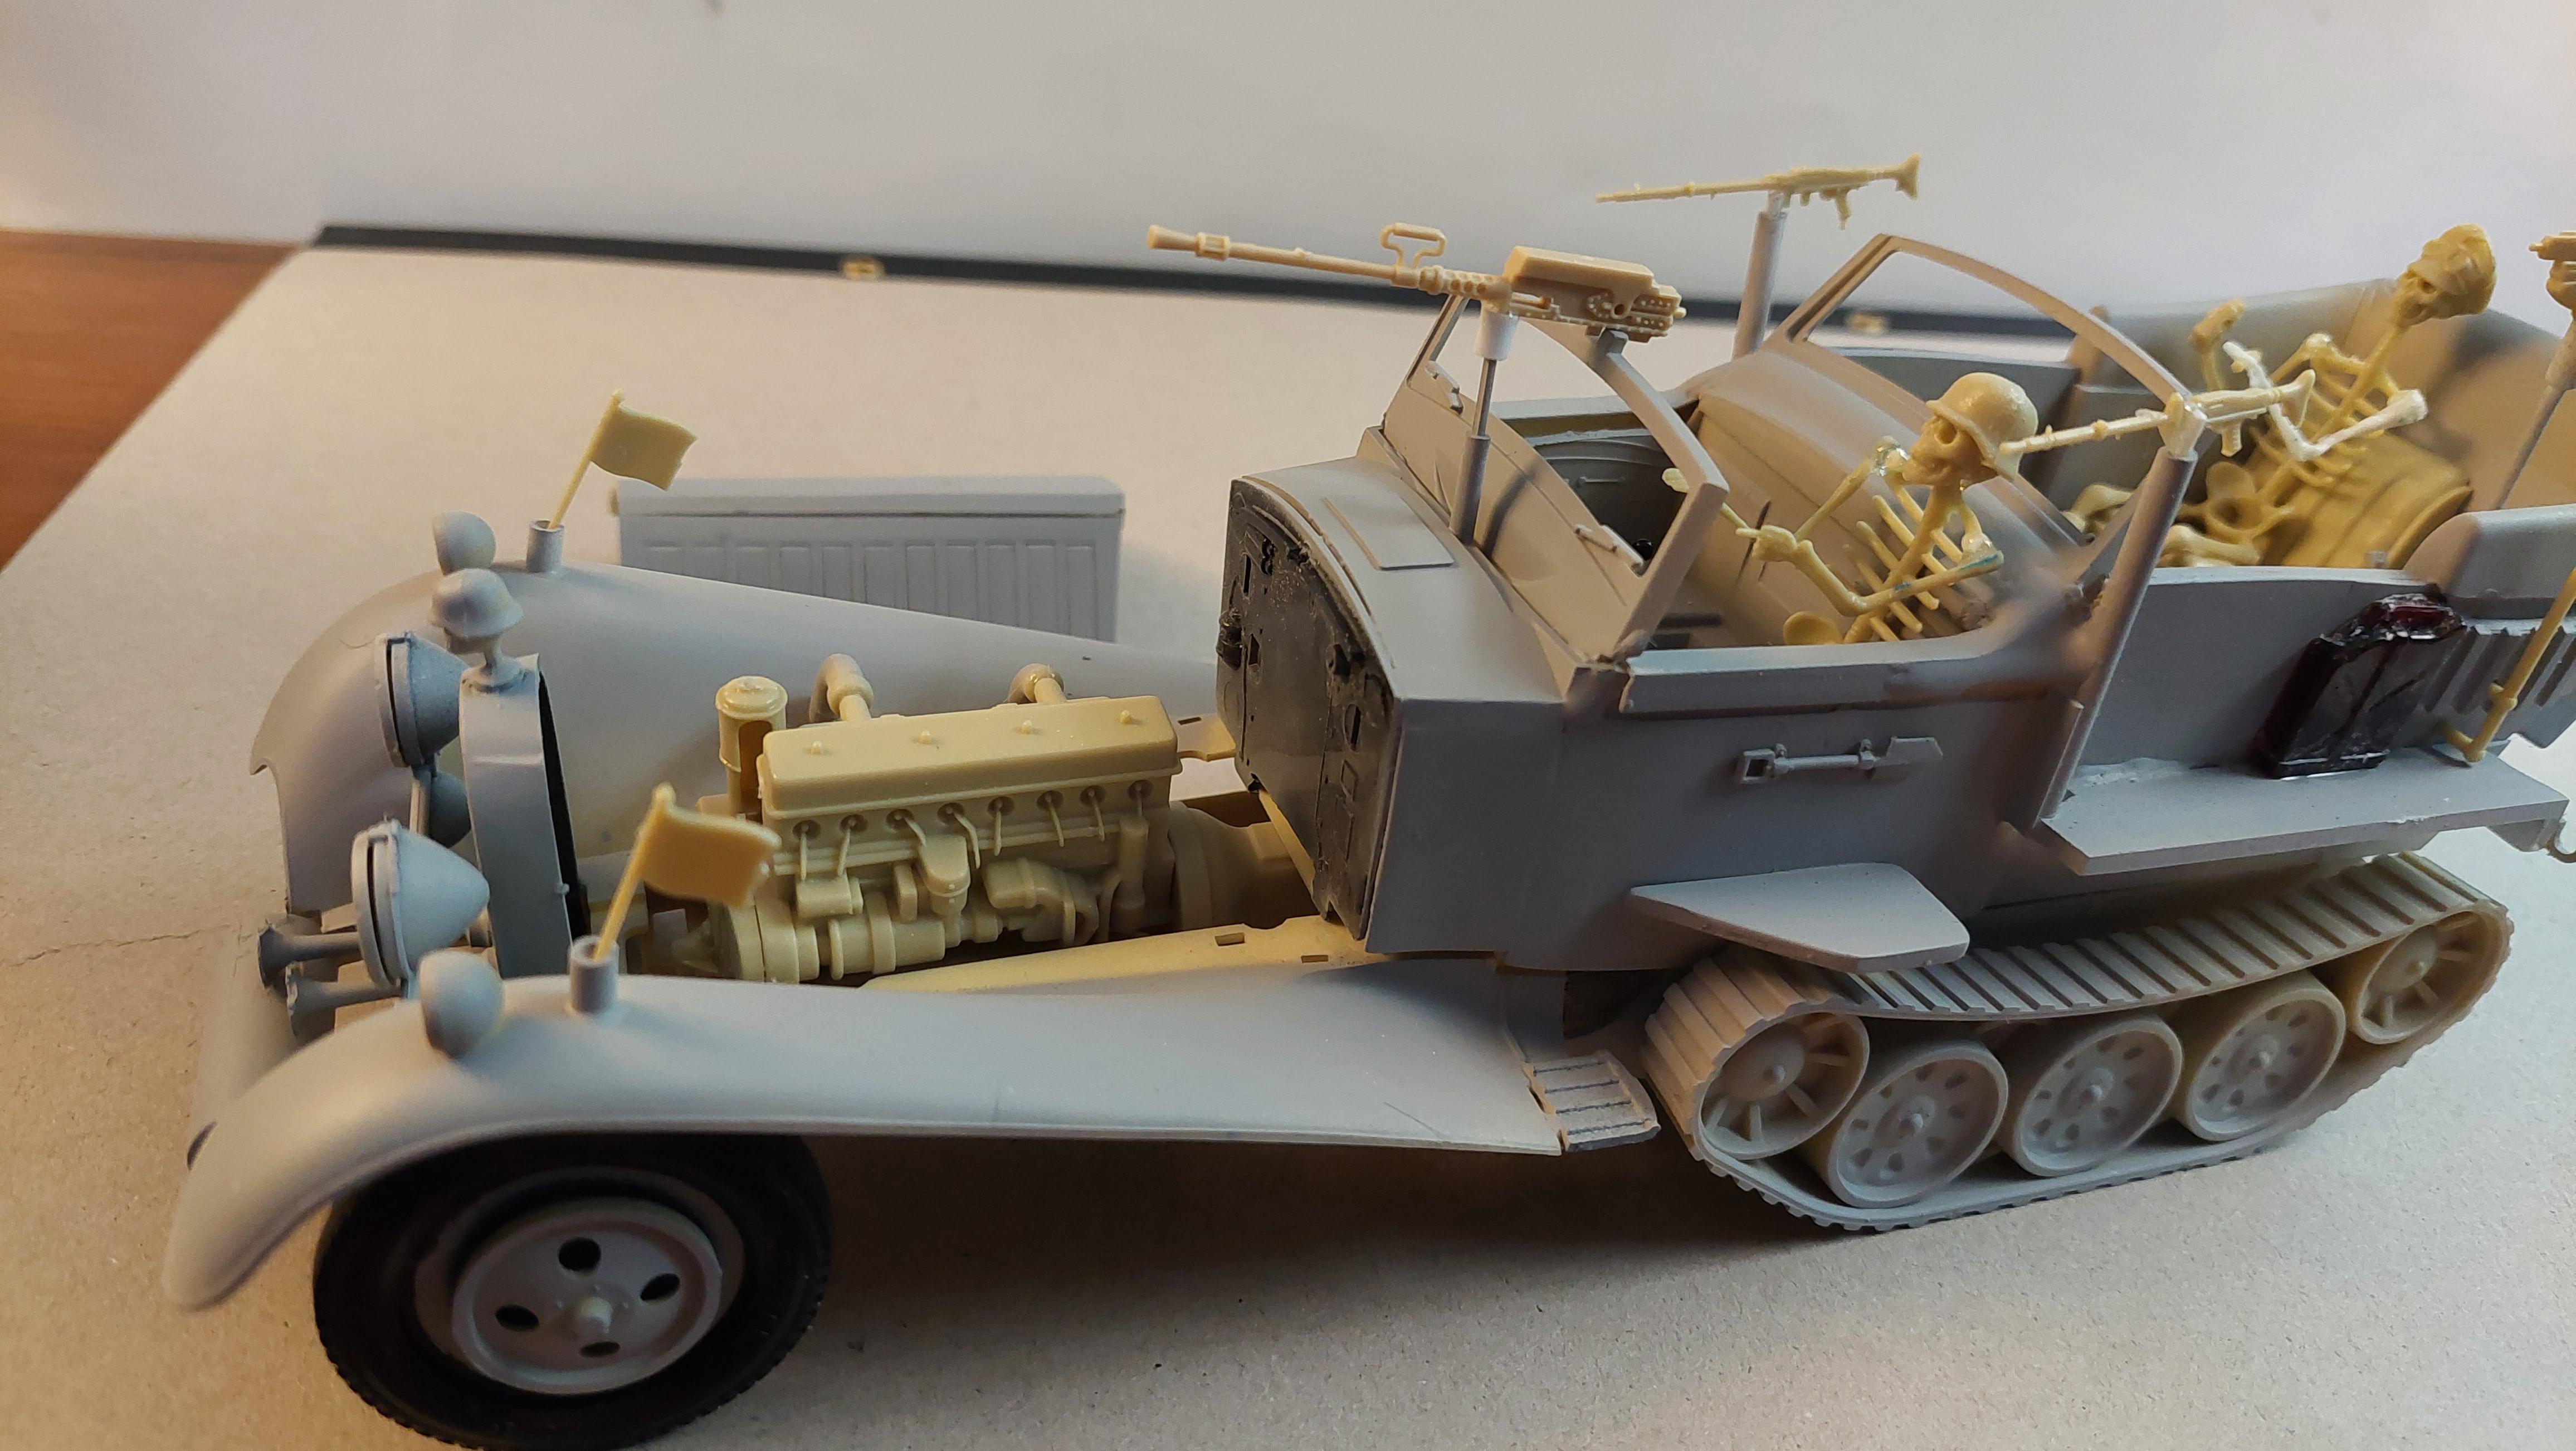
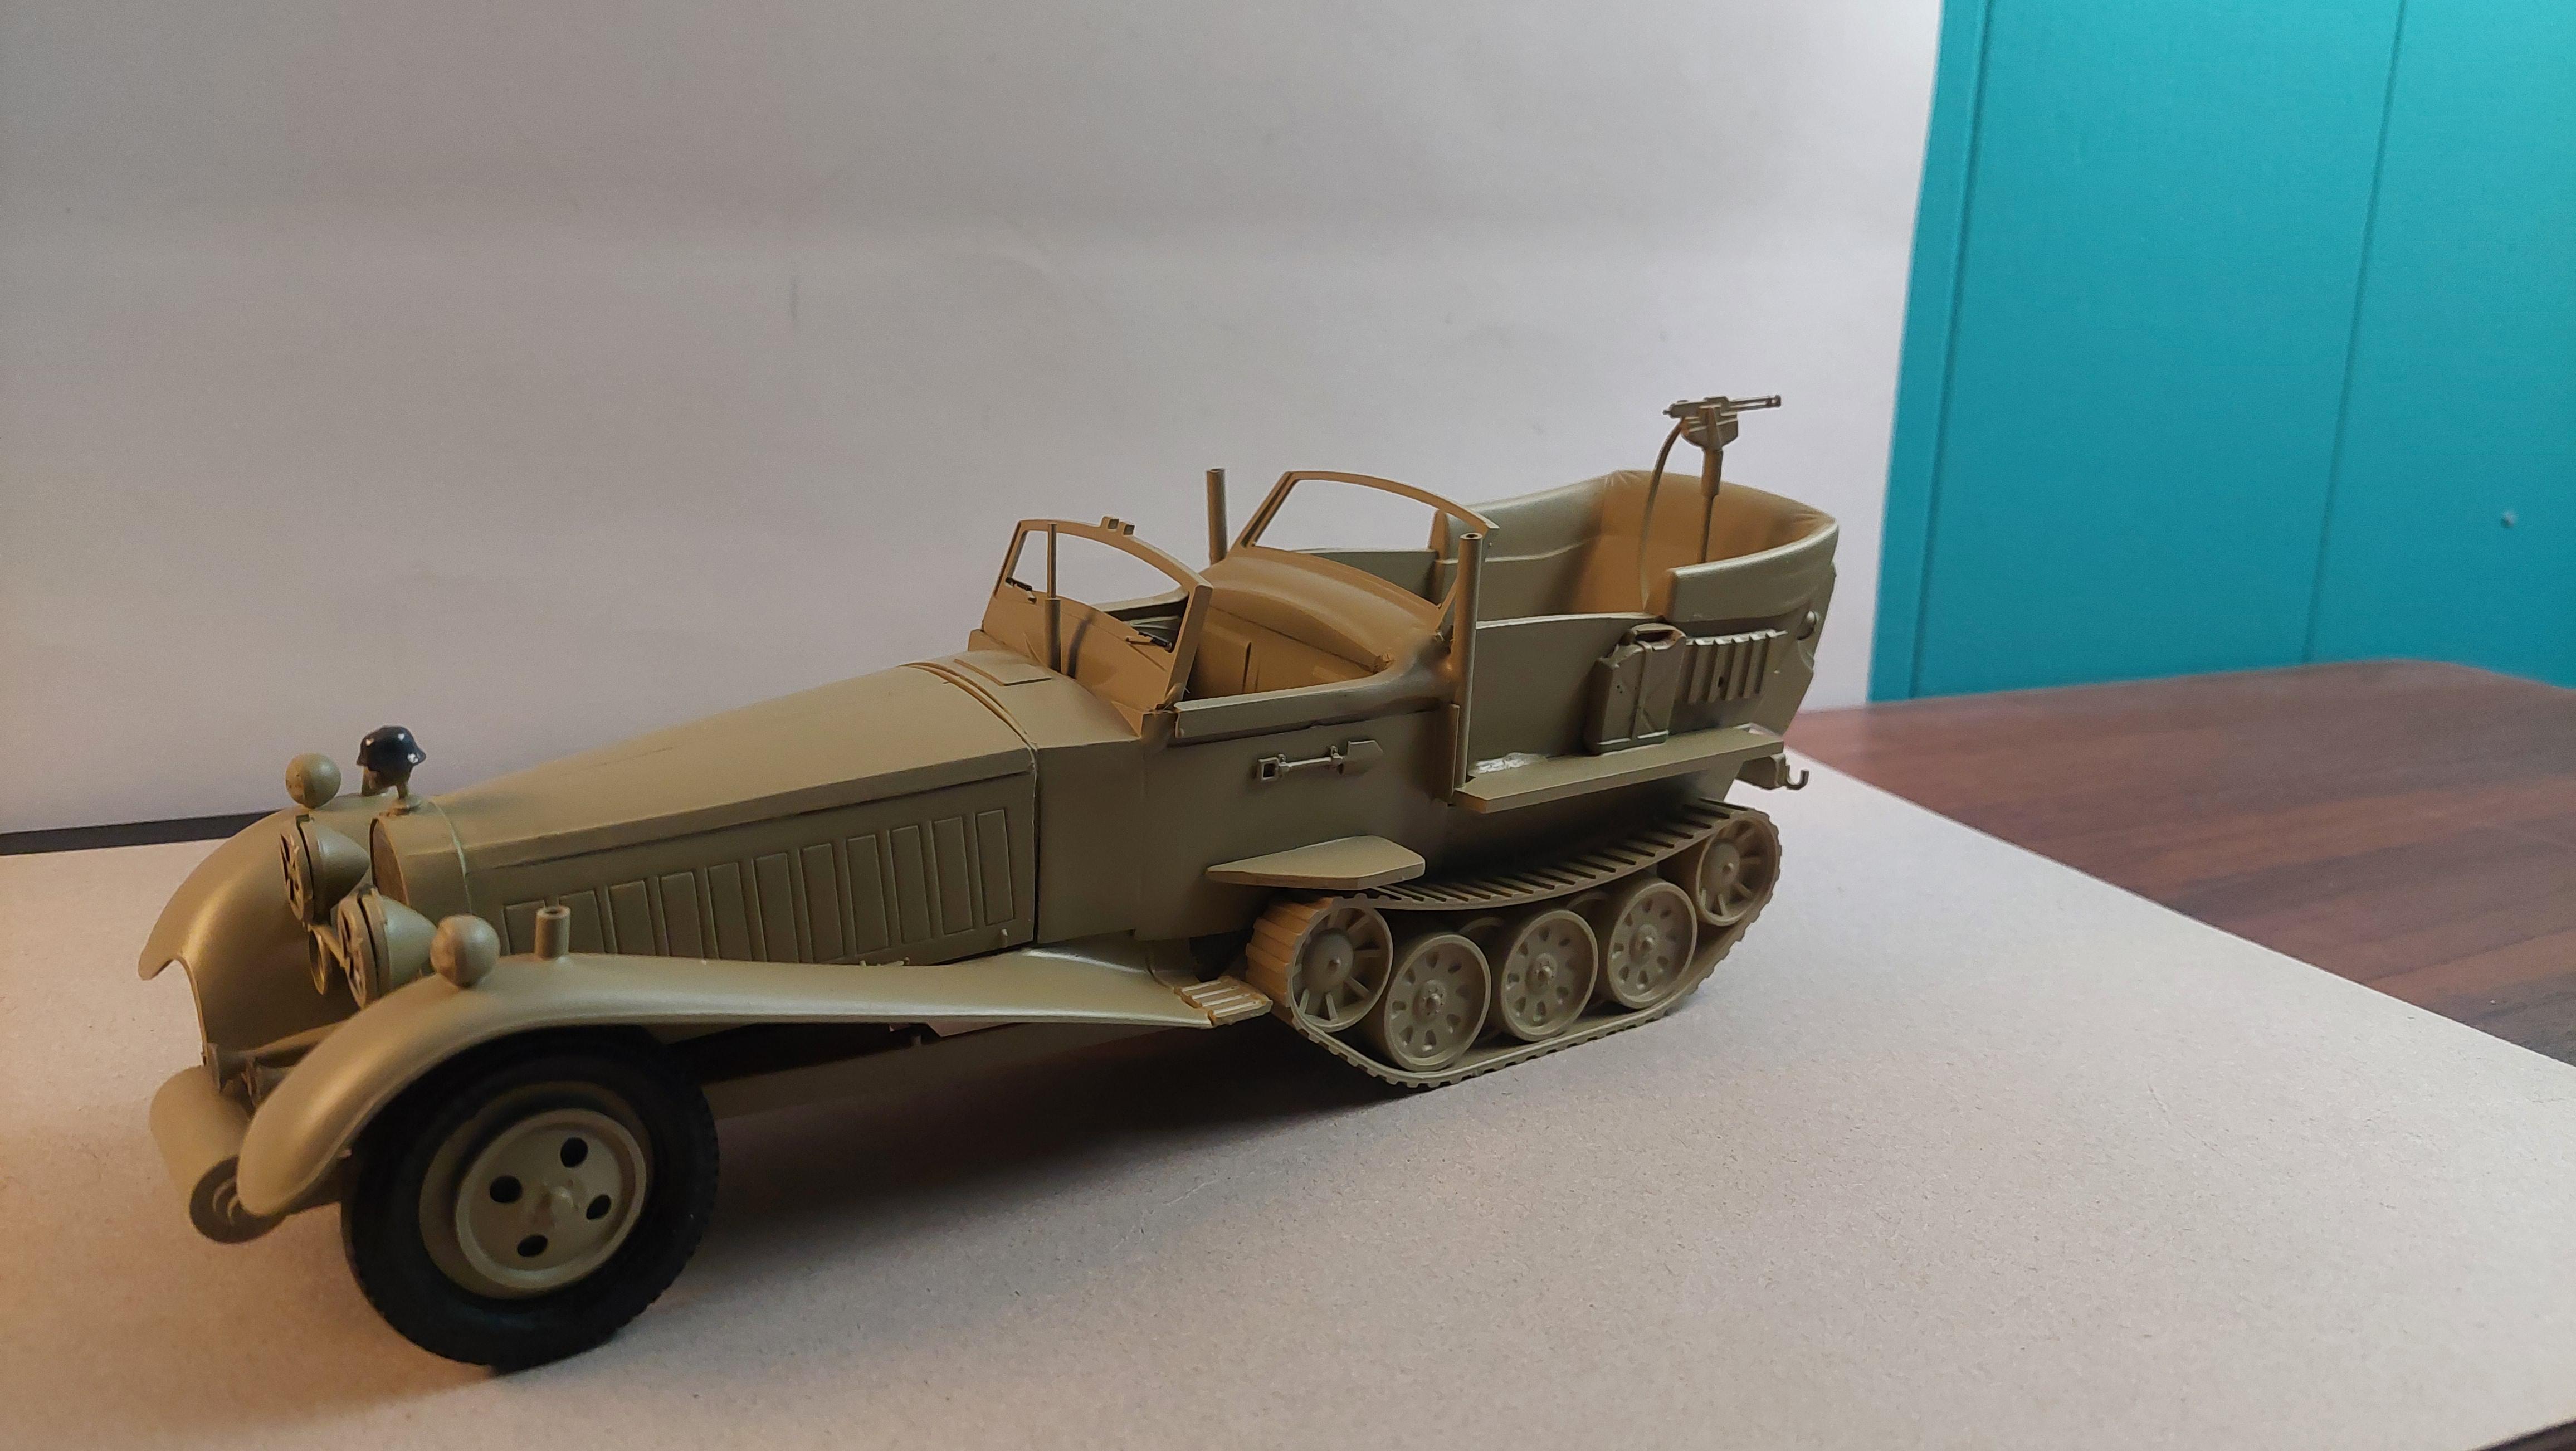
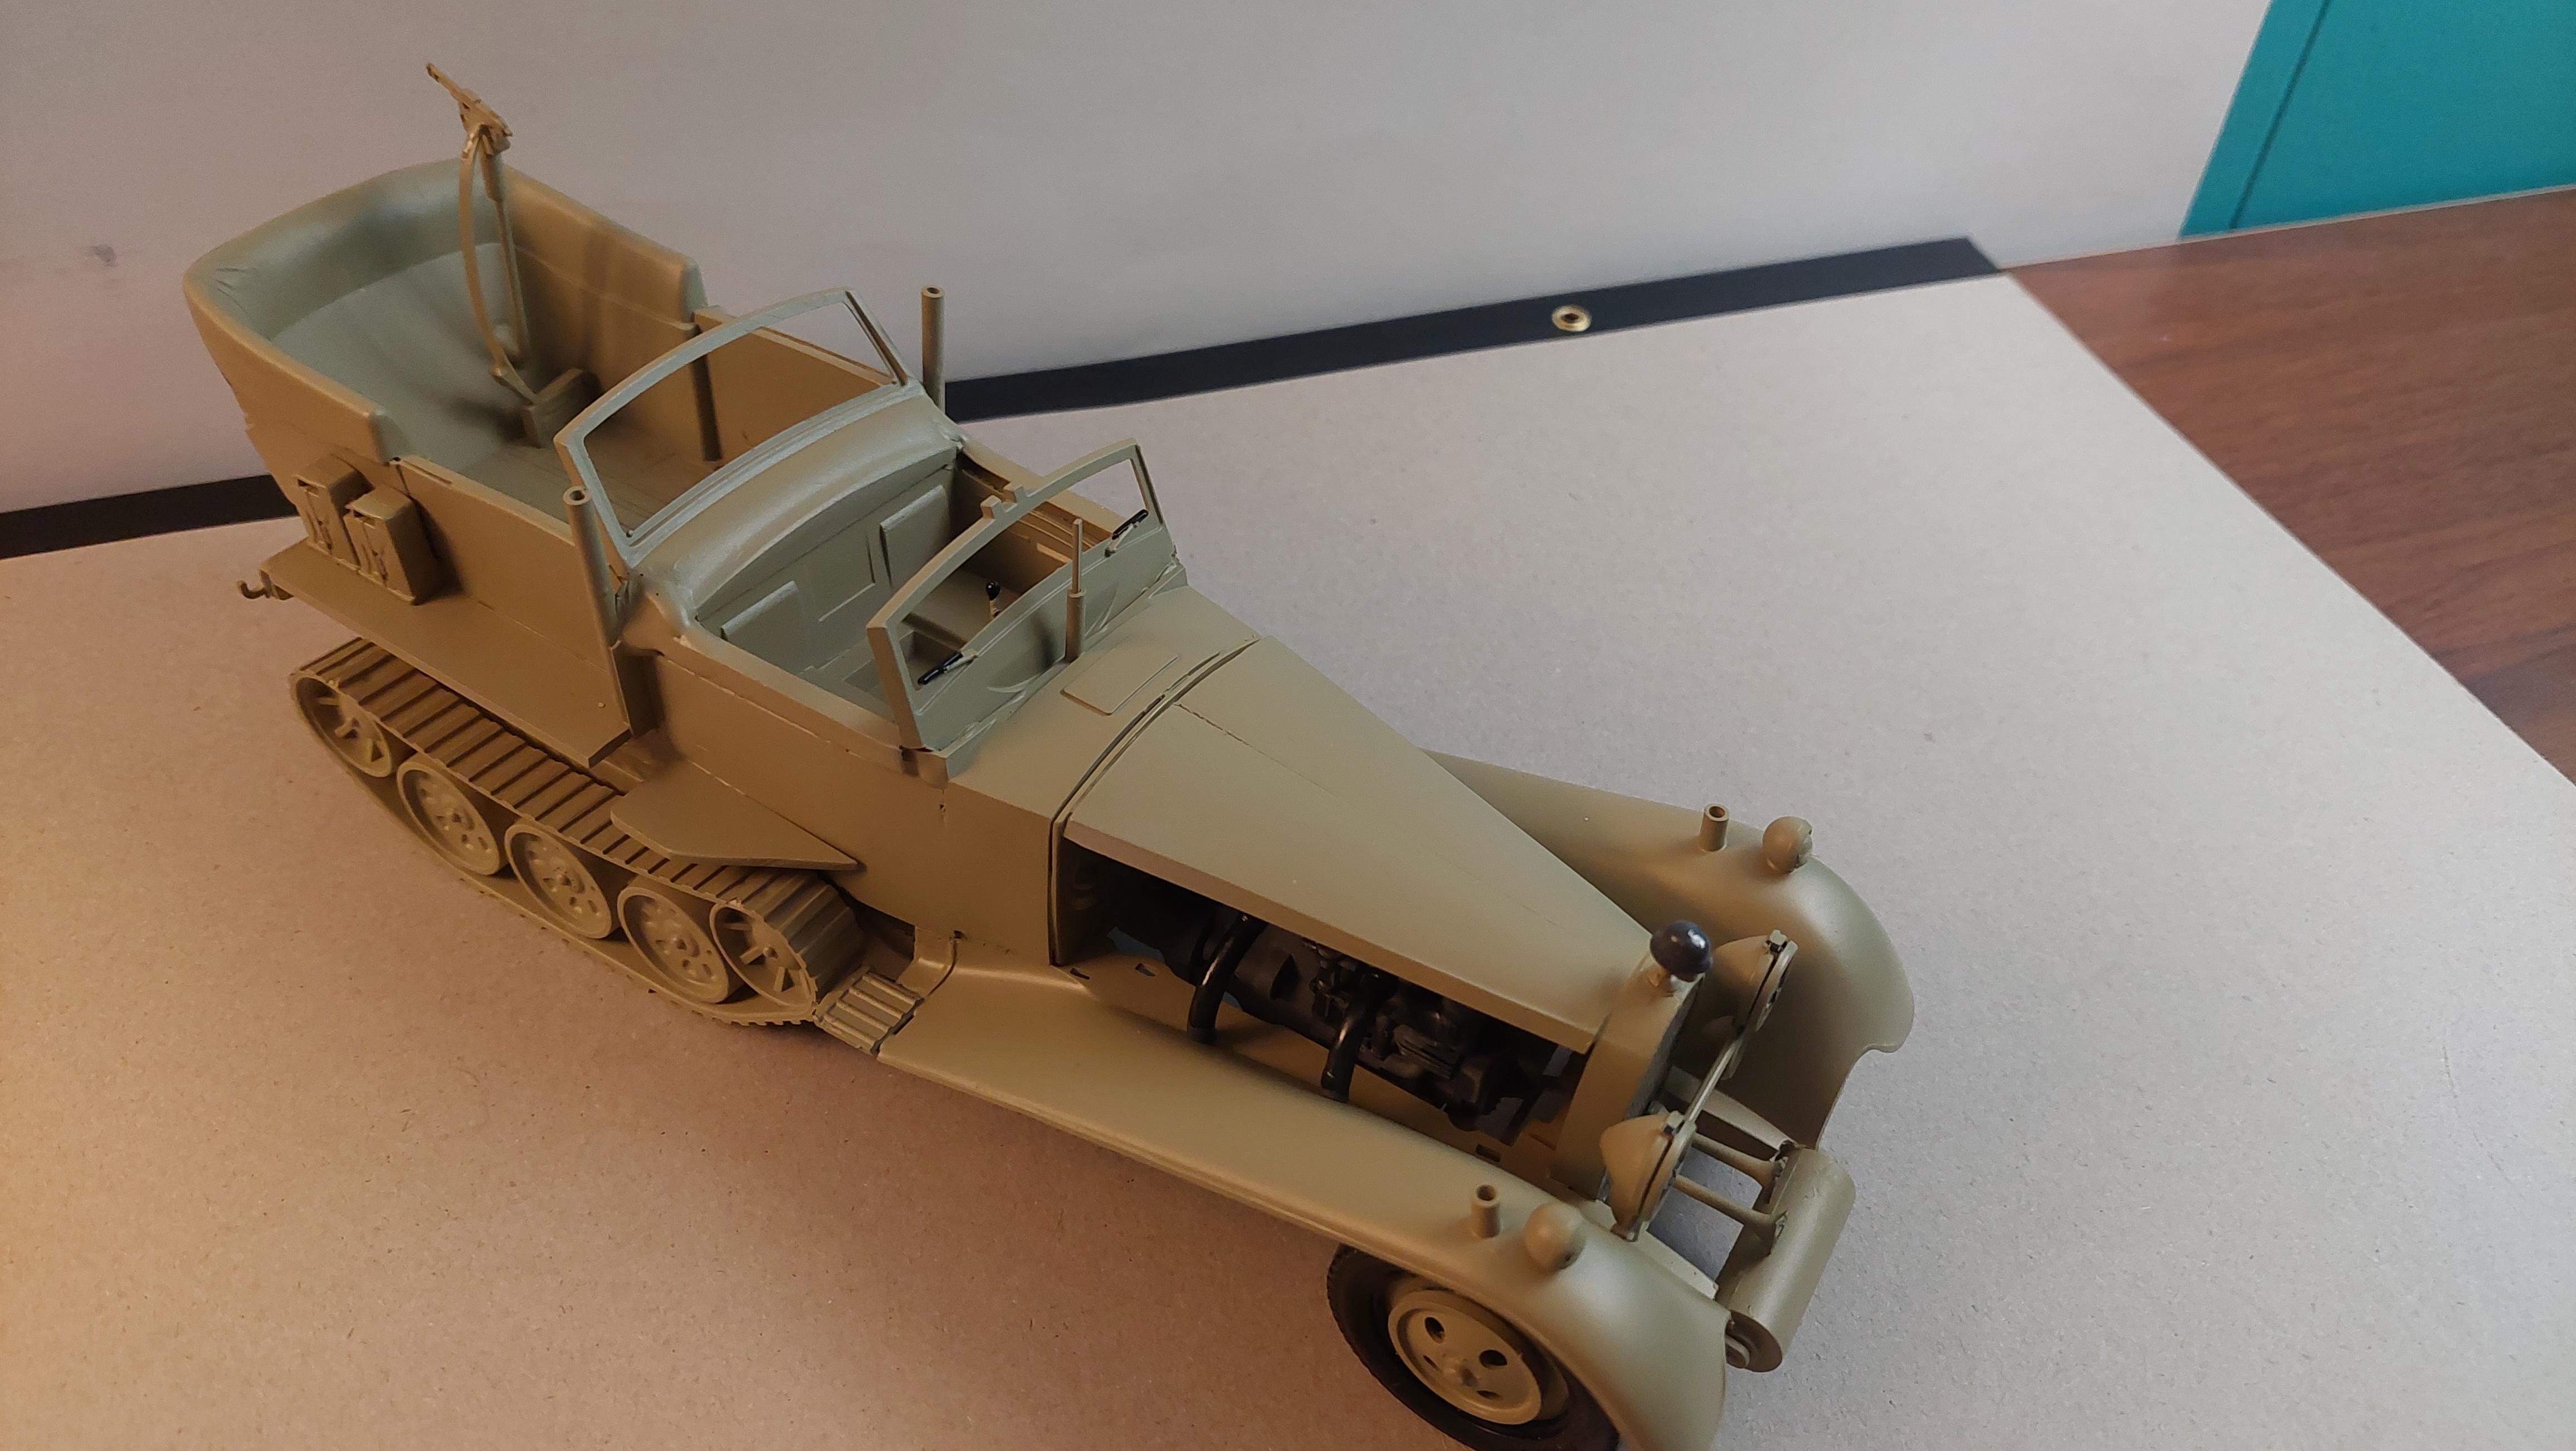
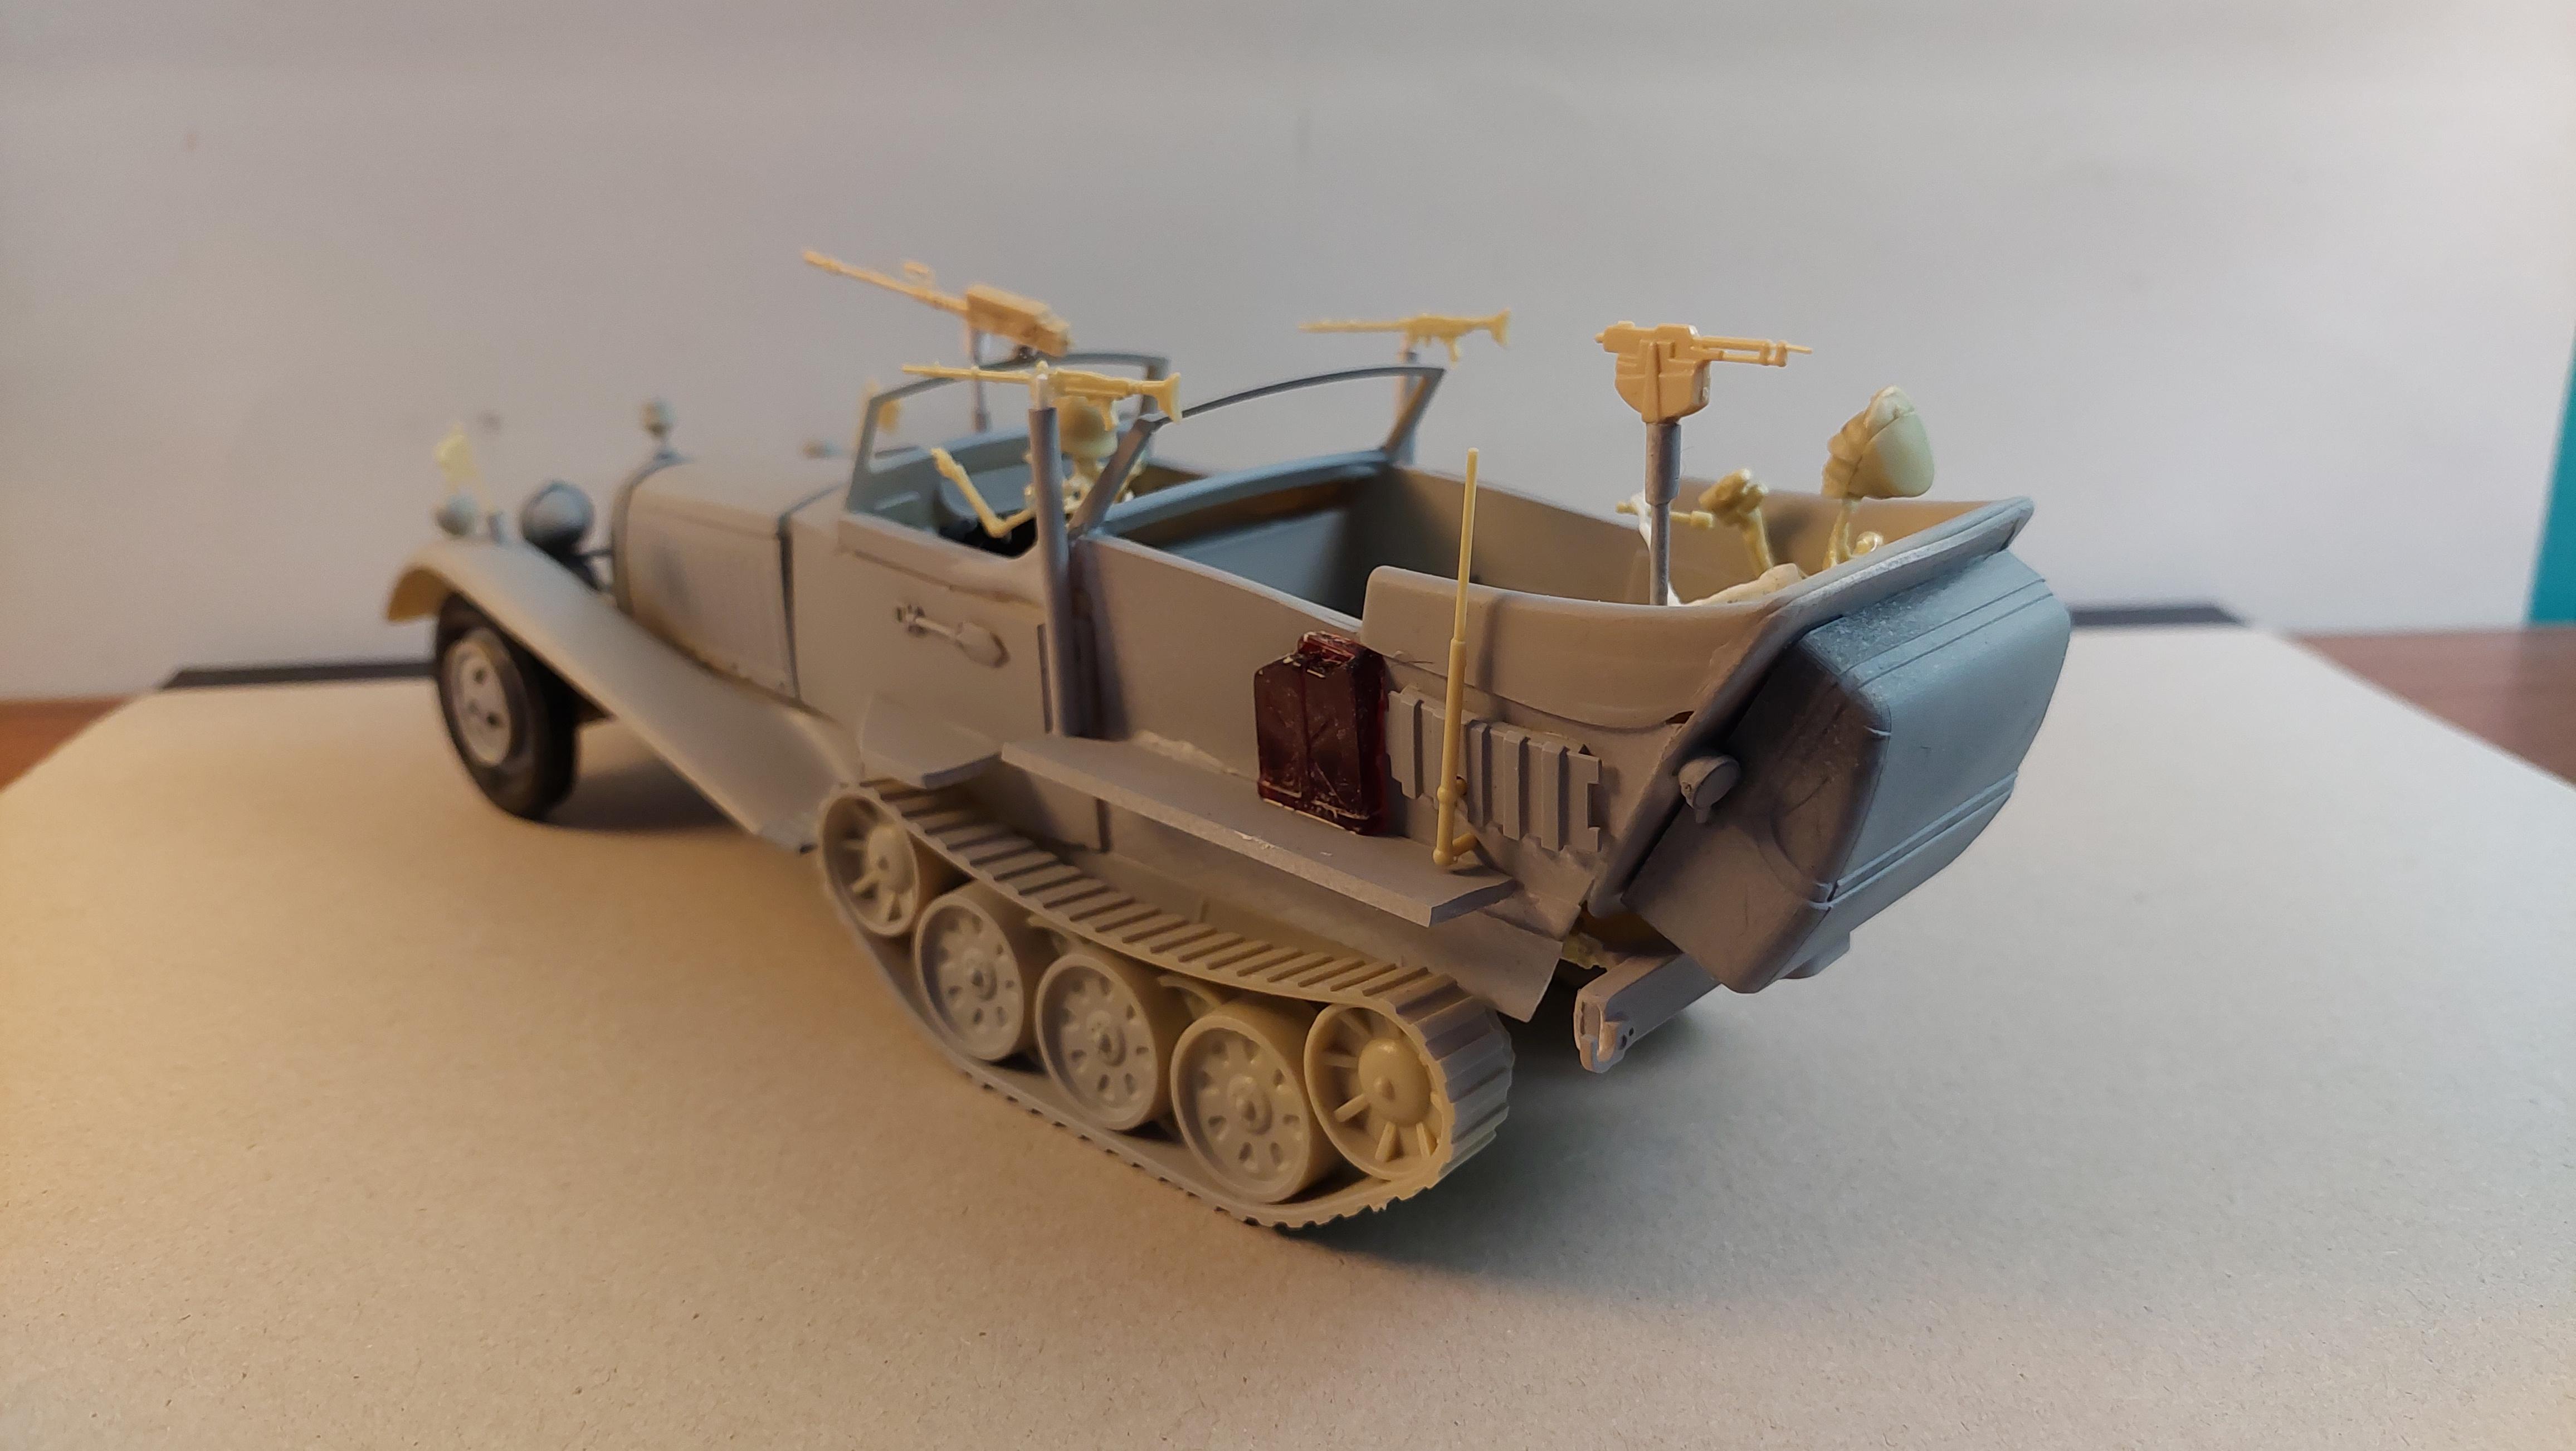
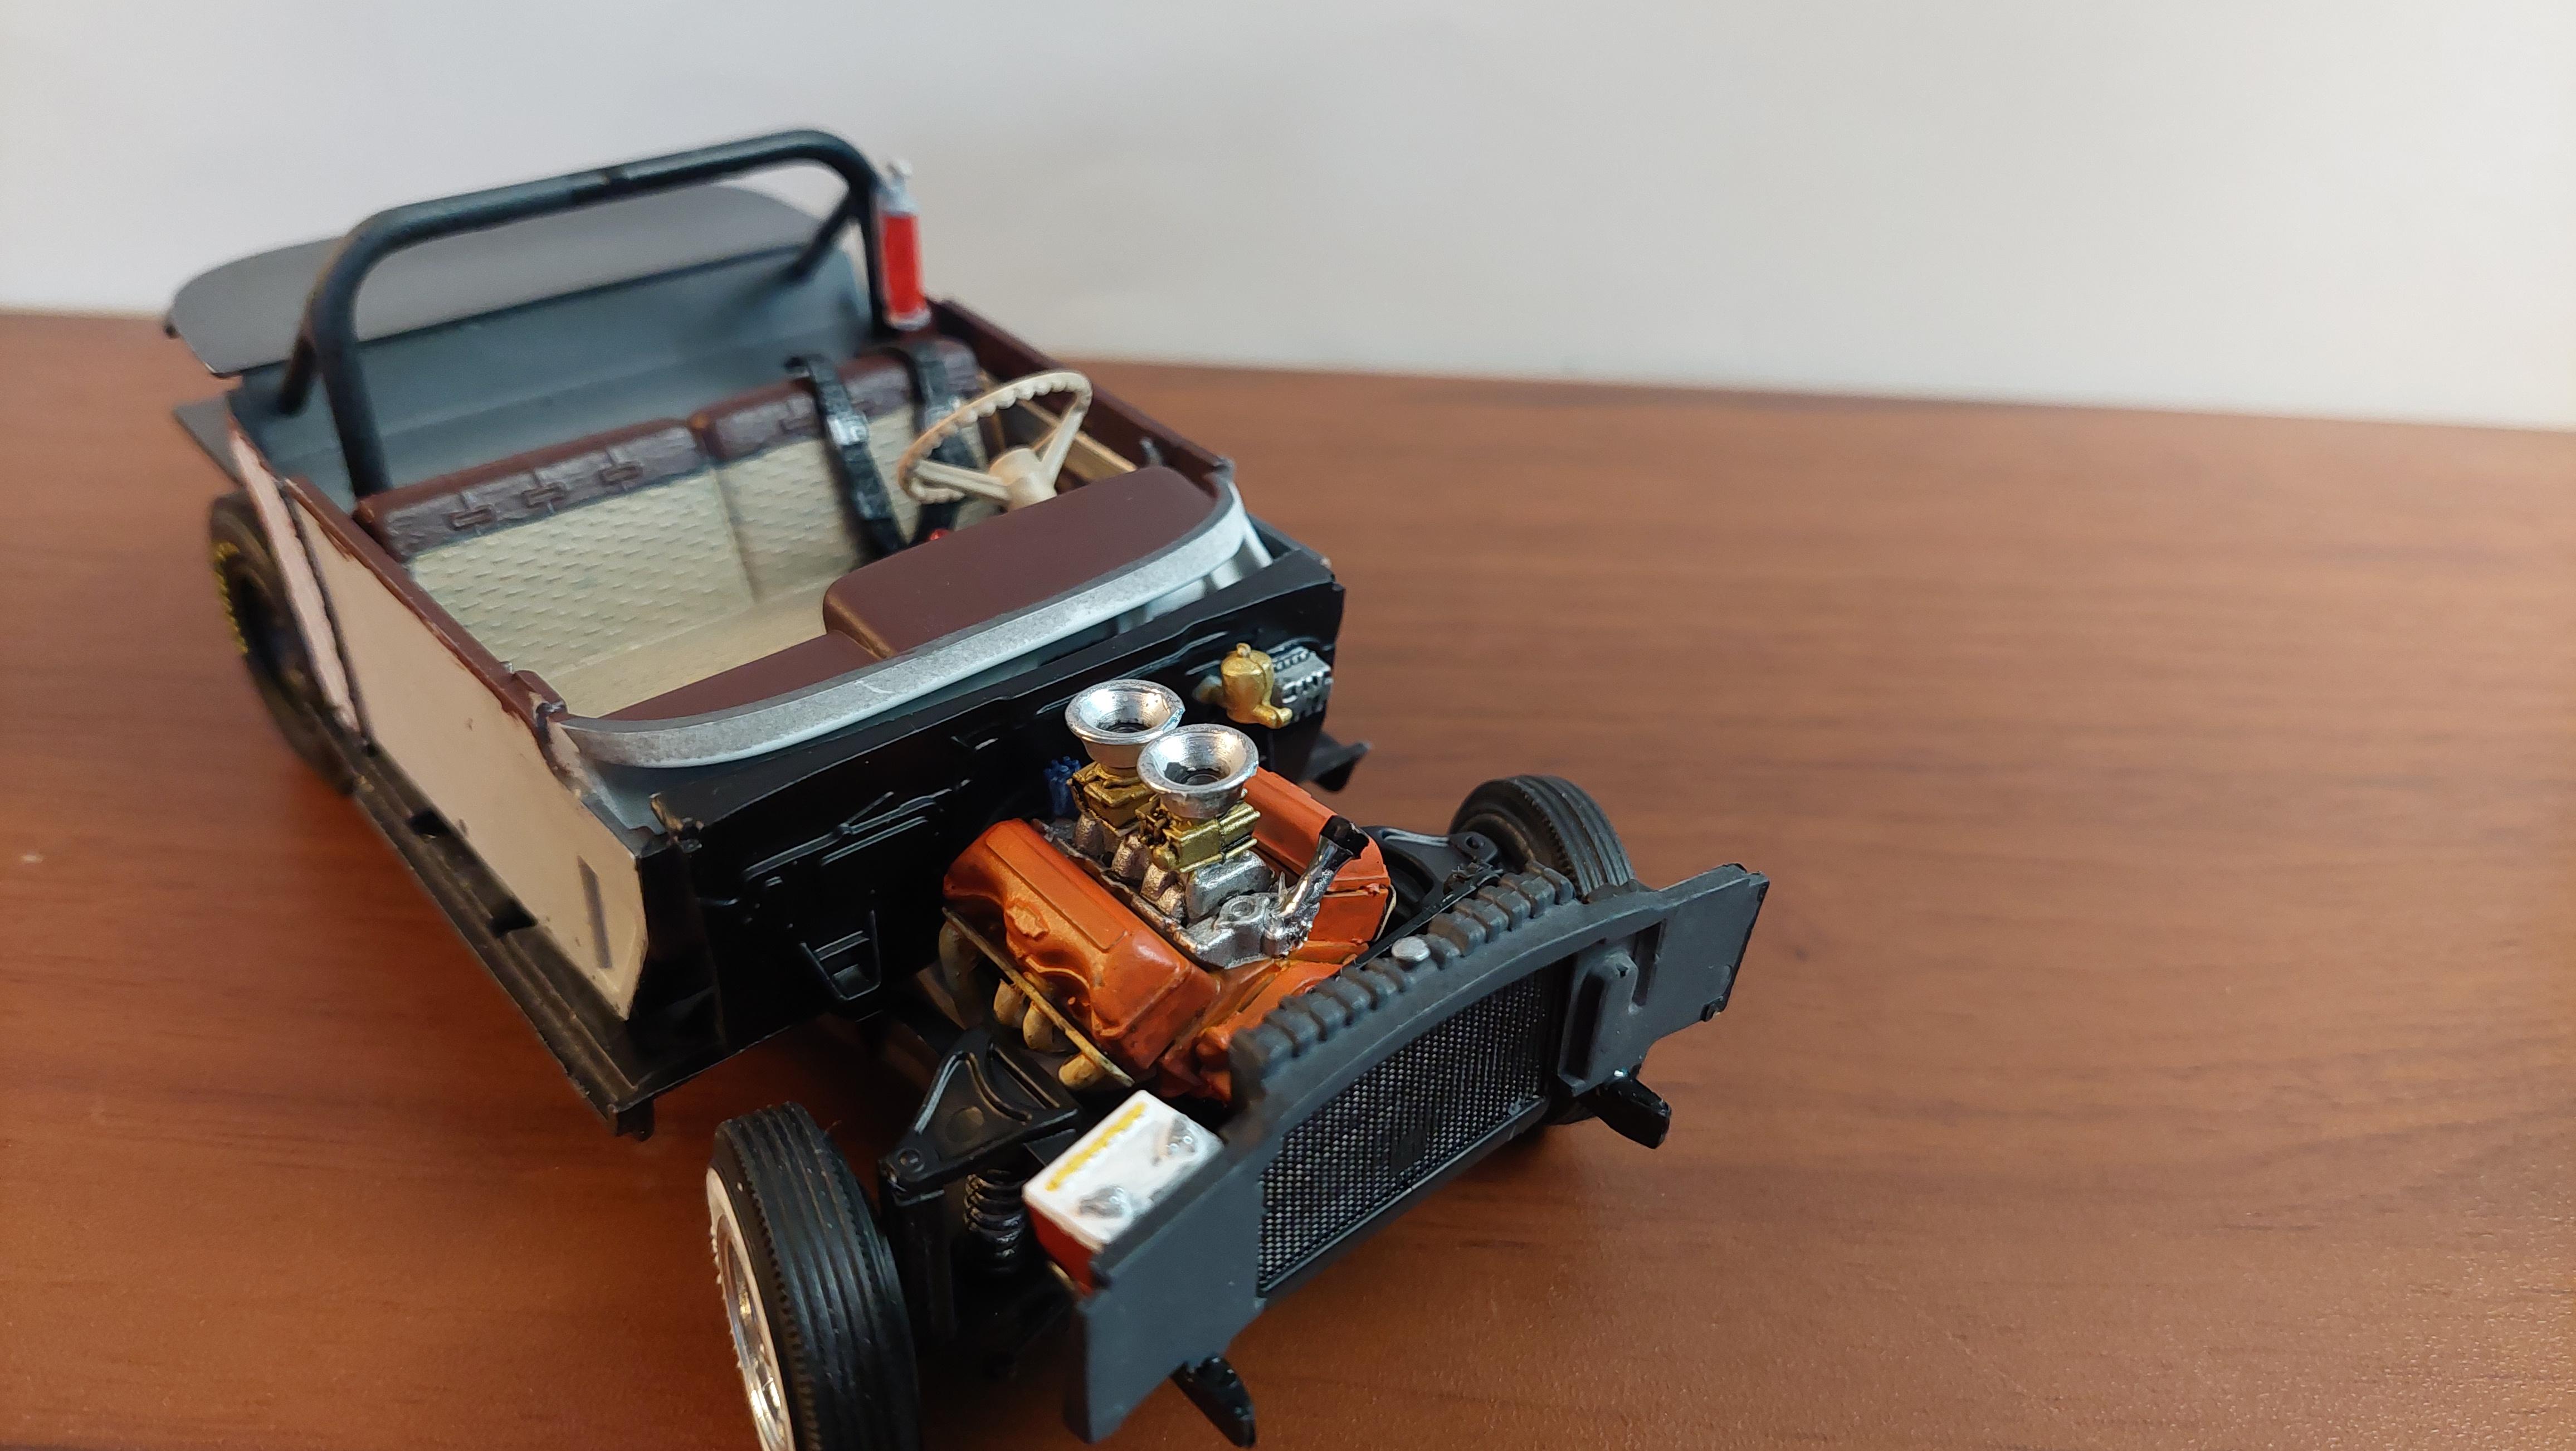
I had this Rommels Rod but the body was missing. I have 2 others sealed inside but this one was completely open, so something had to be done with it. Tried the "wanted" section here and a swap meet and of course Ebay looking for a body or junk builder but nada. I had this Lindberg Bugatti forever, the fronts area was pretty close but the middle and back needed to be made. I used the interior and complete chassis including engine from the RommelsRod, the front clip , tires, wheels headlight buckets , trunk, hood and grille from the Bugatti, anything white was made from evergreen sheet plastic, 1/8" tube and various sizes of flat stock. Removed all chrome. The headlight covers fit right onto the Bugatti buckets, also modded the Rods front wheels to the Bugattis tires, the RommelRods tires were smaller, added the German skull hood ornament to the ew grille. Added a few more guns from a 1/35th tank kit. Painted Tamiya Dark Yellow (a tip from member 'showrods' on this forum) Getting closer and the hard stuffs done but still alot to do.

-
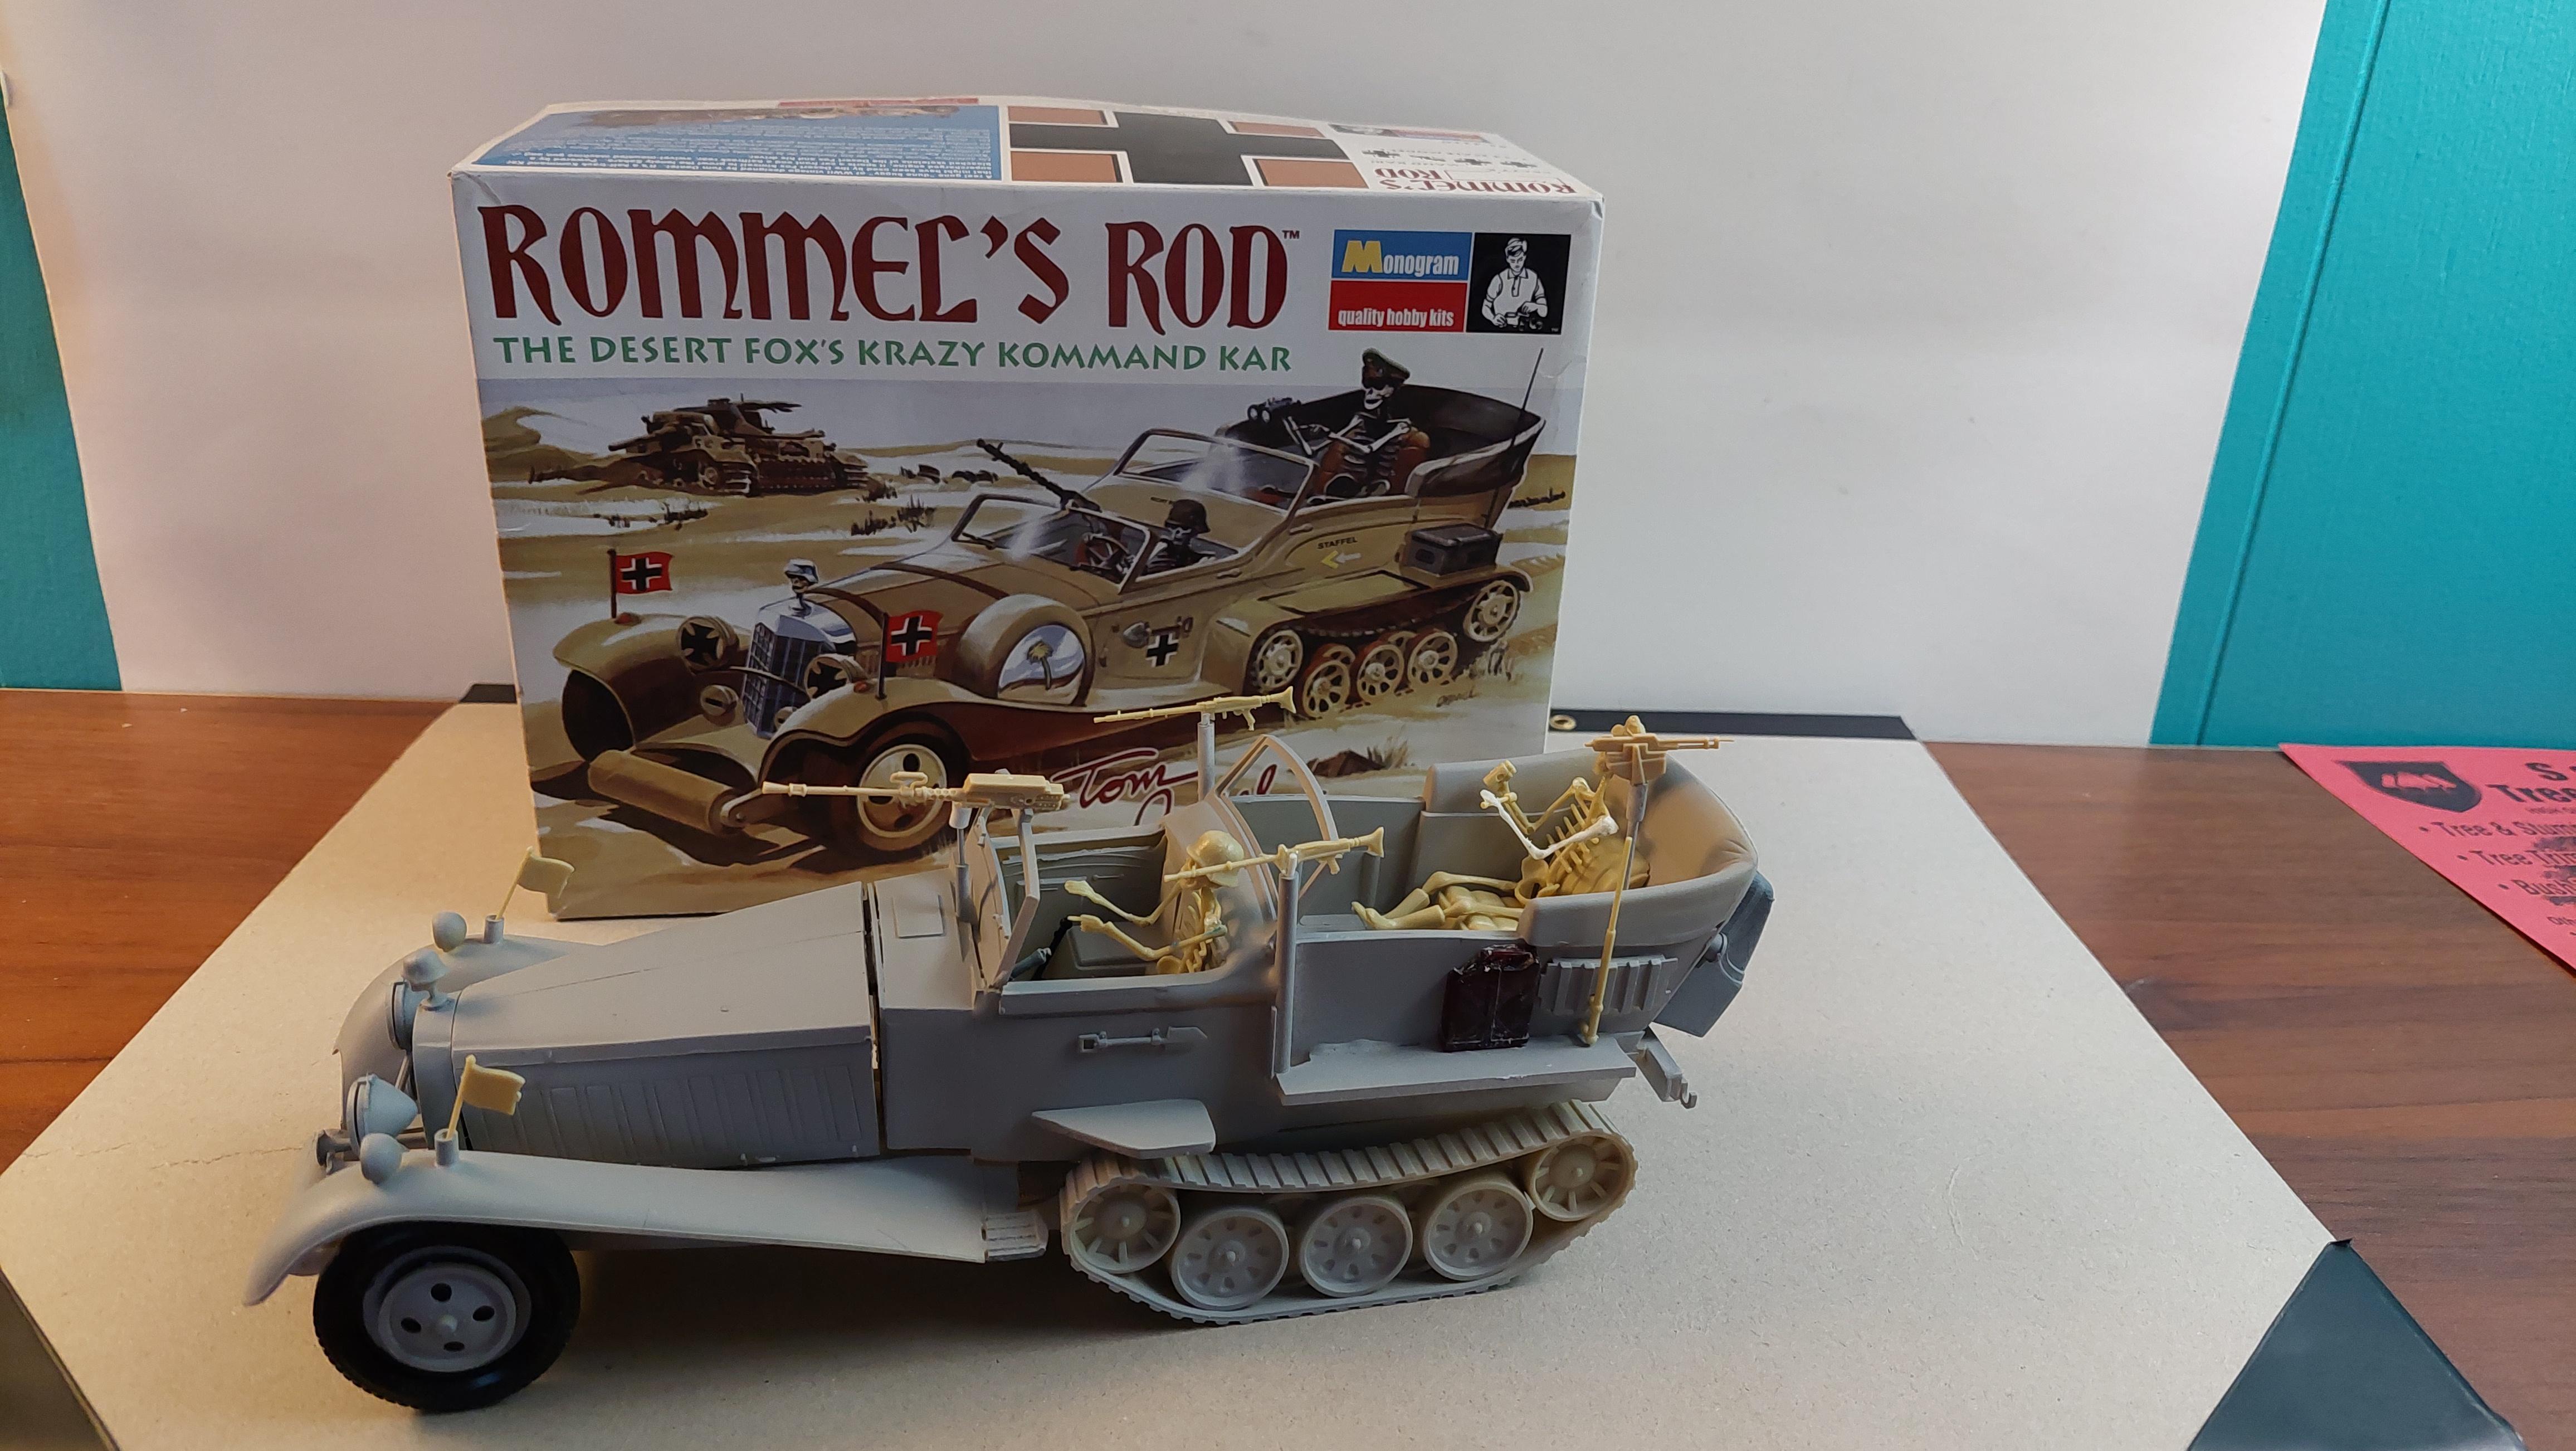
Thanks to all who have helped , but Im going another route without the body using the Rommels Rod parts.
-
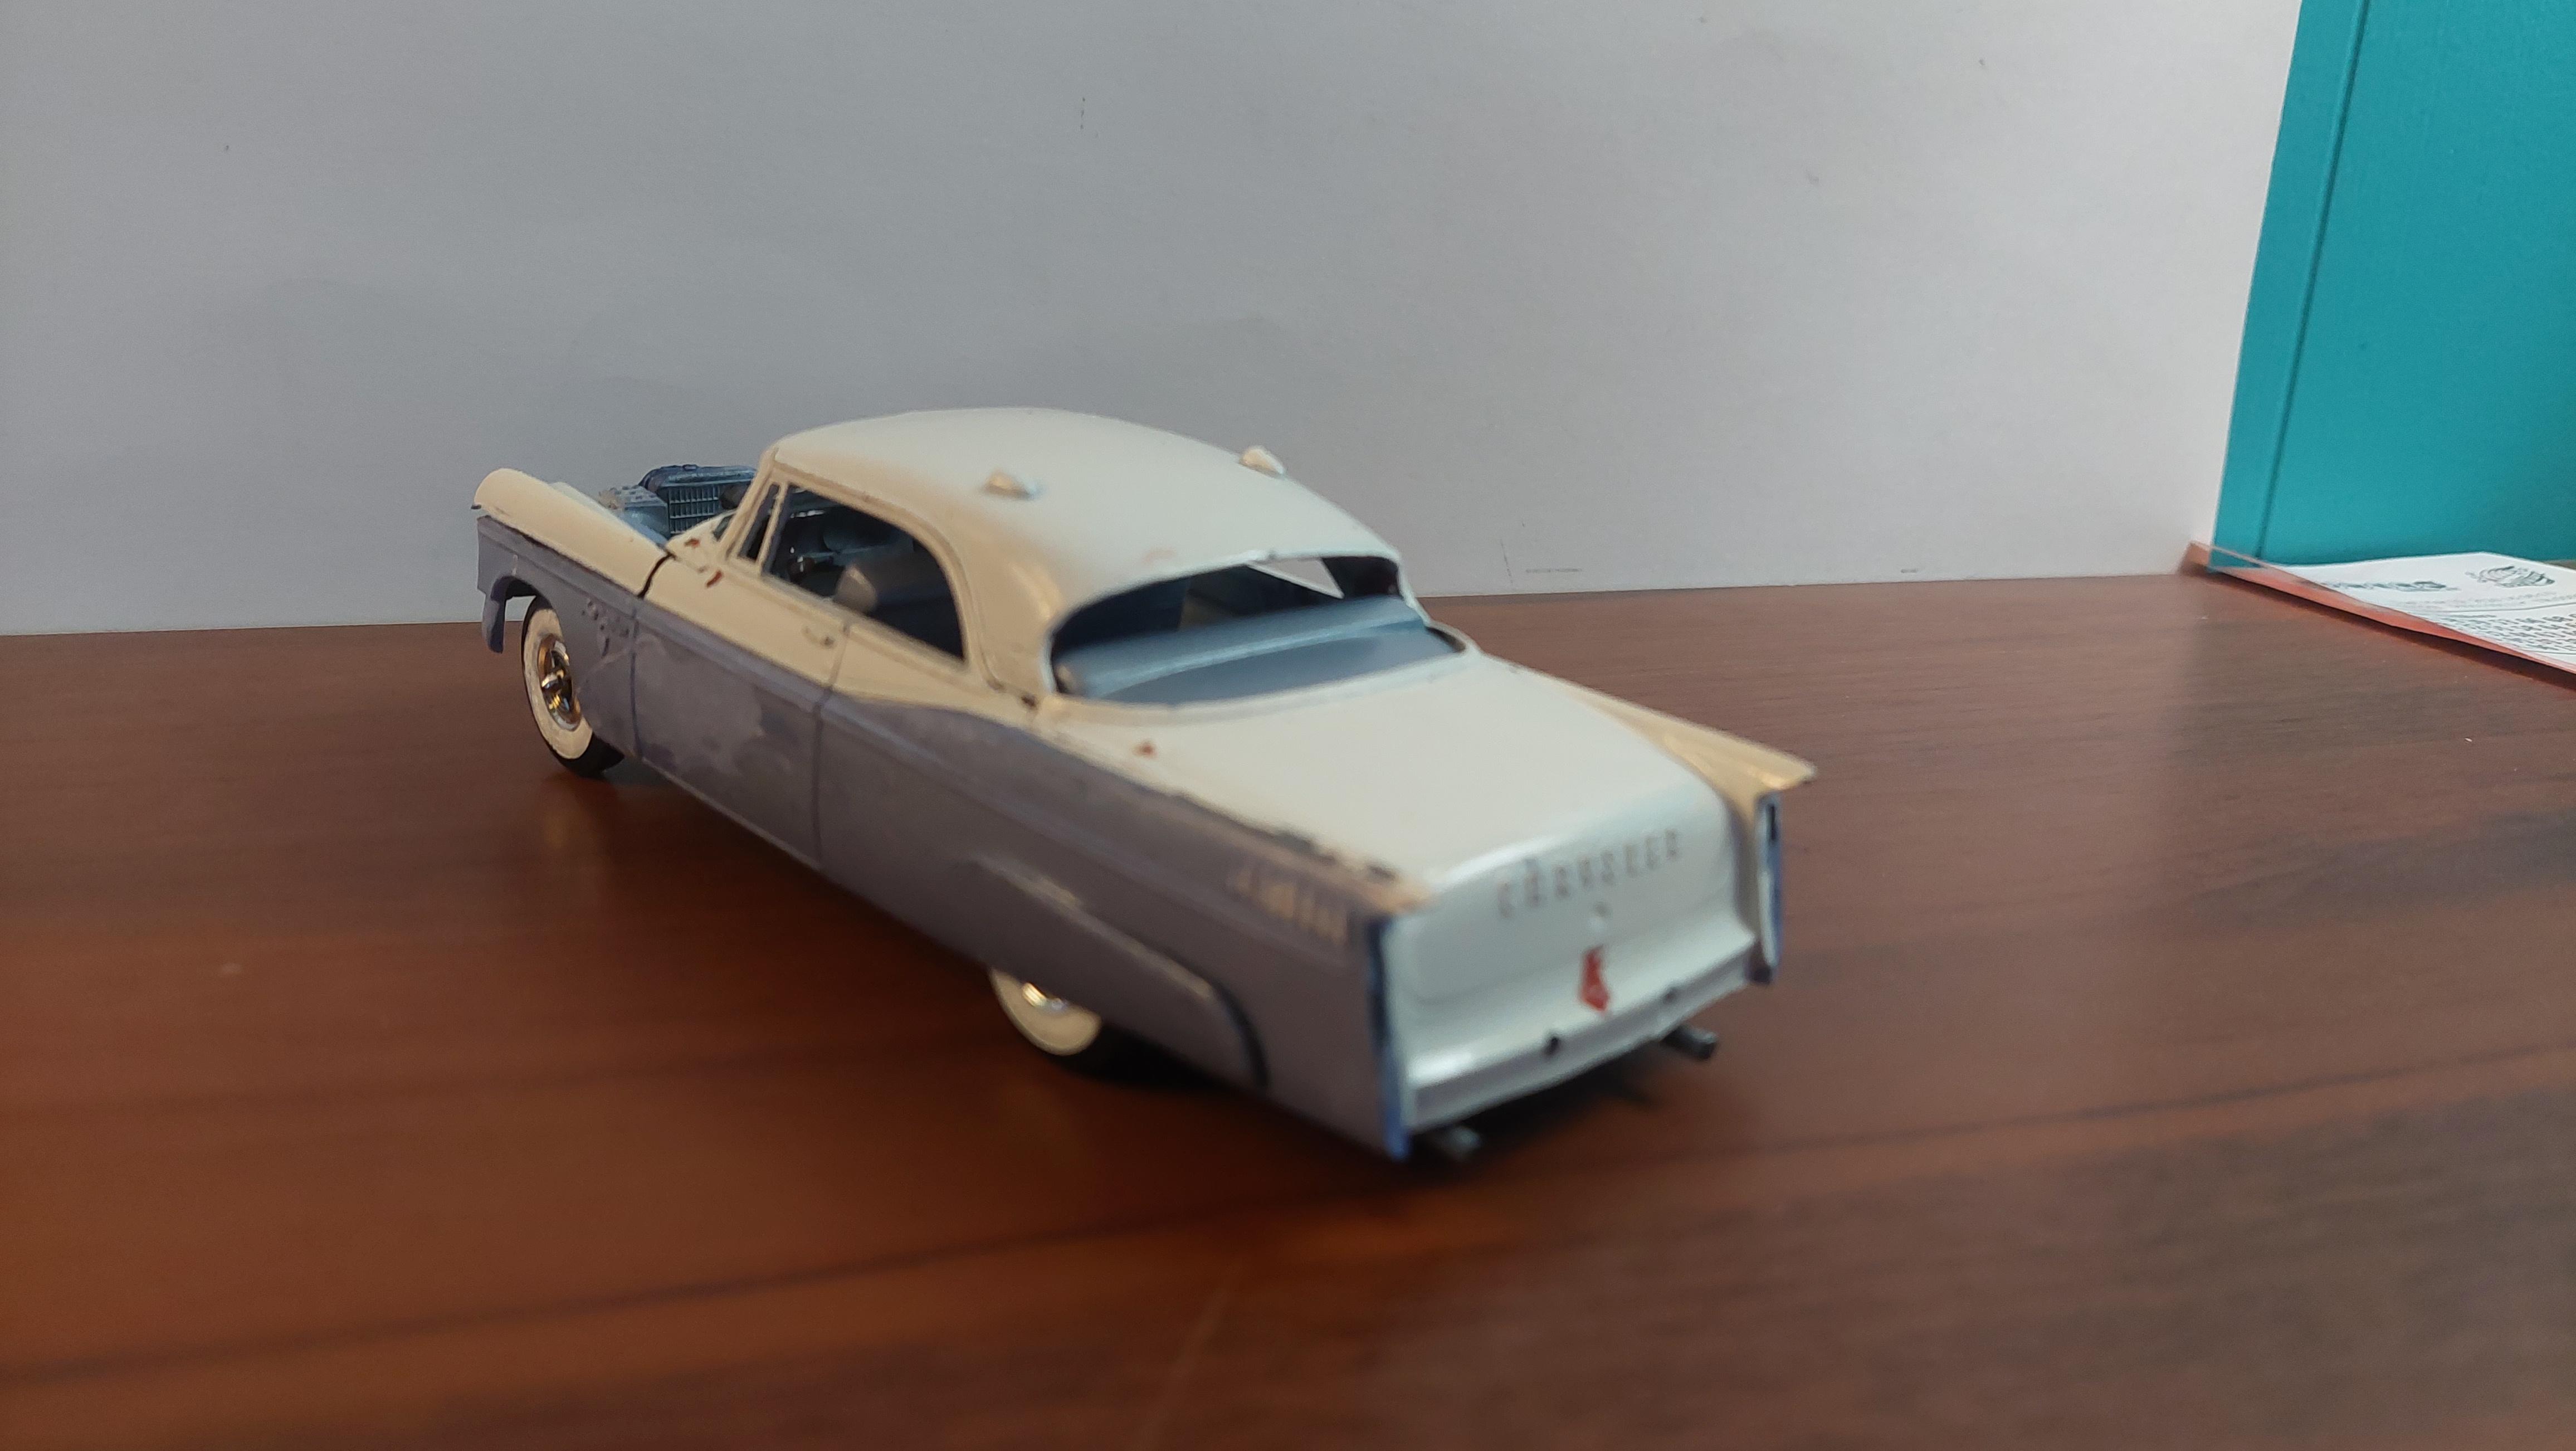
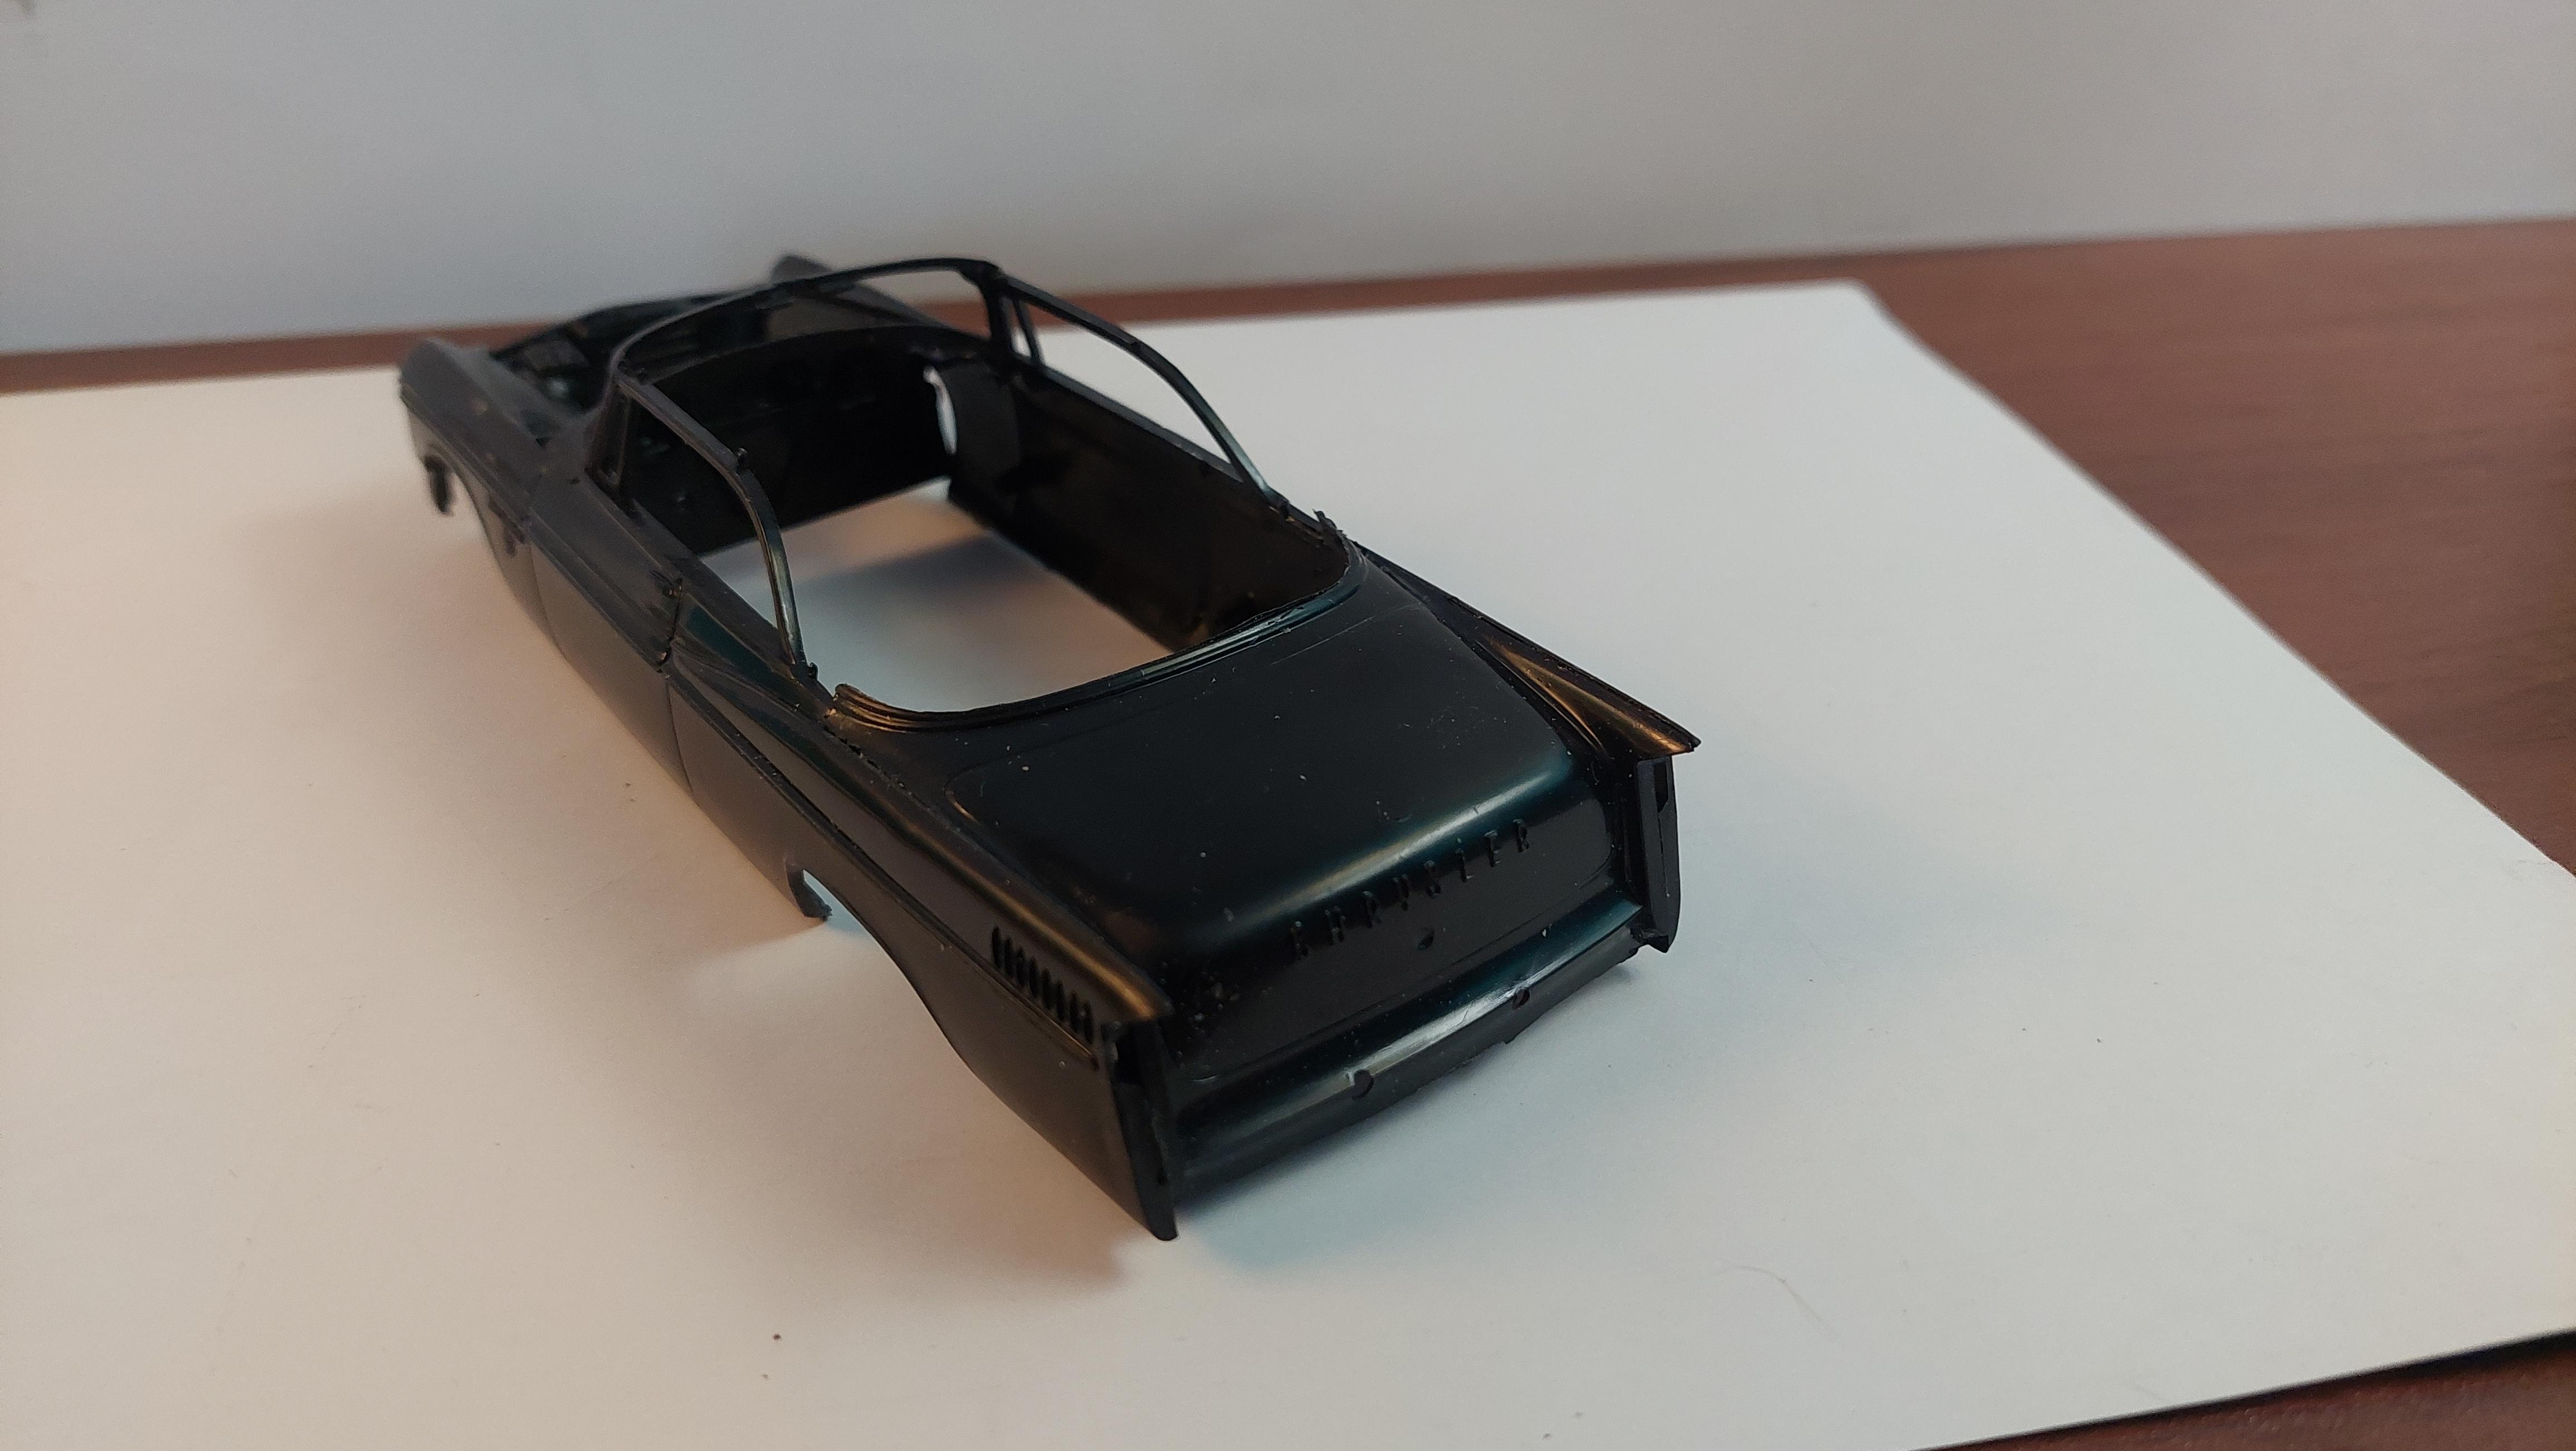
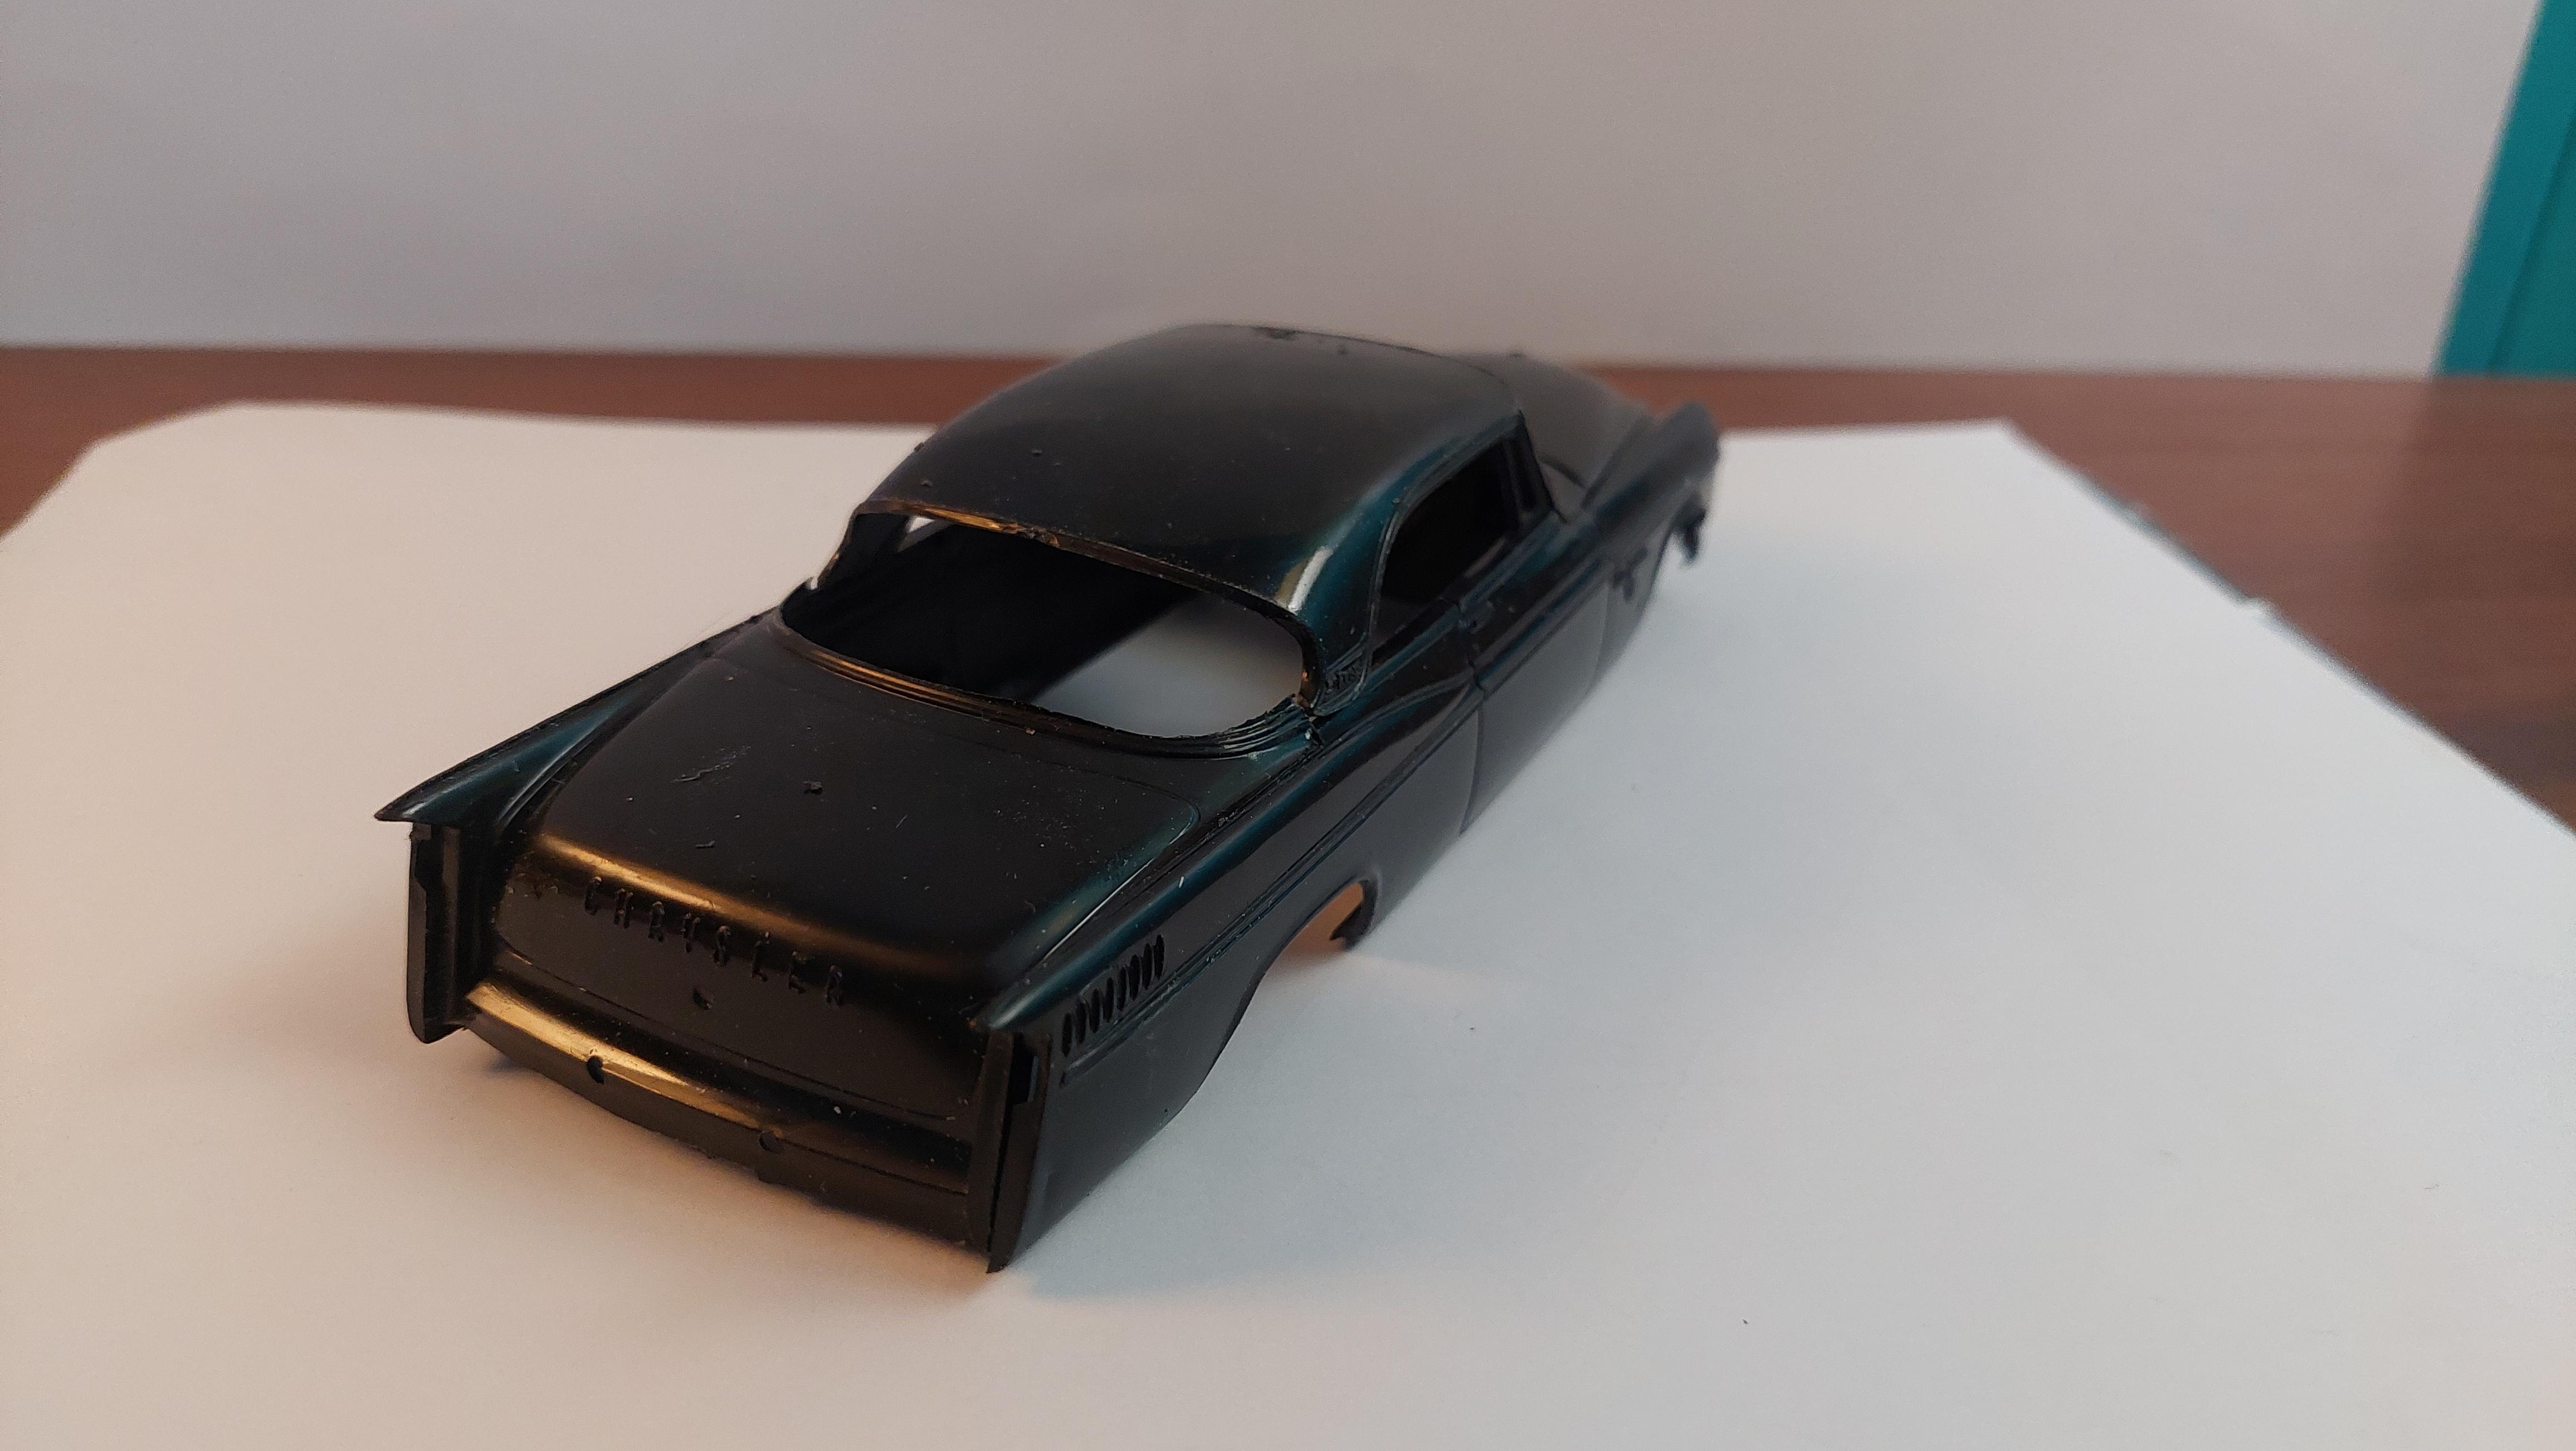
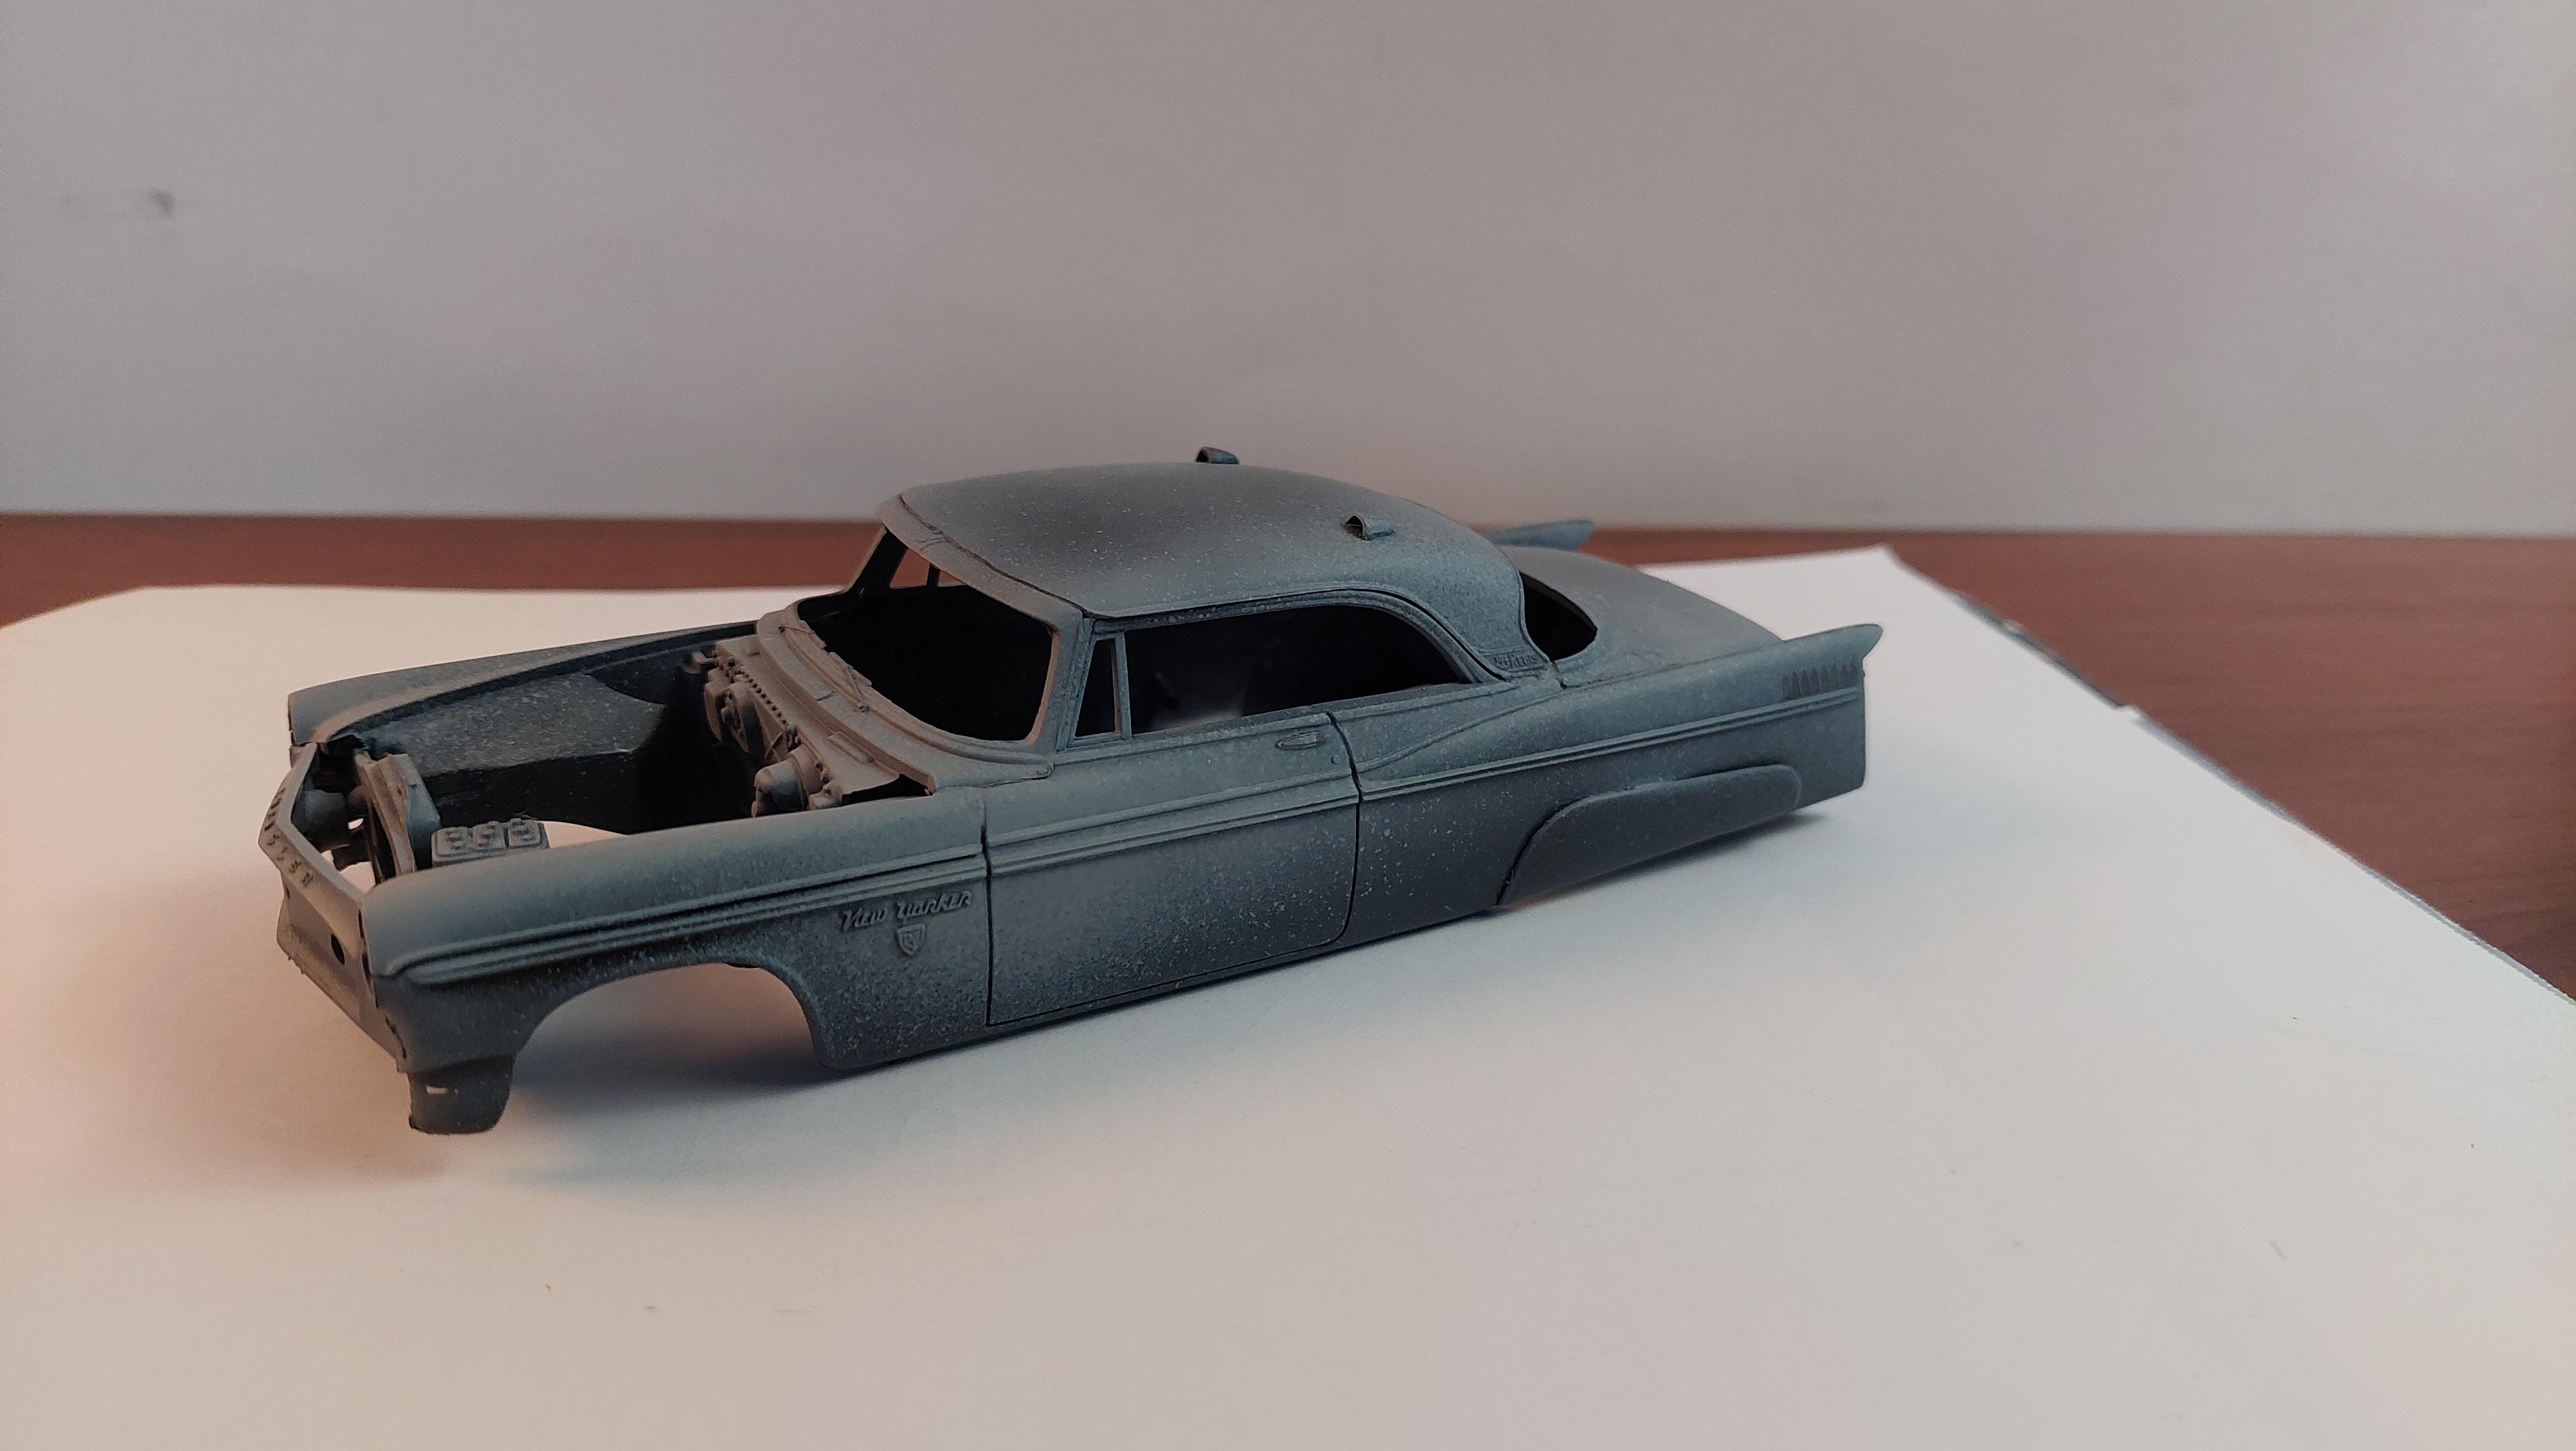
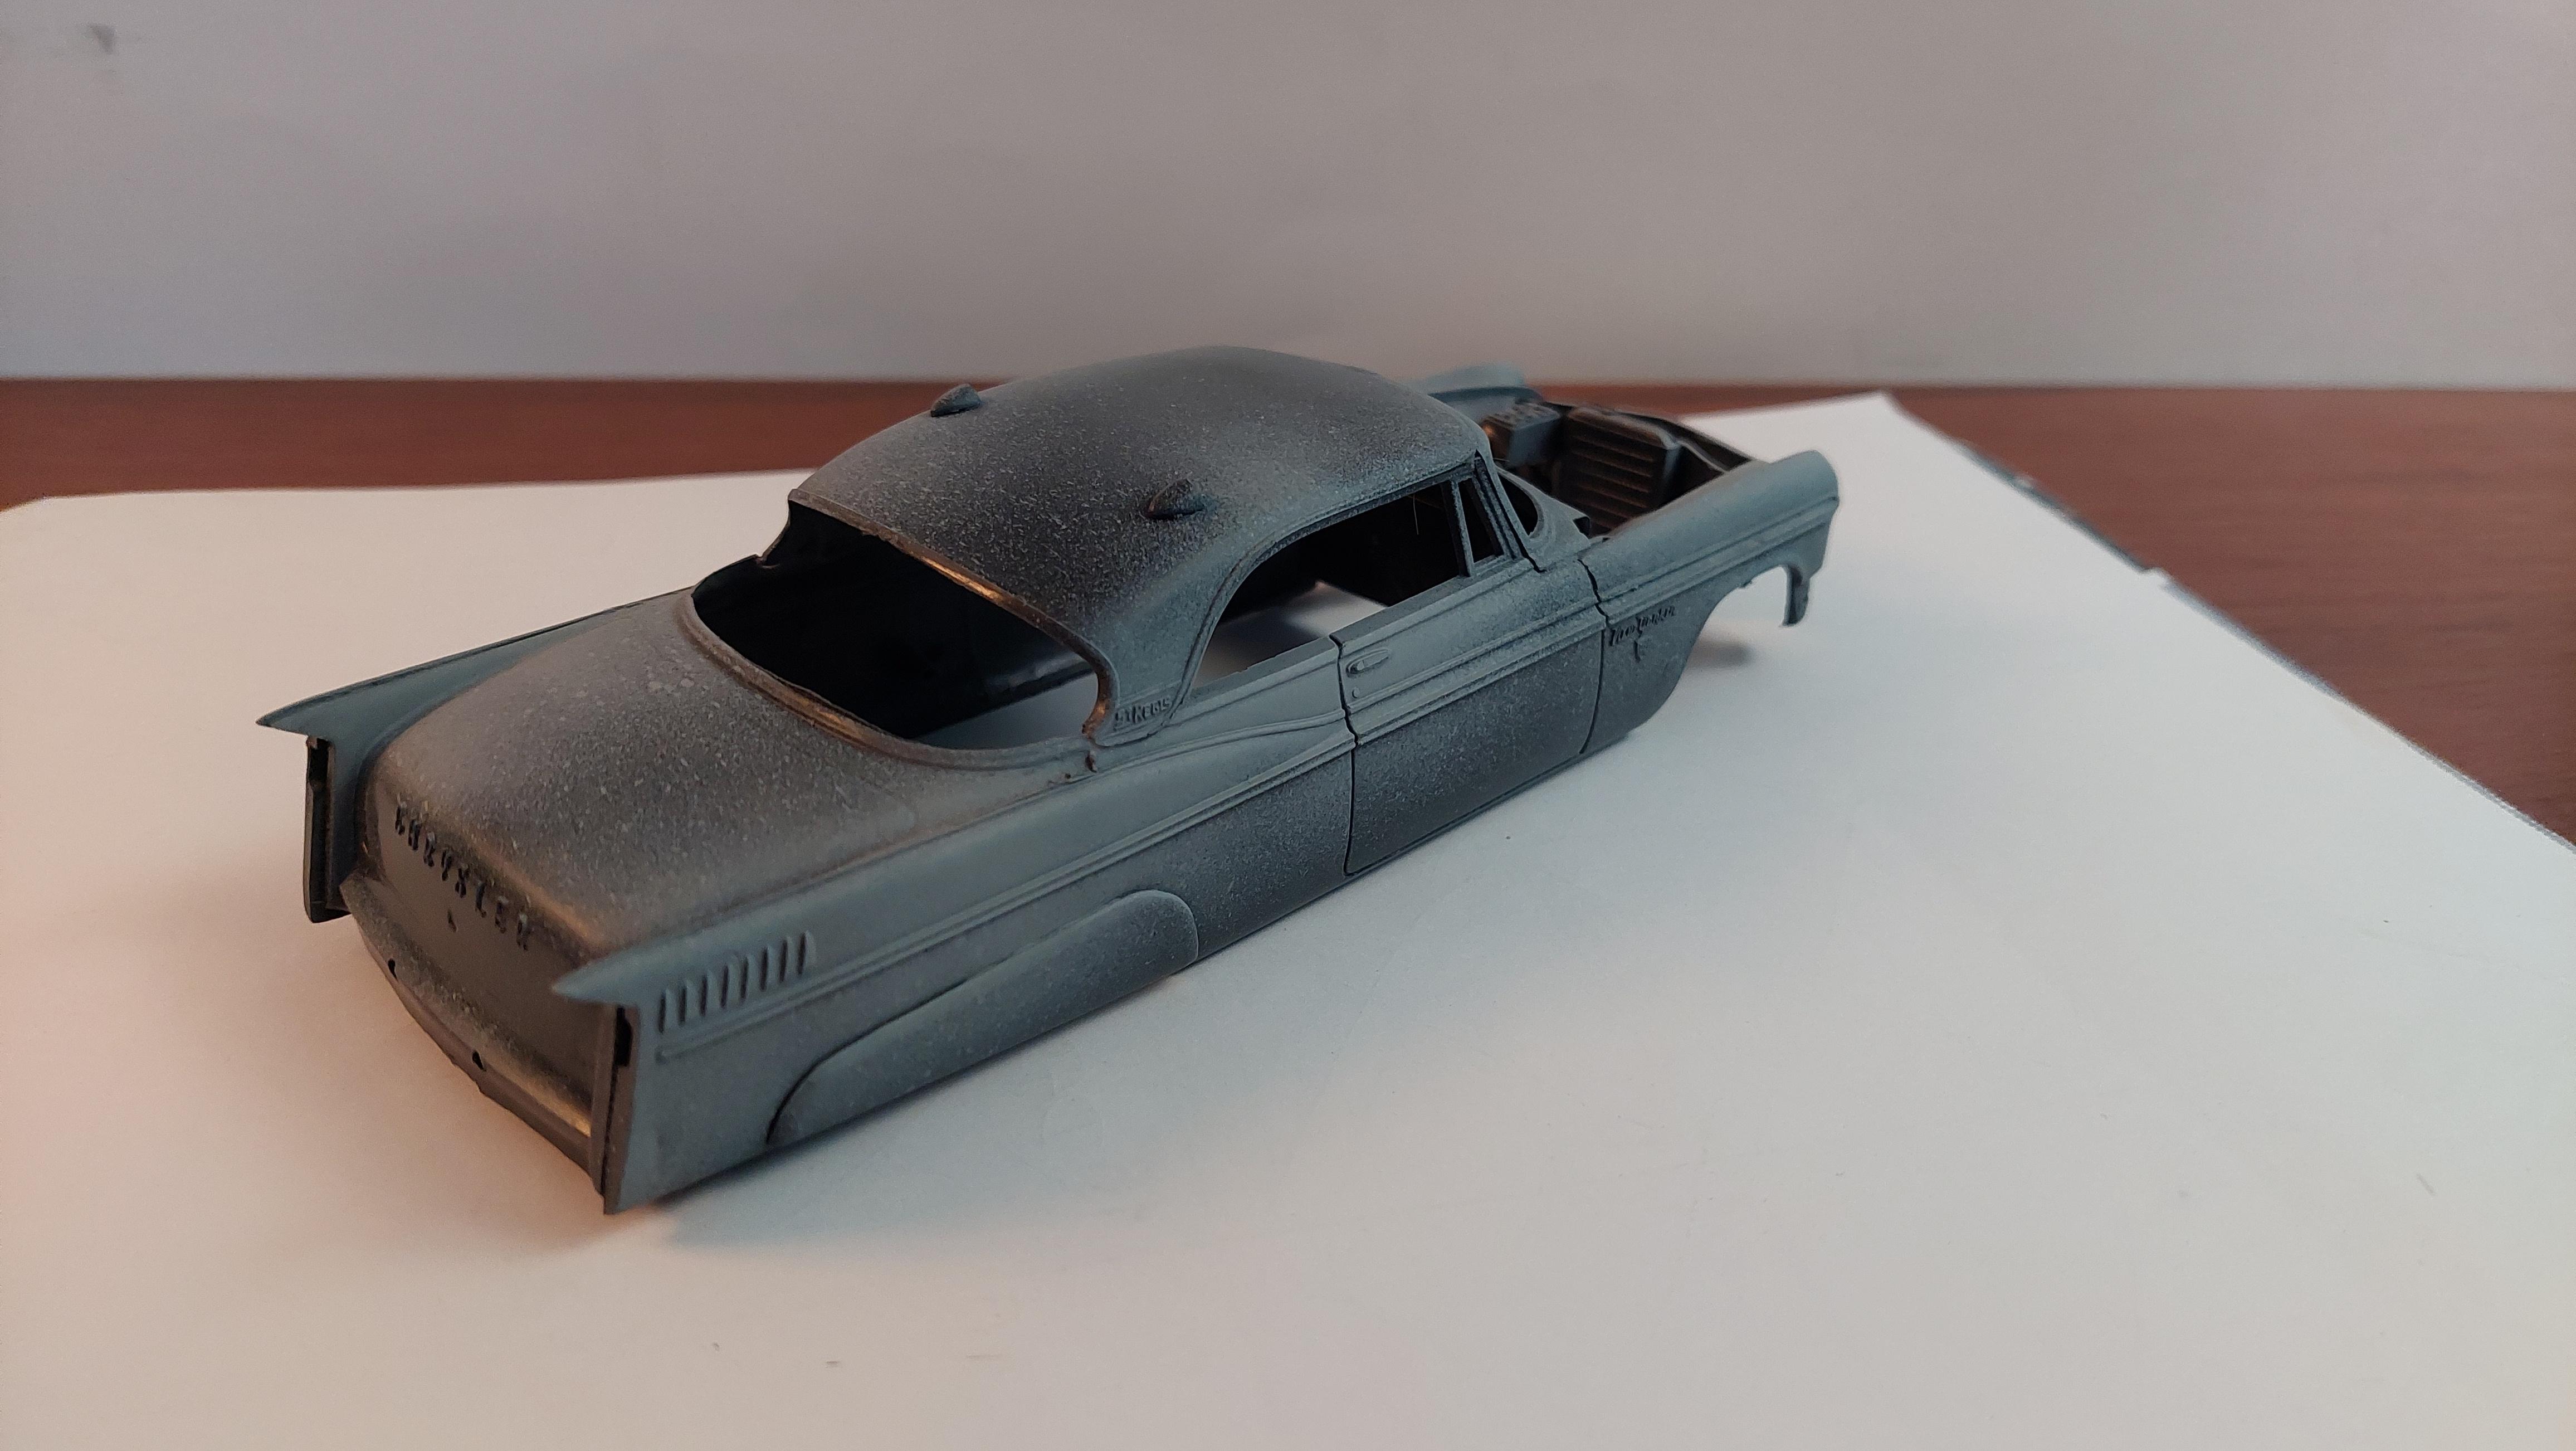
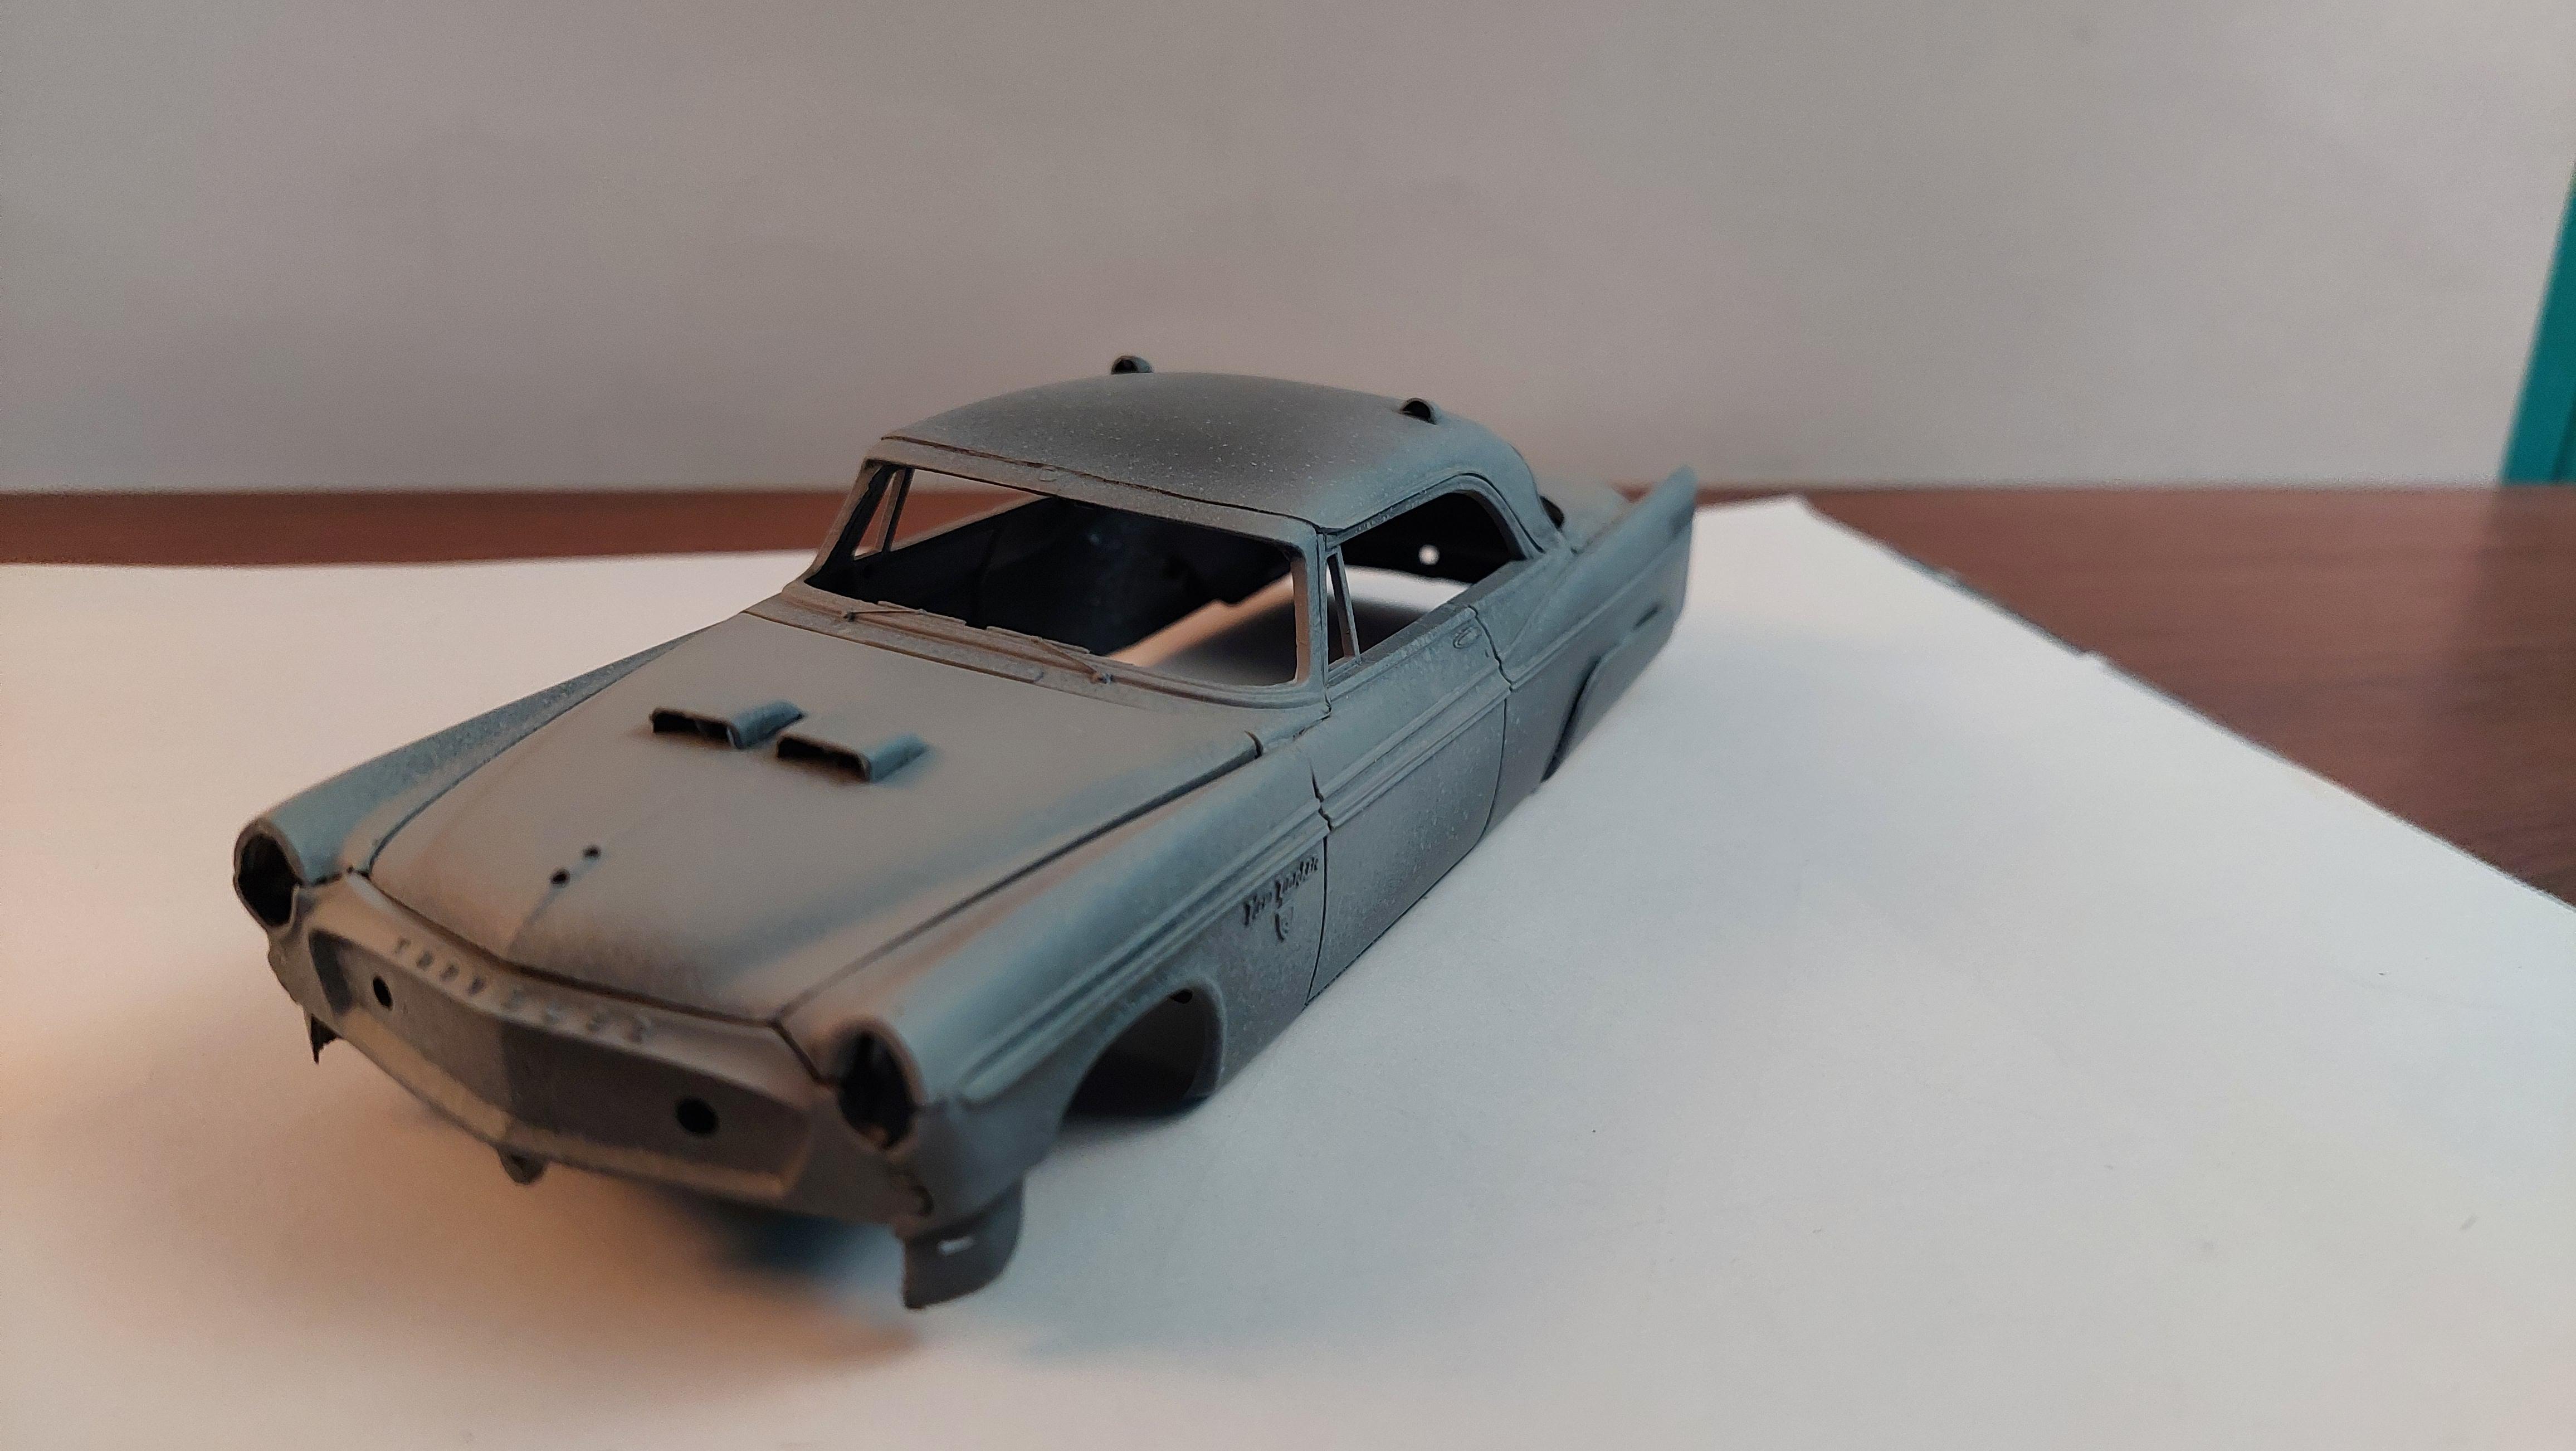
I had this one 99% done, two tone paint came out fine, mucho baremetal foil done all chrome on, interior done and in, contiental kit on and of course it took three tries to get the front and rear glass to fit pretty good, but then the idea machine went on.....decals. I found some Revell flames in blue that went great with the blue on the 56 but even with micro sol and micro set the decals went funky. I let it dry and they were foggy in some areas and crinkled on the edges. I tried to get them off as best as I could but the paint under the decal was clearly off so into the remover it goes. It sat for a few days in SuperClean but Tamiya paint holds firm. Next is EZ Off Oven or brake fluid..after new paint and foil go on I wont even consider using decals.
-
Mercury,Buick Ford,Cadillac and Lincoln Mark II. I never saw the Olds.
-
Fit was fine on mine except headers. Decals were fine, and the extra stuff : Engine parts , roof, rear body and wheels.
-
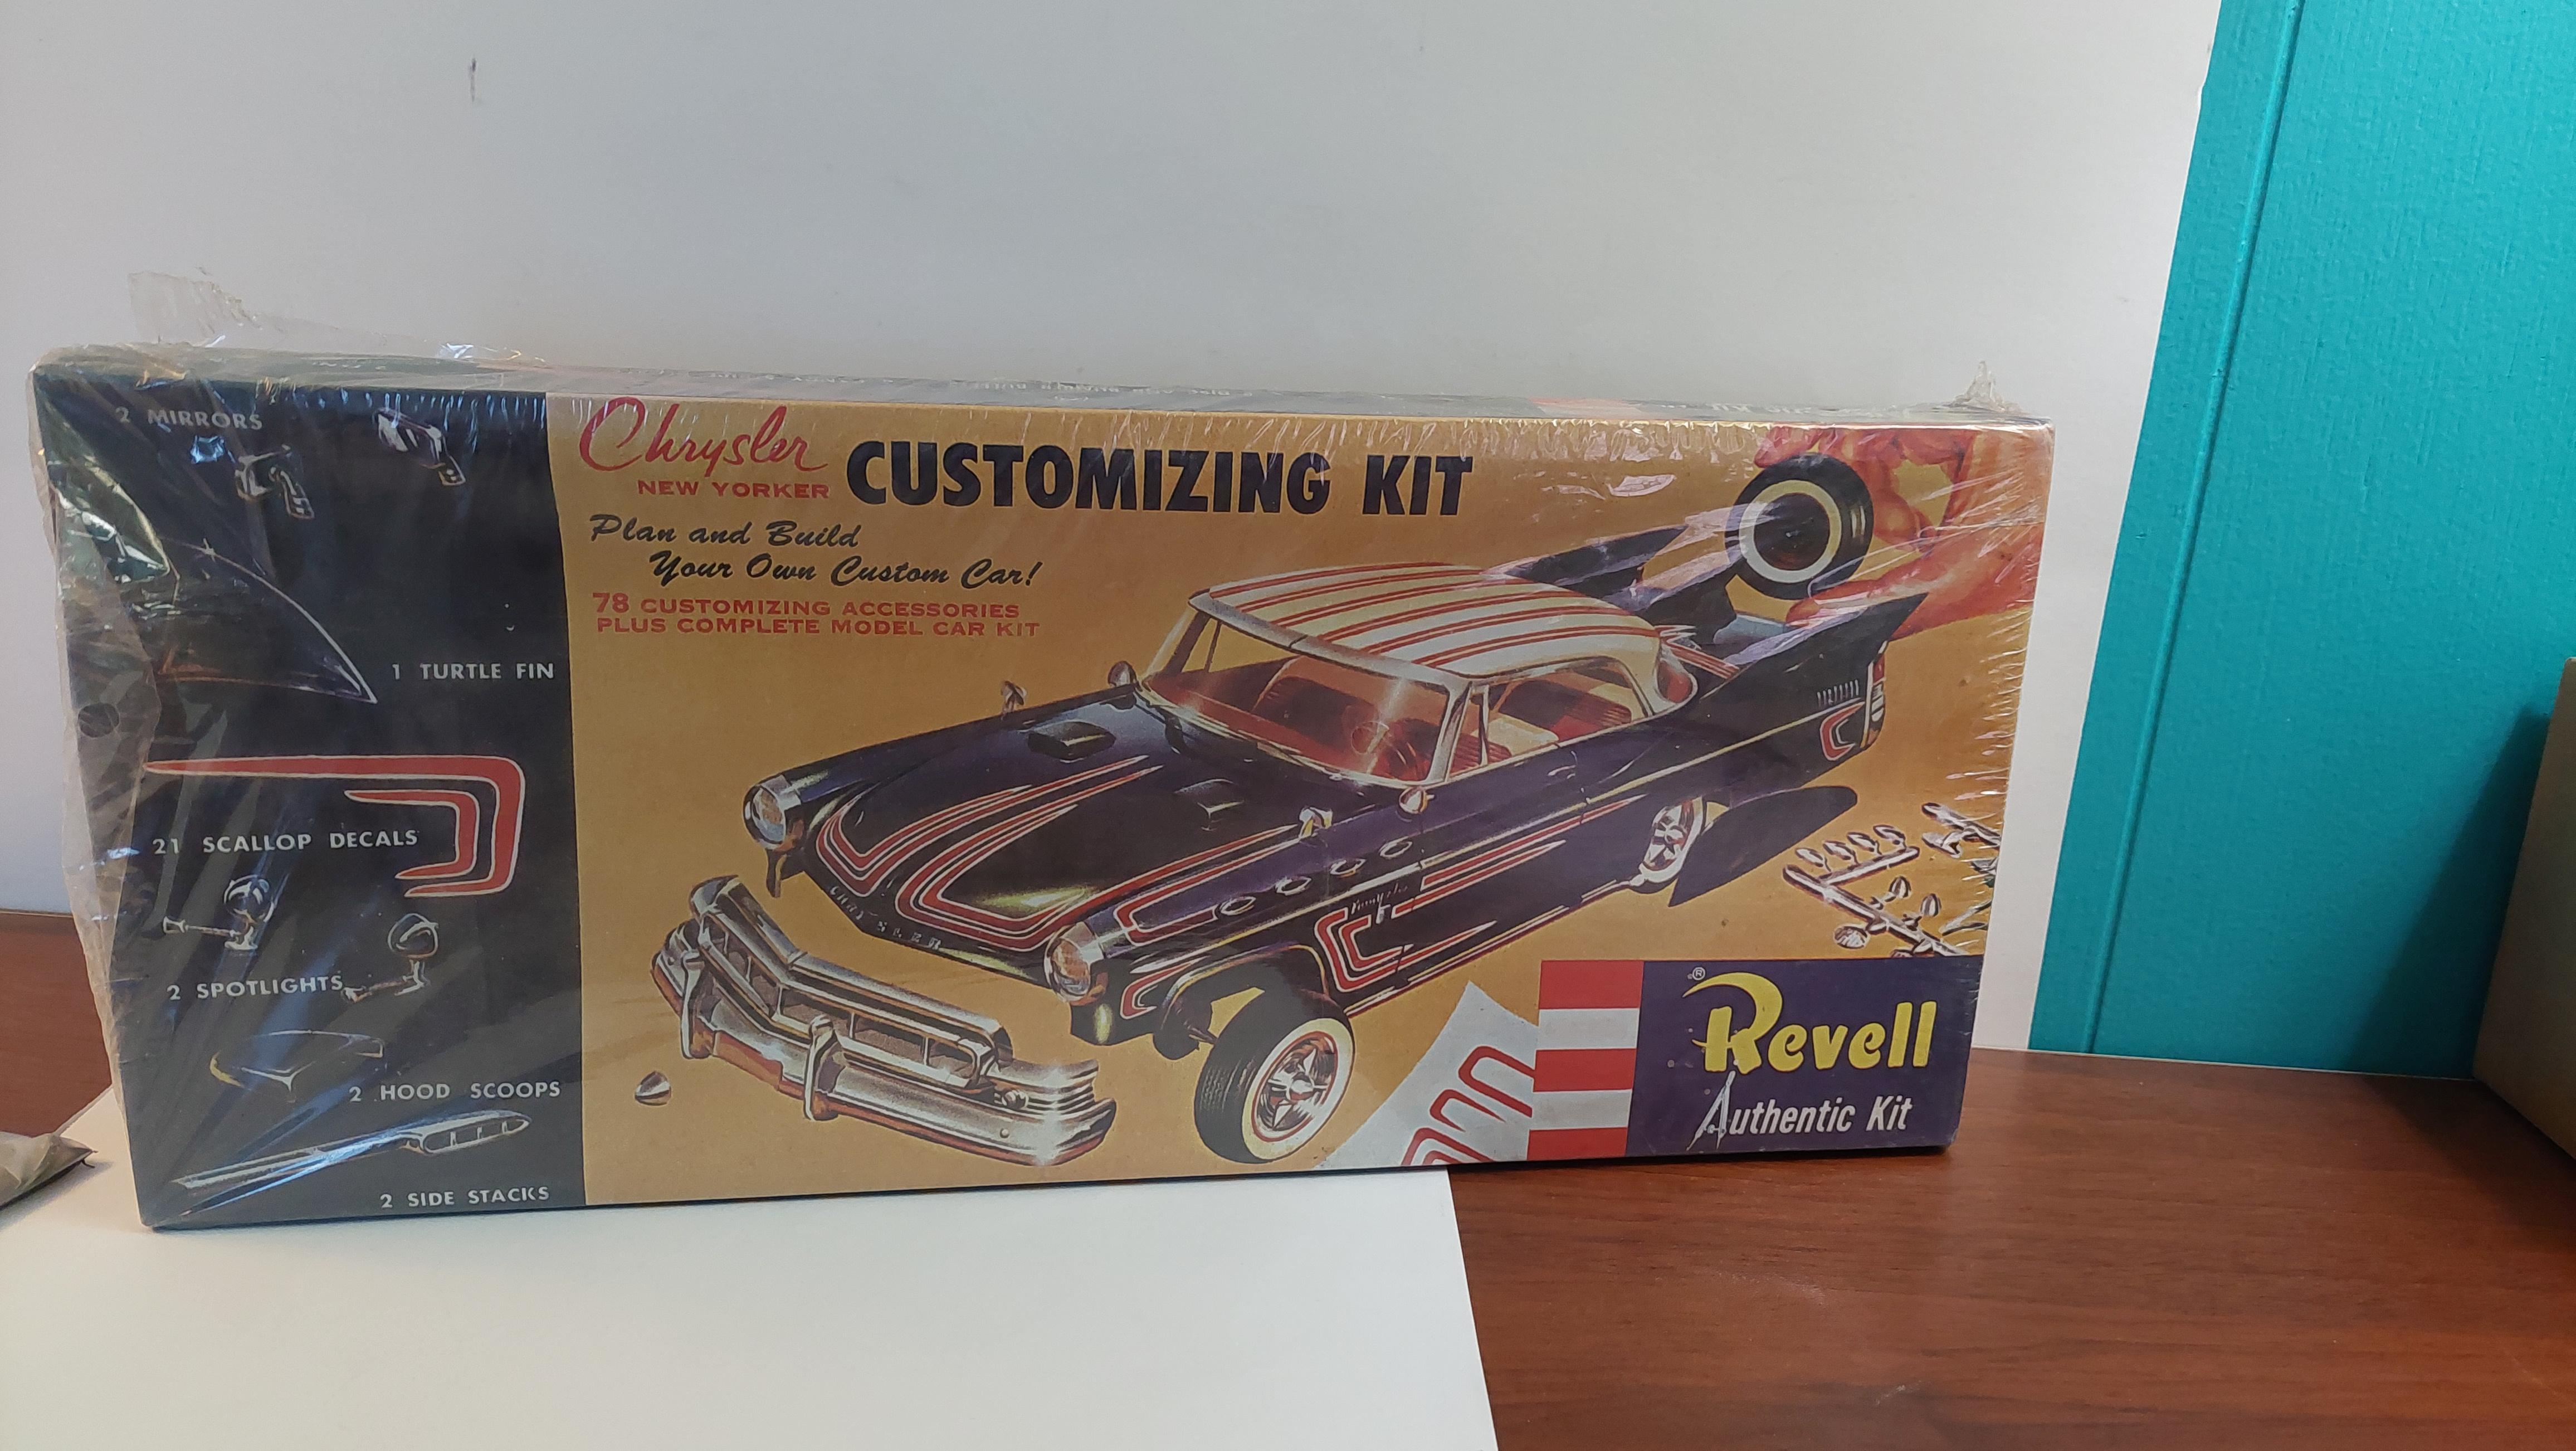
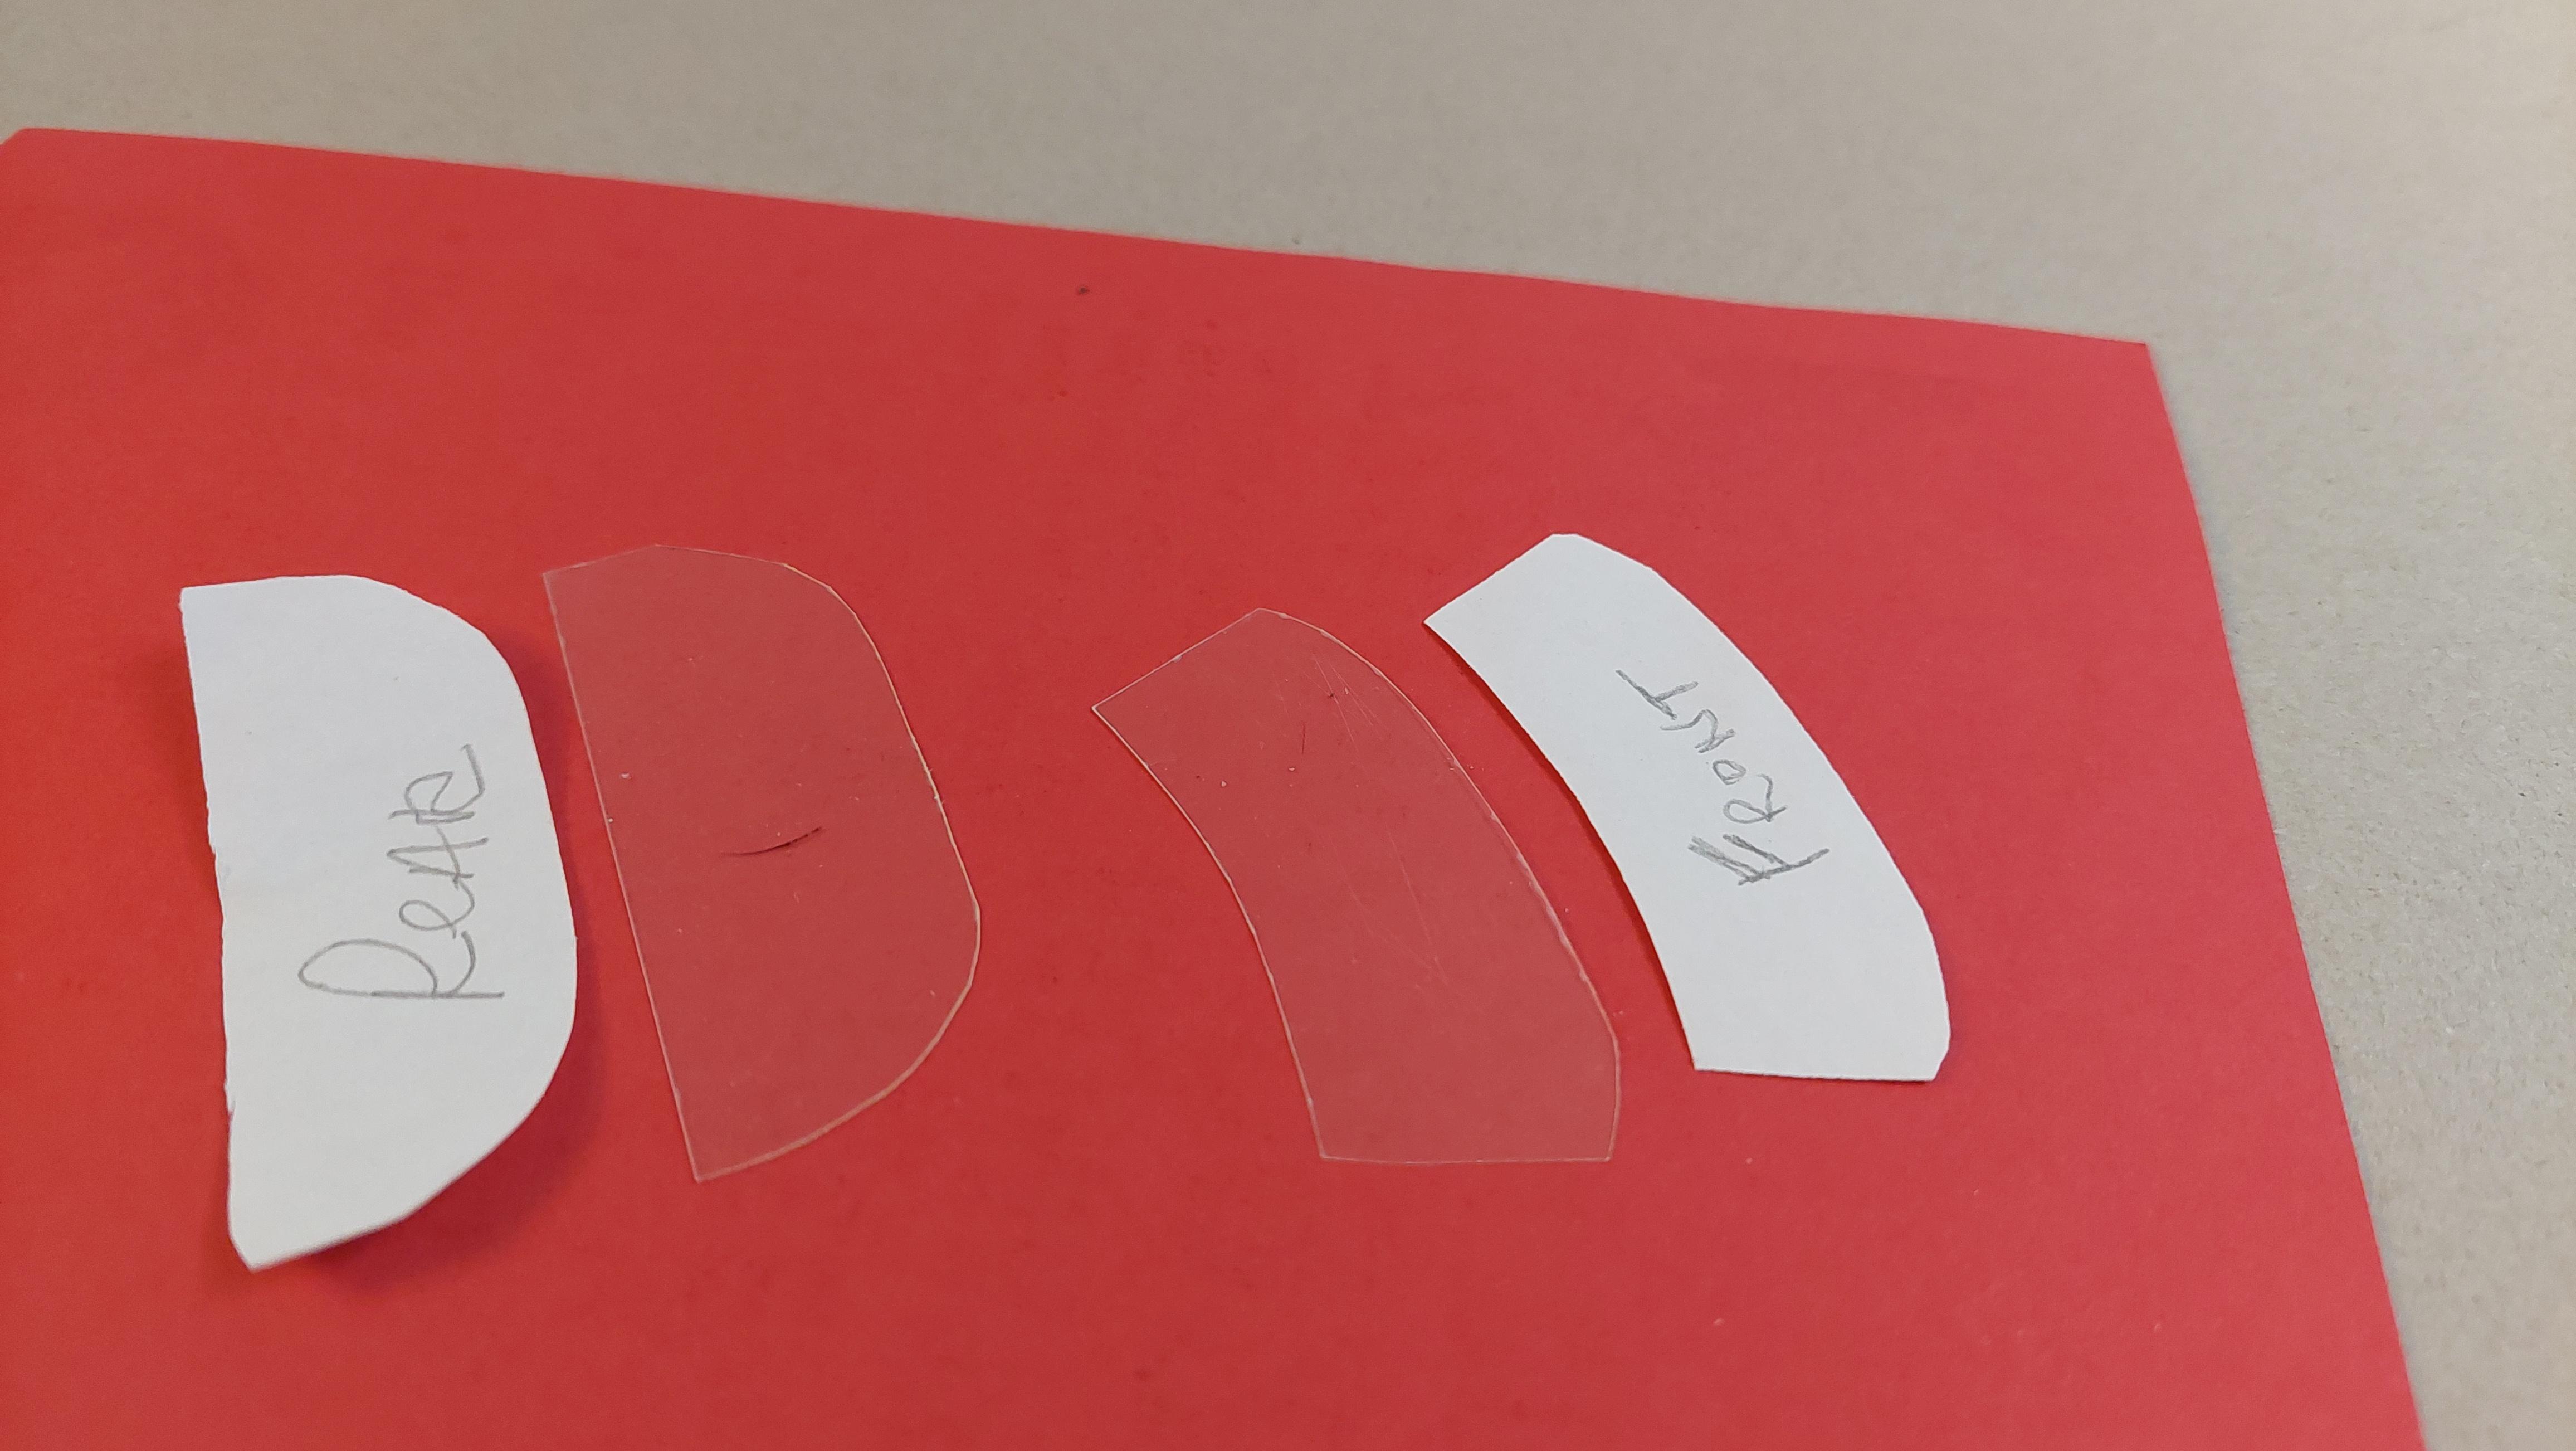
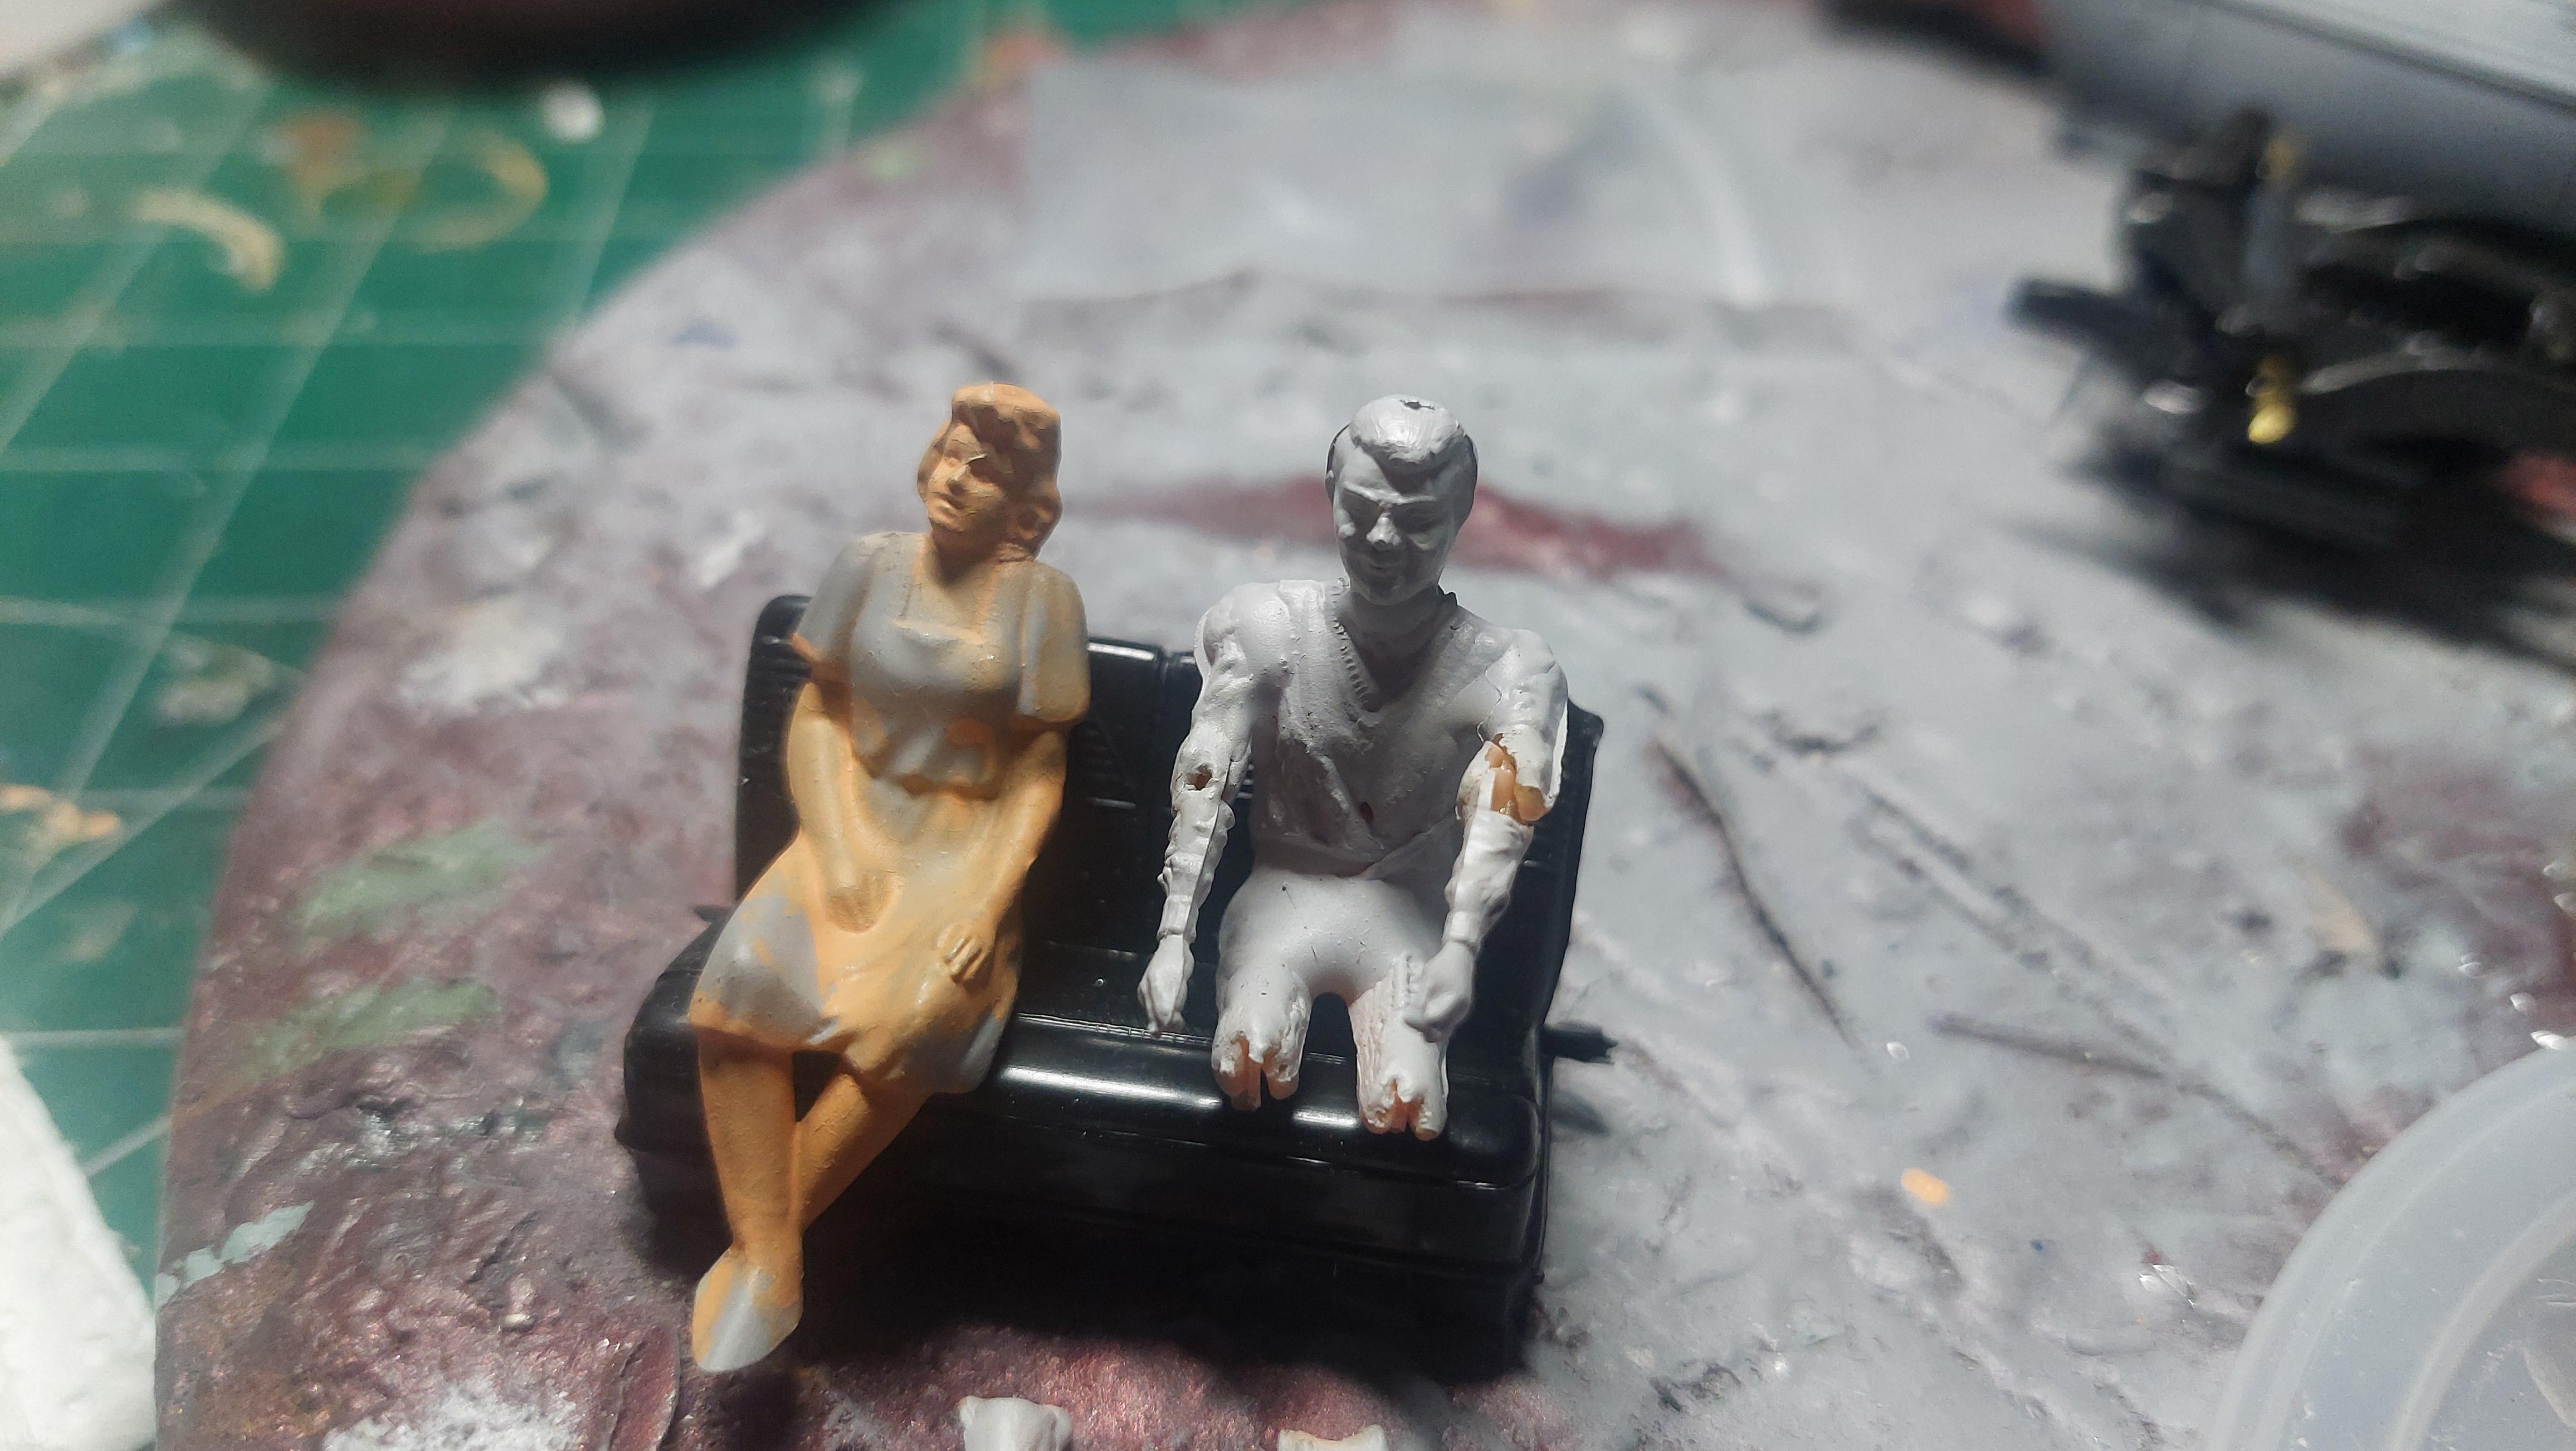
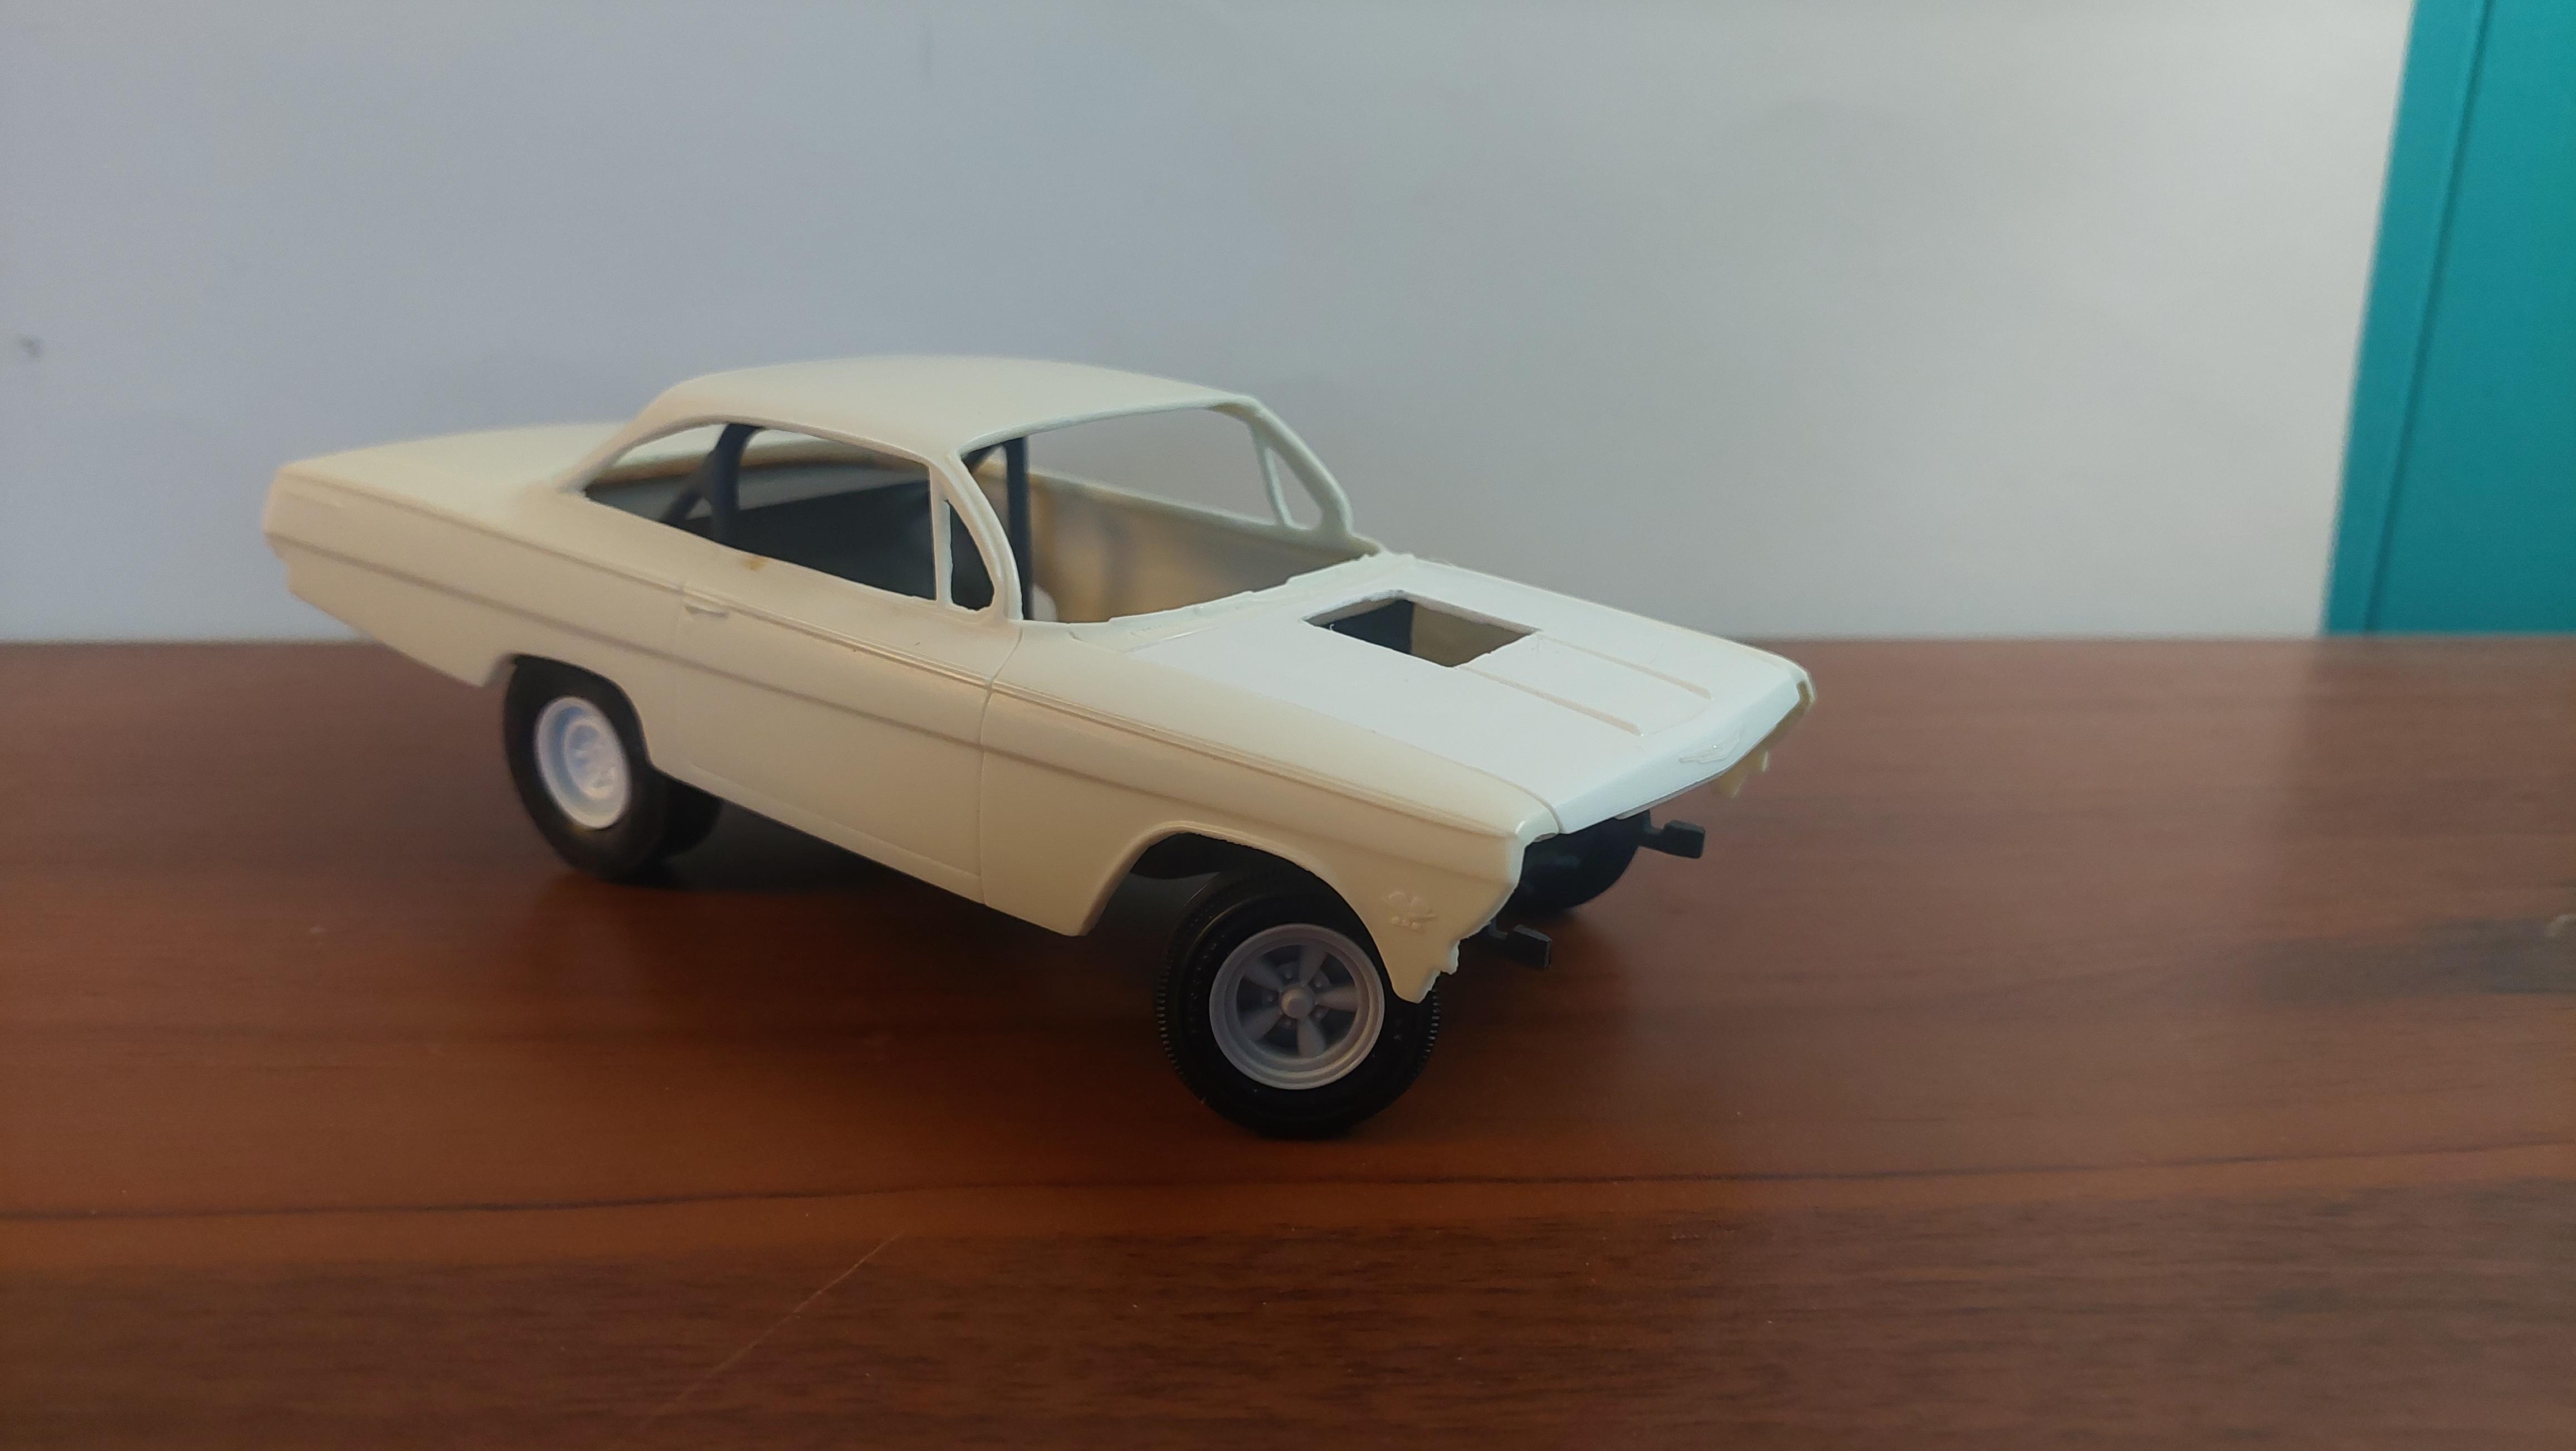
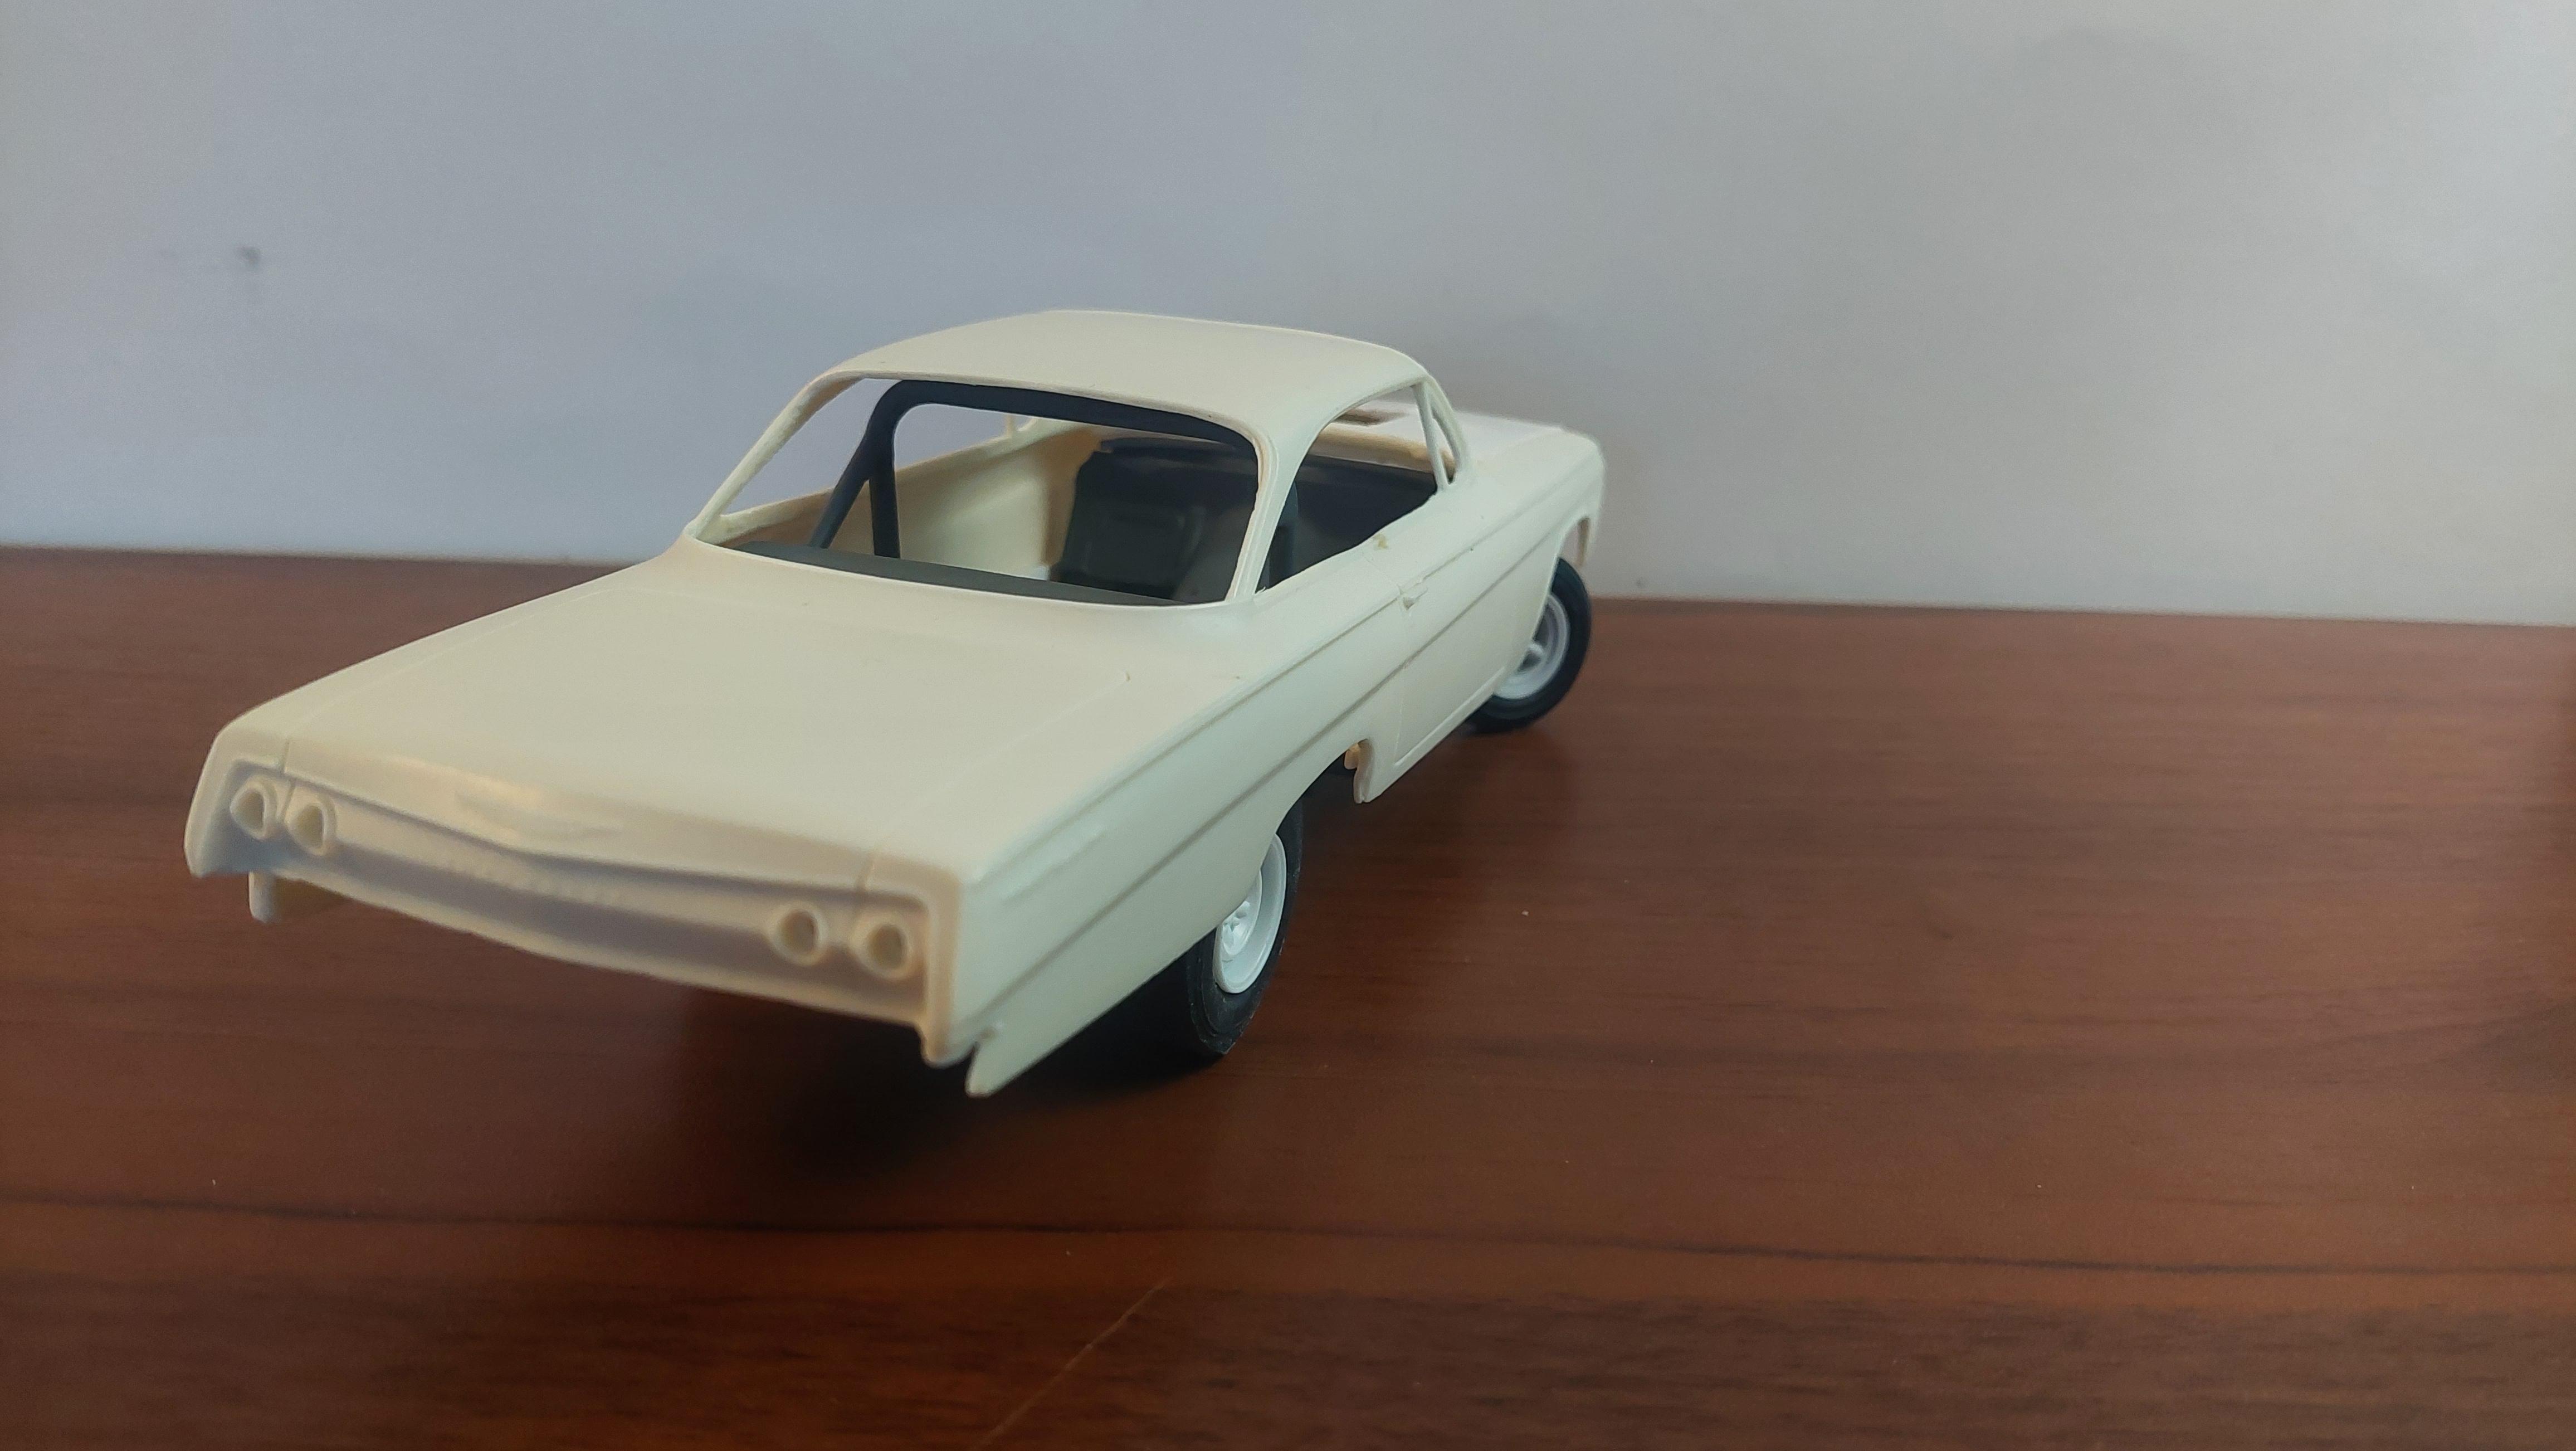
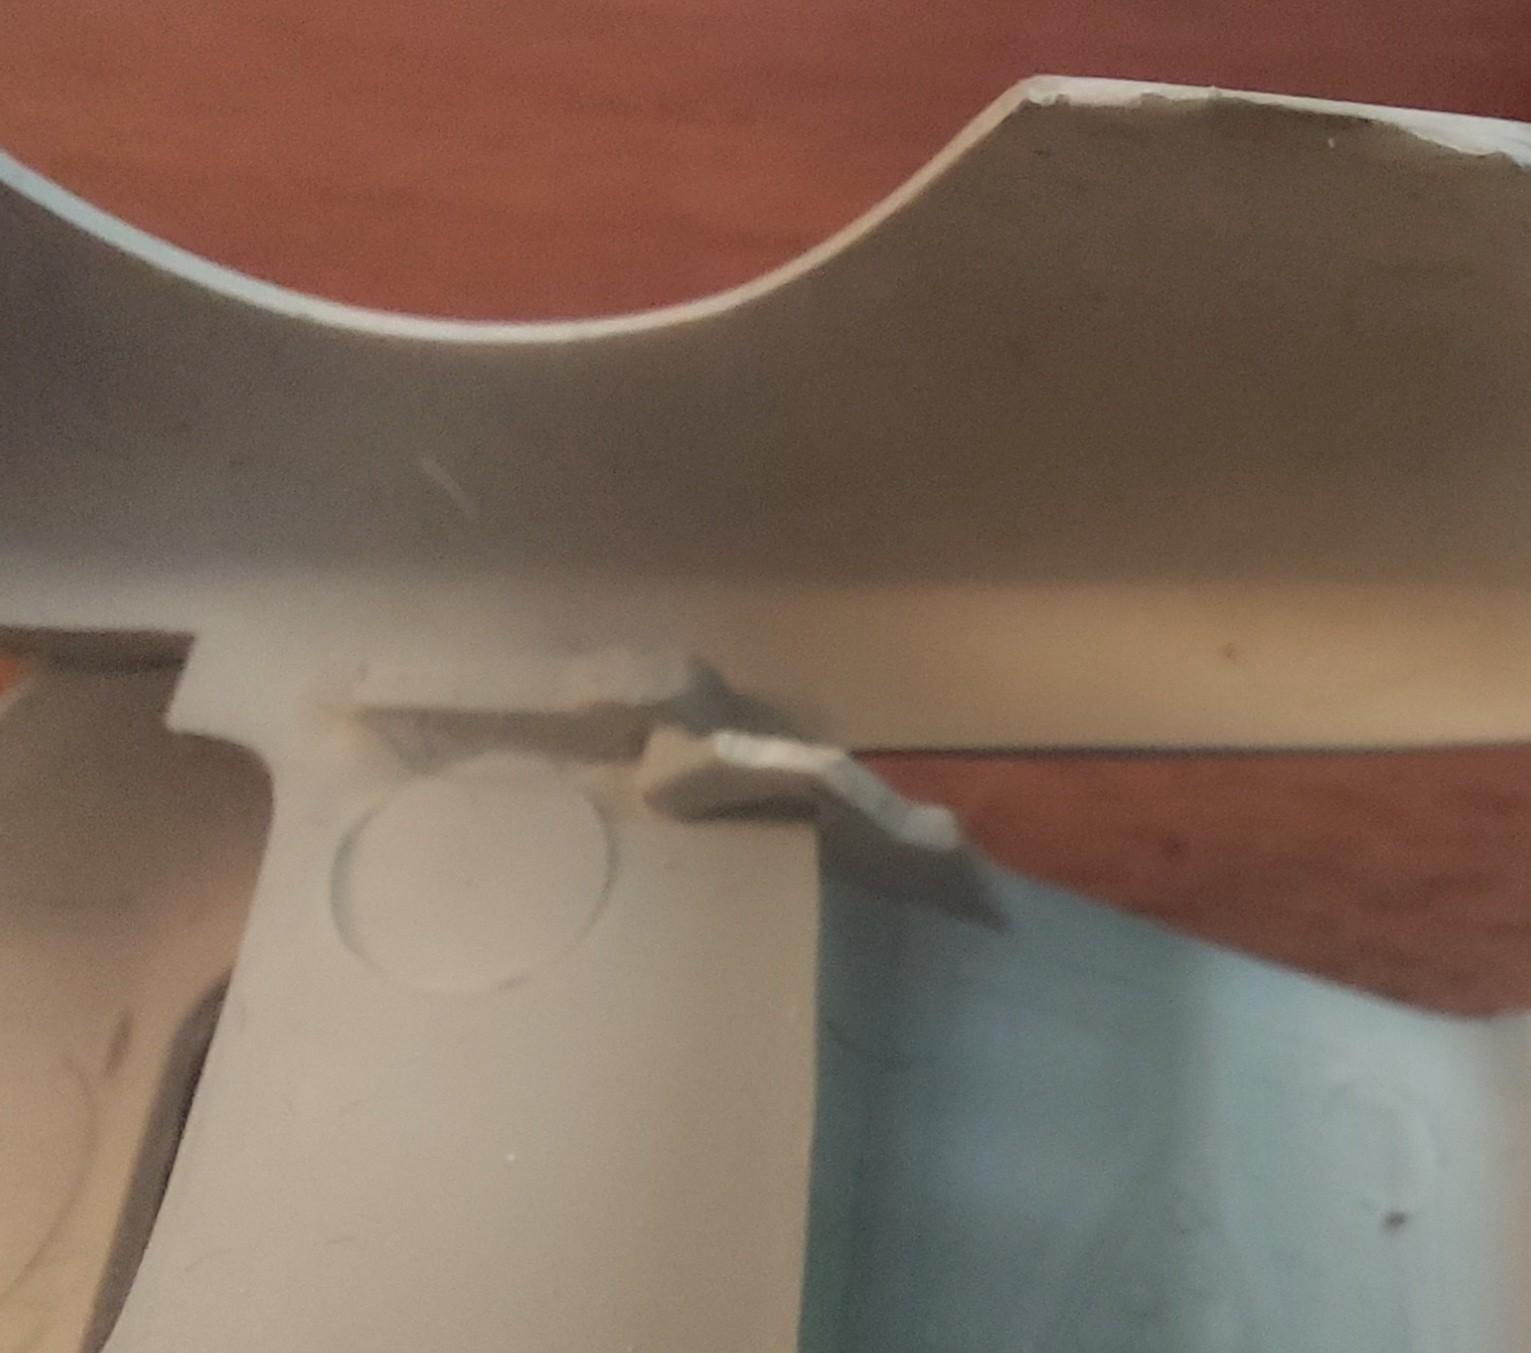
I have a few of these multi-piece body kits so I figured whats another headache or 2. Lots of flash on this old school tool , after that was cleaned up I started putting left side, right side, trunk with part of rear fenders, firewall with 'A' frame, front fender tops with wheelwells , front filler panel, radiator and core support, roof and hood. When they say multi piece body they mean it. To my surprise nothing was warped. I used liquid glue and once the part cured upI ran a bead of Bob Smiths epoxy on the inside seam. This 1/32nd scale kit has pretty good detail for its time. This one going to get all the parts in the box built, but may leave the 3 rear fins off. The entire body would be tighter if I glue fixed the hood shut but I wanted the motor. I made templates and cut provided clear plastic for windows. I may try sticking a Ulrich mini-men driver inside, but the 1/32nd mini guy I built looks a little odd, big torso and short thighs and legs compared to the women. I'll work with it until the next headache starts?
-
JimmyFlintstone resin
-
PM sent...
-
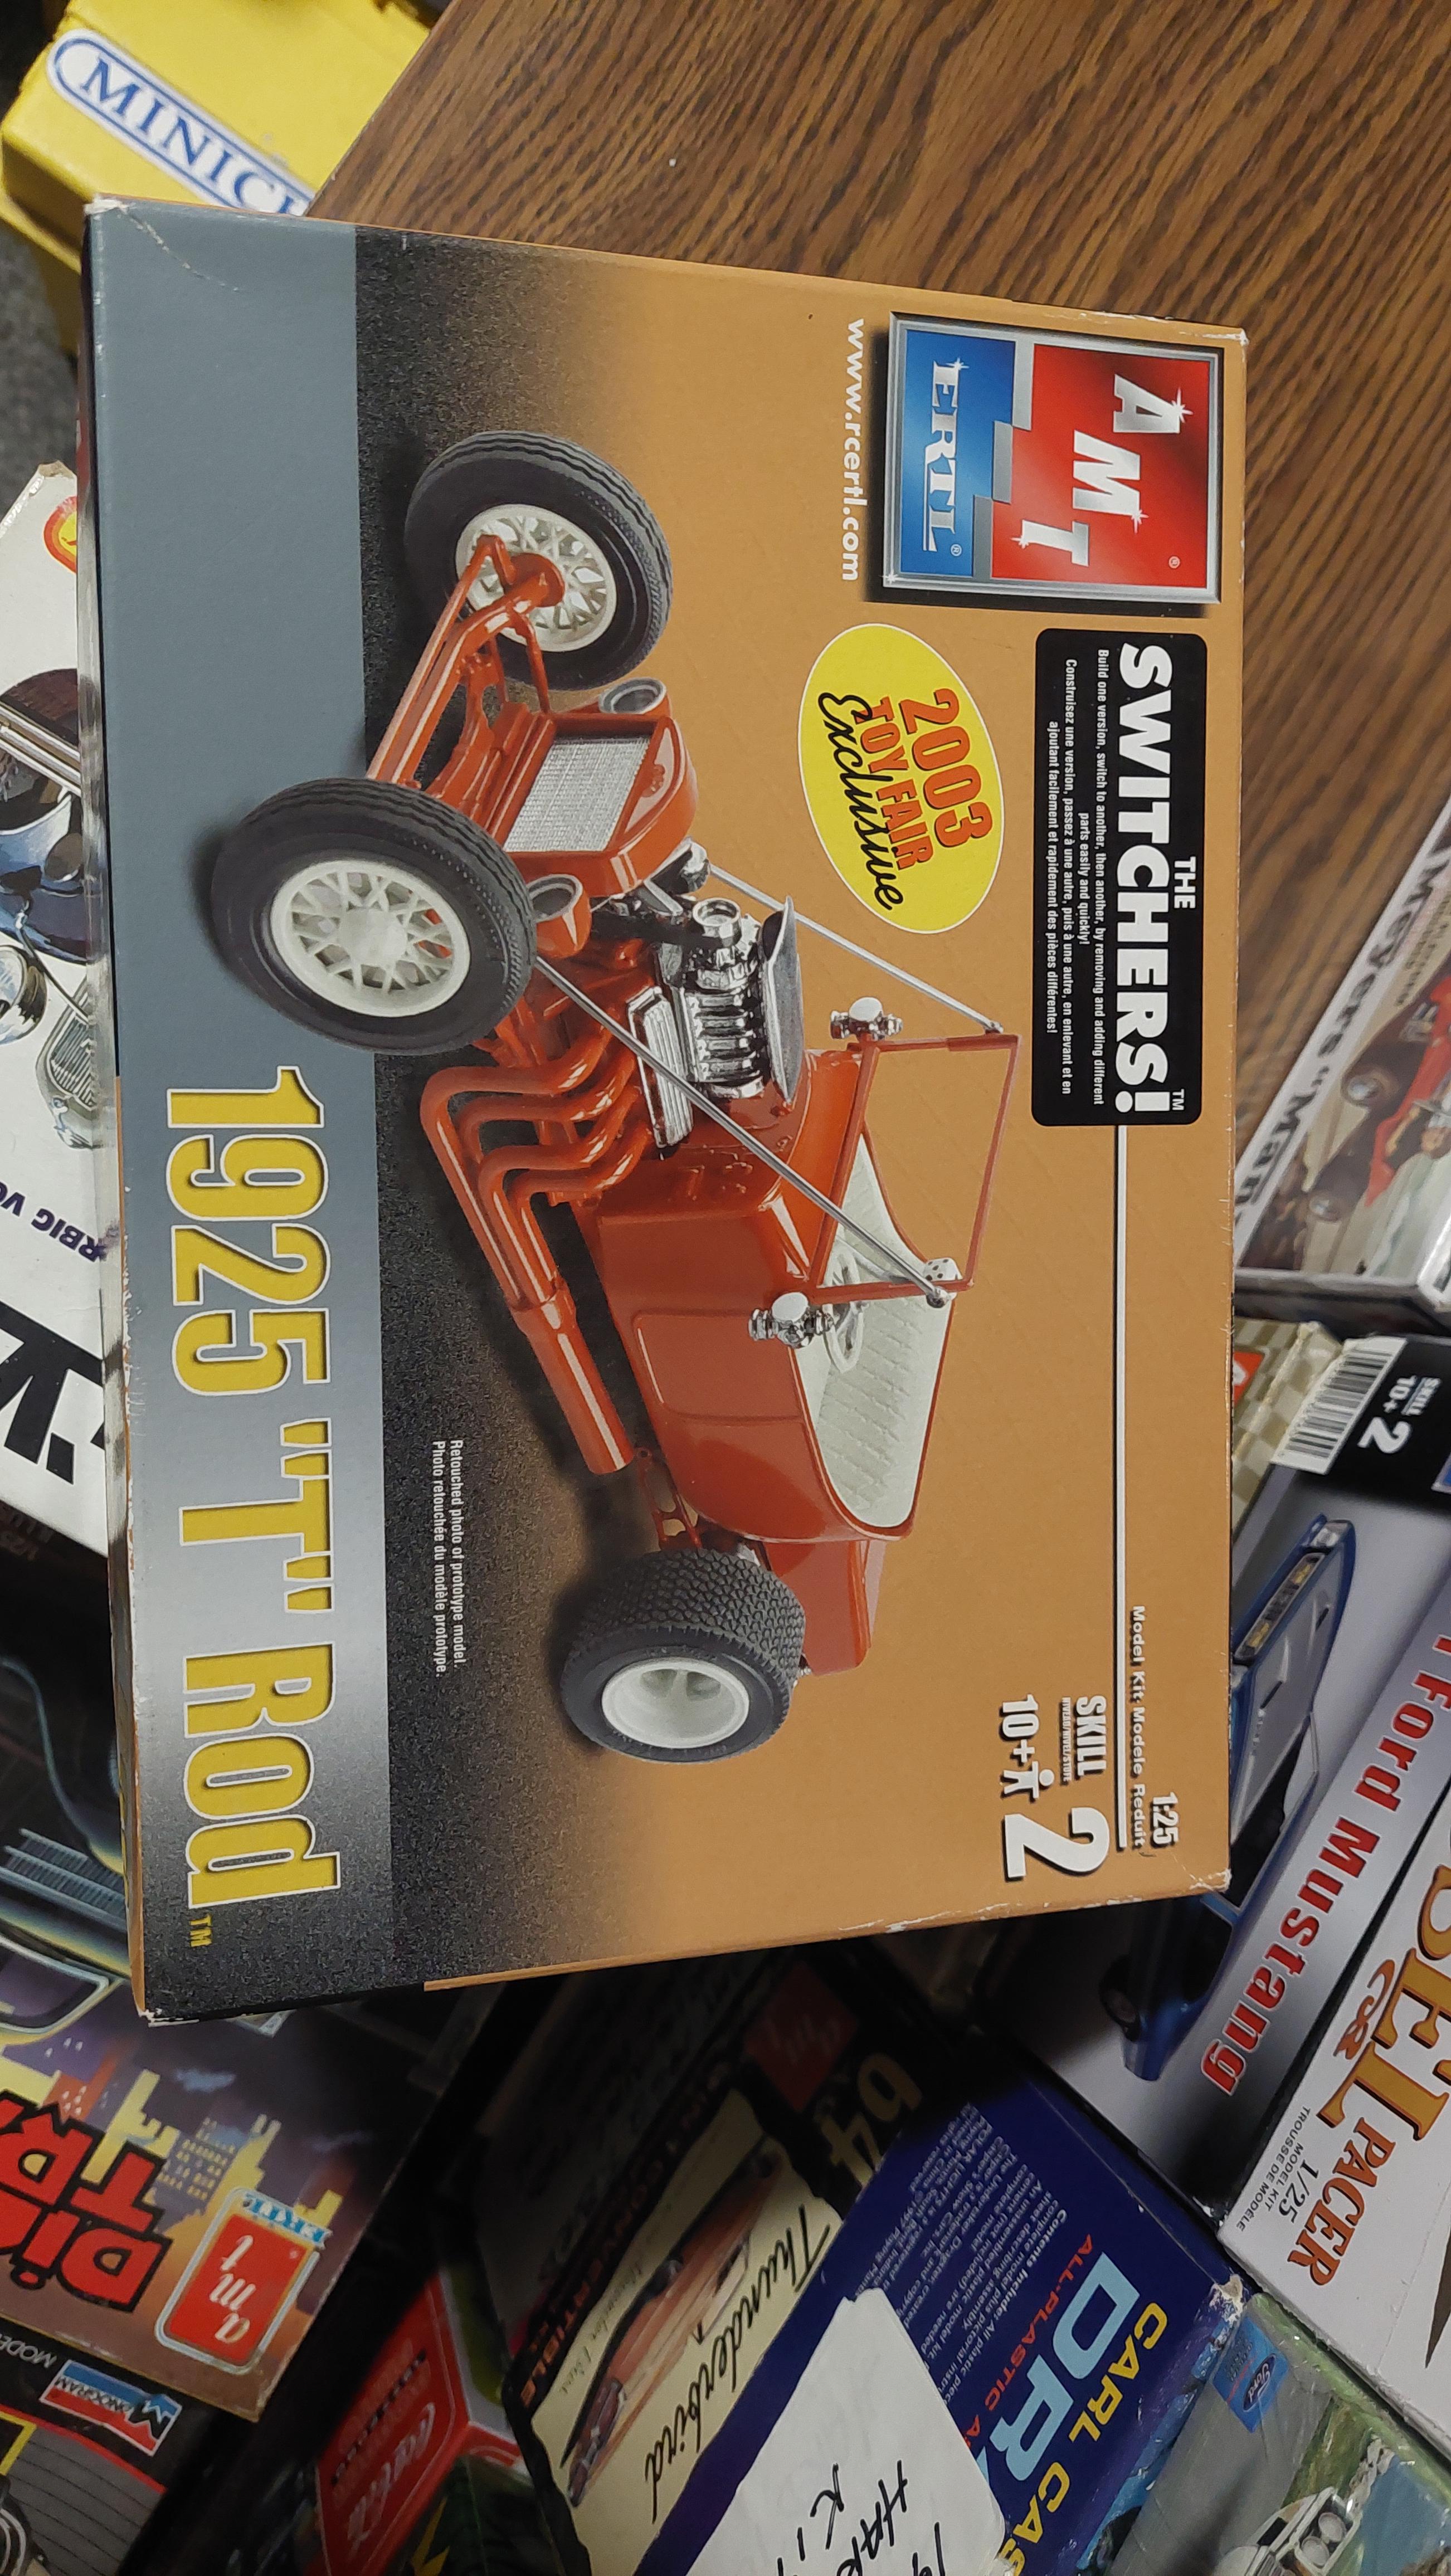
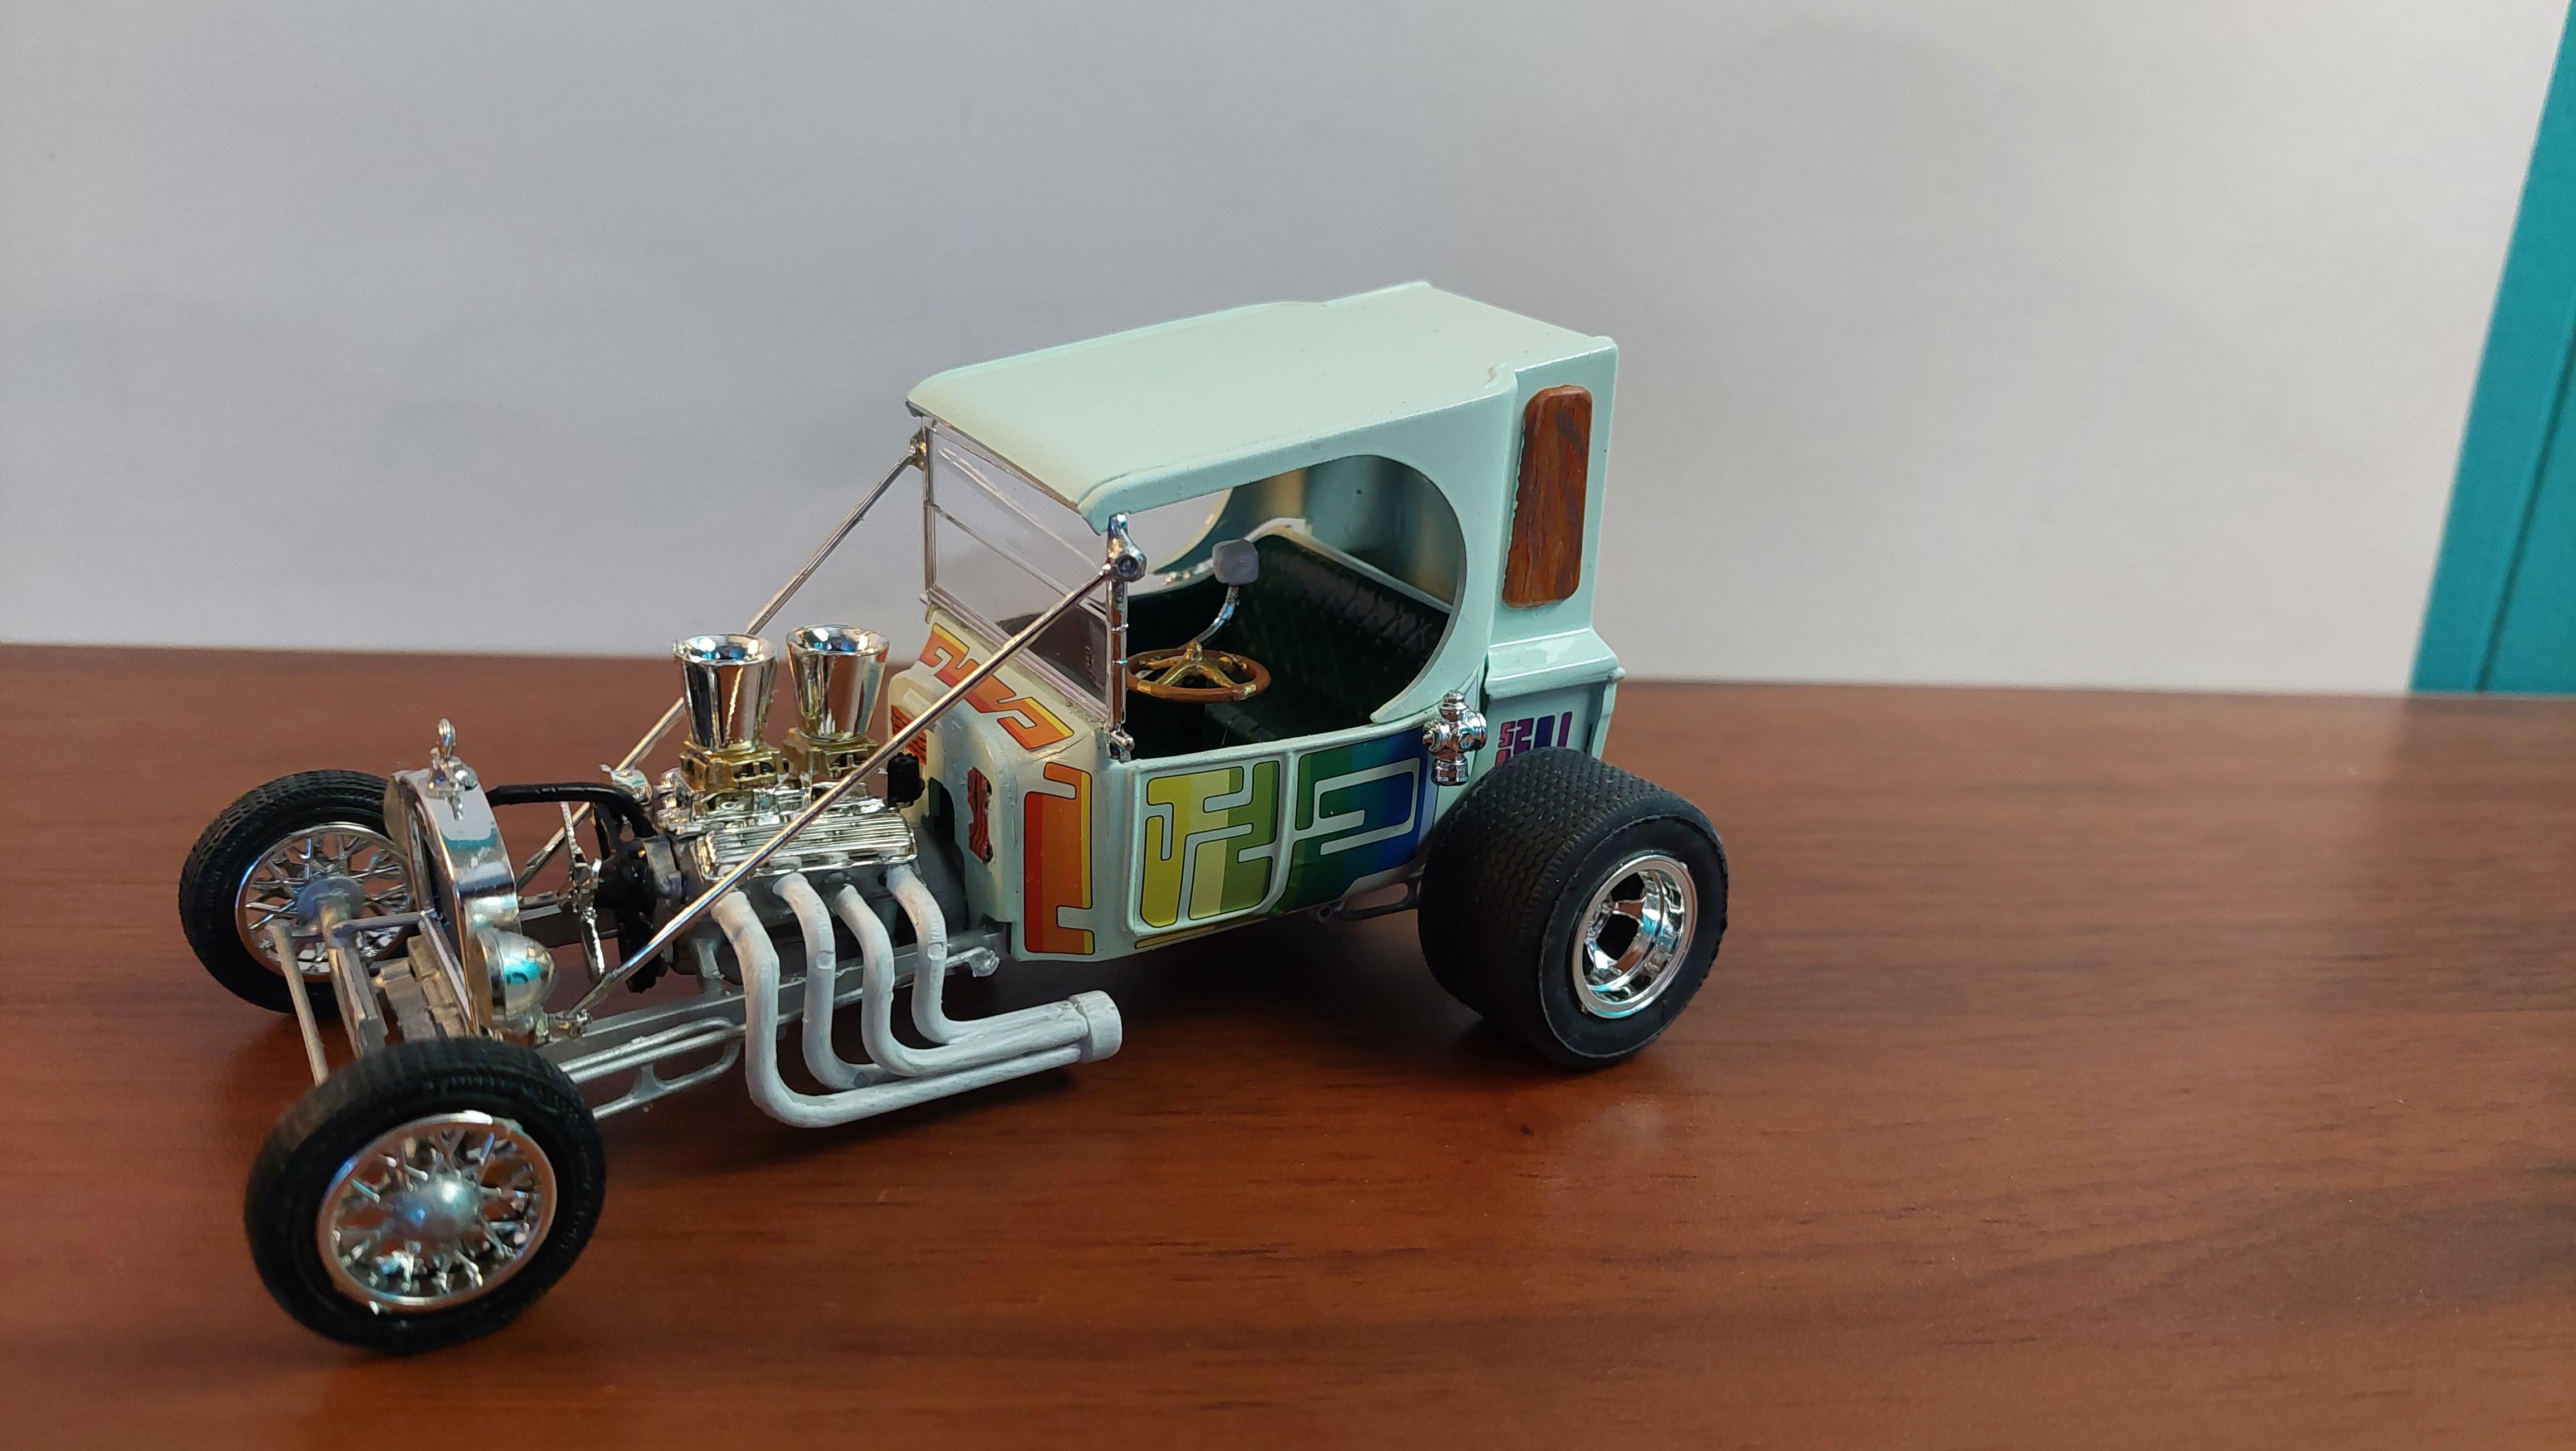
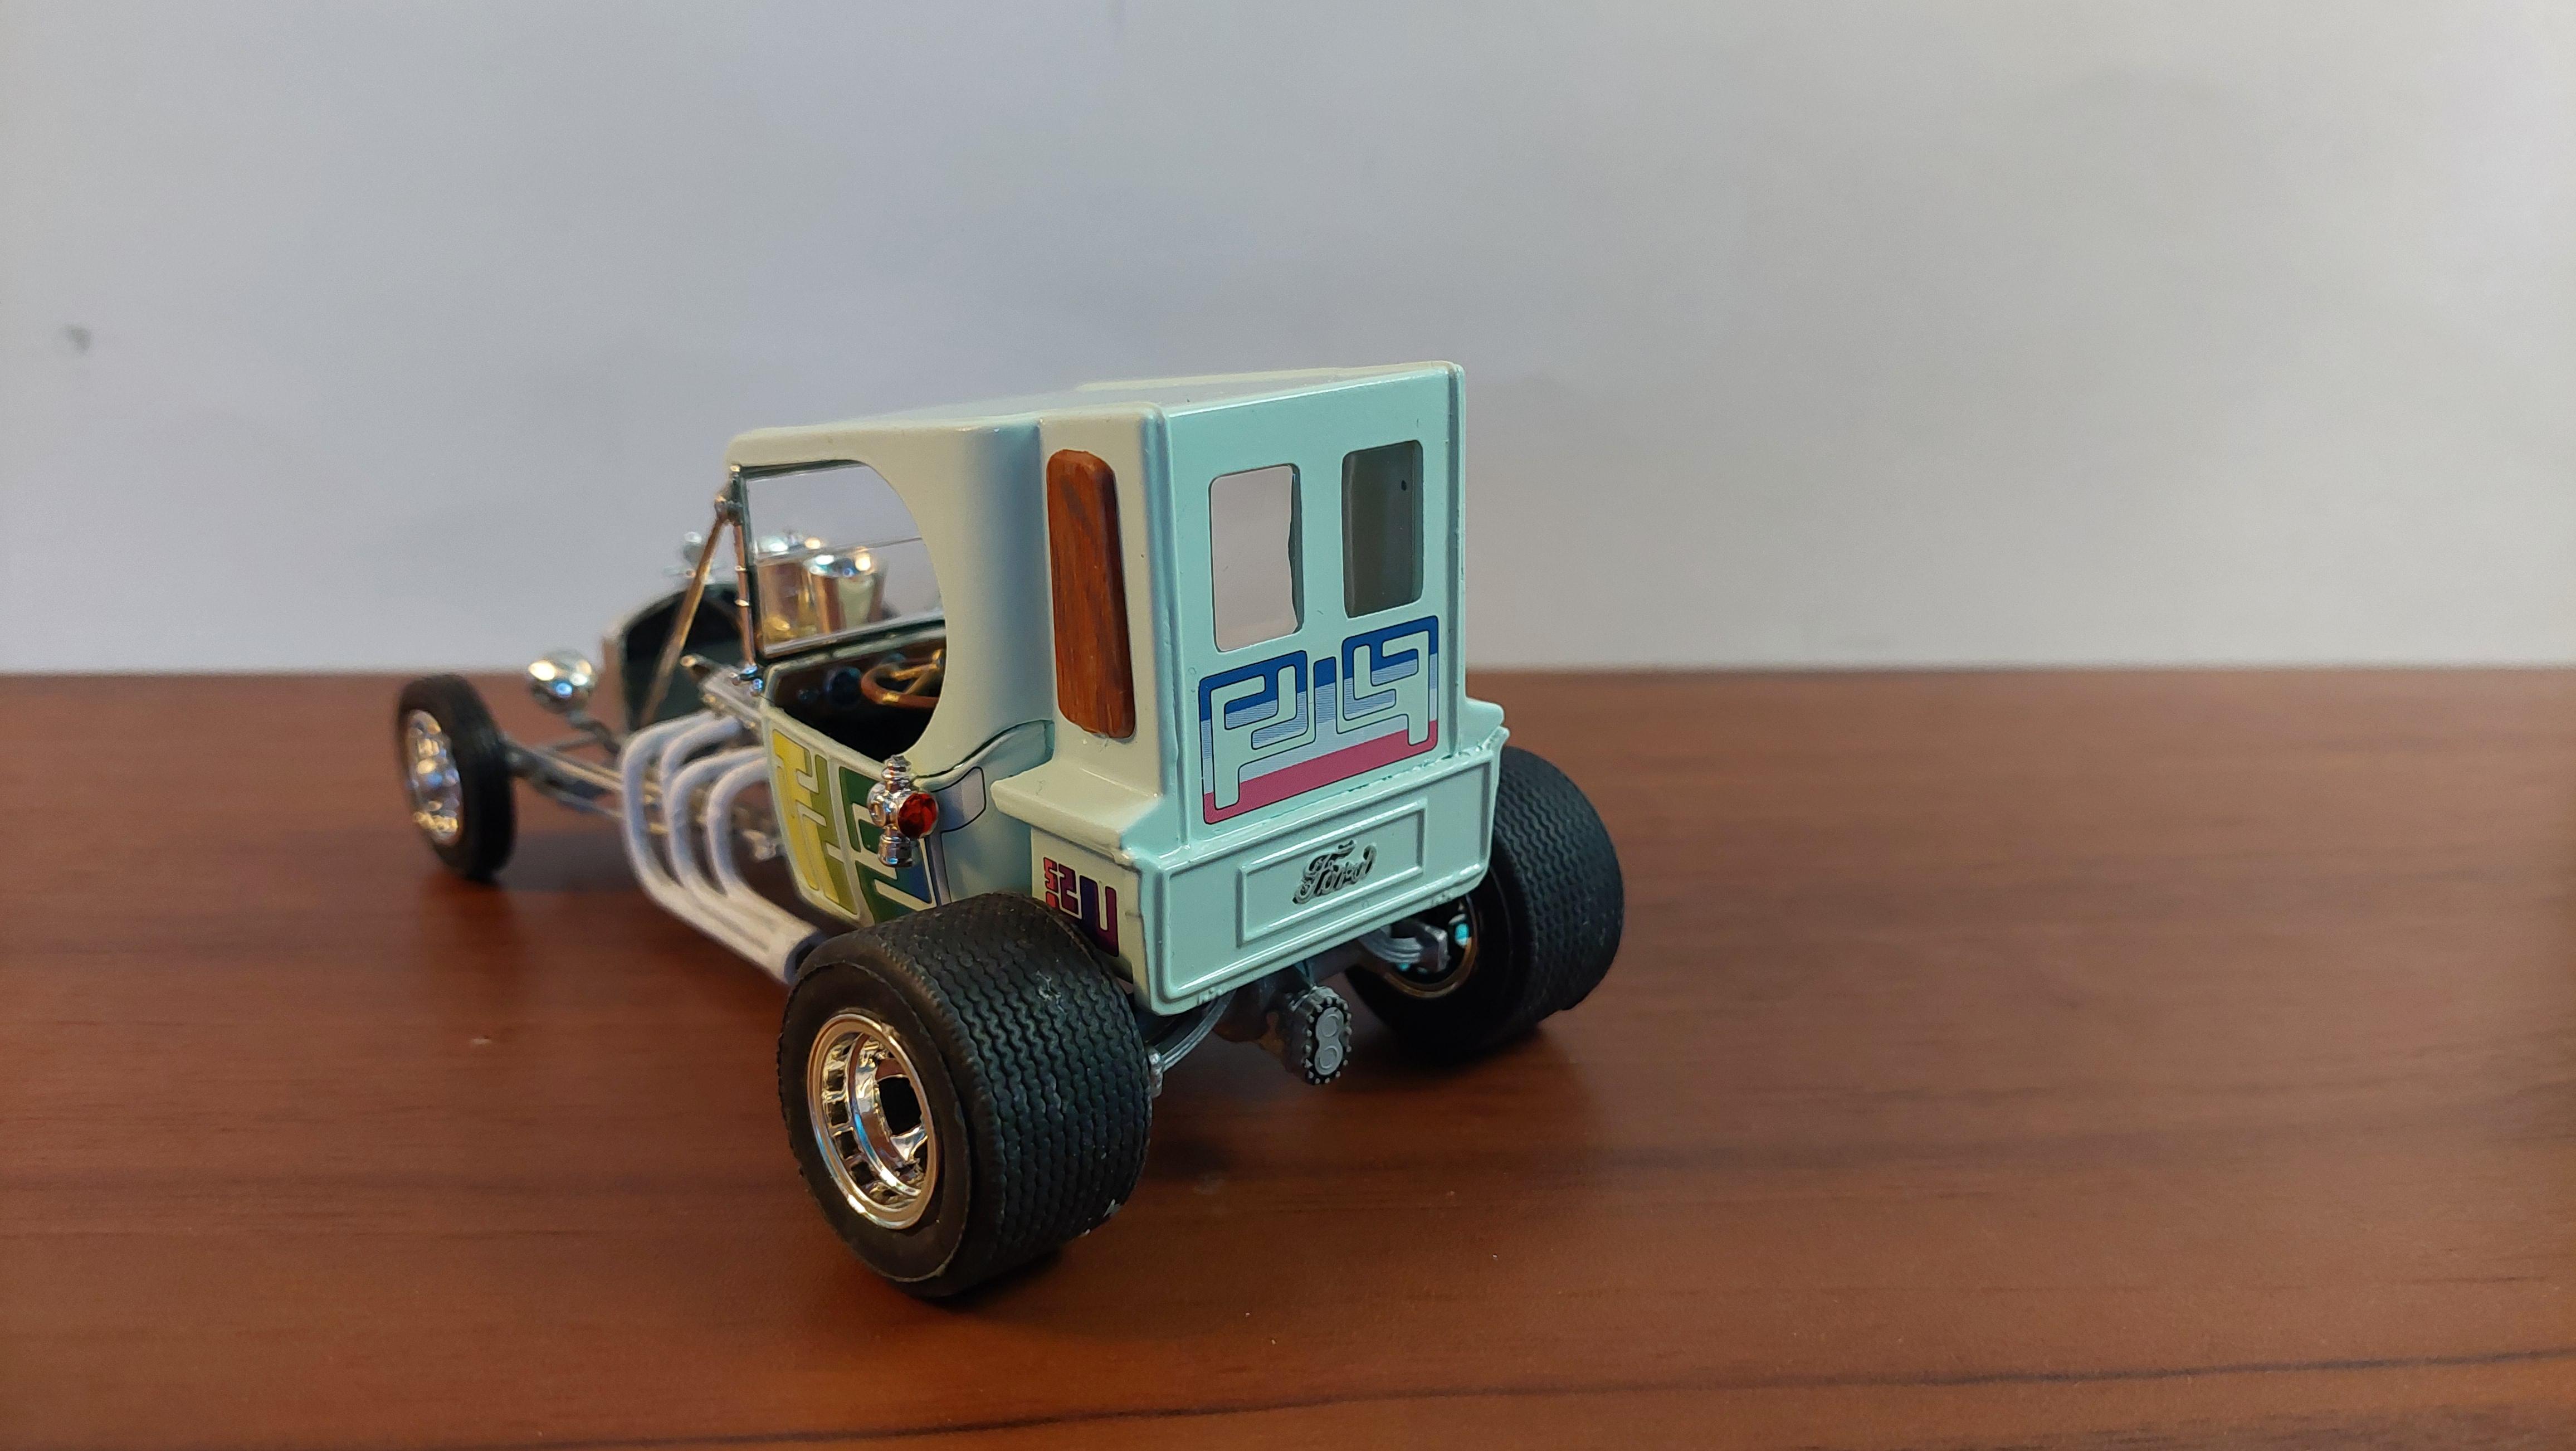
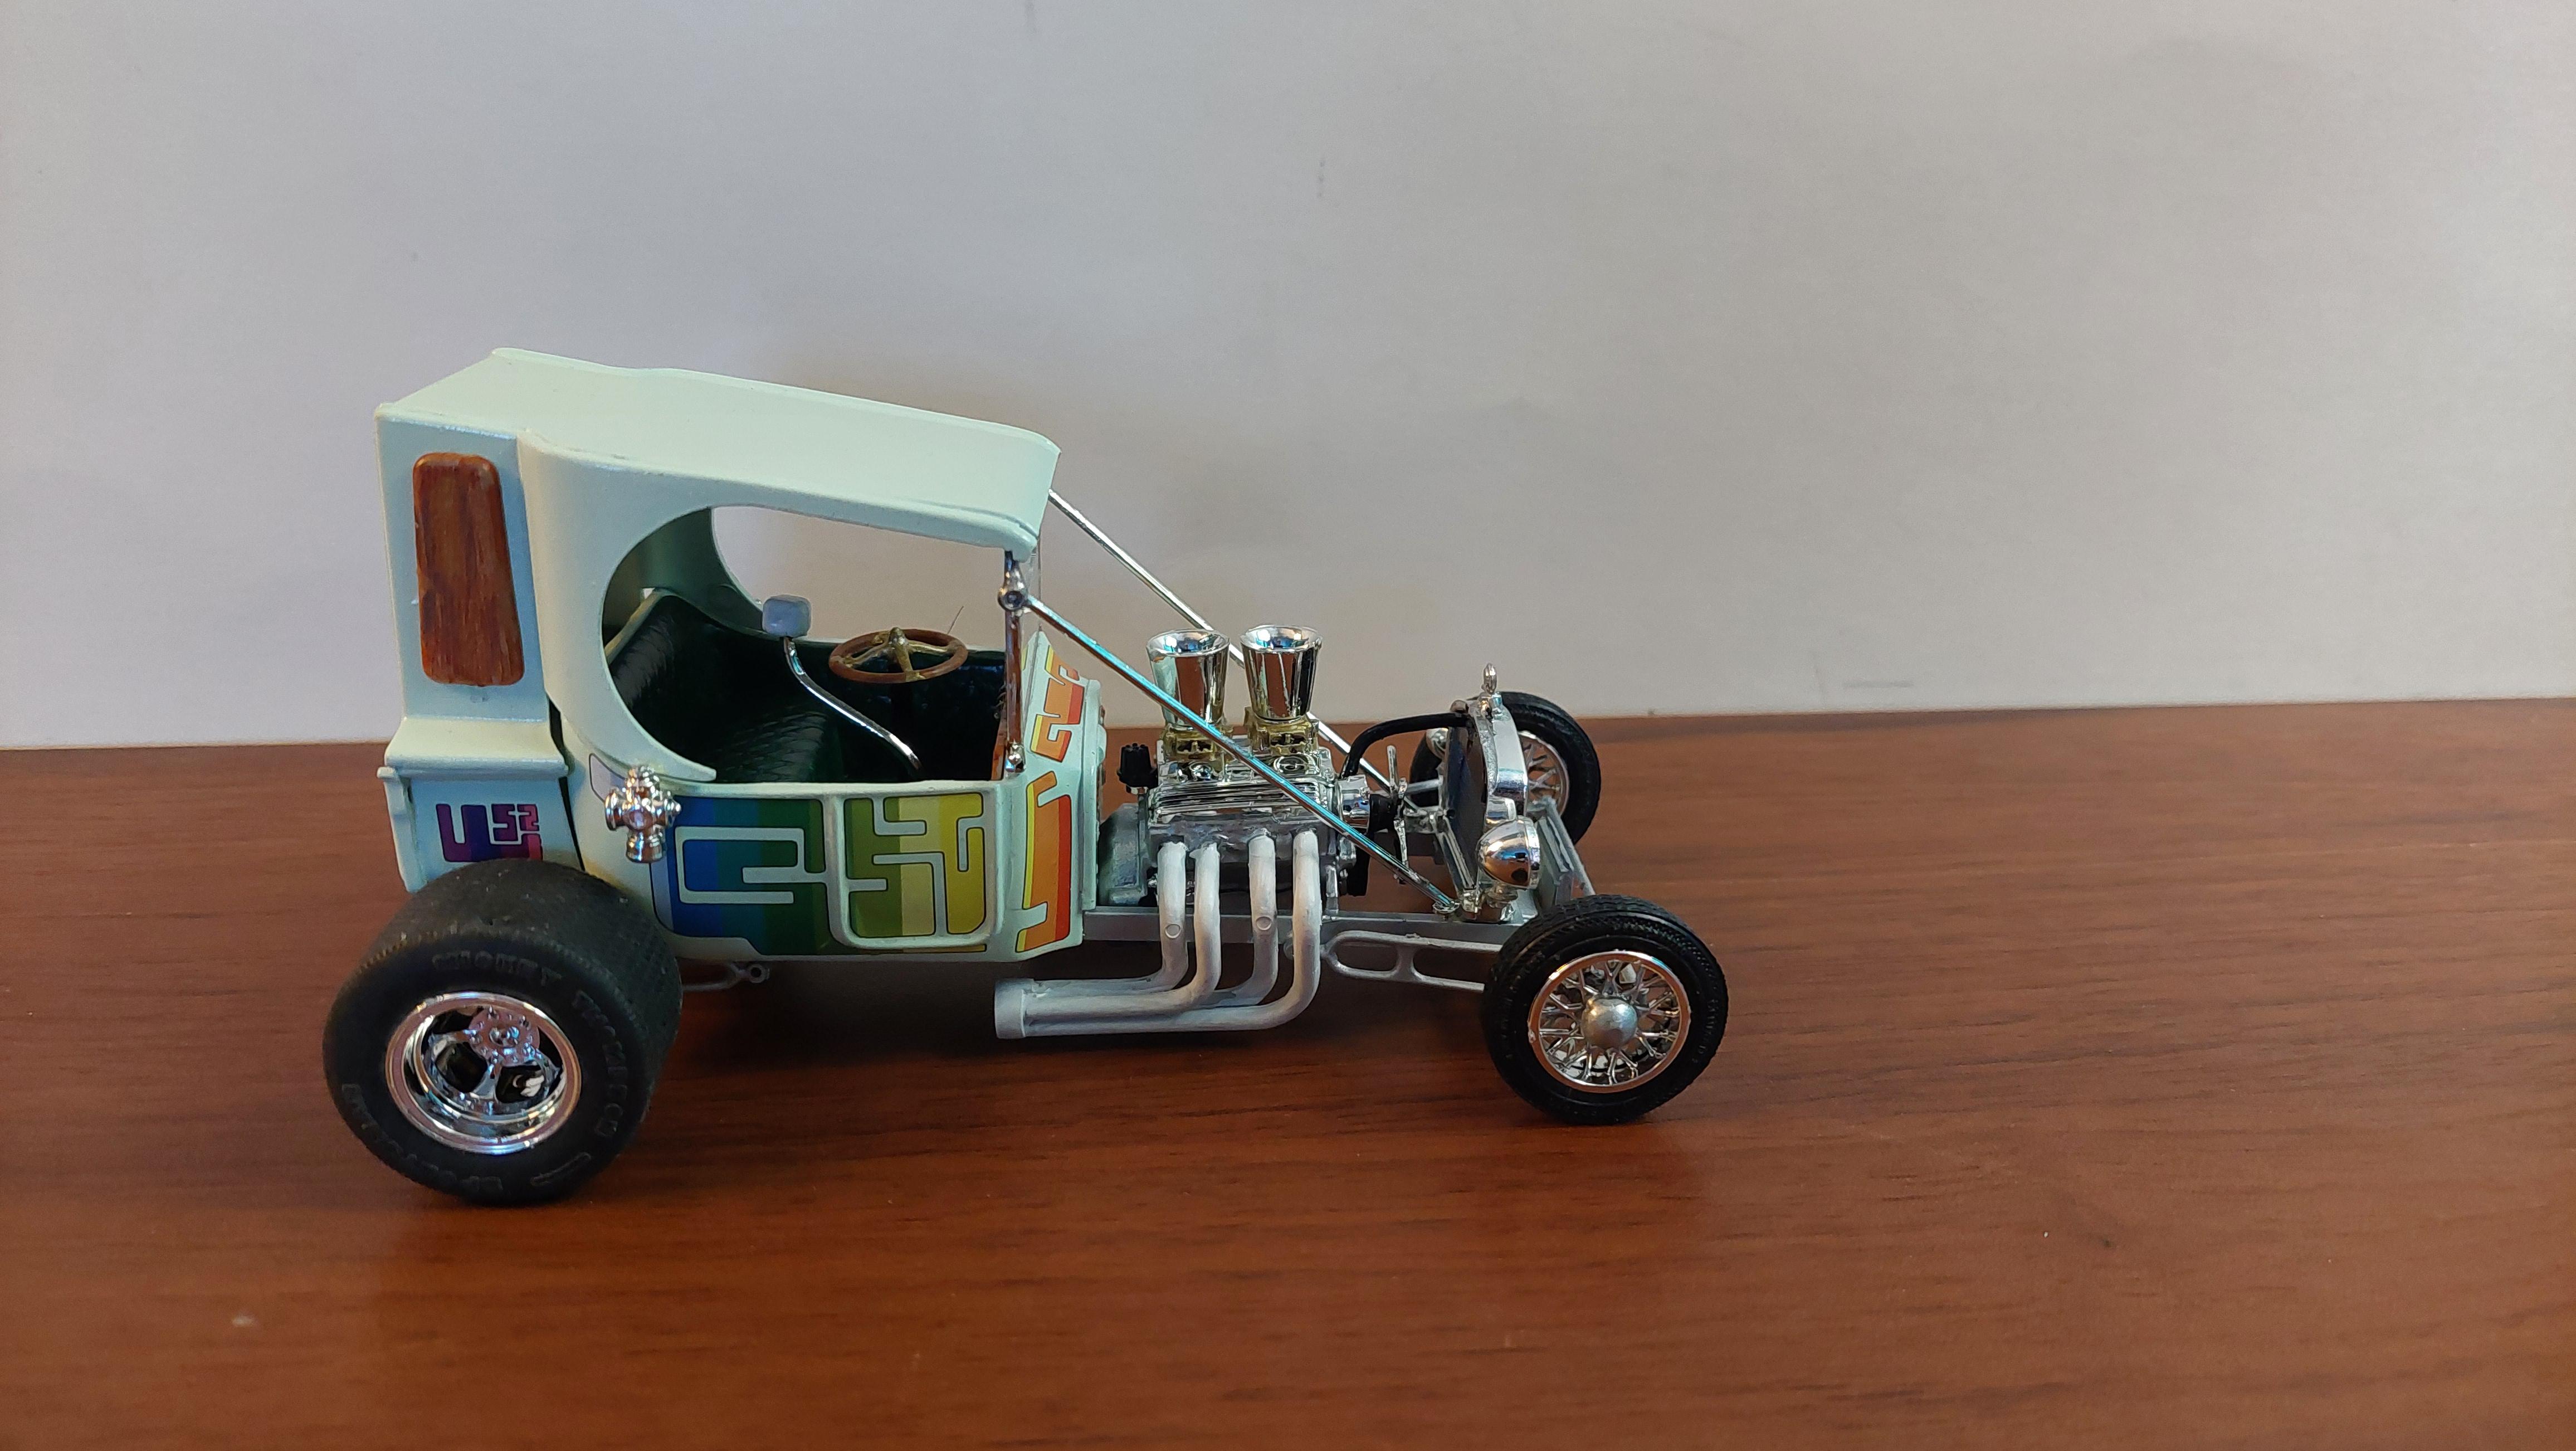
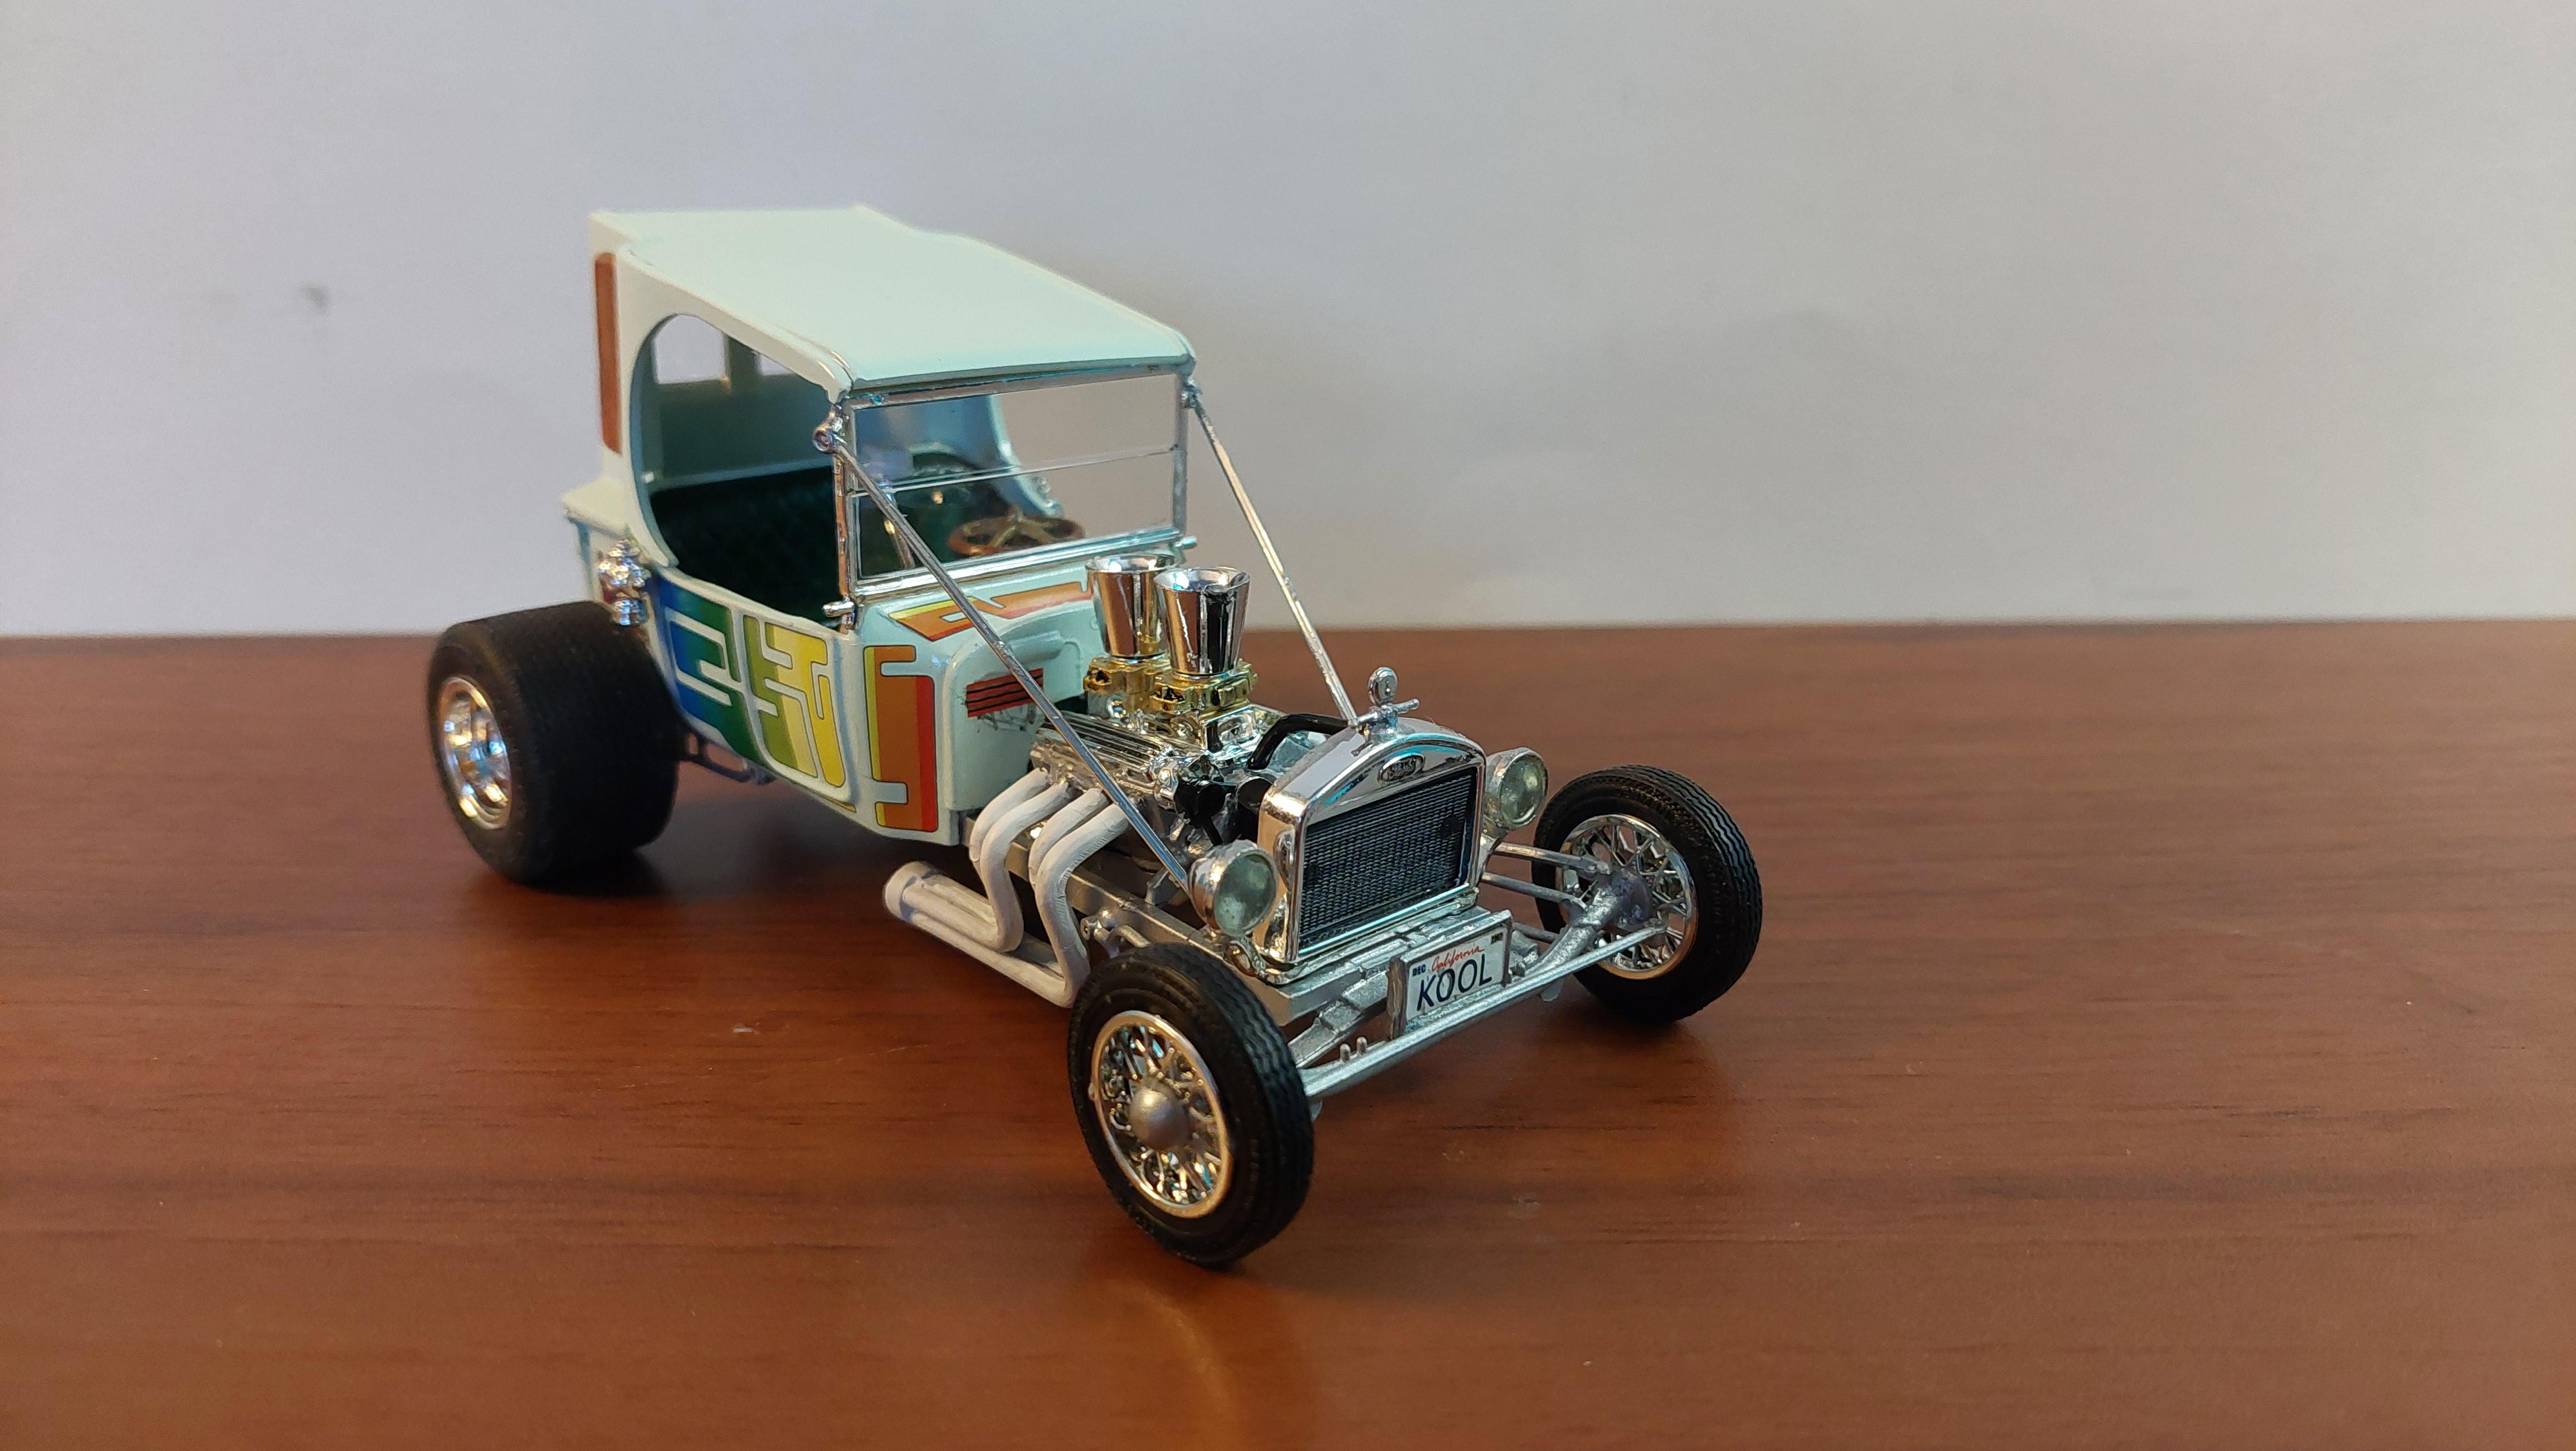
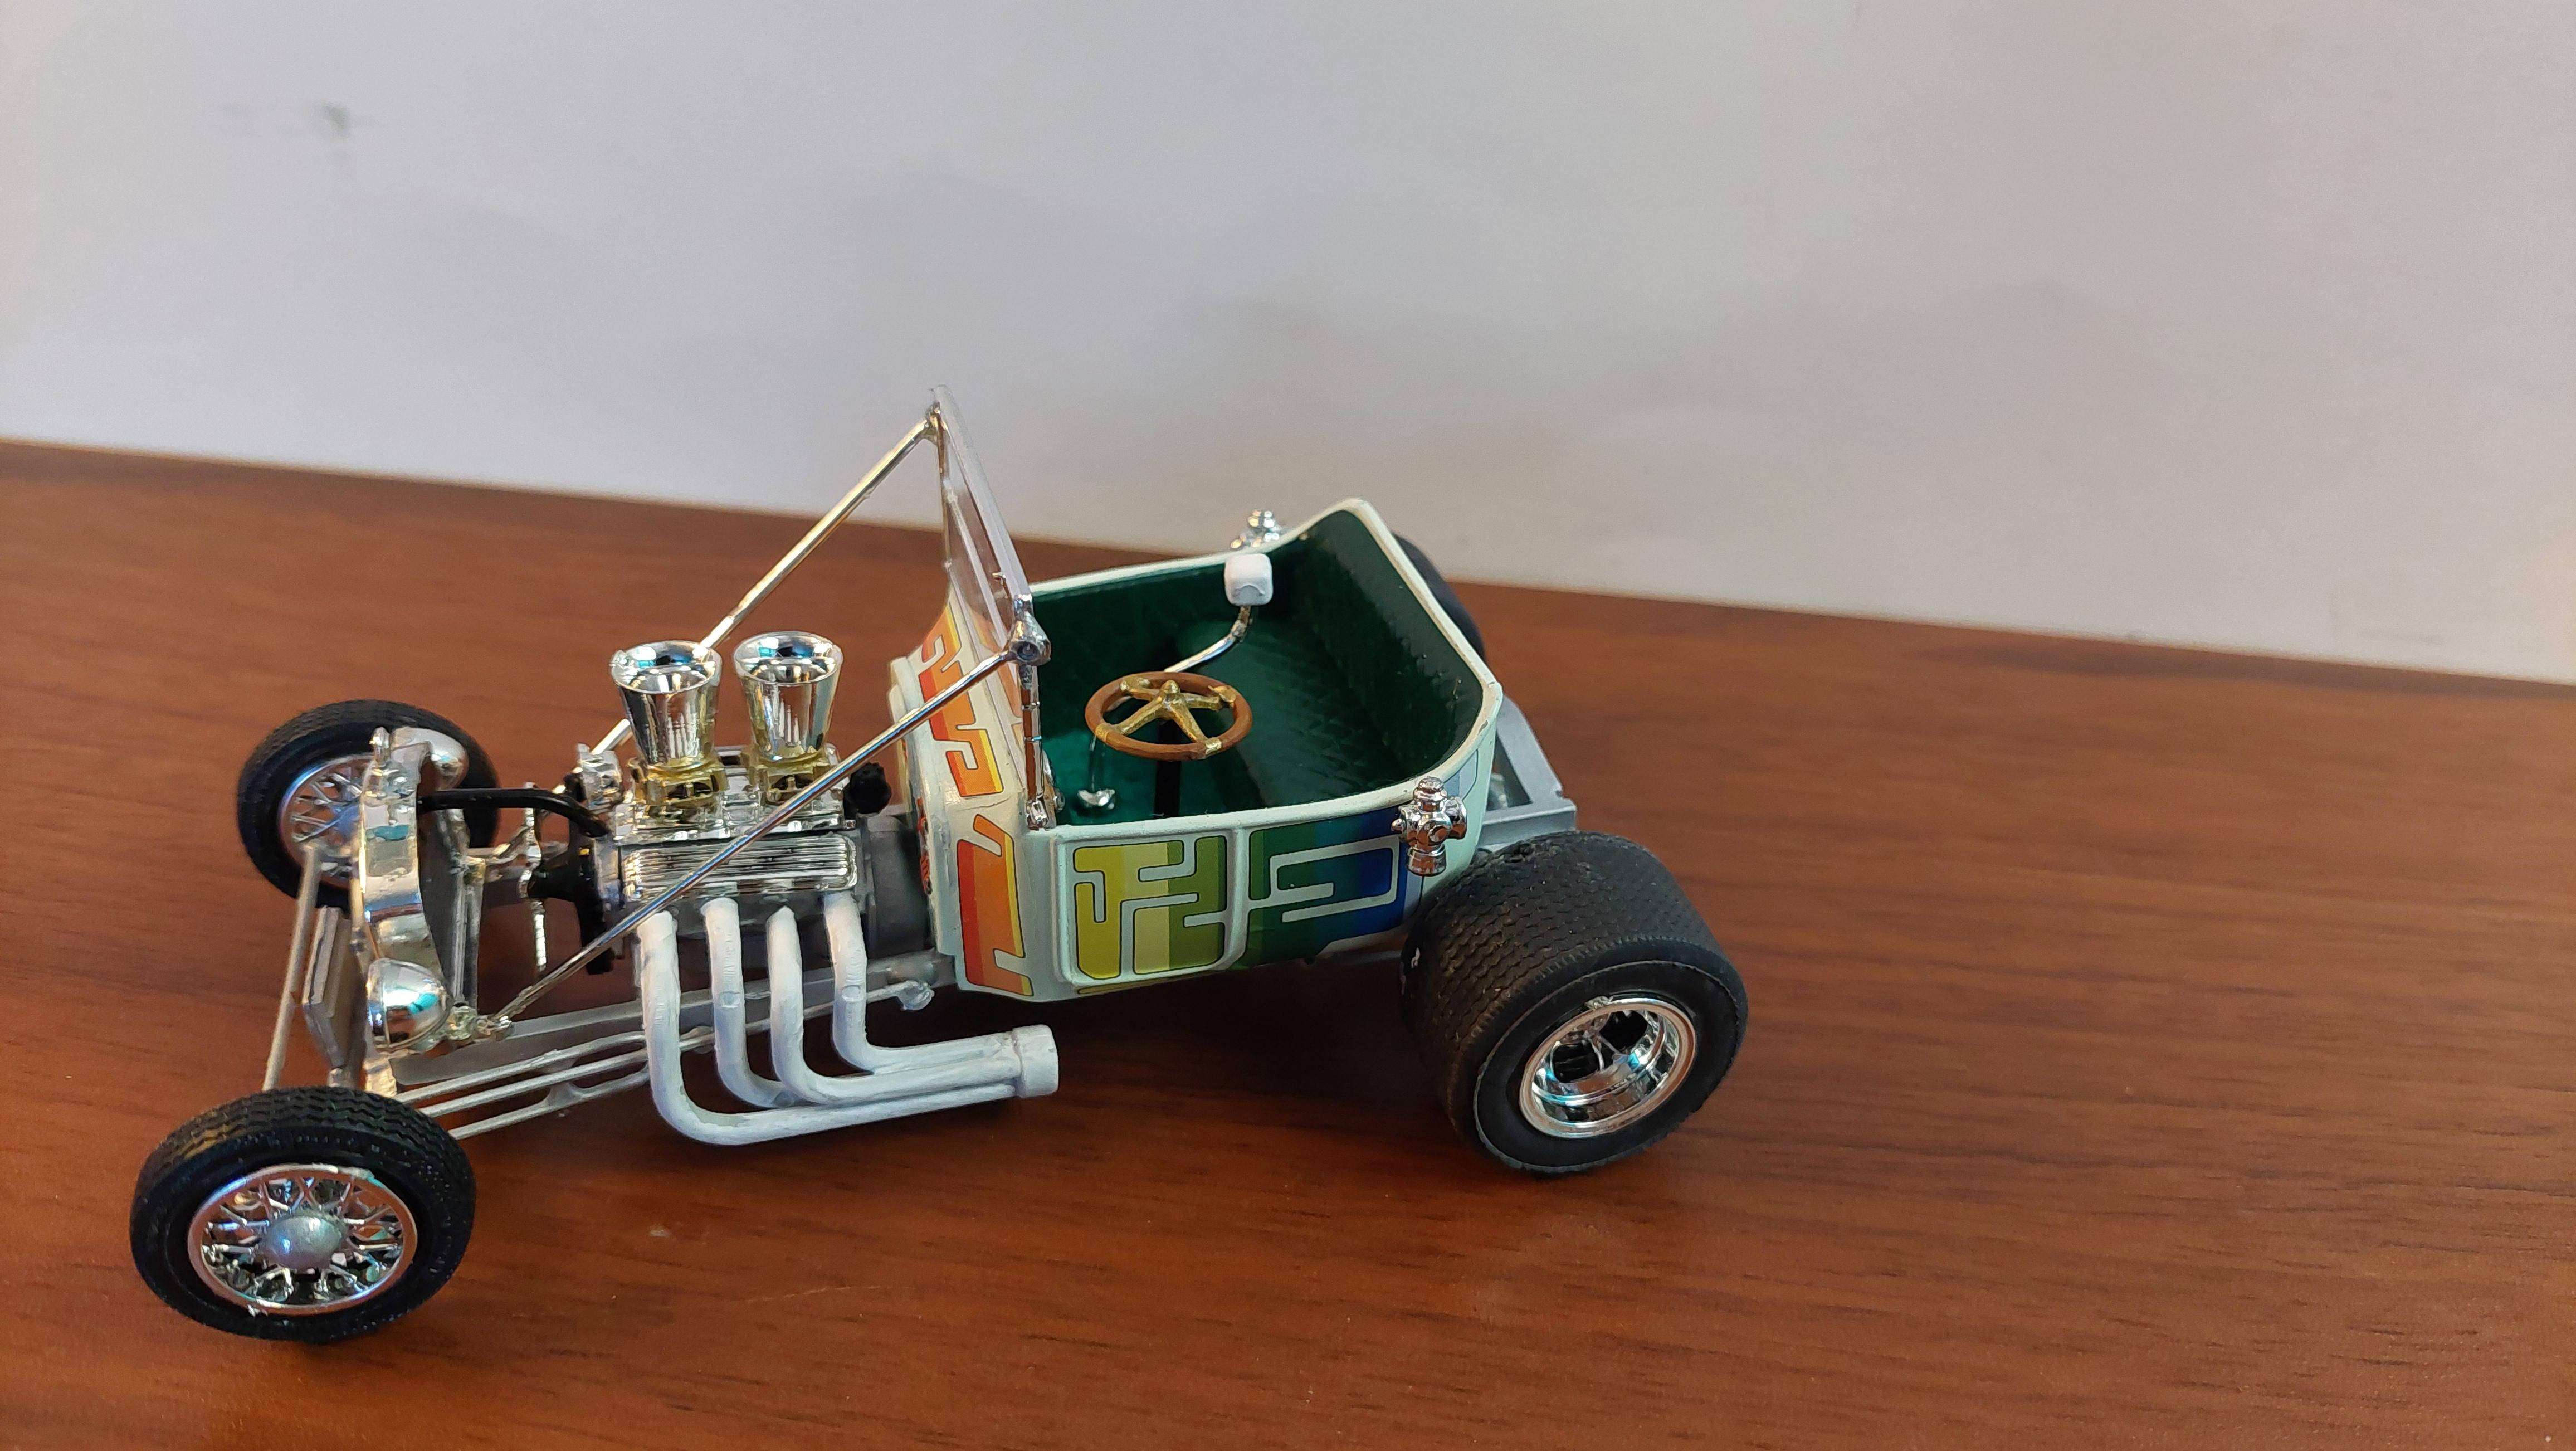
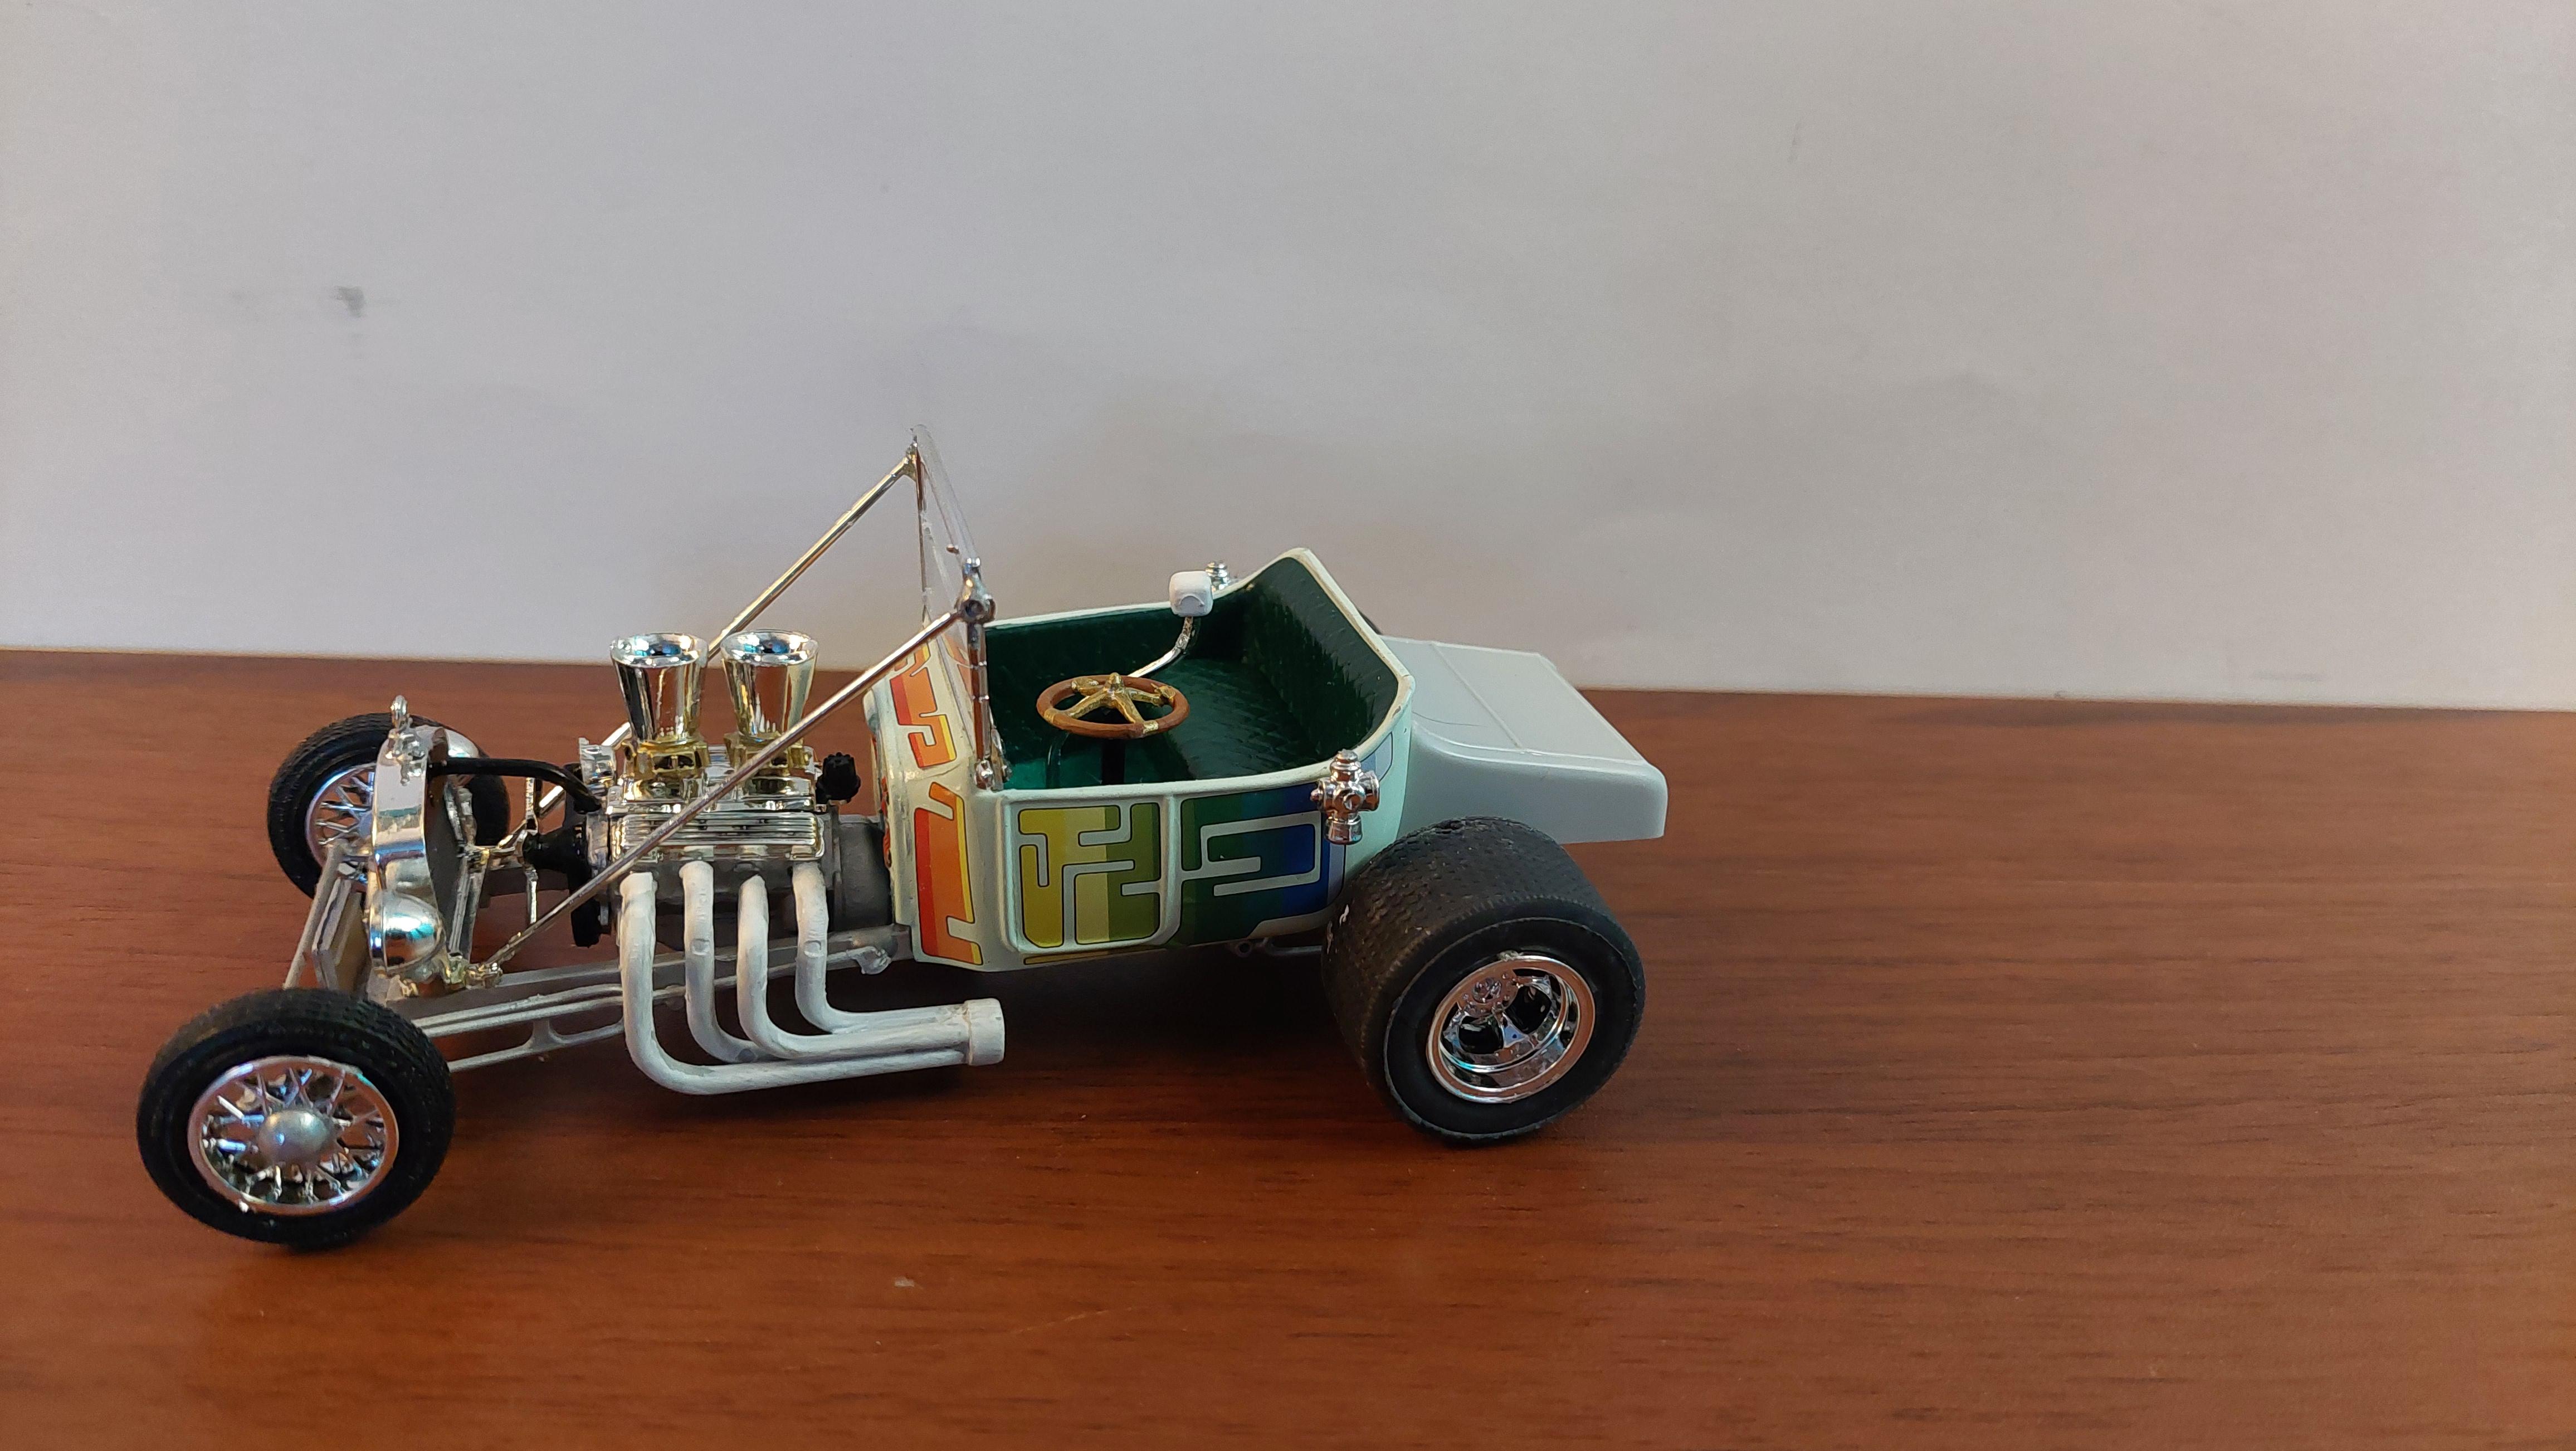
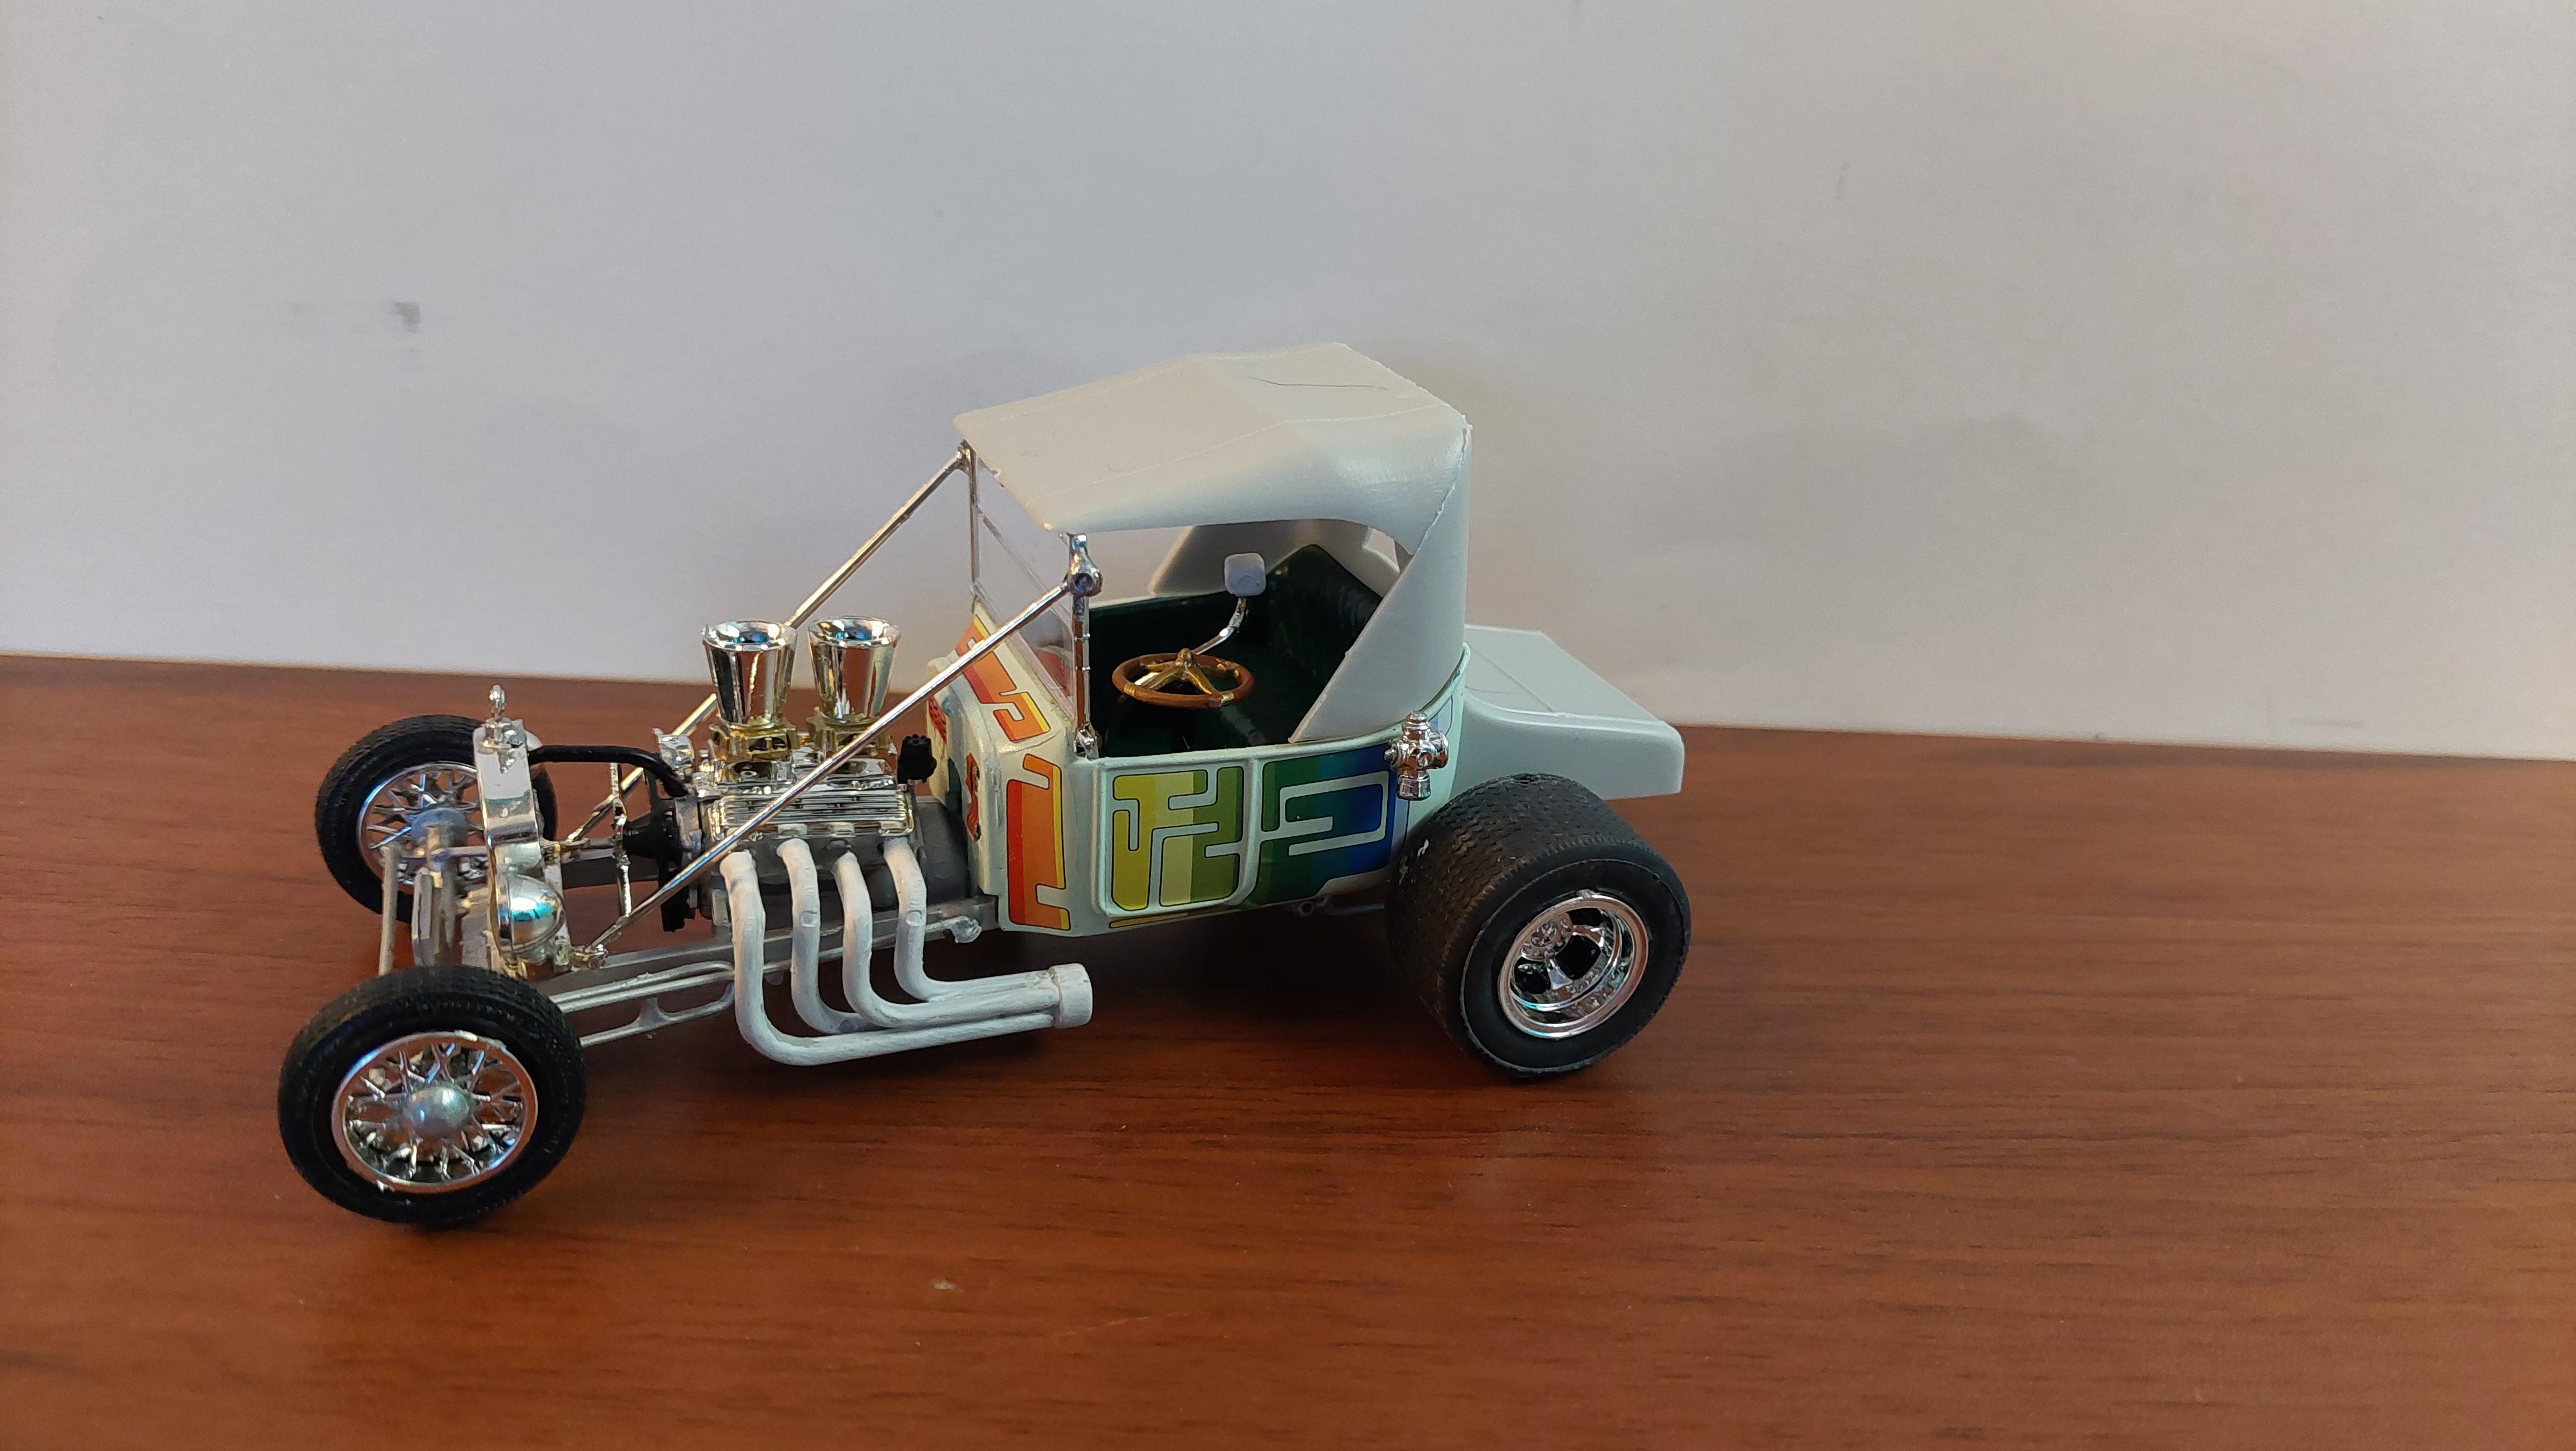
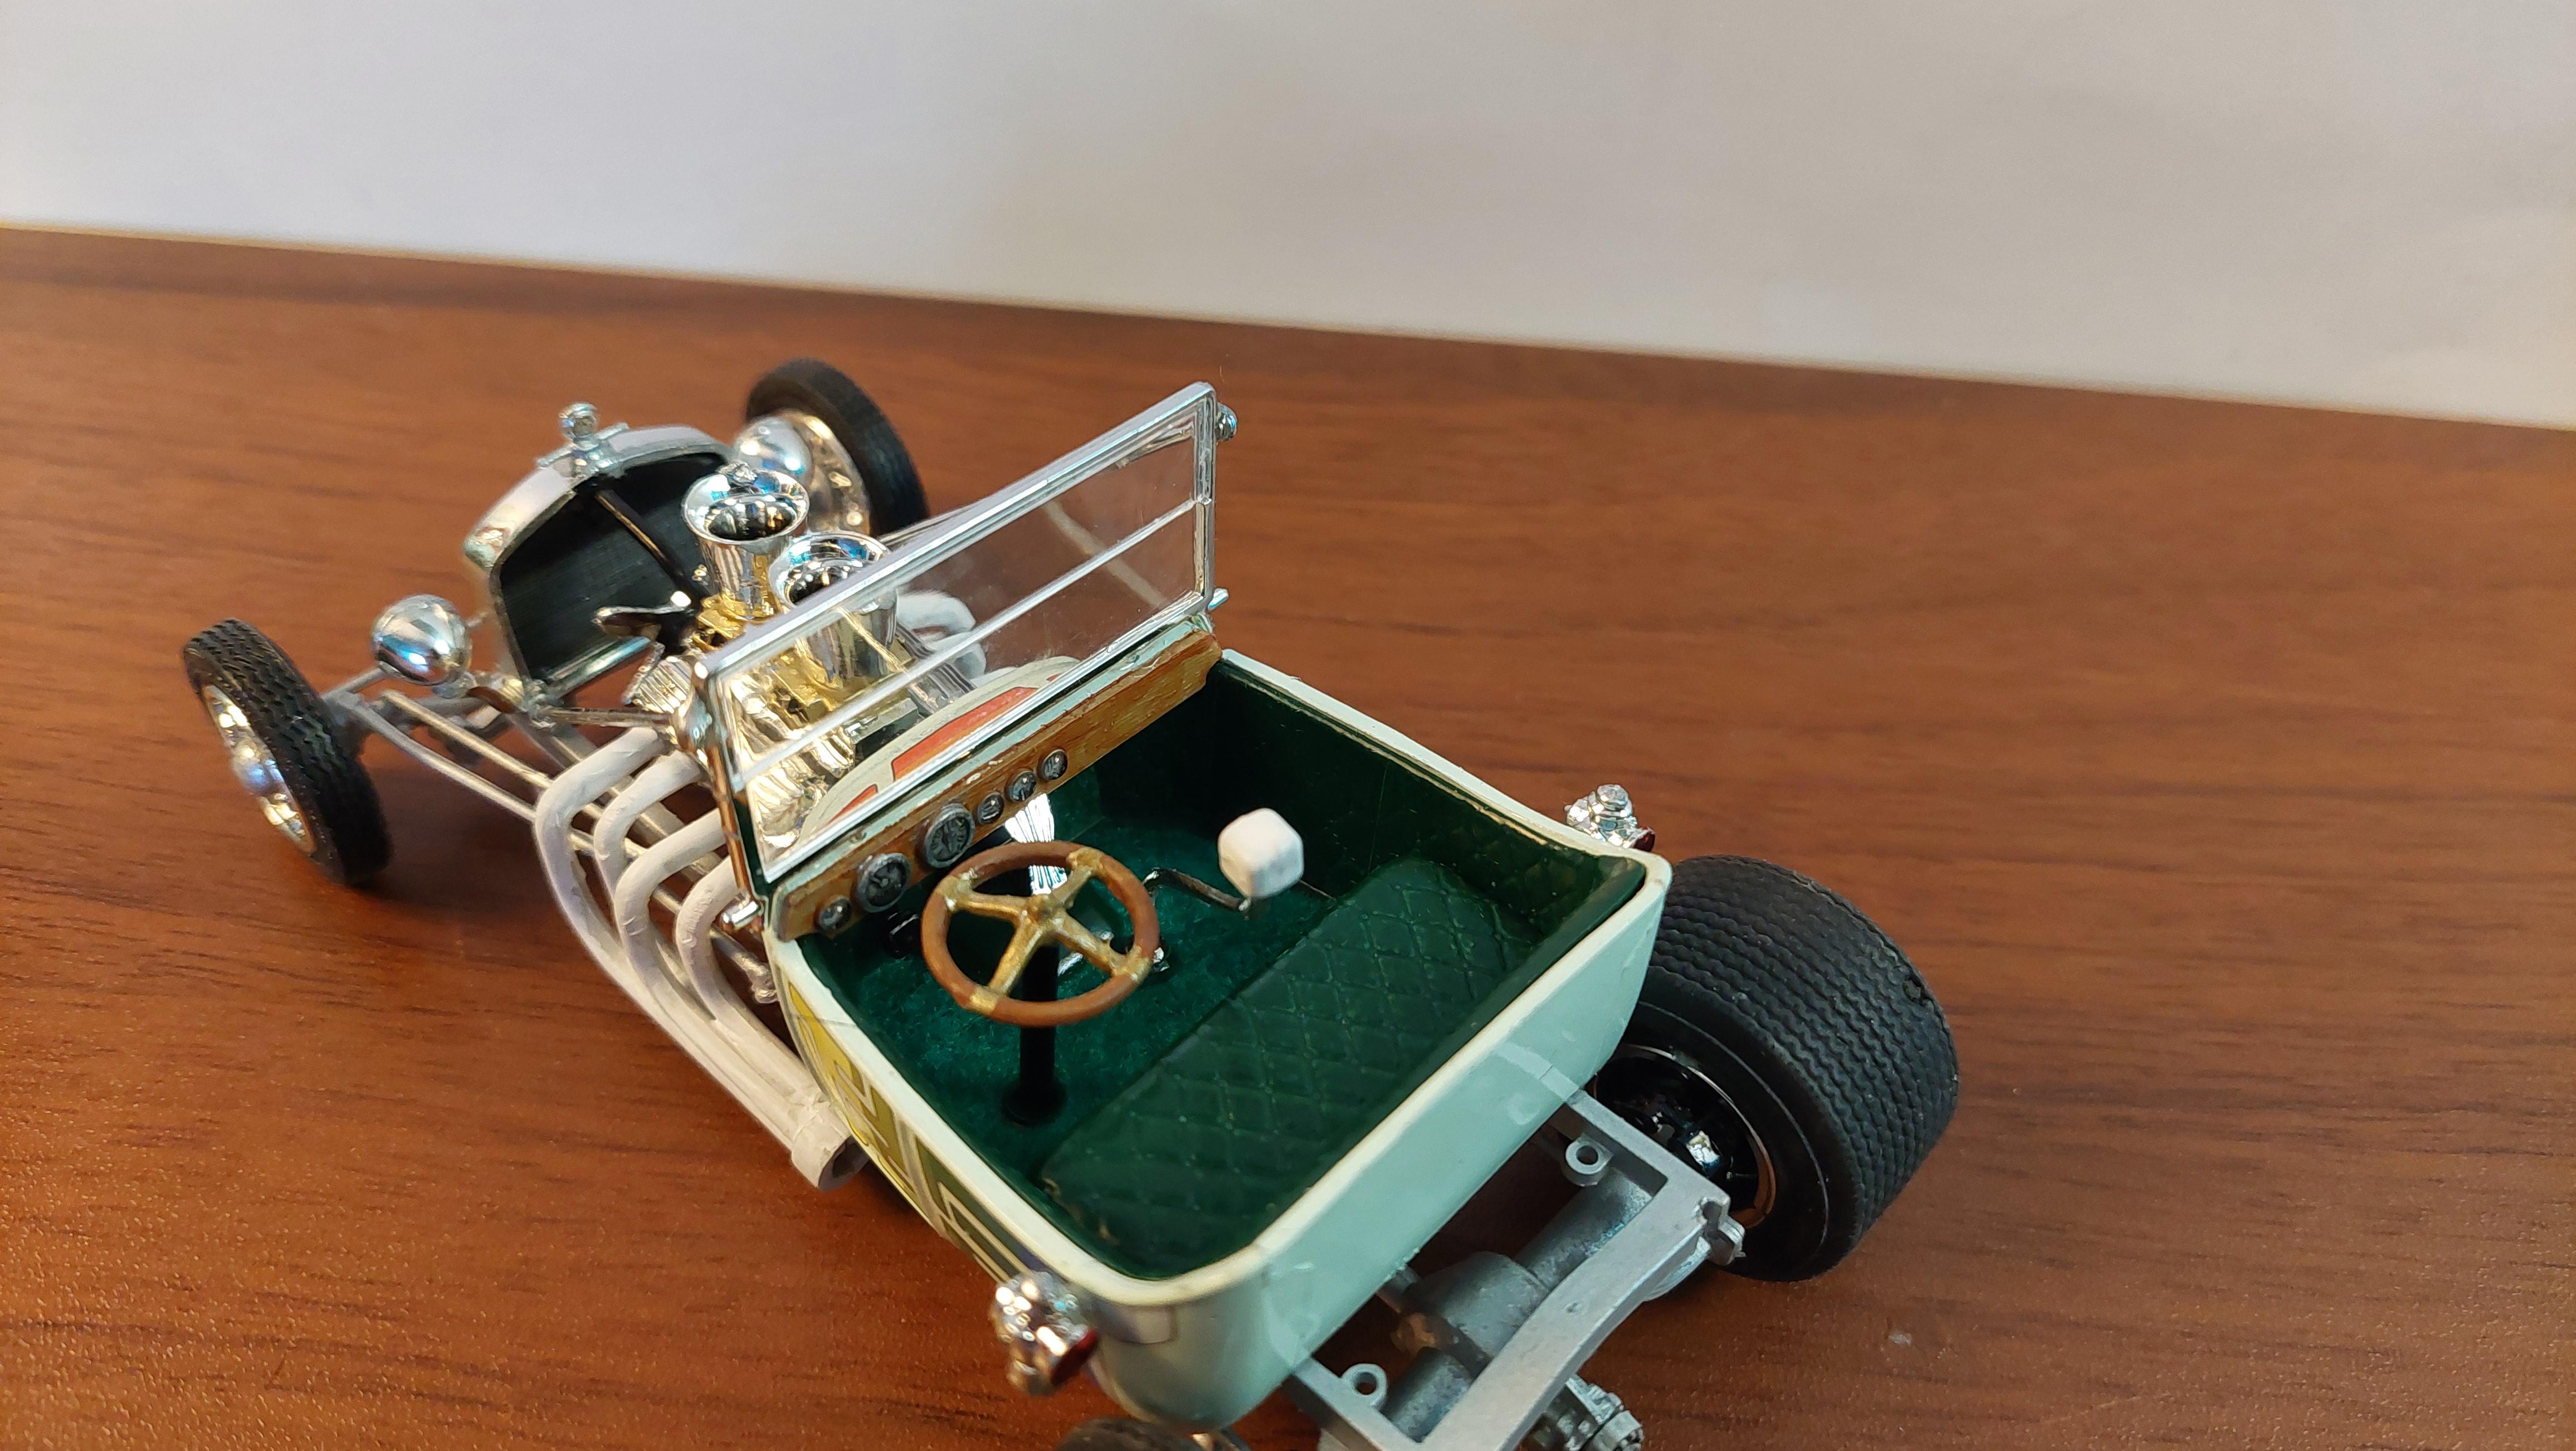
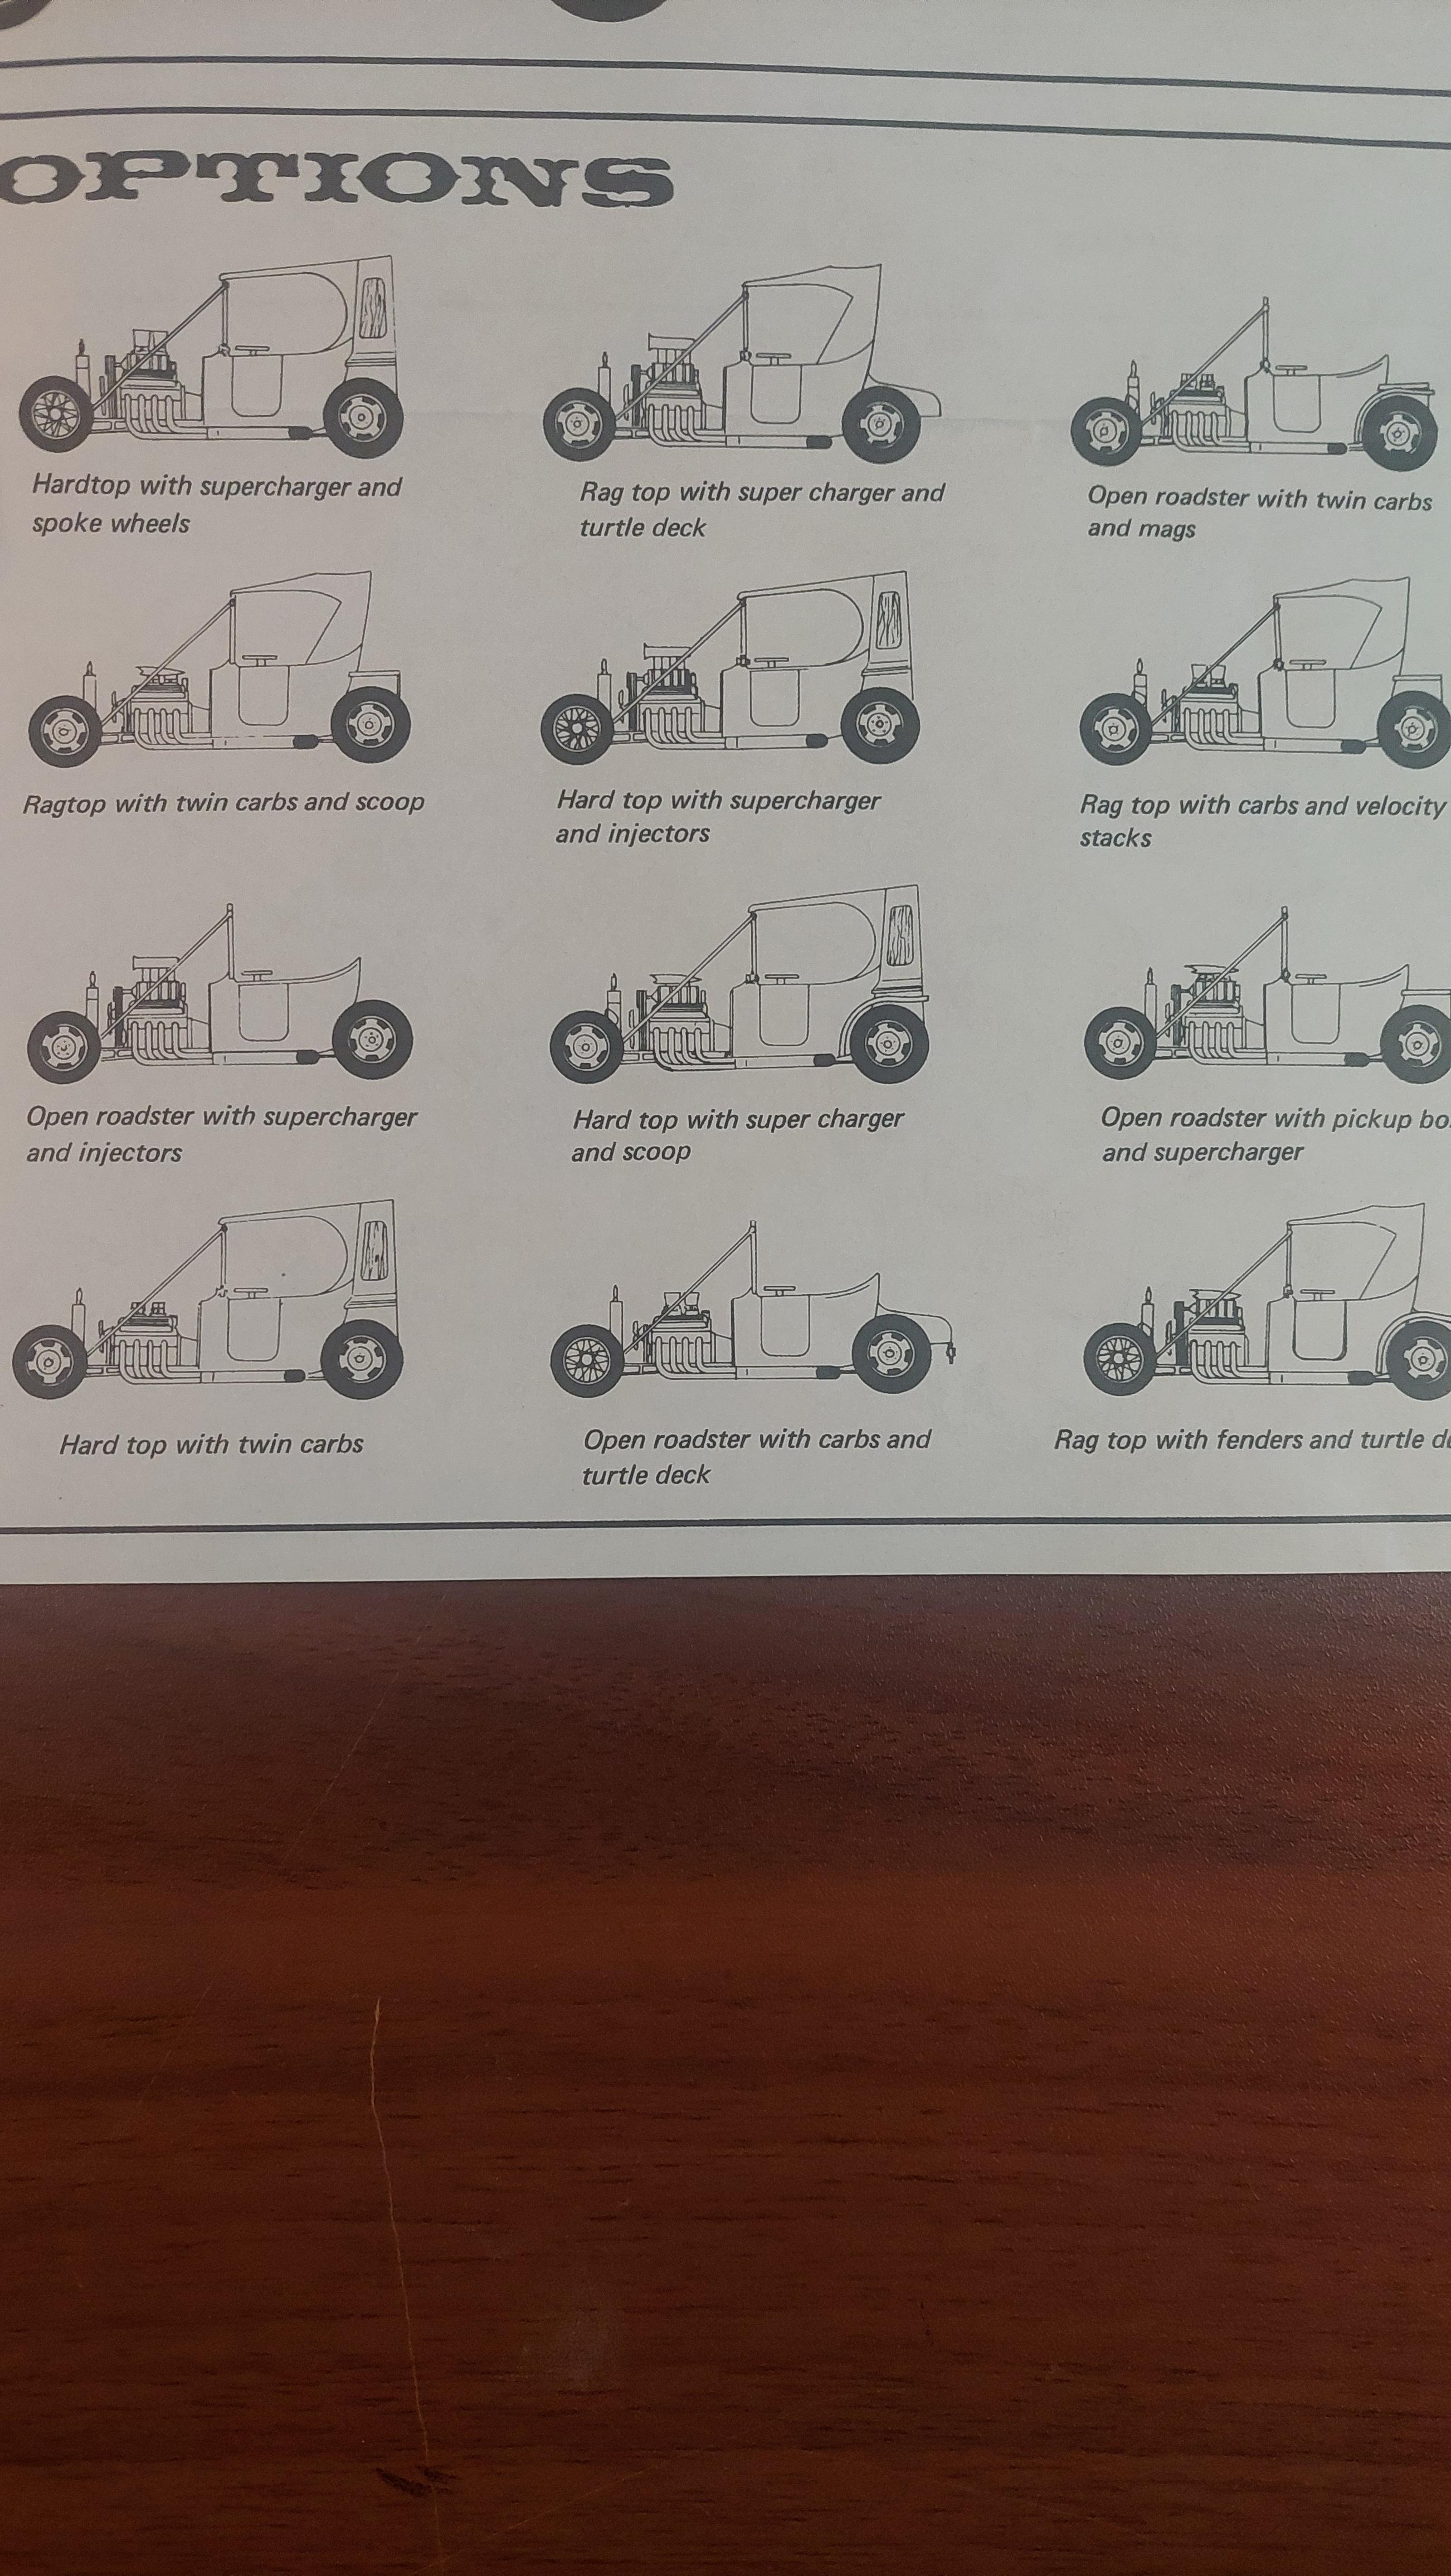
This is the AMT reissue of the MPC Switchers kit. This one had mant options for engine, wheels and body (roof ,pickup bed ,turtle deck). I chose to do the hardtop with pickup bed and big velocity stacks and paint it with a 70's flavor color to go along with the decals. Dark green Fuzzy fur carpet . Only thing thats not kit are the rear tires, they are solid rubber Mickey Thompsons wides , the kit tires were not wide enough. This was the old Buyers Choice release and had no warp in the kit except headers and I had to modify them, the decals good and of course I had to remove chrome off one entire tree, on some kits they love to chrome everything. In some of the pictures I show other optional looks with the extra body parts.
-
Very cool build of a pretty rare kit.
-
Bump up...
-
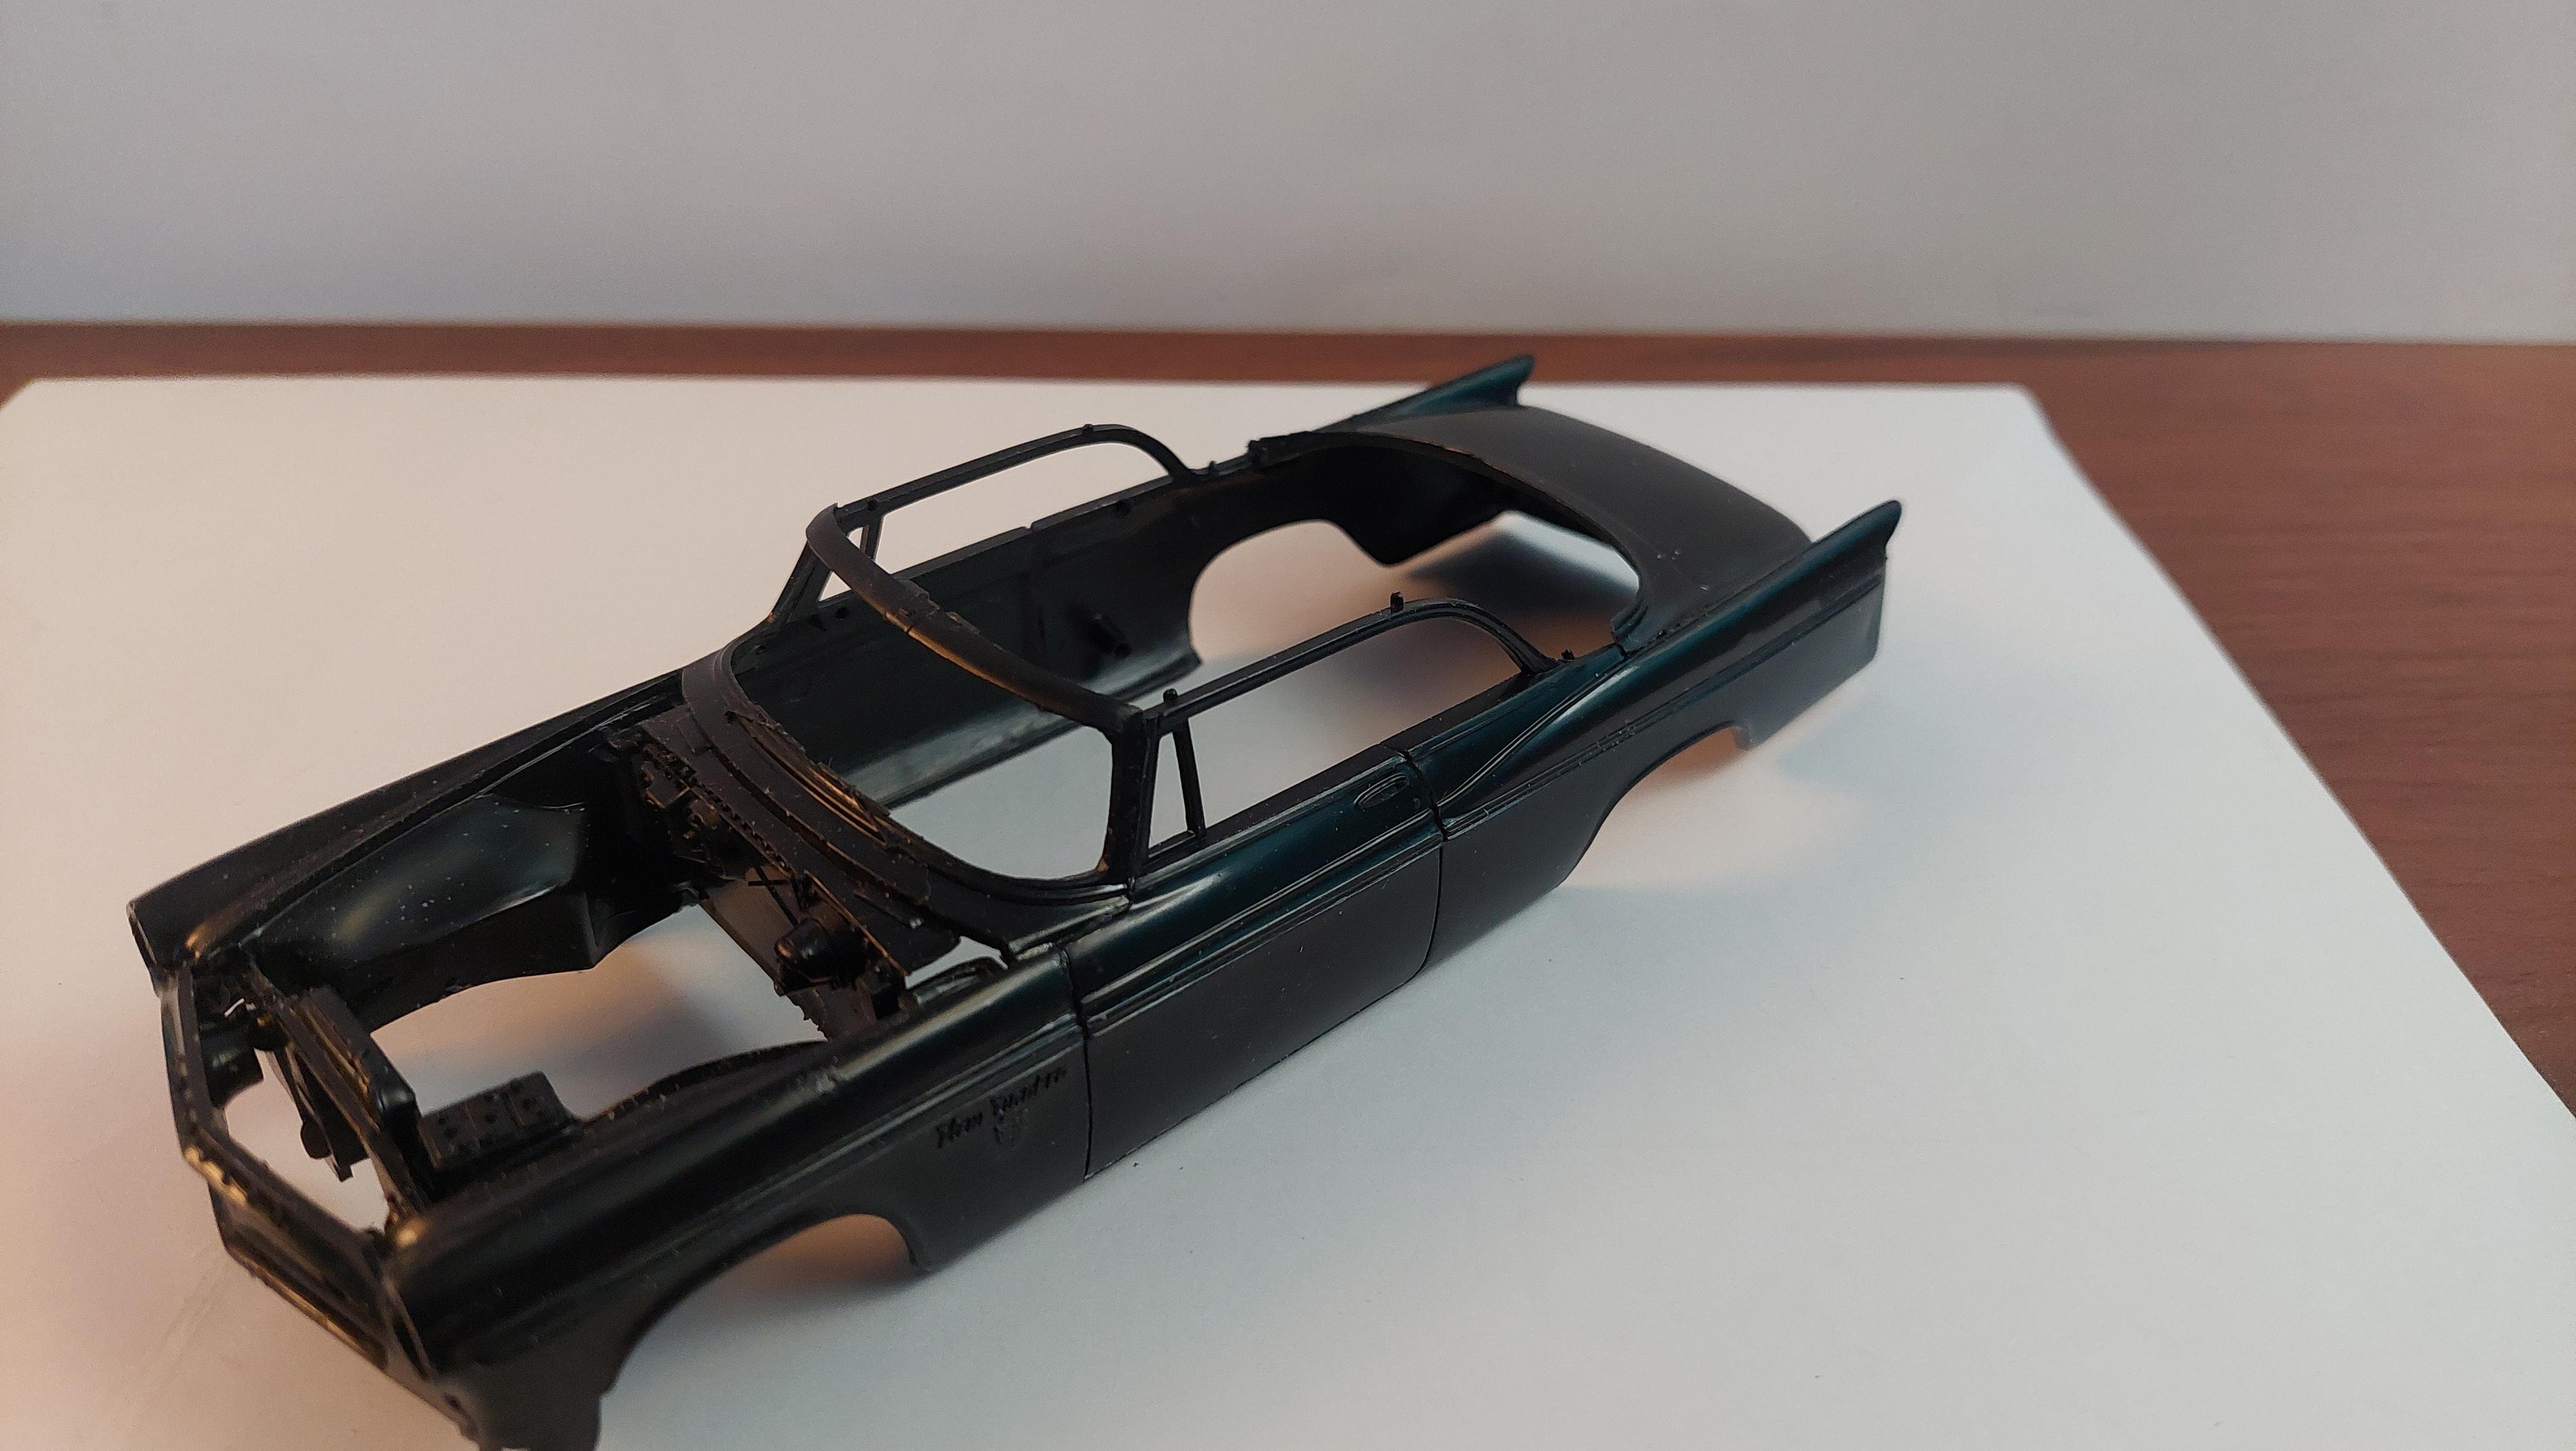
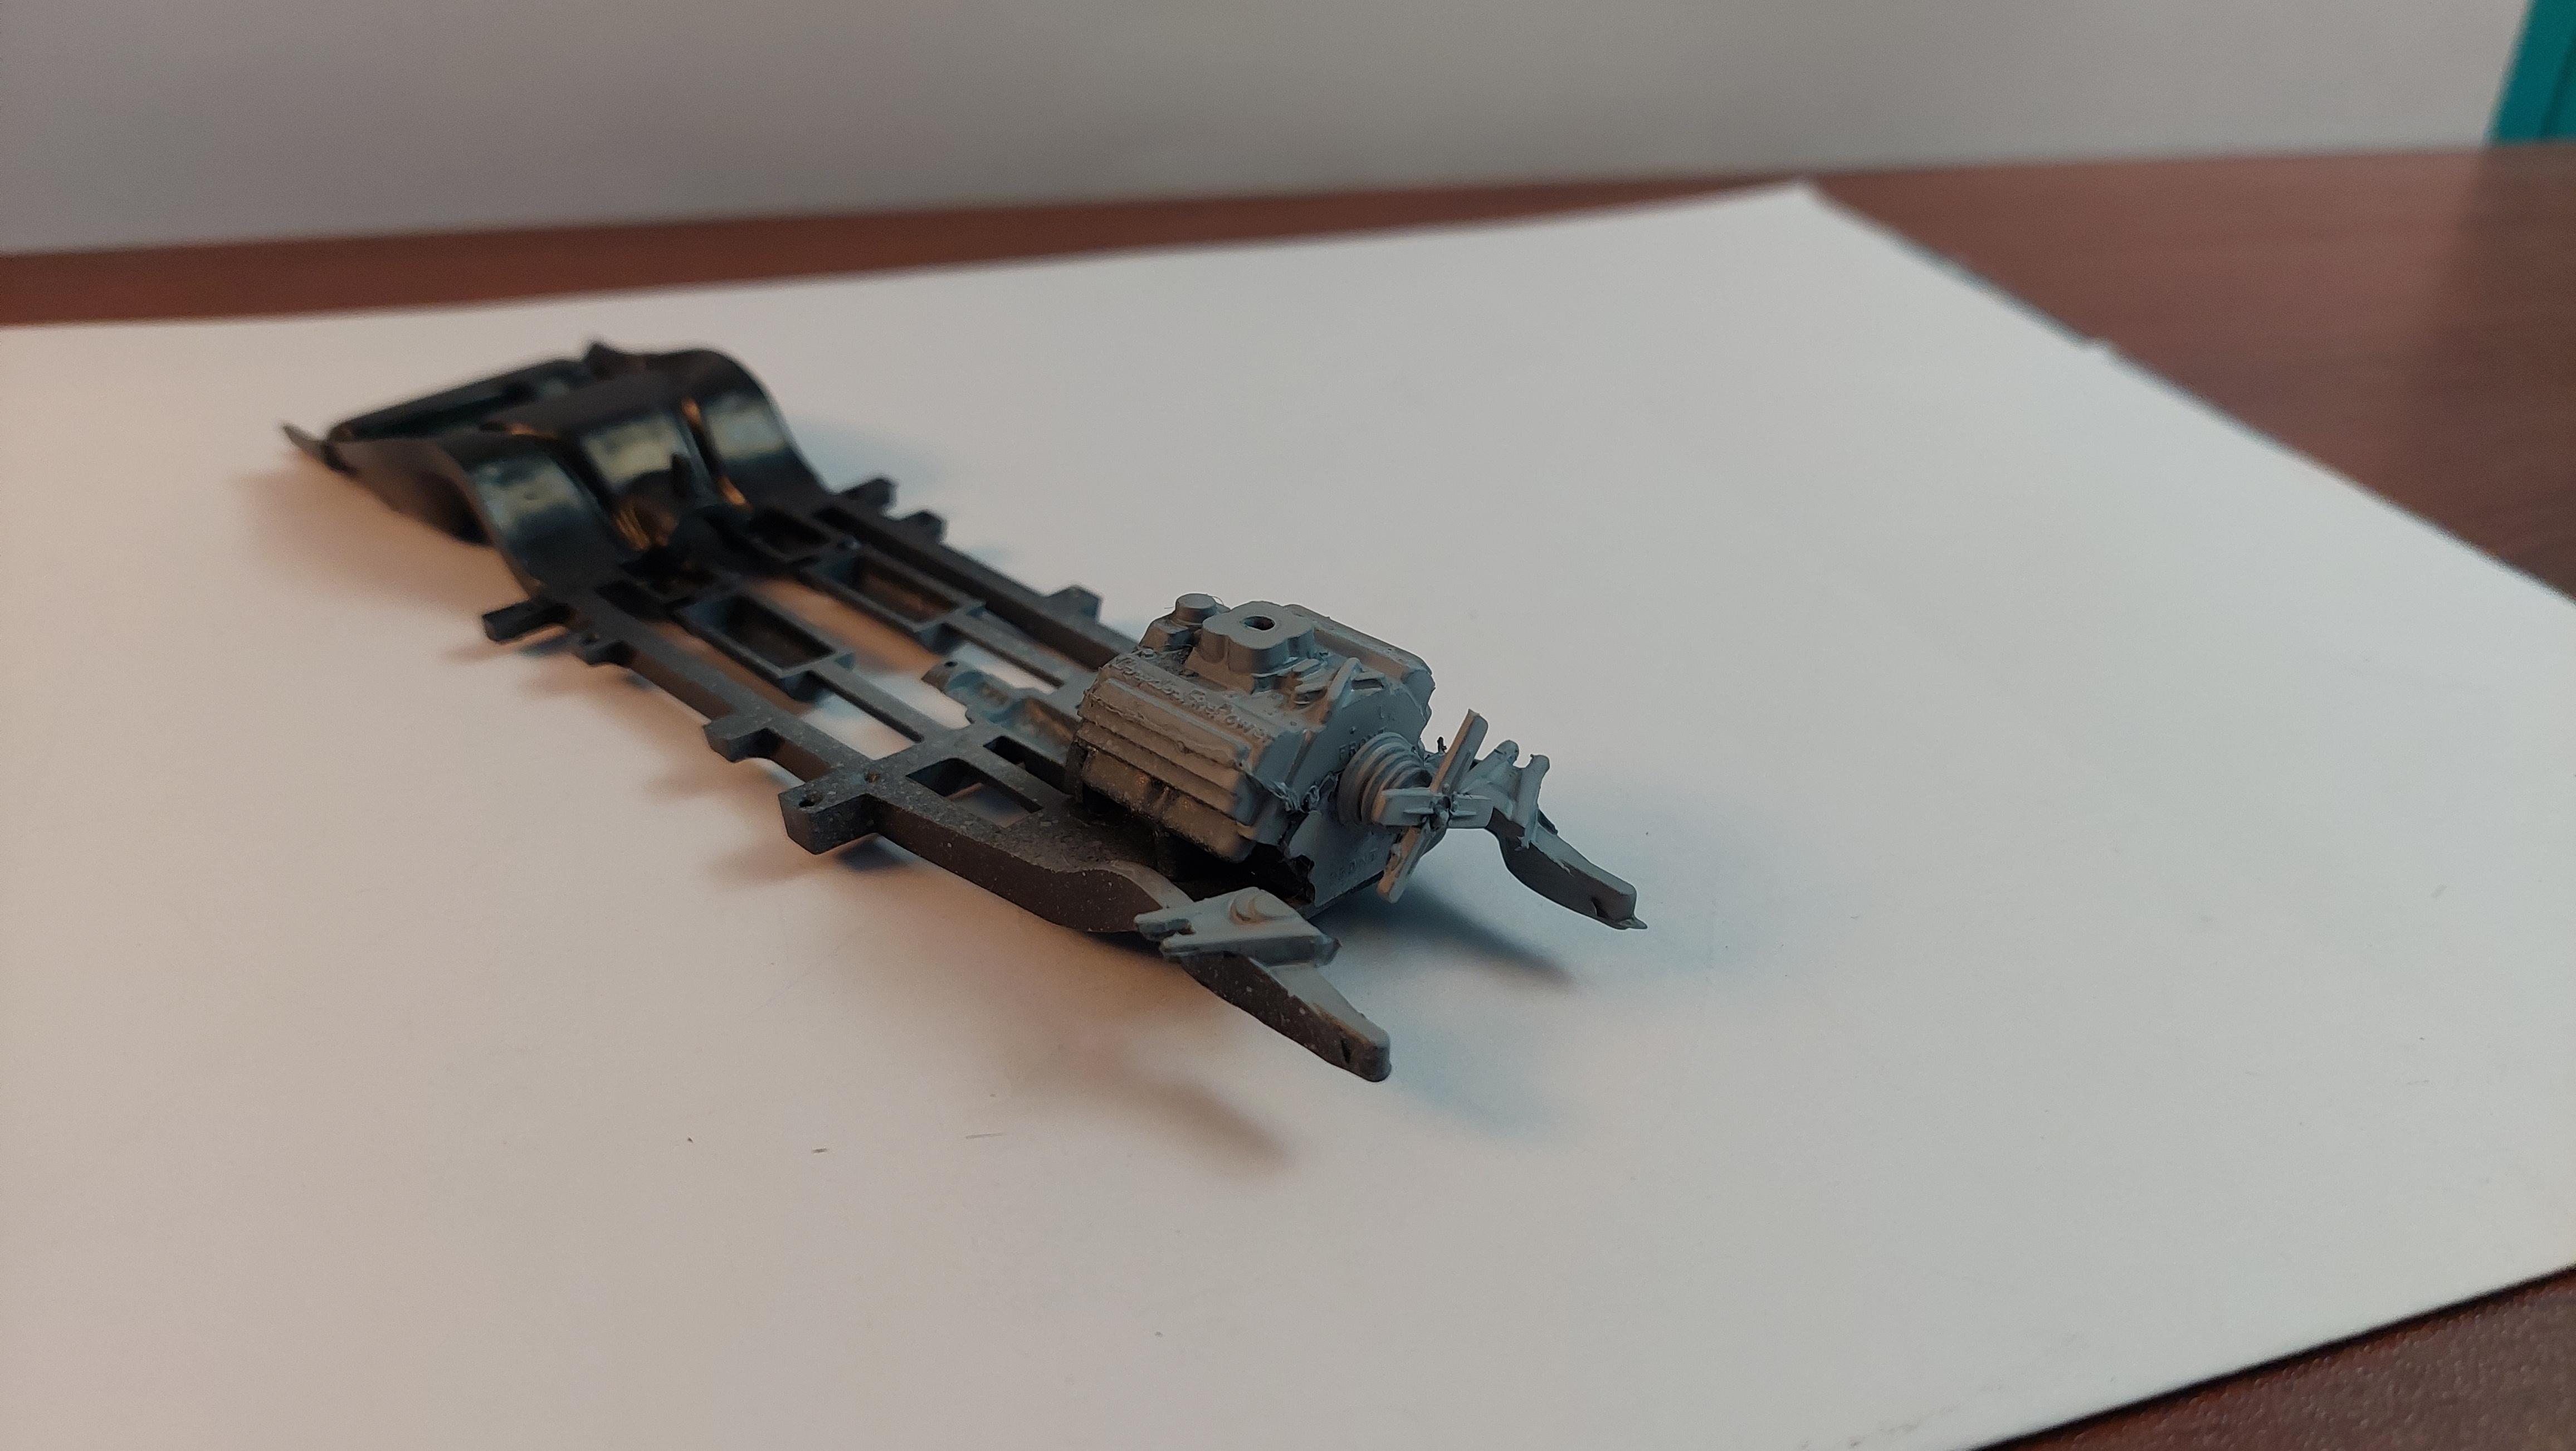
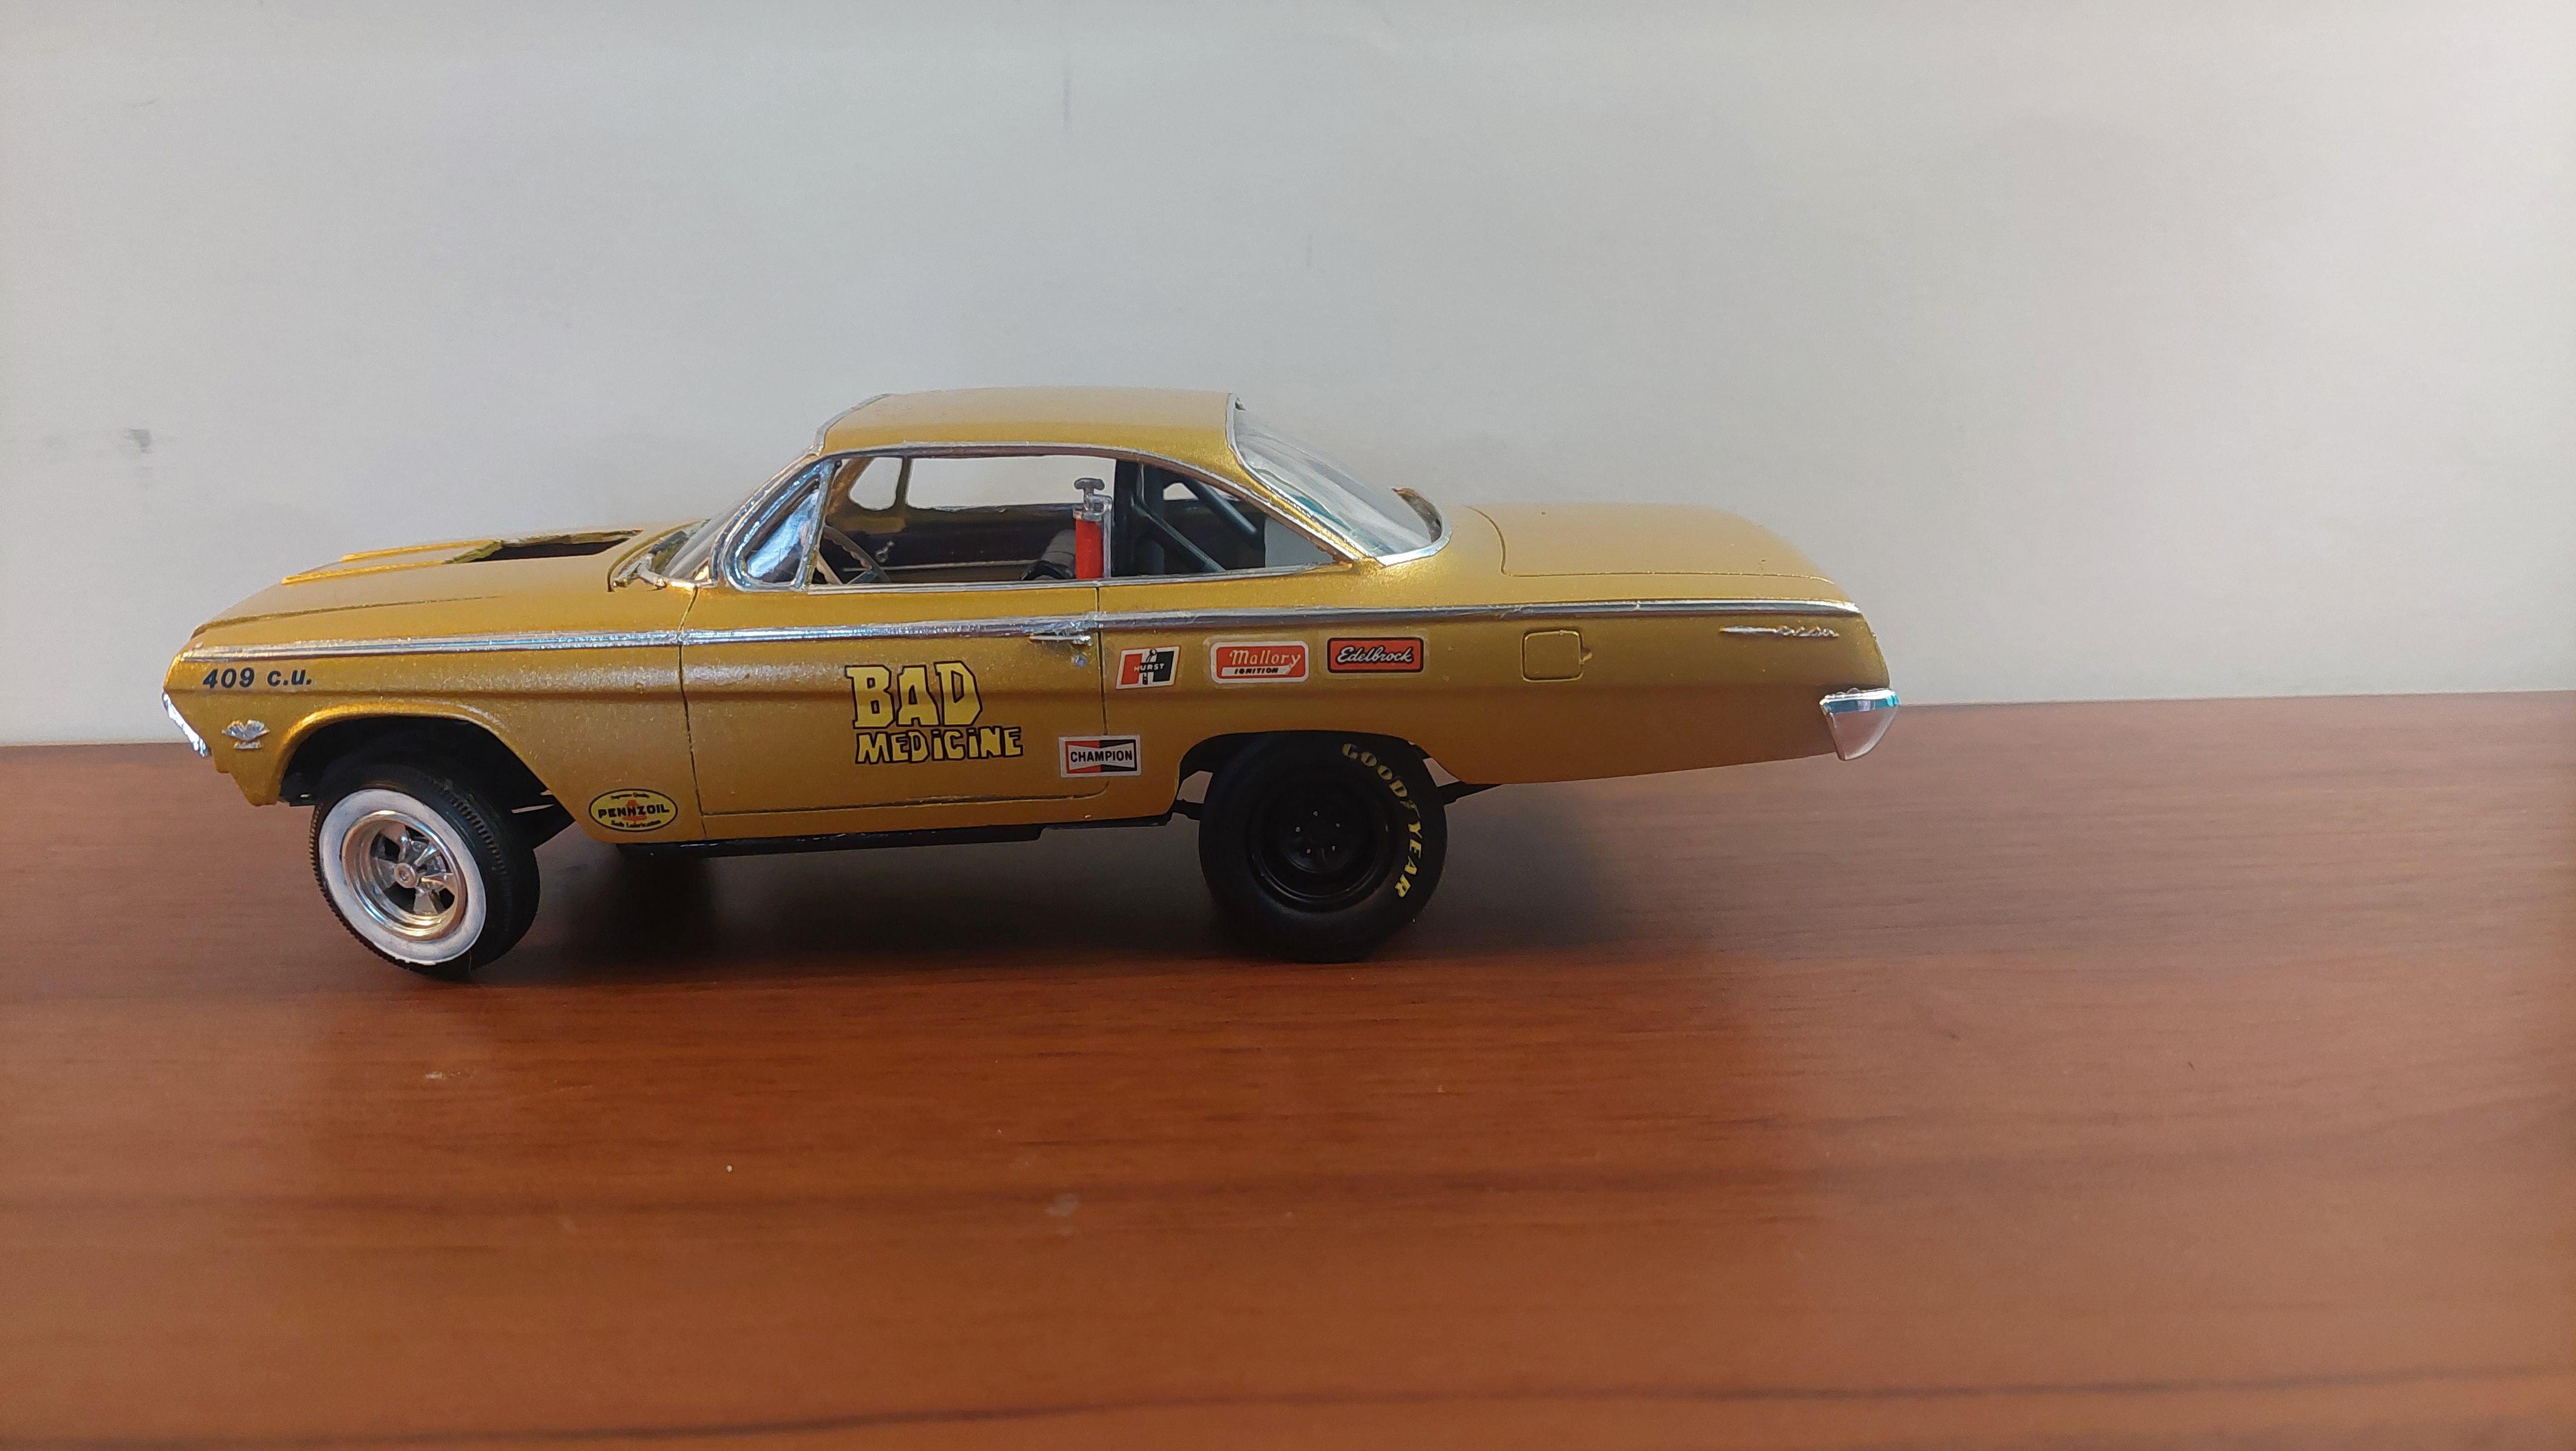
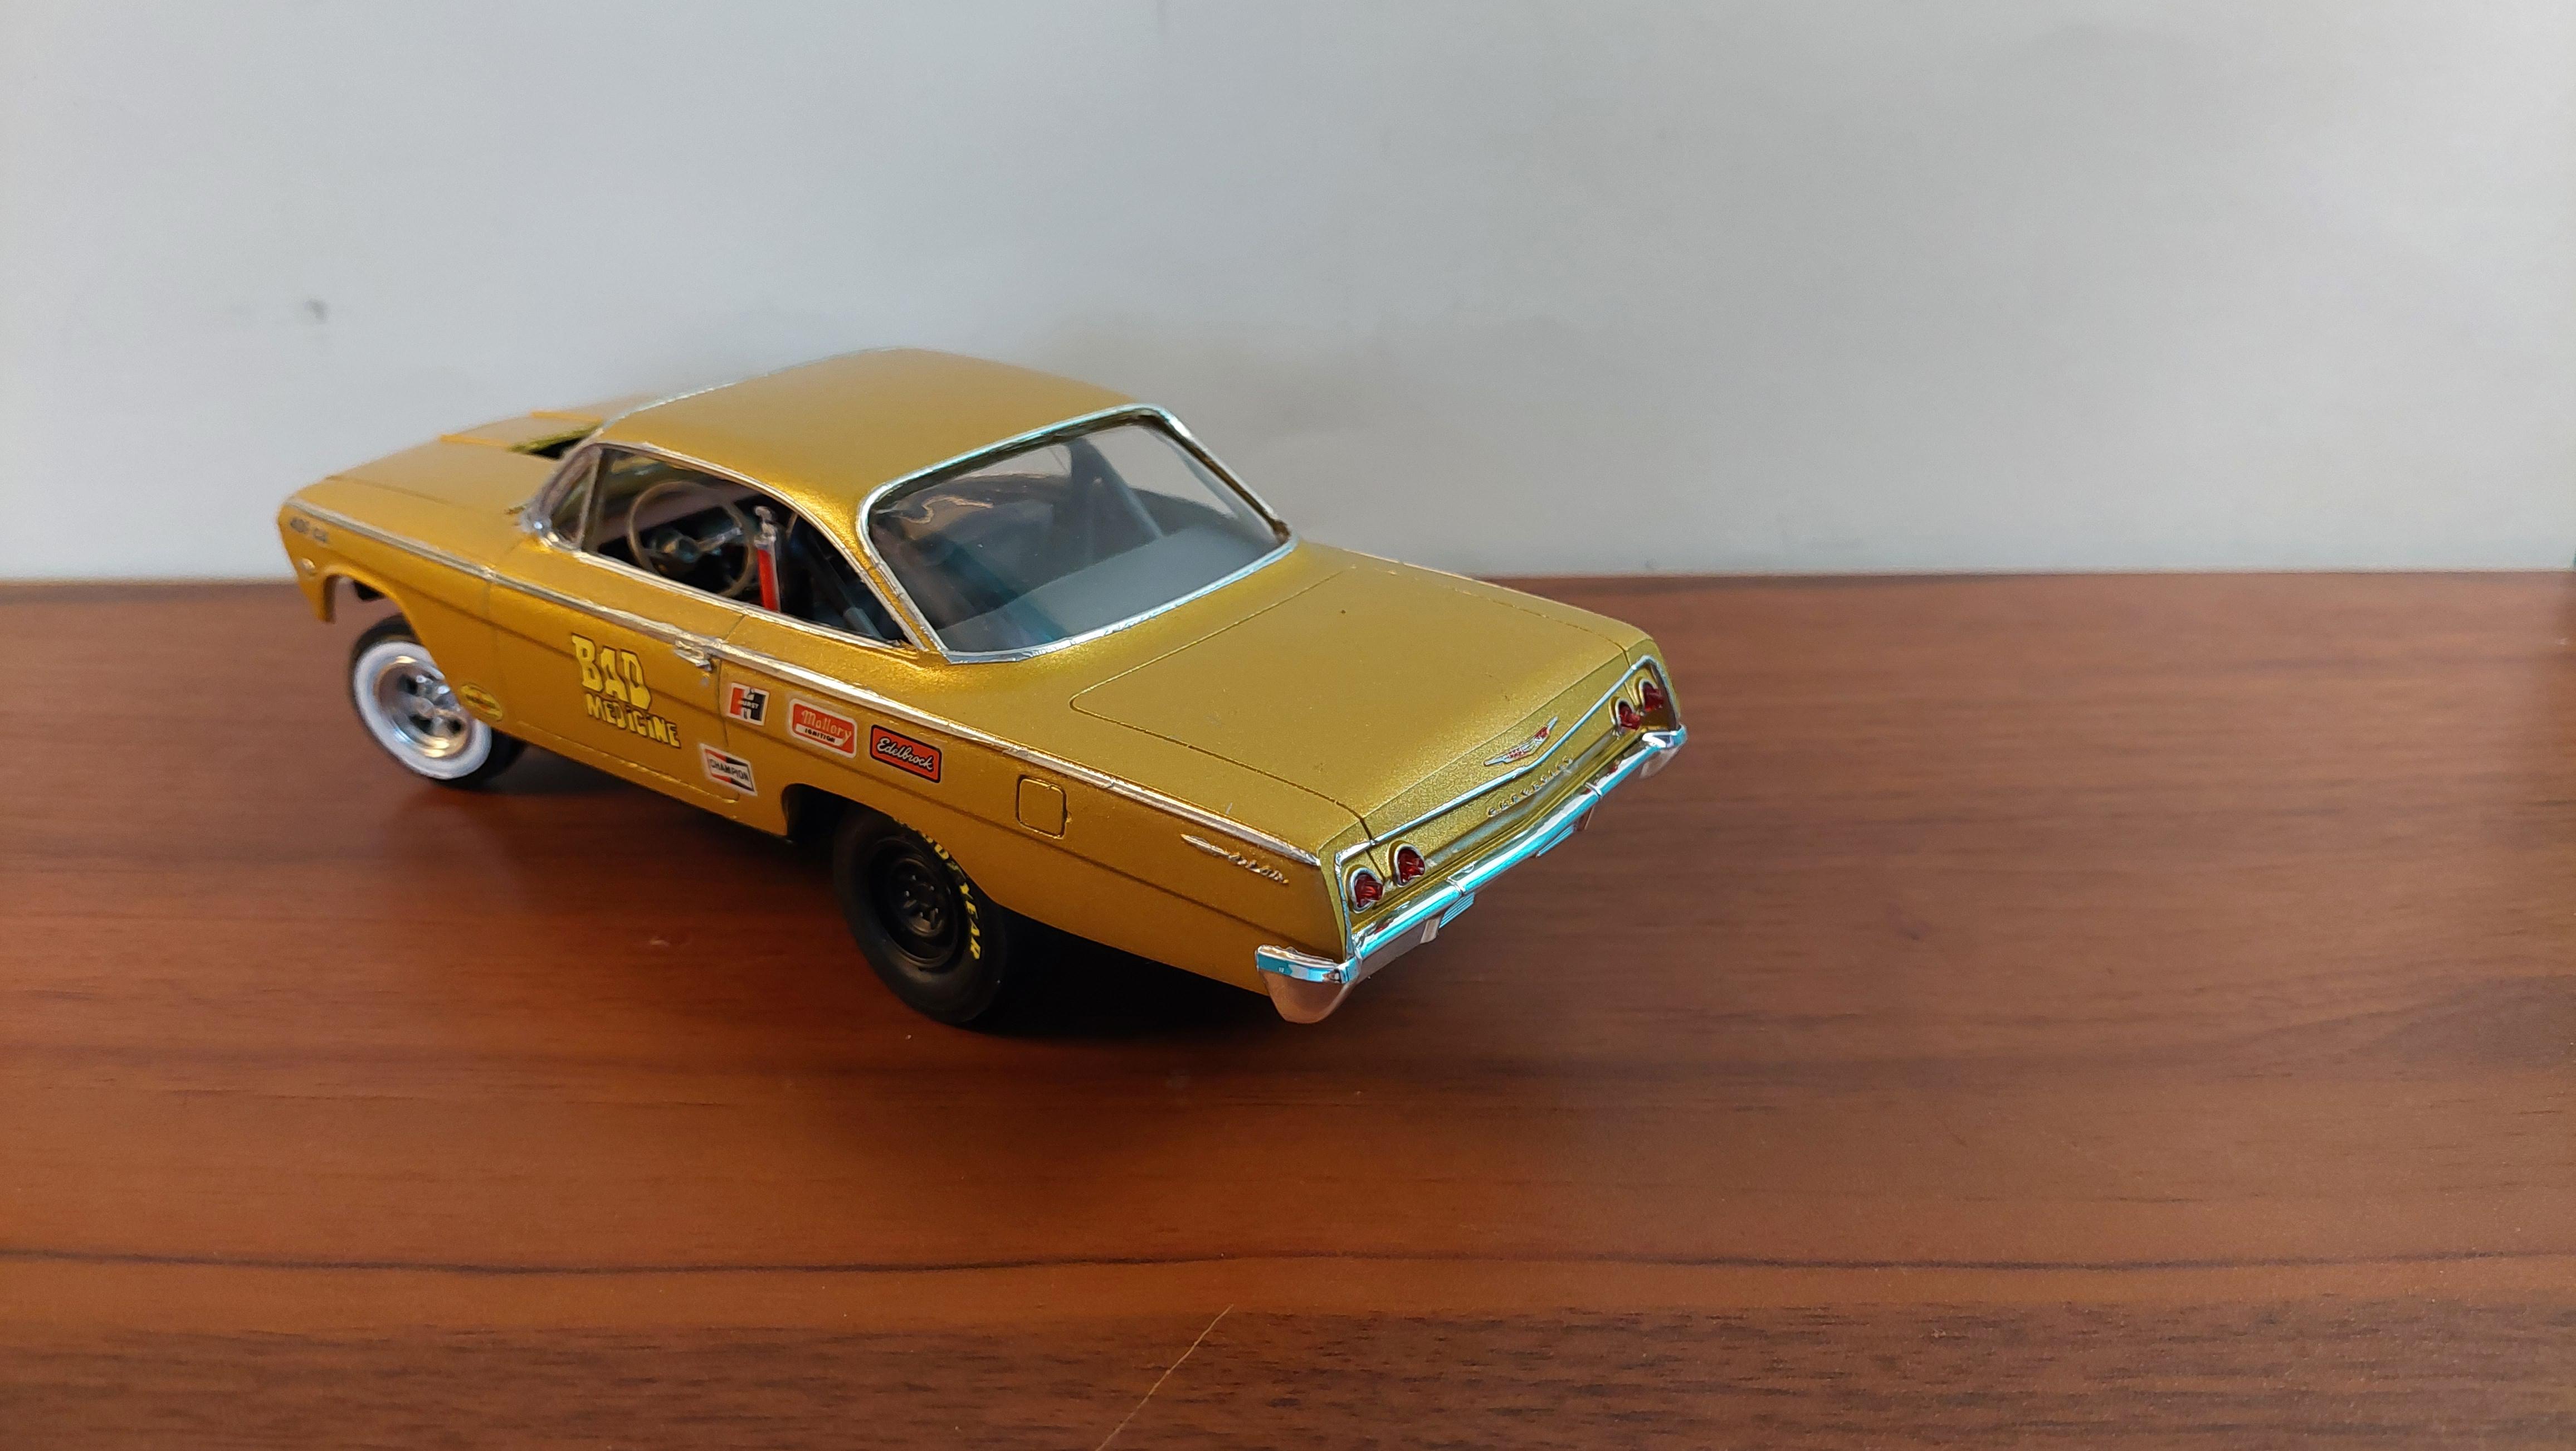
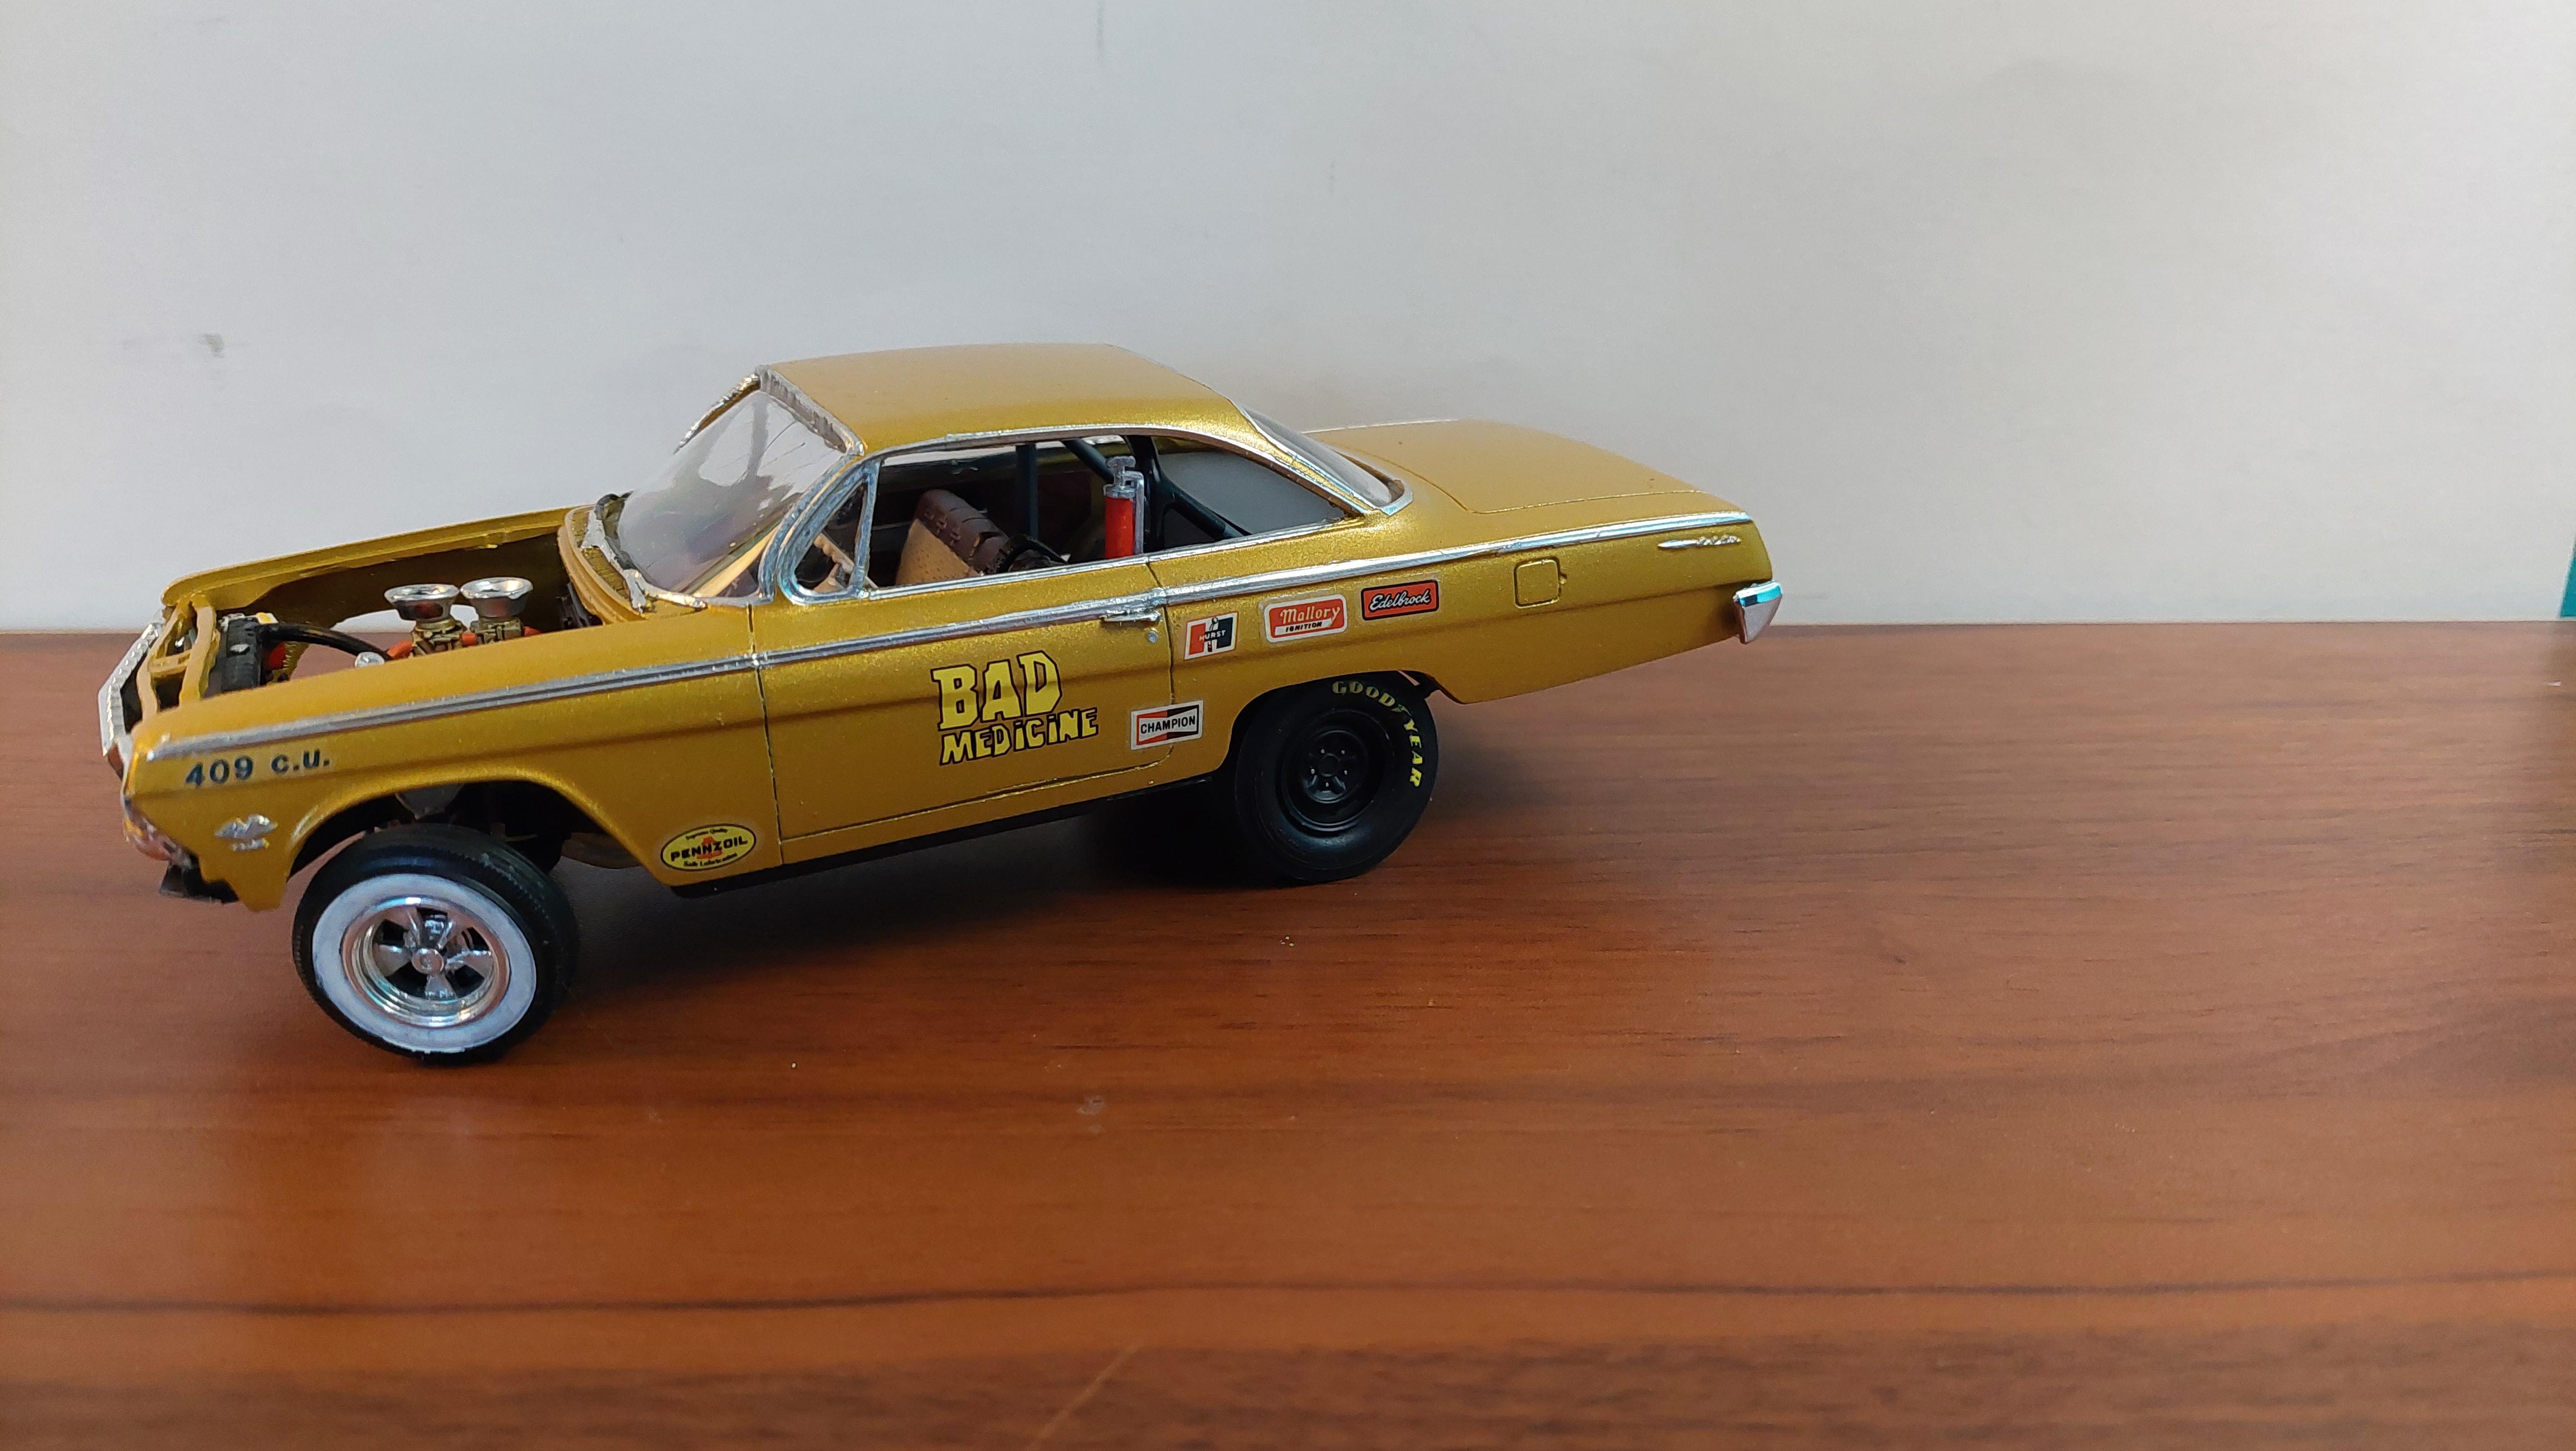
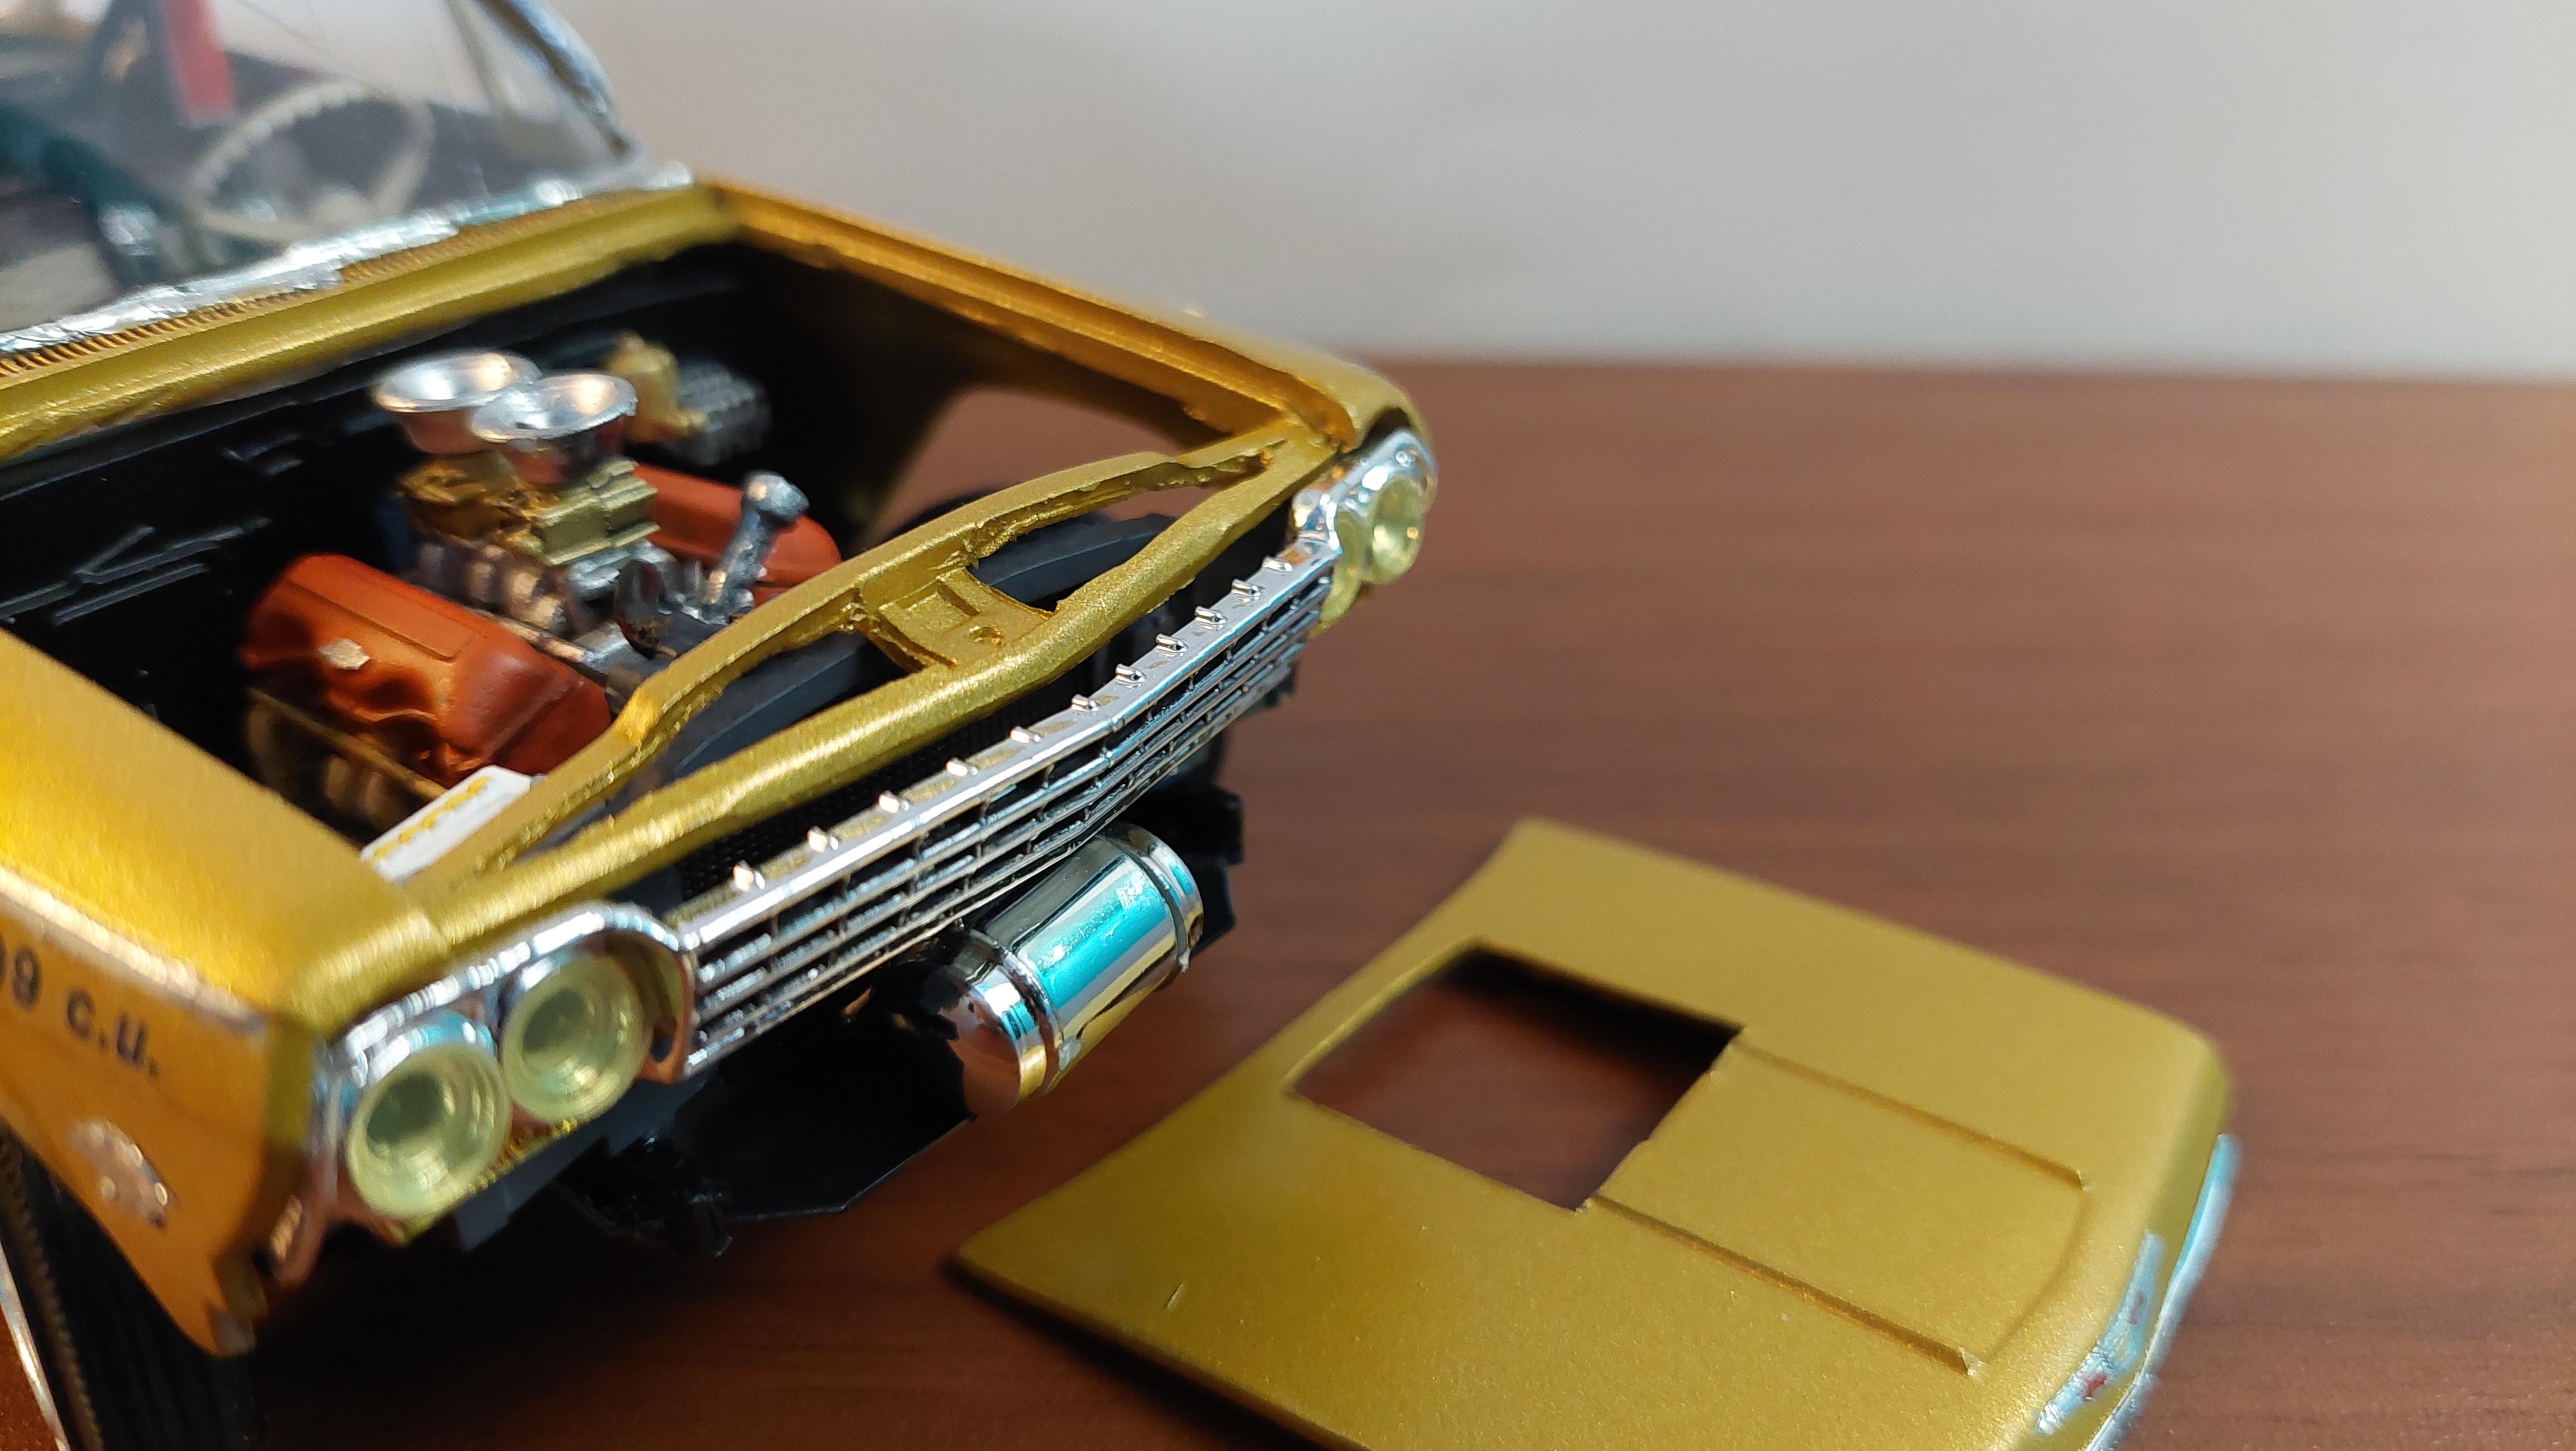
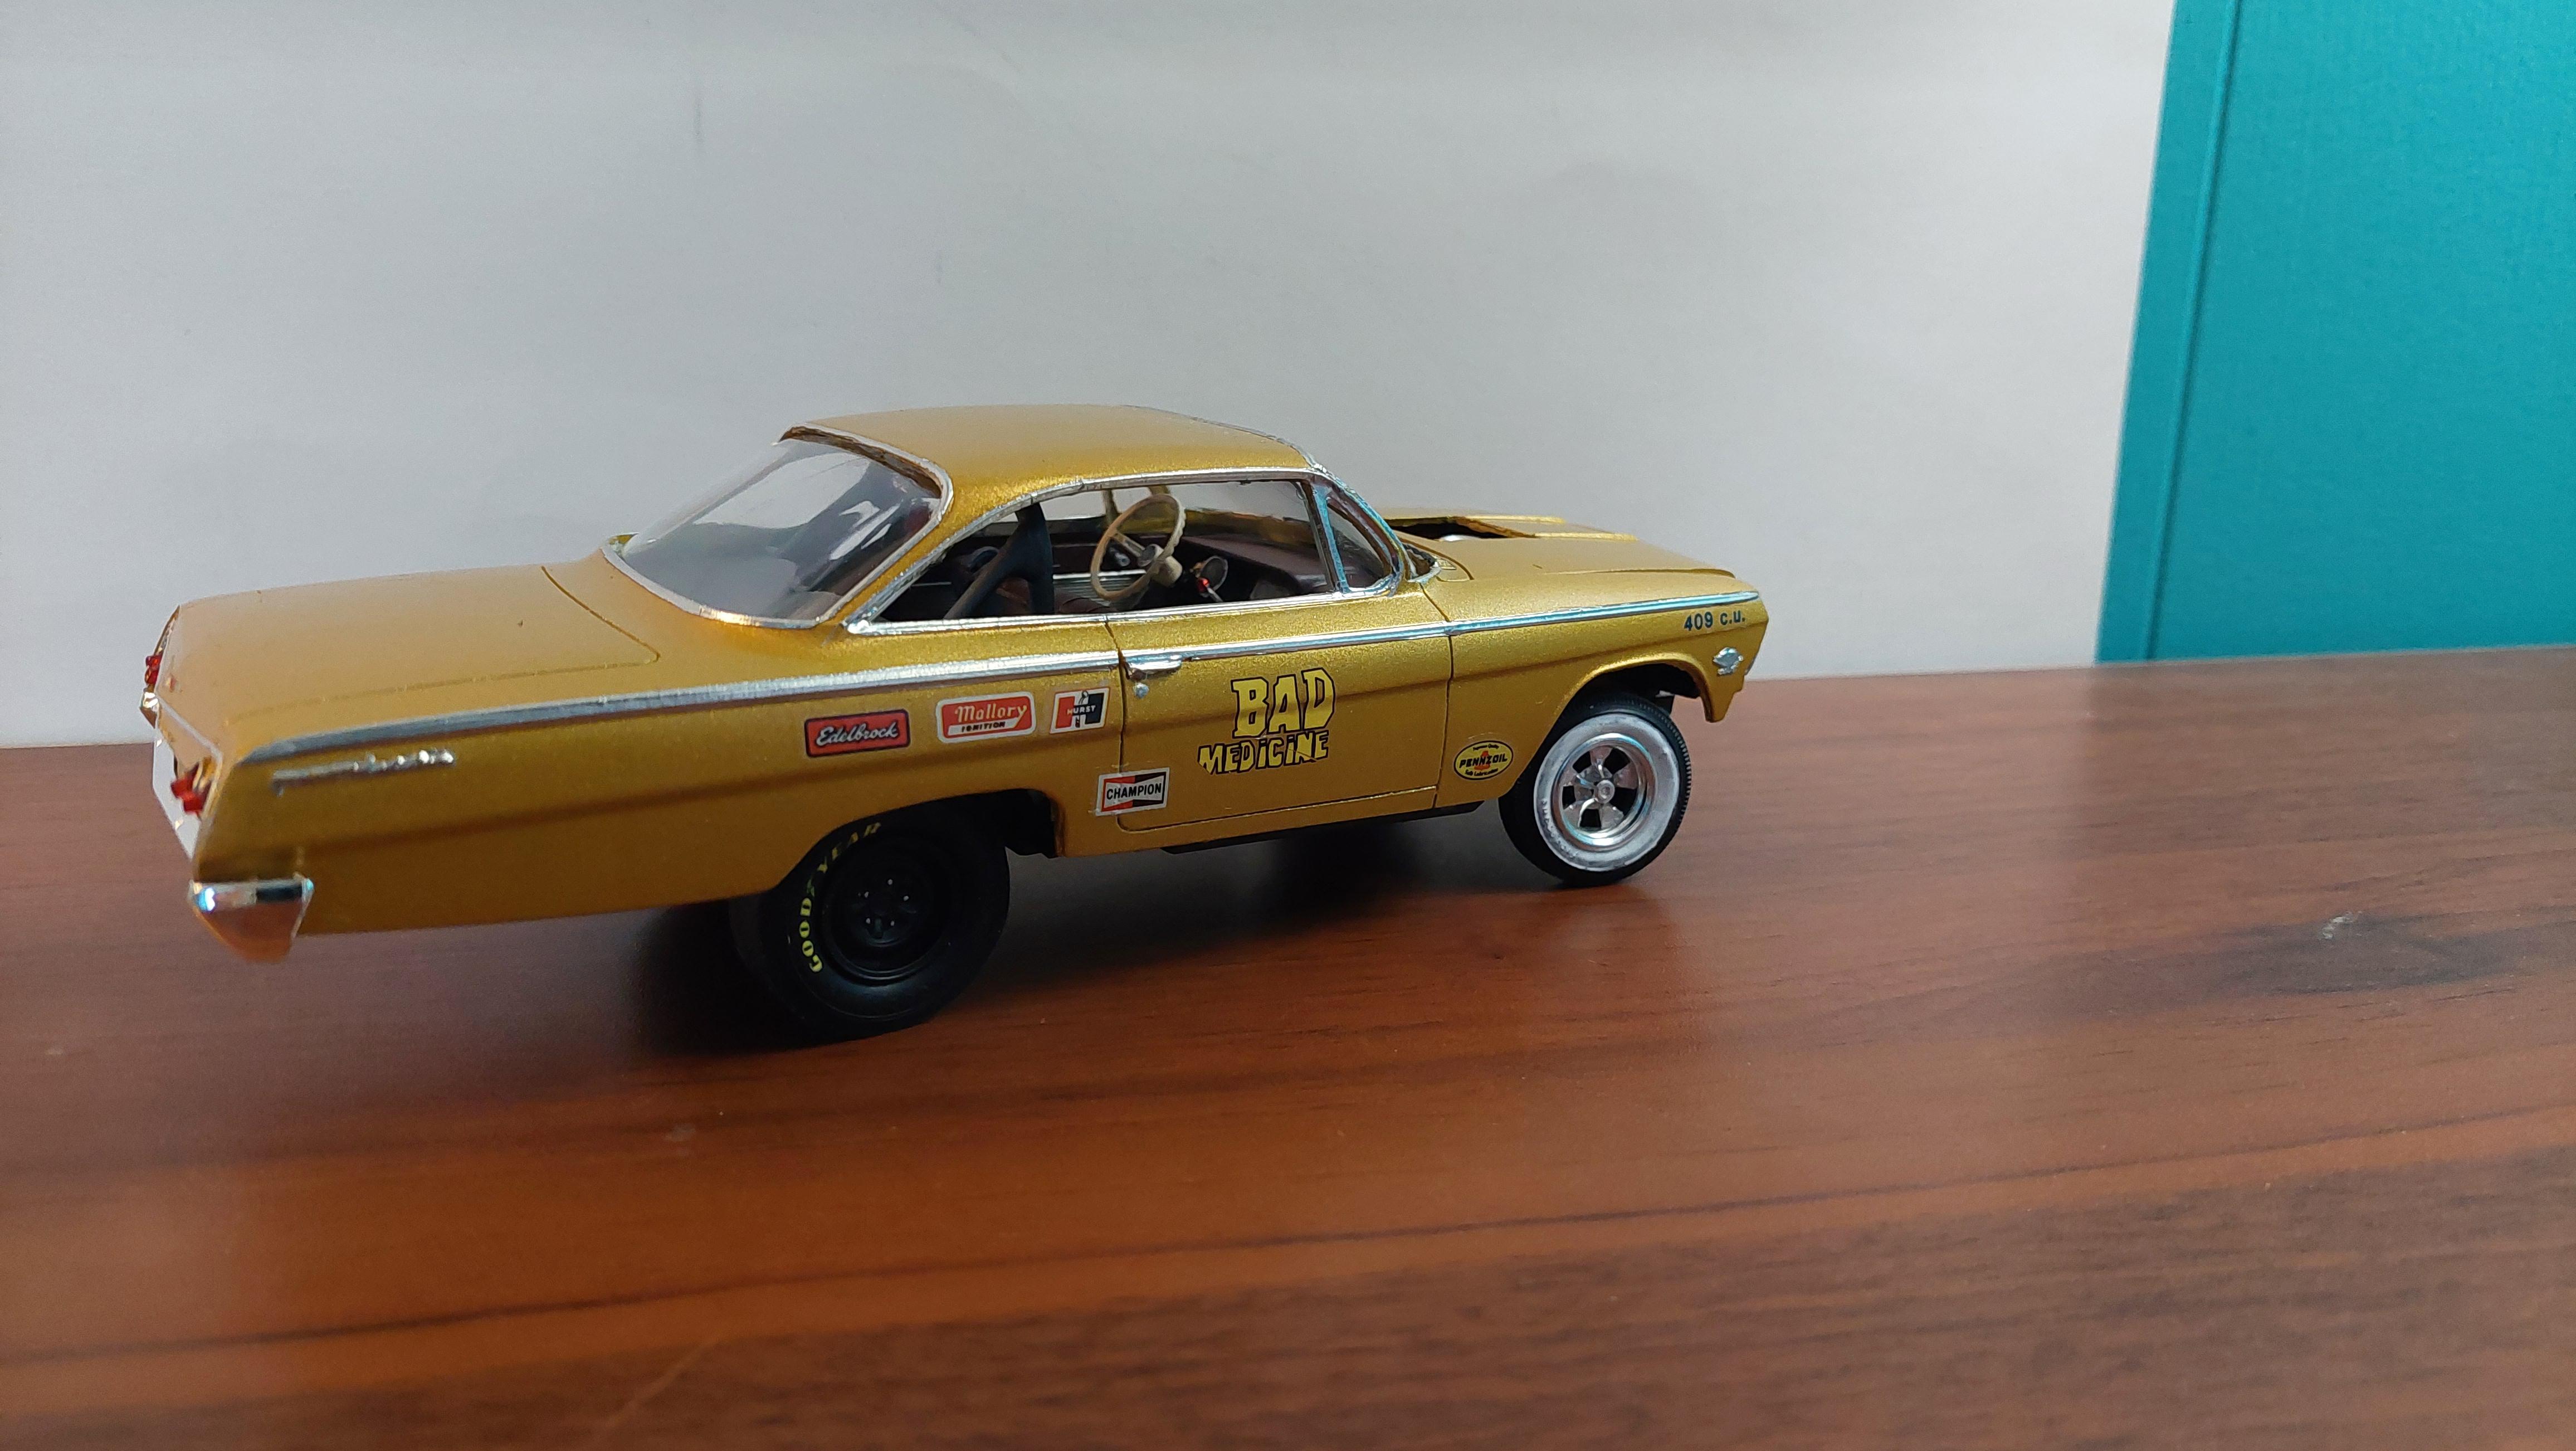
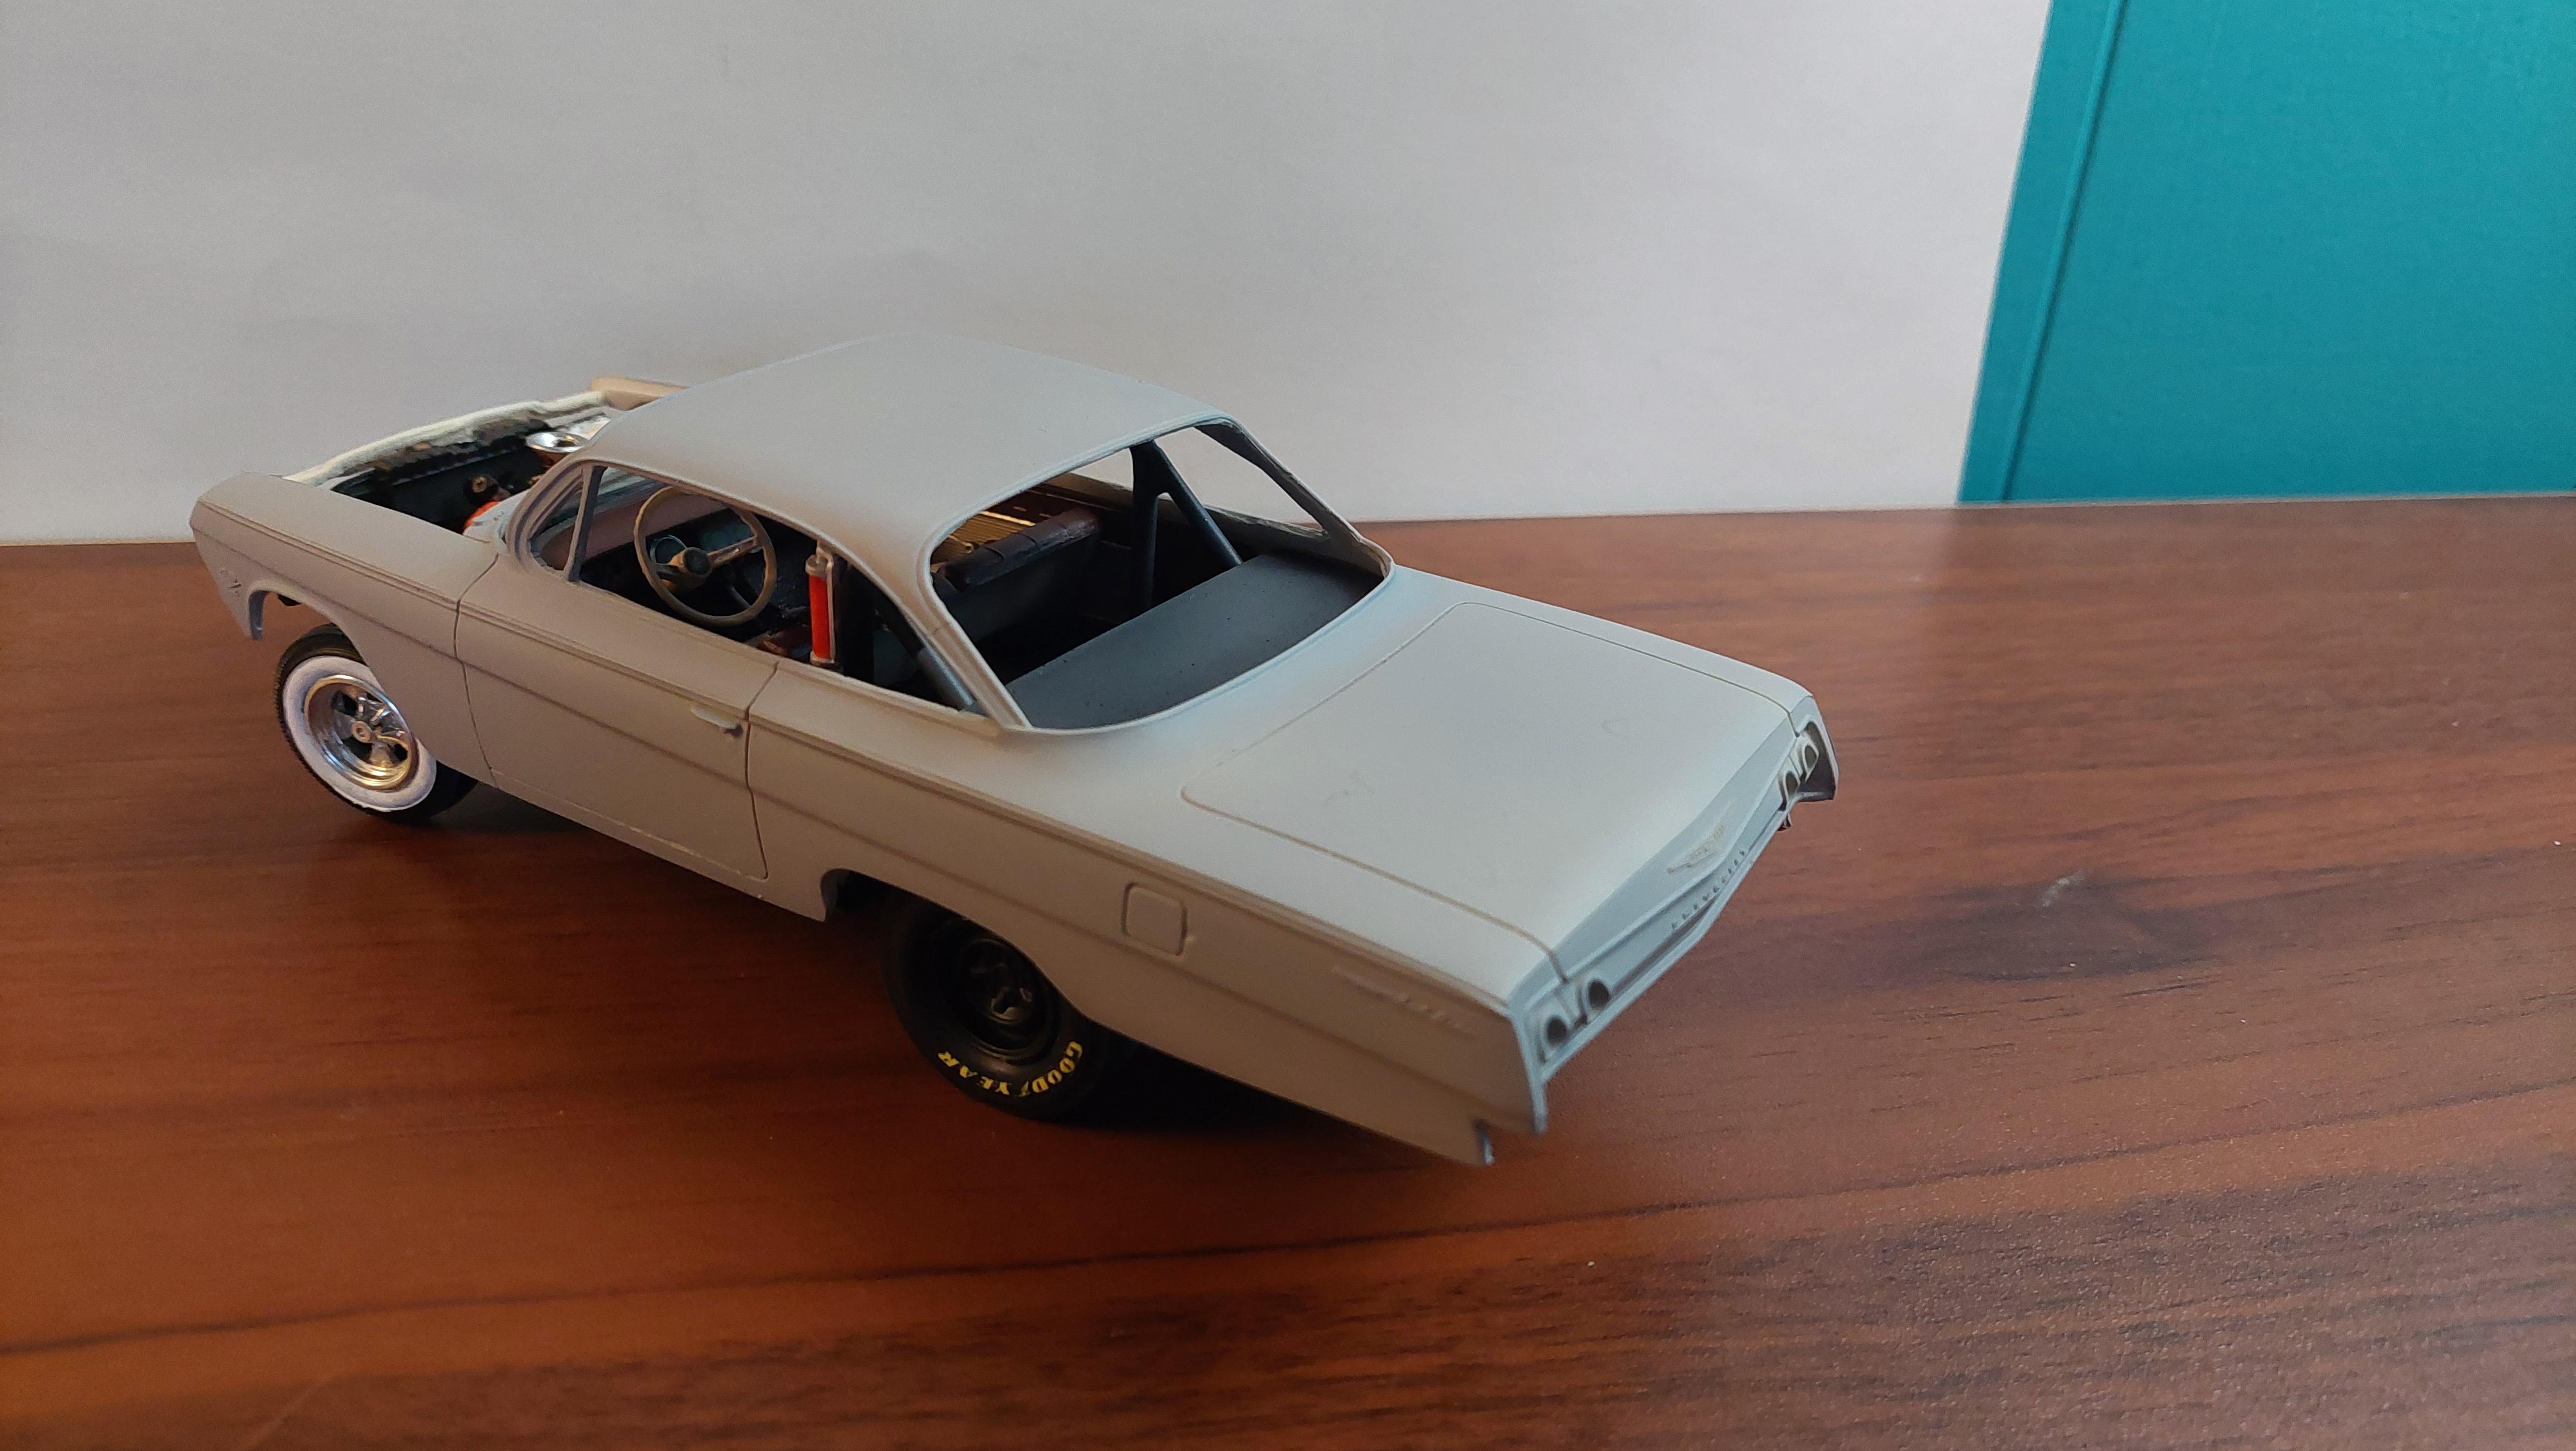
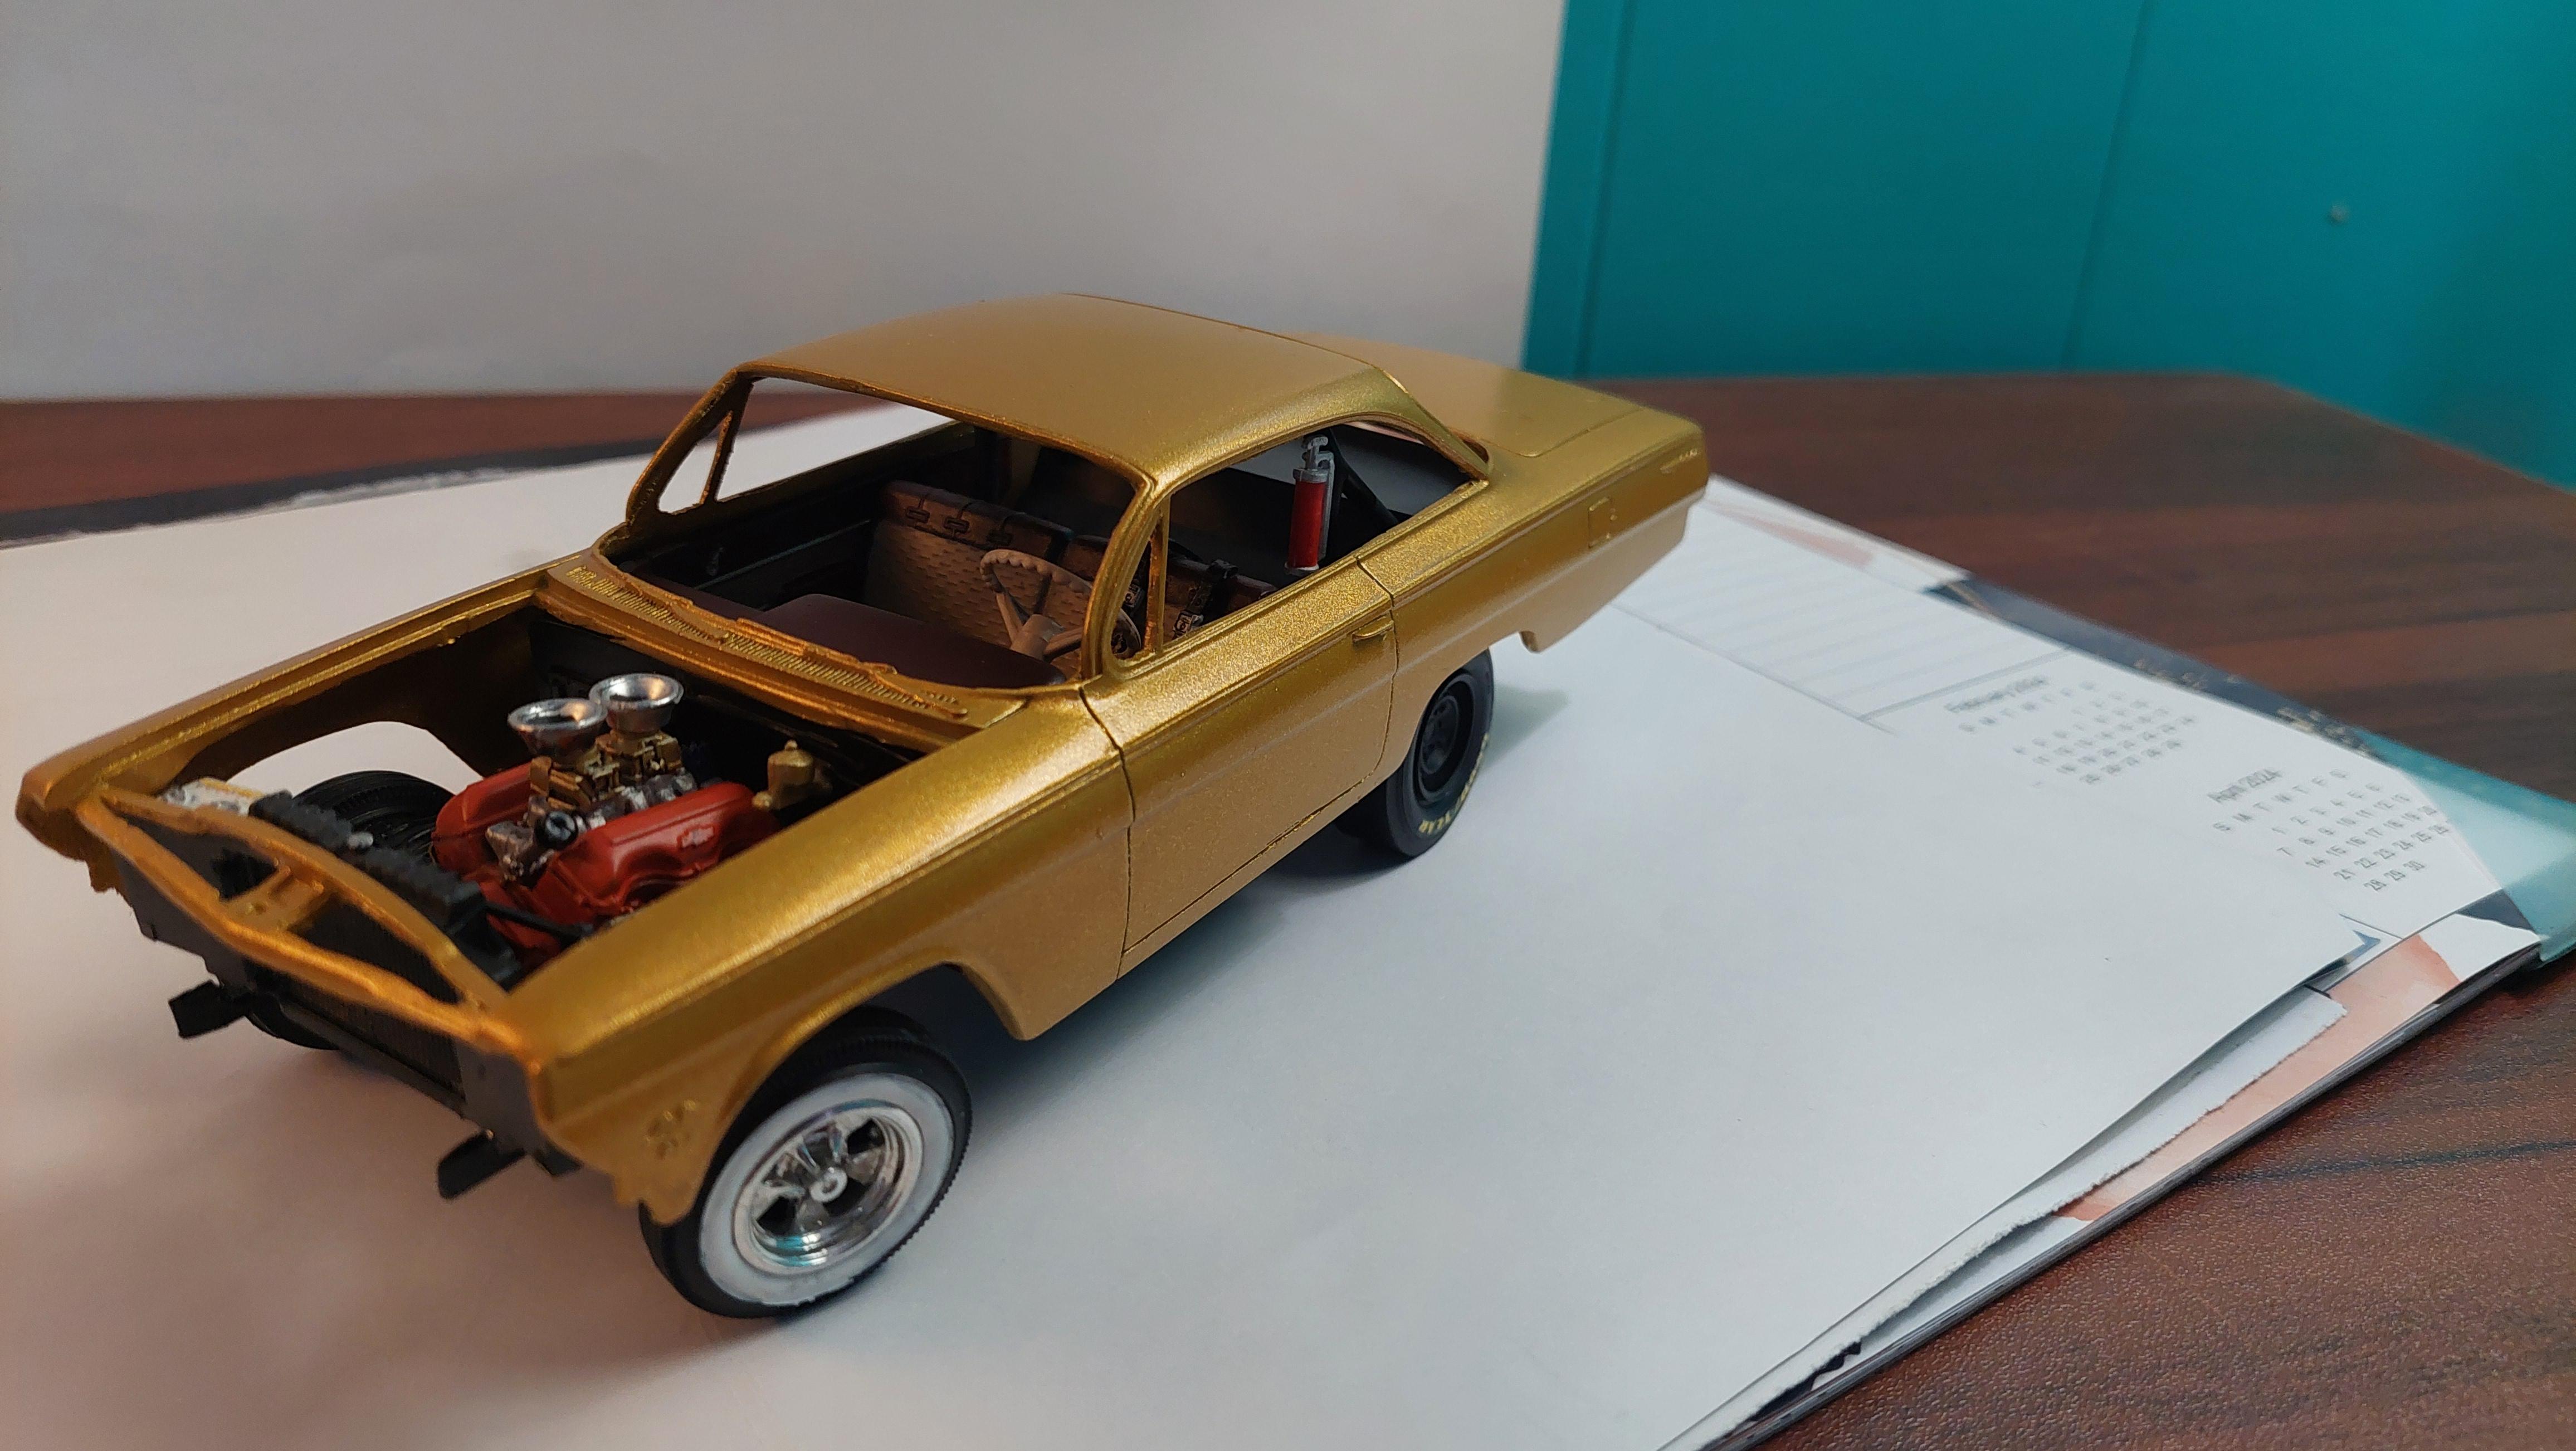
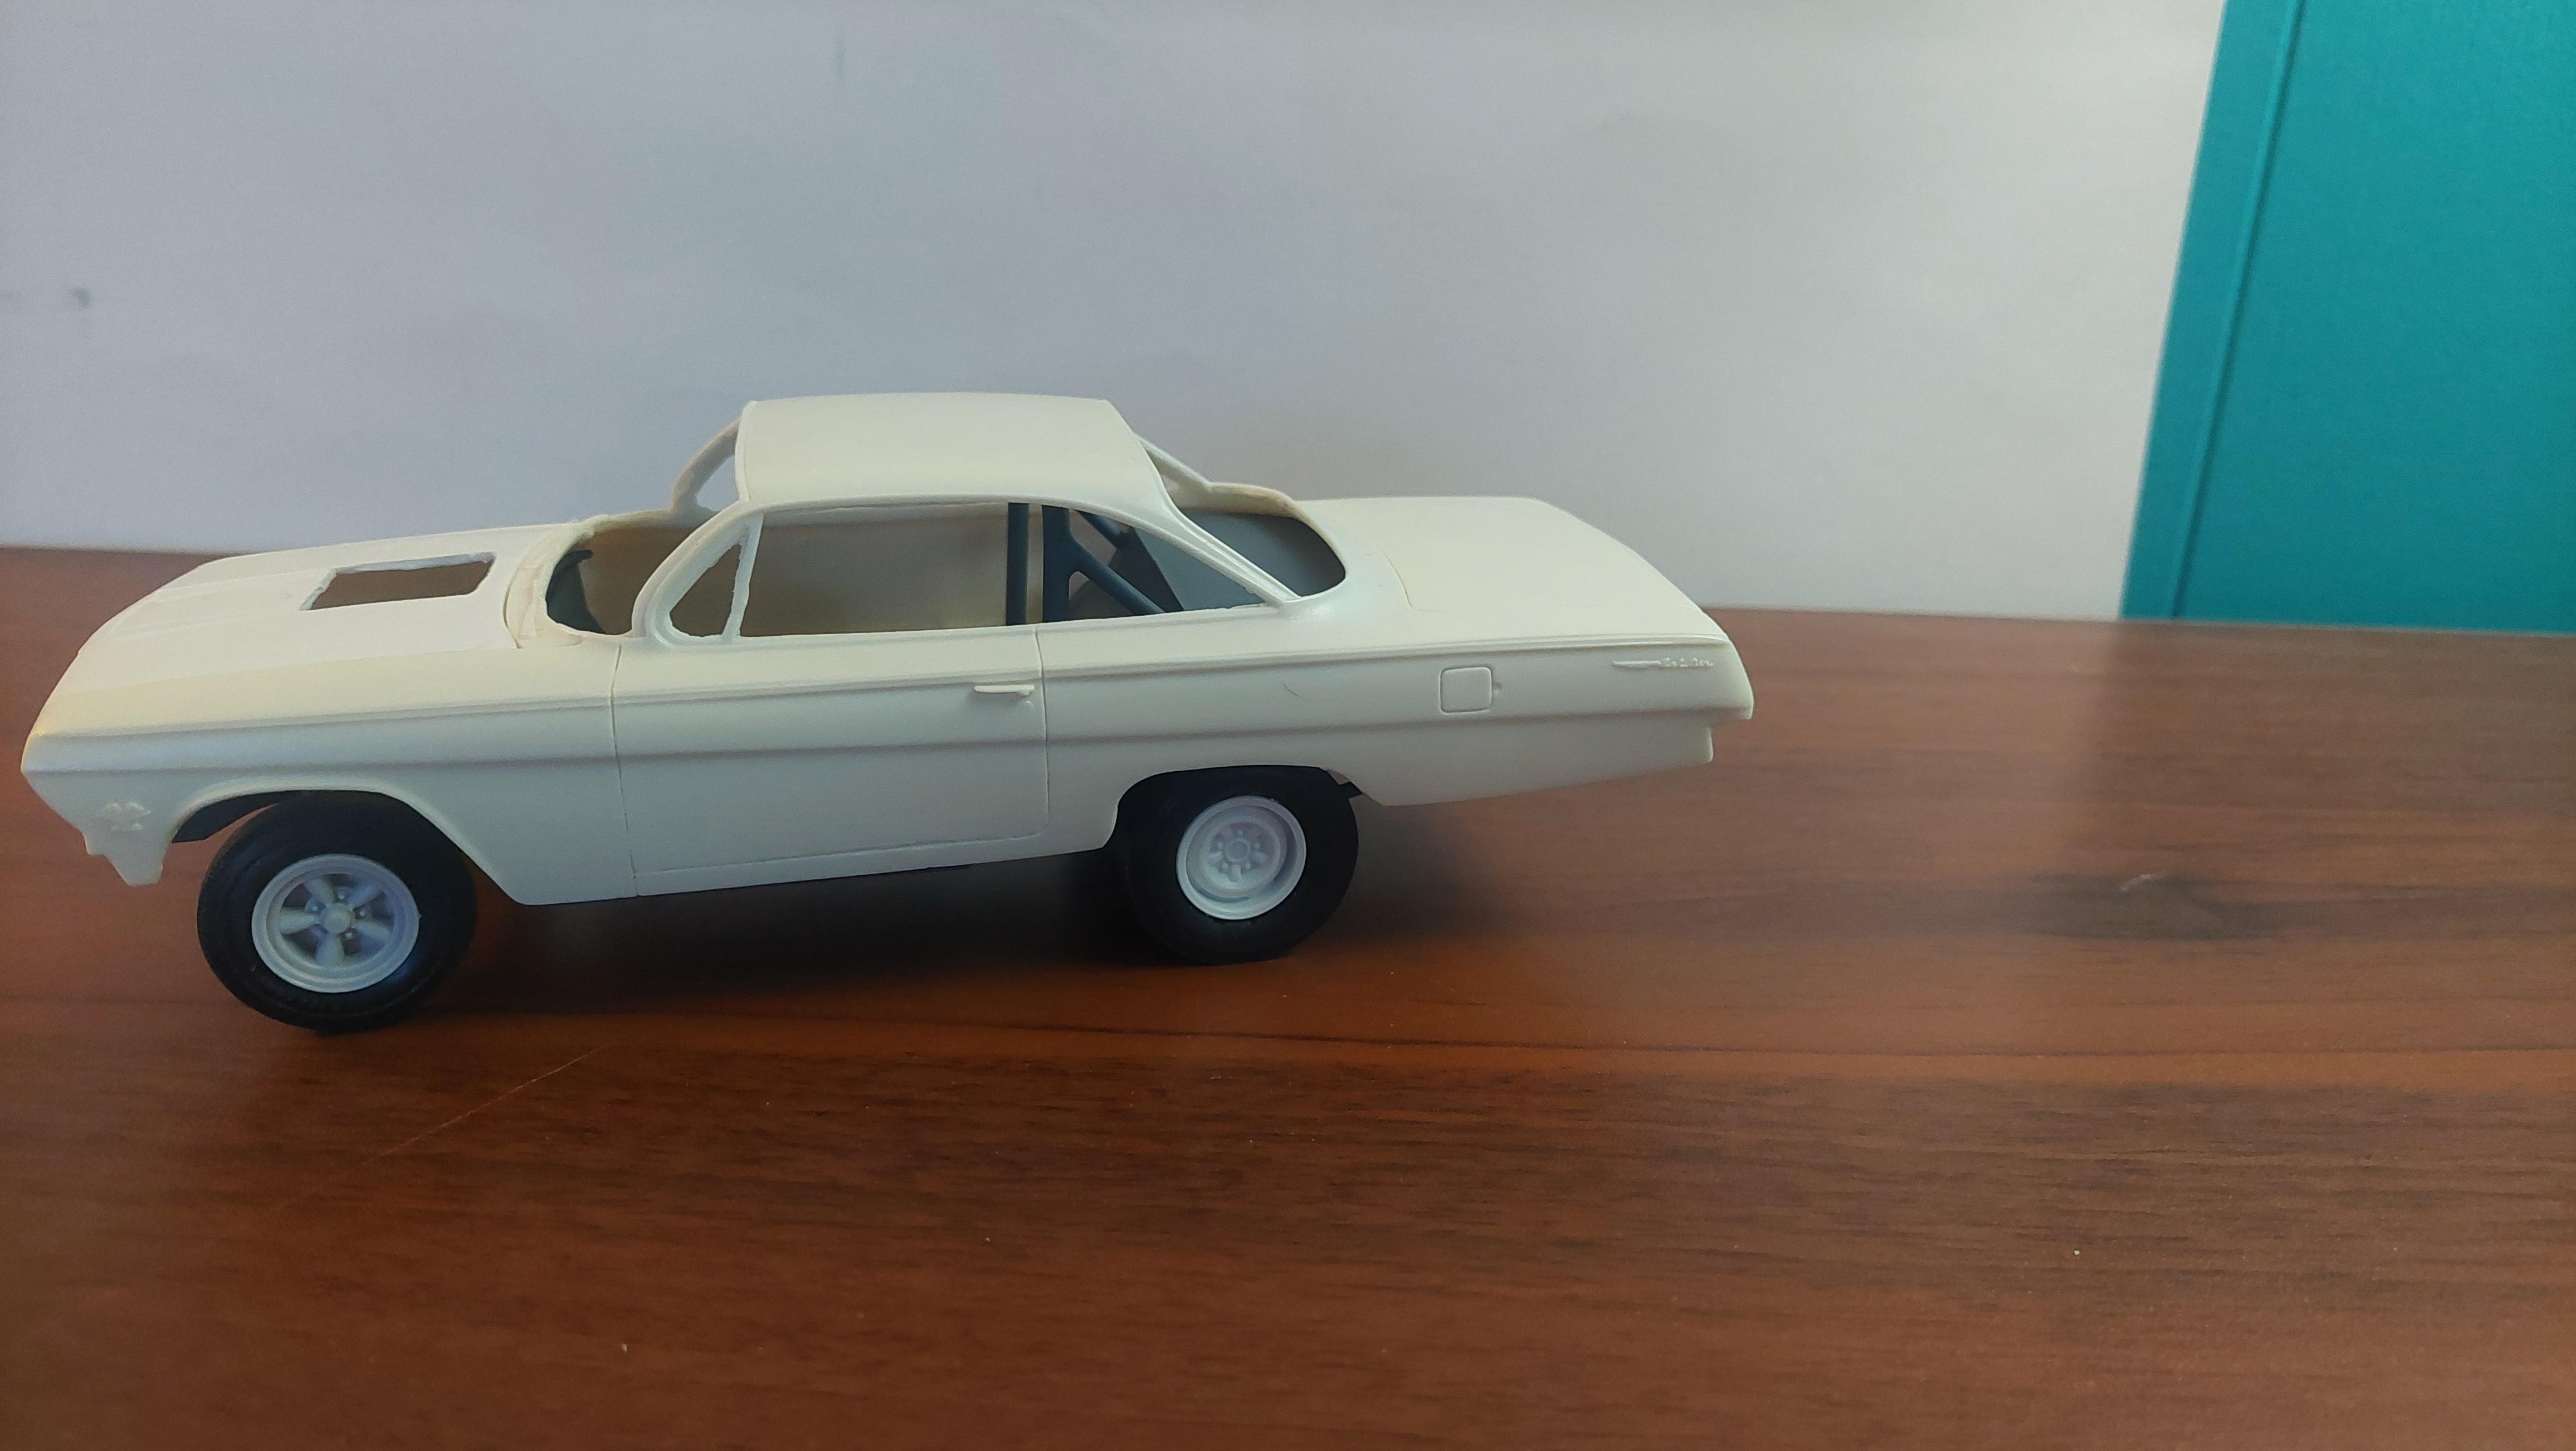
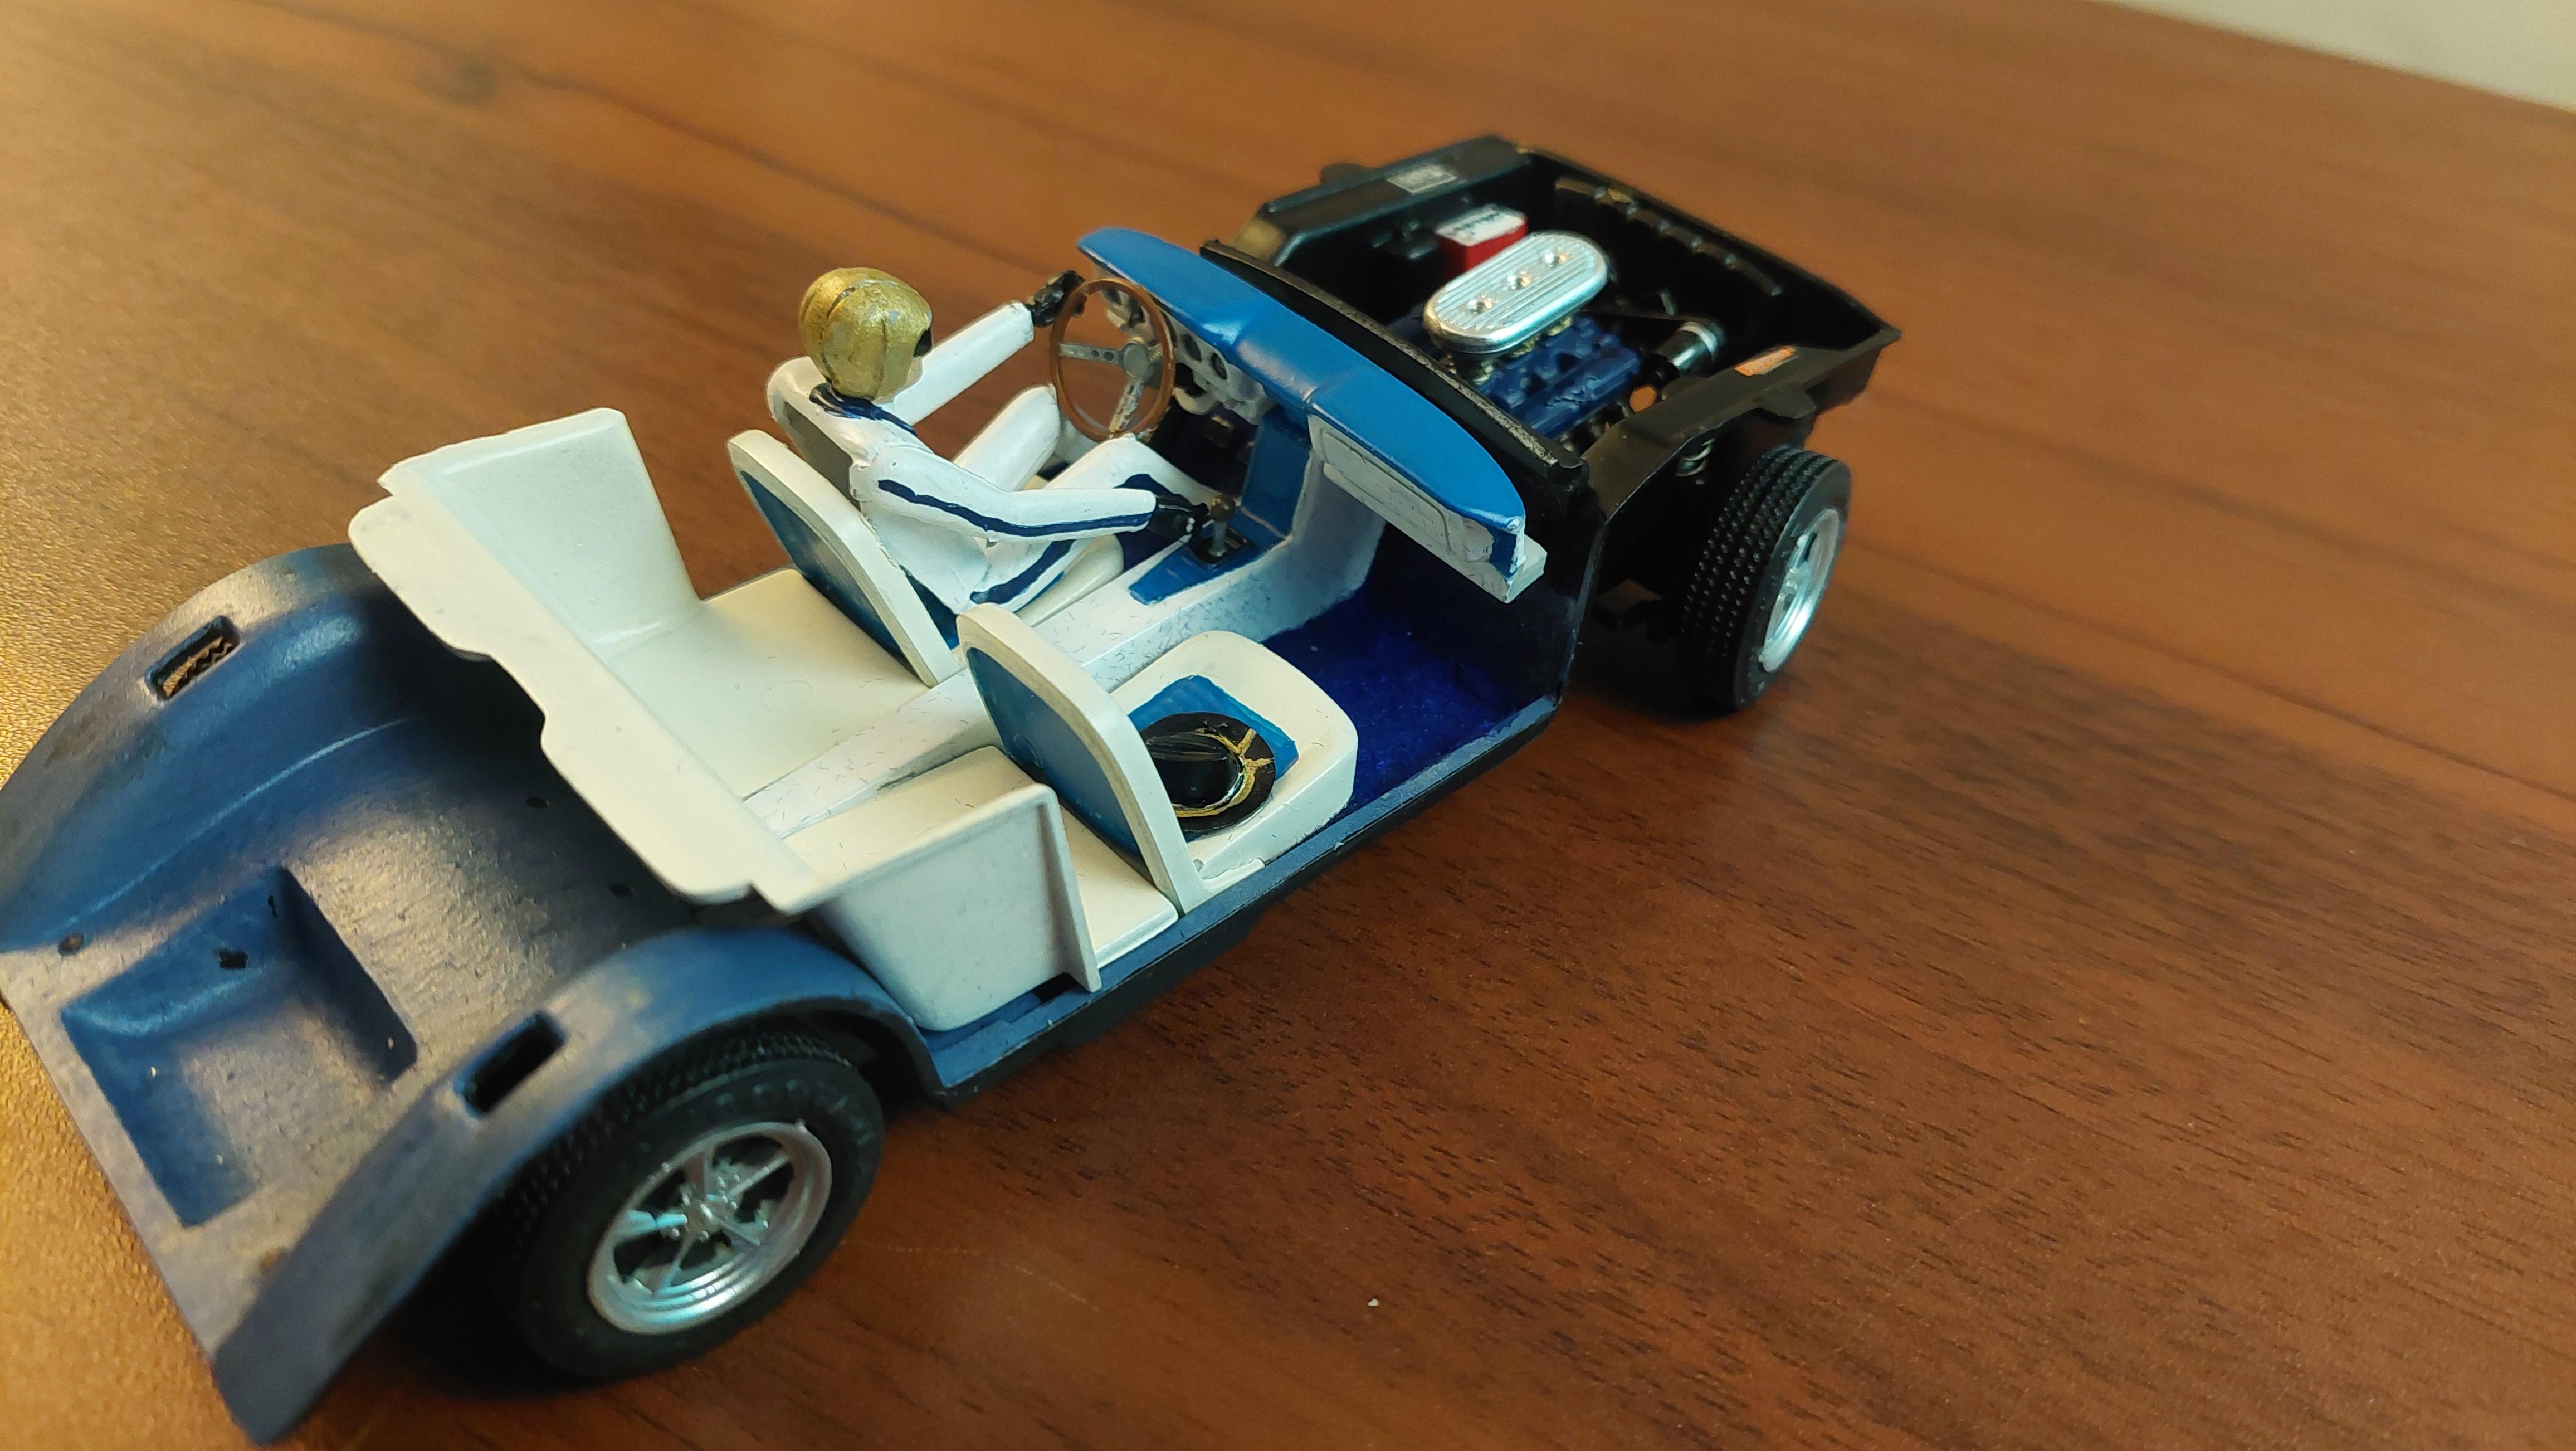
Its a combination of J/F resin body ,AMT parts. Full front interior, rear seat delete, back half of chassis is from an AMT AWB kit, front half is from AMT 62 Chevy kit modified to fit interiorand kit 409. Parts box tires and wheels , moon tank and decals. Paint was Testors Extreme Lacquer Inca Gold. The bare metal foil was hard to use on the 62's thin trim.
-
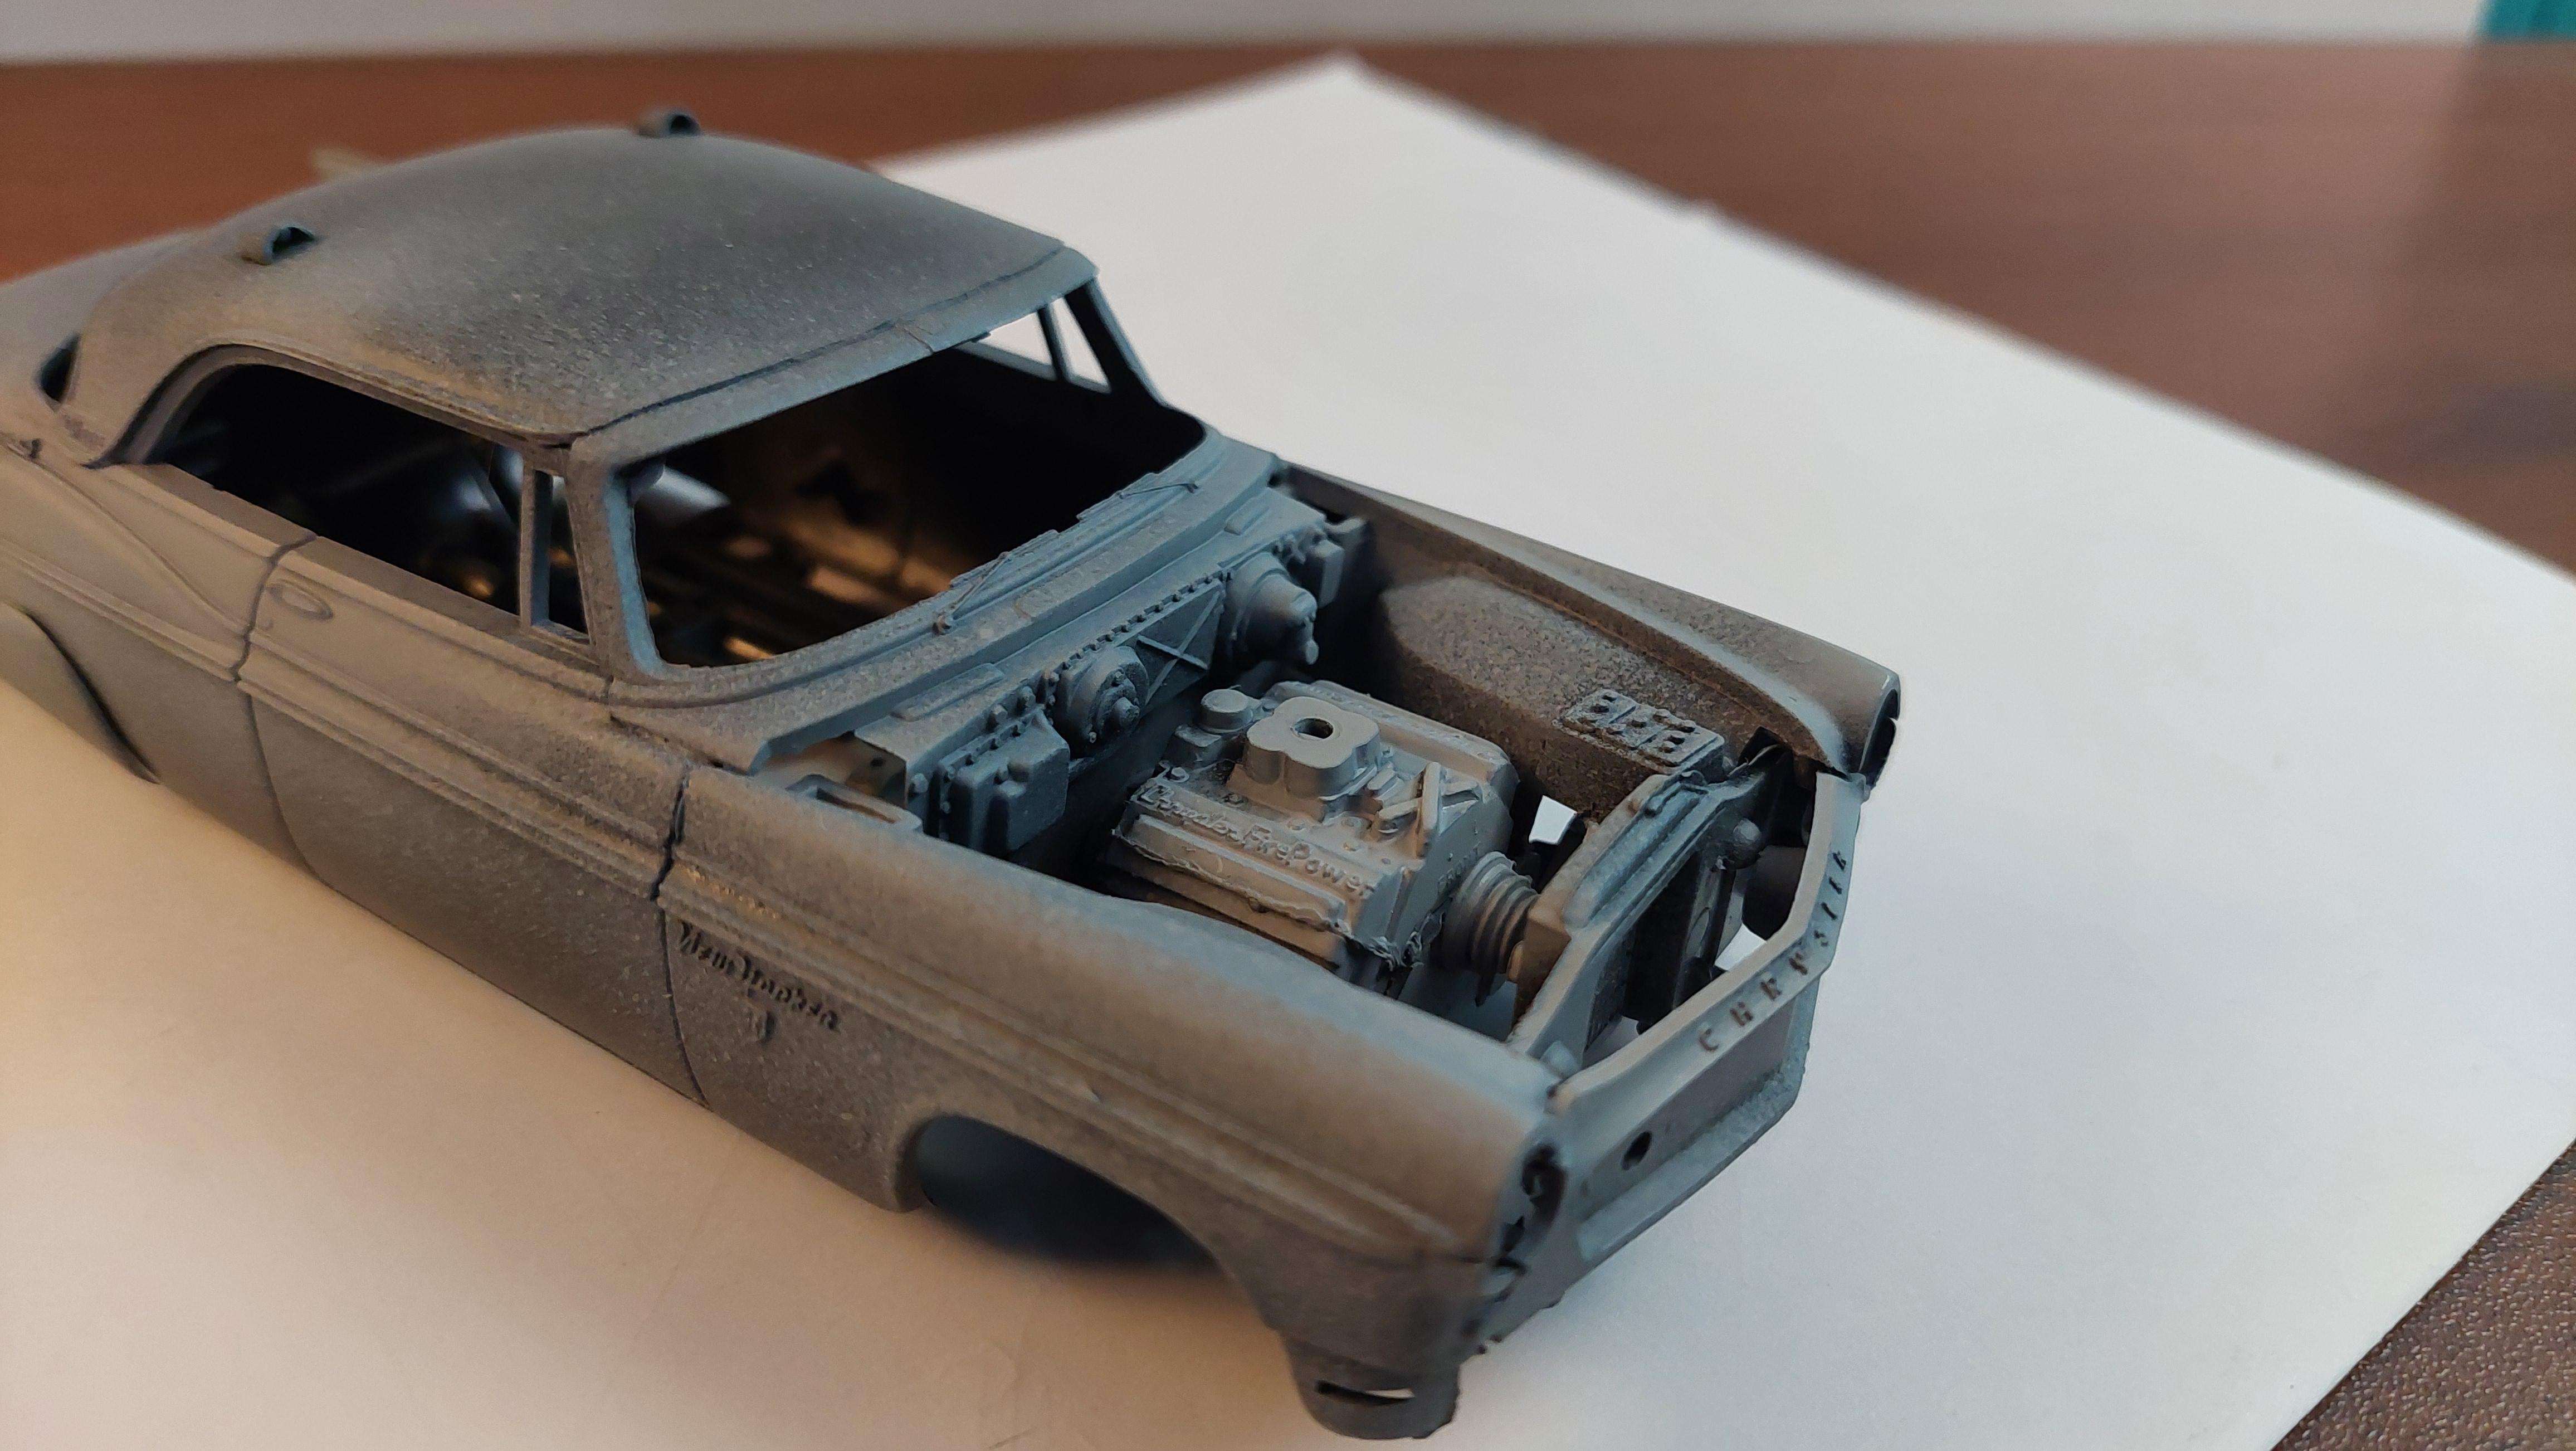
Moving it along this week, interior done, engine almost done, a few odds and ends on the chassis to complete while the paint cures up before foil.
-
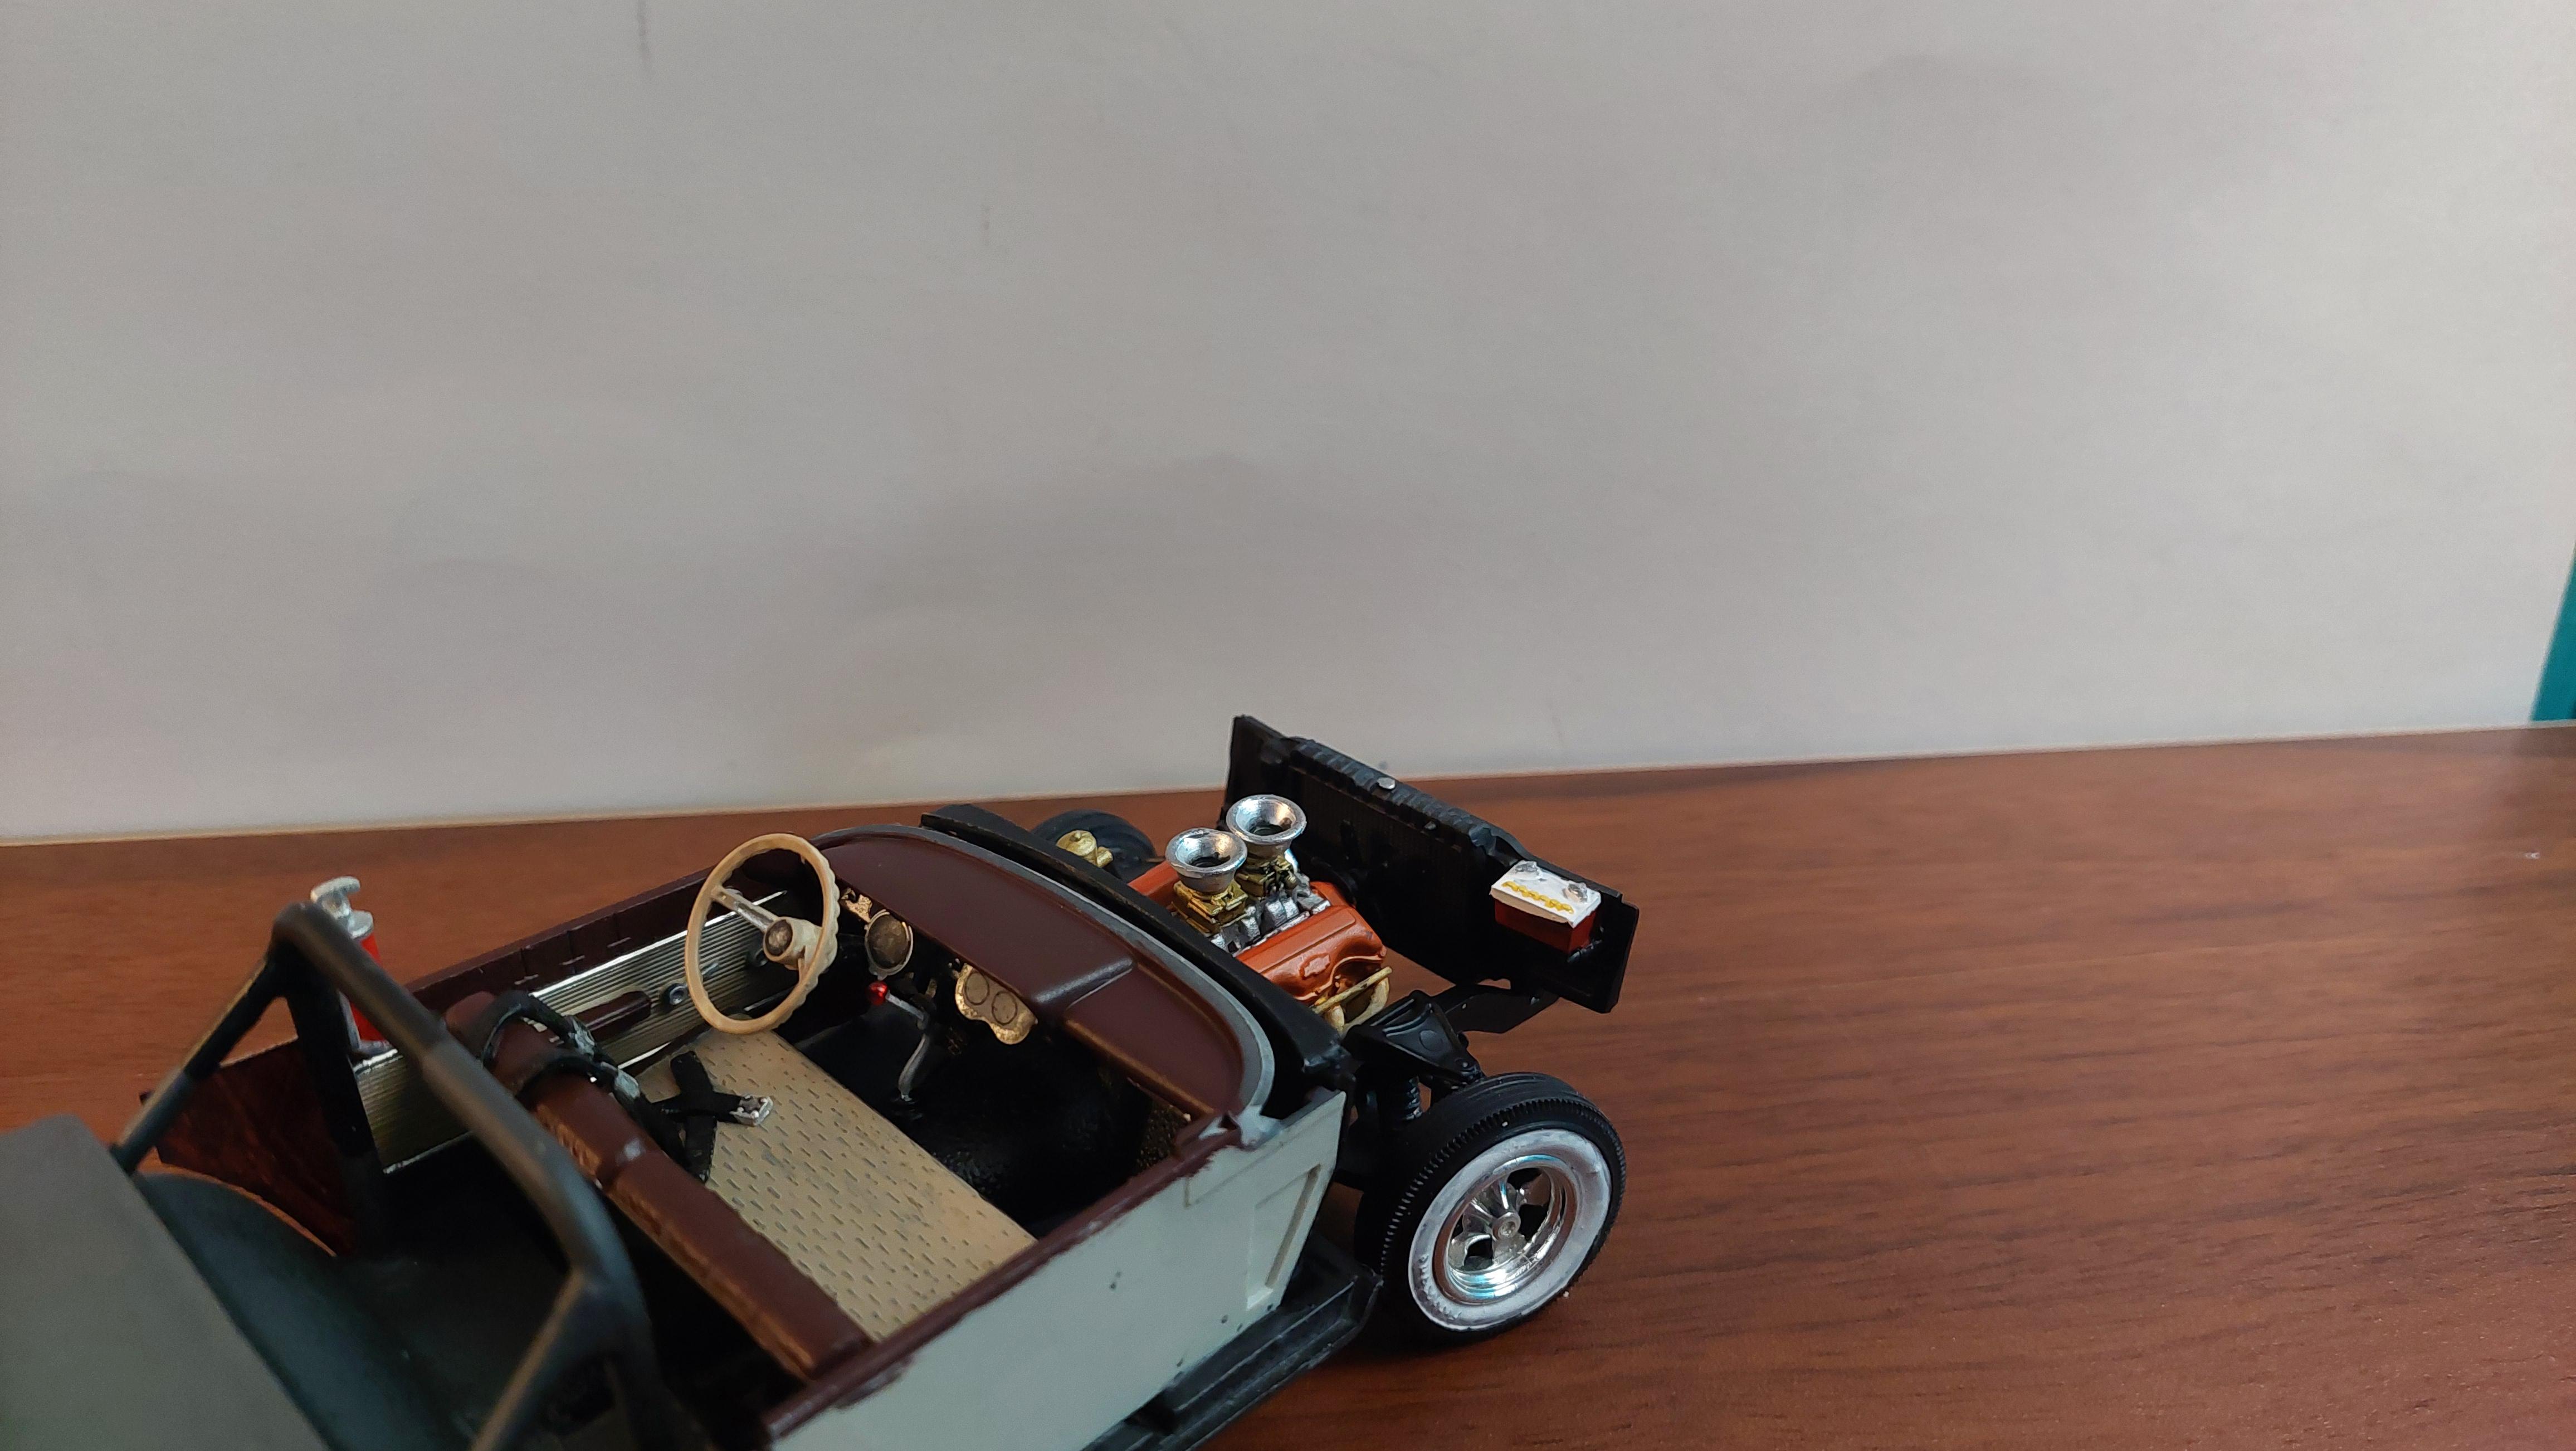
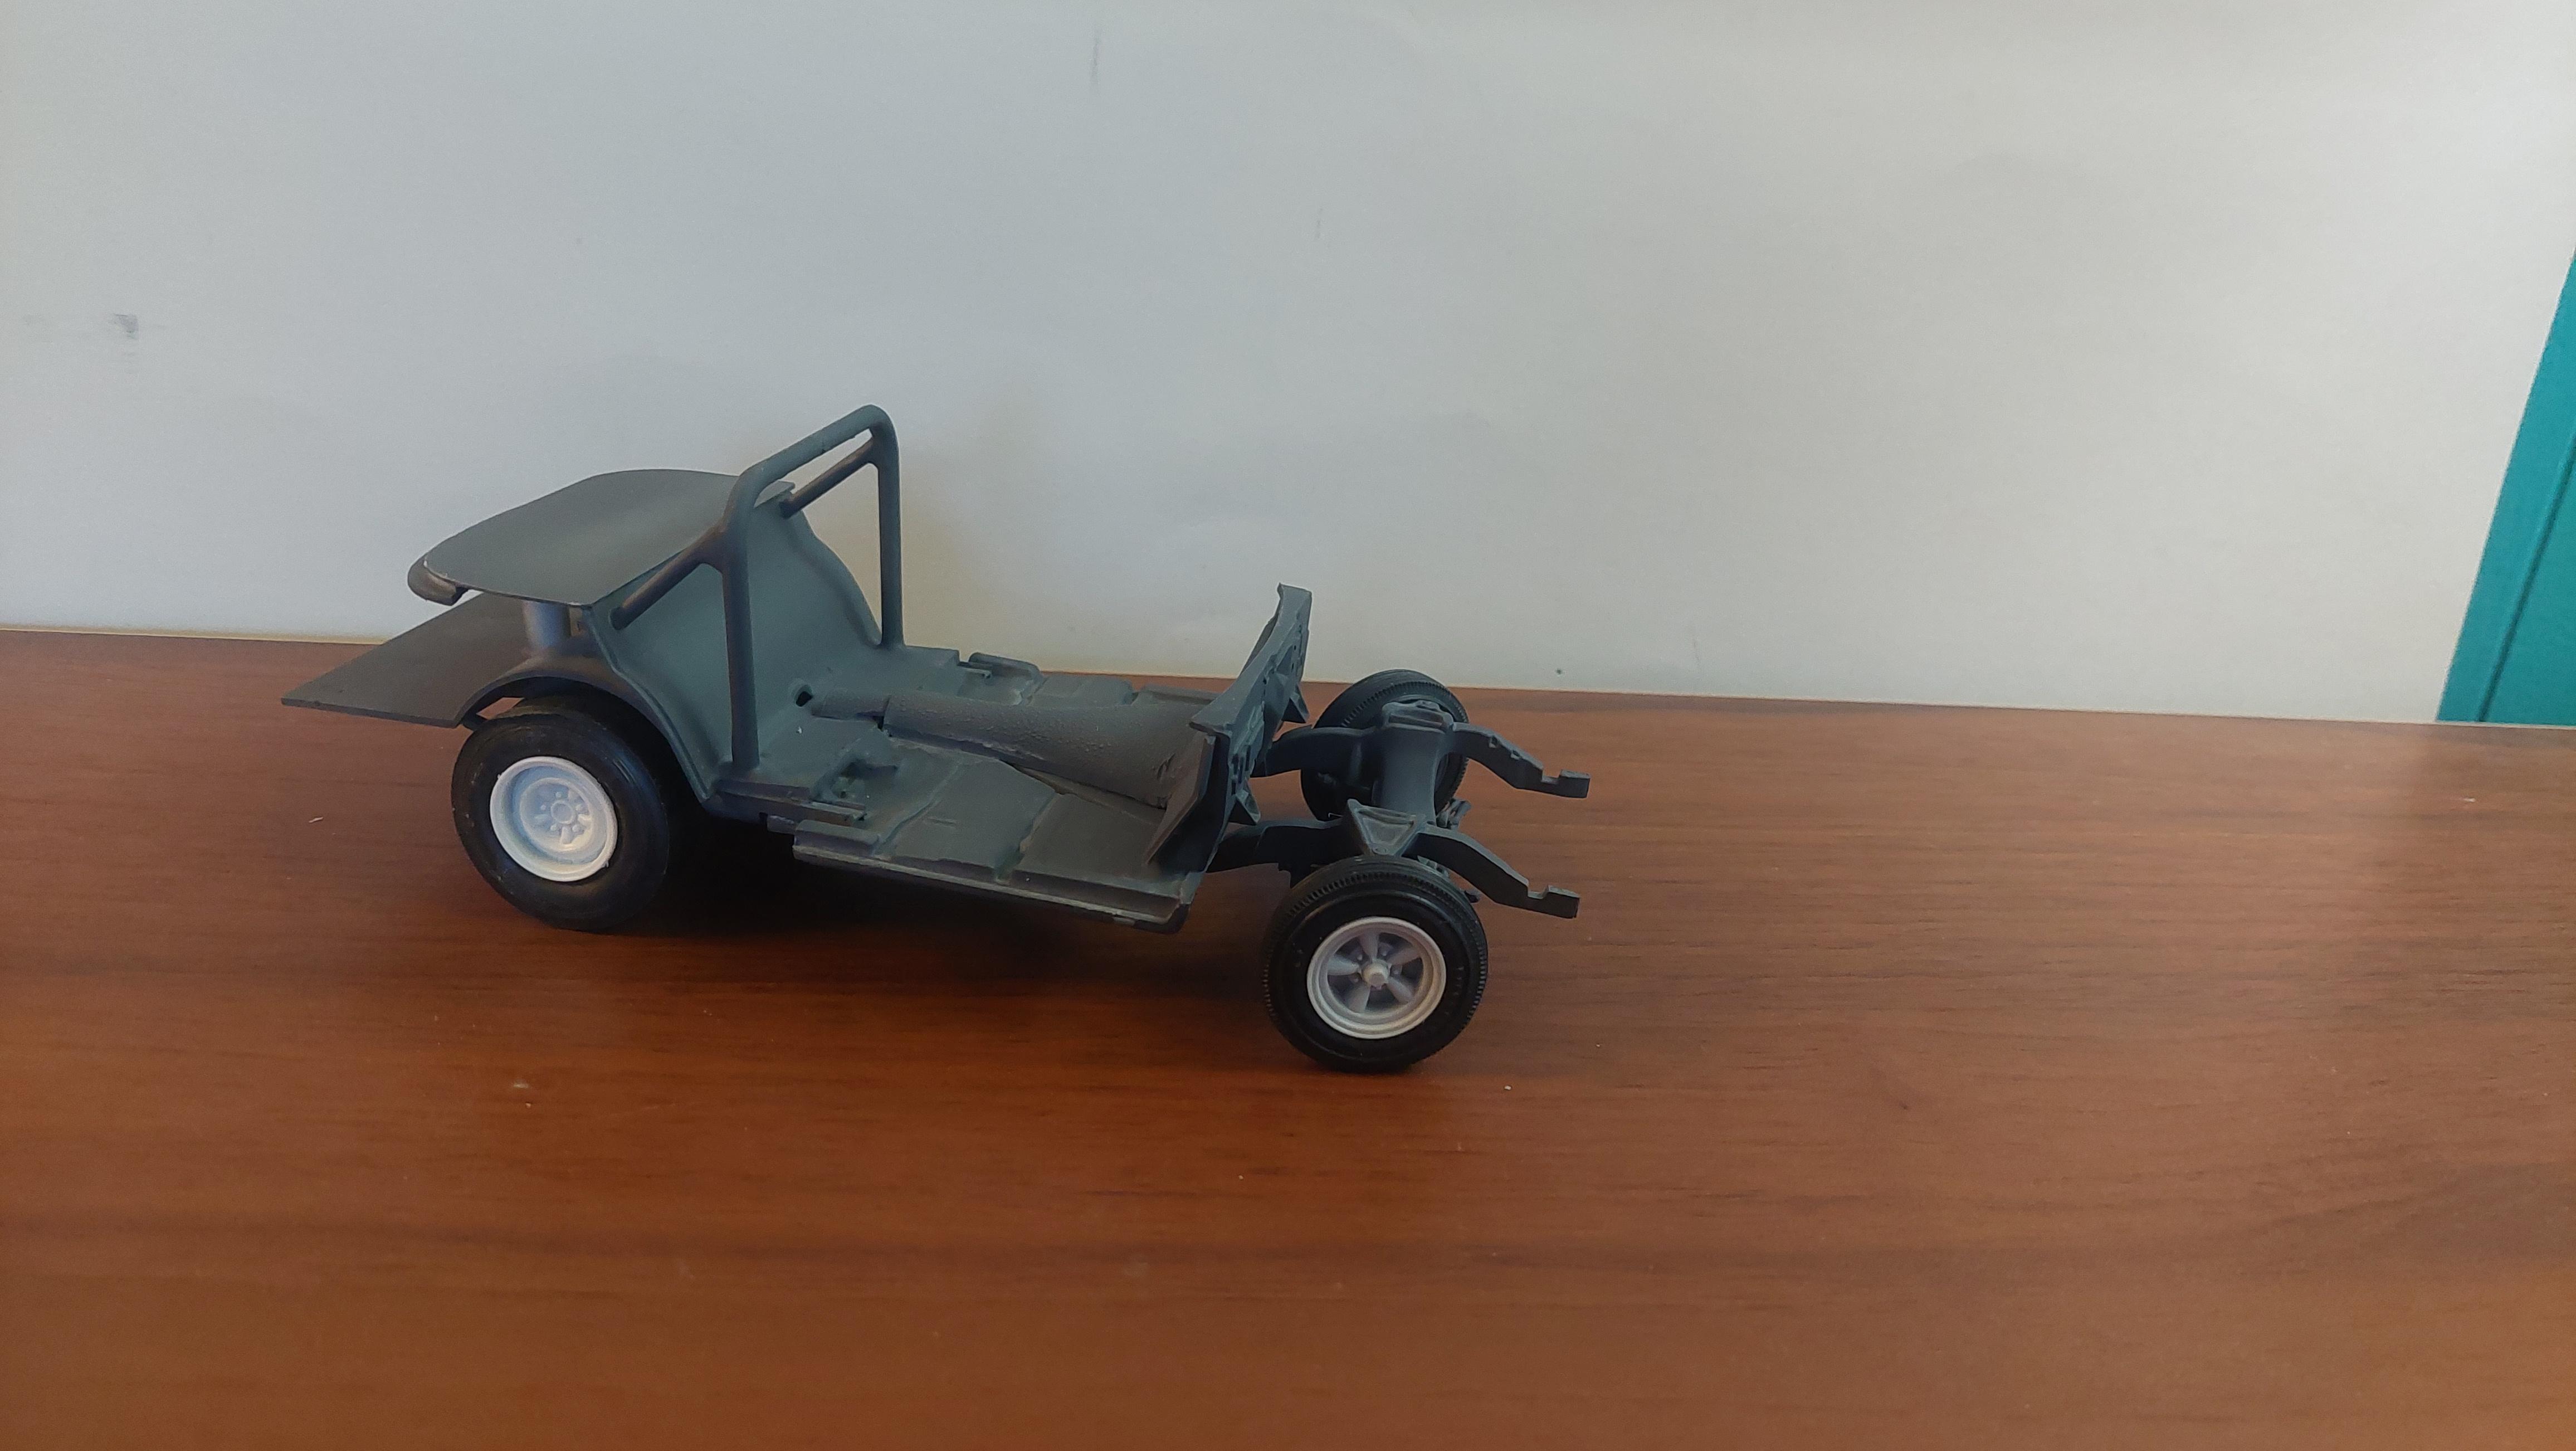
Started on this AWB last week but wanted to try combining the front half of the AMT kit chassis and the rear of the Chevy II AWB kit chassis. After measuring and cutting and much test fitting I got the body cleaned up and this is where Im at. Flintstone resin body. Parts box slicks and rollbar. Working on using the 409 with a high rise. Extended package shelf from scrap sheet plastic.
-
That warped body would be one hard kit to keep everything aligned with opening doors,trunk and hood ,plus being a convertible.
-
The first issue had more custom parts and I think black stripes, 2nd issue had blue and the one I built has a blue/green stripe that I opted out off, they seamed a little crunchy to try.
-
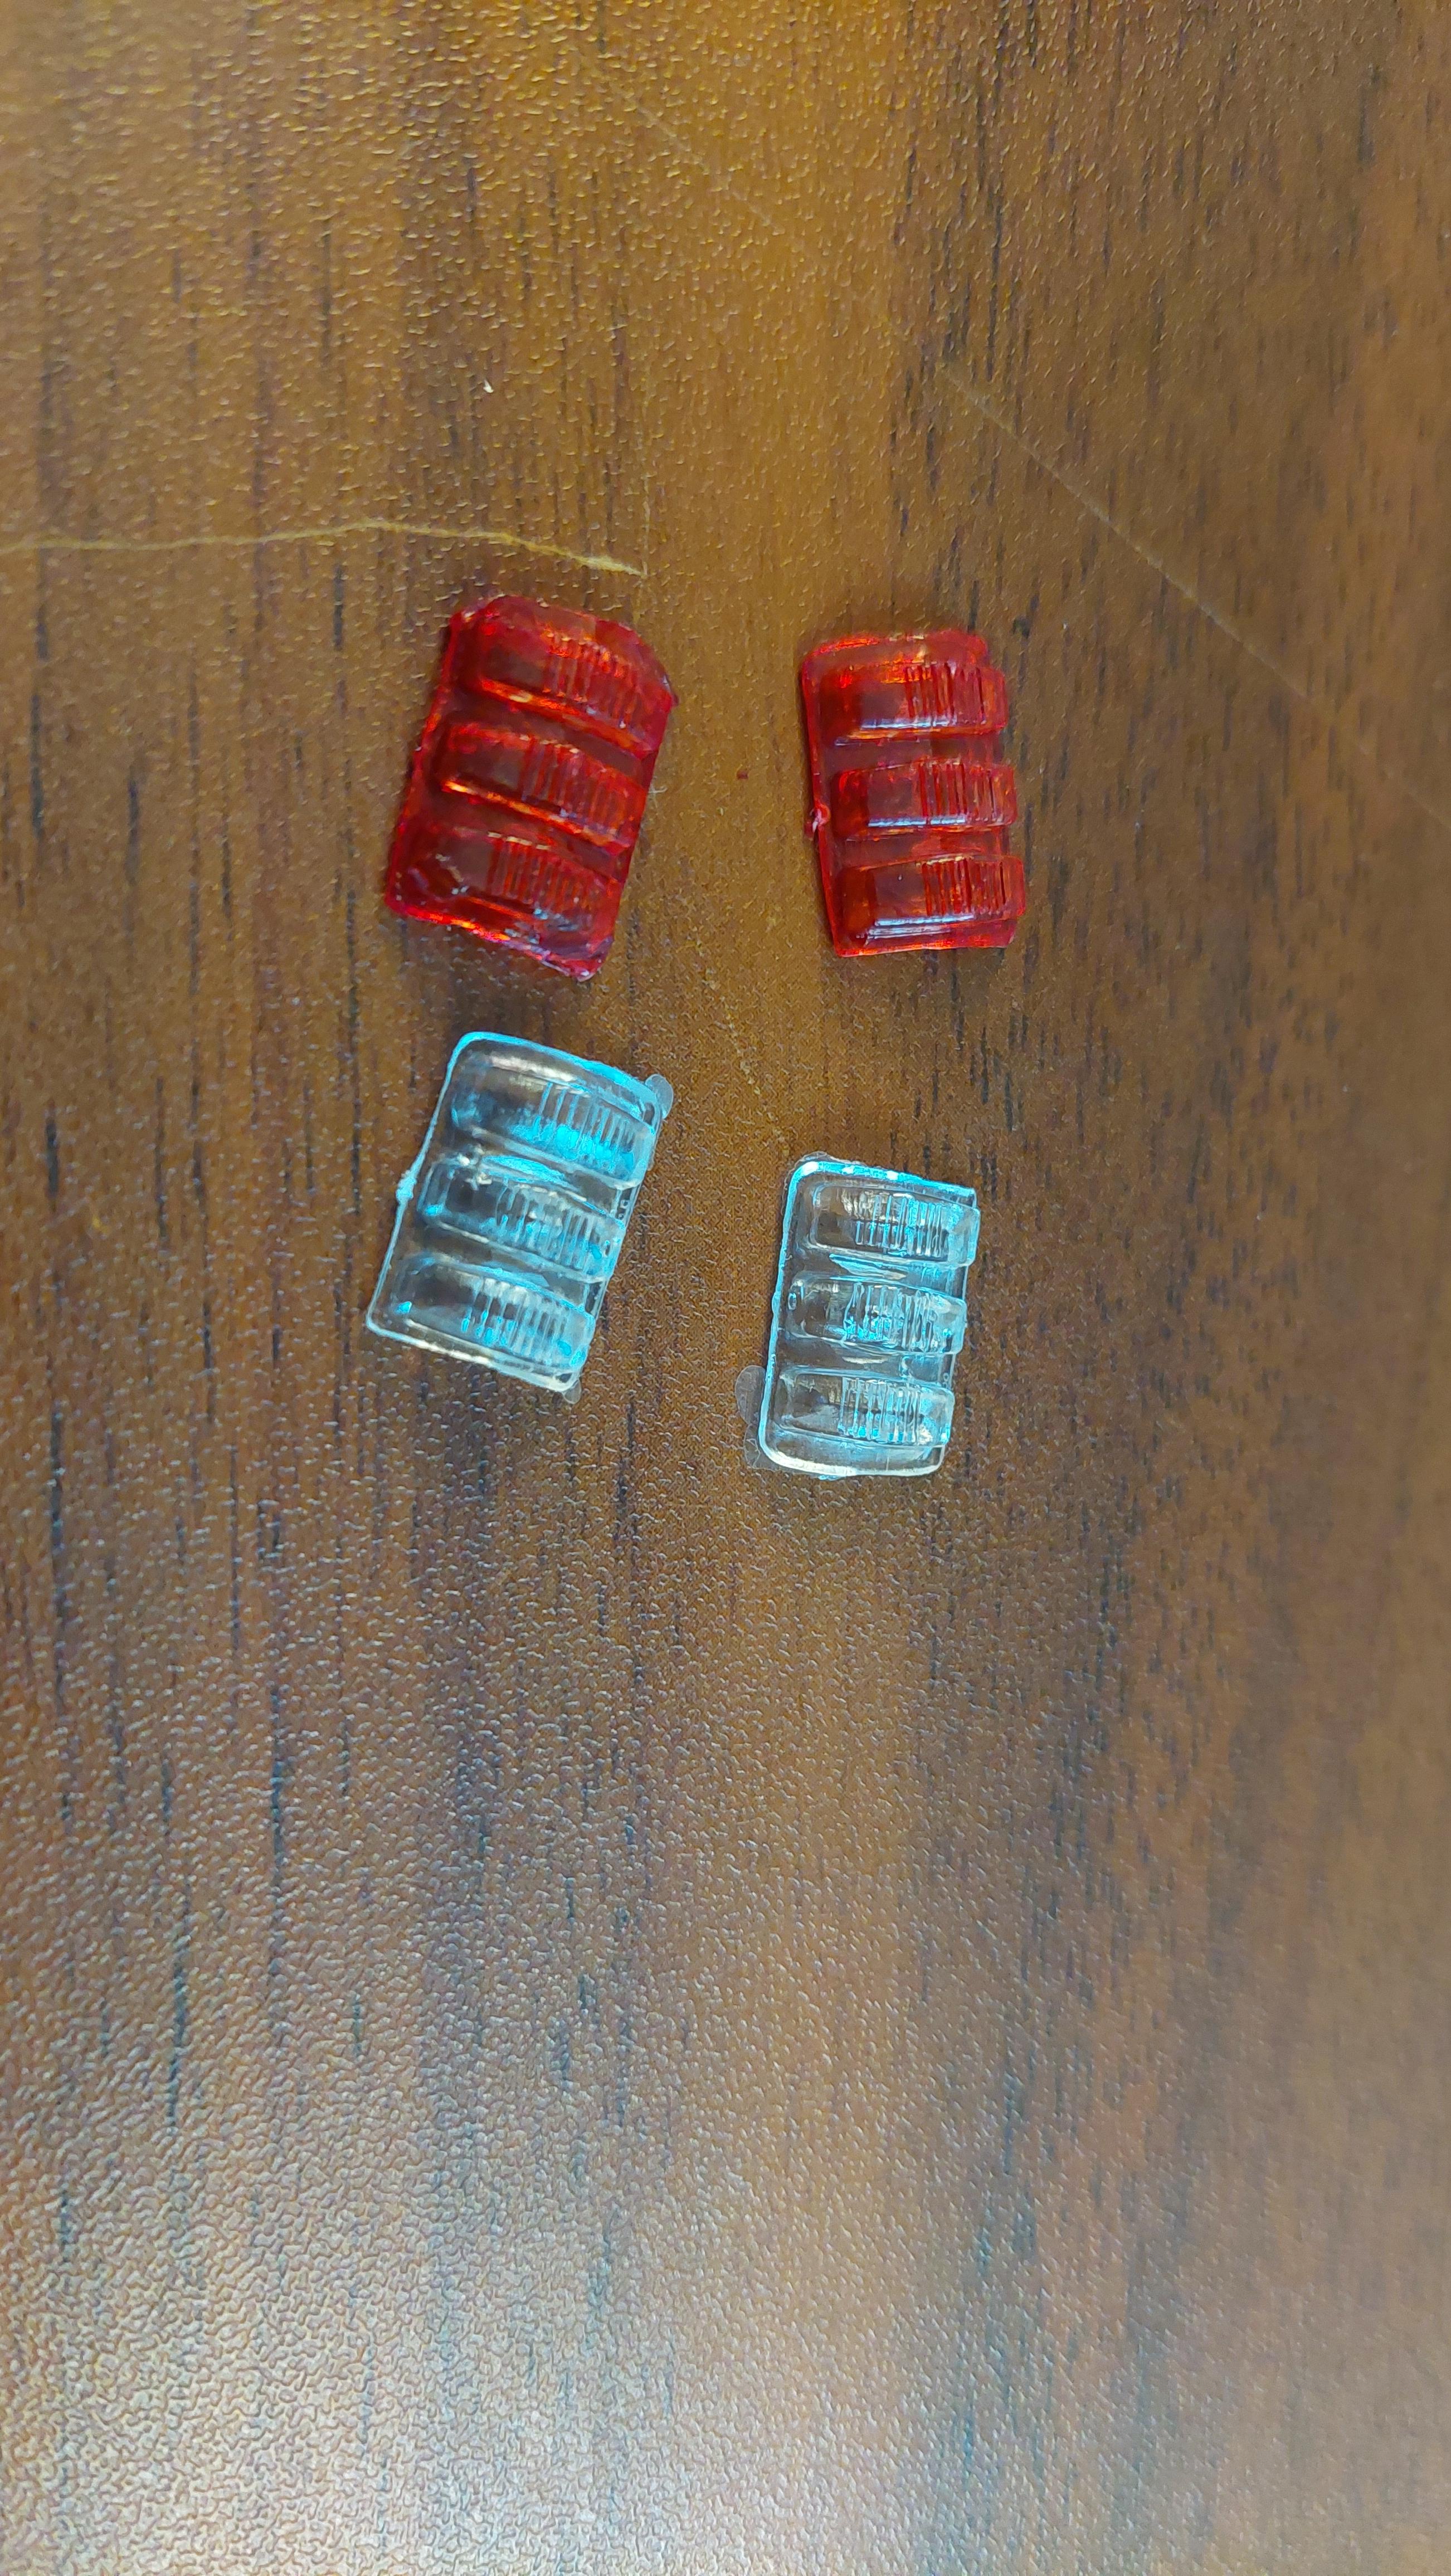
This one is the 1995 Lindberg issue of the IMC kit. The only 2 differences in the kits, the IMC had red rear lights and Lindberg had clear. The decals also differ alot. Kit was pretty fiddly, the top door and trunk hinges needed to be ground down to close properly once chassis was installed, they would bind. Cowboy hat will never fit the driver as in the IMC and Lindberg kit, drivers head already had on a helmet. Everything works as it should, steering,doors trunk ,folding bucket seats and hood but it all needs much trimming and test fitting. I chose the race version with bigger motor, mags and rear seat delete option tub.
-
Yes it did , all healed up thanks. Best of luck finding a GoodGuys kit with useable decals.
-
Still looking for this body if anybody has one...
-
Thank you... and yes it was a 55 wagon, that AMT kit comes with the roof and bed rails to make the ElCamino and the Revell 55 convertible parts fit pretty nice on this AMT kit too.
-
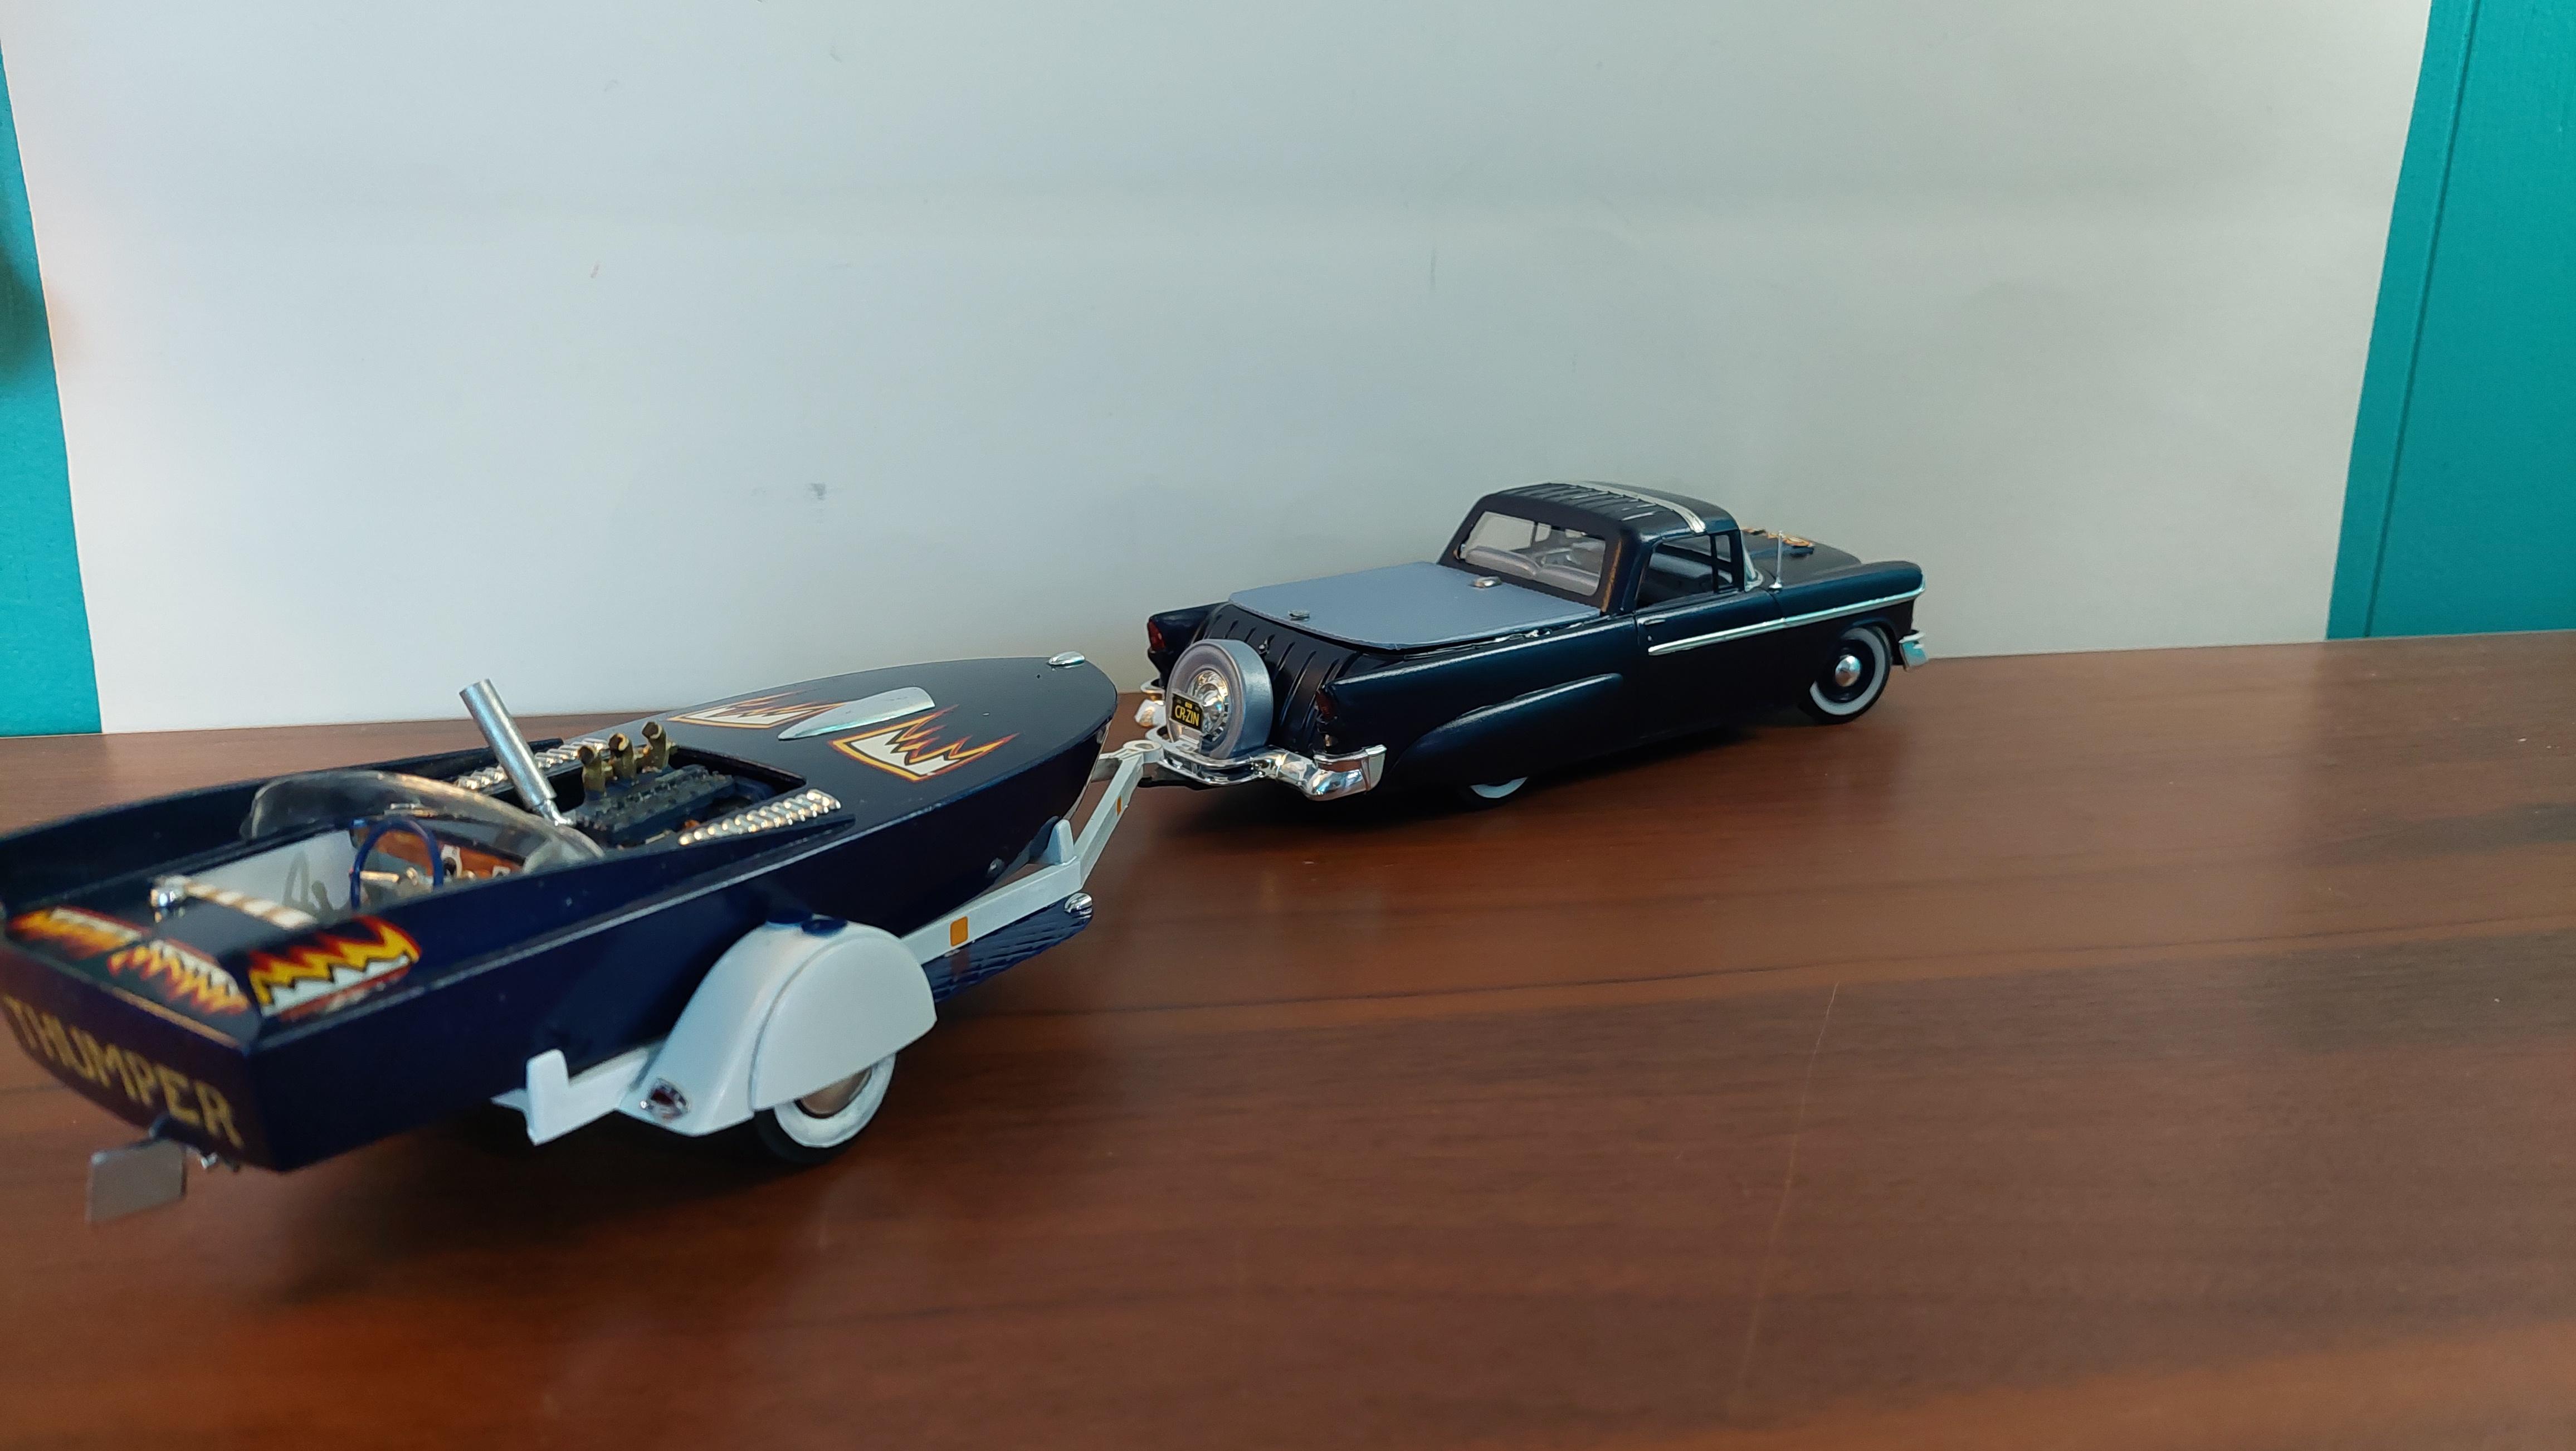
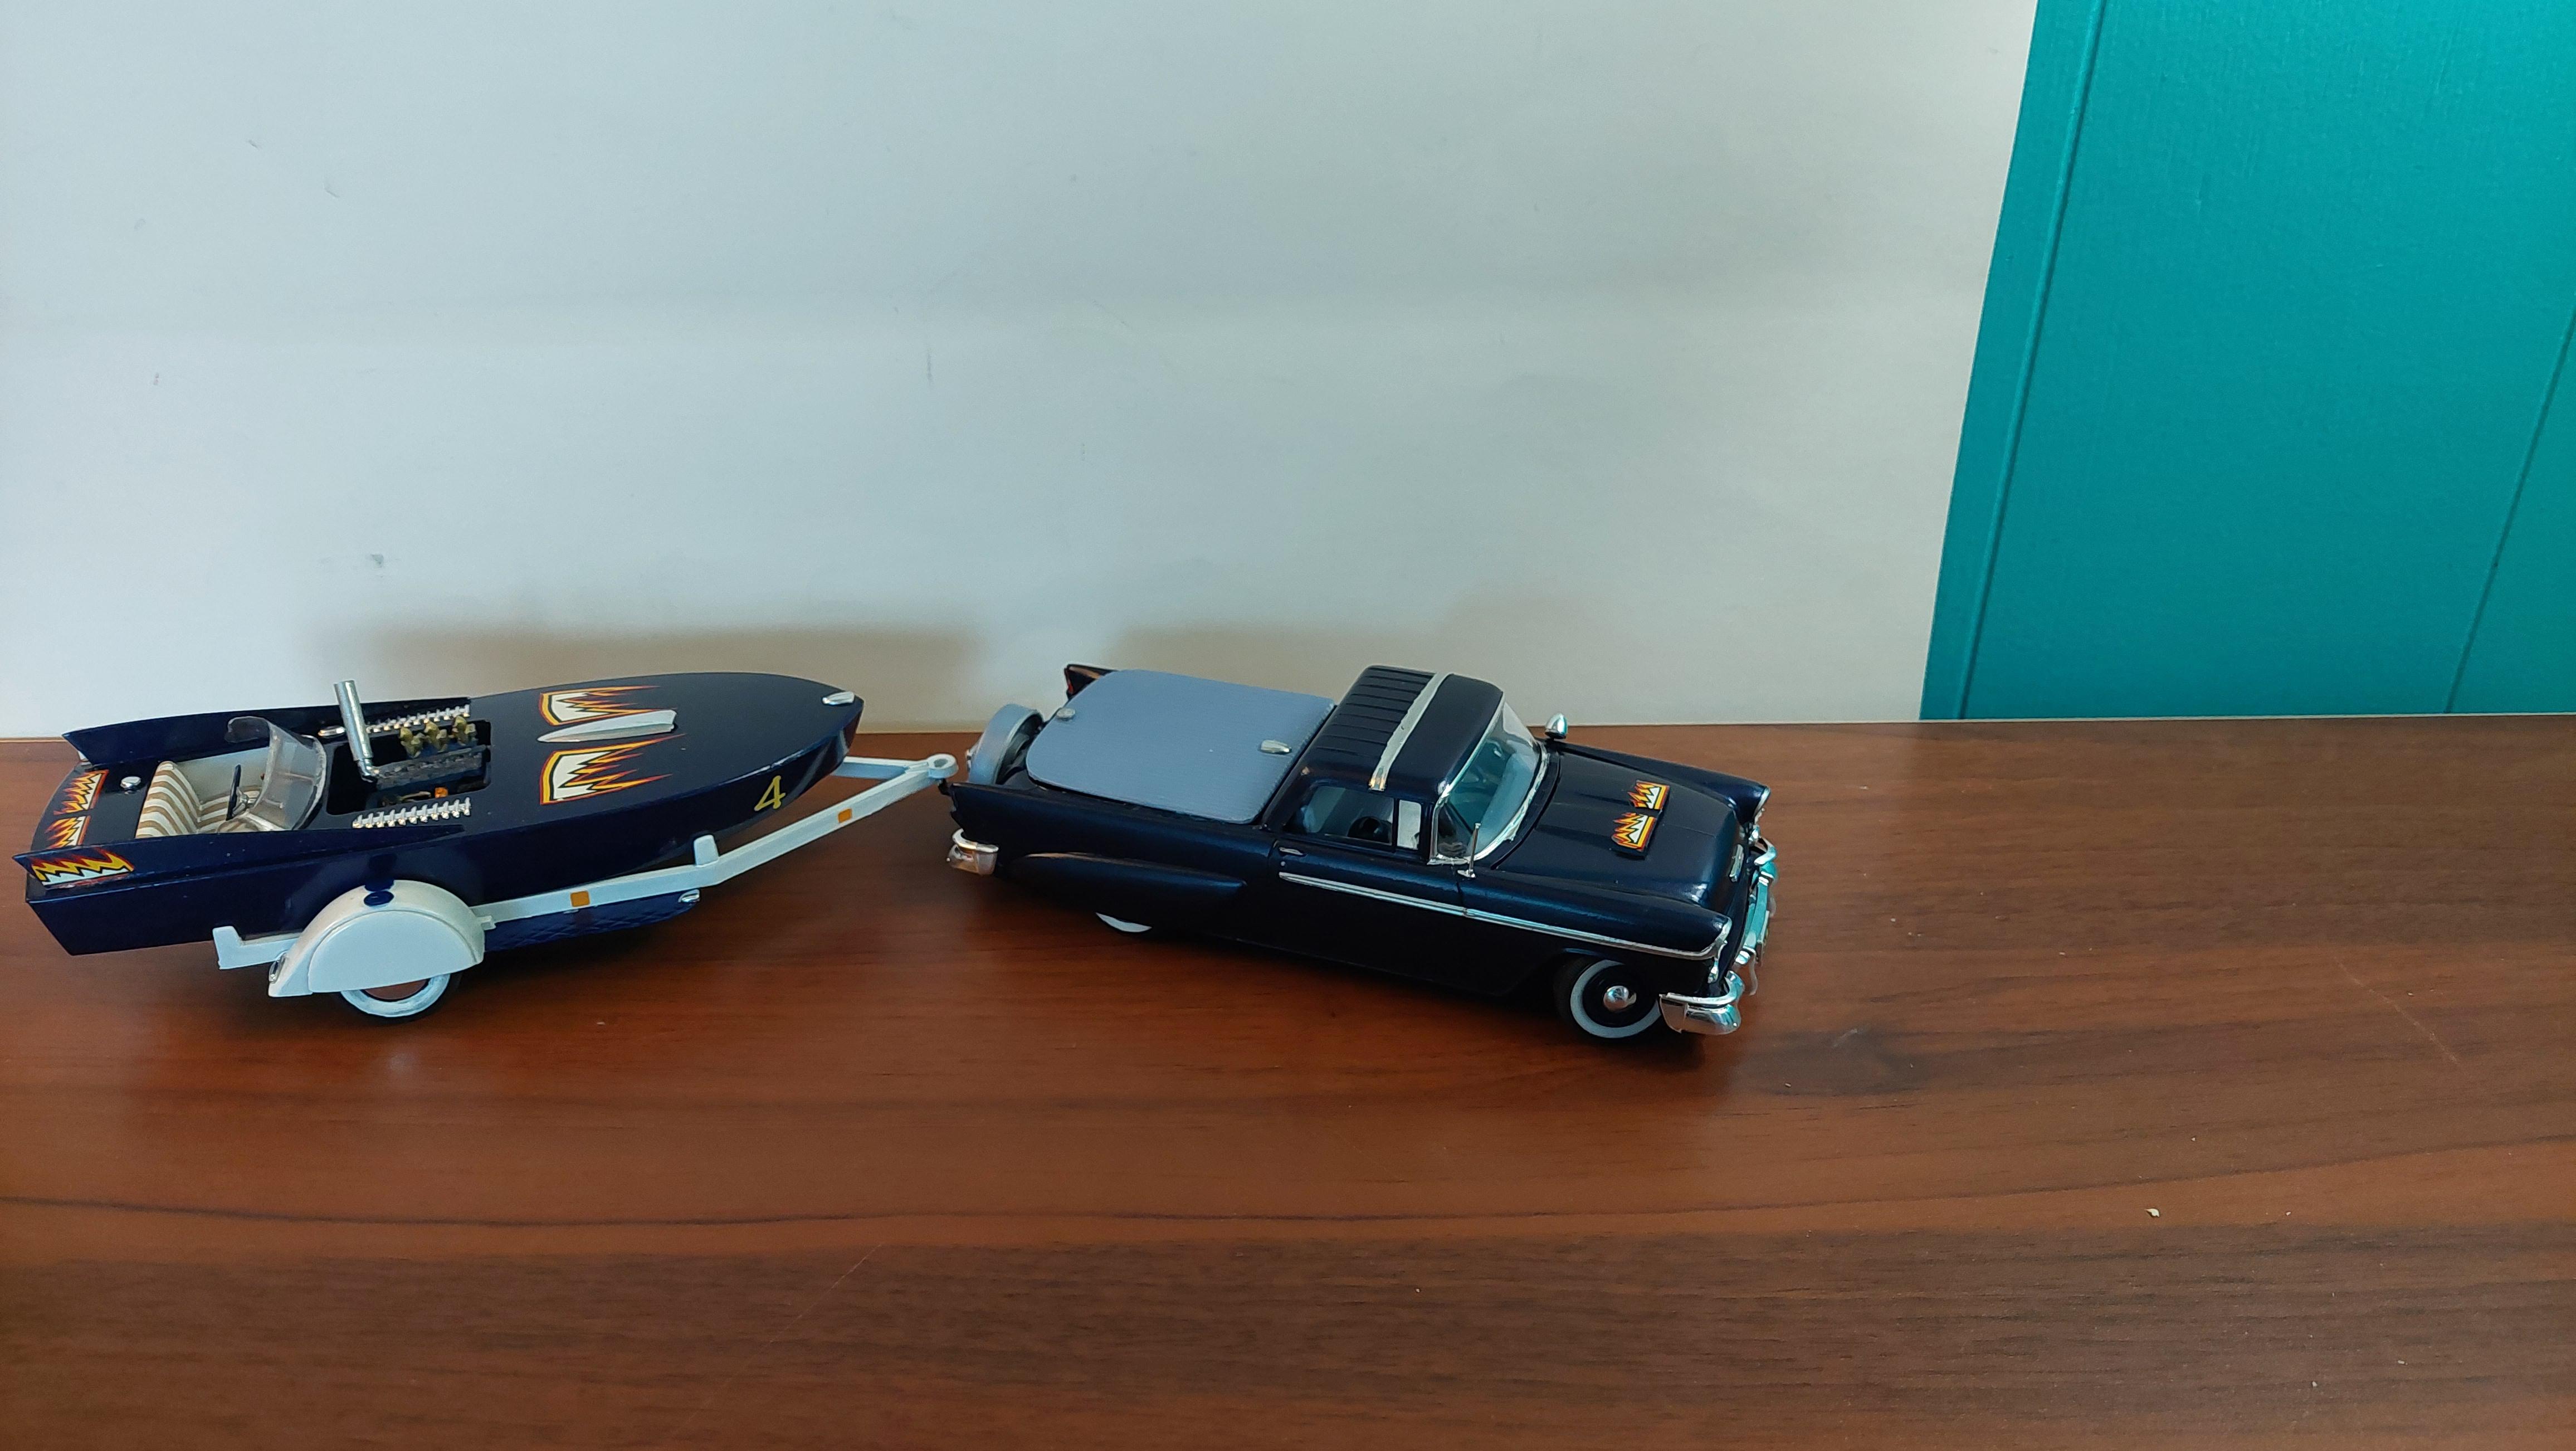
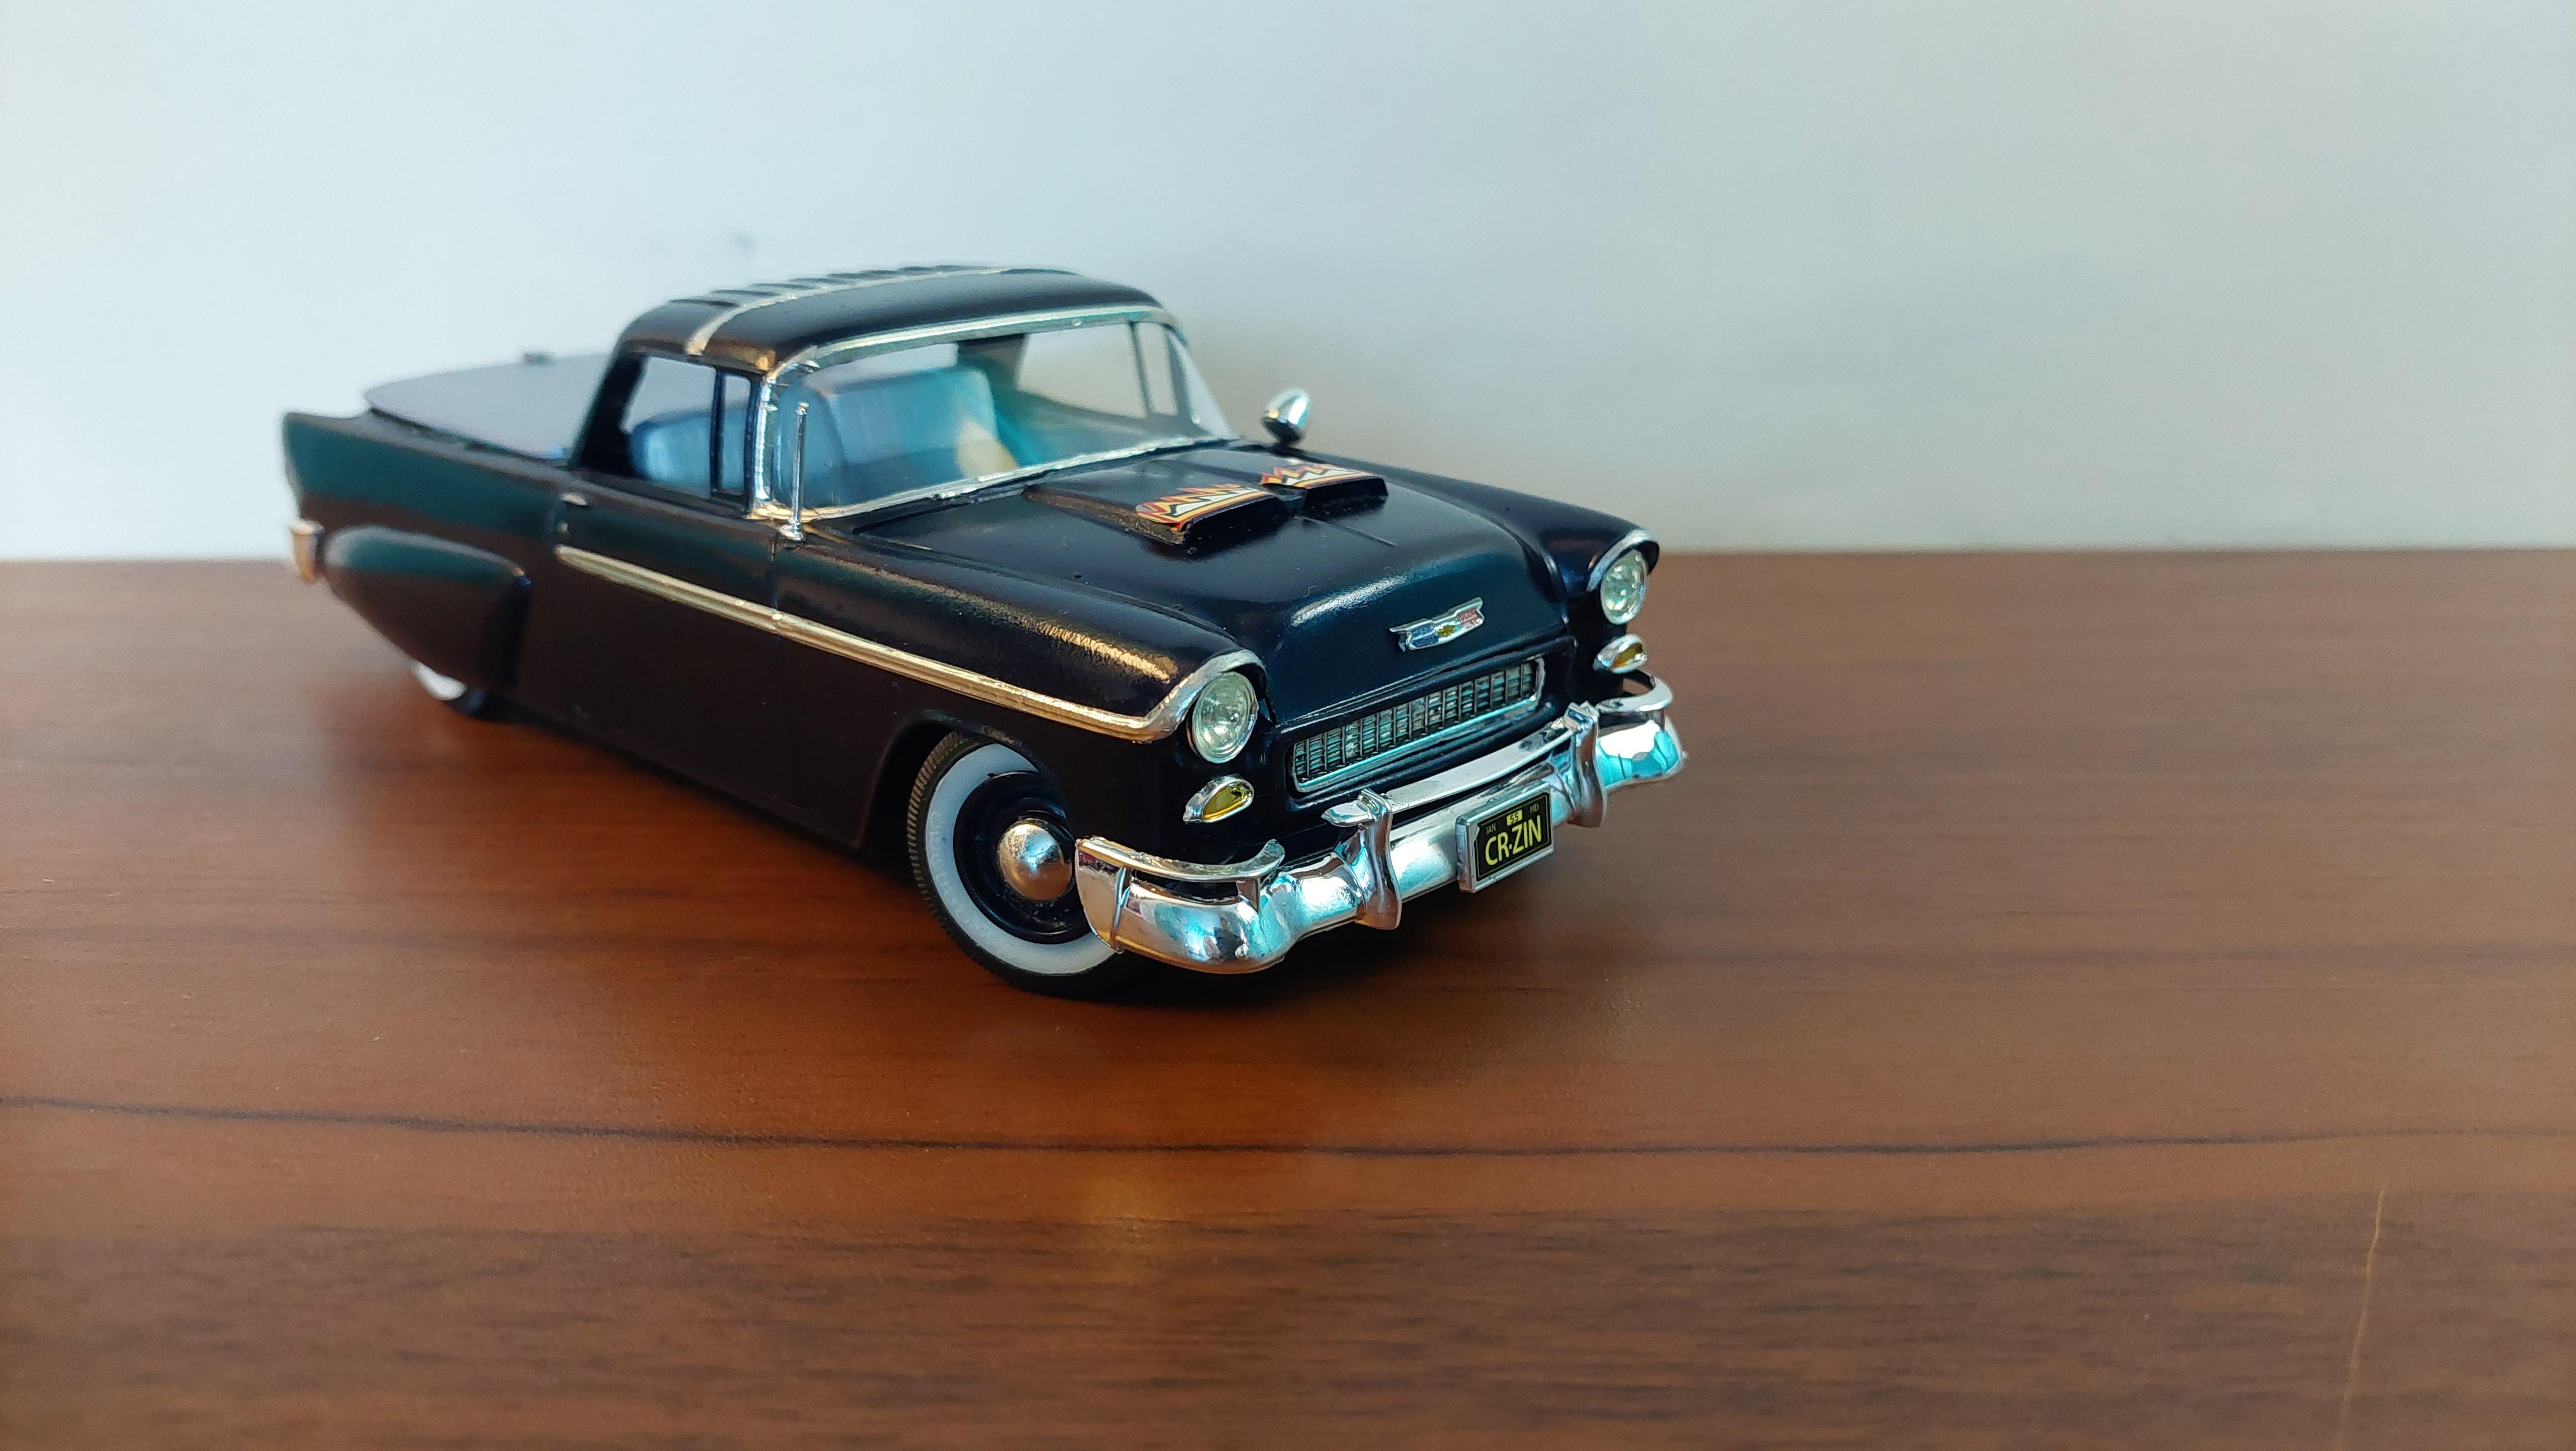
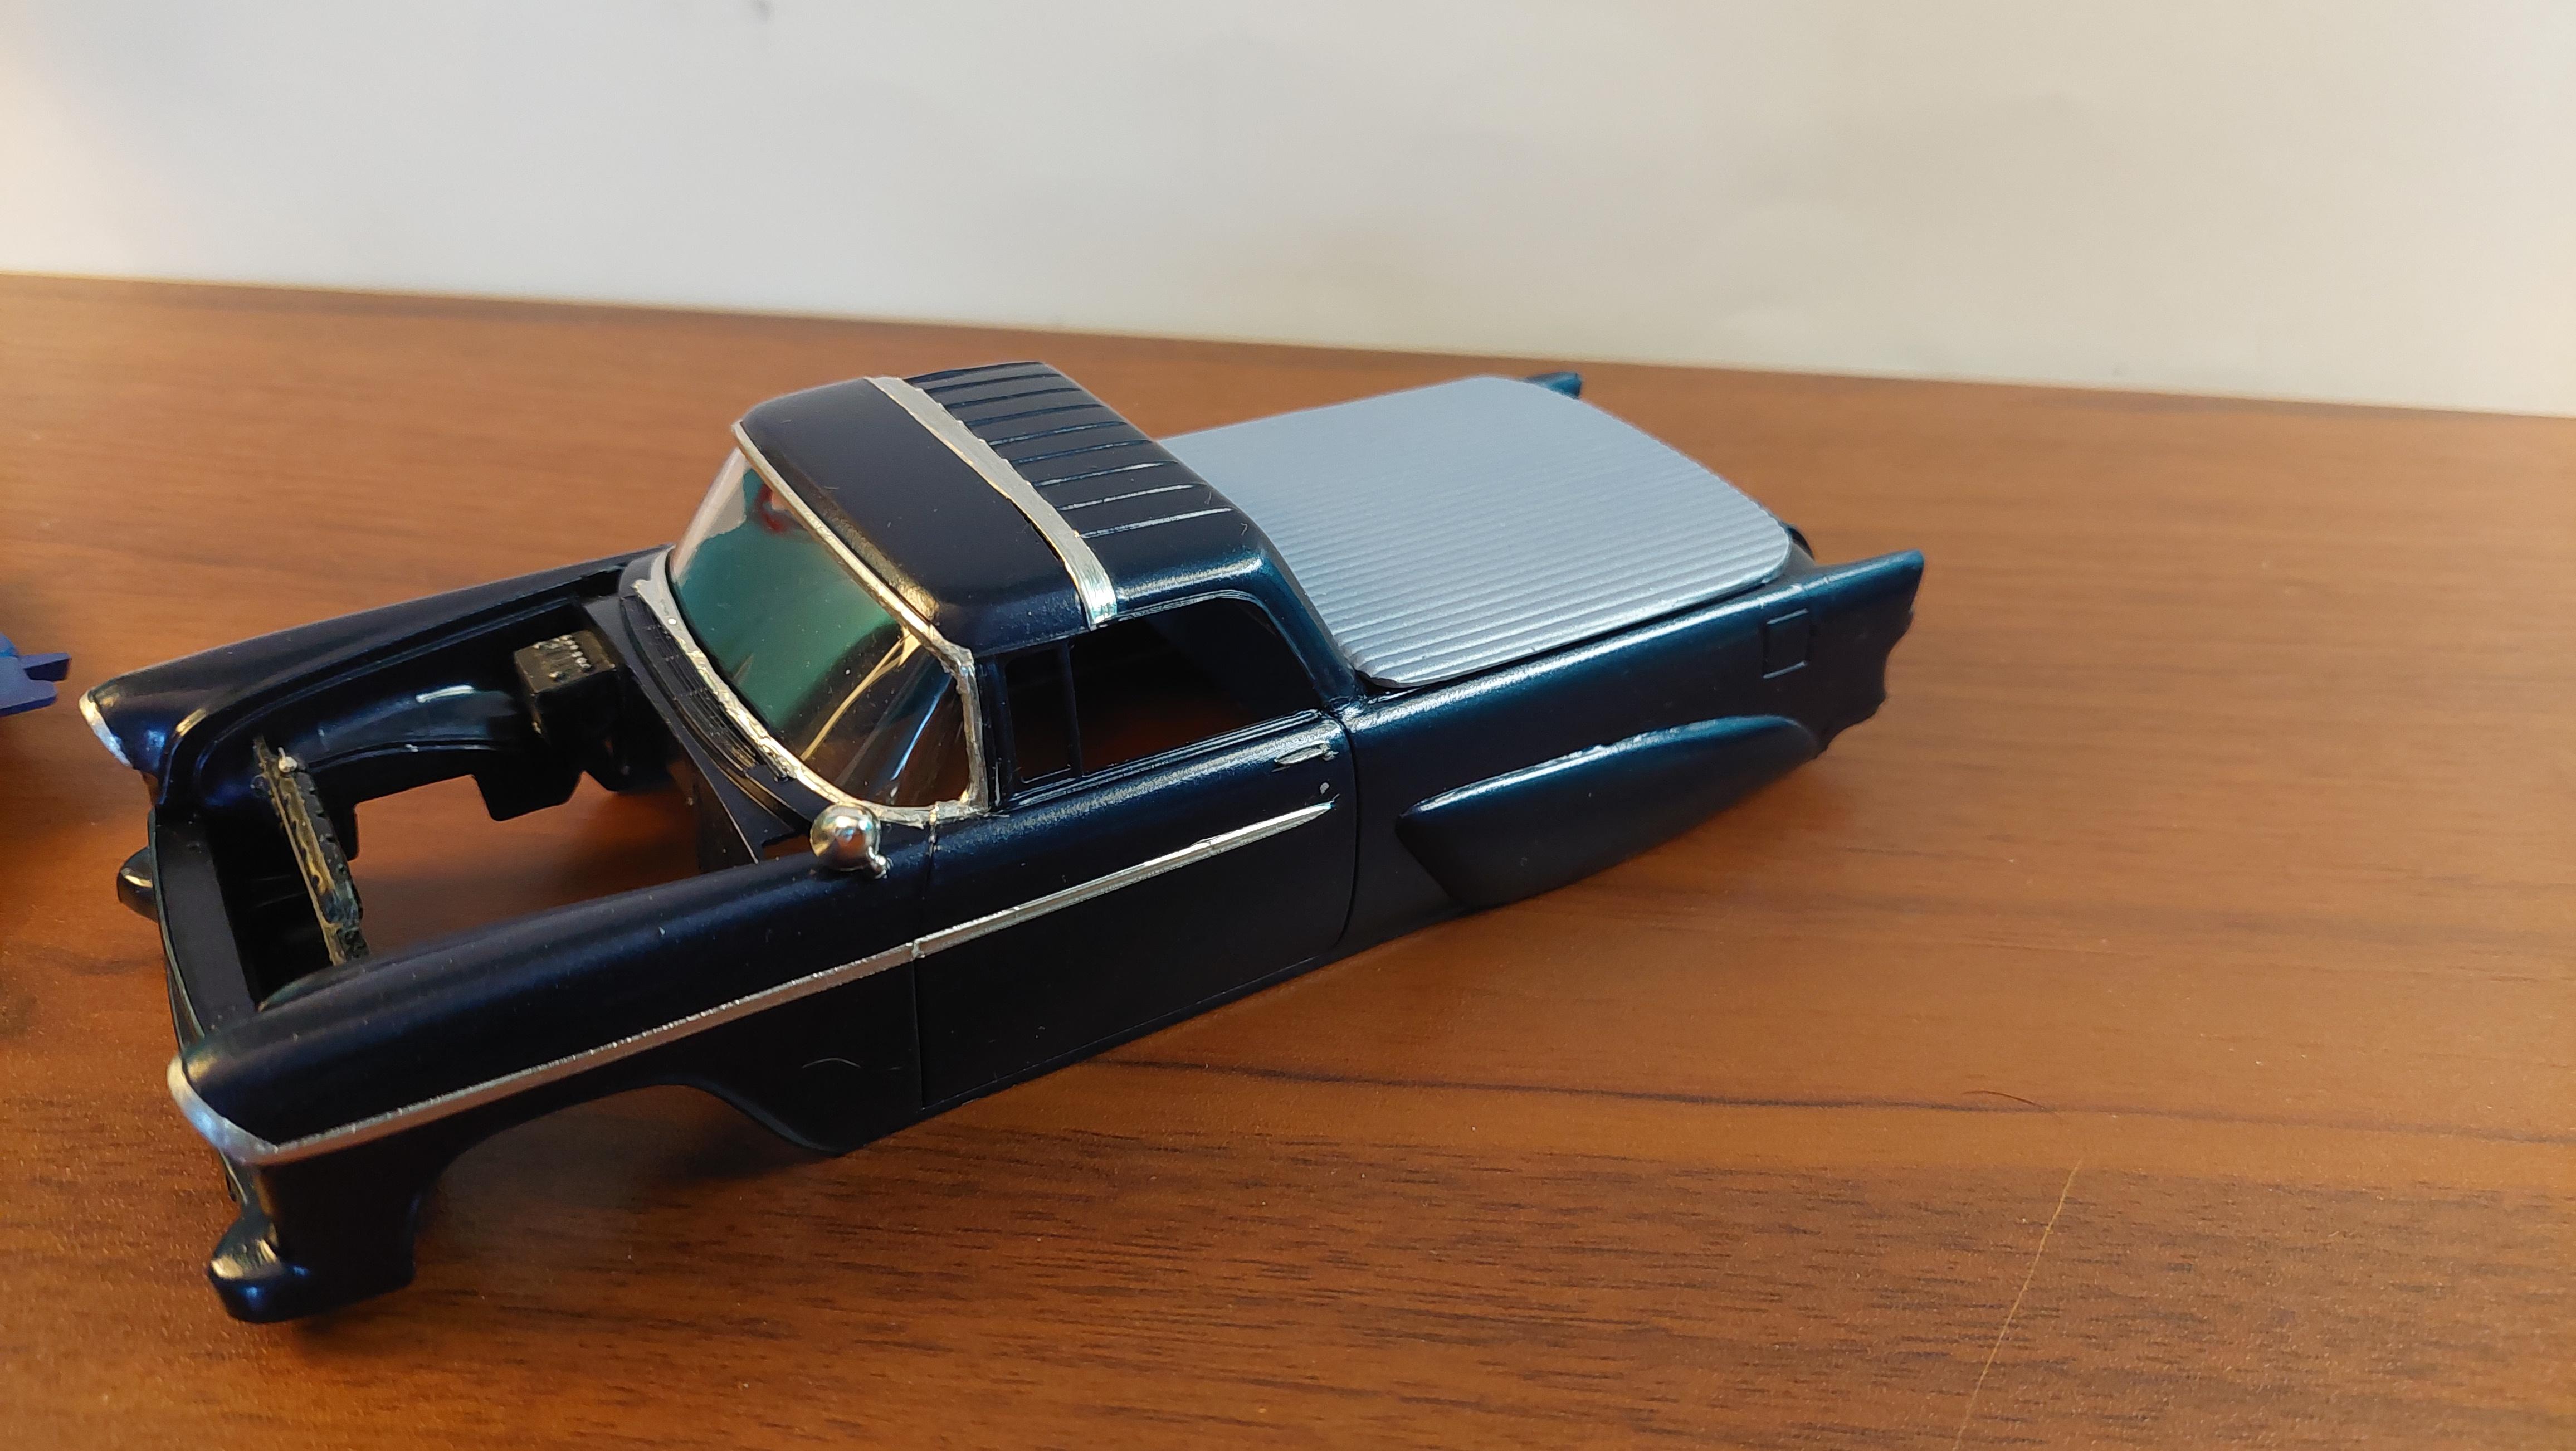
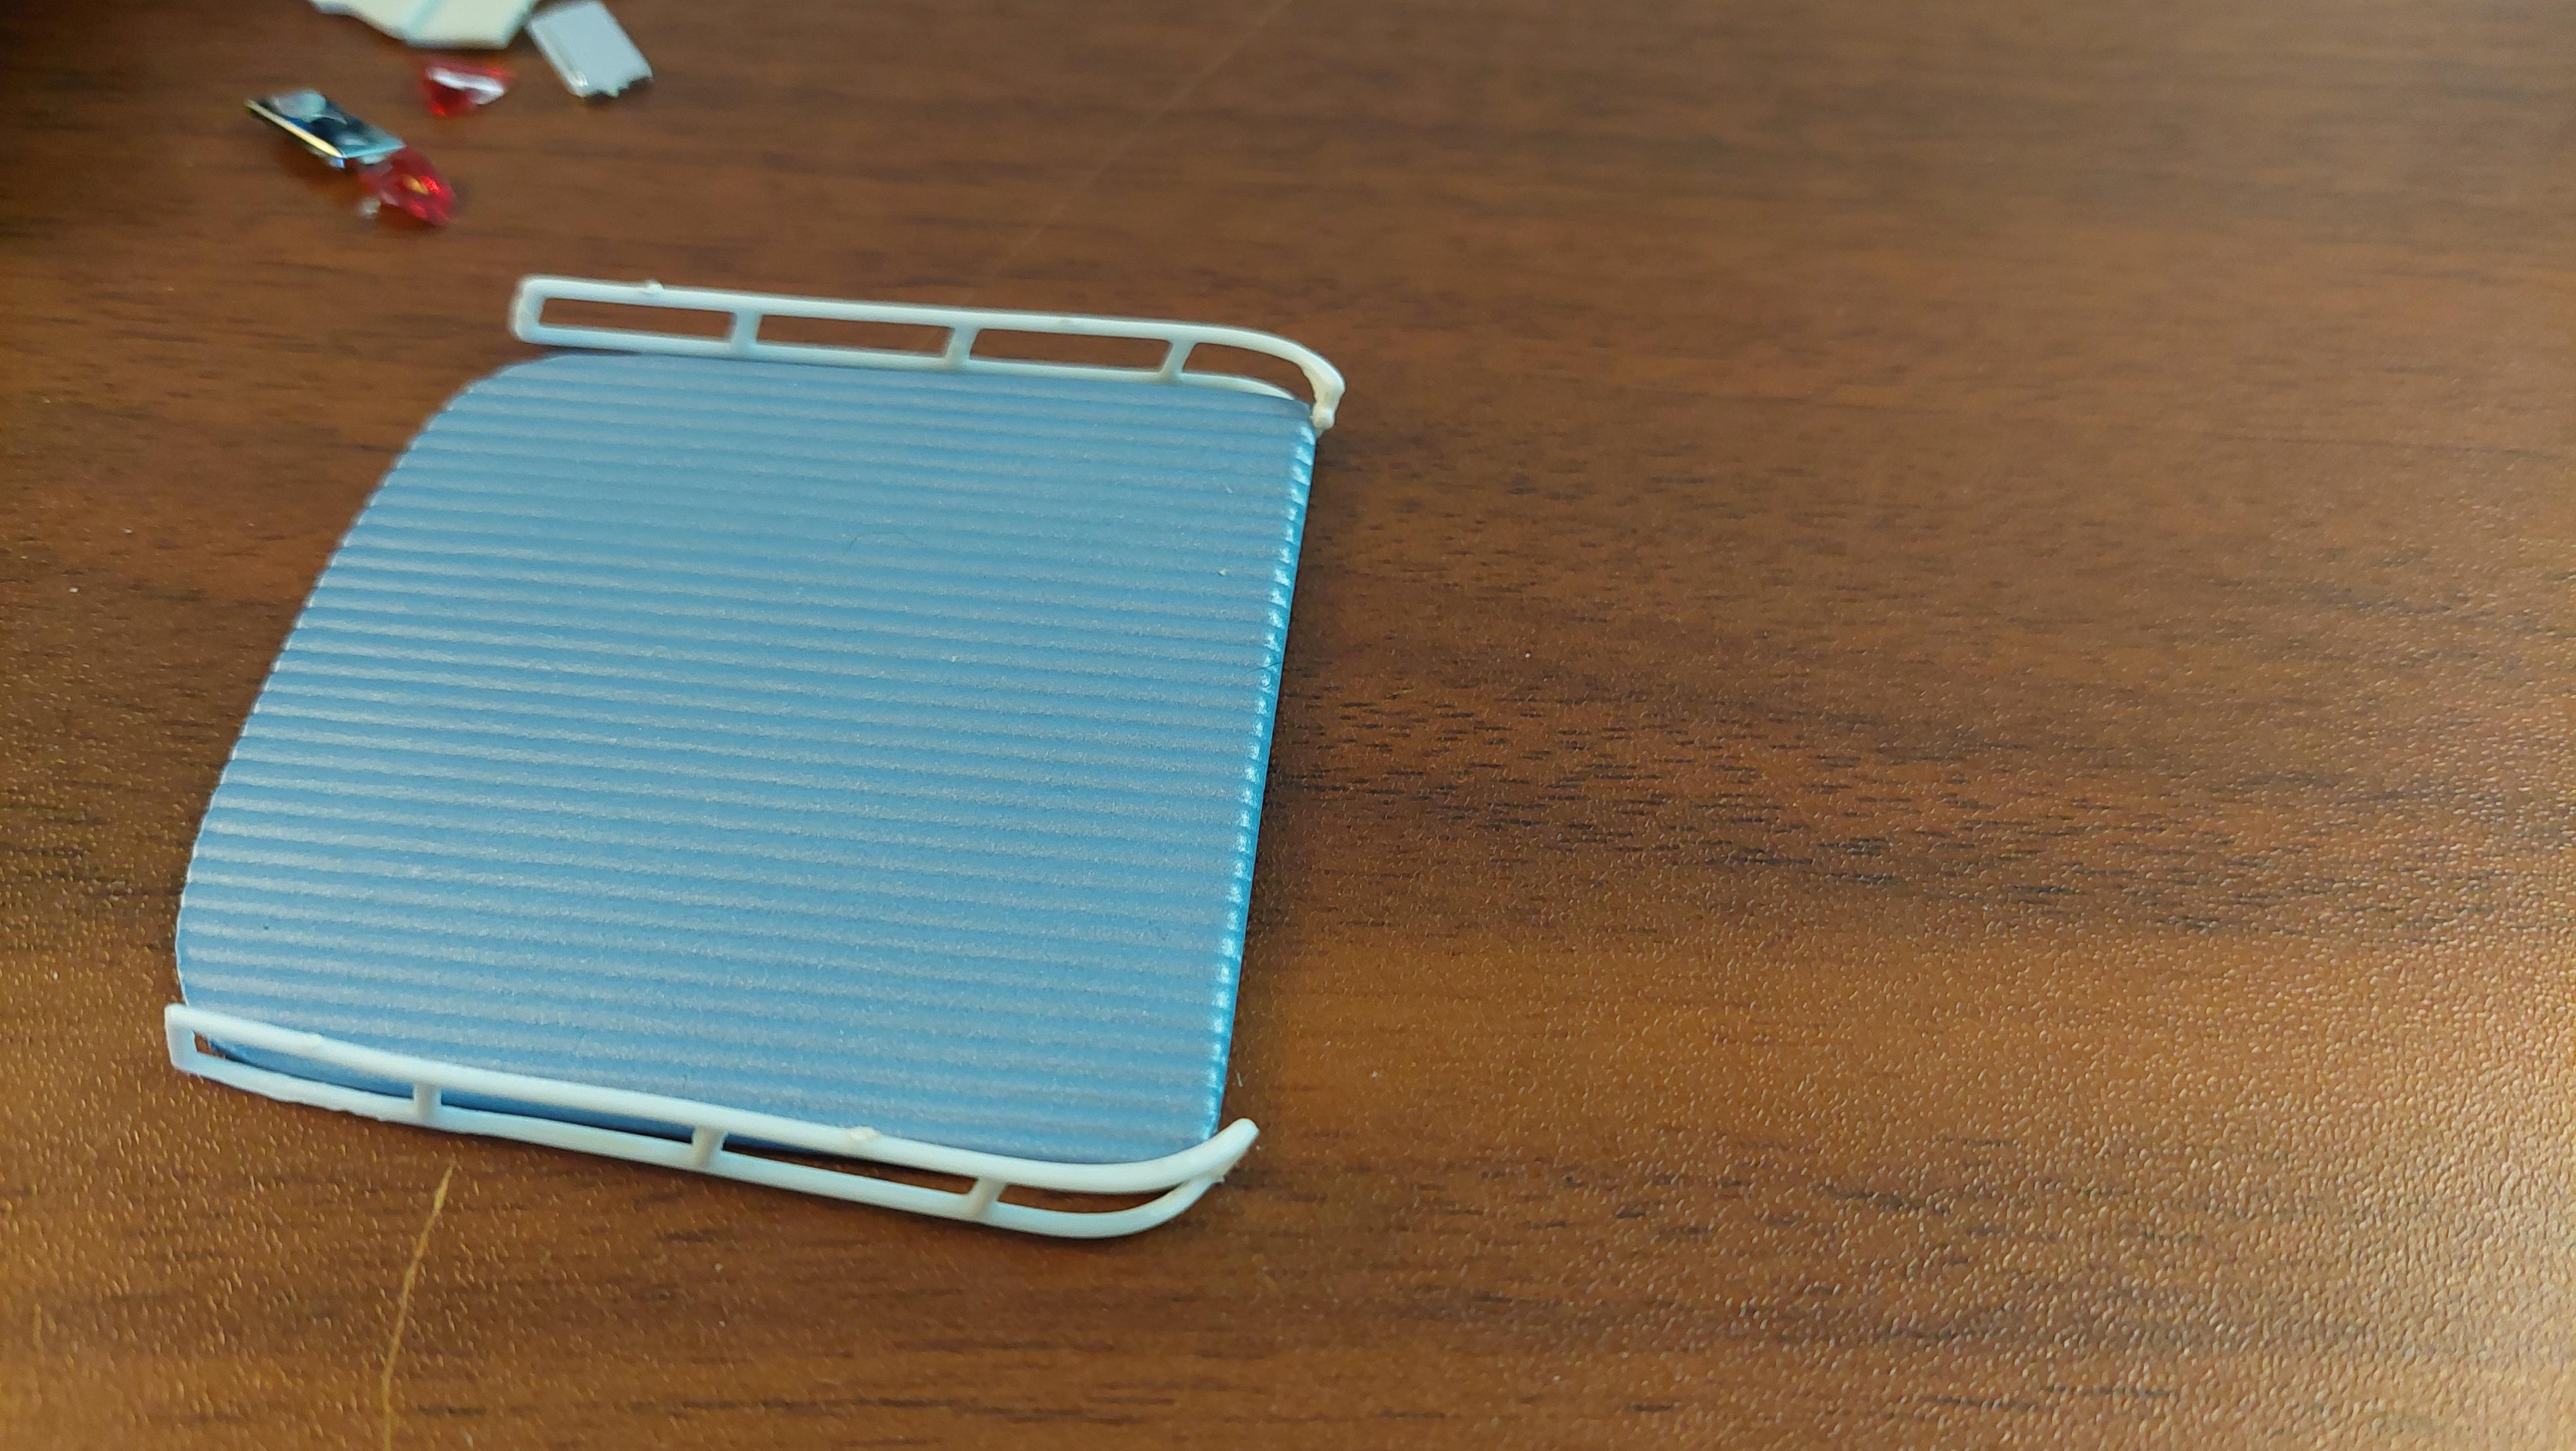
At last got this one buttoned up. Together its 17 inches long. The 55 interior is mostly from the Revell 55 convertible, so are the bumpers and continental kit. Interior detail from AMT is pretty lame but it is old technology. Skirts are parts box as is the tonneau cover
-
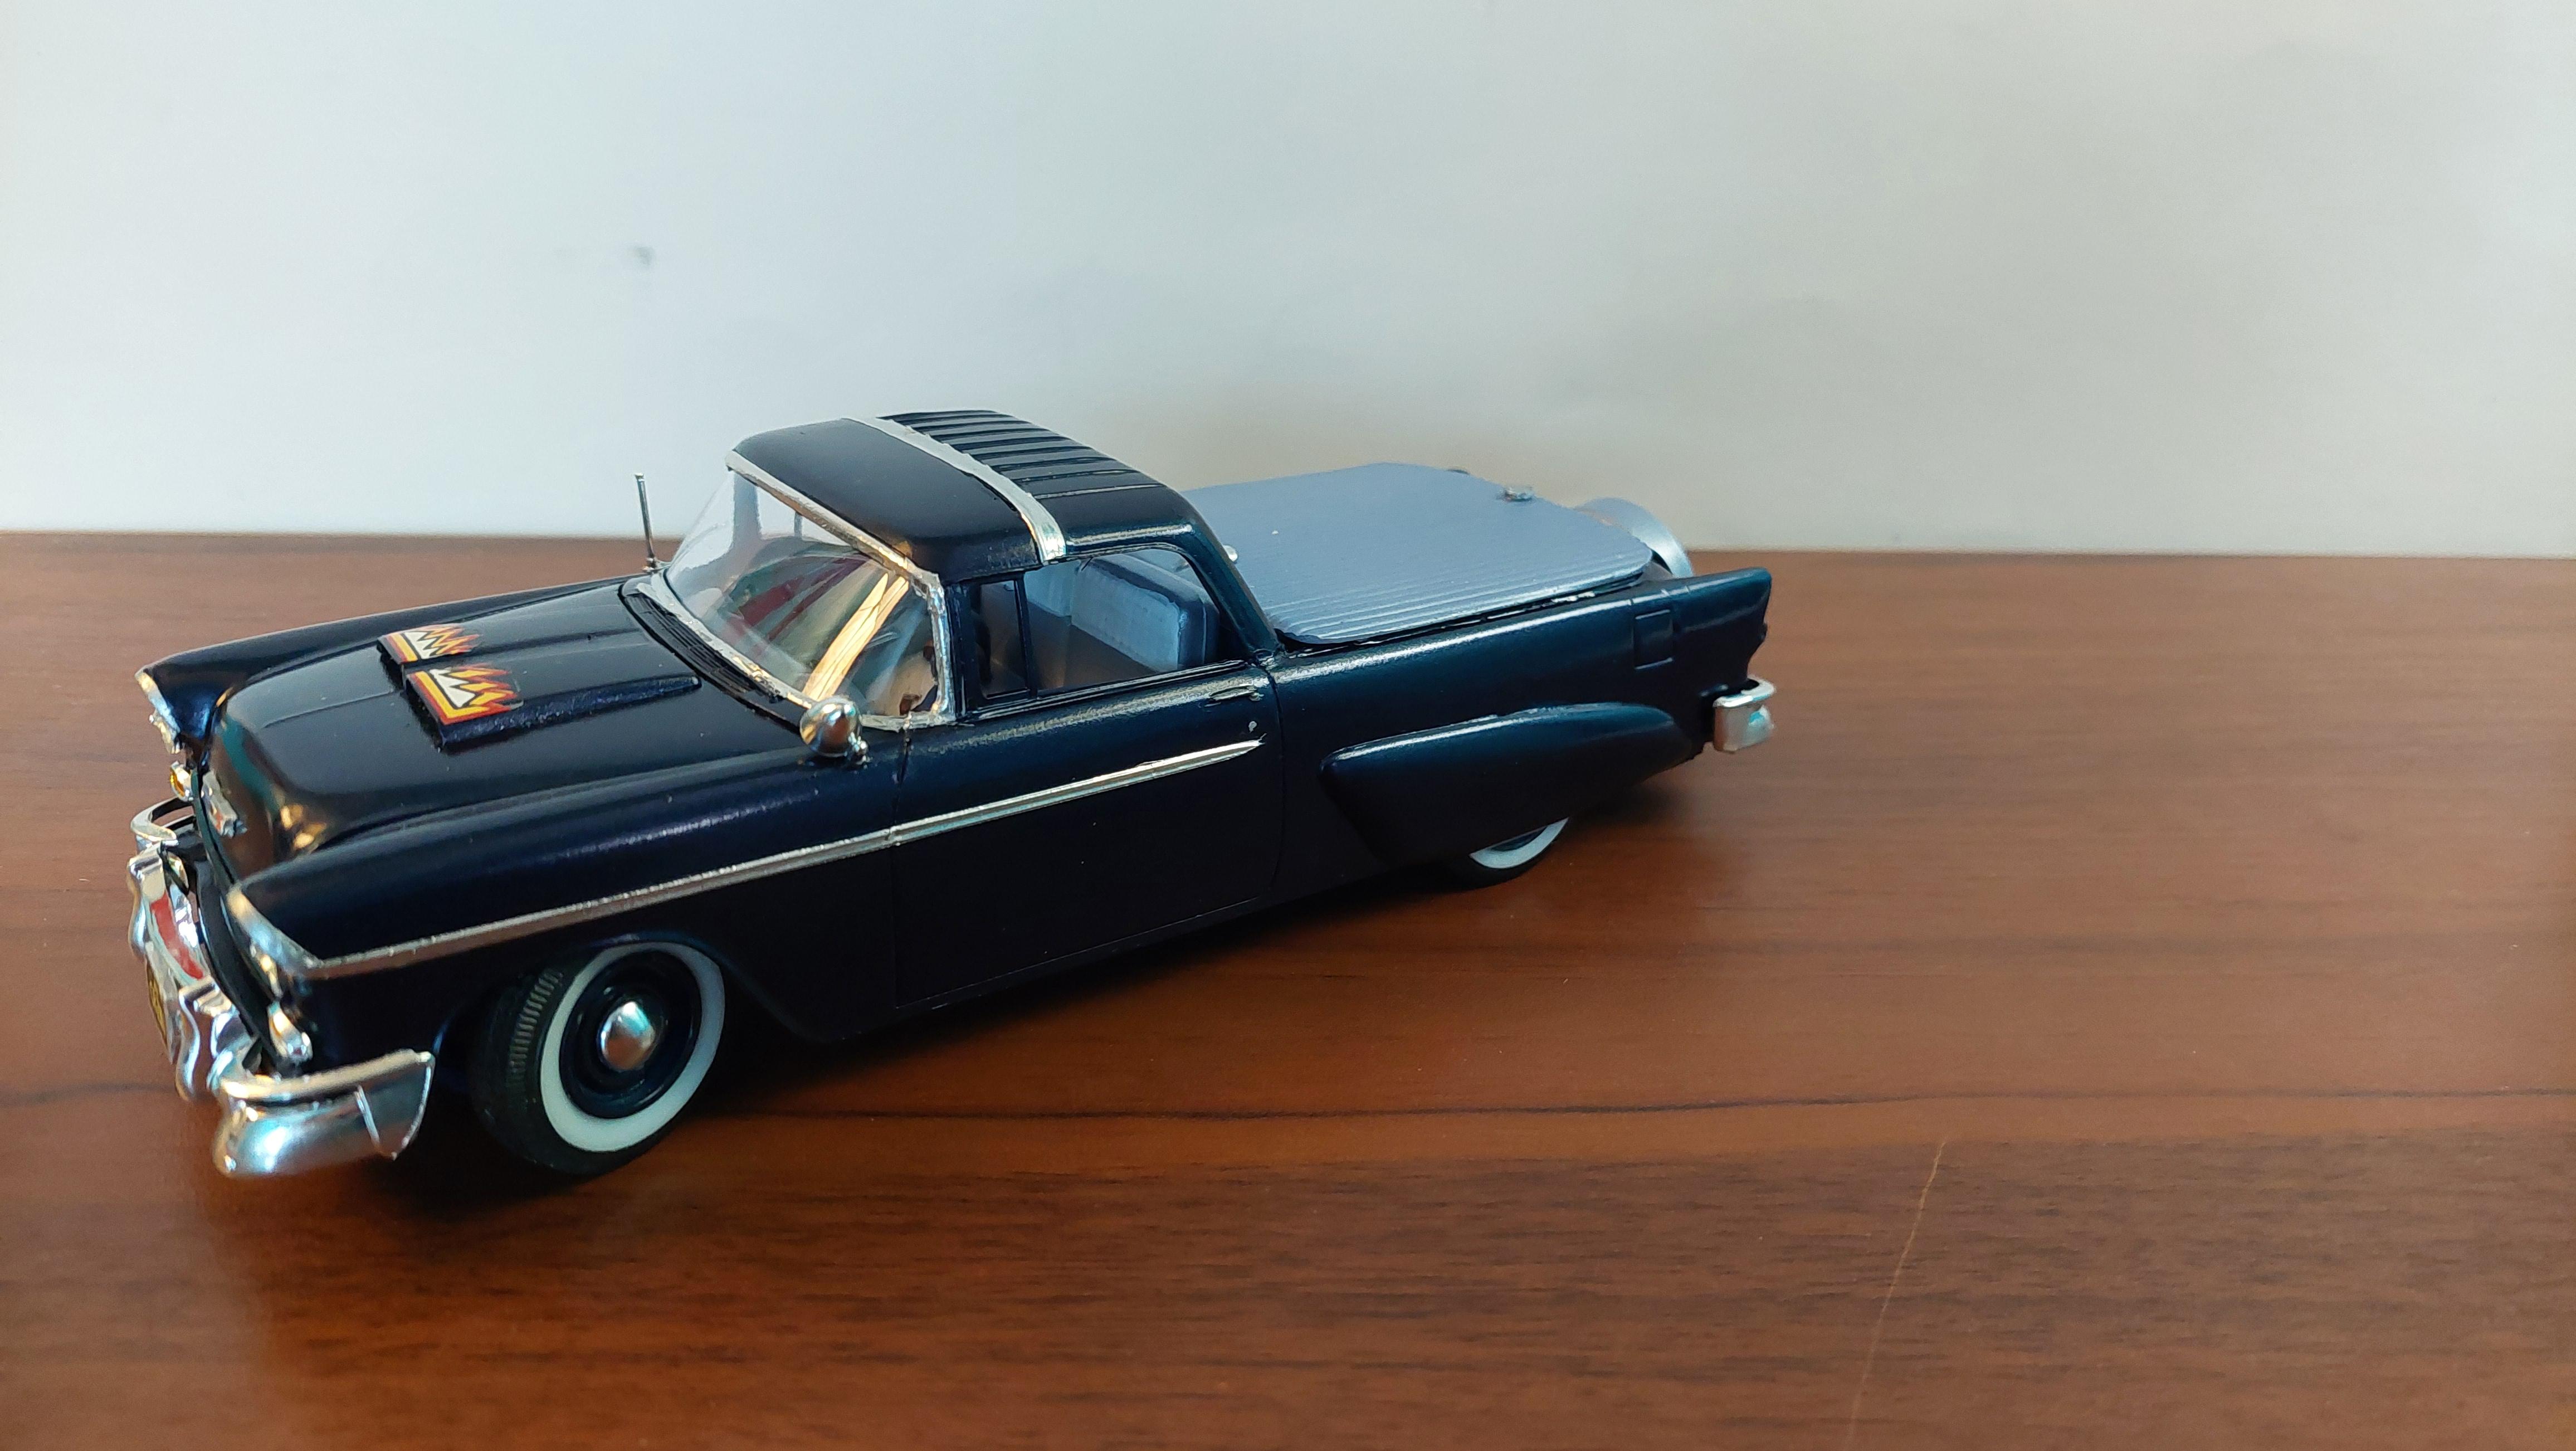
Just about got this boat hauler buttoned up, need a day for final assembly , maybe today or tomorrow. Door panels were from the Revell 55 as well as the bumpers and continental kit. Not sure on bed rails, on or off , I guess I can decide last minute. Tonneau cover is a modified parts box piece, rear moons were left off as they cannot be seen under the skirts.
-
 Its a pretty rare item.
 -
Is that the AMT 28 Ford below the Ala Kart in picture #8?