.jpg.b9265433dc8c3b550370b1d0e4e4d2fc.jpg)
MarkJ
-
Posts
4,698 -
Joined
-
Last visited
Content Type
Profiles
Forums
Events
Gallery
Everything posted by MarkJ
-
.jpg.b9265433dc8c3b550370b1d0e4e4d2fc.thumb.jpg.915f5b46e3c9402eeaa6972073121c87.jpg)
Salvino's JR - '71 Petty Plymouth
MarkJ replied to TooOld's topic in WIP: Stock Cars (NASCAR, Super Stock, Late Model, etc.)
Your work with aluminum is adding such a huge addition to the model. This is truly going to be a one of a kind build to be proud of. -
1963 Super Torque Ford
MarkJ replied to MarkJ's topic in WIP: Stock Cars (NASCAR, Super Stock, Late Model, etc.)
Thanks, Gerald and Bob. I have always wanted to do this driver in a 63 Ford and somehow never got around to it. -
1963 Super Torque Ford
MarkJ replied to MarkJ's topic in WIP: Stock Cars (NASCAR, Super Stock, Late Model, etc.)
Got the left quarter panel mostly done. I find its better to complete a section before moving on to the next section instead of hitting all the moldings at the same time. Keeps me from getting overwhelmed.
-
1963 Super Torque Ford
MarkJ replied to MarkJ's topic in WIP: Stock Cars (NASCAR, Super Stock, Late Model, etc.)
Thanks, Jason. I will be going the one kit way with this model, so I will be removing the molded in exhaust and not worrying about actually having a real chassis. It will be more a shelfer than what you are doing using the 60-ford kit with yours. Really looking forward to seeing yours. do you have a wip going on with it? -
1963 Super Torque Ford
MarkJ replied to MarkJ's topic in WIP: Stock Cars (NASCAR, Super Stock, Late Model, etc.)
Thanks, Jim. Yes, it was a pretty dominate year for the Super Torque Fords. Chevy got out before they really got started and the Plymouths and Dodges were still 1 year away from the hemi and were pretty underpowered. Pontiac which had been dominate in 62 were heavier and had not increased their power and most of their drivers had switched to the Ford. -
1963 Super Torque Ford
MarkJ replied to MarkJ's topic in WIP: Stock Cars (NASCAR, Super Stock, Late Model, etc.)
Very true, Johnny. Might not need to do much on this 63. I just need to study my ref pictures. -
1963 Super Torque Ford
MarkJ replied to MarkJ's topic in WIP: Stock Cars (NASCAR, Super Stock, Late Model, etc.)
Lots of moldings and a couple of voids in the front fenders to remove and fix. need to do some wheel opening work too.
-
1963 Super Torque Ford
MarkJ replied to MarkJ's topic in WIP: Stock Cars (NASCAR, Super Stock, Late Model, etc.)
Thanks, Pierre. Probably my favorite Fords too from that era. -
1963 Super Torque Ford
MarkJ replied to MarkJ's topic in WIP: Stock Cars (NASCAR, Super Stock, Late Model, etc.)
I always liked the advertising campaign for the 1963 Ford. They would play it during replays of Nascar races back in 1963 on ABC's Wide World of Sports. My buddies and me would get on our bikes after the broadcast and pedal as hard as we could and yell that we were driving Super Torque Fords. Those delayed broadcasts were a big deal to us kids back then.
-
The kit.
-
I have always wanted to do this car and you are giving me the incentive to do just that. Great job on this one.
-
Bennys Laguna
MarkJ replied to yellowsportwagon's topic in Stock Cars (NASCAR, Super Stock, Late Model, etc.)
Beautiful build as always, Tim. Nice to see more Benny cars done. -
Salvino's JR - '71 Petty Plymouth
MarkJ replied to TooOld's topic in WIP: Stock Cars (NASCAR, Super Stock, Late Model, etc.)
Very realistic looking. -
Chaparral 2D at 1966 Daytona 24 hours
MarkJ replied to Pierre Rivard's topic in Other Racing: Road Racing, Salt Flat Racers
No problem for you Pierre. But black would be the toughest paint to brush on. -
Chaparral 2D at 1966 Daytona 24 hours
MarkJ replied to Pierre Rivard's topic in Other Racing: Road Racing, Salt Flat Racers
Wow, you finished this one quickly, Pierre, but with the same perfect results. Paint is smooth as ever and not a hint of a brush mark. Love the details you added like the driver. The chapparal gave chevy fans something to root for back in the sixtys when they were pretty much out of the game in Nascar. -
Excellent job as always, Randy. Mr. September Oldsmobile. Probably the most important car Gant drove. I don't know why more of these models are not built. Yours is the best I've seen.
-
Couple of 62 Impalas
MarkJ replied to Rattlecan Dan's topic in Stock Cars (NASCAR, Super Stock, Late Model, etc.)
Excellent work on both builds, Dan. Especially the Rex White build who happens to be my favorite all time Nascar driver. I saw him race at Richmond in 1961 when it was still dirt. We actually got to come into the pit area after the race and touch the actual cars. I rubbed some dust off of Rex's car with a kleenex my mom gave me. I kept that kleenex forever but somehow in the transition of growing up and moving out to start my own life a lot of my old stuff got lost in the shuffle. I was 10 years old when we attended that race, my first ever live Nascar race. -
Ford's First Southern 500 Winner
MarkJ replied to raisin27's topic in Stock Cars (NASCAR, Super Stock, Late Model, etc.)
Excellent build of an Iconic car. Really like your photo setup as well. Makes the model look 1:1. -
Thanks, Steve, and thanks for your help on the build. I really appreciate it.
-
Thanks, Jim, Bob and Scott for your positive comments they are much appreciated.
-
Thanks, Terry. Just take your time and don't rush and it should go together okay for you. I watched a video of a guy putting one of these together very quickly and picked up a few mistakes that he would of had to deal with later when he realized he put the part in upside down. That can happen on this build.
-
Thanks, Steve, Tony, Bruce and Mathias. I really appreciate the kind words. And now its safely in its case on the shelf, right above its sister model. Now back to the sixty's where I belong.
-
Thanks, John. That really means so much coming from you, and I really appreciate it. I think you have probably seen the last of my new Nascar builds. I'm heading back to the really old stuff, fifty's, sixty's and seventy's now that Salvino's is resurrecting some seventy's stuff.
-
2022 NextGen Camaro part deux
MarkJ replied to MarkJ's topic in WIP: Stock Cars (NASCAR, Super Stock, Late Model, etc.)
Thanks, Martin. I think if they would make the instructions a little clearer, it would be a lot more fun to build and a lot less chance of making a mistake. Sometimes the part numbers did not jive with what you're building so you had to figure out what they were talking about before you could do anything. -
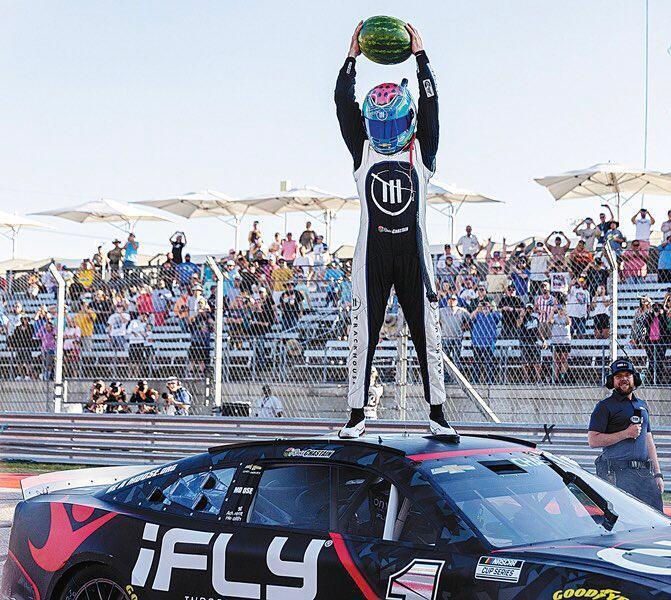
Here is the photo from COTA I used to model the melon. During my research I found out that Ross was 5 foot 9 inches. The melon turned out being 15 inches long. Must be a special tossing melon. A standard Florida watermelon is 20 to 24 inches long when ripe. That is according to google.