.jpg.b9265433dc8c3b550370b1d0e4e4d2fc.jpg)
MarkJ
-
Posts
4,695 -
Joined
-
Last visited
Content Type
Profiles
Forums
Events
Gallery
Everything posted by MarkJ
-
.jpg.b9265433dc8c3b550370b1d0e4e4d2fc.thumb.jpg.915f5b46e3c9402eeaa6972073121c87.jpg)
Tiger Cobra Duo
MarkJ replied to Pierre Rivard's topic in WIP: Other Racing: Road Racing, Land Speed Racers
Pierre, those rear flares are looking perfect. -
1964 Ned Jarrett Ford
MarkJ replied to MarkJ's topic in WIP: Stock Cars (NASCAR, Super Stock, Late Model, etc.)
Thanks, Barry. I appreciate your interest in the build. -
1964 Ned Jarrett Ford
MarkJ replied to MarkJ's topic in WIP: Stock Cars (NASCAR, Super Stock, Late Model, etc.)
You might want to get some ref pictures of the interior of the car you're doing. I don't think yours is a Holman and Moody car either. If it was, there are plenty of pictures of Holman and Moody 64 ford interiors. -
1964 Ned Jarrett Ford
MarkJ replied to MarkJ's topic in WIP: Stock Cars (NASCAR, Super Stock, Late Model, etc.)

-
1964 Ned Jarrett Ford
MarkJ replied to MarkJ's topic in WIP: Stock Cars (NASCAR, Super Stock, Late Model, etc.)
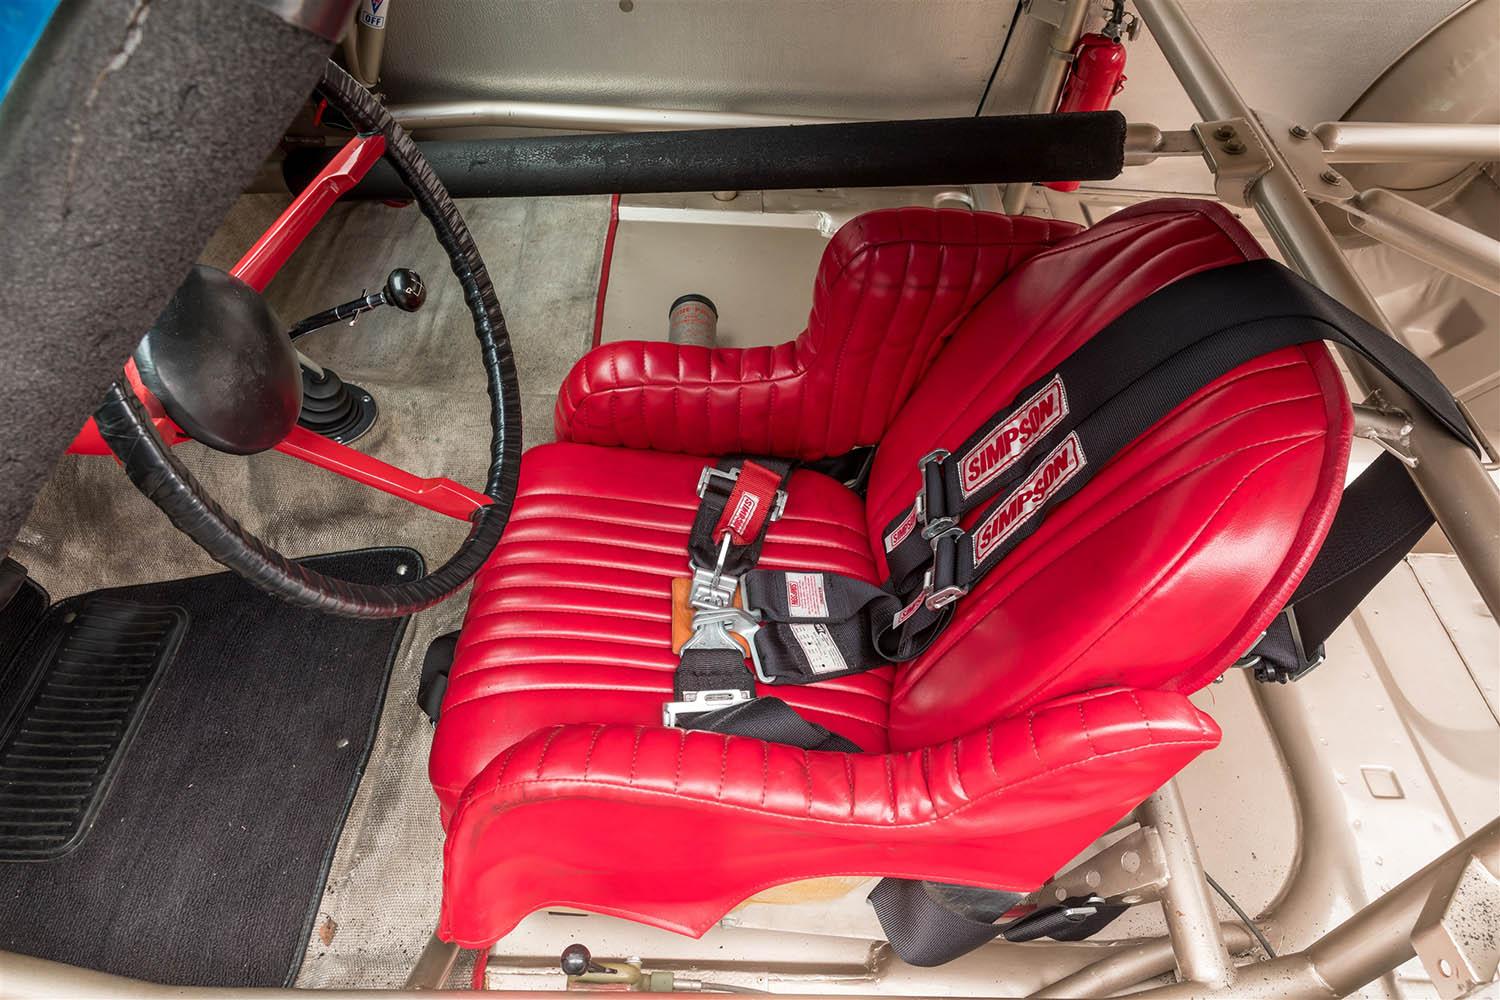
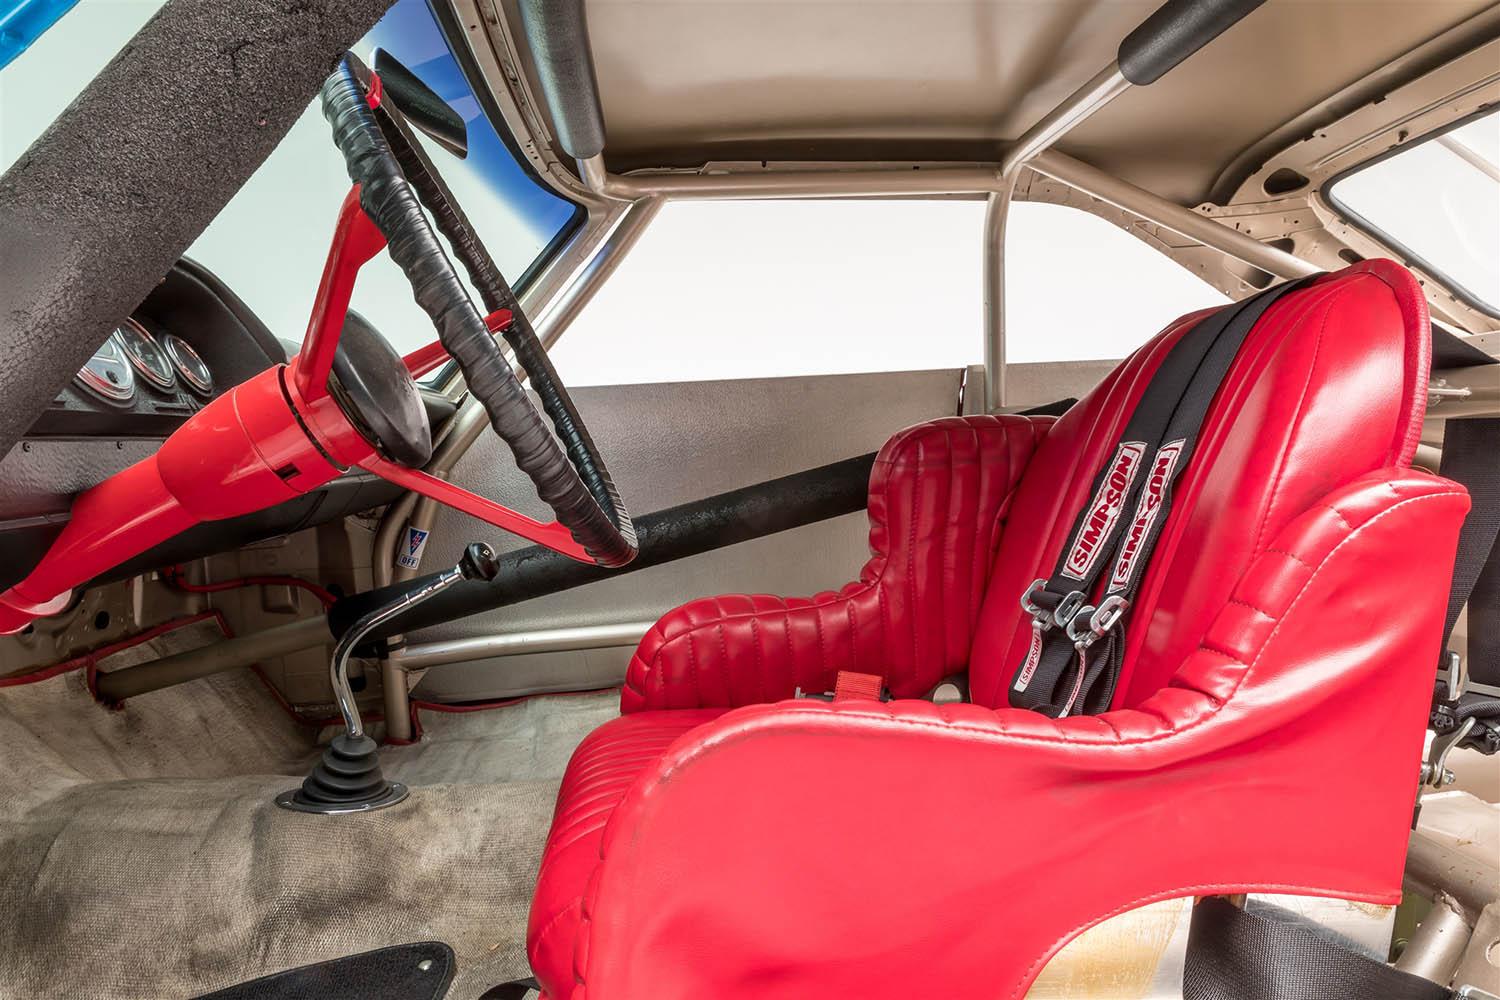
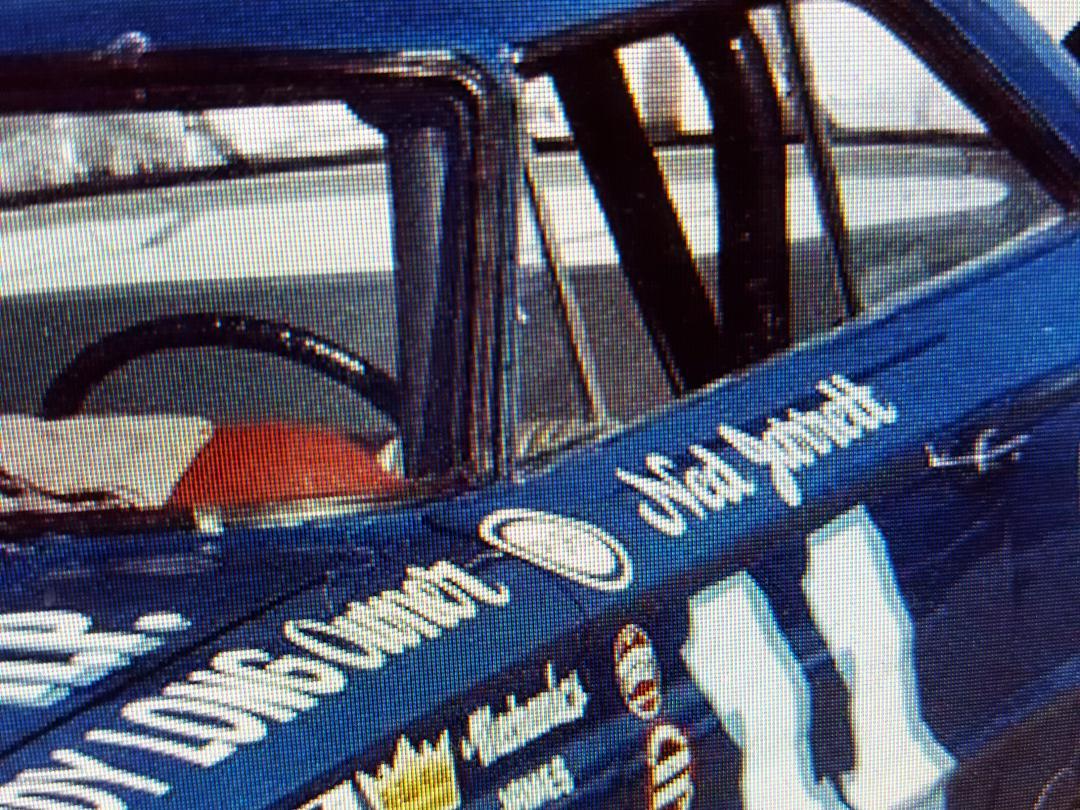
Here are 2 ref pictures I found while searching for 1964 Ned Jarrett photos. I'm assuming they are his car being prepared. You can clearly see that the seat is not a bostrum and it appears to be white with a darker colored rib pattern on the inner section of the seat. Got a good view of the cage behind the seat as well. I know it's a 64 Ford because of the feature lines on the body.
-
1964 Ned Jarrett Ford
MarkJ replied to MarkJ's topic in WIP: Stock Cars (NASCAR, Super Stock, Late Model, etc.)
i believe this is the Bostrom seat you are talking about, but it still doesn't look like what I'm seeing in that picture of the top of Ned's car I posted.
-
1964 Ned Jarrett Ford
MarkJ replied to MarkJ's topic in WIP: Stock Cars (NASCAR, Super Stock, Late Model, etc.)
Yes, I've seen Bostrom seats, but they don't look like the one you have pictured here in Hutchersons 65 Ford. I believe the seat in Bud Moore's 64 Joe Weatherley Mercury was a Bostrom seat. I've got a picture of it someplace in my files. -
1964 Ned Jarrett Ford
MarkJ replied to MarkJ's topic in WIP: Stock Cars (NASCAR, Super Stock, Late Model, etc.)
The dash doesn't fit like that when its glued in. it's down more.
-
1964 Ned Jarrett Ford
MarkJ replied to MarkJ's topic in WIP: Stock Cars (NASCAR, Super Stock, Late Model, etc.)
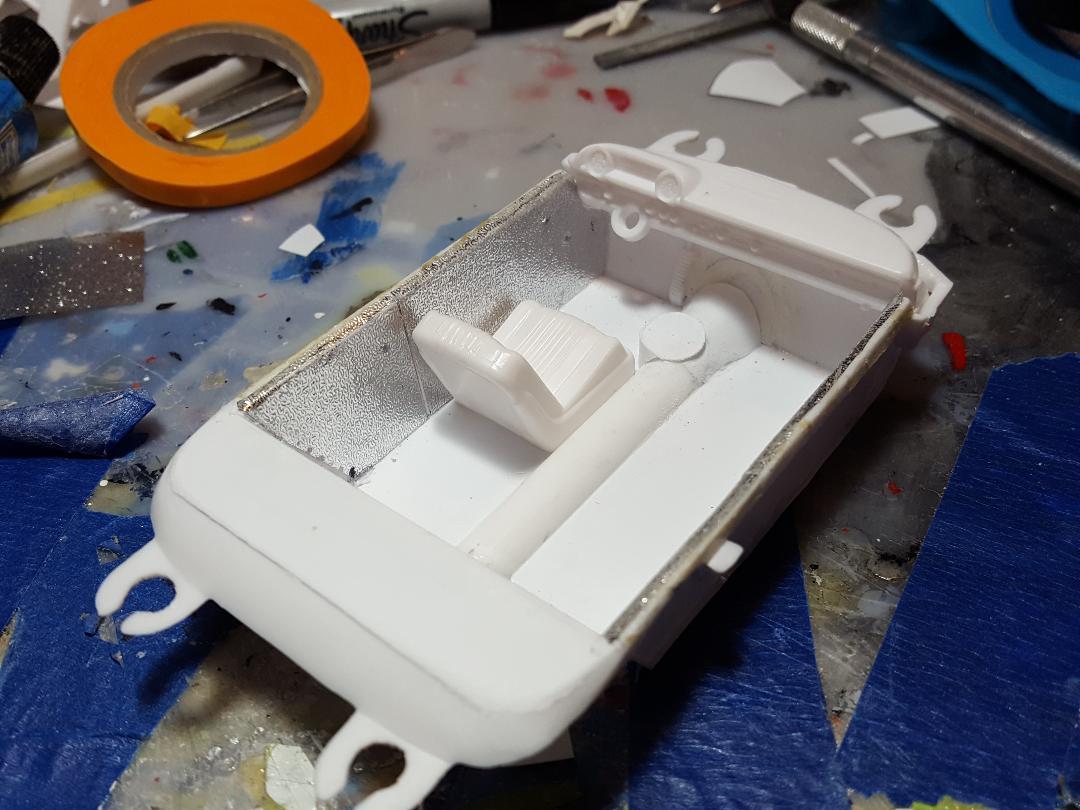
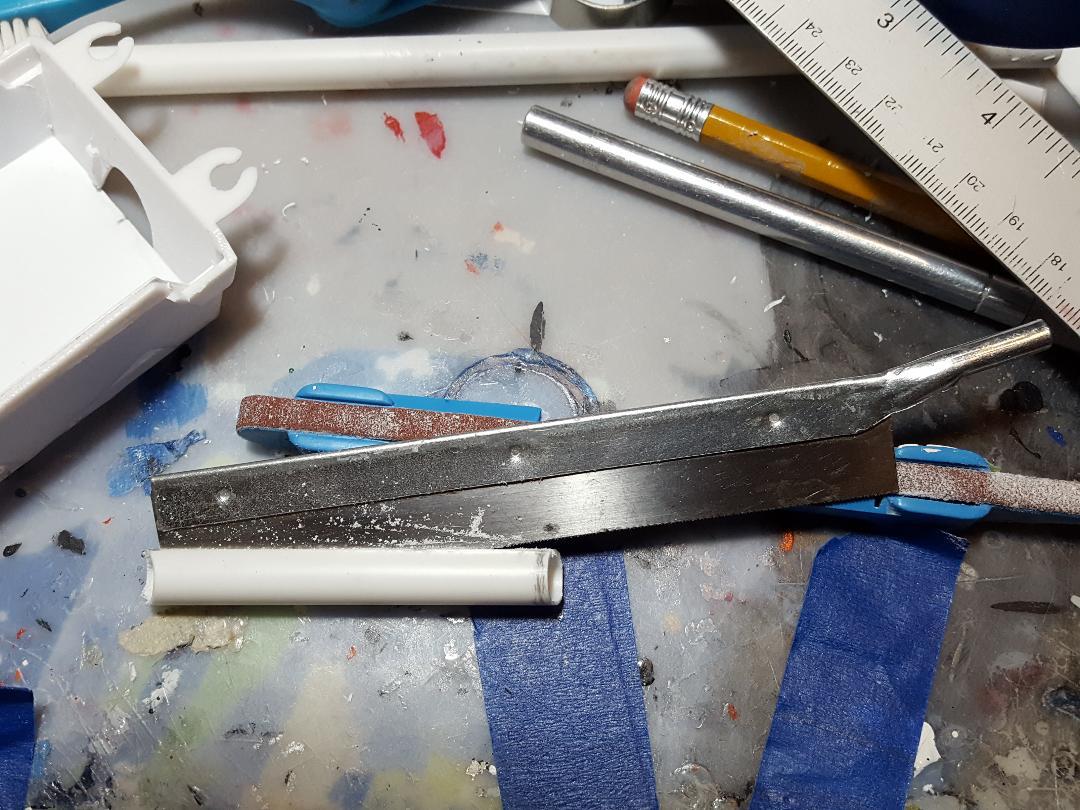
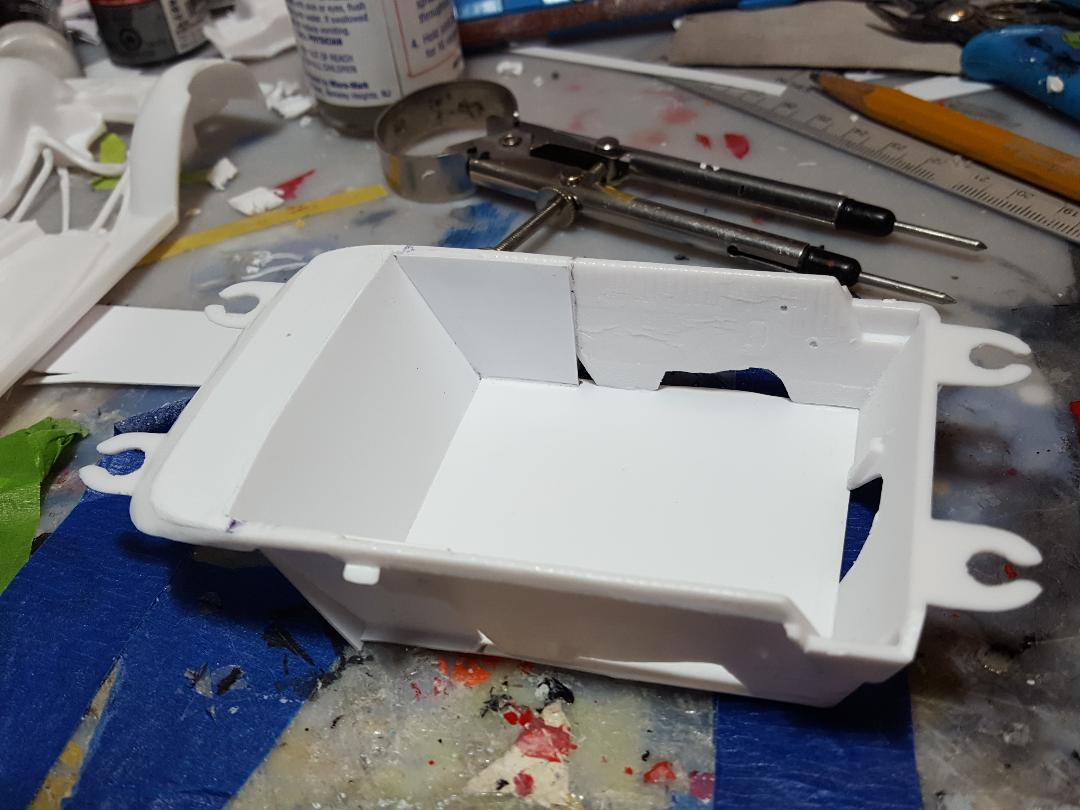
I got the tunnel finished so I can move on to the dash. I noticed when I was trying to see what the seat looked like from the one ref picture, I have, which only shows the extreme top part of the seat, it was very telling. The seat had the ribs going vertically down the seat. The seats in the 64 Fords were not like that but the 63-ford bucket seat was. I believe the 64 Ford that Ned drove had a 1963 seat in it and it is gray in the middle and white on the outside edges. Luckily, I had a left-over seat from the 63 Fireball Roberts build I did a few years ago. If you guys use that streamer stuff dont use the plastic welder type liquid adhesive like I used. It comes loose later on. You could probably use elmers but it might be too thick. I guess I'm going to have to redo mine. Bummer.
-
Ebbro/Tamiya 1:12 1968 Matra MS11 F1
MarkJ replied to Nacho Z's topic in WIP: Other Racing: Road Racing, Land Speed Racers
Wow, this makes my head hurt thinking about doing this micro type of scratch building work like the transistor. I'm in awe. -
1964 Ned Jarrett Ford
MarkJ replied to MarkJ's topic in WIP: Stock Cars (NASCAR, Super Stock, Late Model, etc.)
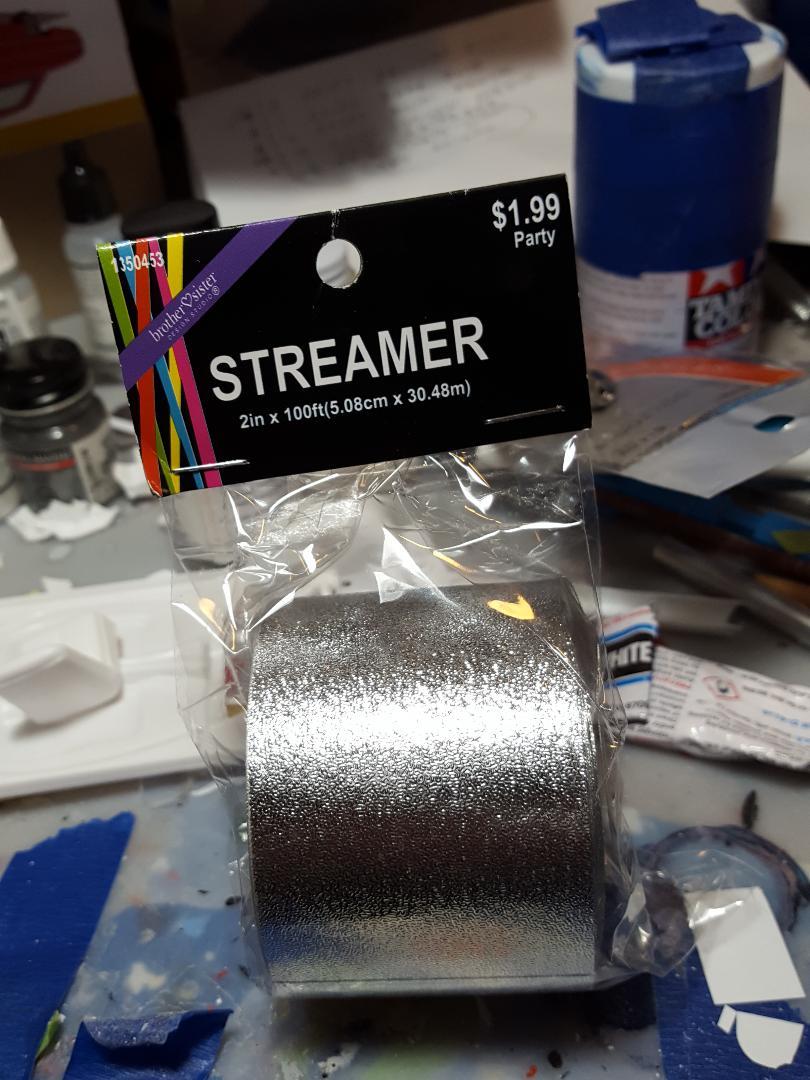
Pierre, you must have some sort of Hoblob stores up there. A party store might actually sell it. It looks the same on both sides. It's very, very thin. And of course, there's always Amazon. They sell everything. The company name is Brother&Sister. -
1964 Ned Jarrett Ford
MarkJ replied to MarkJ's topic in WIP: Stock Cars (NASCAR, Super Stock, Late Model, etc.)
Bill, the steamer must be some form of plastic because I used the "Same stuff" liquid glue that is actually a plastic welder type adhesive. I have to wear a respirator when I use it because it gives me a cough and a sore throat if I don't. Like I said Ned's guys must have just painted over the aluminum because his door and quarter panels are white. -
1964 Ned Jarrett Ford
MarkJ replied to MarkJ's topic in WIP: Stock Cars (NASCAR, Super Stock, Late Model, etc.)
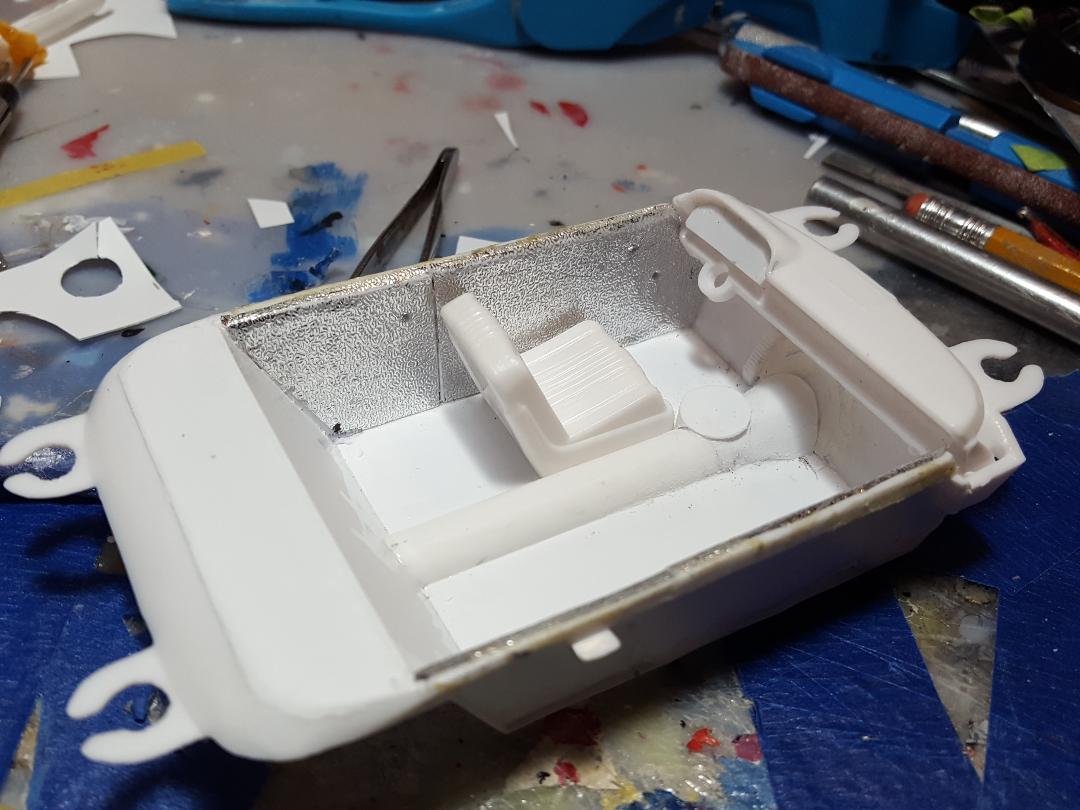
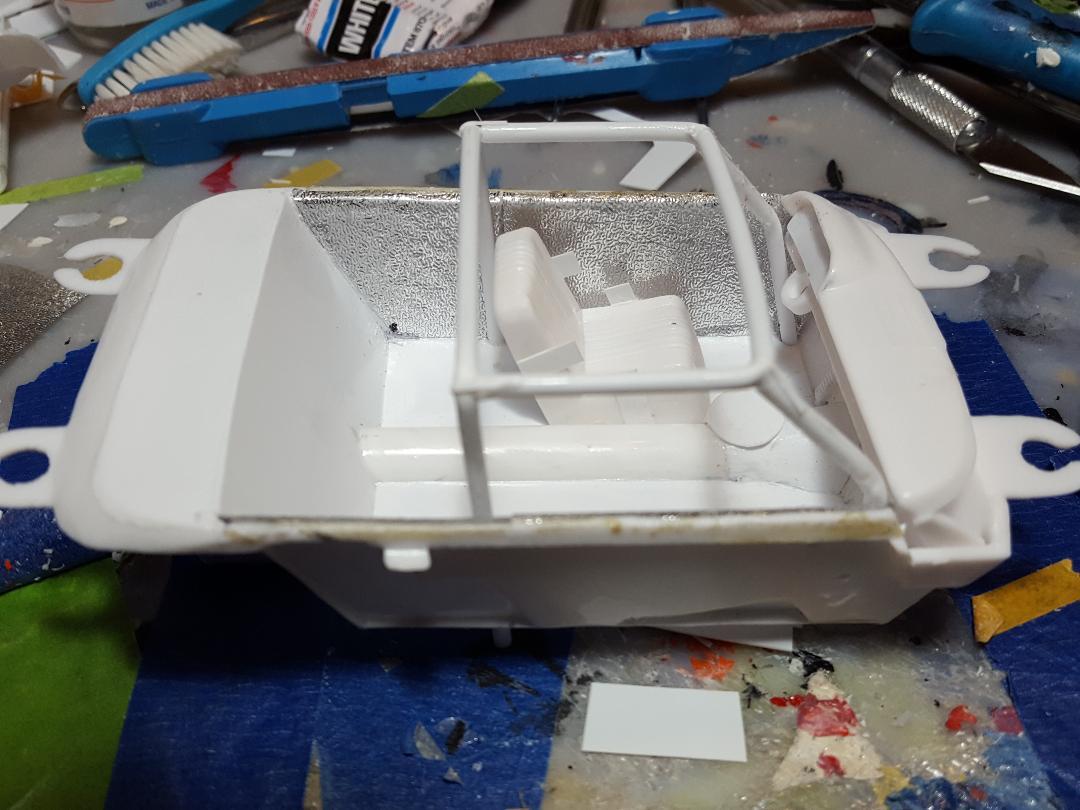
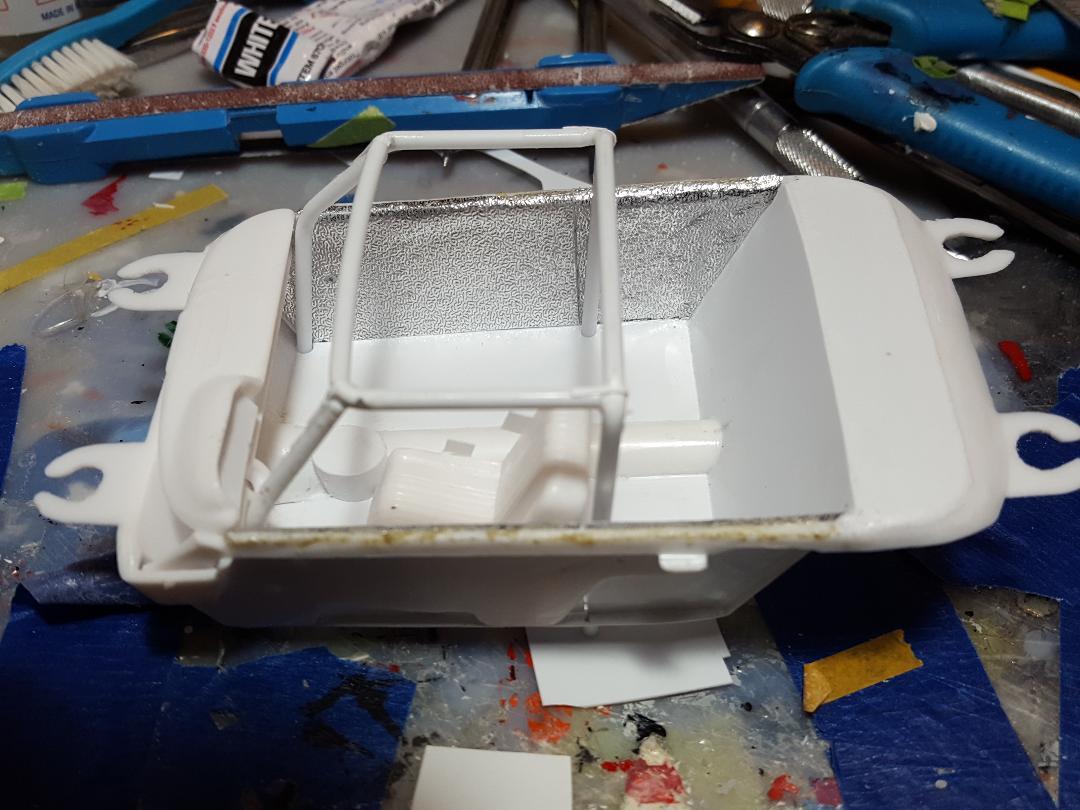
Bill, I found that streamer material at hoblob and it does do a good job of looking like a textured aluminum sheet that was used by cars of this period for door and quarter trim panels. It's a pretty chrome color but Ned's office was all white except for a red dash and a blue seat so I will be painting them flat white. Thanks for that tip. It was pretty easy to cut and install as well.
-
Will be waiting with great anticipation to check it out.
-
Tiger Cobra Duo
MarkJ replied to Pierre Rivard's topic in WIP: Other Racing: Road Racing, Land Speed Racers
Pierre, the one you chose will be awesome. I'm looking forward to progress reports on it. -
1964 Ned Jarrett Ford
MarkJ replied to MarkJ's topic in WIP: Stock Cars (NASCAR, Super Stock, Late Model, etc.)
Thanks, Pierre. I agree about finishing quality of the body being more about what I care about doing then the added detail. Especially when it comes to the interior which is hard to see when the model is finished anyway. -
1964 Ned Jarrett Ford
MarkJ replied to MarkJ's topic in WIP: Stock Cars (NASCAR, Super Stock, Late Model, etc.)
Thanks, Mike. The real car showed the rear fender humps in the back corners, but I'm not going to get ridiculous with it. Just a basic tub. I think I might just do printed shoulder harness hardware. In other words, it will be flat. Trying to figure out how not to spend 6 monthst on one build. -
1964 Ned Jarrett Ford
MarkJ replied to MarkJ's topic in WIP: Stock Cars (NASCAR, Super Stock, Late Model, etc.)
I'm going to try to find that tape Bill was talking about to do the door and quarter panel trim at Hob Lob tomorrow.
-
1964 Ned Jarrett Ford
MarkJ replied to MarkJ's topic in WIP: Stock Cars (NASCAR, Super Stock, Late Model, etc.)
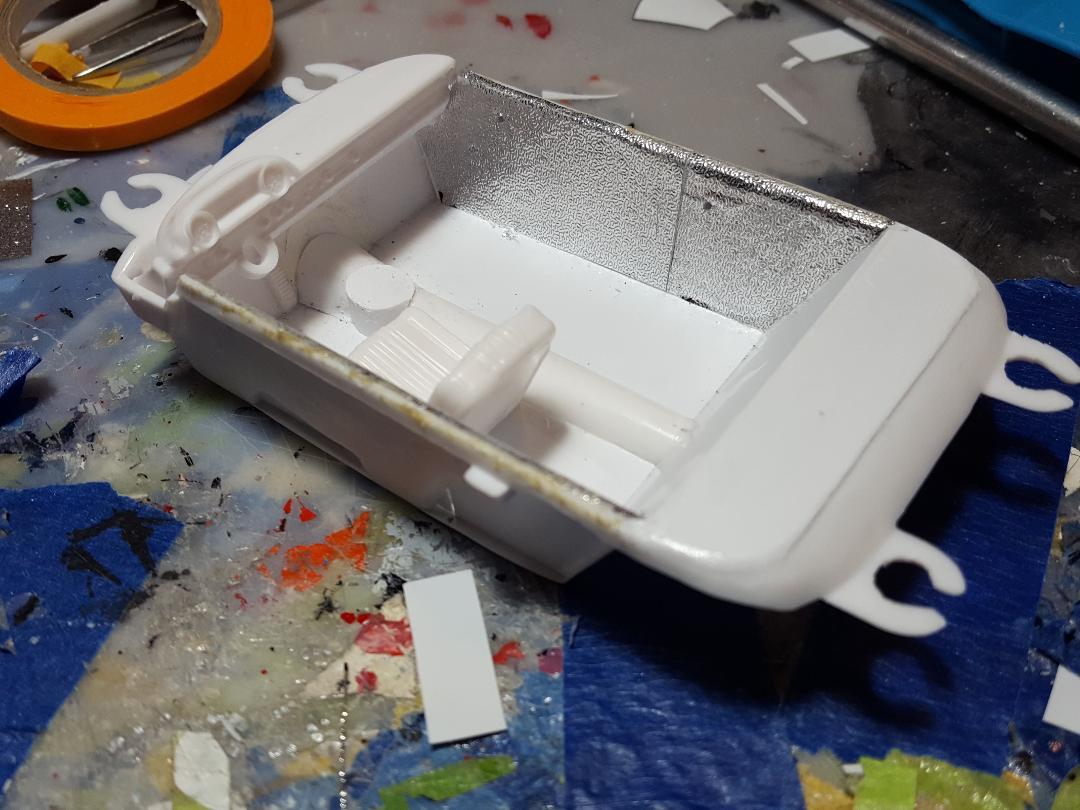
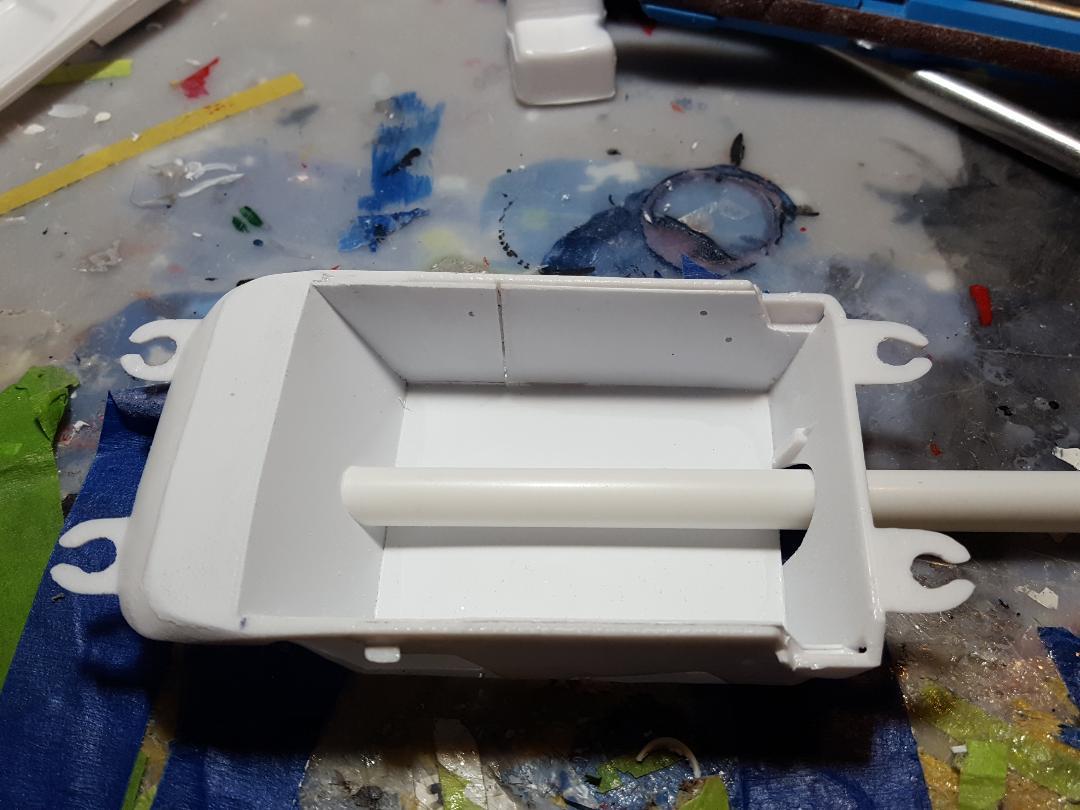
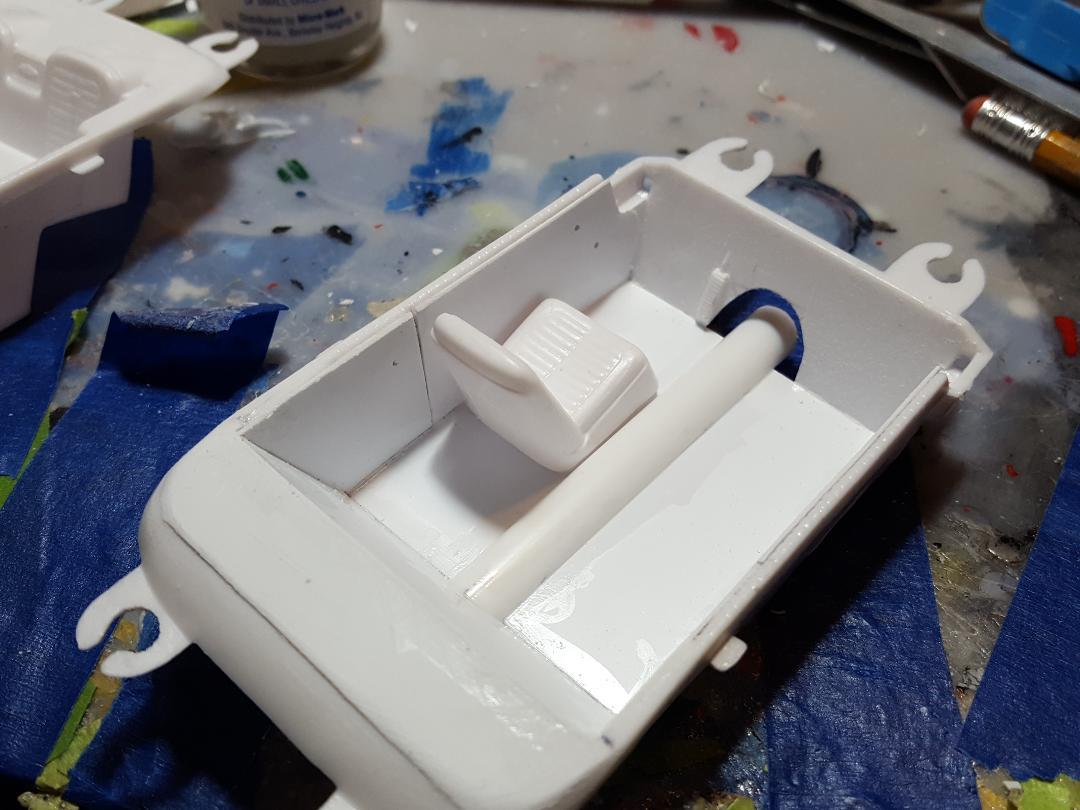
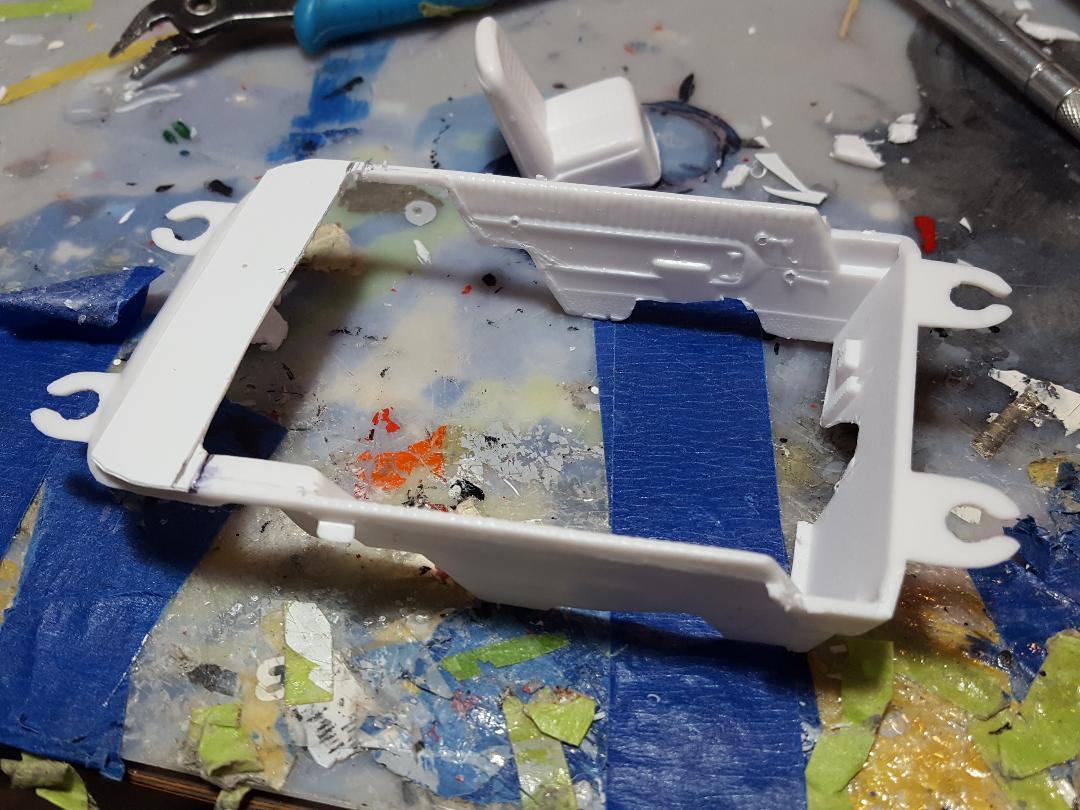
Some more progress. Gotta figure how big the drive shaft tunnel needs to be. I have some pretty good ref pictures for that.
-
1964 Ned Jarrett Ford
MarkJ replied to MarkJ's topic in WIP: Stock Cars (NASCAR, Super Stock, Late Model, etc.)
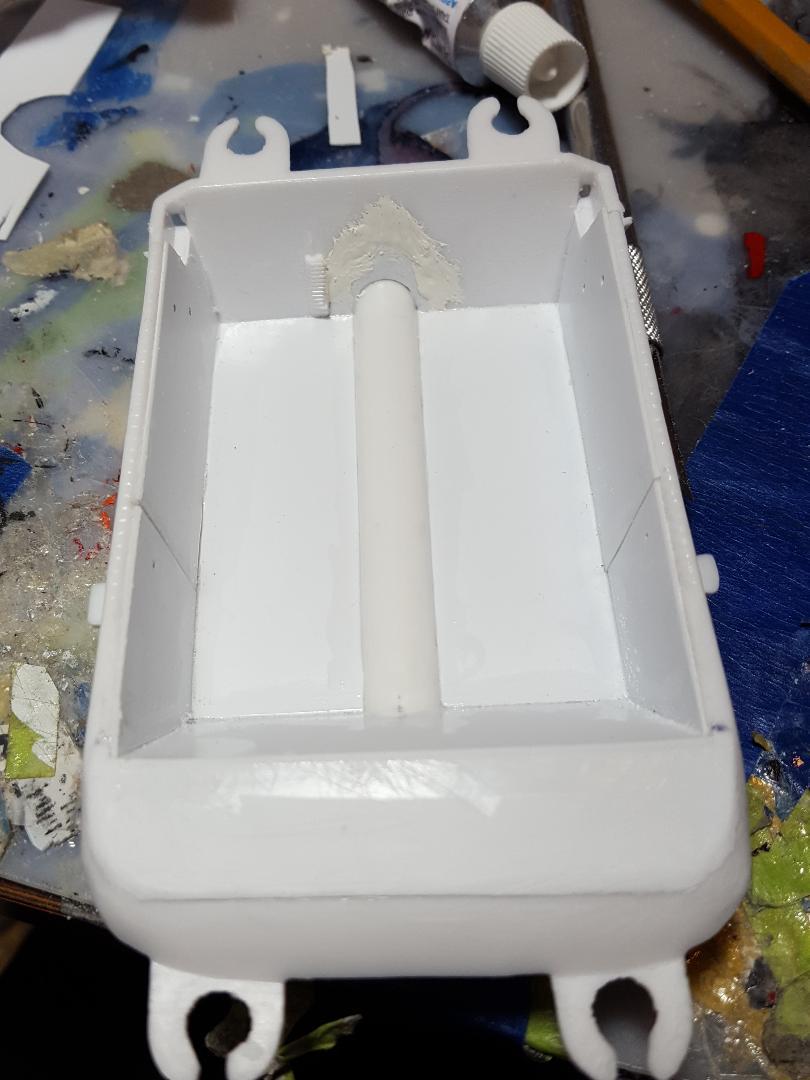
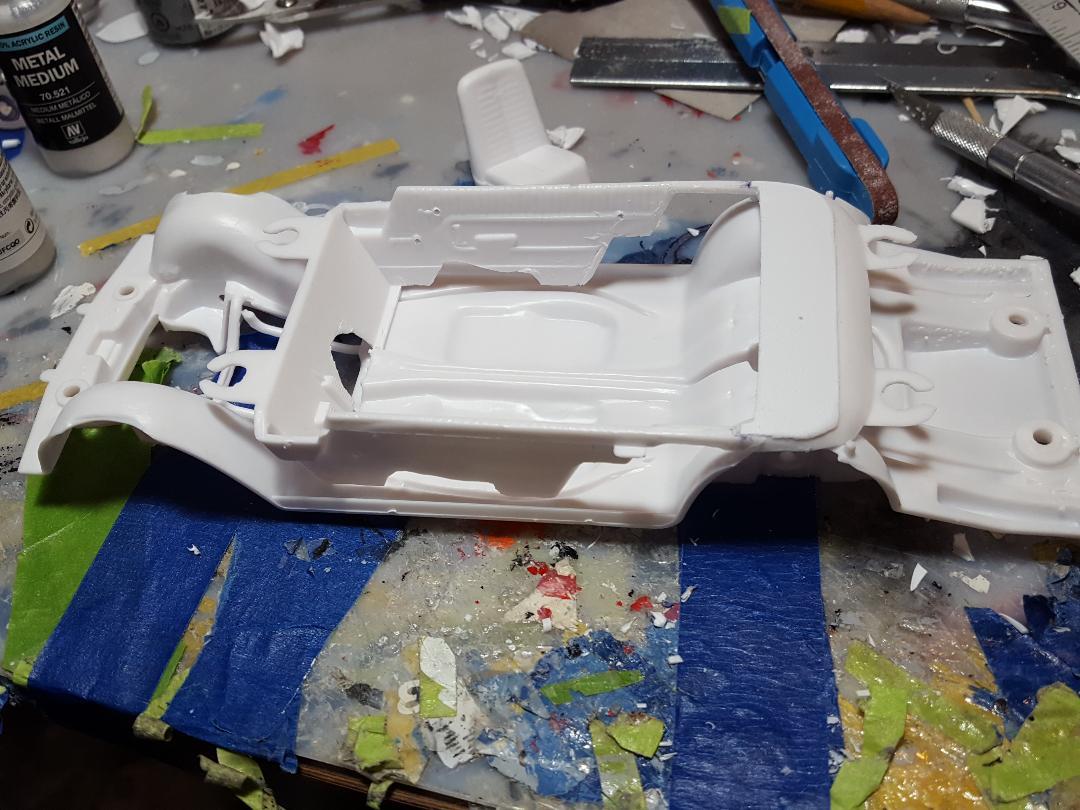
Starting to come together.
-
1969 Dodge Charger Daytona
MarkJ replied to jjsipes's topic in WIP: Stock Cars (NASCAR, Super Stock, Late Model, etc.)
I agree with Haken. I had to remove a lot of material around the wheel openings on my Dick Brooks Daytona. If not the tires would not have fit right much less have the right stance. -
1964 Ned Jarrett Ford
MarkJ replied to MarkJ's topic in WIP: Stock Cars (NASCAR, Super Stock, Late Model, etc.)
Cmon Mike, you have a lot of room to talk tackling that warped Porsche. I can't just put a roll cage in a stock interior. It just wouldn't look right. Ya think? -
Tiger Cobra Duo
MarkJ replied to Pierre Rivard's topic in WIP: Other Racing: Road Racing, Land Speed Racers
You know which one I'm voting for. "The Turd". Then I would have a guide when I got ready to do it. Penske's Grand Sport I did, was the one he beat Miles in at Nassau when he blew the engine on the Cobra. Miles would get ahead of Penske on the straights, but Penske would catch back up with his little 377 in the turns. Penske ended up sweeping all the races that week at Nassau. -
1964 Ned Jarrett Ford
MarkJ replied to MarkJ's topic in WIP: Stock Cars (NASCAR, Super Stock, Late Model, etc.)
Yes, I will have to do the same thing with the frame. Lots of carnage. -
1964 Ned Jarrett Ford
MarkJ replied to MarkJ's topic in WIP: Stock Cars (NASCAR, Super Stock, Late Model, etc.)
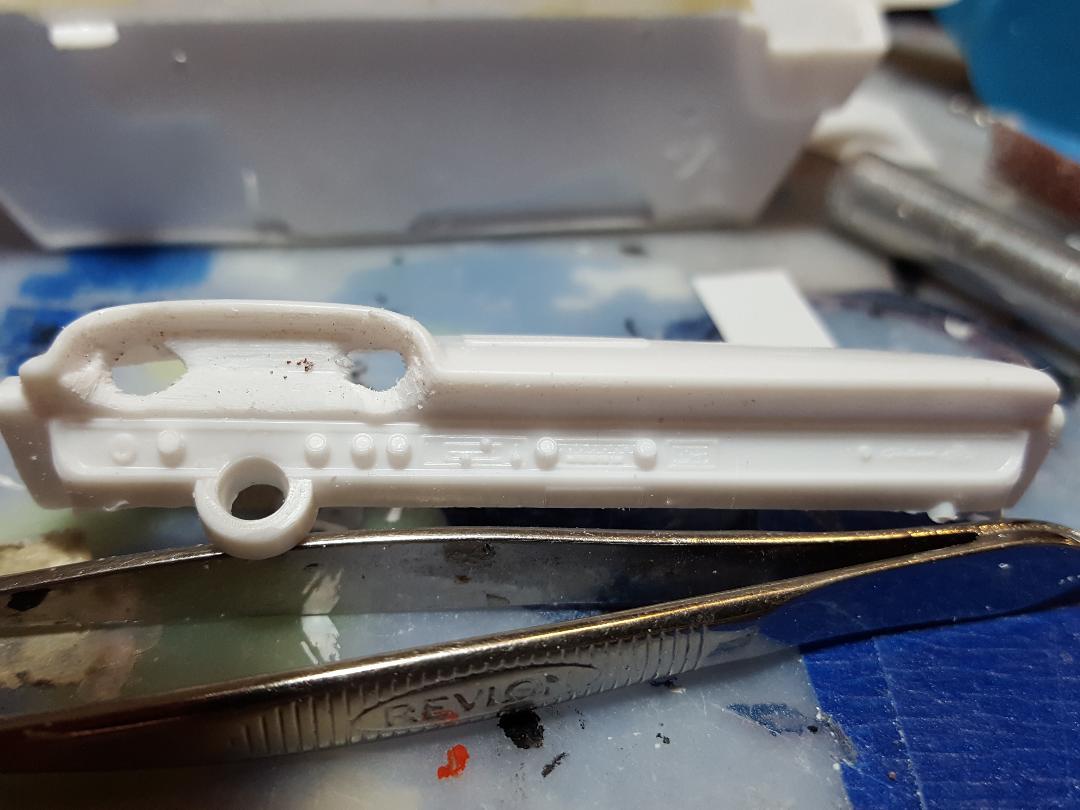
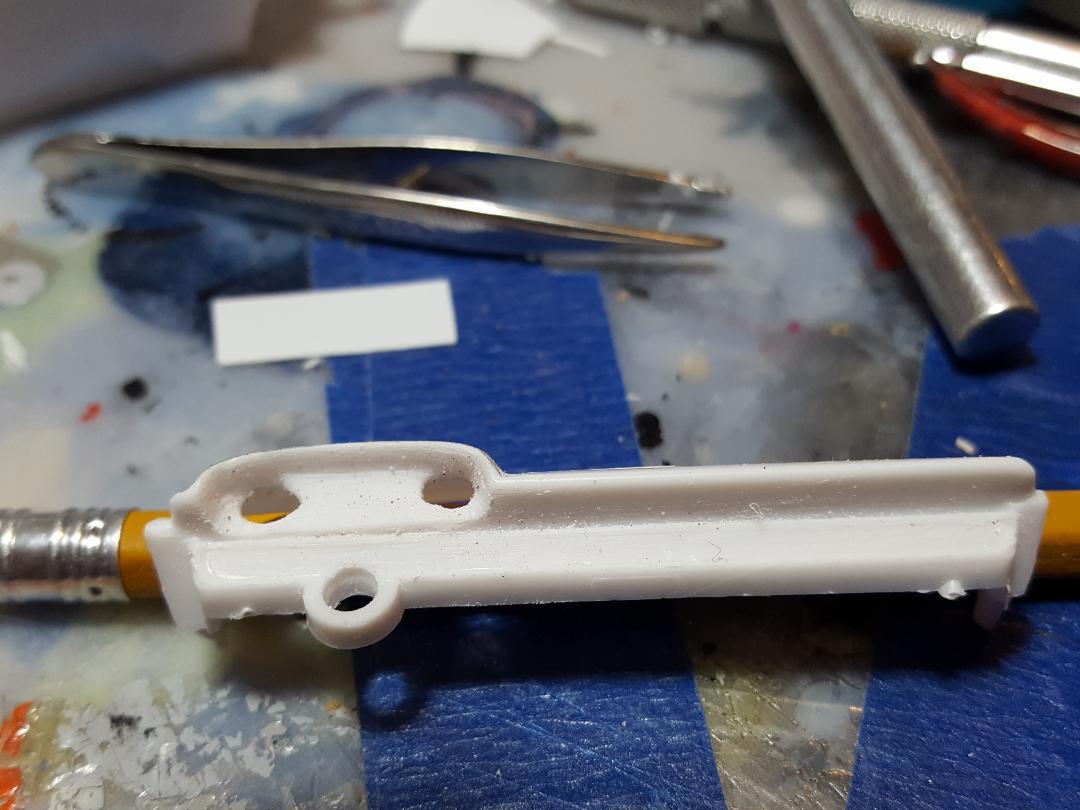
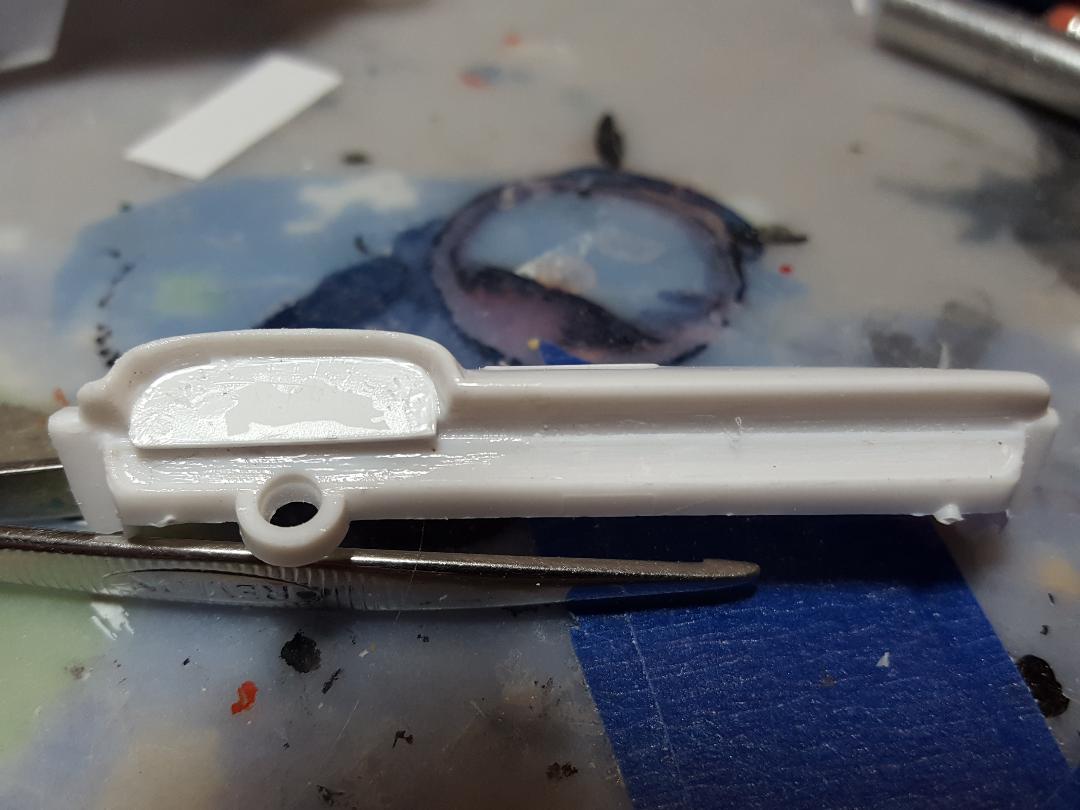
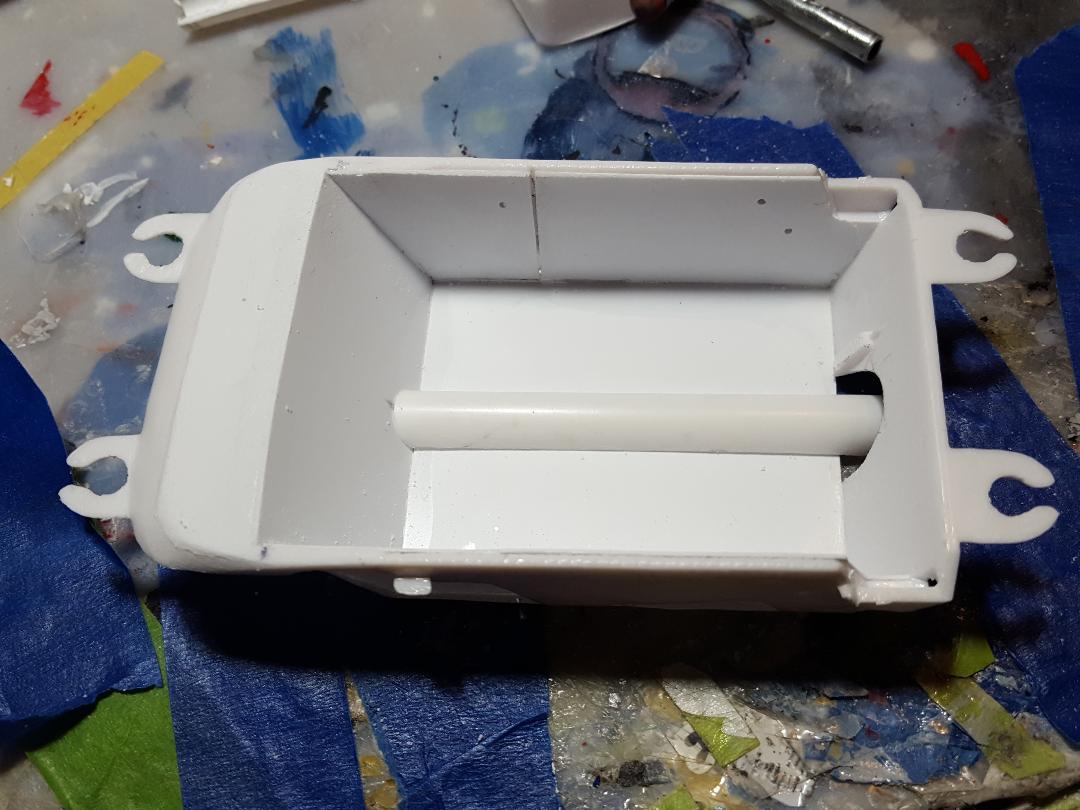
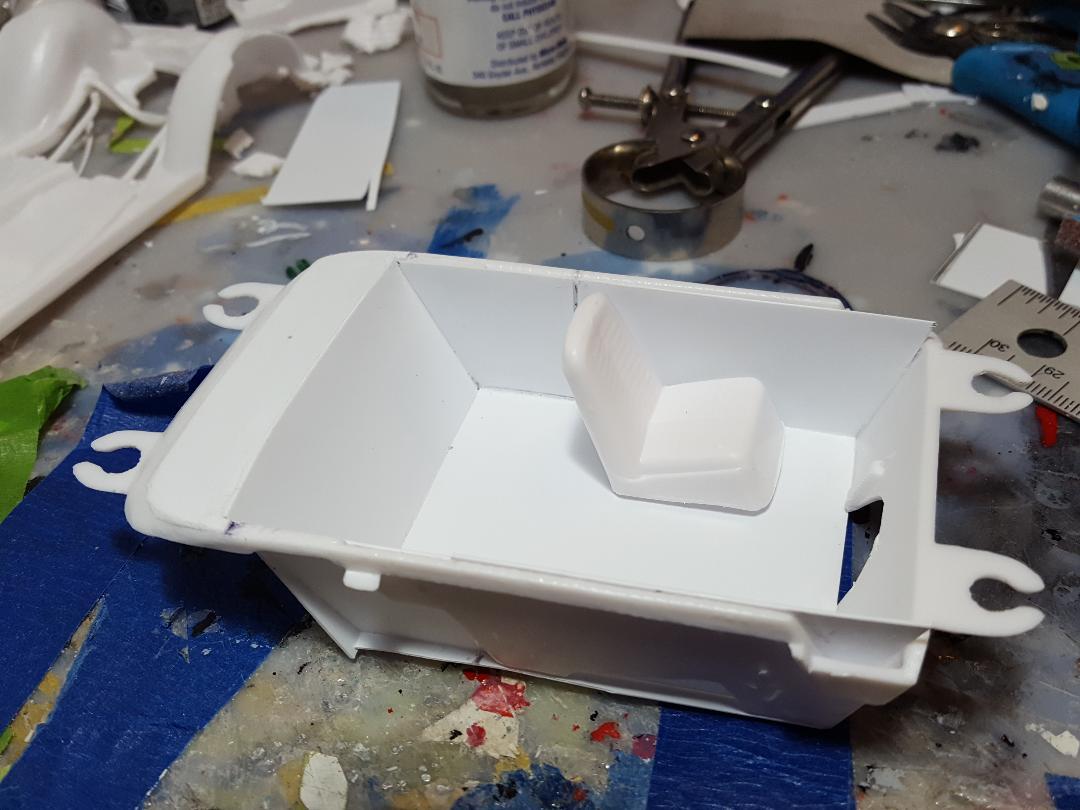
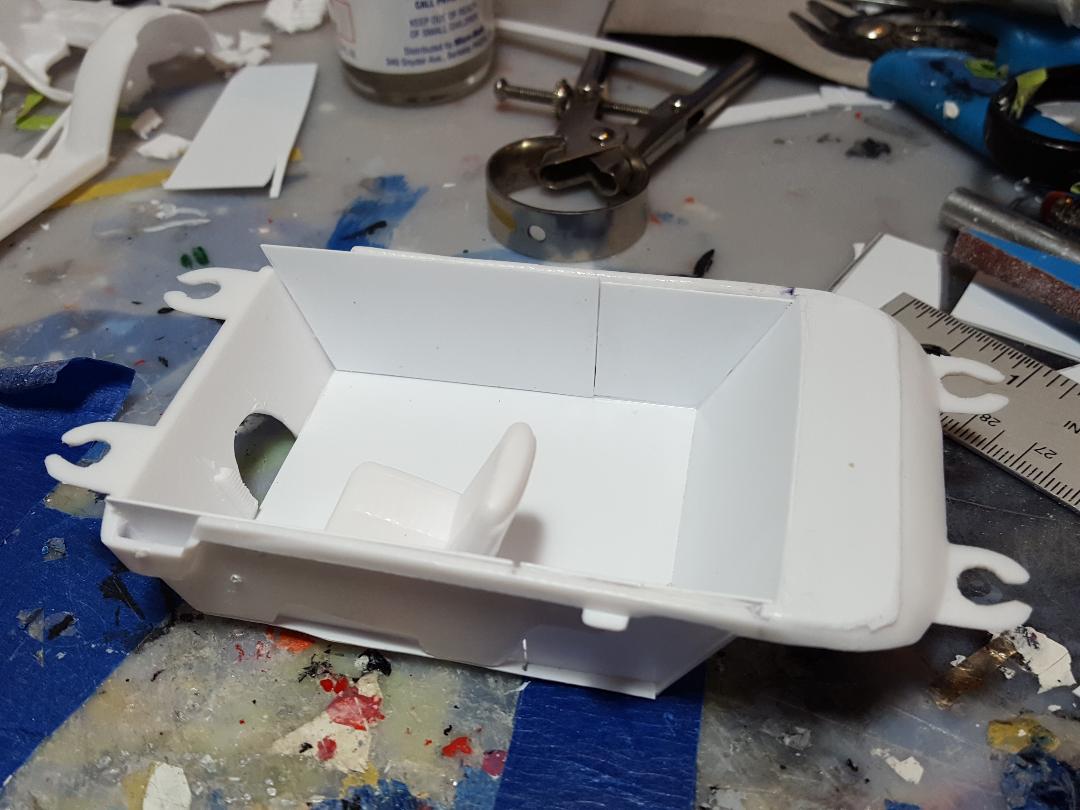
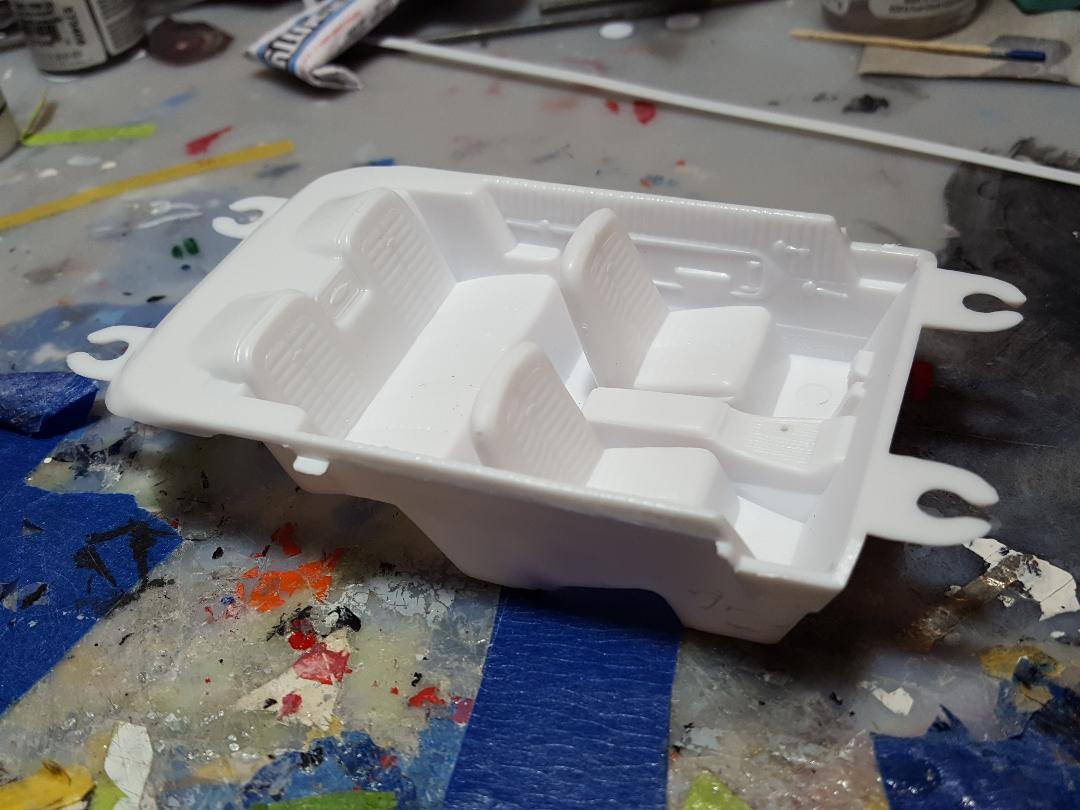
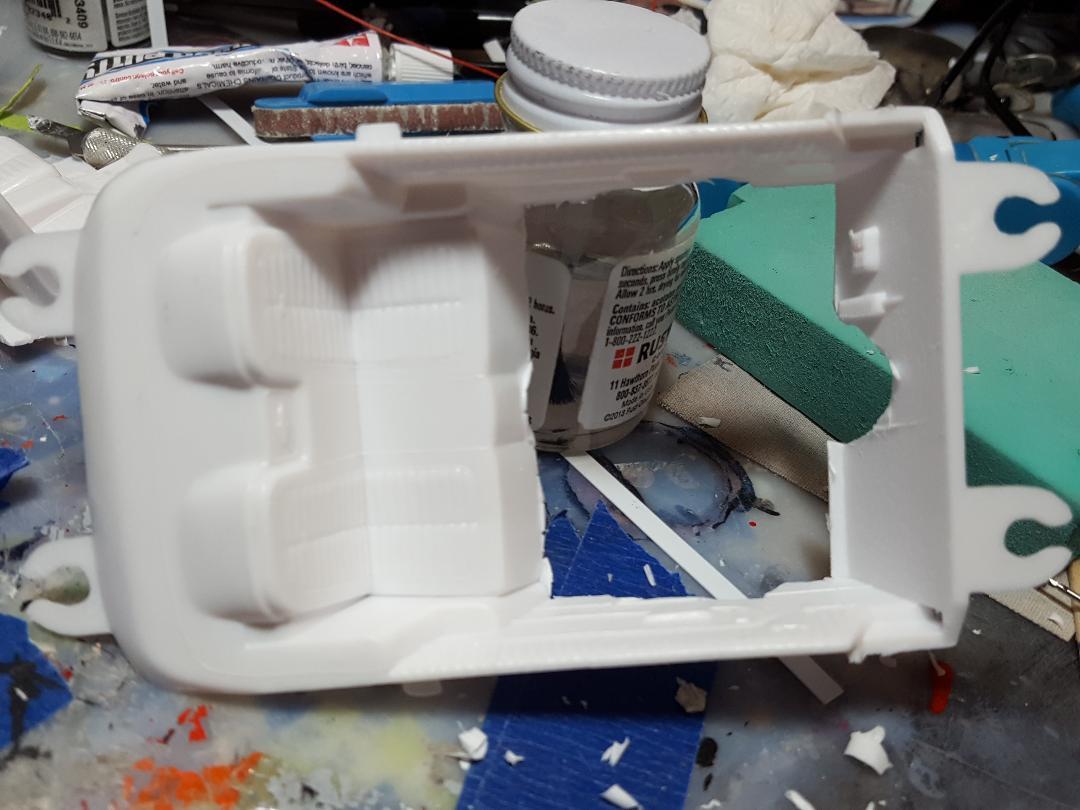
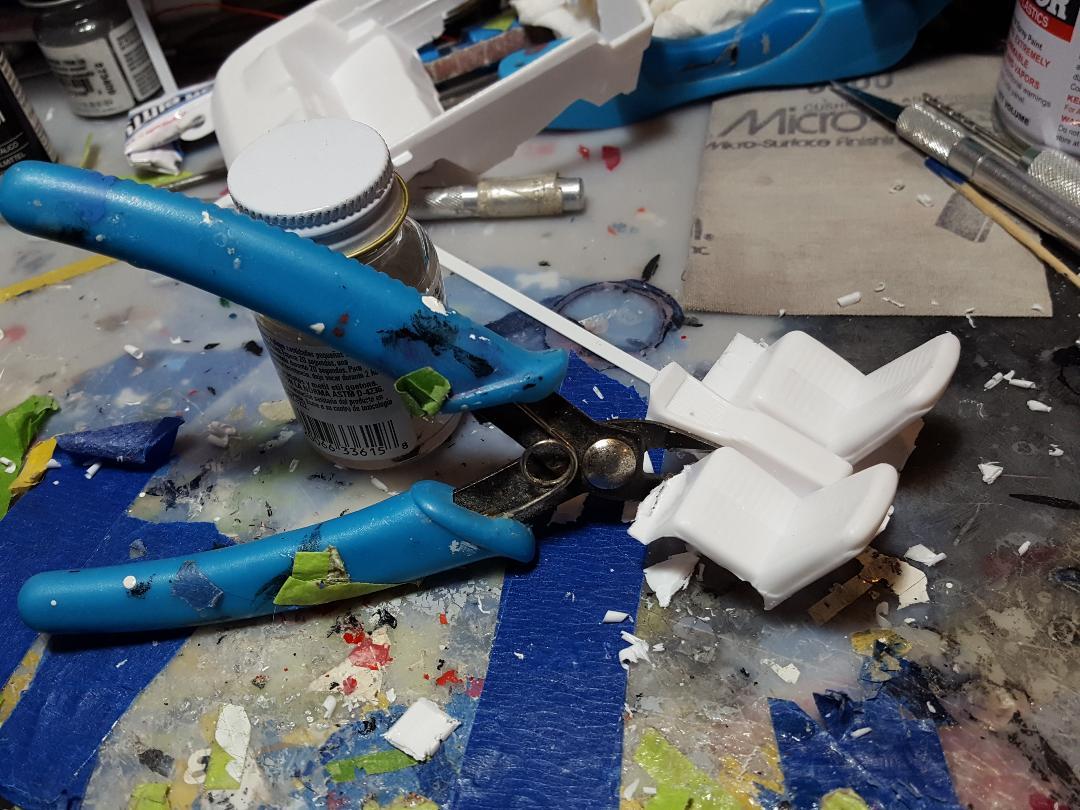
Started on the interior. Have to get rid of the floor and seats, but save the driver's seat. I will need to add a new floor with drive shaft tunnel. Add a new rear foundation and package tray, and fix the door trim panels. After all that I can continue with the dash and roll cage and the other stuff. The sprue cutter comes in very handy for the demolition of the old interior.
.jpg.8e0aa75a179df6e169954ba7f556d09a.jpg)
.jpg.33f4f2a1fab2fceb790df55ea3d43269.jpg)