.jpg.b9265433dc8c3b550370b1d0e4e4d2fc.jpg)
MarkJ
-
Posts
4,688 -
Joined
-
Last visited
Content Type
Profiles
Forums
Events
Gallery
Everything posted by MarkJ
-
Sorry for the double post. This was my attempt at getting rid of one of them.
-
.jpg.b9265433dc8c3b550370b1d0e4e4d2fc.thumb.jpg.915f5b46e3c9402eeaa6972073121c87.jpg)
Tiger Cobra Duo
MarkJ replied to Pierre Rivard's topic in WIP: Other Racing: Road Racing, Land Speed Racers
Pierre, man those jack hooks are ridiculous. Looks better than what would have come in the kit. Check out the reflection of the jack hook in the trunk. Shows how mirror like the paint is. -
1969 Dodge Charger Daytona
MarkJ replied to jjsipes's topic in WIP: Stock Cars (NASCAR, Super Stock, Late Model, etc.)
Time to get the chassis done and put this baby together. I can already tell it's going to be a winner. -
1964 Ned Jarrett Ford
MarkJ replied to MarkJ's topic in WIP: Stock Cars (NASCAR, Super Stock, Late Model, etc.)
Pierre, You will see when the wip begins hopefully later this week. Most guys will not be interested in the wip because they have already built a few themselves, so it will basically just be for me to review before I tackle my next one. Maybe eventually I won't need the instructions anymore. -
Tiger Cobra Duo
MarkJ replied to Pierre Rivard's topic in WIP: Other Racing: Road Racing, Land Speed Racers
Double Wow, Pierre. You have solved the brush stoke mystery. Those body's look awesome. Even better than rattle can or air brush. Three things about brush painting you don't have to worry about are, orange peel, runs in the paint, or a grainy sandpaper like finish. all these are possible when spraying paint. -
1964 Ned Jarrett Ford
MarkJ replied to MarkJ's topic in WIP: Stock Cars (NASCAR, Super Stock, Late Model, etc.)
Halfway through the decaling process and I found out that future is not a good fixadent for ink jet decals. I decided to do the color decals that go on top of the white underlays on the inkjet printer because it prints clearer with tiny detail then the laser printer does. Luckily, I had an old can of testors 1261 clear rattle can to clear over the future to hopefully save the rest of the decals, so I won't have to print another sheet. I always make multiple decals on my sheets in case of mistakes. My next build arrived in the mail yesterday. Thank you, Mike. You always provide excellent service. I noticed my next build had finally arrived on his website, so I ordered one of those too. Looking at the instructions I will probably be busy for at least a year on these two builds. There's no way I could wing it on these models without instructions. -
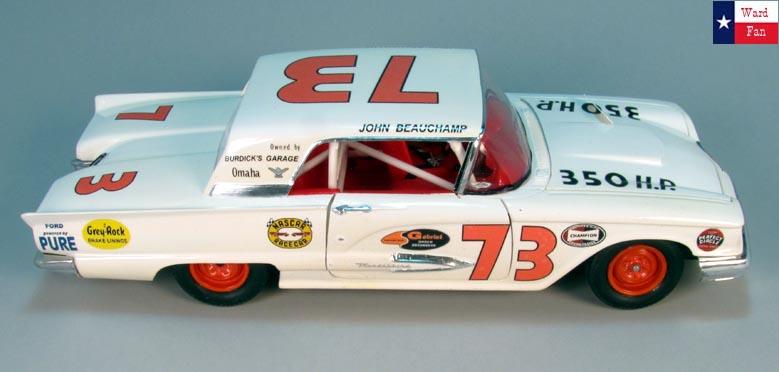
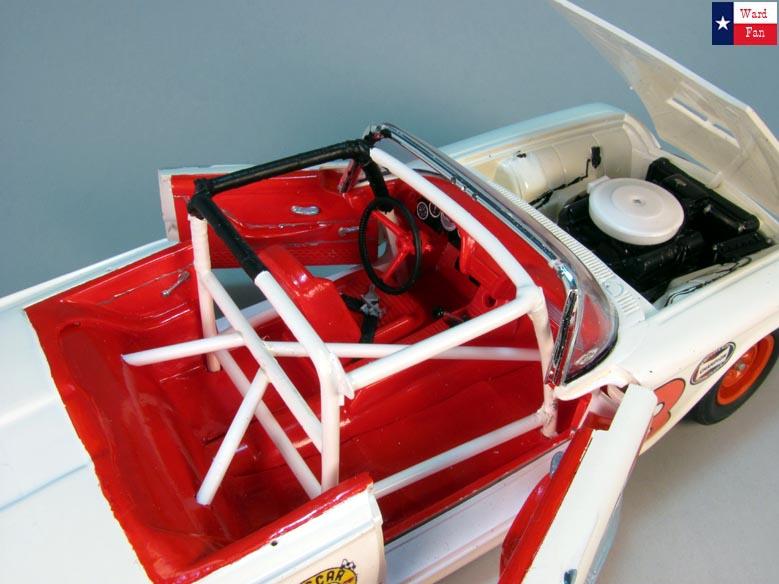
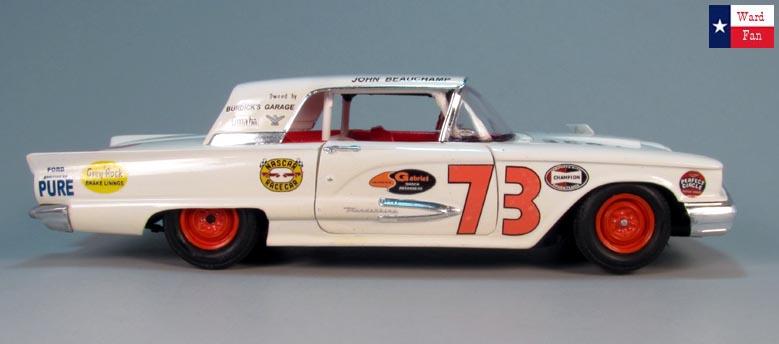
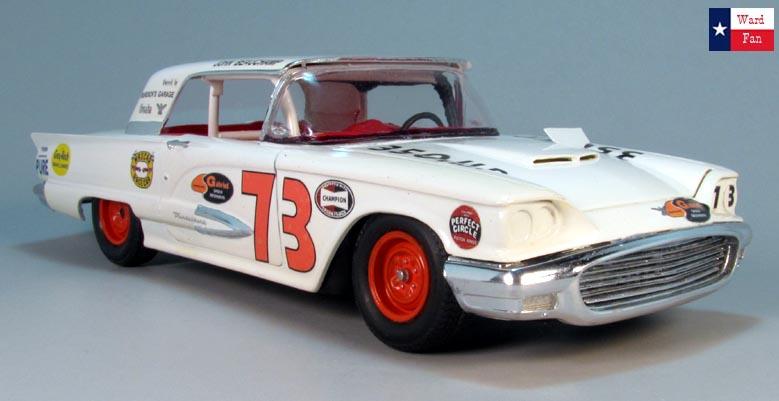
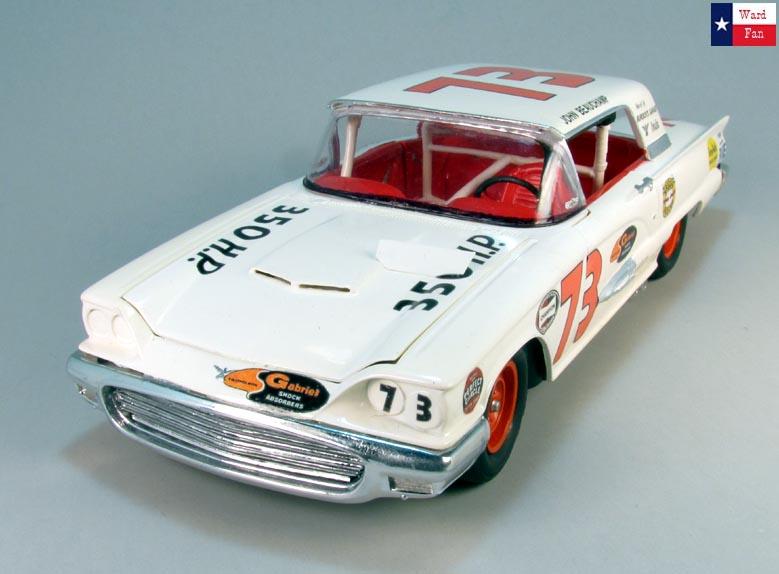
1959 John Beauchamp Thunderbird
MarkJ replied to MarkJ's topic in WIP: Stock Cars (NASCAR, Super Stock, Late Model, etc.)
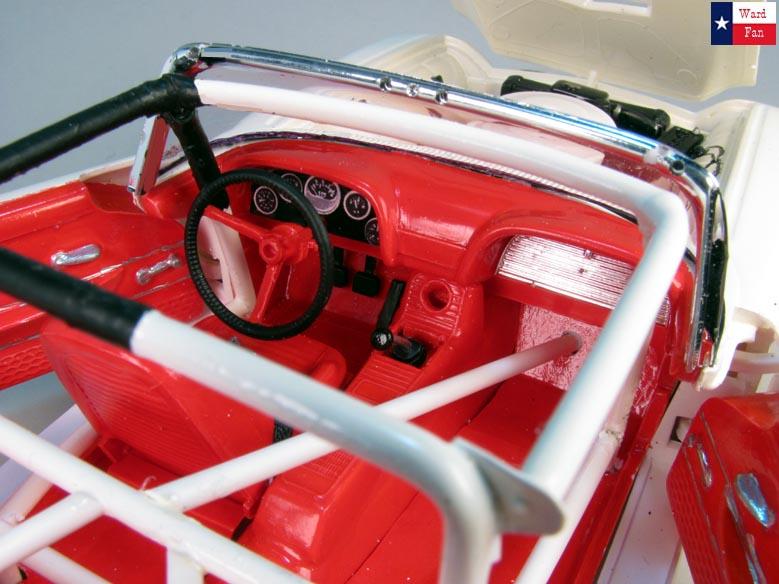
Joey, I had a wip showing how I did the grille and side moldings, but I don't know what happened to it, and I can't remember now, because it was so long ago. I had no color pictures of the car, so I just guessed it was a red interior. I think the wip was over at Randy Ayers and they had to shut down and they lost all their old forums, and they told me they could not get them back. Needless to say, I won't be doing anymore wips over there. -
1964 Ned Jarrett Ford
MarkJ replied to MarkJ's topic in WIP: Stock Cars (NASCAR, Super Stock, Late Model, etc.)
Will start decaling today, if possible. The model is finally finished, except for a final blue touch up, right before the future goes on. Got my next build ordered yesterday. Looking forward to something completely different. -
Tiger Cobra Duo
MarkJ replied to Pierre Rivard's topic in WIP: Other Racing: Road Racing, Land Speed Racers
Great news on the no brush strokes. I wasn't as lucky on the Jarrett ford. But it did turn out better than my first 2 attempts. Maybe someday I will get to the no brush stroke place I want to be in. -
Tiger Cobra Duo
MarkJ replied to Pierre Rivard's topic in WIP: Other Racing: Road Racing, Land Speed Racers
Looking good. Can't wait to see the clear on and then polished. -
Tiger Cobra Duo
MarkJ replied to Pierre Rivard's topic in WIP: Other Racing: Road Racing, Land Speed Racers
Ducts look fabulous and both chassis are super cleanly finished. The exhausts on both look perfect. -
1964 Ned Jarrett Ford
MarkJ replied to MarkJ's topic in WIP: Stock Cars (NASCAR, Super Stock, Late Model, etc.)
Just installed the tire/wheel assemblies. Futured the decal sheets so they will be ready to use when I get to that point. Still need to make the hood and deck pins and touch up the exhaust ports. Oh yes, and there's always the windshield and back glass brackets. I'm glad my next build will be exclusively oob, and I mean that sincerely. Hoping to order the kit Monday. -
1969 Dodge Charger Daytona
MarkJ replied to jjsipes's topic in WIP: Stock Cars (NASCAR, Super Stock, Late Model, etc.)
Awesome paint, Jason. The paint separation line is perfect. Thats one thing I wish I could improve on. What kind of tape do you use, not that it will help me any. -
Tiger Cobra Duo
MarkJ replied to Pierre Rivard's topic in WIP: Other Racing: Road Racing, Land Speed Racers
Very cool looking ducts , Pierre. Seriously, those are awesome looking. Looks like they came in the kit. -
Tiger Cobra Duo
MarkJ replied to Pierre Rivard's topic in WIP: Other Racing: Road Racing, Land Speed Racers
Top notch job on the dash and gauges -
1964 Ned Jarrett Ford
MarkJ replied to MarkJ's topic in WIP: Stock Cars (NASCAR, Super Stock, Late Model, etc.)
Made and installed the rear-view mirror and tomorrow I will paint it and then I can assemble the sub-assemblies . After that I just need to paint and put the tire/wheel assemblies together and add the firestone decals. after that I can install the tire/wheels and then just do some mop up work here and there and be finished. -
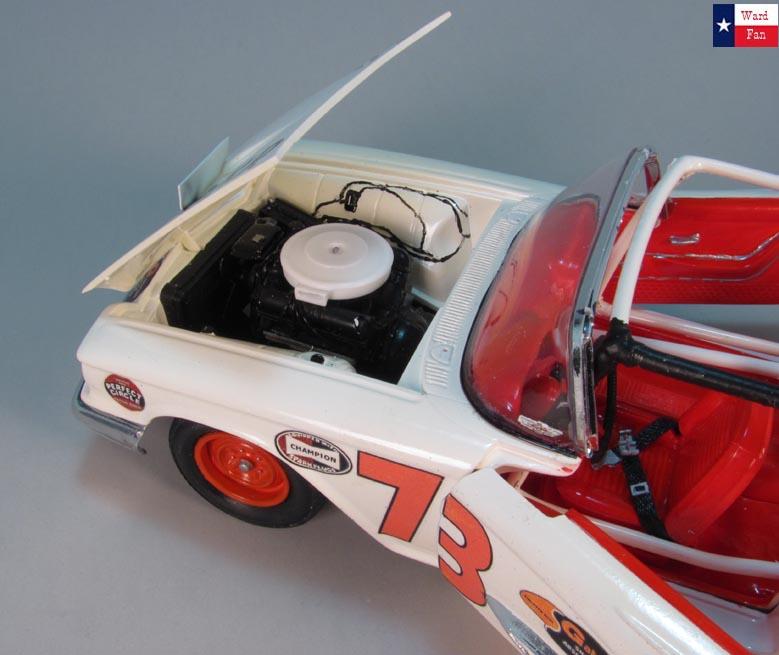
1959 John Beauchamp Thunderbird
MarkJ replied to MarkJ's topic in WIP: Stock Cars (NASCAR, Super Stock, Late Model, etc.)
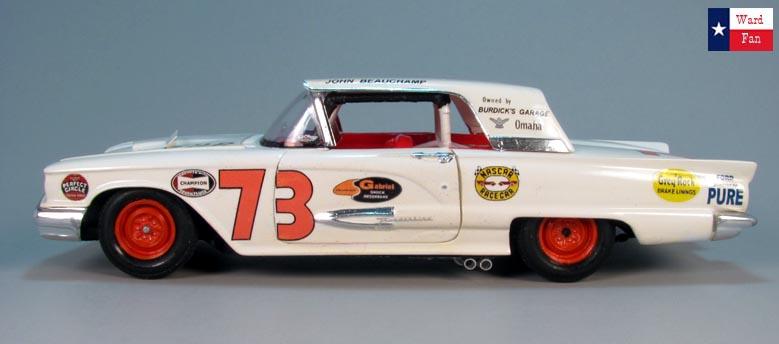
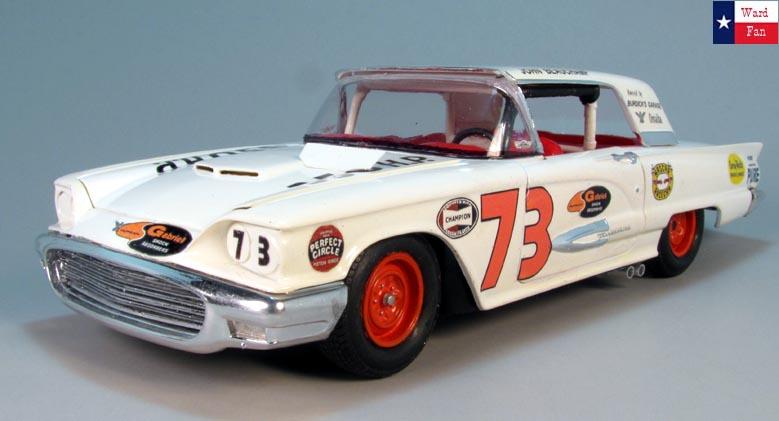
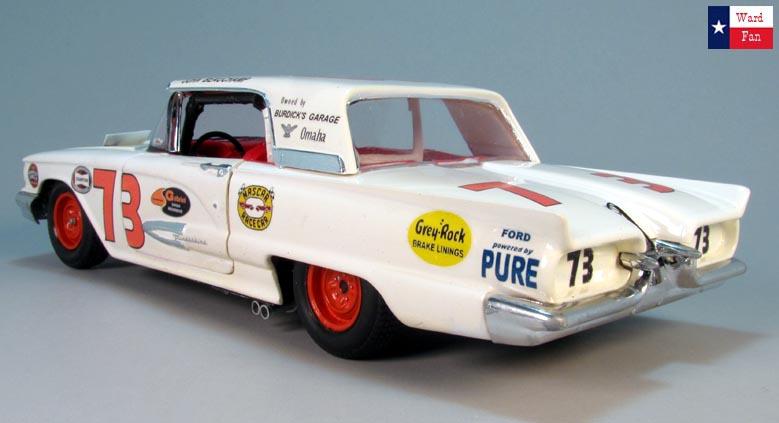
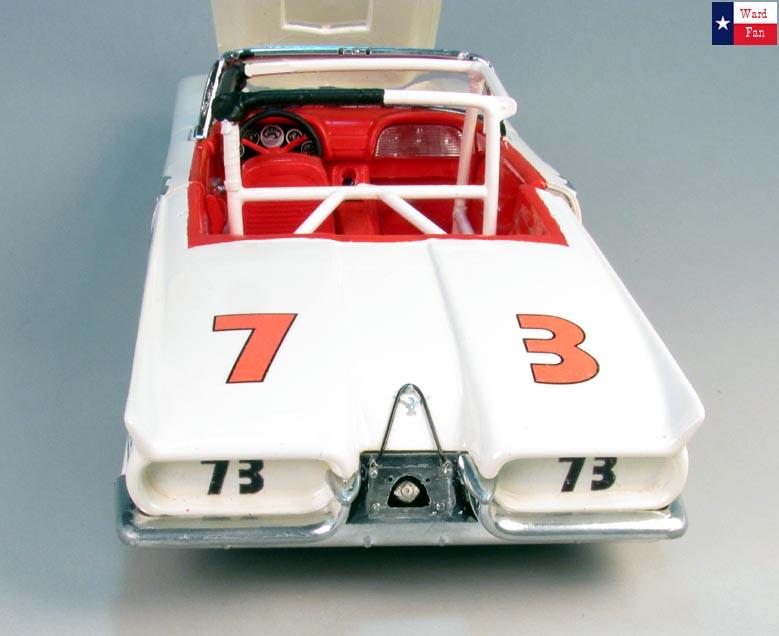
Thanks. Pierre. the deck lid tie down is the first photo below cut the right length and then the 32 guage wire is tied to the ends of the material and fashioned into a hook. You then hook it to a convenient place in the license area and loop it over a .020 rod that is glued right above the thunderbird emblem, The material is elastic so it works just lie a real Bunji cord would work. Both items are available at hob lob.
-
1959 John Beauchamp Thunderbird
MarkJ replied to MarkJ's topic in WIP: Stock Cars (NASCAR, Super Stock, Late Model, etc.)
-
1959 John Beauchamp Thunderbird
MarkJ replied to MarkJ's topic in WIP: Stock Cars (NASCAR, Super Stock, Late Model, etc.)
-
1959 John Beauchamp Thunderbird
MarkJ replied to MarkJ's topic in WIP: Stock Cars (NASCAR, Super Stock, Late Model, etc.)
-
1959 John Beauchamp Thunderbird
MarkJ replied to MarkJ's topic in WIP: Stock Cars (NASCAR, Super Stock, Late Model, etc.)
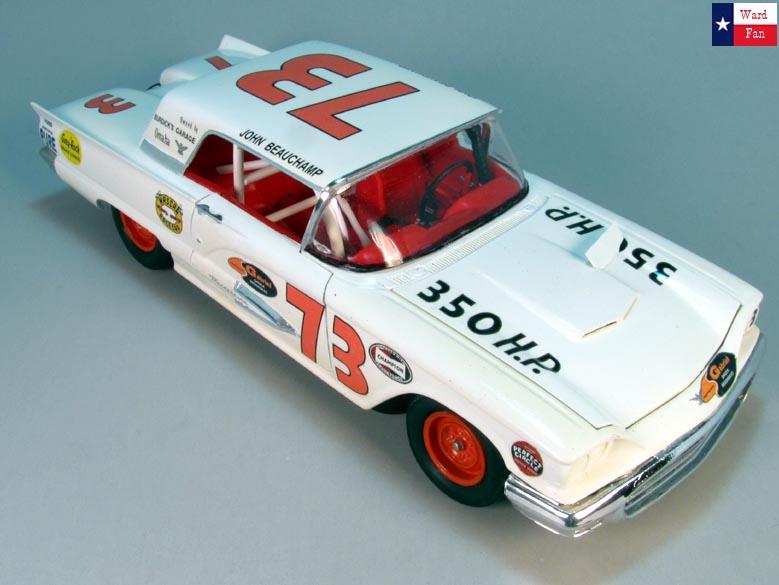
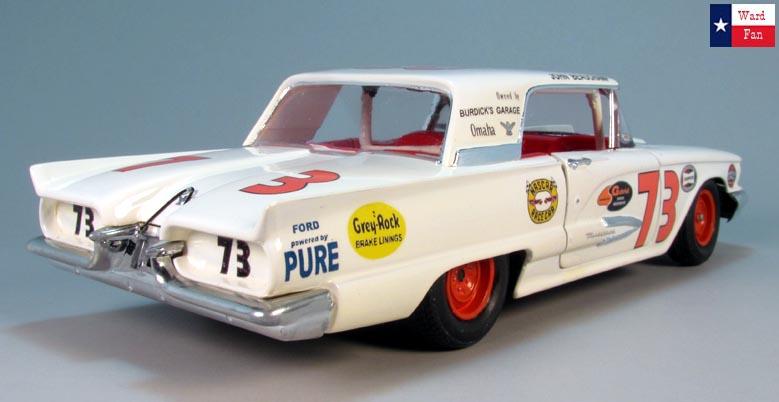
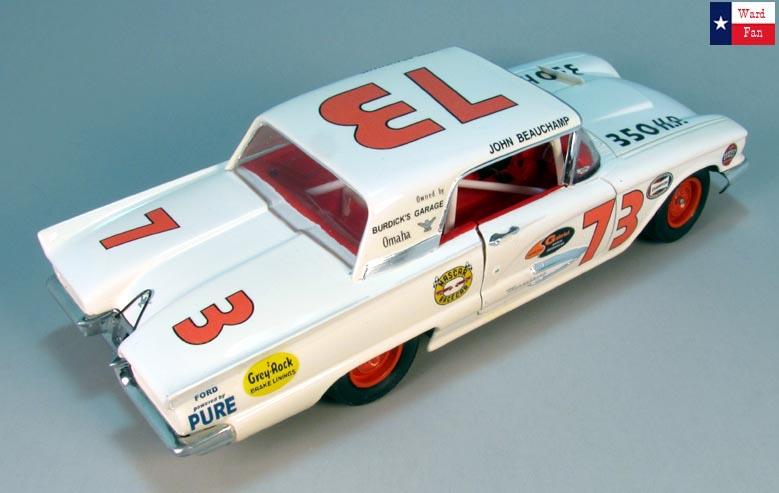
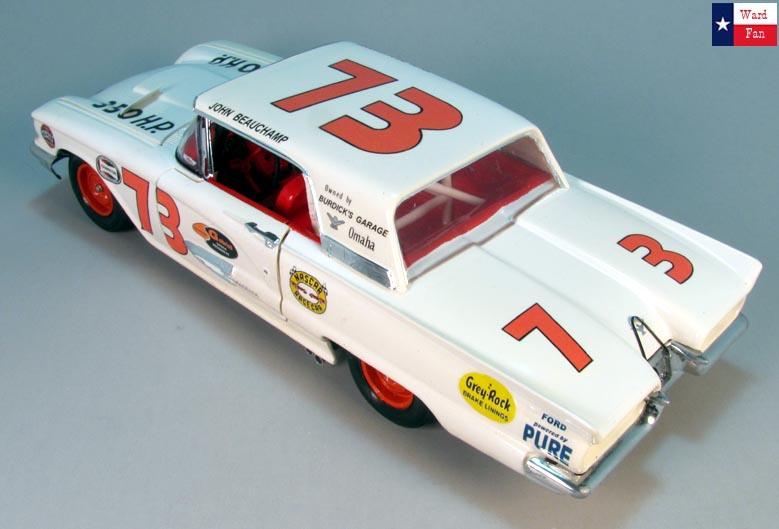
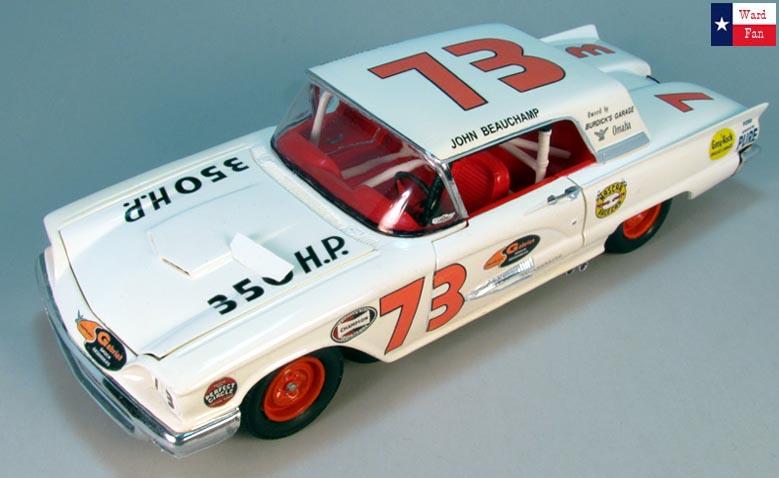
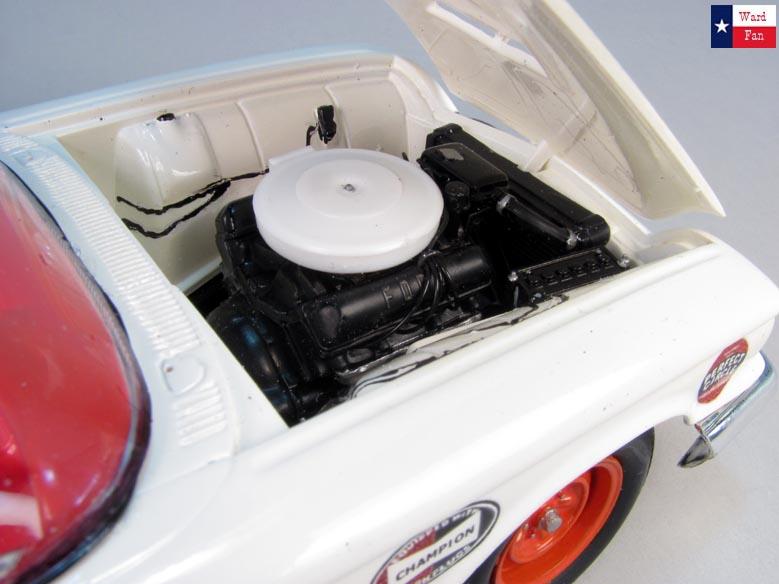
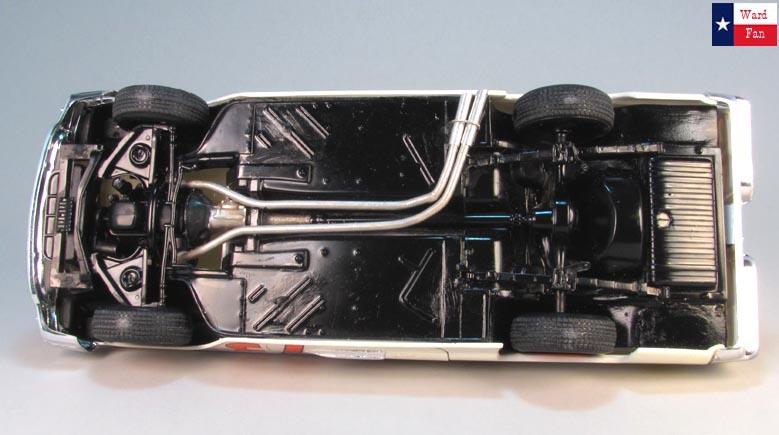
I haven't looked at this post since 2015 and did not realize how small the photos were, so since it is easier to post photos here now then back then here are some updated photos a little bit larger.
-
1959 John Beauchamp Thunderbird
MarkJ replied to MarkJ's topic in WIP: Stock Cars (NASCAR, Super Stock, Late Model, etc.)
Thanks for the inquiry, Joey. I sold a model to Tom Pistone's daughter and always regretted it. These are like good memory's in my life and to sell them for money just doesn't feel right. And to give them away doesn't feel right either, I did a lot of research on this build and found out how your grandfather was not treated well by Nascar, which I'm sure you are aware of. This car actually was the first winner of the Daytona 500. I've seen othe builds of this car and if you do a lot of research you can probably find a guy who is willing to sell his model. Take care and I wish you luck in your search. There might even be a diecast out there of it. -
1964 Ned Jarrett Ford
MarkJ replied to MarkJ's topic in WIP: Stock Cars (NASCAR, Super Stock, Late Model, etc.)
Thanks, Mike. They actually were pretty shiny at the start of the season but after a while they weren't so shiny anymore. Back then a lot of the competitors used the same car all season. They didn't have a fleet of cars like they do today. -
1964 Ned Jarrett Ford
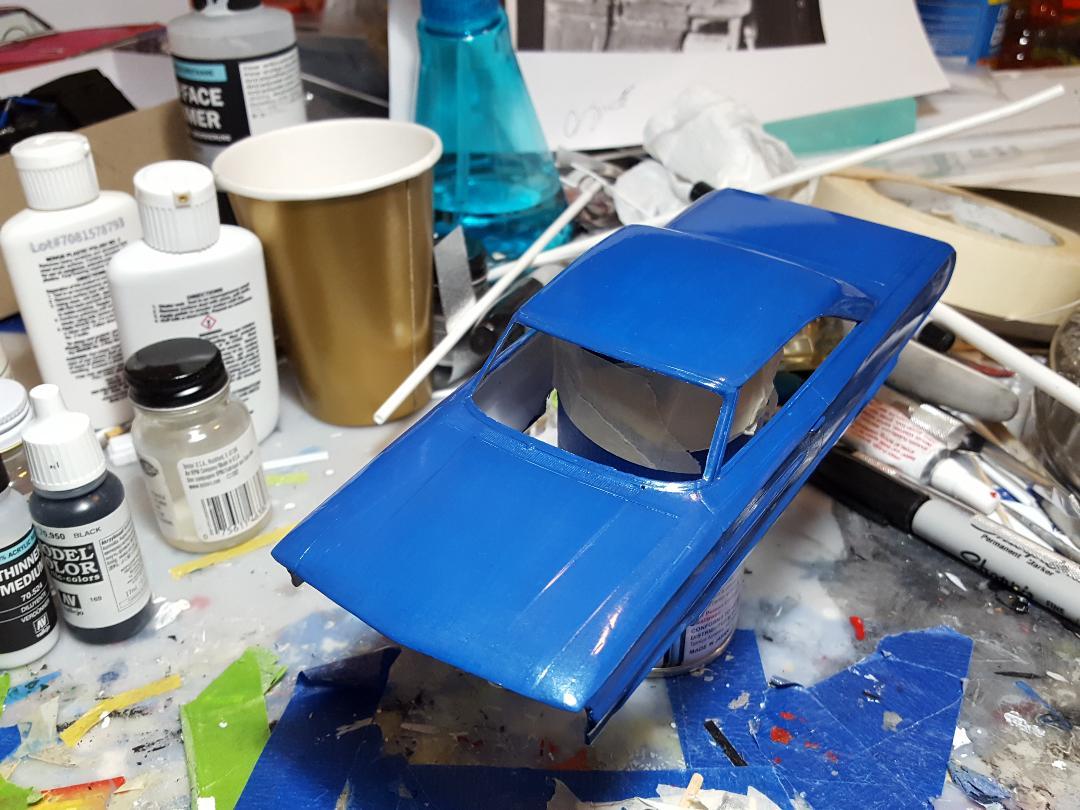
MarkJ replied to MarkJ's topic in WIP: Stock Cars (NASCAR, Super Stock, Late Model, etc.)
This group of pictures is after polishing with the Novus. you can't really see too much difference between the last group of pictures but in person the finish does seem smoother and more reflective then after the clear alone. I think the future will improve it just a little bit better. We shall see. When I get the model completely finished, I will mix up a batch of blue and touch up the little, tiny chips that always appear after the model is completely finished. The chips are so tiny they are barely discernable. I will probably need a sharpened toothpick to apply the paint to them.
-
1964 Ned Jarrett Ford
MarkJ replied to MarkJ's topic in WIP: Stock Cars (NASCAR, Super Stock, Late Model, etc.)
Thanks Jason. Its slowly starting to come together.