.jpg.b9265433dc8c3b550370b1d0e4e4d2fc.jpg)
MarkJ
-
Posts
4,689 -
Joined
-
Last visited
Content Type
Profiles
Forums
Events
Gallery
Everything posted by MarkJ
-
.jpg.b9265433dc8c3b550370b1d0e4e4d2fc.thumb.jpg.915f5b46e3c9402eeaa6972073121c87.jpg) Yes, that is a much better choice for the tires. I had to use kit bashed street tires for the front tires on my Grand Sport, built from an amt kit, to make it look like the ref pictures of the 005 car I built, Penske won at Nassau with it in 1964 . I used 1964 P.P.P. Nascar tires for the rears and they seemed to look pretty good on it. I modified some P.P.P. 64 Holman and Moody wheels to look like Halibrands. I was deep into the project when i found out that accurate miniature Gran Sport kits even existed. So I stuck with it to the end. It was one of those builds I always wanted to do.
Yes, that is a much better choice for the tires. I had to use kit bashed street tires for the front tires on my Grand Sport, built from an amt kit, to make it look like the ref pictures of the 005 car I built, Penske won at Nassau with it in 1964 . I used 1964 P.P.P. Nascar tires for the rears and they seemed to look pretty good on it. I modified some P.P.P. 64 Holman and Moody wheels to look like Halibrands. I was deep into the project when i found out that accurate miniature Gran Sport kits even existed. So I stuck with it to the end. It was one of those builds I always wanted to do. -
1966 Mercury Comet
MarkJ replied to MarkJ's topic in WIP: Stock Cars (NASCAR, Super Stock, Late Model, etc.)
Thanks, Pierre. Sometimes I overthink things. I just tried straight flat red and it's a great match for what I need for the red in the interior. I had in my mind that I had to lighten it even before I tried it. I wish hobby Lobby would offer more color choices from Vallejo. -
1966 Mercury Comet
MarkJ replied to MarkJ's topic in WIP: Stock Cars (NASCAR, Super Stock, Late Model, etc.)
Got most of the stuff primed. I'm trying to get the right color for the interior. Its brighter than the outside of the car according to the reference I have. So far, I'm using 7 drops of flat red and one drop of white. It's still coming out too pink. I tried using crimson, but it is really an orange color. Those are the only Vallejo red colors my Hobby Lobby sells. I have a Creatix red but the Creatix paints are very thin like they already have thinner in them. They don't cover well with a brush like Vallejo does. -
Looks like you nailed it to me Pierre. The fender openings look so much more like the real car now and the car is sitting down like it should now. I think you also cleaned up the work you did on the fenders perfectly.
-
1966 Mercury Comet
MarkJ replied to MarkJ's topic in WIP: Stock Cars (NASCAR, Super Stock, Late Model, etc.)
Thanks, Pierre. if i try to hurry I make lots of mistakes which makes the process longer so it's faster for me to go slow. if that makes any sense. -
Yes, that sounds like the way to go. Are those Tamiya colors or Vallejo?
-
1966 Mercury Comet
MarkJ replied to MarkJ's topic in WIP: Stock Cars (NASCAR, Super Stock, Late Model, etc.)
Thanks, Pierre. I'm just glad I can finally prime everything and get it painted so I can finally assemble this project. it seems like the older I get, the longer these projects take. But that's okay. What's the rush anyway. There's no boss standing over me saying, when is this going to be finished? It's not just getting to the destination, it's the journey along the way. But there's nothing like getting it all assembled and adding the wheel /tire assemblies to finally get it sitting and looking like a car. The decals are just the frosting on the cake. It's weird how so many people rush to paint the body and apply the decals first and then never actually finish the build. -
1966 Mercury Comet
MarkJ replied to MarkJ's topic in WIP: Stock Cars (NASCAR, Super Stock, Late Model, etc.)
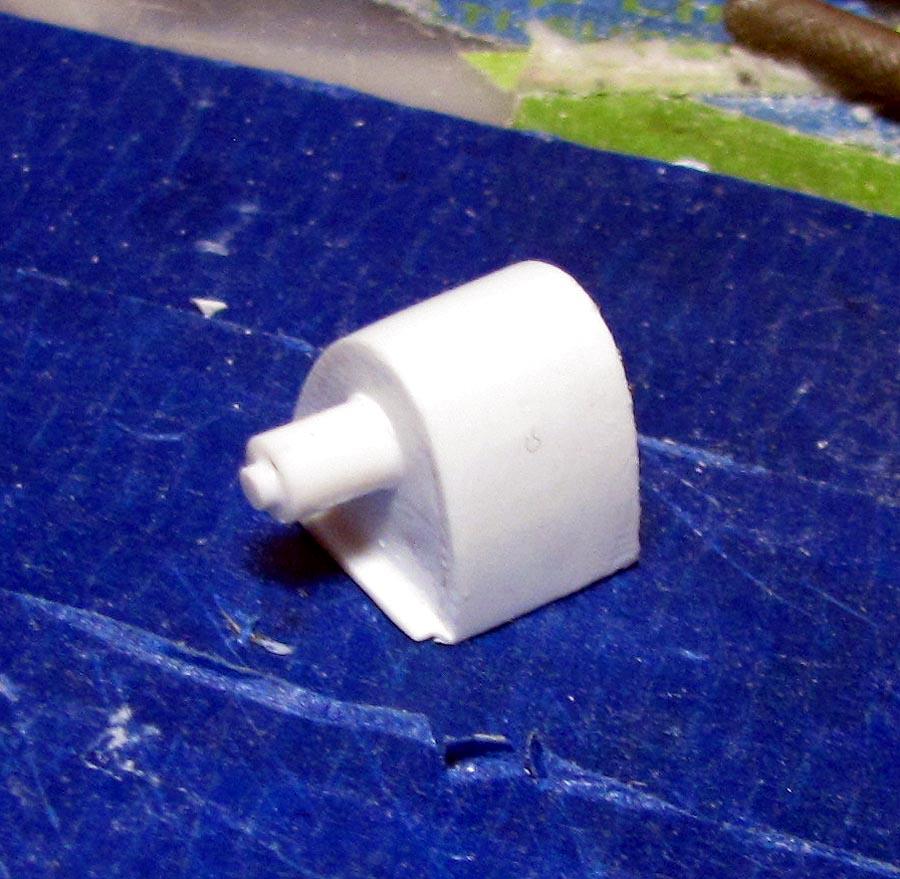
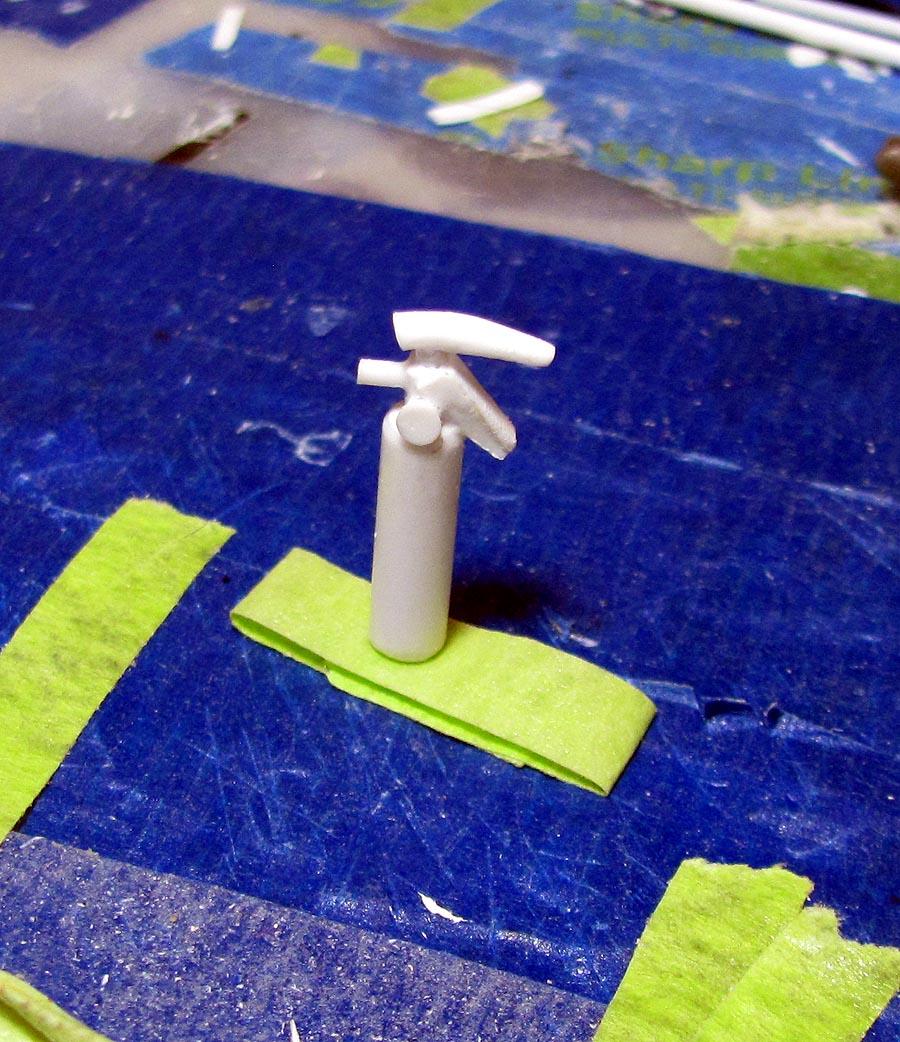
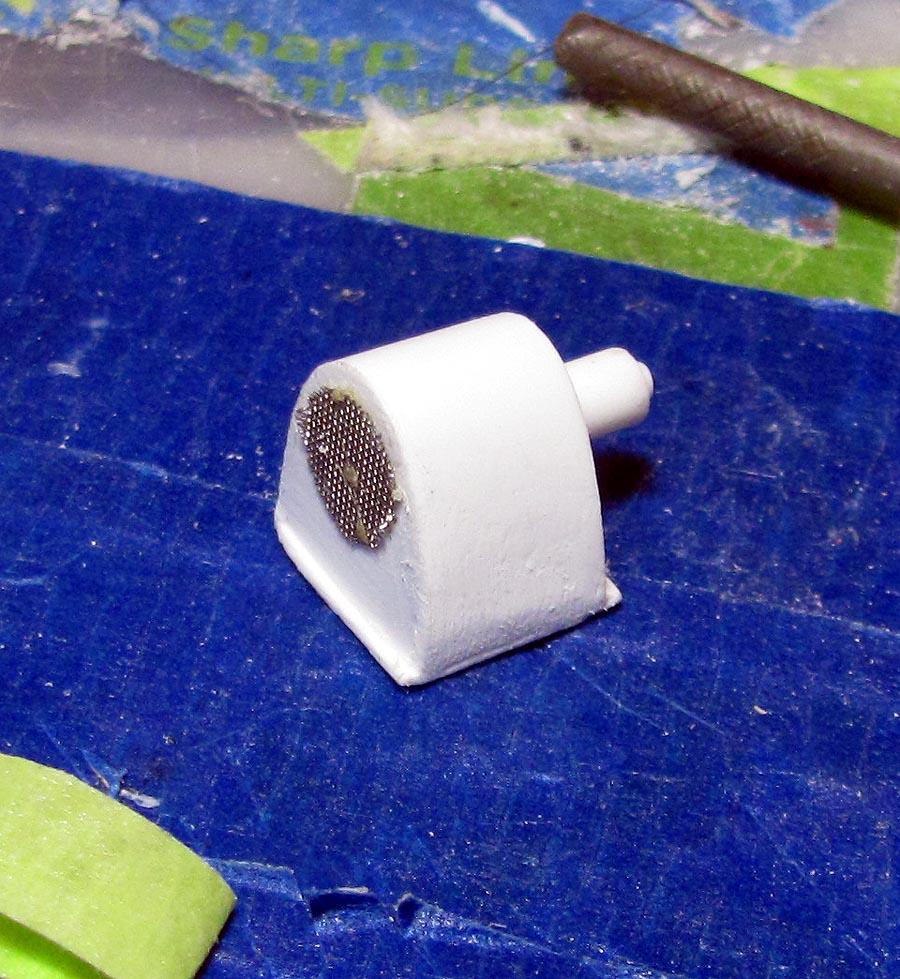
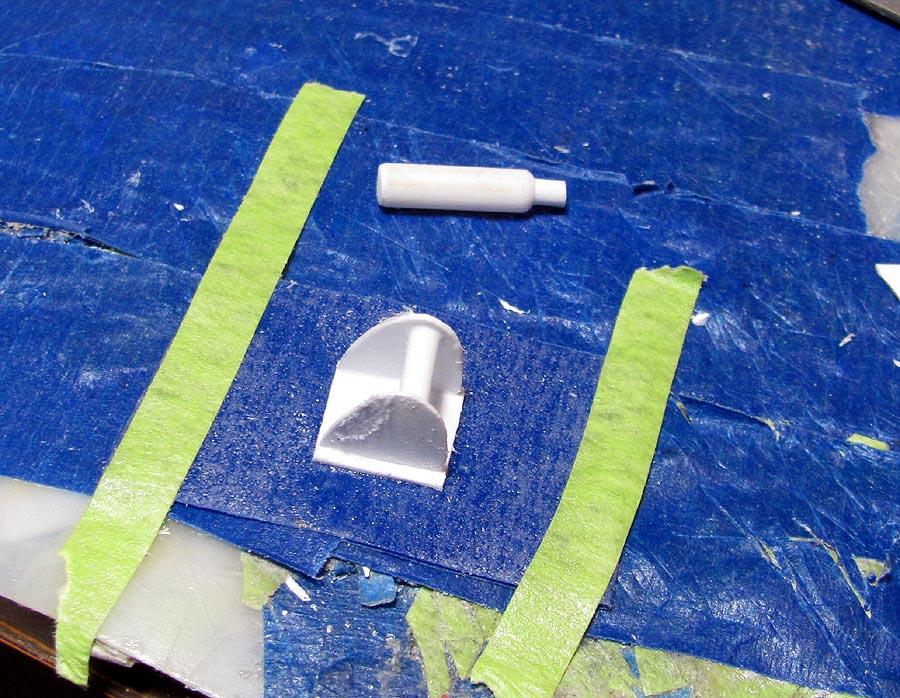
Thanks, Gerald. I finally finished the last two items for the interior. I just need to figure out where they mounted the fire extinguisher. I had to copy what Smokey Yunick used in his 66 Chevelle because I could find no reference for it for this car.
-
Okay, so you're doing the blue #3 car. Looking forward to your color mix for that metallic blue. Should be awesome as usual. I guess it will be like the #65 car that someone posted earlier in the thread. I've always liked that color.
-
Glad I found your WIP, Pierre. I agree that the ride height is a bit too high on the oob model. I'm glad you're fixing it. If the 3 car above is an accurate miniatures, it also seems that the tires are a bit too large compared to the refence of real cars posted. Maybe with tire decals it wil make them look less large. The stripes and the Firestone decals should help. Can you share which driver and what color the car will be?
-
1966 Mercury Comet
MarkJ replied to MarkJ's topic in WIP: Stock Cars (NASCAR, Super Stock, Late Model, etc.)
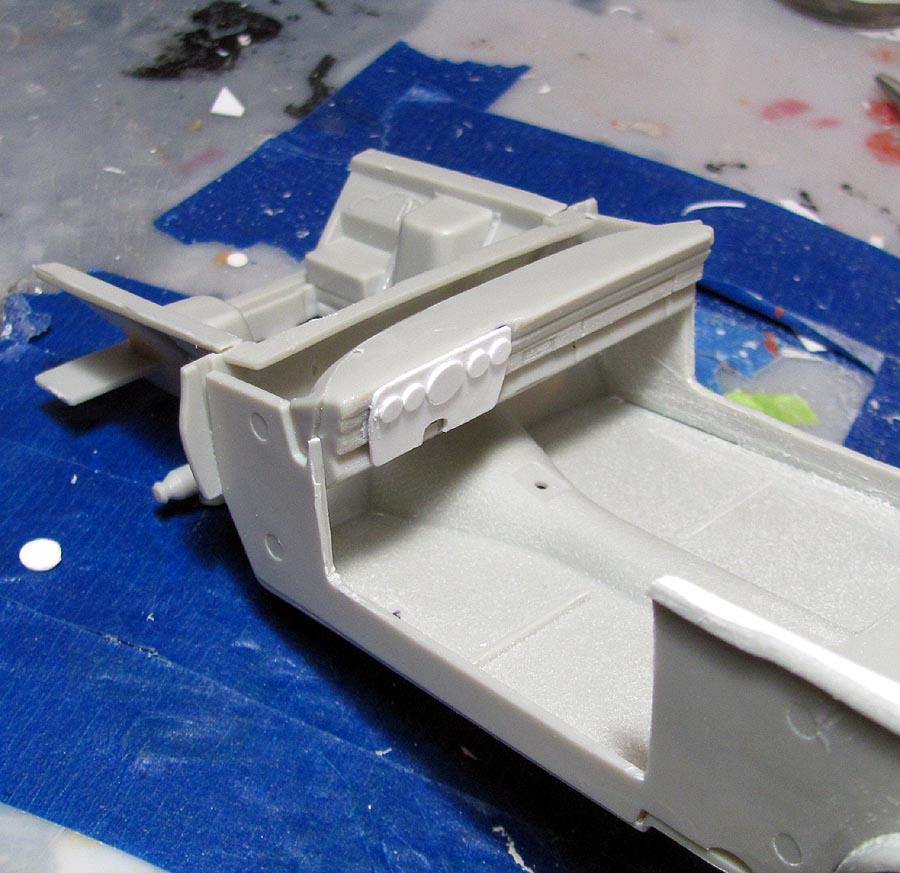
Thanks, Mike and James. James if you go further back in the wip you will see how I lined up pieces of 1/16 inch styrene rods and glued them together to make a faux tuck and roll seat, door panel, and headrest. You just put them down on 2 sided tape to hold them in place and paint the plastic welder glue on like it was paint. then you shape the ends with needle files. The headrest started off as a square and then it was shaped into a triangle with xacto knife and belt type sanding stick. Not perfect but kinda looks like the stuff the real car had, that may or may not have been the real car. Photos of the 1:1 car are in the wip. -
1966 Mercury Comet
MarkJ replied to MarkJ's topic in WIP: Stock Cars (NASCAR, Super Stock, Late Model, etc.)
These should be the last two things I need for the interior. I will have to figure out a place to mount the fire extinguisher. None of the ref pictures show where it goes. But I know the car had to have one. The car did not have a strut going from the middle of the rear of the cage to the right side under the dash. So I have no idea where they mounted it.
-
1966 Mercury Comet
MarkJ replied to MarkJ's topic in WIP: Stock Cars (NASCAR, Super Stock, Late Model, etc.)
That should be a great wip. I wished that I could have gotten one of those kits instead of what I did to the amt kit. Sounds good on doing the 64 Ford at the same time. I will try to keep up with you. -
1966 Mercury Comet
MarkJ replied to MarkJ's topic in WIP: Stock Cars (NASCAR, Super Stock, Late Model, etc.)
Are you talking about doing the same one or two different ones? you would probably finish yours in half the time I will take. By the way, what is your current build and is there a wip on it? -
1966 Mercury Comet
MarkJ replied to MarkJ's topic in WIP: Stock Cars (NASCAR, Super Stock, Late Model, etc.)
Thanks, Pierre. Most of the reference for this model comes from a car featured in a Hot Rod magazine article that says that the car in the article is the actual car that won the 1966 Southern 500. The more photos of the real car from 1966 is starting to show that, that is not exactly true. But you use what you have, so the interior of the model will be like the car in the article, whether they are correct or not. My guages will just be what I came up with because some of the guages in the car look like post 1966 guages. The headrest in the hot rod car is big and square but the actual headrest was triangular in shape and not quite as big. So, the model will really not be correct but good enough for me. Finding good reference photos of cars from the sixty's is getting to be quite a task anymore. I already started looking for reference for a 1964 Ford I'm thinking about doing with not much luck. -
1966 Mercury Comet
MarkJ replied to MarkJ's topic in WIP: Stock Cars (NASCAR, Super Stock, Late Model, etc.)
Seat is almost finished. Just need to make a headrest and brackets to mount the seat to the floor and have a place to mount the seat belt and shoulder harnesses.
-
1966 Mercury Comet
MarkJ replied to MarkJ's topic in WIP: Stock Cars (NASCAR, Super Stock, Late Model, etc.)
Thank you, Gerald. Those 1/16 inch rods are painstaking to put in place to achieve the look of the real seat and left door panel. -
1966 Mercury Comet
MarkJ replied to MarkJ's topic in WIP: Stock Cars (NASCAR, Super Stock, Late Model, etc.)
I finally found a photo of the area behind the roll cage. It also shows me what the head rest looked like. -
1966 Mercury Comet
MarkJ replied to MarkJ's topic in WIP: Stock Cars (NASCAR, Super Stock, Late Model, etc.)
-
1966 Mercury Comet
MarkJ replied to MarkJ's topic in WIP: Stock Cars (NASCAR, Super Stock, Late Model, etc.)
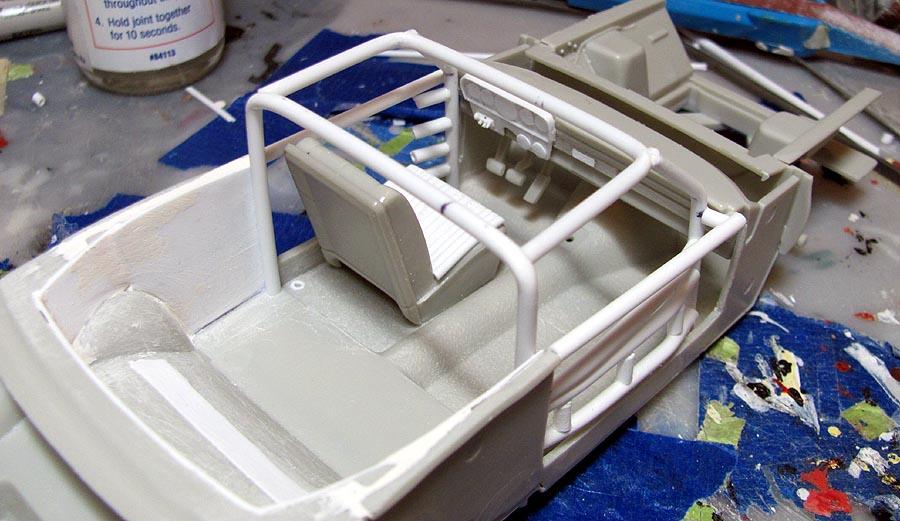
Thanks, Pierre. This car had tuck and roll seat and left door panel. The right door had no panel. It's good that the left door had a panel, so I don't have to do a complete 4 horizontal bar cage with vertical supports. I just have to show them going under the panel as you can see depicted here.
-
1966 Mercury Comet
MarkJ replied to MarkJ's topic in WIP: Stock Cars (NASCAR, Super Stock, Late Model, etc.)
-
1966 Mercury Comet
MarkJ replied to MarkJ's topic in WIP: Stock Cars (NASCAR, Super Stock, Late Model, etc.)
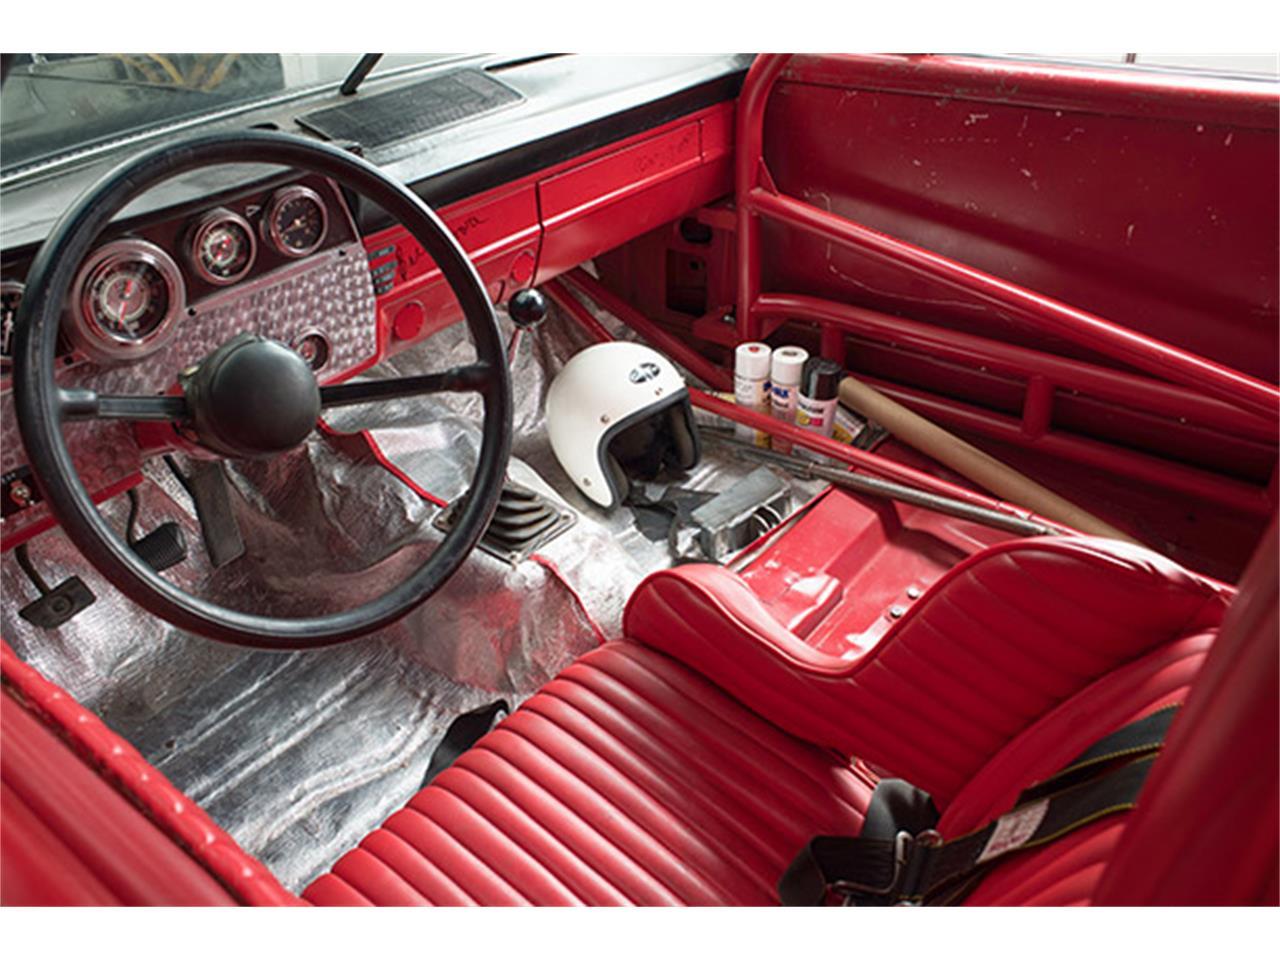
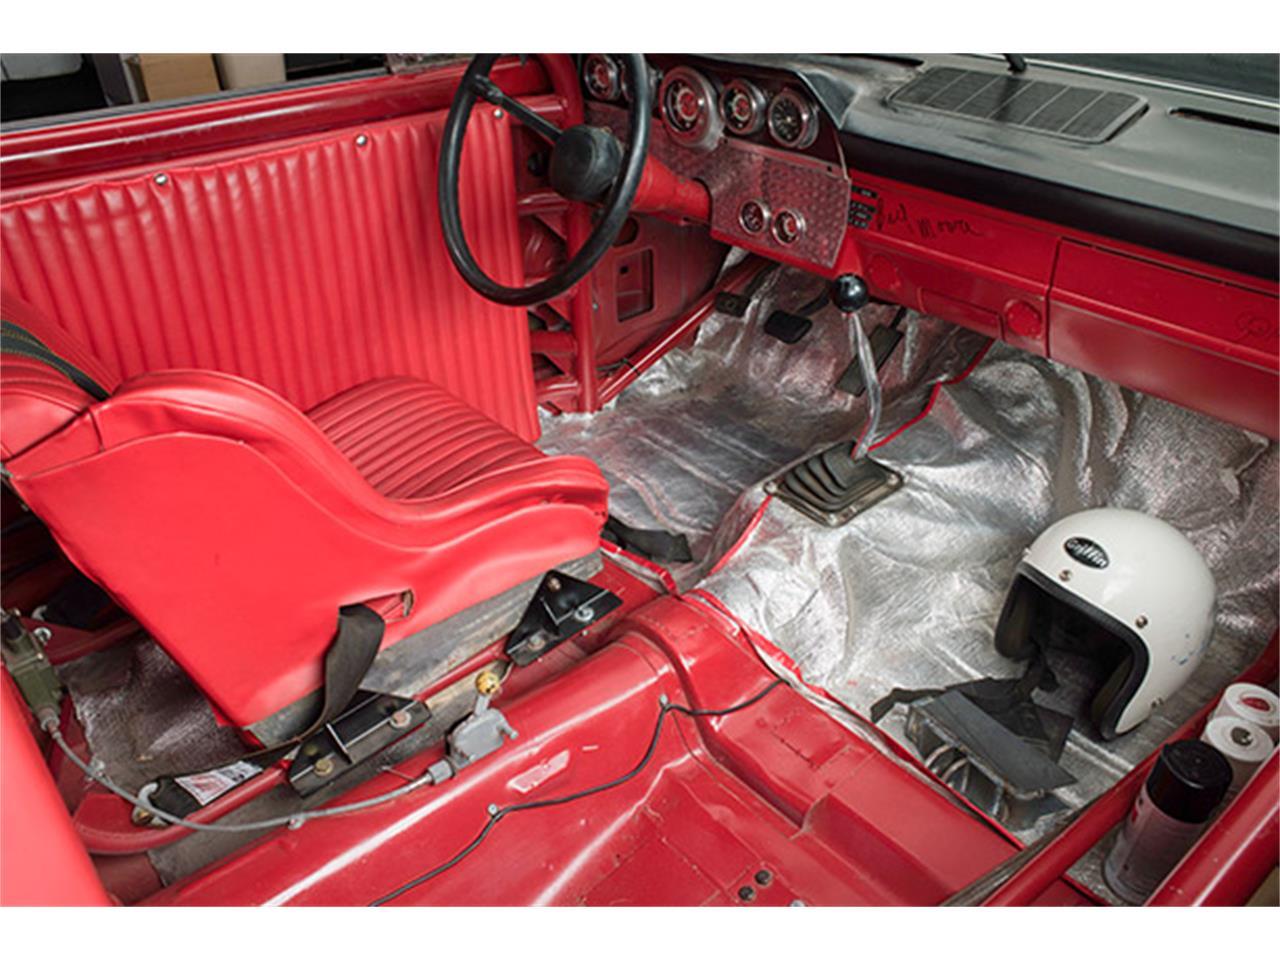
If anyone has any photos of the area behind the driver's seat on both sides, I would really appreciate if you could post them. The 66 and 67 Fairlane should be the same. I need to know how the struts for the main cage look back there. The only pictures I have are these small ones of a Fairlane.
-
1966 Mercury Comet
MarkJ replied to MarkJ's topic in WIP: Stock Cars (NASCAR, Super Stock, Late Model, etc.)
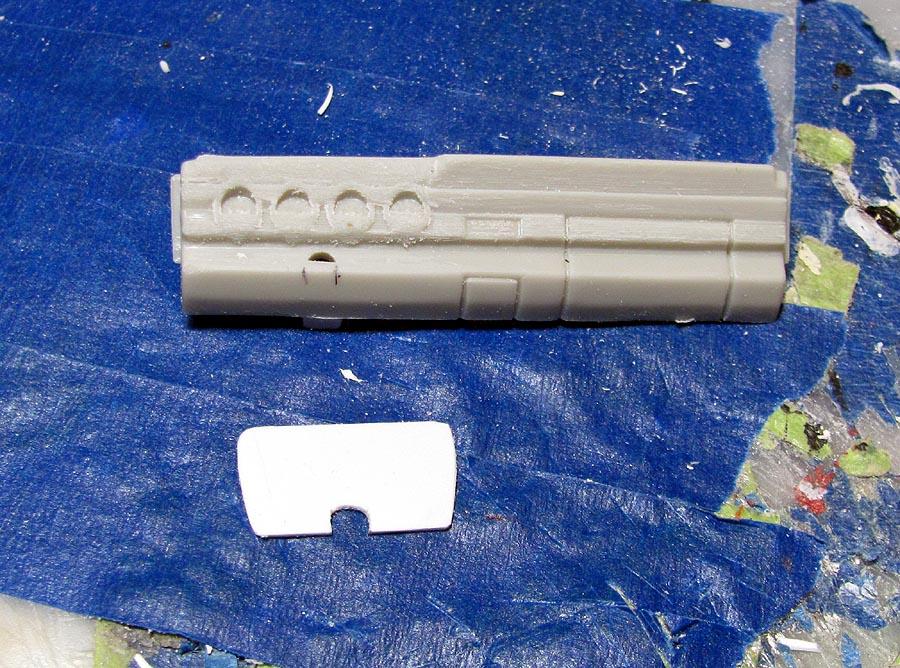
Need to shape the switches a little. They are kinda flat looking.
-
1966 Mercury Comet
MarkJ replied to MarkJ's topic in WIP: Stock Cars (NASCAR, Super Stock, Late Model, etc.)
I could not find a Tamiya polishing kit I could phone order, so I ordered a Novus polishing kit from micro mark. I will see if it can improve what I have done so far with the 4000 to 12000 polishing cloths I have. It comes with the soft polishing cloths as well as the polishing liquids, in 3 stages, in bottles. I would like to remove the very fine scratches I still have even after the 12000 cloth is used. -
1966 Mercury Comet
MarkJ replied to MarkJ's topic in WIP: Stock Cars (NASCAR, Super Stock, Late Model, etc.)