.jpg.b9265433dc8c3b550370b1d0e4e4d2fc.jpg)
MarkJ
-
Posts
4,686 -
Joined
-
Last visited
Content Type
Profiles
Forums
Events
Gallery
Everything posted by MarkJ
-
.jpg.b9265433dc8c3b550370b1d0e4e4d2fc.thumb.jpg.915f5b46e3c9402eeaa6972073121c87.jpg)
1974 Camaro , continued
MarkJ replied to MarkJ's topic in WIP: Other Racing: Road Racing, Land Speed Racers
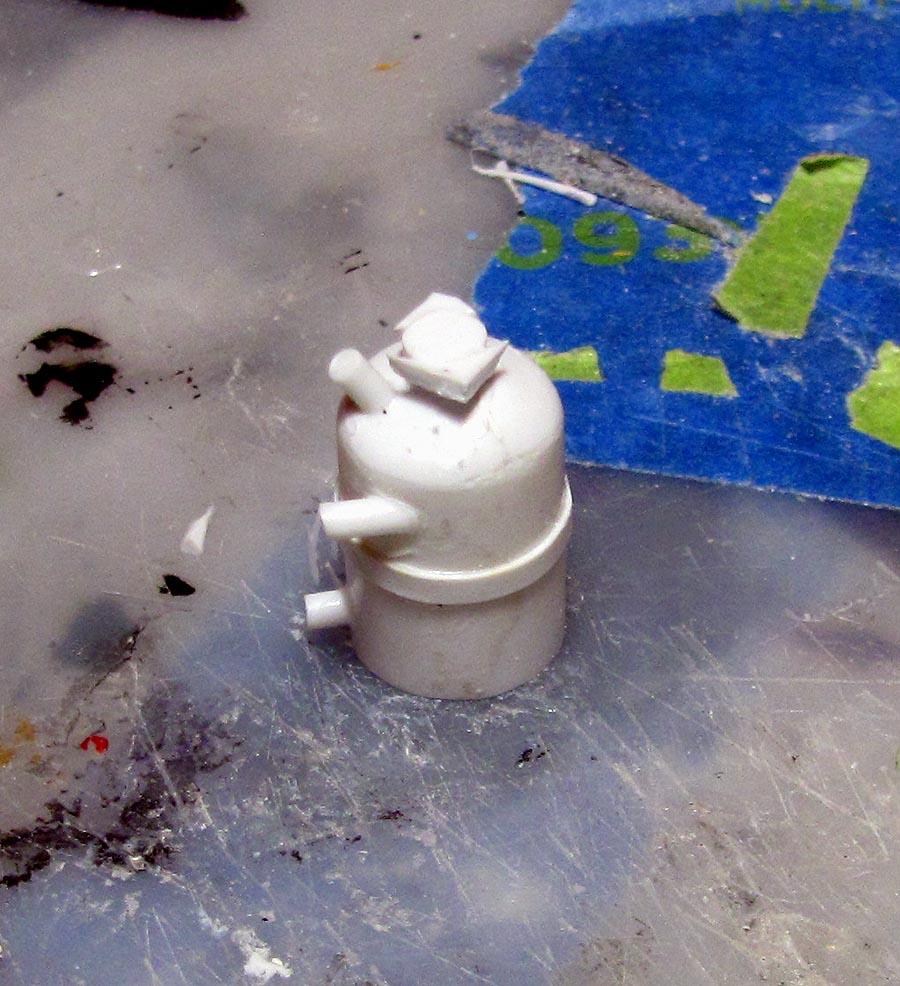
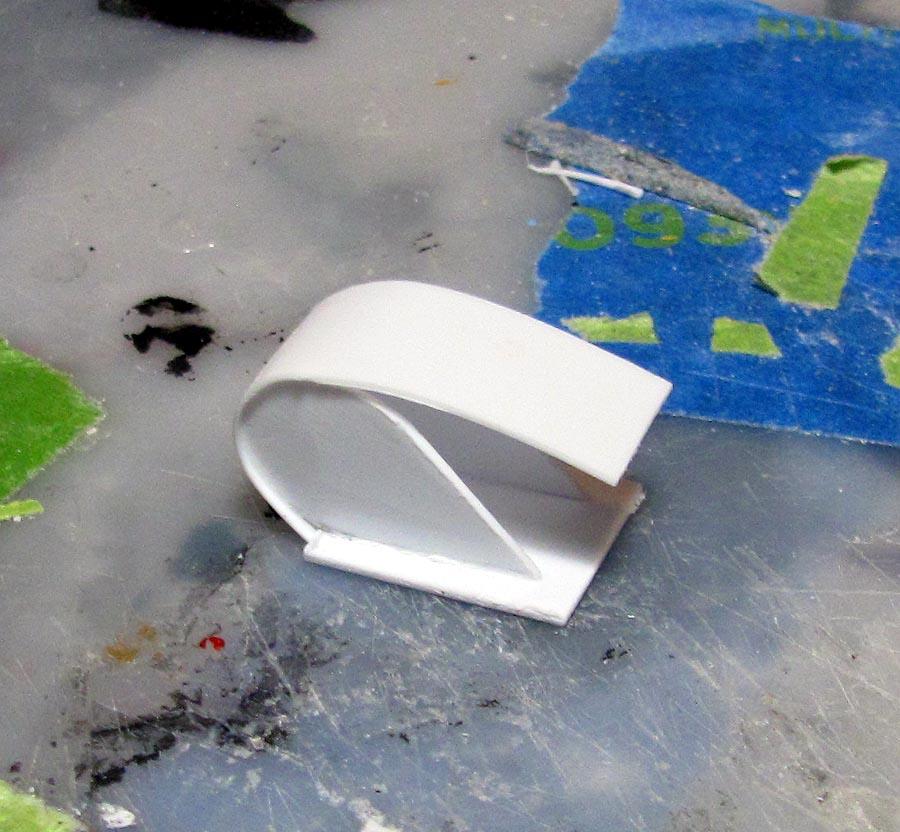
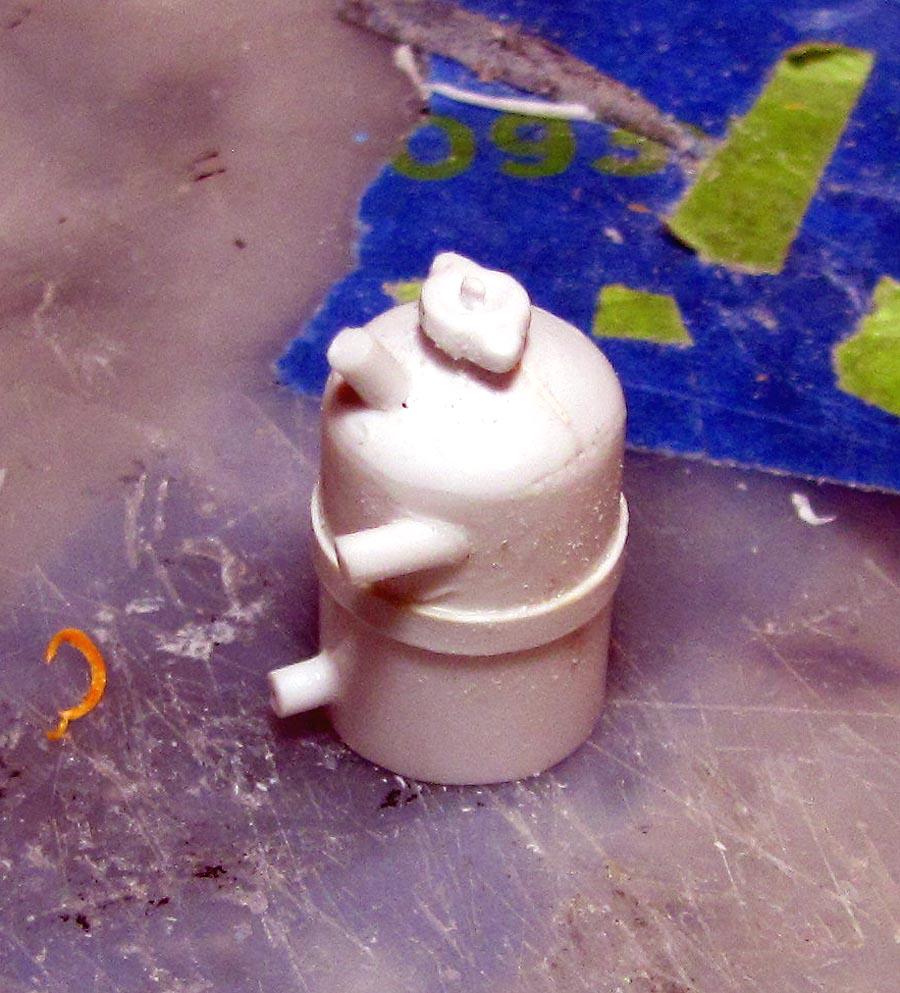
Yes, Carl. That is next on the agenda. I had to steal a 350 from a 1970 corvette kit. What's weird is from the ref pictures, the engine appears to be all white and the headers too. I will use a big block in the Corvette if I ever get around to building it. I bought the Corvette kit strickly for the engine to put in this 74 Camaro build. I have a big block from a 65 Chevelle kit I can put in the Corvette. The small block from the 70 1/2 Camaro kit was used in the 65 chevelle late model sportsman I built a while back. -
1974 Camaro , continued
MarkJ replied to MarkJ's topic in WIP: Other Racing: Road Racing, Land Speed Racers
Thanks, Atin. I appreciate the feedback and the kind words. -
1974 Camaro , continued
MarkJ replied to MarkJ's topic in WIP: Other Racing: Road Racing, Land Speed Racers

-
1974 Camaro , continued
MarkJ replied to MarkJ's topic in WIP: Other Racing: Road Racing, Land Speed Racers
-
1974 Camaro , continued
MarkJ replied to MarkJ's topic in WIP: Other Racing: Road Racing, Land Speed Racers
Pierre, check your private messages. Thanks. -
1974 Camaro , continued
MarkJ replied to MarkJ's topic in WIP: Other Racing: Road Racing, Land Speed Racers
Thanks, Pierre and Mike. Slowly but surely, step by step, inch by inch, its becoming something, hopefully. -
1974 Camaro , continued
MarkJ replied to MarkJ's topic in WIP: Other Racing: Road Racing, Land Speed Racers
Thanks Josh and Scott. I think all the items that go inside the car are finished, so I believe I can start painting the frame and interior and all the parts that go in there. -
1974 Camaro , continued
MarkJ replied to MarkJ's topic in WIP: Other Racing: Road Racing, Land Speed Racers
-
1974 Camaro , continued
MarkJ replied to MarkJ's topic in WIP: Other Racing: Road Racing, Land Speed Racers
Yes , I still got a lot of kid in me, even though I'm really getting old. -
1974 Camaro , continued
MarkJ replied to MarkJ's topic in WIP: Other Racing: Road Racing, Land Speed Racers
Thanks, Edgar. Much appreciated. -
1974 Camaro , continued
MarkJ replied to MarkJ's topic in WIP: Other Racing: Road Racing, Land Speed Racers
Pierre, I'm just afraid, some day, the finished product will look so bad, I would have to say, that the dog ate it. -
1974 Camaro , continued
MarkJ replied to MarkJ's topic in WIP: Other Racing: Road Racing, Land Speed Racers
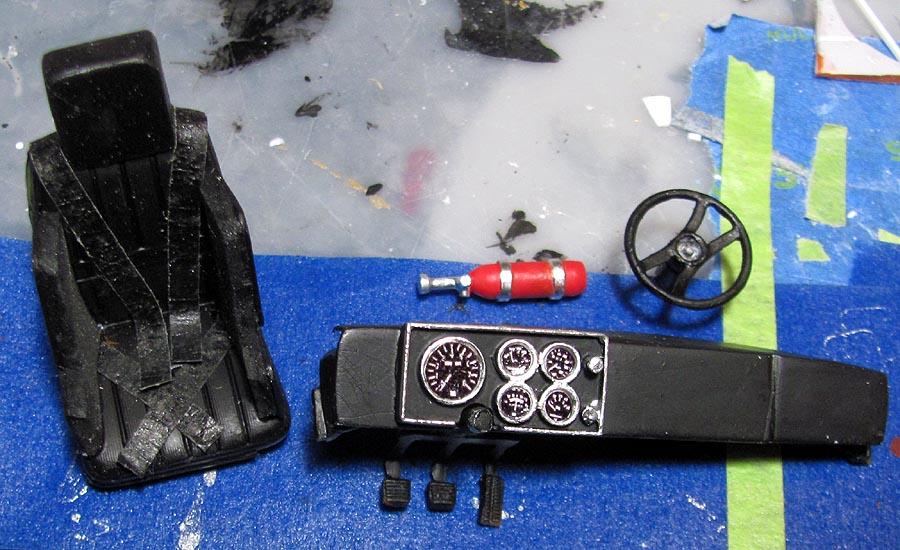
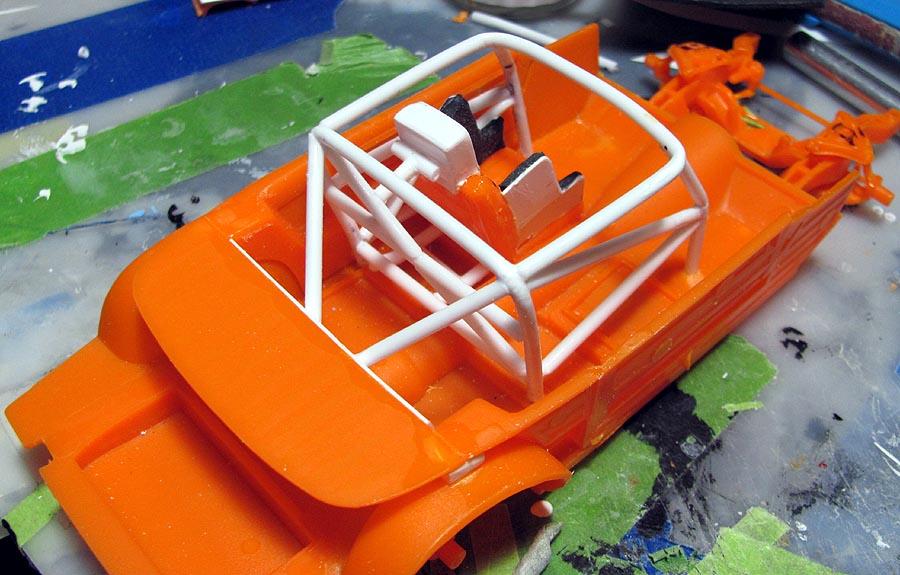
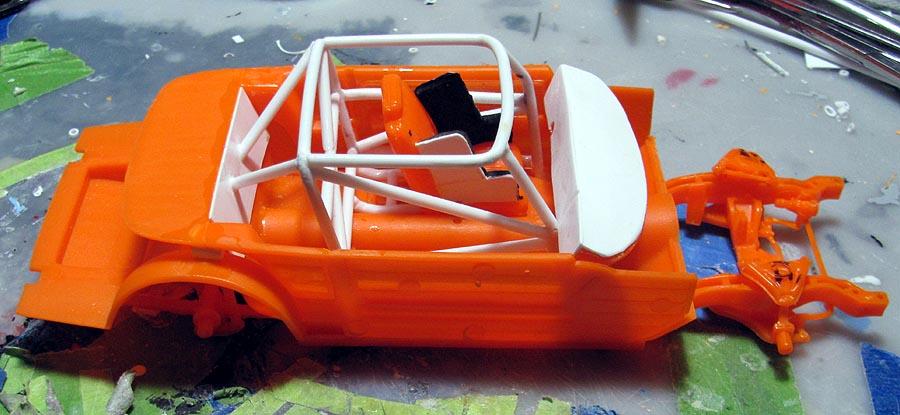
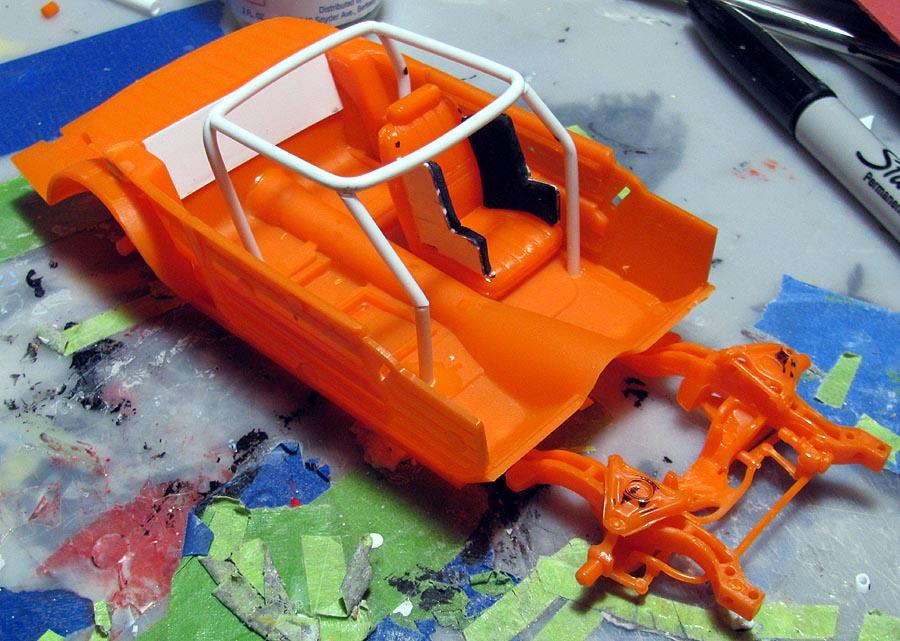
Thanks, Carl. I start out saying, I'm not doing anything to the interior but a roll cage, but always keep adding extra stuff that you really cant see that much when the model is finished. I guess I'm scared to finish the darned thing. Afraid of what it might look like. -
1974 Camaro , continued
MarkJ replied to MarkJ's topic in WIP: Other Racing: Road Racing, Land Speed Racers
-
1974 Camaro , continued
MarkJ replied to MarkJ's topic in WIP: Other Racing: Road Racing, Land Speed Racers
thanks, Josh. I really appreciate the feedback. -
1974 Camaro , continued
MarkJ replied to MarkJ's topic in WIP: Other Racing: Road Racing, Land Speed Racers
-
1974 Camaro , continued
MarkJ replied to MarkJ's topic in WIP: Other Racing: Road Racing, Land Speed Racers
-
1974 Camaro , continued
MarkJ replied to MarkJ's topic in WIP: Other Racing: Road Racing, Land Speed Racers
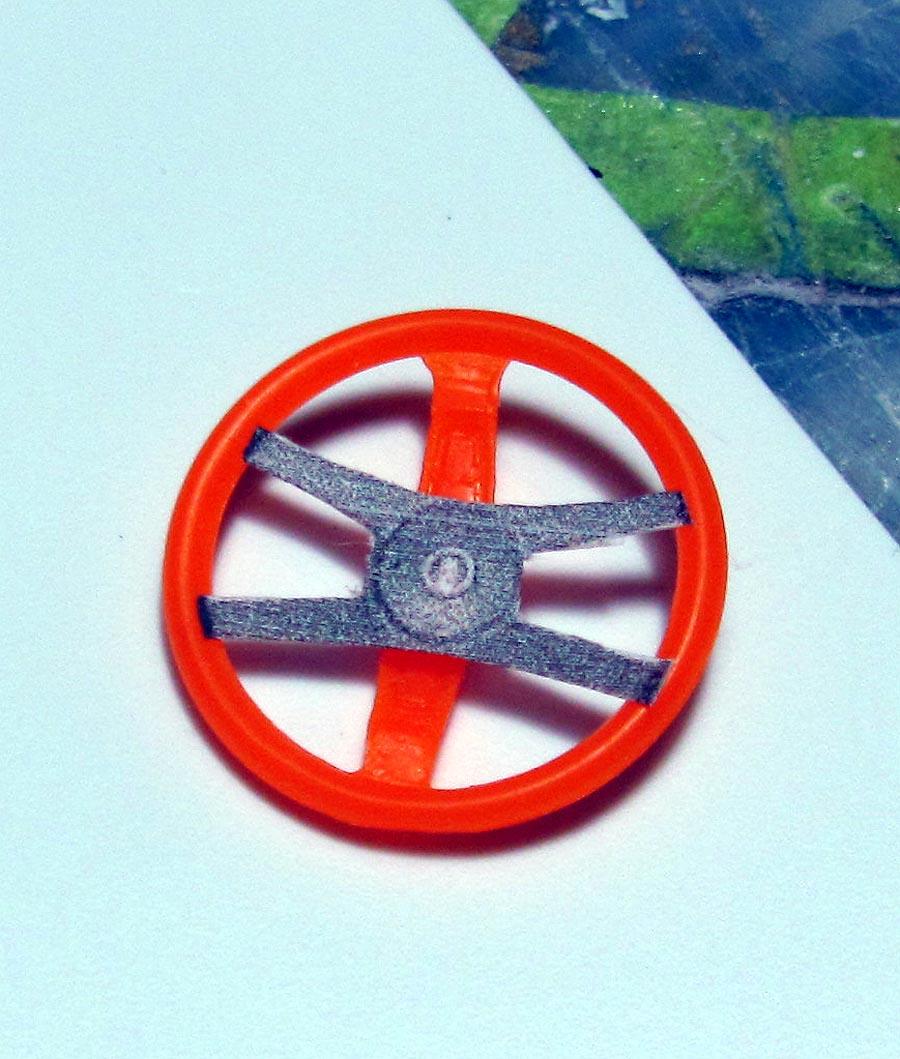
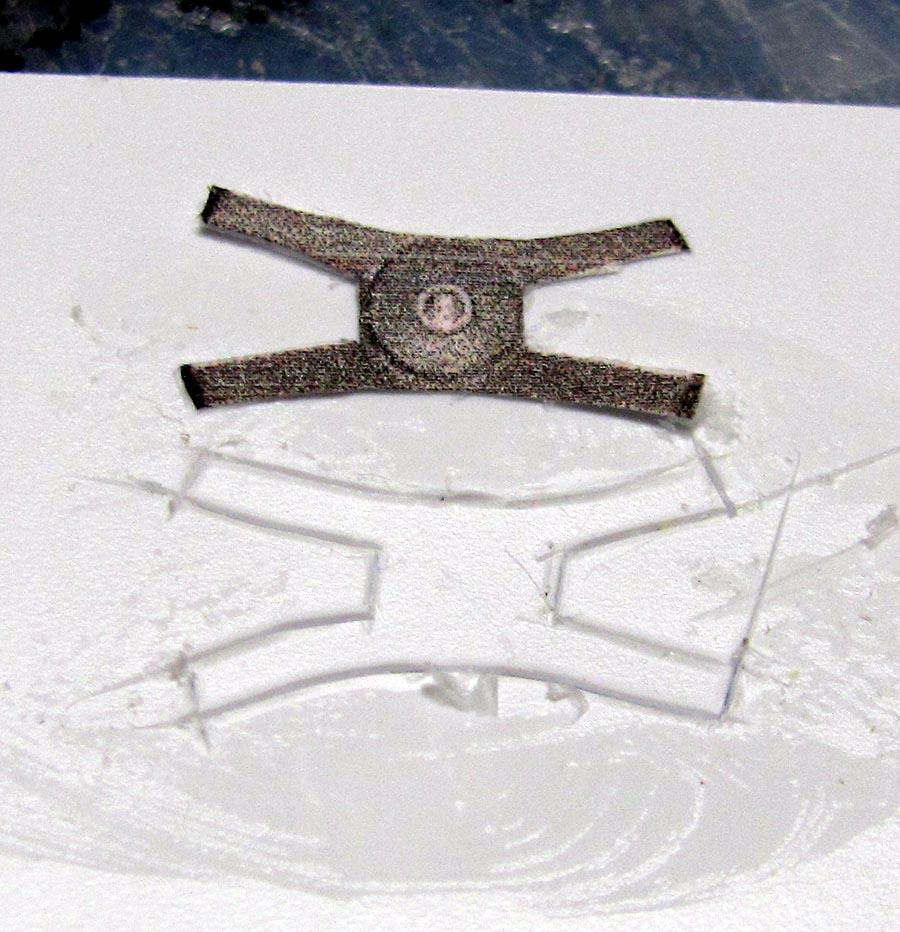
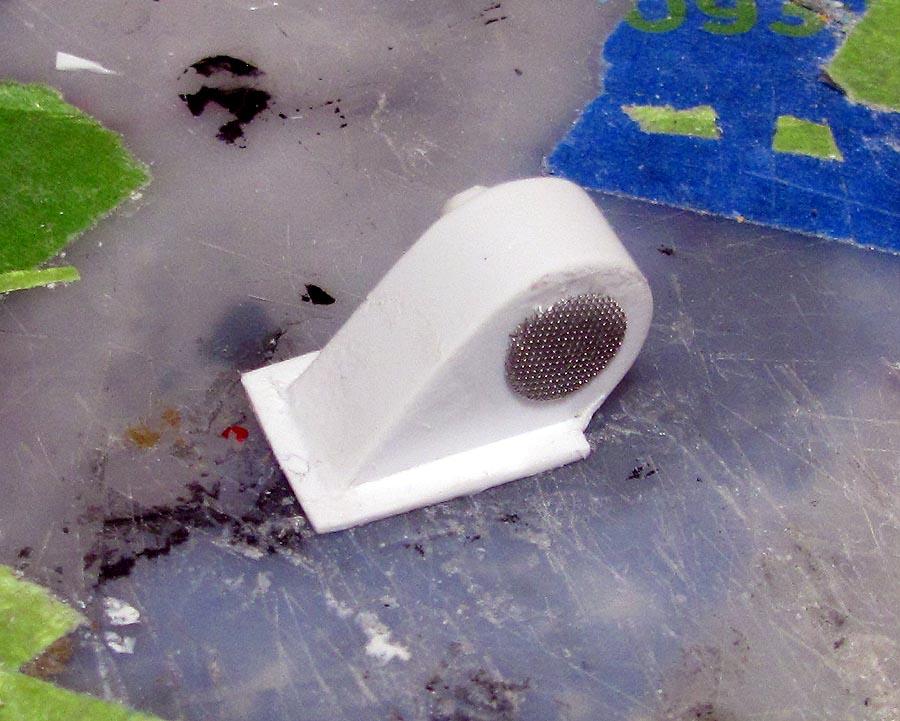
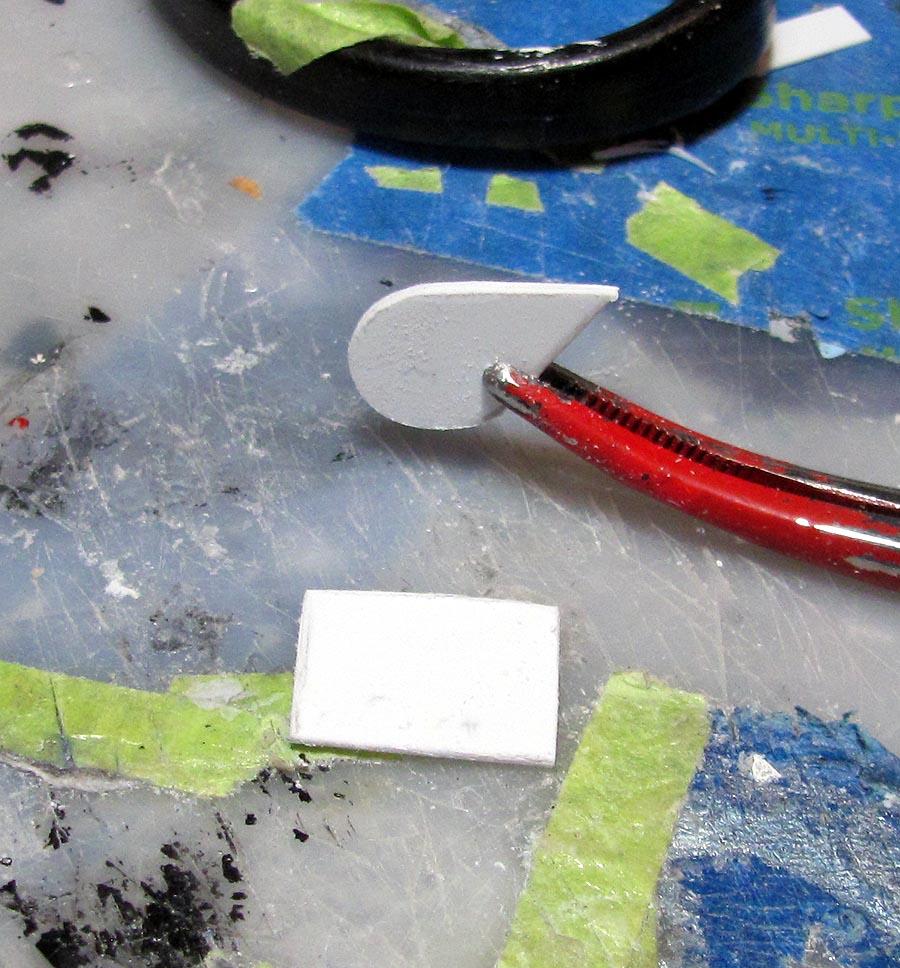
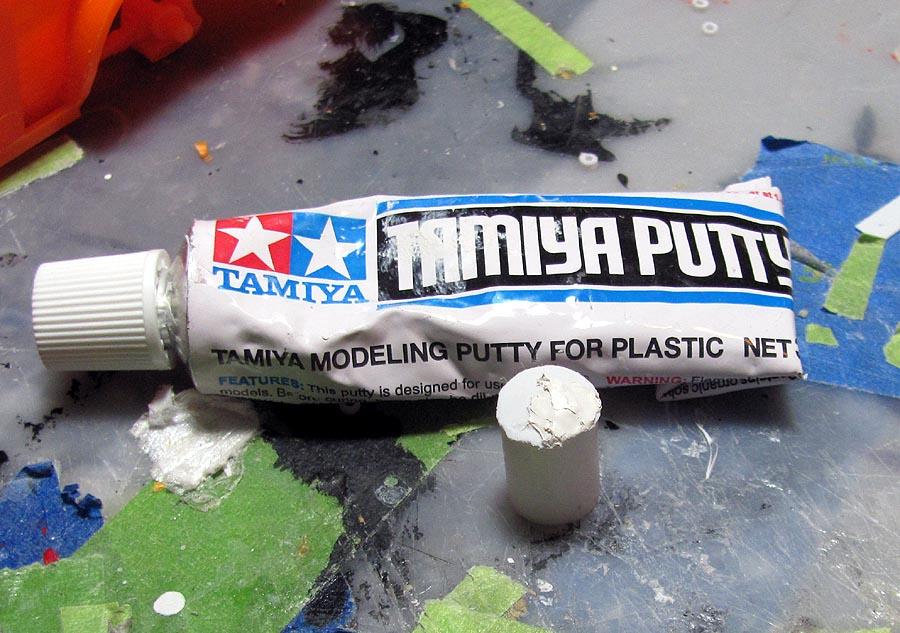
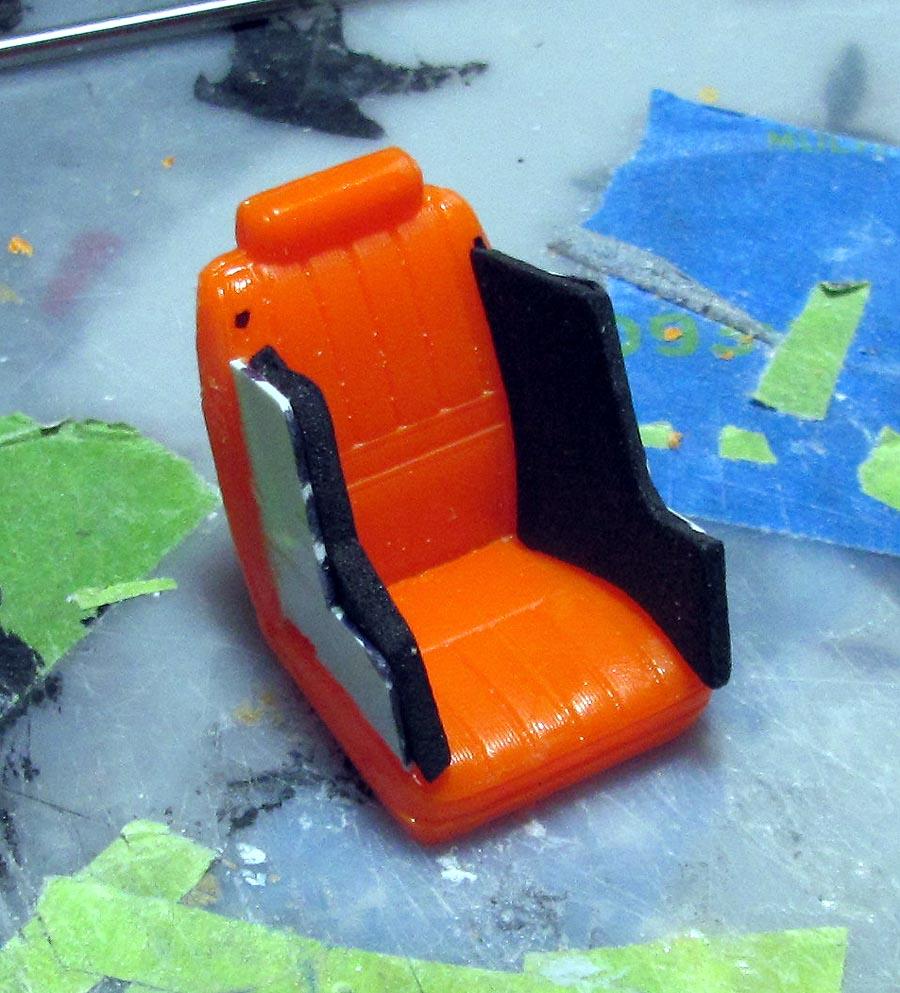
Thanks, Pierre. Its a sheet of thin foam rubber called Silly Winks. Comes in 12x18 inch, 2mm thick sheets. Have no idea where the name comes from but I purchased them at Hobby Lobby a while back. They might not sell them anymore. I installed them with Elmers glue, and trimmed them with a small scissors. -
1974 Camaro , continued
MarkJ replied to MarkJ's topic in WIP: Other Racing: Road Racing, Land Speed Racers
-
(HRM) Shelby Cobra Daytona Coupe
MarkJ replied to Venom's topic in WIP: Other Racing: Road Racing, Land Speed Racers
Looking great, Josh. Will be awesome when finished. -
1974 Camaro , continued
MarkJ replied to MarkJ's topic in WIP: Other Racing: Road Racing, Land Speed Racers
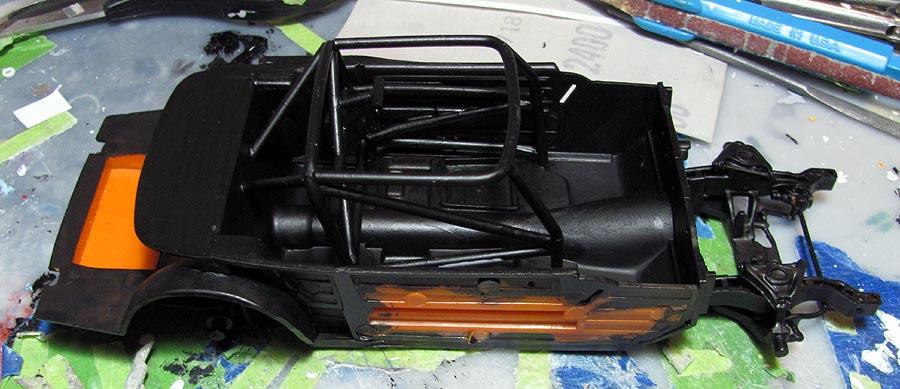
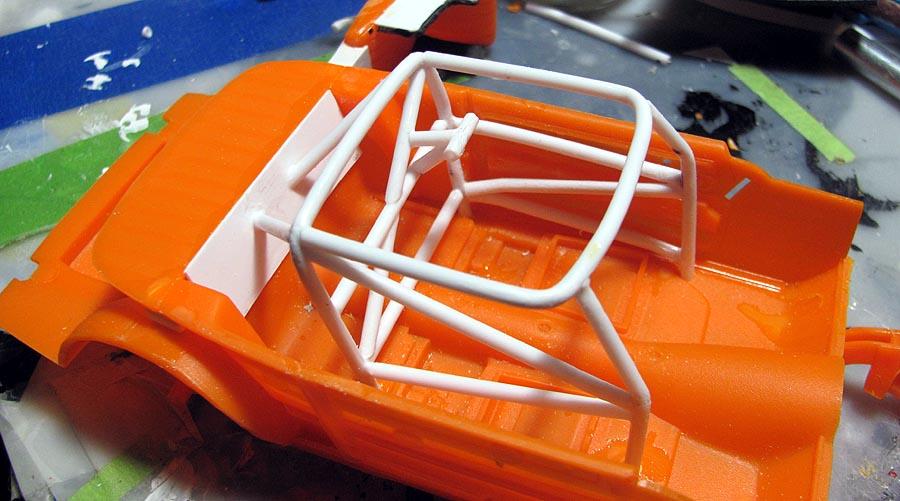
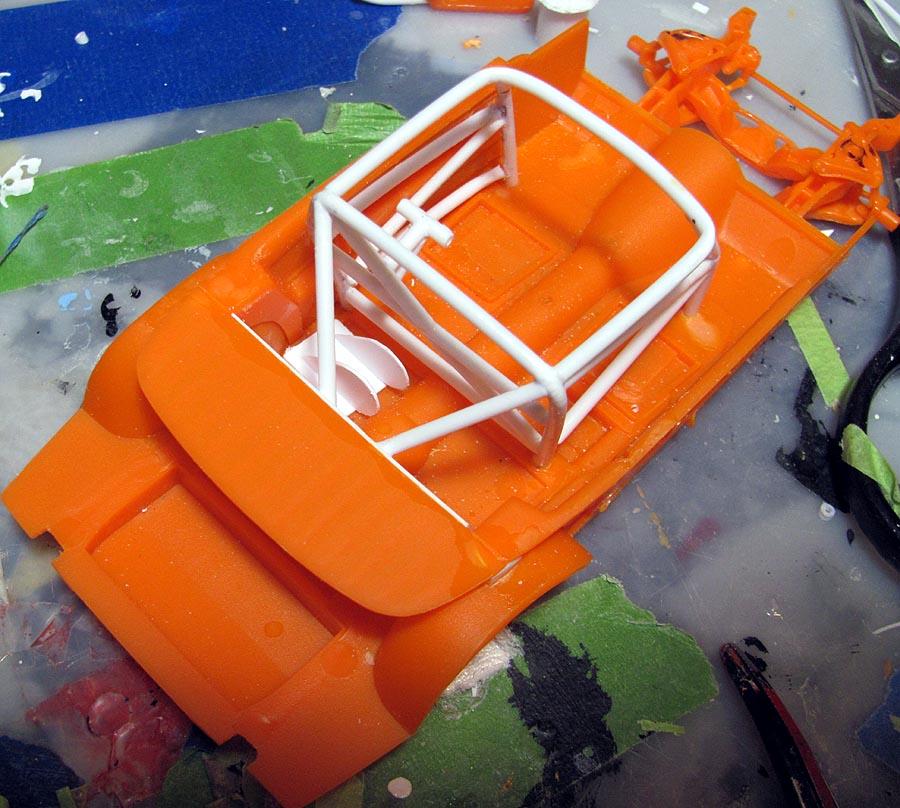
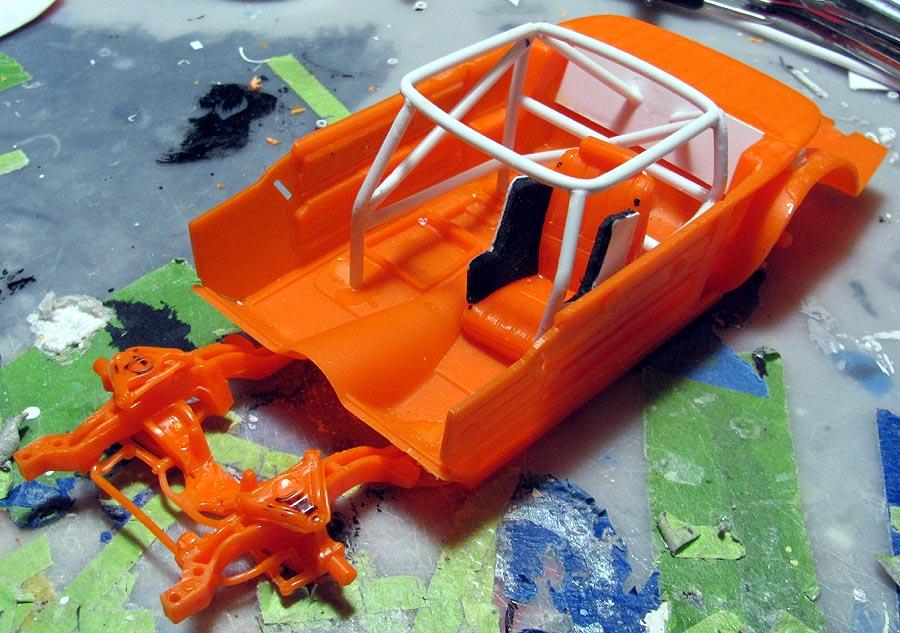
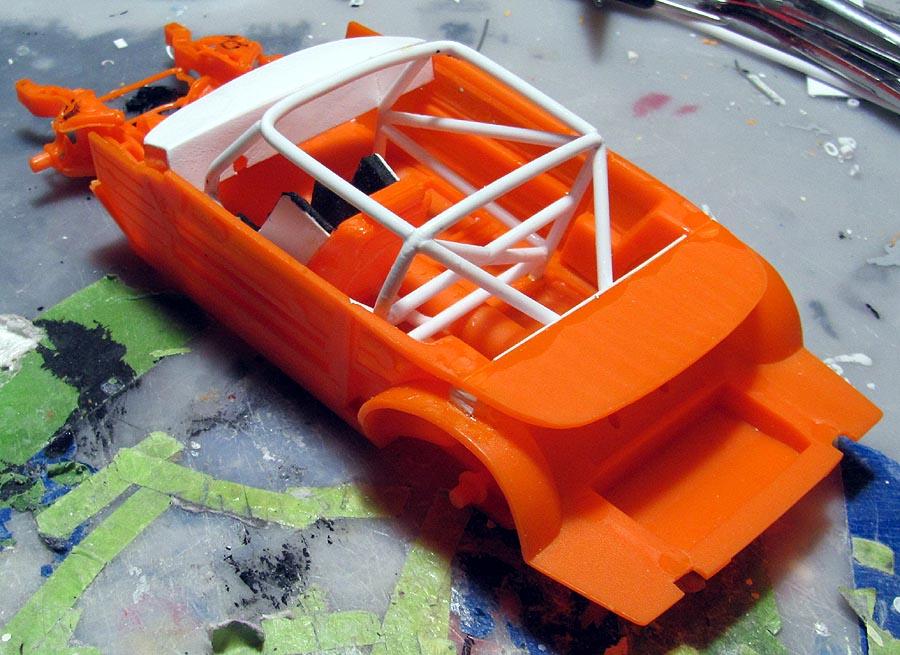
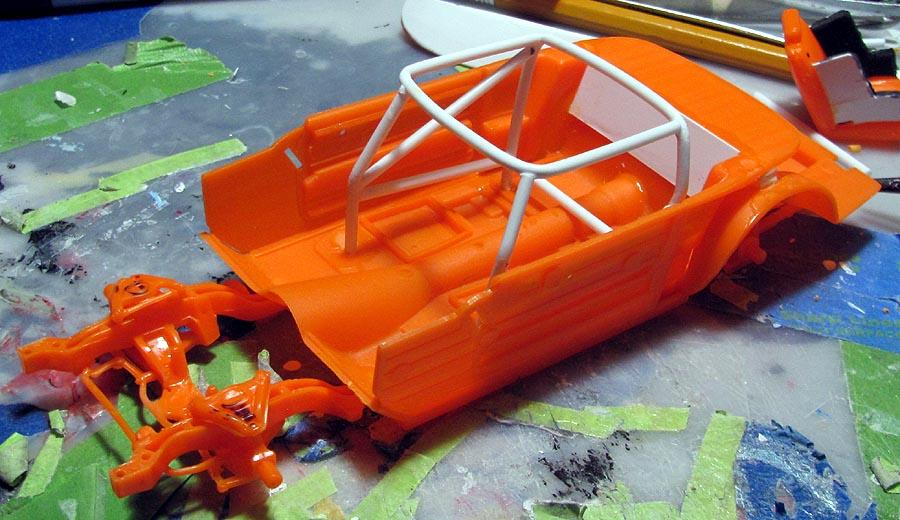
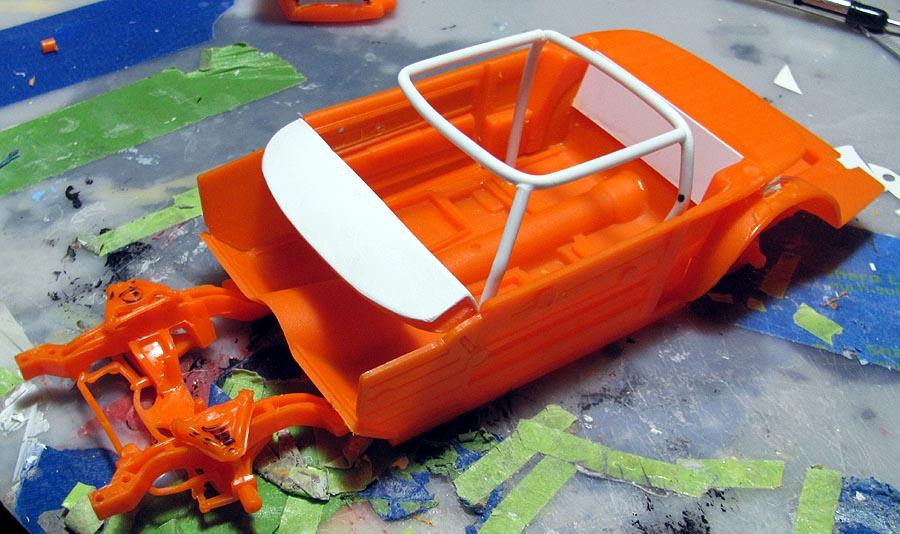
Cage is almost finished. Just a couple of more bars.
-
1974 Camaro , continued
MarkJ replied to MarkJ's topic in WIP: Other Racing: Road Racing, Land Speed Racers
You're welcome, Gary. Thanks for the feedback. -
1974 Camaro , continued
MarkJ replied to MarkJ's topic in WIP: Other Racing: Road Racing, Land Speed Racers
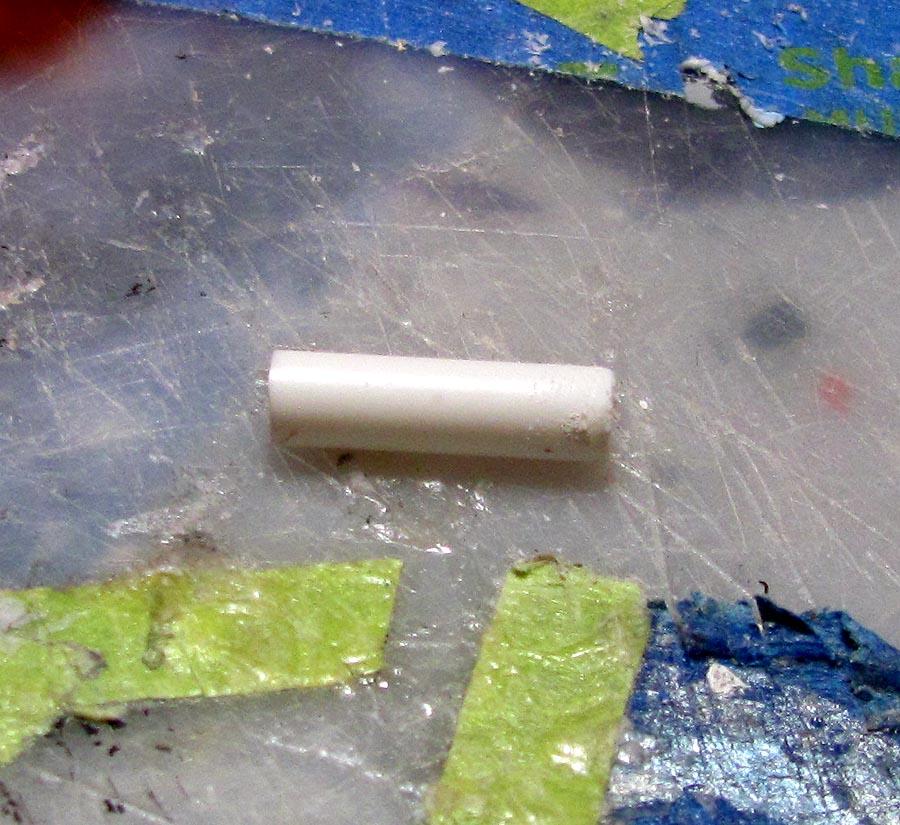
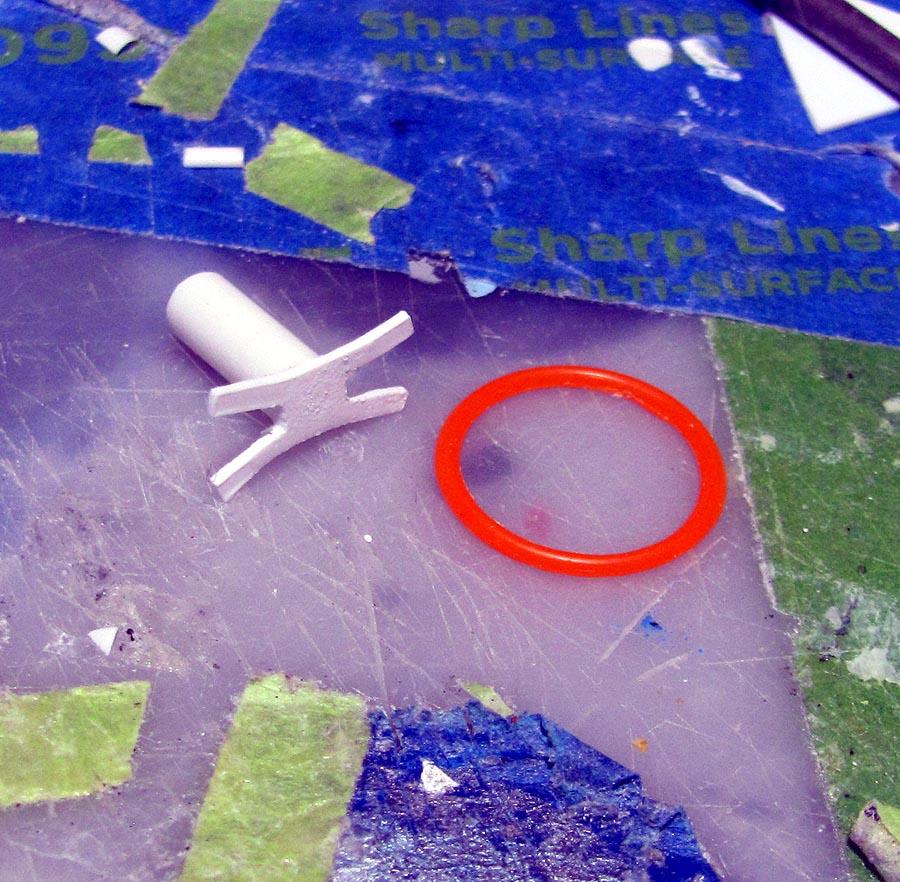
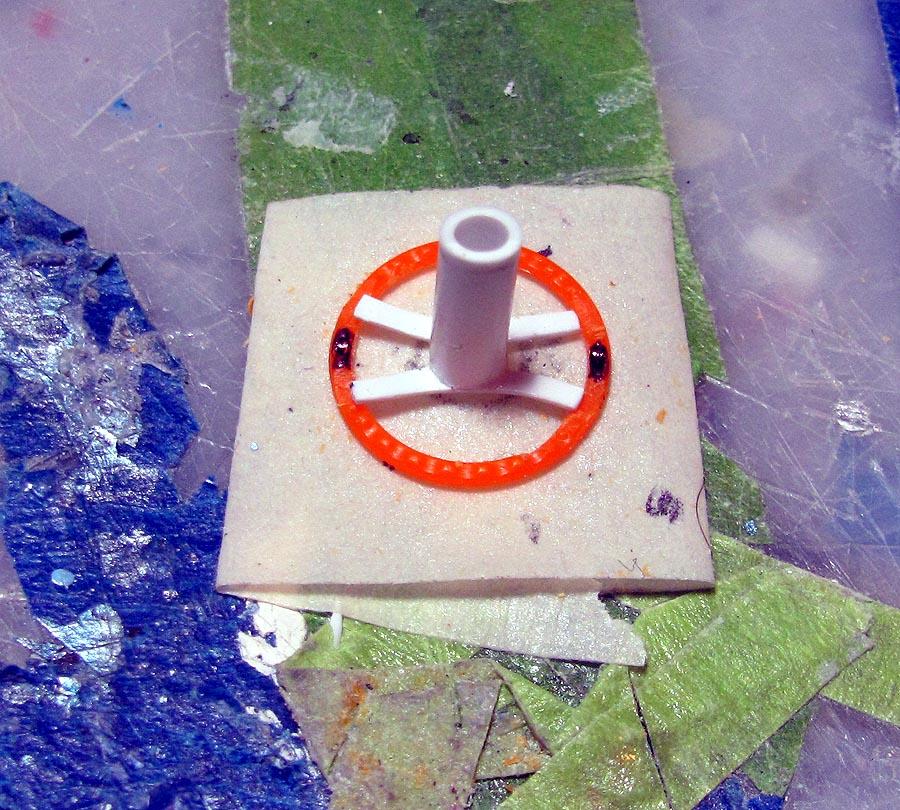
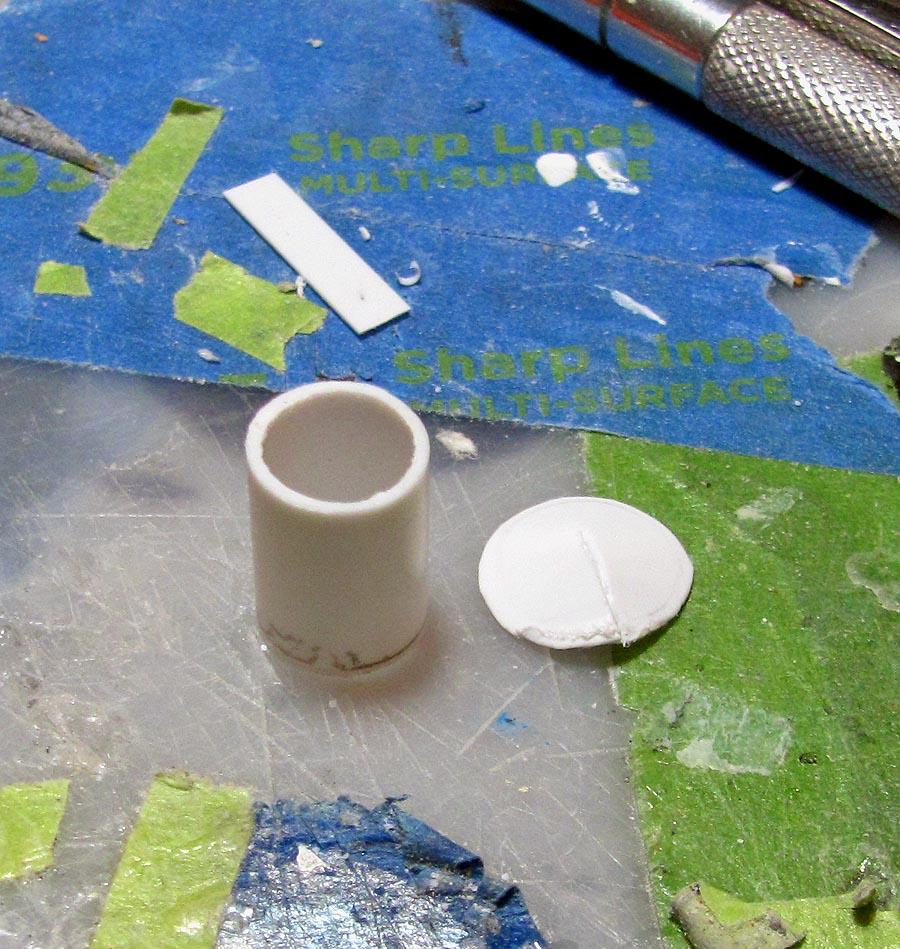
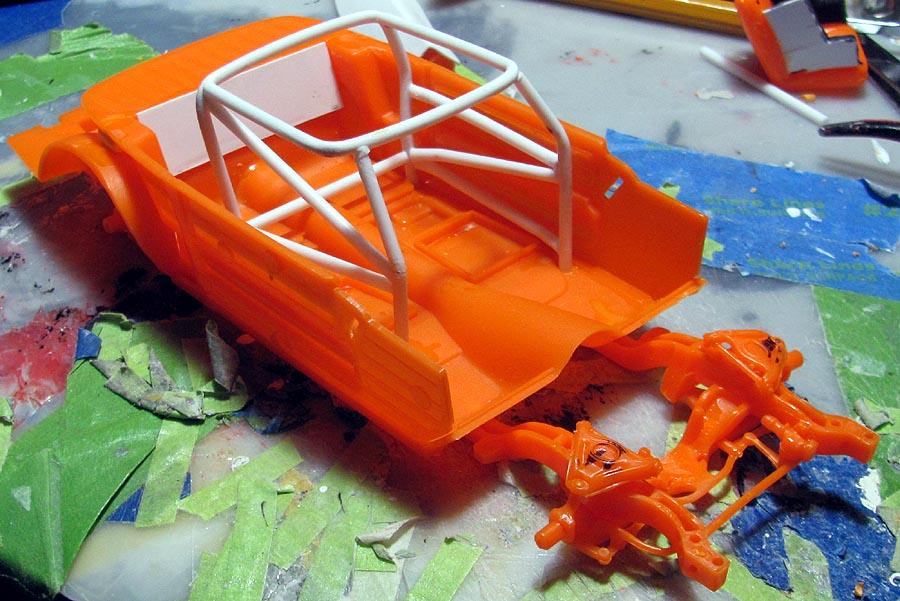
Thanks Carl and Pierre. Pierre, the tube is 3/32 inch evergreen tube and the wire is just an old roll that has no marking on it, but it fit inside the tube so I used it. Got a lot more done yesterday and will try to add more photos today. -
1974 Camaro , continued
MarkJ replied to MarkJ's topic in WIP: Other Racing: Road Racing, Land Speed Racers
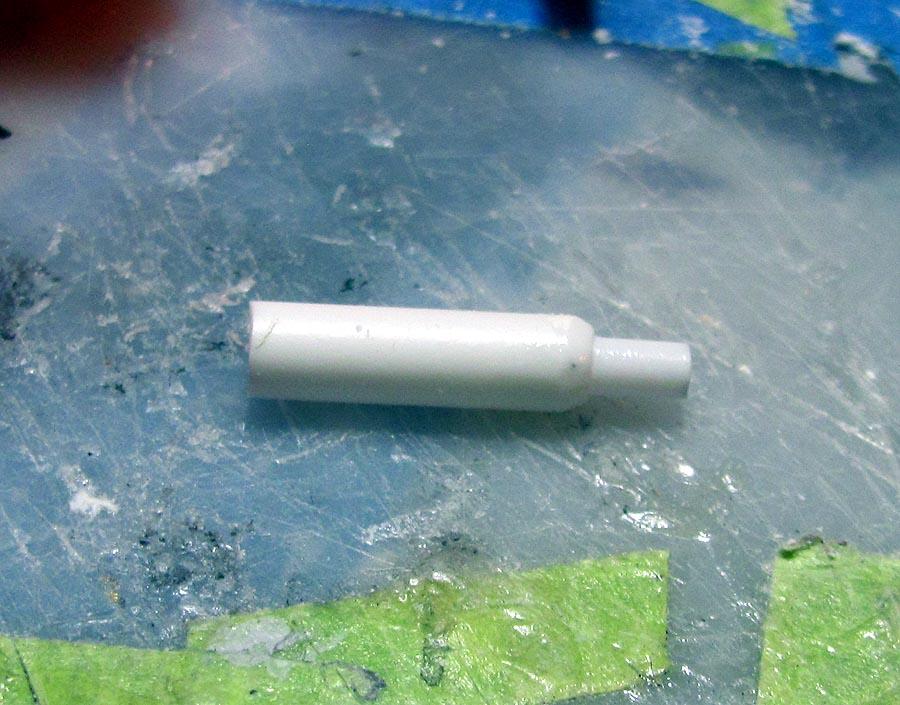
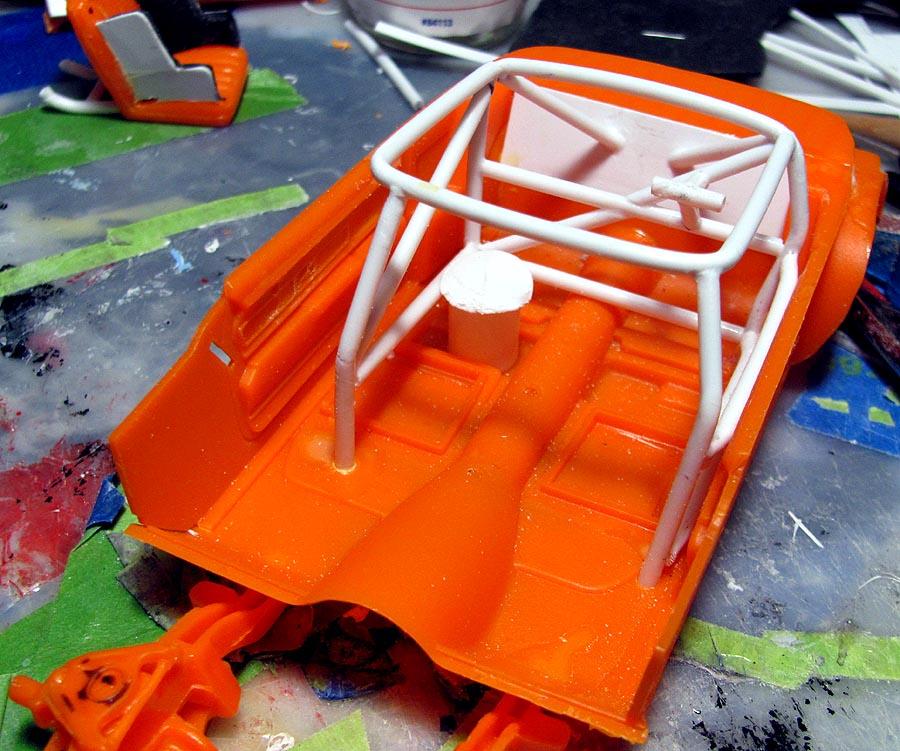
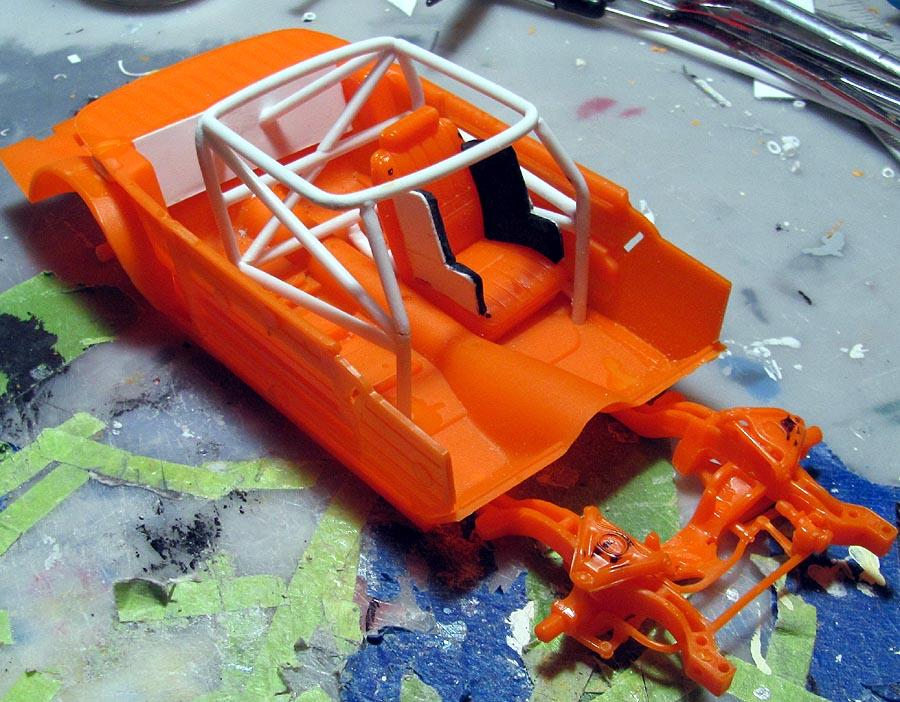
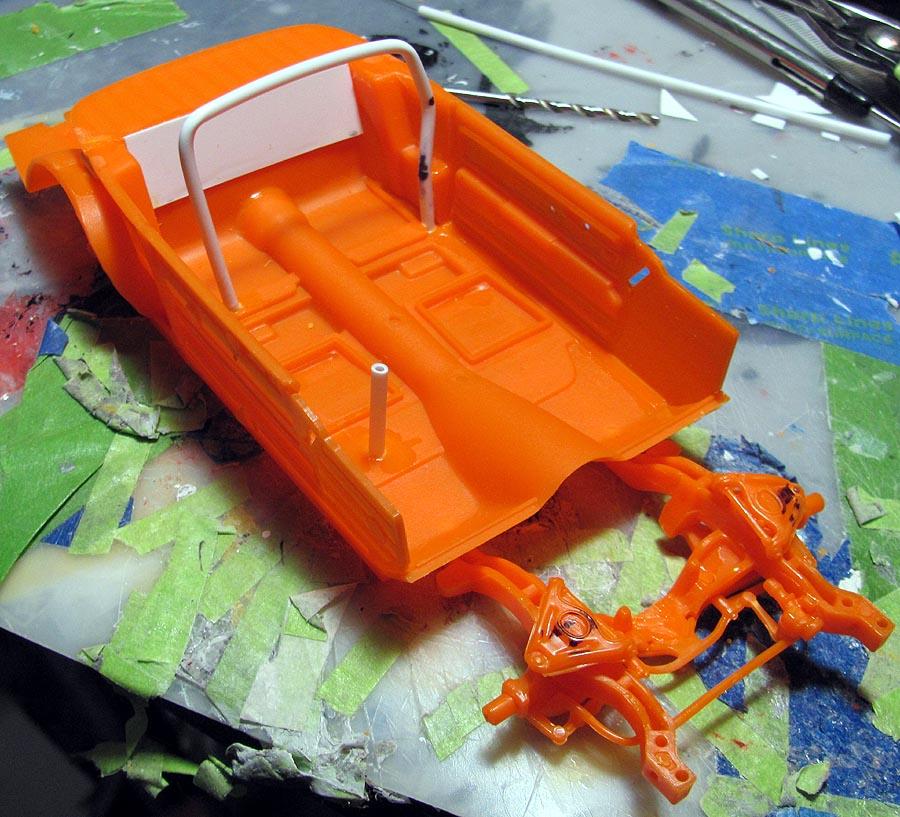
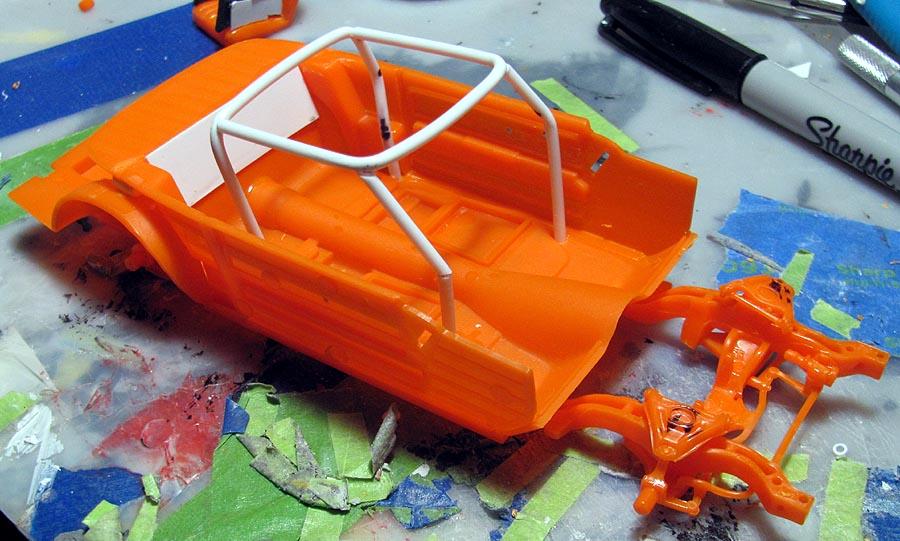
Don't know if you guys use this trick when building your cages, or whenever you need to bend a tube, but putting wire in it helps keep it from breaking when bent and also helps you keep the bend you choose by keeping the tube from rebounding to straight. Got started on the cage. I know it looks off center, but I will explain why I think the real cars cage was made this way, when the model is finished, and I give the story of the build in the under glass section, when finished.
-
1974 Camaro , continued
MarkJ replied to MarkJ's topic in WIP: Other Racing: Road Racing, Land Speed Racers
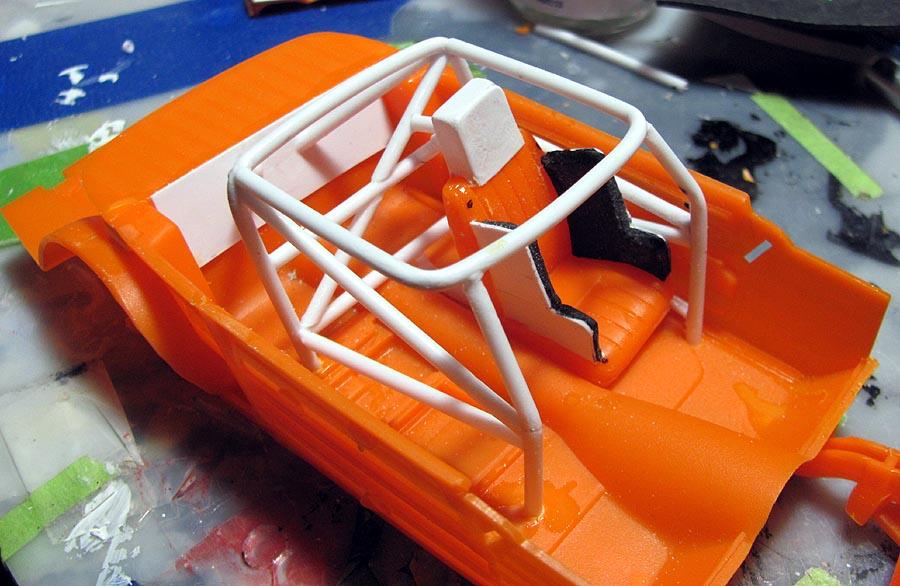
Thanks, Mike and David. I really appreciate your interest in the build. Got the main hoop of the cage , in the rear seat area, installed . everything else builds off of it. Will try to post some pics this afternoon. -
1974 Camaro , continued
MarkJ replied to MarkJ's topic in WIP: Other Racing: Road Racing, Land Speed Racers
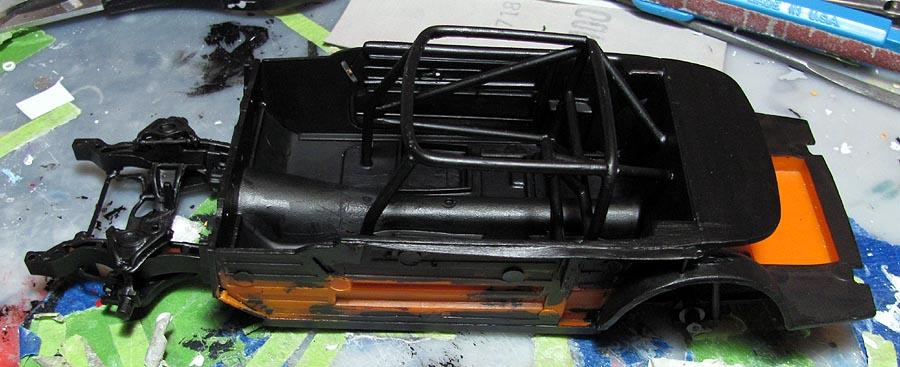
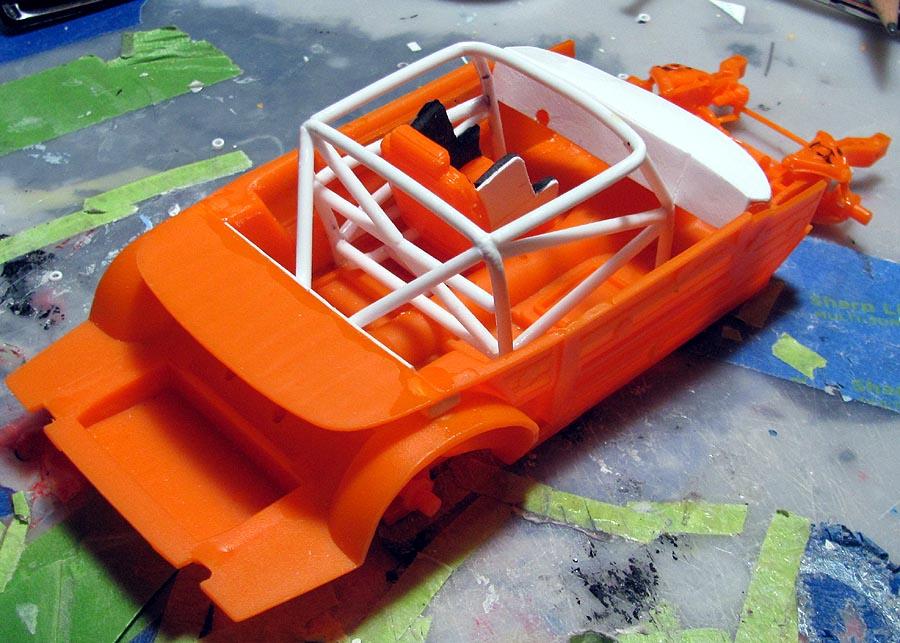
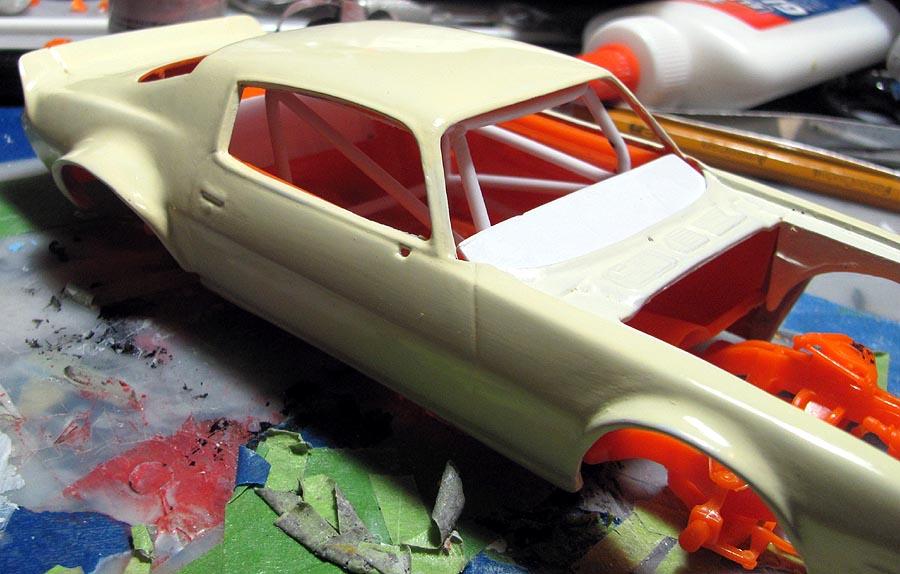
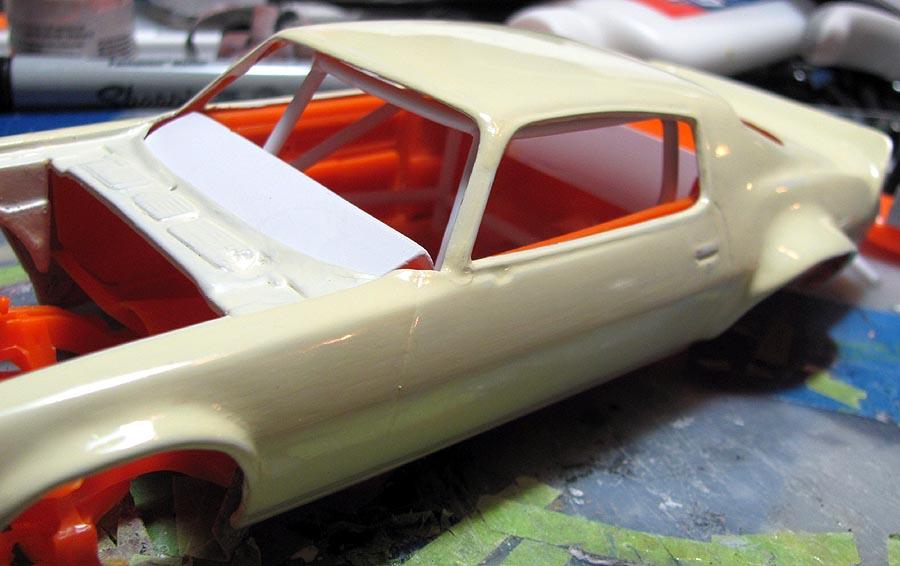
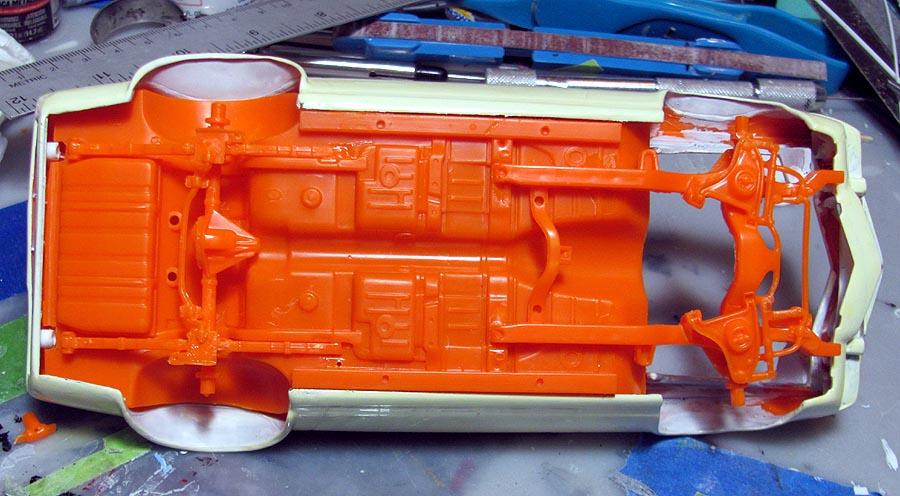
Got the body to fit to the chassis/interior. Still going to have to do some fixes here and there to get it right.