Butter 1
-
Posts
294 -
Joined
-
Last visited
Content Type
Profiles
Forums
Events
Gallery
Everything posted by Butter 1
-
48 Ford Ranchero
Butter 1 replied to Butter 1's topic in Model Trucks: Pickups, Vans, SUVs, Light Commercial
Hi Chuck. Thamx for the feedback. There were a few phantom 48 Rancheros that showed up in scale auto magazine back in the 90's. I finally got around to building one. -
48 Ford Ranchero
Butter 1 replied to Butter 1's topic in Model Trucks: Pickups, Vans, SUVs, Light Commercial
Thanks for your response. There is a thread on this build in the wip trucks section that you may want to check out. As for the fenders and box, both are stock widths, but the box is shortened about 3 scale inches -
48 Ford Ranchero
Butter 1 replied to Butter 1's topic in Model Trucks: Pickups, Vans, SUVs, Light Commercial
Thanks for the feedback. Sorry I didn't respond sooner but I really appreciate your comment. -
48 Ford Ranchero
Butter 1 replied to Butter 1's topic in Model Trucks: Pickups, Vans, SUVs, Light Commercial
Hi Slusher. Glad you like it. Sorry I didn't respond sooner. I really appreciate the interest you have shown. -
48 Ford Ranchero
Butter 1 replied to Butter 1's topic in Model Trucks: Pickups, Vans, SUVs, Light Commercial
Hi Dan. Thanks for your feedback. Sorry I didn't respond sooner but I really appreciate the interest you have shown. -
Hi Ron. I have emailed MCW and am waiting for a response. Hope they still offer it. It looks like a nice casting.
-
Hi Tom. Thanks for commenting on the wheel covers. They looked OK to me but it is nice to see that they make sense to others.
-
Hi Andy. Thanks for checking in. Glad you like it.
-
Hi Richard. Thanx for the info on the resin stuff. The Missinglink hubcaps I saw are a different style than I am looking for so at this point I will use the ones I fabricated. I really appreciate all the information you have sent me. I saw some other stuff on Missinglink that looked ineresting for other future projects I have in mind.
-
HI Ian. Just caught up on all the progress you have made the last couple months. Absolutely stunning. 1/12 scale is not very forgiving if the details aren't right. Your details are absolutely spot on. Everything fits. I also like the idea of gold annodized Morroso valve covers, along with about everything else you are doing.
-
My sister's car had stock 68 Torino hubcaps like the one in the picture. The hubcap on the left is my rendition. I used a 57 t bird hubcap (top hubcap) and inserted the hubcap from the Monogram 69 Talladega wheel (wheel on the right). Anybody have an idea about how to replicate the Ford script on the center of the hubcap. Thanks Bill H for helping me come up with this solution.

-
Hi Richard. I e-mailed Motor City Resins today about ordering a body.
-
HI Todd. Thanks for checking in. I am not familiar with 70 Torino kit but I will look into it before I do too much on the suspension. thanks for the info on the 68 grill. Took a look at the picture of it and it looks pretty good. Fortunately it is not a GT grill so it has the correct center emblem.
-
Hi John. Thanks for commenting. The Talledega I have is from before Revell and Monogram merged. The wheel base is several mm longer and a couple mm wider. The good thing is that the front fame rails are almost the same width as the AMT frame so I am hoping to use the front end suspension. As for the rear suspension I think I can narrow everything up a bit to make it work. The old Monogram talledega has a pretty accurate looking suspension under it.
-
Thanks for commenting Bill. I am supposed to be building this as a shelf model for my sister but it may be a contest level piece if the body and interior go together ok. I will continue to update the thread as I go.
-
Thanks for the tip about Modelhaus. I know Steve Kohler, the owner of Star Models. They distributed Modelhaus resin, I am contacting him to see is he has anything available.
-
Thanks for the info about the resin body. The picture looks pretty good except the rear side window is not qiuite right, but that would be an easy fix. It looks like their web site hasn't been updated since 2015. I e-mailed them to see if they are still in business. Waiting for a response.
-
HI bill. thanks for the feedback. I think I am going to update the frame with a lot of stuff from the Monogram 69 Talladega. The issue there is that the Talladega is a large 1:24 scale so a lot of cutting and pasting will need to be done to get it to fit and look "in scale".
-
This is what I started with
-
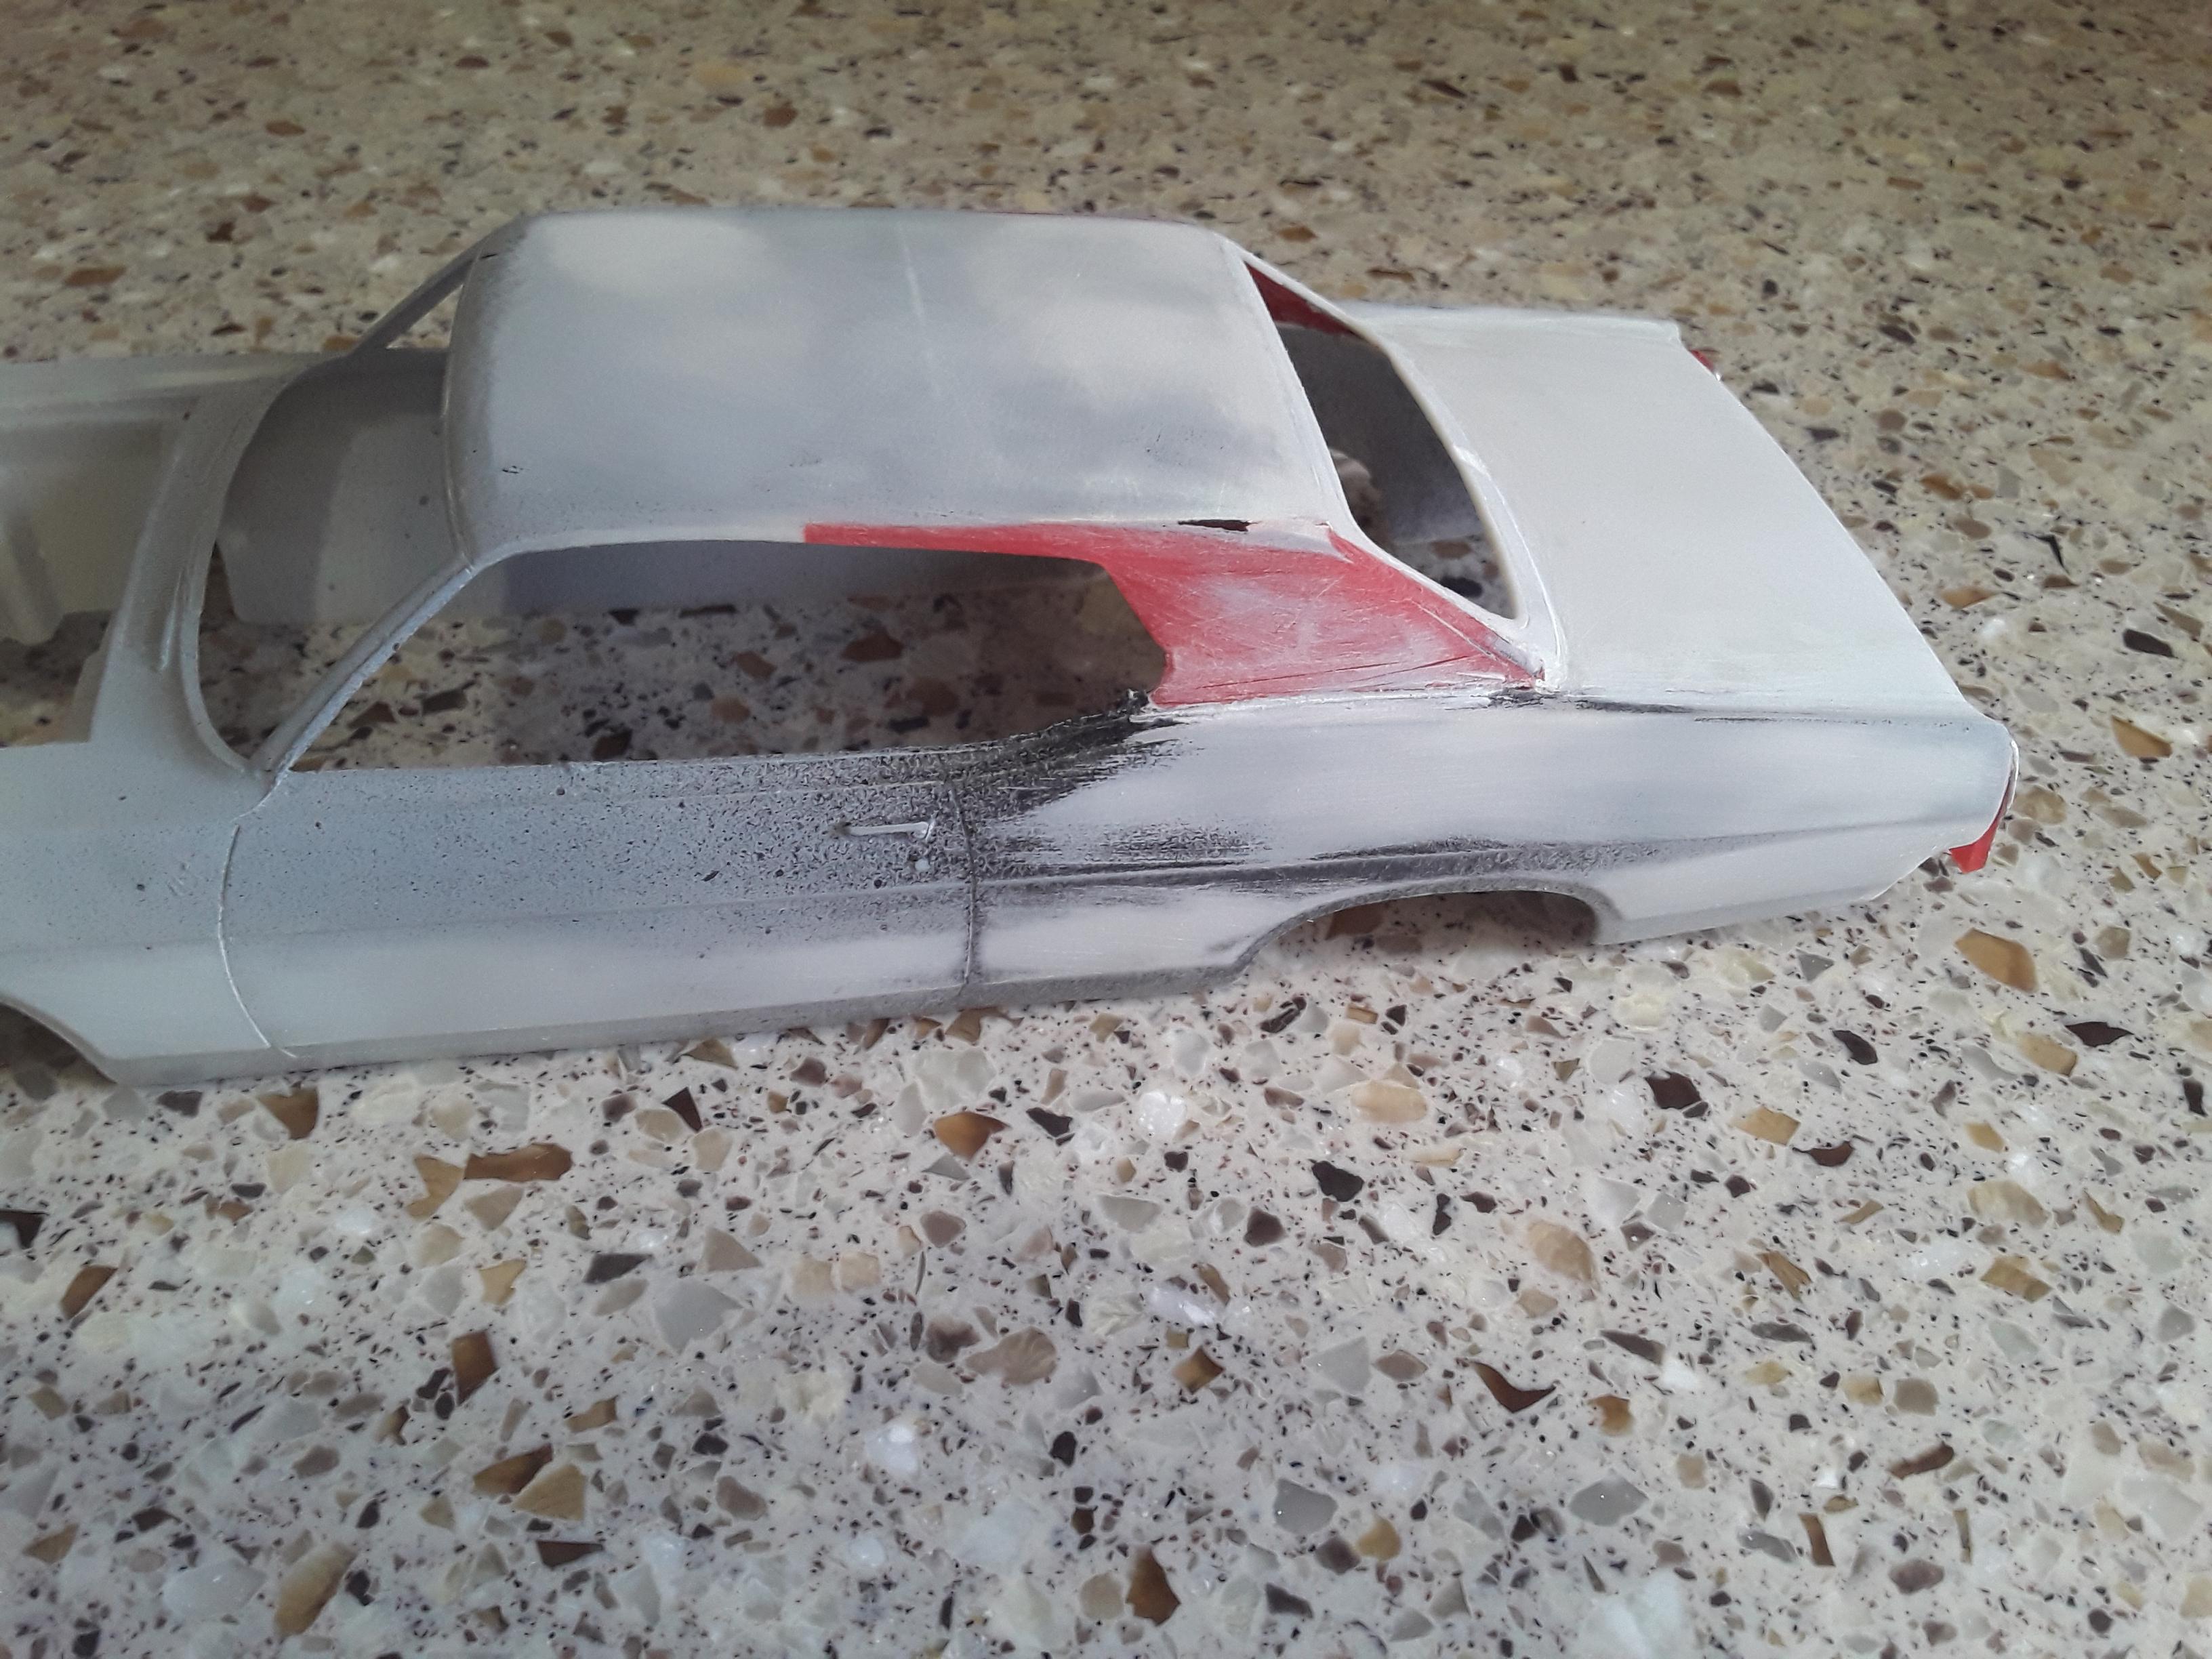
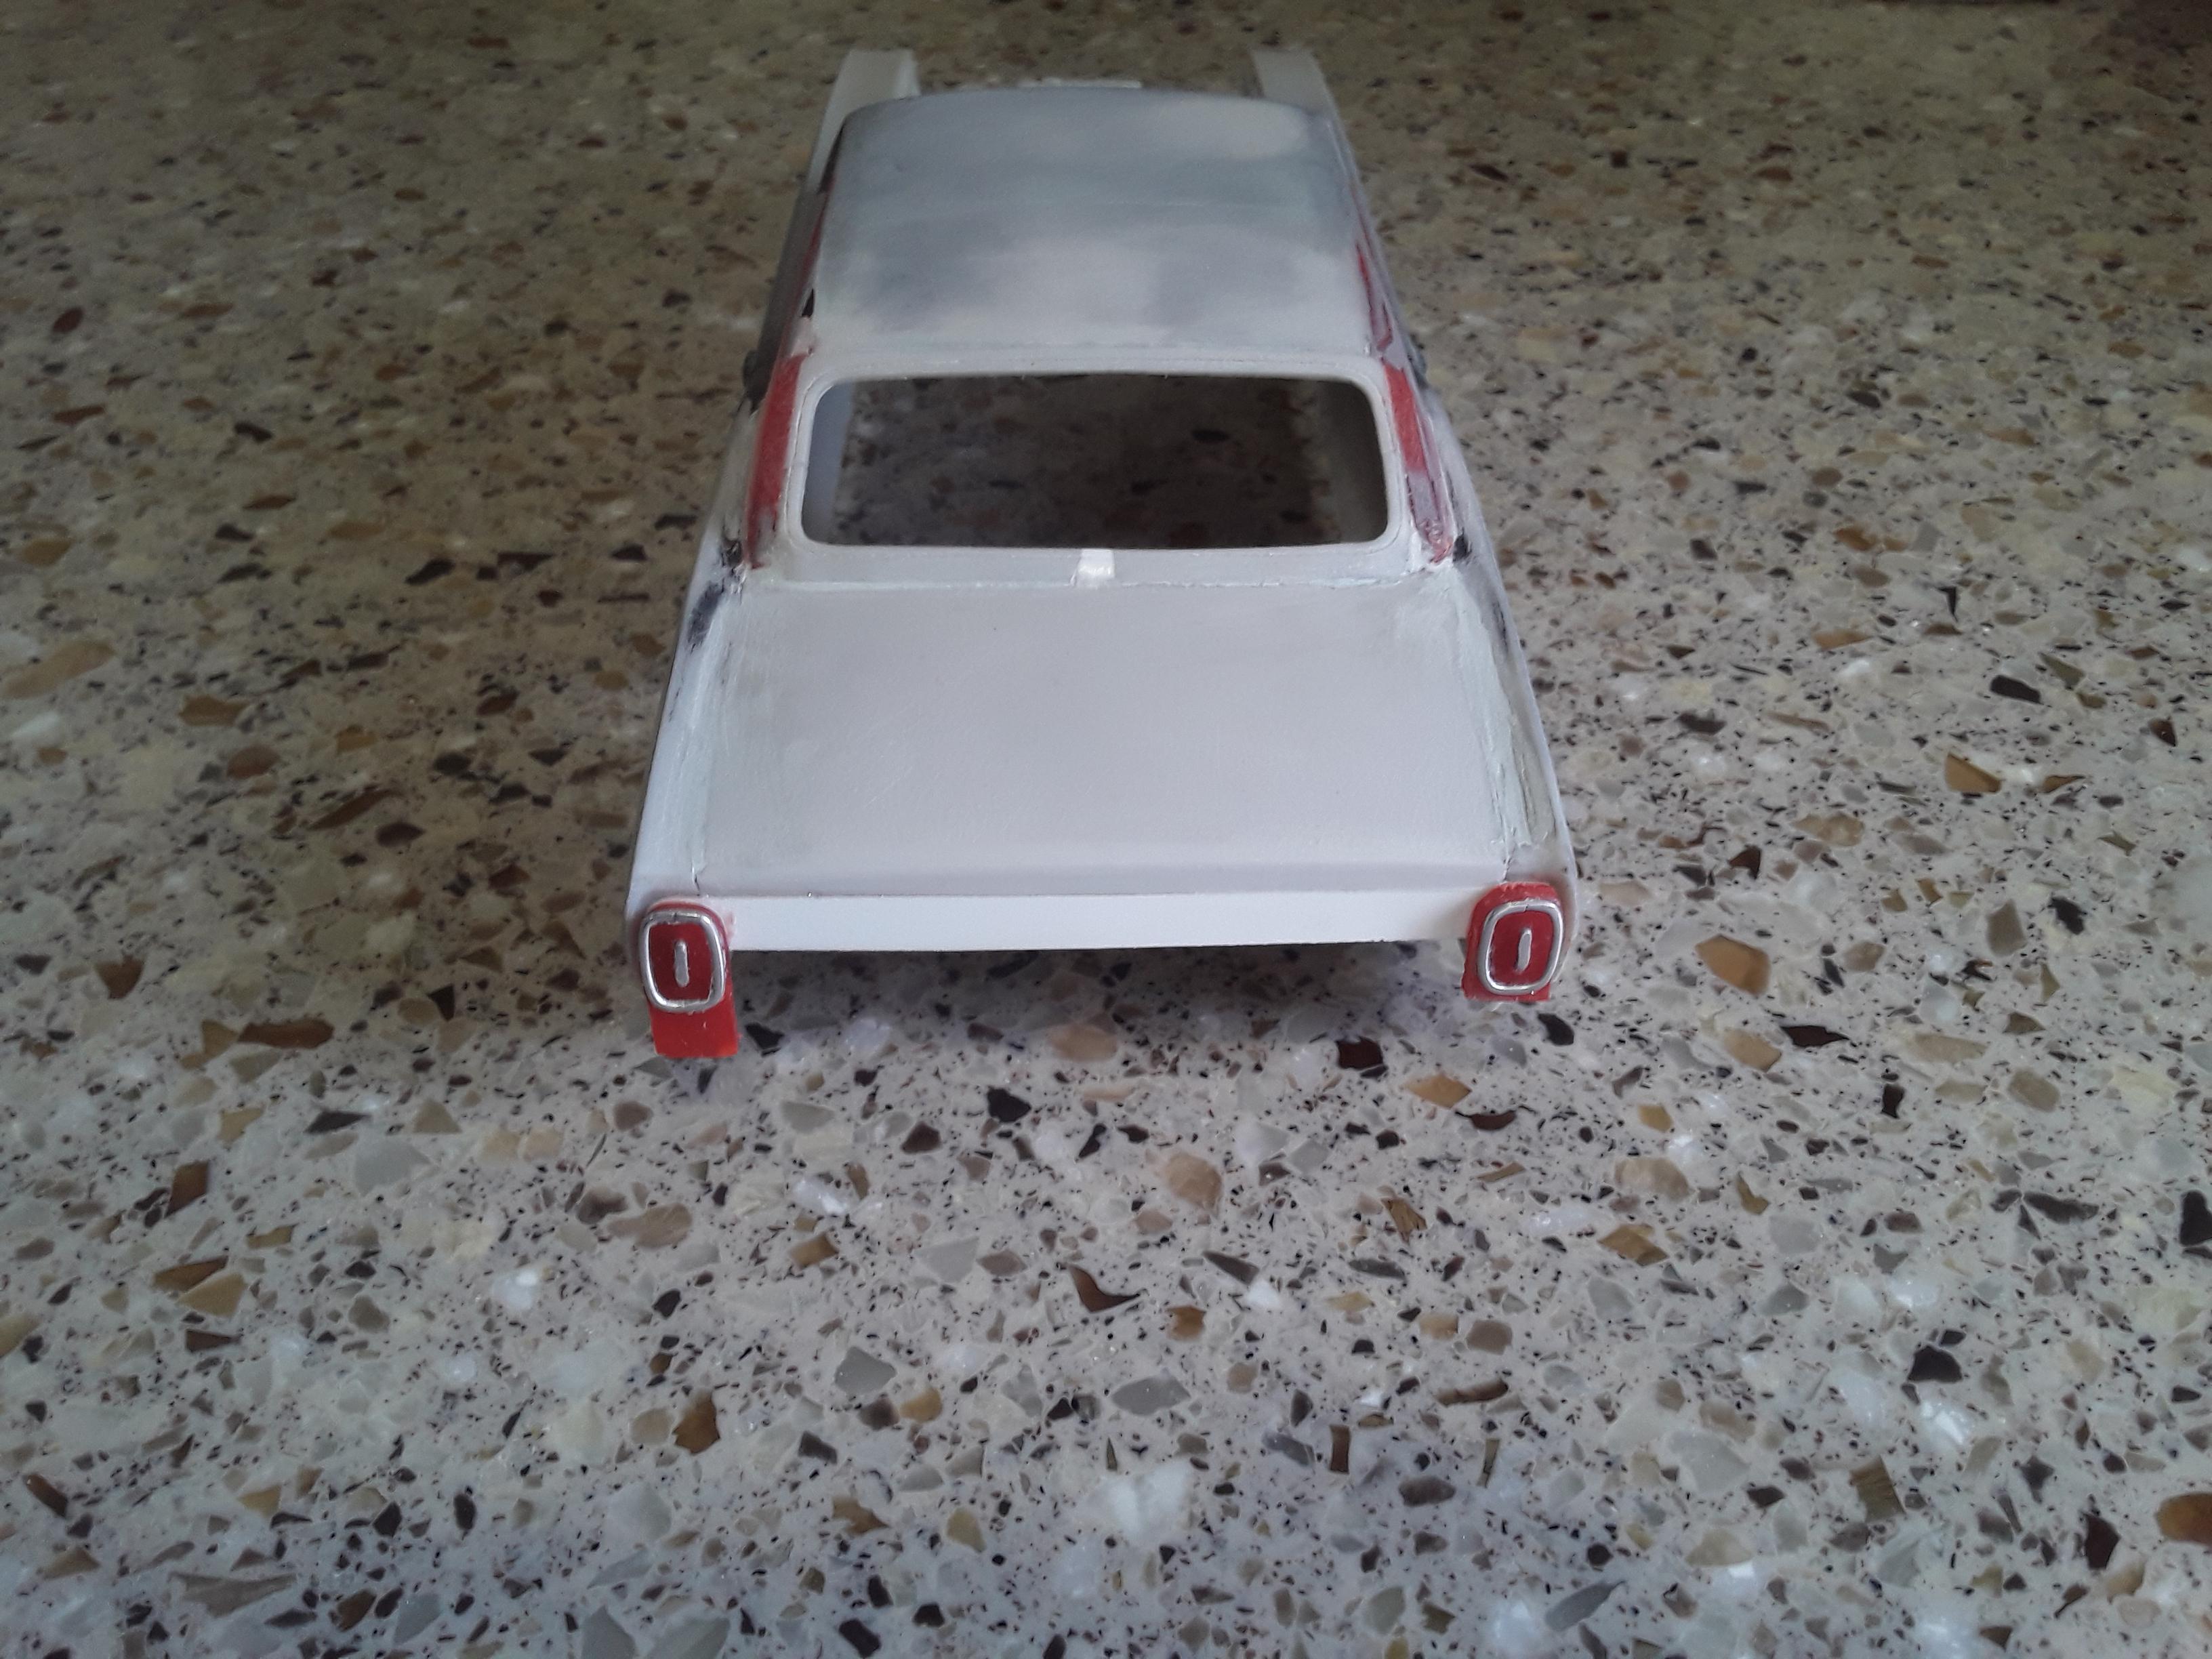
Converting an AMT 69 Torino fastback to a 68 hardtop. It will be a replica of the car my sister owned. Leaf green with black interior and vinyl top. So far I roughed in the top using the Starsky and Hutch 76 Torino top as a starting point. The deck lid is a portion of the 64 Mercury Maurador deck lid and part of the roof is also from the 64 Merc. I narrowed the 69 Torino tail lights and wrapped them in aluminum wire to replicate the 68 hardtop tail lights. The tail light inserts are also aluminum wire. (The tail lights will be embedded into the back of car once I finish the bottom of the trunk lid.)
-
Wheel Arch Molding Foiling Tutorial
Butter 1 replied to StevenGuthmiller's topic in Tips, Tricks, and Tutorials
Glad I ran across this thread. The blue tape guide is so much better than what I was dong. -
48 Ford Ranchero
Butter 1 replied to Butter 1's topic in Model Trucks: Pickups, Vans, SUVs, Light Commercial
Thanks for commenting Chris. Glad you like it. -
48 Ford Ranchero
Butter 1 replied to Butter 1's topic in Model Trucks: Pickups, Vans, SUVs, Light Commercial
Thanks Bob. I have seen some of your work on the forum. All very tastefully done. -
48 Ford Ranchero
Butter 1 replied to Butter 1's topic in Model Trucks: Pickups, Vans, SUVs, Light Commercial
Hi Mike. Thanx for commenting. I am glad you like it. I have seen others do 48 Rancheros and thought they looked "real". I hadn't seen one with a big back window so I thought I would give that a try.. -
1965 Ford F100
Butter 1 replied to Chuck Most's topic in Model Trucks: Pickups, Vans, SUVs, Light Commercial
The weathering is very well done. Especially in the bed.